Flash
-
Posts
1,719 -
Joined
-
Last visited
-
Days Won
2
Everything posted by Flash
-
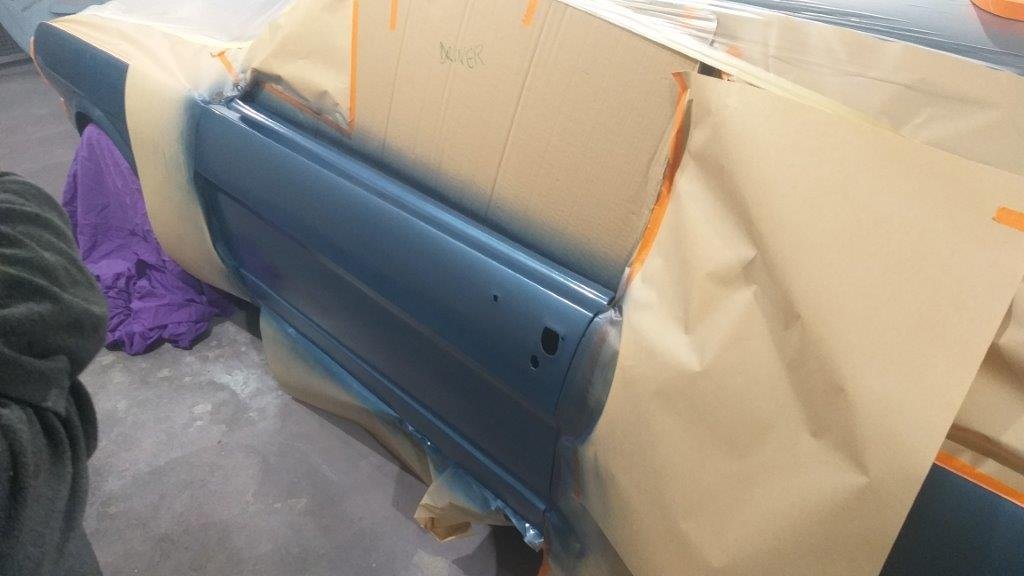
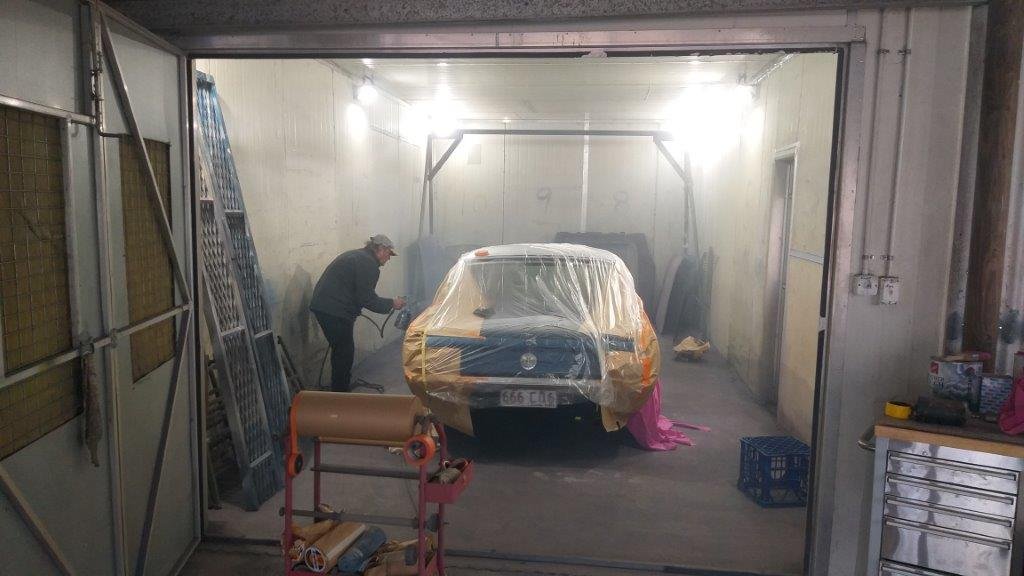
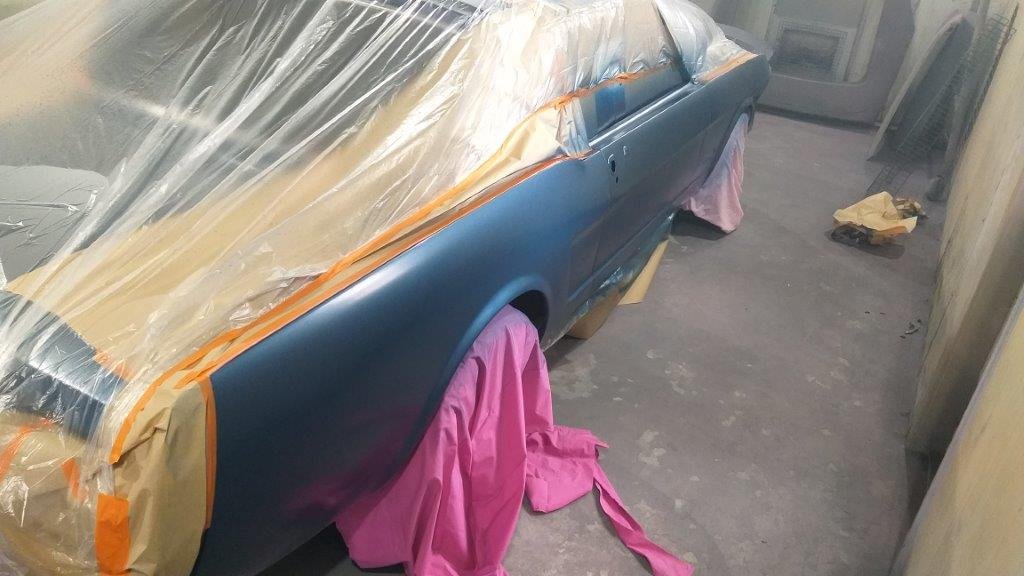
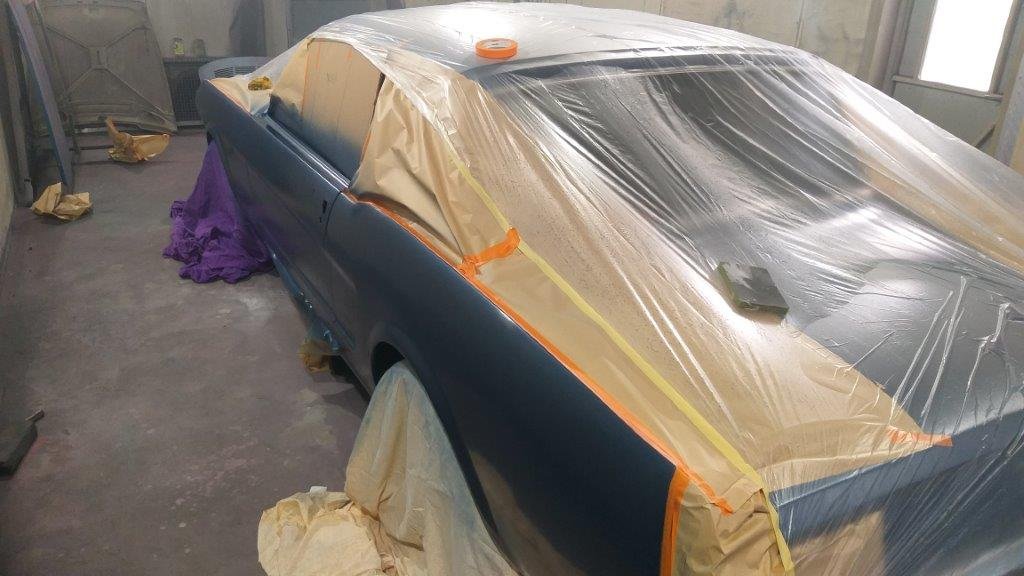
Well after weeks of particularly shitty weather, yesterday arvo the cloud cover lifted and the sun finally made an appearance. Swapped a few calls with Grant the painter last night and then shot through to his place just after morning smoko. It took Grant a couple of hours of trial and error before he declared that he was finally happy with the colour match. Pulled the car into his booth, chucked a bit of masking tape and brown paper about the place and after lunch he squirted a bit of colour onto the doors. After a few coats of base on the doors, we then unmasked both sides and Grant shot a few more coats of colour down both sides. It's looking really mint. Grant is an absolute wizard at colour matching. He has also laid down three coats of clear but I'd left my mask at home so didn't want to go into the booth to take any photos of the finish, so I'll do that tomorrow. Plan for tomorrow is to give it a good buff and it should be good to go. Some photos of the base coat.

- 198 replies
-
- 16
-

-
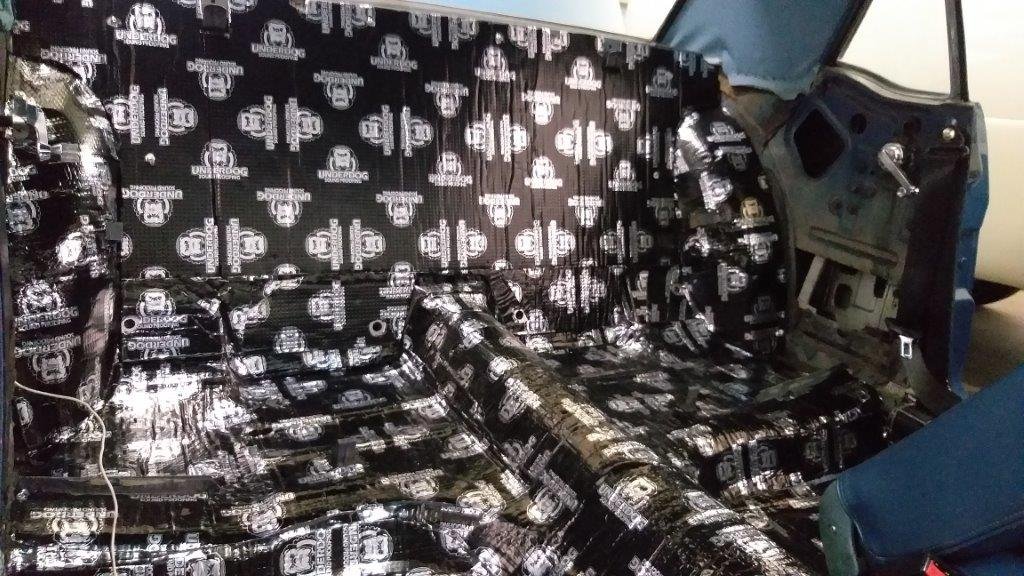
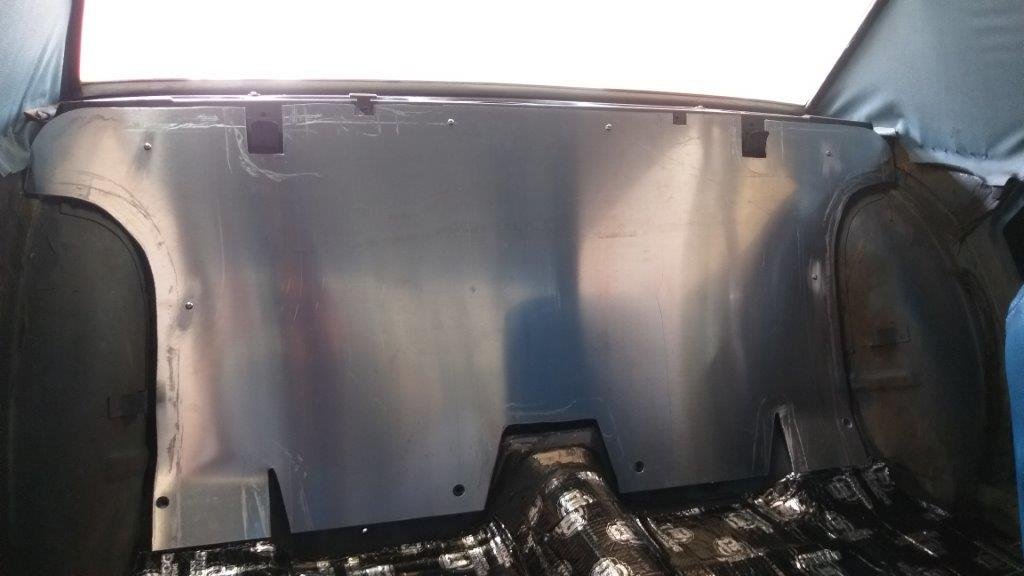
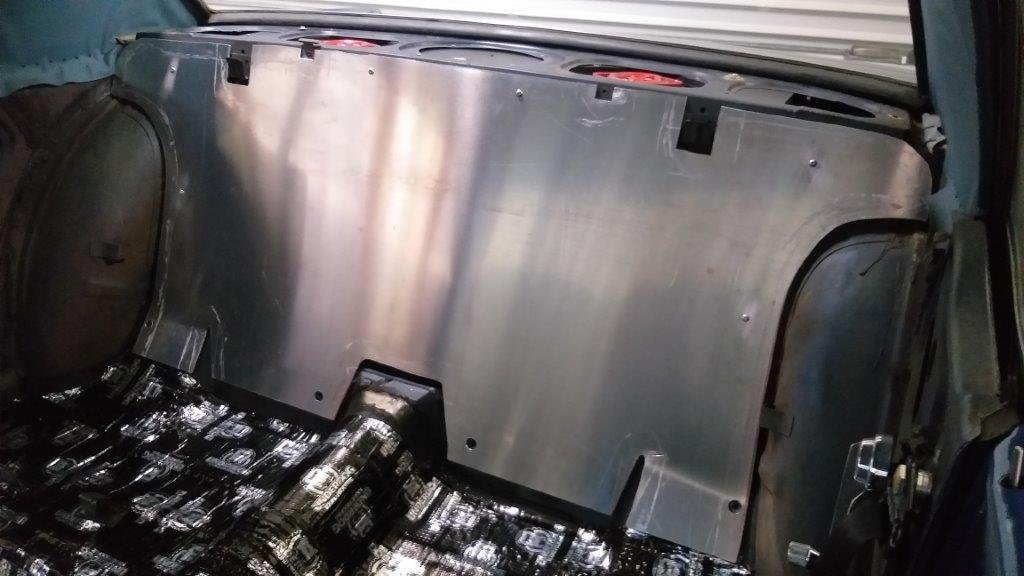
Yesterday arvo the courier pitched up with another roll of sound deadening, so this morning I pulled out my recently fabricated seat back panel to cover it. While I had the panel out I covered the rear wheel arch inners and the last portion of the transmission tunnel. Feels nice and solid. I've just got the rear quarters to do, but my plan there is to cover the backs of the shaped metal side panels rather than covering the body panels as that would entail leaving big openings to access the rear quarter window mechanisms for maintenance purposes. Thanks for looking.
-
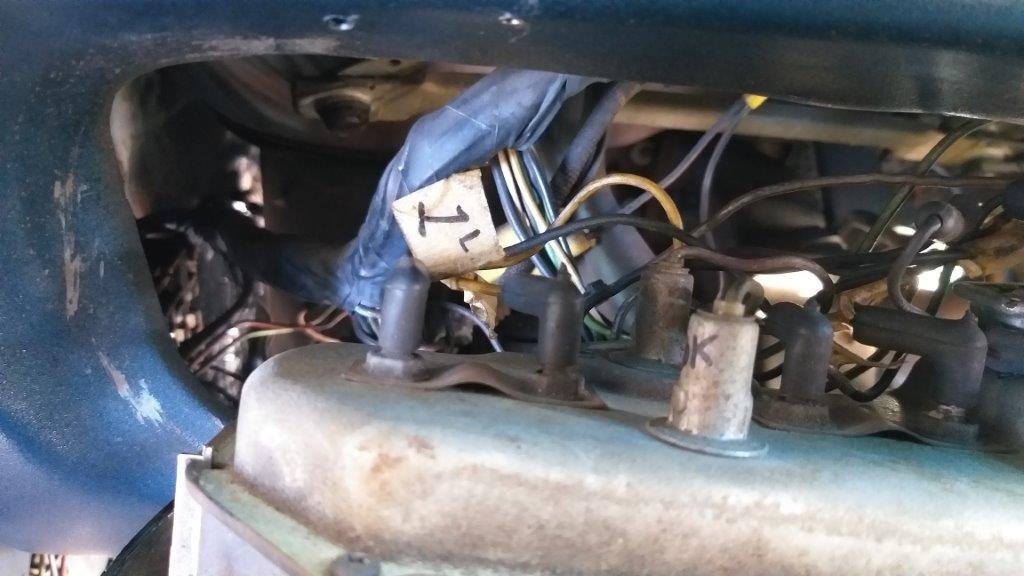
First step was to mark the instrument cluster wires before removing the cluster itself. I made a rough sketch of the setup and then added the cable numbers as I marked each cable. Initial observations: 1. Someone has been at the instrument wiring before as there are little hand written labels. Hopefully they just removed the cluster to replace the surround. 2. Instrument surround has been replaced at some stage with a reproduction part out of Taiwan. 3. As previously mentioned most of the globes have been replaced with LED items apart from the turn signal ones so I'll sort those while I am here. 4. Instrument cluster voltage regulator is relatively new. Bonus as bad ones usually result in erratic gauge behavior, so I'll take that as a win. 5. The main wiring harness appears pretty solid and relatively unmolested. Will need a clean and a bit of a tidy up, but apart from that just the previously mentioned items to sort. Photos of the spaghetti for your viewing pleasure:
-
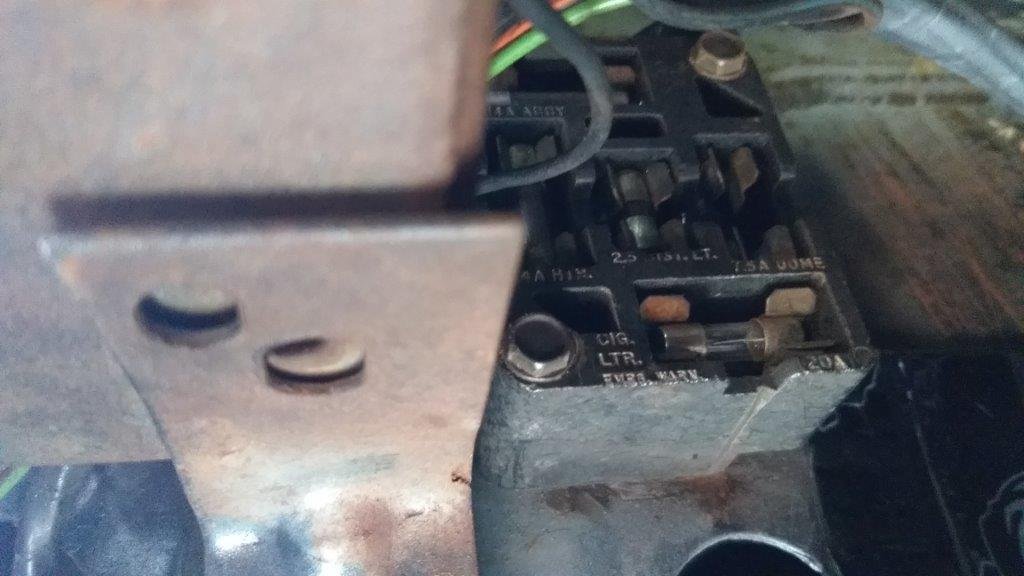
Some of you may be wondering why I am so hung up on augmenting the current fuse related setup, so here is a bit more detail. The factory fuse box is pretty poor by modern standards. In addition to being hard to access it only consists of 5 fuses which vary in physical size. I suppose the size differences make it easier to figure out what amperage fuse goes where, so that's a plus. But it still doesn't really cater for the addition of any modern creature comforts. I've included images of the fuse box schematic and a photo of the replacement fuses, just to show you what I am talking about. The last two photos are of my factory fuse box as it currently stands. The missing fuse labelled "dome" probably explains why my interior lights aren't working.
-
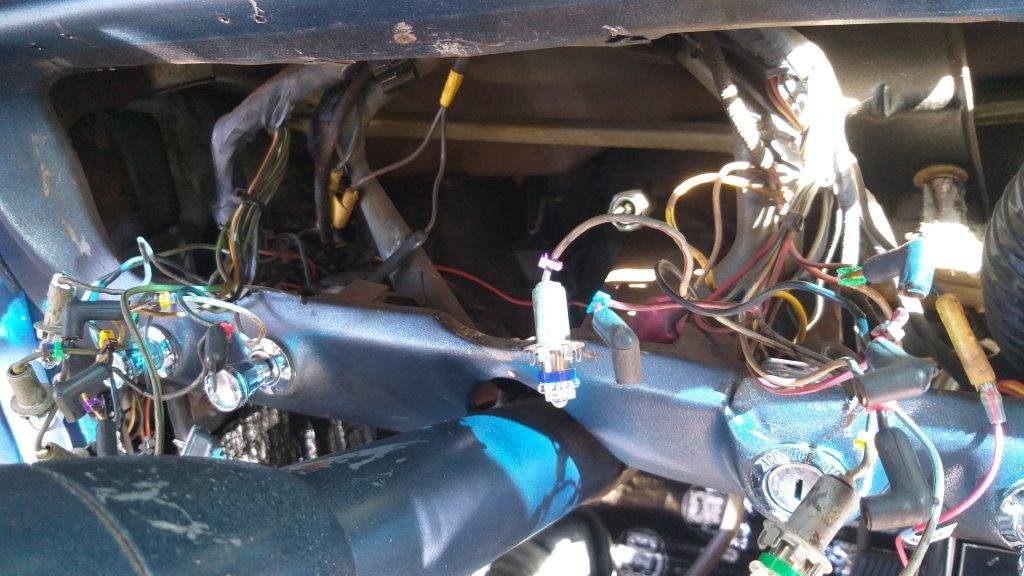
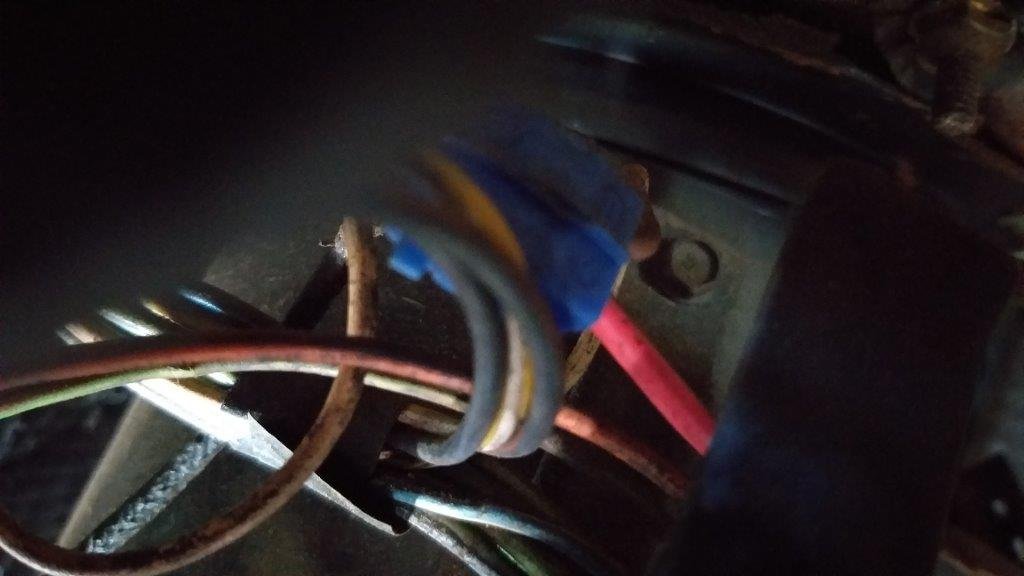
Yesterday my cable numbering rings pitched up, so this morning I thought I'd tackle a bit of under dash archaeology in order to assess the overall condition of the wiring harness and associated electrical components. As previously mentioned my fuel gauge and ammeter aren't currently working so they need some investigation. I've also spotted a few inline fuse holders that I'd like to remove as well as one of those blue plastic cable splicer thingies that usually indicate bodged wiring modifications. There is also an aftermarket toggle switch that thus far has some unknown purpose. The basic plan is to remove all of the wiring related bodges and reconnect all of the "non factory" items to the new fuse boxes.
-
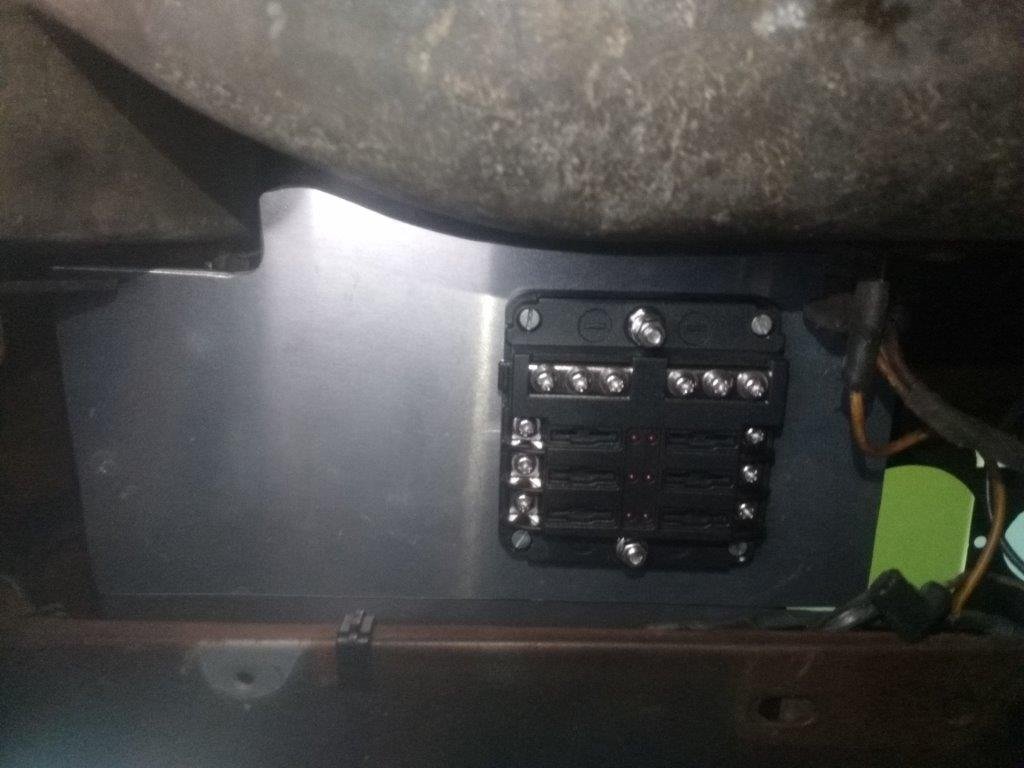
This morning I cracked into part two of the new fuse box panel. Two portions are required as there just isn't enough space to get a single piece panel in without removing the heater core housing and I didn't feel up for that right now. Yesterdays panel is the part that is fixed to the car and today's panel is the portion that the actual fuse boxes bolt on to. The two fuse box back mounting bolts perform double duty holding the fuse box in position and also fixing the two aluminium plates together. Sounds a bit complicated I know, but hopefully the photos make things a bit clearer. I've only installed the ignition fed fuse box for now as I'm still waiting for the battery fed fuse box to arrive. Fuse box two is a similar style, but because the mounting space narrows I've had to order a slightly smaller box without the earthing terminals. A small compromise as I should have more than enough earthing points on the first fuse box. Apologies for the quality of the under dash photo. It's pretty dark under there and the flash reflecting off the aluminium doesn't exactly help matters. Thanks for looking.
- 198 replies
-
- 10
-
-
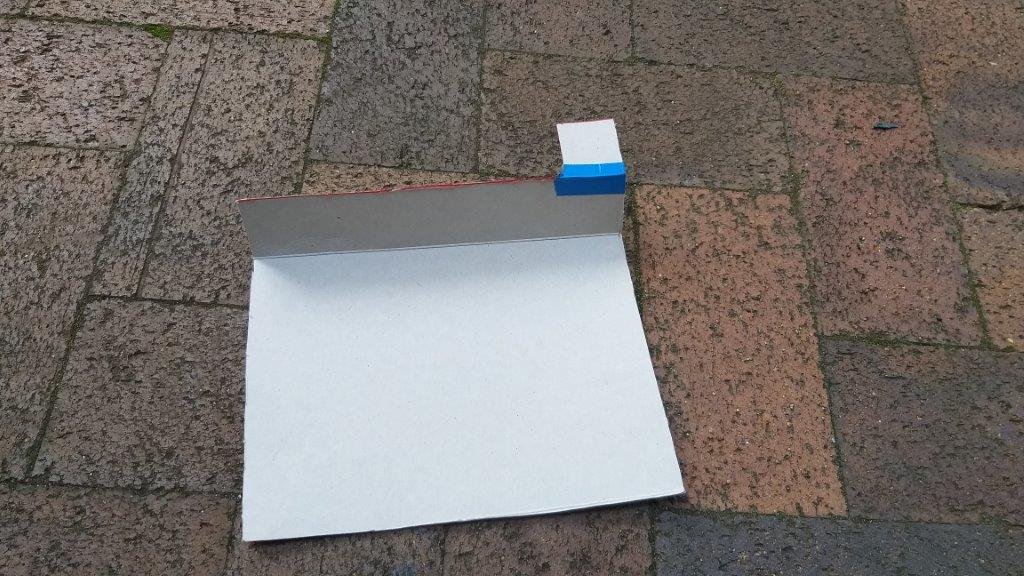
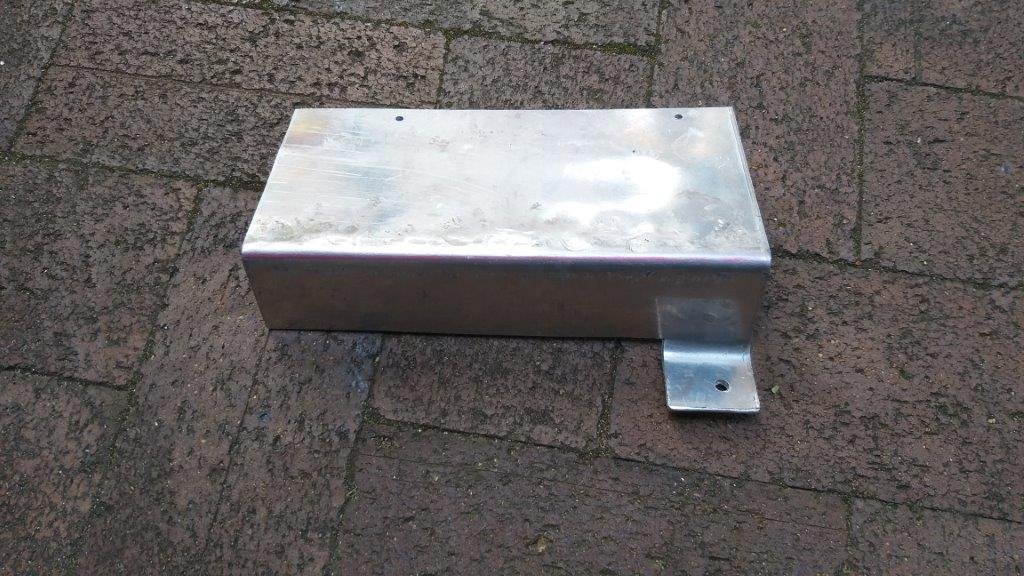
Only got a few hours on the Mustang this morning, so made a start on the mounting plate for the new fuse boxes. Plan is to hide them on the passenger side under the glove box for easy access. Not wanting to drill any fresh holes, I was able to make double use of two of the glove box hinge fixings and another fixing for the heater box. Then quickly replicated my cardboard template in aluminium. Managed a quick test fit before I had to pack up. Plate still needs a good tidy up before final fit.
-
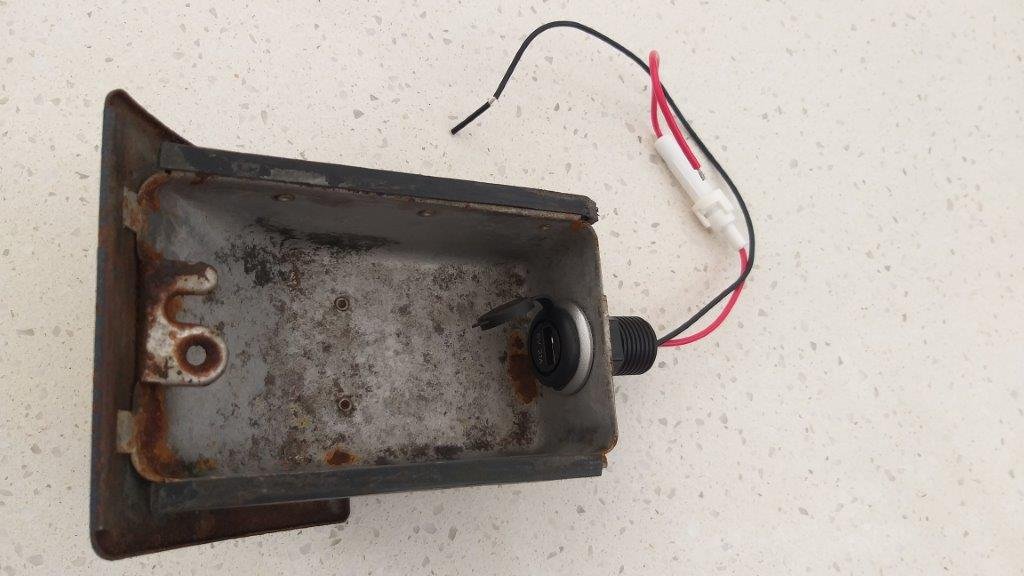
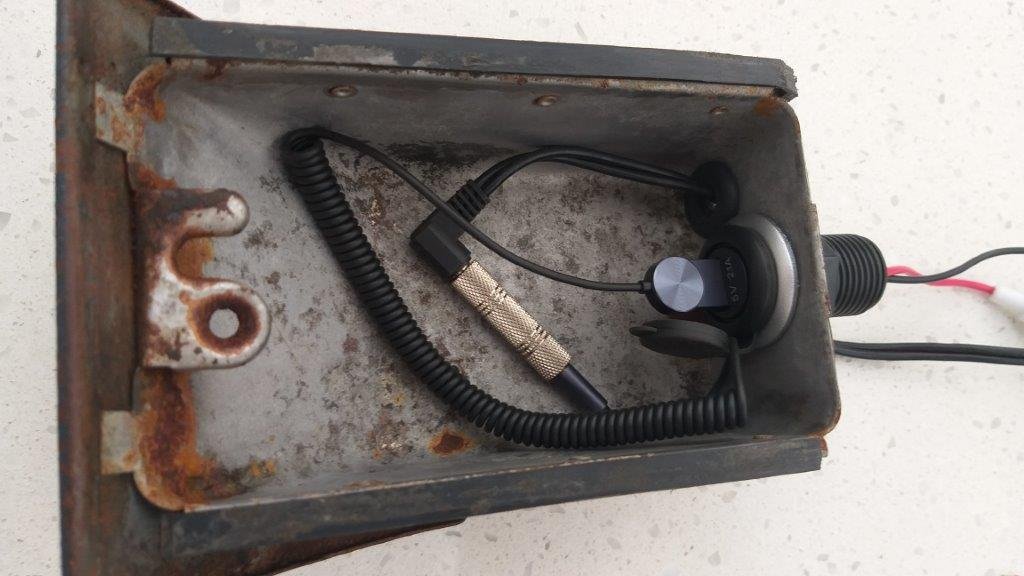
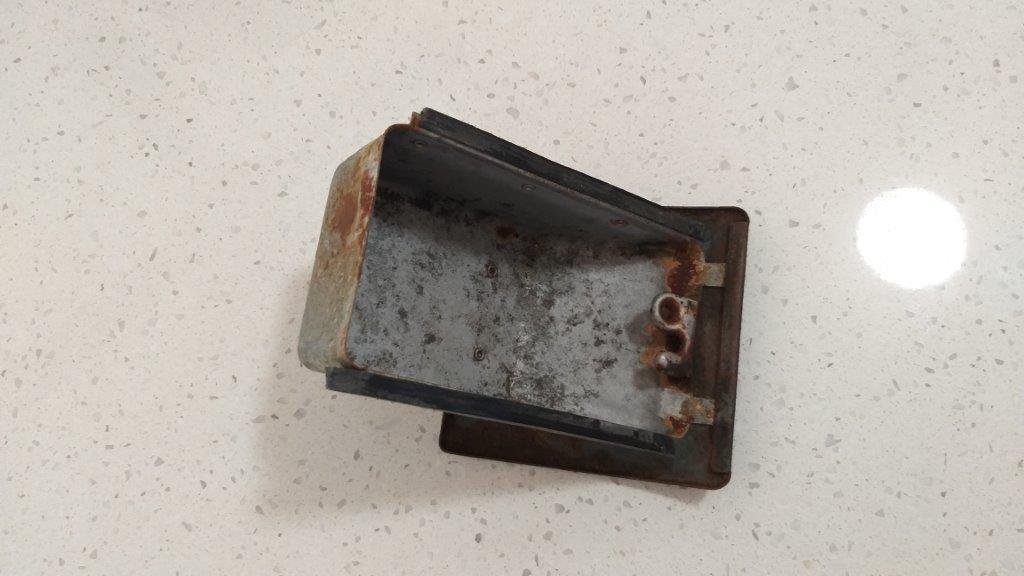
Before I clean up the rest of the ashtray I thought I'd poke some holes in it. I'm never going to use the ashtray, so it is getting a second lease on life as the hidey hole for the USB power socket and my blue tooth dongle for the head unit.
- 198 replies
-
- 15
-
-
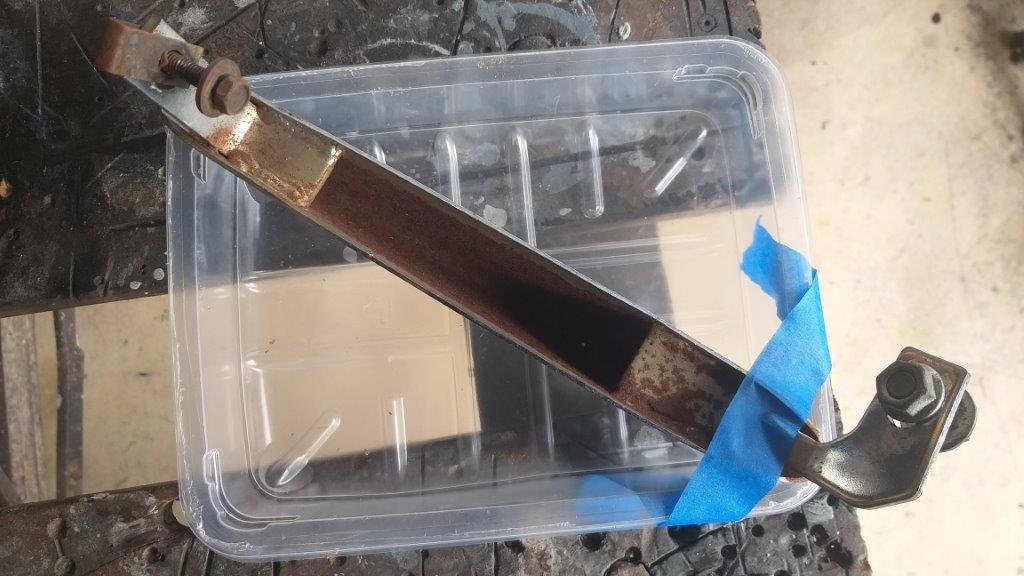
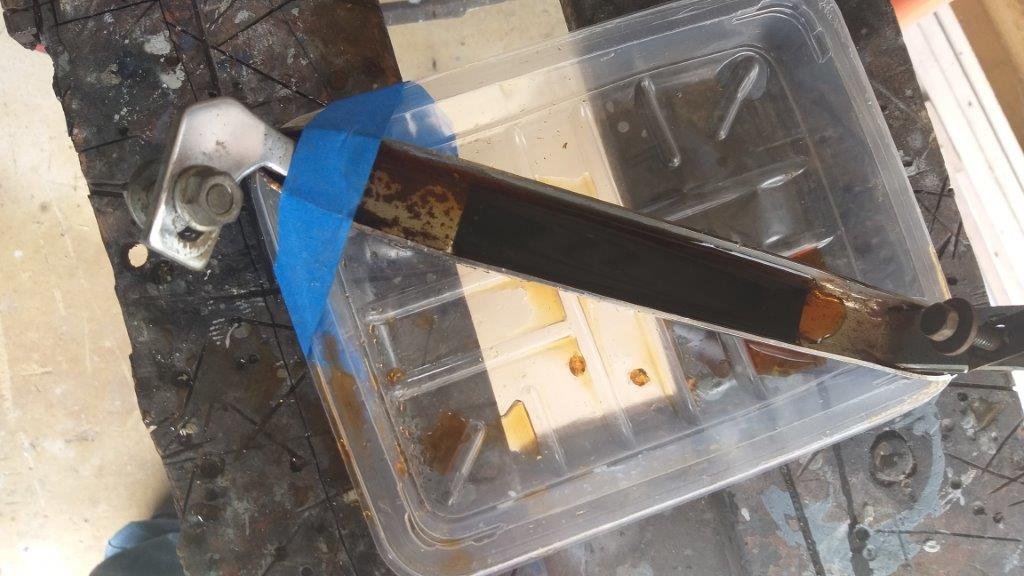
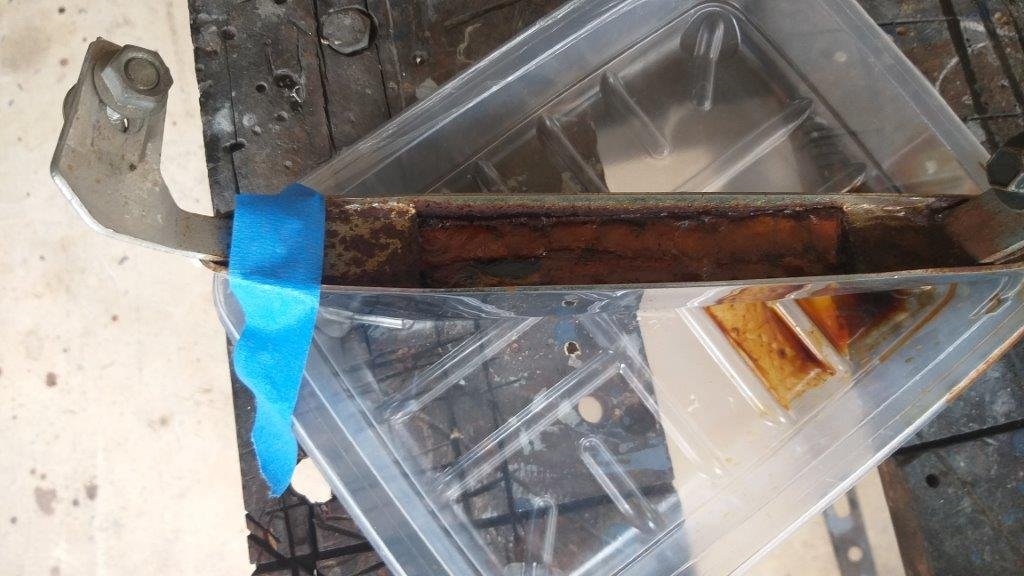
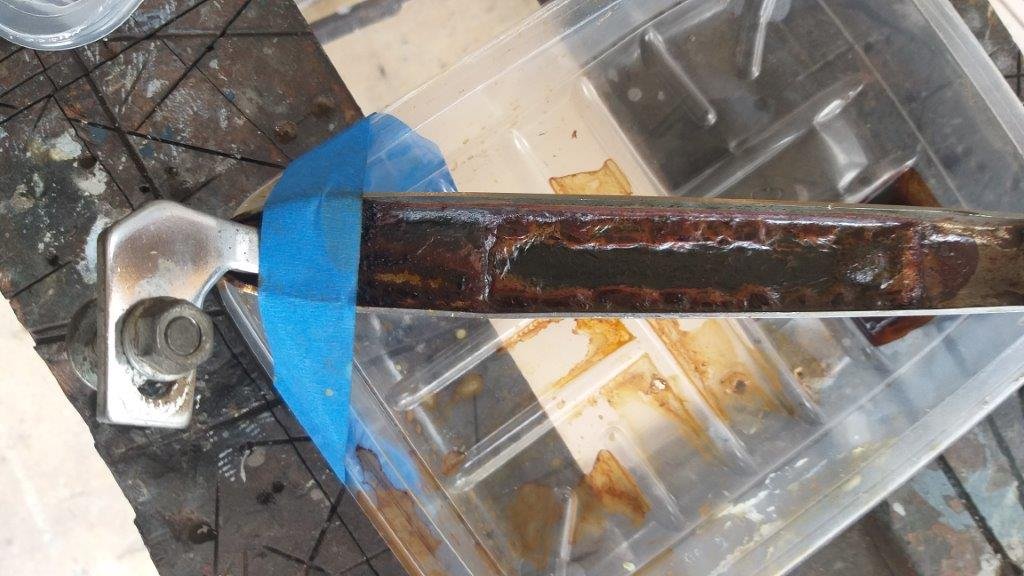
Earlier this week I started putting the front bumper over riders and the metal ashtray through my vinegar process. They are looking a lot cleaner now, just some minor bits to sand, then I'll chuck some rust converter on them before giving them a good coat of 2 pac primer.
-
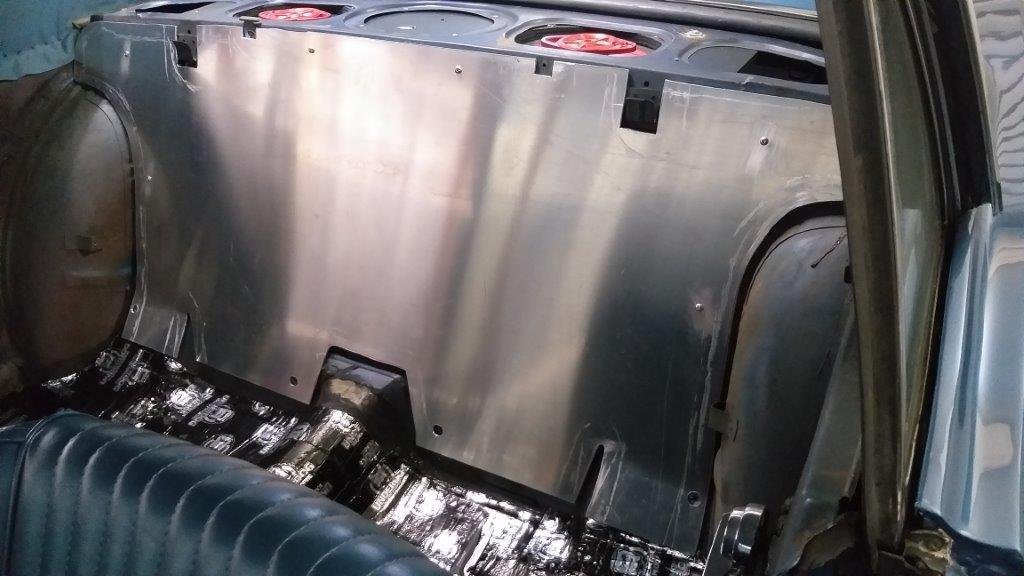
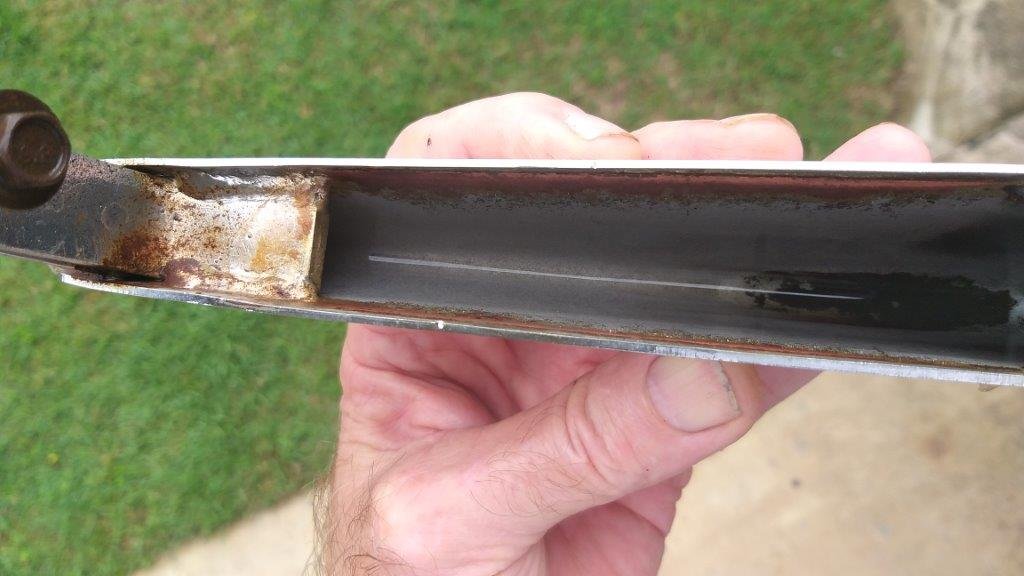
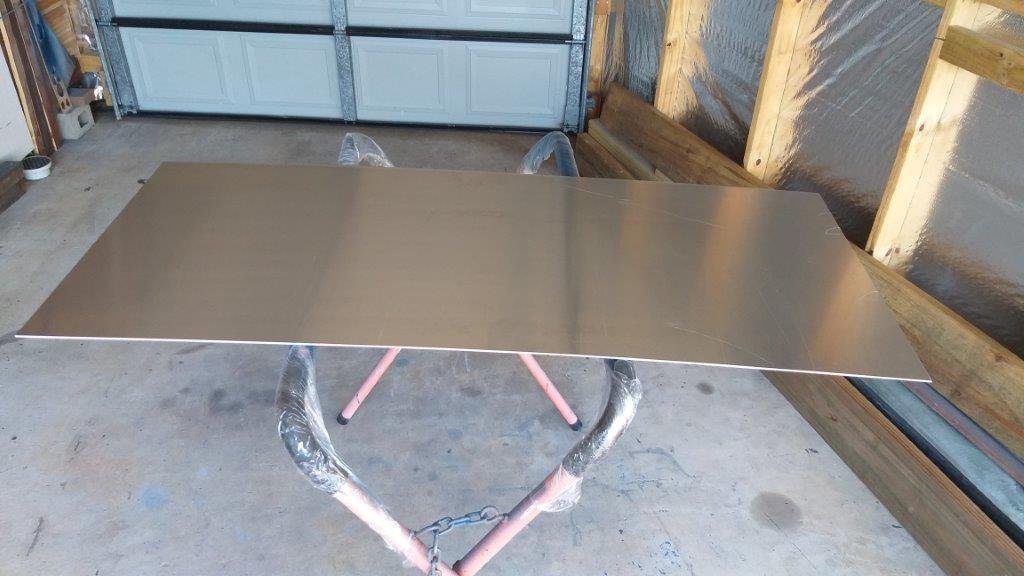
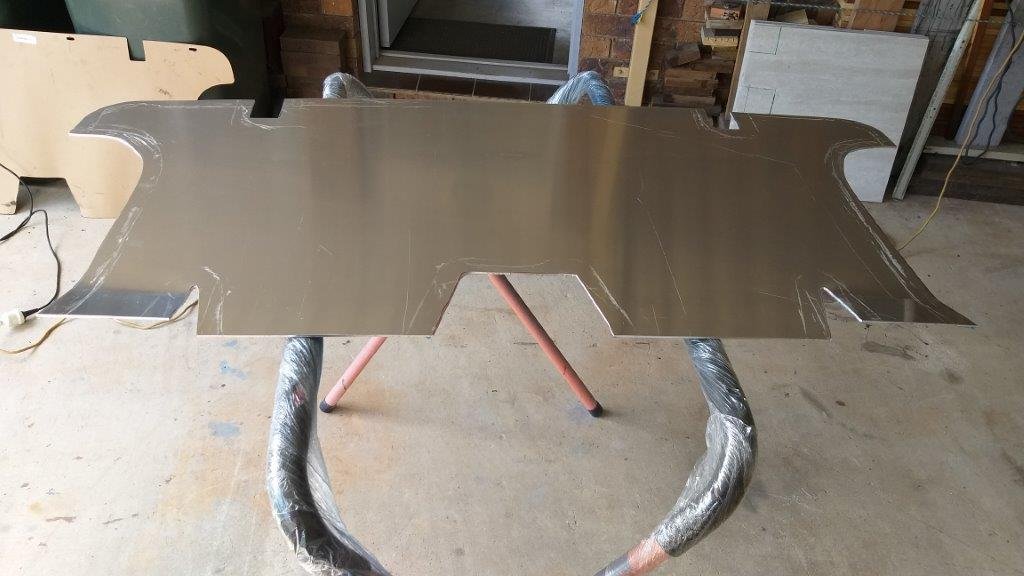
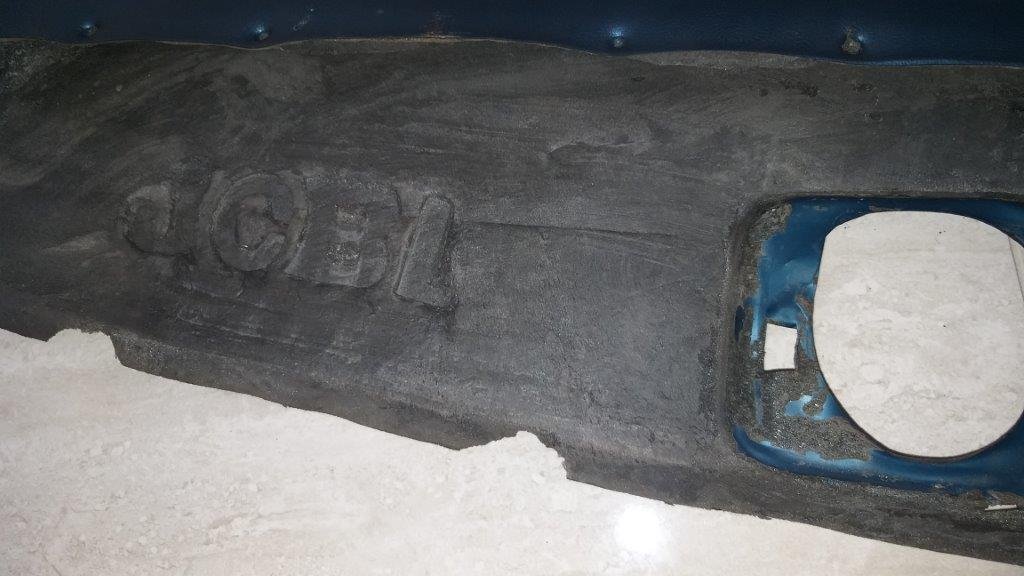
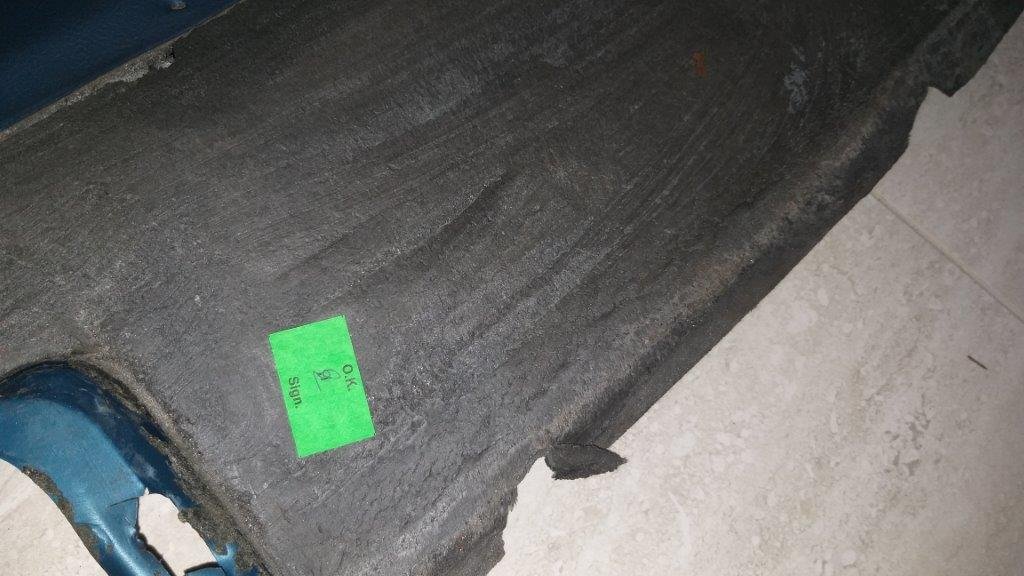
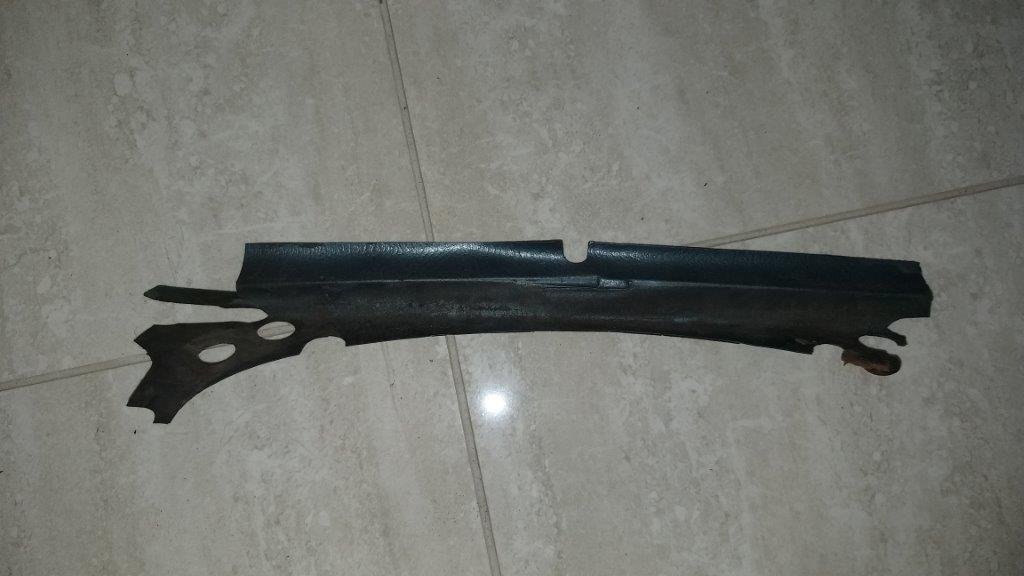
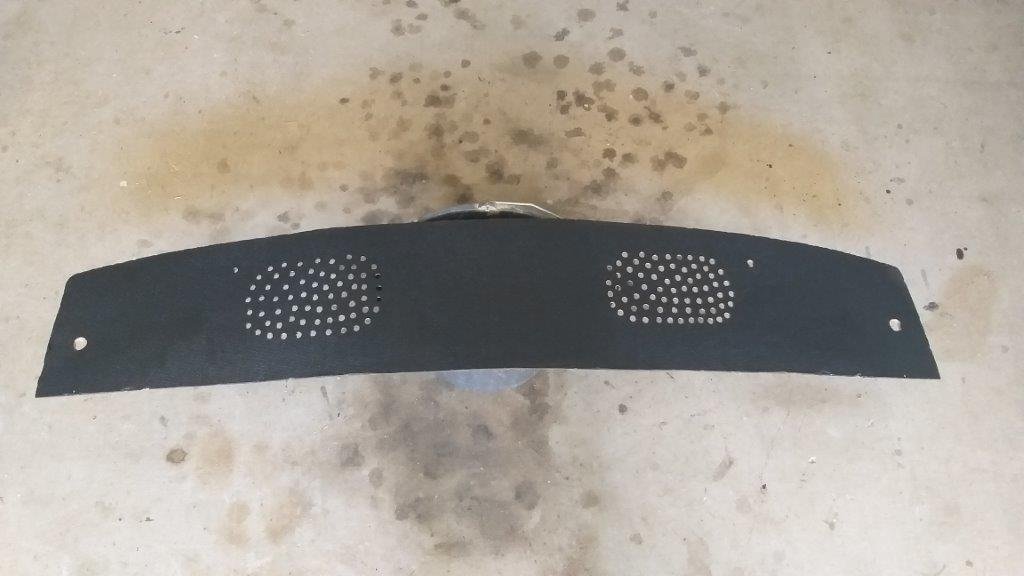
This morning I turned my attention to the panel that separates the cabin from the boot. I'm not sure how robust the original factory panel was, but my Muzzy has been fitted with one of Scott Drake's replica items. The little production label tells me that this beauty was manufactured on 11th February 2014. It is made of only the finest hand picked 2mm cardboard and has obviously passed through the loving hands of a skilled Taiwanese craftsman. It's clearly one of Mr Drake's superior quality products and I hope that he is well proud of this achievement. Anyhoo from the date stamp I'm guessing it was procured by Tom the previous owner and fitted at the same time as the 3 point rear seat belts and the twin baby seat anchors. I'm not altogether unhappy as it has made a lovely template for my slightly more robust replacement panel. So earlier in the week I hit my old mate Cameron up for a piece of 3mm aluminium plate which I picked up yesterday arvo. First thing this morning I got jiggy with my jigsaw and in next to no time I had my own interpretation of this part. I managed to use some factory holes in the seat back brace panels to bolt the panel into position. Marking the holes had to be done from inside the boot and much fun was had squeezing my lanky 6 foot 2 frame into the boot to get them marked. It was well worth the effort. The 4 lower seat belt anchor bolts will hold the bottom of my new panel firmly in place when I refit those. All that is left to do is to poke a hole and fit a grommet for my new rear speaker wires and I'll also cover the new panel with some sound deadening when my next batch arrives. Apart from that I'm very happy with this improvement. Thanks for looking.
- 198 replies
-
- 11
-
-
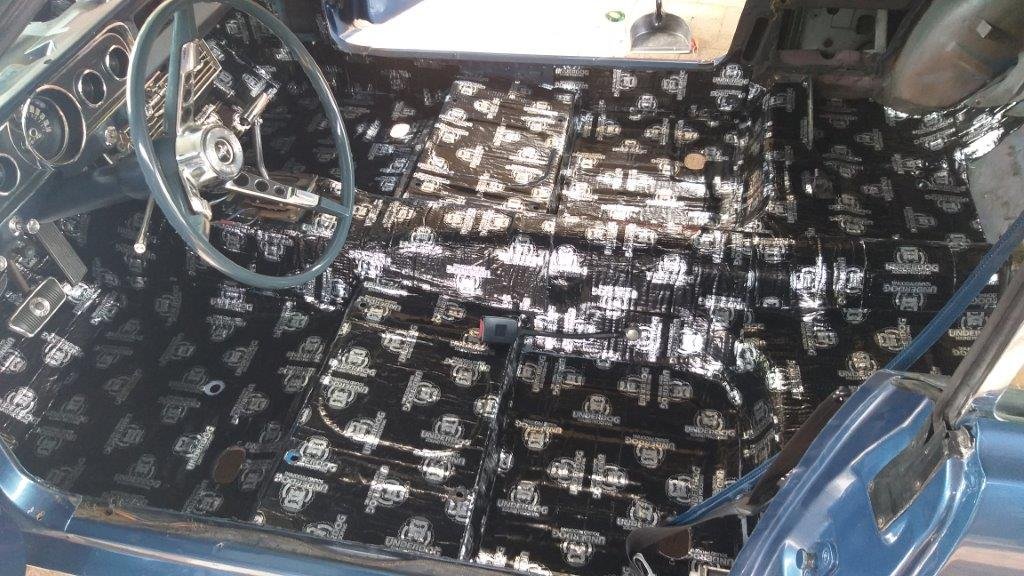
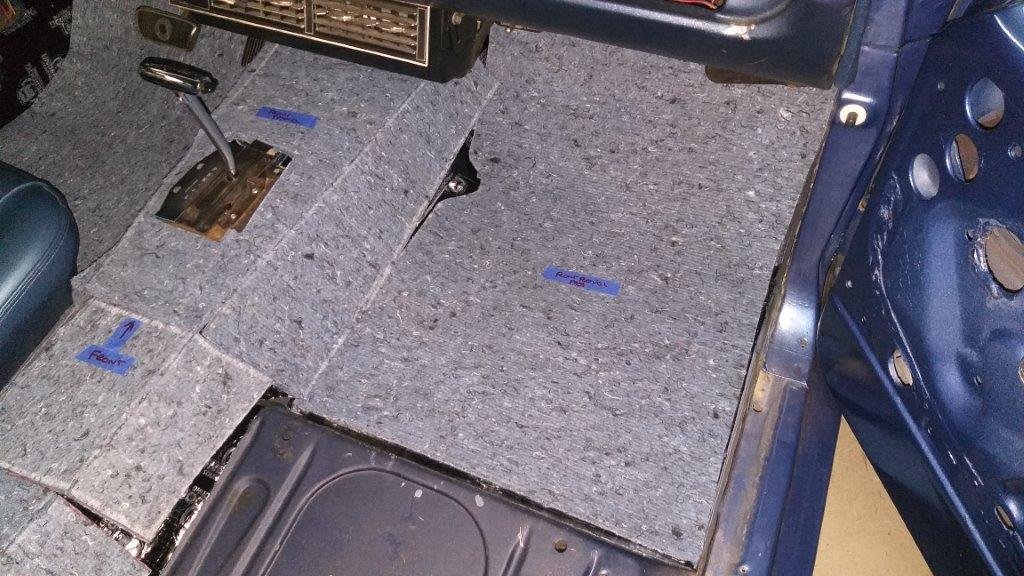
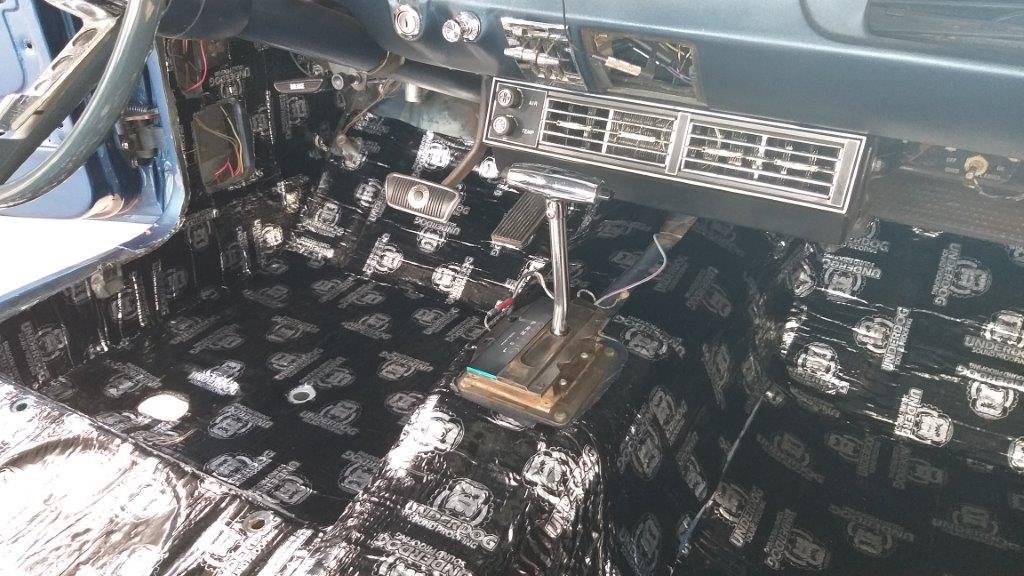
My second roll of sound deadening finally pitched up yesterday, so I played a quick round of Tetris with my remaining paper templates and proceeded to lay down the rest of the floor. I'm out of material but would still like to cover the rear wheel arch inner panels and the removable panel that separates the cabin from the boot, so I'll order another roll. I can always use whatever is left over on the Thames van when I get back into working on that.
- 198 replies
-
- 12
-
-
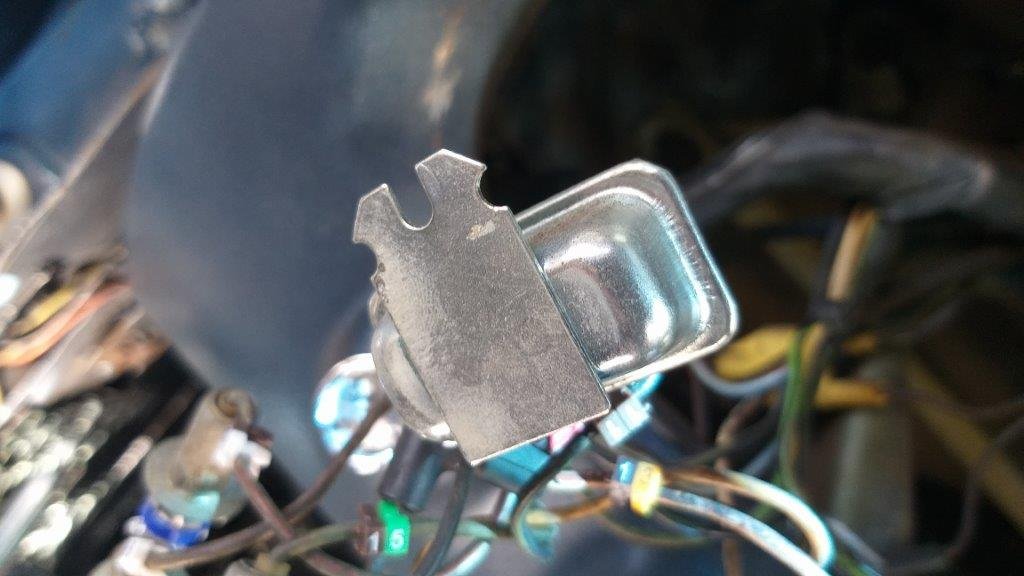
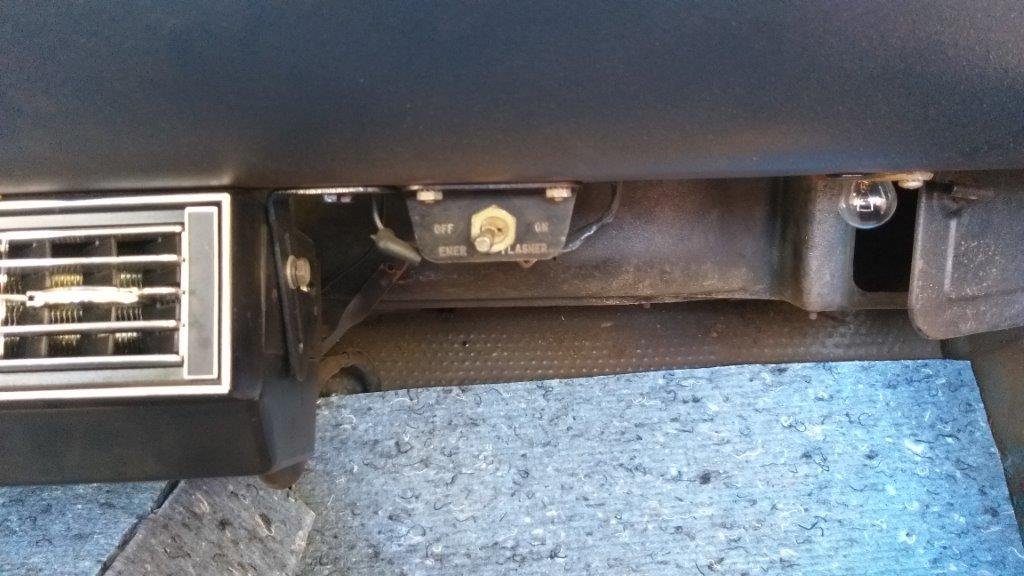
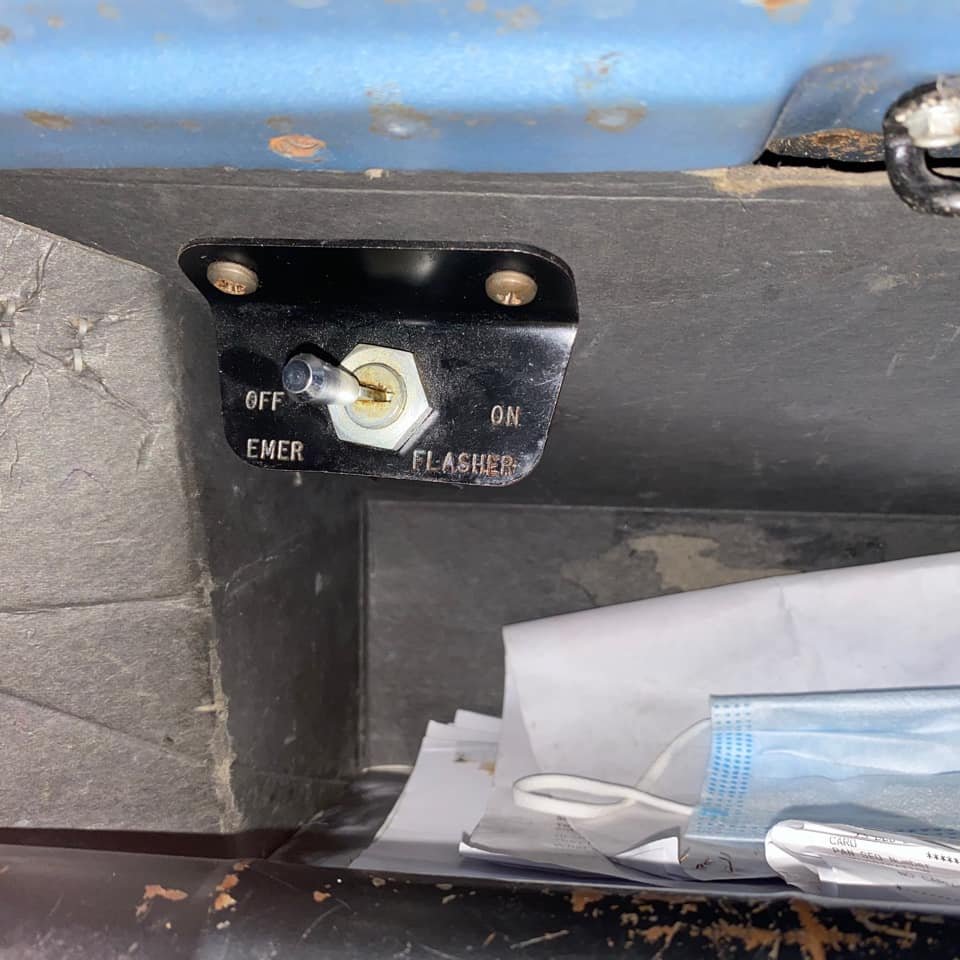
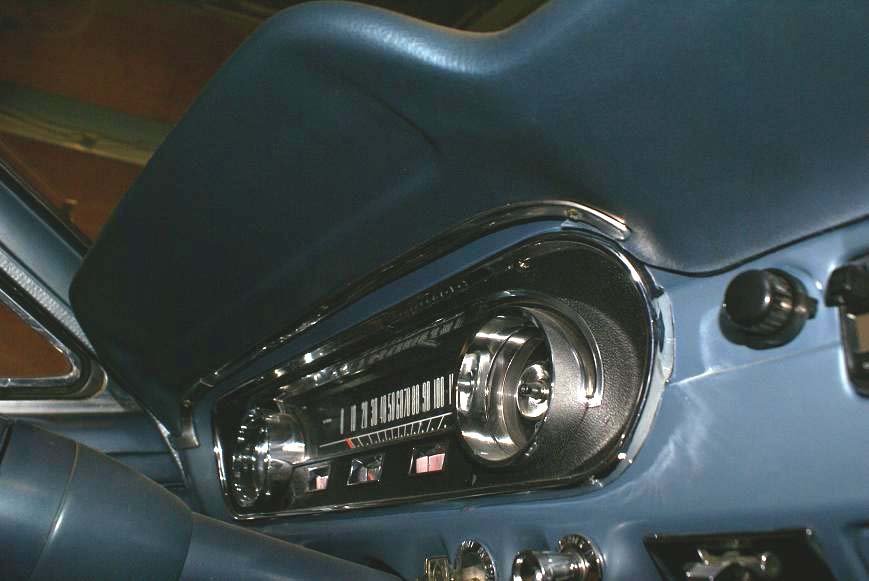
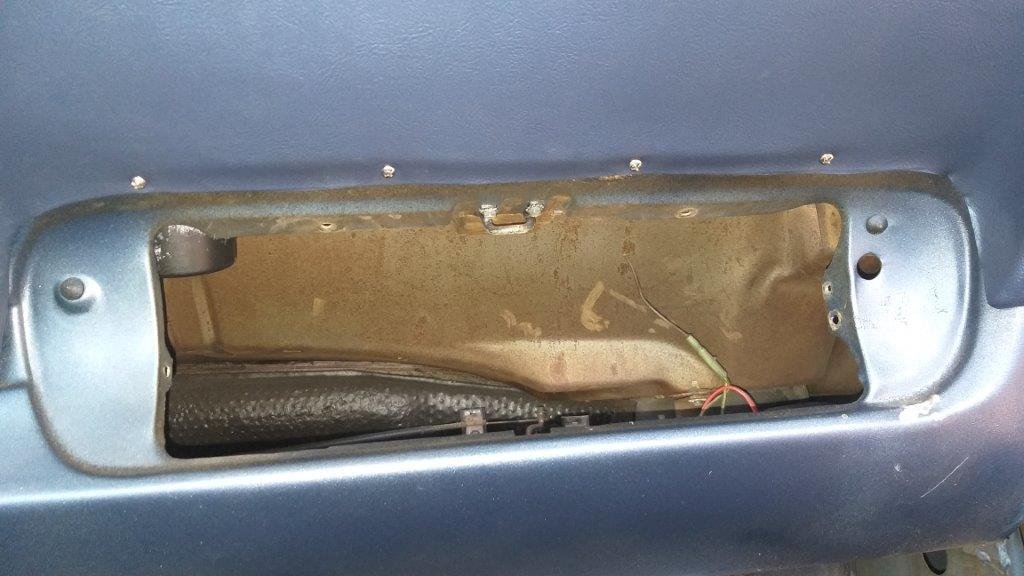
Another item on the list is the factory fitted hazard light switch. On the 65 Mustangs the switch is fitted under the dashboard on the passenger side. It's not the prettiest looking thing so in 66 the factory relocated the switch to inside the glove box. For some reason my early 66 still has the switch under the dash, so while I'm about it I'm going to relocate the switch to inside the glove box. Should look much neater. Photo's of my setup and the last photo is off the net and shows the updated switch position which I will replicate.
-
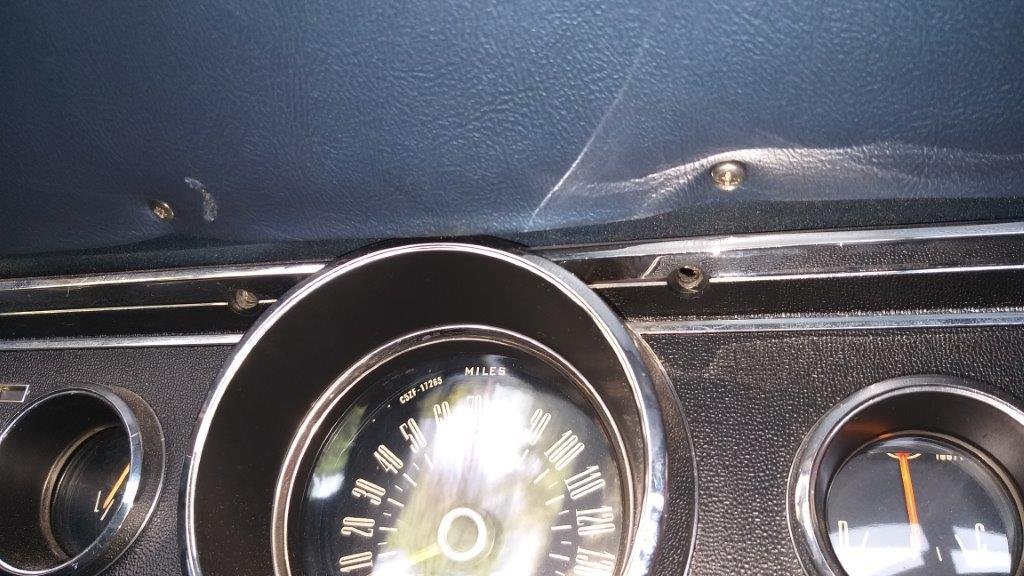
There are a few other minor dash related items that I want to sort while I am about it. One of the things that currently bugs me is the lack of lower dash trims. These are two stainless steel trims that go around the instrument cluster and the glove box lid respectively. They just neaten up the whole look and since I'm planning to spend a lot of time looking at the instrument cluster the visible sag in the dash pad just above the gauges will slowly drive me insane. Aftermarket trims are available but at $130 each plus shipping I'm thinking I'll have a go at making them myself. They don't look that complex First photo below is off the net and shows what the trim looks like. In the next two photos which were taken before the dashboard strip down you can see how ugly the absence of the trims look.
-
With the dash pad safely tucked away I stripped a few other bits and bobs. I unbolted the gauge cluster and flipped it forward. No loose wires that I can see. There is a small voltage regulator fitted to the back of the cluster and I have heard that when these go tits up you get weird gauge related issues. The regulator looks like a fresh unit and the gauges have been fitted with LED globes so someone has definitely been in here recently. The gauge cluster is old school with a separate wire going to each terminal so I'm going to order in a set of those C clip cable markers before I start disconnecting anything. Figured it will be worthwhile permanently marking the wires as I suspect I may be going back in here more than once. Do it once, do it properly, I reckon.
-
Managed to get the dash pad off in one piece which was a bonus. Turns out its a repro part that I suspect was fitted as part of the 2010 restoration undertaken in the USA. I found a sliver of the original dash bad wedged underneath the new pad.
-
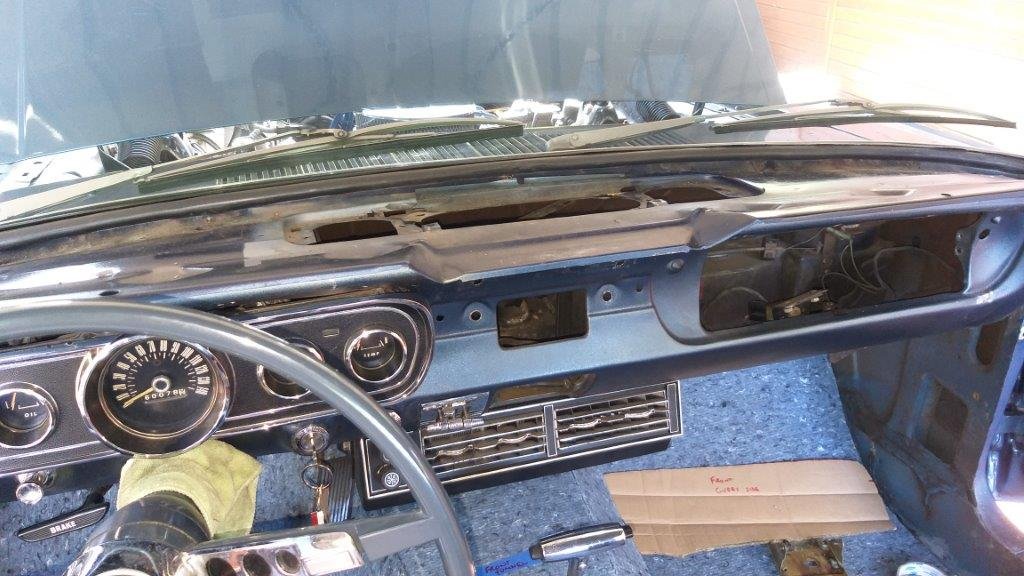
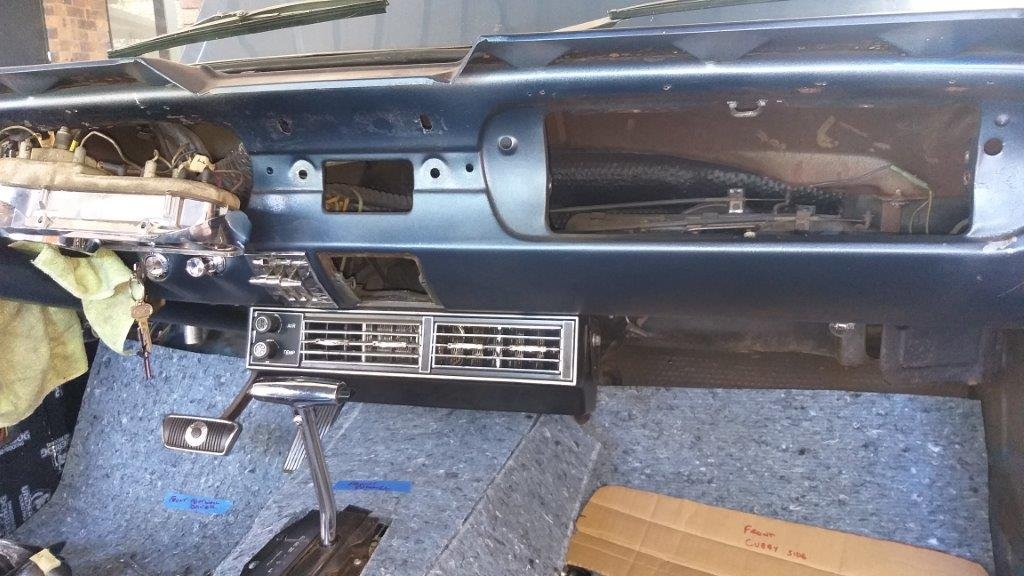
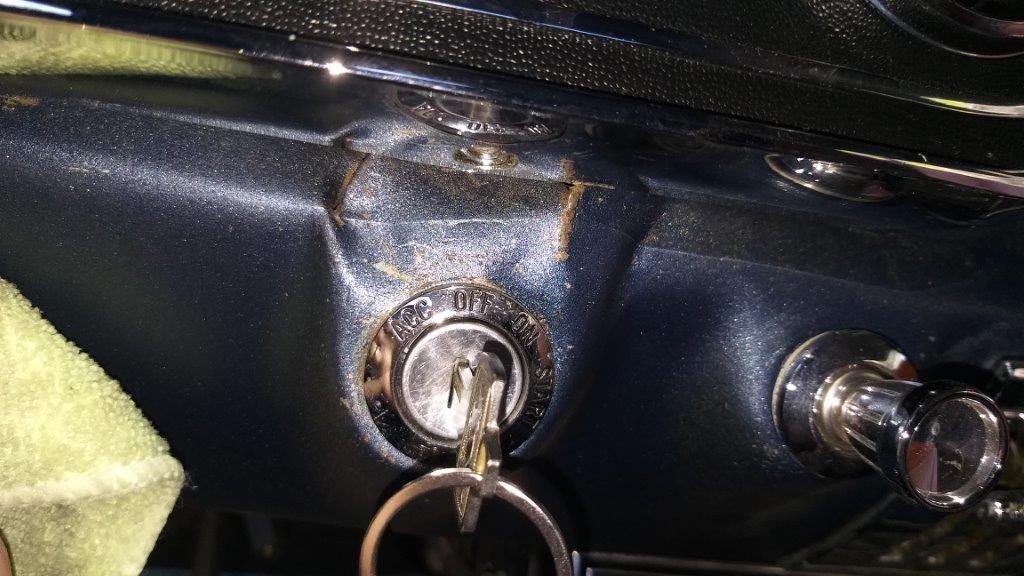
I've been putting this job off for a while but today I thought I'd put on my big boy pants and start stripping the dash out of the Mustang. There are a few reasons why I want to tackle this. First reason is that I want to re-fresh the paintwork on the metal portion. There are some bad rub marks caused by the misalignment of the glove box. I've resolved the rubbing by elongating the holes on the hinge which has moved the lid slightly to the left so now its just the paintwork to resolve. Also someone has butchered the metal around the ignition switch for some reason, so I need to fix and repaint that section too. Careless removal of the instrument cluster some time in the past has also damaged the paintwork on the steering column surround. It will be much easier to repaint things with everything dismantled Reason two is that the interior lights, factory fitted ammeter and fuel gauges are not working so I'm thinking that there might be some wiring issues under the dash. Reason three is that I want to sort out the sound system wiring as the front kick panel speakers have never worked. Reason four, the woefully inadequate factory fuse panel is really hard to get to and from a quick glance under the dash there appear to be a whole herd of aftermarket inline fuses that feed the radio, a/c system and a few other bits and bobs. I'm not a fan of these so am thinking about installing a new blade style fuse panel that I'll rewire all of the non factory items to. Reason five is that the heater and demister controls are badly seized up so I'd like to give them a birthday at the same time. Photos of the paint and metalwork issues:
-
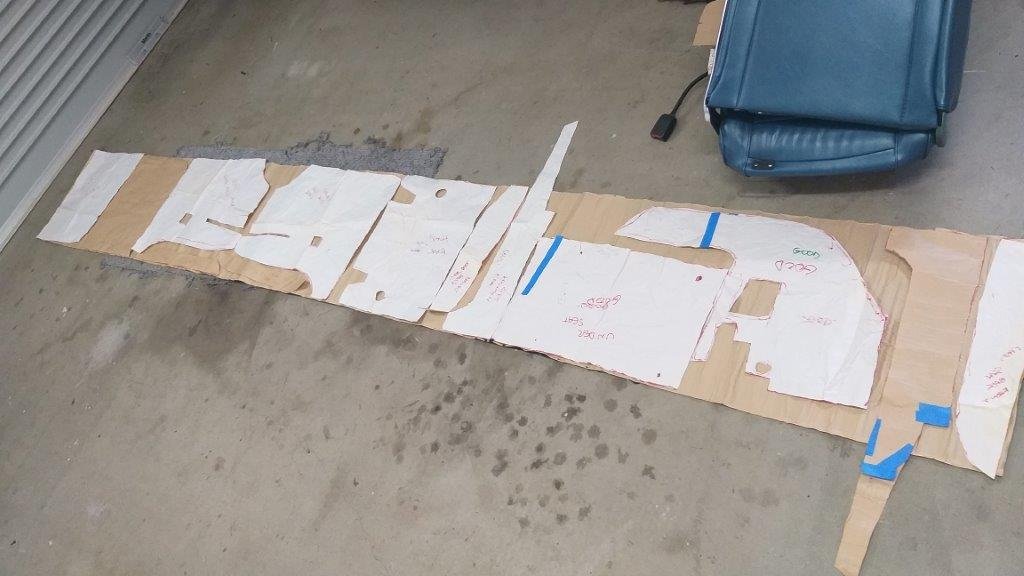
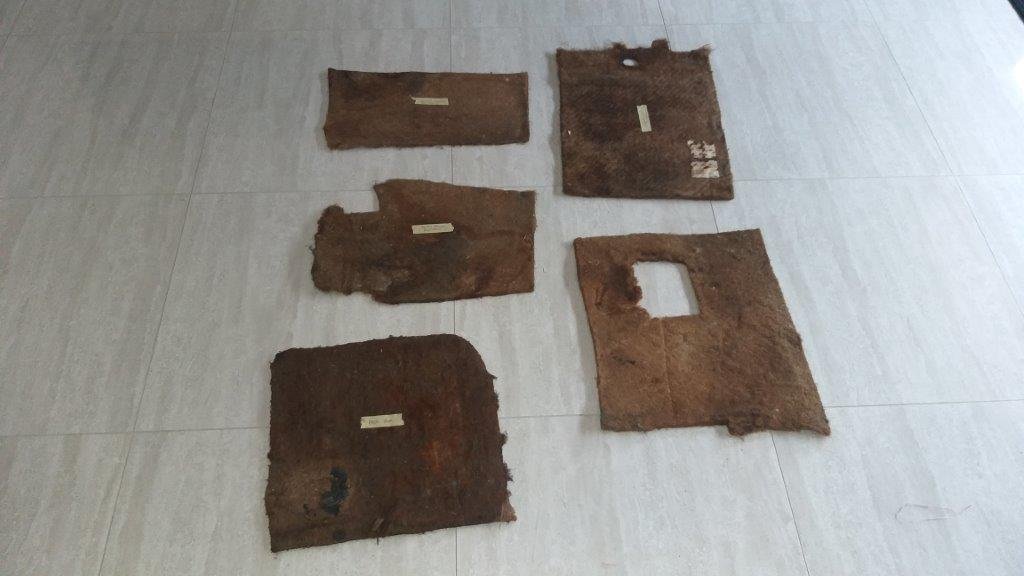
The couriers somehow managed to separate the two boxes of sound deadening with the result that one is still sitting in the Brisbane depot, so my installation has stalled half way. No matter I've still got heaps to keep me occupied. Woke up to another wet and cloudy day so figured I'd crack into something that I could do inside the house. So figured I'd give the carpet underlay some loving Now when I lifted the Mustang carpet a few weeks back the original factory underlay was looking sad and grubby with lots of pieces falling apart and some sections completely missing. The only piece really worth saving was the rearmost portion that covers the driveshaft tunnel as that one has a rubber backing that has kept it pretty mint. Yesterday we did a supply trip through to town and I was able to source a new piece of automotive underlay. It's pretty lush stuff but was a bit spendy for what it is, so I figured I'd take a punt at getting away with a linear meter. So this morning I started off by making some paper templates, then played a bit of Tetris to get everything to fit....... and .... whew, I just made it. Then some chalky, chalky, cutty, cutty, testy, testy, trimmy, trimmy and it's not looking bad at all. The weight of the carpet together with the bolting down of the centre console should help it to settle nicely. Thanks for reading.
-
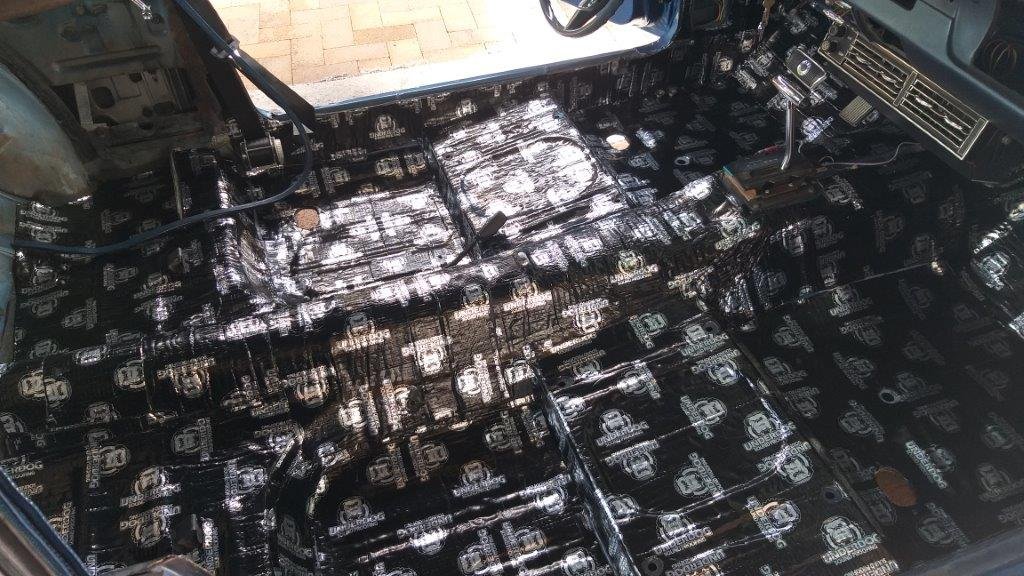
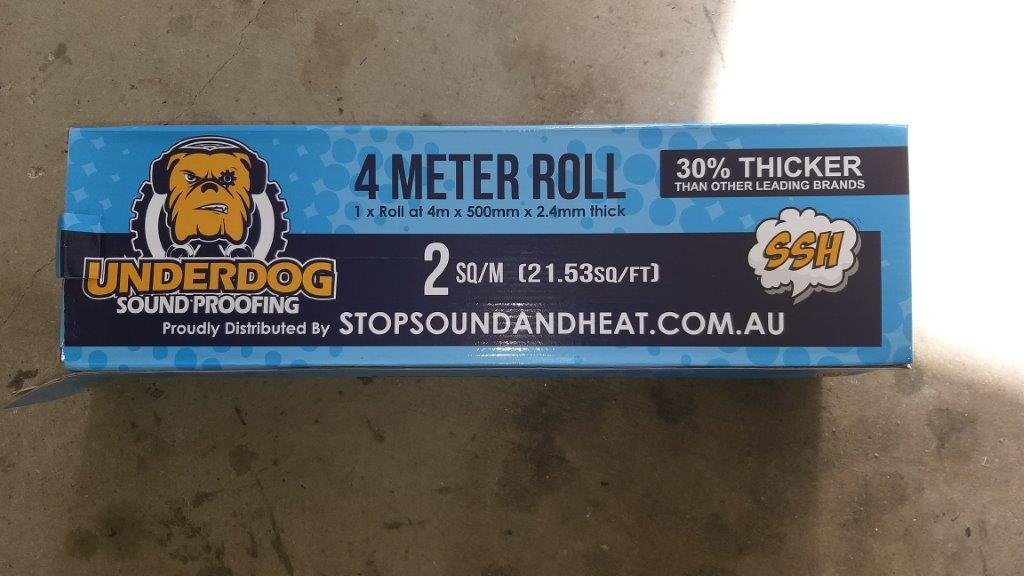
Today I made a start on installing the sound deadening. I'm using a product called Under Dog, which I haven't used before, but I've got to say I'm really impressed with it. Well priced and appears to be a quality product. Will definitely trade again.
-
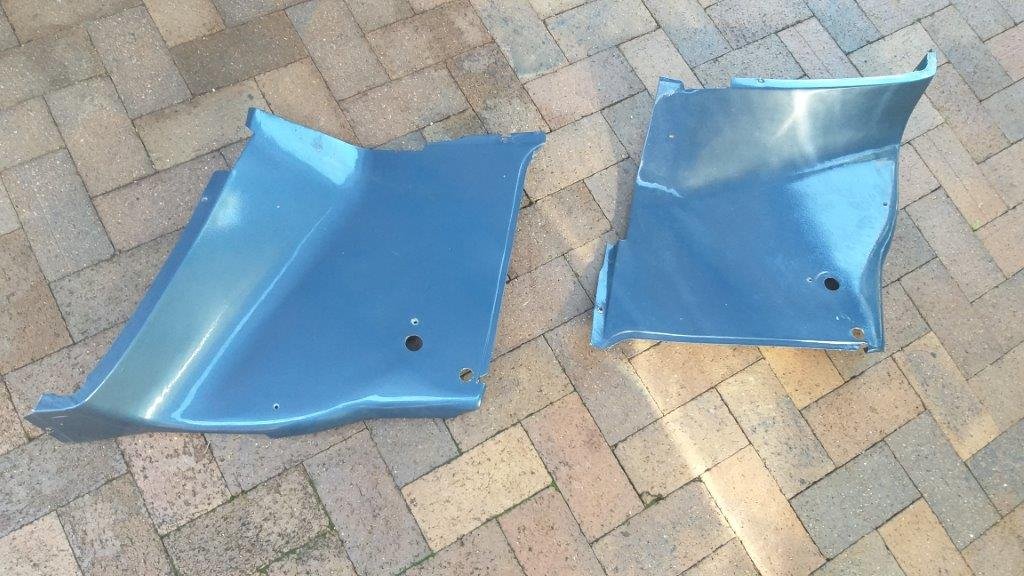
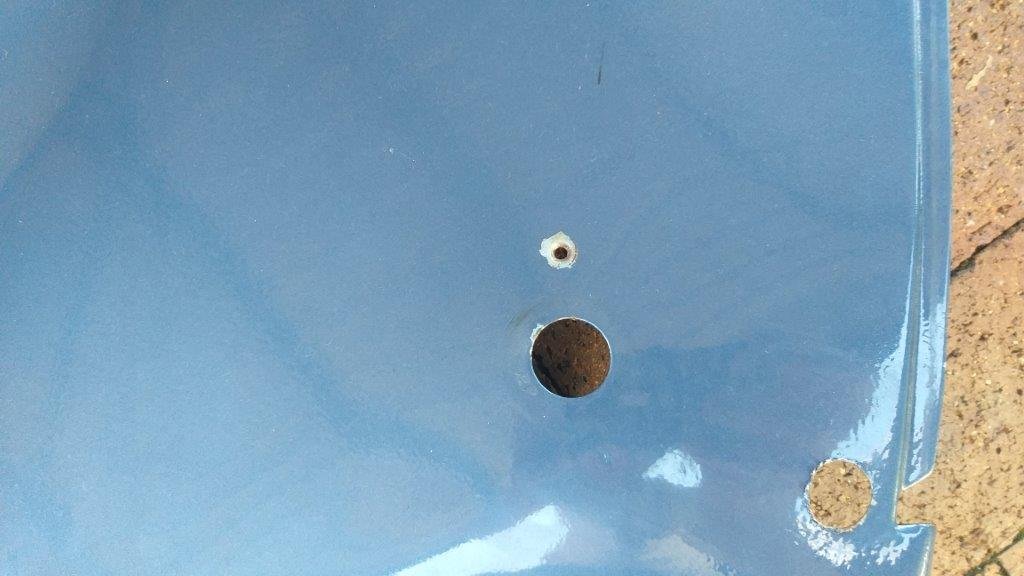
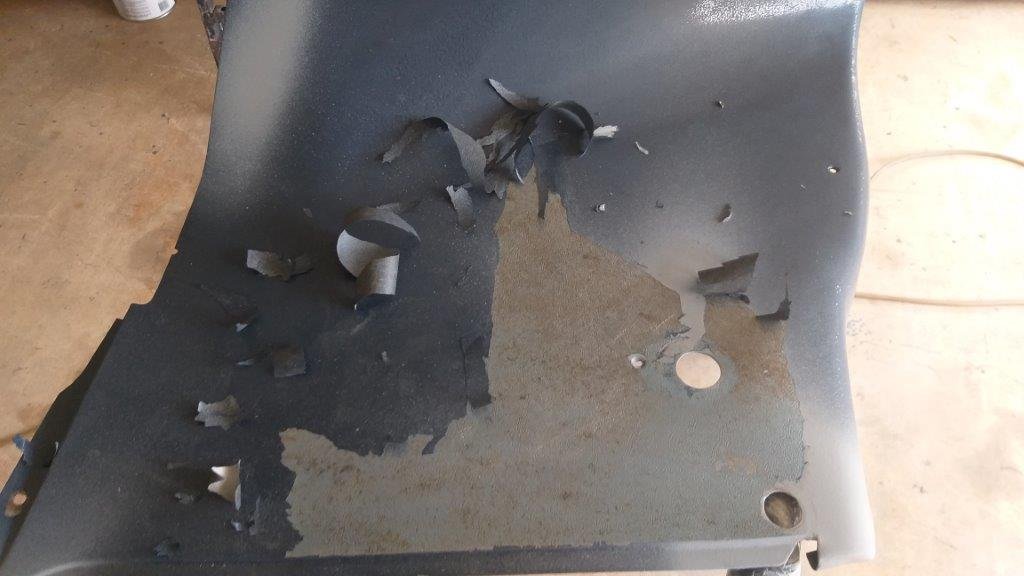
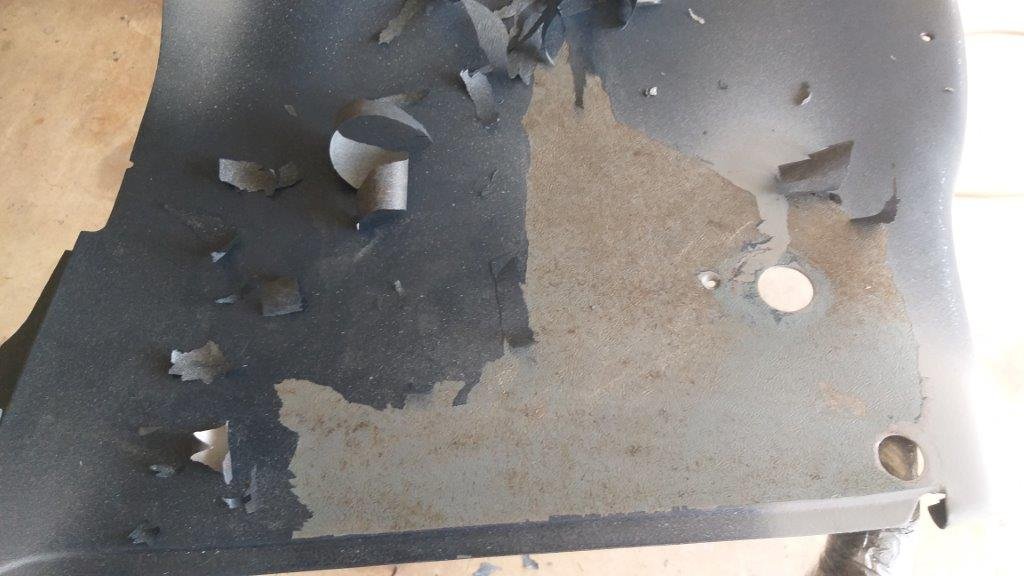
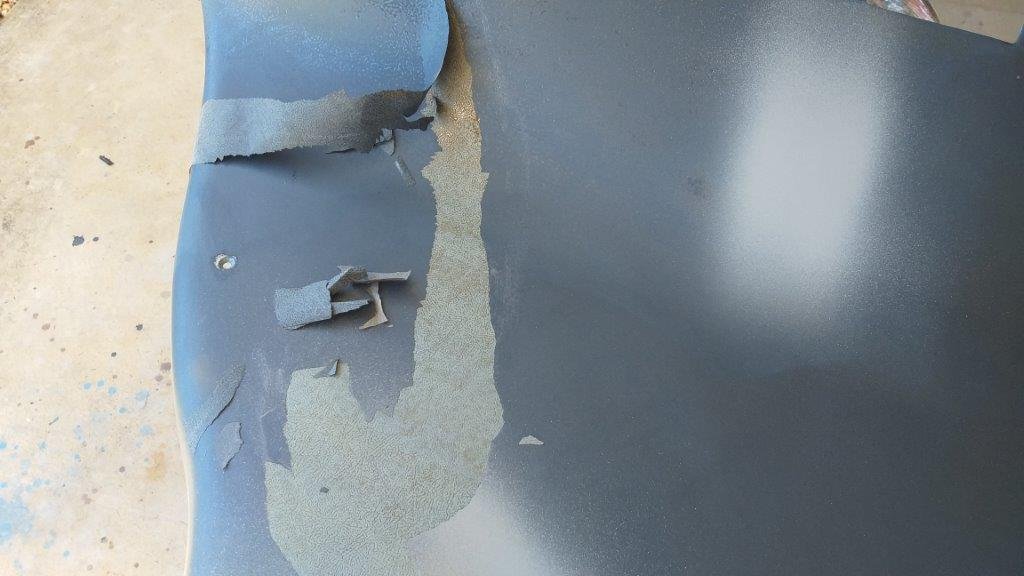
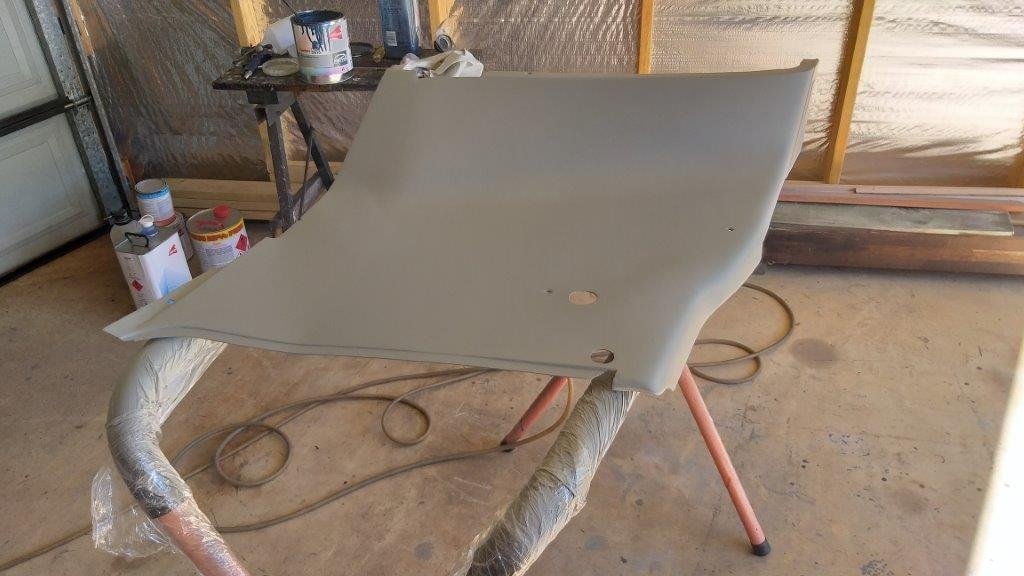
After a good few days of cloud cover and rain the sun has finally made an appearance here in Queensland, so whilst I'm waiting for Grant the painter to clear his backlog I thought I would give the inside rear quarter panels a birthday. They are shaped metal jobs that are painted from factory. Since my fresh front door surrounds are now a slightly different shade of blue my OCD spurred me on to colour these to match. At first glance the existing paint didn't look to bad, so I thought I'd chuck a bit of spray filler on the nicks and scrapes and then just primer the rest. Spotted with spray filler and she started to fry up. Figured it wasn't a big train smash as I could just tickle the reaction spots before laying the primer. Took to the fry with a carpet blade and that is where things started to get interesting. The factory paint started to lift in sheets. Looks almost like it has separated from the original primer. Managed to scrape down the whole panel with very little effort. No fry ups on the opposite panel but again the original paint lifted off easily. I've never seen anything like this. Anyhoo, they are all clean and shiny now and I've laid some fresh primer and a first base coat. Just waiting for that to go off so thought I would type this up in the mean time.
- 198 replies
-
- 11
-
-
Thanks heaps for the suggestion. Chur.
-
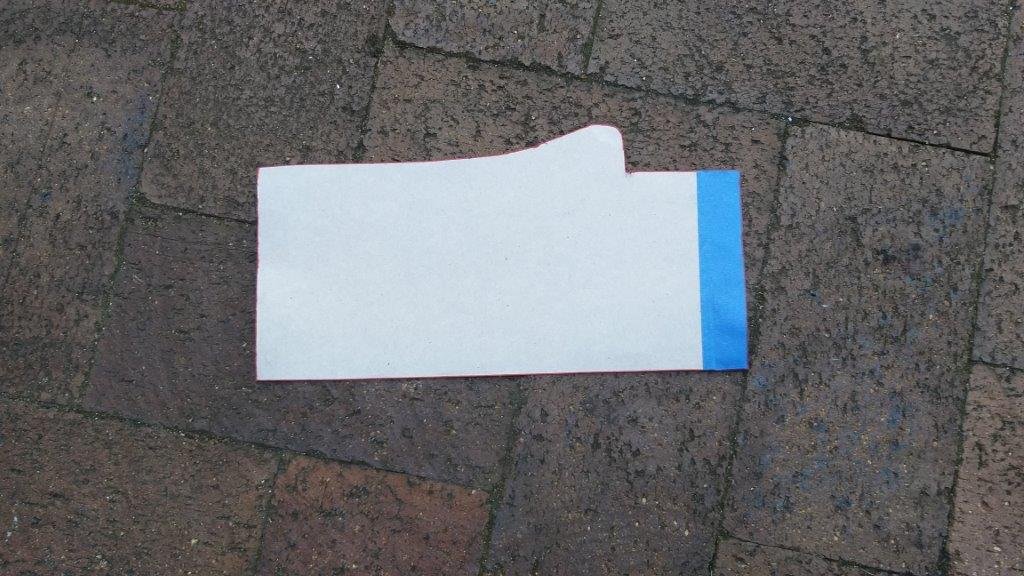
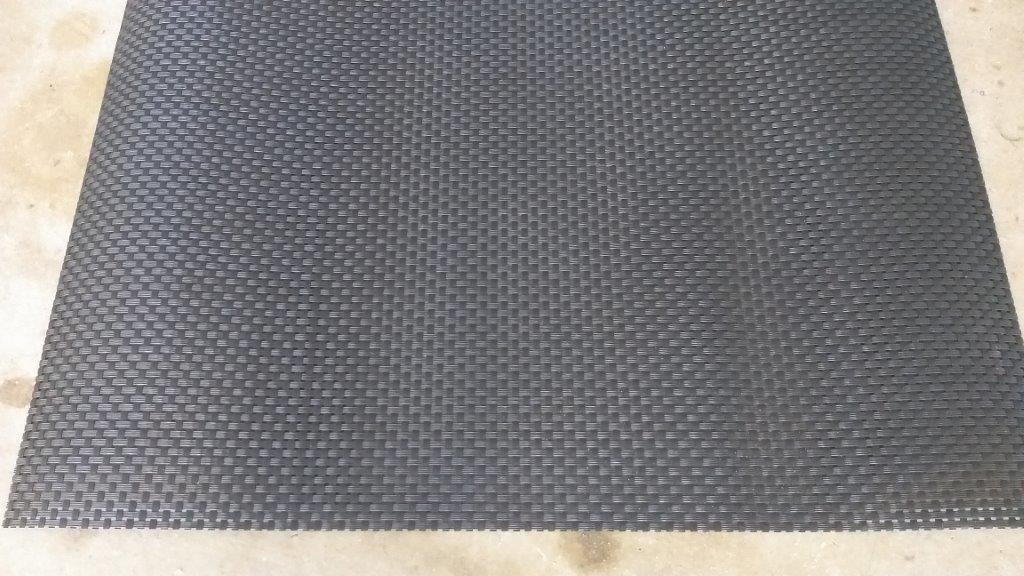
Took to the particle board shelf with a 10mm drill bit to allow the sounds to leak through. Then slapped a bit more paint about the place. I've ordered some of that textured kitchen drawer liner stuff as per my sample to cover the panel. Should hide the holes and mounting bolts nicely. Hopefully that will arrive sometime soon. I'm not going to win any audio awards with this setup but at least it will look pretty subtle and the sound should be an improvement over my existing single dashboard speaker. Thanks for looking.
-
Bolted the speakers onto the ply using bolts with countersunk heads then used similar bolts to attach the ply underneath the metal shelf. The raised speakers now sit well below the parcel shelf.
- 198 replies
-
- 12
-
-
Next step was to carve up a piece of plywood and chuck a bit of paint on it. Clamped it in place underneath the metal shelf and marked out the fixing positions based on the factory speaker mounting holes already punched into the metal shelf. I can also make use of the holes that were previously used for the baby seat anchors as I no longer need those.
-
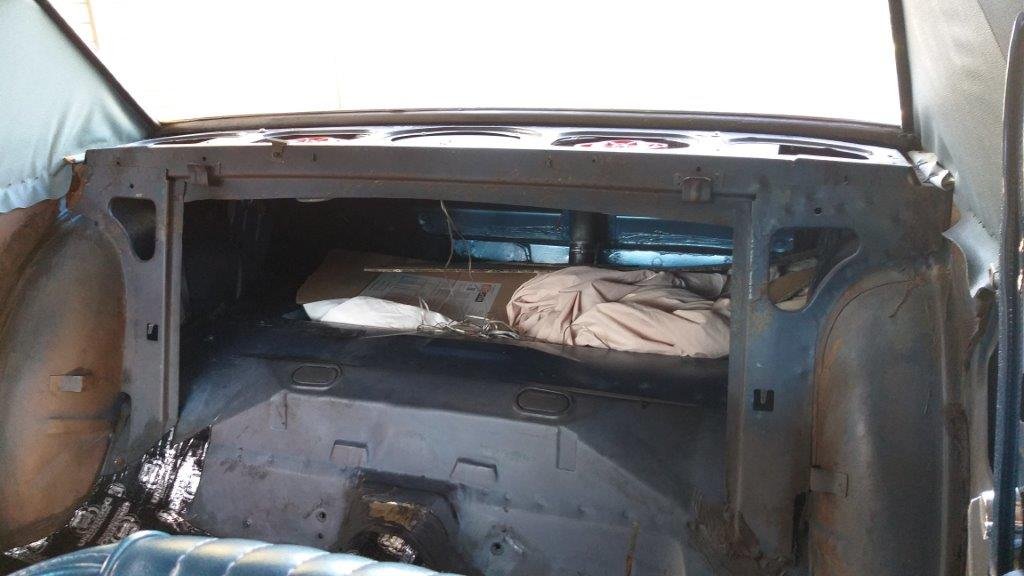
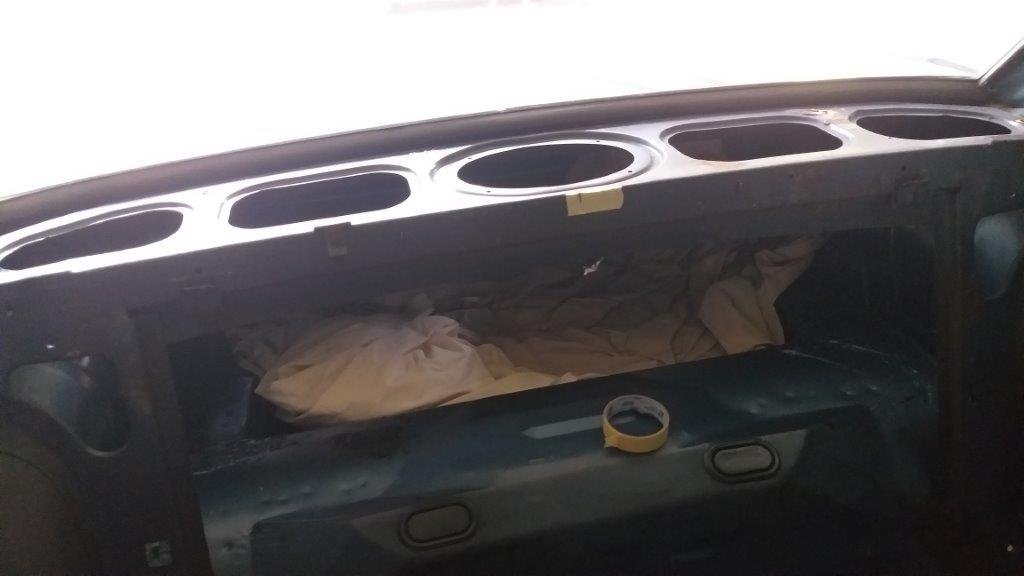
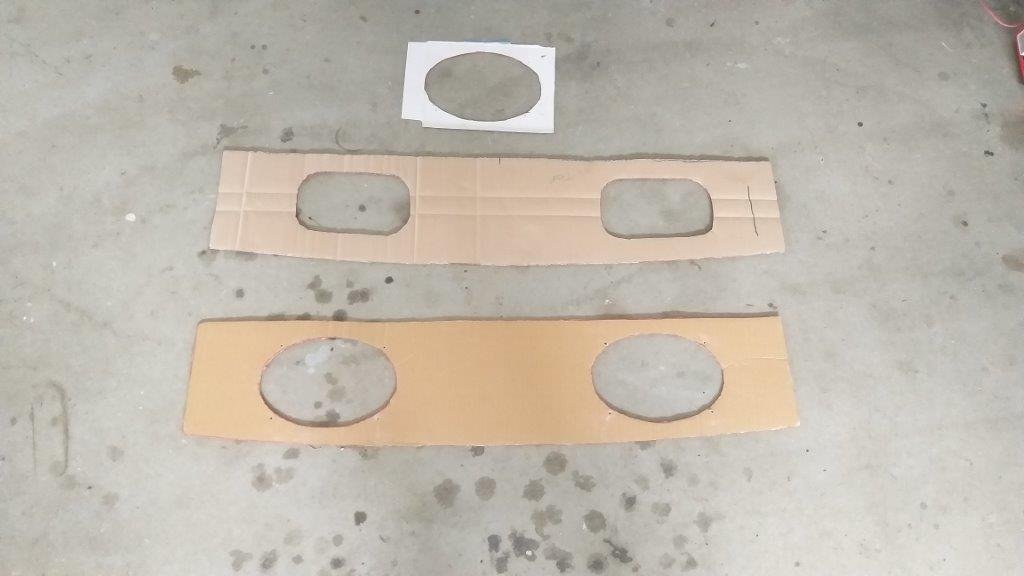
So after sussing out the speakers I moseyed on over to the Mustang for a better look at the parcel shelf. The cover plate is actually a purchased repro part, but it has been slightly butchered in order to fit modern 3 point rear seat belts as well as dual baby seat anchors that the previous owner Tom fitted for his twin boys. I reckon I can still use it though. Lifting it out and looking at the metal structure underneath it is an almost unmolested factory panel so I definitely don't want to be cutting that up. The metal panel has a total of 5 factory cutouts presumably for speakers and the like. The centre hole is perfect for a single 6 x 9 but that helps sweet fanny adams. The holes on either side of the centre hole are a reasonable size so I'm picking I can do something with them. Started off by making a few cardboard templates, the middle one is modeled on the factory holes and the lower one on the 6 x 9s.
-
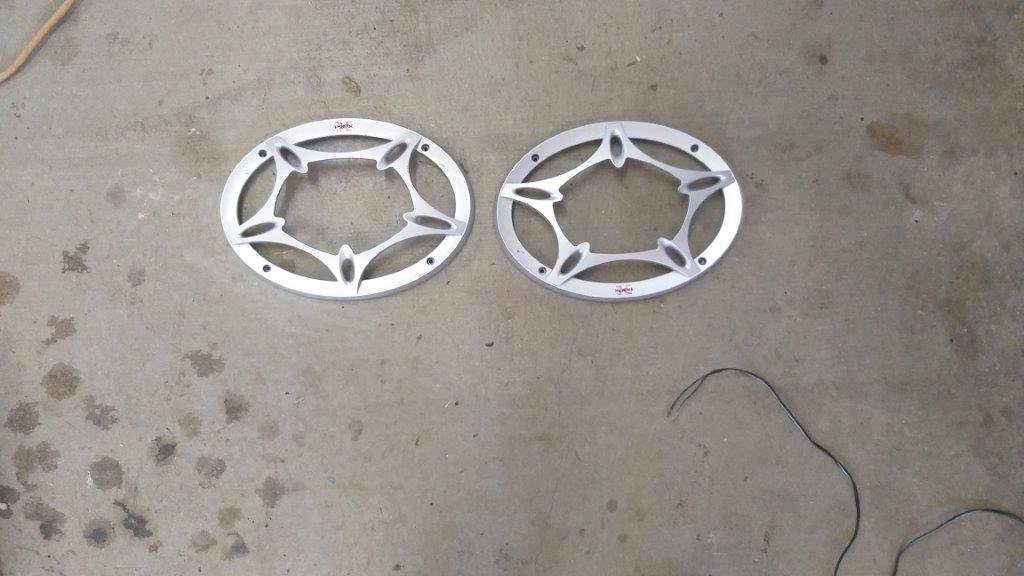
The head unit currently plays through a central mounted dashboard speaker. It's not ideal so I figured a set of 6 x 9's in the rear parcel shelf would be the go. Now it just so happens that I have a set of 3 ways sitting on the shelf, so I dusted them off for a closer look. The smaller speakers sit well proud of the tops and the covers look like like something you would find in Liberace's boudoir, so they will definitely look out of place in the Mustang. But fear not as I have a cunning plan.