


Flash
-
Posts
1615 -
Joined
-
Last visited
-
Days Won
2
Posts posted by Flash
-
-
If you are looking for a pure road tyre, I'm a big fan of the Nankang N729s. I'm currently running 225/50/15s on 8J rims on the front of my 66 Mustang and 245/50/15s on the rear on the same width rims. Looks like they do a 205/50/15 too. If I had to do it again, I'd go 225/50/15s all around as I prefer the look of the slightly smaller side wall profile.
I have the same 225s on the rear of my Thames van.
I'm not crazy about the raised white lettering so I had them reverse fitted for a subtler look.
-
 3
3
-
-
- Popular Post
- Popular Post
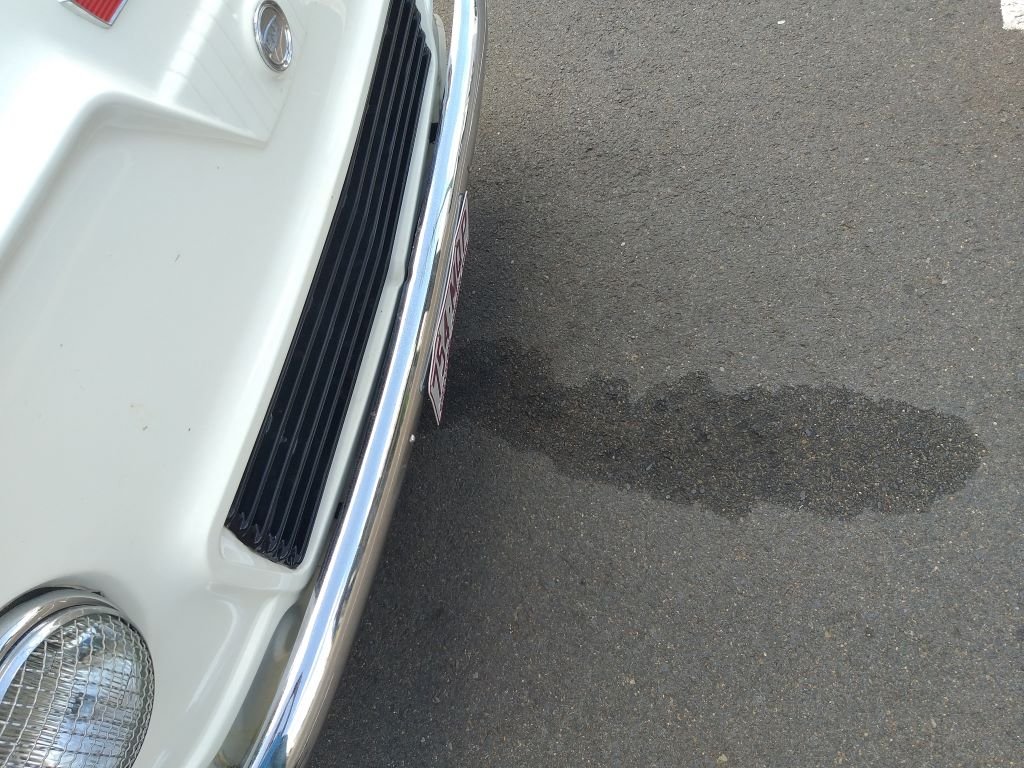
Did a supply run to town this morning and when I got back to the van it had done a little wee.

Stuck my head underneath for a nosey and it looked suspiciously like it had originated from the radiator overflow pipe.
I keep an almost constant eye on my temp gauge, so I knew that she hadn't run any hotter than usual.
Grabbed a rag and popped the radiator cap off and he didn't spew his guts, so I figured that was a good sign.
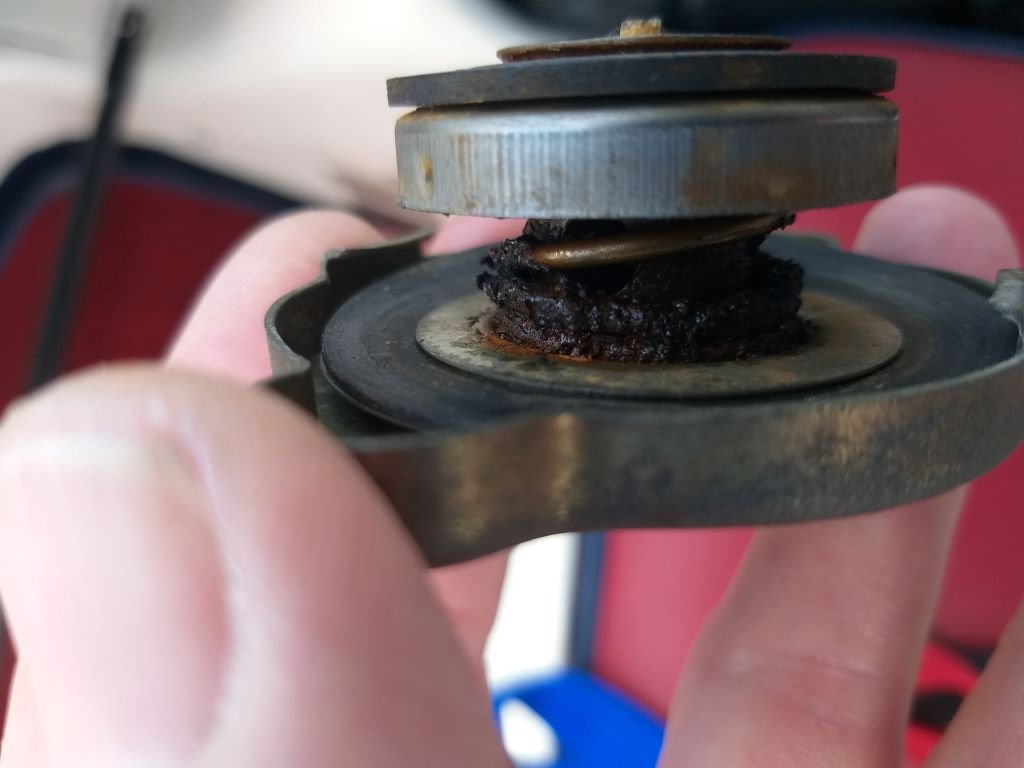
Cap spring felt pretty weak to the touch and on closer inspection it looks pretty crusty:
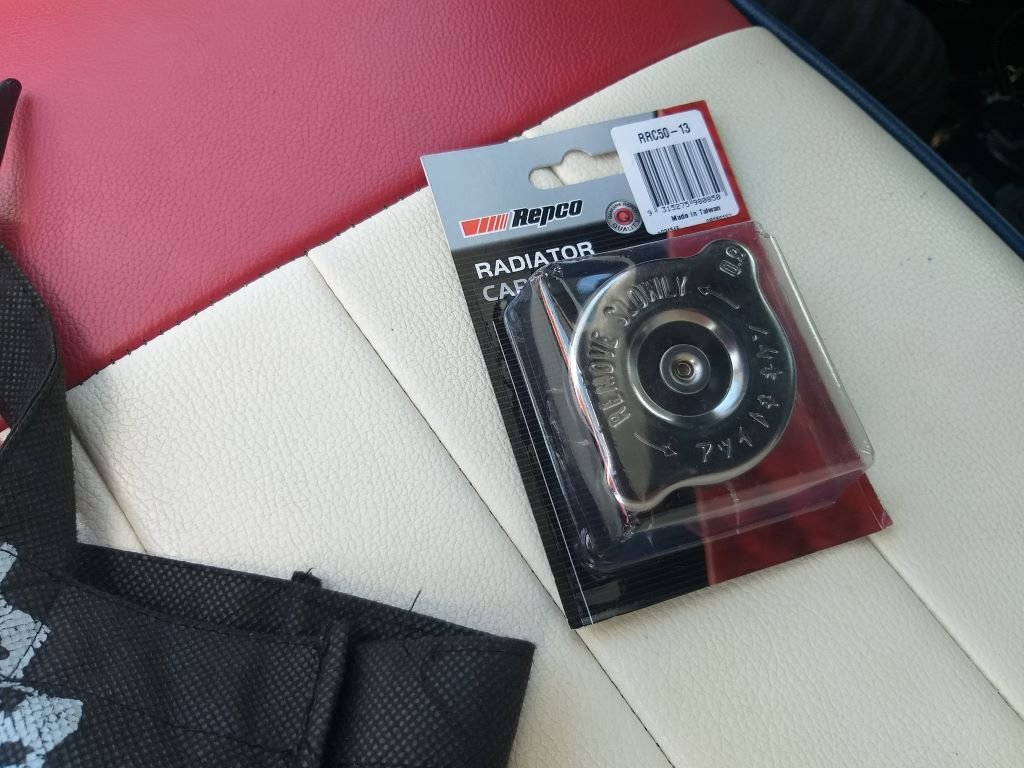
Luckily Repco was just a block away, so I strolled on down and grabbed a new one.
The new cap is the same 0.9 bar rating, but I could definitely feel the difference in the spring resistance compared to the old one.
Made a few extra stops before heading back home and no more piddles, so looks like that's another win.
-
14
-
What an amazing outcome Alex. Well done mate ! I can't wait to see the video of your first hoon in the Imp with his new heart.
-
1
-
-
Tiny step forward today.
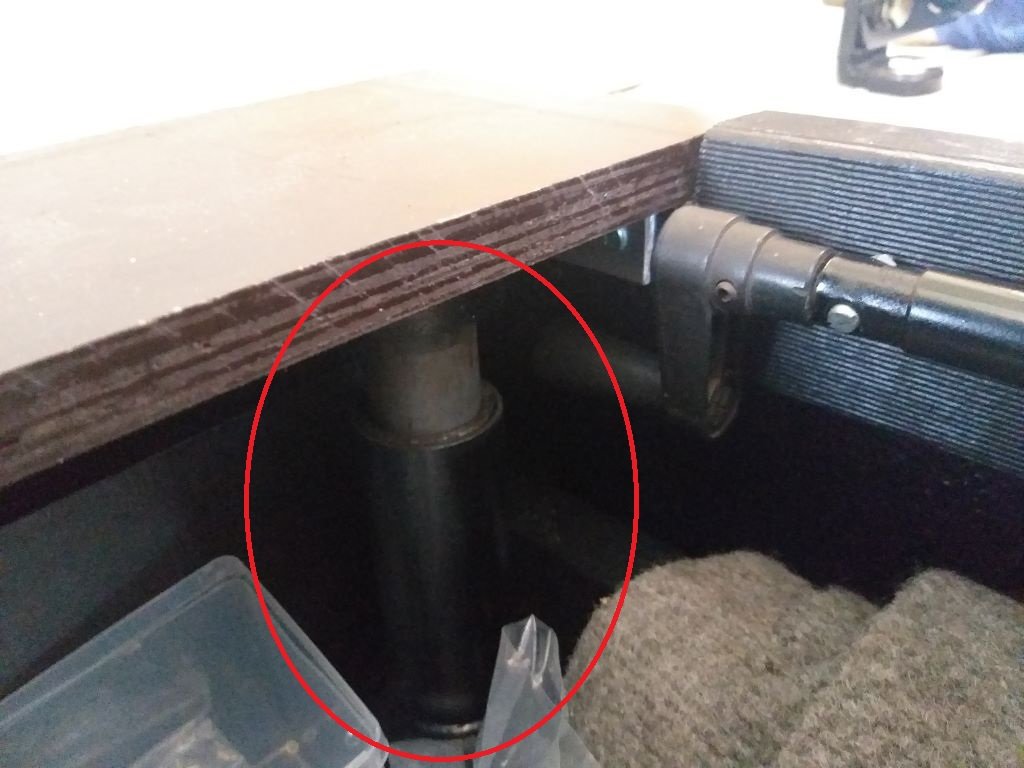
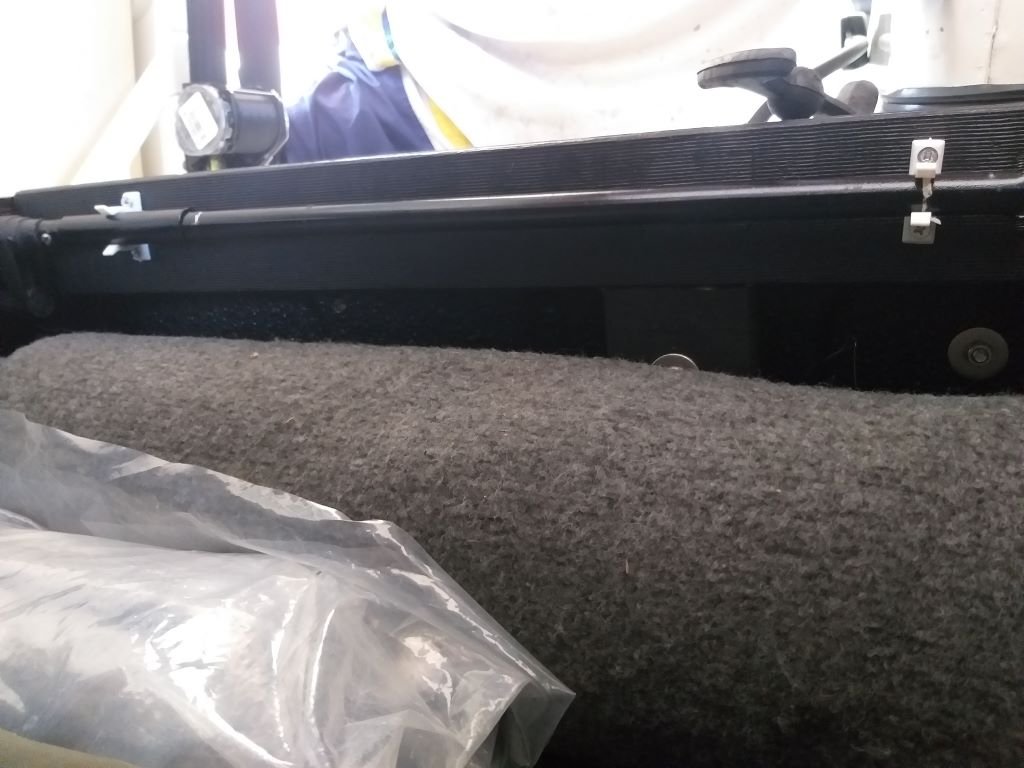
Sorted out a hiding place for the bottle jack and associated bits.
The bottle jack slides under the wooden side panel in my front storage box and jacking it up a notch to press against the underside of the side panel holds it firmly in place. I wedged the wooden block between the back of the jack and the side of the van so she ain't going anywhere either.
I then fitted two little plastic clips that I found amongst my stash, and they hold my spare wheel crank in place.
I've rolled up a thin piece of marine carpet that I've also stored in the same compartment just in case I ever need to crawl under the van for a roadside repair.
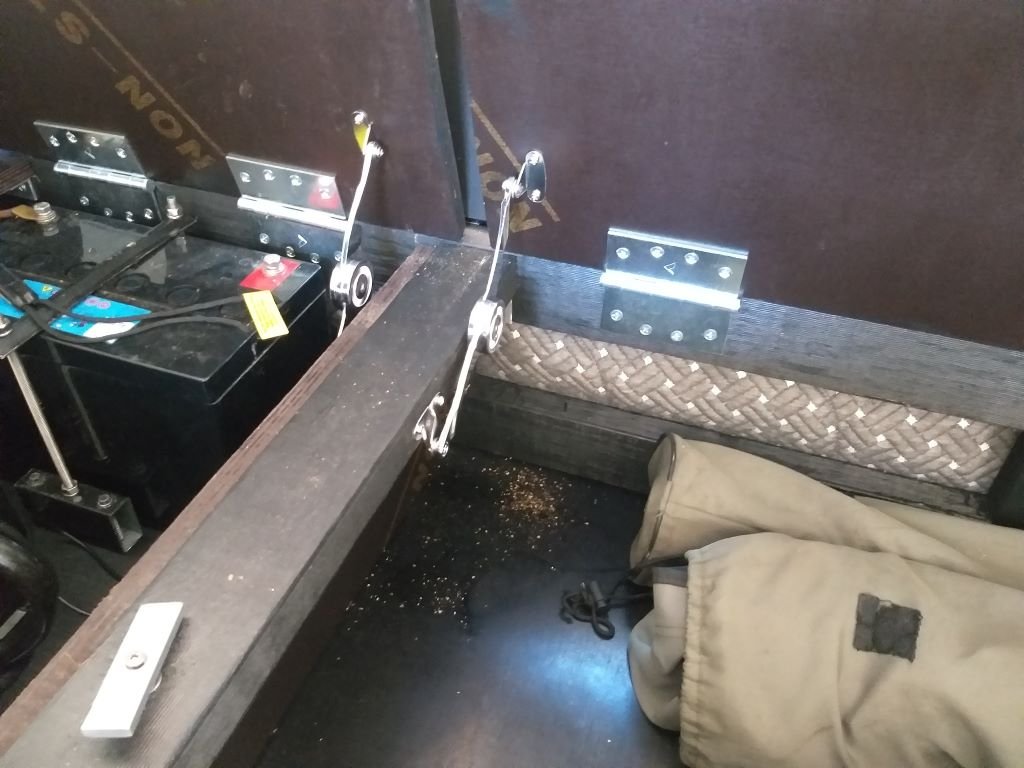
While I was mucking about in the two front storage bins, I figured it was time to fit some kind of stay for each of the lids as I'm a bit over them closing on my fingers all the time.
Scratched around in the shed and found some more leftovers from our kitchen reno:
Chucked in a few wood screws and the lids now stay open all by themselves.
I did think about fitting my new voltage sensitive relay to add the house battery to the charging loop, but it's so bloody hot here at the moment that I packed up and went to wallow in the pool instead.
-
7
-
-
Okay, so having a spare wheel doesn't really help if you haven't got a jack ... duh.
So today I thought I'd remedy that situation.
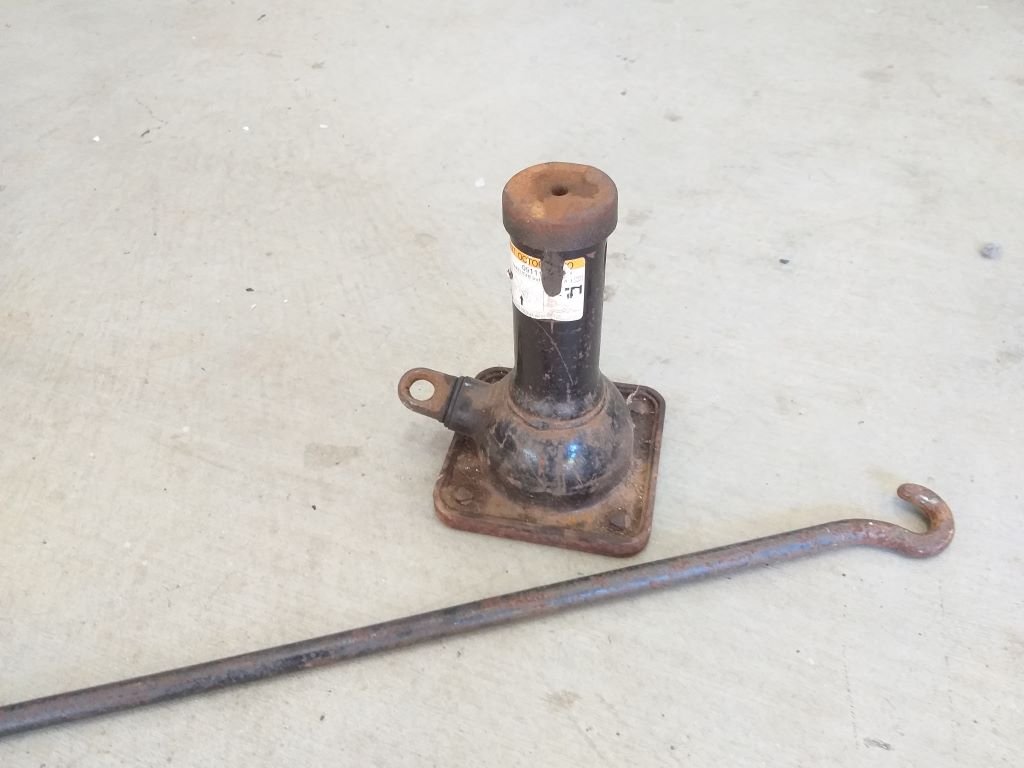
Rummaged through the pile of leftovers from my donor vans and I have a choice of two scissor jacks and a bottle jack. I'm not a fan of scissor jacks so the bottle jack got the nod.
Pulled it out into the light of day. Looks a bit crusty but it does come with a crank handle that looks just as crusty:
First step was to check that the jack still functions and that it has enough bottle to lift the Thames (did you see what I just did there .... absolute howls of derisive laughter Bruce)
Grovelled under the van and it will lift either of the back wheels perfectly. Tried the fronts. Bottle is too tall to use under the front beam. Bugger. Scratched my head a bit then decided to try using my strut rod mounts as the lifting point and she lifts a wheel, but it's just on the borderline and I doubt that she is high enough to get my commercial profile spare on. So I grabbed a bit of timber which will make a solid base for roadside lifts as well as giving enough lift for the front. Perfect.
With the functionality box ticked I then focused on the aesthetics.
Took to the jack and the handle with my wire wheel of death and it started looking a bit better:
Quick wipe down and a spritz of the usual satin black.
I even fed my OCD by giving the wooden block a few coats of flat black fence paint.
Tomorrow I'll work out a nifty way to store everything, so it doesn't rattle around in my storage compartment.
Thanks for looking.
-
8
-
 1
1
-
-
2 hours ago, Kayzee said:David
Cairns, Australia
Toyota Sprinter
KE55 Corolla coupe
Daihatsu Compagno Spider
1948 Bedford PC utility
Lotus 7 replica
googling Compagno
Welcome. Good to have another Queenslander here.
-
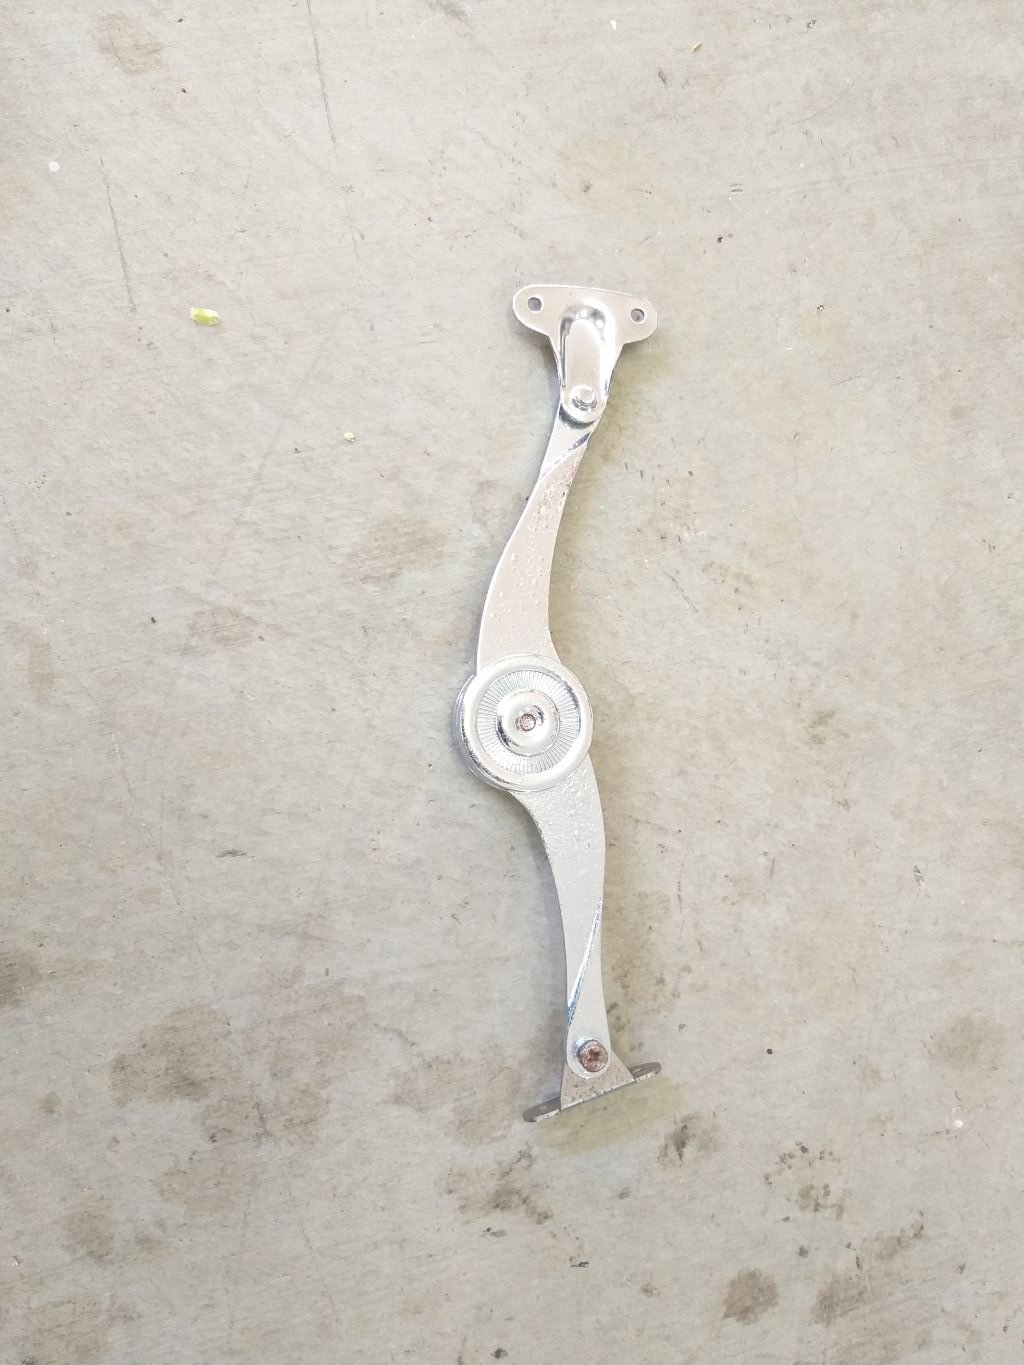
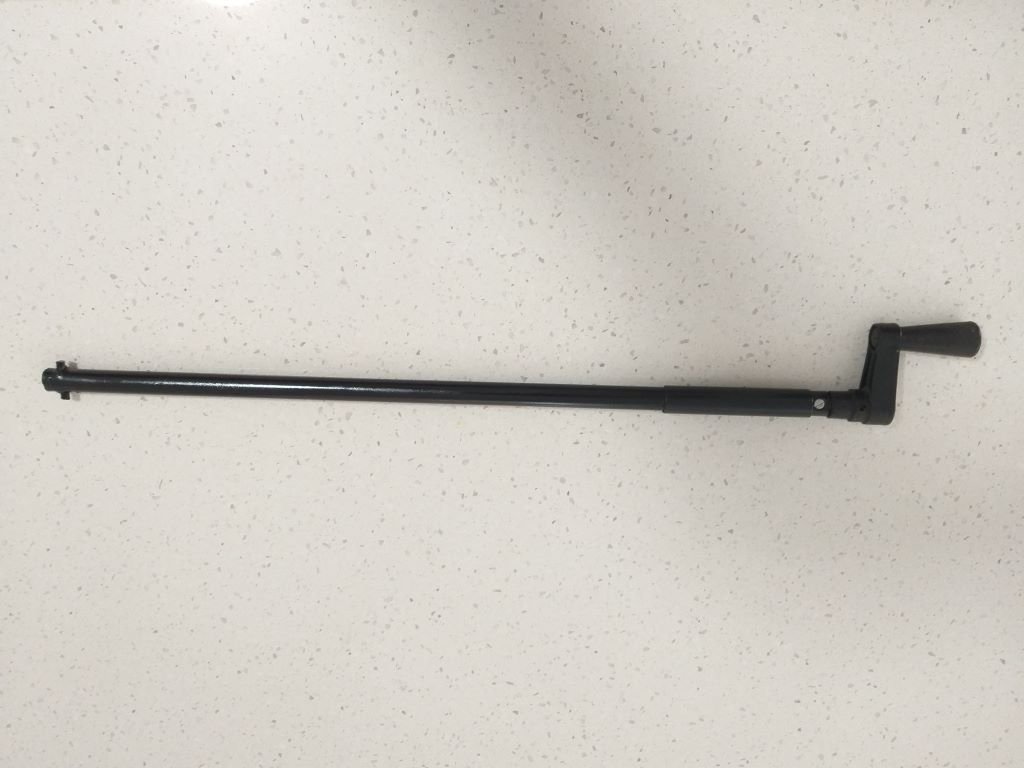
And that's the spare wheel crank handle done and dusted.
Works like a charm.
-
8
-
-
- Popular Post
- Popular Post
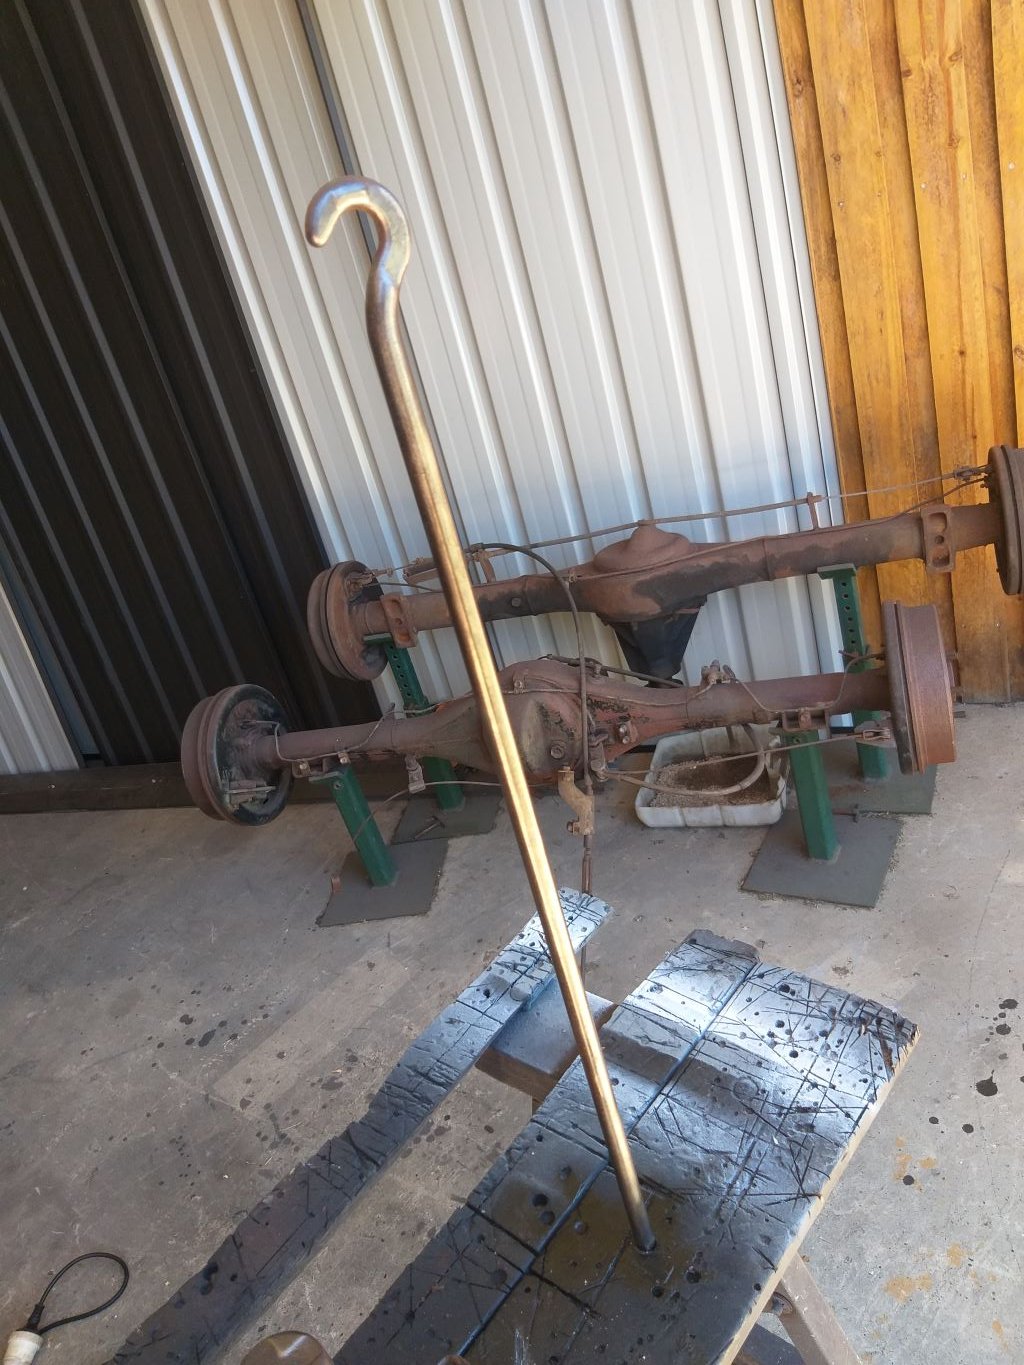
Well according to the Captain's Log it's day 656 on the Thames build and I thought I'd celebrate the fact by adding a spare wheel.
When we bought the van it had no spare, but the factory wheel carrier and lifting mechanism was still in situ.
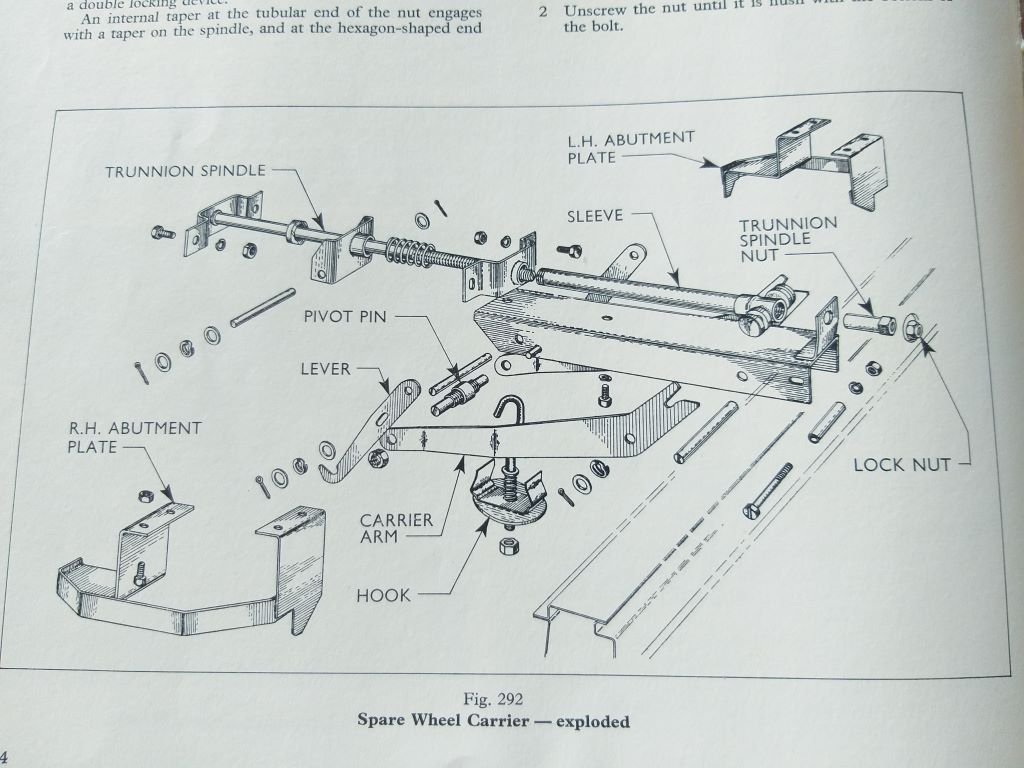
The original mechanism was pretty complex, so I suspect that the Dagenham based propellor head responsible for the design was on an hourly rate and decided that it was time to milk the system for everything it was worth.
Schematic of the system looks like so:
Unfortunately, the threaded rod, ... ahem ... I mean the trunnion spindle, was seized solid and no amount of lubrication would free it up, so I ended up taking to said spindle with my grinder of angles way back when I refurbished the underside, and the van has been going commando ever since.
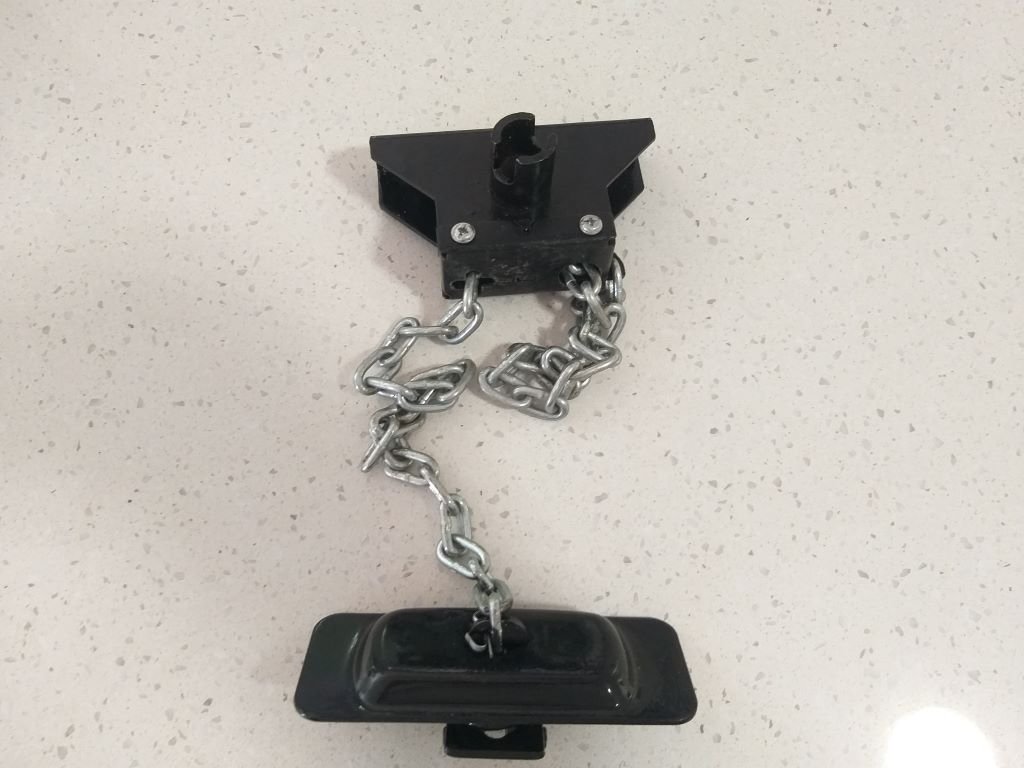
So as part of my Christmas present, Santa popped one of these fine marvels of modern engineering into my stocking:
And as previously mentioned today was the day to figure out how I was going to mount the thing.
So I grabbed the bull by the balls and headed under the arse end of the van for a look see.
Turns out there is a perfectly placed chassis cross brace that looked like it might do the trick.
The first part of the exercise was to try and make the new mechanism line up so that the crank handle hole in the rear Thames badge would still work.
So, I started off by poking an appropriately sized steel rod through the hole in the badge and then through the corresponding hole in the chassis cross brace. The rod was able to temporarily hold the new lifting mechanism in place. Next step was to prop the spare wheel up on a few blocks of wood and then drop the lifting chain to make sure that it lined up with the centre of the spare wheel.
As luck would have it things lined up perfectly, so it looked like I was off to a good start.
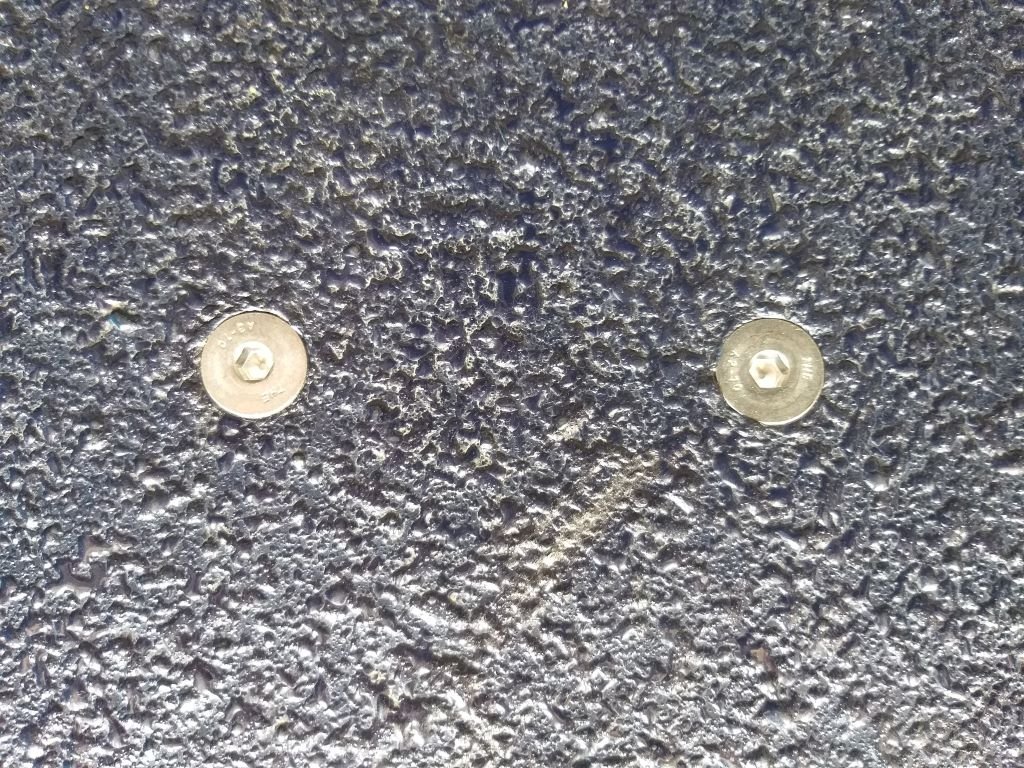
Slapped some white paint on a spare bolt and poked it through the threaded nuts attached to the mechanism and I now had a good guide for the mounting holes:
The flooring in the load area is still the original ply that was rubber lined by the previous owner, so I figured the easiest thing to do was to lift out my false chequer tiled floor and then drill some pilot holes through the chassis cross brace and then up through the ply. Eventually ended up with the correct diameter holes and bolted the mechanism up. Worked perfectly and I ended up with these countersunk beauties:
Next step was to attach the spare and winch it up into position.
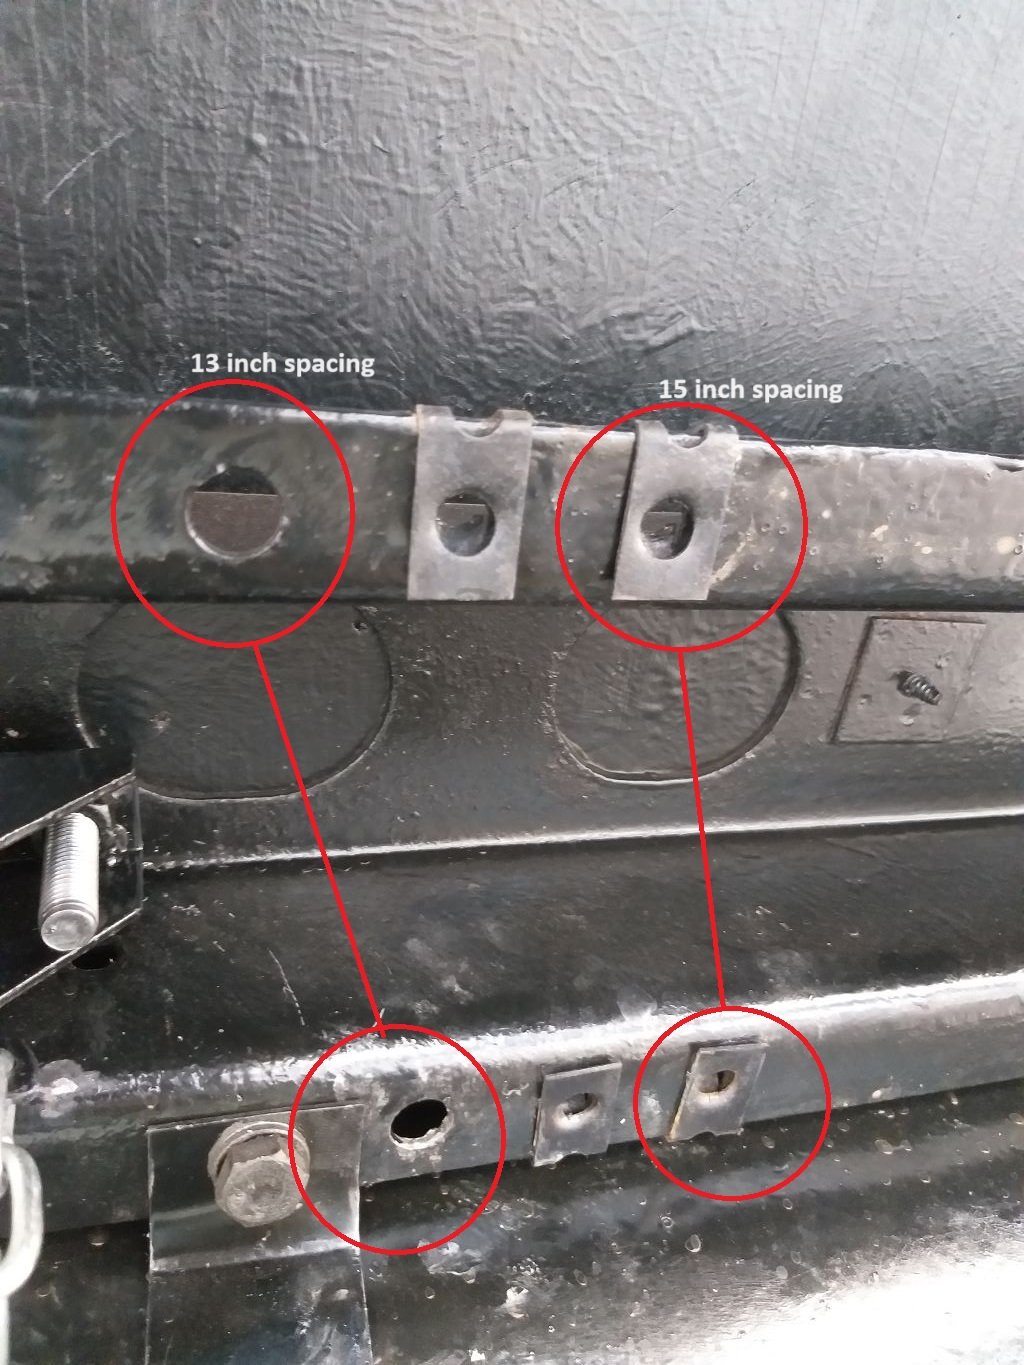
These vans were offered from factory with two wheel options, option 1 being 13-inch diameter and option 2 being 15-inch. Again, the forward-thinking engineers had allowed for both options when it comes to the spacing of the abutment plates which is achieved by moving the captive nut thingies to the appropriate holes:
Unfortunately, my spare is a 14-inch wheel so I had to mix and match the spacings to get the wheel to sit snuggly, but it's all good now.
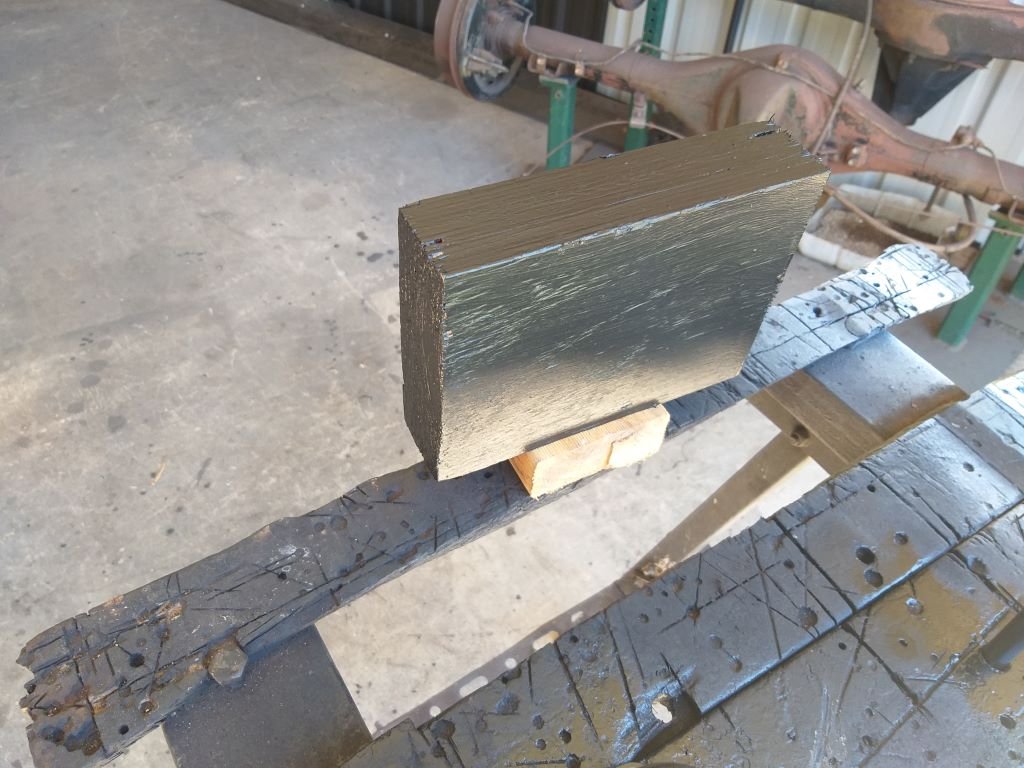
Tomorrow exercise is to turn these little bits of scrap into a crank handle for the mechanism:
Thanks for looking.
-
13
-
- Popular Post
- Popular Post
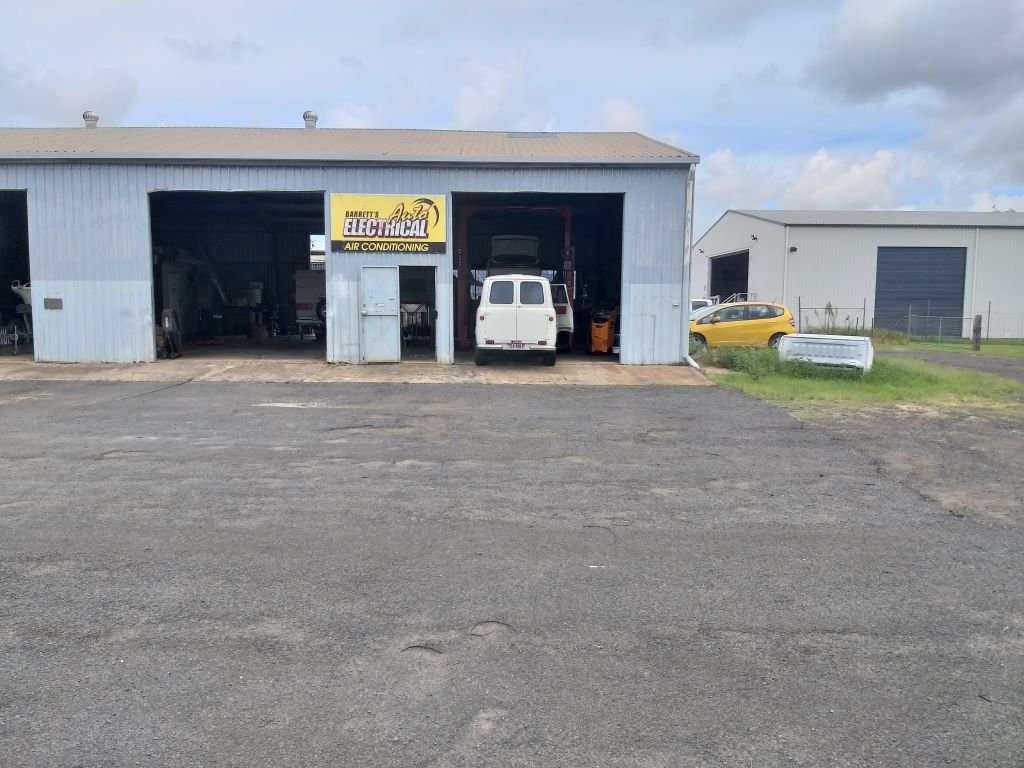
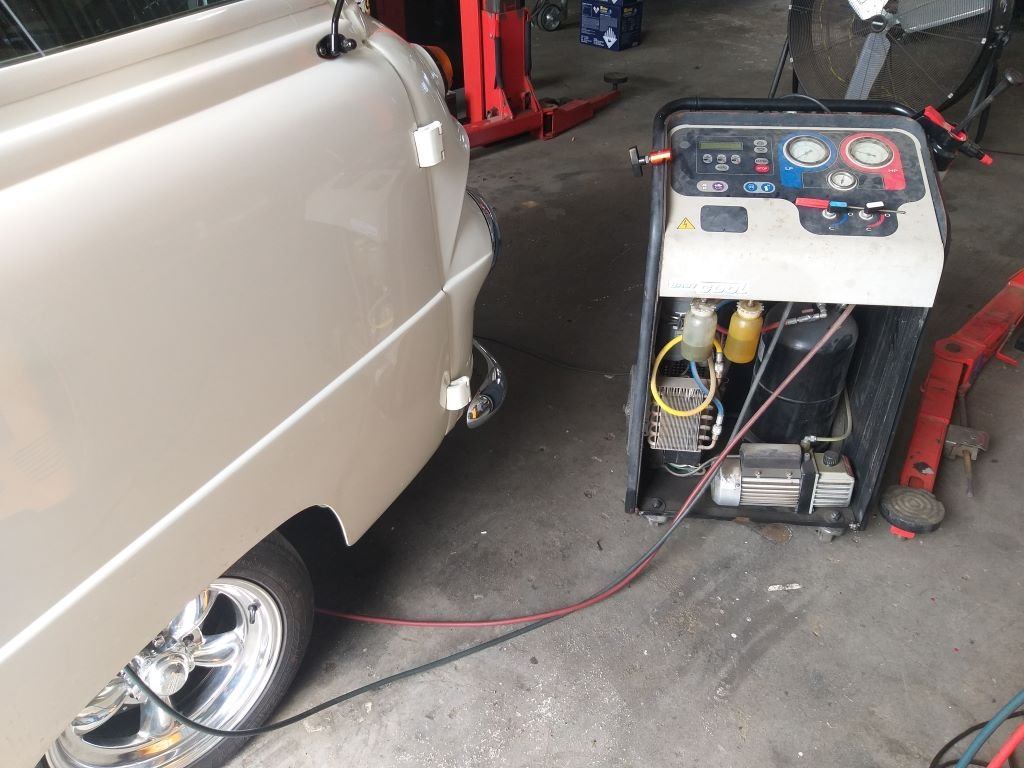
It's a toasty 32 degrees Celsius in our part of the world today, so a perfect time to visit this place:
To get this done:
And I then enjoyed a cool ride home.
My DIY a/c hoses are holding up so far. Time will tell how long that lasts.
I'm getting a bit of a/c belt slip, so some adjustment is called for, but apart from that all seems good.
-
22
-
 1
1
-
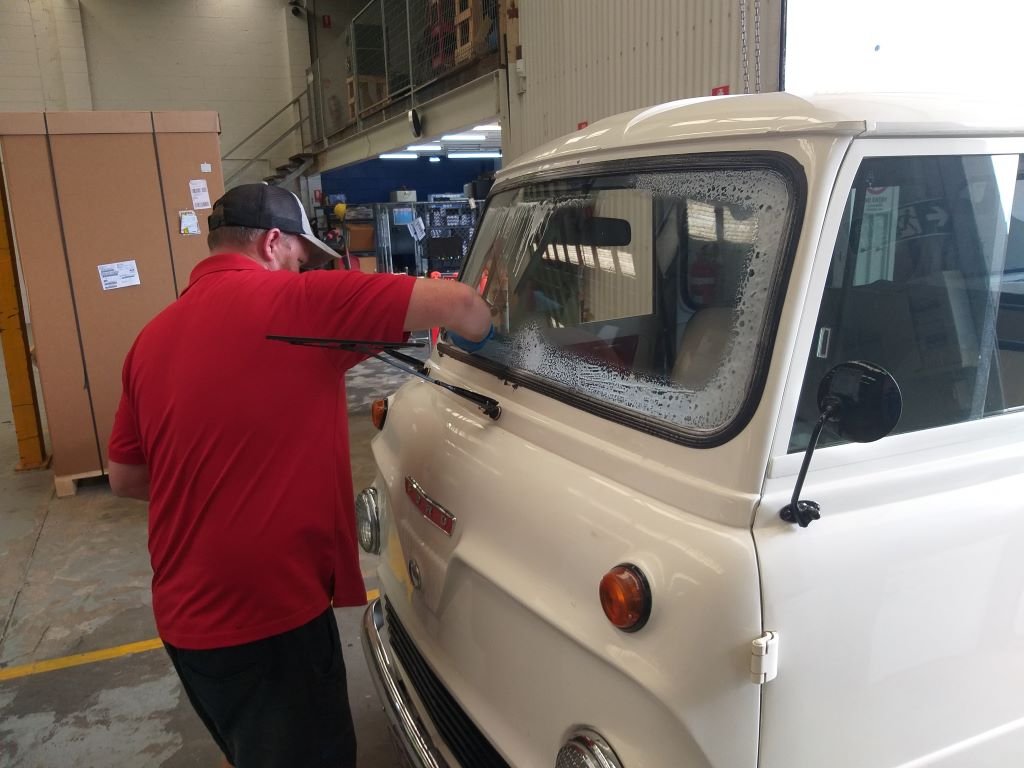
We are deep in the rainy season here and I'm a bit over getting sprinkled with liquid sunshine, so while in town today I wheeled by my mate Ben's place, and he worked his magic.
-
8
-
-
- Popular Post
- Popular Post
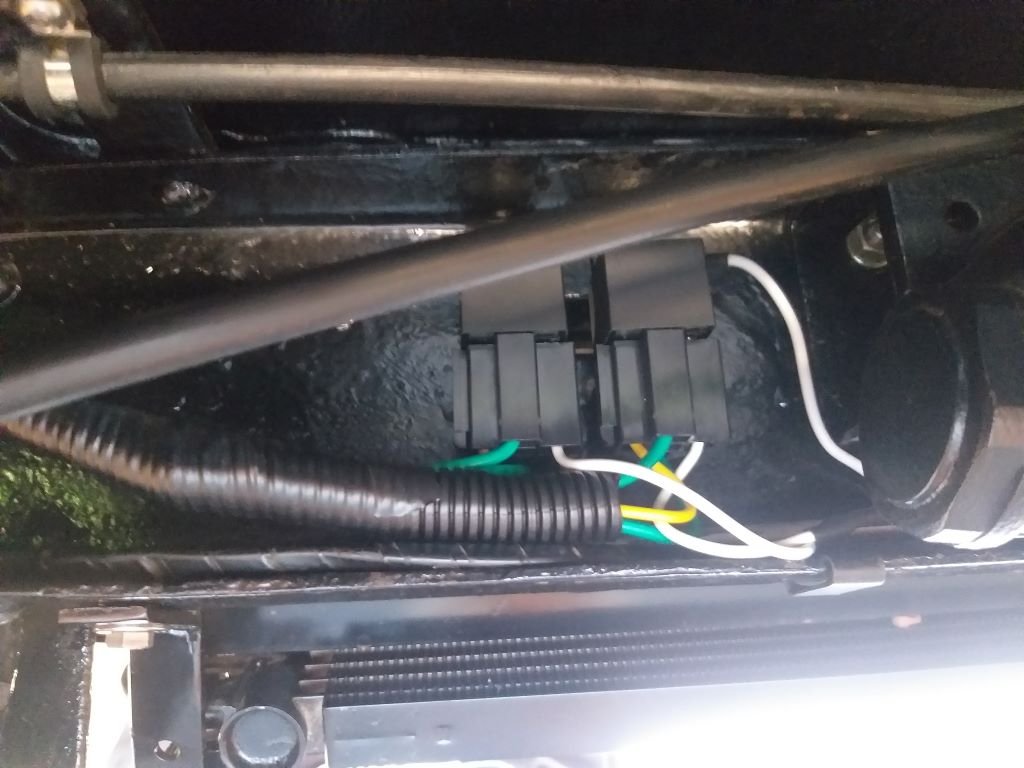
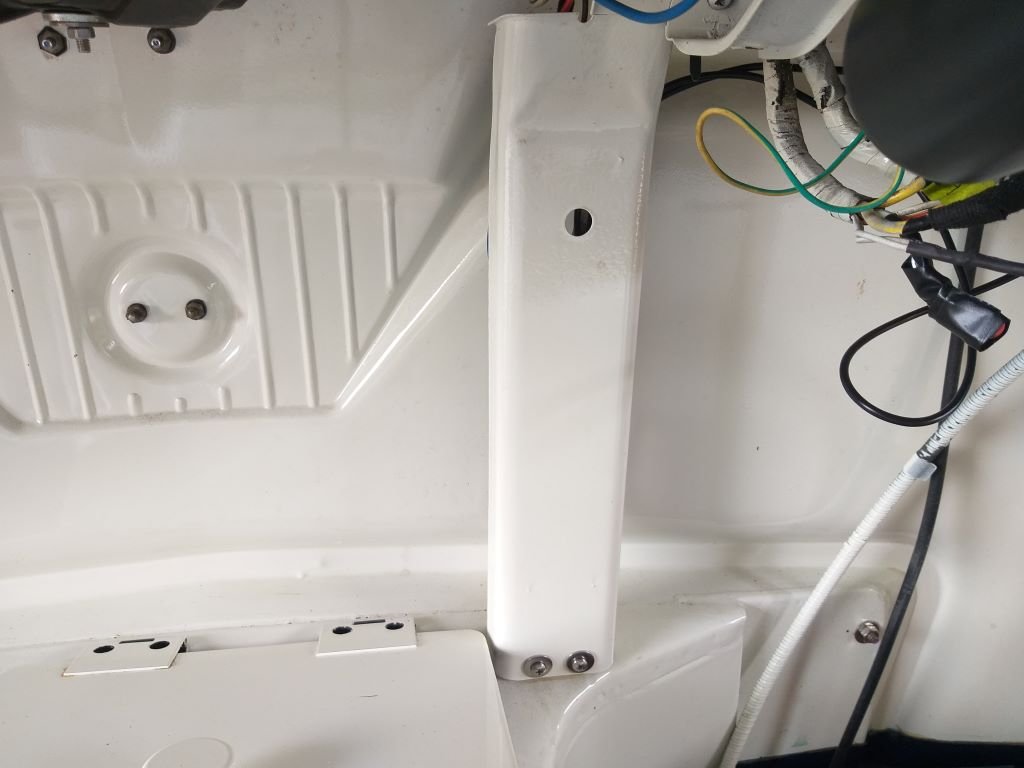
Yesterday I finished off the last of the a/c wiring being a pair of relays for the condenser thermo fans. I poked a few mounting holes in the RHS chassis leg and the relays are now tucked up in a sheltered spot. I ran out of single wire sheathing, but I'll grab some on my next town run just to neaten things up a bit more.
I then spent a bit of time carving up an old HiAce roof rib to create a matching cover for the main wiring loom.
Ended up with this:
I need to get some paint colour matched, but in the meantime I've just chucked on a few coats of primer followed by some appliance white.
Apart from the colour difference the two cover panels match up fairly okay.
-
10
-
- Popular Post
- Popular Post
Yesterday arvo my favourite courier pitched up with a parcel of goodness so today I took a break from a/c related wiring to fit said goodness.
But first a bit of background and I'm afraid it's another longwinded tale of woe, so grab a drink or snack and settle in while Uncle Flash tells you a story.
Now those of you who have been following along will recall our spark related breakdown in early December where we ended up getting the Thames transported home. At the time I suspected either an ignition coil or condenser failure and ended up replacing the condenser which solved the issue. Then on the last Friday night of 2023 we headed off in the Thames for our usual burger cruise and a couple of k's from home the engine started to stumble, not badly but just enough to make my arse pucker. Foolishly I pressed on and things got worse to the point where the engine would idle but would not rev cleanly. At that point we turned around and started to limp home. Nek minnit a loud backfire and it was good night nurse. Managed to coast to the side of the road and broke out my emergency kit which included a working ignition coil. Swapped over the coil, but still no spark. By this stage it was starting to get dark,so I gave Steve the local towie a quick call and he came to our rescue once again.
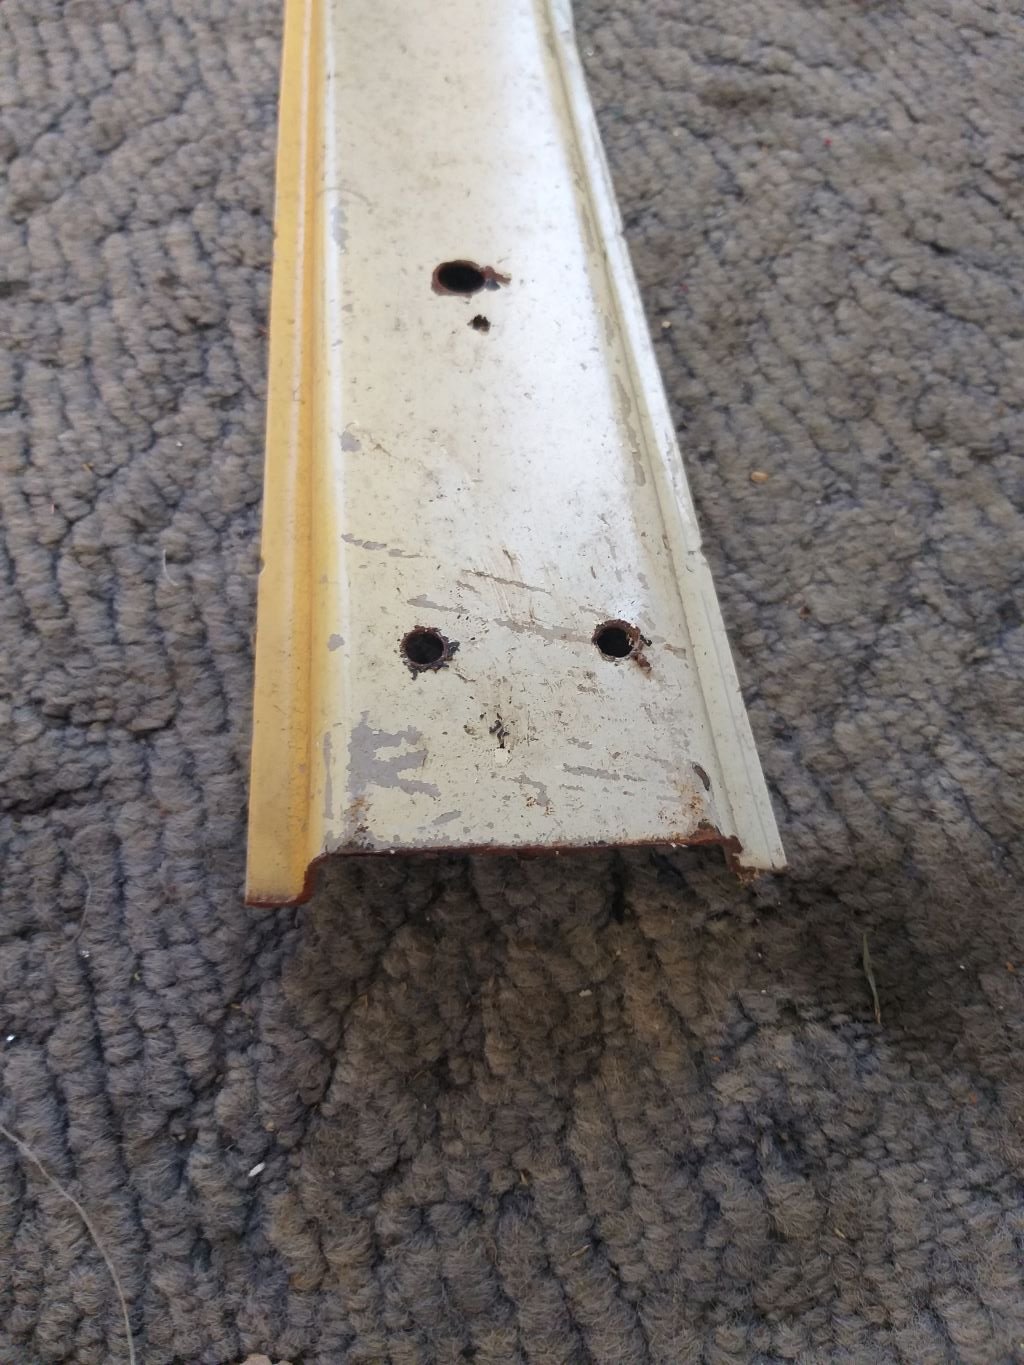
The next morning, I started tracing voltage to see where things were going wrong and the fault appeared to be somewhere in the distributor itself.
By this stage I'm well over dodgy distributors as this is the third spark related breakdown that we have suffered since getting the van on the road. The message from the long-suffering Mrs Flash was "Just get rid of that bloody distributor" so I decided to make it so. After my awful experience with an eBay sourced one that resulted in the first breakdown you can appreciate how keen I was not to repeat the same mistake, so my first call was to the Toyota dealership in town. The parts guys there are helpful as, and after making a call to the centralised parts warehouse in Brisbane, the message came back that the points-based factory distributor is no longer available. "What about the later electronic distributor that came out in the late 80s?" I asked. "Sorry mate also no longer available". Yikes !!
So, at this point I put a call out to my fellow oldschoolers hoping that someone would be able to recommend a reputable supplier of an aftermarket distributor and @AllTorque comes to the rescue by introducing me to his parts supplier. They turned out to be good guys too and put me in direct contact with their supplier who just so happens to be OZ based.
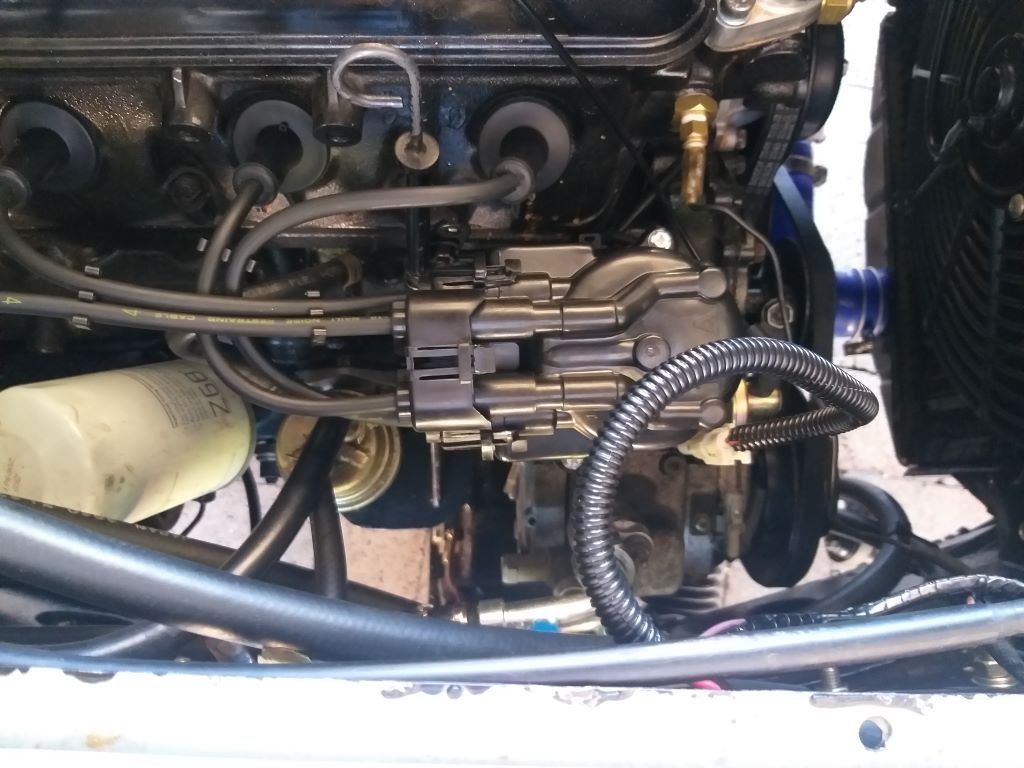
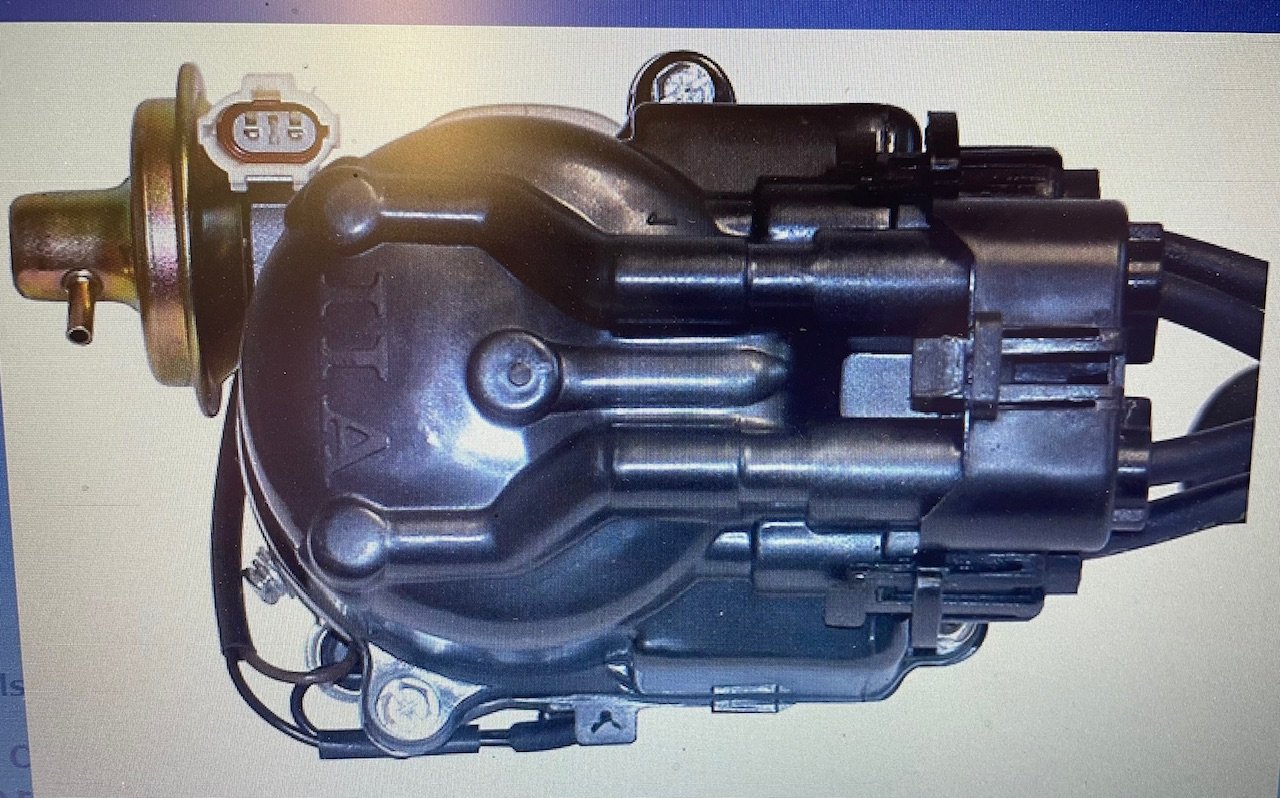
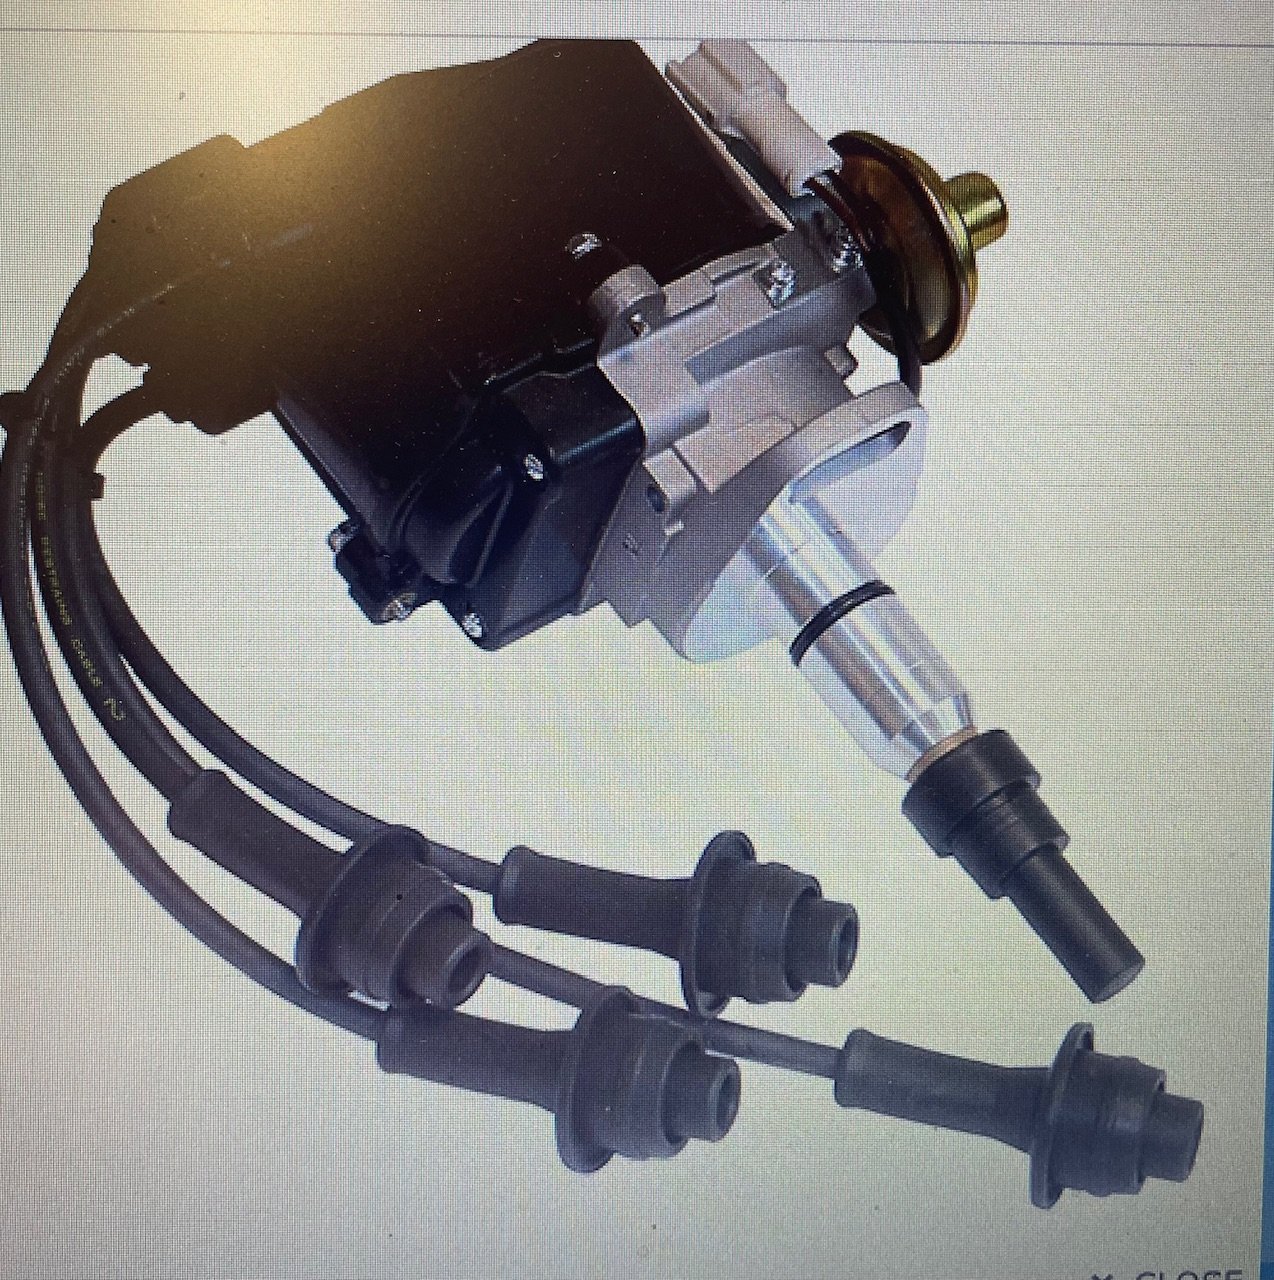
For those of you who are still awake at this point, here are a few images of distributor related goodness:
Full of electronic goodness including a built in coil. Lovely.
Yep, I know another Chinesium part, but @AllTorque's NZ supplier has sold around 20 of these units over the past 2 years and hasn't had one return. On top of this the OZ based import agents are a company called Goss Automotive who have been in the aftermarket parts business for over 80 years, so that gives me some additional reassurance.
Anyhoo, that brings me to this morning's exercise which included the installation of a fresh 12-volt source wire directly from the ignition switch.
And here she is in all her glory:
Thanks so much to everyone who has made it to the end of this update. Your staying power is amazing.
-
20
-
1
-
- Popular Post
- Popular Post
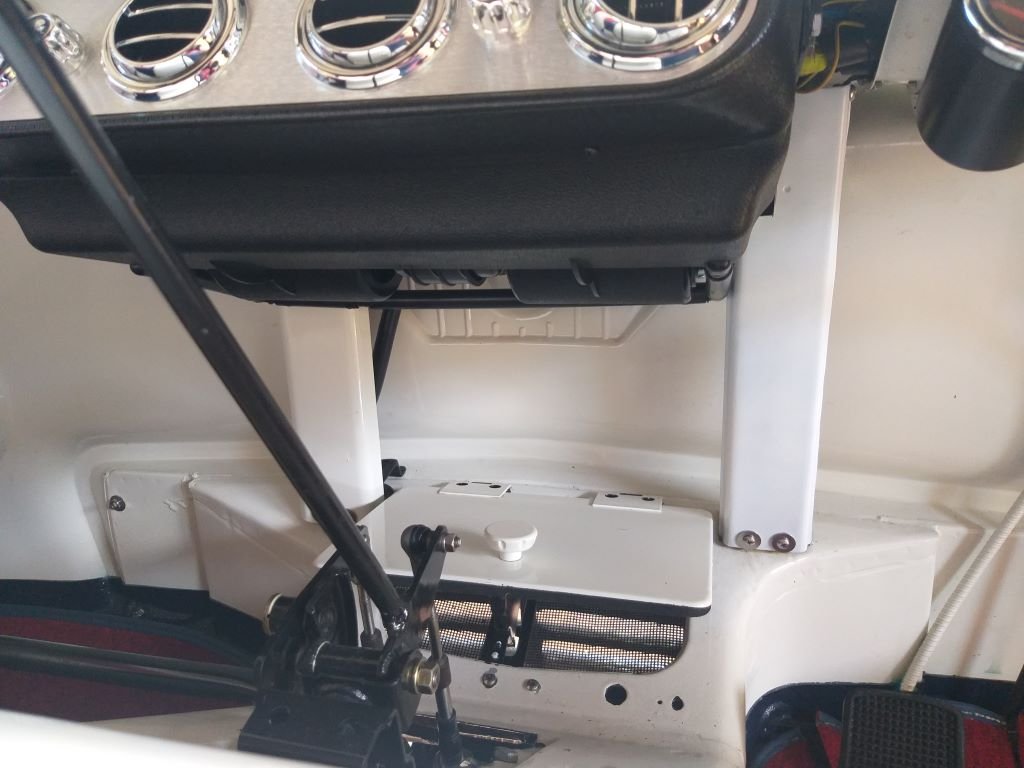
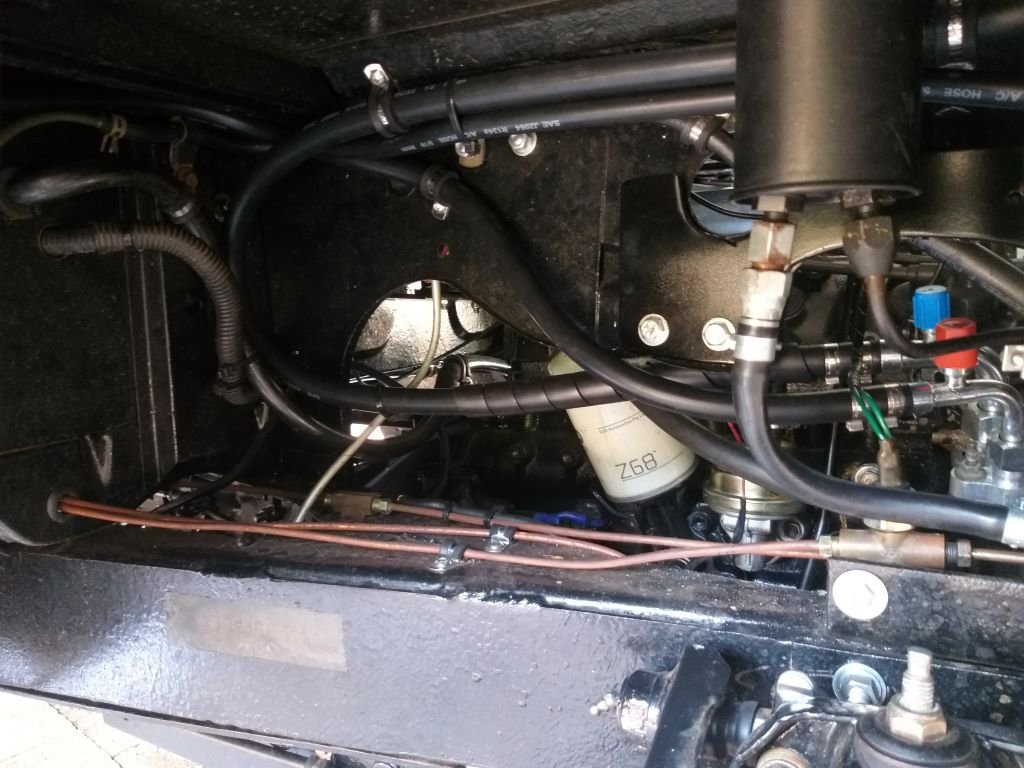
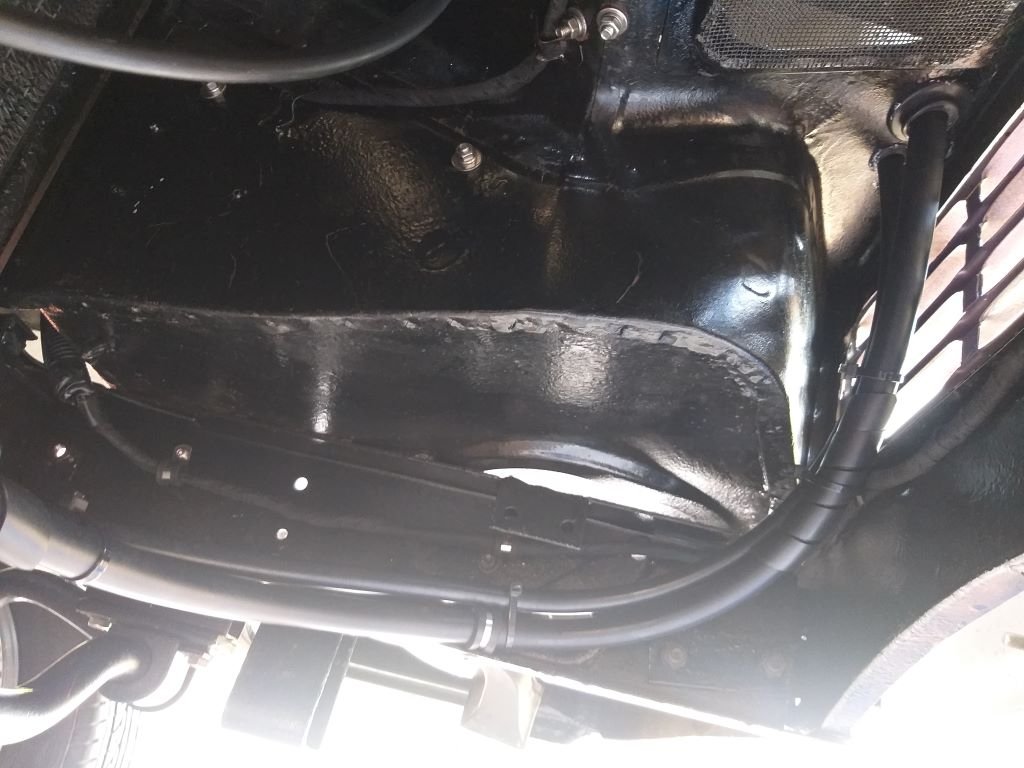
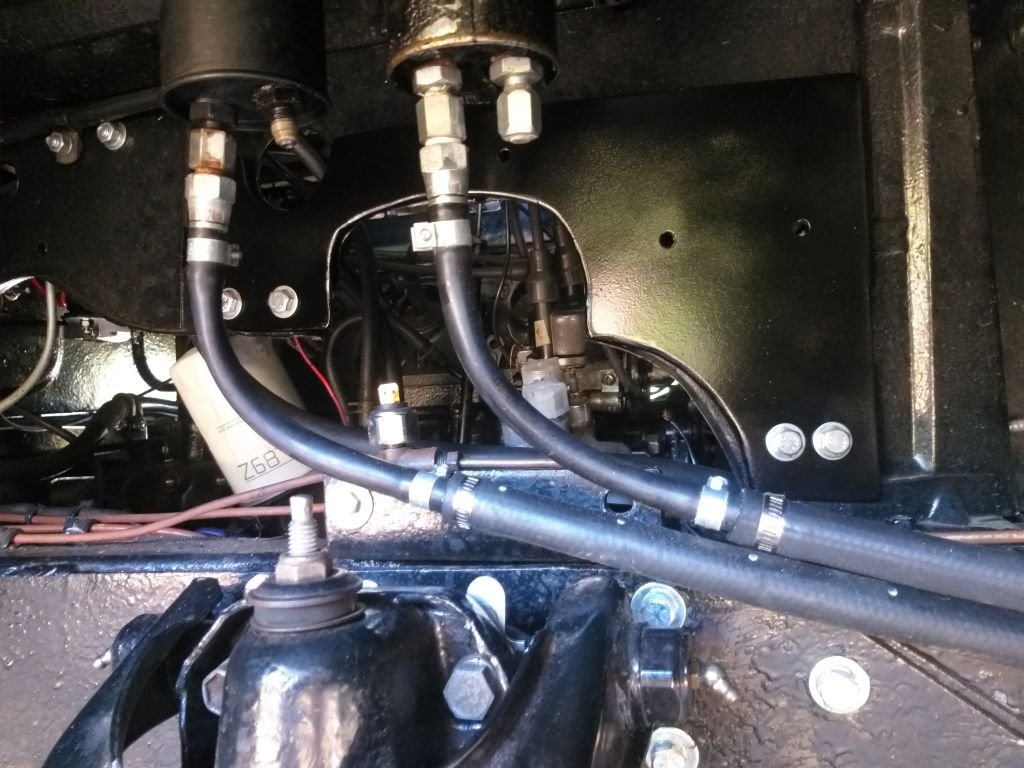
And that's the a/c pipework all done.
Not that easy to photograph but I've done what I can to show you the final results.
The driver's side front fender well is looking a bit like spaghetti junction.
The radiator tunnel looks slightly neater.
I've put a bit of spiral bind at strategic places to give the pipes additional protection against possible rubbing due to road and engine vibration.
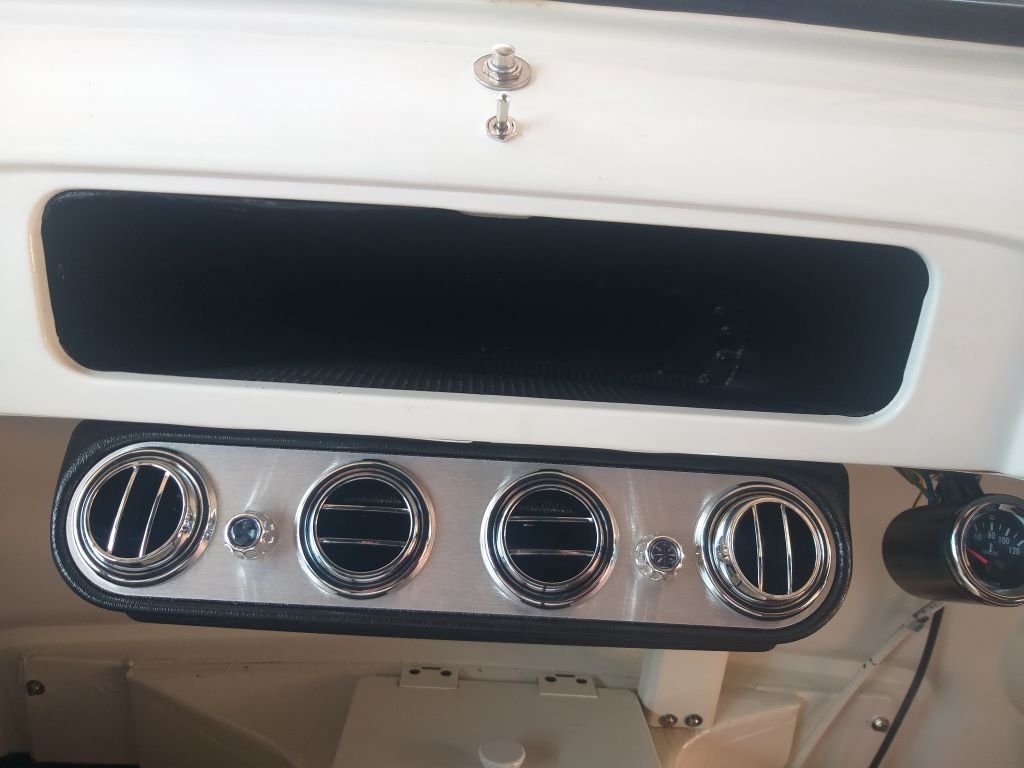
Inside the cab things look slightly neater with everything tucked behind my relocated cover panel.
In the above photo you can see the exposed main wiring harness that stands out like balls on a greyhound, but I've got a cunning plan to create a cover panel using an old roof rib from one of my Toyota donor vans.
It currently looks a bit shabby, but the profile looks pretty close to what I need and with a bit of effort it should tidy up okay.
In conclusion all that is left to do on the a/c front before the big gas up is to wire up the relays for the thermo fans and to fit the condensate drain.
The thin-walled condensate pipe supplied with the evaporator kit is for a standard car installation so isn't long enough to poke through the floor on the Thames, so I'll need to see if I can source some more pipe when I'm next in town.
-
11
-
2 hours ago, ajg193 said:
On a side note, how worn out is the distributor drive gear on your camshaft? I put a new gear on my distributor and the slop only improved marginally.
That's a good point. The long block is a reco'ed unit with less than 1000km on it, but I guess it all depends on how diligent the engine builder was when he checked the tolerances.
-
- Popular Post
- Popular Post
On 03/01/2024 at 11:27, AllTorque said:My sources tell me this is the replacement electronic distributor. Note the coil is built in and will not fit all applications.
I can source a Denso brand for $450
where are you based?
Just a quick shout out to @AllTorque who did this brother a real solid.
He put me on to his supplier who confirmed that they have sold around 20 of these units over the last couple of years with zero comebacks. Not only did @AllTorque's supplier share this info with me but they also supplied me with the brand and part number and some resellers across her in OZ. Turns out the units are supplied to NZ from an OZ based importer, so I was able to source the exact unit locally.
So a big thankyou to @AllTorque as well as the NZ supplier who he put me on to. GCs all around.
-
9
-
2
-
- Popular Post
- Popular Post
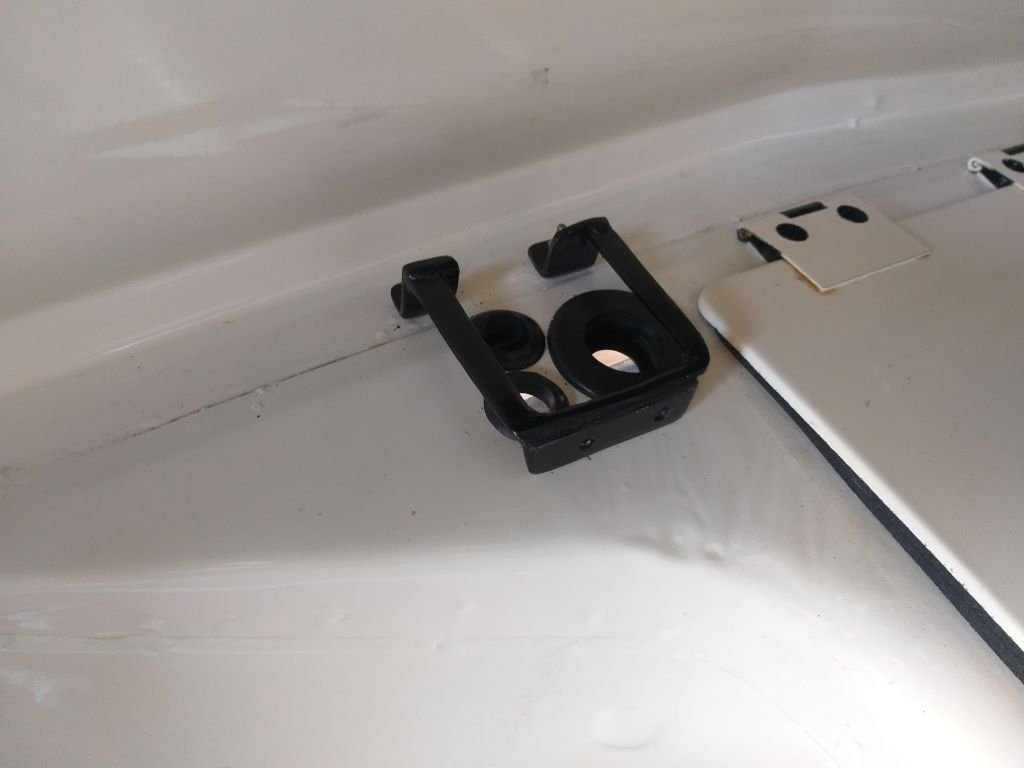
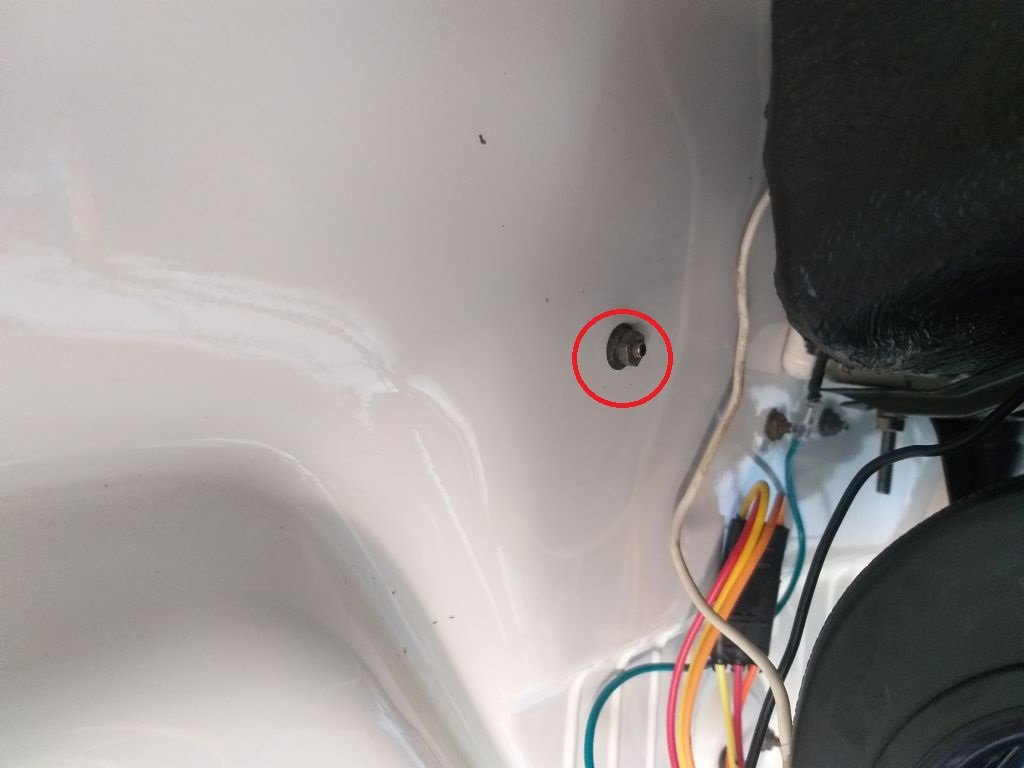
First thing this morning I fitted the freshly painted mounting bracket for the panel that will hide the a/c hoses inside the cab.
I then scratched around under the dash trying to figure out how I was going to fix the cover panel at the top.
Luckily one of the bolts that holds the Ford badge on the front panel is perfectly positioned for the task.
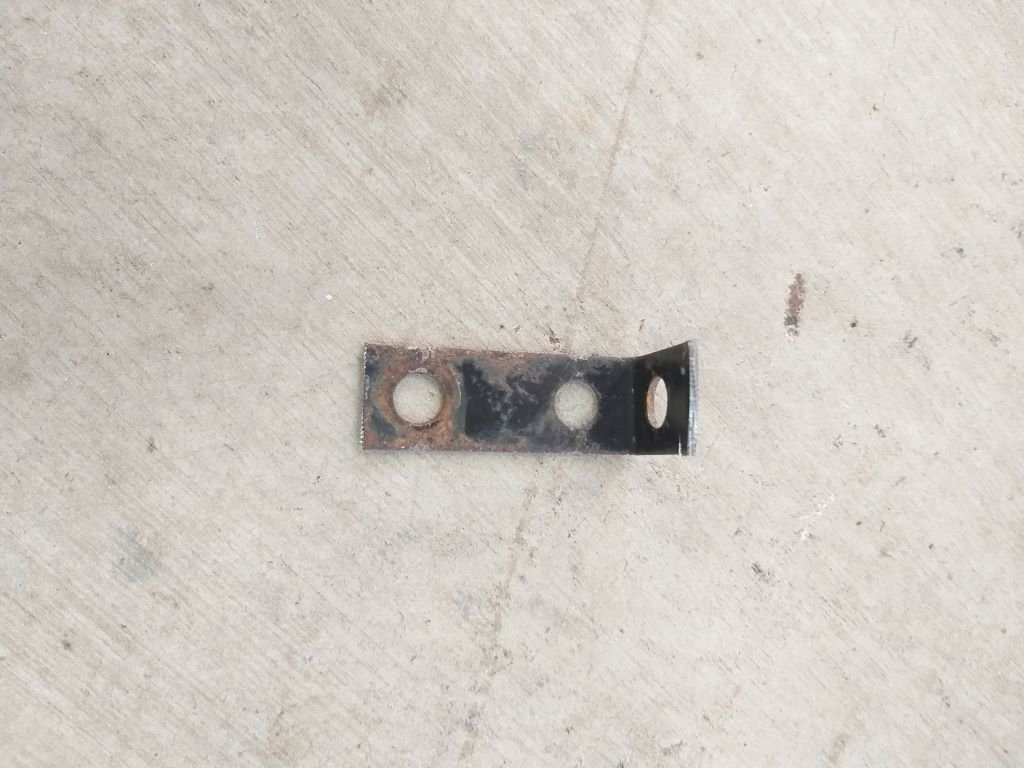
I found one of those multi holed mounting strips in amongst my stash. Looked a bit manky but nothing that a little loving wont fix.
Gave it a trim and a quick bend followed by a test fit. Works like a charm.
Gave it a tickle with my flapper disc then a few coats of the usual satin black.
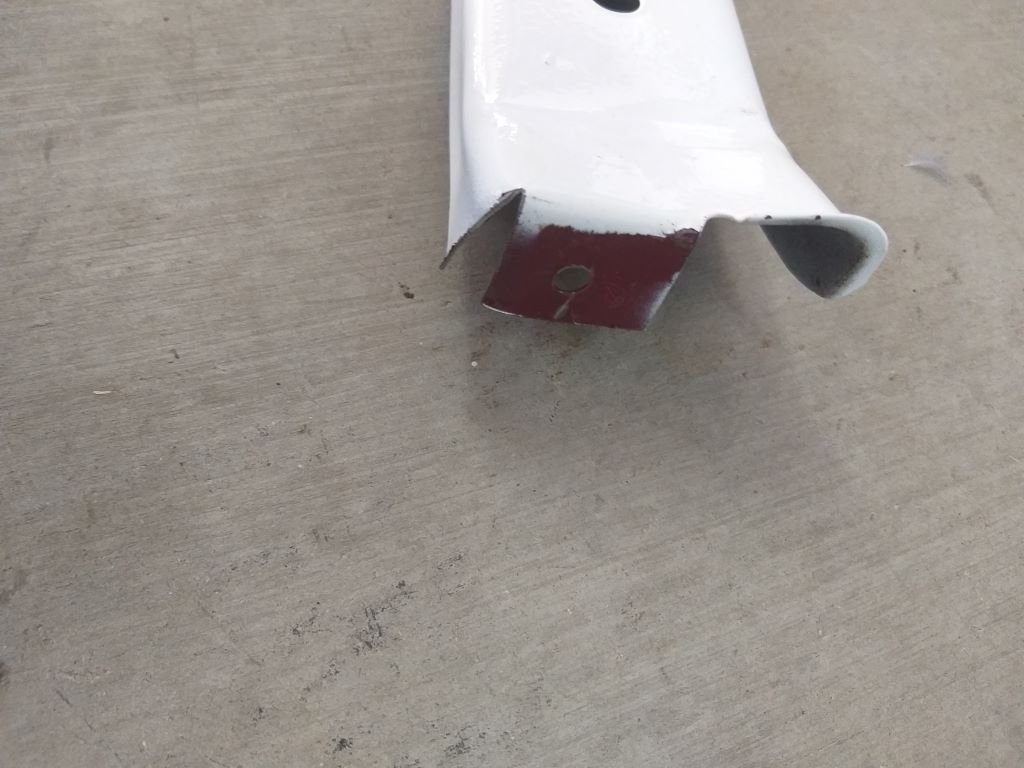
I needed to bend the upper mounting tab on the cover panel itself which was easy enough:
Can't mount it till the paint dries on the new bracket, so I carried on making up a/c hoses.
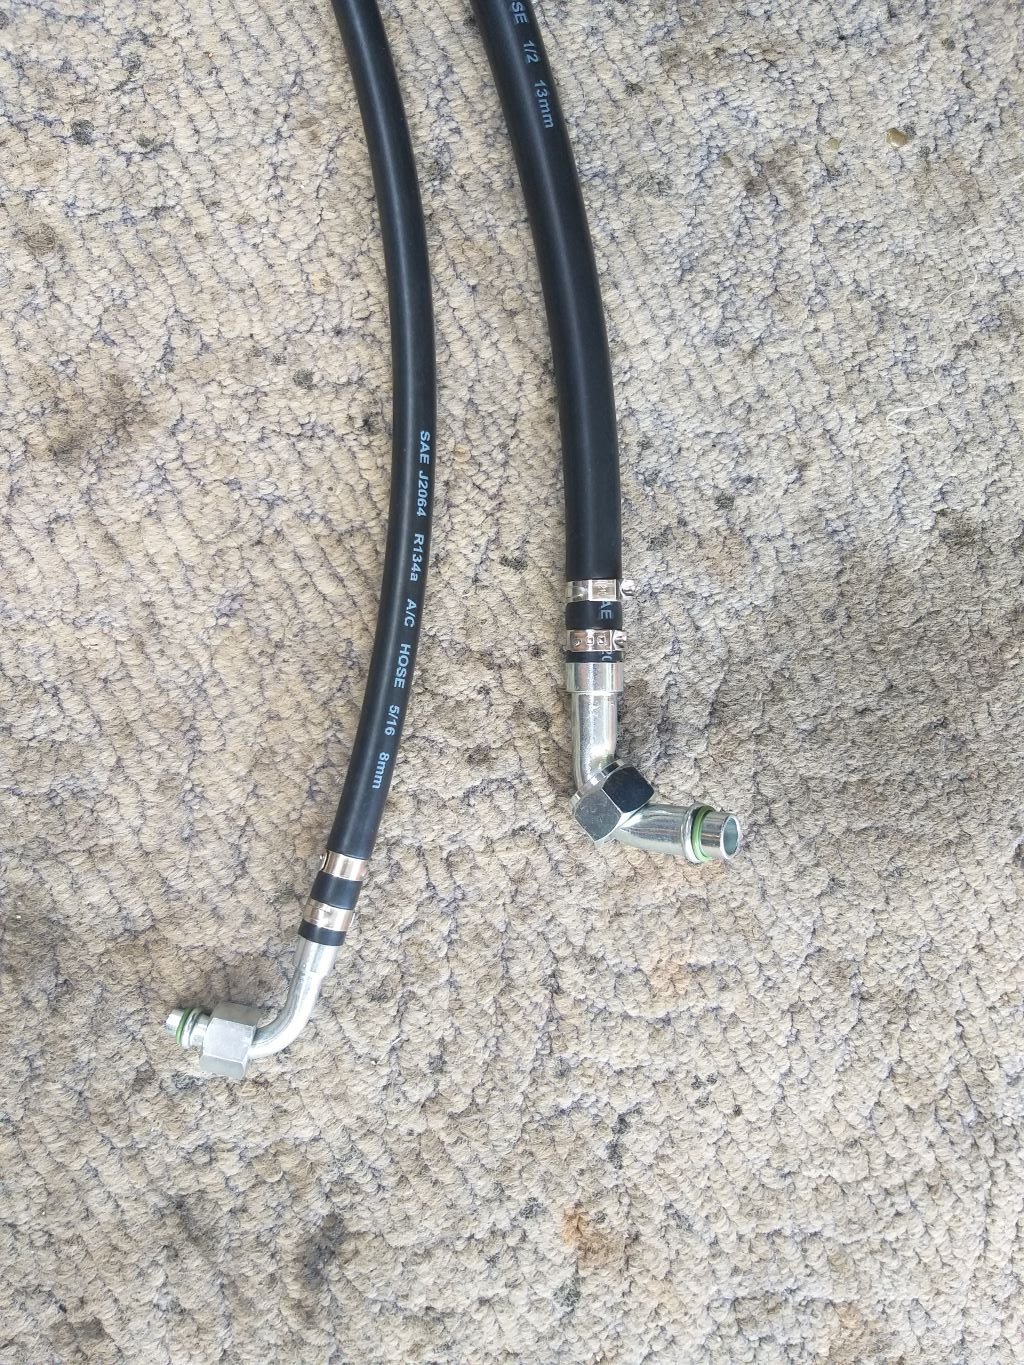
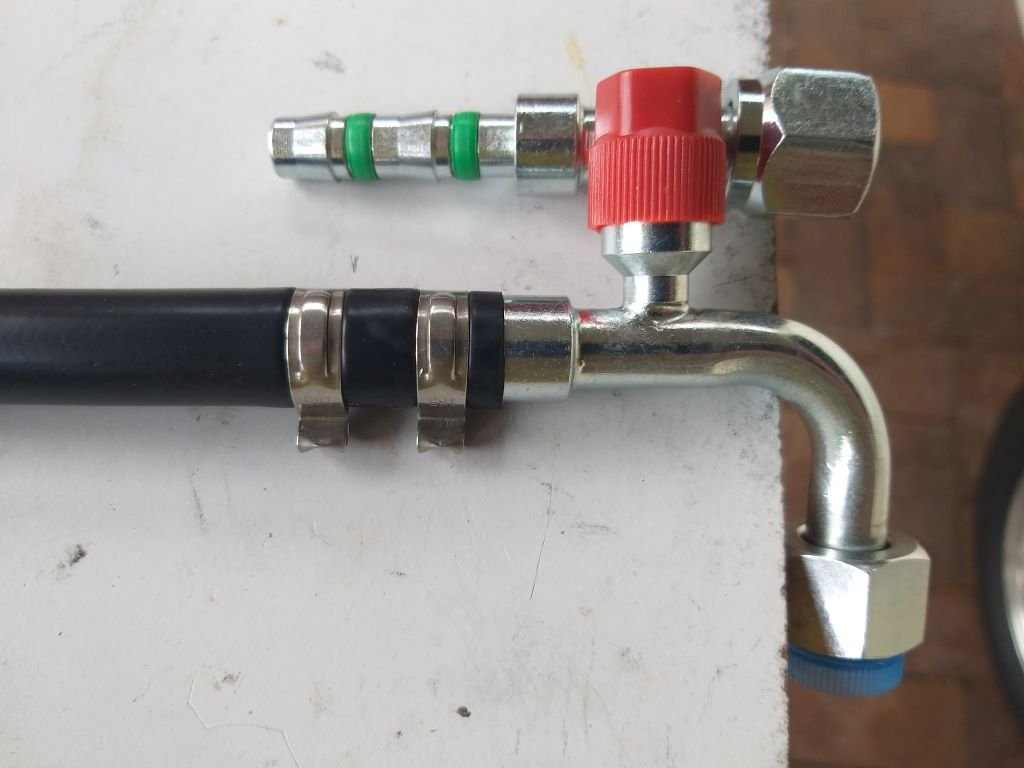
These are the two hose ends that run from the under-dash unit to the compressor and drier bottle respectively:
Spent the rest of the morning routing these hoses under the dash, through the floor and then under the front of the van.
I'll post some photos of the pipes in position tomorrow.
-
13
-
15 hours ago, Otodat said:
Been waiting to see how those hoses work, quite surprised those clips can hold. I assumed ac ran at high pressure but I guess it's similar to an air compressor.
Yep, got to be honest when I say that I had my doubts about the hose joints being up to the task, but in talking to a mate of mine who used the same system on his Mk2 Capri a few years back, he reassured me that they actually work and haven't let him down so far.
I guess the final proof will be when I get it gassed up.
-
2
-
-
- Popular Post
- Popular Post
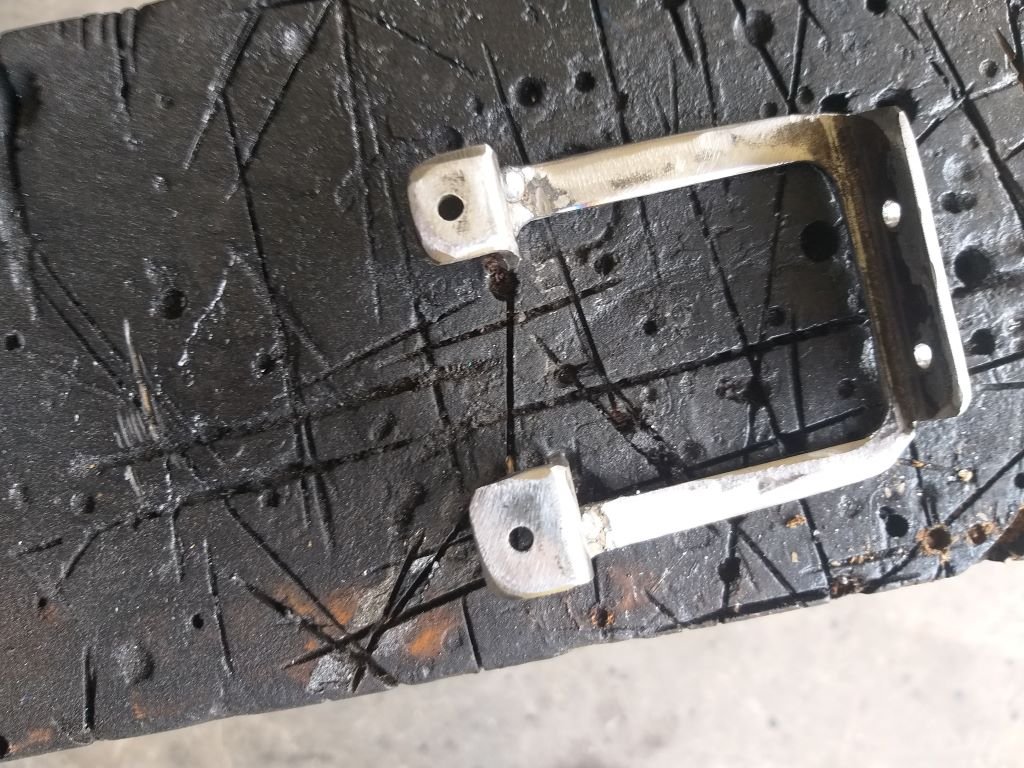
Spent the morning entertaining my neighbours with the sweet tune of my angle grinder and ended up with this:
Gave it a quick test fit followed by a spot of satin black:
Looked around for another noisy Sunday job, but eventually had to settle for something a bit quieter.
Decided it was time to make up the first a/c hose. Picked the compressor discharge hose as my first victim.
The process is pretty straight forward and goes like so:
1. Test fit and trim hose to final length.
2. Slip the clips over the hose.
3. Slide the hose coupling into the hose.
4. Line up the clips with the green o rings using a spare coupling as a guide.
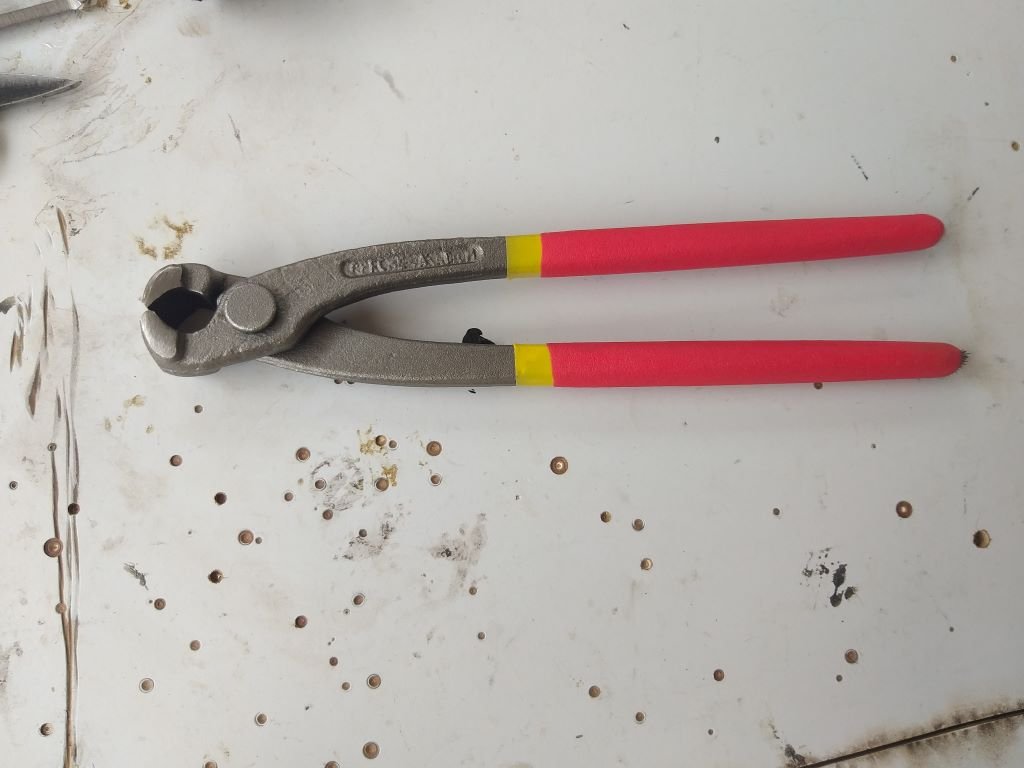
5. Crimp the hell out of the clips using these state-of-the-art crimping pliers:
And, that's the first hose ready to rock 'n roll.
-
10
-
- Popular Post
- Popular Post
And that's the strengthening plate fitted:
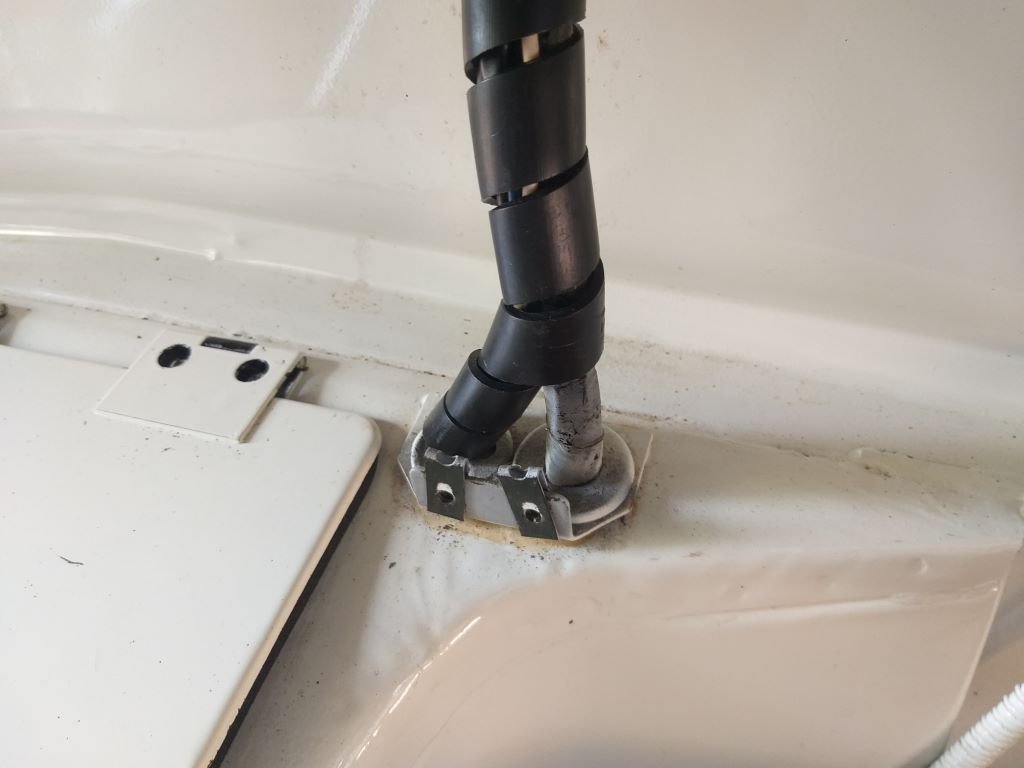
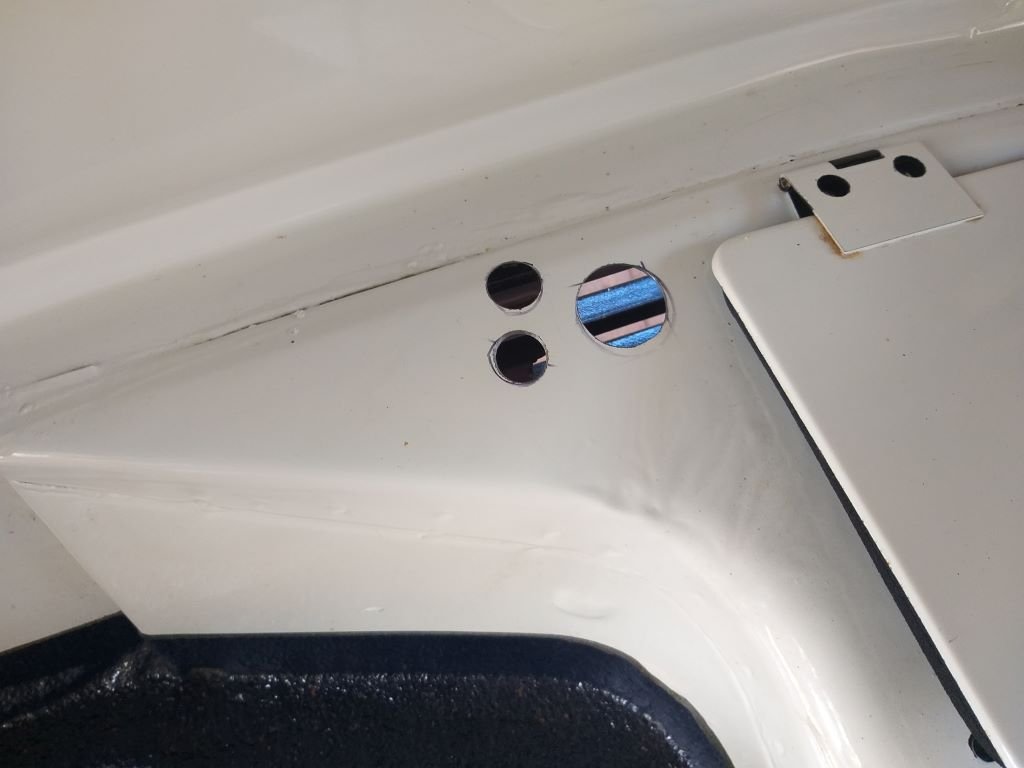
And whilst I've still got my big boy pants on I thought I'd do some more butchering. This time some holes in the cabin floor for the a/c pipes.
My plan is to mirror the placement of the main wiring harness that looks like so:
Started by making a little cardboard guide to assist me with the placement:
Then drilled my first pilot hole:
Then opened the pilot hole up with a series of drill bits before taking it up to the final 30mm diameter using my step drill bit. I needed to get the two a/c hoses and the condensate drain fairly tightly bunched together but with enough room between them to accommodate all three rubber grommets, for reasons that will become apparent later in this update.
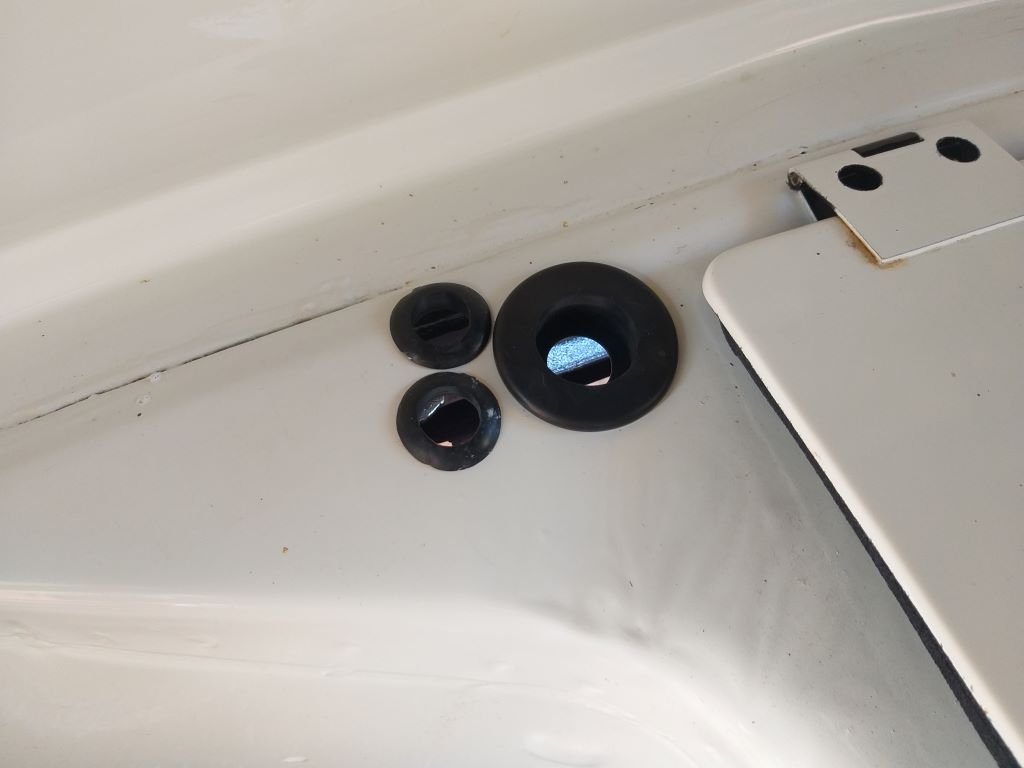
Chucked a bit of paint on the raw steel to give things a fighting chance against rust, then once the paint was dry in went the 3 grommets like so:
Luckily the second a/c pipe and condensate drain were a smaller diameter.
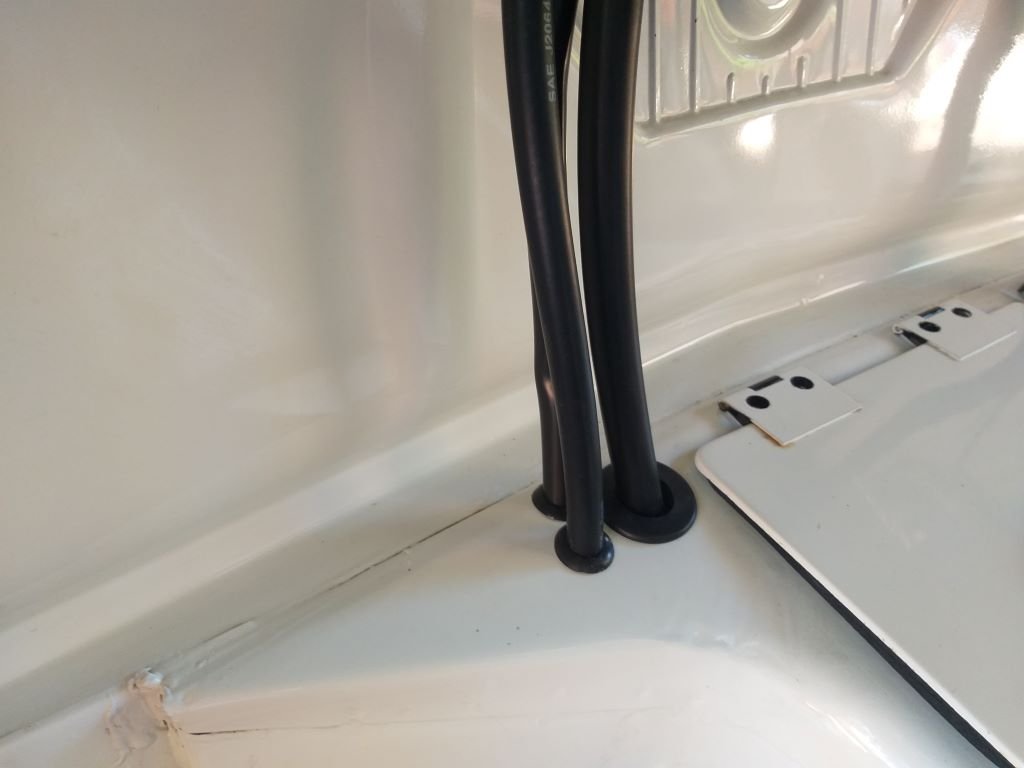
Quickly test fitted the hoses to get the feel.
Yep, functional but looks nasty.
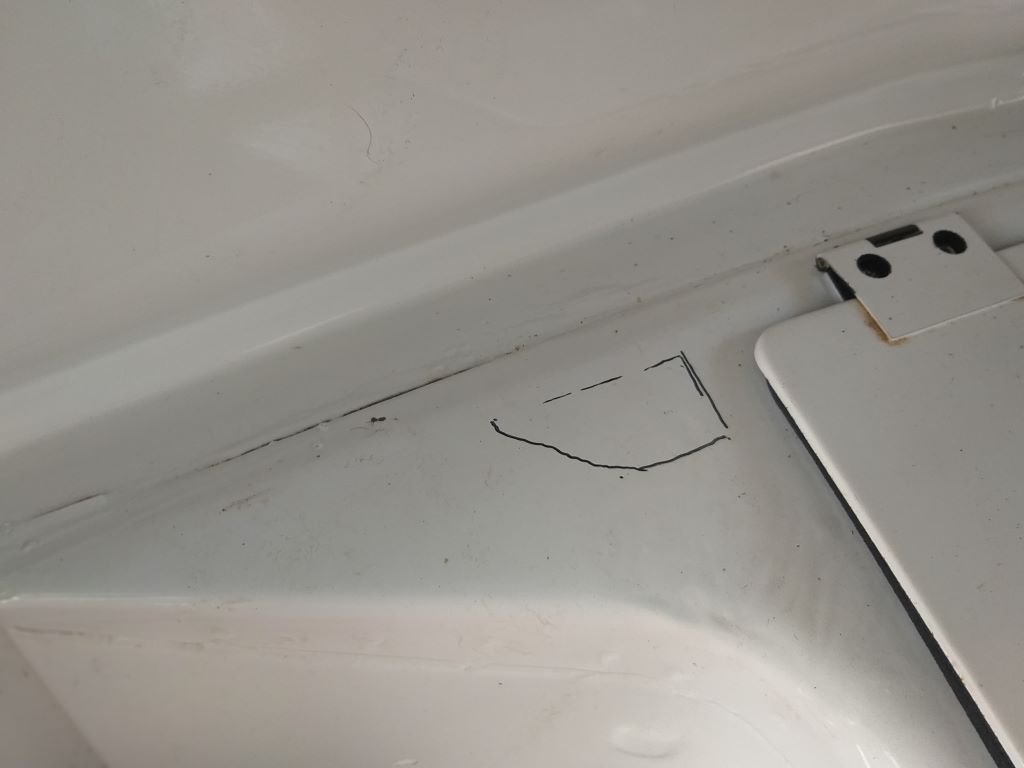
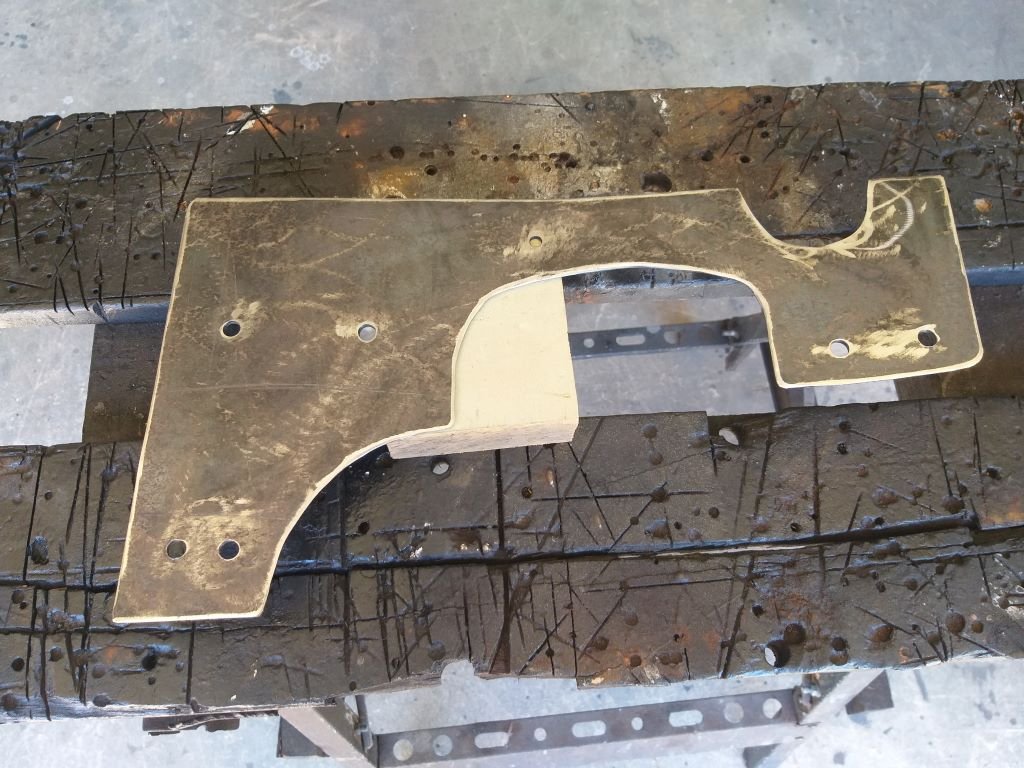
So, my cunning plan to hide the fuggliness is to create a cover plate to hide the pipework similar to the original that covers the main wiring harness. Cover looks like so:
Now it just so happens that the wiring cover needs modifying in order to clear my TX valve and hose ends, so I figured rather than butcher the existing cover I'll just move it across to the left-hand side and then fabricate a new cut down cover for the right-hand side.
Moved the cover across to the left to get the feel and pipes be gone:
All ugliness hidden away and my OCD is back in equilibrium. Perfect.
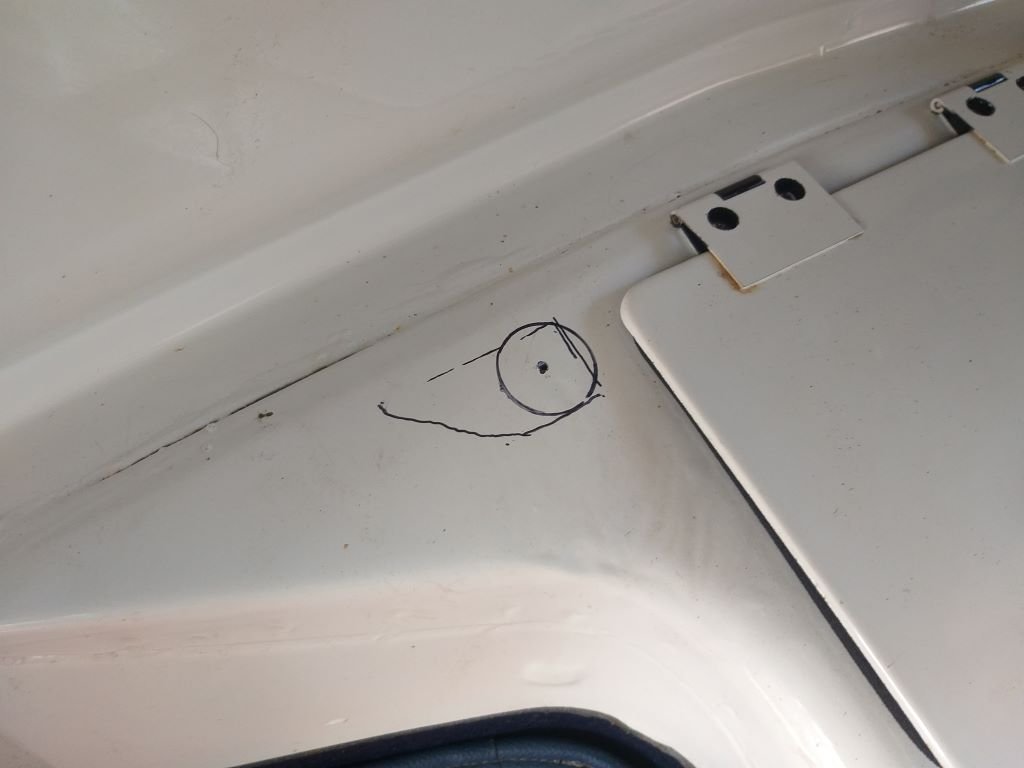
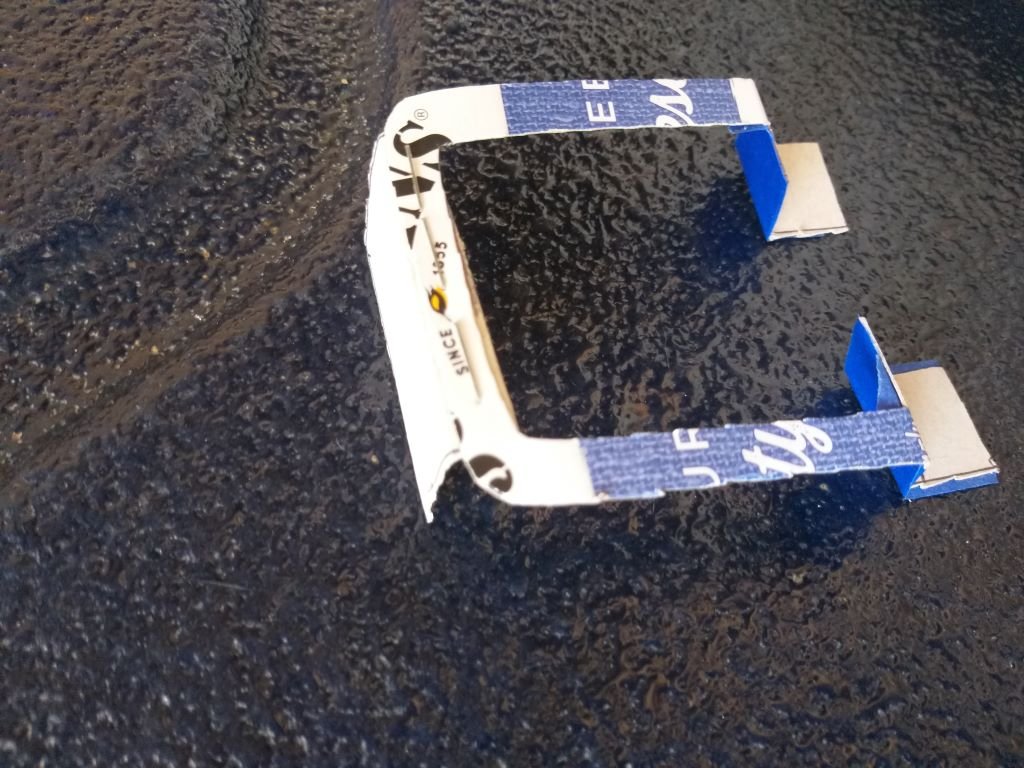
Now all I need to do is make a holding bracket for the cover.
Out came some repurposed cereal box and after a bit of fiddling about I came up with this:
Which in position looks like this:
So, the plan for tomorrow is to create this mounting bracket in something a bit more robust than cardboard.
Thanks for looking.
-
12
-
8 hours ago, rotormotor said:
Interesting you are installing AC fabrication on your van whereas I'm deleting mine.
AMobile aircon degasser due nect week.
Yep, here in tropical Queensland life without a/c in summer is not worth living LOL.
-
1
-
-
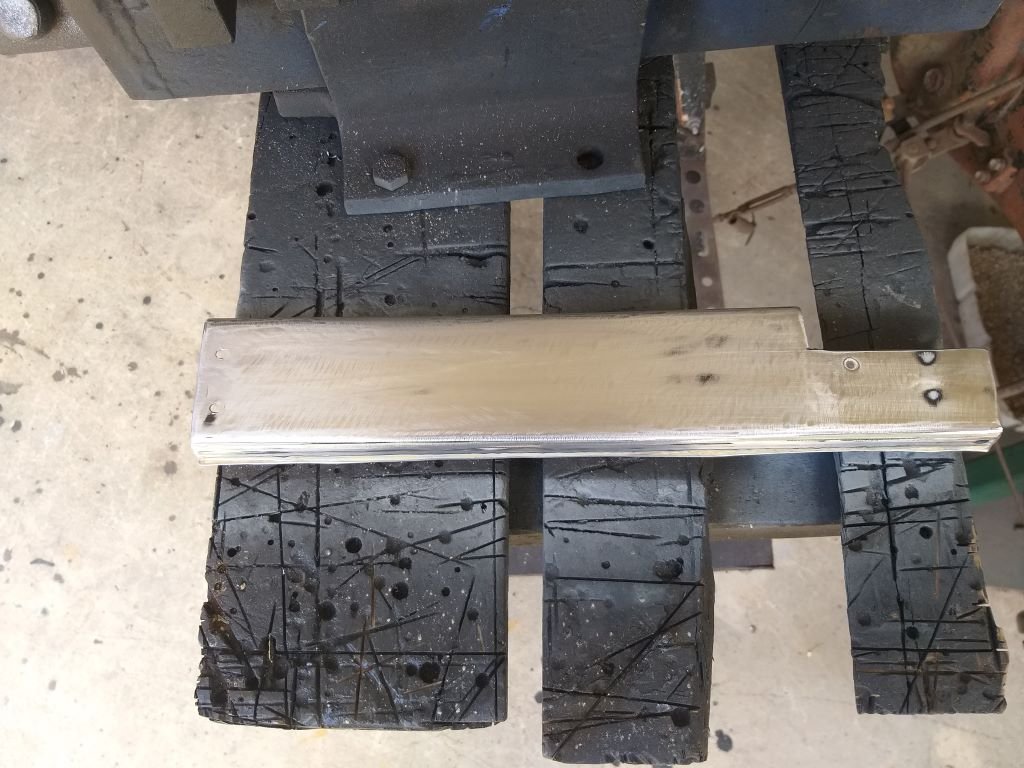
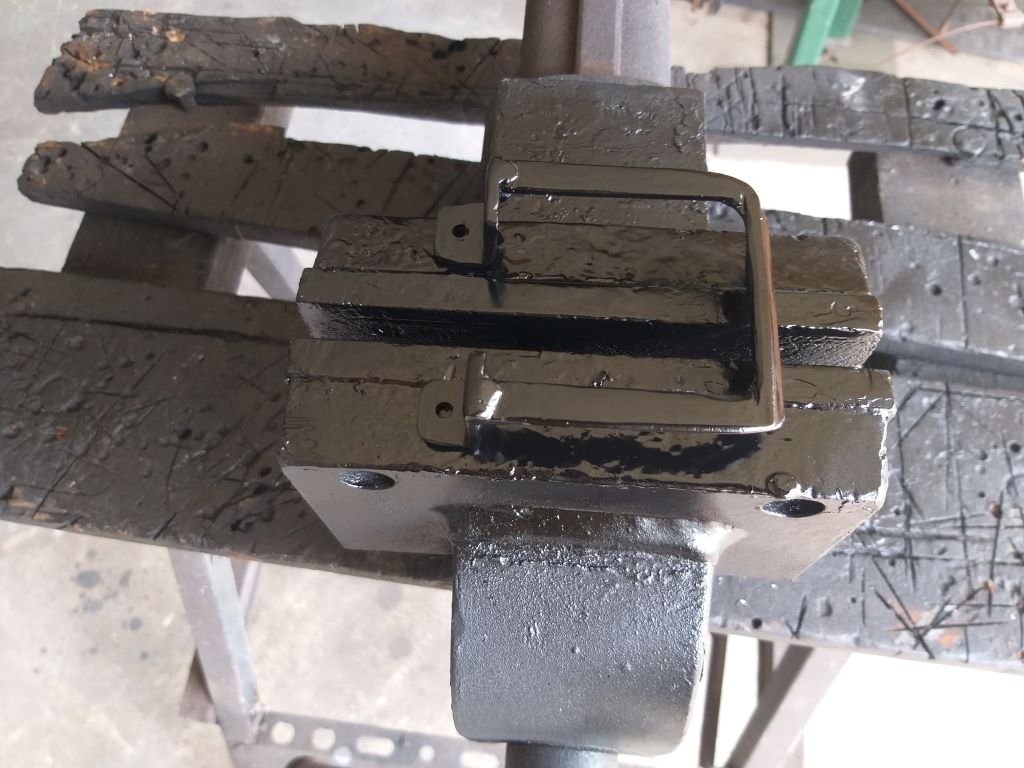
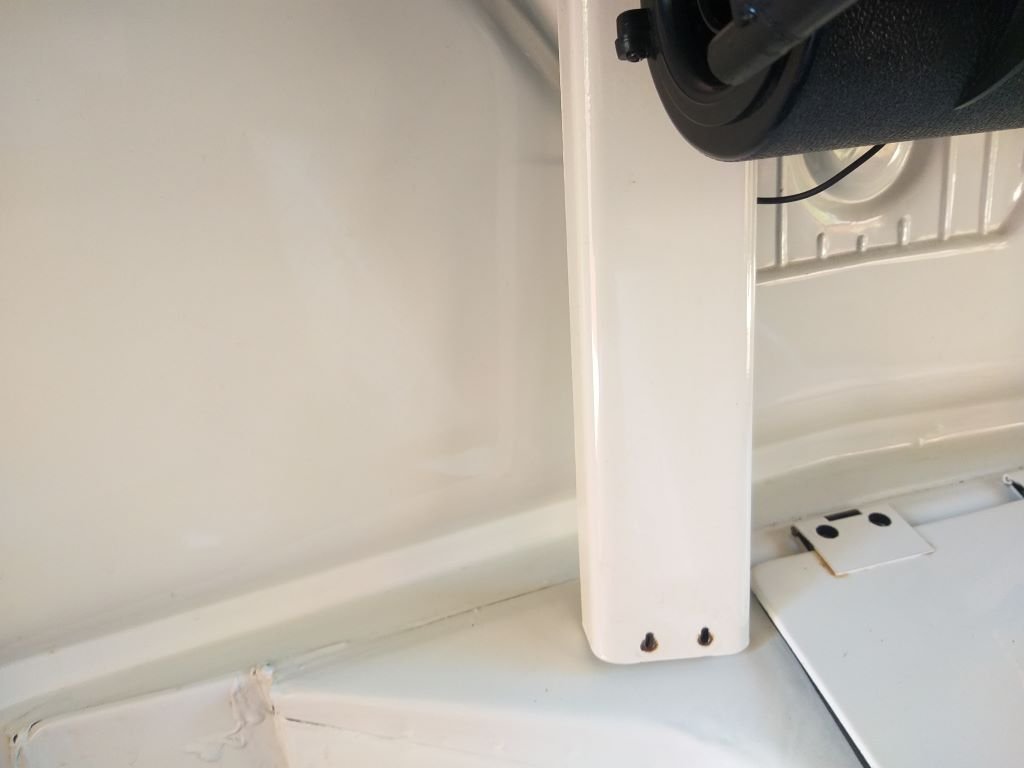
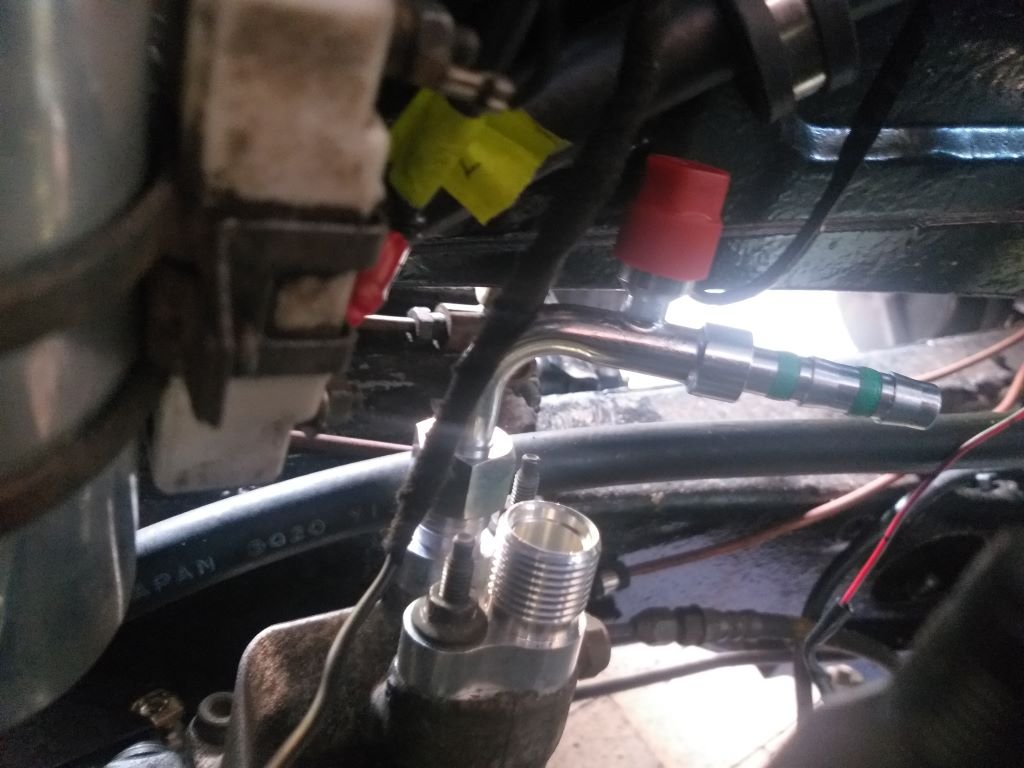
A bit more butchering this morning. The service port on the #8 fitting no longer clashes with the engine box side wall and I reckon there is enough clearance for a/c man to fit his pressure gauges when he gasses up the system.
I then created a reinforcing plate to strengthen the side wall back up. Looks like so:
Gave it a few coats of the usual satin black and it looks almost passable:
I'm letting the paint go off overnight and I'll bolt it in tomorrow.
Thanks for looking.
-
9
-
-
Made a start on my a/c pipework today.
First step was to test fit each of the hose ends on their associated components.
This uncovered two minor challenges. The first being the #10 fitting on the evaporator unit. With the TX valve already fitted to the other outlet there isn't enough clearance between the little protrusion at the top of the TX valve to tighten the nut on the neighbouring #10 fitting.
The photo above was with the TX valve joint backed off.
I was able to rectify this by completely removing the TX valve and then fitting the #10 fitting first before refitting the TX valve.
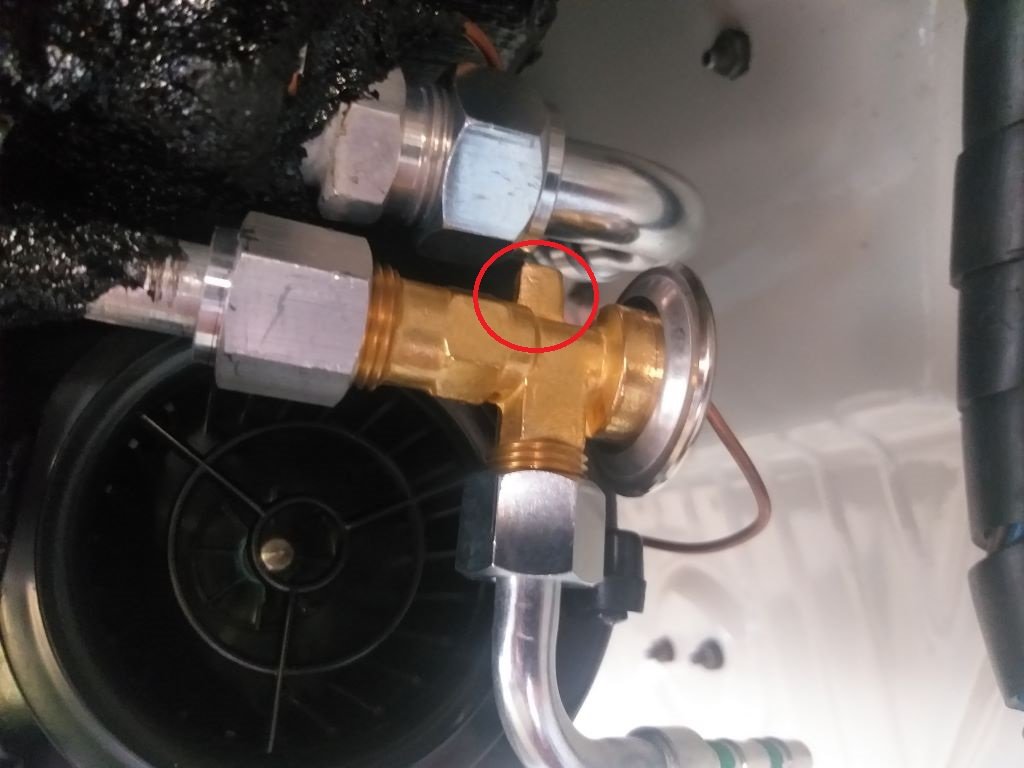
The next challenge was the #8 fitting on the compressor. The 90 degree bend works okay but the incorporated service port is clashing with the side of the engine box which will result in a less than optimum angle once I've crimped on the hose:
I've bitten the bullet and started trimming back the offending part of the engine box side. To do this I had to remove my clutch reservoir and hardline, ignition coil and newly mounted a/c receiver drier bottle.
I got half of the job done before lunch stopped play, so more butchery planned for tomorrow.
-
5
-
-
15 hours ago, Doug Hill said:
You could re-kit it. Just don't look at the price for a complete unit
Replica units from Aliexpress and eBay are pretty hit and miss, have had a few show up with all sorts of fun issues
Thanks mate. Could be a good second option.
-
With the wipers all sorted the next job on the list was to re-instate the glove box.
Chucked it in for a quick test fit to make sure it cleared my new wiper mechanism, and the good news is that it does. The not so good news is that while I was mucking around with it, I noticed that the almost 60 year old cardboard material was crumbling with just a light touch.
Scratched my head for a bit, then decided to chuck on a few thick coats of water based paint as a binder. Left it in the sun till the paint went off and no more flaking so I'll take the win.
To give it a fighting chance I thought I'd line the bottom of the interior with something. Rummaged amongst my stash of junk and found a roll of that PVC based drawer liner stuff left over from our kitchen reno.
Shaped a bit to line the bottom and chucked the box back in.
Looks pretty good and the drawer liner stuff stops things from sliding around, so double bonus.
A bit hard to get a decent photo with my potato camera, but here you go:
-
8
-


Street tyres for 15x7.5 & 15x8.5
in Tech Talk
Posted
I guess a lot depends on your driving style. If you are going to lay rubber all the time no tyre is going to last that long.