
- Popular Post


Sunbeam
-
Posts
1,168 -
Joined
-
Last visited
-
Days Won
1
Posts posted by Sunbeam
-
-
- Popular Post
- Popular Post
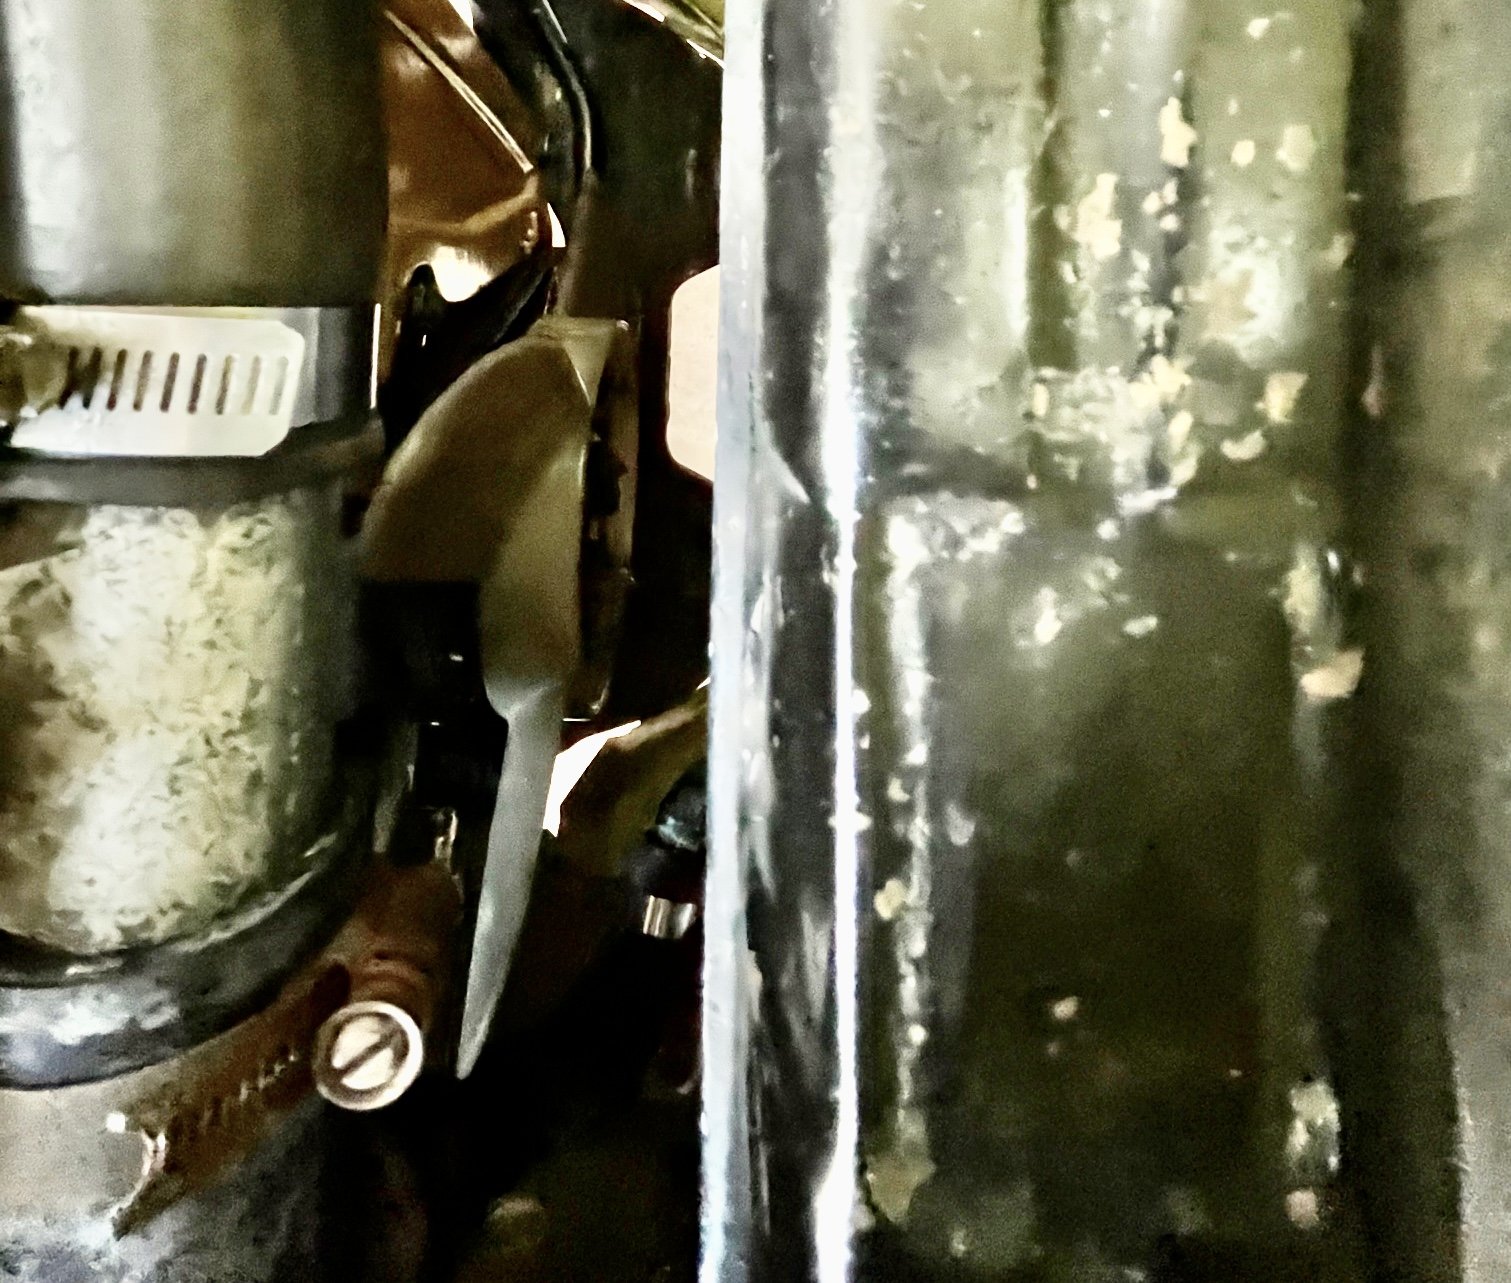
Did a couple more things this afternoon after work. I borrowed the fixed fan off the 1500 while I decide how to proceed with an electric fan. She’s tight down there…

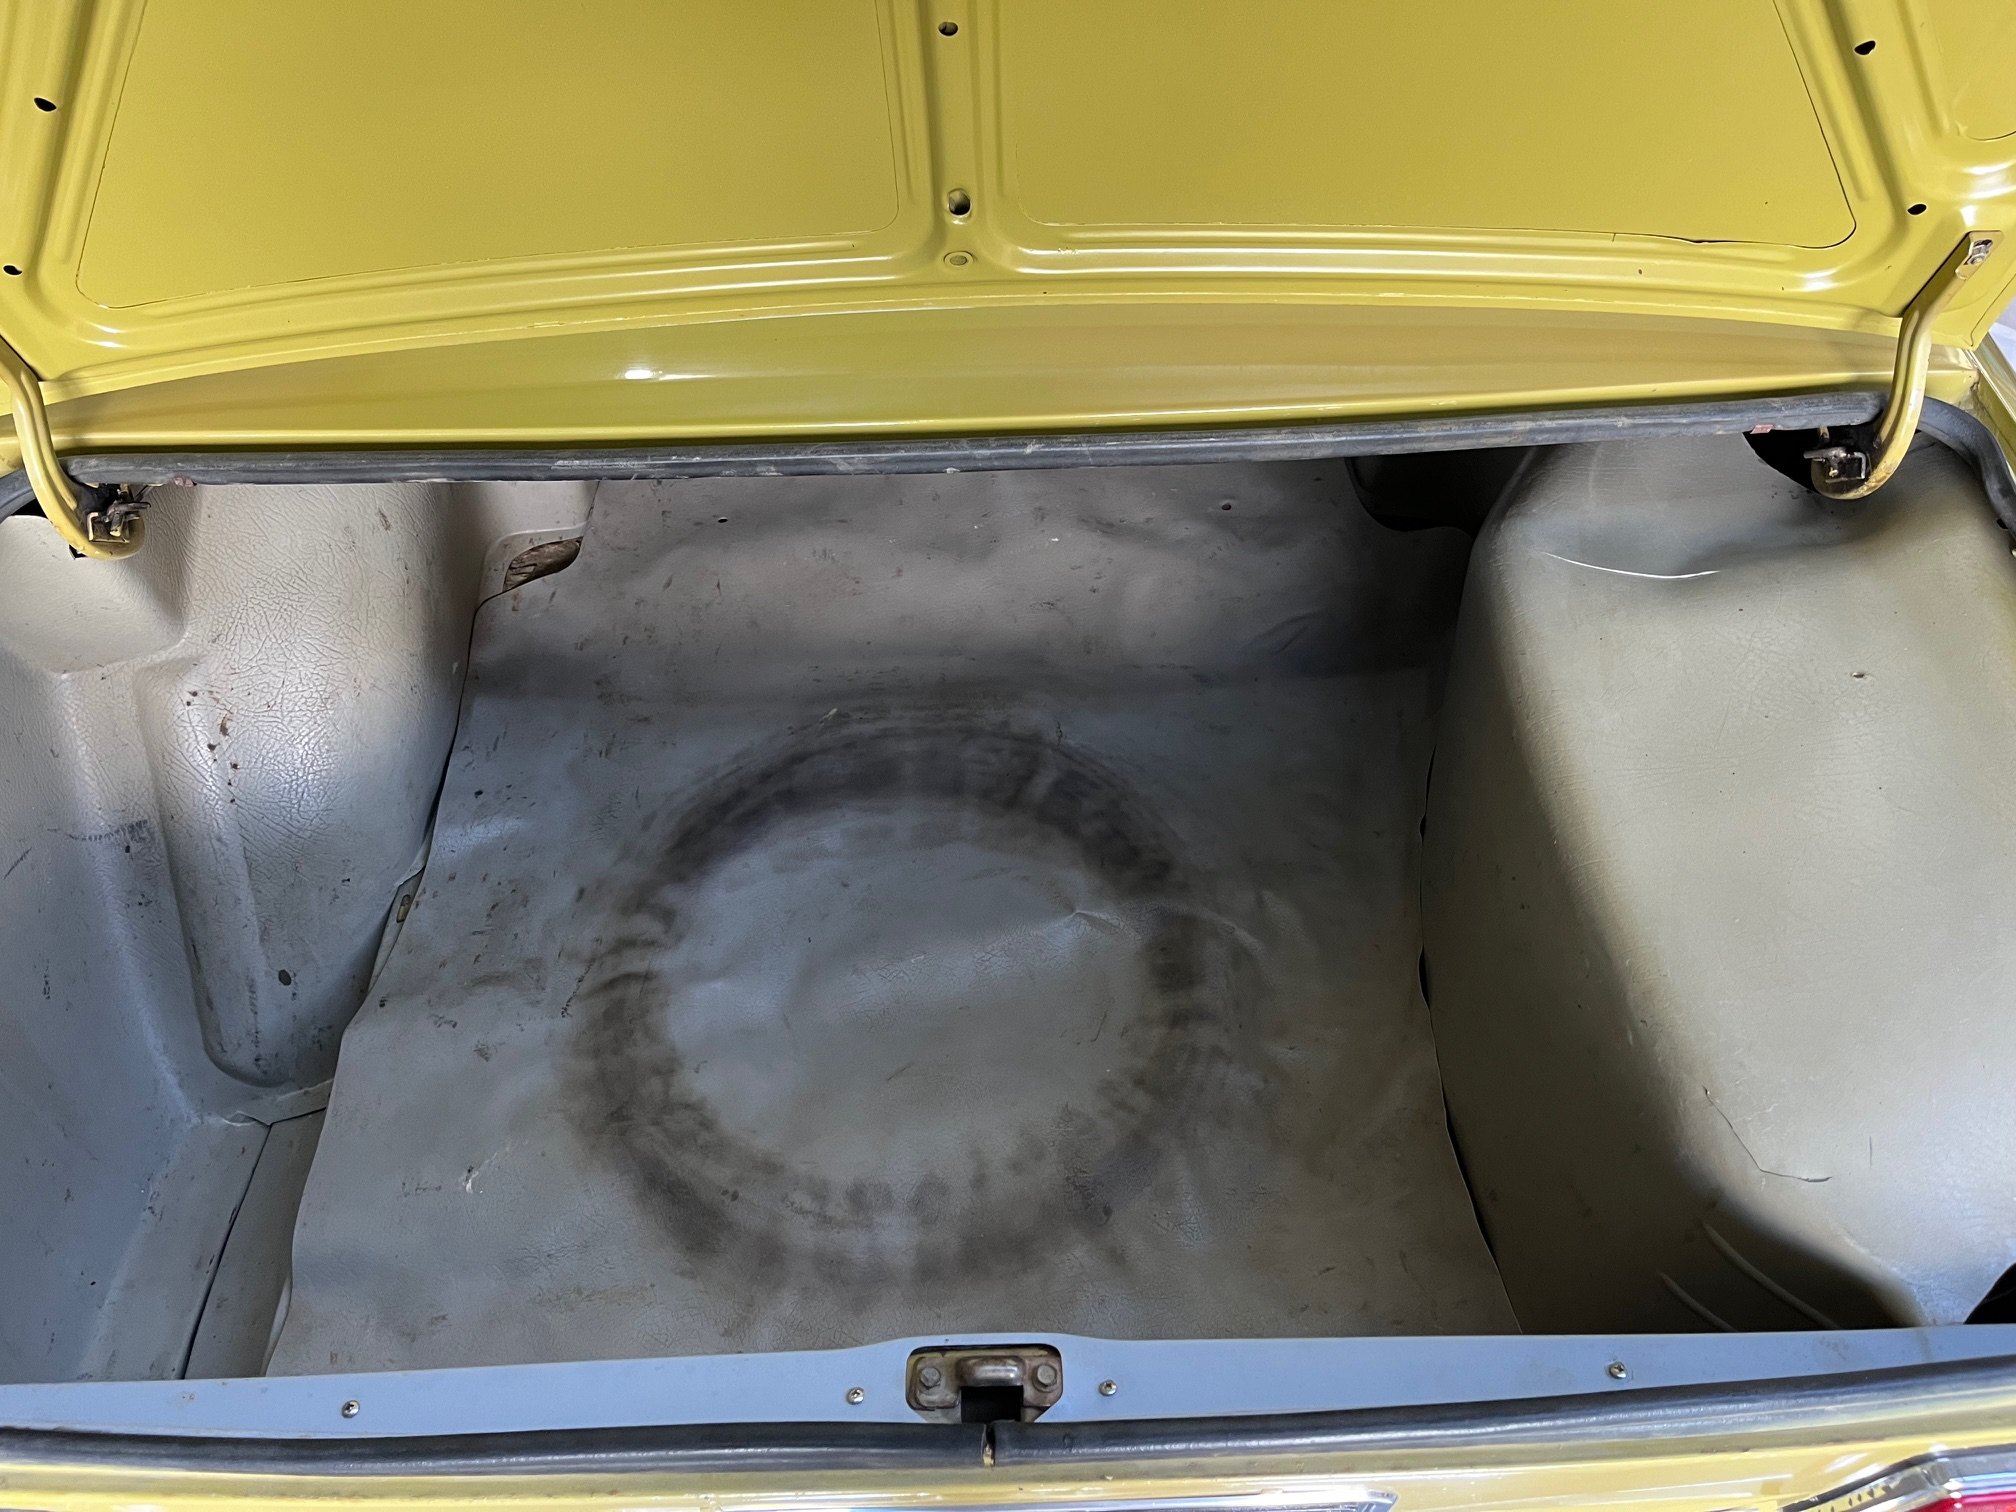
Then I flung the boot linings back in.
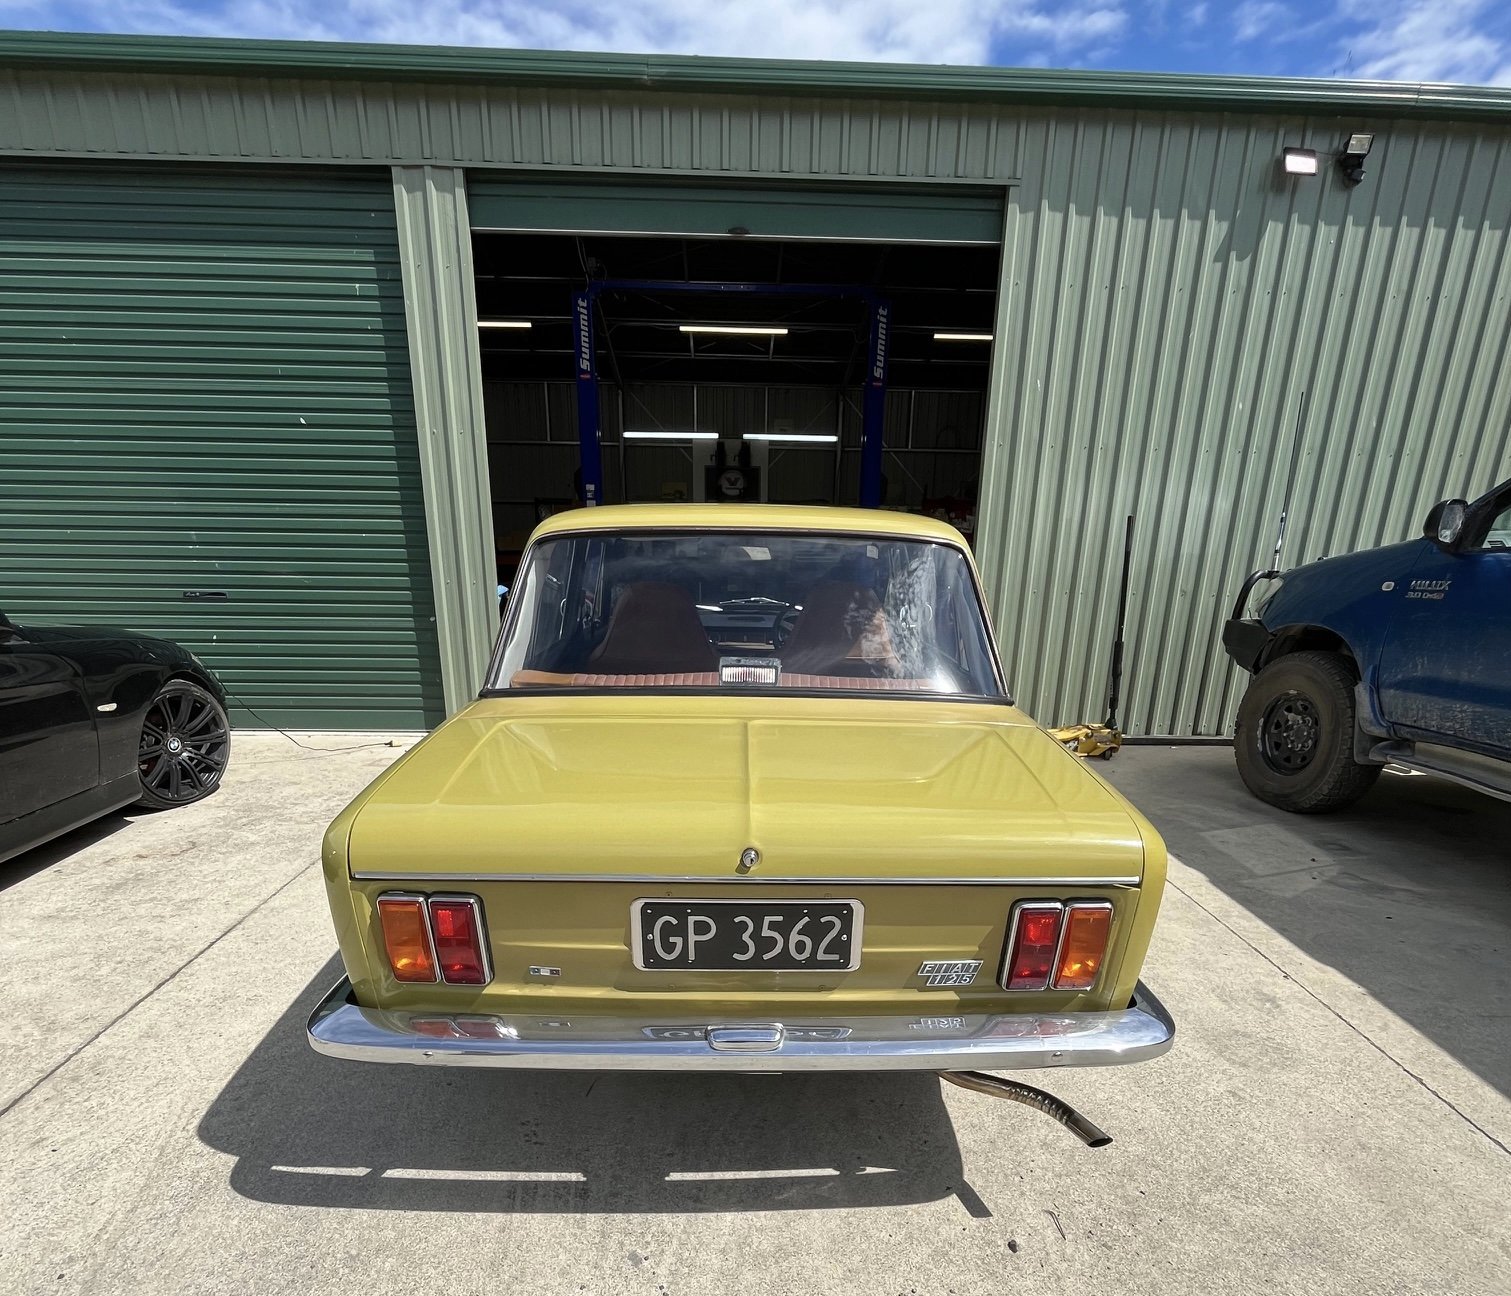
And then I went for a drive to a place…
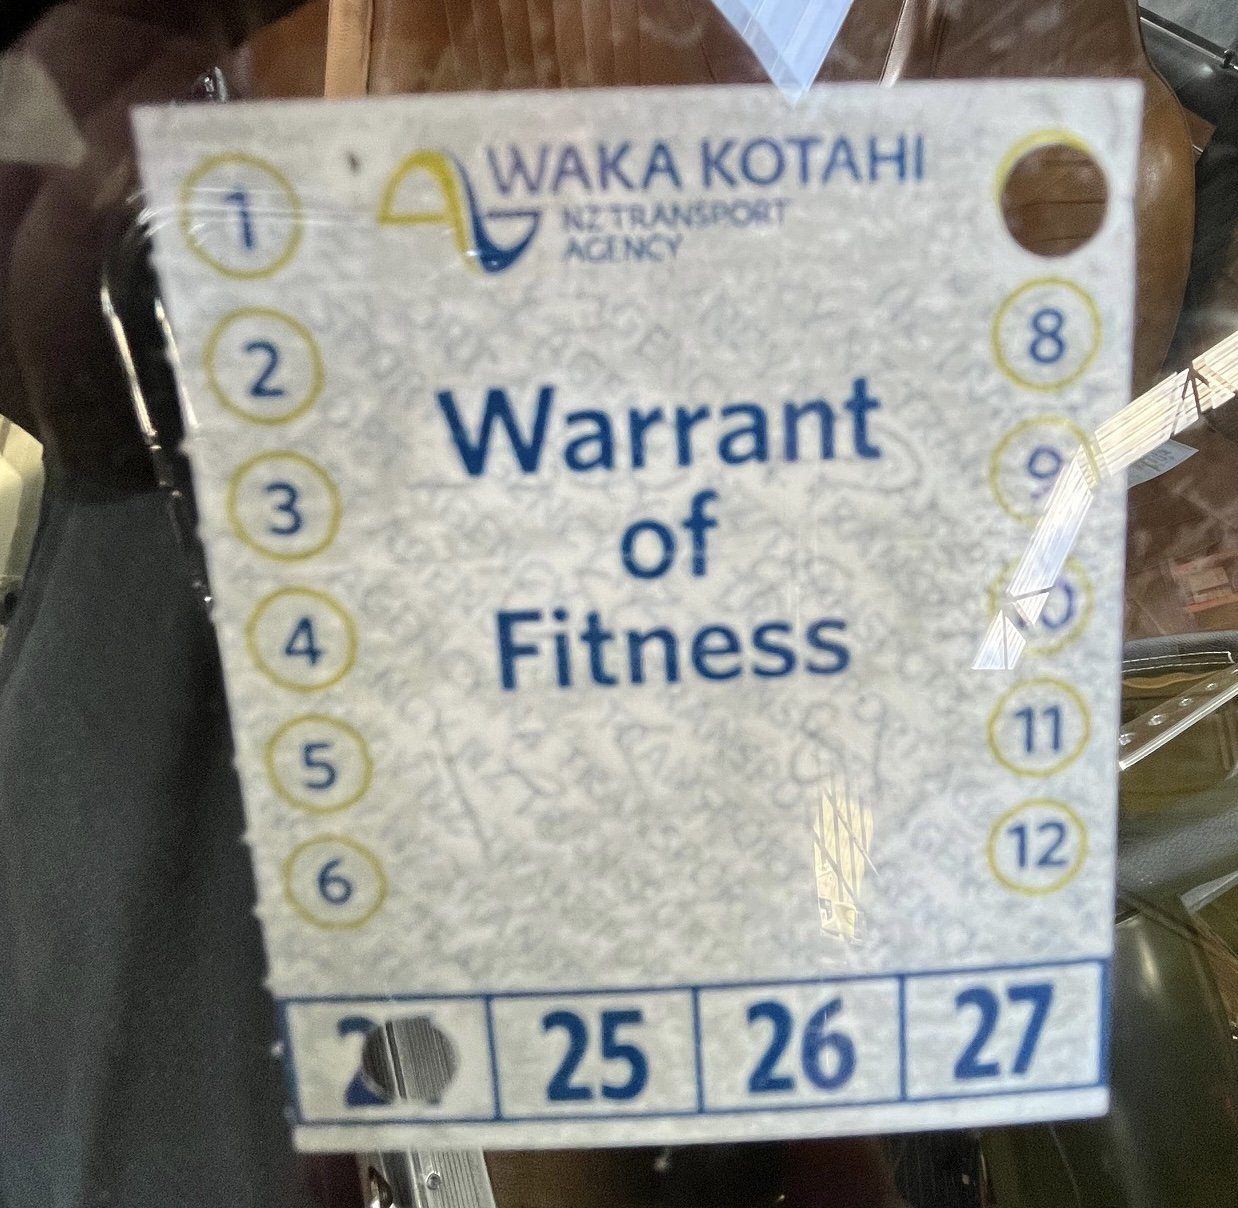
And got a special sticker for my troubles…
CLEAN SHEET!! First WOF in 15 years. I’m feeling pleased with myself and am looking forward to a celebratory beer with dinner.
-
 21
21
-
 3
3
-
- Popular Post
- Popular Post
Spotto at the wof man’s garage, nice mk3 1.6
-
11
-
- Popular Post
- Popular Post
Merry new year.
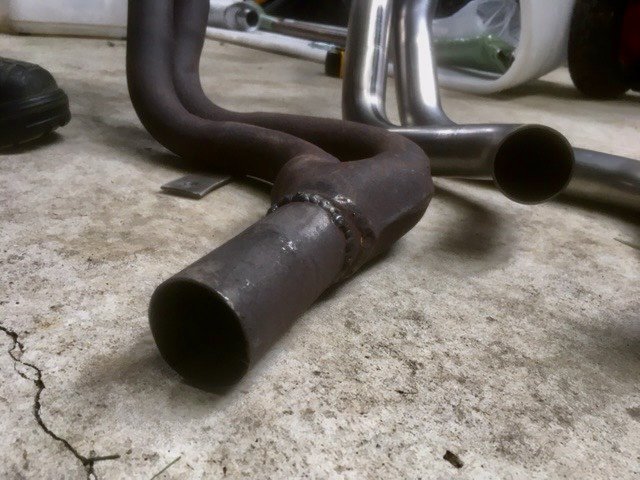
So…. No, I can’t rescue it.I started with this bit
which became this
which fit here
which meant I had to lengthen the inner pipe
so far so good. Side profile, the end needs more up:
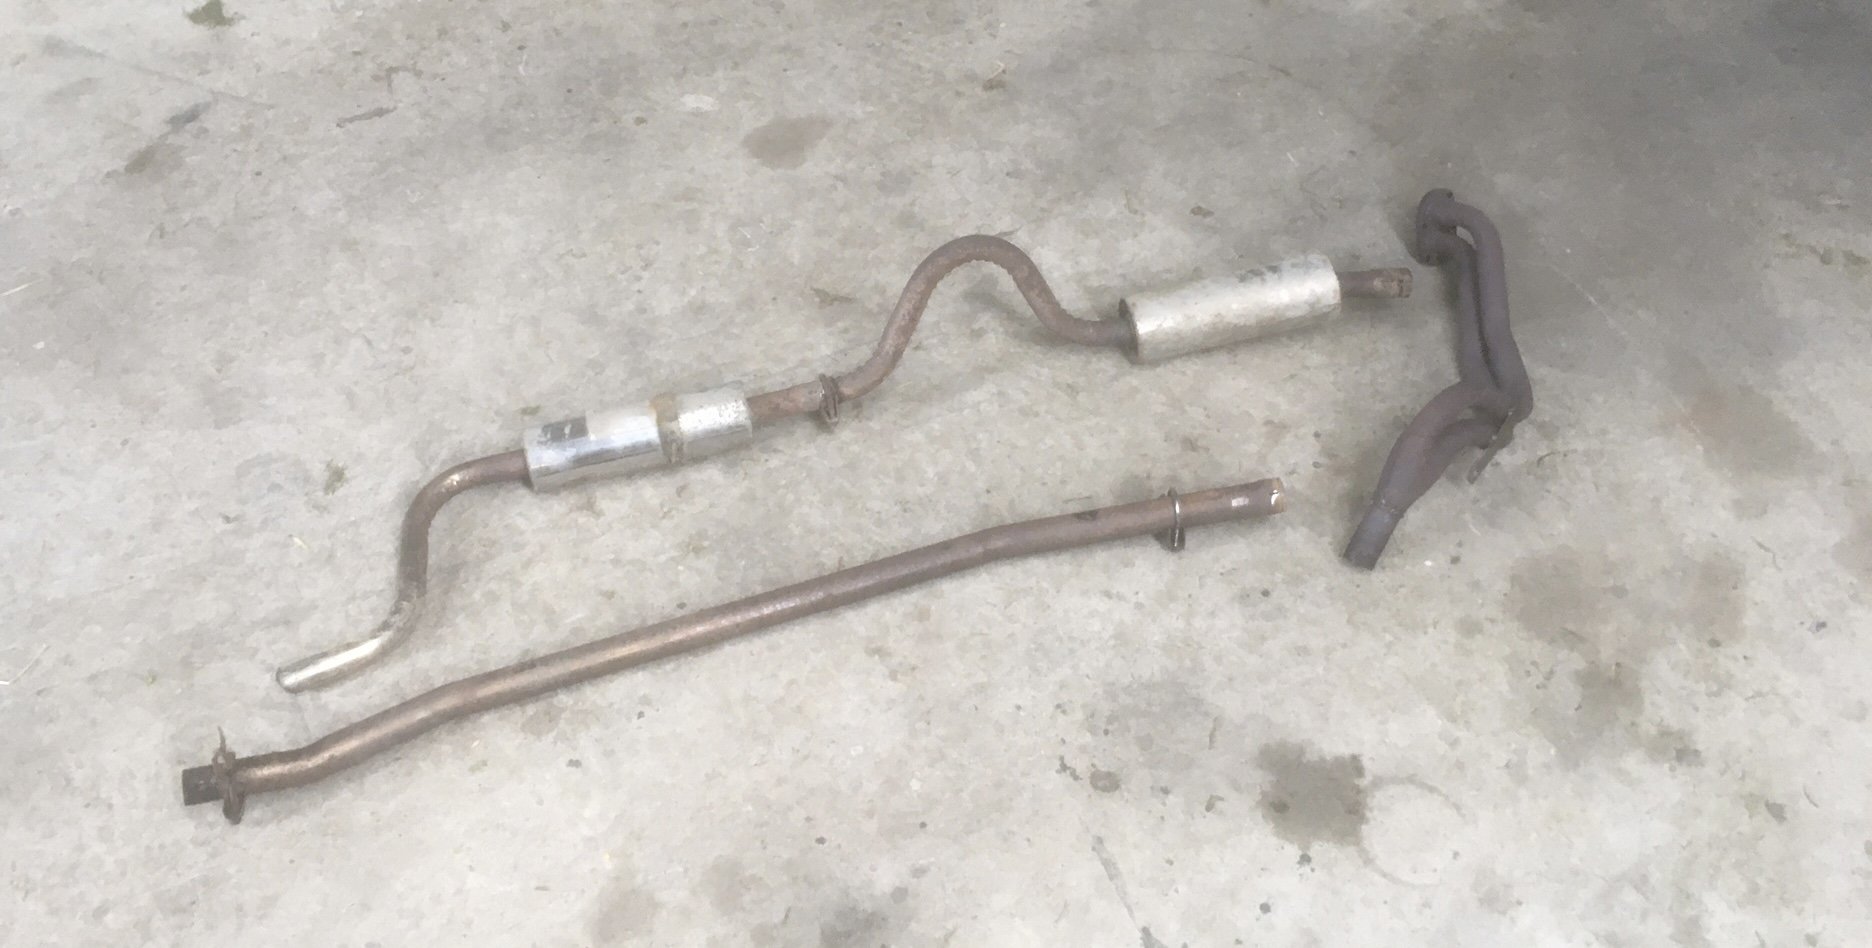
So I gave it a tweak which then meant the inside pipe did’nt fit and no amount of faffing about could get the angles right and I ran out of both bends and patience. I then cut it up and threw it in the scrap bin and ordered a new one from Britannia. About the same price as bending the new one and laser cut flange. Shipping hurt a bit though and I’m sure being a mass produced aftermarket part it won’t be quite as nice but I’ll find out soon.
Meanwhile I managed to cobble the old exhaust back together without leaks and went for a hoon.
-
15
-
Was browsing 40kw Leafs on Tardme. Prices appear to have self-corrected already. Never saw that coming.
-
2
-
 3
3
-
-
Rage quit. I could NOT make them fit properly, plus I wound up with a pinhole inaccessible by welder. Also my ocd can’t cope with the franken-look bits and pieces all welded together so I’m going to start again. Will have to be after new year at this rate. How annoying is it to spend hours on something which then becomes scrap metal? Maybe I can chop it up and use a couple of bends to fix up the old one…. Oh well, off to the beach.
-
4
-
1
-
 6
6
-
-
15 minutes ago, Bling said:
That SoH is doing well for 100k, how old?
2014, SOH is 77%, never more than 13mv spread. I’ve owned for 5 years and since 7800km on the clock. I’m going to run it til it won’t make it to town anymore.
-
2
-
1
-
-
Don’t know how it chugged 2% in 1km.
-
5
-
-
I’m welding a mild steel exhaust together, brand new fresh tube. Is it worthwhile or necessary to coat/paint the outside?
-
I’m getting there. I’ll post an update in due course. The benders have given me a couple of off the shelf 90 degree bends which will get me over the line I hope. The outer pipe ended up being ok. I have to make the inner one fit it now. I didn’t want to get too upset with them as a club member works there and hooked me up with a solid deal $ wise.
-
2
-
-
36 minutes ago, Willdat? said:
I guess because for you it's a work vehicle that's probably quite different to a typical owners experience? In theory the new govt are chucking a bunch of chargers in too instead of subsidising the clean car rebate.
I hadn't thought about that company car issue, probably something that people would want to negotiate with their employers if possible? A huge part of the EV benefit is refuelling at home.
As a private ev owner I mostly charge at home but if I ever need a quick topup when out and about I fully identify with @flyingbrick . It’s a shit show out there.
-
3
-
-
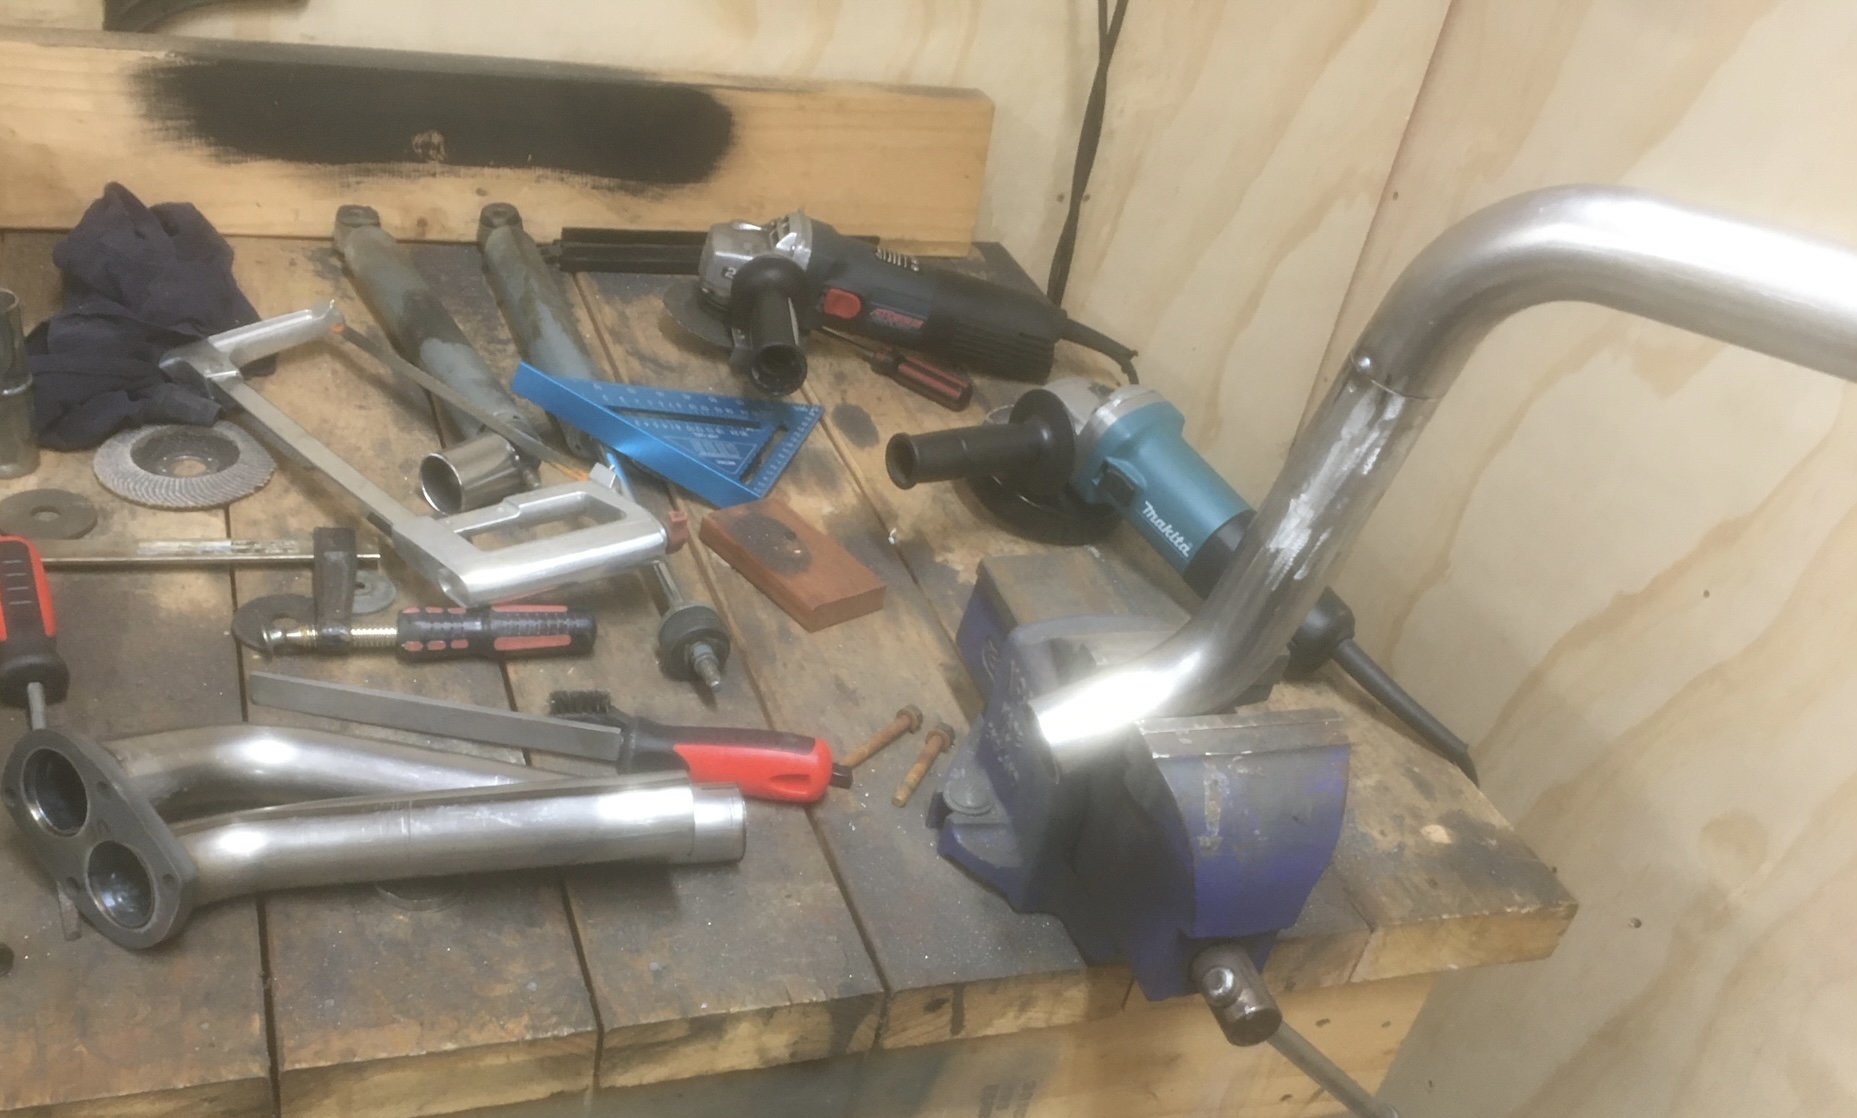
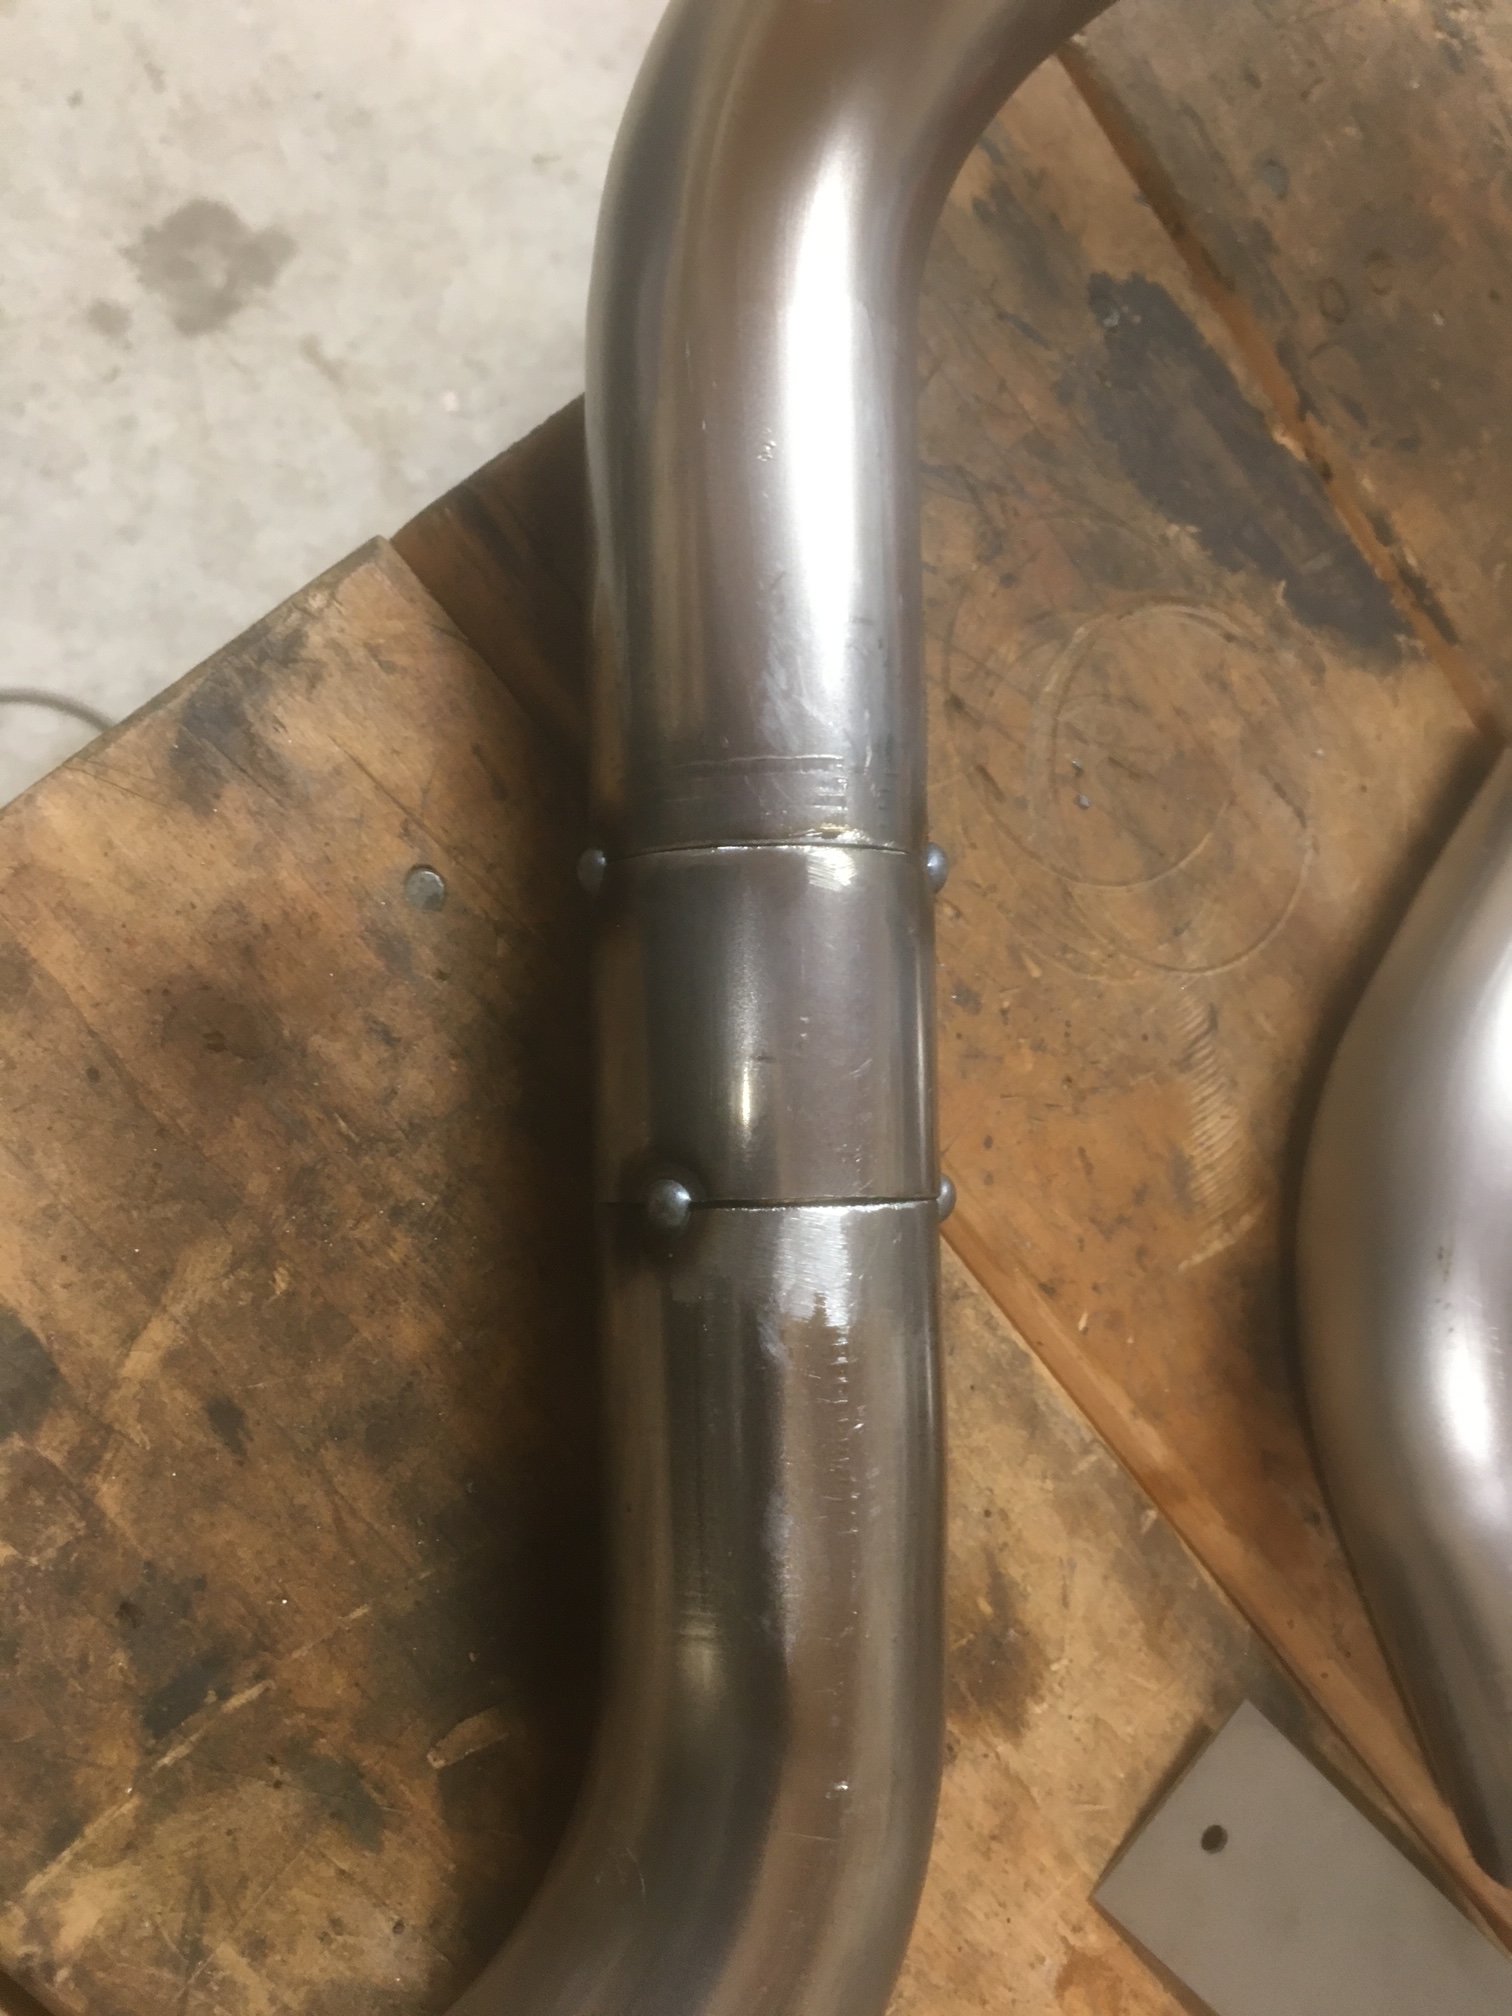
I was told some fettling would be required. This is more than fettling!! I’m at the point where if I had a 60 and a 75 degree bend to weld in I can make it work. I’ve enquired about obtaining said bends from the company.
-
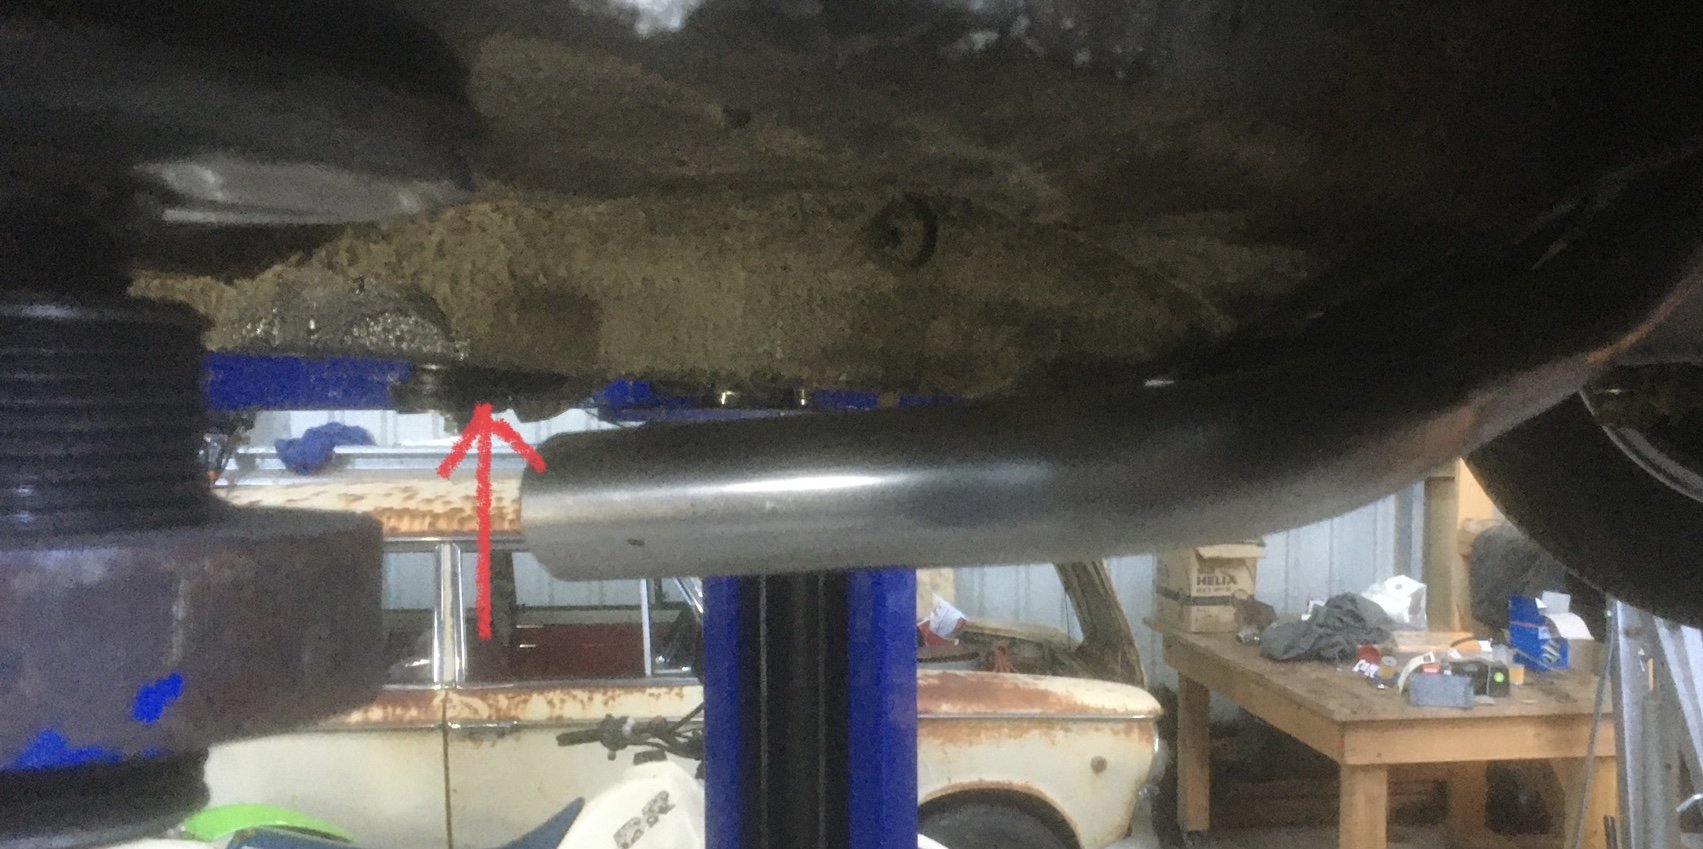
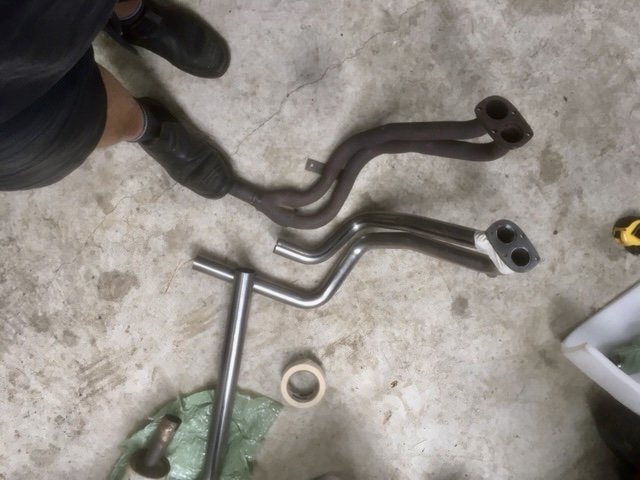
The pipes are bent up so I have been mucking around with fitting them up. I’m hitting a wall with the secondaries, I can’t make them fit.
Look how far apart the ends are. They are supposed to come together to weld into a collector. Also they should be on the same plane in the vertical sense but…
There are other problems too. I can’t lay them as per the factory ones due to slightly different bend angles so I’m simultaneously hitting the bell housing and the chassis rail. Tell me, am I unreasonable in expecting to be able to fit up the pipes with minor trimming? This part of the job (bending 2x pipes and laser cut flange ran to $215+GST. They had my original as a pattern and supposedly use 3D scanning. At this rate I will need to cut them at nearly every bend and add or subtract sections. What would you recommend?
-
 2
2
-
4
-
-
- Popular Post
- Popular Post
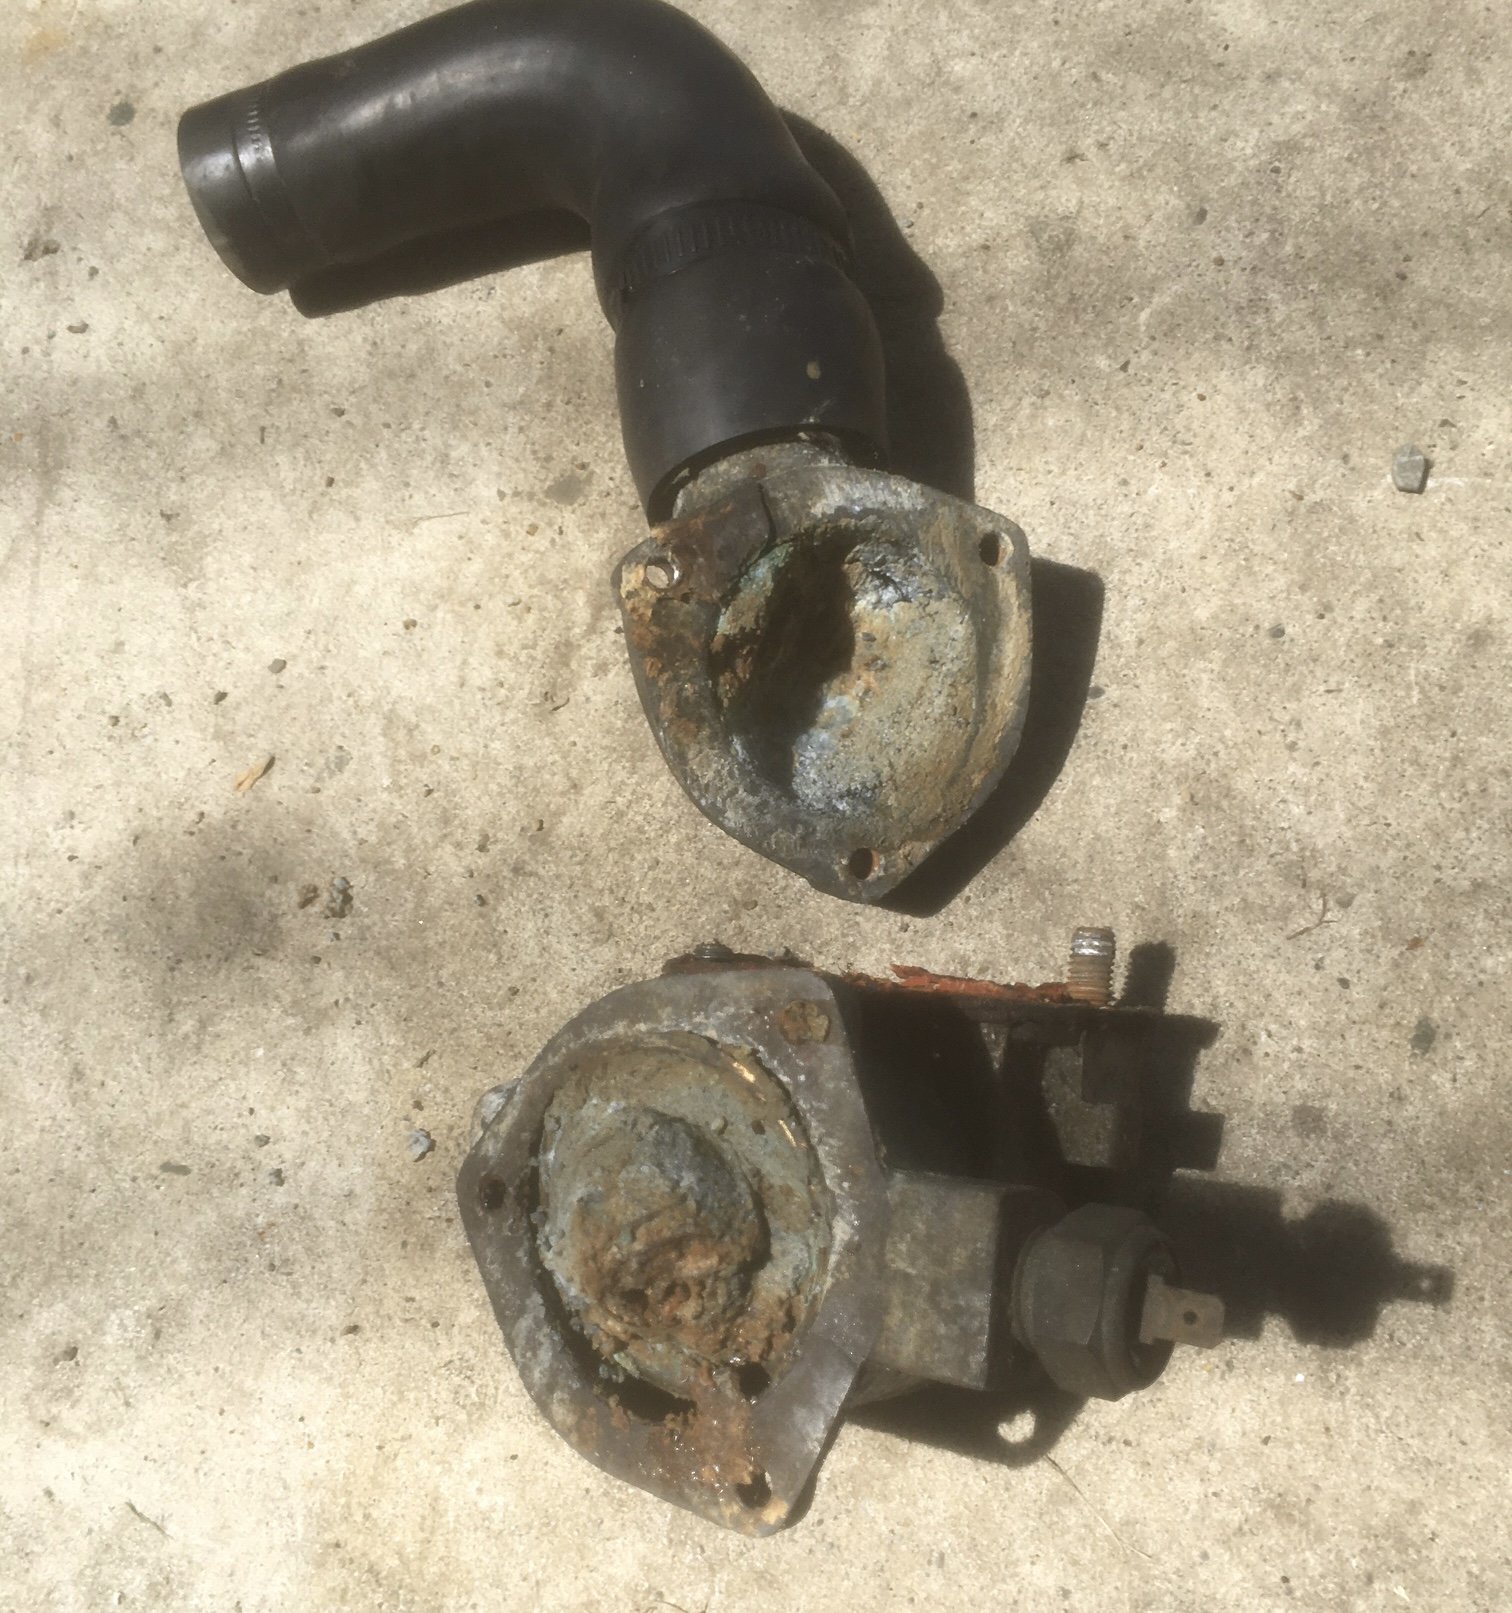
It boils after 3 minutes of running. Let’s check the thermostat.
Yeah, that’ll do it I guess.
-
6
-
10
-
1
-
I agree on the quality look of things. Different era.
-
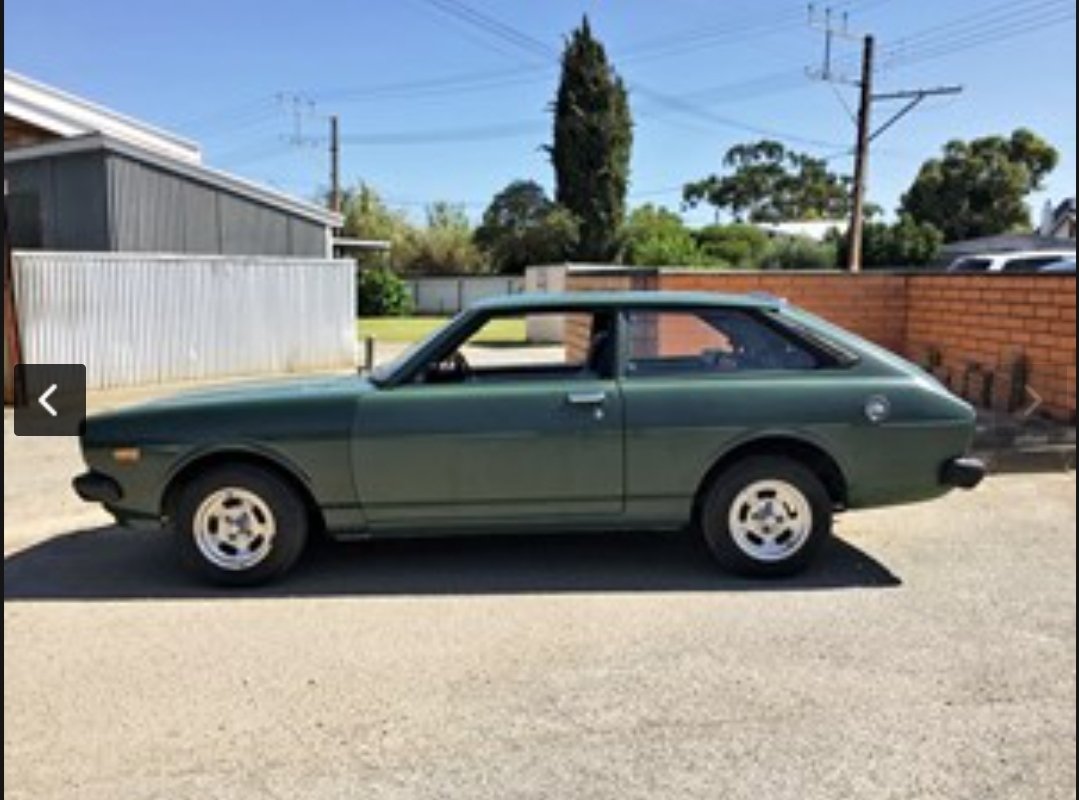
46 minutes ago, Pee Dubs said:
First candidate
https://www.tradeuniquecars.com.au/detail/toyota-corolla-886549
Kinda the ugly ducking of the KE series. Would it be worth something reasonable here, or too weird to be desirable?
Not sure about the two tone seats or the two tone paint for that matter, but that’s a savagely cool ugly thing.
-
2
-
-
Yeah, a wagon would be sick.
-
- Popular Post
- Popular Post
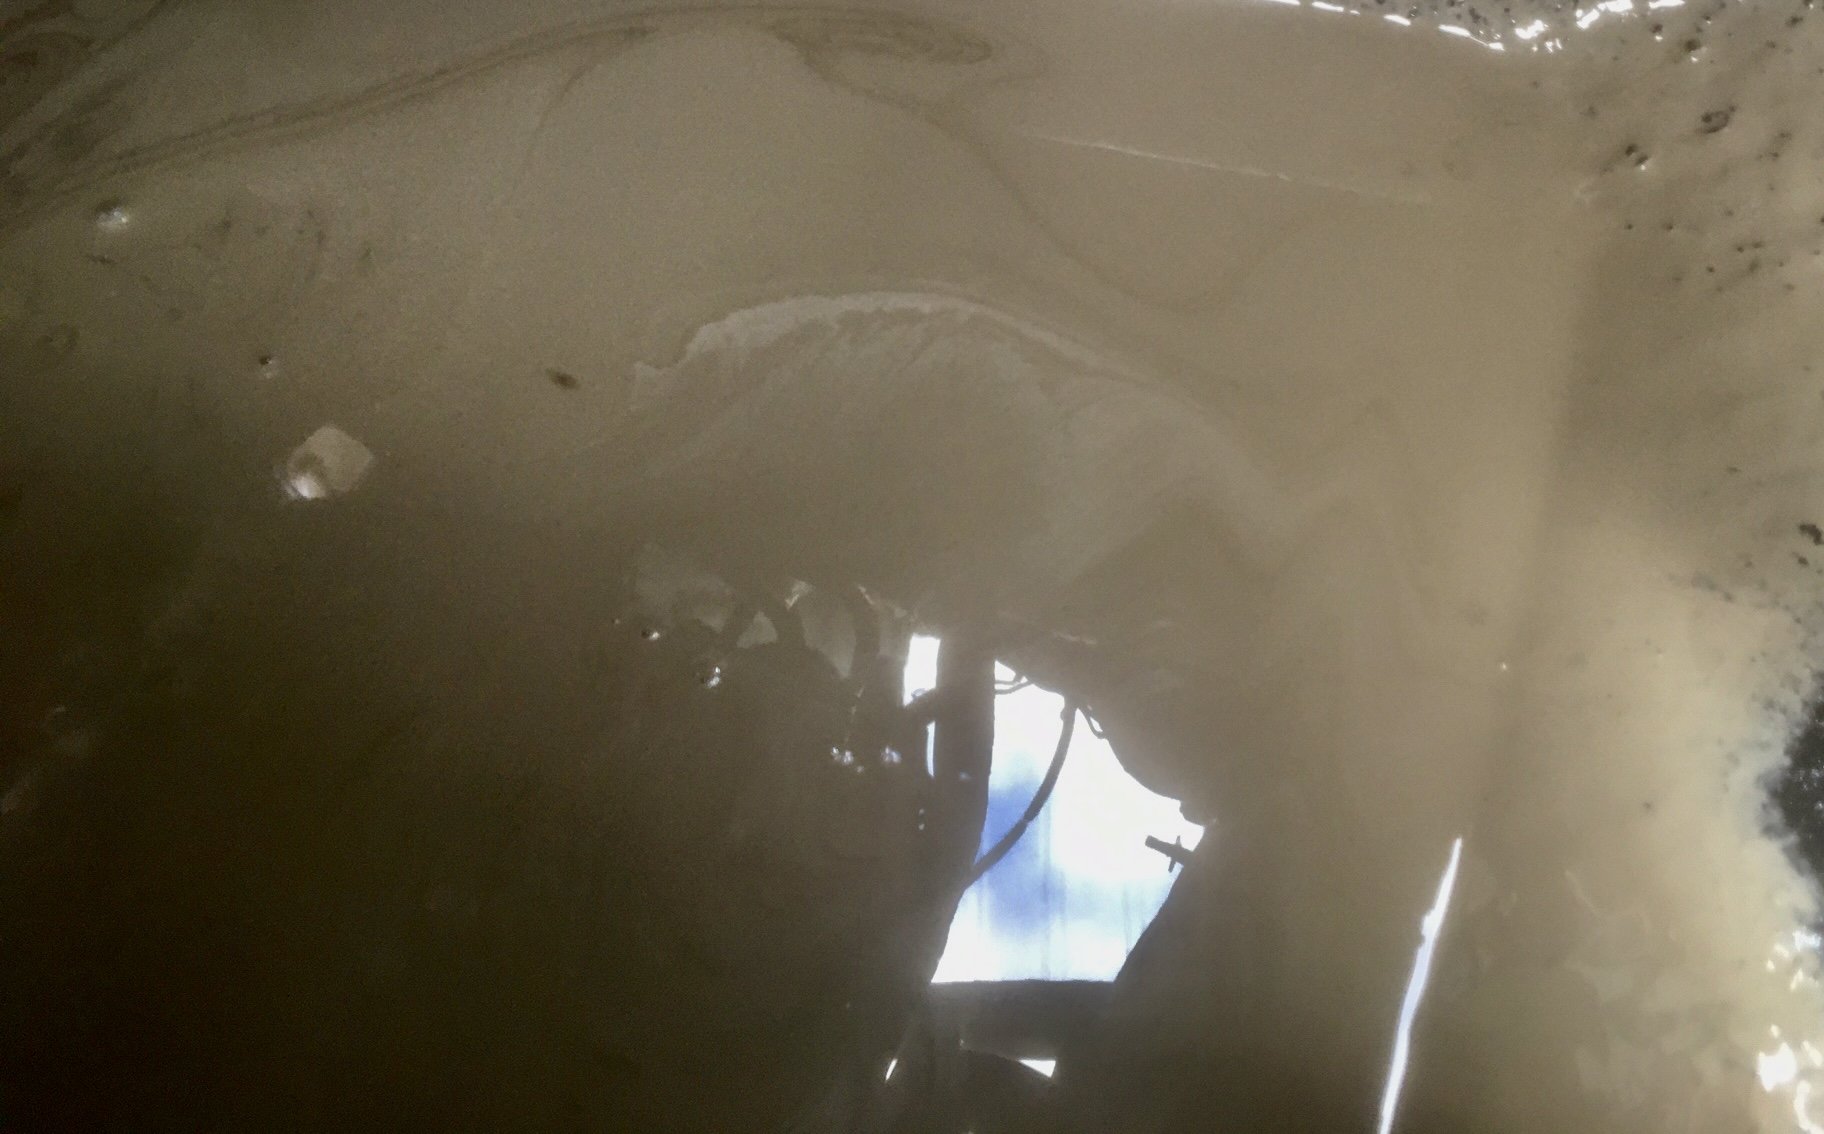
I took her into the paddock today and did a skid. It was awesome. This is when the fuel pump decided to start working, spraying old petrol wildly around the engine bay. I E-stopped it and did a field repair literally in a field which is cool. I thought if the fuel pump is working why not hook it back up to the carb? I had suspected there was water in the fuel tank and the droplets visible in the filter confirmed it. I worked on the assumption that the watery stuff had already been pumped out all over my paddock so I went and fetched some new hose and a new filter and hooked it up. It still ran mint, so the fuel is not completely stale. Speaking of water, there was also a robust quantity of it in the sump so I have drained it and given it two oil changes so far. I’m waiting for a new bypass filter to turn up from Rock Auto because nobody local had a listing, so I have a years supply of filters for the whole fleet coming.
Pic of milkshake:
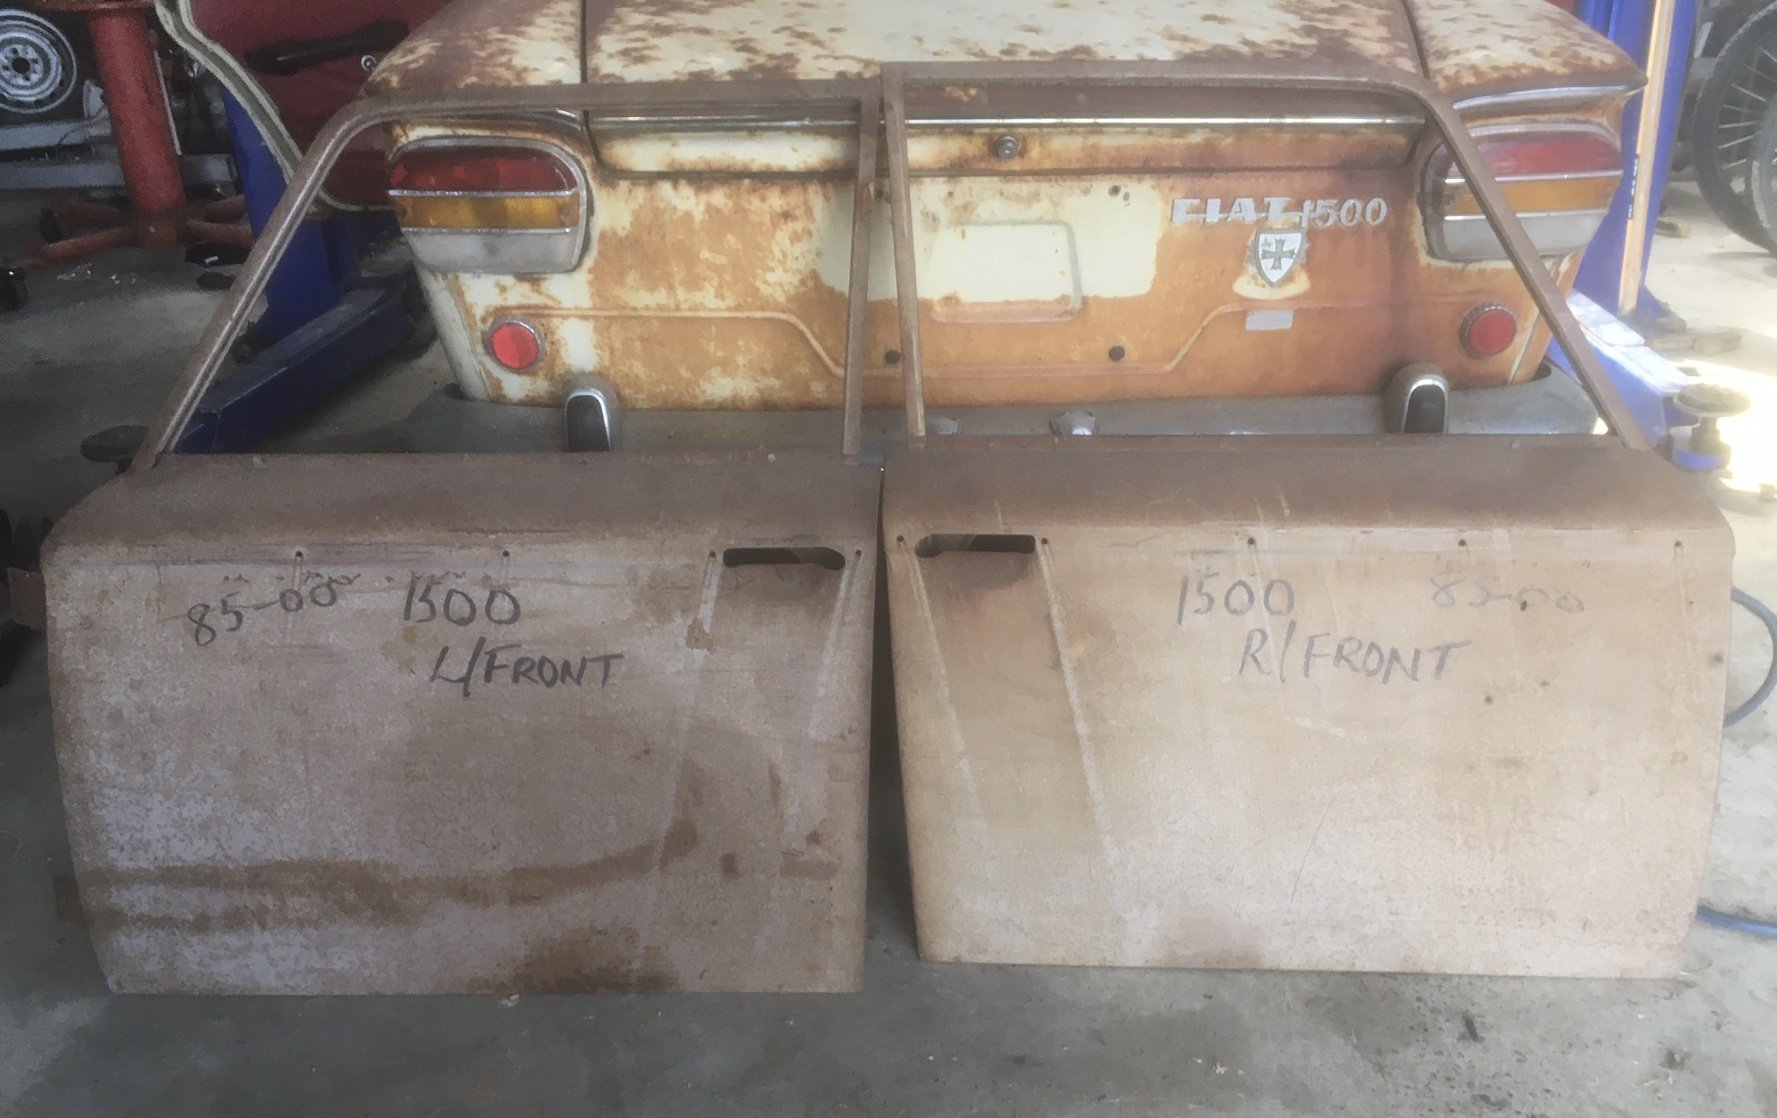
I have also emptied the car out and taken stock of the bits and bobs. I have two sets of hubcaps, many headlights and headlight bowls and a set of surrounds, two taillights for a Fiat that is definitely not a 1500, and a bunch of interior door handles and window winder handles. In the back seat was a windscreen and the boot contained:
A pair of BRAND NEW front doors. N.O.fricken S! Score.
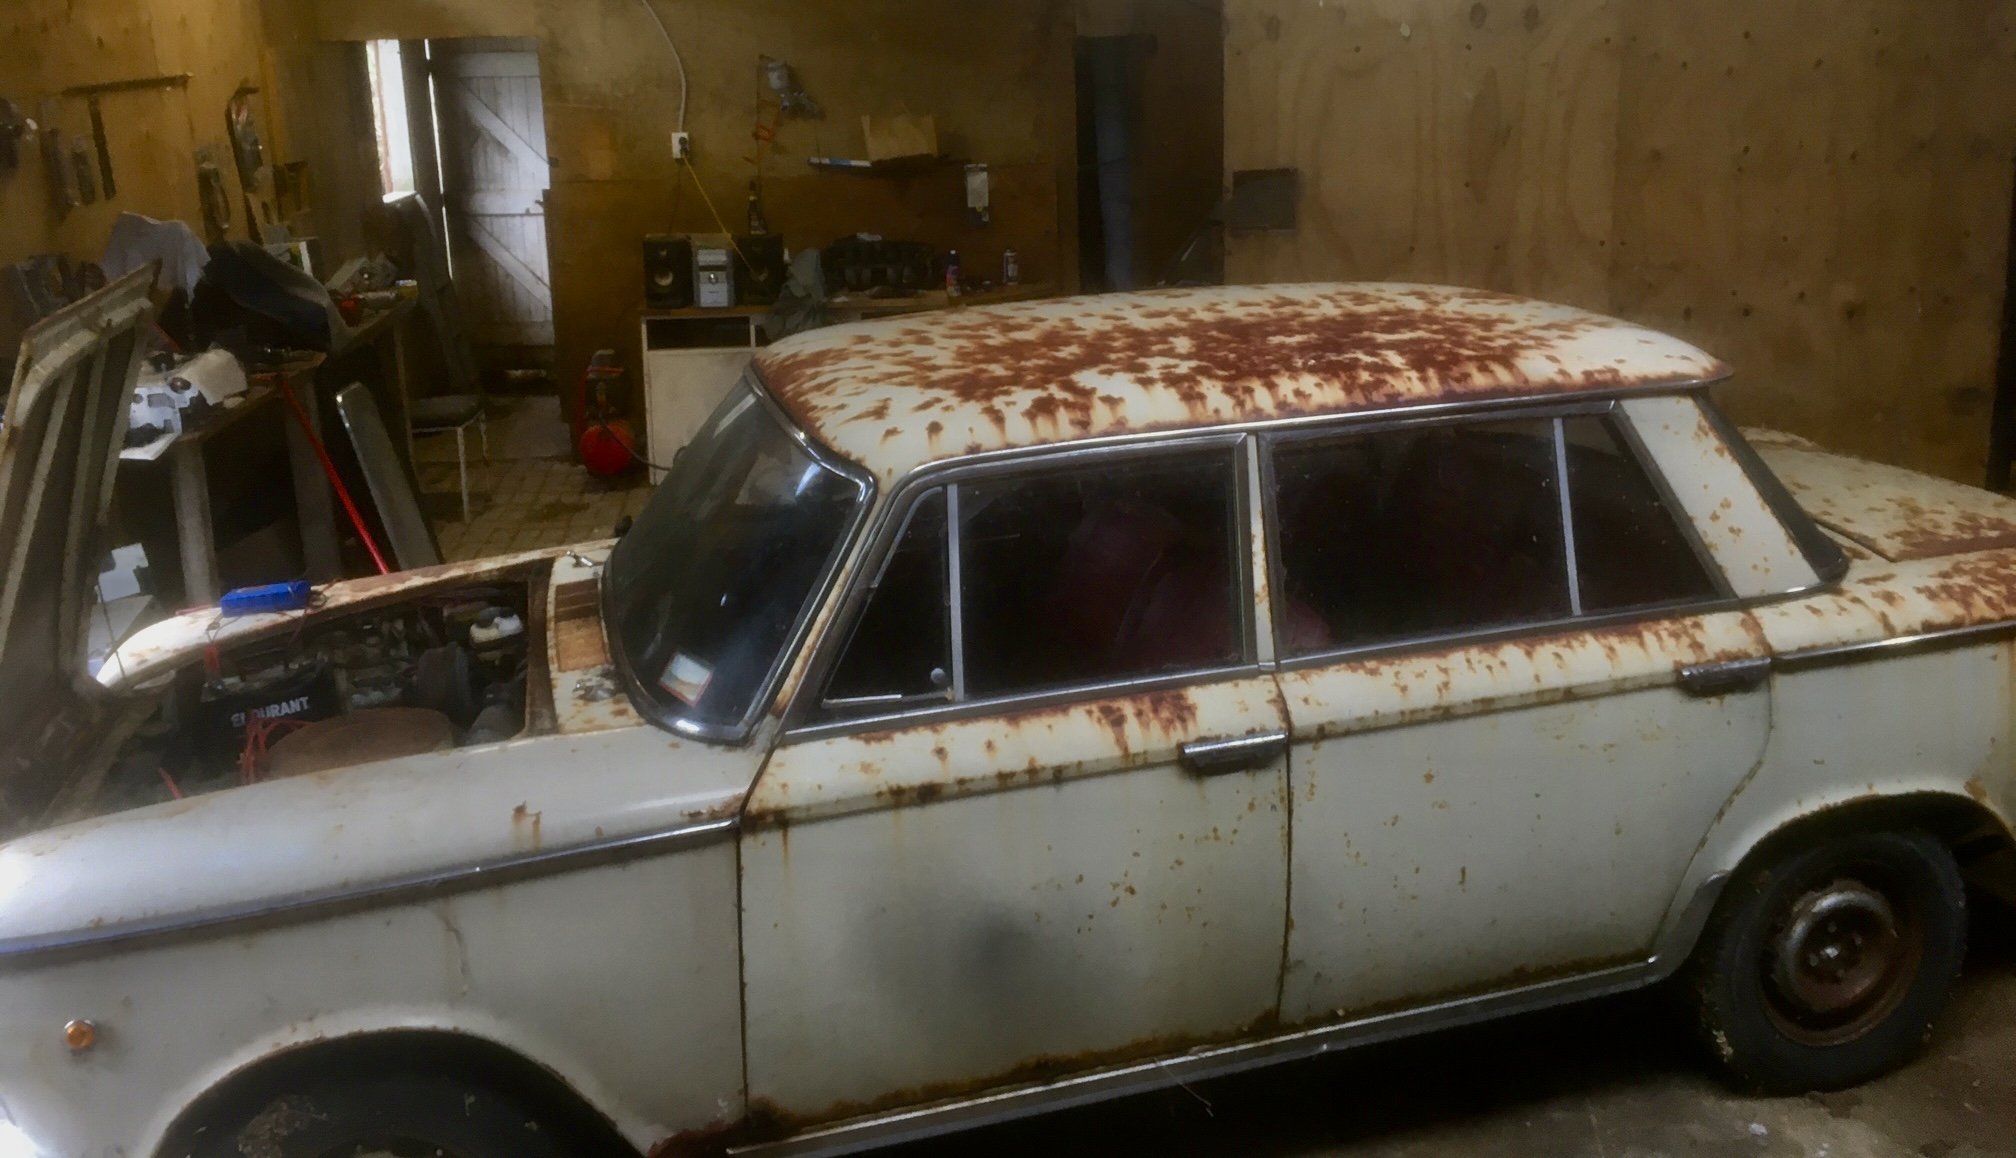
With the interior empty I gave it a thorough vacuum. I’m considering weighing the dust bag in for scrap. The car is definitely lighter now as a result. I also cleaned the windows which immediately makes the car look less derelict. Second impressions are that it’s more solid than it looks. The boot is mint, all the floors are great except for the driver’s which is quite bad. There is obviously a LOT of surface rust but actual perforation is limited to only a few structural areas. I have lifted some big scabs off the roof but no holes underneath, though I guess the steel is now rather thinner than it should be.
I should be parking it to concentrate on other things like getting the 125 legal, but I feel like it’s a good idea to do some preventative pre storage tasks before burying it in the corner. If you have any ideas about slowing the rust let me know in the discussion thread. Thanks for reading.-
21
-
- Popular Post
- Popular Post
Dear reader,
When confronted with an inexorably increasing stack of projects, none of which are complete, what does the sane protagonist do?….
Why, MOAR CARS!!! what else?
Let me take you back to a time when we cowered from the Bat AIDS in our homes and became listless and dare I say bored. This delightful wreck pops up for sale deep within Covidistan (a locked down Auckland) The first thing my brain said was BUY IT so I did. Well the lockdown dragged on, couldn’t get a ferrry when it finally lifted etc, so a deal was done to un-buy it. Got my money back, the seller was free to re-list. 6 months later he contacted me to ask if I still wanted it, it’s free to a good home and you seem like
a retarded nutjobyou would provide that home, but please come fetch it soon because the car is now stored outside and I’ve sold my house and need to be out in a month. No worries. I flew to New Plymouth, borrowed my mate’s Hilux and trailer and picked the car up from muggy salty Kaukapakapa. Thus:
She was put into storage here:
One year and six months later, I suggested to the family that a trip to our old home of Taranaki would be a good idea. Oh, and since we’re going anyway we might as well collect the old Fiat. Foolishly everyone agreed. Now, what to do about a trailer? We were planning to be away for 6 days and that makes hiring a trailer expensive. Therefore I did what any sane person would do and bought one. When we arrived at our objective we decided that since the trailer lacked a winch, it would be much easier to get the car to run and drive it onto the trailer.
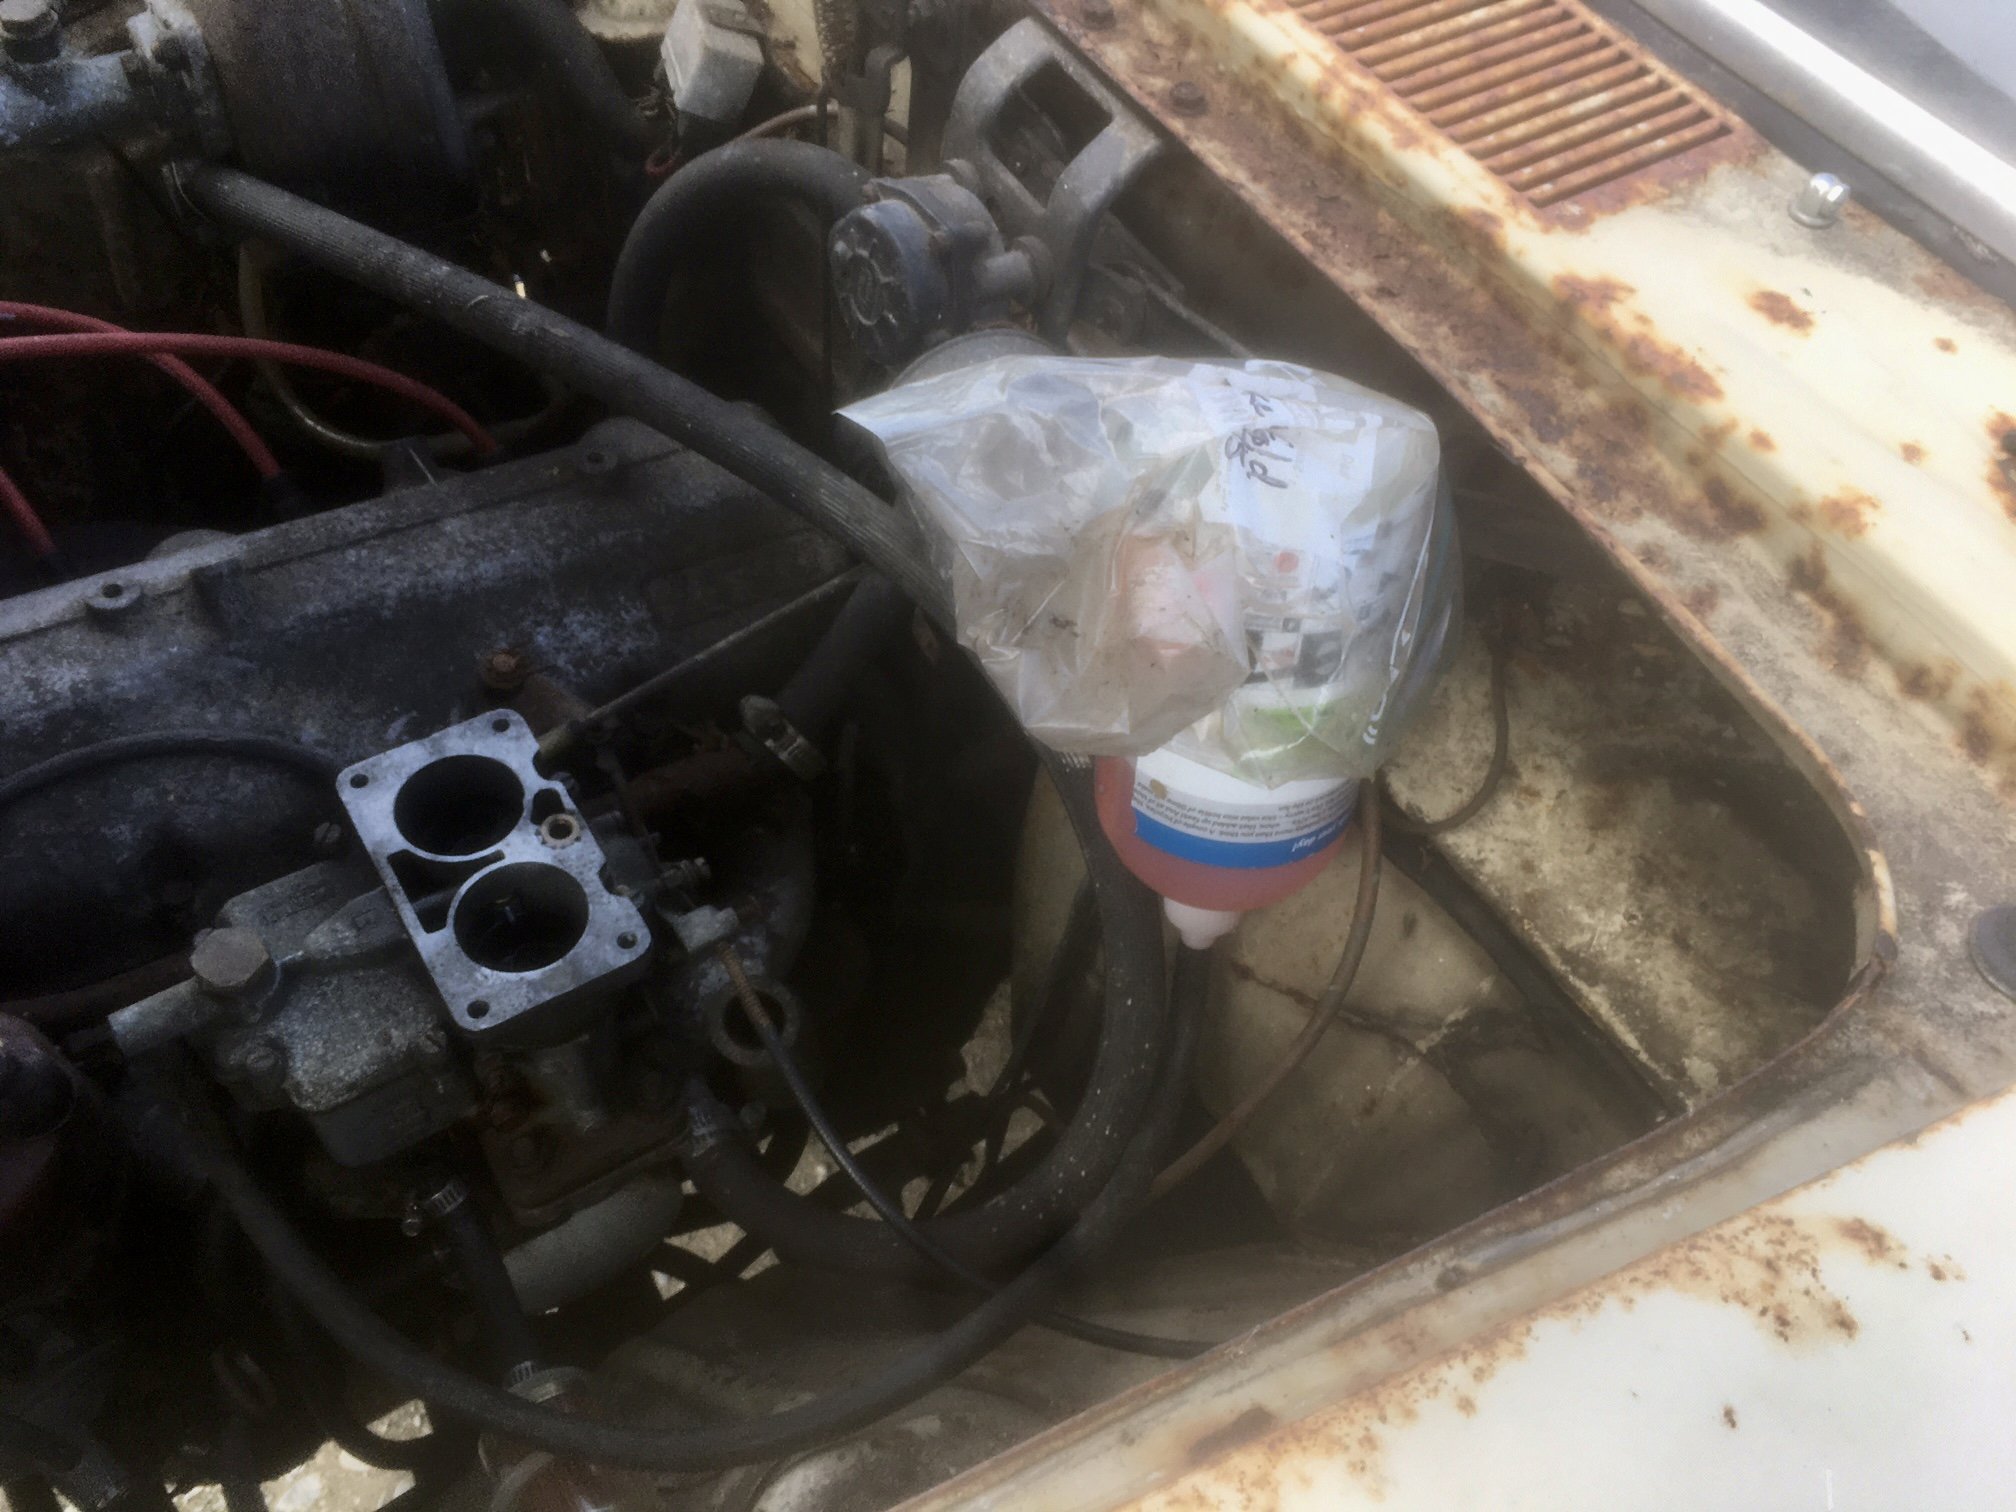
A charged battery was produced along with a can of Start ya Bastard! The points were levered to ensure they weren’t stuck. A fuel feed was rigged to the carb..
Brake fluid was tipped into the (bone dry) clutch reservoir and much fluid was spilled in an attempt to bleed the system. Eventually we had clutch! Then a thing happened.
She purrs like a kitten!! No stumbles, rattles or misfires. Back to the trailer. I did indeed drive the Fiat straight on to the trailer and a problem became evident. You see, the previous owner had just put brand new wheels and tyres on the trailer going from 13 inch to 14 inch wheels. The tyres were sitting hard on the inside of the guards with the 1000kg Fiat on it. This led to some bush mods in the pouring rain involving a battery drill and prybar to raise the guards. I’ll tidy this up at some point. Then we were on the road back home.
At this point I wish to make an aside to extol the virtues of a 16 year old 375,000km BMW X5 as a superlative touring and towing vehicle. I still had power in reserve to accelerate up transmission gully. We covered 1650km at an average of 65km/h and 11.2 l/100km.And home…
Astute readers will spot that the trailer axle is well forward of the centre of the deck. This struck me as odd but for most front engined vehicles probably results in a reliable proportion of the weight being on the towbar. Anyway I’m very satisfied with how it behaved.
-
21
-
1
-
Discuss (nicely)
-
17 minutes ago, igor said:
How old are those things now though? Prob getting near the end of their design life.
Depends… the Leaf seems to change the battery recipe every 5 minutes. 2014 seems to be a sweet spot as mine is approaching 100,000km and still at 78% SOH. Will still do 110km open road. But look at a 2013 and they’re nearly all buggered-even worse than the 1st gen. And yeah, for some reason the 30kwh one seems cursed too. I still think EVs are great around town and the burbs, but increasingly silly for most other tasks with current tech. No pun intended
-
2
-
1
-
-
On 01/11/2023 at 19:06, NickJ said:
I have a cheap one, its crap.
good for primer thats gunna get a sand or motivation to purchase a nicer gunWhat brand and price point are we talking? Total bodyshop is clearing some at very steep discounts. Italco brand
-
LVMP guns… ok for home warrior? 6CFM at 36psi sounds pretty compressor friendly.
-
- Popular Post
- Popular Post
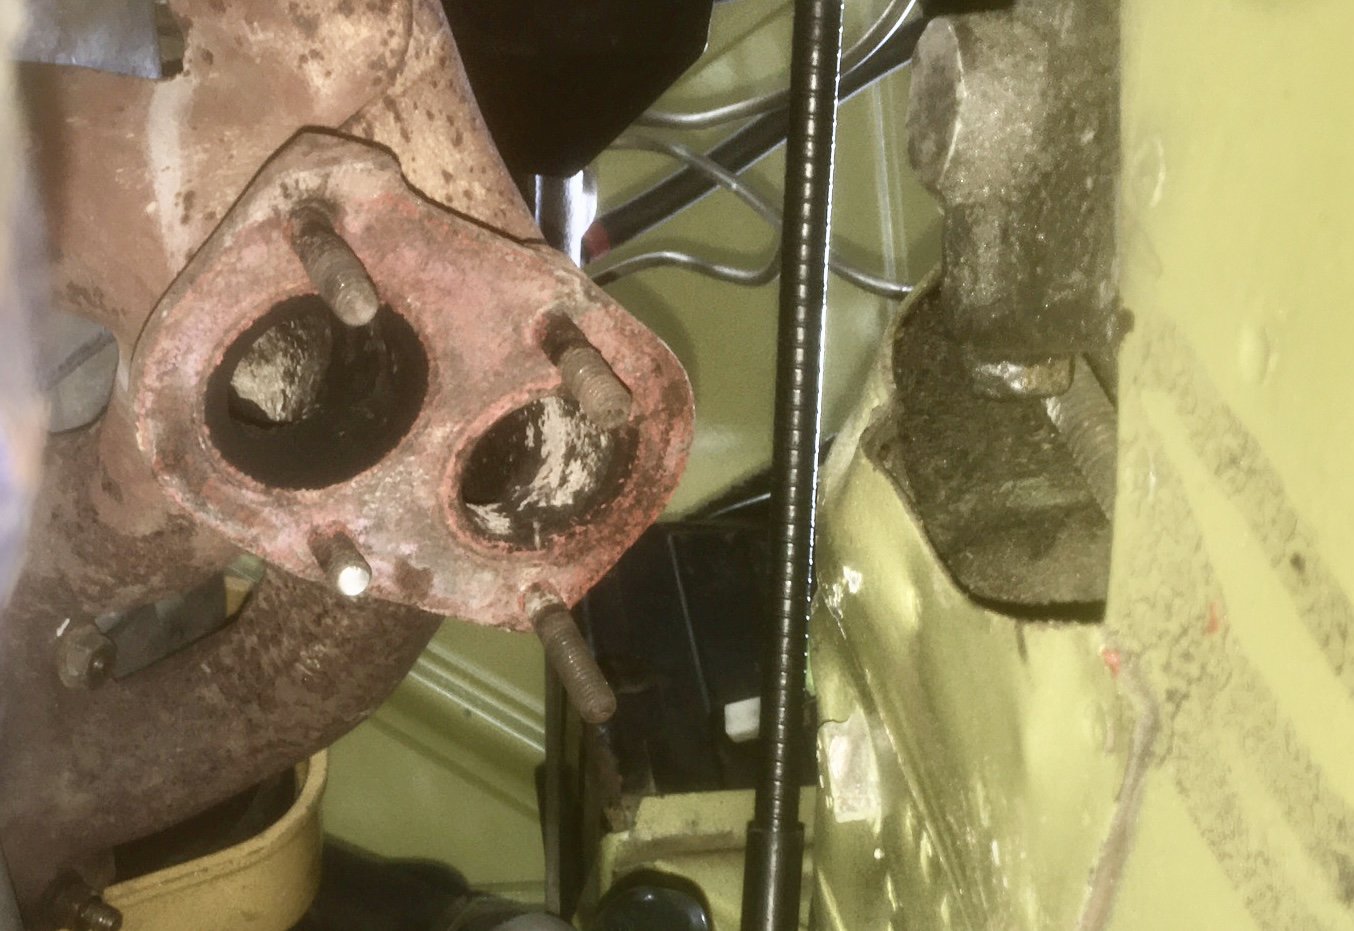
I can’t catch a break on this thing. I had a WOF booked, so I had to quickly fix the exhaust leak. It turns out there were two leaks, a small one at the manifold flange and a larger one at the first slip joint. I reached in to undo the flange nuts and 3 were easy and one was not. SNAP… Broken stud!! WOF booking cancelled. Did I mention I like my hoist? 10 minutes to achieve this:
Removing the manifold takes a bit longer. Firstly you to drain the cooling system. For the umpteenth time… because the pipe off the back of the water pump has to come off to get to the last manifold nut. Then if you remove the battery and turn it just so you can slip it out past the brake master cylinder.
The plan of attack is to soak in crc for a day and then attempt stud removal. I’ll replace all 4 while I’m this deep. Before I wind in new studs I might get the sealing surfaces planed to ensure flatness. Then the universe, I think, is telling me just to replace the whole janky drinking straw sized exhaust system while I’m at it. It won’t be cheap because the downpipe will need to be remade as well. The lesson,dear reader, is don’t waste your time and effort on something you know needs replacing to hasten the point at which you can go for a hoon. 100% I will ignore my own advice in the future.-
11
-
4 hours ago, cubastreet said:
Shall we do a group buy and import a boatload of old leafs before the rebate ends?
Give it a few months and you’ll probably find the prices of leafs will magically reduce by about $3.5k anyway to offset how they were magically worth more in Japan 5 minutes after the govt announced free money to buy them….
The most noticeable thing that happened imo was dealers started importing much lower SOH cars than before.
-
4
-
2
-


Sunbeam's 1973 Fiat 125
in Projects and Build Ups
Posted
Maiden voyage beyond the end of the road today, I decided to take it to work, a distance approximately 5 times further than I have ever driven it. Some observations:
It needs a 5th gear
The tyre roar is harsh, possibly a consequence of polyurethane bushes?
A rear wheel bearing is noisy
The wheel alignment is terrible (expected)
I drove home at night, the low beam is pants, high beam is good (need to relay the low beams)
It looks comically tiny parked next to the corollas and swifts in the carpark.
I like quarterlights as they are excellent wind deflectors with the window open.
90 km round trip acheived with no broken things!