


Sunbeam
-
Posts
1,169 -
Joined
-
Last visited
-
Days Won
1
Content Type
Forums
Downloads
Events
Gallery
Posts posted by Sunbeam
-
-
Try acetone with the atf. Otherwise take the crank out and bash the pistons with a steel drift. Wood absorbs too much power from the hammer. Sounds brutal, but the pistons and bores are already rooted anyway at this point. It’s a tractor engine so the marks should bore out for new oversized pistons with meat to spare. I had to use the agro method on a Fiat block to get a piston out. Moved pretty quick once the wooden drift was abandoned and didn’t even break a ring in the end.
-
 1
1
-
-
Thanks!
-
- Popular Post
- Popular Post
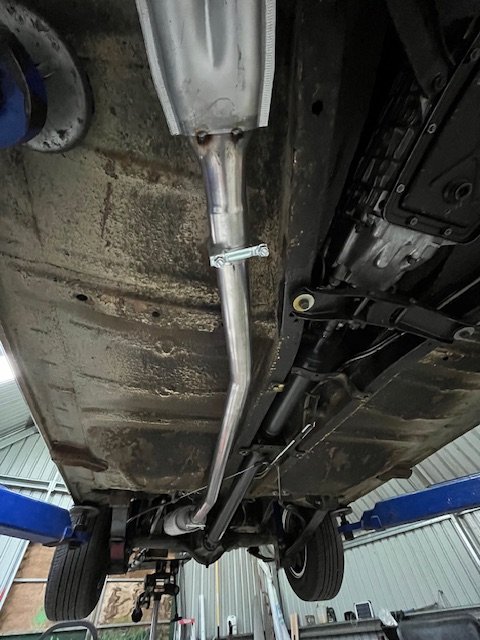
Been driving around some more. 2200-2800 rpm is punishing to cruise at. Transitioning through this band is fine and generally it makes bad-ass old car tunes. The rear muffler is a straight through bullet style and this needs to change, I think. I have a new problem with clearance though. The exhaust isn’t banging the floor anymore but now the rear axle housing is banging on the inverted U section. I think I need to ditch the slip joints and weld flanges in instead. This will give me some more wiggle room to play with angles before welding the flanges on. Also I may investigate adding another leaf or part leaf to the rear springs. They are so soft I can make the diff housing touch the bump stops (and exhaust)by pressing down firmly on the boot! Increasing ride height is not an option.
Servo pic: 8.8 l/100km on this one. I was expecting 10-11 so call me pleasantly surprised.
-
23
-
I can confirm BMW M57 is the shiz. Bone stock is 220hp and 500nm. Almost zero issues with mine in an old X5 with 375,000km. A starter motor and one injector in it’s whole life. I would shudder at swapping it into something else though as they are very electrical, which is not my jam at all. Land Rover peeps are routinely doing it in the UK though.
-
1
-
-
- Popular Post
- Popular Post
Yes, 4.5mm is too close. It bangs the floor vigorously when traversing bumps. So I have undone everything again and extended the hook eyes I fabricated for the rubber straps and meddled with some angles and I now have about 10mm. Also, no leaks. Also also it might be a smidge loud. I know, I know but I’m closer to 50 than 40 nowadays and I have enough hearing loss from hundreds of hours in a Cessna 206. Don’t need to be more deaf.
-
11
-
- Popular Post
- Popular Post
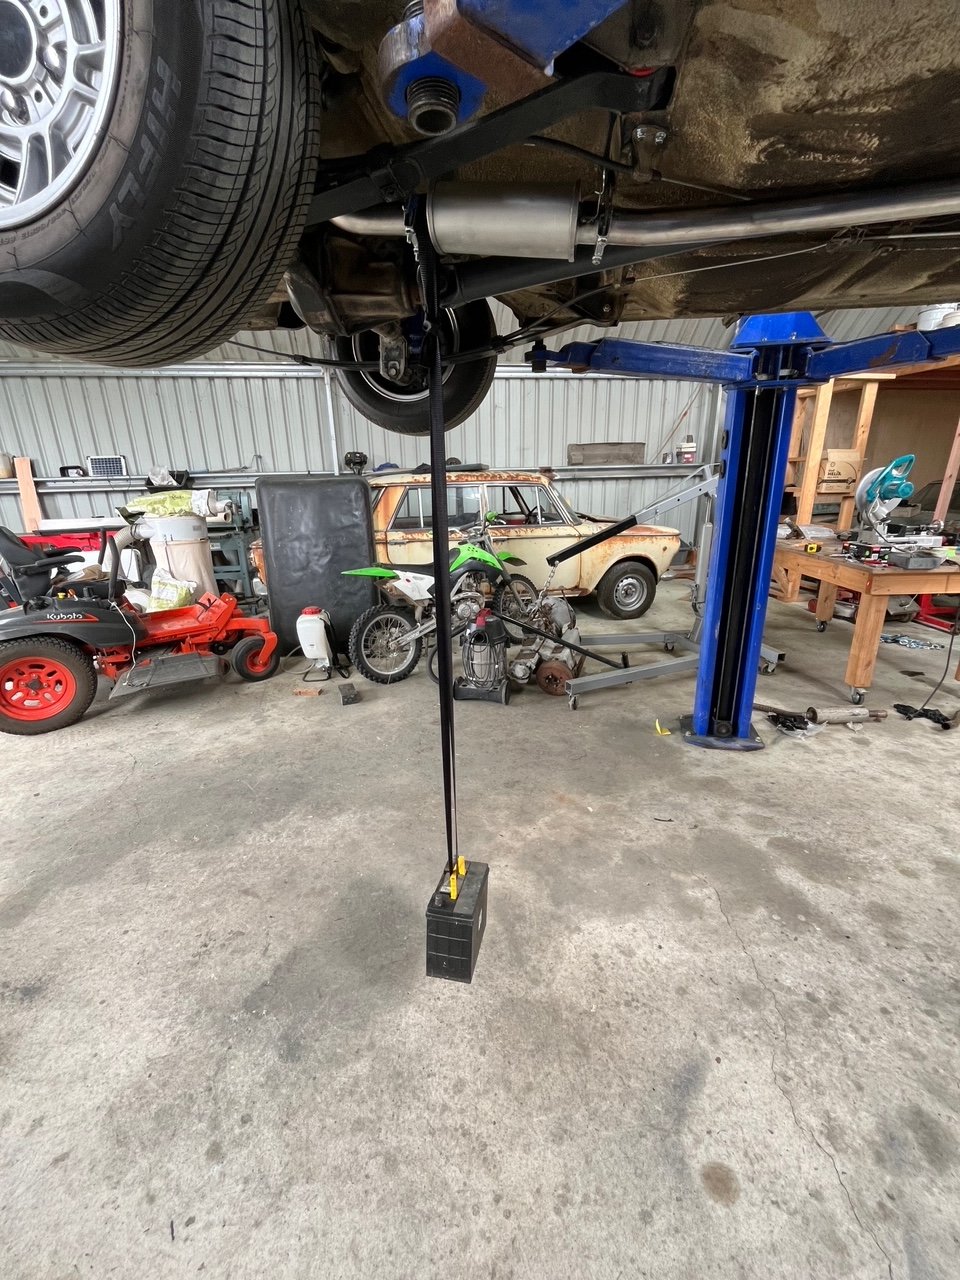
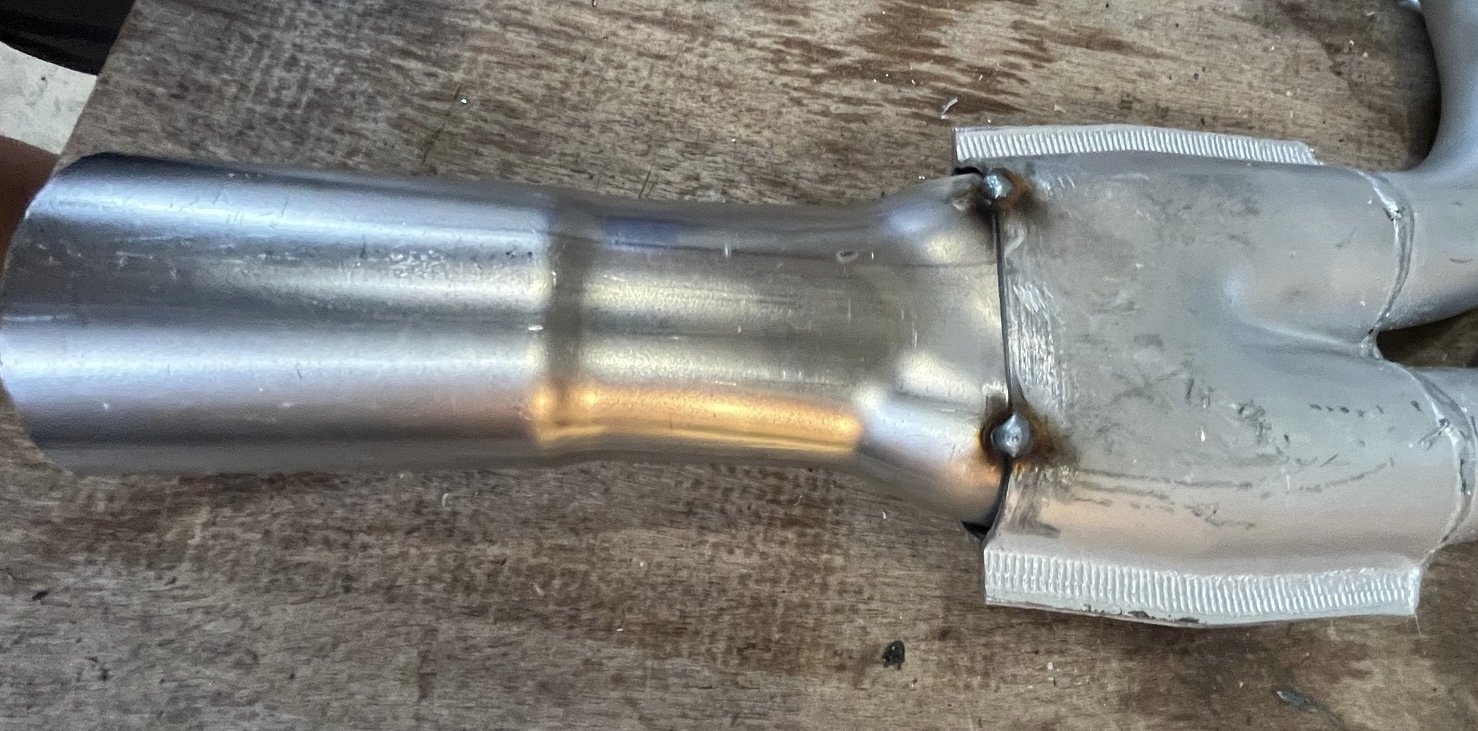
I personally don’t like doing this on slip joints but beggars can’t be choosers.
Also I have new rubber hangers so I thought I’d accelerate the stretching process. Yes, that’s an old battery..
-
6
-
 4
4
-
- Popular Post
- Popular Post
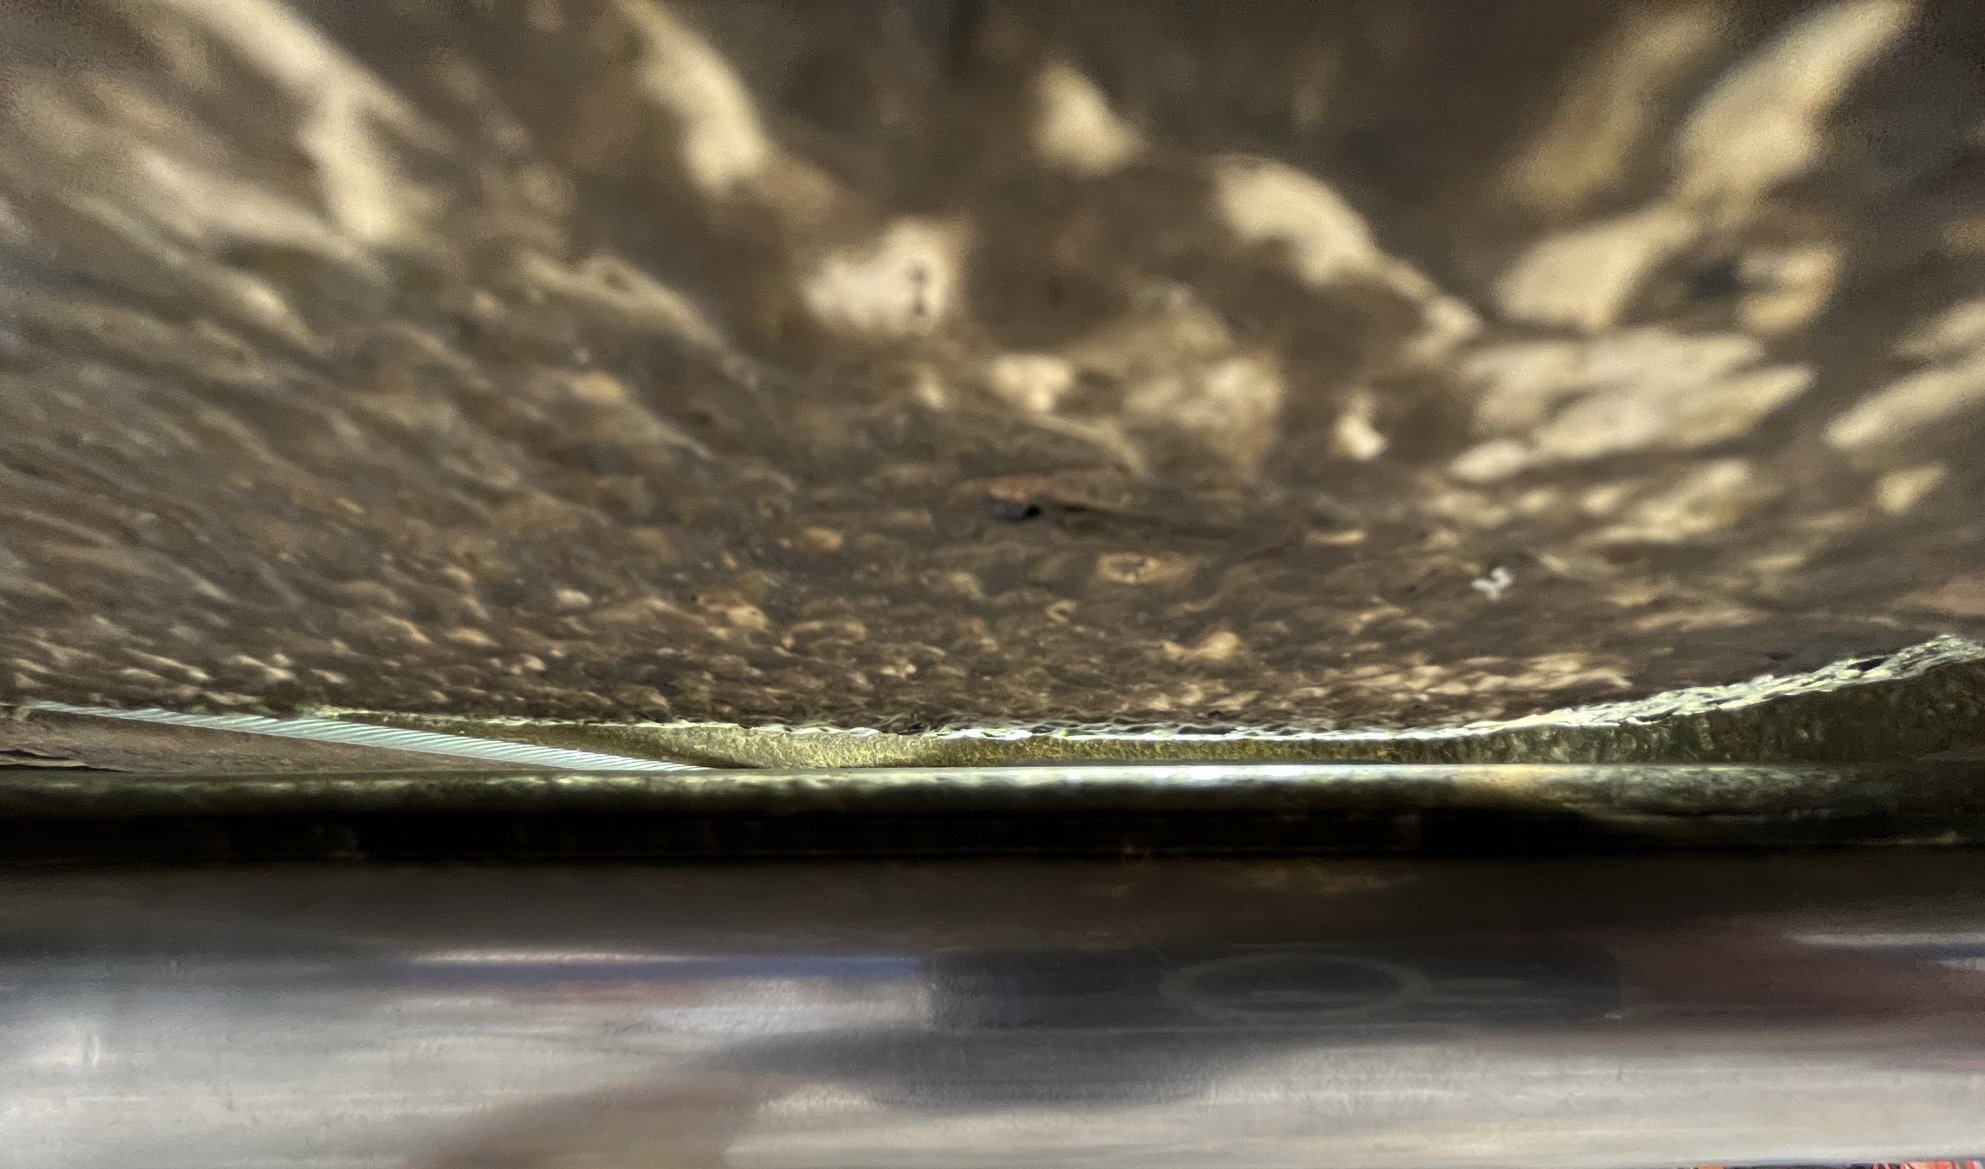
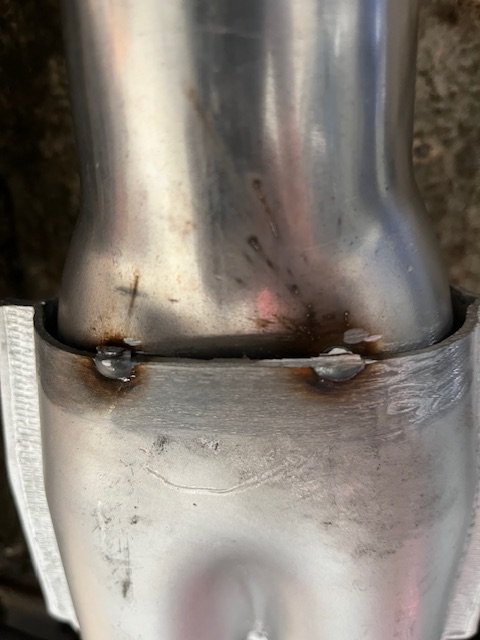
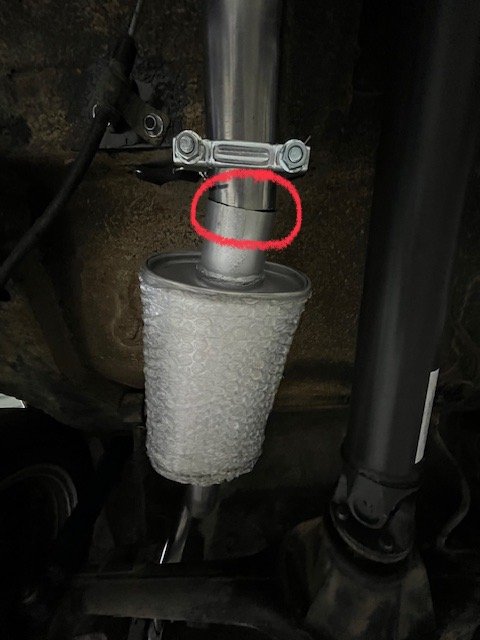
I have gotten as far as I can go with what I have. I’m very happy with the downpipe I bought, the fit is perfect. All the other joints are aligned now, but this leaves the tailpipe exiting at a 5 degree angle. This will be unfixable without tweaking some bends in the tubing. The lowest hanging part has 125mm ground clearance and it’s close to the rear axle so I’m happy with that. I also haven’t been able to avoid a very tight gap with the rear passenger footwell pressing in the floor. I have 4.5mm… is this too tight?
Also, every slip joint has a tiny leak!! I’ve run the engine and it sounds quite stout, a bit more bass but still with all the twinky rasp.-
11
-
12 minutes ago, Alfashark said:
Further semi-EV news, the '23 Prius is a genuinely good looking car - As far as modern appliances go.
Would happily hoon one.
Agreed. Second hand / parallel imports only though. Chyoda isn’t selling them here. However they will sell you a Yaris cross ew I just threw up in my mouth a bit.
-
2
-
-
6 hours ago, kws said:
They're excellent when used properly and aren't shitty high km worn out imports... That's his own fault.
When used a certain way, yes they’re brilliant. I got the old man into an eclipse cross phev and he loves it but he has the perfect use case in where 90% of travel is within the battery’s capacity so he’s winning. People using PHEVS for long trips are getting shafted imho. I groaned inwardly when the RUC for EV/PHEV was announced not because it wasn’t needed - it bloody well is, but it really needs to be all vehicles at the same rate (in weight classes). I understand this is the ultimate aim, but in the meantime I feel the scheme advantages HEV owners and dumps on PHEV owners. Example: going through my fuelly app and seeing what the Toyota Aqua cost me per km is the same as what my EV costs me (maintenance notwithstanding) My mate with a new model Outlander PHEV is going to be taking an unlubricated pineapple every time he drives up to the family farm. Whew that sounds like a rant.
-
4
-
 1
1
-
-
2 hours ago, locost_bryan said:
Apart from Bart's lawn of despair, would many "amateurs" buy a lot of petrol for lawnmowing and chainsaws?
Yep. Me in spring about 20 litres a week, which I consider a lot.
-
Crikey!
-
1
-
-
- Popular Post
- Popular Post
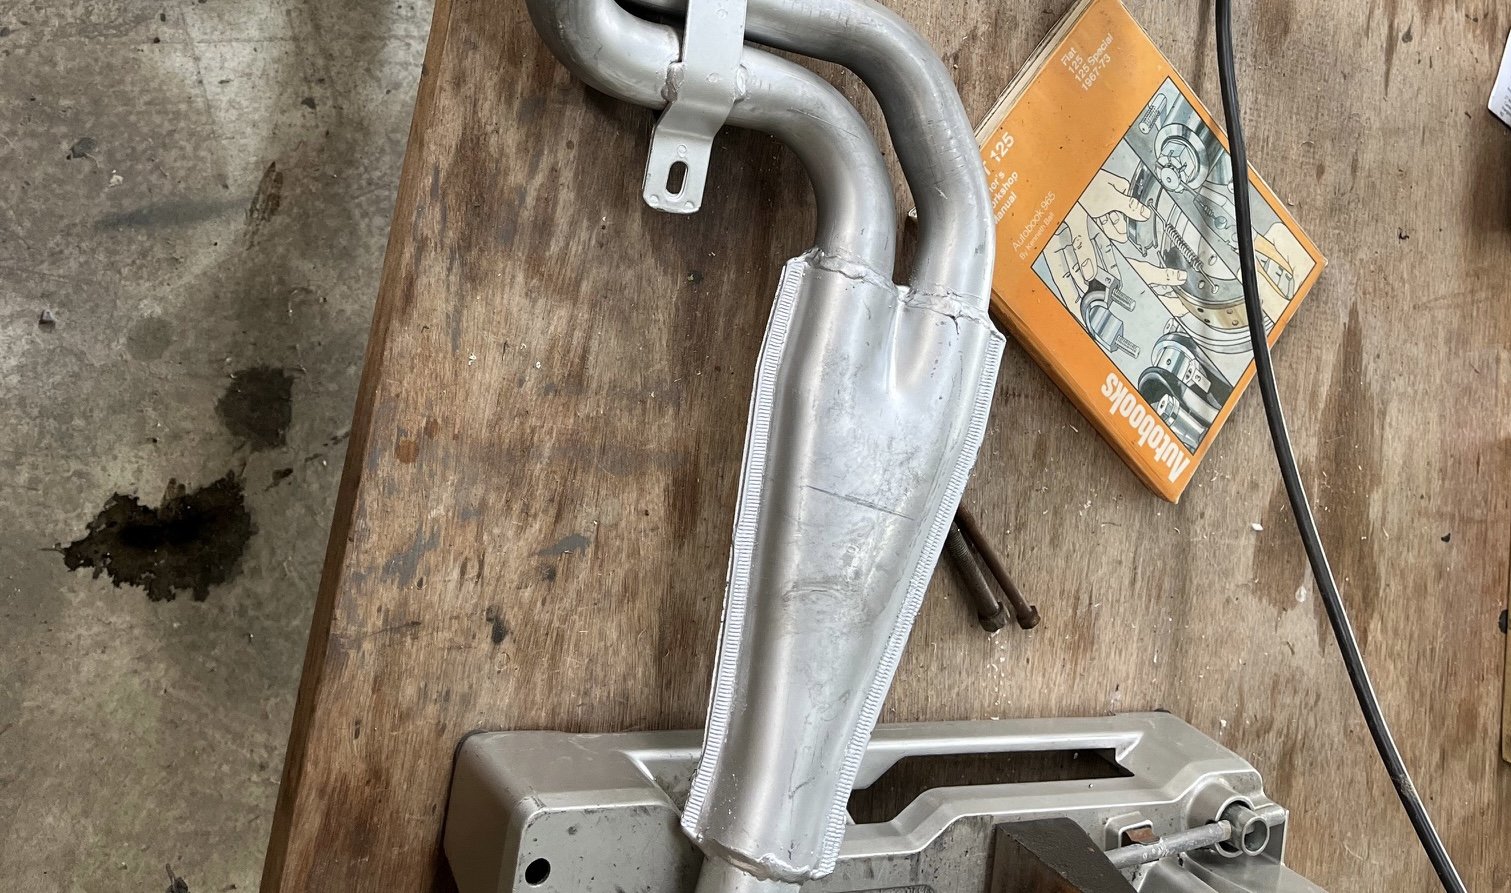
Did a bit more today between farm chores and ferrying kids around (to be fair it was for dirt drift karting which I enjoyed as much or more than the kids). First job was to grind off the bottom tacks so I could tweak the end of the pipe down a bit
.
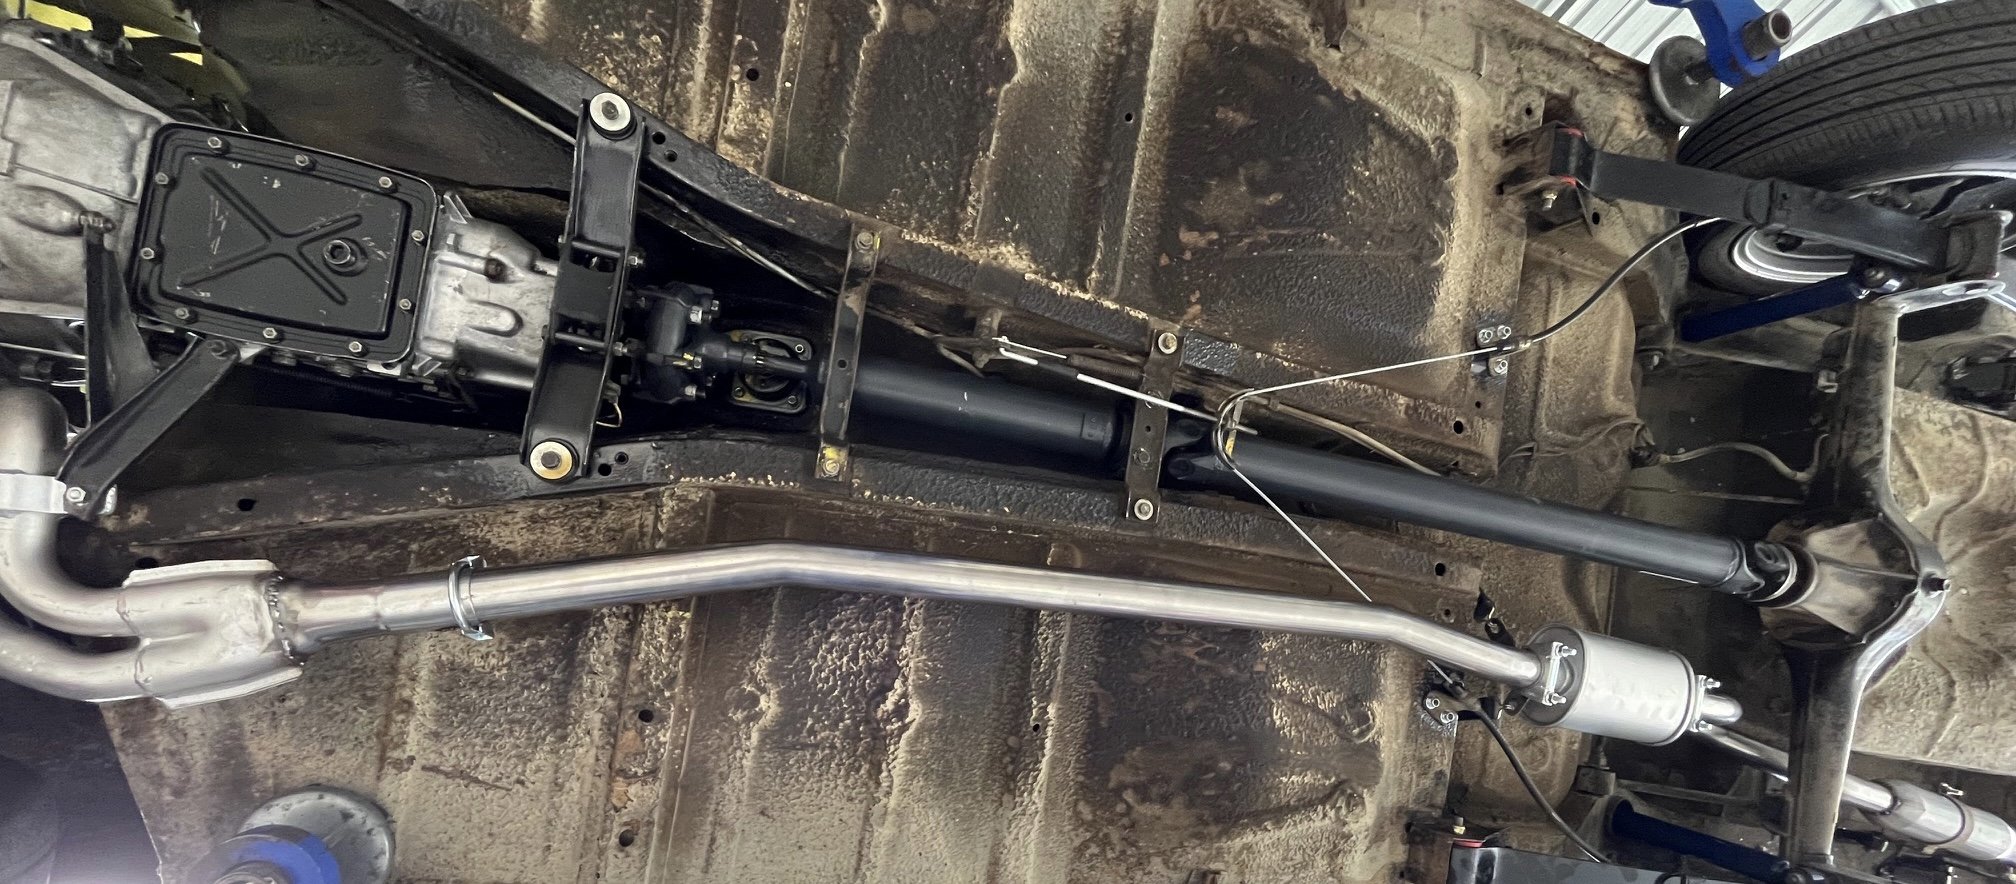
Then it was time to trim and hang the rest. This took a few goes. Main pipe section is ok
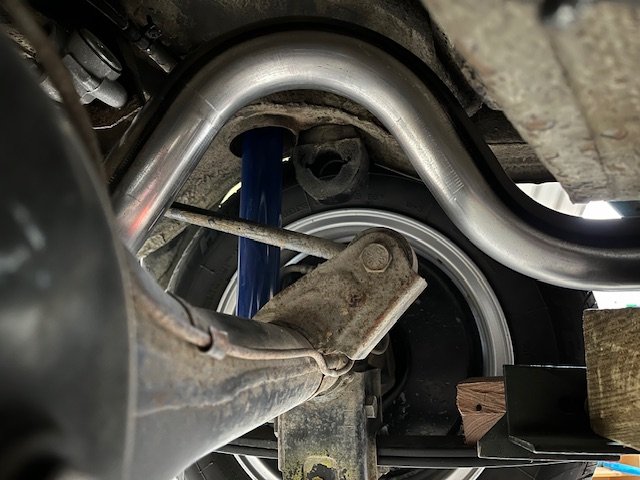
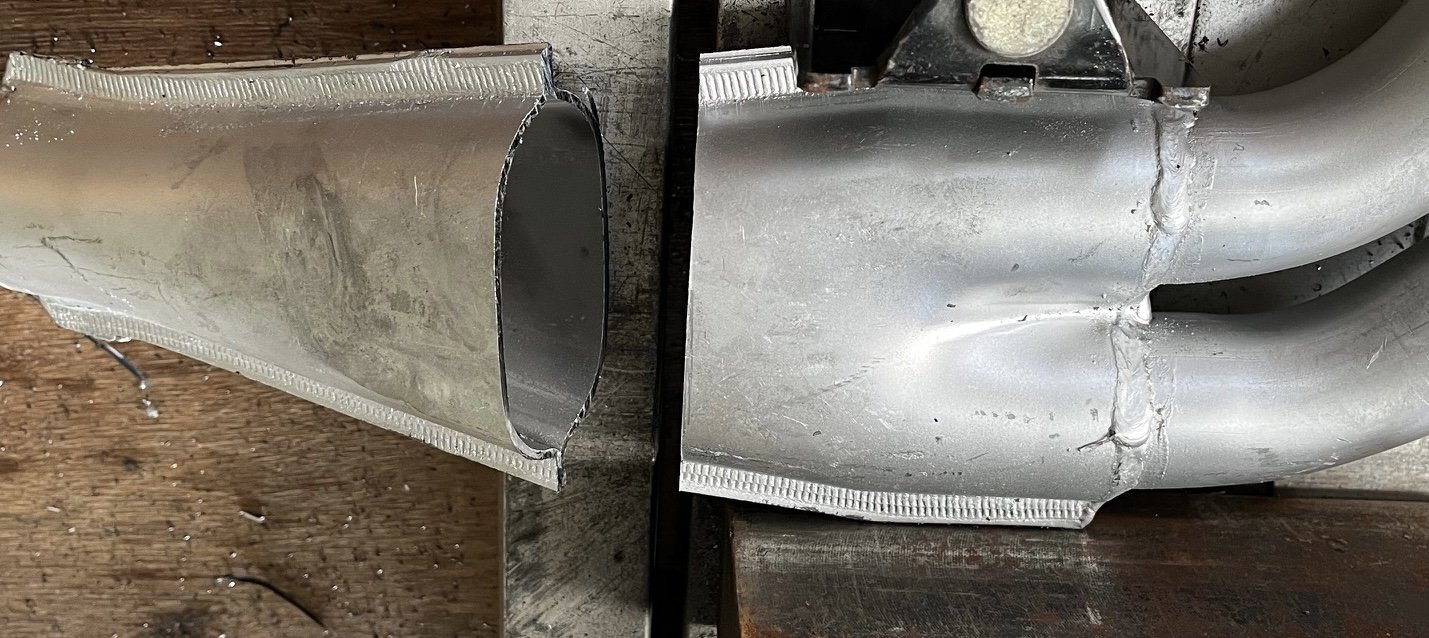
Over the diff is good:
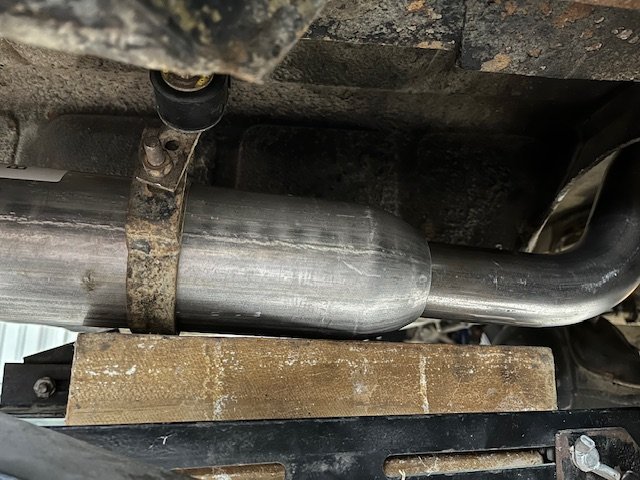
The rear “muffler” hangs pretty good too, but could do with hanging a few mm lower which is just a small adjustment on the clamp
It’s the bit where the front pipe should slip into the first muffler that needs a tweak:
It surprises me how much just increasing the diameter of the pipe affects ground clearance. I have 105mm under the front of the first muffler. This is now the lowest point on the car. Also, the hand brake cable is quite close to the pipe- the bare steel bit, not the rubber sheath which will limit my ability to lift the muffler for more ground clearance. Is there a minimum clearance for cables that I need to be cognisant of for WOFs?
-
10
-
Pop the cam cover off and check for sludge. SR 18/20 heads sold like hotcakes at the wreckers I worked for 20 years ago due to rooted cams from no lube
-
2
-
-
- Popular Post
- Popular Post
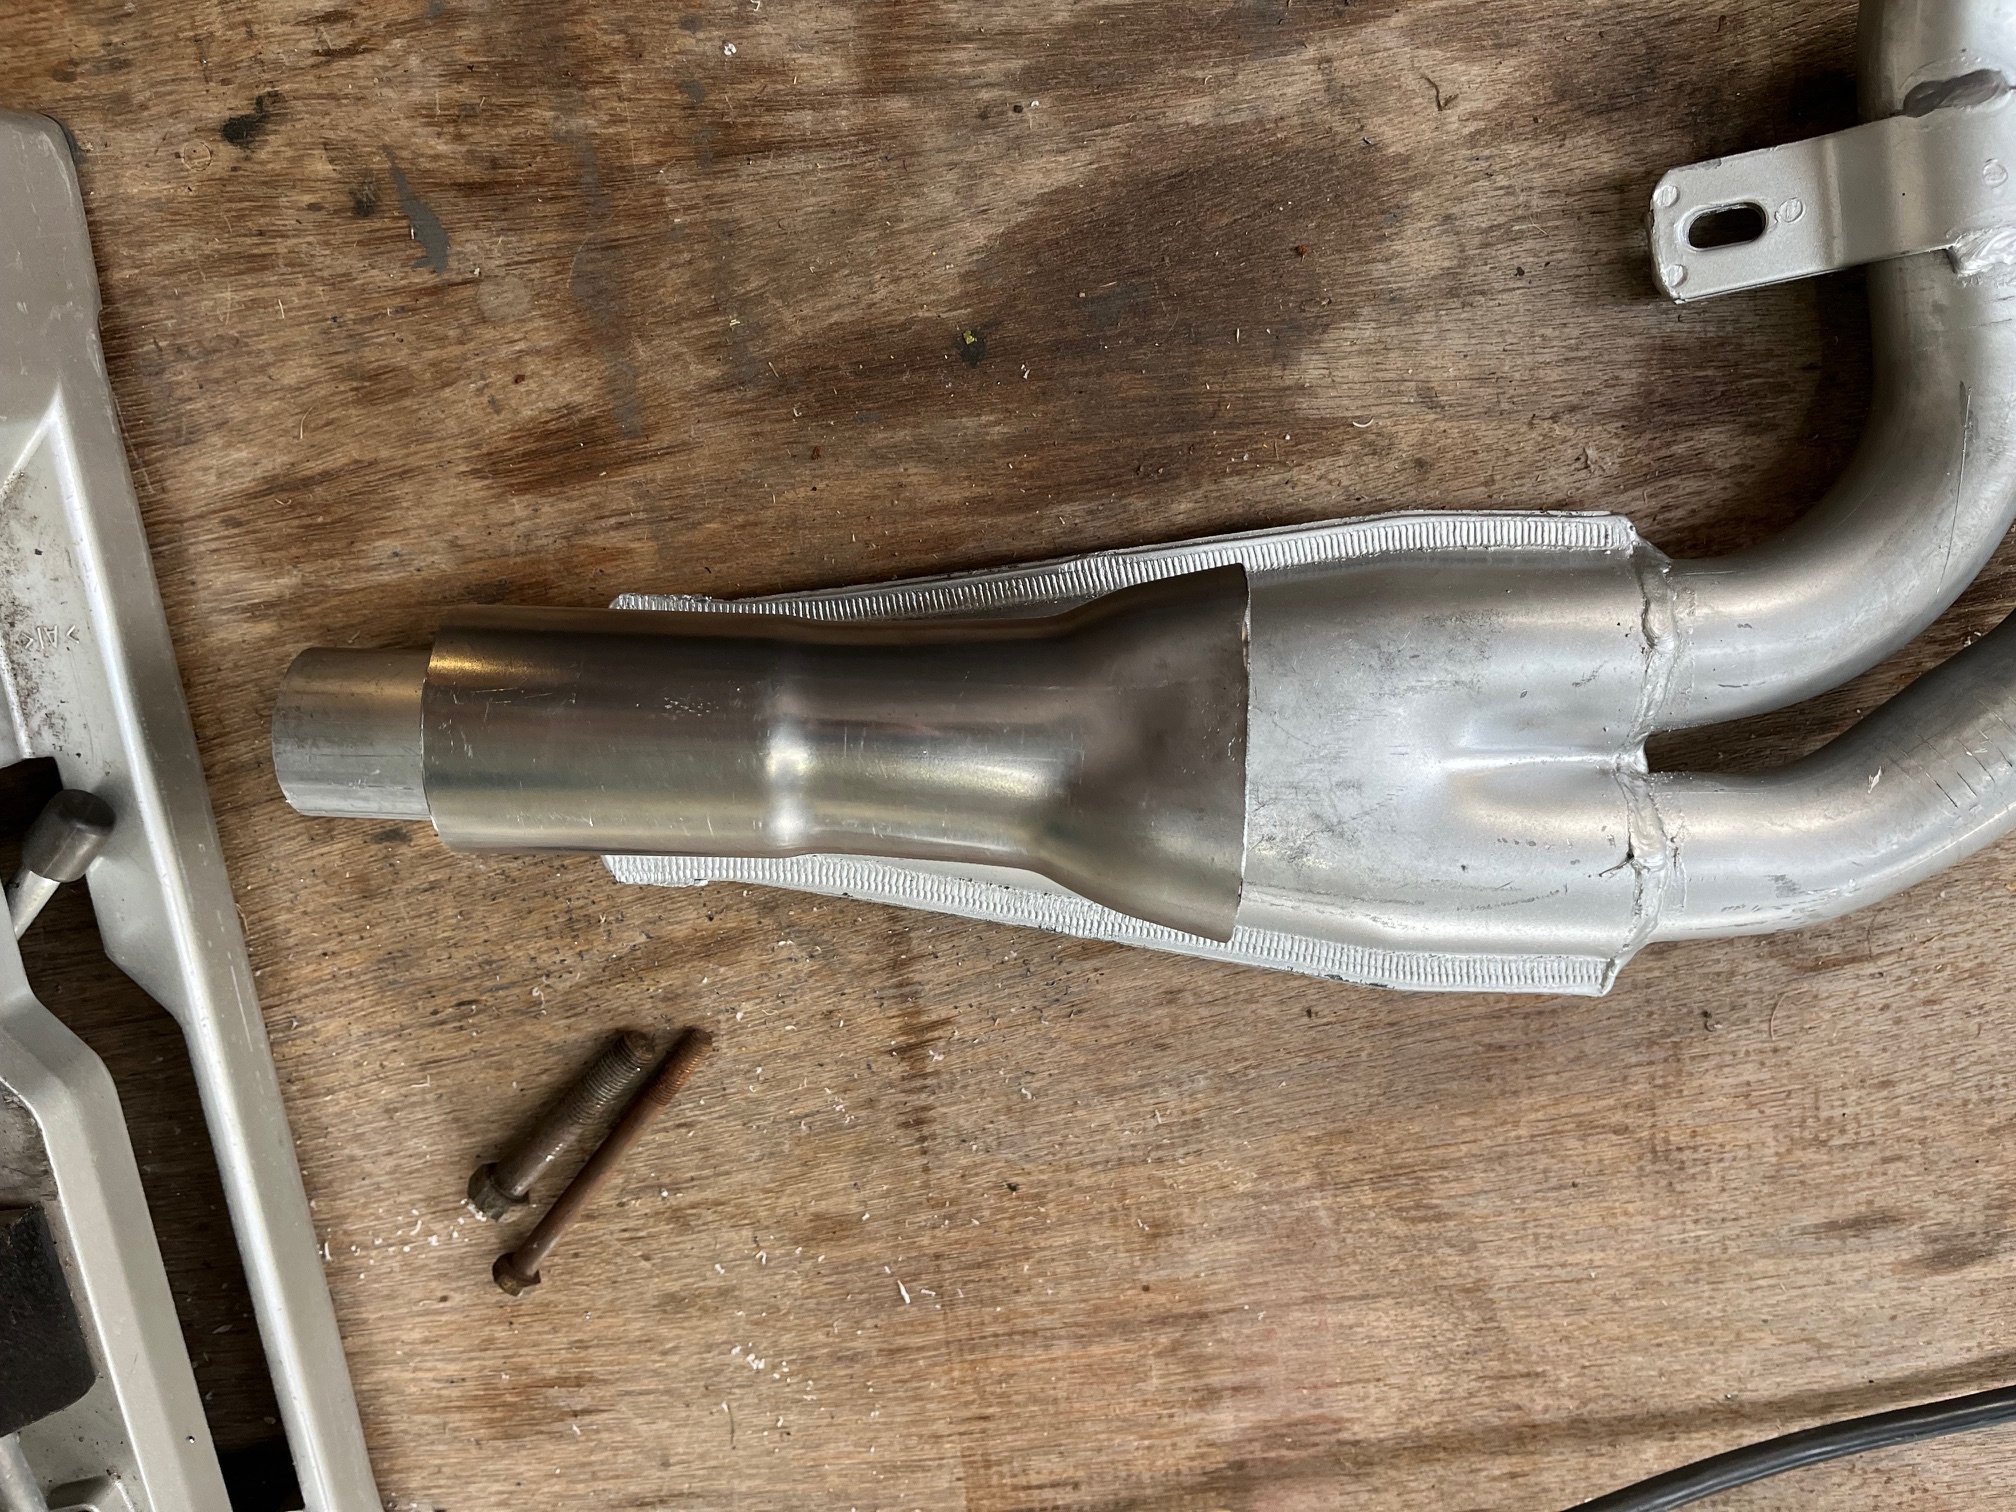
Flushed with the glow of success from obtaining legality for the first time in 15 years, I am acutely aware that there is more to do. My exhaust downpipe arrived.
It came with an inch and 3/4 outlet and I need to make it 2. Mark:
Chop. No going back…
Tack.
Beer.
-
11
-
- Popular Post
- Popular Post
Excuse potato spec driving hands free pics…
Dorito racer
Shit pic doesn’t do this one justice. Geezer looked to be enjoying himself. Manual and lush exhaust note.
-
14
-
On 01/02/2024 at 13:30, yoeddynz said:
no rust (yet)...
HAHAHAHAHAHAHAHA!!, HAHAHAHAHAHAHAHA!!, HAHAHAHAHAHAHAHAHAHA!
sorry, couldn’t help myself.
-
4
-
2
-
-
Got told about the plain water thing by my mate who’s much more experienced than me. I would have done the same thing as you did otherwise. Shit that engine sounds good!
-
5
-
-
I’ve got 7 inches.
-
1
-
-
2 hours ago, NickJ said:
I put Nankang NA1 on the Datsun in 205/60/13. Was the only mid range non performance tyre I could find
Seems good for cruising and squeals real loud on track.
Yeah but do they grip?
-
8 minutes ago, Dudley said:
https://www.hyperdrive.co.nz/product/4407/yokohama-advan-a539?associated=9352
wait around and they normally o on sale for $125 ish
best 13” tyre size , look and performance
Not in my size it seems. Any smaller and I’ll be a billion rpm on the highway
-
Been trawling the search function and nothing recent comes up. For us cool kids running 13 inches of roundness, quality choices are hard to come by. Most of my local retailers offer a very limited range of either utter Chinesium garbage or yokohama semi slicks and nothing in between. Share the intels please. Personally interested in 205/60 and 185/70 ish since that suits my fleet.
-
Knowledge is power, my son.
-
1
-
-
300 miles on engine rebuild now, I’ve been driving it a fair bit. First tank of gas 9l/100km which seems a bit too good to be true given the type of driving I’ve done and the fact that it’s turning 3700rpm at 100km/h.
-
4
-
-
- Popular Post
- Popular Post
Another job ticked off.
Was miles out. Doesn’t necessarily feel heaps better but good to know it’s correct now.
-
18


Bike spam thread
in General Bike Chat
Posted
I have a 1986 DR200 I got for $0.00. It’s complete and for its age the plastics etc are tidy and unmolested. I’ve had it running and it sounds ok. There was some glitter in the oil by the looks. Brakes, suspension are all chooched. Is it worth spending a dime on these old things? Could easily hit $1k in bits and bobs without even looking at the motor or rear shock. Engine leaks oil profusely and may have a hairline crack in the bottom of the case, dunno. @tortron you’re the expert on these?