sr2
-
Posts
760 -
Joined
-
Last visited
-
Days Won
1
Everything posted by sr2
-
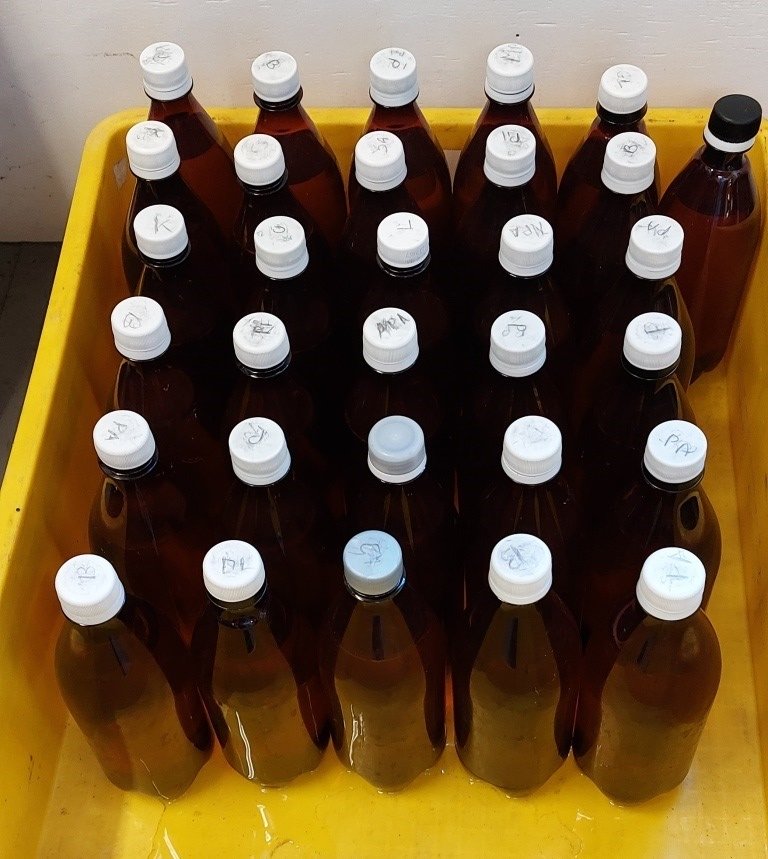
Returning home (after a short break) to the sanctuary of the “ever famous in the Southern Hemisphere sr2 man-cave” I was dismayed to discover that Rigamortice was once again up to her usual treacherous climate changing antics. Much to my horror her depth of moral decay had sunk to the production of 50 liters of the evil Co2 emitting brew. I felt shocked and defiled. How I could I ever look our dear equine faced leader, (the PC goddess of fertility, transparent government and cultural sensitivity) in the face again! The only practical solution has to be an open invitation to all local Oldschoolers to assist the destruction (via ingestion) of this evil concoction in about 3 months, (good things take time).

- 184 replies
-
- 12
-

-

-
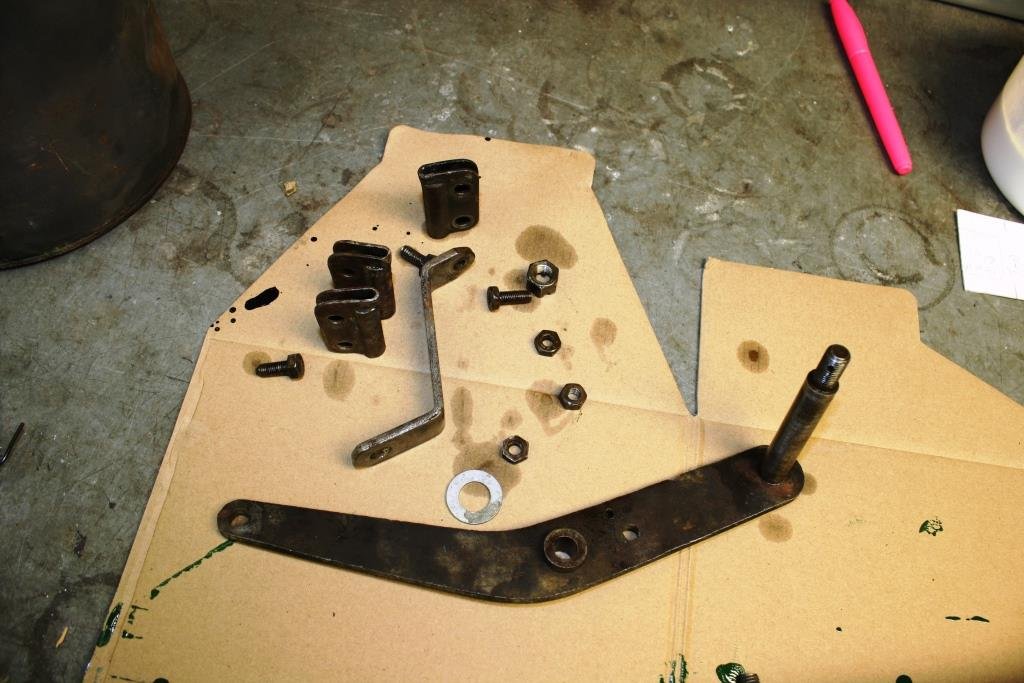
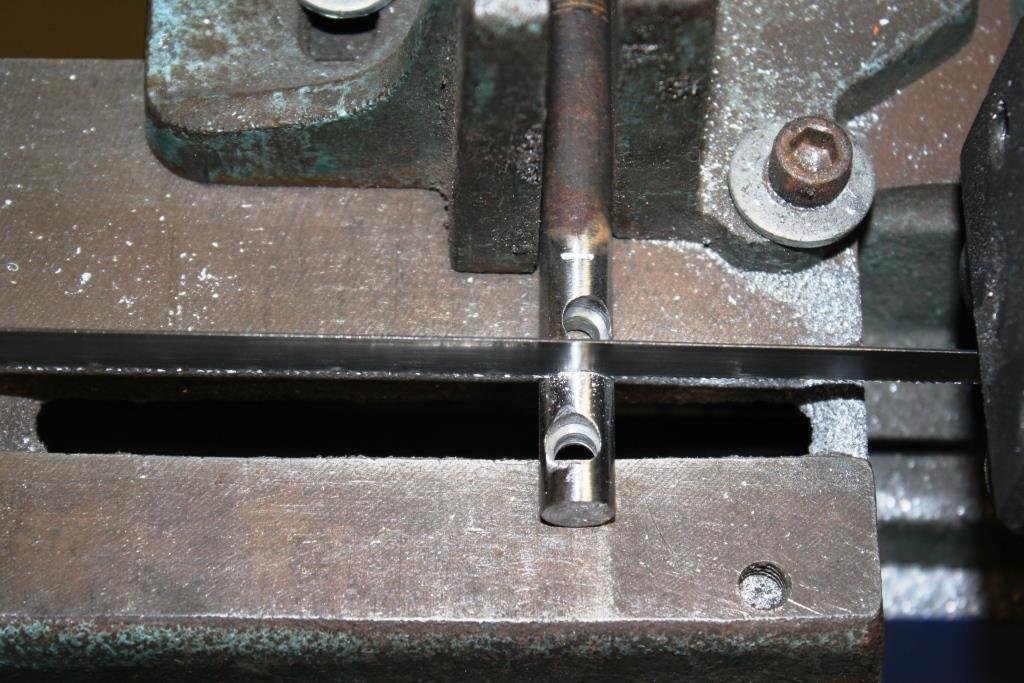
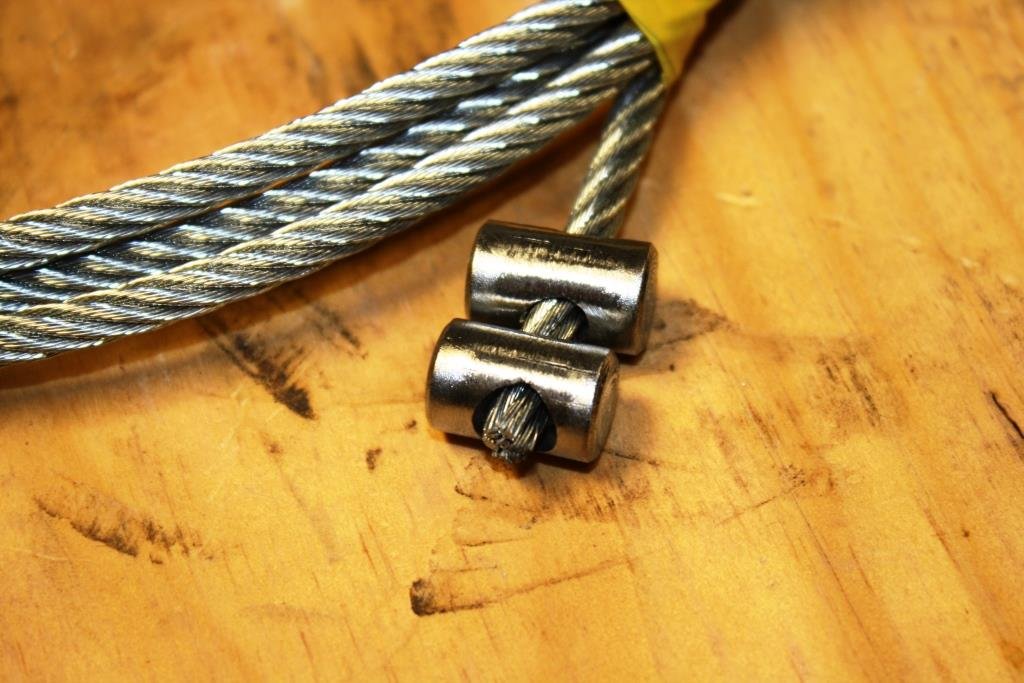
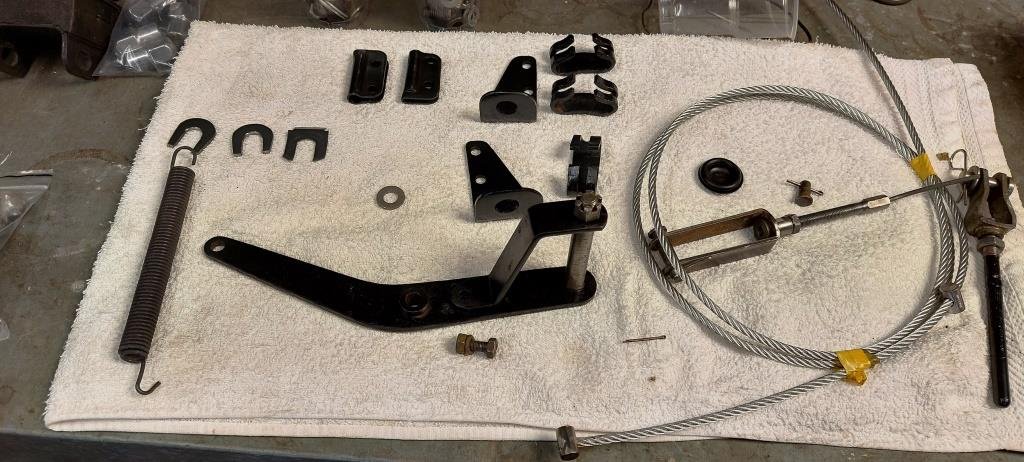
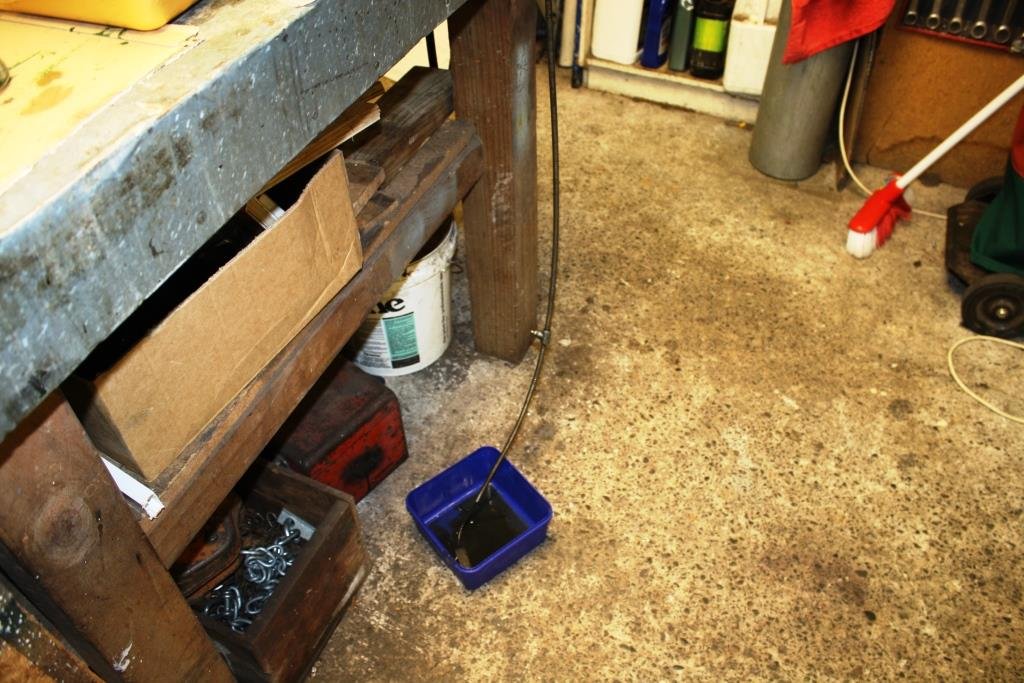
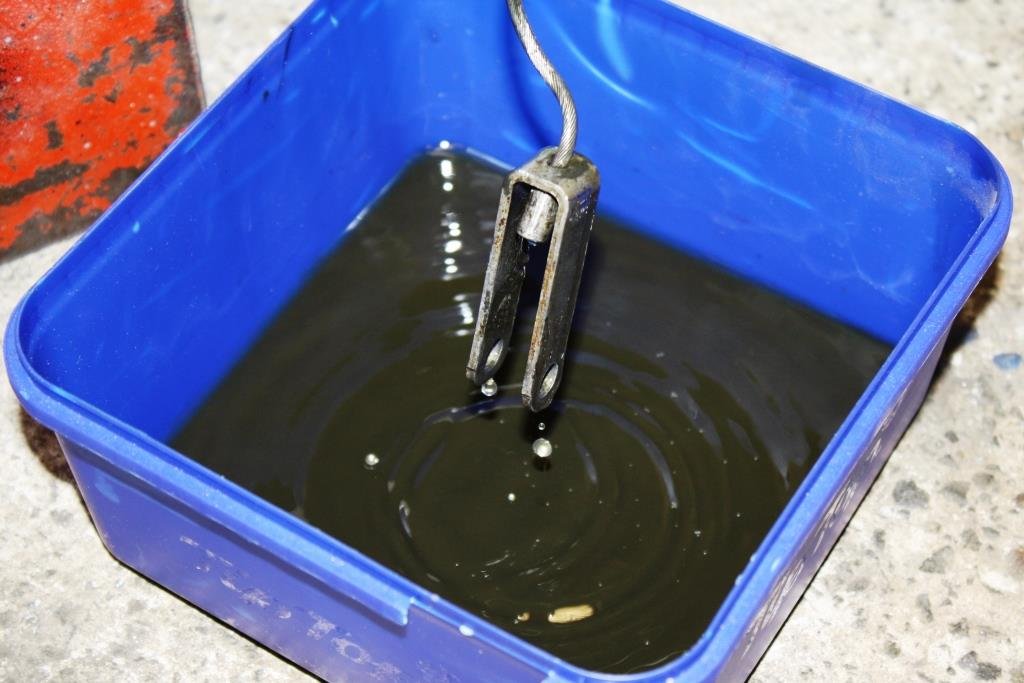
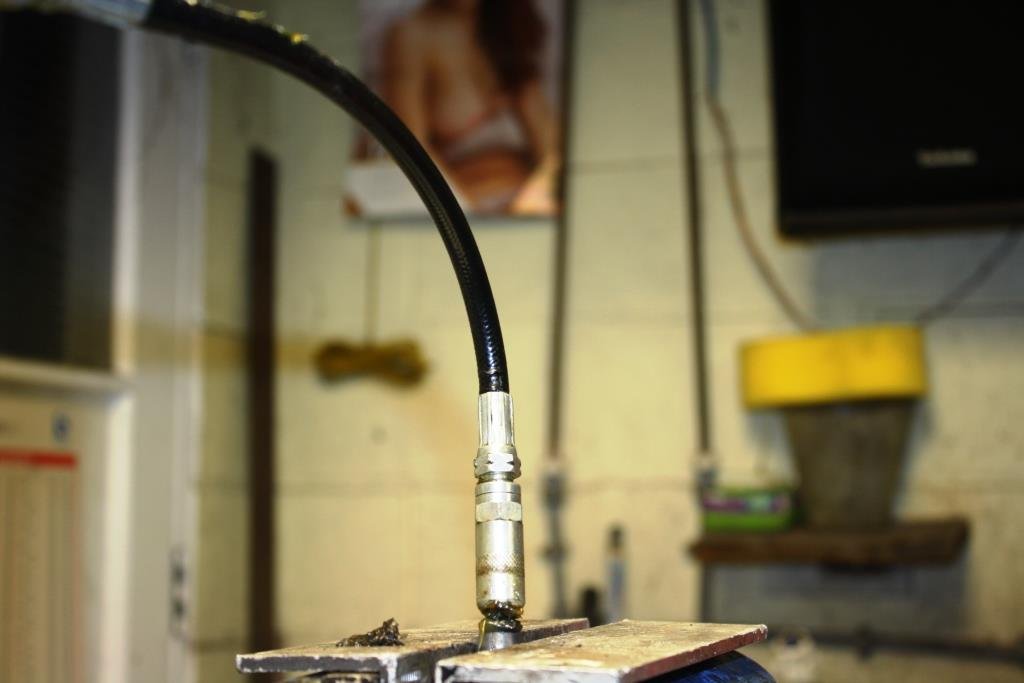
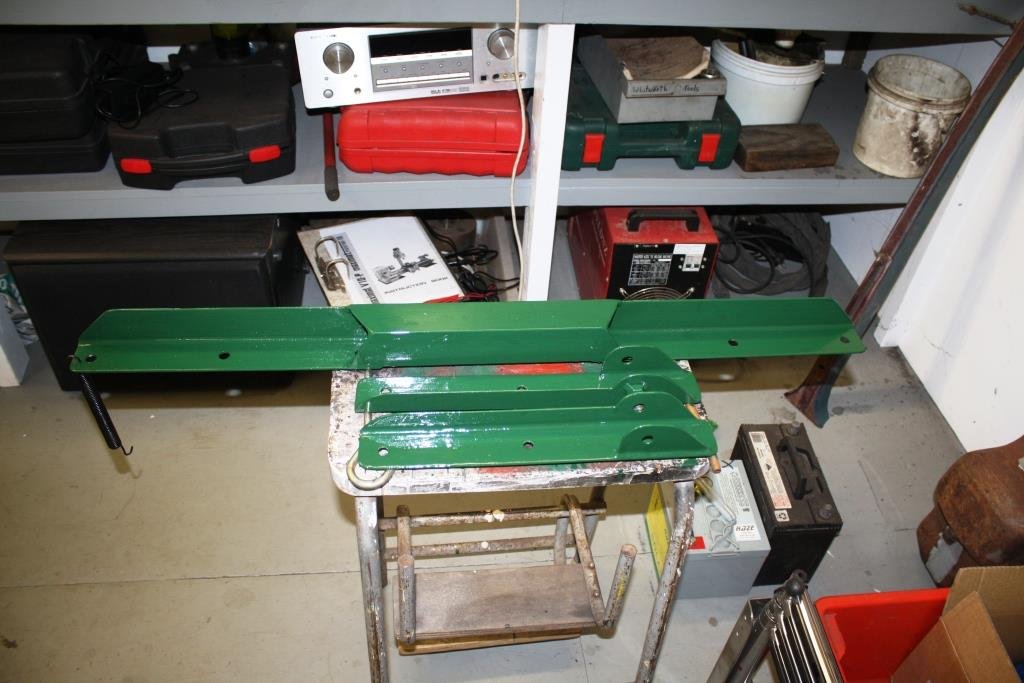
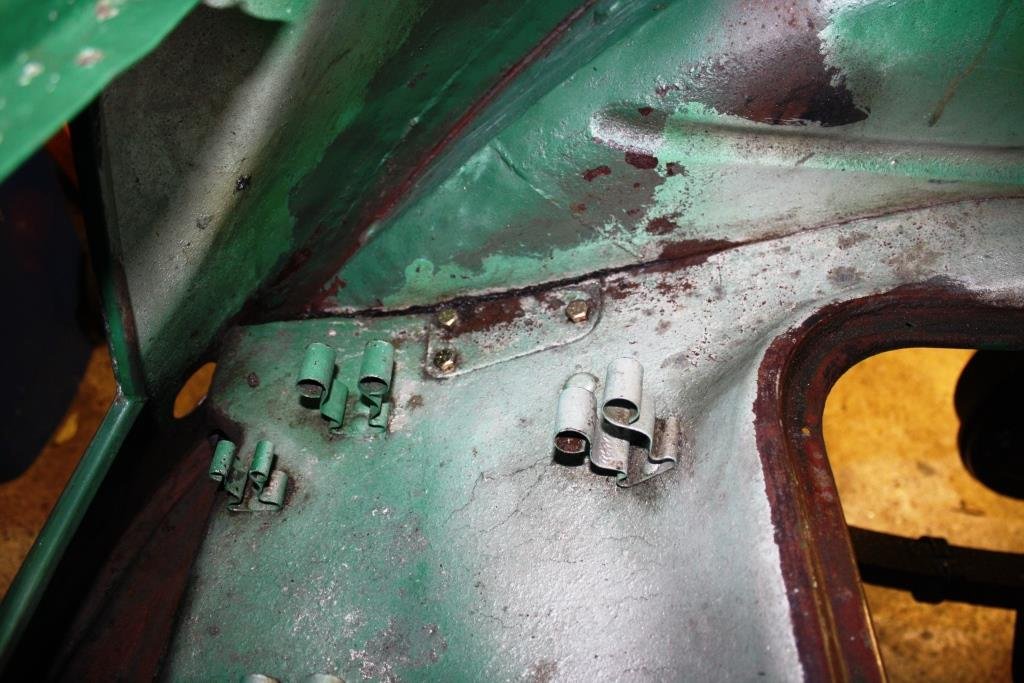
Still working on the hand brake linkage, I assembled the original parts I’d be using and started cleaning and painting. I sourced some woven wire cable and made up some ends. Made up a “thingy” to pull the cable…….. … and soldered the ends on….. Discovered I had no clips for the Bowden cables that go to each rear wheel so I made some. Works for me…. Rust converter on the parts…. Everything painted and ready for assembly.
- 184 replies
-
- 23
-
-
Co-Mac are a great source for hard find fittings for projects, their catalogue makes great reading..............jeeze, I just re-read my post - sounds like I need to get a life!
-
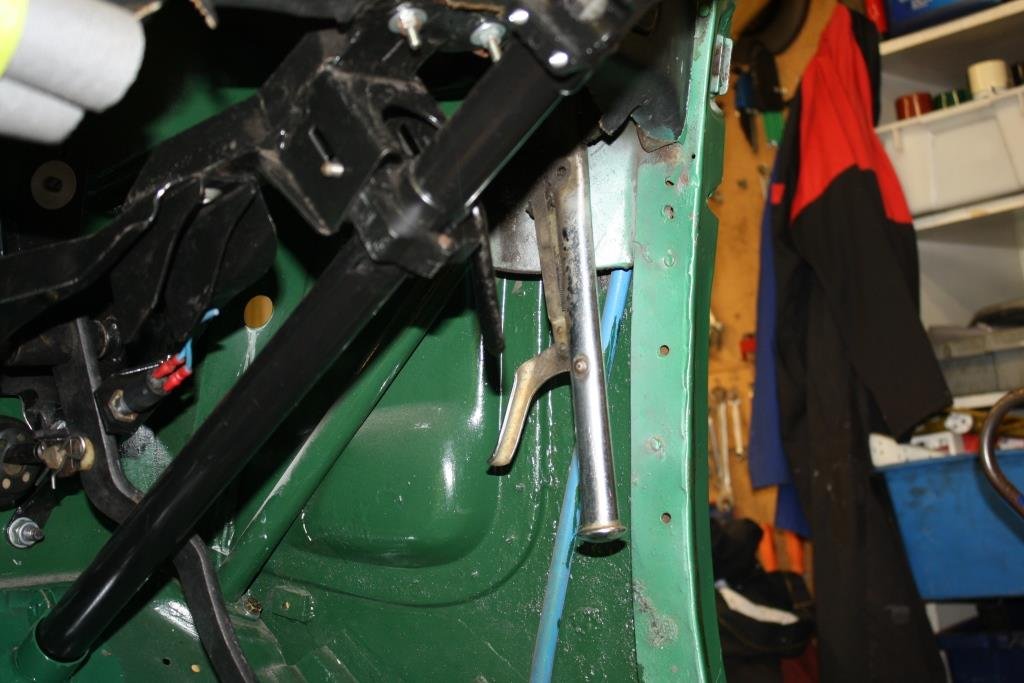
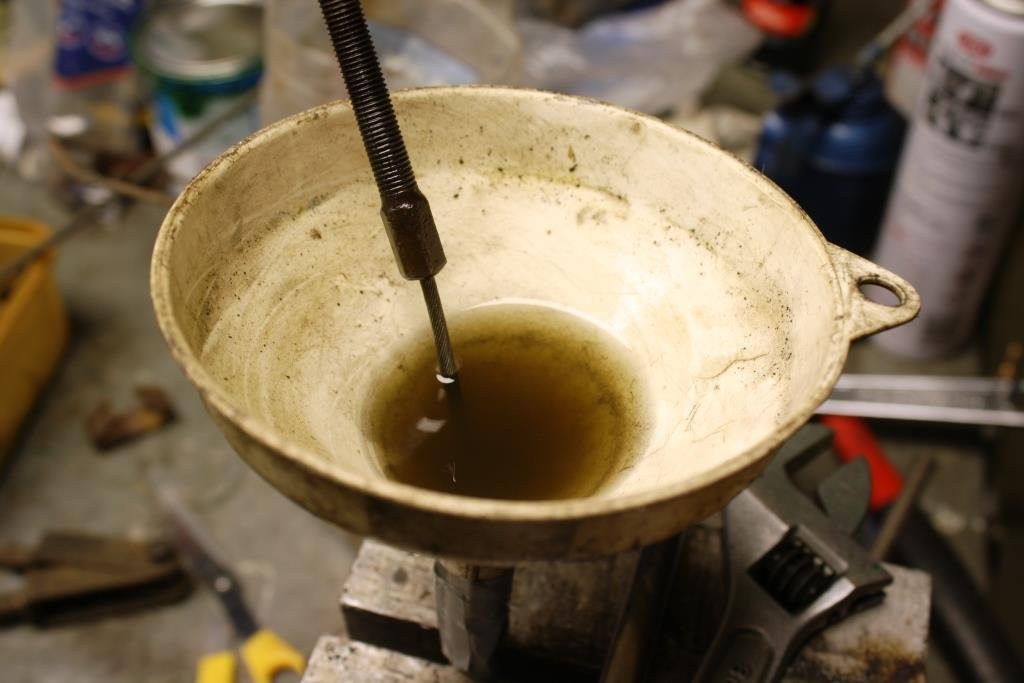
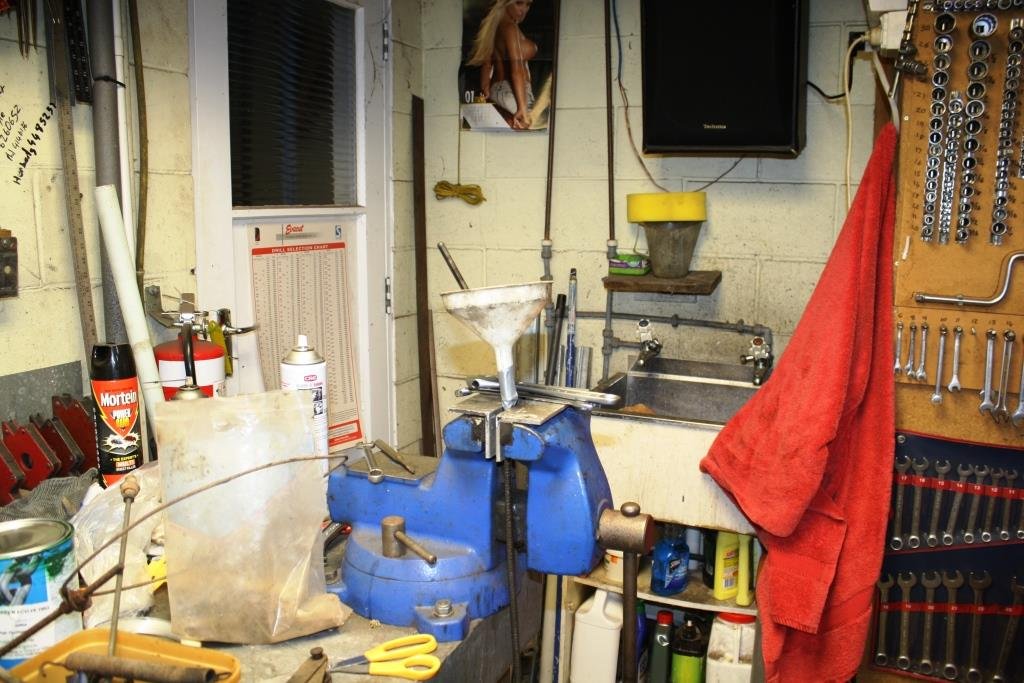
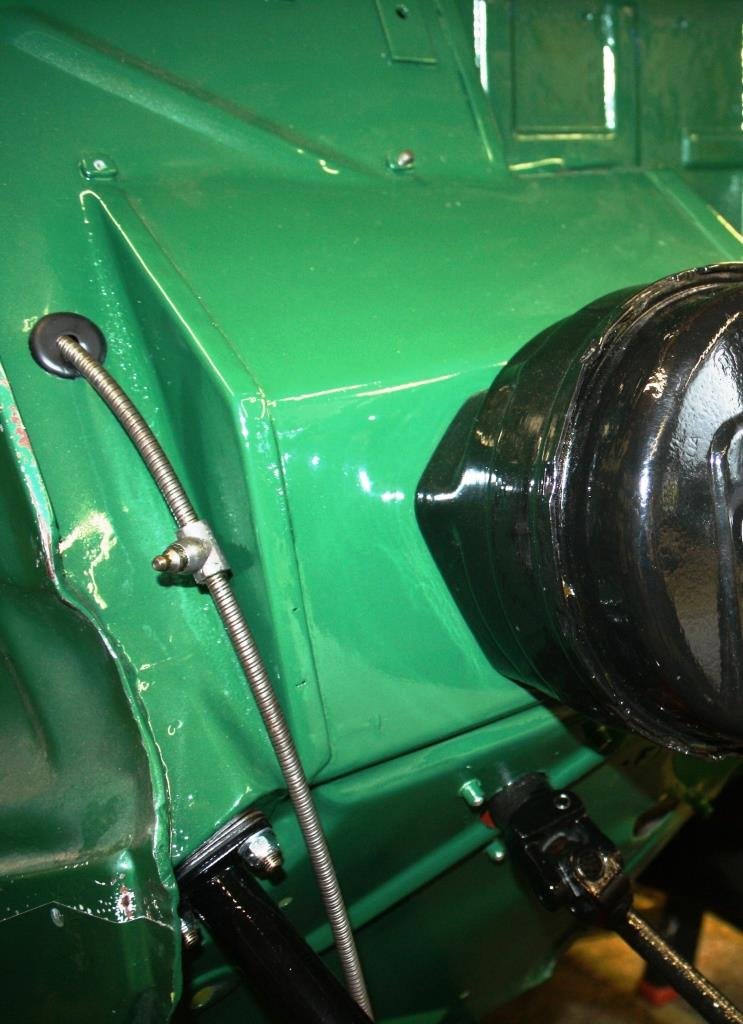
Time to sort out the hand brake linkage. It’s a big under the dash ratchetty thing that looks like it came from a 1920’s Allis Chambers bulldozer. The original Bowden cable was extremely gunked up so I taped a funnel to one end and started flushing it with kerosene. The amount of sludge that came out was very impressive……… It had a grease nipple in the middle (as they did in those days) so I pumped it full of grease. Found a fire-wall grommet that sort of worked and re-fitted the cable.
- 184 replies
-
- 13
-
-
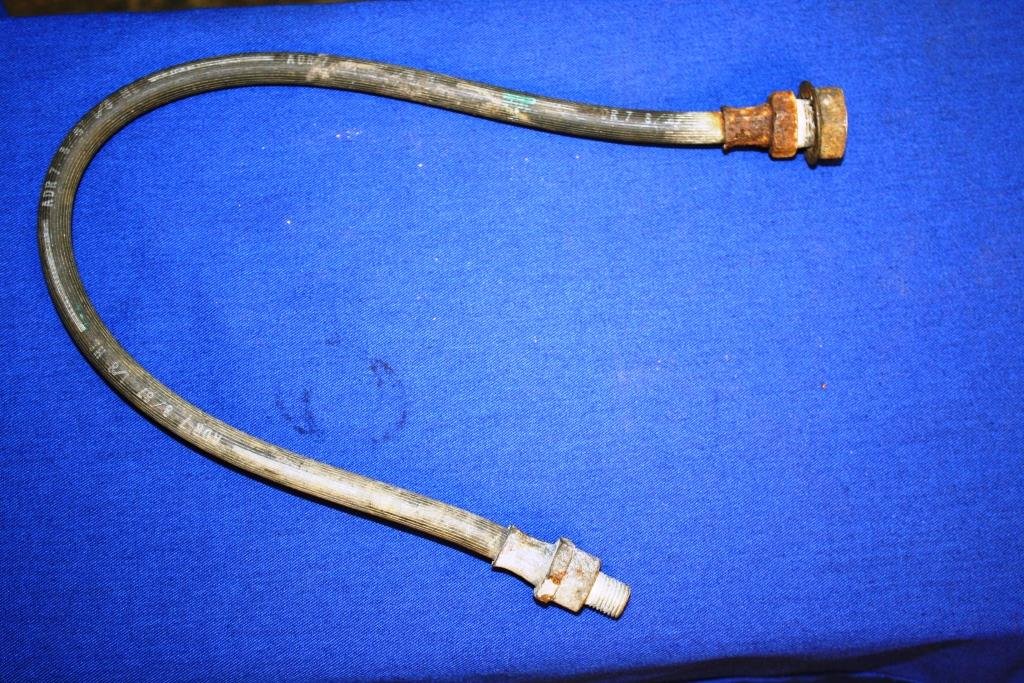
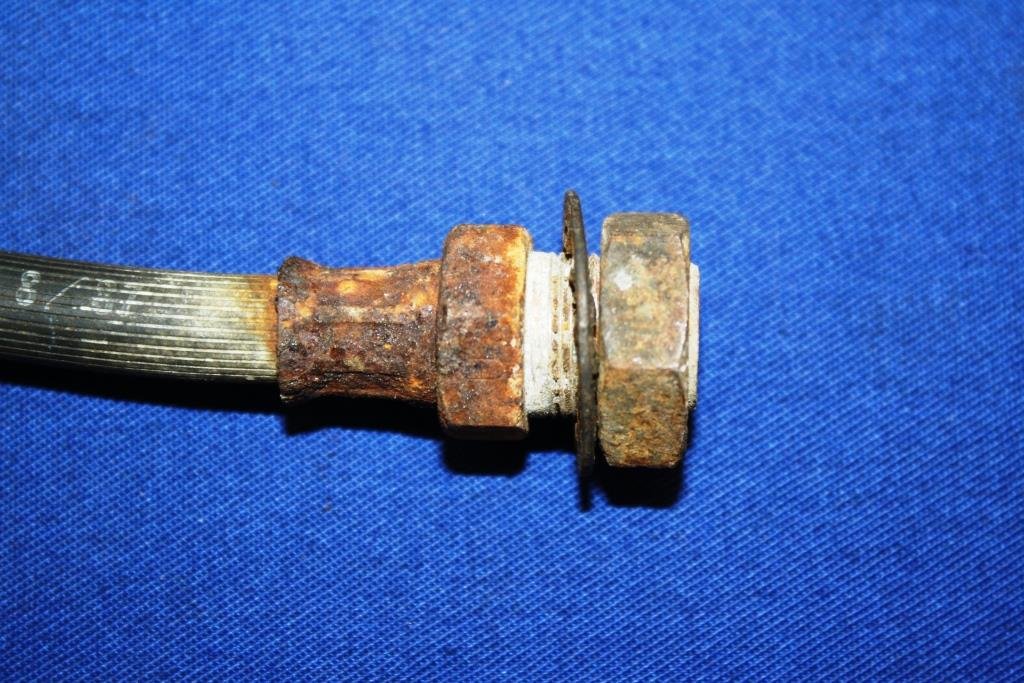
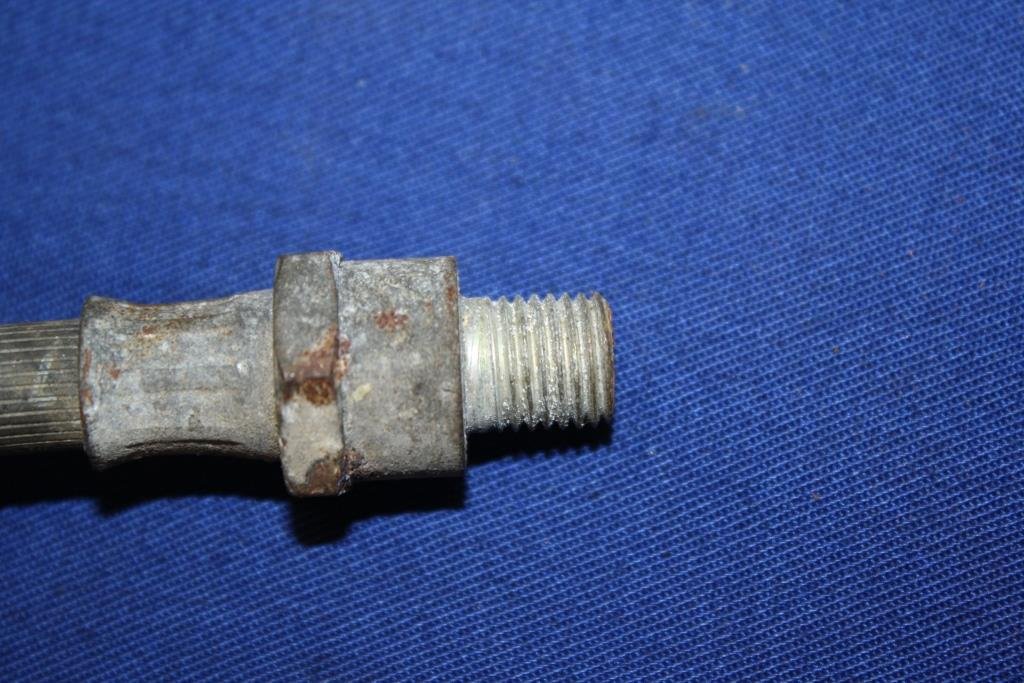
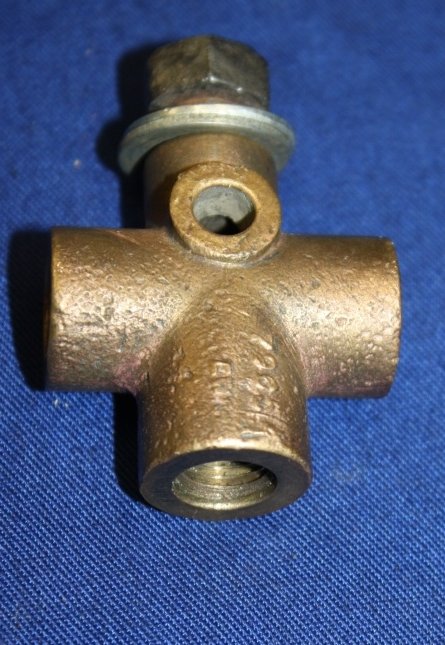
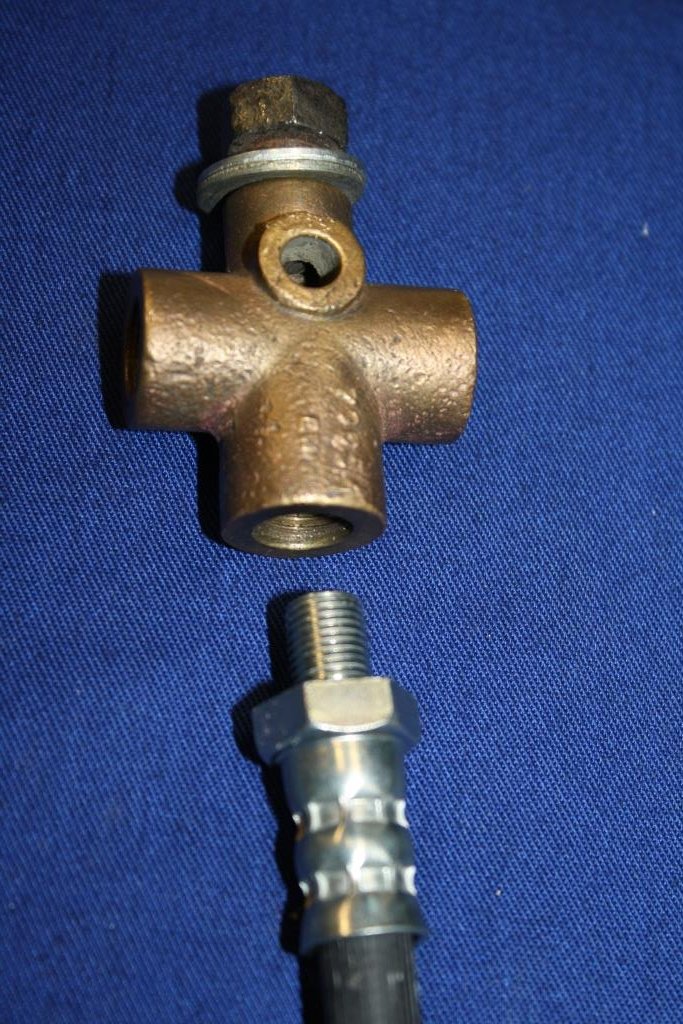
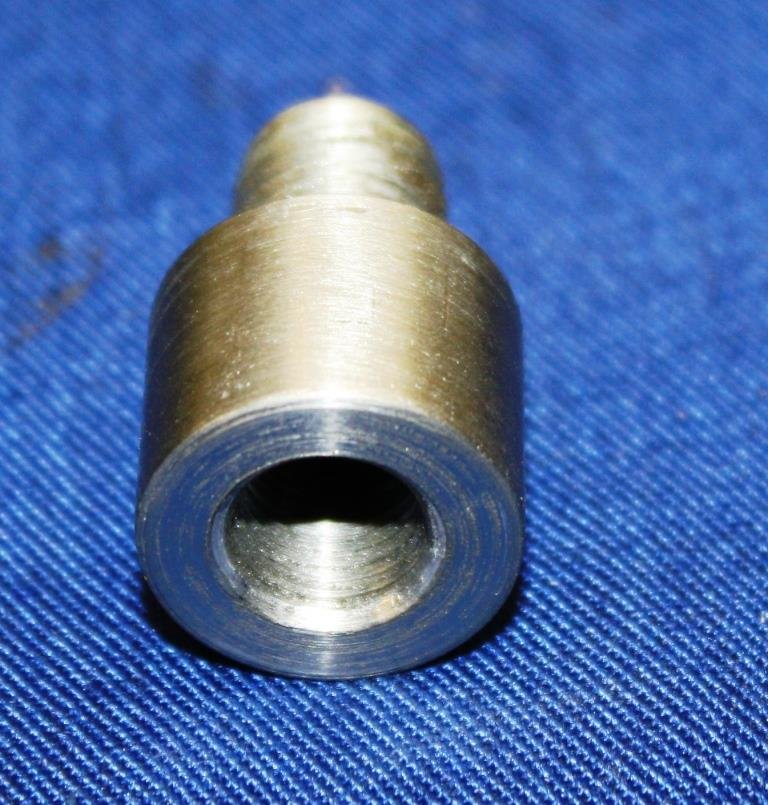
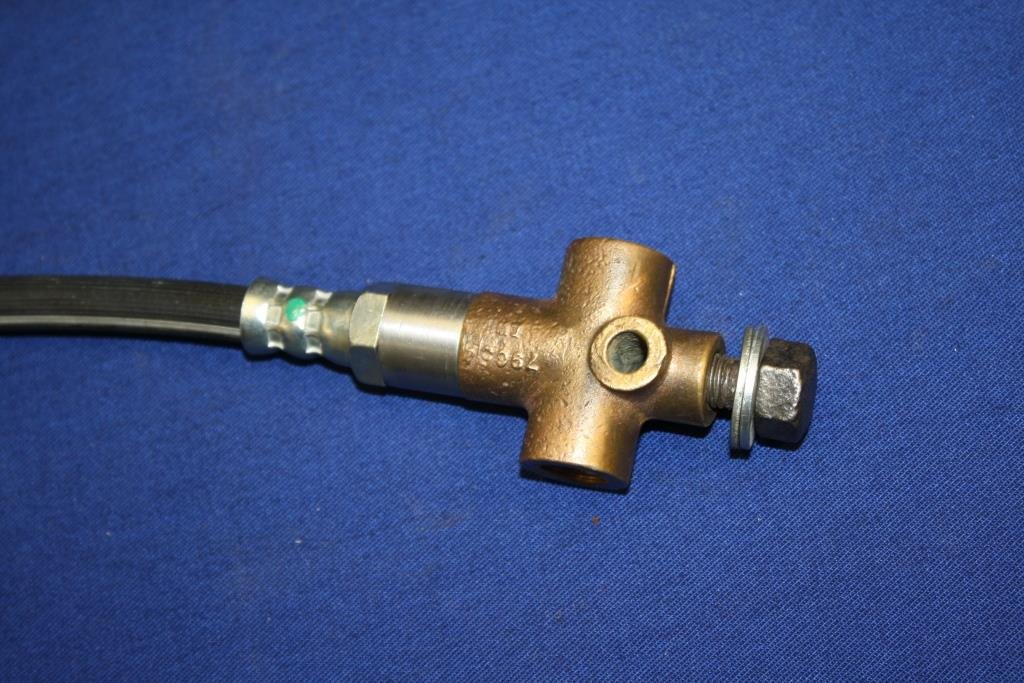
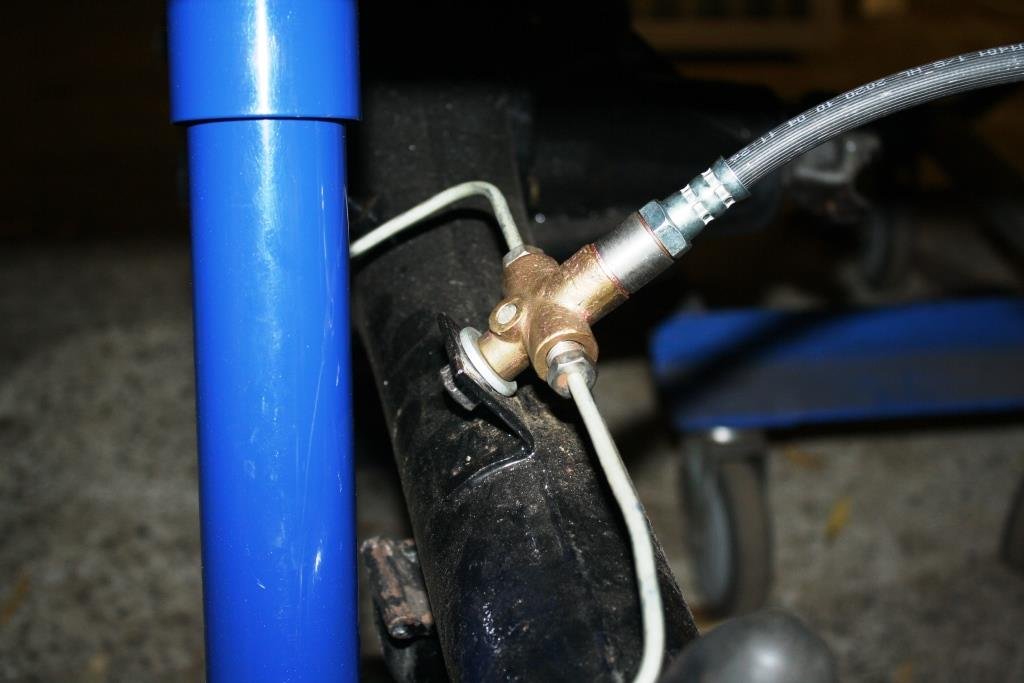
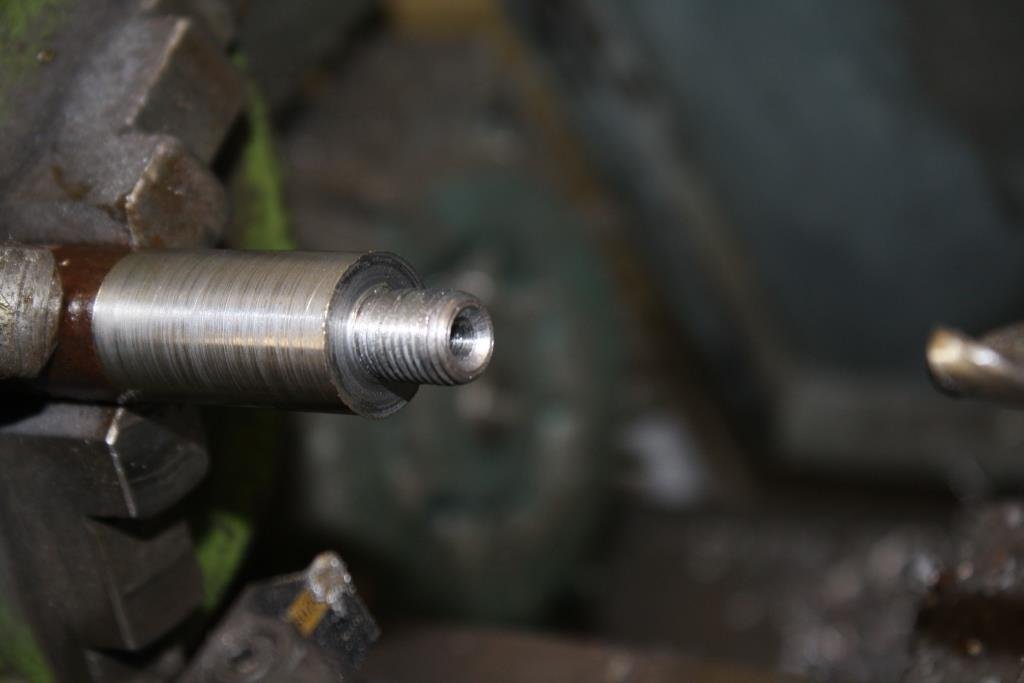
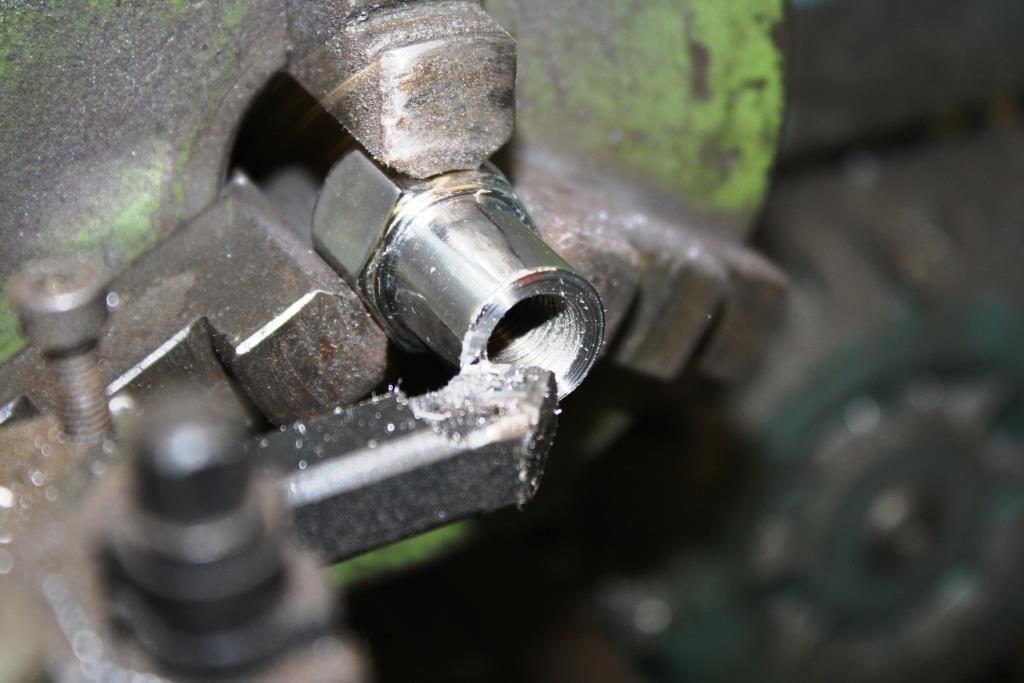
Having difficulty identifying the original rear brake hose. At the risk of sounding like a grumpy old man (yeah I know……), buying spare parts in our modern world can be a bit of a circus. Recent trip to Reppco with afore mentioned hose in hand for example. After failing miserably to identify the hose the “spare parts salesperson” ( I use that phrase with some hesitation) asks for the cars Rego. When informed it’s BP4*** their millennial face glazed over and he/she/they/it/…..etc. starts looking for a safe space to invent even more PC correct gender fluid pronouns! Rant over……… I made the call to use an HQ front hose (same as on the fronts) and hopefully still available in another 50 years time. How could I not reuse the original, glorious 70 plus year old brass 3-way plumbing fitting? Problem was I needed a male 7/16” NF 20 TPI to female 3/8 NF 24 TPI adaptor. (When it comes to brake plumbing gender diversity is a myth!). Found a piece of scrap ¾” round and fired up the faithful old Emco. Yes I know I could have just gone and bought some hardware but Rigamortice and I had a great evening sampling the new brew with Genesis blasting on the Video/Sound system and the neat and tidy result works for me. Sometimes the journey or process is just as important and rewarding as the end product.
- 184 replies
-
- 17
-
-
Nothing feels better than assembling newly painted parts. Time for some more unadulterated, rear-end porn….! Have to put a huge shout out here for the The Bolt Shop in Glenfield. All the way through this rebuild having you guys just up the road with your expertise and huge stock of fasteners has helped me out of many a jam!
- 184 replies
-
- 25
-
-
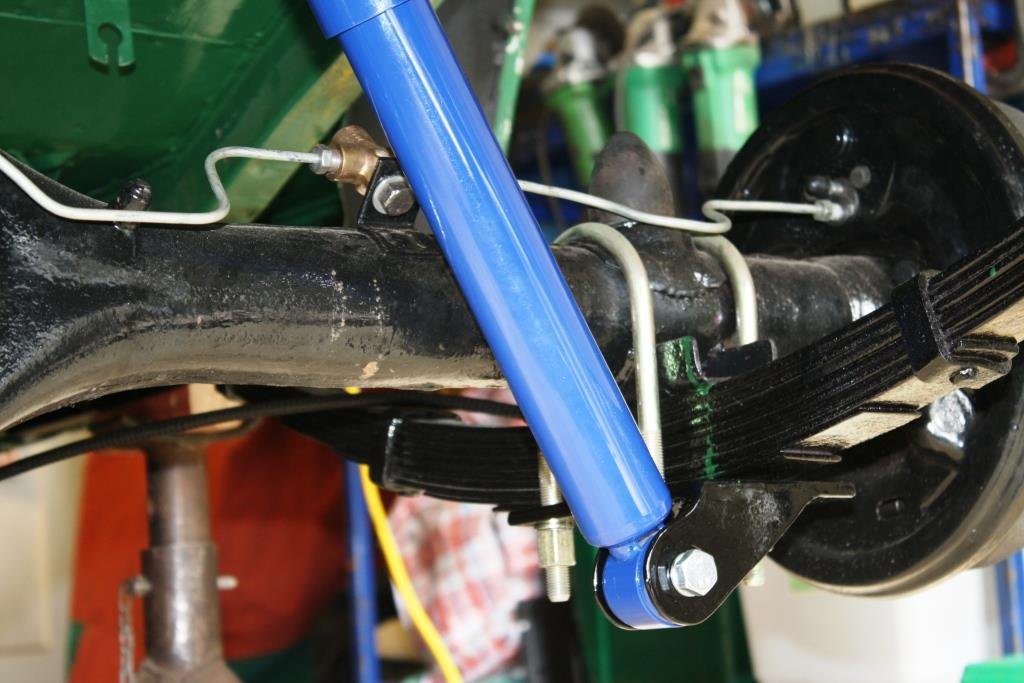
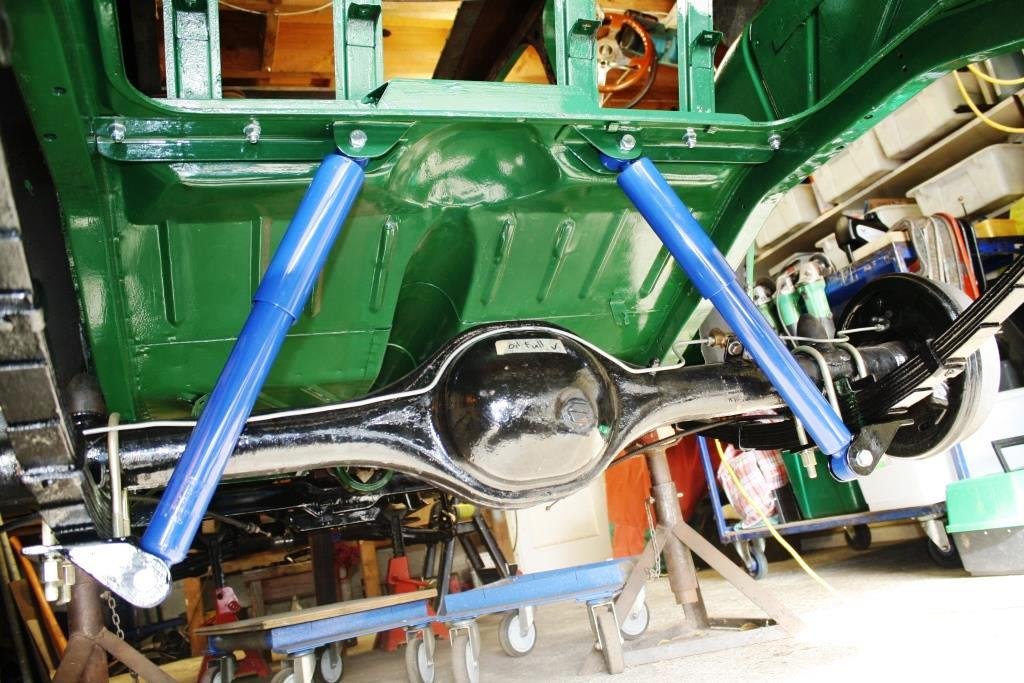
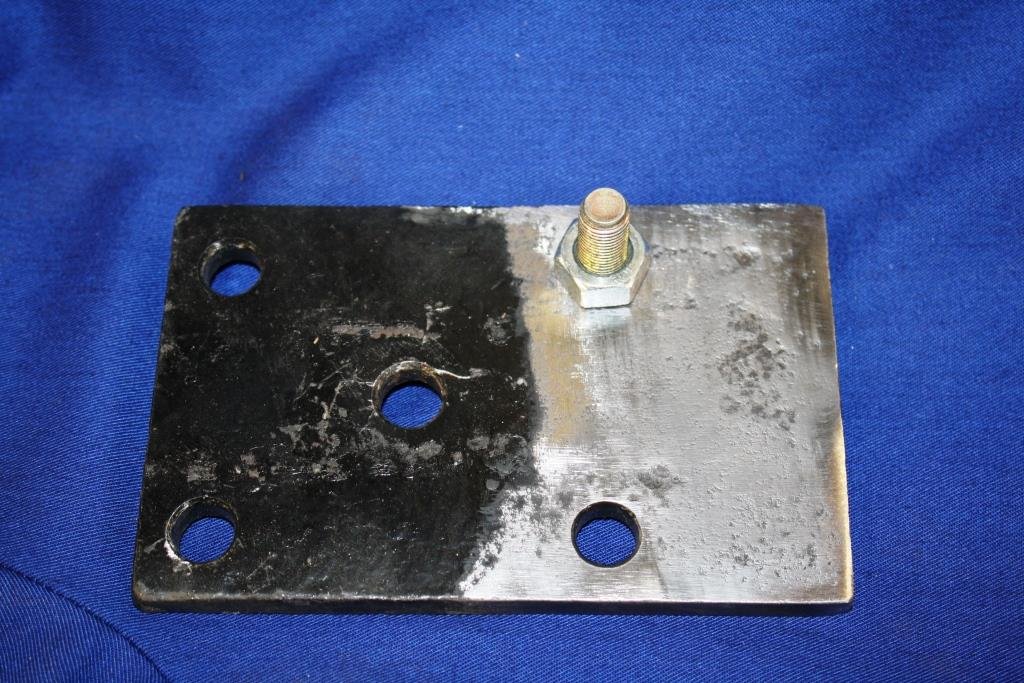
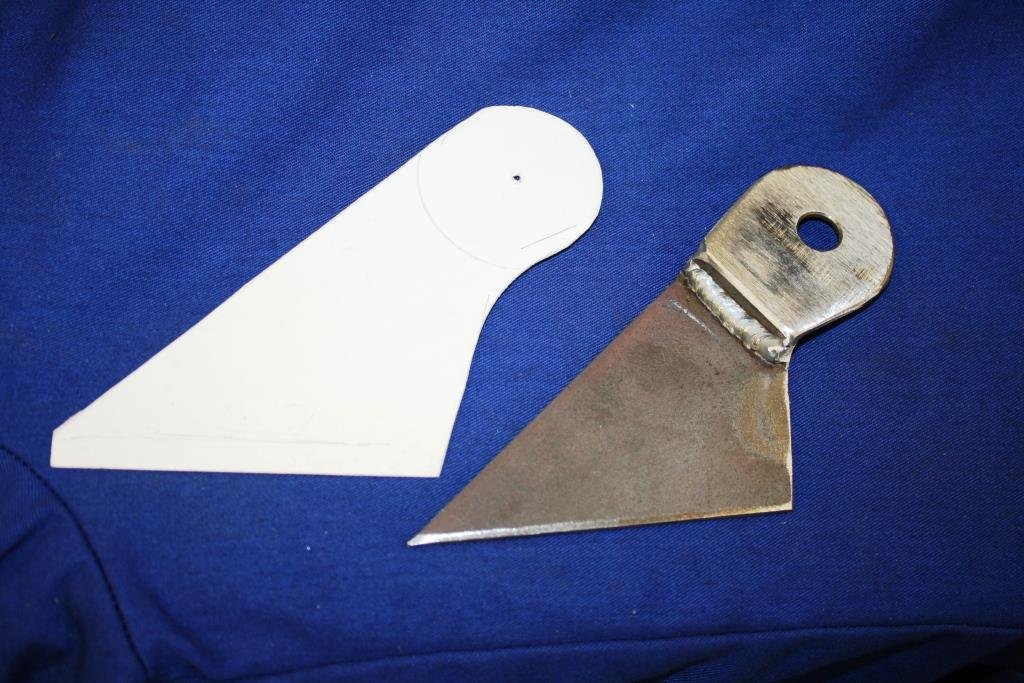
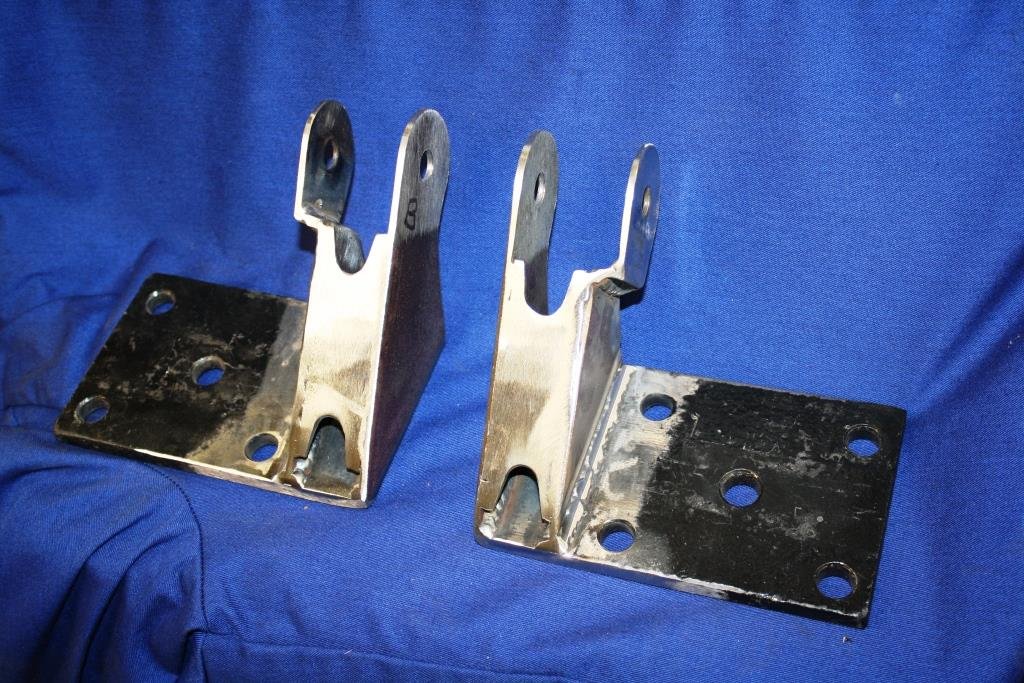
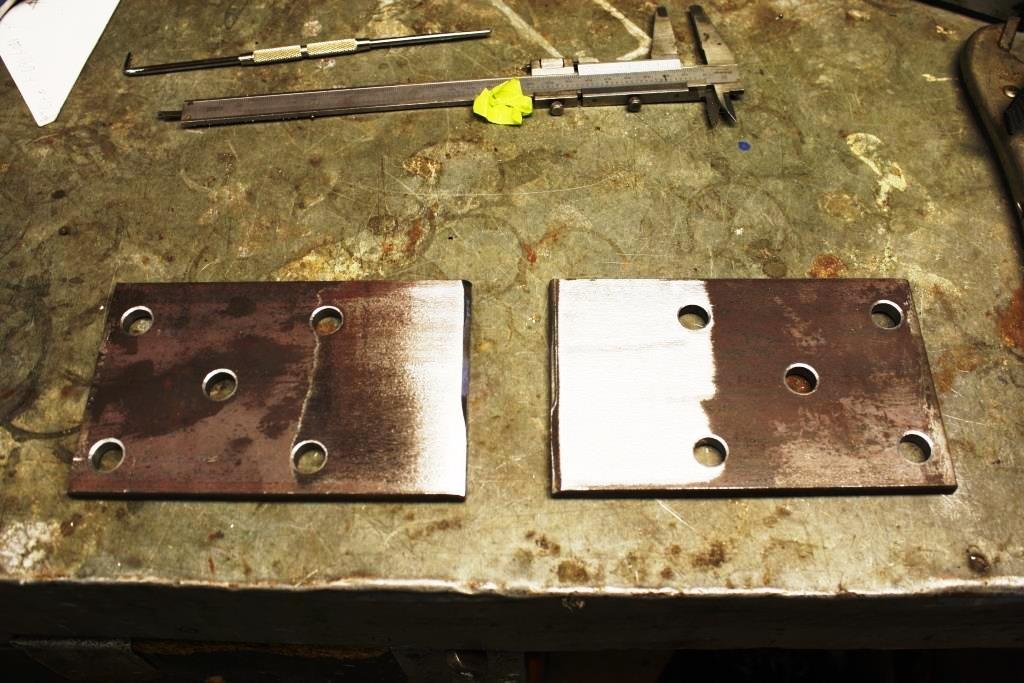
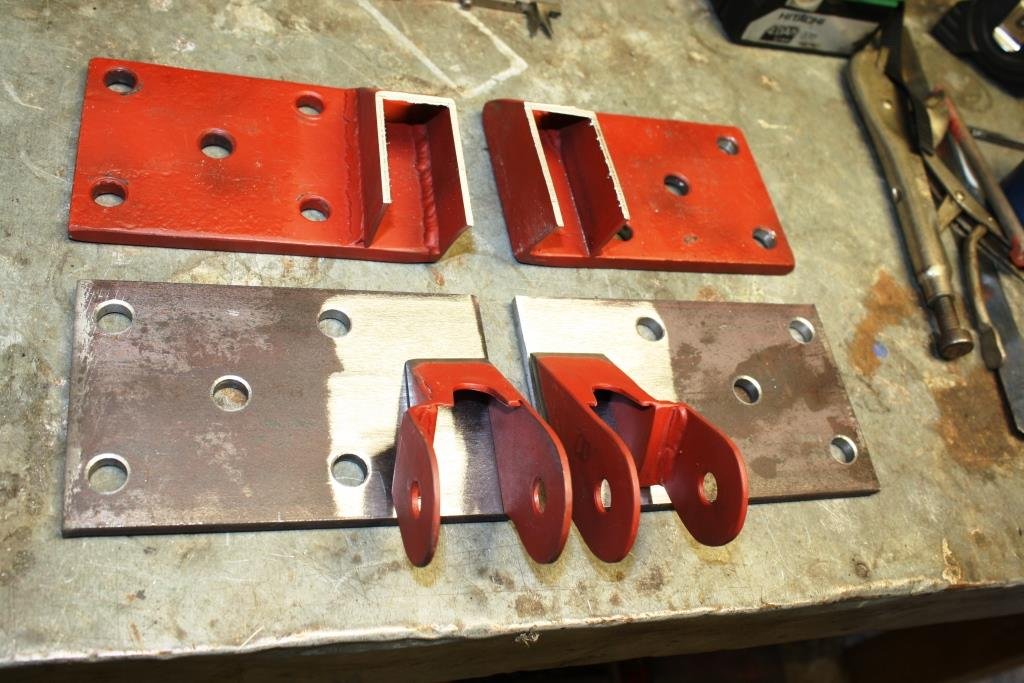
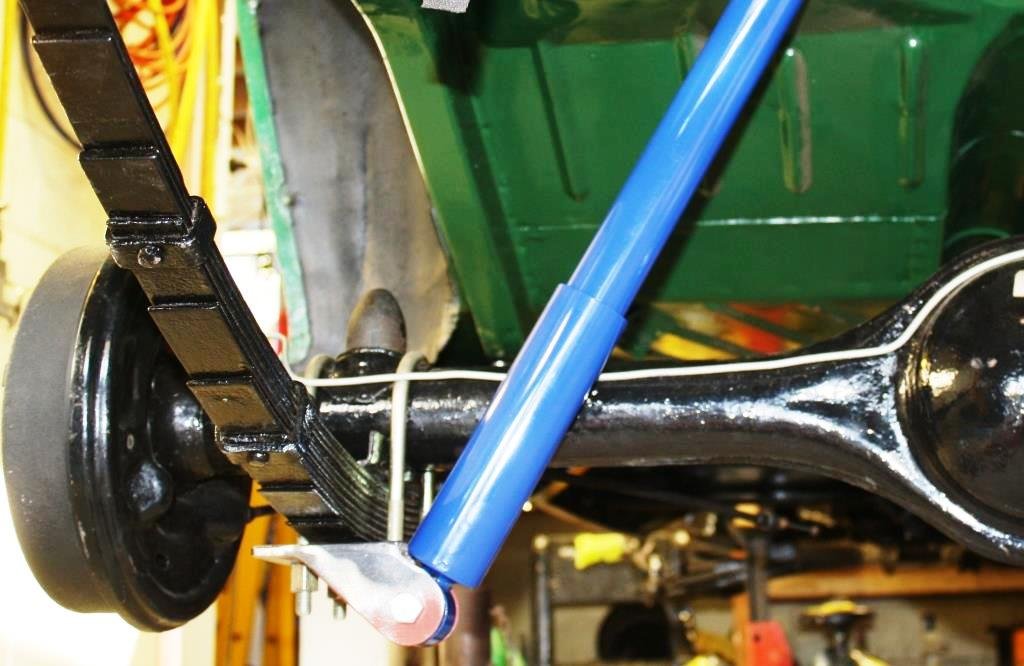
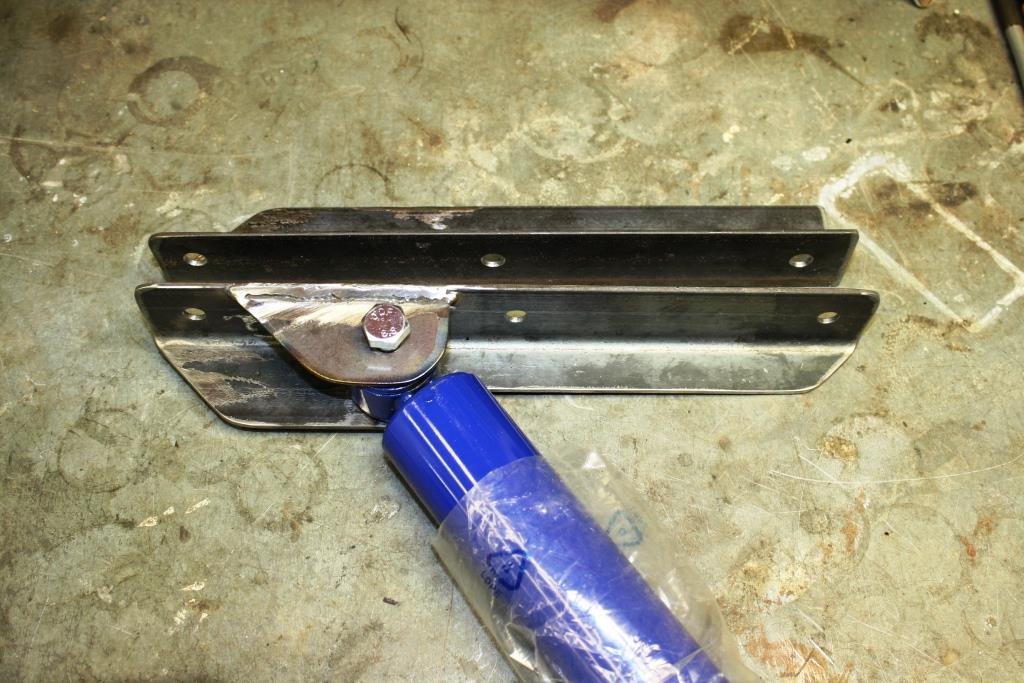
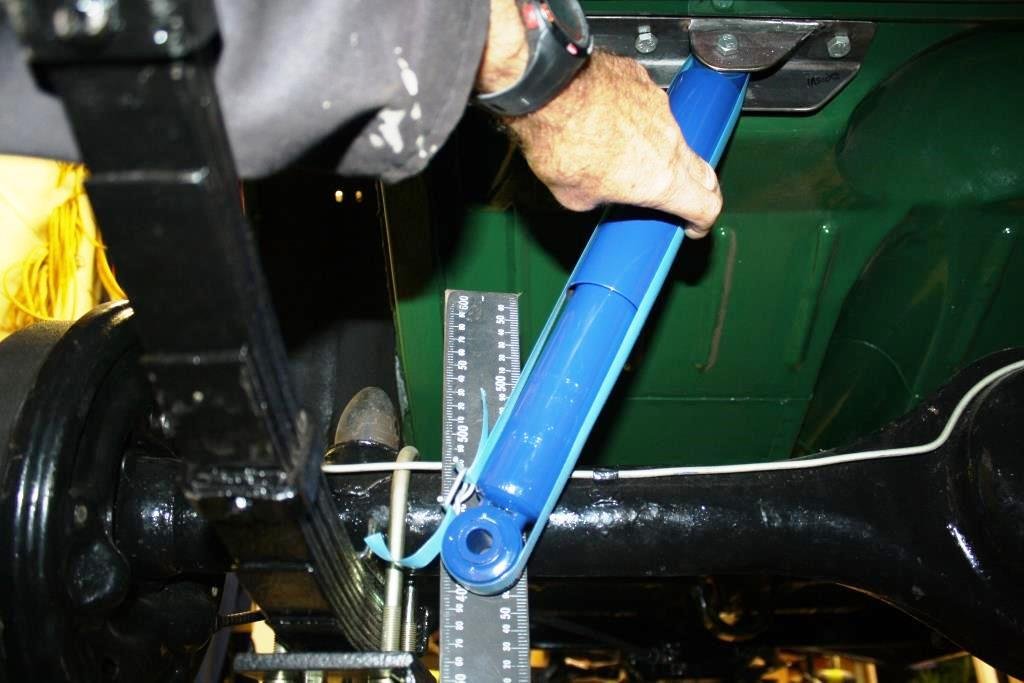
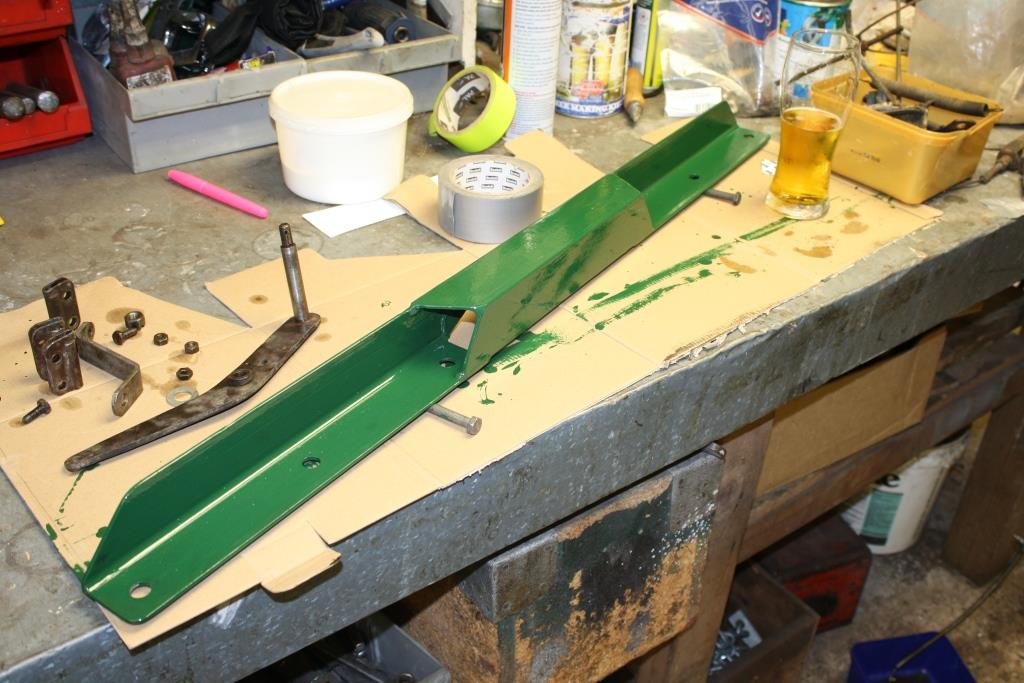
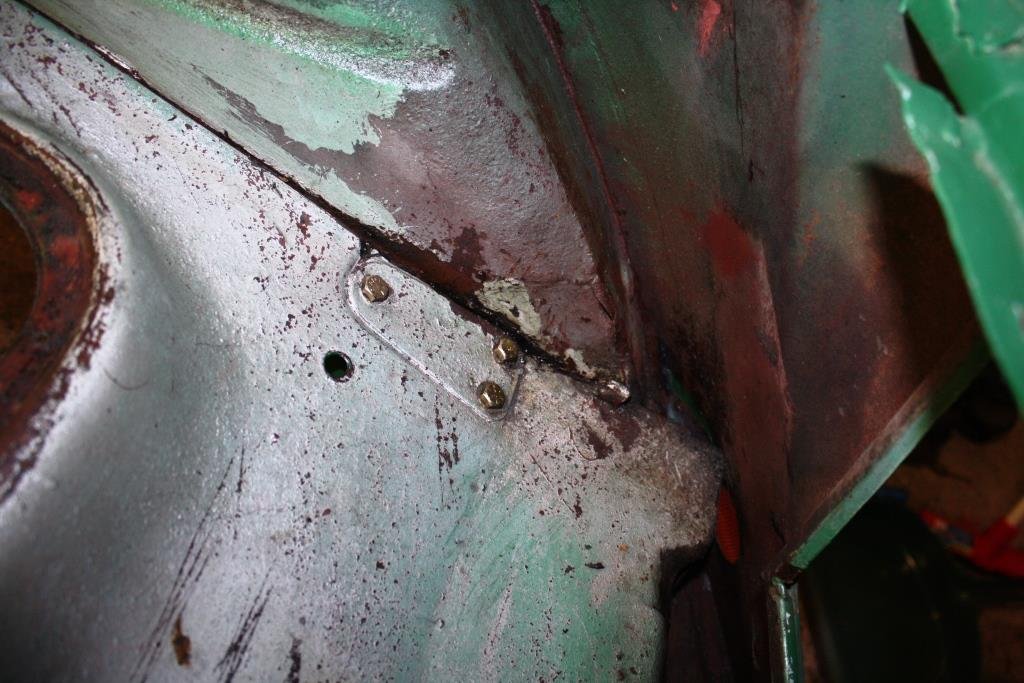
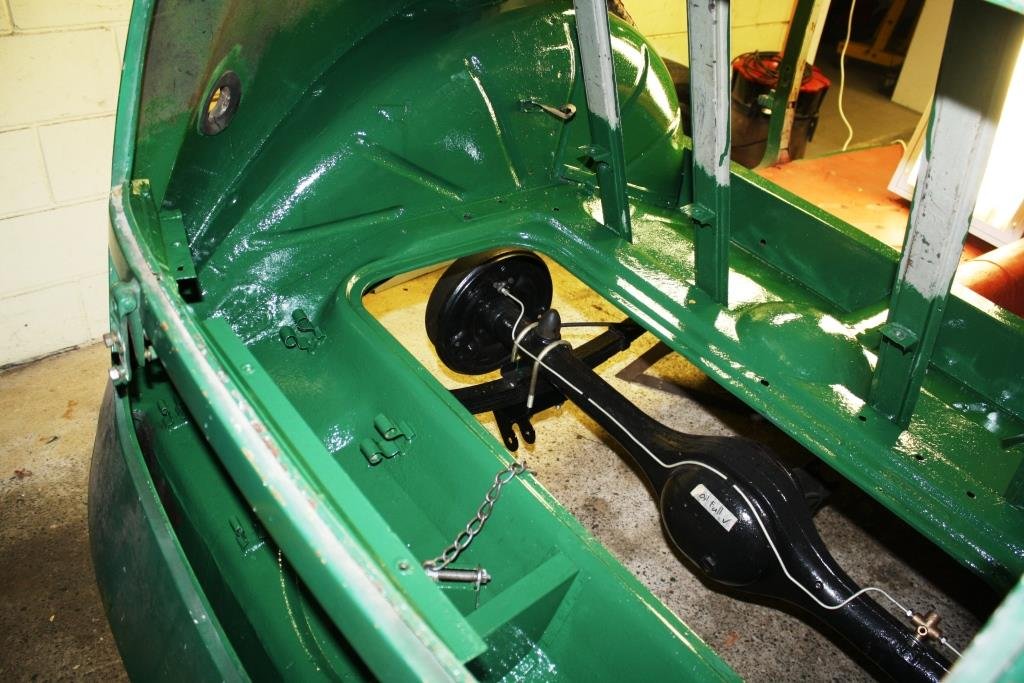
Slightly out of sequence with my thread guys, just bear with me. After failing miserably to identify the telescopic shocks I’d used to replace the lever action shocks some 40 plus years ago I settled on a pair of aftermarket EA Falcon shocks. To be honest they were cheap new/old stock, (i. e. the EA is not the most popular ‘Coon ever made) and they were blue! Thought I’d use as much as the original bracketry as I could. Cleaned up the old spring pads. Getting tight for room allowing access to the U bolts… Some CAD work… A bit more mocking up…. Had to notch the inside mount to give access to the U bolt nuts . Then started to stitch it all together. In true oldschool fashion I decided I didn’t like the result, spat the dummy, and bought the steel to make larger spring pads. I then cut the mounts off and attached them to the new pads. A quick mock-up and it works for me.
- 184 replies
-
- 21
-
-
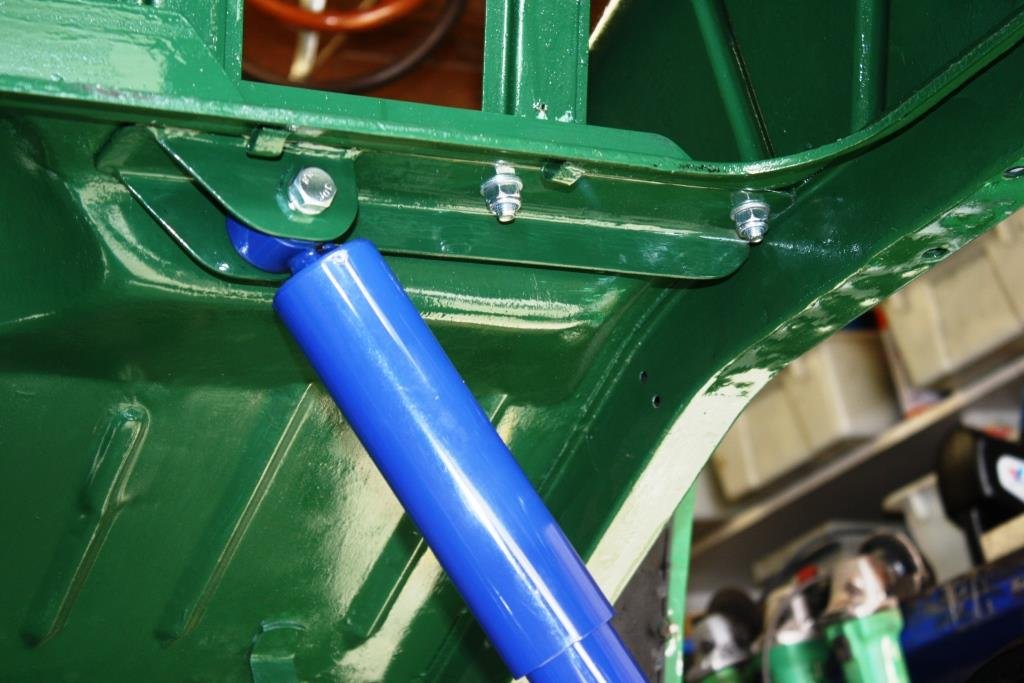
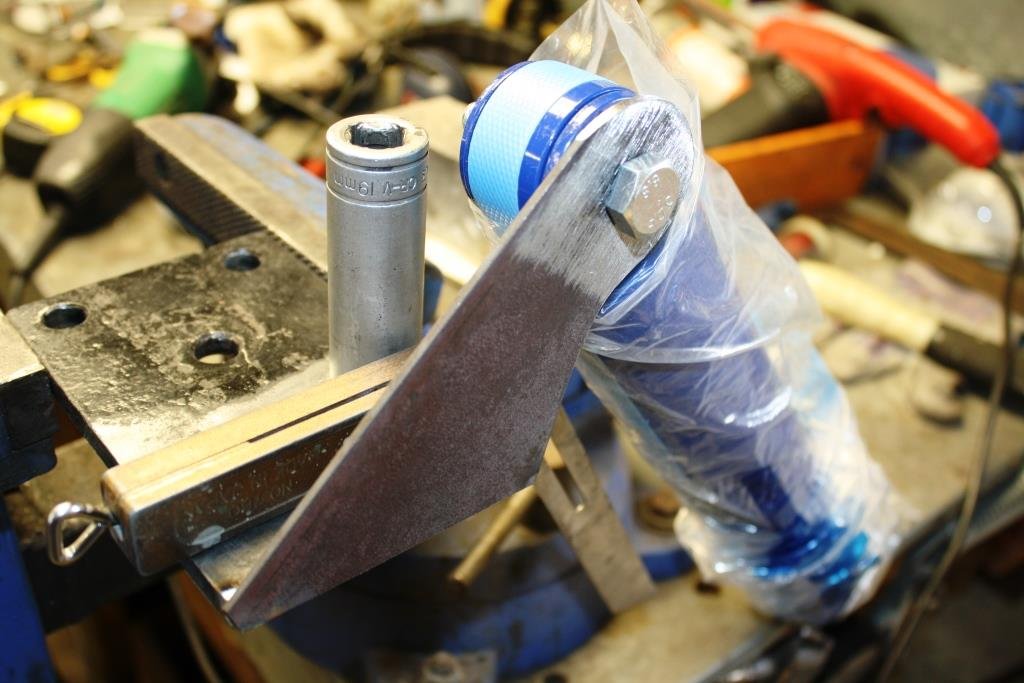
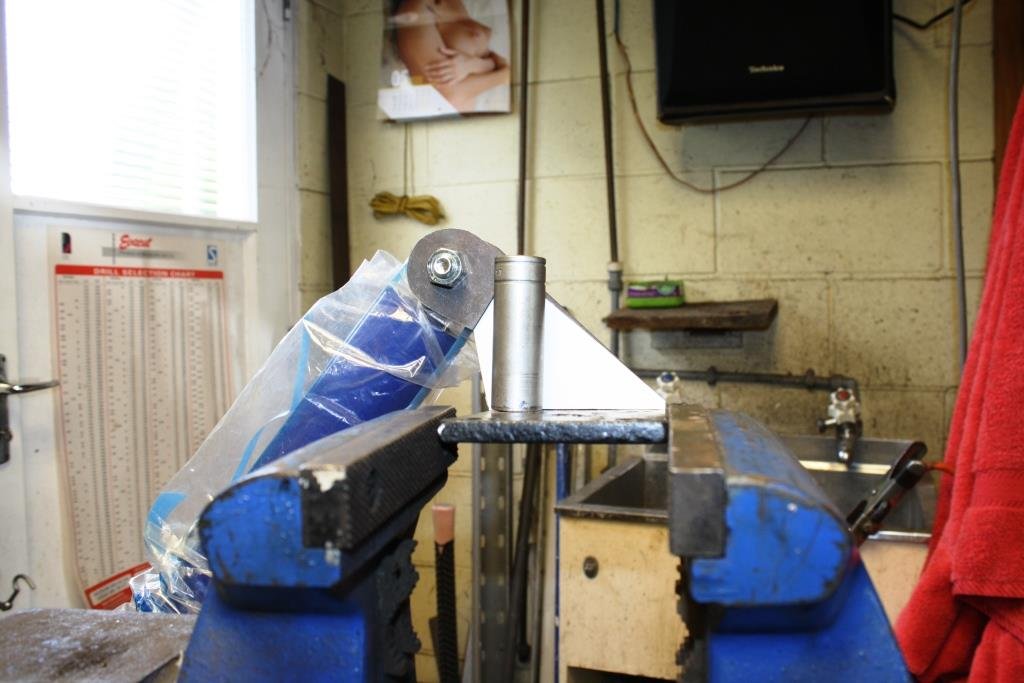
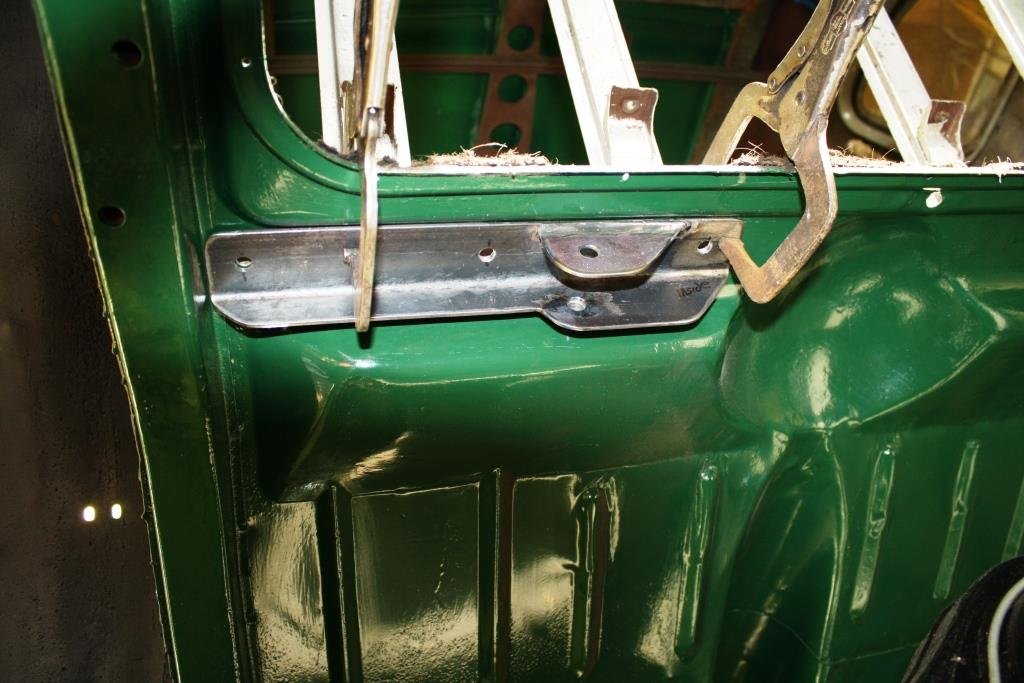
Time to make some new top mounts. Had a play and made up theses… Looked good in place…… A bit more measuring for a “sanity check” – a vital strategy when either Rigamortice or I are involved! And we’re happy Did some painting........ Decided on joining the top clamping plates to form an additional cross member, could be useful if I end up fitting a panhard rod or a watts linkage. And once again I’m happy with the results.
- 184 replies
-
- 11
-
-
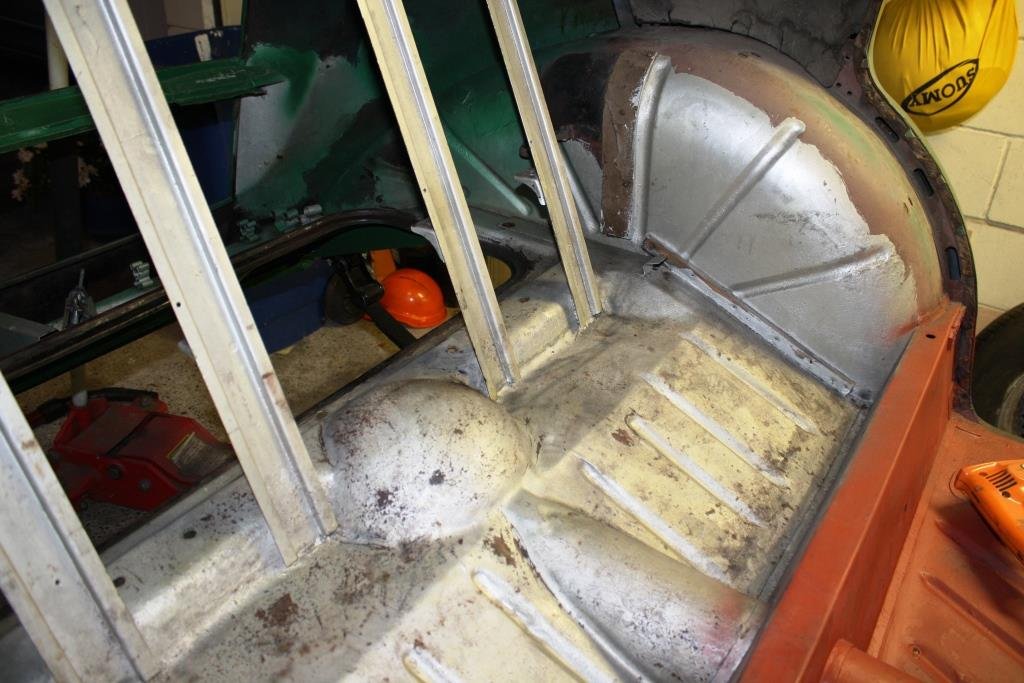
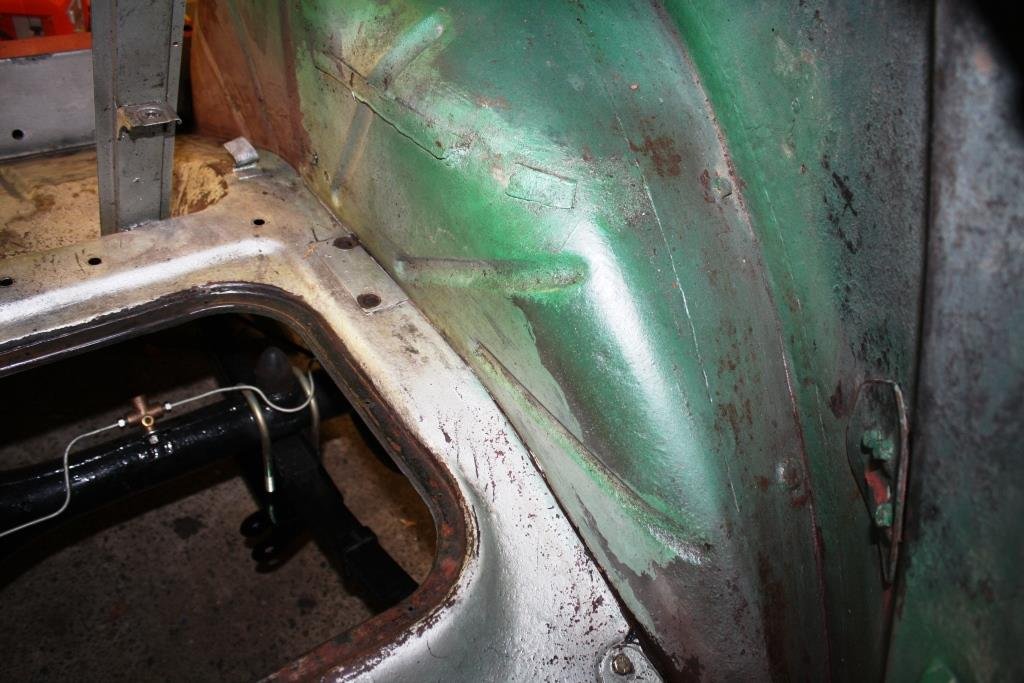
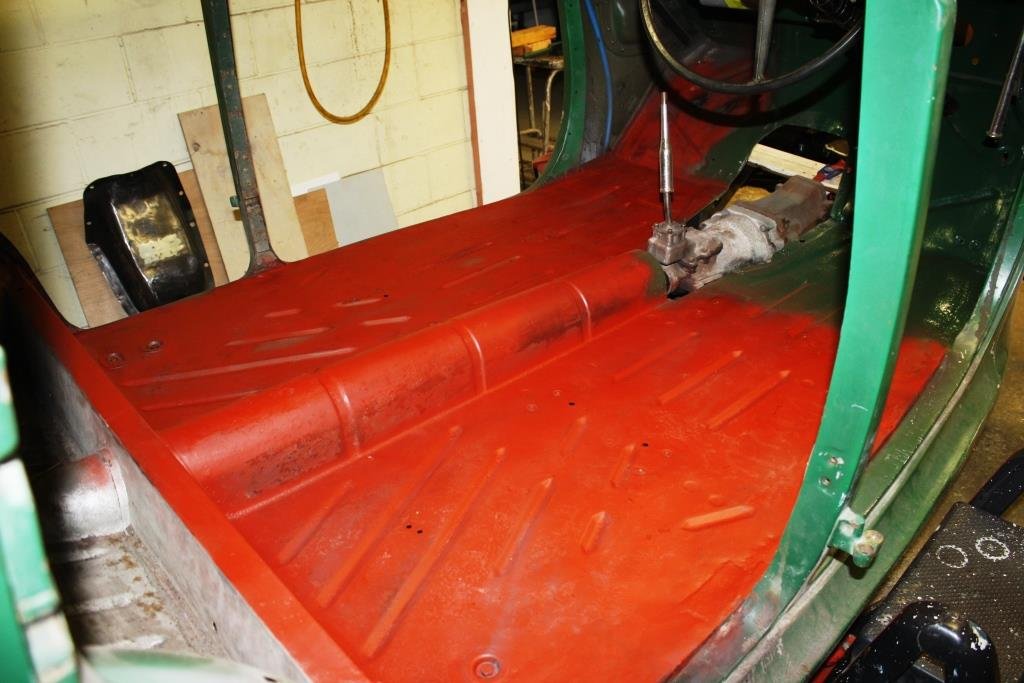
More bloody endless scraping and wire brushing, this time the top of the rear floor pan. Lots of surface rust to deal to…. But thankfully nothing that needs cutting and welding (‘cause I’m over it). In my eyes the result is nothing short of sexy; in Rigamortice’s eyes I apparently need to get a life!
- 184 replies
-
- 21
-
-
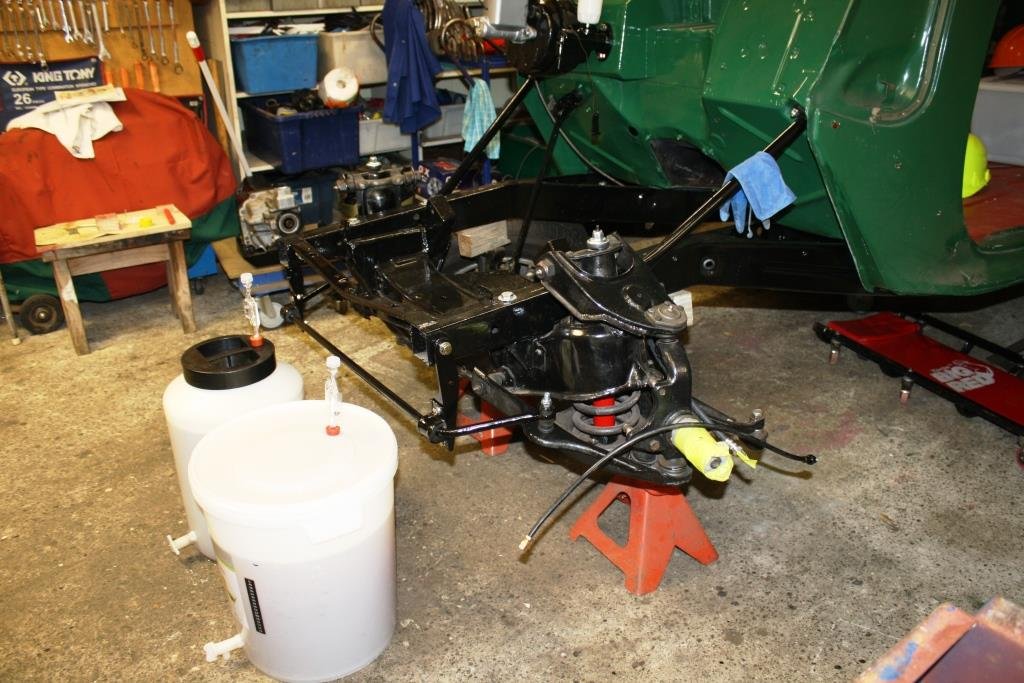
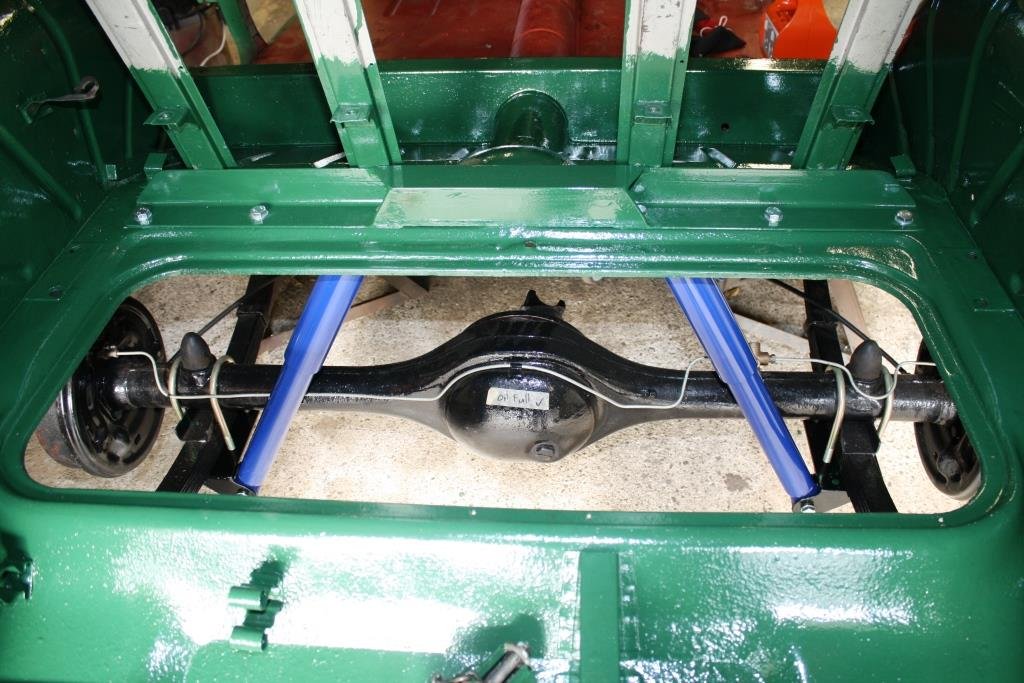
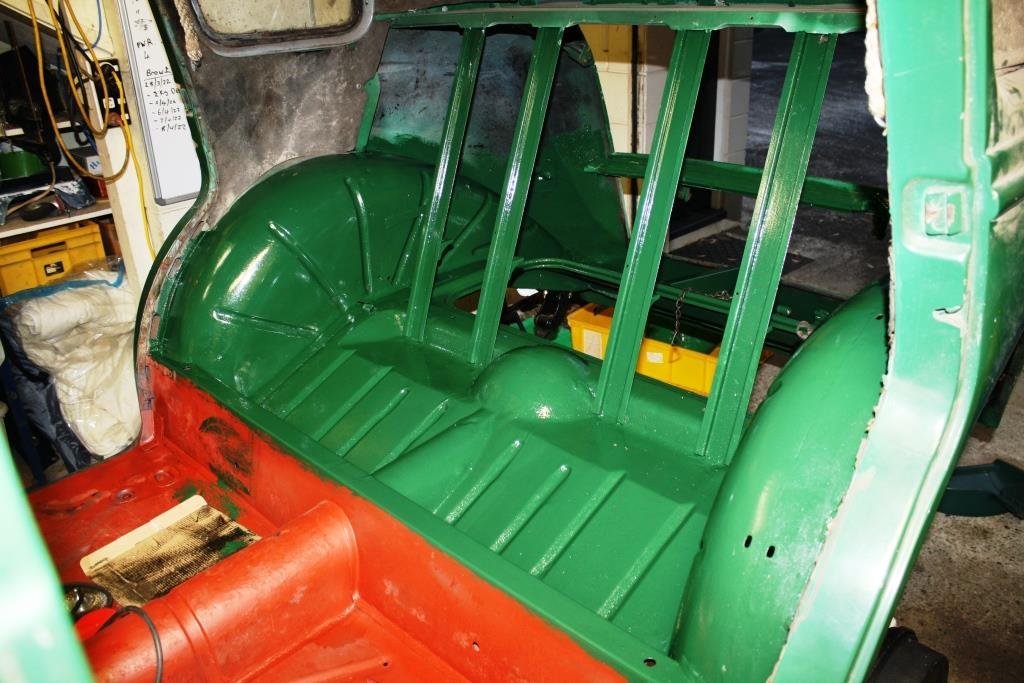
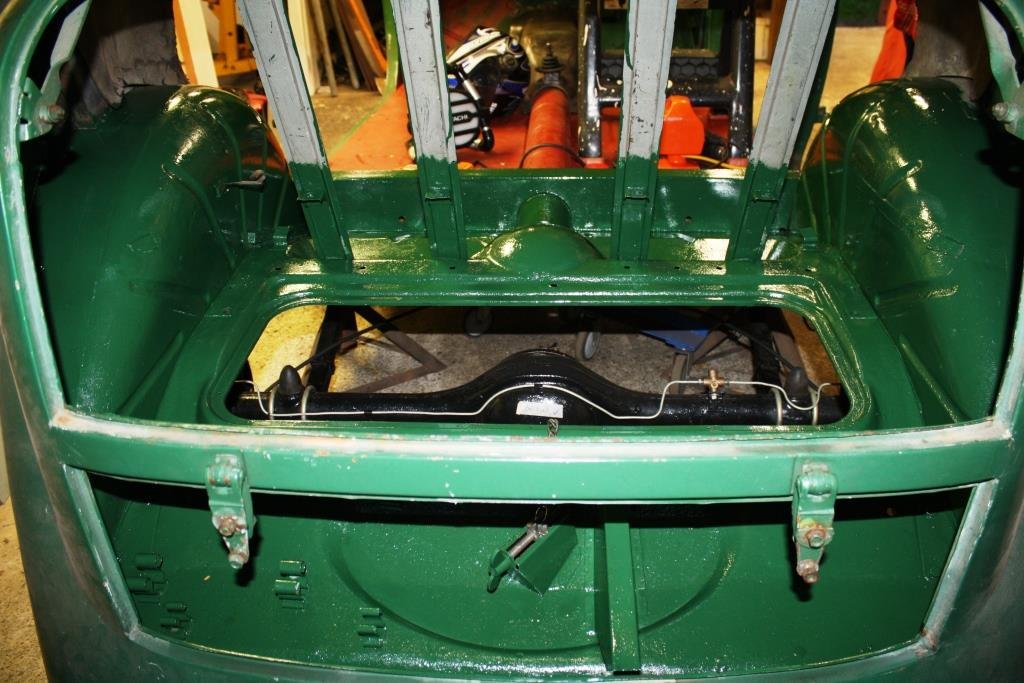
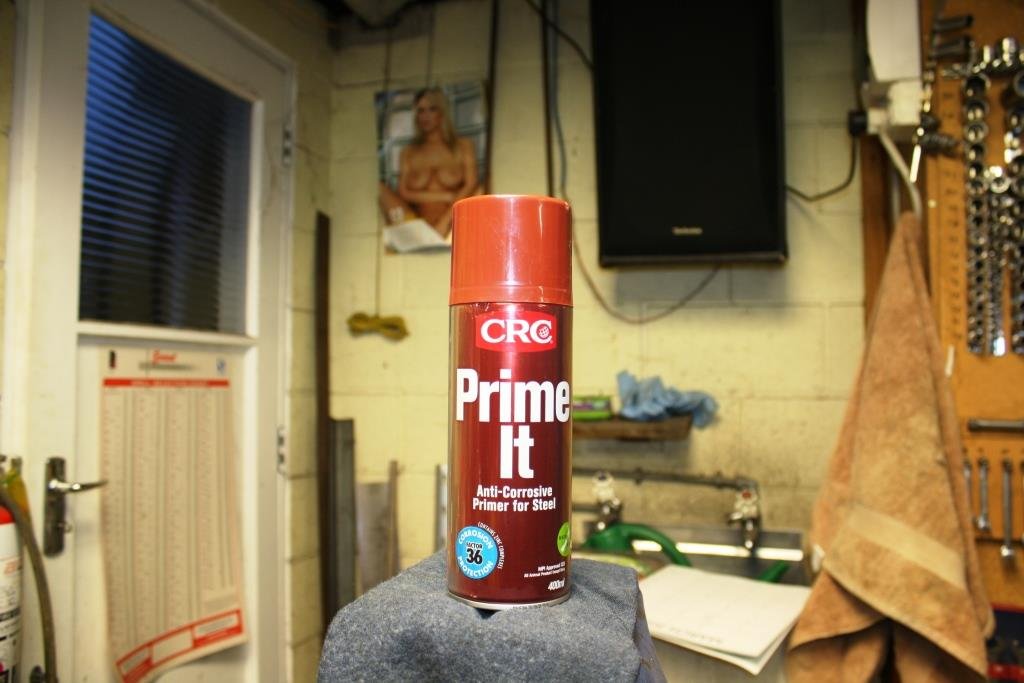
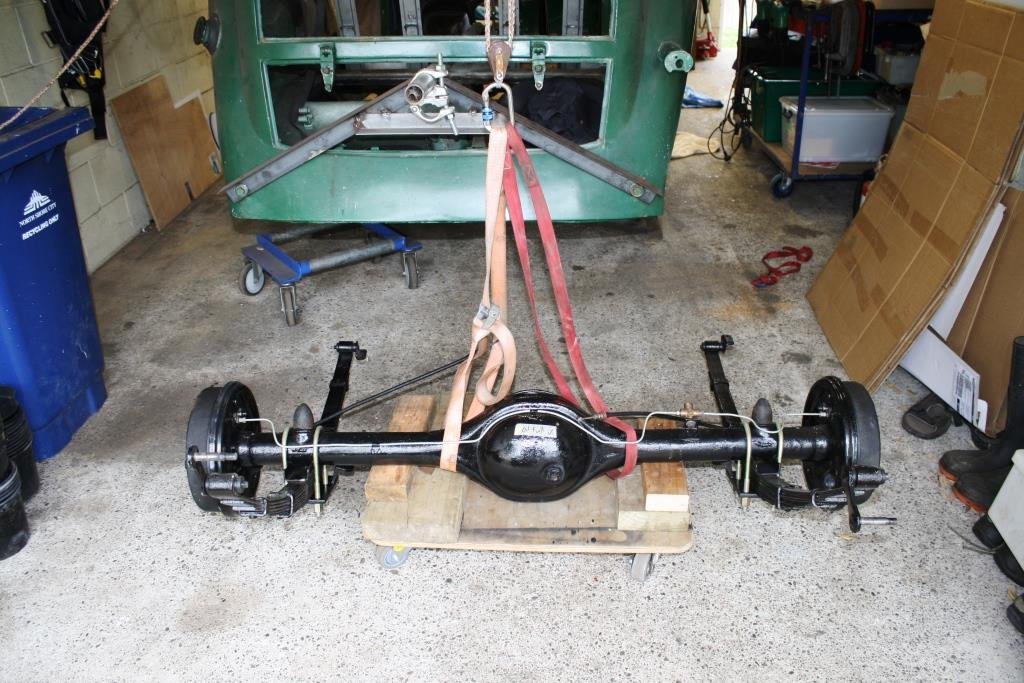
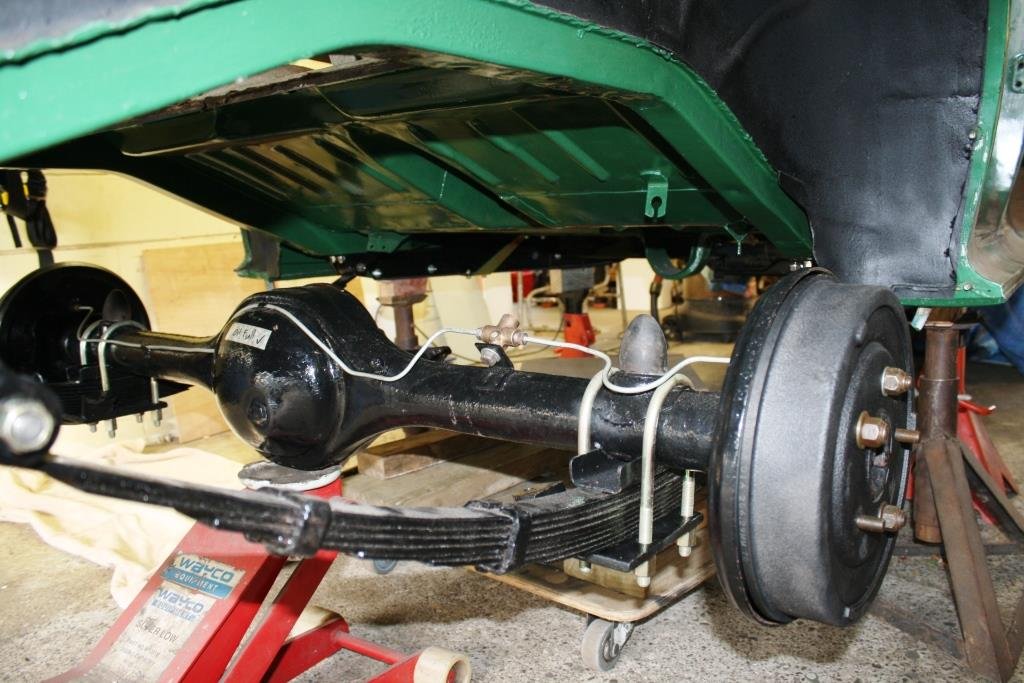
Did some wire brushing (i.e. lots of!) on the floor and applied rust converter. You’ve probably noticed I’ve become a big fan of CRC products, (still waiting for the sponsorship deal), since they’ve started producing in NZ and have subsequently got competitive price wise. Thought I’d try their primer. Getting seriously tired of scraping and painting, time for something more interesting….. Pulled the refurbed rear end out of storage… Fitted the springs.. All in place with all new bushes, U bolts and fittings...... Couldn’t resist seeing what it looked like with a real-jokers, (i.e. non gender-fluid), old-school mag hanging off it – nothing short of gorgeous!
- 184 replies
-
- 15
-
-
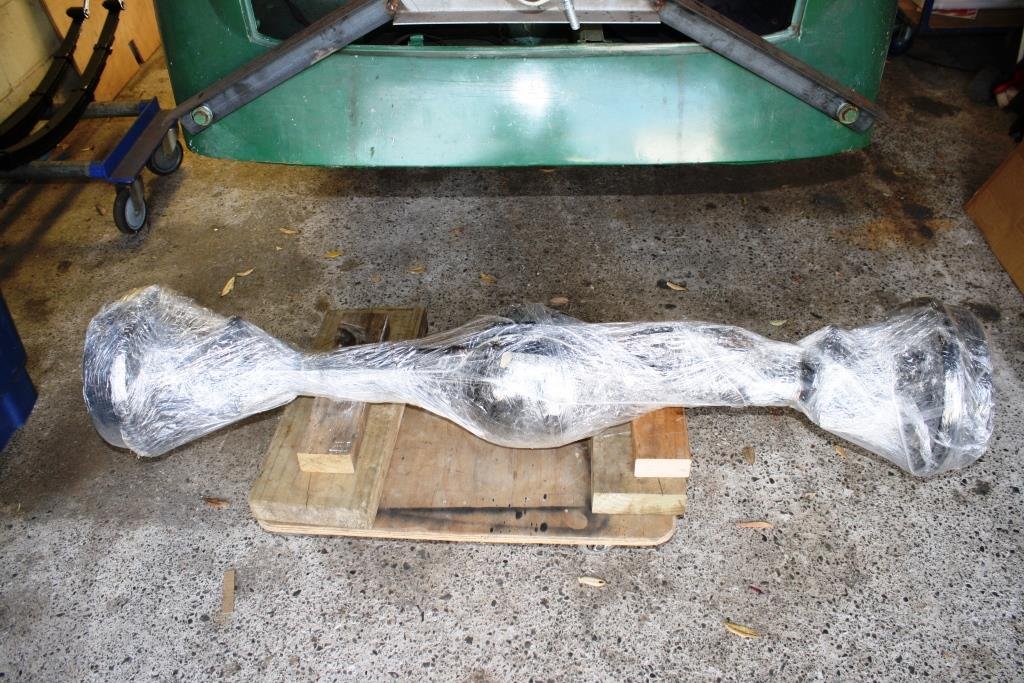
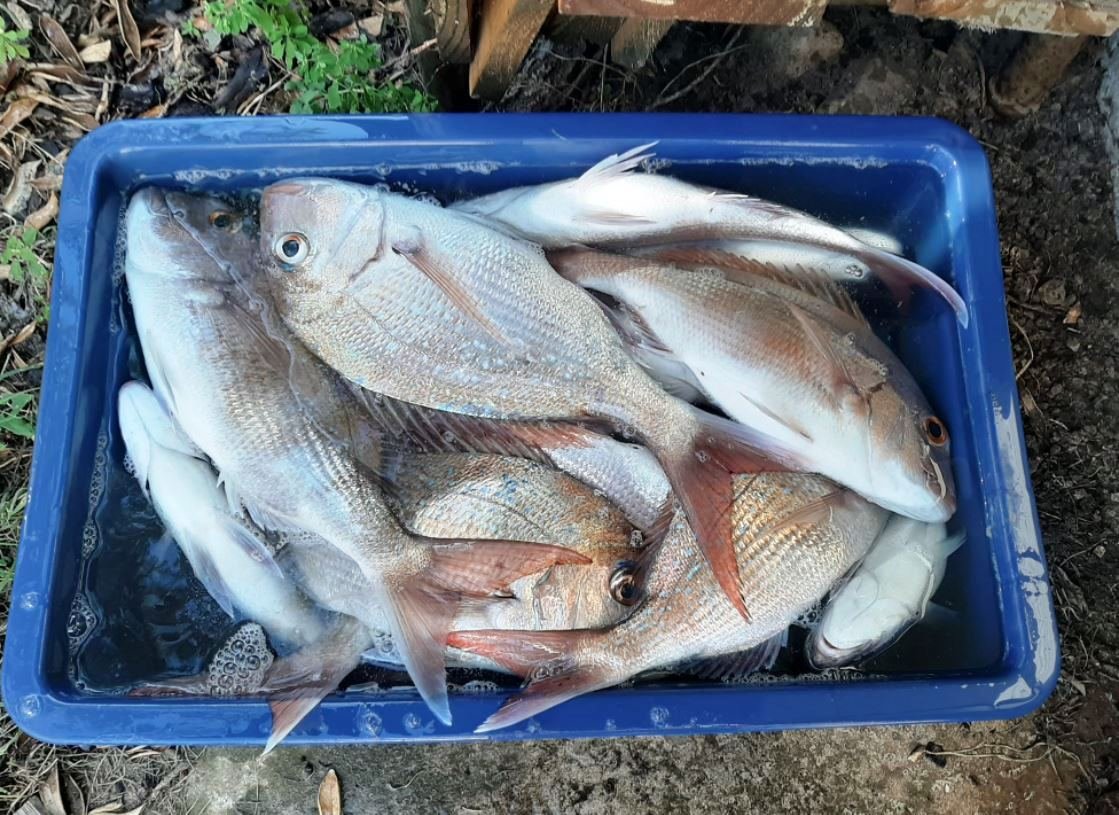
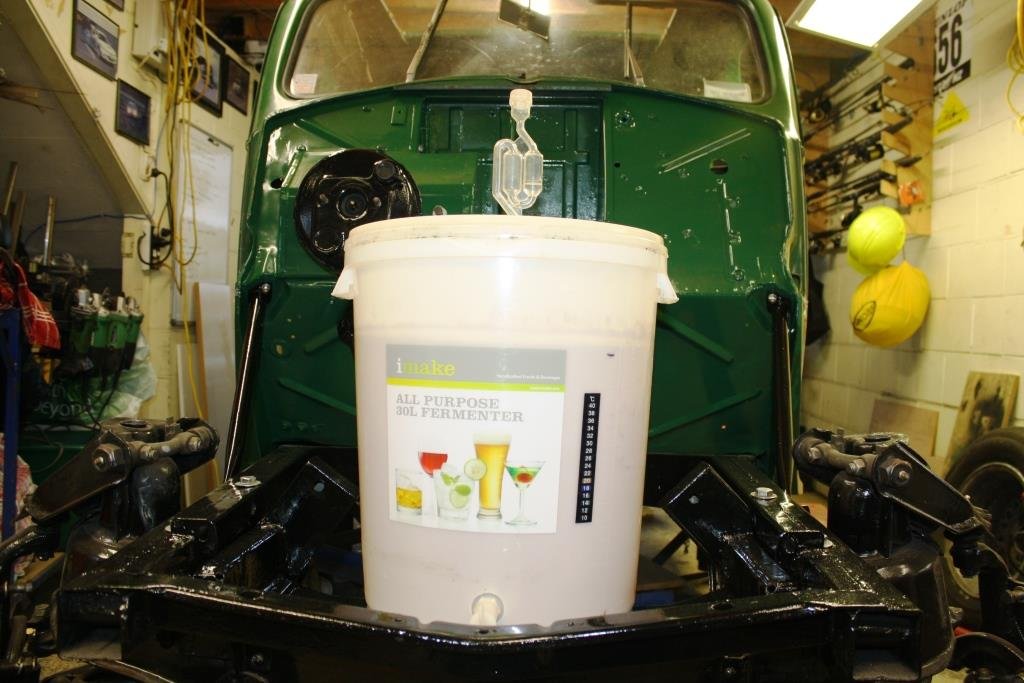
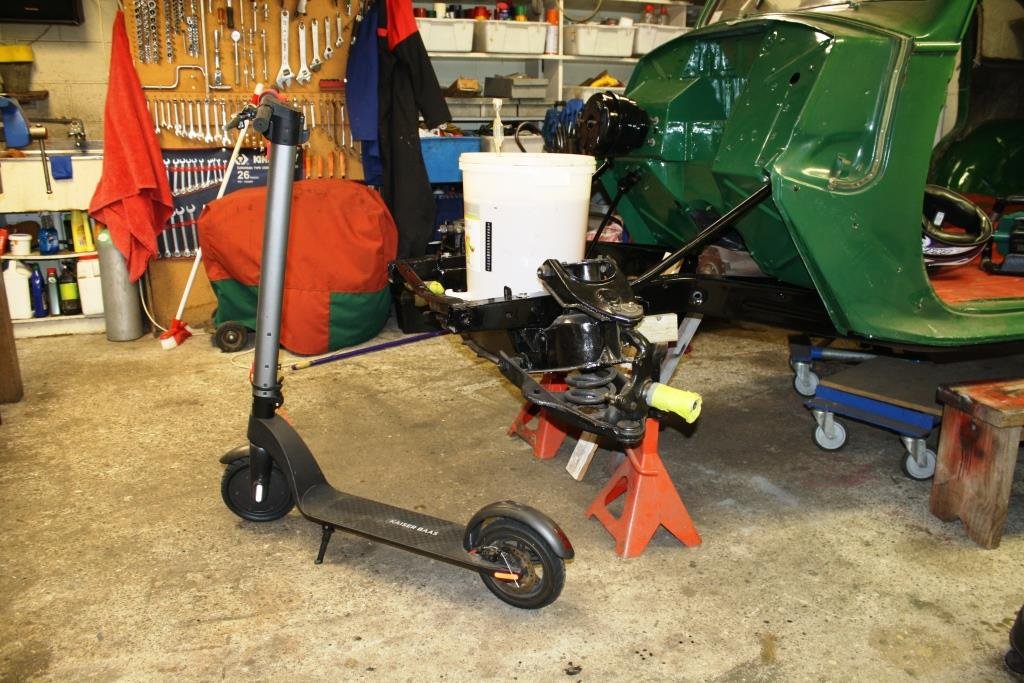
The “ever lovely Mrs sr2” and I headed up North to the batch for the recent long weekend, the fishing was an improvement on the New Year. (It would be bloody hard to be worse; see the Jan 18, 22 post). On my return I was shocked to see that in my absence Rigamortice had been blatantly and deliberately emitting the nasty horrible dangerous carbon laden CO2 gas, (that our dear leader the "PC goddess of fertility and cultural sensitivity" has been repetitively warning us about).......... to the atmosphere! Still showing total faith in our “transparent” government (in these turbulent times) I was overwhelmed and riddled with guilt as to the long term effect Rigamortice’s senseless selfish act would have on climate change, (it used to be called global warming – but it didn’t get hot!). In desperation to restore our lost carbon credits and head off an imminent climate emergency I decided to “give it the Greta” and acquired an E-Vehicle. Being Oldschool (i.e. 75 oldschool years old) Rigamortice insisted that I hand in my man-card immediately………..begin the public humiliation….! Thankfully after a few medicinal Wild Turkeys, Rigamortice and I devised a cunning and fiendishly clever way of containing the evil fermenting concoction, preventing any further release of the nasty horrible climate changing CO2 gas…..What could possibly go wrong!
- 184 replies
-
- 14
-
-
-
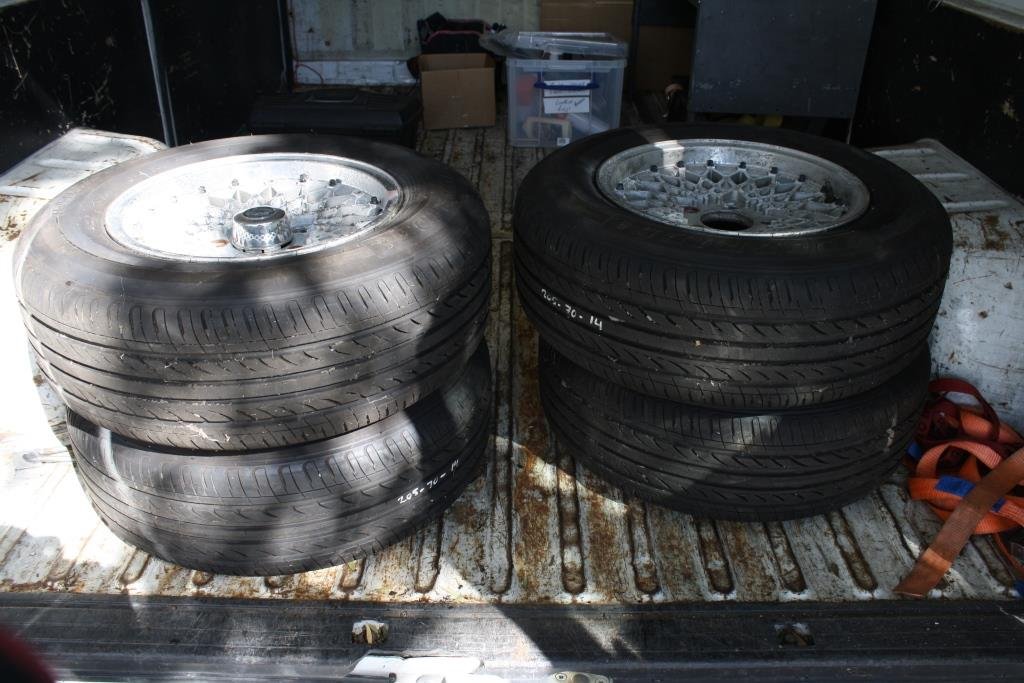
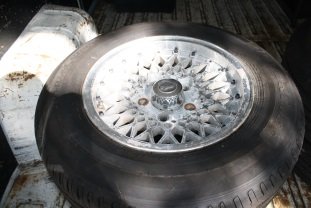
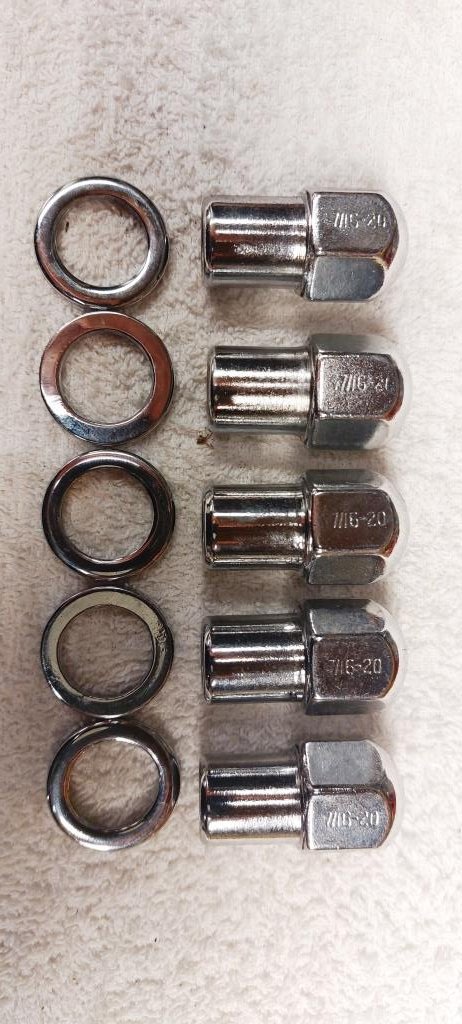
Couldn’t resist putting the tyres on these bad boys! Decided I’d keep them original, only problem is where to find some 70’s style lug nuts for some 70’s Cheviot's? The Lugnut King to the rescue; Murry is da- man, a big recommendation from me. 7/16 “ x 20 tpi, I don’t where the hell he finds this stuff. Borderline too deep for the Cheviot's but a little tickle from the Emco V10 keeps things safe.
- 184 replies
-
- 14
-
-
Some good 4g63 gearbox info here. https://projectzerog.com/
-
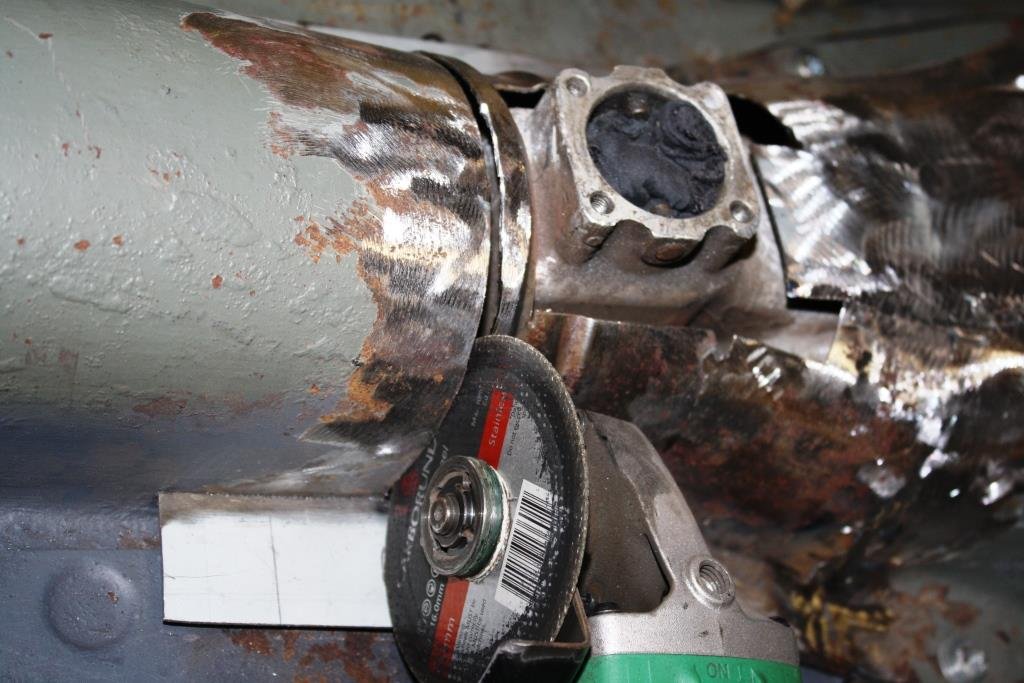
Some 40 years ago had a mate with a very tidy Mk IV Zodiac Executive (very flash in it's day) that had a 289 Mustang fitted. As I recall he ran the floor change (?) Zodiac manual gearbox which gave no trouble but he was always having diff issues - in hindsight it was more driver right foot issues! He was based in Tauranga and had been cajoled in to running a car wreaking yard for a few weeks while the owner was on holiday. I loaded the girlfriend (now Mrs sr2) into my "slightly modified" J14 Vauxhall and headed down from Auckland for a few days play in a wreaking yard, better than Heaven in those days. They had a Valiant ute that had been in a big frontal and when I discovered that not only it had the ford stud pattern but it was a limited slip I got serious with the tape measure. We ended up fitting the sold rear complete with the ute leaf springs. From memory once I'd made pads for the spring mounts it was a very easy swap, all done with stick and gas welders and basic hand tools. I even managed to swap the rear (or was it front?) yoke with a hacksaw and the stick welder, I shudder now wondering how well it wasn't balanced! The swap was a great success, the taller ratio suited the motor well and diff problems became a thing of the past. Sadly my mate wrote the car off on the Papamoa straight coming home on a rainy night after a session in the old Greerton pub.
-
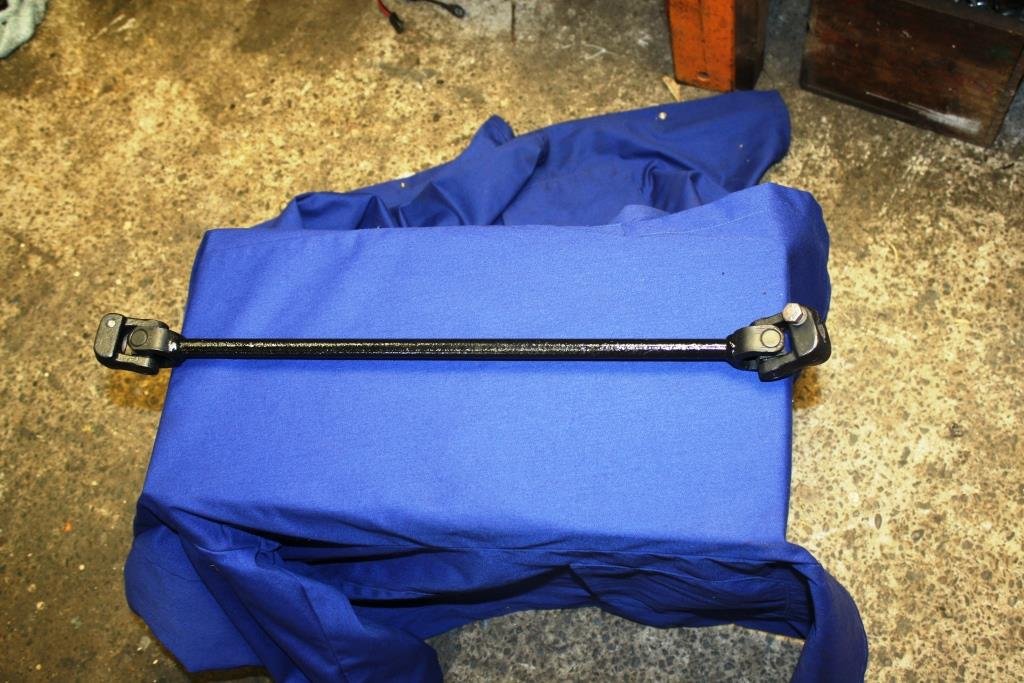
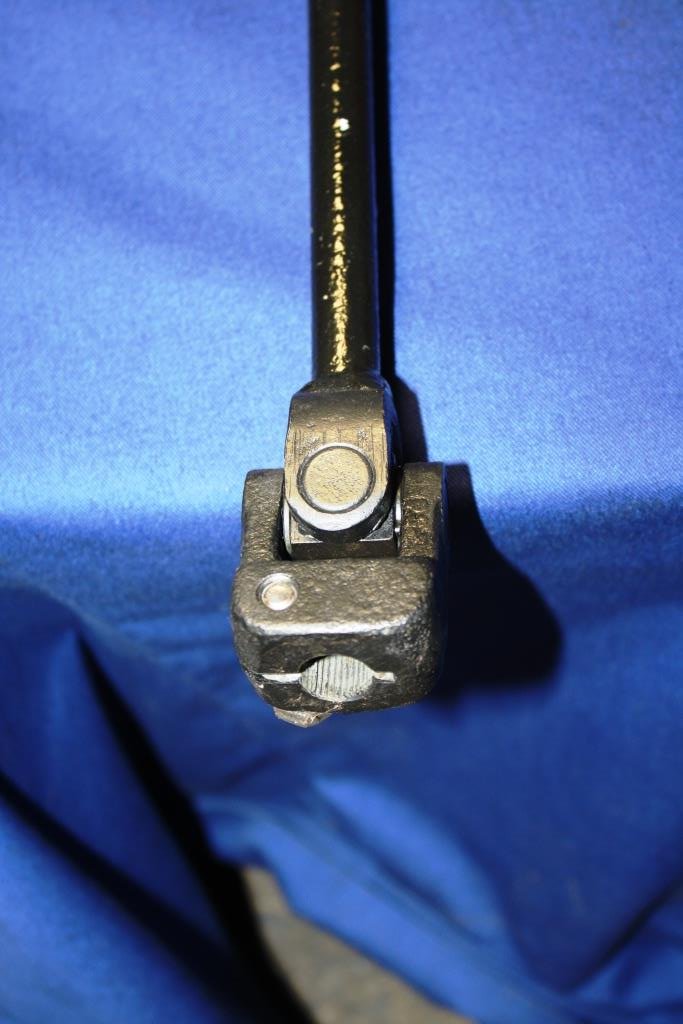
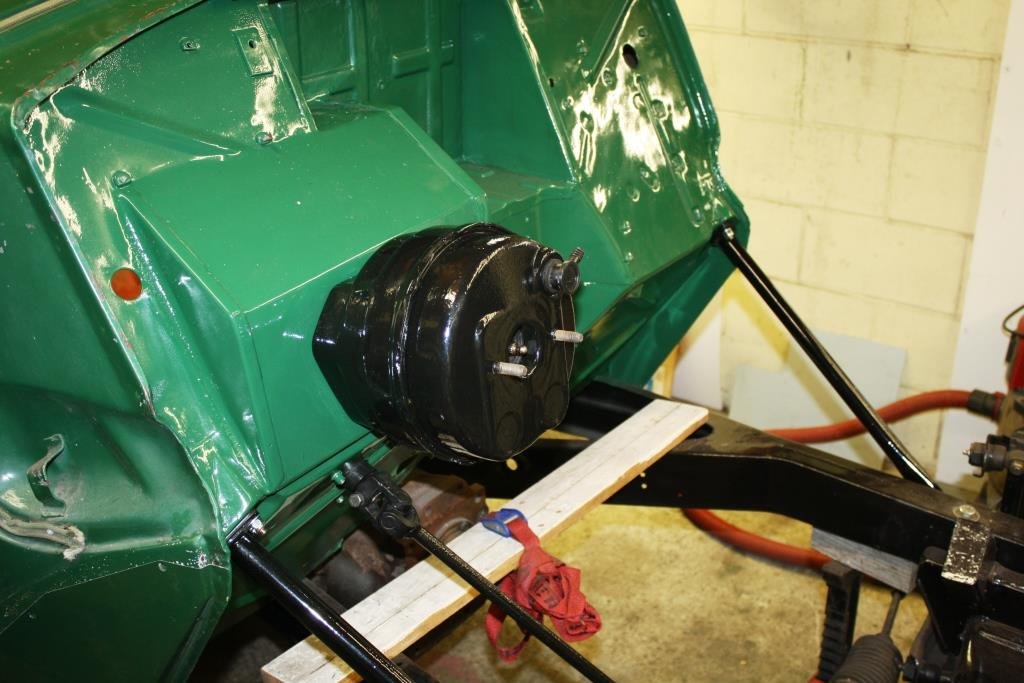
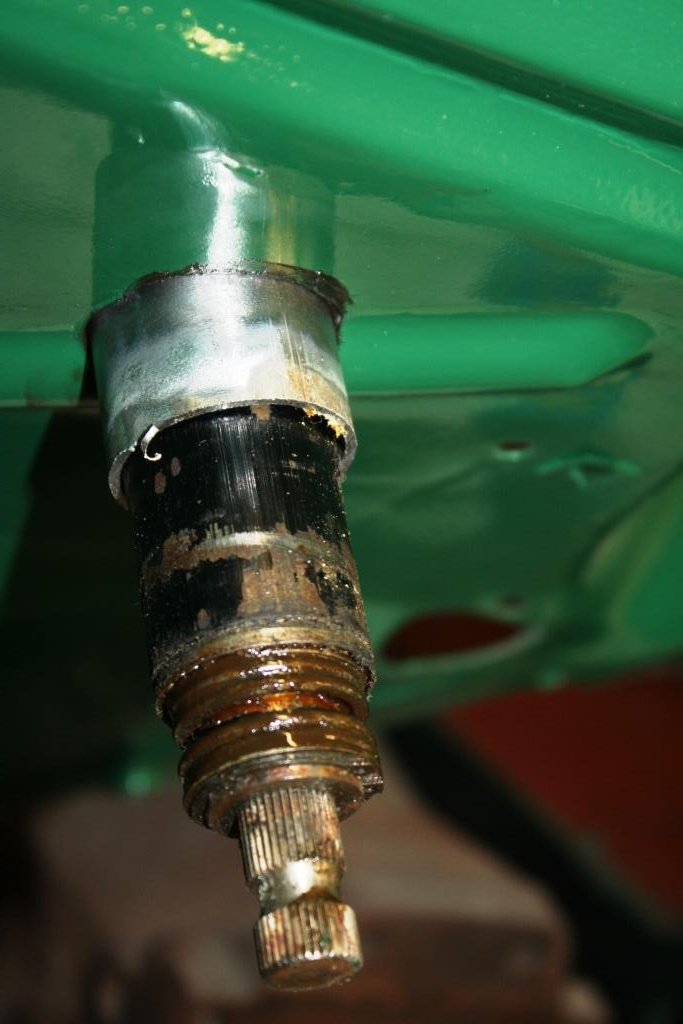
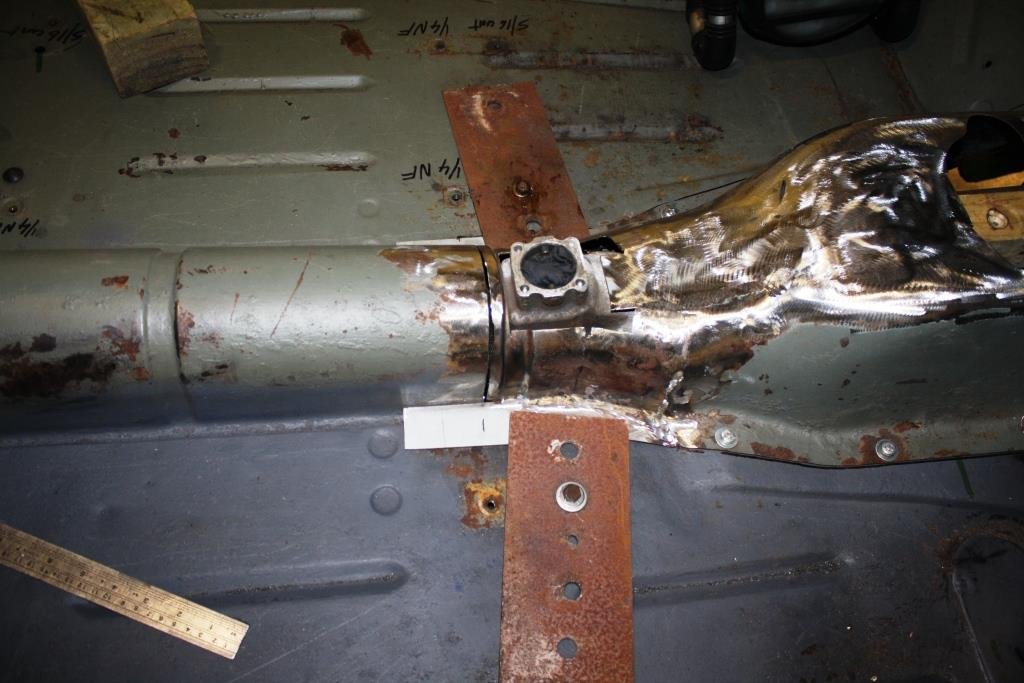
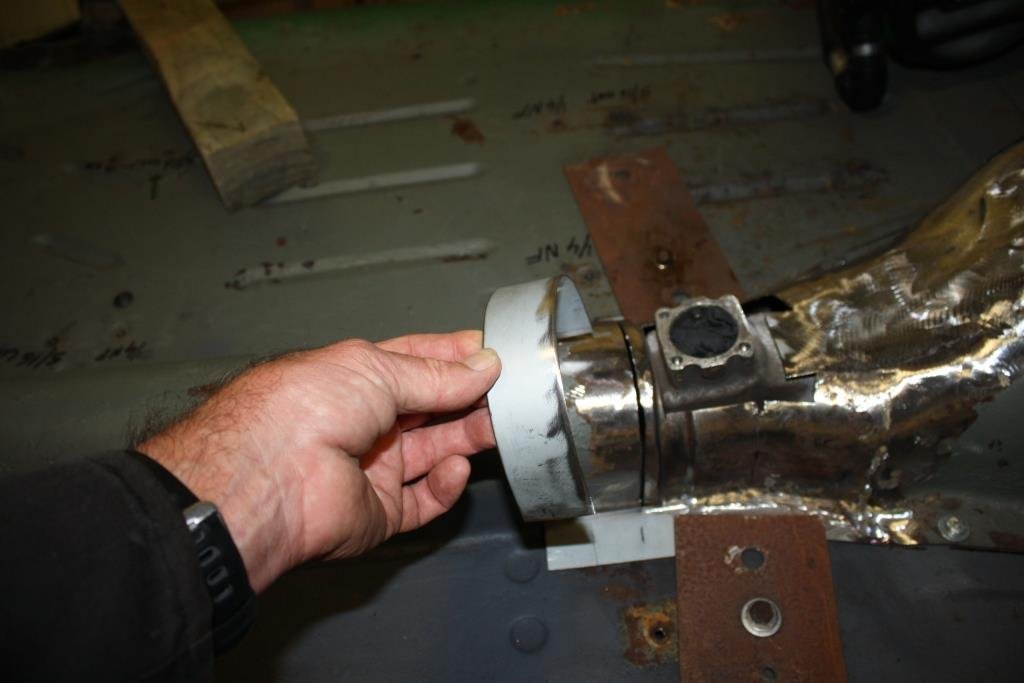
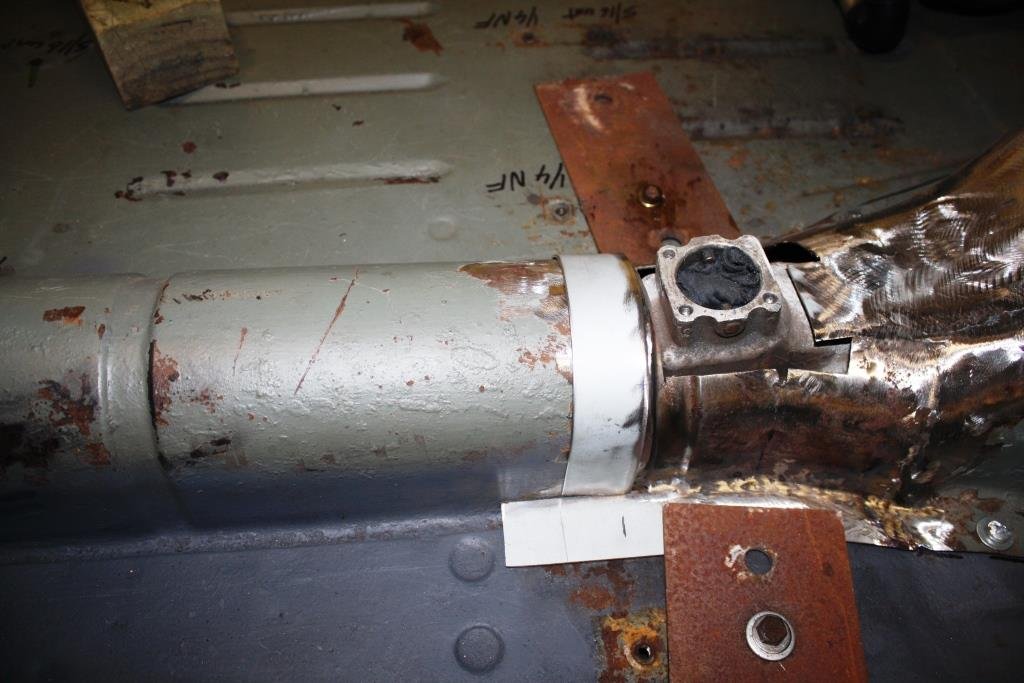
The steering universals both looked good with absolutely no play so a little lube and some fresh paint was all that was needed. I can’t for the life of me remember what car they came from. Any UJ experts out there? Fitted up to the old tart…….. And the booster in place as well.
- 184 replies
-
- 14
-
-
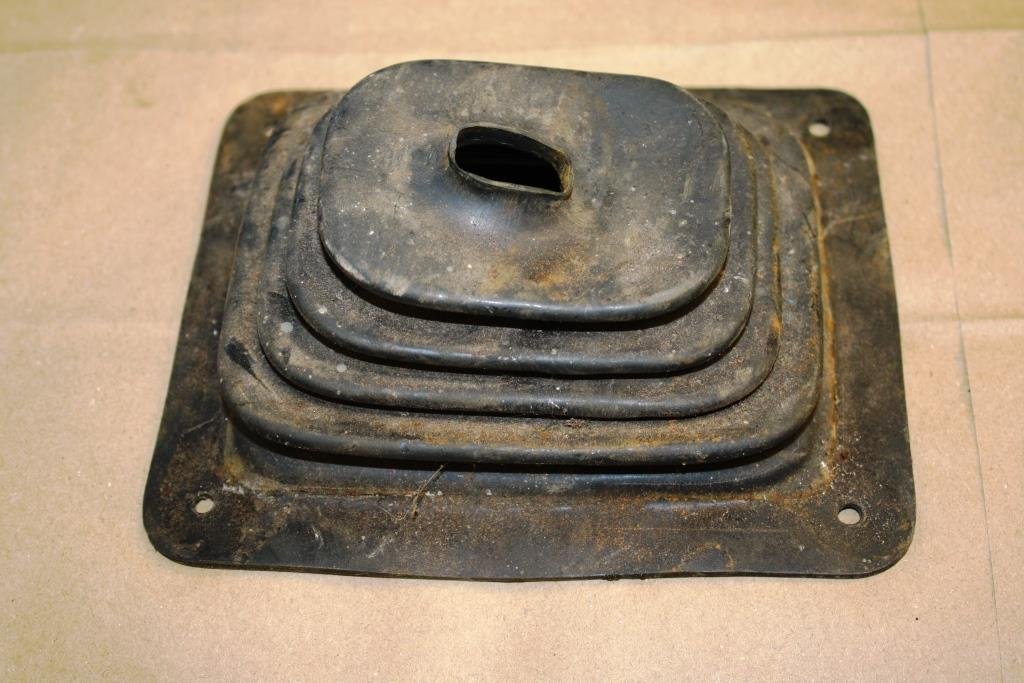
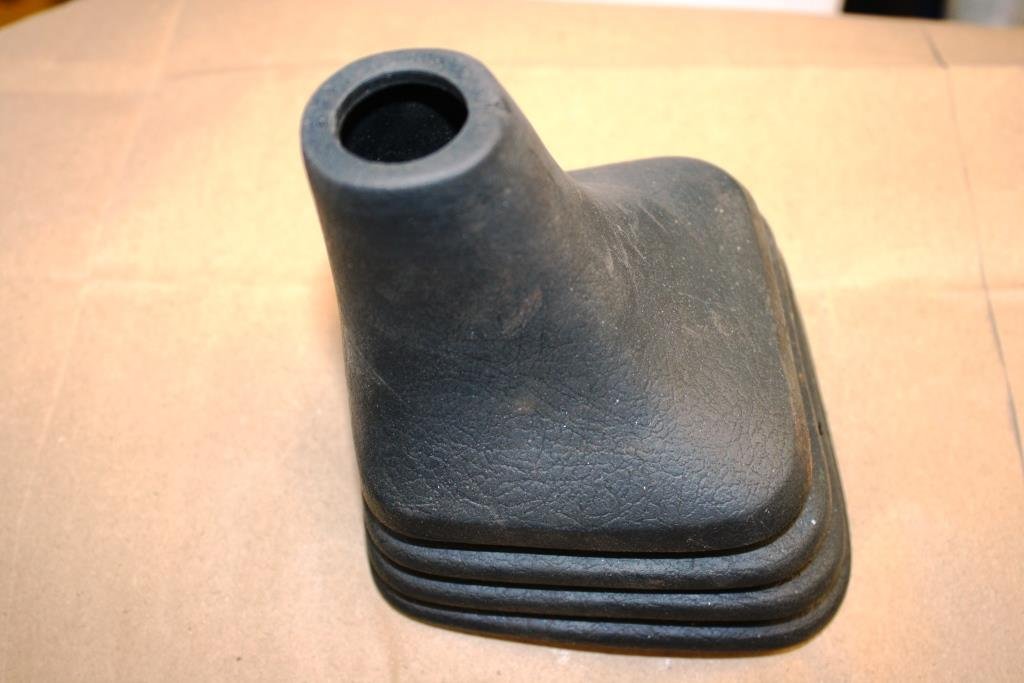
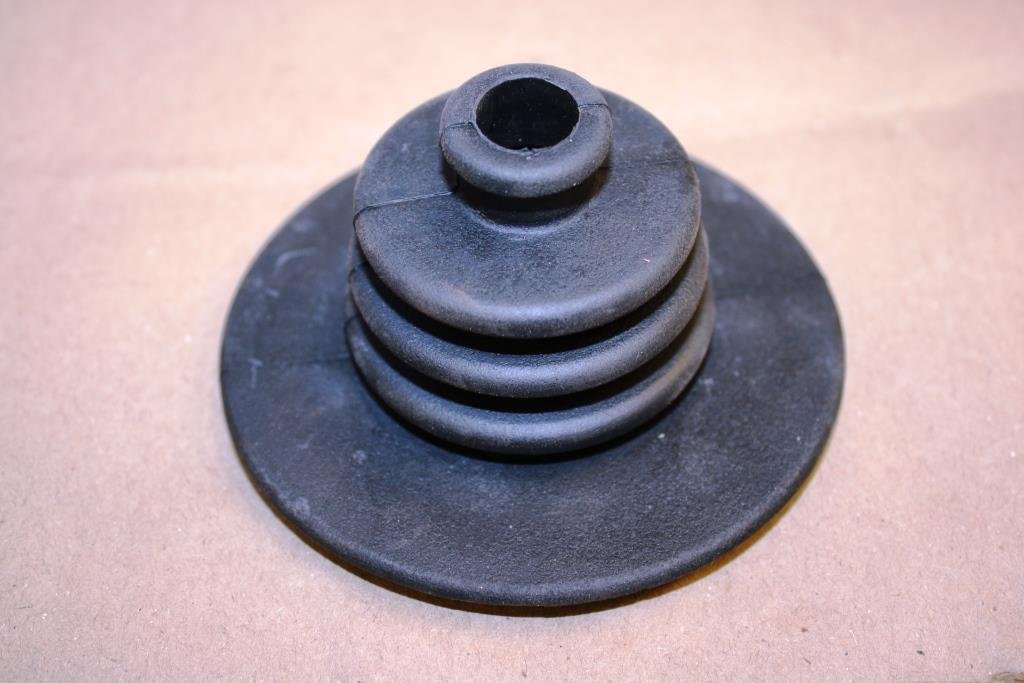
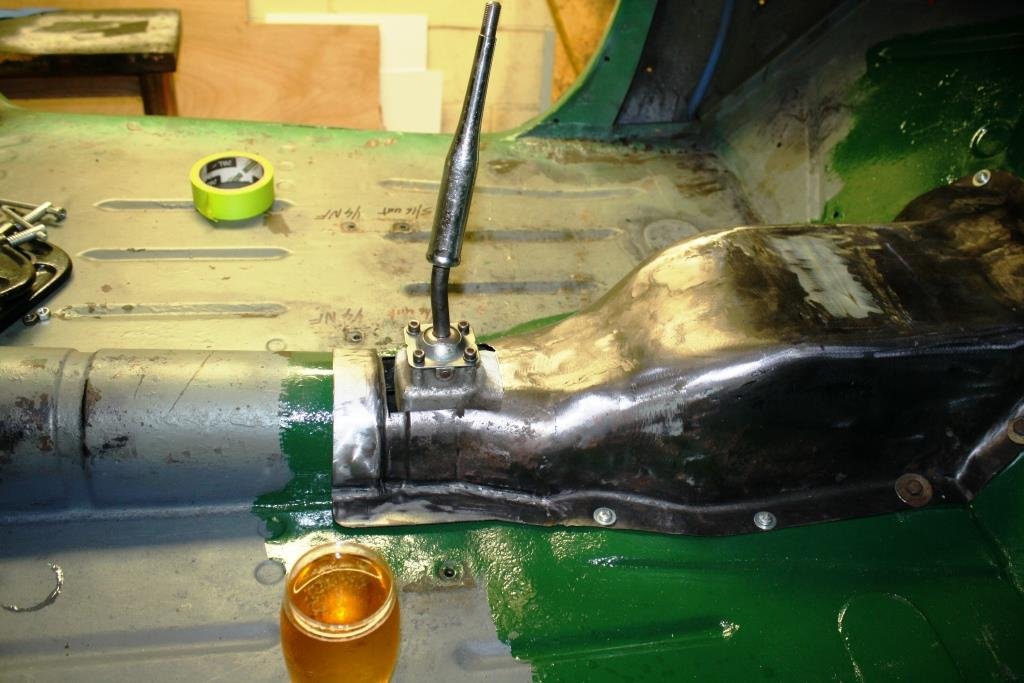
Rigamortice’s original gearshift boot was looking a little worse for wear. Thought I’d brave the local Pick-a-part to find a suitable boot. I couldn’t believe it when I discovered the whole place was filled up with bloody automatics! All I could find was this plastic monstrosity. Someone donated a cool “new old stock” MGA boot…..I think it’s my current favourite. Any comments or suggestions appreciated. https://oldschool.co.nz/index.php?/topic/49843-sr2%E2%80%99s-1947-vauxhall-%E2%80%9Crigamortice%E2%80%9D-discussion-thread/
-
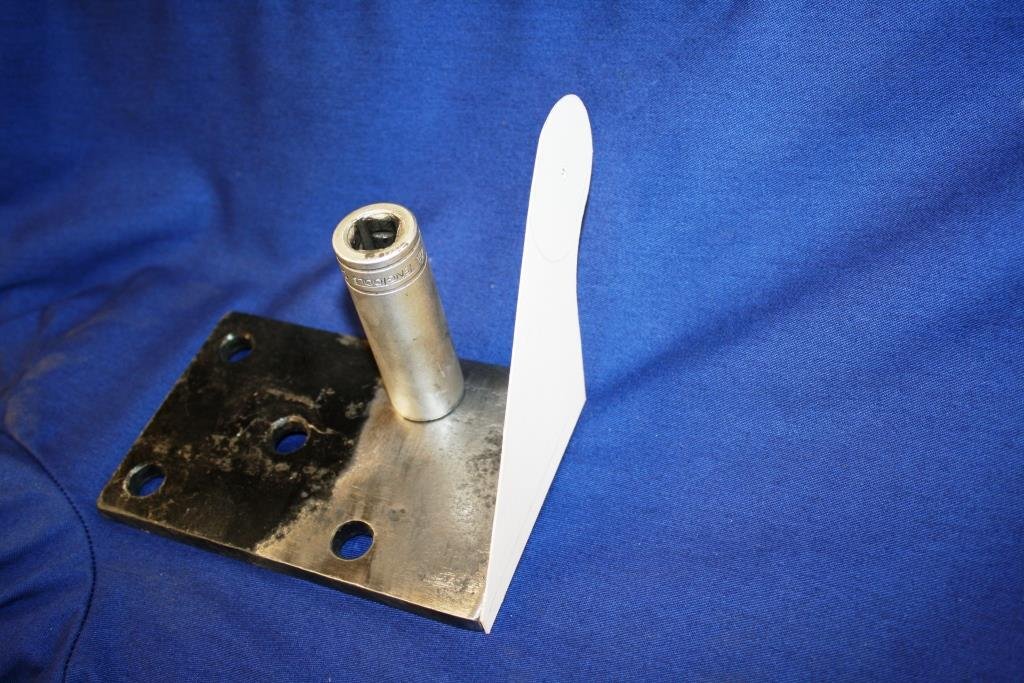
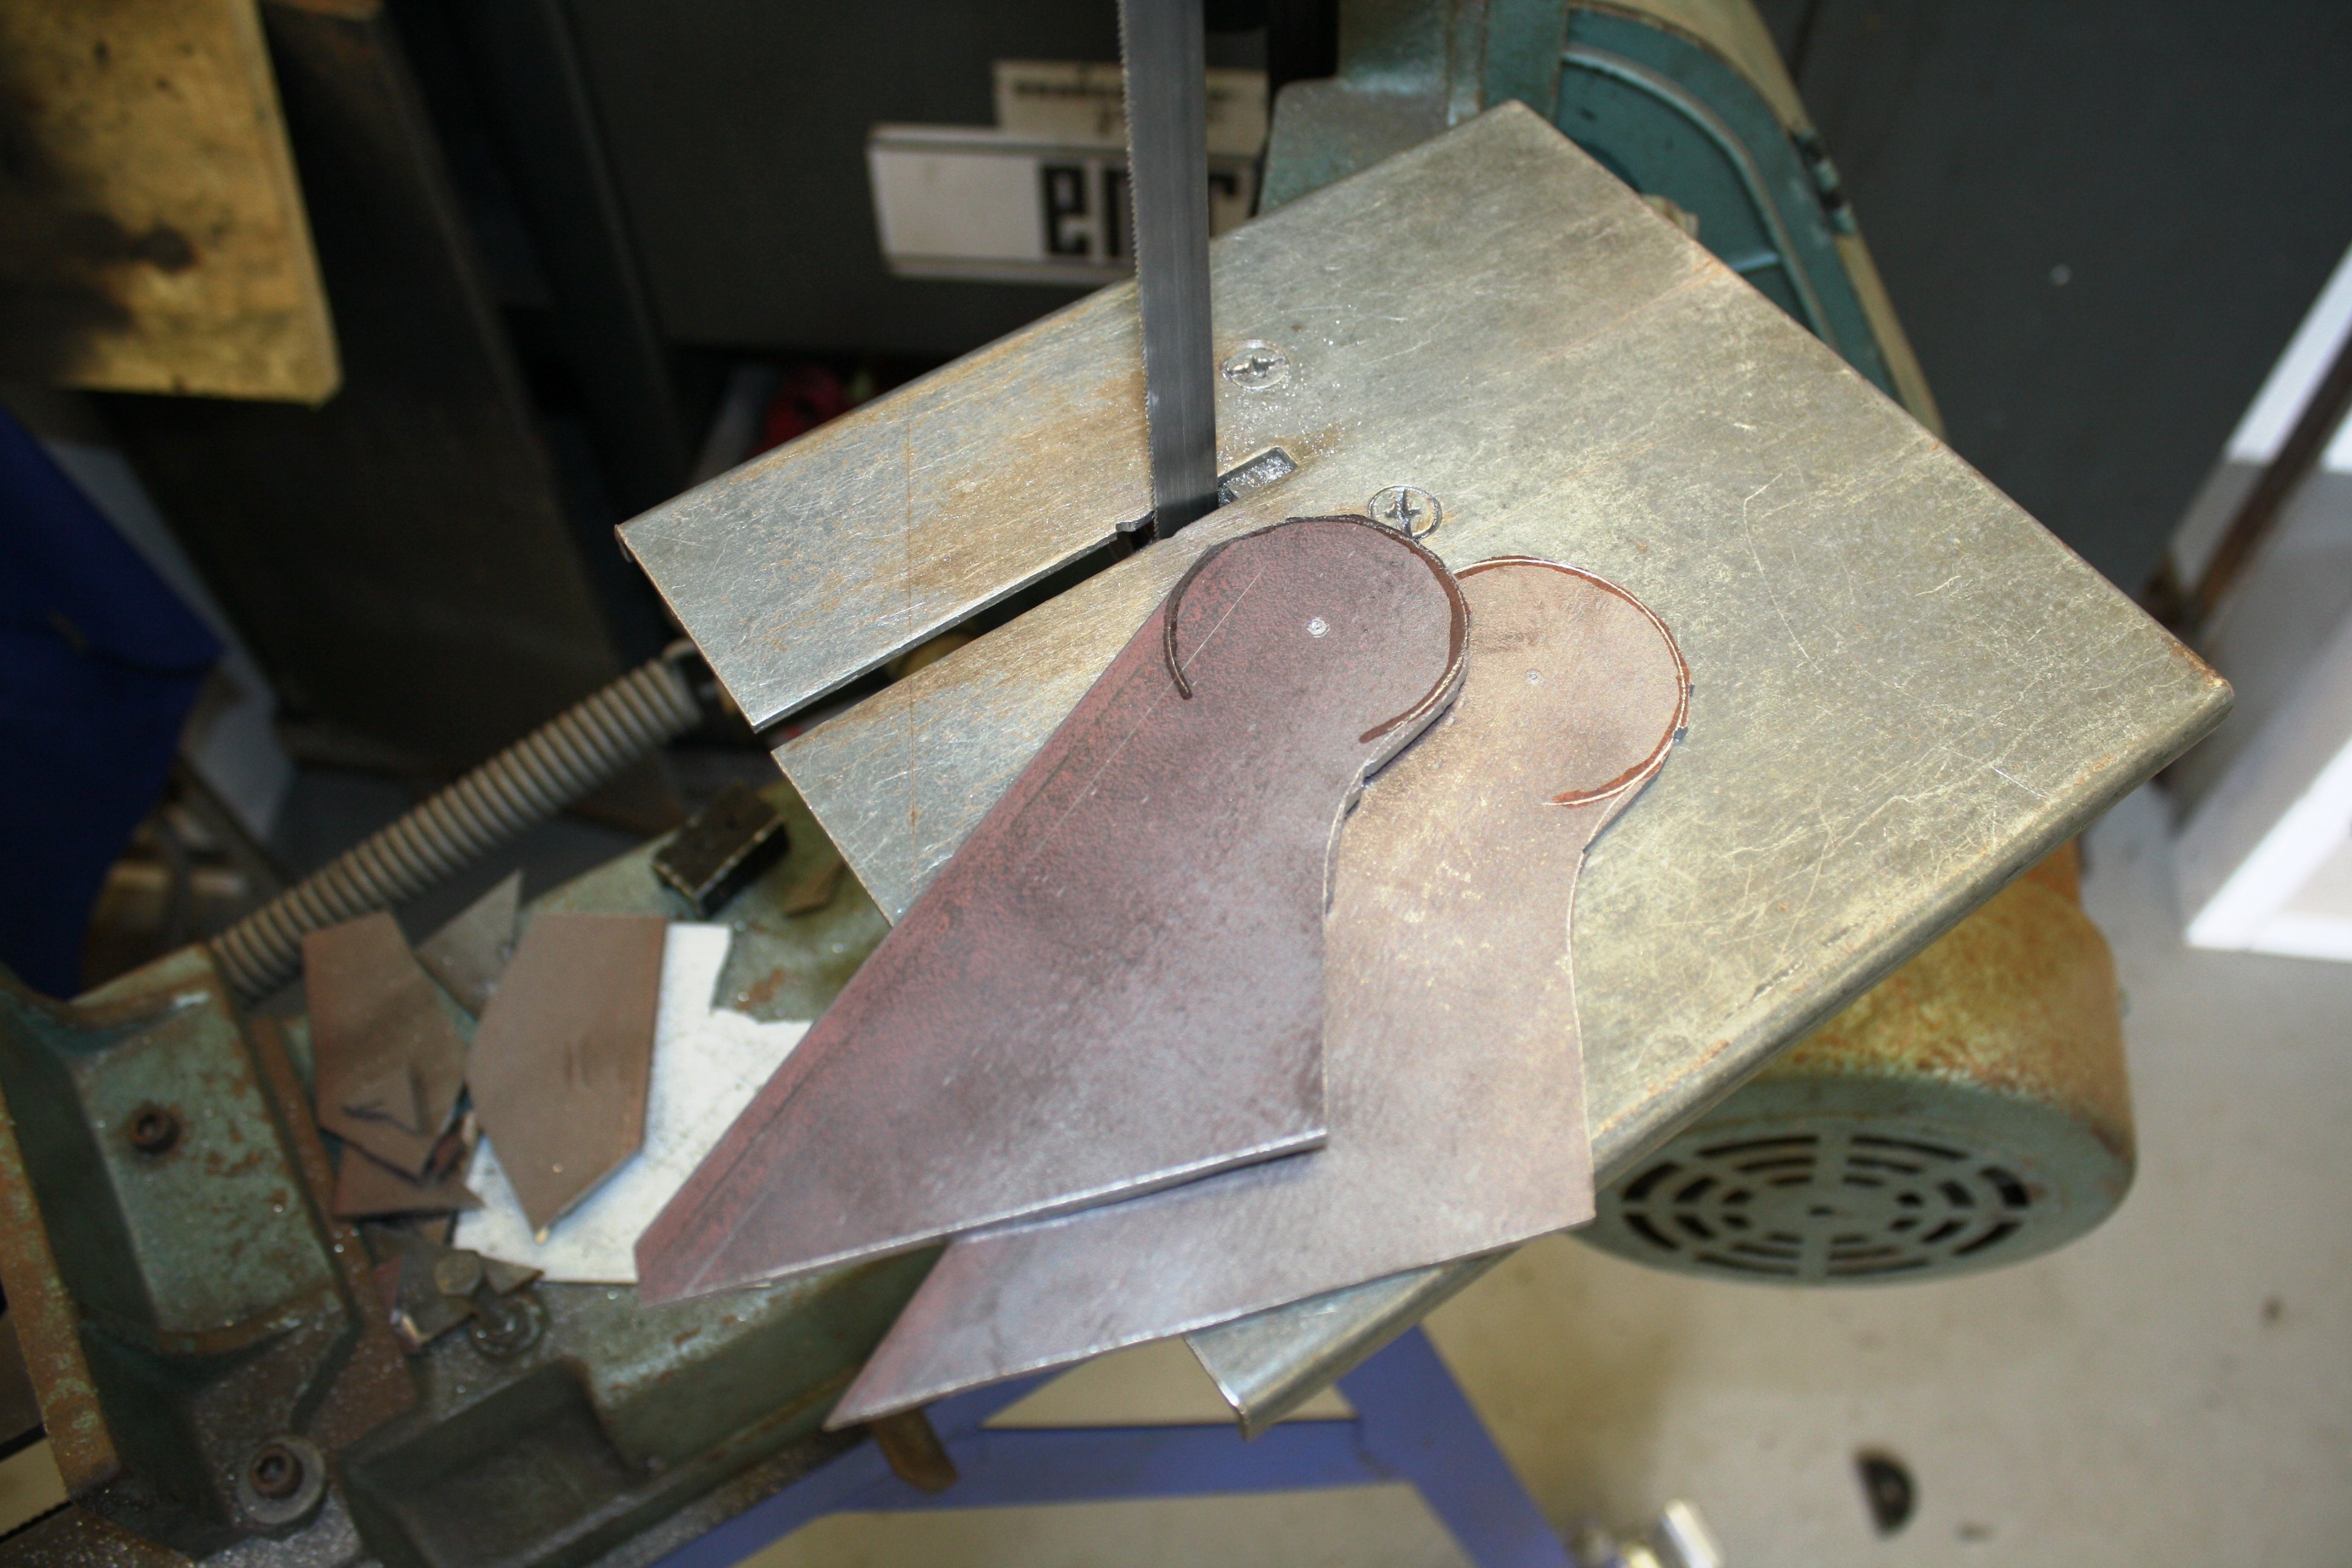
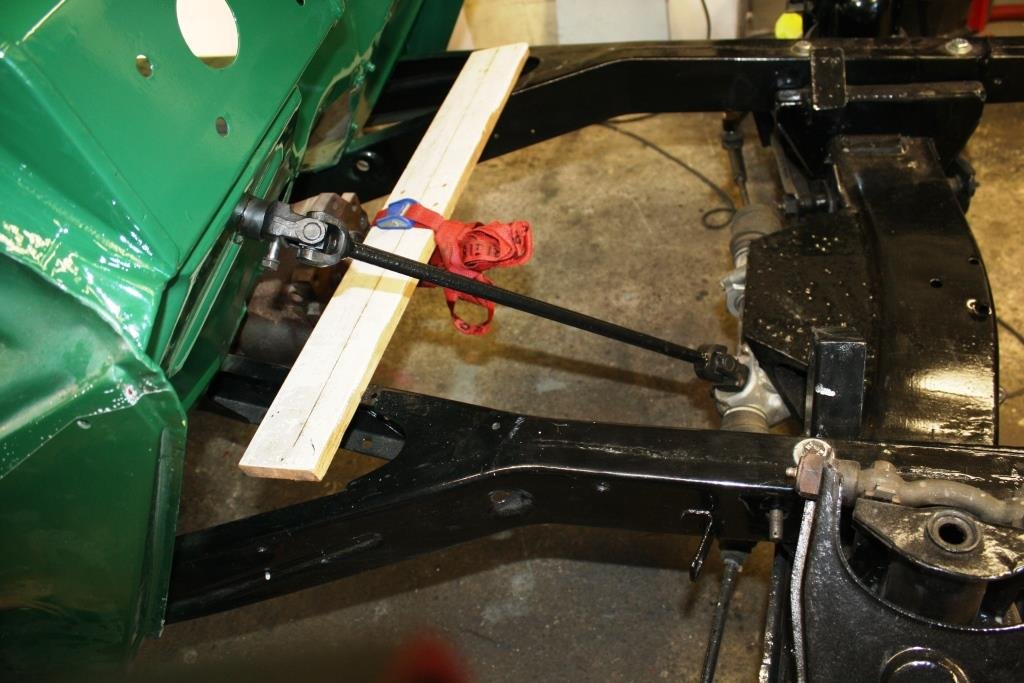
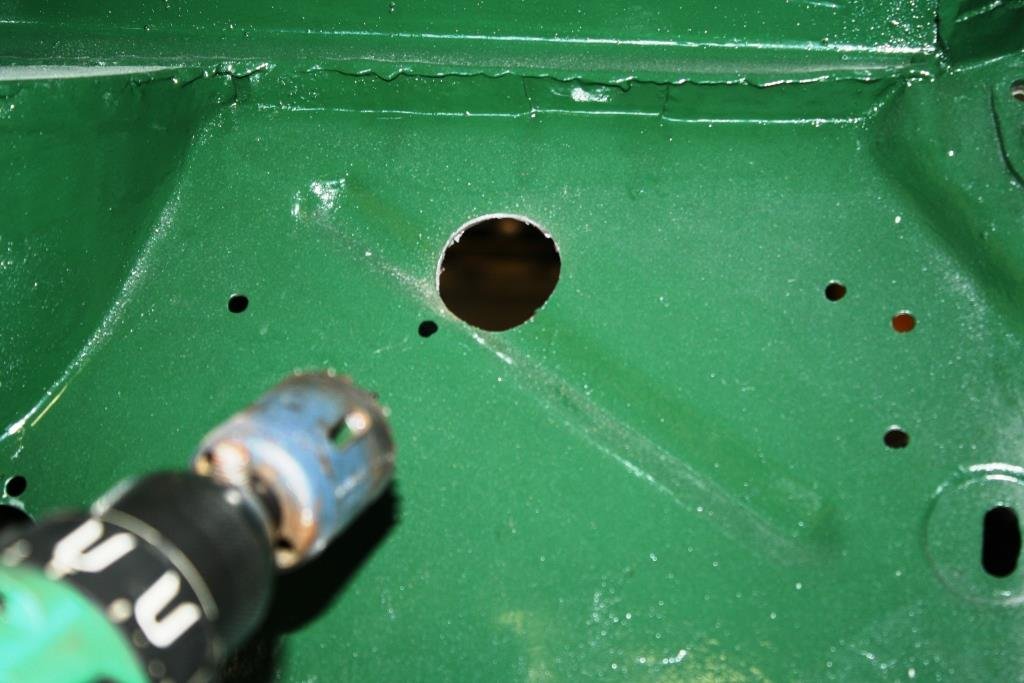
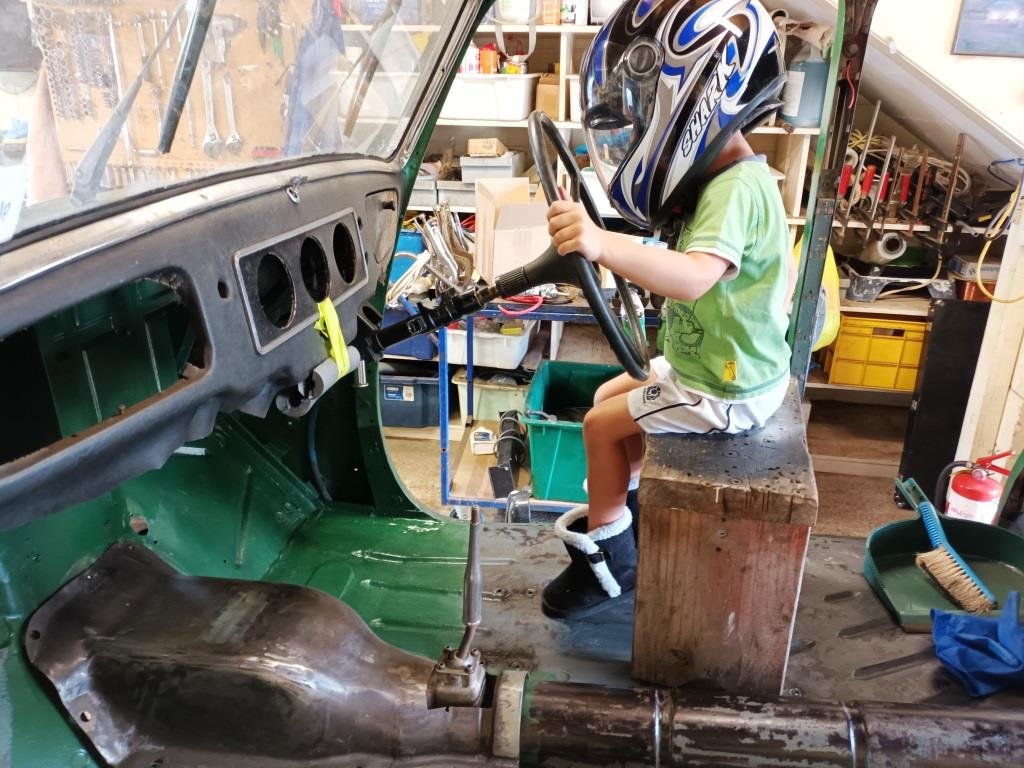
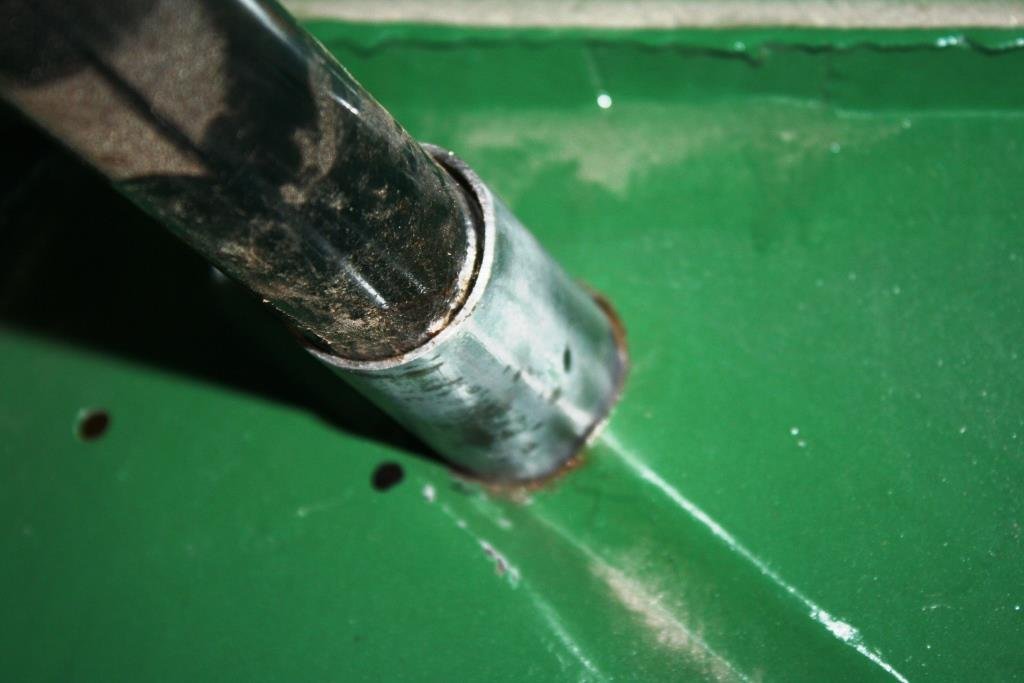
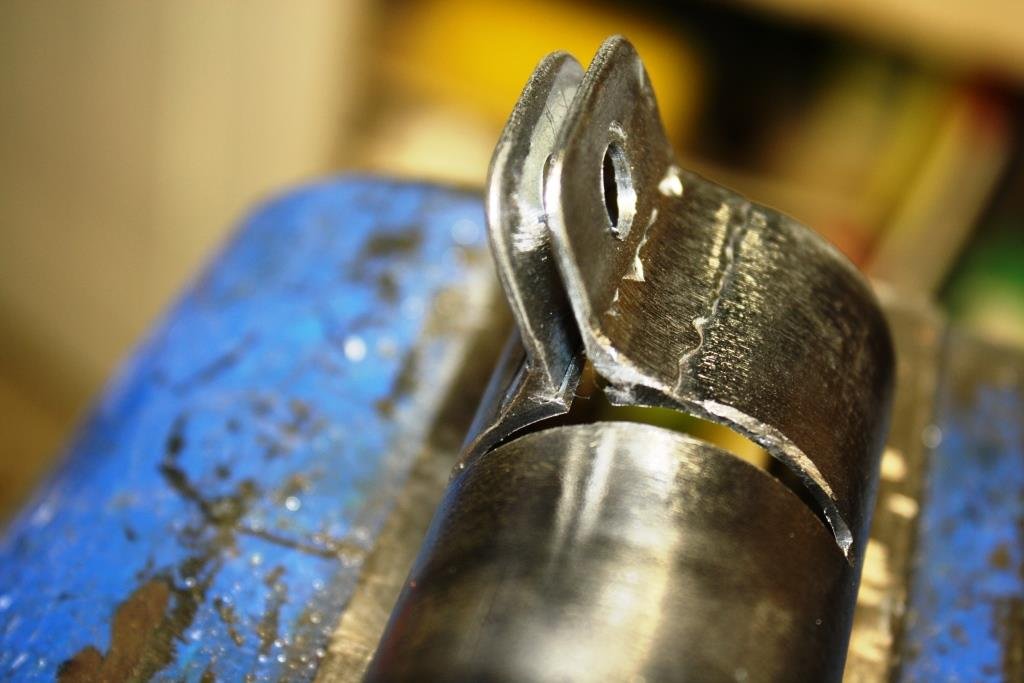
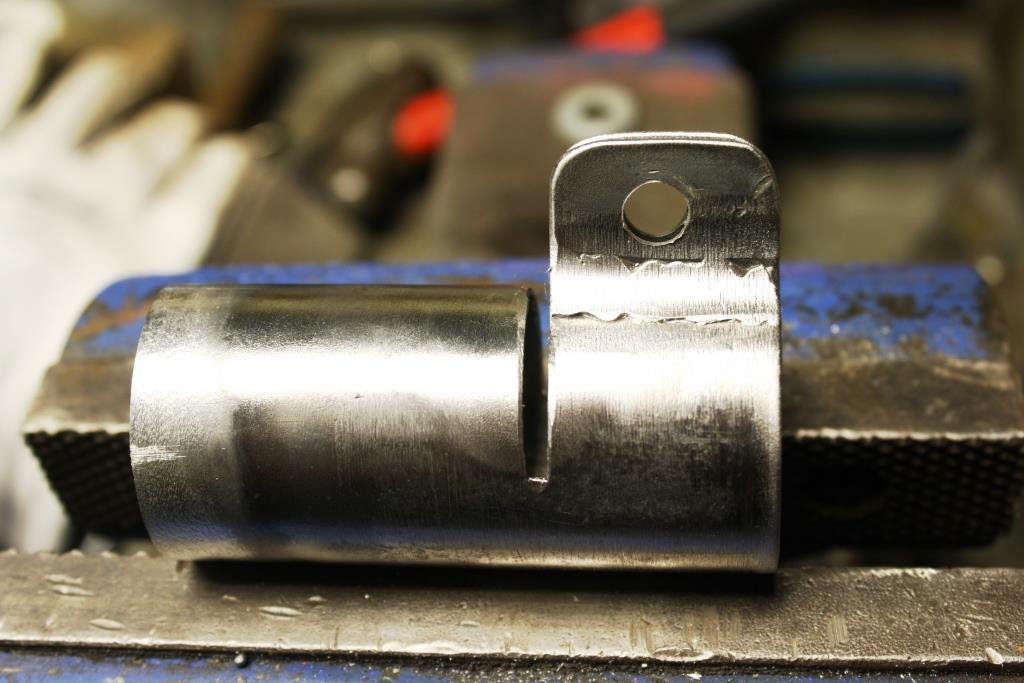
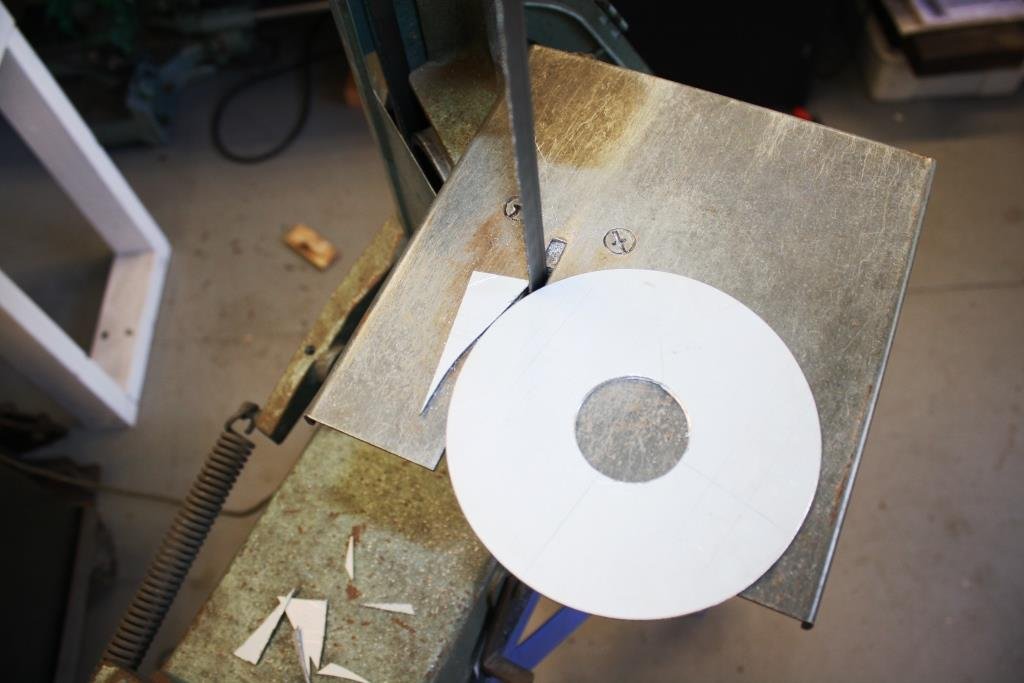
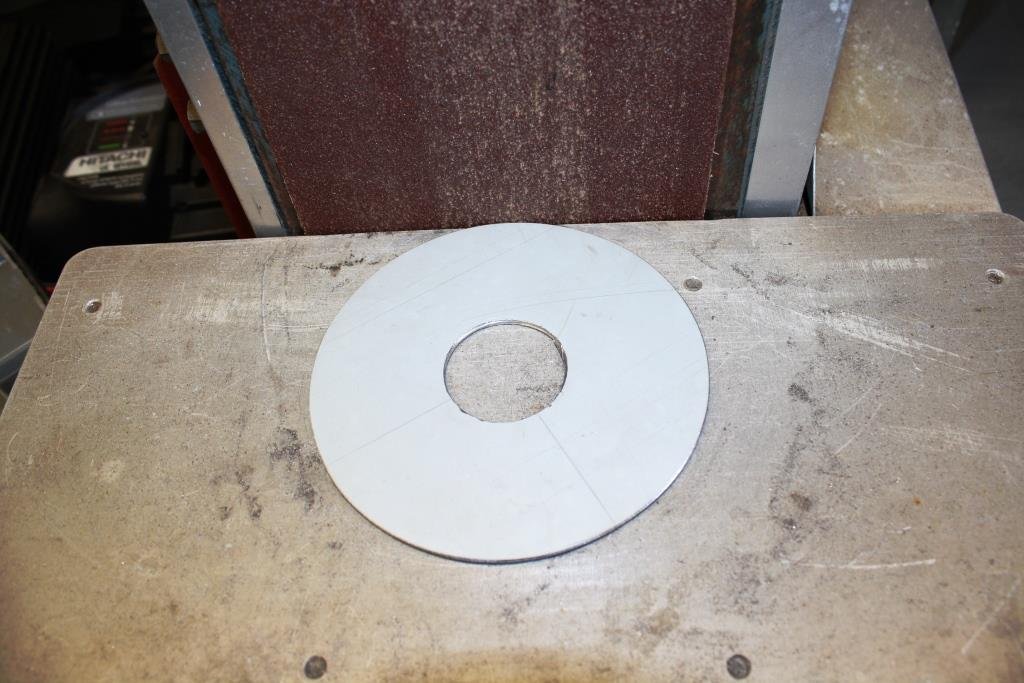
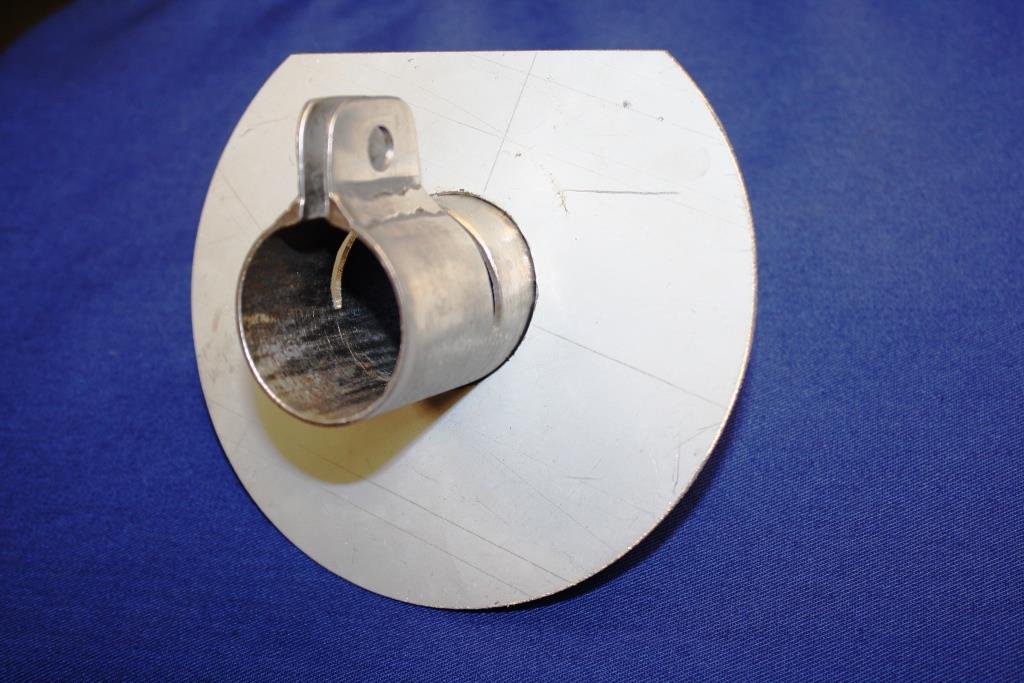
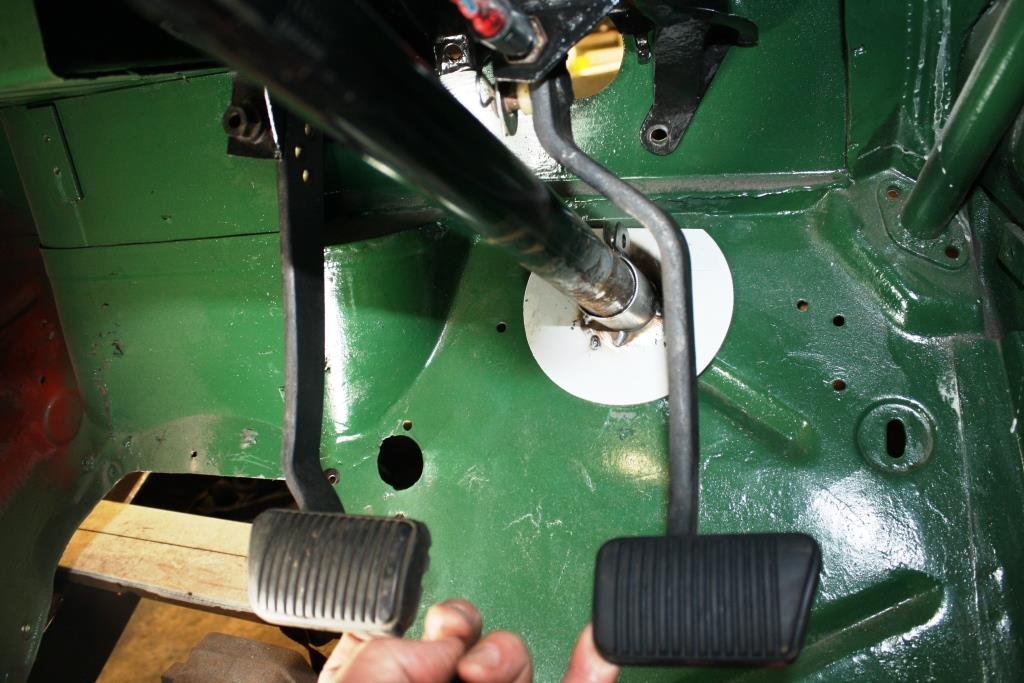
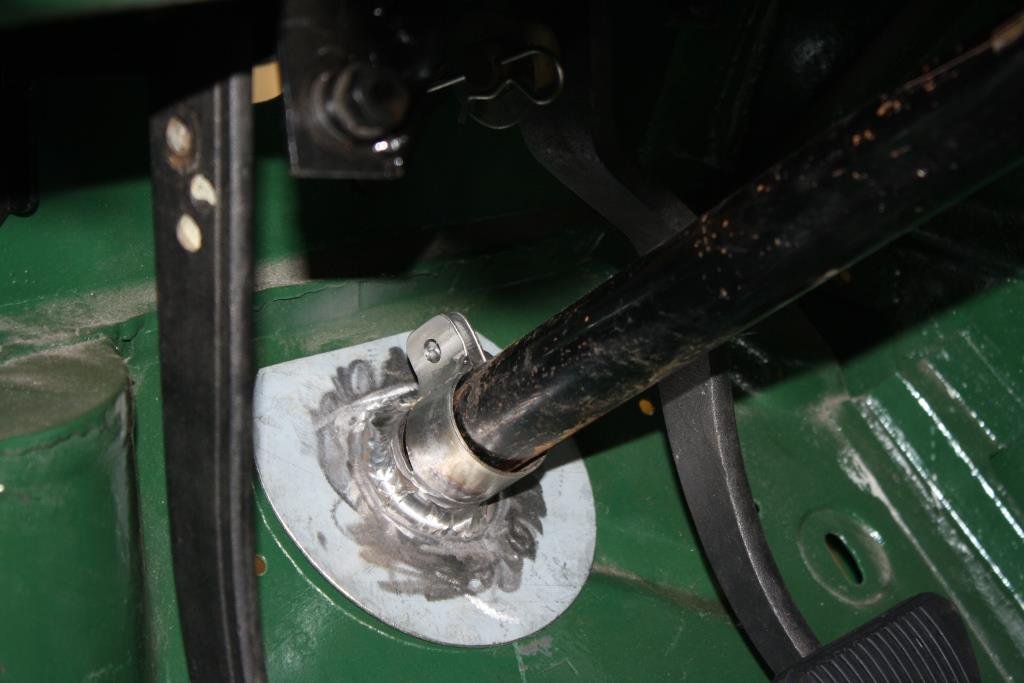
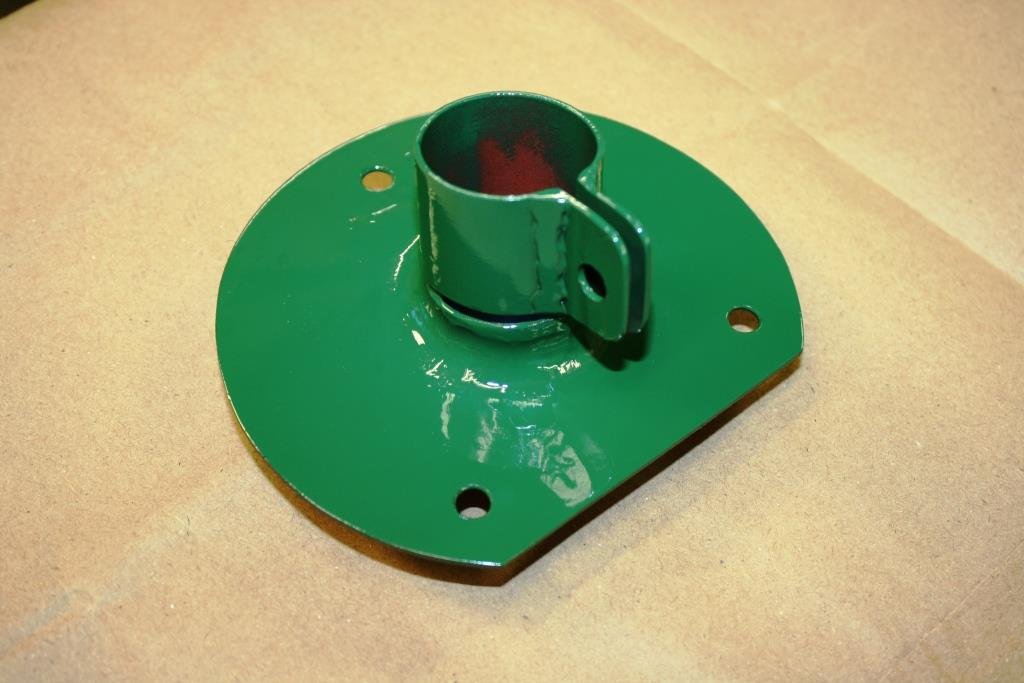
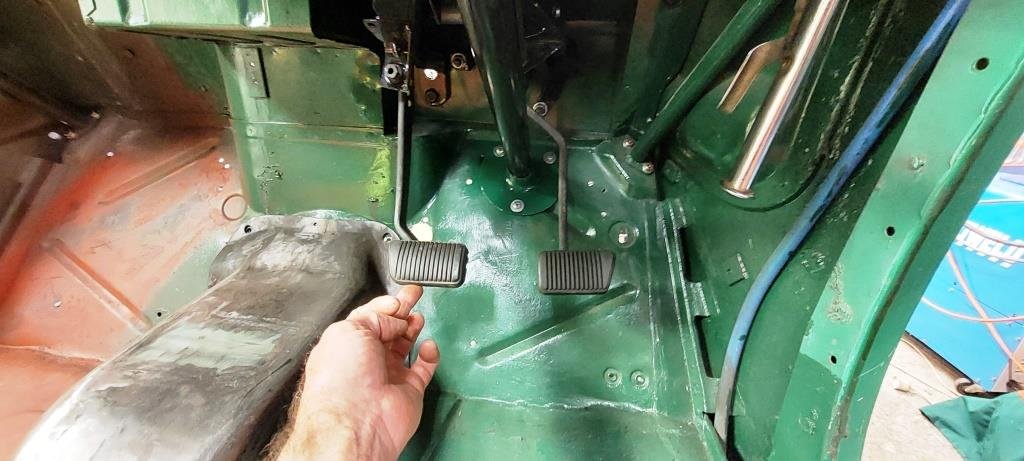
After careful measuring and considerable prolonged “scientific guesstimation” I drilled a hole in the firewall for the steering column. At this stage Rigamortice and I engaged the services of a 3 ½ year old professional race car driver to check the mocked up steering wheel and pedal positioning. Final prognosis from our expert was it would go much faster if we painted it red like a fire engine. Our expert then proceeded to hang his hammer on the tool wall – looks like he’s moved into the man cave for a while! Found a piece of tube in the scrap bin that was a slopping good fit on the Triumph steering column. Cut some slots and welded on some tabs………. Cut out a circular base plate that will be screwed to the fire wall. Tacked it all in place……. Finished up the welding on the bench…. One last check for fit…… And some paint to finish… Happy with the end result. Hoping I can still run the original floor dip-switch with enough clearance for the clutch pedal.
- 184 replies
-
- 24
-
-

-
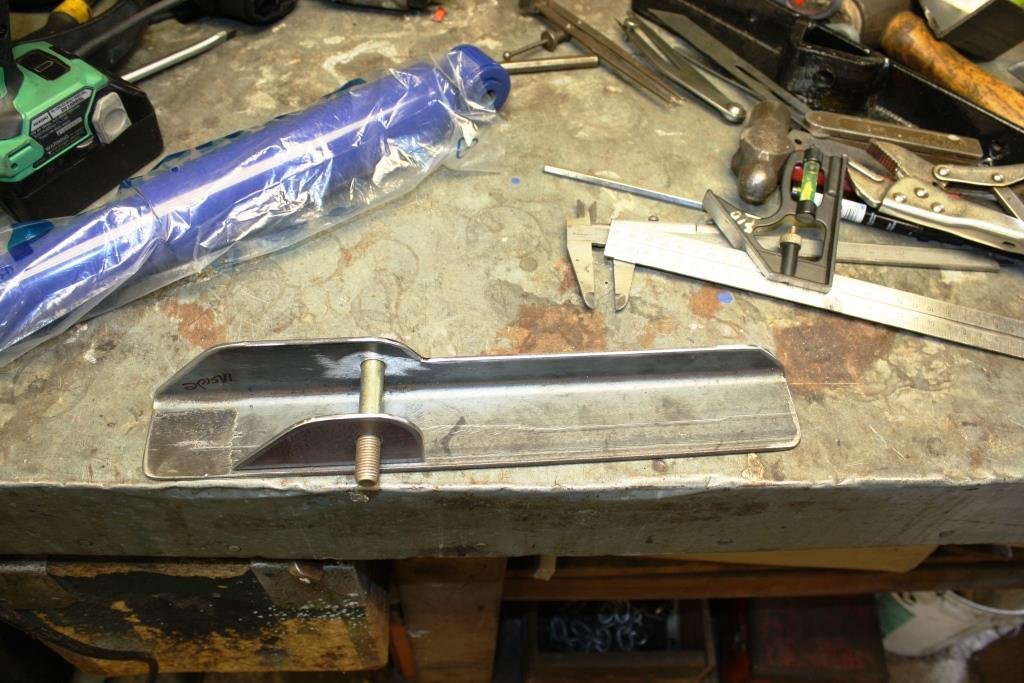
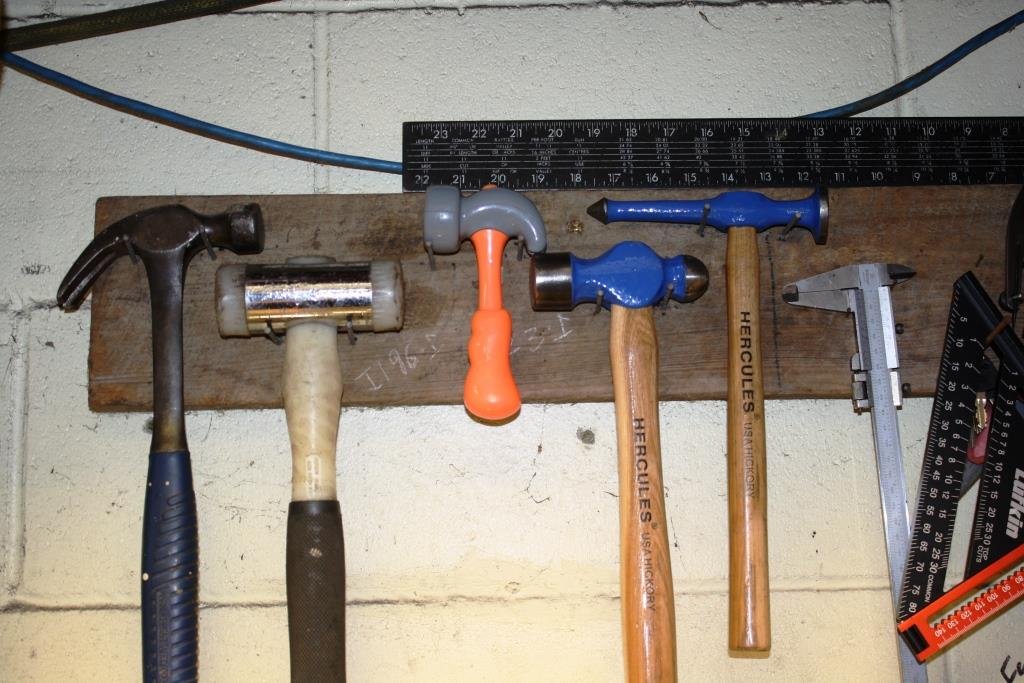
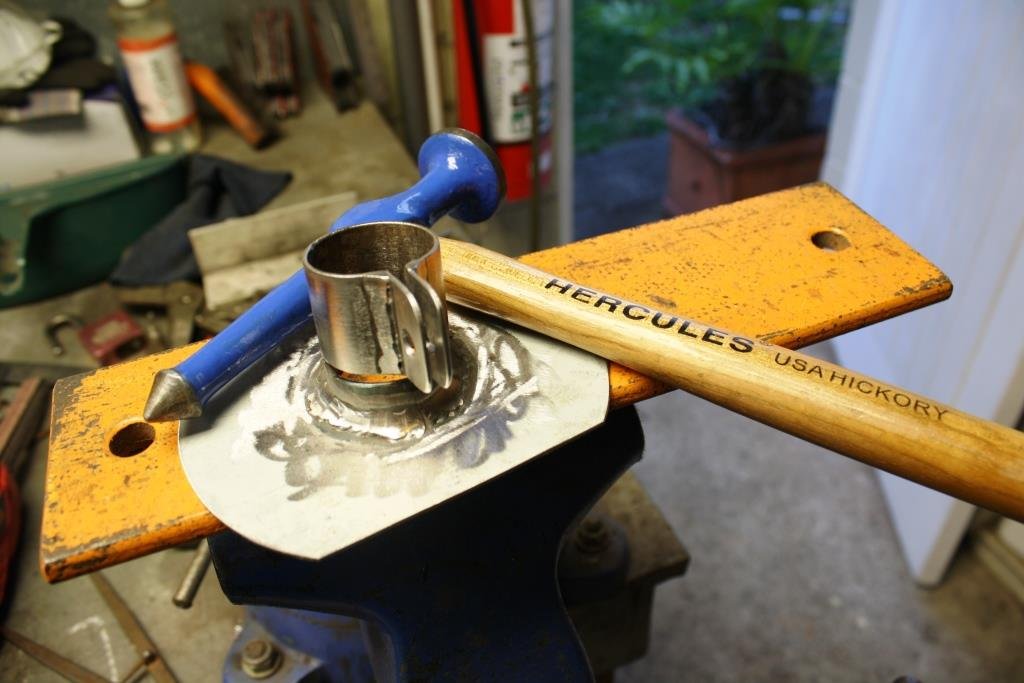
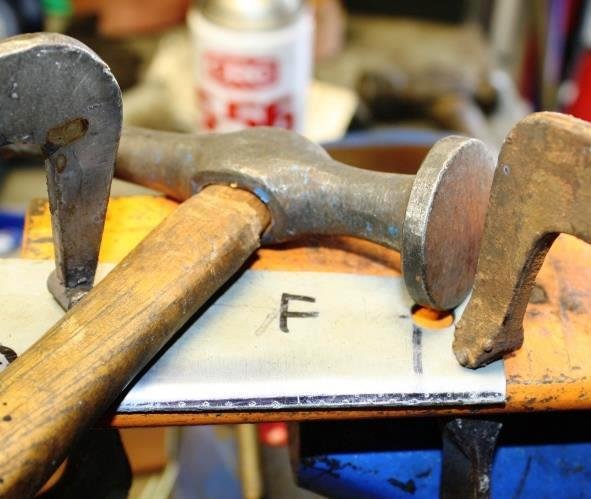
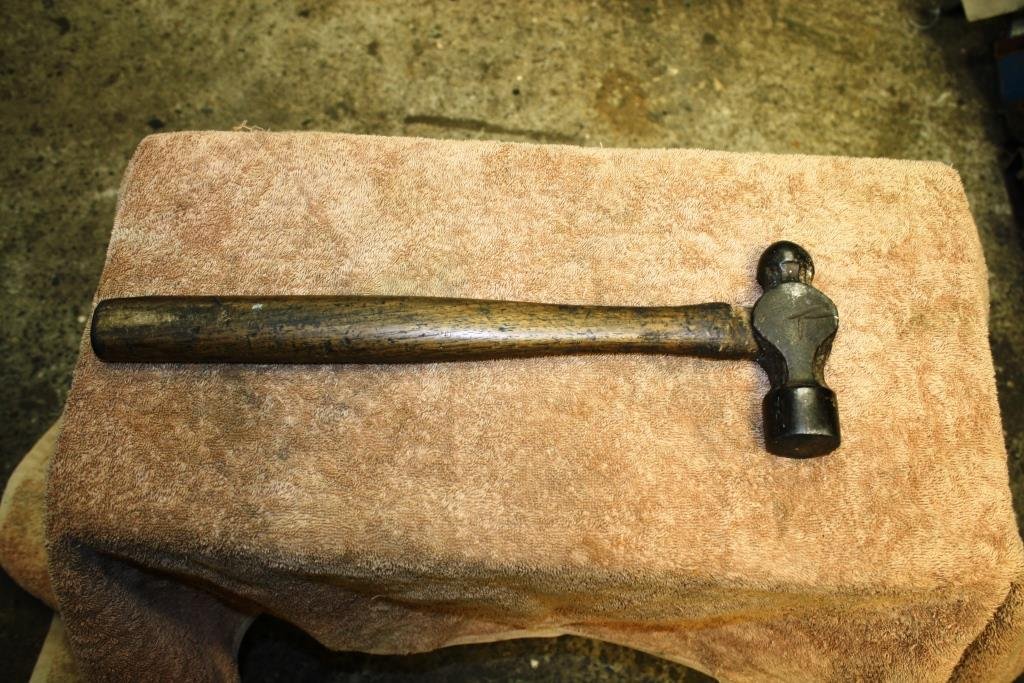
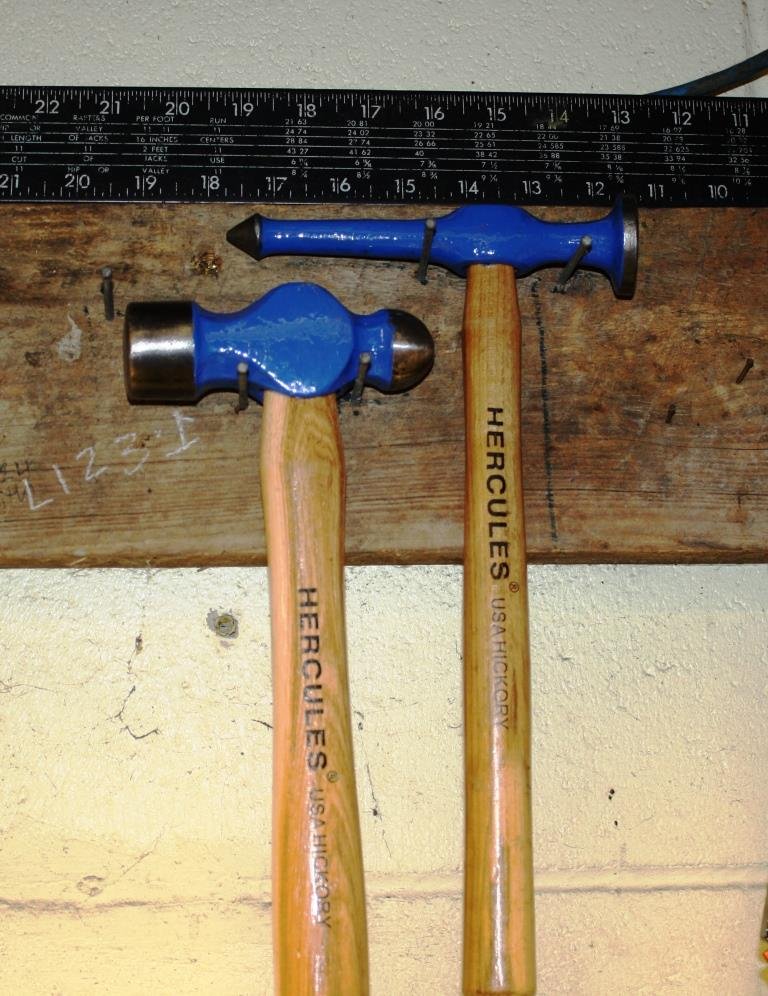
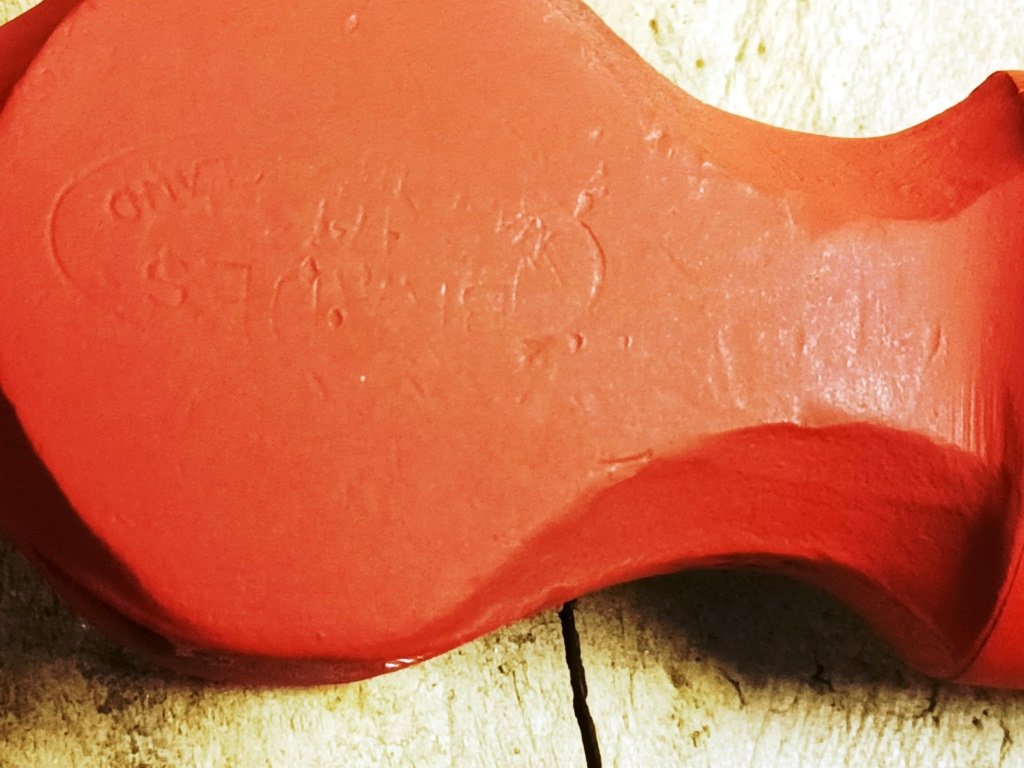
For some years now both Rigamortice and I have always shared a propensity for saving old tools and painting them blue (don’t ask!). The handle was falling off my favourite planishing hammer (bought in a junk shop years ago when we were buying our first house, ms sr2 had a baby on the way and were broke). This ball-pen was my grandfathers and we think was probably pre WWII. It’s got a name on the head with Sheffield England below it? Found a guy on Trademe selling American Hickory handles and ordered a couple. Spent a pleasant evening with Rigamortice in the “much esteemed & universally applauded” (in NZ) sr2 man cave drinking ½ a bottle of Barossa Valley Pinot Noir while linishing and painting the two hammer heads. Following day I shaped the handle ends and wedged them in tight. These hammers should outlive me and the people reading this thread – It’s easy to discard history but it is just as easy and far more rewarding to keep it alive.
- 184 replies
-
- 24
-
-
-
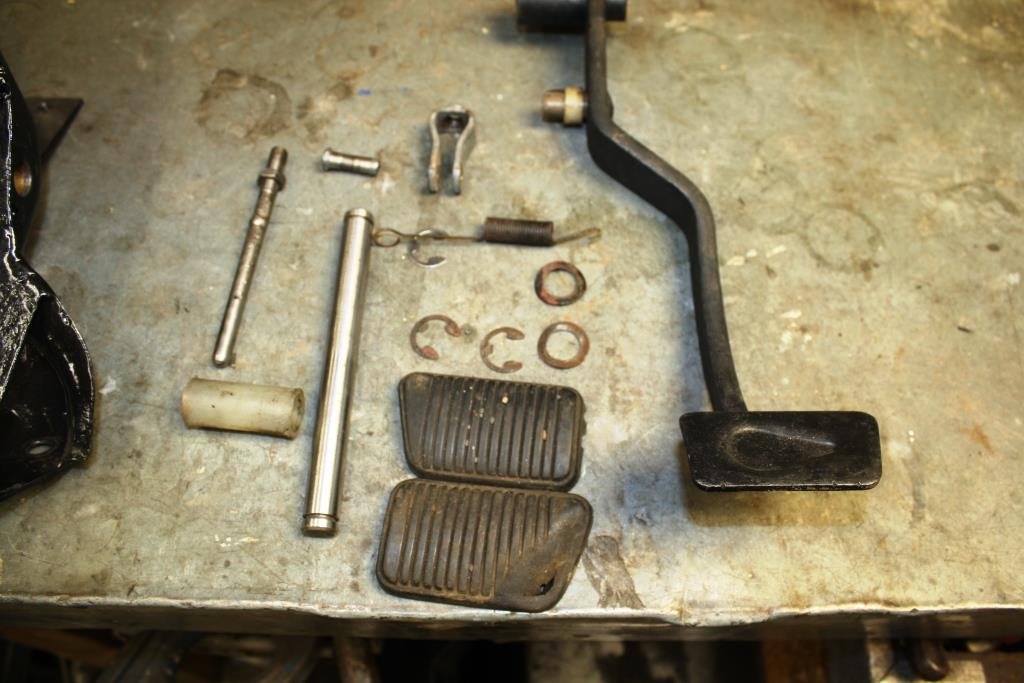
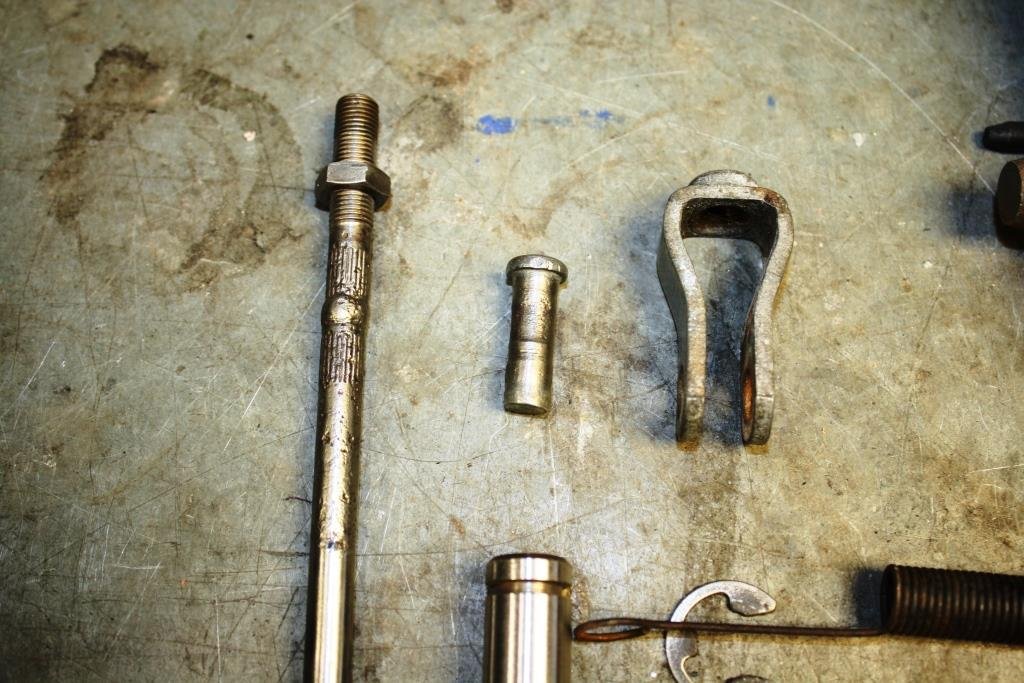
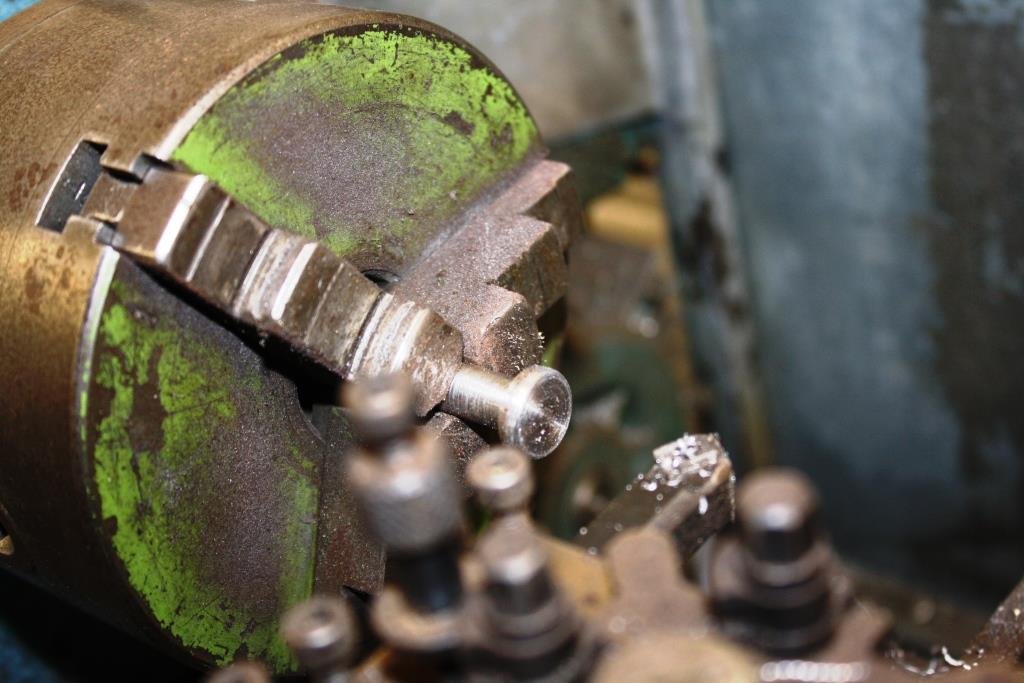
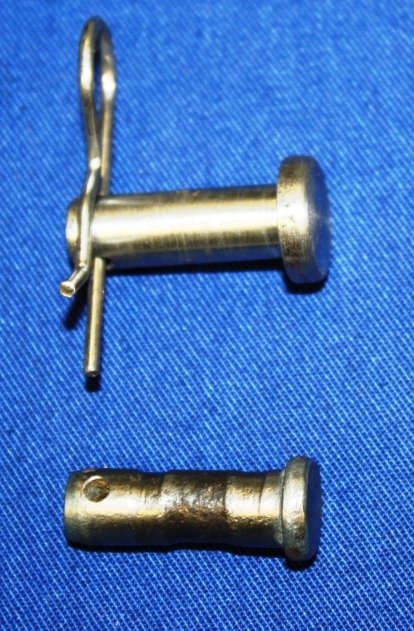
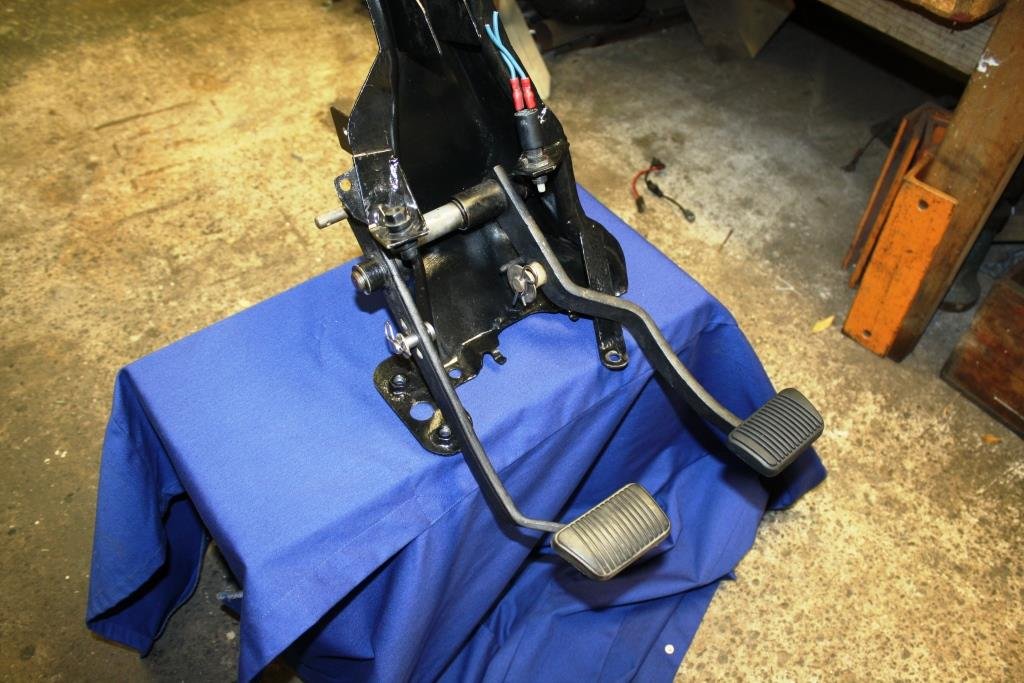
Time to look at the XA Falcon pedal assembly. The clevis pin on the brake pedal has seen better days. I’m picking it had already done some 300 odd thousand Km’s in a clapped out XA Falcon before I bought the assembly on “Trade And Exchange” in the early 80’s, (no internet in those days). The welded push rod is for the hydraulic clutch - came from an HD Holden. Spun up a replacement clevis pin. Old vs new…… Pedal assembly ready for installation.
- 184 replies
-
- 20
-
-
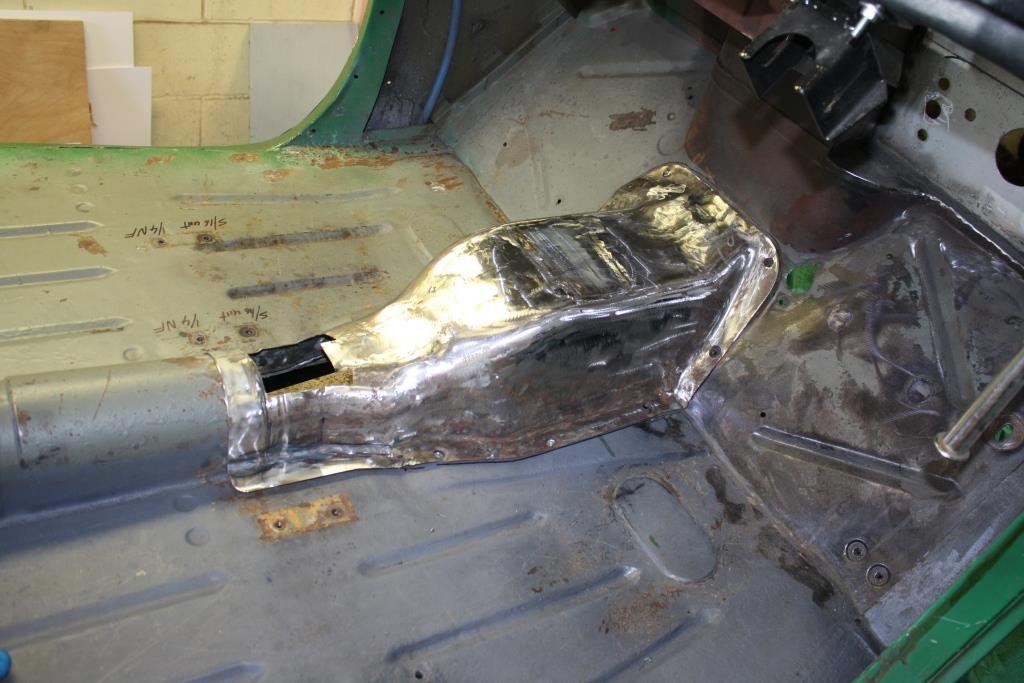
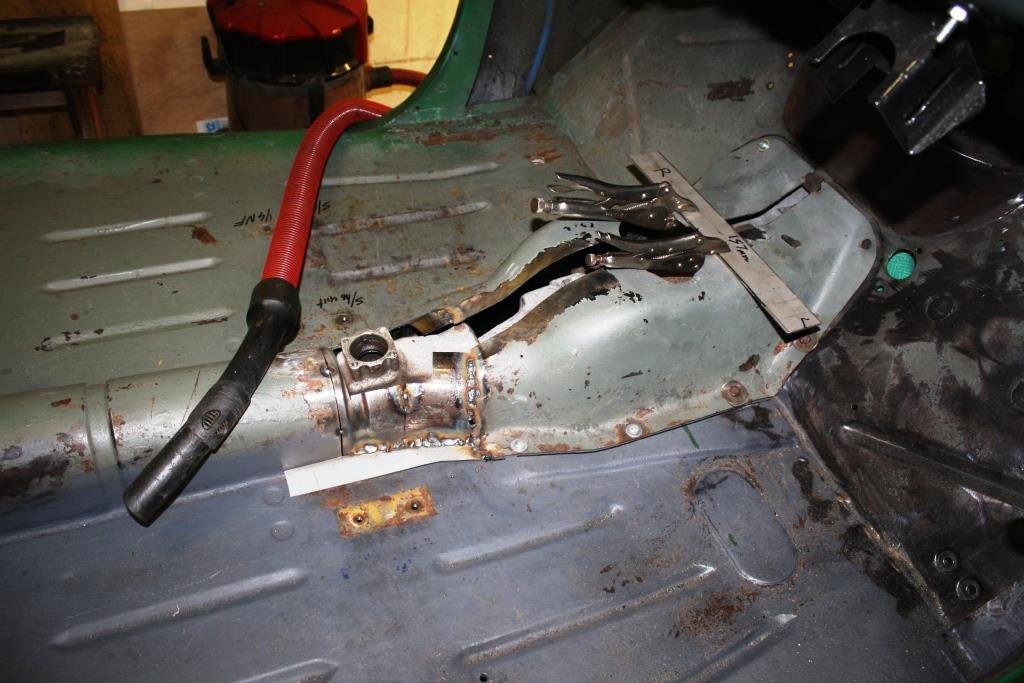
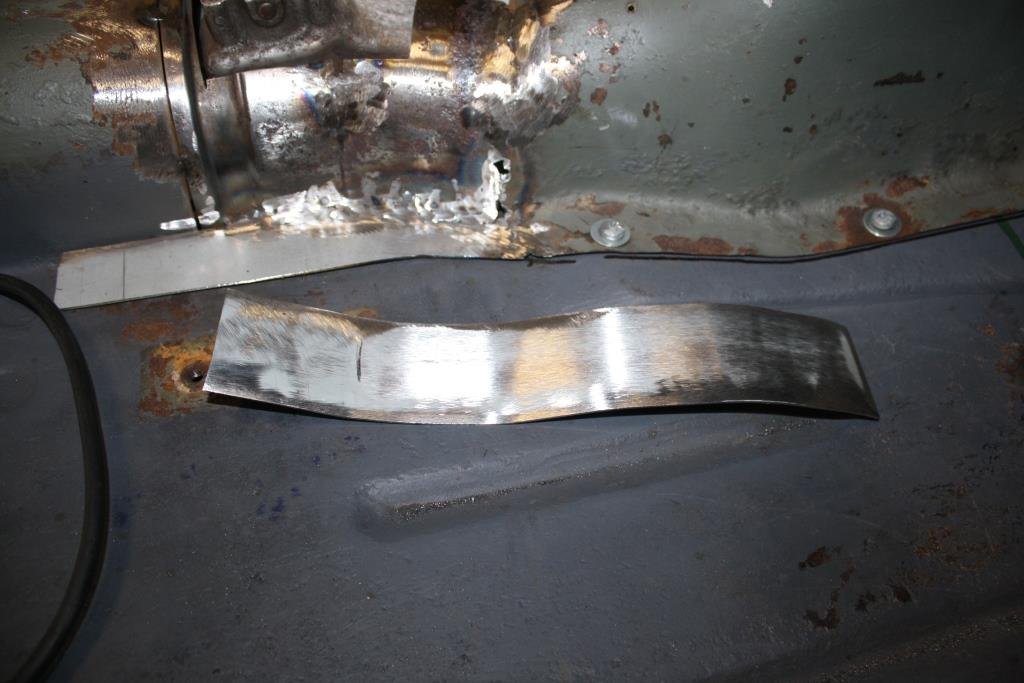
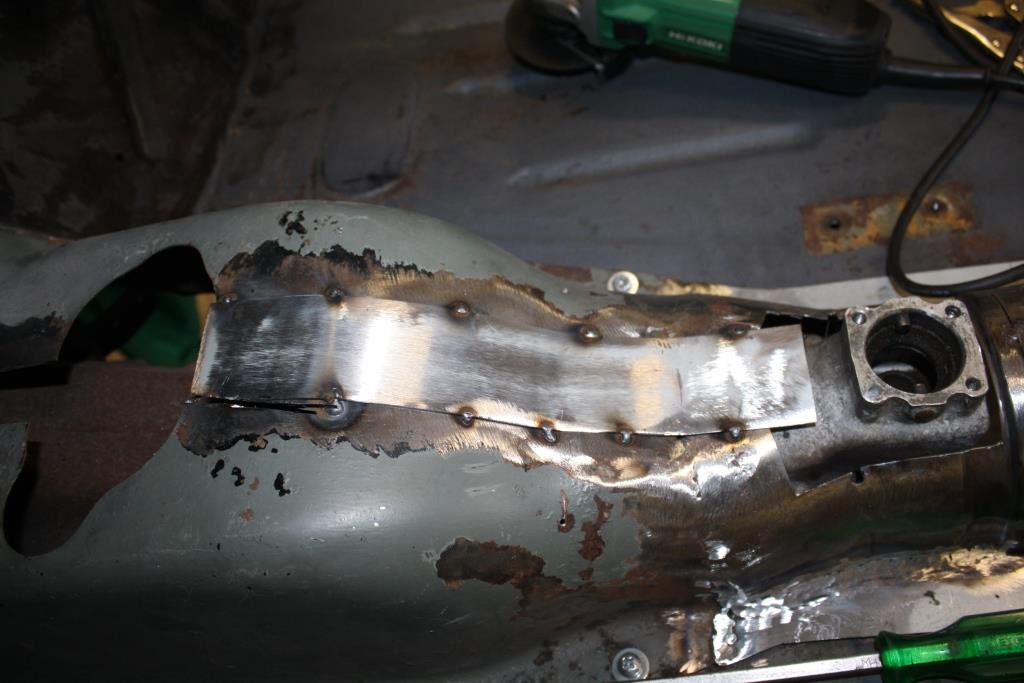
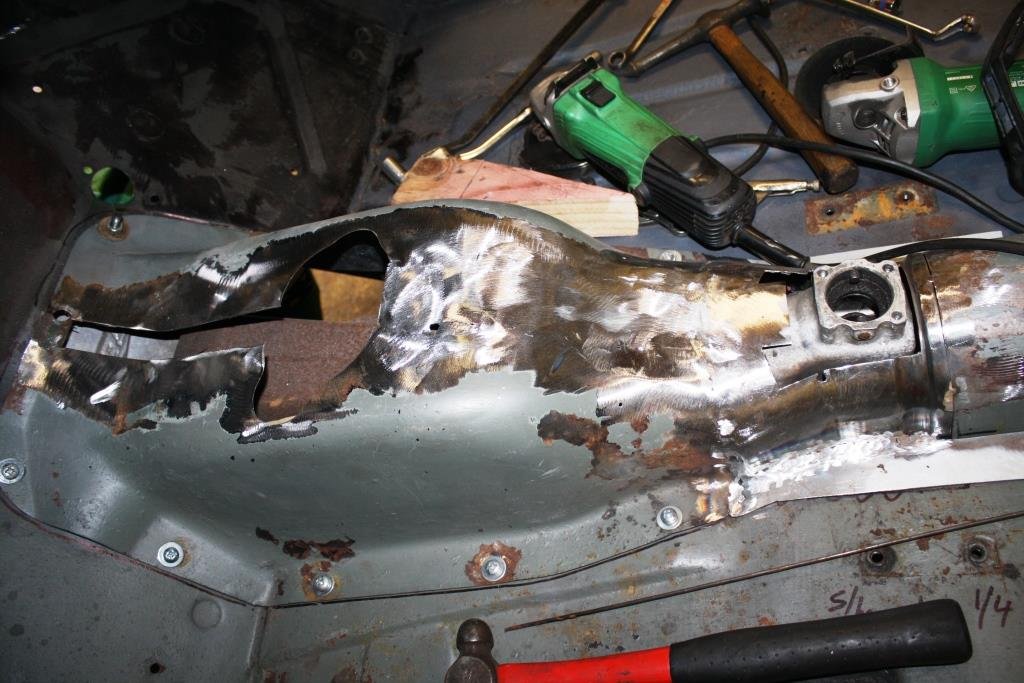
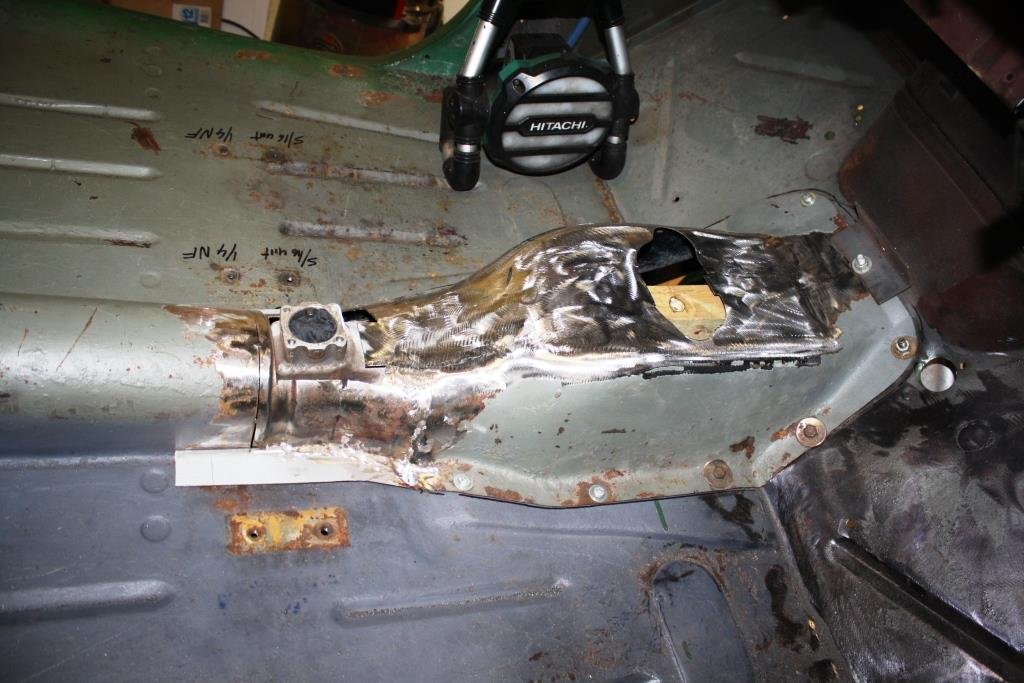
Proceeded to cut the tack welds out so I could fabricate a lip to go over the trans (don’t ask) tunnel. I’m keeping the original bench seat so things will get tight with the shifter further back. It sprung slightly when released so I held things in position with some scrap and the mismatched seat mounting bolts. Bent up a piece of 16 gauge zintec for the lip…… A bit of massaging to make it fit…… And tacked it in place….. Out of the car to finish the welding and trim. A quick test fit – still holding its shape. Time to fill the big hole; endless, painstakingly small tacks cooled off with the compressed air trying not to have it distort on me. Cleaned up and it still fits! Did some floor painting and installed some 8mm riv-nuts. Beer o'clock! - Happy with the results, I’ll finish the rear part of the cover when I find a suitable old-school gearshift boot.
- 184 replies
-
- 21
-
-
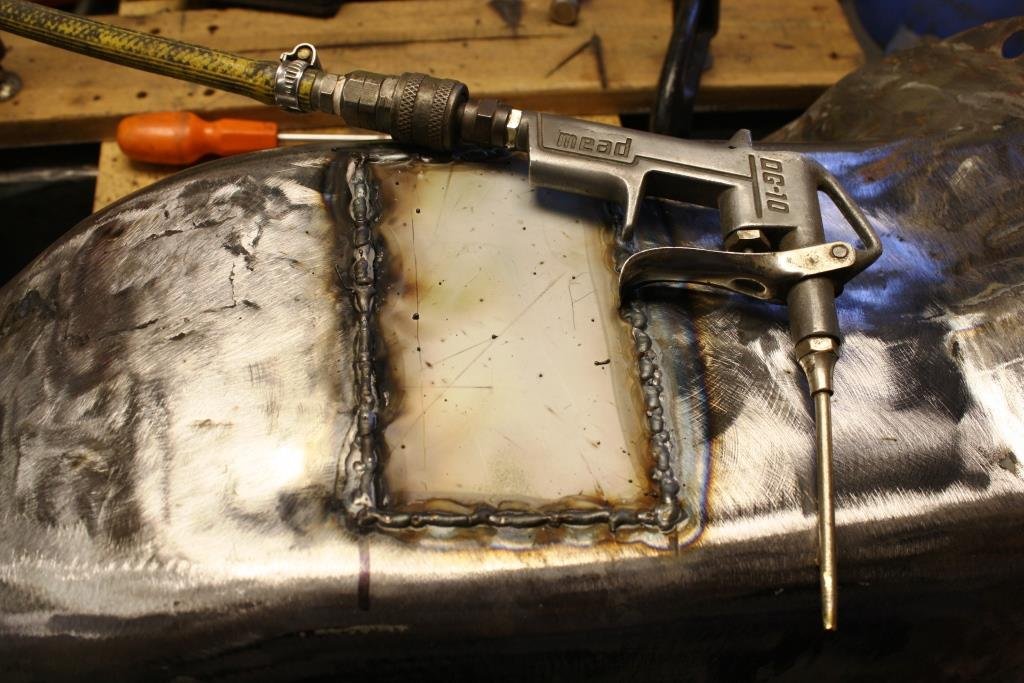
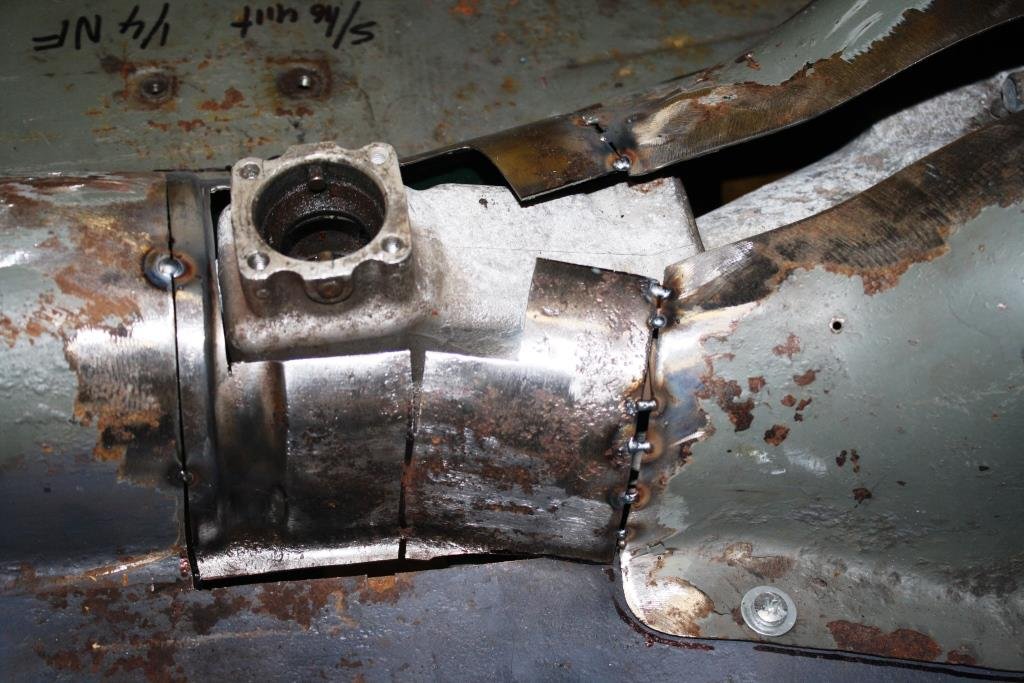
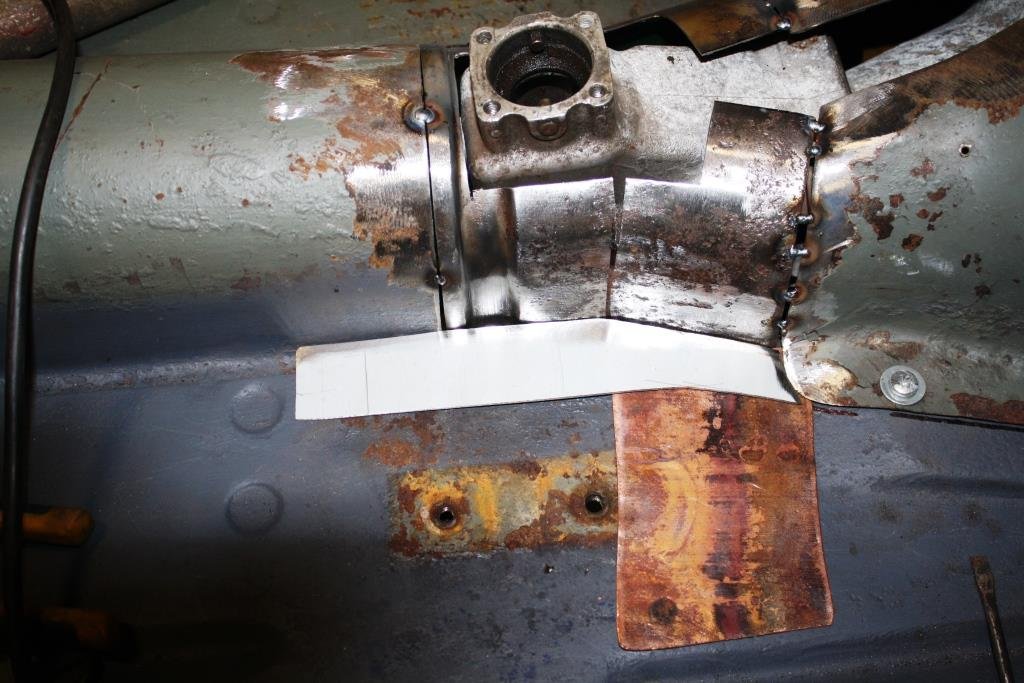
Started tacking in pieces I’d cut from the trans (i.e. “gender fluid”) tunnel. Once again a piece of thin copper sheet gives you something to weld against that wont stick. A bit messy but I think we’re heading in the right direction. Cut out a strip to join the two halves. Starting to look like the shape I’m after. It needs to be removable but has to fit well, I’ll fill the big hole where the original gearshift was when it’s out of the car and then see how good (or bad) my hammer and dolly technique is!
- 184 replies
-
- 19
-
-

SR2’s 1947 Vauxhall “Rigamortice” Discussion thread.
sr2 replied to sr2's topic in Project Discussion
Thanks for thatmate. Loved the positive feedback you always get on this site. -
SR2’s 1947 Vauxhall “Rigamortice” Discussion thread.
sr2 replied to sr2's topic in Project Discussion
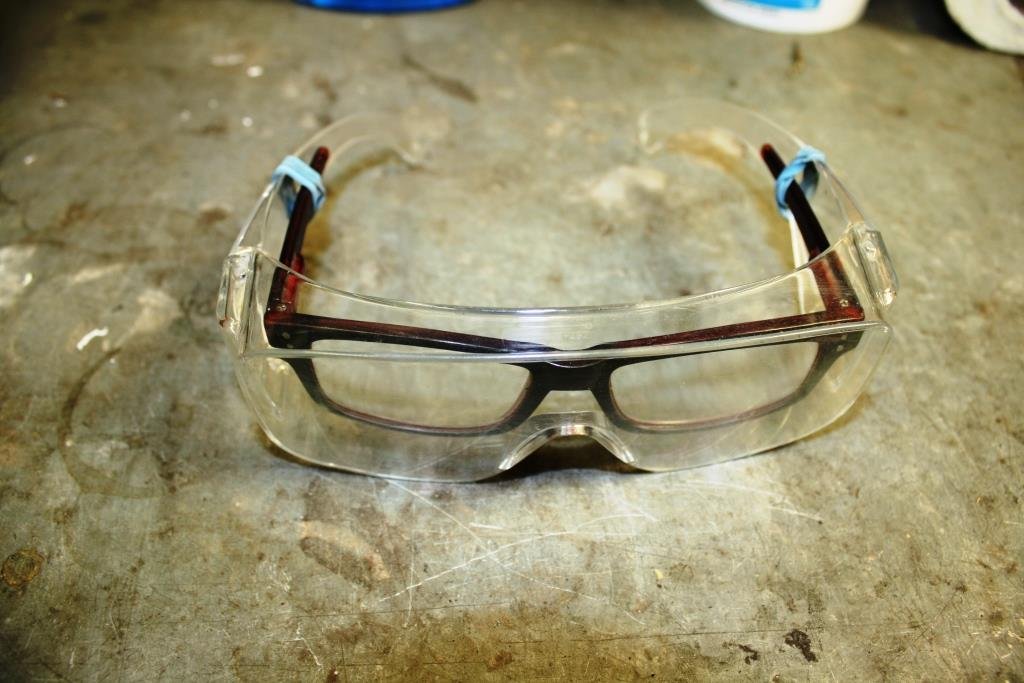
All good mate and thanks for the feedback - us blind bastards need to keep together! I actually invested in a pair some 6 months or so ago; found them great for weed eating, lawn mowing, etc. and discovered they worked well on the boat when there was a lot of spray around and you need to still see the GPS and the gauges. Problem is when grinding, welding or machining I need all the perifocal vision mother nature can throw at me and bi-focal doesn't quite cut the cake. -
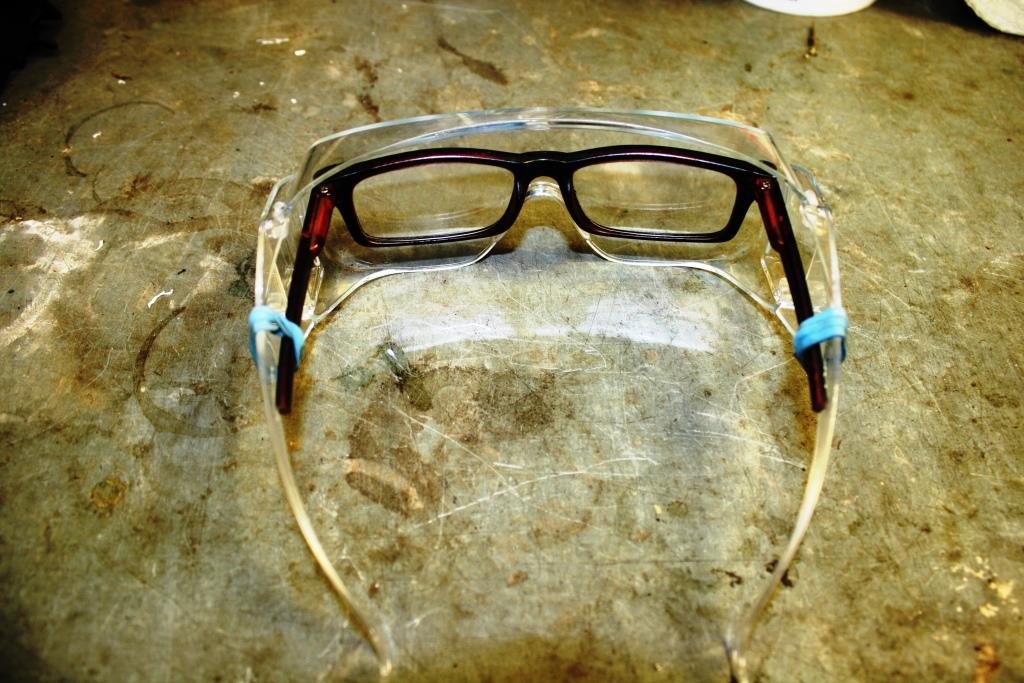
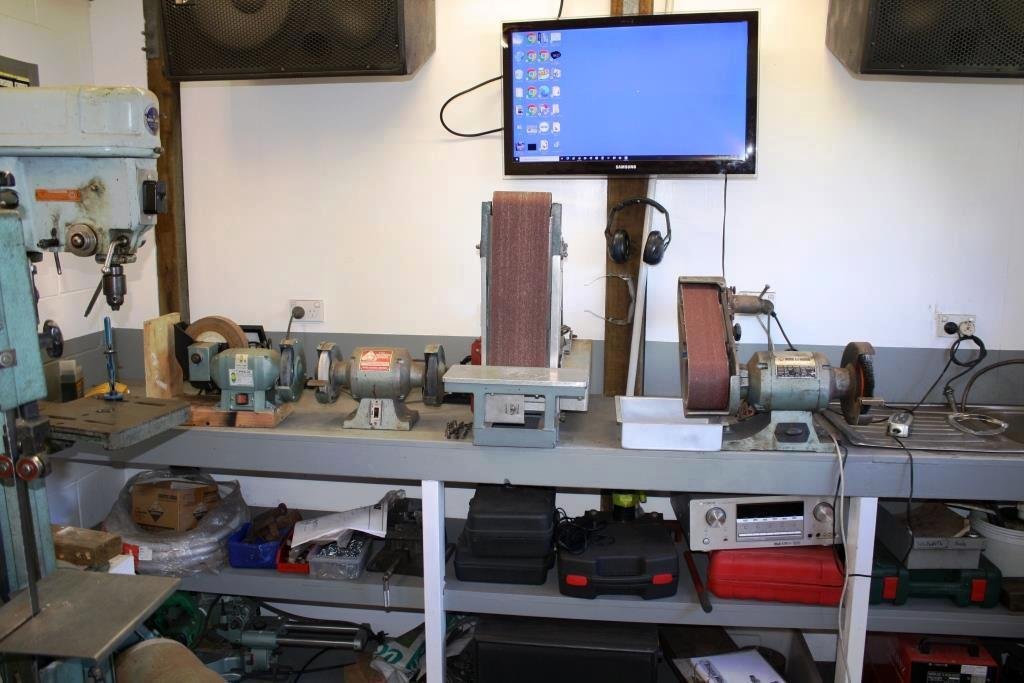
GRINDING 101 FOR OLD BLIND BASTARDS! Ouch! - While waiting at the local Shorecare A&E (don’t ask!) to have yet another chunk of metal dug out of my eye I came up with a solution for the “reading or safety glasses” dilemma. Spend ten Bucks at the local Warehouse on a pair of plastic reading glasses, cut the arms down and attach them inside a pair of safety glasses. As an added bonus you can comfortably wear ear muffs over them without developing front row forward cauliflower ears! Lastly hang them somewhere handy, in this case the grinding bench in the universally renowned and revered (in NZ) “sr2 man cave”.
- 184 replies
-
- 24
-
-
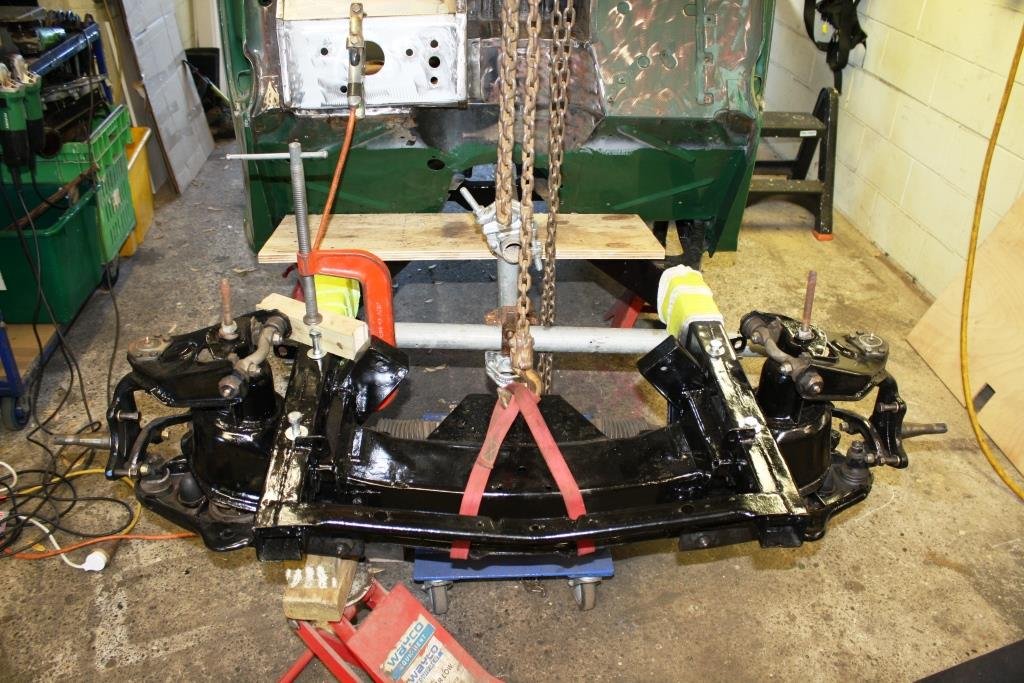
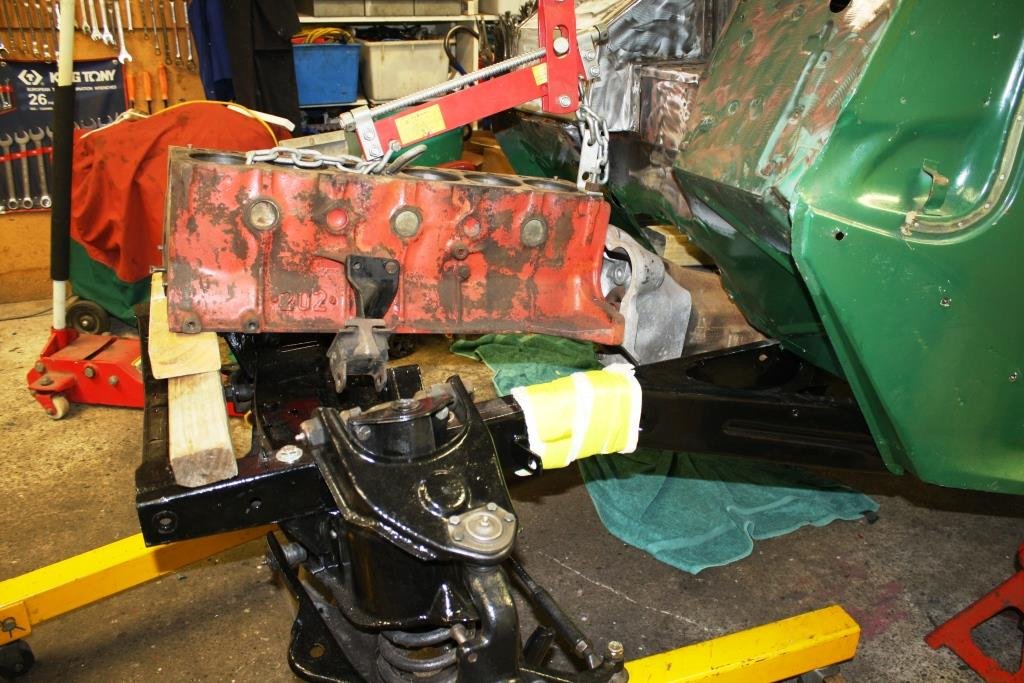
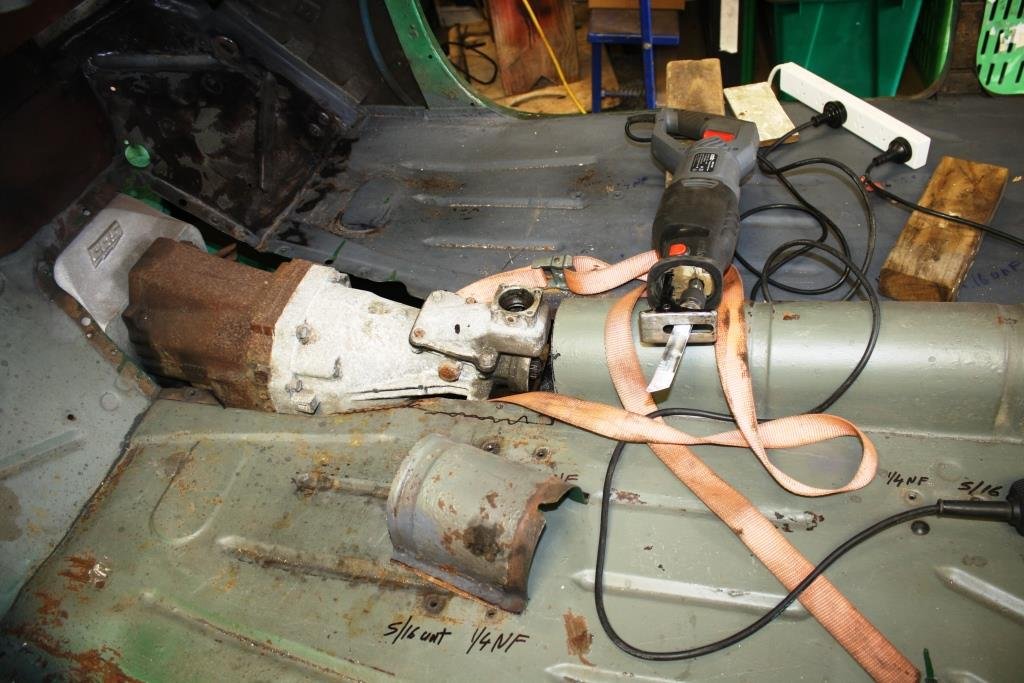
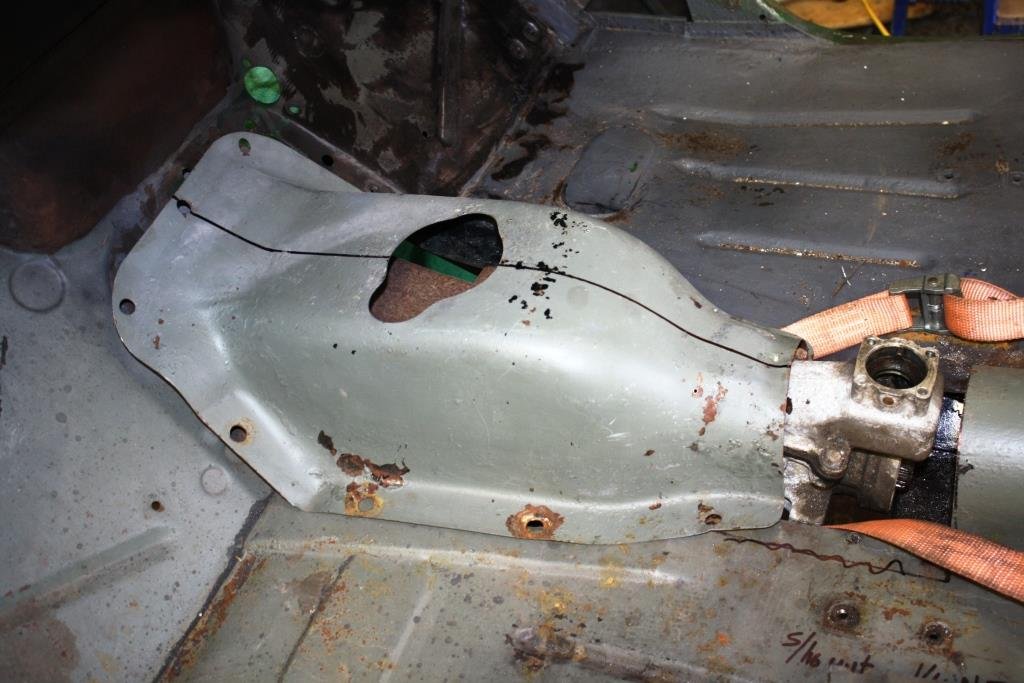
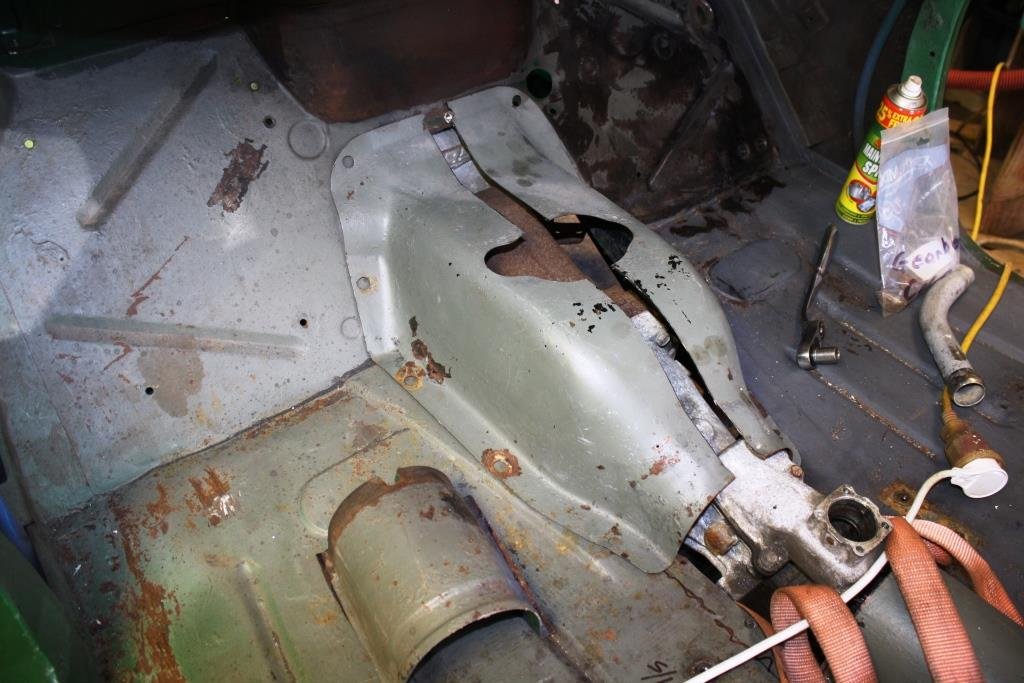
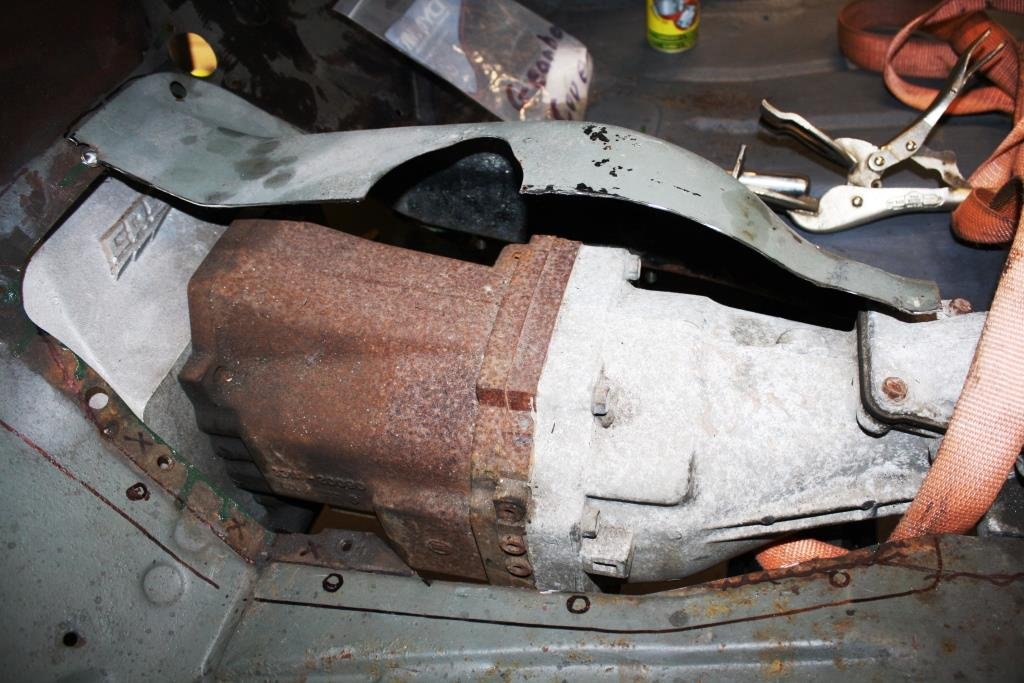
Slightly out of sequence, (story of my life!) but while finishing the firewall mods I Bolted the front suspension in place, hopefully for the last time. What can I say…..it still fits like a glove. Dropped the dummy block and gearbox into the hole to check the fit. Started trimming the firewall, floor and trans (or should I have said “non binary gender fluid”) tunnel for clearance. It was obvious the standard gearbox cover would not fit Time for some surgery….