


Guypie
-
Posts
854 -
Joined
-
Last visited
Posts posted by Guypie
-
-

They are there if you want them. Just pm me your address and how many you need.
-
 2
2
-
 2
2
-
-
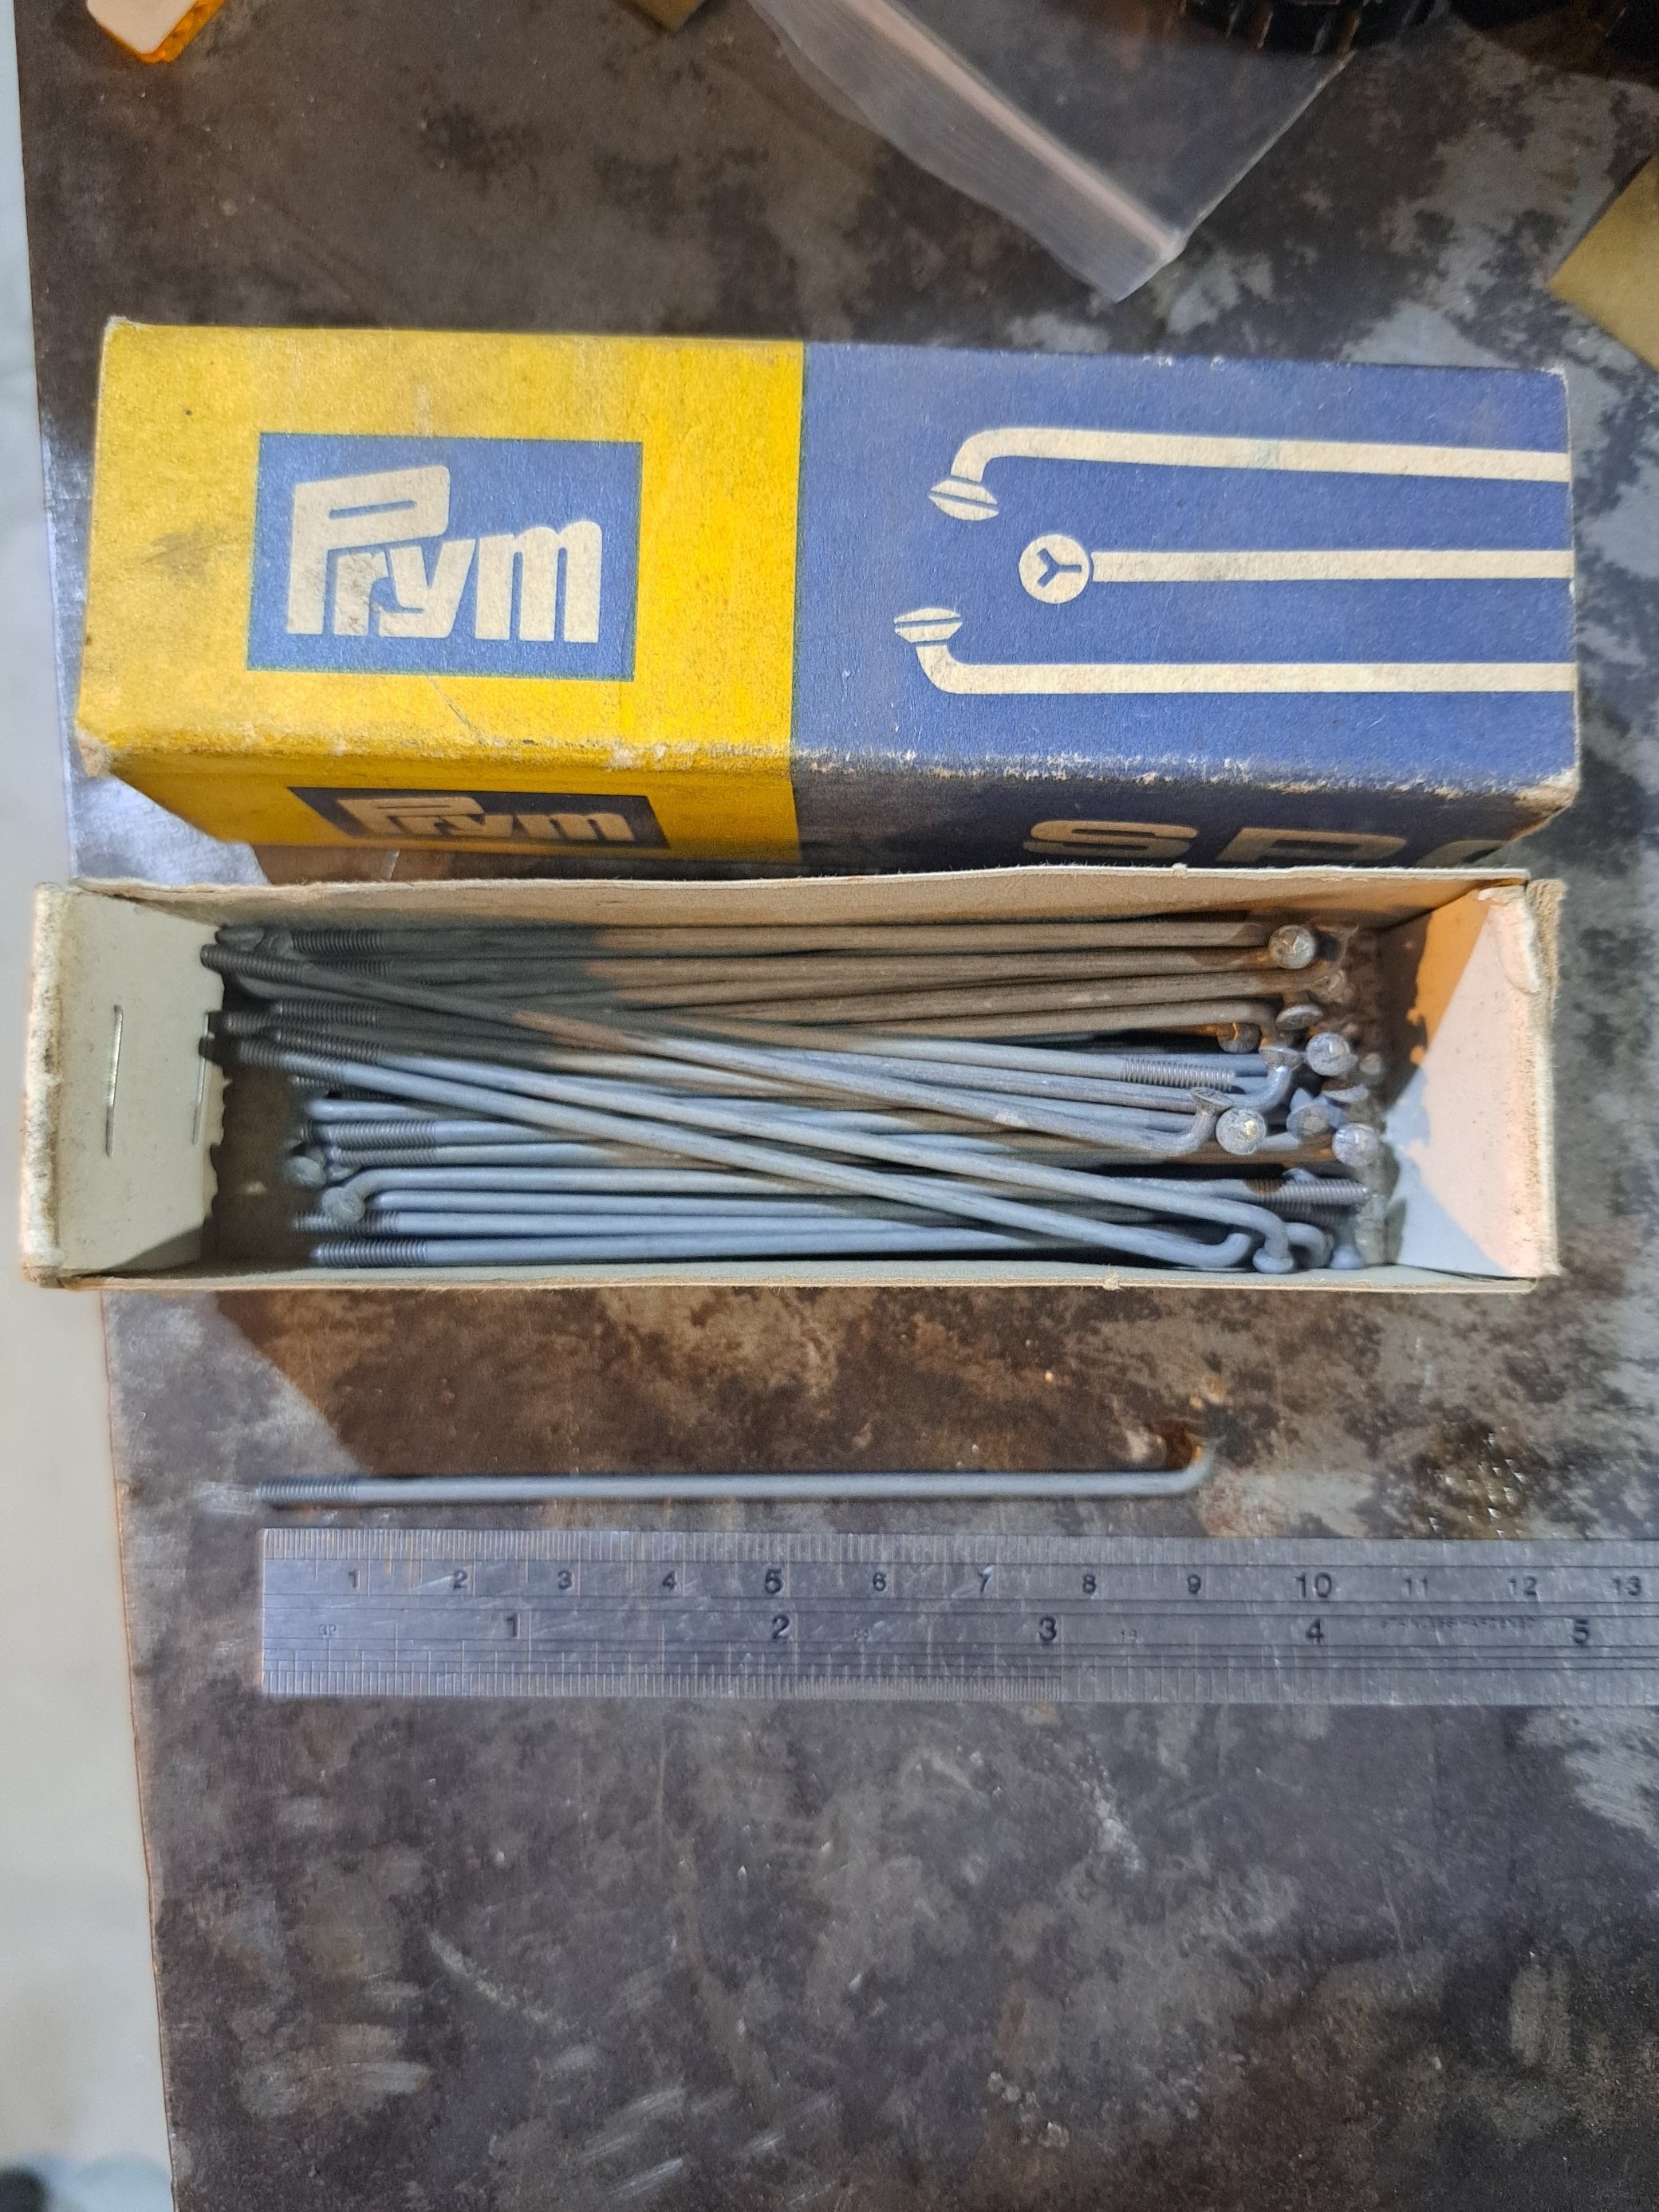
I might have some new spokes in the right length. Let me know how long they are and I can probably hook you up.
-
5 hours ago, Geophy said:
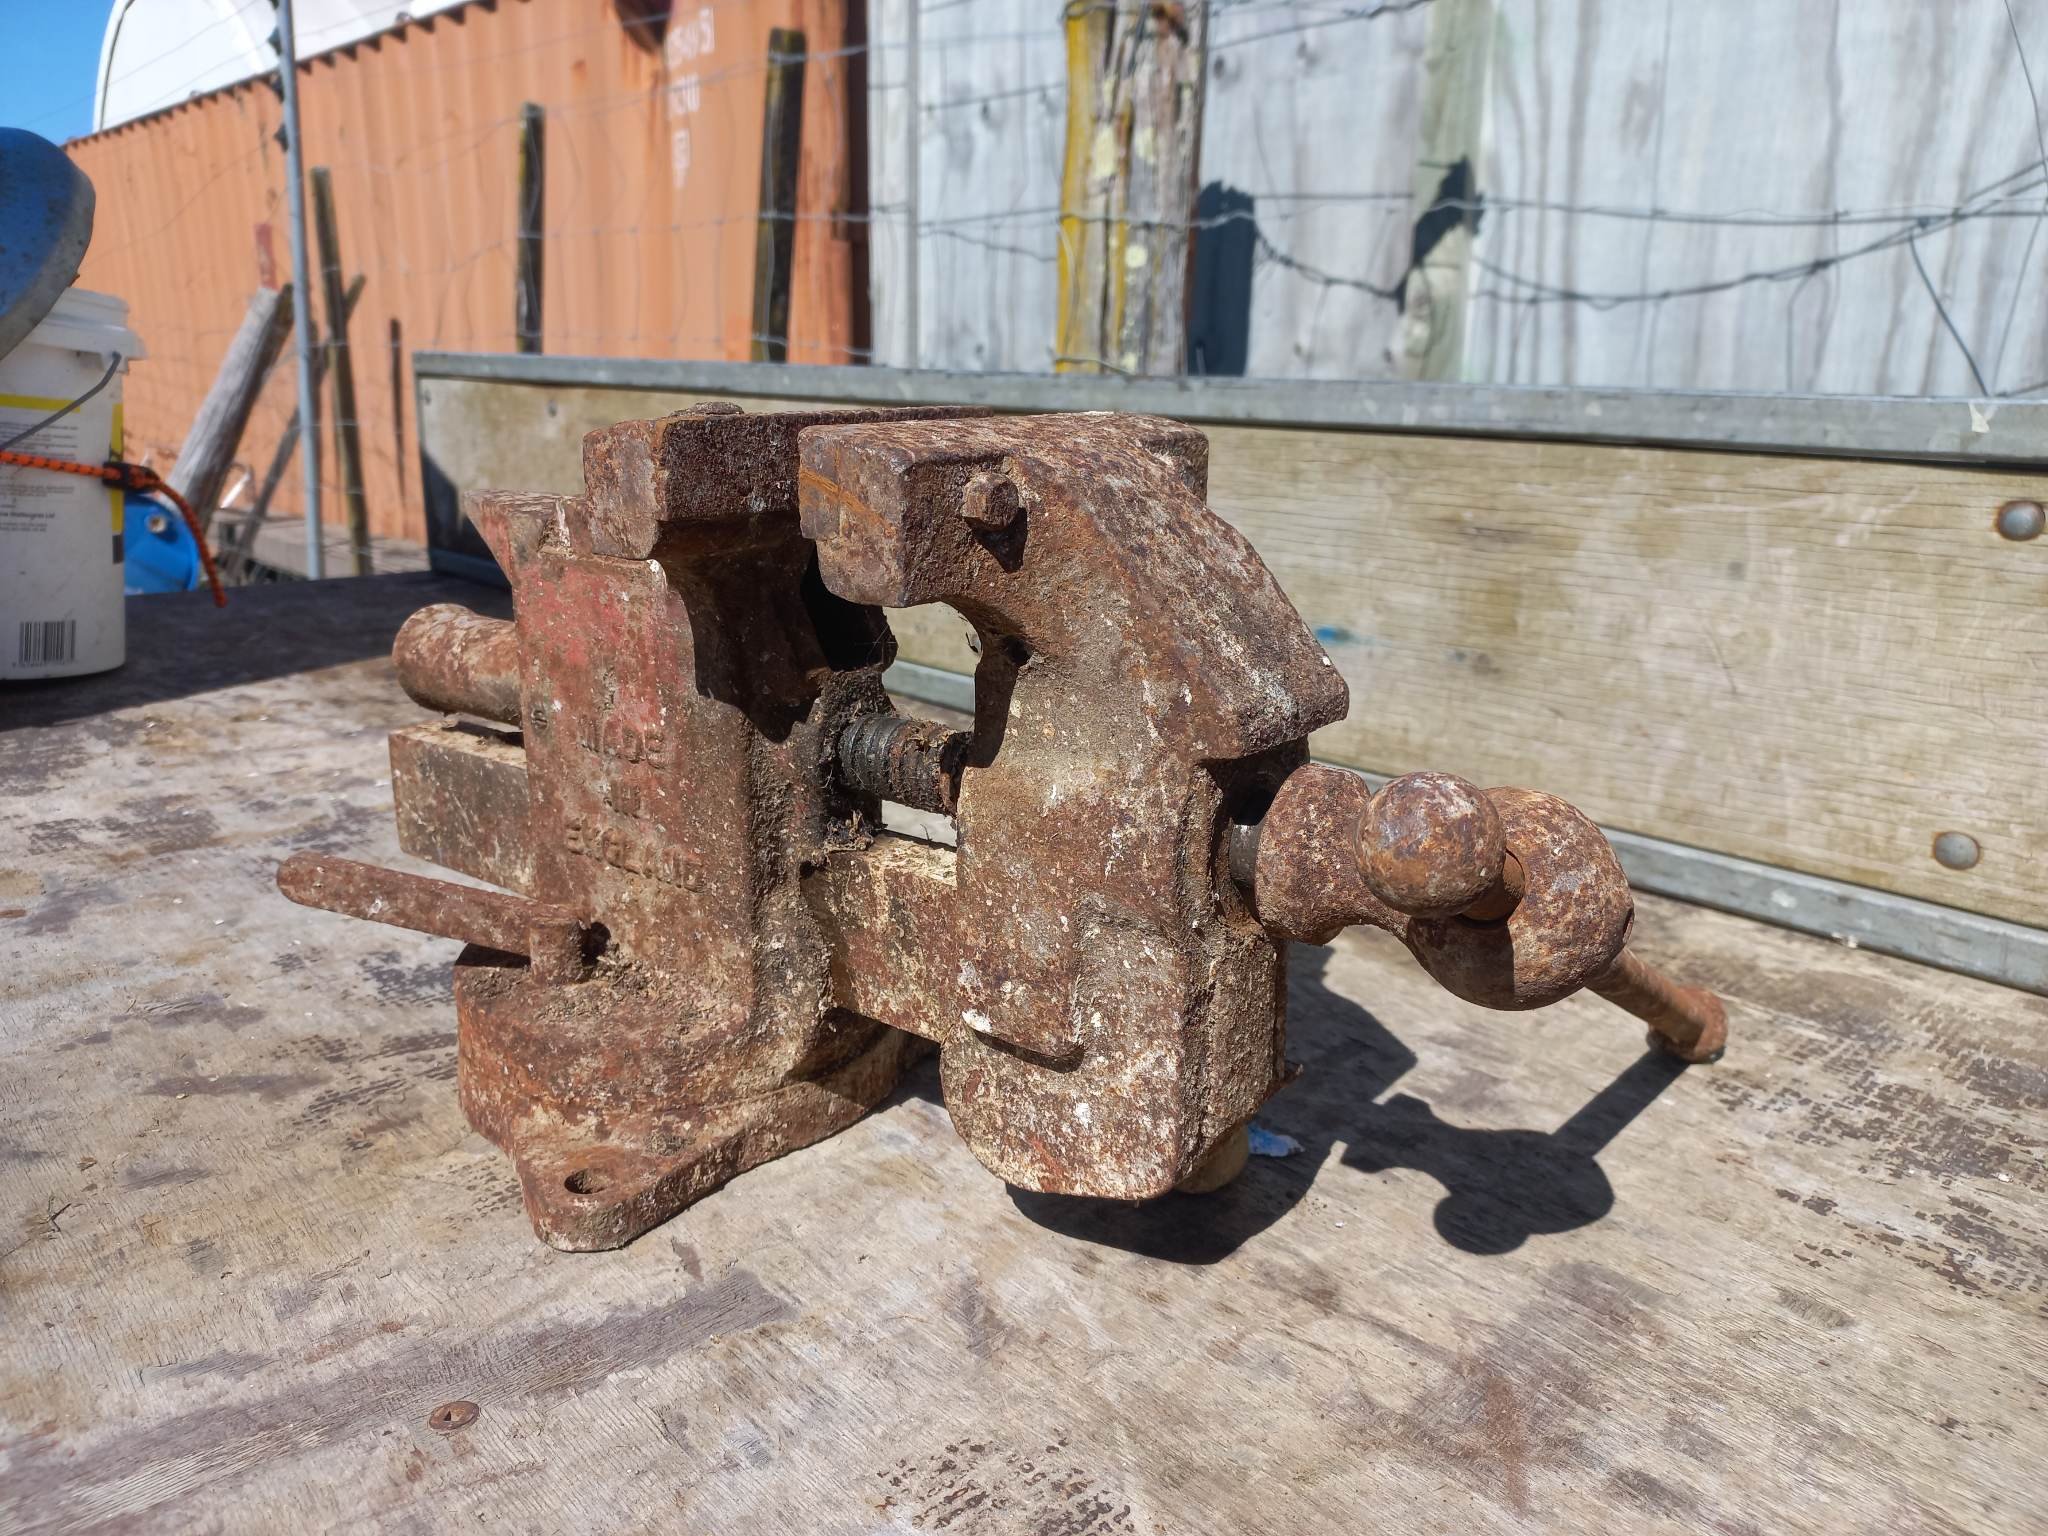
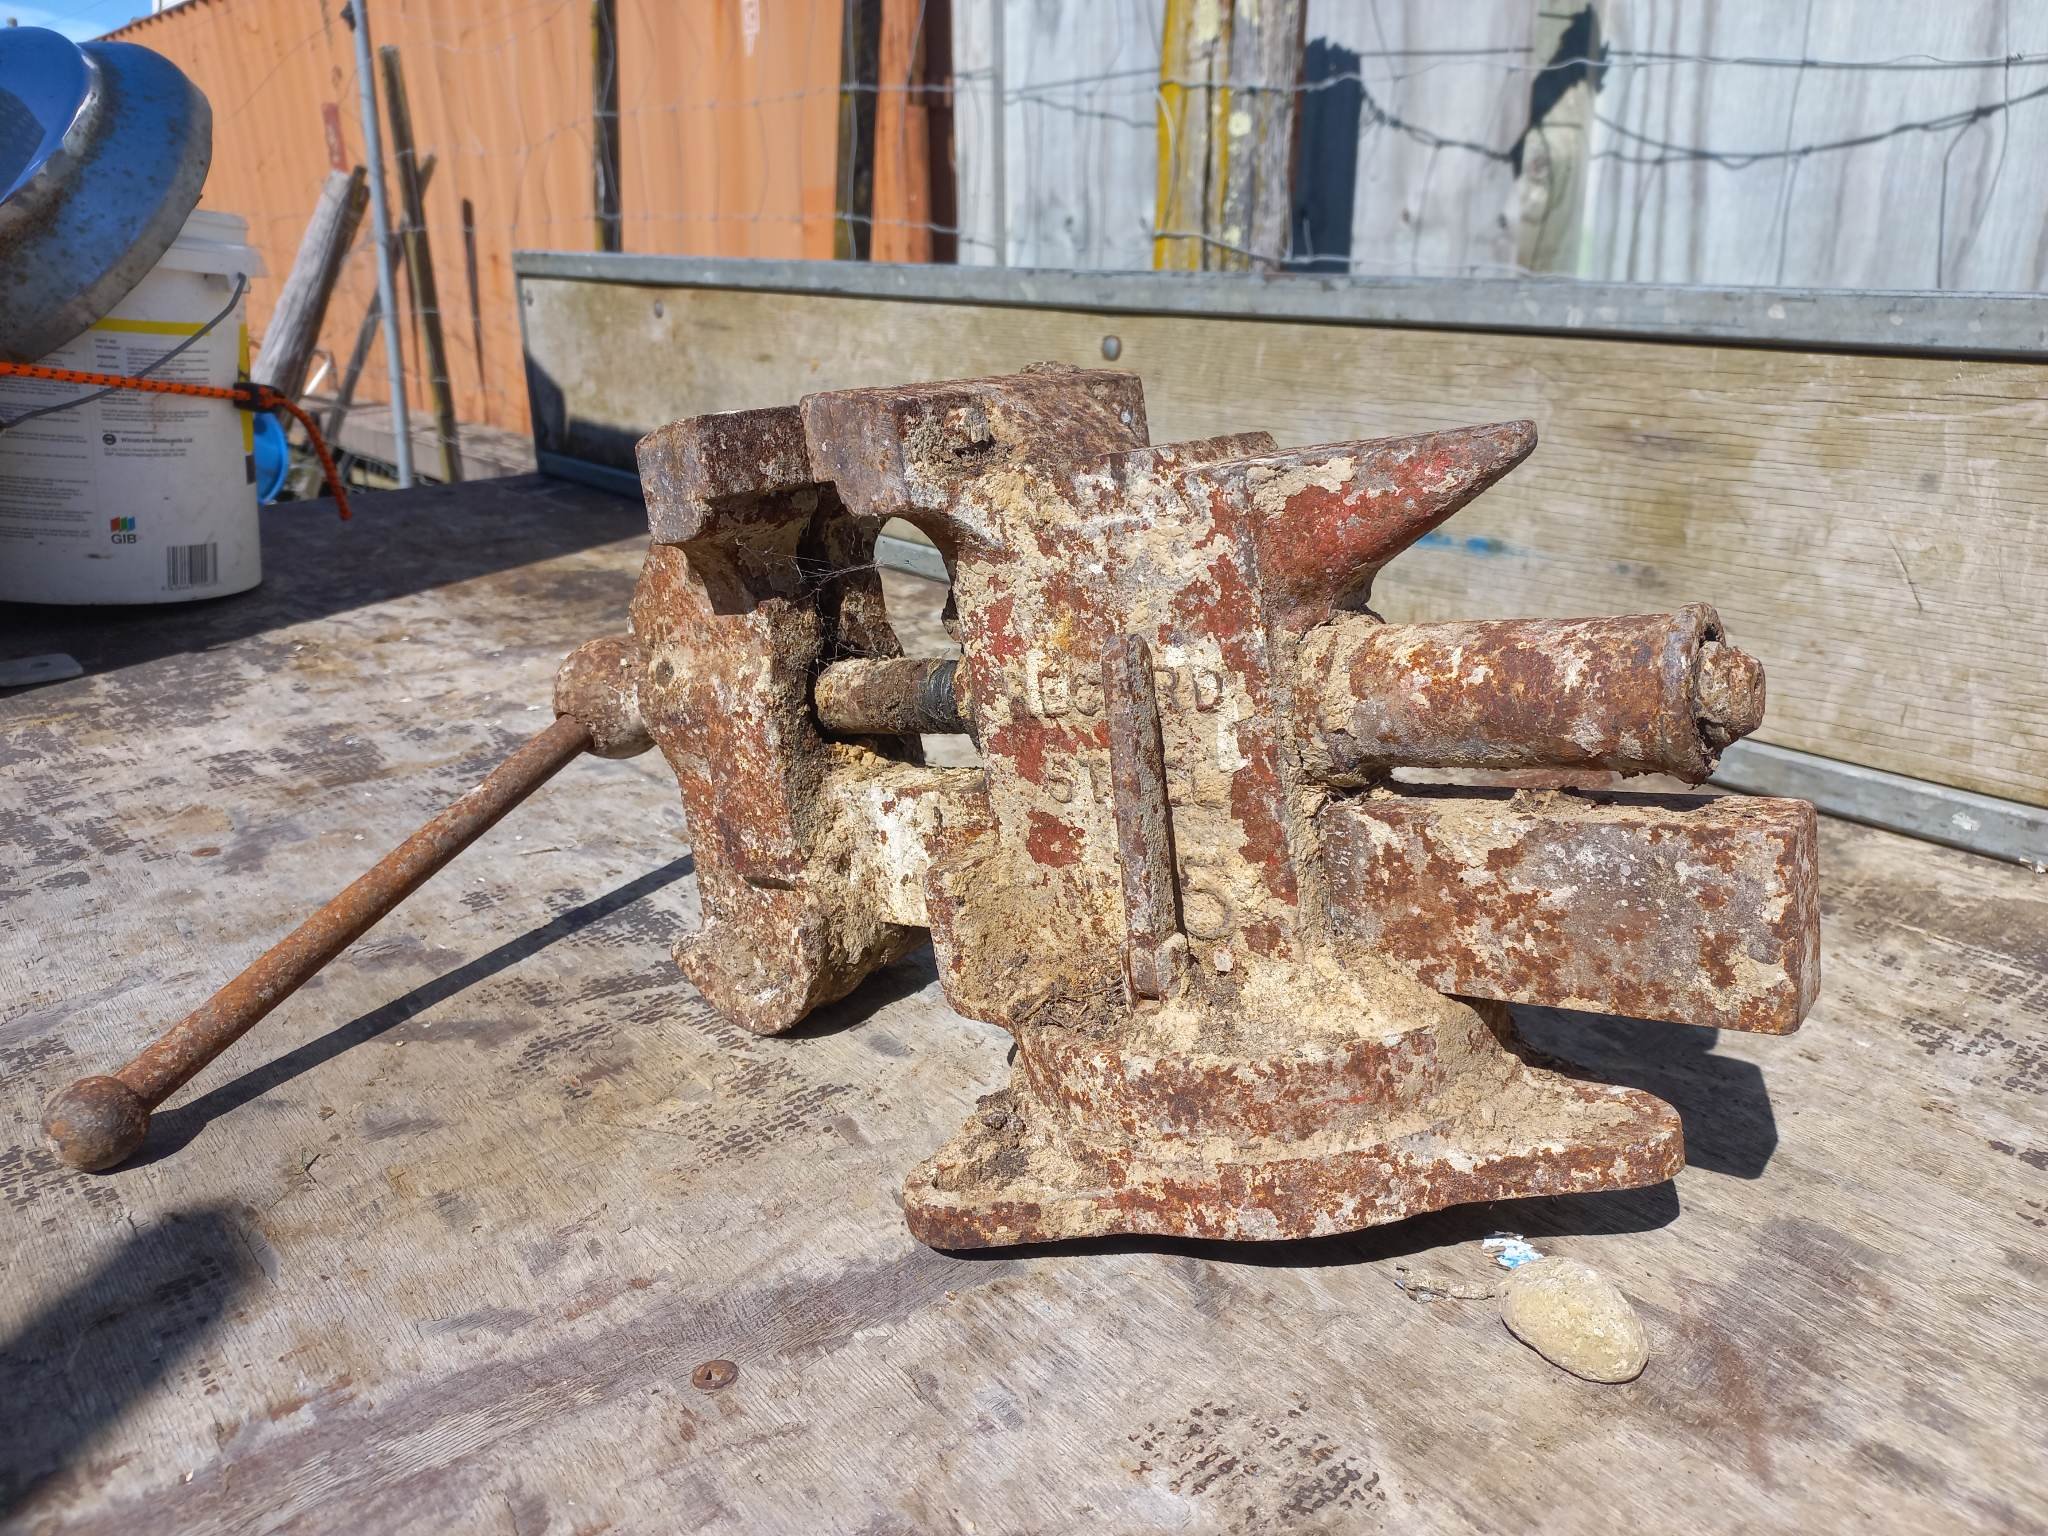
Dont know if this is right place to post this but does anyone know about Record no75 vices? Is the neighbours that I am restoring for him was his dads. Always thought records were blue but this seems to be red. Is that normal or is it had the dulux ovehaul at some point? Cheers.
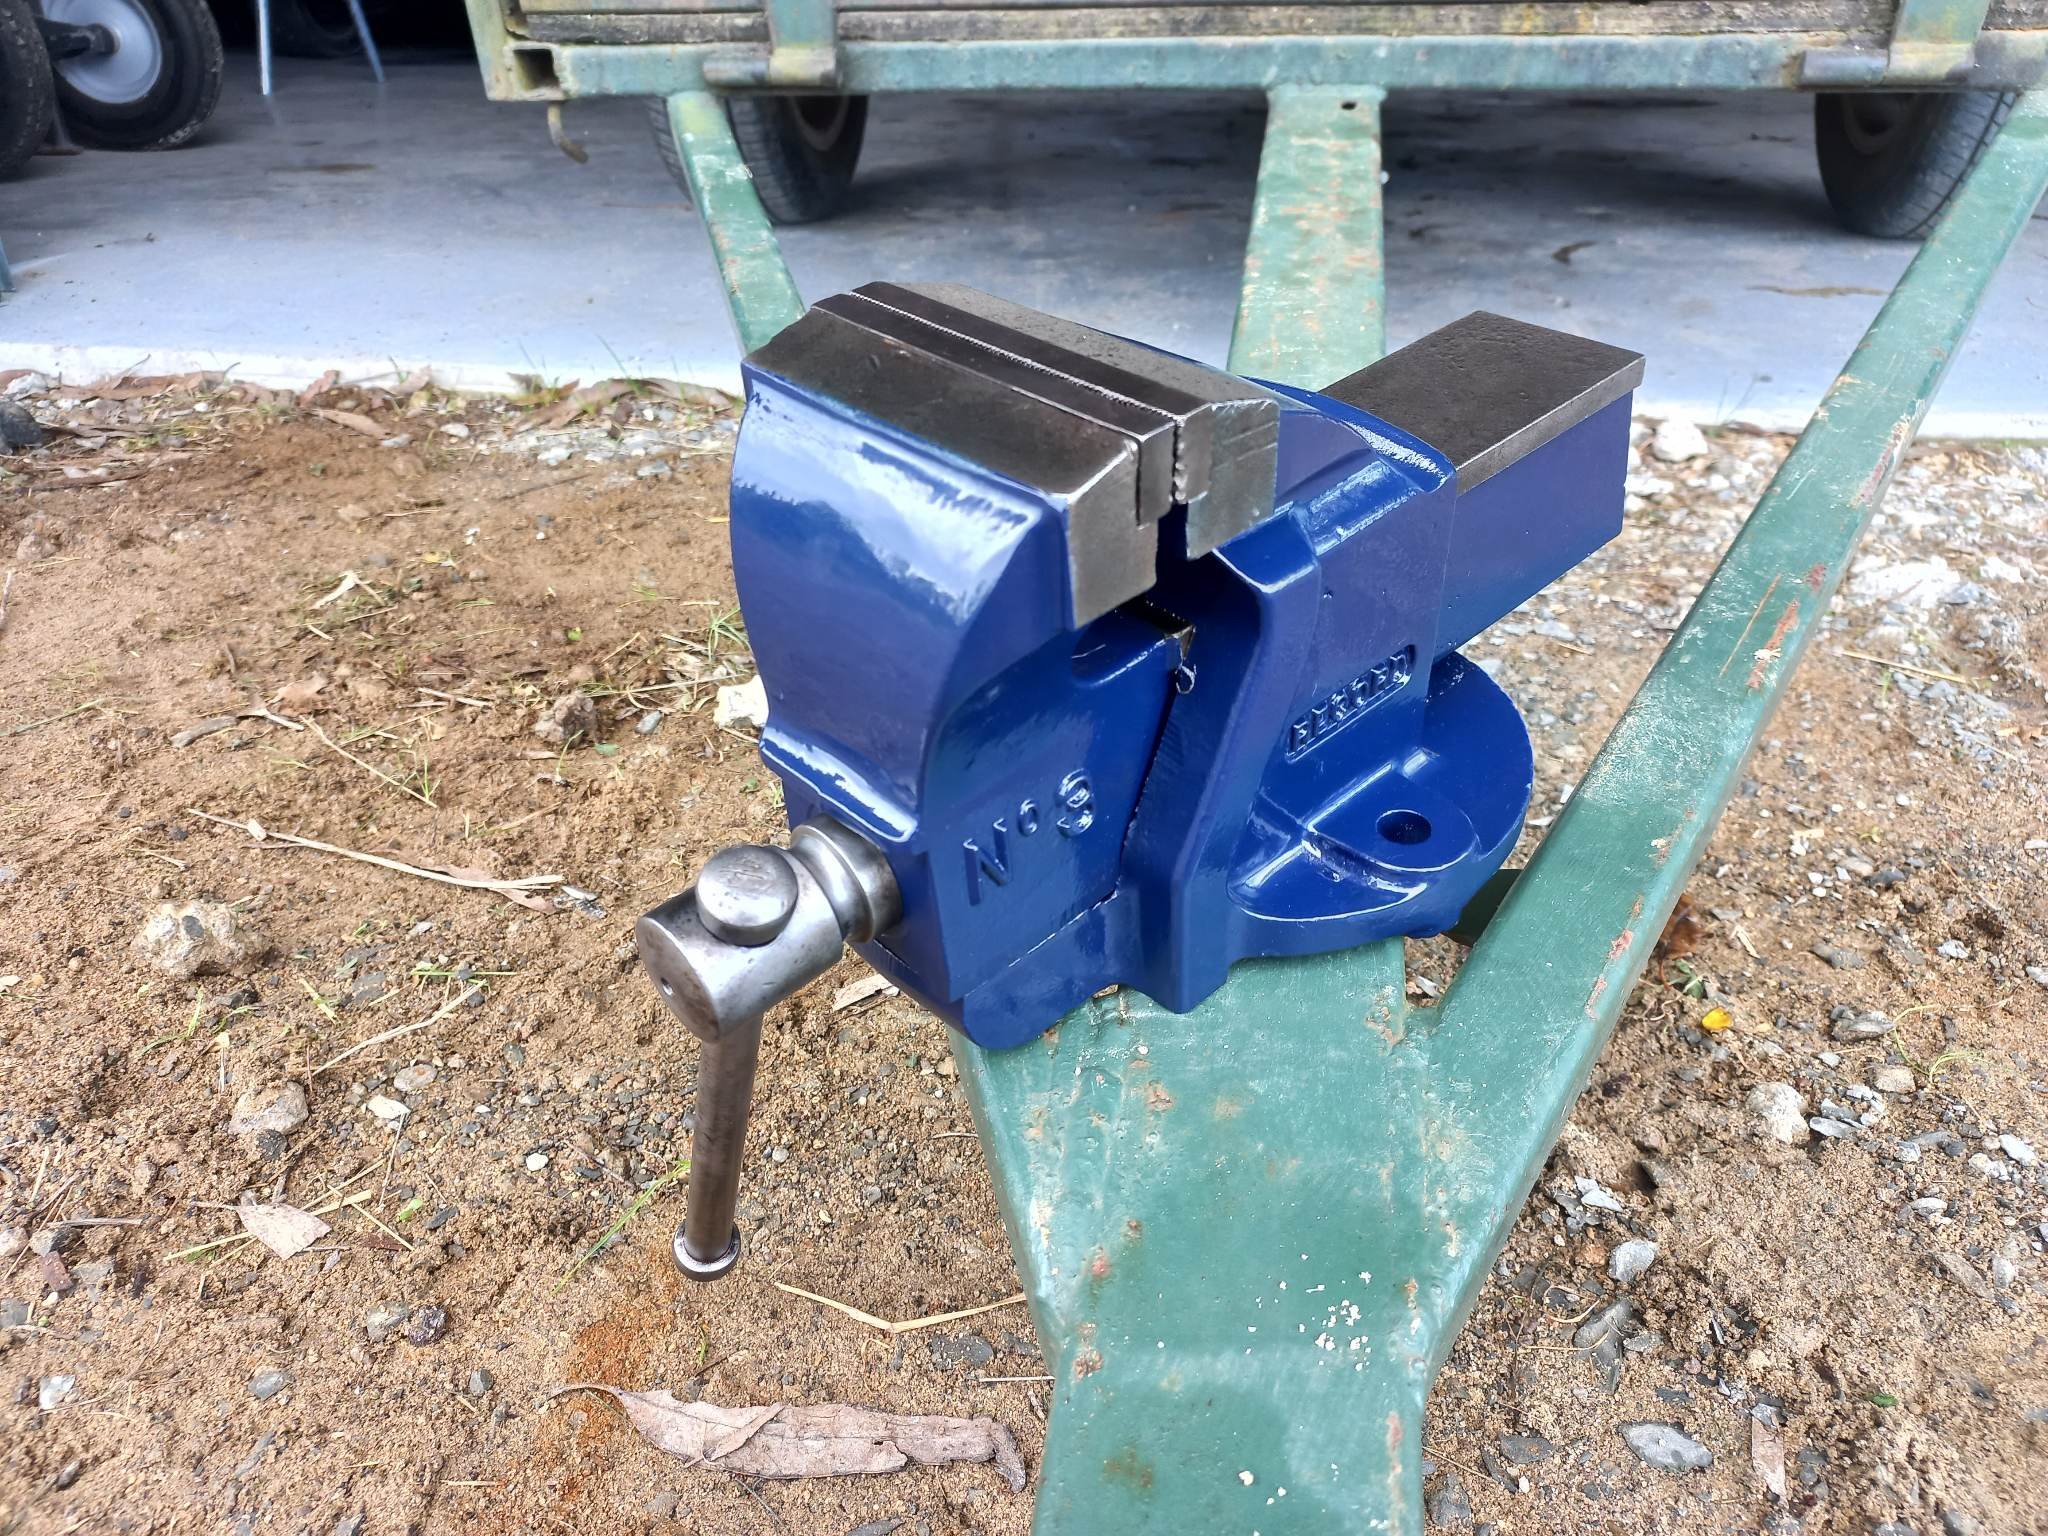
Also last one I finished for @Dogwatch dad last week. Was his dads one so about 50 years old I understand. Dont have a before picture but was all seized up, went a bit hard on the paint so a bit too smooth looking but you live and learn.
Ah I have one of those somewhere. The nut has stripped so if you want to make a good one out of 2 bad ones let me know. Mine was red as well before I painted it blue.
-
1
-
-
I know that a friend got his coregas or eziswap bottle filled by gaspro in Hamilton when no swappas were available. Doesn't look like they have a welly branch though.
-
I make bikes for fun, so 4130 tube etc. The local place I get some from said they are not planning on importing any more for the forseeable future as it is not profitable at the moment. Fortunately I can get 3ft lengths posted from USA for not terrible money, because bikes are small. Sucks to be building big things at the moment I imagine. I also get some butted bike specific tubing but the sellers are smaller companies so don't get as good pricing on postage. Its basically how much do I want to spend on tubing and then double it to cover the freight to NZ. I did just find a place in aus that sells bike tubing so hopefully they can post to NZ for a bit less.
-
4
-
-
On 13/10/2022 at 15:39, ajg193 said:
What's the go with coregas these days? Looks like the swap bottles are out of stock everywhere.
Can I just take my coregas bottle to BOC and get it refilled?
They aren't updating stock on the Bunnings website from what I can tell. Give them a call and ask, I got some argon from my local the other day and the one on the other side of town had mig gas.
-
K11 is that you?
-
2
-
 3
3
-
-
13 hours ago, ul9601 said:
how legal is it?
No wof no reg no worries
(reg on hold)
-
1
-
1
-
-
Yeah CO2 bottle here. Would trade again, have been running it about 8 years now. Lasts way longer than mig gas per fill due to storing as a liquid.
-
Depending on the application a vfd is possibly a better option than replacing the motor. The 2.2kw one on my mill was $130 off aliexpress.
-
3
-
-
I have been slowly chipping away at getting 3 phase to my shed, and in the meantime the lines company who were going to do the connection have added about $4000 worth of fees to the cost of connection, not including the cost of the new cable from the pole to the house (about $1000) and the cost of works. What I currently have is 2 phases and the cable sizing will allow 32a per phase. Biggest machine is a lathe with an 6kw spindle motor and it has a couple of other motors for coolant and for pumping lubricant through the spindle bearings.
So. I am thinking I will probably go a different route but I am open to suggestions. Here's a list of options as I see it:
1: Just pay the money and get 3 phase off the pole. Almost certainly going to be upward of $7k all said and done, wouldn't be surprised if its more.
2: 3 Phase booster - www.eurotech.co.nz has these, 10 year warranty and locally made. Still $$$$ though would probably come in around $6000
3: Homejob rotary phase convertor - Done a bit of research about these, seems like a solid option but playing with high voltage is a bit worriesome. Lower cost, higher effort.
4: Aliexpress VFD the world. Make it rain vfd's. Probably about 5 to get everything in the shed working. The big spindle motor one would be about $600 the rest of them around $150 a piece. Would involve a lot of modifying stuff to make it work, but probably cheaper in the short term.
If anyone has better options/good ideas that would be great. Annoyingly the new fee scheme came in July so I missed the boat by like 2 months. Would have had it sorted in a month or so otherwise (sadface)
-
Oh that could be fun!
-
2 hours ago, Nominal said:
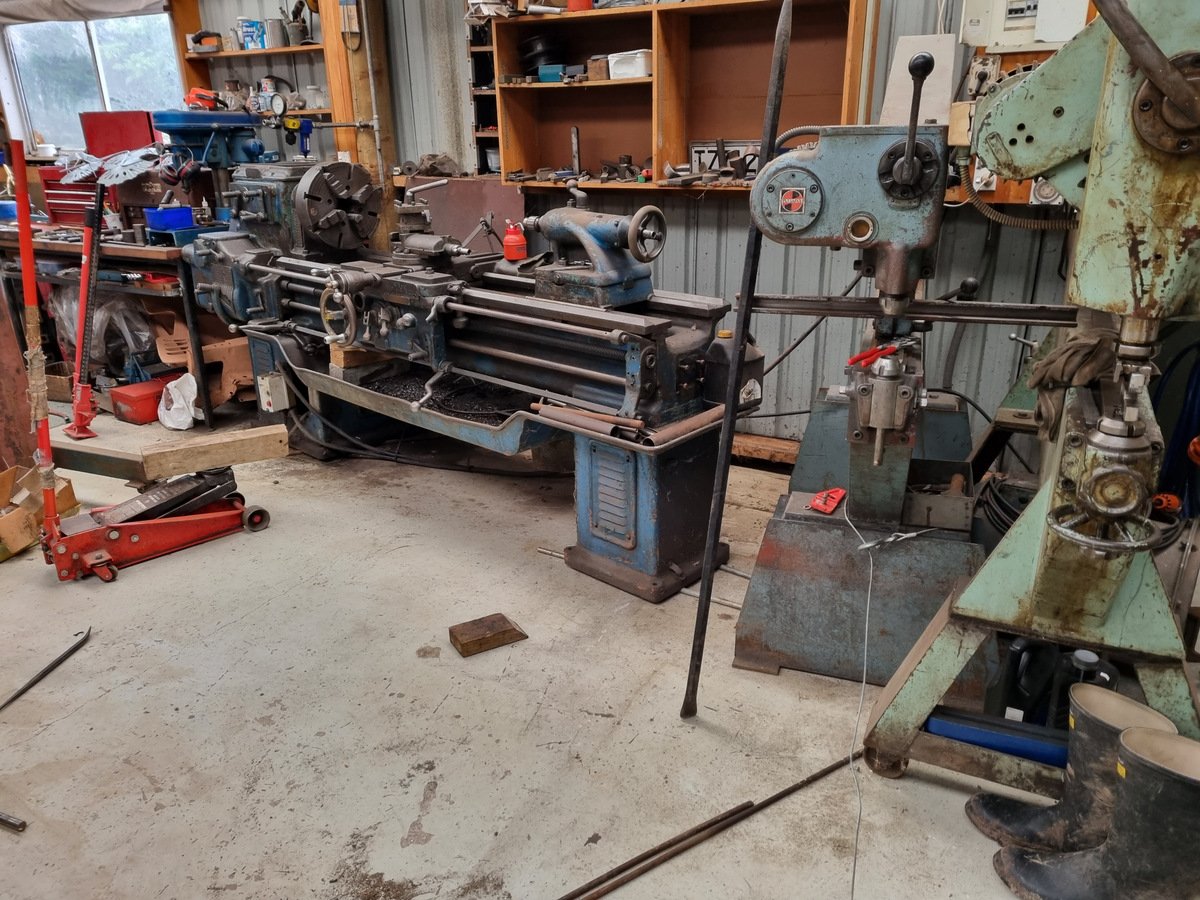
Wrangled the lathe over to the doorway today. Bit of jacking, some round steel bar rollers, a small winch and a crowbar did the job. Hopefully it will get collected in a few weeks from the TM buyer.
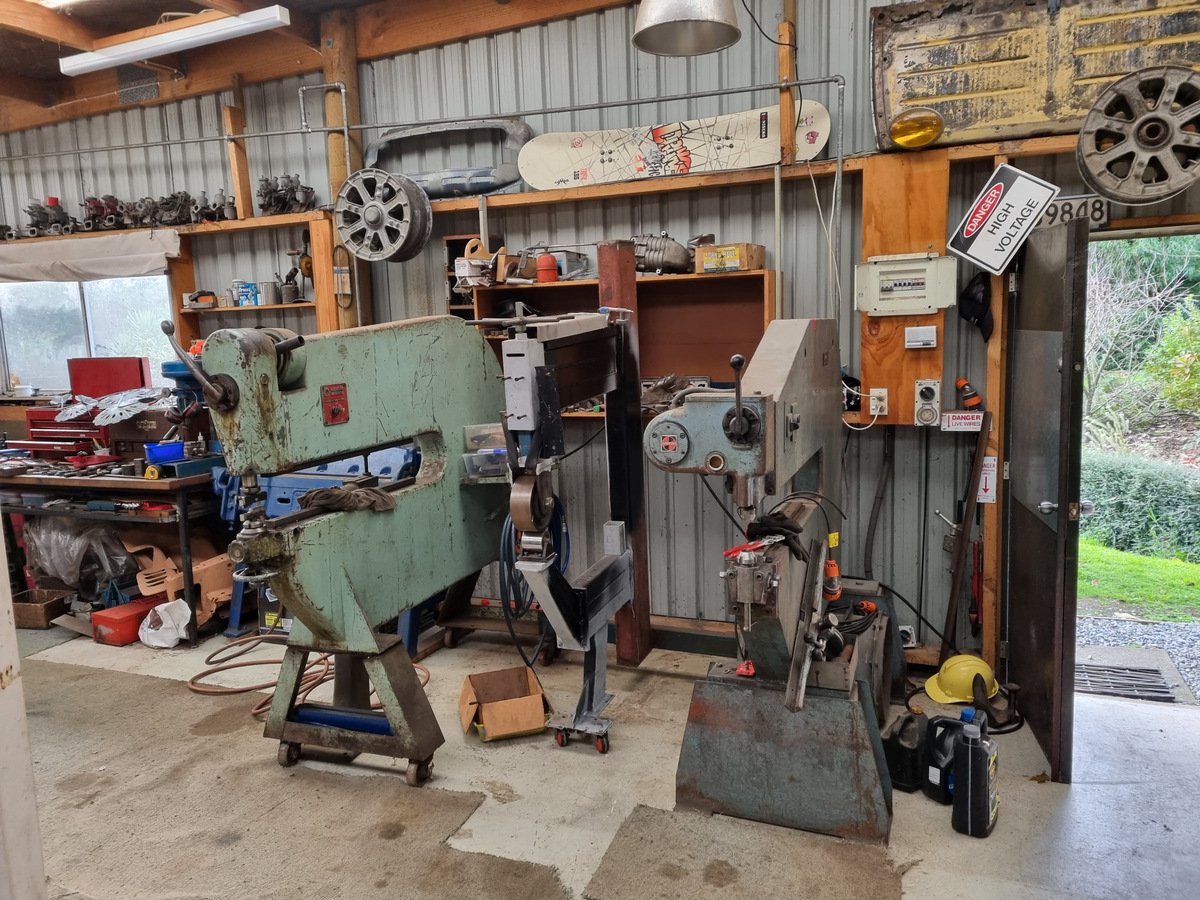
Spaced out the pullmax/nibbler/folder and english wheel. A bit more tidying then I better get on with some sheetmetal work.
Last time I moved a lathe over to a door like that on a pallet jack. I accidentally got one of the front rollers onto the downslope out the door and it took off on me. Fortunately I had the pallet jack all the way down and it bellied on the slope change before it got out the door onto the lawn and flopped over. It was 1.7 ton, would have made a hell of a divot in the lawn hahaha.
I chucked a tarp over it and called it good for the night and the engineer down the road came and picked it up with a forklift and drove home with it on the forks.
-
4
-
1
-
-
I got a 50mm 4 tip facing mill off aliexpress, it came with a pack of no name inserts that run mint on steel. @Geophy used them on Ali too with good success. Here's a link, it's for nt30 so you will probably have to find one with a different arbor cause I'm guessing your machine is a Morse taper but the seller probably has another listing somewhere.
-
2
-
-
How's the ring gap? I have heard of ring gap closing up when pistons get hotter than intended from the factory setup then wedging in the cylinder. Maybe it happened at tdc and the rod yanked the bottom of the piston off. Probably unlikely but another thing you could check on the other pistons. Maybe do some maths with thermal expansion coefficients and see if it would be likely to close the gap in the temperature ranges it could be experiencing.
-
1
-
-
- Popular Post
- Popular Post
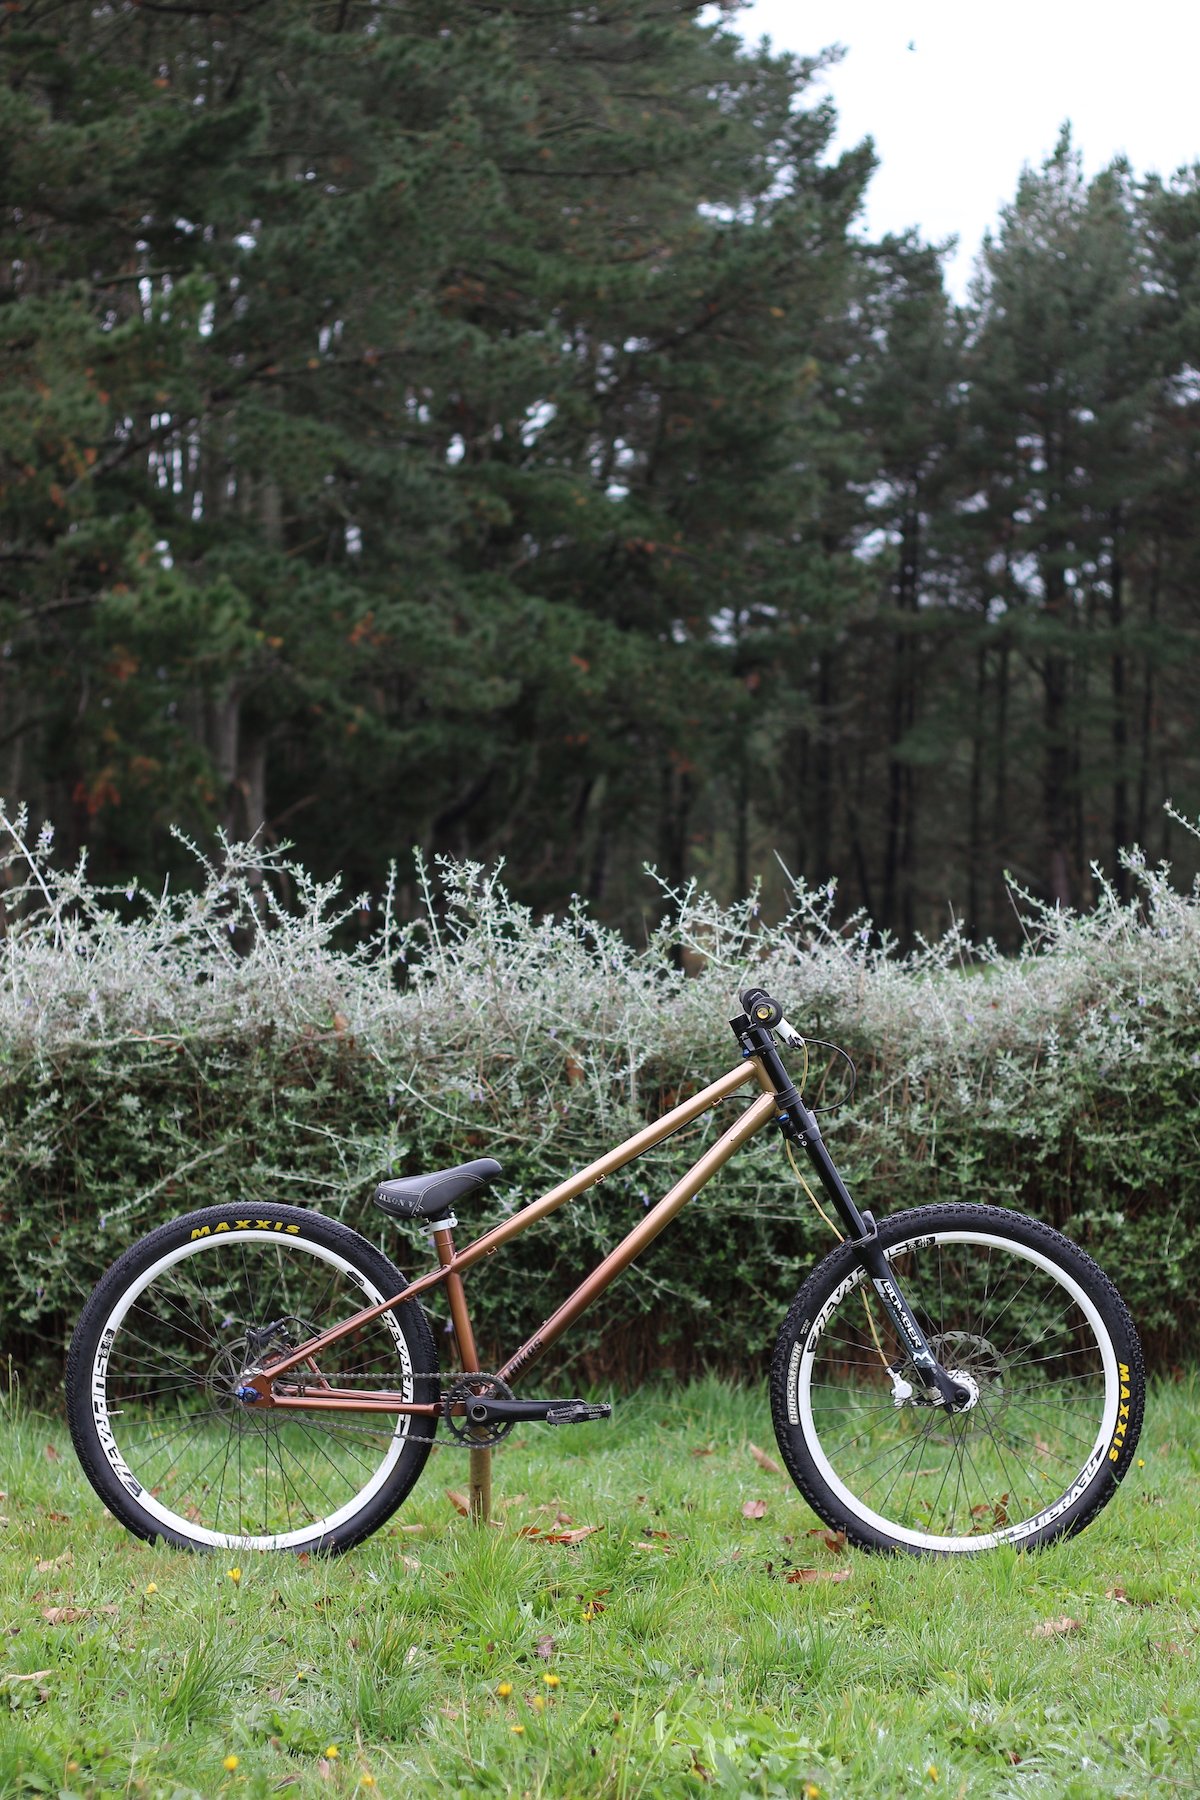
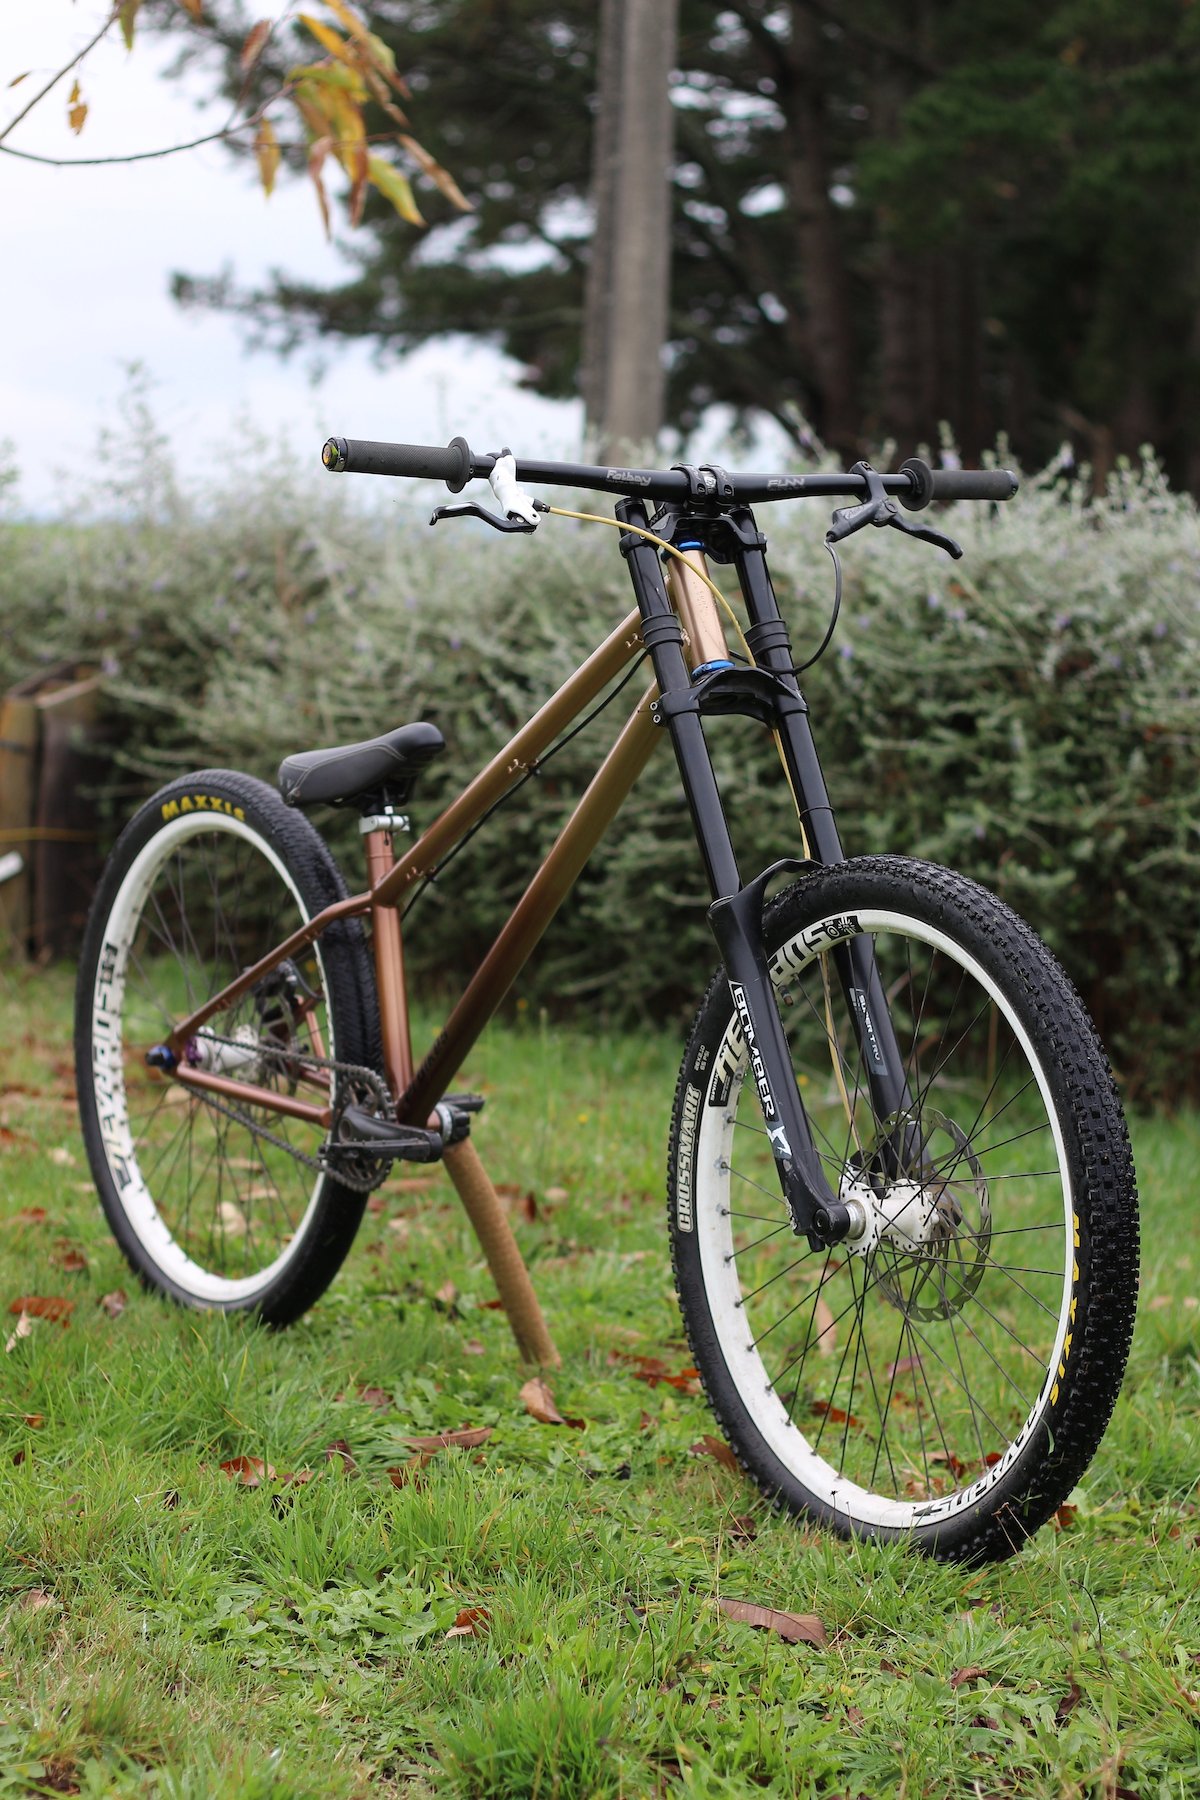
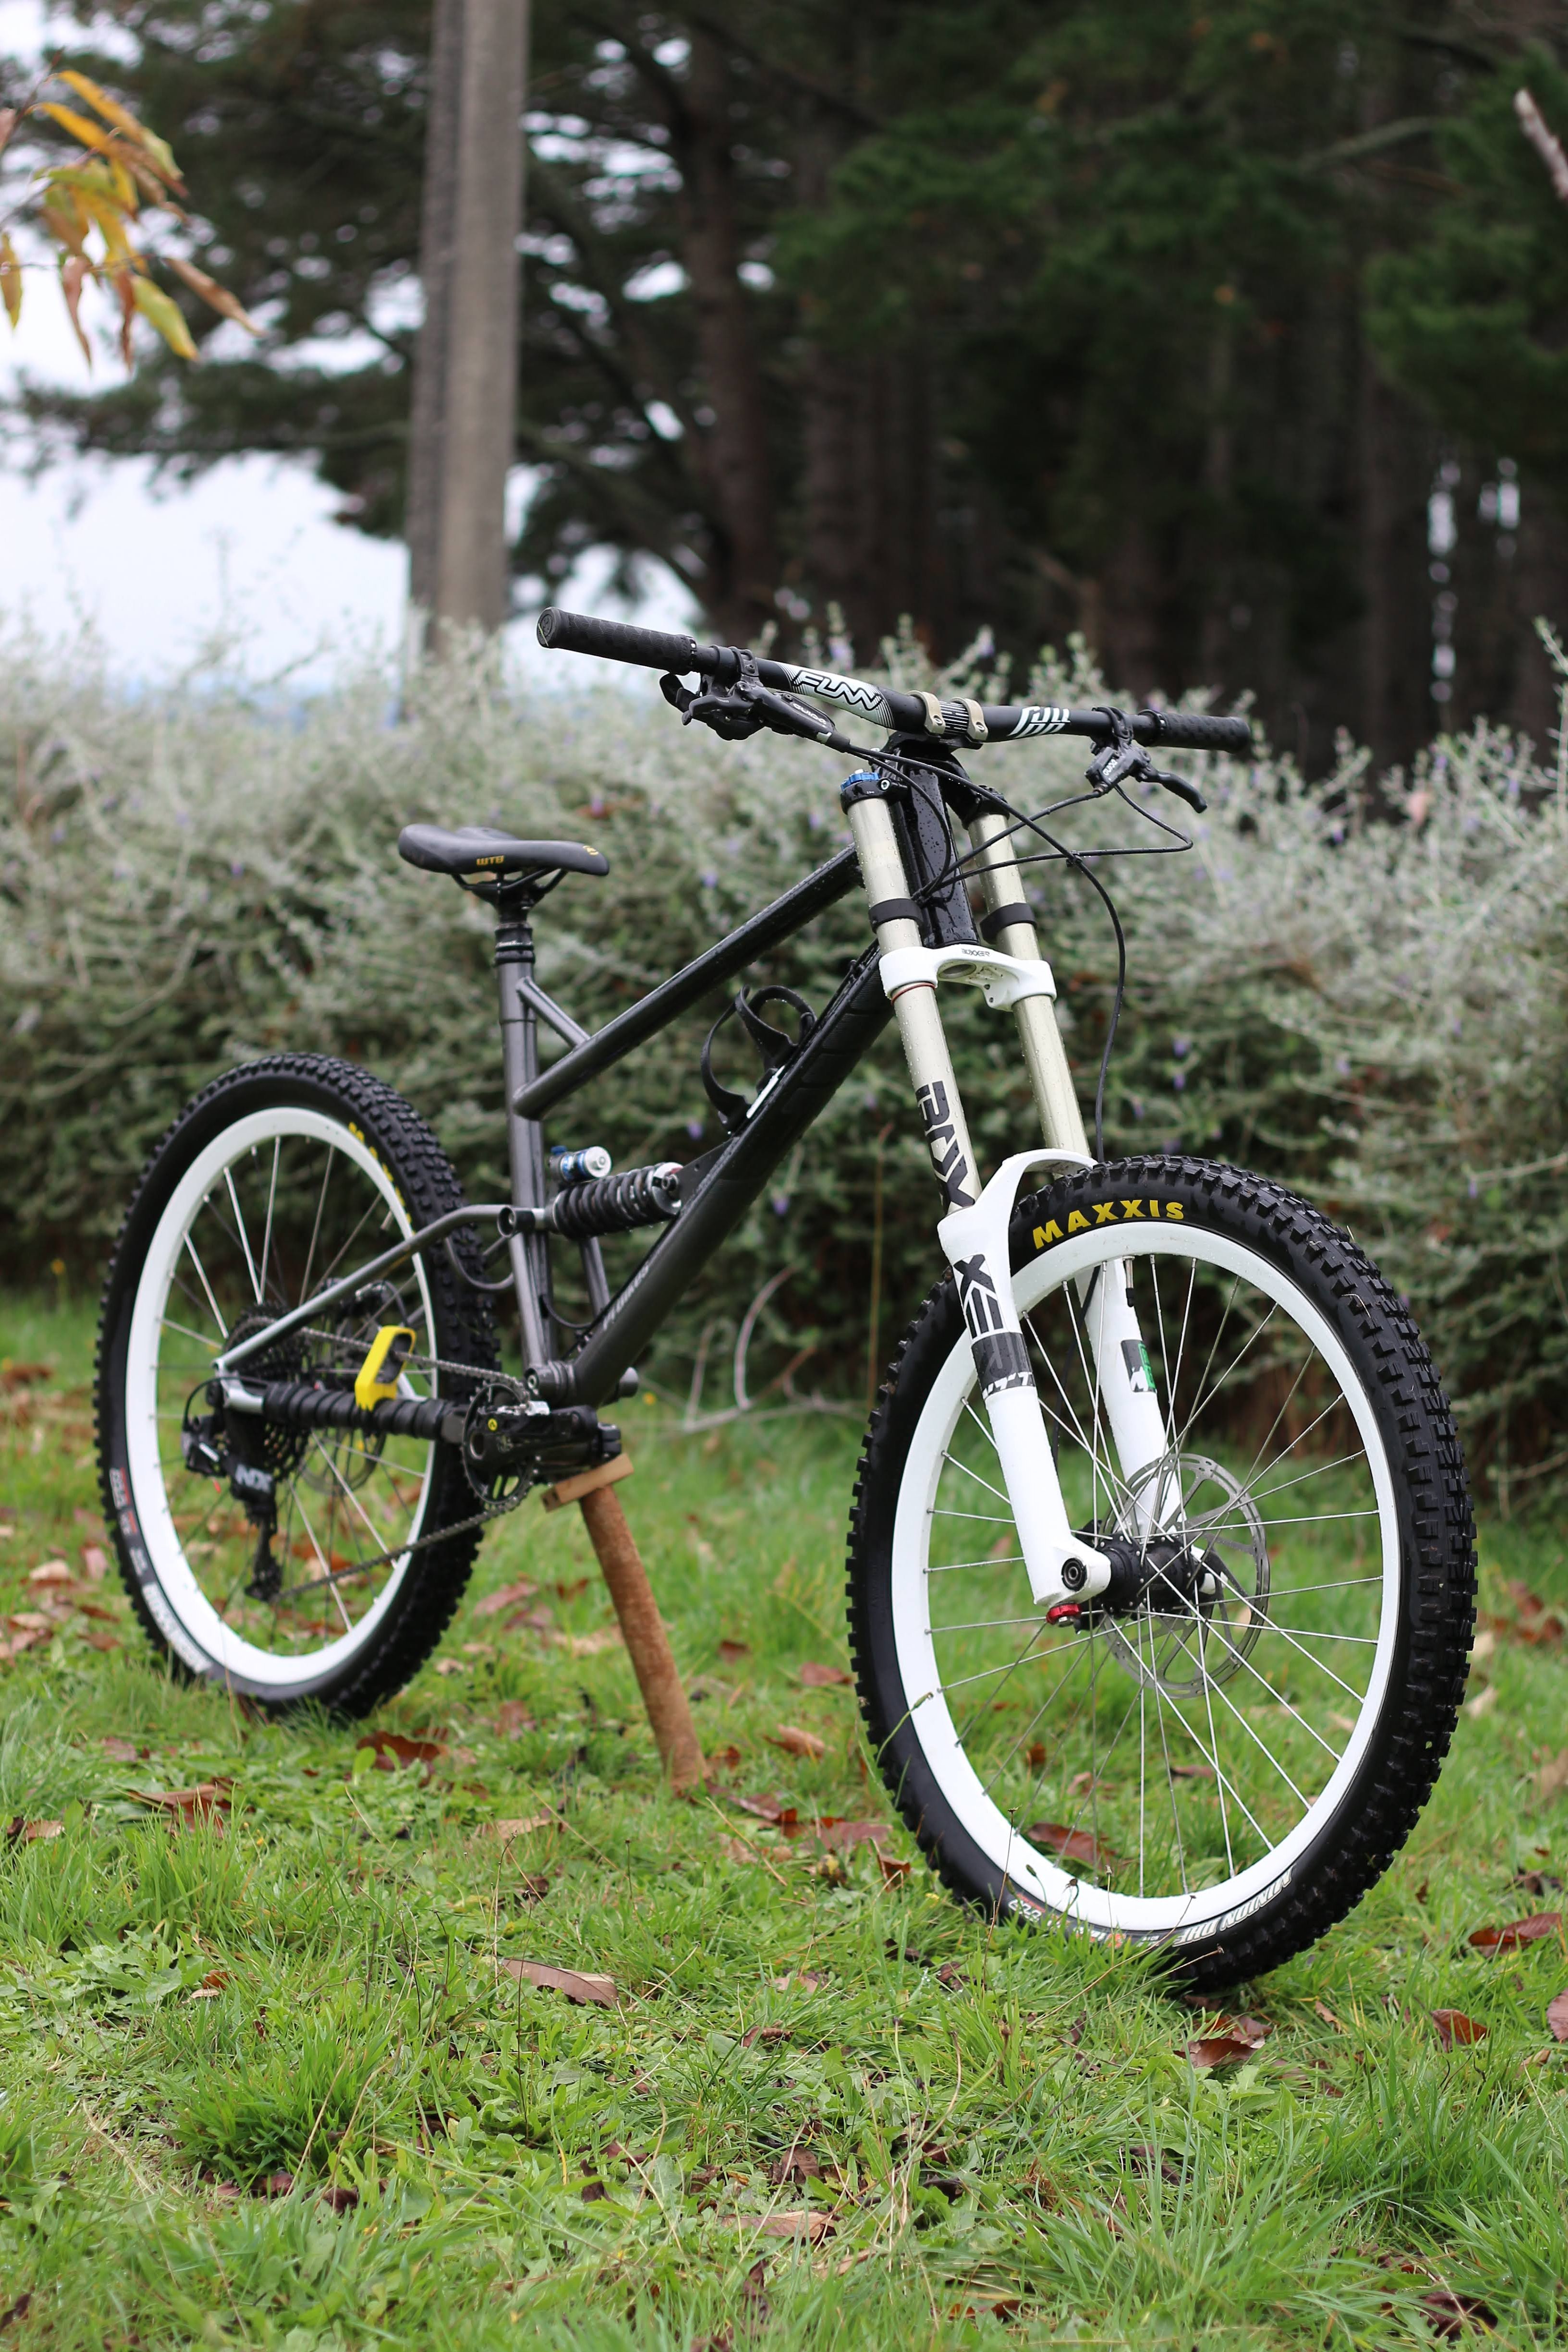
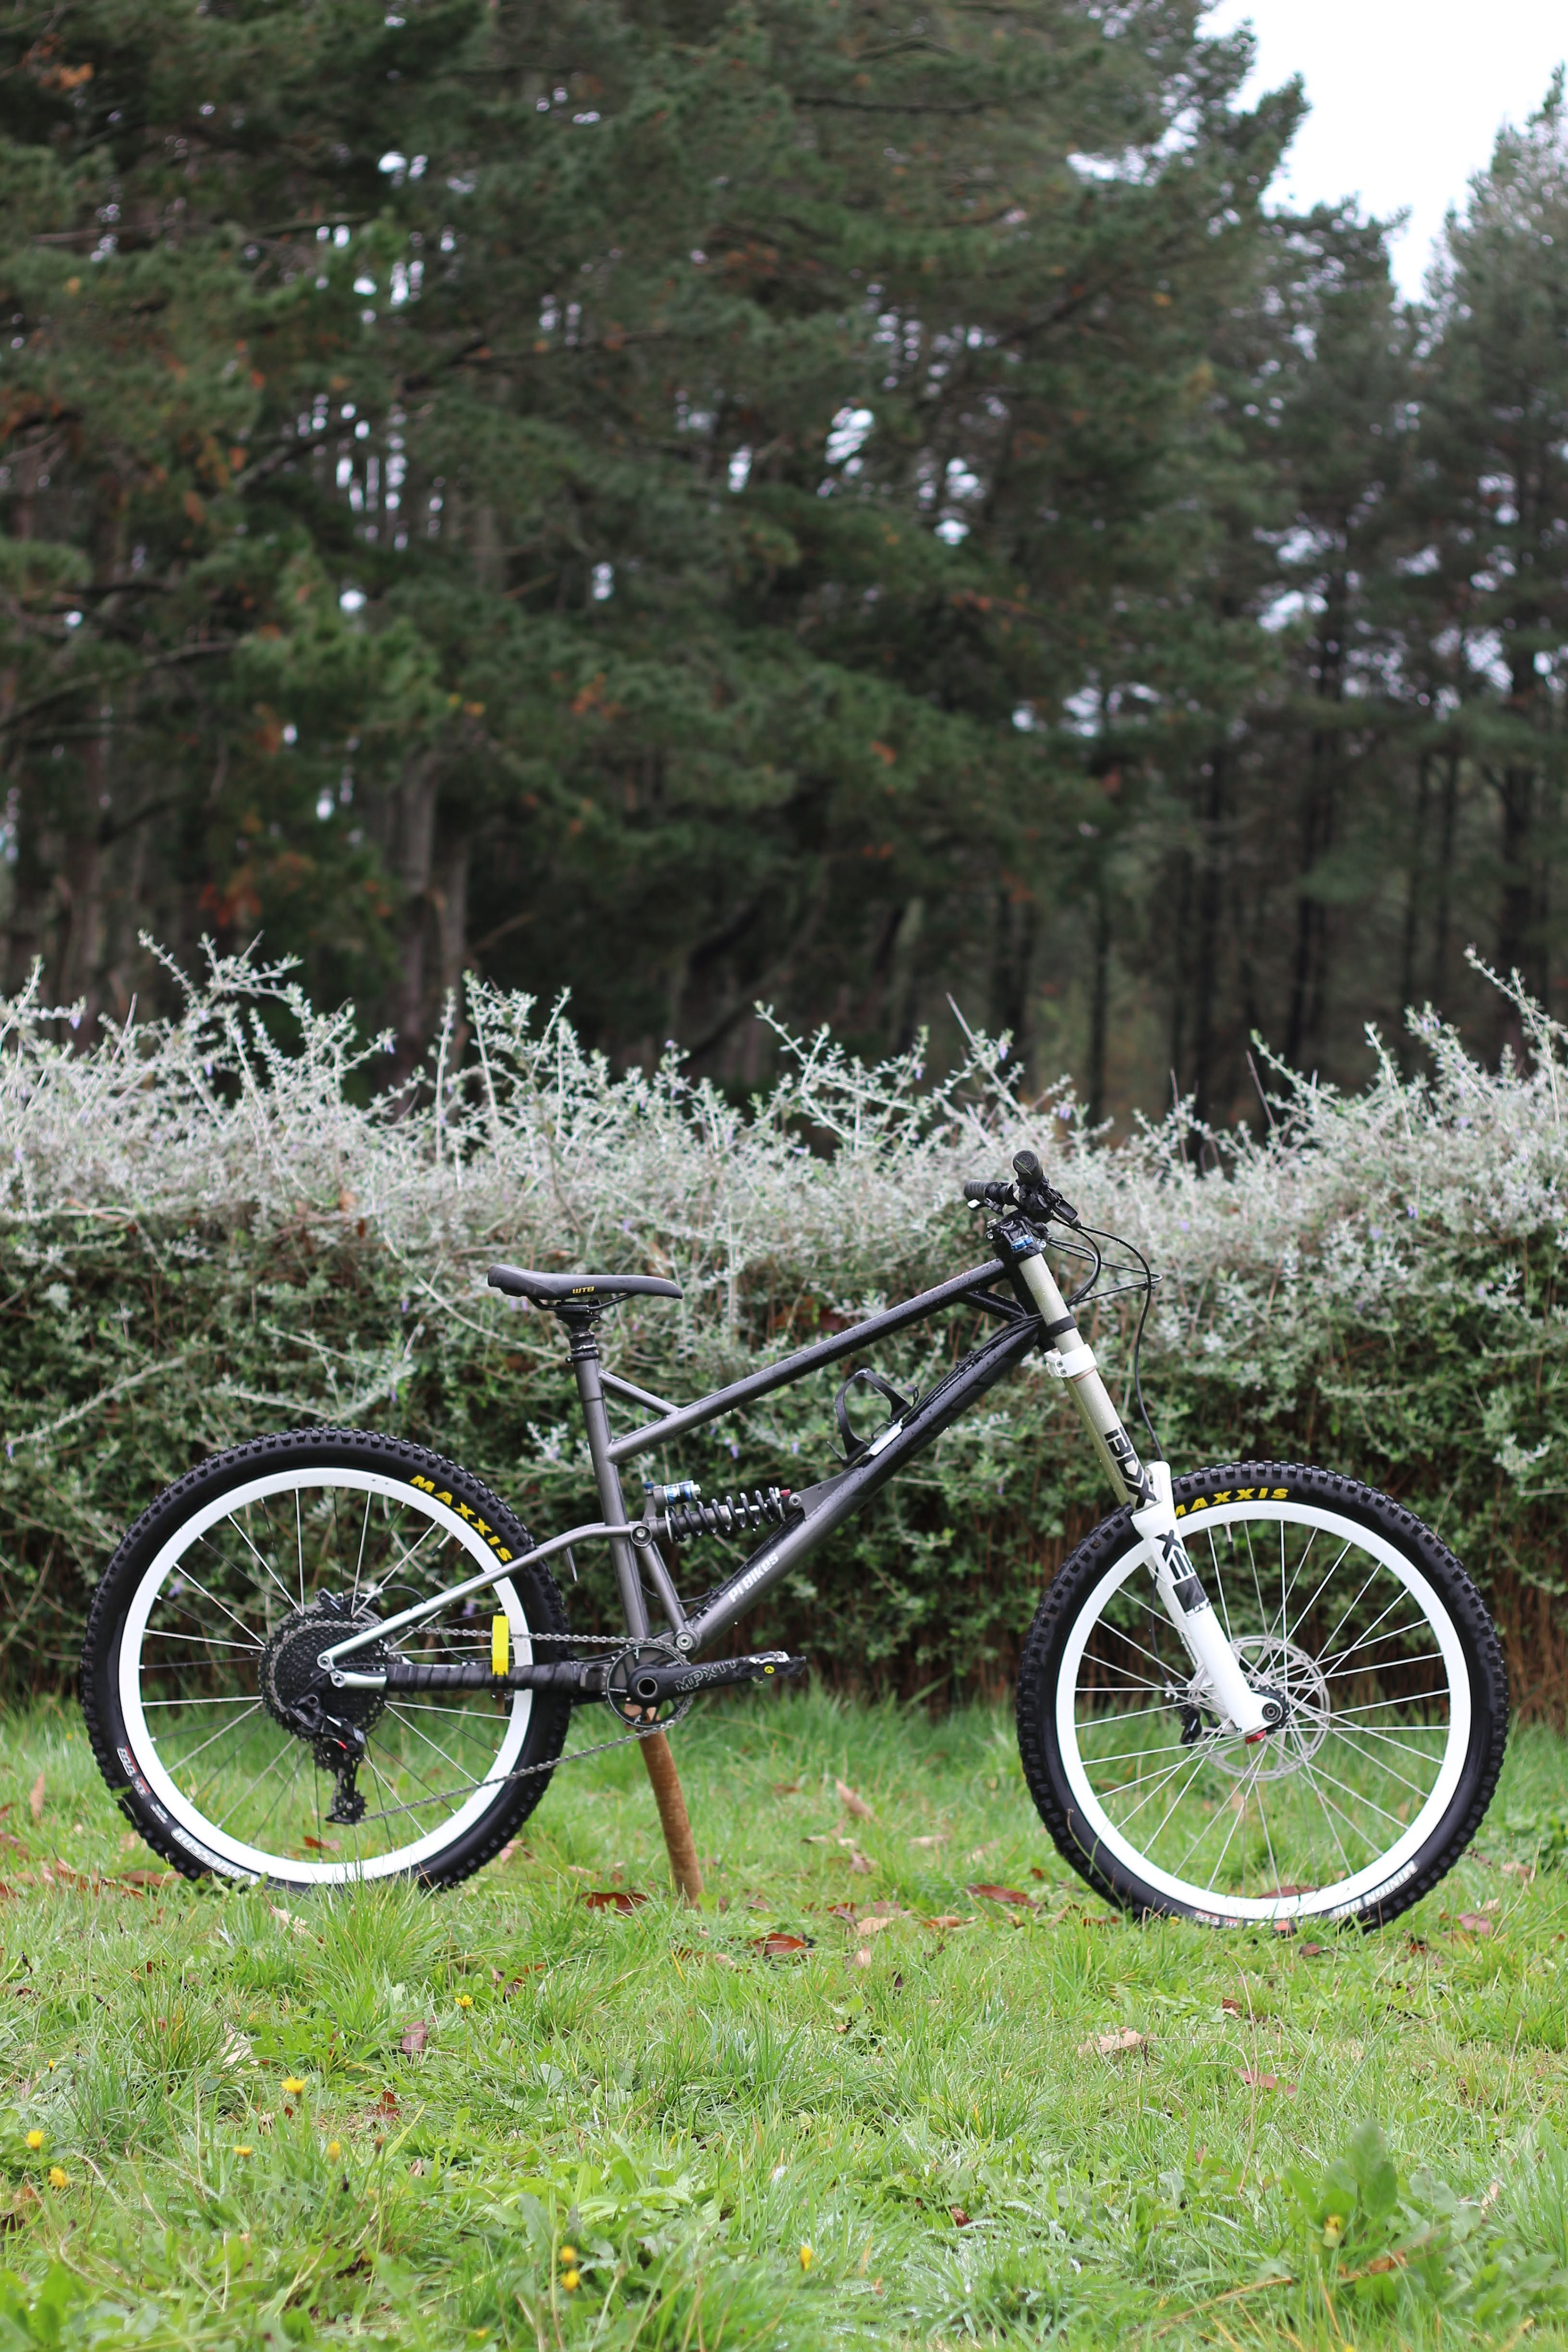
I didn't really give it a big test run before paint like the first 2 bikes, I don't think there will be any issues so I decided to paint it after spending about an hour or so riding it around the house doing bunnyhops and generally messing around. I painted it GM beechwood medium fading to GM beechwood light, a very 80's metallic colour. Pretty happy with how it came out, its far from perfect but its straight and shiny and looks very purposeful.
Now I need to get some good tyres for it and go do some shuttle runs!
... it might be a little while I think I might have cracked a rib out riding on friday hahaha.
-
10
-
2
-
1
-
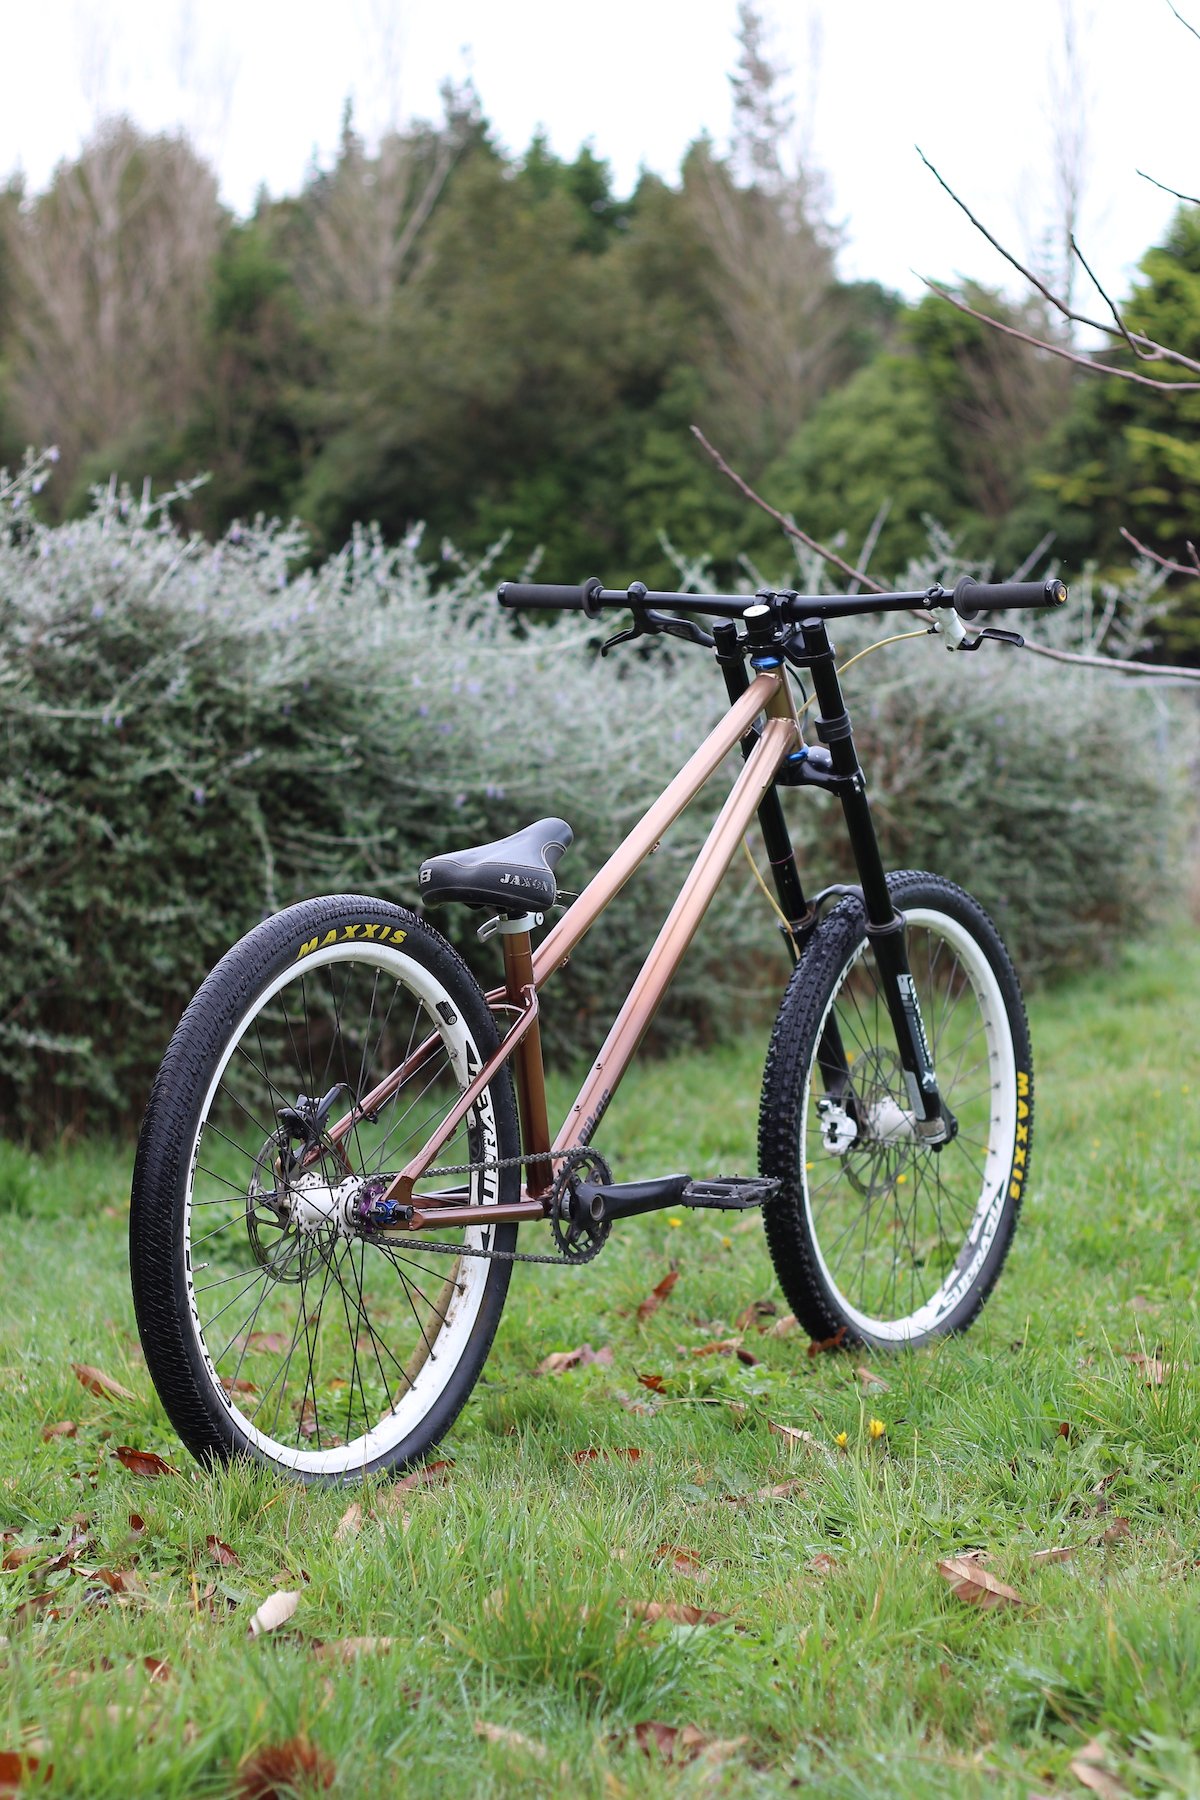
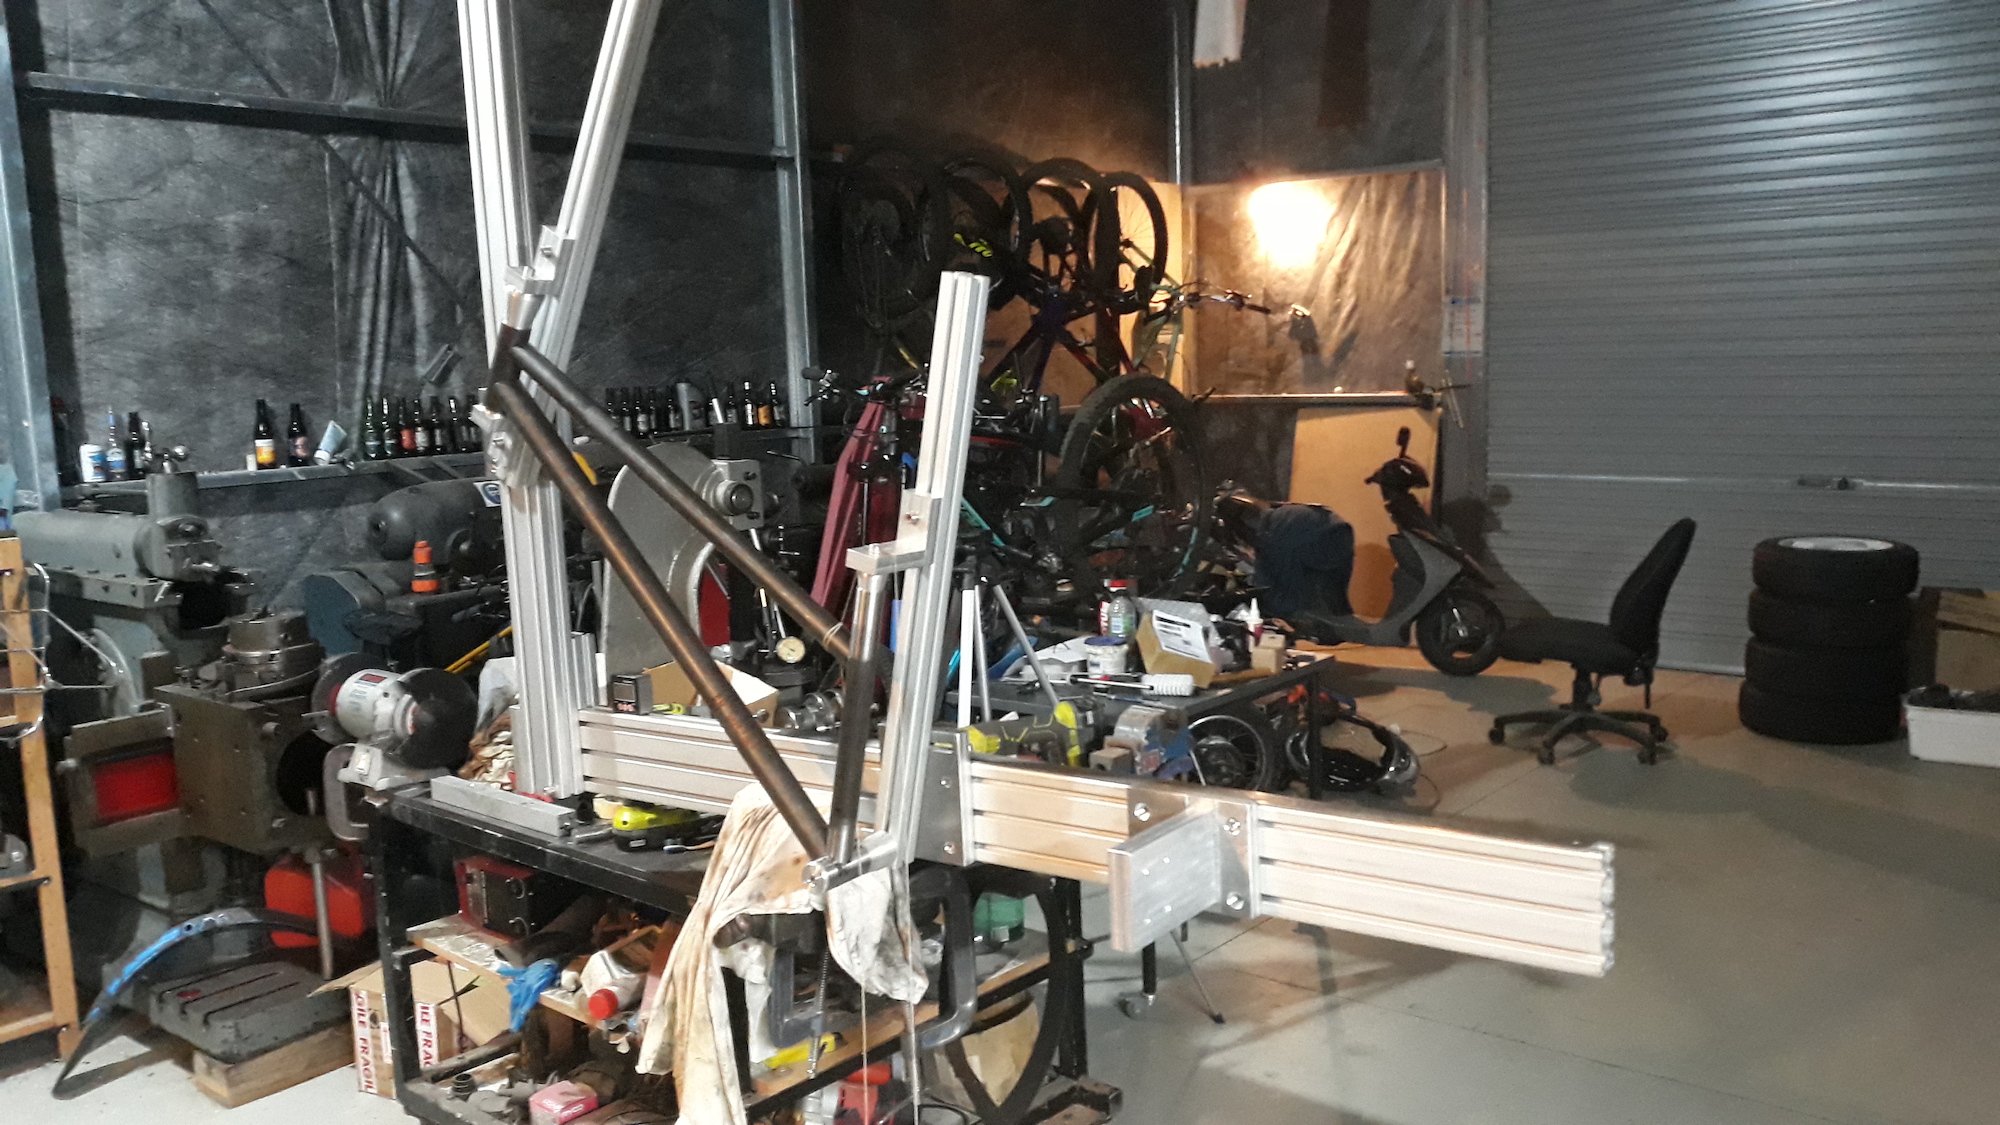
So for bike number 3 I decided that my previous 2 bikes were far too practical and that I need to make something that is almost useless. Well not really but thats is pretty much how it turned out. Most of the design decisions were made for 2 reasons.
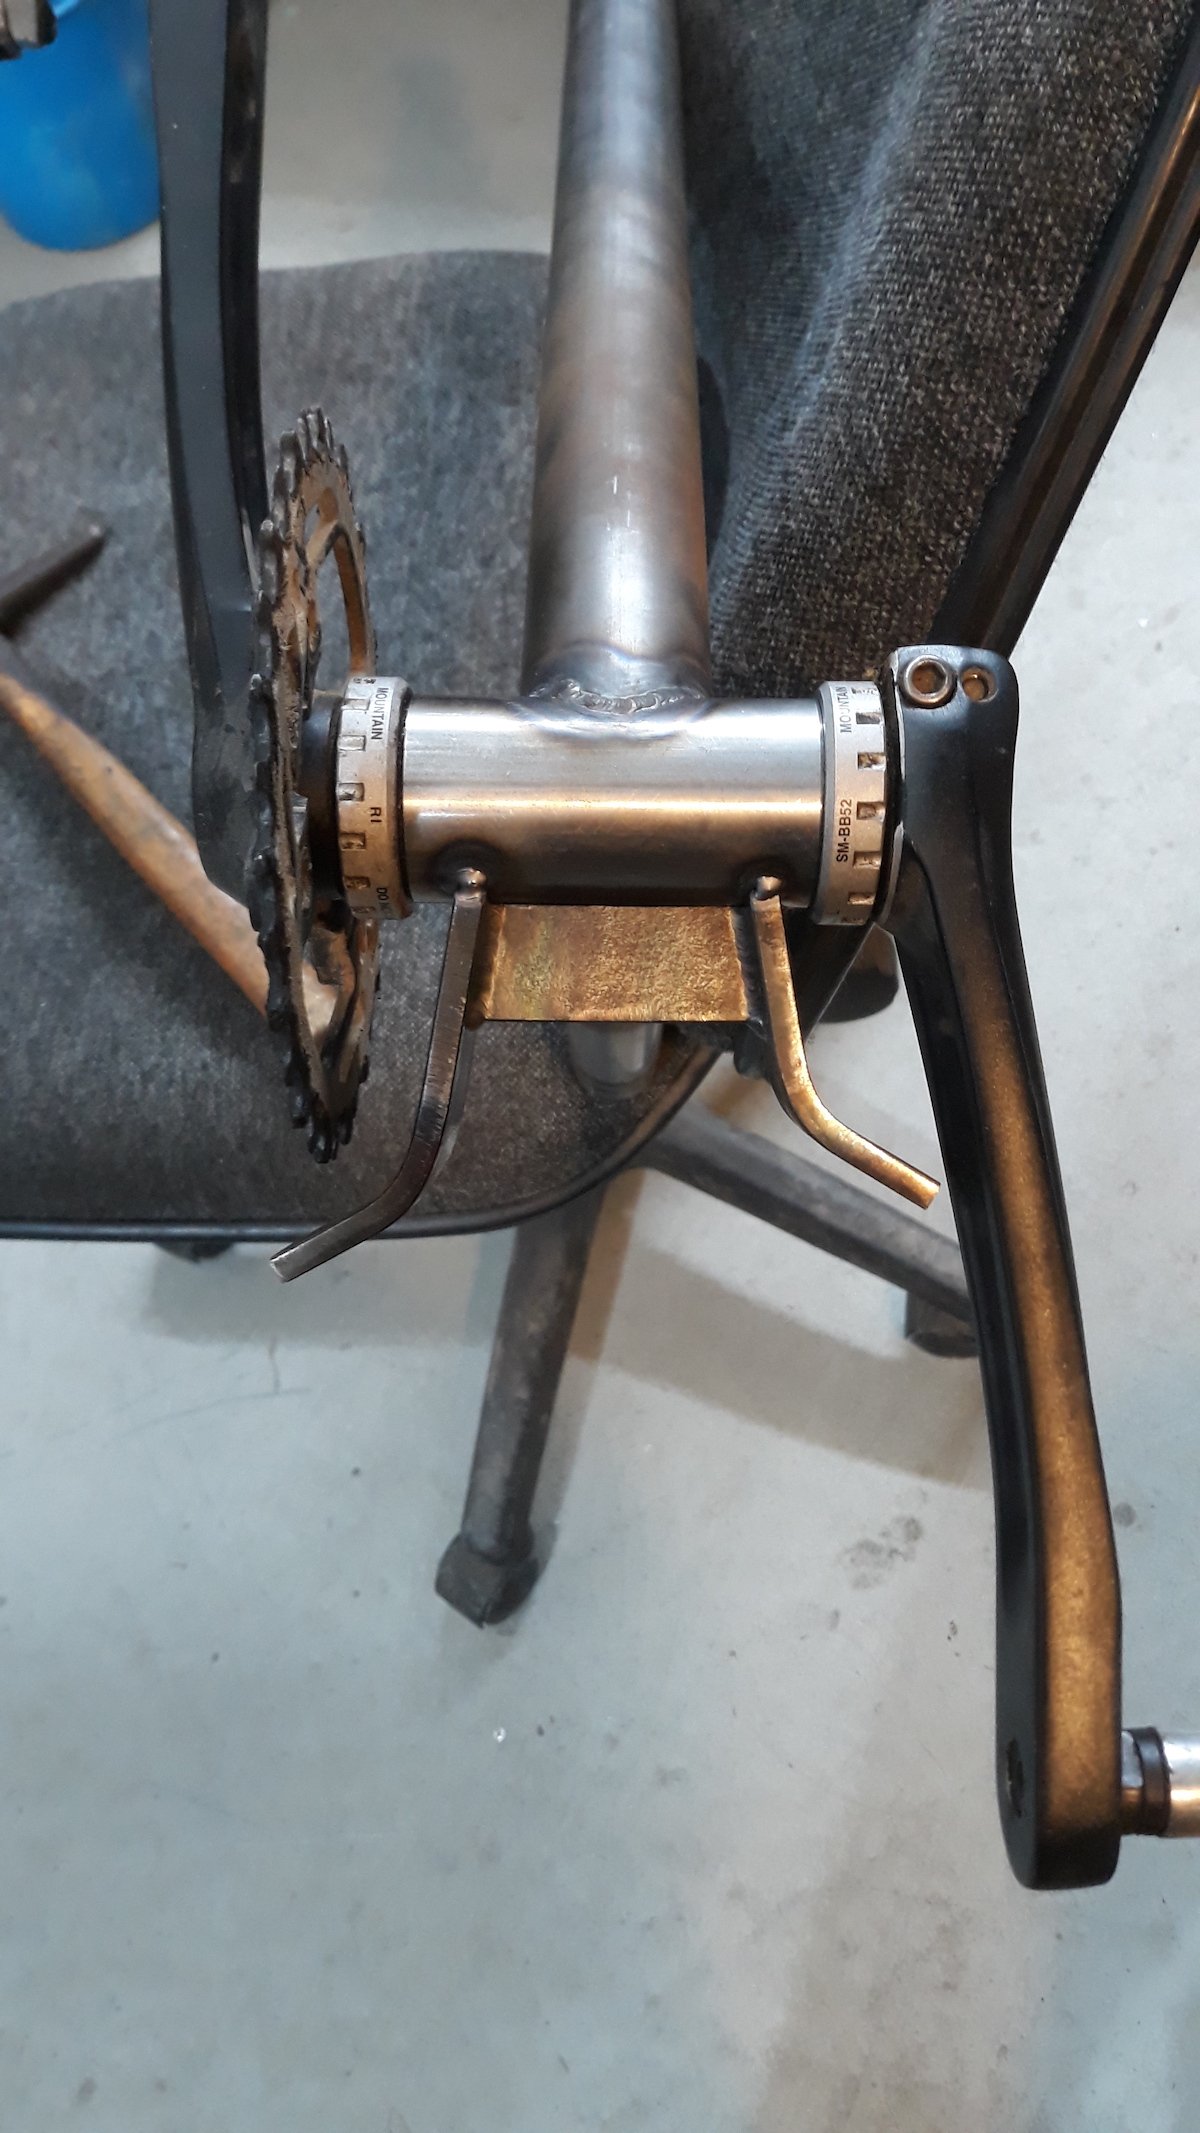
First reason is that I wanted to make a bike with as short a chainstay length as possible as that has a few advocates in the frame building world. I'm not convinced and think that it should be a ratio of front centre to rear centre, so if the front gets longer the back should too to maintain a neutral weight distribution between the front and rear wheel. But I don't really know so I figured I would make a long bike with a short rear end and see how it rides.
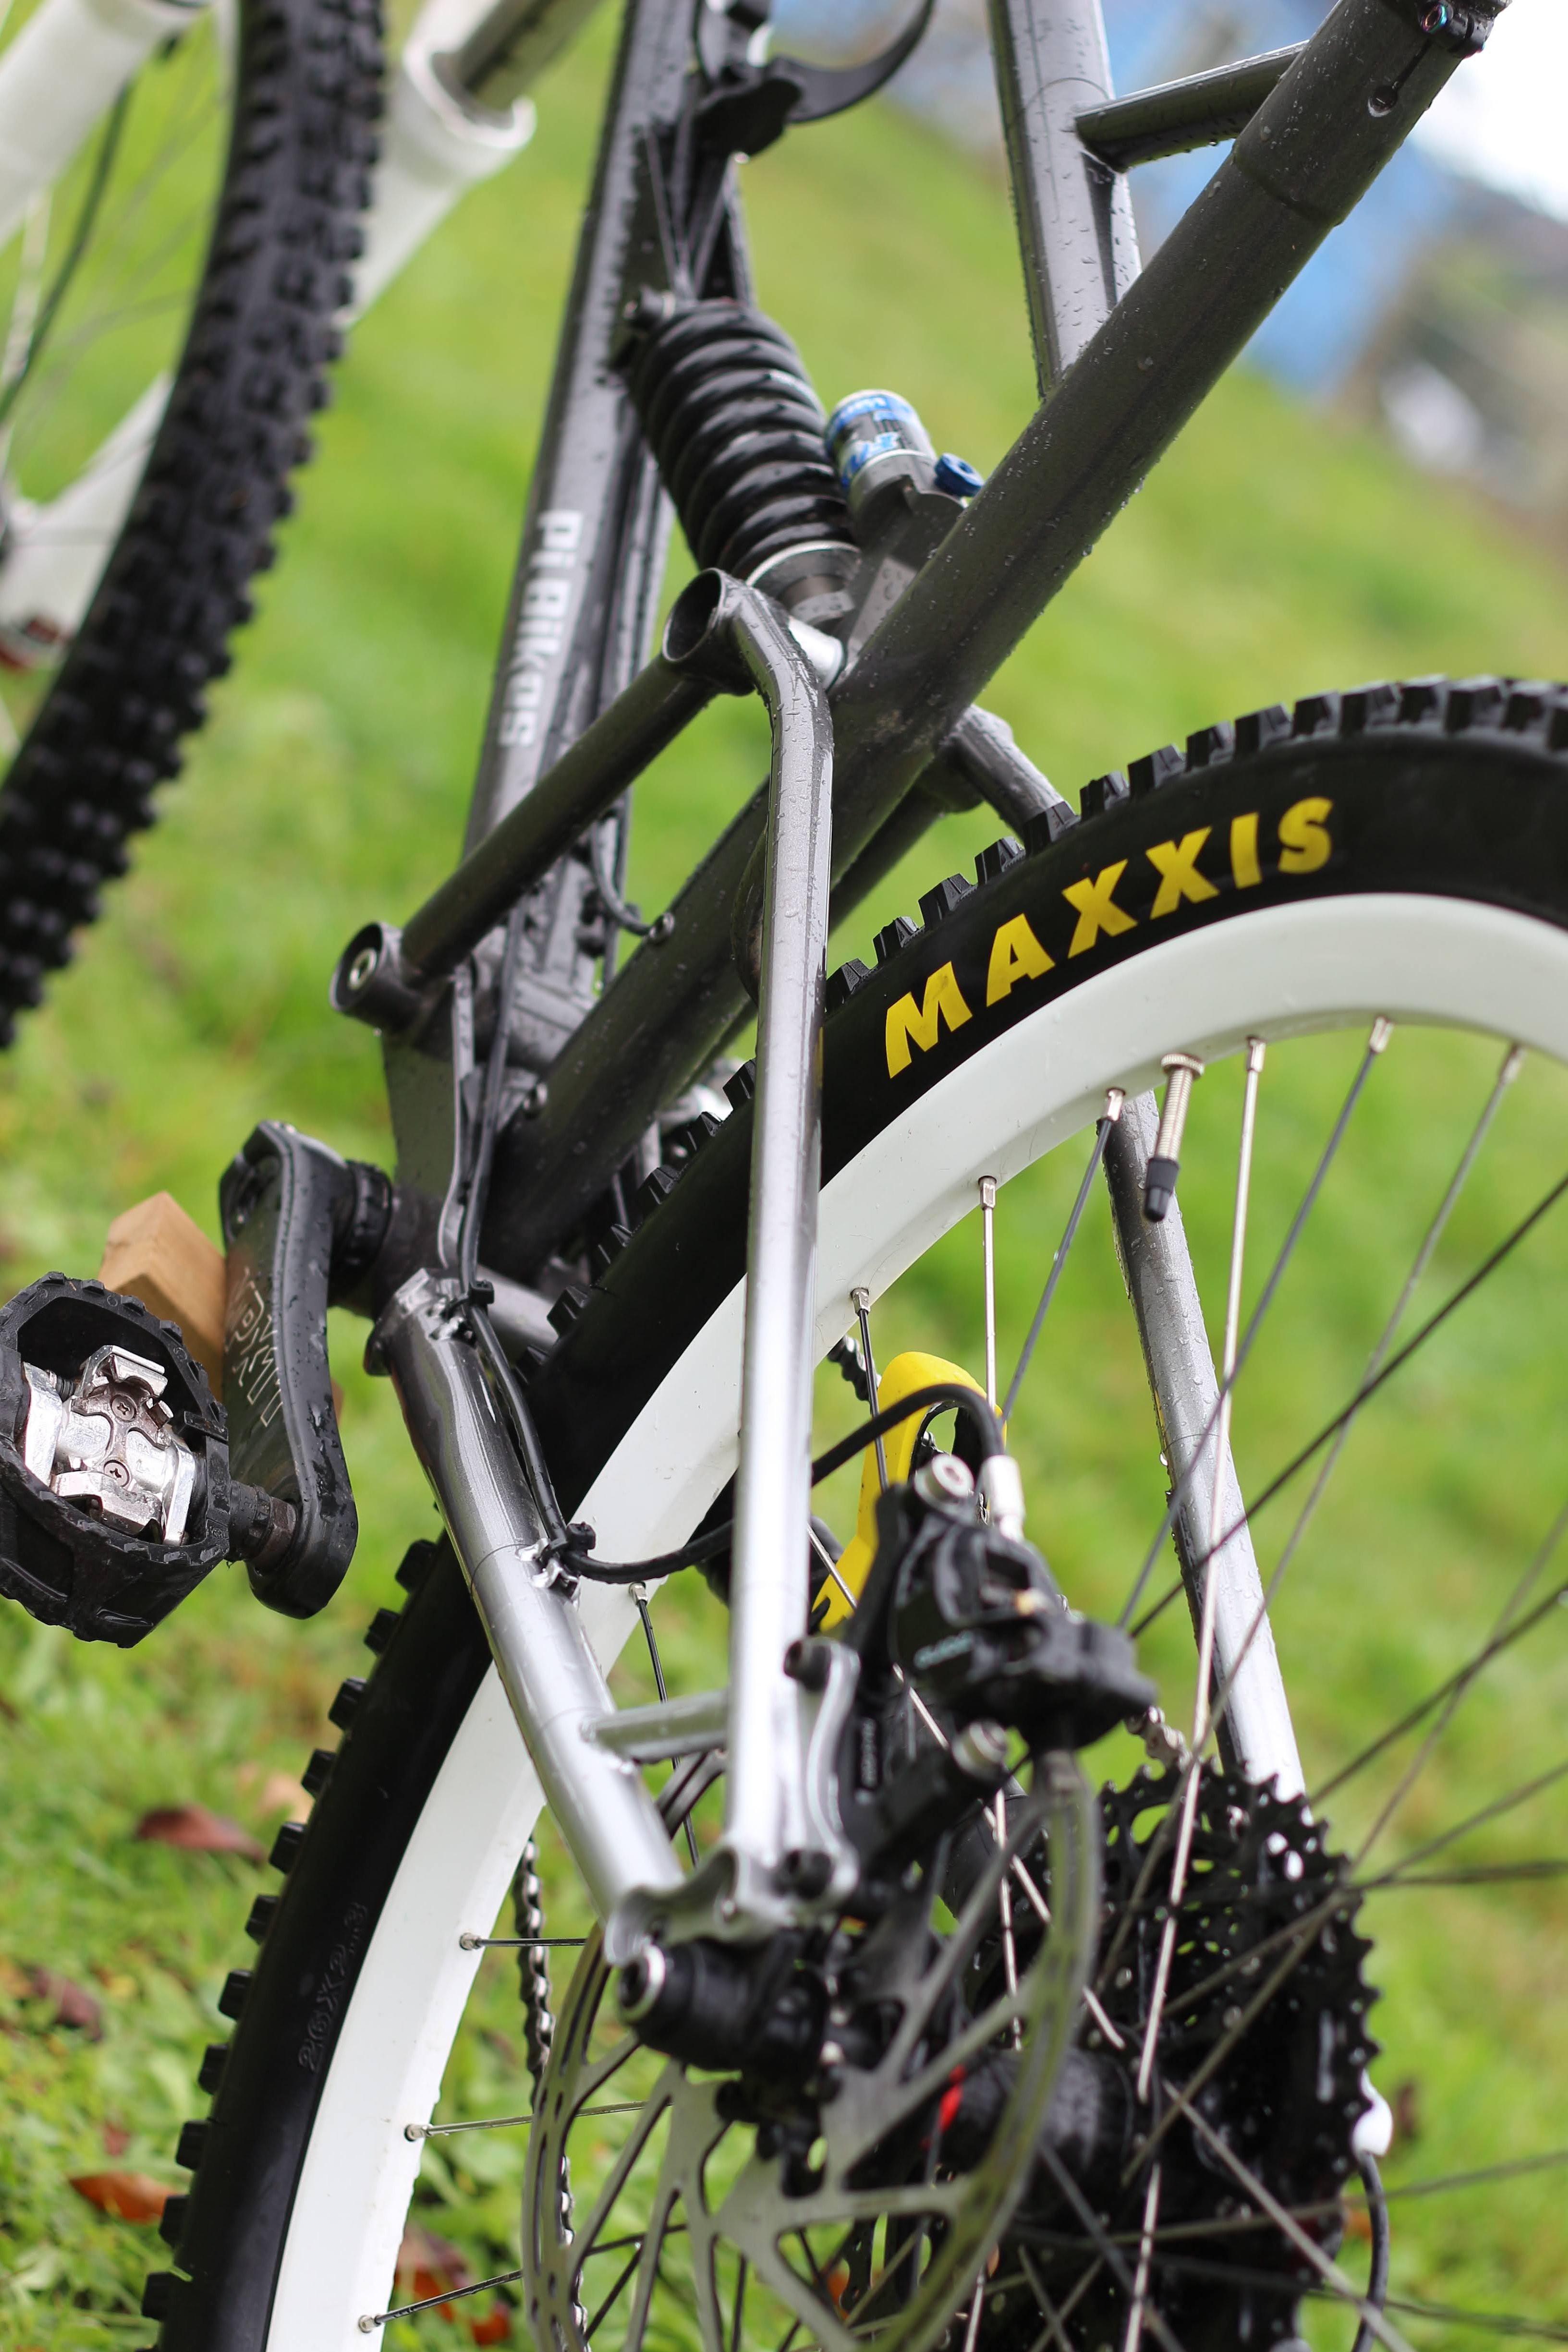
Second reason is that I wanted it to be cheap and use as many of the parts that were already floating around in my shed. So it has a few odd standards that will make it ineligible for further upgrades in many ways. I had a single speed setup in the stash and sliding dropouts would be easy to make at home and allow for chain tensioning. I had a spare 26" wheelset from a dirtjump bike that I had built up then decided I didn't really like and then sold off the frame, so I made it to suit this wheelset with a 10x135mm axle.
I made a chainstay yoke out of 25x6 flat bar with a couple of bends and the dropouts are from some 6mm plate. After putting all the parts in the jig its a just a game of connect the dots. So much easier! there are still some processes with getting tubes mitred that I need to make tools for, particularly the seat stay to seat tube interface. It intersects at an angle on 2 planes so I really would like to make a jig for the seat stays so I can just pop the mitering jig in the milling vice and get a nice clean cope. that is probably next on the to do list after building @hampie a bike.
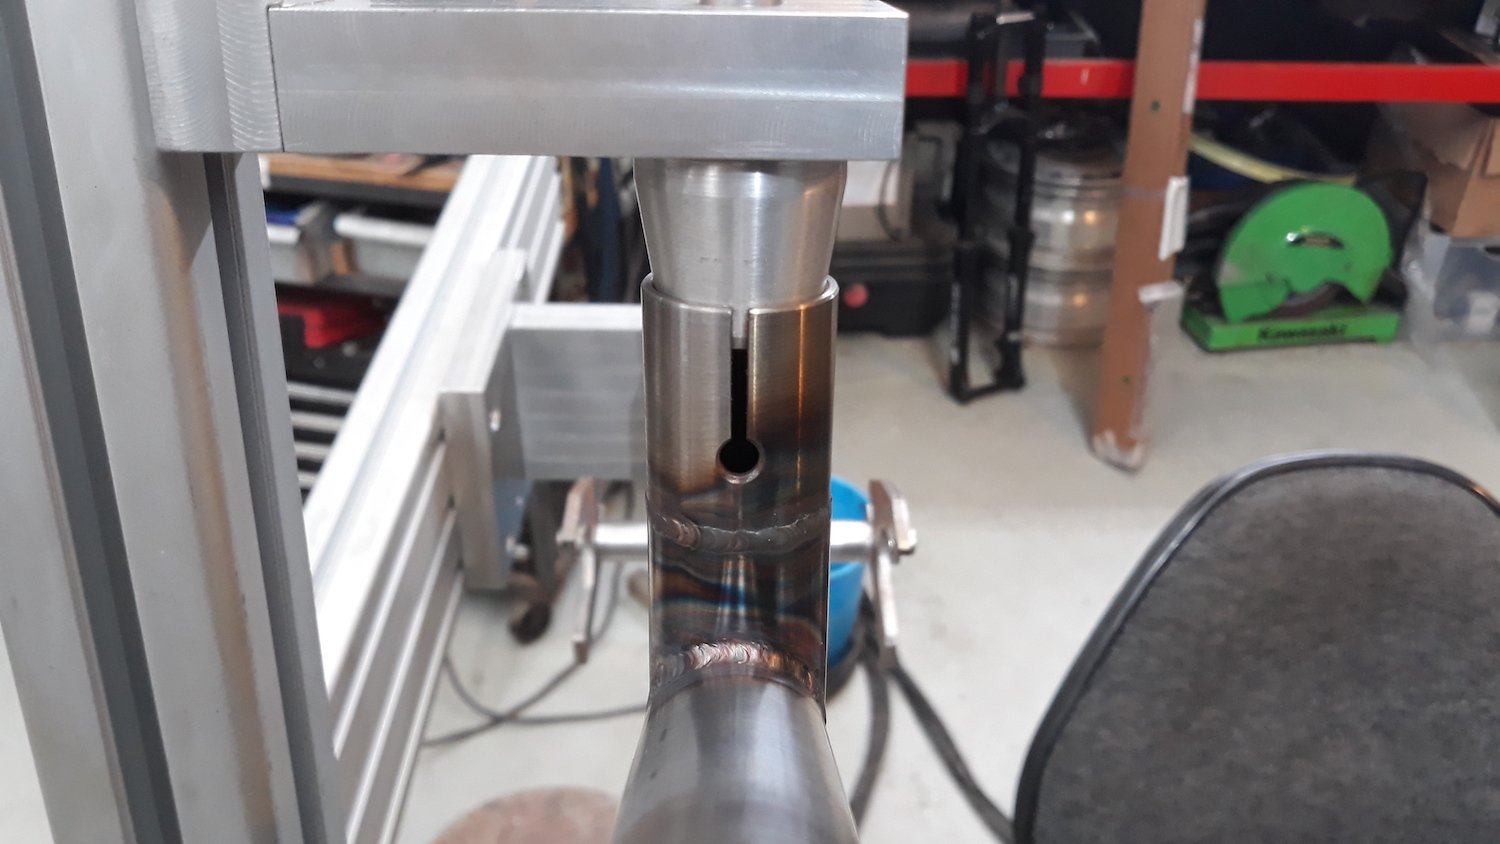
I made a reducer to go in some straigt gauge 31.8mm tubing to fit a 27.2mm seatpost. I slotted it on the mill with a tiny wee endmill spinning at 4000rpm. that was quite exciting but it came out pretty well I think!
I borrowed @Geophy's bramley bender and had a go at bending up some seat stays. they came out ok, a little wrinkly on the inside. Probably could have done the packing with sand or ice trick. I mostly covered it up with a little brace that I was super happy with, I recon it looks cool.
-
8
-
-
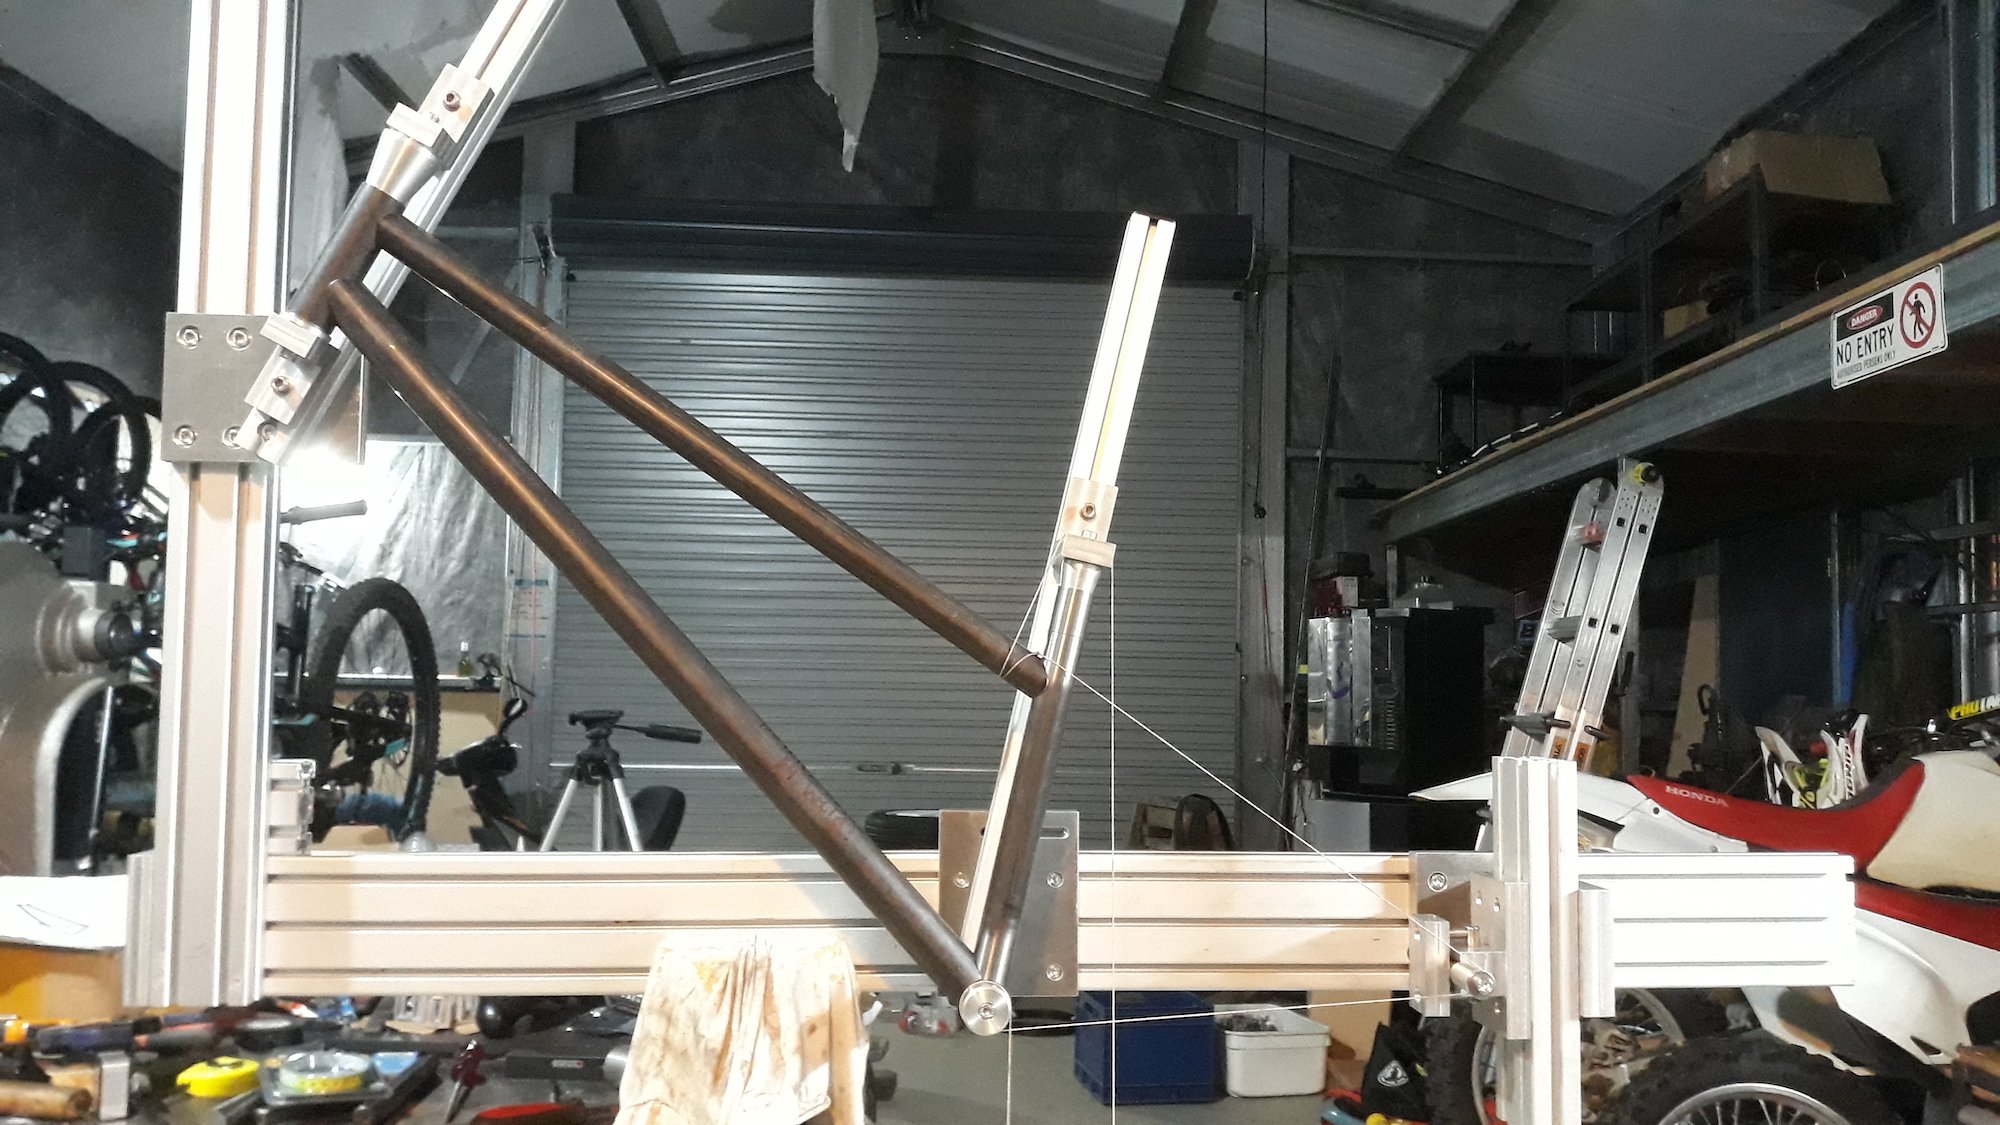
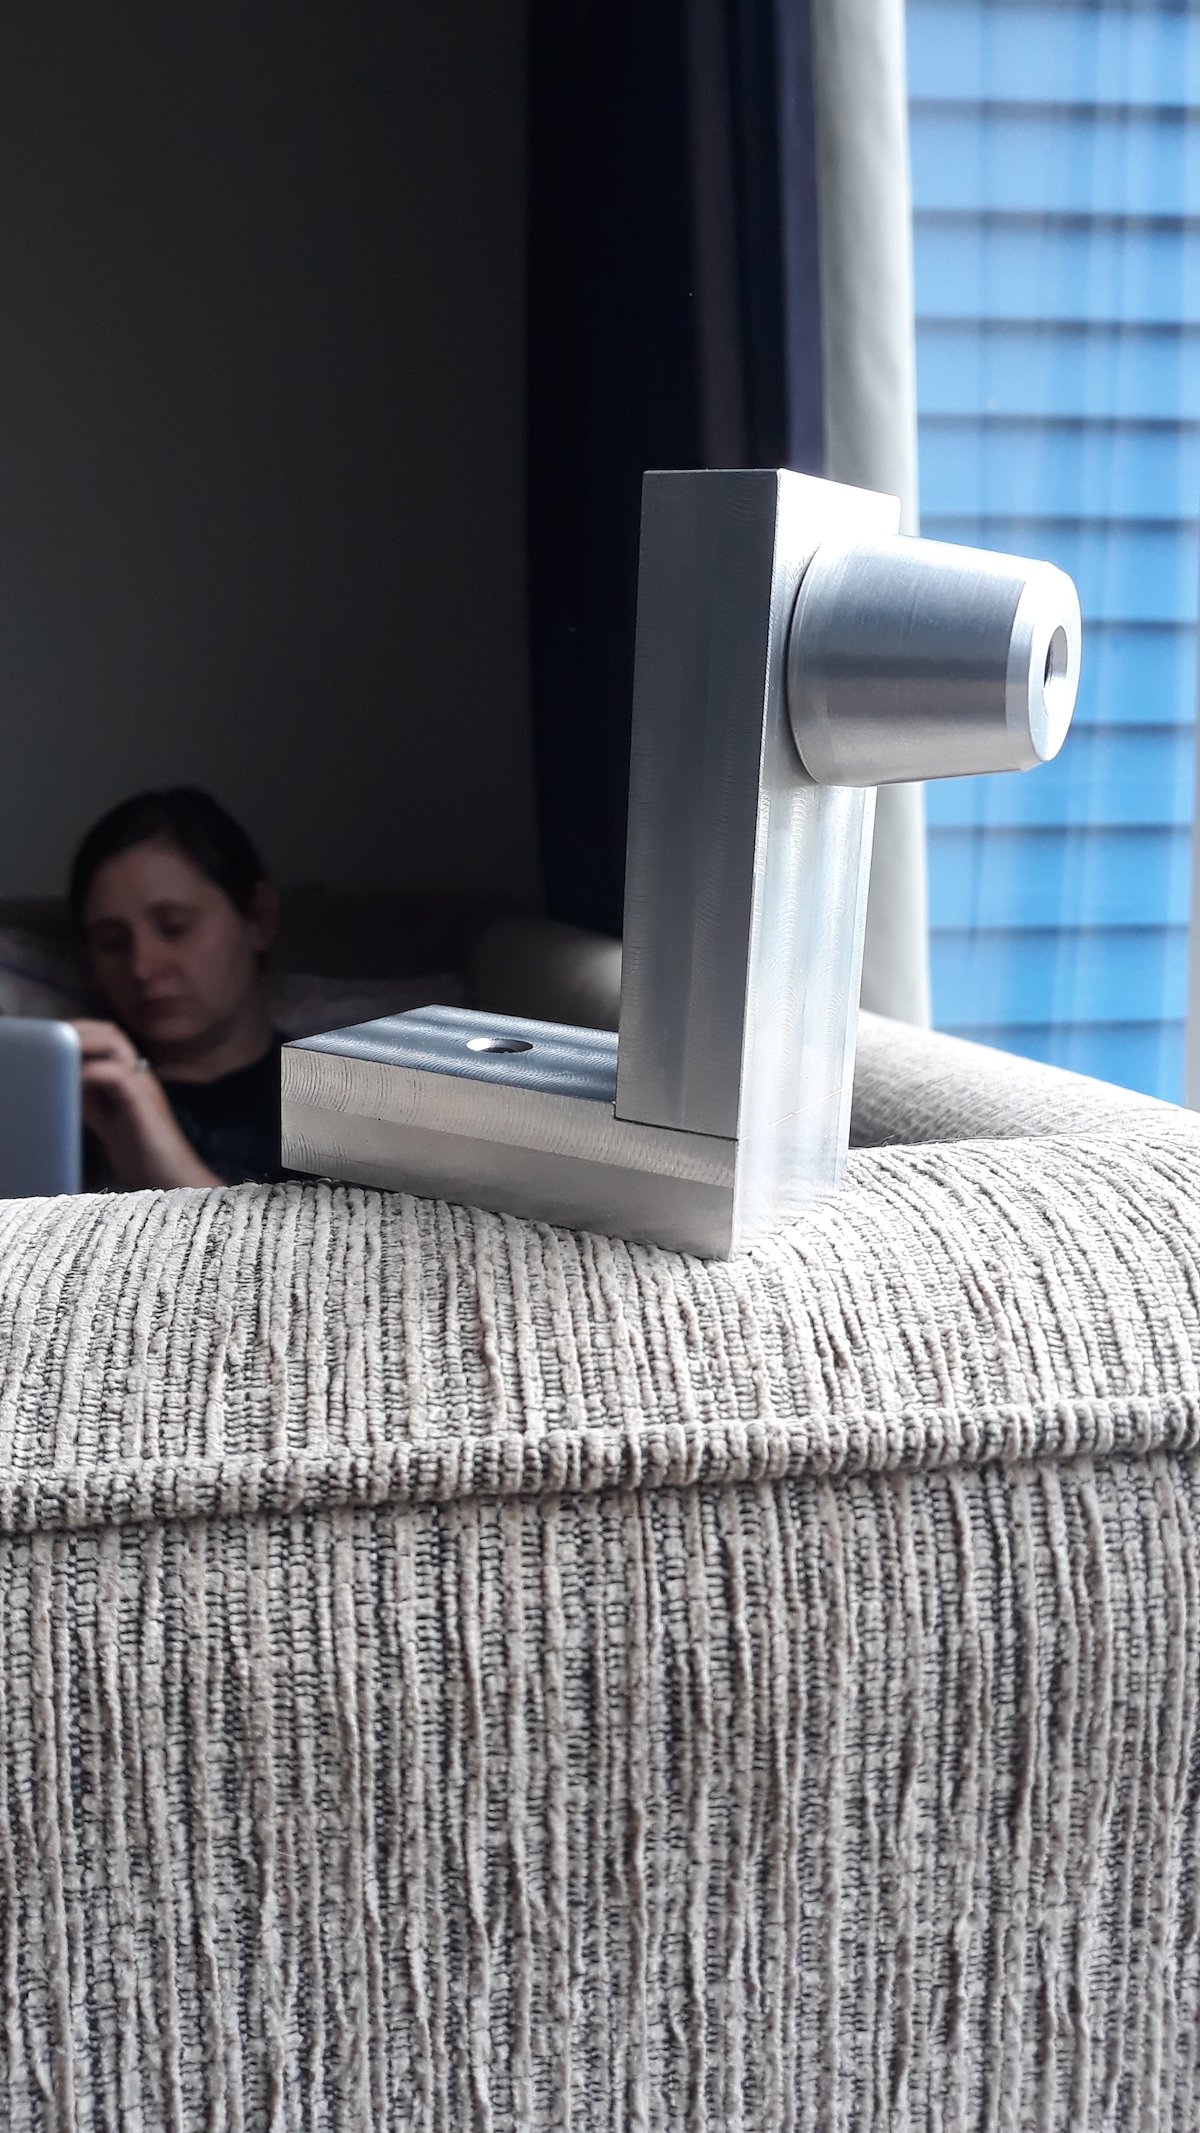
After the great success of the Llama based seat post alignment tool design I decided that maybe the dummy axle holder would work well if it looked like a duck.
With that done a dummy axle and clamp followed shortly after
And that is the jig mostly done. Certainly done enough to make a bicycle with.
-
9
-
-
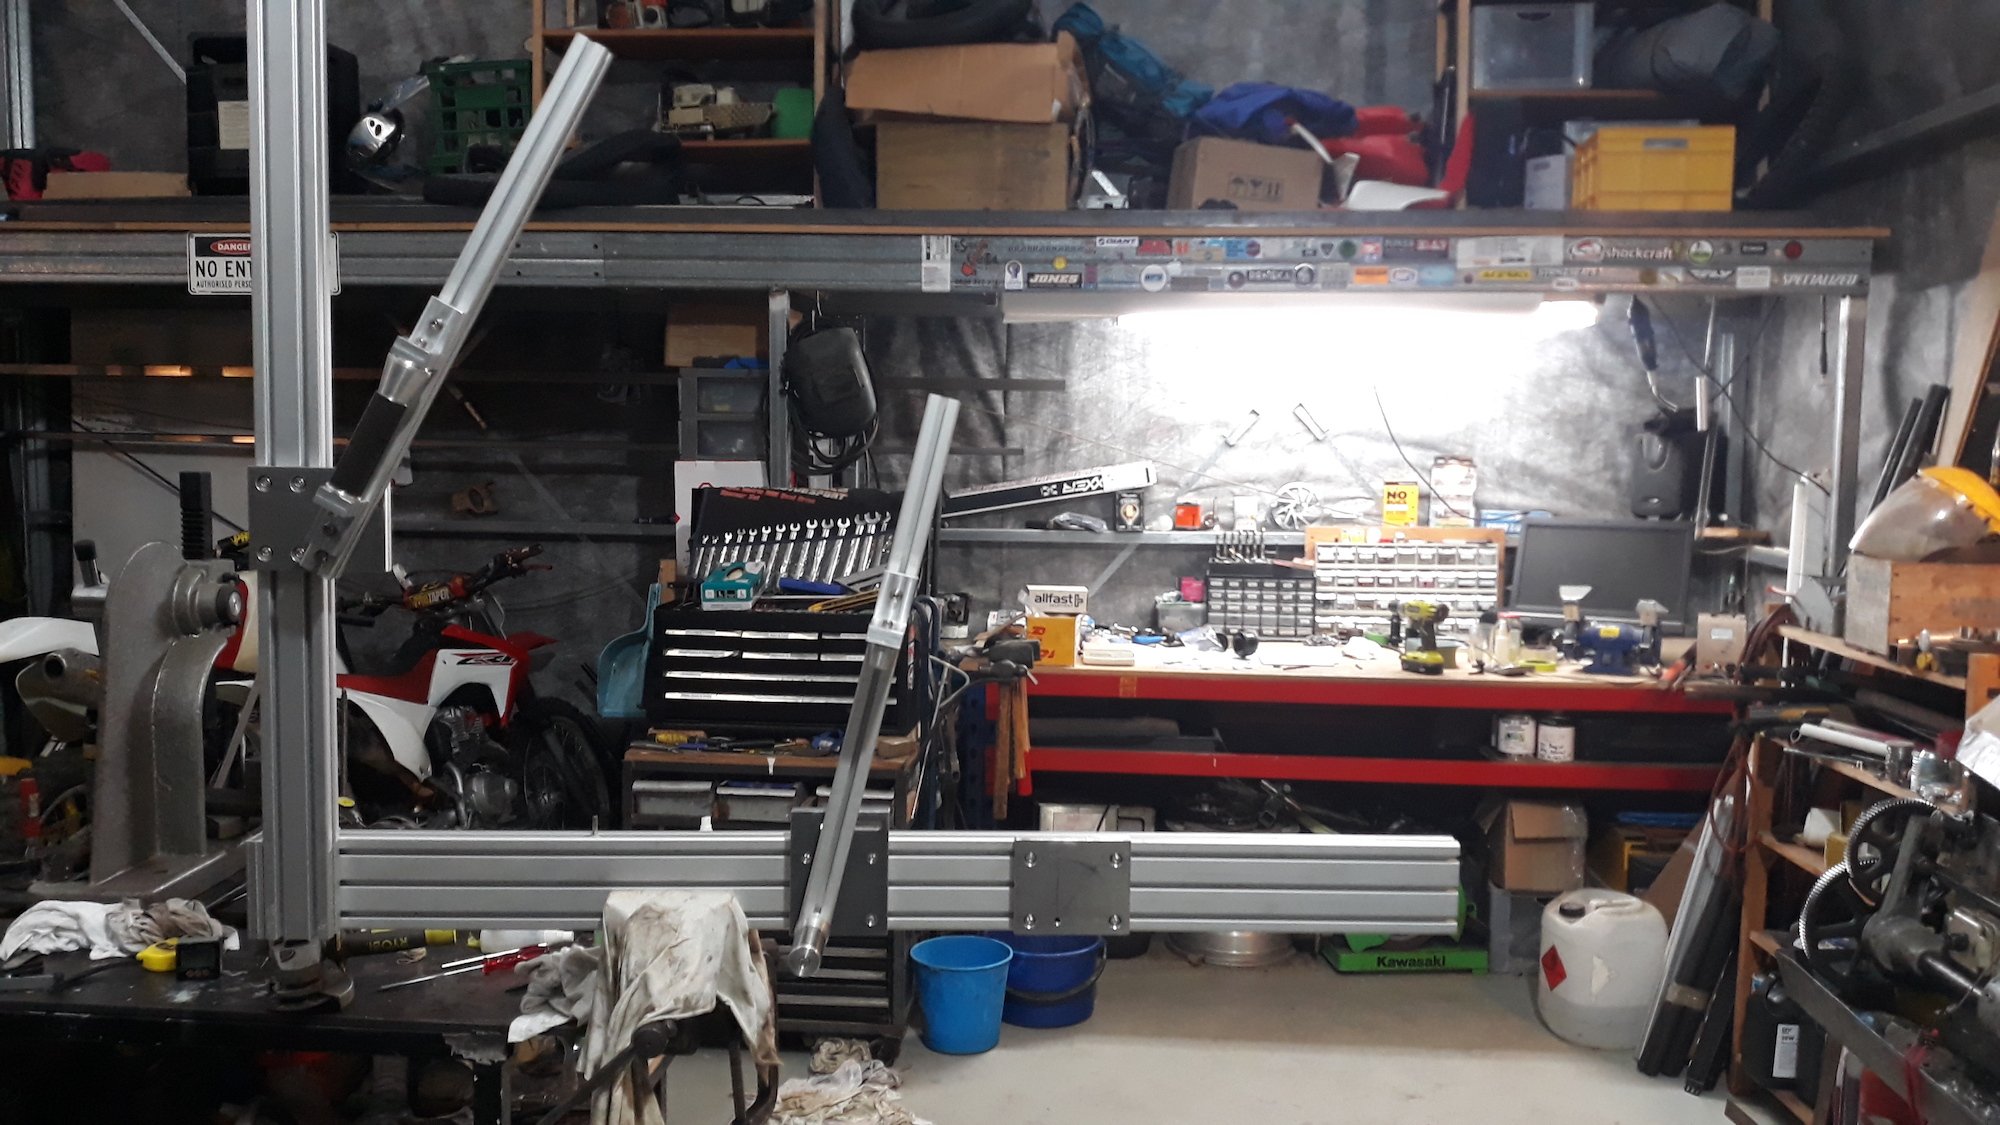
Next I made a
small legless llamaanother L bracket thing for centring the open end of the seatube.
Almost immediately this happened:
Wow a jig makes life so much easier. that front end went together in a matter of 3 or so hours without even trying to be efficient. Bike number 3 was underway and the jig wasn't even complete!
-
6
-
-
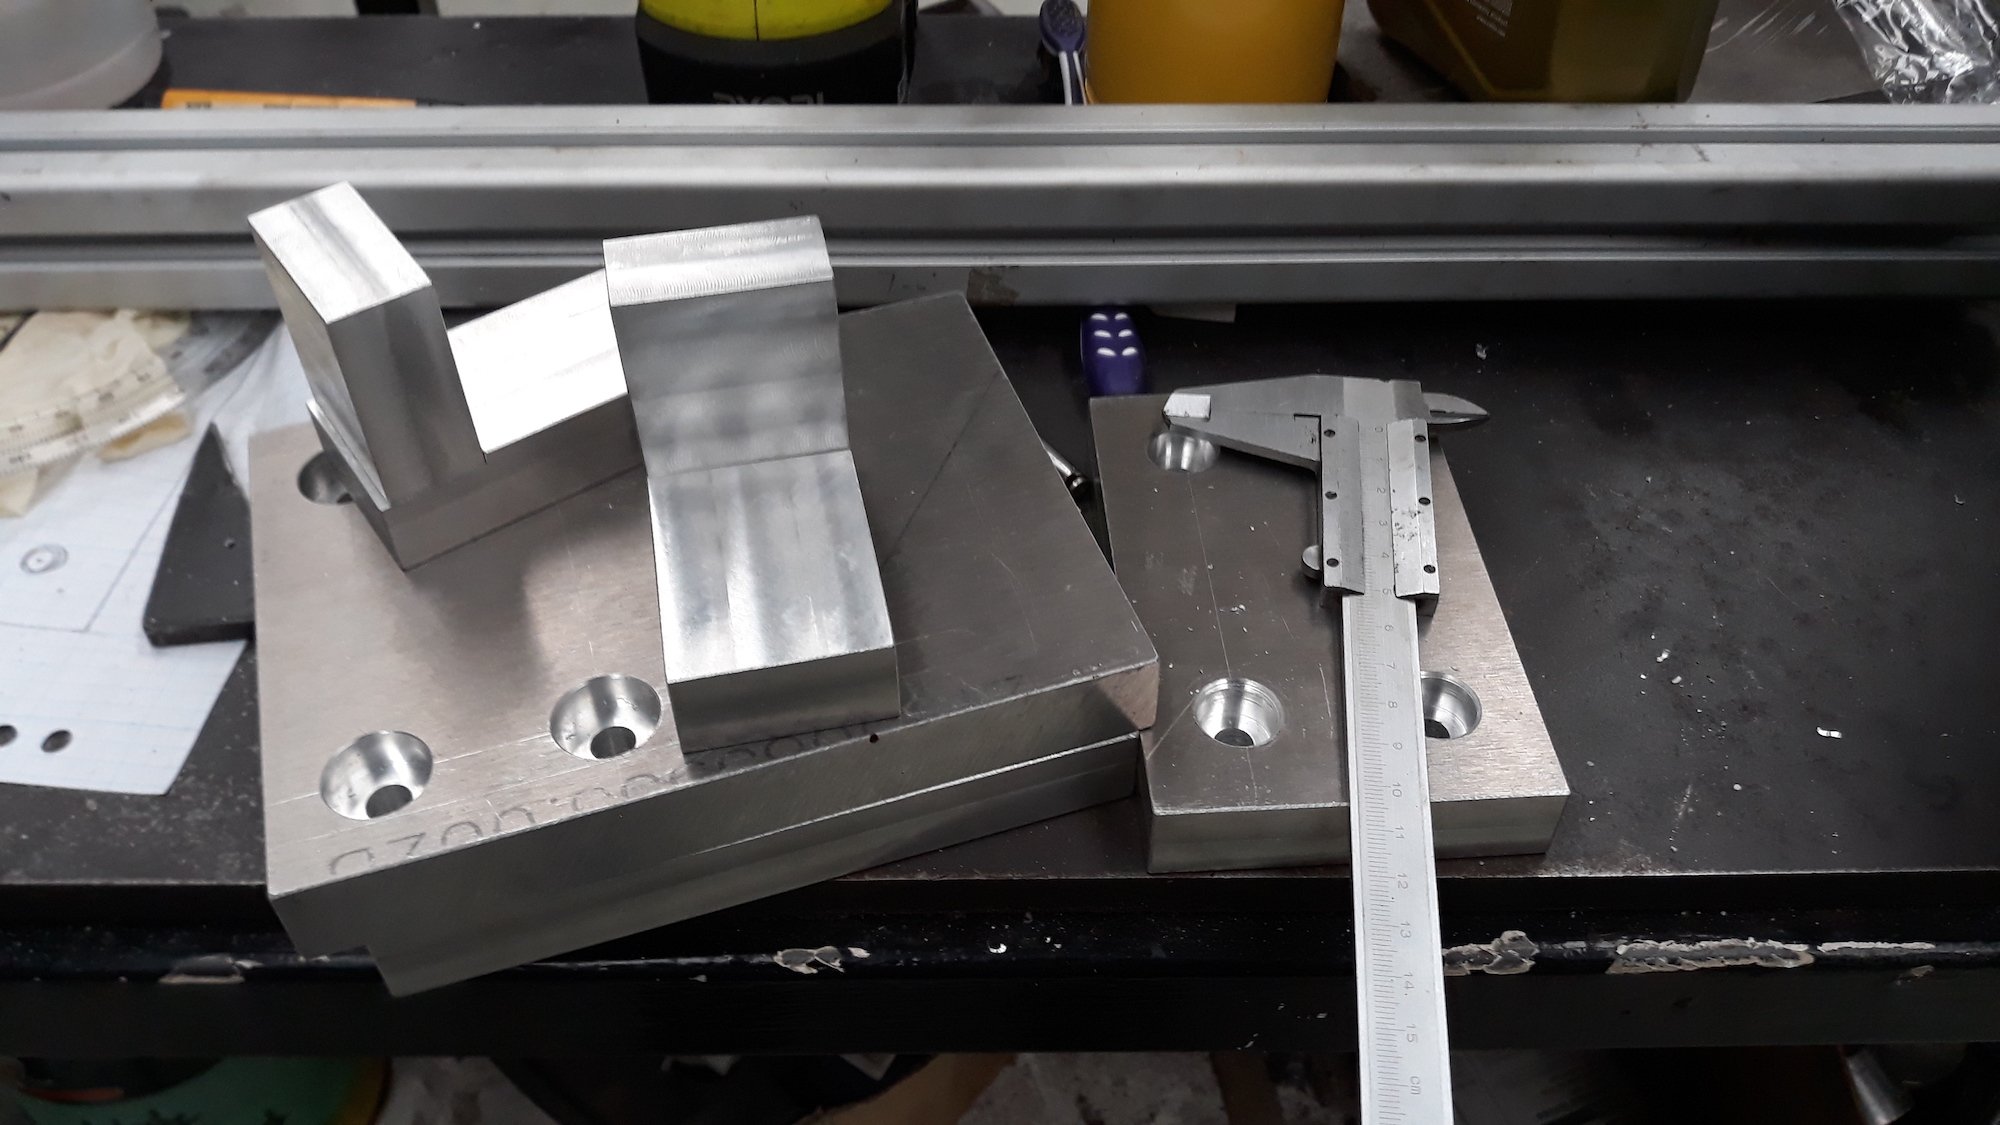
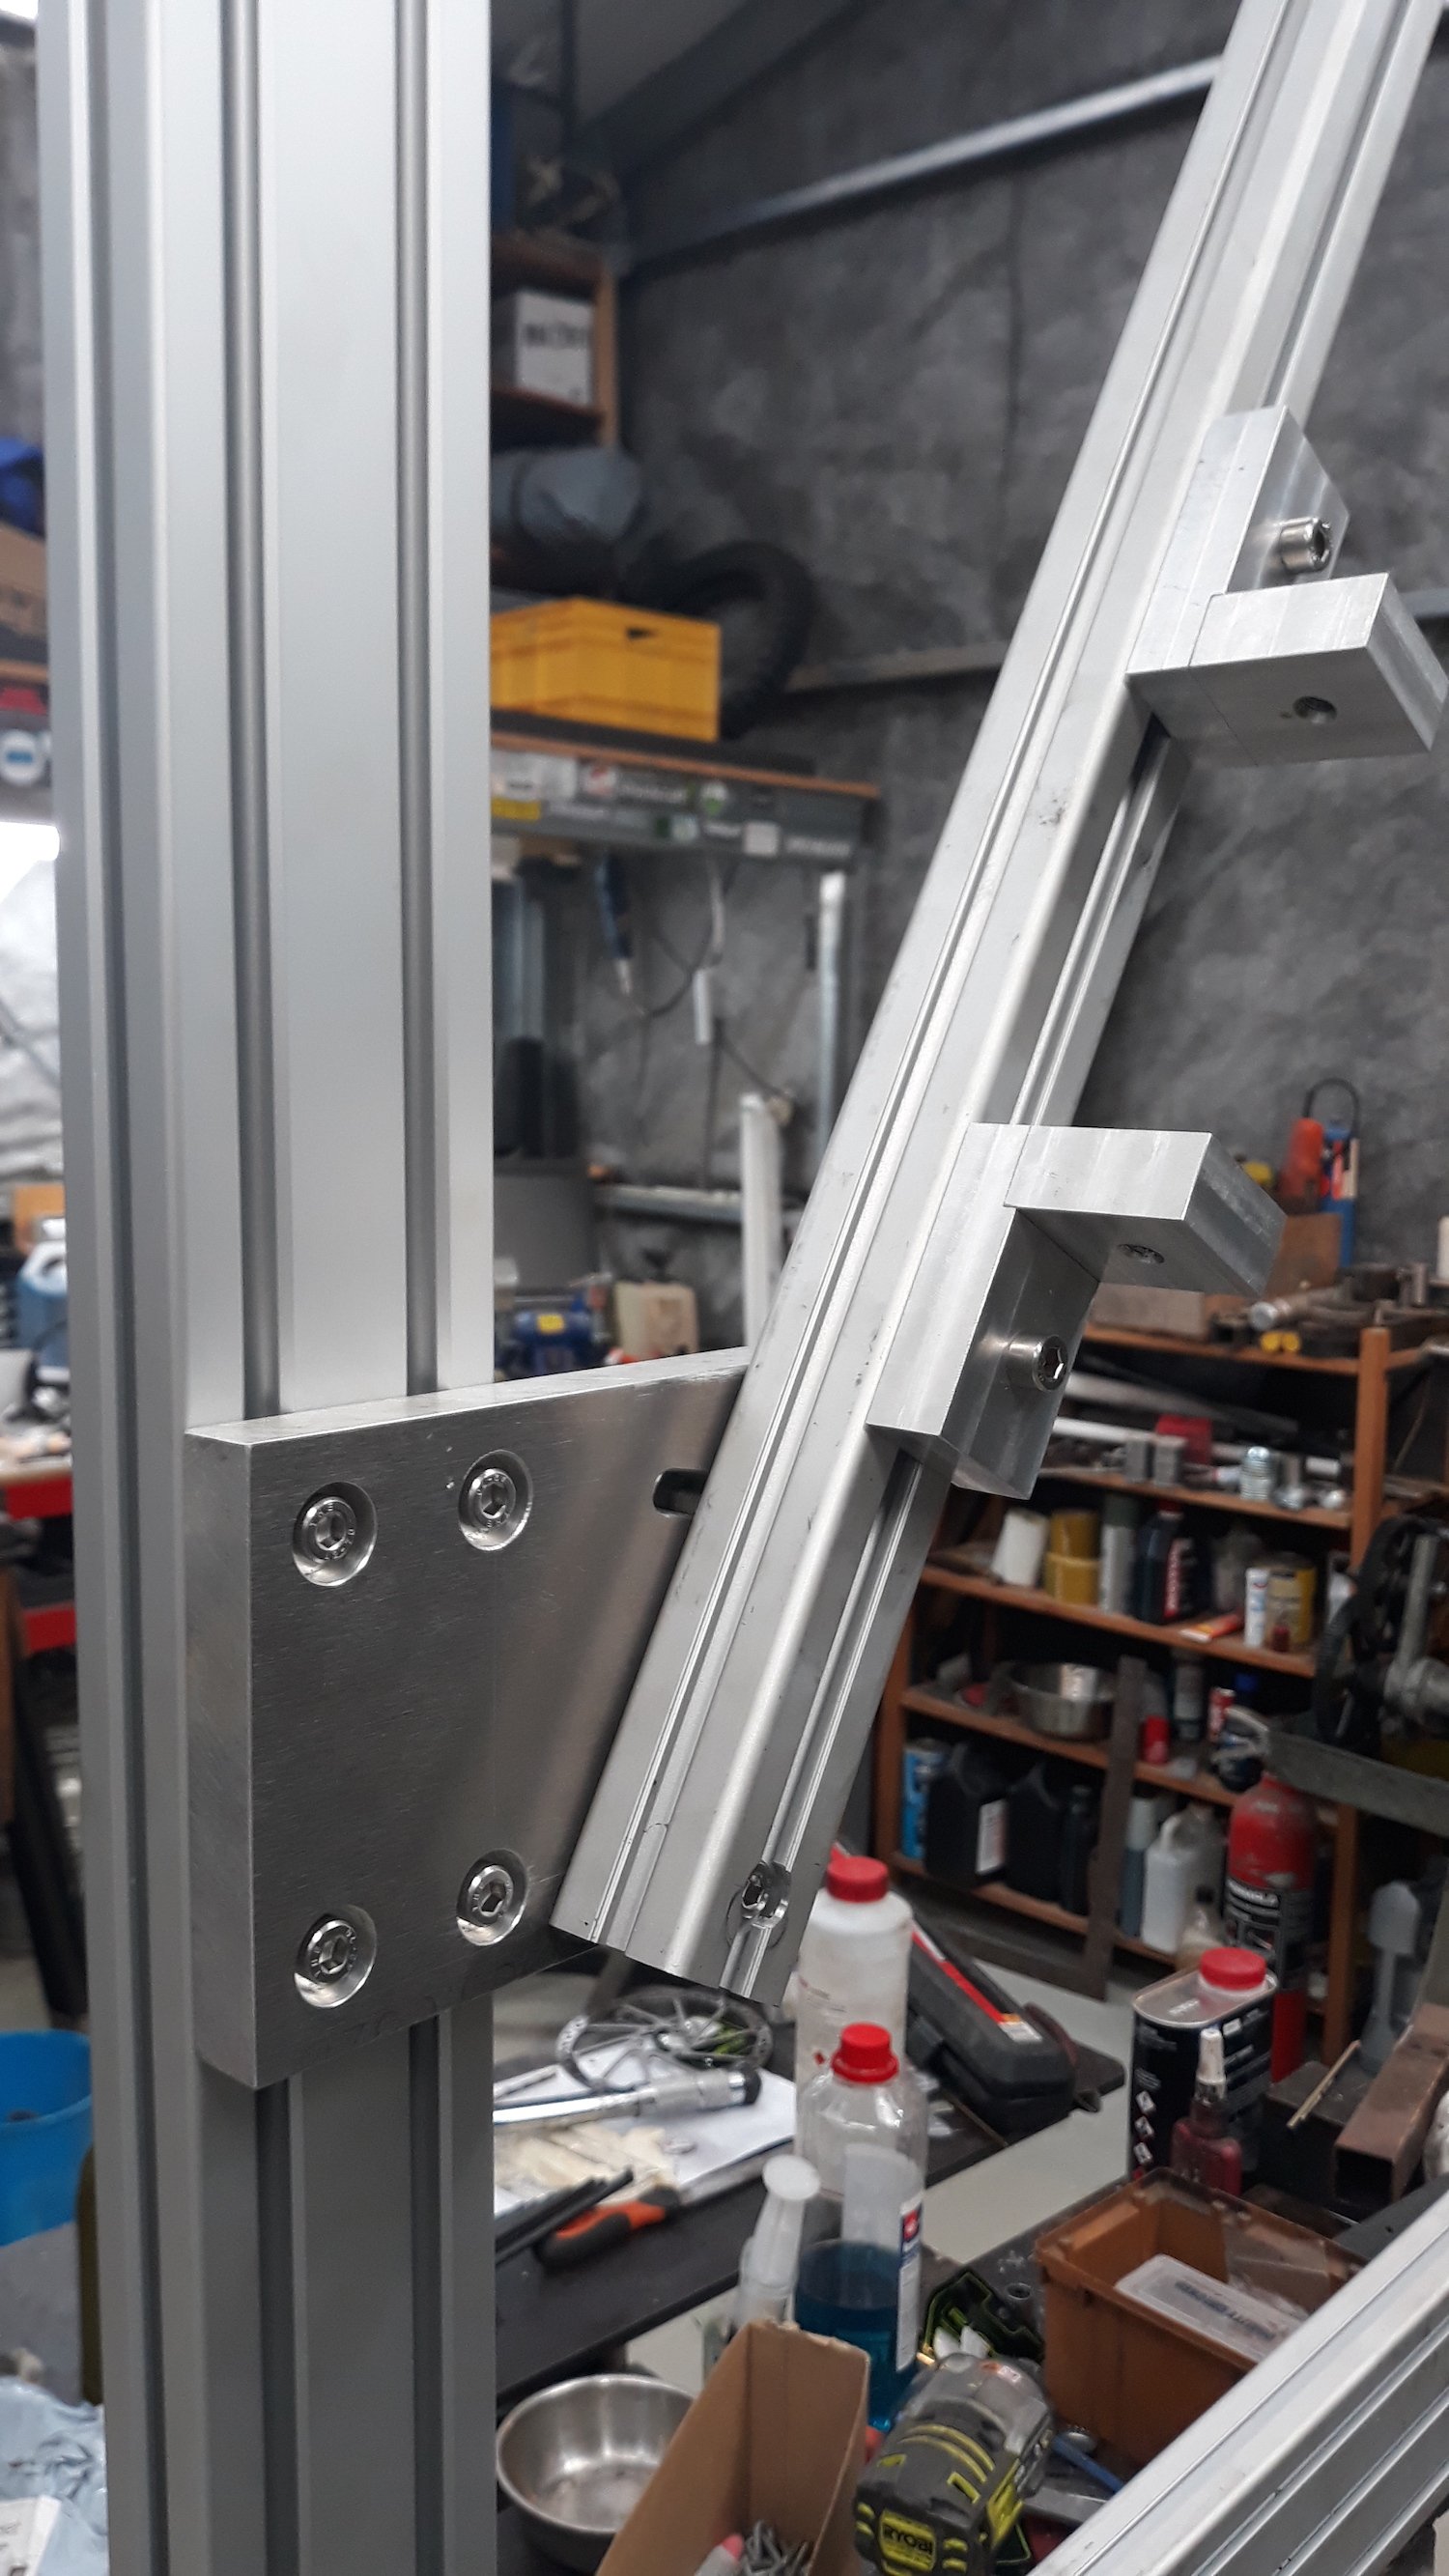
I didn't take photos of all the steps but here's a few of the highlights. I started off by bolting a 4080 extrusion to a 40120 at right angles for y and x axies (axises?axes?) and milled an arc into some plate to make the head tube angle plate. then milled and bolted some L shapes together for the headtube standoffs with a cone on the top end for centring and a stepped platform on the lower to make it easier to measure the lower edge of the headtube. I figured the lower edge was more important as fork length is more critical to the frame design vs stack height which is usually adjusted to suit the rider with stem choice/headset spacers/bar rise etc.
The L brackets have alignment dowels to keep them in line with the t slot underneath.
Seat tube plate was basically more of the same though I simplified the design a little with a horizontal slot instead of an arc.
-
5
-
-
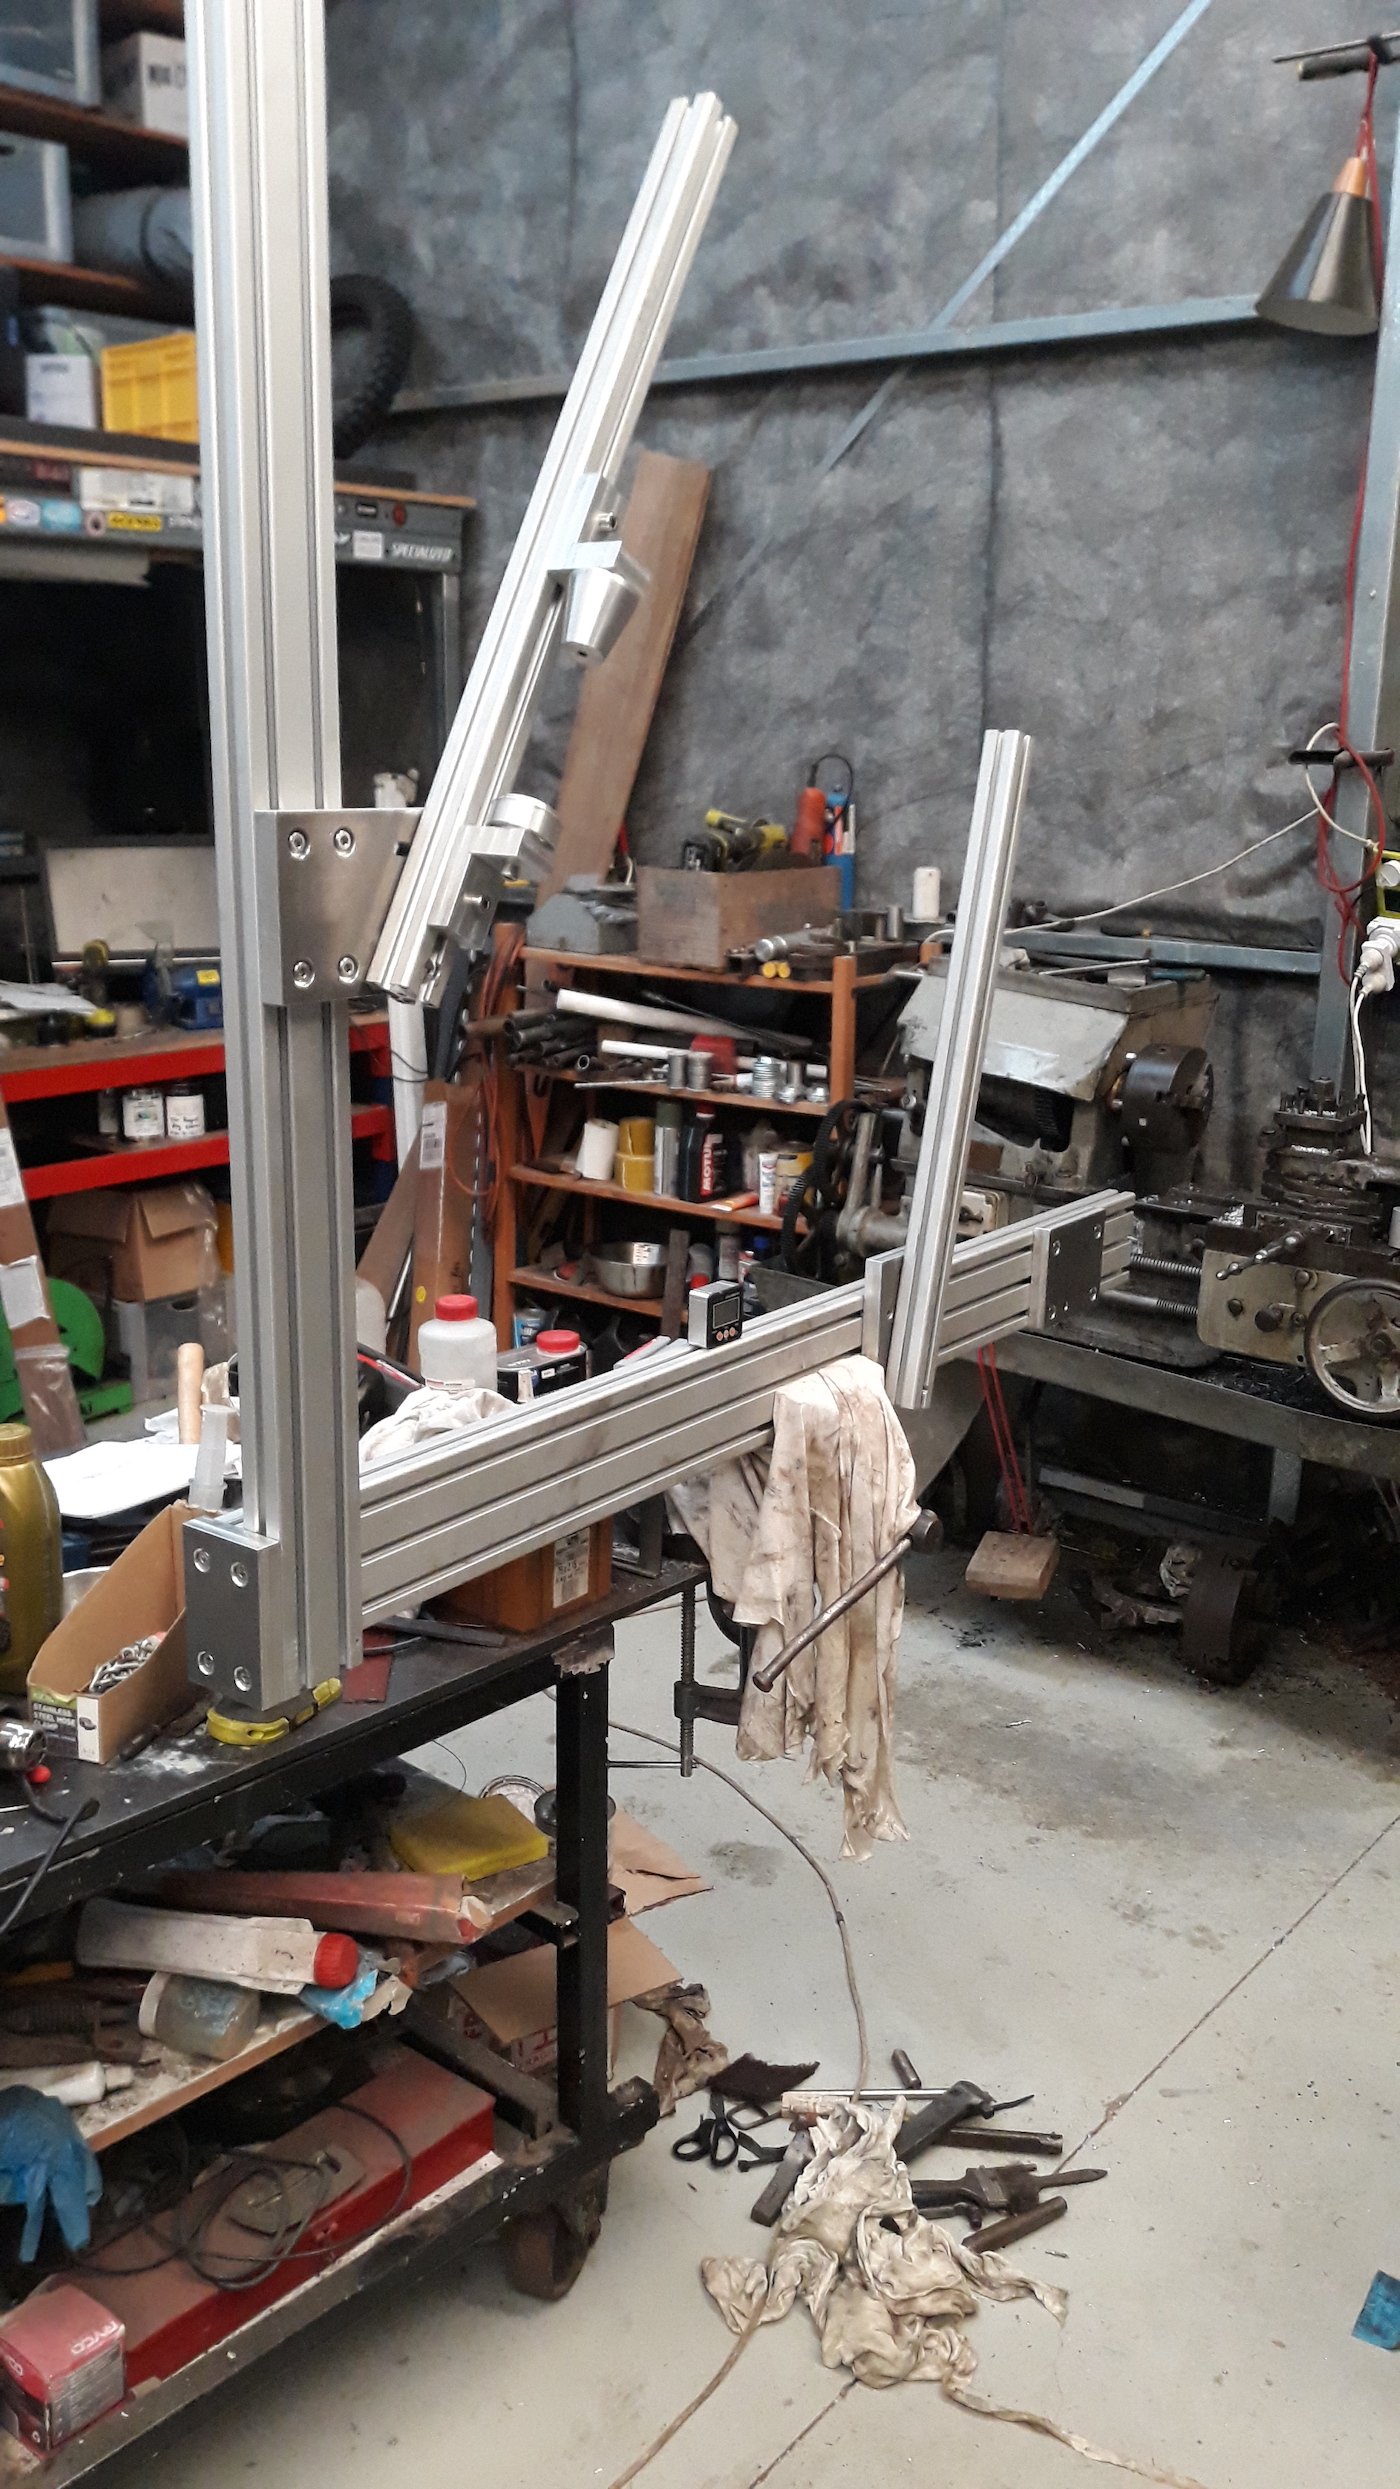
The paint job is a 3 tone fade, mazda starlight silver>1988 GM corvette gunmetal grey>black topped off with 2k clearcoat. I prettymuch use the bike like you would use an enduro bike since it pedals pretty well and it has been getting regular use up Pirongia.
Anyway, since then the bike building shannanigans have been ongoing. I decided its finally time to make a jig since the milling machine is now available for use, so I ordered a slab of ali plate and some extrusions and got stuck in...
-
5
-
1
-
-
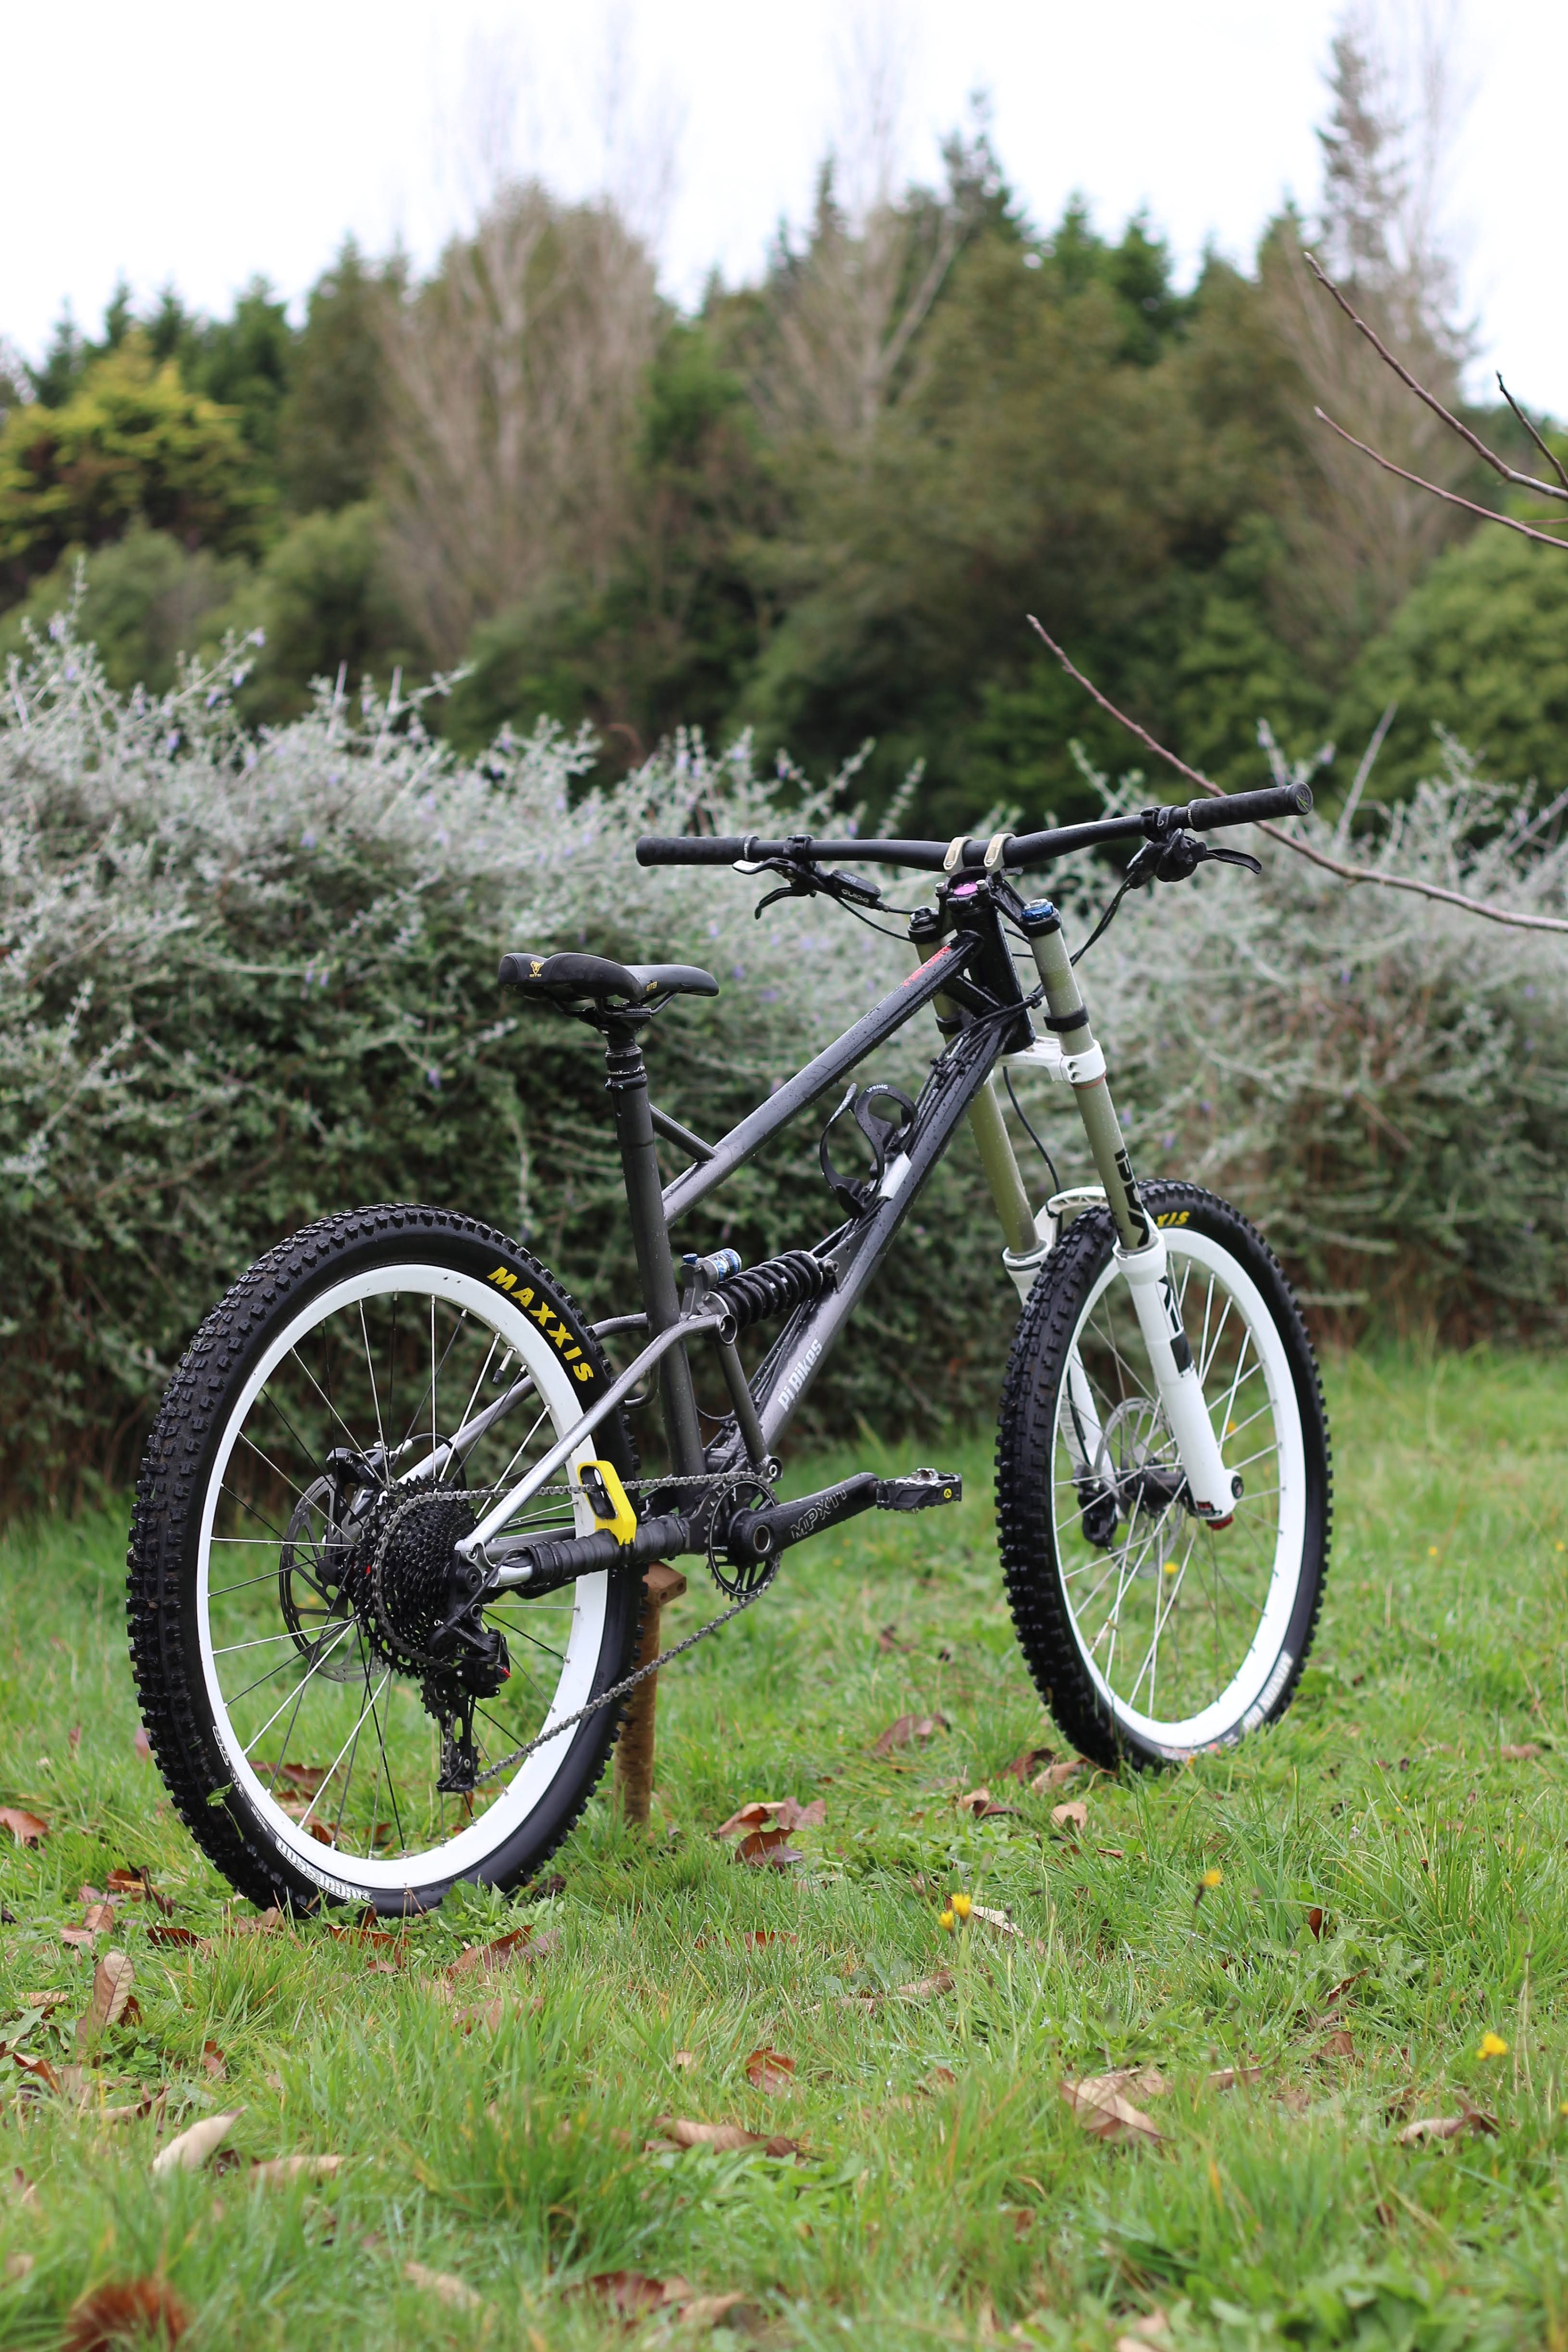
Finally got round to taking some pics after the paint job on this bike. Also, a few spec changes. Got an old boxxer WC and a fox van rc coil shock, both solid upgrades. Bicycle rides very well, life is good. Also made a 3d printed chain slap prevention thingee, its a bit ugly in yellow so I will probably redo it in a silver at some point cause I have some silver filament now.
-
4
-
1
-
-
Problem number 1 sounds like its too lean, problem number 2 sounds like its too rich. The mods would tend to make it run lean.
My normal way of dealing with mixture issues like this are to make it richer and see if it improves, but I'm a moderately sucky mechanic.
-
I had a friend who used to do the recycled engine oil thing. He would settle it for a few months and then run it through a centrifuge and a filter. He had a 1kz prado and did some 180,000km or so on it if I remmeber correctly.
He originally used transformer oil as he was a industrial electrician, I mentioned this to someone once and they said something about that stuff being super carcinogenic.
I heard some nightmare stories from him too though, hoses popping off the centrifuge and staying up until 4am on a work night to clean up the mess. I always kind of thought it was in the too hard basket really.
-
5
-


Old Lathes and machining shite
in General Car Chat
Posted
Ah nice, I have been pining over the Victoria U/H0 range. seem like very nice machines