kseries.rookie
-
Posts
944 -
Joined
-
Last visited
Everything posted by kseries.rookie
-

Tech Spam thread - because 1/4" BSP gets 5 hand spans to the jiggawatt
kseries.rookie replied to Roman's topic in Tech Talk
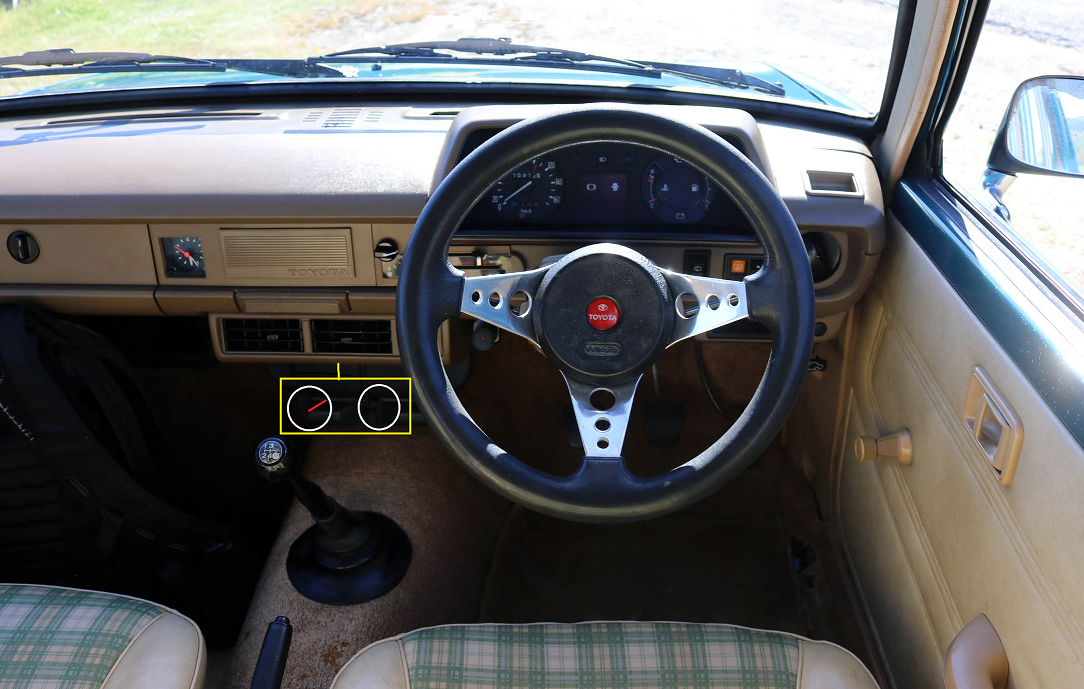
I'm not sure if this is the appropriate spot to post this, so if you think there is a better spot for such question, please let me know. In the spirit of trying to keep my interior as incognito as possible but wanting the modcons of a standalone ECU.. I want to have some form of digital dash but I don't want to replace the factory dash. I have a bit of space up under the dash and my idea is that I could possibly have something that is on a swinging/pivot arm that would hold a small tablet. Can anyone think of something that could work? Mount wise, I could just use a quad lock of sorts on the tablet but it's the spring loaded (to keep in position?) swinging arm bit that I am unsure of.. Example of interior.. Can either go in the centre or under the glove box area.. Does anyone know of an off the shelf product that does something like this or have you had a thought "Oh I remember seeing a small mirror at bunnings that was on a pivoting arm that could be adapted for this" while reading this? Keen to hear your thoughts.. Thanks in advance
-
KSR's KP60 Documentation discussion thread
kseries.rookie replied to kseries.rookie's topic in Project Discussion
Thanks for the kind words. Oh to have the engine bay space of a ke70! I'm sure you'll run into similar issues, but I dare say clearance won't be as prominent for you as it has for me. So, without sounding like a cop-out.. I do suggest speaking with the person who is certifying your vehicle. I'm fortunate enough to have a good relationship with the person that is going to certify the vehicle. With this, it has allowed me to ask questions, propose options/solutions and generally work together to make sure what I am doing is done to the right standard. Haha hmm.. I was hoping I could retain the factory location of the fuel lines but just make them slightly bigger and add a return. After some back and forth with the certifier he made a firm recommendation that I am to move them out of the tunnel entirely. That said, a second driveshaft hoop may have negated that, but we've previously discussed me only doing a single hoop so may he have taken that into consideration. In theory it seemed like a bit of a ball ache but once I started, it was surprisingly easy.. I was able to have all 3 (fuel in, fuel return and brake) run parallel down the chassis rail mitigating any possible damage to the rail with the car being a bit lower than designed for. They start on the left side of the firewall and then end shy of the factory brake line clip at the rear. For the clips I have e30 style in a carbon fibre infused material. They're sleek, very strong and are rated up to 200 degrees. While it's getting a wheel alignment I’ll snap some pictures of the underside as it would be good to see a comparison from when I first got the car. Fire away any further questions you have -
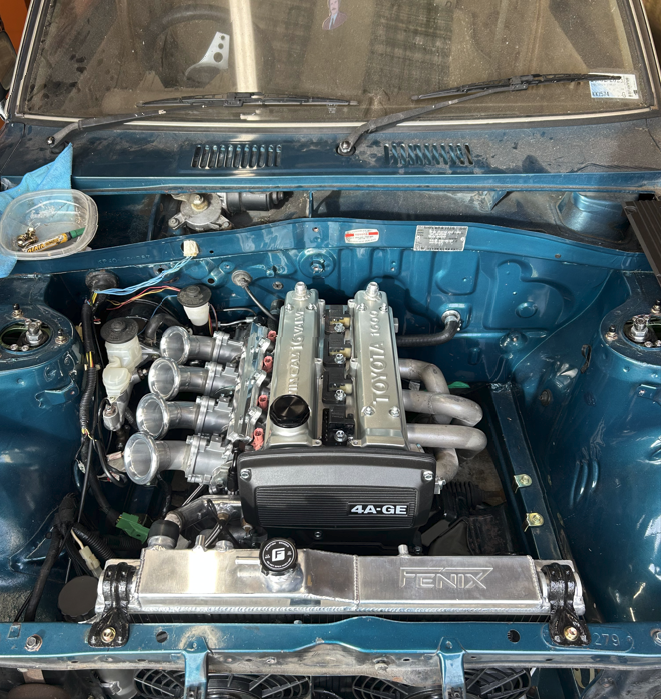
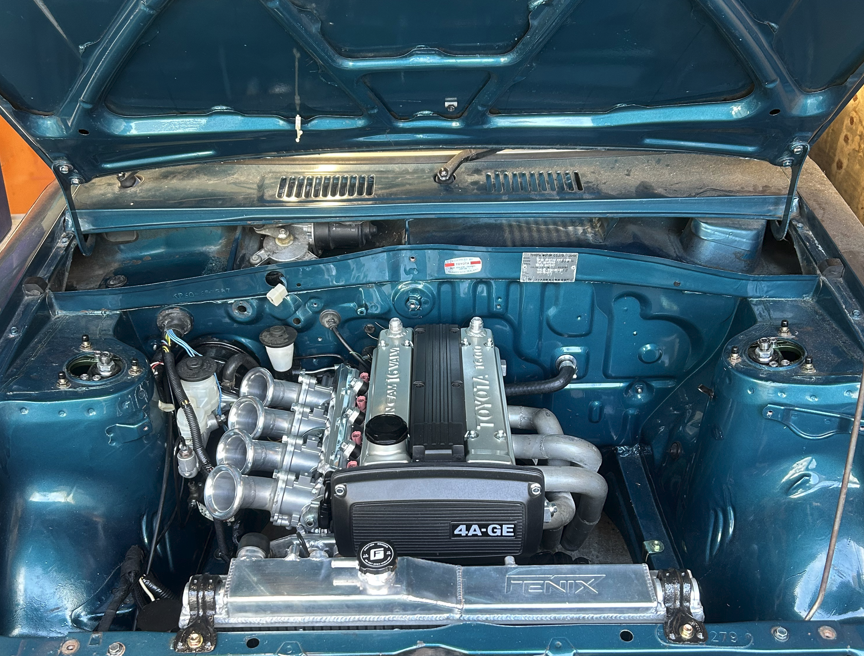
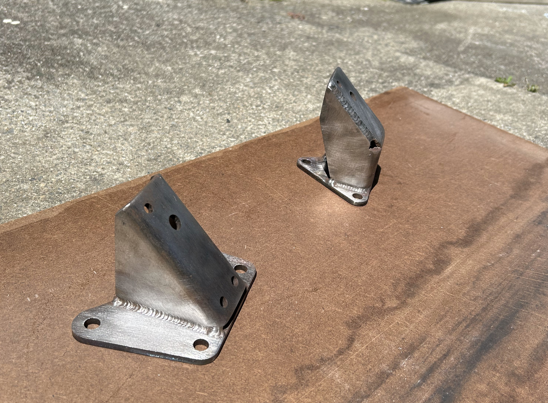
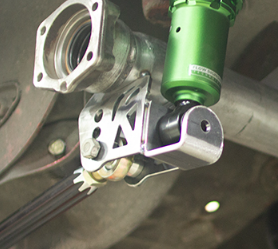
Two months ago I boldly booked the car in for the standalone install. This was set for early May, in the hopes to give me the push I needed.. haha Priorities were to get it to a point where they can start it and test the basics. Cooling and heat wise.. I wanted to retain the heater but engine bay space is a premium. I relocated the valve to inside the car, under the dash and then ran a bulkhead fitting behind the exhaust to the heater core. For cooling, the original KP rad wasn't going to cut it. I picked up an ae86 FENIX radiator and two 9" slimline fans, had a friend make me a custom little reservoir bottle, bent up some L brackets and have it sitting in there like a glove with some ae86 top mount brackets. I have to run new brake and fuel lines to get them out of the tunnel, so I bent up some lines from the front to the rear. While I was there I also remade the engine bay brake lines to get it off the back firewall where I could. Fuel lines are a mix of hard line, ss braided hose and normal fuel hose. AN fittings and a modified OEM fuel rail to suit. Tackling the gearbox mount was next. Thanks to two pieces of craftsmanship, one from @83_kp60 for the gearbox mount and the other @ajg193 for the spacers.. The engine and box were ready to be mounted. With that in place I was able to get an accurate measurement for the driveshaft to be made up. Off the stands and outside for the first time in months. Barn find In it goes and bolt on all the bits i've been collecting, painting and plating, blasting, polishing etc. That is a pretty condensed version but It's starting to take shape. There aren't many things left to do before it goes off for the wire job. It has been a journey so far. I need to extend my gratitude to the people around me and while I am very grateful to them directly, it needs to be said. A 4A swap into a KP60.. while done a fair few times, there really isn't much "step by step" documentation out there, especially the specific KP nuances. I am fortunate enough to have picked the brains of many throughout the process which I will be eternally grateful for..
- 14 replies
-
- 26
-

-
KSR's KP60 Documentation discussion thread
kseries.rookie replied to kseries.rookie's topic in Project Discussion
Haha they're so sad in comparison to the beauties that kpr makes.. Sad thing is the Cobys don't really fit so i'll need to get them modified to work but naturally that means additional scope creep to some high rise headers right? -
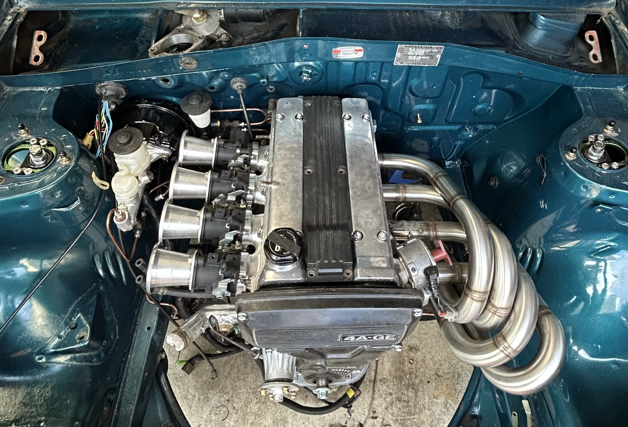
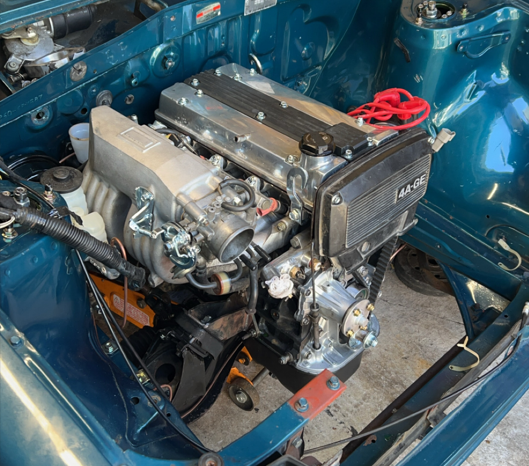
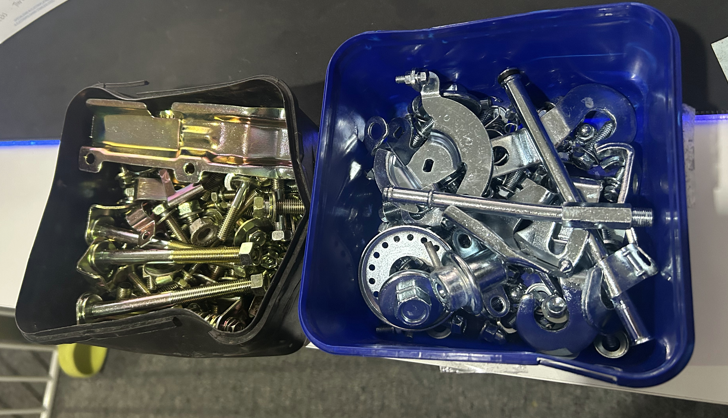
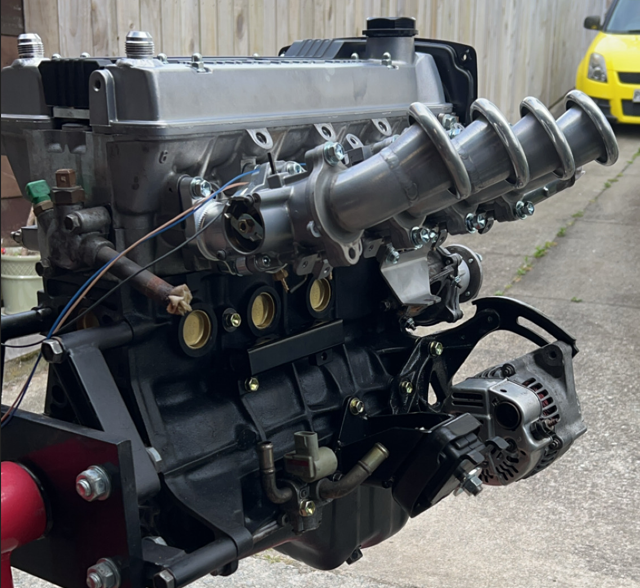
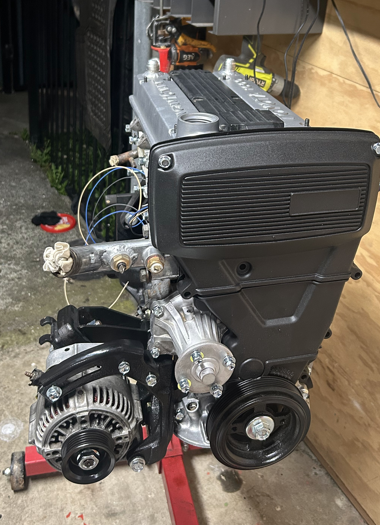
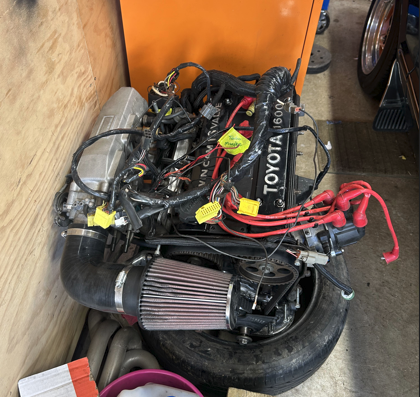
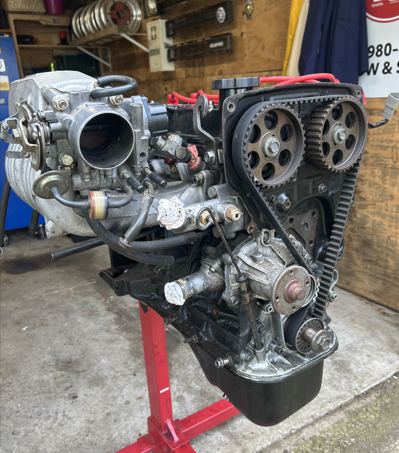
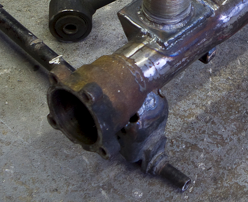
Although it may look a little crusty on the outside, it should be healthy internally after only having around 8000 kms since it was rebuilt. The engine was pulled out of a two door slant front, which has some subtle differences to the four door best front but in theory it should still be fine. It was the bug eye that had a much shorter bay therefore less space. There really isn't a heck of a lot of information (and absolutely no step by step guides) on the internet for this stuff so it's going to be a lot of asking peers, trial and error. Moving from a cable clutch to a hydraulic clutch was first on the list while the bay was empty. Oldscoolautos do a pedal box conversion and with a little bit of bending, hole elongation and a few grunts I managed to get it all lined up and fitting in the bay. This allowed me to know where the master cylinder sits and plan around it moving forward. Engine mount wise I used the flos engine mounting brackets paired with some AE86 Cusco race mounts. The brackets came deconstructed, so I had a friend who is handy with a hot glue gun them together for me. What I like about the flos brackets is that it allows the 4age to sit flat along the bay rather than on a slight angle like factory. This does add complications for the gearbox mount and the shifter will be leaning slightly towards the driver side but it's not a biggie for something a little more aesthetically pleasing. I had planned to keep them in the raw metal finish but these eventually got hit with a fresh coating of gloss black. Bolted the box and engine together and in it with for the inaugural test fit. Immediately I saw some things I would need to re work/consider. Issue #1 - The heater core fouls on the back of the head. I did anticipate this being an issue so prior to the install I was able to remove the interior to get the heater core out. Although it's not a daily, I still want to retain the functionality of a heater. Relatively easy fix.. Modify the bottom heater core pipe to bend 90 degrees, chuck in a bulkhead fitting on the exhaust side firewall and re mount the heater tap under the dash. I am a little nervous about having a heater tap under the dash as it does introduce another variable for leaks but hopefully with some FT hose clamps i'll be alright. Issue #2 was that the intake plenum fouled on the brake booster. Not by a lot but enough to render the brake lines useless. I am faced with a few options to move forward.. 1. Revert to standard and sell up 2. Remove the TVIS plate.. That may have give me enough space, just.. but will change the way the engine performs 3. A combination of removing the plate and shaving down the intake runners 4. Look into alternative brake booster/master cylinder options (such as a wilwood pedal box) 5. Remove the intake plenum all together and replace with ITBs.. Each had their own pros and cons but of course, naturally I went with option 4.. because dorts. As I said, it comes with it's pros and cons. One of those cons is that the internet tells me the factory ECU will struggle with individual throttles.. So lets add aftermarket ECU and wiring job to the ever growing list of things to procure. I didn't fancy investing further without knowing things will actually work as desired.. Fortunately the m8 that sold me the engine had an SQ engineering manifold, ITBs and trumpets for his new build and was kind enough to let me trying before I buy. And of course naturally it would have been rude of me to not test fit his G4A headers. So at this point we've established the 4age ITBs combo fits and I need to fork out for an aftermarket ecu.. It meant the world was my lobster for further outputs. Coil on plug is an obvious improvement to make but I am not really a fan of the coil plate sitting on top with the plugs on display. I took inspiration from Sean (Kune RE on YT) who used small port covers, made up a centre plate and used Subaru Legacy/WRX coils. I went about sourcing some covers, commissioning Stu (OSGC) to whip me up a centre plate and grabbed some coils from Pick A Part to dummy up. With the coil on plug conversion under way, the next eyesore to tackle was the distributer. I no longer needed it from a spark perspective but it was required for a camshaft timing perspective. The crank trigger wheel kits you can get off the shelf are a little bit of an eyesore.. I got my hands on a G4A trigger kit and picked up a couple of hall sensors for the crank and camshaft. This should totally negate the need for a distributor so I nabbed a dizzy blank off plate from JSP to seal things off. This also puts me in a good position for future scope creep and not restricting myself with header options. With the engine back out, I took the opportunity to give it a little freshen up.. Re plated nuts and bolts, bunch of new gaskets, purchased and vapor blasted the new to me ITBs, new frost plugs and a general scrub and paint. I stand by my earlier comments in the first few posts that I have no intention of bringing the starlet back to "brand new condition". Used but maintained.. Otherwise I will obsess over it and it will simply never get finished. The car has already been on jack stands for far too long for my liking. Ignore the idle control valve and the vacuum chamber/box thing.. That was me just messing about with placement. Next on the list is cooling and then into the fuel system.
- 14 replies
-
- 20
-
-

-
KSR's KP60 Documentation discussion thread
kseries.rookie replied to kseries.rookie's topic in Project Discussion
^ Even Kris knows
-
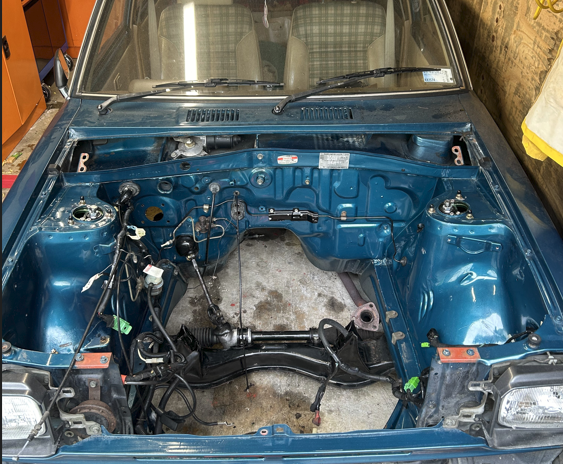
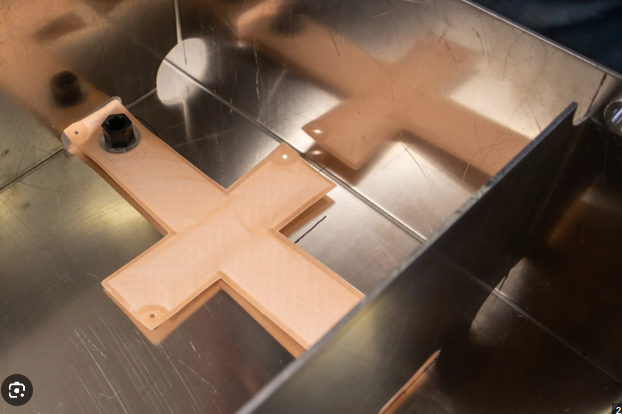
The inevitable happened.. As a big time K series fanboi, this wasn't an easy decision.. Knowing certification was on the horizon, it just made sense. The thing is.. and while it's not all about the power, I asked myself - Did I want a 5k with a bunch of work done (increased unreliability risk) to barely scrape 85hp.. or do I just put in a 4AGE that is bone stock with that Toyota reliability stamp and get around 100-105hp? It made sense to me to take option B. It sort of happened in a meant to be kind of way. A good friend of mine has a 4age powered KP60 with a recent ish (8000kms ago) stock rebuild and was almost ready to whip out the motor to replace with one he had been building for a few years (all the N/A fruit). At this time a post was made on the facebook where somebody was wanting a 4 or 5k engine.. After a bit of back and forth, he seemed like a GC and we came to an agreement on price. He ended up buying the rebuilt engine with all the "go fast" bits for a price where we were both happy with. The new to me motor was originally out of an AE86 (big port) and with it coming from a KP (with loom, ecu etc), I knew I had put myself in the best possible chance of an easy ish install. Couple of wires to the ECU and hey presto. Lots to consider.. New set of certification rules to look into, converting from cable clutch to hydraulic, space within the bay, cooling, heating, and more. More to come soon
- 14 replies
-
- 23
-
-
-
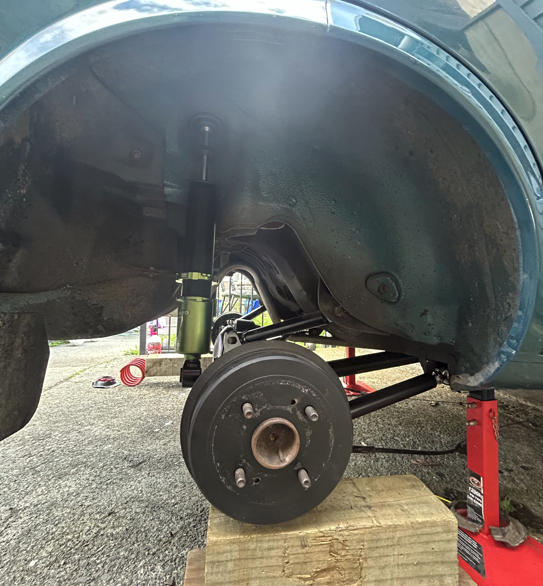
After a while of driving the car, I just couldn't shake the dort bug.. The rebuilt 5k was getting closer to be finished, so I made peace with the fact that a cert was on the horizon and started ruining the purity. Did somebody say... scope creep? Ahh yes, ye ole' classic. The ride height as always bothered me.. and this was only amplified when I stupidly photoshopped to sit on the ground. Going for cert so may as well do it properly, I guess? There werent any off the shelf options for coilovers so I had my spindles welded to some Fortune Auto coilovers. The KP has a divorced coil and shock system, which presented me with a choice to either go true coilover and strengthen the rear, which would mean having to go through further compliance hoops or to stay divorced. I ended up going with the latter. Still using the adjustable height and dampner rear FA shock and an off the shelf spring. I picked up a AE86 GTS rear housing and slowly started collecting the rest of the bits I need. It all went to somebody much smarter and handier than I to get shortened (housing, axles and spares), LSD installed. It came back looking like a thicc standard KP diff with adjustable platforms. I struggled to find rear calipers.. Instead I had the engineer adapting some ke70 drum brakes. While being bent over a barrel for diff parts and suspension, I added adjustable 4 link arms and roll centre adjusters to marry up to the other new bits. Install was relatively straight forward.. One out one in. There was a little bit of playing around with the arms and height adjustment but this will get setup properly by someone who has the tools and technology so I did a "there or thereabouts" height, dampner and pinion angle setup. Admittedly I was pretty slack with the photos, but a few here to tell the story.. some photos are old and have had since been revised but you get the idea.. and some things still need to be revised such as the wheel stud length for example. Tactical park on a downslope for increased lows The tricky part through all of this is that the KP wasn't designed by Toyota to be low so making sure I comply with the virm has had it's ups and downs.. Some of the more tricky parts I think where making sure I had enough travel, enough droop and not having too small of a bump stop. I've been working through all these changes with the certifier and been given the unofficial tick throughout the process but we'll never know until the time comes and what rules may or may not have changed since. It's quite comical having this suspension and differential married to a 900cc 4 speed but all in good time. It's now properly "off the road" (will provide context later on) but before then I hadn't driven it much, just around the block to see how things are clearance wise and to settle the suspension.. but with the very limited driving it seems to be much stiffer. Those who lurk the certification thread may know what is coming next... I'm writing this retrospectively so there are a lot of trials and tribulations with things that I won't cover but if anyone wants me to elaborate on something specific, feel free to ask away or tell me I am ruining the purity here..
- 14 replies
-
- 16
-
-
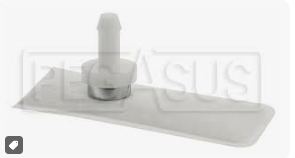
I saw a product like a filter sock that sits on the end of the fuel pickup inside the tank - I wish I saved the link because I can't find it. It was like a flat pad that acts as a filter/sock that sits on the bottom of the tank. bit like this I guess Good idea with a simple in line fuel pump? Or bad idea? Tank will get cleaned to the best of my ability but will be relying heavily on this filter sock as well as in line filter Edit: Hydramat
-
Converting a carb fuel tank to EFI.. I suspect I will be alright with a simple in line fuel pump mounted externally under the car (and run a new return line into the tank) but with no baffles in the tank I may come across surging issues? Option could be mounting a surge tank in the spare tyre well but with battery in the boot I think it's quite a mission? Could mounting a small surge tank under the car be an option (space permitting)? Or if anyone has alternative options I am keen to hear. Car is a KP60 starlet and needs to comply with certification rules. Friend of mine has an inline pump on a factory carb tank and hasn't experience any surging issues.. Am I just over complicating it?
-
I'd never commit such fraud, get outta here
-
Appreciate the insightful response - good to know as I will be going through cert at some point soon
-
If I go down to BNT and pick up a roll of cop nic tubing, it's highly likely it's all made in the same place right? How would one tell the difference between the good and the bad copper nickel? Genuine question..
-
DirtyThirtys 1984 Toyota Starlet KP61
kseries.rookie replied to DirtyThirty's topic in Project Discussion
Lucky bastard is already certified, so he may get away with it -
DirtyThirtys 1984 Toyota Starlet KP61
kseries.rookie replied to DirtyThirty's topic in Project Discussion
I’ll send through a series of photos and then you can decide if my advice is sound or not haha cause I could very well be wrong. Slant front and flat front have their differences -
DirtyThirtys 1984 Toyota Starlet KP61
kseries.rookie replied to DirtyThirty's topic in Project Discussion
Looks like that plug is the one that has the reverse light switch, oil pressure switch (for oil light on cluster), water temp (for cluster) and the switch for the fan to turn on at a certain temp. Although your pins are in a different order to the picture I have here of mine -
I'm surprised the M16A (Suzuki swift sport motor) hasn't had an honorable mention.. especially seeing as @kws has been in the thread
-
You would think so but alas, it is not. Anyway sorry for spamming up your thread!
-
Would be awesome if it actually sent me the download link when registering. 17th time lucky, lets hope!
-
This peaks my interest. I wasn't aware that fuel and brake lines couldnt be in the tunnel and I don't recall reading anything about this. I vaguely remember someone telling me that if you're making twice the original power you need to have two driveshaft hoops and cant have the lines too close to the drive shaft but haven't found any literature backing this up. Is it because you're making a certain amount of power compared to what it comes with from the factory? Perhaps a question(s) for our residential cert overlord @cletus
-
DirtyThirtys 1984 Toyota Starlet KP61
kseries.rookie replied to DirtyThirty's topic in Project Discussion
Don't quote me on it but I think k40 and k50 are different. I just confirmed with me mate - he said that he just removed the shifter from the k50 base and put into the t50 and was good as gold -
DirtyThirtys 1984 Toyota Starlet KP61
kseries.rookie replied to DirtyThirty's topic in Project Discussion
I read that you can just use a k50 shifter instead which has a better angle. Not tested myself tho -
Cheers Cletus, I will have a gander. Admittedly I didn't look in the CCM. I've seen an example of Matts KP60 build where he has boxed it in (or whatever its called) and an example of Snoozins where he has retained the original appendage for the shock to slide onto. I will check with the certifier too, as most people would recommend but thought if it was black and white in a rule book, I could avoid interrupting his busy day.
-
Is anybody able to point me to where in the rule book it talks to what is involved (if anything) with lower shock mounts when changing the differential? Basically, are you able to chop off OEM lower shock mounts and weld onto new diff housing or does it require additional strength/boxing? Maintaining separate shock/spring combo rather than going to a true coilover but while I am there, if it make sense to strength to leave the option to go to true coilover, I may as well, right? Please and thank you
-
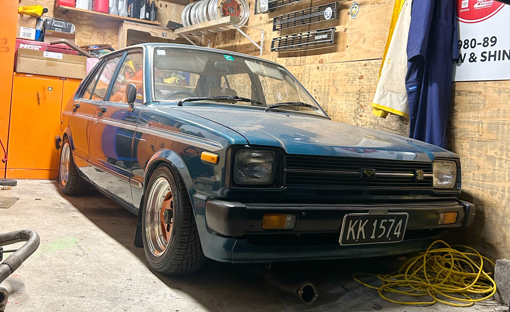
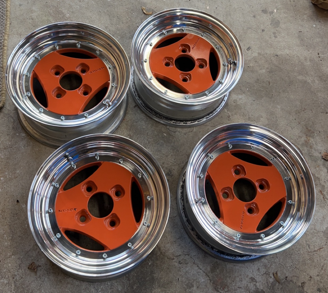
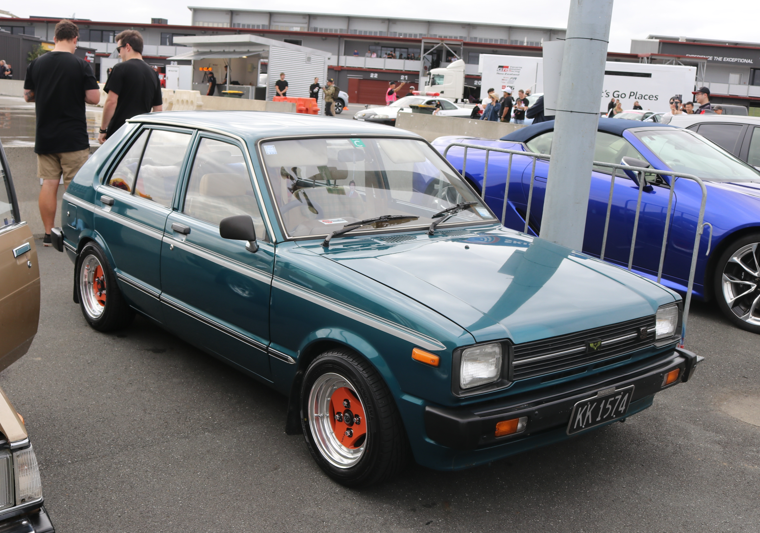
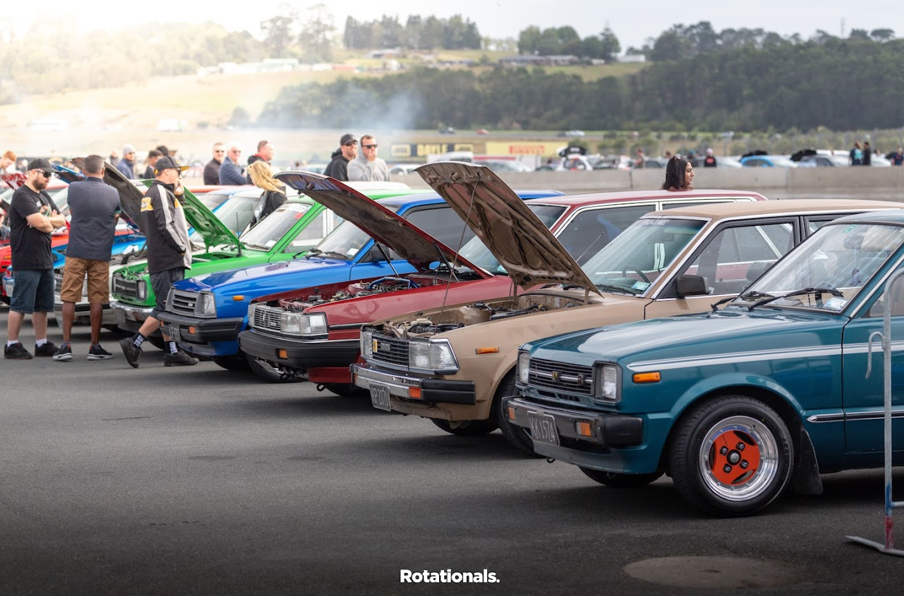
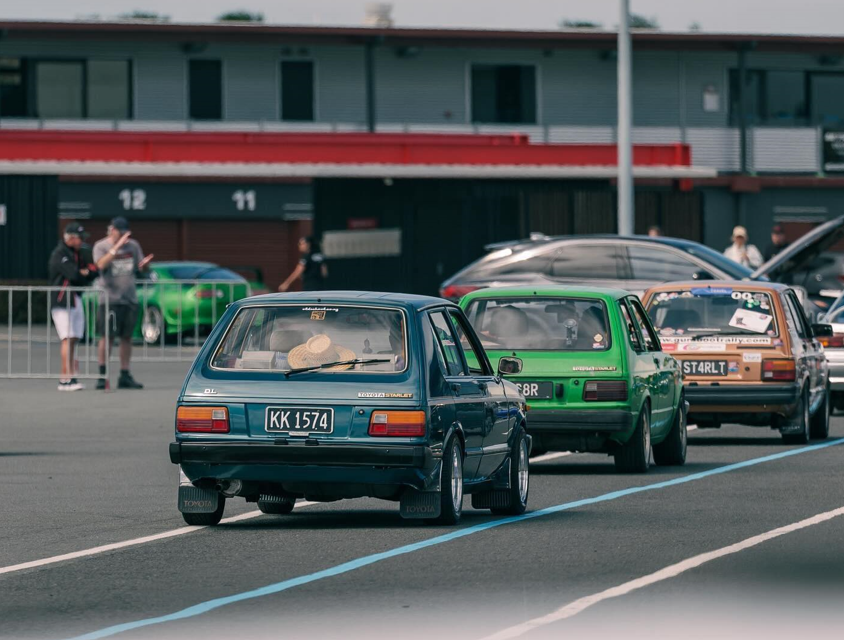
I have always loved Advan A3As and I managed to I pick up a set of 13x6s. I got the lips fixed, painted the centres and convinced the bro to polish them for me (not a member but cheers mate). Orange and blue is a sharp contrast, but it's grown on me Which brings us now back to first sentence of the previous post. I've just driven this from Wellington to Horopito to Toyota Fest at Hampton downs and back (1300 kms) with a couple of mates. There were a couple of small issues with the KP on the trip but those were quickly and easily rectified. It might be slow, but it got there ha } Have a squiz the oldschool.co.nz sticker I got over a decade ago and never used until now. That's all for now
- 14 replies
-
- 29
-