M_C
-
Posts
836 -
Joined
-
Last visited
M_C's Achievements
Post Fiend (4/5)
1.9k
Reputation
-
My 351 Clevo had similar issues getting hot when idling for long time or slow traffic on hot days. Turned out to be the wrong thermostat for 351C in it so when hot and open the hot water still circulated through the heads to get even hotter. -May have had 351W thermostat in it? Swapping to correct thermostat helped heaps as bypass then properly blocks off to send hot water just to radiator. Now runs much cooler stationary on hot days and going up slow hills. I see you have already tried a couple of different thermostats, but not sure if your engine has similar set up where the thermostat could be mixed up?
-
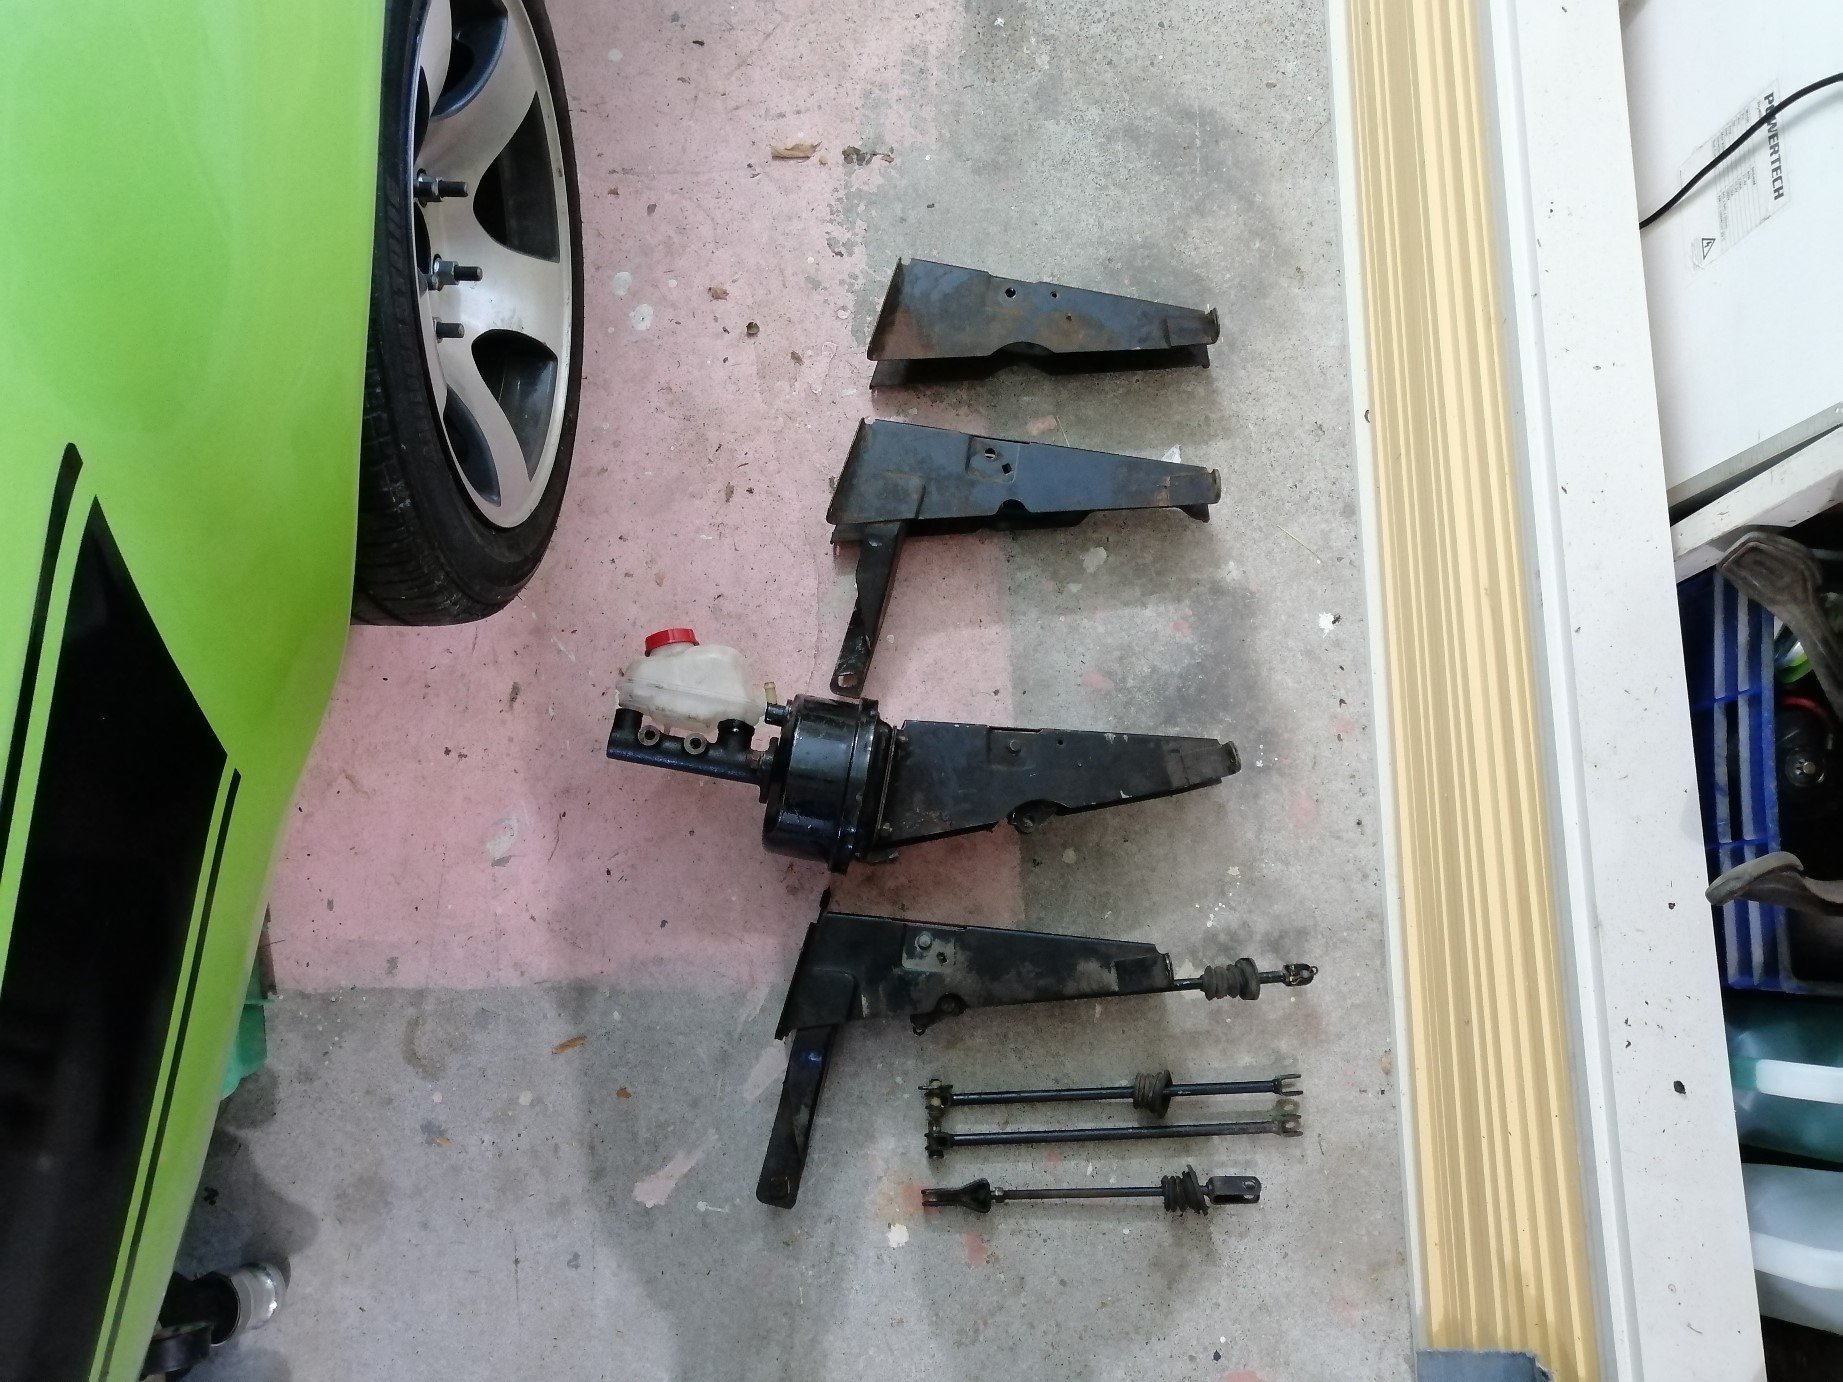
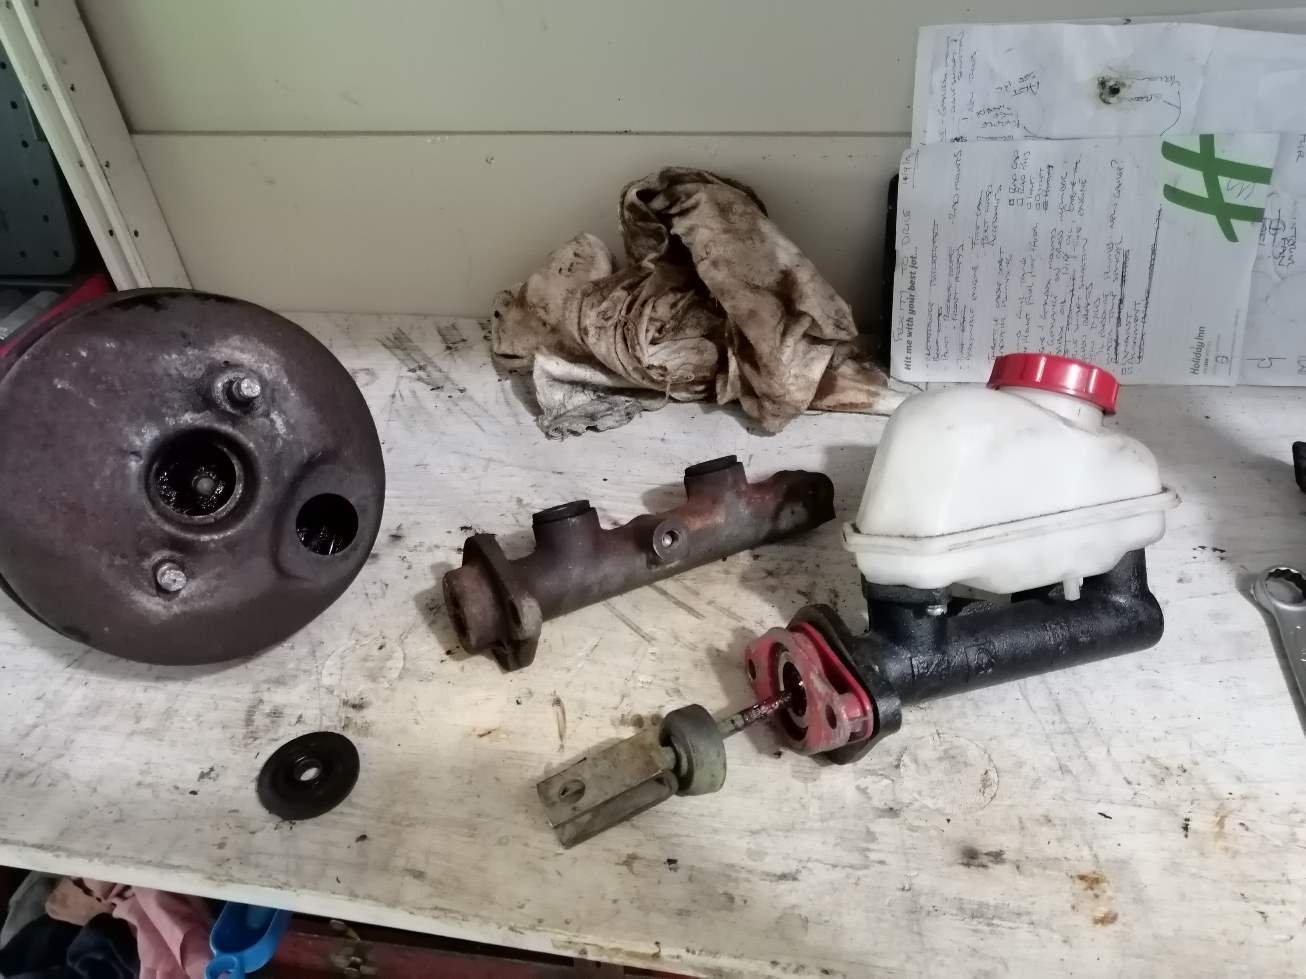
Good guy off the FB interwebs came to help with an assortment of booster towers, rods and another booster. I didn't know there are so many variants! I ended up with 3 different types of towers, 2 different boosters and assorted linkage rods. None of which were going to work easily or cheaply. Bugger. I could not get them to clear the extractors and larger radiator and then would need possibly rebuilding anyway. So I went the expensive way and bought this. Very excited as it just turned up. With certification for road use too. Mildly annoyed as I could have not bought the pacemaker extractors when trying to avoid buying it earlier and also fitted the super duper extractors. (But I did want the sexy thing coz racecar.) While waiting for this to arrive I pulled the rear bakes down. Hadn't been inside them so was pleased to find them nice and shiny.

-
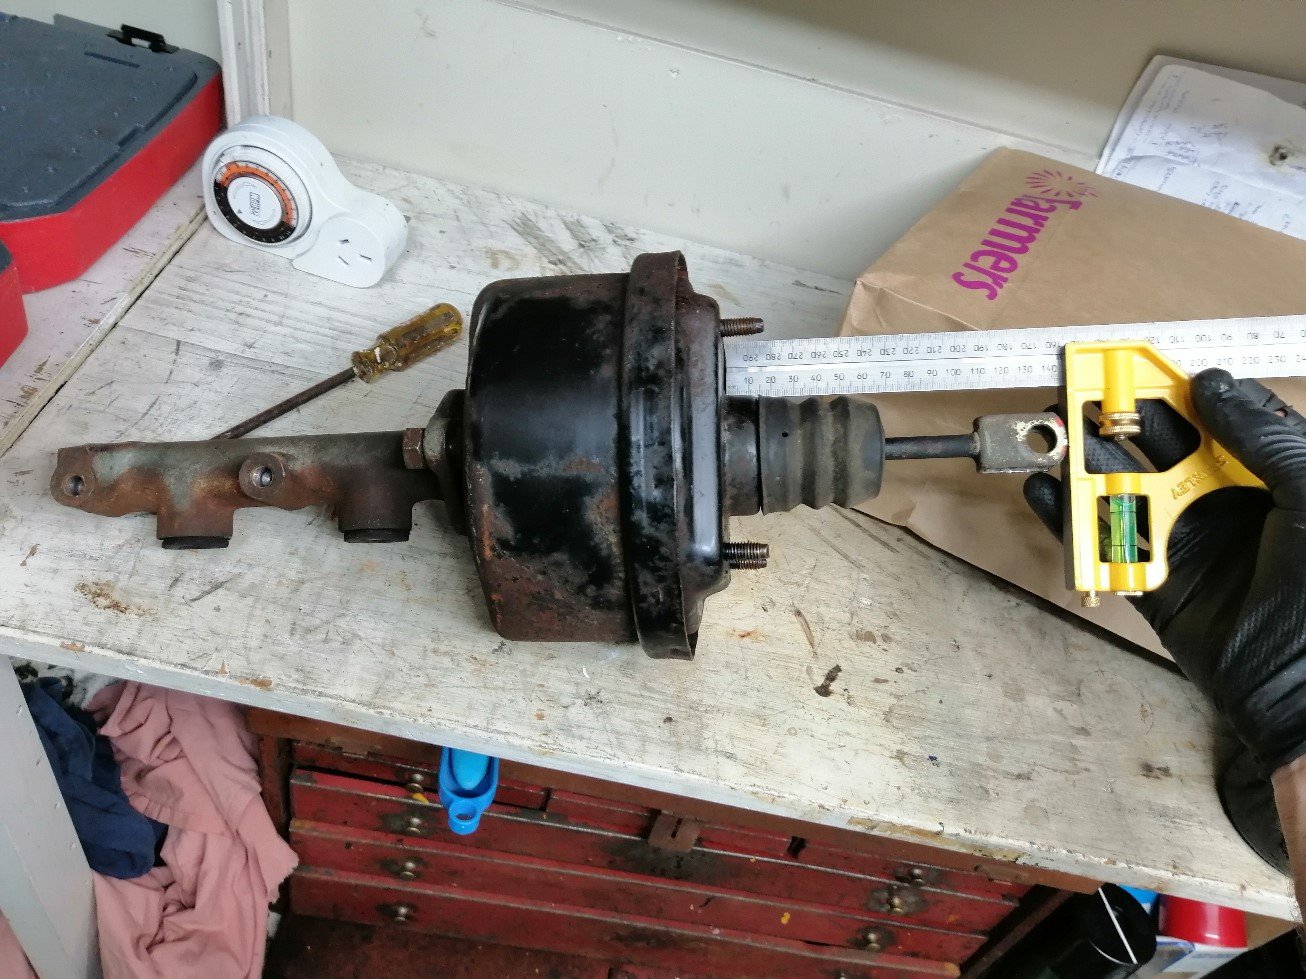
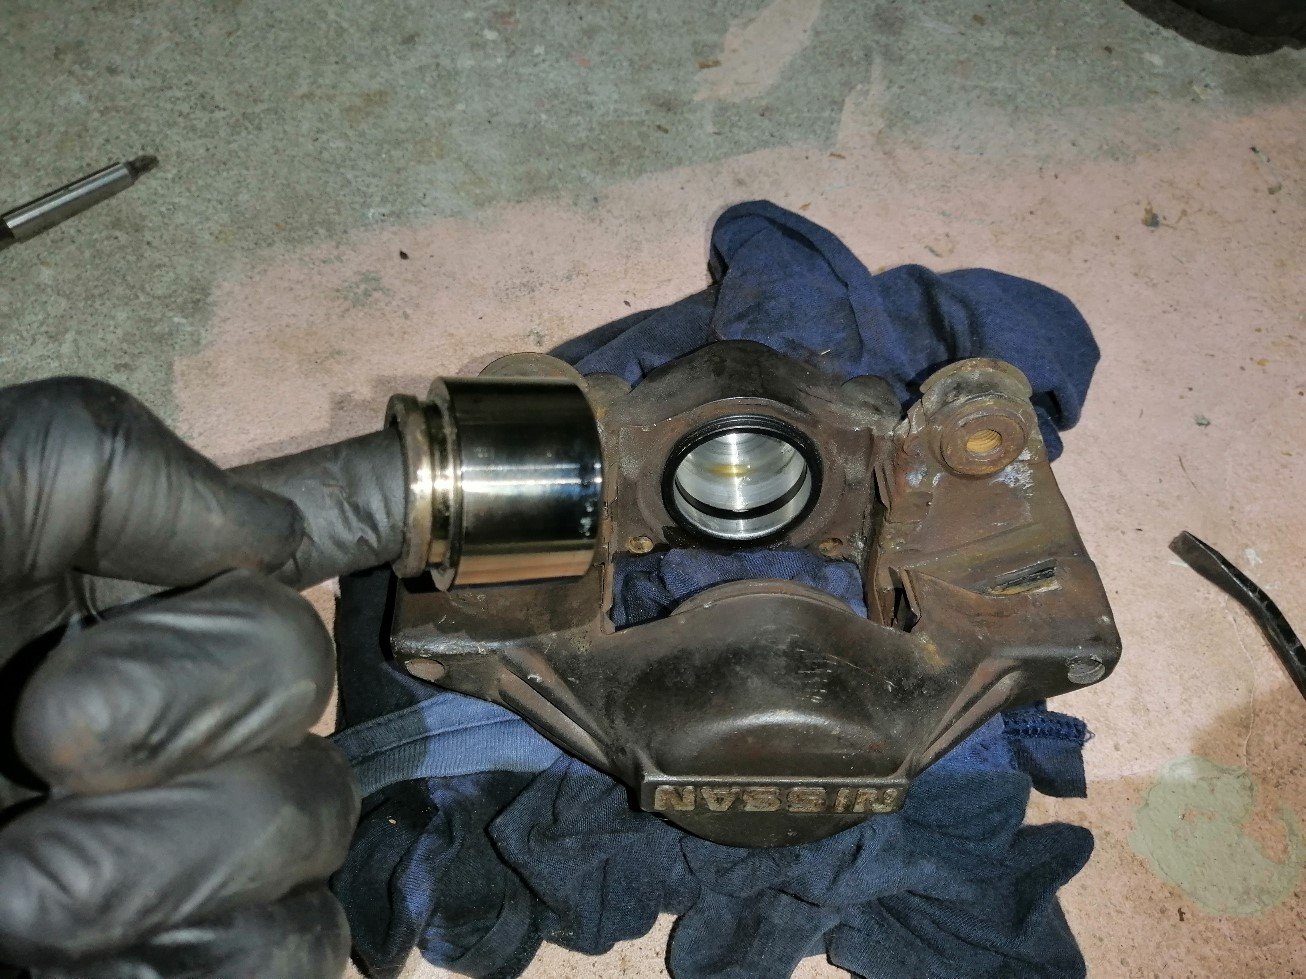
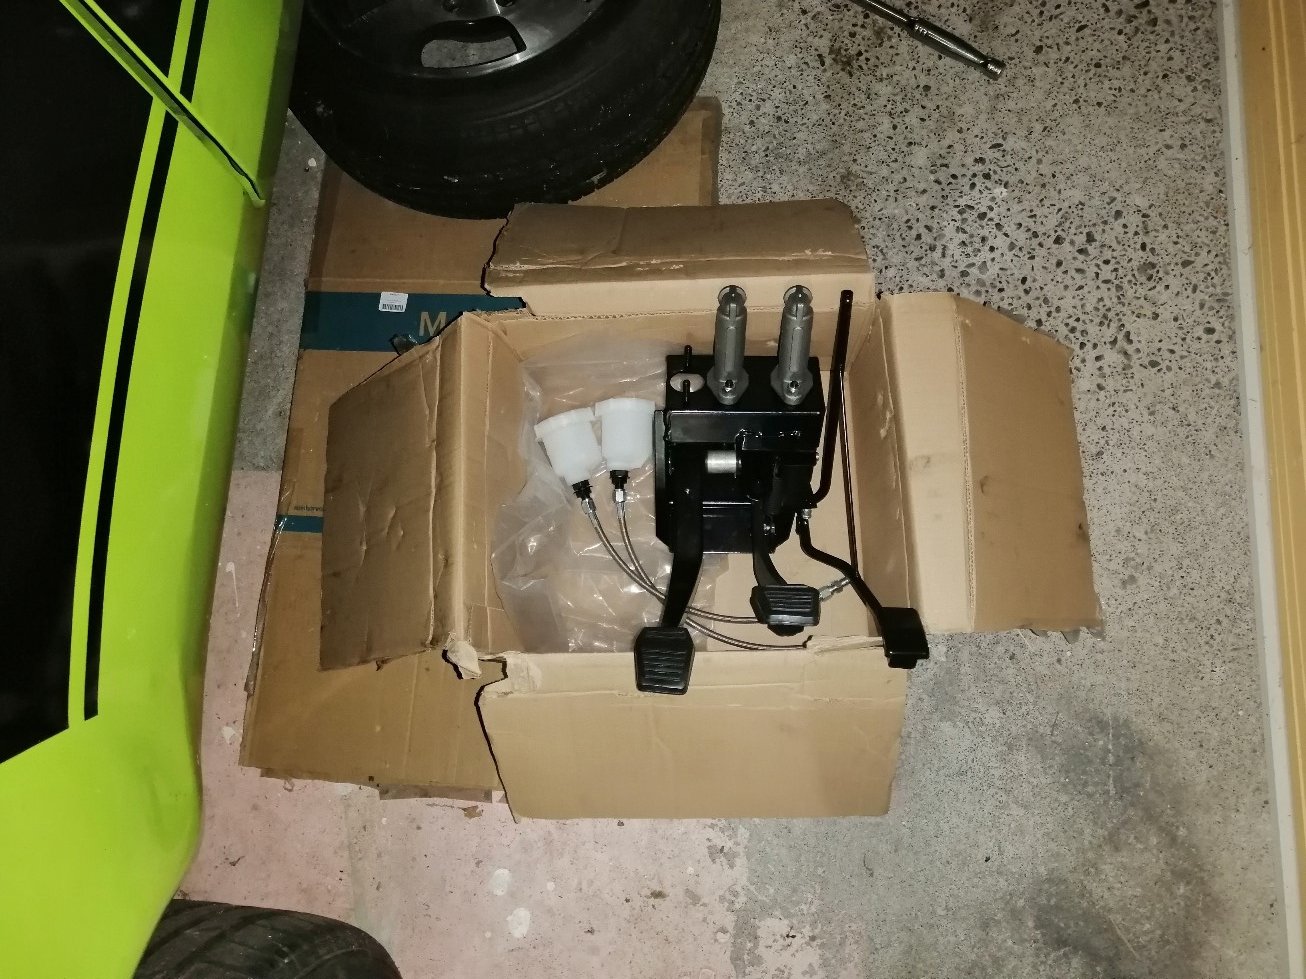
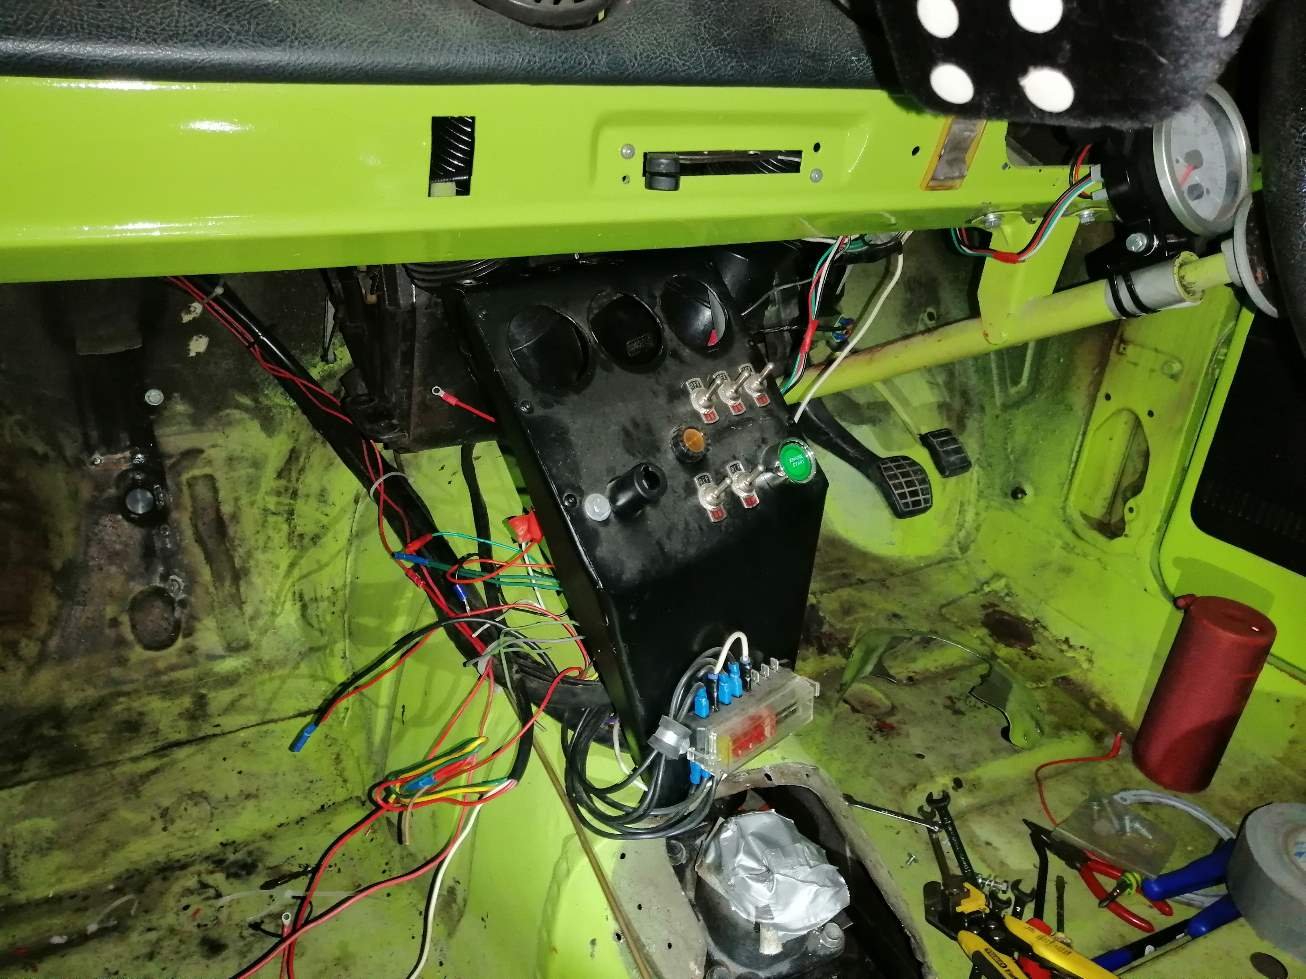
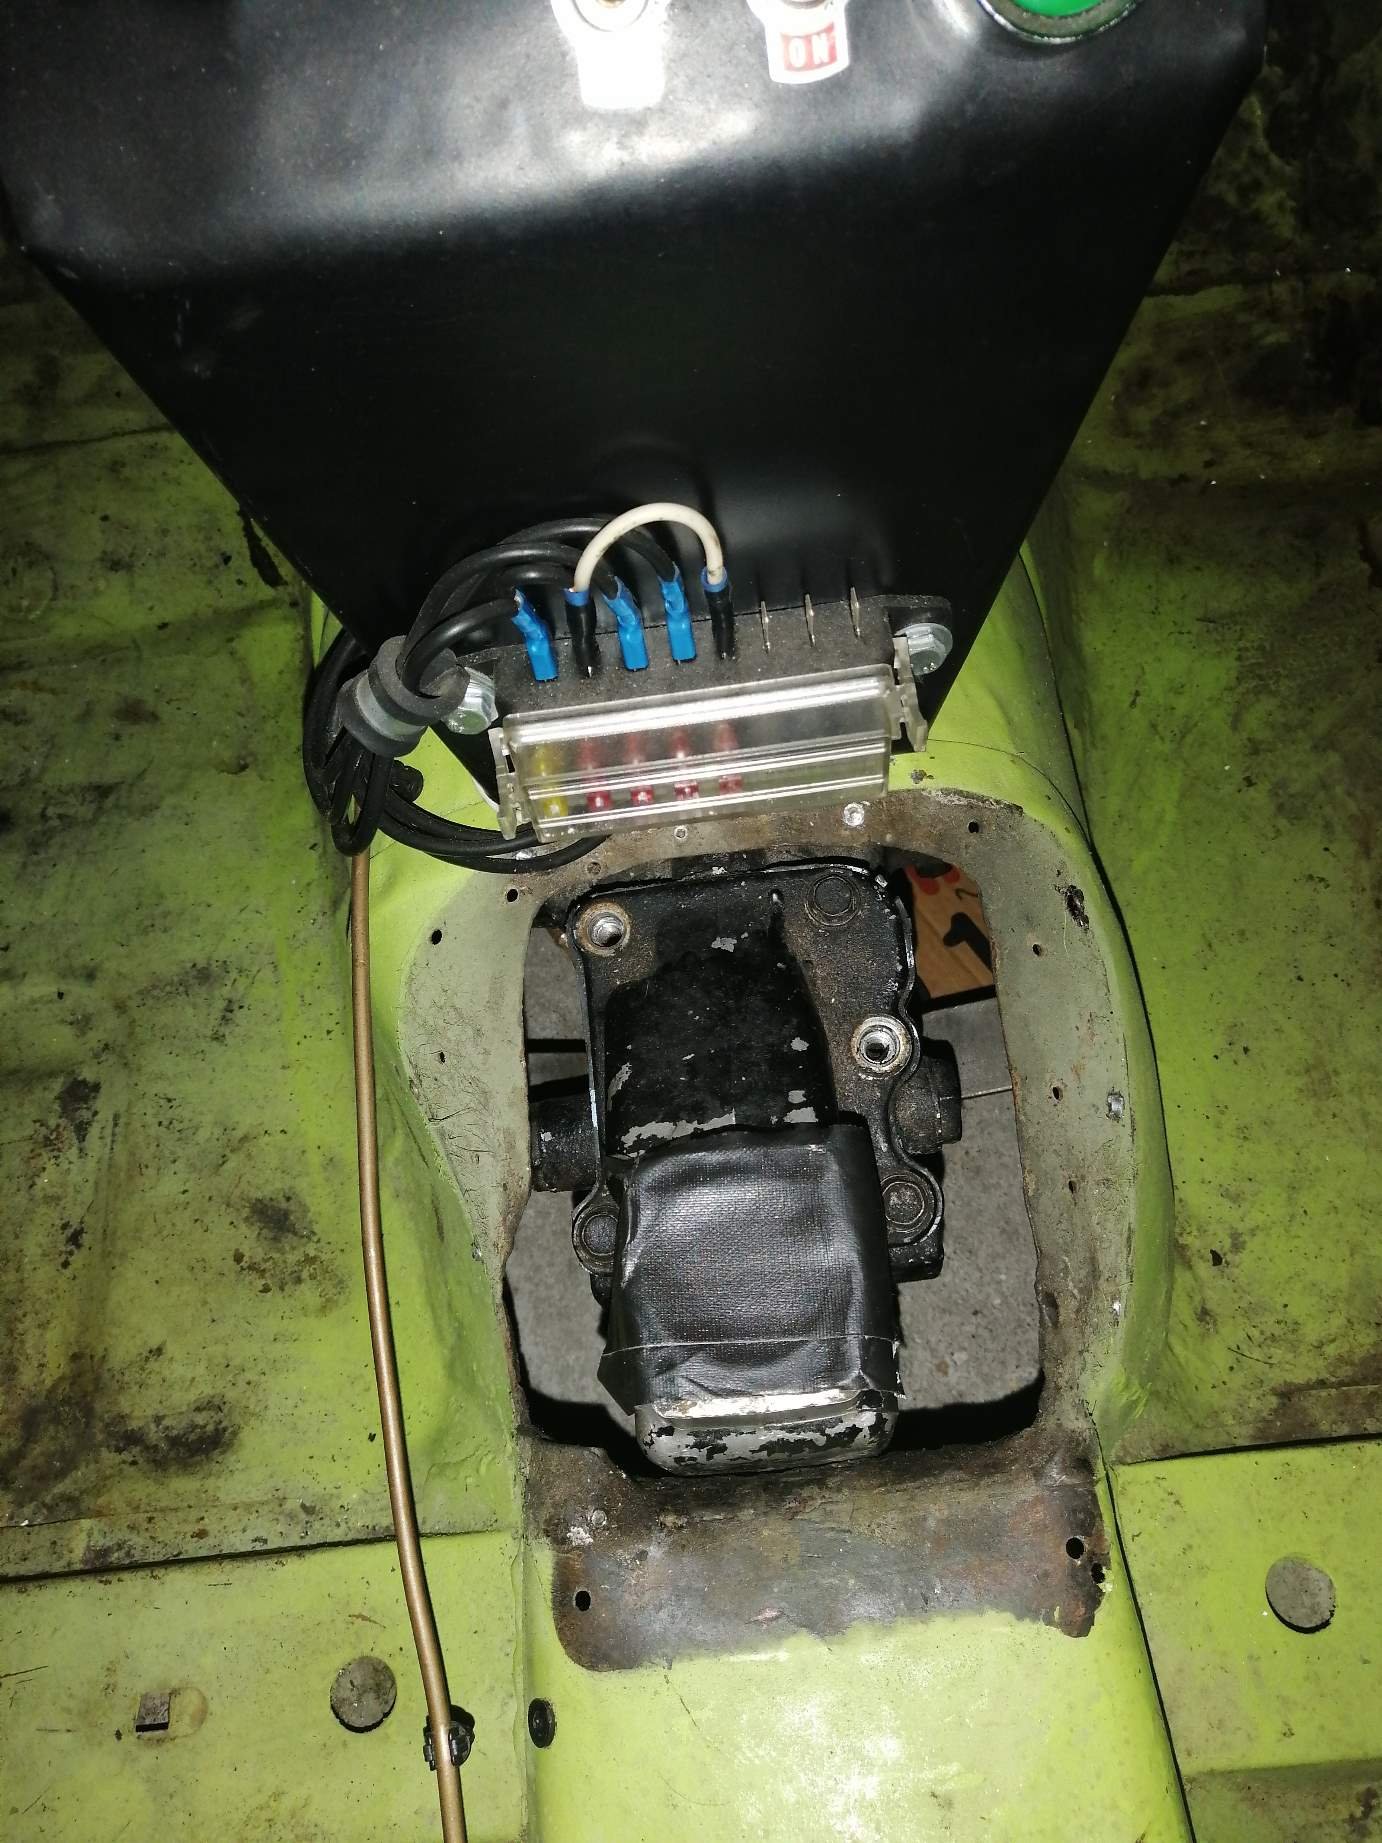
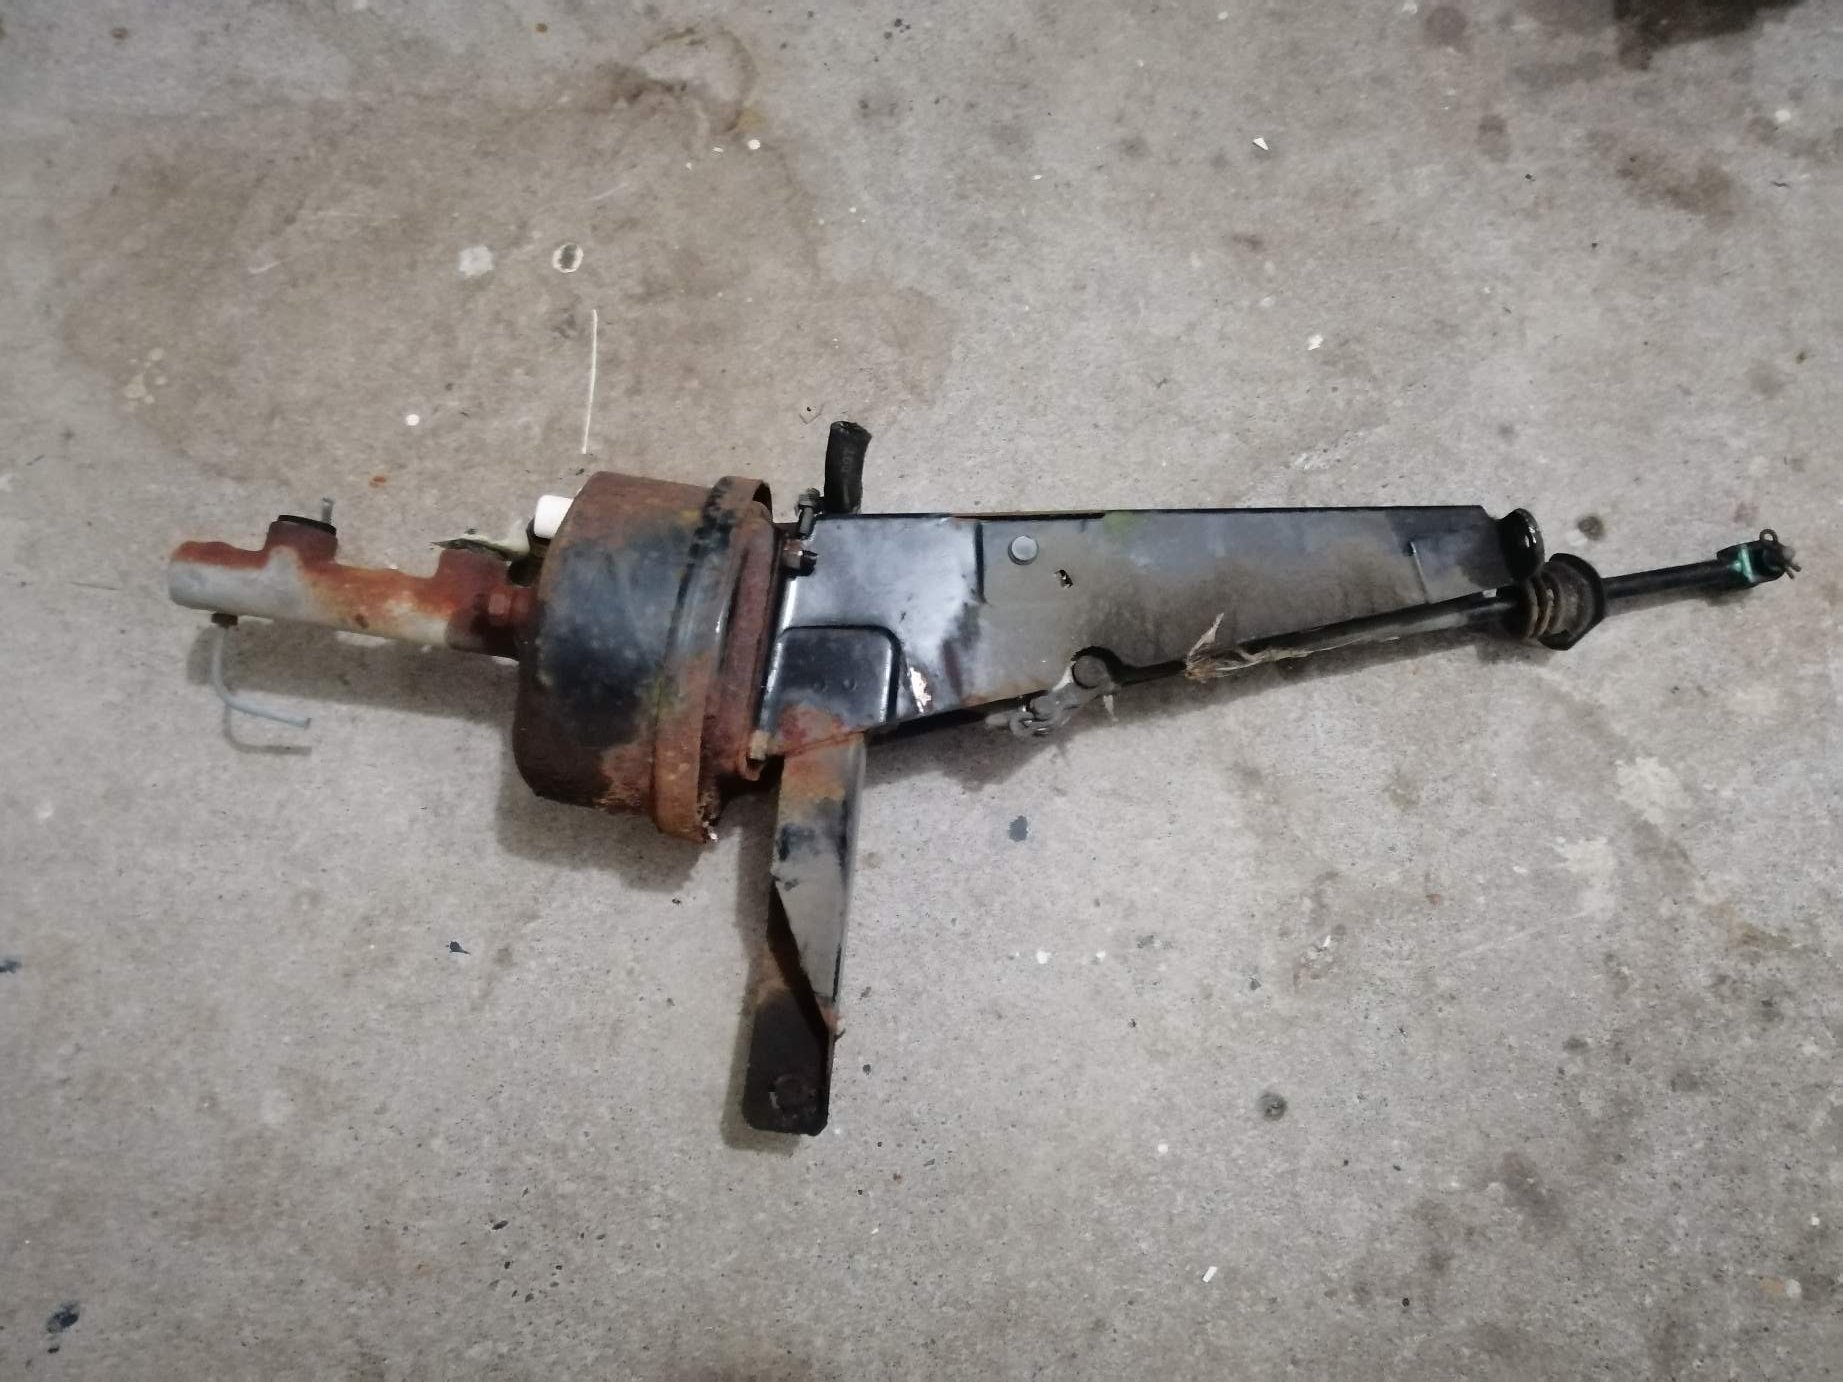
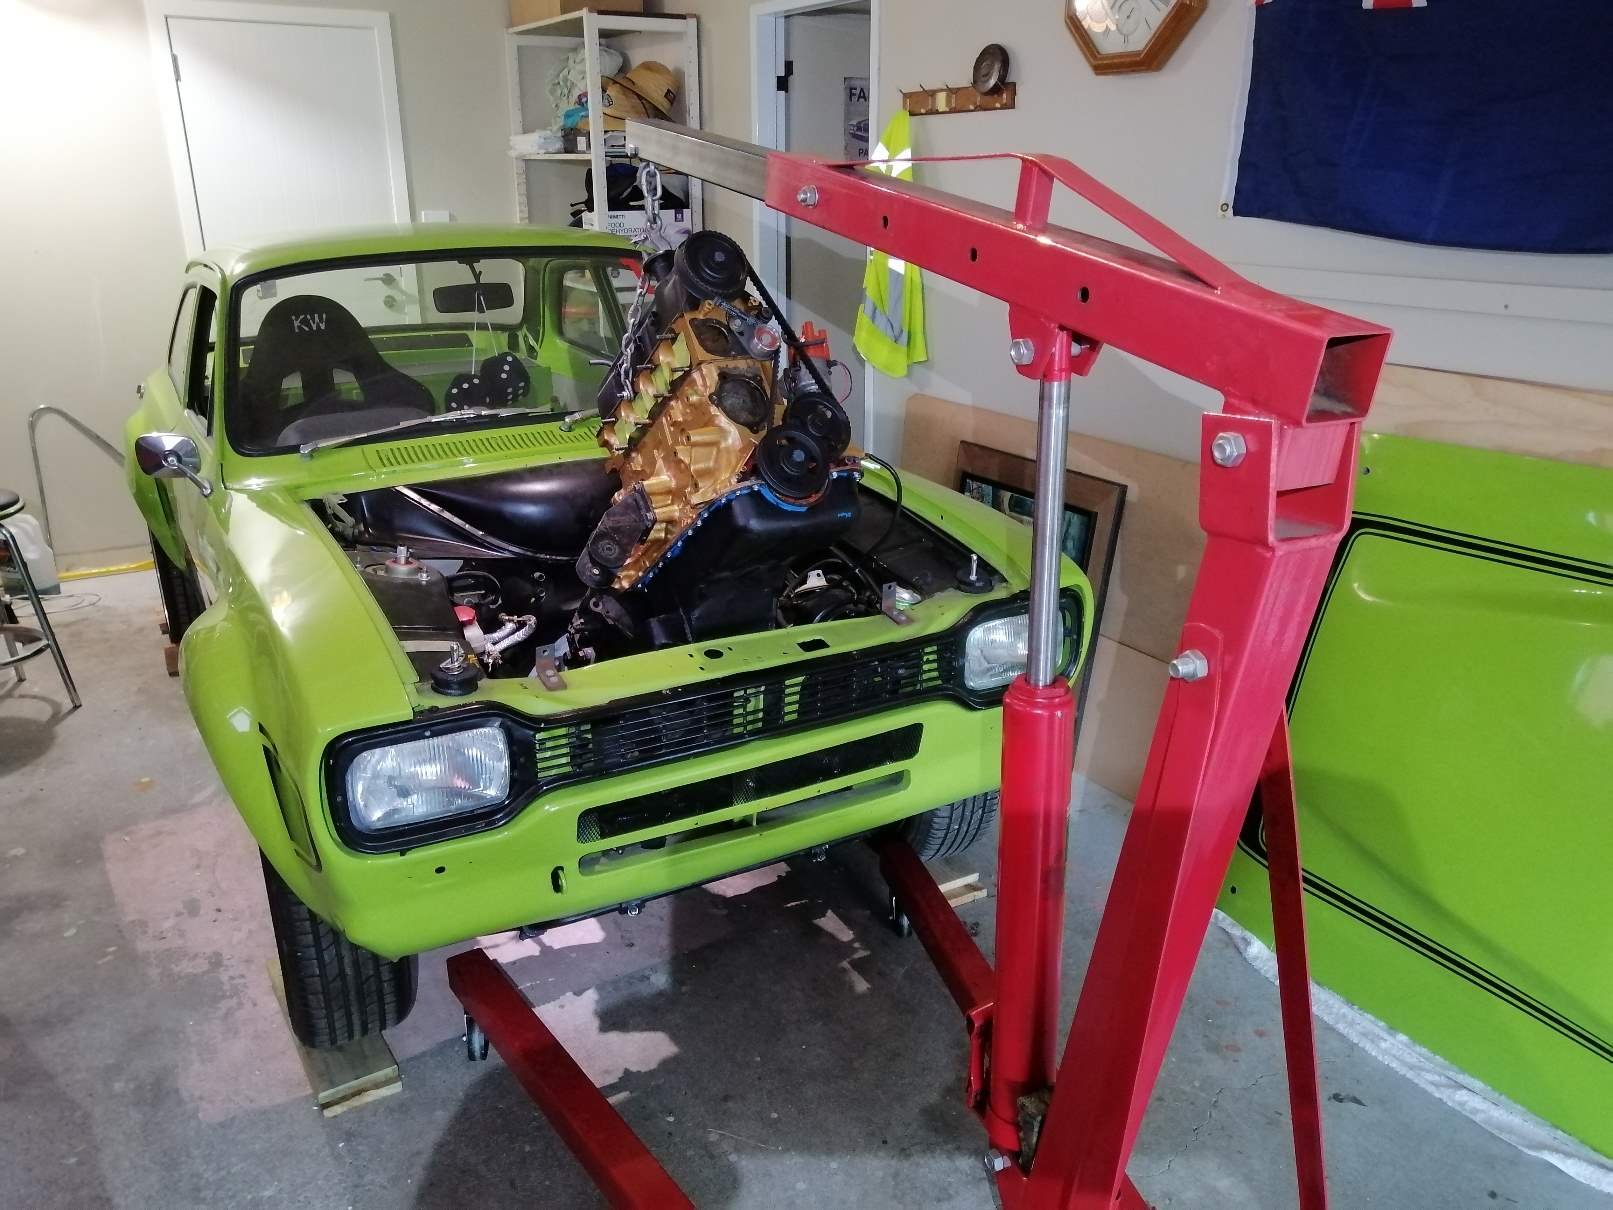
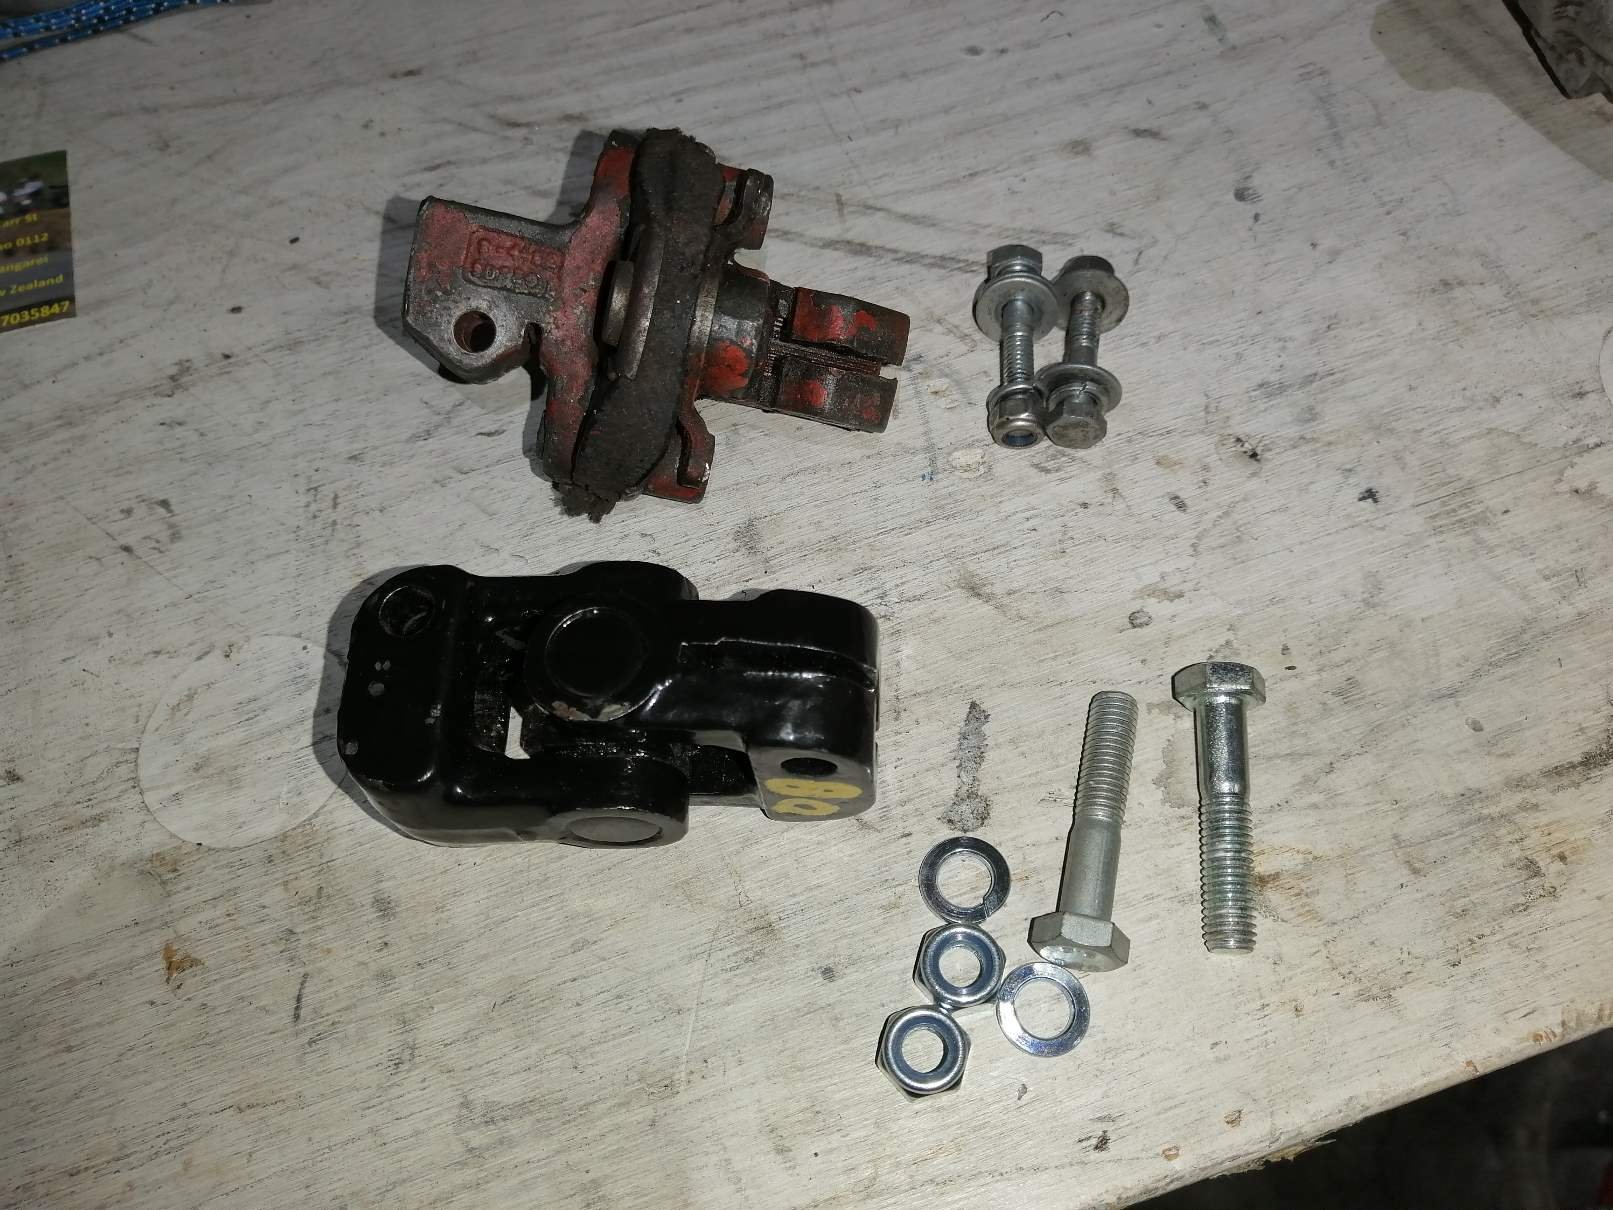
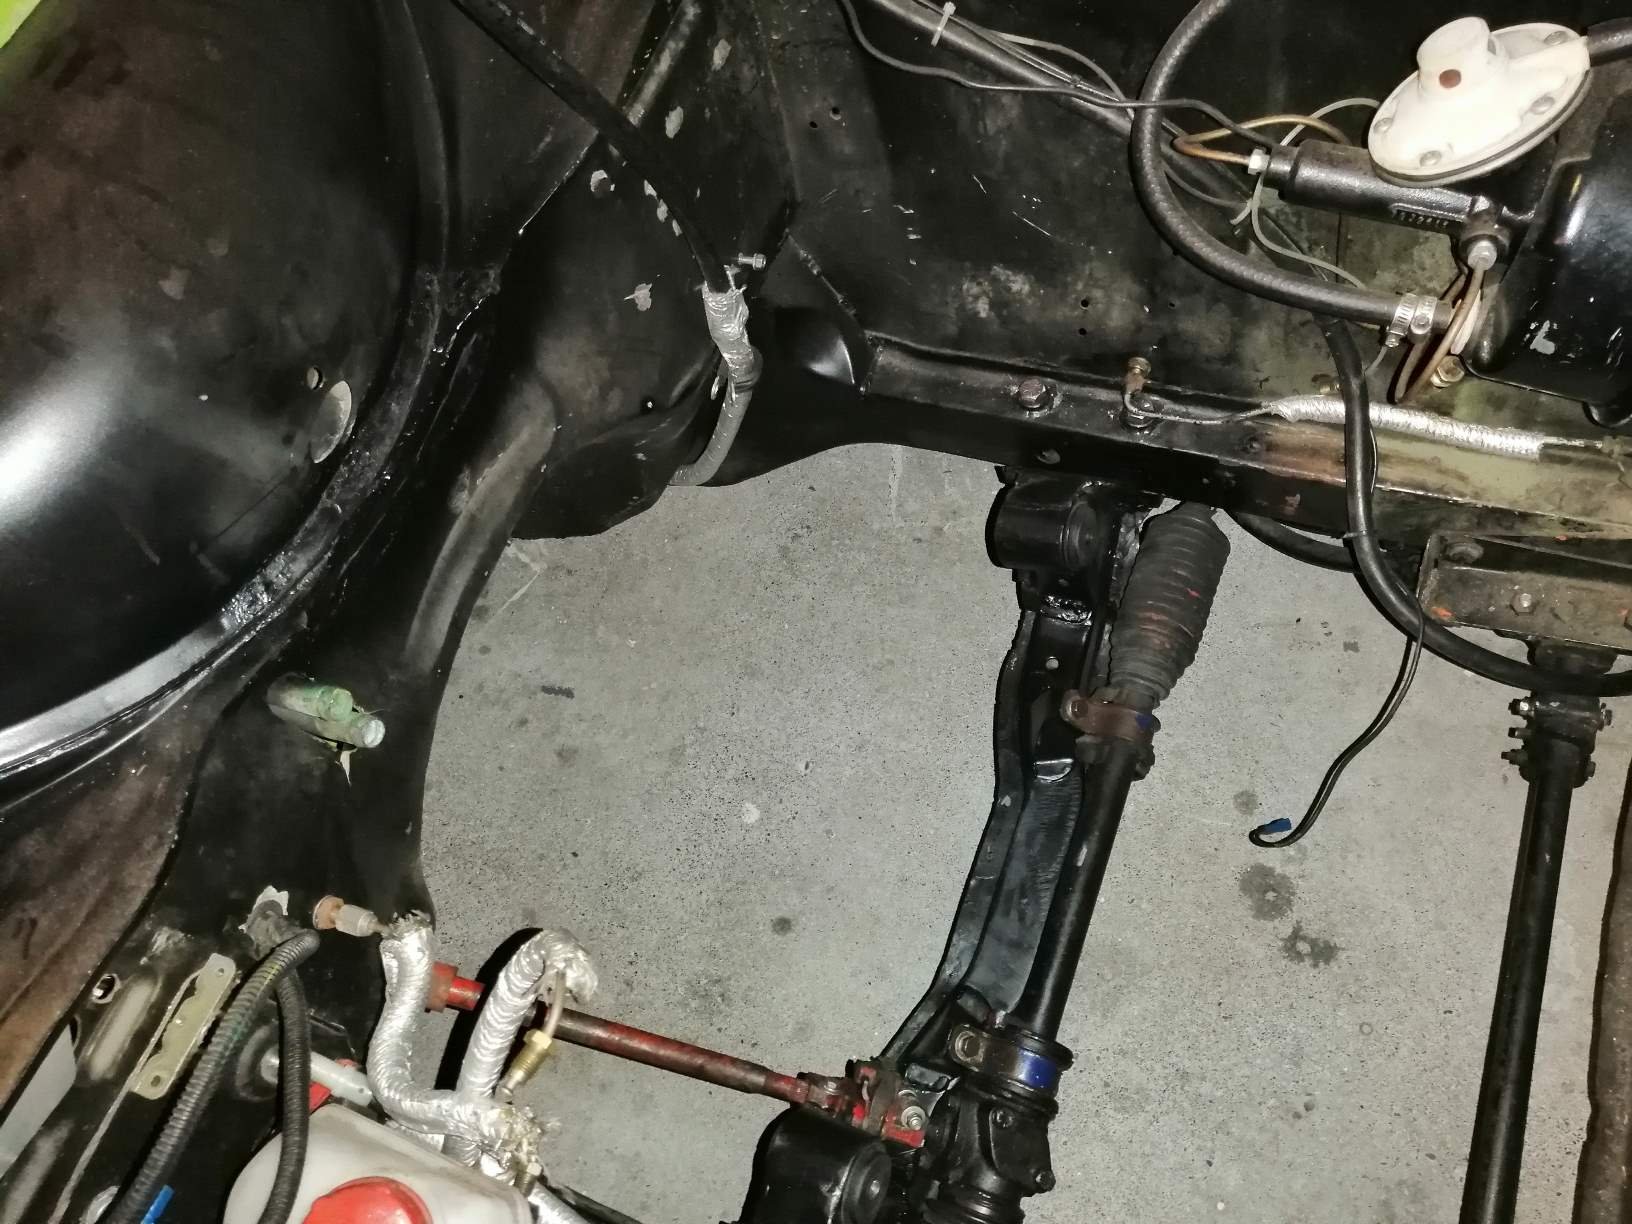
So working on sorting out the brakes, I bought a new engine... Rebuilt pinto, new +0.020" pistons, arp conrod bolts, lightened rods etc. Not a 205 block, but a bare 205 block was thrown in. Nice! It was came with a car a mate bought that had 3 ute loads of parts! I had to rescue it as it was getting damp and starting to rust in his shade shed... Actually almost on the critical path was a new water temperature gauge as the old mechanical sender unit for the mighty essex V6 does not come close to fitting the pinto. I was also a bit nervous of the 10 year old thin plastic tube for the mechanical oil pressure gauge. Hmmm, if that has on oops the oil pump will merrily pump the oil out of the block, rather than through the bearings where is it rather needed. Well, if I am going to replace two gauges I might as well get a matching volt meter as the old ammeter was never wired in. So a Xmas pressie was asked for and a nice avo spent playing under the dash. Back onto the critical path to driving I finally persuaded the brake booster to let go of the master cylinder. Phew. Mocking up the Mk2 brake booster tower and oh dear. The first push rod looks to be too long, the booster diameter clashes with the inner guard, it still really close to the new headers, and my oddball master cylinder reservoir does not allow the bonnet to close. Bugga. What's the chances someone has a Mk1 escort, cable clutch, certifiable bias peddle box they could be persuaded to part with...? Or a Mk1 booster tower with hopefully a good booster and master cylinder? -Booster can be non working as I may just use it to mount the master cylinder.
- 123 replies
-
- 10
-

-
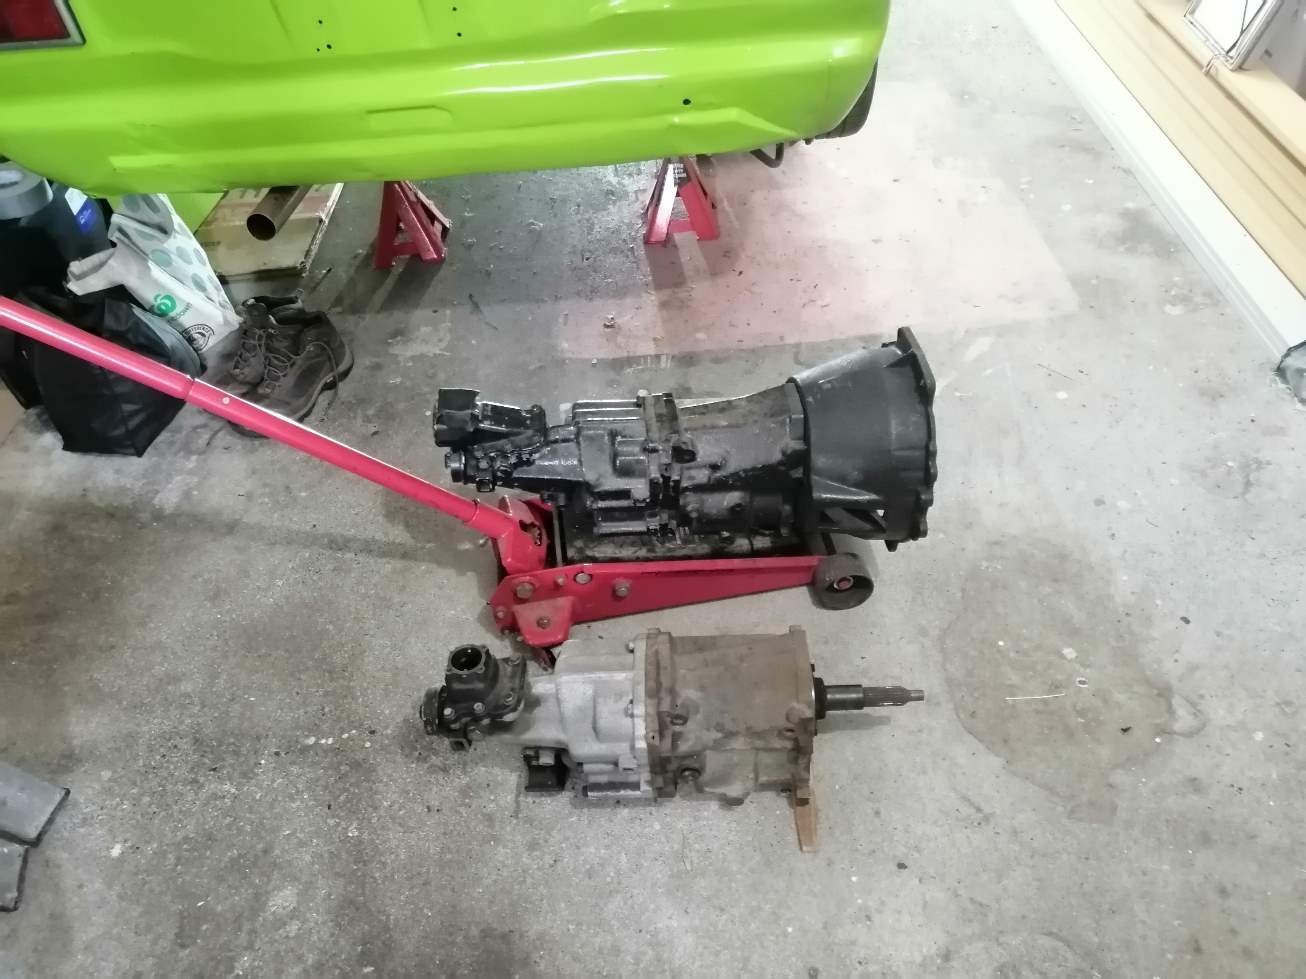
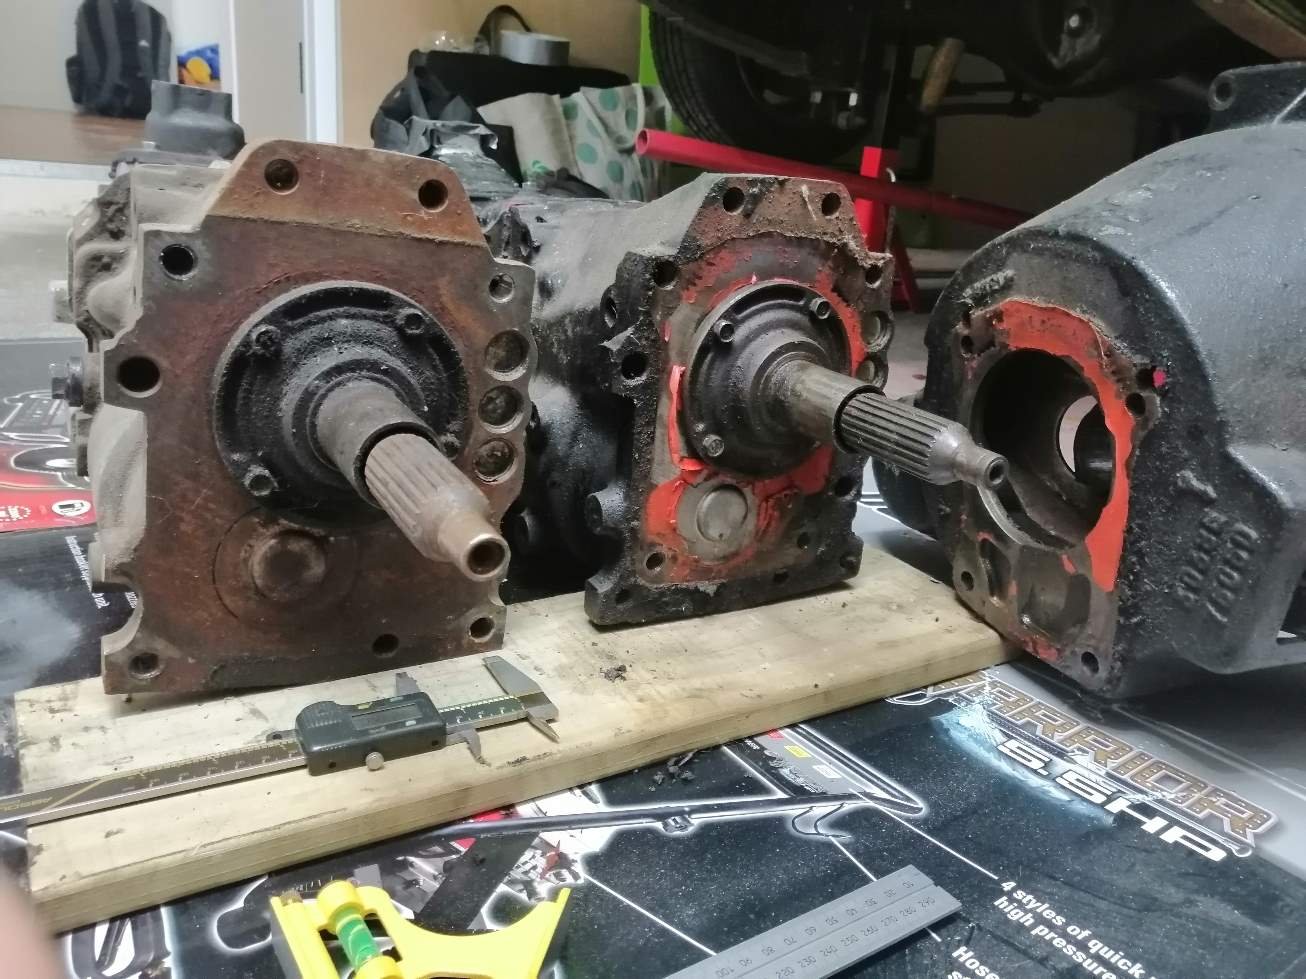
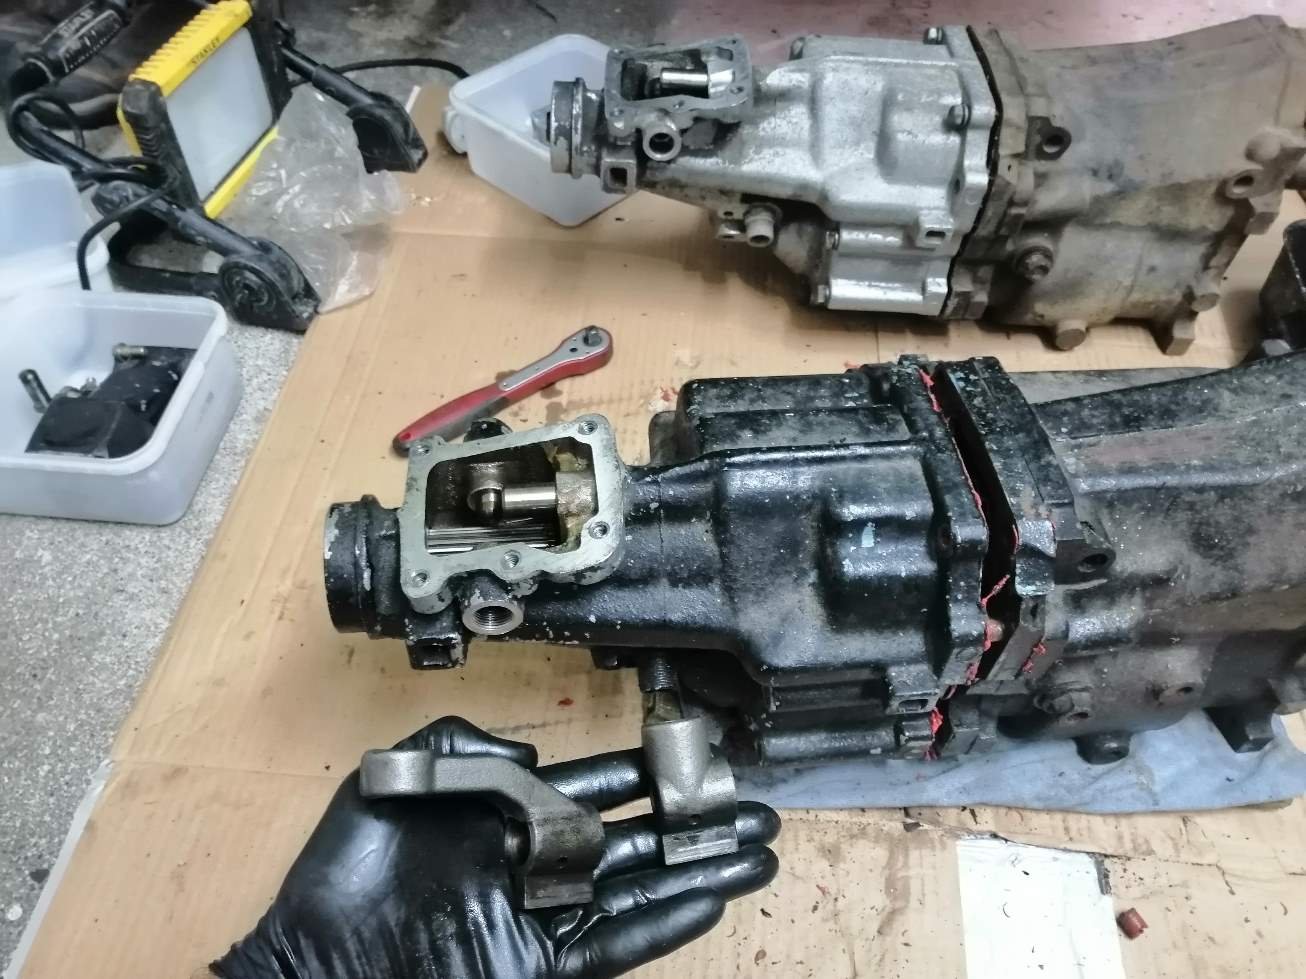
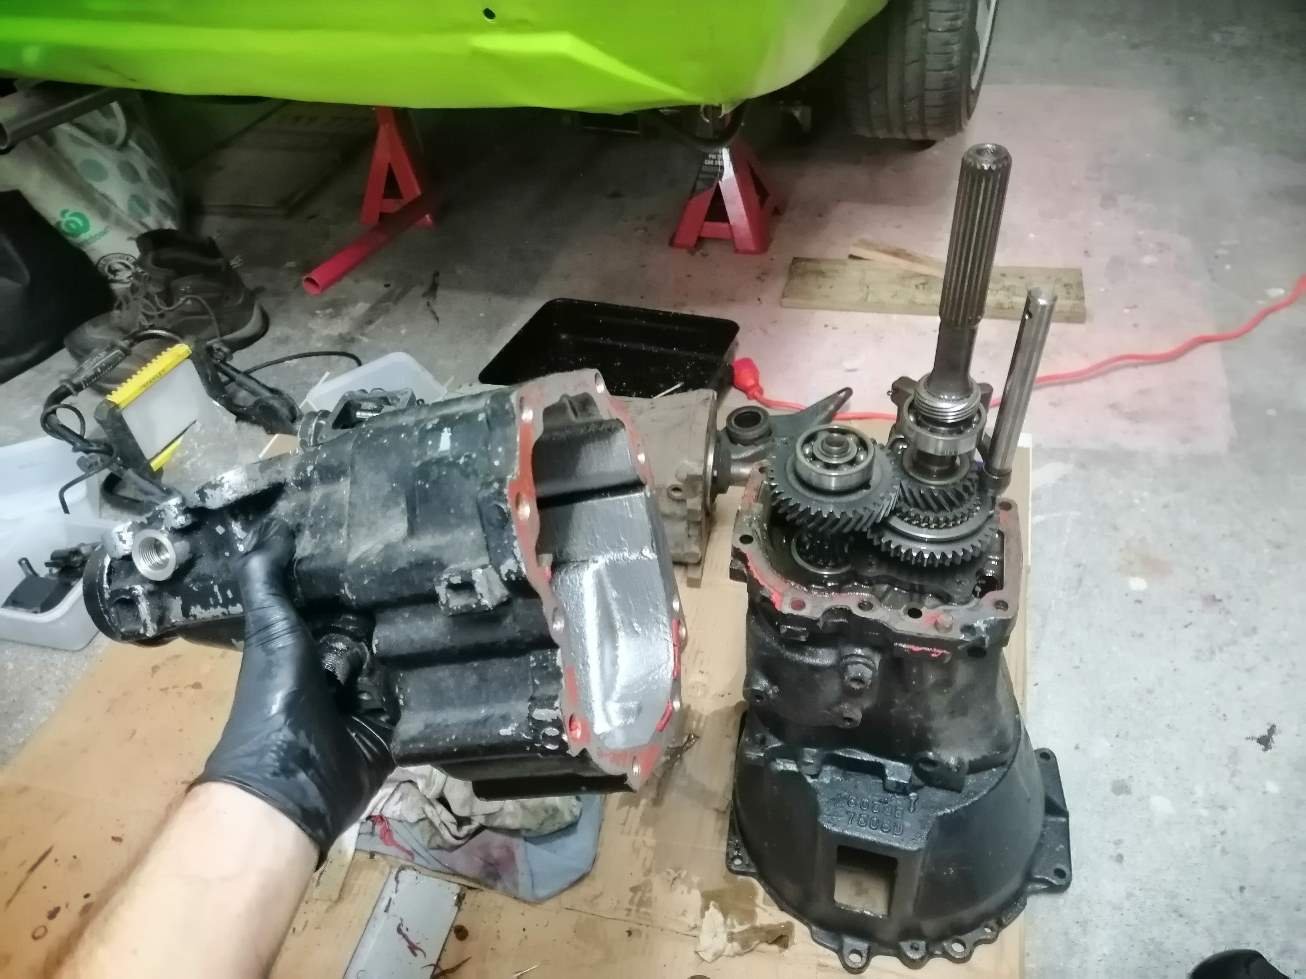
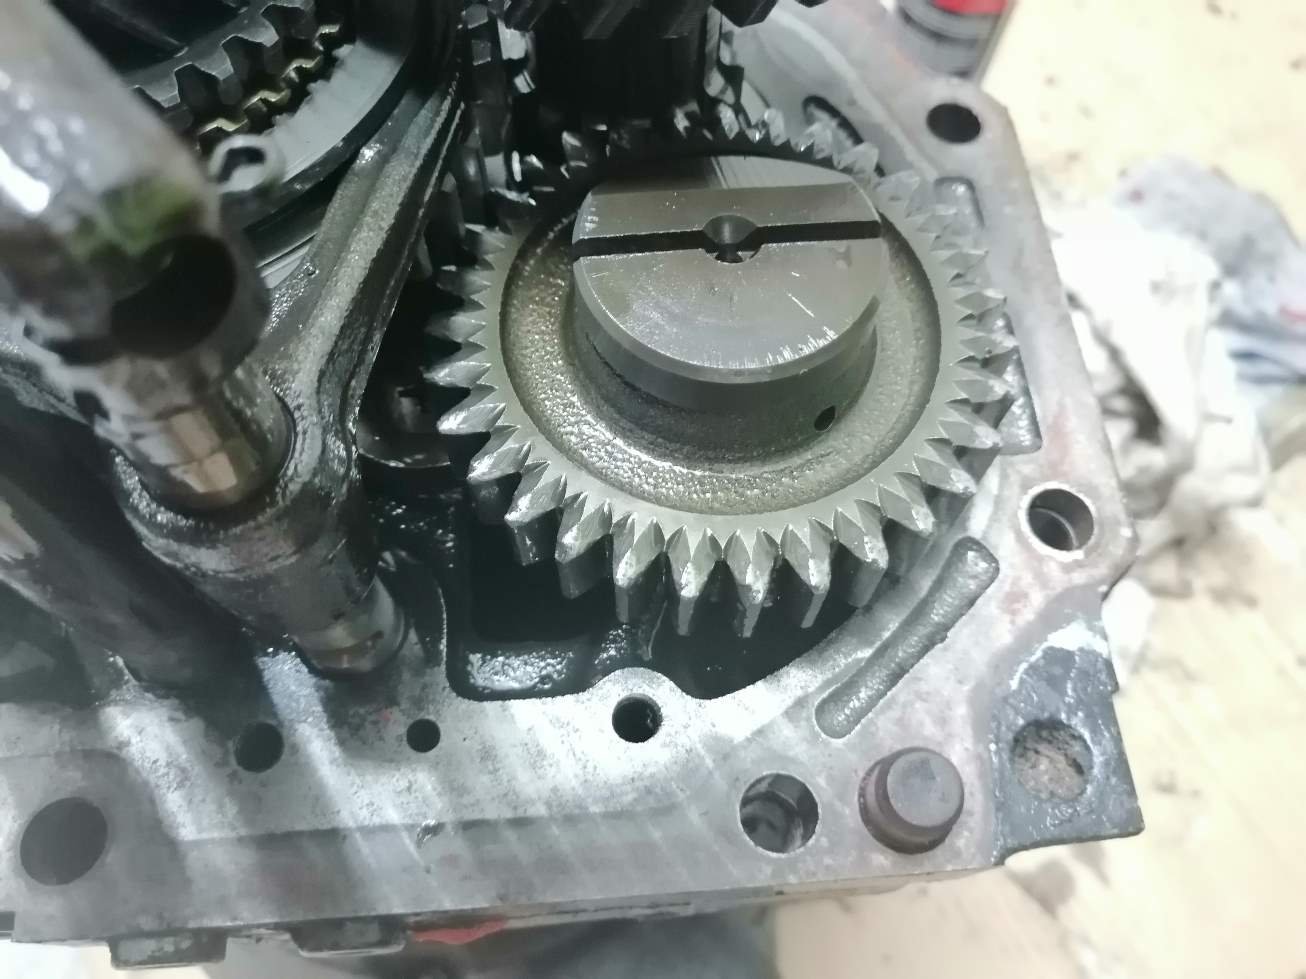
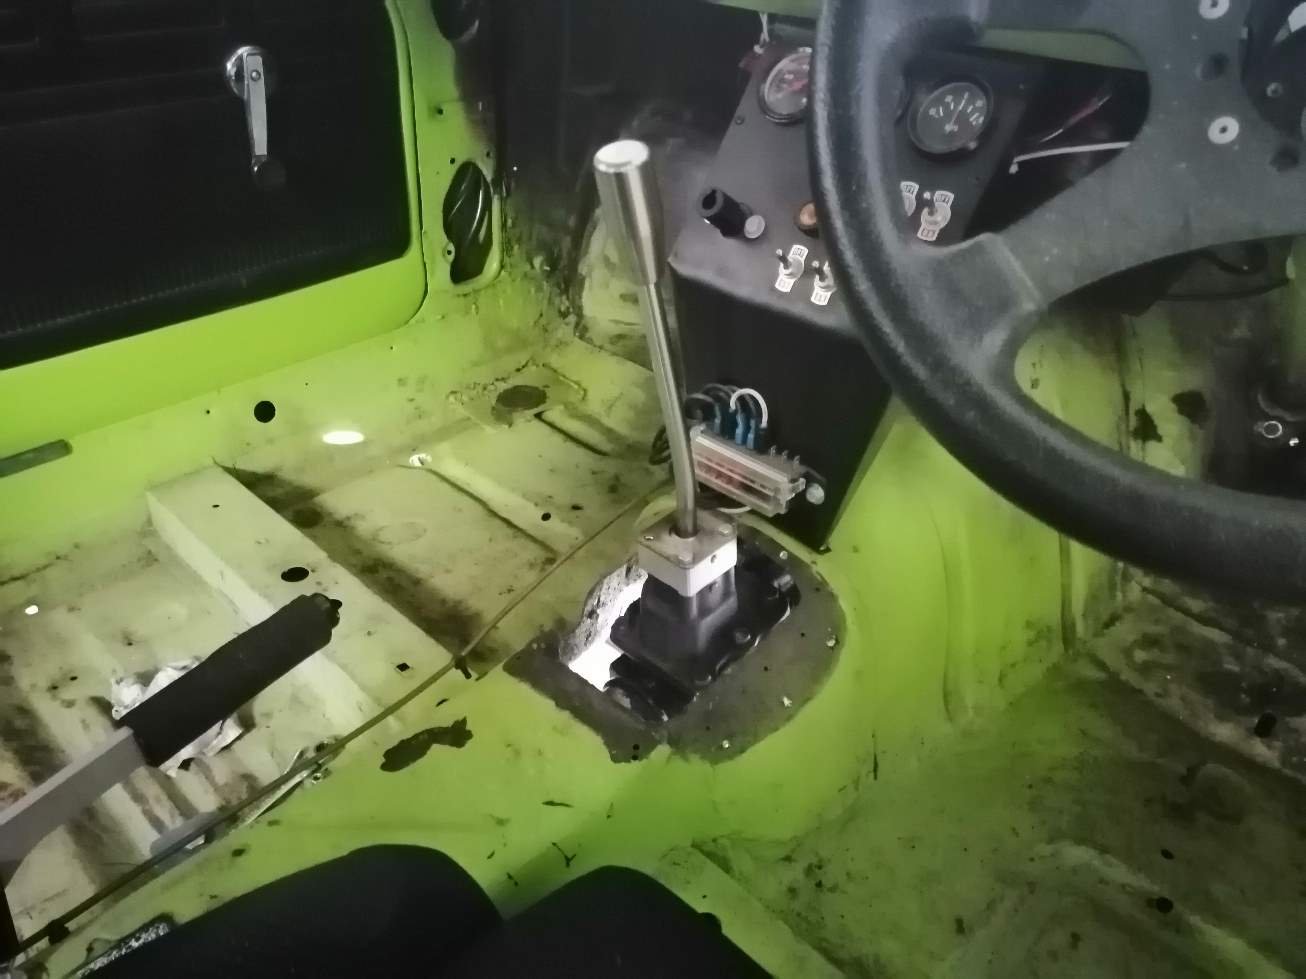
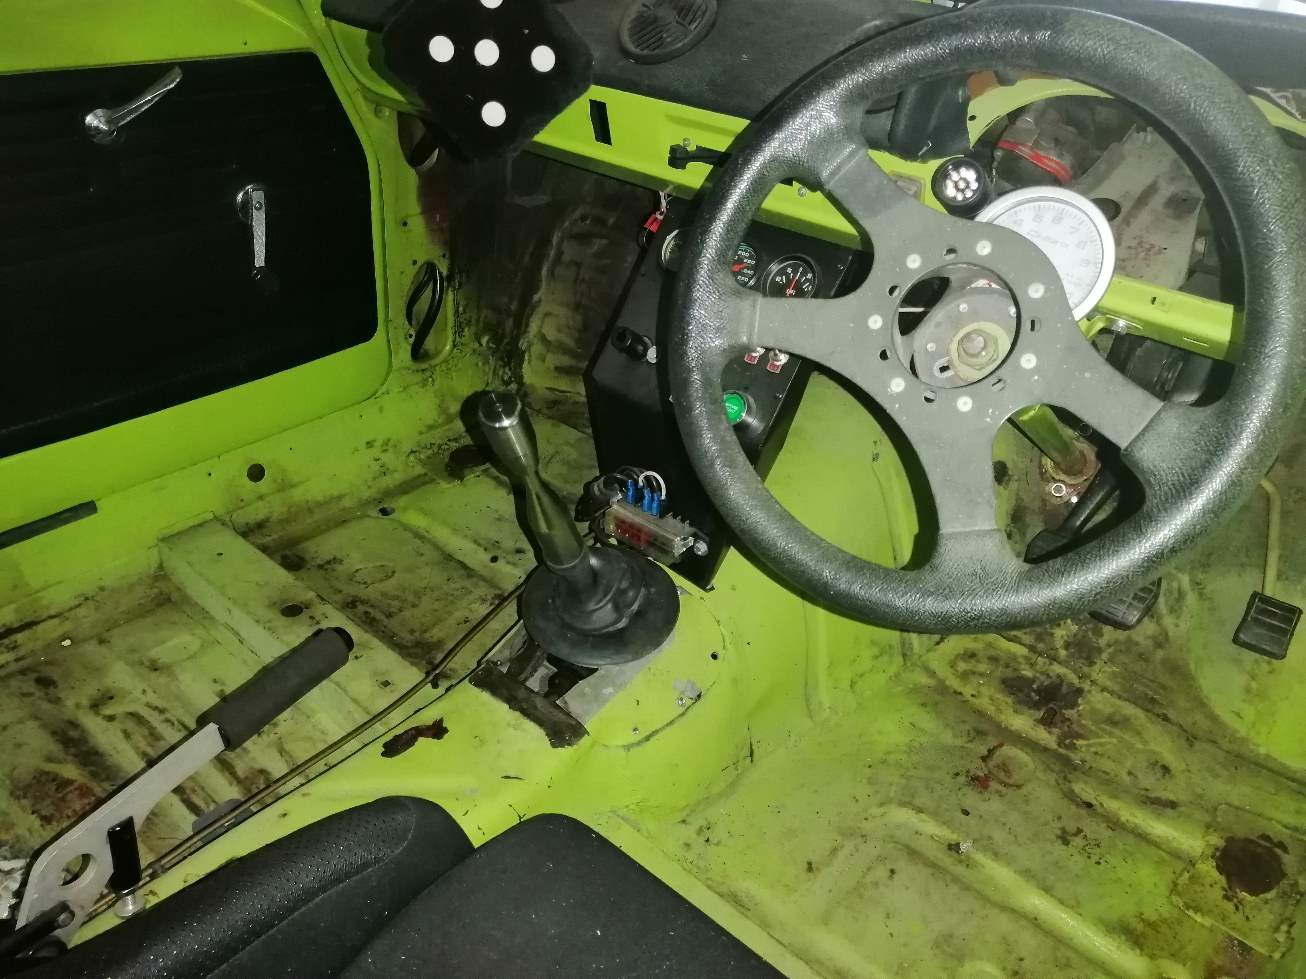
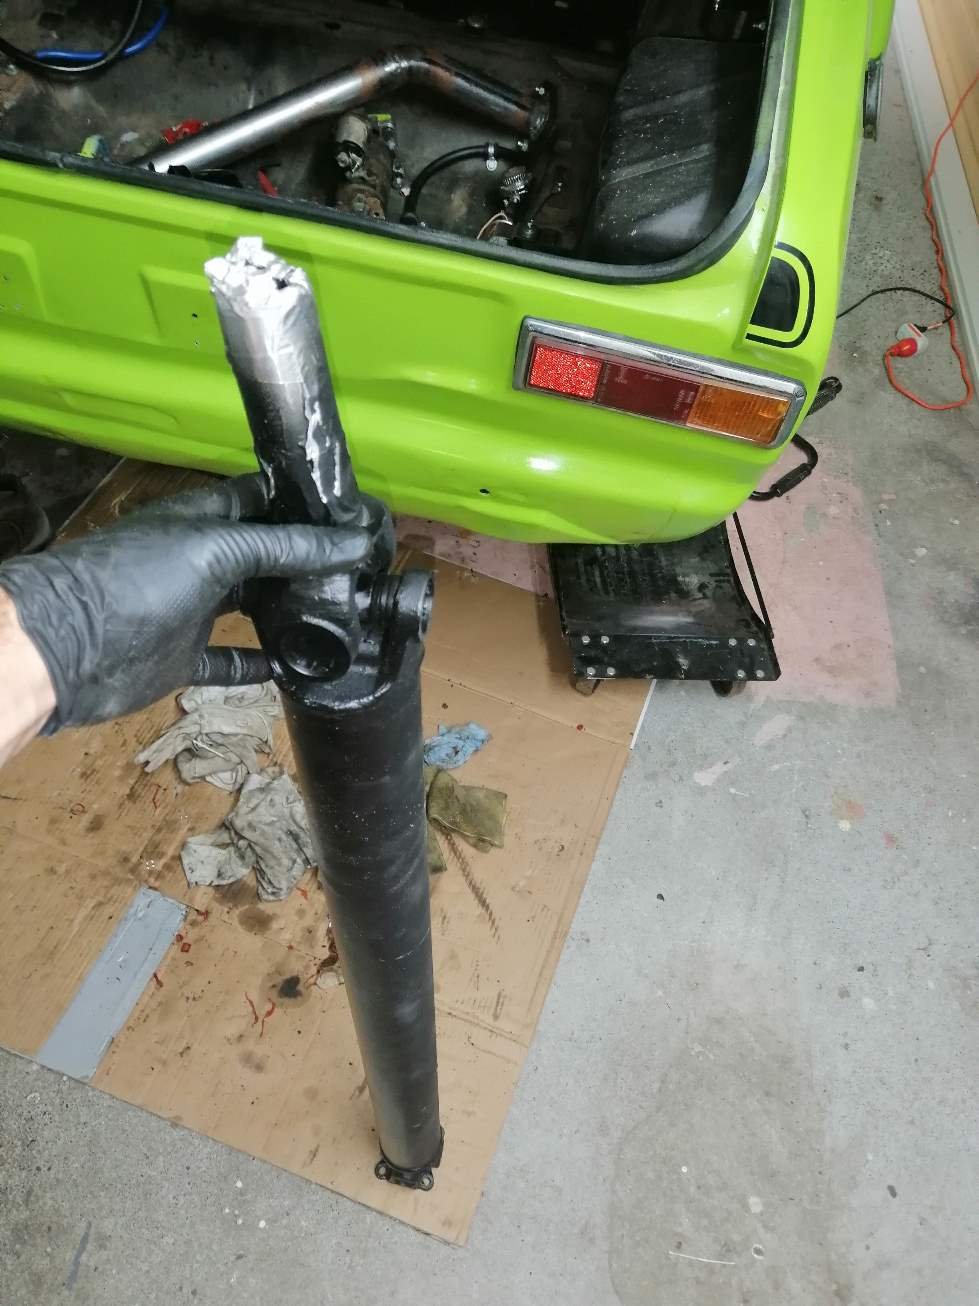
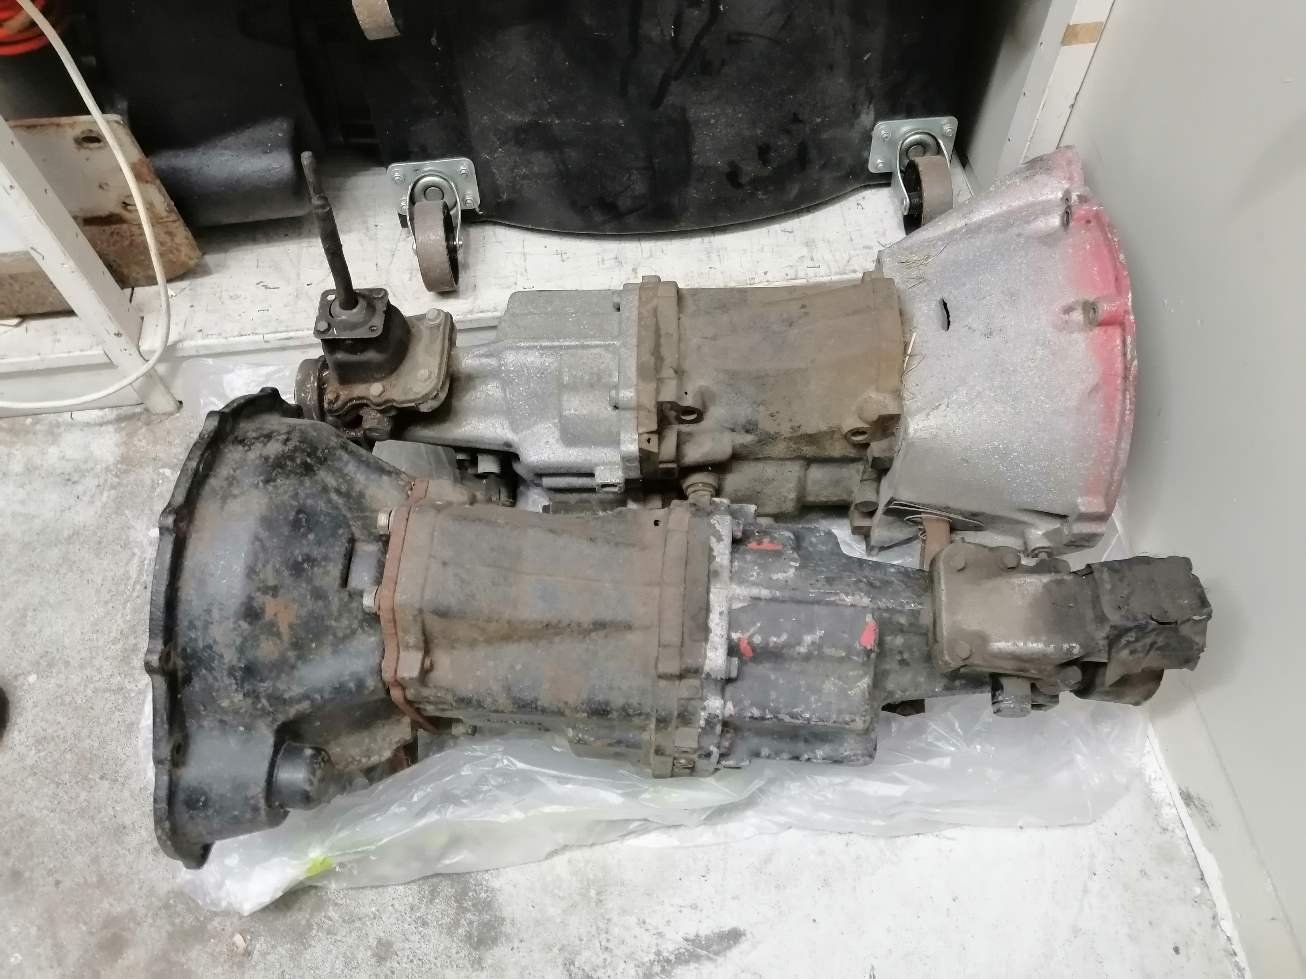
Gear box out. Just change the bell housing and sorted. Um, no. My gearbox has an extra two tapped holes to mount the bellhousing to and the output shaft looks to have a smidgen taken off the end. Unsure on the red gasket goop? The bottom two holes do go through into the case so I put a little around them when reassembling them. Time to do it the hard way. Split both boxes and swap over the shifter lever housing and the actuator underneath. Only had to split the case a little to get the actuator out. But need to get it fully apart to clean up the gasket faces. New territory for me as I have never pulled a gearbox apart. How hard can it be...? -Thank goodness for YouTube! Hmmm, those chips don't look ideal. And had a more that I would like stuck to the magnetic bung. Lots of swearing and muttering later to get the gearbox lined up on the engine and its back in the car. Phew. Now that is a better shifter location. I will use the standard shifter for now rather than the quick shifter as I hope it will be easier for the kids to learn and find the right gears. Yay! Happy driveshaft day! The shop took a silly long time to do it, like over 3 months. Ah well, I wanted a good job at a good price, not a fast job. Ended up needed some new universal joints and the bill was not too bad. And the drivetrain is all together for the first time! There is a big gap between the end of the gearbox tail and the shroud on the driveshaft. Heaps of engagement though so not about to send it back for another 4 months.
- 123 replies
-
- 11
-
-
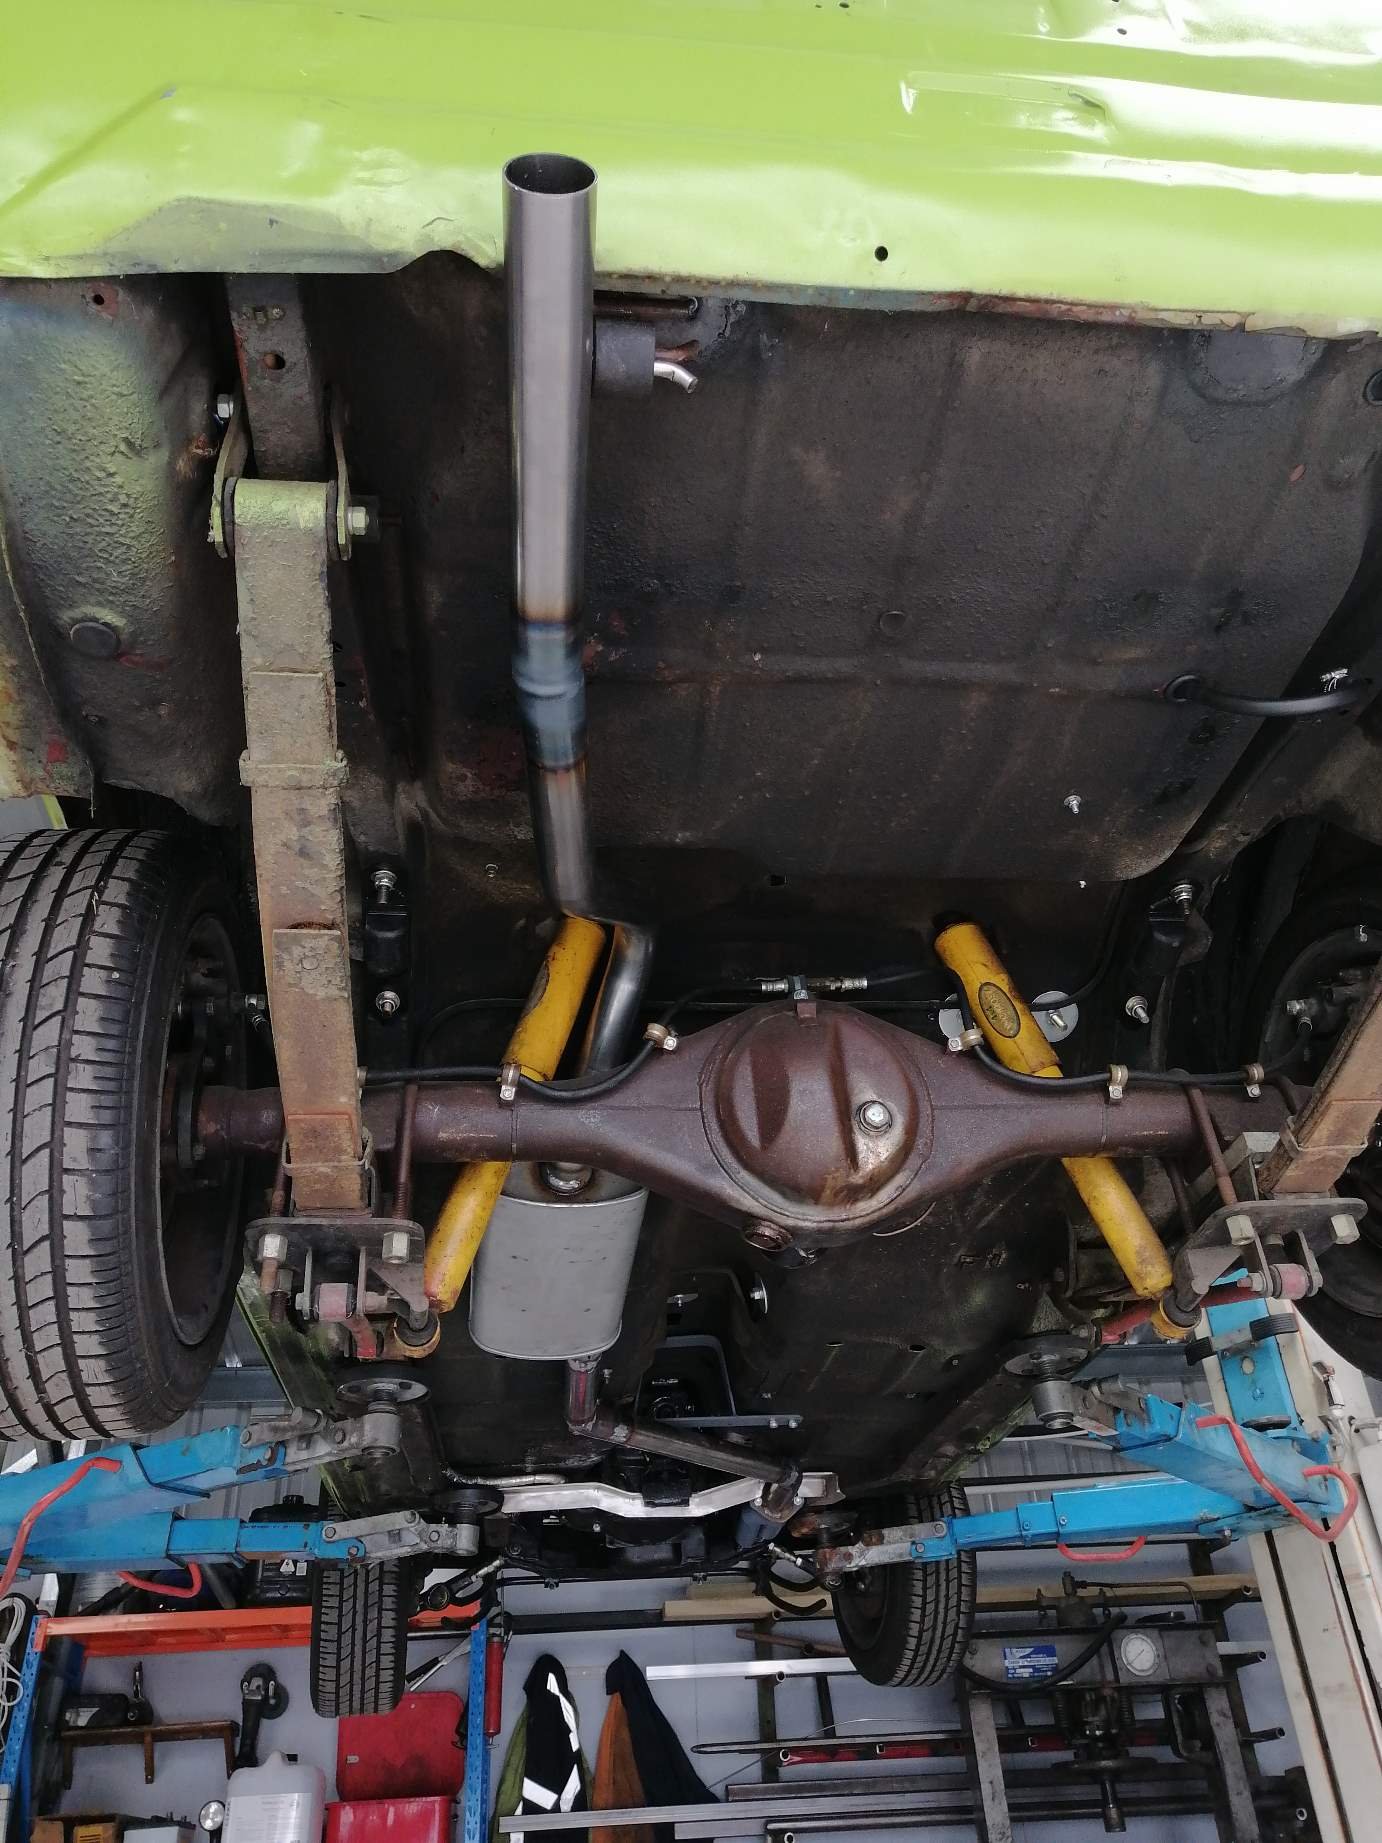
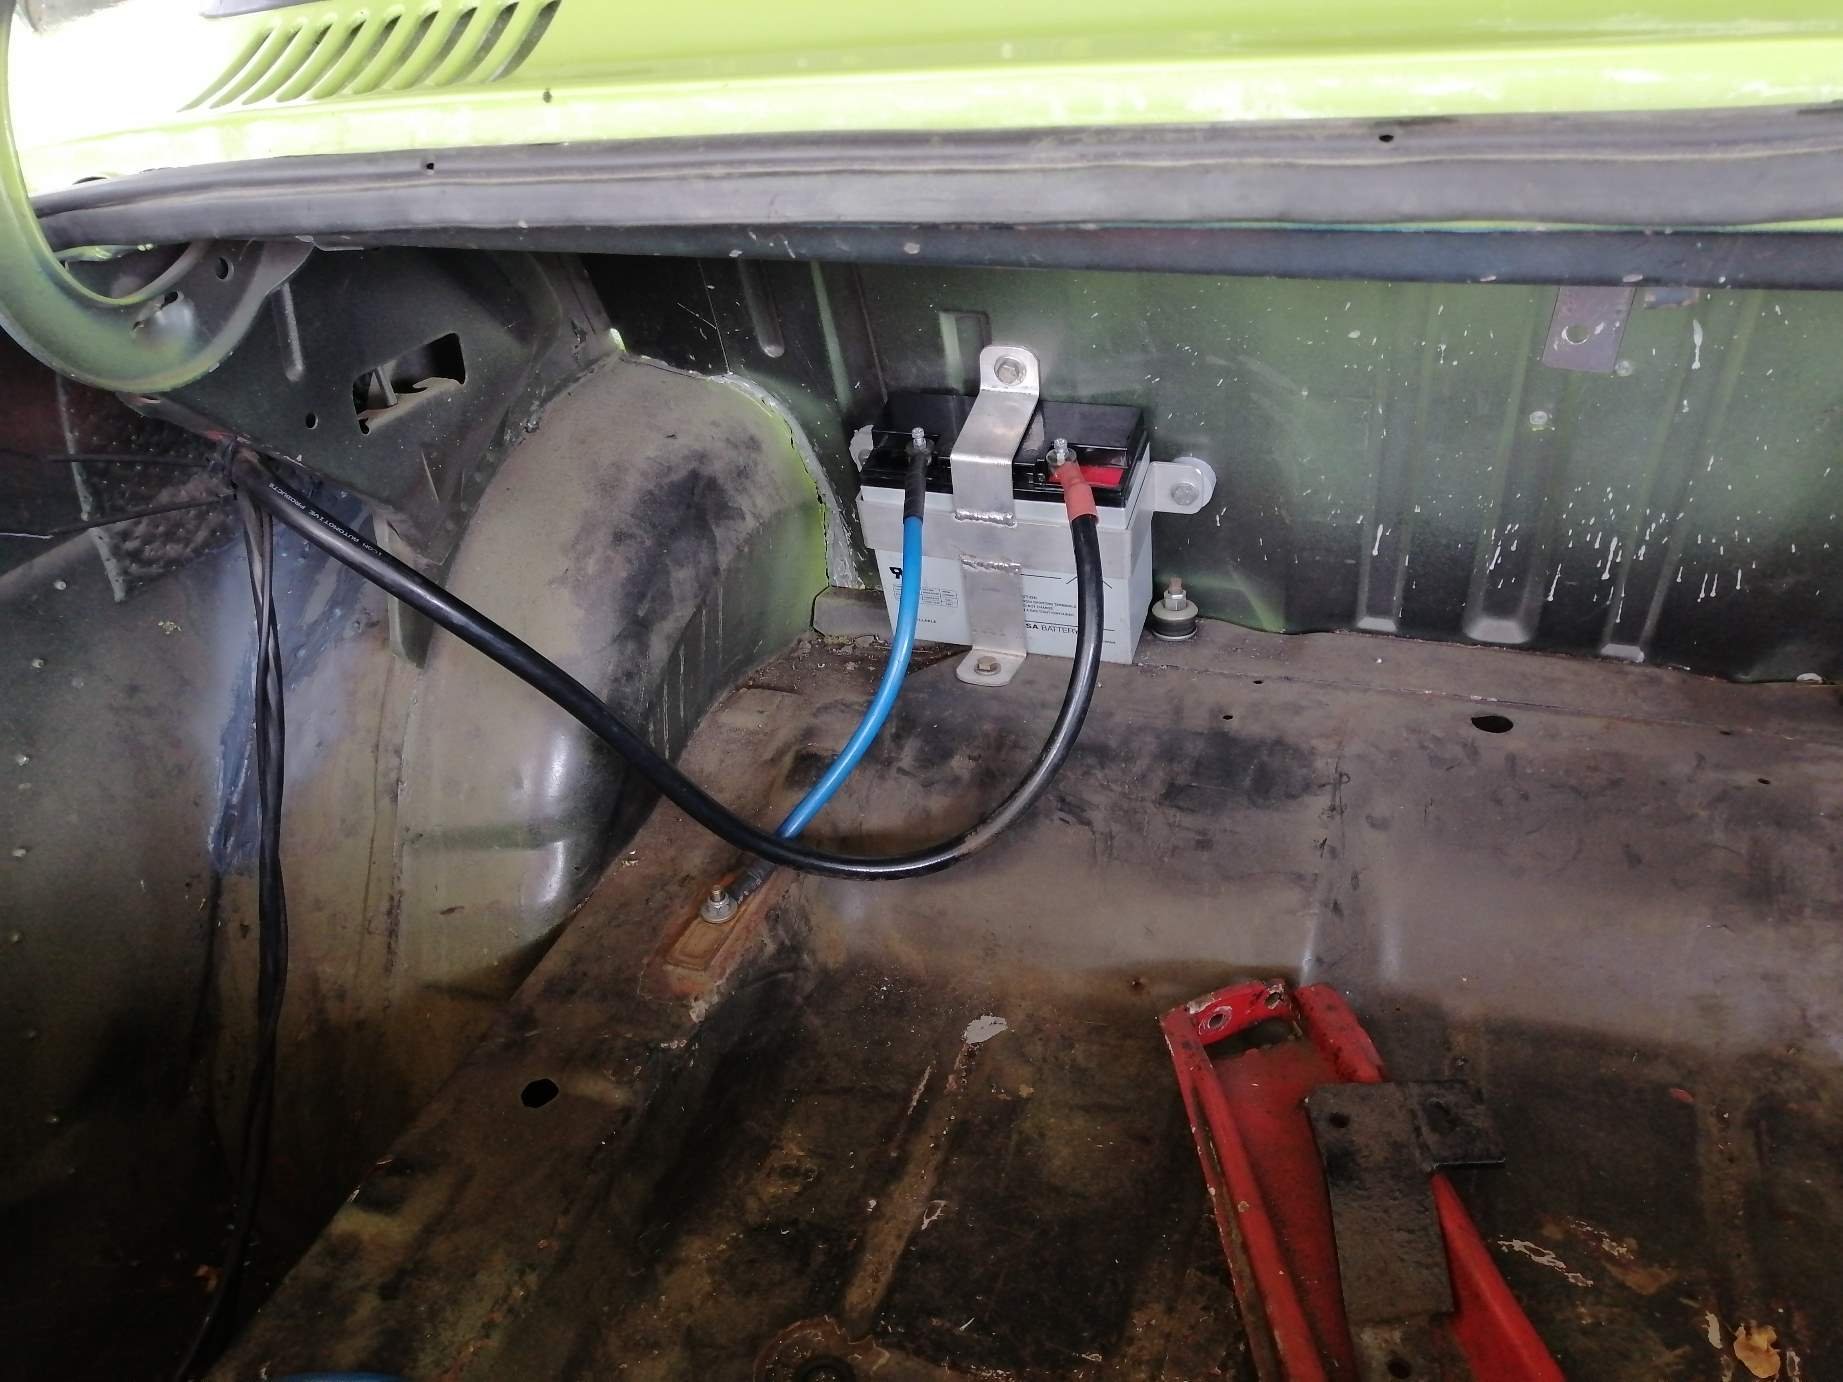
Got my beer holder home at last! Big thanks to Andy for fabricating the exhaust, new gearbox mount, driveshaft hoop and battery holder! Exhaust crossed over so can use the factory floor panel dent to tuck it up nice and high while avoiding brake and fuel lines. Cross over is higher than the lowest point of the gearbox mount. New little sealed battery. Cranks and starts the pinto fine so happy days. Cable routing and big fuse on the positive lead still to sorted out. Annoying that the same gearbox as was behind the V6 now sits further back when behind the pinto. This means new gearbox cross member mount, gearstick mount and driveshaft are needed. Ah well, a chance to fit crush tubes in the chassis rails. The gearbox stick mount is virtually touching the trans tunnel strengthening brace. Rather than chop into the brace I bought a new mounting positing for the gearbox. That came in a package of two more W50 gearboxes... One the long list to do is to change to box over to the one with the forward mounted gear stick. It also means the driveshaft is too long. Its been at the shop for almost two months now waiting for attention... Seems the universals are toast as well so sounds like even more $$$. To sort out the too close brake master cylinder and lines: This standard escort set up was dragged home, Cheers Billy. By the time I get a new booster sorted it may have been cheaper to stick with the sexy bananananarama headers and get a reverse peddle box? So cool at Miss15 is excited to start up Felicity. Looks like I am going to be sharing driving. New exhaust sounds good in real life, a bit raucous, but not obnoxious. https://youtu.be/l7mFxC03C1c
- 123 replies
-
- 14
-
-

-
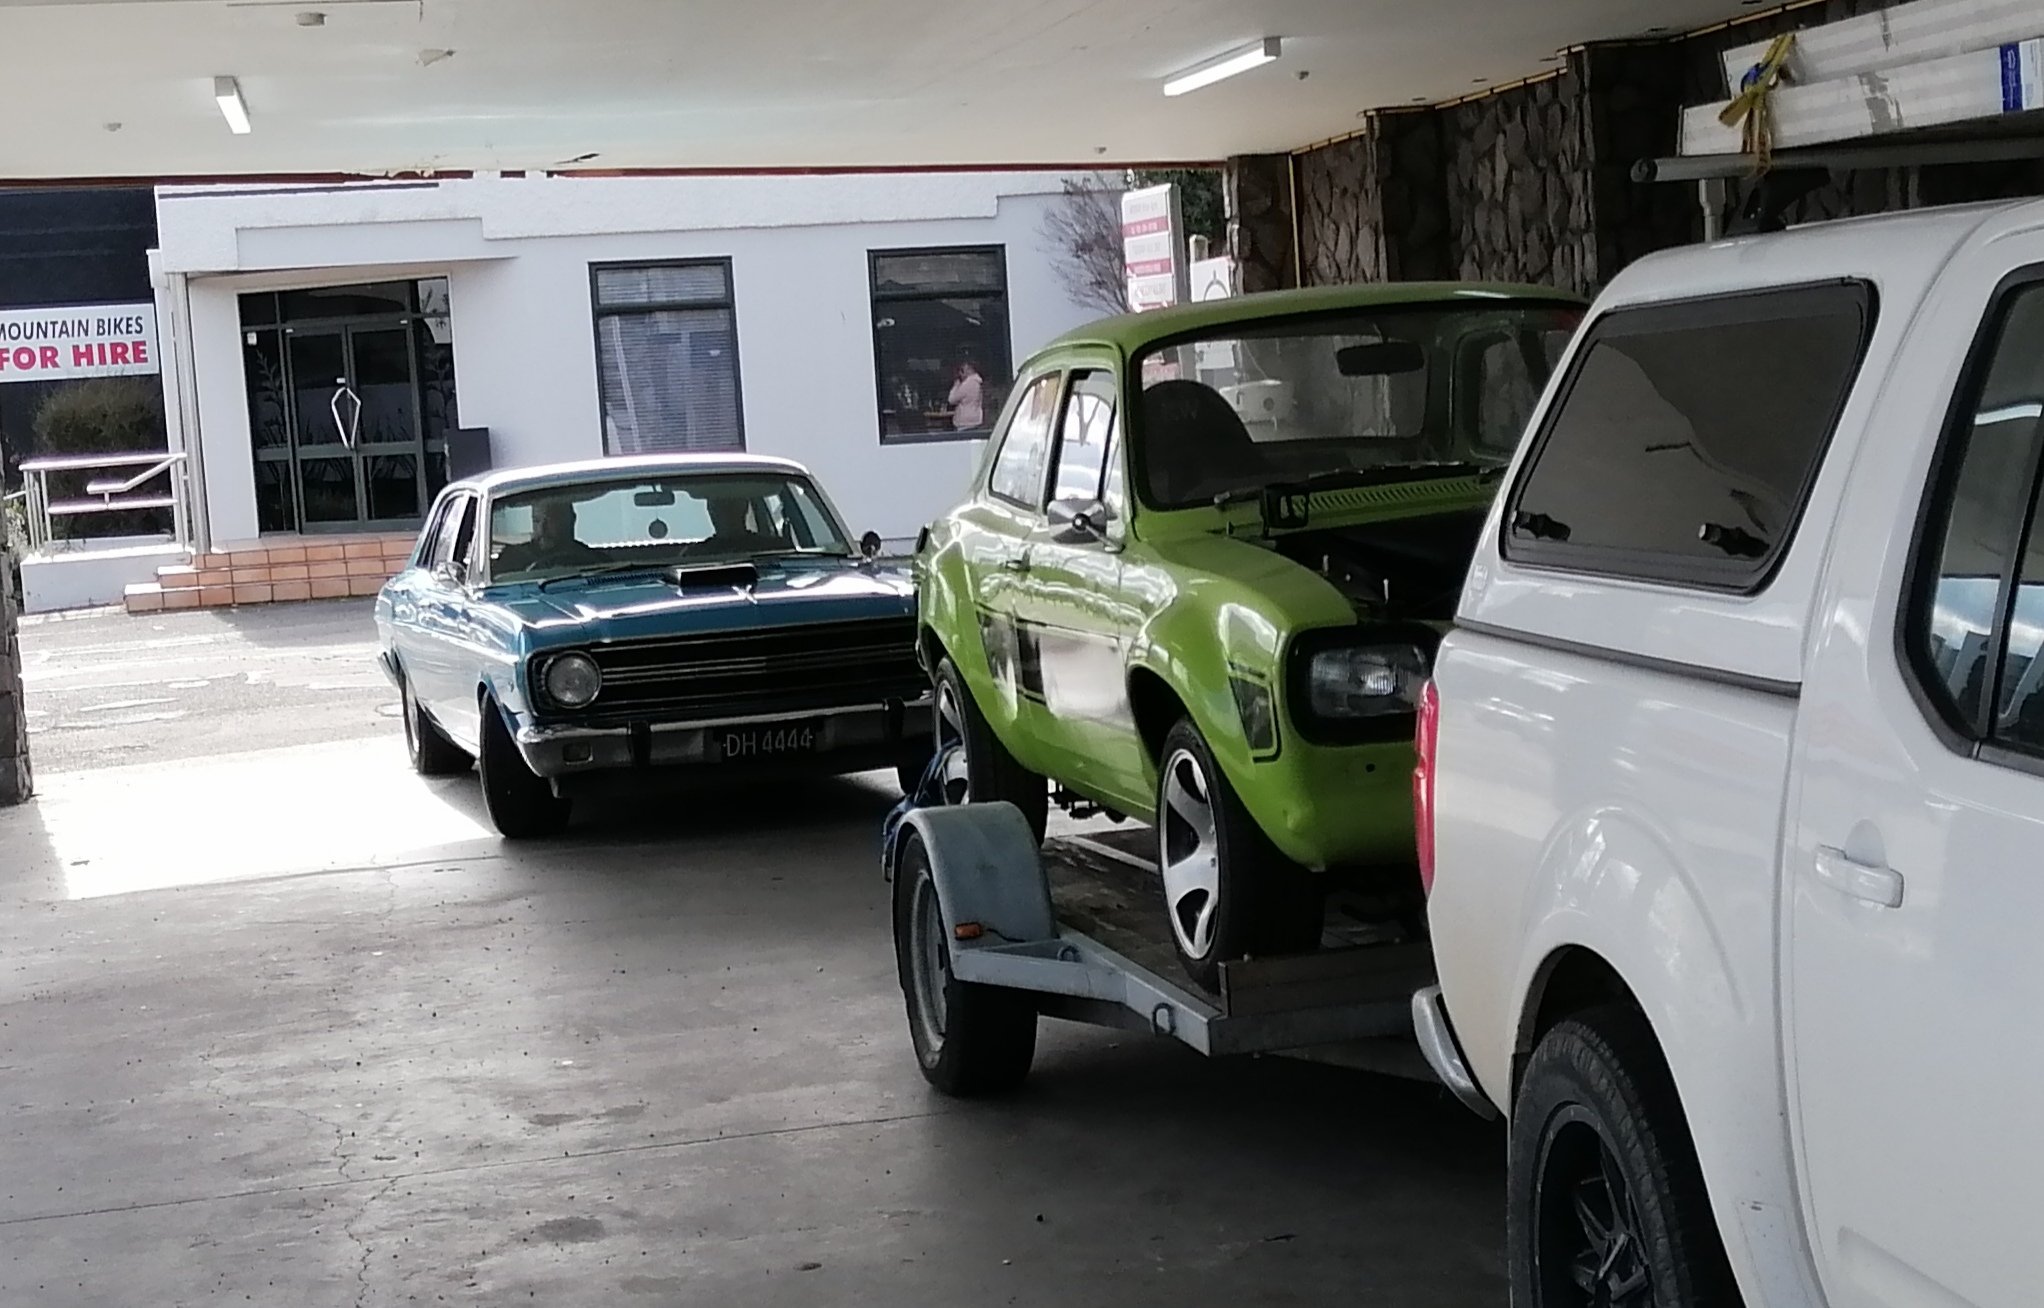
Taking Felicity out to get a drink from the local liquor shop and an angry sounding beautiful XT pulled in behind. Couldn't resist a photo. Much excited as time for exhaust and sundry bits of fabrication!
-
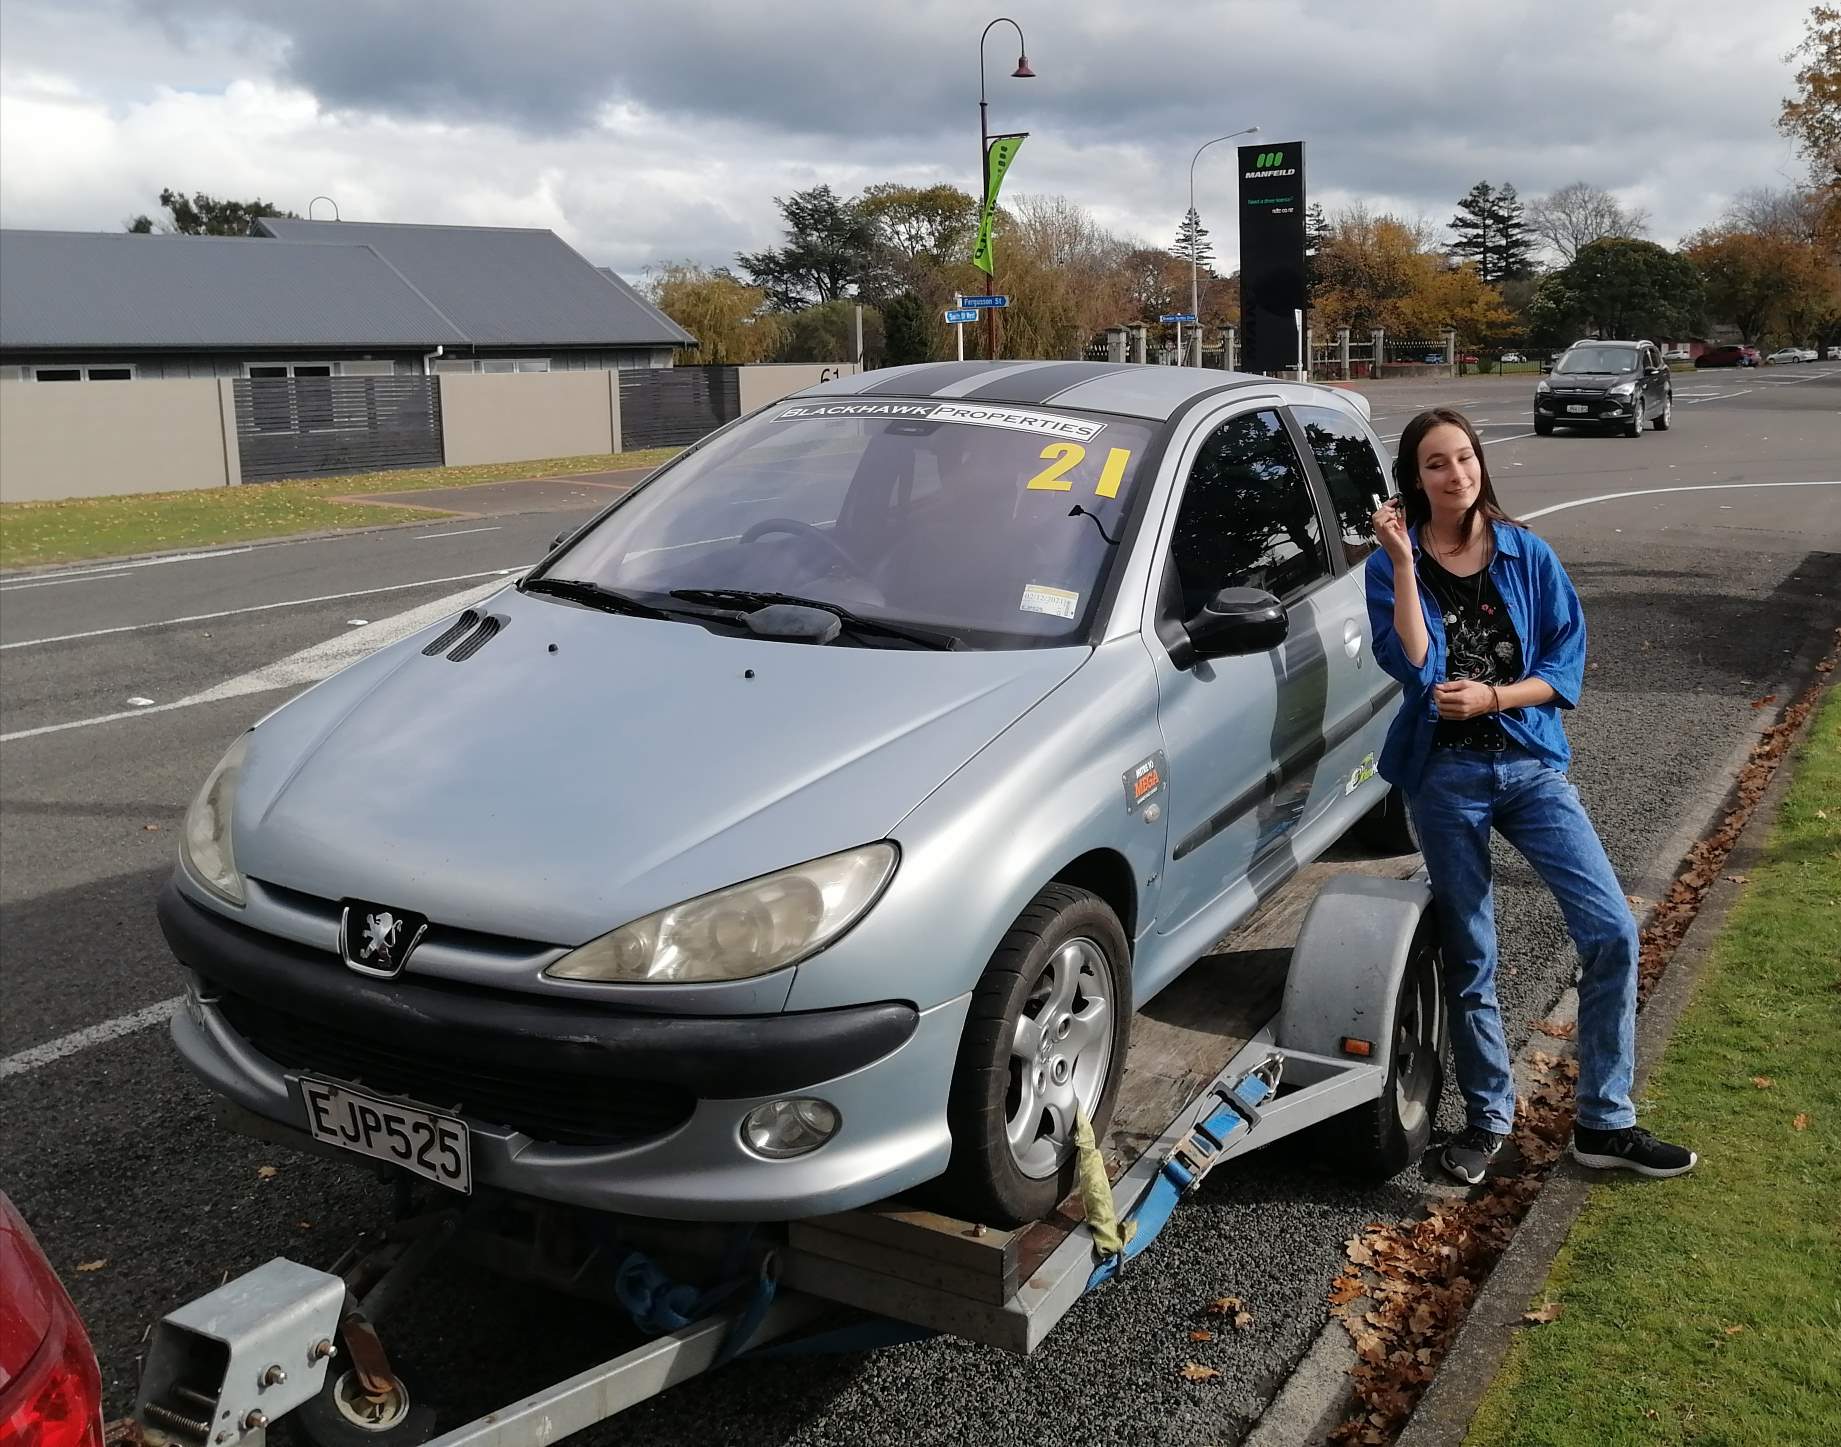
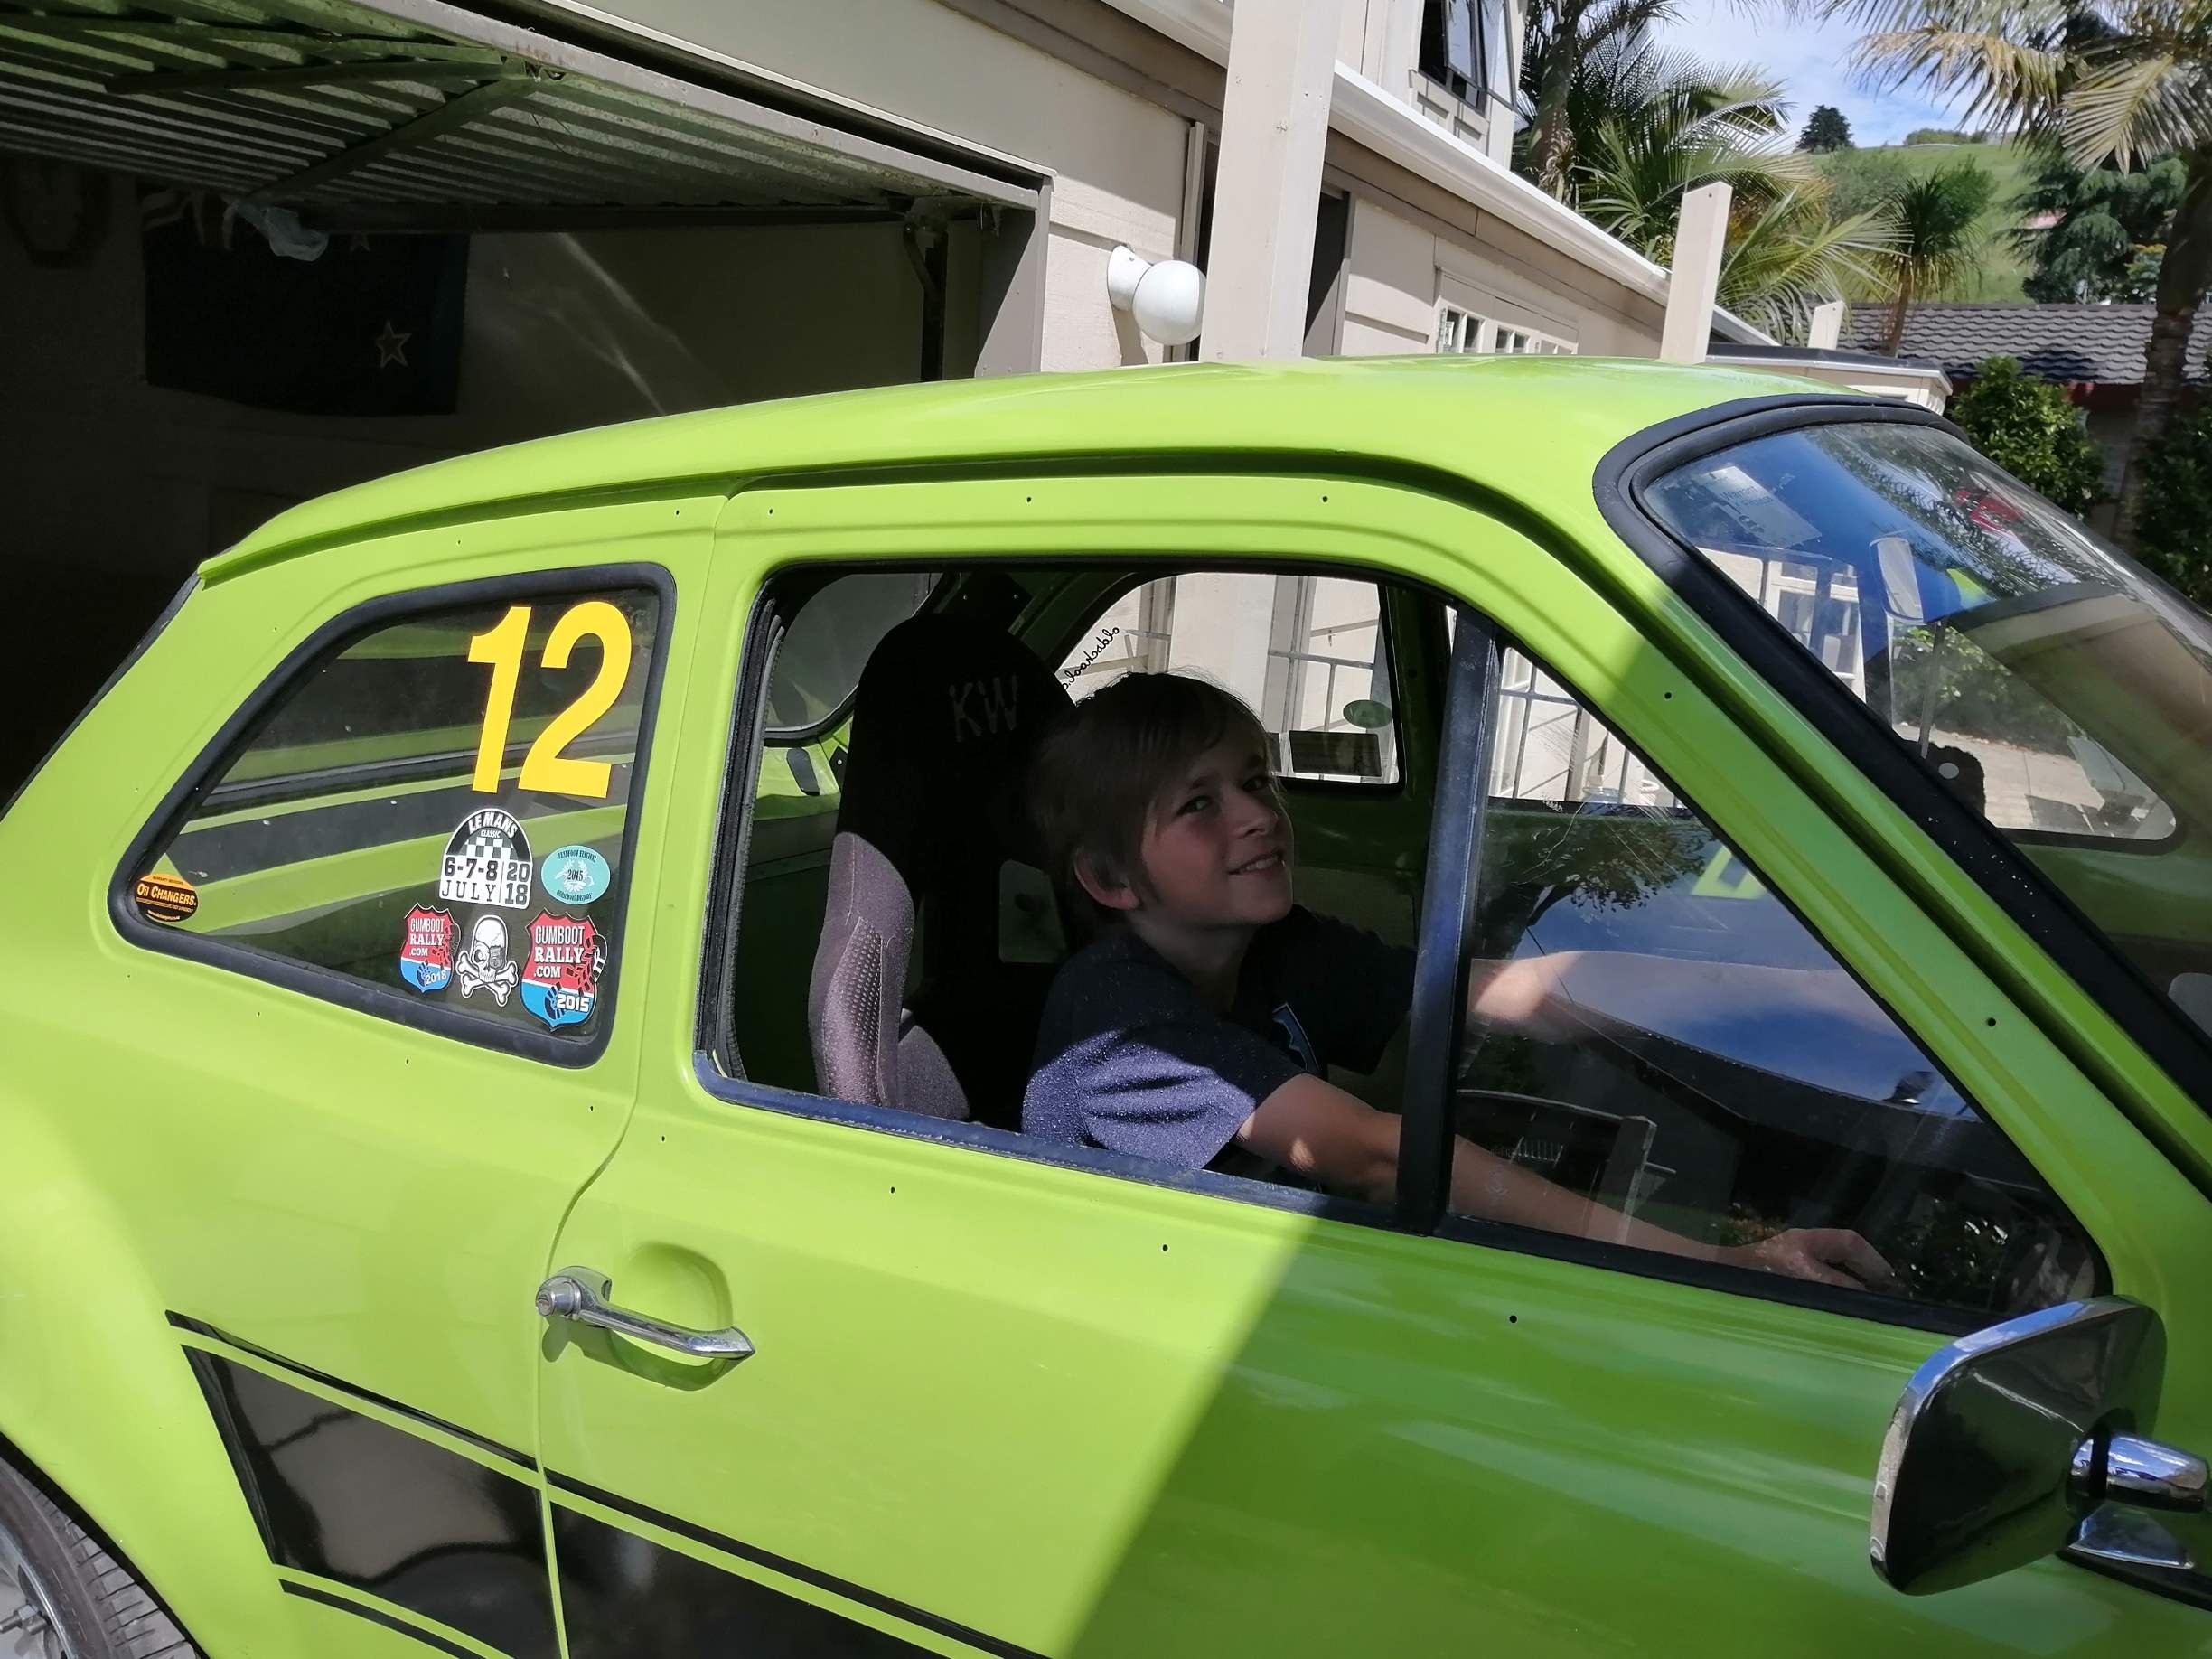
After blowing the old V6 up at Hampton ~2013 I did get distracted when shopping for an engine and buying a nice turboed one that came in a car -the Geisha. And then numerous other escorts, and a 2 year sabbatical on a boat with the family, and move to new town etc etc etc... Yeah, its been far too long. Scary how young the kids look, even just at the top of the current page! Let put it this way the kids were 7 and 5 the last time I drove her and this month I bought the kids their own race car. If they bin the Puglet I will be sad, but no where near as sad as if they bin Felicity the escort. And for a front tugger its so much fun to drive. (Return spring is on the long list )
-
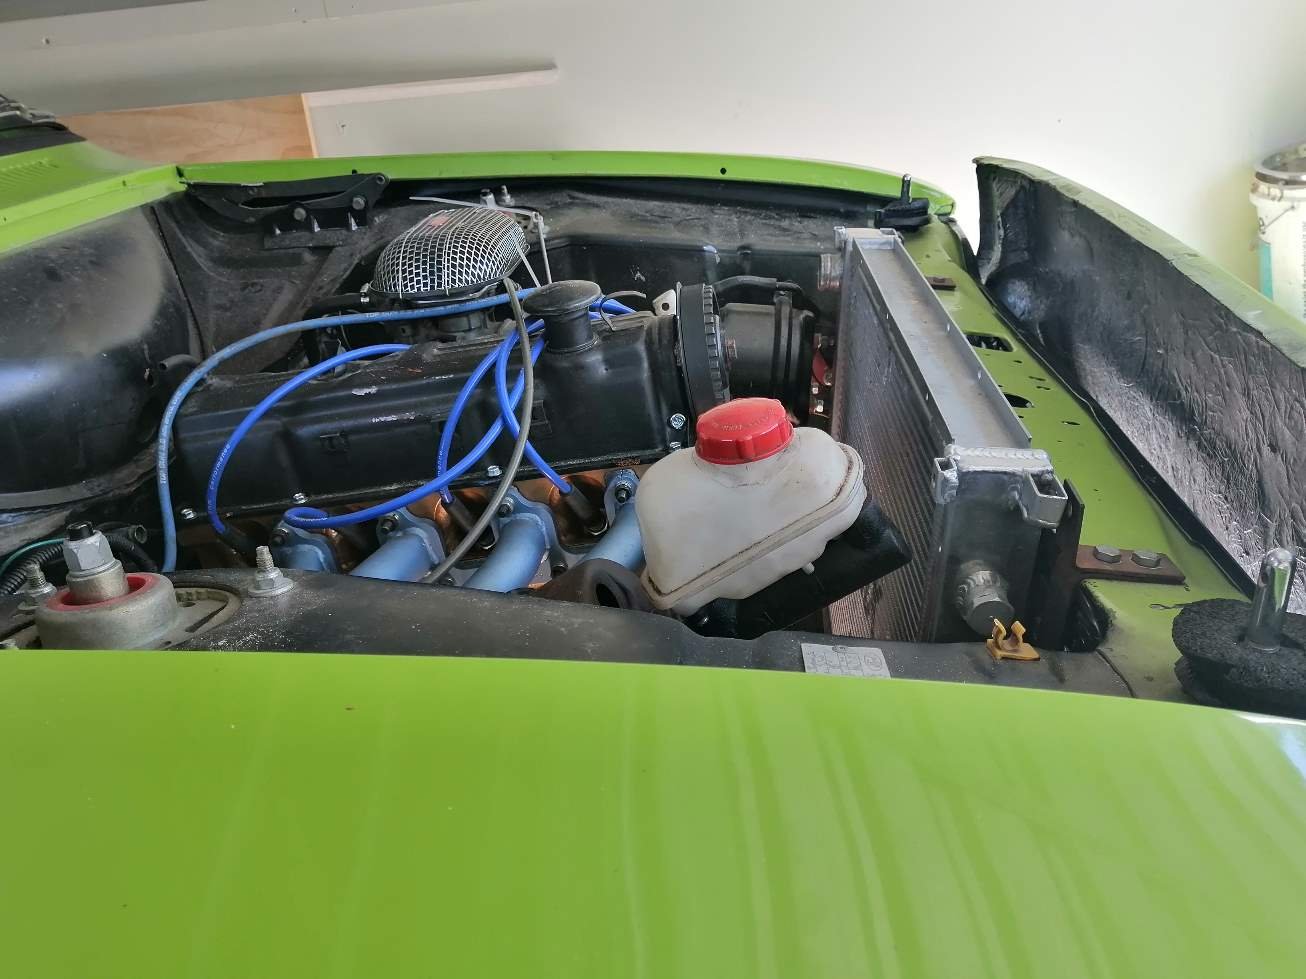
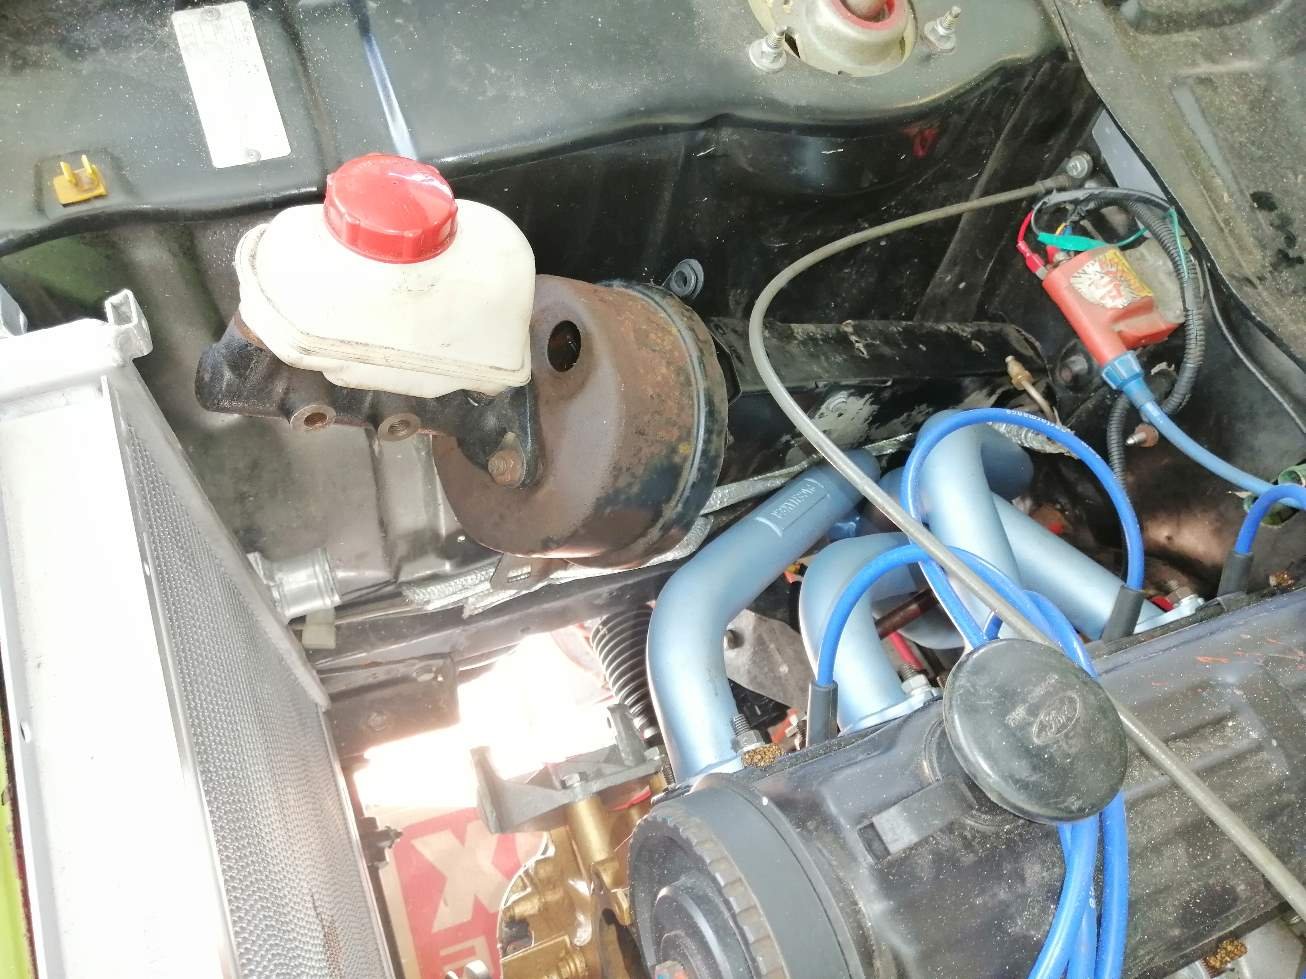
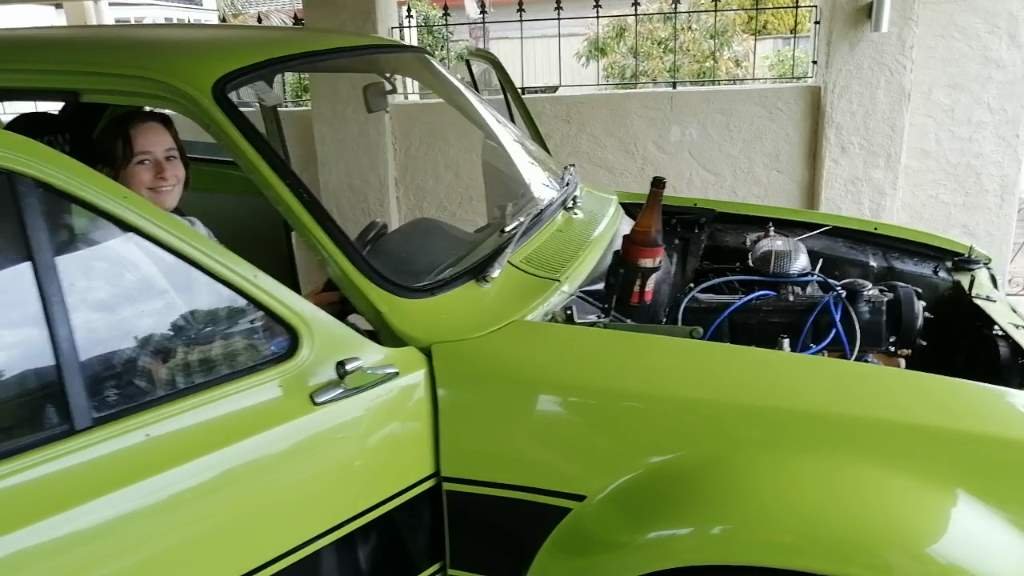
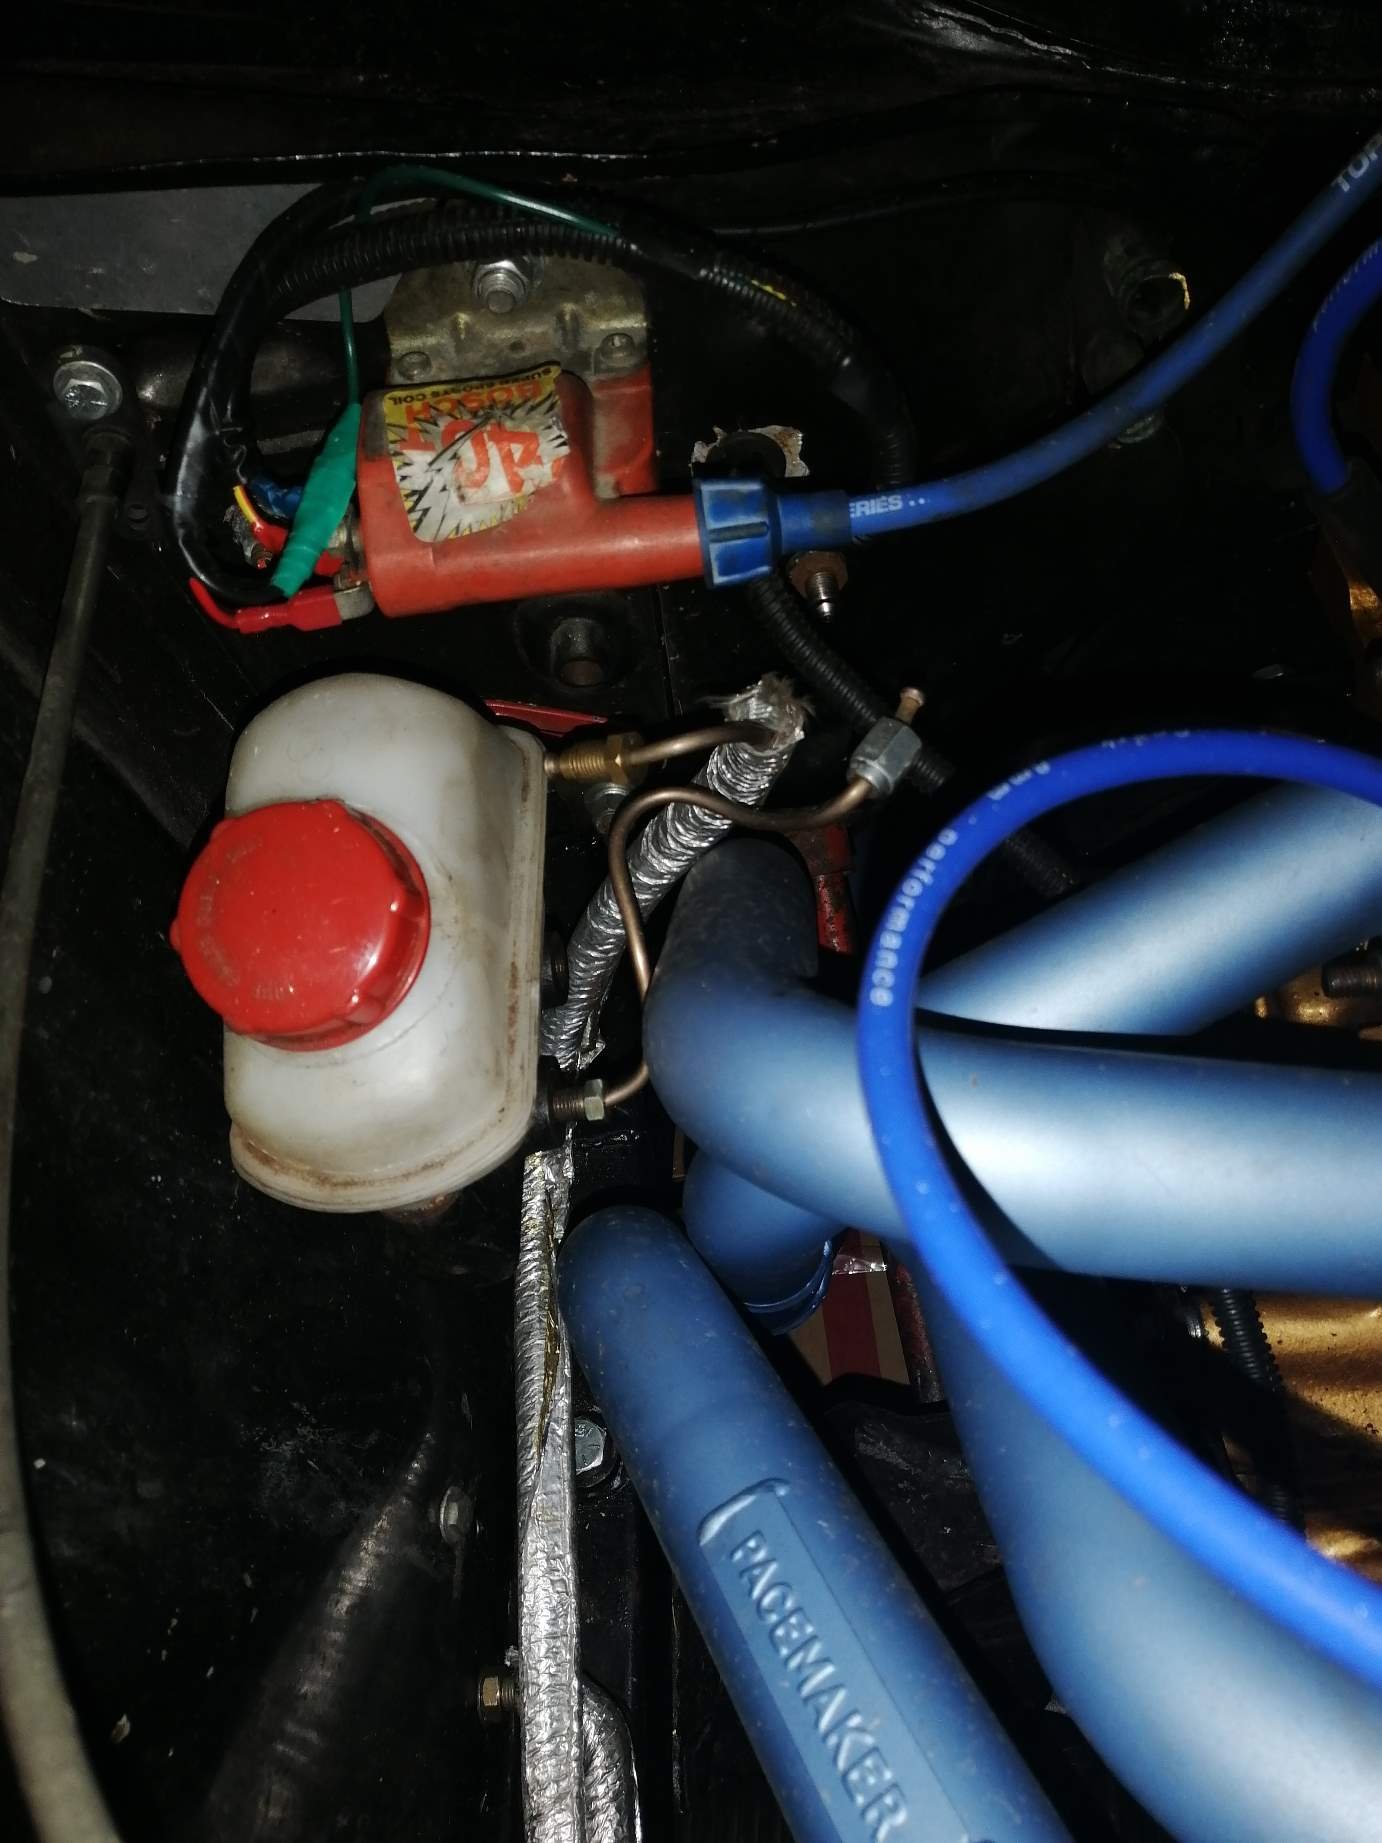
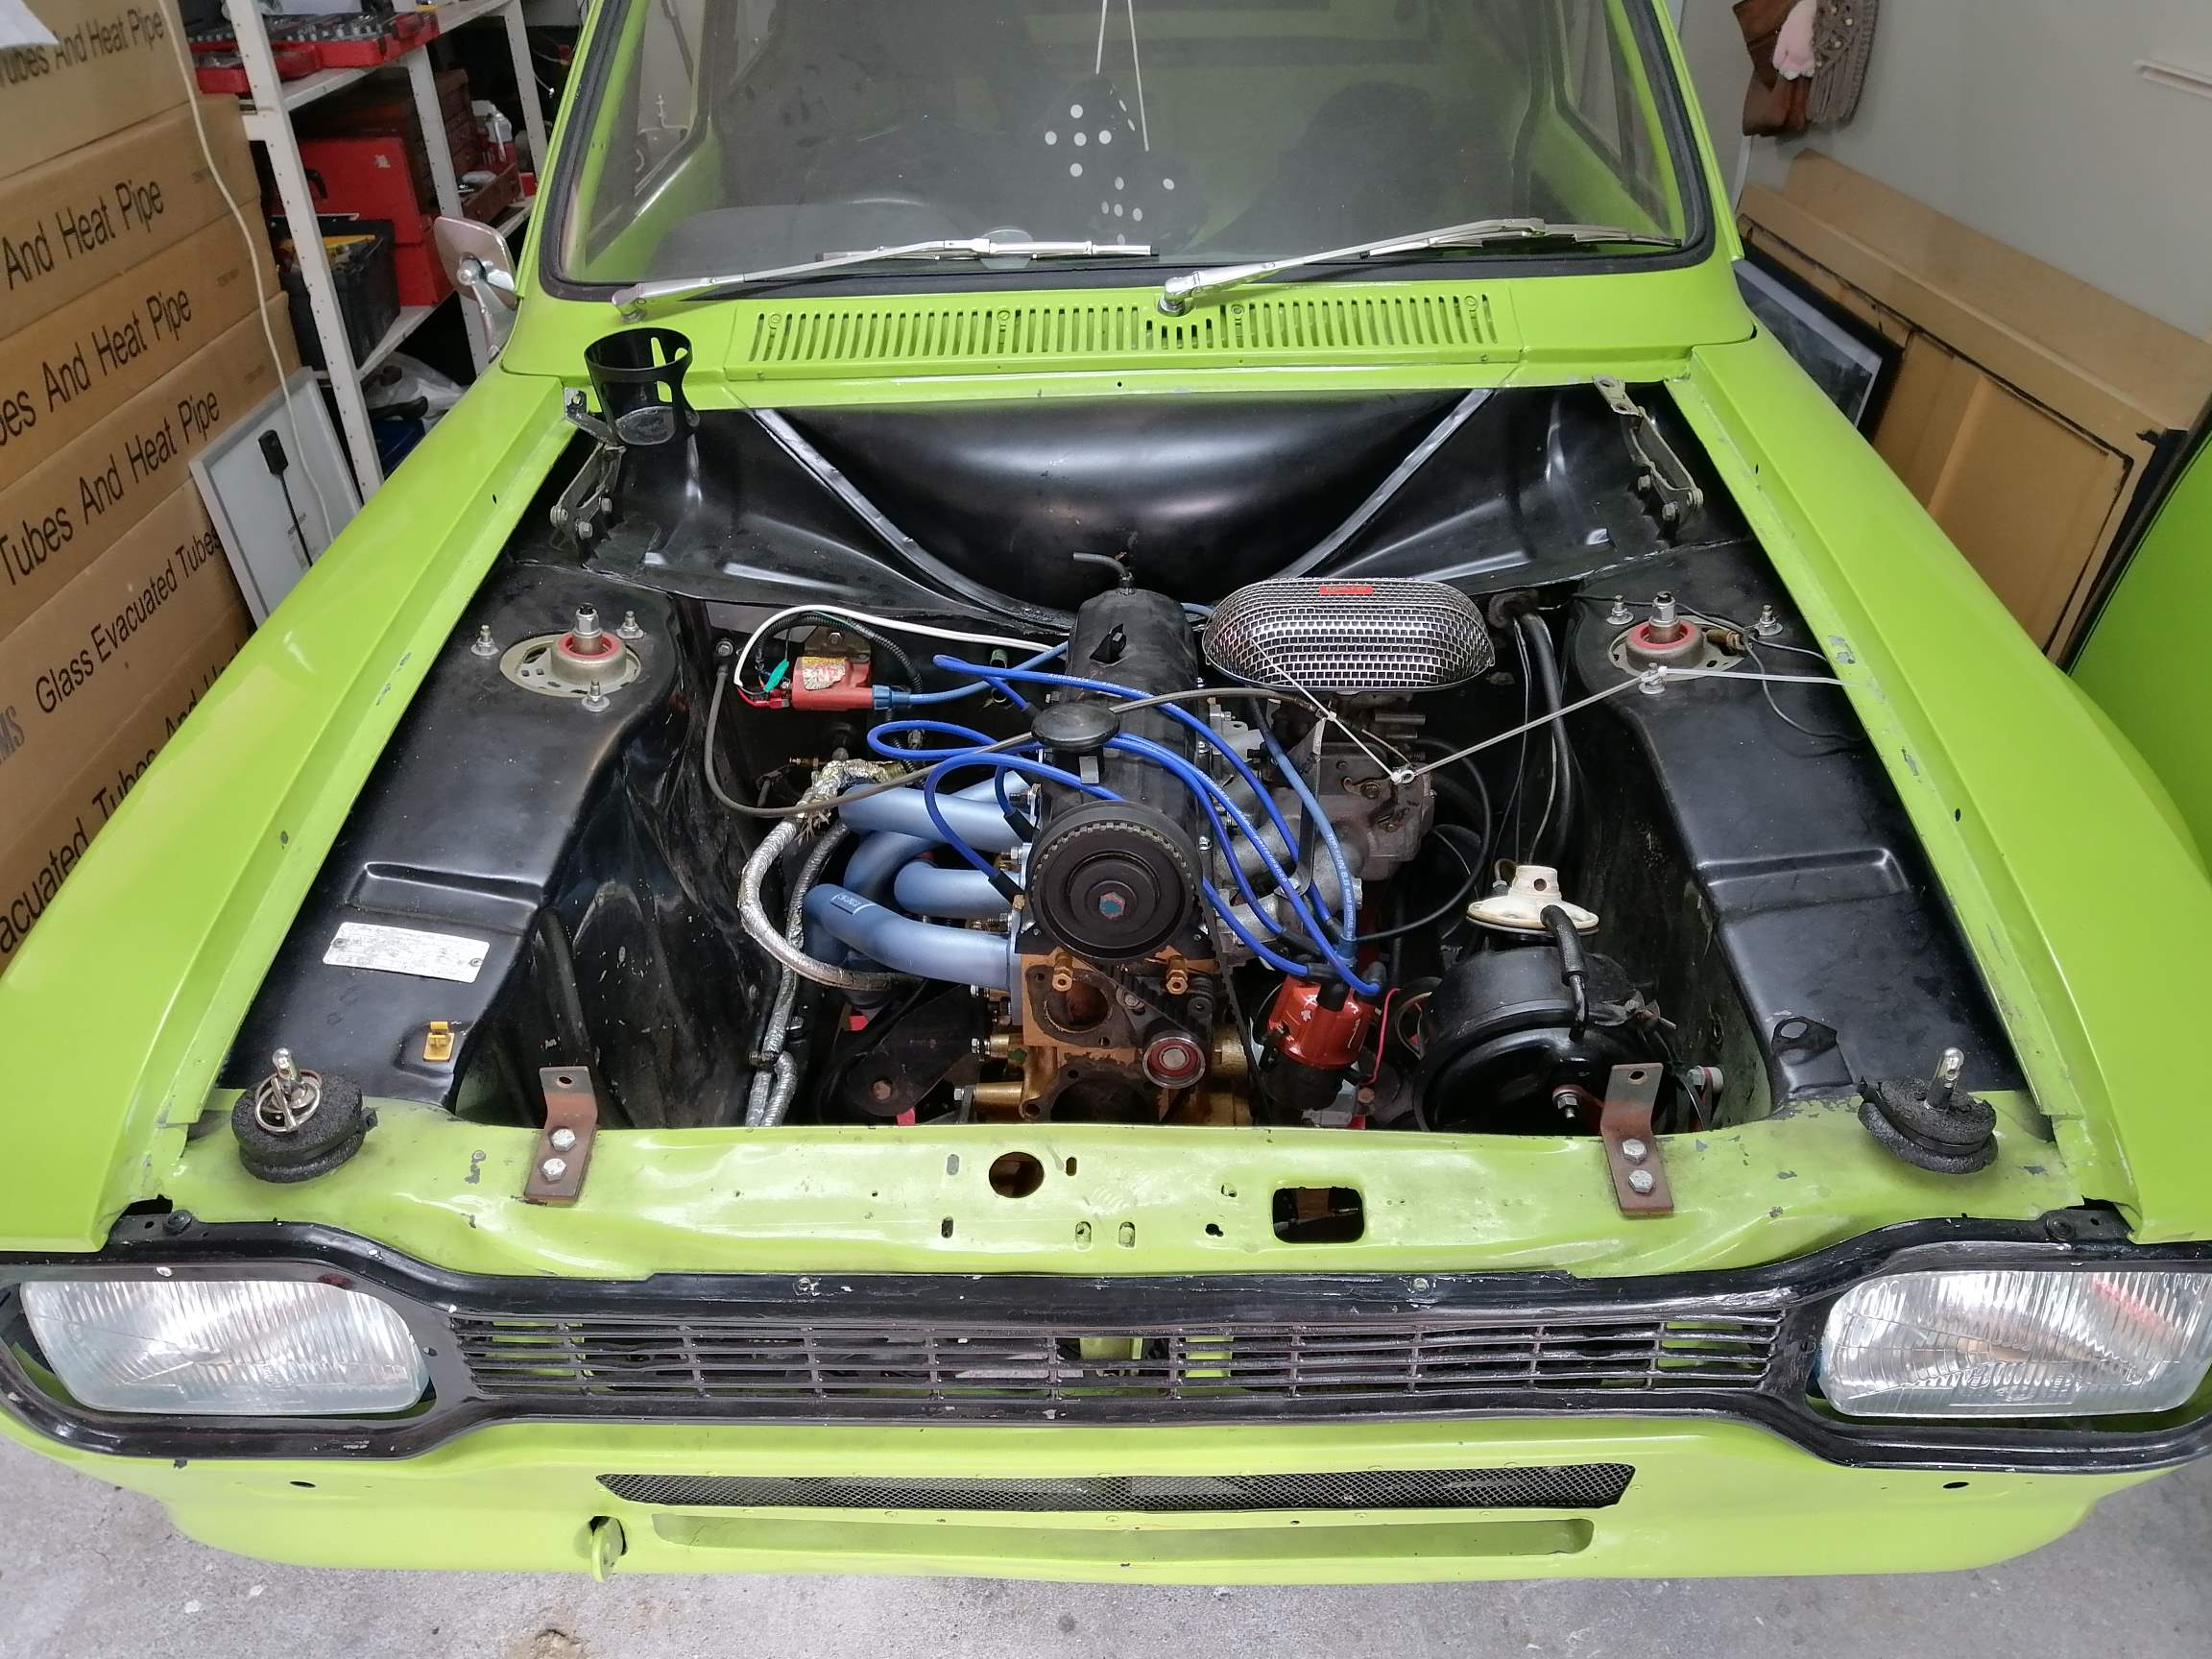
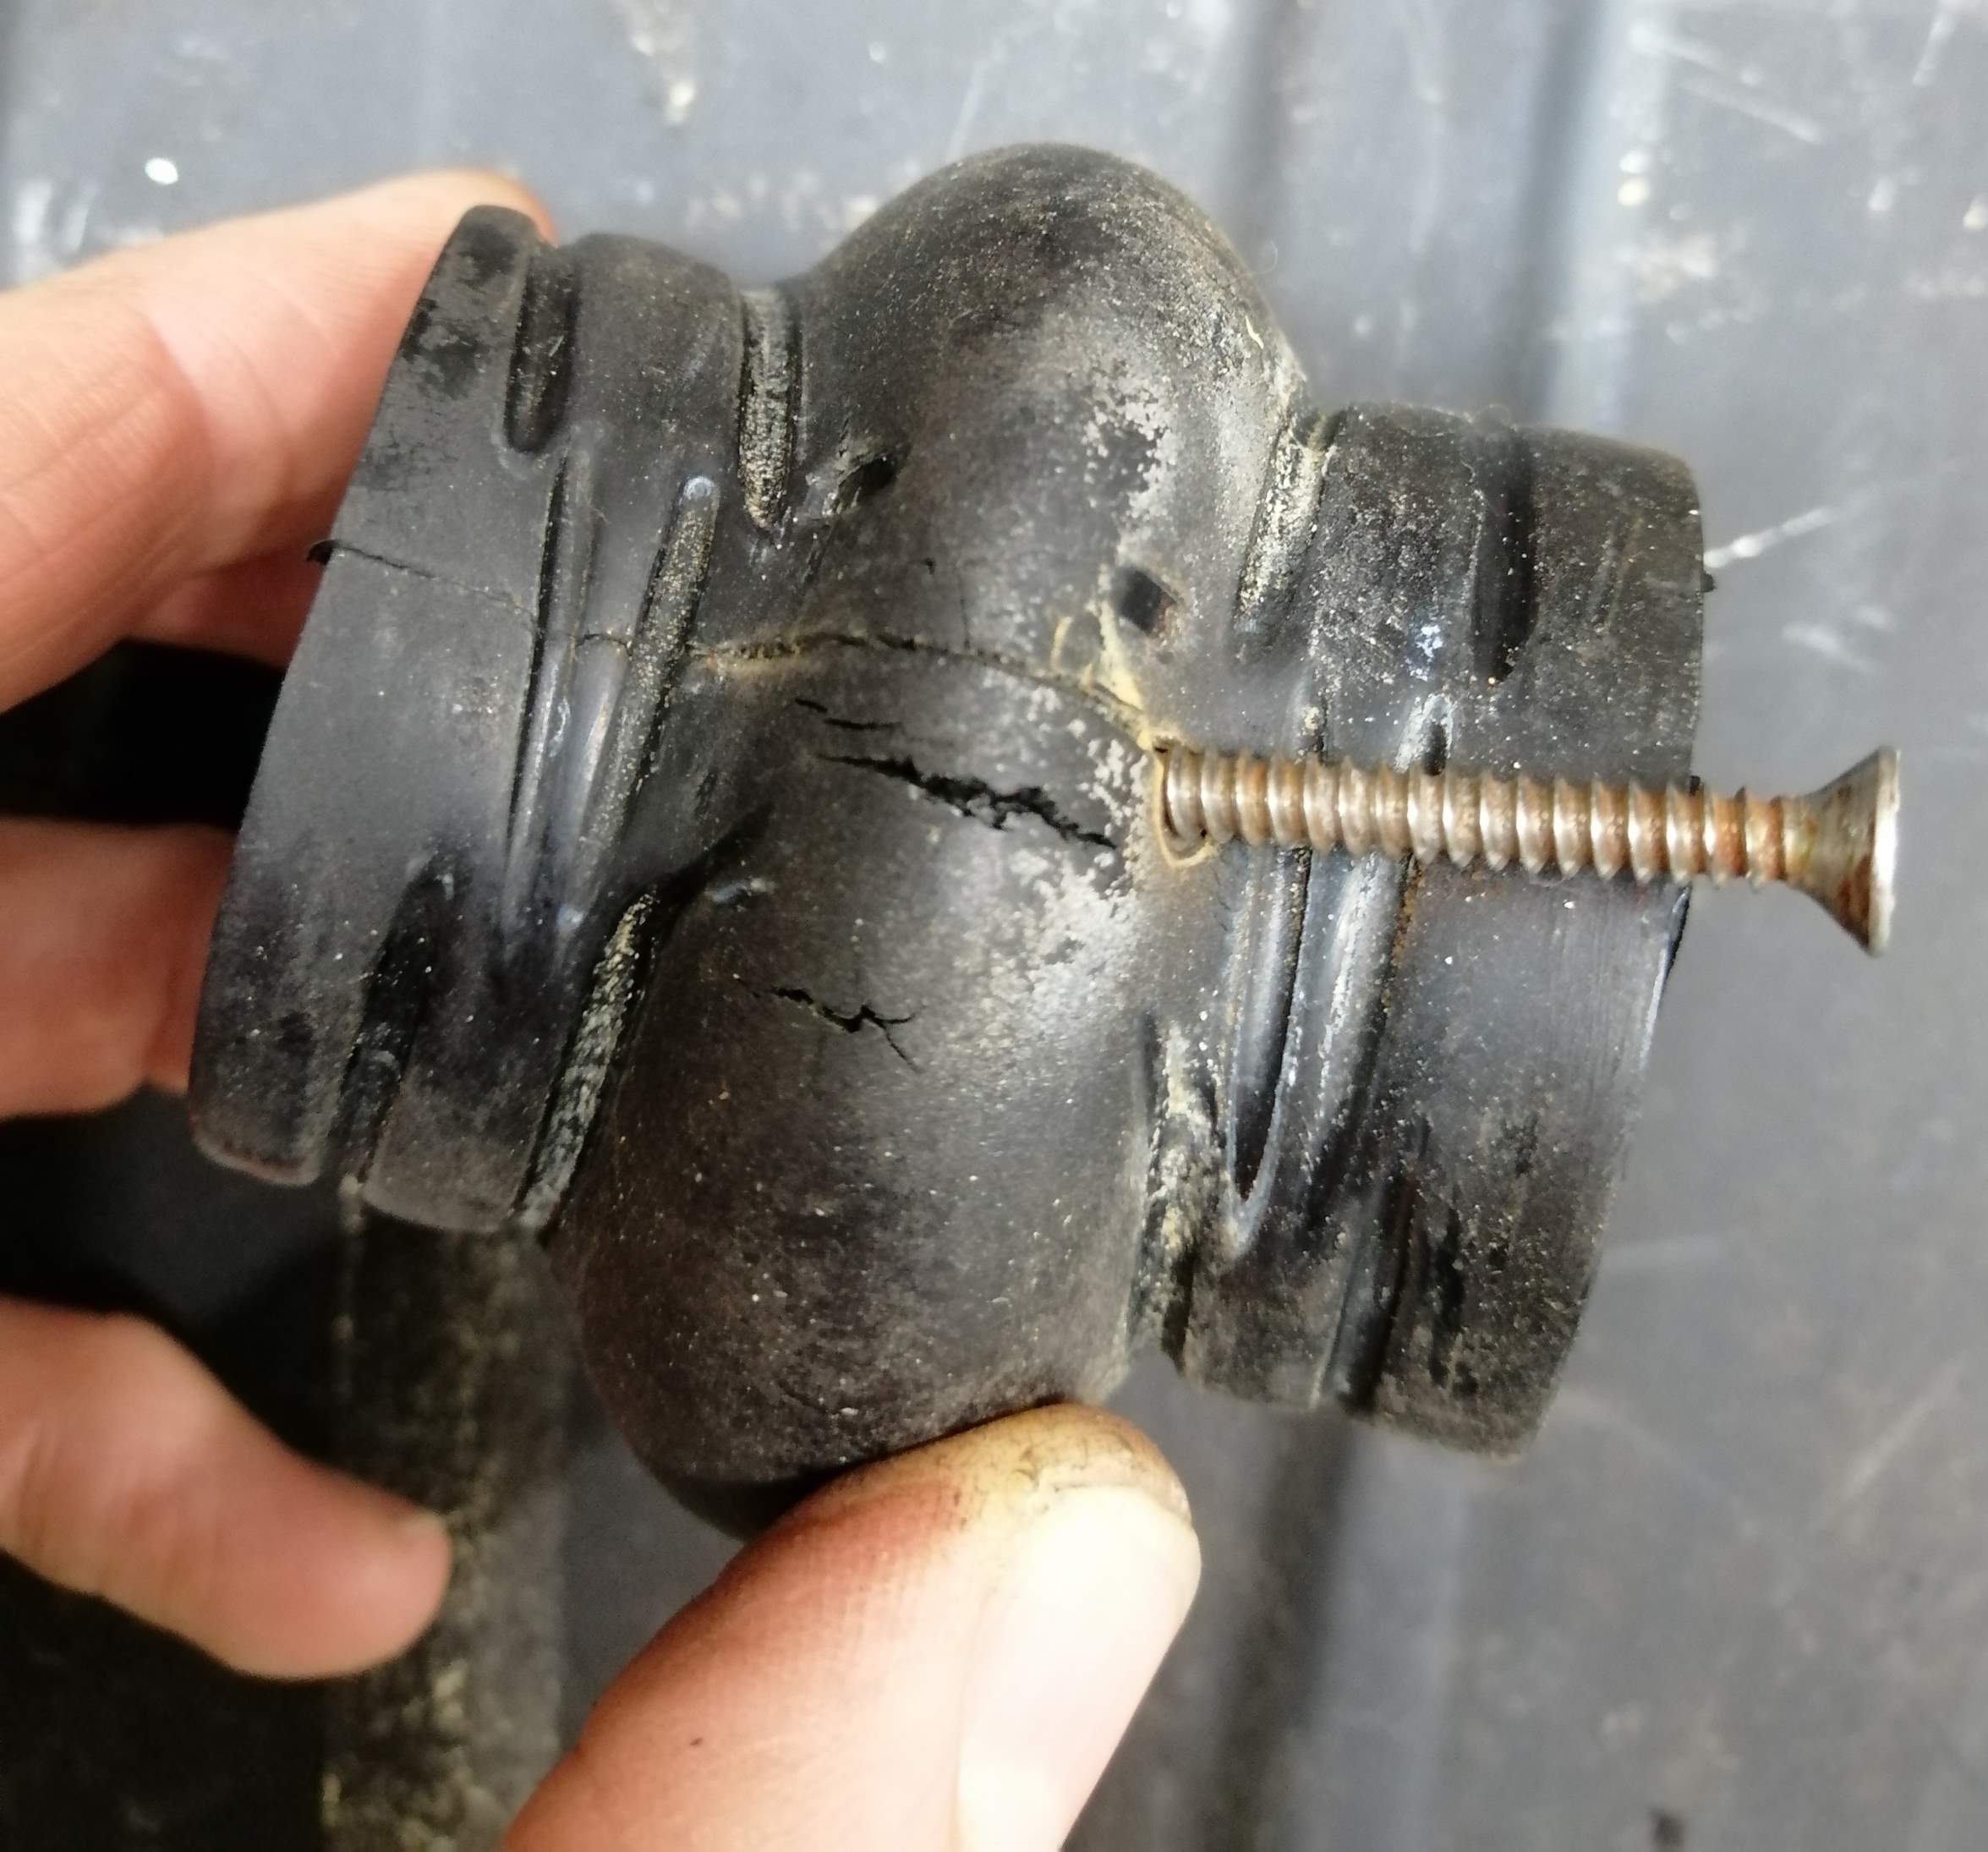
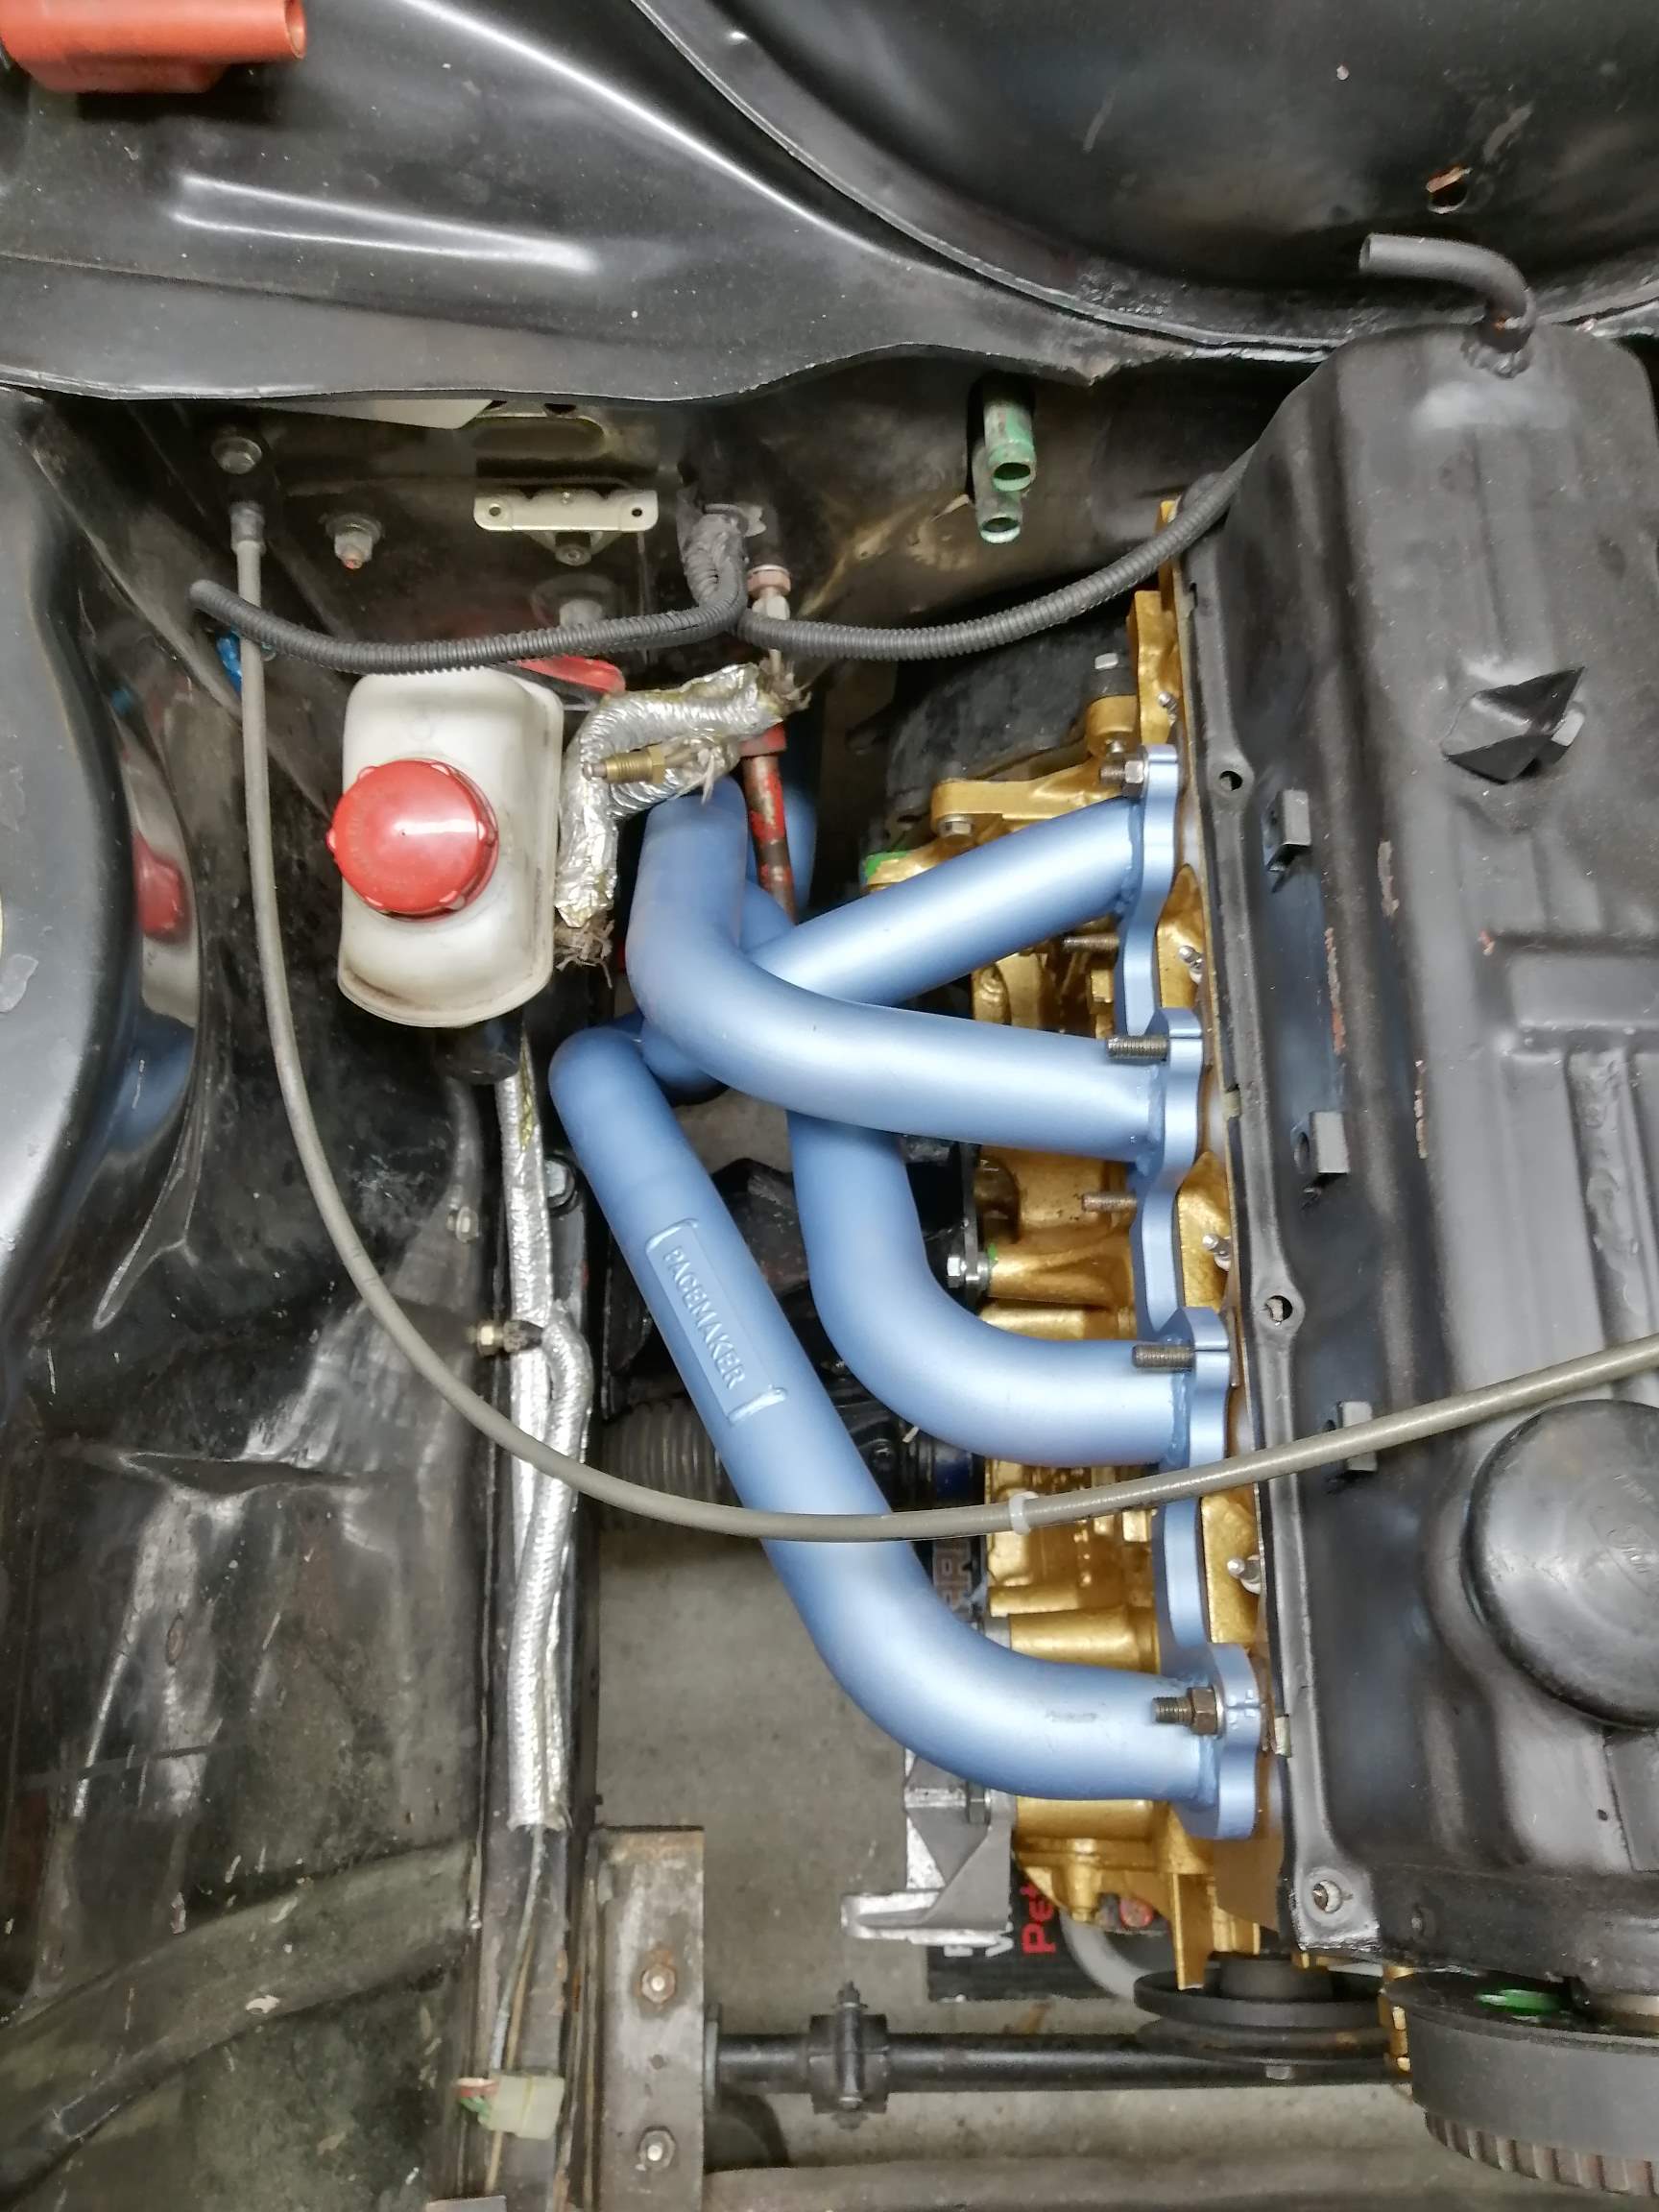
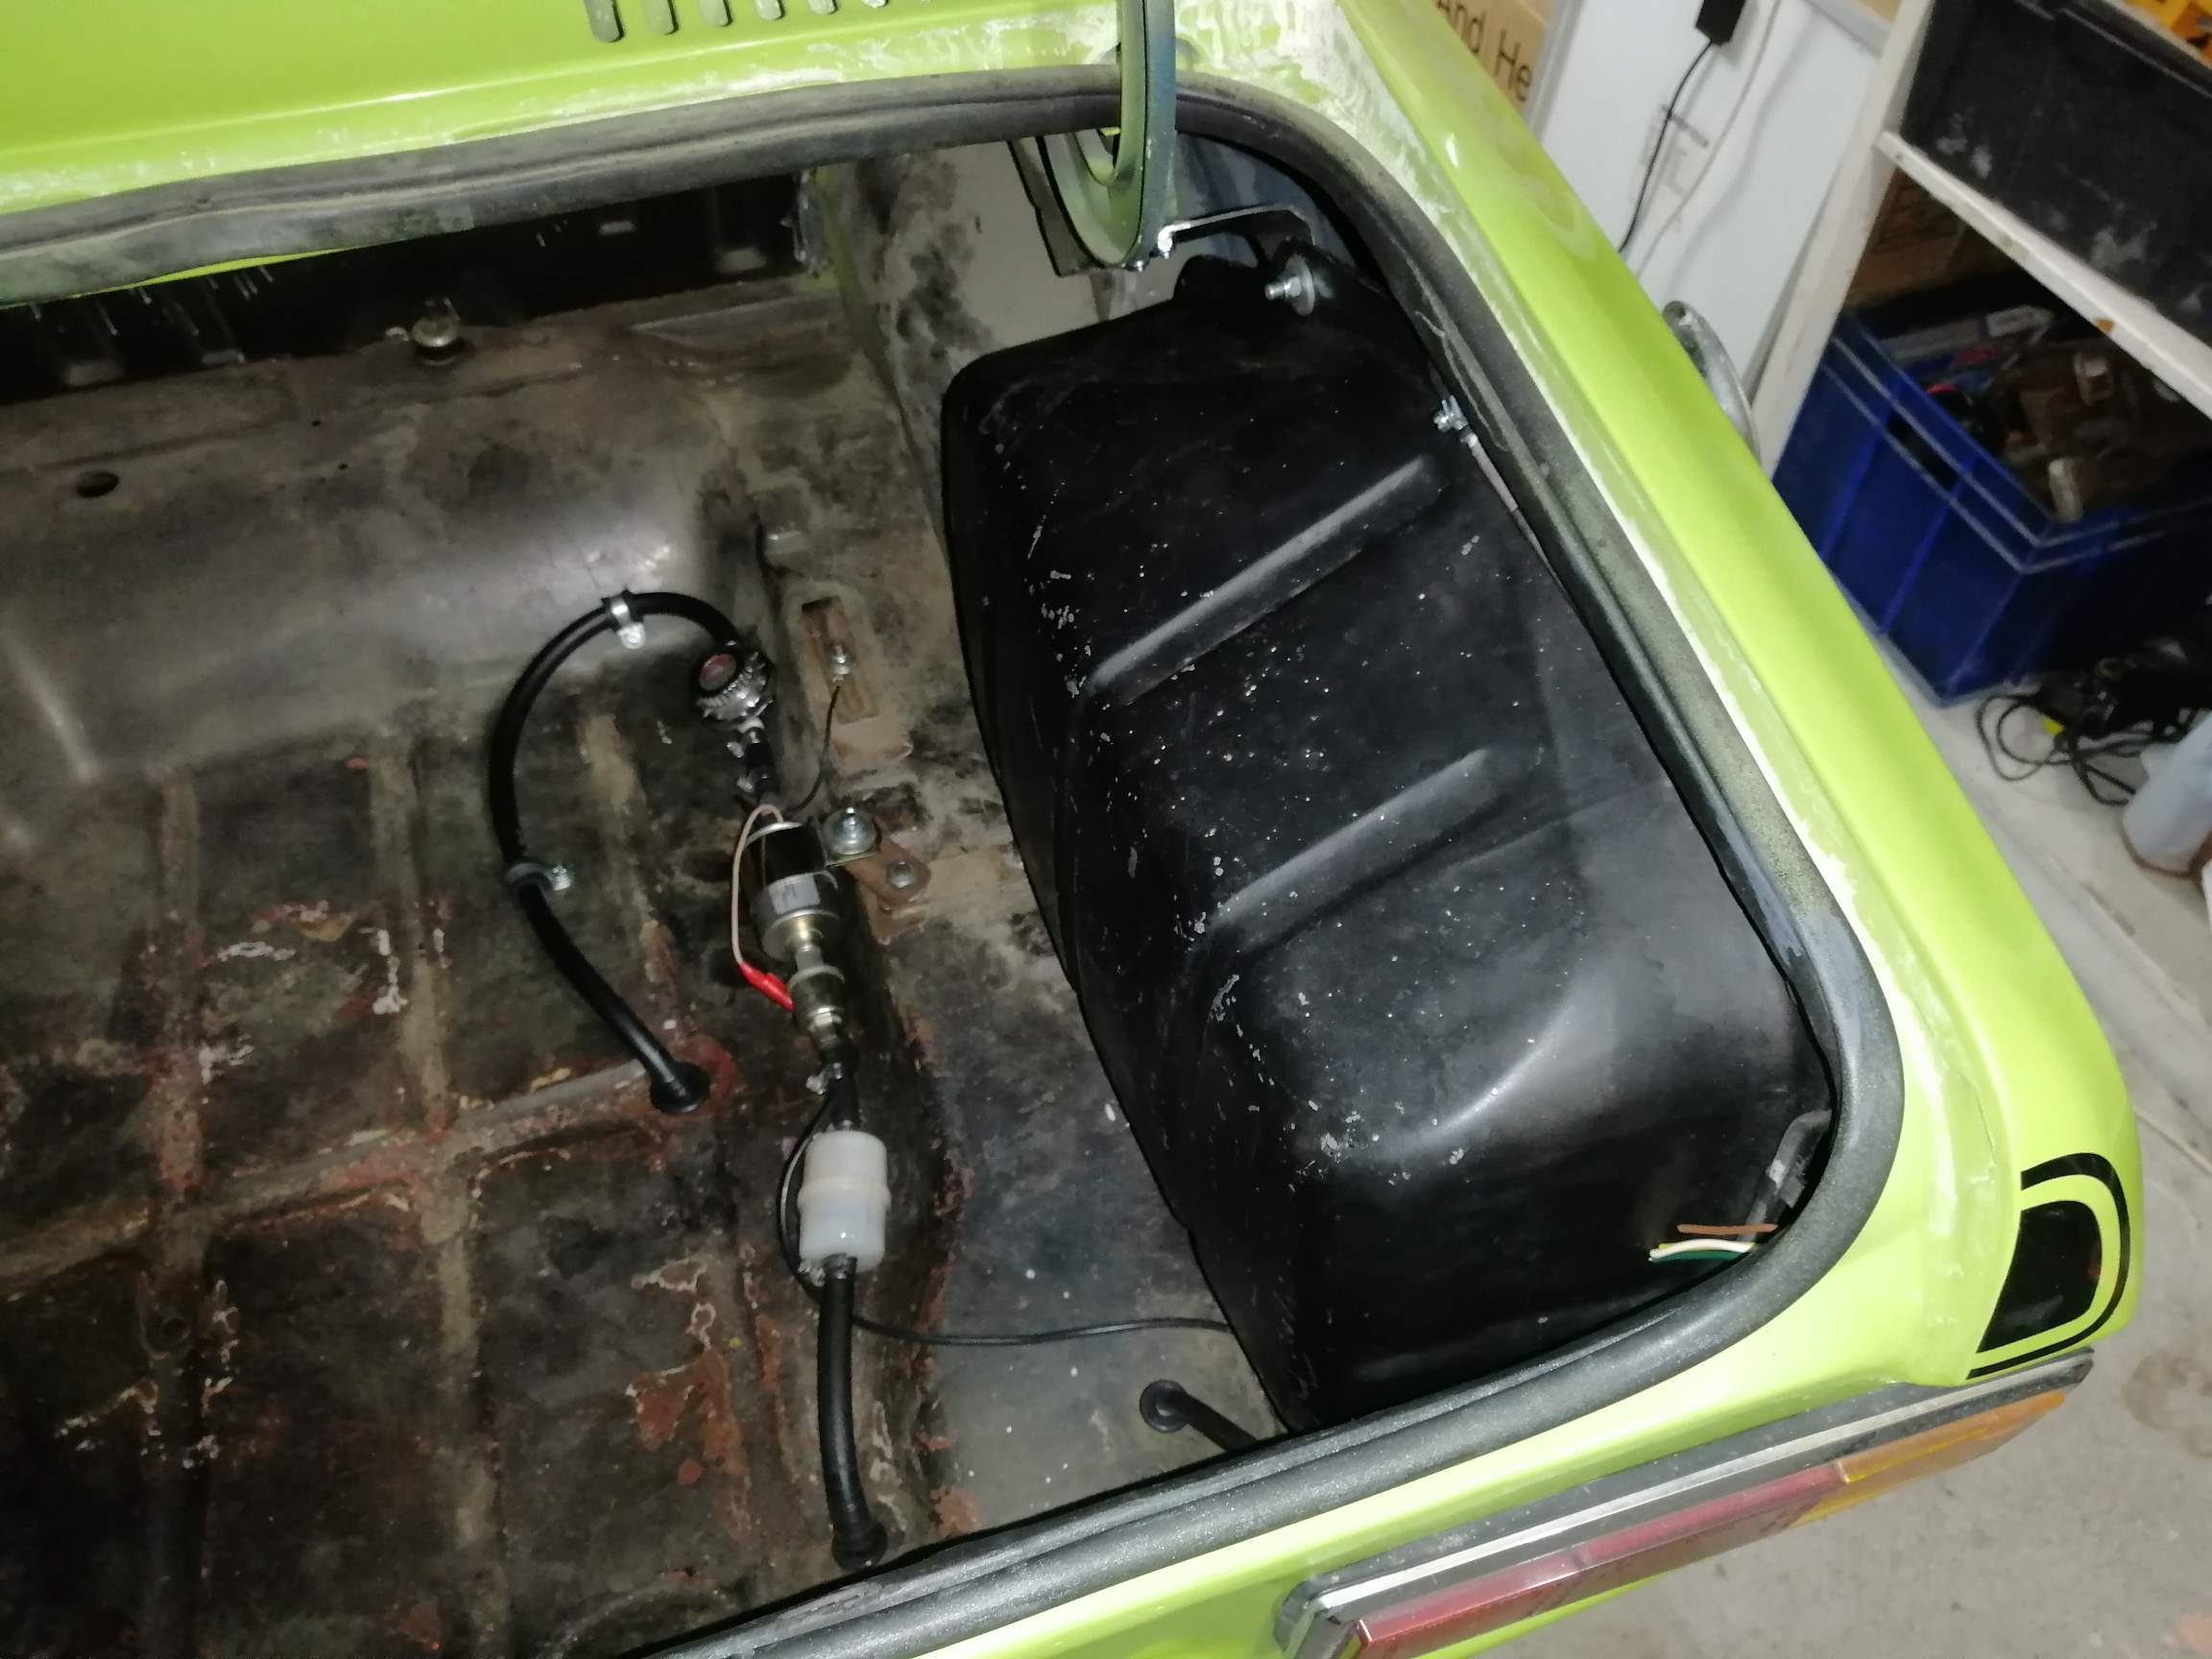
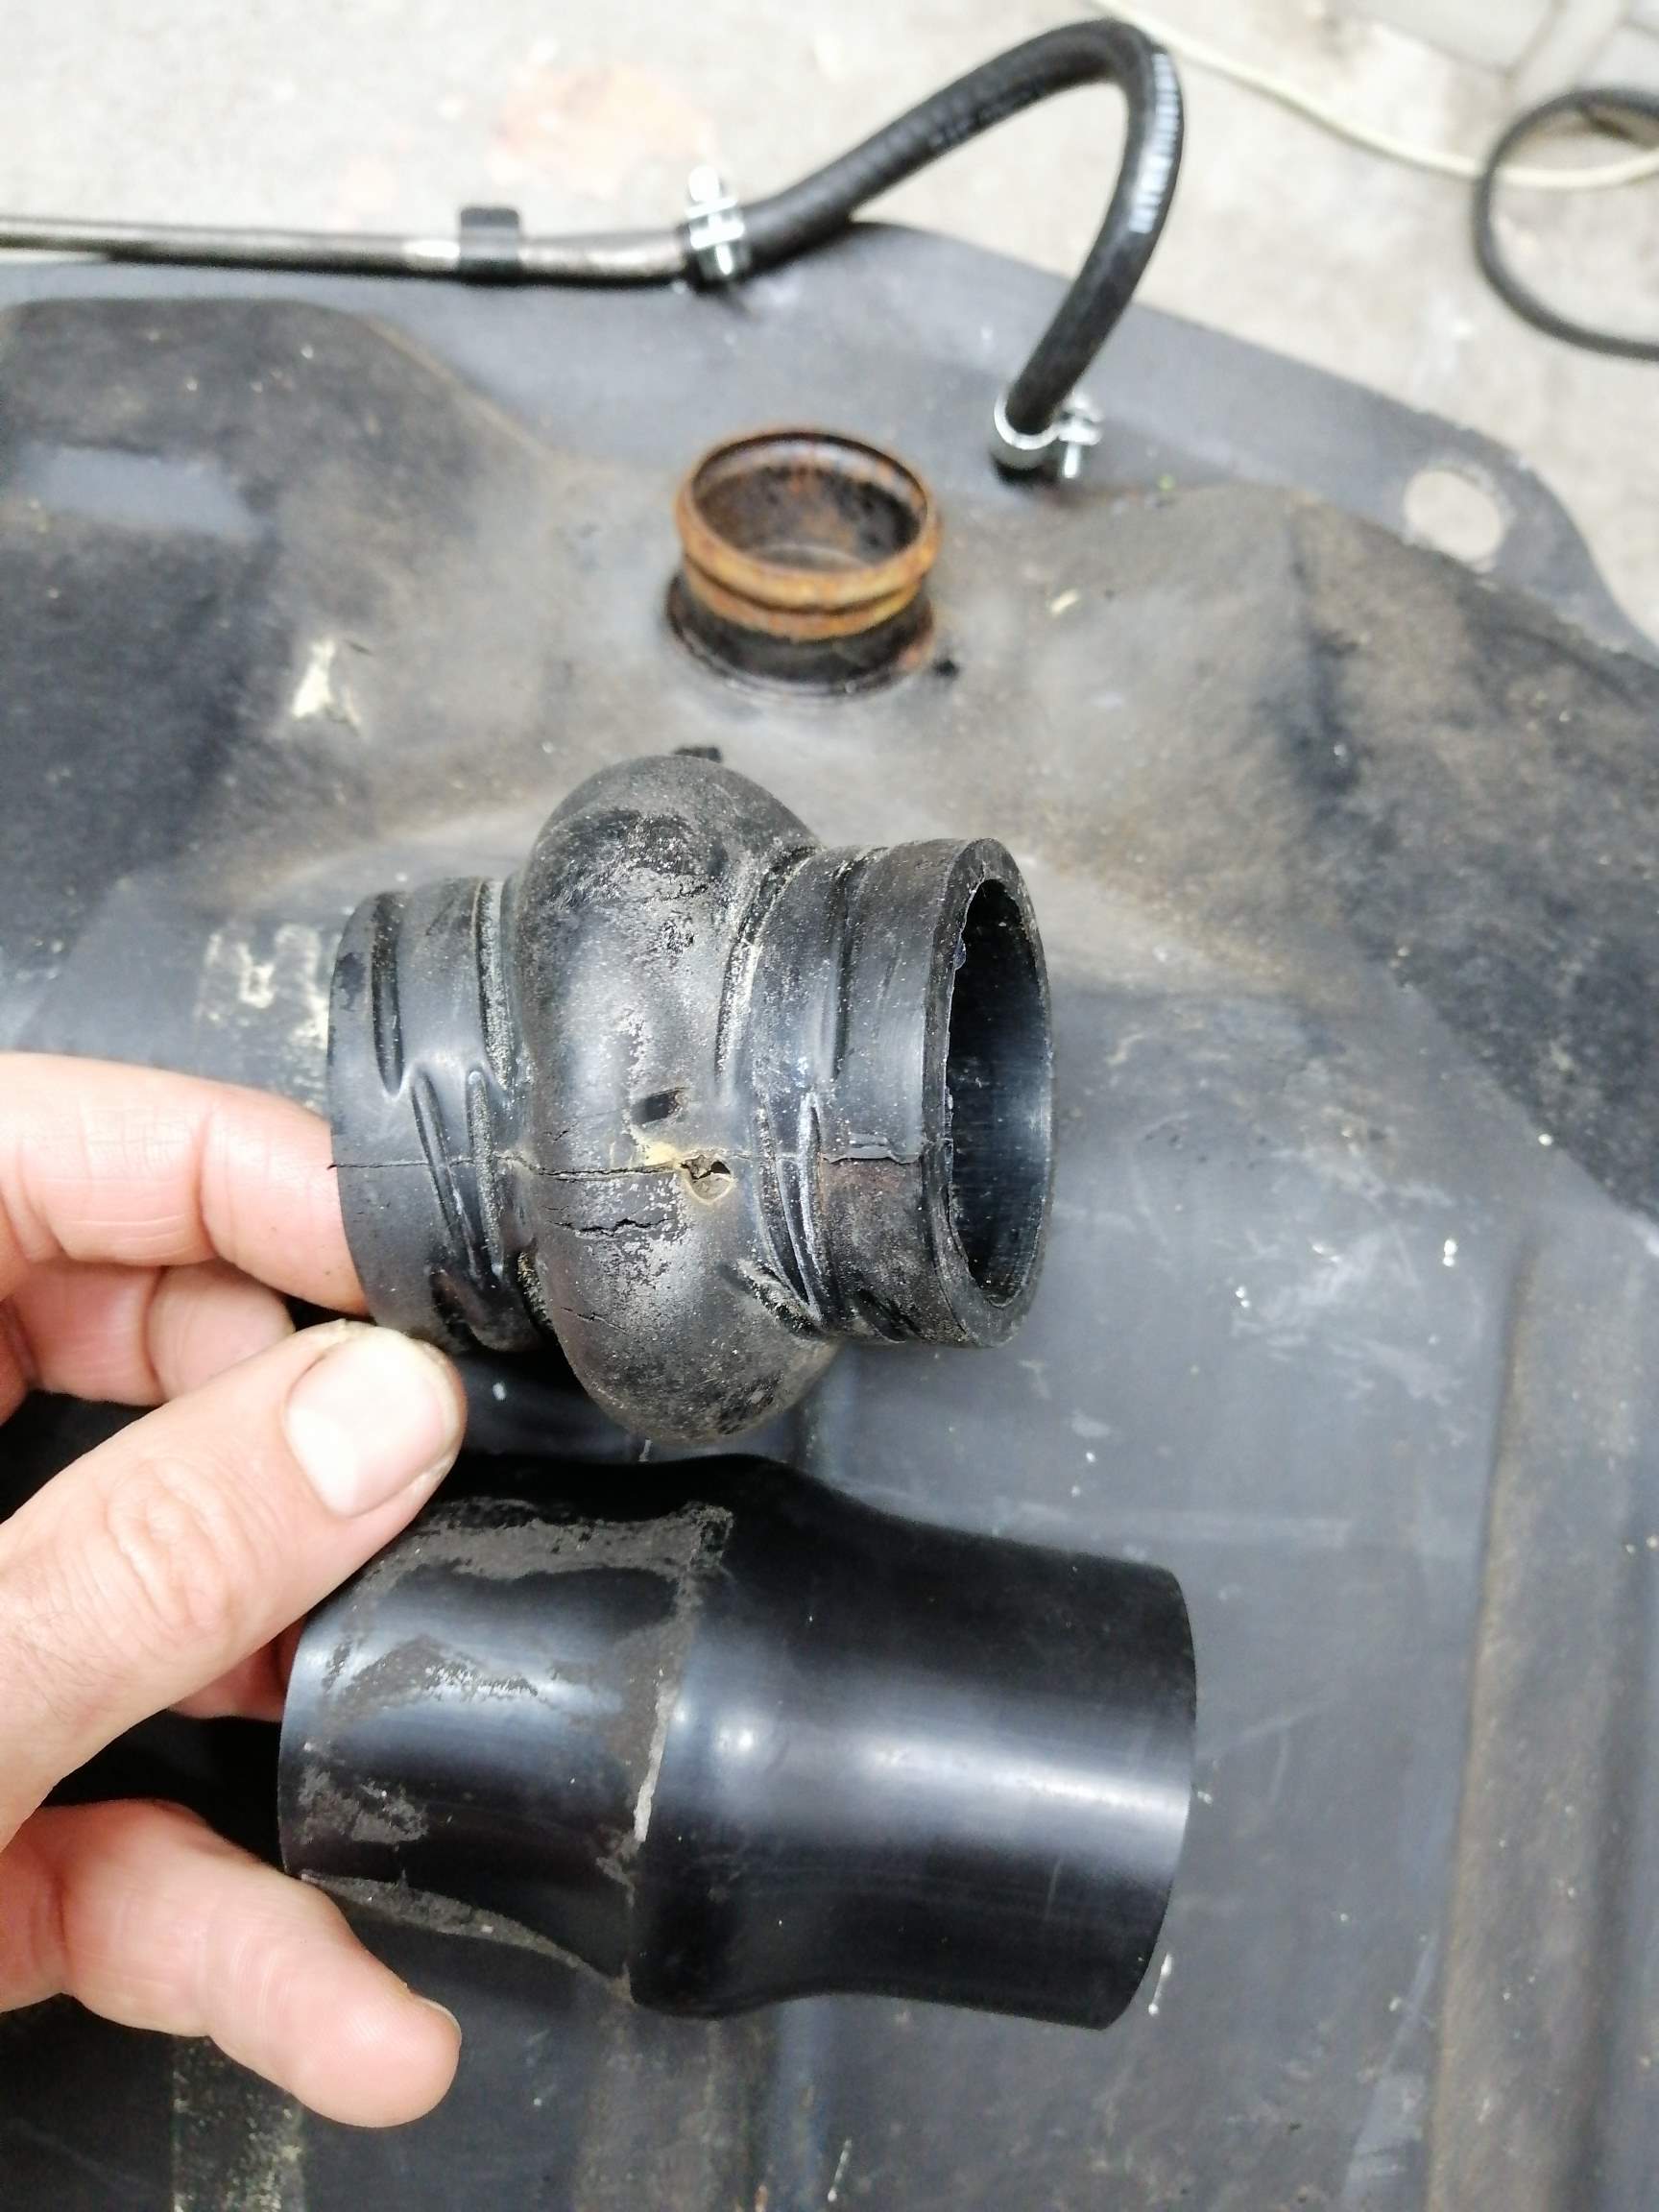
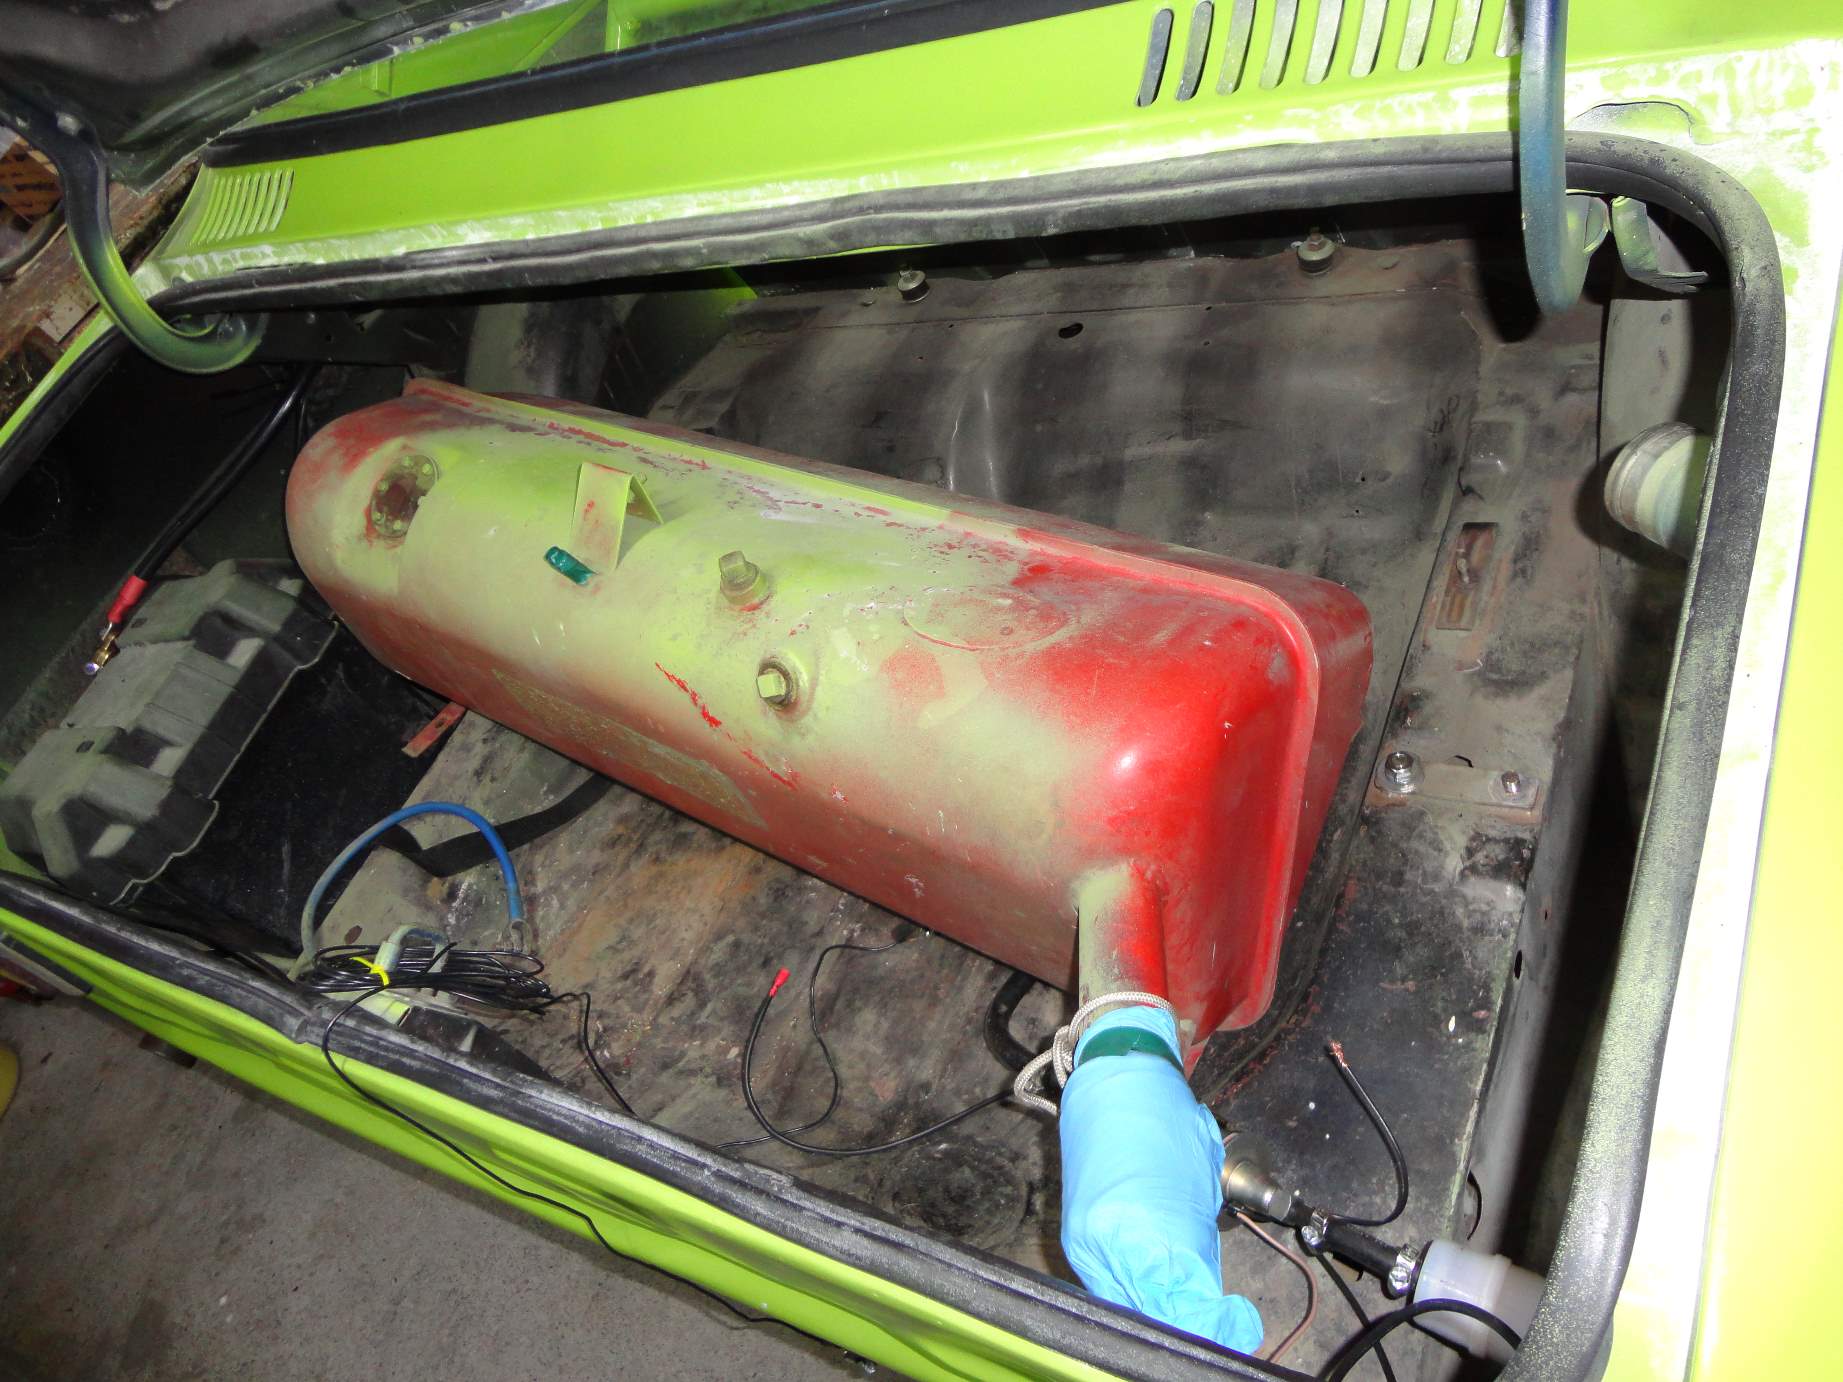
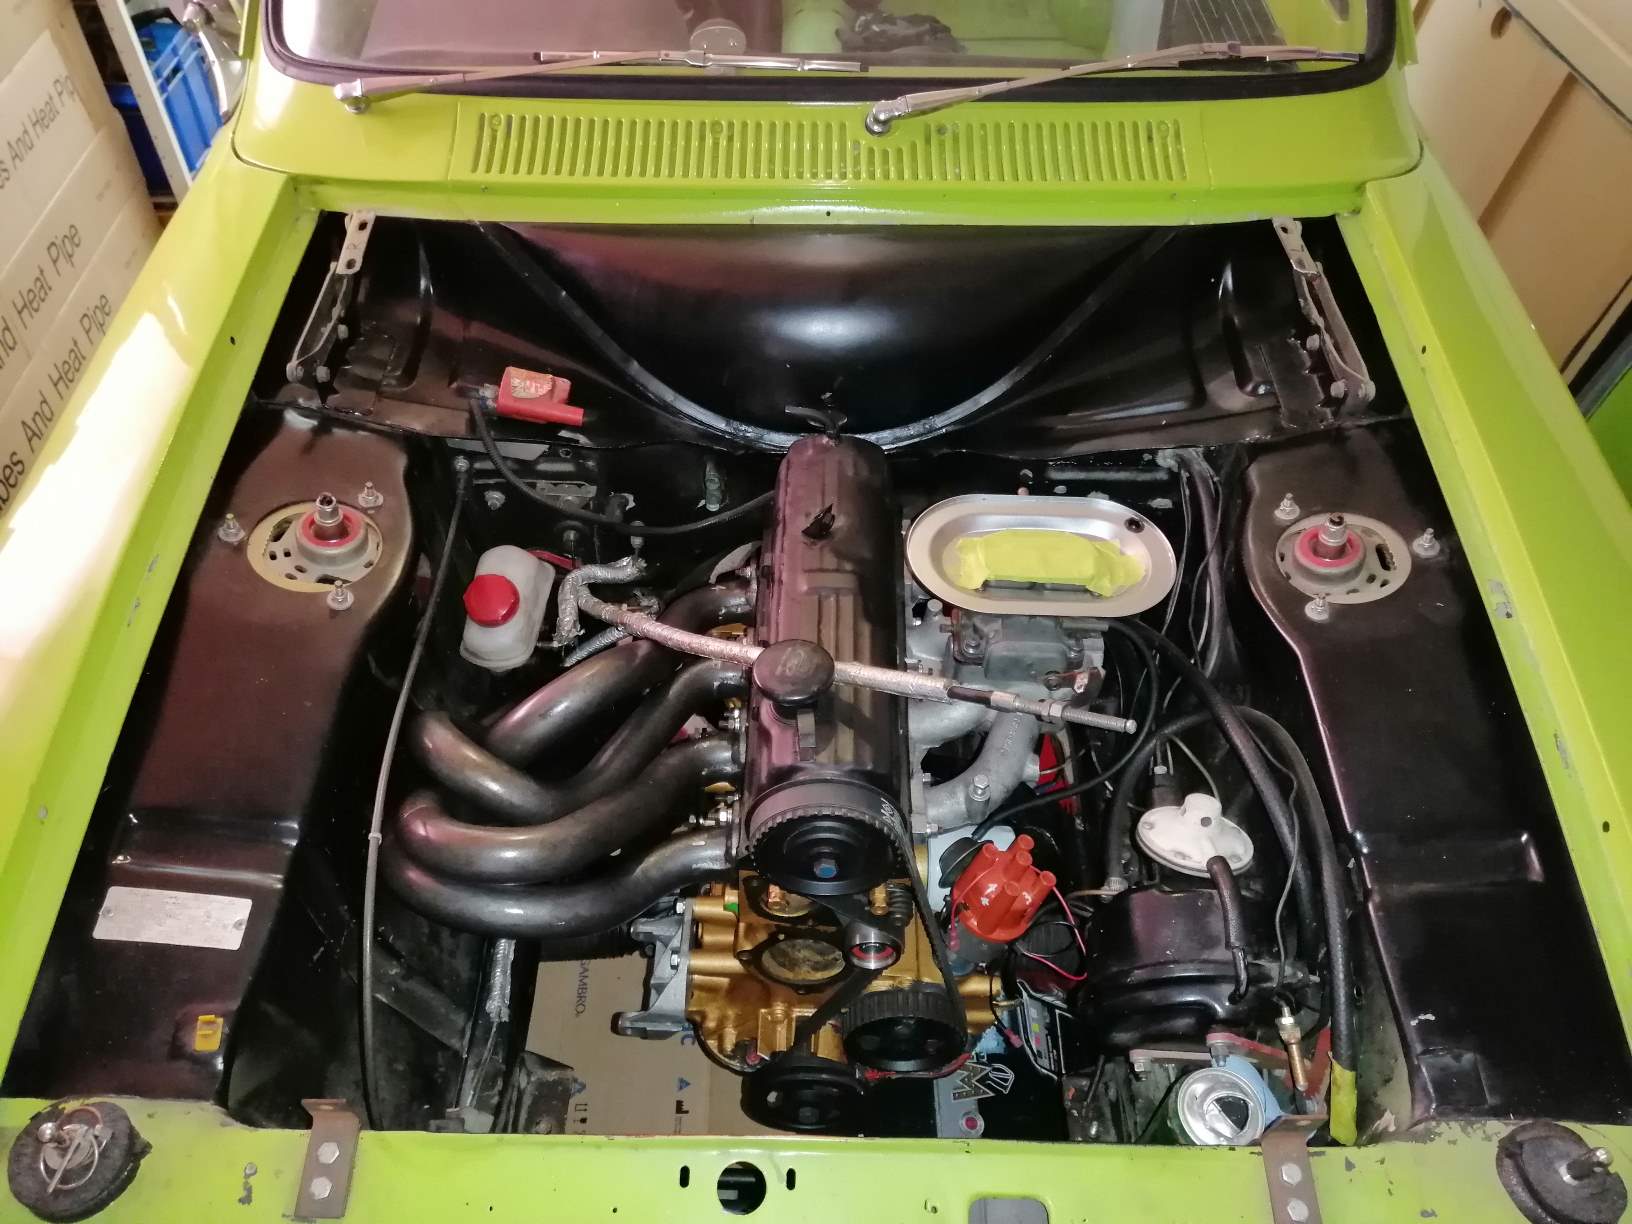
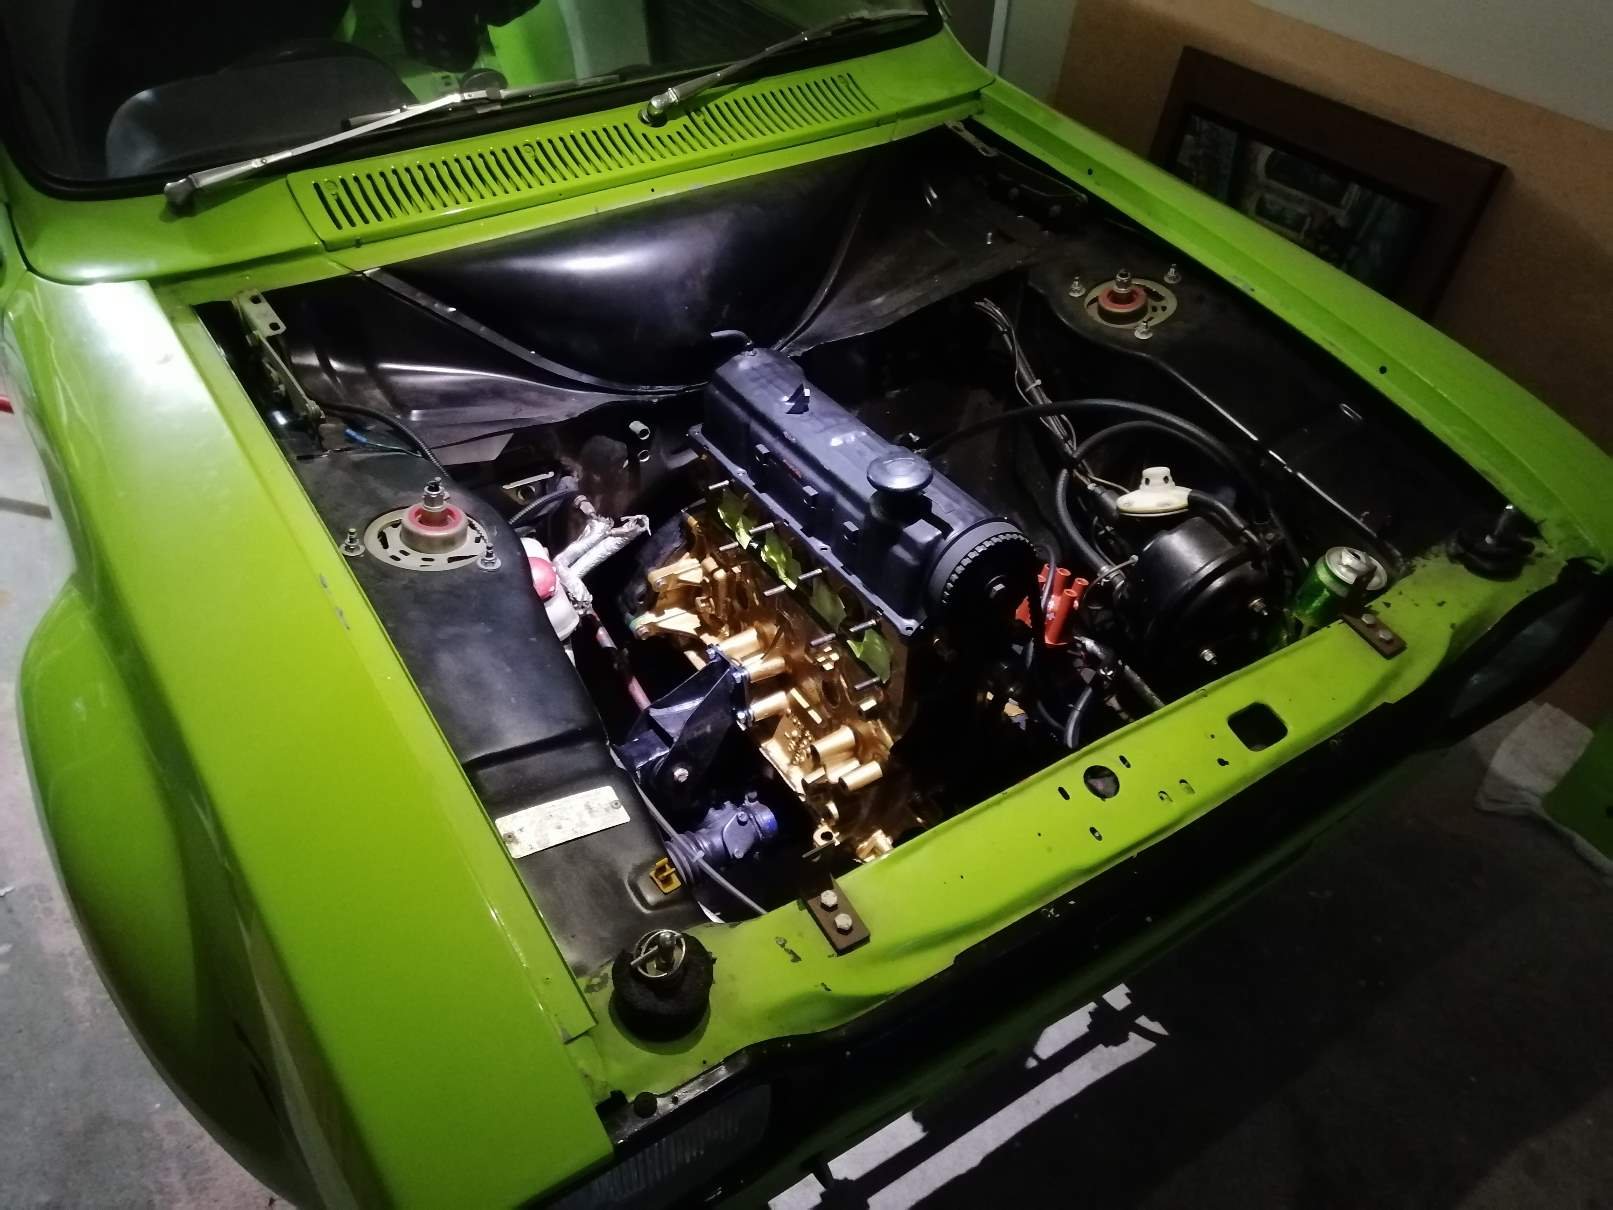
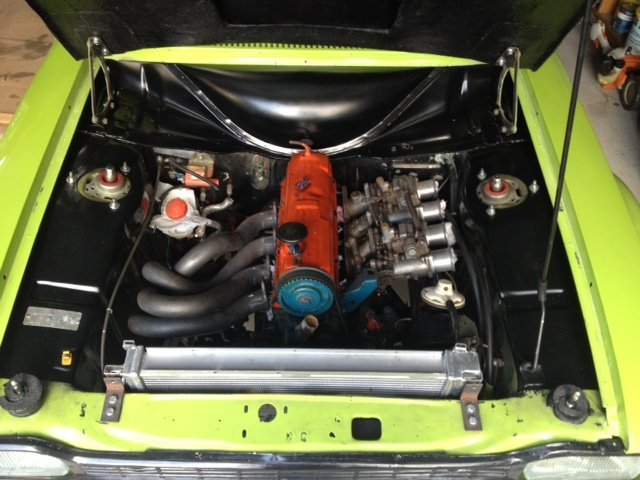
On the list to do was to get rid of the horrible red sausage dog petrol tank. No idea where this thing came from originally. Mounted behind the rear seat and lying across the boot it seemed designed to create fuel surge. And not really tied down properly. Back to a standard escort fuel tank that will be much easier to certify for the future. On the tank I was installing some clever person thought it was a good idea to attached the fuel filler cap with screws long enough to go through the old bellows and nearly out the other side! Combined with the perishing its not really ideal... So time for a new bellows it is then. And hoses and clamps. Disappointing to find my Super Sexy headers were made to fit around a reverse peddle box with the master cylinders inside the firewall. Dam, they look so good. But at over $1,000 for a certifiable peddle box and then still some fettling and sealing issues with the 5 separate pieces I bought some Pacemaker ones and sacrificed the looks and a few hp to get going. Even these ones are making issues trying not to cook the brake master cylinder and brake lines. Timing the dissy and building oil pressure without the spark plugs in, just the #1 plug strapped to the block I found that the coil is making a good spark and was quite happy to earth the other three cylinders through me. Ouch. I don't think I make a good spark plug... And Then She Was Alive!!!! https://youtu.be/Tt31HSOstnM This was the first push of the starter (After I worked out I had the dissy 180 degrees out) So Happy she just fired right up and would even idle when cold and not really tuned! I am sure the neighbors enjoyed the open headers as much as I did. The to do list is still pretty long to get driving. As a mate said, 80% done and 80% to go.
- 123 replies
-
- 24
-
-
How many do you need? I have one spare you can have. Freebie to get another escort working. Should be able to sort more if you need them.
-
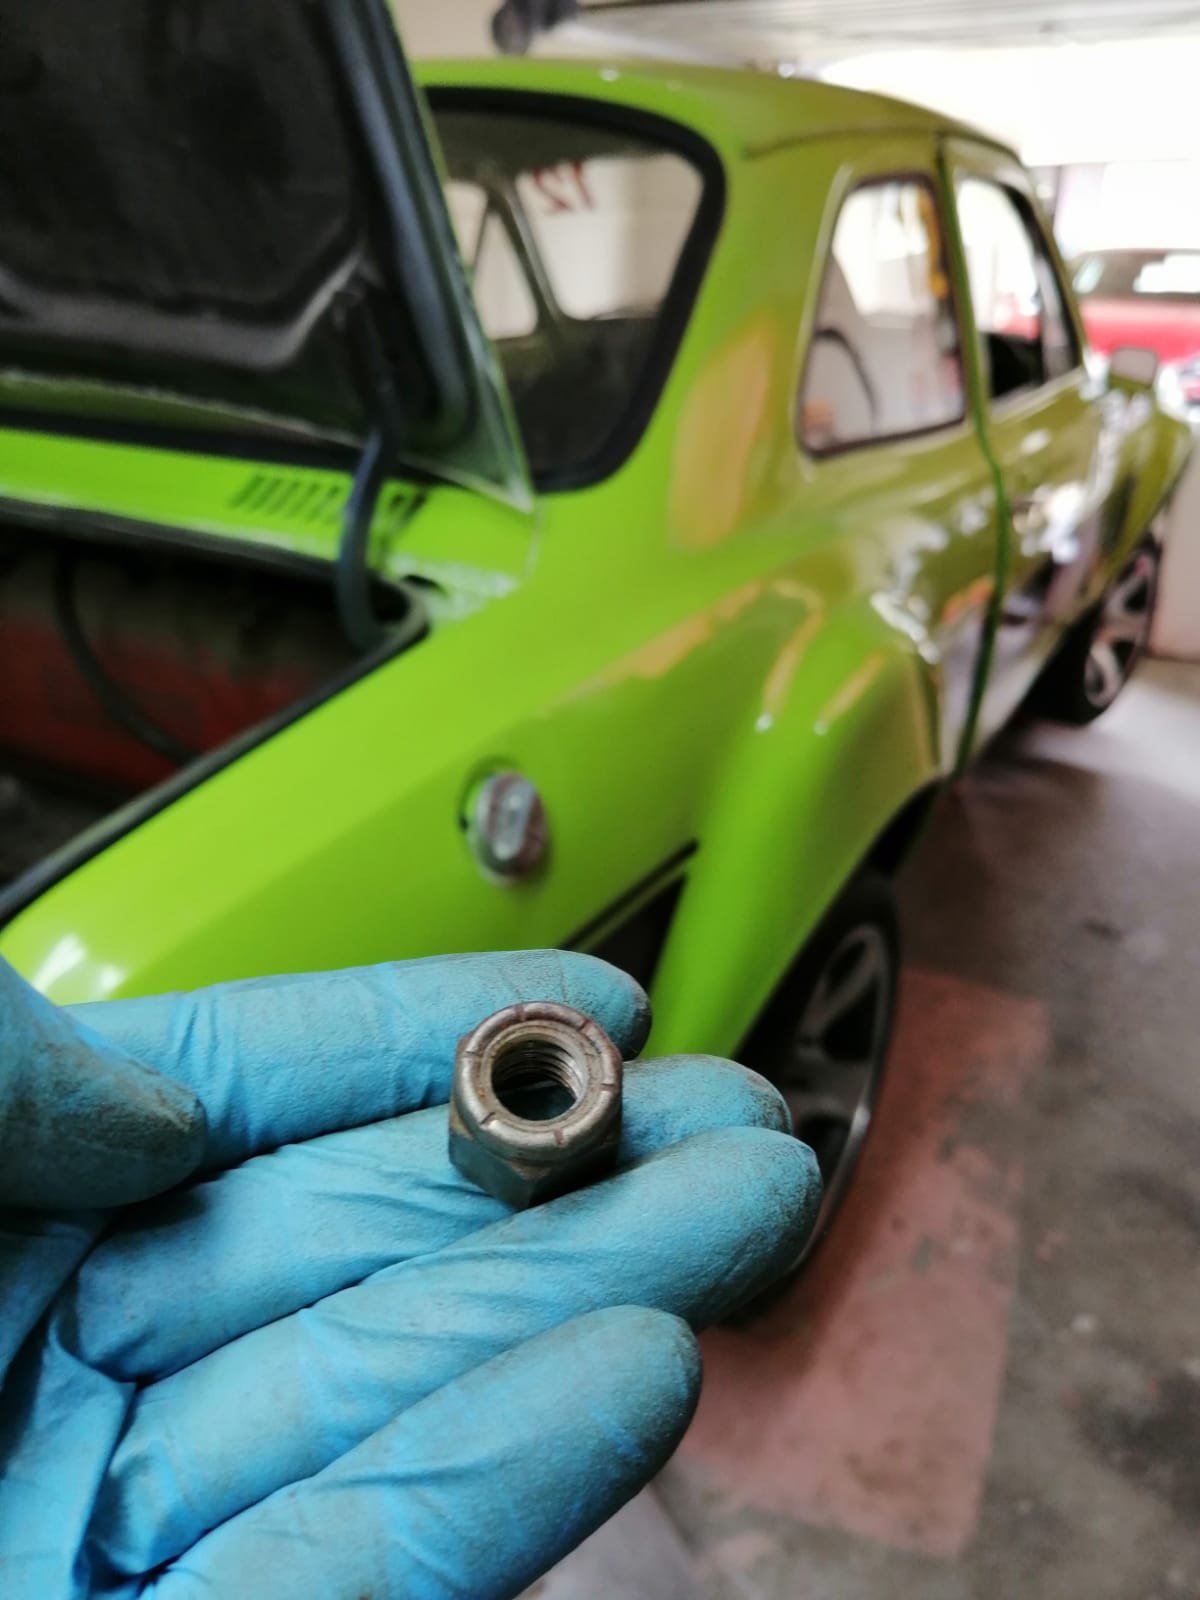
I have a spare nut if you still need one.
-
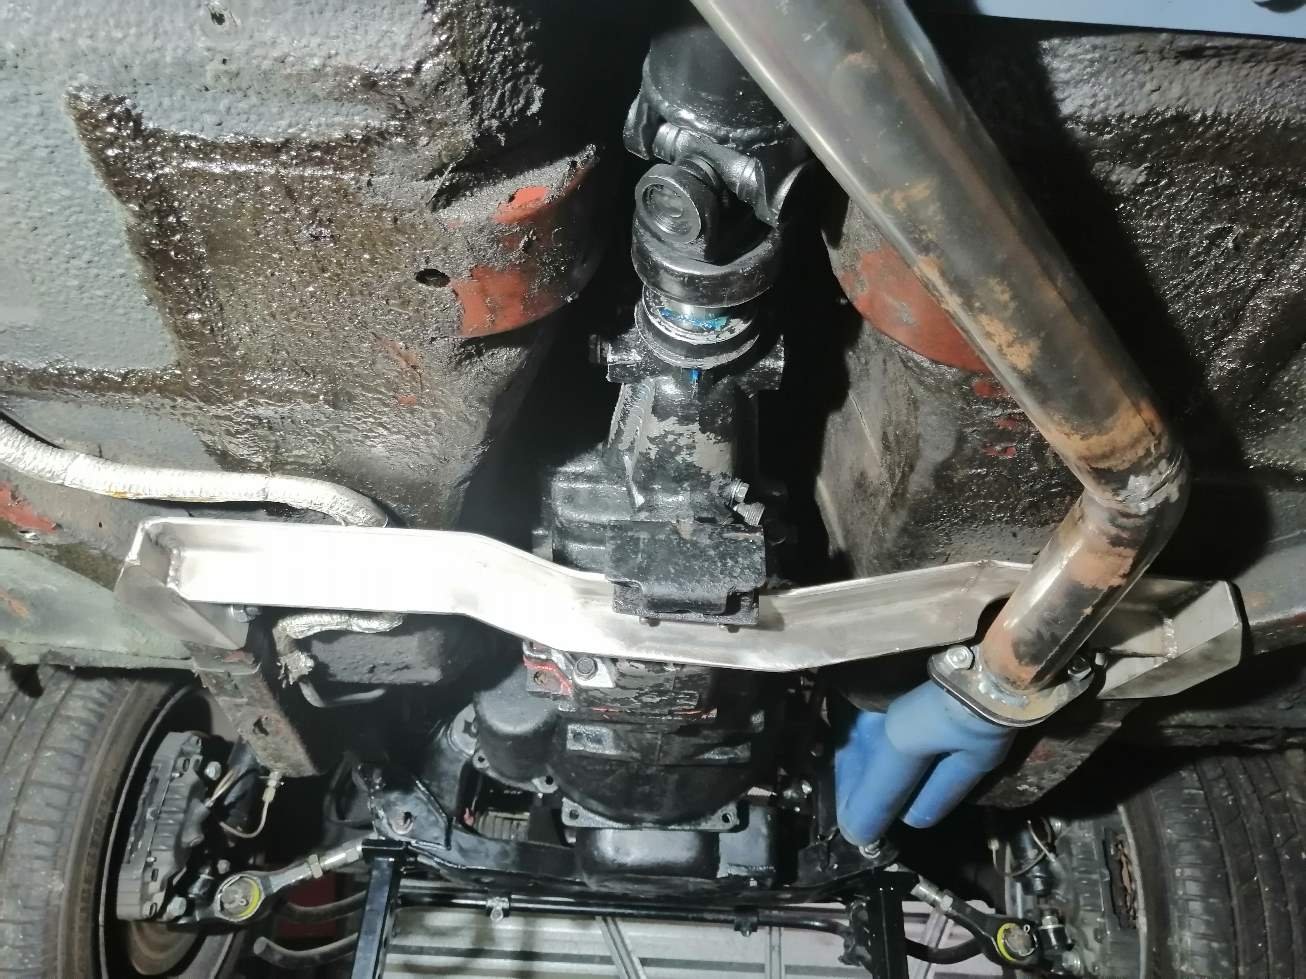
Insert engine tab A into slot B... W50 on the back of a pinto made a bit of a juggle to fit in one piece, but GoldMember is home (again). Hopefully not too many more months to be lost before driving her at last. Gearbox sits further back than it did on the V6 so new cross member and a shortening of the driveshaft is needed, and perhaps trim on the tunnel as well. I had bought a steel steering knuckle from Rally Design to replace my tired doughnut one. But then found I needed the short one. Sourced the correct one, cheers Pete. Looking at how rotten the old one was I pretty happy to have replaced it.
-
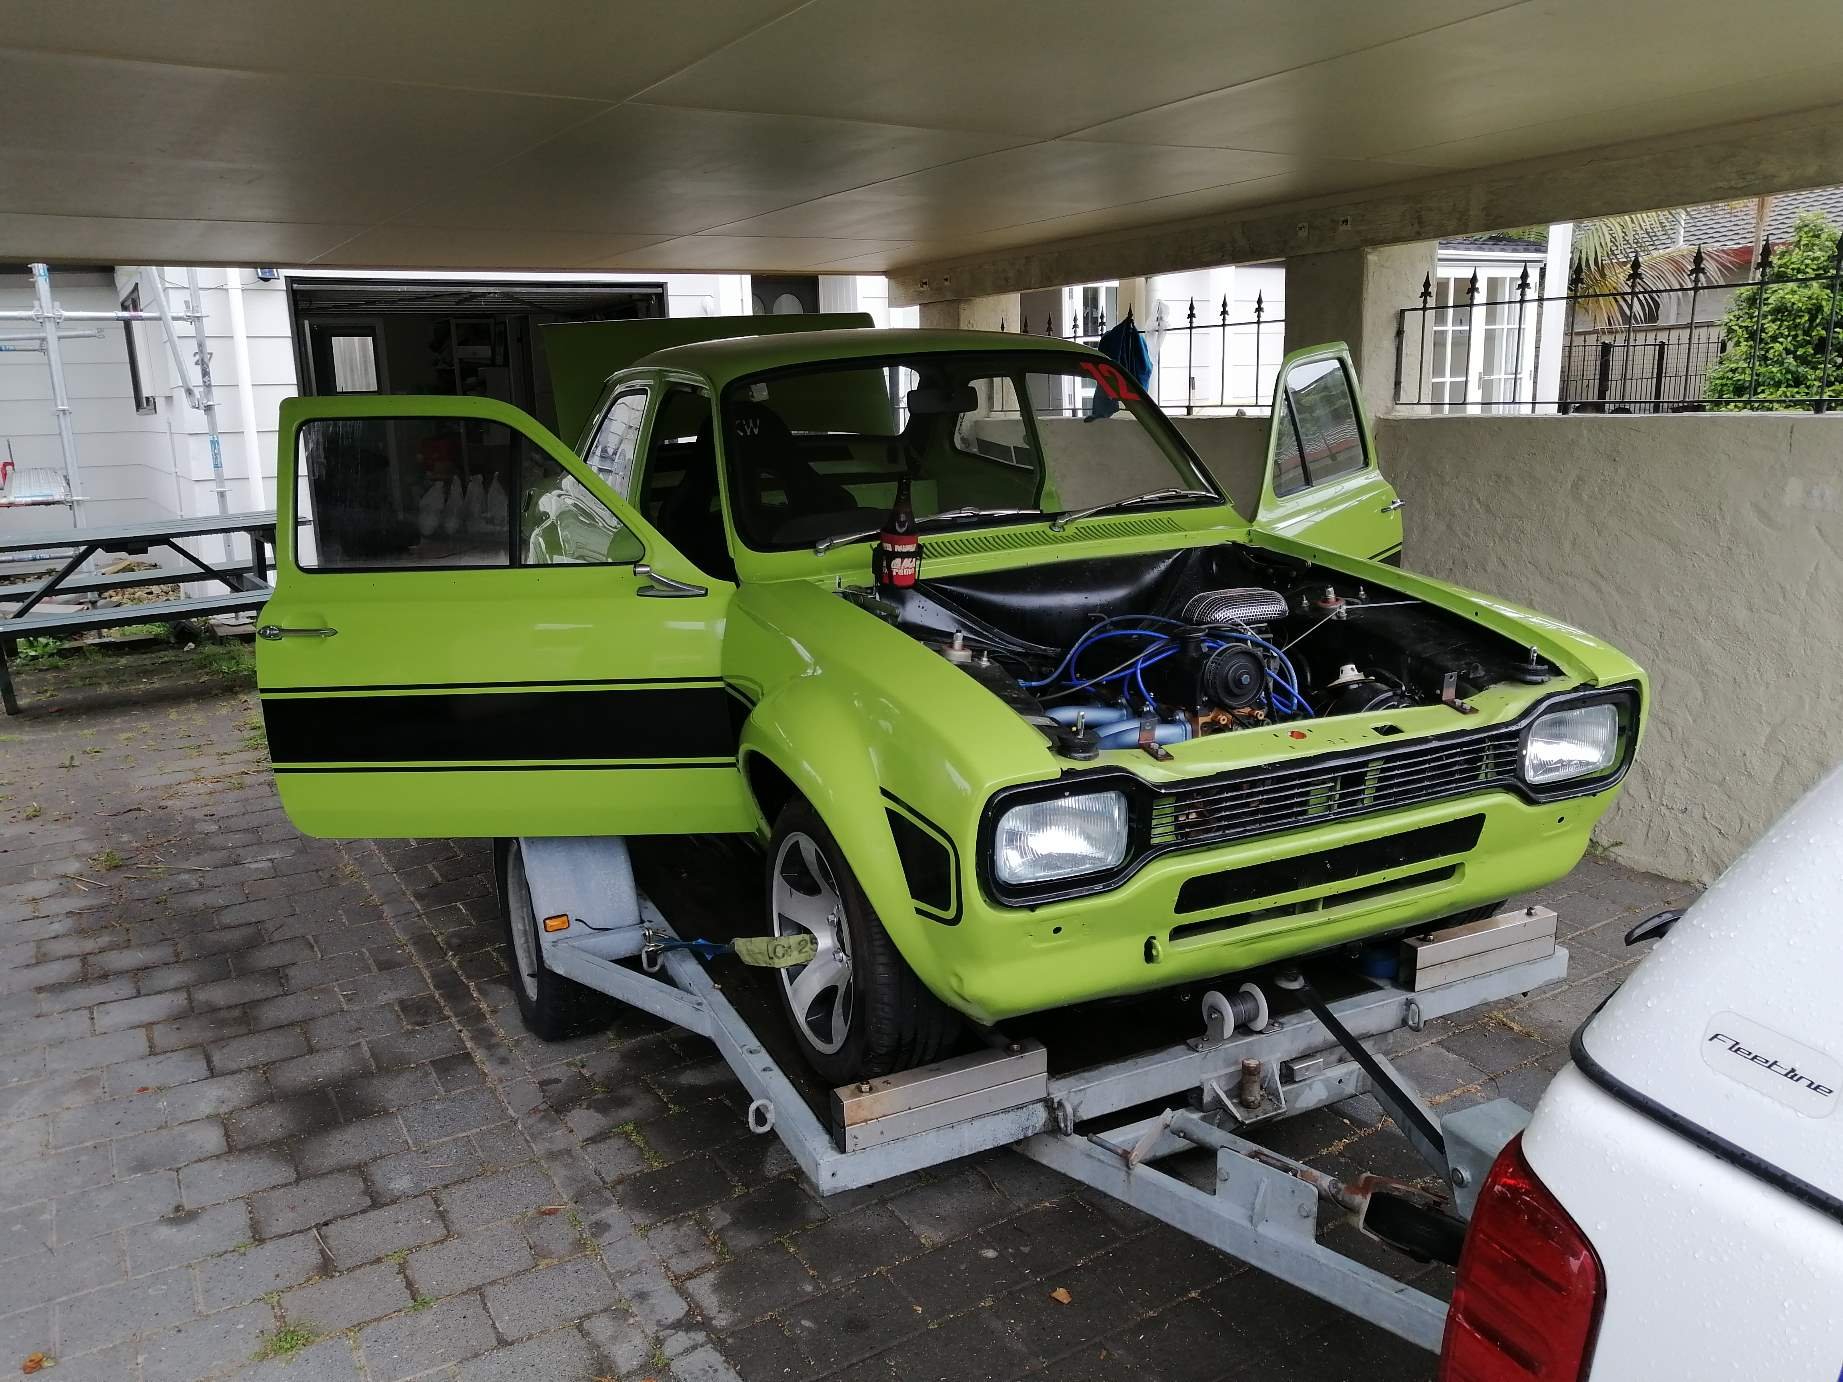
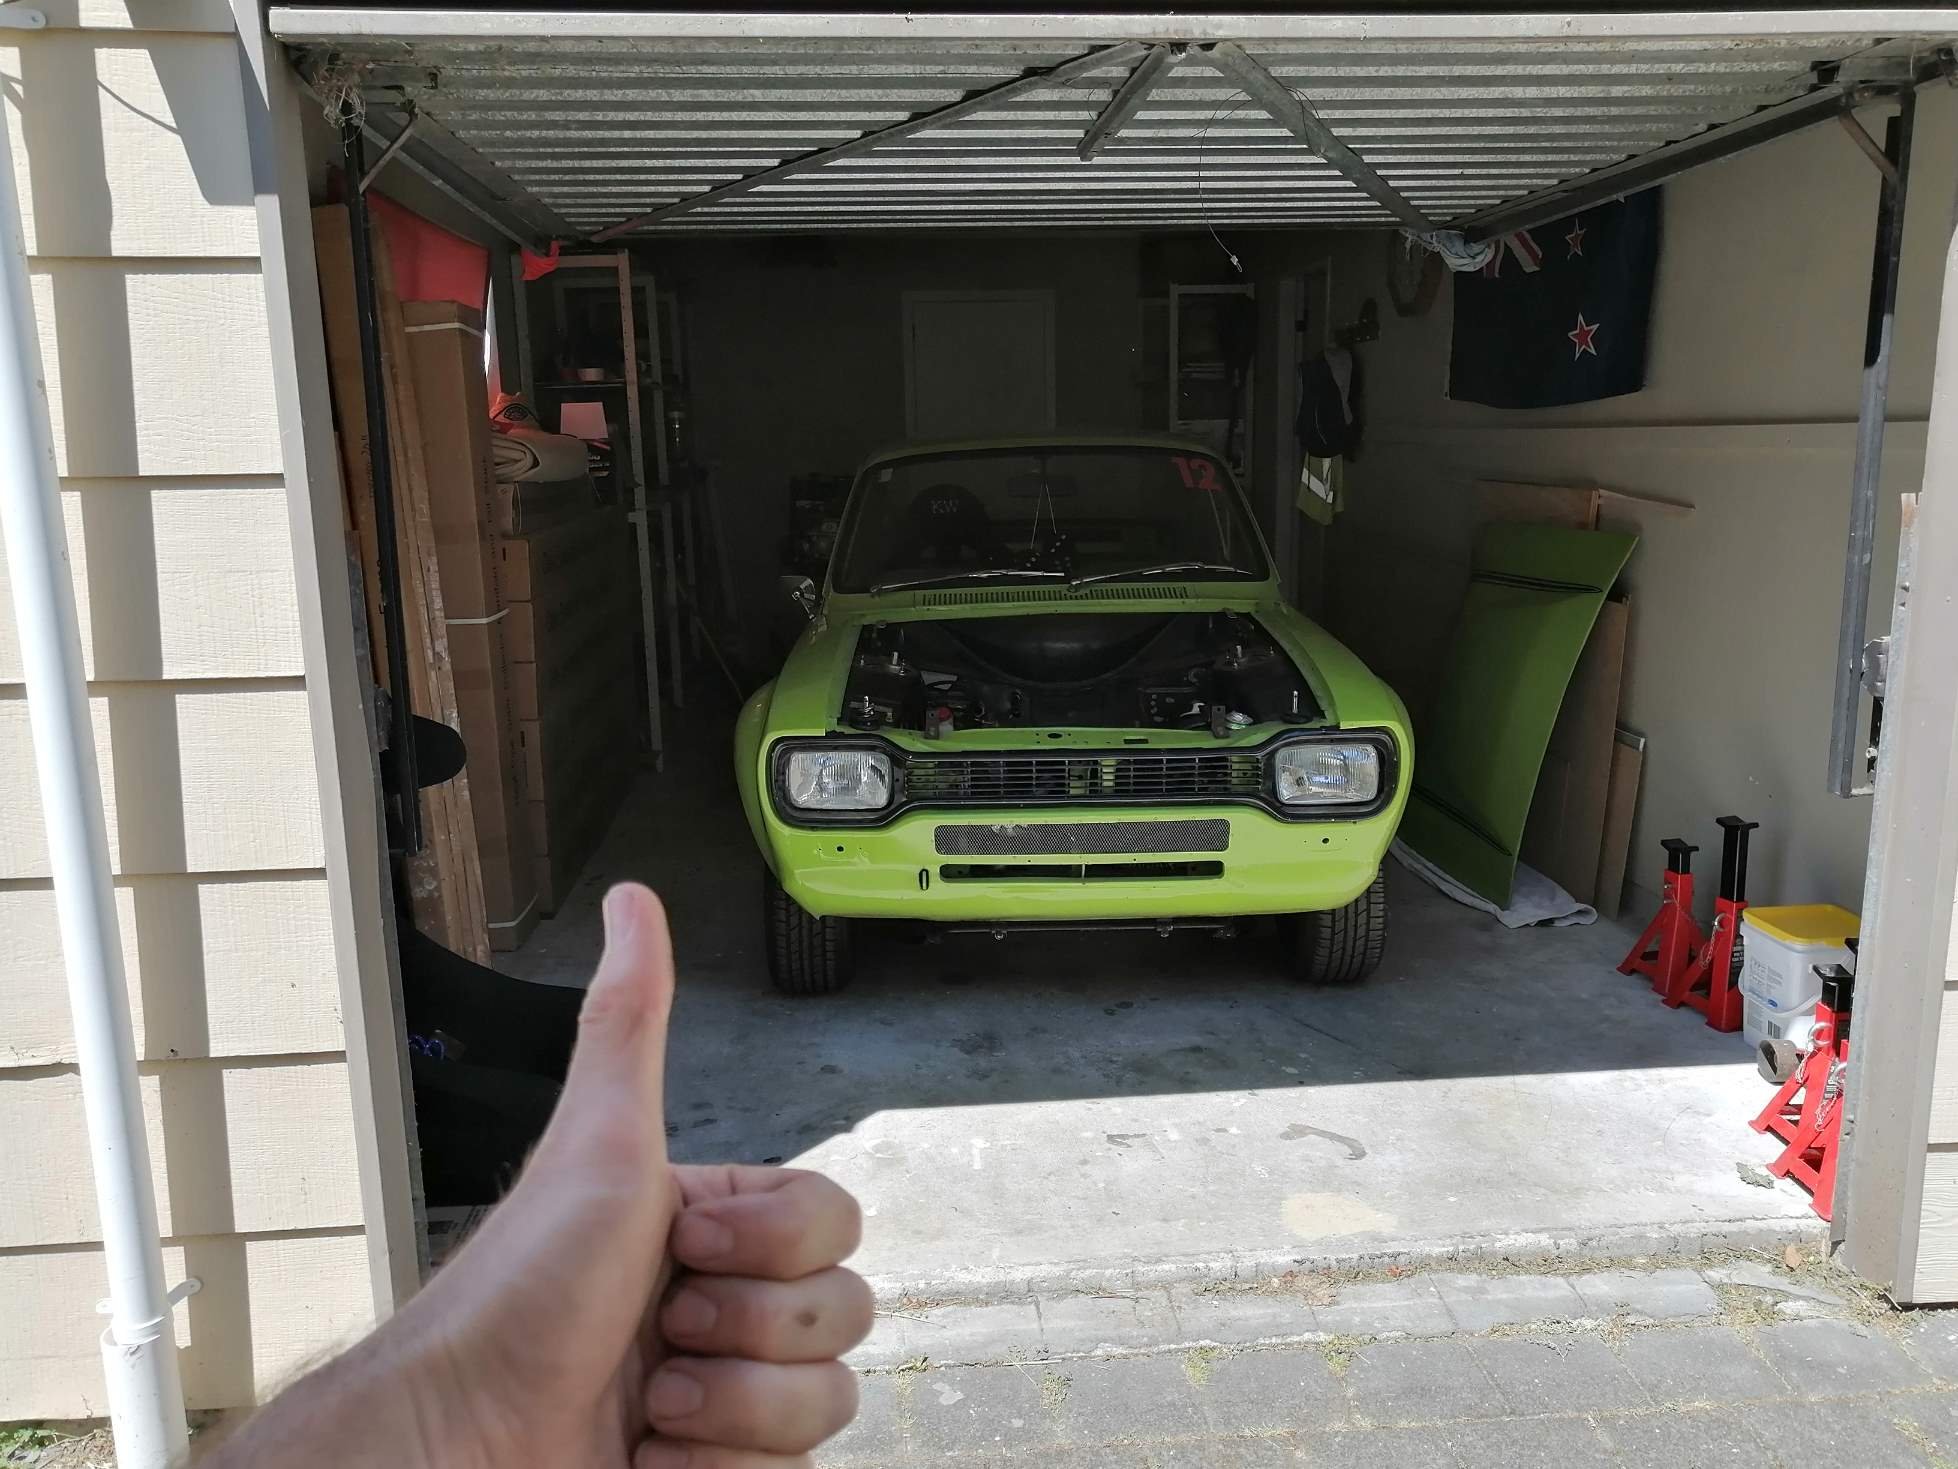
Very excited to have Felicity back in my own garage after far too long (again...) Kids are now a whole lot older than when I first dragged her home way back in 2011! Comes in handy for steering her back into the garage. Will have to go back and reload some of the early pics in this thread I think. Safely settled back at home at last. While she was a garage ornament at a mates place for over a year I got them to do a little fabrication on their racing off season. Worldcup cross member turned out to be a little twisted to go with the flogged out mounting holes so two was made into one good one. lightweight cross member mounting nuts were ditched and tubes welded through the chassis rails so they are now through bolted. Firewall to chassis rails gussets were welded in. Heater bowl lip removed and welded up so the pinto has a bit of clearance. Yay! Almost ready for engine.
-
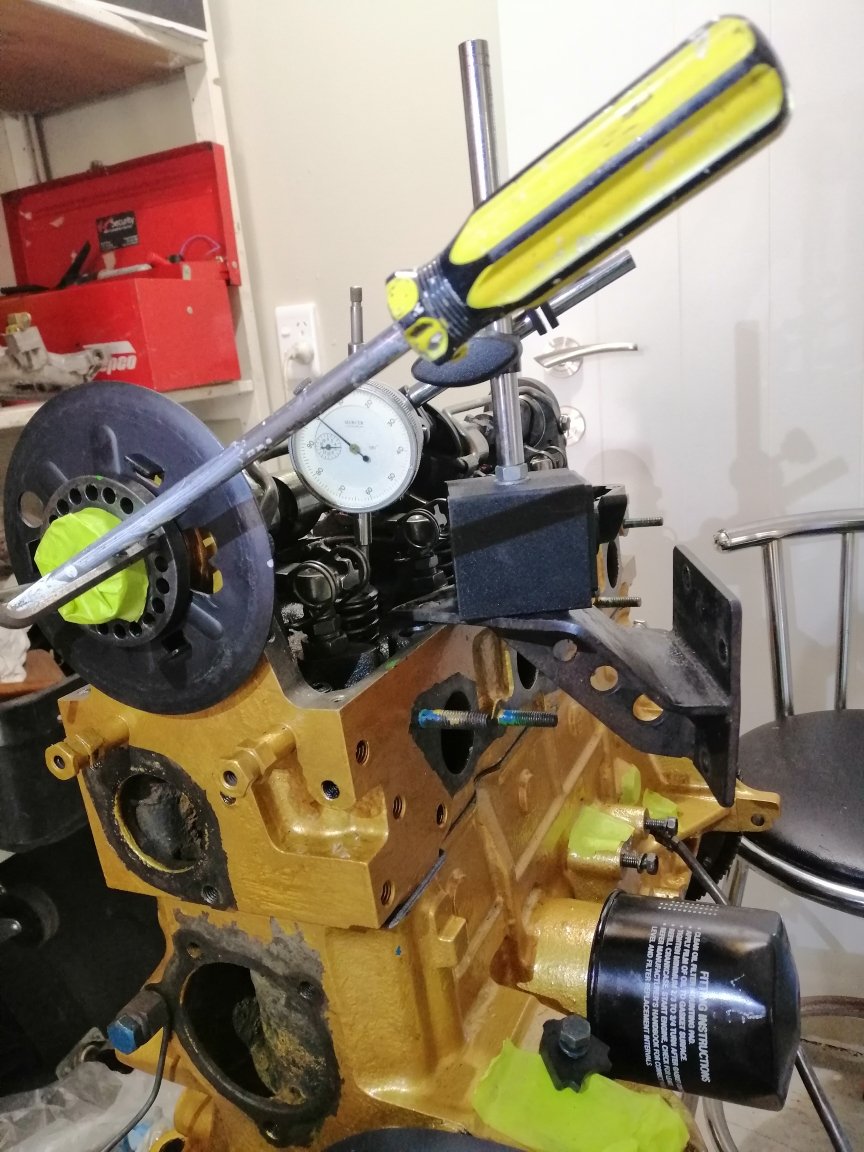
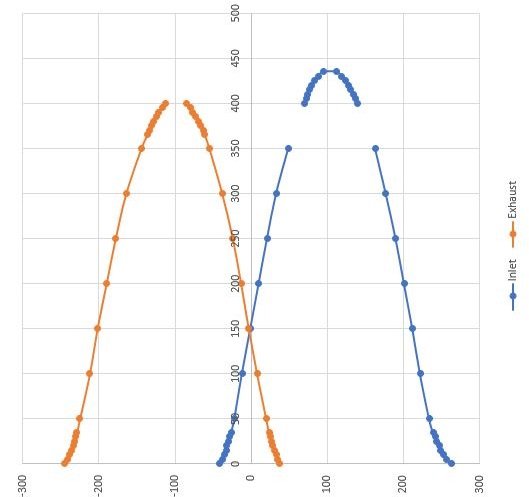
Thanks! I put this up in the tech talk as well and kpr suggested slightly more lift on the inlet at TDC. 3.86mm inlet lift is 3.45 exhaust lift and 103 degrees advanced. This is pretty close to same lift which is 105 degrees. The head has been shaved a small amount and there is more lift than standard so possibly interference now. I don’t want to find out the hard way...
-
Thanks guys! The cam keyway is well out compared to a standard cam so the factory settings don’t work. Yeah, definitely trying not to get an interference fit with the valves... Thanks, slightly more lift on the I left at TDC sounds reasonable. 3.86mm lift on the inlet is 3.45mm lift on the exhaust as it closes and 103 degrees advanced. Is this the sort of figures your are thinking? Thanks, I had found this spreadsheet, however my cam has more lift on the inlet than the exhaust and I couldn’t find many like that. Most have the same lift, and a few have more lift on the exhaust?
-
Wondering how I can work out the correct cam timing for an unknown specification cam? Cam was in the mystery package 2.0L SOHC Ford Pinto I bought a while ago. It’s had a bit of head work done with some porting and larger valves. Had 48 Delorto sidies and sexy looking banananana extractors. I plan to start running it on the 40DFAV V6 carb off the old 3L Essex as I know it’s good, rather than rebuild the old Delortos first up. Markings on the nose of the cam appear to be “308D 308D 06 9341 JG” I have no idea whose cam it is and can’t find any references to any of these numbers. looking at specifications for pinto cams the timing for full lift on number one intake varies from 113 degrees for mild to 104 race cams, but do not follow a linear progression. Different makes and cams tend to move around a bit. The valve lift is 11.13mm inlet and 10.19mm outlet at the valve with std clearance so more than standard, but not wild. Some posts on the UK sites suggest timing it with equal lift for inlet and exhaust at TDC on #1 like this post. #http://www.turbosport.co.uk/showthread.php?t=836432 This would equate to 105 degrees which seems pretty advanced? Here is a graph of the lift I made from measuring the valve lift. Degrees is crank not cam degrees. Lift is in thou and measured off the valve retains with standard clearance to cam. Any thoughts or tips on where I should put the cam timing to start with?