Trigger Posted November 17, 2008 Author Share Posted November 17, 2008 Bit of a one step forward, two steps back this week... Have been trying to work out how to mount this carb (STILL!) see the link to see what I mean... //oldschool.co.nz/phpbb/viewtopic.php?f=2&t=15963 So now I think I'll spend the time and mount it correctly (the OTHER way round!) Accelerator cable, fuel line etc will all fit a lot better, and its how the "Weber Book" suggests aswell So just a quick pic to show the way the carb will now go (hopefully) fuel bowl to the FRONT now Also picked up a set of xtractors... (probably not the "greatest" but for $15 cant really complain!) have cut the "down pipe" off, and merged it into 2 1/4 pipe from the collector, using a mandral bend then had the flange (to the head) re-surfaced, just comparing colours, think I'll go with the silver/grey Hope to be buying the "NEW" carb and air cleaner soon ... Quote Link to comment Share on other sites More sharing options...
Trigger Posted November 23, 2008 Author Share Posted November 23, 2008 Its been an Expensive week this week... Sorted out a new air cleaner (bit "smaller" than what I wanted, but only thing available) a BIG thanks to "Mike" at Appco, for knowing what hes talking about and getting it here And finally (saved up the money) and got a "new" carb (Weber 32/36) (note: manual choke, x1 fuel feed and xtra jets) Big thanks to "Cookie" for picking up Quote Link to comment Share on other sites More sharing options...
Trigger Posted February 1, 2009 Author Share Posted February 1, 2009 Well its been a while... Had over a MONTH holiday (after christmas) doing a HUGE road trip of the South Island!!! (was ALL GOOD and clocked up about 3,500kms!) So havent spent much time on the "Starmax"... Still waiting on the inlet manifold to be modified... But in some "good news" a mate of mine had a bit of spare time? in Jan, so he grabbed my "blue" SSR centre's and painted them for me, (and did an unreal job as always) Back: (note hasnt painted any of the mounting surfaces) Front: "Sitting" in band... Hope to be getting the inlet manifold back ASAP, to be coated and FINALLY fitted, so I can get the exhaust made and see IF it actually "goes" (so $$$ for the tyres etc might mean the wheels will be the last thing to do) Cheers HEAPS to Rueben, for another mint job mate! Quote Link to comment Share on other sites More sharing options...
Trigger Posted March 2, 2009 Author Share Posted March 2, 2009 Right... Got all the wheels, re-assembled with new nuts/bolts and valves (now saving for 16inch tyres...) And... finally got the inlet manifold back, carb etc all fit properly now (basically got the adaptor plate welded to the manifold so the carb now bolts directly onto it) And just a few pics of the carb and air filter "dummied up" so I can work out where to run the accelerator and choke cables Then remove inlet (hopefully for the LAST time) and get HPC coated Quote Link to comment Share on other sites More sharing options...
Trigger Posted April 12, 2009 Author Share Posted April 12, 2009 Been sussing out prices on 16" tyres and ended up getting some Hankooks... 195/45/16 (FRONT) 215/40/16 (REAR) Not sure what they're like... "look" all right tho? either way I'm sure they'll be ample for my setup Could be a bit (or a lot) lower... but still needs ALL fluids (including gas) and the suspension is brand new, so hopefully it will settle down a bit once its been driven (hard to get decent pics in the drive way) Quote Link to comment Share on other sites More sharing options...
Trigger Posted April 21, 2009 Author Share Posted April 21, 2009 Another big part done this week, the exhaust... Decided on: 2 1/4inch pipe, flanged in x2 places, mandral bends, x2 mufflers Wow, its OUTSIDE! (On the way to the exhaust shop) Got it all made up and fitted etc and did some painting... Getting a small mod done to the fuel feed (of the carb) then remove all parts to be coated Quote Link to comment Share on other sites More sharing options...
Trigger Posted May 15, 2009 Author Share Posted May 15, 2009 Sent the carb back, and got them to change around the fuel feed into the carb (to the other side from in pic) so it wouldnt hit the thermostat housing anymore Now fuel feed on the otherside (way from engine) And today I finally got my parts back from being coated at HPC!!! (mite add a bit of "bling" to the engine bay) Inlet manifold, dizzy and thermostat housing: Extractors: Now just have to re-assemble dizzy with the new parts (even managed to get a brand new screw set!) Quote Link to comment Share on other sites More sharing options...
Trigger Posted May 21, 2009 Author Share Posted May 21, 2009 Long COLD night, tonight... But got a bit more done, including re-assembling the dizzy Got the extractors fitted Also scored an owners manual, and 80's advertisting poster Oh and... Got IT GOING too!!! (FINALLY) Note: HUGE thanks to Craig! for ALL the help tonight and along the way (got a few things to sort out still before I take it for a "drive" but stoked with it so far) Quote Link to comment Share on other sites More sharing options...
Trigger Posted May 22, 2009 Author Share Posted May 22, 2009 SO KEEN to take it for a drive! I've been working on it late last night and this morning (had to have the heater cranked up in the shed!) After changing the dash clusters over (1200-1600) found the oil pressure gauge on the 1600 dash would either be completly ON or OFF when the engine was running? Worked out I needed to change the oil pressure sender from the standard "light only" type to a gauge type sender (ordered a new sender yesterday and fitted) now works mint! Original oil pressure sender: New gauge type sender: Now just need to test the electric fan to make sure its going, and work out how to "wire up" the rev counter on the 1600 dash (note: next time SO much easier starting with a 1600 Ex!) Quote Link to comment Share on other sites More sharing options...
Trigger Posted June 22, 2009 Author Share Posted June 22, 2009 Well, I wish I could say... "I've been driving it around heaps, and running the new motor in" but no not yet... But I have been "slowly" getting the last little things sorted out, found the "aftermarket" thermostat was no good (didnt open?) so got a genuine Mitzy one, (which I've tested 1st) and is mint! just need to fit it now... One of the last things I've still gotta do is, sort out the brakes (pedal real spongy?) have bled the system over x10s! (manual/and vaccum) with no luck... so might start up a "tech question" on it and see what everyone thinks I could/should do? I have changed master cylinders and boosters (from Ex to Sigma) But did get the electric fan "wired up" properly and going sweet as (BIG THANKS to ROJ) And finally "Towed" it down to get a wheel alignment, to find that the Starion front struts had 1.5 negative camber Well, using the parts that I'm using anyway, which is a mixture of; Starion, Sigma (GS) and Ex (1200) (so much to all the internet "rumours" of 3-5 degress negative Starion struts give?) Heres the copy of the W/A specs... Note: camber is different from the Left and Right (1.2 - 1.5 negative) nothing is adjustable, so may need to get adjustable "top hats" or lower arms maybe? Also the rear toe is out, so I might try "slotting" some lower arm holes? Oh yea, I got one of these too Quote Link to comment Share on other sites More sharing options...
Trigger Posted July 19, 2009 Author Share Posted July 19, 2009 Haven't had a chance to work on the "Starmax" lately... (Having a pregnat wife doesn't leave much spare time) But did work out the alt. wasn't charging the battery, and had replaced everything on it when I had it apart, except... the regulator so I'm guessing that its the problem? Have removed it now and getting it tested ASAP replaced the regulator, but ended up being a bad earth (good reason not to power coat everything!) so have addedd a couple of xtra earth wires and all good now Then theres the brakes... Still havent been able to work out why the pedal is "spongy" - Have bleed the whole system countless times (vac and manual) - Bleed the master cylinder - Tested different x1 way valves - Even removed the "new" Sigma master cylinder/booster and re-fitted the old (orginal) 1200 Ex m.c and booster with no change? New Sigma M.C / Booster: Old Ex M.C / Booster: Going to put a question on "tech questions" and see what everyone else thoughts are (any HELP would be great) see link... viewtopic.php?f=2&t=19426 gotta get the brakes sorted for the swap meat (esp that I'm in Palmy!) bit dodgy to leave it as it is tho... Quote Link to comment Share on other sites More sharing options...
Trigger Posted August 24, 2009 Author Share Posted August 24, 2009 Well its been awhile between posts... but for good reasons my wife gave birth to our baby girl (so I ended up missing the swap meet...gutted) but... I've finally taken the Starmax out for a "drive" or two! Not ALL 100% yet but SO GOOD to get out and drive it in this primo weather! Have put the orginal 1200 Ex master cylinder and booster back in, but brakes still far from good... just not pushing it too hard and giving myself a bit more time/room to slow down (still only running it in anyway, and taking it easy) Now some car pics... (not from the garage or driveway for the 1st time!) Views from "Pork Chop"... From Mr Flatly's work... been thinking about "more" wheels... viewtopic.php?f=1&t=19916 - Have also found the speedo wasnt working? - And the gearbox has an oil leak? (always something aye) Speedo: After about 20mins of driving (the 1st drive) the speedo stopped? So I pulled the speedo drive out, to find... there was NO drive sprocket? disappeared? (see pic) Cheers HEAPS to Cam (Ogre) for another speedo drive (speedo all good now, just dont know "where" the other drive sprocket has gone?) Gearbox: Had a small leak coming from the tail shaft (about 5-6 drops on the ground) so replaced the rear tail shaft seal (custom size, to fit L200 housing and Ex uni) But went for "another" drive today and found its STILL leaking...? Managed to get another L200 extention housing (thanks AGAIN Ogre) to compare it with my orginal Sigma extention housing, (that I'm not using) and have noticed the rear "internal" bush on the L200 housing is "BIGGER" and wont be sealing against the Ex uni (when it sits inside the housing) Bit hard to see, but the Sigma housing is on the LEFT (smaller uni hole) I'm using the L200 extention housing (Bigger of the two) and the Sigma AND Ex driveshaft uni's are the same size, which is smaller than the L200, cant use an L200 uni because the splines are differnent between L200/Sigma, so looks like I might need to get a bigger internal bush made up for the L200 housing to seal up against the Ex uni... (make sence?) Seems a few peole have swapped the Sigma extention housing with the L200, to get the shifter coming up inthe same place as factory (in an Ex) but have either put up with oil leaks or have done it "another" way without saying? I hope to have found out a way of using the Sigma housing (ie complete Sigma box) but still have the the shifter in the factory poistion and NOT having to cut a hole Quote Link to comment Share on other sites More sharing options...
Trigger Posted September 6, 2009 Author Share Posted September 6, 2009 "Finally" got around to taking the gearbox out this weekend... Had a couple of things to do to it while it was out: - fix the oil leak - removing L200 extention housing - fit L200 parts to Sigma extention housing - re-fit Sigma extention housing - replace all gaskets/seals - replace thrust bearing - cut down shifter Replaced the "nosiey" thrust bearing: What I had to start with on Sat morning: Sigma box with L200 extention housing (including leaking tailshaft) Both the extention housings: Spot the differnce... (Sigma on the RIGHT) As you can see both housing "look" the same, except the L200 housing has a "bigger" tailshaft (for its bigger driveshft uni) which is causing my oil leak So I have to use the Sigma housing, but still want the shifter in the factory Ex postion which the L200 did... (Sigma shifter mounts about 2inches further back, need to cut a hole) So after stripping down both housings, the only internal difference is the mount for the shifter, on the shifter shaft Sigma the "longer" of the two: So all I did was swap the two shifters around (or could use the complete L200 shaft and shifter) Then all I had to do was, re-use the L200 top plate/cover (same bolt pattern as Sigma) L200 top plate/cover (TOP): Oh yea and I "found" my missing speedo drive... And swapped the Sigma shifter around with the orginal Ex shifter, to make it a bit lower Sigma shifter: Ex: NOTE: Put a notice up on "tech questions" about this box mod too... viewtopic.php?f=2&t=20025 Quote Link to comment Share on other sites More sharing options...
Trigger Posted September 30, 2009 Author Share Posted September 30, 2009 Got the Starmax "tuned" this week... Took it to Rodney at Roskilda, where he tuned and adjusted the carbs on the Dyno (link to question on "General car chat" //oldschool.co.nz/phpbb/viewtopic.php?f=1&t=20108) Wrapped with the work and results from Rodney see Dyno sheet below... - 78kw - 105hp (at the wheels) Gona do a few more "run in" kms on the motor and take it back to him for a "final" adjustment/tune (hope to break 80kw!) Also have been taking some random pics when out and about crusing... Quote Link to comment Share on other sites More sharing options...
Trigger Posted November 24, 2009 Author Share Posted November 24, 2009 Right, its been a little while between updates... (so I'll put up a few pics) And its been all good news for the Starmax have done a few more kms on new motor, going everywhere from Hawkes Bay to Masterton to Welly! Also managed to get the Starmax back on the dyno for a re-check and to bump up the timing (even made a bit more HP!) Dyno (2nd time) (82kw at the wheels! up from 78kw from 1st time!) Went for a cruise with some of the local O.S Boes over to Dannevirke to check out some old shit and take some mean O.S group pics (cheers Richie) At the beach for Hawkes Boes... Went over to Masterton for the Speedtech drags (just for a watch tho) and managed to get a couple of pics... And just a random sunny Sunday... Quote Link to comment Share on other sites More sharing options...
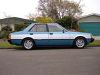
Trigger Posted June 17, 2012 Author Share Posted June 17, 2012 Well its been a while... Just a quick update to say the Starmax is still alive, and to show I DO drive it (sometimes) Have had the wheel alignment sorted properly, which has made a huge difference and I have refitted all the interior bits (seats, steering wheel and gear knob) back to factory Need to think about putting on the market, for the only reason x4 cars (and a work vehicle) makes it hard to get any use of it But for now it lies in wait wrapped up in the shed, for the next sunny day Outside (and not just in the driveway) Nothing has changed here Back to factory (inside) Quote Link to comment Share on other sites More sharing options...

Recommended Posts
Join the conversation
You can post now and register later. If you have an account, sign in now to post with your account.