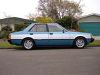
Trigger Posted April 12, 2008 Share Posted April 12, 2008 Thought it was about time I got off my ass and put some pics up of my Ex Lancer... It's a: 1982, 1200cc, 4 speed, 1 owner minta, done a genuine 58kms Few pics of when I 1st got it about 18months ago, pretty mint, but SO HIGH! I've found out a bit, about the history of it, I work at a Mizty dealer (mechanic) it was sold new from one of our 4 braches back in '82 and yeah, the silver stripe was put on when "new" and sold from the showroom like that Quote Link to comment Share on other sites More sharing options...
Trigger Posted April 12, 2008 Author Share Posted April 12, 2008 Wanted to get the suspension sorted out ASAP! So looked through pages, and pages of topics on here about lowering Ex's etc Found the rear King spring listing a lot of people seemed to use on their Lancers wasnt avalible anymore? So long (LONG) story short, I got off the shelf 30mm lower Kings for the rear (which hardly dropped it at all?) then cut 1.5 coils off them, while using new KYB, EX.CEL-G rear shocks The front was custom made by "Stocks" in Auckland, where they shorten and re-welded the front struts, fitted new inserts (Corolla?) and Kings springs for a MK2 cortina Also at the same time I got some Sigma rims, and got them powder coated (silver) with new 185/60/14s (A lot better than the stock suspension and 155/80/13s!) So then at least it "looked" a bit better... Quote Link to comment Share on other sites More sharing options...
Trigger Posted April 12, 2008 Author Share Posted April 12, 2008 Just some pics of the interior, has been well looked after... Still had the problem with a stock 1200cc "power house" Have been deciding on what to do about the engine, a VR4 motor would be great! But I wanted to keep the "oldschool" theme, and since its a tidy example decided on the simple convertion to a 4G63 (SOHC, carby) from a Sigma, to make it a 2litre 5speed So ended up buying a complete Sigma for ALL the parts I was going to need, and then brought another one... ? Quote Link to comment Share on other sites More sharing options...
Trigger Posted April 12, 2008 Author Share Posted April 12, 2008 I quickly stripped all the parts I needed from the two Sigma's (esp. to keep the missus happy!) Kept: Engine gearbox x-members all suspension steering and lower arms wheels rear diff and was left with... she wasnt too happy having the body out the front of the house tho! Then heard Starion front struts were the go, so I suss out a pair, inc hubs, vented brakes, calipers, x2 bolt knukles Quote Link to comment Share on other sites More sharing options...
Trigger Posted April 12, 2008 Author Share Posted April 12, 2008 I better explain the name, (Starmax) Since I'm using the Starion struts, Sigma, engine and x-members etc in a Ex I thought... STARion sigMA eX So its a Mitzy STARMAX! I started stripping the Sigma engine down 1st, It was a runner and had done about 180km, but got it down to a bear block and checked everything out, Was all mint, but still decided to do a few mods to it while it was apart... Nothing major: Hone, rings and bearings, lightened flywheel, removed balance shafts, got all balanced, tidy up of the ports, re-cut valves, surfaced the head, "mild" cam from snow (Kiwi Cams) dipped the block and re-painted LEFT: machined flywheel, RIGHT: standard Sigma flywheel I've started slowly putting the engine back together, using ALL "new" gaskets seals, even BOLTS! Also fitted an evo metal head gasket and now getting a few bits 'n' pieces powder coated (slowly but surely) Since I'm going be using the Starion front struts now, I have to change the suspension, AGAIN So I pulled ALL the suspension out and sold it to my younger cousin (who has a 1600cc Ex/silver) and I picked up some mags too, (Alloy even!) so sold my Sigma rims to him also Now starting again fresh, and getting custom springs and shocks made from TSV in Palmy This is my younger cousin's Ex with my old, suspension setup and powder coated Sigma rims, I got these rims off Trade Me, 16x7 and 16x8 have removed the centres (x2 piece) to get re-powder coated black and the bands polished up Quote Link to comment Share on other sites More sharing options...
Trigger Posted April 13, 2008 Author Share Posted April 13, 2008 Things have slown down a bit now, waiting on the suspension to be made, the x-member/ arms and steering parts to be powder coated, and for some parts to turn up for the engine, so I can finish assembling it. So this is what I'm left with at the mo... In the mean time, I've got a few things for the interior sorted, Didnt want to change it too much, since its mint anyway, but did the... Drivers seat: still on factory runners (so can go back and forth) Fitted my old momo, (bit easier to hold on to, than that "skinny" factory one) Scored a 1600cc dash cluster too, (rev counter, oil press.) found this at work, so thought I'd put it on the "Starmax" while its parked up Quote Link to comment Share on other sites More sharing options...
Trigger Posted April 13, 2008 Author Share Posted April 13, 2008 Since I've got lots of "bits" (Ex, Sigma, Starion) lying around now, thought I'd show some of the comparisons etc... Radiators: going from the 1200cc Ex motor, to the 2litre Sigma motor, so had better swap the radiators aswell (will be getting the Sigma radiator re-cored etc and electric fan at some stage) Sigma: (LEFT) Ex: (RIGHT) "furry" helpers... Brake booster: I'm going to run the Sigma booster and master cylinder, bolts straight into the Ex as you can see there is a bit of size difference, and thought if I'm running the Starion front brakes (bigger calipers, and vented rotors) might help changing to the bigger booster/cylinder setup Sigma: (LEFT) Ex: (RIGHT) Brake pads: The brake pad sizes arent much different? Between the Ex and Starion, but the piston (inside the caliper) is bigger on the Starion Ex: (TOP) Starion: (BOTTOM) Spent a bit of time, "modding" the Sigma rocker cover Cut off the factory air cleaner mounts x2, filled in the small "front" breather (PCV) Going to open up the rear breather hole and weld a threaded fitting onto it (sometime soon) But have had it sand blasted, ready to get the rear fitting welded on, then will be painted Quote Link to comment Share on other sites More sharing options...
Trigger Posted April 14, 2008 Author Share Posted April 14, 2008 Gearbox: I did some reading about Sigma gearbox's, and it seemed like when fitted to an Ex Lancer you had to cut the hole in the floor (for the shifter) about 2inches further "back" But I also found out, that if you swap the rear extention housing with a L200 box, it brings the shifter "forward" about 2inches, so I tracked one down and fitted it to my Sigma box Also replaced most gaskets, seals etc and then got bored so ended up giving it a quick spray too... Quote Link to comment Share on other sites More sharing options...
Trigger Posted April 18, 2008 Author Share Posted April 18, 2008 Been waiting on some powder coating, new parts to arrive, and the suspension to be built, so things are moving along slowly at the mo... Got the "front" of the Sigma motor, on and together now Have replaced every nut and bolt etc (all genuine from Mitzy/Japan) Dont thing I'll be able to keep up this level throughout ALL the car tho! Pic: Replaced, or painted everything (even tho no-one will see it!) note: (balance shafts removed) easy motor to work on, esp. like this Pic: Before I get the sump back, the complete bottom end (balanced) Quote Link to comment Share on other sites More sharing options...
Trigger Posted May 5, 2008 Author Share Posted May 5, 2008 Right, its been a few "busy" weeks! Fitting and removing parts, ordering "new" parts and getting more parts sand blasted and powder coated! Dummied up the Sigma x-member and steering (un-painted) to test fit the "new" suspension setup, (that I got made) to see how everything was sitting (but still NO engine/g.box in at this time) And just like "Ke36" has found with his Ex... there is NO NEGITATIVE CAMBER? (well not "crazy" negitative camber) Otherwise good news! Everything bolted in sweet and there weren't any problems with the steering (Sigma/Ex) or suspension (Starion) So after towing it down to the suspension place and getting it ALL checked out on the hoist, I got to tow it back and remove it ALL AGAIN, to be blasted and coated! (YAY!) Few pics of how the powder coating turned out: BEFORE: AFTER: I would highly recommend "Centeral Powder Coaters" (in Palmy) TOP job and very reasonable prices! Now just have to re-fit everything (I'm getting good at doing this now) fit the Sigma booster, Starion front calipers, finish the engine, and get it IN! Quote Link to comment Share on other sites More sharing options...
Trigger Posted May 24, 2008 Author Share Posted May 24, 2008 Right... It's been a busy few weeks sorting shit out, waiting for parts and getting things painted, re-assembling and fitted (finally) All powder coated parts "in" Starion vented brakes: Fitted / calipers painted and re-kitted... New brake hoses, "Bigger" Sigma sway bar, and nolathane bushes "all round" Engine x-member, lower arms, and all "new" steering componnents etc fitted... Got the final parts for the engine too, All complete (bar manifolds) Ready to drop into the Ex... Quote Link to comment Share on other sites More sharing options...
Trigger Posted May 25, 2008 Author Share Posted May 25, 2008 Non-stop this weekend! Got "HEAPS" done (for once) 4G63 IN... 5 speed IN... Sigma gearbox, and gearbox x-member (using the L200 extension housing) All bolts up with NO modifcation, gear stick in factory postion (NO cutting of floor/tunnel) 4G63, mounted in Ex engine bay (YAY!) From underneth; (gearbox, drive shaft, powder coated front end) Just got the Sigma, booster and master cylinder back from the painters, so after I re-kit the master cylinder can fit and bleed all the brakes (can't wait to have half decent brakes) Quote Link to comment Share on other sites More sharing options...
Trigger Posted May 29, 2008 Author Share Posted May 29, 2008 Boring post... Found the Sigma master cylinder bore is "pitted" and is seeming difficult to get a new or aftermarket one? (may have to get it re-sleeved) Good news tho, I finally have a clutch pedal! Have been "trying" to use the Sigma clutch cable but seemed to be too short? So after asking around I ended up using the standard 1200 Ex clutch cable, (thanks Ke36) And have got the starter re-assmebled after, new brushes, a clean, and quick lick of paint Tested it (and it GOES!) now fitted... Quote Link to comment Share on other sites More sharing options...
Trigger Posted June 12, 2008 Author Share Posted June 12, 2008 Finally got the Sigma master cylinder sorted Ended up getting a brand new one (just like EVERYTHING ELSE!) So got the booster and the master cylinder painted, re-assmebled, and fitted all the new bits back onto it Complete and ready to fit to the Ex... Also got the alternator back together, (with new brushes and bearings) Hope to get the Sigma booster etc fitted and bled soon as, then tow it down to the suspension place to get the ride height sorted and wheel alignment (have got 95% of weight in car, just no manifolds or radiator) but its sitting "way too high!" dont want to take any pics of it like it is, being SO HIGH on shitty black Sigma rims with 70 series tyres! Cant wait to have it at the right height... Quote Link to comment Share on other sites More sharing options...
Trigger Posted July 9, 2008 Author Share Posted July 9, 2008 It's been awhile but... Have got a few things sorted (slowly) Got the "new" Sigma booster and master cylinder fitted, and brakes bled (ALL orginal Ex brake lines, holes, fittings etc in correct place NO mods required) Got the Starmax down to the suspension place and got the height "adjusted" but with brand new shocks/springs still is "stiff" and will probably settle down a bit more still so, no pics yet (esp. with shitty rims and tyres!) Also a quick note about the gearbox seal... I'm using the Sigma box (5 speed cable) with the L200 extension housing (to keep the gear stick in the factory position) but found after filling up the box I had an oil leak from the tailshaft seal? (see above pic) (after changing it twice) I worked out that you cant use the L200 tailshaft seal (Sigma seal way to small for housing) The L200 uni-joint is bigger than the Ex/Sigma making the "inside" edge of the seal a bigger diamanter and not sealing on the Ex/Sigma uni So... You need a seal the same size as the L200 "outter" and Ex/Sigma "inner" (Size: 52/32/7) Started working on the inlet side of things, Have dummy fitted the factory manifold, to work out where things will sit etc and have had an adaptor plate "made" to run the 32/36 Weber (I got one of those "brought" adaptor plates but couldnt believe how CRAP it was!) So had a mate make up this one, and had it matched to the intake ports on the manifold I know, I know... those crap Mitzy fuel pumps, but I want to "try" and keep it as orginal and stock looking as possilble (but yes, IF it fucks out I'll be changing it!) Quote Link to comment Share on other sites More sharing options...
Trigger Posted July 13, 2008 Author Share Posted July 13, 2008 Few more things sorted this week... Fitted the "dummy" carb to manifold/adaptor plate to work out height to bonnet, fuel/vacumm lines etc Got the Sigma radiator re-cond, and a temp sensor switch fitted to the bottom tank (running an electric fan) Then had to suss out what hoses I needed for: radiator, heater, by-pass, etc Got radiator and hoses mounted in engine bay (lots of room with no fan) Quote Link to comment Share on other sites More sharing options...
Trigger Posted August 19, 2008 Author Share Posted August 19, 2008 Its been a while since I updated this build, but my camera has been playing up and who wants to just "read" about updates with no pics? Been waiting on bits and pieces (usual story) so have been doing a few of the boring, but important jobs lately... Got an electric fan etc which I mounted to the outside of radiator (behind grill) and wired up the relay, earths etc to be out of the way as possible Also started sorting out the ignition side of things with new HT leads, coil and dizzy bits Finally, "found" some MORE wheels... They are 16x7 (+25) and 16x8 (+26) Speed Star RS-8 (changing the tyres ASAP, "WAY TOO BIG" 205/55/16 and 225/50/16 mint as tread tho) And NO, I didnt get them painted to match the car! But open to any ideas of what colour to repaint them... (was thinking some sort of graphite?) and for the tyres, 195/45/16 (Front) 215/40/16 (Rear) Trying to keep the same diamater of 185/60/14 Quote Link to comment Share on other sites More sharing options...
Trigger Posted September 7, 2008 Author Share Posted September 7, 2008 Right have been putting this off for AGES... But since I'm waiting on parts and the wallet is a bit "lite" at the mo thought I better get it over and done with... Removing the dash (x2 reasons) Had a leaking heater core and wanted to swap over the 1200 gauge cluster to the 1600 one (plus 1600 loom) Dash "out" (note: where heater core was leaking) Re-cored the heater core (very expensive!) and managed to pick up a mint 1600 dash cluster and the complete (1600) wiring loom Dash Clusters (1600 top, 1200 bottom) Both Looms: The different plugs, 1200 (left) 1600 (right): Removed 1200 cluster and loom, and re-fitted the 1600 ones (all same and bolts up etc) just double checking a few plugs and wires, made a lot easier with an old work shop manual I found at work Dash back in, and now 1600 cluster NOTE: Everything worked fine with the dash swap (excepted I didnt have background dash lights with the 1600 cluster?) So I looked into it and found out that the 1600 Ex's have a "dimmer switch" for the dash lights but the 1200's DON'T, It was a matter of "finding" the x2 pin white plastic plug in the 1600 loom and bridging them together = DASH LIGHTS! Cheers Cookie Quote Link to comment Share on other sites More sharing options...
Trigger Posted October 3, 2008 Author Share Posted October 3, 2008 Just a quick update... Finally got my inlet manifold and custom breather back from getting welded up Had had ALL the un-wanted holes in the inlet filled in, and brought "new" fittings for the heater hose and booster (even a new themostat housing) Once I've dummied up the inlet (yet again) and worked out ALL the coolant/fuel lines, and how the 32/36 will sit, I hope to get ALL the alloy HPC coated and then start saving for the "NEW" carb and K&N... Pics of the breather when its 100% (and have all the lines and fittings)... Quote Link to comment Share on other sites More sharing options...
Trigger Posted October 17, 2008 Author Share Posted October 17, 2008 Have finally got the breather; made up, polished and mounted in the engine bay, with all the fitings and -10 hose (all plumbed up) Note: have just got inlet/carb dummied up for now to work out fuel/vac lines, and accelerater cable Quote Link to comment Share on other sites More sharing options...

Recommended Posts
Join the conversation
You can post now and register later. If you have an account, sign in now to post with your account.