sry_not4sale Posted February 19, 2007 Share Posted February 19, 2007 Comments: viewtopic.php?f=18&t=8844 I am going to use this thread to keep track of progress with my car, and also record its history to date. I could easily write a novel about this car, but I'll try keep it simple lol. My name is Aaron, and I live in Wellington, New Zealand. I brought this car on the 4th of July 2004 for $1,950 from a mate in Tauranga. At the time I lived in Taupo, and thought the car looked familiar. The car came without an engine and exhaust but was otherwise complete. It came with the awesome tri-spokes you see above and had 196,997km on the clock. It is a 1983 Cosmo Limited coupe, the series-1 shape - originally a carby 12a automatic, it had been removed and replaced with a cosmo 12at and 5-speed before I brought it (although I got it minus the engine). Quote Link to comment Share on other sites More sharing options...
sry_not4sale Posted February 19, 2007 Author Share Posted February 19, 2007 The car came with a huge amount of spares, and was getting a bit rough. My first object was to tidy up the rust in the car and try get my hands on as much near perfect exterior parts as possible... I priced up replacing the front veneer and fixing the rust in the boot, and went ahead with only the front as at the time the rear was out of my price range ($1000 was what I was quoted for the boot). (yes, the tacho is LONG GONE ) It came out looking a million times better considering the tiny price I outlaid. The paint wasn't the greatest but the parasitic rust was gone and replaced by a NOS veneer straight from Mazda's japanese warehouses I also found out why the car looked so familiar. For 5 years of my college life I walked past the car every morning on the way to school! Since being imported the car has spent its entire life in Taupo until brought by the previous owner - in fact my father had even worked on it in his workshop previously, and it had been offered to a friend for $2000 only a few years before! Quote Link to comment Share on other sites More sharing options...
sry_not4sale Posted February 19, 2007 Author Share Posted February 19, 2007 Next the car went into storage, and I spent some money... The following was purchased/acquired: - Second hand FC3S HA Tein adjustables (camber adj at front, height and damper adjustable all around) - 17" TWS Kylamis - Bridgestone Potenzas 235/35/R17s - 5mm spacers The Tein's bolt straight in, but are the wrong offset and height for the Cosmo. The fronts being far too low (barely driveable even at max height adjustment), and the fronts also fouled on the wider front wheels. The spacers remidied this, however the front struts were damaged and I am looking for a lower km set. The rears went in my daily 929 and were amazing. Even on the softest setting they were very stiff, and made a huge difference on the open road. However the downside to them is that if you hit any small lump/hole in the road the rear of the car skipped around and was midly dangerous if you were giving it death. Also purchased were NOS trims - chrome trim, tail lights, interior, suspension rubbers, grills, too many to list. You will also be pleased to know the monster tacho was removed... UPDATE: After moving around a bit and having no garage to store the car in - it stayed in storage in my hometown, so not much happened to the car for a couple of years. My parts collection however continued to grow! Quote Link to comment Share on other sites More sharing options...
sry_not4sale Posted February 20, 2007 Author Share Posted February 20, 2007 Photo shoot!!! This is the ride height I am going for, was easy with the coilovers to get it to this height, however I am worried about the front tyres rubbing on the guards. Also, going wider at the rear - I know 235's will fit, but gonna try some 255s Note the Mazda6 "MAZDA" badge on the bootlid. Am going to add an RX-5 "Cosmo" badge on the passenger side of the bootlid as the standard HB Cosmo badge looks horrible (and is also located on the quarter). Also note the NOS front grill "MAZDA" badge, NOS front grill, NOS rear tail lights and NOS rear chrome. The only alterations from this to the exterior that are planned: - Respray in a more "icy" white rather than the creme it is now - Repaint the rubber and plastic trims in a charcoal black - Re-tint (most likely in a navy blue tint rather than black) - Mag center caps back on - Twin exhausts (one on either side) - GUARD MIRRORS - Add some later model chrome and better condition plastics - Replace rear # plate with a message plate minus the messages (to be closer to the original Japanese plate size) - Chrome door handles from the sedan model - Paint the white metal behind the front grill black Quote Link to comment Share on other sites More sharing options...
sry_not4sale Posted February 21, 2007 Author Share Posted February 21, 2007 Engine trouble: Currently the car has a 12a turbo block in it. This was all good, except I found out when trying to install it is actually out of a series-3 RX-7, which means it has the incorrect mounts! So... engine is now coming out and being replaced with a rebuilt and street ported 12at Cosmo item. The plans for the motor are to have enough power to scare the shit out of me. So enough for trackdays, losing traction in the higher gears and burnout comps (of course!). It has an extremely tight LSD in it, and that combined with coilovers has proven to be a very effective combination in my daily 2.0l Cosmo. Its 85hp of pure muscle is extremely capable and I have video footage to prove it!!! (To be uploaded soon ) A full electronic line-locker setup I have already purchased should help achieve this also Rather than going the typical route of adapting a late model 13bt intake manifold, front mount intercooler, ball bearing turbo, yada yada. I am going to try keep the engine bay as similar to standard as possible. This means keeping the current setup of no intercooler to keep the standard Cosmo's selling point of zero lag. This is very possible and I will have more details of this setup closer to it being installed I am looking at a realistic 300hp@9,000rpm at the flywheel from this "small block" motor!! Here are some pics of the motor in the car and the other parts I have for it. Engine in, but wrong mounts! Just dummy fitting stuff and making sure I have everything... Intake and exhaust ports. Note the ghetto mount and the distinct lack of space for a turbo due to the rack&pinion steering. You will see in the picture at the bottom of this post how close the turbo must sit to the block to fit. The intake manifold runners actually go around the compressor housing! Standard rad and oil cooler New motor before being pulled down. Note the extremely short distance pressurised air has to travel from turbo to block. Goes straight up from turbo (a 200mm journey at the most), does a u-turn back down, through a throttle body and straight into the intake ports. Extra injectors will be added to remedy design flaws in the standard system, and the intake passages will all be ported and flowed. Turbo will be rebuilt with a combination of standard, RX-7, and T04 parts. Quote Link to comment Share on other sites More sharing options...
sry_not4sale Posted December 11, 2008 Author Share Posted December 11, 2008 Well, well lots has happened since this thread was updated last lol This car just will never die, I know for sure I will be buried in it. I'm doubtful whether I would have driven it more than 1000kms before then however I wrote this back in Feb... With a wedding coming up in a fortnight, I finally did what was necessary - brought car the car down from storage and bolted in a spare carby MA 2.0l so it could be our ceremony car! Keeping the subframe, motor and boxes bolted together, swapping the two front ends was a simple enough job, with the only frustrations being with the wiring! It seemed under dash wiring was in far from the best condition and the engine management computer was not receiving all the signals it should. Updated with pics: Video of moving the parts cars (lol): We got the car going that day, but after only a week the wheels were stolen off it Quote Link to comment Share on other sites More sharing options...
sry_not4sale Posted December 11, 2008 Author Share Posted December 11, 2008 State of car after conversion (well before mag theft)... (still being put together, yes engine bay wiring was temporary ) Quote Link to comment Share on other sites More sharing options...
sry_not4sale Posted December 11, 2008 Author Share Posted December 11, 2008 Well it seemed the car was destined to never be on the road for any period of time and the motor let go from *cough*lack of oil*cough* the day before the wedding. So in true style, it was towed there!! Because we just wouldn't have it any other way Quote Link to comment Share on other sites More sharing options...
sry_not4sale Posted December 11, 2008 Author Share Posted December 11, 2008 Here is a selection of some of the parts cars/victims of my project: FE injected Series-2 manual Sedan MA series-1 manual Coupe Another MA series-1 manual Coupe - injected!! And another random pic or two: And a vid of me burning it up in a shitty 100hp 929 coupe i had http://nz.youtube.com/watch?v=AQWDvzoAFrI Quote Link to comment Share on other sites More sharing options...
sry_not4sale Posted December 11, 2008 Author Share Posted December 11, 2008 So... a shitloads more has happened since blowing it up before the wedding lol. Shit, almost a year ago now... Brought heaps of parts to get the 12at going the right way, with an aftermarket ecu and all new wiring, emissions removed etc. However due to the mammoth job it is being, lack of funds, and wanting to just drive the prick of a car - about a month ago I have decided to go FE DOHC / FE3 It'll get the 12at in it one day, just not in the next 12 months Plans are: - Get motor in and running - Boso exhaust like lofreq's current one - Slammed on std 15" alloys with mega camber (IRS for the win!) - Drriivveee... skiiddddd... enjoy it (for once!) Quote Link to comment Share on other sites More sharing options...
sry_not4sale Posted December 18, 2008 Author Share Posted December 18, 2008 Sorry for the shit quality: Got a spare dizzy now for my CAS conversion plans. Going to use the standard FE3 computer, so have to keep the standard ignition setup. The dizzy fouls against the firewall, so I am going to mount it off the front cam gear. The fact that it rotates the opposite way wont be a problem if I plug in the lead in the opposite order. I will setup the standard CAS (which is in the base of the dizzy) in the standard position by the firewall tho as it won't run backwards. I should be able to make it short enough so it doesnt foul the firewall Next is to get a RWD sump and lift it onto the 12a subframe. That should lower it enough so I don't need to modify the mounts so it clears the bonnet Progress is stalled by me not being able to find my passenger side FE engine mount (piece that bolts to block) It seems like FE ute mounts are the same tho, so going to have a look for one of them at the wreckers. Tried a couple so far with no luck Quote Link to comment Share on other sites More sharing options...
sry_not4sale Posted December 28, 2008 Author Share Posted December 28, 2008 SWEET. Now have engine mount I need, RWD sump and pickup, and gearbox Quote Link to comment Share on other sites More sharing options...
sry_not4sale Posted January 4, 2009 Author Share Posted January 4, 2009 Well... made some progress last night.. Bolted up the left hand engine mount, had to remove the power steering pump and bracket from the FE3 to fit it. So might have to modify the bracket if I want to use the FE3 one later. Went to bolt up the SOHC FE sump, and its alot smaller... so thats a no go. Later found out its not an FE sump at all... lol Found out the 12a subframe mounts are too far apart and far too low (fe3 windage tray fouls on subframe...), so pulled out a FE/MA subframe and bolted it up to that. Had issues getting the rubber mounts lined up so just got it on there temporarily. Figured once its in the car the subframe wouldn't move around and I could get some leverage on the mounts. Looks like it might be high enough off the subframe to fit the standard FE3 sump, although the motor is going to foul the bonnet... Me getting frustrated with getting the mounts on: Motor bolted to gearbox and subframe: Subframe bolted up into place Now, it may look all nice and happy - but we have some problems. It was getting late so I haven't had a huge look at all these, but grabbed some snaps For some reason the motor is pushing hard forward on the mounts, probably something fouling on the firewall/gearbox tunnel entry: Thermostate housing stud and sensor fouling firewall: No room for CAS as planned: These might be fixed by slotting the mounts so the motor can sit a bit further forward, otherwise some custom mounts + everything that goes with will be required. On the plus side, I can use the standard extractors as they clear the power steering rack So, definitely not an easy conversion so far! A bit more work will be required before I have tamed the beast! Quote Link to comment Share on other sites More sharing options...
sry_not4sale Posted January 11, 2009 Author Share Posted January 11, 2009 Fuck it's weird putting stuff BACK onto a cosmo lol normally I'm ripping stuff of one hahaha Spent most of the time so far looking for stuff in boxes, found most of the engine bay stuff I need. I want to get all the electrical stuff bolted back in first so I can start making up the new loom (hidden in guards and engine wiring coming out under the clutch master and running under the intake manifold). Got gearbox cross member on, pedal box back in. Took the drivers door off to make getting at stuff alot easier. Looks like the heater hoses and master cylinders are just going to clear the engine. Won't know for sure until I get the proper subframe in. Next is to pull the loom out of the capella when the weather fines up. Going to pull the brake master out to see if it bolts up to the cosmo too. Quote Link to comment Share on other sites More sharing options...
sry_not4sale Posted January 22, 2009 Author Share Posted January 22, 2009 Found out I must have dumped my FE subframes Found mk3 supras have big 100mm liquid filled mounts, so think I am going to use some of them to space out the rotary engine mounts. Quote Link to comment Share on other sites More sharing options...
sry_not4sale Posted January 25, 2009 Author Share Posted January 25, 2009 Spent sunday afternoon dividing up and labeling the FE3 loom... fucking wiring Also got a 5-stud, brake upgrade sorted ... if they fit! Trying them on tonight *prays* Quote Link to comment Share on other sites More sharing options...
sry_not4sale Posted January 27, 2009 Author Share Posted January 27, 2009 The S13 hubs fit up, but would need some slight mods to strut mounts and tie rods. No big drama, but makes me wonder what the advantage of doing this over the FC3S brake conversion is - or just getting custom hubs made up for the stub axles. They all seem to require the same amount of work. Anyways, no drama. First priority is to get the engine running! Quote Link to comment Share on other sites More sharing options...
sry_not4sale Posted February 17, 2009 Author Share Posted February 17, 2009 Started rubbing down my front guards and bumper Paint was damaged from the police fingerprinting them when my wheels were stolen, and some damage from storage. So I am putting some of my better second hand guards on, and a straighter bumper. Done some more on the wiring, running the engine loom under the clutch master cylinder and the rest through the front guards. Also, picked up a Bosch 070 external fuel pump cheap cheap Thanks MESDUP! Quote Link to comment Share on other sites More sharing options...
sry_not4sale Posted April 3, 2009 Author Share Posted April 3, 2009 So here are some pics of how the car looks atm... nothing is happening as I am moving into a new, bigger shed shortly Started sanding down some spare guards as I have never done this before so didn't wanna fuck my best ones!! Gonna make a post in tech about how to do it properly cos I am worried I'm not Quote Link to comment Share on other sites More sharing options...
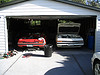
sry_not4sale Posted April 16, 2009 Author Share Posted April 16, 2009 Got a bit further with the sanding... time has been a bit short lately tho Finally chucked a sticker on the car! Moving the car to its new garage: MA70 tow car! Quote Link to comment Share on other sites More sharing options...

Recommended Posts
Join the conversation
You can post now and register later. If you have an account, sign in now to post with your account.