


gazguy
-
Posts
490 -
Joined
-
Last visited
Posts posted by gazguy
-
-
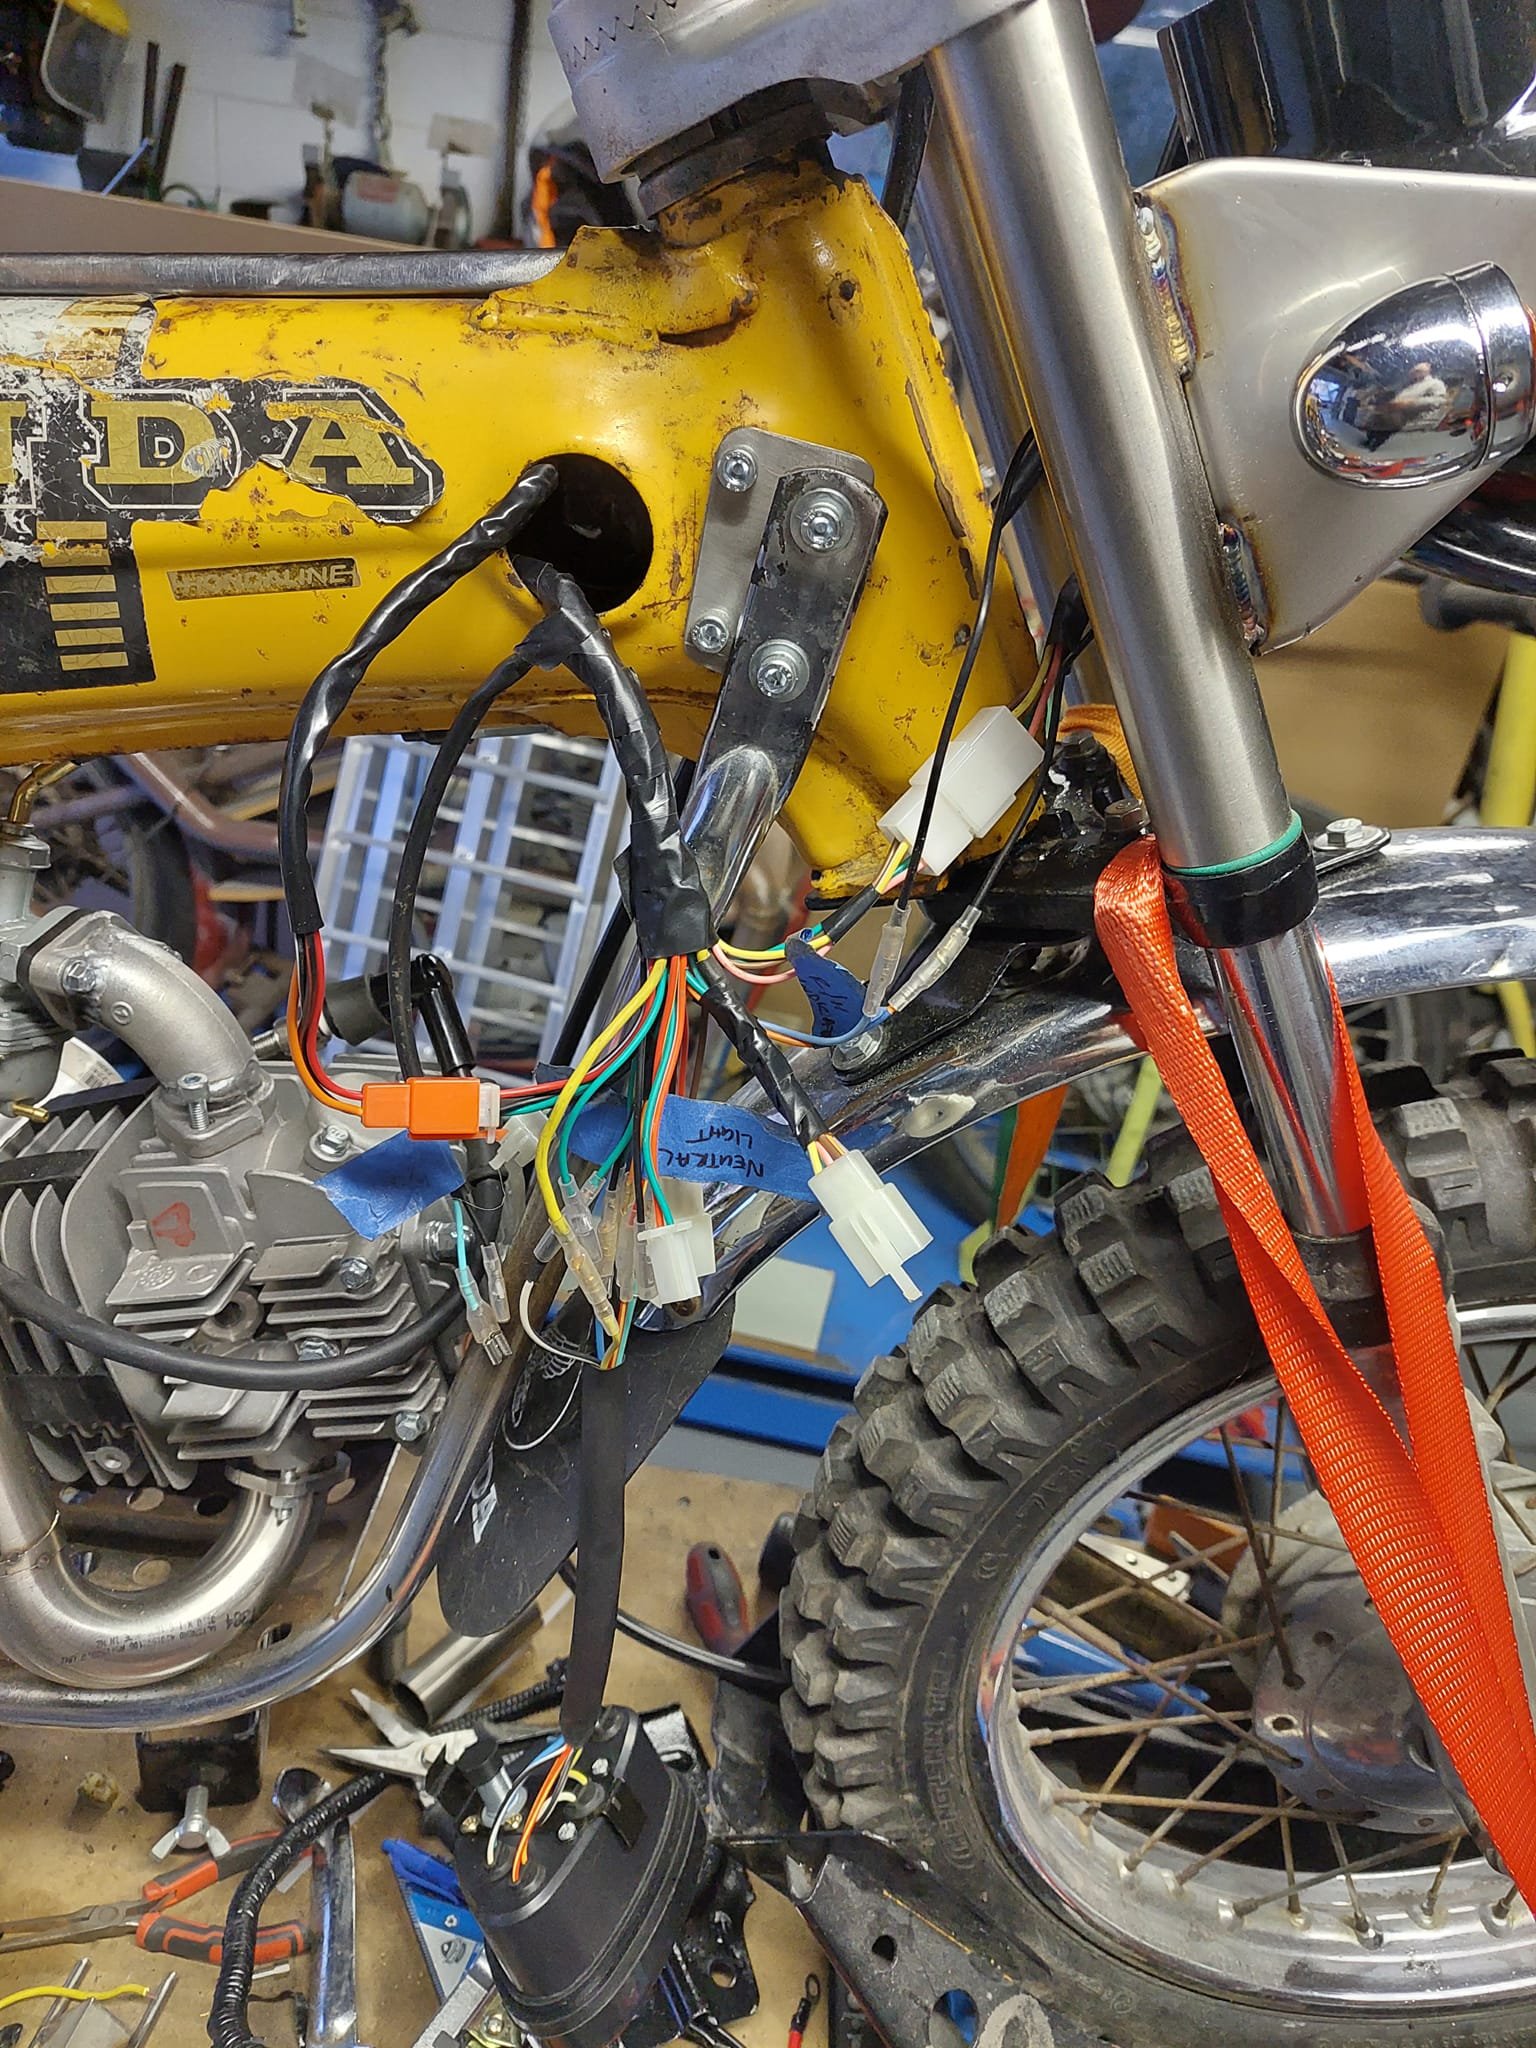
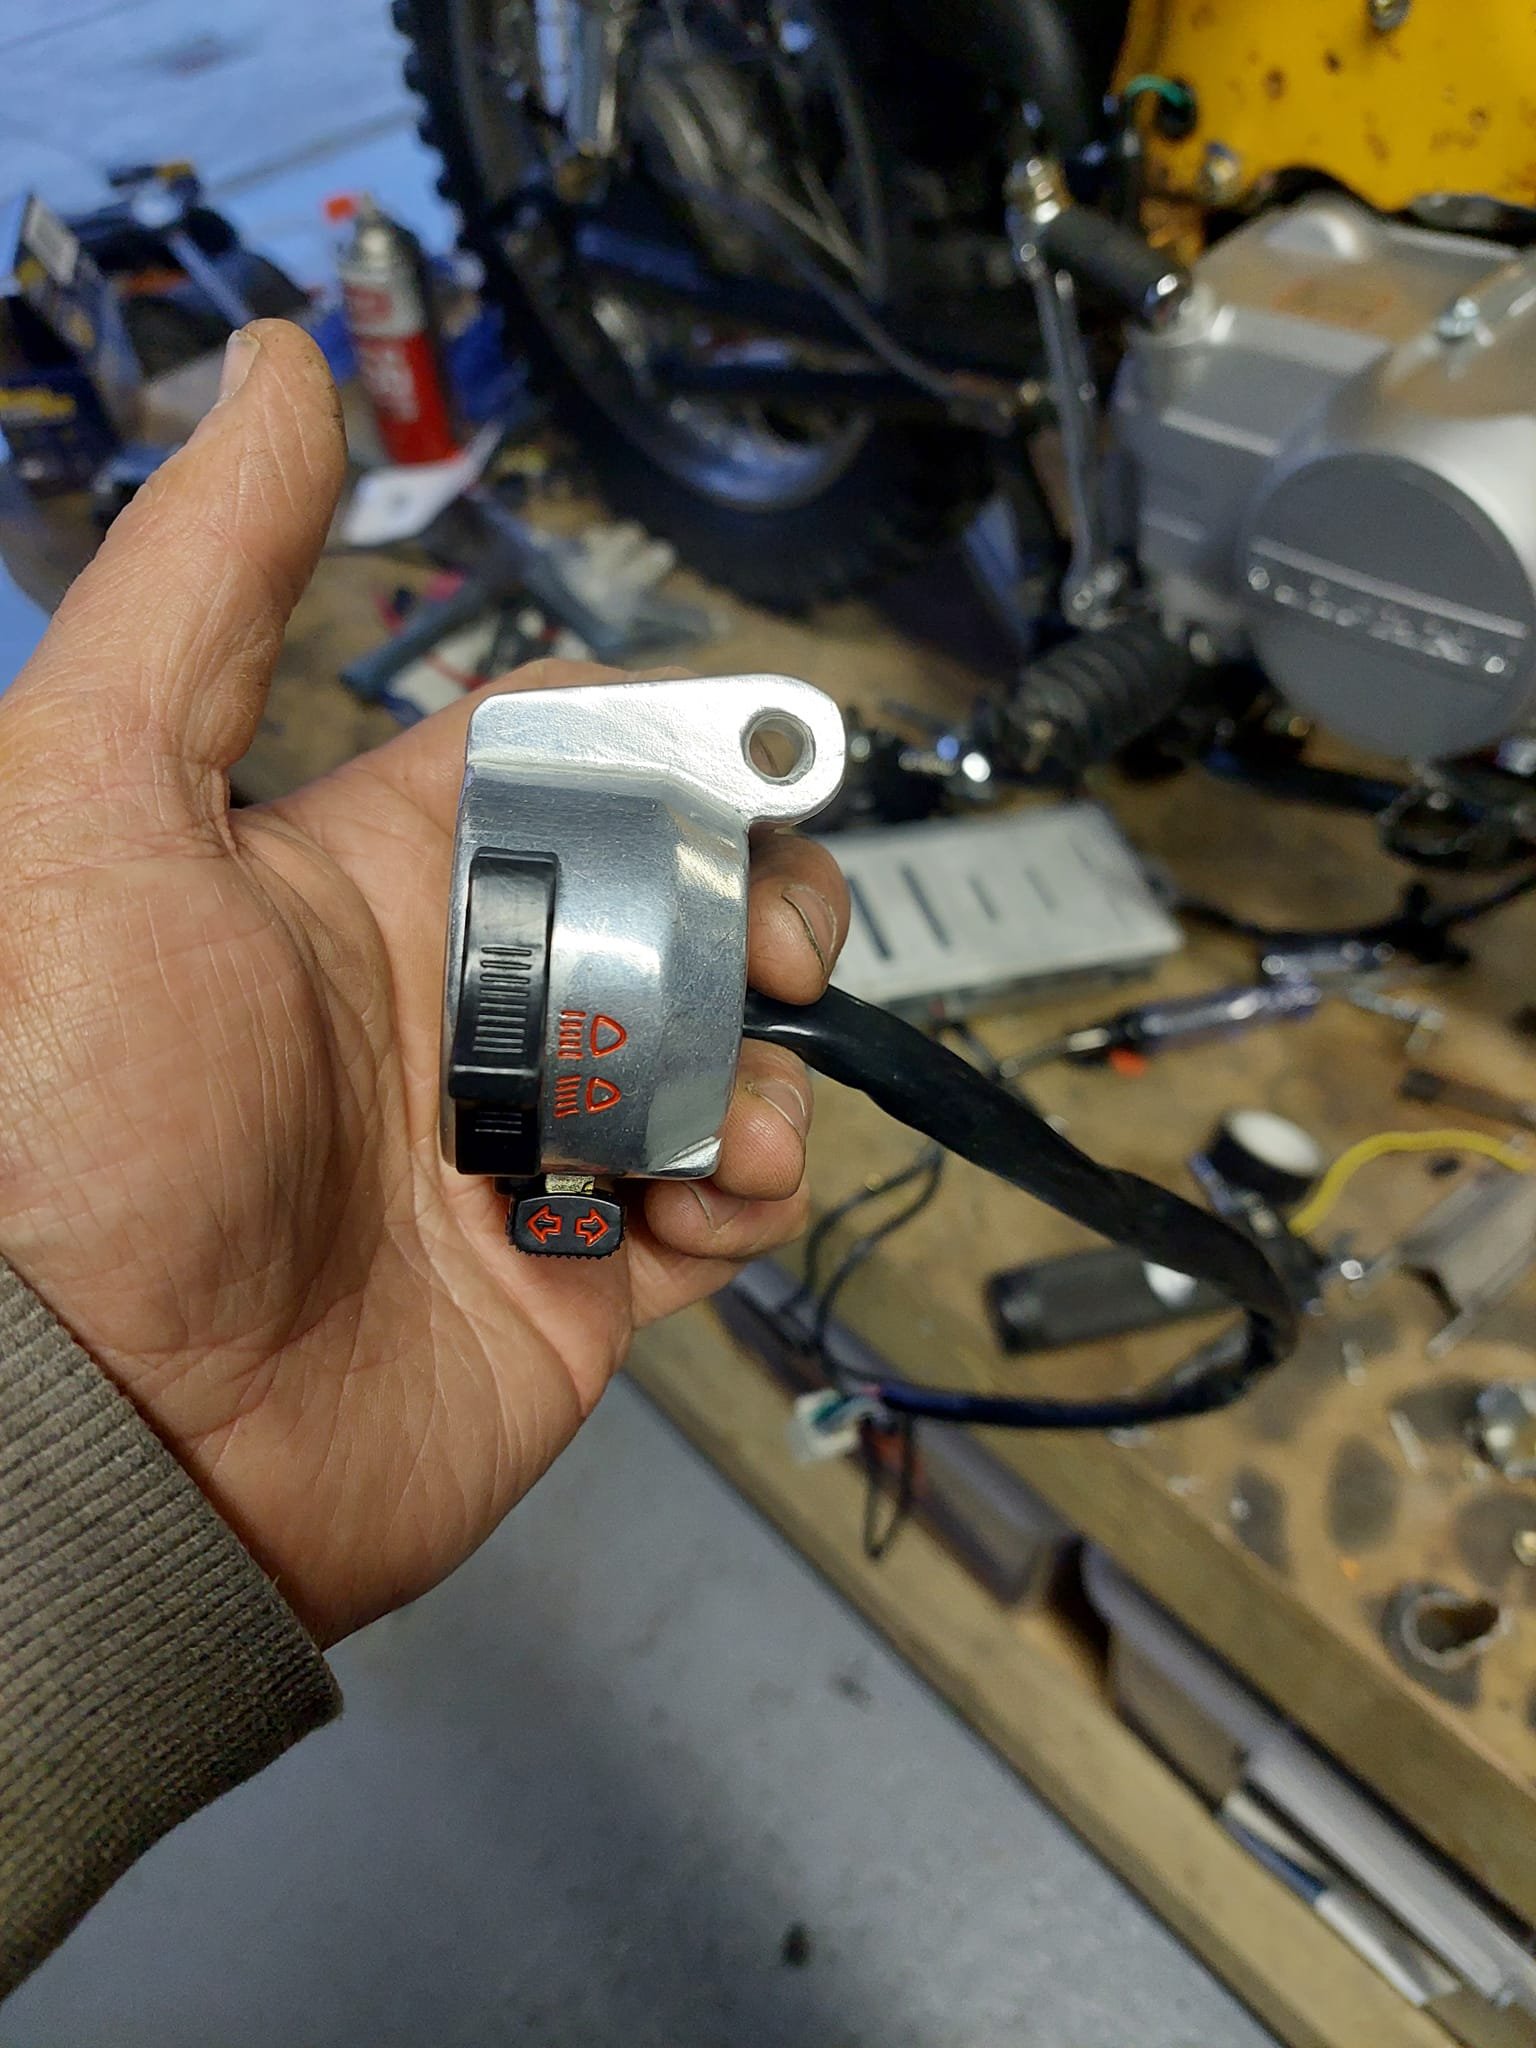
last week I started the dark art of the electrics. I bought a 'plug and play' Monkey Bike loom and had to swap over nearly every pin but got there in the end. I guess you have to expect that from parts from different manufacturers. So I had Roxettes Greatest Hits on repeat and a 6 pack of Boundary Road Hazy Pale Ales and got it knocked out, still some extending of the wires to go from the hand controls to get them to go through the handlebars.

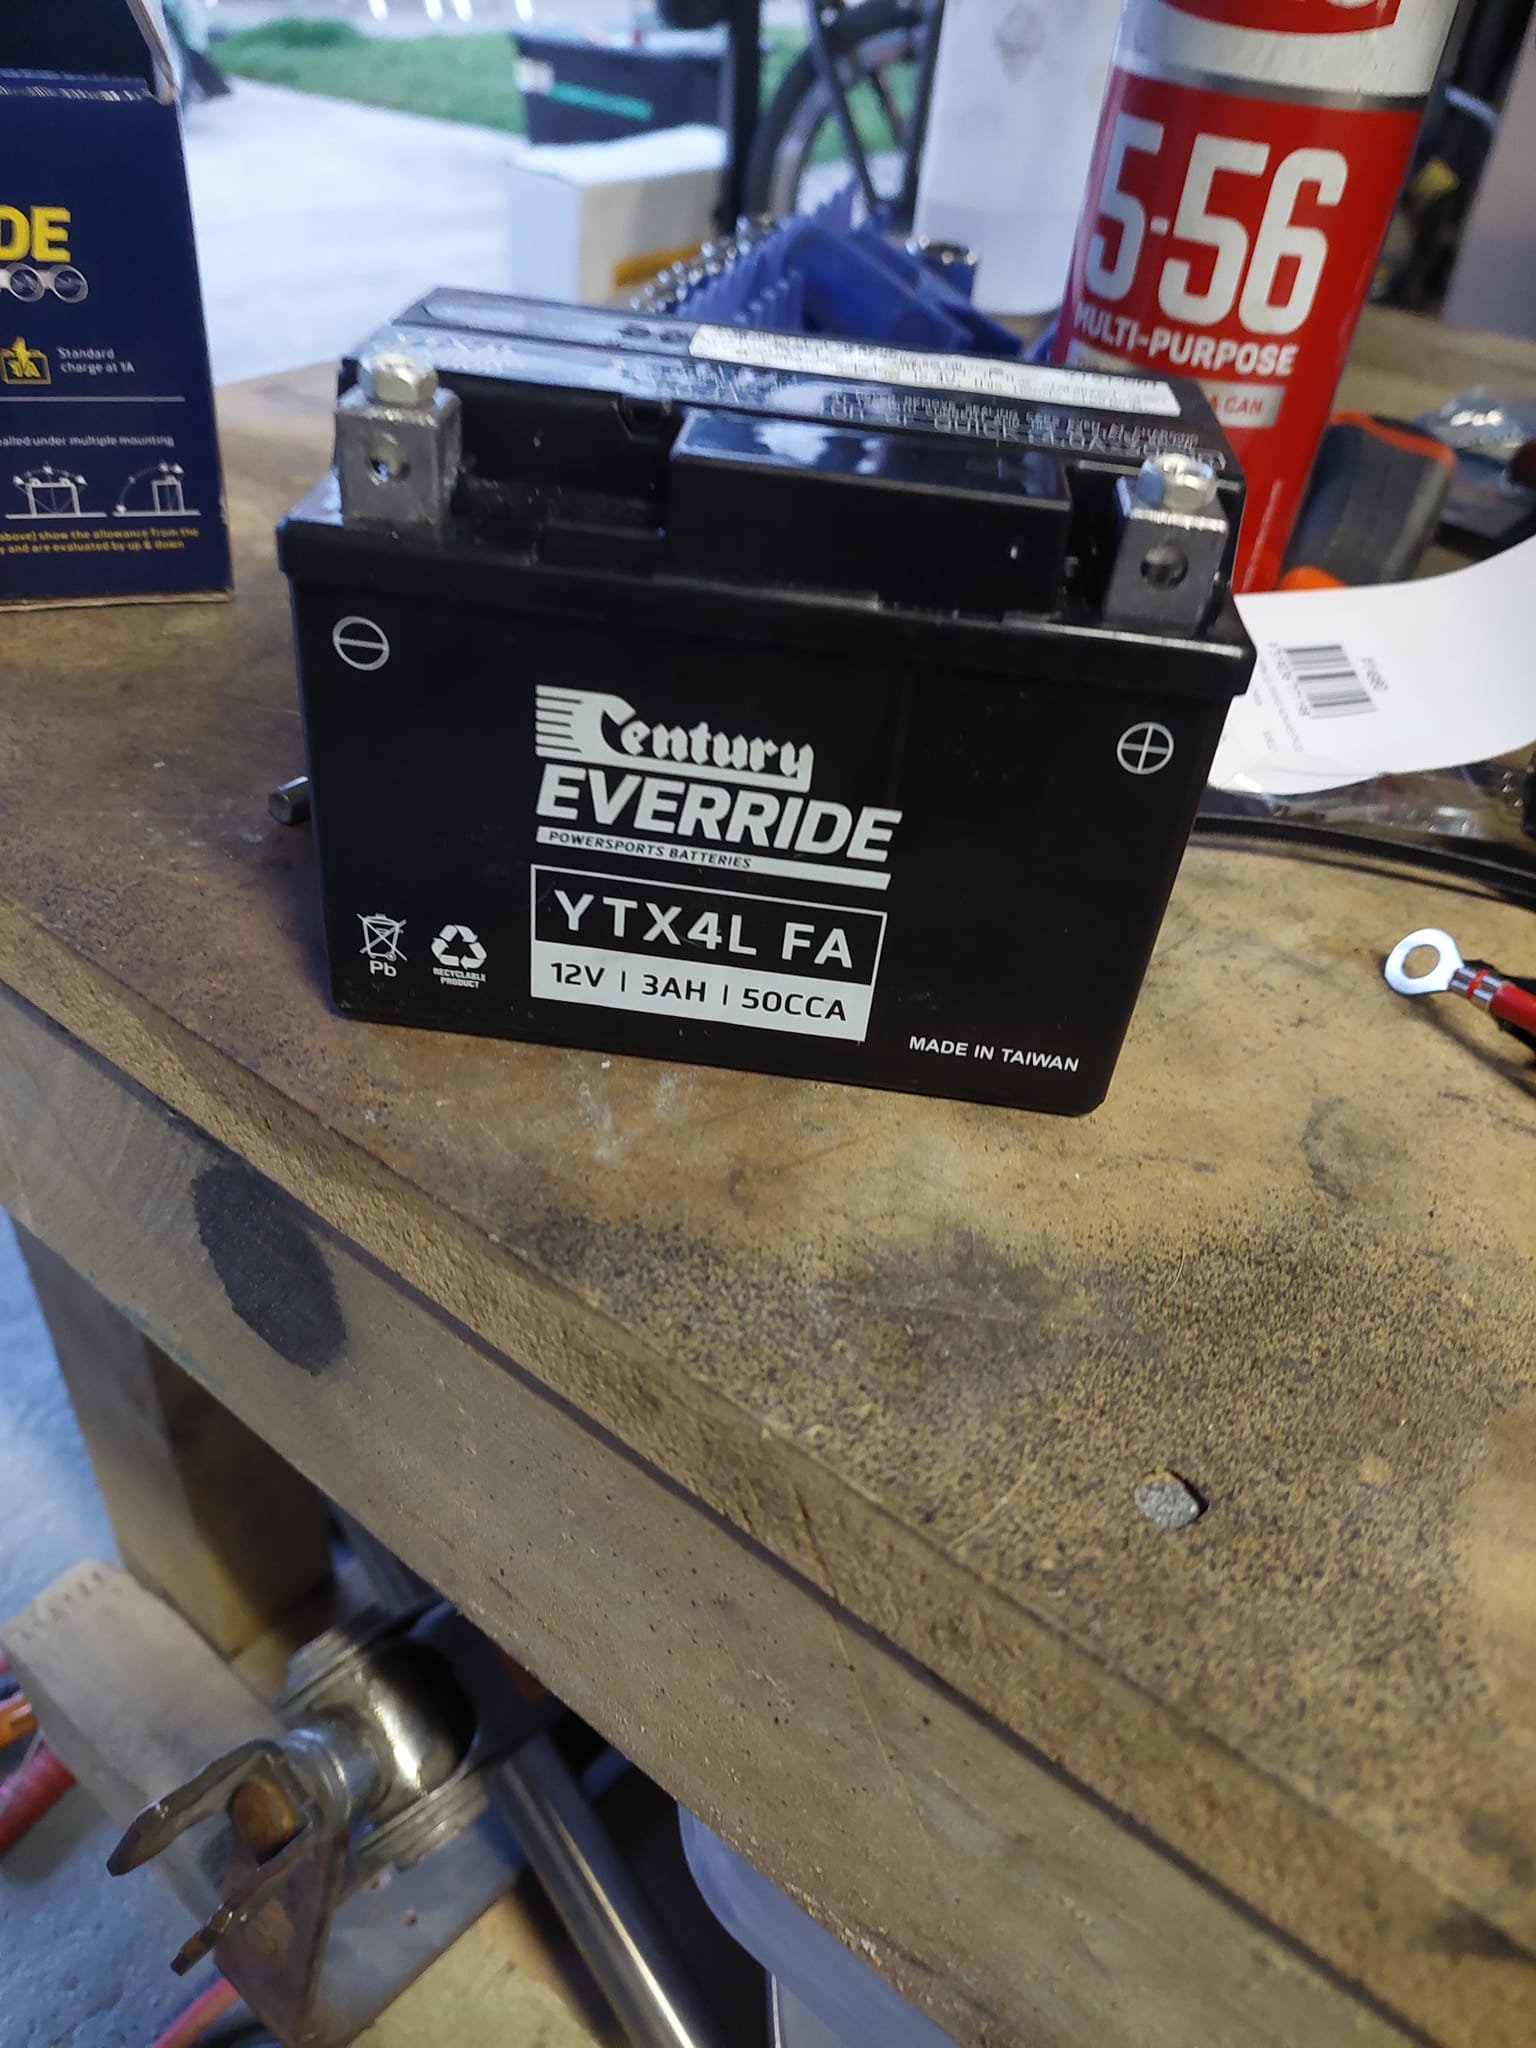
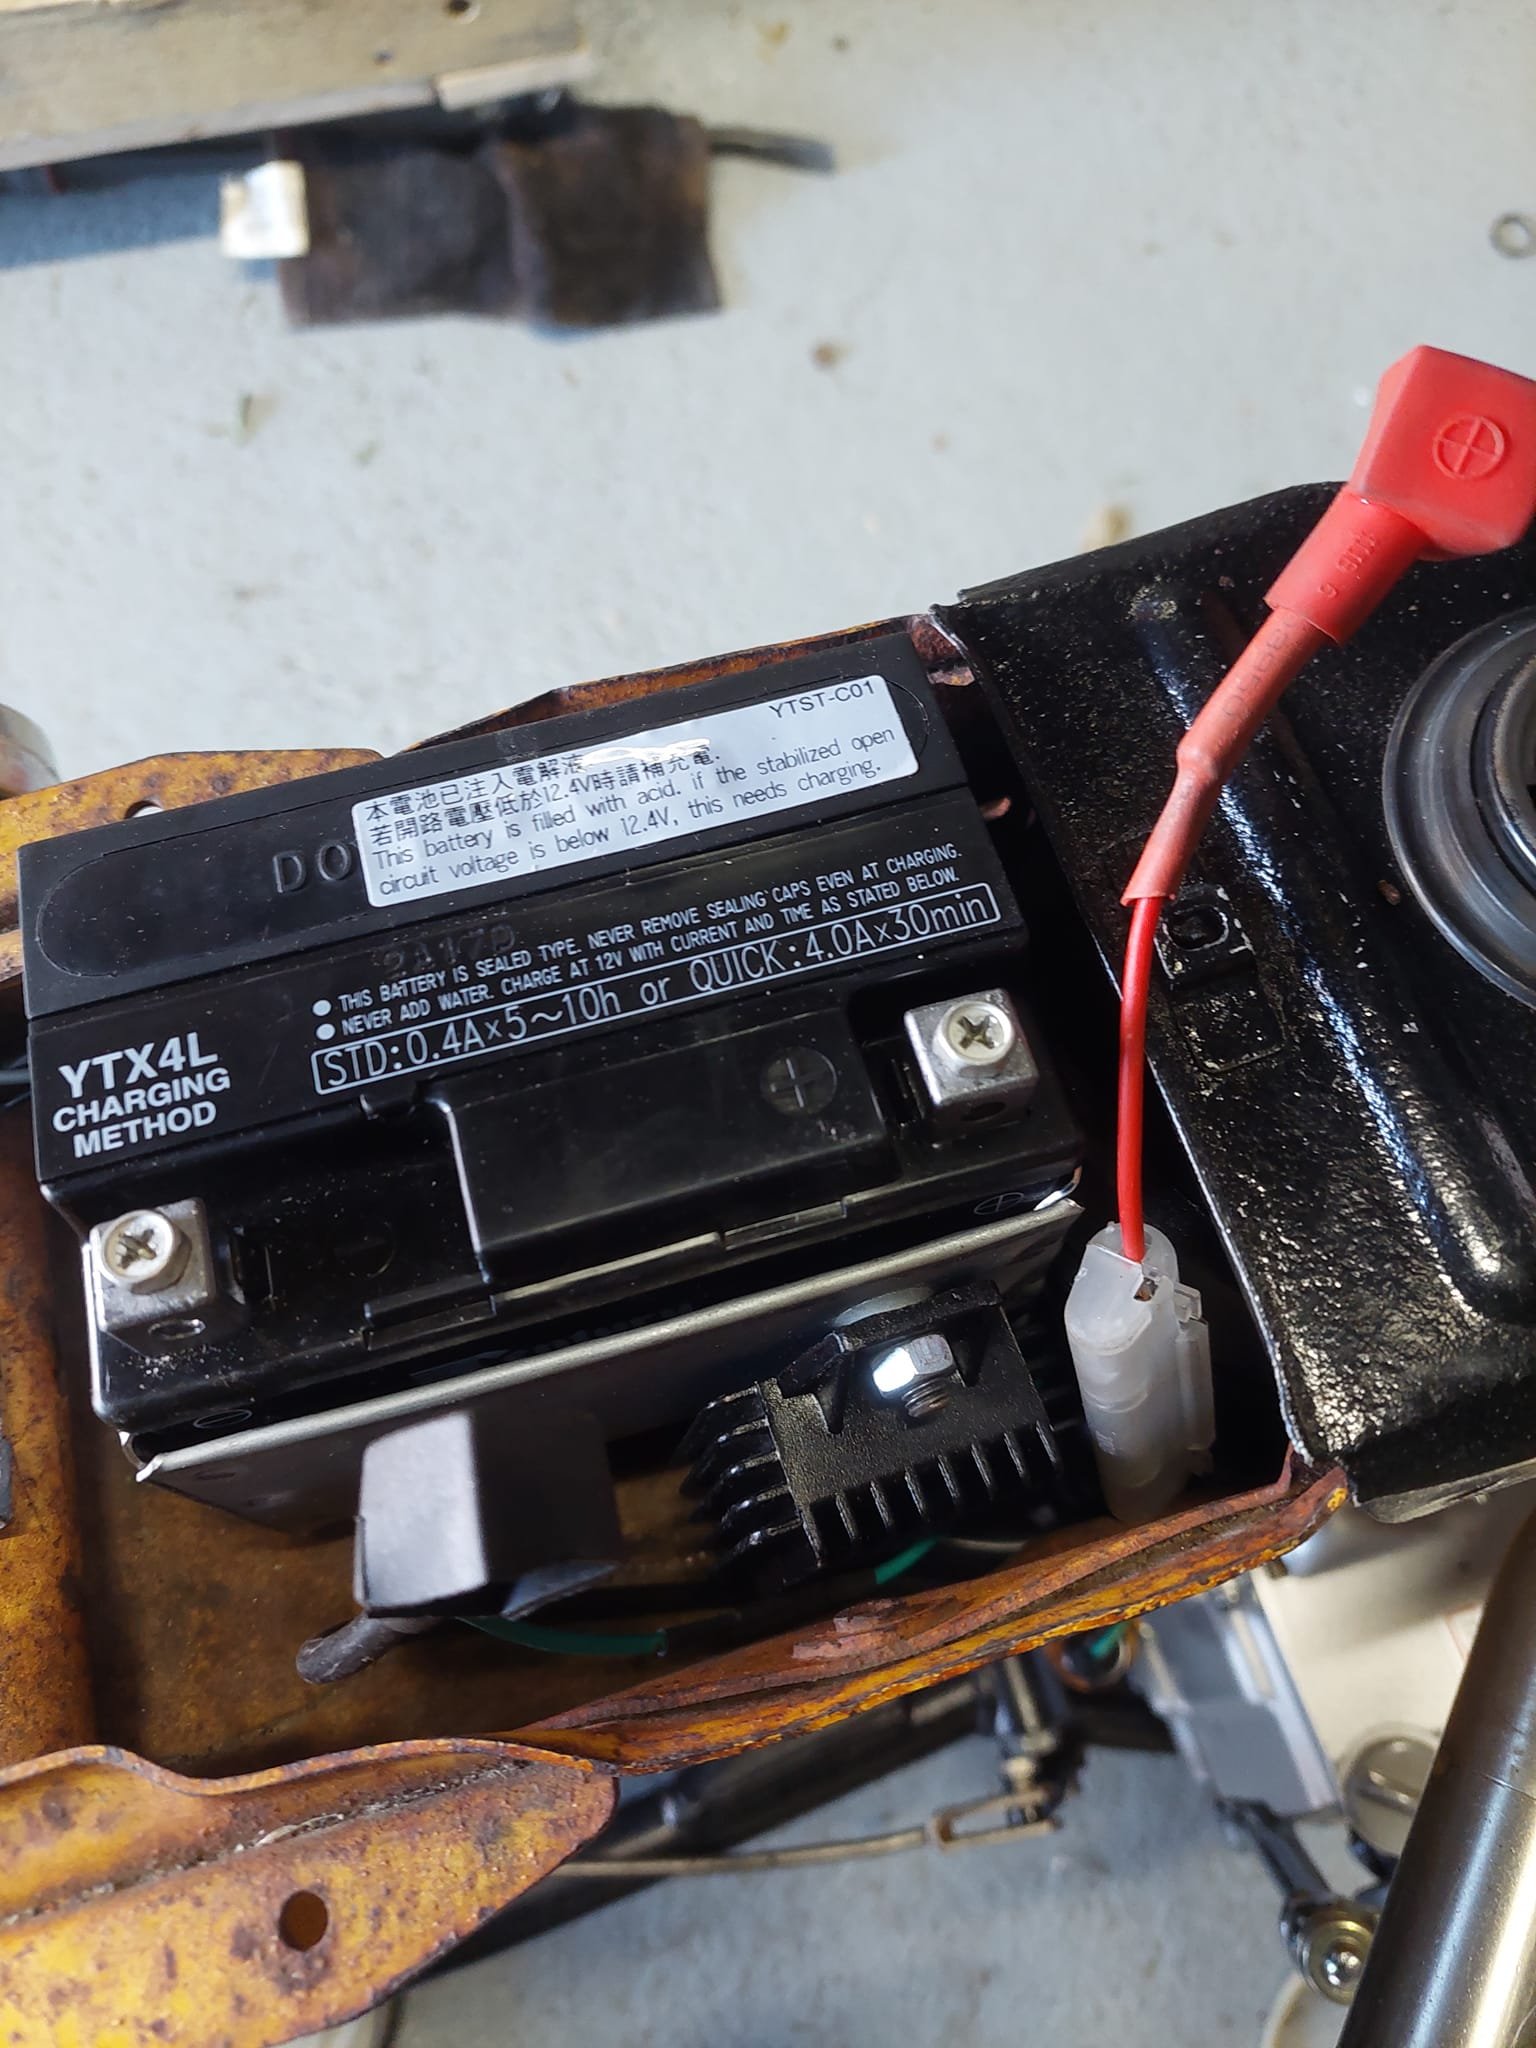
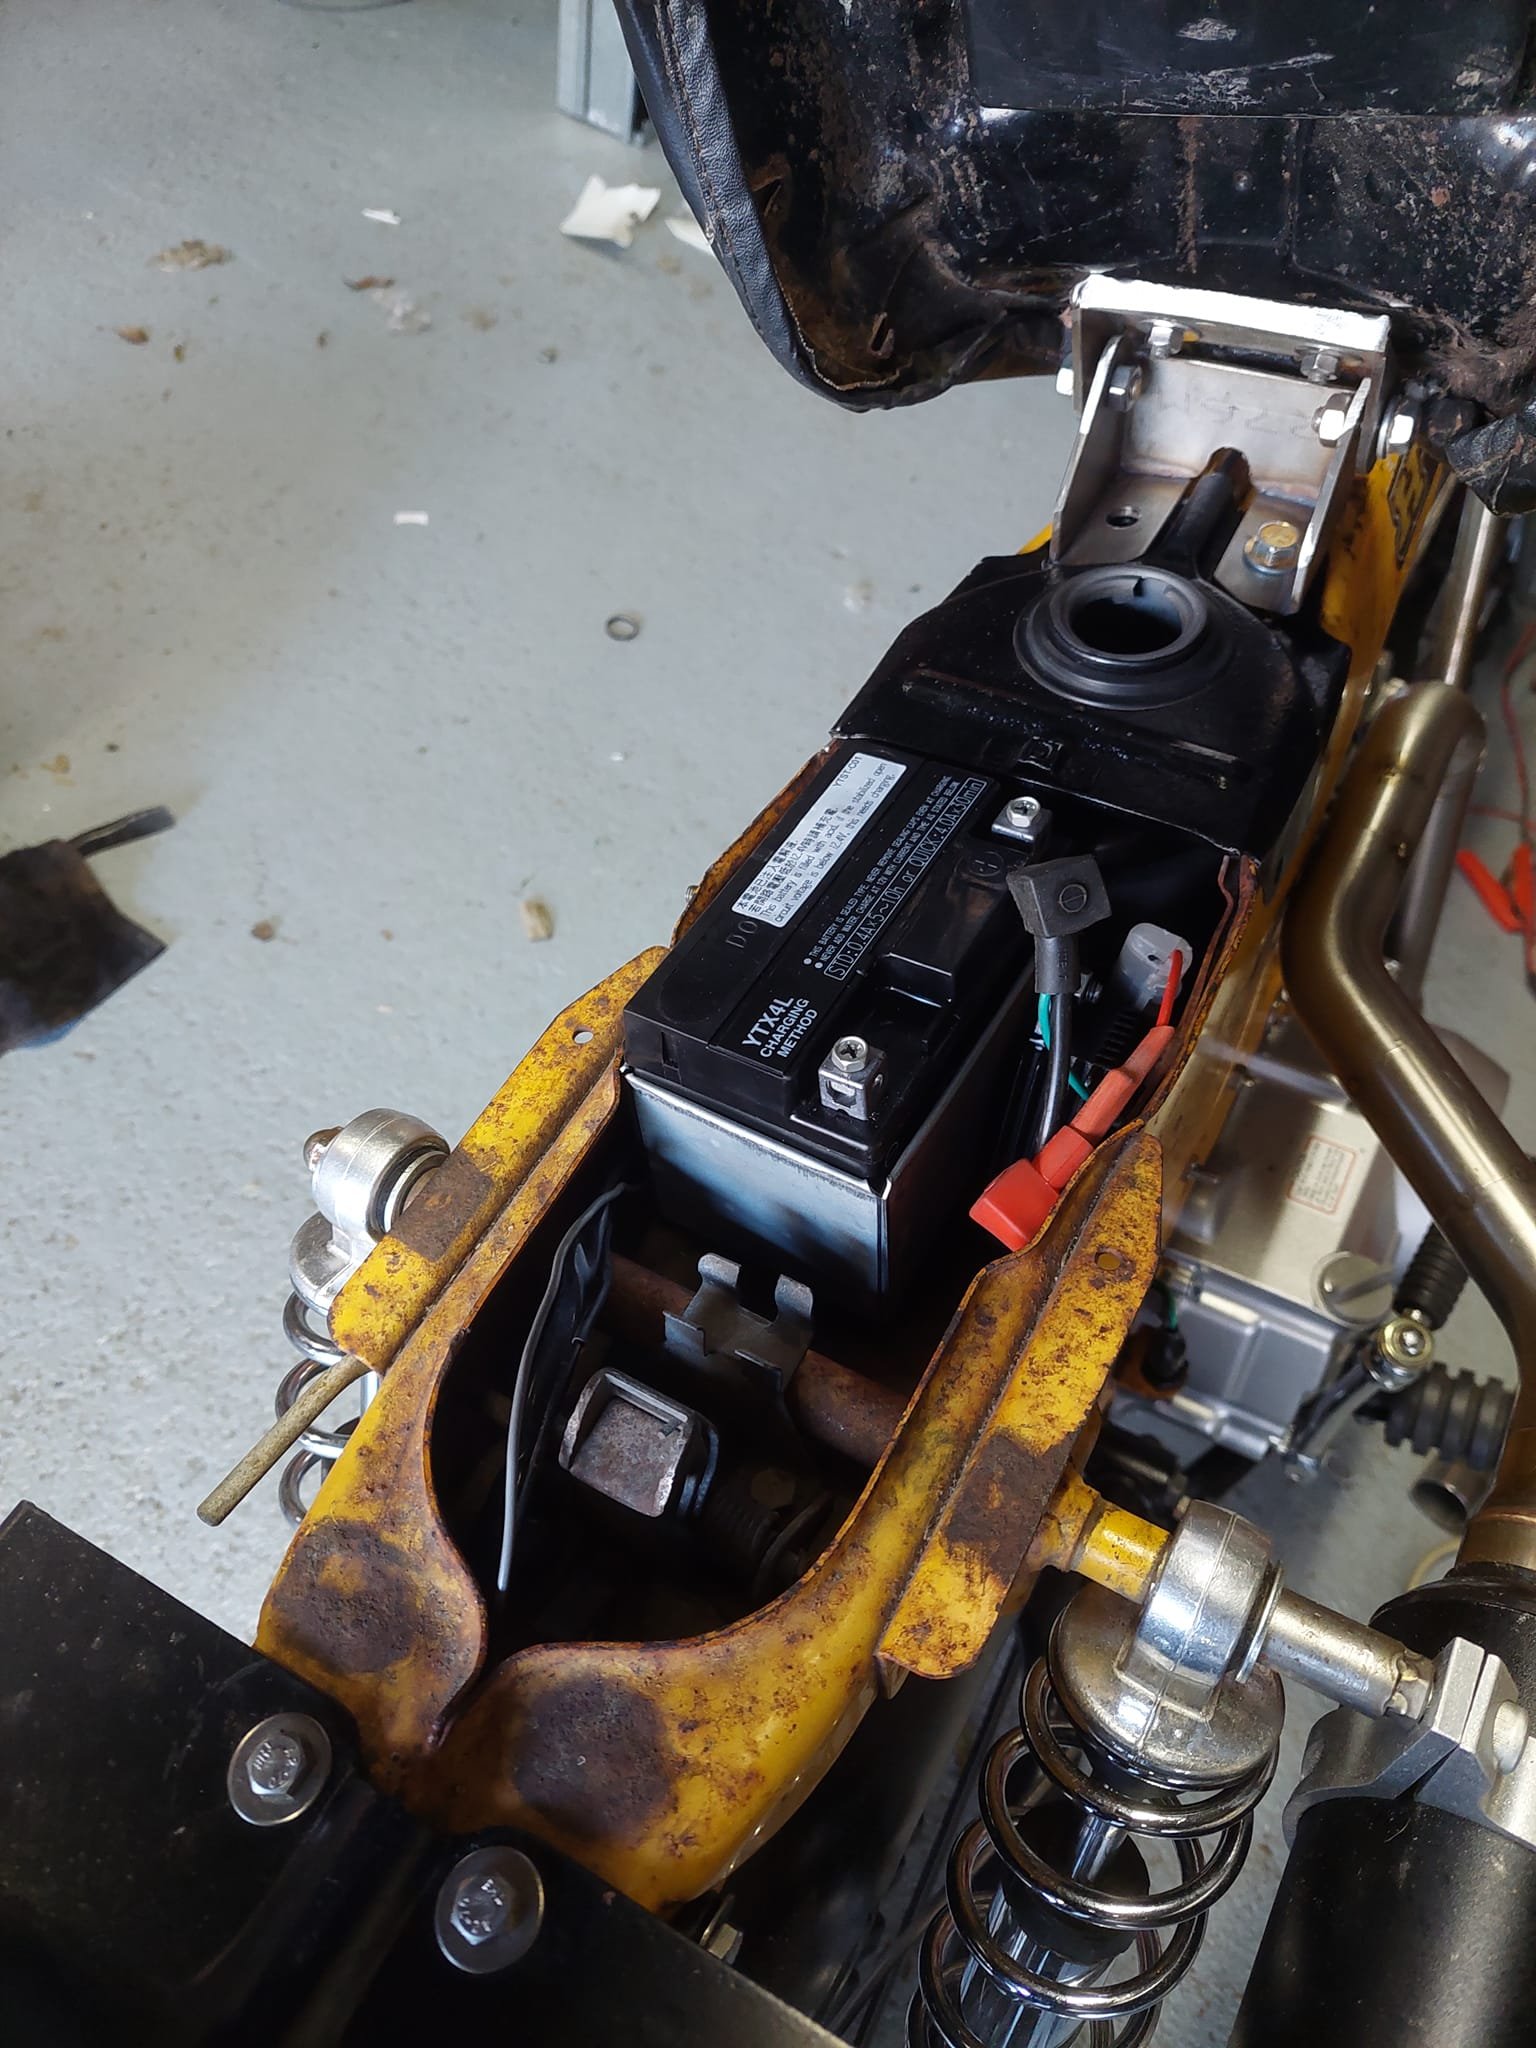
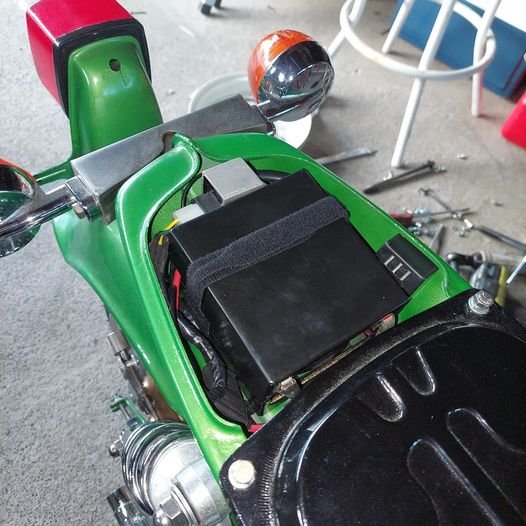
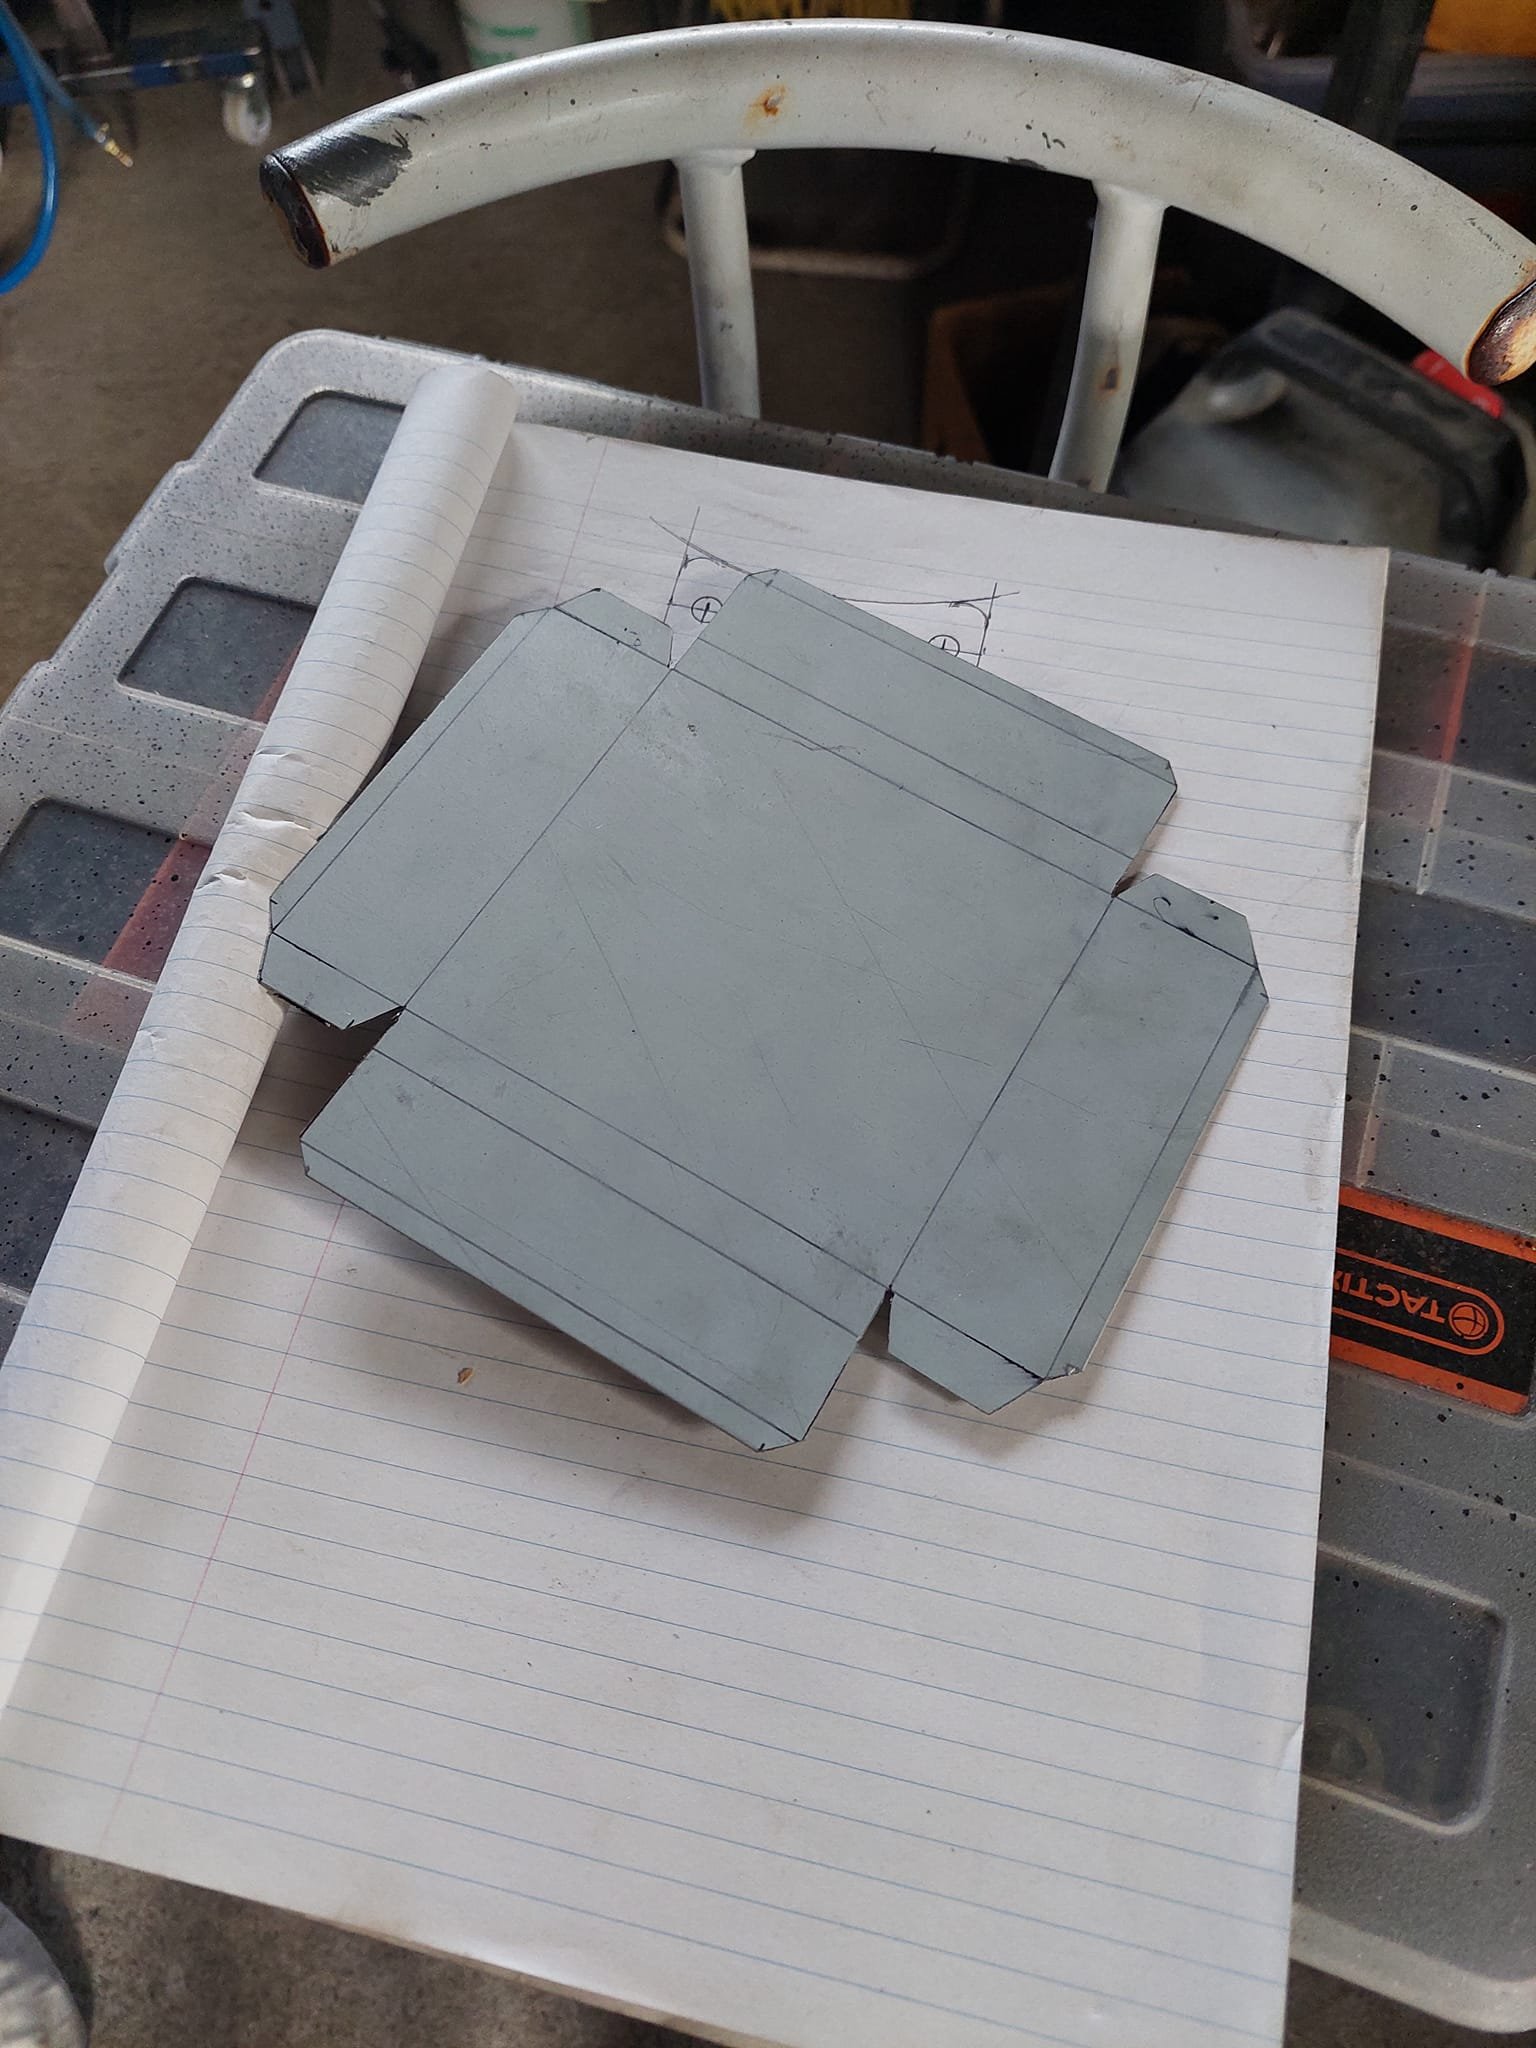
I bought a battery and folded up a box for it to sit in. I used a M6 countersunk socket head bolt and a piece of thick steel which I countersunk to use a makeshift dimple die so that the battery wouldnt rub against them
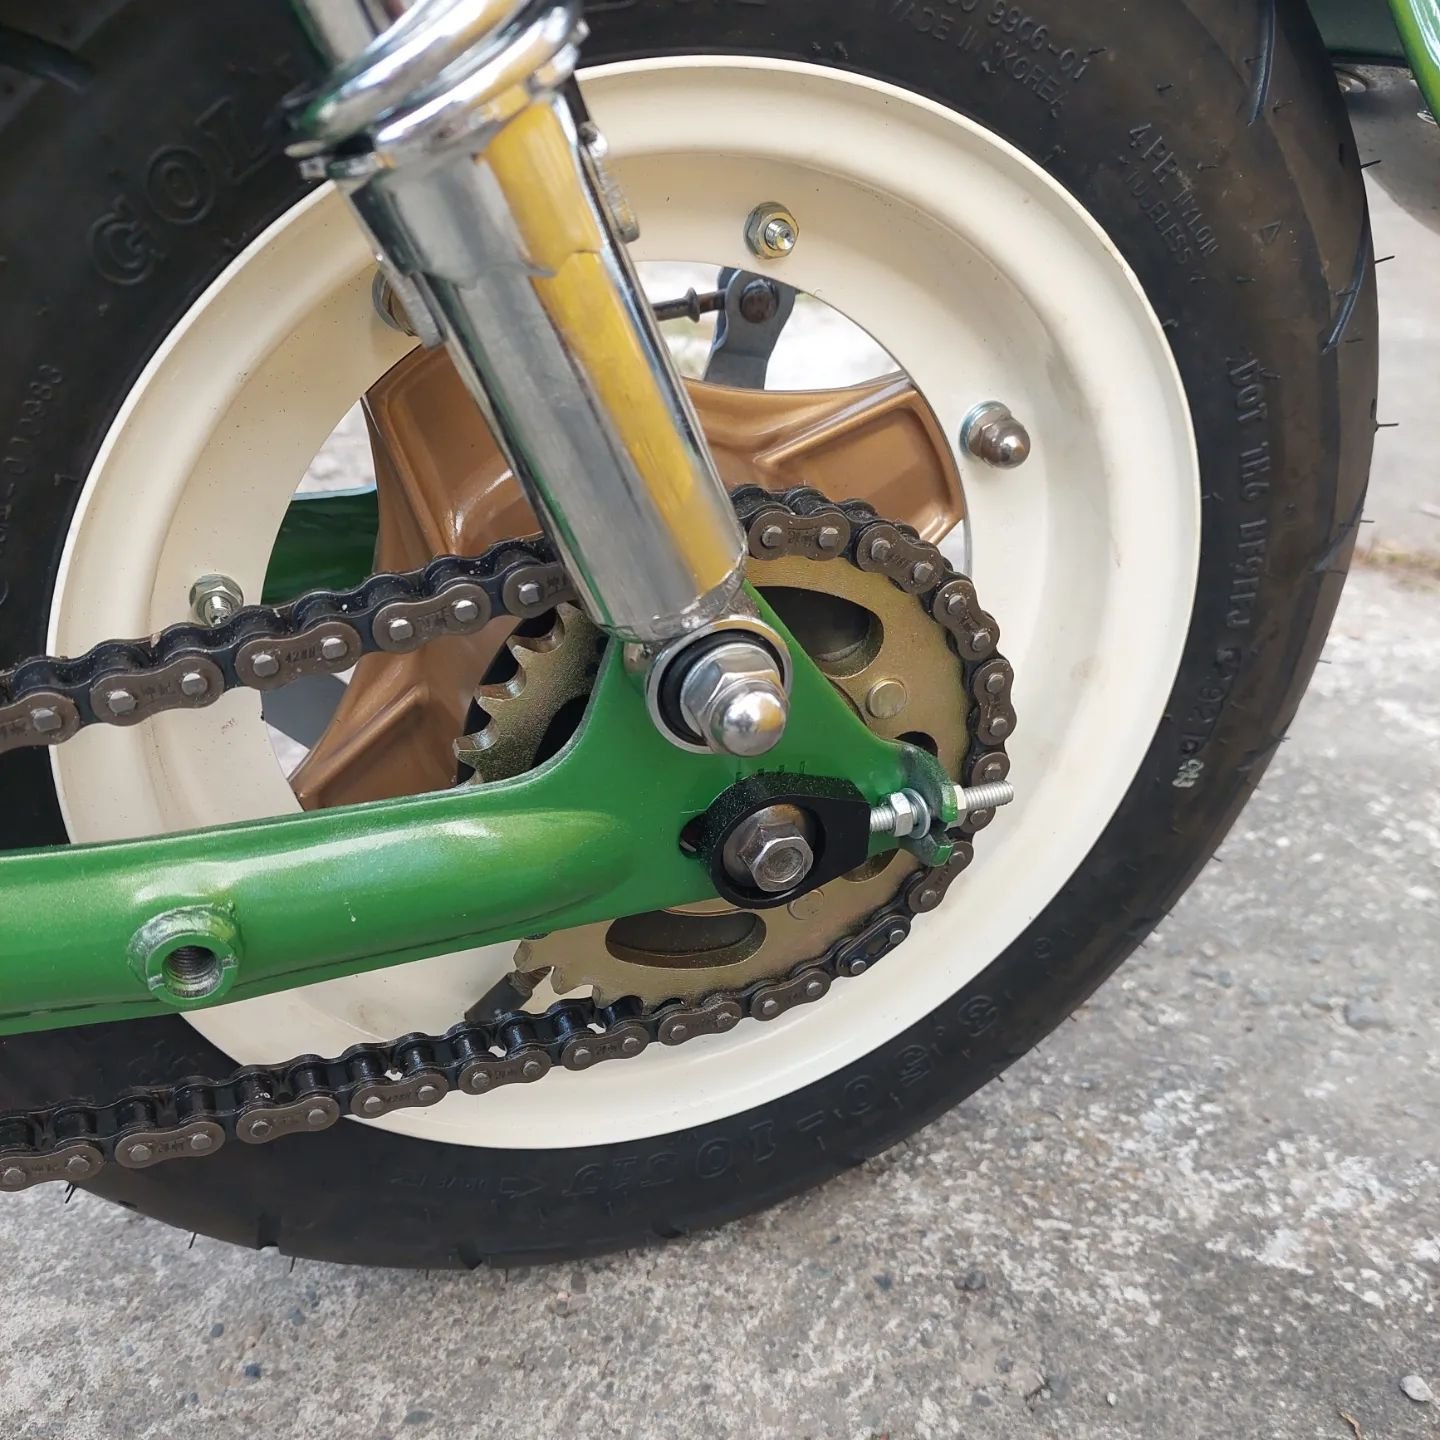
At the Mcleans Island swapmeet I came across a 14 inch NF75 wheel with a tyre thats pretty mint, haggled the guy down from $20 to $15 and got it swapped over today when it was nice and warm so that both tyres were nice and soft to get off and on. I put on the correct front brake cable too.
-
 3
3
-
-
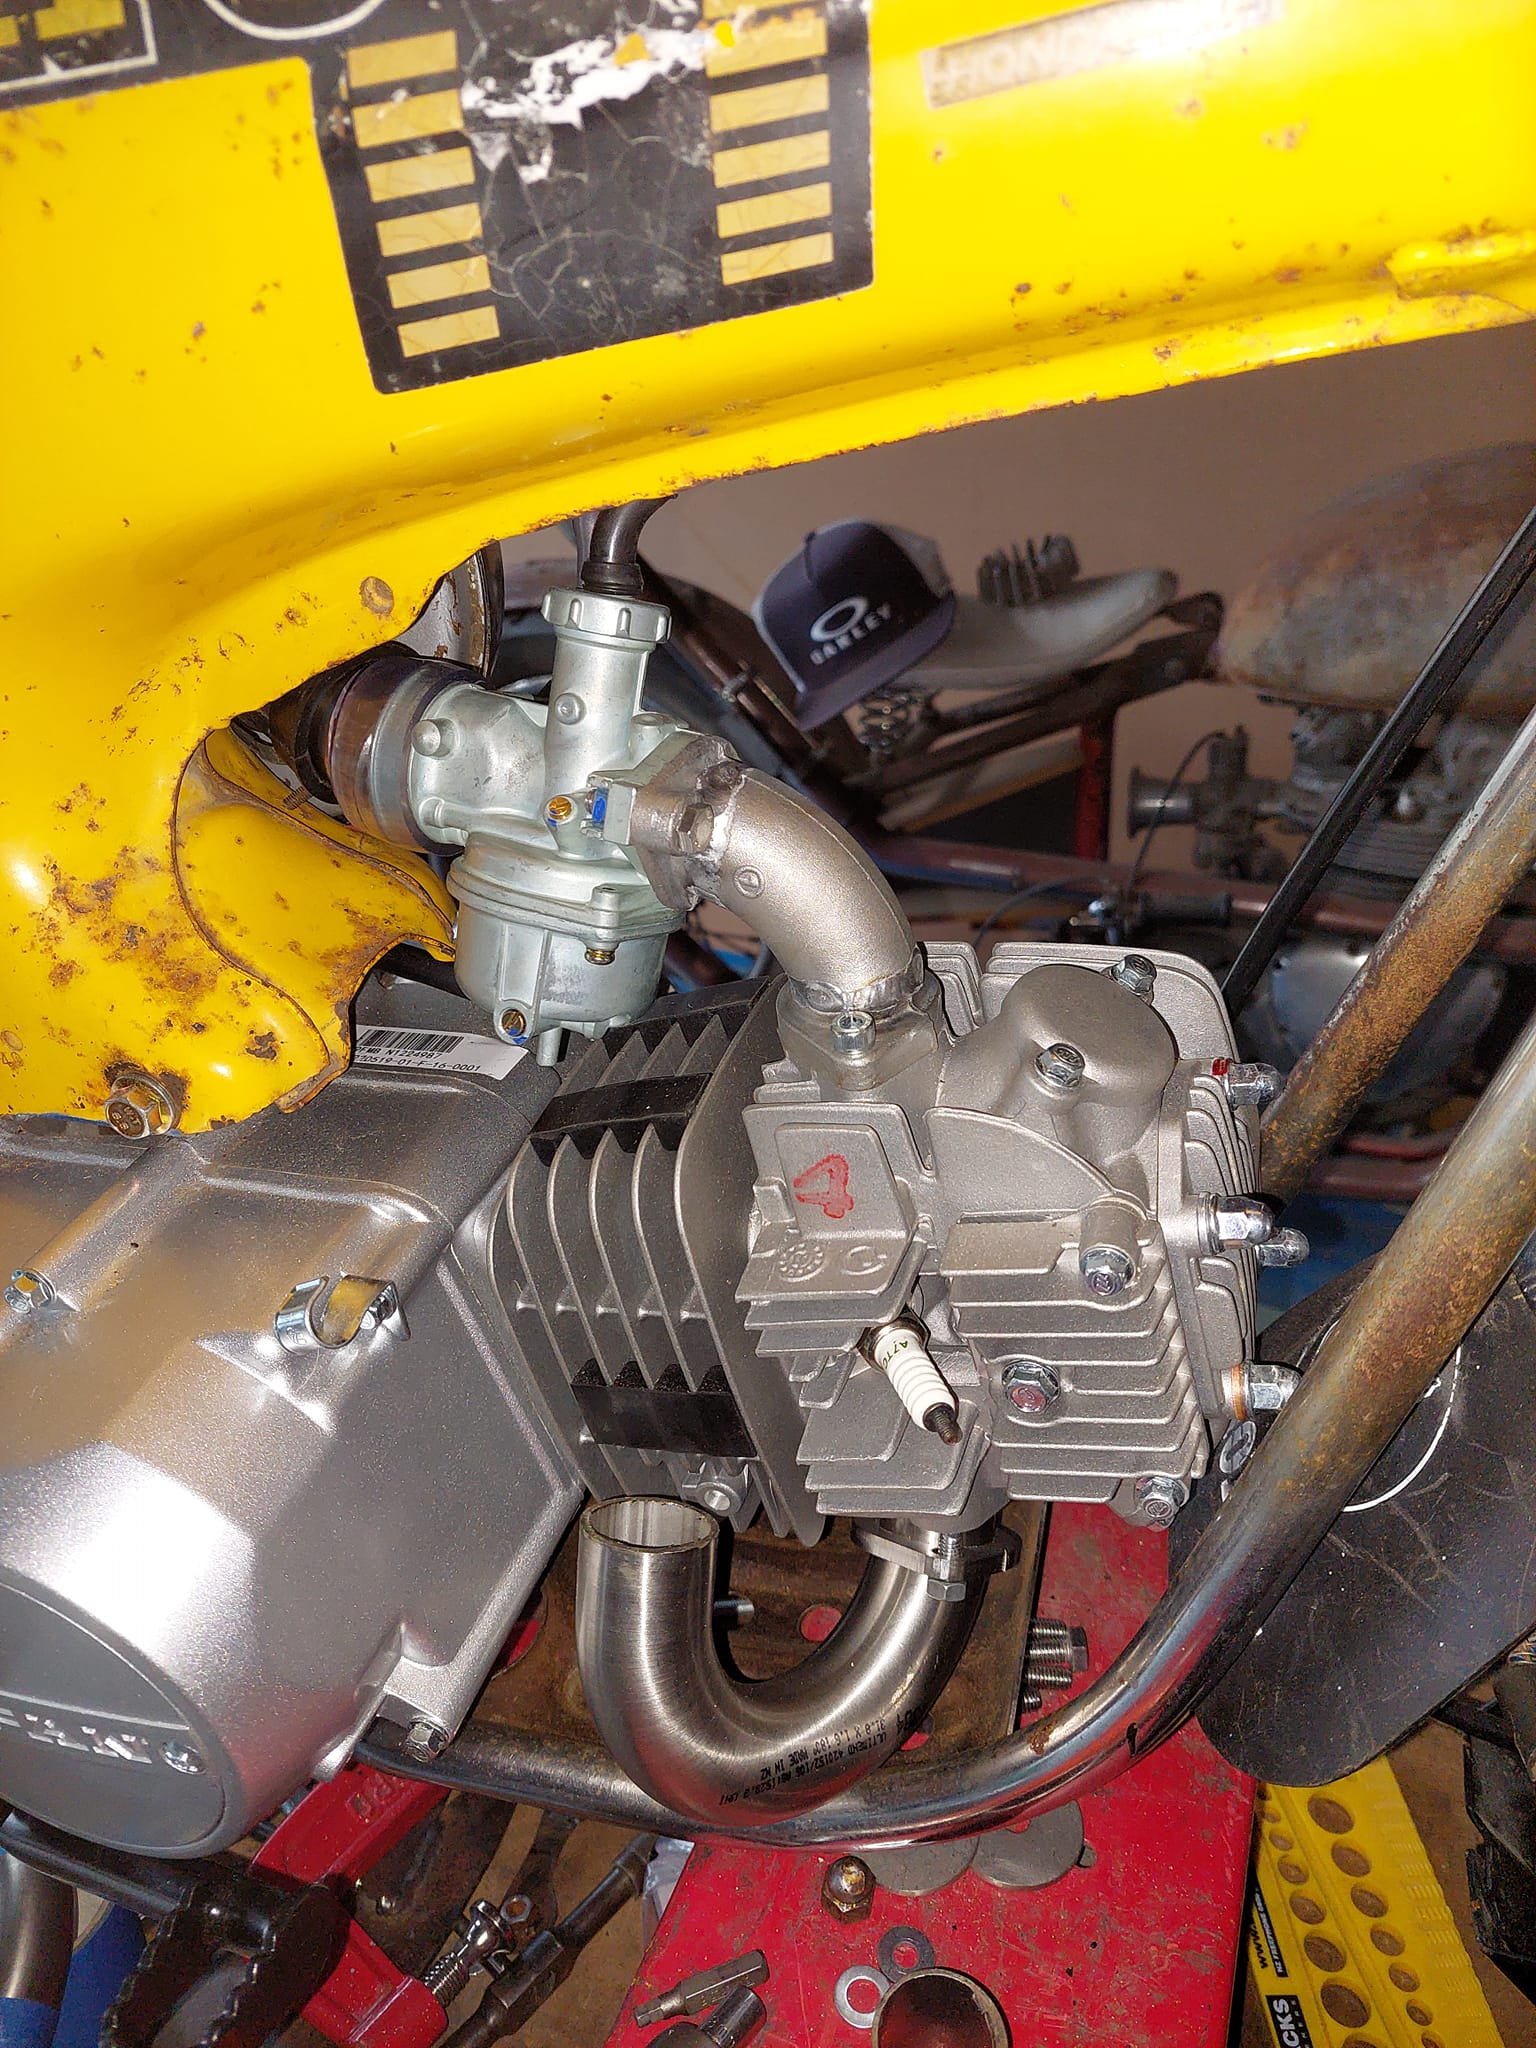
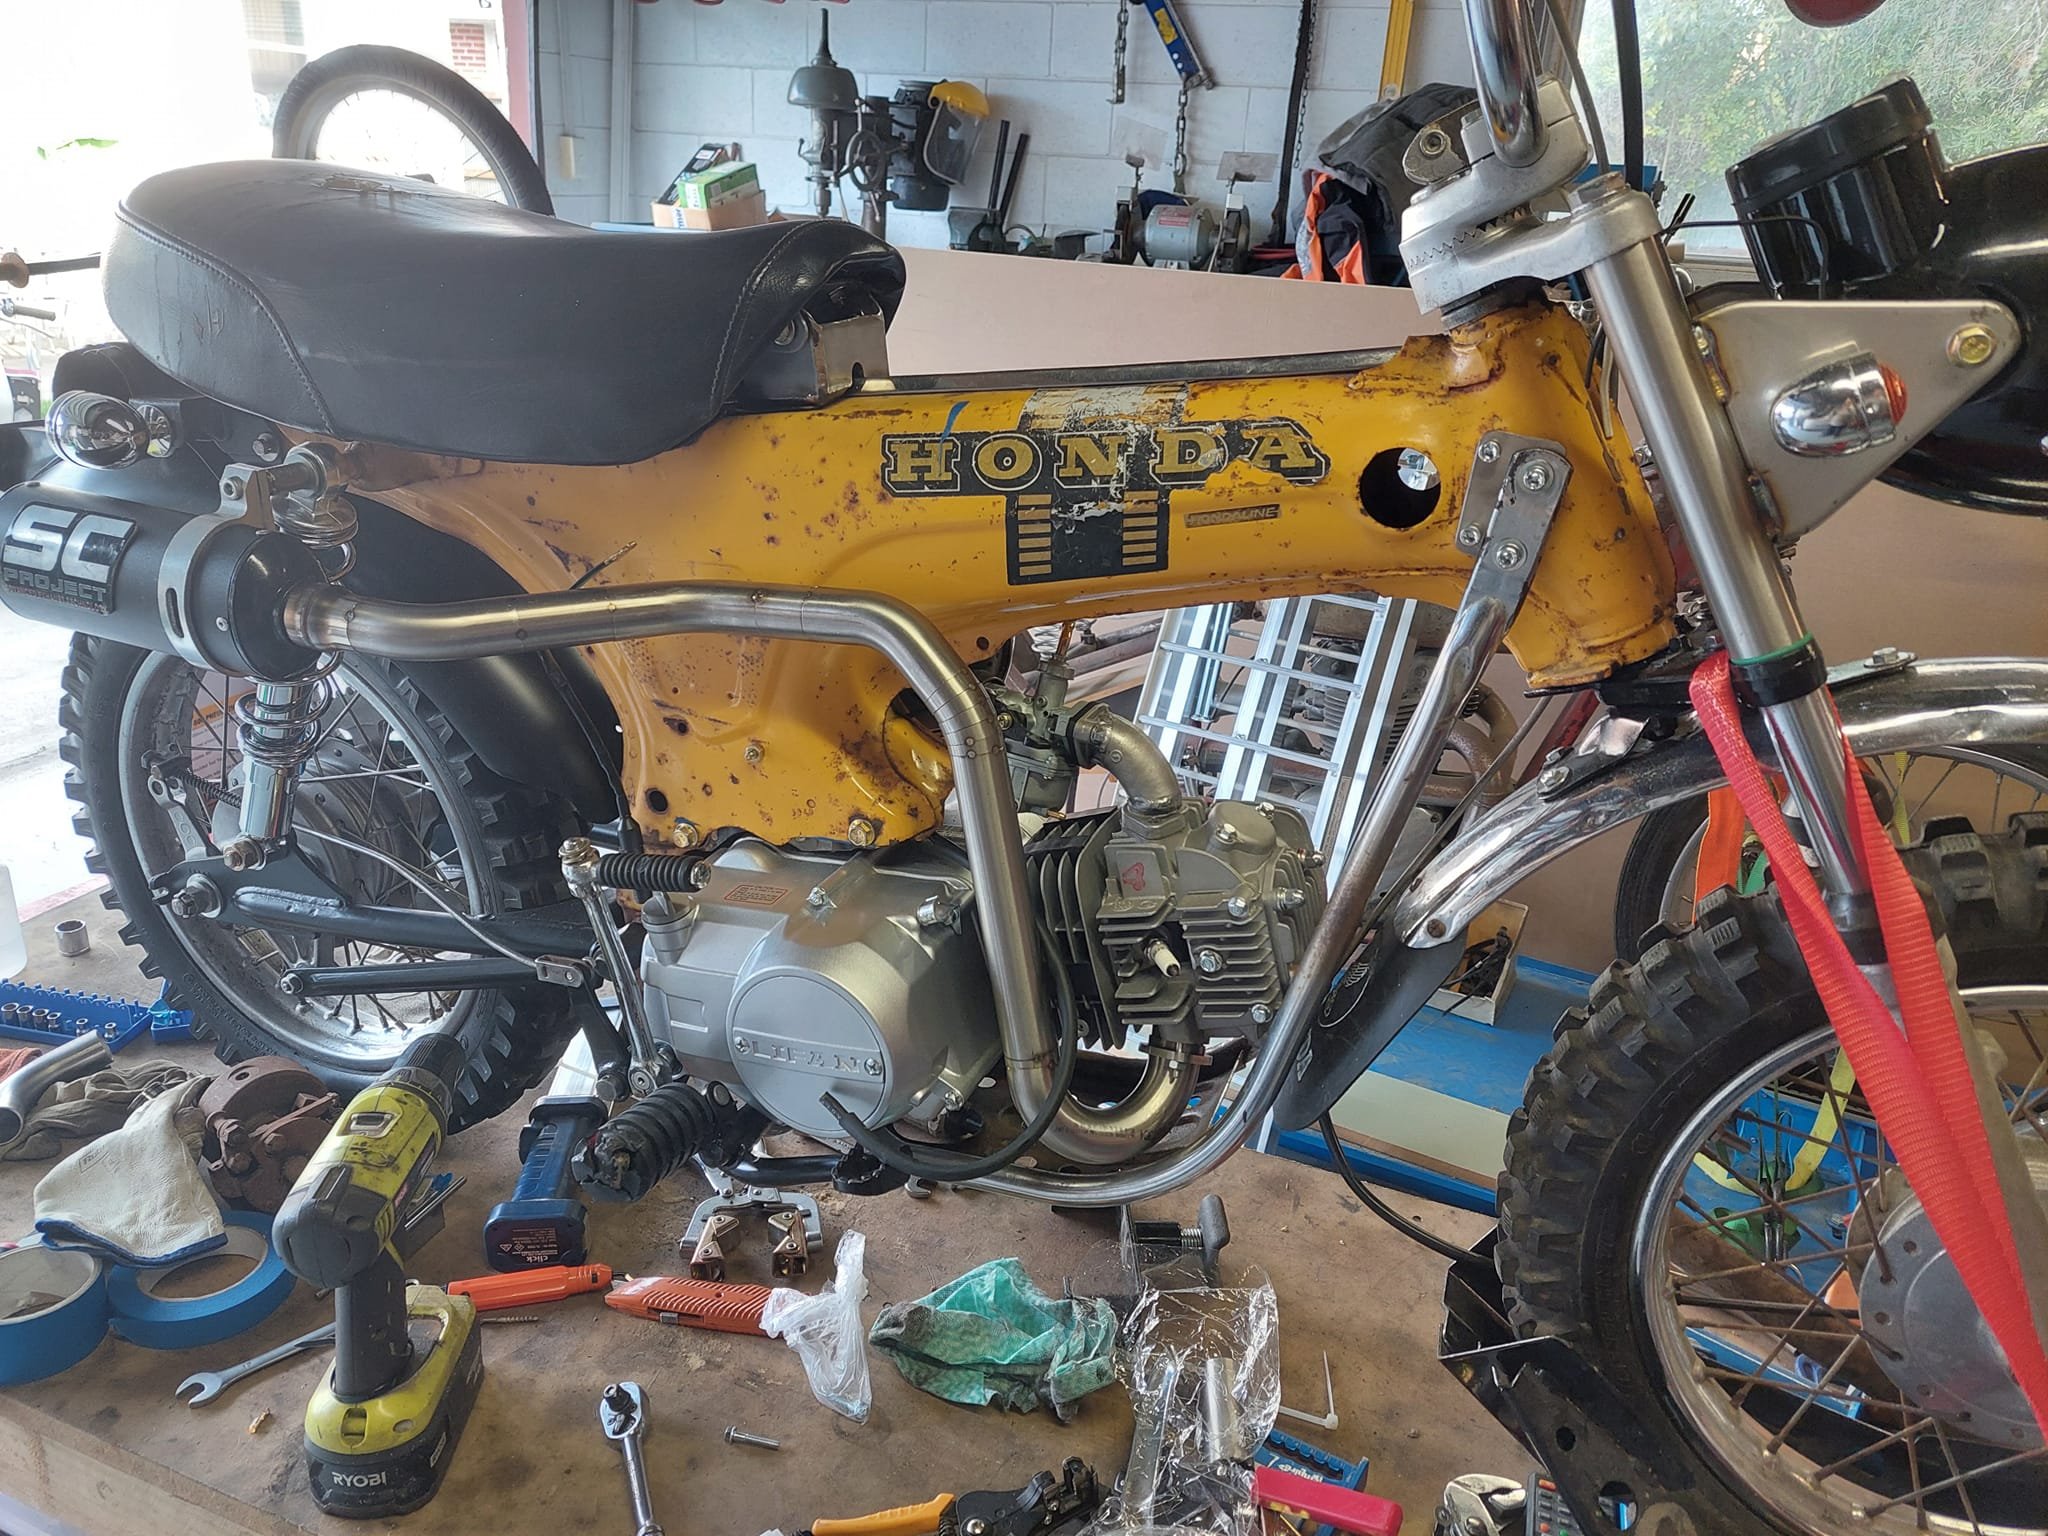
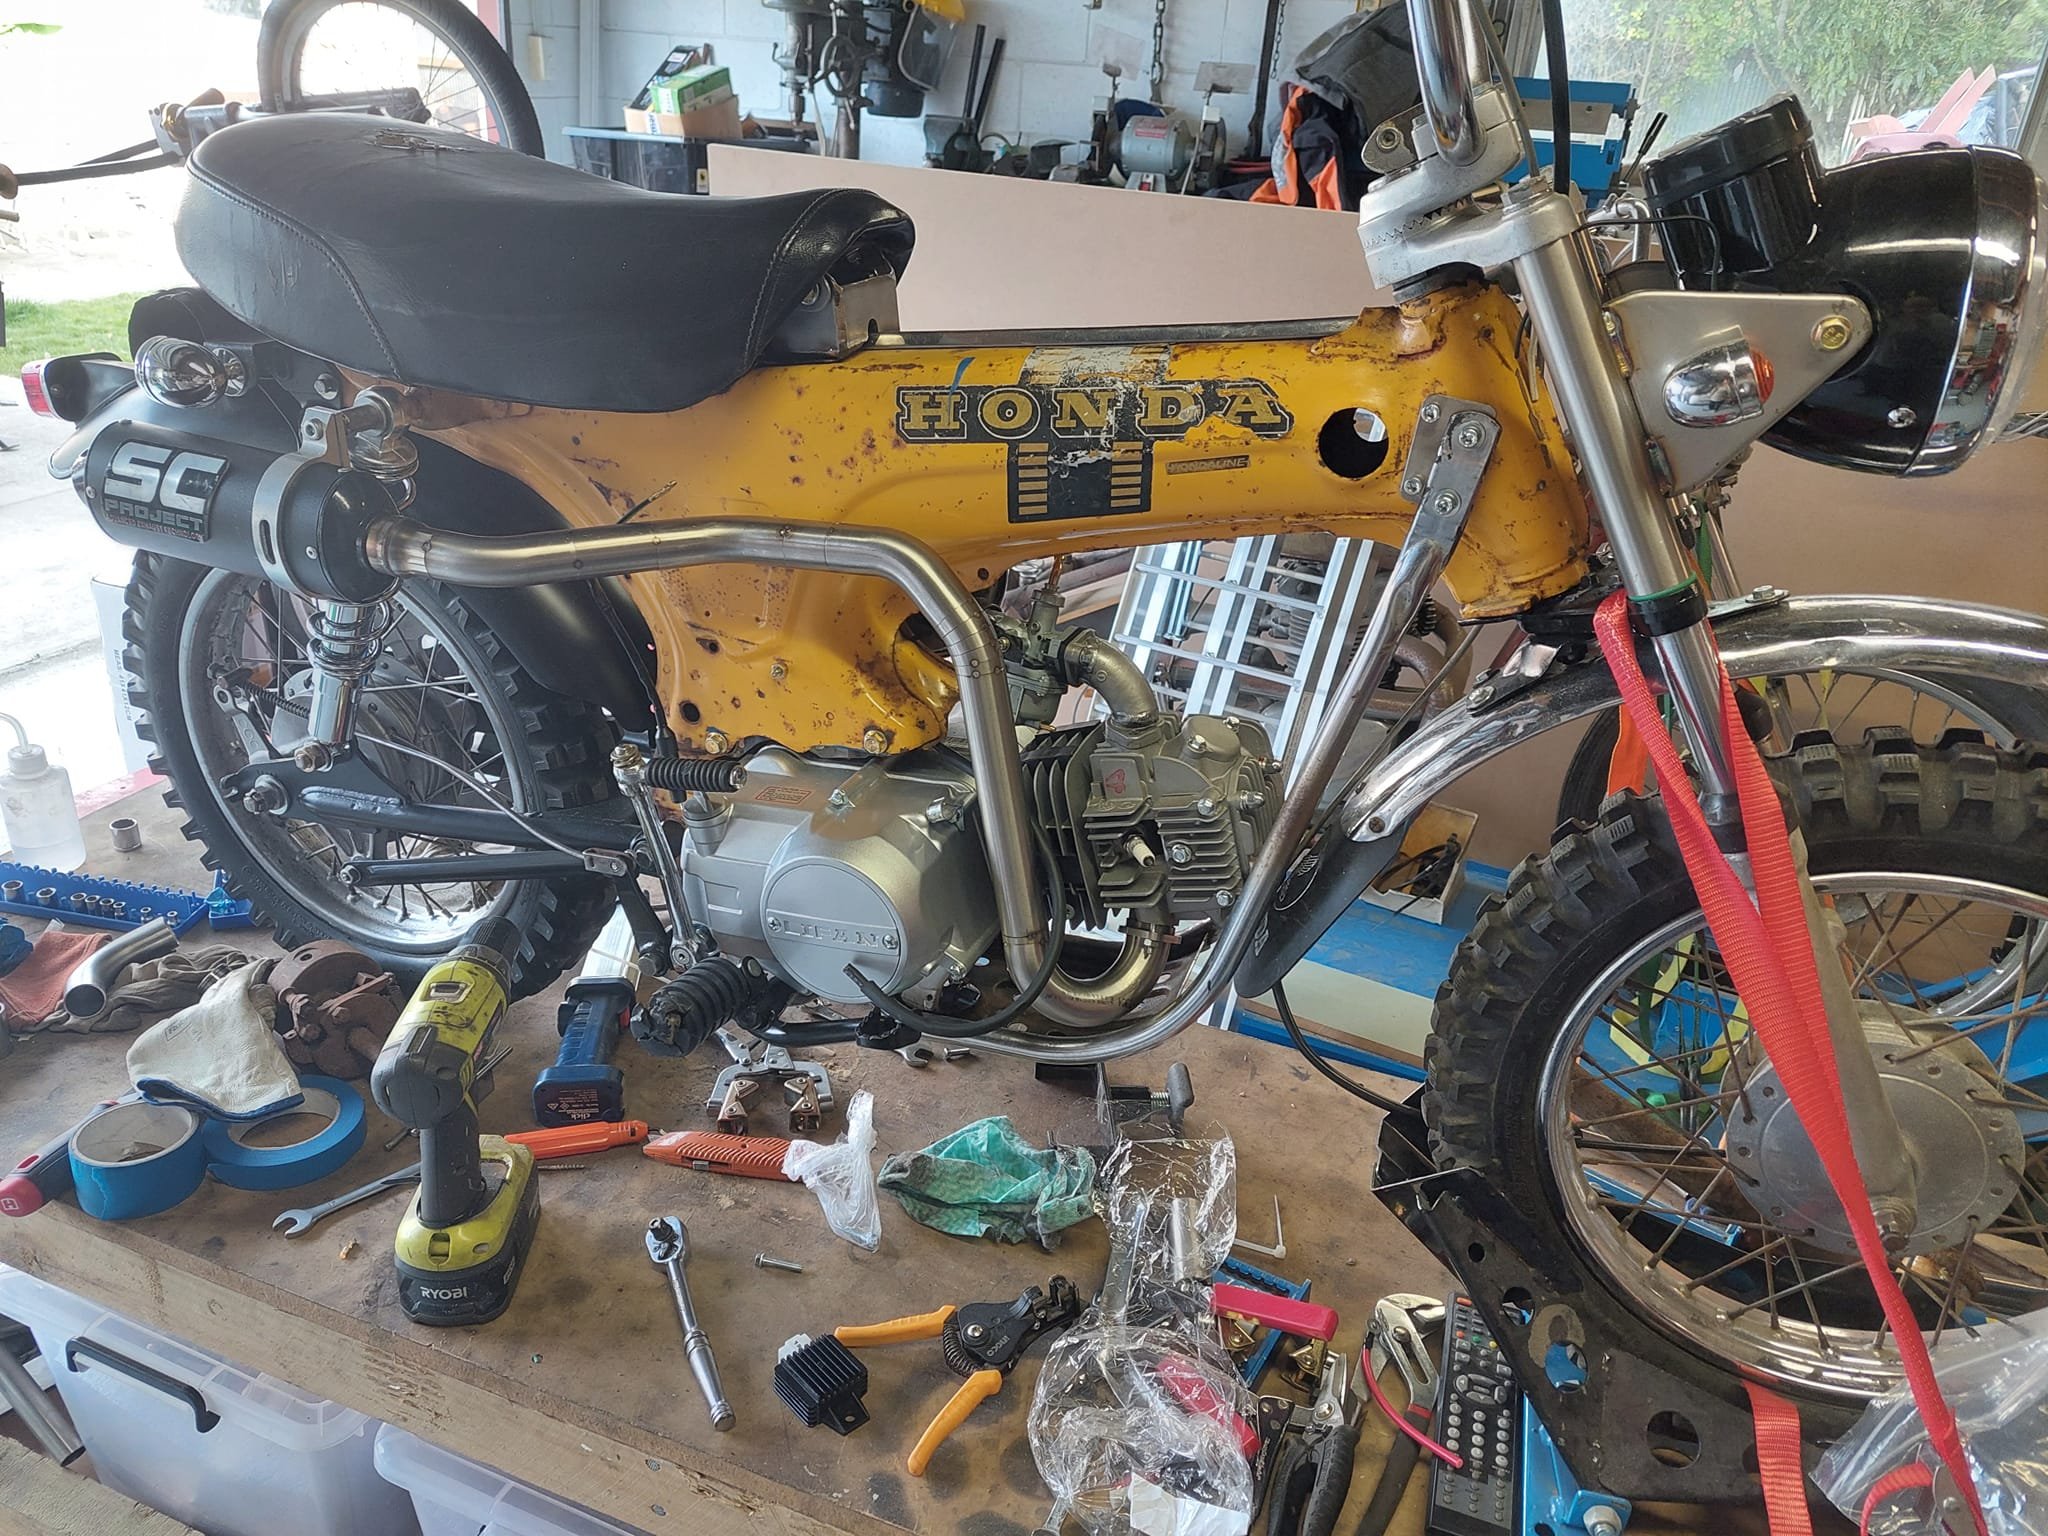
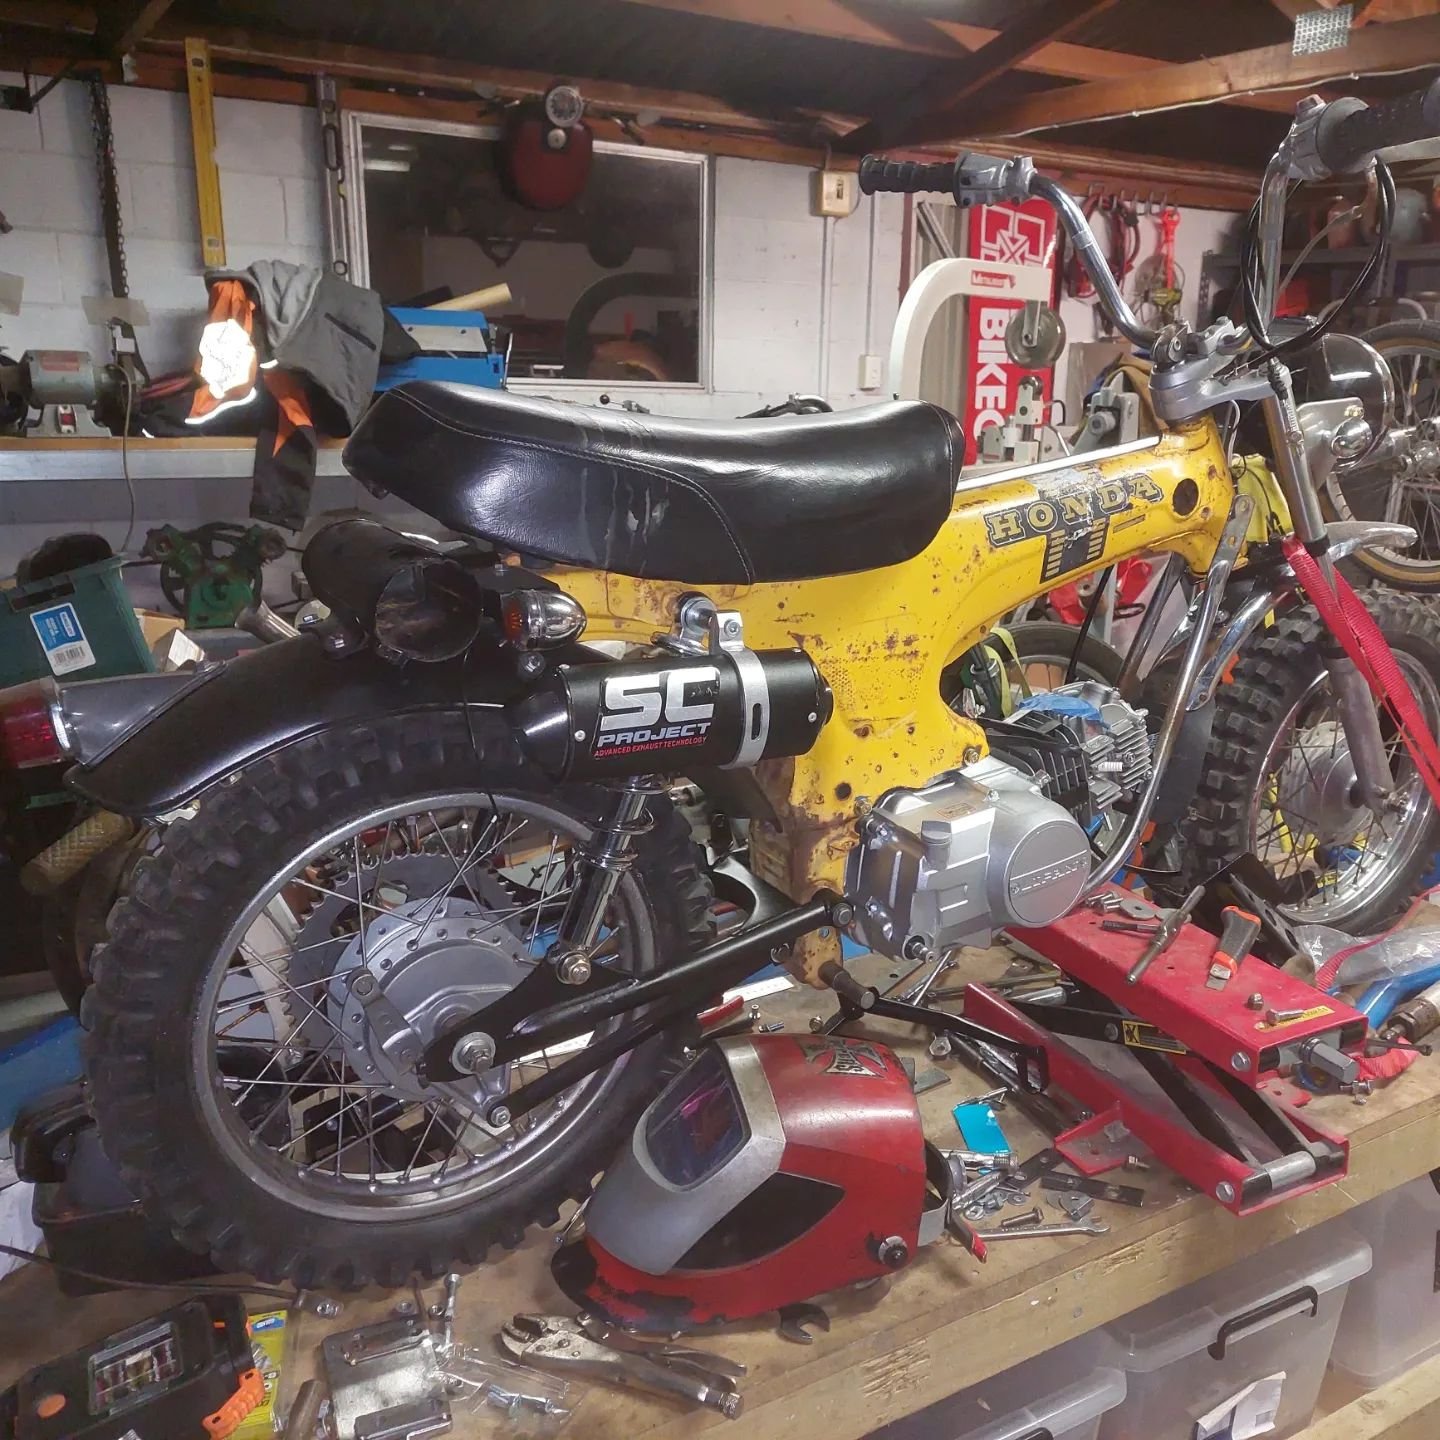
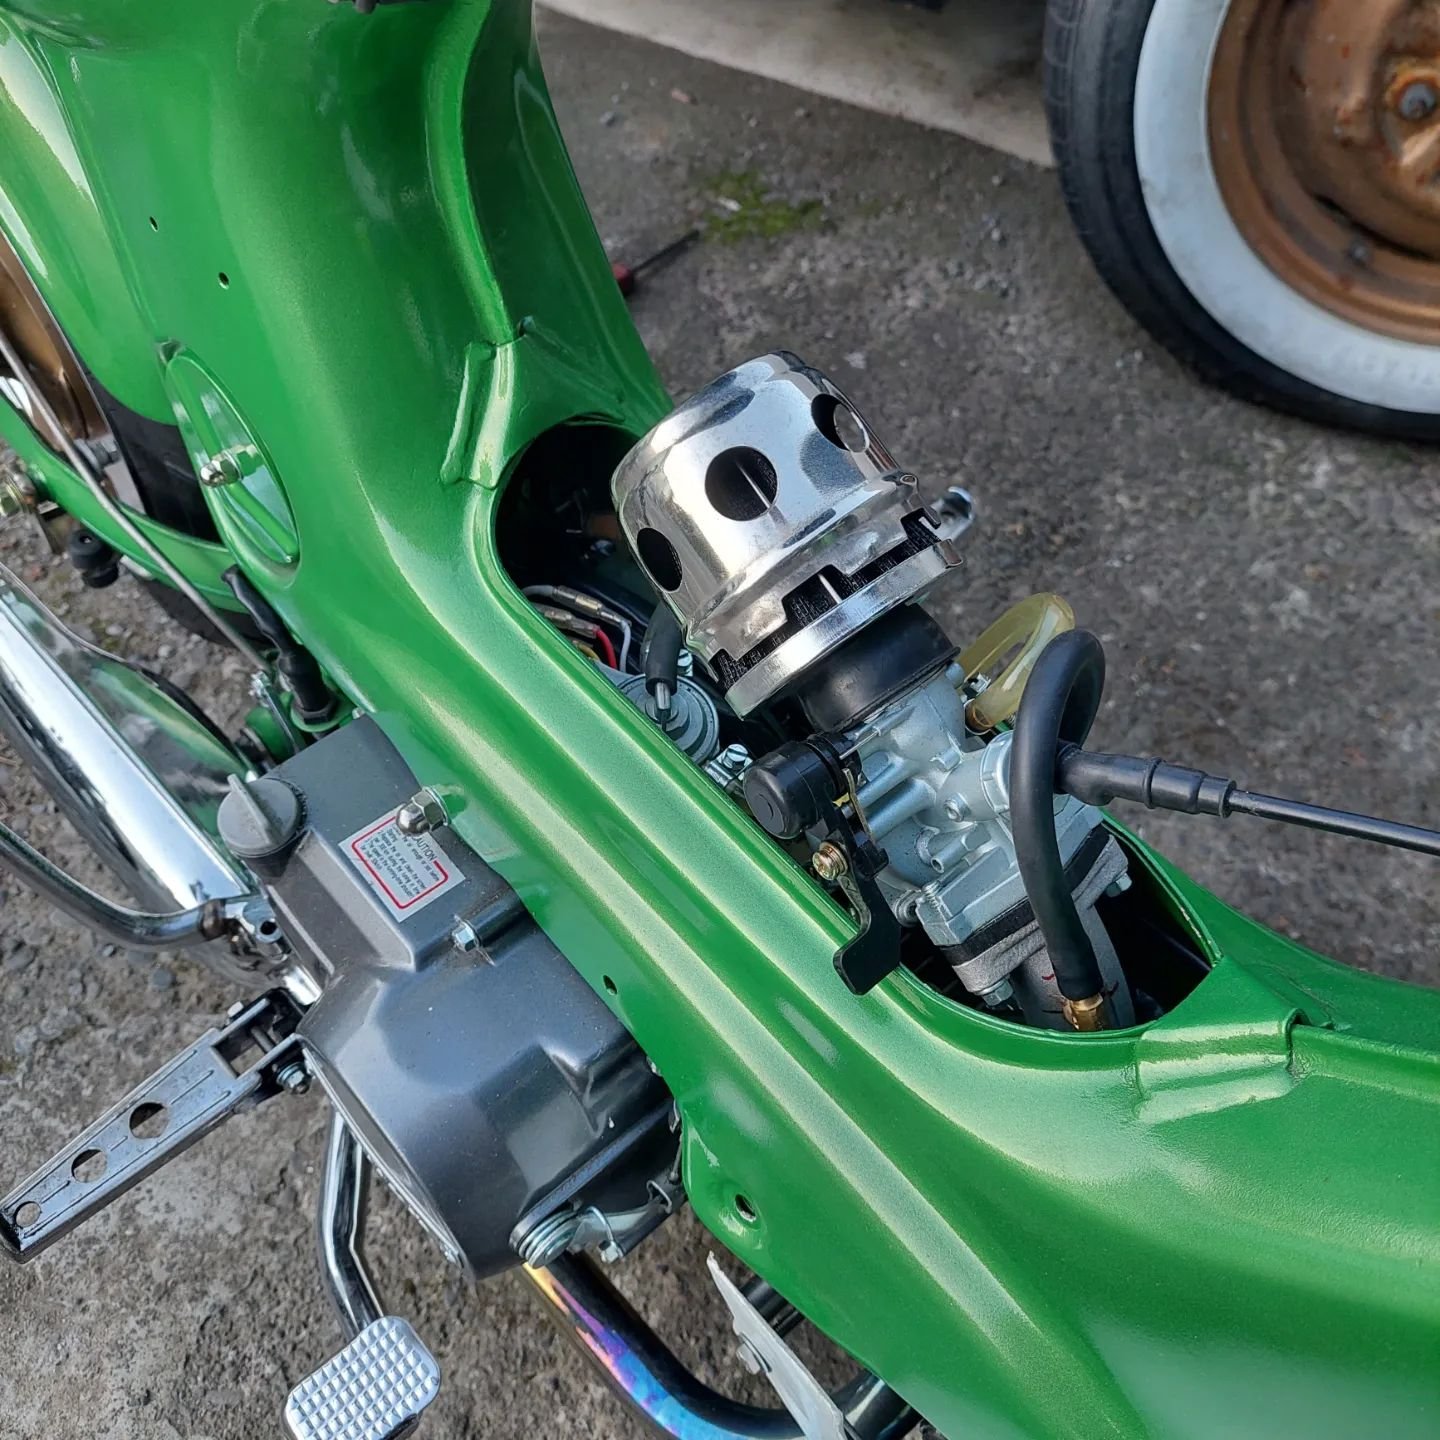
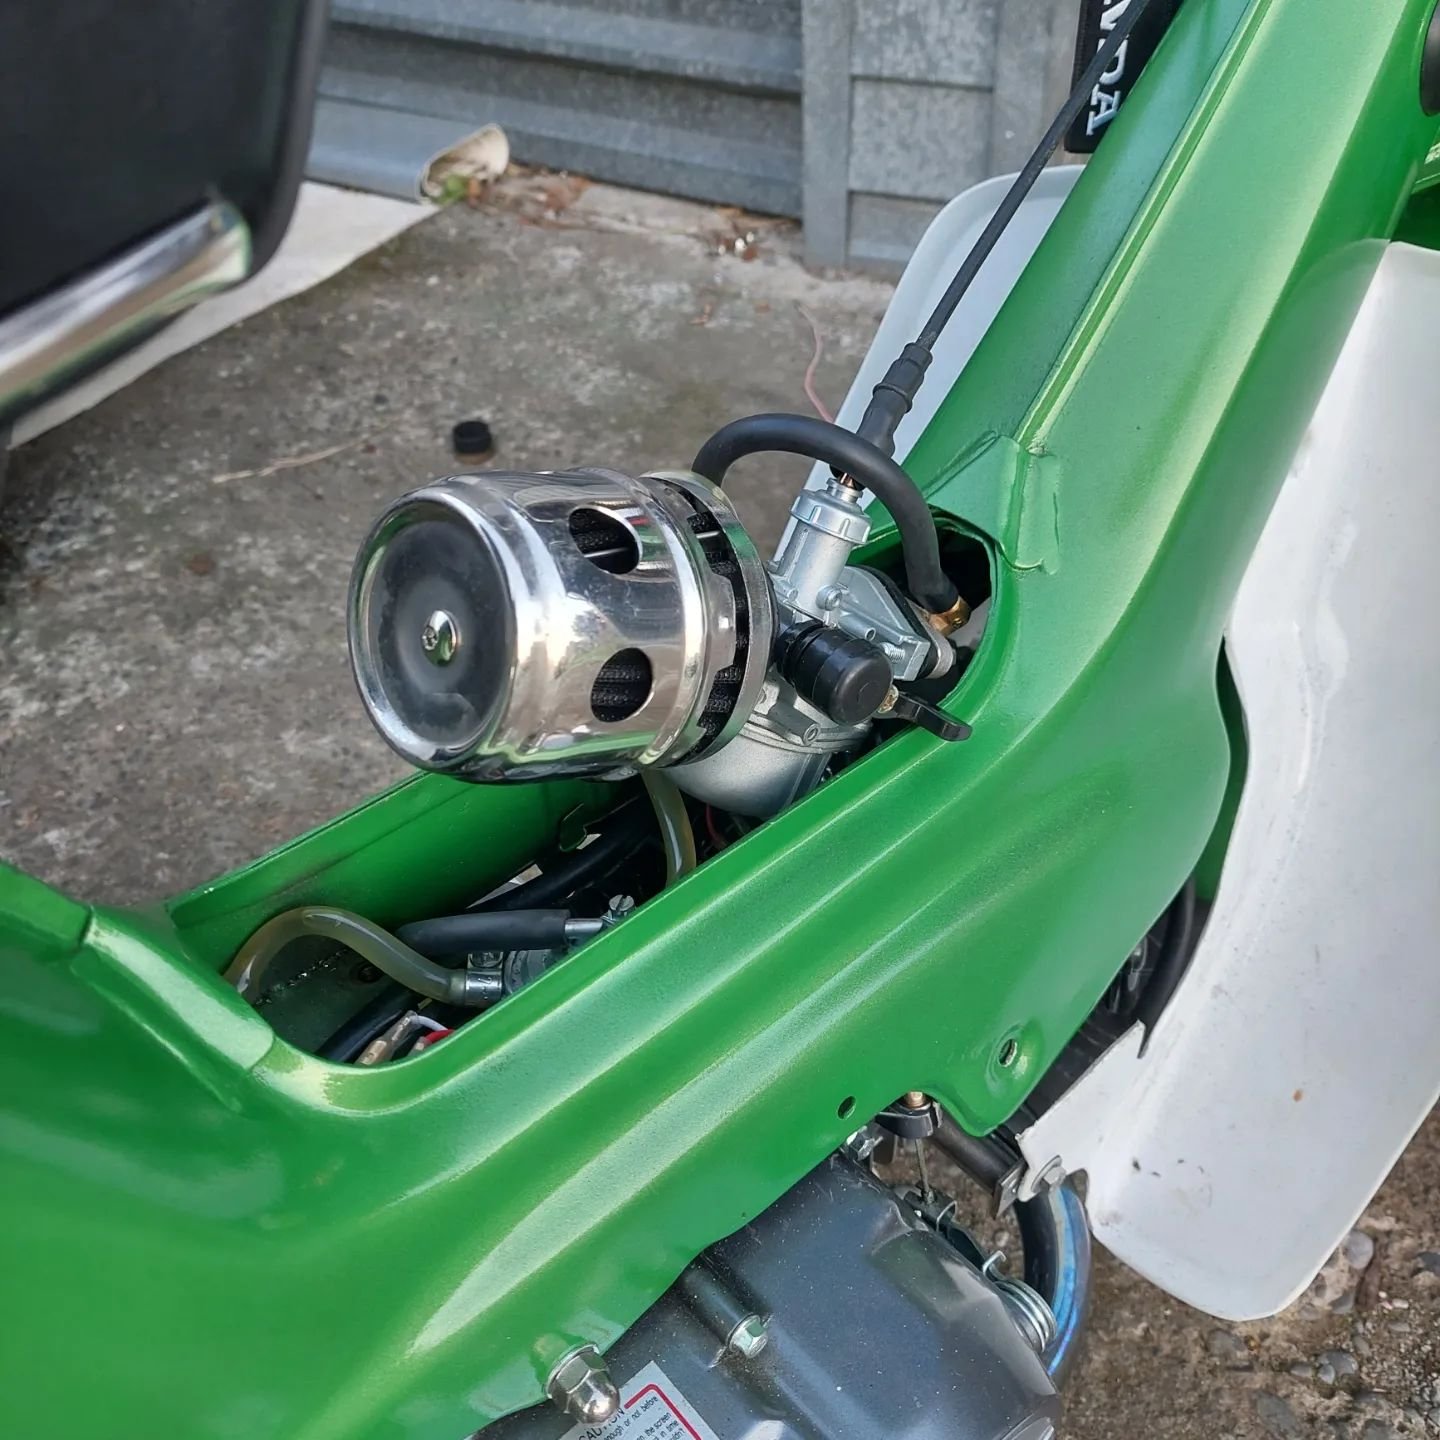
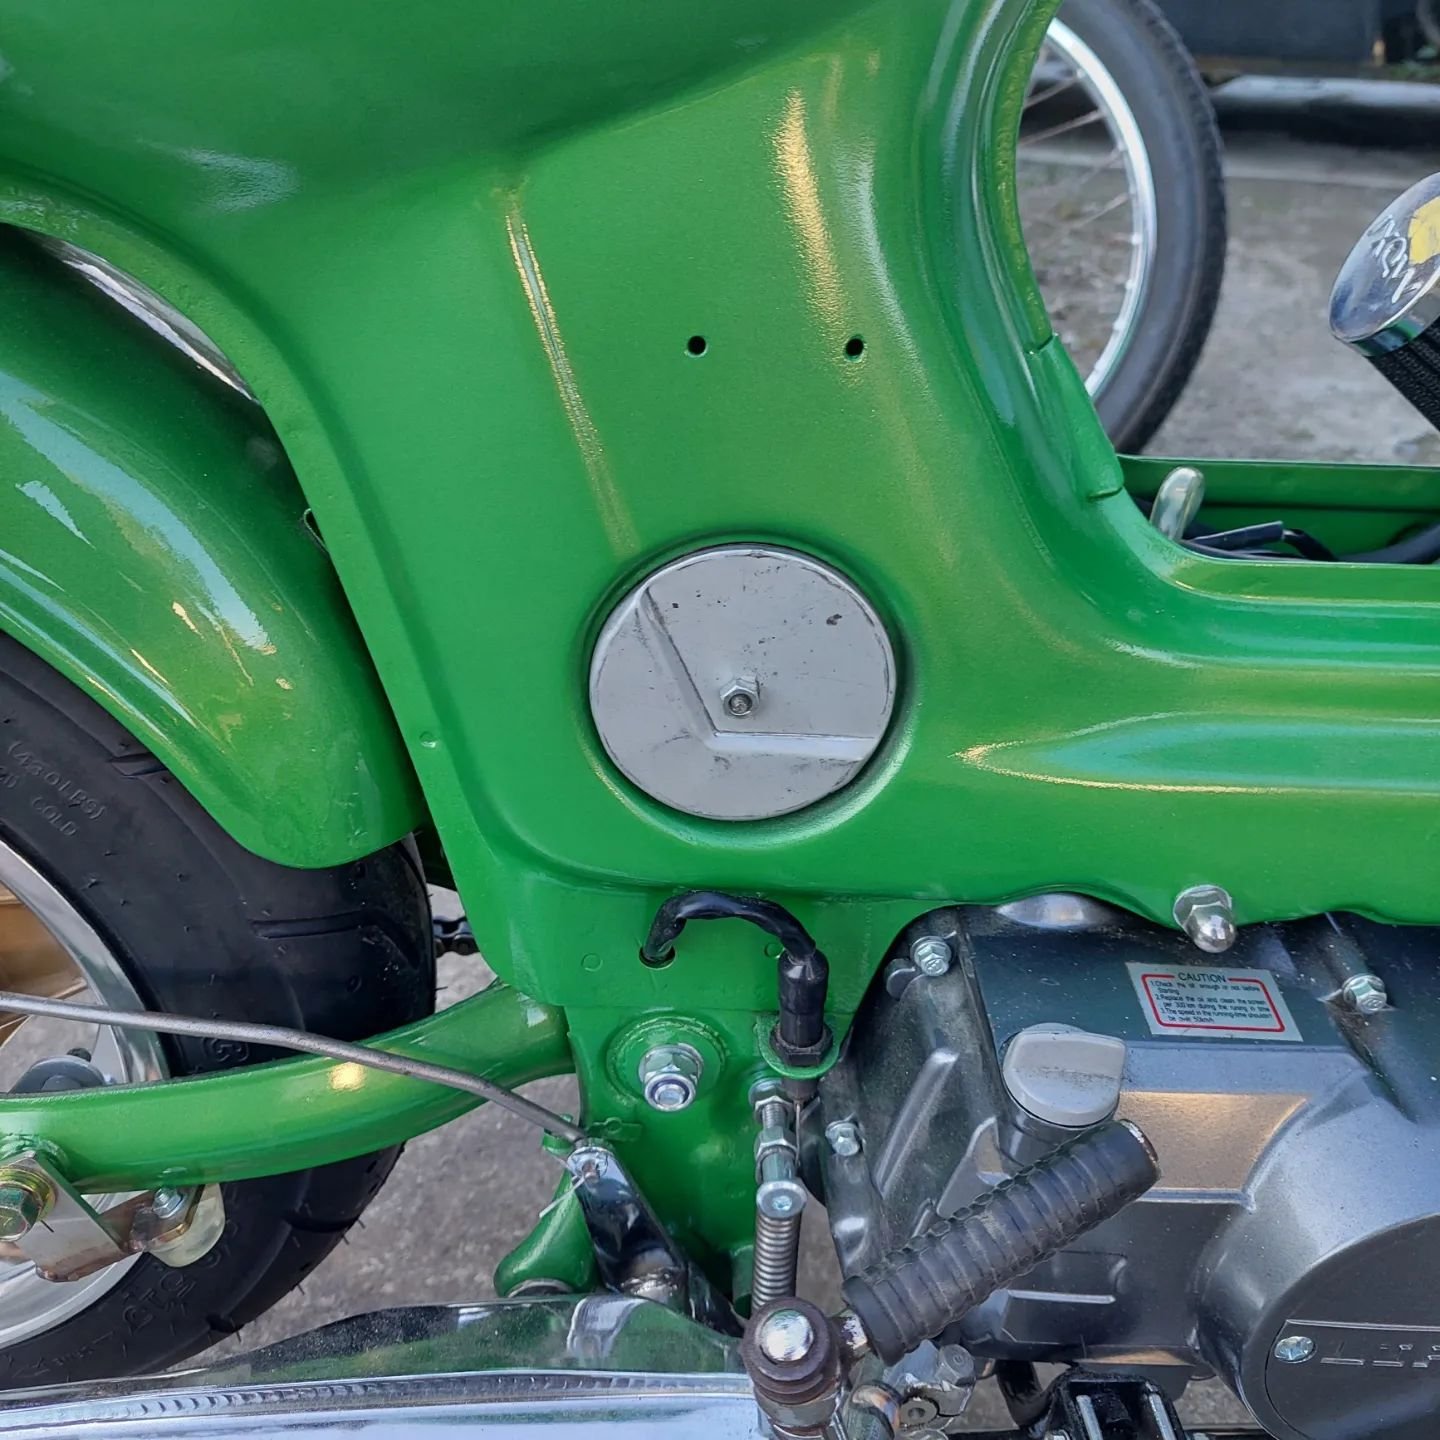
I wanted to keep the original air filter and box as it looks really cool and adds to the appeal of the ST, but the inlet manifold that came with the Lifan motor was clocked wrong, was too long and too tall. So I cut the flanges off and shortened and narrowed it.
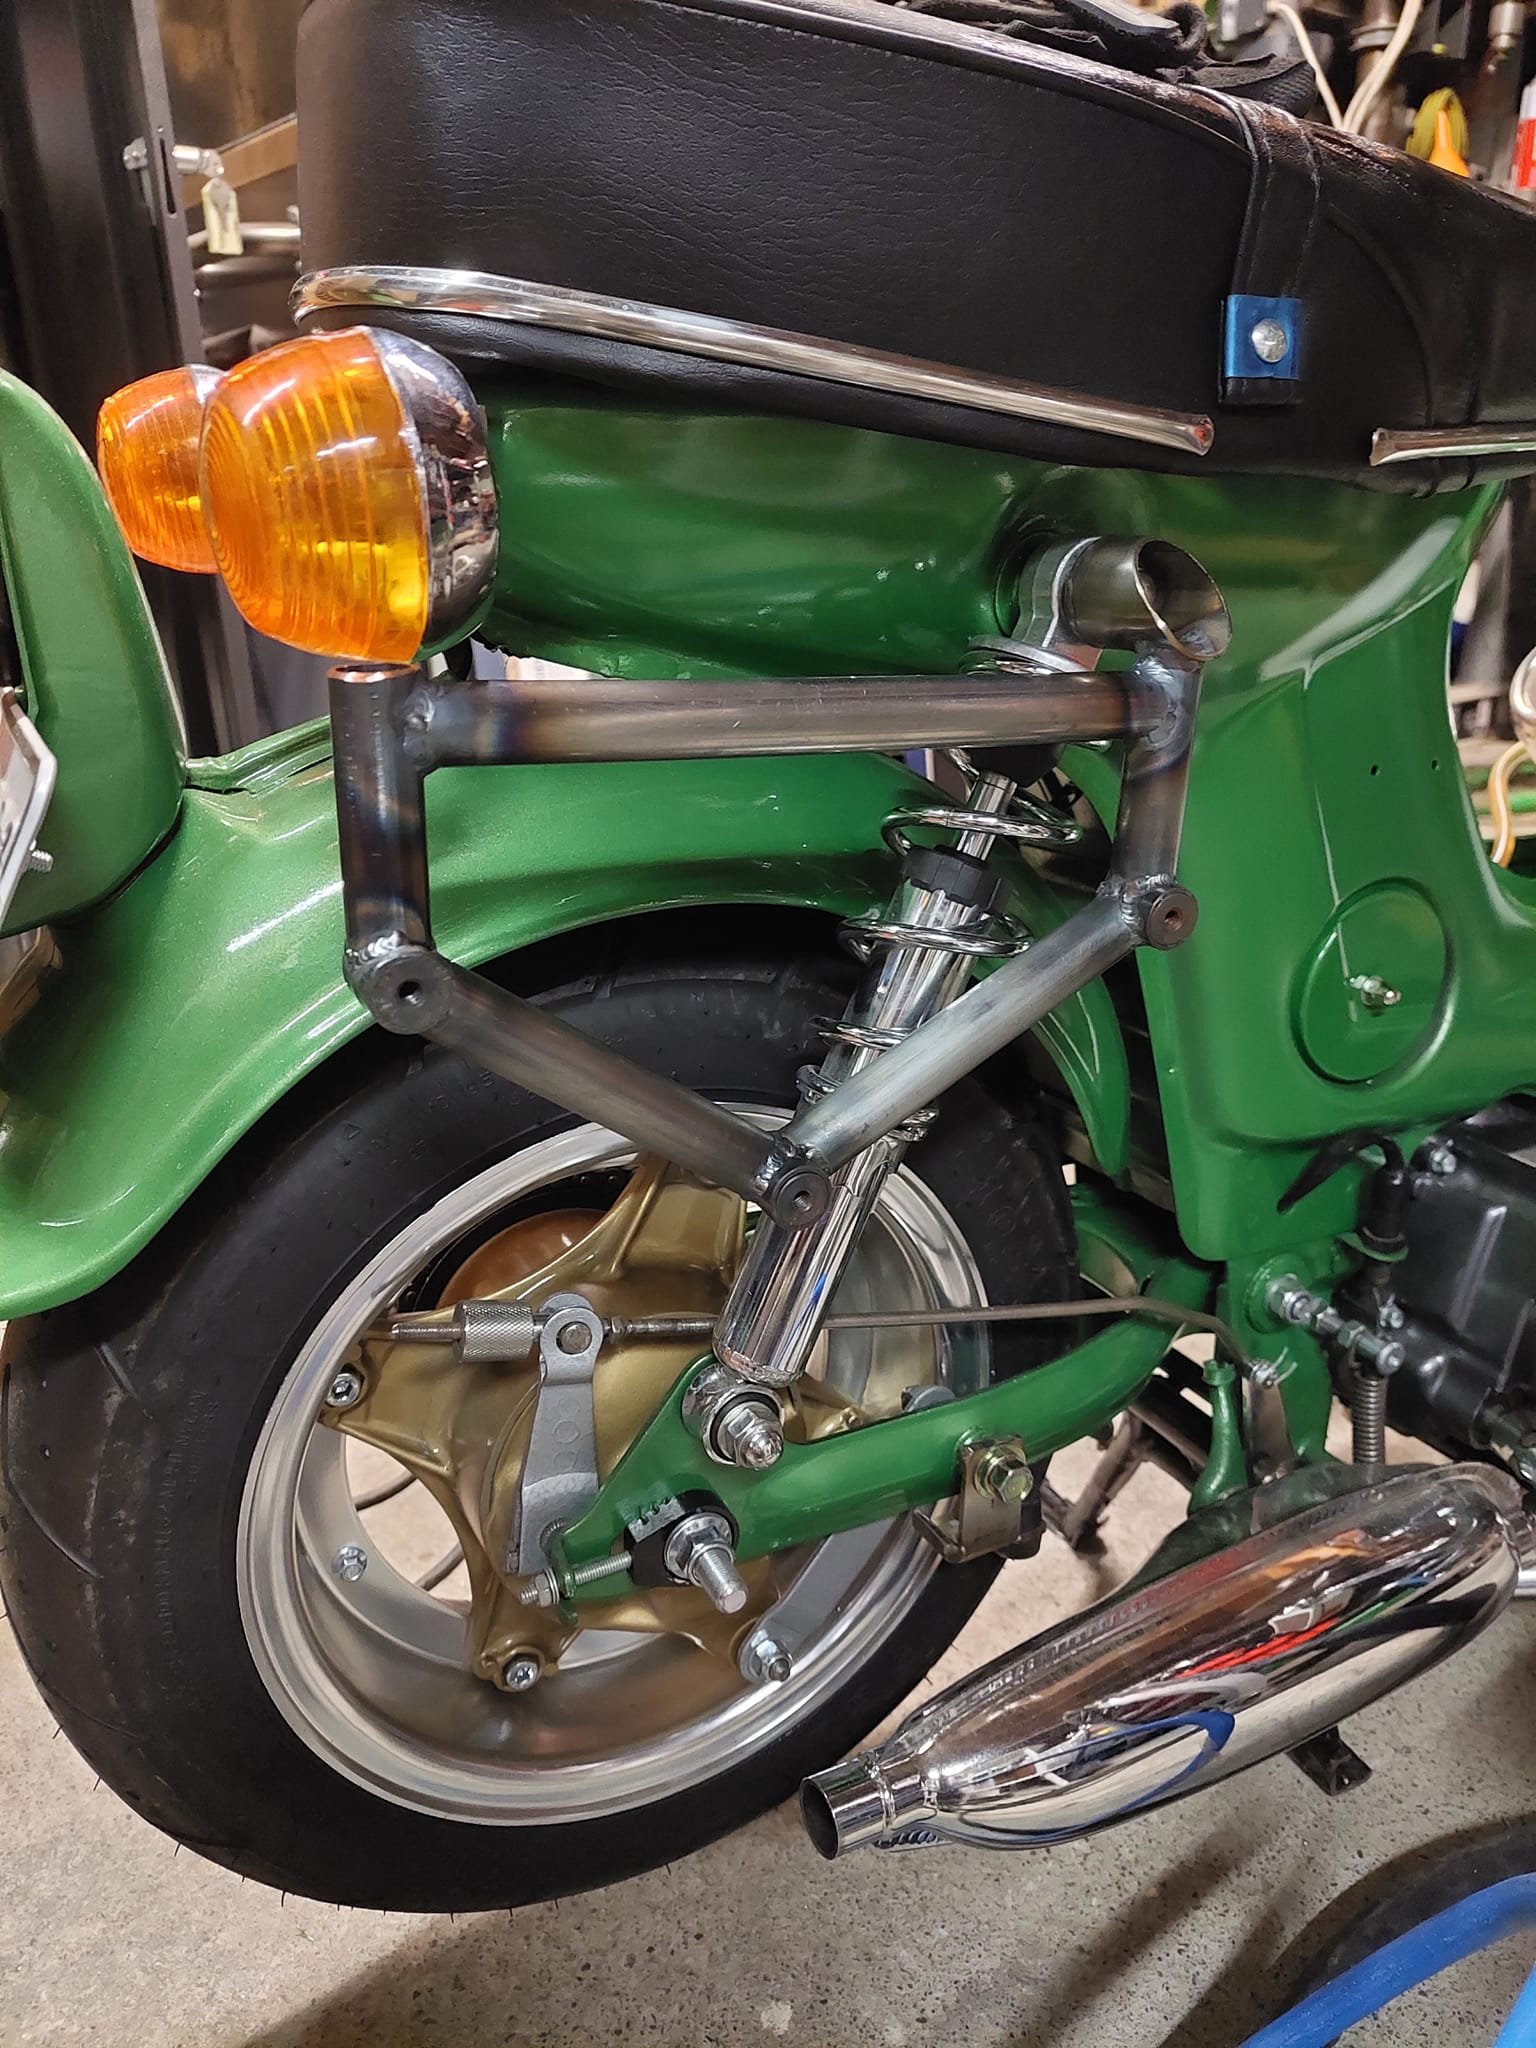
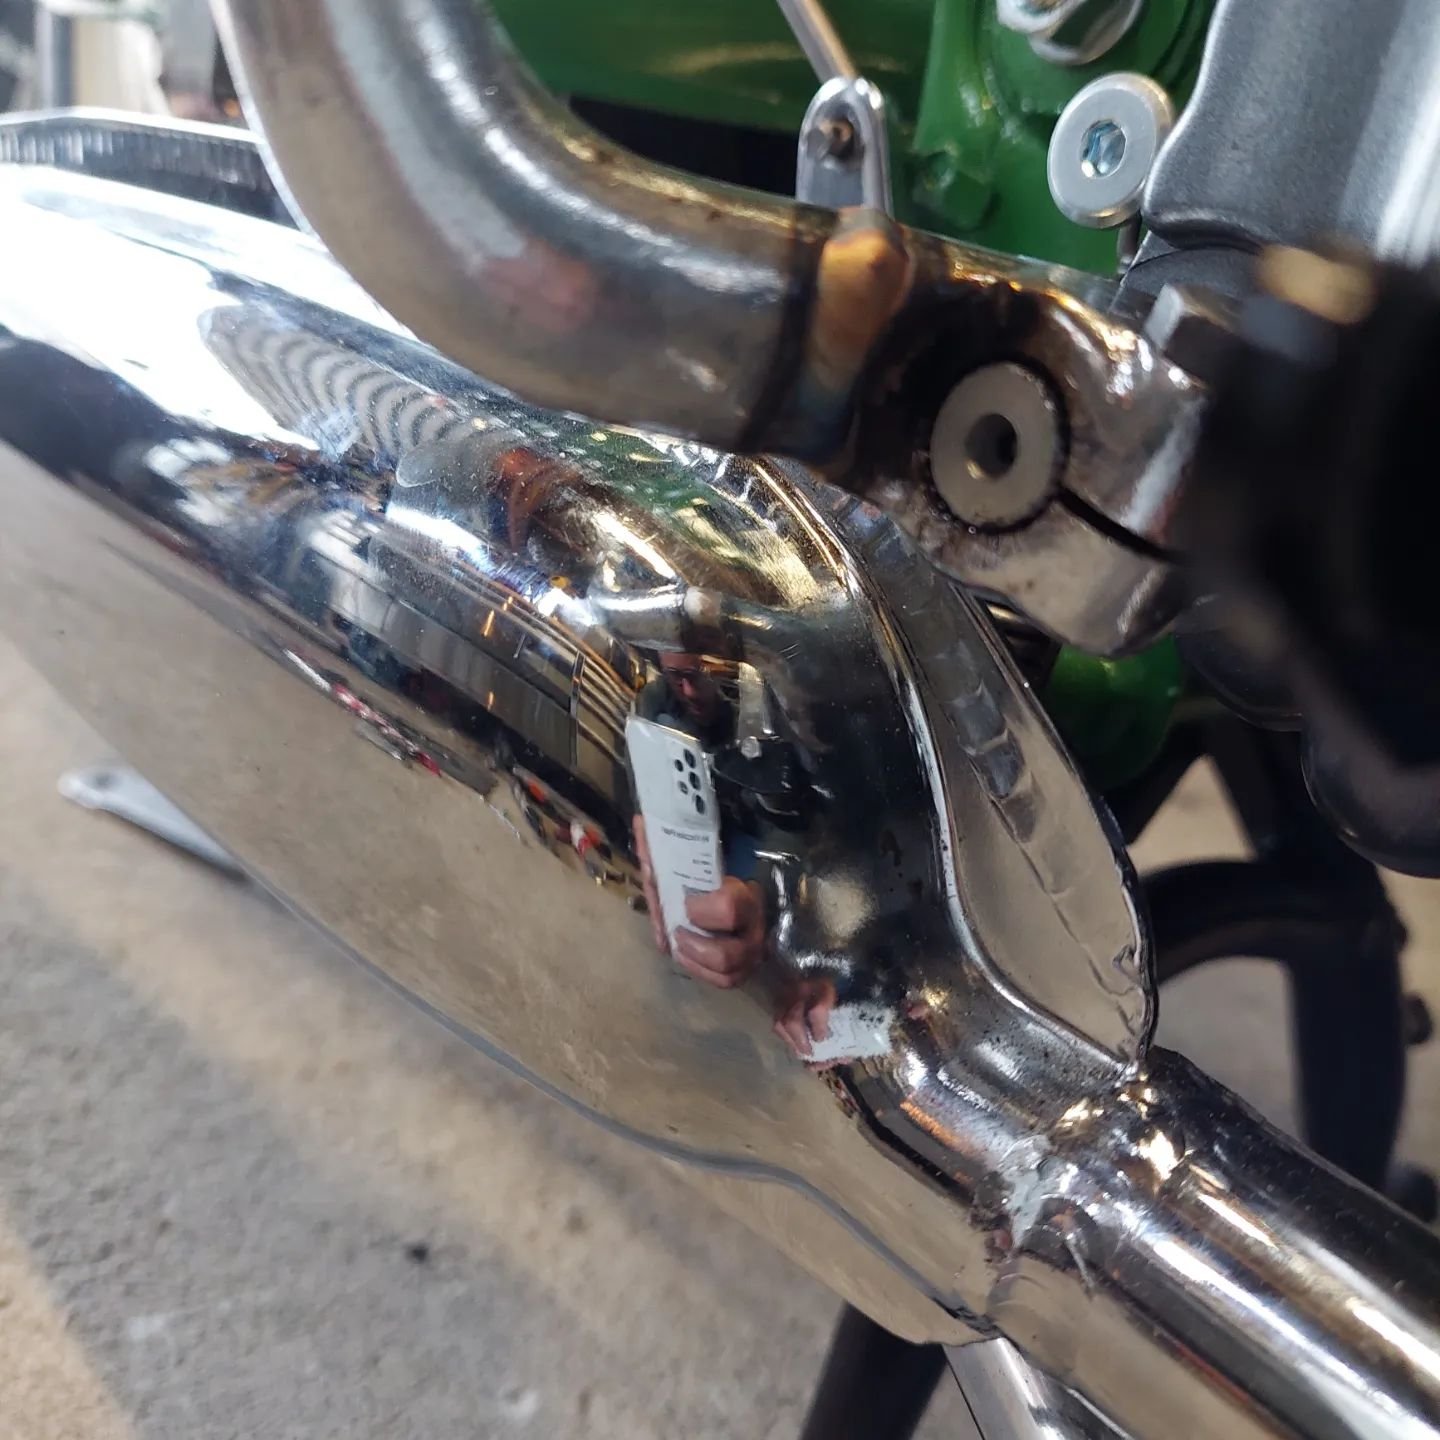
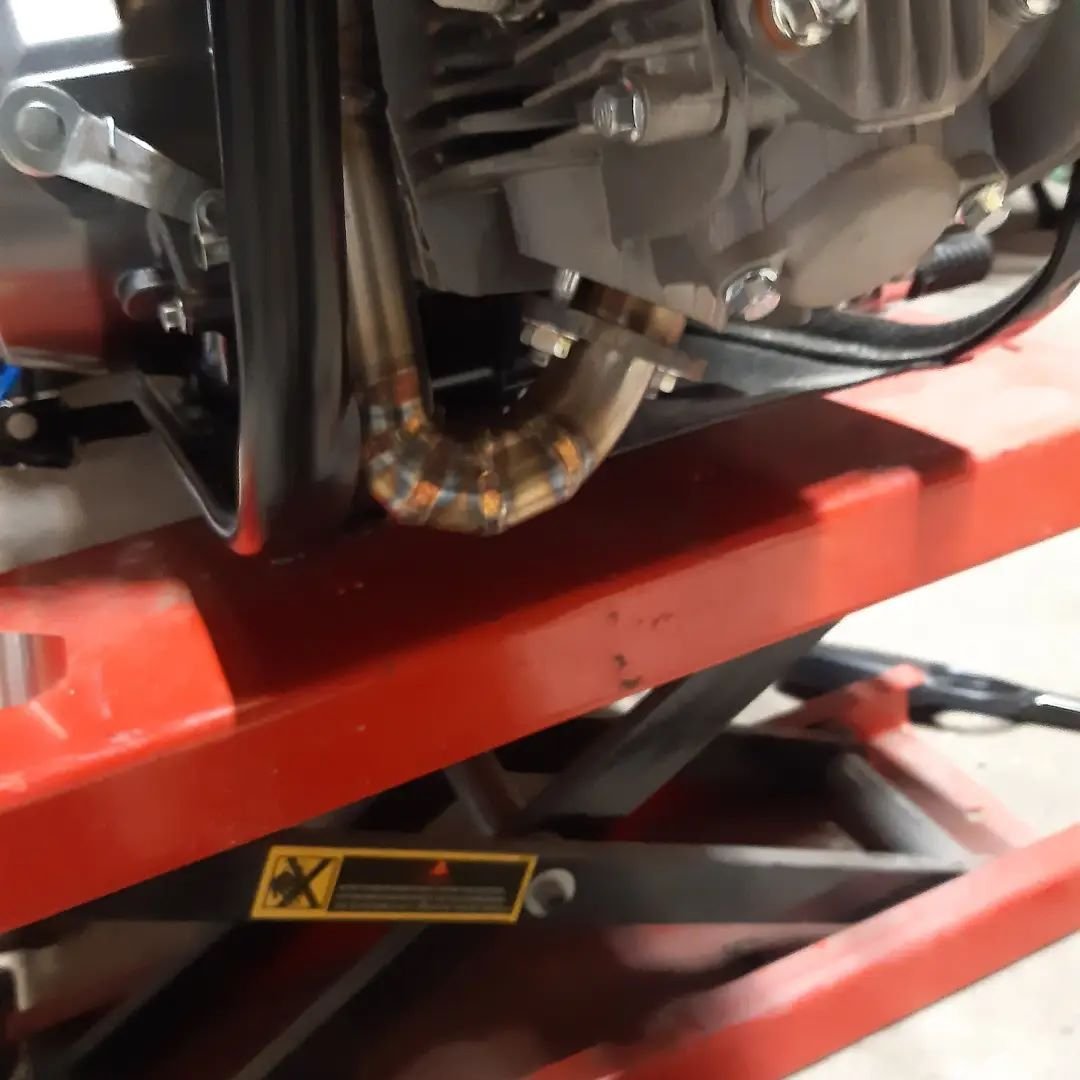
I made a start on the exhaust too so I ordered some 32mm stainless bend and started piecing them together. The diameter of the muffler is 38mm so I had to make and adapter.
Ive just got the bends and pie cuts tacked into place and will fully weld it at the weekend. I tried to get the bends and tubes to match the lines of the engine and frame as best I could.
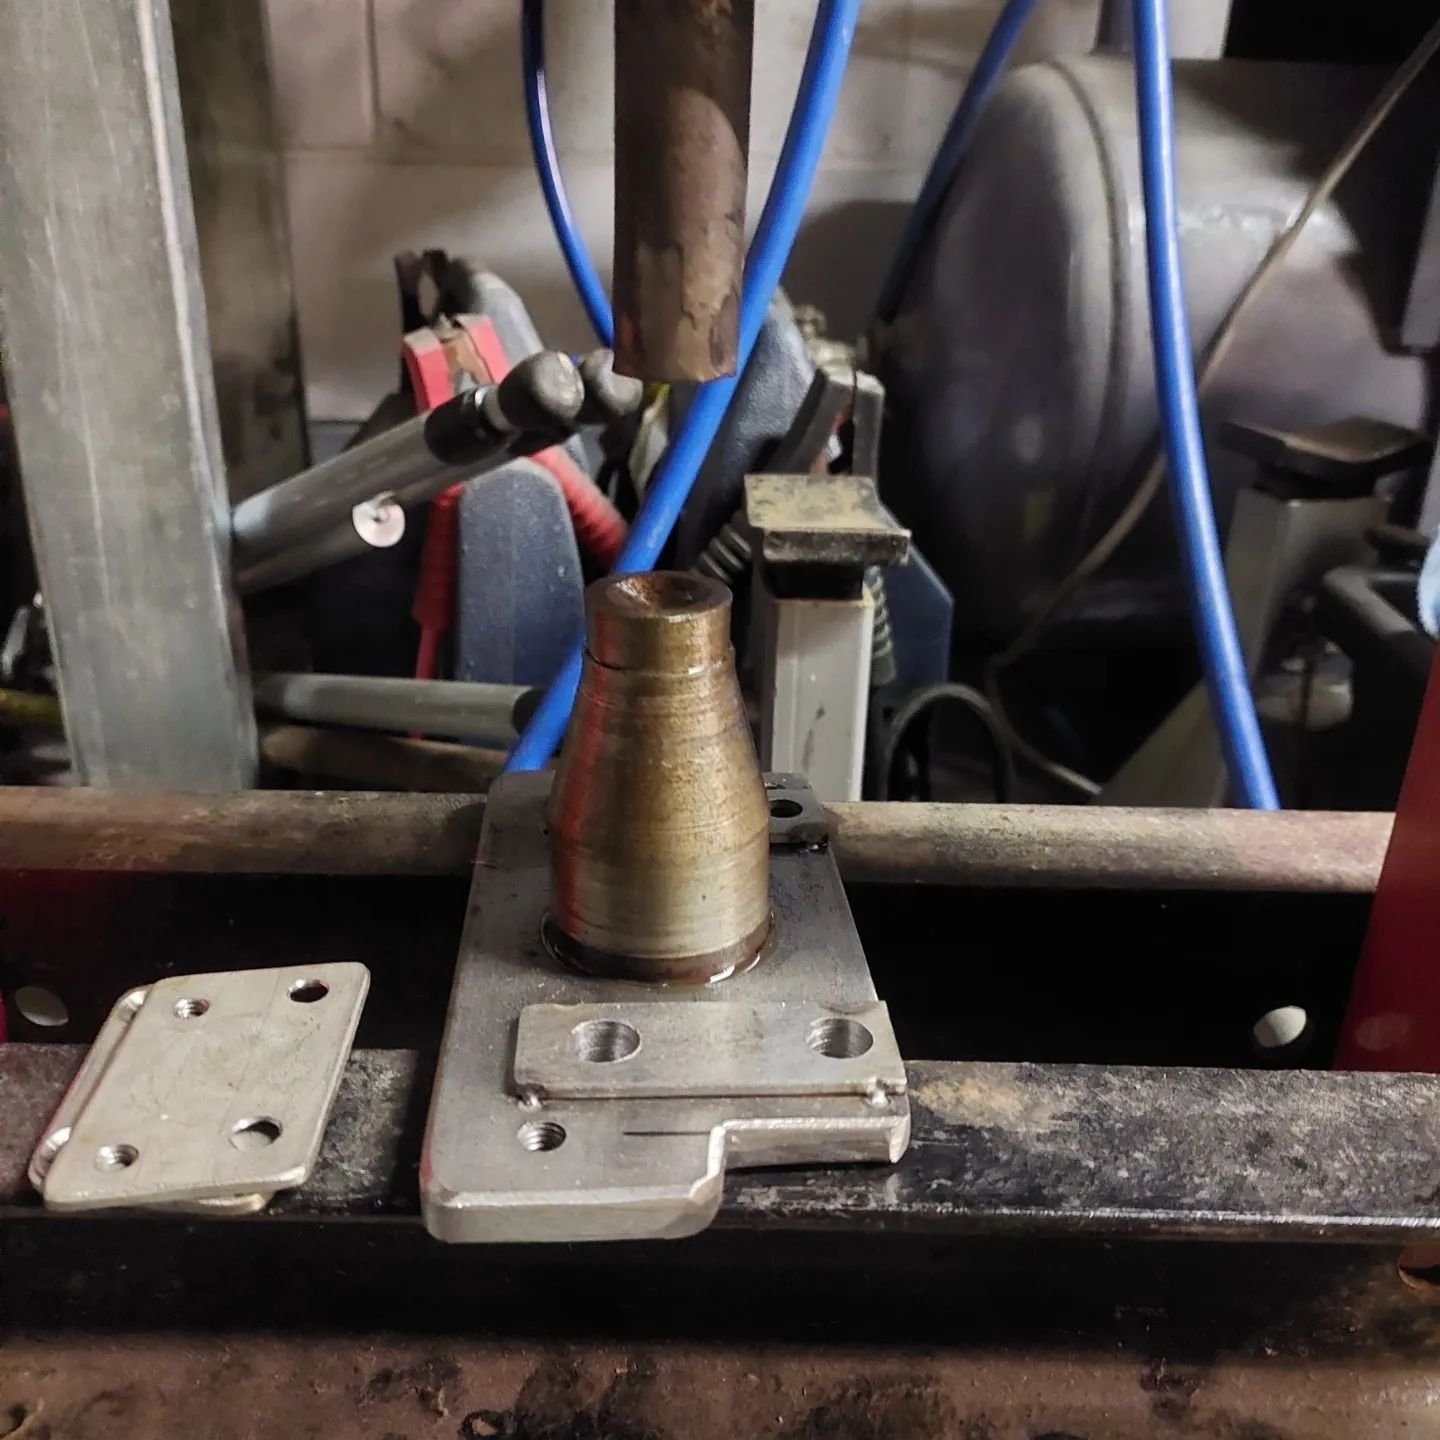
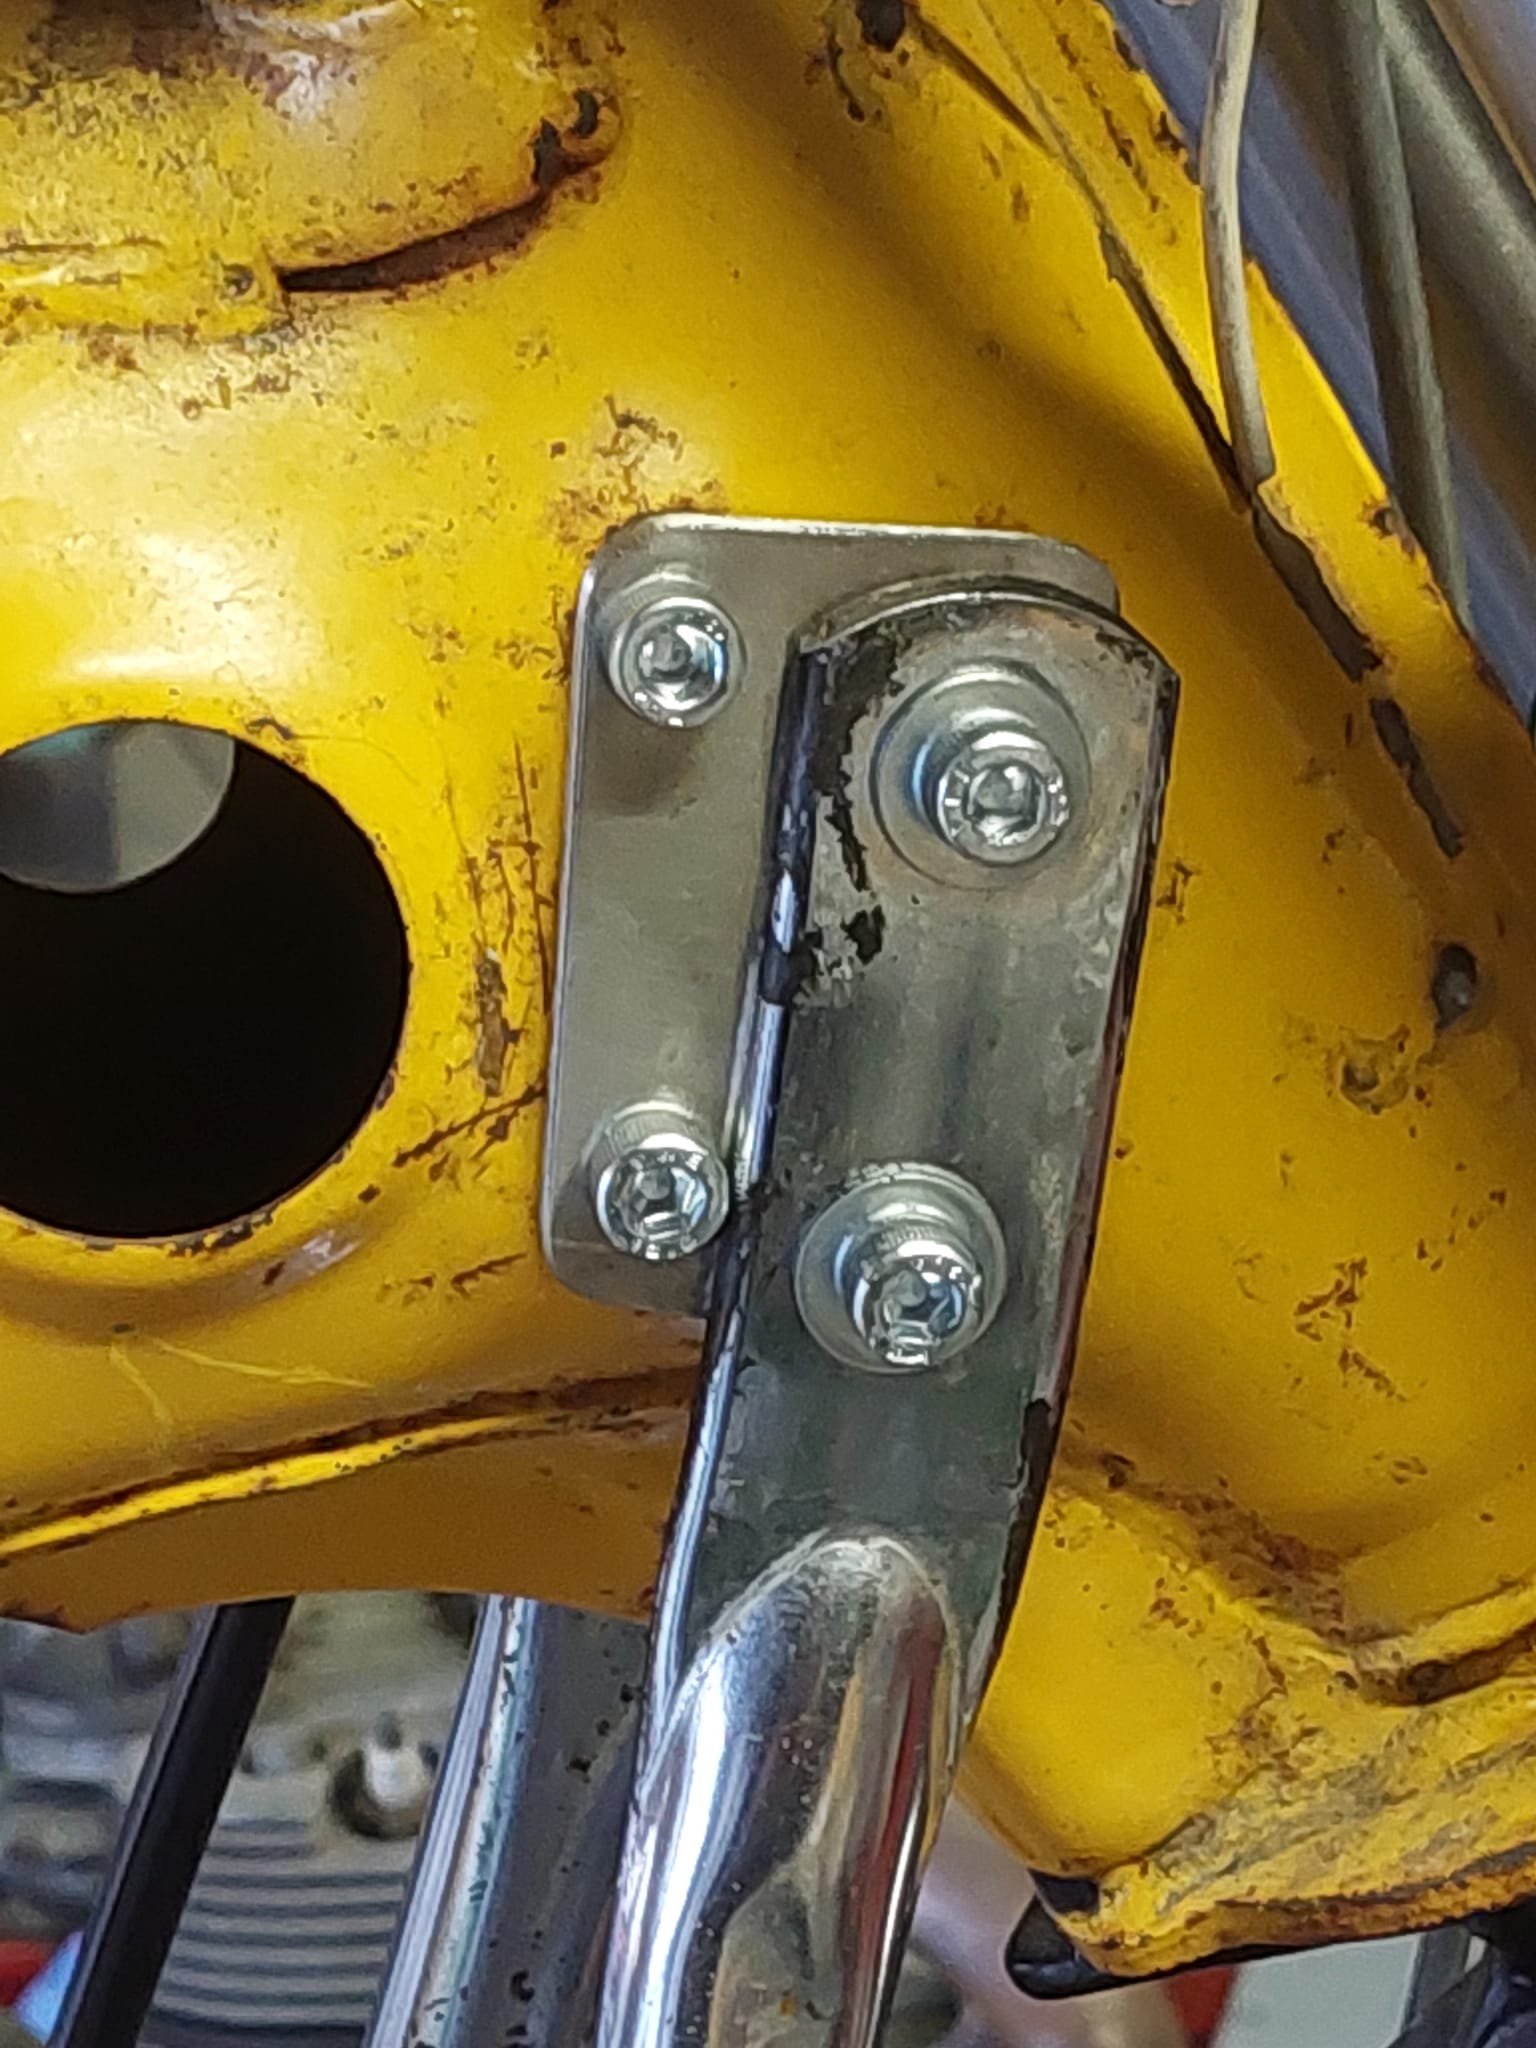
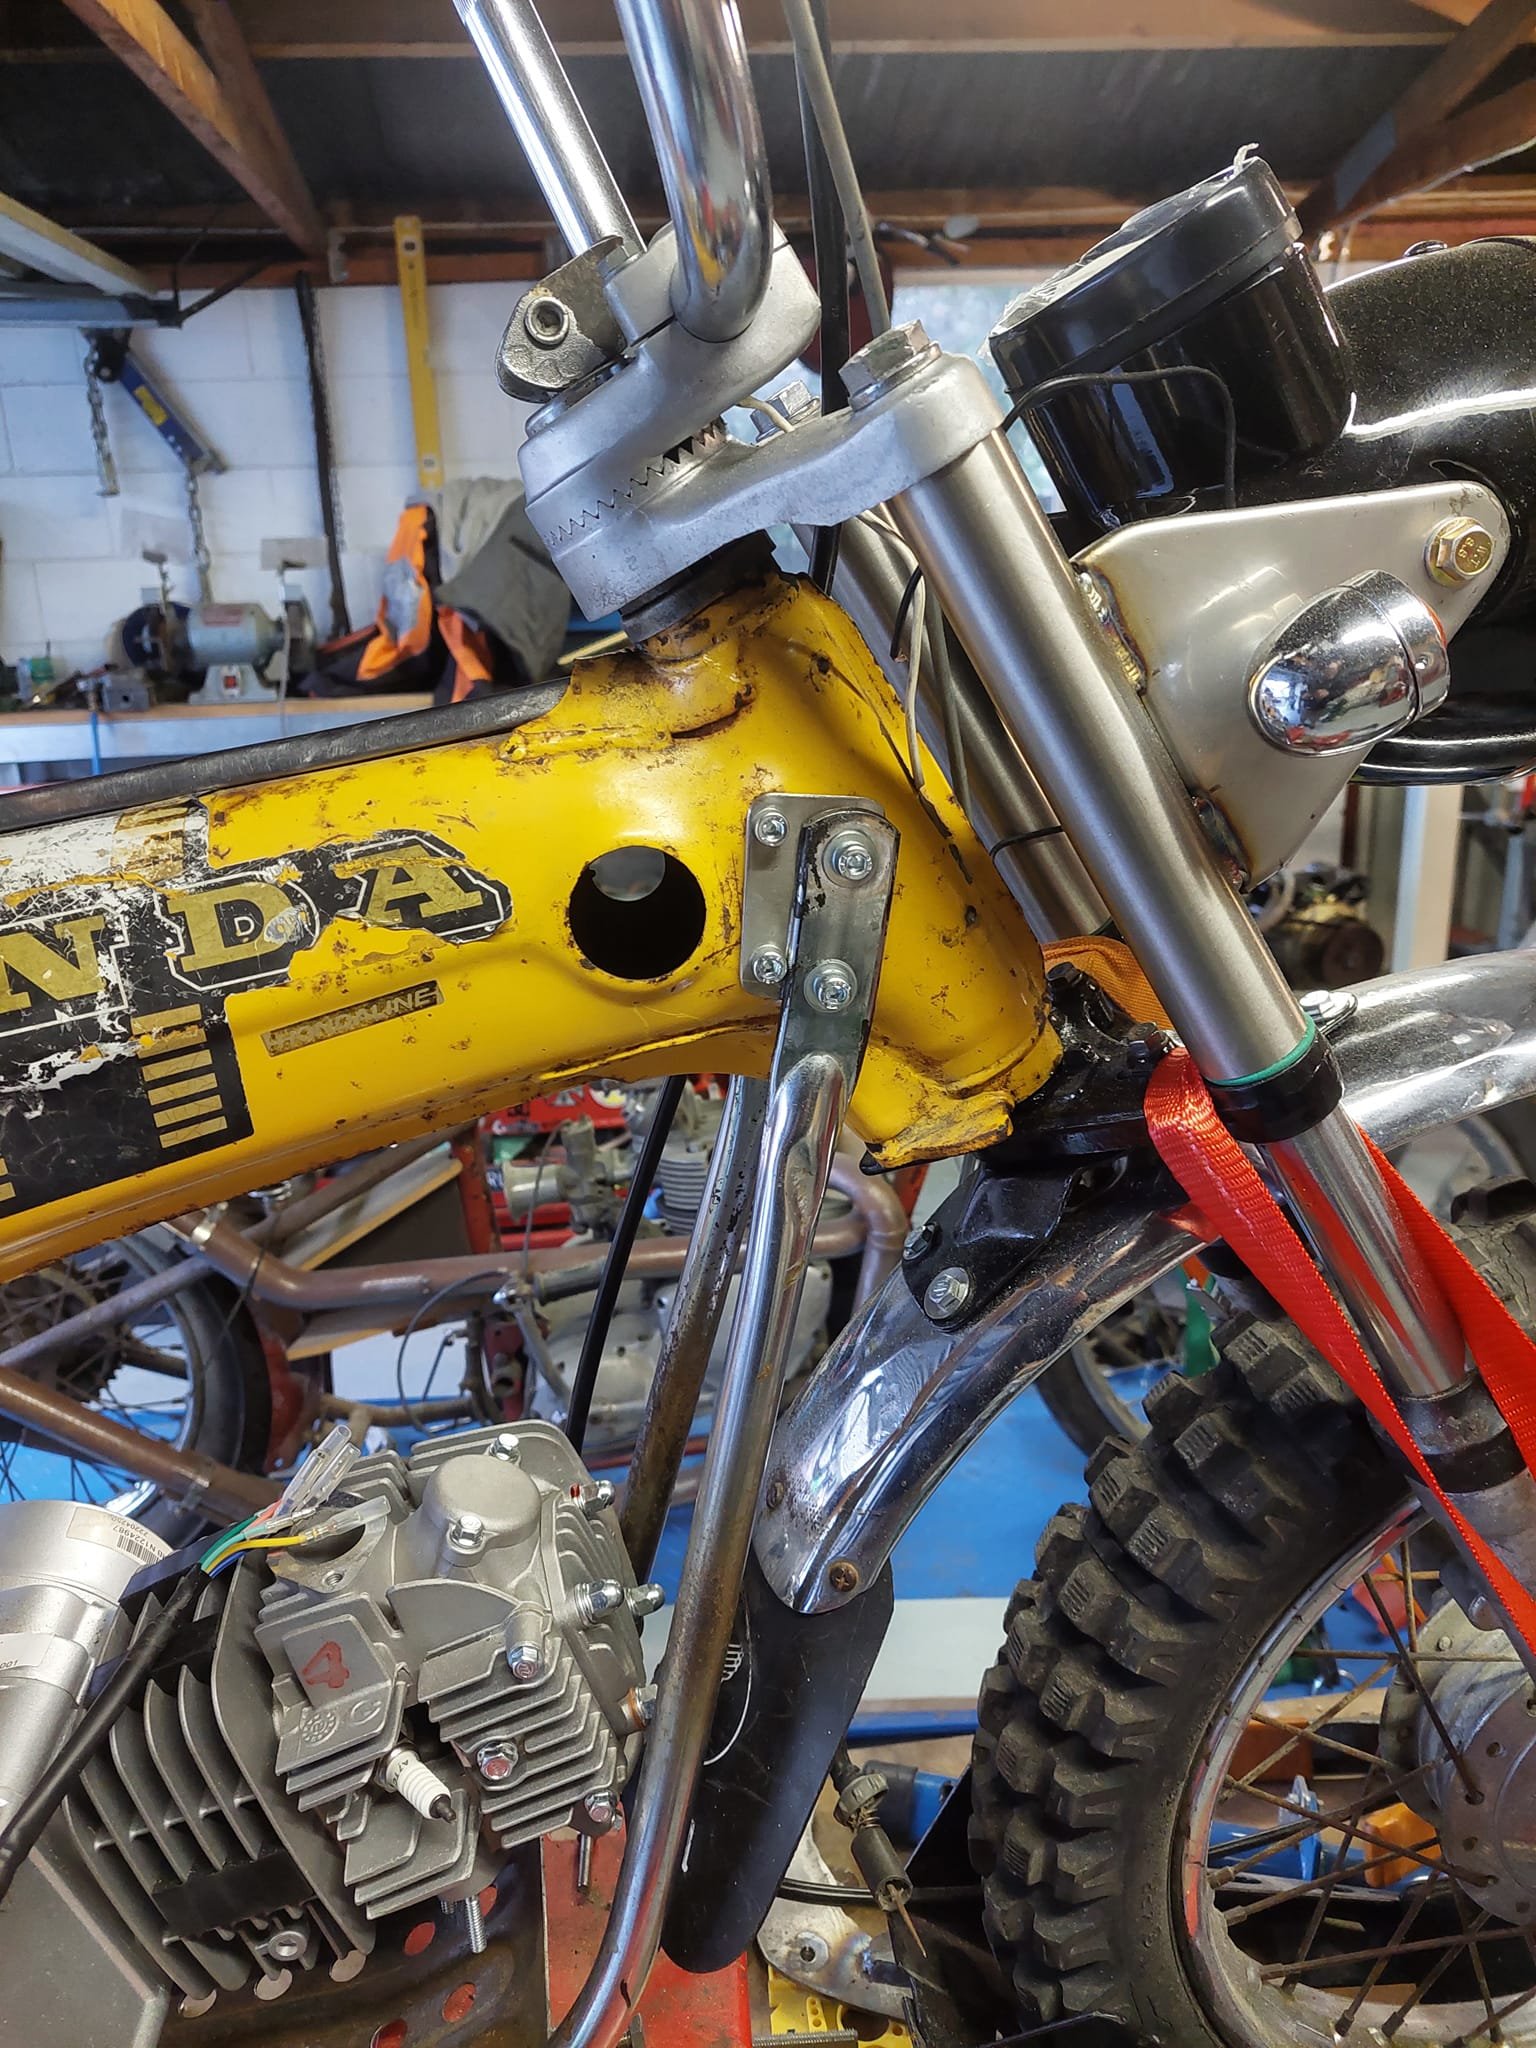
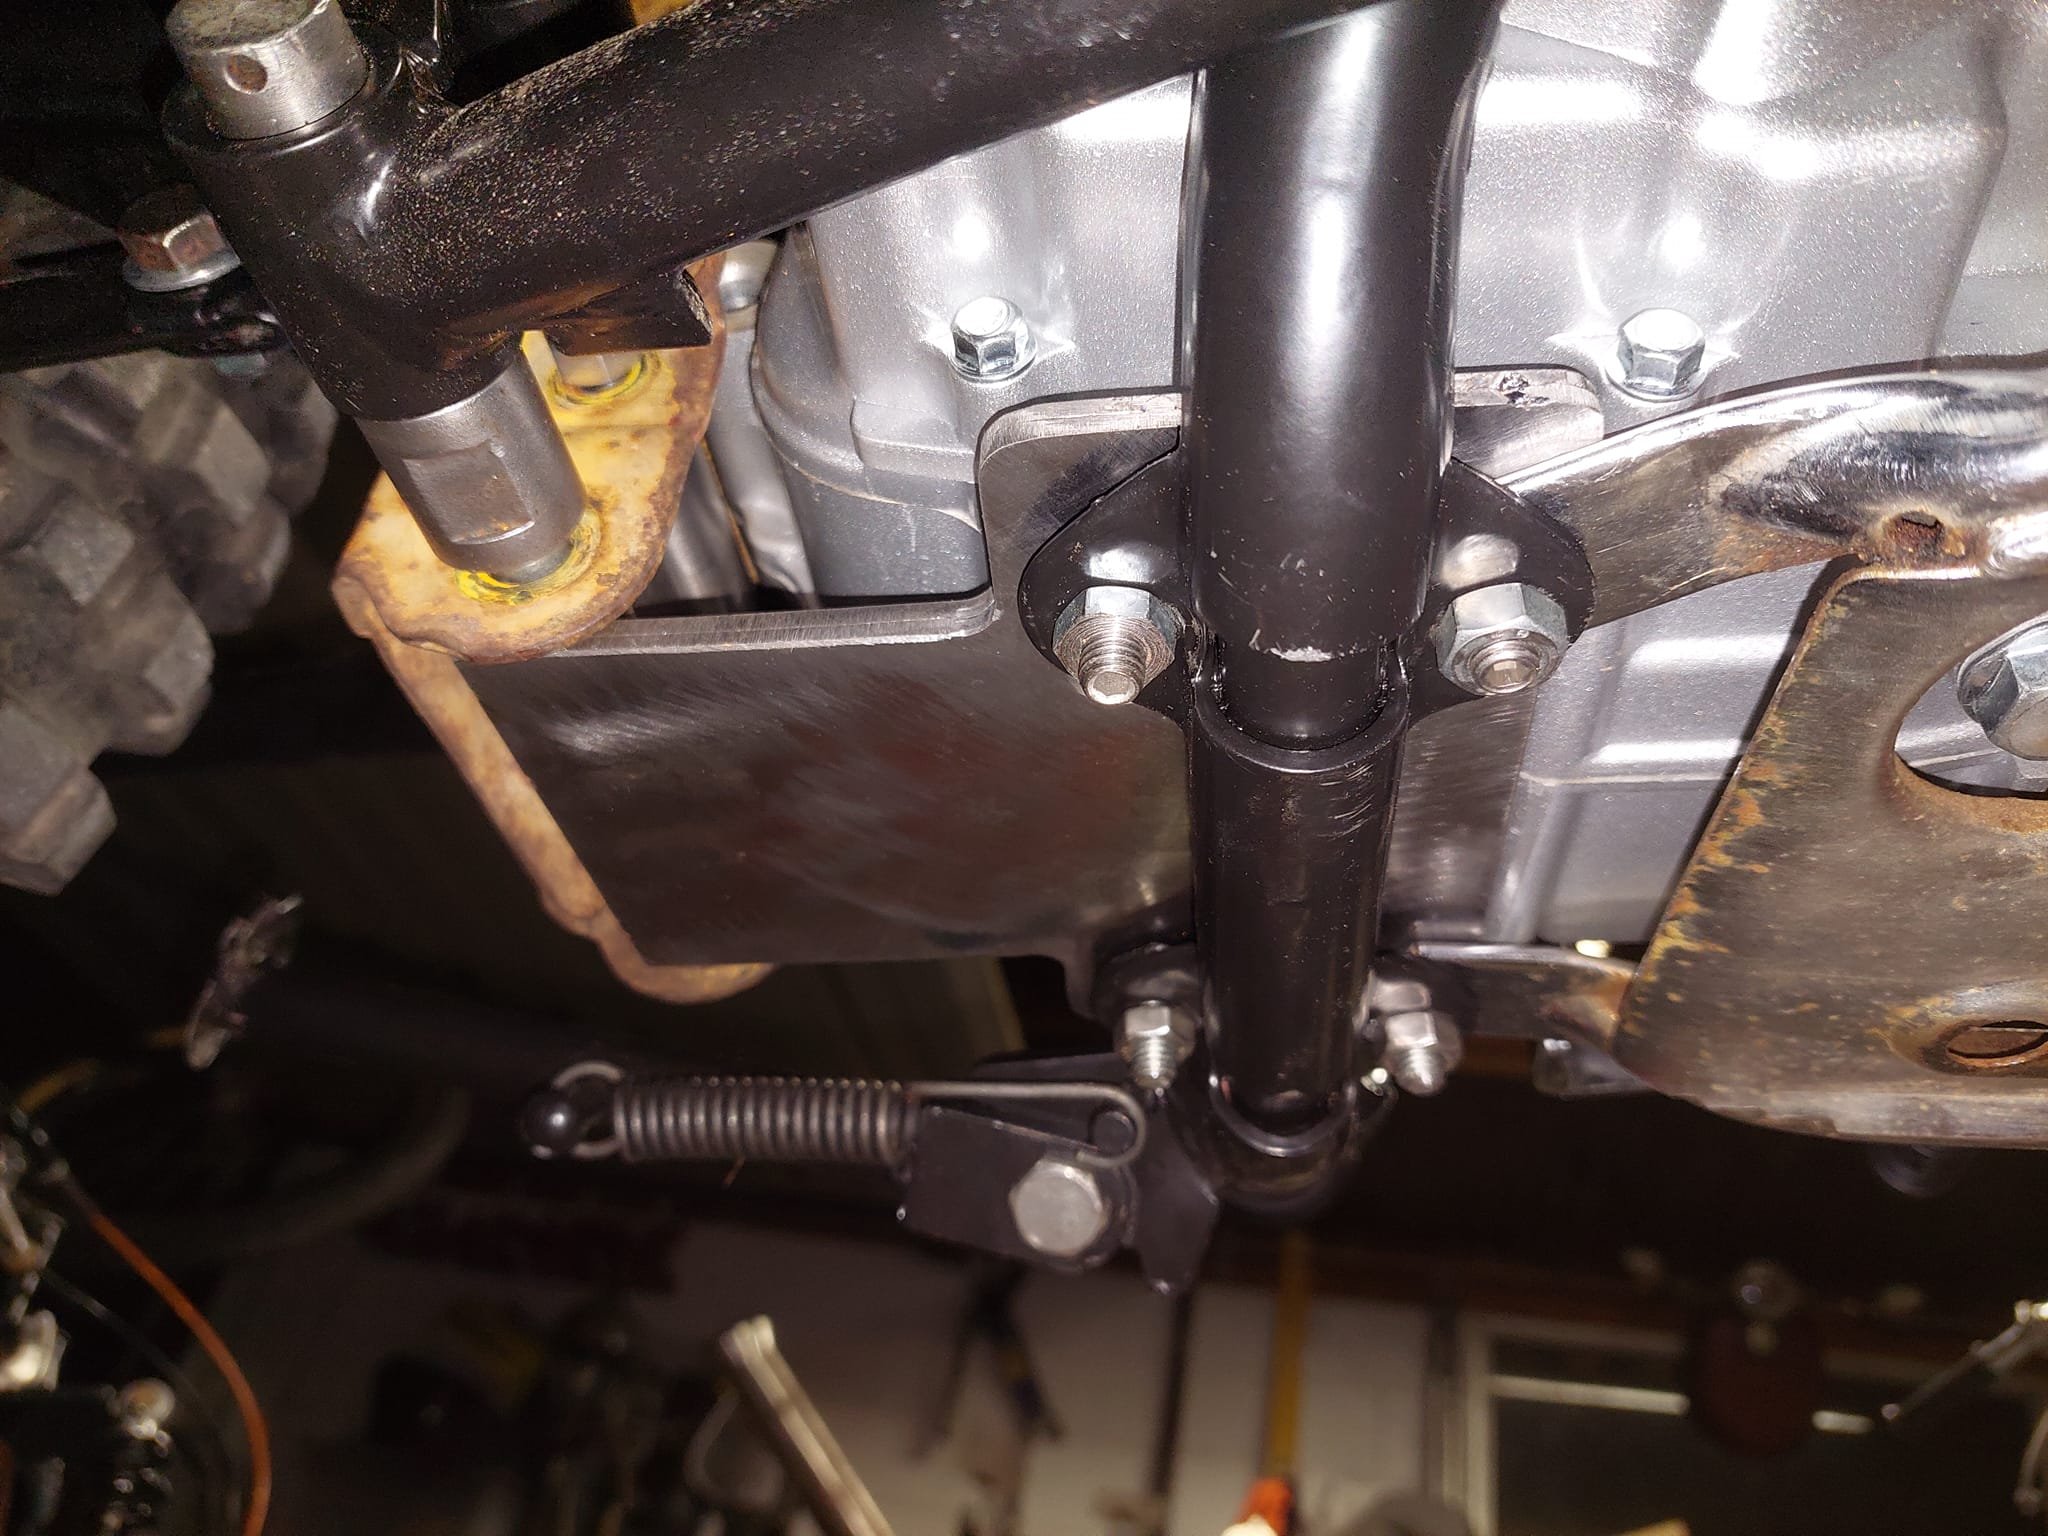
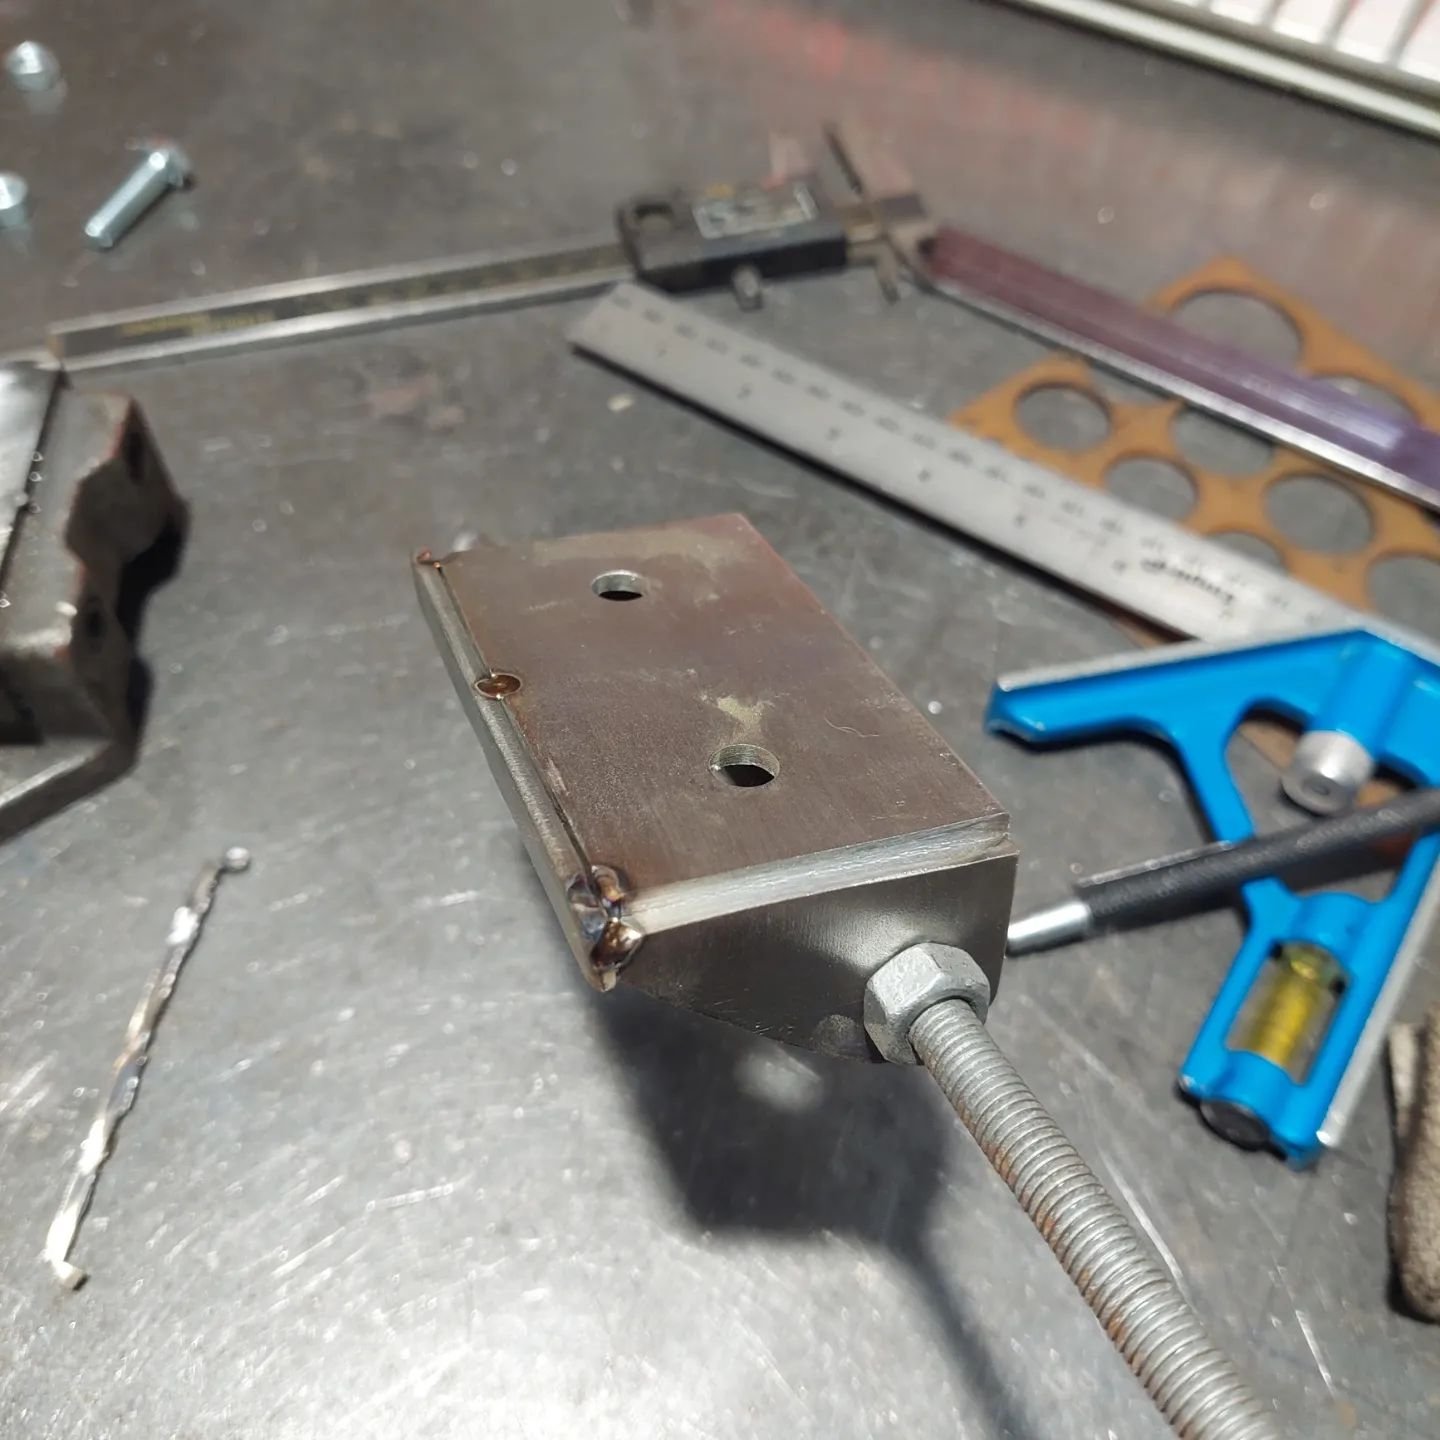
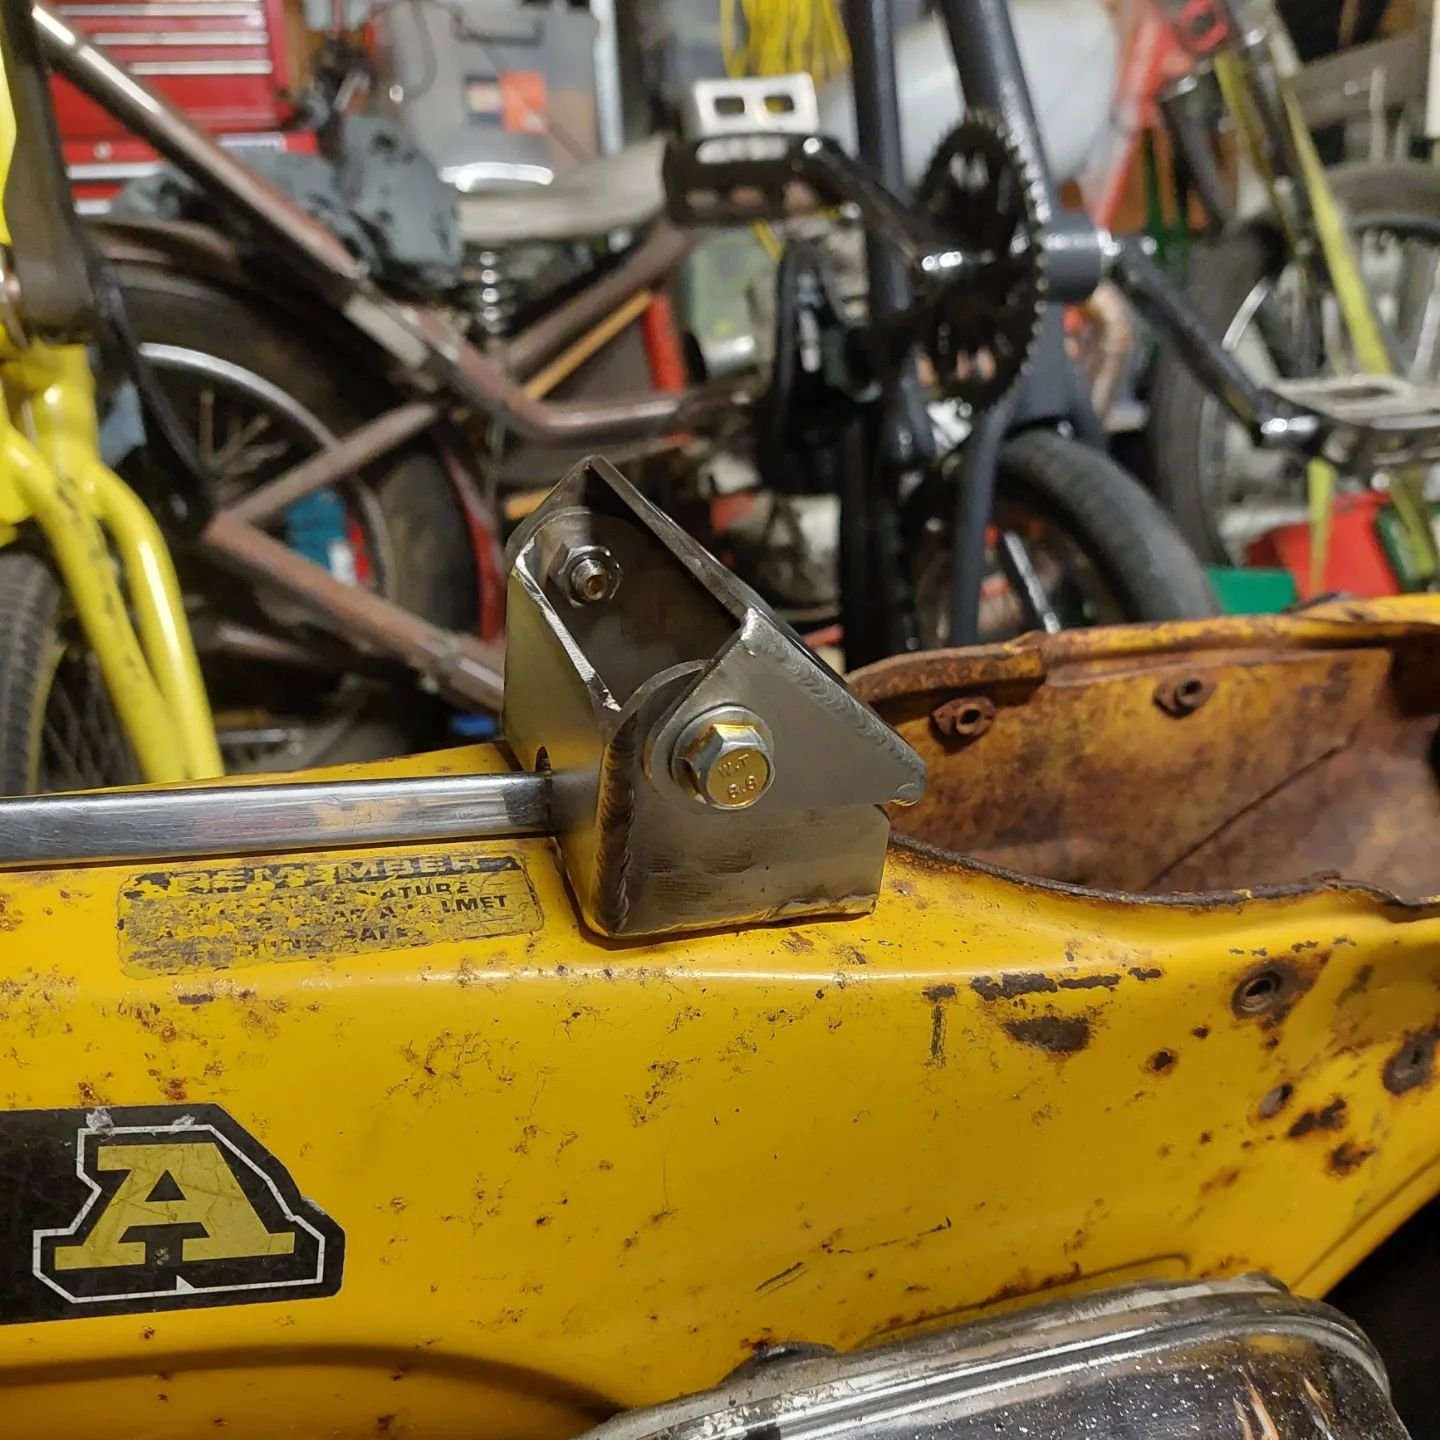
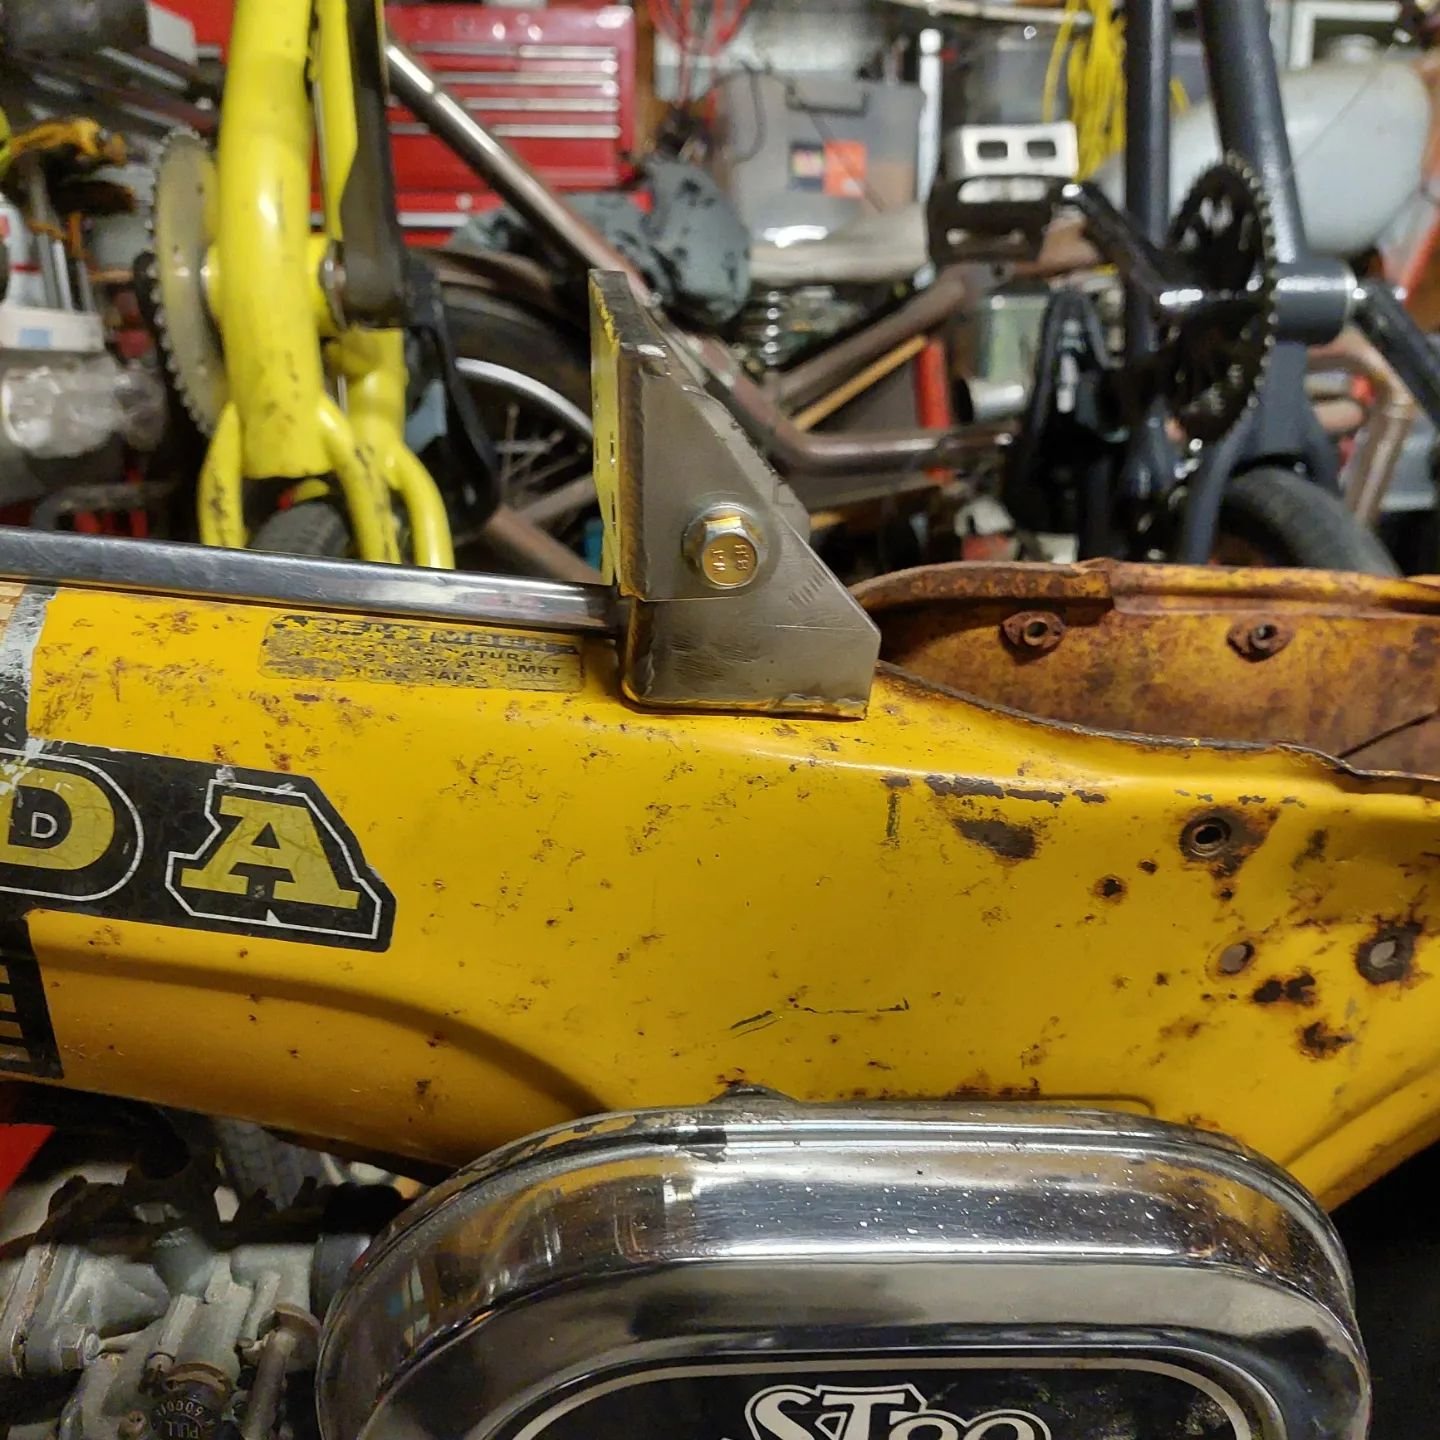
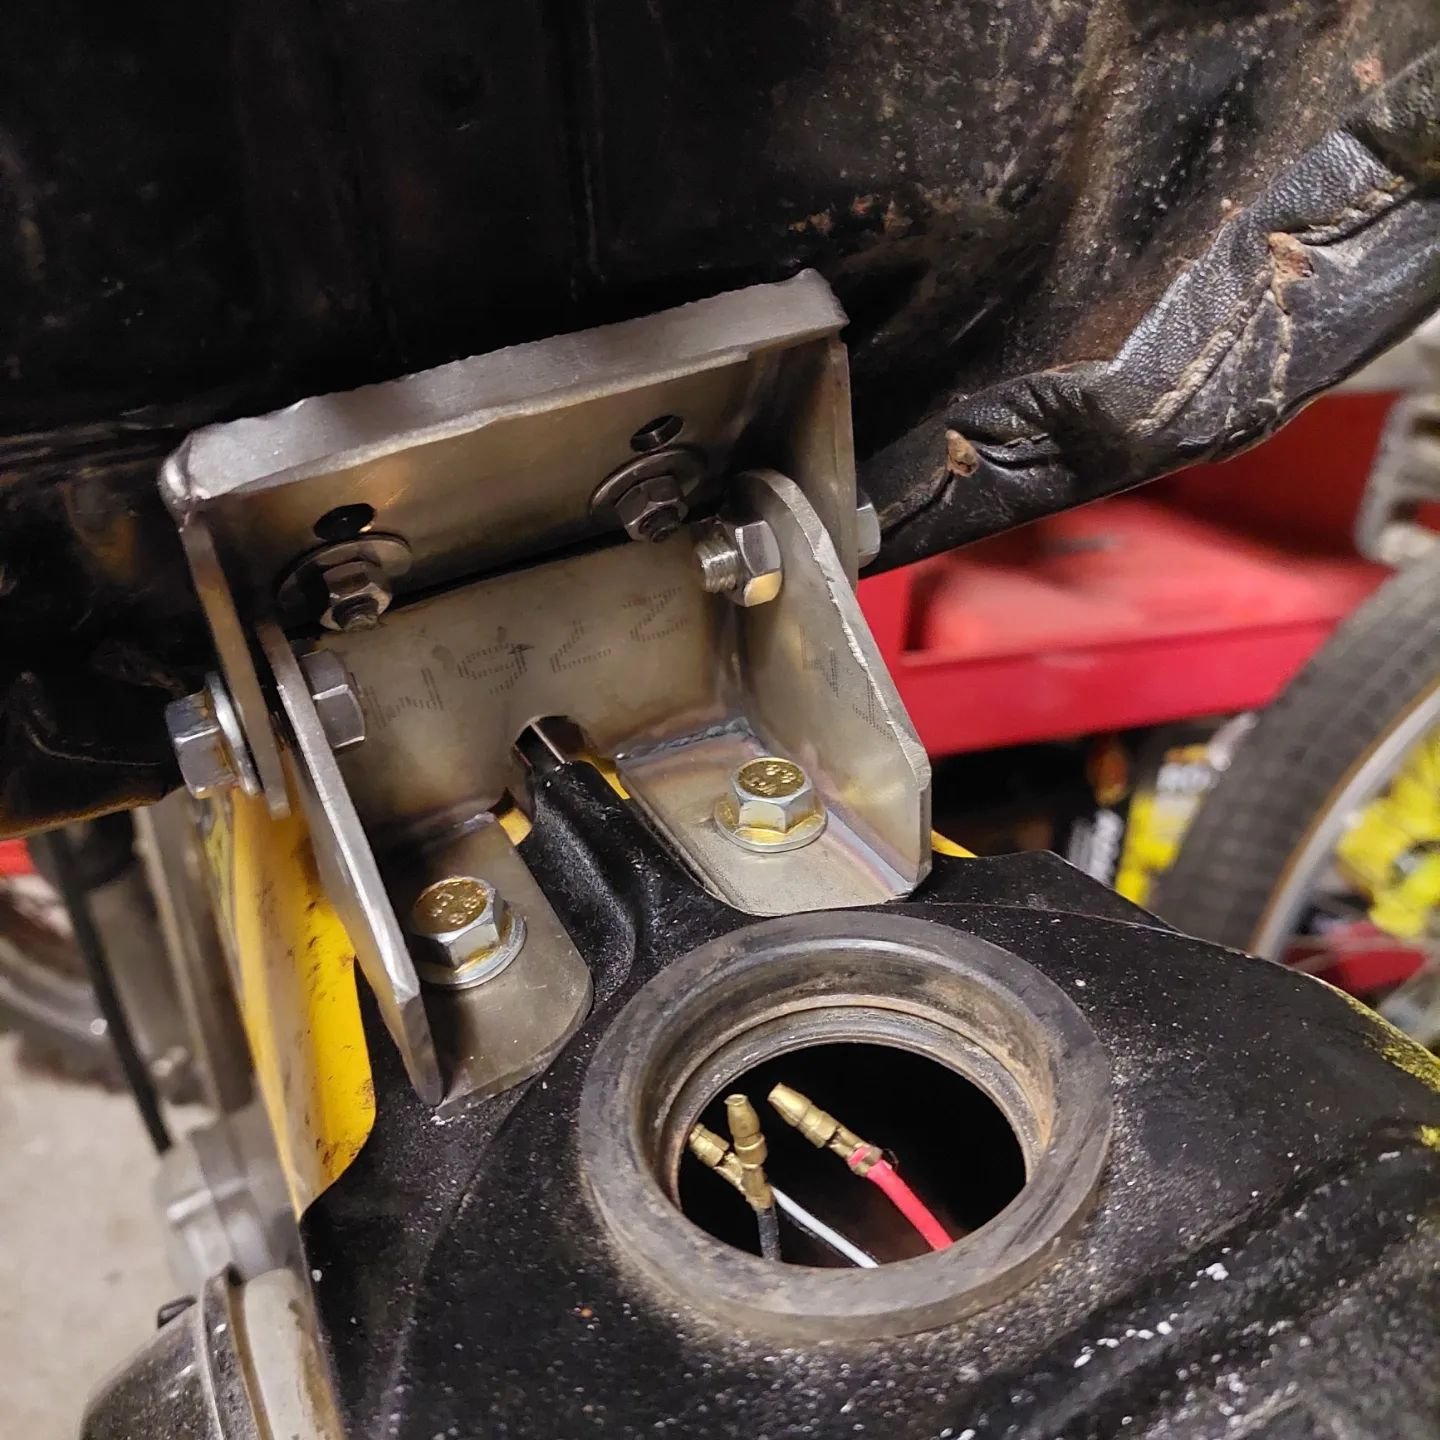
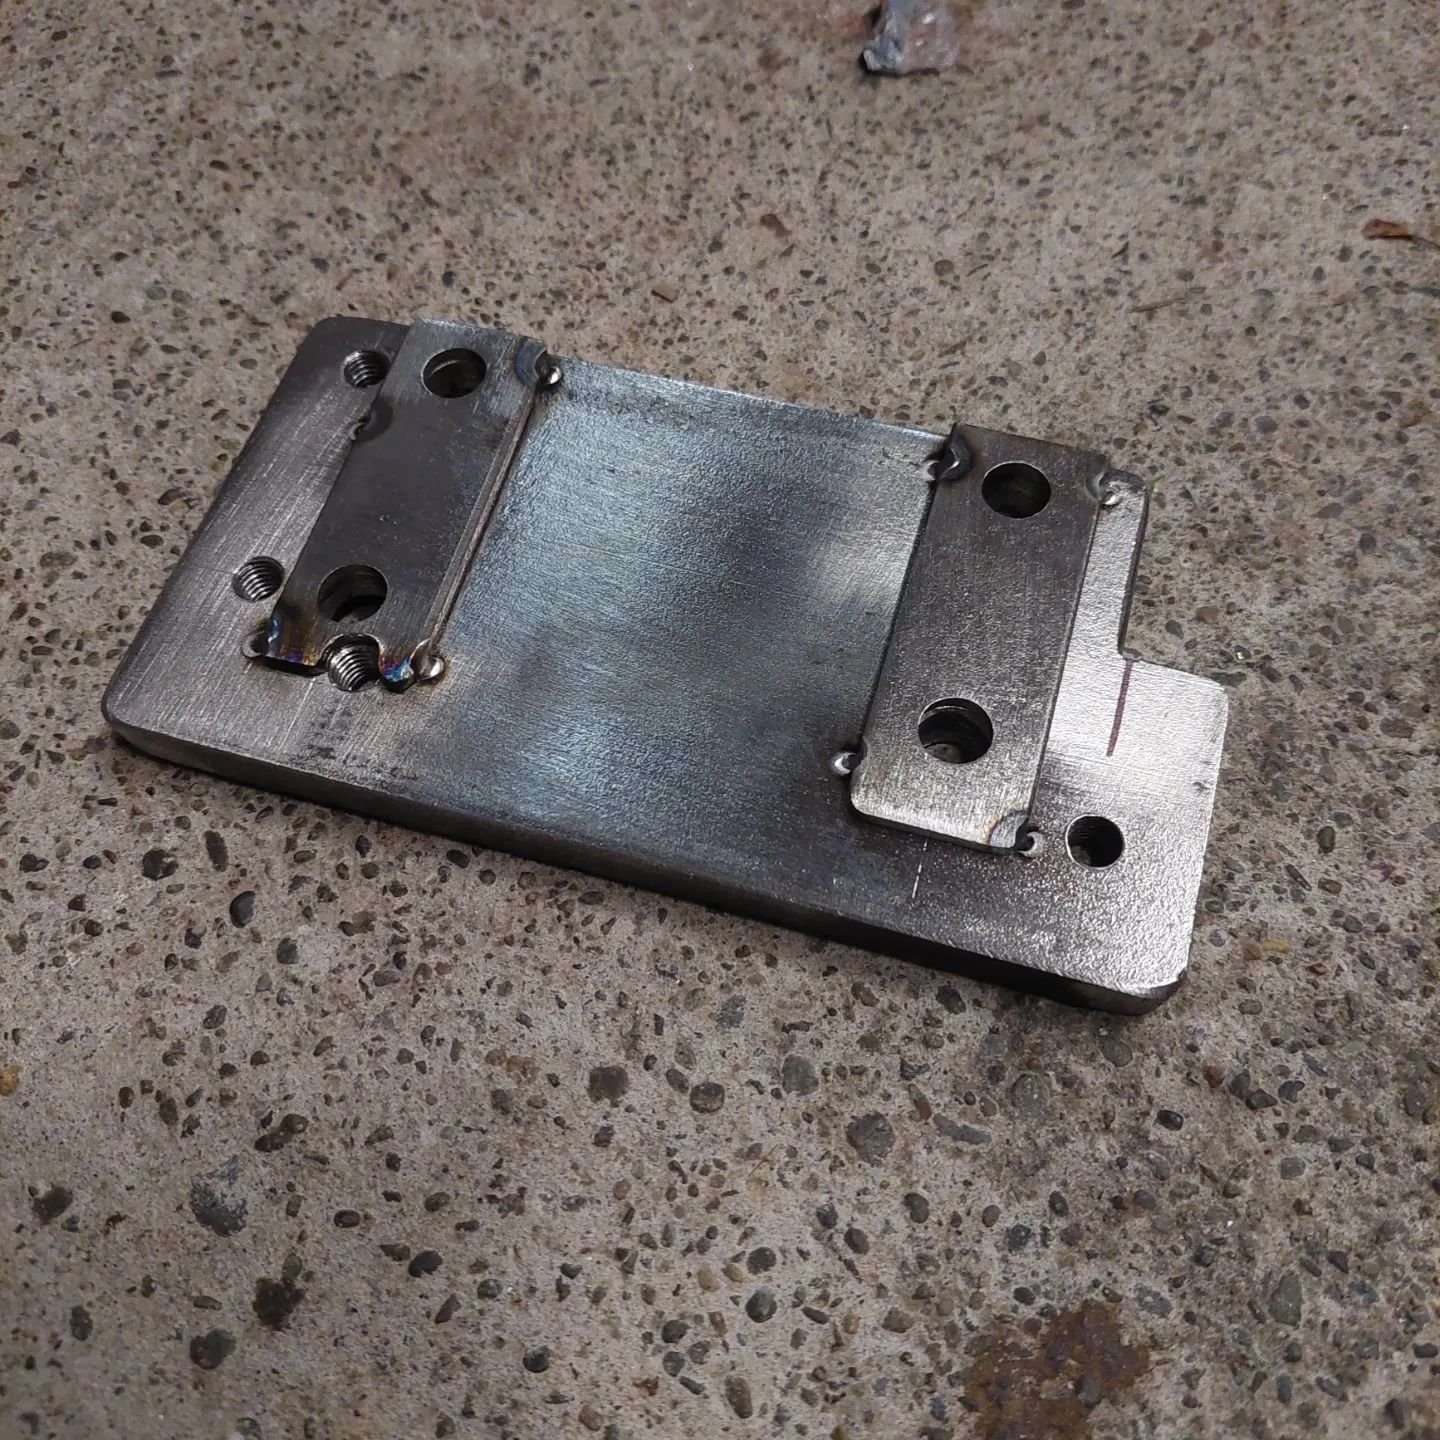
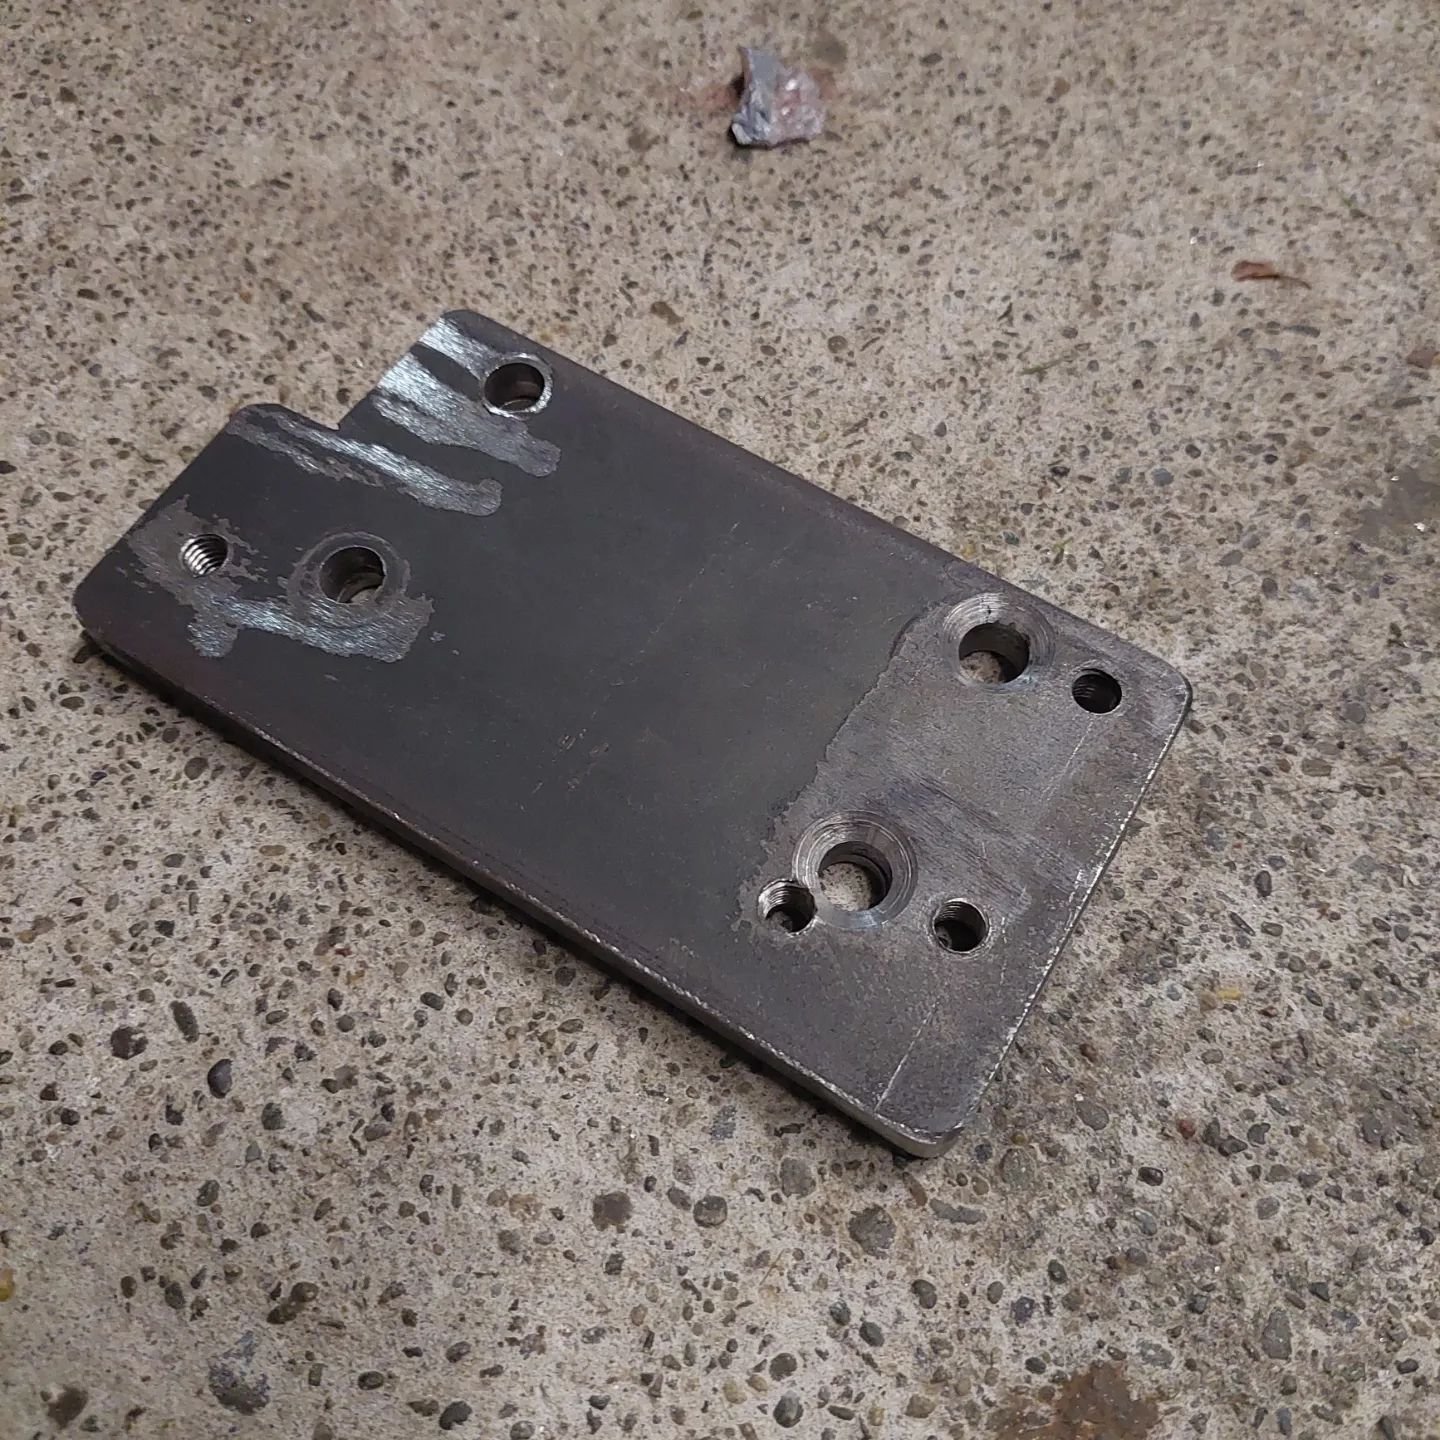
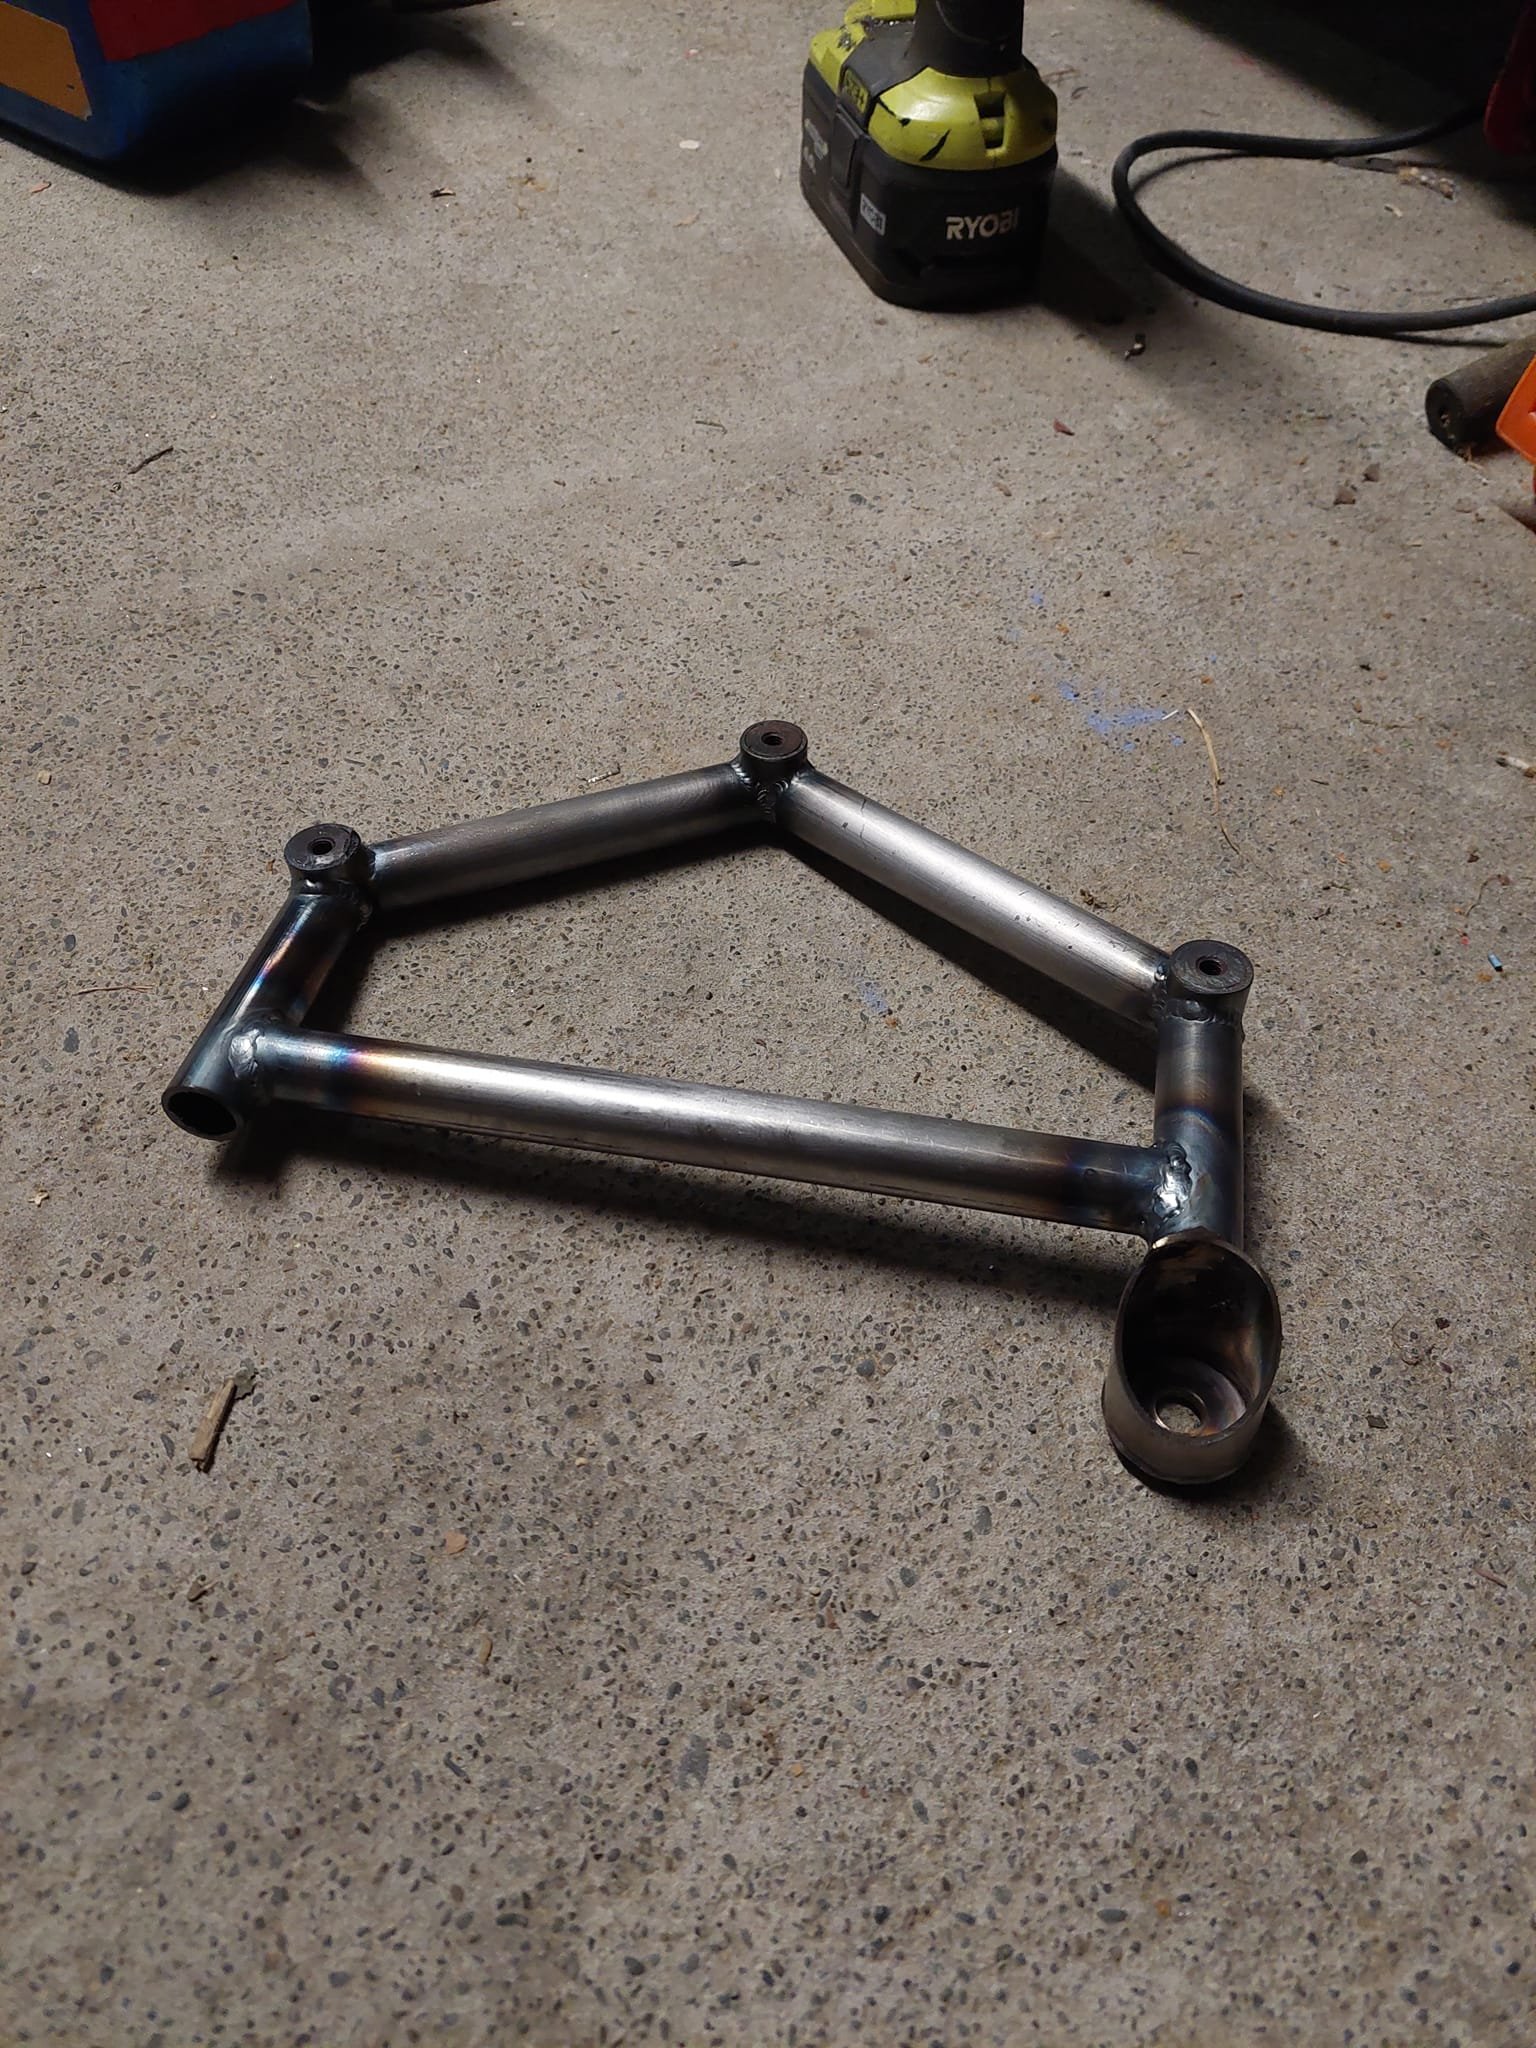
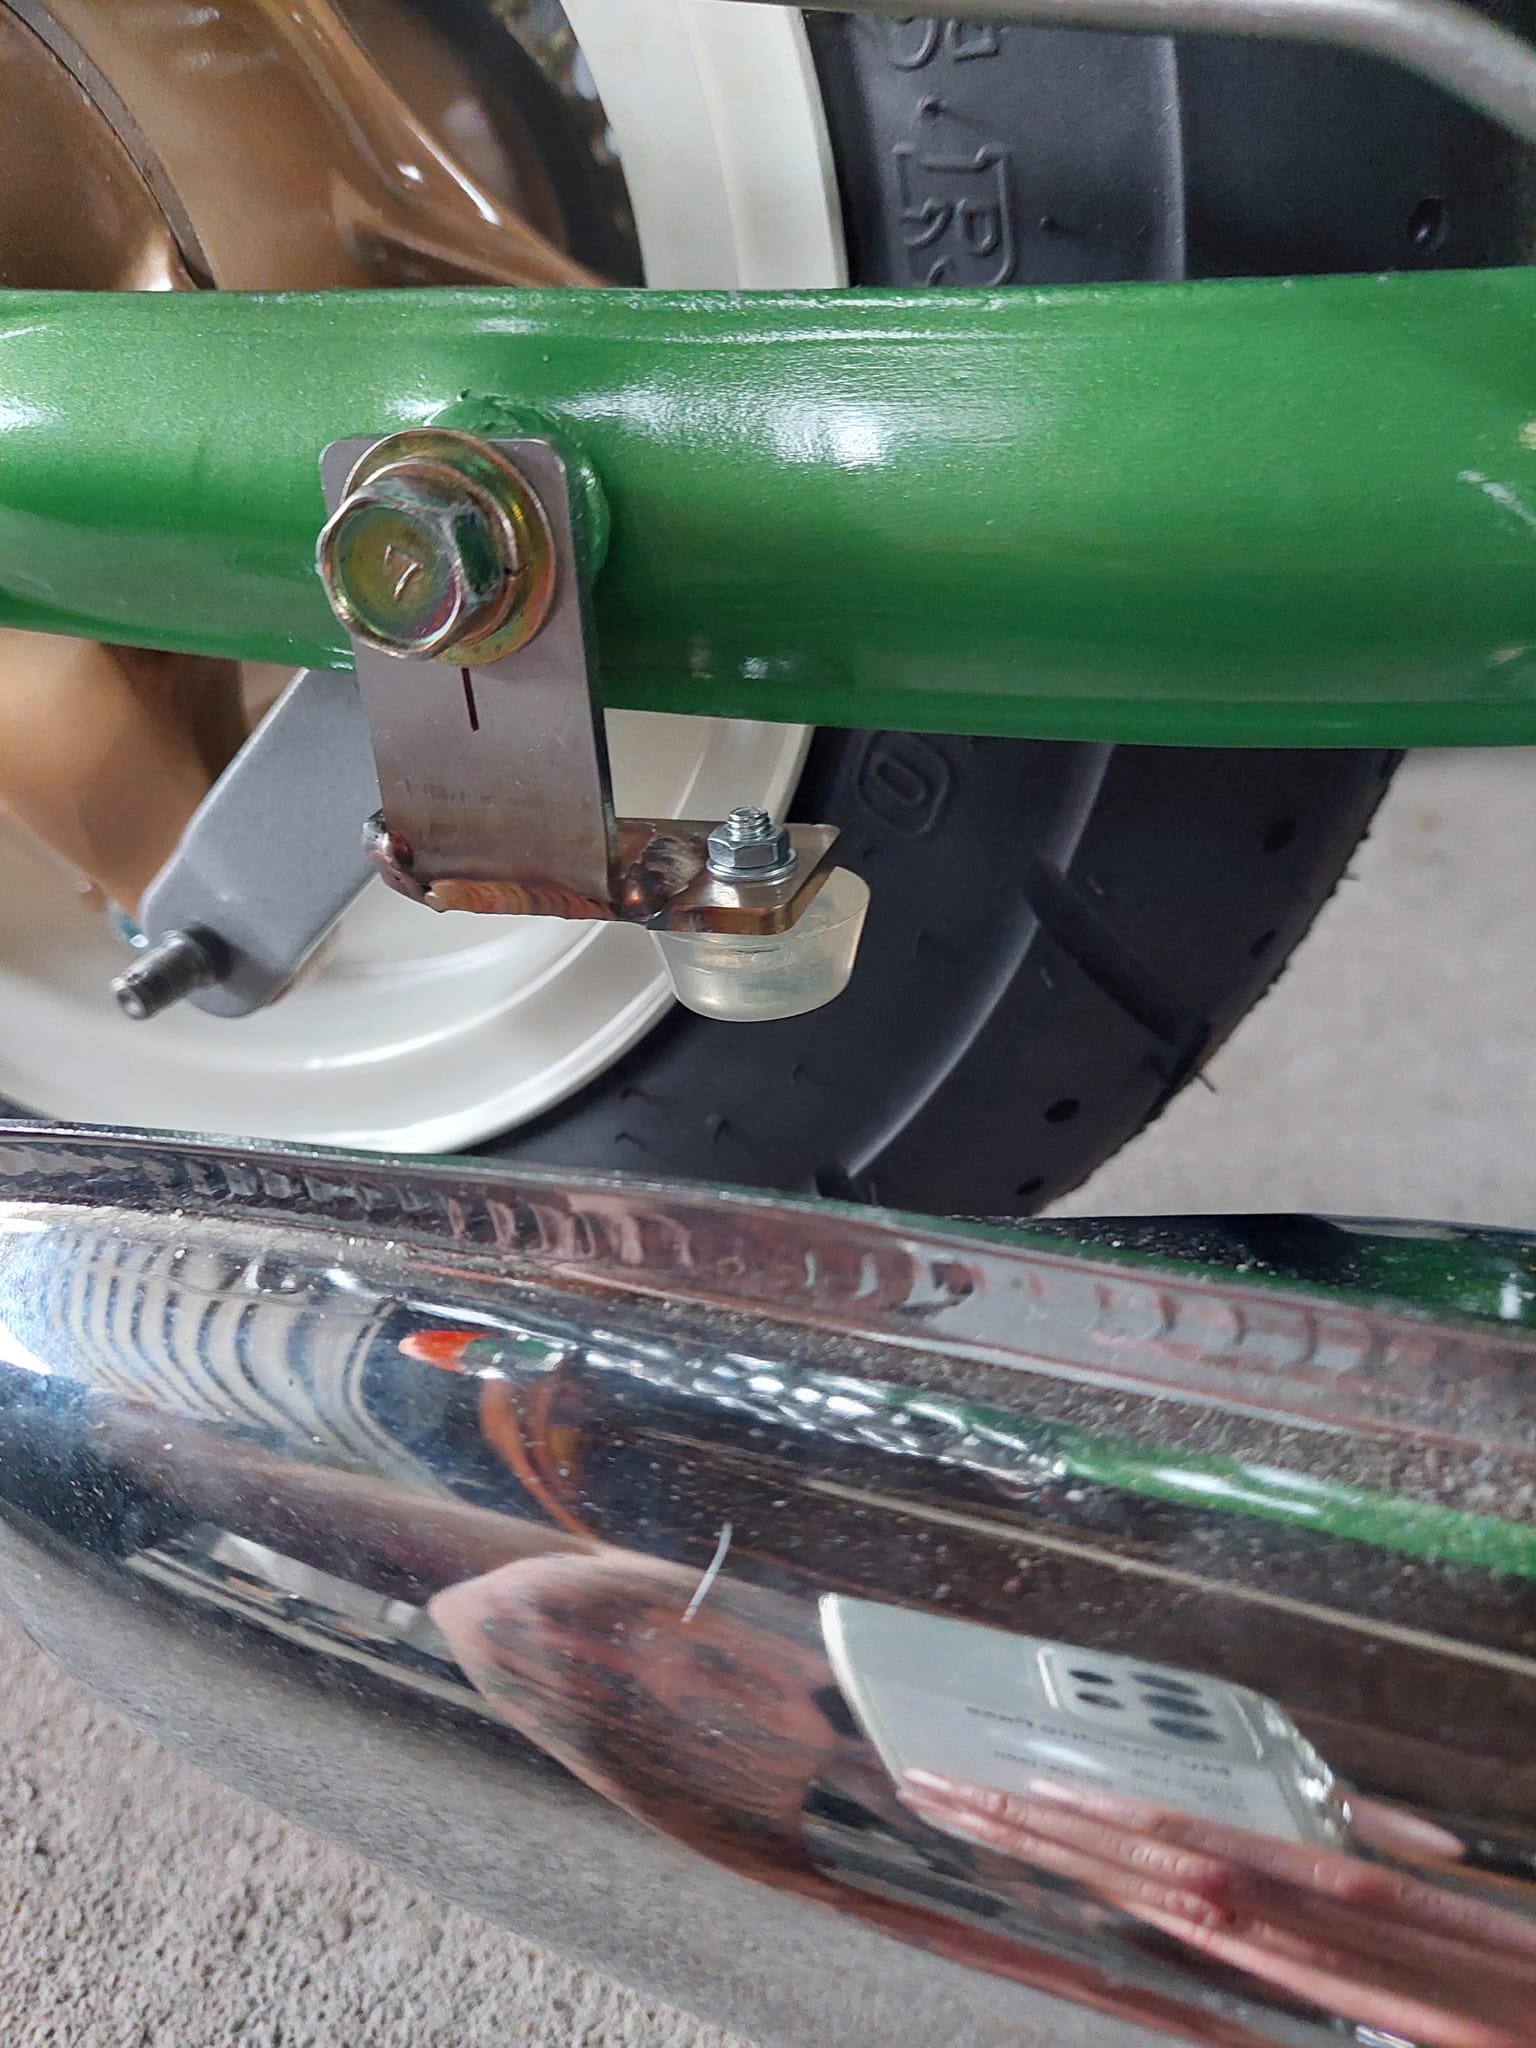
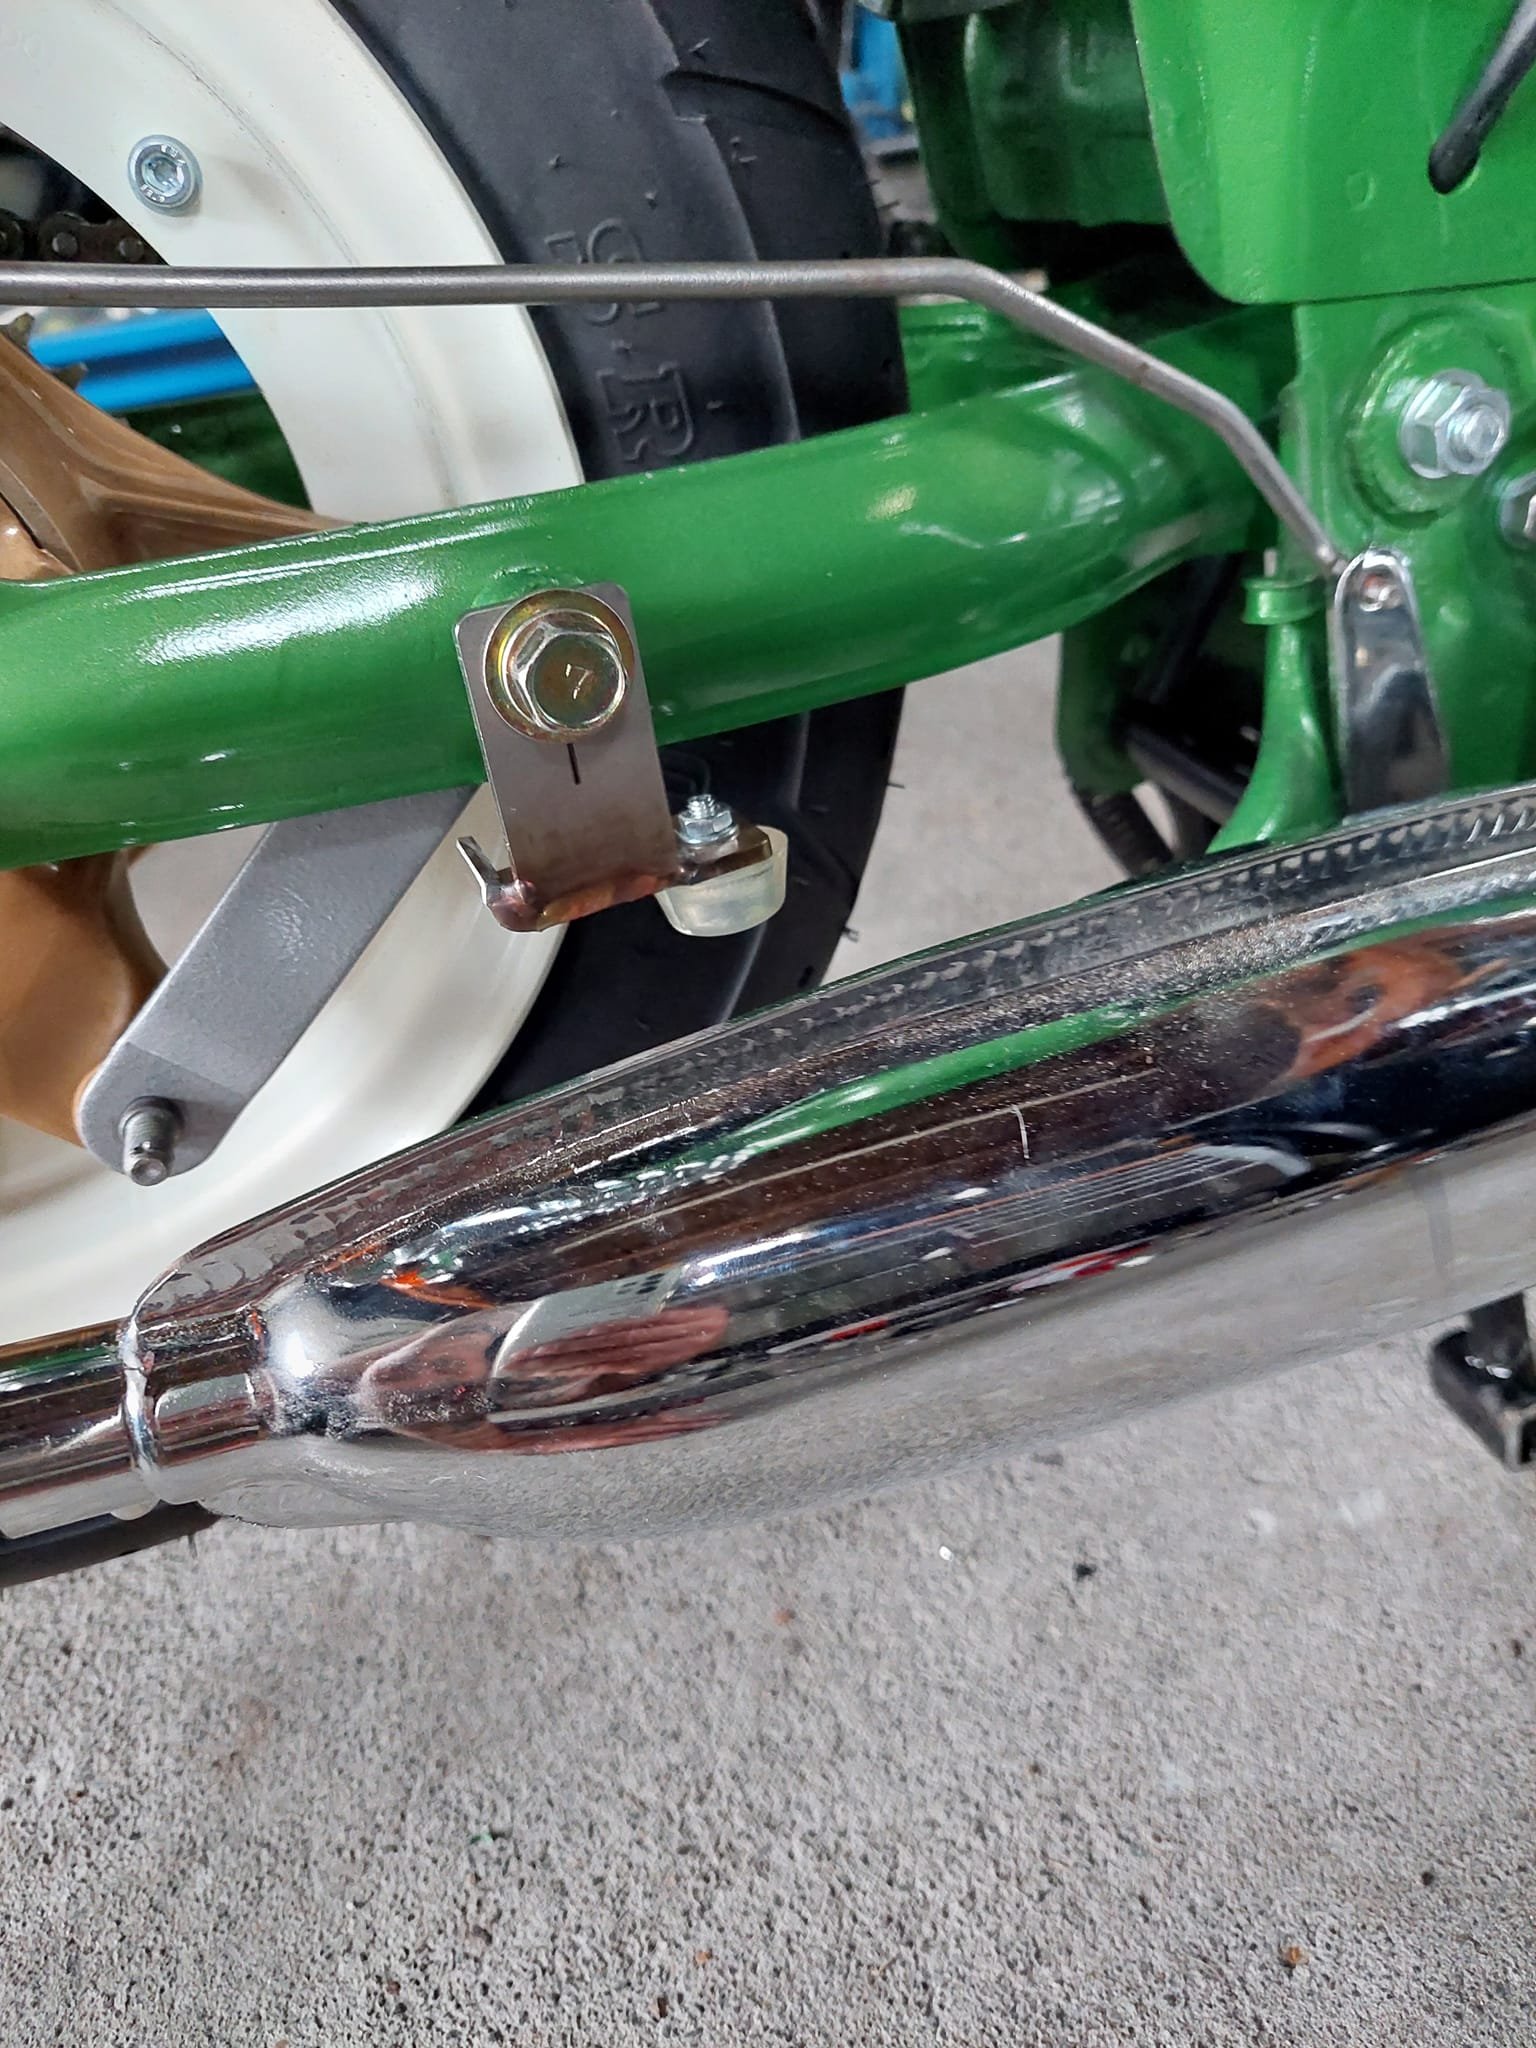
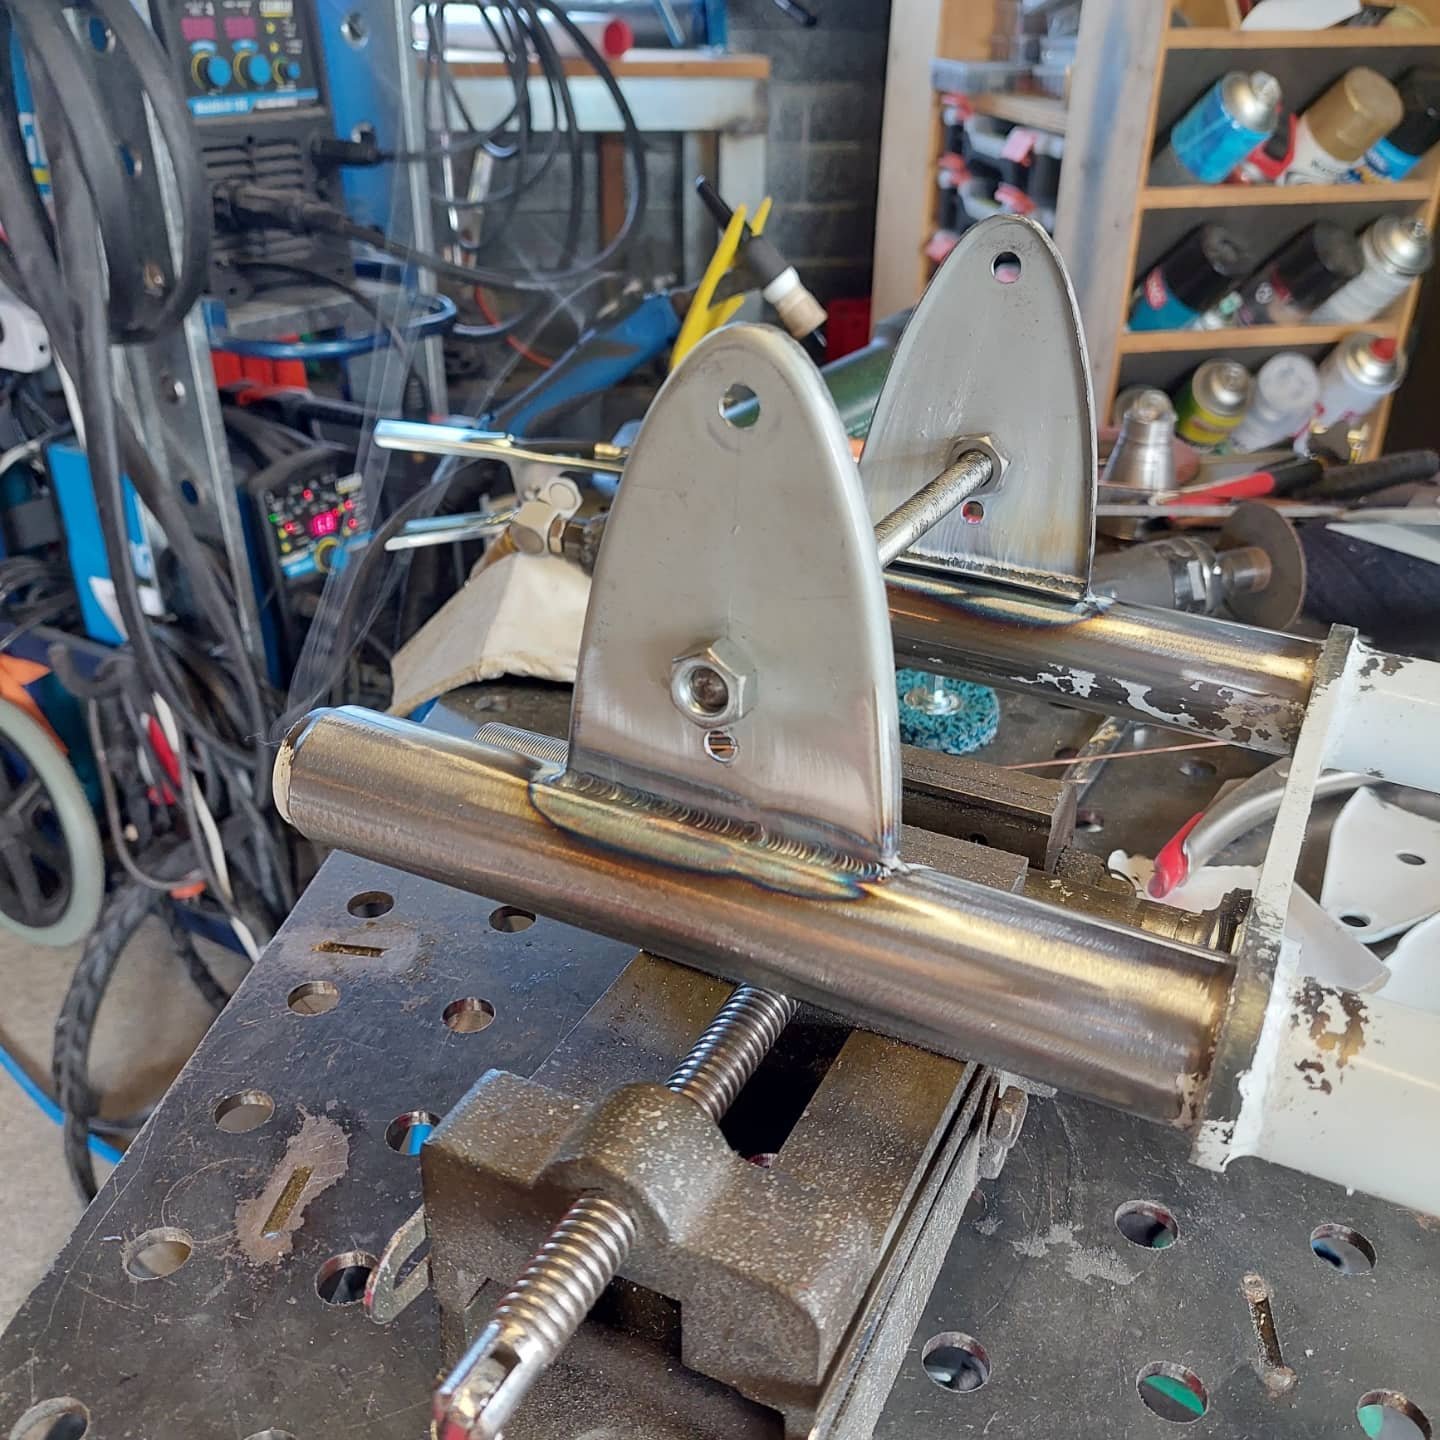
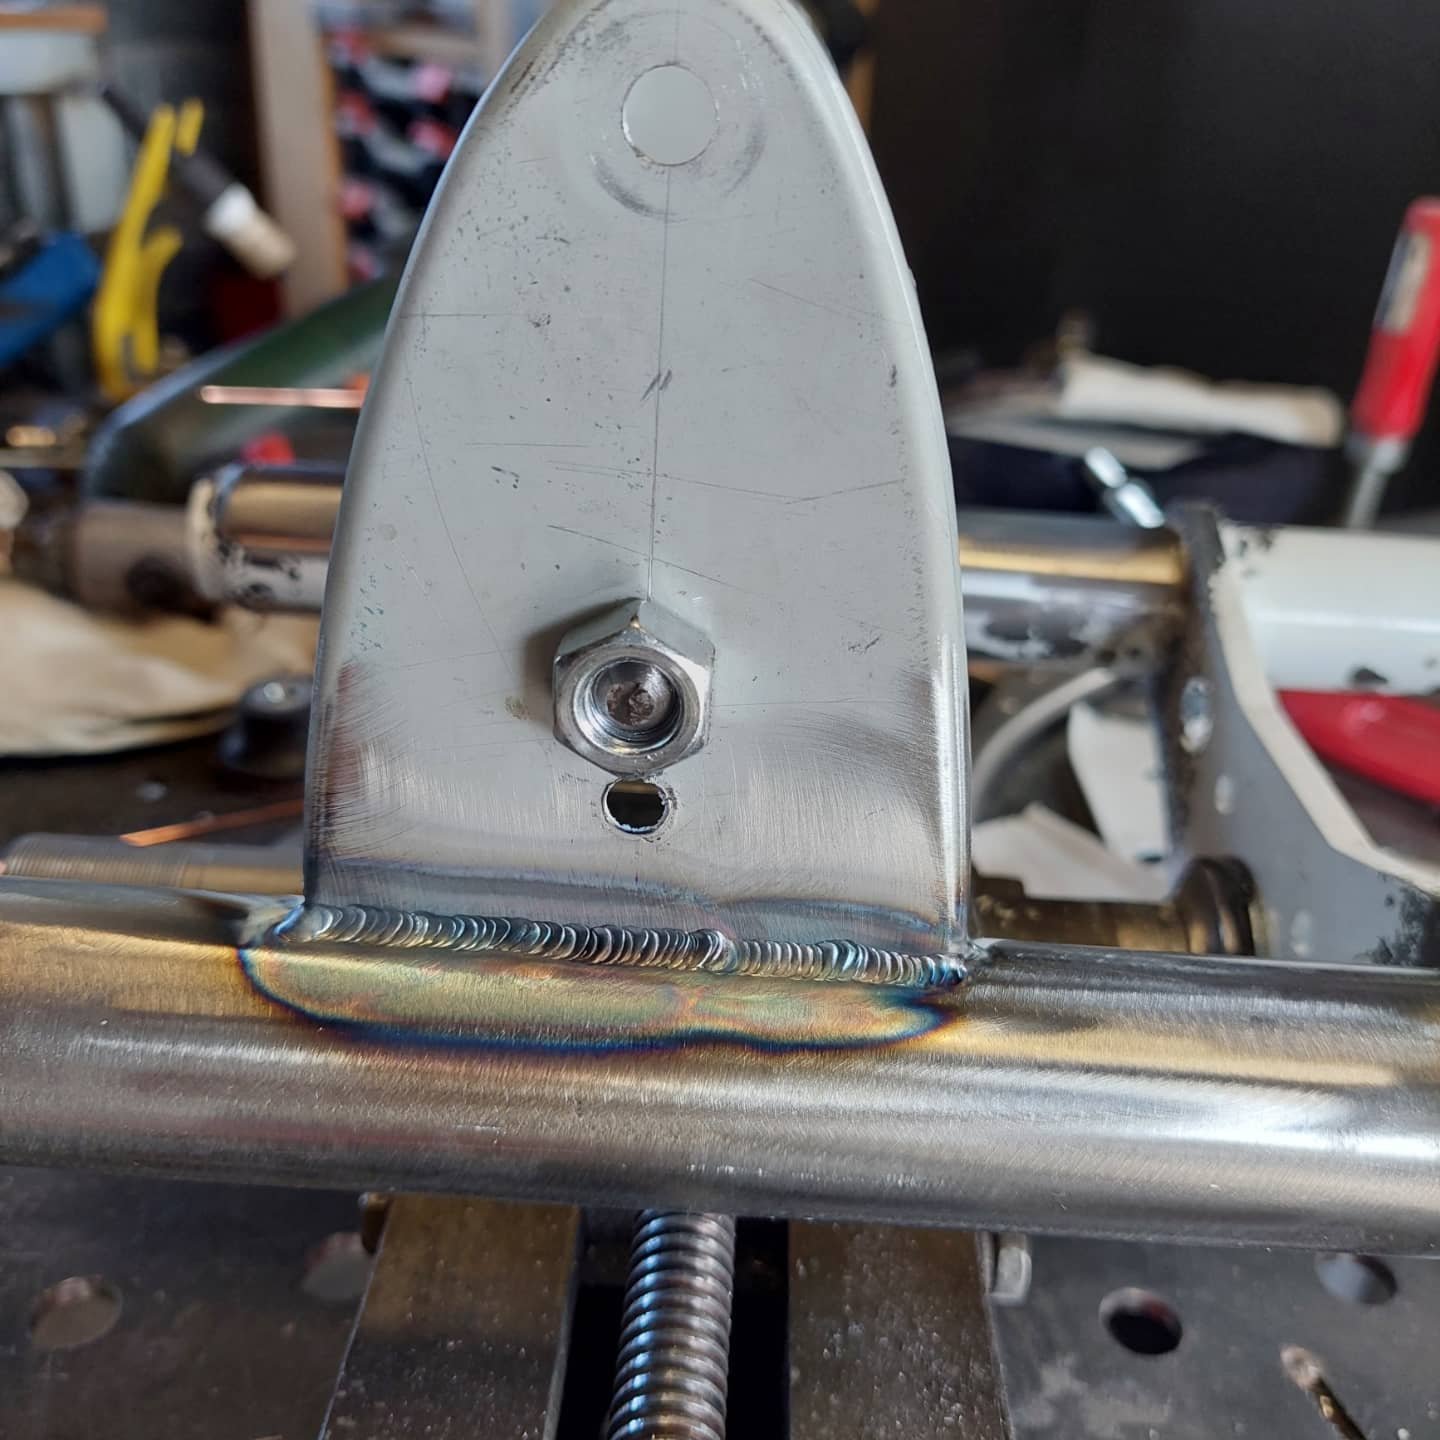
Here's the adapter plates I made for the support brace . I didnt want to drill or weld anything to the frame incase I want to put the bike back to original, so I made some plates from 3mm stainless and offset and tapped the 6mm holes
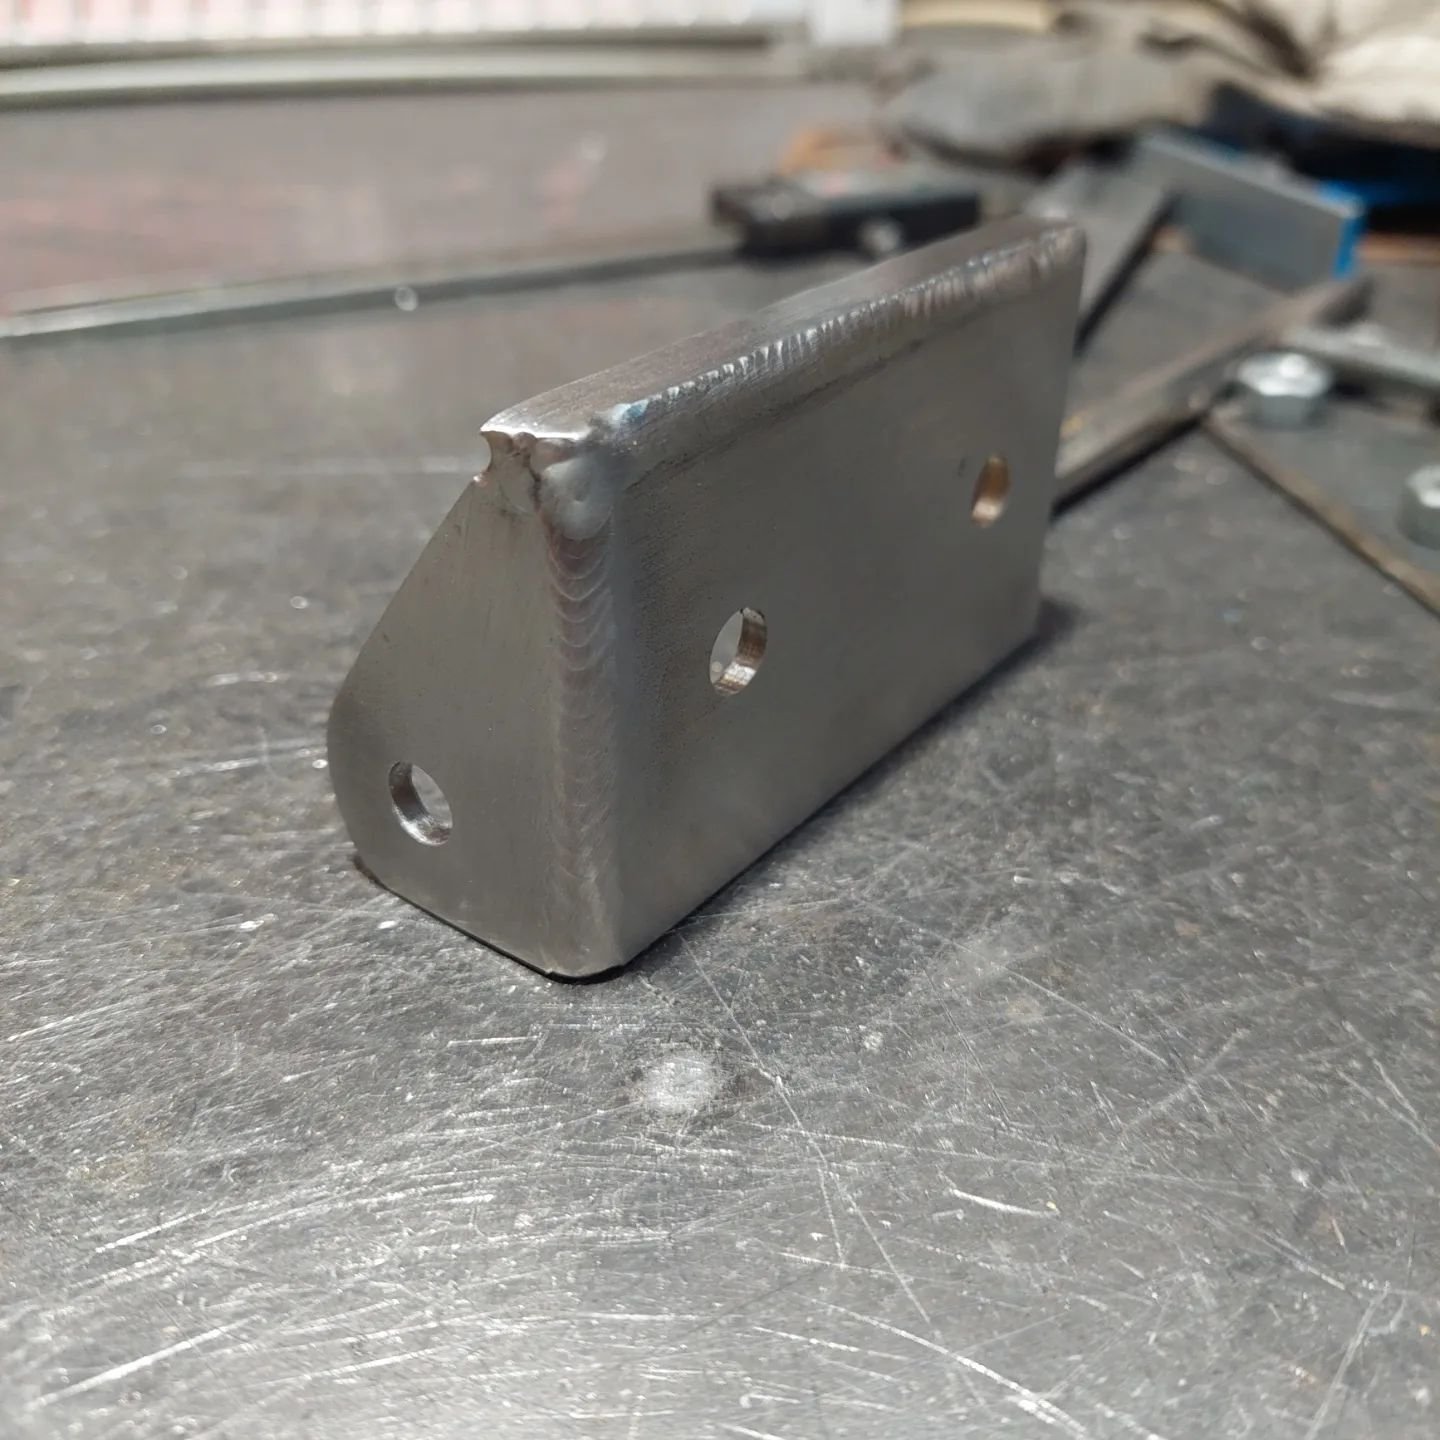
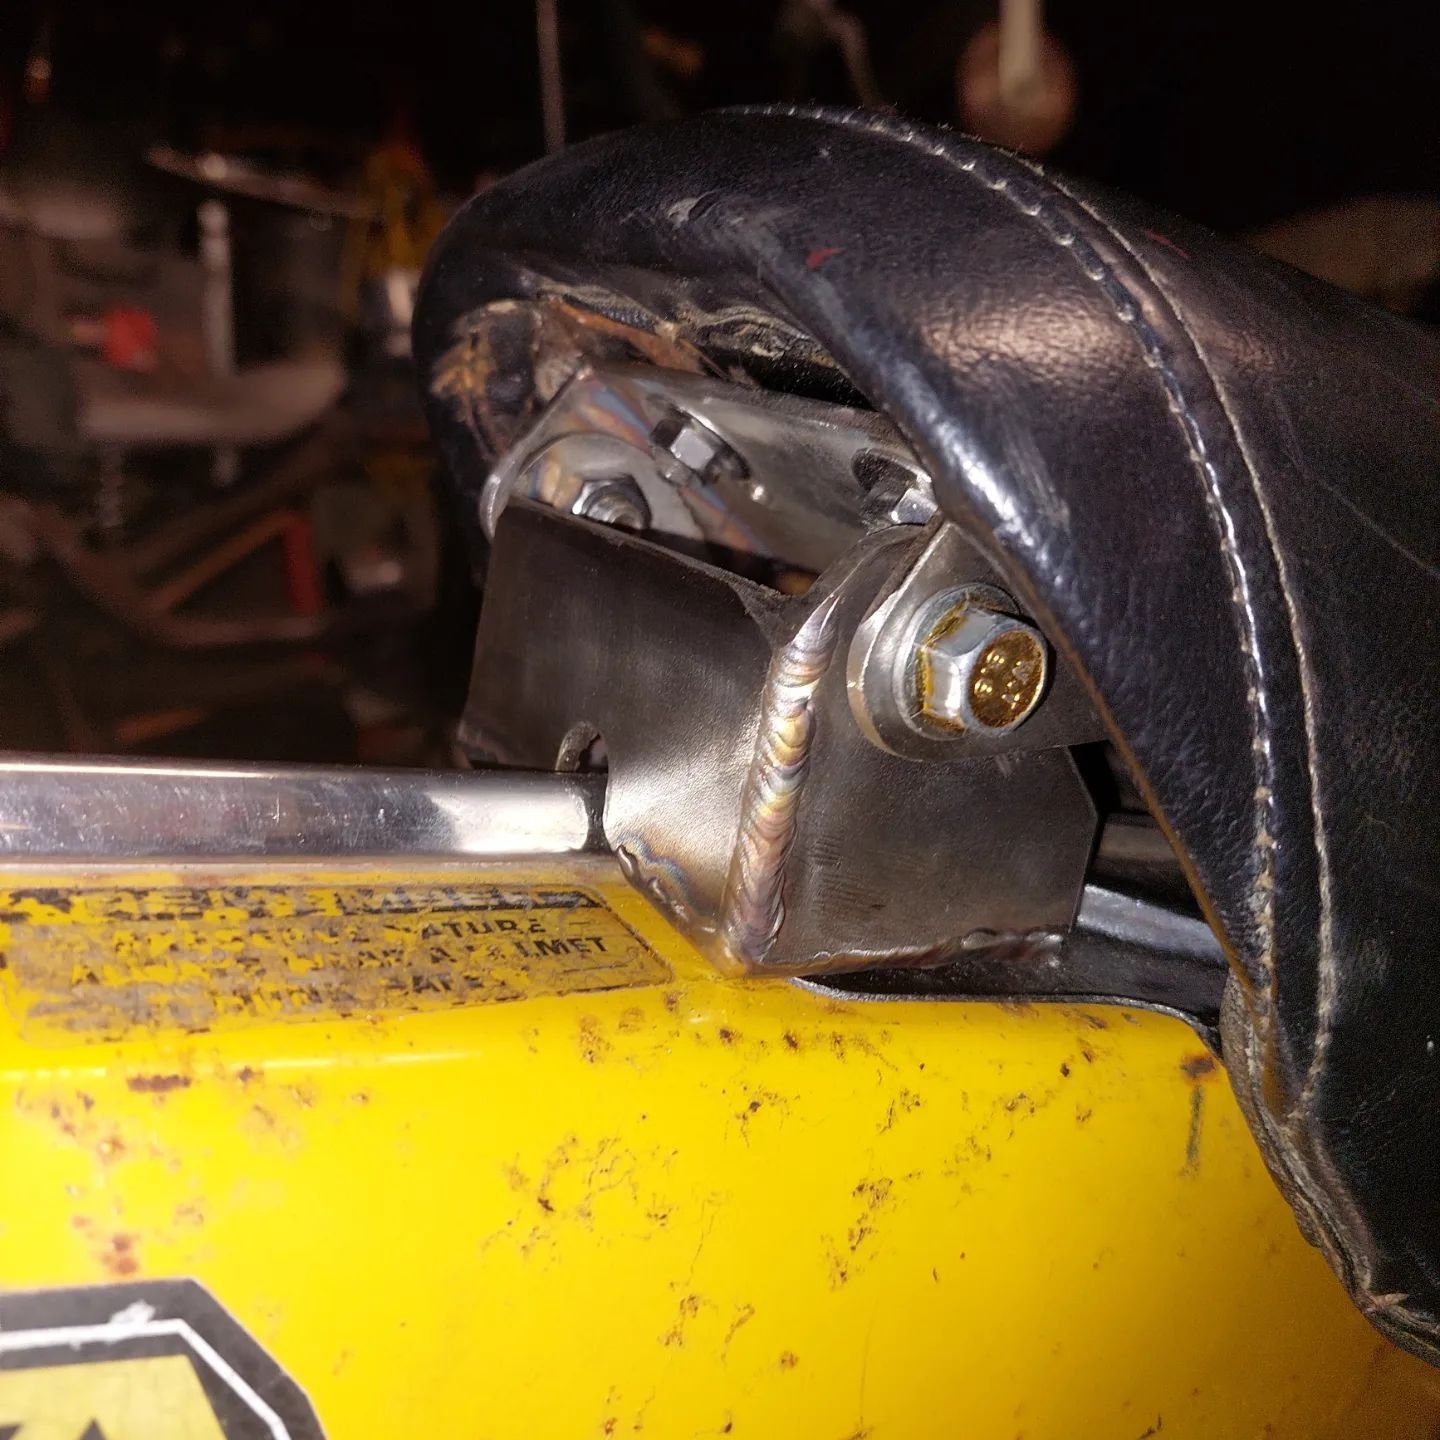
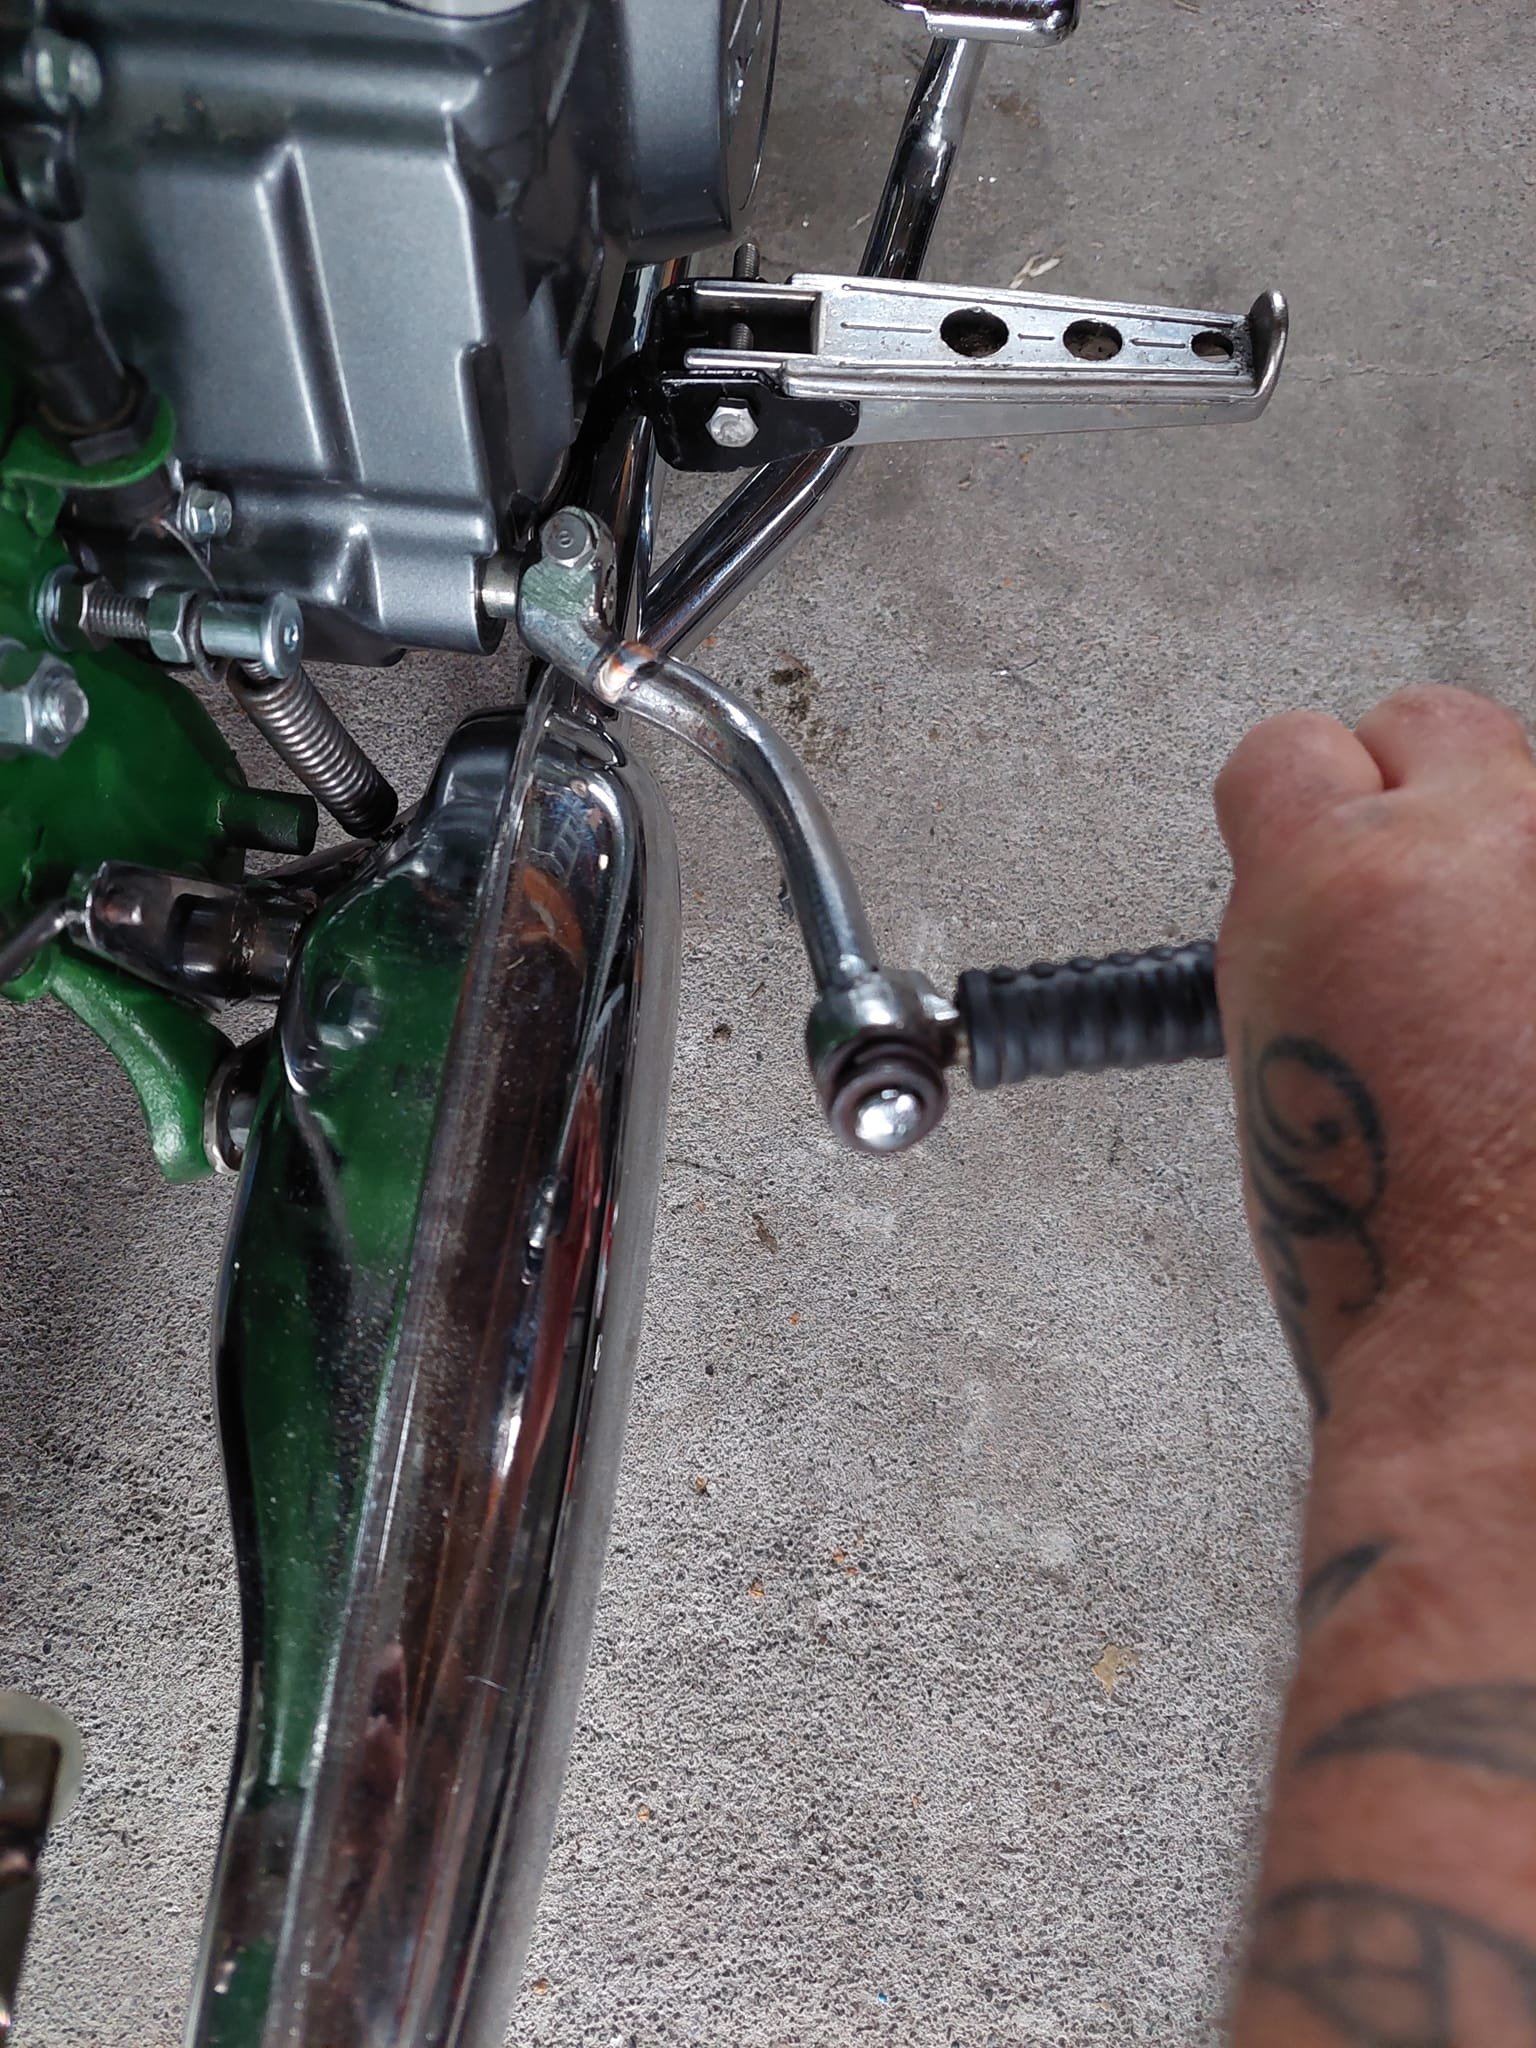
Here's a quick shot of the adapter plate for the engine mount which includes the mounts for the original footpegs and support brace. It bolts to the footrest mounts of the lifan and is welded to the tube that the brake pivot passes through

-
6
-
-
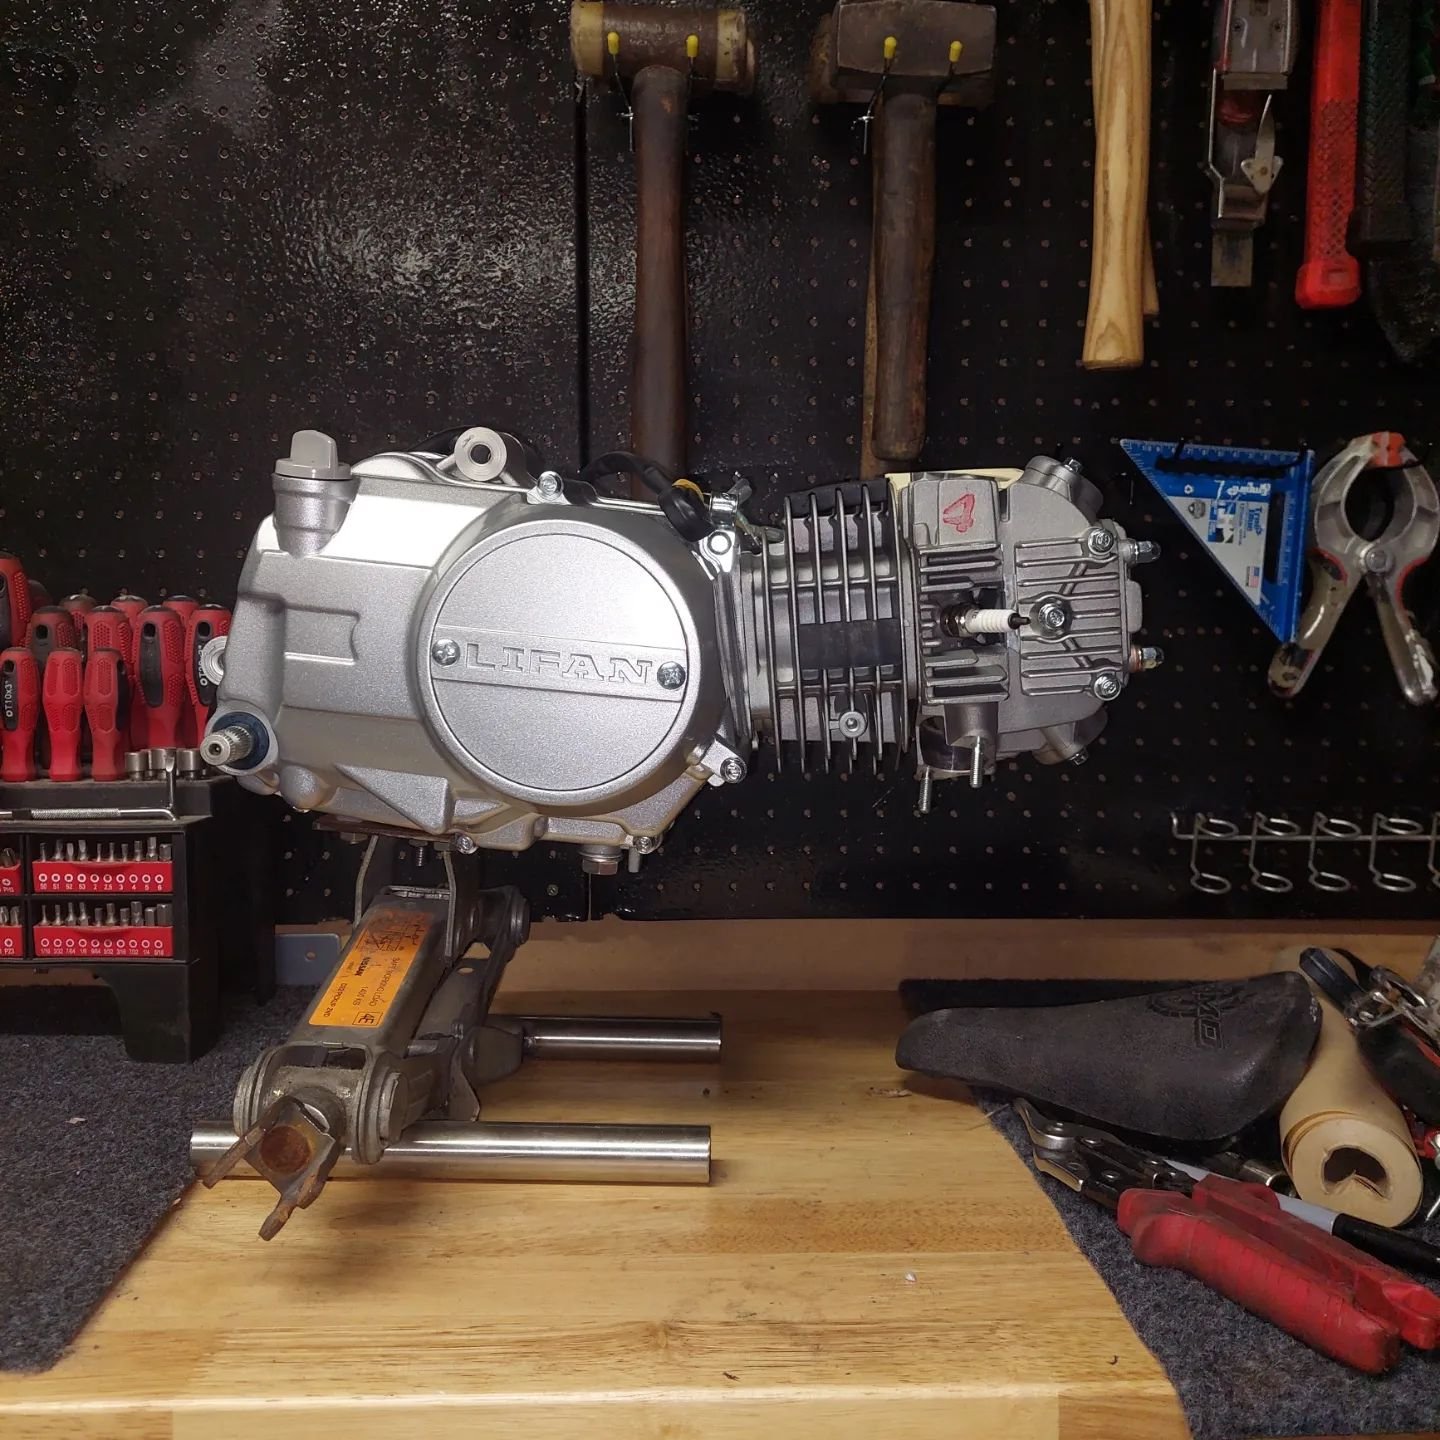
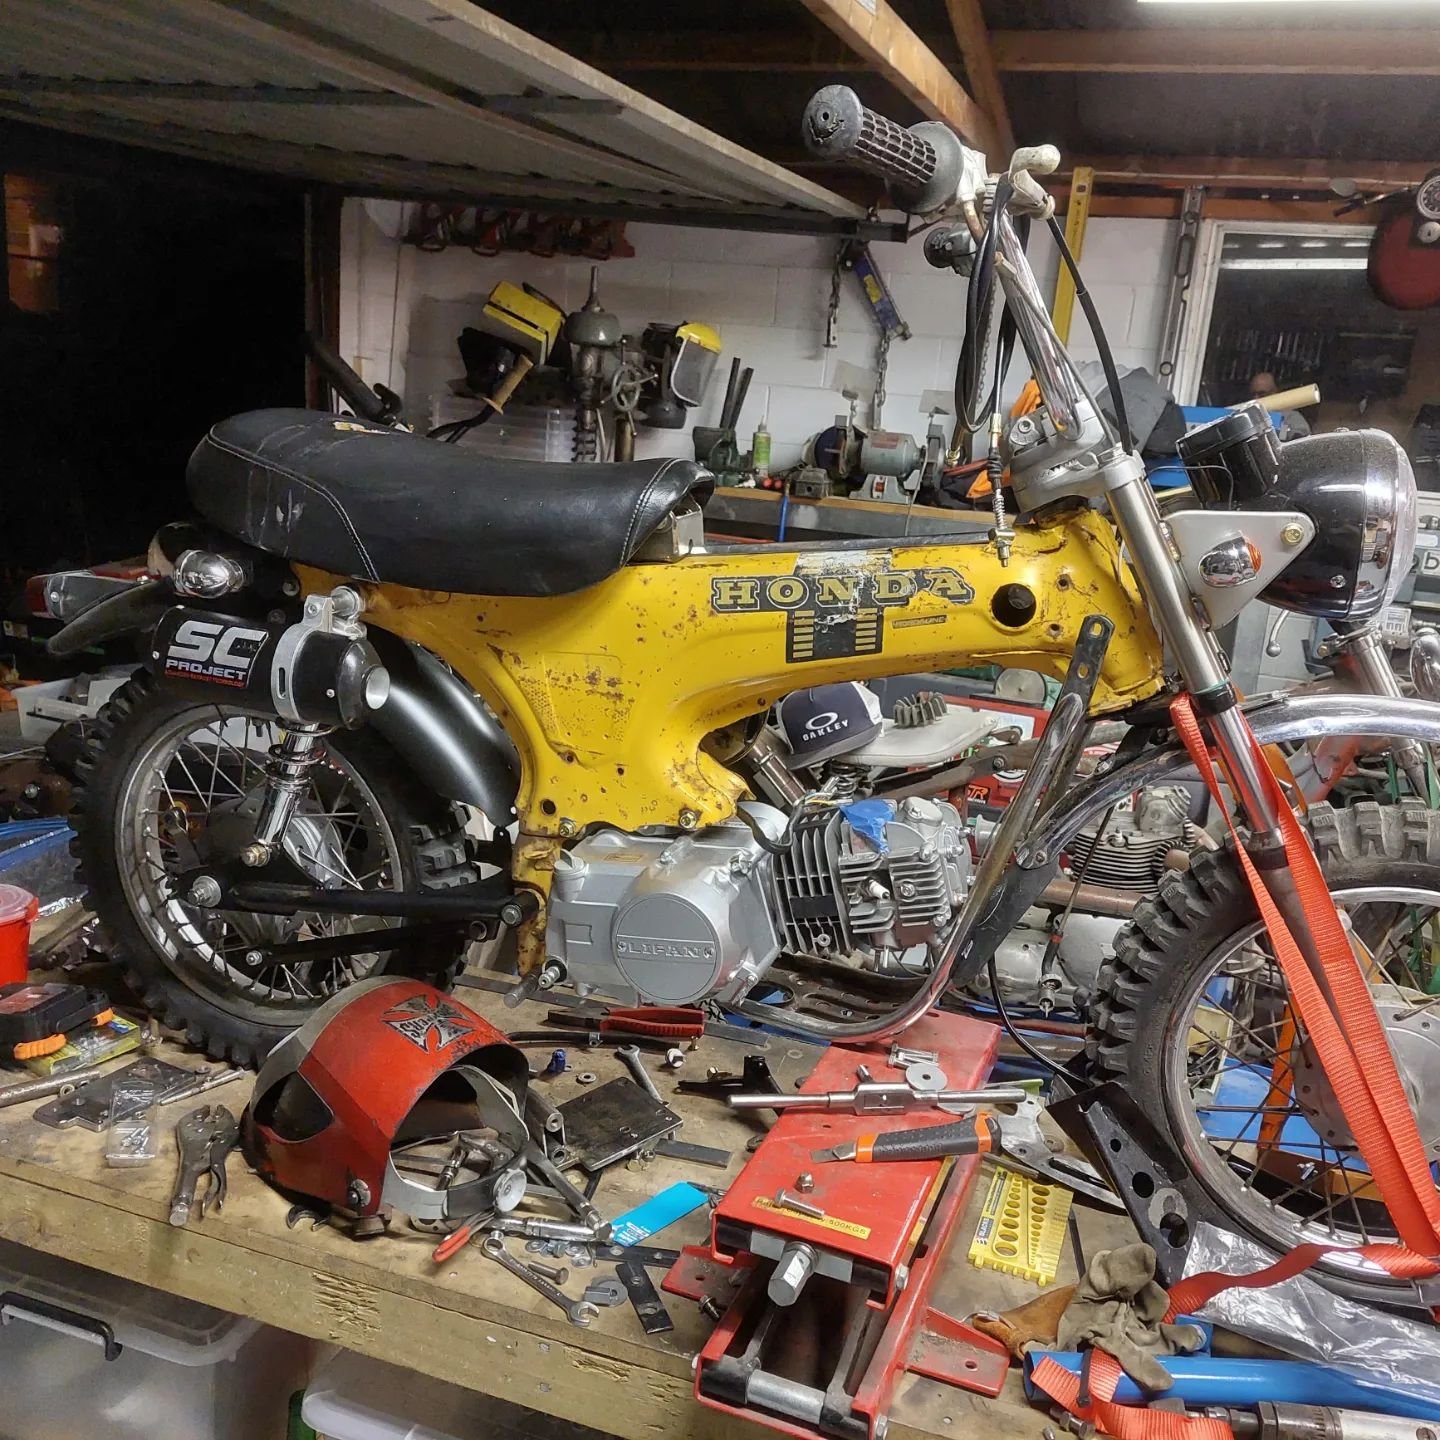
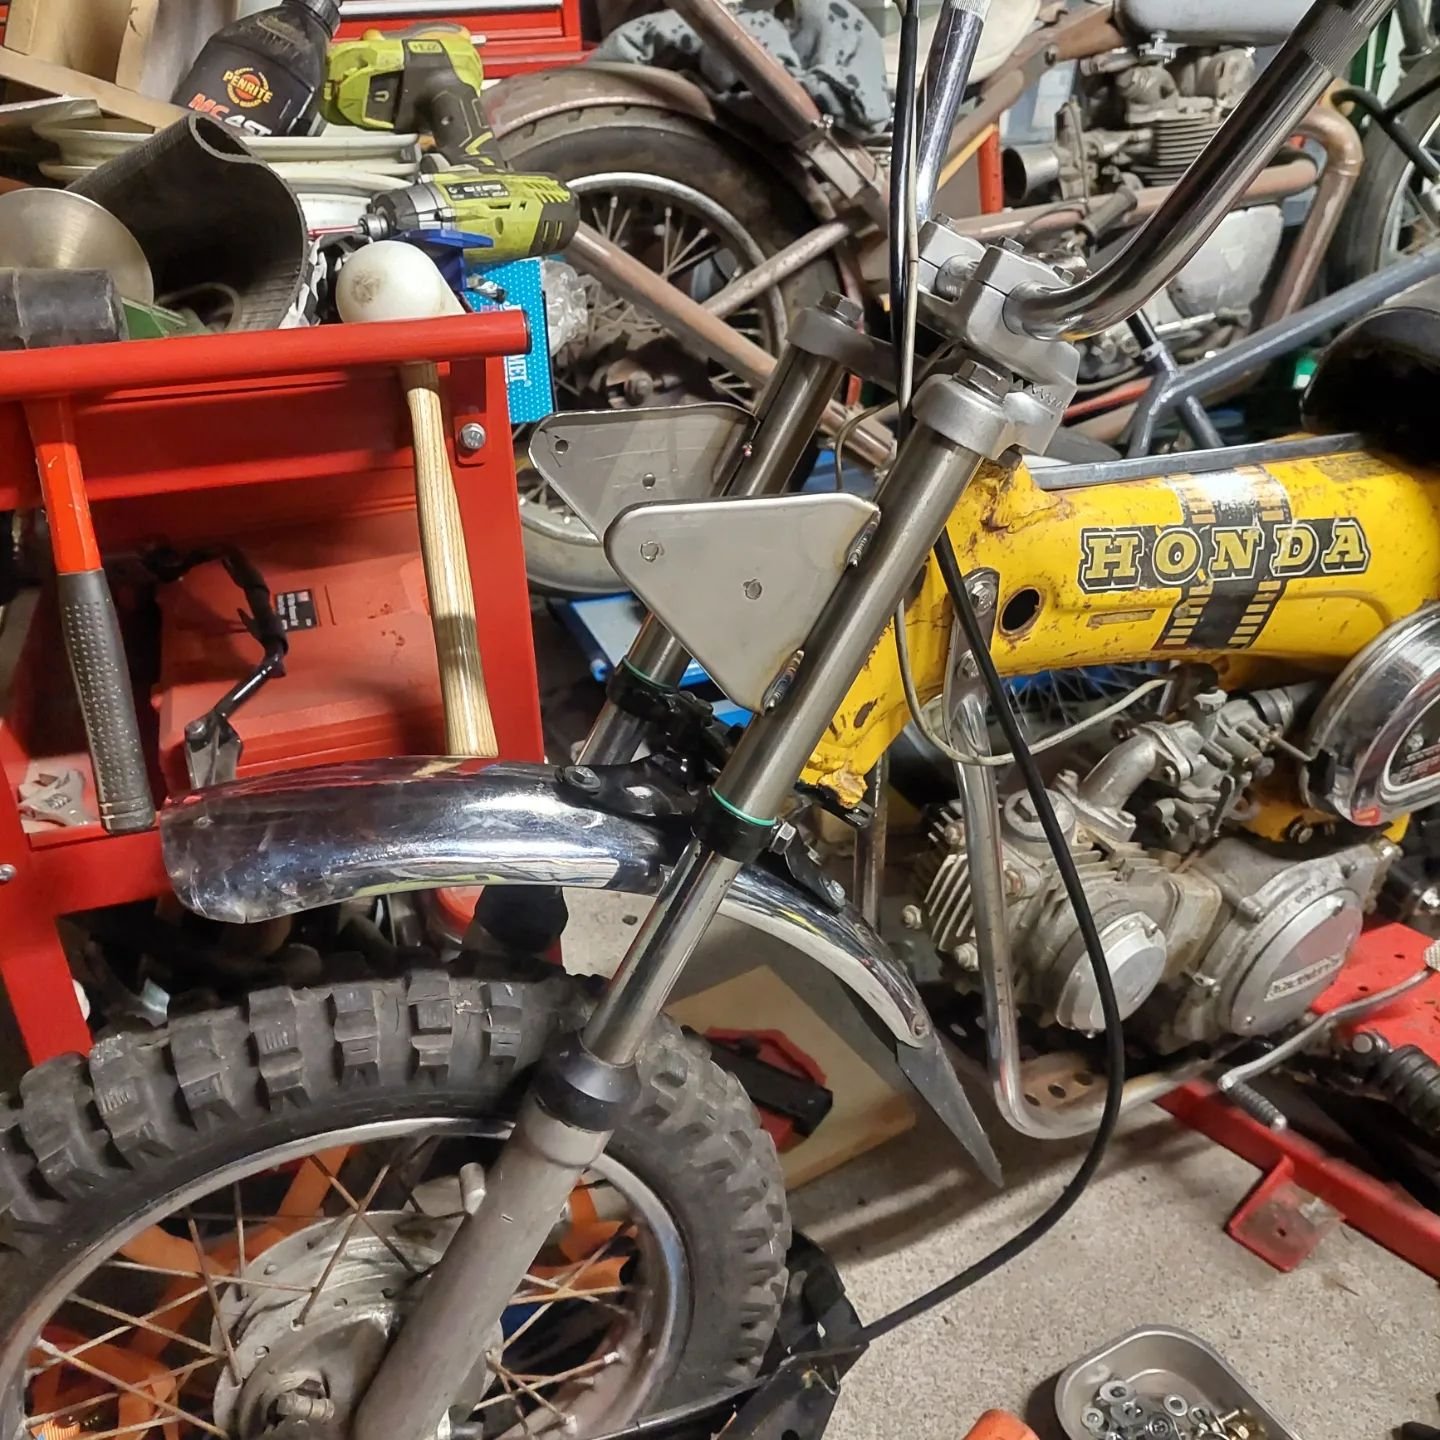
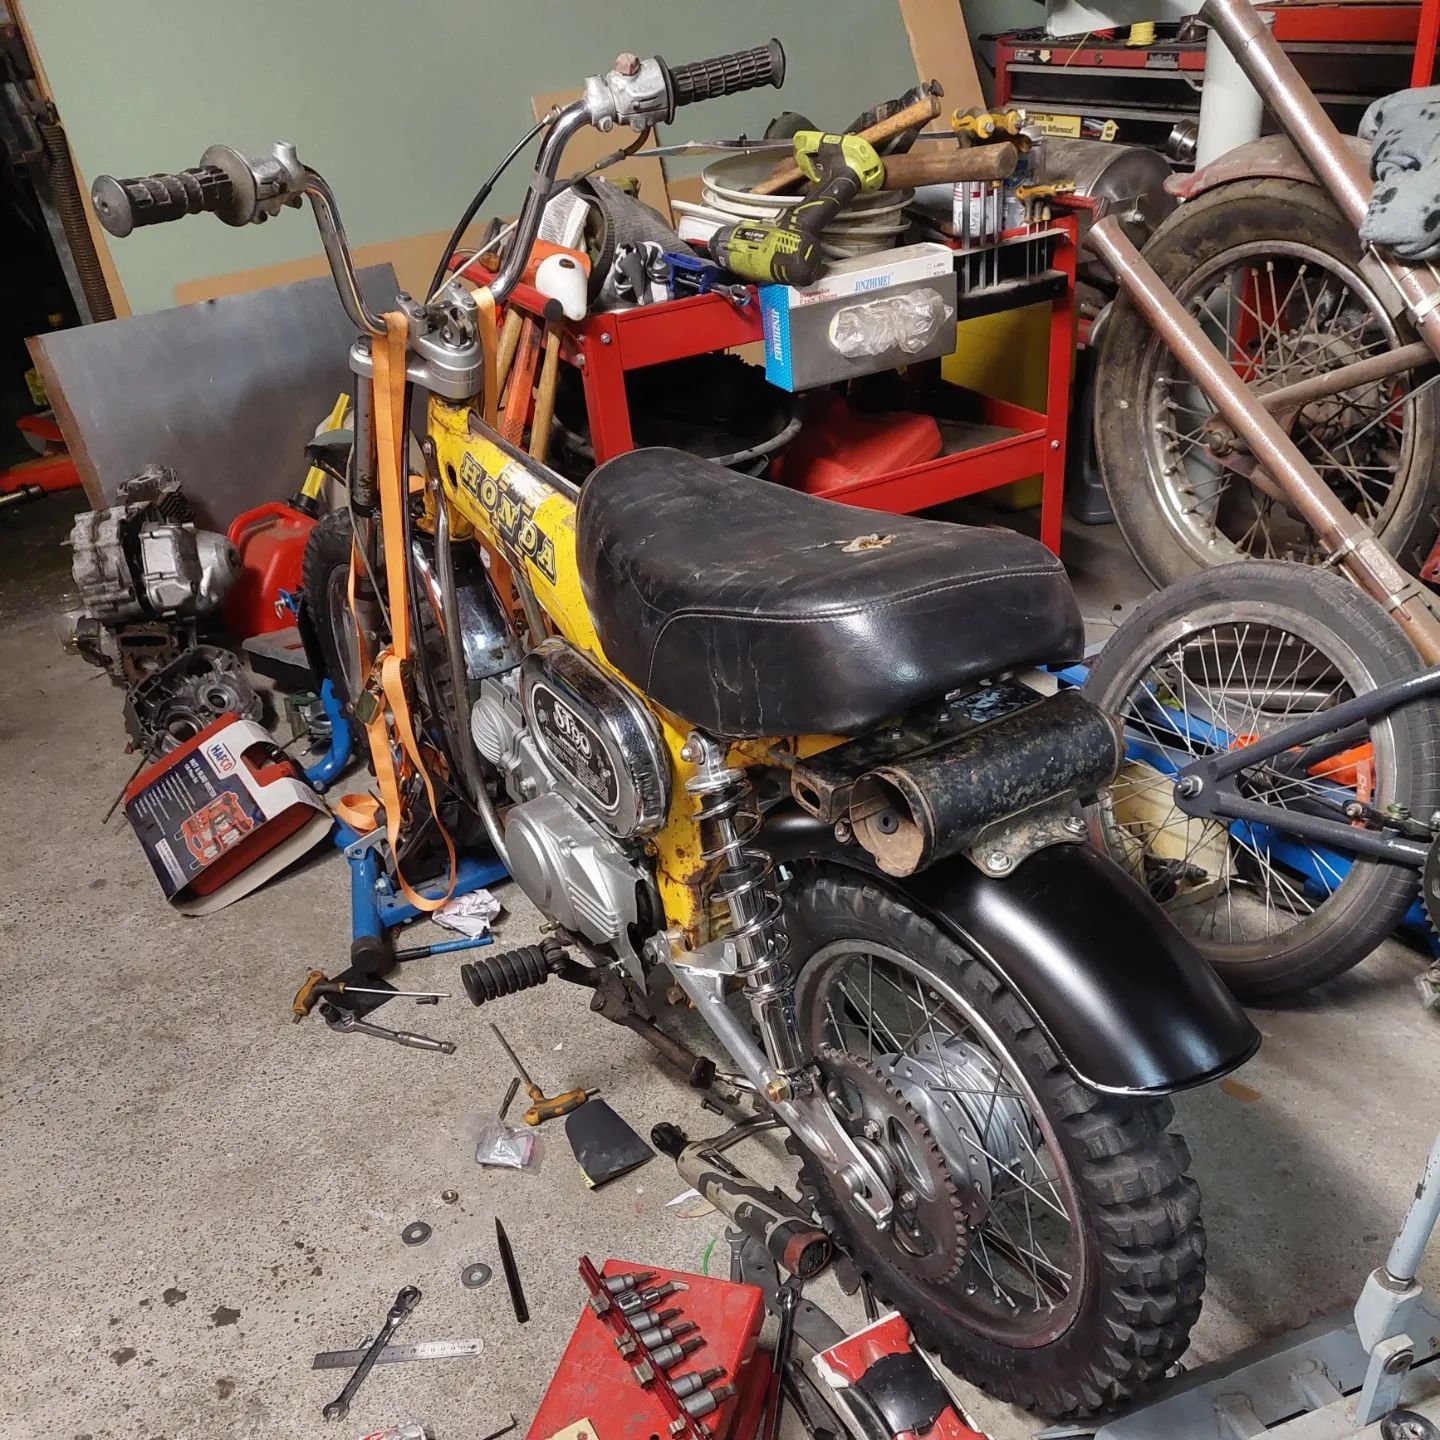
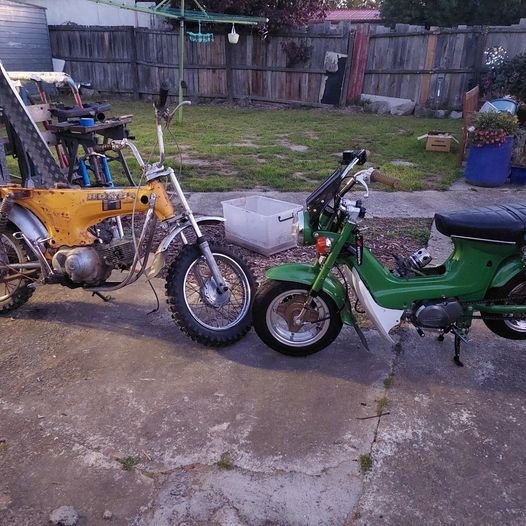
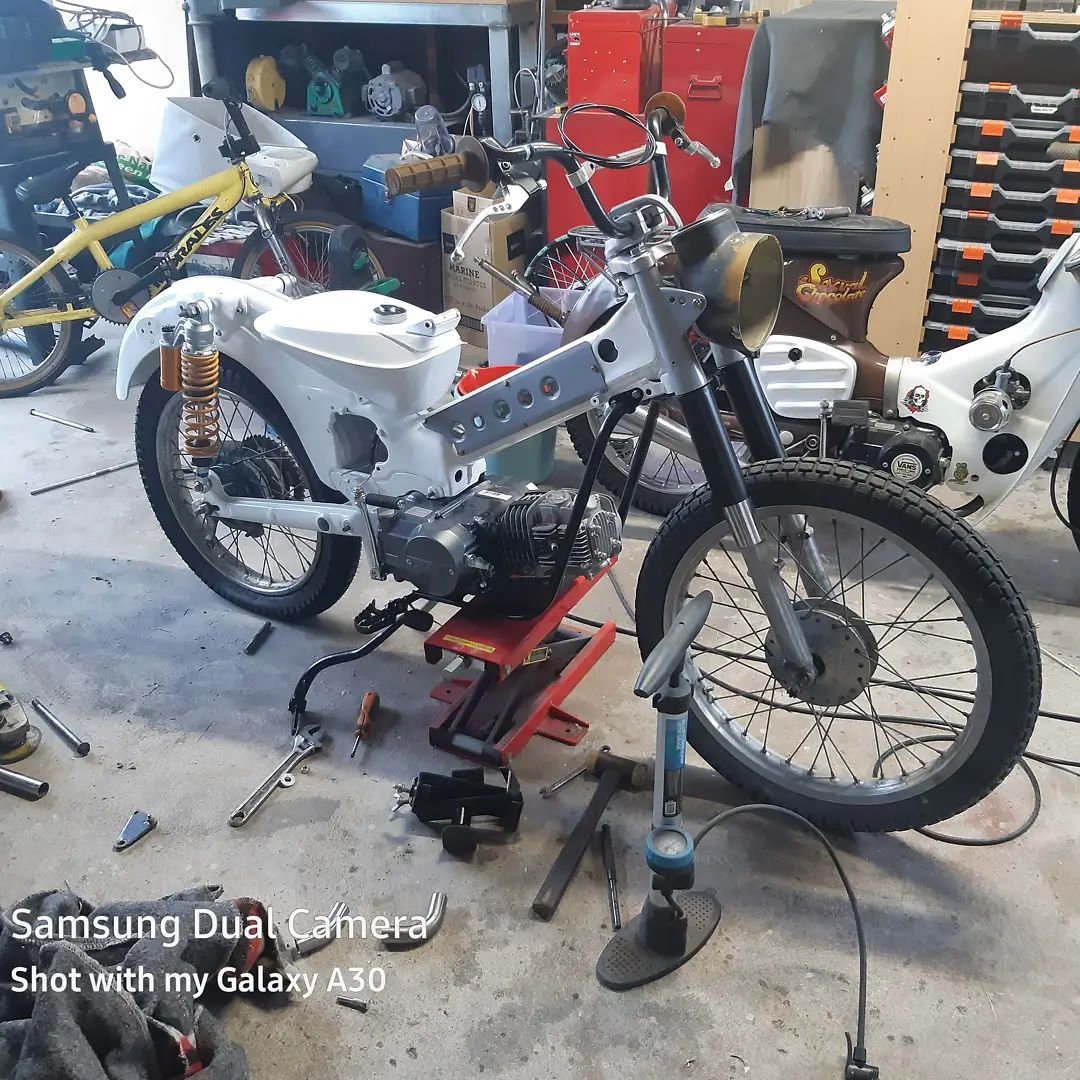
I recently bought a new place at the end of July and after a few weeks of unpacking and organising I thought I'd get stuck in to dads ST90 again
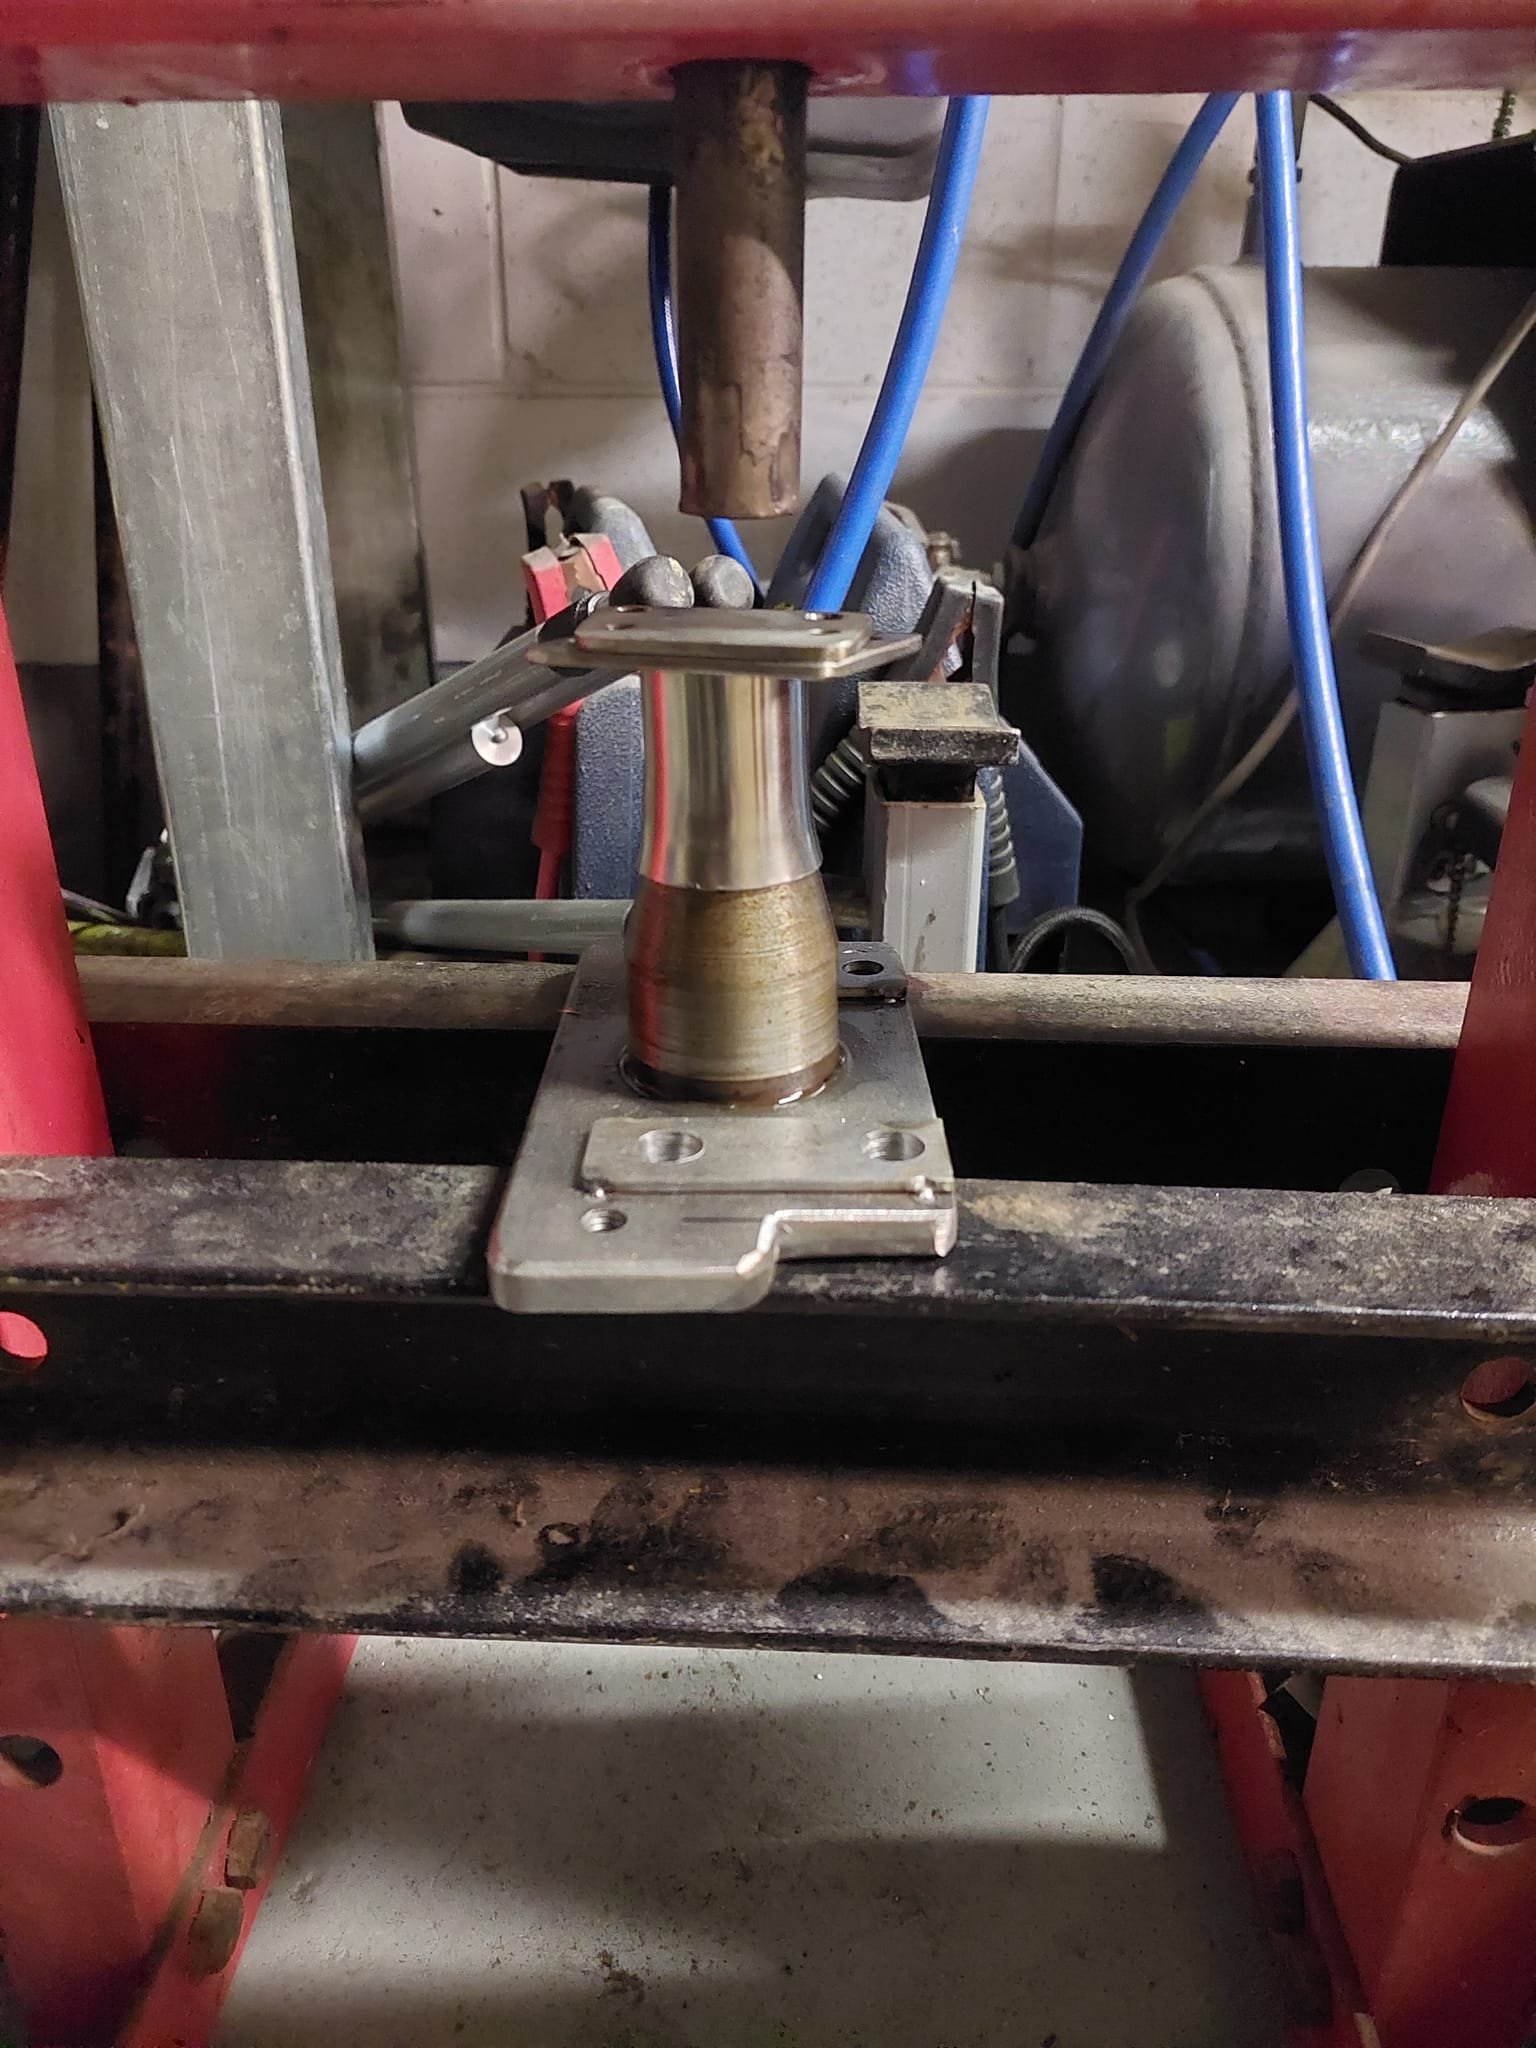
The engine turned up from mBike so I adapted an old scissor jack to help raise and lower the engine whilst I make new engine mounts as I wasnt happy with how much lower and forward the adapter plates I made the engine sit. I'll take some photos of my design one I'm happy with how it looks and works.
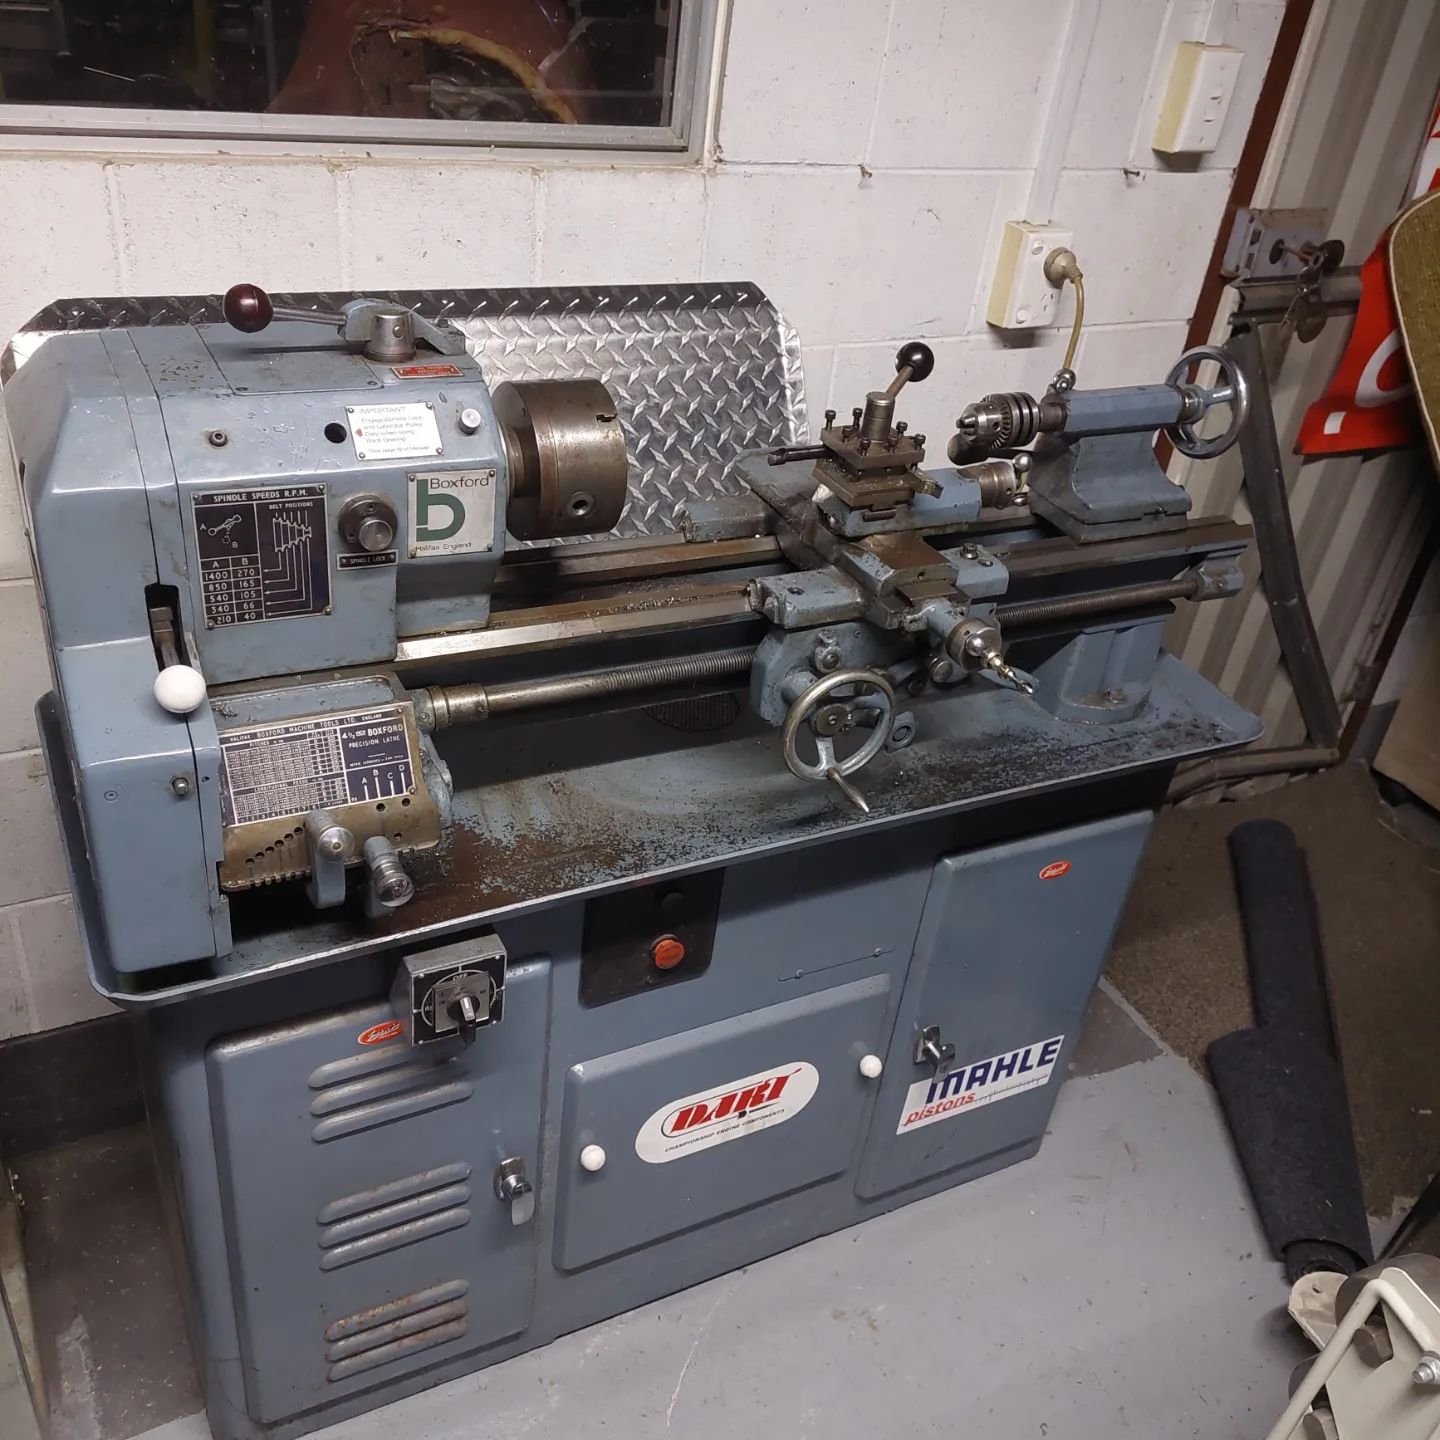
Along with buying a new house a treat myself to a new to me lathe for my birthday. Its a Boxford AUD 4 1/2''. It suits me perfect for what I need in my workshop, anything bigger I'll use the Colchester Triumph 2000 at work
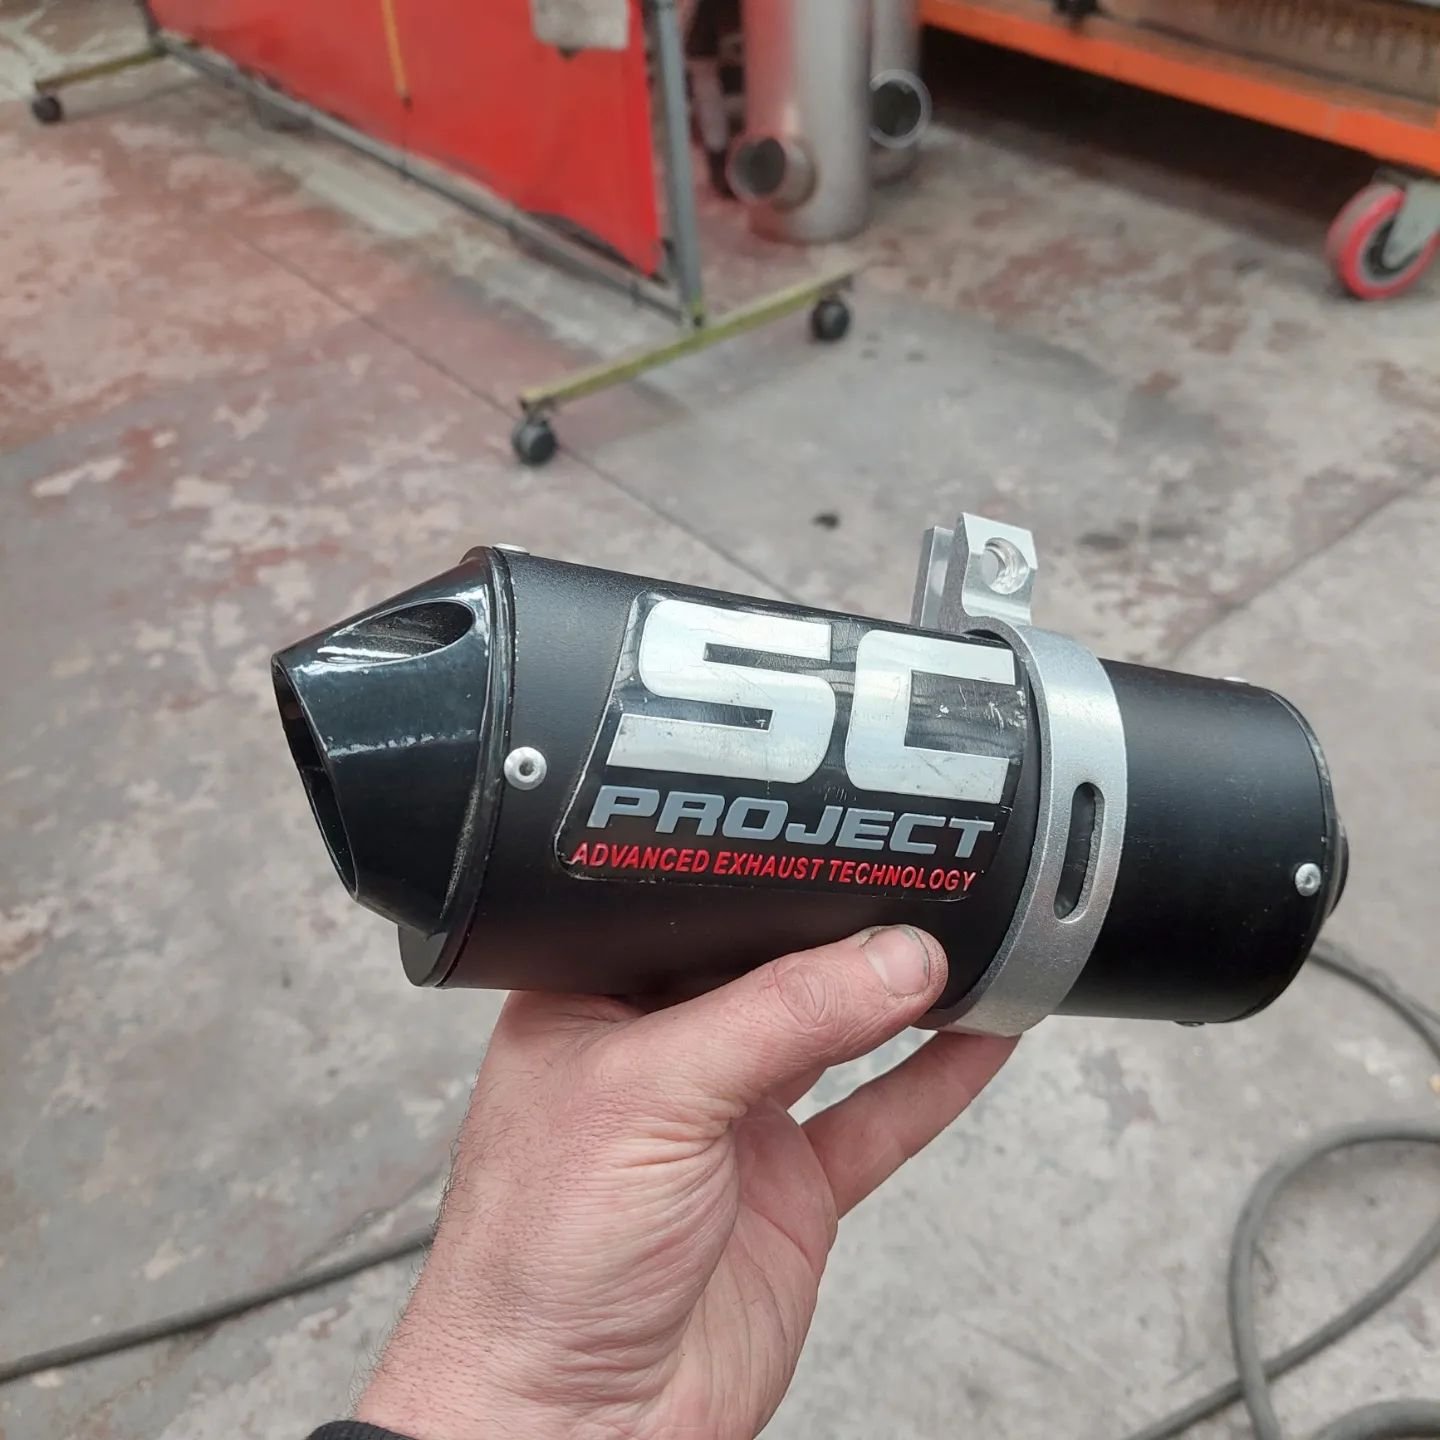
I swapped an old hot dog muffler and a small welding job for a mate for the delivery of the lathe and this small black muffler. I'll get some stainless bends at some point and start making the header pipe for it
Next job is to make some small offset plates to bolt the support brace to the frame so they're not under constant tension from being in its unnatural position
-
3
-
-
One of the main things I was missing was the seat hinge. I had a rough idea what it looked like but had no measurements to work from.
So I fabbed one out of some 50x3mm and 25x3mm stainless plate (incase I felt like polishing it) and just kinda joined the dots to where it needed to be.
The indicators arrived so I threw them on too
-
9
-
-
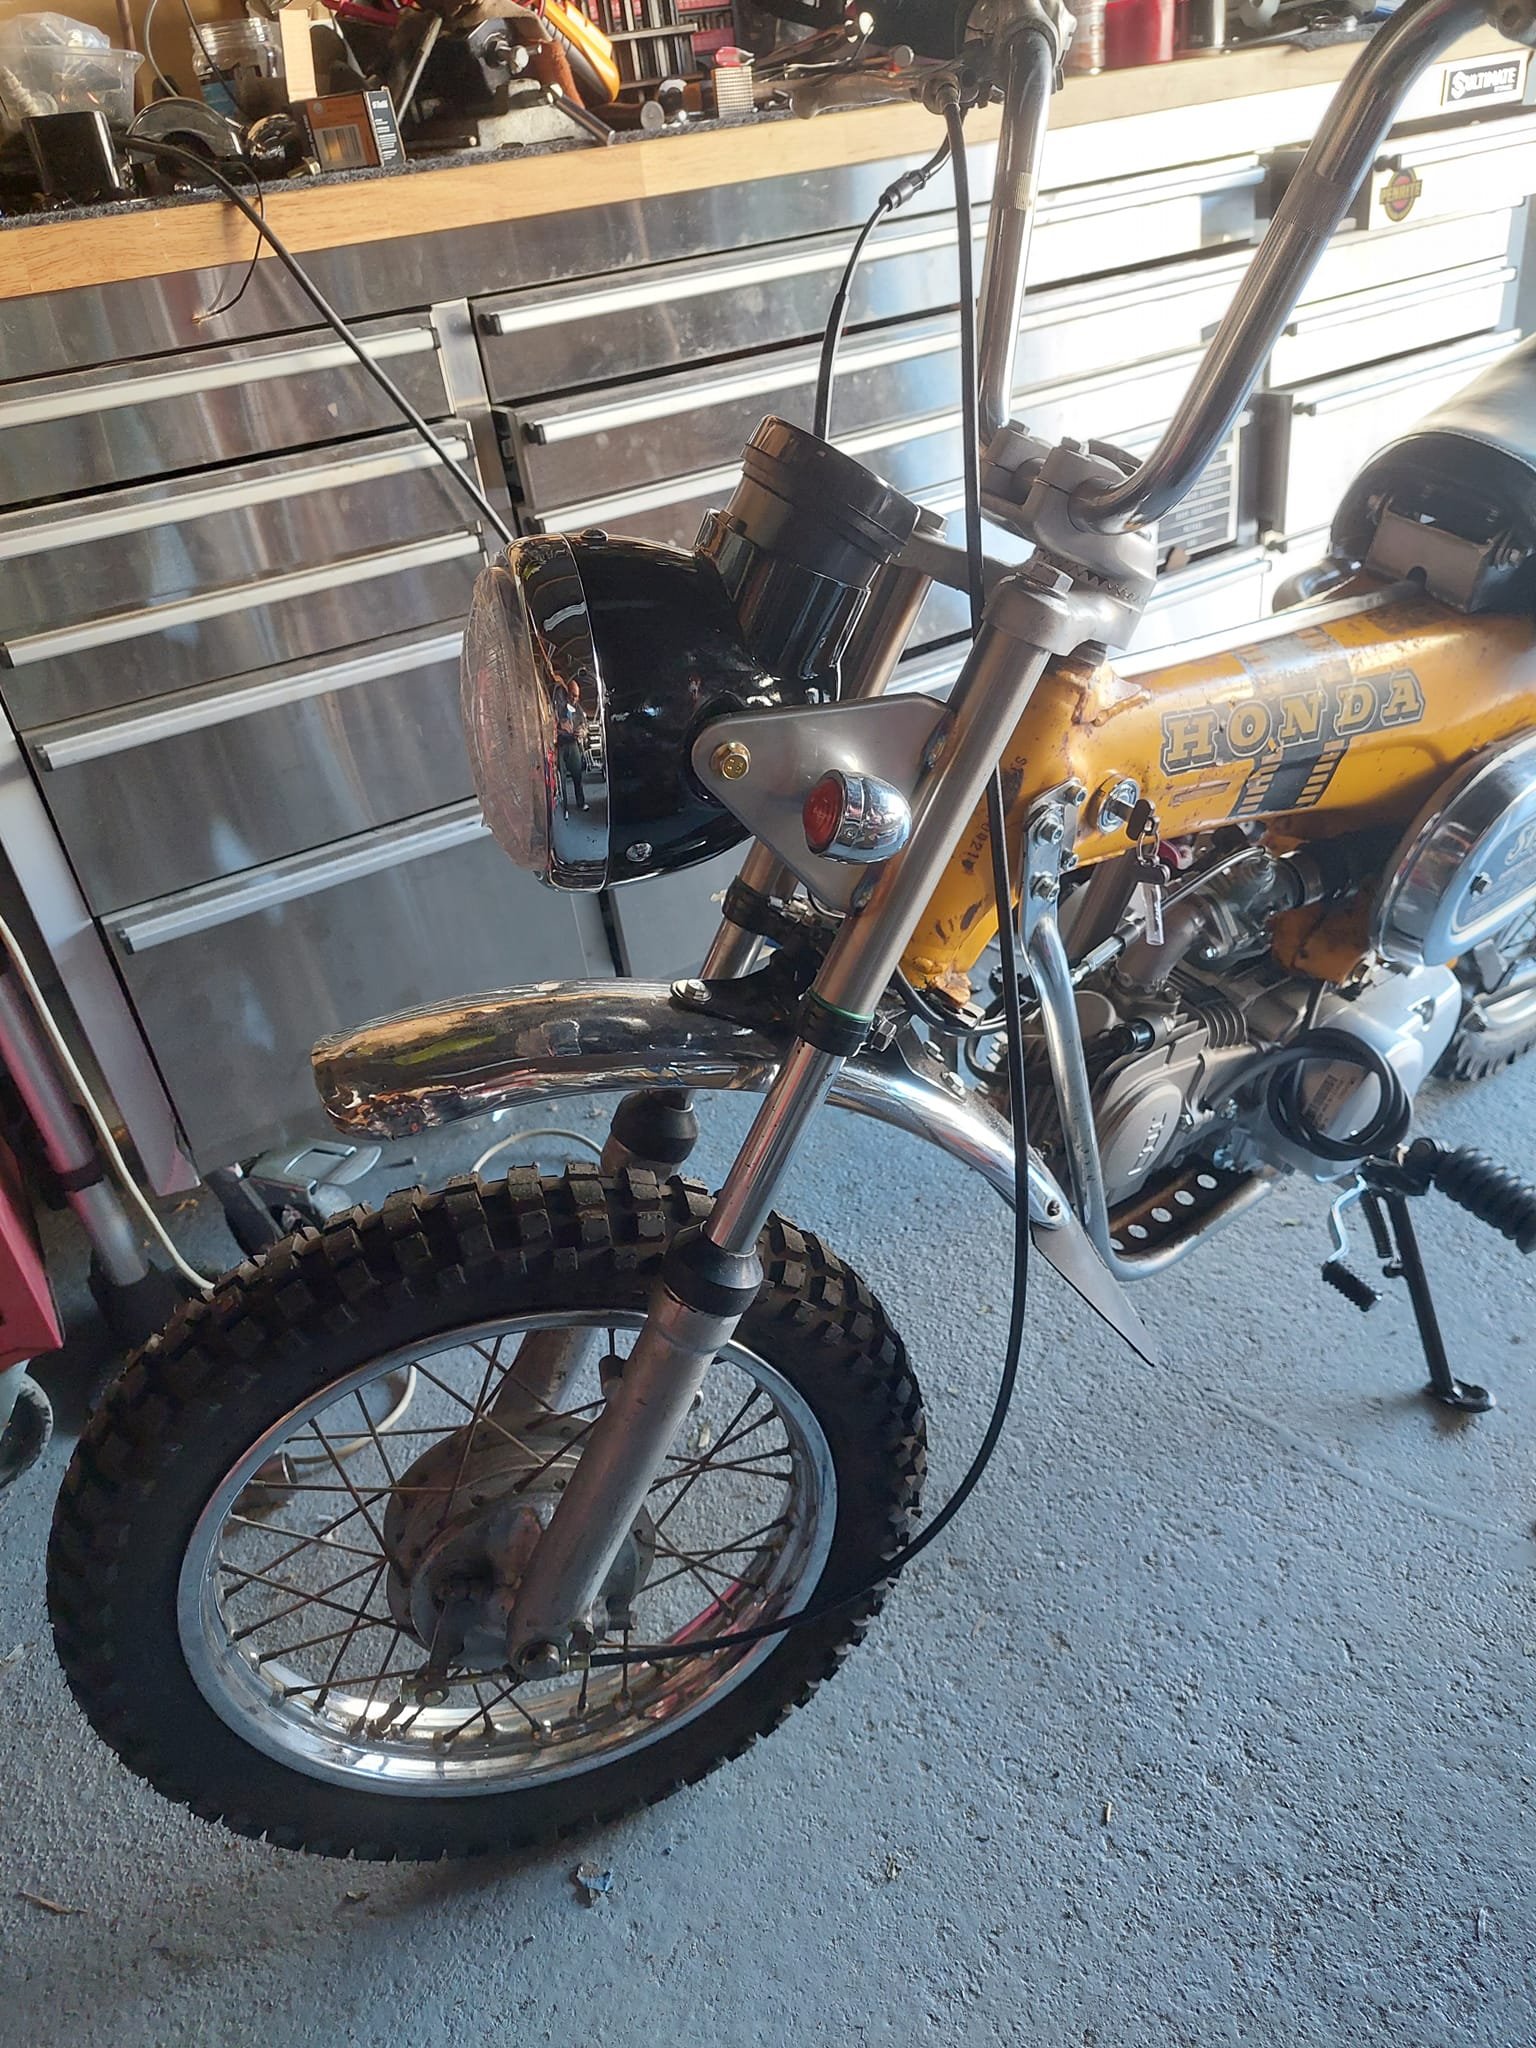
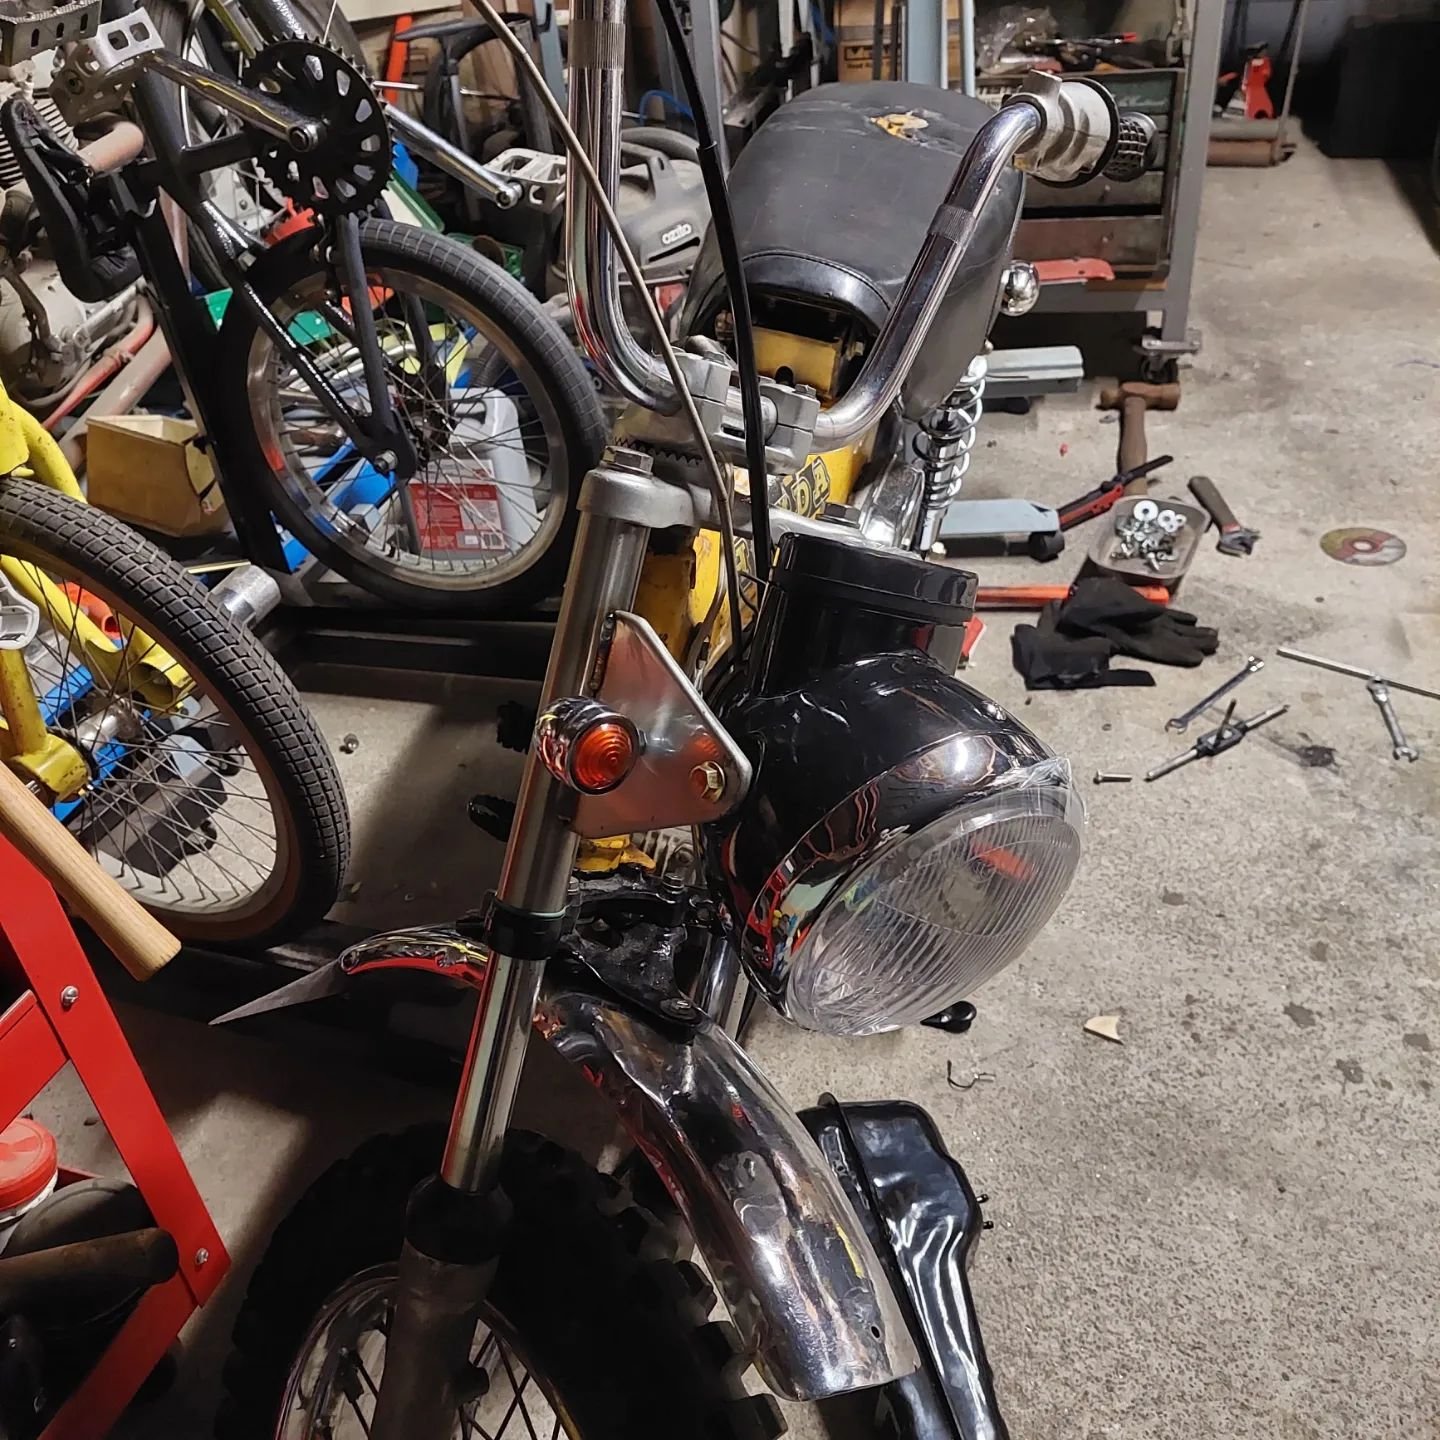
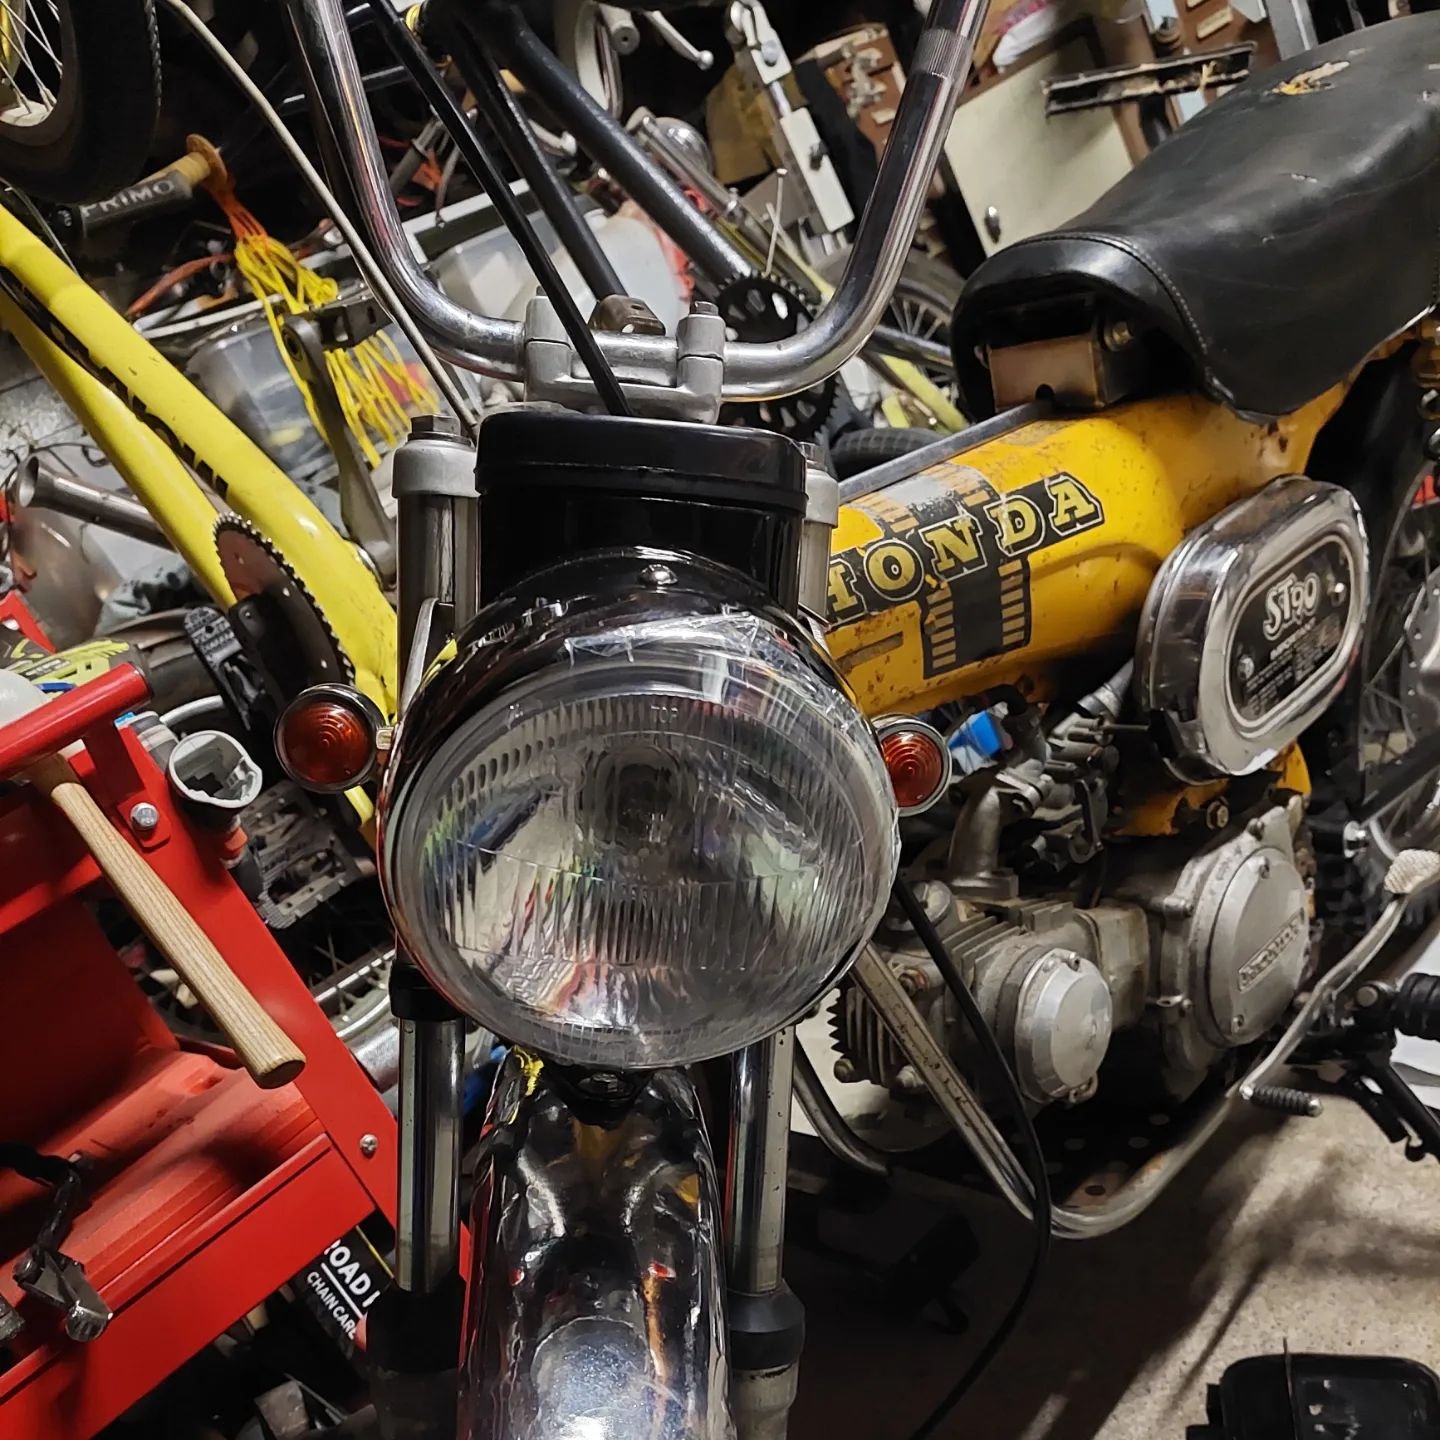
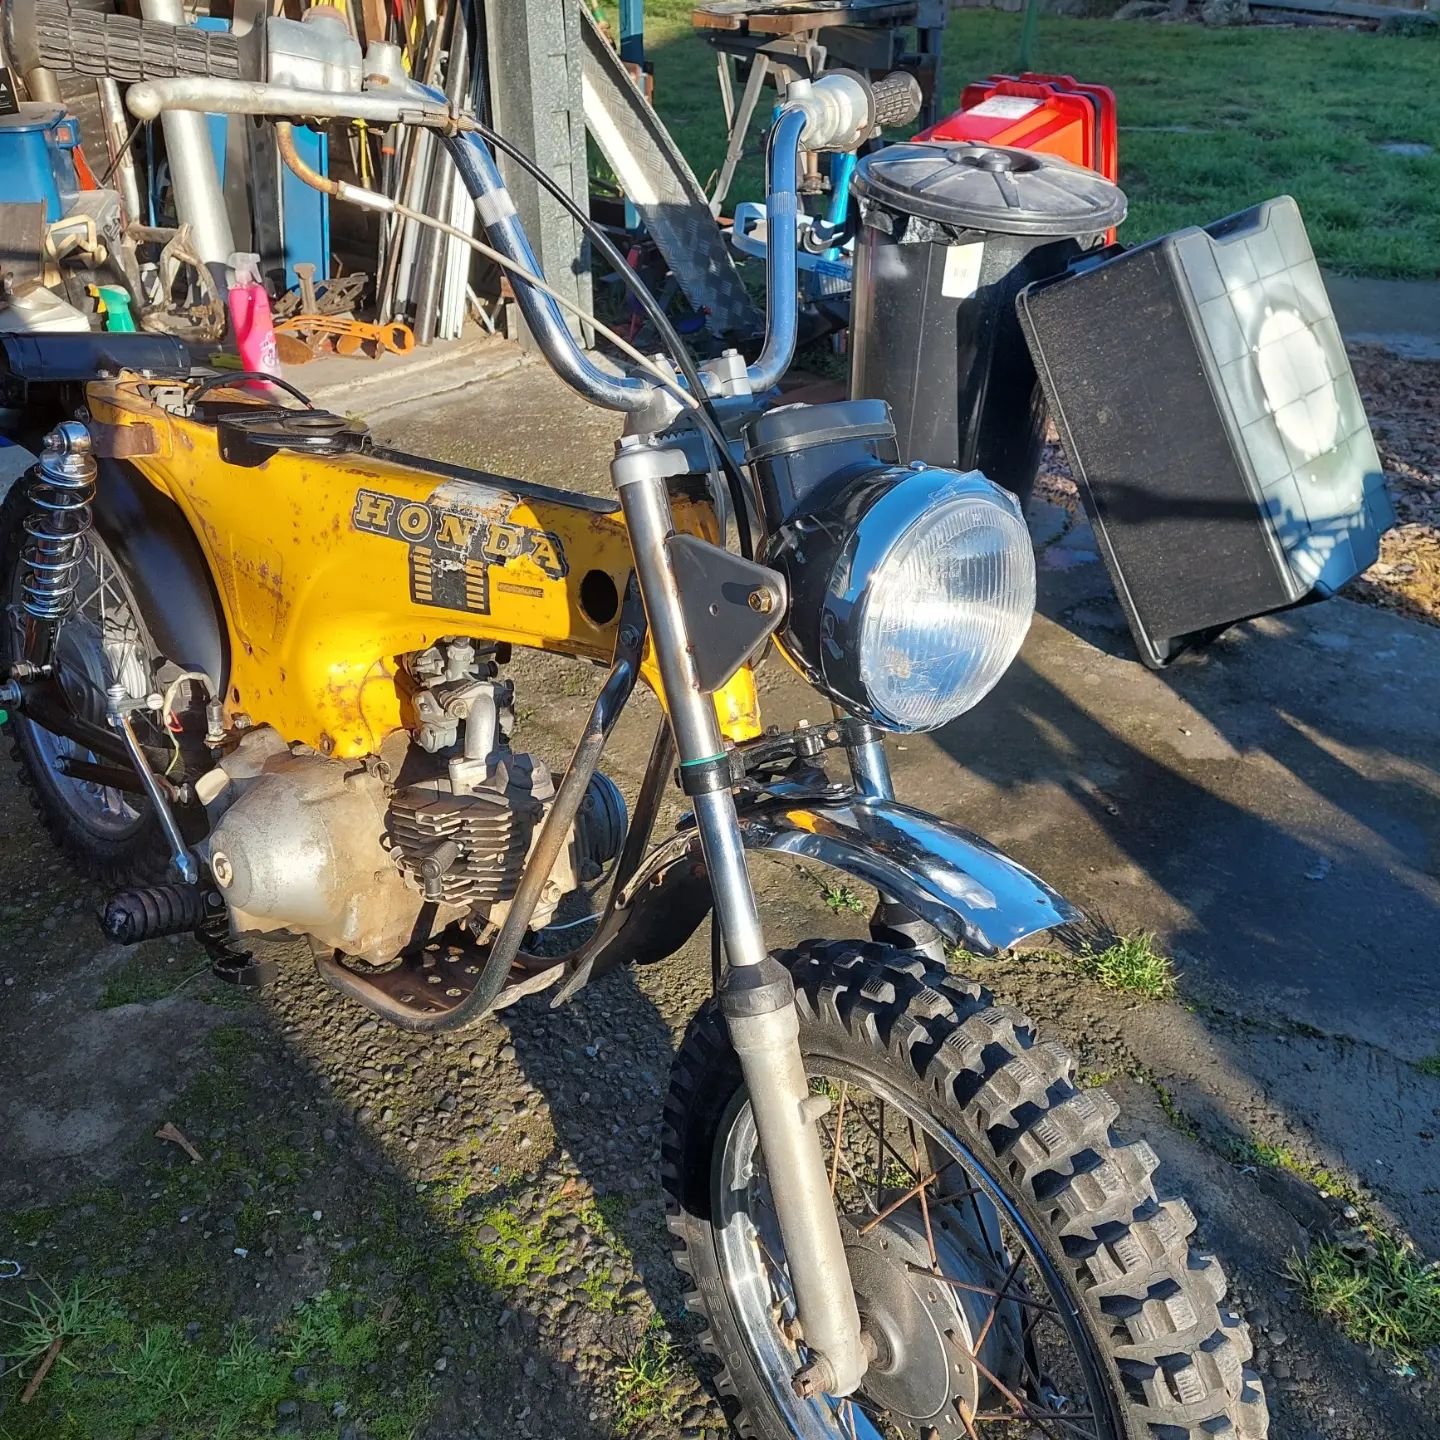
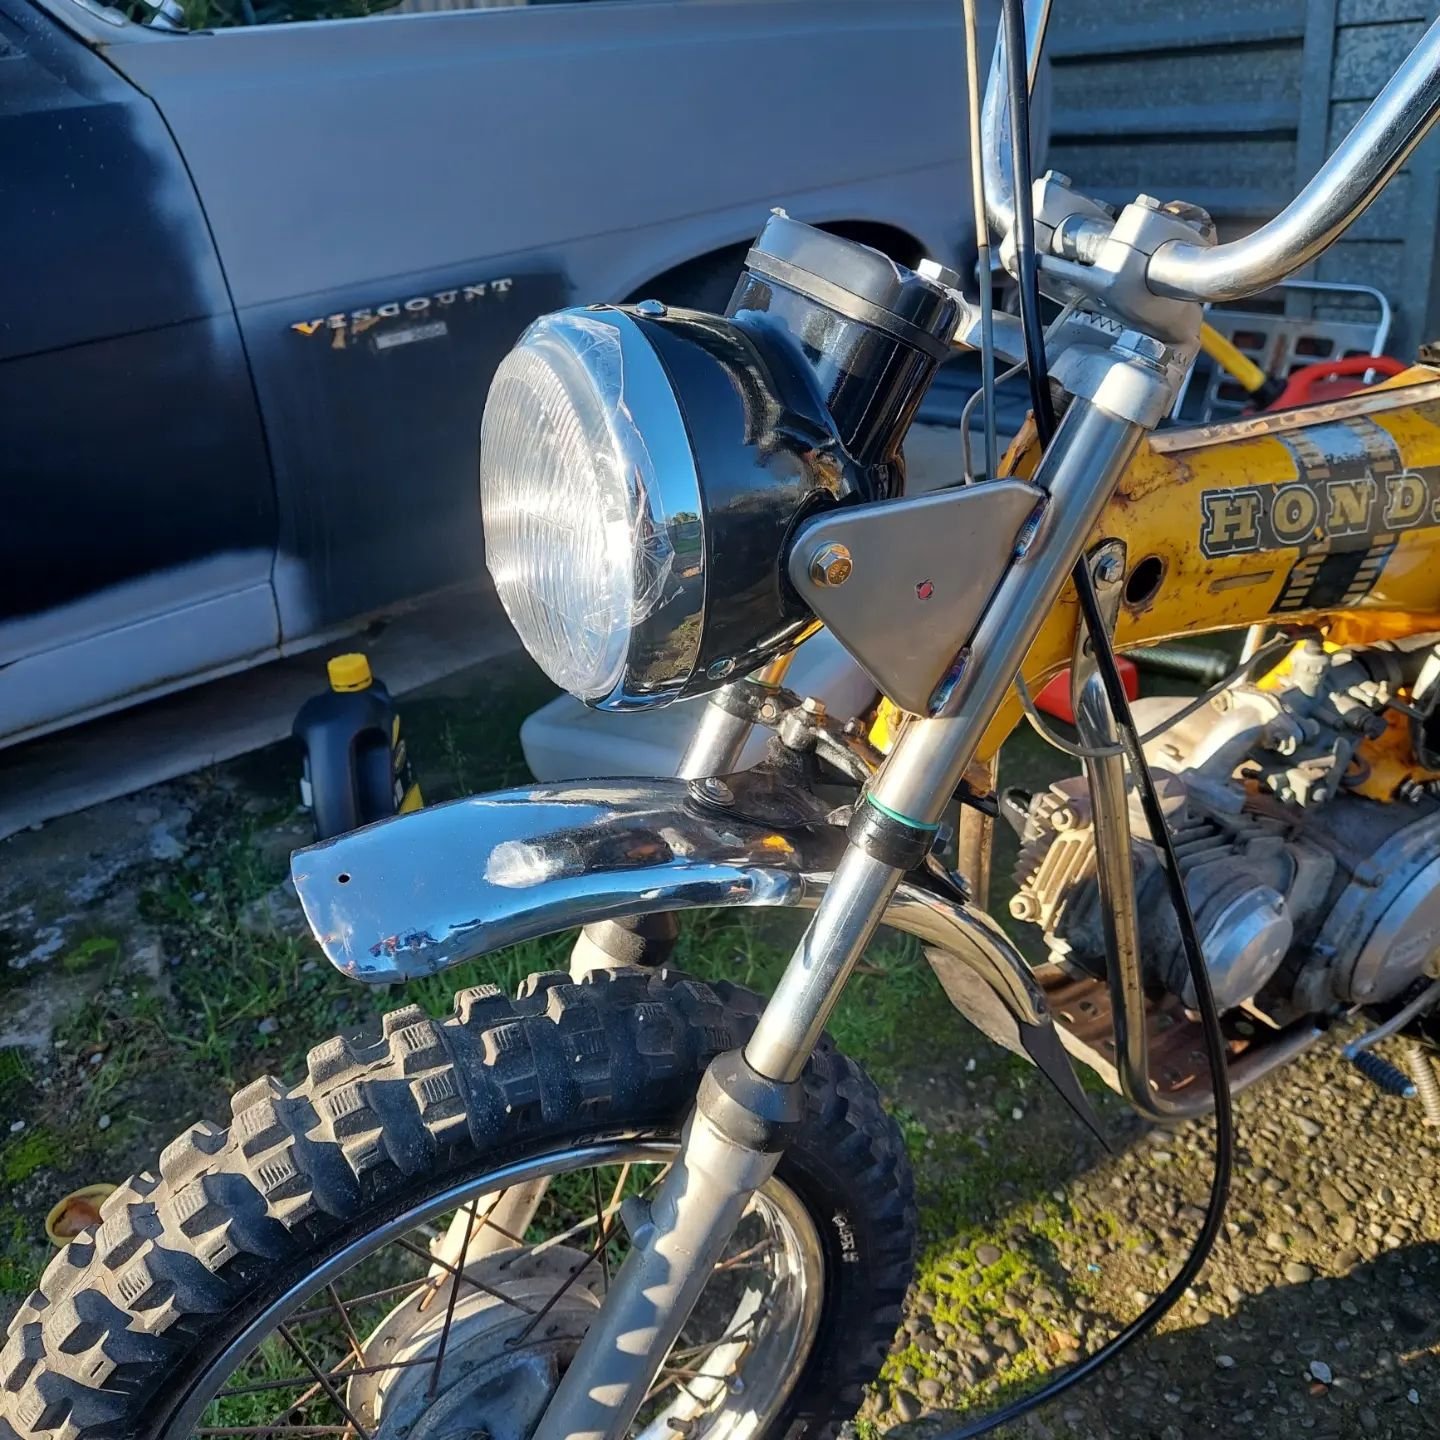
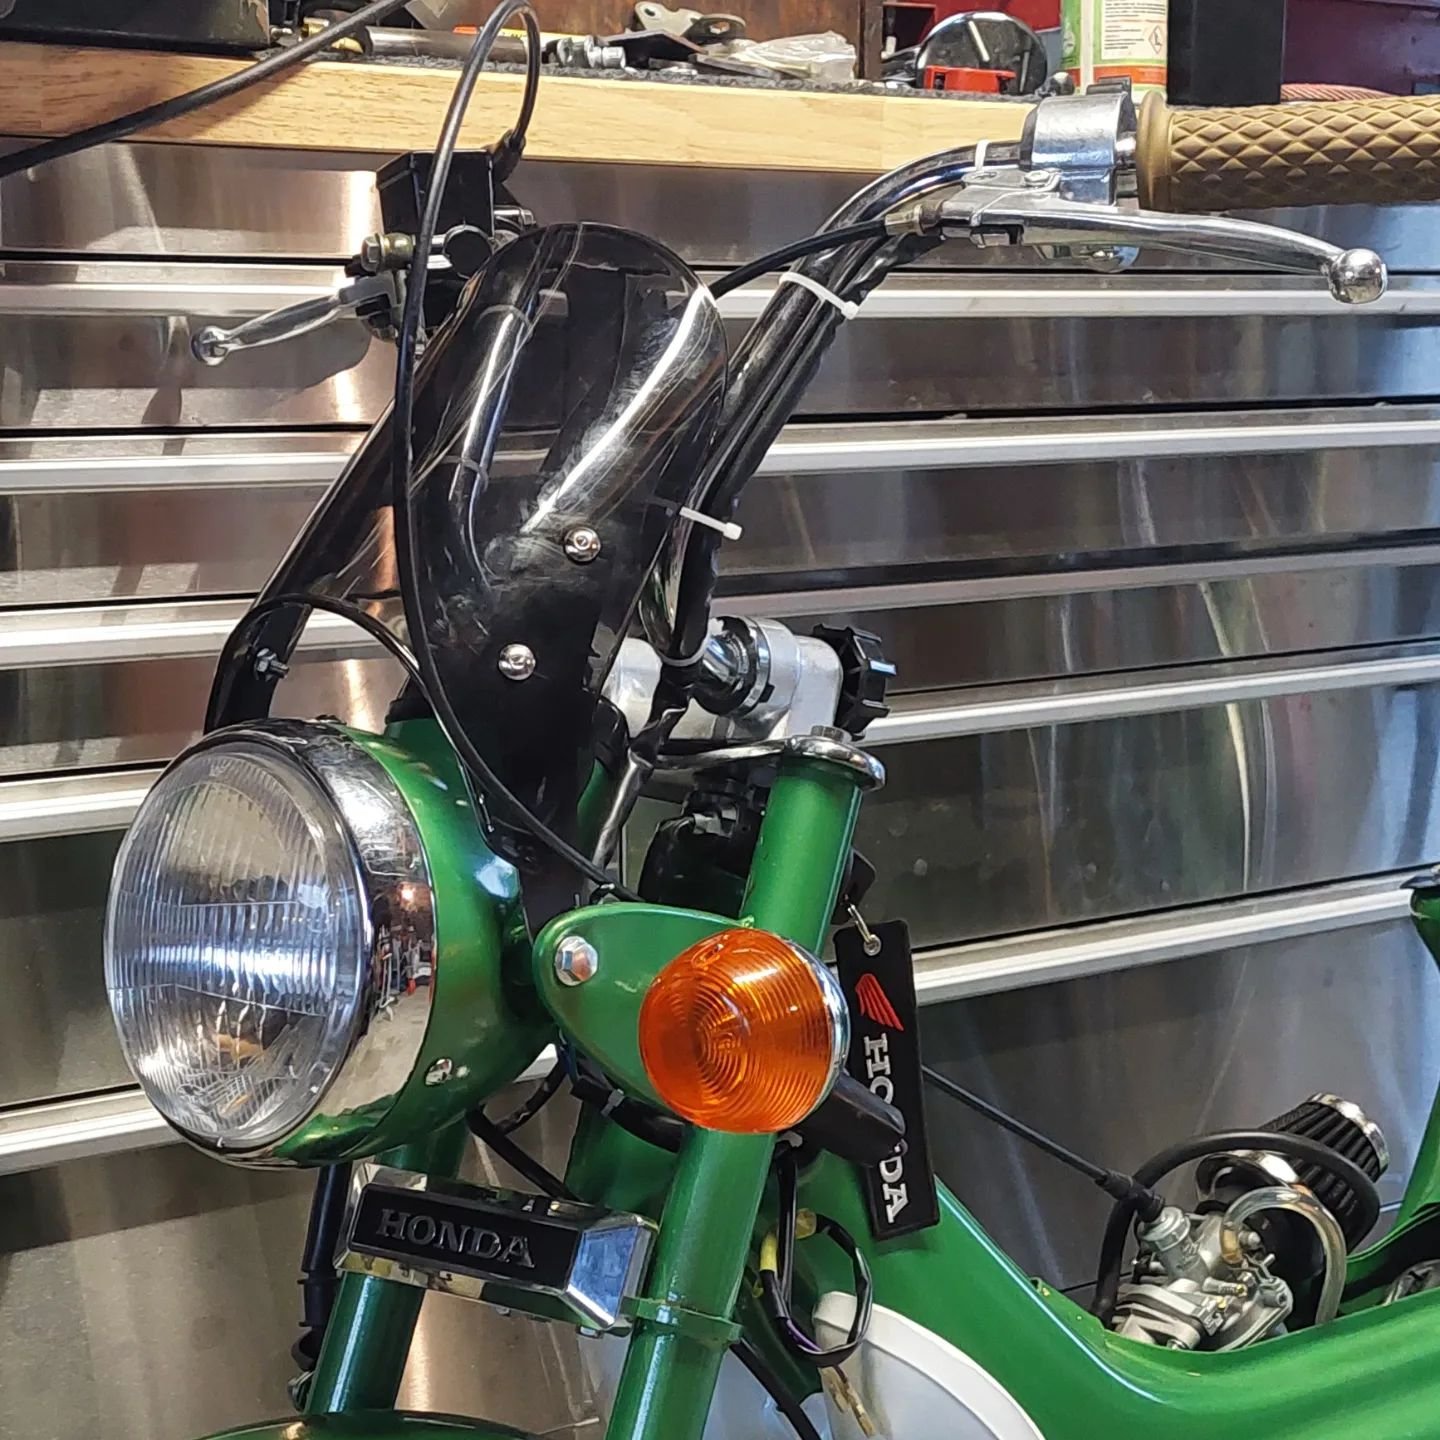
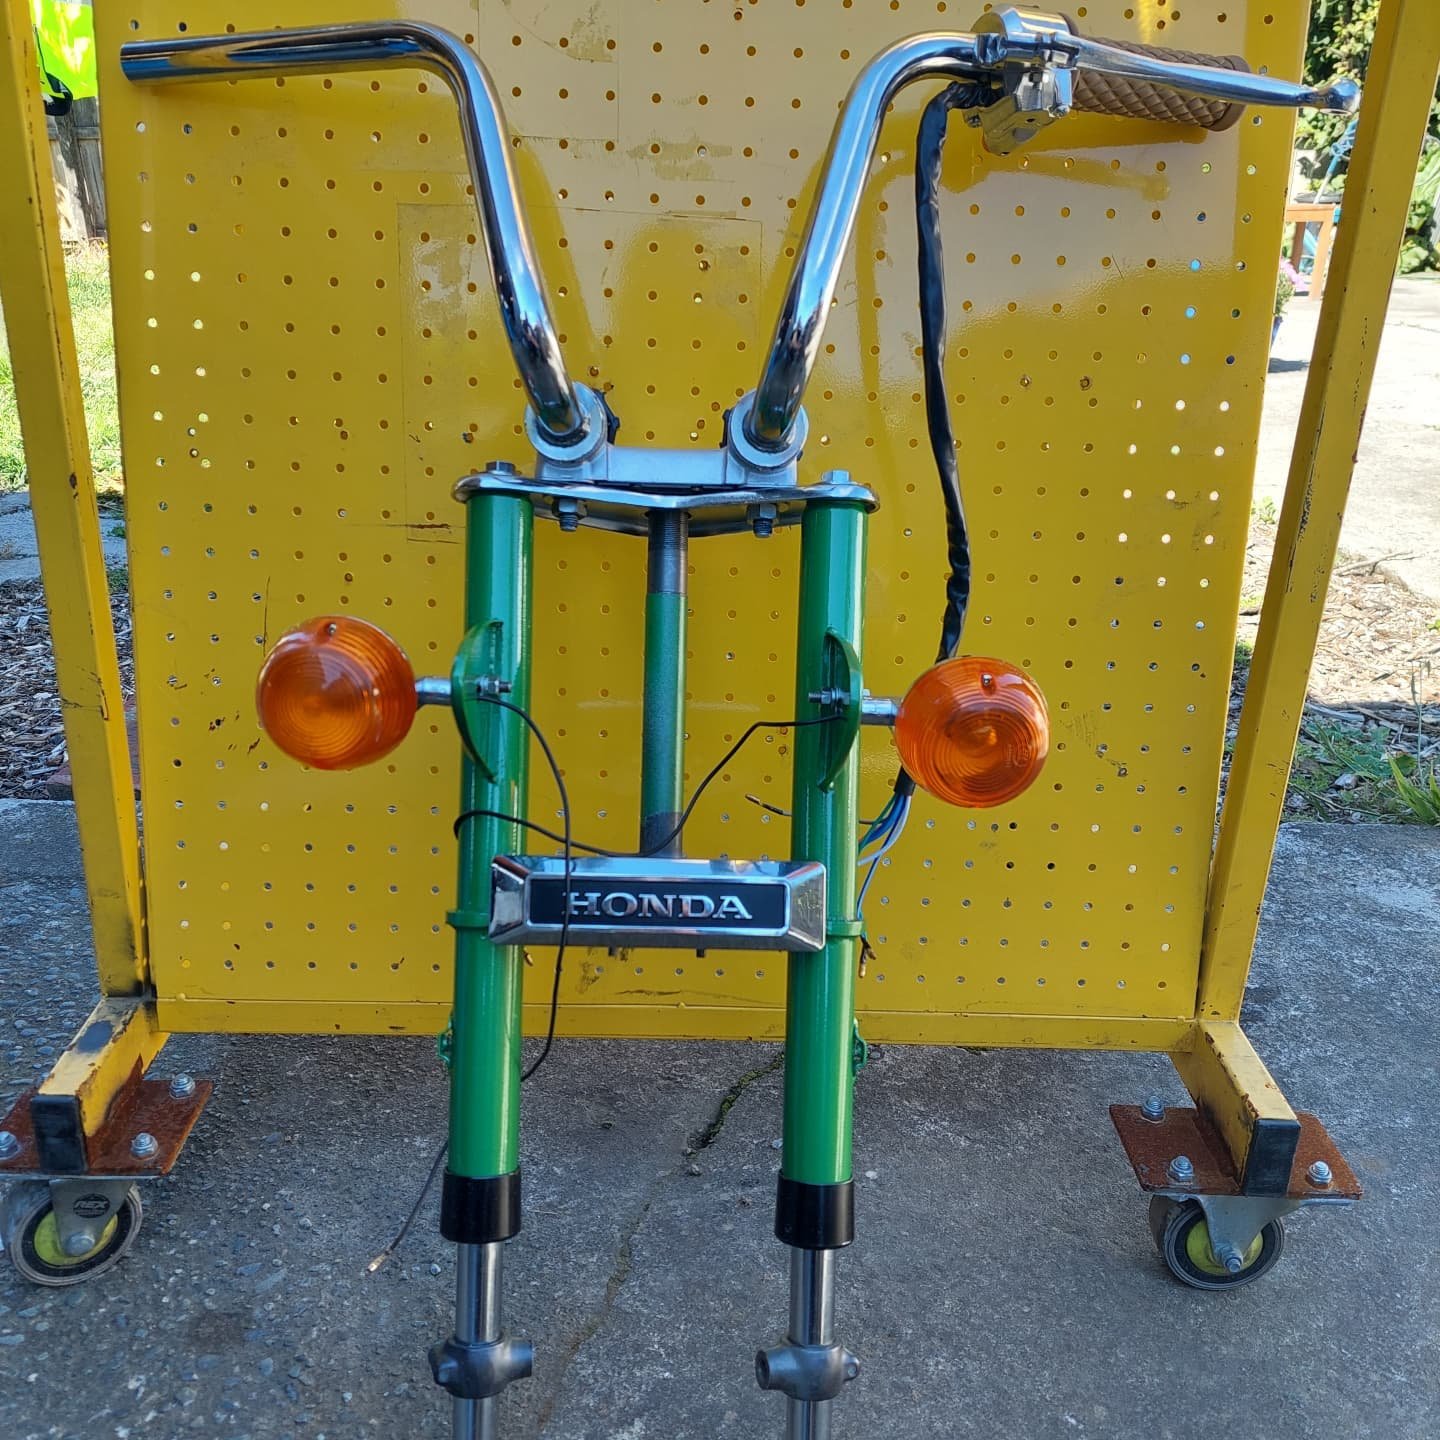
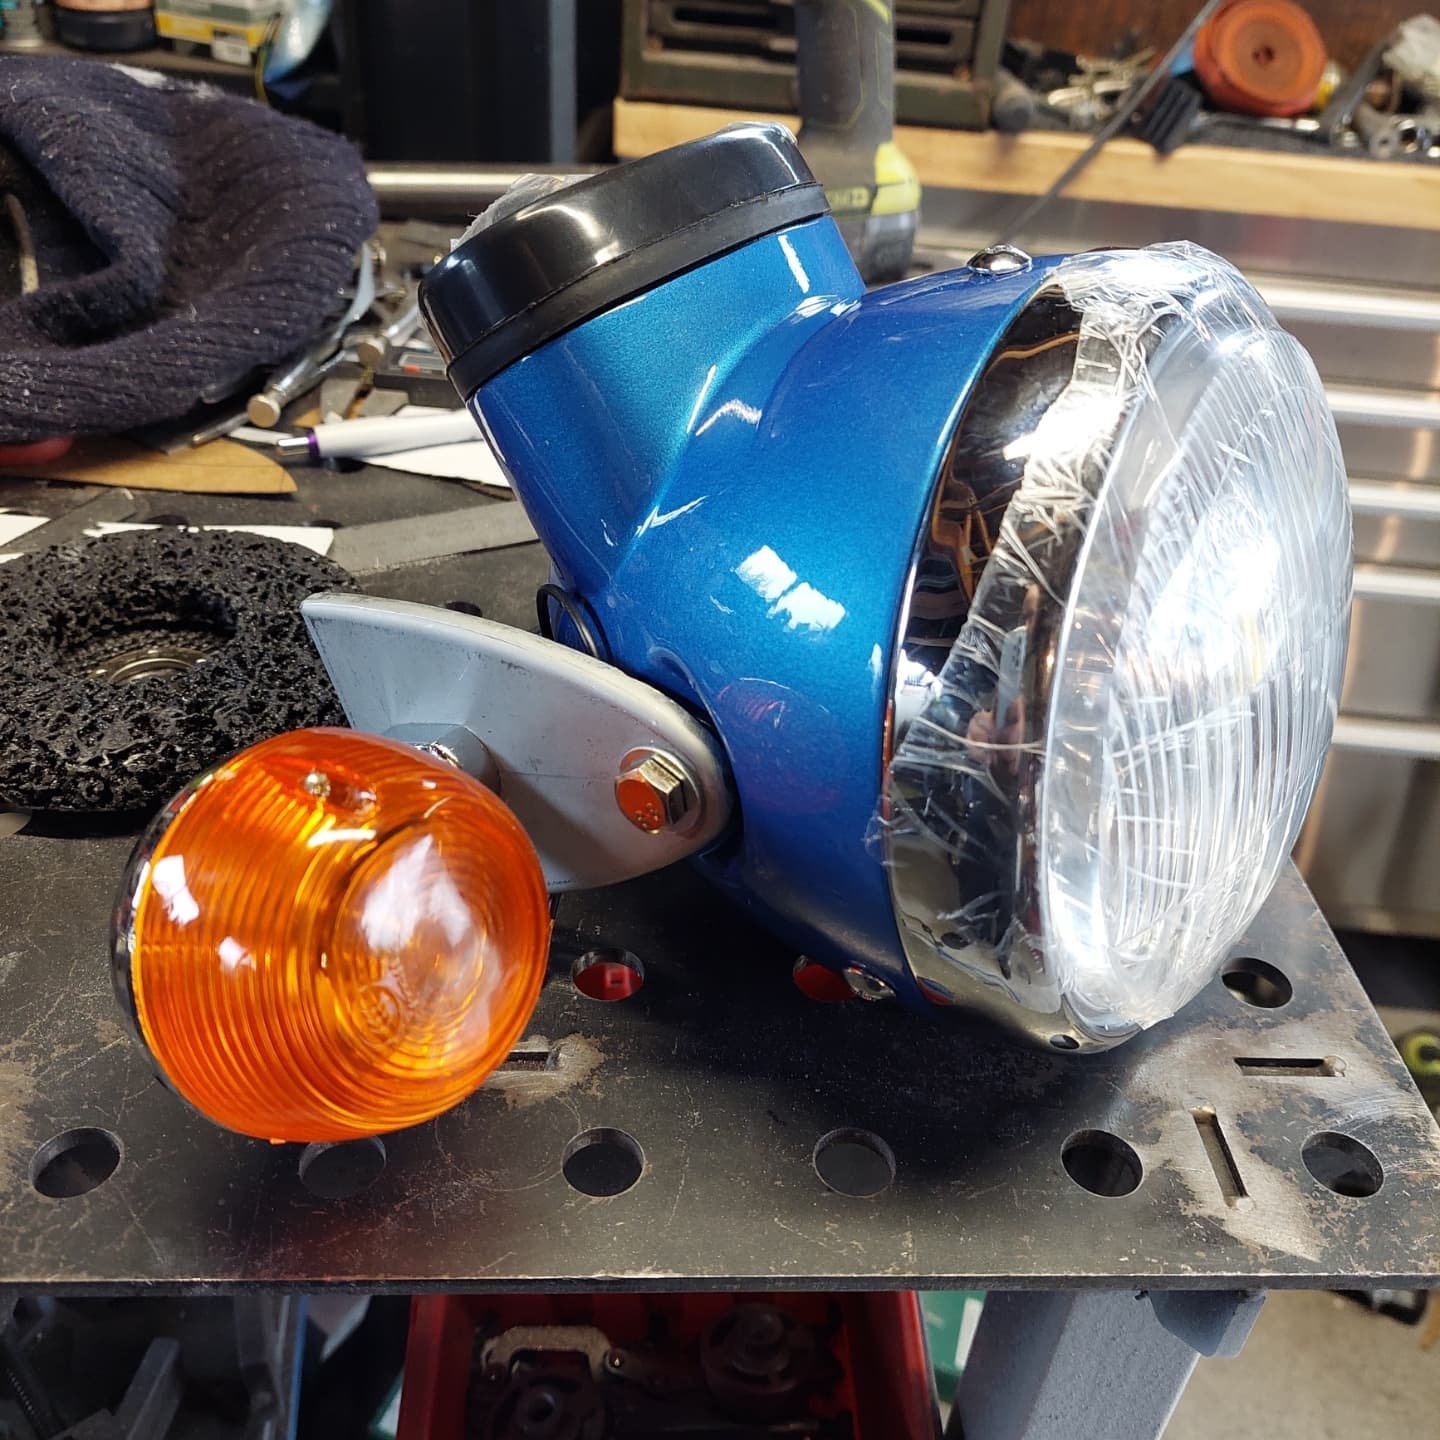
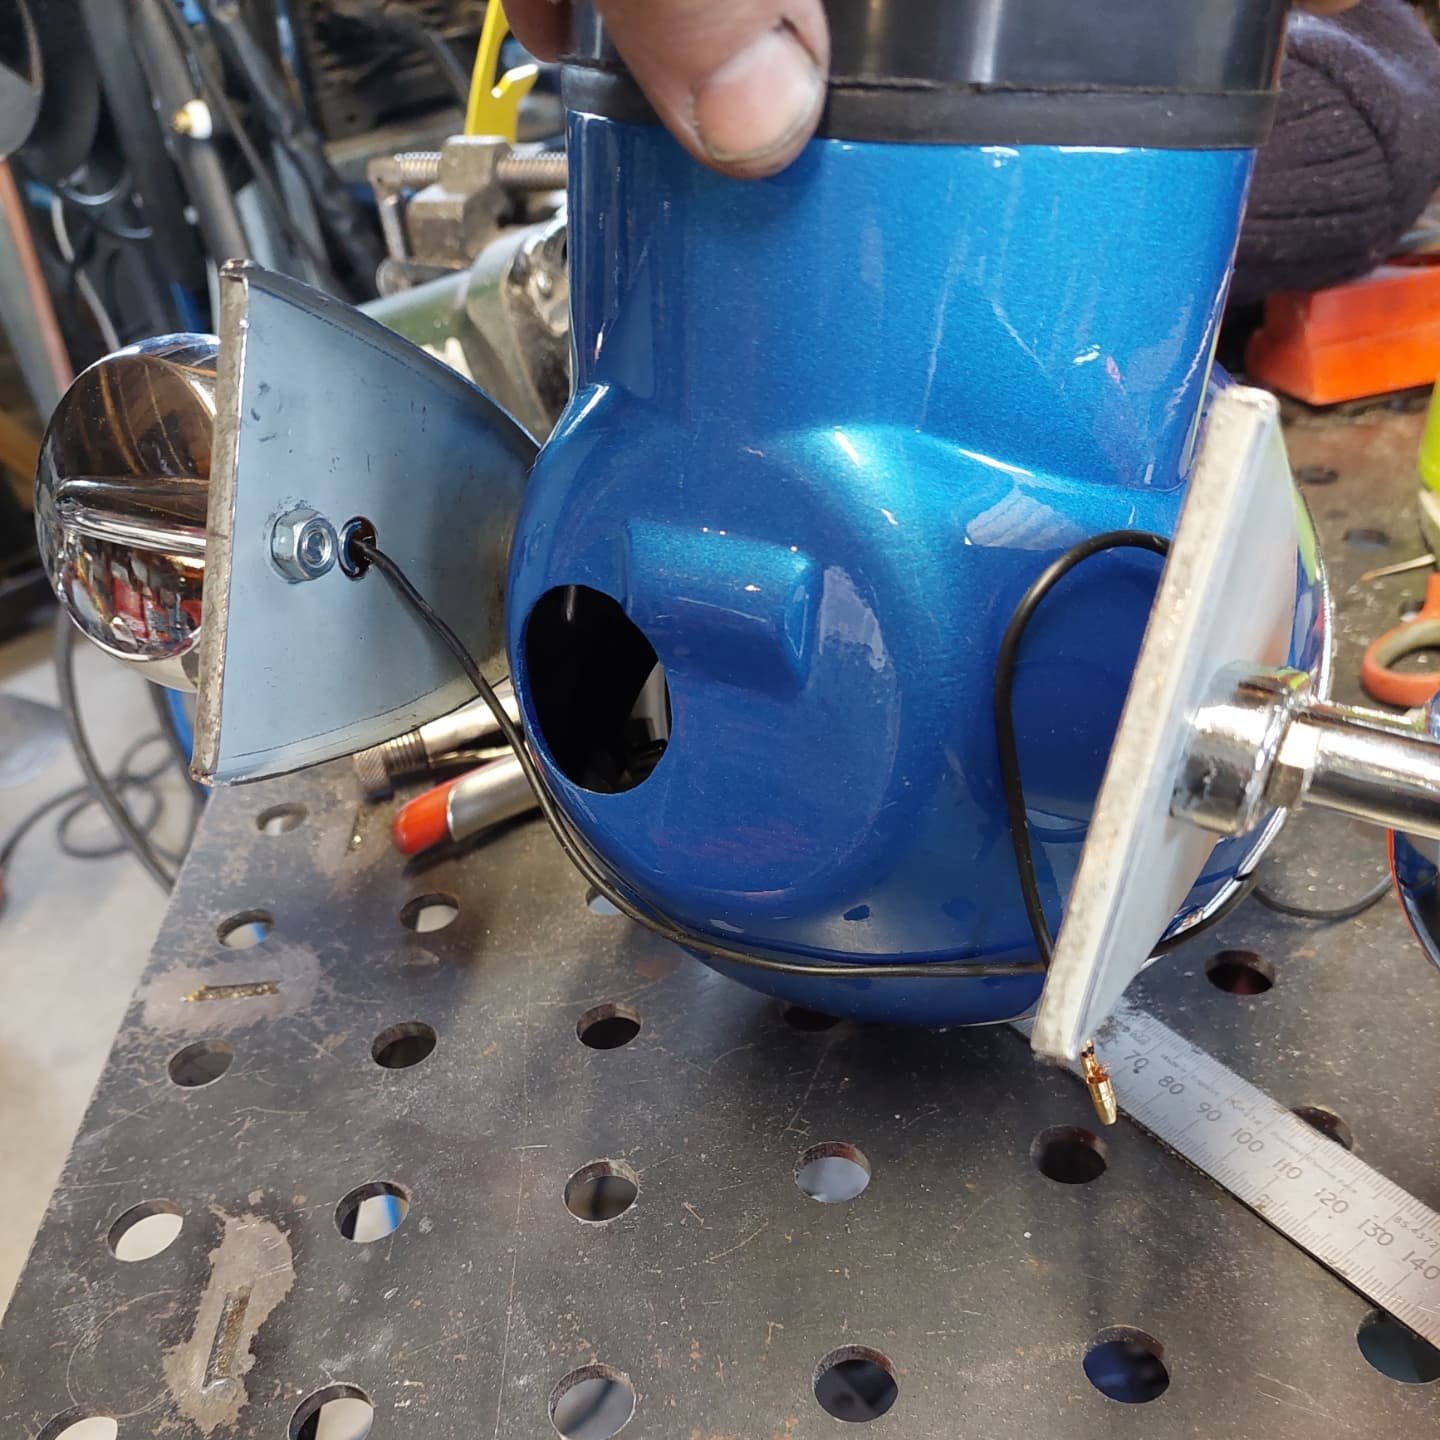
mBike to the rescue again as I got a new headlight and speedo from them yesterday and fitted it today. It was already painted black too so thats 1 job less to do.
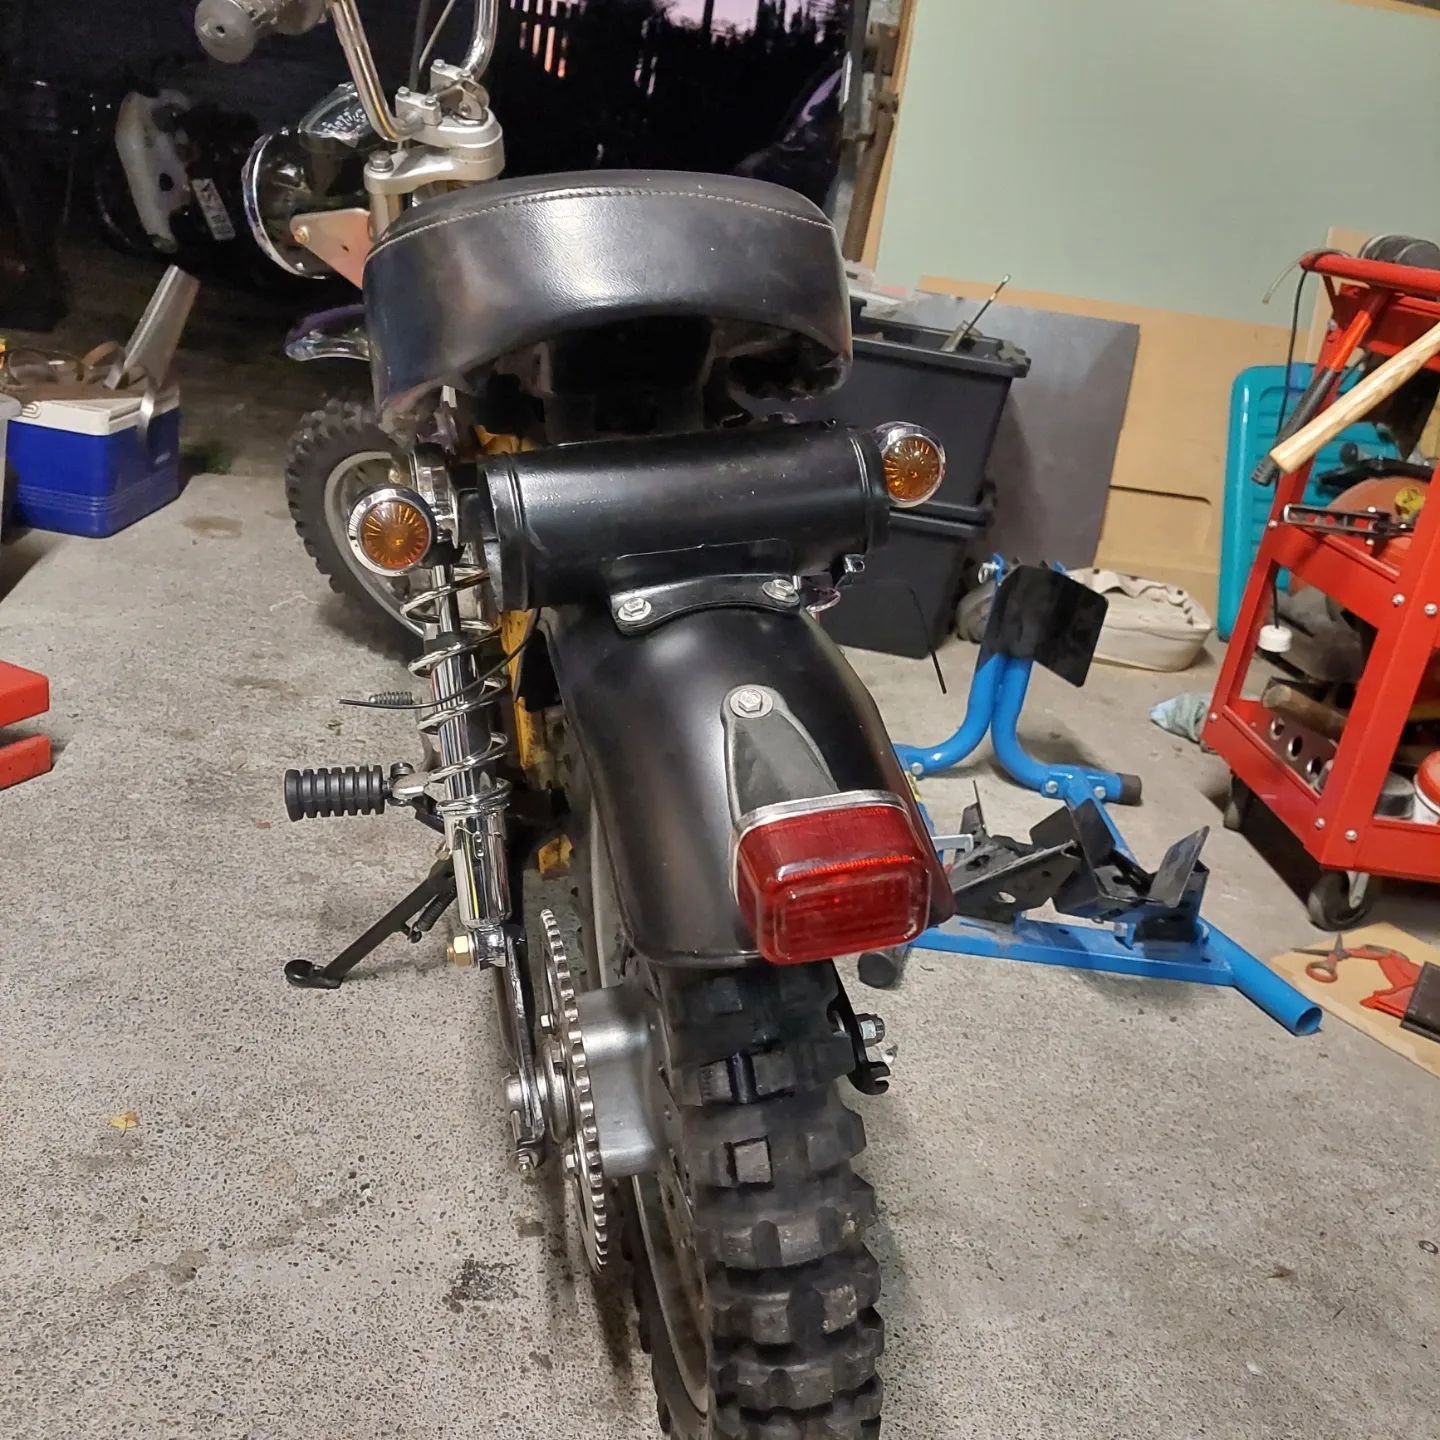
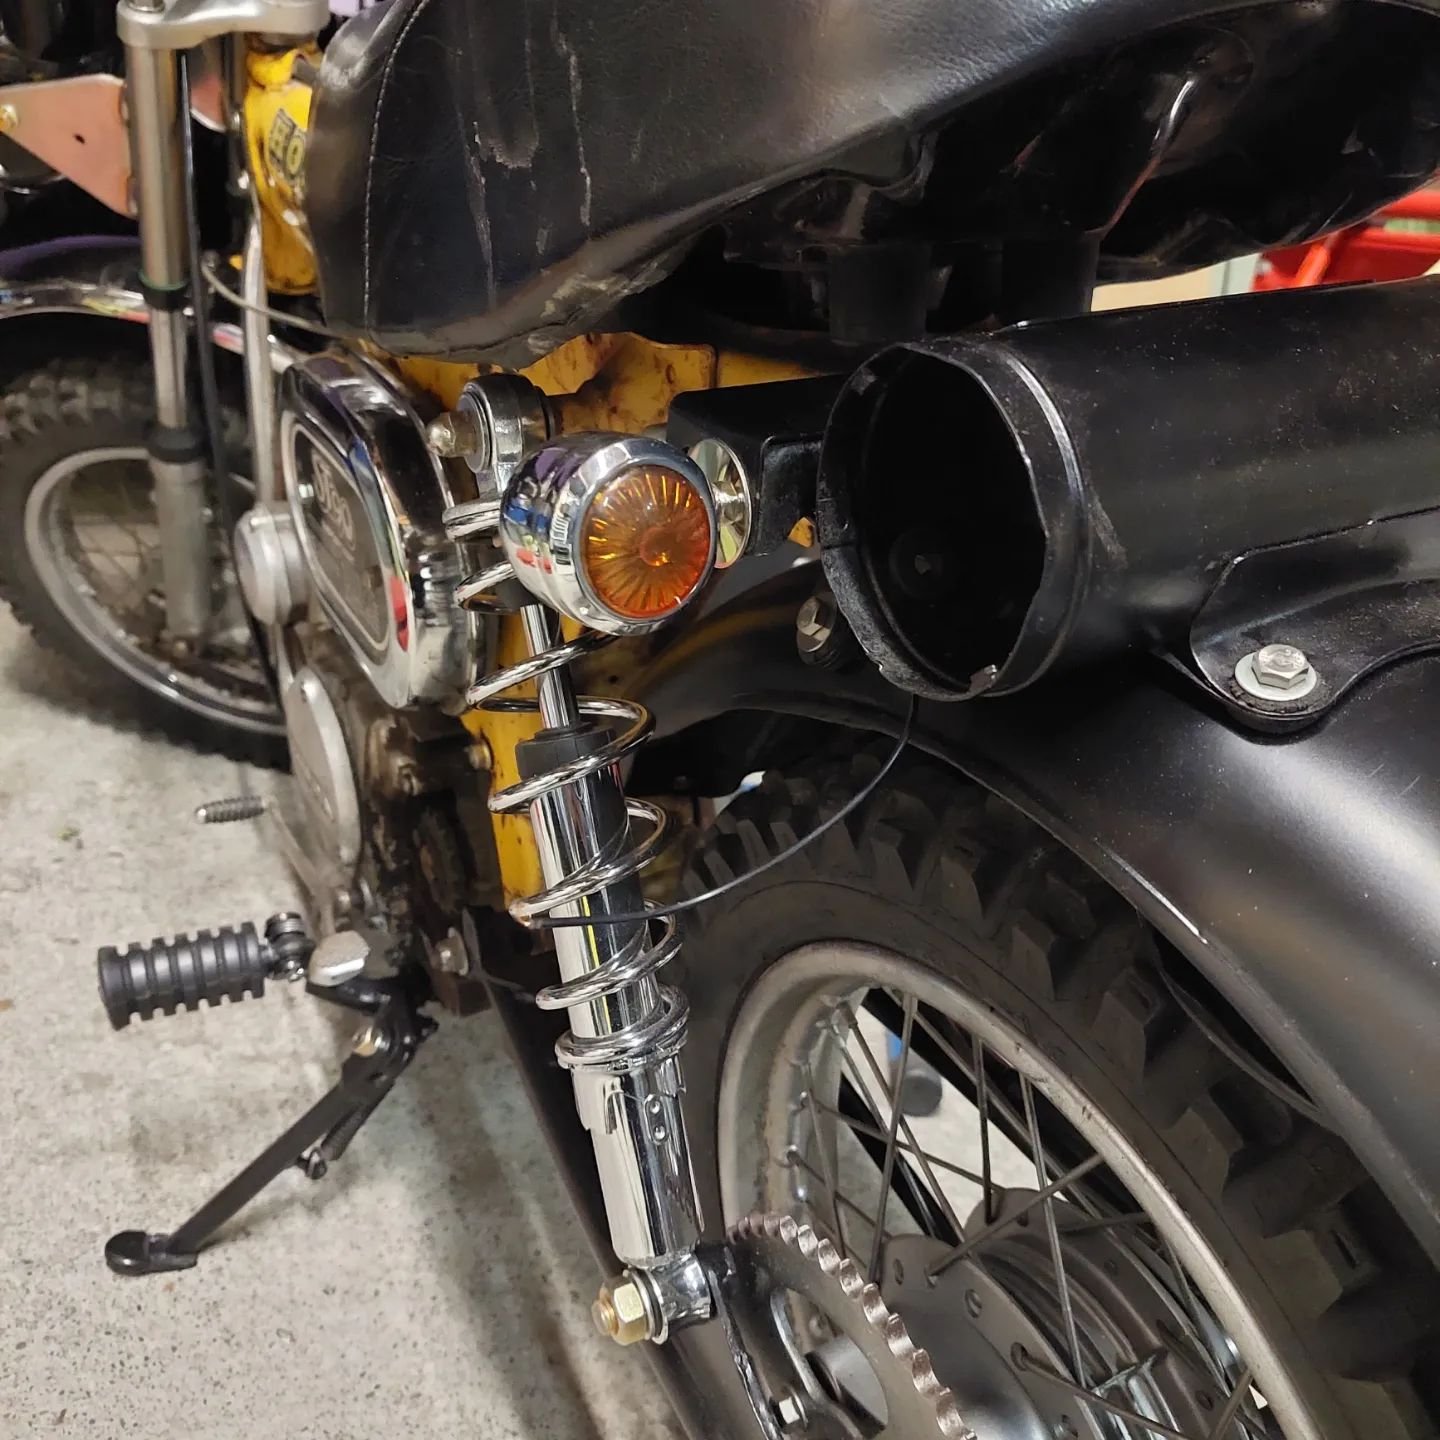
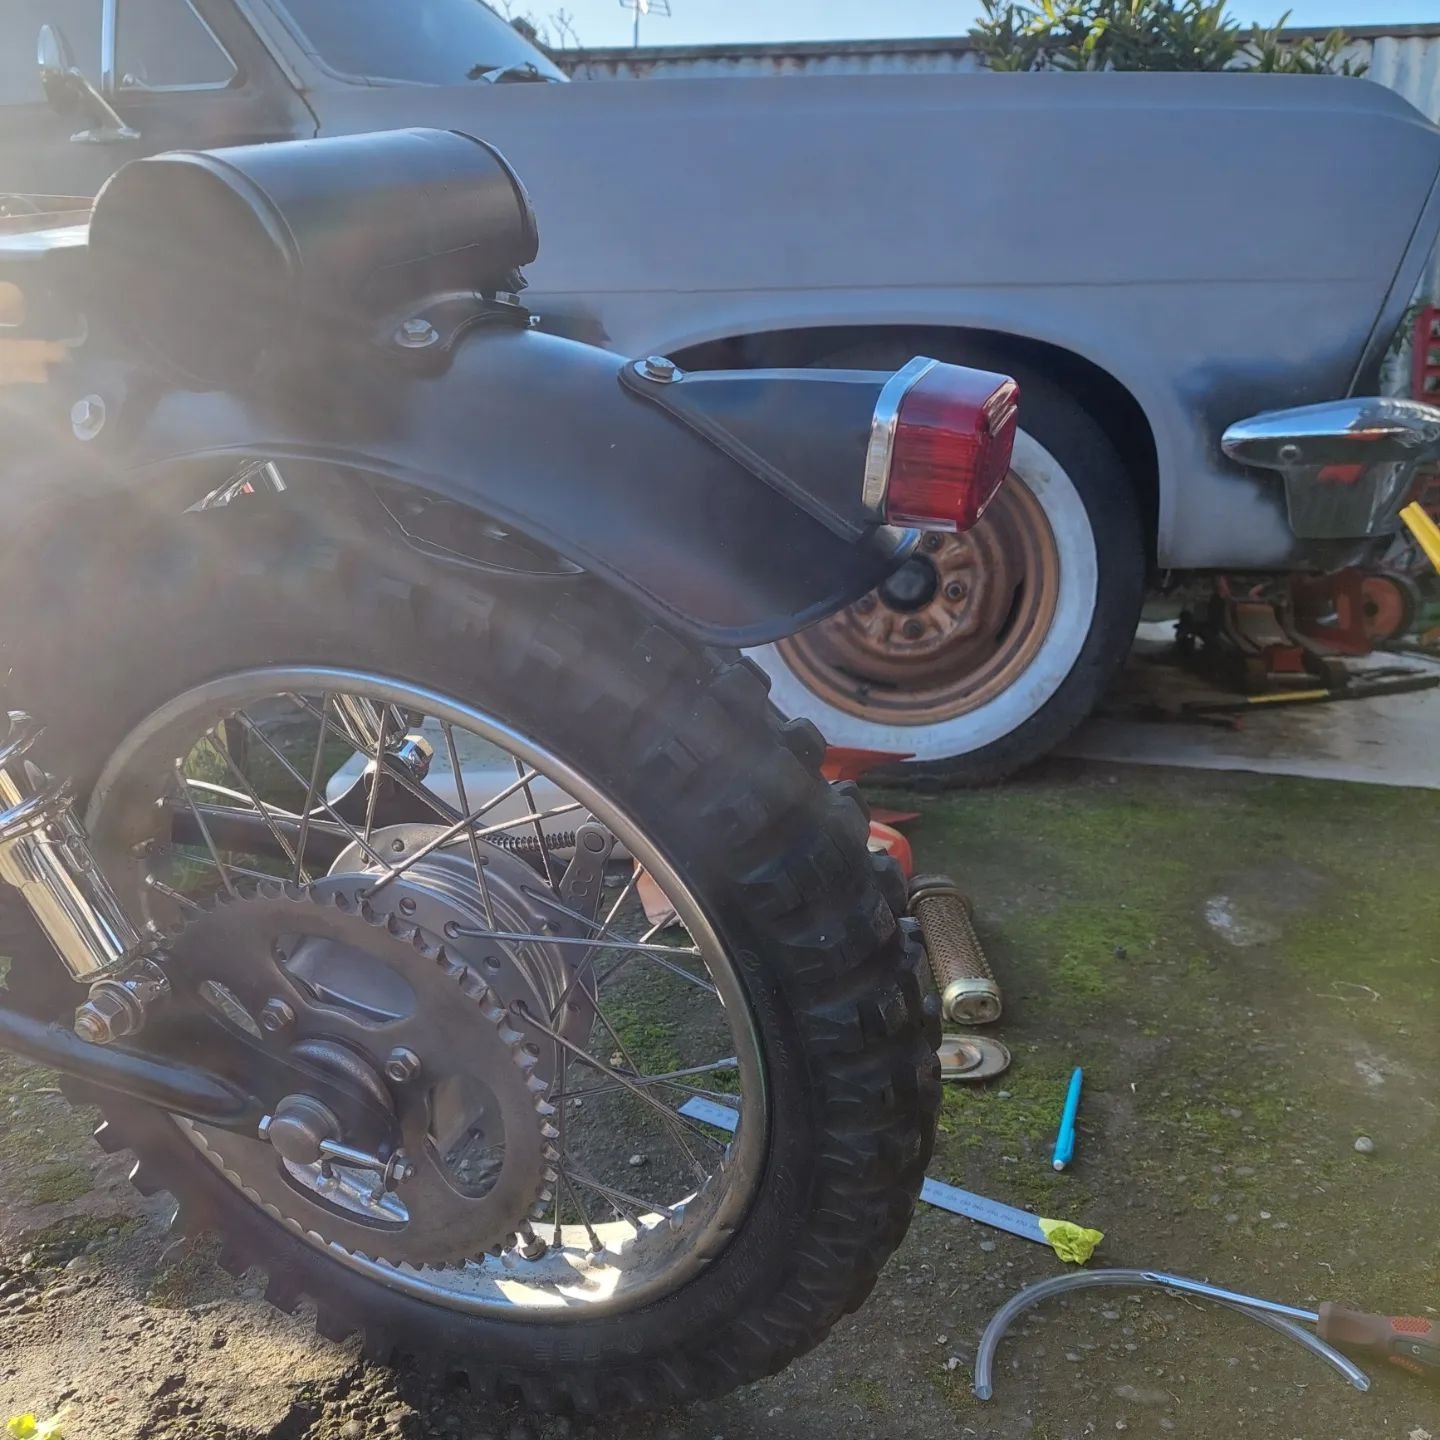
As I was going through my stash of indicators and tail lights I came across these
The indicators and tail light were a swapmeet find. Unfortunately I only had 1 pair of indicators so Ive ordered another pair for the front from trademe so they should be here within the next few days. I think the tail light really suits the shape of the guard. I'll make a bracket for the numberplate to bolt to.
-
5
-
-
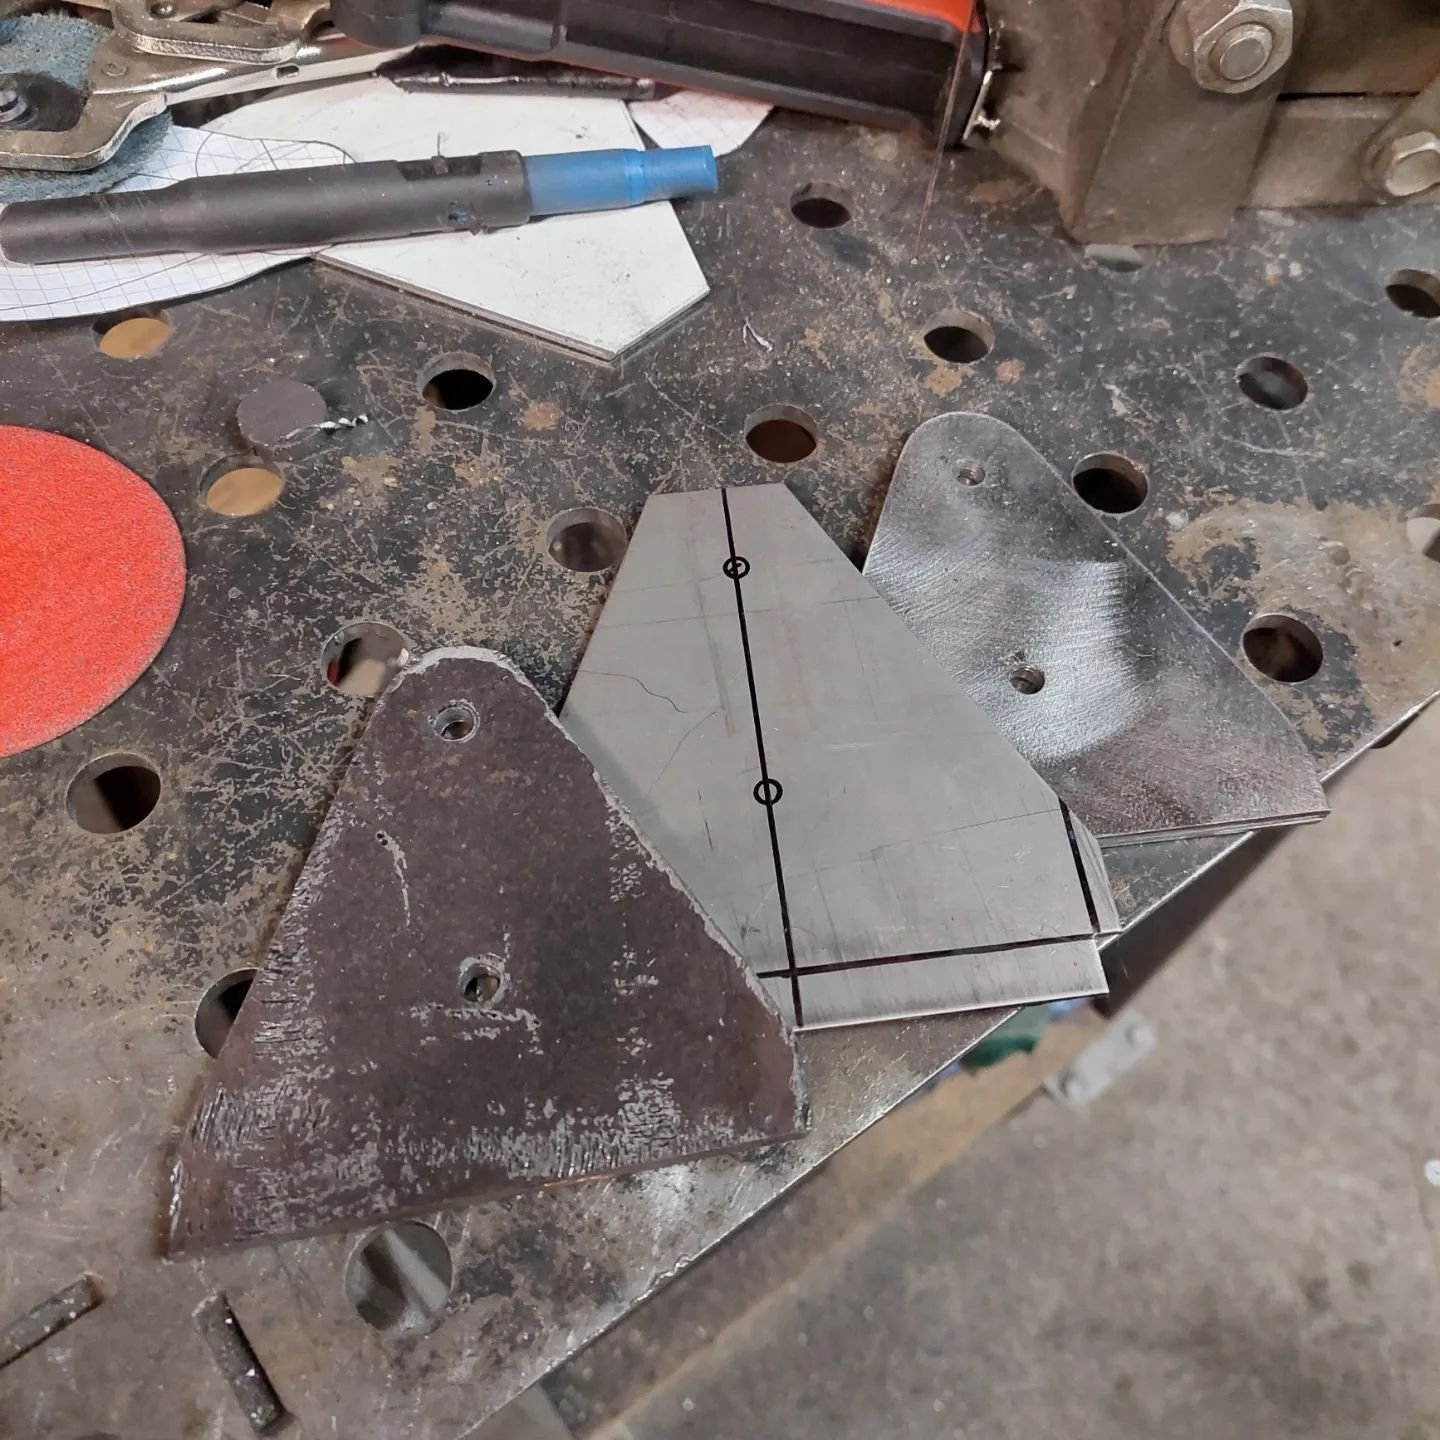
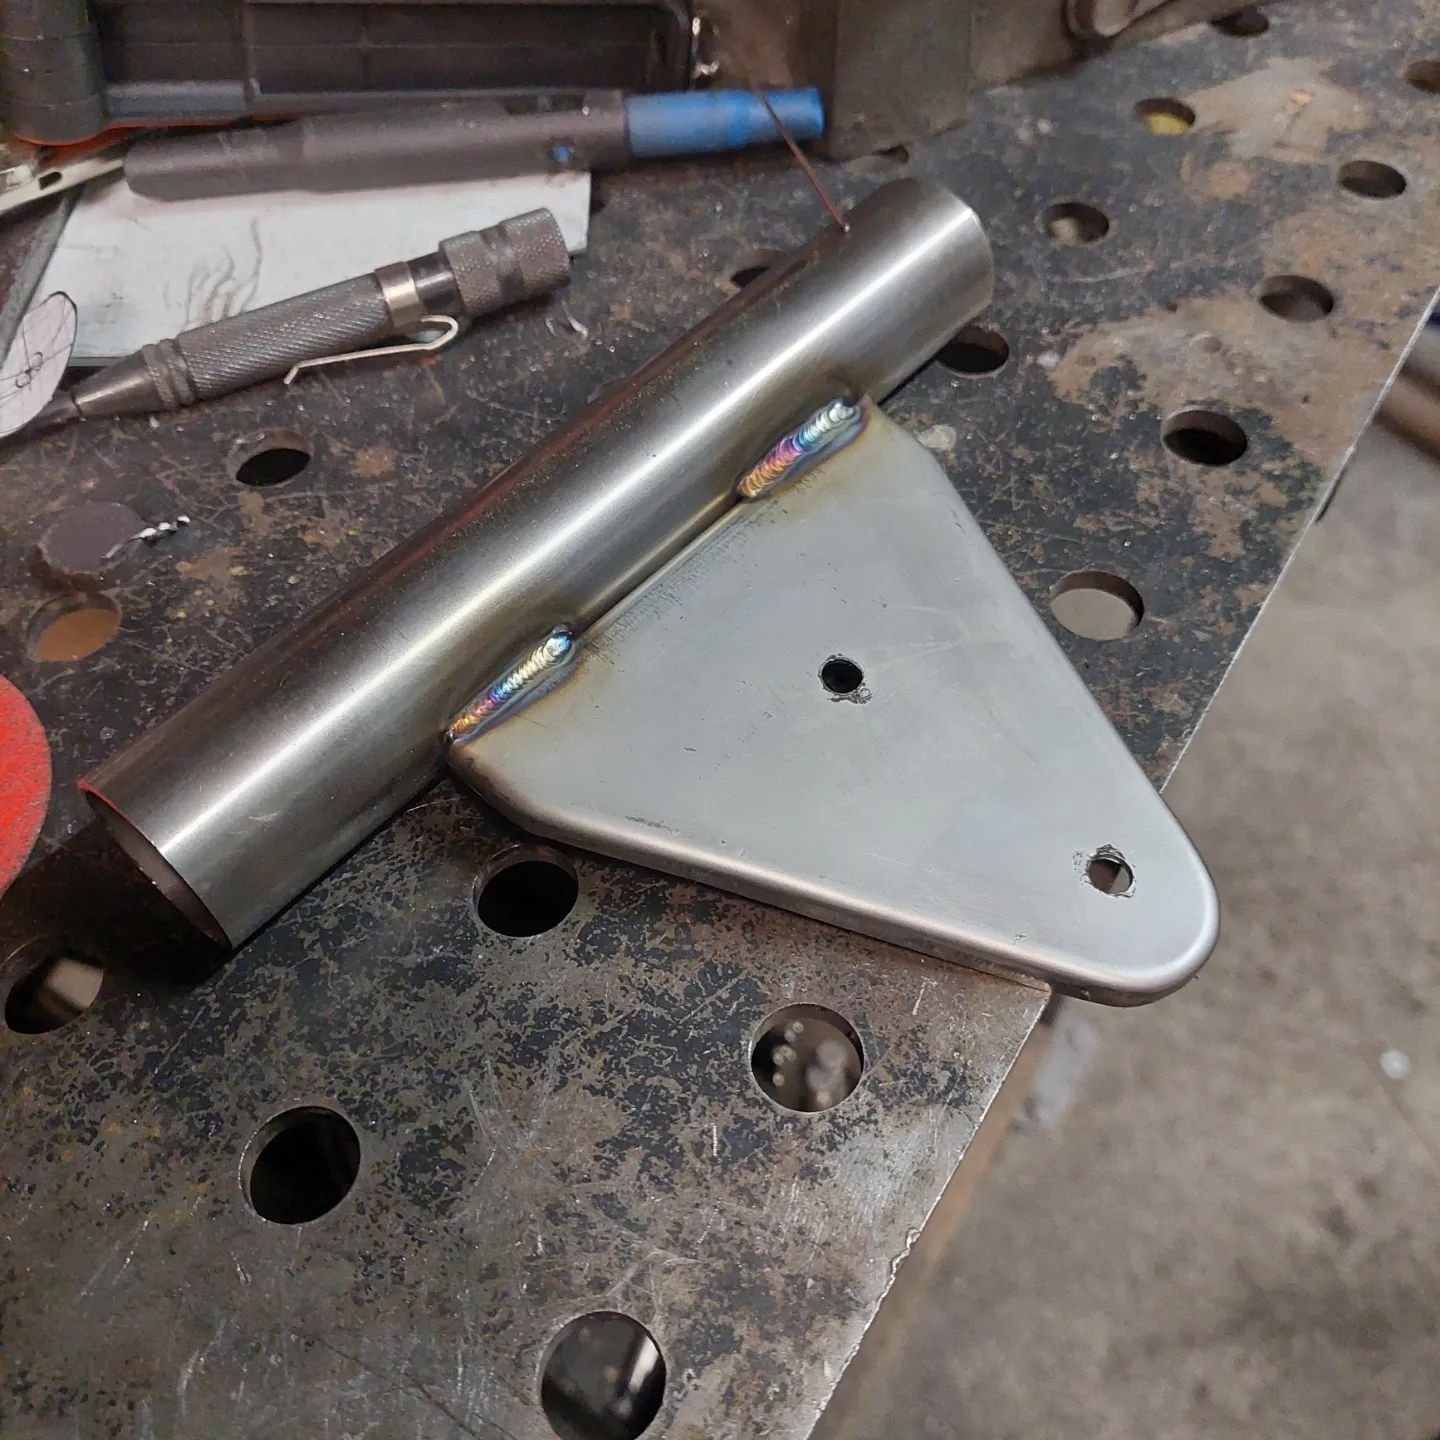
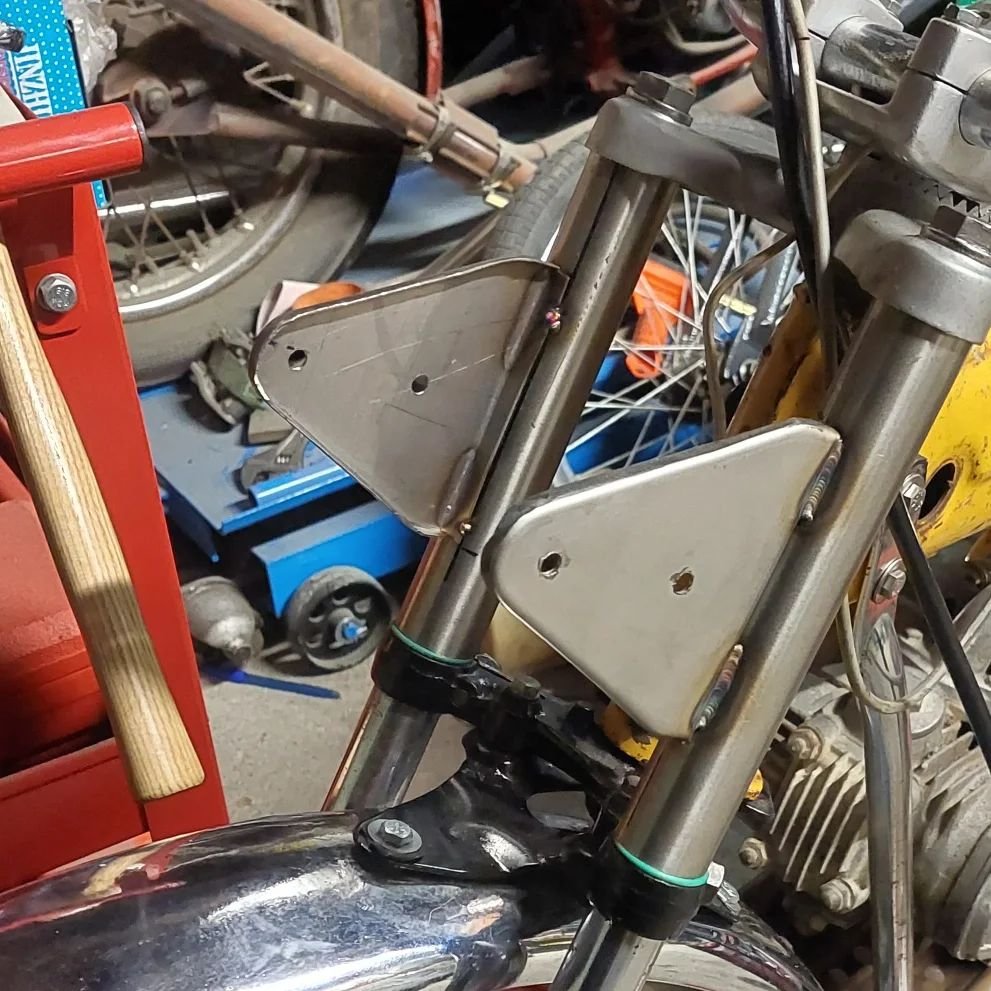
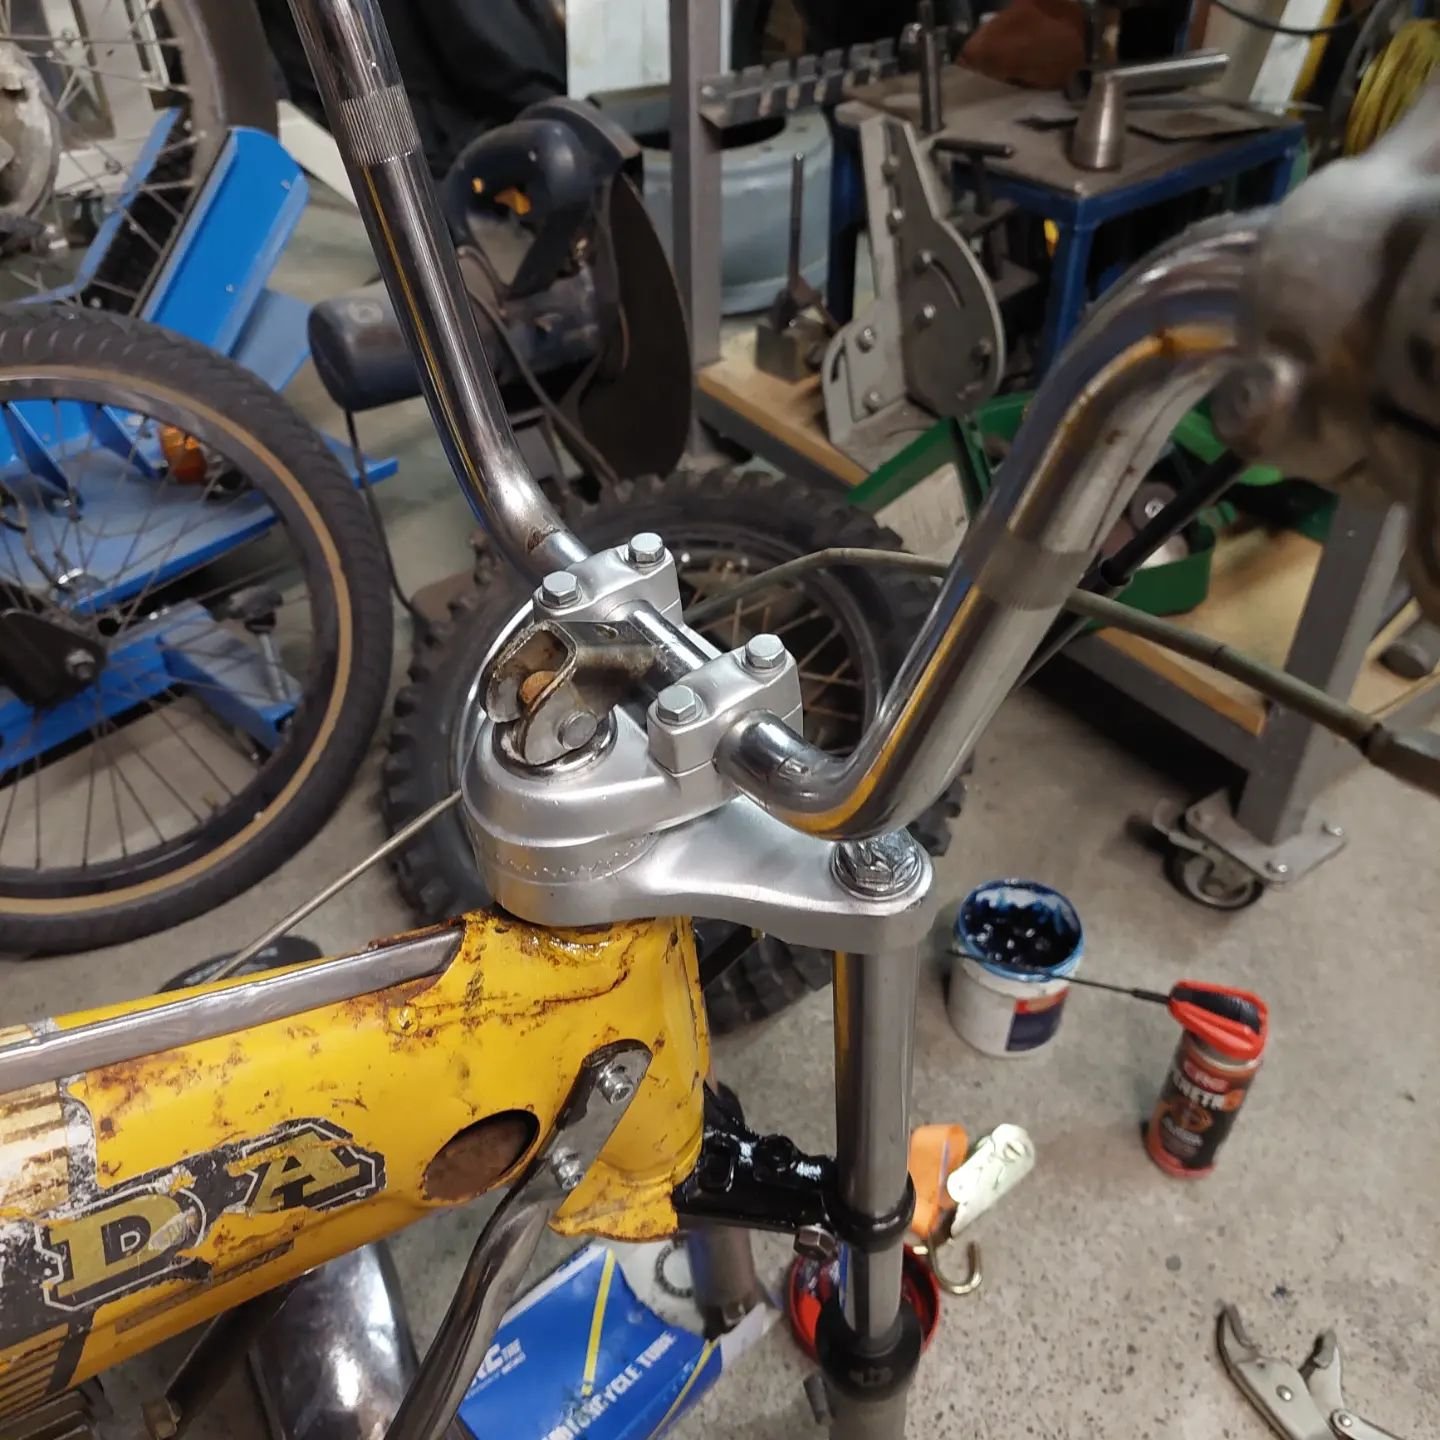
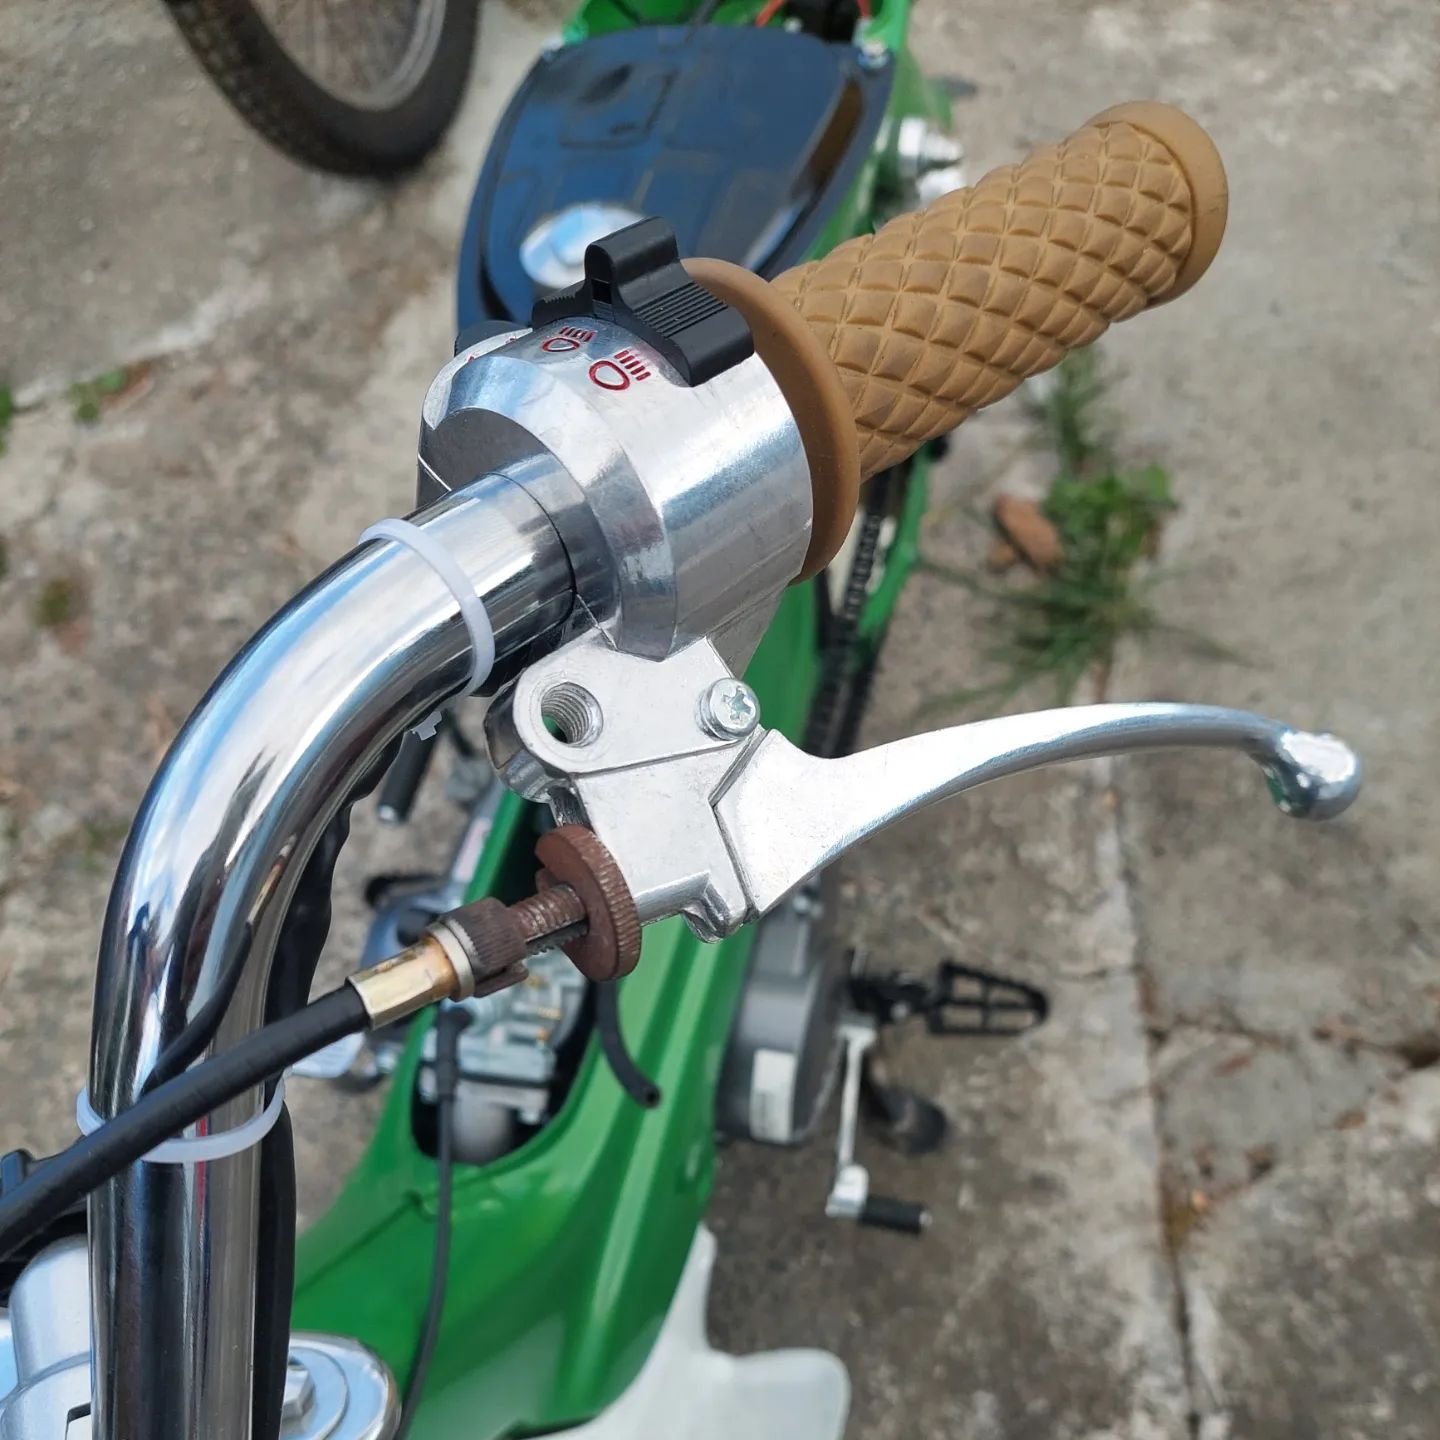
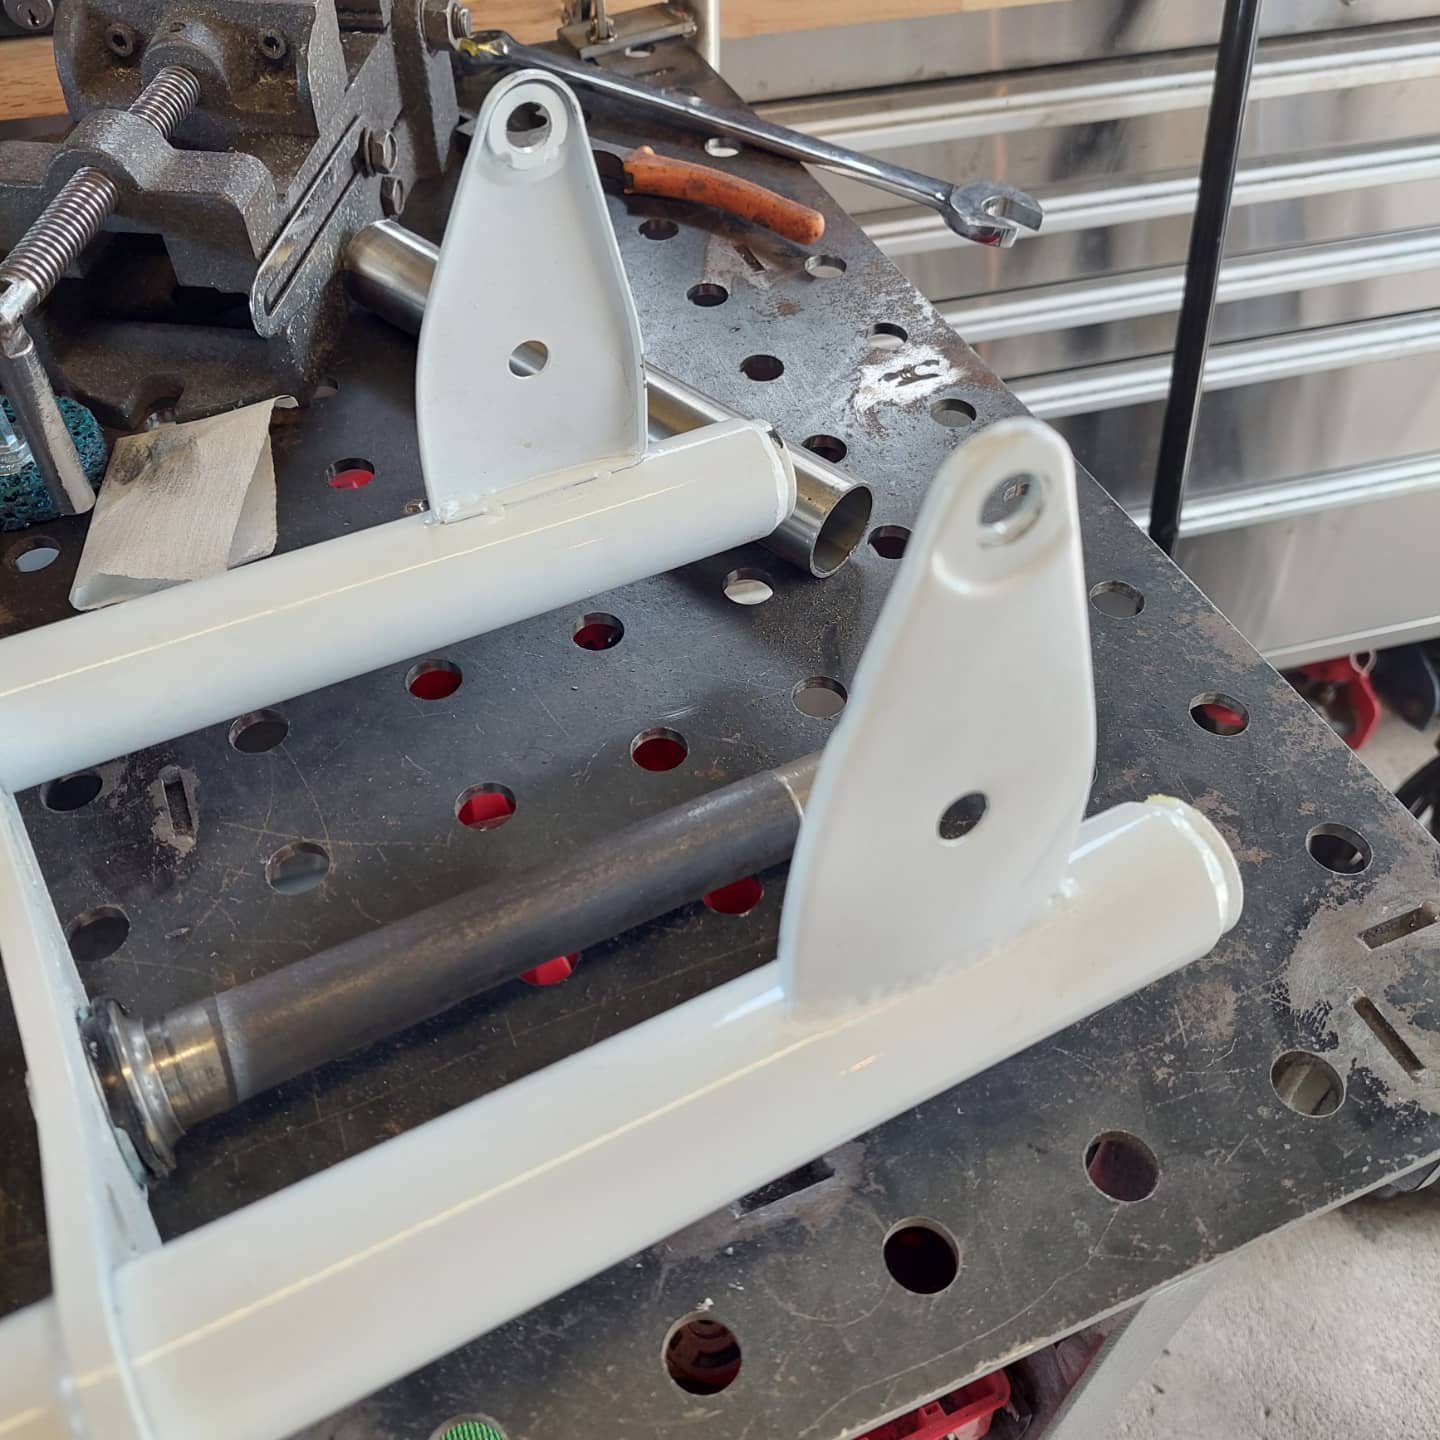
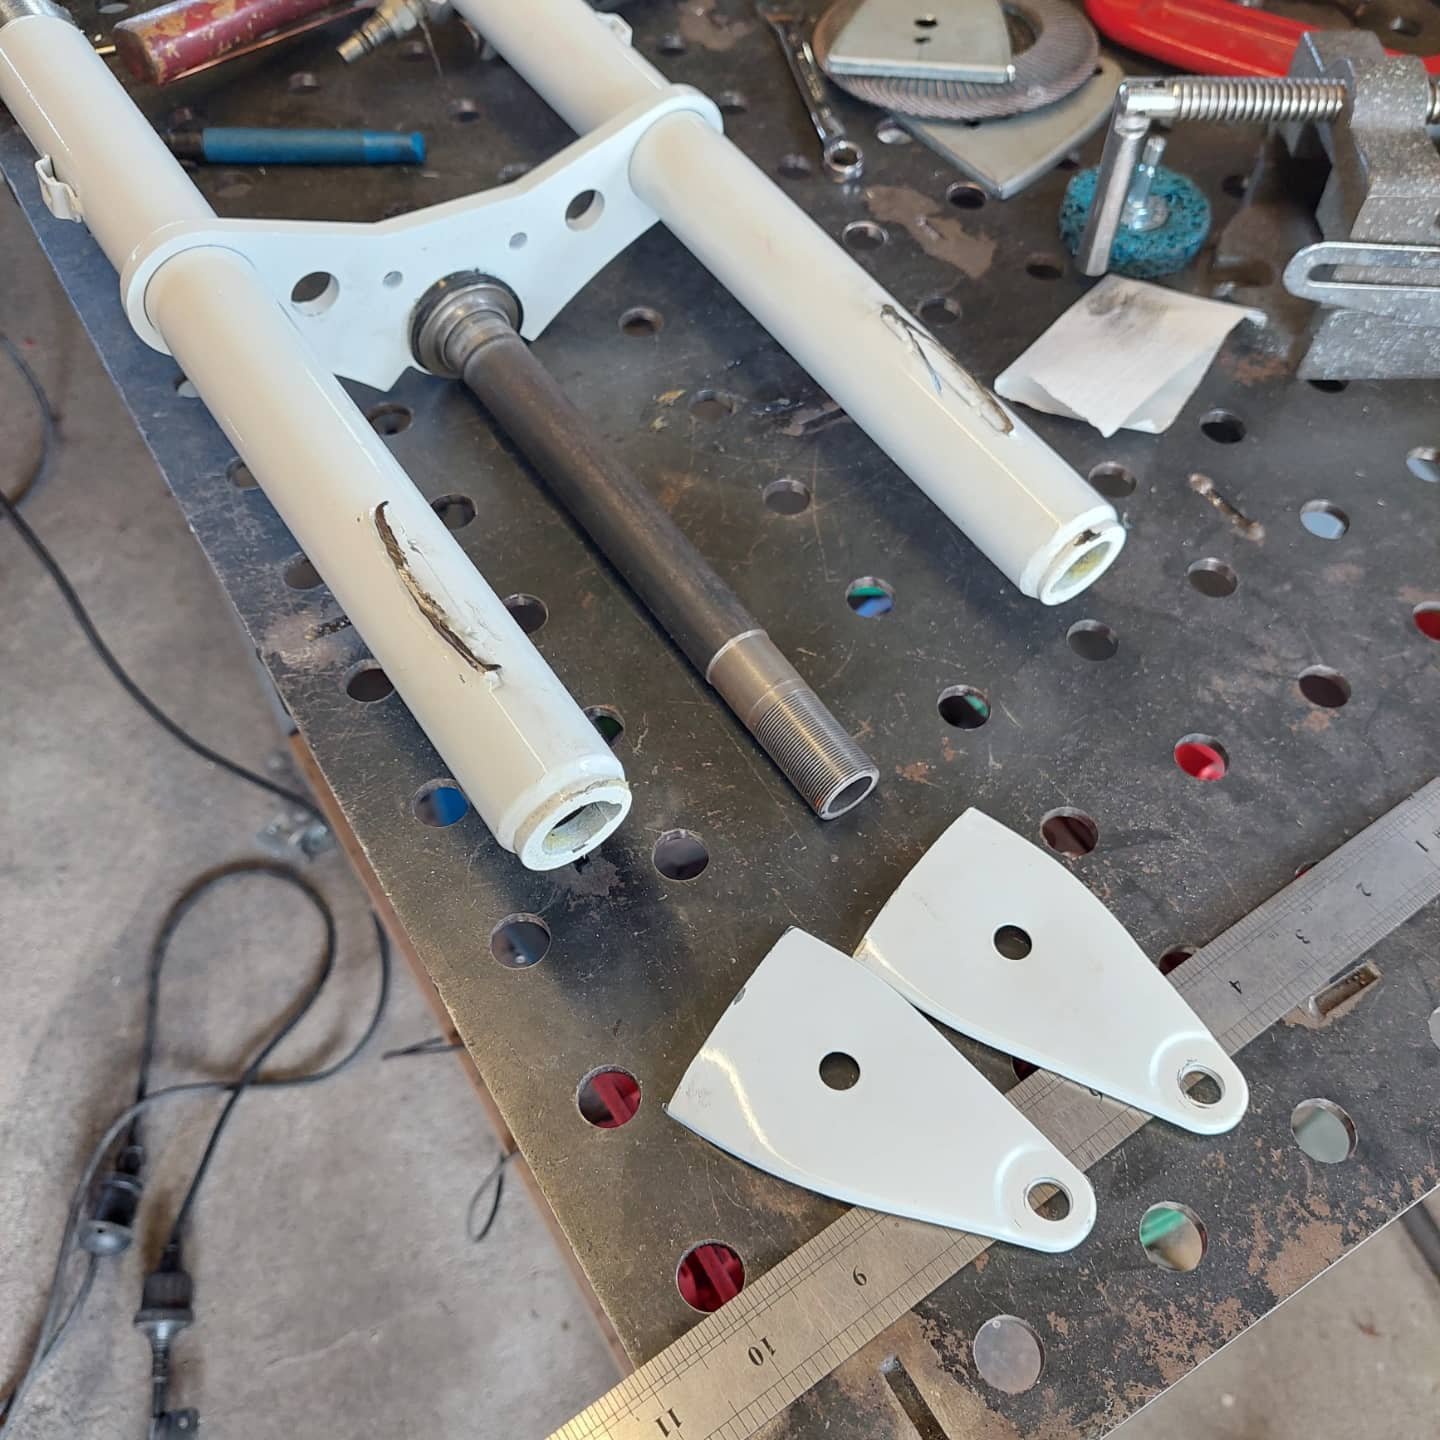
I'm still looking for a headlight and bucket but have sourced a speedo. So in the meantime I made some headlight ears that will also double as indicator mounts. The original indicators clamp to the knurled sections on the handlebars.
I cut some lengths of 31.8mm stainless tube from work then hammer formed some 18g stainless to make the ears and glued them together
-
8
-
-
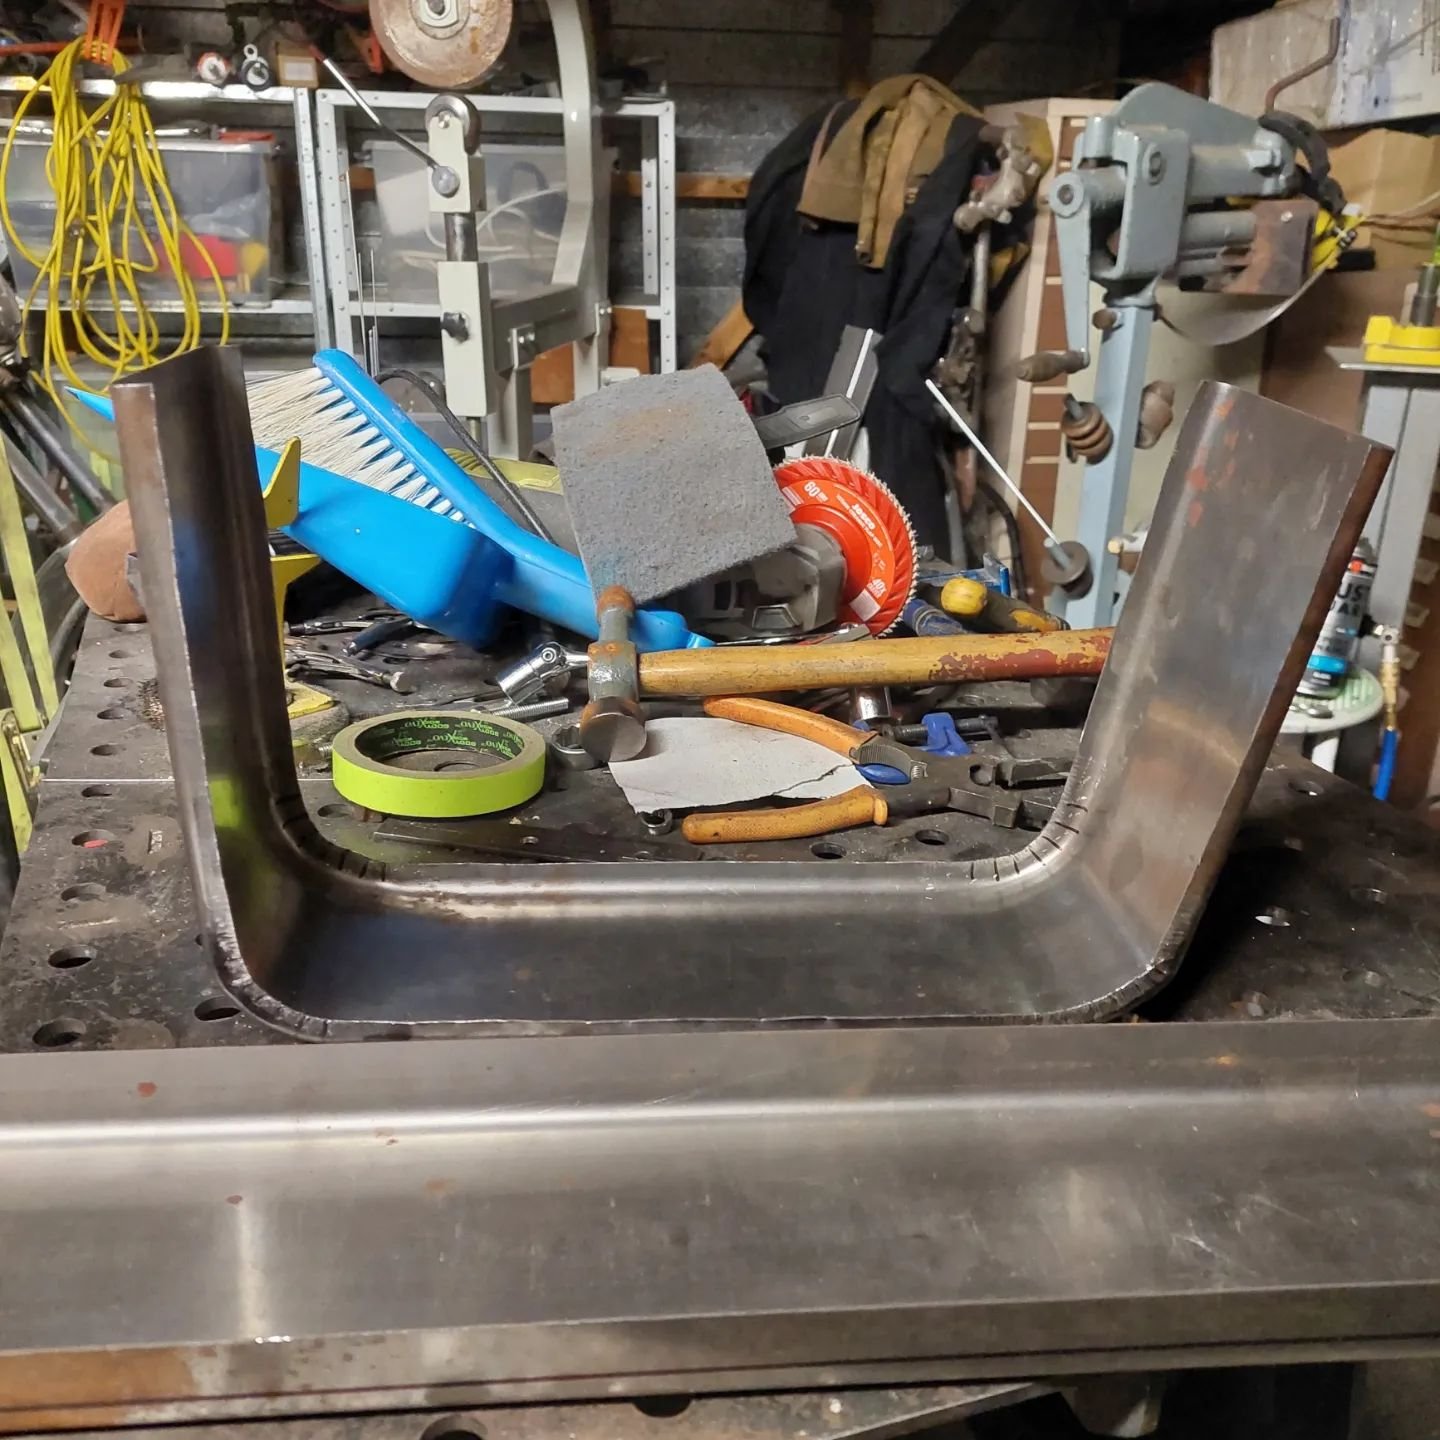
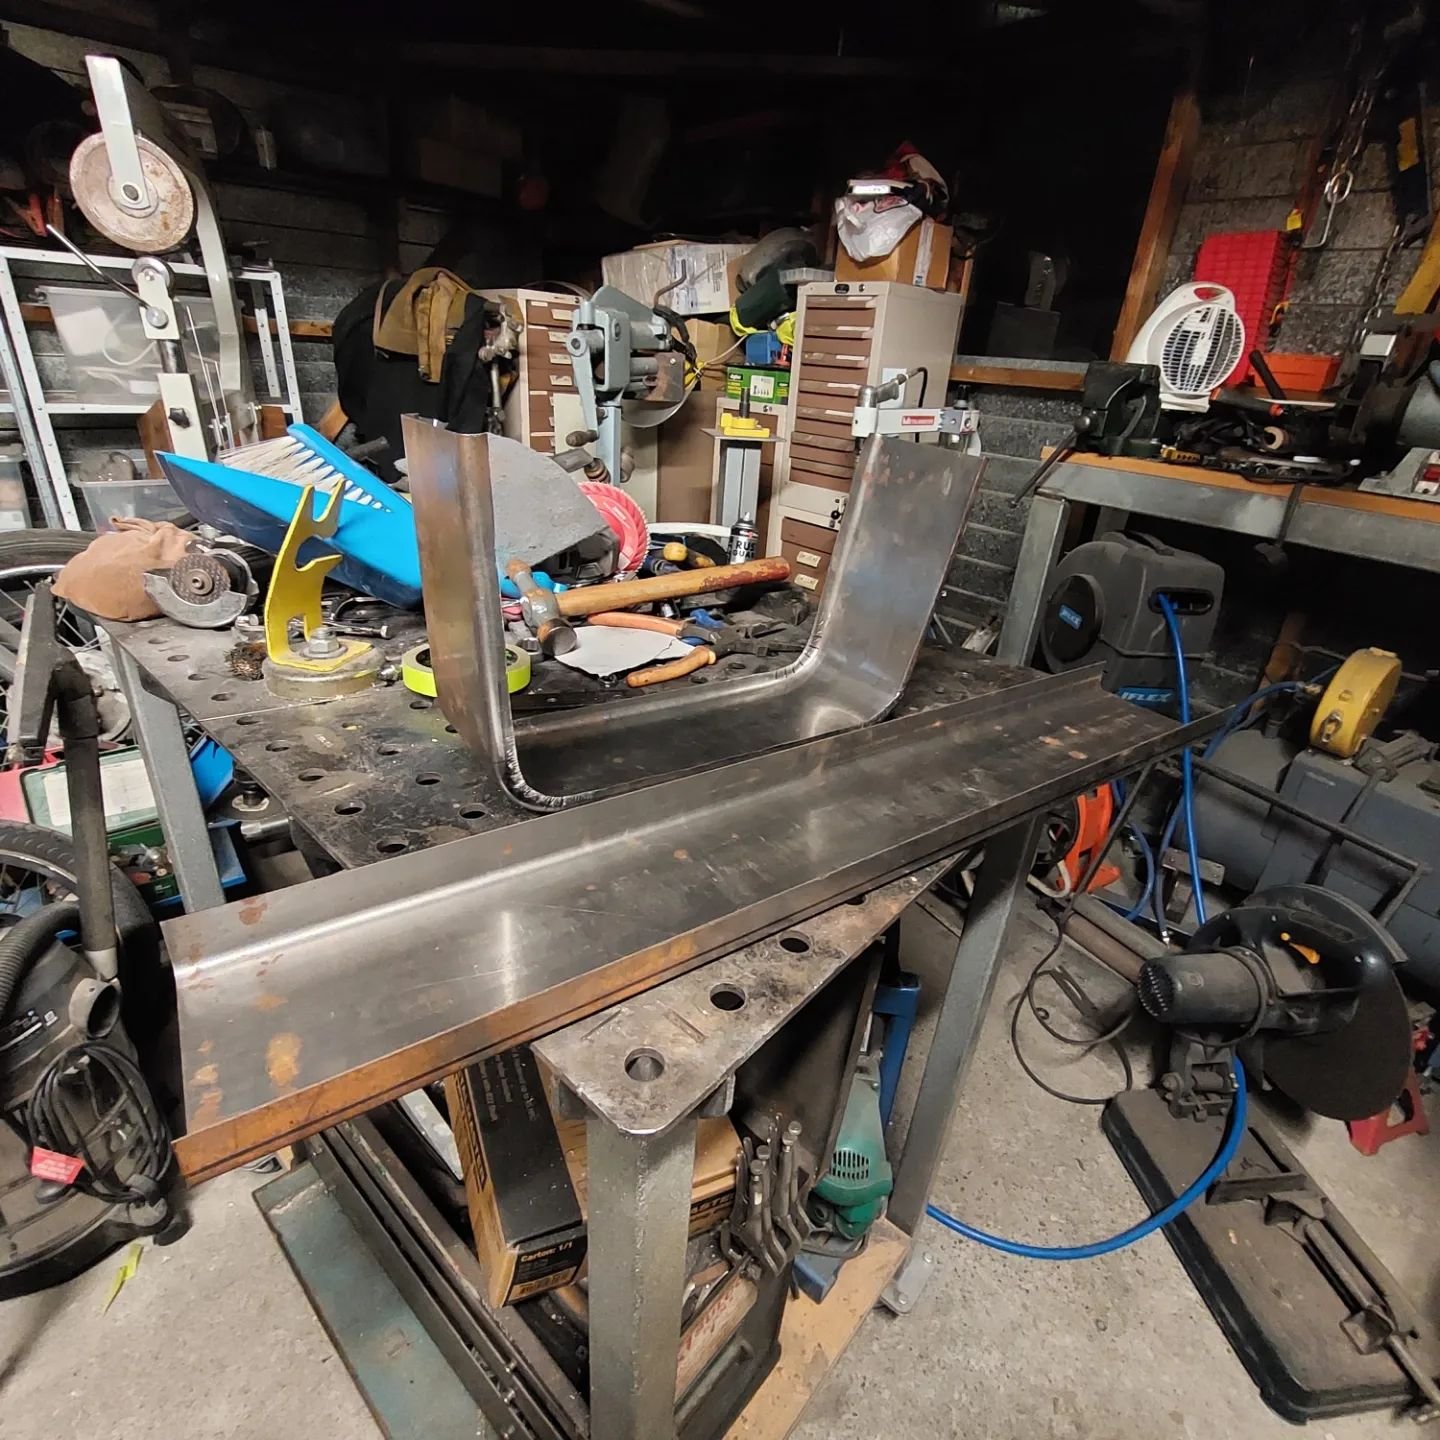
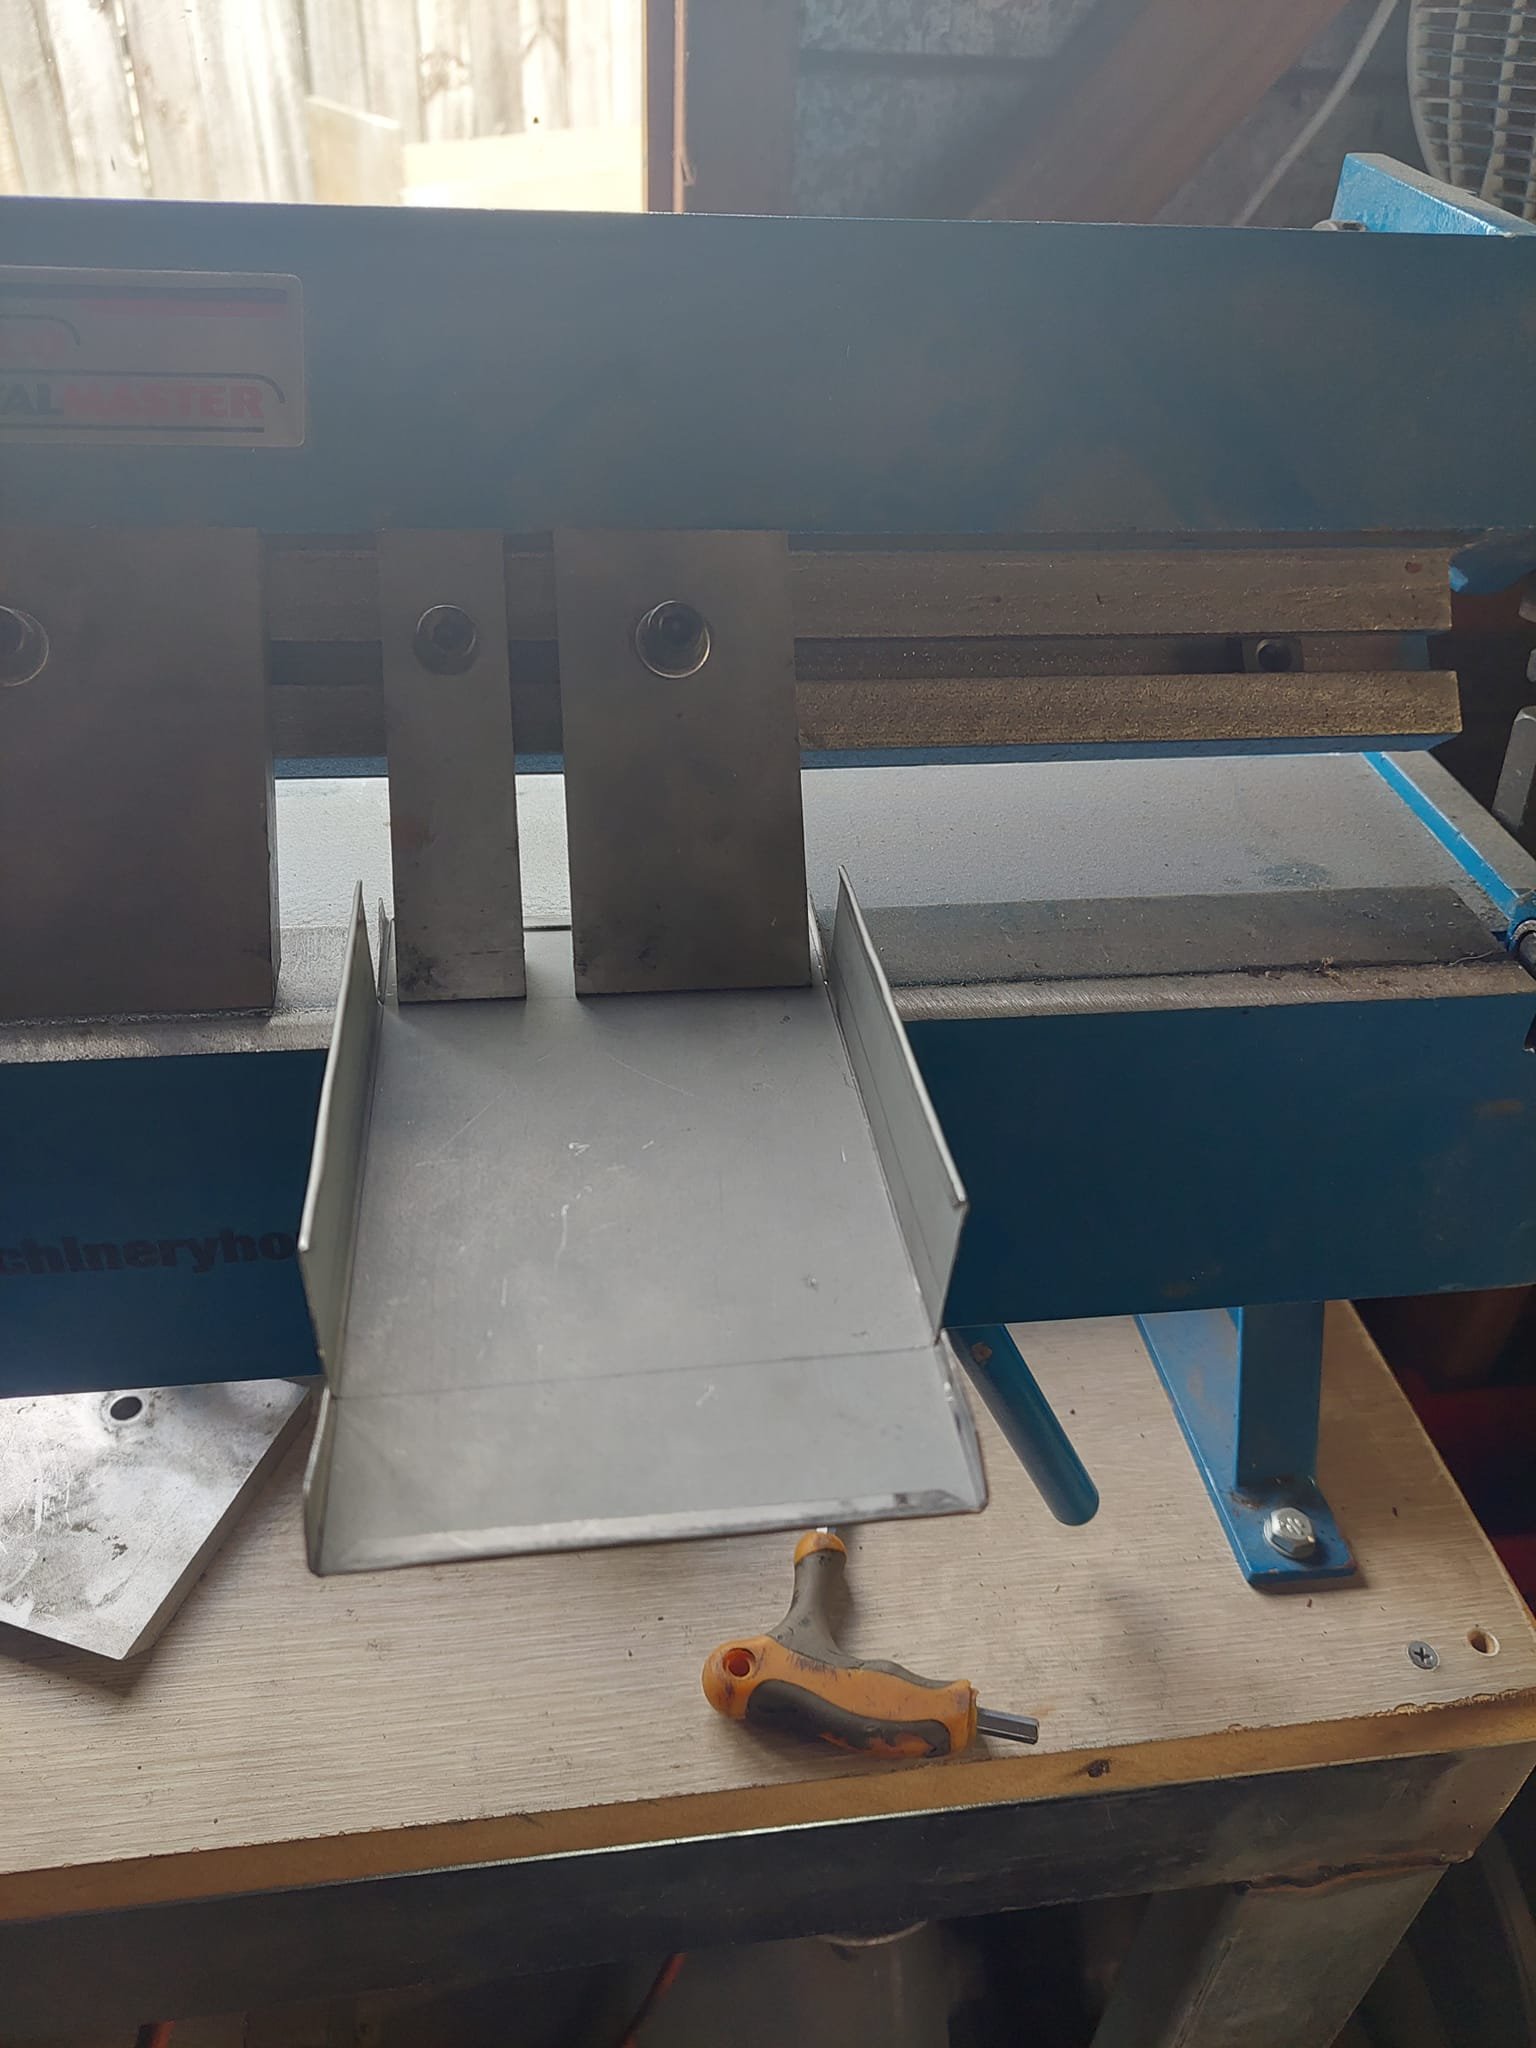
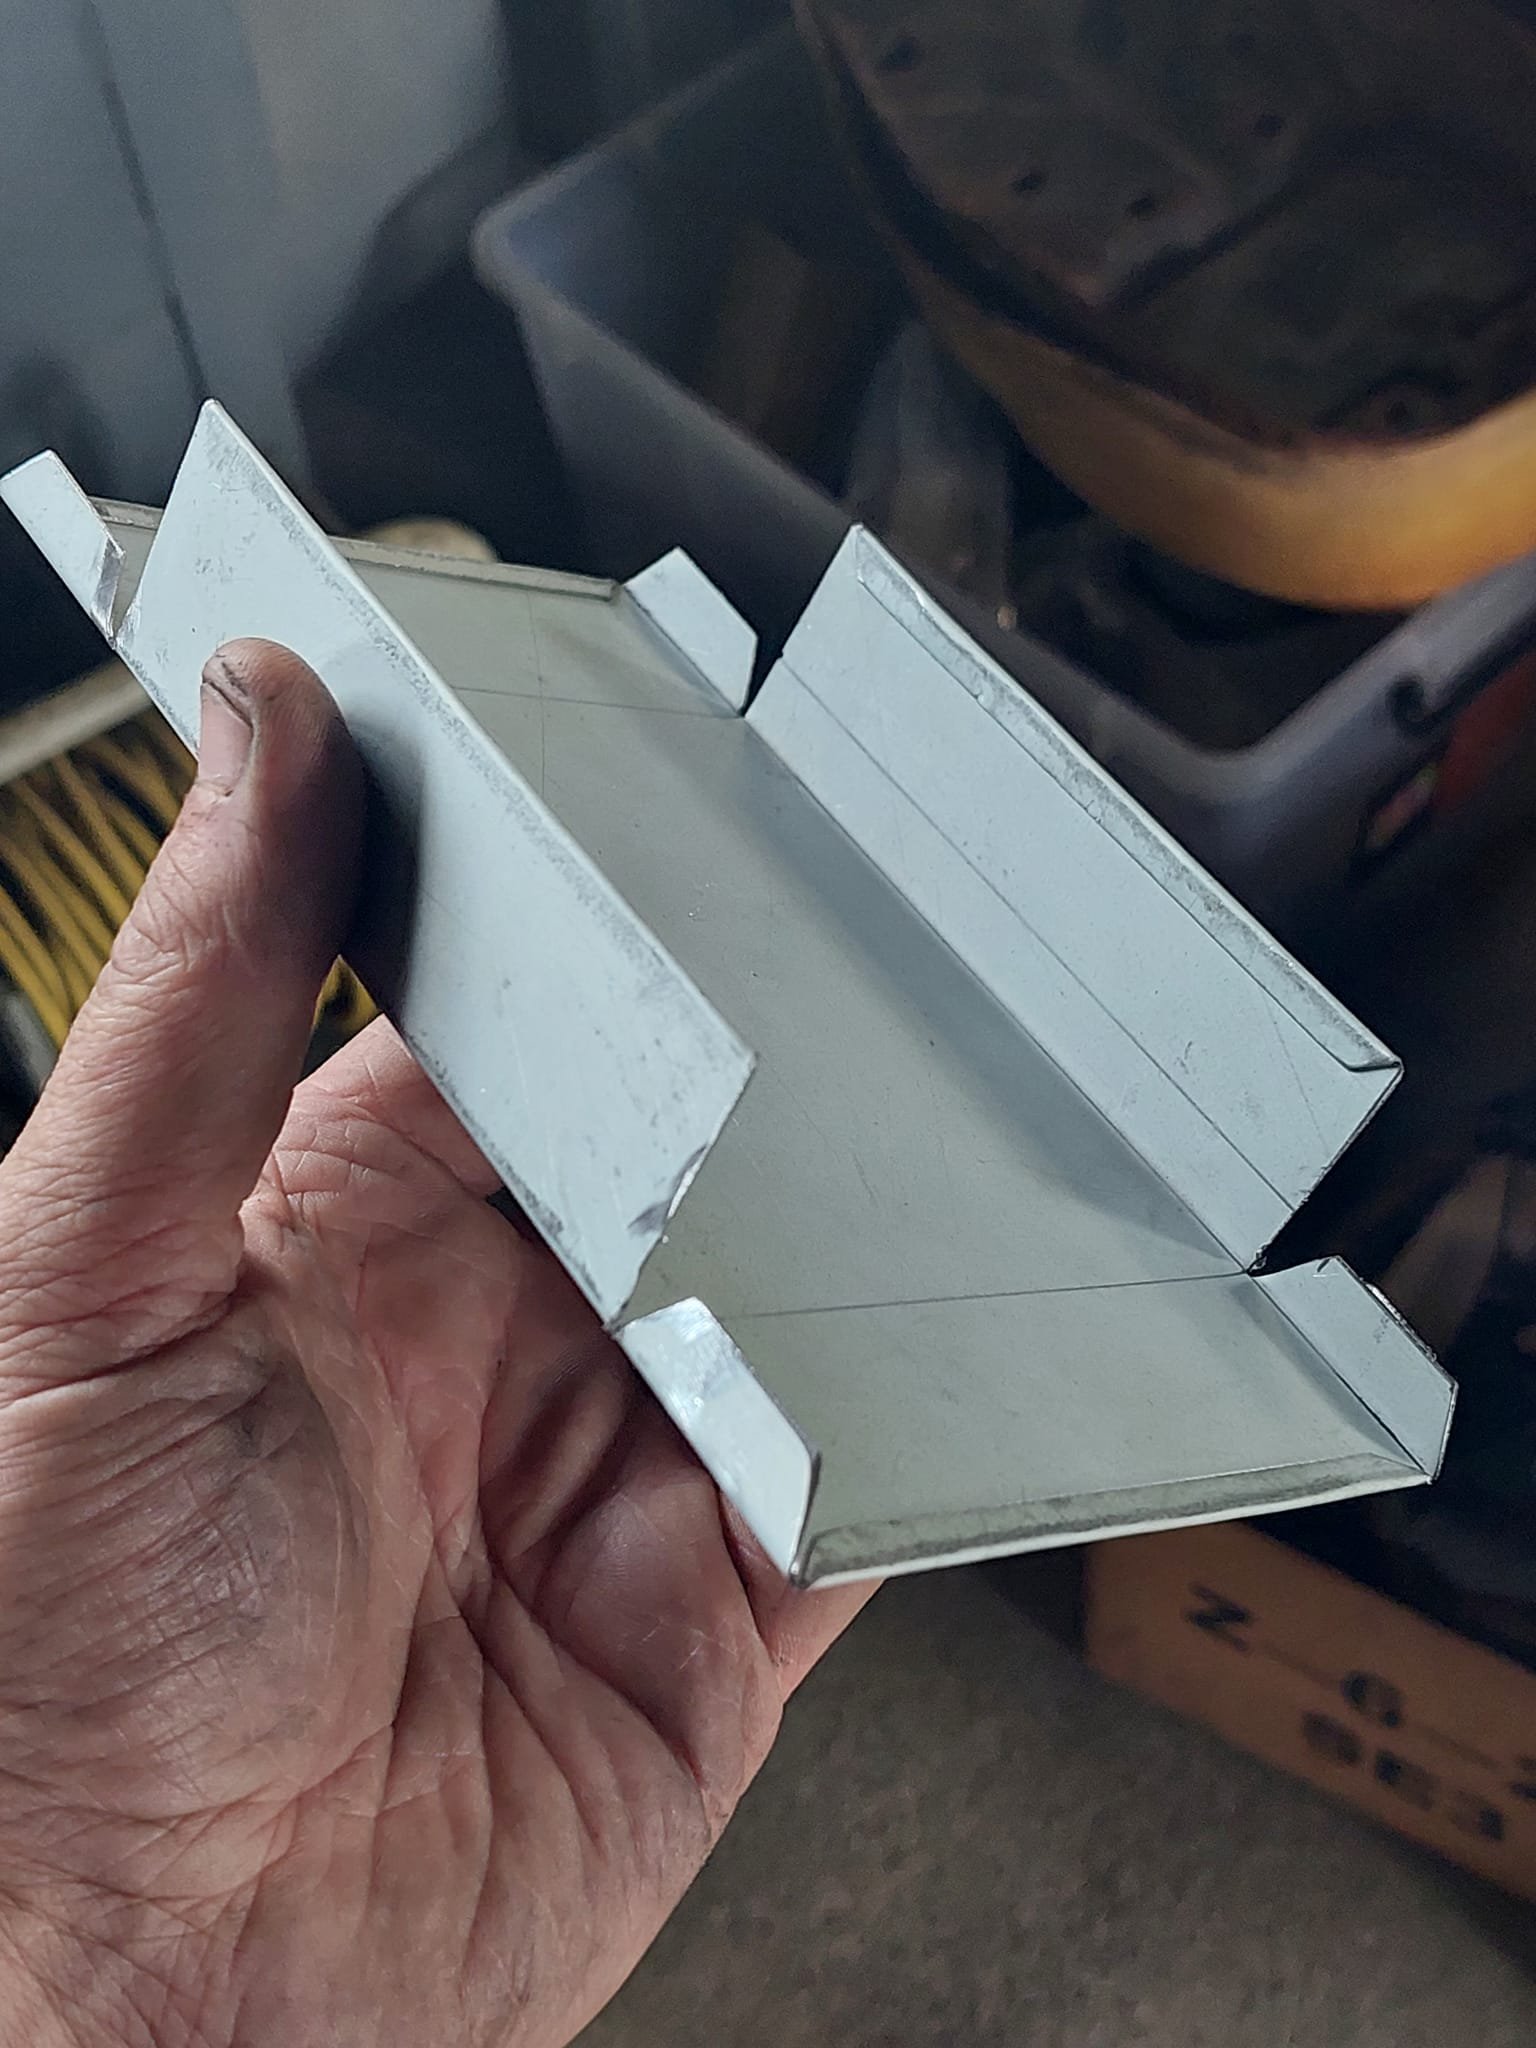
Whilst the blue panniers were a great addition theyre just too brittle and small parts kept breaking off after every ride. So I bit the bullet and decided to start making some from steel.
To start with I made some channel out of 18g with a slight radius, not a breaked edge.
Then I had to modify my shrinker stretcher stand as once I got to certain point it would hit the stretcher stand upright. so I moved them apart .
Using the shrinker I incrementally started shrinking the sides. Shrinking one side then the other so they'd both be the same.
One end is 90 and the other is just under.
Next is to make the sides and get them welded in
-
6
-
-
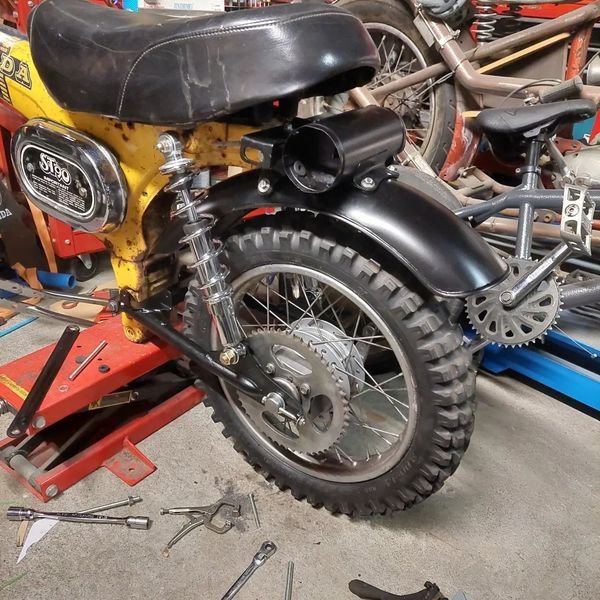
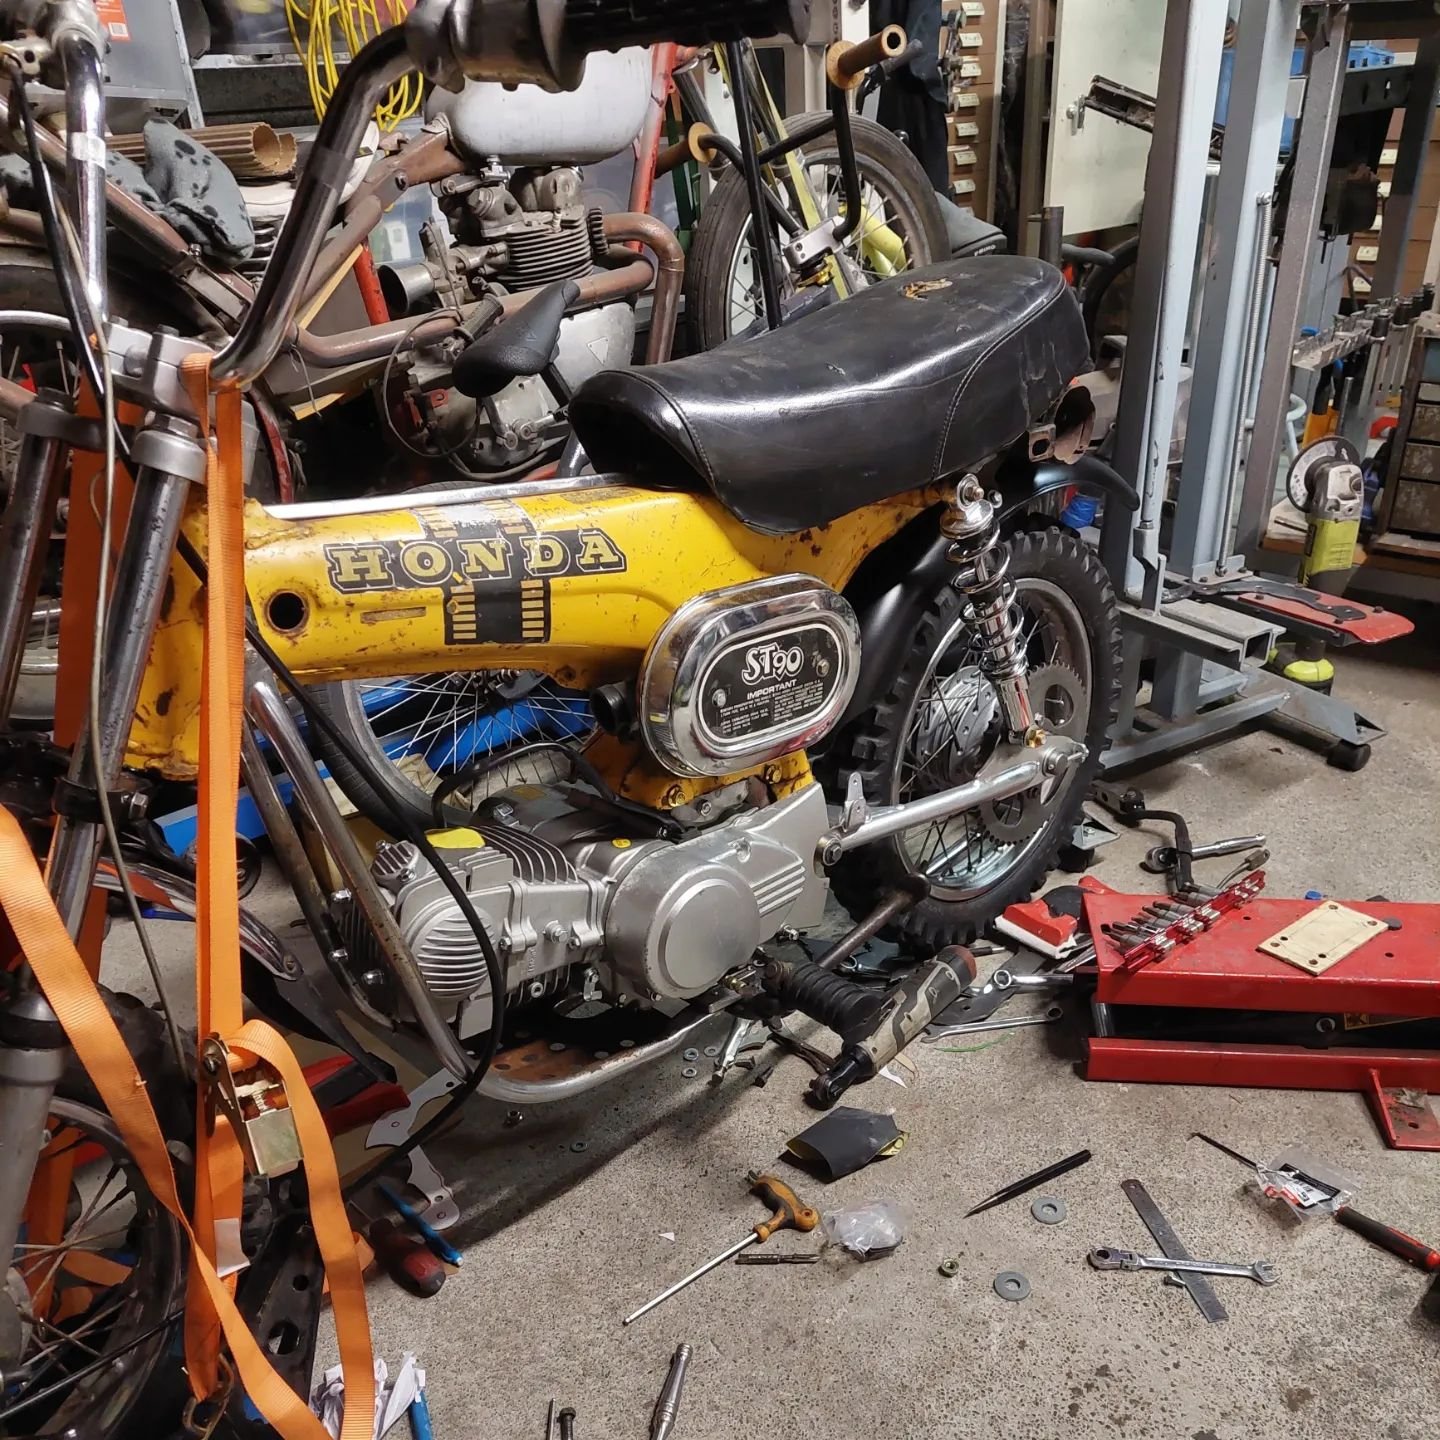
Not a huge update but slowly chipping away at dads ST whilst waiting for my engine to arrive from overseas. In the meantime Ive reinstalled the original engine so to stop me from tripping over it everytime I walk past it, and also make it easier to move when I move house end of July.
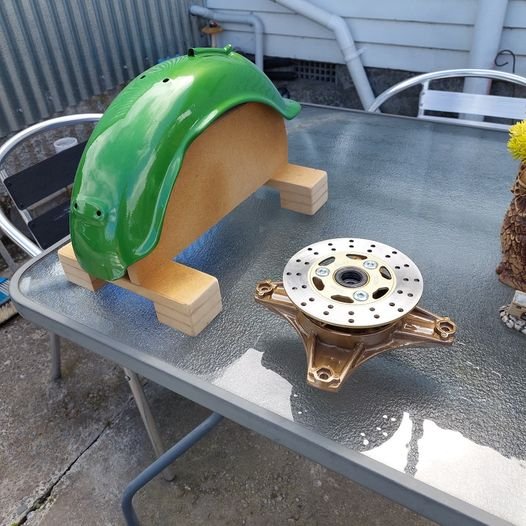
Swingarm is painted satin black to match the guard. The tool holder was stripped and painted too.
-
4
-
-
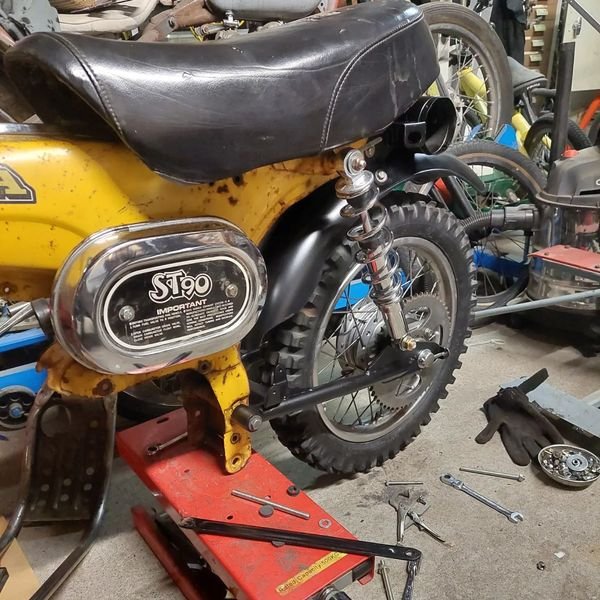
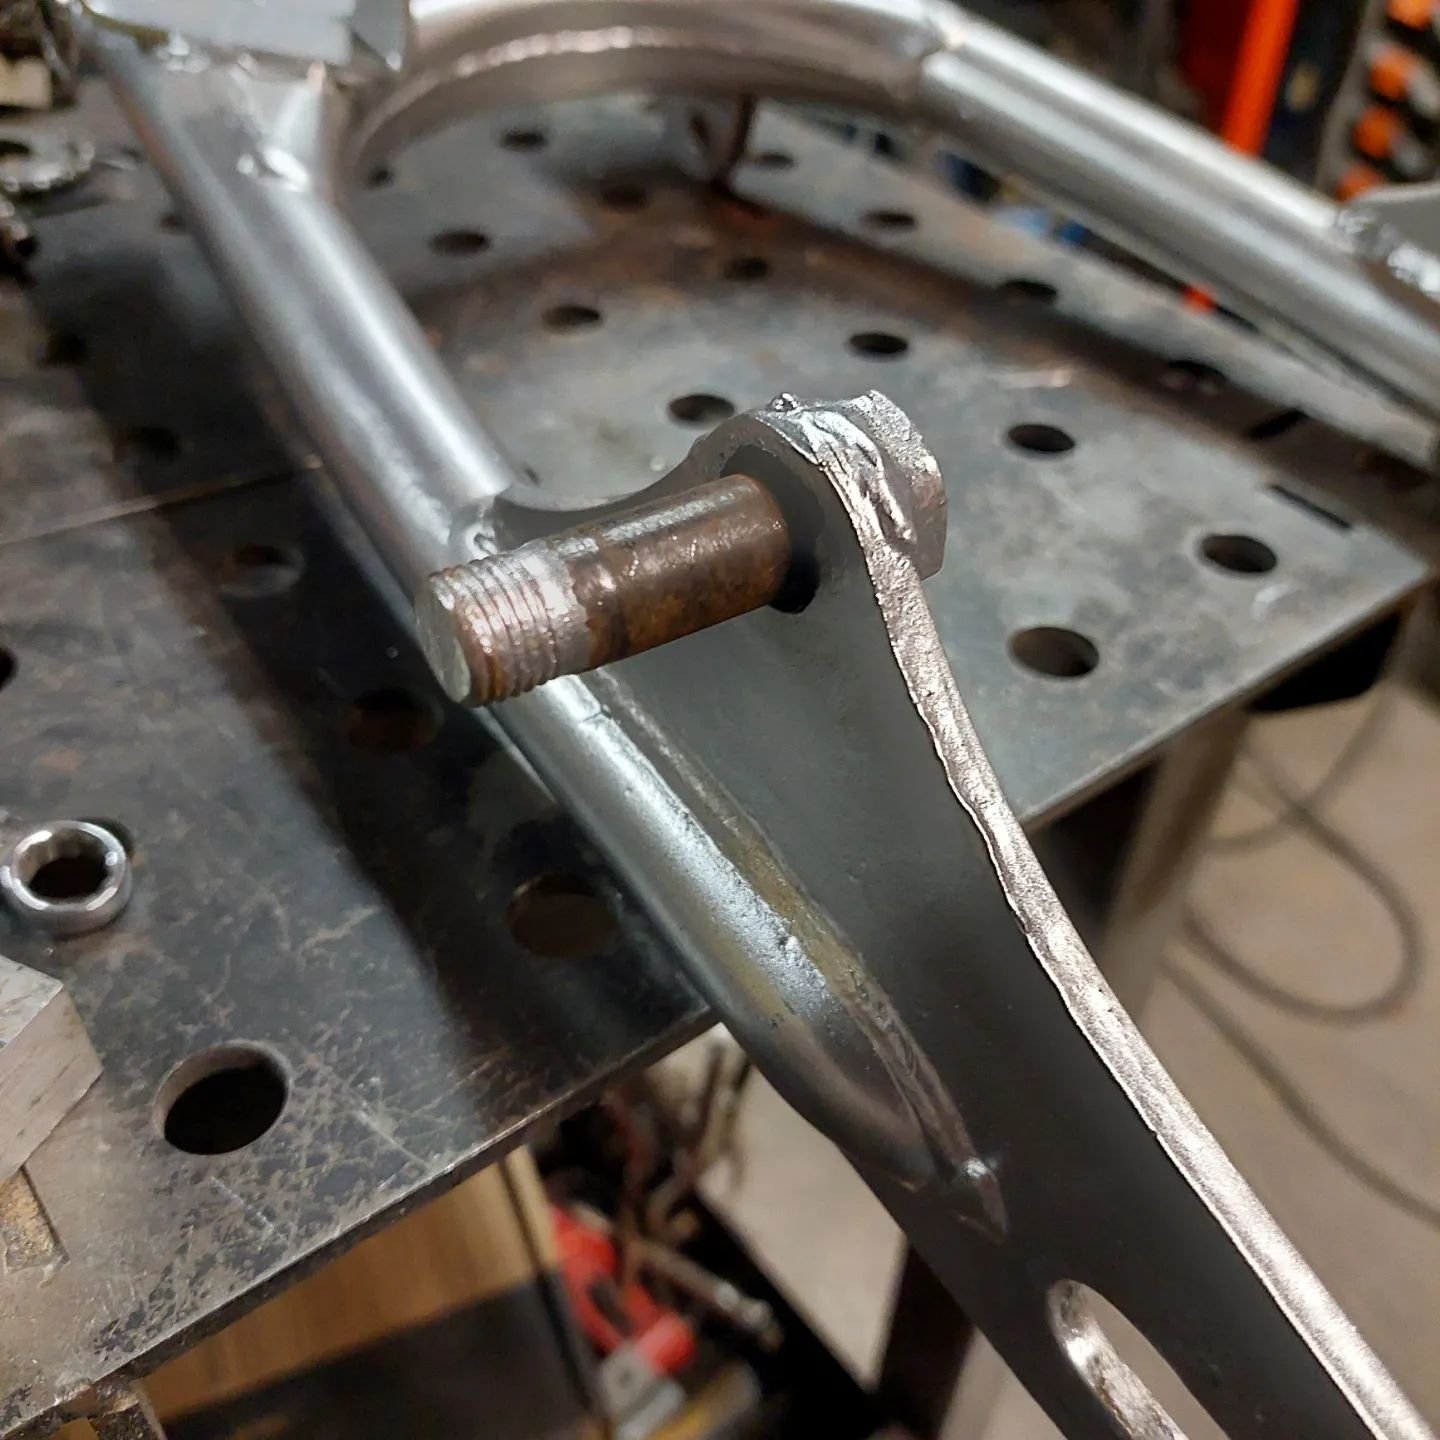
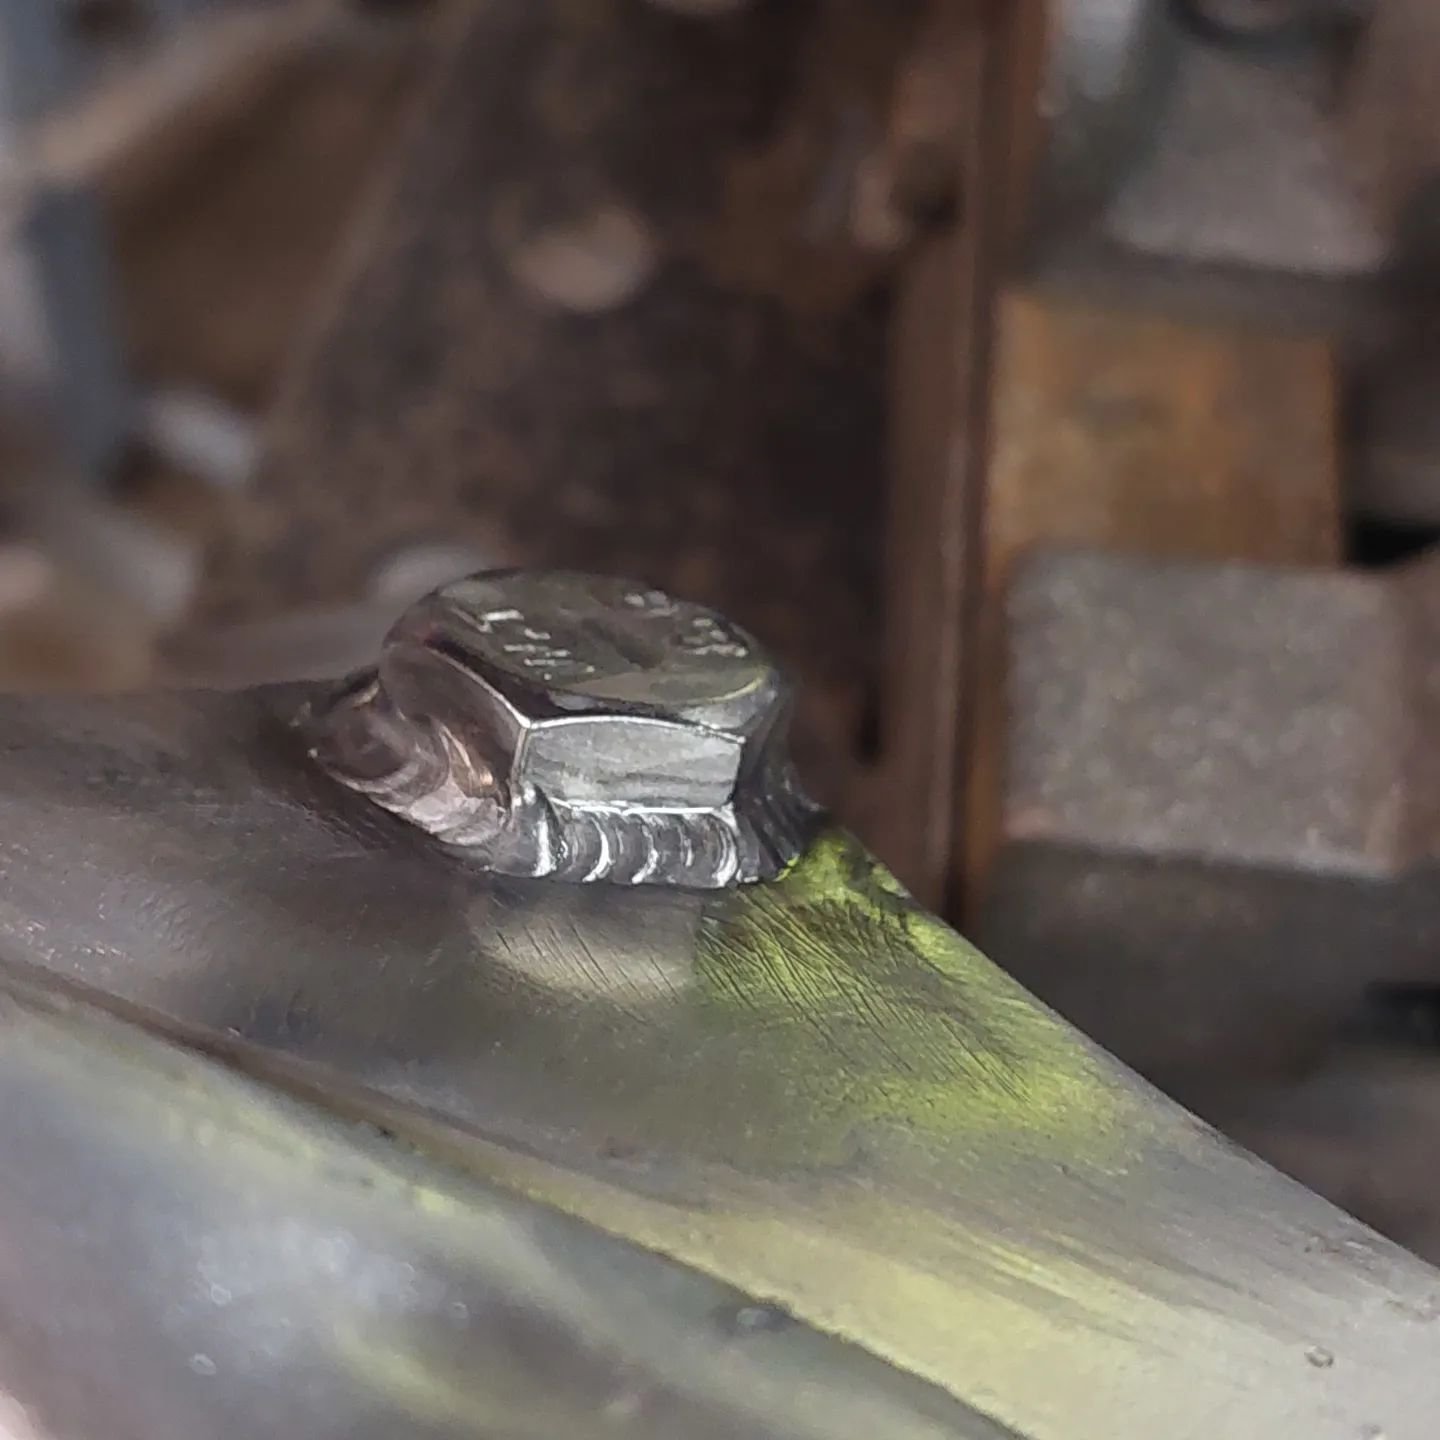
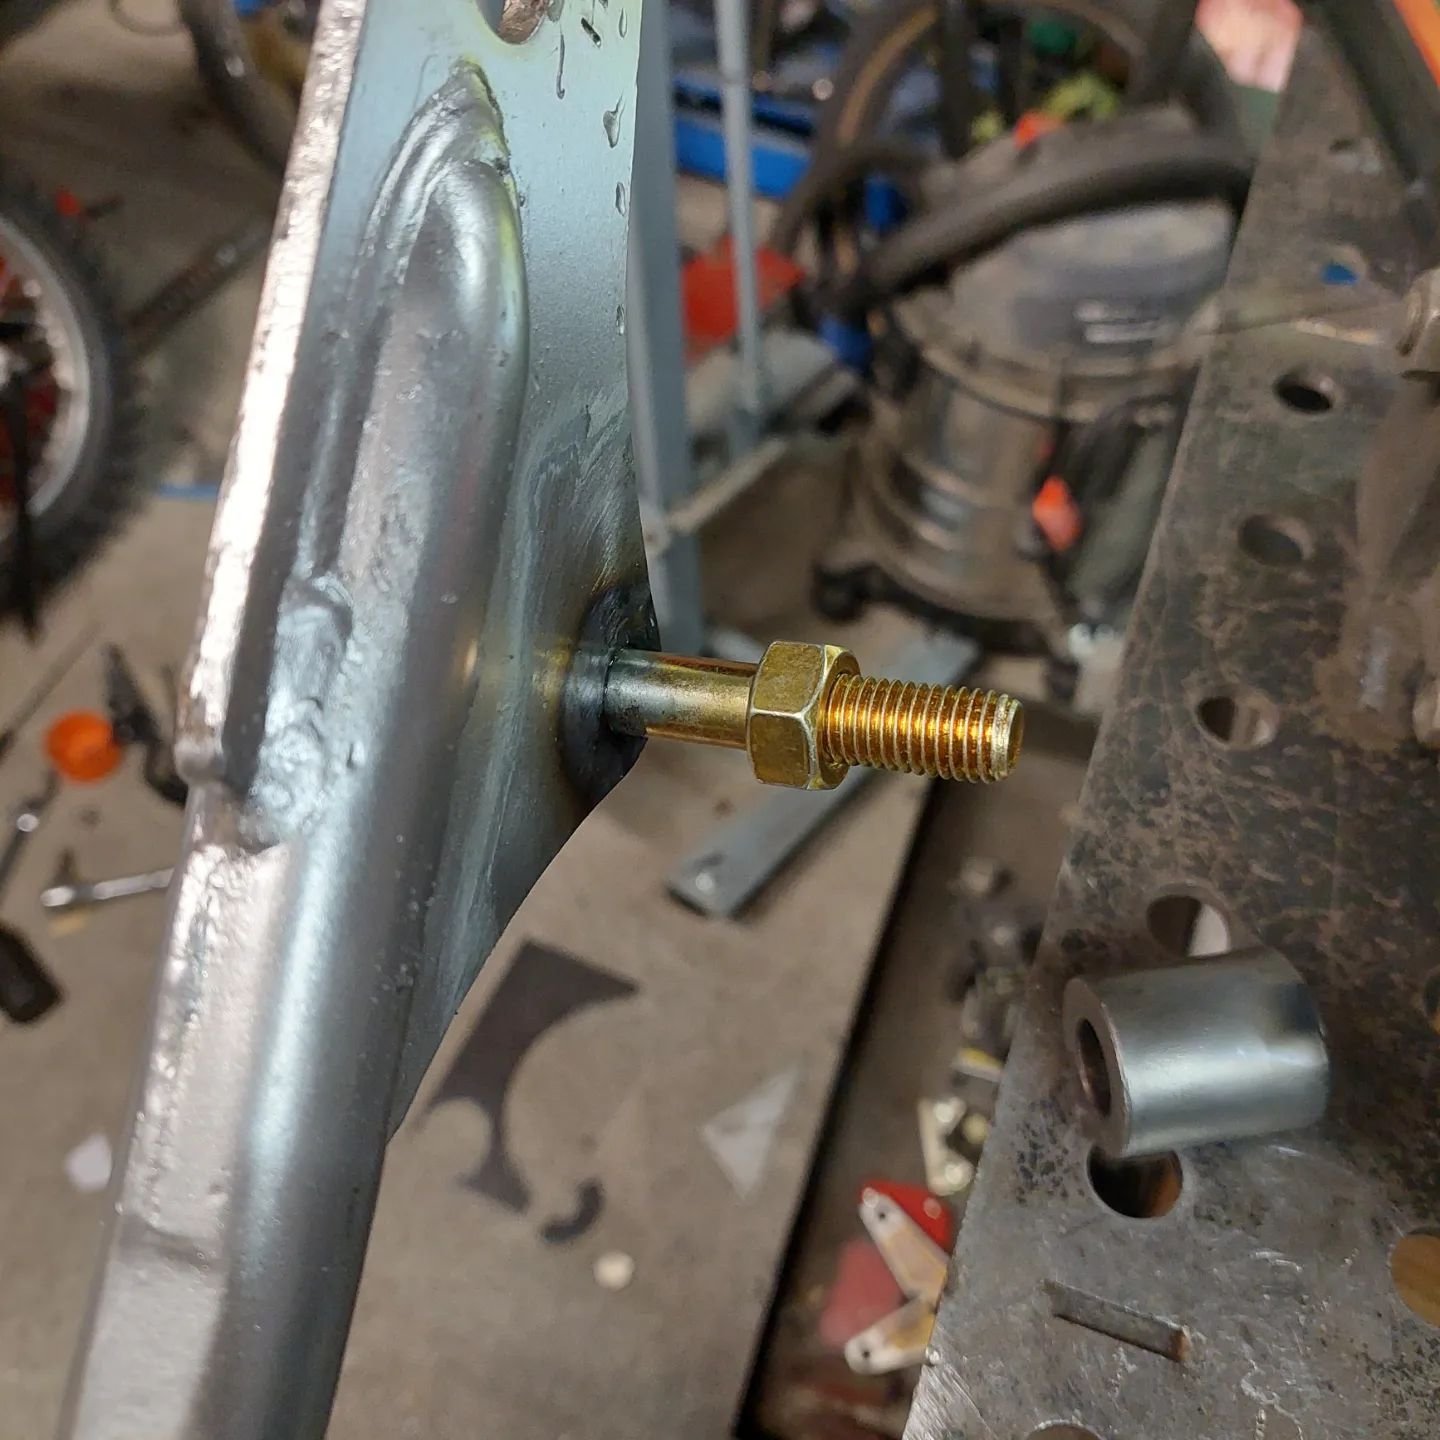
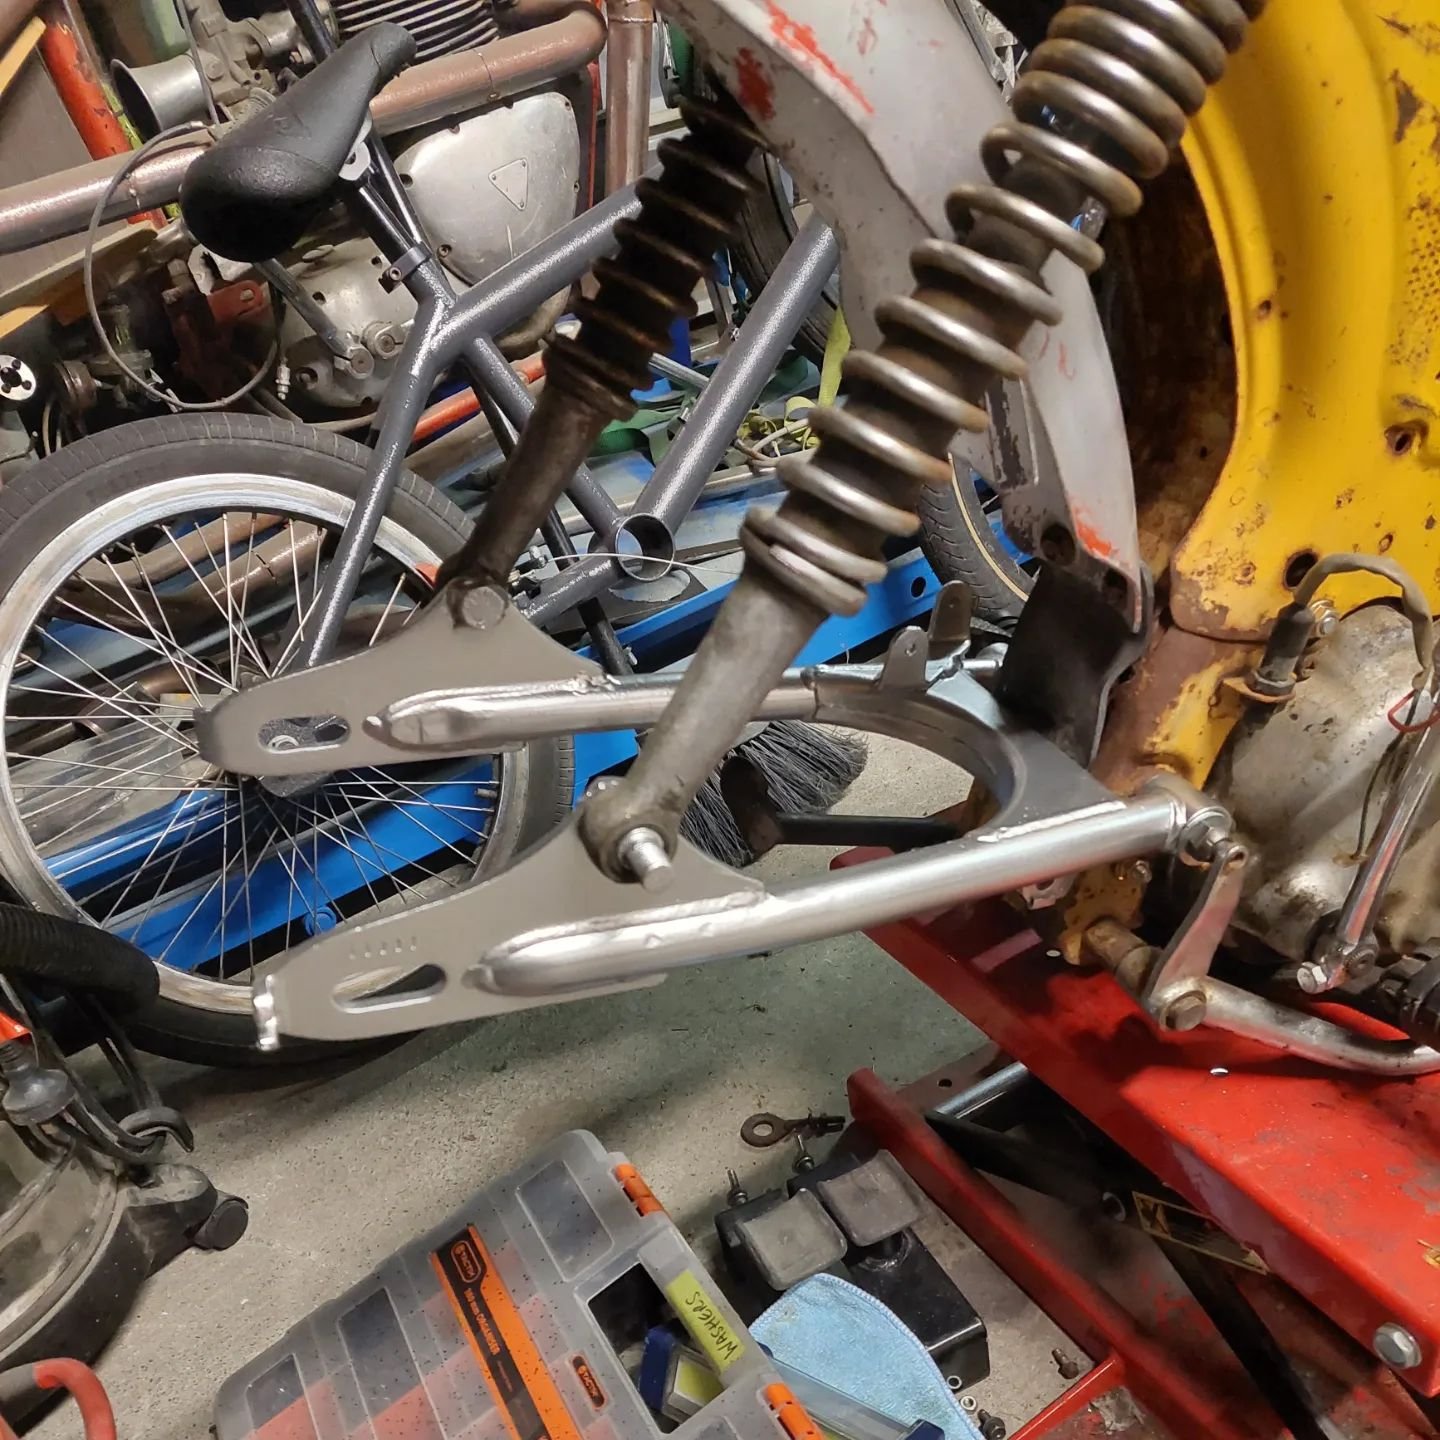
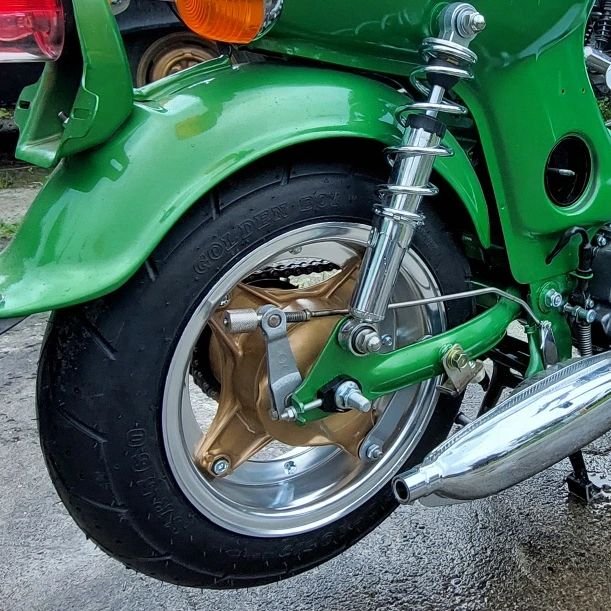
The rear shocks on dads st were pretty poked so I got a new pair of Thai style from mBike. But when i went to install them I found out that a 14mm bolt had been used as the lower shock mount. The shocks I bought from mBike are 12mm. So I cut off, ground it flush and beat fuck out of it so it could be replaced with a hi-tensile M12 bolt. The traces of gold zinc left on the bolt and my argon bottle nearly empty made it a prick to weld
I made some adapter plates to mount a lifan whilst still keeping the original mounting holes incase I ever want to put the original engine back in, same with the mounts for the original foot rests and bashguard. I gave the plastic mudguard a paint of satin black to tidy it up whilst i look for an original metal chrome one.
The swingarm has been painted satin black too but Im waiting for the paint to harden before I mount it.
-
6
-
-
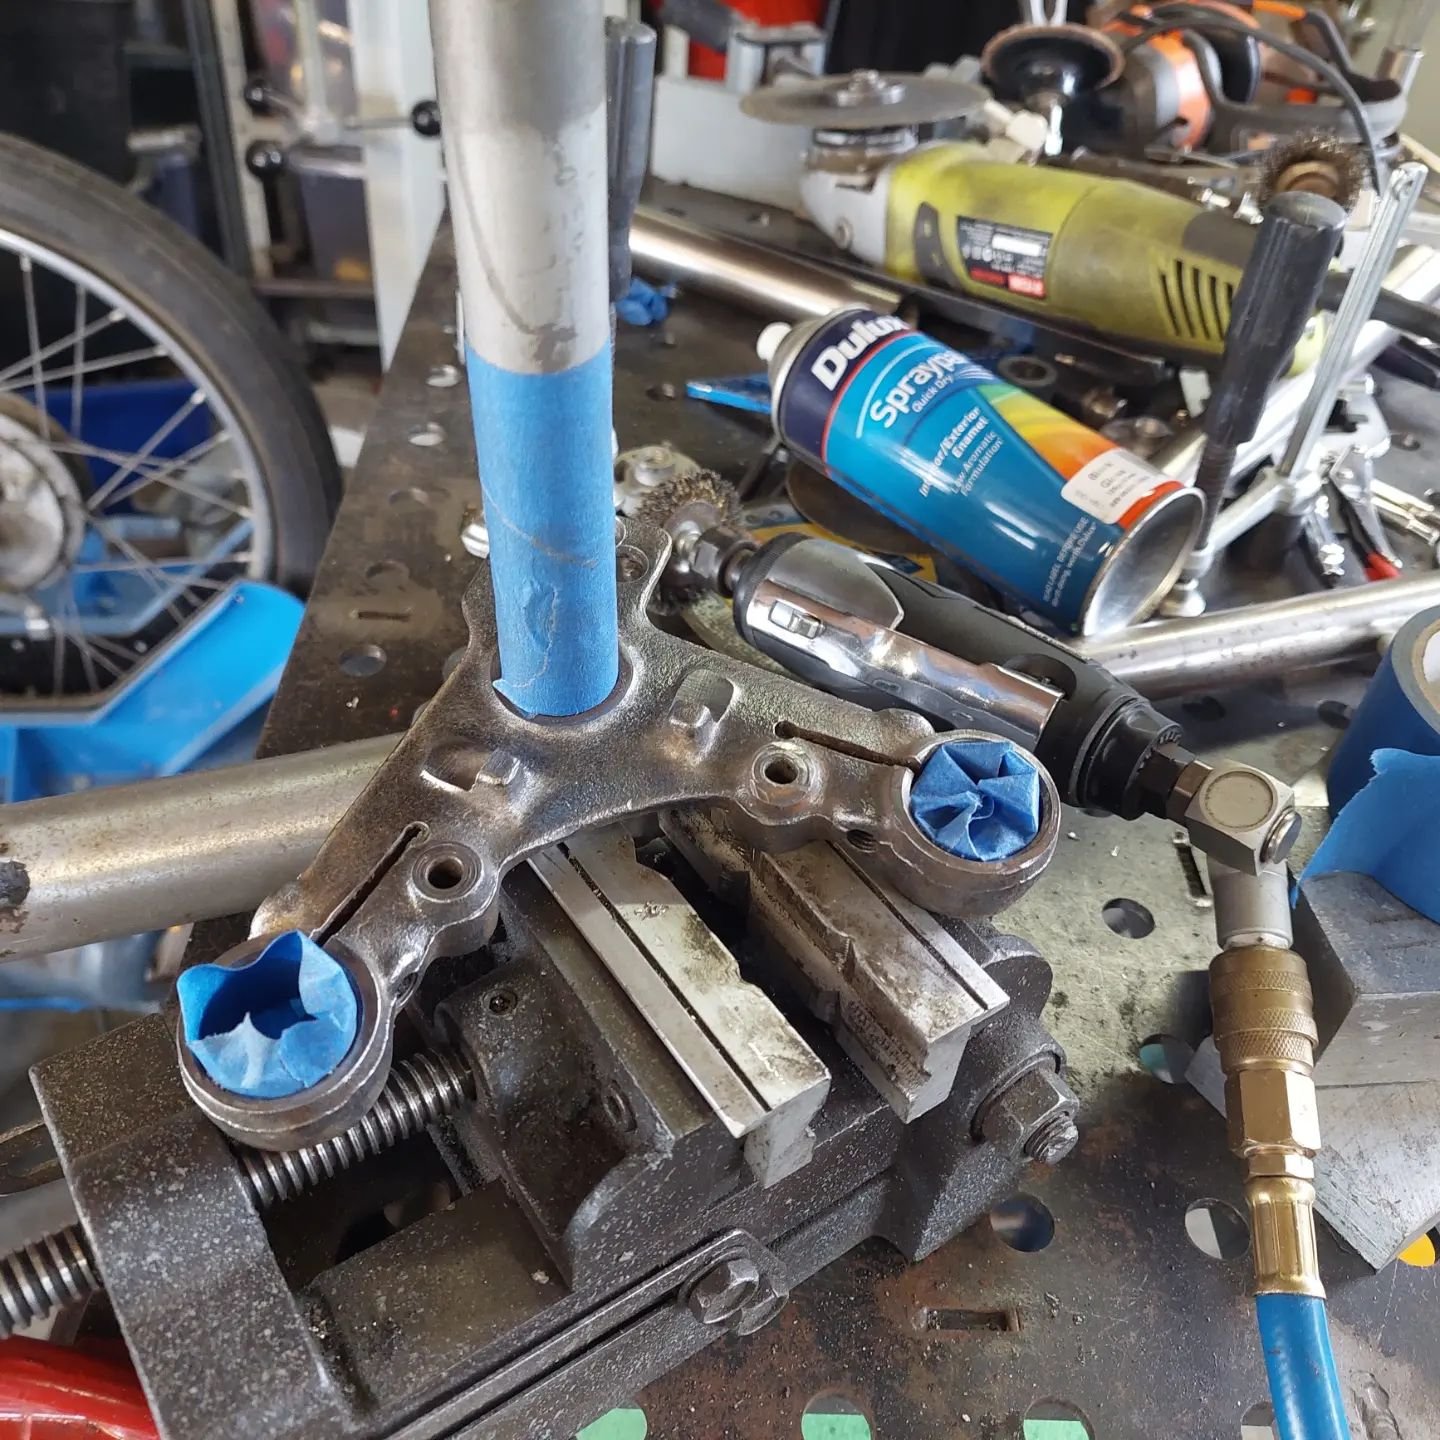
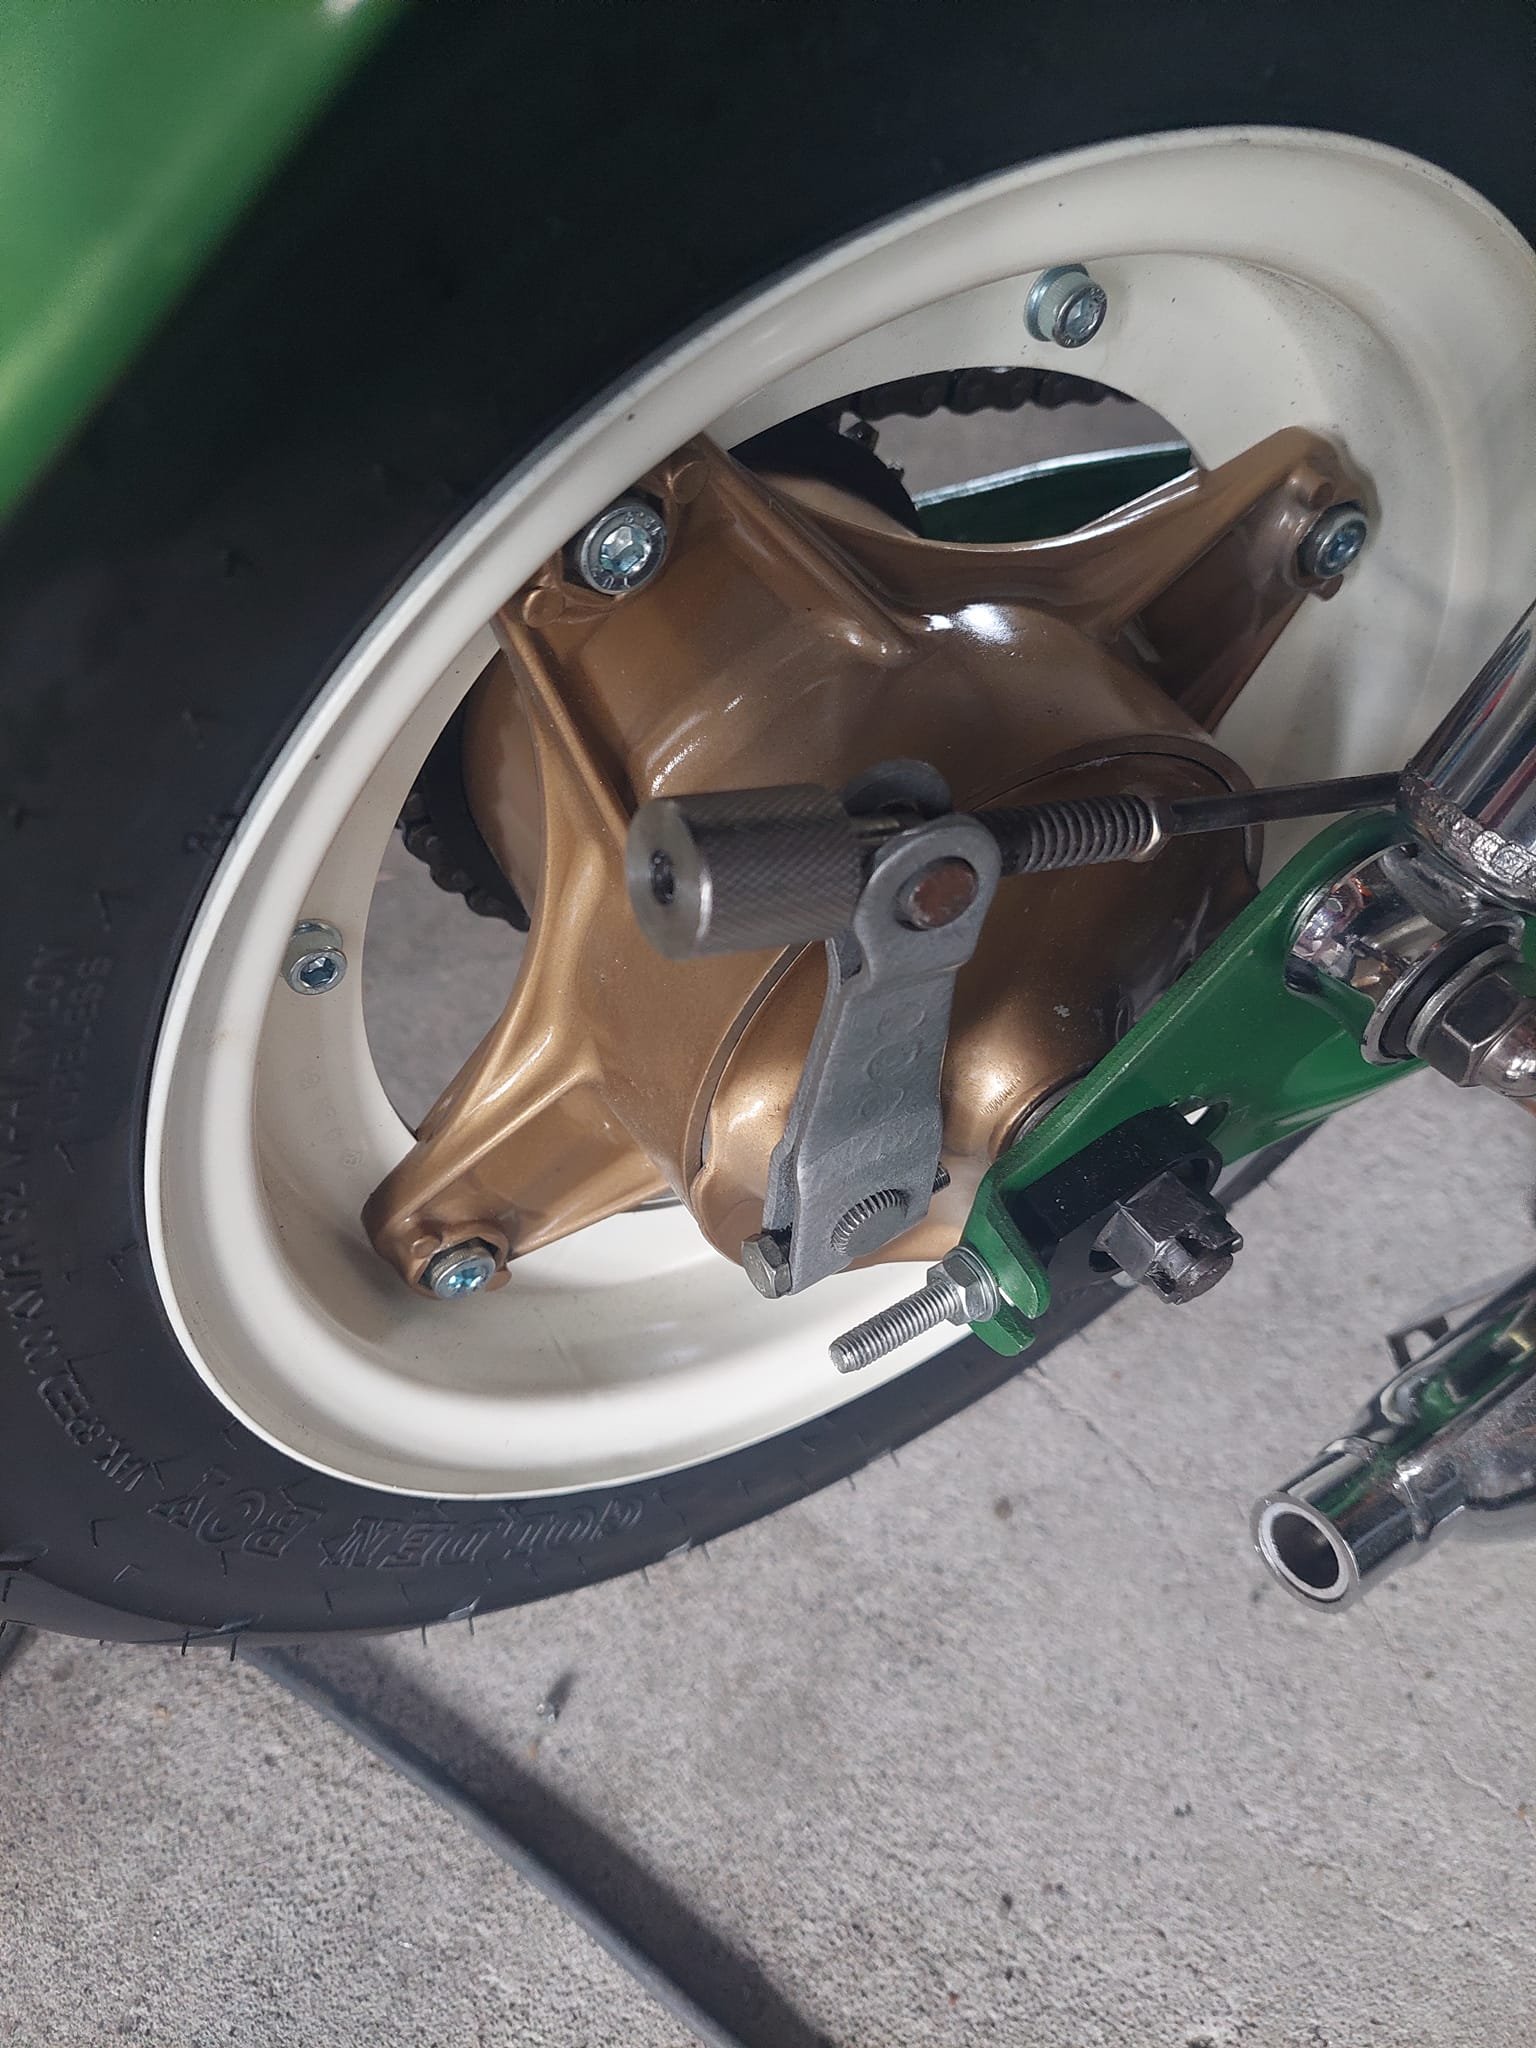
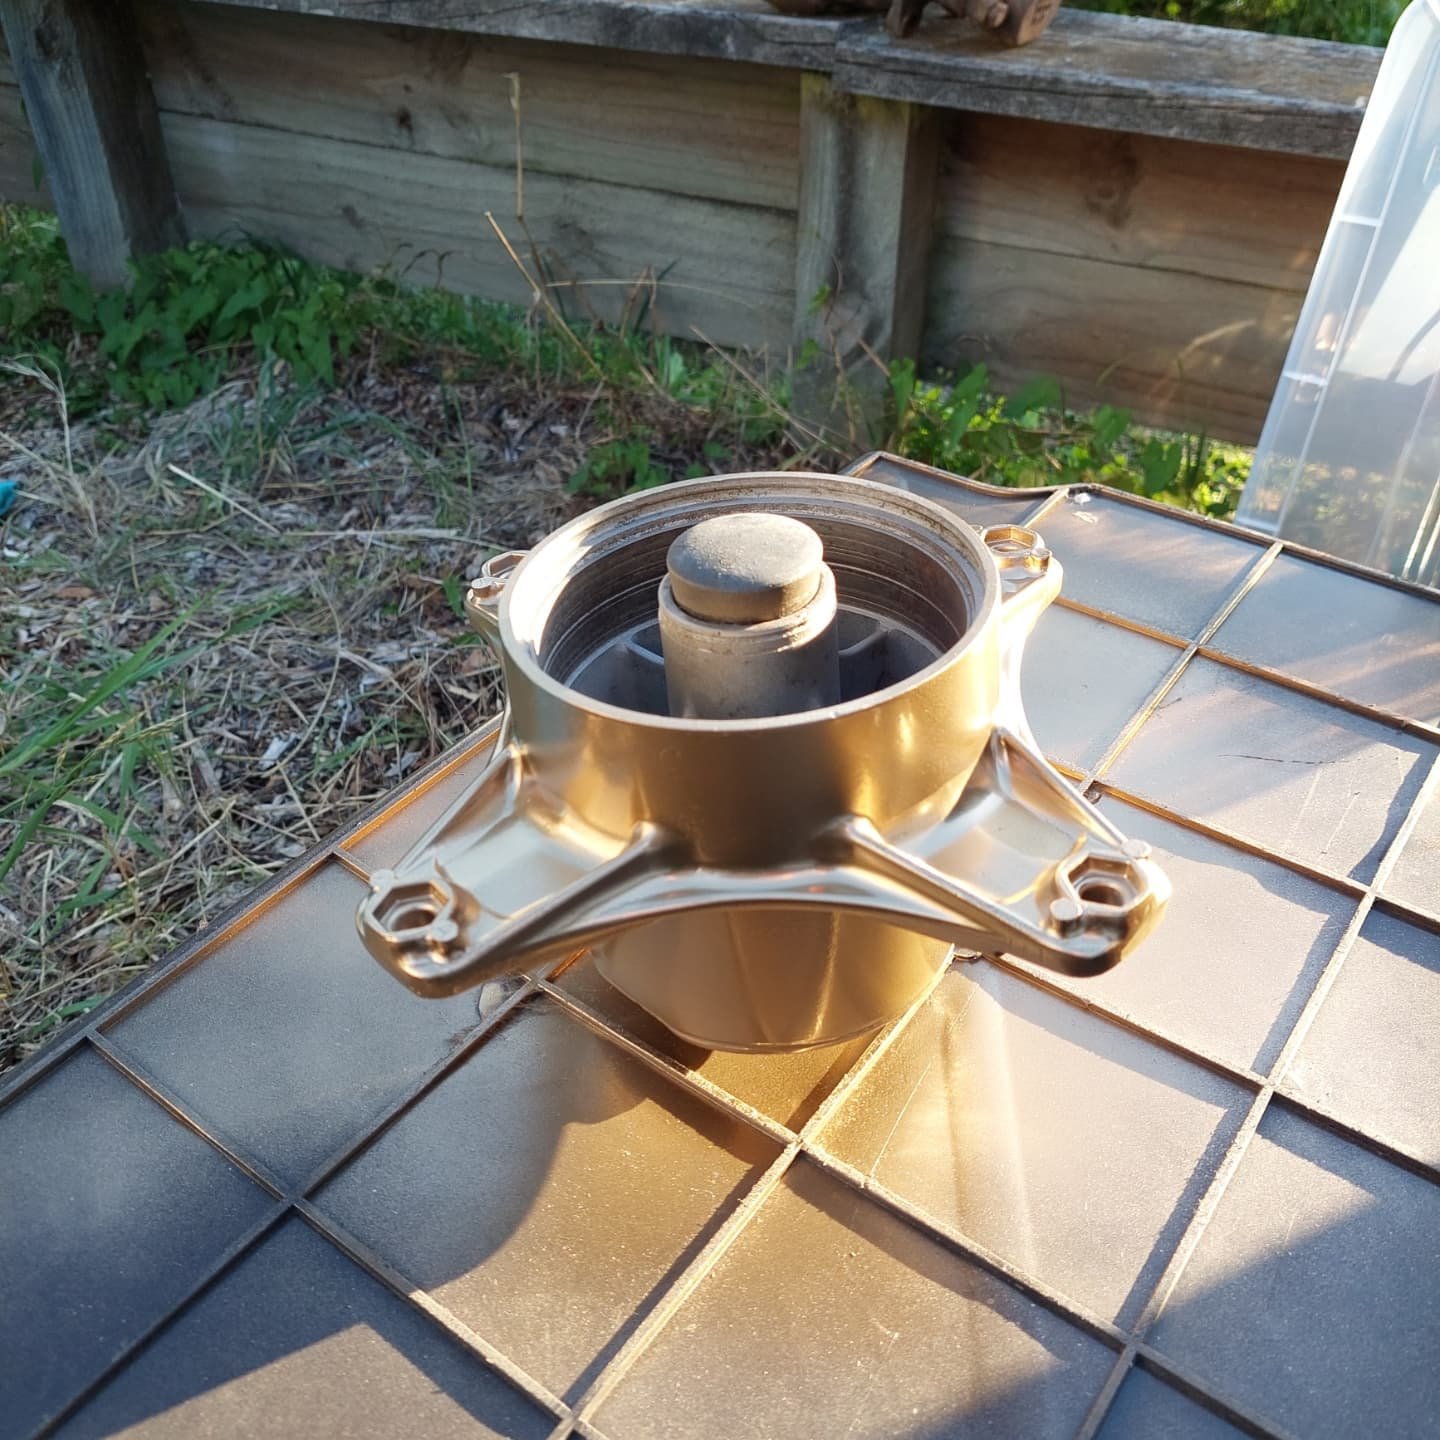
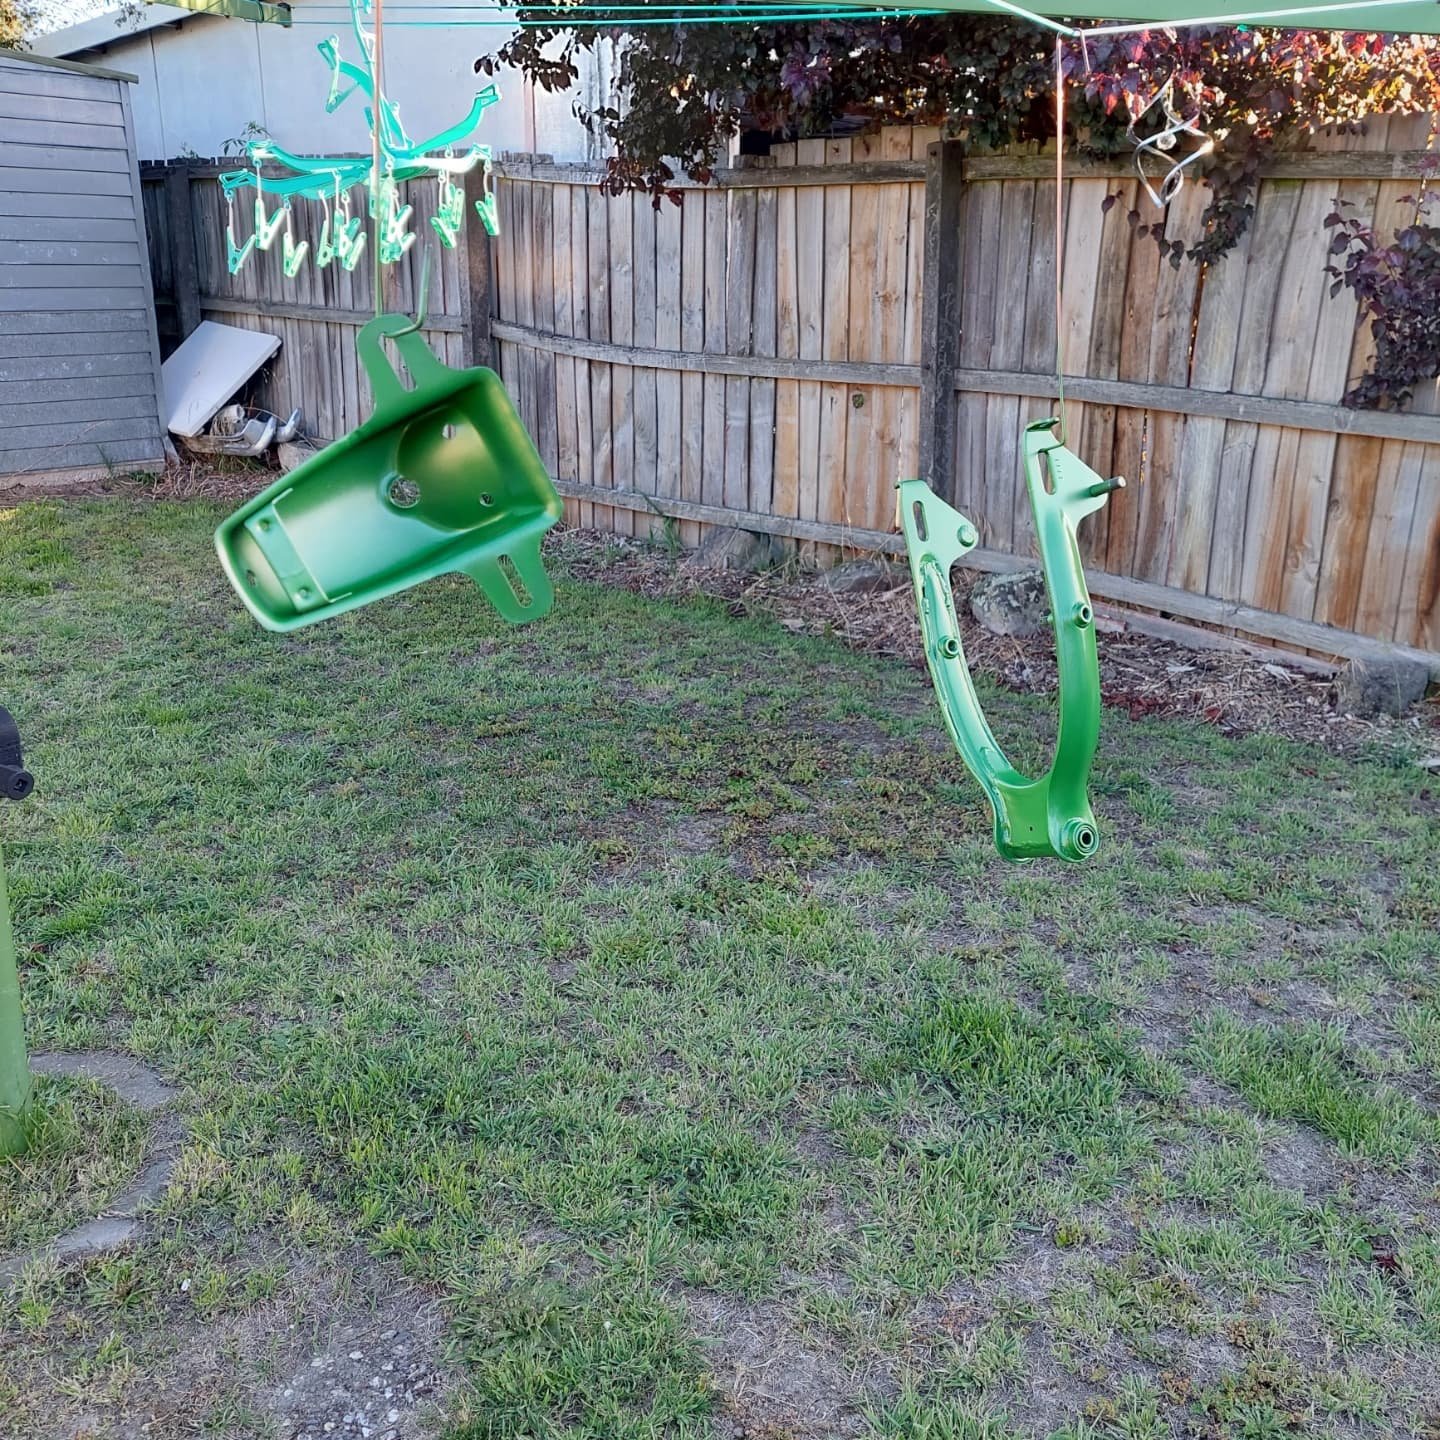
Not a great deal of progress but every little counts. Whilst some parts were away getting vapor blasted I concentrated on stuff i could do at home.
So I stripped and painted the lower fork yokes and swingarm and painted them with gloss epoxy enamel .
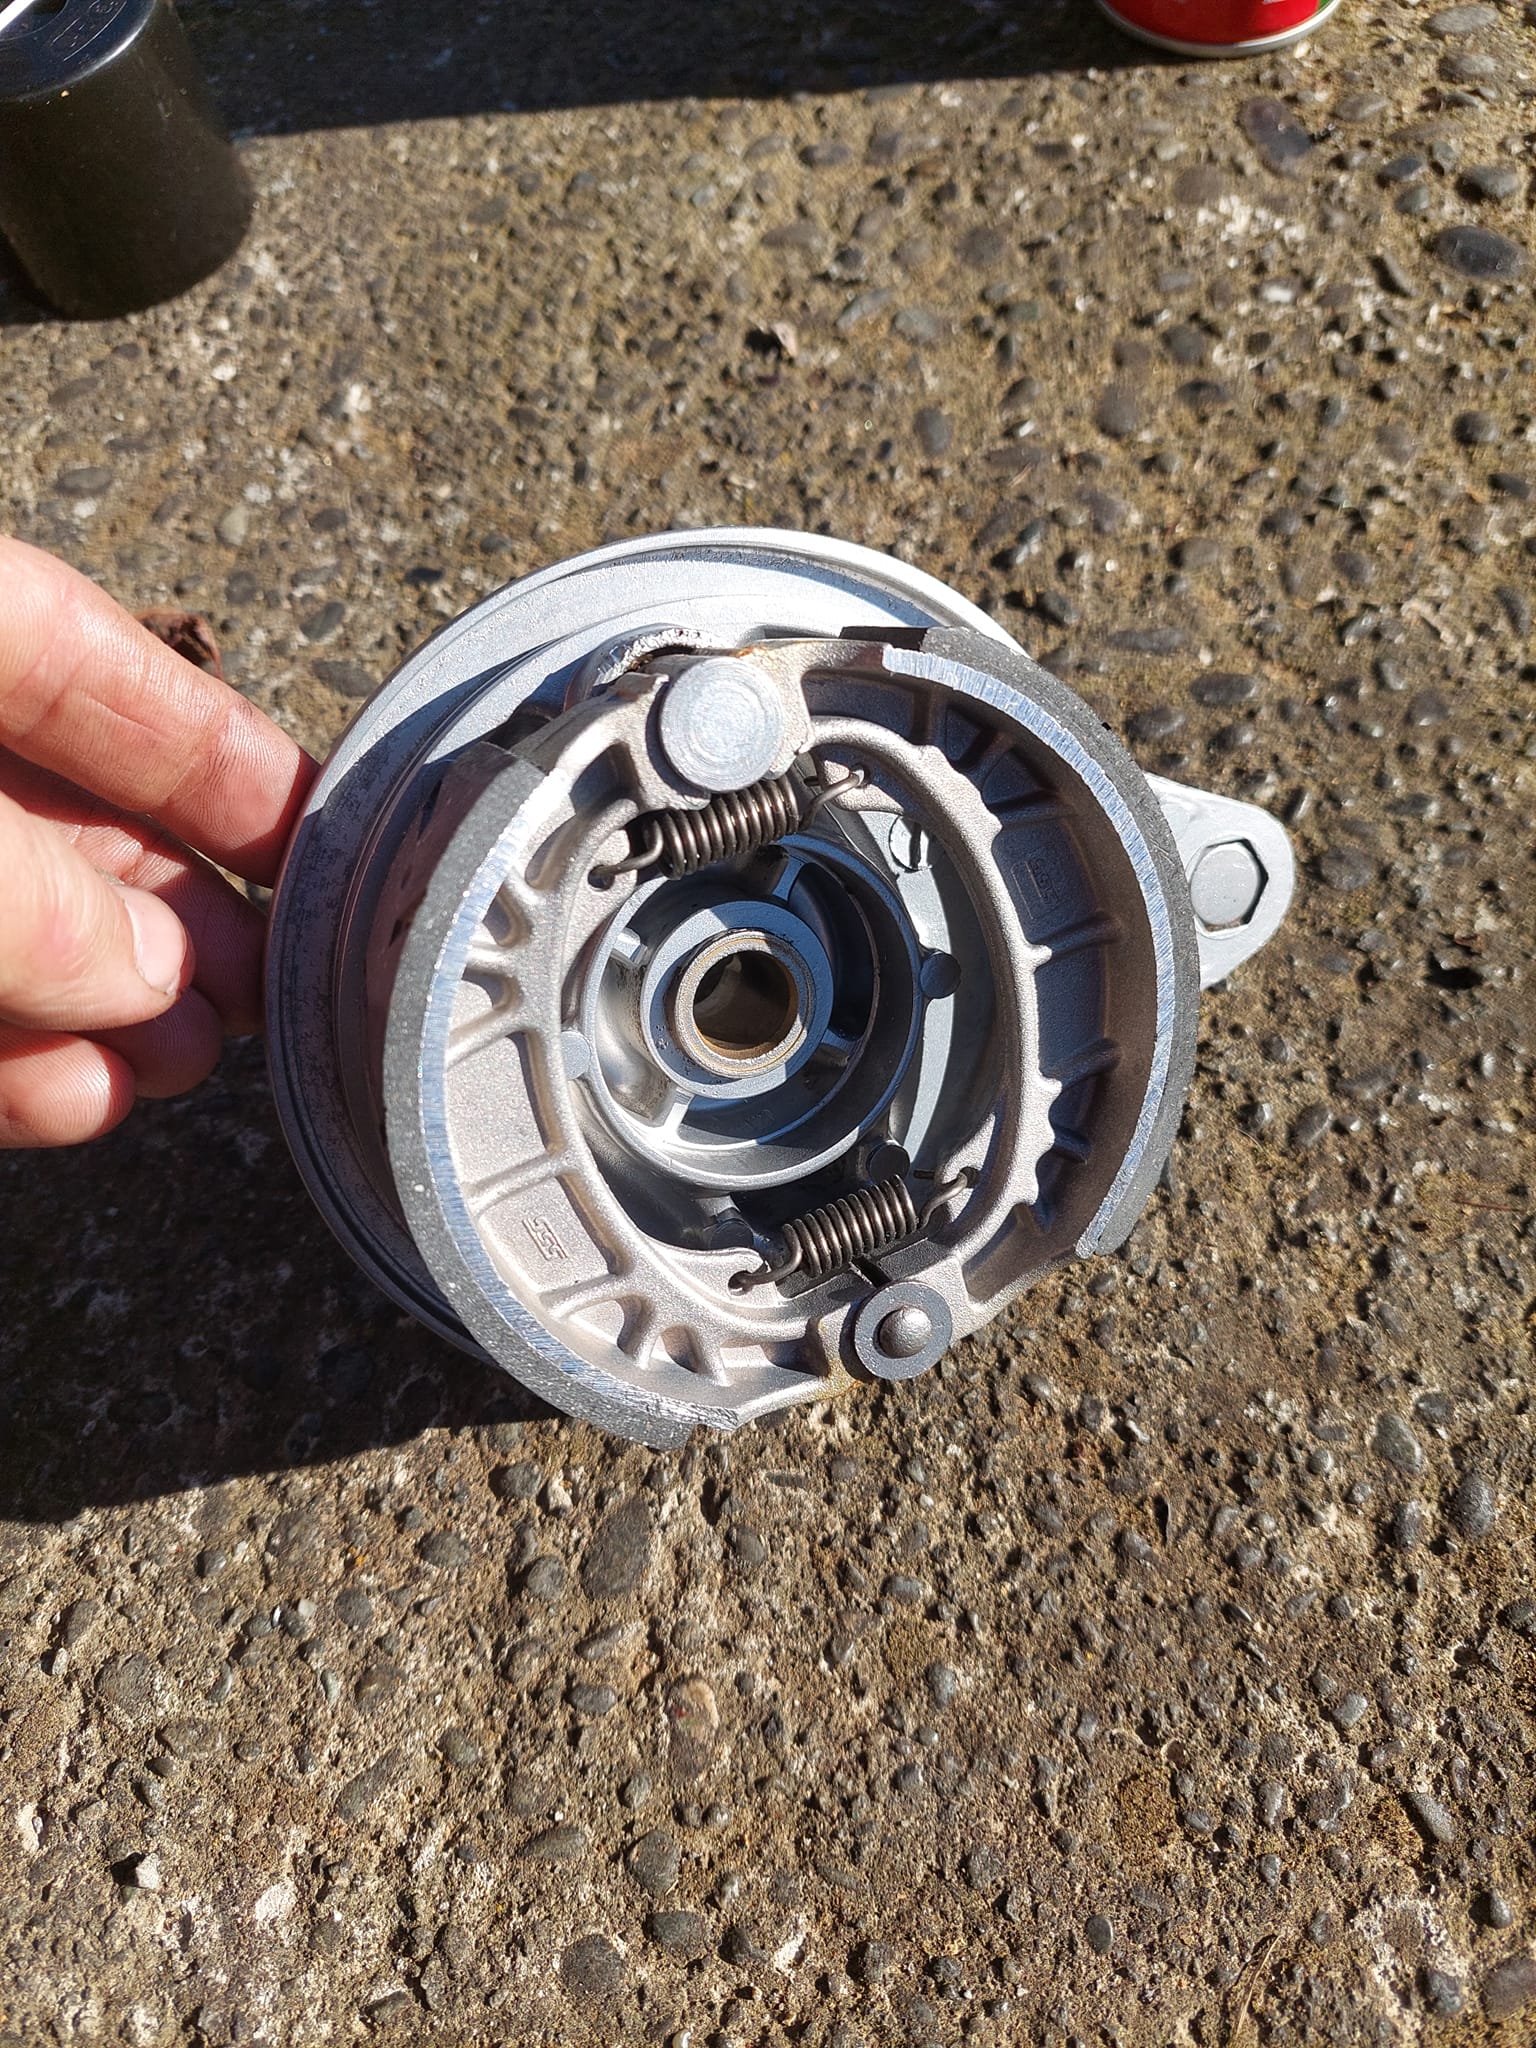
I picked up the rear wheel from my mate dave who does vapor blasting locally and reassembled it. the bearing were fine but I put in new shoes and springs
I sprayed anything that was vapor blasted with Lanolin to prevent flash rusting and further corrosion
-
5
-
-
- Popular Post
- Popular Post
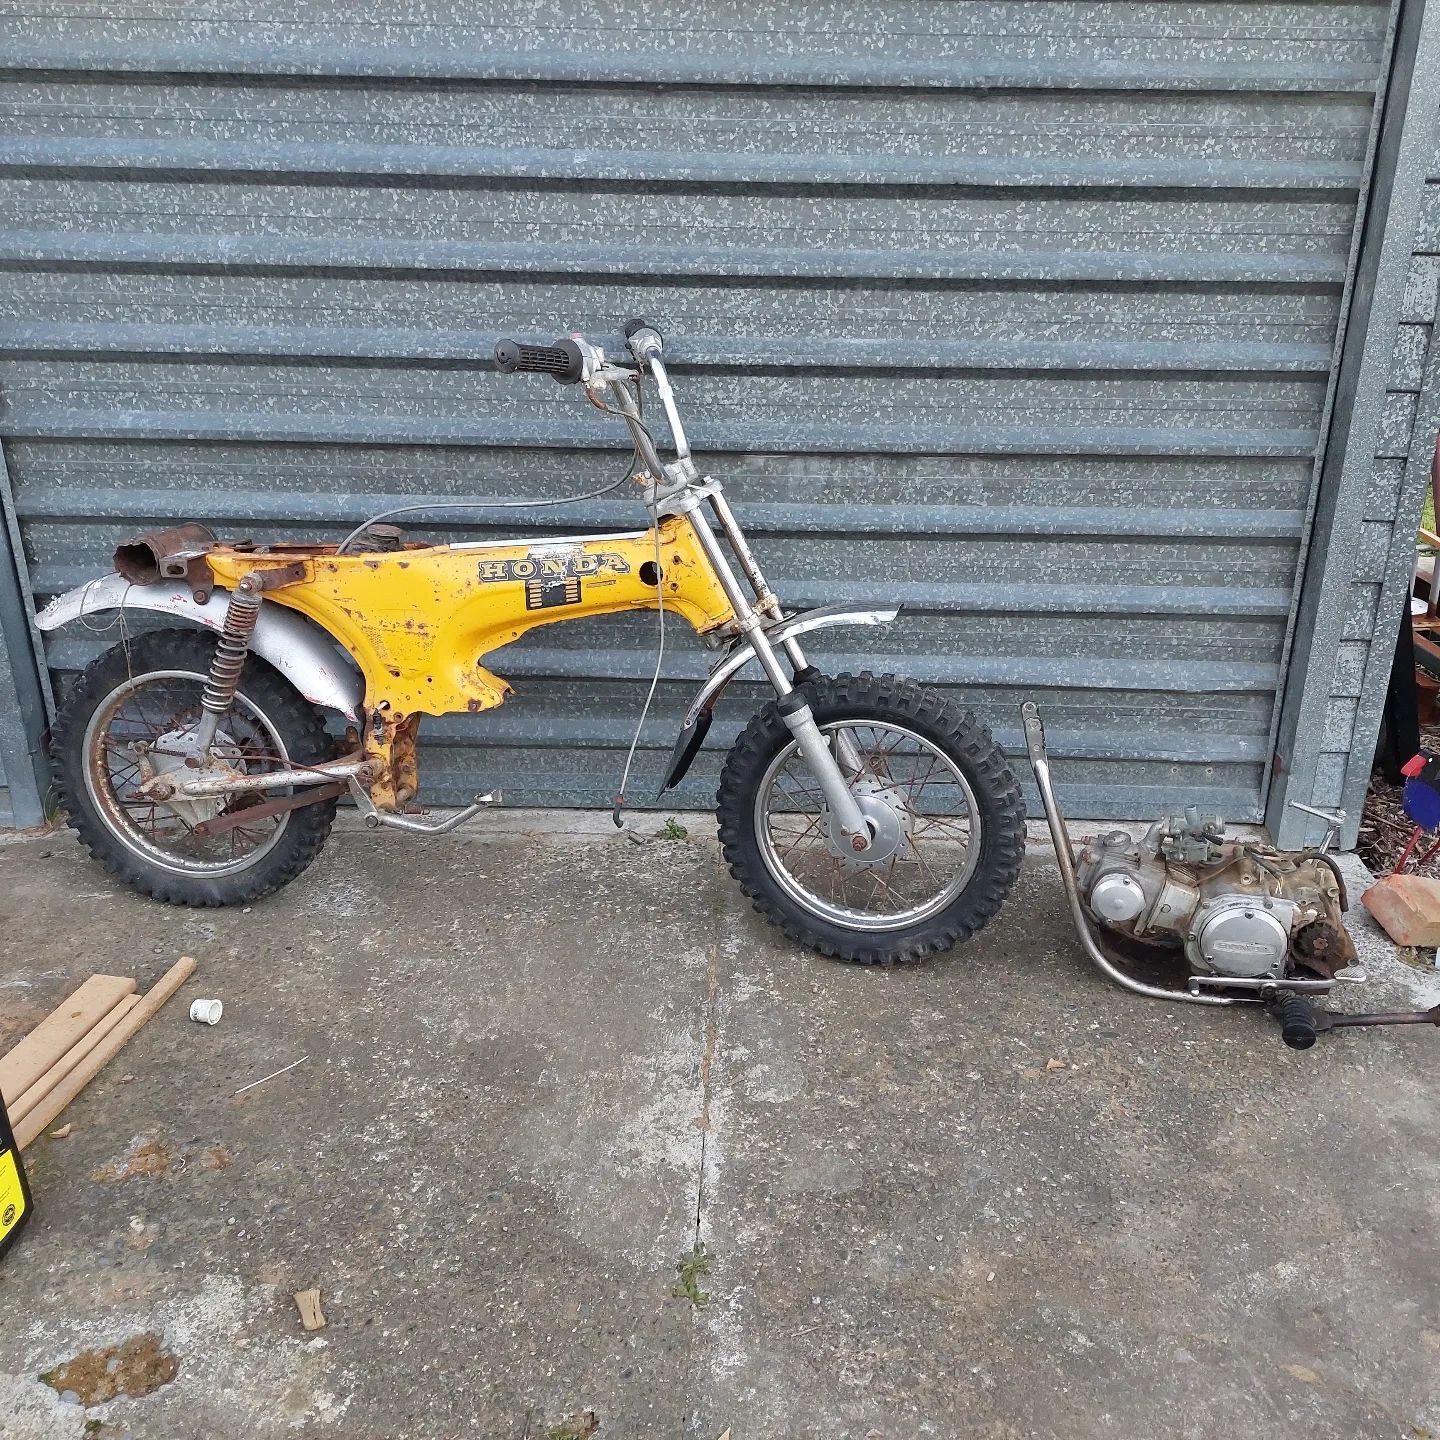
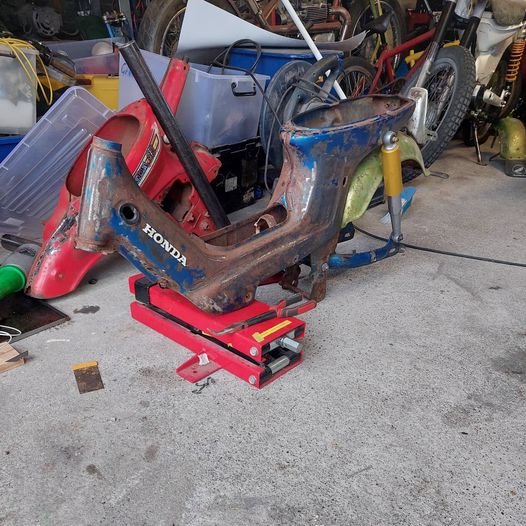
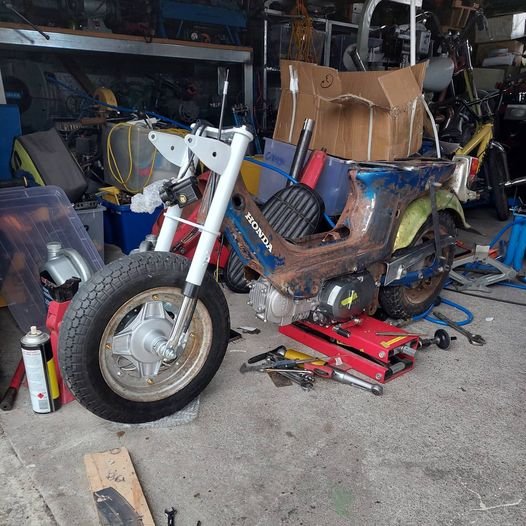
I was pretty adamant that I was I was going to get tattooed this month after a good few years of not getting any. After a few st90s came up for sale on a group chat I thought I wouldnt get one for the price it was offered again but can get inked anytime.
So I bought with the plan to repower it and give it to my dad so he can come out on the small bike rides with me and the rest of the small bike community.
My initial plan was to blast everything and repaint the frame and powdercoat everything else that isnt chromed. I'm going to leave the frame as it is and just give the bike a general tidy up. Replacing cables, bearings, bushes and brake shoes.
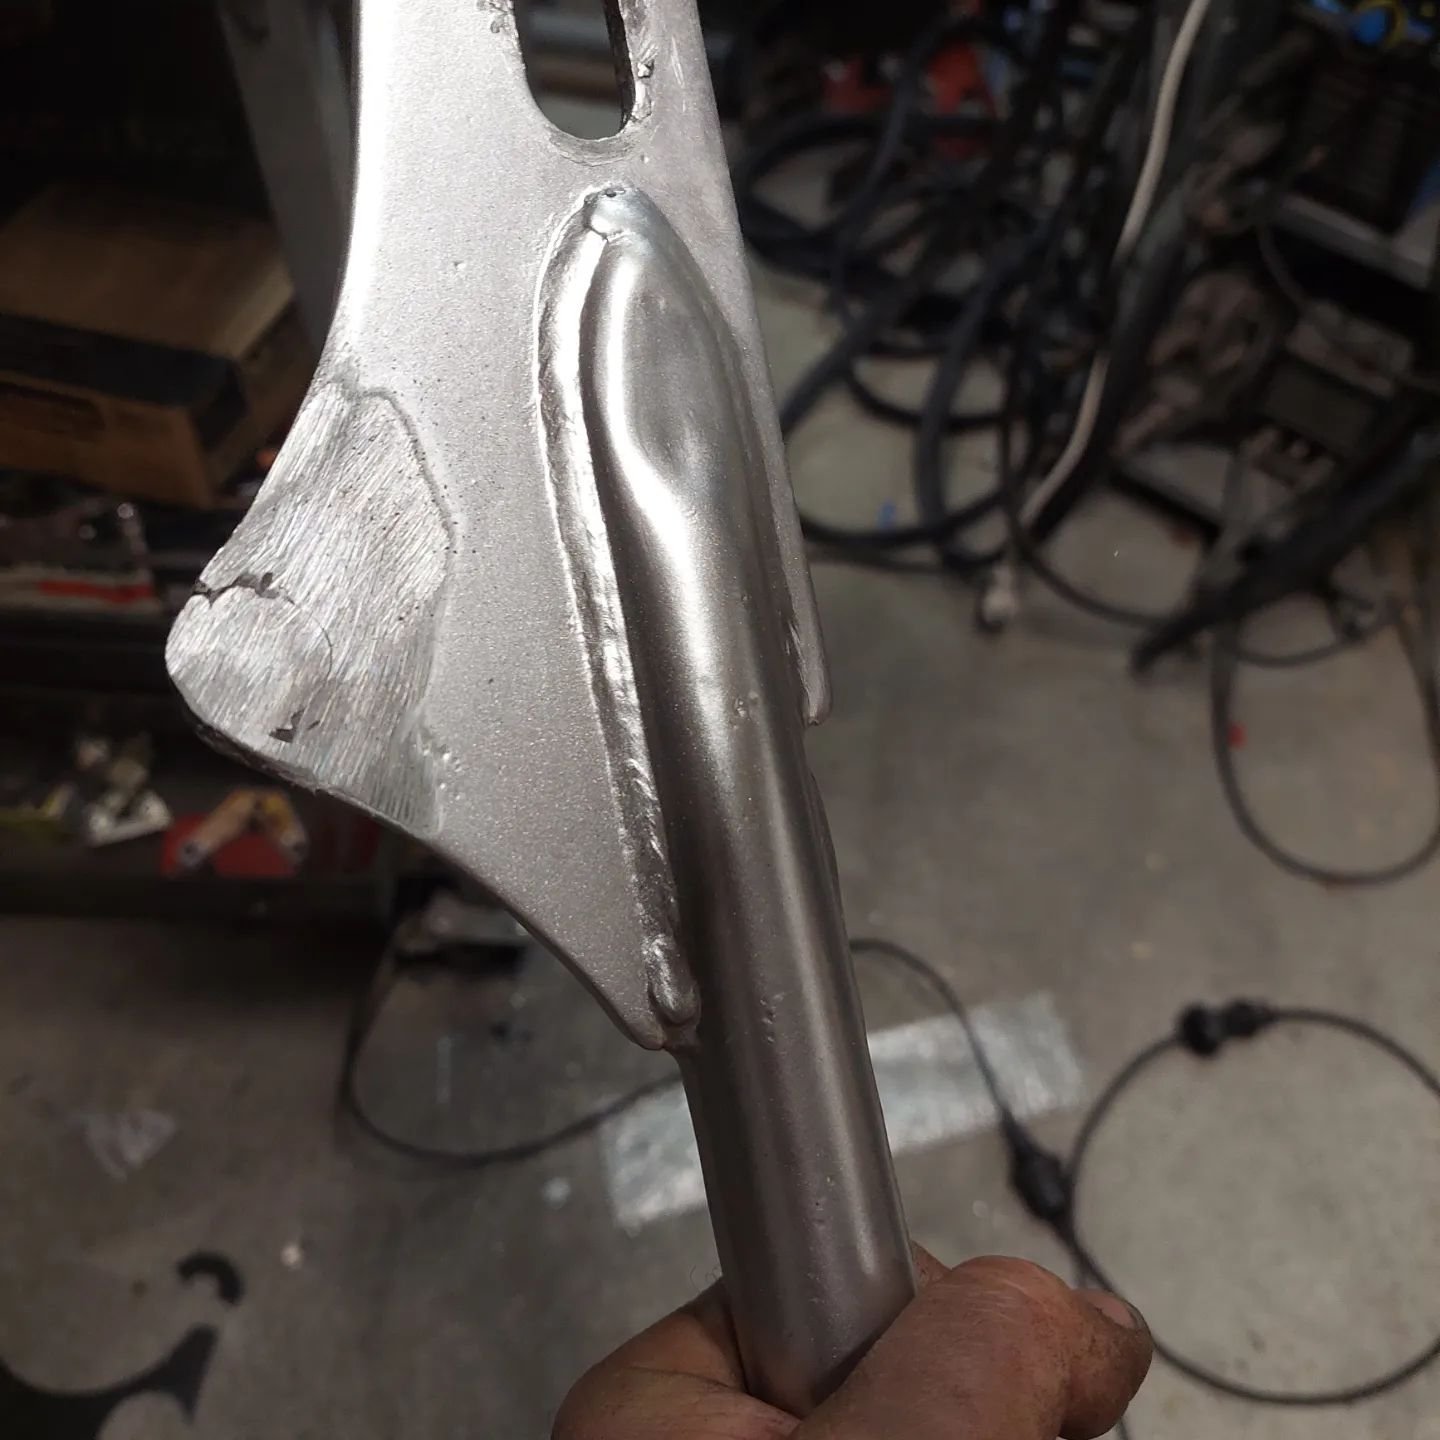
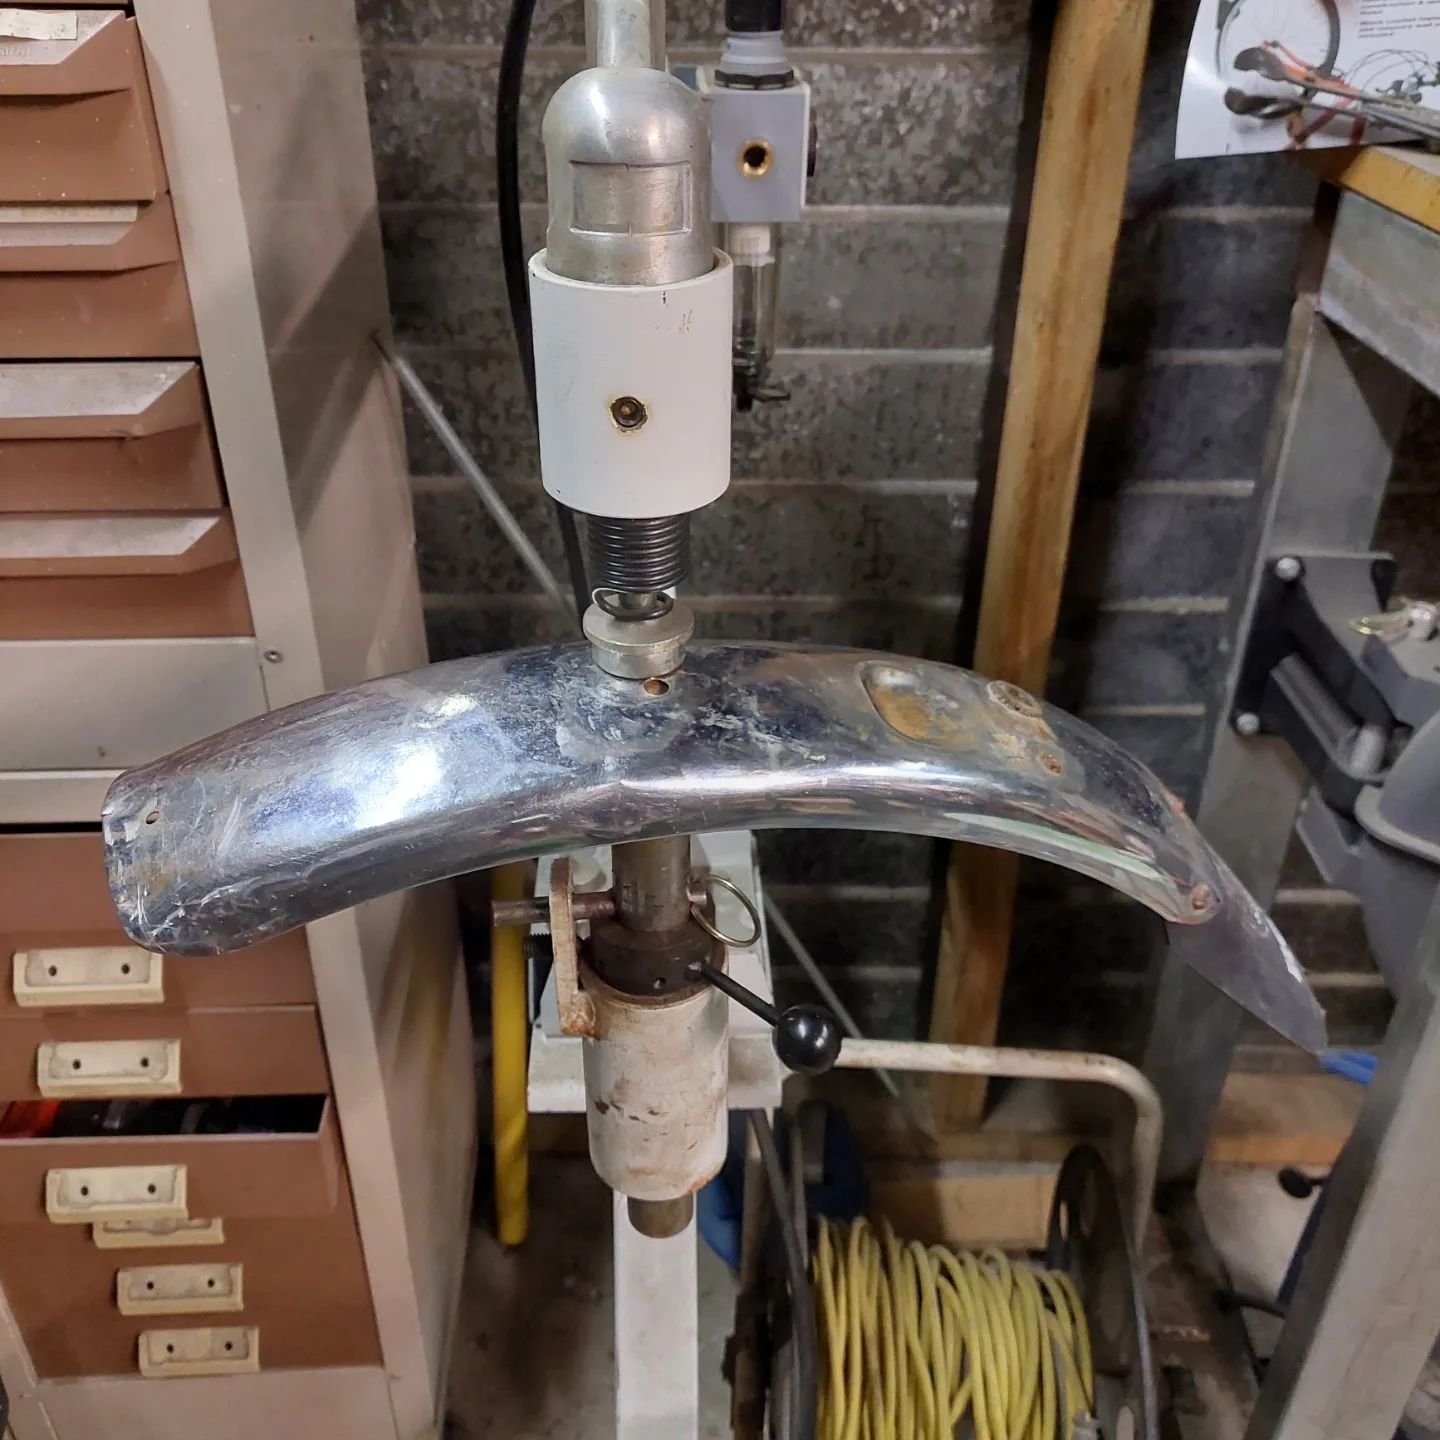
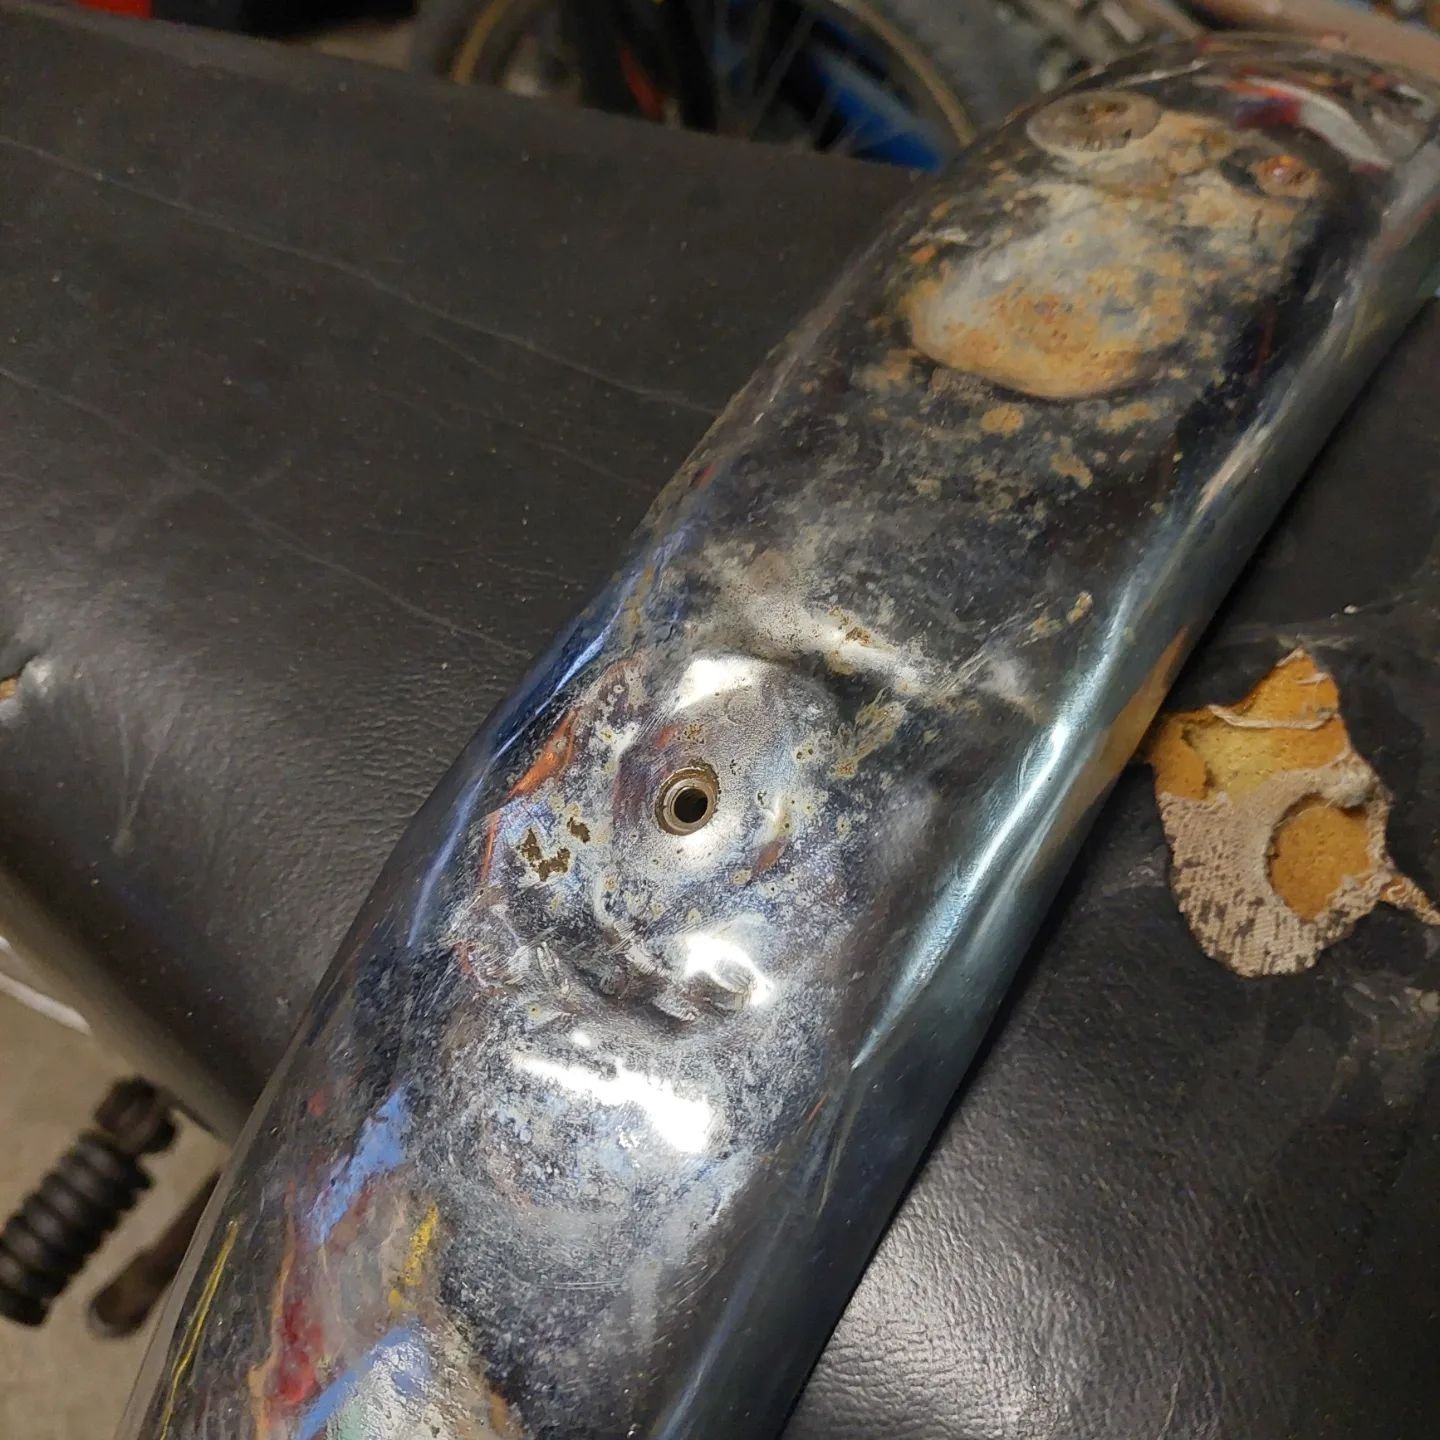
The front guard was pretty hammered so I fettled it a little with my planishing hammer, it came out surprisingly good.
-
17
-
- Popular Post
- Popular Post
-
14
-
 2
2
-
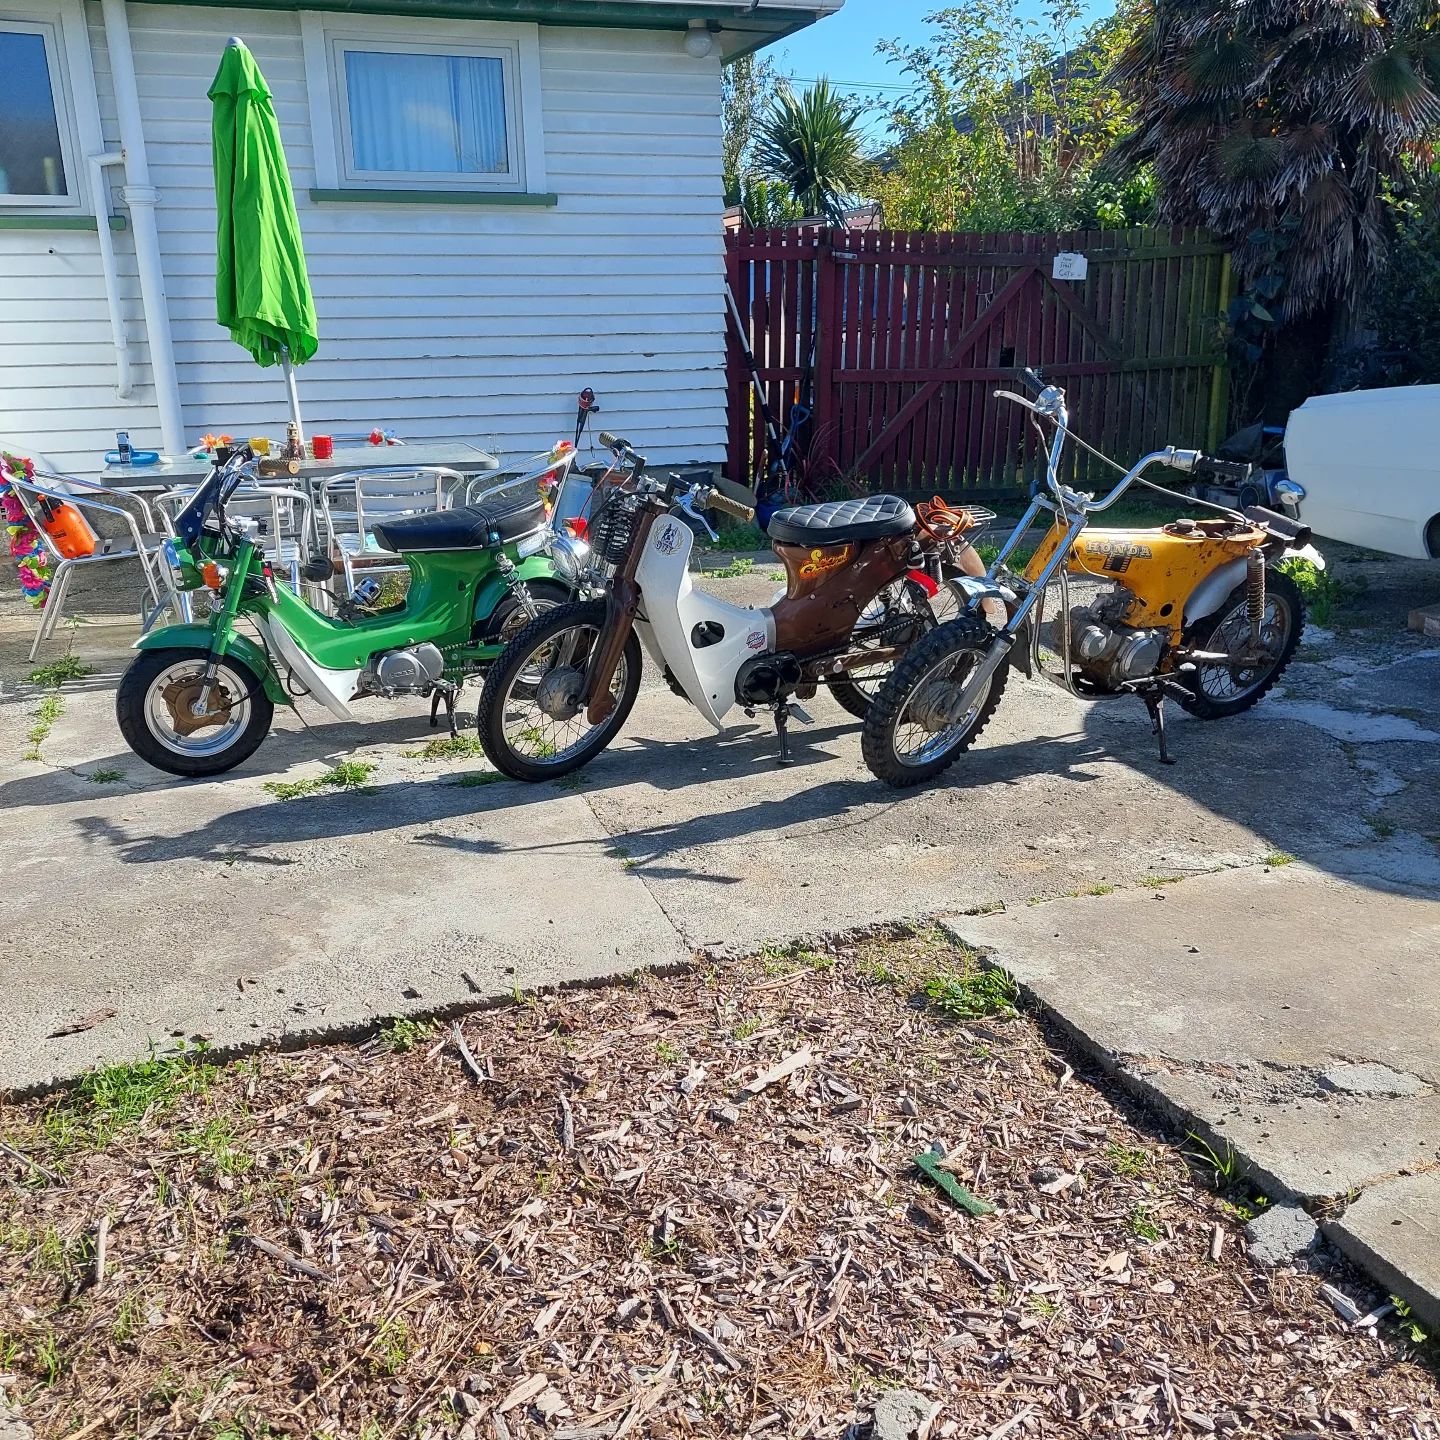
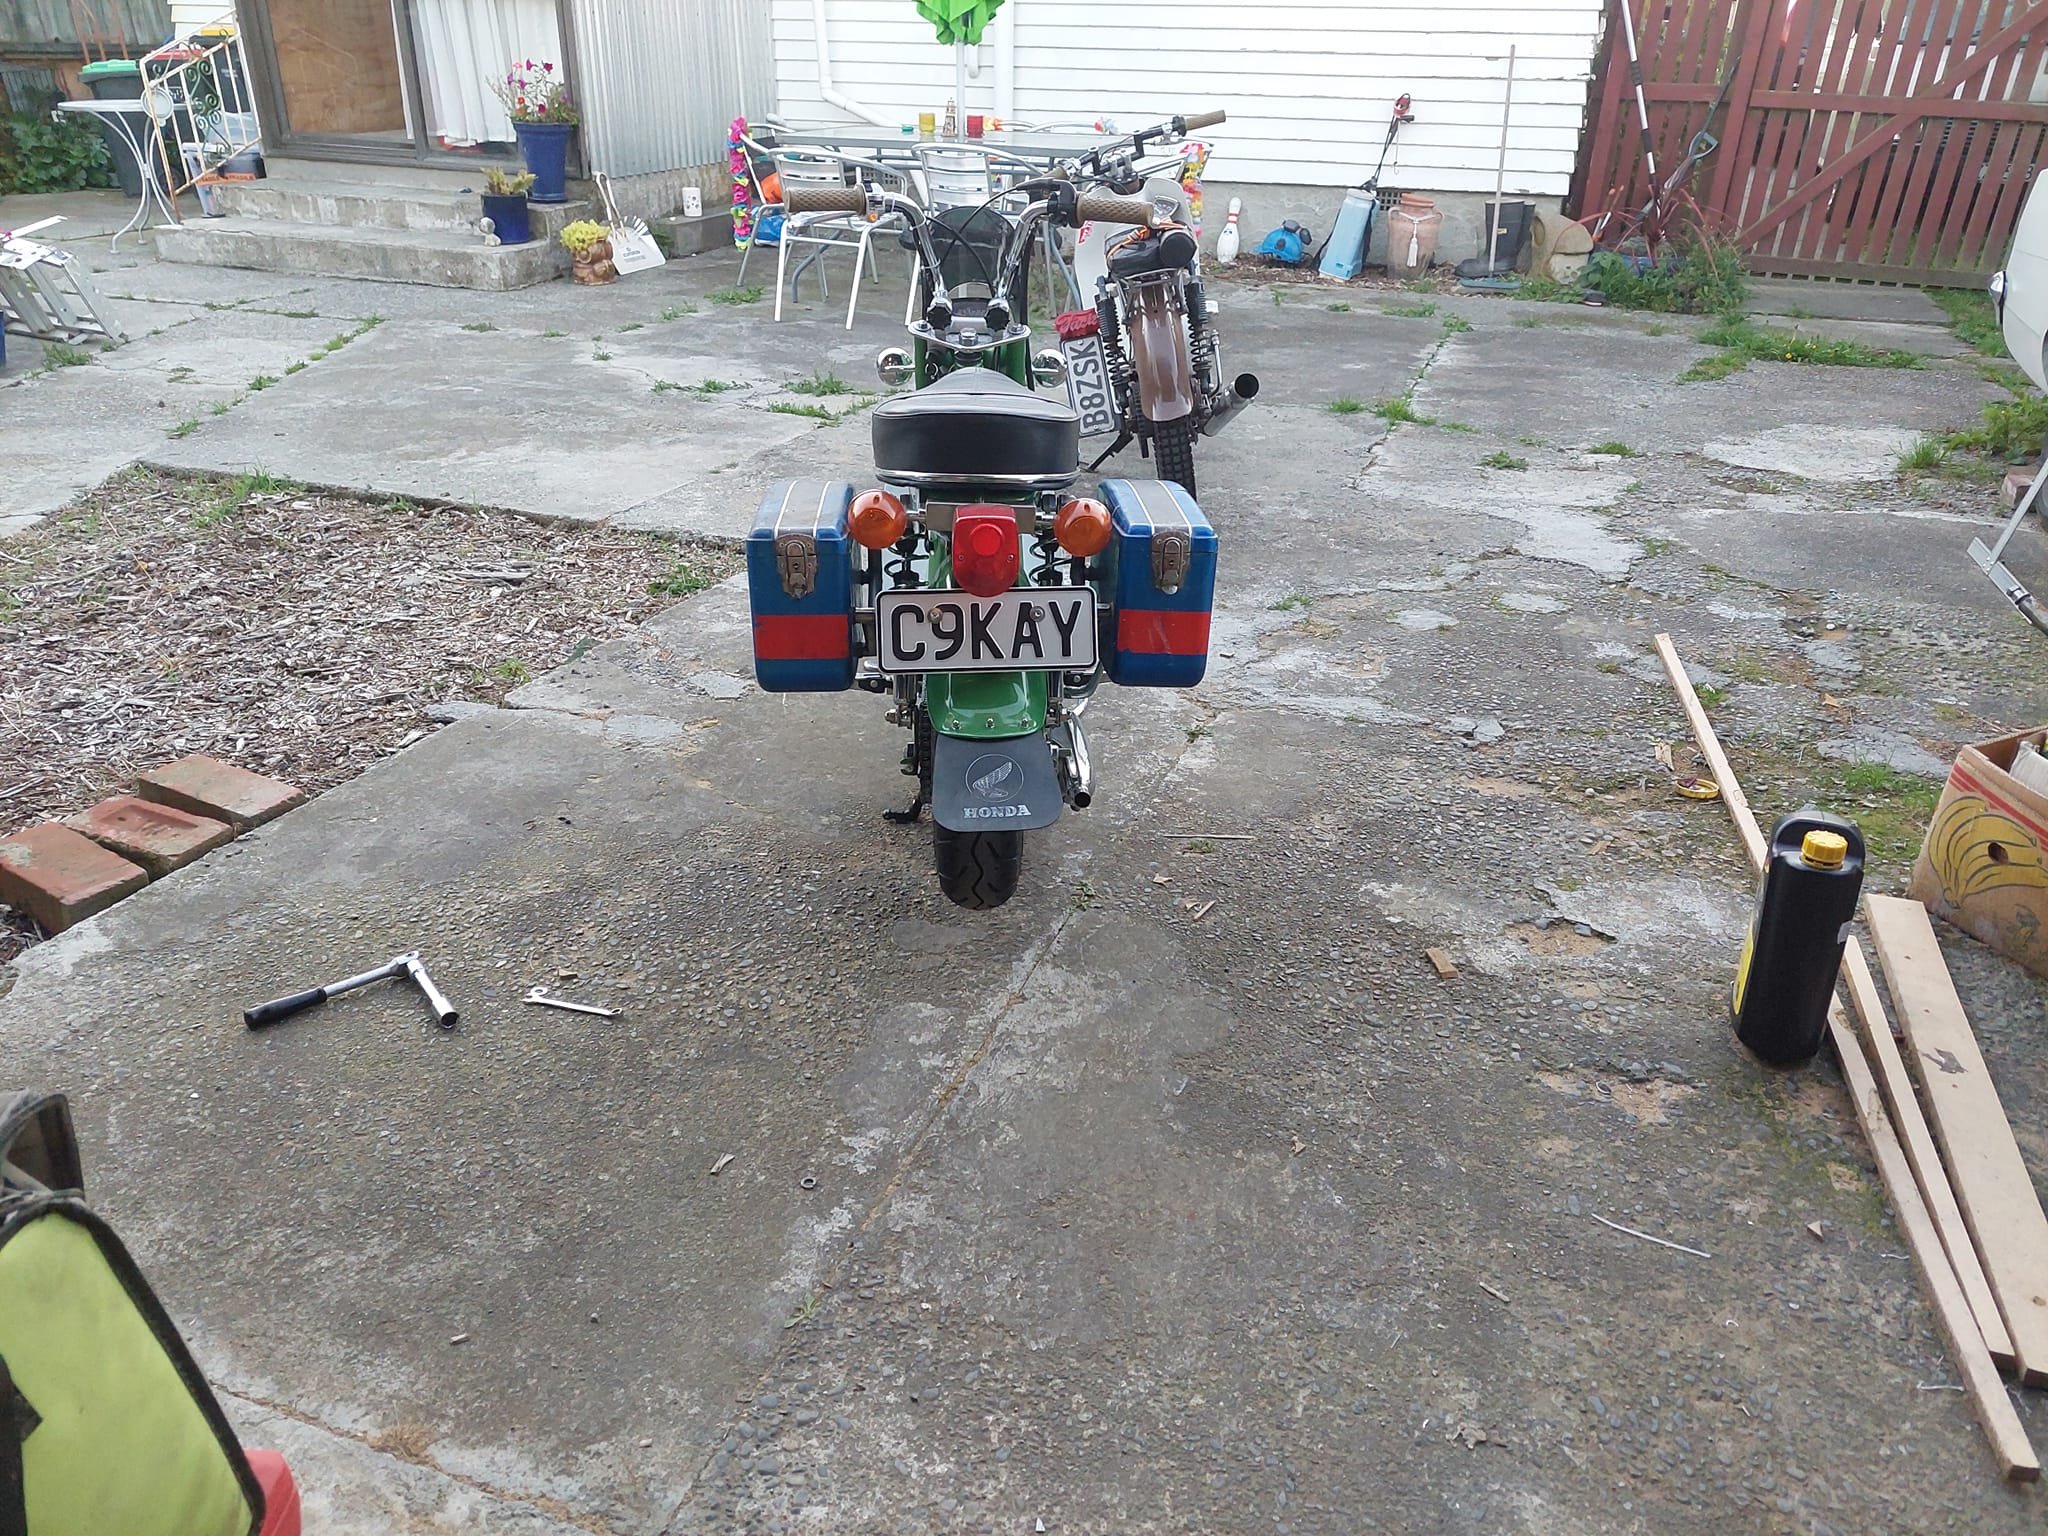
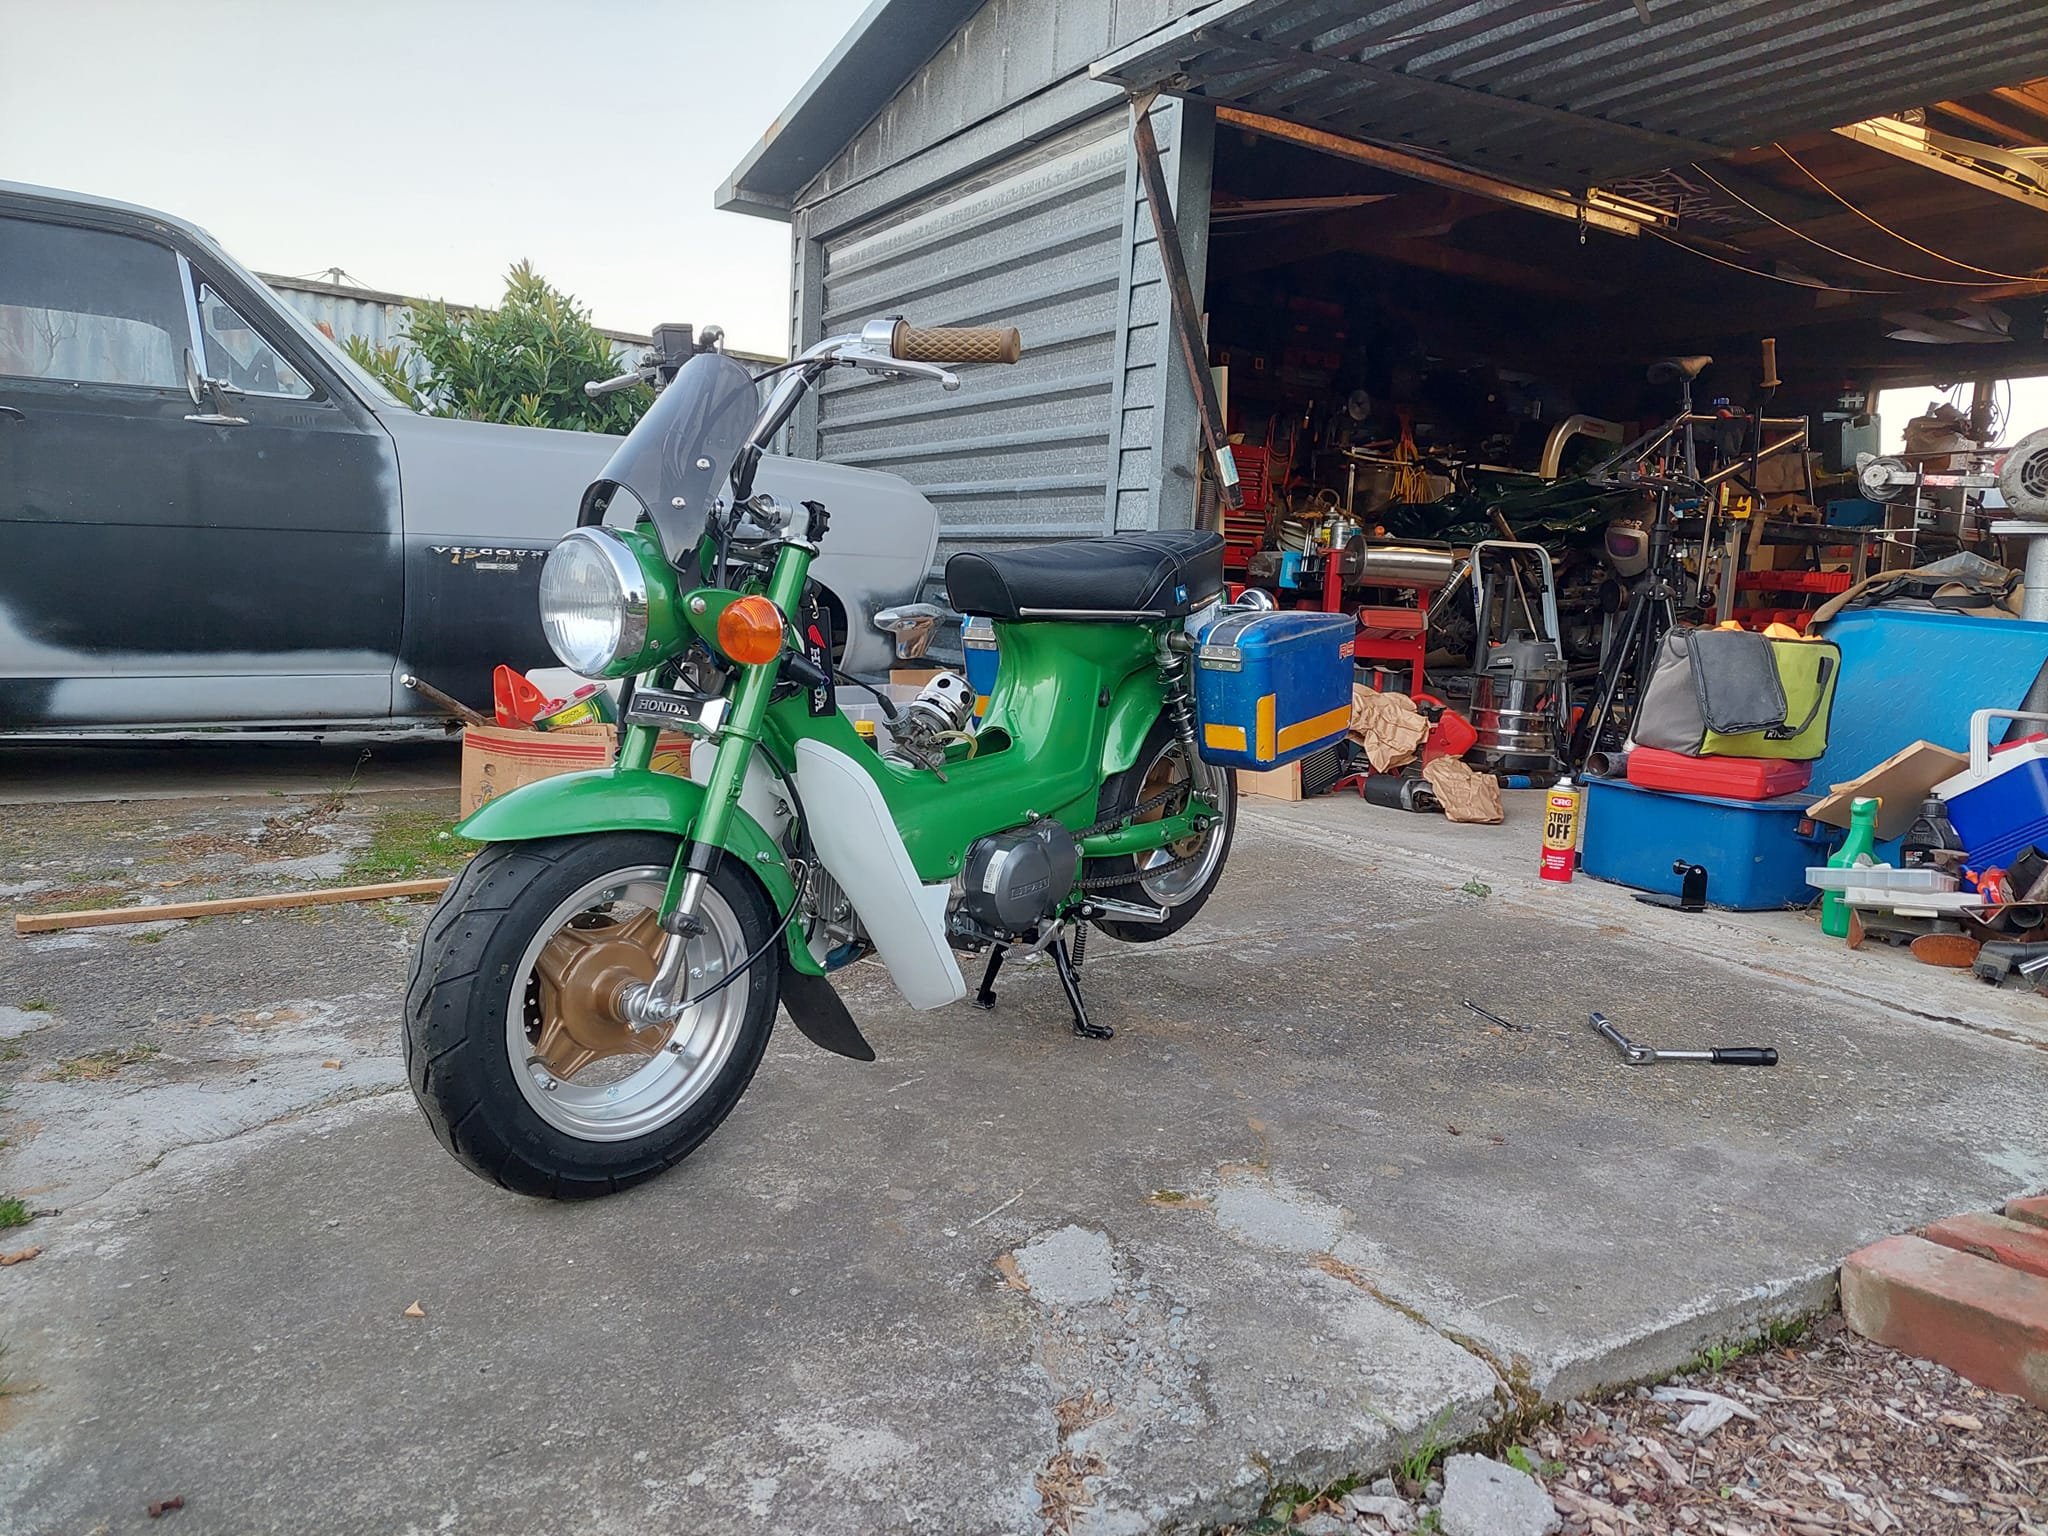
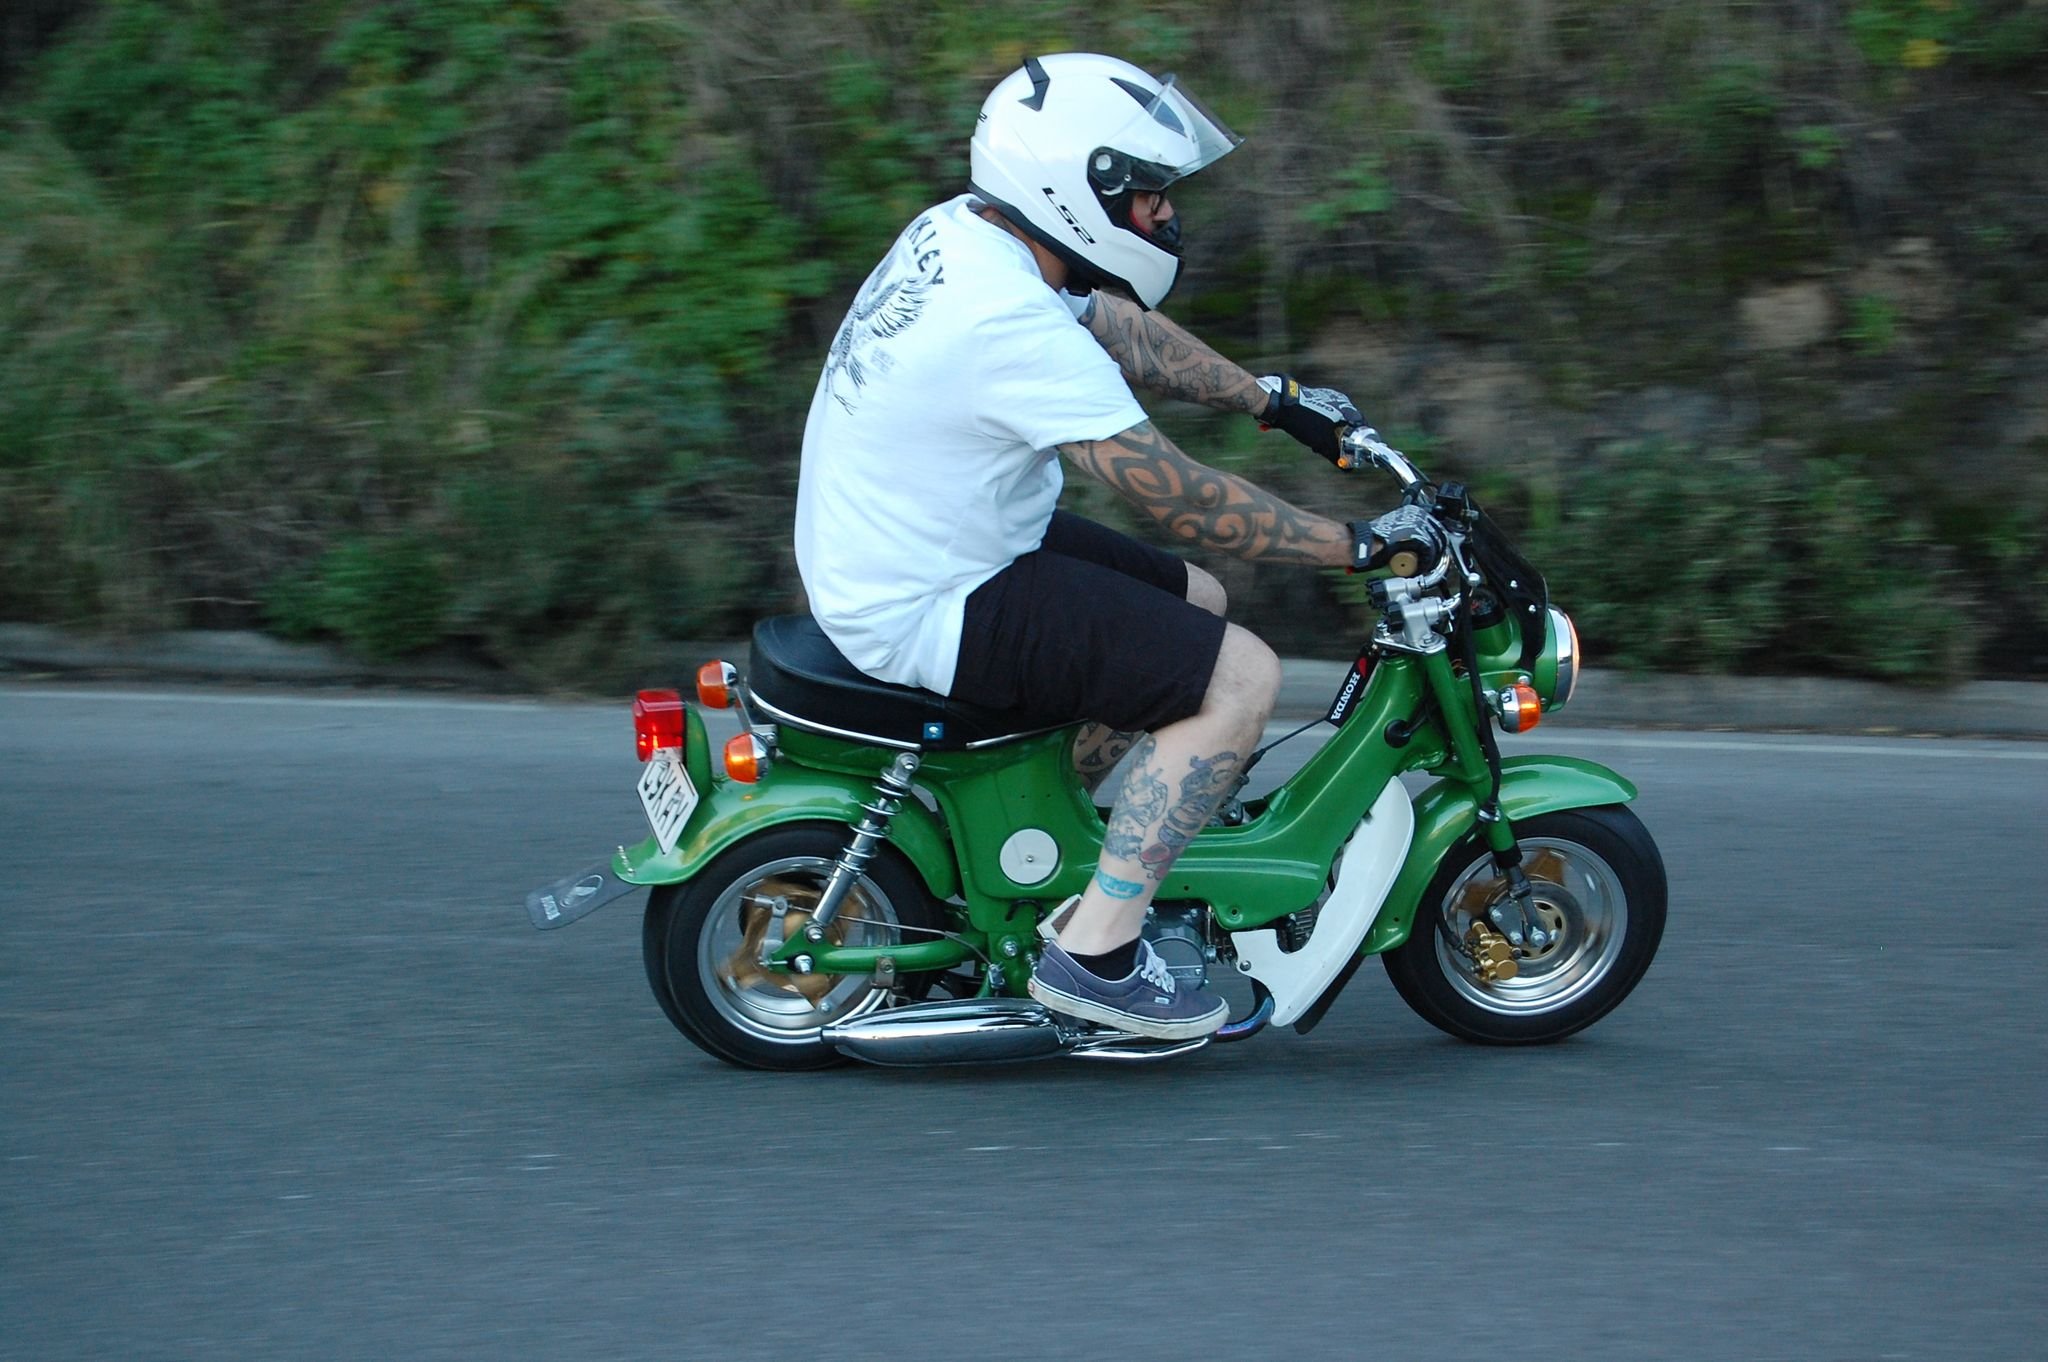
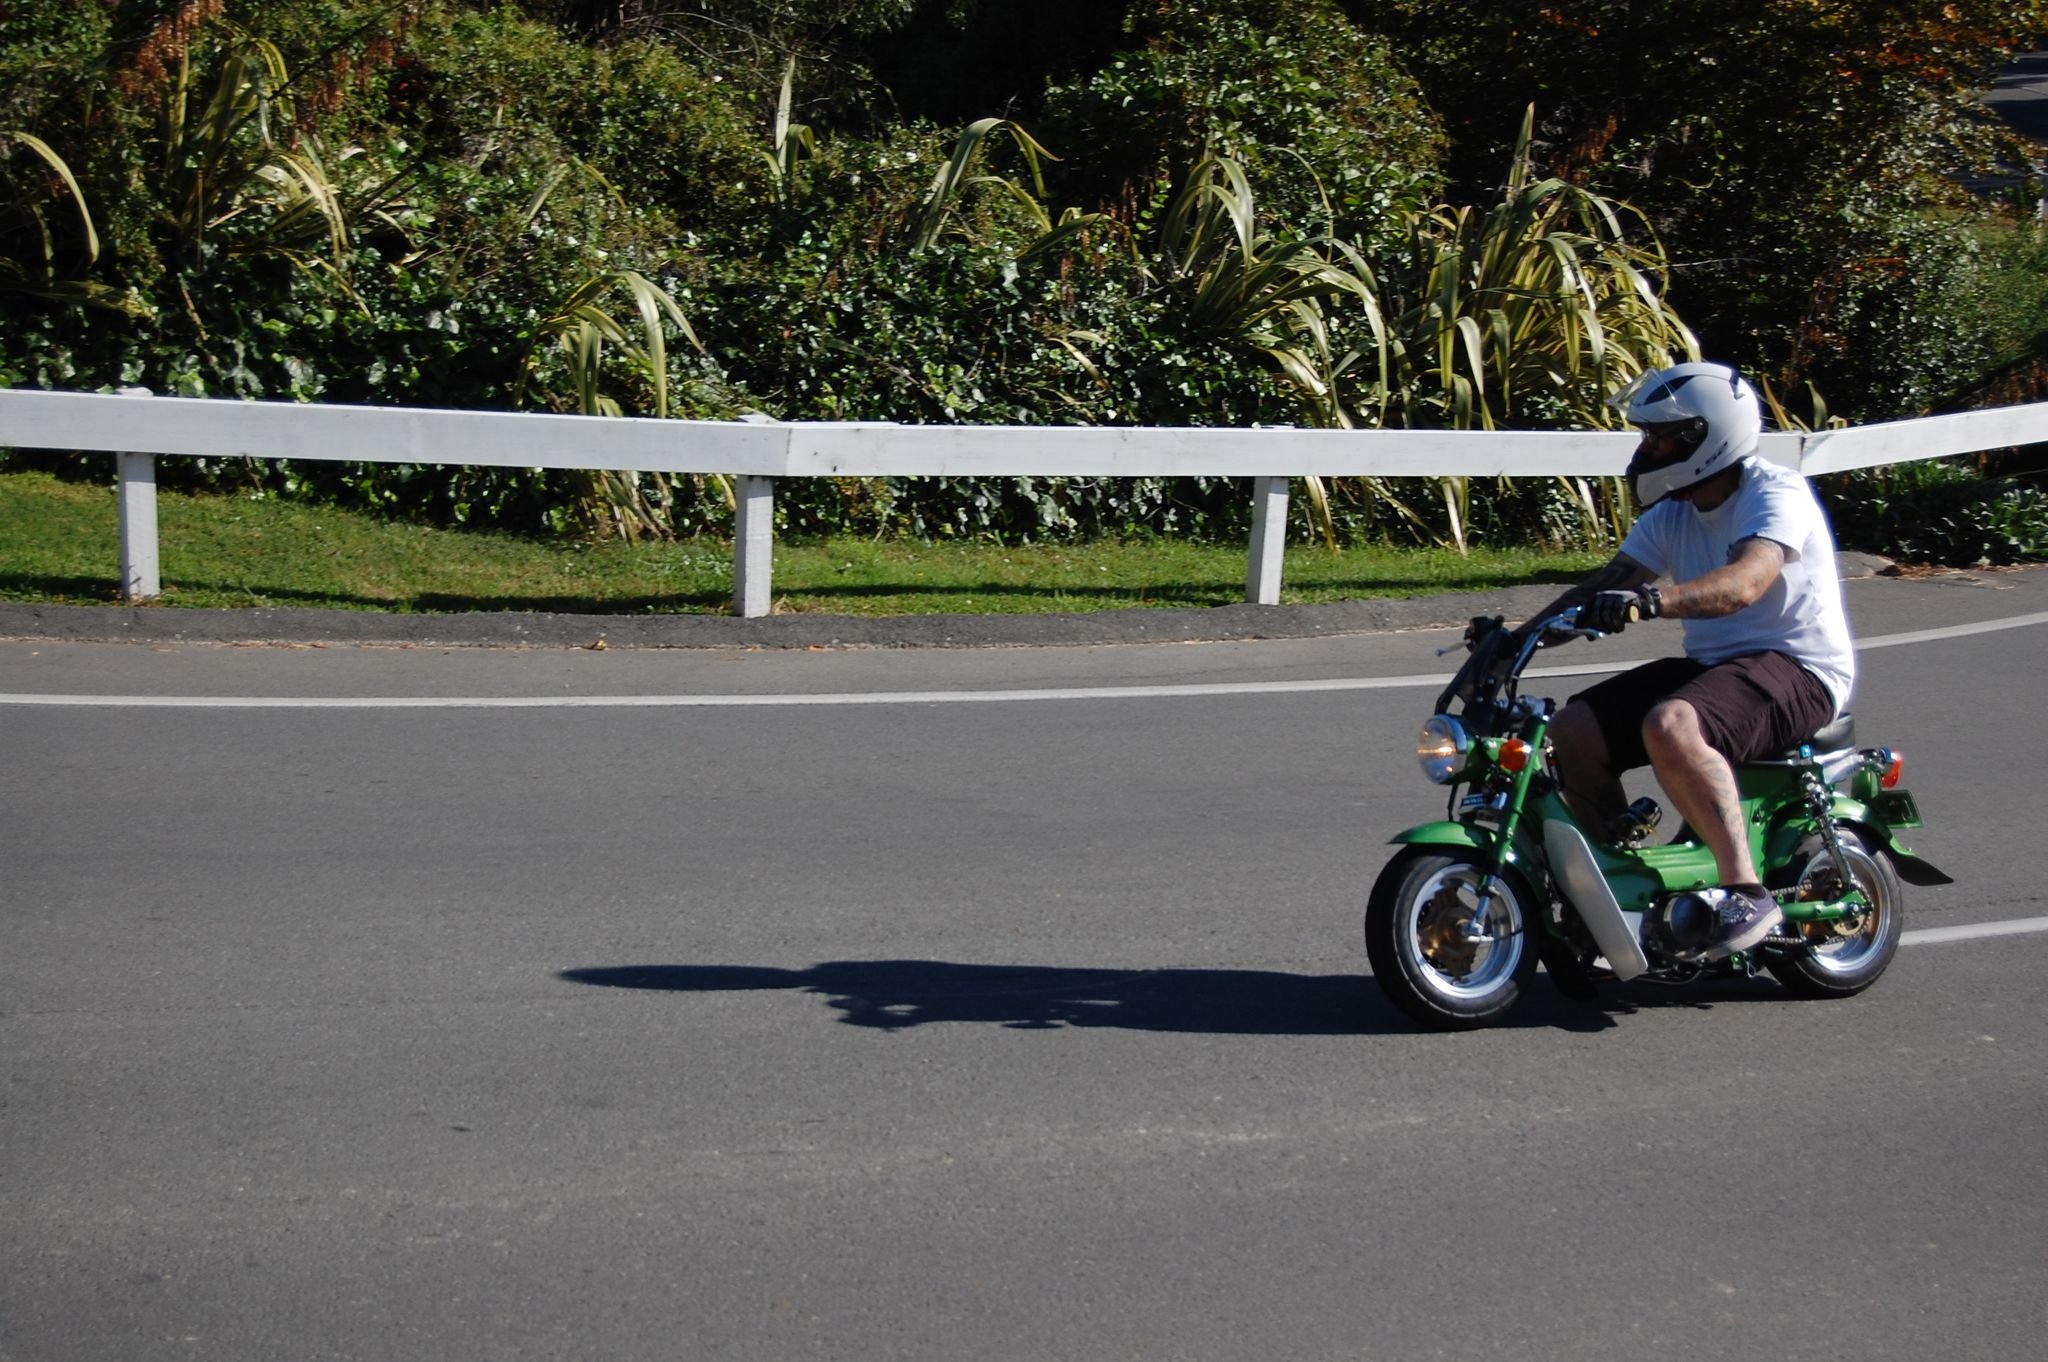
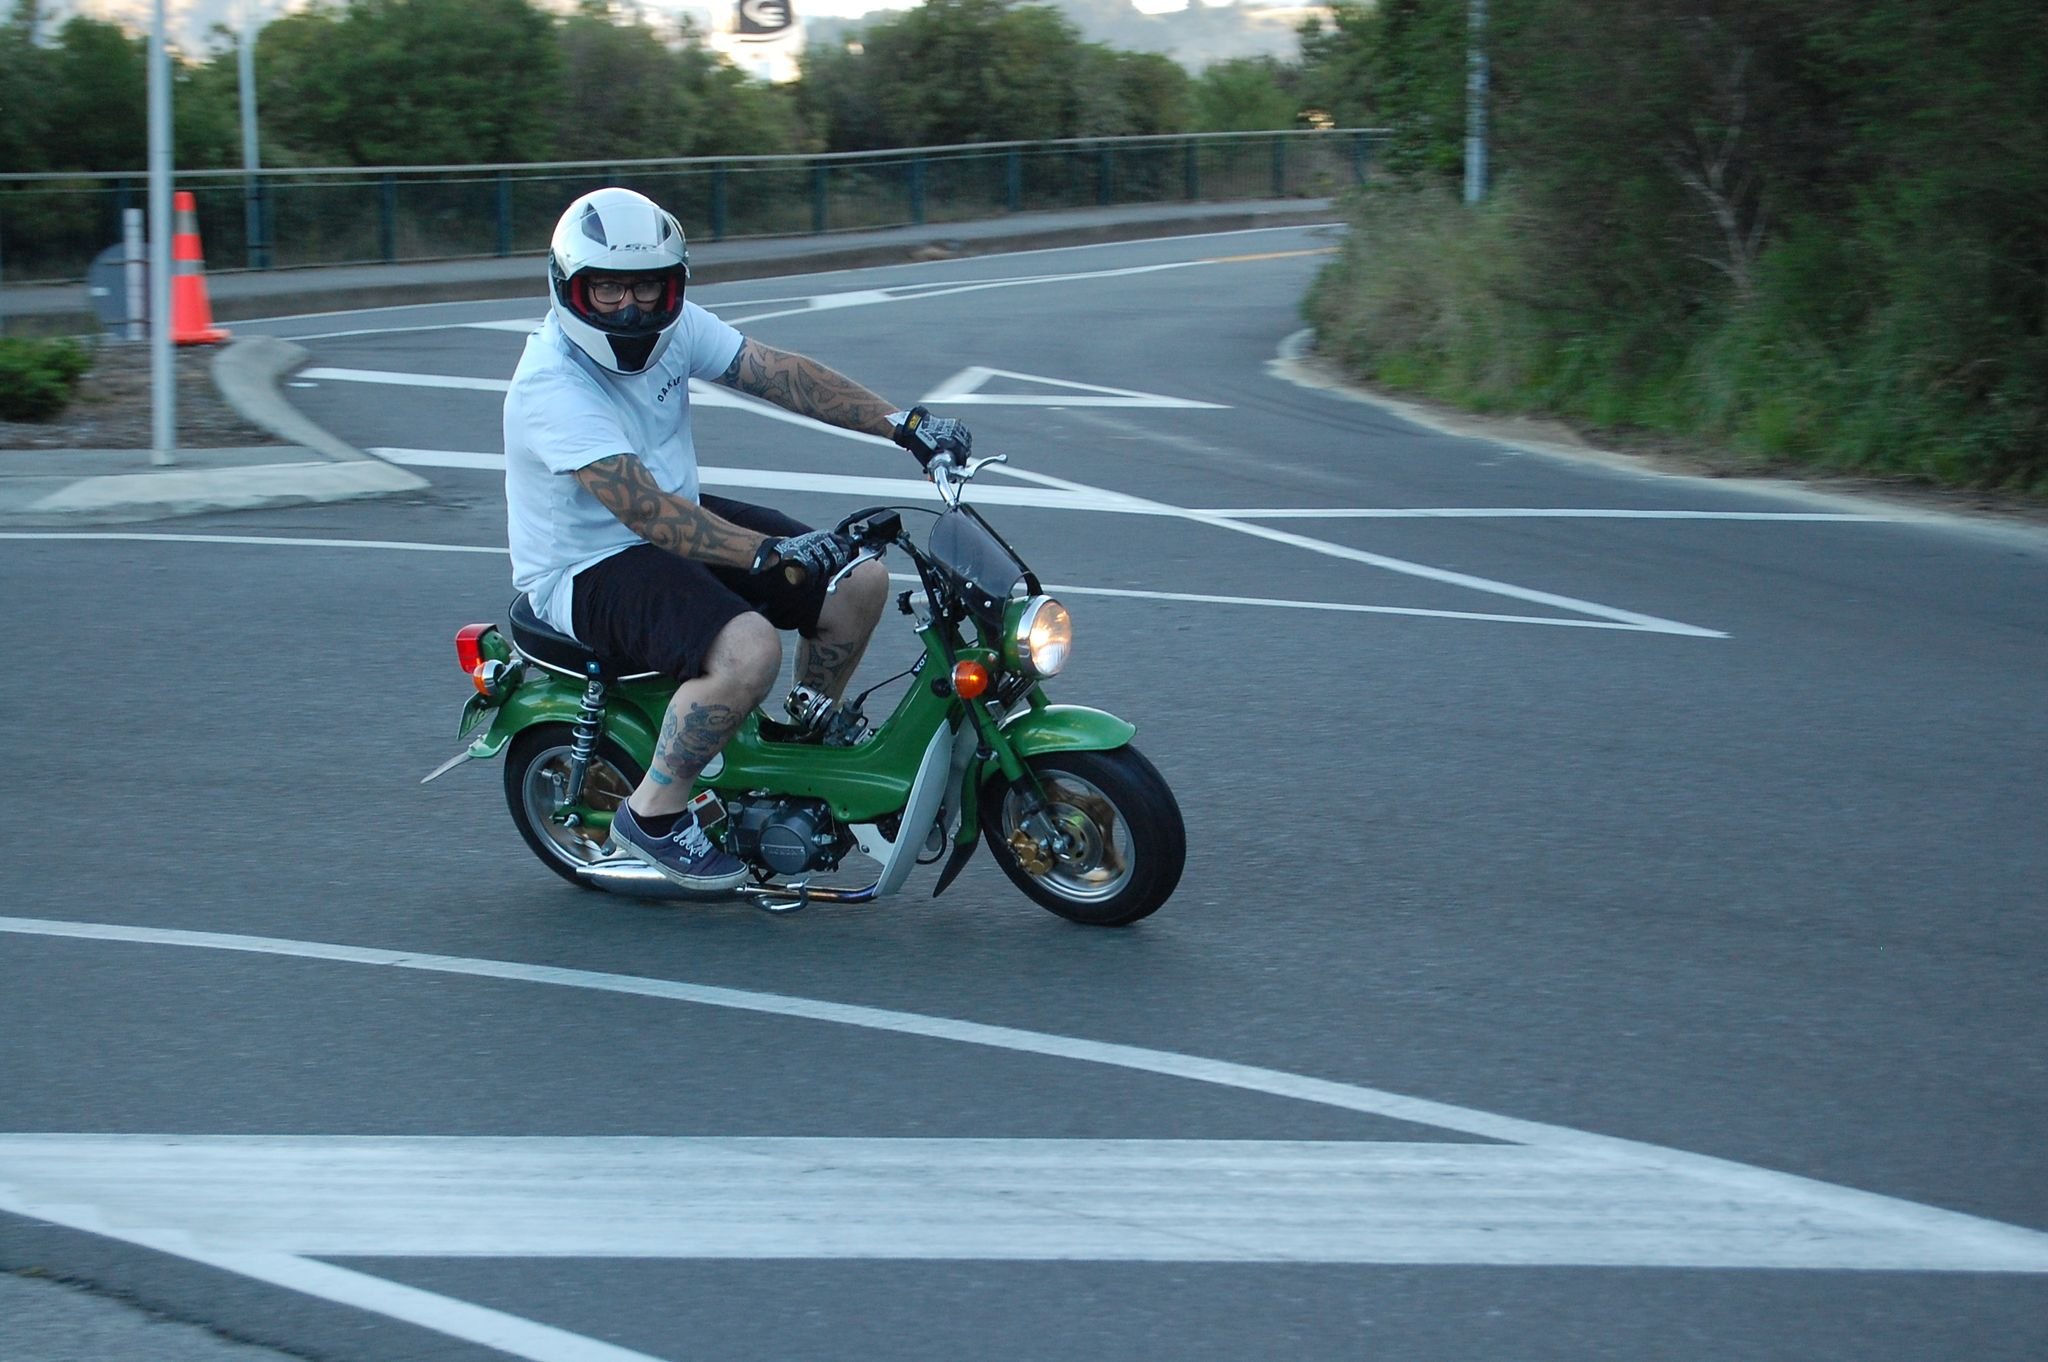
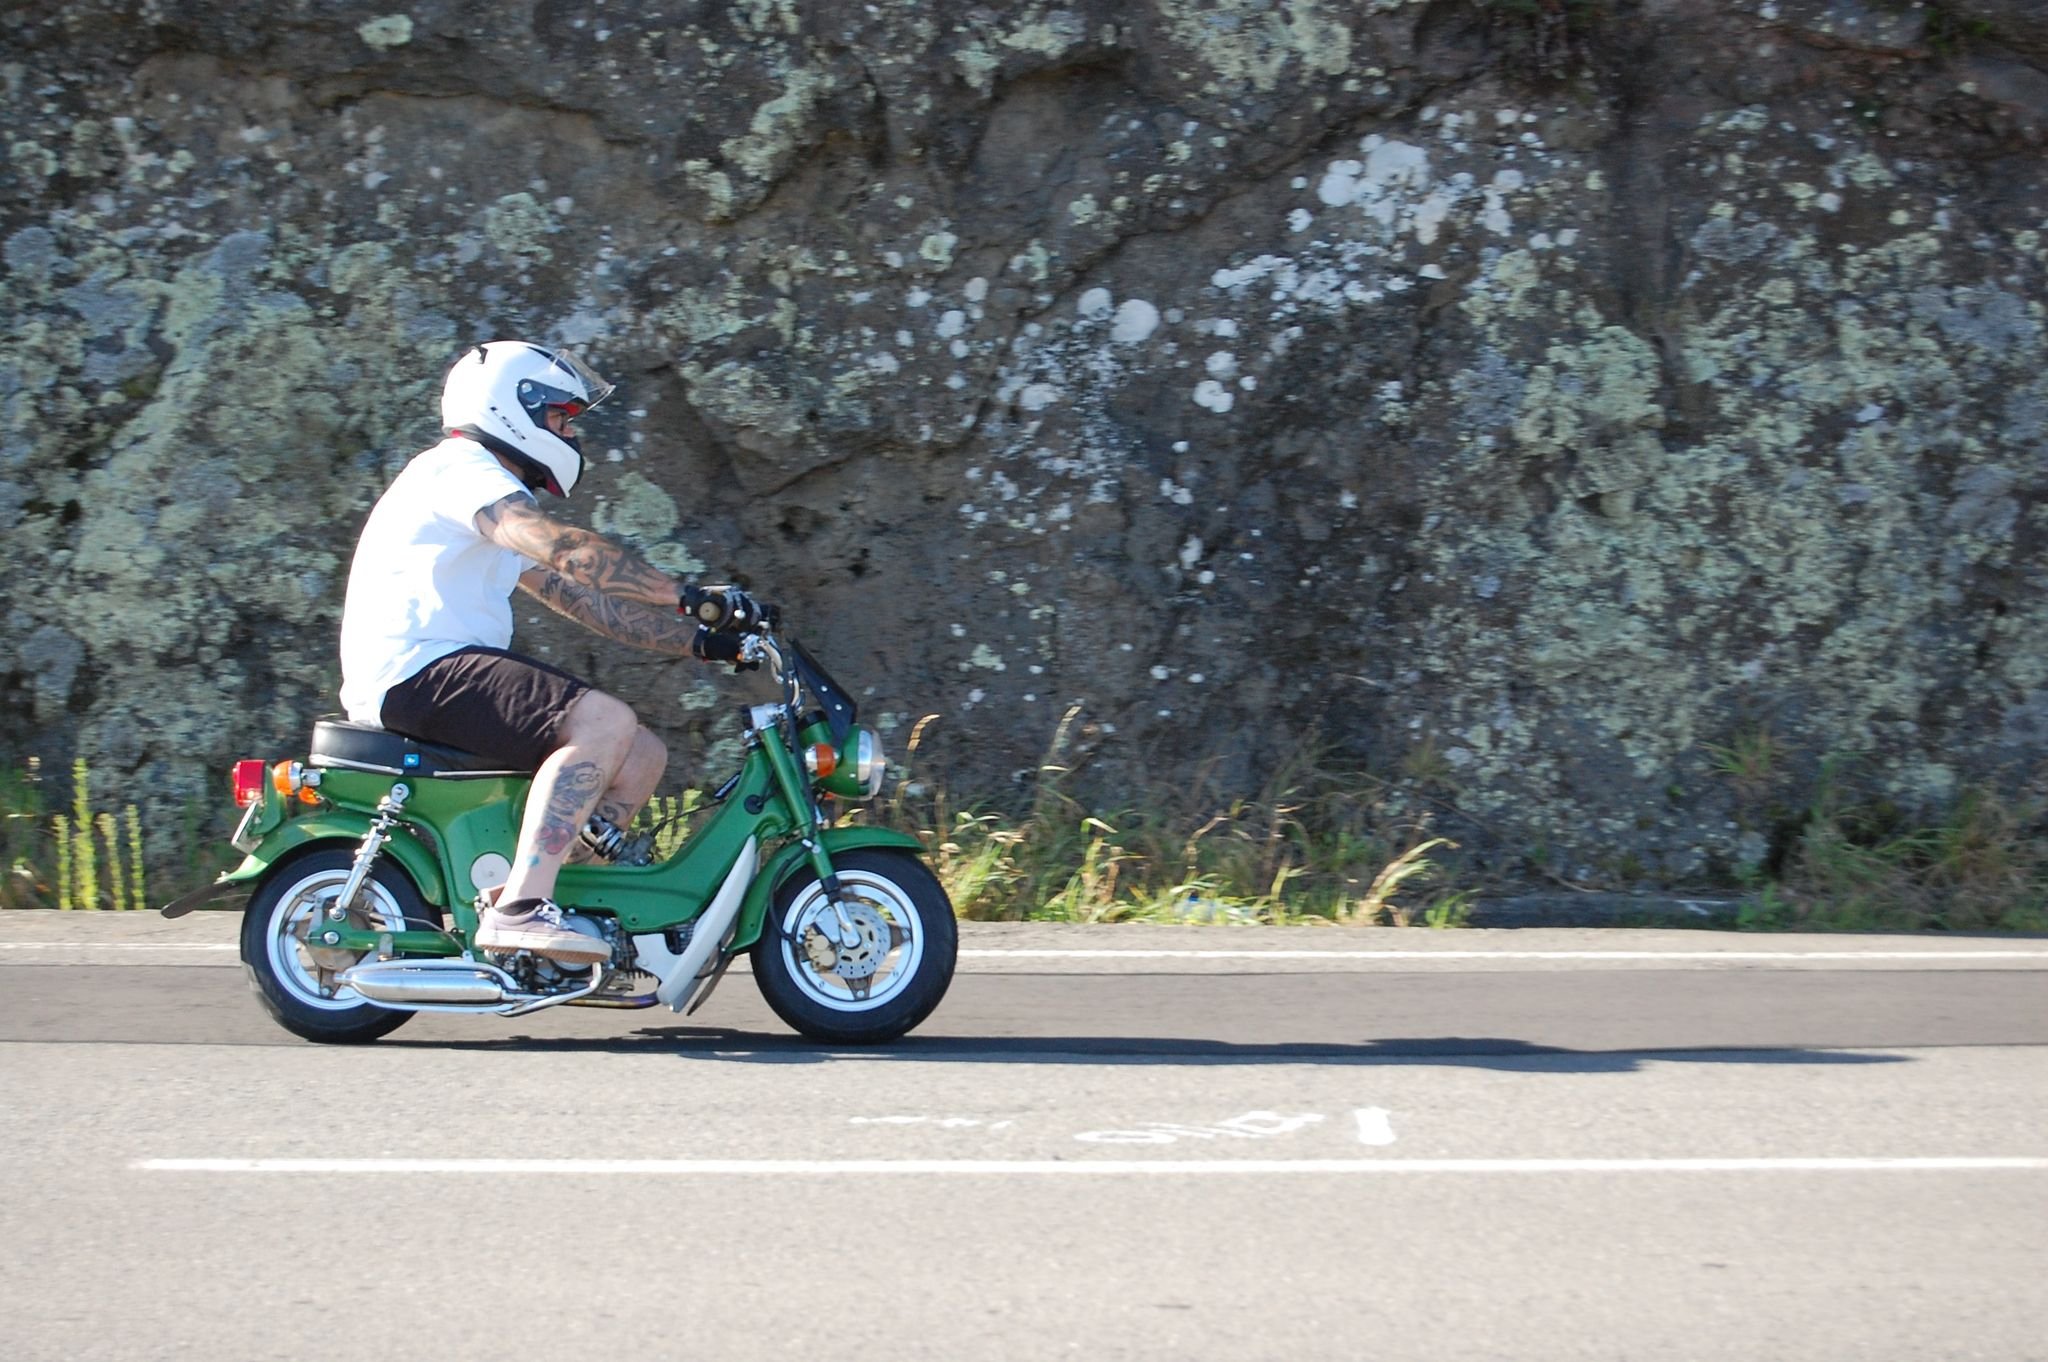
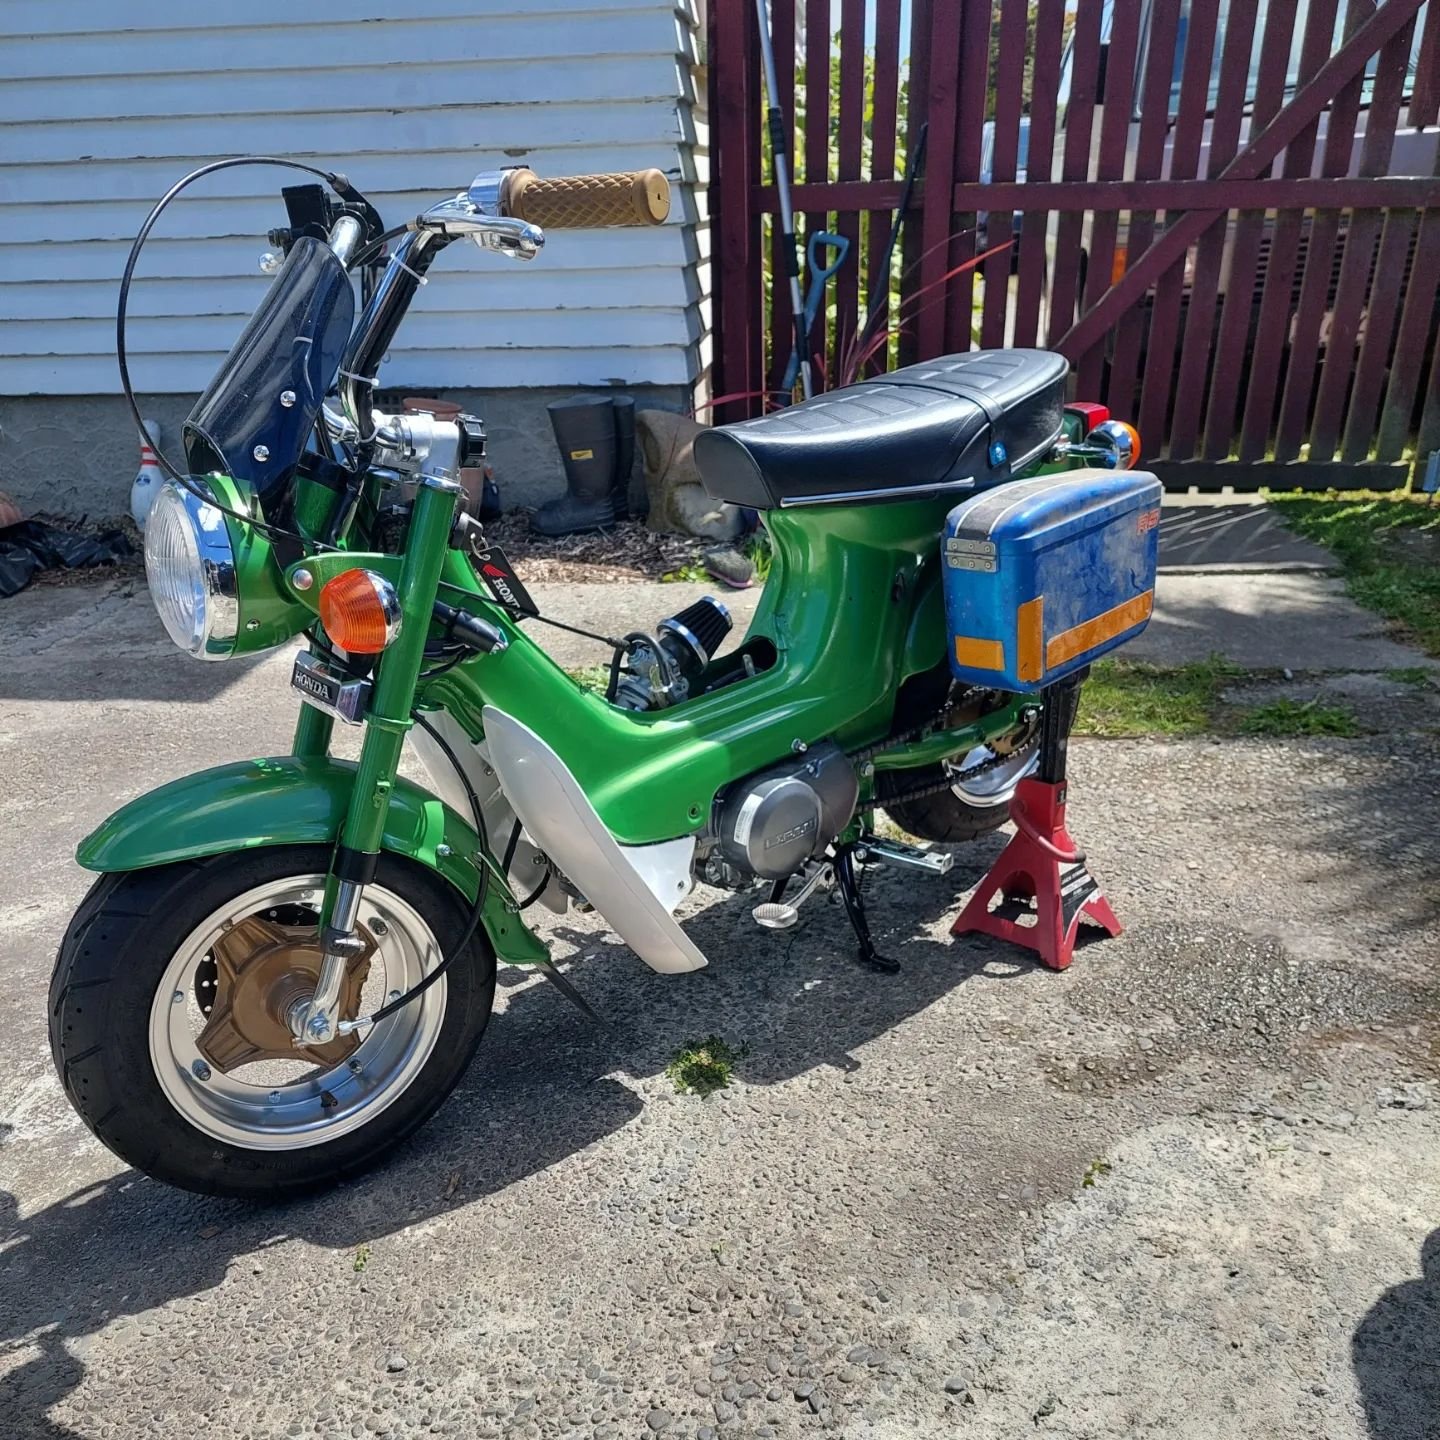
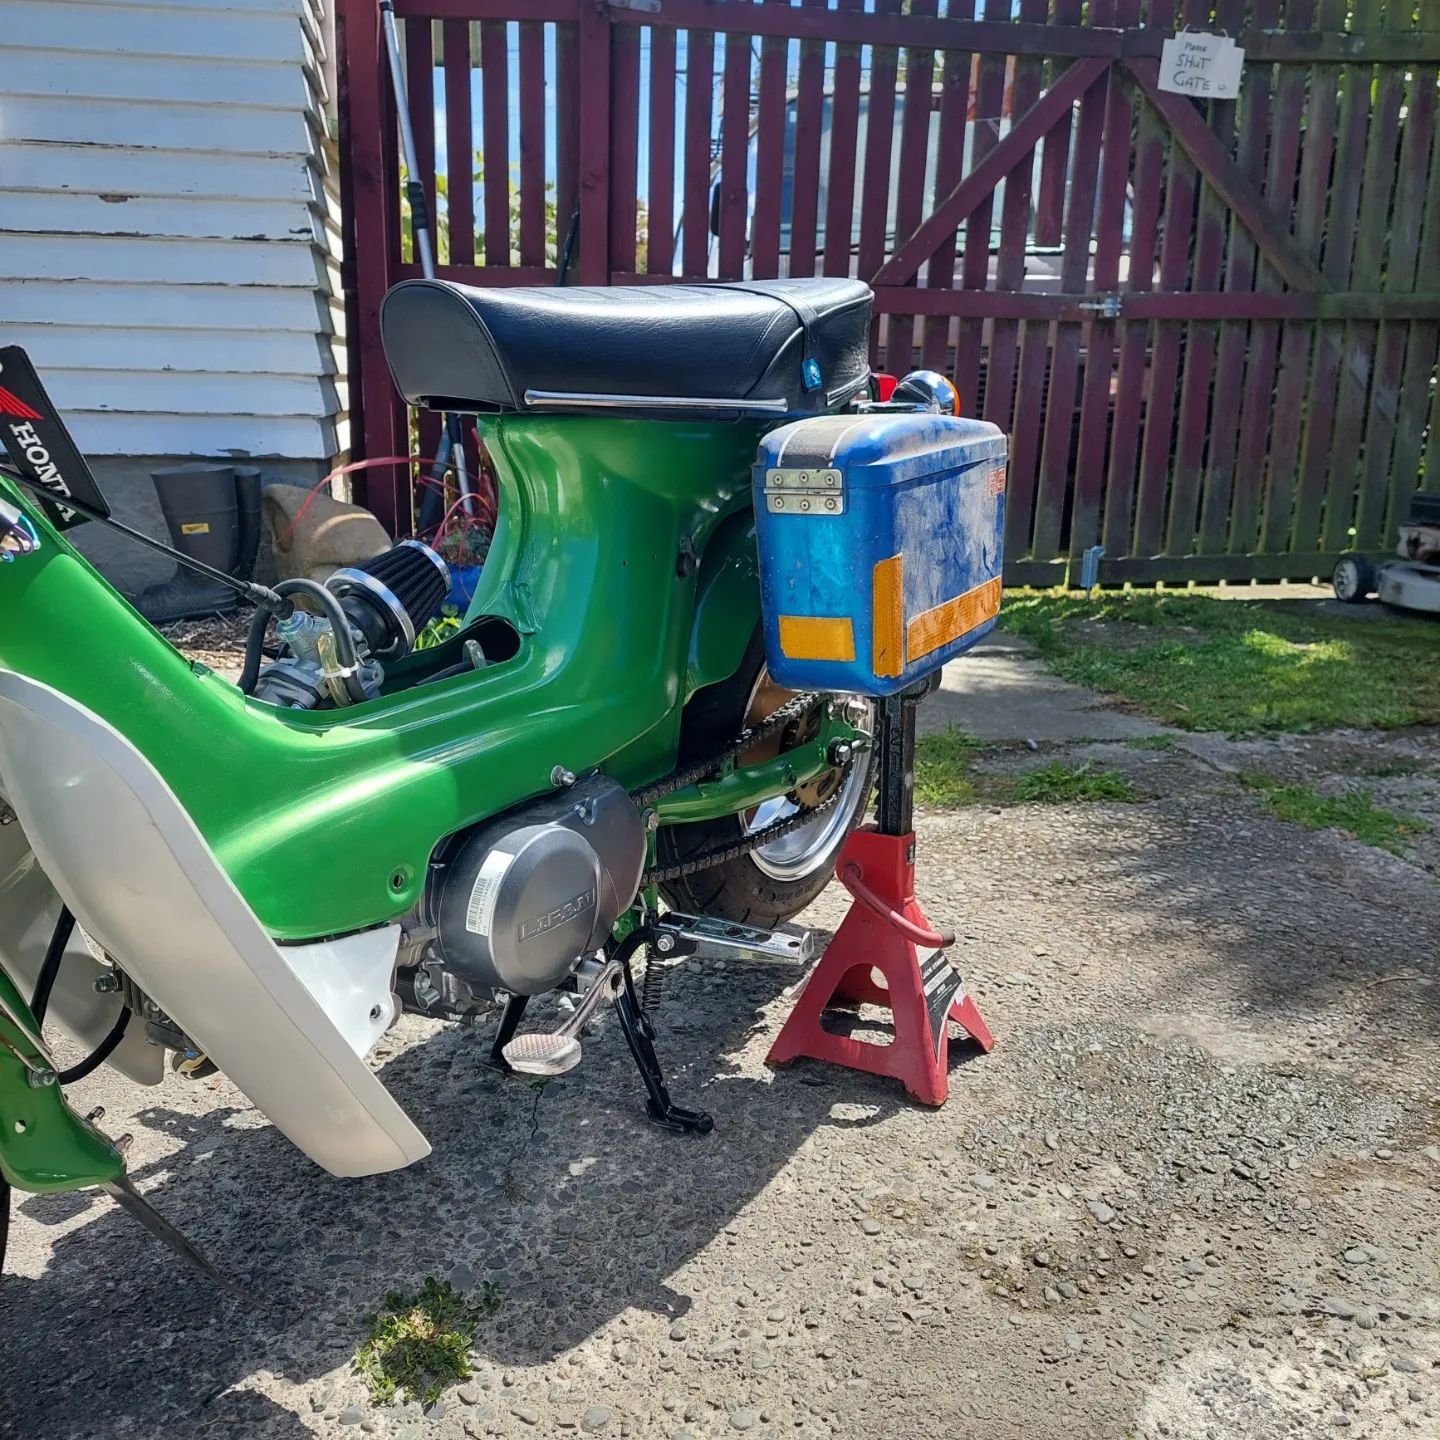
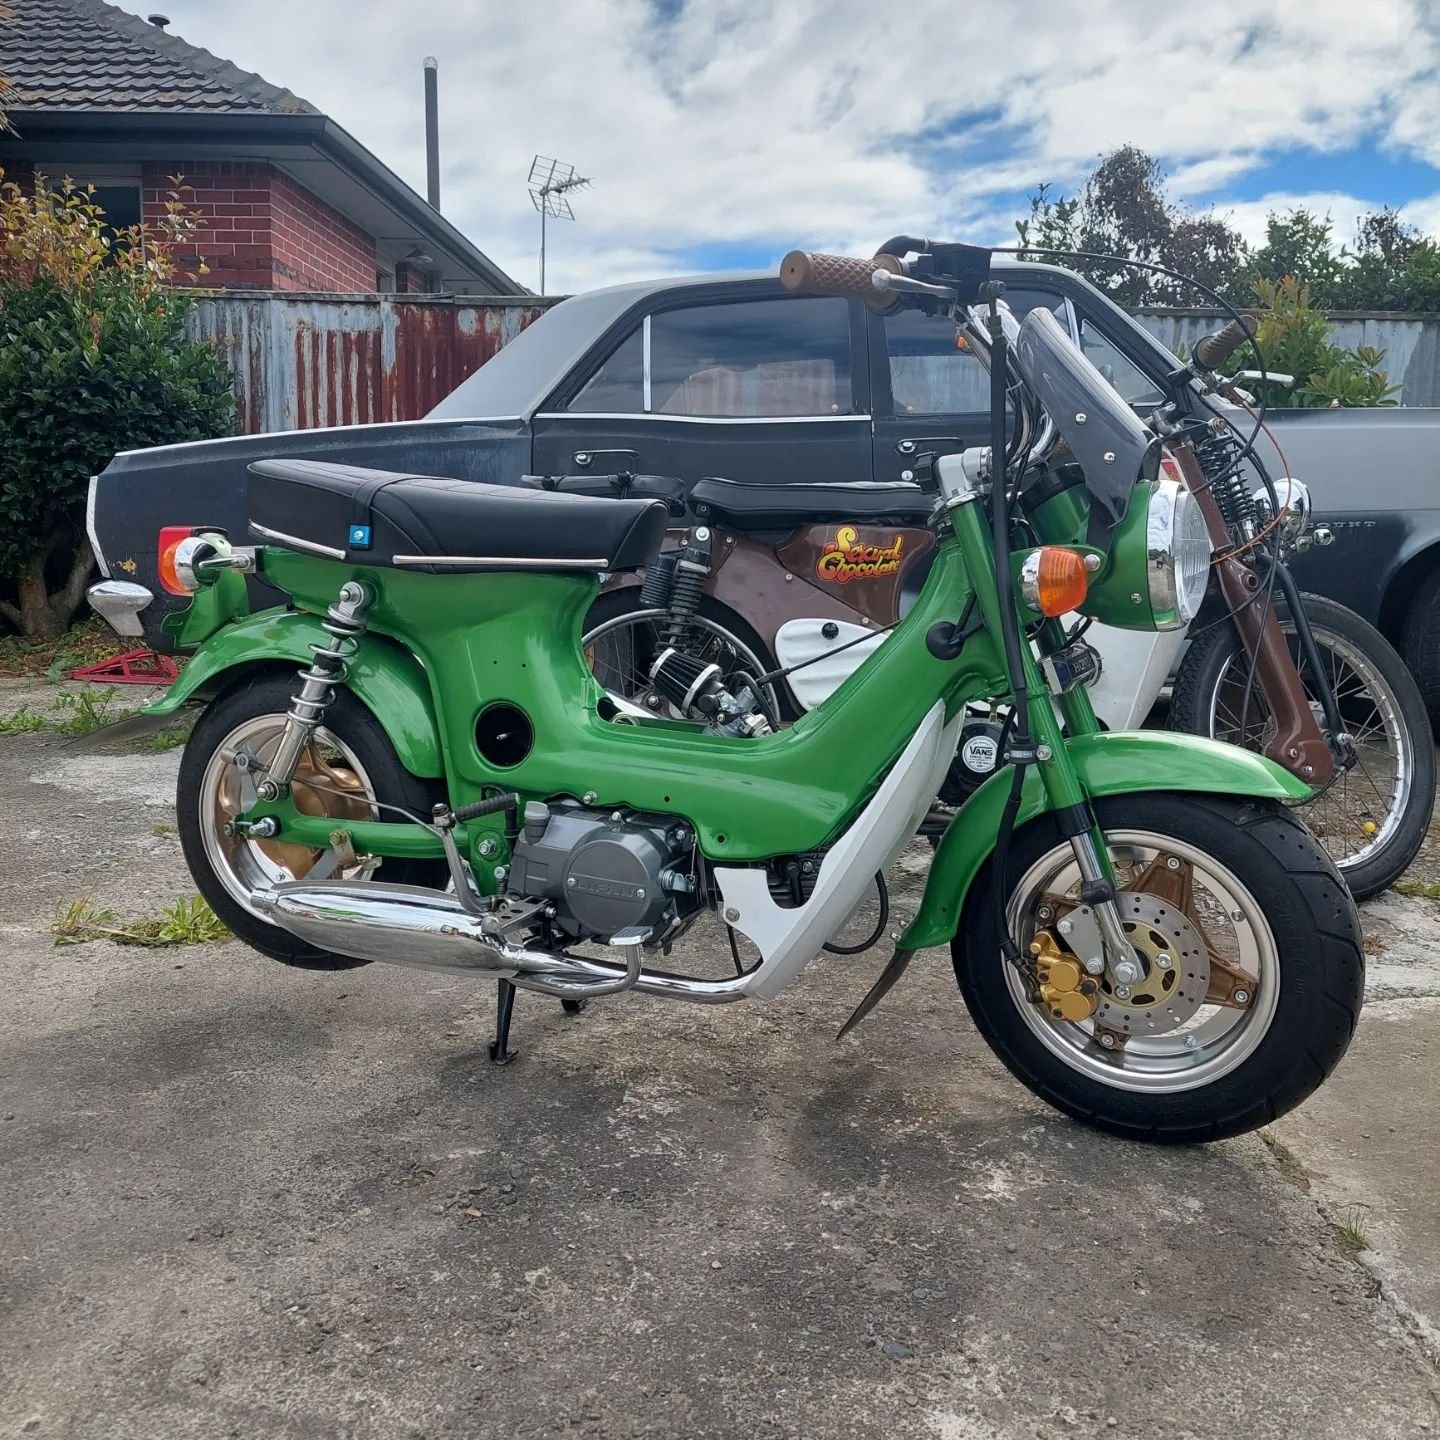
I got the chaly registered and road legal and took it out for its first shakedown run a few weeks back around the hills and through Lytellton to Wunderbar.
Those side boxes I got from the swapmeet last year were on the back of my mind so I pulled the pin and started making some brackets for them
The boxes themselves are pretty rough and have a few cracks and pieces missing, so I'll address them, paint them and maybe add some gas struts.
-
6
-
1
-
-
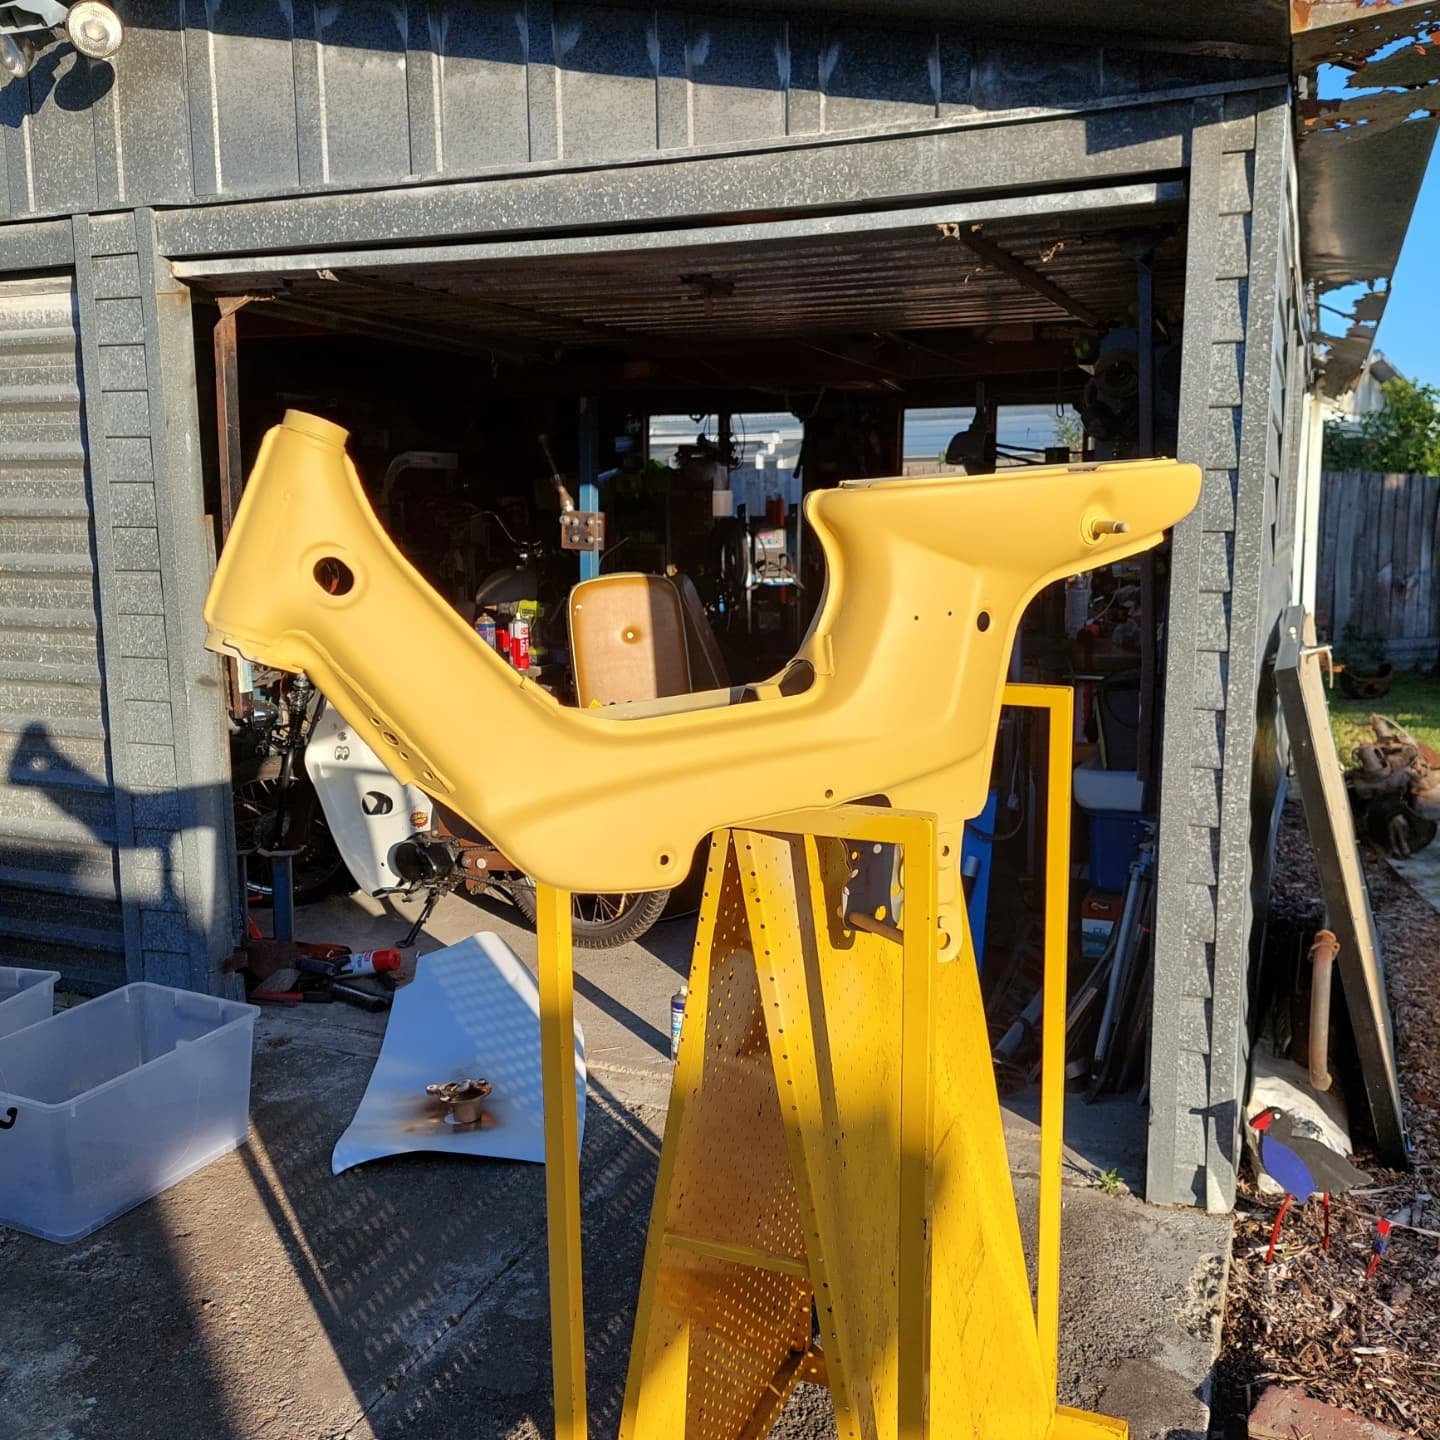
Its normally the smaller jobs that take the longest, but im gradually ticking them off the list.
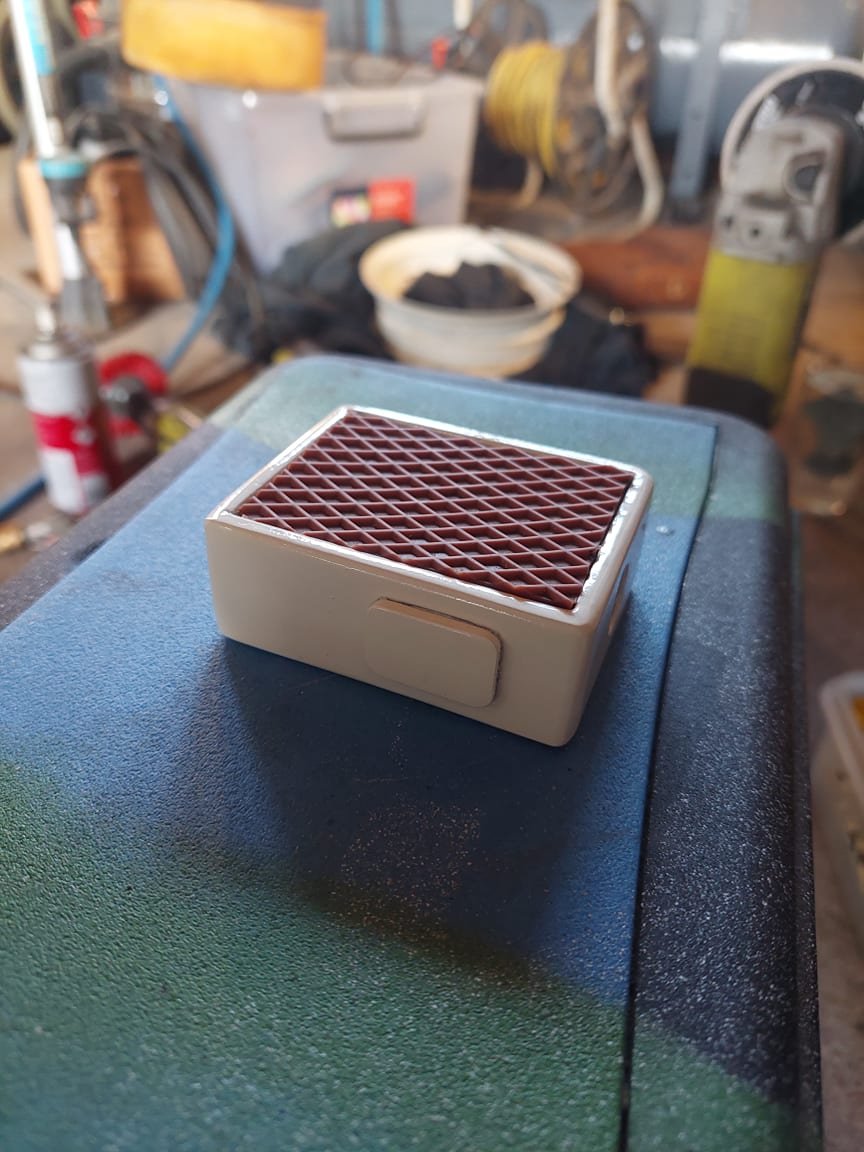
1st up is the painting of the air filter cover
2nd is the air filter cover. I found some old mag wheel centre caps at work, drilled some holes and put a 6mm rivnut in the air filter.
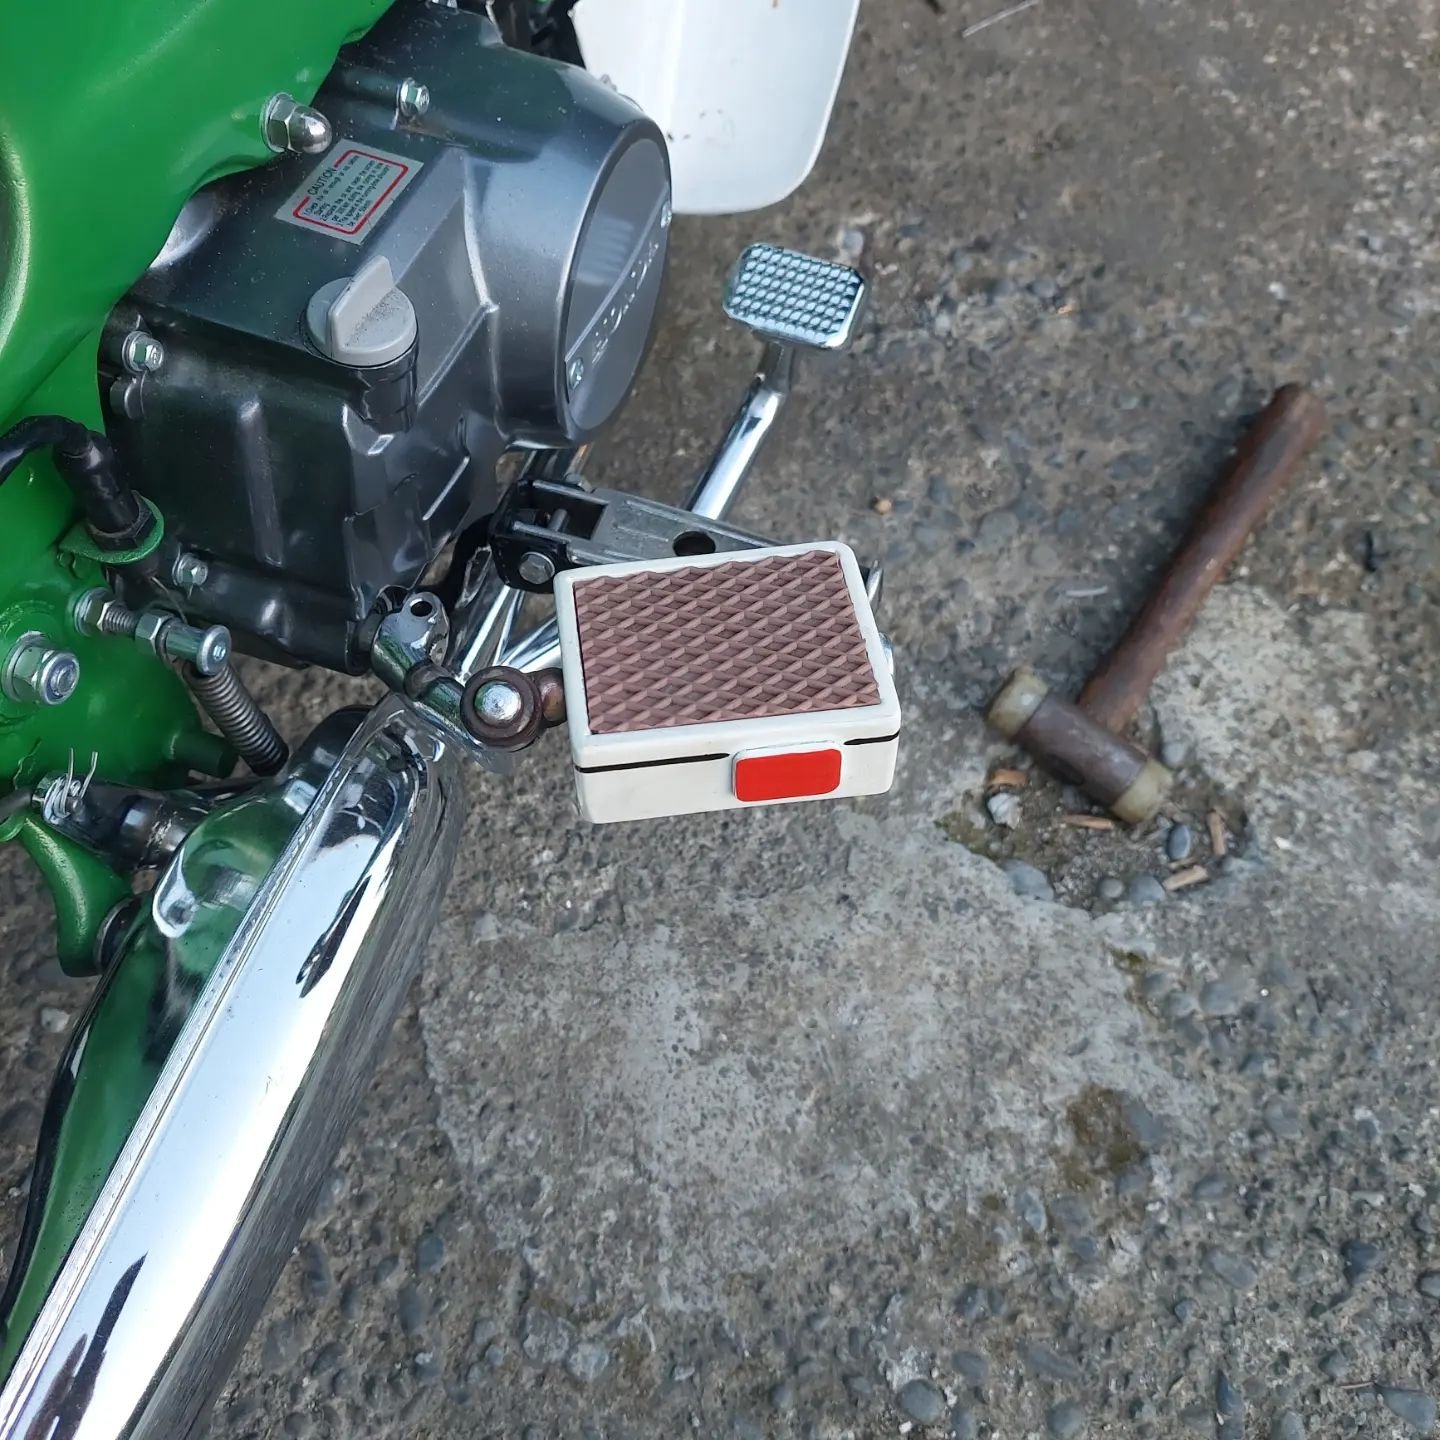
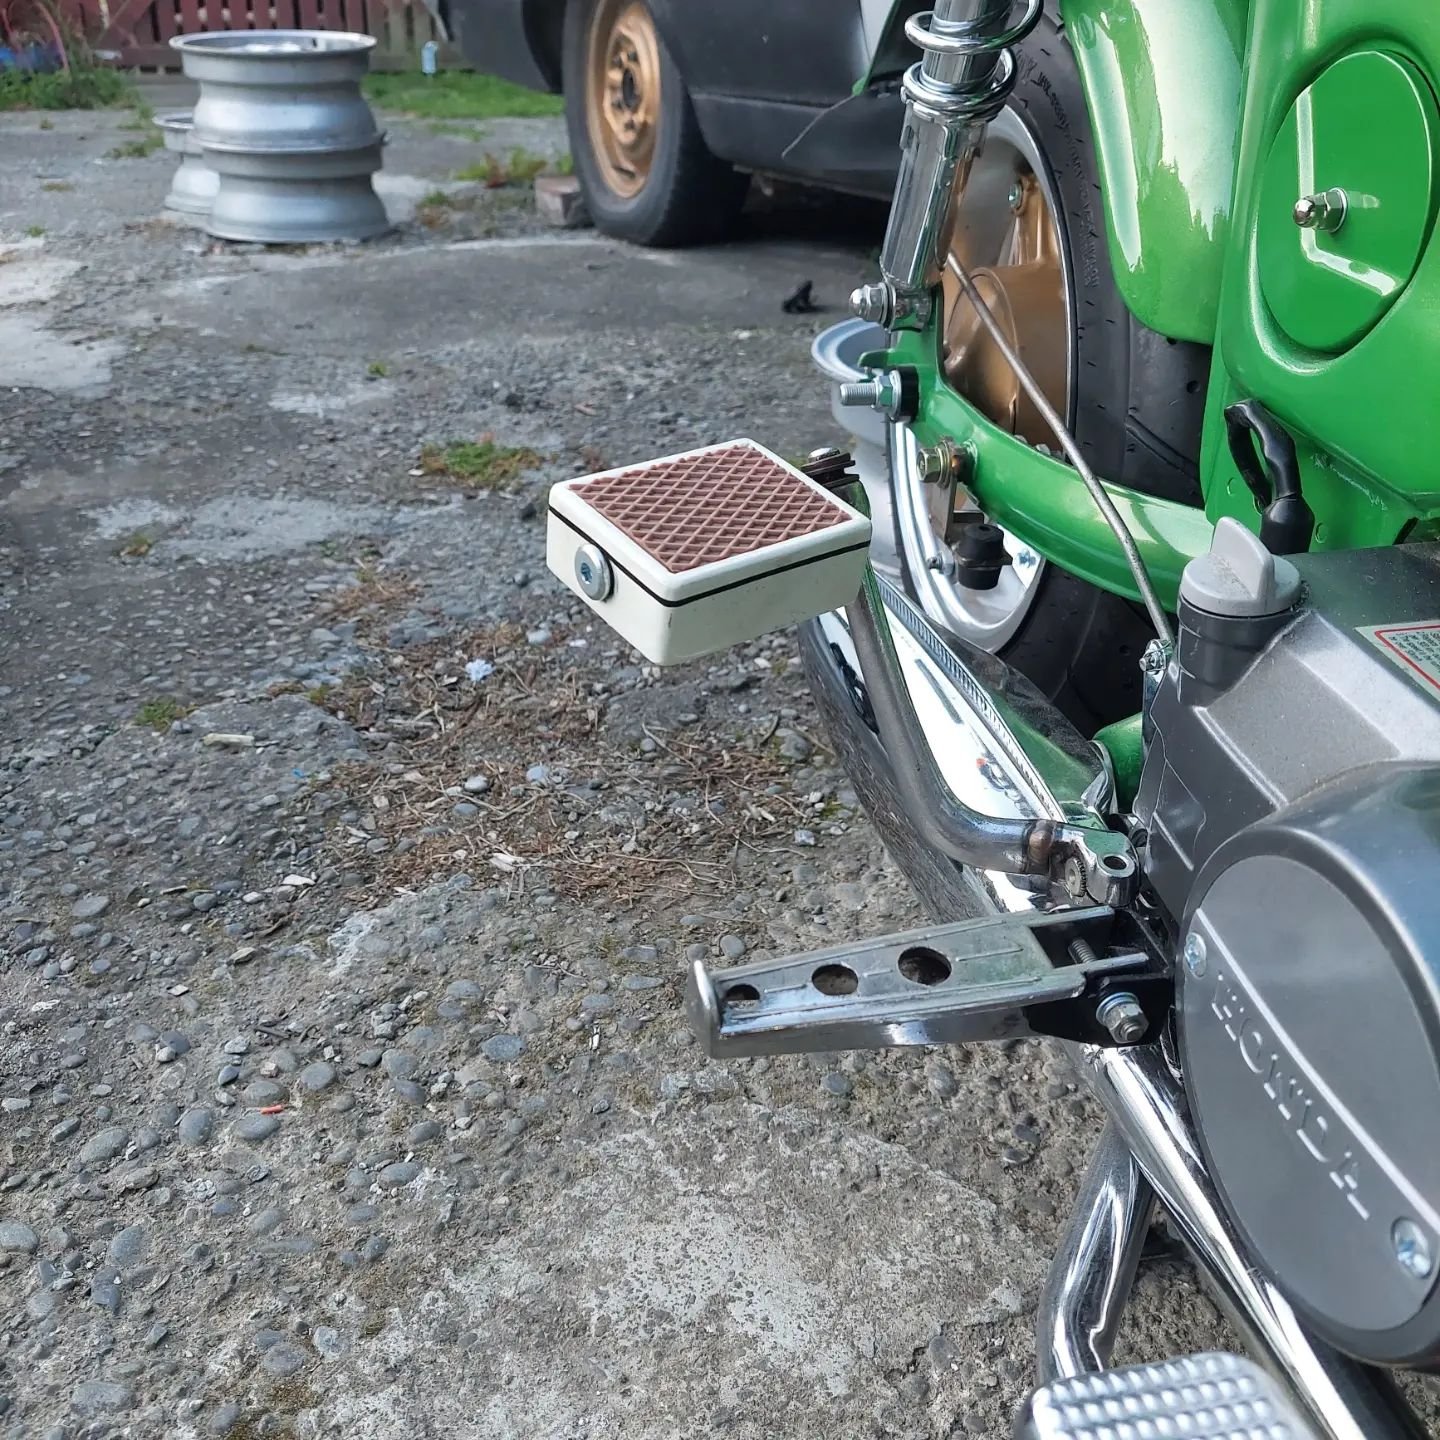
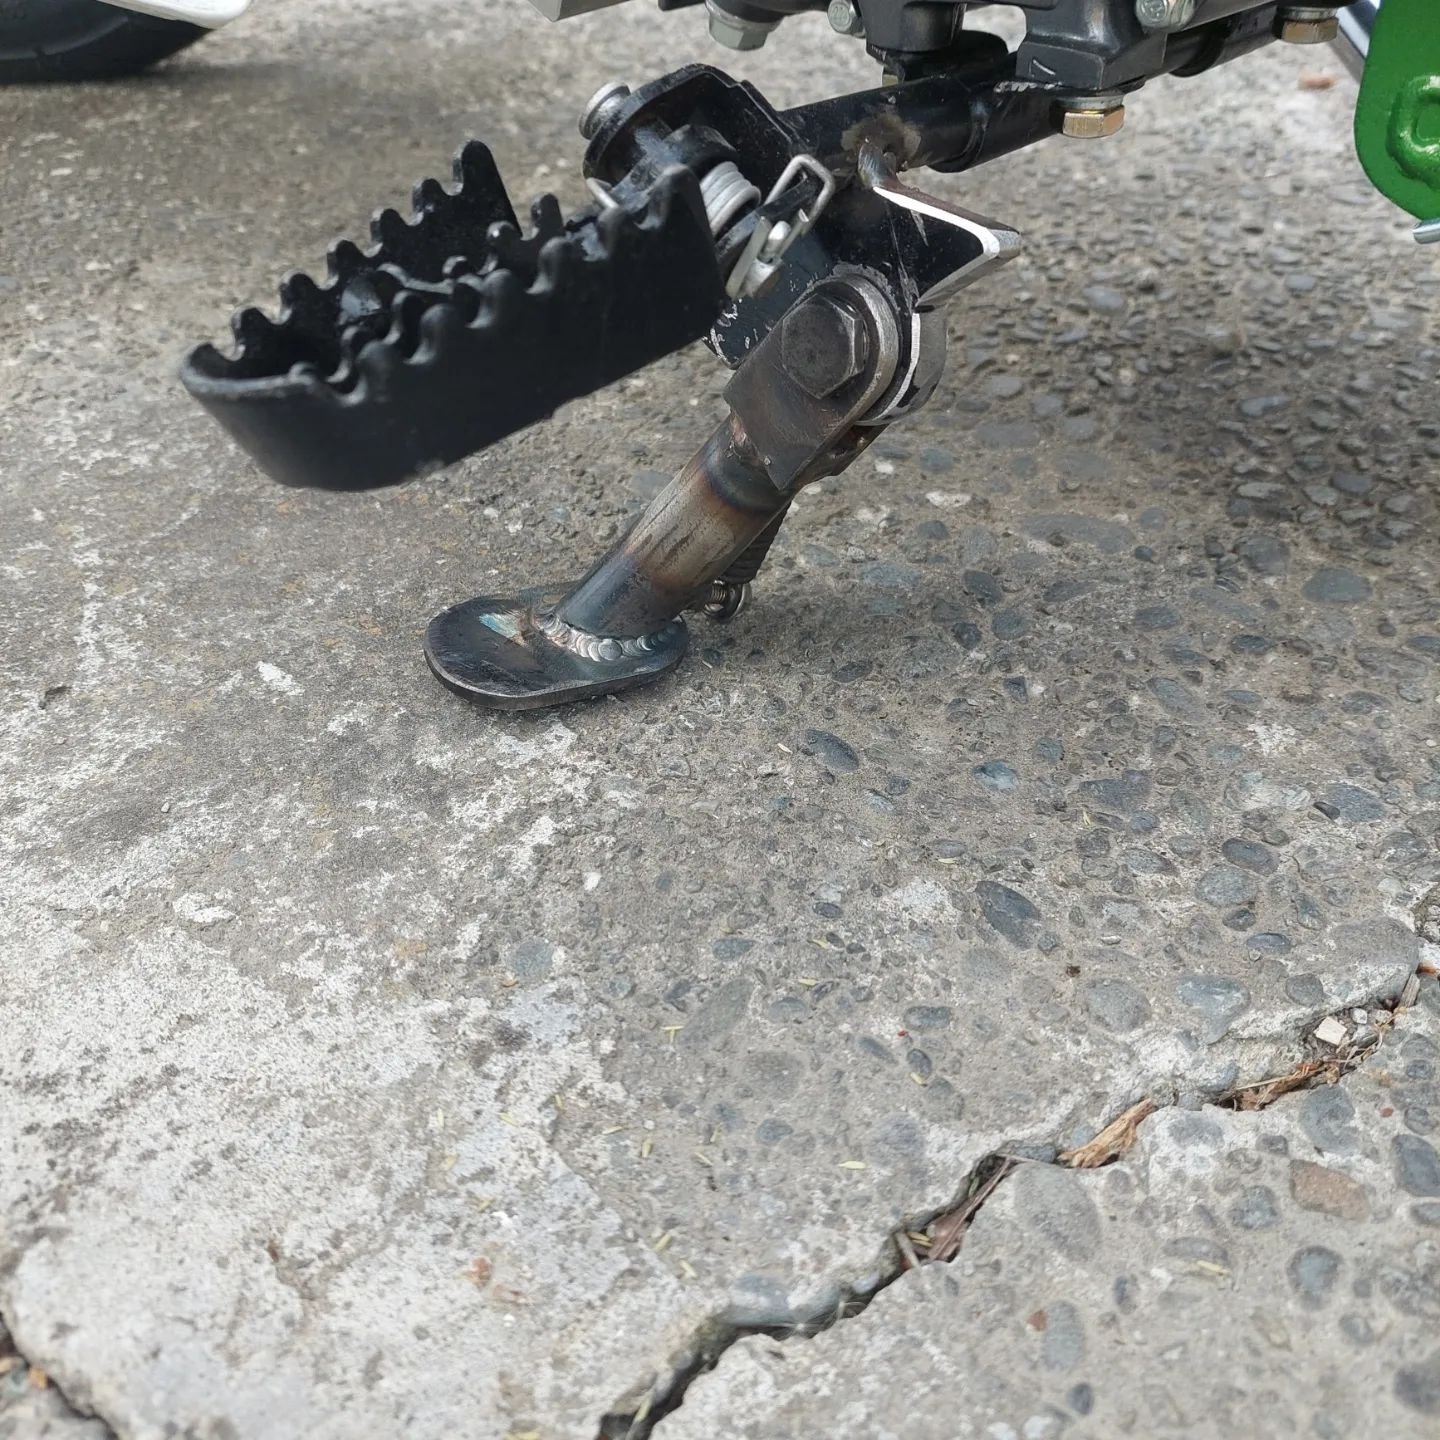
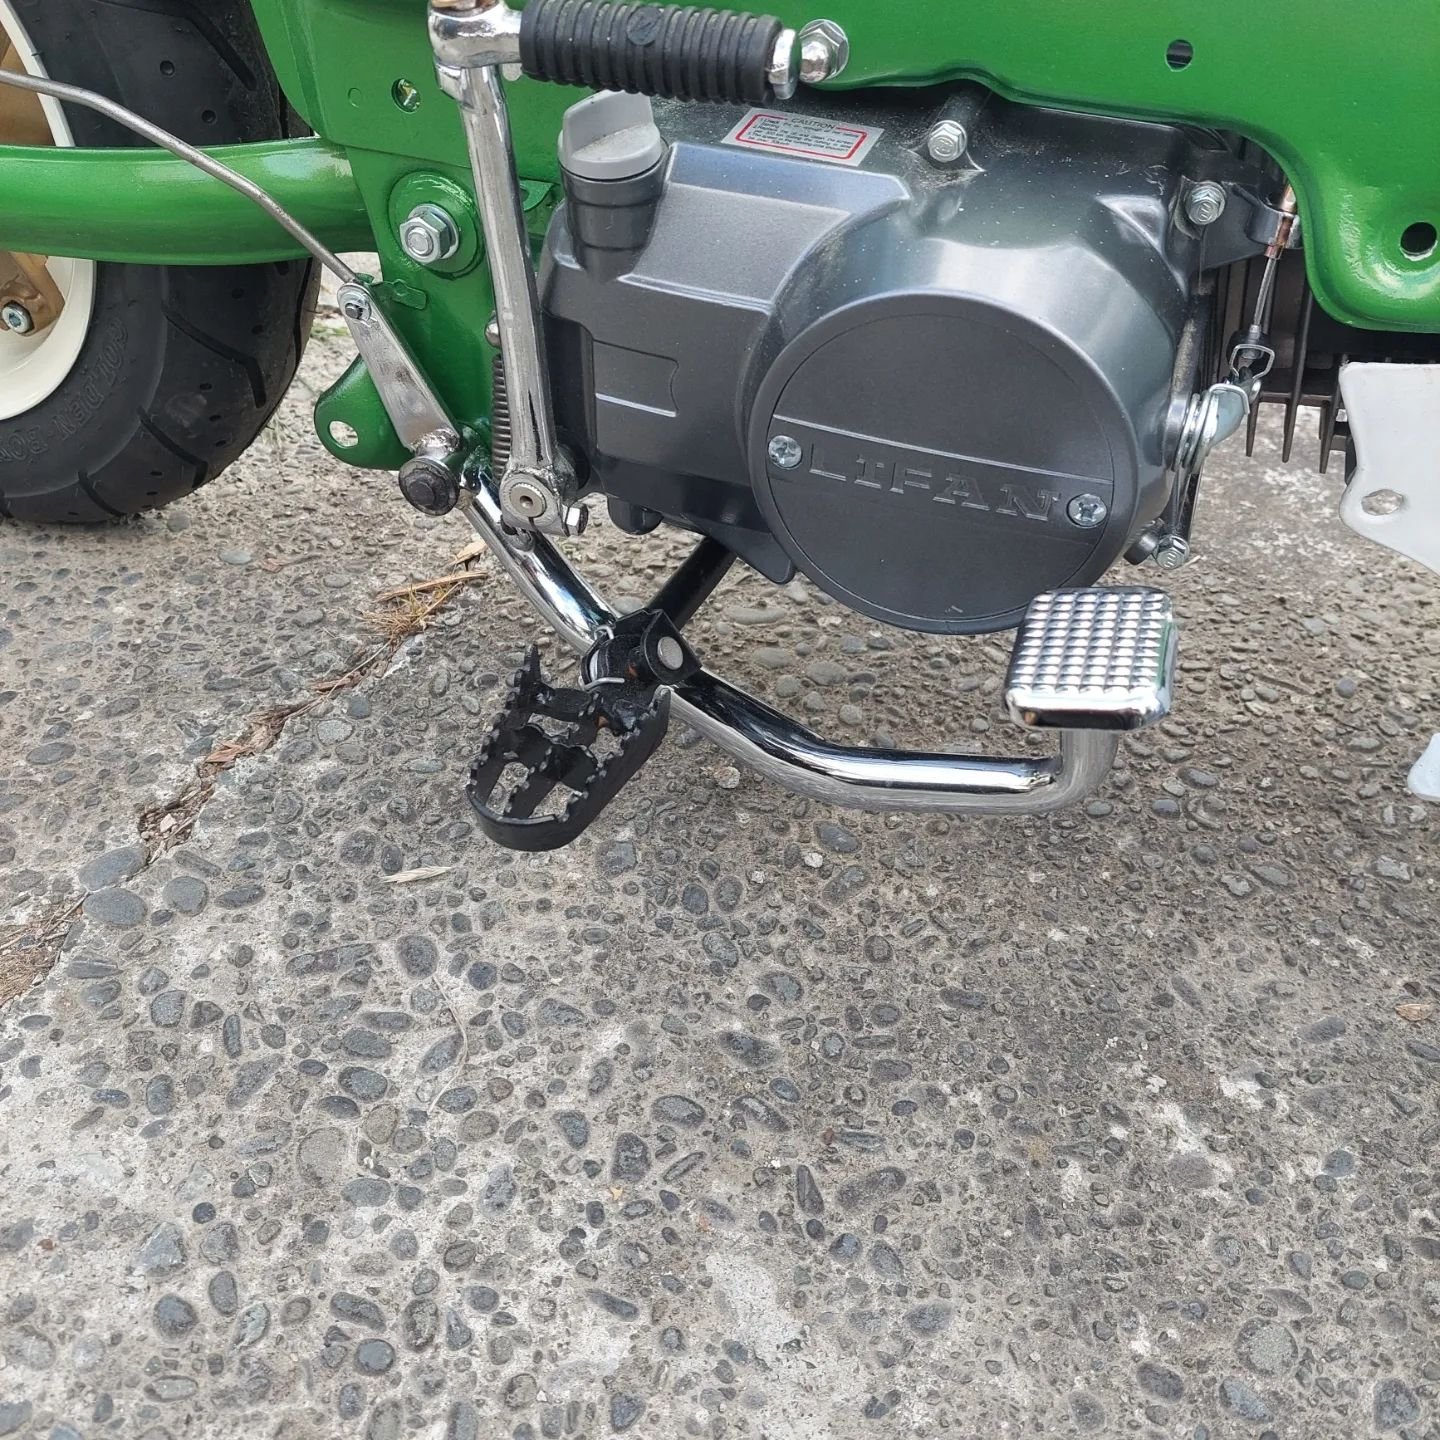
3rd is the kicker pedal I fabricated out of some flatbar, plate and an old vans phone case i had hidden in a drawer.
Lastly I bought some side boxes at the winchester swapmeet last year when swapmeets were actually a thing and you could go to them. Just toying about with the idea of them but Im pretty keen to make some brackets, colour code them and have them fitted ready for syds run this year to store some tools, spares and a few BRB Hazy Pale Ales
-
5
-
3
-
-
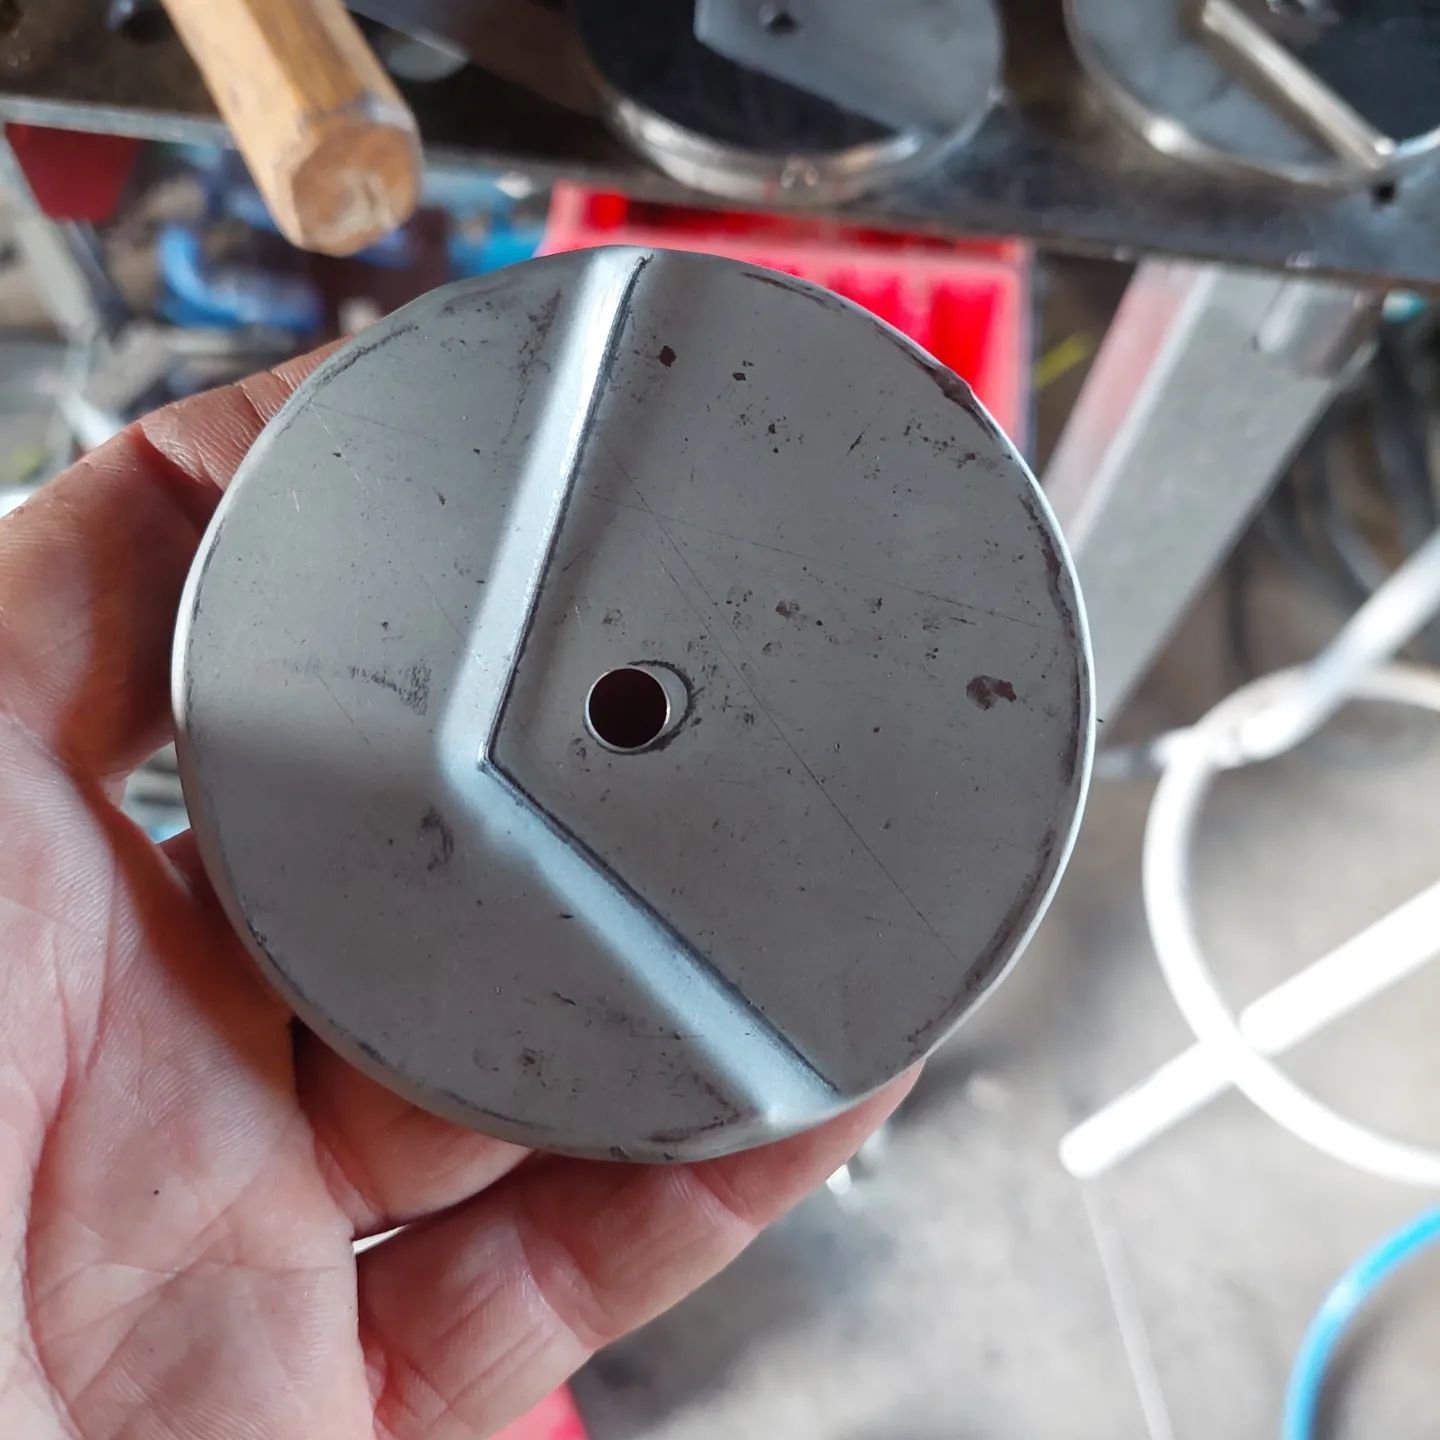
This thing is nearly complete now. I just need to make a bracket for the horn which I'll do tomorrow.
I put some feelers out for an air filter cover, to no avail. So my way of thinking is cant find it, make it! So thats what i did. I used a combination of pressing and hammer forming. I used 2 75mm OD 6mm thick discs and 1 2mm 75mm OD disc cut to the profile I need.
It just needs some minor massaging then prep it for paint.
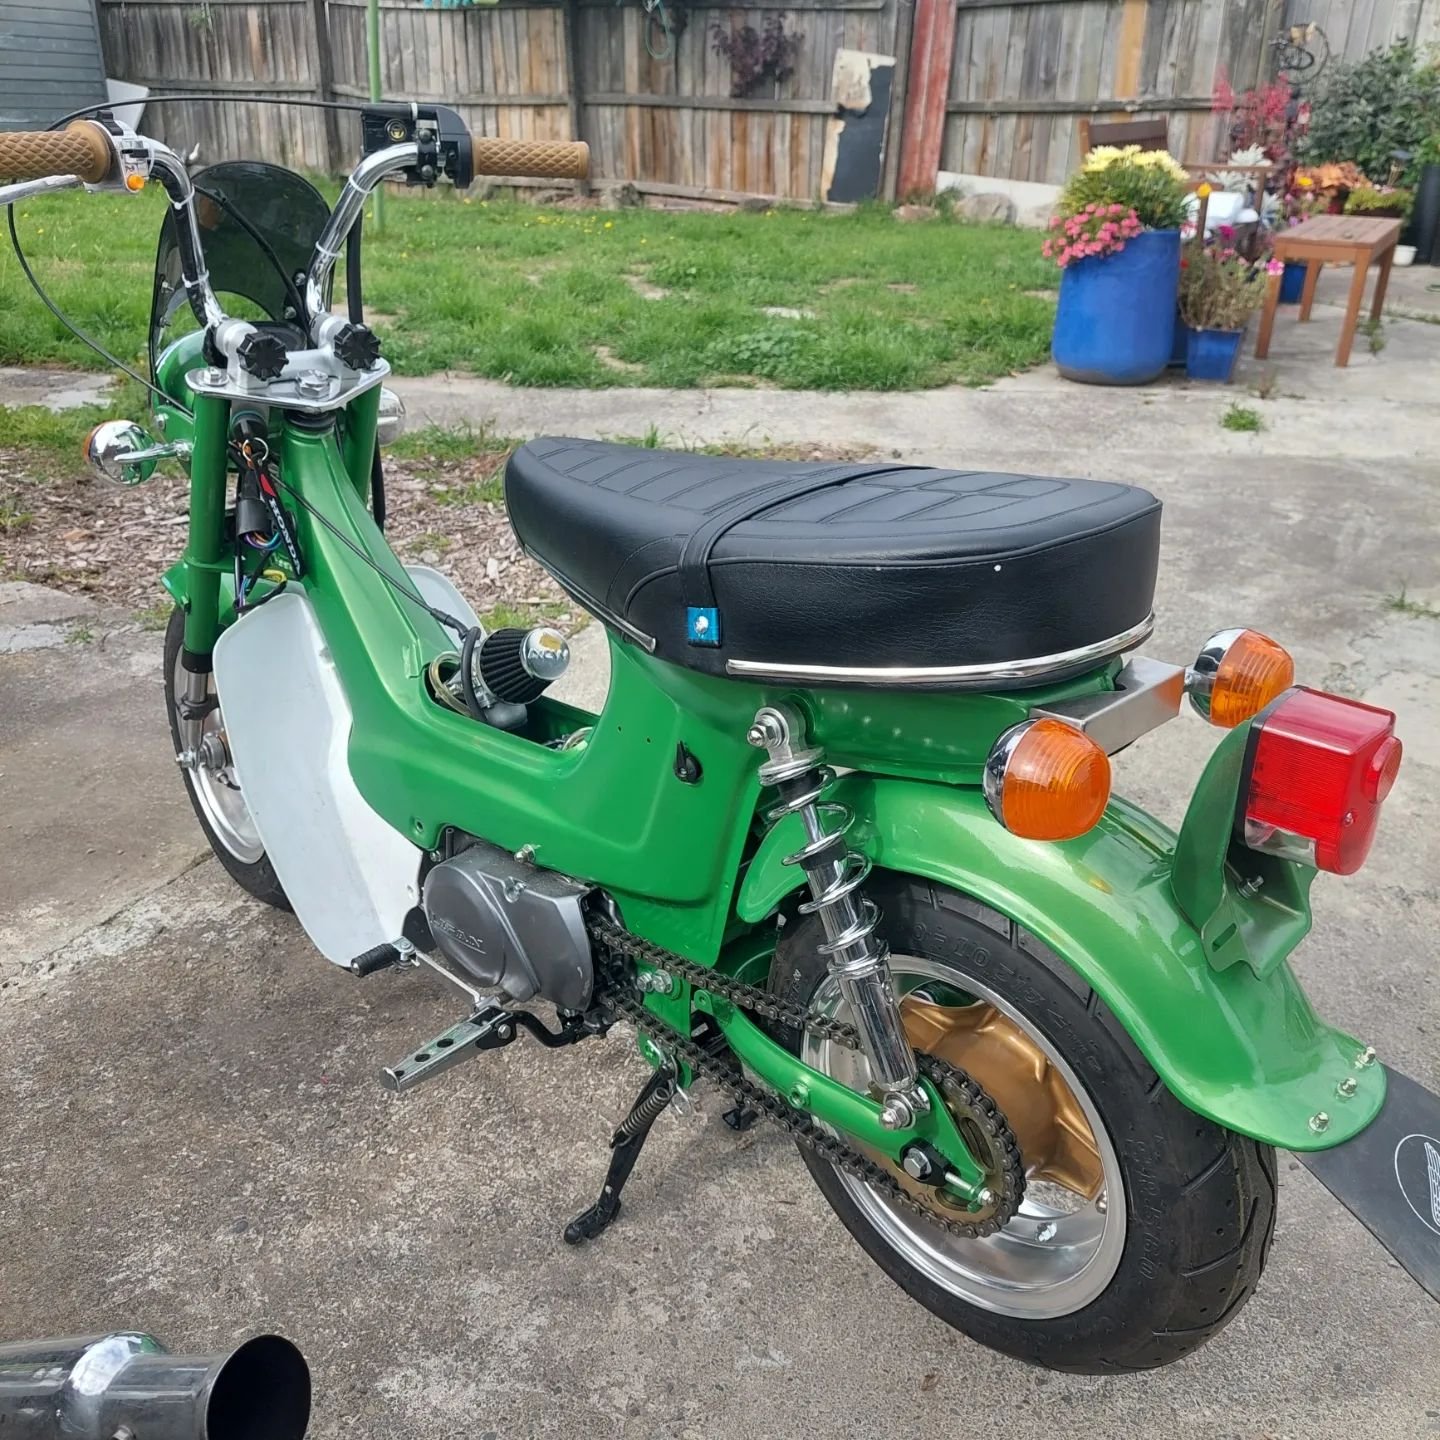
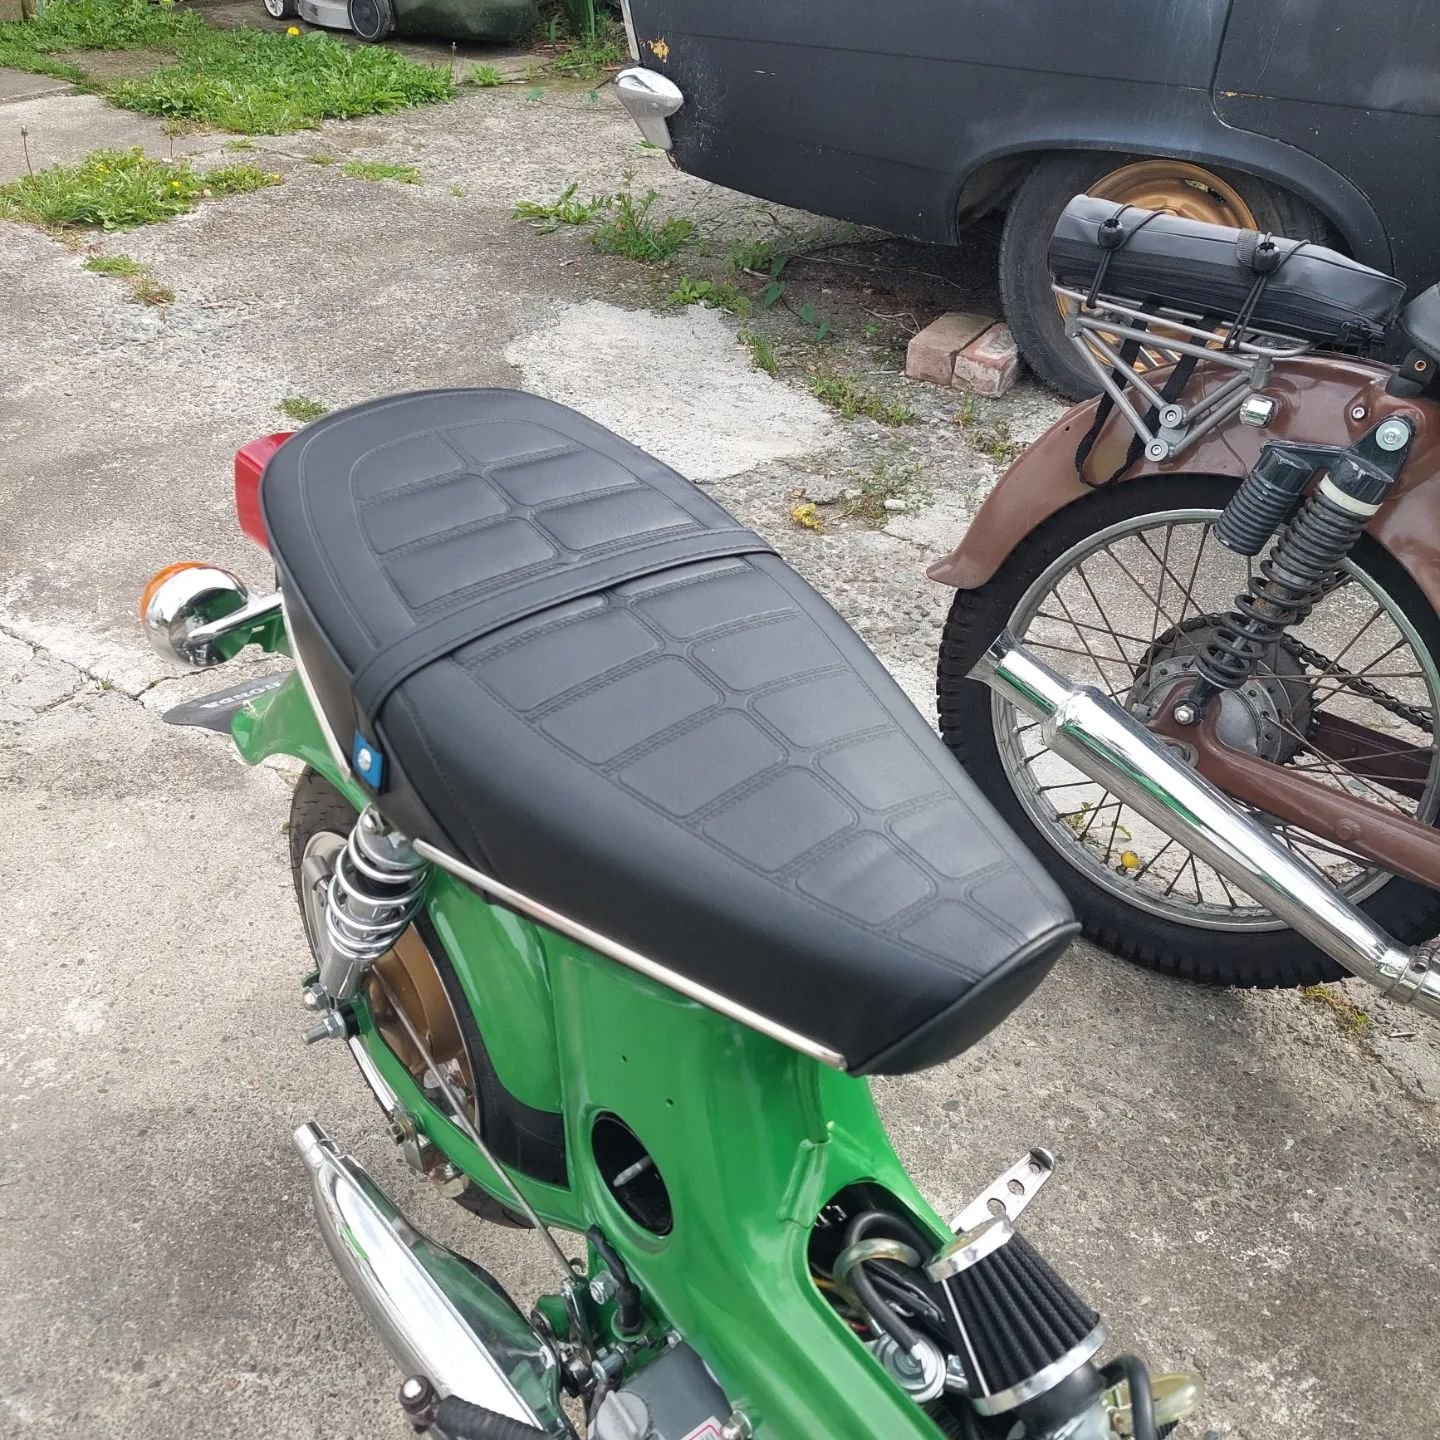
The last major piece of the puzzle was the seat which I got this morning thanks to Andy and Wei at mBike. Bolted it on and couldnt be happier then took it for a hoon down the street
-
8
-
1
-
-
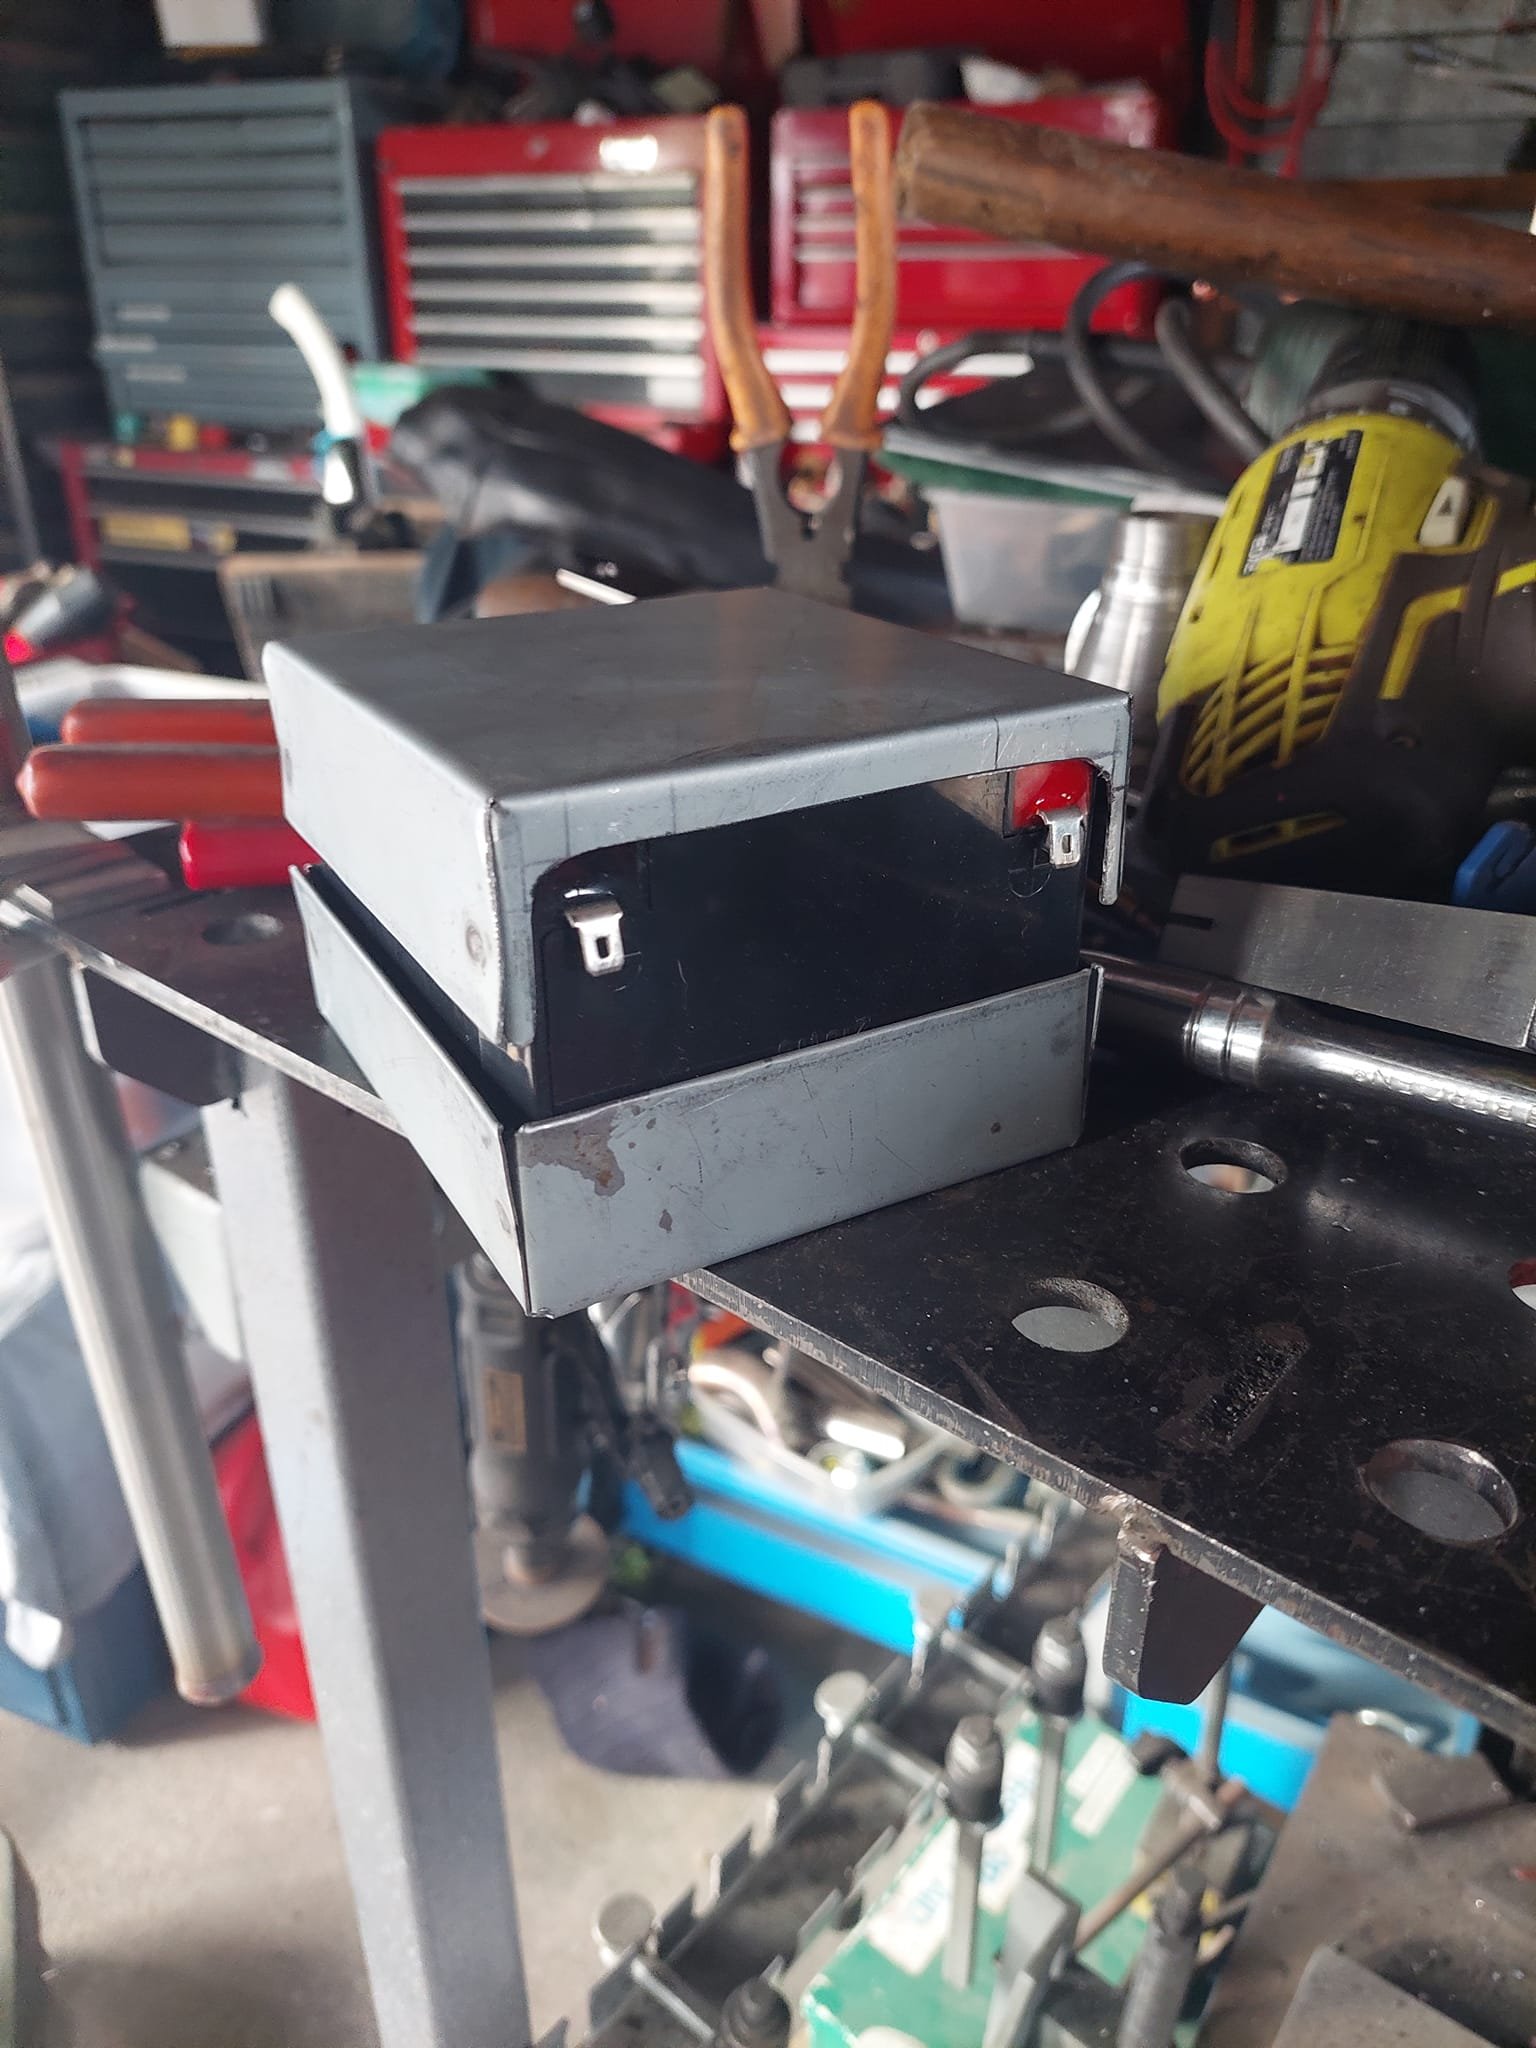
The battery box has been powdercoated at work and installed, I used those cable tidy velcro straps from Bunnings to hold the top down.
Also a sneak peak at my kicker pedal I made, its getting pinstriped tomorrow to finish it off.
-
5
-
-
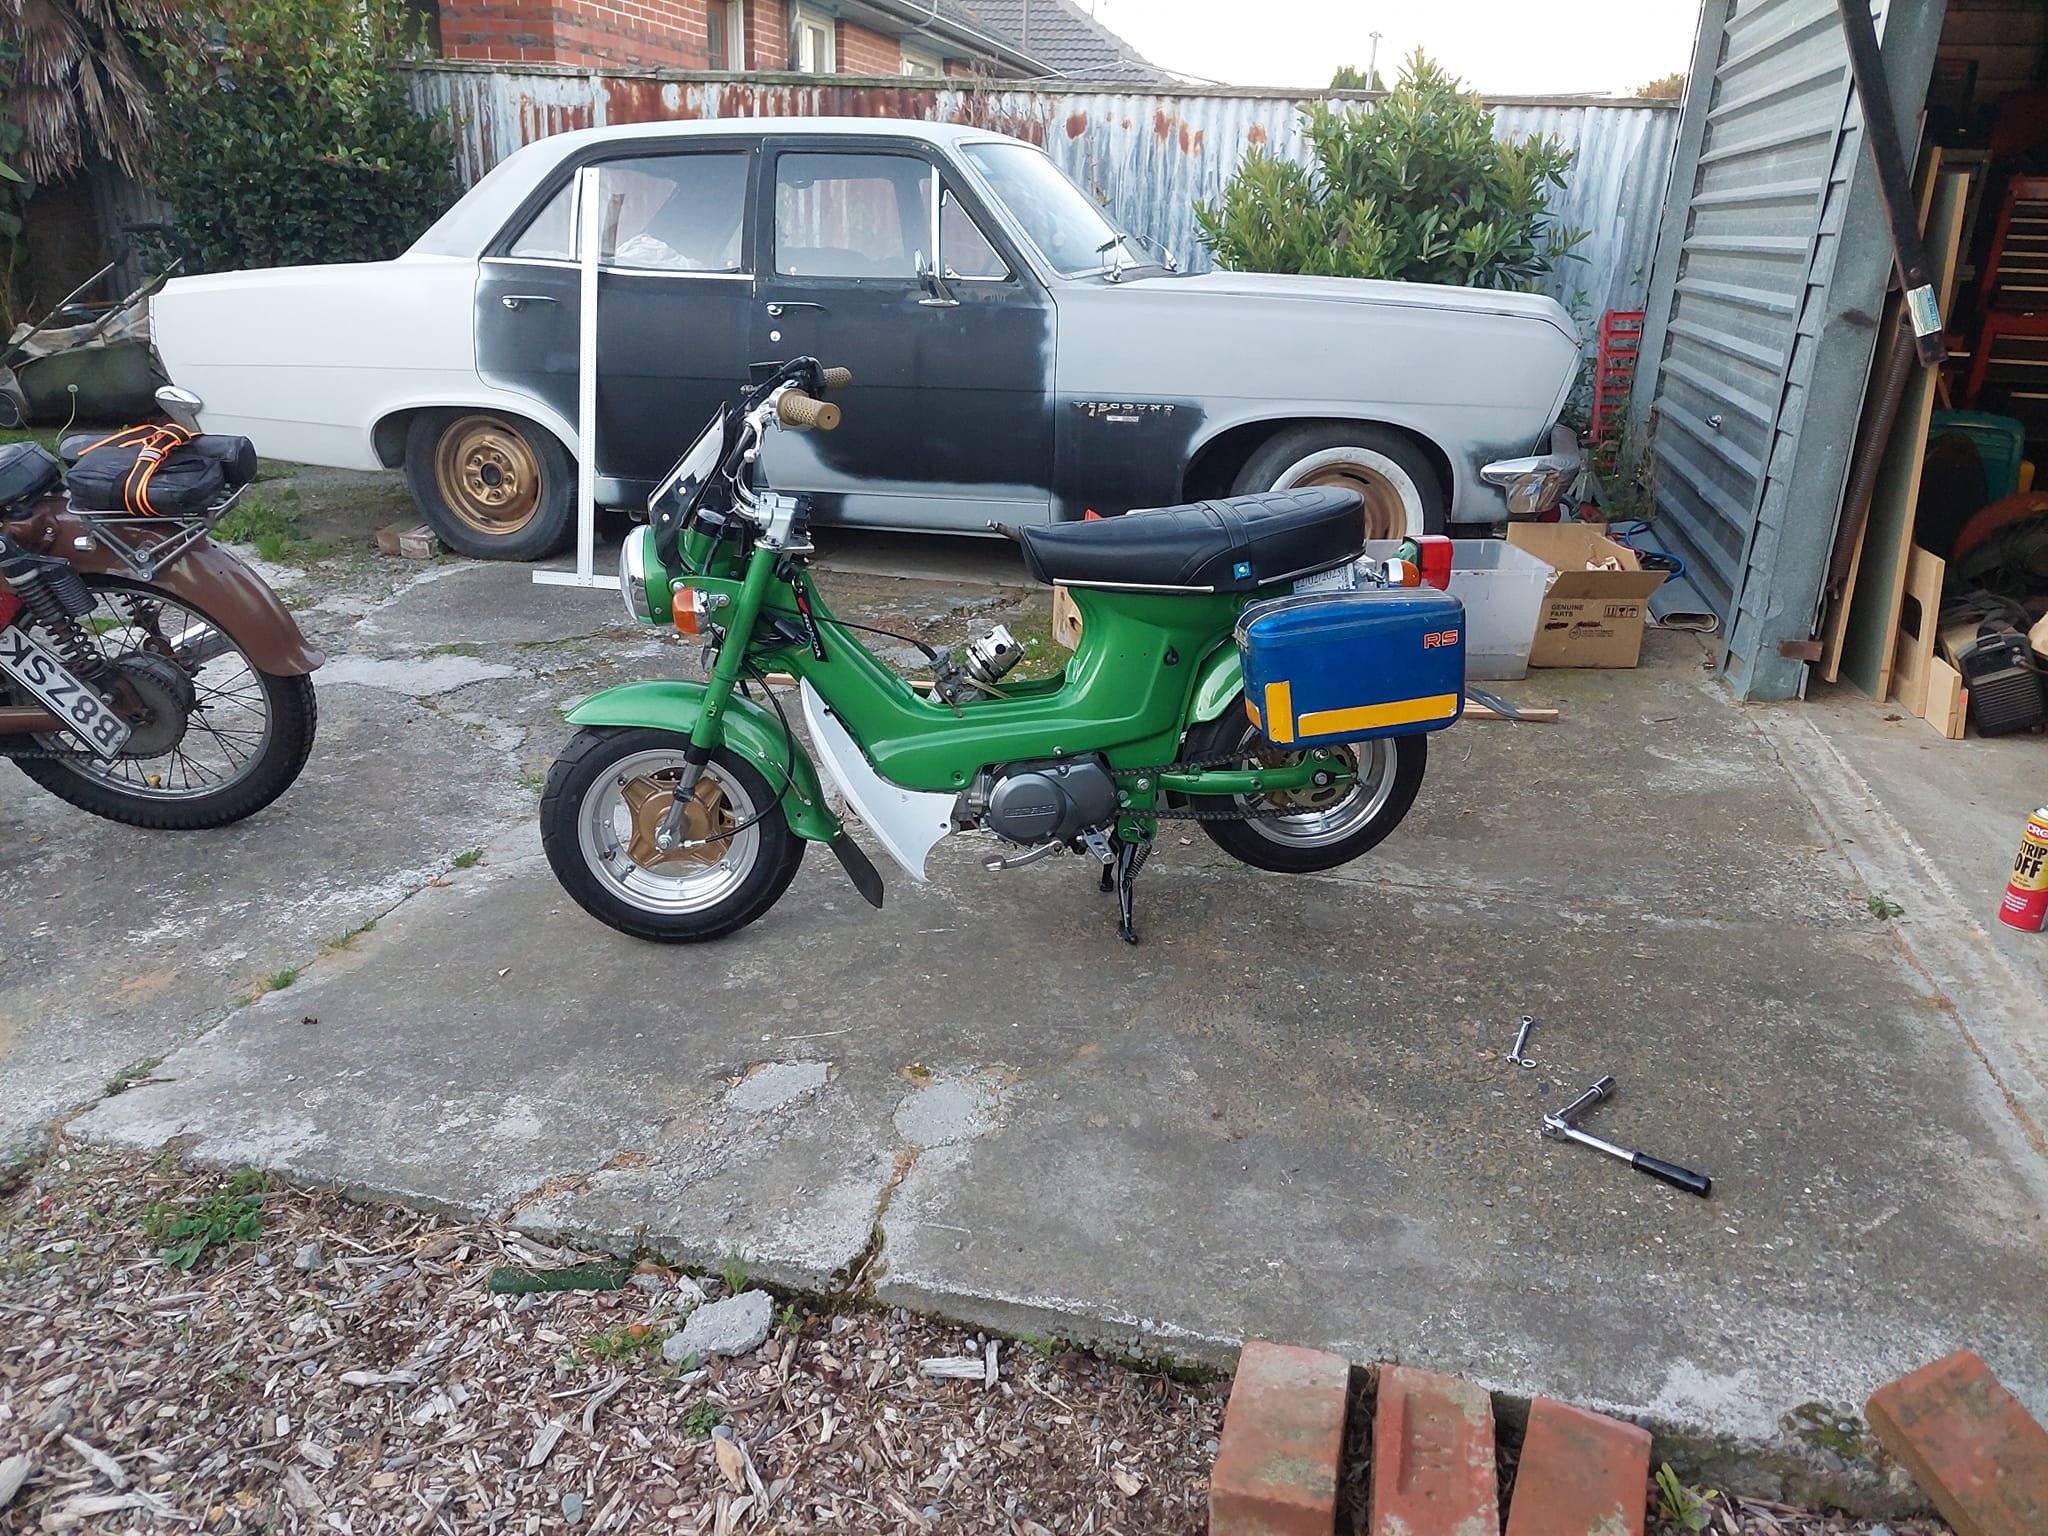
As the weathers been pretty shit here in CHCH over the weekend I got stuck into the chaly. Another trip to mBike and a good few dollars lighter I walked away with a tinted windshield and some widend rims. the front is 3.5 inch and the rear 4 inch.
-
7
-
1
-
-
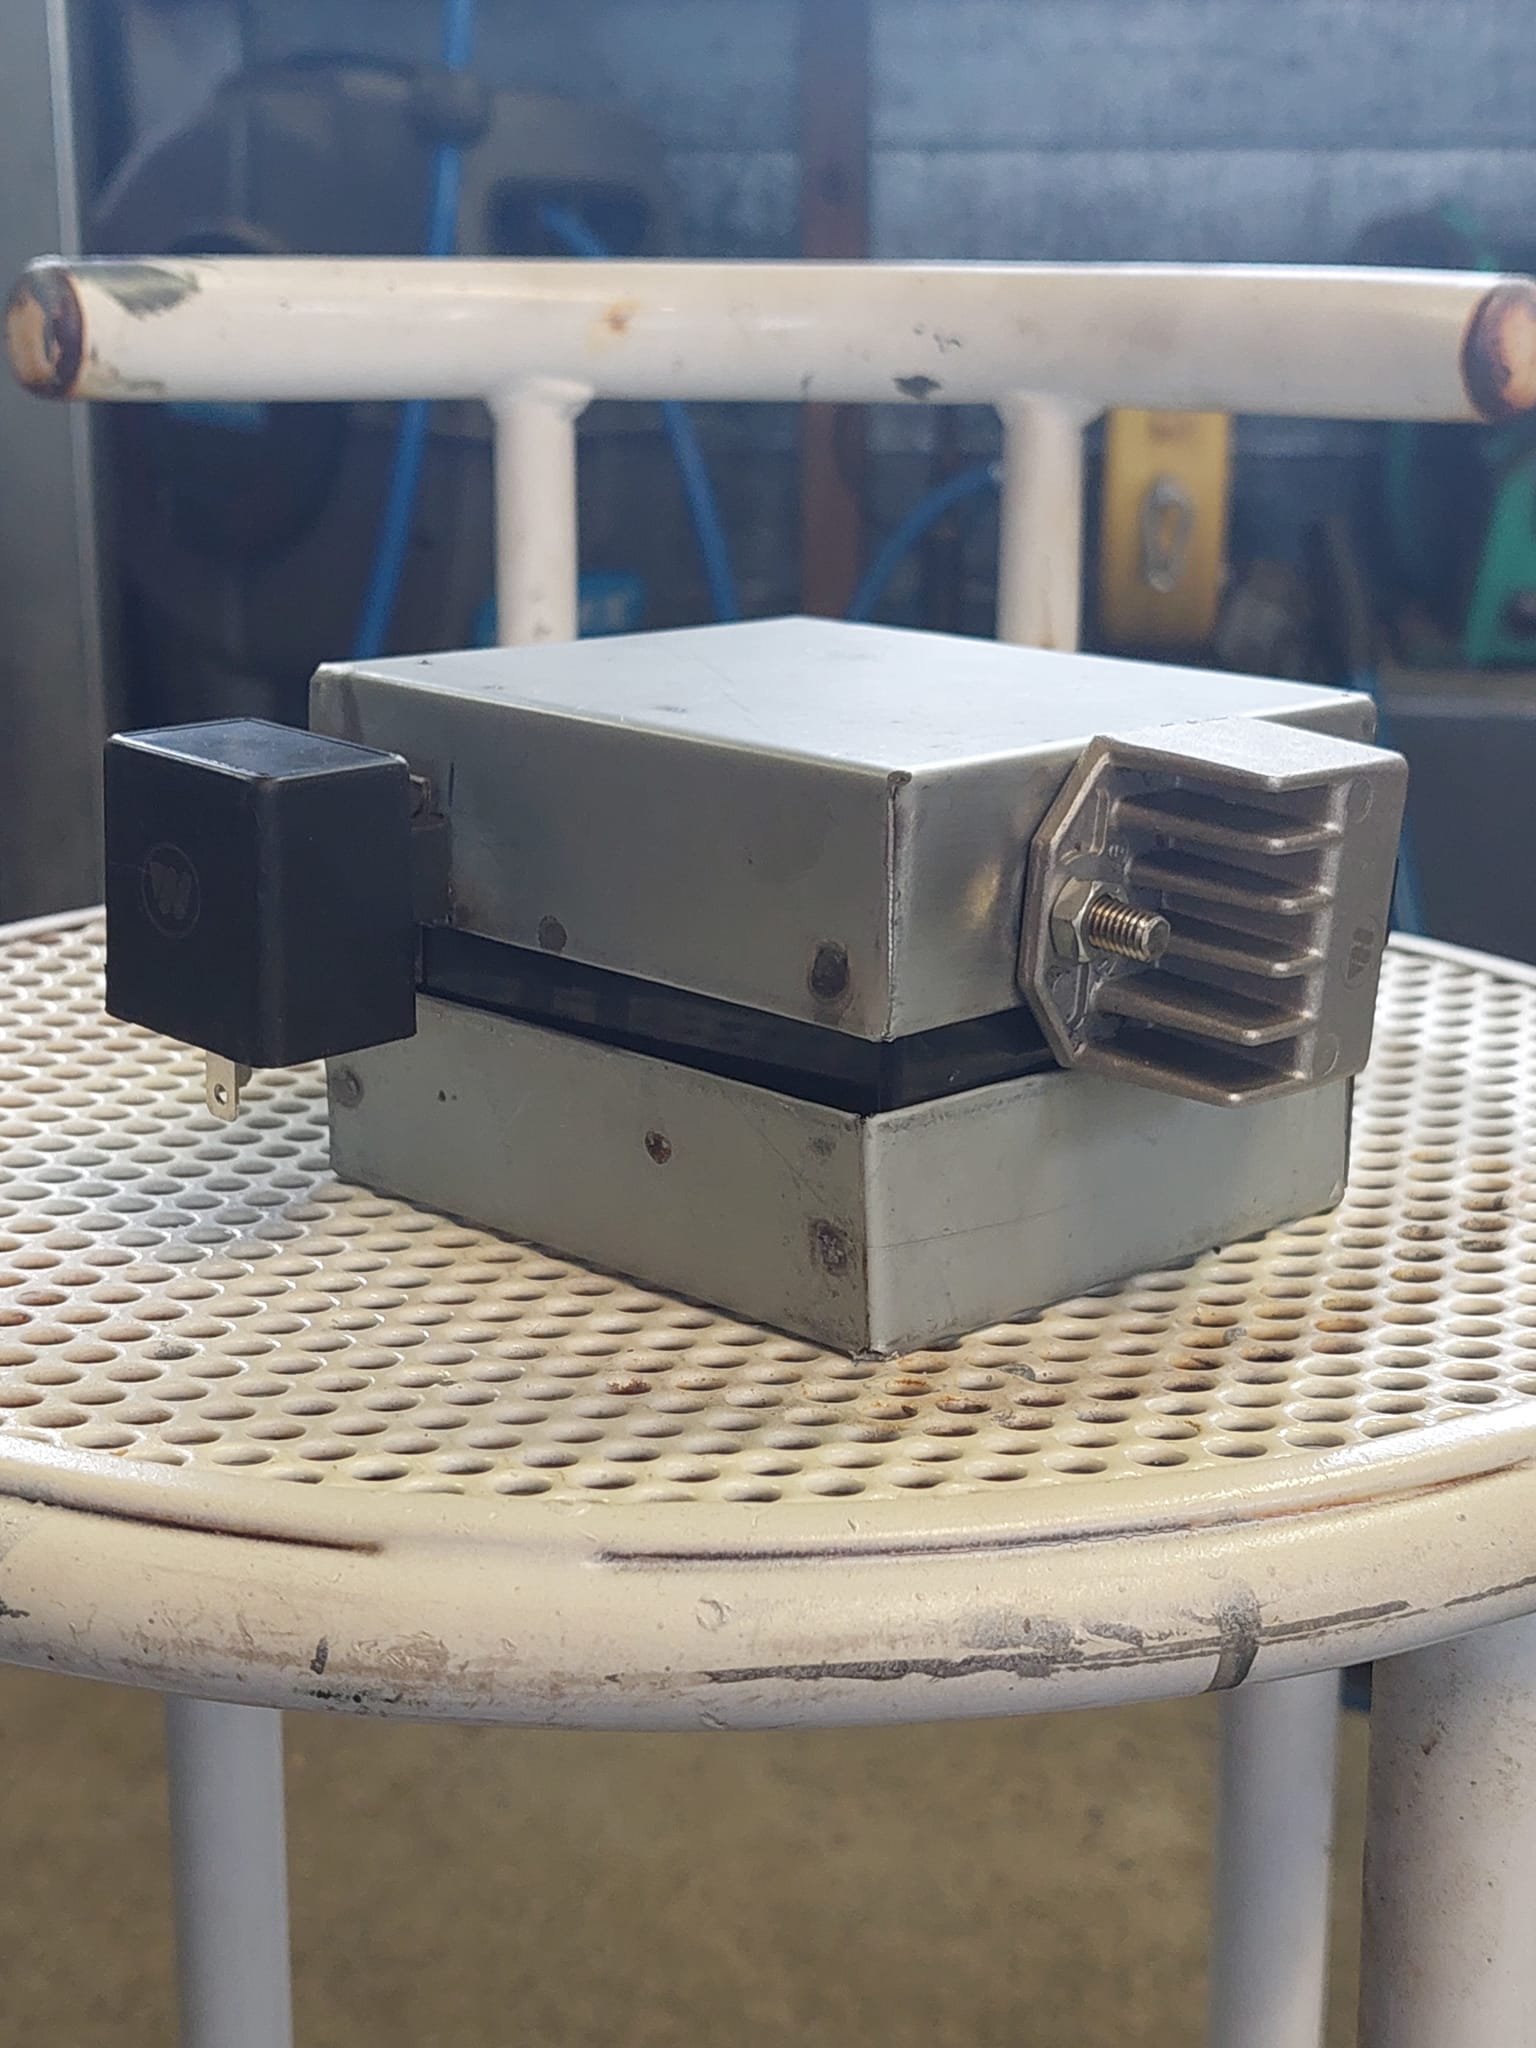
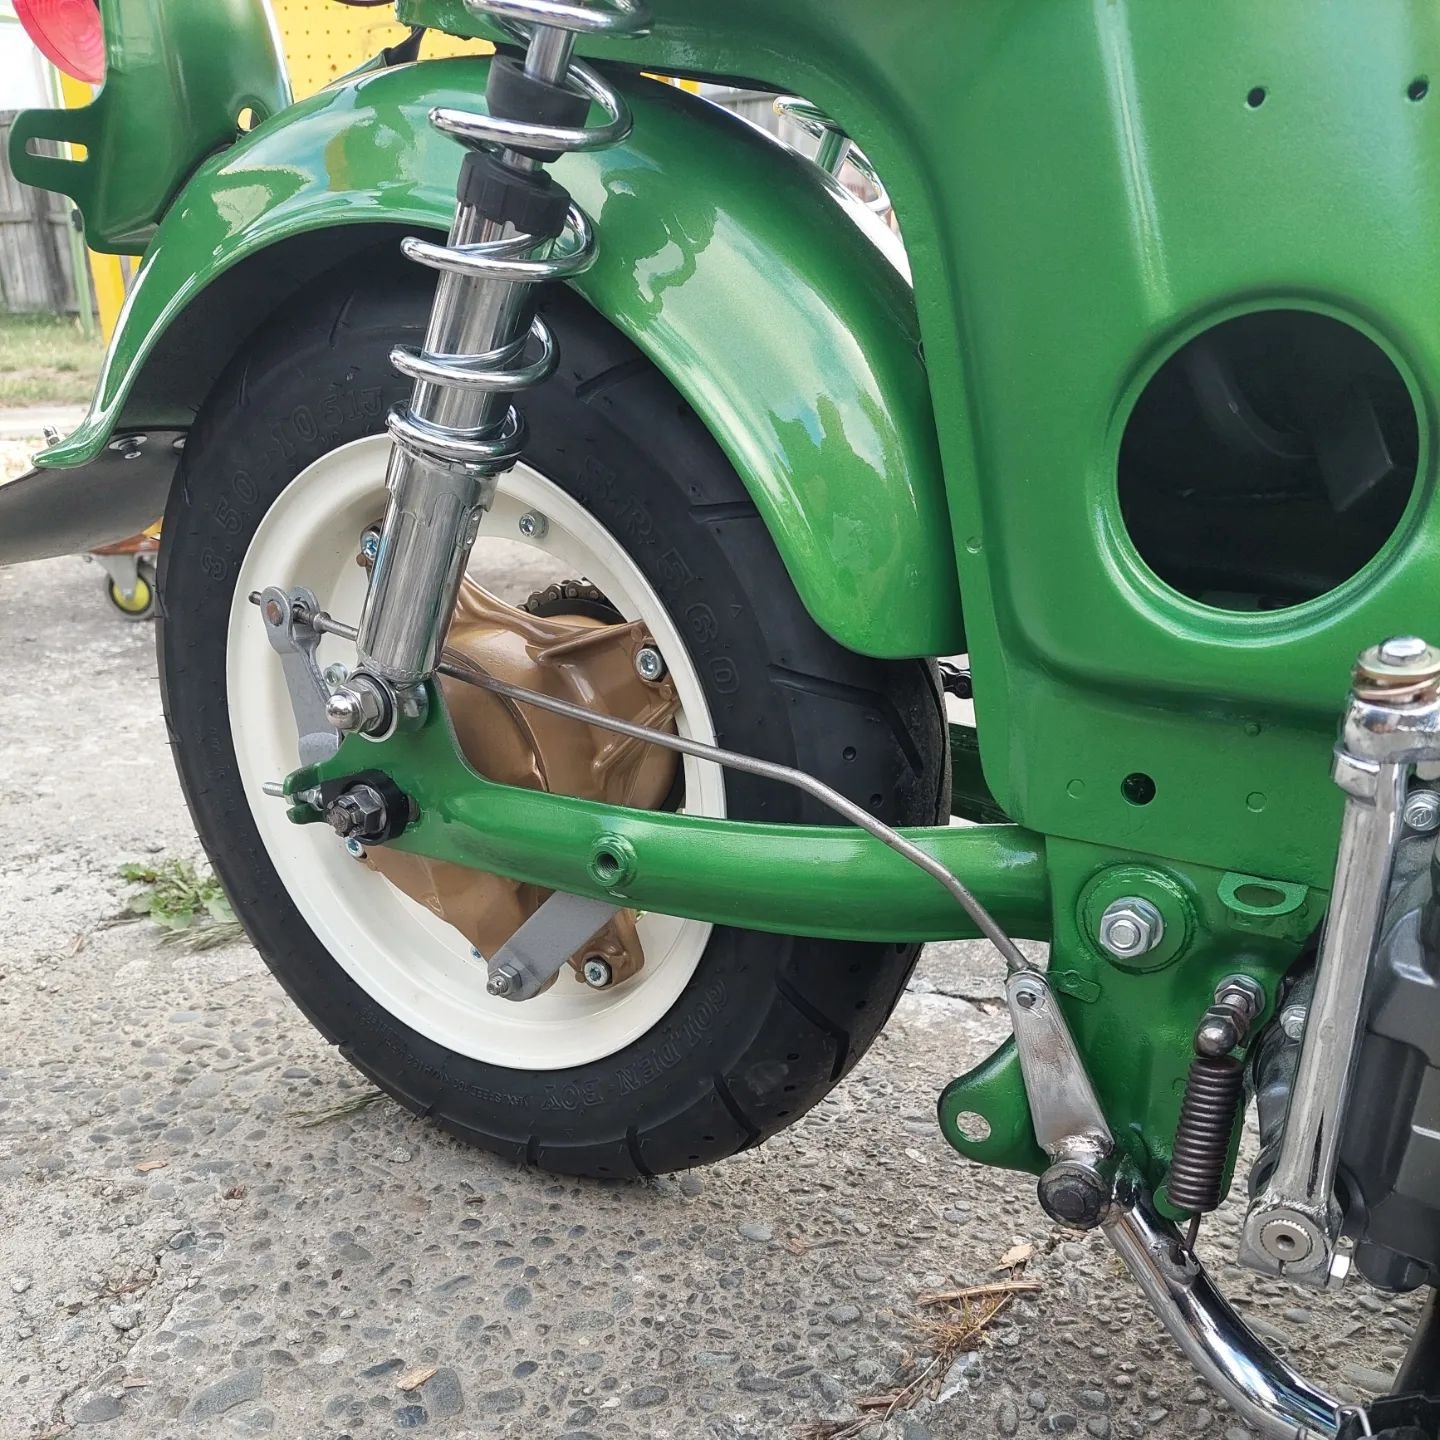
On my lunchbreak at work I knocked up a rear brake adjuster on the lathe, its an old 3 phase colchester and runs like a champ.
I made up a battery box that also held the voltage regulator and the flasher unit. I'll get around to powdercoating it at some point
-
4
-
-
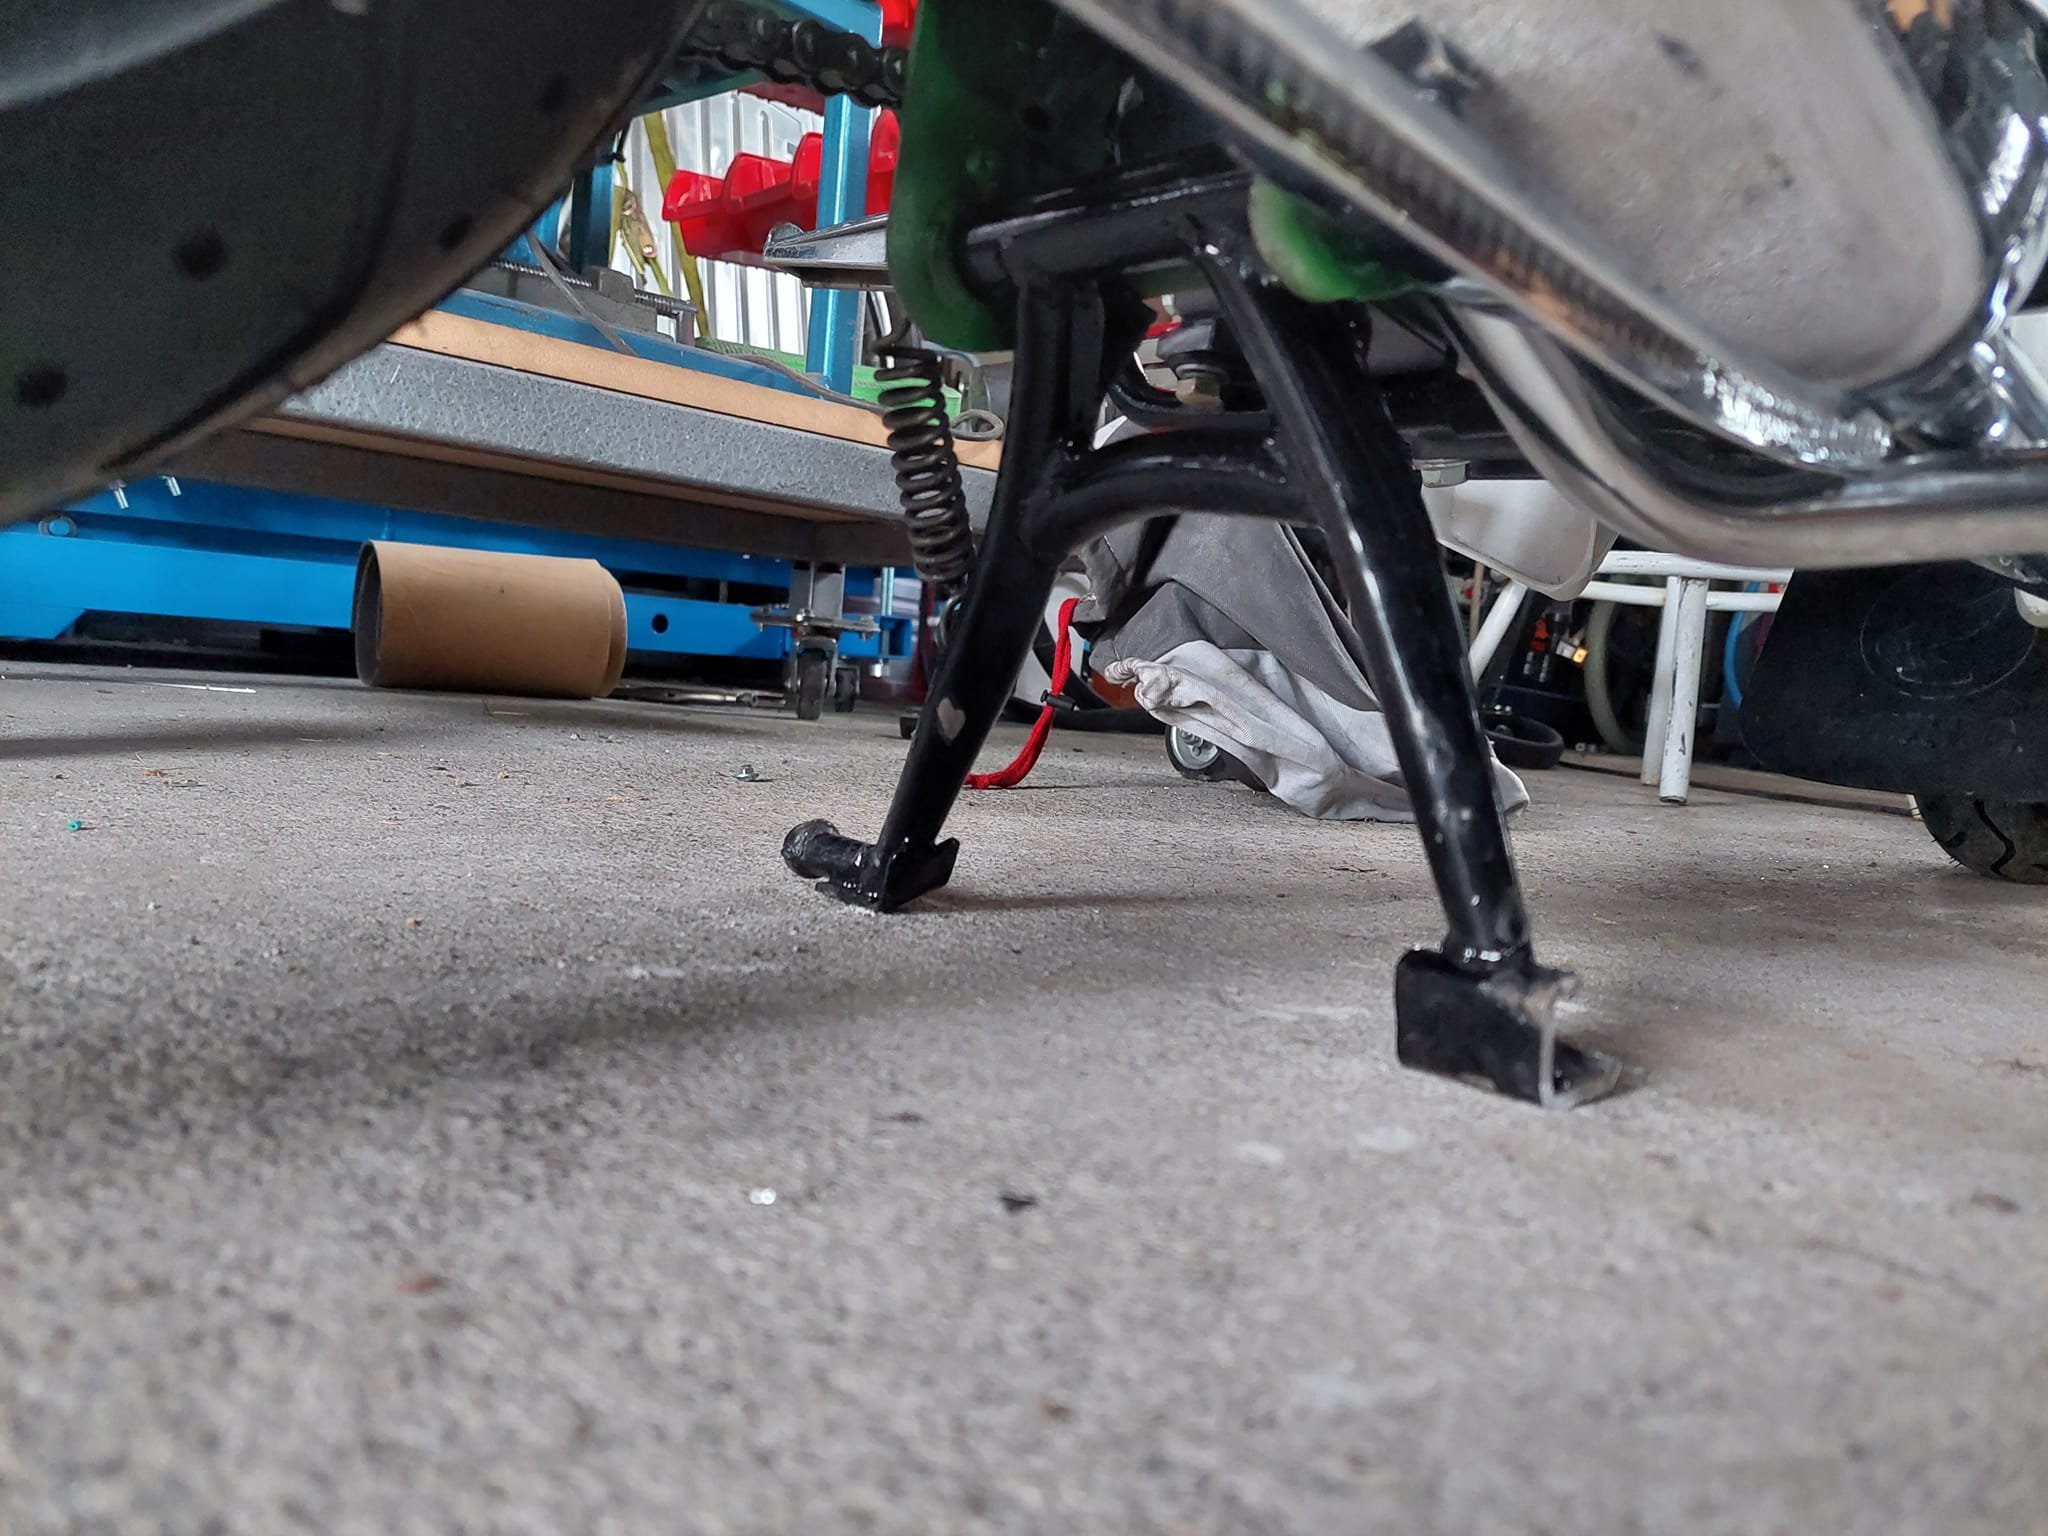
I really wasnt feeling the tiny side stand and it was pretty pointless to be honest. So I opted for the centre stand. With it being lowered quite a bit it lifted the rear wheel so far off the ground it became unstable. I cut off 25mm from the bottom and made new pads from some 25mm shs.
I purchased a chaly big bore exhaust from mbike, its for a standard chaly so the rear mount doesnt meet up due to the bigger engine. Other than that it looks pretty sweet. To stop the centre stand from hitting the swing arm and the chain i whipped up a small stainless bracket with a rubber stop and bolted it to where the passenger pegs would go.
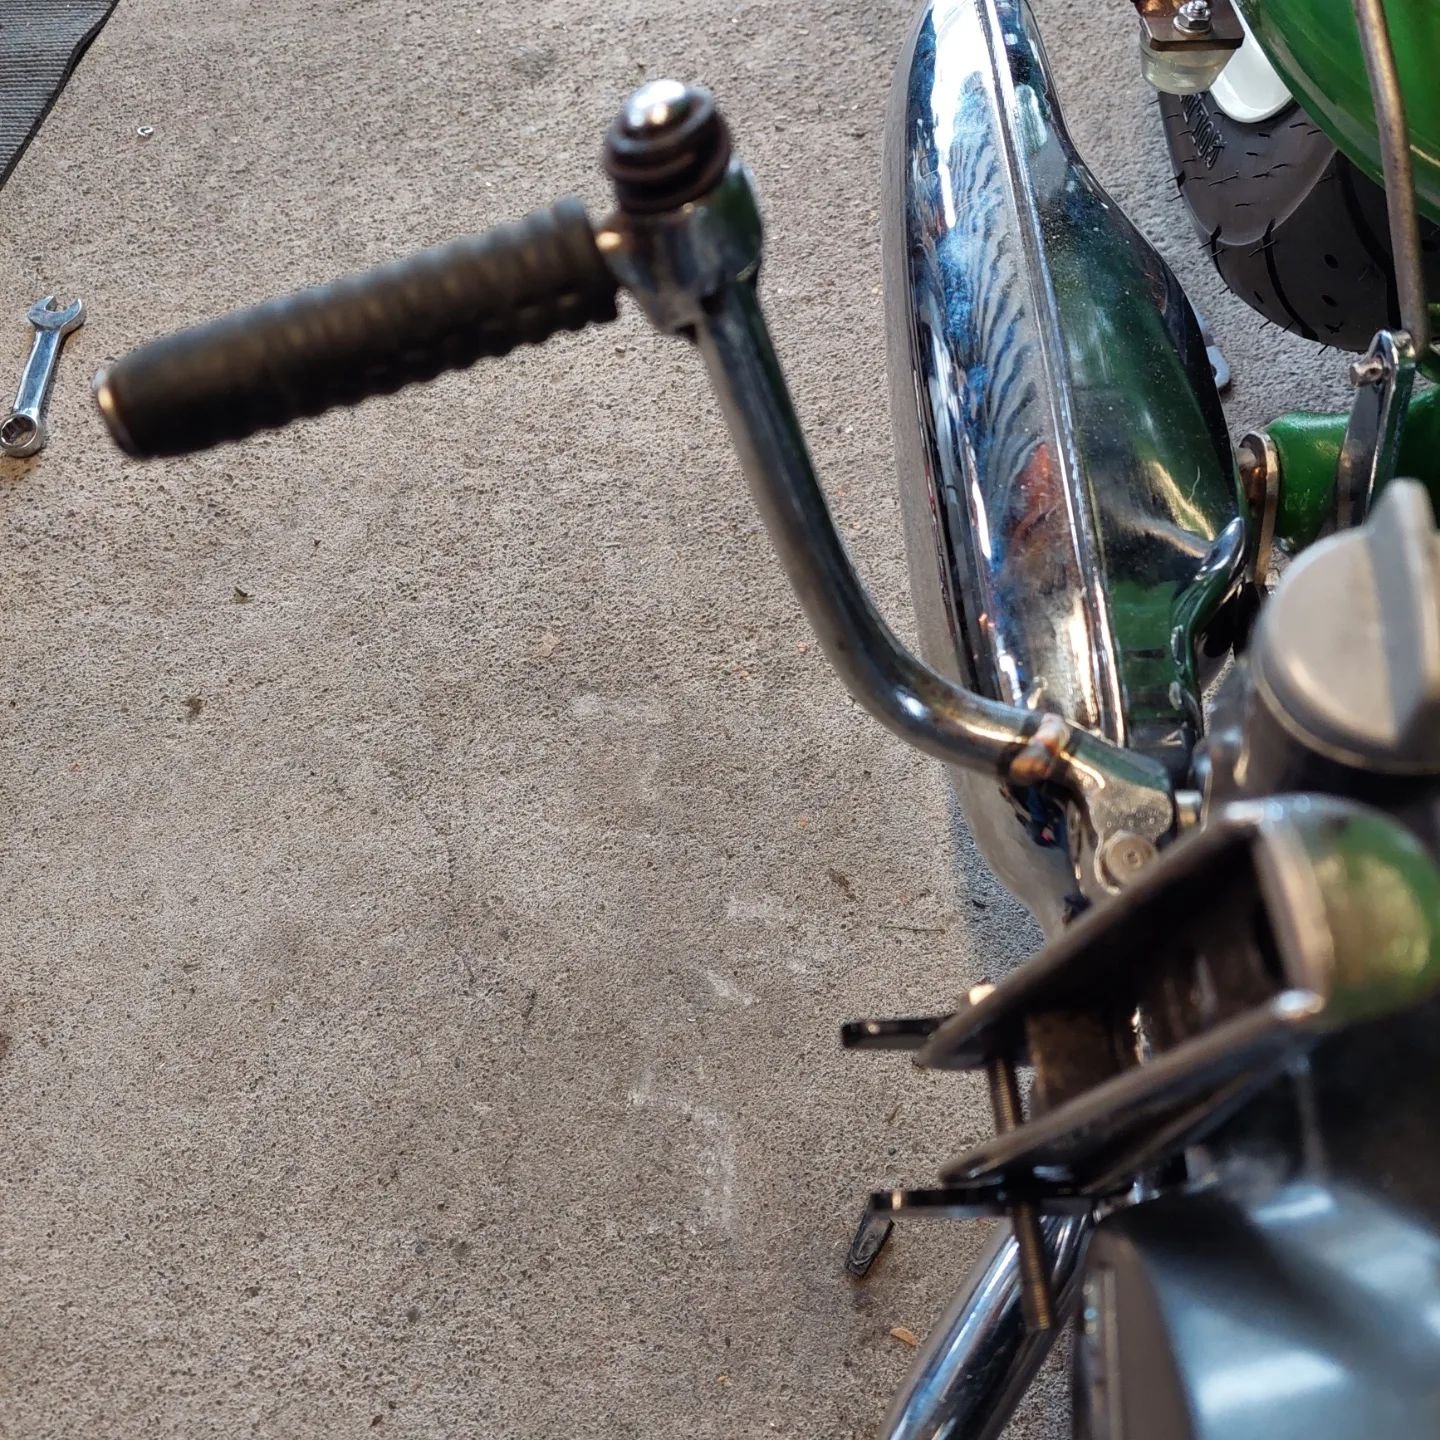
I tried the kickstarter from my C50 to see what the fitment would be and it was touching just by millimeters. I didnt want it scratching my new exhaust everytime I kicked it over so I managed to get an old c50 kickstarter from my mate Jeremy, pie cut it and bent it forward and tig welded it up with stainless rod. Plenty of clearance now!
-
8
-
-
- Popular Post
- Popular Post
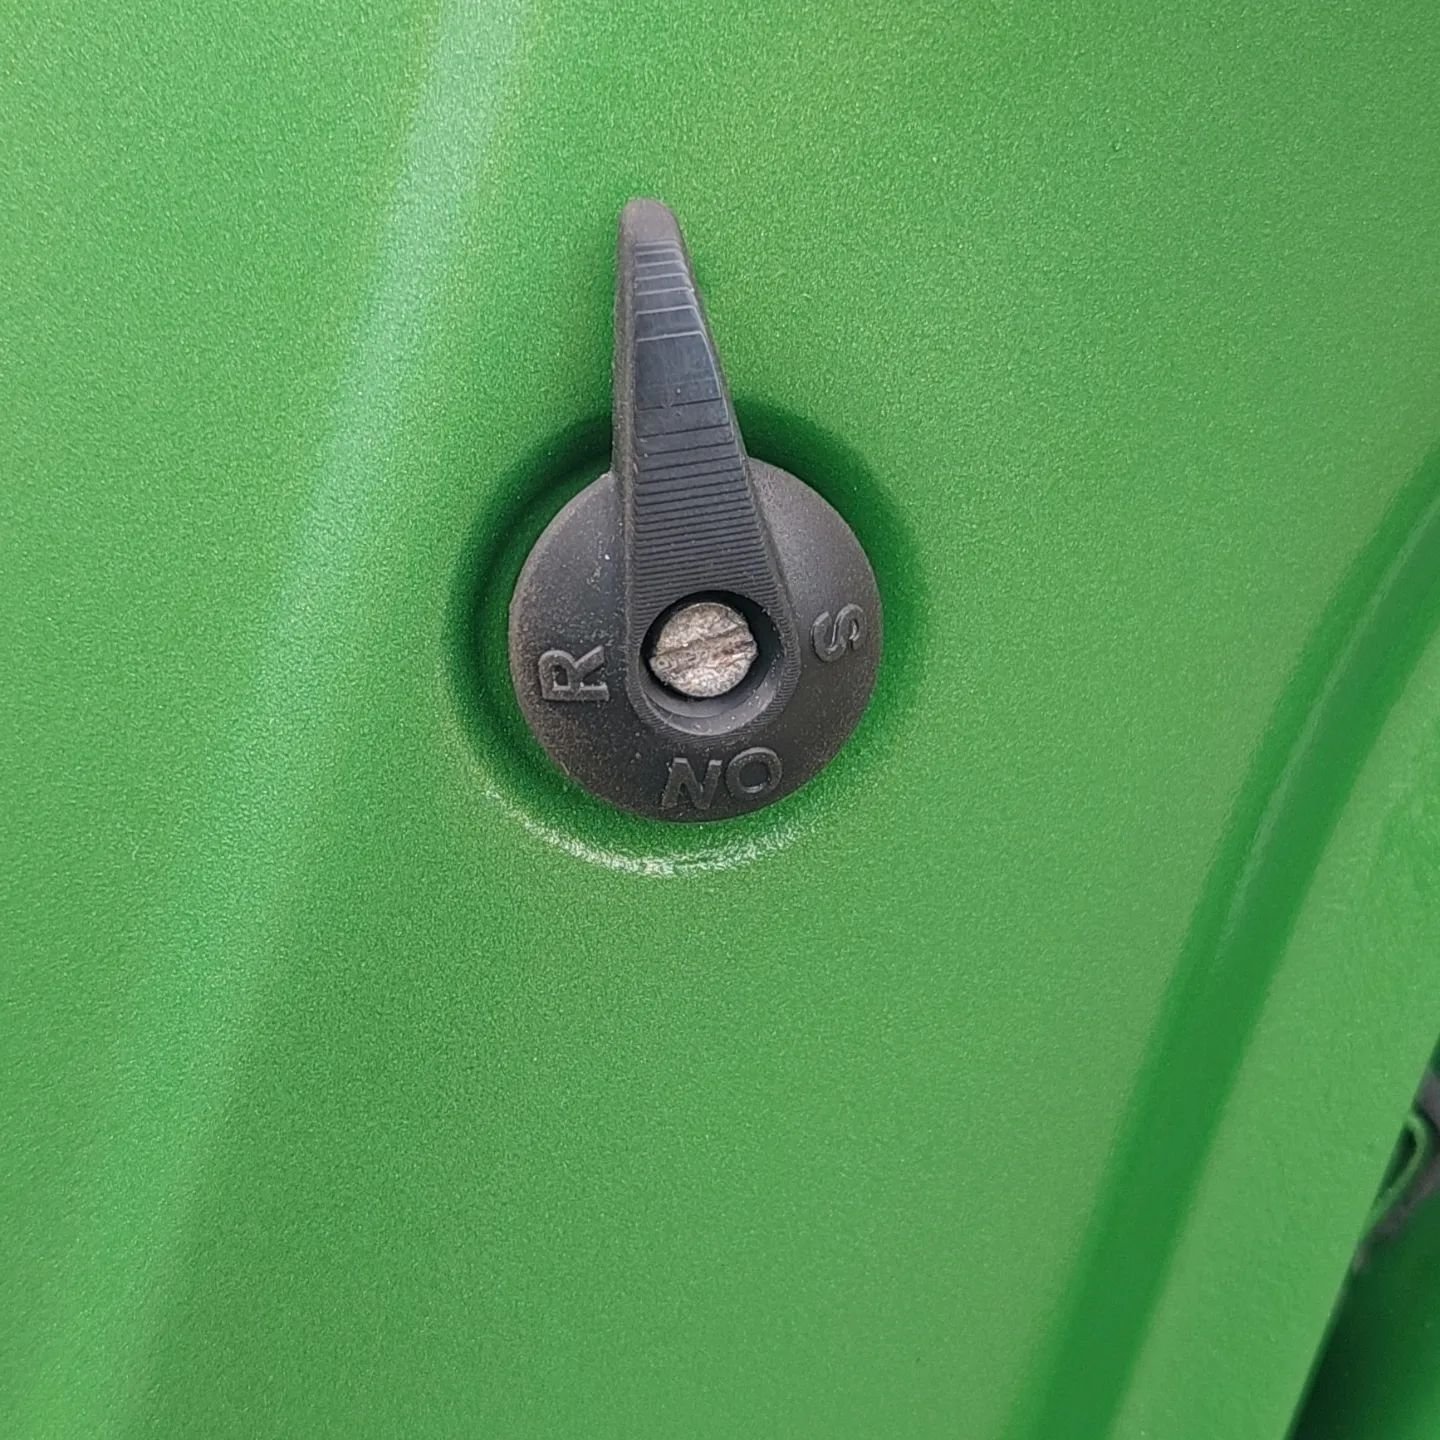
A few more jobs ticked off on the chaly over the past few days. A big hurdle was the wiring as I'm pretty shit at it but getting better, with the help of my dad we got there.I had to cut down the side stand considerably, the footpegs will be changed for Anderson style pegsI had to put an adjuster on the clutch lever as I've routed the cable through the frame and can't access the inline adjuster.New chain, rear sprocket and chain adjusters mounted too.@dvsdev.chaly on Instagram 3d printed me a fuel tap handle which is awesome
-
15
-
- Popular Post
- Popular Post
-
19
-
Just before New Years I sent the frame, swingarm and wheels away to get blasted. I was charged a bit more than my usual guy but he wasnt open over the holidays.
After a bunch of primering and sanding the frame and other parts were ready for paint. doing body work really sucks! I dont know how anyone can do it for a job.
I can pretty much say I've spent most of my time off waiting for paint to dry.
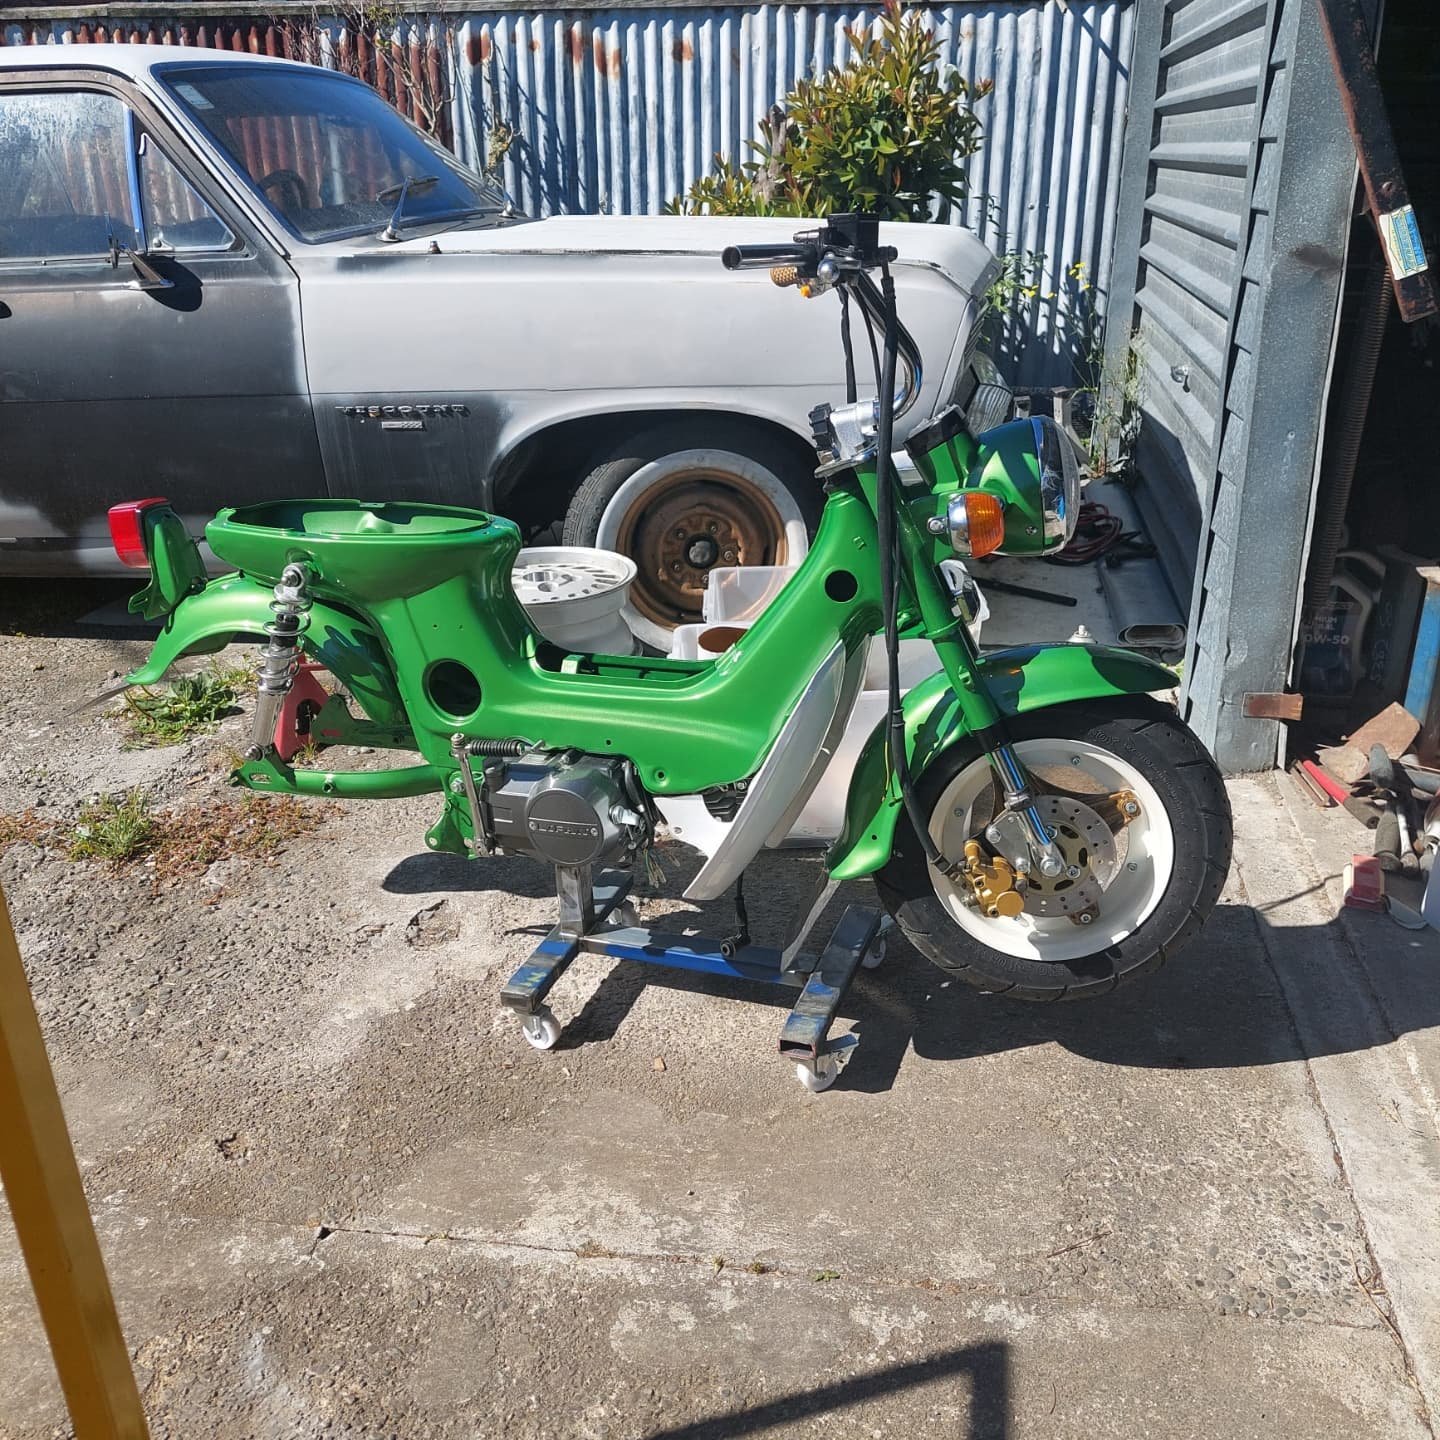
Once the paint had a chance to cure, which was all of 3 hours I started bolting parts on cos I'm really impatient haha. The engine is a manual Lifan 125 which was in my CT90. Following numerous trips to MBike more and more parts were acquired.
Over the weekend I'll try and get the wiring and fuel lines sorted out.
-
4
-
-
- Popular Post
- Popular Post
So 2021 was a bit of a shitter for me, recovered from collarbone surgery after being hit by NZ Post on my C50, broke up with my long term girlfriend and finally moving house twice! So to keep me from getting anymore depressed I like to my mind occupied so that means fucking around with small Japanese bikes. After selling my 2 Honda CBX250RS and 2.5 Kawasaki KV75 I had some spare coin so I thought I'd do what alot of others do on here and thats buy another project before finishing the others. The others being the white CT90 I was building.
To be honest I wasnt really feeling the CT and have really been thinking of building a chaly since my accident. So I put the feelers out for a Chaly, there were few on trademe but they were a bit spendy for me and it was a shame to do to them what I wanted to. Anyways a mate hit me up with a frame he had the he was going to convert to electric, a deal was struck and I paid him what he paid for it. I'm sure this frame has passed through a few hands of people here in CHCH.
Overall the frame was in OK condition. At some point someone has removed some of the paint causing heavy pitting but no terminal rust causing me to have to get the welder out.
Within the space of a week I'd managed to piece together parts to try and get it in to a roller. Wheels, mudguards and swingarm were sourced from my mate Jeremy and the forks are a disc front end from the guys MBike.
The overall quality of the forks wasn't too bad but the strength of the headlight ears was really average. I didnt like the position of them as they were a bit too high and too pointy and thin. so that got remedied by hammer forming some new ones and welding them in a lower position.
-
12
-
- Popular Post
- Popular Post
More progress has been made over this lockdown. I'm moving soon so I thought getting this bike into a roller will make it easier move around. I threw the tyre on the rear and managed to pinch the tube.
Anyways I had a go at making the exhaust, the header part at least. It's full stainless including the flange that clamps to the head.
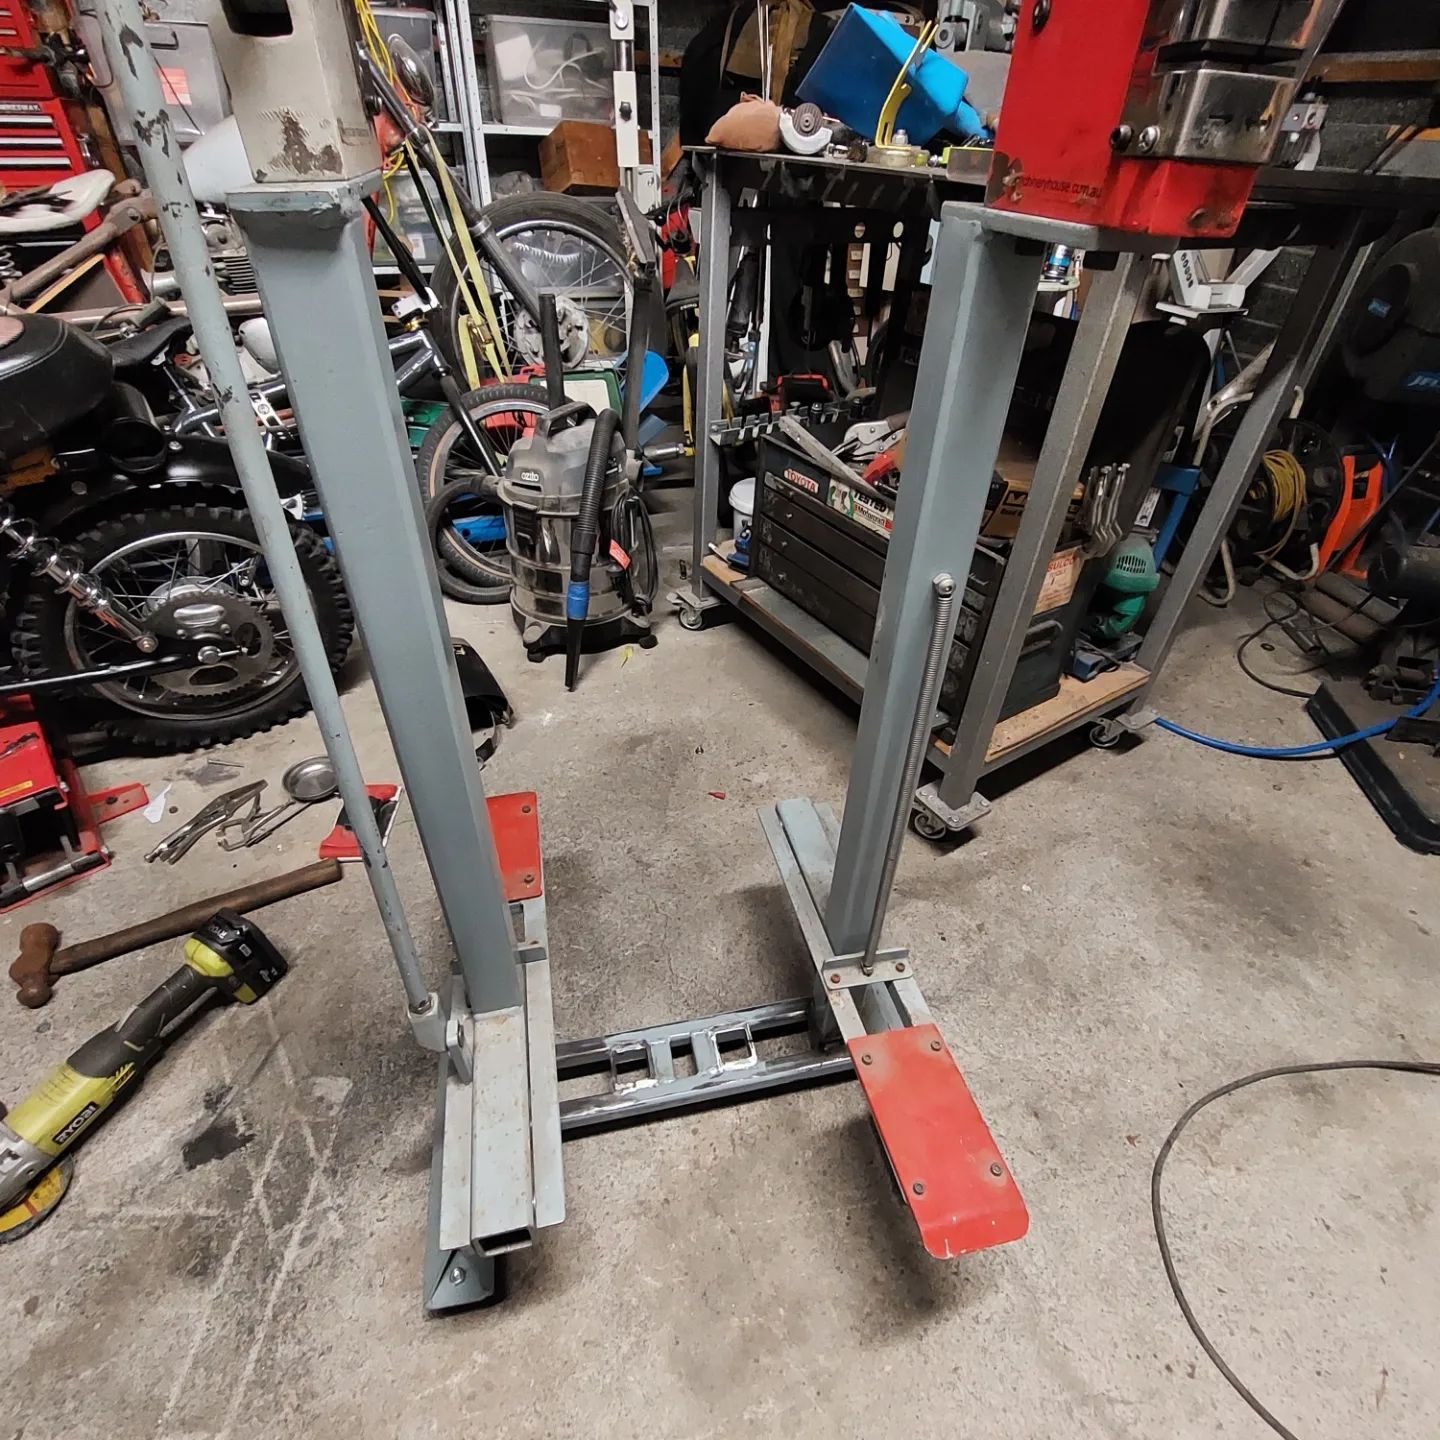
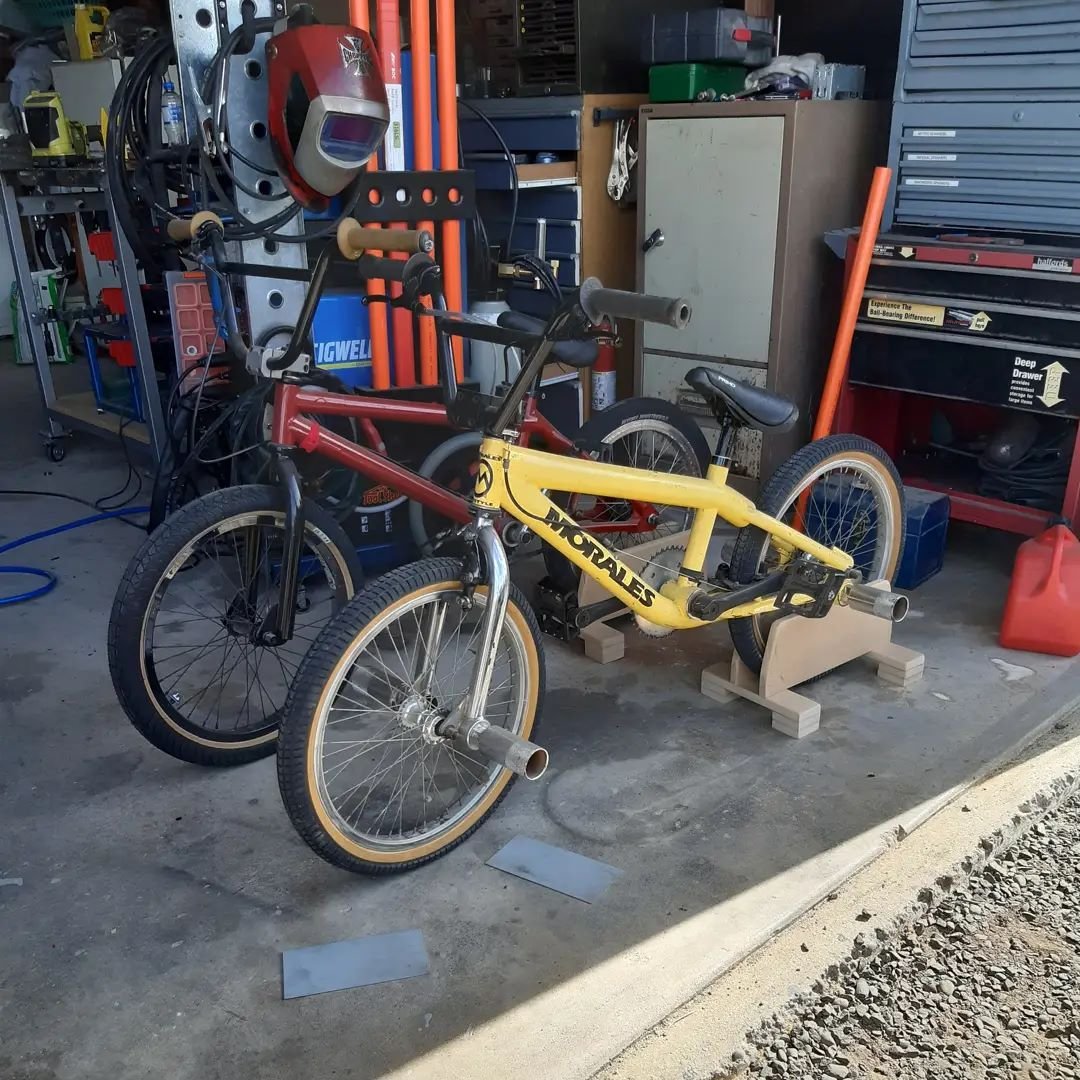
To take a break away from working on the bike I knocked a few stands for my BMX's so theyre not leaning against anything and everything in the garage. The yellow one weighs as much as the ct90, I'm not kidding!
-
10


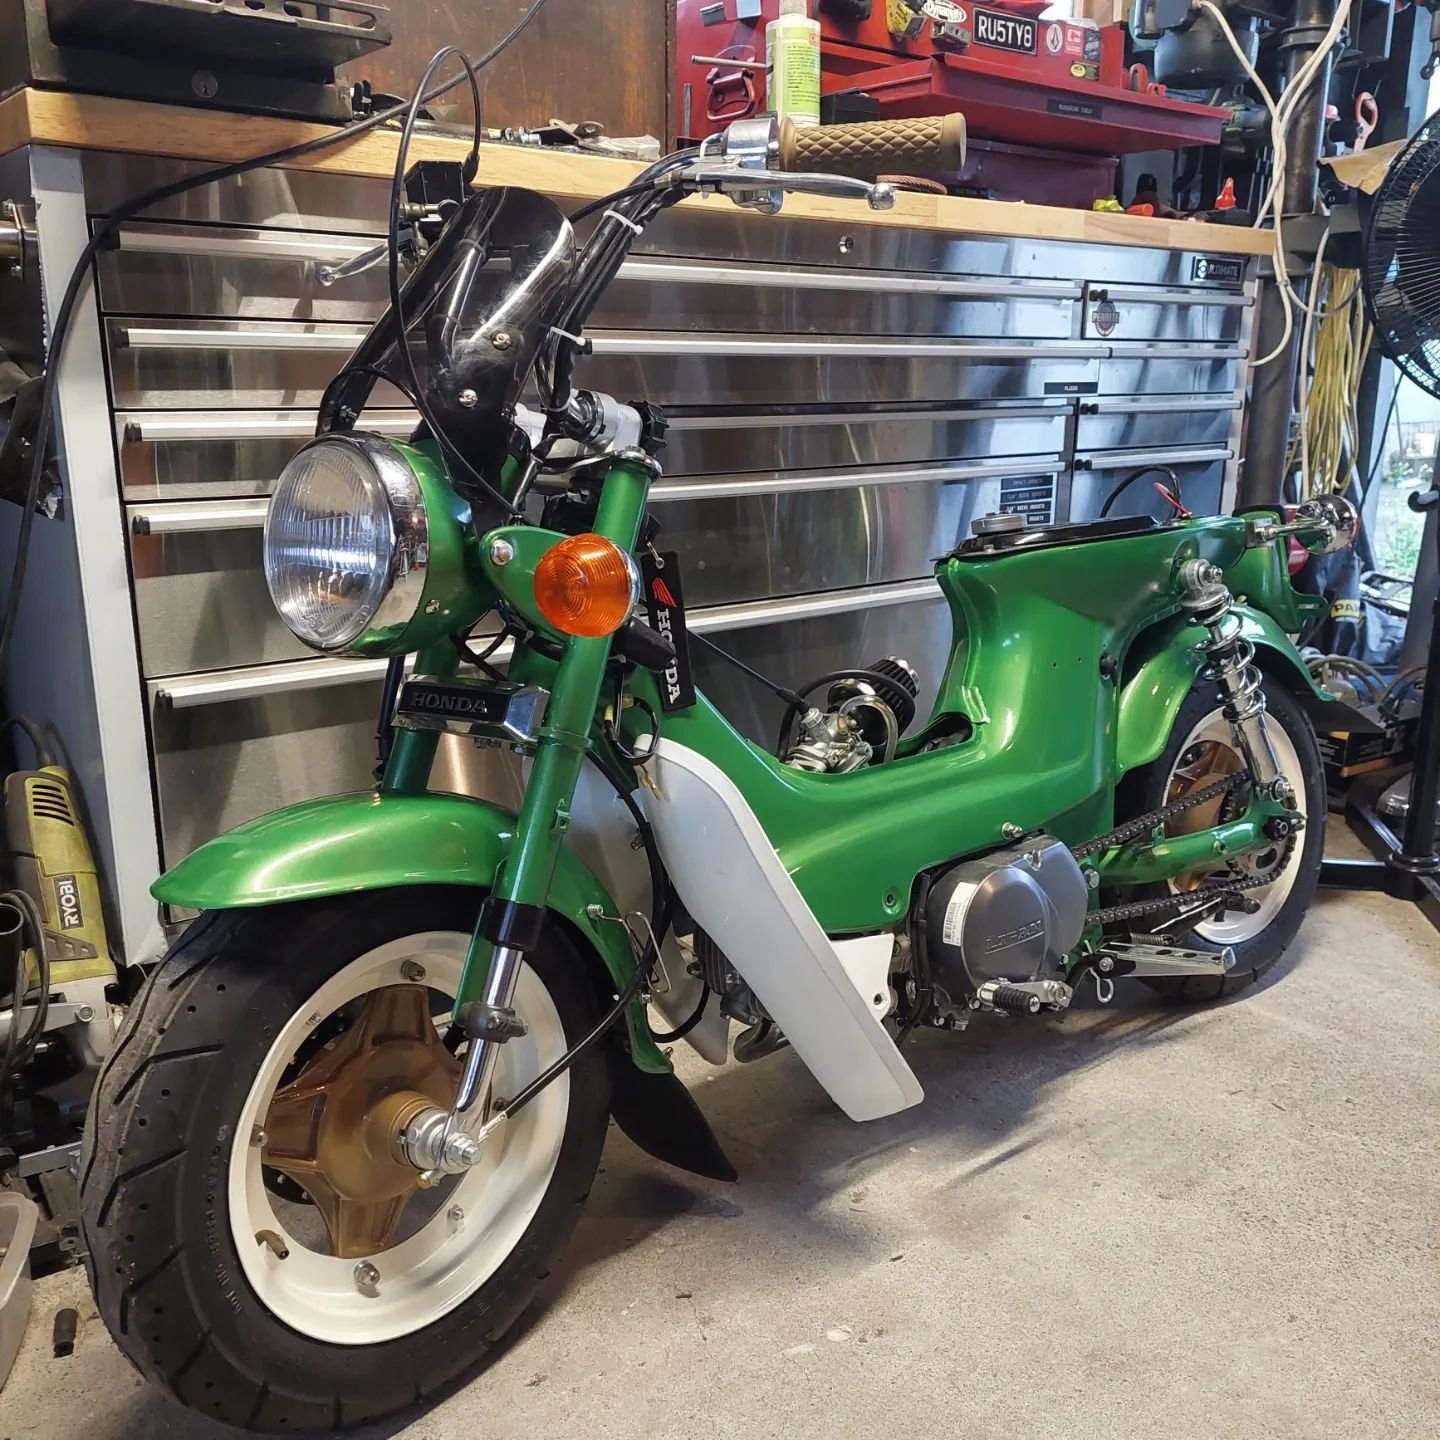


Gaz's Dads Honda ST90
in Two Wheels
Posted
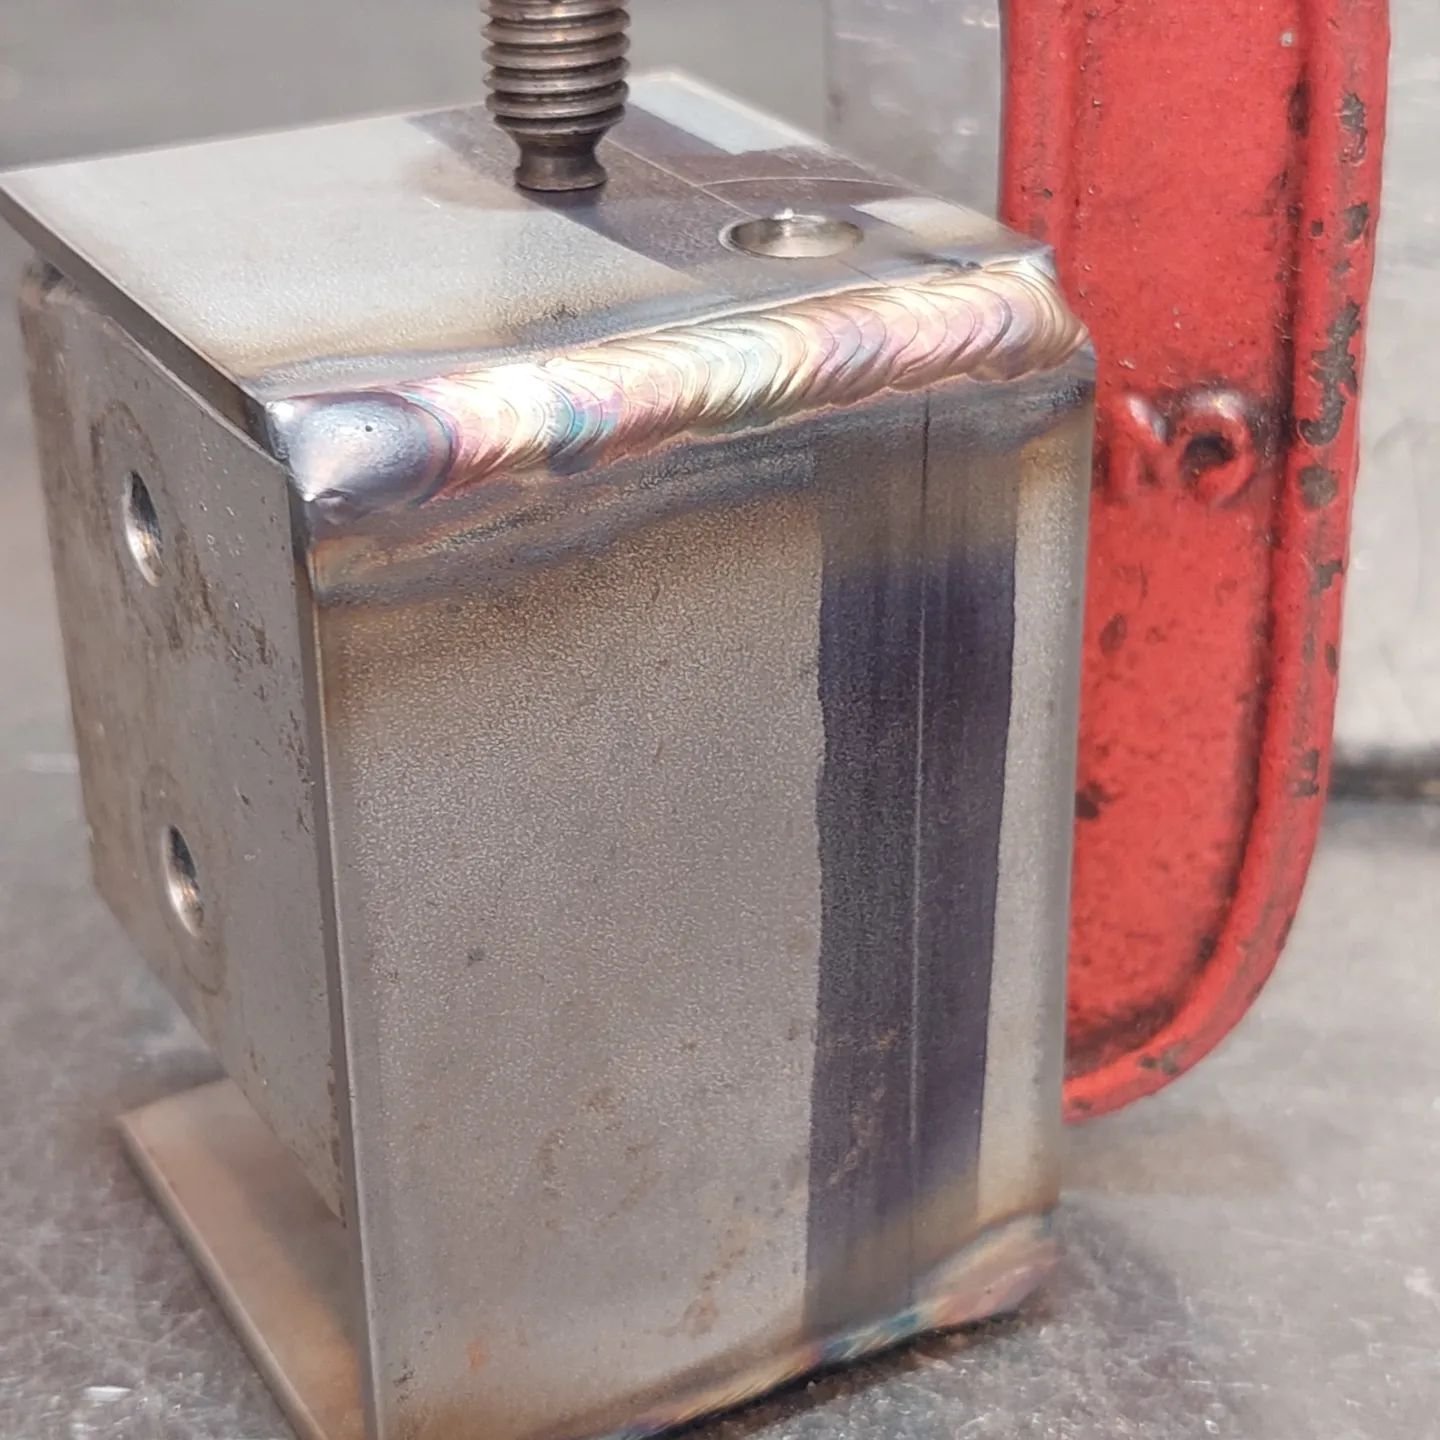
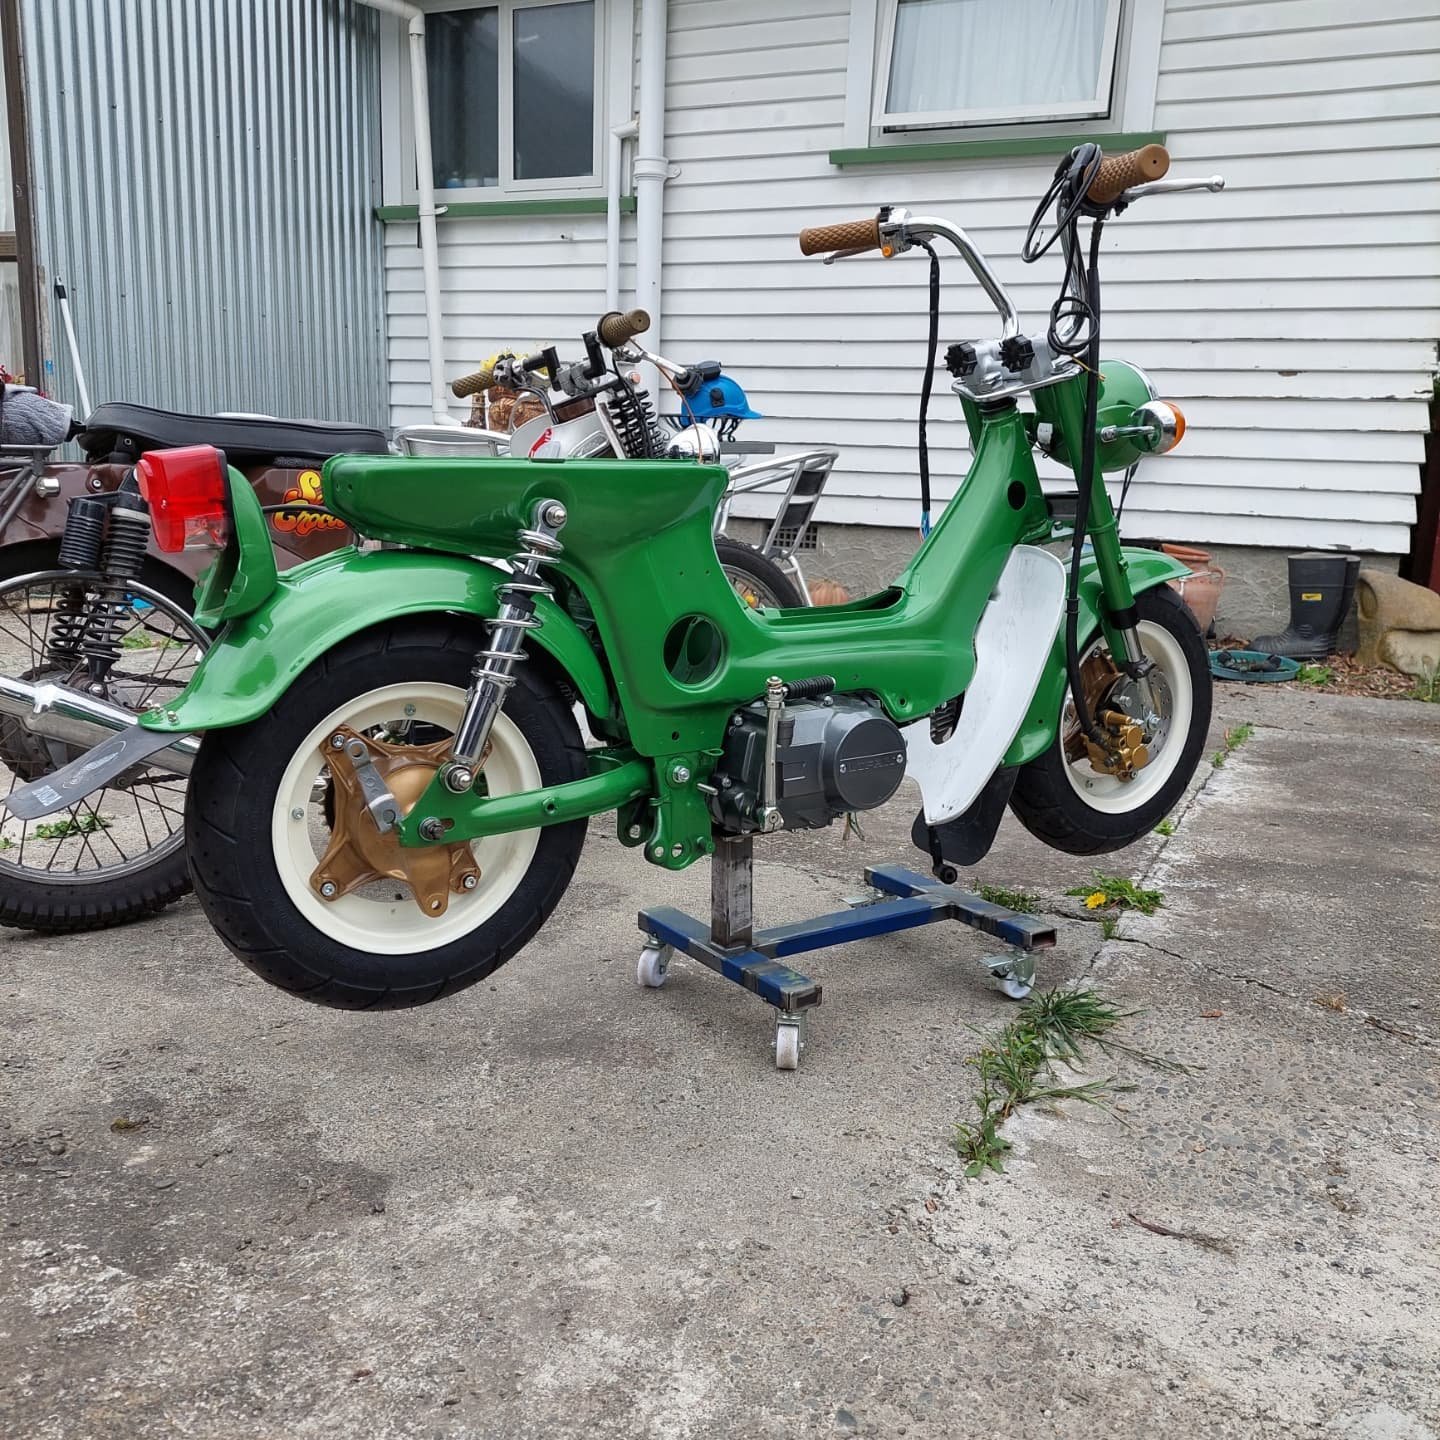
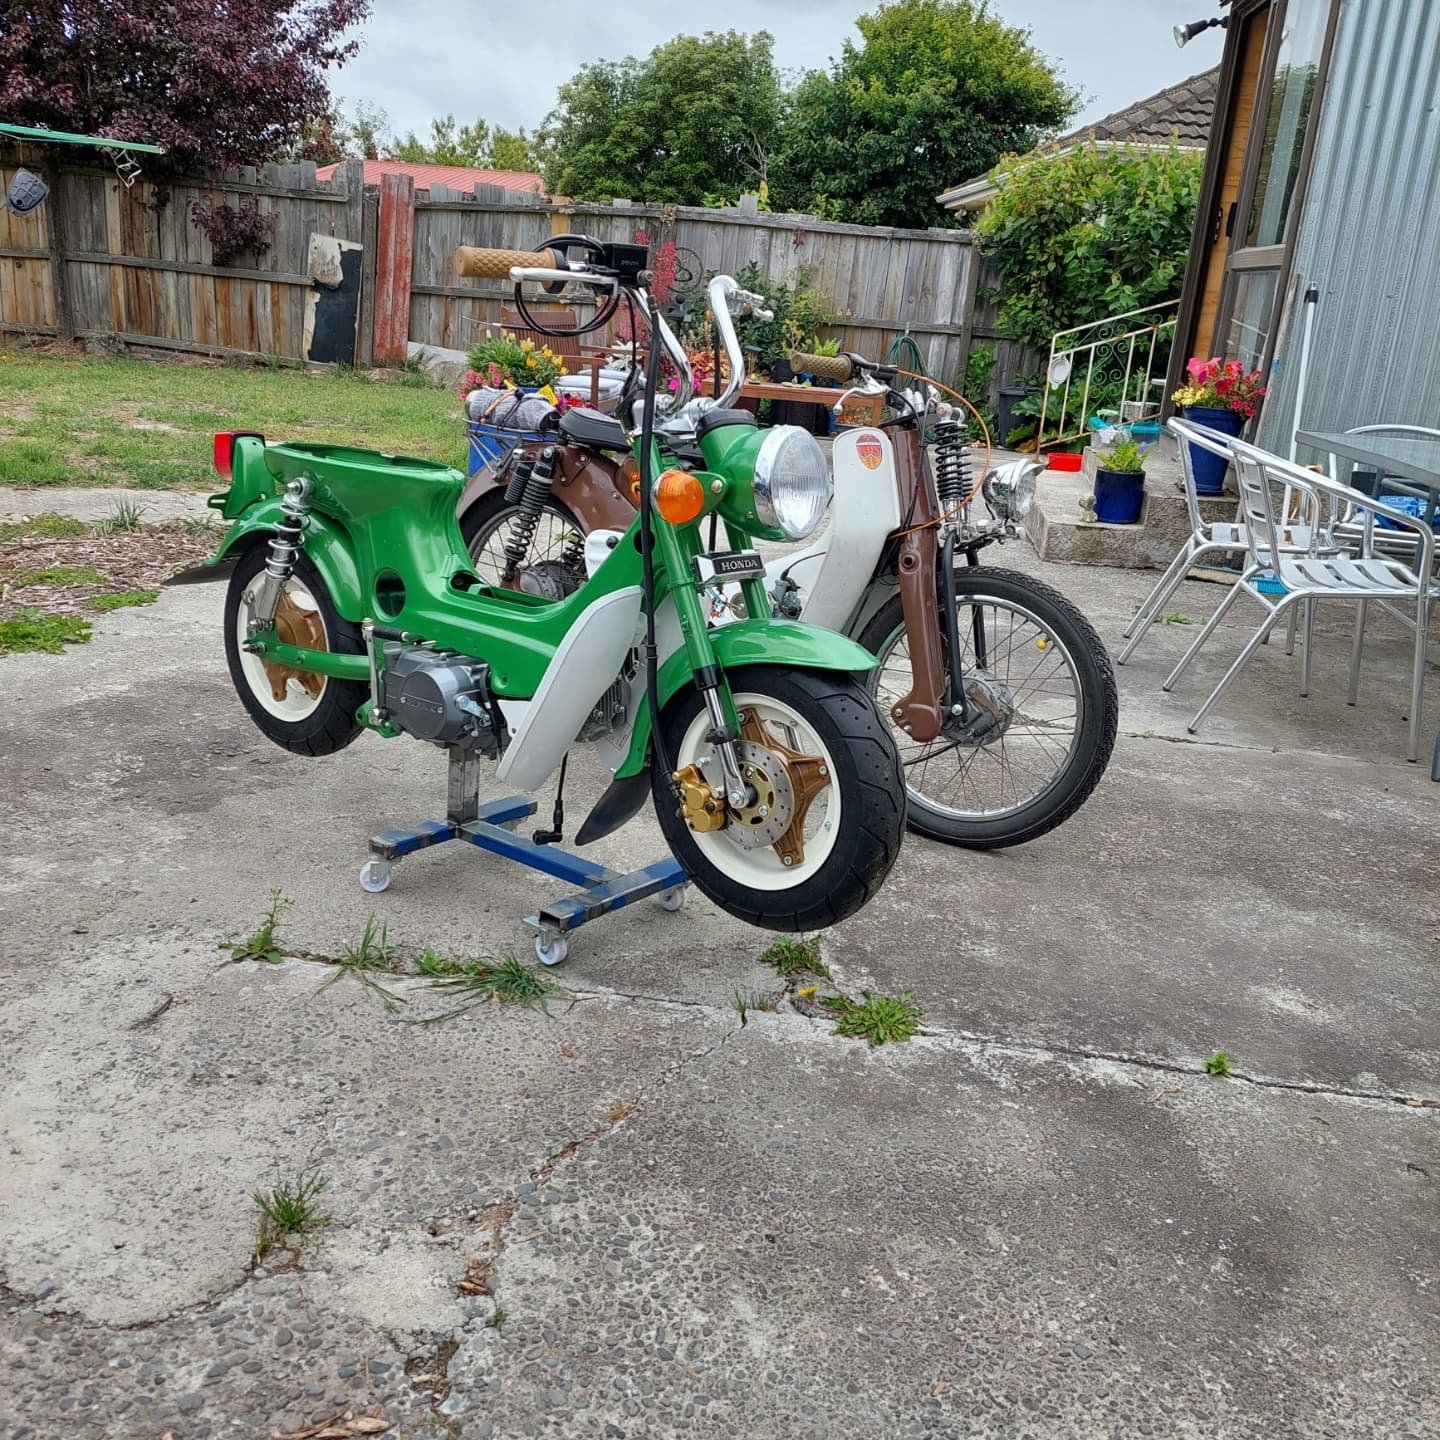
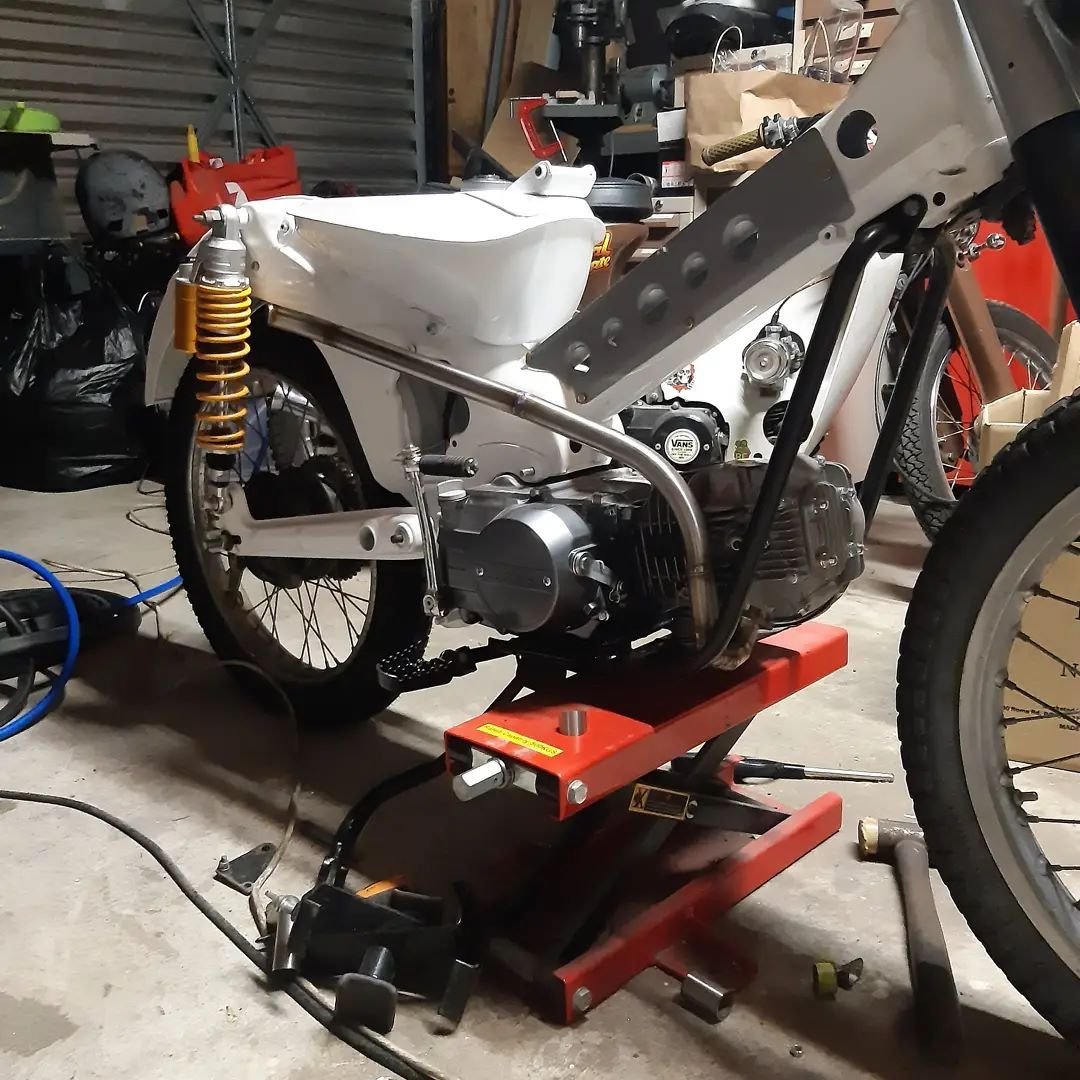
Over the weekend I made a push on the last of the welding that needed to be done so I can bolt the engine in for the last time.
The engine adapters will be powder coated sometime this week