


azzurro
-
Posts
2744 -
Joined
-
Last visited
-
Days Won
3
Posts posted by azzurro
-
-
^good advice, sometimes appearing to give a fuck goes a long way.
these are the air discharge rules applying in the auckland region (subject to any other more specific rules/legislation applying to the particular chemical):
General Permitted Activity Rule
4.5.1 Unless provided for otherwise in this plan, activities that discharge contaminants into
air are Permitted Activities, subject to the following conditions:
(a) That beyond the boundary of the premises where the activity is being undertaken
there shall be no noxious, dangerous, offensive or objectionable odour, dust,
particulate, smoke or ash; and
(
 That there shall be no noxious, dangerous, offensive or objectionable visible
emissions; and
© That beyond the boundary of the premises where the activity is being
undertaken there shall be no discharge into air of hazardous air pollutants that
does, or is likely to, cause adverse effects on human health, ecosystems or
property; and
(d) That beyond the boundary of the premises where the discharge into air of
agrichemicals or paint or powder coatings is being undertaken there shall be
no drift or overspray from the application.
-
+ compomotive BTCC style wheels in bonus white for 80's win
have a soft spot for these, also have some very cool blue velour seats from one im gonna fit into my fiat one day...
-
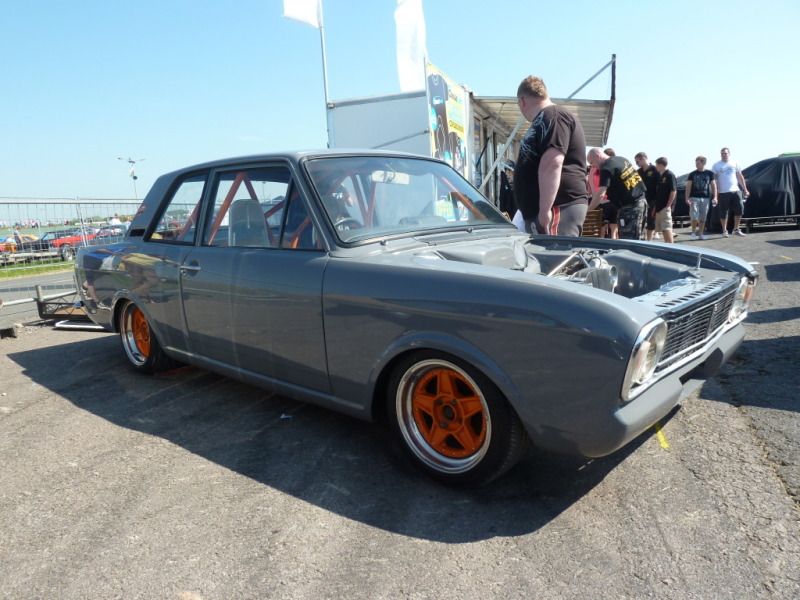
that grey POR15 looks real good, with all your hard work your car is going to be very tidy, and should go well too!
the colour made me think of this one:
-
if you planning on keeping it, cut that rusty thin lacey crap out and let some new steel in, otherwise youll be fixing up the scuttle panel/a-pillars AND redoing the windscreen next time but it will be even worse. rust converter is ok if there is some meat left but youve got holes already - it doesnt convert rust back into metal that used to be there.
You might even be able to cut the rust out without going onto the visible part of the a-pillar?
make some patches in the vice, just make sure you space your welding tacks out/take your time so you dont warp the pillar skin (pulling it in), and drill a couple holes for some plug welds on the inner itll be just like factory and last another 30 years, plus youll be able to put converter inside the A-pillar while your there.
If youve got a flapdisc on your grinder you can do anything!
-
glad those nuts fit, at least they will come in handy for someone. wish i still had the beetle they were on, i kinda abondoned it after my gf rear ended someone at the bottom of whakapapa road due to brake fade, and my olds sold it when they sold their business where it was stored and i was too poor to not take the $, but asked to keep the 5 spoke EMPI rims and nuts. Rims are now lost too
contessas looks good, roll as is, maybe with a polished lip?
-
cheers man, the work you are doing on your 'tina is definitly going to make it a real nice one. Bad luck with those heads!
following on from VG's thread im looking for some (16!) of these:
being rocker or sill trim clips, this one is missing the plastic pin that fits the hole in the sill
these may be similar to later model ladas which maybe? have a wider sill trim like 2107 etc, as the earlier models 2101 have a 124 style round clip (part No; 2101-5003017) that just isnt big enough to hold all my bling, like this:
-
did not end up attending as family (who were keen on Burger Fuel and checking out other cars) were not keen to take FIAT on longest drive in 20 years/shakedown run on a dark and stormy night, 99% of which was on the motorway.
Stupid weather.
Next time for sure.
-
My parts listing says the the clips are "2101-5003017" and I'm going out to work on the corolla soon, so will measure the strip for you.
Cheers man, those 2101 ones are the same as the 124 ones i think, like this:
I need the same part but bigger, My strips are 42mm wide and require a 32mm wide clip, that rectangular is more like a large door trim clip and fit a 8mm diam hole. Does holds the trim in a similar way tho. I think the 2107 has a wider strip and might use the 125 style clip? dunno. Id take a photo of it but ive lost my only one
-
couple vids for ya from my boy from yesterdays test runs:
this one features a cool blue car
siaSHFAI1dM
and this one has some not very sustained loss of traction and 60mph like a boss (seperately of course)
35lcC0ci7y8
-
^ thats hawt!
Eddie, do you know what the part number is for the clips that hold the long chrome strip that is on the sills? Or how wide those strips are?
I need some for my Fiat 125 and I think they will fit, but I cant find the number in my 2107 Katalog - there is a picture of them but no number
-
Did another job today (after making coffee, pancakes with fruit salad and cream, and doing the dishes
) which was relay the headlights. Wow what a difference!I decided to use 4 relays (one for each light) as i had 4 and this allowed me to have some redundancy as well (each one has 2x 87 (power out) pins) in case one of the cheap ones blow. I also retained all of the factory wiring (IMO its the loading through the ignition, cloumn and dash switchs that is the problem with this circuit, not the wires themselves) and i have already installed modern lamp plugs at the bright end.
The only extra wire is between the relay 86 pin and the old fuse box outs (for switching), a ground for the relays (85 pin) and + from my fused distribution block for a solid power supply (30 pin). The hot supply to the lamps is the old fuse box to lamps wiring but now plugged into the switched 87 pin on the relay.
The point of all this is so now, the only load on the the fuse box, ignition and dash and column lights switches, is that needed to trigger the relays, which is milli-Amps not big Amps x resistance through 40 year old switch contacts that could hardly cope when new.
Still have to get 2 more bosch relays and mount them on something less agricultural, and tidy up the wires more but it works very well.
Also went for an italian tune up, to check out the state of my newly rebuilt carb, and the car goes much much better, but still has a big hesitation on mashing the go pedal, otherwise its fine.
I popped in to my boys mates place to pick up his bike that he left there the other day, (good excuse to test the racks) and his old boy (a mechanic) thinks maybe the accellerator pump jet is still a wee bit blocked or it needs a slightly bigger jet - i tend to agree.
I also think that I could maybe be a bit more aggressive on the jets in the secondary for a bit more pep on WOT.
All in all its only a minor issue (not a break-downy one) and now im happy to start to drive this around more and go a bit further now
While i was out, we stopped for a couple of shots that were not on the driveway:
not sure if i should put the shorter (by about 1") rack feet at the front or rear, currently at the rear -
I like how the rake complements/highlights the reverse wedge shape of the car, but maybe its supposed to be the other way around?
My boy also took some 'in car video' so ill try to get it out of his i-pod soon.
-
ended up picking up my rebuild kit from weber specs late friday so today, being a bit shitty outside, I got cracking inside.
Was not permitted on the kitchen table in the sun, but worked out well in second choice location anyway
Had some some bleg in the emulsion tubes, and you can see the state of the rest of the fuel bowl in the background, and found a few other blocked orifices as well:
part of taking it apart was to check all the bits were within spec (i used the specs for a 1600 base model 132), as ive got 1 1/2 spare DMS as well as 3 other webers to steal bits from - ended up changing just about every thing, including the blocked tubes for the 'fluted' ones on the top:
the new needle valve was also quite different!
Changed the accellorator pump and the choke diaphrams as well.
I was stressing about messing it up, but I followed this guys http://tedperkins.com/carb_rebuild.htm advice and found it all quite theraputic, key is to take your time and be organised - i had a parts tray thing with heaps of dividers and did a component/barrell at a time, and it even came out looking much better:
set it to base settings, chucked it on and once the fuel pump had built up some juice the engine fired up almost straight away on a fast but smooth idle.
Bit of fiddling and it seems to run much much better now, even could put the static advance back a bit too to where the 10 deg mark is, nice and steady dile and rock solid on the mark. Havnt had a road run yet, but feels very promising
-
sweet, i knew that place by another name. should be able to get there in time for a roadie.
i shall keep an eye out for sweet sweet pipework
-
did this for the pshop thread a while ago but dude is no longer active i think,
anyways
your beast looks good on them steelies
-
assuming weber specs sends me a goddam kit for my carb already (i will go in tomorrow ad pick it up i think) and that actually what is wrong with my car, i will be there.
i work on the shore now too - so where is this backyard bar?
keen on convoy/tow vehicles
-
my Fiat does the same thing - if its been sat for a while the engine has to be cranked for quite a while so the mechanical fuel pump (on the engine) can draw fuel back up from the tank again and will run rough for a while untill all the air is gone.
I just supposed it was just lack of a one way valve of some description or another in the design of the fuel system.
A blocked breather would exacerbate the issue by creating a suction/siphon in the tank as its level drops and though temp changes, but also affecting engine running though fuel starvation (pump can overcome vacuum in tank esp via a long run of small ID pipe) if its blocked bad enough.
If its like my fiat, the breather will be a pretty long looped lenth of pipe off the tank sender/top of tank venting into the rubber under the fuel filler flap. Just replace it and/or clean it out.
You can probably get inline fuel filters with a one way valve?
-
No progress on making it go better, other than getting in touch with Murray at Weber Specialties to order a rebuild kit for my carb. I had to remove the carb to check a few things so as to get the right kit, so going backwards really, but that guy seems like a walking encyclopaedia. Bit spendy, but the dude knows his shit.
However in anticipation of future actual use/missions i finally went and picked up from 73crownwagons place some roofracks he kindly brought up from nats for me (fanx mang), that id purchased off shavenyak way back in february. Based on teh measurements yak had given i thought they might have needed some cut and shut to fit properly, but they fitted on pretty much perfect:
Only issue is the original clamps to hold them on had been lost in the Yaks shed somewhere, so, i had to make some, which i have sort of done before to fit an OEM Nissan Terrano roofrack onto my Homy van.
A random Prorack fitting kit from supercheap provides the basic parts - just bent, cut and ground a bit. They are made of very hard stainless steel so they wont rust, but are a reall bastard to drill (with my blunt bits):
Also had these random stainless allen shank nut things which have been in my bolt bin for ages - fitted perfectly inside the clamp pipey thing:
Ive cleaned off the tape and hardened plastic on the base of the feet, cut up some black silicone vacuum hose to replace it, wirebrushed off the rust and painted the ends silver so it looks nice and tidy like the rest of ithe rack, just need to get a couple more bits of hardware after wook next week sometime to complete and shes all good to go back on.
I can see that it will end up being filled up with crap all the time as a storage area in the shed, so ill only be rocking them when needed. Looking forward to chucking the bikes up there as this might save me putting my towbar on (for a bike rack) which is as heavy as all get out.
-
Keen on getting a Pertronix Ignitor system (pointsless ignition) for this as they do make a kit to fit all of my potetial dizzy options:
http://www.pertronix.com/prod/ig/ignitor/default.aspx
Any opinions/Experience?
I can get them from the US for US$89 + shipping, but on T-Me they seem to be around $220, which seems a bit steep?
Would also like to express more than a passing interest in some good condition DCOE40 Weber's or DLHA40 D'ellorto sidedrafts if anyone is holding.
-
So hanvt done too much on the list in the last post other than fix the steering wheel noise and fit a Weber DMS during the week.
This latter job took blardy aaaages as the action required was the opposite to the original carb and also passes though a greater arc.
These cars have a rods and linkage set up and the bits between the go pedal, fire wall and the cam box/carb is (mostly) interchangeable between models.
Luckily i have the right linkage from the car that ran the carb im installing (a Weber DMS from a 1600 GLS Model 132), but it you would not believe how long it took bending up the little adjustable rod to connect the 125 firewall bit to the 132 engine bit so it rotated without fouling or binding while also pulling though the full arc required between idle and WOT.
Proof of a Weber powered vehicle:
My custom rod is between white plastic swivel behind the spring and the black metal arm (which is actually connected to/part of the go pedal all the way back to the otherside of the engine)
Spent quite a while tutuuing with the mix and idle and could not get it right, decided to check the timing and putting my hand on the dizzy, got a nice HT shock and did the Jitterbug. Still gives me the willies putting my hand down there even with the car off.
Dizzy must have been chasing a trace in the cap, so pulled it out, and got my box of spare dizzys from the lock up.
Ended up using a later model one (on the right right) as the the couple i had of the slightly newer version (centre) were all a bit rubbish, and all the OE ones (left) all had huge end play due to a missing collar (missing on all 5 of these dizzies ive got, so i never picked up on it),which would have been messing up all sorts of shit inside the cap and the advance.
The later model one (actually from an X19) fits and runs and is very steady on the timing light - the old one hunted all over the shop. I will probably also get a Pertronix Ignitor system rather than a new set of points.
Also repainted my 14"x6" 131R Steels and got some new 195x60 tyres
I likey.
So does this guy who came out for a look:
However even shiny new sports shoes and an appreciative audience could not convince this cantankerous elderly italian gentleman to run quite right.
So we assumed the position again:
After advancing the timing a wee bit (you can/t trust those timing marks?
) it seemed to run a bit better, pulling well till about 4000rpm (but sometimes 5000) and running out of puff. Befoare advancing a bit it always ran out of puff at 4000rpm and took longer to get there too. Ive also swapped from the Lucas coil i'd replaced the original MM Resistor one to this beefy Magnetti Marelli one, but that didnt do anything much either. I was going to put the original resistor one on, but i dont feel it will achieve anything much:
I now suspect its the carb as it surges and hunts around, runs sweet then wont idle, that kind of thing. I supect some dreg in there somewhere 1/2 blocking something up, and only sometimes. A number of hearty 'Italian tune up' runs didnt seem to fix it either.
So Ill need to take off the carb again for another clean out + an air blow, check the jet sizing ( i heave acouple of spares as well) and try order a new rebuild kit for it this week.
Its a bit frustrating as while its all legal, its still not really relible enough to take very far.
It has also started leaking a bit of oil, either from the front of the Gbox or the rear of the engine.
Anyway, at least it looks really nice on the driveway
I also have a side draft manifold and the rams which might solve my fueling issues good and proper, but i'd want a decent set of crabs to put on, so that will have to just wait.
-
ahh, K-betripping, then you have never experienced the joy of owning a FIAT and their Fully Italian Alternative Take on everything.
oh,
also what Mikuni says, in the first sentence.
Second tho wouldnt quite work - see Toms photos - the top of the spring is quite far below the top of the shock, and the bottom shock mount is just a bolt though the bottom wishbone, which are not that beefy, IMO not beefy enough to take the concntrated forces from a coil over bottom mount .
Even this full tilt tarmac rally lada uses std spring mounts, and these guys knows what theyre doing (video is worth a watch):
(note also reinforced wishbones and use of spring compressors
) -
dont bother with resetting, like you say because of the long spring and low rate, under a lot of commpression at std height, it wont hold any weight after resetting - it will be lower, but softer too
ask me how i knowalso, $1700 can gtfo - go to pick-a-part mang, and spend the change on twin sideys, a roof rack, widened steels, and some $30 kybs from here:
http://www.autoricambi.us/cgi/commerce. ... egory=SU03
you might even have enough left over for a crate o' quarts to go up on the rack
-
like i say it might be balls, i only know about 125s, and they are a bit different suspension wise and mines not even that sorted!
but this guy is doing it right
http://retrorides.proboards.com/index.c ... 992&page=4
this is a good 'where to check for rust' thread (other than errywuurr) and how to fix it:
http://retrorides.proboards.com/index.c ... 251&page=3
but this is the real shizz (turn google translate on)
-
this is what i understand, but it may be all balls:
fiat running gear (ie twin cam) is a bolt in (pretty much).
these are based on the 124 series which had coil springs in the rear, same as on 124 Coupe as well, so there is quite alot of aftermarket stuff out there for them. However the susp was designed and set up from factory to ride higher than the fiats due to rough russian roads/snow/fat babushkas so lowering to bumps = not really that low.
Also lowering makes them handle like shit, (moving wishone mounts etc etc required to fix geometry esp if you are looking to go real low) but they do look 100x better.
most lowered 124/210x ive seen use coil springs rather than installing coil overs as the strut top mounts (rather than the OEM spring mounts) would be taking all the suspension stresses and cars weight, and are not that strong as they were never designed for it. On the front, for eg the lower weiht/stresses would all be on the lower shock mounting bolt.
can be done but poss not worth it? You would have to change so much to get them to work properly. Just chuck some one way adjusties at it.
If the coils are 100m ID then toyota estima rear srings will fit - easy to remove from an estima, plenty being wrecked and have a higher spring rate. Niva springs are also an option and come in a range of rates (colour coded)
you will need an internal spring compressor to get the fronts out tho, as they mount on the bottom wishbone, but have the upper wishbone around them :\
-
swish, was also on my pine/watchlist,
so i thought you might appreciate these
 That there shall be no noxious, dangerous, offensive or objectionable visible


 ) which was relay the headlights. Wow what a difference!


SHIZZLE's pinto powerhouse mkV cortina
in Project Discussion
Posted
re woodgrain, looks pretty flat to me - try some formica sheeting, its <1mm thick and comes in all sorts of colours etc and you can cut it with scissors
or drawer liner stuff from M10
or duraseal