


azzurro
-
Posts
2744 -
Joined
-
Last visited
-
Days Won
3
Posts posted by azzurro
-
-
the stuff on that dub seems to have been scewed on from underneath?
i use some straps made from webbing with a fold to create a loop sown into one end for cranking down (strap is doubled over everything with a reverse though the loop on the top)- used thse for years for all sorts of stuff - i use my roofies all the time on the daily too.
go to a surf or outdoor shop or anywhere that sells roofies, to get some branded ones with a metal cam lock, or a canvas place could make some easy.
Not sure if thats the what the cool kids use tho.
-
fiats have a similar issue with gearbox oil eating brass components if you put the wrong shizz in - Sulphourous additives (usually added to make the oil EP) is the stuff that eats brass, so just need a non-EP oil of the correct weight.

-
Started on my WoF/missed items list and pulled the driveshaft and diff over the weekend. What amission the driveshaft was!
Last shot of old diff in place - i like this shot for some reason, rear tyres look really fat
:Zooming out a bit you can see theres not much room (btw, car is not supported on bits of wood! thats just taking the weight of the diff while loosening a few bolts).
Hanger support hoop was defintily toast, so that would for sure be making some noise, but the bearing seems smooth.
universals looked a bit tatty from the outside but were actually ok - only one had any visible witness signs of the needles having worn on the shaft and i couldnt even feel them with my fingernail, and the front one had been replaced before. Interestingly they were the self greasing type but the nipples on each were missing and therewant much grease in them.
Anyway, looks like the vibration was not universal related, hoever they cant go back in
Anyway the whole shaft is now cleaned and painted and this along with the new parts are in the boot of the daily to have the hanger bearing removed (dont have the 27mm scket for the yoke nut) and universals fitted and probably balanced? as there are a couple of small dents in the end of the shaft from rocks or something and a few witness markes from the seat belt bolts.
Also because my socket and hammer removal method is not suitable for the refitment of new precision parts so ill pay someone to do it properly
Also removed the old diff,
which was leaking from all three, that is both wheel and and nose seals pretty bad and it all felt a bit crunchy rotating the wheels and head compared to the smoothness of the refurbished one so im pretty sure its gone bad as well. This is diff oil from only 700 miles driving as id cleaned most ofthis out when i did the brakes about a year ago.
The replacement diff is a 1:4.11 (as stamped on the cage) so i may pop the head off the old one to see what its ratio is in case its different (i reckon it would be higher than 4.11) as speedo reads just over 3000rpm @ 60 mph at the moment but im not sure how accurate either is
- my traffic-o-meter suggests its about ballpark, but that seems a but high geared to me - 4.11 will sureley bring that down? Will need to find a 5 speeder maybe .chucked the discs and spacers on the new one and got it sitting in place. then decided to clean and paint a few things while i had the chance so thats where ive left it for now.
Also, my rear calipers cannot contain their brake fluid. Thats definitly a WoF fail! the paint on the inside of my rims is all blistering as well
The pistons were quite pitted when i took them part last time and i guess new seals just wernt enough. Ill clean and swap in a different set (that i now have with clener cylinders, and i got a rebuid kit in the last package) i think rather than try to fix these ones again. You can see the blistering of the go-fast red caliper paint
So in a strange way im quite chuffed that i didnt spend all that time pulling perfectly good parts and that this work is actually necessary, and will make the car better, and not just cleaner/shinier.
However, I need to pay some guy (only this, exhaust and winscreen fitment ive not done myself so far) to get the driveshaft put back together, meanwhile refurb some more rear calipers. When thats done and back in i can then back it out,reverse it back up the driveway and then ill be onto pulling the engine and box and fixing up the bay.
Also had this ghettobird circling over the hood today. Grey with no markings. Gummint's grey men are keeping tabs...
-
sweet meet again.
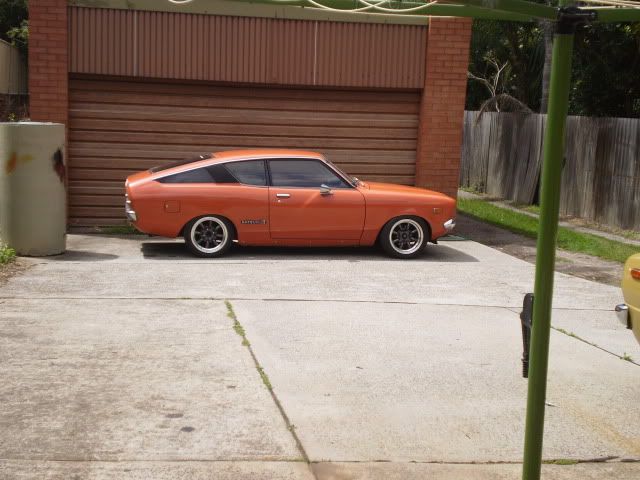
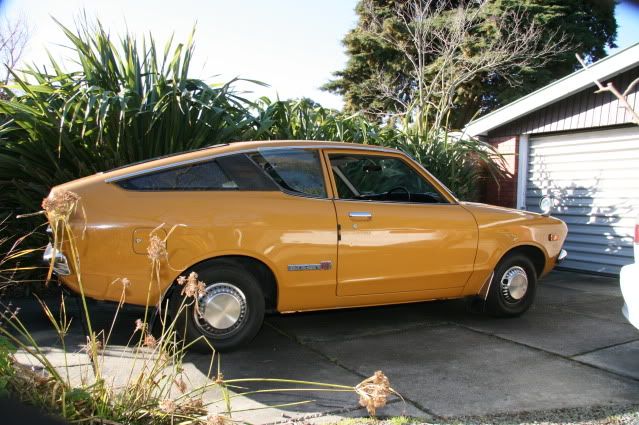
was especially loving the ratsun (always wanted one) and the freshly minted duddub, so so fresh. Made me pine for my old ones.
-
cheers man,
Im a bit overwhelmed by it tbh.
i wanted to get started on this today but went to pickapart instead for the daily (needed a rear wheel bearing = whole rear hub). Scored some plush factory mats too. Luxo.
Battery went flat in the fiat and I started to take the std carb off to fit the twin sideys and gave up/reconsidered. I really need it to run to be able to turn it around becuase of my teeny shed, and ill just have to pull them off to take the engine out anyway. So ill l do the front (engine and gearbox out) after ive changed the rear end stuff over and turned around/back into the garage.
i did put new o-rings in the spare diff and chuck the shafts back in so its ready to go. so ill swap diff in tomorrow i think and pull the driveshaft for cleaning etc . I realised i havnt got myself a tool for compessing the rubber guibo to get the driveshaft off, so i might just cut it off and leave the fitting strap on the new one untill ive turned around, pulled the gearbox/engine and replaced them...
Diff and driveshaft definitly need doing as does the engine bay rust which needs the engine out to get at easily. All the rest is ' while im in there i may as well' type stuff.
-
Come home after my first day at work after 2 1/2 weeks off to find my package awiating on my doorstep. Bloody typical
Anyway straight out the door to BF meet (without the twin sideys on of course cause that will have to wait for some time off ), as always an eclectic collection of cool & interesting cars there, but these two in particular really tickled my fancy, as I Had 2 Beetles, a barn door and a 57ish splitty (rusty wreck but still regret letting it go) back in the day, and have always wanted a Datsun 1600.
I would have both in my garage if i won the Lotto so could have a bigger garage.
Loving the photos man!:
http://www.facebook....40690467&type=1
Including these ones for some thread relevant contentt
The package had plently of small bits and pieces and a few big ones that completes all my parts collecting for the final part of my resto - the driveline, which ive not touched at all and the engine bay which has only had cosmetic fettling and fluids so far.
Ive been really hanging out for the $US4/$NZ8 inlet manifold gaskets that came with (i ordered 3), as cant get anyone to sell me one in NZ, and now Ive got some (all the way from the USA) I can now finally fit my sideys mainifold to an engine to test the setup.
However because the WoF expires this Friday ill only be able to burn up and down the street a couple of times to make sure they run as there is a bit of work I should do/need to do before takin it in to get one, and ive driven it 700miles since recomissioning it, and now ive got all these bits too, so its good timing.
THe driveline definitly needs a good looking at (vibration and noise starting off and at speed), and the engine is leaking a lot of oil (old gaskets and long time sitting im not surprised). It does burn a bit of oil as well, but it runs really well considering and doesnt get hot (now ive stoped the fan blowing fuses!) or use water.
THE TO DO LIST:
Job #1 - DOOORRT!
- fit sideys to fitted engine and get them dialed in so they run OK, and linkages finalised/working etc -
mainly as a motivator because then ive got a big list of jobs I need to do before getting another WoF, so it will be back up on the stands for a while:
Job #2: Strip down and body work
- pull engine, gearbox, diff and driveshaft
- fix a patch of rust in the engine bay right behind the exhaust
- trim passenger door skin to allow better gaps and closing due to front wing fitment
- tidy and respray engine bay
- fix a few bodywork issues that i messed up last time, as well as a few touch ups and paint chips
Job # 3: Driveline refresh and reinstall
- install refurbished spare diff, with new o-rings and oil seals
- check rear brake calipers + fix as required (one only has 4 H/B washers and the other leaks
- ive a few spare calipers now )- strip clean and refurbish driveshaft, install new universal joints and hanger/bearing
- clean check and reinstall the best gearbox with new guibo and transmission mount (GB in the car works fine, just dirty and leaky)
Job#4: Spare Engine finishing and installation
- replace timing belt, tensioner, waterpump, gaskets and etc on spare engine ready to start up with single downdraft carb from curent engine (because i know it works)
- install new clutch and bearing (still to obtain)
- get running and timed/tuned (that will be a laugh with those silly cams in it)
- drive to garage for WoF.
Job #5: Interior
- take out dash, heater box and carpet and front seats
- fix heater and install new tap
- refit new (for me) dash, & tidy up wiring situation in behind there
- make mounts for nice blue velour bucket seats ive got, - hints and tips from 125 owners welcome (stupid uneven mounts!)
- fit front speakers (6"? in kick panels)
- make/install new carpet esp for front floor
Job #6: Original Engine
- Assuming the spare engine goes fine, start the strip down and refurbishment of the original engine with new gasket set etc (Ive never taken an engine fully apart before), to have as a good spare
Oh boy that is a long list now ive typed it out.
If i actually do all that evey major system will have been taken apart and put back together at least once :/
-
wof due 19th, so best have a last blat before then
also hoping a pakage may arrive sometime tomorrow from merrika/ let out of cu$toms so looking forwards to dooooorting* all the way there and back with hastily installed twin sideys
*dooorts may be limited by bogging, bunny hops, flooding, non-starting and general crappy running and/or non-arrival of long awaited package. only burgers will ease my pain.
-
rocked up with some big fiat caster arms that i needed nuts for and they were sweet as. they can probably get whatever if they dont have it in stock.
probably similar places all over but these guys were good for me
-
replace the clutch and then see if you can be bothered with all the rest?
plenty of info out there on them in english and much more if you google translate. the engines respond well to light fettling esp carberetion and ingition and can handle light boost ok as they are faily low compression already.
the 'injection' is a big single one where the carb main jet usually is, swap it for a weber and keep the leccy ignition?
-
as tom said you only 'need' the gubbins (manifold + throttle linkage and some air filters usually) to bolt them to the exterior of the engine for them to go. if they are jetted for a 'worked'* 1600 they might be a bit rich or the venturies may be too big for a std 1600 to atomise properly is all so it wont run smooth and efficiently as it might otherwise, but tbh 1600 to 1600 is probalby close enough as you would get for a pretty good starting point for any second hand carbs.
Usually you set the internals of the carbs (change jets etc) to the engine rather than the other way around, but if you are going to do some work on your engine anyway you may as well go as far as you can afford in there to get as much from the fuel and air delivery advantages from the twin carbs as possible, tho i recon they are worth it for the noise and look alone. (hey, thats why im doing it!)
plenty of info online about what jetting etc esp for small fords, and what too look for condition wise, but worth getting them set up by a pro to suit YOUR engine once your engine is redone as far as you take the rebuild.
so you should budget for at least :
- the carbs themselves
- a rebuild kit (x2)
- a manifold to bolt them to + gaskets etc
- throttle linkages
- air filters/rams
then probably/possibly
- new fuel pump and regulator
- rejetting & tuning
+ labour for all of the above if you are not confident or to fix up where you messed up from being too confident
* whats that mean? how did they run on that engine? will you do the same mods to your engine? will you drive the same way? are they in good condition?
Having said all that tho, if they are in good nick and ran well on the other car, I vote buy them and bolt them on and see what happens
-
 1
1
-
-
-
exciting times!
i bet ya one rusty wheel nut that when you get it it will still be covered in radioactive mud and invasive spiders, despite MAF invoicing you $400+ for a steam clean and full decontamination with a toothbrush.
-
looks so nice,
cool to see some proper front tyres on there
-
so not much happening on the 125 front, im pretty much being held up by #$%& parts.
Ive given in and ordered a bunch of stuff from the always friendly and well priced AutoRicambi.us - be interesting to see if this package arrives before i even get a reply from the several local vendors ive called/emailed (some more than once). I guess business must be really good to not be bothered to follow up on a $500+ sale
In the meantime ive been pulling my spares together in prep for a big splurge when i get all the bits i need.
Had a look at my diff and drivetrain due to the noise coming from there. Verdict is some maintenance is required: centre bearing hanger thing is hosed, diff leaks from the nose seal (flinging stinky SP90 onto my nice new exhaust to burn
), and the diff end cap has somehow been bent in (by a stone?) and was rubbing on the housing, and probably making half the noise - bent it out of the way again, but this wont have fixed the leak (or replaced the diff hanger).So got the guibo and hanger already, just waiting on universals and a bearing and then ill pull the driveline out and can bung in this:
This is from the old blue car i chopped up on the driveway, except it now looks like this:
Someone has been in there before, with one of the halfshafts being replaced and the diff head having evidence of being removed & disassembled (it was also nice and clean and smooth with no chips or anything obviously untoward despite finding a large chip from a gear tooth in the pumpkin (probably undiscovered debris left over from the reason for the last rebuild) i think that har had been driven pretty entusiastically and someone had blown a diff
However, the unreaplaced halfshaft bearing is a bit noisy (oil seal o-ring was chewed into the cavity so oil out and greb in) so ill put the best one from the diff thats in the car currently when i swap it over along with fresh o-rings.
Ive also found (by driving in the dark and rain trying to demist the windscreen) that the heater doesnt get very hot (but neither does the temp guage), possibly related to the connections between the heater controls and the tap, but possibly also because its just stuffed, so ive dissassembled my sparest one. Unfortunately the matrix on that one is stuffed too, so i do have another spare in the red car, if the one in the car is also busted, but all the other parts are all cleaned up and ready to go in if required. Ill need to pull the whole dash apart to do this to, and at that point ill put the new dash pad in as well.
I have also made a start on cleaning up the engine bay, in readyness for pulling the engine out to do the clutch/and maybe swap the spare one with the new pistons in and fixing some rust. The start is by moving the battery to the boot:
Current state - was about 100mm short with the brown wire replacement last time
Battery out and ready to drill out the tray to relocate it to the boot:
And done (ill cut the rest off and tidy it up when im doing the rust/engine bay prep):
Pretty happy with the state of the metal underneath the battery tray spot welds
All wired in, 80A fuse, nice thick cable to the drivers knee area, earth screwed to a new captive nut:
Then to this thing, which is a distribution block with built in 60A breakers - the brown wire replacement (main supply for loom), starter (unfused apart from the 80A job) and Alternator all run from this. The voltmeter reads about 0.2V less than when the battery was in the front.
And done, bolted in from underneath while i checked the diff:
When i get my new parts box i should have plenty to get on with
-
seems that the biggiest difference betwwen the lowered one (want!)
and your one one is blacked door surrounds (excl. lows and wheels of course):
seems to make the lines flow together much better or something
do it - STAT!
-
mean
was on my watchlist - seemed like a bargain for a rare car in ok condition with side skirts
there's nothing wrong with those engines:
ka6-K4xqk5s
-
nomnomnom burgers for dinner a day early nomnomnommmm .
car ready to go, have intalled roofies for a pickup
(must remember to pm euron8!) -
im no expert but...
the factory felt is to stop noise of the large roof panel flexing and tappitty-taptaptapping on the bars not hold the bars up, the welds/screws on the roof surround hold the bars in place.
there is proably a better/non-water absorbing way to stop the noise and reduce the roof flexing too, probalby some sort of strong yet flexible adhesive. i want to say tiger seal but thats proably too much retro rides.
however i do know that on my fiat the lining went over the window lip to the 'outside' - this is so the window rubber holds the lining in place nice and taut. seemed a bit funky to me too but ive since put the screens back in without any sealant other than the filler strip (as per factory) and no leaks yet.
however ford may be different?
also those big black foldback clips are good for the hours of crease chasing you have coming your way
-
i would but Baleno is immobile awaiting a new clutch cylinder and blocking the Fiat in the garage.
Also Homy-Van will need the same thing done soon.
Lucky the CVT in the high milage Primera is sweet...stupid unreliable manual transmissions!
-
speaking of bringing stuff to meet,
chris do you want to bring them rims along for a car park test fitting?
-
JB weld on thermostat?
-
well, if your gonna do all that stuff then you should do this too:
makes haymans one look about a trillion times better, and bmw lights are surely easier to find than integrale ones!
a compulsory mod for all square headlight deltas I reckon.
-
they work by sensing the change in magnetic field from the dizzy cam lobes moving past the sensor to rest/fire the coil instead of the points opening and closing to do the same thing.
they are as easy to install as replacing points, as this is basically what you are doing, and basically the only difference between models is the screw holes to suit. The dizzy rotor and cap still work the same as before to get the spark from the coil to the plugs so work best if these are good too.
Only problem with them is if you have small lobes on the cam as the sensor will have problems accurately sensing them relative to the shaft, so they arnt as good an upgrade as they could be for my fiat for example
Theyll still work, but not as good as they could (wobbly dwell times, which is the main 'performance' problem with points remain, the other problems of constant adjustment and maintenance are fixed). this pic shows difference between lobes for points and an electronic one - the electronic one ® has exaggerated lobes for the magnetic sensor, which i suppose you could make your lobes bigger with blobs of weld (lol) or machine one up, or steal necessary parts from a suitable electronic dizzy from PaP?
they are also about $70 landed from overseas...
-
was at M10 on weekend - $33.14 for a 1200x2400x4mm hardboard sheet - more than enough to do 4 doors @ < $8 each with heaps left over.
however the stuff is hard to cut, flakes off esp around trim clip holes etc and cracks easy, and is affected by water ingress even with plastic sheeting, so id probably go for the same thickness treated ply (which is also a couple bucks cheaper) or that plazzy stuff mentioned above + some thin foam from spotlight to puff the covering out a bit.


 - ive a few spare calipers now )


azzurro's 1969 FIAT 125 Berlina
in Projects and Build Ups
Posted
wee bit more progress on ye olde 125 this weekend.
Pickup up Driveshaft from the shop, all reassembled and balanced. Was quite a bit more than I was expecting to pay, but theyve definitly welded some weights to it and the new UJ's & bearing are smooth like butter:
and all back where it should be:
Reminder: need to have brakes back together to torque diff bolts. Also need more diff oil!
Also reassembled the old caliper bodies with the best cylinders from the 4 i had. The handbrake spindle seal i was able to use from my 124 kit, as i think that was missing from the last set i got, as the o-rings in there were not a good fit and i recall chucking a random oring i had spare and the best of what was there last time i did the calipers. Im sure they were leaking from the back where the handbrake mechanism is as well.
I also had some slighty different (DBA?) caliper brackets in my collection, that are not OEM FIAT branded but also do hot have wear where the steel ends of the pad sits and rattles in the braket and digs a hole from 40 years of driving. They were also 940gm each compared to the 1100g of the OEM ones as you can see from the few extra rebates in the design. (yep i weighed them to see if my hand guages was right - it was!)
Thats a 10%+ reduction in the weight of that component. Which is unspung. So i reckon thats a high performance racing part right there yep.
All togther again now and they look nice, but I suspect these will probably leak at the caliper seal again because the bore is a bit worn (too easy to put the piston back in IMO), but also looked like they were leaking out the back as well which ive hopefully fixed with new o-rings. Well see i suppose.
ill order another 125 caliper kit to refurb my spare set, but they are a bit rough but serviceable only problem is i broke a bleeder screw off on one, AND my 5th one is a 124 one with a smaller caliper so i cant use it as the spare
Anyway ill sort that out another day (mig blob on the end + vice grips) as these ones look nice for now. Plenty of other work to do before road test time anyway to see if they will leak in the meantime.
I would have had it buttoned up bled and turned around ready to remove the engine at this point but i decided to take the opportunity to have a quick clean up the brake proportioning valve while i was there and was going to bleed the brakes anyway
well it does look ok? (this is after removing 40 years of gunge of course and a paint)
shame the bloody thing is totally seized! So ill need to order one of those as well. I think this may have been letting too much pressure to the rear brakes which seems likley from the driving behaviour, as well probably exacerbating the caliper leaks.
So im stuck there - cant bleed it up or put it back down in the ground untill the brake valve is replaced. Bums
So Ive had to start another parts shopping list:
- rear brake proportioning valve!!!
- SAE 90 gear oil
- 125 rear caliper rubber rebuild kit x2
- clutch kit + flywheel bolts
- dizzy rotor and cap (still on order)