


azzurro
-
Posts
2744 -
Joined
-
Last visited
-
Days Won
3
Posts posted by azzurro
-
-
Hopefully I have a lead on a donor tunnel,
im happy to wait to do the 5 speed conversion till later on if i can get one, so its both easy/neat and is as factory as possible.
Been busy today, Auckland Anniversary Day, woot.
Clean and working Heater assembly assembled from a 132 matrix up top, just change the control levers to 125 type including the cables, otherwise the heater exactly is the same as 132.
Its ready to go in but ill see about a new valve just in case before i install it - may as well while its out eh. (note - 132 and Millicento heater valves are same as 125 - 124/lada doesnt fit)
Got the new dash in and moved the guages up to the stereo hole. Because they are mechanical and have long oil and cooland filled pipes (and im lazy) i had to push them out the hole from inside the dash out so the holder got hacked up and bent a bit.
Its pretty haggard but they still work and that will do for now.
I think if they are going to live there then i would want nicer guages anyway.
Silver Veglia ones from a 124 to go with the clock and dash.
You can also see my new passenger foot rest
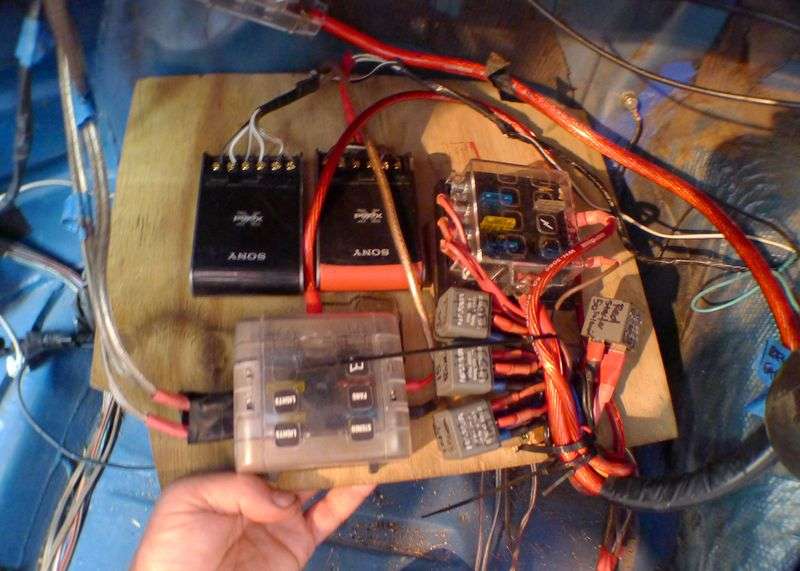
Rest of the day was tidying up and extending, shortening, rerouting and whytfdidIdothat?-ing my various electrical addins to get them to the new footrest panel. I had semi planned this when installing these various mods (the 'Brown wire replacment', Headlight relays, Ignition switch relays and extra ACC fuses/supply)
The whole lot is fed by a (fused) 4Ga wire from the boot to a distribution block under the choke cable - the alternator & starter hot wires connect though the firewall and one goes to this:
CW from R:
Main feed from dist block and relay trigger wires from Ignition Switch:
Ignition switch relays and fuses (Starter, Coil, Main Dash, Headlights & ACC Circuits),
Then to:
ACC Circuits fused distribution box (Electric Fan, Amp, Headlight Relay Supply)
Headlight relays are now tucked up above the fuse box out of the parcel tray.
Tucked the Cross-overs in there too. Will put some yoga mat or something down to stop it shorting, but nothing touches.
Way tider than it was before scattered though the dash and parcel tray, but still ugly!
Gerd I hate wiring/being under the dash.
-
 2
2
-
-
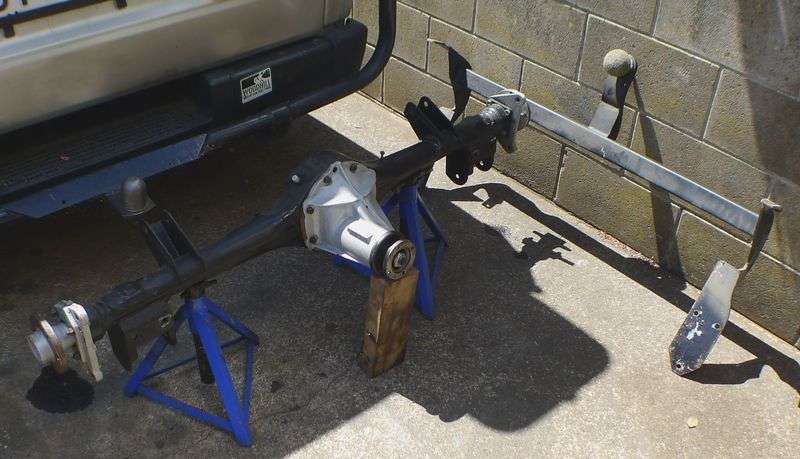
Diff went it pretty easy, im getting pretty good at it now!
This is the original one, dont let its apprearance fool you. It has a bent shaft and or bearing on the way out and the nose seal leaks, and clunks & whines down.
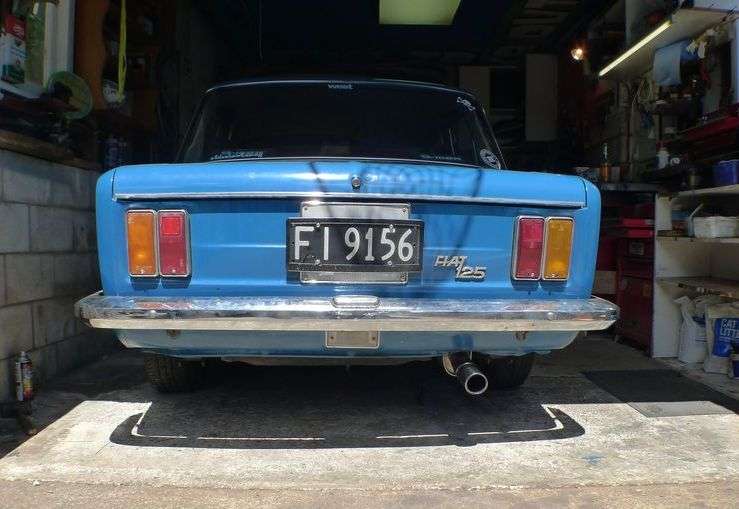
The towbar fell off. While its real good and solid one, its visually too 'chunky', so back to bare bumbums for now.
Test drive was all good too. Smoother and quieter all round, a bit surprisingly so.
Since its all going so swimingly, it must be time to ruin everything!
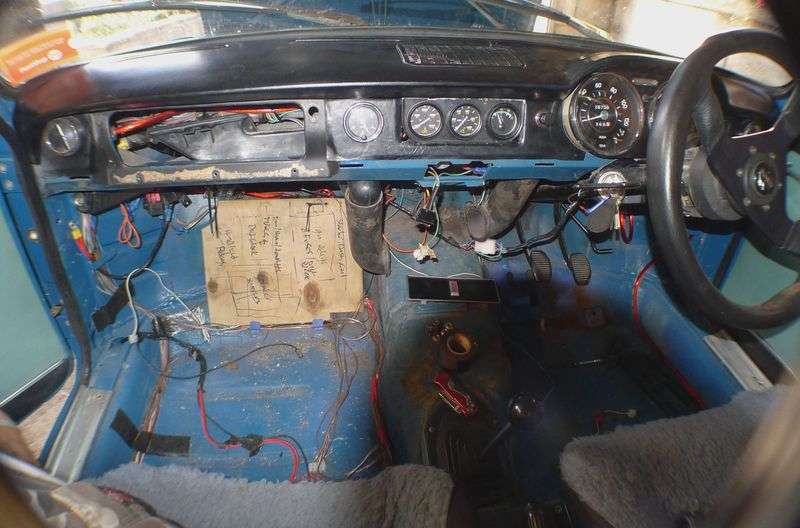
Pulled the front carpet, dash and heater out.
This is for a few reasons:
1: Tidy random non factory wiring that some stupid egg has left all up and through that.
I plan on putting most of the add ins where the white polystyrene footrest thing is on the passenger side, replacing it with a bit of ply to create a electrics box as the poly bit is about 100mm deep- they will be easy to access and all in one (hidden) location out of the way.
Ill also move the guages (Volts, temp, oil pressure) up to the stereo hole to line up with the clock, as the tunnel mods wont allow them to stay between the console and heater.
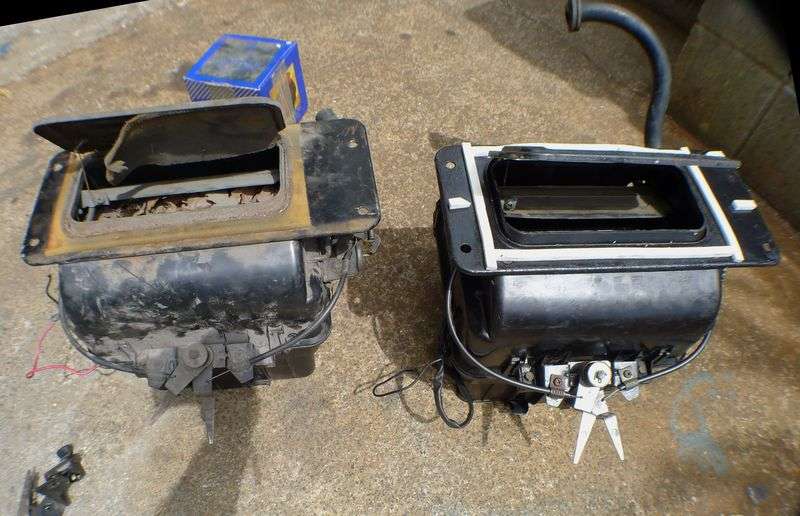
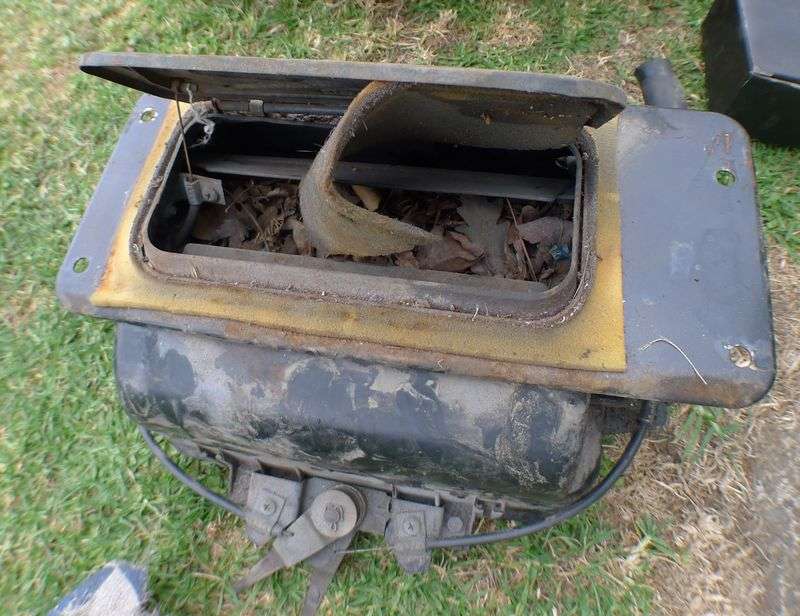
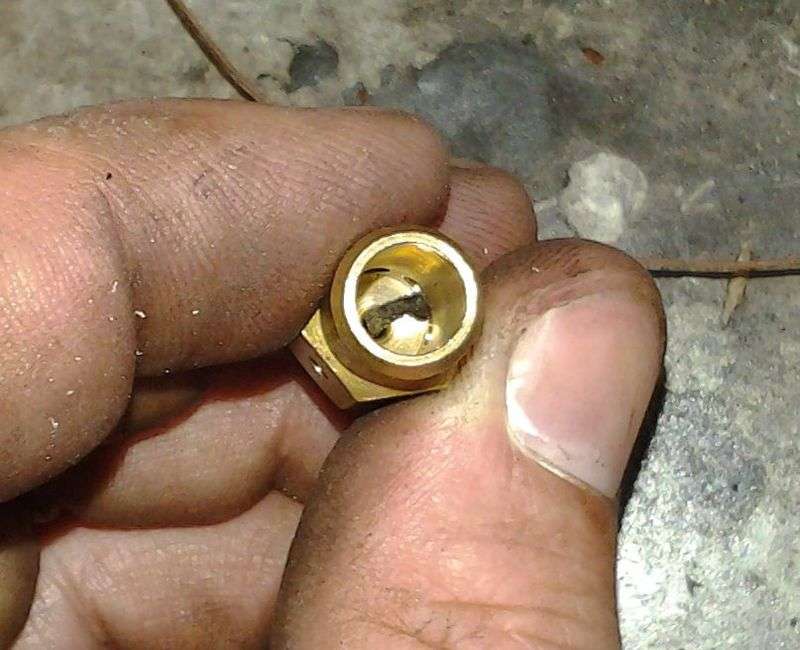
2: Heater Box - I think i found why its not very stong fresh air inflow despite the fan working well:
The valve is seized (closed!) too, as are the ones on all my spares but one. Will see if i can buy a new one, else the one freed up one will have to go in.
3. I also have a tidier dash to install: Guess which is which.
Ive also decided that I will pull the currently installed 1608cc engine, and replace the crank seals for the nats run.
I know it runs and runs well, and is worth having a good blat on the factory fitted engine.
Will try fitting the Dellortos for extra last minute dramas.
While its out i will also do
4. 132 Adjustable steering column and matching box swap. Have the all bits for this for a while, its just a bit easier without the engine & dash in the way.
5. 5 Speed Gearbox - have all the parts for this too, except a longer (more common) clutch cable, which im ordering next week.
Only the tunnel needs modification, raised about 50mm at the shifter hole for 300mm forward, to make room for the remote shifter, but otherwise bolts in.
Im totally dreading cutting the perfectly rust free tunnel, and may not quite get onto it before nats!
6. New carpet? Old stuff cam out on 5 bits and is pretty much nonexistent on the drivers side. Autodec has a pattern for $310.
If i get all that done thats pretty much the end of my mods list, and If i want to run the 2L engine later on i only need to swap the bell housing if/when the 1608 engine comes out
-
3
-
-
such puppy!
she would rather come and sit in the car than be tied up at home. shame she will never be able to heel-toe
-
cheers chaps,
diff issues hopefully resolved for now, but have added "escort lsd" to my tme favourite searches.
SiR, stoopids more likely!.when it goes good, it seems to make up for those, um, other times.
-
First Pre-Nats job a success!
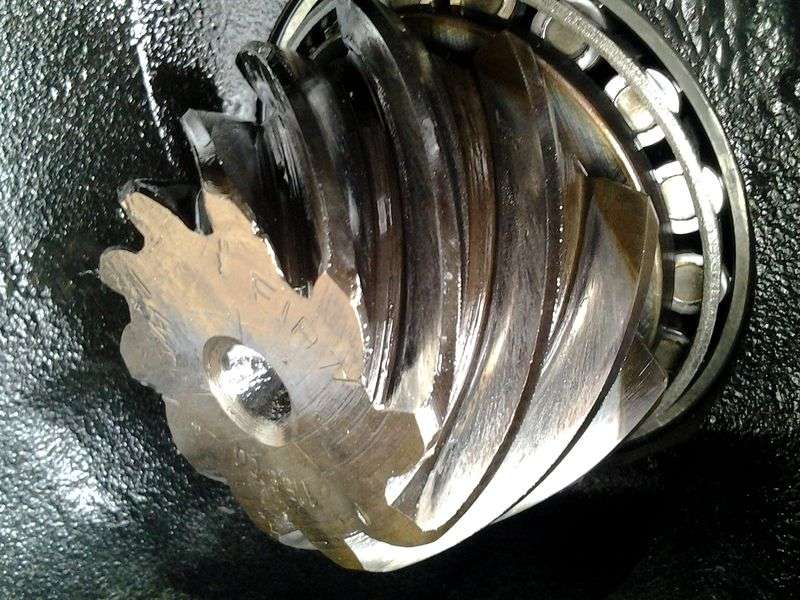
Popped in to Dr Trans to drop the diff from the red car and pick up my other pronounced dead one:
Yerp, shes toasted alright:
Must have timed my arrival very well, because Egan had a look over the one from Red directly and promounced it "mint, chuck it in mate" and charged me only small change, including the strip down & inspection of the other one and gave me a bucket to take the bits of the other one home in as well.
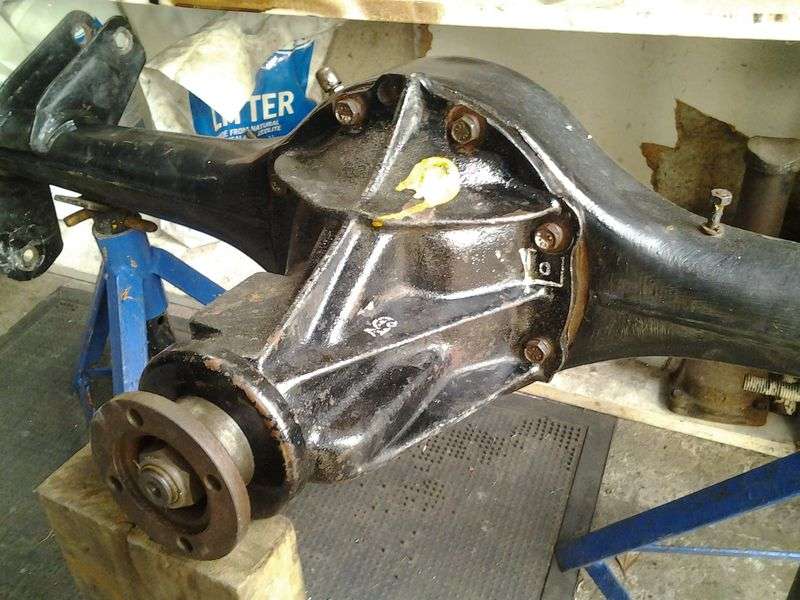
So got home early and popped it the already ready axle thats been sitting under the house, along with new o-rings and seals, ive had for a while which only took a minute to do as well.
Pretty happy as it came up nice and clean, and even has the factory original stampings on it too
Even took special care to properly touque the bloody bolts this time too, with an actual touque wrench even instead of just goodntite
Done & ready to fit.
No more whine, clunking and leaks (maybe!)
-
FUCK
I think/ thought 124 and 125 diff parts are the same, just the mounts are different (coil vs leaf) - the diff head can be removed from the front.
(i hope) you may be thinking late 131/132 diffs which are bigger and 'rear loading'???
Ones a banjo and ones a sailsbry, but i can never remember which is which cause those words dont relate to anything that makes sence to me.
---
dipstick chat: are you sure you dont need a super long one with a long tube extension so you can check oil without burning your face off?
-
Air filled bag?
(oh no you didnt!)
-
YOur best air bag was wrong sorry.
The ratty green f100 wins that award
Wrong. Bouncy Castle wins. Ratty green F100, in 'Best Air BagS' category, maybe.
Judges Decision is final.
-
Best ITBs:
Best:
Best Mecedes Interior:
Best Norks:(not really)
Best Yellow Pickup:
Best Accessory Mounting:
Personal Fave/Judges Choice gets twice the pixels. Much Want:
-
2
-
-
was good. heres proof.
Best Russian Plates (not best sunburn, not even a contender)
Best Spirit Animal Painting:
Best Glitter:
Best Chrome and Black engine bay i took a photo of:
Also Best Air Bag:
Best Under Construction:
Best Trailer Queen:
-
1
-
-
Duuuuuude. your an ideas man.
also thought i could put the 'correct' volume of oil in and make my own marks.
Hoping some Fiat pervert will just tell me which one to use (Pro Fiat tip: Its probably neither)
-
1
-
-
was plenty of piners and droolers and number takers at Kumeu whenever we were dropping stuff back at the Fiat parked next door.
Am half tempted myself!
-
looks real good man, looks like its pretty much set up already.
good to see more fiats on here too.
is that paint worn off from the car cover?
-
keen,
maybe last drive of the car for a while - hopefully its going again by nats
-
Hope everyone had a nice break, havent been doing too much with the Fiat, have been speding a lot of time in teh Van which is great.
\Oldschool.co.nz nationals coming up in March (omg is like 6 weeks!) , so hoping to get a few things sorted before then.
Im undecided abount doing the 2L swap before then as the 1608 (apart from oil leaks) is running really nice FINALLY.
Pretty sure im going to try to get the 5 speed in before then which means i need to pull the engine anyways, so which engine to put back in?Devil you know or???
If i pull the engine i may as well do the bottom end seals (as i should have before i put it in!) as i know it runs well.
OTH why not drop the newly built 2L in instead? (and see if the Dellortos work on it?) and take a high risk high reward strategy?
____
The 1608:
It still had the wierd miss at 4000rpm from the drags after swapping out the fuel pump and i found this:
That will do it! it was a small bit of rubber, totally blocking the needle valve inlet hole, and also being held in place by the needle valve. Kinda lucky as if it had got into the carb passages it would have never come out.
Also i had the inlet and oulet pipes around the wrong way on the fuel pressure regulator (i think after testing bypassing it at the drags) - but dont tell any one
Seemed to go much better after that, but still a bit meh, so tried slightly smaller air correctors, to 170 on P and S from 180s, which is way better, then main jet from 125 to 132 even better.
Just top end remains a bit stumbly, but my next sized airs are 150 which is a bit of a jump, and the secondary jet is a 155. I have chucked the 150 air in and will see how that goes on Wednesday, but i suspect that air size < jet size is bad?
I have a 160 jet to try if its no good to run with the 170 air but access to it is way more of a pain.
At the same time I also reduced the plug gap to factory 0.6 from 0.8, and pulls much better especially pulling from down low.
However it now runs on a little (started doing it just before drags), and the BP5EY which before jet change where also a bit glazed, after jet change they were a little sooty but still ok (compared to teh oily crap that was on them pre- valve stem seals!)I wonder if the seal job has reduced the need for the sparks to work through an oily mess and now are too hot? I also fitted a K&N Filter which may be increasing air flow (lean) over the old & dusty paper one thats been on it for ages (would havebeen full of bog dust and shit)
I have bunged in a set of BP6EY and see how they go.
_________
Diff:
Finally pulled the diff from my red car to check, I think it may be worn as well Will drop it into see, and pick up my other dud one.
If its also no good then an alternative may be in order, or maybe just a new CW&P which will probably be a similar price.
Aparrently Ford Escort diff head very nearly bolt up (4mm spacer + bolt pattern change required - shafts are same splines and diam) so that could be an option too.Lada LSD would be good but with me needing a CW&P as well, shipping becomes a drama (over sendinfg CC deets to the Ukraine!)
Interested in any suggestions or spare parts (WTB Cheap ESCORT DIFF!) to assist on this issue
_________
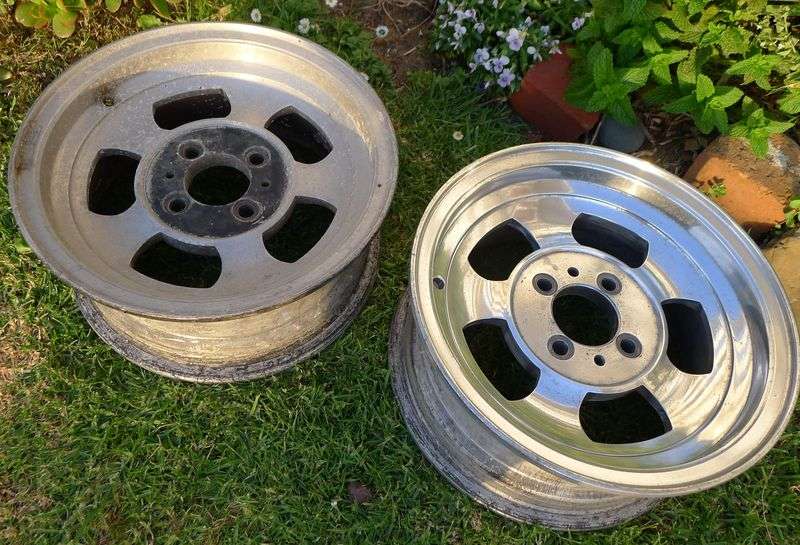
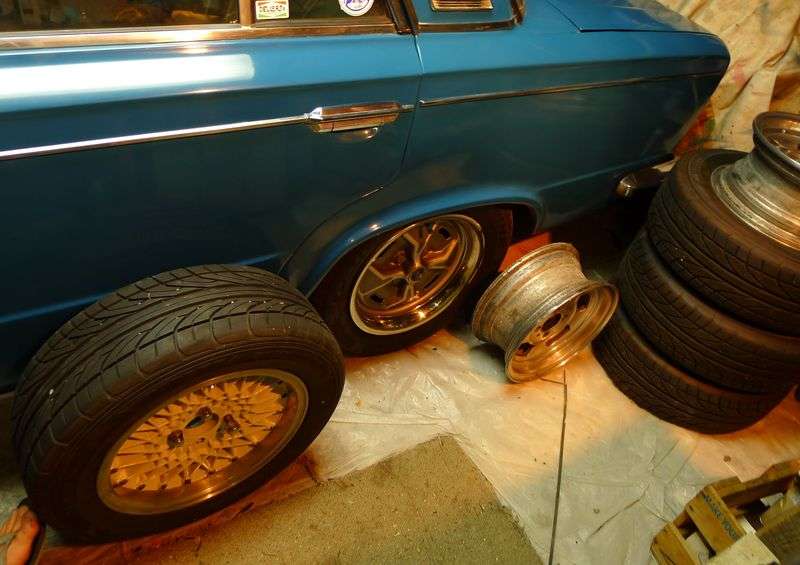
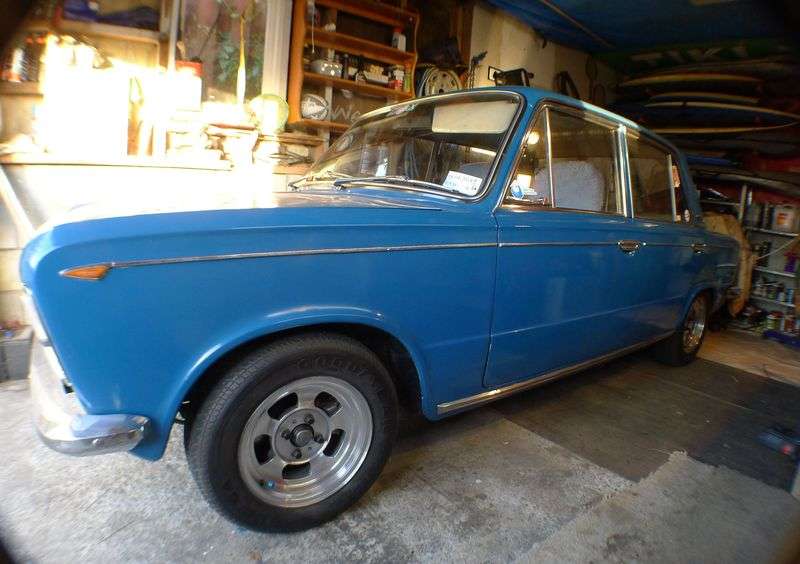
ive also polished up the 'correct' Wards and swapped the tyres over, dont know if im becoming a purist, but I reckon they look much better than the other ones, which will be for sale soon. in case anyone is interested.
Just need some Ward centres now...My swappers trawling at Kumeu came up nix.
before & after polishing (OMG soooooo boring! blew up my drill too)
Now ive got lierally nothing to wear!
yep, those ones
____________
In 2L related issues, I got a few more bits, mainly a new clutch, but a ferw more things to make the shipping worth while.Was still cheaper, even with heavy itme shipping and the extra bits than getting just the clutch locally which is a shame, but $ is $.
Clutch Kit incl Bearing, manifold nuts, clutchcable nuts, shims, dipstick rubber thingees, fuel pump blanking plate & gear stick gaiter for the 5 speed.
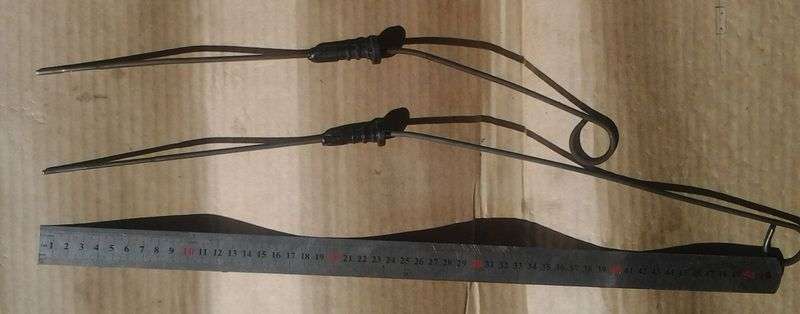
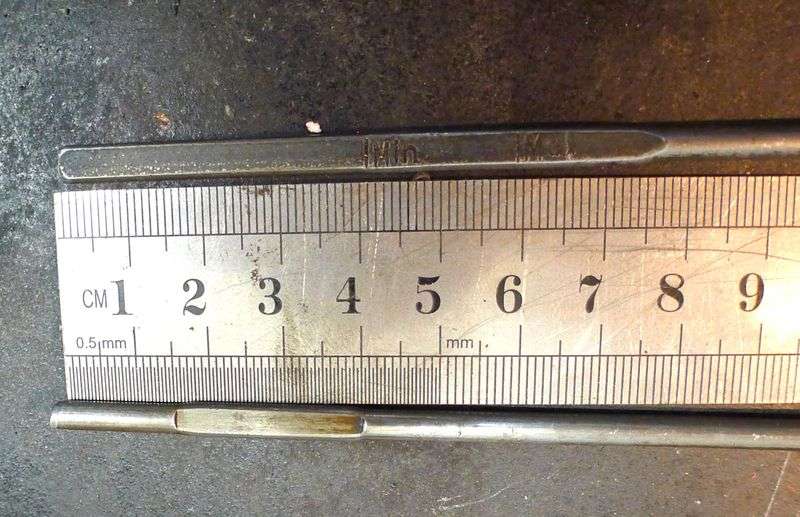
I also have 2 dipsticks, both came with the 2L engines, both completely different readings:
Low on One is full on the other! Which is the correct one for a RWD/2L?
-
1
-
-
will be heading in from slightly north west of the venue pretty earlish.
bring your sunblock!
-
http://www.kumeuhotrodshow.co.nz/about.html
"The 20th National Classic Car and Hot Rod Festival is January 18th -19th 2014. Head out to Kumeu in West Auckland via State Highway 16....
Show hours are Saturday 7.00am to 6.00pm, and Sunday 8.00am to 5.00pm. Just $15 for adults and under-12s free."
Pretty sure its free and campable if you bring an OS car into the show grounds (not the carpark) Friday or early Sat/Sun?
We wont be doing coffee this year (gah - dont ask!) but will roll along Saturday.
Hillman1 - you should collect those chrome rings
They will be in the boot of my car if you see it. -
Rain-x
-
4
-
-
yep, oil cap changed and alls well up top, only the bottom end crank seals pissing out now.
went to OS drags on saturday, was freaken awesome,
//oldschool.co.nz/index.php?/topic/41074-oldschoolconz-club-drag-day-discussion/?p=1231716
Only ran 4 pretty consistent 18.7s @ 116km/h before figureing out that the slight miss that had turned into a 'rev limit' at 4-5k rpm was the mechanical fuel pump on the way out (low feul pressure - only noticed as the bulb on the regulator was half empty (i mean half full).
Decided id better save what pumps it had left for making it home, but couldnt resist accepting a grudge match against Chris and his Lada, which still won
.He defo won the b-out comp!
Made it home fine from Drags and swapped it out for a spare today, and seems way better.
Cracks in the diaphram - no wonder my oil smells like petrol and its hard to start if its been sitting!
I was thinking the blowby was so bad and/or carb too rich letting petrol into the sump, and also of getting a drain back valve, lol.
pershied diaphram - i think you can get rebuilt kits - this is a weber one.
but just bleh
- all that shit was on the sump side too and was probably falling into the oil with the gas washing though the diaphram
So the 1608 seems to be running well now, and only the front and rear crank seals need doing now (badly!), but as thats an engine out job, its not gonna happen.
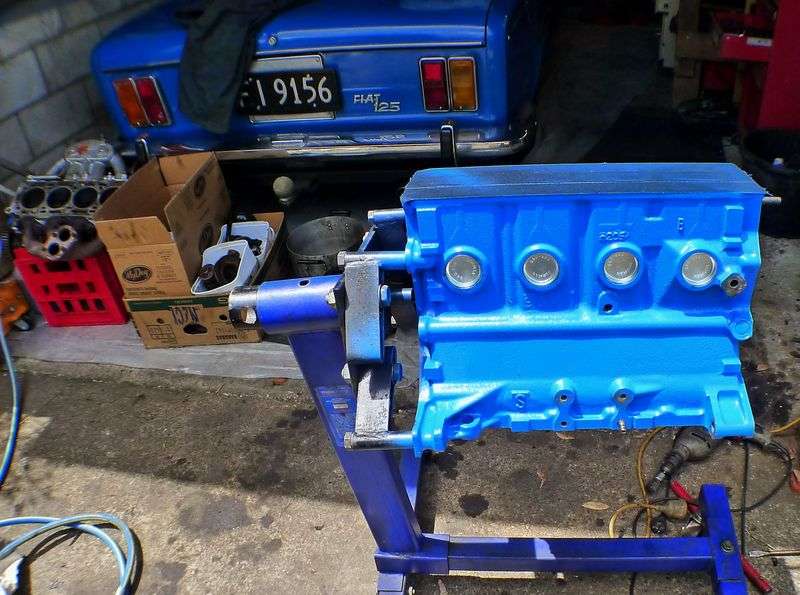
THIS IS:
1995ccs of twin cammage - But, that looks pretty much the same as the 1608's you have already you say
- exactly
has the rebuilt (but no machine work) bottom end and cams/boxes from the newer/cleaner 2l and the tidied up big valve head from the first one i got. Should be a bit better and certainly no worse than the 1600 in there performance wise and should keep more oil inside itself.
Will use quite a few parts from teh current engine when it comes out like mounts and stuff.
Just waiting on a clutch kit, and ill join it to this 5 speed, which is all ready to go, just hanging in my heavy bits corner (Gerhd - look at that surface rust! stupid sea air!)
spare diff waiting for a nice head - will pick up last chance head from red oxide tomorrow.
-
29 November 2013
Been continuing to work on the 2L engine, received a few shims today, so thats done, and the big valve head is ready to go on the tidied up block, with the cams and boxes from the head that came with.
Ive put the oil restrictors in, ended up just winding them to a sligtly opened up passage without a tap - the high grade steel grubs bit into the ally no trouble, much better than the tap which kept slipping out. Forgot to take any photos before i fitted the cam boxes tho.
thought id compare the new 'big valve' head to the early 125 head- the valves are only a few mm different so the valve size difference is not so visually obvious in these photos (43.5 vs 41.4mm inlets 37? vs 36.0mm ex) , but the difference in water passages in particular is interesting - i understand you can put a lete model head on the early bocks but not a early head on a late block?Also the Combustion chamber is a wee bit different, later model 2L seems to be a bit bigger, but also more 'shaped'
Big Valve Late Model Head on left, Early 125 Head on Right
I also noticed playing with cam covers that the older/crusty oil caps were quite hard to turn off, compared to my shiny and new (but not genuine Fiat) one on the engine in the car, which also appears to be the source of the major oil leak
Put a new gasket on the tightest feeling one i had and fitted that.
Im kinda hoping its is that simple, but also silly to have been chasing rainbows for a while, but i will also be stoked if it is as i can slow down a bit on the 2L build + 5 speed conversion and just use the 1608 over summer.
Test run tomorrow! -
woops - missed a few posts...
24 Nov 2013:
i have now reassembled the majority of the block with a coat of paint and new bits (new frost plugs
, gaskets, waterpump etc) that i had lined up for the other worn 2L that is now put aside. Finally used up my can of blue engine paint!
I checked the rings and bearings and they were all in good condition and within spec etc, and the engine was pretty obviously running well before the PO took it out (to use it in a 124 project that never eventuated), so ive just slapped them back in and tourqued it back up.
I just want to drive this car over summer instead leaving it in the garage!
Just the big valve head to assemble, and cam boxes off the head that came with fthe engine or this to be ready to go. Ill do that this week.
Im unsure wether to obtain a clutch, and pull the old engine/box and start on the 5 speed swap, or just swap the belhouding on the 4 speed to suit the larger flywheel and get driving faster, as ill just be pulling the engine out again to fit the 5 speed eventually.-
1
-
-
In other news, Ive got the 125 going much better, tweaked the cam timing a bit and went on a run to Burger Fuel meet, took it easy on the way in and had no leaks, got cocky and gave it a bit of a blat close to home, and yep, splurt.
As it was a quick test, when i got home its obvious that its coming from the oil cap. Engine is quite smoky as well, both at idle and revs, so I think that theres somethiing going on with blowby and/or valve seals.
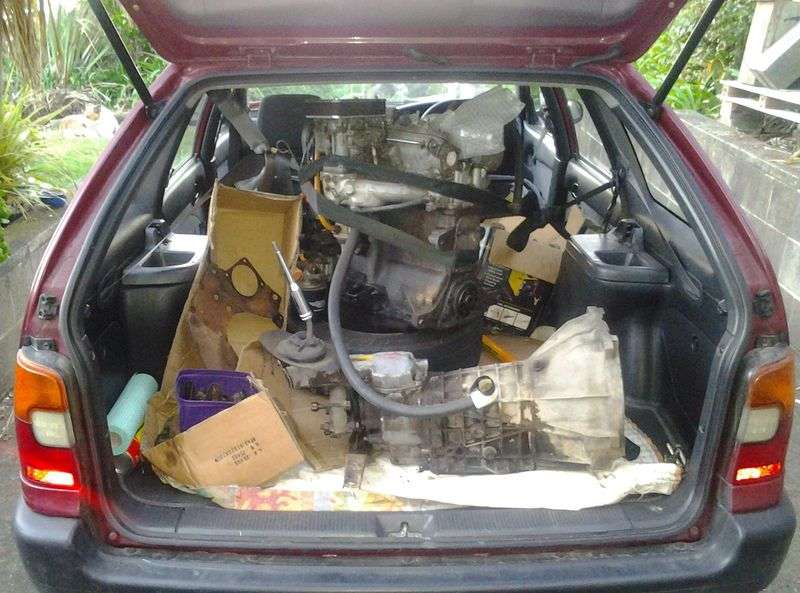
But, good news on that front, picked up ANOTHER 2L engine and bonus 5 speed gearbox today:
Lo-rolla doing the business:
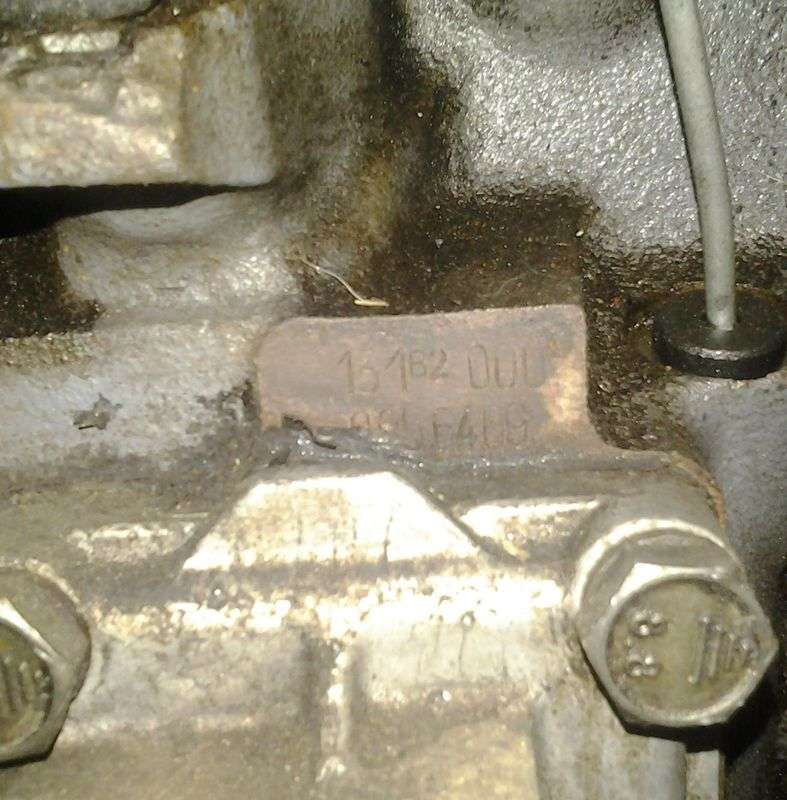
Another 131B2 Block, ex 132, same as the other one I got a while back:
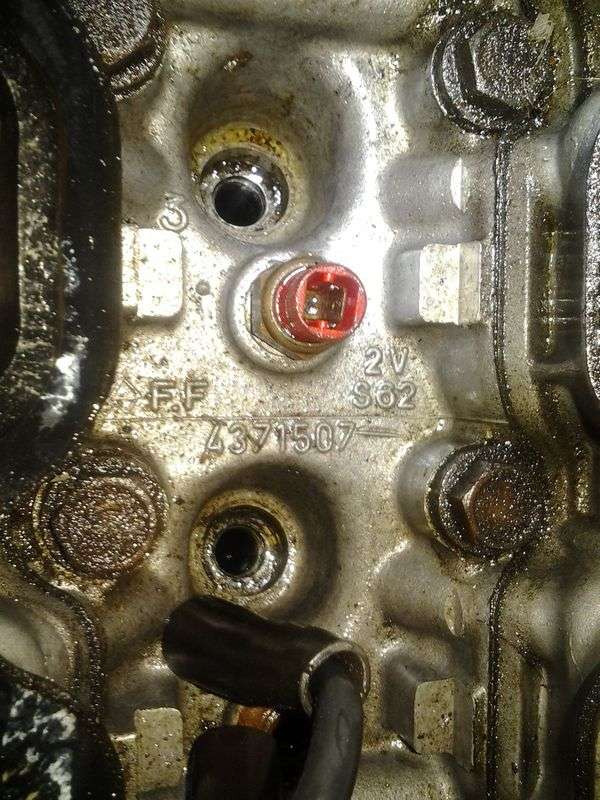
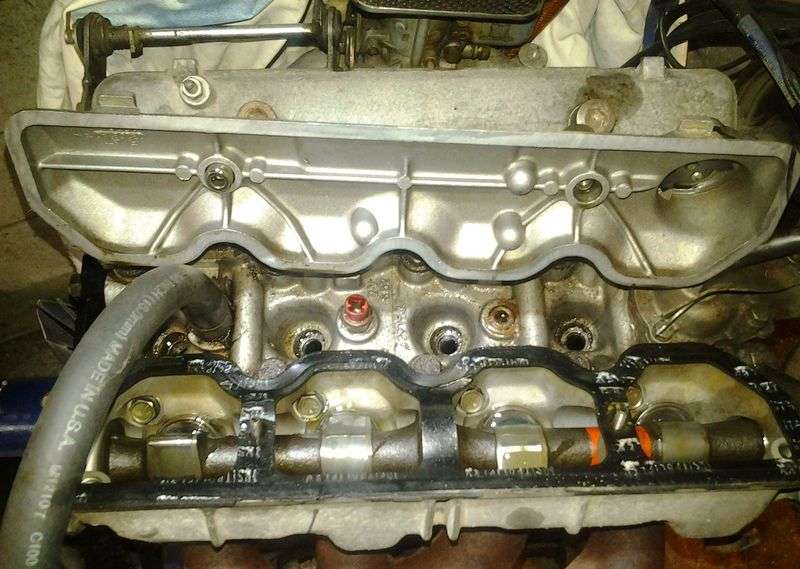
Head, 4371507, has funny later model cam top covers ive not seen before, lots of studs and recesses
And would you look at that, yum yum yum.
Did not have spark plugs, but i put some CTV fluid down there before trying the crank nut, and shes smooth, so hopefully thats me sorted.
I will pull this down to check it out and regasket, and probably put the big valve Regatta head on this block with these nice clean cam boxes and unworn cams
I also saw this 132 the other day, first time ive seen one in the wild/not under a cover or on blocks-
4
-
-
keen to make second run at BF Ellerslie, hopefully make it this time
-
Car has ben parked on the driveway for the last 3 weeks in disgrace after having a major oil blow out on the way to Burger Fuel last month.
This is having a look and pondering turning around at rosebank after another 10km or so from the initial stop. Bit hard to tell but there is oil all though the cam valley around the spark plugs and smoke from oil burning off the exhaust:
and this is underneath after about 2 minutes sitting in the same spot:
So we wnt to BF lincoln on the way home. Cool solo meet
Anyways after a bit of discussion on the Fiat forum, it seems that a good mod/old school race mod is to add oil restrictors to the head feed, vasically where the cam jounal feed makes a bit of a kink in the diagram below:
Fiat twin cams run a lot of oil in the head and in my case for whatever reason (over filled oil, blow by, worn main bearings, worn cam journals, blocked pcv valve, blocked oil drains or more likley a combination of all of the above) meant there was too much oil in the head and it exits from the cam cover seals and oil filler cap instead of retunring via the drains..
So im gonna do that, ive made the restrictors, from some M8 grub screws with a 3mm hoole drilled in them.
This will mean more oil pressure in the lower part of the engine (big ends, mains) where it needs it, and a bit less, but still plenty in the head
they will go here, where it says 'oil feed' which in the head between the cam boxes, which is an easy tap in the ally 6mm hole. Ill also open up the oil drains a bit internally (i wont lower the oil level in the head tho which is also sometimes done)
This means pulling the head off (AGAIN!!!) but hoefully thats the end of it.
I also want to recheck the cam timing, replace the valve stem seals and fit the sideys too, which is easiest done with the head off, so its not all pointless.
I also need to sort the diff out, I will try the one in the red shitter, as im keen to have this going good for a DRAG, cause all going well i reckon i could get into the upper 20's WOOT!


 .
.


azzurro's 1969 FIAT 125 Berlina
in Projects and Build Ups
Posted
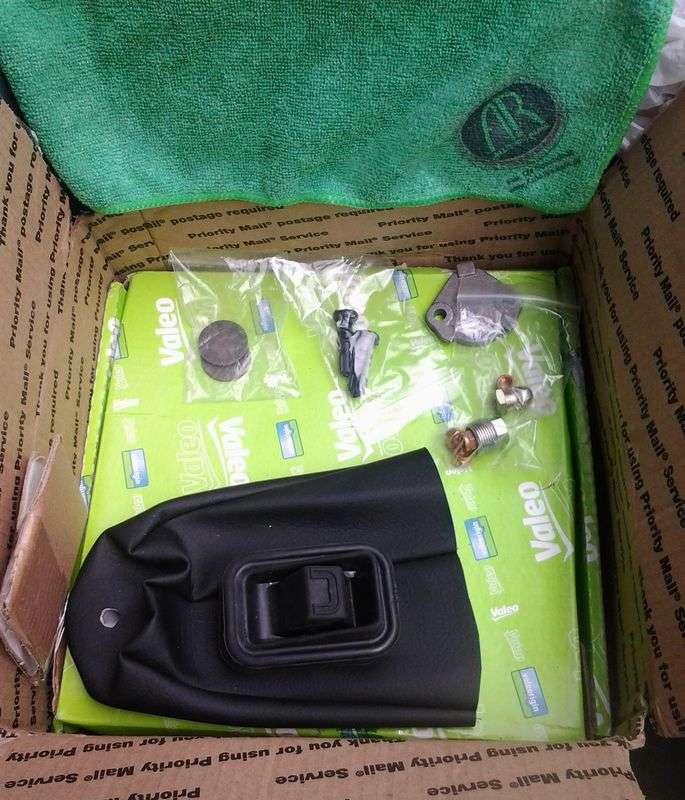
Did quite a few jobs over the weekend, as i received a parts order:
Got a new heater valve from Mal at Fiatparts.co.nz (note heater valve is the same as on milletrecento (1300/1500) and early 132),
and a fuel sender float.
along with a 125 Special Clutch Cable and some 2L flywheel bolts,


All the 2L+5speed conversion parts required are all collected now excepting tunnel, which i have a laed on a car for a tunnel chop, still need to follow up on, and will do after nats. Will try to get it sorted to use OS pony express to bring it up from Chch to nats.
Fuel Guage
swapped the fuel sender's 'sink' out for a float and put an earth line in too, fuel guage works well and stays solid instead of waving around and reading low.
bumped the tank a wee bit further forward, all the boot linings seem much happier.
Wiring
Much tidier, all fits on my bit of wood, moved the amp back onto the top of it too which will be hidden by carpet.
Most surprising thing is sverything still seems to work!
Heater
Reinstalled matrix and valve, seems to work well and no leaks. Thank god because getting it in is even harded than getting it out, esp with my new wiring i routed without the heater in the way
Fan i had tidied up ages ago started squeaking, swapped out for the old one (after a clean).
Test fit parcel tray, realised the heater levers were installed upside down
Managed to get them off, reversed and back in without pulling the whole thing out again or breaking anything.
Fingers crossed its job jobbed.
Carpet
New Carpet from AutoDec turned up today, so got straight on it.
Old Stuff out:
New Stuff out of its packet to compare:
And in:
Pretty happy with that, ordered Wednesday am and was at the Mrs's work late Friday. (she didnt bring it home till today)
Not bad for a custom made bit of kit for a pretty obscure vehicle.
Fitment seems good, (they even chalked the bits they left for me to cut which were also pretty spot on) and i think there is sufficient slack on the tunnel that its made for a 5 speed, so yay.
My only complaint is that I paid $100 extra for loop pile to match the OEM stuff i yanked out, but the carpet feels really cheap which i did not expect given the price premium over the 'standard' cut pile, and that they could have used a nicer carpet as they sewed it rather than moulded it, but for the work thats gone into it, and speed of delivery etc, the price was still very fair, and otherwise im a very satisfied customer.
My shoes wont be complaining about it anyway, and certainly looks 100% better!