


azzurro
-
Posts
2744 -
Joined
-
Last visited
-
Days Won
3
Posts posted by azzurro
-
-
I gues that means neither up nor down?
-
ACC Says: (page 98 of Levy Consultation Documents)
"Vehicles that are over 40 years old are termed veteran or vintage and are put into classes 3 and 7. They are not affected by this proposal."
-
keen.
will try to remember to investigate wobbly voltage/flickery lights before then.
maybe have a goork at the carb too.
(im sure it will be fine)
-
i have a box of weber bits incl jets you are welcome to swapsies with. (on a busy nightclub one in one out basis
 )
)bring to BF tomorrow? we can play carbs.
those jettings dont seem to out there.
could be the mixture screw is busted, or its seat worn
or maybe idle jets too big,
or ???
i have same issue on my downie and it runs best wound right in and adjust using the throttle stop. seems bung but it goes fine (mostly)
-
Why not just piss it all off and use a microsquirt for everything??
U MAD BRO!
I dunno man, stop hassling me. I probably will, but all this electronic shit is new to me.
I mean, calibrated orifices and weights on springs is pretty simple. 2x computers, 10x sensors, and 100x wires to do the same thing (but better, i know) just doesnt seem as elegant somehow.
OTH,
TURBO!!!
I got a new slave cylinder for $30, with a parts order for the dailies, but masters are like $120 if they are instock.
So to 'save' me $98 i drove 50km round trip to PaP Takanini, spent 3/4 of a sunny Saturday in the greasy mud and got one from a wet and smelly Uno for $22.
Hopefully next weekend should be able to test if the boost guage works on my private test track.
-
yes, i was awake pondering this last night.
Mircroplex (ignition) &/or Jetronic (Injection) doesnt need dizzy for signals, but does need 2 tooth crank wheel (crank position) and pulse from coil (RPM).
However the engine does needs spark - either from dizzy (which dont fit) or some alternative - edis needs 36:1 trigger wheel (already have 2 tooth for Microplex and Jetronic in way).
I thought maybe mounting two wheels (one front one back?) might work, but unsure of practicality
May just copy Nick (which is a good strategy i suspect!) to keep 100% OEM management withonly packaging to worry about or go fully Link or Mega-thing or whatnot.
-
cheaps is my favoirite price
-
maybe? basically need to replace the dizzy with something non-dizzy
cam mount will clash with brake booster, there is no block mount hole (or oil pump shaft to drive it), current possition will be in firewall, and nicks solution, well i probably will mess it up.
and hoping EDIS might be the go, if i can make it as 'dumb' as possible (no advance) as the Microplex will handle the advance.
Essentially a dizzy but firing the sparkplugs off a crank trigger wheel instead of a rotor in a cap - maybe COPs?
All sugestions welcomed, this fancy electronic stuff is all new to me!
evlone said on t-124: "if its magneti marelli microplex as you say it is they are run a full 3d map of the rpm and crank sensor and vacuum and all the advance is done in the ecu same as uno turbo 130 tc etc distributor does nothing but send spark down the plug leads as it swings past "
"microplex is full 3d map ecu decides on advance based on rpm versus crank position and engine load based on vacuum and boost"
-
also, have a read of this, i think im gonna be busy
124 Special croma turbo repower
http://www.turbo124.com/forum/viewtopic.php?f=11&t=2905
main jobs will be
- changing the head from 'reverse flow' to normal flow, but a normal head just bolts on and the manifolds bolt on the other way
- rwd bell housing bolts up, puts starter on (normal) inlet side
- tap 1 bolt for RWD engine mounts
- turbo/inlet/intercooler packaging
- ignintion - dizzy issues - no boss for the block mount and booster is in th eway of cam box mount, so cant use the Digiplex initially, (unless do what Nick did above) but probably to EDIS, just need a new trigger wheel and the module, is a common conversion in the US.
- injection - will use Jetrronic for now
May use the red car as a mock up whn it comes to that point so the blue one can keep running.
-
Got this in the mail the other day, all of it will be needed in RWD too.
- CPS sensor
- Dizzy cap and Rotor
- Cam Blt and Tensioner
my order came to $16.62 more than I paid for the car (but that included a mechanical fuel pump for the 125 and postage)
chcked that in (apart from the cam belt and tensioner) and Ive got it running now, after a bit of connector drama.
went to pickapart and stole some injectors (704 vs 401 so a bit leaner, but not sat for 10 years) from a BMW and a bunch of bosch connectors as well as the Fuel Injection is LE-Jetronic controlled + a Marelli Digiplex (with a vacuum line input!) to handle ignition so both can be standalone.
CPS connector swapped over - now have signal to the injectors! woot-woot!
pop in the bmw ones and she fired up almost straight away!
starts first pop now, and revs out, but i dont know if the turbo works as it wont boost without load.
Which brings me to the next issue is the clutch hydraulics, so i can take it for a test boooost on my private test track.
It seems the master and slave cylinders are jammed in thier bores,
Dont really want to spend $200 on new parts just to bin them after 10km, but i also want to take this for a drive to motivate me to put the engine in the 125.
Anyone got Fiat croma/Lancia thema/Alfa 164 or Uno clutch master and/or slave cylinders kicking around in the shed?
Here it is in the slopy corner of doom having some wagon time till i get clutch bits to test drive it, then/or drag it onto the driveway to drop the engine out.:
______
Nothing much to report on the 125, been distracted by other stuff and the croma has been sucking up car time.
However did get it out it for the first drive since geeting back from Nelson the other night to a BBQ and then to Burger Fuel..
Before that I got a new mechanical fuel pump in with the Croma parts order, and in, wow, heaps better, fuel pressure & flow must have improved considerably, bowl in regulator was actually getting drained before on hard runs!
old one had a slightly different angle on the 'foot' that would have made about 5mm difference at the aux shaft lobe which is only 10mm or so eccentric - i think it was probably pumping less than 1/2 what it was meant to.
---
I also sorted the steering column switches and swapped the steering wheel for a slighty larger one i got from an op shop (ex-subaru momo), which made a bit of differnce to turning effort.
Can also see all the guages
and the steering wheel offset (which is a bit much the other way now ( )Must get it out more!
-
 1
1
-
-
i liked that no-one took any photos of all the billions of swweet whips there.
-
That is what I said lol.
ill shank your nuts!
-
^ bad idea, as even 'proper' bolt-to-stud conversions are shit, but to make it less bad i would locktight/molten metal the allthread into the shank nut (to make a shank bolt) as there is way more thread to catch (20mm on a nut vs about 12mm for the hubs)
Also they are Ward Atlas, so will polish up real nice.
Good to see some photos of the Panda, Mr C Dog!
Gonna put some flares on that and ddrop it?
-
since OS Nationals, ive not done too much.
Ive
- swapped out the noisy RR wheel bearing/axleshaft,
- swapped the column switches to the Special ones, and
- replaced the diff swing arms with adjustable ones (Toyota AE10* rear toe adjusters) to correct the pinion angle.
In other news, Euron8 (cheers bowl!) and I picked up this yesterday:
for this:
and especially this:
and all the gubbins that make all that go.
Its a 1987 Croma Turbo ie, 2l fuel injected 8V Turbo. 155hps and some 115kw, that will (sort of, lol) bolt in to my 125.
Not that i was looking for it but it was too cheap not to BUY NOW!It is the peak of '80s electroniques and design.
unfortunately the factory sunroof has ruined it:
and the inside is totally minging. Shame because brown velour corduroy is my favourite cordoroy.
Good bits:
To keep:
unmolested 2L Turbo ie engine, and all the etc to make it go.
full stainless 2 1/2" exhaustTo sell:
rebuilt gearbox
full nolathane bushes all round
uprated shocks and springs
14" cromodoras with good tyresIf anyone wants any bits other than the engine, let me know!
-
3
-
-
POST NATS UPDATE
Phew, what a weekend. Was super rad and there are heaps of photos here:
//oldschool.co.nz/index.php?/topic/42690-os-nats-14-marahau-pic-chur-thread/?p=1283072
Basically my trip was:
Wednesday night: Finish work, pack car, Auckland to Taupo, stay at Toms
Thursday - Taupo Convoy to Ferry in Wellington, which is now delayed 4.5 hours. Get to Camp in Maharau at 1:30am
Friday: Cruise via back roads to Upper Motere Pub Lunch and then back to camp for beersies
Saturday: Over Takaka Hill to Golden Bay. poker run and park up/swim, then back to camp for beersies
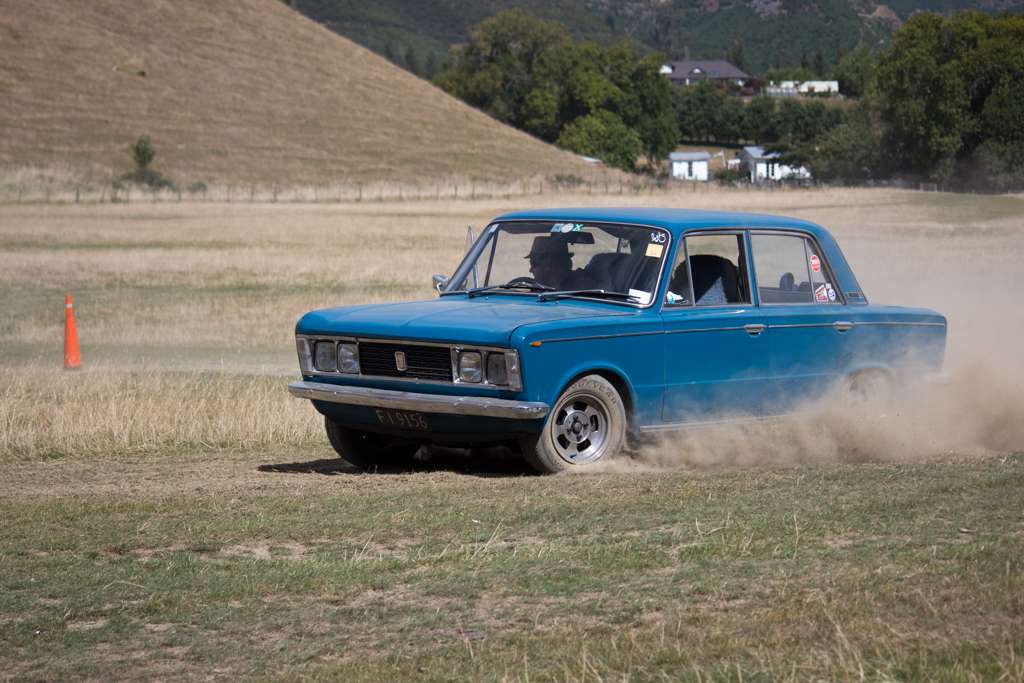
Sunday: Cruise to Nelson, park up/carshow at Tahunanui Beach, then Grasskhana, then back to camp for beersies
Monday: Maharau to Picton via Queen Charlotte Drive, Ferry to Wellington by 10:30pm, stay at mates place.
Tuesday, Wellington to Muriwai via every Opshop in the lower North Island. Home at 10:30pm. No more beersies
Wednesday, WORK
Car went really good TBH, returning an average 10.6l/100km fuel on 98 and 2.6l/1000km of oil over 2500km, oil consumption reducing as the lashings of Moreys and cheap mineral 15W40 slowly replaced the fancy synthetic 10W40 i put in before i left
Clouds of smoke on overrun going down Takaka Hill caused one wag to note that at least the smoke matched the car
Other than excessive oil consumption, which was not impacting driveability, the only other problem was On the way down from Auckland i stayed at Toms and had a revalation on the drive on the miss on throttle thats been plauging me for aaages:
the secondary idle jet!
there are two designs - one that has an o-ring, and one without - i had an o-ring on a 'without 'type, putting the jet slightly off seated. after that doooort to 6k rpm and beyond!Also at Grasskhana, seems blowby from the PCV glugged up the carb a bit (oil filter was dripping, so ok a lot), but that only shitted up the idle.
Other than that I only got my tools out to borrow them to others
_____
Since this is my blue car thread here are some of my blue car in profile against a range of bluish backgrounds:
@ Maharau, NO AMPING!.
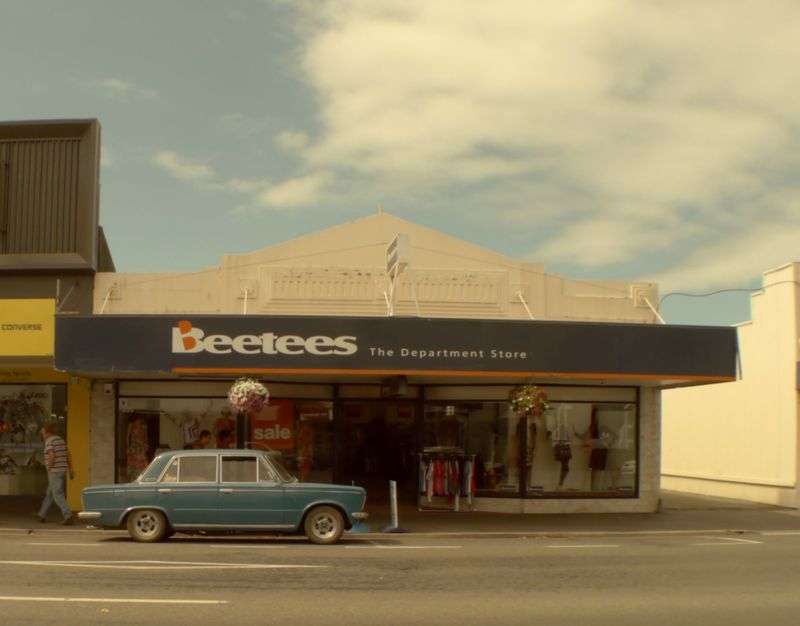
Outside a shop in Motueka, with coincidentally related Family injoke name:
Plenty of this, looking forward to a 5 speed now tho!
But nowhere near as much of this as I would have liked! (Photo Credit: Roman)
Queen Charlotte Drive, great road.
Back in the north Island:
Foxton (up the road from Otaki but with worse pies, and second hand shops instead of outlet stores)
Desert Road:
Taupo:
I have a long list of mainly minor improvements, aethetics, and 2L/5speed related items now, but overall it went very acceptably, and Id take it anywhere confidently.
Better living everyone
-
7
-
-
have some stuff i brought up from nats for a couple duudes,
but i have QOTSA/NIN to go to instead,
sorry chaps...
#gloat
-
looks good man, sweet photo spot
-
am realtively close to H-ville too, and if required can chuck it in my storage unit till whenever
-
Perfect. Better be lobbing the engine from the carpi in there
-
Since then ^ Ive got the engine and stuff back in time for for a shakedown run to Burger Fuel on Wednesday,
seems to go as good as it ever did which means i didnt break the engine/clutch getting it in and out, so thats a bonus.
Had to make a bit of a list of tidy ups as this was the first drive after quite a mjor overhaul and next couple of weeks pre nats will be busy:
- ajust nut on steering box - no more slop
- its also a 2.8 turn box (vs 3.6 from old one) still only has like 25deg of turn angle, but now i can get to it fast, lol
- Drivers rear brake super hot - handbrake cable adjusted too tight
- No Left Indicators - fiddled with column switches, majically works again
- swapped secondary jets again, to 170 air and 160 fuel (from 160air and 155 fuel) - no discernable difference to drivability abd still seems to run out of puff at 5k rpm (should be ringing to 7ish) suspect ign issue as its also a bit missy on load and those jets are quite rich for a 1600
- fix light in water temp guage - bulb had somehow fallen out of holder into it?
- fitted EURON8 special vacuum guage - such wow!
- fix dash parcel tray
- adjust bonnet
SO it seems im pretty much ready for nats mission with time to spare!
If i get some time i may try fitting the sideys with new jets, but if they dont work that will cost me at least 2 inlet gaskets, lopts of time and a whole lot of mojo, so i may wait till after I get back.
-
Woopsie, Missing update from 8th Feb
___
Todays job,
Something ive been meaning to for ages - swapping the steering column over from the single piece 125 job to a late 132 one, which has the following benefits:
- adjustable! up and down, but mainly also a bit side to side (125 steering wheel is positioned offset towards the middle)
- collapsable! - hopefully will never take advantage of this feature, but being speared through the chest in a crash is now slightly less likely
- steering box is ~20 years newer
- "bolt in" (lol) upgrade
Steering box is the same mounting bolt fitment, and column is the same assembled length and has same steering wheel fitment.
125 and 132 being otherwise basically the same car, I thought this would make it easy to swap but no, EVERYTHING else is different.
In retrospect, for the effort involved, its probably worth going straight to rack and pinion.
First things first, remove one piece steering box/column from 125.
Hahaha. One manual suggests removing tie rods, another suggests removing the road spring and lower wishbone.
I went with dismantling most of my recently re-assembled dash to swing the meter long hardened steel shaft towards the passenger side suffiently to clear the suspension. Fan box off the bottom of the heater is the main obstruction + i mangled the firewall a bit.
I seriously considered chopping the shaft but as i dont have a spare handy, i resisted.
That done, comparison time:
132 top, 125 bottom
With them out i could do a proper contrast and compare, to note the many differences, some of which i knew about, some i didnt:
- ignition/key are on opposite sides, and are different sorts/not interchangeable
- column switches are close (lights and indicators wiring same) but 132 wipers are 4 position vs 2 (neding about 13 wires vs 5)
- dash mounting different.
- column switch mounting arrangements is different, including static column (46 vs 48mm) AND upper rotating shaft diameters (18.5mm vs 19mm)
I wanted to reuse the 125 column trims (dont have the 132 ones anyway) and the ignition switching (relays) this meant swapping the ignition holder.
chop both key holders off (snap off bolts), drill the 125 one
Note 125 one needs the ID englarged by 2mm to slide onto the 132 column (which has a pressed lump as well)
To mount the column i reused the top half of the 125 column clamp to keep the use of the factory 125 mounting holes, and to clear a hump in the pedal bracket it mounts too, and added a couple more bolts in the lower section to steady the (heavy!) adjustment mechanism to the pedal box brace. Lots of in and outing to ensure i could offset it to the right (centre of drivers position) a bit as well as adjust, clear stuff etc. Some minor trimming of the very solid 132 adjuster parts required, interstingly had been drilled out a bit before, maybe to swap from late to early 132 based on where i got it.Anyway it basically bolts up to the factory 125 mounts but I will probably improve it a bit eventually given the solid shaft/steering box bolts itself doenst assist in holding the steering wheel in position any more and the upper end is so much heavier.
Nest job is to make the 125 switchgear fit on the 132 shaft. I would have used the 132 stuff if it plugged in to the 125 wiring, and I even made an honest attempt to figure the wires out but gve up mainly due to the wiper wiring (13 does not go into 5, 4 plugs vs 2 etc)), but also its been hacked about a bit before and was brown.
As you can see my 125 stuff isnt in the best nick, but it does work, its black and it plugs right in.
Main differnce is in the column mounting - they attach to the static part and extend over the rotating part between the column cover and steering wheel.
After much humming and haaing, I eventually swapped them over, 125 needed some descrutive force applied to seperate teh spot welds and drive the shaft off, with a strip of metal to pack out the OD of the remaianing 125 lip, the 132 parts attached with some slightly bigger than factory screw.
Have now got it all assembled/steering and plugged in, parcel tray needed a bit if a trim to clear the adjuster, and the top column trim will need a shave to clear the front of the dash when going up/down but thats pretty much done.
Steering wheel is now much better located, and steering box feels a bit less sloppy, but TBH im not sure it was worth all the effort...
The main reason for doing (collapsable in a prang) it i hope to never have to use. -
keen,
got engine running again just now,
just a couple of things to do tomorrow (bonnet & air filter) and we are there, hopefully without any oil leaks (lol who am i kidding!)
- Chris, will bring cash moneys for that guage, chrur
-
greb in the seating area,
worn seat from long gone greb in the seating area
wrong nipple not sealing
-
1
-
-
Reinstalled the interior on top of the new carpet last week.
Heater works, dash is uncracked, extra wiring is invisible and guages moved.
Fells really nice in there now. Will need to get a better photo at some point, but you get the idea
That job done, so onto the next.
Was Waitangi Day on Thursday.Happy B-Day Noo Zild!
Best part of Waitangi Day (apart from Rainbows, obviously) is having a couple days off,
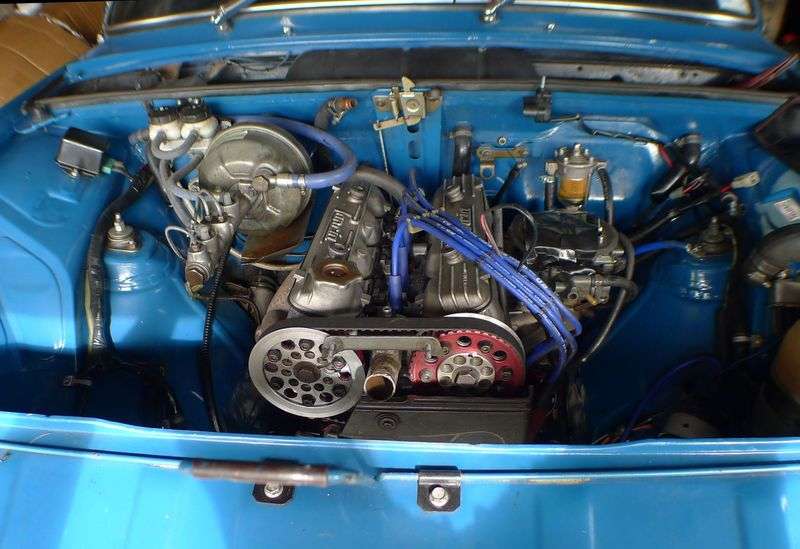
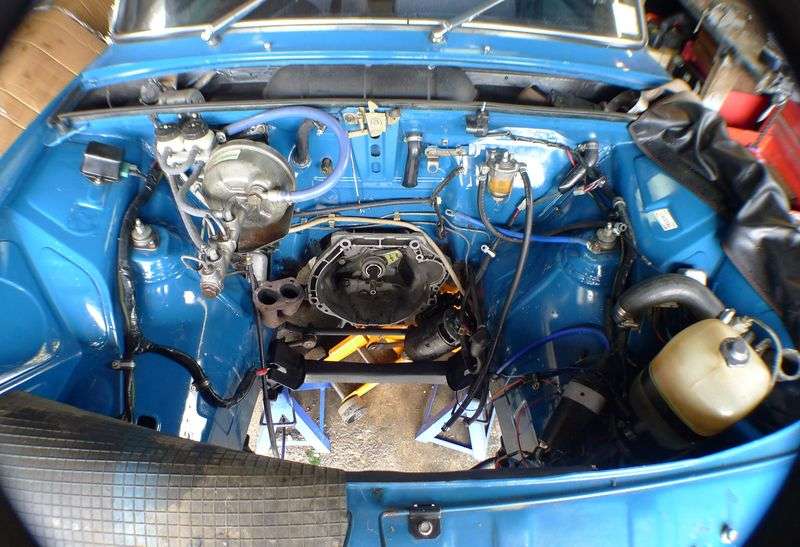
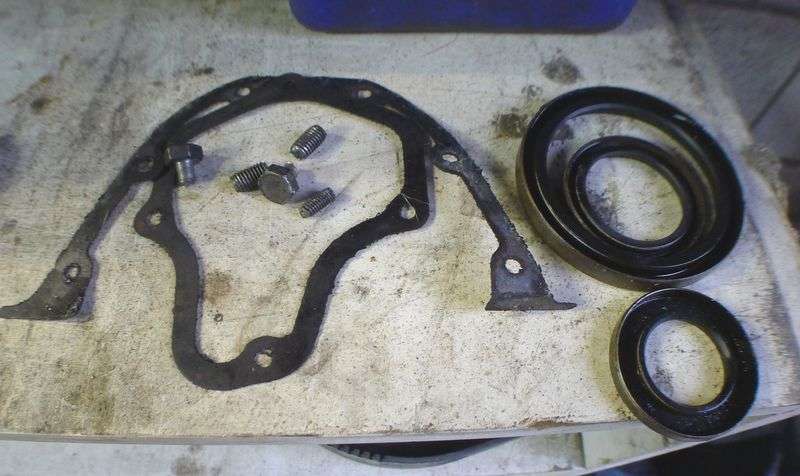
to lazily (in between other stuff) dig this lump
of of this hole (after a can of degreaser!)
Replaced 3 seals (front and rear crankshaft and aux shaft),
put in 3 new gaskets for the seal carriers (front crank one had no gasket) and
extracted 3 broken bolts (one being a sump bolt fixing to the rear seal carrier).
Missing gasket and sump bolt were the cases of front and rear oil leaks respectivley i reckon,
but new seals and gaskets wont hurt.
Hopefully that should stop the oil puddle in the bell housing and greasy cam belt.
Then Myte128 showed up on a 'free stuff from Fiat Nats Australia' swag delivering mission, (Cheers Bro!)I put my new merchandise to 'work' directly:
-
4
-


 and the steering wheel offset (which is a bit much the other way now (
  )
)


 after that doooort to 6k rpm and beyond!


Rego for cars 40 years +
in General Car Chat
Posted
Yeah, two points in the last 20 years does not a trend make.
For a fun game, try find your OS steed in the list of cars they have in the supplement.
Im interested to see how they deal with light deisel rego costs, as when was the last time you saw ACC paying out for an 'emergency' respratory injury cause by elevated atmospheric PM10, hmmm?
Thats right, they fucken dont (preexisting condition or repetitive injusry, not an accident) .
ps just dont follow my van too close going uphill, suckers hahaha..hack..cough...