WhangareiKE70
-
Posts
798 -
Joined
-
Last visited
Everything posted by WhangareiKE70
-
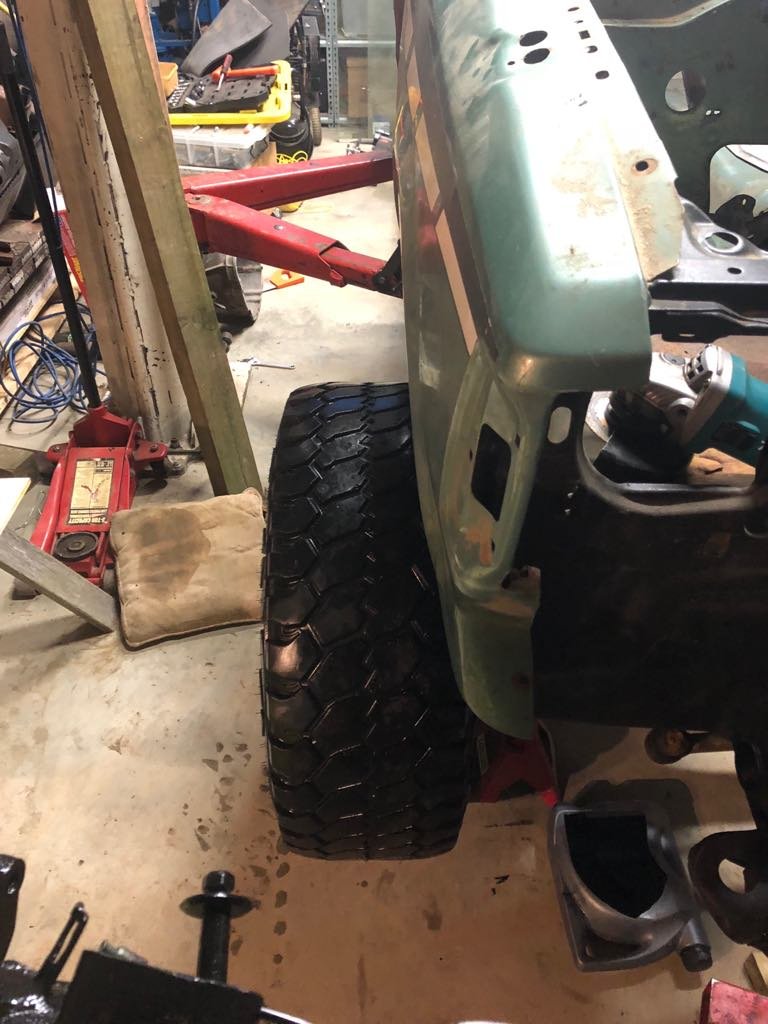
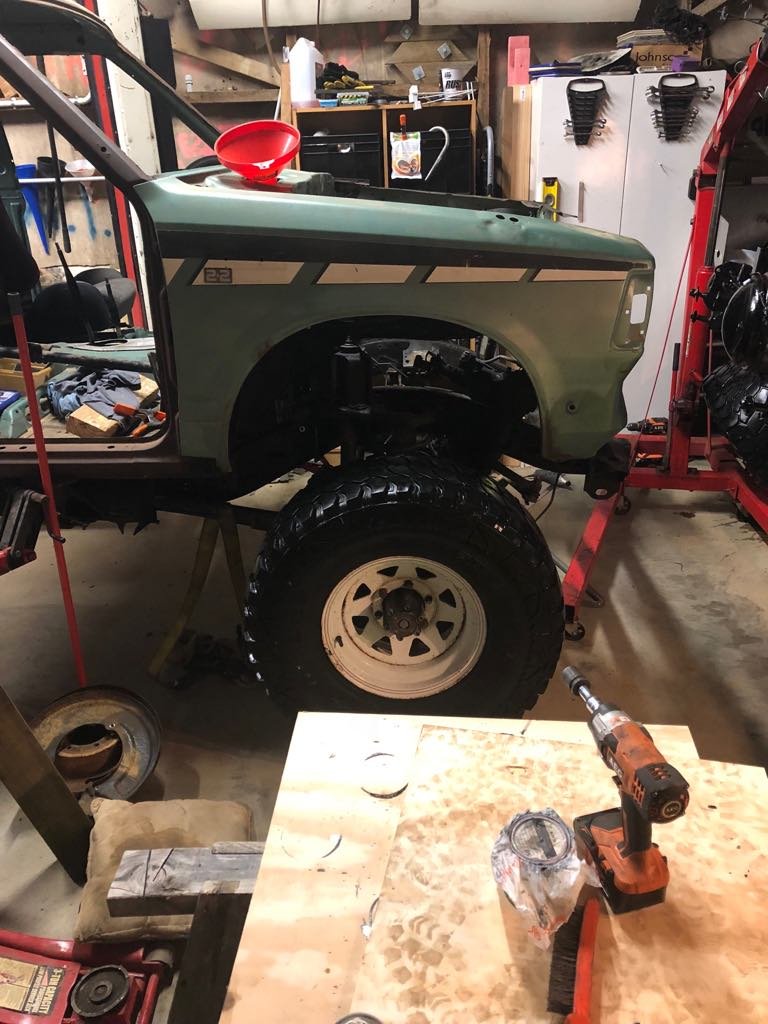
Okeley dokeley, Did some more on this. Pulled the diff apart, as far as didn't take out axles or anything, just cosmetically, will check to see what it's like once it runs and go from there. Drained the oil and that looked fine, which was good, was honestly quite worried it would be half full with seawater. Put some new rotors on bacause shiny/old ones were shot and well past a skim to get them right Painted the rotors, baked them in the benchtop oven I conveniently already had (how cute) then kitted them out with new slide pins (only 1x cause it was munted), pistons, seals, etc. Shiny.... And all together. Shocks are RAW monotube 4" lift, should do the business. Wheel are new ROH 15x8 -22 with the secondhand 33x12.5R15s I acquired from @Stu They will do until it's done, didn't want to buy fresh rubber only to have it sit around and dry rot. The dummy engine, an RB25DE that doesn't have all its insides, long story, but it will do for mockup. Put it in the engine bay, got a couple of bellhousing bolts in just to get the faces together so I could see where it would sit. Which meant this had to happen... I will be incoroporating a hatch in the top of the gearbox tunnel to allow access to the rear plug/coil. The hole has been somewhat refined since I took this photo, and will need to be further dependant on intake and exhaust manifolds. I plan on running a forward facing plenum, but a cut n' shut may hug the block more and work better, I am not sure yet. If anyone has a Greddy type FFP on a RB25DET, if you could measure the distance from the intake flange face to the furthermost away point at both the front and rear of the manifold, that would be super helpful and appreciated. Not the best photo, but you can sort of see clearances will be minimal on intake (driver) side, exhaust should be fine (I hope) Heaps of clearance to the radiator at least in this position, this is with it just sitting there behind the rad support panel. Going to pick up this beast of a tray this afternoon, it has been made to suit a Safari ute conversion already so the mounts suit, it's almost perfect! Just need to shorten it a little at the head board end. Even comes with a 200l auxilliary tank if I ever feel like having $500 fuel bills. So that saves a lot of work adapting the other tray I had for the mounts, and is waaaaay more solidly built than the tray I had, so I am happy. Did this, which makes clearance for the front wheel/tyre, may need further trimming, will check once I can flex/articulate it, once the body is mounted. Trimmed this also, will be getting a tube/plate bumper eventually which will follow that line. Took this one as I was leaving the shed one day as I thought it looked tough, but also shows the rad support chop. (If anyone wants to buy the little gas/gasless welder in the picture here for a reasonable price, message me, it is getting in the way at the moment since I bought my new setup). The body is sitting slightly higher than the final height here as it is on the hoist, and I lifted it up, because I was test fitting these: This was after the first chop just to see that they would fit in the space I made, they got refined more, then I tacked the top on: Still needs some more refining, and a mirror image made for the other side, but I have a bench sander turning up this week that will make the job easier (easier to sand interior curves/straight lines) so moved on temporarily, and painted the rear half of the chassis. Will do the front half when I take apart the front for a freshen up, which will be once I have the rear back together. Makes it easier to move about should I need to move it/get it off the hoist if it can still roll on one set of wheels. After sanding: After a coat of POR15: Painted to just in front of the lower trailing arm mounts, so I can get the back end back together completely without worrying about getting paint on anything. And that is essentially where I am up to! Got to go and pick up that tray now, let me know what you think in the discussion (linked at TOTP). -Hayden.

- 11 replies
-
- 11
-

-

Wtd: Anyone heading to Zebra Whangarei?
WhangareiKE70 replied to Bluebird_U's topic in Upper North Island Region
I don't know about this "like going into yards" business, makes us sound a bit dodgy up here in mighty Northland. I could be convinced to head there after work tomorrow afternoon for a look if Linden isn't already over that way? What model Navara is it and what parts were you looking for in particular? EDIT: I take it that it's the D22 listed on their stock list? EDIT EDIT: @Bluebird_U let me know by tonight so I can make sure I have the right gear if I need to get something. -
Hayden's Datsun 720 4WD project discussion
WhangareiKE70 replied to WhangareiKE70's topic in Project Discussion
On one hand, hell no. But on the other hand, it will probably need something like that haha. Had a quick squiz at the Car Construction manual and it said something about minimum of 30(?)% of the overall circumference of the wheel needs to be covered, so that means I can hopefully I can get away with having the front essentially uncovered, and just covering the top and back side of the tread. Was thinking something similar to the Smittybilt Jeep fenders, which are essentially a tube and plate construction, and join that to the front tube bumper I plan to build, I just need to allow for flex between the flare and guard, as the flare will be mounted to the chassis and the guard obviously to the body. -
Discuss away. Let me know any advice, comments, suggestions you may have. I have many ideas but more ideas never hurt.. Stance for days. -Hayden
-
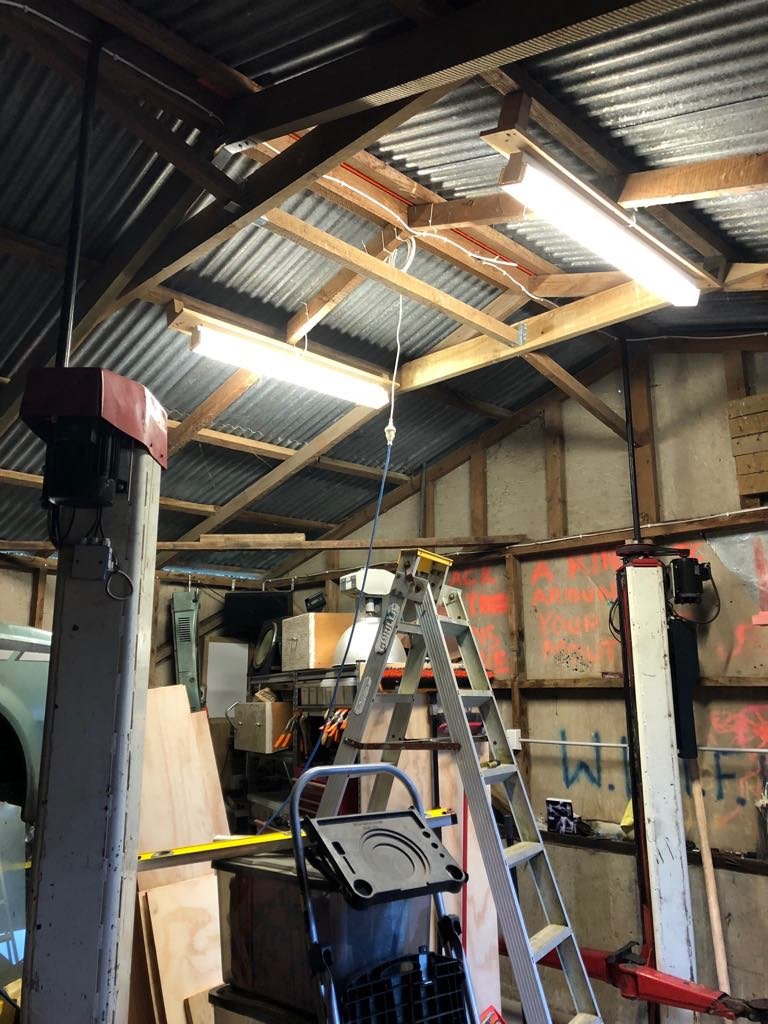
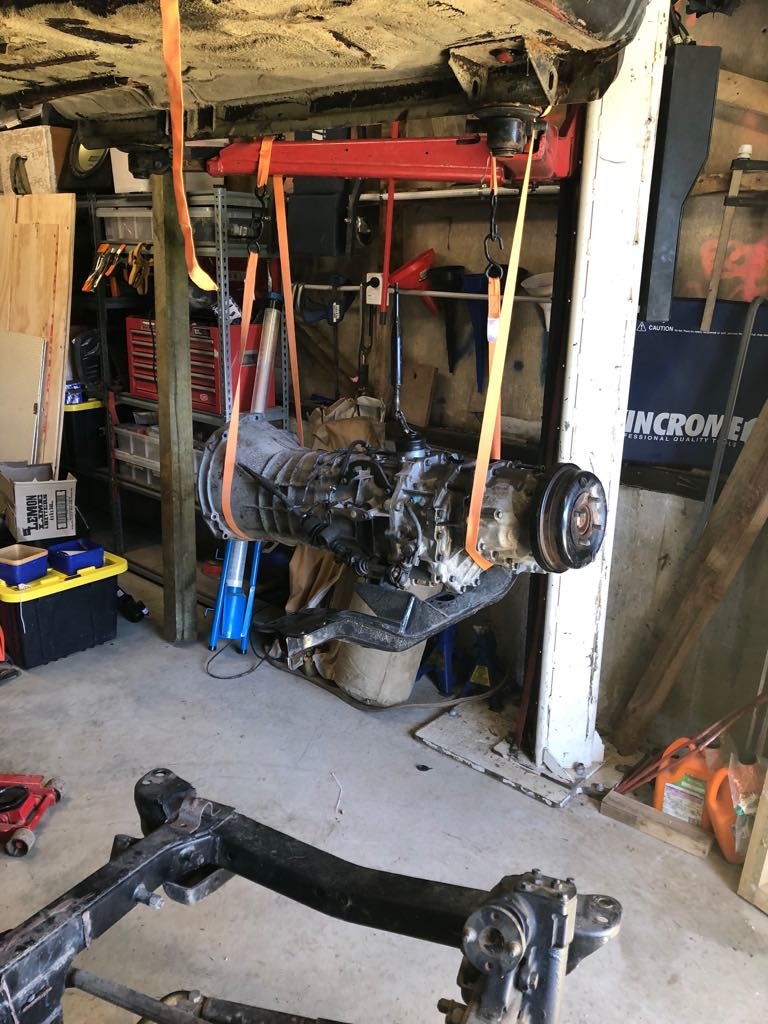
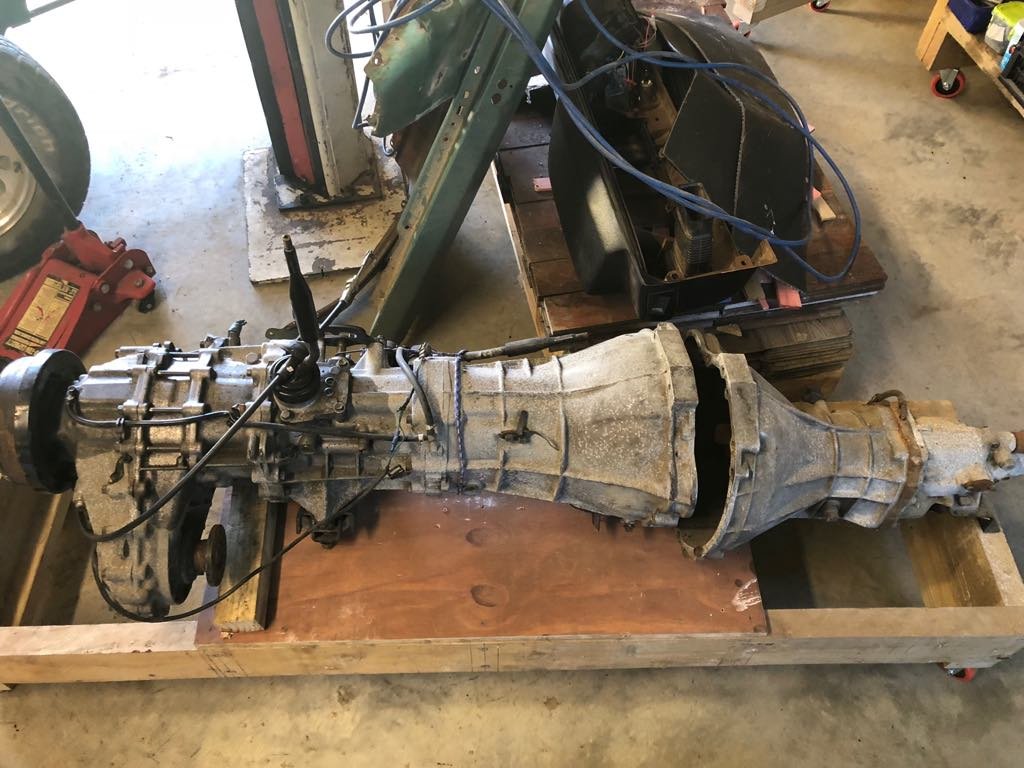
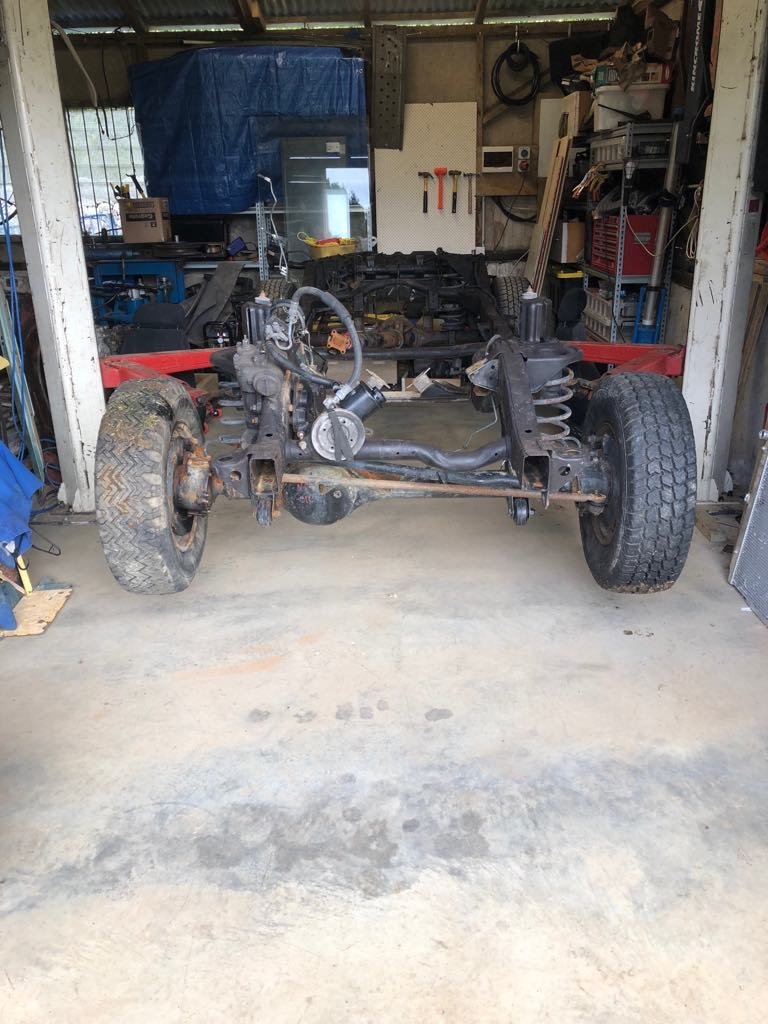
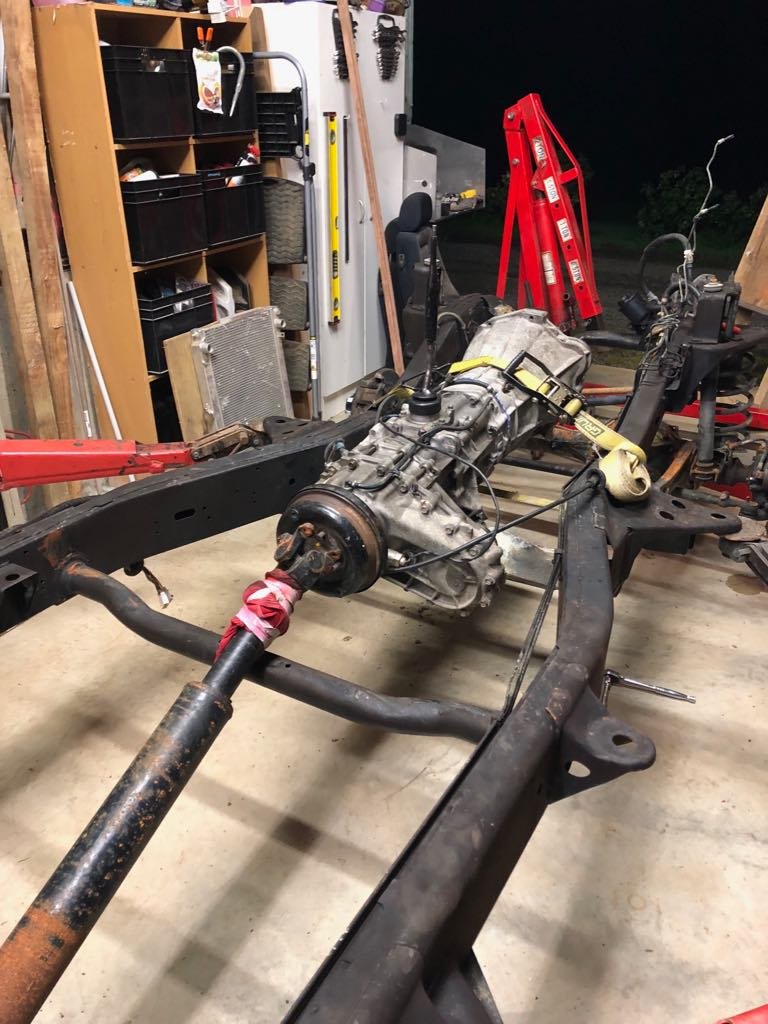
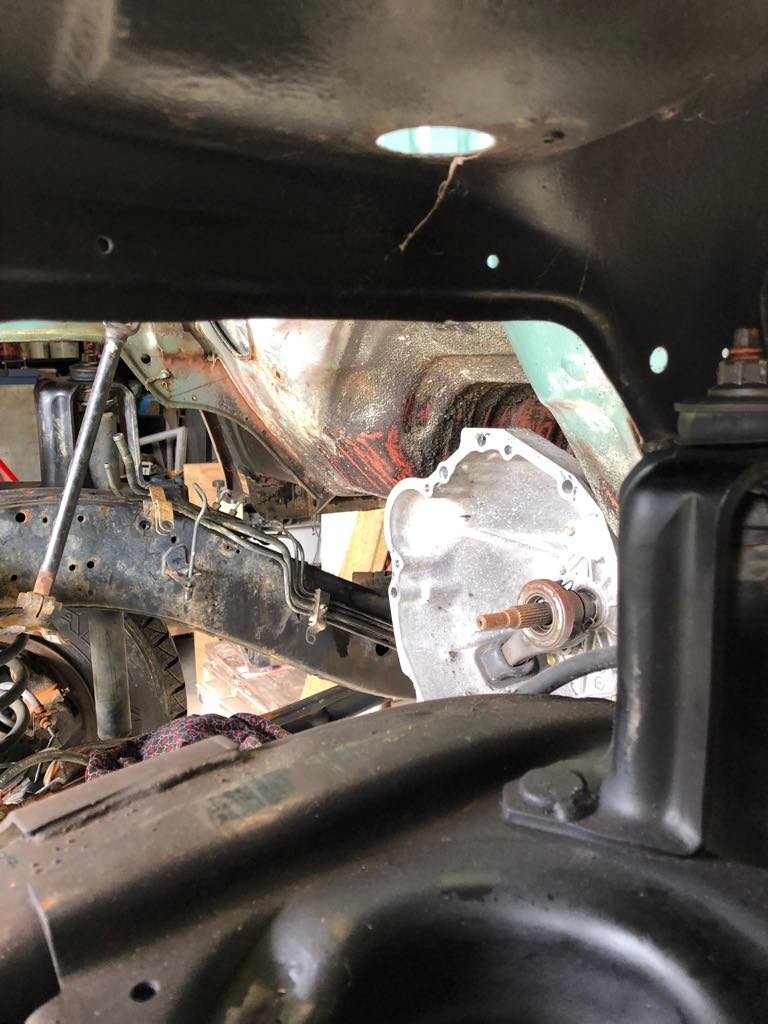
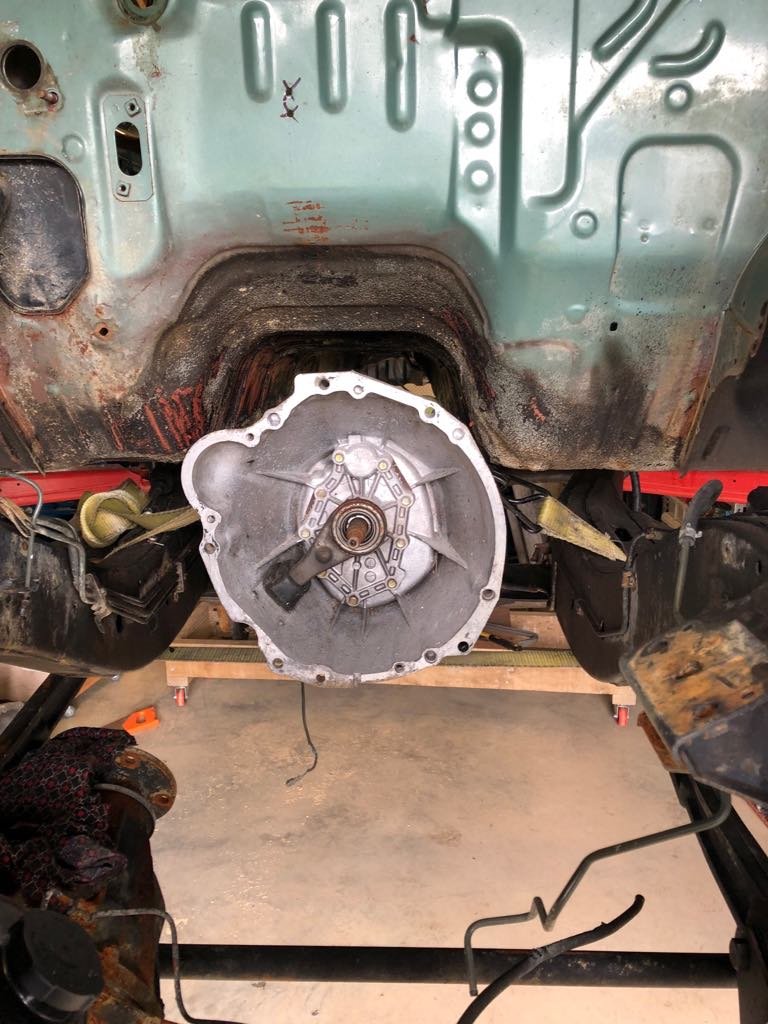
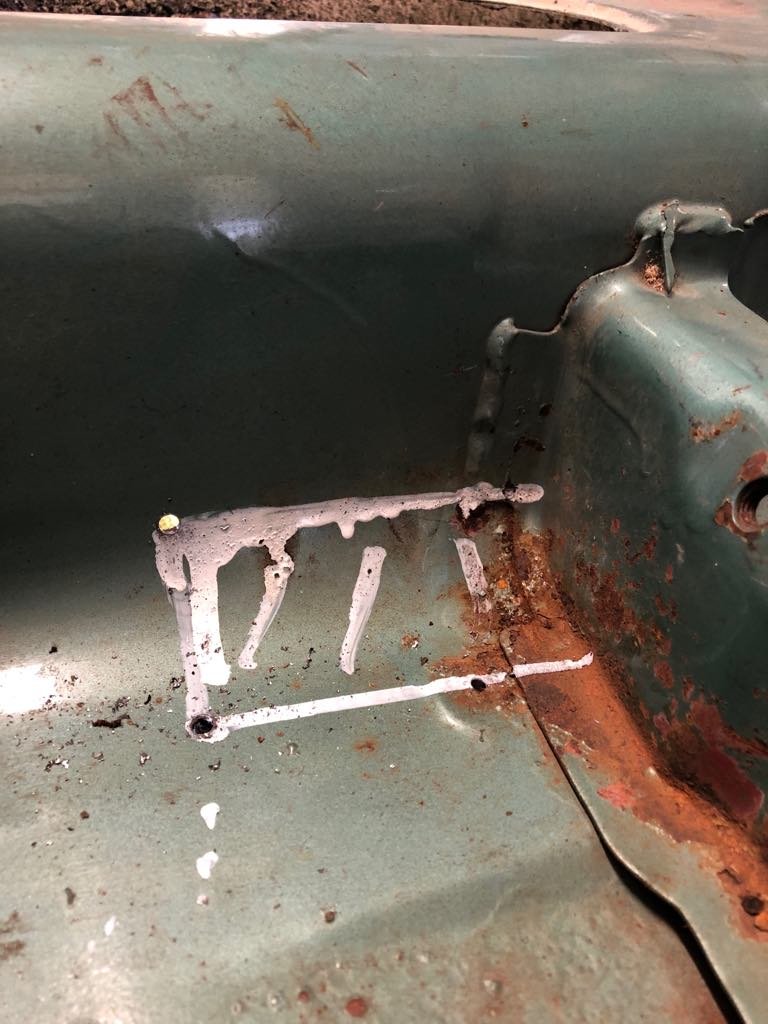
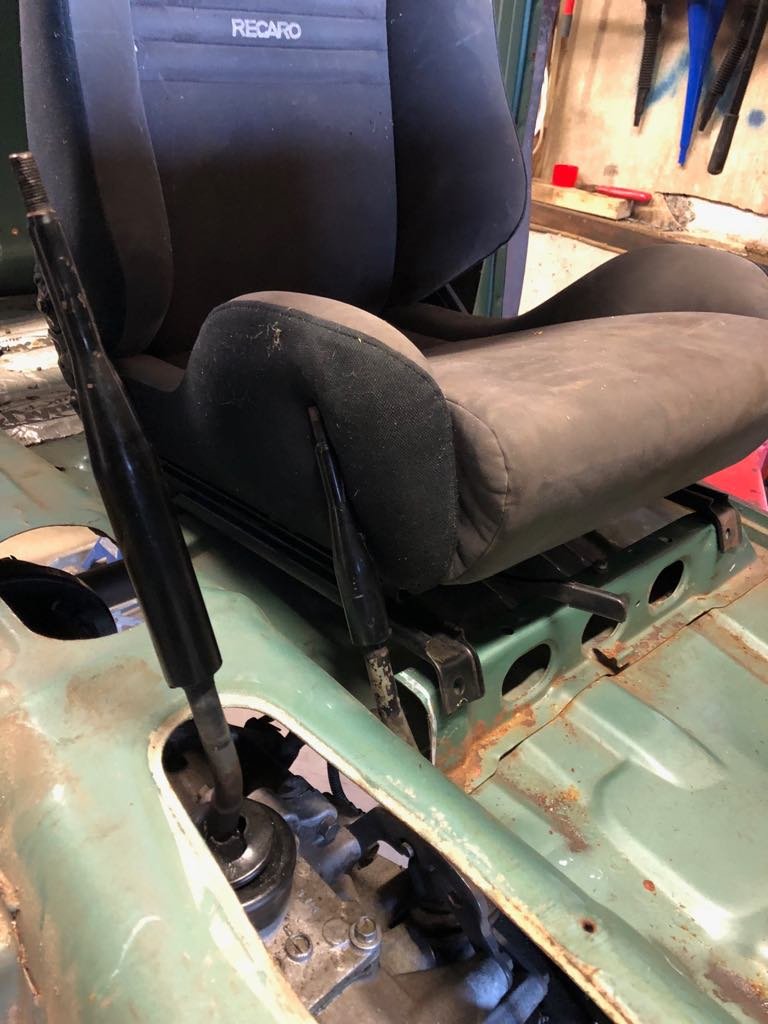
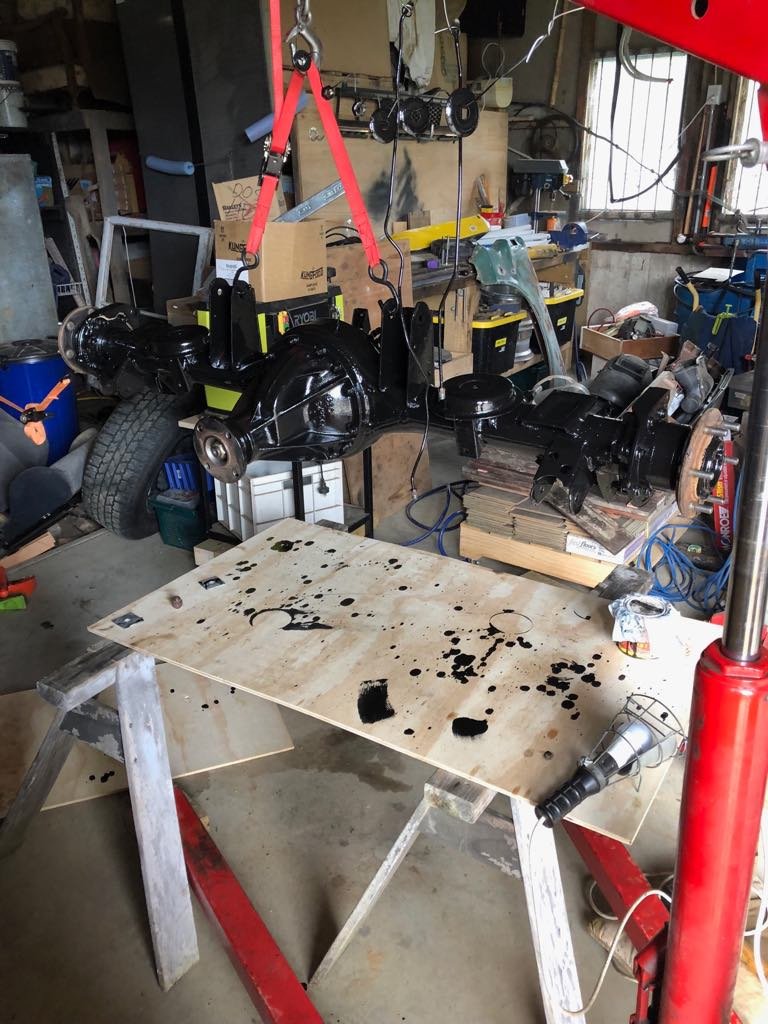
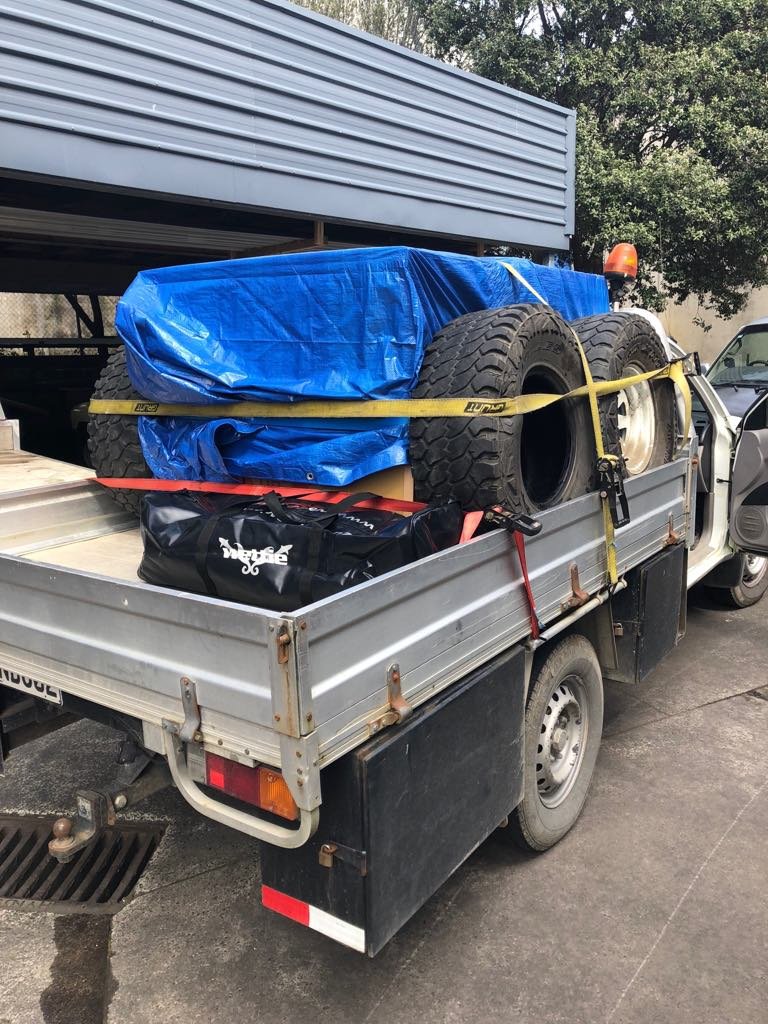
I did have a thread for this, but it didn't get worked on for several years, and I think it has gone. So, start again. (Picture here of Datsun when I first got it if I can find one) I have/had (depending how you look at it) a 1985 Datsun 720 4wd. It was gutless, it had rust, so it was a Datsun (not a Nissan haha). I thought I would pull it apart for some rust repairs and paint, that was (too) many years ago, it snowballed, I ended up disassembling the suspension, driveline, painting a lot of things, modifying the gearbox to accept an RB, bla bla bla. Then this year, I had been chipping away at it, I had finished study and finally had a decent job. And one day as I was doing something I looked at it and decided I wasn't going to be happy with it when it was done if I continued down the path I was on. I couldn't add too much power or things would explode. I couldn't get aftermarket parts to improve things like ride height and driveability (not easily or cheaply anyway). So I thought, "stuff it", and decided to just do what I wanted in the first place, and had always said I wouldn't do because of cost essentially, but yeah, now I'm just going to be irresponsible for a bit and throw money at this thing until it runs and drives and I am happy with it.. So the basic equation is: GQ/Y60 Patrol chassis and suspension, diffs etc. 4" suspension lift and all the goodies that go with that. + RD28 gearbox from RD28 factory patrol. + RB25DET from your friendly neighbourhood Ceffydrift/Skidline. + Datsun 720 King Cab body, with factory body mount points, adapt the chassis to suit. + 33x12.5 R15 tyres on -22 offset 15x8 steel wheels. + Flat deck because practicality (I do want to use this thing once it is done)/ease of adaptation to Patrol chassis, and adaptation to toolboxes etc. = Profit??? /more likely major losses. But profit in happiness. Have done some work so far, but a lot of time/money has gone into setting up my shed to make this project as easy/efficient as possible. I modified the roof in the shed: (Ignore thee strange writing on the walls, it's an old farm shed that has slowly been modified to be my garage, there are lots of .22 sized holes in the walls, and there were gas lines in the ground when we dug it out to put in the floor) So I could install a hoist, which has multiple uses: Lift it up to put it on a dolly, damn these things weigh a whole lot. On a dolly next to the gearbox from the Datsun with an RB25 front housing swapped onto it. Slight size difference. Patrol chassis in place. RD28 gearbox. Unfortunately this chassis originally had a TD42 (which it didn't come with, but there was no way I could use anyway as it was waaaaaaaaay too big), so the driveshafts don't work, but will have a look to see if Beattys Drivelines have any listings or if I can source replacement entire driveshafts to suit. Nissan Lego! With the body in about the only place it will go, i.e. engine will fit behind radiator support with radiator under the panel, gearstick in a useable position, etc. Will likely need to cut and box the firewall/tunnel. Had to cut out this bit as well as some of the seat support to let the transfer case shifter come through. With that cut out the shifter comes through the factory shifter hole, bit further back than normal, but still very useable, and with a slight tweak to the actual shifter the transfer case shifter will work fine and not rub on the passenger seat. The picture above is with the shifter in 4th so that is as close as it gets/have checked it in all gears. Currently tidying the rear diff: Painted in POR15, will get new rotors and rebuilt calipers shortly. Then will go back in once I buy the last pieces of the rear suspension lift, which will give me enough time to tidy/paint the rear of the chassis. Has an LSD which seems to be in good condition, which will do until it is on the road and then I can think about an air locker. Went to Auckland the other day, got some tyres from @Stu, bloody nice guy, nice to meet you in real life after all these years of seeing you on forums. Sharp price too. Pictured here with my parents flash new couch and a whole bunch of new free diving gear, was an expensive day all up haha. (Please excuse the twist in the tie down, I know, I'm embarrassed for me too) If you are thinking: "Gee, that looks like a fairly low offset wheel, and you are already putting them on a chassis that was designed for a significantly wider than the body than what is going back on it, are they going to fit?" Then the answer is "Yes?" Gonna have to make/buy (I don't know of any 200mm ish wide you can buy?) some fairrrrrrlllllllyyyy hectic flares, but I really don't want to reduce the offset, so that is what I am sticking with until such a time that I may be forced to do otherwise. They should be fine this way, will just be a case of trimming the sheet metal to suit. Look, honestly, if this were an exercise completely in practicality, then I would have failed. But mostly it's an exercise in "I do what I want", then deal with the fallout. So I call that a win! I get my new welder this week (HF TIG, MIG, Arc w/ spool gun) so looking forward to having a play with that, and potentially making a start on the design for the chassis to body mounts/posts, will make up something up then get them ok'ed by my local certifier and welded up fully by a mate I hope, my welds aren't up to crucial parts like this and I feel like there are better places to practice on. At the moment it is sitting on the hoist with the chassis on axle stands. I will make a discussion thread shortly and link to it at the top of this post, let me know your thoughts, constructive criticisms etc. I will try to keep this updated, I am good at taking photos of stuff usually as I do it, just terrible at actually putting those pictures up. Cheers, Hayden.
- 11 replies
-
- 19
-

-
-
Bump. Is this in the correct place? Should I have posted it in general car chat? -Hayden
-
Hi all, Looking at the steering setup of my Datsun/Patrol amalgamation, and as the patrol chassis is obviously wider than the original Datsun 720, the steering shaft is no longer a straight shot into the steering box. I understand this means running an intermediate shaft, but I have a few questions regarding this. A ) Does the angle of the intermediate steering shaft matter, or as long as it isn't too hectically sharp and the angles are the same is on the input and output then it's all good? B ) If the splines don't match for the steering box and the steering column, can you purchase/have made adaptors? If so where/who would do this? And at which UJ would the adaptation happen, or does it not matter? C ) Will the shaft to the steering wheel and the one to the steering box require some sort of support now? Any help or advise would be hugely appreciated, most of my experience thus far has been buying and bolting parts, this project is my first major foray into proper custom stuff. Nothing like jumping in the deep end aye? Cheers and thanks in advance. -Hayden.
-
He must have heard us talking, haha, I have a meeting with him set up for tomorrow morning. Did offer to bring beer in an email I sent so that may have been the clincher. @cletus I am most of the way through filling out "Form 4A- Concept Approval Application", is this the best thing to take to the meeting with me, or is a list of parts/brands/processes/materials I intend to use better? Or both? Also a seperate question/sort of related, in the application, it has a section for steering, which is not something I had overly considered, as it isn't something I would be dealing with just yet. Is it possible to retain the factory steering column from the Datsun 720, and just have the input shaft spline/length machined to suit the GQ Safari steering box? Or is there a more common way of doing this? It might even be the same spline for all I know but as I say not something I have thought of much until now, and I won't likely have the chance to check between now and tomorrow morning. I will be buying the CCM (on PDF) later today but I won't likely have time to fully read and understand that section by tomorrow either. Any help is greatly appreciated.
-
I get what you mean. I have already had a cert through him for my Mitsubishi Challenger so he knows me and I paid straight away, didn’t screw him around or anything, so I thought he would know I’m not a time waster. You might be on to something with the beer idea though. Always good for some brownie points haha
-
I have always been told to get in contact with your certifier before/during every step of a major project, what do I do if the only certifier near me isn't interested in discussing my new/not so new project? Essentially I am looking at putting my Datsun 720 body onto a GQ Safari chassis, which will end up being scratchbuilt, I got that much out of the LVVTA. Problem is I sort of want to know where to start and how to proceed in terms of keeping them in the loop, and being in Whangarei there is only one certifier who can certify that level of mods? I have been trying for months to get a hold of him, but he is never in his shop when I stop by (several times), when I ring him he is always busy, and he won't tee up a time to talk for 5 minutes about what he needs from me to essentially make my/his life easier. What is the recommendations of the OS community in regards to what to do? I could go with a certifier in Auckland but that means trailering it to him at various points in the build process (2-2.5 hours each way). I'm sure if I keep trying I will eventually get a hold of my local certifier, but if it is this difficult at the beginning I can imagine it may become a nightmare down the road.
-
//oldschool.co.nz/phpbb/viewtopic.php?f=18&t=30255 to discuss.
-
Wowwwww... I haven't updated this in a while (17 months). Lots has happened, I promise! Basically I have decided to go the full distance on this now, which means: -Full sound install (still only mild however) -No nut and bolt left unturned refurb. -Body off chassis. -Paint chassis. -New shocks, bushes etc. -Body lift. -Rb25de conversion. -New interior. -New flatdeck. Etc... /New or converted or refurbished everything. A lot of the above is already done, or is in the process of being done. Aim is to get it finished this year, so it's all go at the moment. I will do a proper update when I figure out how to do pics again. Chur.
-
Hey guys, Just got some D21 Terrano 2 pot brakes for my Datsun 720 (which bolt straight up by the way). Good upgrade from the singles. I also got the booster and brake master cylinder with them. Because the booster is smaller in diameter but fatter, it can sit right back against the firewall, whereas the original is spaced out by approximately 100mm. This is advantageous because it moves it back out of the way of the intake of the new engine. My main problem is that the rod thing (not sure what it's called) on the back of the booster is too long and hits the mount on the brake pedal while the booster is still about 50 mm out from the firewall. Can I either : A ) remove the nut mount thing, chop the rod, and use a die to thread it again, and wind the nut mount thing back on, or B ) fix this some other way. Option C involves spacing it out from the firewall with a spacer,which is not ideal, for aforementioned reasons. Any help is appreciated. Cheers
-
Sooooooo... I'm a noob when it comes to this. Basically I putting a CA18DET (DOHC injected turbo) into my ute, which originally had a Z22 (SOHC carby N/A) in it. My question is, what do I need to change /upgrade to meet the demands of the new engine? Pump, lines, etc. Any help or advice would be appreciated. P.S. If this has already been covered somewhere let me know, I had a quick search but no luck. Cheers, Hayden.
-
Legalities of removing part of radiator support panel.
WhangareiKE70 replied to WhangareiKE70's topic in Tech Talk
Cheers guys, made removing the engine heaps easier. -
Hi guys, Just a quick question, I am wanting to make part of my radiator support support panel on my Datsun 720 removable. It is the part that is on the top between the headlights, which the bonnet release catch mounts too. The plan is to weld in tabs with captive nuts on them that sit underneath the remaining panel either side then bolt them in. That way the whole radiator support opens up when the panel is removed, and makes it easier to remove/replace the engine. I have seen it done before, but just wondering about how legal it is. The ute will be going through certification anyway so no problems if it would need a cert. Any (relevant) input would be appreciated. Cheers guys.
-
Discuss/ tell me I'm slow here: viewtopic.php?f=18&t=30255
-
Also made a way to mount my Recaro seats. Just folded up some simple adaptors/spacers, which is how they were from factory just different spacing for the different rails. They look like this: And mount on like this: I haven't got a photo of them sitting in but I have had them in and they work great. Also finished off that sub box I mentioned a while back, it now only contains 2 6x9's instead of 4 as I decided to go for front speakers in the kick panels to get more of a surround sound thing going on. It's all done in carpet with aluminium trims, and looks pretty sweet if I do say so myself. This last view shows where the 6x9's go, when I have the money to buy them. Still a little tidying up, a few wires to run, and mounting the amps, but that's not hugely important for the moment.
-
Lol, page 15. I am so slack at updating this. Have done things though. Note: these are all in no particular order, just things I have done since the last update, which was, ummm, a while ago. Haha. Also sorry for the crappy cell pics, I don't own a real camera. Painted up the front with Hammerite. Did a few coats. It's not perfect but it doesn't need to be. And sprayed some other front bits as well. Dyed a spare mint condition dash I had as well with VHT Vinyl spray, came out great. Just went over it with IPA, then a scotchbrite so it had something to key into. Also mounted my Nardi wheel in, but the horn button won't go in because the inner diameter of the boss kit was too small. Have to find a new horn button.
-
In reference to: I will be keeping the same transfer case as it's seperate from the gearbox anyway, I will just be adapting the driveshaft between the gearbox and transfer case.
-
The reason I may need to change the driveshaft is because I want to put different brakes (calipers, disks etc) from a different model on (the same model as I would get the rear axle from)? Would it be possible to just upgrade the front brakes, and then put in a different rear diff? If so how would I then go about upgrading the front? Does anyone make upgrade kits for 4wd 720s? (I doubt it)
-
Hi guys, Thinking about potential brake upgrades for part 2 of my project with my Datsun 720 (part 1 is get rust out which is coming along nicely, should update project thread). It's a 4wd Datsun 720, and in part 2 I want to put a VG30DE in it. with this new power (when it happens), I will need better brakes. I was thinking about getting a complete setup from a newer 4wd Nissan ute, which has the same type of suspension setup, so as to keep the 6 stud pattern but hopefully gain better brakes and all round disks (currently has little disks in front and drums in the rear). What I need to know basically is what I am missing/don't understand. -If I use the full brake system from something else can I just use the brake master cylinder from that? -I know I will need a custom rear driveshaft for the new live axle, but how do I get the front driveshafts to work? -And the rest. TL:DR? Help me decide how to get better brakes on my Datsun 720 4wd.
-
Took the tray off. Used the digger, and chained it up half assed, 'cause it's not going back on (going flat deck) and I don't mind if it gets damaged. Dad the digger driver. Naked rear end, but SFW. And for once there was no rust to be found. And there was much rejoicing. Gave it a quick spray with the hose and then sprayed some CT18 Superwash on with the water blaster, will wash it off in the morning. Tucked it up in to bed for the night. All for now. Will hopefully get my cutty cutty on tomorrow, will see.
-
Hmm, will have to check that out next time I'm in town. Know about engine stands, or just the cranes?
-
Got some stuff done. Looks a bit like this now. No doors, all stripped right down and ready for panelbeating. Also, you may notice no windscreen. I messed up. Oh well at least it's out now, and I have a spare. Found these once the windscreen was out. Confirmed my suspicions that the dodgy patches at the top of the A pillars were contributing to the rust problems in the bottom of the A pillars. Going to cut them out and replace them, as well as a significant chunk of the drivers side guttering which has rusted right out. Almost got the tray off but need a hand for lifting it off. That's what I accomplished today. Haha