


Adoom
-
Posts
2196 -
Joined
-
Last visited
Posts posted by Adoom
-
-
39 minutes ago, Nominal said:
You can do a lot with a sturdy bench, some bits of angle iron or flat bar, clamps and a hammer.
My bench is a real sturdy motherfucker, so heavy.
-
48 minutes ago, ~Slideways~ said:
Rust, so much rust. But it looks possible right?
Will feel good to have new metal in there and covered in POR15 all over your hands.
Most of the patches I need to make are simple shapes. A bunch of straight bends, no compound curves. A lot of it is out of sight so it doesn't have to be exactly the right shape.
I'll need to make a sheet metal bender. They are stupid expensive to buy.
46 minutes ago, ~Slideways~ said:New bits don't look too bad!
But freight for stuff that size must cost a fortune.
-
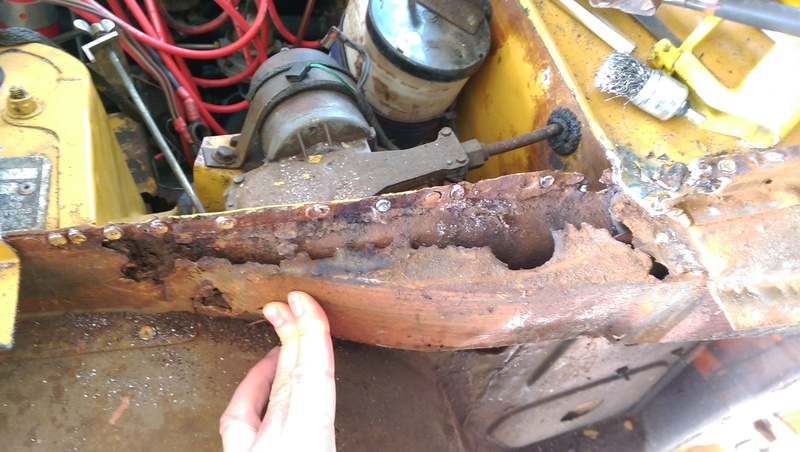
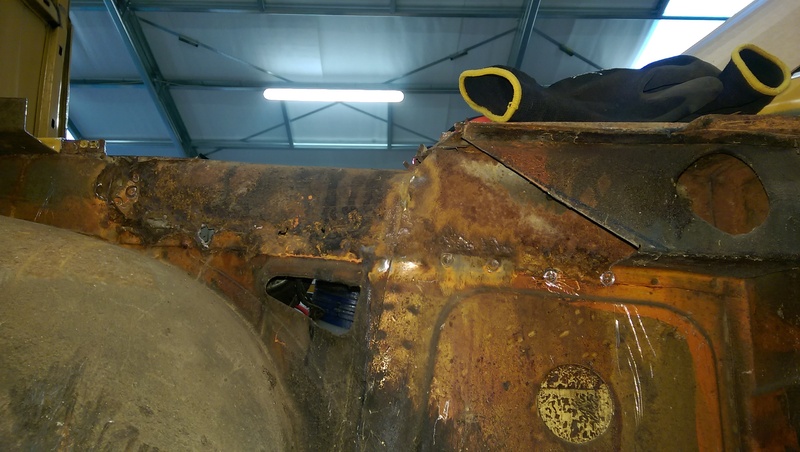
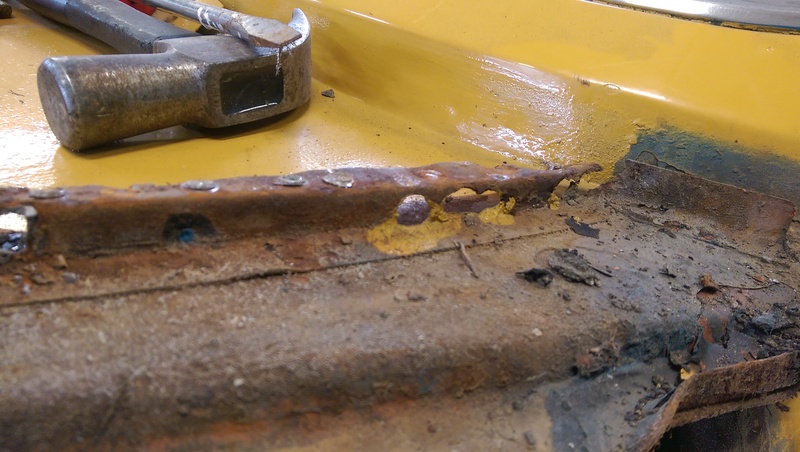
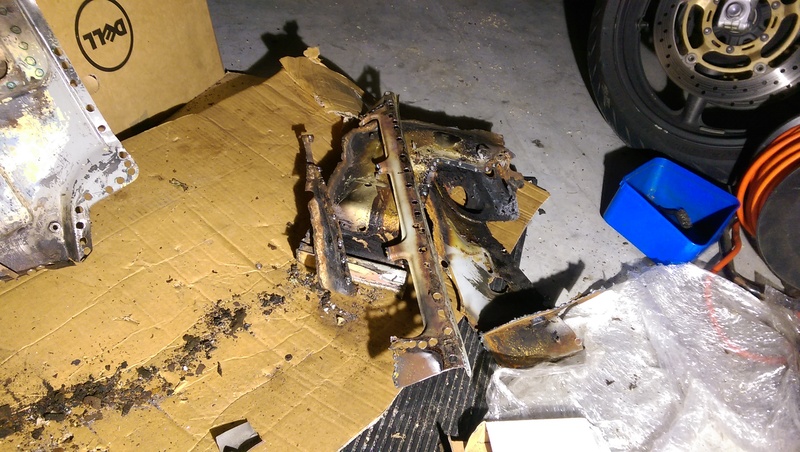
I got the channel off.

This is rusty.
These are bits I have cut off and need to use to make templates for repair pieces.
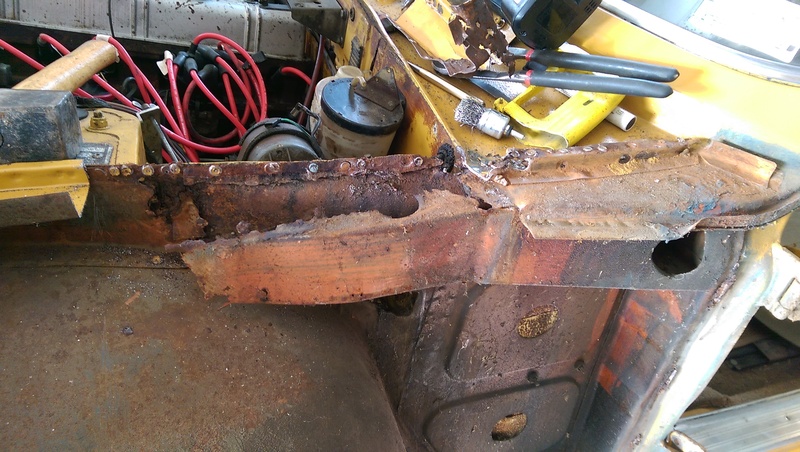
Cut that off. The inner wing panel behind it also need to be replaced, it's pretty thin in lots of places.
An outer sill was BRAZED, over the old rusty sill, so that will have to come off too.
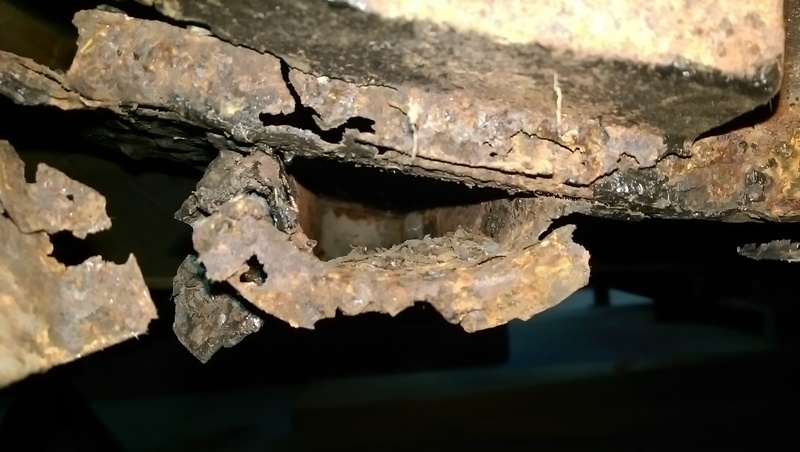
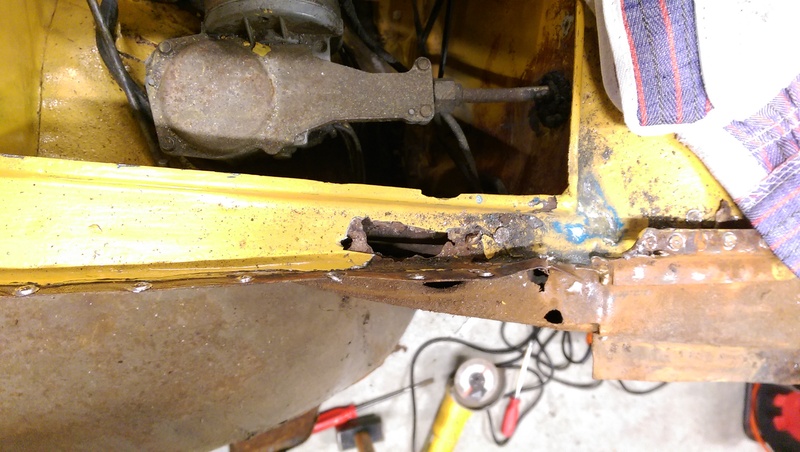
Need to make a new end for this box section thing.
Still more cutting to do before I can start putting new metal in, getting a bit hard to fit the grinder in... Might have to switch to the reciprocating saw. Maybe the plasma cutter, but I'm wary of cutting through more than one layer.
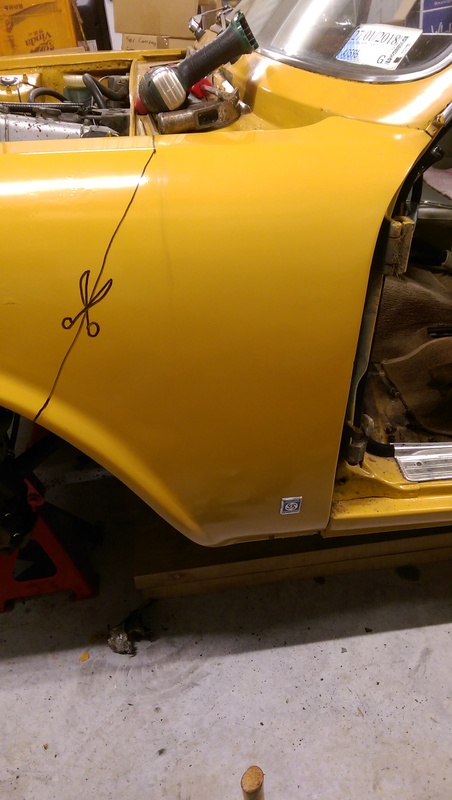
I would like to replace the rear half of the wing/guard as mine is full of bog. Anyone got anything? Front half of the guard appears to be okay,
-
 2
2
-
-
I've looked further down the guard and didn't see any more horror.
-
1
-
-
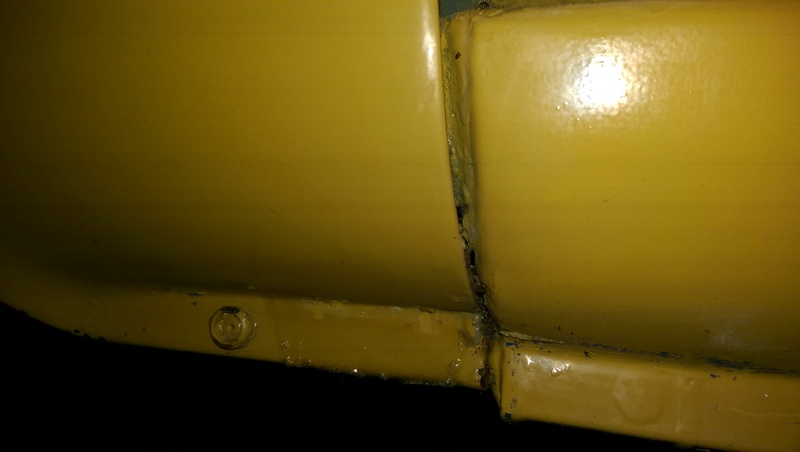
And then...so the guard has been damaged in the past, beat back into shape, then skimmed with about 6mm bog.
Balls, more rust up there.
Bye bye guard.
I need to make another one of these.
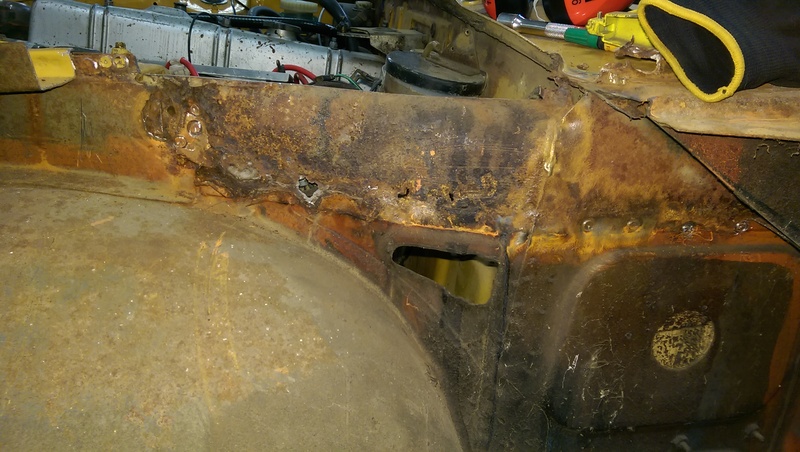
I need to replace part of this gutter, and it needs to come off so I can fix the rusty thing under it.
Most of this thing needs to be replaced... there is also a small hole behind it that has been bogged over.
-
1
-
 1
1
-
-
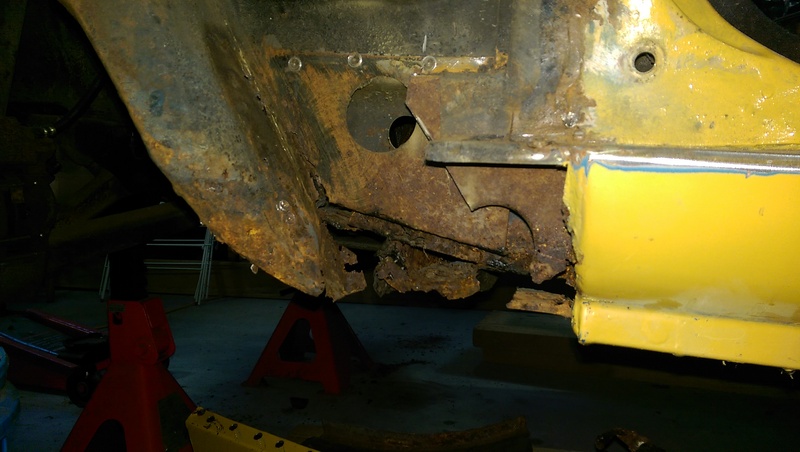
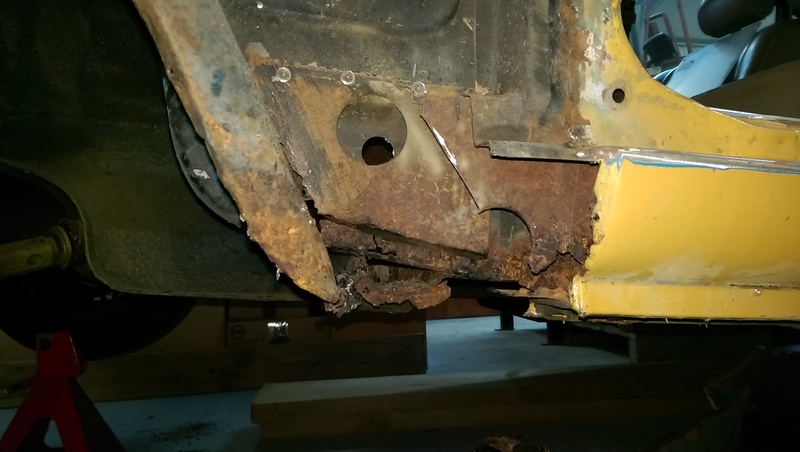
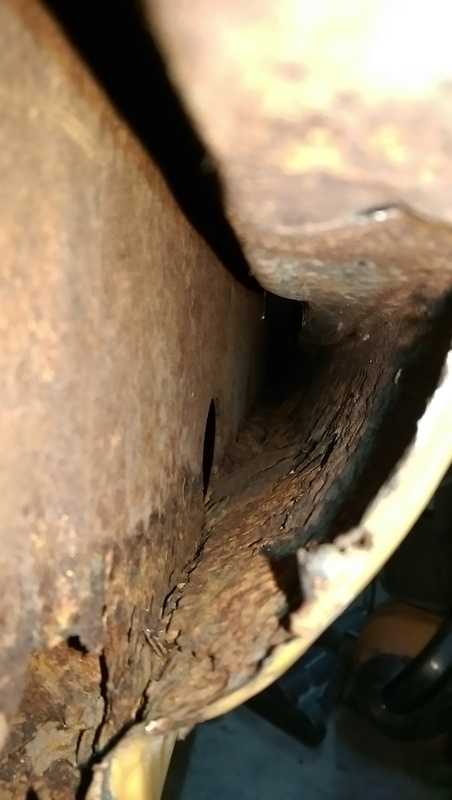
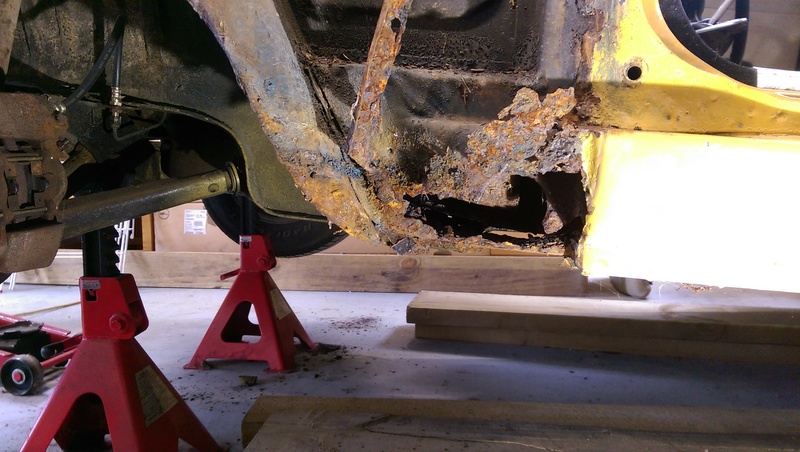
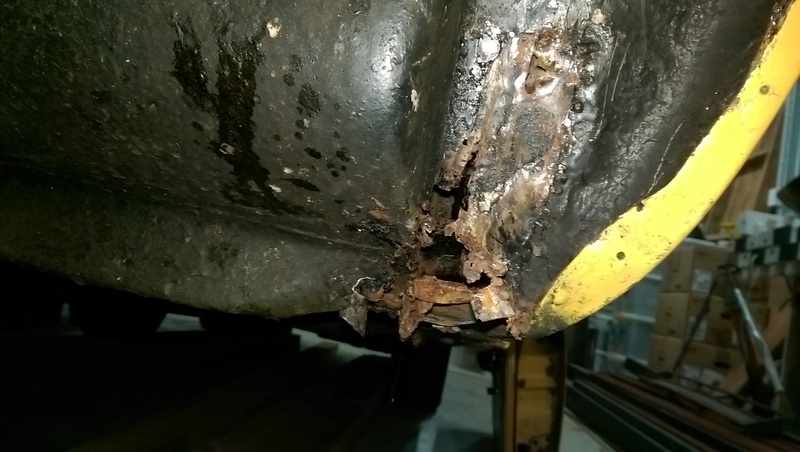
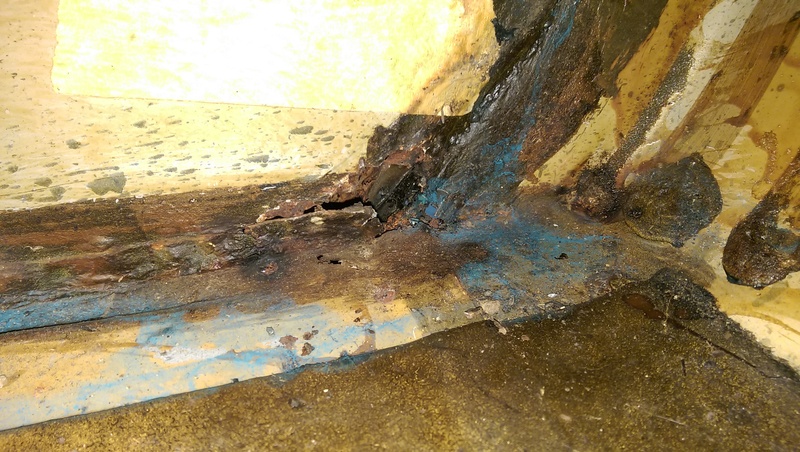
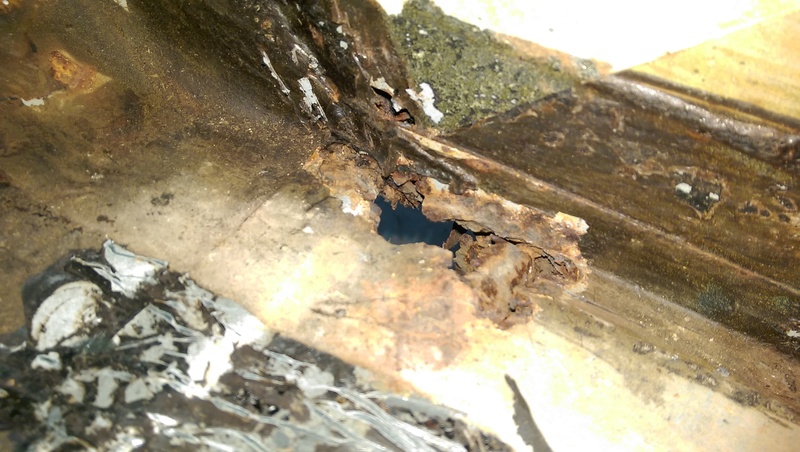
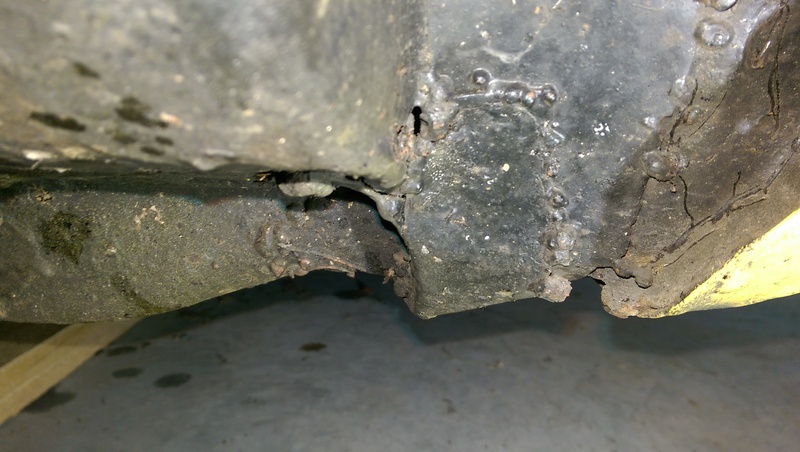
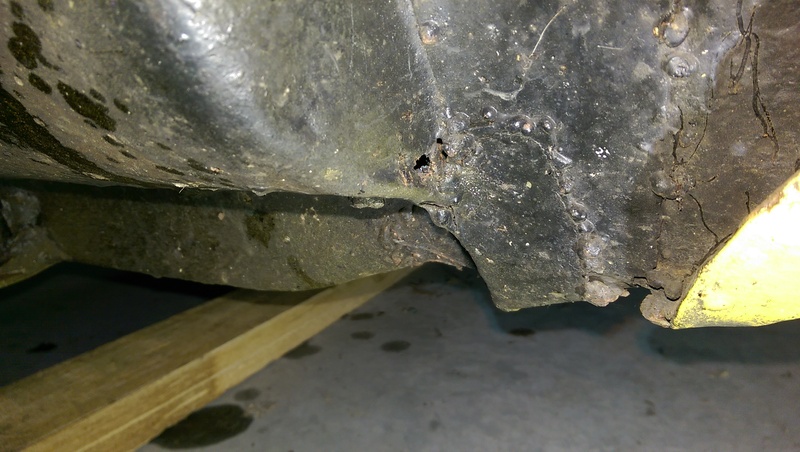
Passenger sill. I can shove a screwdriver through this gap.
I removed the dodgy patch welded on with bird shit. And....
To get behind the guard I'm going to do something that scares me a little.
-
6
-
-
30 minutes ago, Crispen said:
quick question. is it actually possible to remove the 4speed without removing engine from the car? Im having a bit of trouble getting this box out. I have removed all bolts cables and everything but the bellhousing keeps smashing into the tunnel and i can get it to come back the extra 5-10mm that i need to get the input shaft free..
Sounds like my Starlet. Disconnect the steering column and remove the engine cross member bolts. With a jack under the engine cross member, lower it just enough to give you clearance to get the gearbox out, without having to remove the engine.
EDIT: Keep an eye on hoses and earth straps as you lower it, or you could damage them.
-
1
-
-
Could you use a ride on mower with the deck removed? And some chunkier tyres. And a welded up different(mine single spins if I get stuck).
I forget what the original question was....
-
Steam catapult like on aircraft carrier. With a crappy plastic office chair strapped to it.
-
5
-
-
I got power to the shed on Friday! Lights and powerpoints are coming on Wednesday!
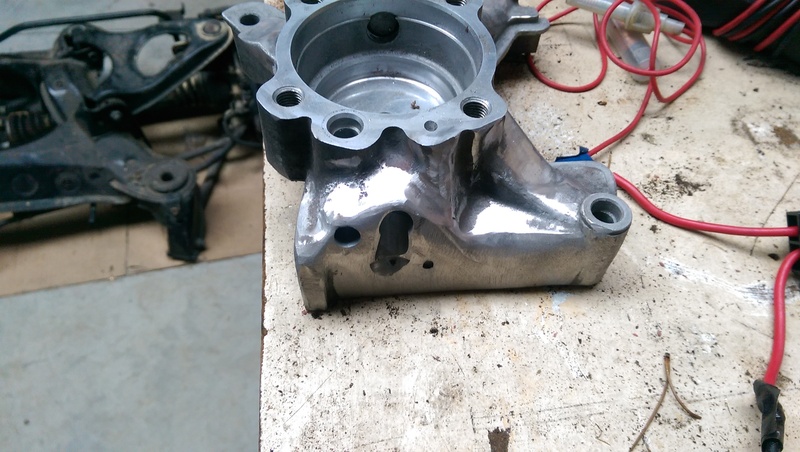
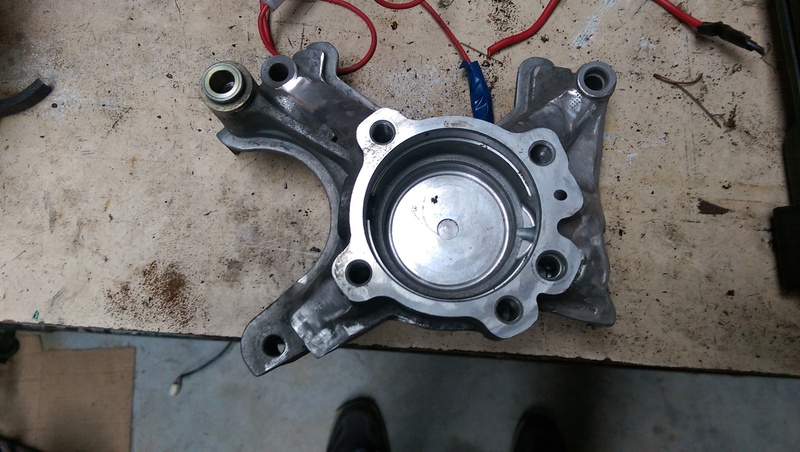
My 1UZ had a hydraulic pump for the fan, wtf is wrong with an electric one?!?! I'm only running an alternator, so don't need any of the other idler pulleys.
If I just remove them, it leaves big holes exposing the timing belt. So I adjusted them with the hack saw and angle grinder to remove the bits I don't need.
I also removed some brackets from this that were for the AC or PS pump.
This tensioner thing no longer served a purpose other than filling in a hole, so I cut the shaft off.
-
2
-
-
Left rear quarter window rust
Right rear quarter window rust
Under the parcel shelf rust
Left footwell/sill rust
Right footwell/sill rust
Right sill/wheel arch end rust
Shitty looking patches on left sill end/wheel arch
Rusty left rear seat belt mount/wheel arch
-
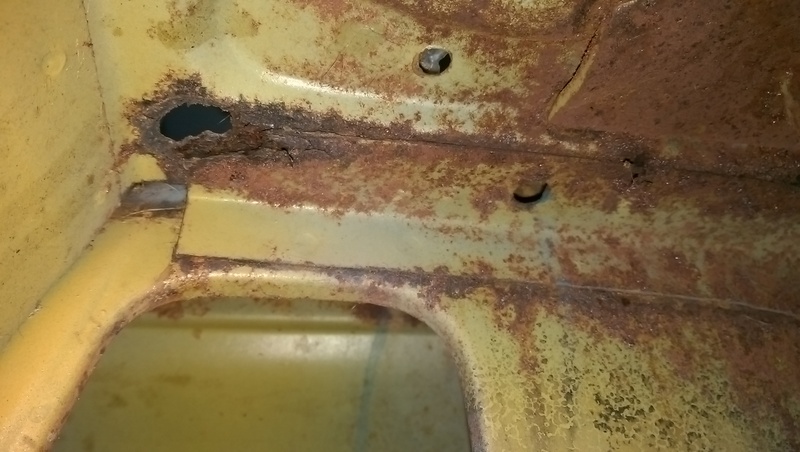
Looks like I will need to do some rust repair on the sills.
There is no rust on the outside/underside, though I still need to do a comprehensive search.
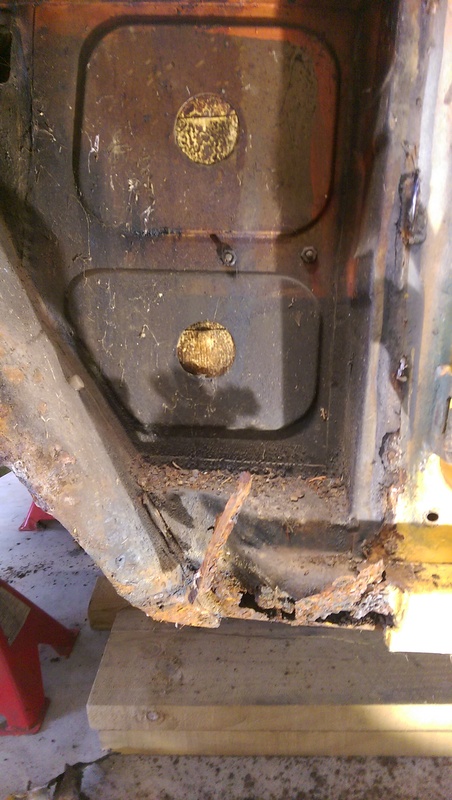
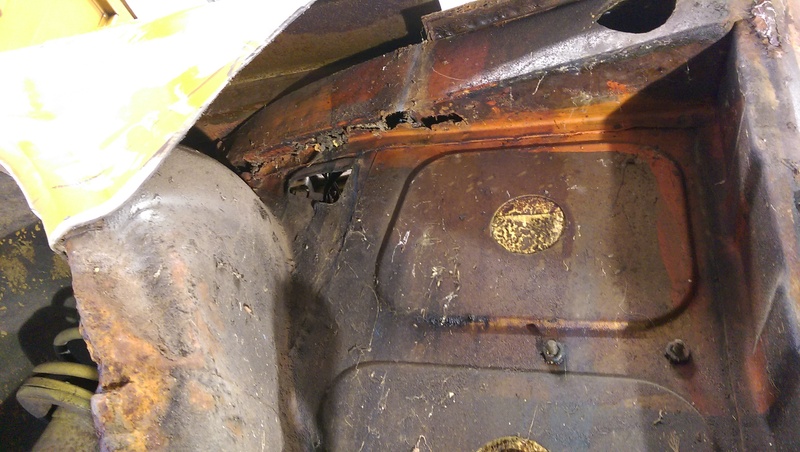
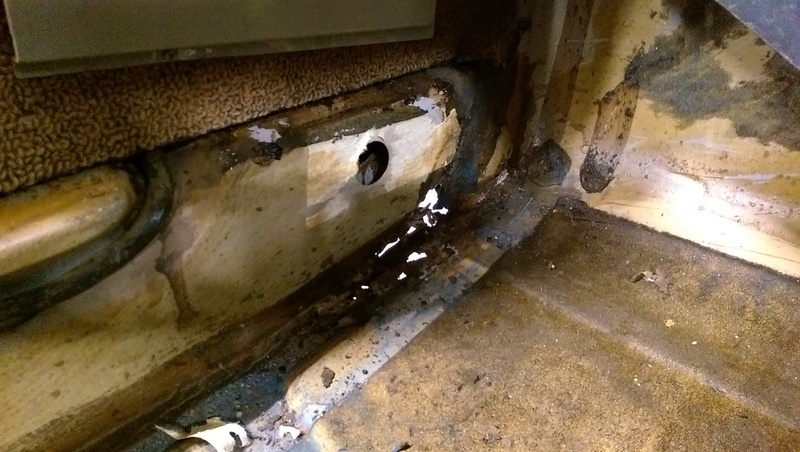
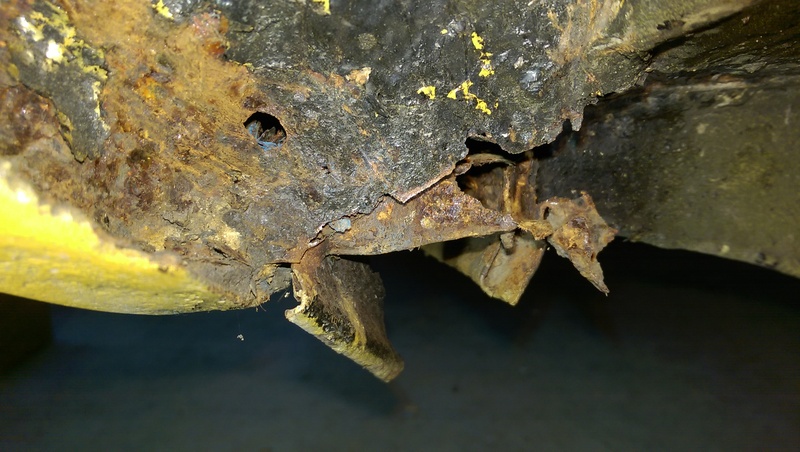
So far... I can stab a screwdriver through the front left corner of the passenger footwell.
The front end of the drivers sill in the wheel arch has some rusty holes.
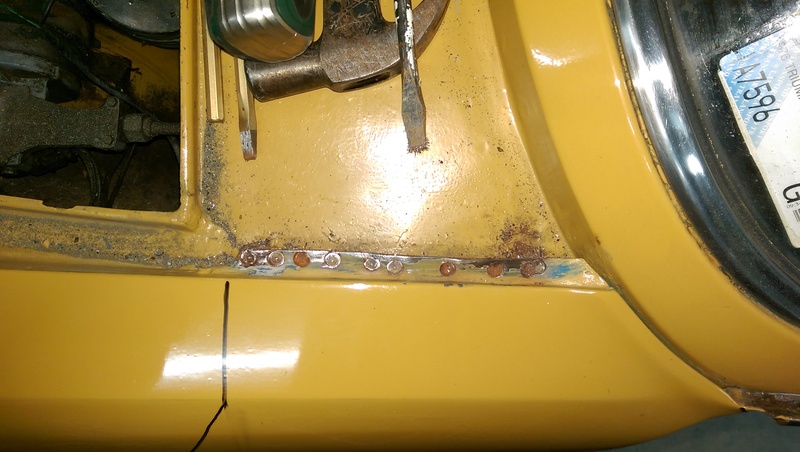
The end of the passenger sill in the wheel arch has some roughly tacked on patches. The front outer part of this sill has been repaired, but I don't know if they cut the rust out first or just slapped a panel over the top because there is a lap weld rather than a butt weld where the repair ends. The end of the sill in the rear wheel arch is rusting through around the seatbelt reinforcing plate.
This guys thread is most helpful to make it look less intimidating. http://retrorides.proboards.com/thread/173102
I'm supposed to be getting electricity in the shed TODAY! So I could use tools other than my cordless drill.
-
1
-
-
You could join a motorsport affiliated car club too. The annual fees are usually bugger all. Like $20 or $60 or something. Then you get invites to their track days, and all the clubs often invite each other to their track days too. So join club X and you could also enter events arranged by club Y/Z/etc...
Often, depending on the event, you run in classes by engine size, forced induction, FWD, RWD, AWD. So you typically end up running with cars 'similar' to yours in performance.
-
1
-
-
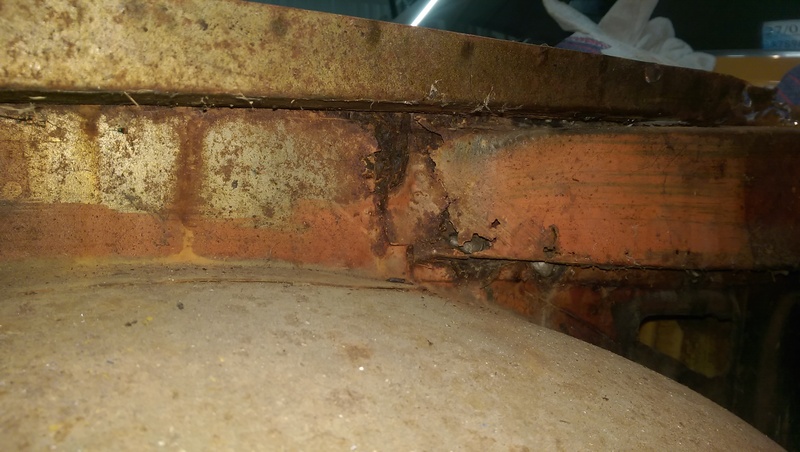
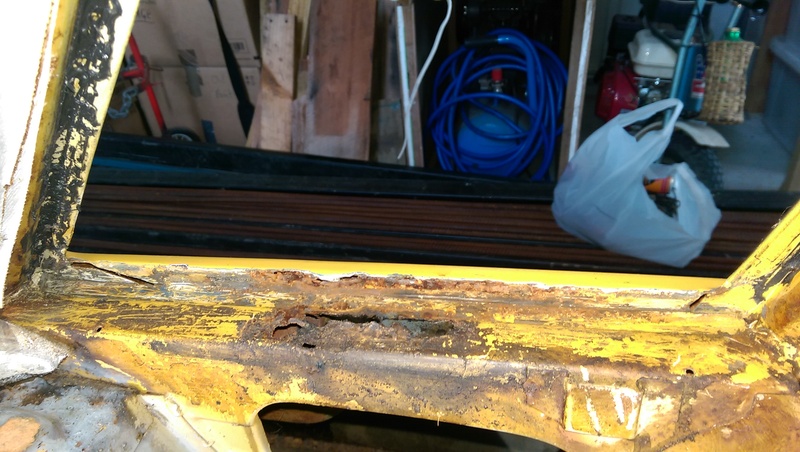
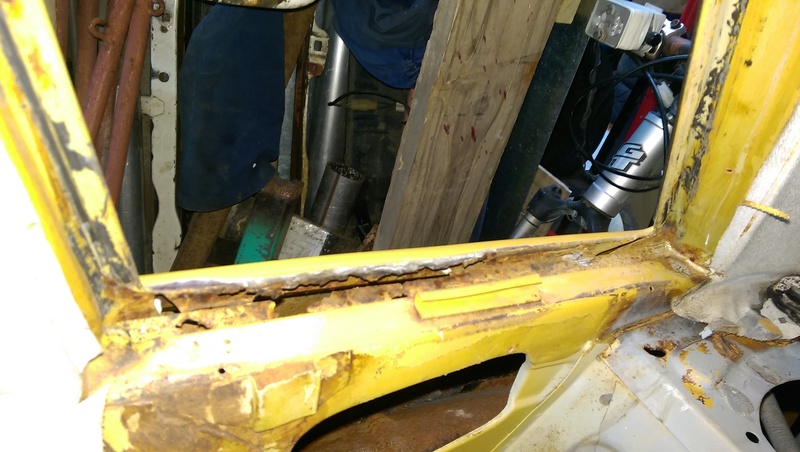
Make that both rear quarter windows are rusty at the bottom. Jeez, the fuck is up with these factory gaps between the panels, it's like they designed it to leak into the guard if the mastic stuff ever failed.
-
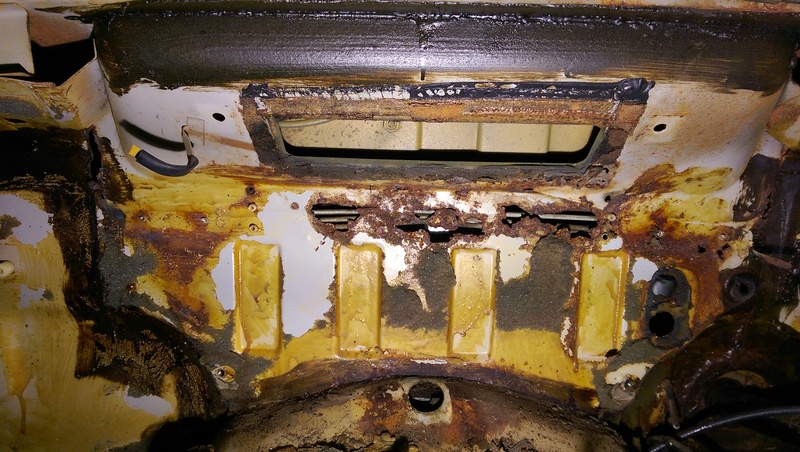
Some clown hot glued the rear parcel shelf in cause the clips were missing. I scraped it off without too much damage. But the long thin metal bit that goes behind it was rusted through at both ends. Anyone got a good one?
Found some rust at the bottom of the left rear quarter window. Took it out to find a decent hole and a small hole on the outside that had been bogged over without bothering to remove the window first. Repair looks to be within my welding skill level, but part will be outside, so it will need to be painted. I wanted to avoid painting it for a while.
-
5 minutes ago, ~Slideways~ said:
I've looked at some like that. But that is so basic, I'd be better off making my own. You also don't get any way to turn separate vents off/on.
The current setup has:
- Large central dash vent.
- left dash vent
- right dash vent
- left windscreen vent
- right windscreen vent
- left rear vent (can't be very effective, could remove)
- right rear vent (can't be very effective, could remove)
- Venting to the foot area(no ducts, just a big hole in the side)
I'd want to retain at least 1-5.
I thought of making a box up for the original long heat exchanger but run two fans that I can control separately. One fan is ducted to windscreen for super demist. The other fan is ducted to all the other vents.
-
28 minutes ago, kyteler said:
Wants to put a UZ in a Trump but thinks retrofitting a heater unit could be difficult.
Mayte, should be a dawdle by comparison.
Nar. Engine transplant is easier. Just needs brackets, all the connector bits like hoses/wires are flexible so stuff doesn't really need to line up.
Heater is big fucking plastic thing full of flappy doors to make hacking it up not really feasible and vents in the wrong place but you can't move them because flappy doors won't work right and mechanical levers for flappy doors that you need to actuate somehow.
I think my options are:
- Fix existing heater maybe try upgrade motor to insane brushless mode.
- Get better condition std heater maybe try upgrade motor to insane brushless mode.
- Replace with something really basic that only does the windscreen. But then I am left with useless vents in the middle and on either side of the dash.
Remember I don't want this to be another racecar.
-
53 minutes ago, Muncie said:
While your attacking the firewall should recess it 100mm so a Barra will fit.....
Probably better to fit heater unit out of something 90's spec and Japanese the triumph units fill with leaves and rust out, or the internal gates seize and give you full time hot feet or wind in your face.
I have considered both of these things. If I recess the firewall, I'll have to change the heater because it won't fit anymore.
But retrofitting a modern heater to the existing inlet hole and vents seems like it could be a lot of work.
-
The heater is pretty rusty too, and full of crap. Jeez it's heavy. Anyone got a good one they don't need before I try fix mine?
-
Saw a Triumph 2500 in Greytown a couple of weeks ago. Did a double take and had to stop to look. It was the same yellow as mine and also had hotwires too. Only difference was it had a new plate, different grill and different c-pillar badges, was 2 years older than mine.
-
1
-
-
Removed the dash and the heater and that horrible foam rubber pad thing. Found the heat tap is seized, not sure if on or off, so had been disconnected.
Also, I think I will need to use that whole patch panel.
All the rust is in that one panel as far as I can see.
-
2
-
-
I would be getting a longer/bigger breaker bar on the crank pulley bolt. This is from my no experience freeing a seized engine.
Also, it's a cast iron head right, it's not like you are going to strip the spark plug hole threads like an alloy head if you just use a longer breaker bar or a bit of pipe on the handle to make it longer. Maybe see if you can just crack them a little, then spray it with CRC. I don't think much/any crc is going to get down in the threads if the plugs are done up tight as.
-
Makin' a patch panel from a firewall I got sent. I dunno how much of it I will end up using.
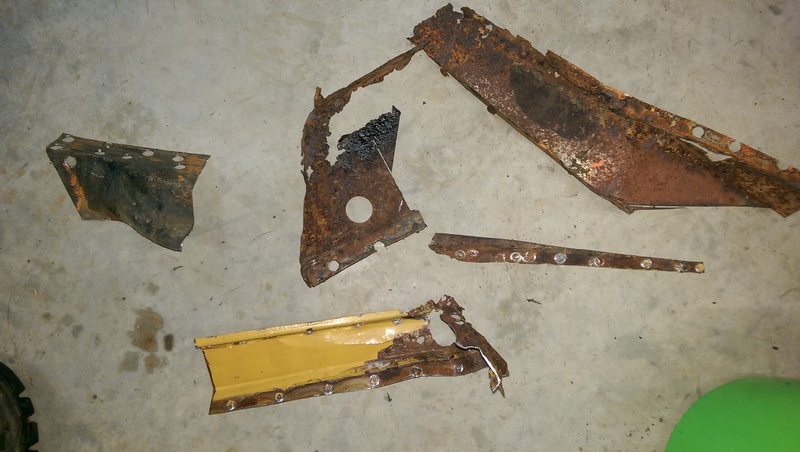
The pile of bits I spot weld drilled off.
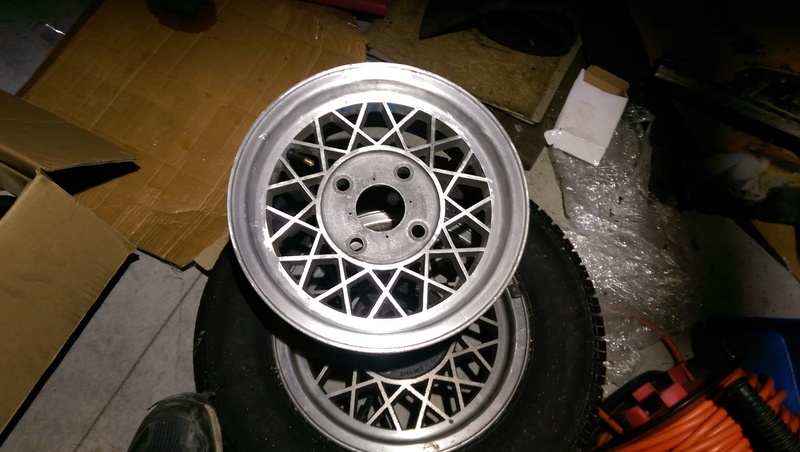
The hotwire I got from @pusherman after paint stripper and water blaster and 400 grit. The original coating and lacquer are removed, but there is still a bit of the blue paint that was all over it. WTF was that paint, it's nearly indestructible?? Still need to scrub a bit between the spokes to get rid of any loose stuff then mask it off and repaint the black bits.
-
I bought one of the hole saw ones from testntools. I'm dismantling a triumph firewall to use as a patch panel. Works good. I found I needed to mark the spots, then drill a 2mm dimple or the pin in the hole saw would wander off as soon as the saw teeth hit the metal. Don't push too hard right away, or it just fucks off making big scratches, wait for it to start cutting, then push a bit harder. Don't drill all the fucking way through.
Just realised this thread is old as fuck. Lol
-
4
-


oldschool spotted
in General Car Chat
Posted
Saw a black triumph '2500' today on sh2 going past lower hutt with a big backwards facing bonnet scoop and large alloys. Suspected a v8 from what engine noise I heard. Wanted to follow him and ask what diff he was running.... but I had a rental trailer and limited time, couldn't follow.