


Adoom
-
Posts
2196 -
Joined
-
Last visited
Posts posted by Adoom
-
-
Fit you bastard!
I need more clamps. Only one of these is mine, I borrowed the rest. Mole grips/Vise Grips are spendy as!

-
 1
1
-
-
1 minute ago, ajg193 said:
I wonder how many there are out there that haven't been certed for engine swaps, must be quite a few
I don't recall when or how my engine capacity changed to 1800 on my rego info....
-
On 7/9/2017 at 20:59, ajg193 said:
HAH!
I found mine. I'm one of 8 1800cc Starlets.
-
1
-
-
And also!
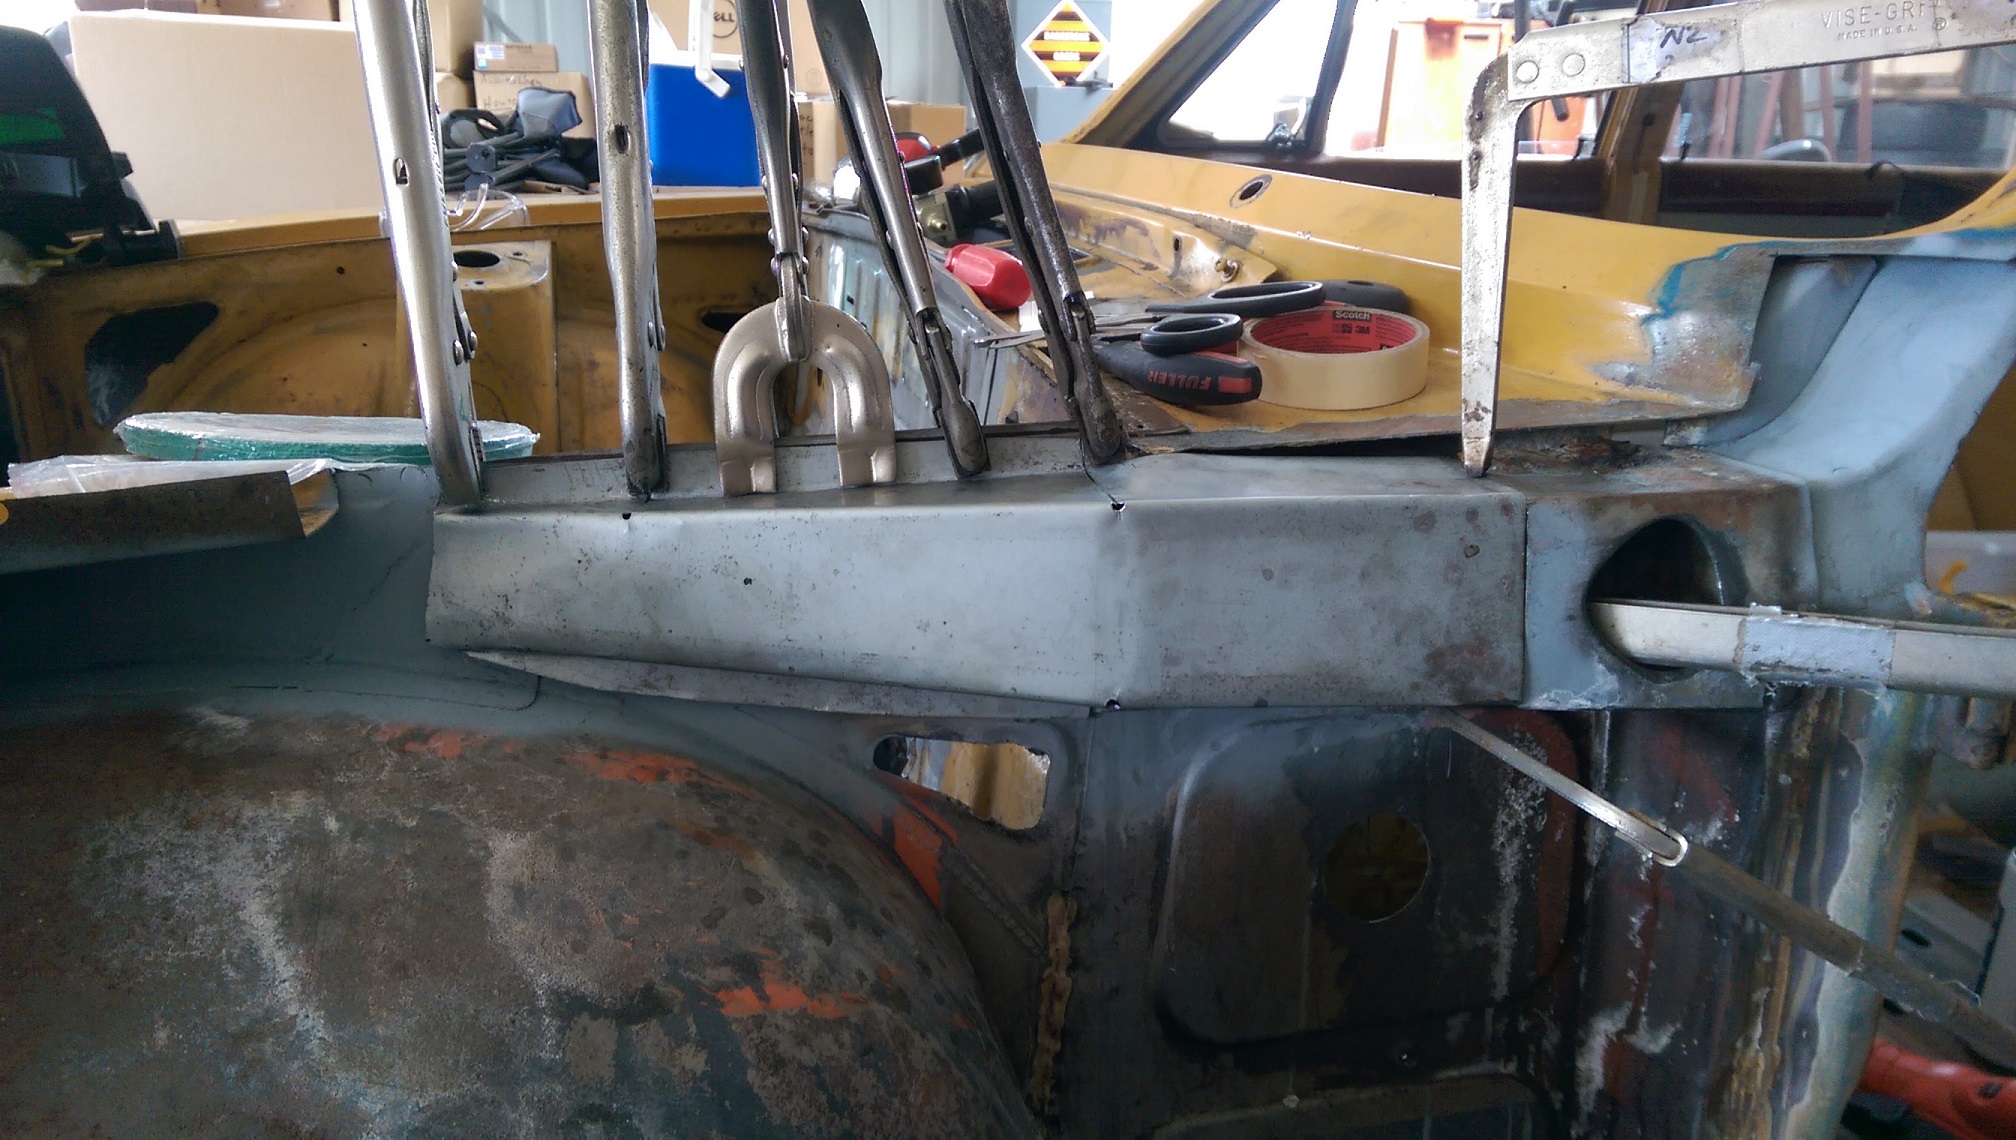
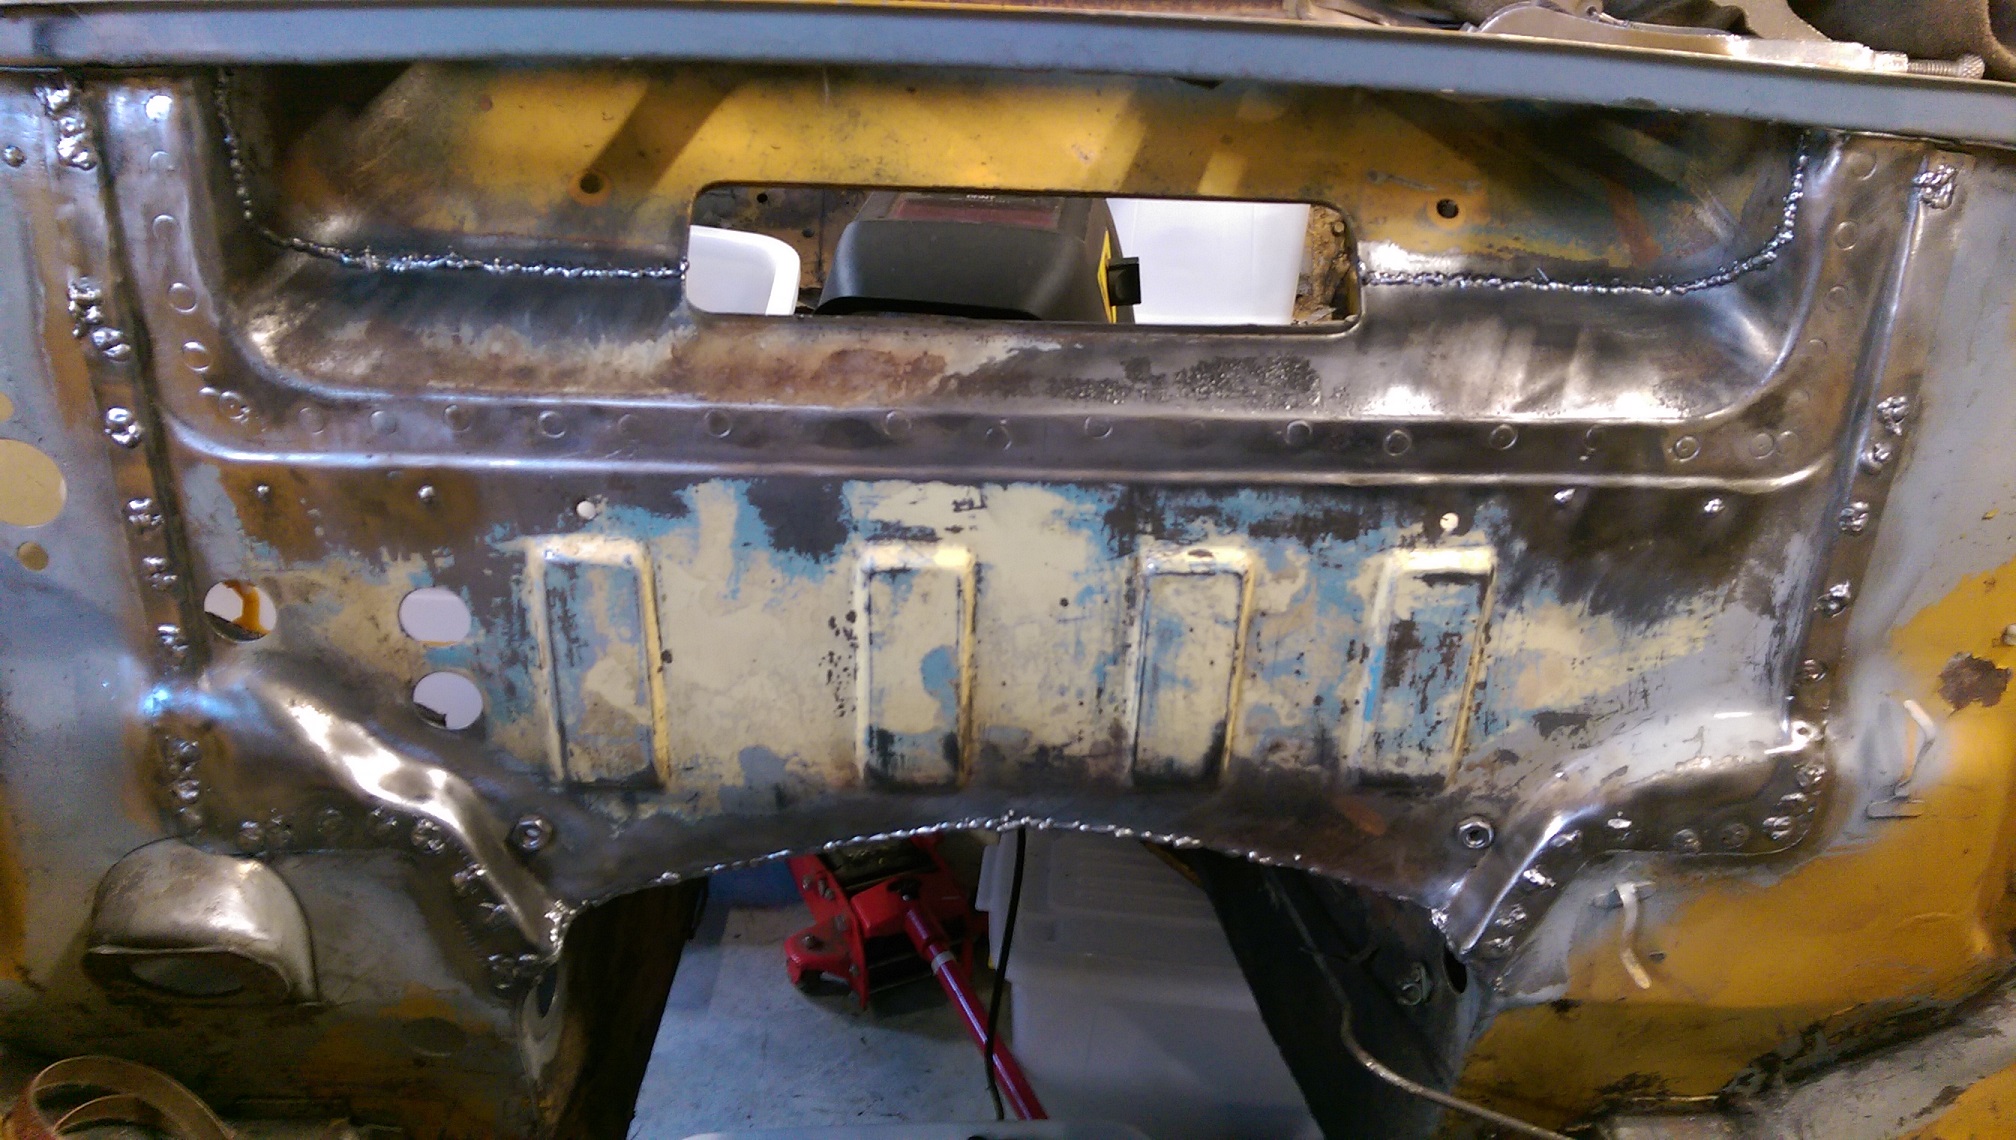
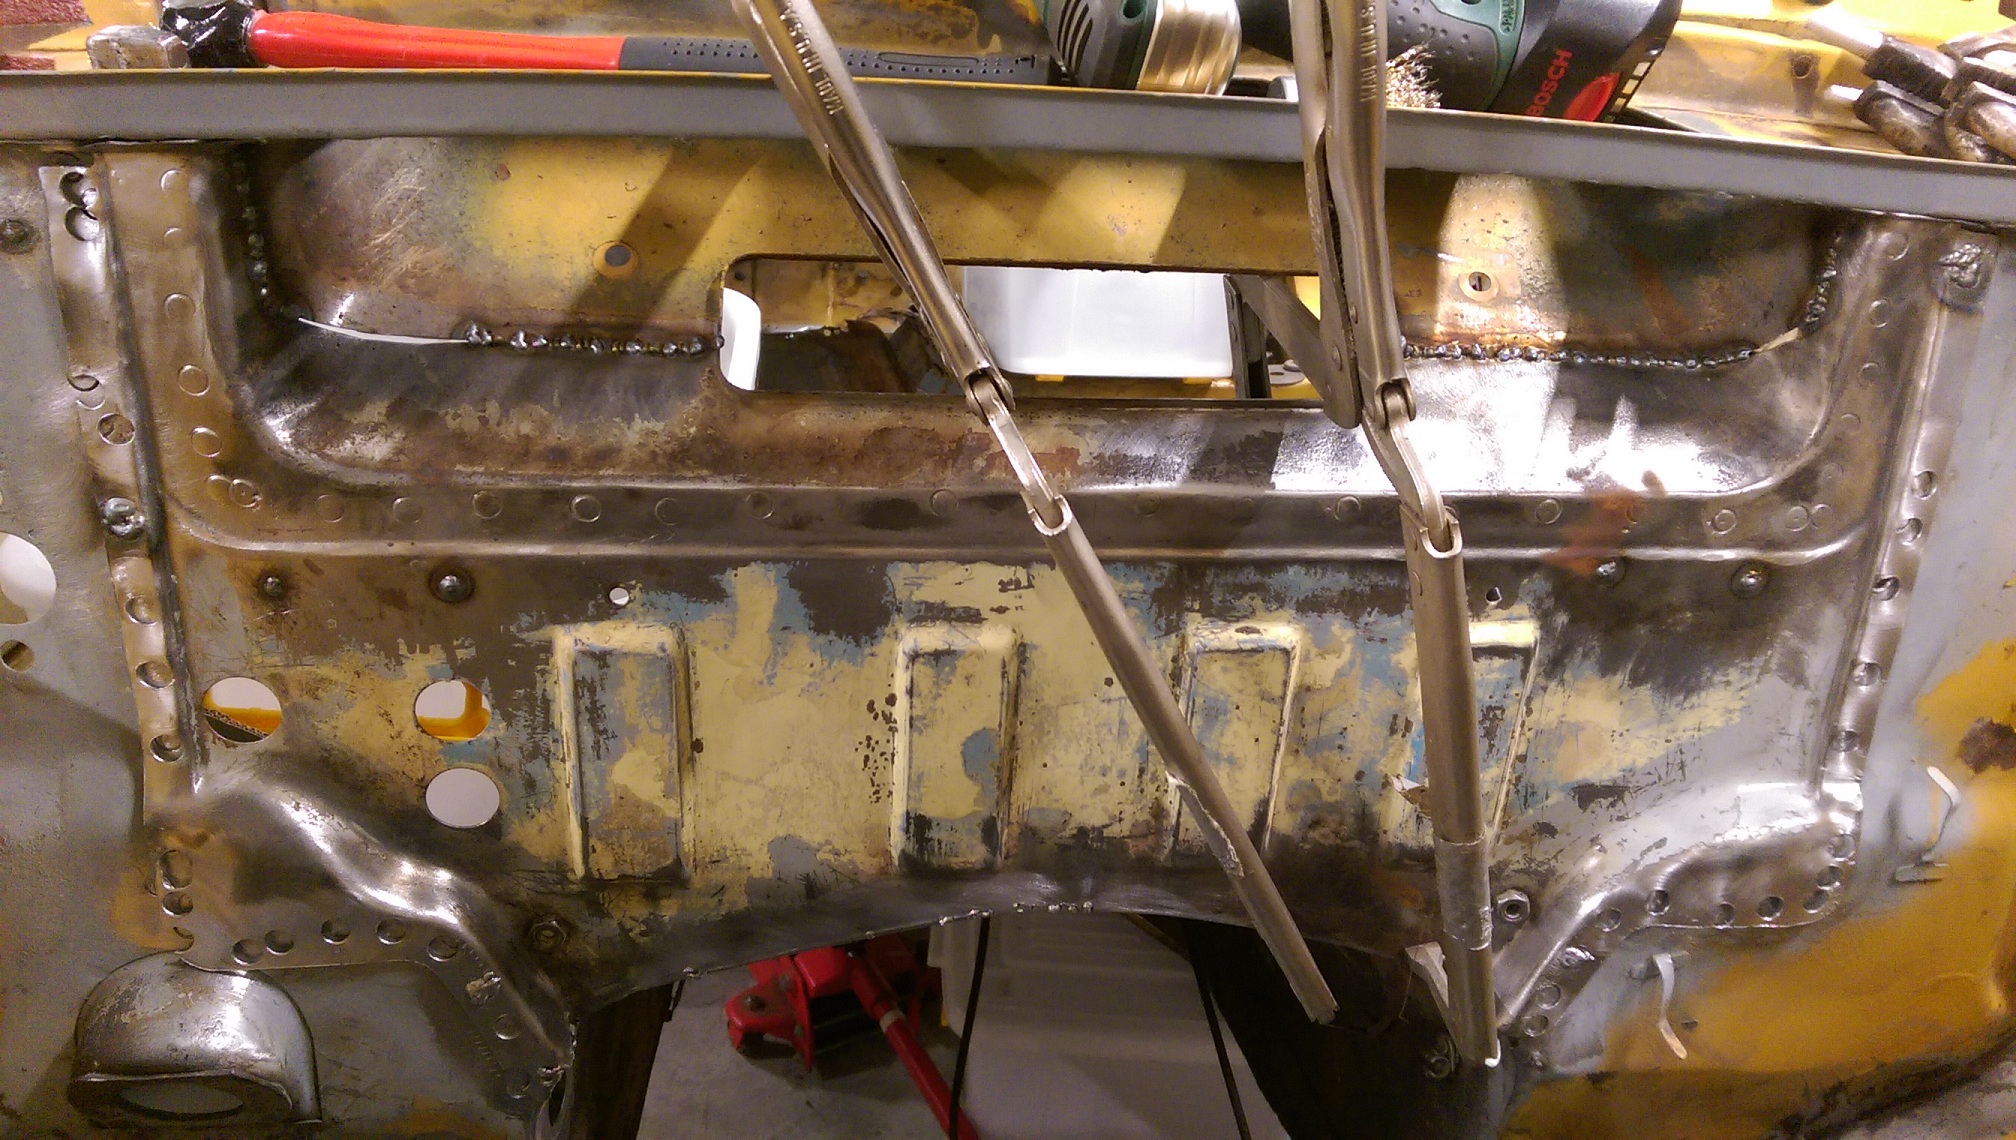
I patched a hole in the A pillar.
And I finally got around to putting some tacks on the rear of the tunnel seam. This is all I will do, it's seam welded all the way on the other side.
And I noticed my Argoshield is on 'empty'.
-
5
-
-
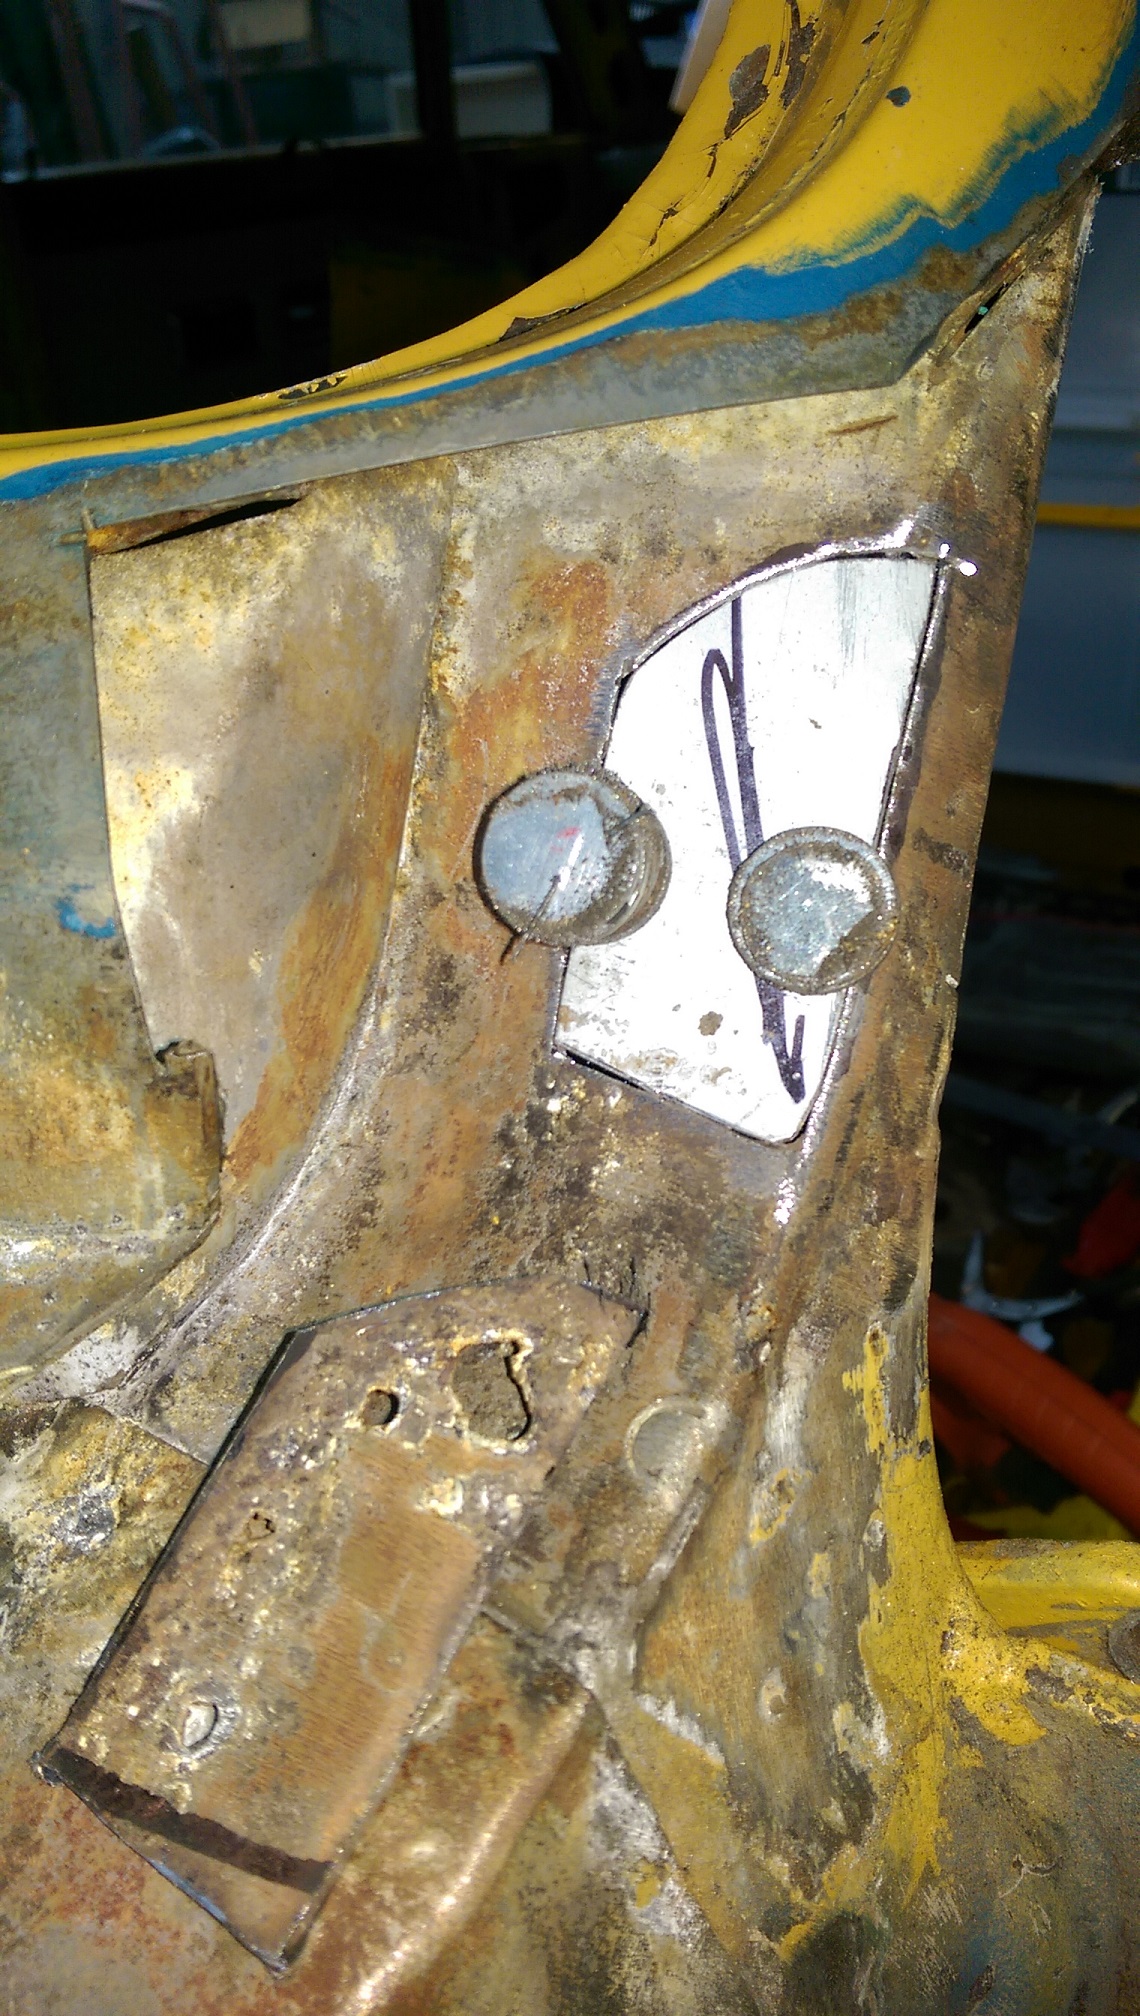
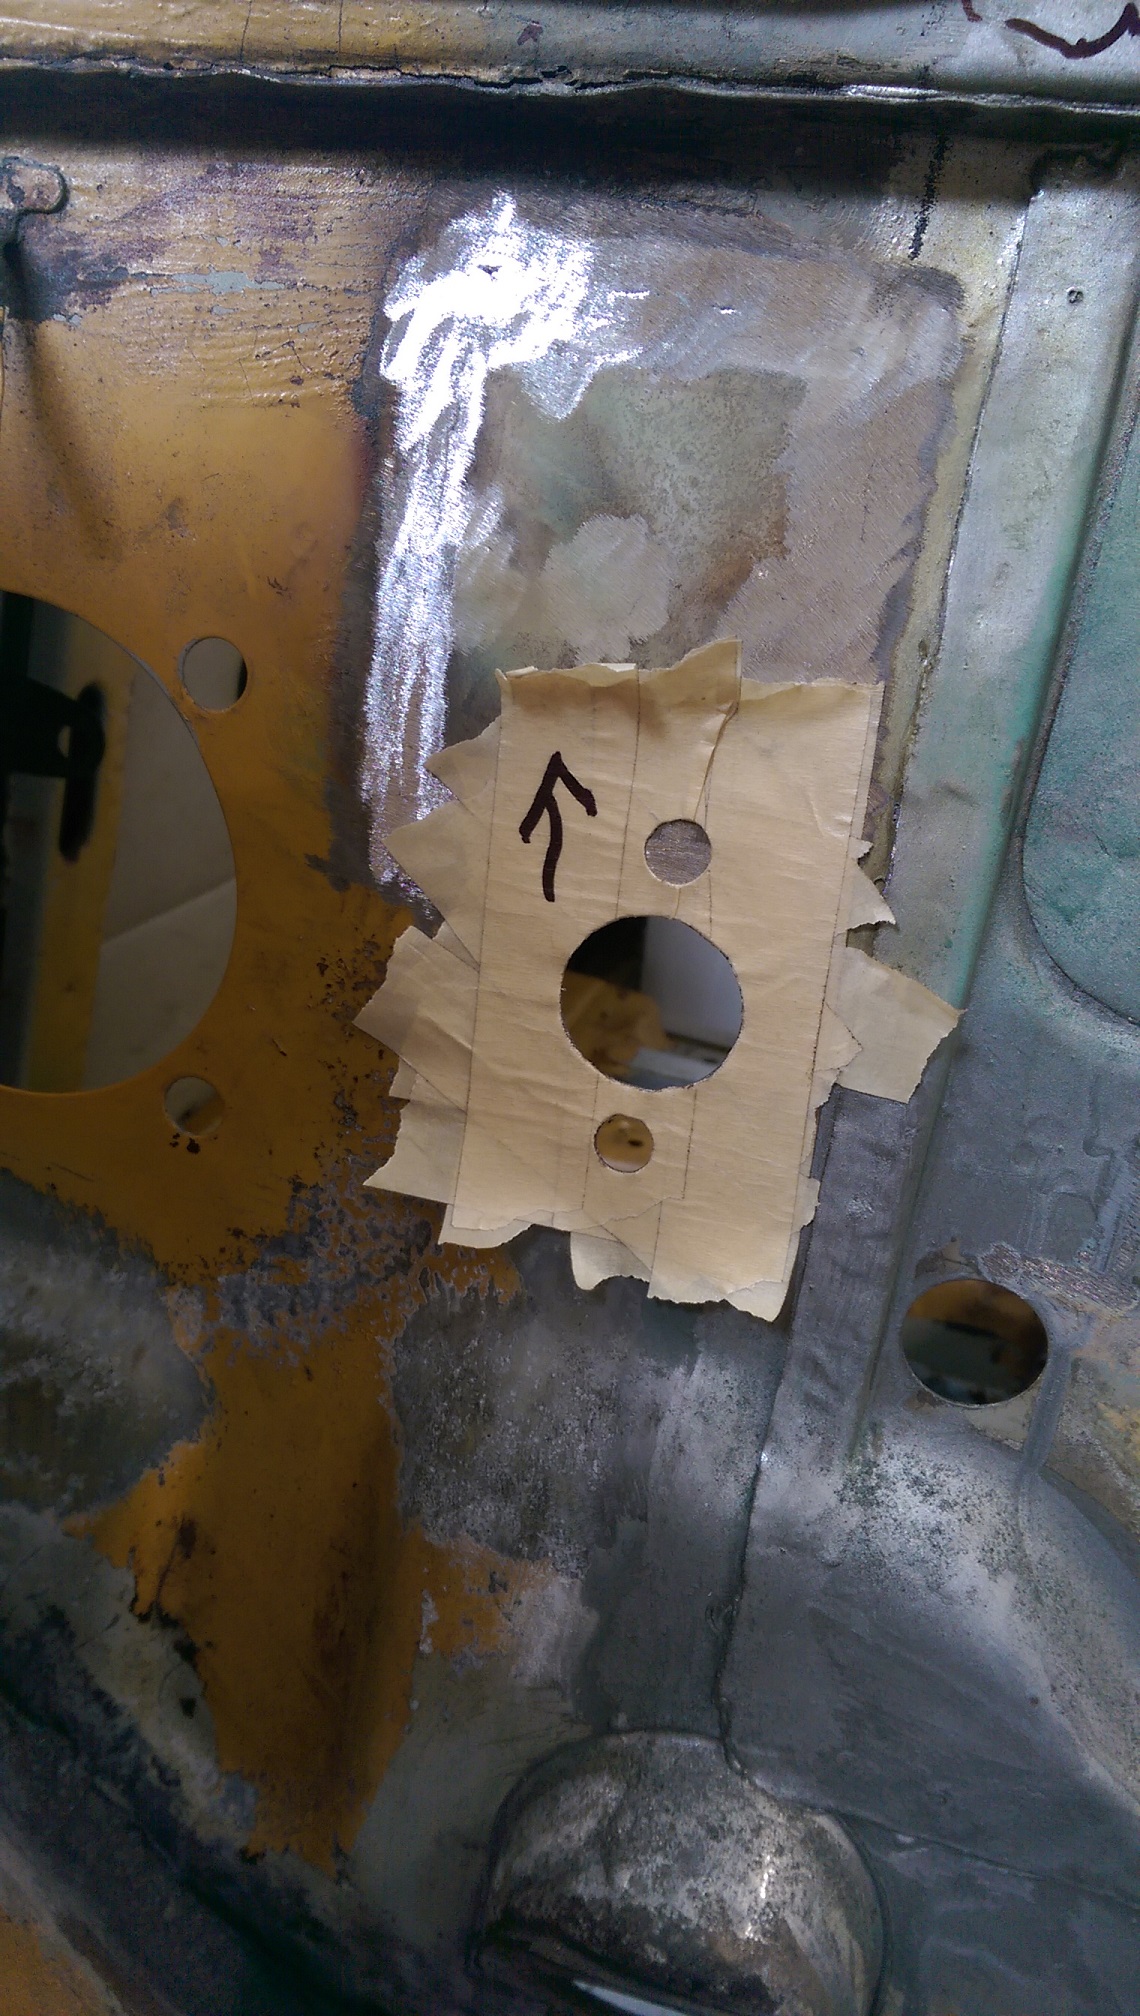
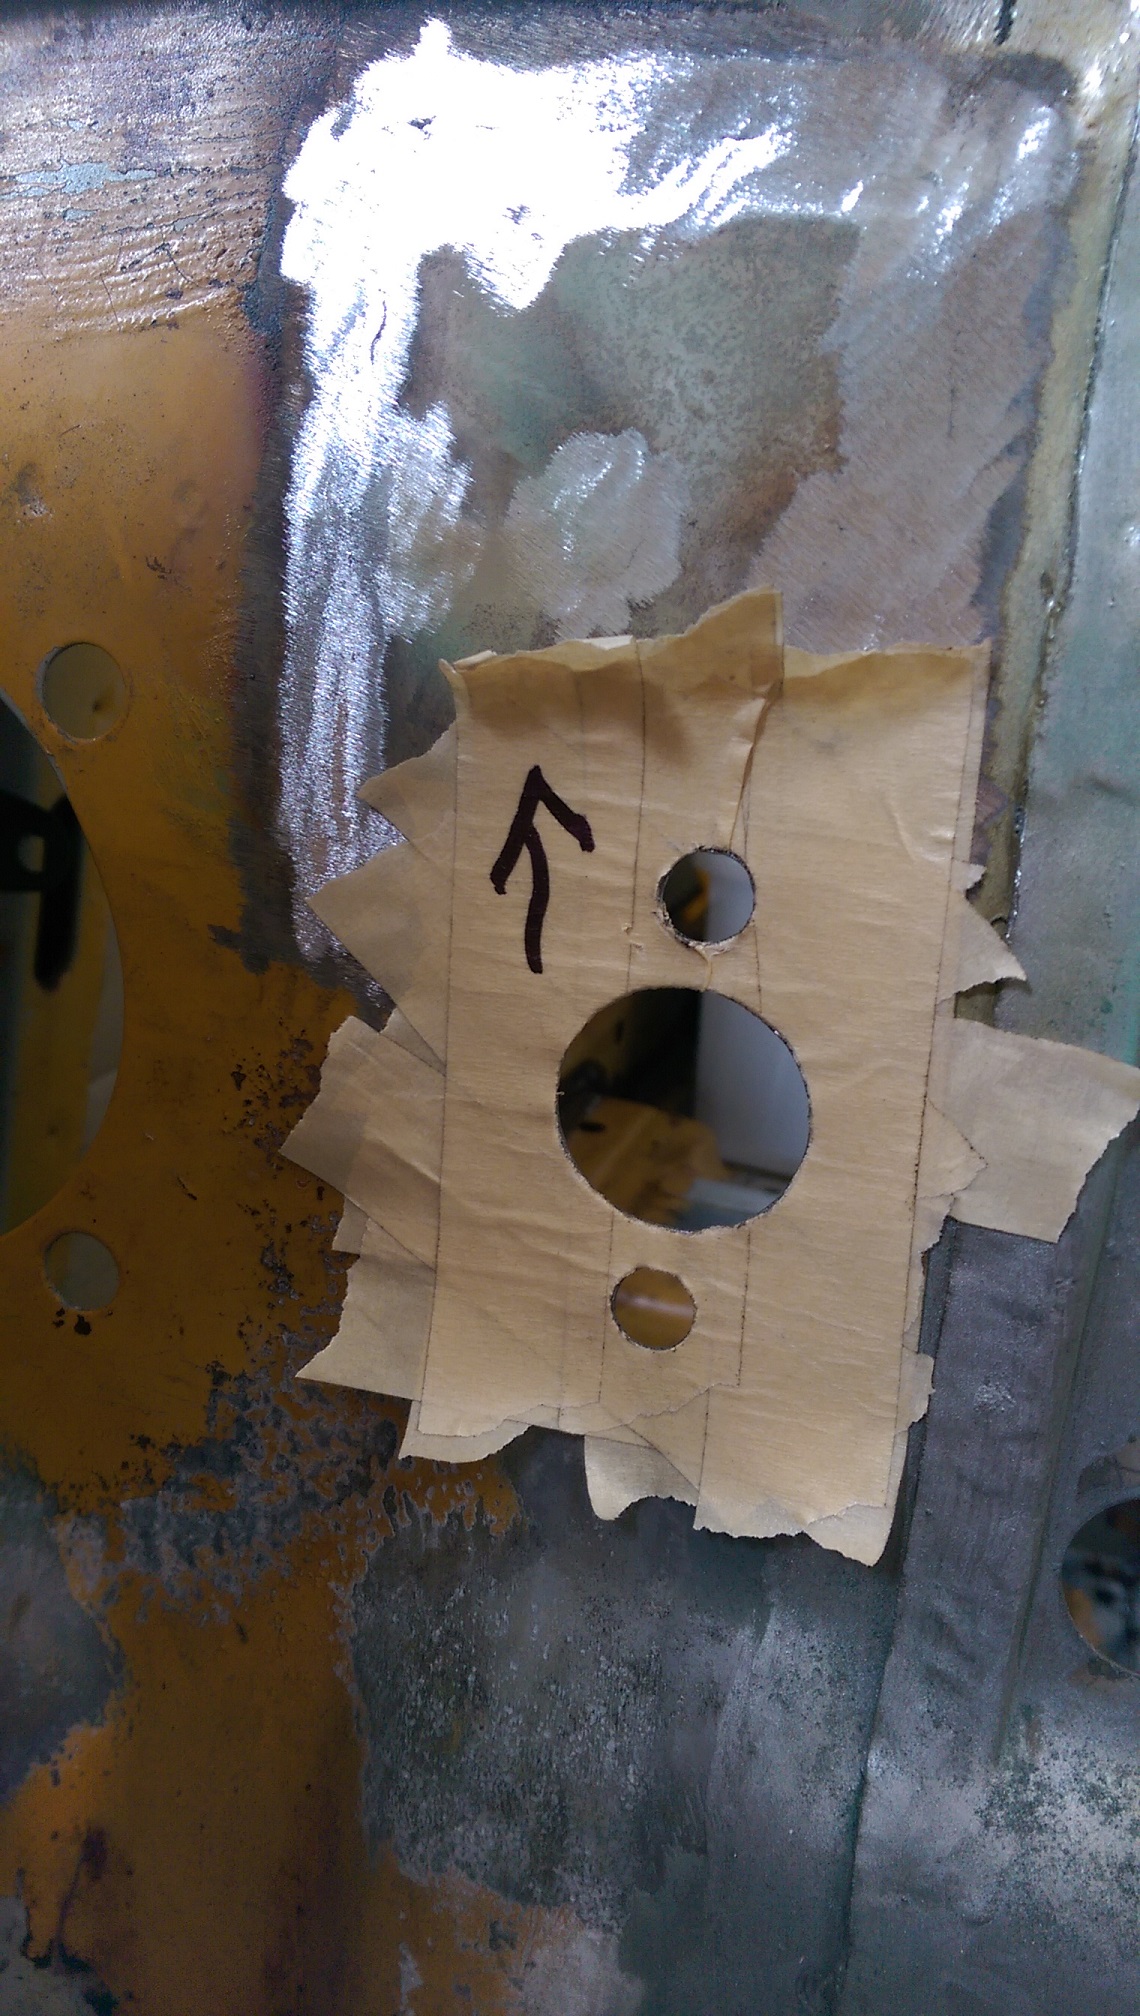
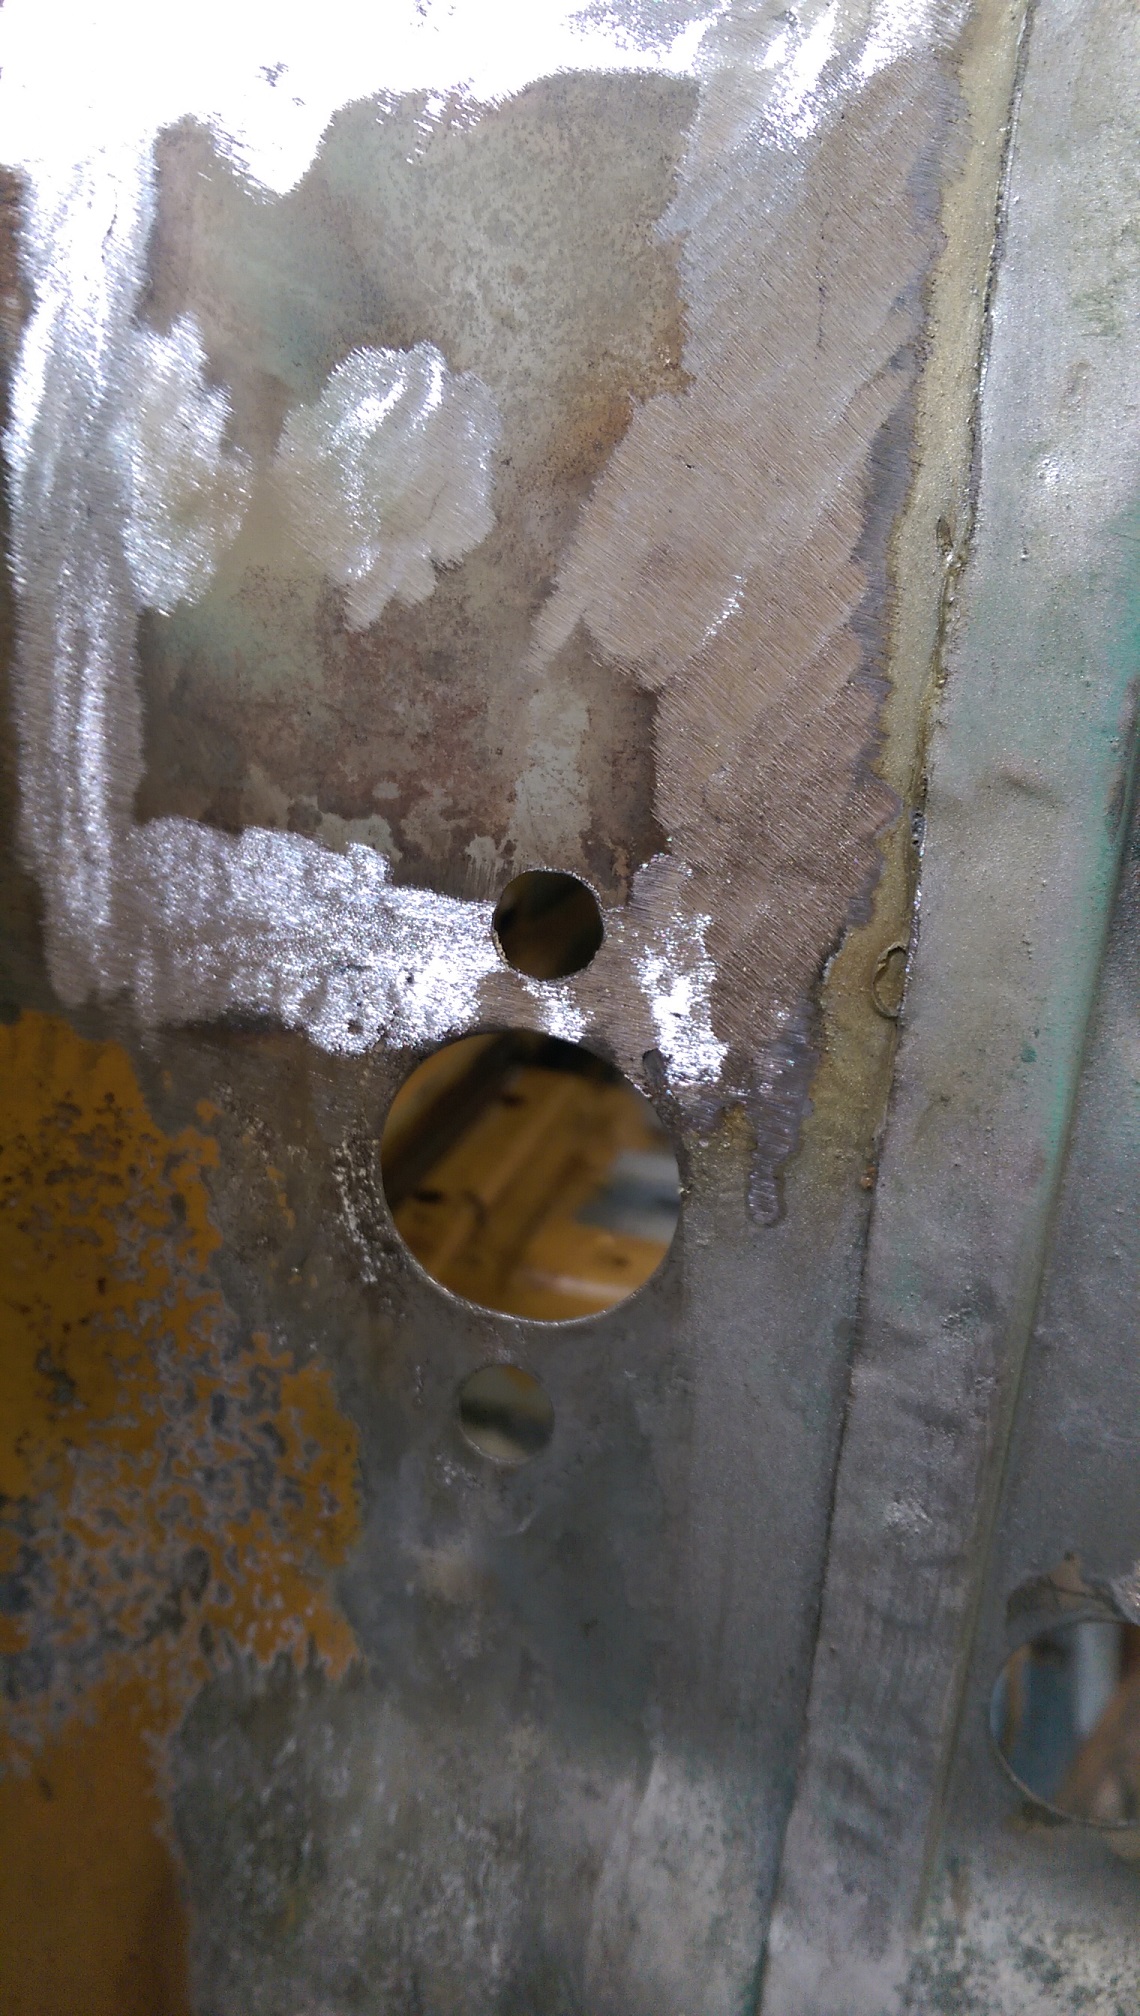
Too many photos...
But I had deleted a hole for the clutch master.
Fortunately I made a template with a few layers of masking tape before cutting it out.
BAM! And the rust is GONE!
-
1
-
-
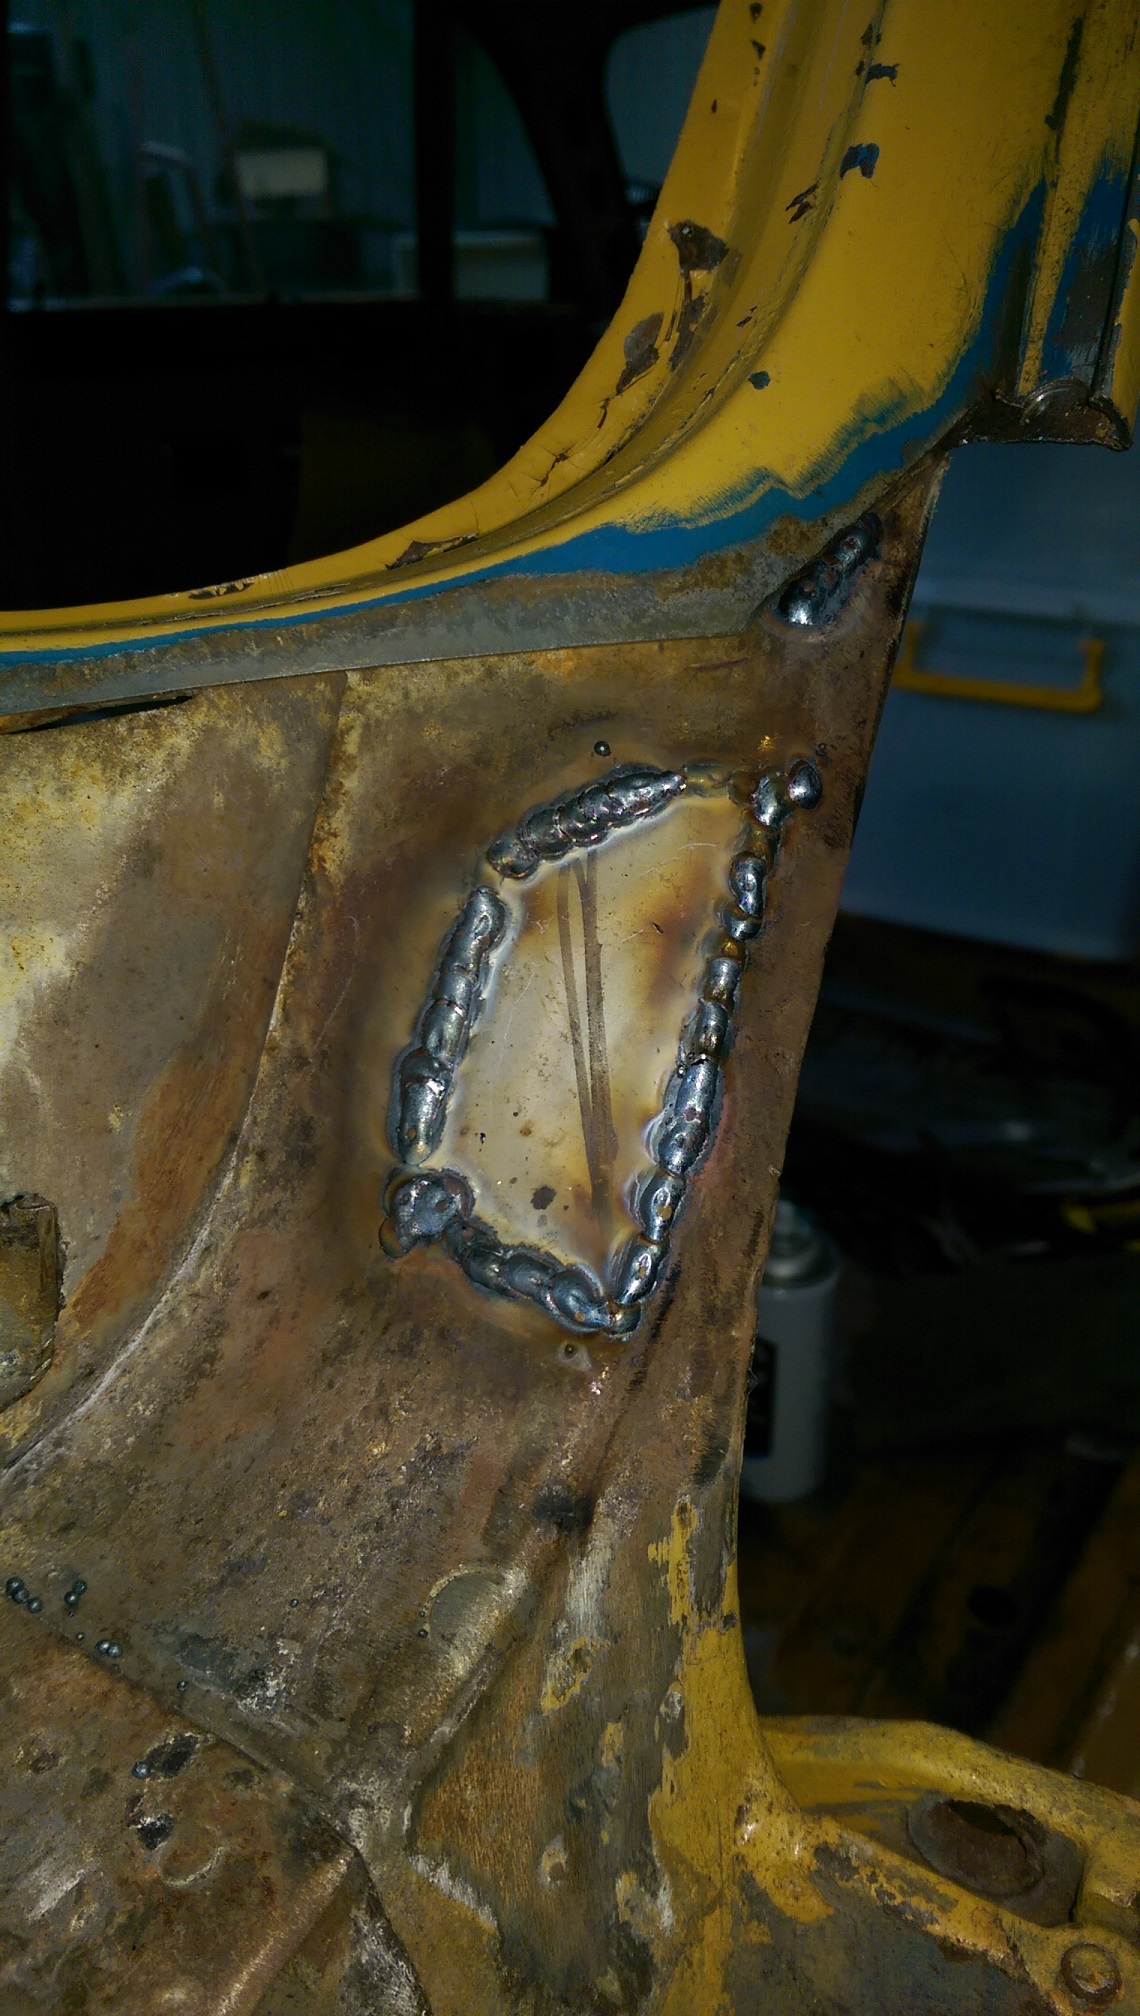
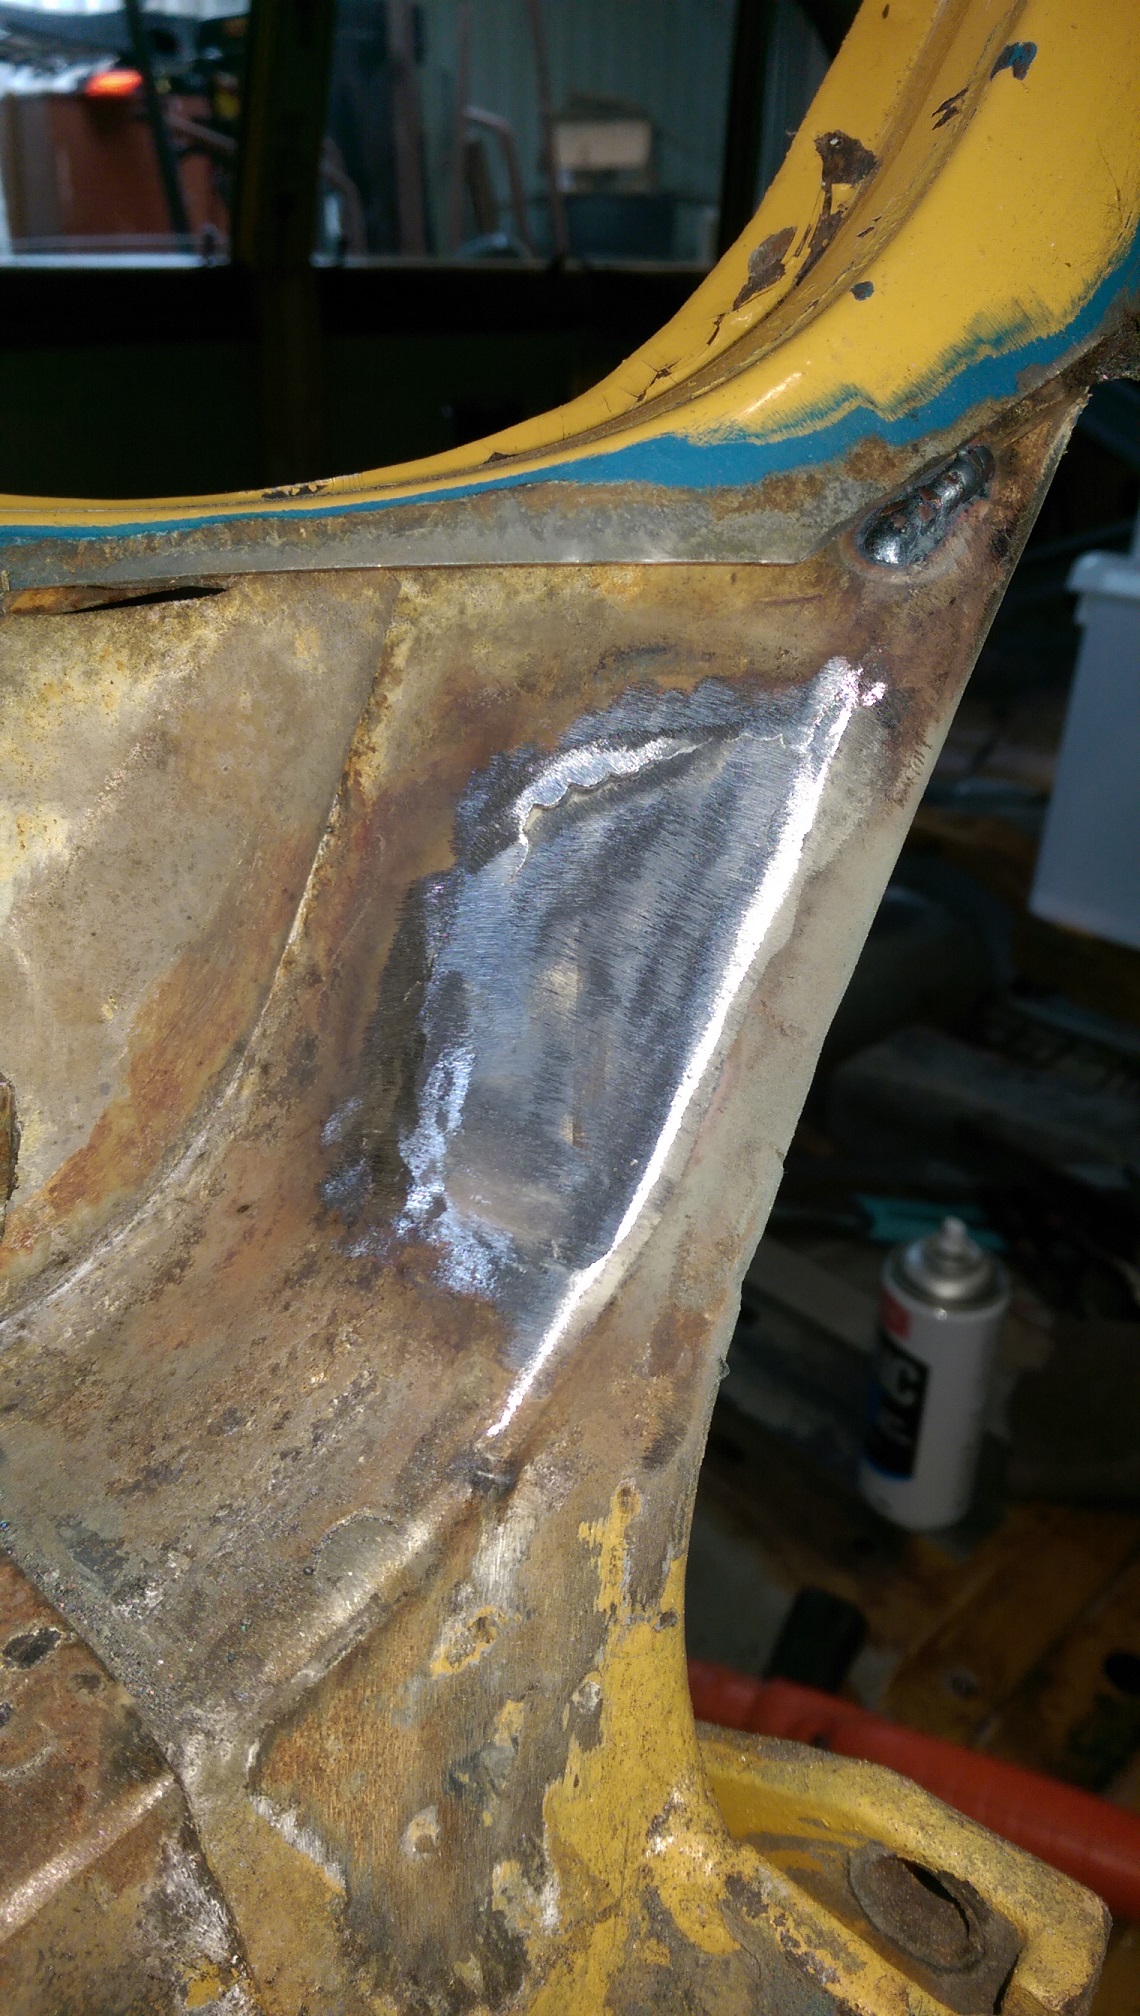
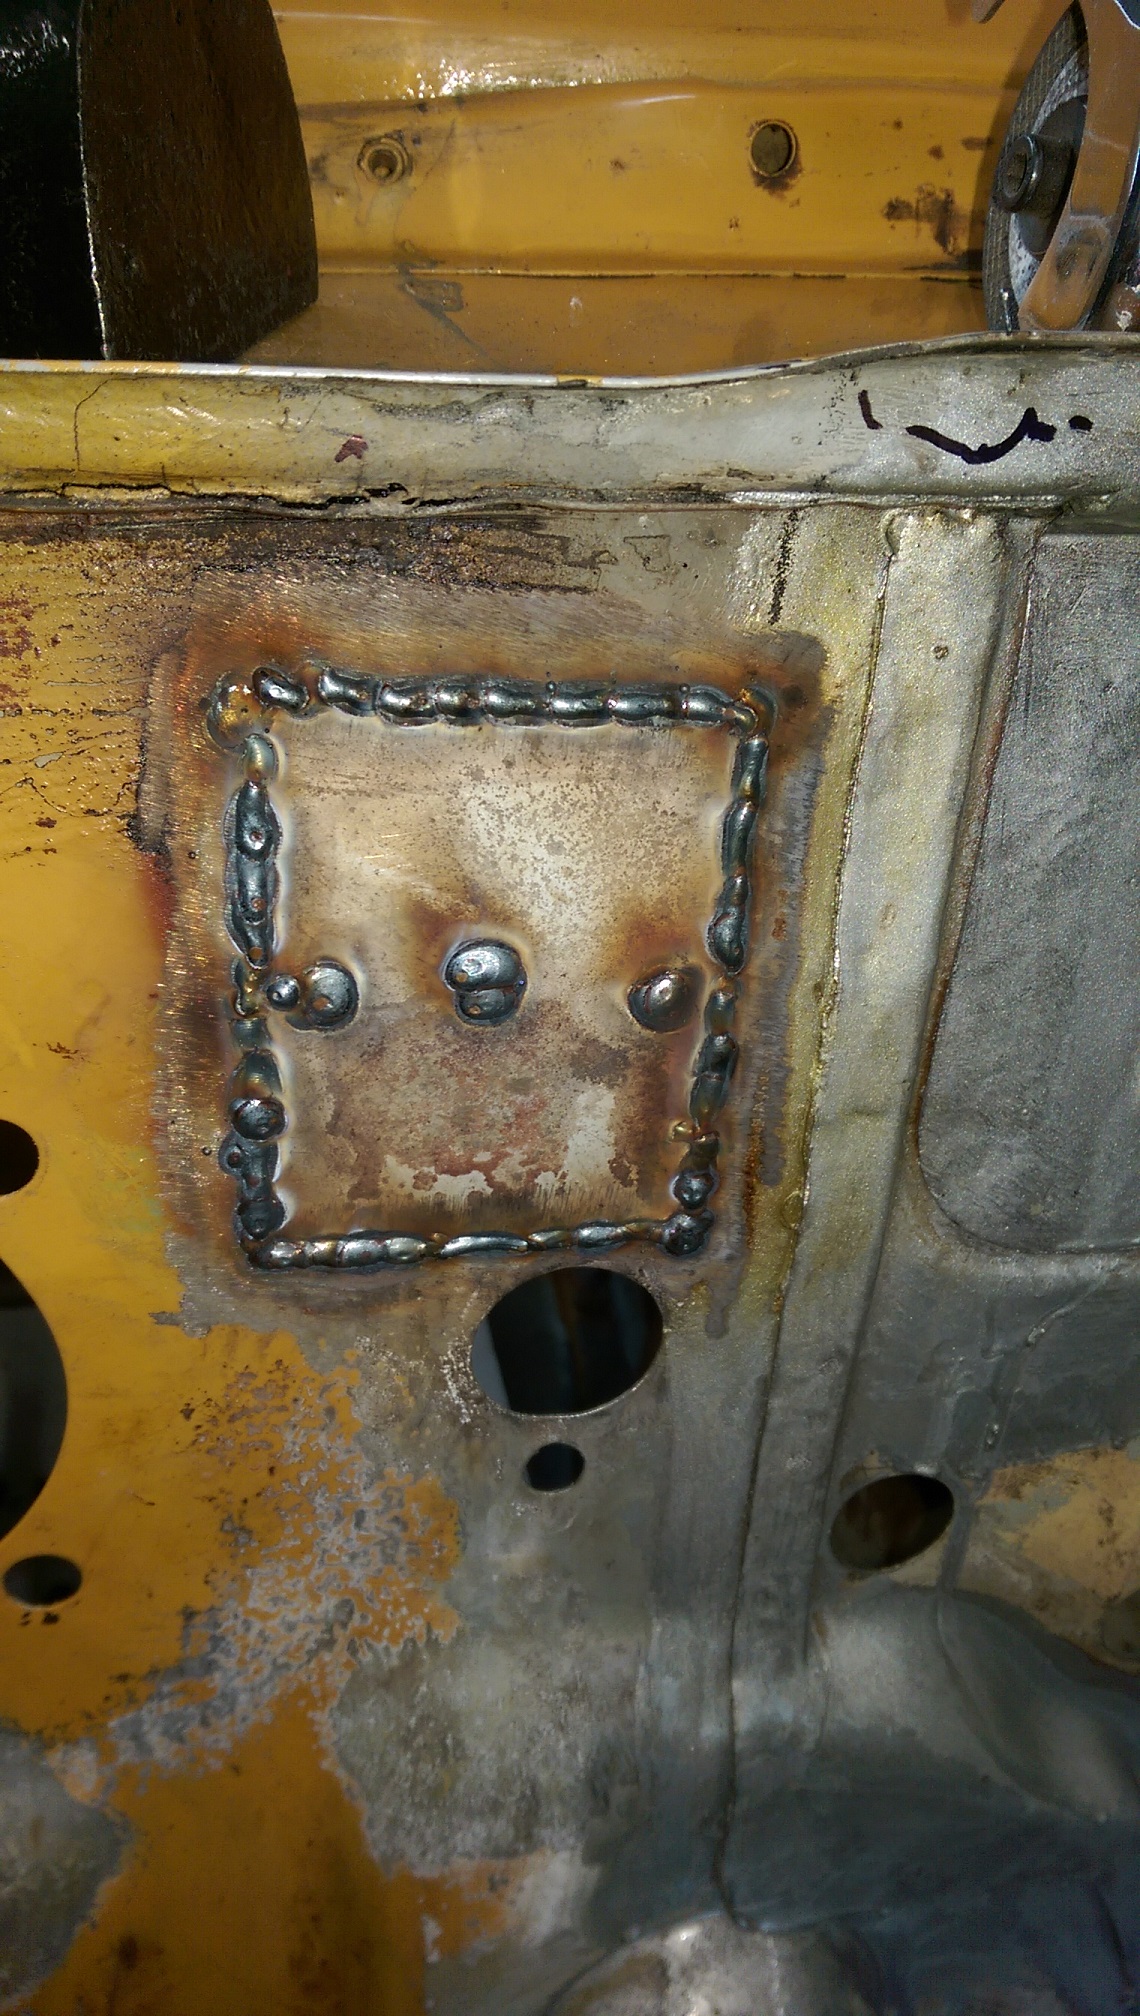
I finished welding and ground down the welds from my last post.
Then today I fixed that pitted bit.
I made the patch first, then marked and cut out the hole. Then trim trim trim trim trim trim bend trim bend. drill drill drill. bend.
Hot glued it in.
Grind grind..... grind grind grind grind grind grindgrindgrindgrindgrindgrindgrindgrind.... grind.
-
3
-
-
FAIL!
Left rear brake doing fuck all compared to right side.
Back home again.
Car up
Wheel off
Drum off.
Turn little adjusty wheel till I can only just get the drum back on.
Wheel on.
Handbrake off, can still turn wheels.
Handbrake one click on, cannot turn wheels.
Spose it's okay, I have no other way to test it.
Car down.
Back to VTNZ. I was lucky, both times there was no one in the queue before me.
PASS!!!!!
FINALLY!
At least it's not fucking raining today.
-
9
-
-
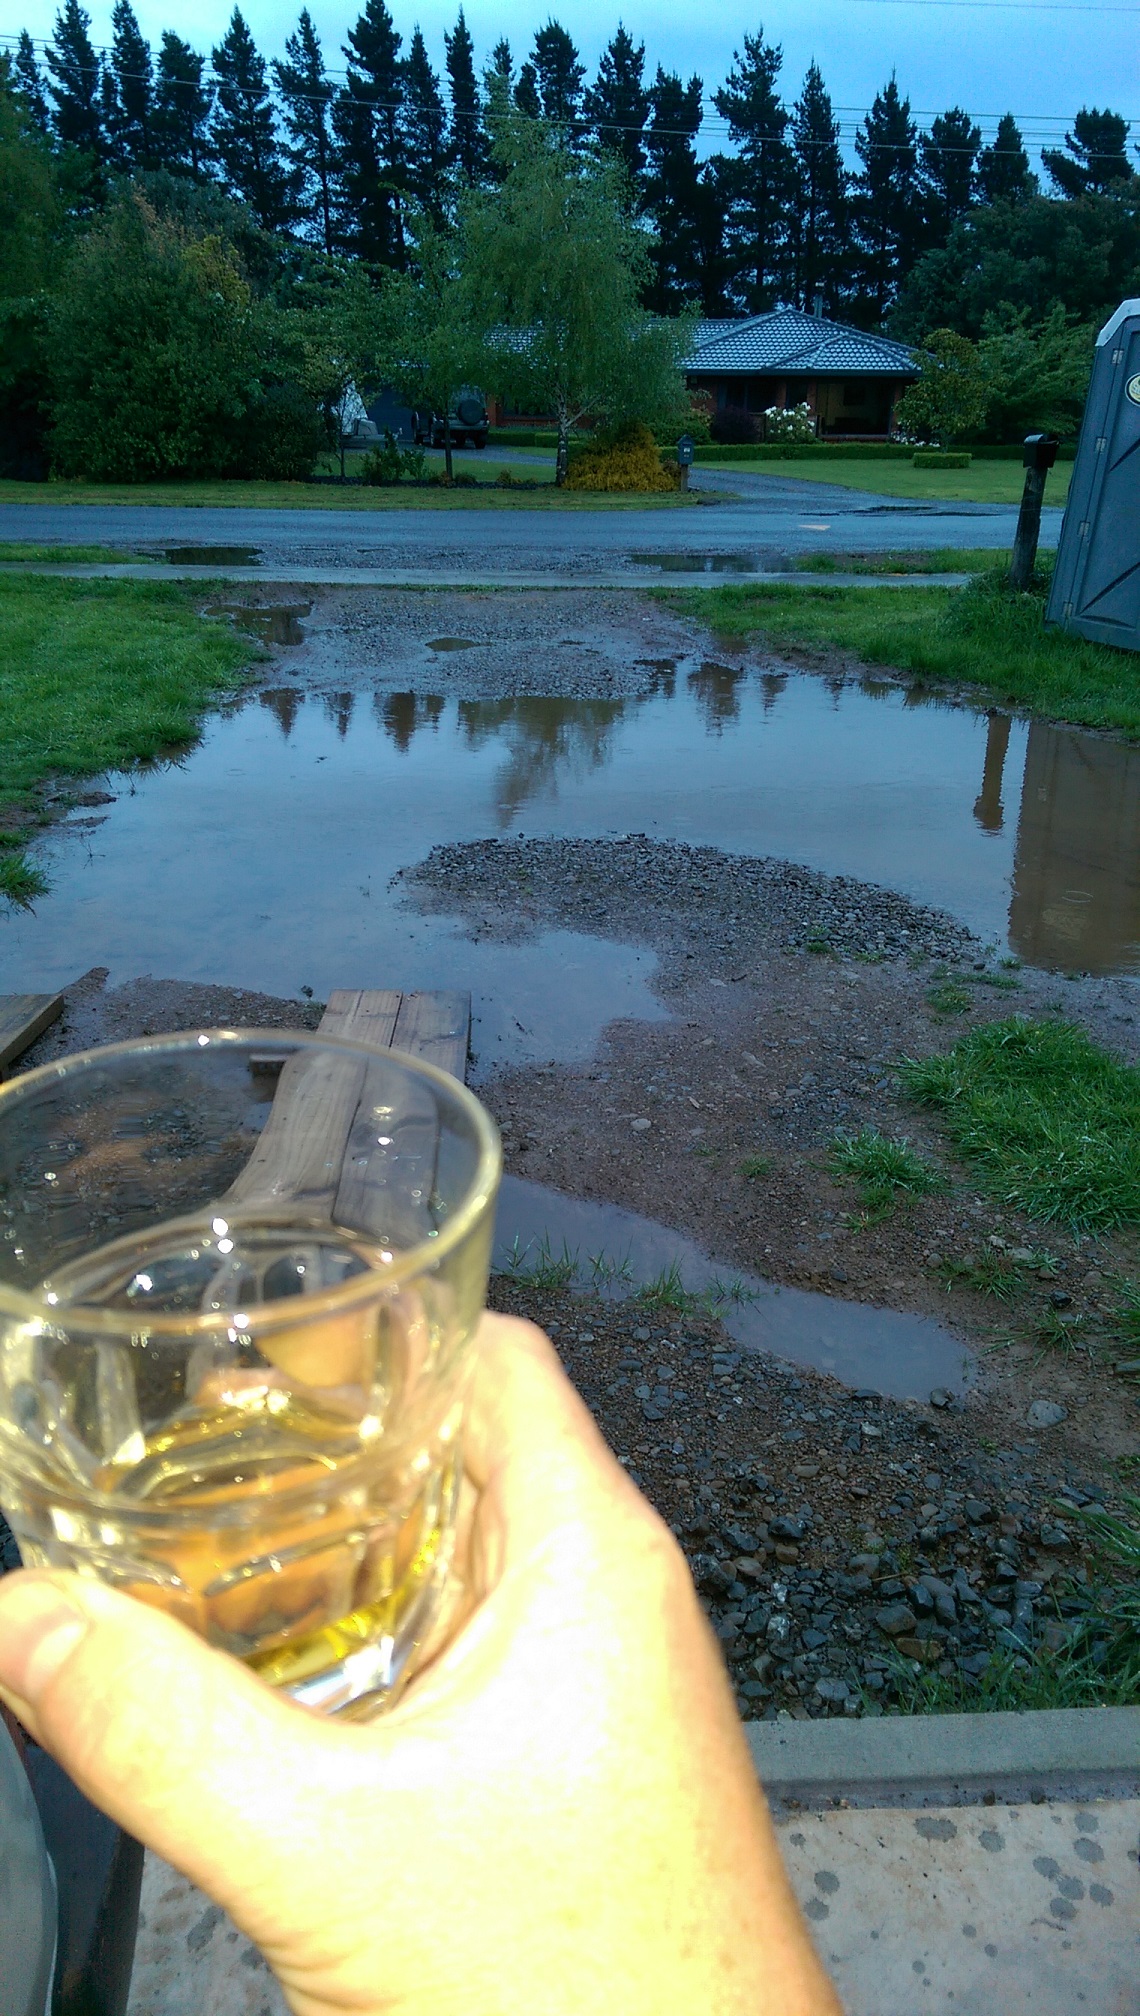
And for the "optics". Here is todays driveway lake. Photo brought to you by Balvenie Double wood. And a pictureographic of Pete and Barb's house.
It was the smallest it's been in agestes's on the weekedn but the rain of today and the day before yesteraven has reincreased its massivisity by the folds, many of them.
Is n't dinner finished cooking fet? Fuck!
-
2
-
-
So I went to see Greg first thing yesterday. He didn't have the right kit, but made up the seals I needed from stock he had on the shelf.
Rebuilt the Master cylinder.
Refitted to car.
Started bleeding the rear system. Discovered one of the big fittings was leaking. GAAAH! And I could not get the spanner on it because the reservoirs and the hardline are in the way. I had to remove the brake pipe from the fitting and use a socket to tighten it. Then bleed the rear system again.
No problems bleeding the front system.
Test drive, doesn't pull to the right anymore. Brakes seem fine to me....
Today. Rain Rain Rain Rain Rain Rain Rain. Welding the Triumph some.
14:00, fuckit I'll just just take it for a recheck in the rain. Even though the muddy mud lake that thinks it is my driveway is extra huge.
Fail AGAIN!
"Back brakes doing almost nothing"
Sigh.
Back home. Jacked up rear of car.
Removed wheels.
Pulled off drums.
Managed to remove a wheel cylinder without removing BASTARD springs. Winning.
Wheel cylinder corroded solid. Doh.
Remembered I had the PBR part number written down in the Starlet's little red book of parts origin.
16:00 call Supercheap. "I have a PBR part number for a wheel cylinder..." "what's the rego?". sigh. But he did remind me we have a local BNT.
16:05 Call BNT. "I have a PBR part number" "We have two of those on the shelf".
Zoom zoom to BNT and get my wheel cylinders.
17:30 New cylinders fitted. Drums on. Bled. Wheels back on. Car down. STOP!
Guess what I'm doing tomorrow....
Fuck I hope hope he still doesn't decide my brake booster isn't boosty enough.
-
2
-
-
So I removed the drums. The right one was a bit tight, left one was how I expect it to be with the handbrake off.
Press brake pedal.... nothing happens at the rear. Well.... shit. Pulled the master cylinder off. Had some crusty brown shit where it fits into the servo.
First piston came out with some thrusting. I had to use compressed air to get the second one out. There was a little bit of crunchy stuff that came out.
I cleaned it up with some wetndry wrapped around a socket extension in the drill.
I'll take it to MP Autoparts tomorrow and see if Greg can find me a kit for it. I think it's off a early 80's corona....
Hopefully nothing else needs rebuilding. I suspect I have never rebuild the master cylinder. Pretty sure I have done the front calipers.
-
Parked up for almost a year, reg on hold.
Went for a wof cause I have the week off.
FAIL!
Brakes are all over the place making it pull to the right. Handbrake doing sfa on the left side. Foot brake doing sfa at the rear and left front.
Of course I got waved down by the police man who was hanging out on the road that everyone speeds down, 2 minutes from my house. Probably because my car looks like shit. He was okay, I opened with "Hi, I've JUST failed my wof and I'm on the way back home". I showed him the wof sheet and he checked my licence and sent me on my way.
I'll pull the rear drums off and see if they are rusty and the cylinders still move. And check the front pistons are not stuck. Then I guess I'll try bleed them and go for a test drive.
-
1
-
-
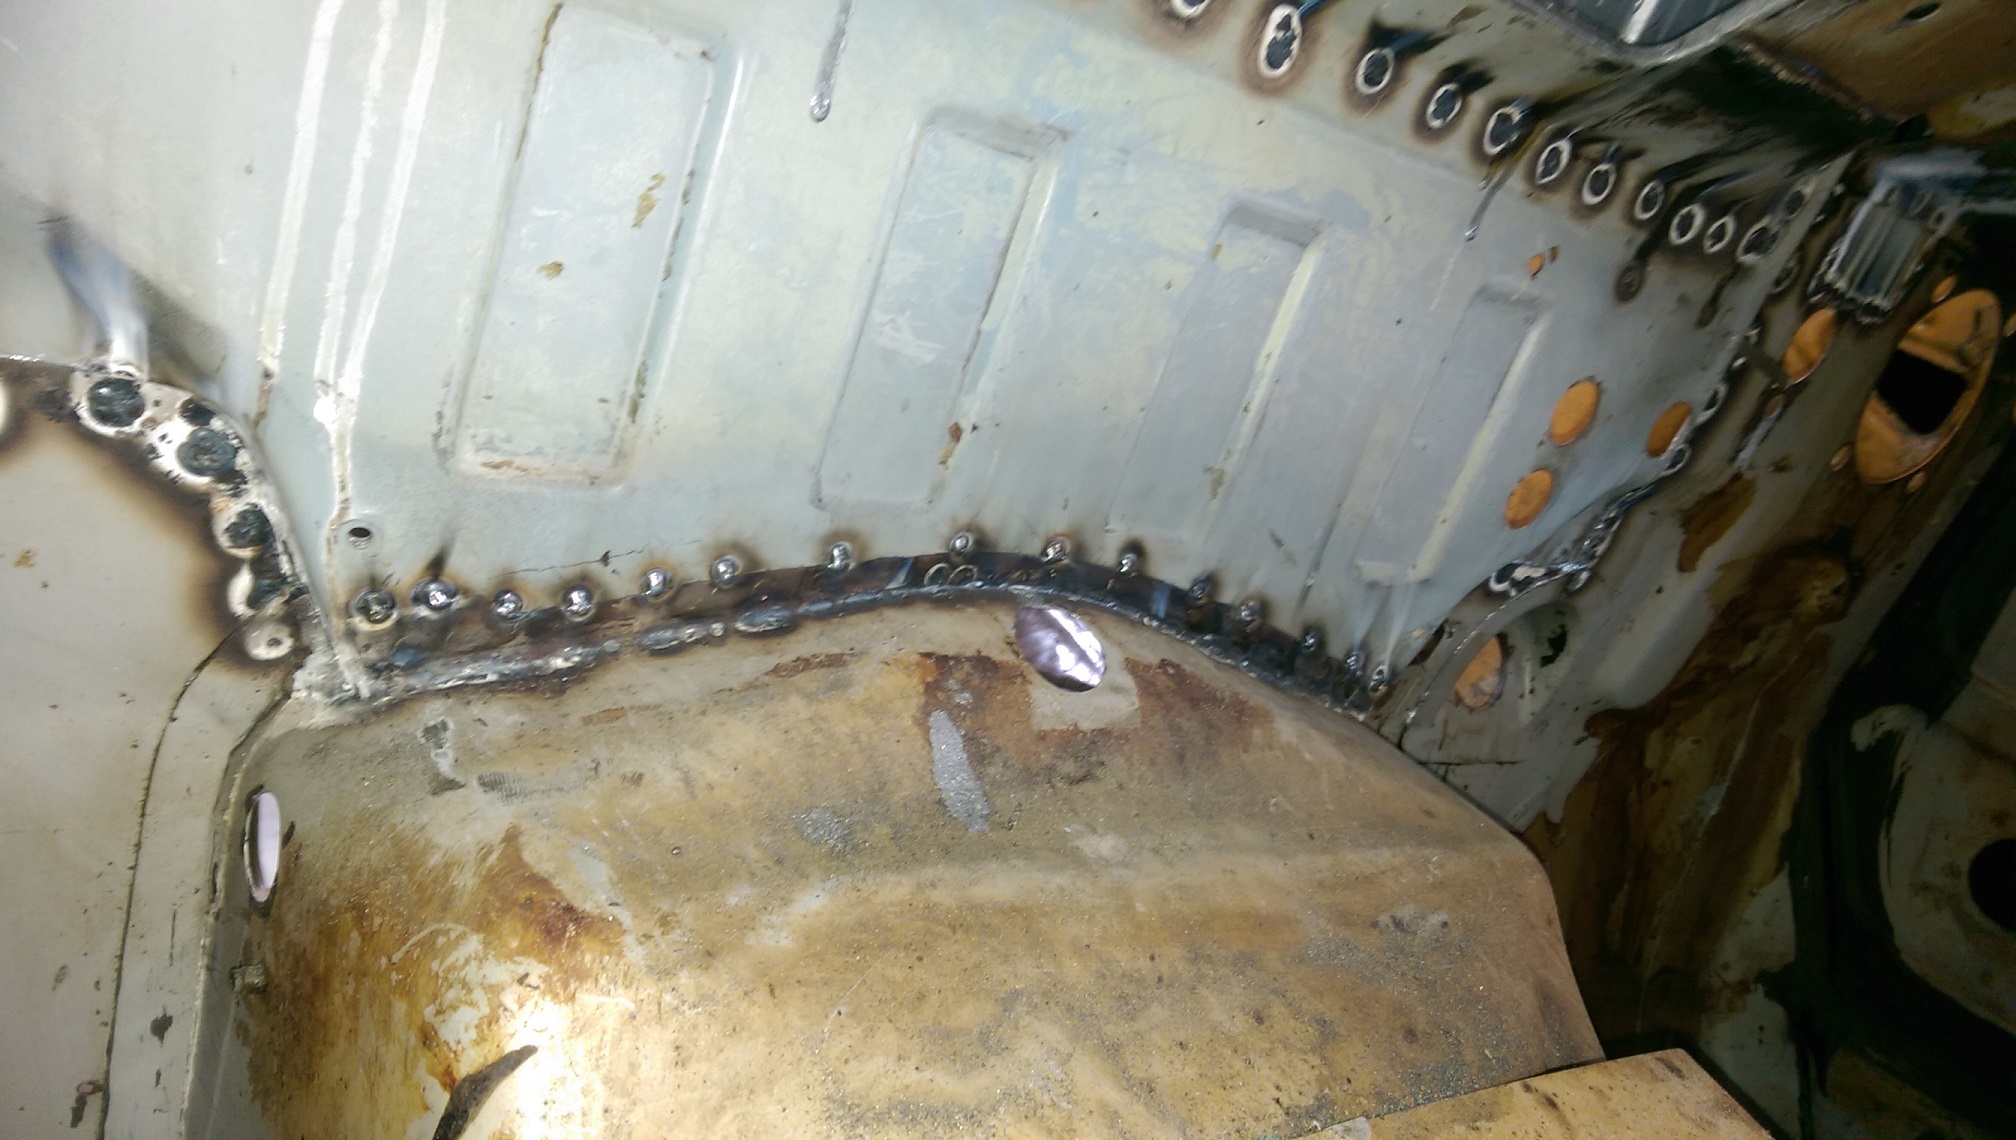
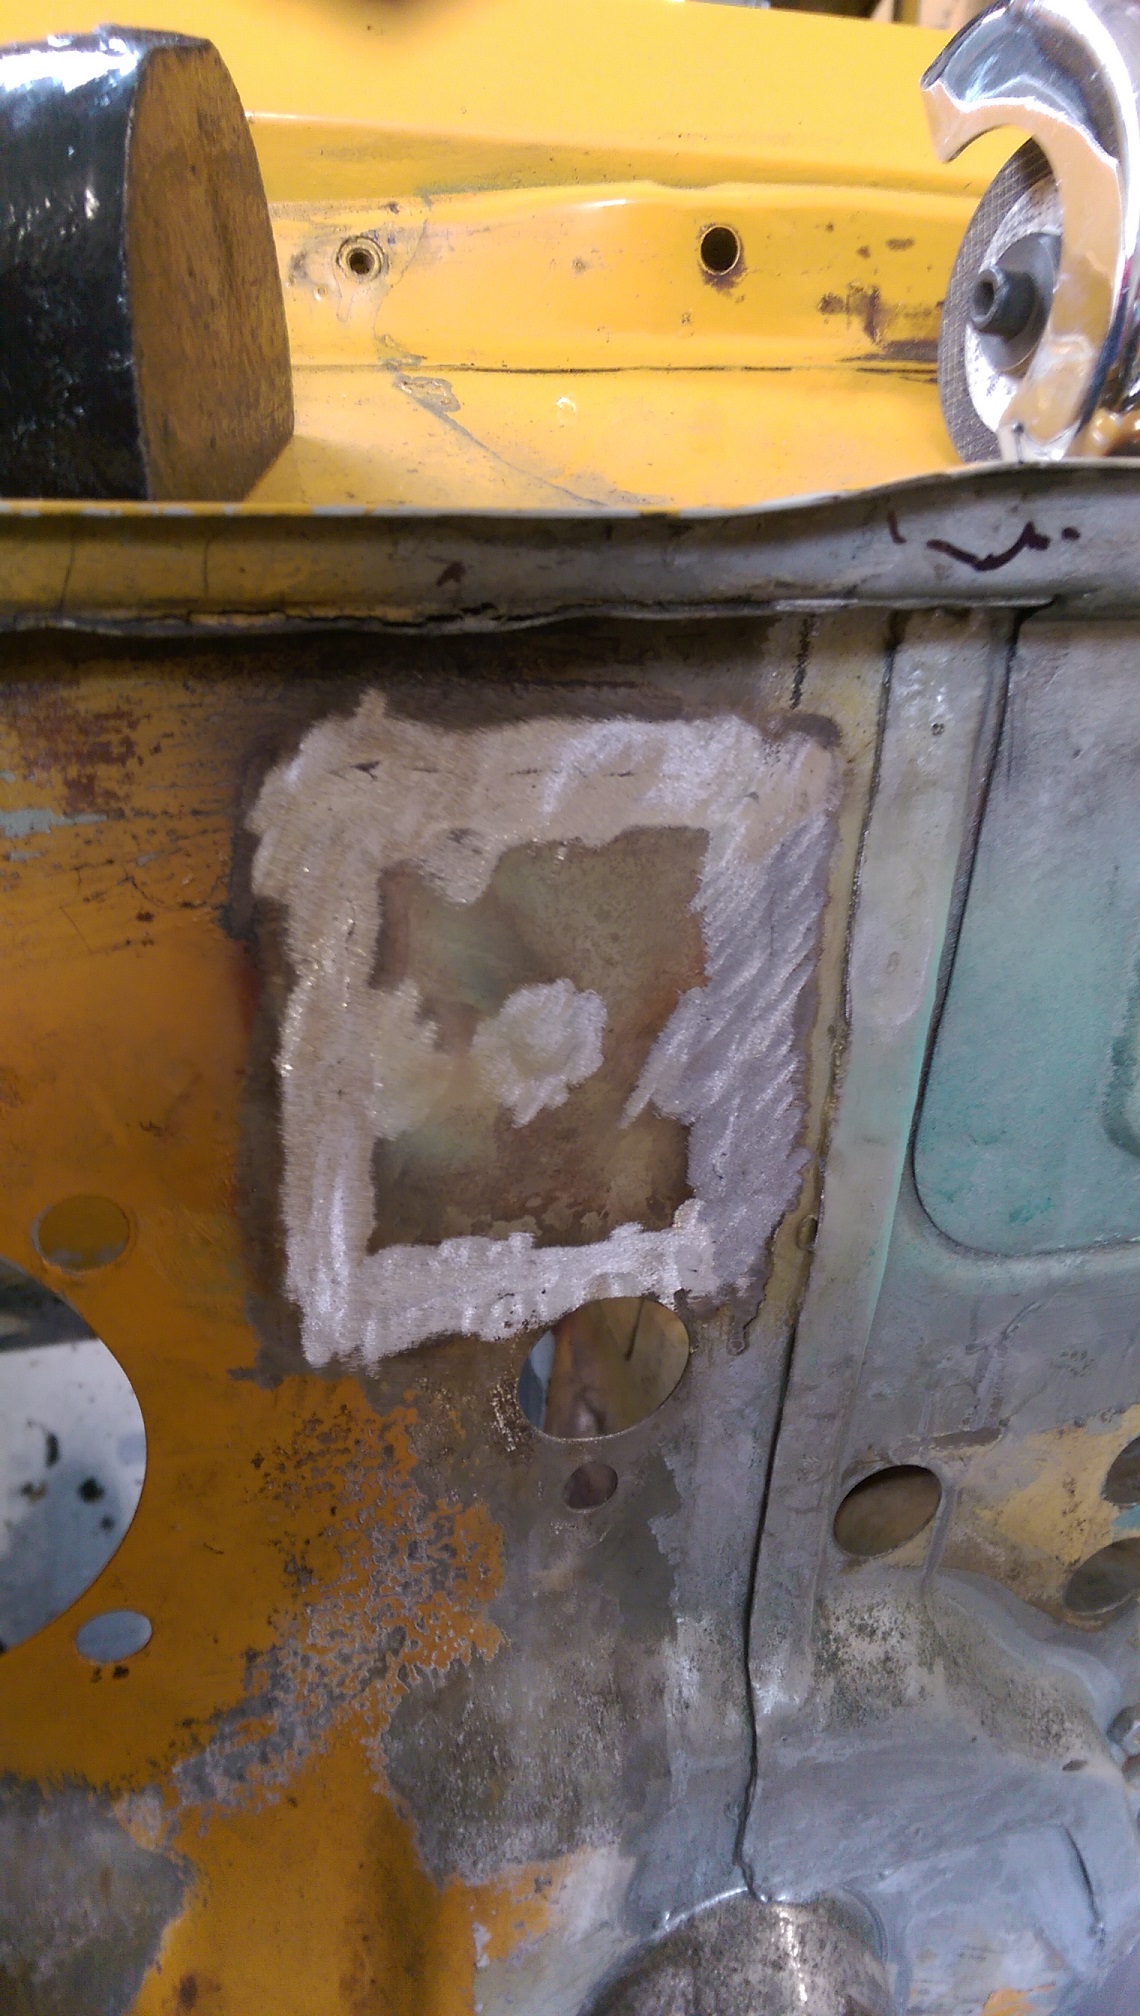
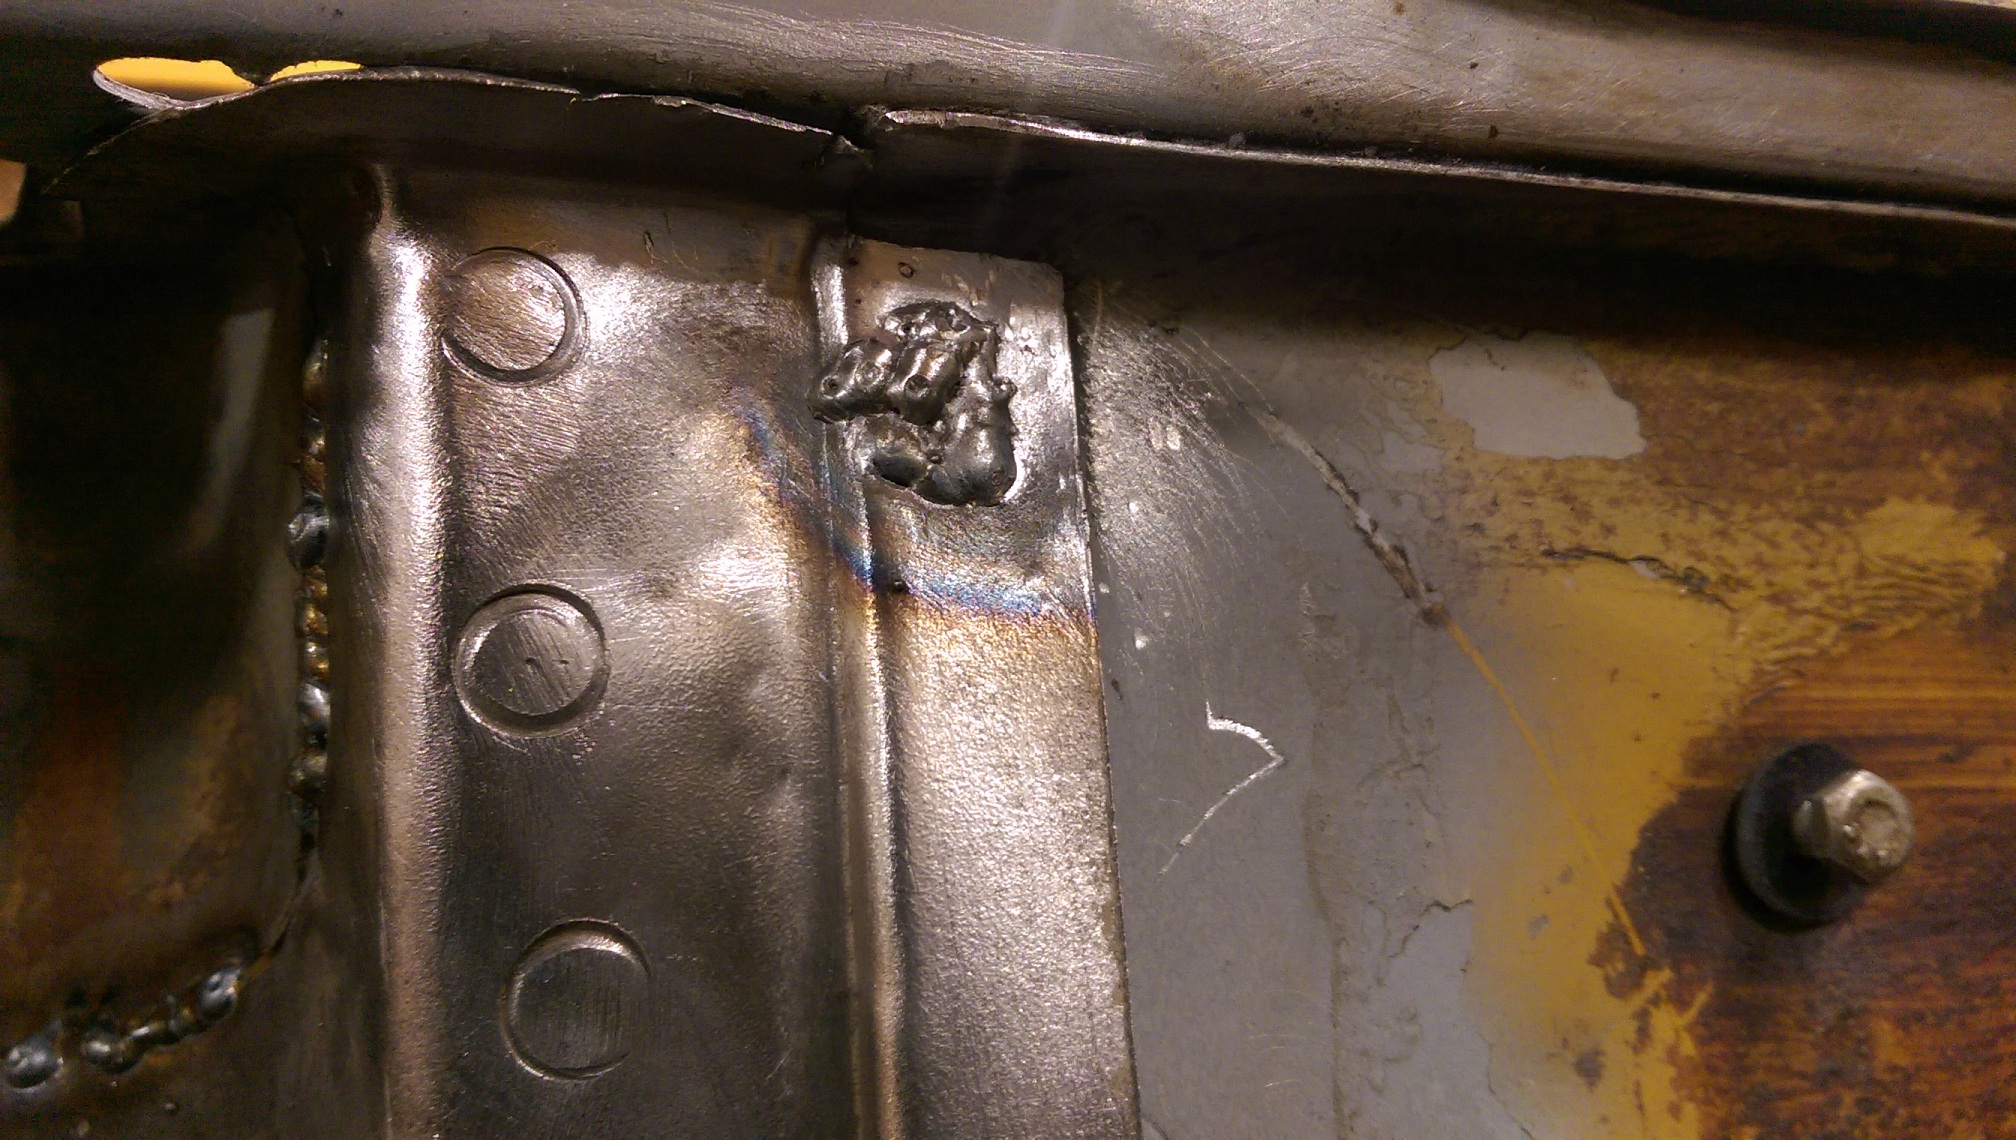
Did some metal gluing yesterday.
This panel was a bit of a bitch. The top profile curve was off by about 10mm in the middle. After extensive bashing, by flattening out a bend and more bashing, I managed to get the top flange closer to the top panel. It didn't sit flush though, so I seam welded the front edge and I'll have to fill up the spot weld holes with weld from the top.
I painted all of the inside of the area with some silver por15 that I had. Then marked where the welds were going and removed the por15 from those spots. Once I've finished welding the holes at the top and ground down the welds, I'm going to do my best to flood the seams with more por15. I'll also be seam sealing the whole engine bay later. Triumph were not really into seam sealer at all.
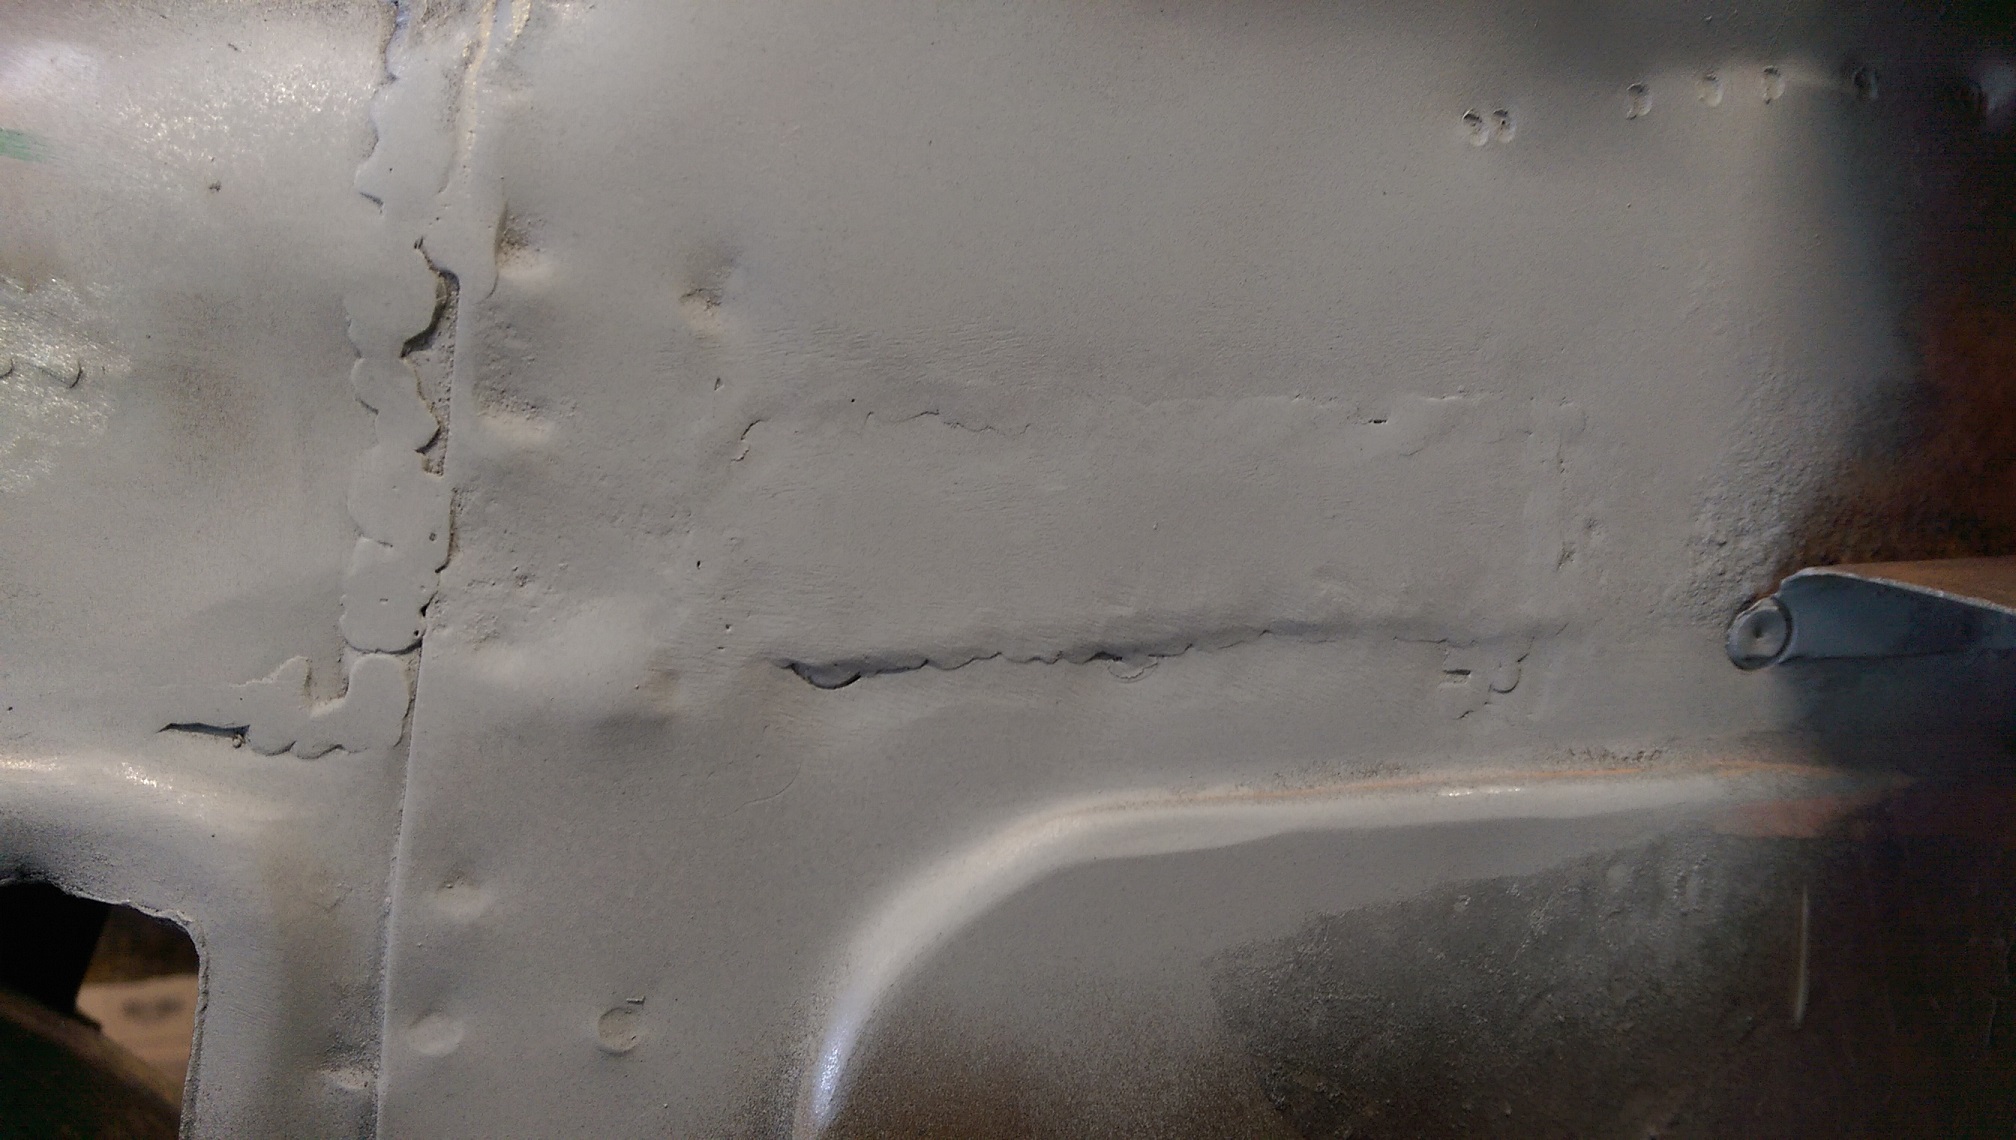
A bit pitted here! I think I'll have to cut that spot out.
-
3
-
-
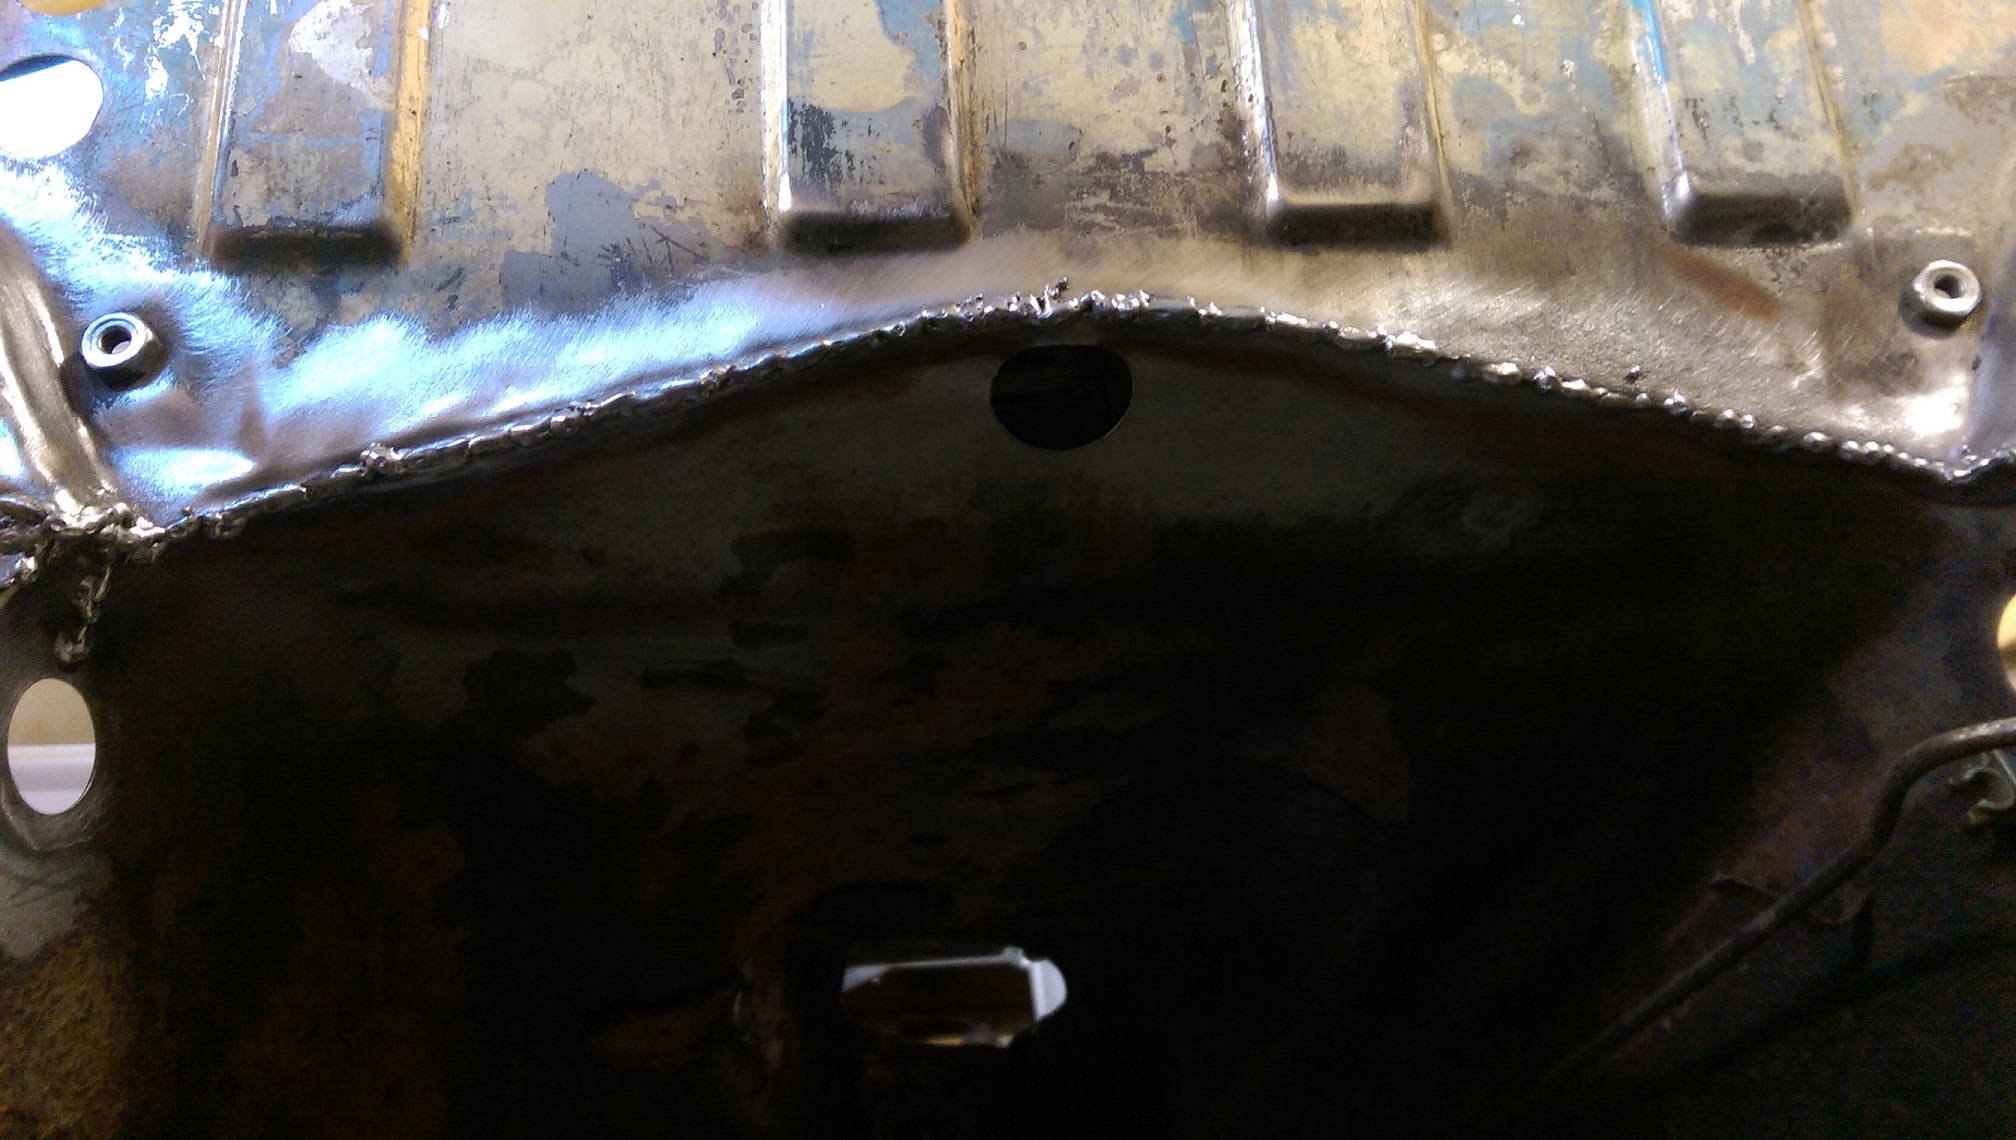
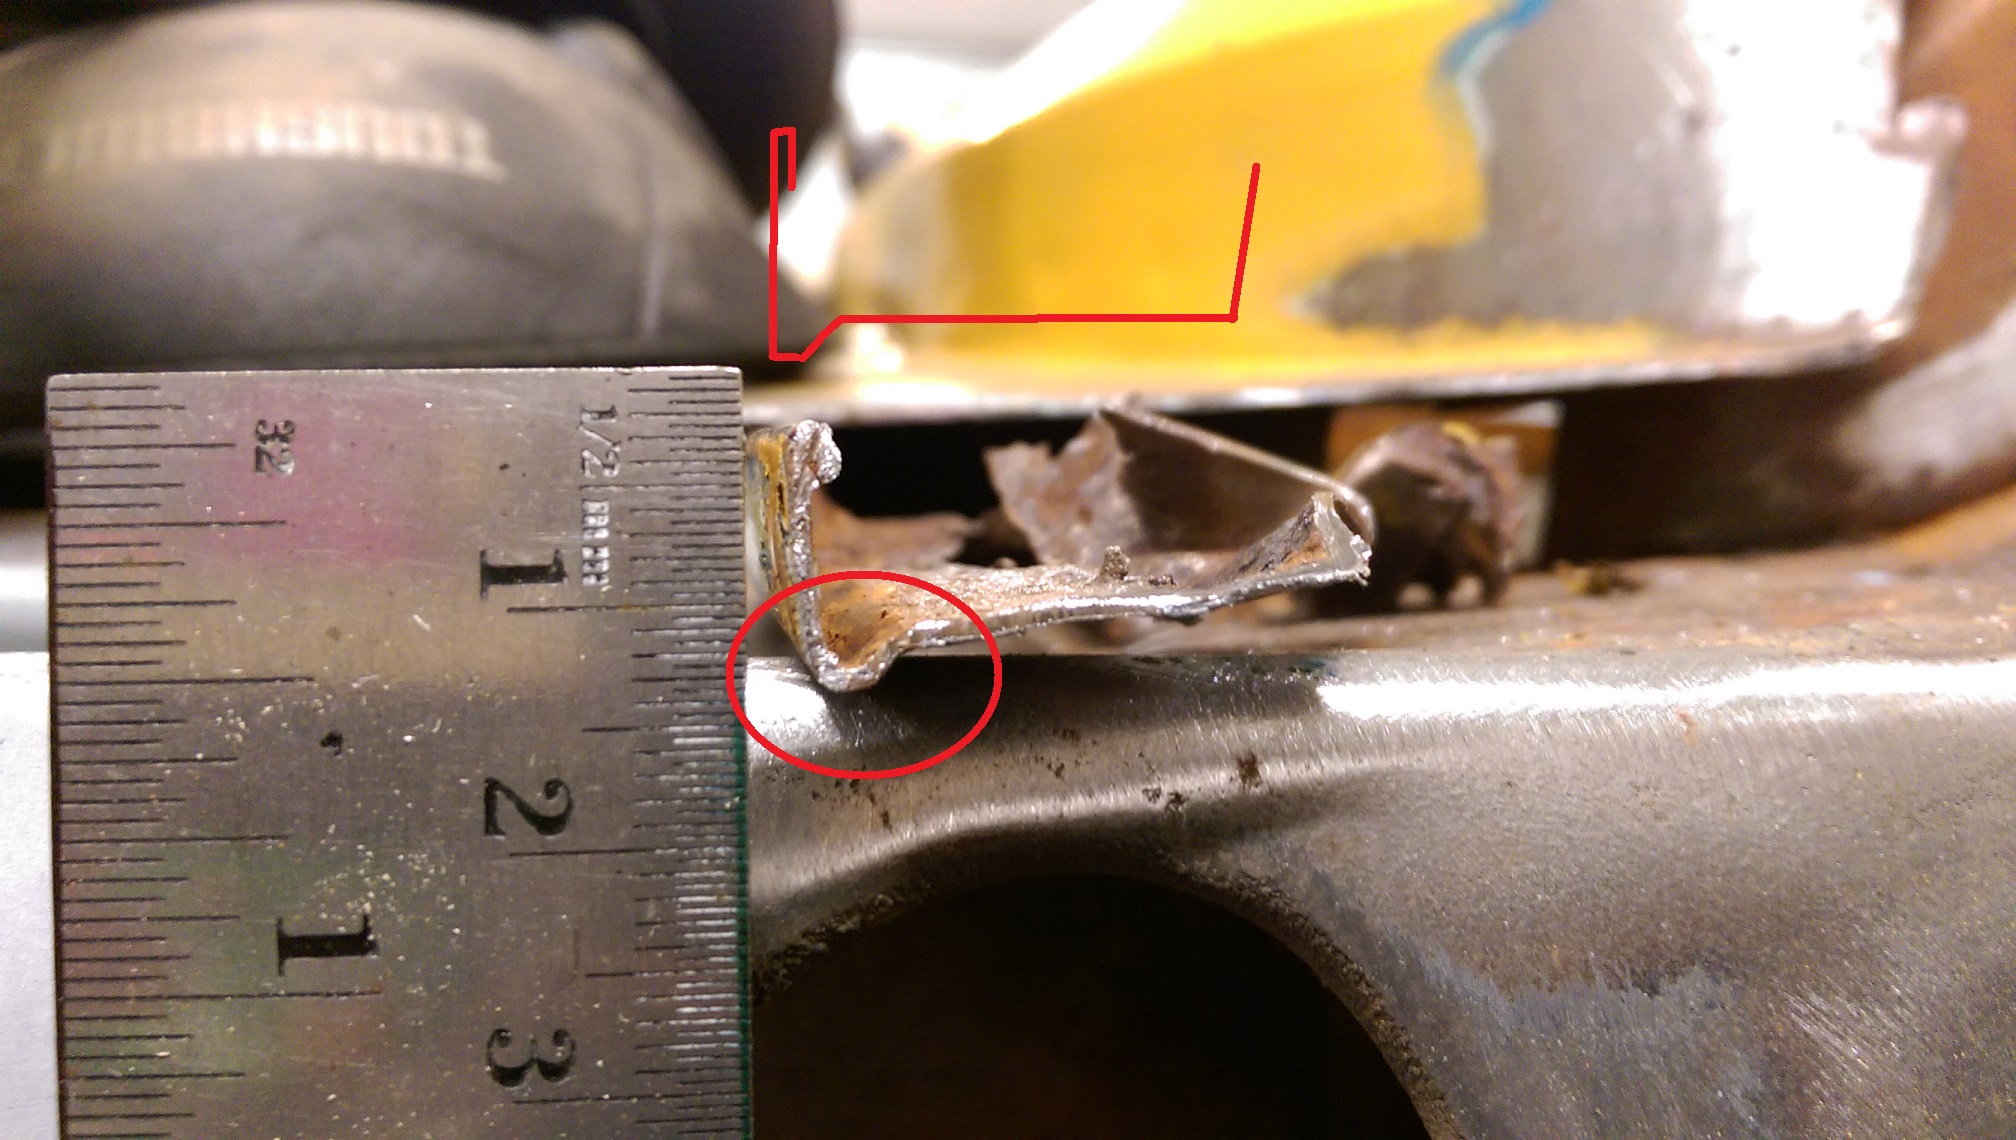
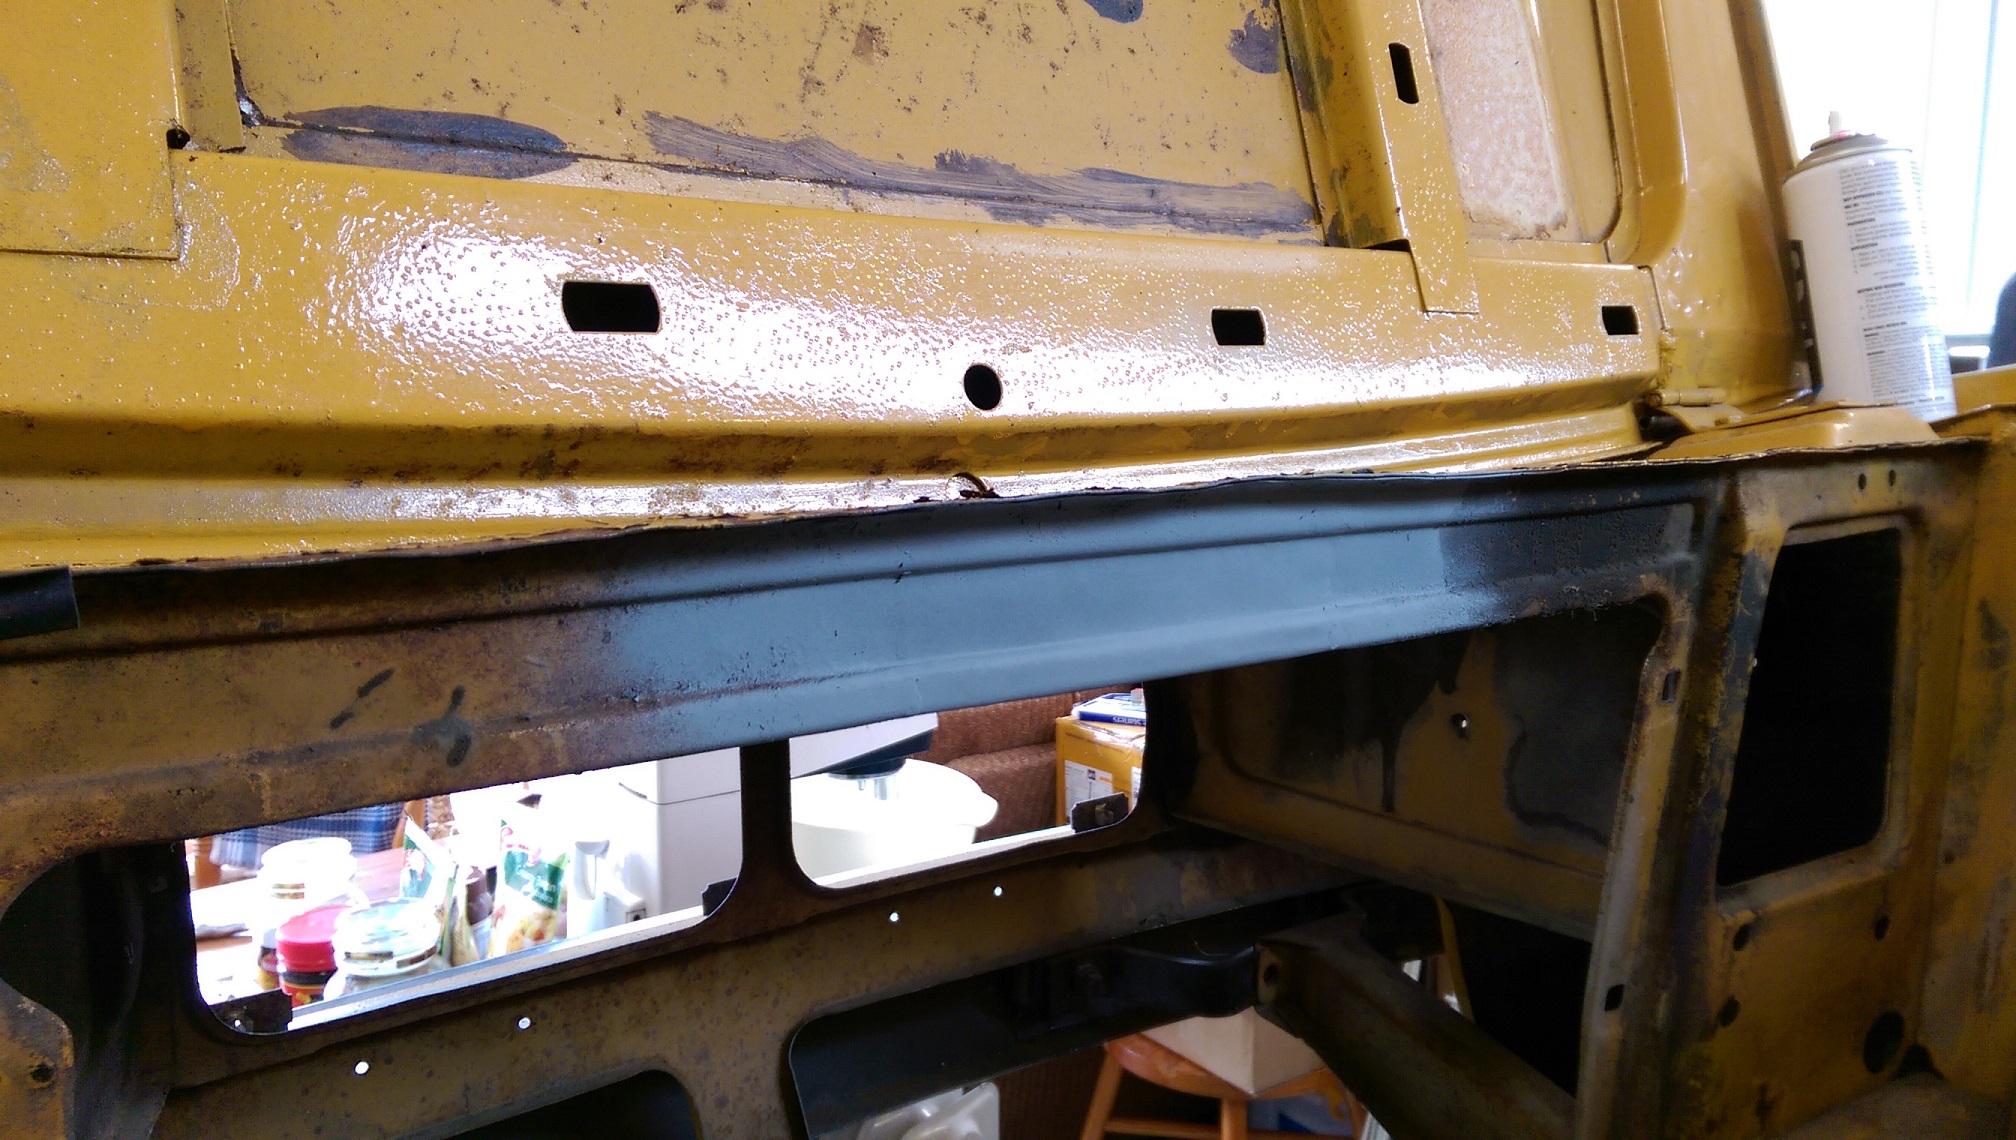
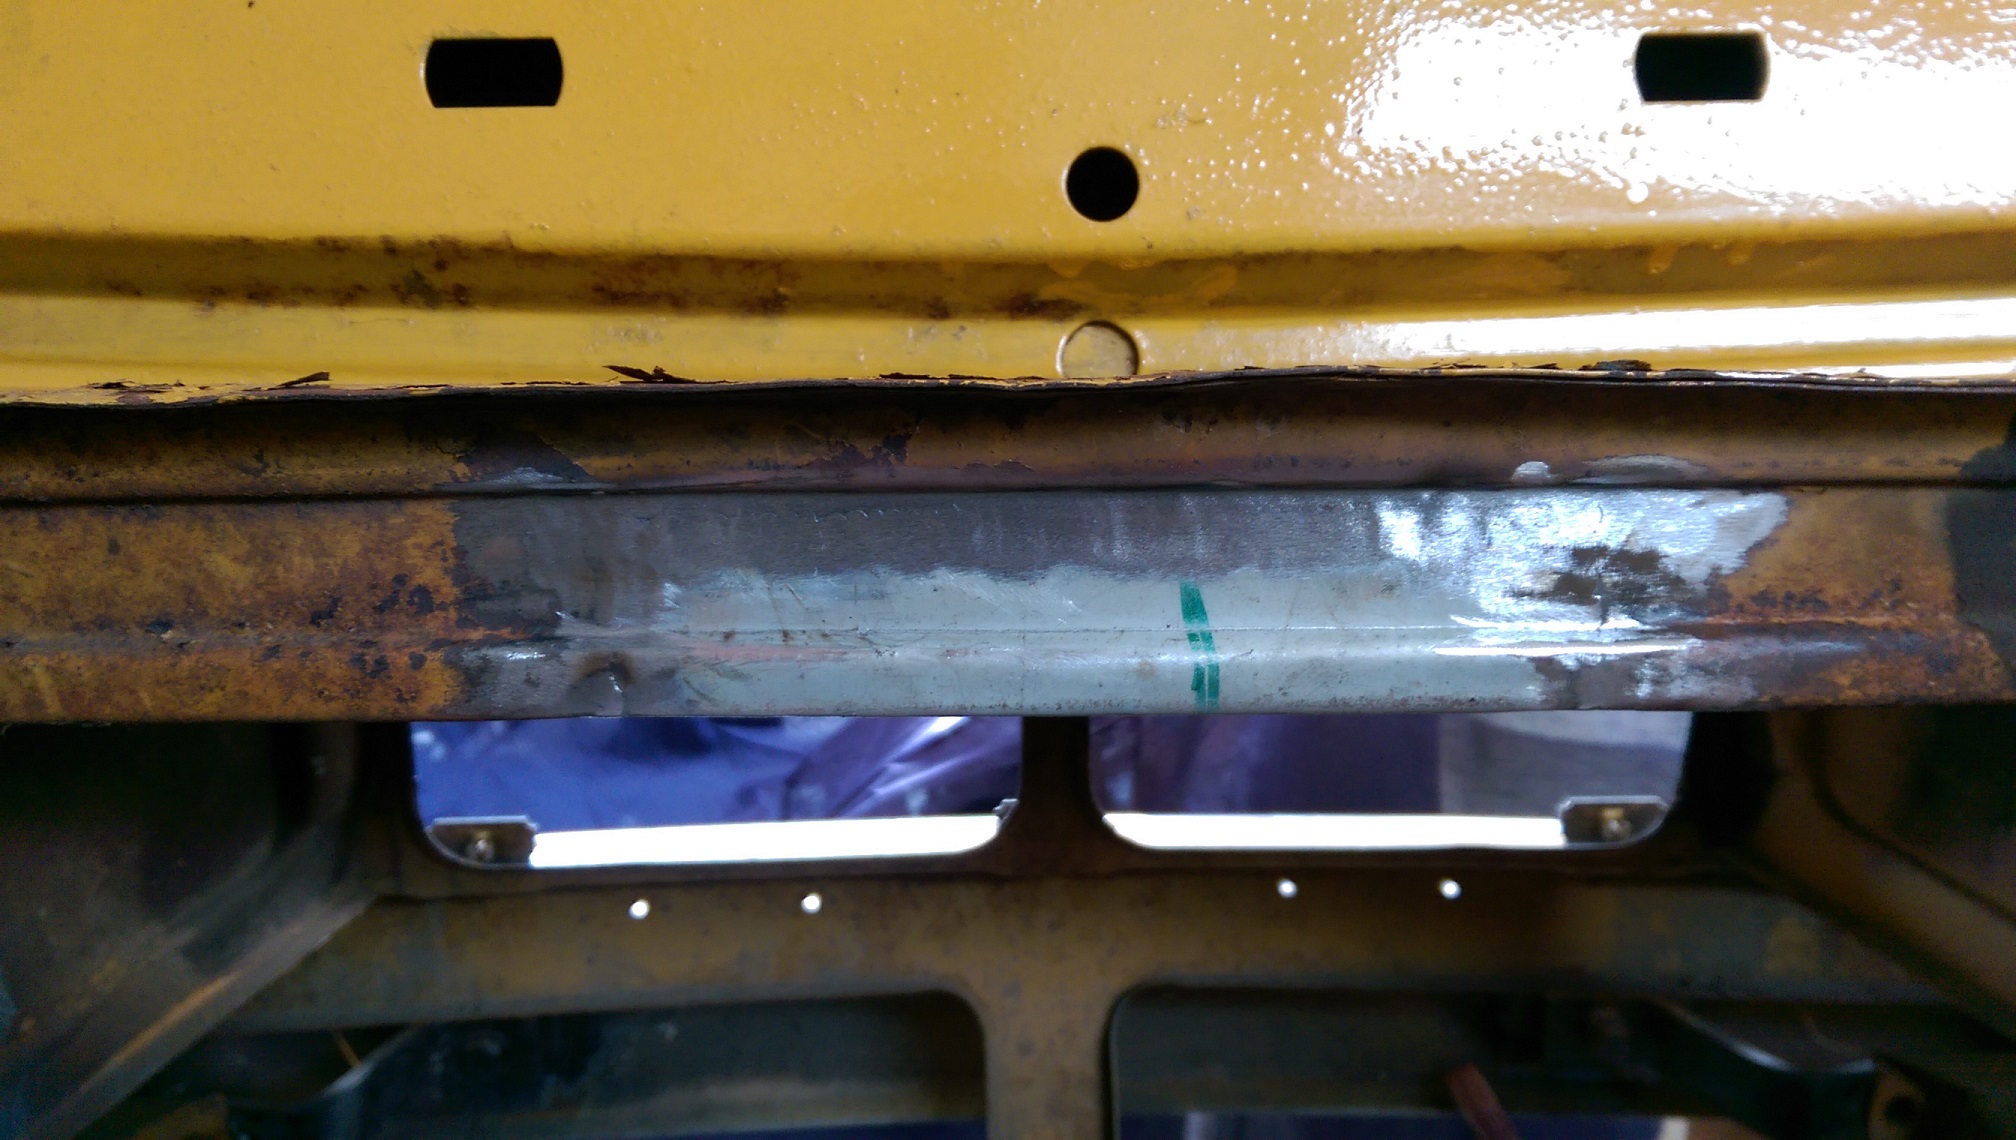
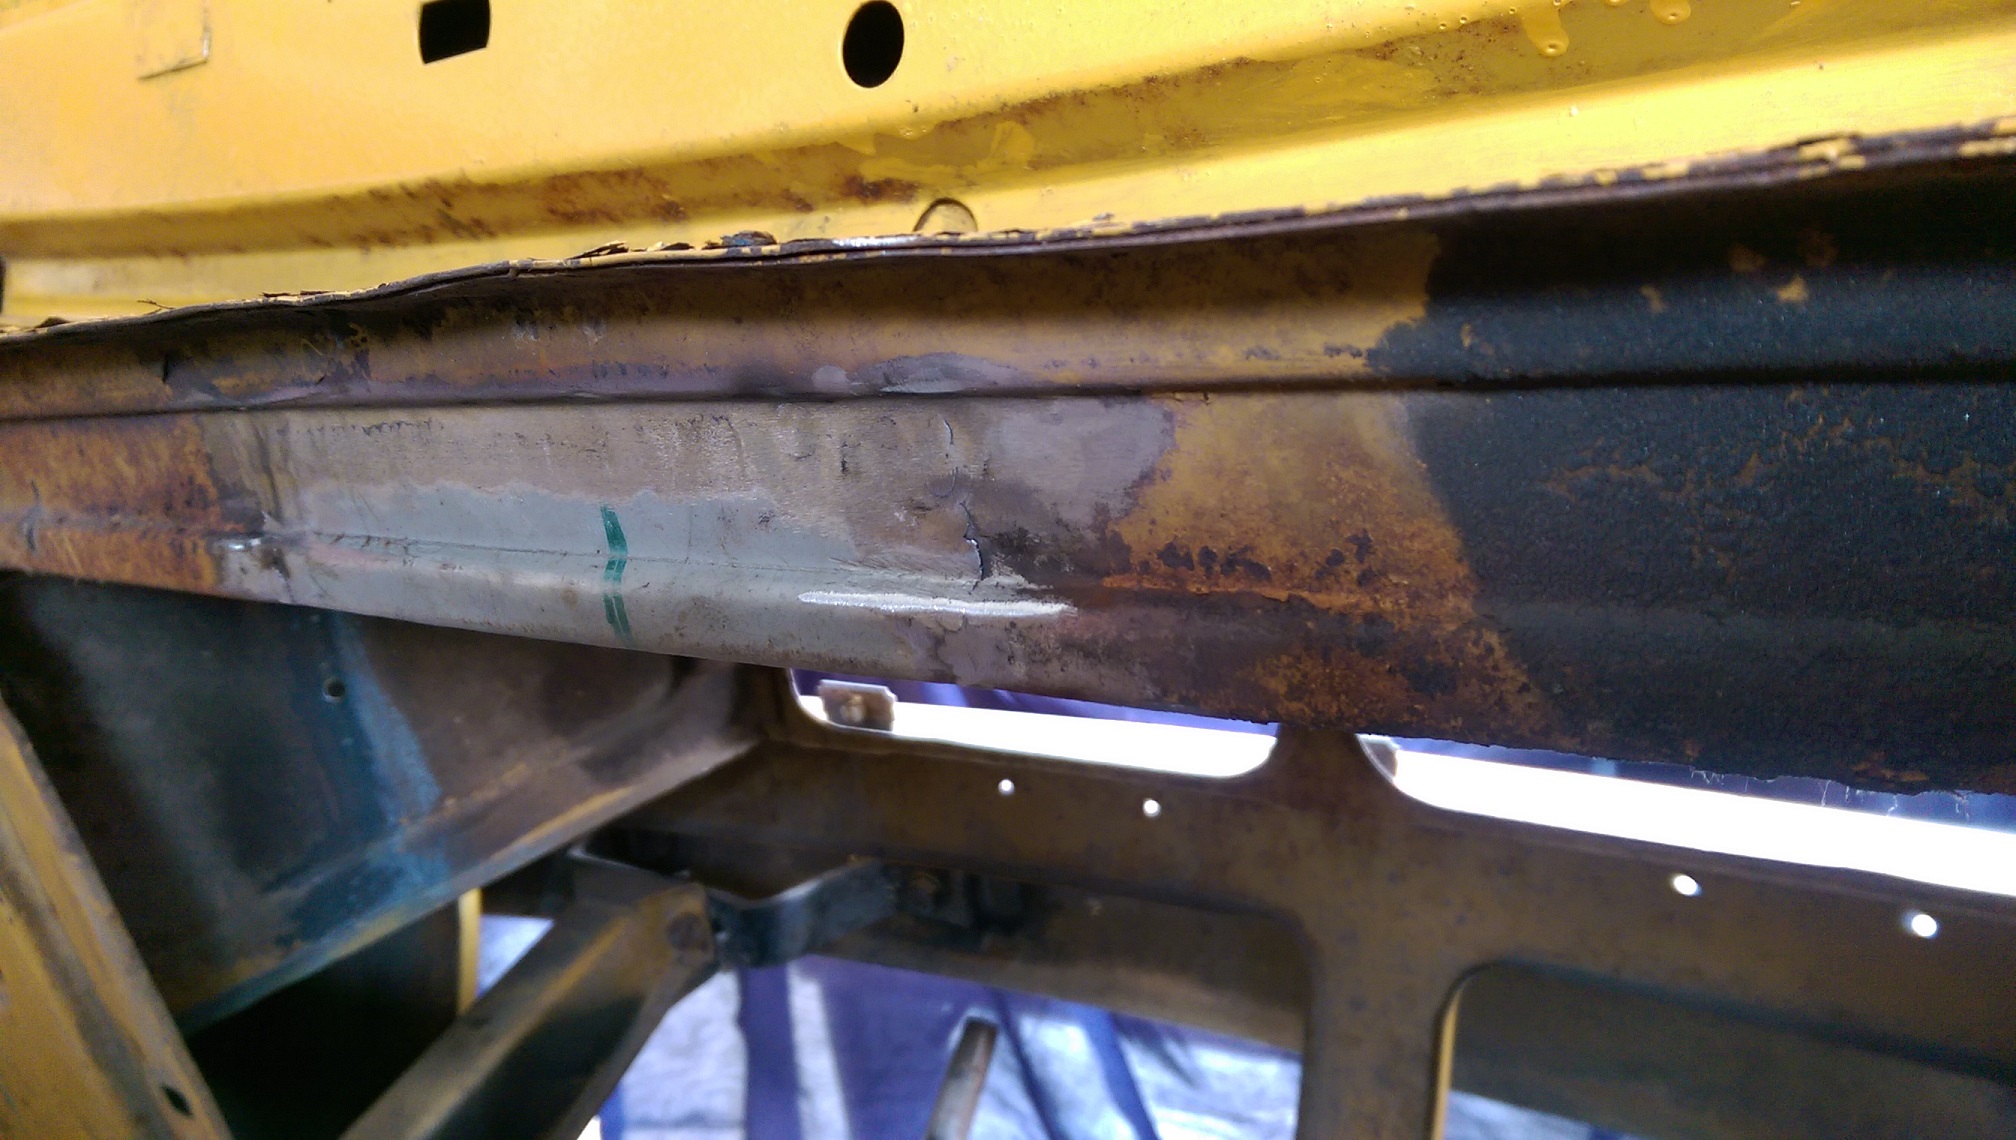
Do these things have a purpose? There is one on the other side too. Something to do with assembly maybe??
-
Showed a borrowed S13 rear subframe the the undergarments of my triumph. It looks feasible... I used the diff output flanges as my reference point. The rear mounts on the car just need to be moved back 30mm, shortened and moved further apart, don't even need to cut into the box section the existing mounts are attached to. And make a couple of 'scallops' into the boot floor to clear the rear mounts on the subframe. The front mounts are actually about 50mm lower than the floor, so the floor/sill/inner guard would need some reinforcing and mounts built down to the subframe.
Here's a shit picture. The subframe would be 110mm higher than this photo. There is a bracket there preventing me from moving it higher, and I ran out of blocks of wood to stack on the jack. I've drawn in the mount, it would actually be partly in the boot to get it back far enough. Those dashed lines are where I would make a scallop thing into the boot space.
Aaaaaand I need to narrow the subframe 200mm, and make custom driveshafts, like @sheepers did.
But, first. keep fixing the rust. sigh.
-
2
-
-
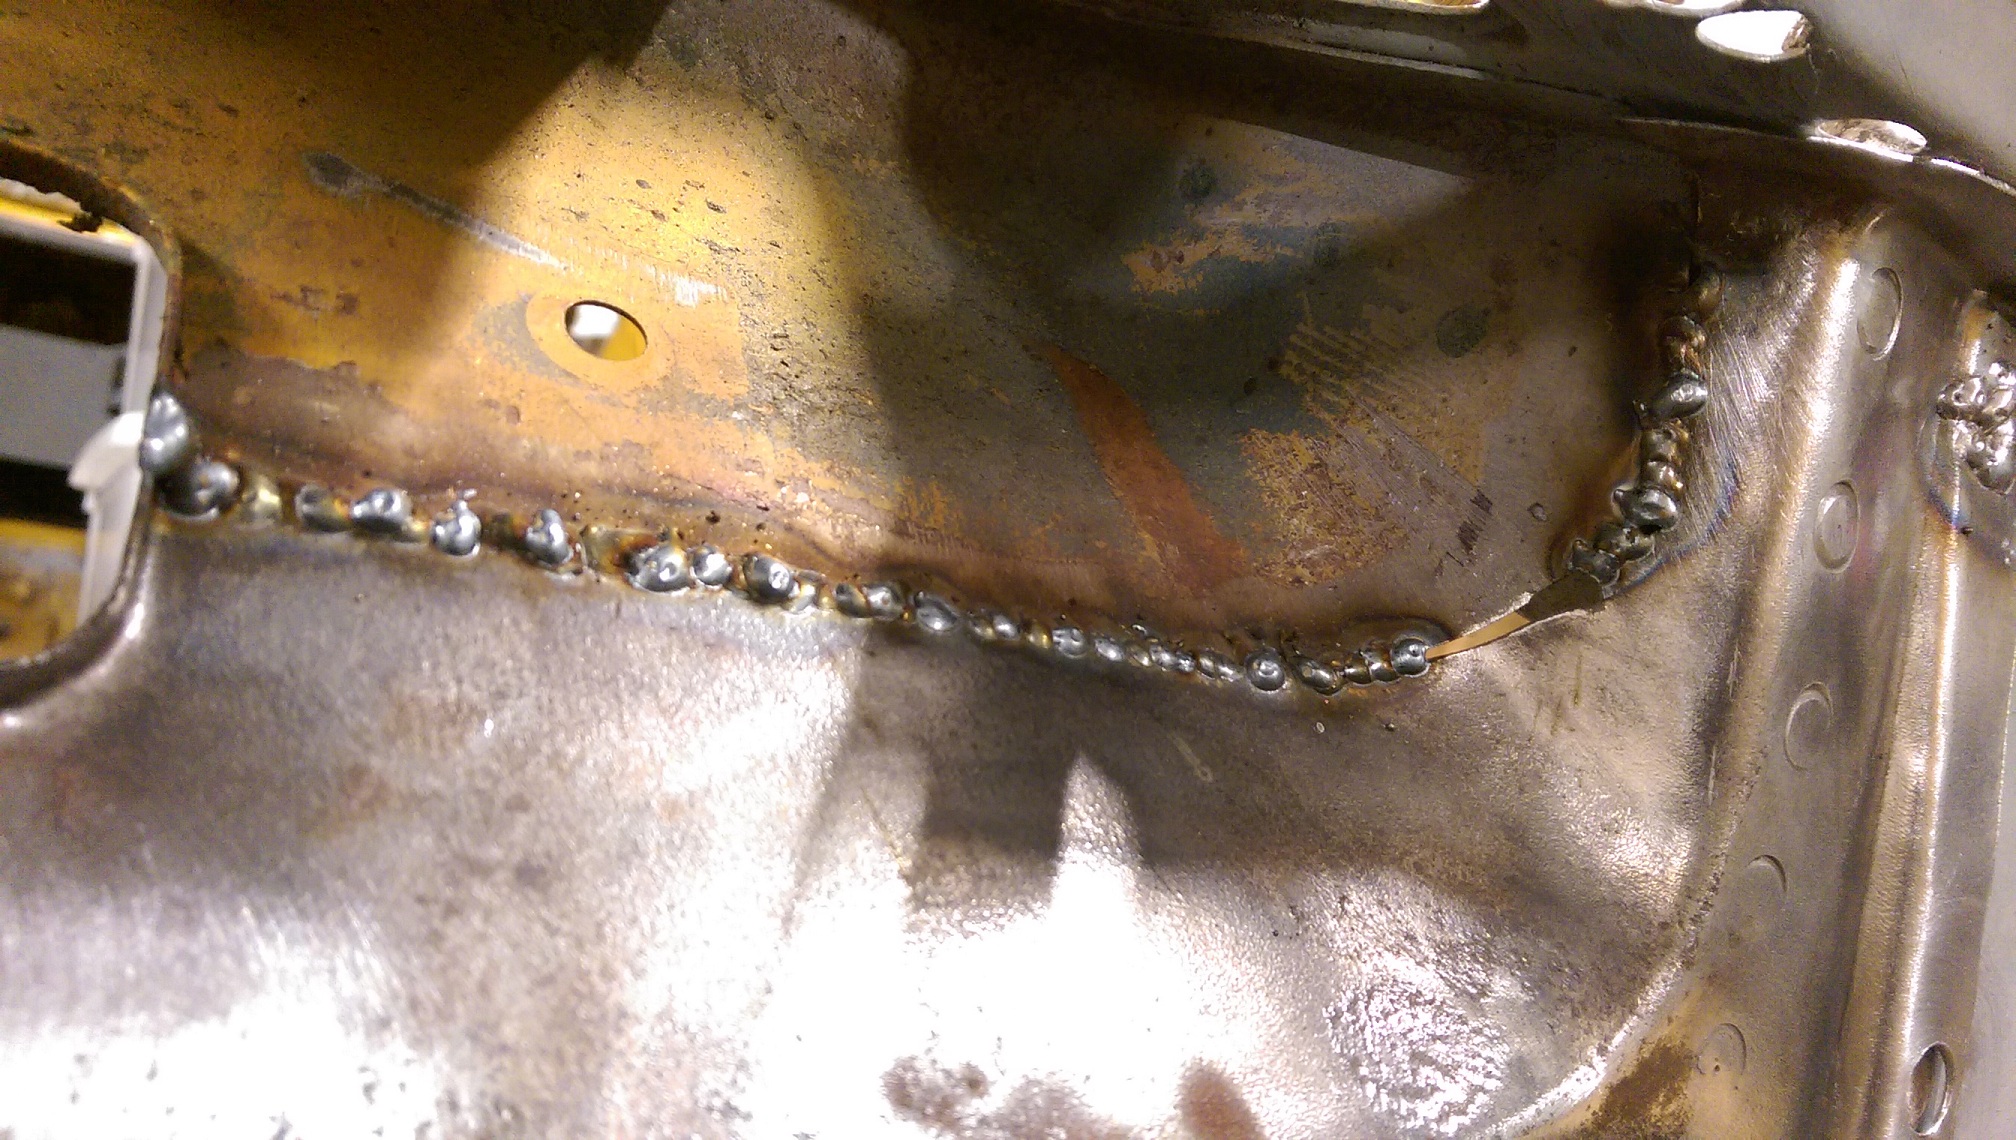
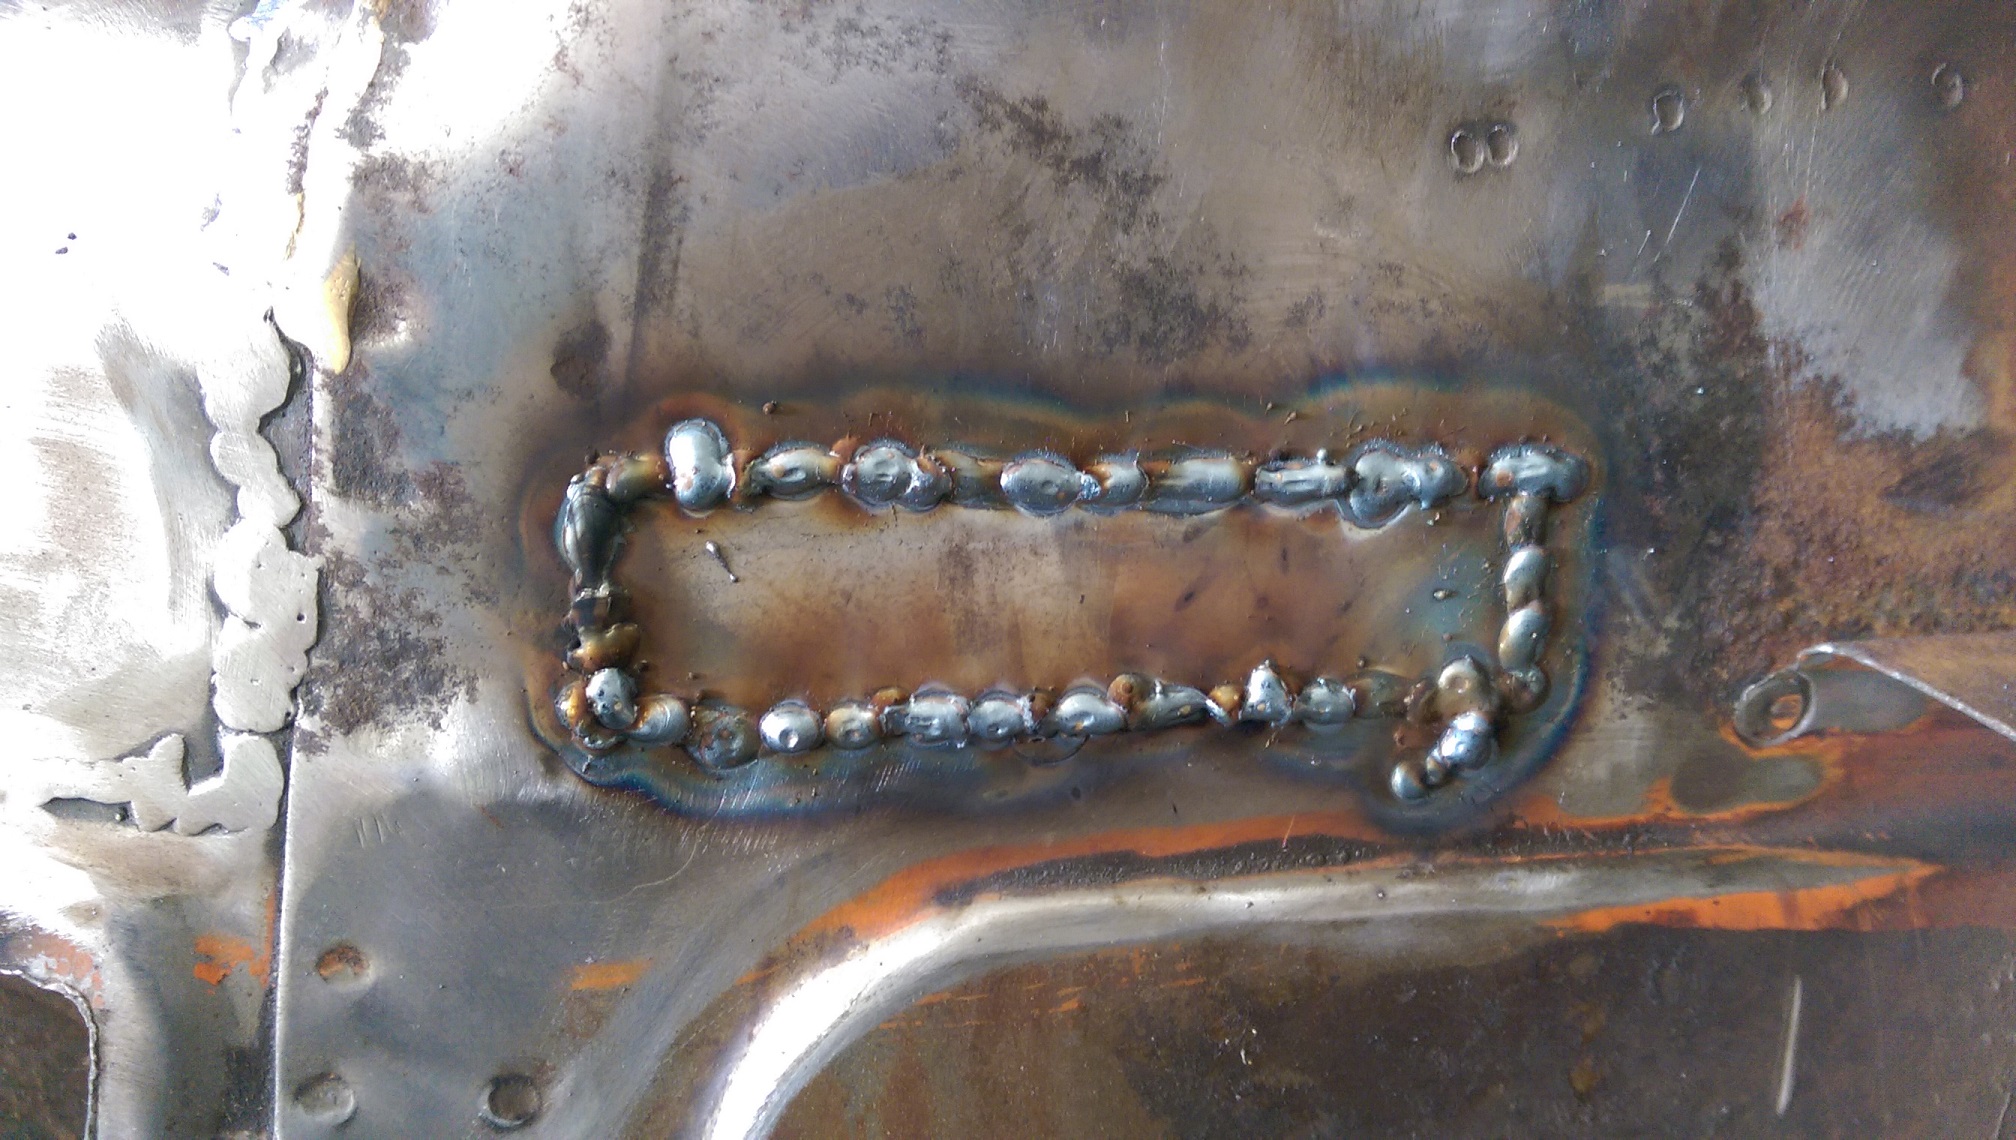
Fully glued in.
Much easier to weld without the primer in the way. Started the fun time task of grinding down the welds. Got pissed off with the power file cause the 40 grit belts kept catching on the join and coming apart. I went through 5 of them in about 20 minutes.
Mental note not to buy the flexovit ones again.
I think the problem is that they butt join it with some backing tape. It would be much stronger if there was an overlap, so there is no join to catch.
The bosch ones I had were good, but I can only find the 80 grit ones which take ages to grind down the weld.
Has anyone used these? Any better than the flexovit ones?
https://www.trademe.co.nz/building-renovation/tools/power-tools/sanders/auction-1420958943.htm
-
2
-
-
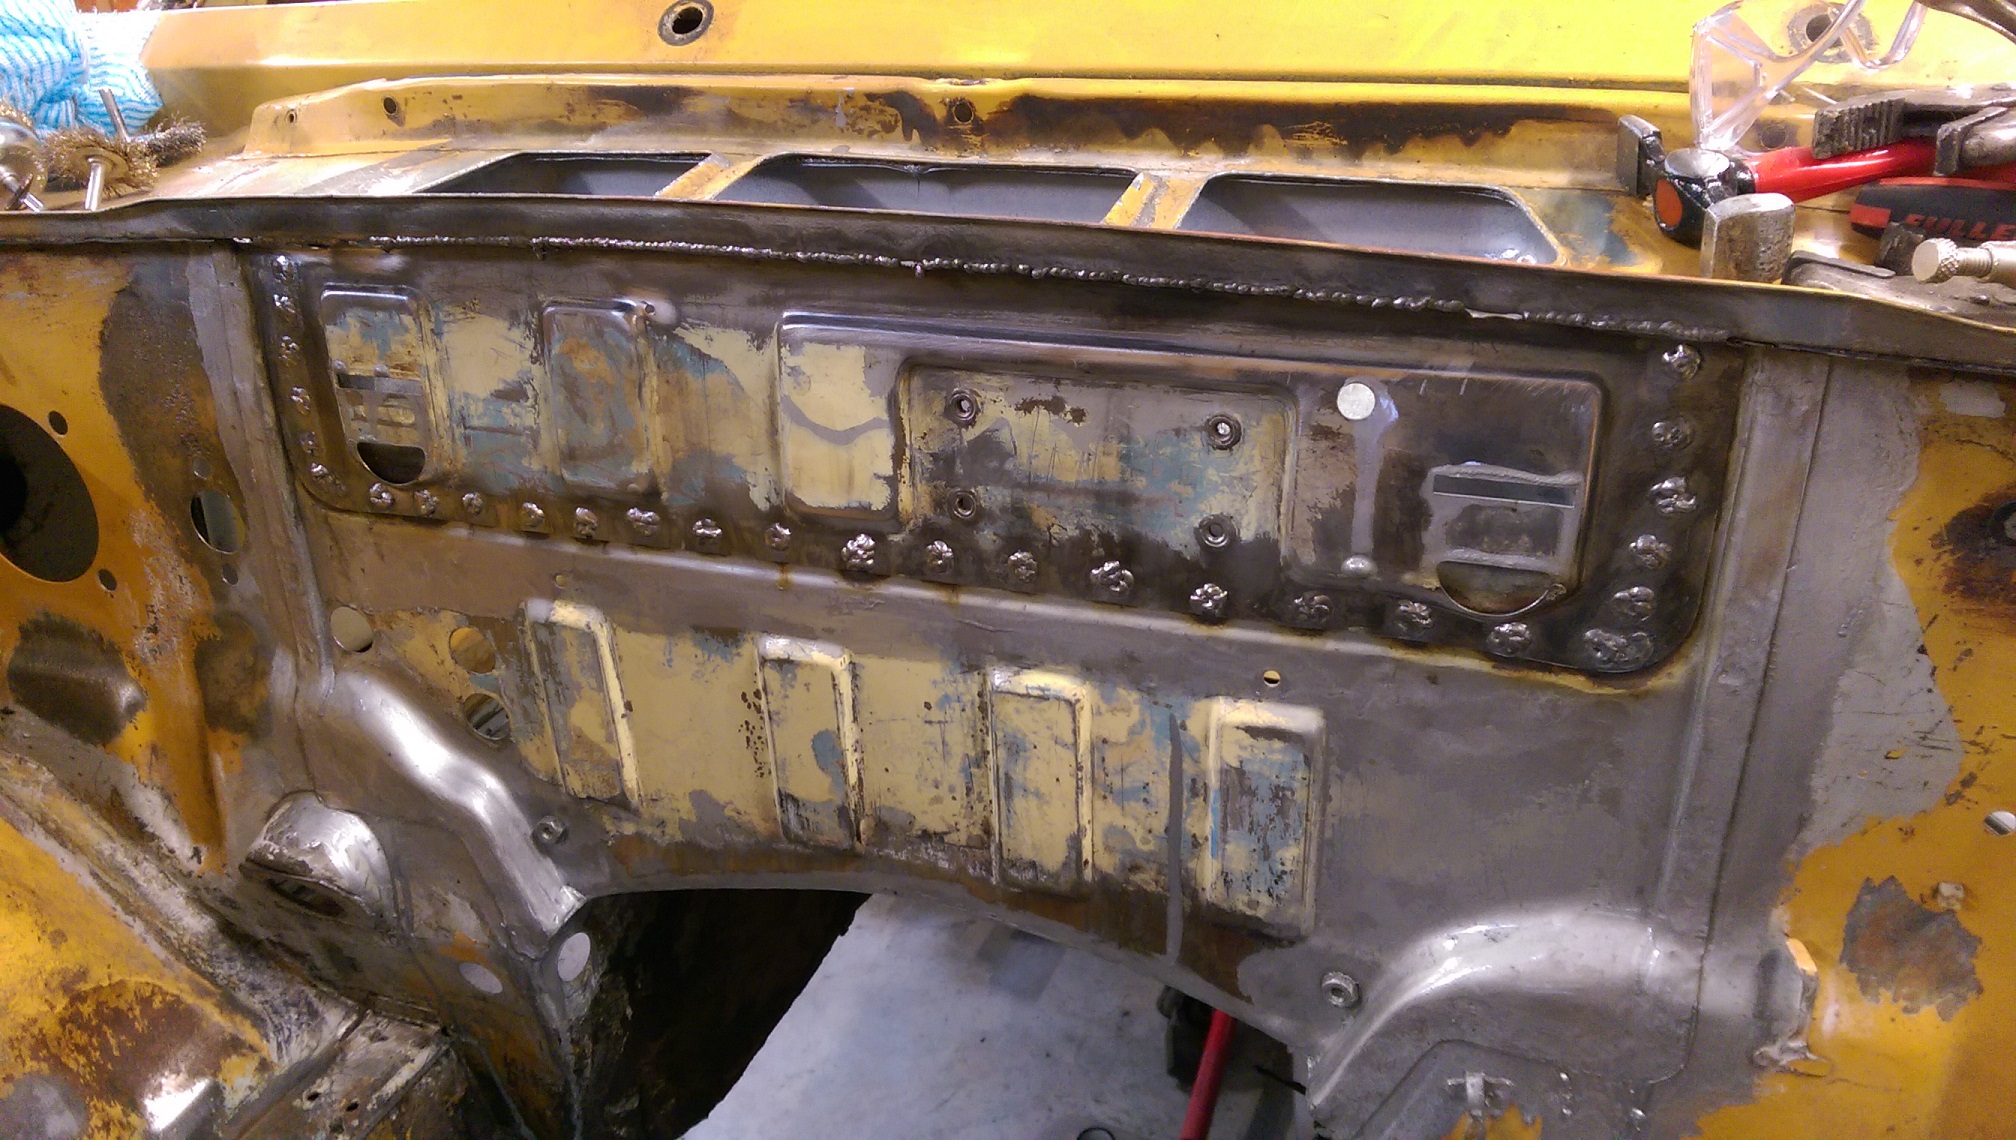
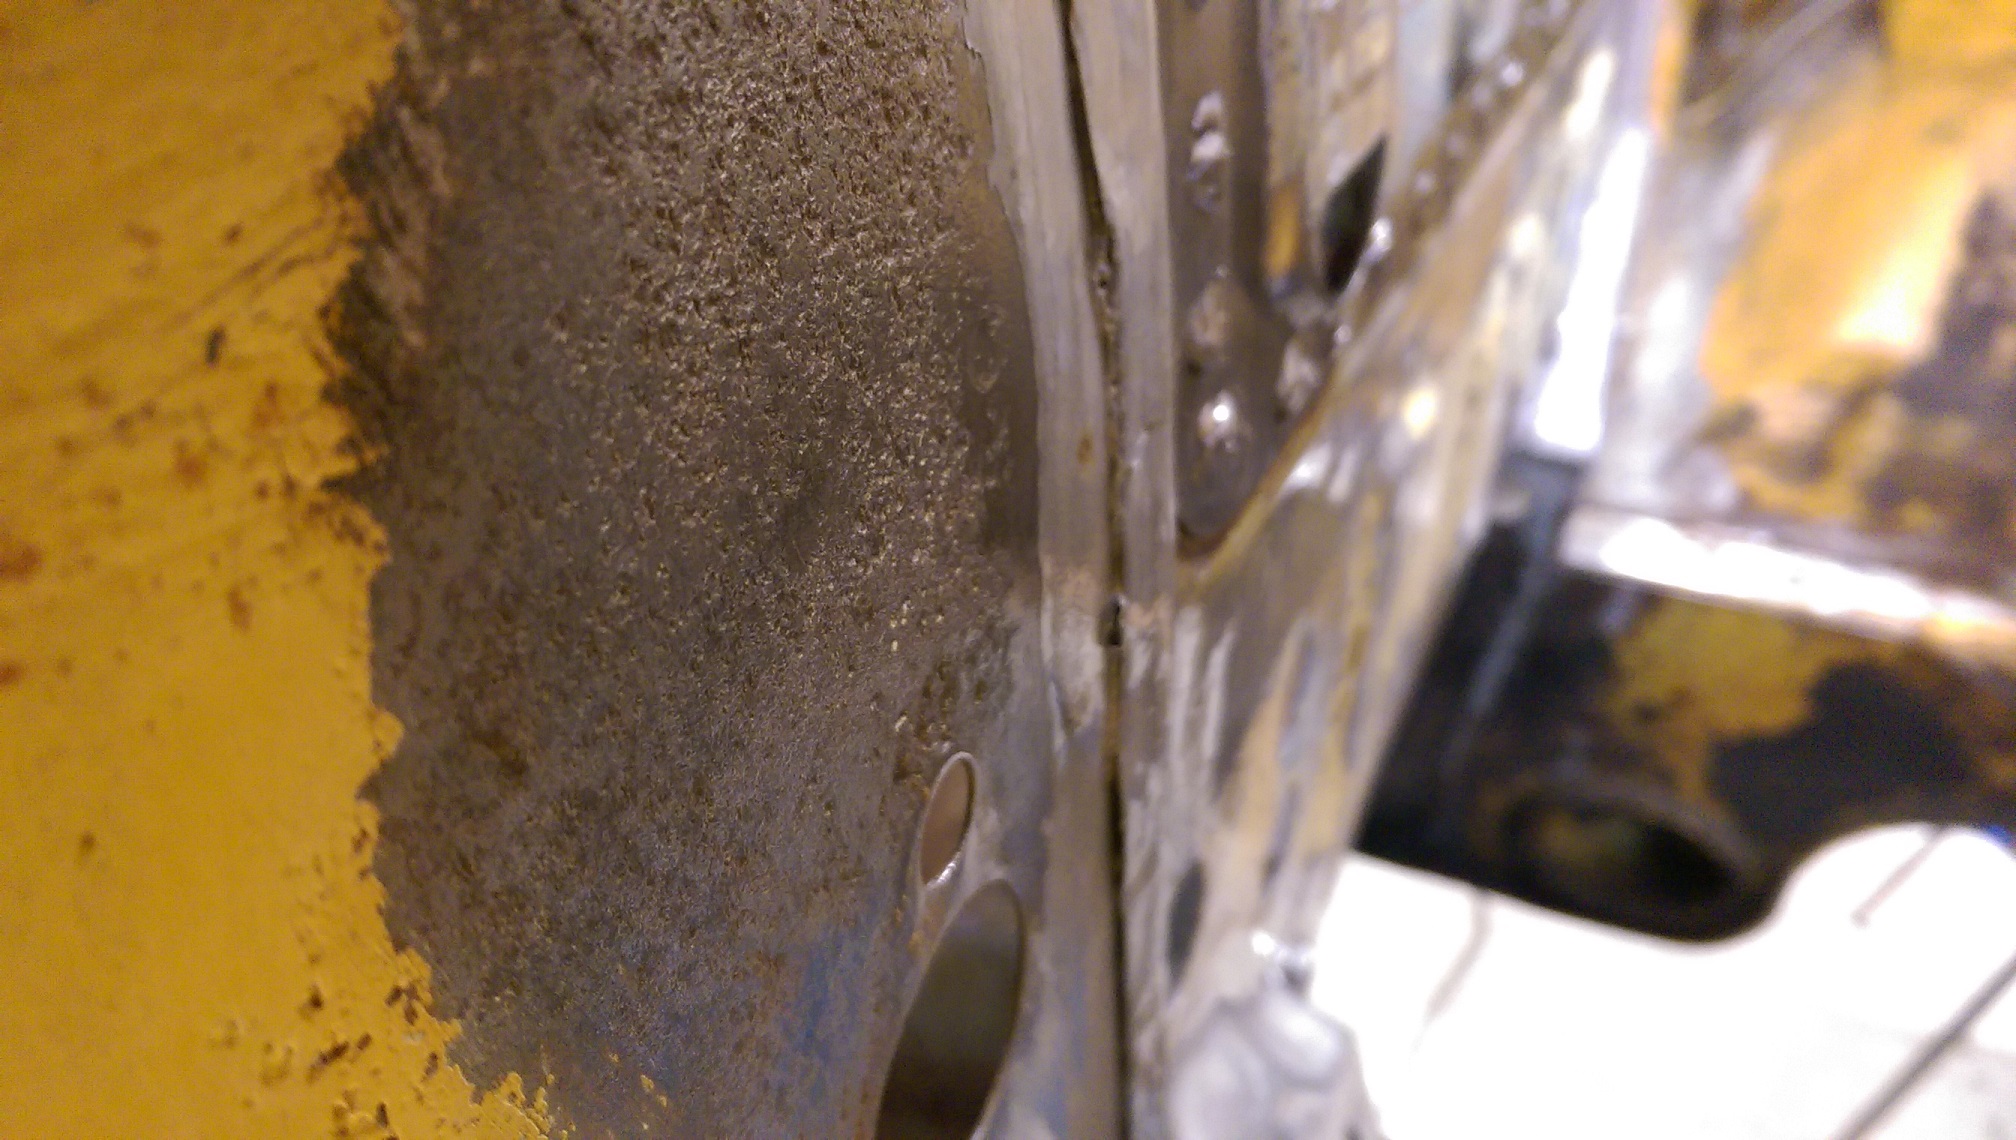
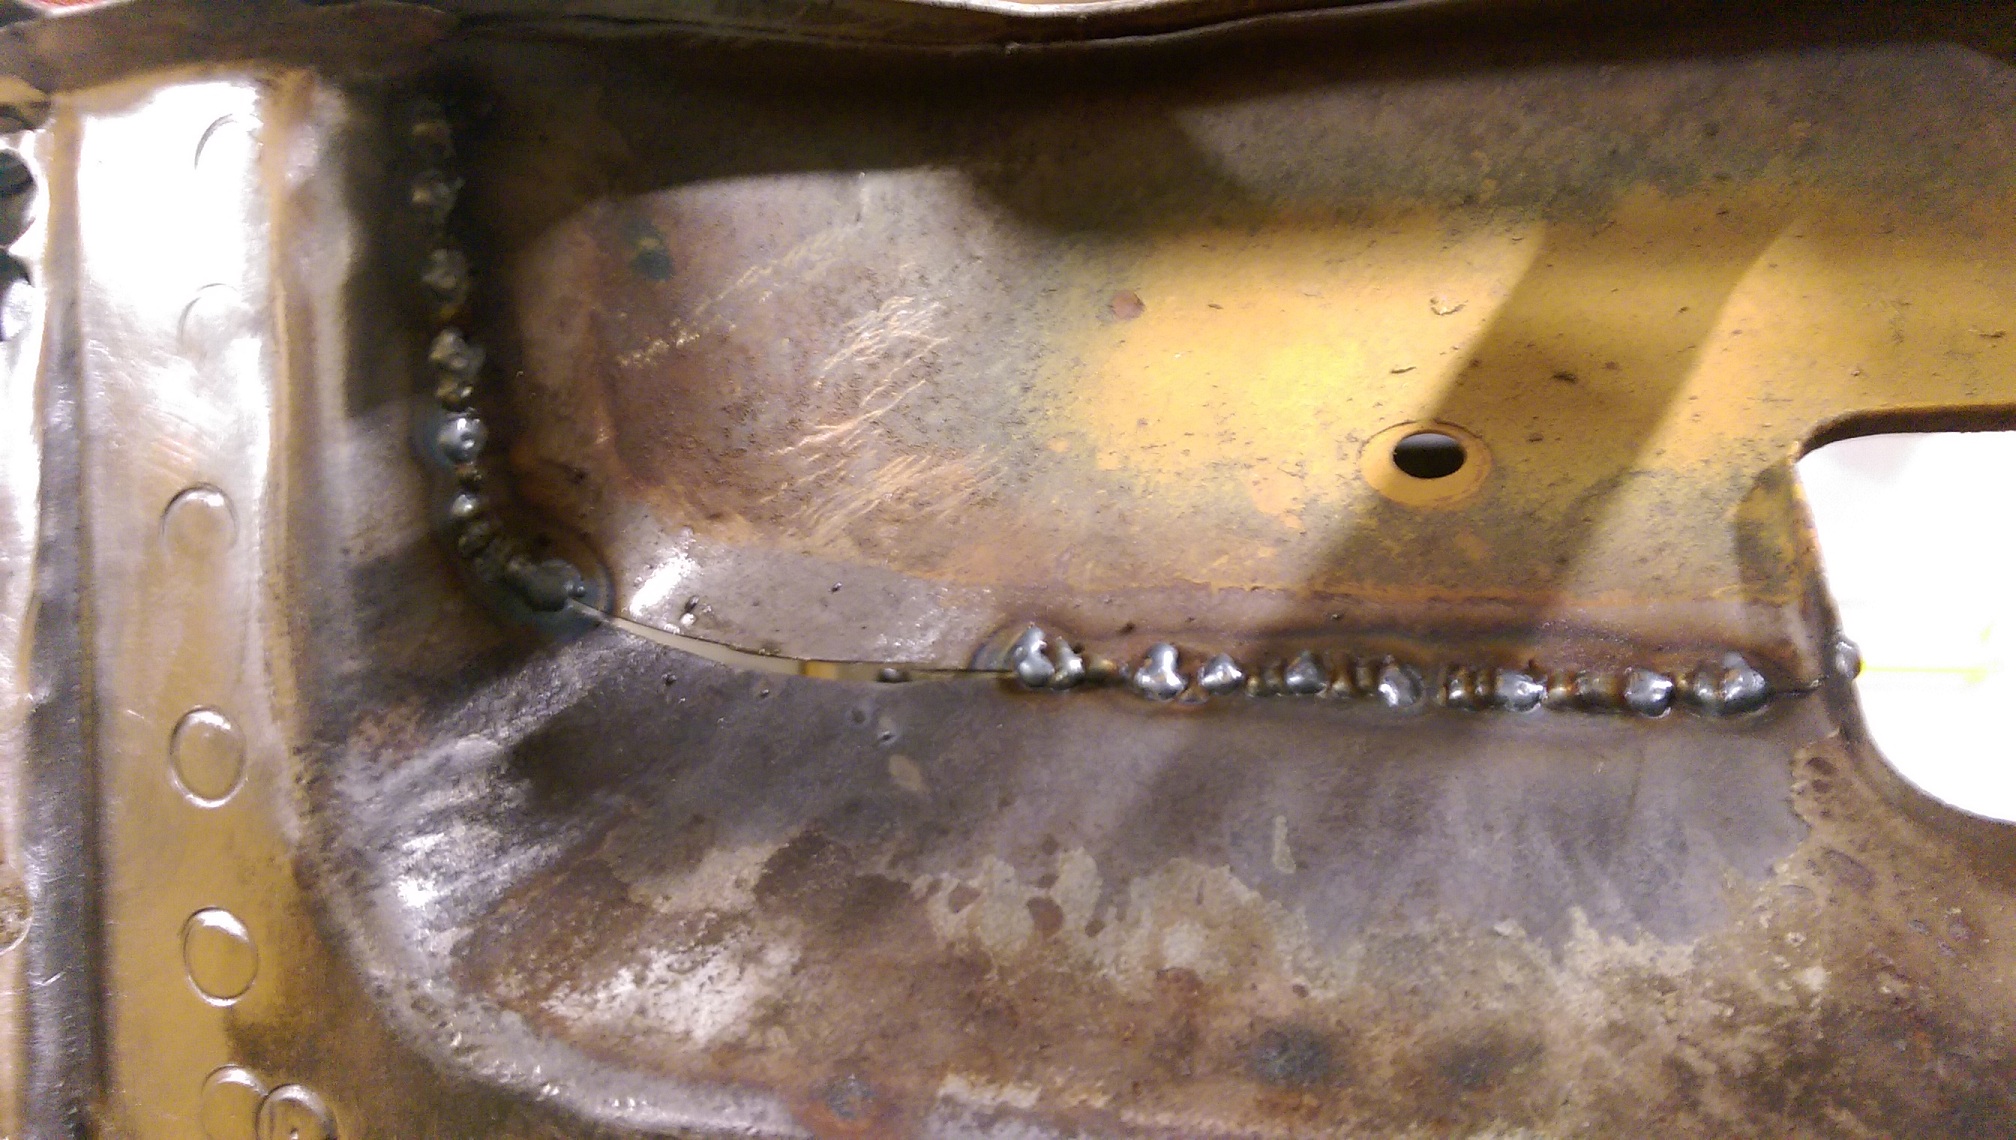
After much cutting, grinding, trimming, filing, bashing and trial fits, I got the firewall patch to fit acceptably. I also cut off the lower flange and bent up a flange on the top of the tunnel so I get rid of the lip that catches water and shit.
I used crc zinc weld through primer on both faces where the panel overlapped. I tried some spots and tacks... Weld though primer is only kinda weld through, my welds looked shit as. So I stopped.
Today I got a selection of wire brushes and did my best to clean off the primer through the spot holes. There was success.
I'll do some more welding on the weekend.
I kept getting blinded when doing those spots along the top because that gutter would block the sensors on my helmet.
-
6
-
-
Hood? You mean a bonnet? Find a similar shape/size bonnet and cut bits off that???
-
13 hours ago, Bling said:
Have run hammerite, should be sweet as. Used white on some rust repairs no worries. Used some crinkle finish silver on a bike frame. All seemed fine to me.
I painted the interior of my Starlet racecar with hammerite smooth white. It seemed to take weeks to properly harden. Otherwise it's okay. It's much more forgiving in the prep than POR15.
-
That looks simpler than my idea. I'll have to dig around to find a lump of metal thick enough to put a groove in the right size.
-
Hmmm, it's another thing to try. I think I will just end up unfolding one of the earlier folds when I try do the last one.
-
7 minutes ago, kyteler said:
Could you not simply make the first 90° bend then place something of appropriate width for your ~2mm flat in the inside corner of your first bend, pull your next bend up at the required ~45° degree angle before then bending that section back flat again after the other ~2mm?
I lost you... Can you draw a picture?
-
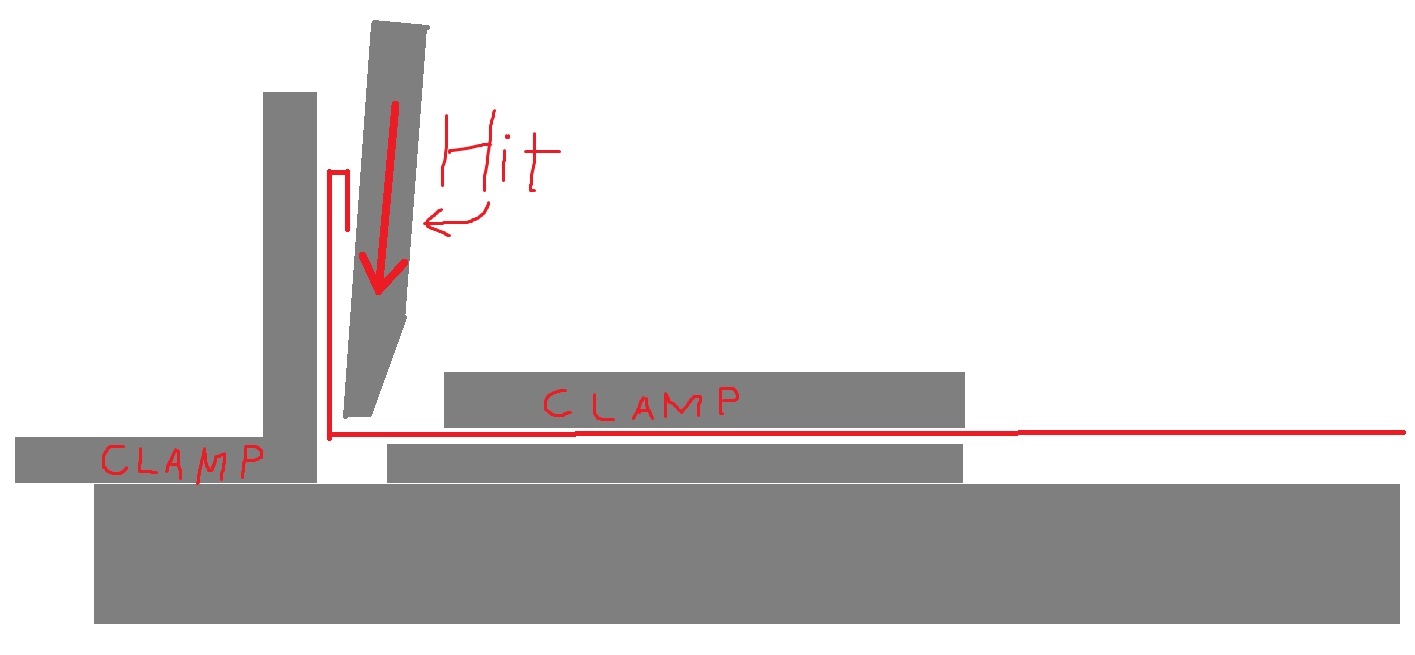
So part of the rain gutter is rusted through and I need to replace a 50-100mm section.
But I'm not quite sure how to make the section I have circled.... That little bump is what the trim strip clips onto.
This was the idea I came up with.... Haven't tried yet.
Maybe there is an easier way?
-
Then I cleaned it with wax and grease remover and warmed it up with the heat gun before putting some zinc weld through primer on.
I have done the back of the radiator panel, I just didn't take a photo.
-
3
-
-
Glued in some bits.
Came out well. The flat patch will never be seen once I rebuild the box section that goes over it.
-
3
-


Adoom's 1976 Triumph 2500 TC
in Projects and Build Ups
Posted
After welding the cuts and cleaning up.
Painted it with POR15. I'll sand it off in the weld areas and drill the spot weld holes when it's dry.