Adoom
-
Posts
2199 -
Joined
-
Last visited
Everything posted by Adoom
-
WTF is an axle cross supposed to be? Do they mean the trailing arms??? They are more of an "L". How is it for rust... Battery fallen through the battery box and dangling? Rear subframe mounting points loose/broken? Broken exhaust mounts? Probably this one I reckon. Not much else under there that could make a knocking like that.
-
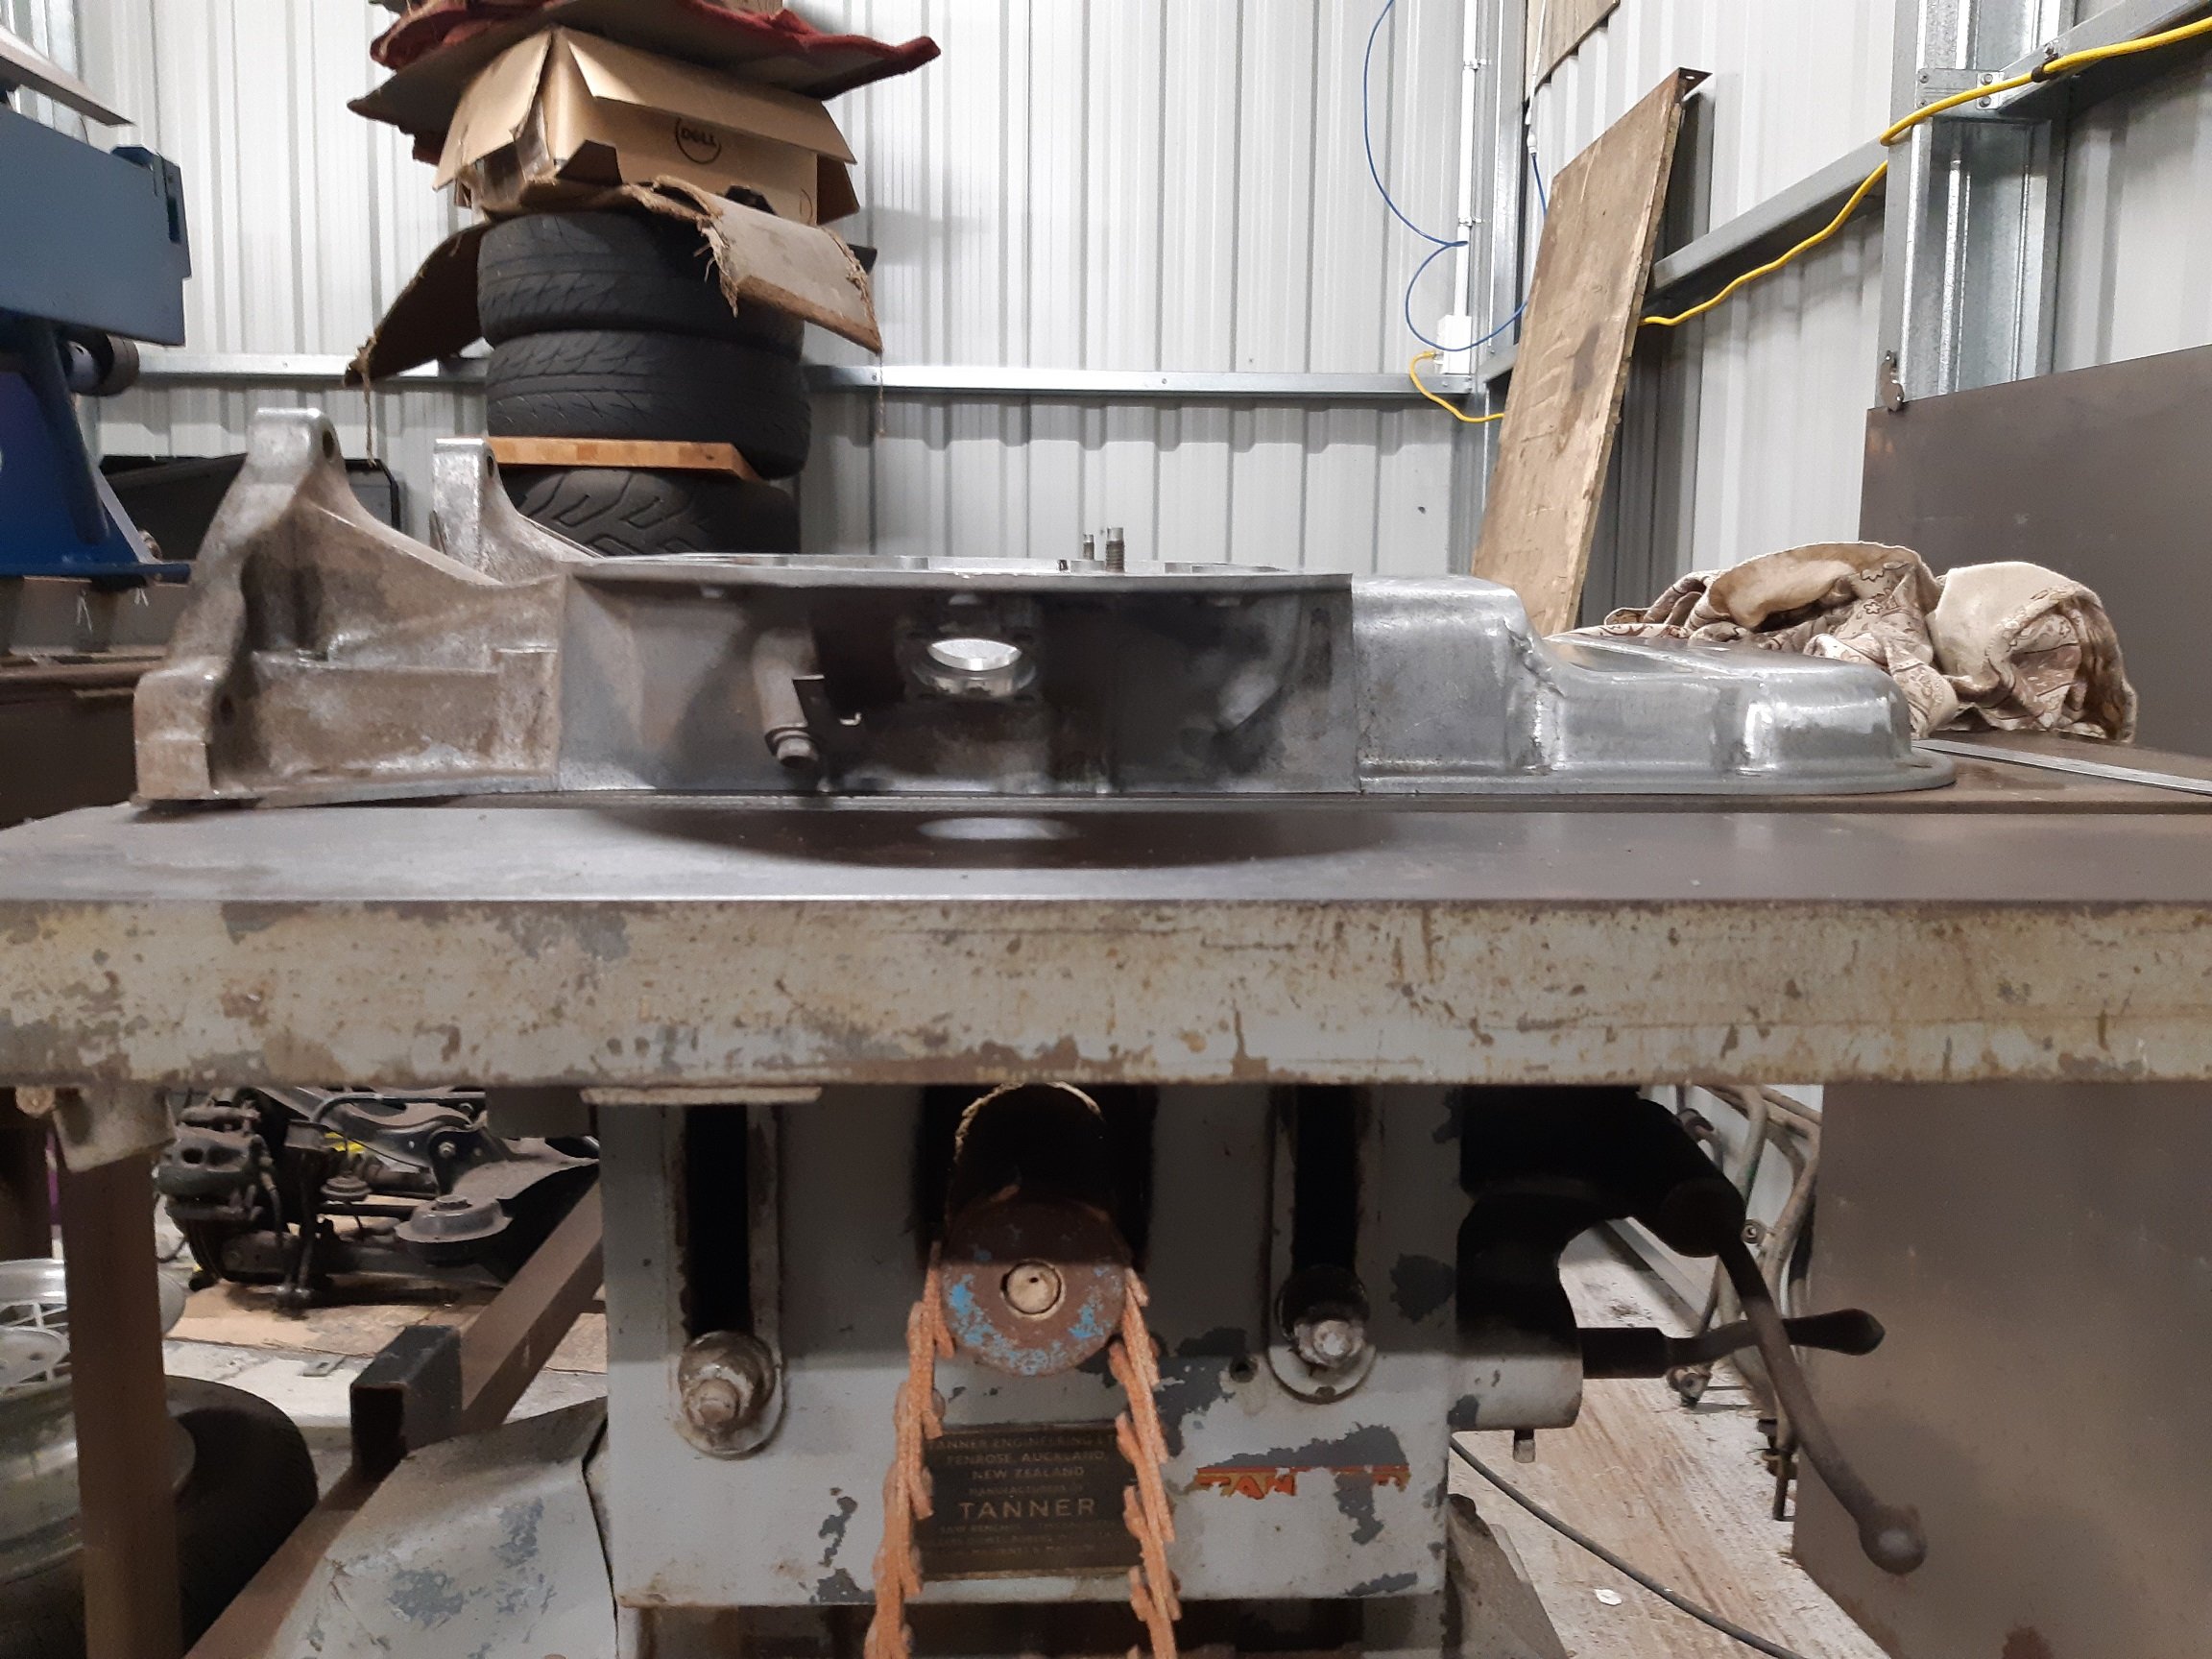
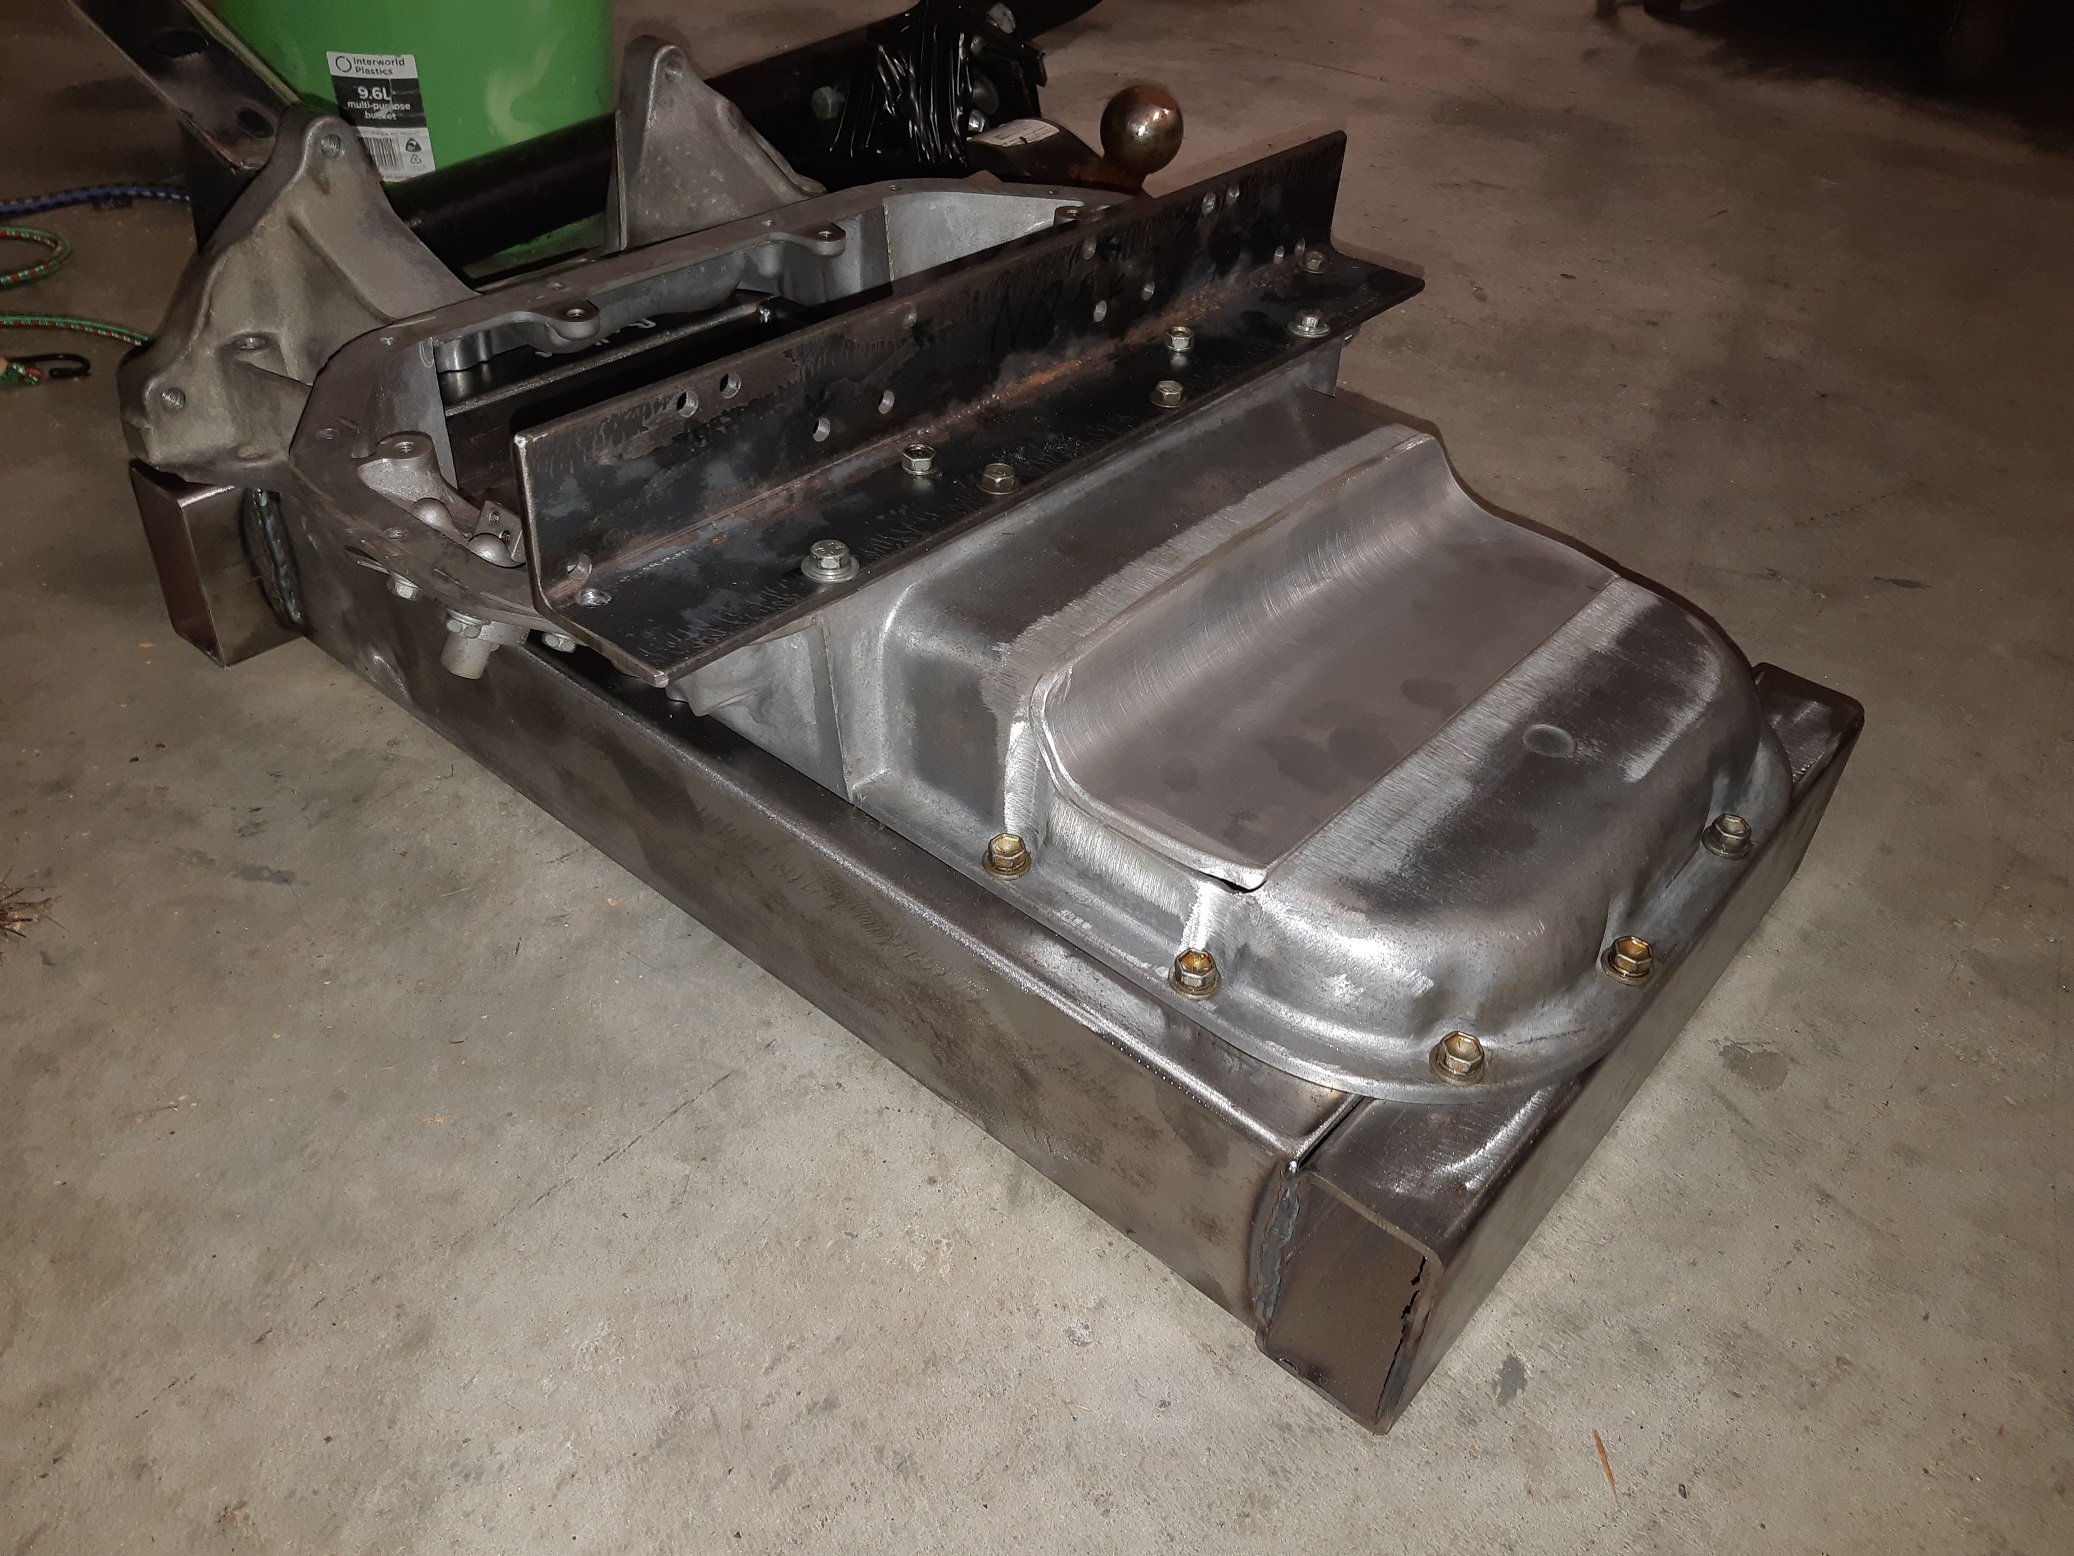
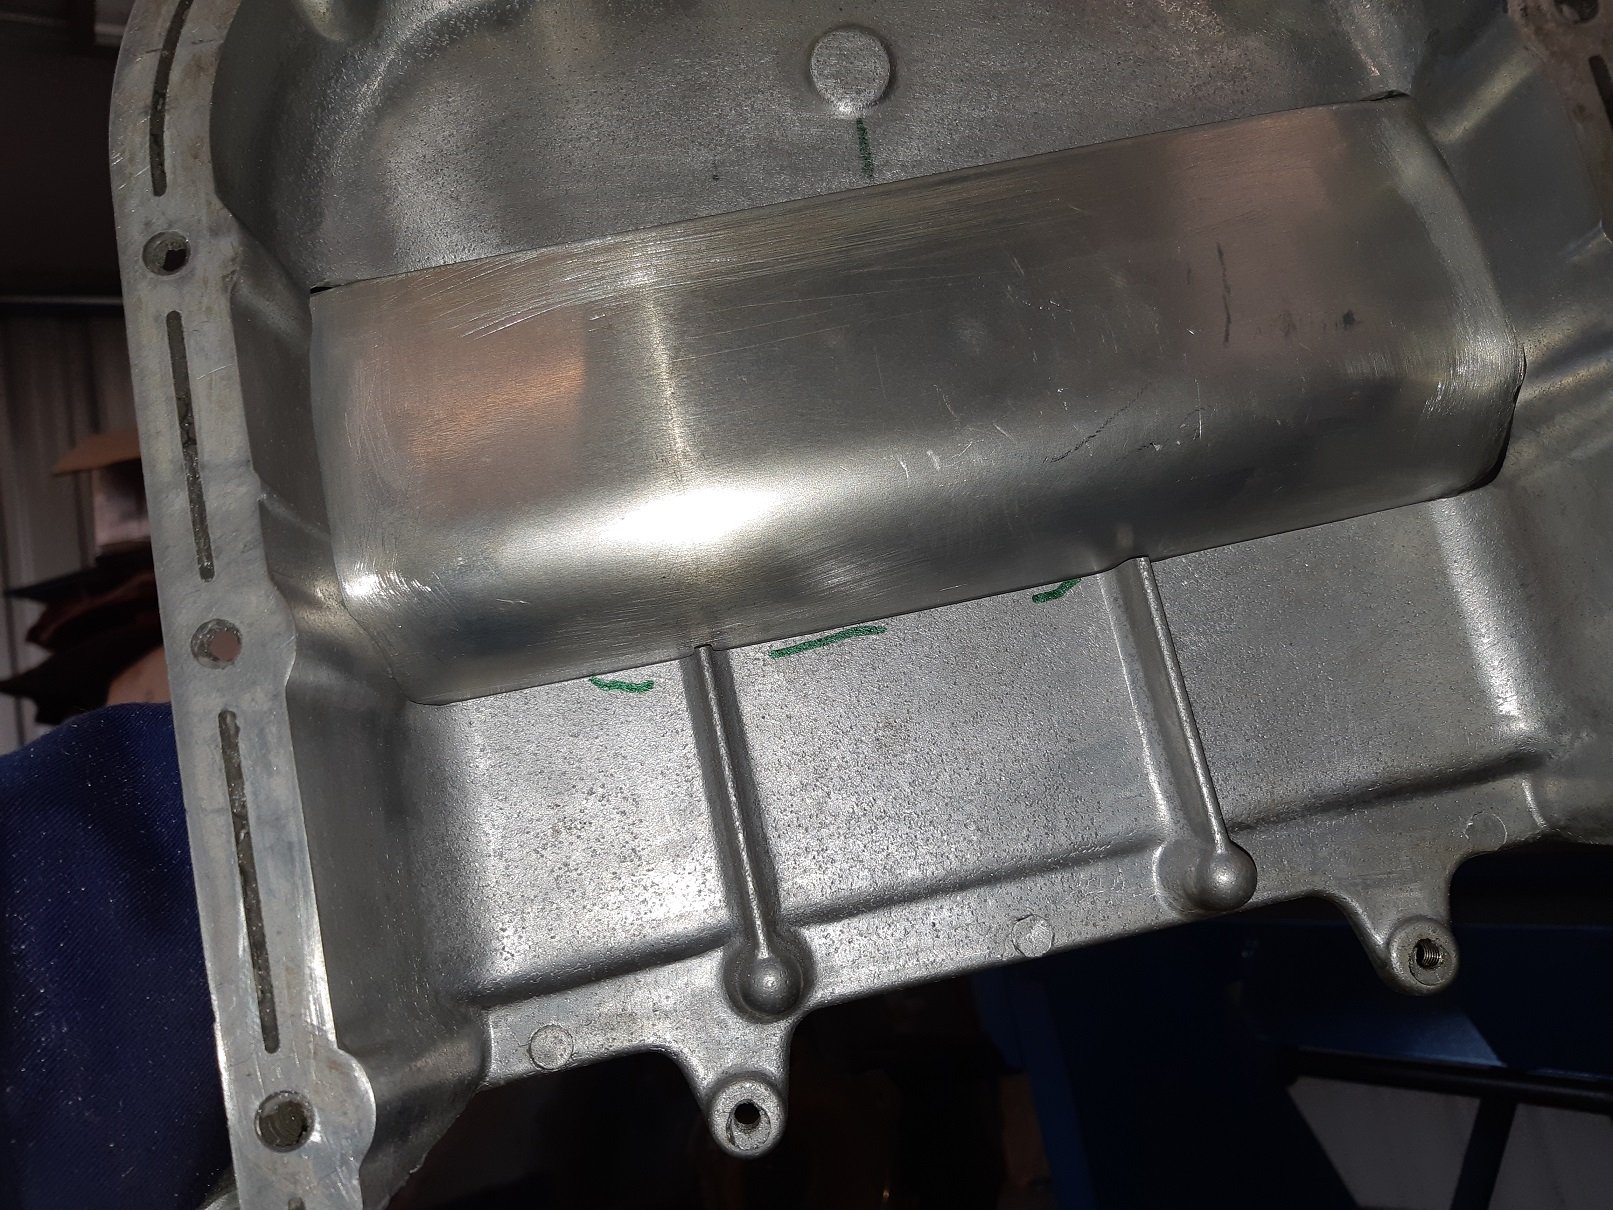
So I found a local place that could anneal my sump which would allow me to pull it flat. Dymo Manufacturing in Wingate. They put it in their kiln with it bolted to the jig. It was heated up to.... hot, then allowed to cool down slowly over many hours. ~10 I think. $70. The heat seems to have baked out any oils and cooked the sealer that was still in the grooves on the mounting face. The sealer just crumbles and turns to powder when I scrape at it. Only down side was it caused some of the small M6 bolts to seize in the jig which I wasn't expecting, so I broke one and stripped at least two more. So I'll have to find some suitable bolts to bolt it back to the engine. Oops. But it's more or less flat already. So I am happy to bolt it back to the engine, the sealer will sort out any tiny gaps. Cast iron table saw top is the flattest thing I have. I did try move it around a bit, just in case the table saw top was bent. It's the same which ever way I put it. There is still a tiny gap at the front of the sump, but it's no bigger than 0.5mm and if I put some weight on it, it closes up. Yay.

- 191 replies
-
- 18
-

-
You got it. The top wheels are a little smaller that you have drawn. The bottom wheel is about right. I think the blade is 0.6mm
-
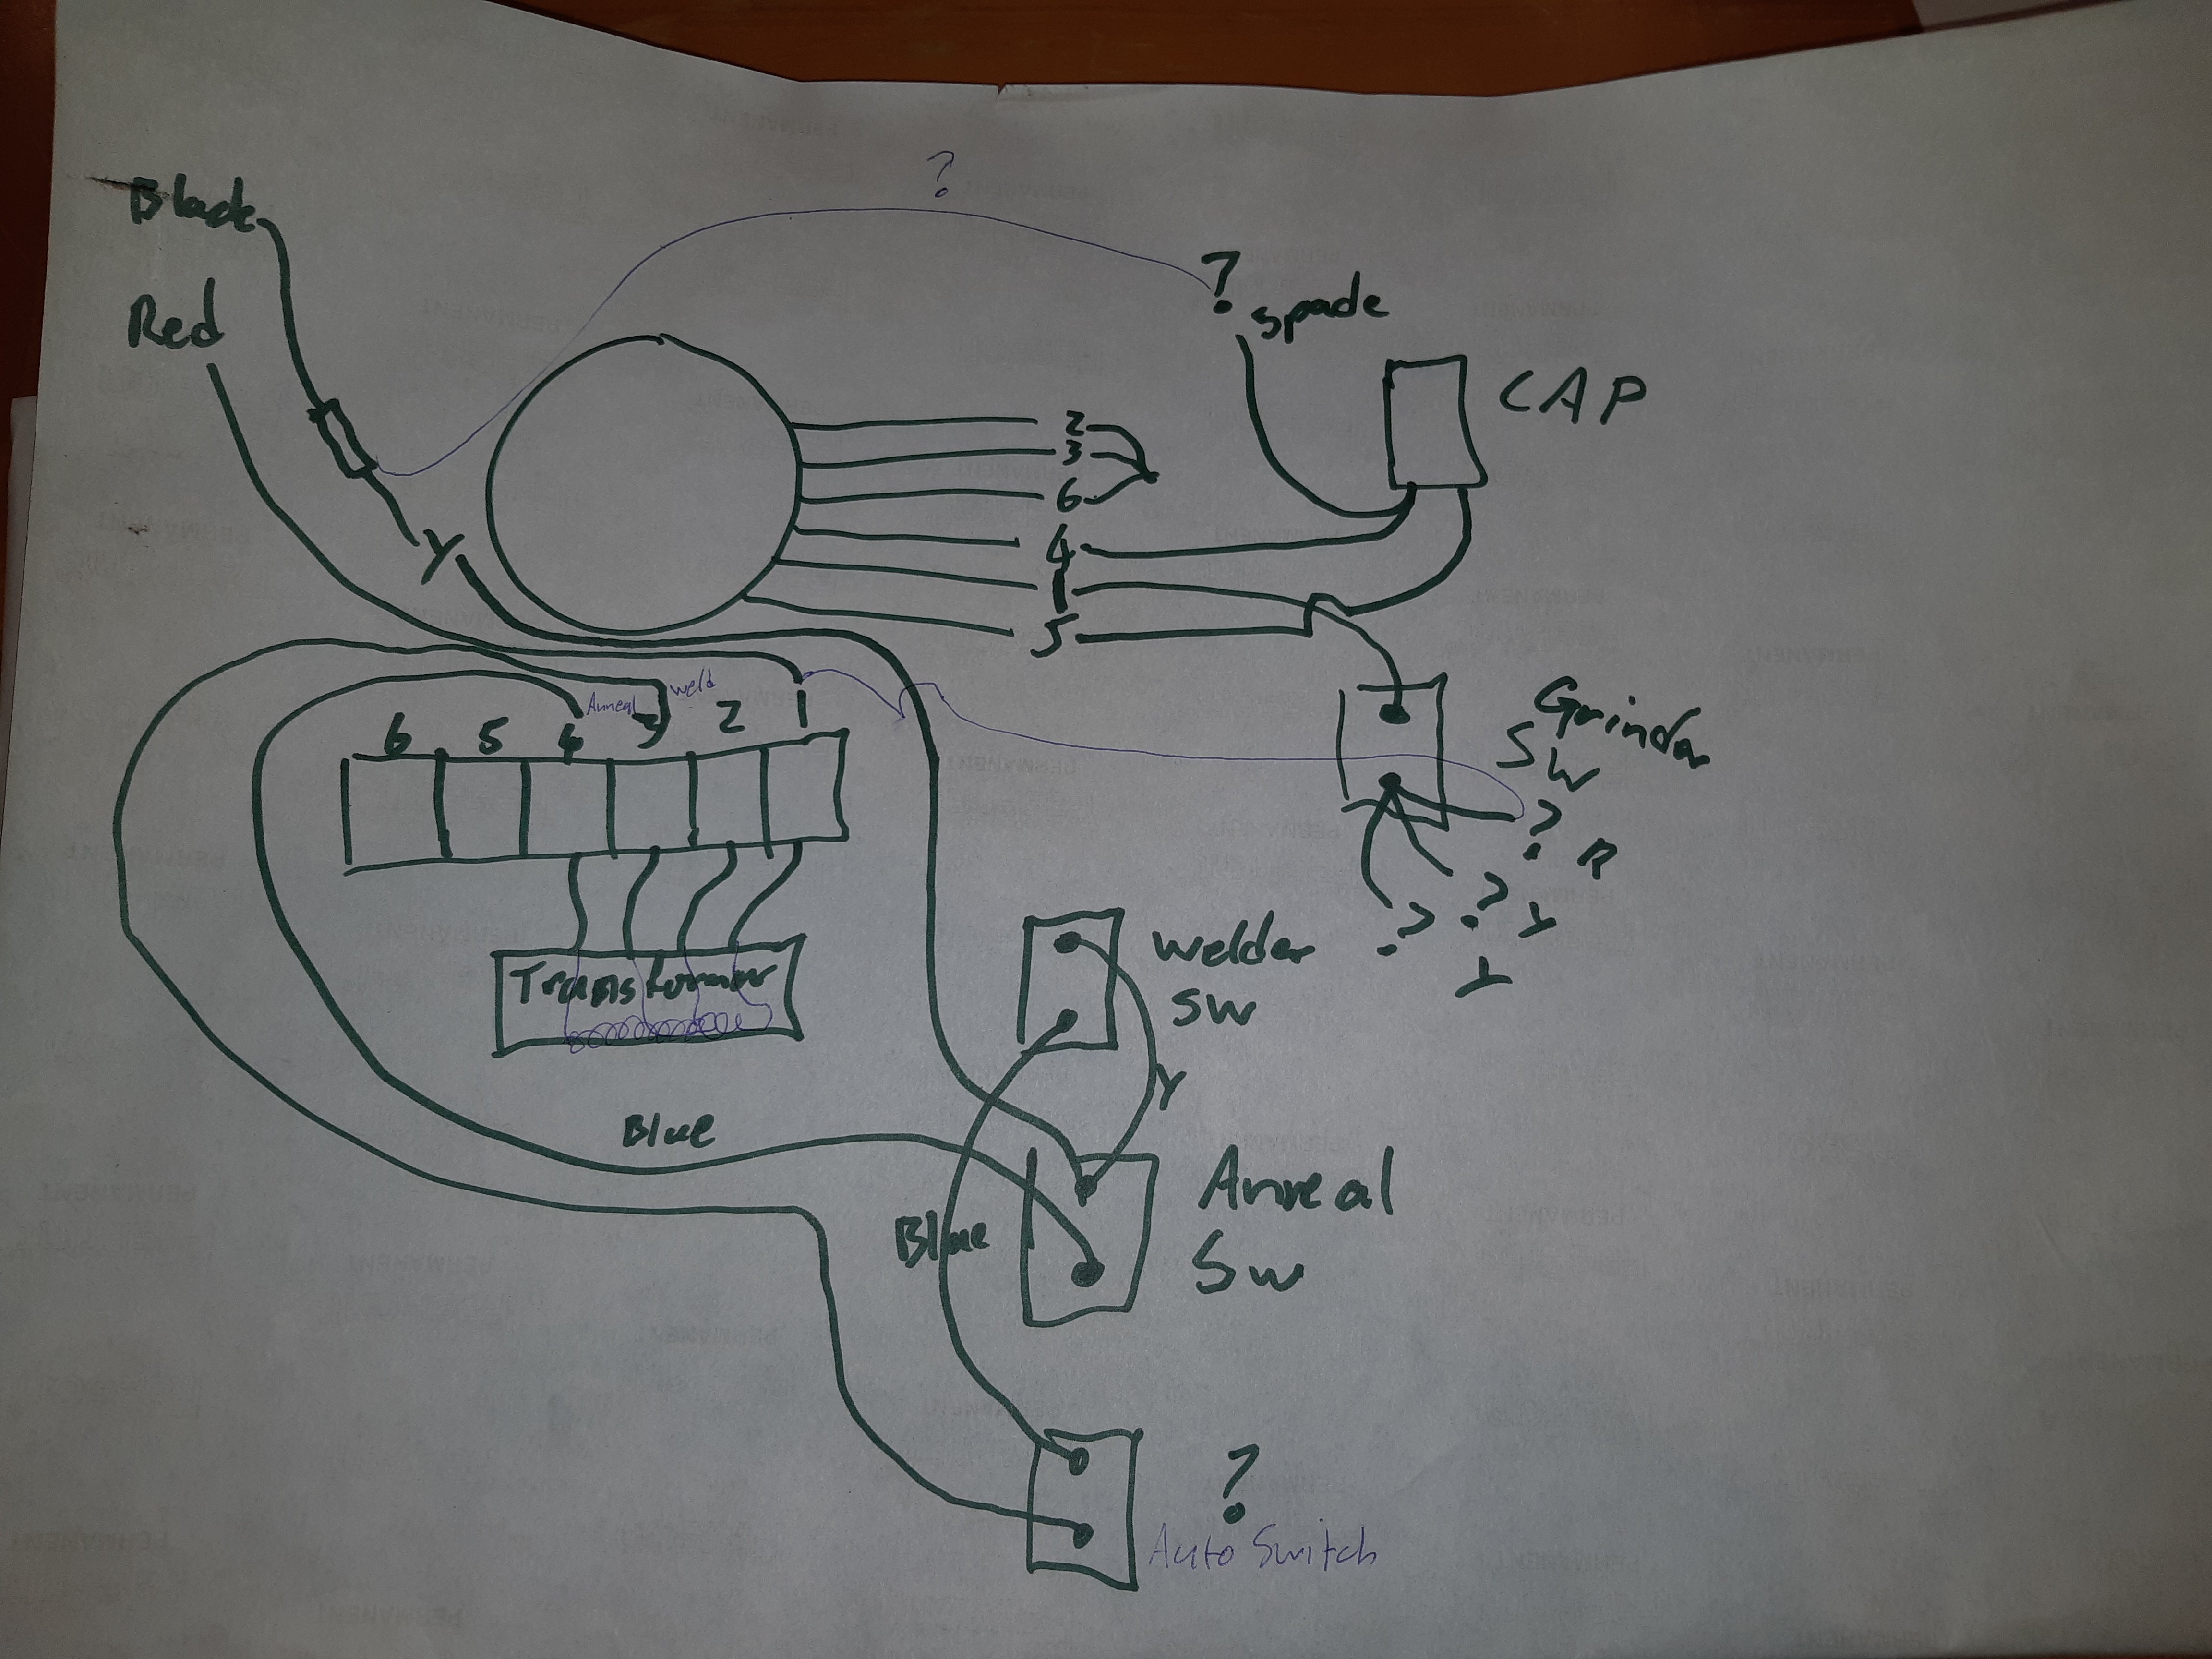
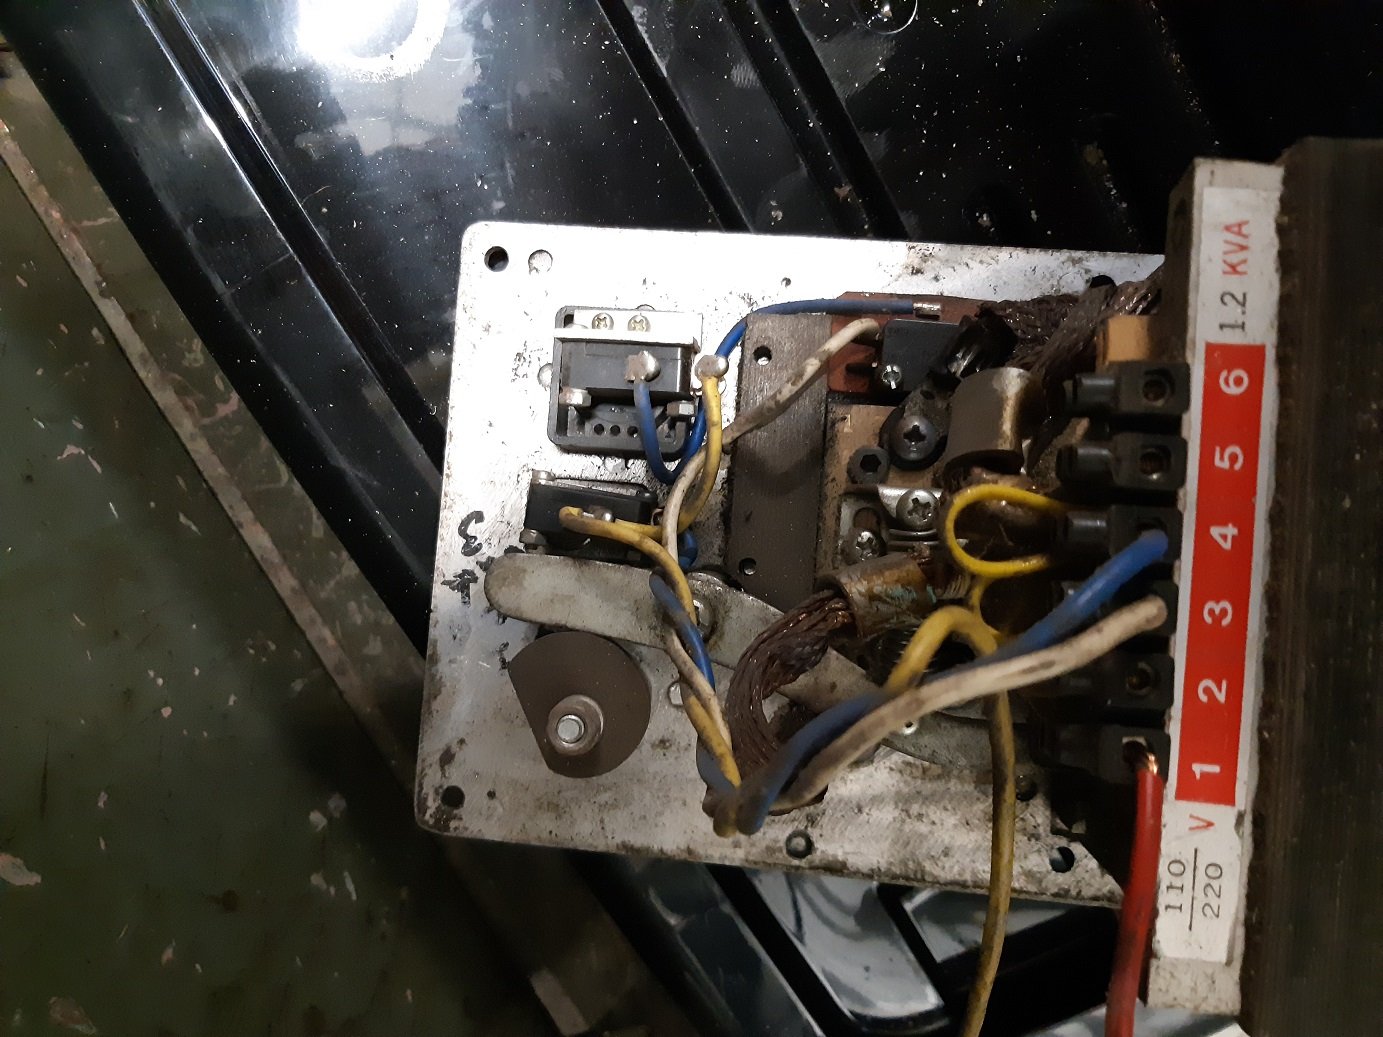
I gave the welder assembly a clean with compressed air. It had loads of metal 'dust' all over it. Which I assume was conductive! I should probably try make some kind of plastic dust cover for it. I traced the wires... Round thing at the top is the grinder motor. 2,3,6 are joined together, which looks original. As far as I can tell, the welder and annealer should have been working, it was only the grinder motor that was no longer connected. AFAIK, if I add in the wires I've drawn in thin lines, the motor should work. So next thing to do is pull out the multimeter and check the switches all work and there is continuity in the transformer coils.
-
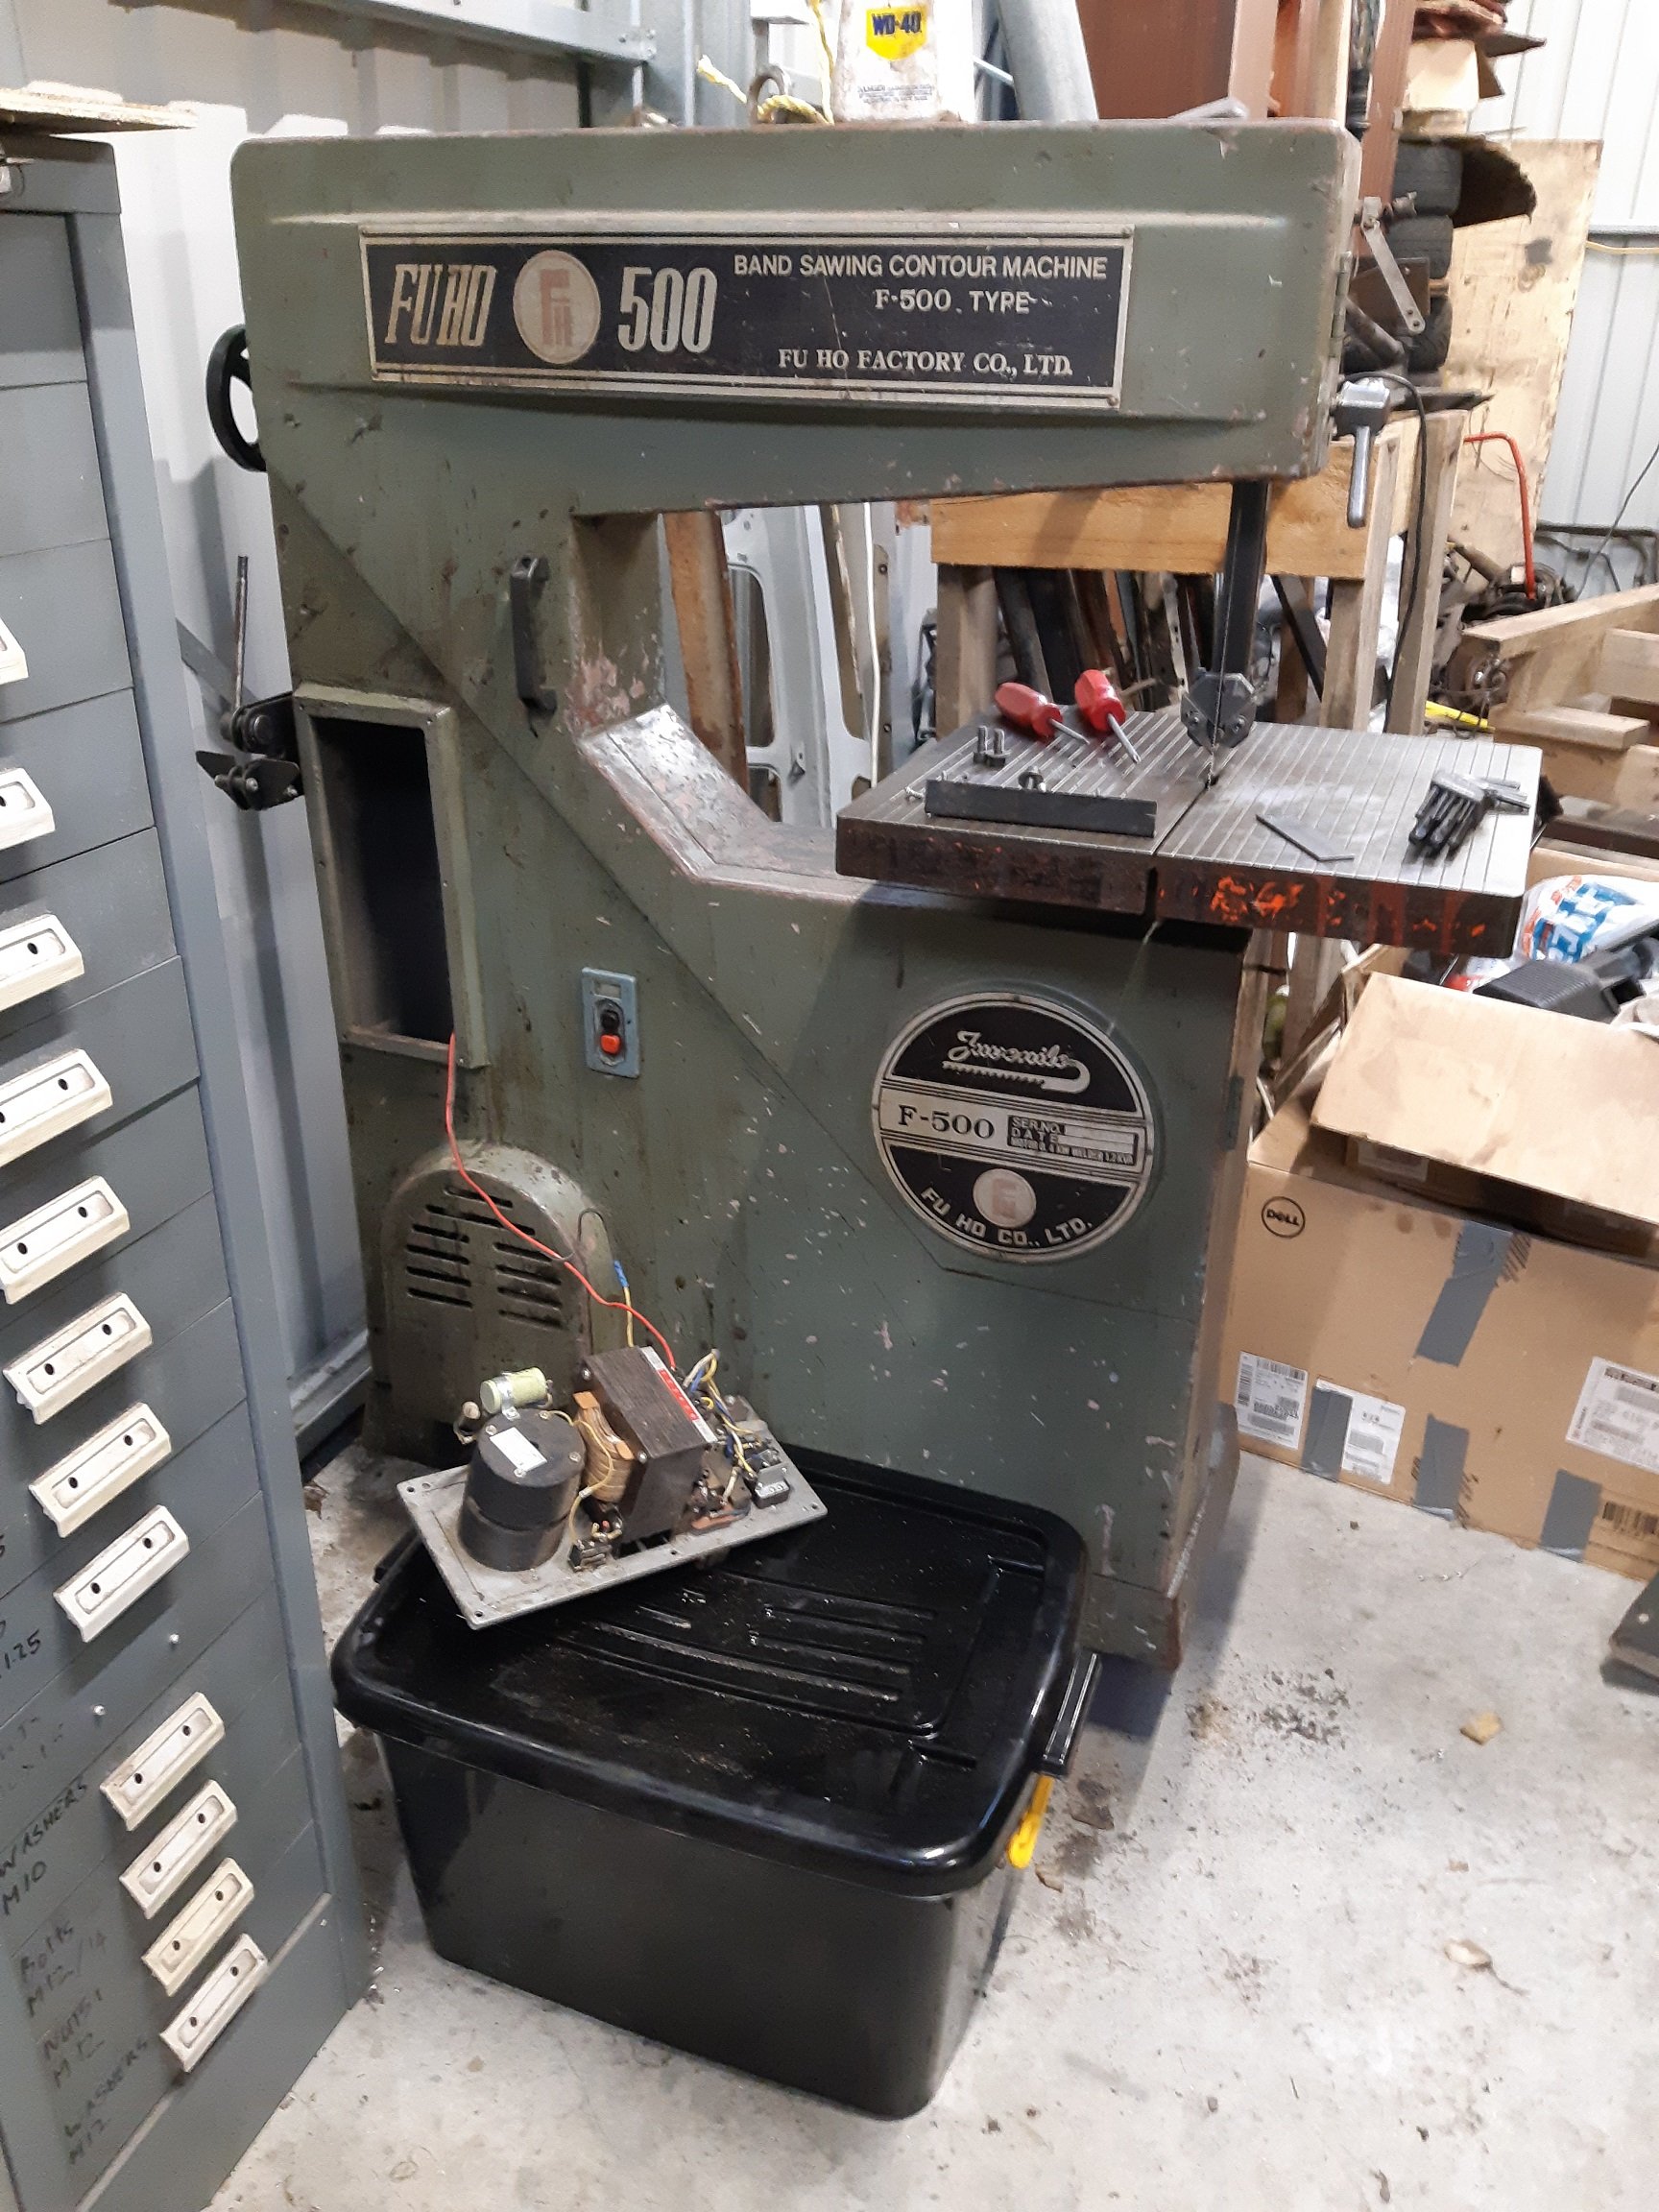
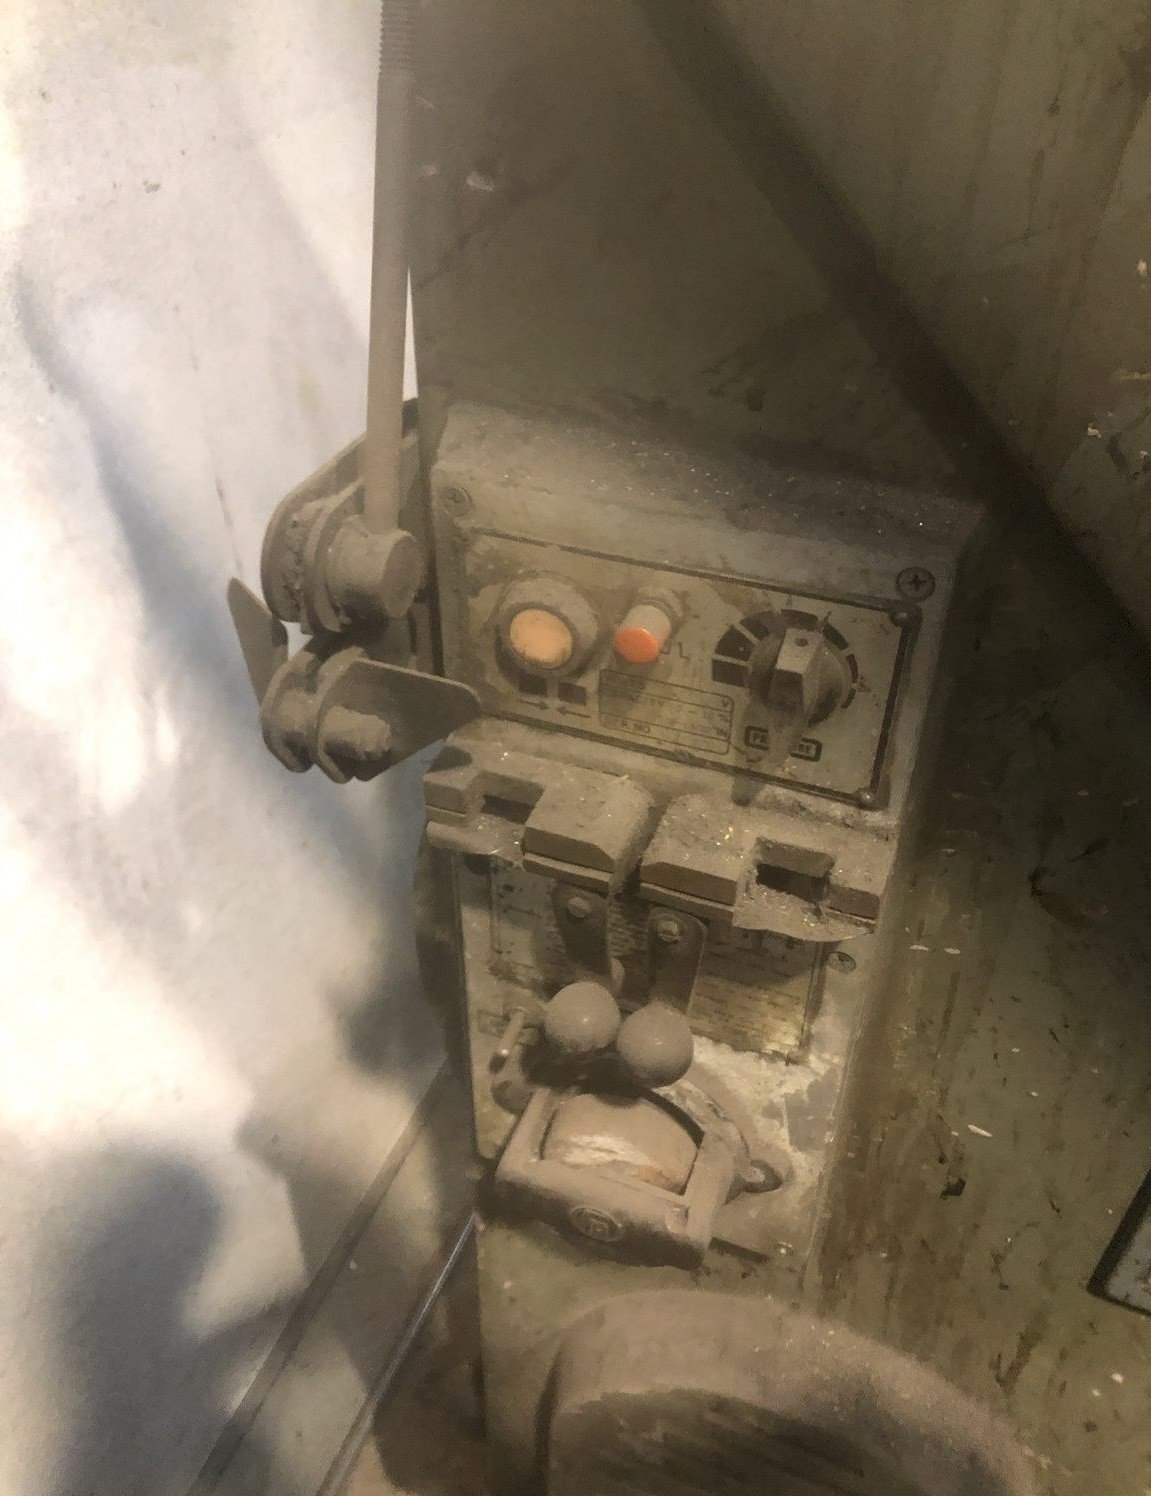
So I bought a metal cutting vertical bandsaw. It's single phase. I picked it up on the weekend. It belonged to a fabrication shop called Metalmorphic. They bought it new ~35 years ago(the plate on the motor says 1982) and stopped using it about 5 years ago because laser cutting exists. All I've had time to do is take the blade guides to bits and clean them. Looking at the photos I realised I put part of the top support in backwards, so the locking screws face the wrong way. I knew the blade welder wasn't working when I bought it, he said it had been "fixed" some years ago, but it's not working. Here is the photo from trademe, it's much cleaner now. Looking on google, it seems like many saw brands use "identical' blade welders. I'll probably never use the blade welder and just buy ready made blades. But I thought I'd take it apart and see if I could find what was wrong with it. "How complicated could it possibly be?". Someone has been in here before me... That switch with all the cut wires is to turn on the little grinder. I assume the red cable originally came here rather than the terminal block? And then yellow wires from here to the terminal block? The grinder motor also has a loose red wire with a spade connector on it that has nowhere to connect to. I assume the two wires coming from the saw are phase and neutral, and it earths through the casing? Does anyone else have a blade welder like this and can take some photos for me?
-
Photo upload limit....
- 191 replies
-
- 15
-
-
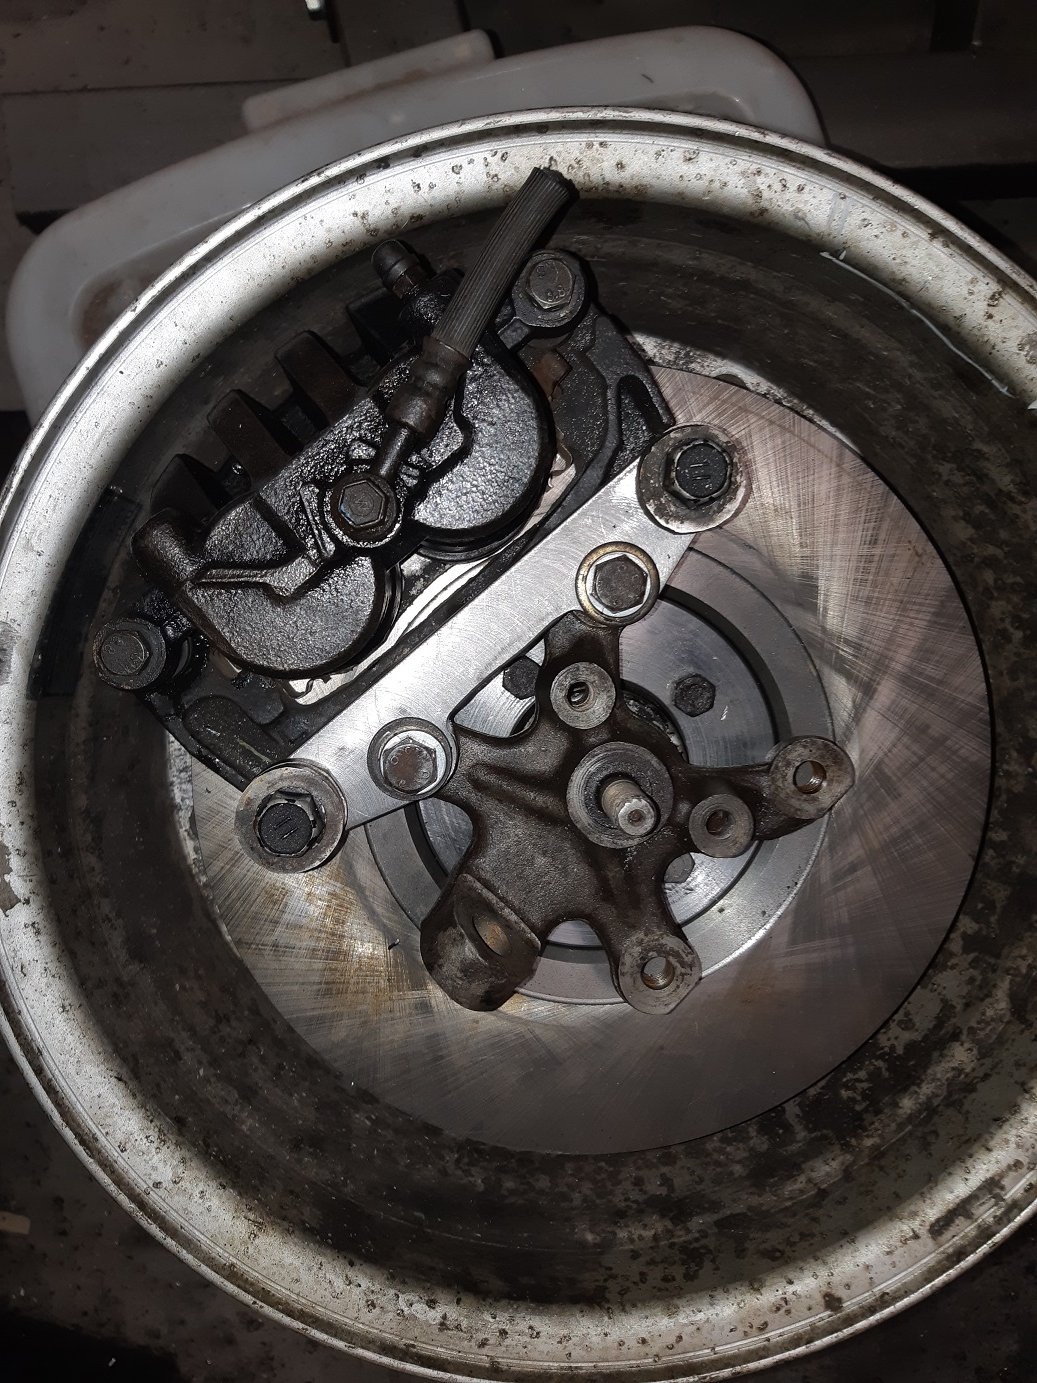
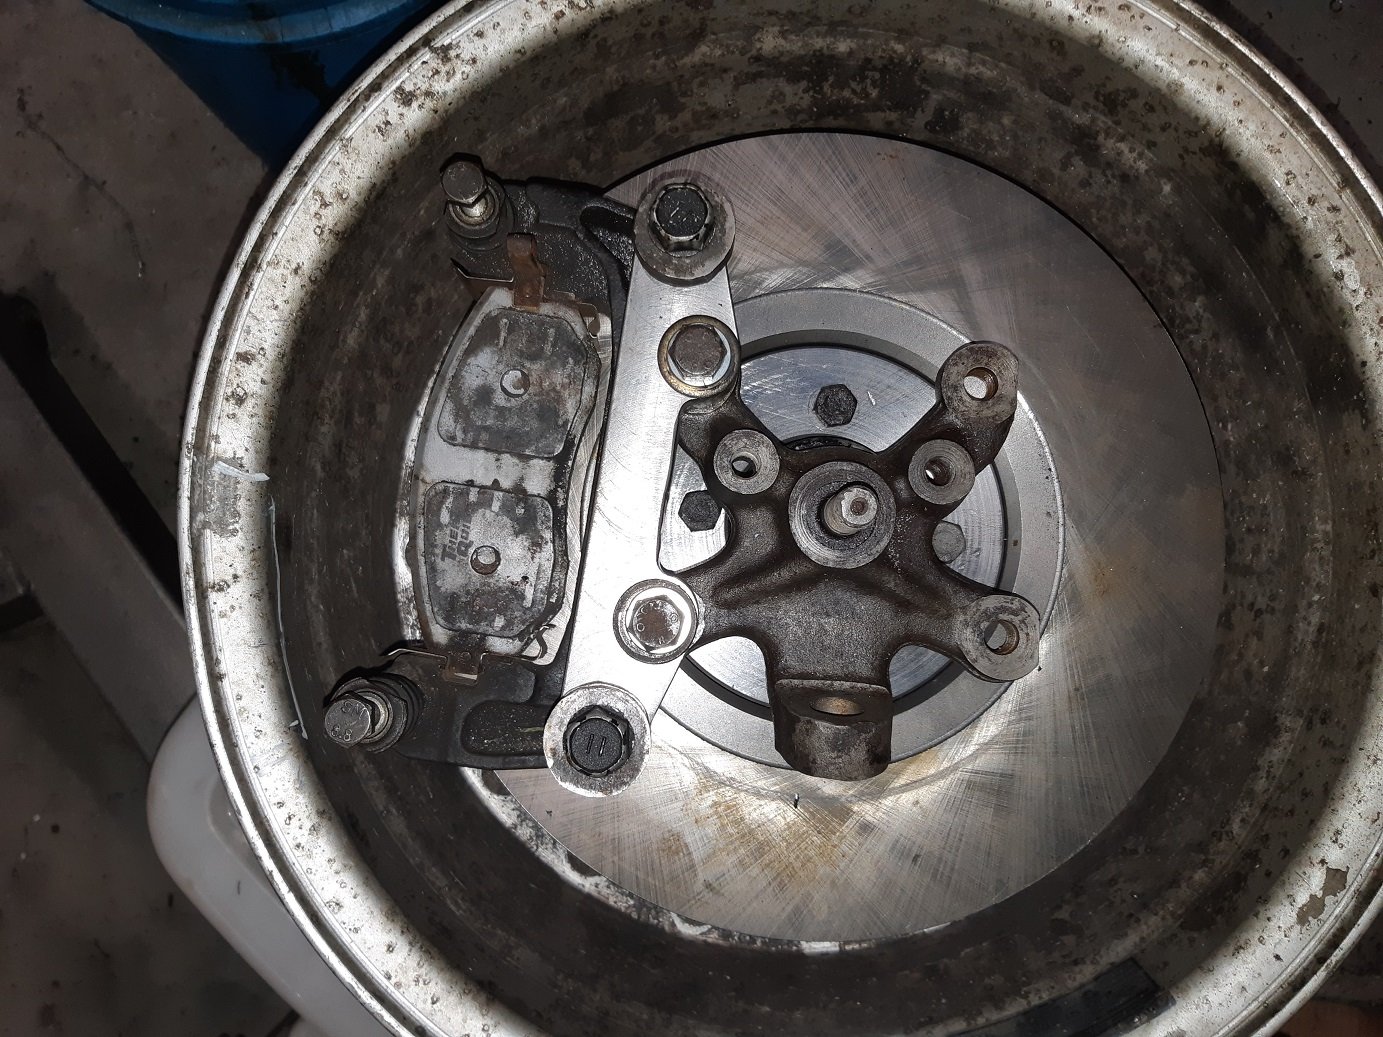
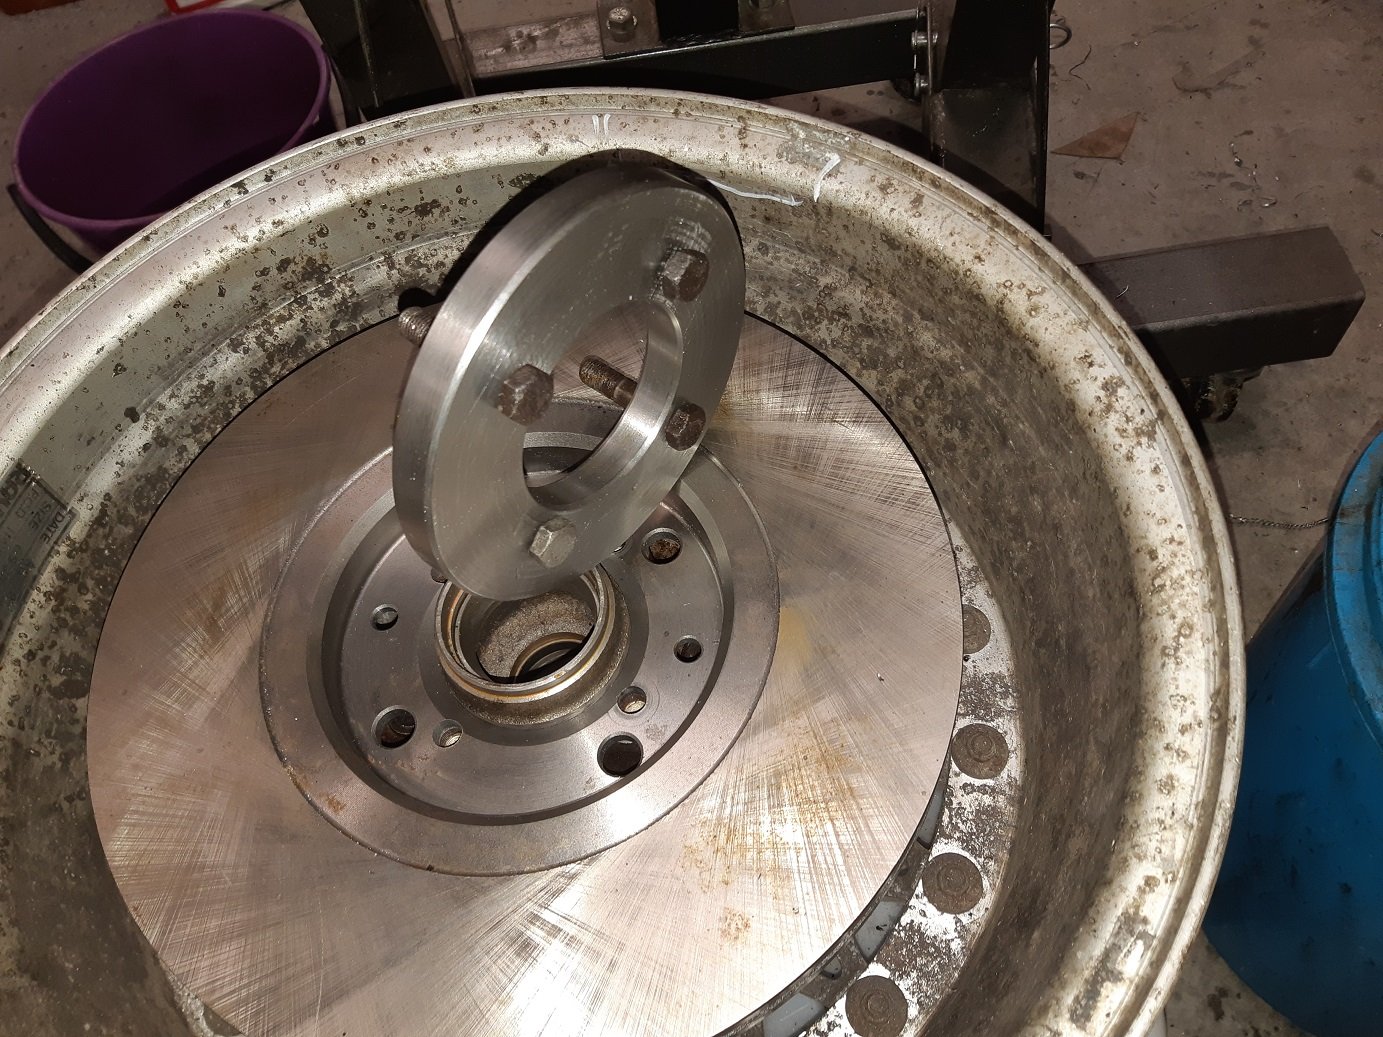
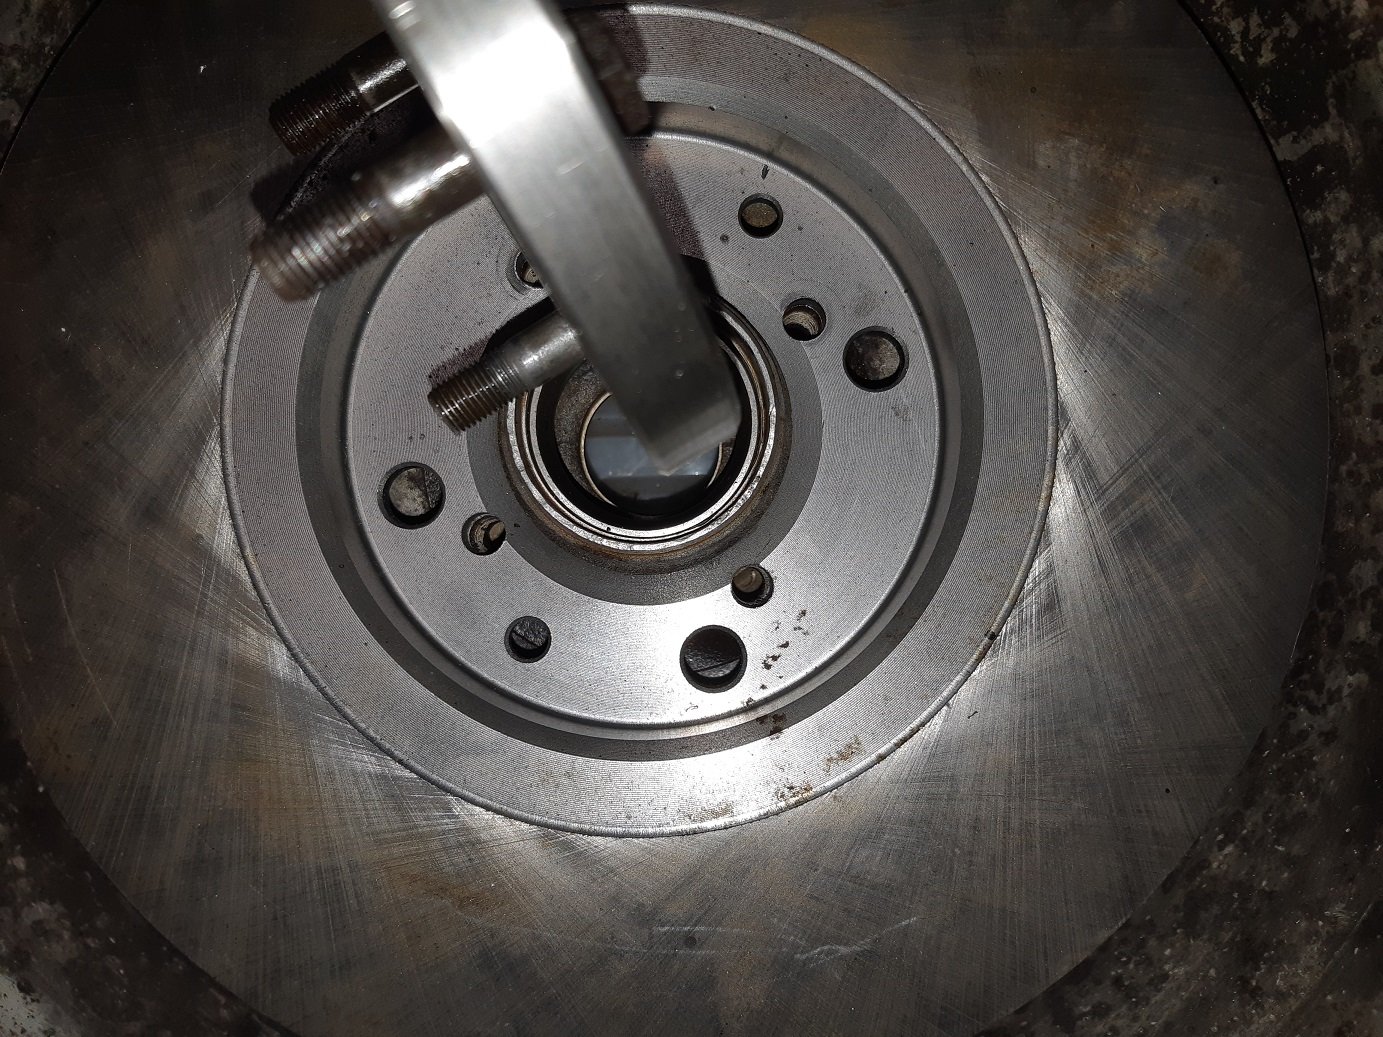
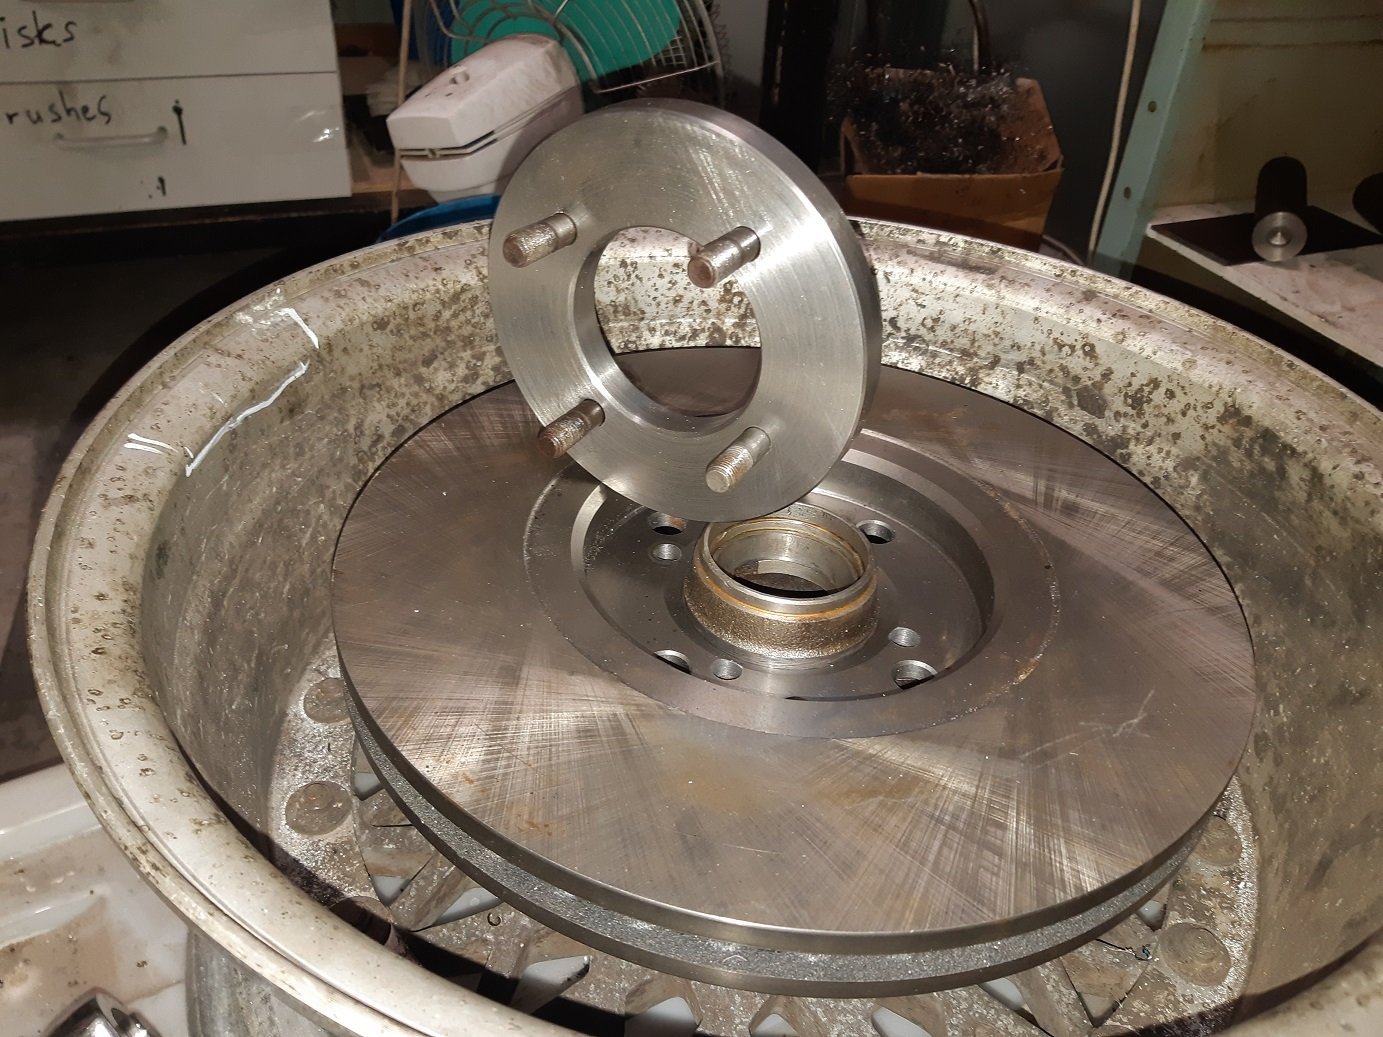
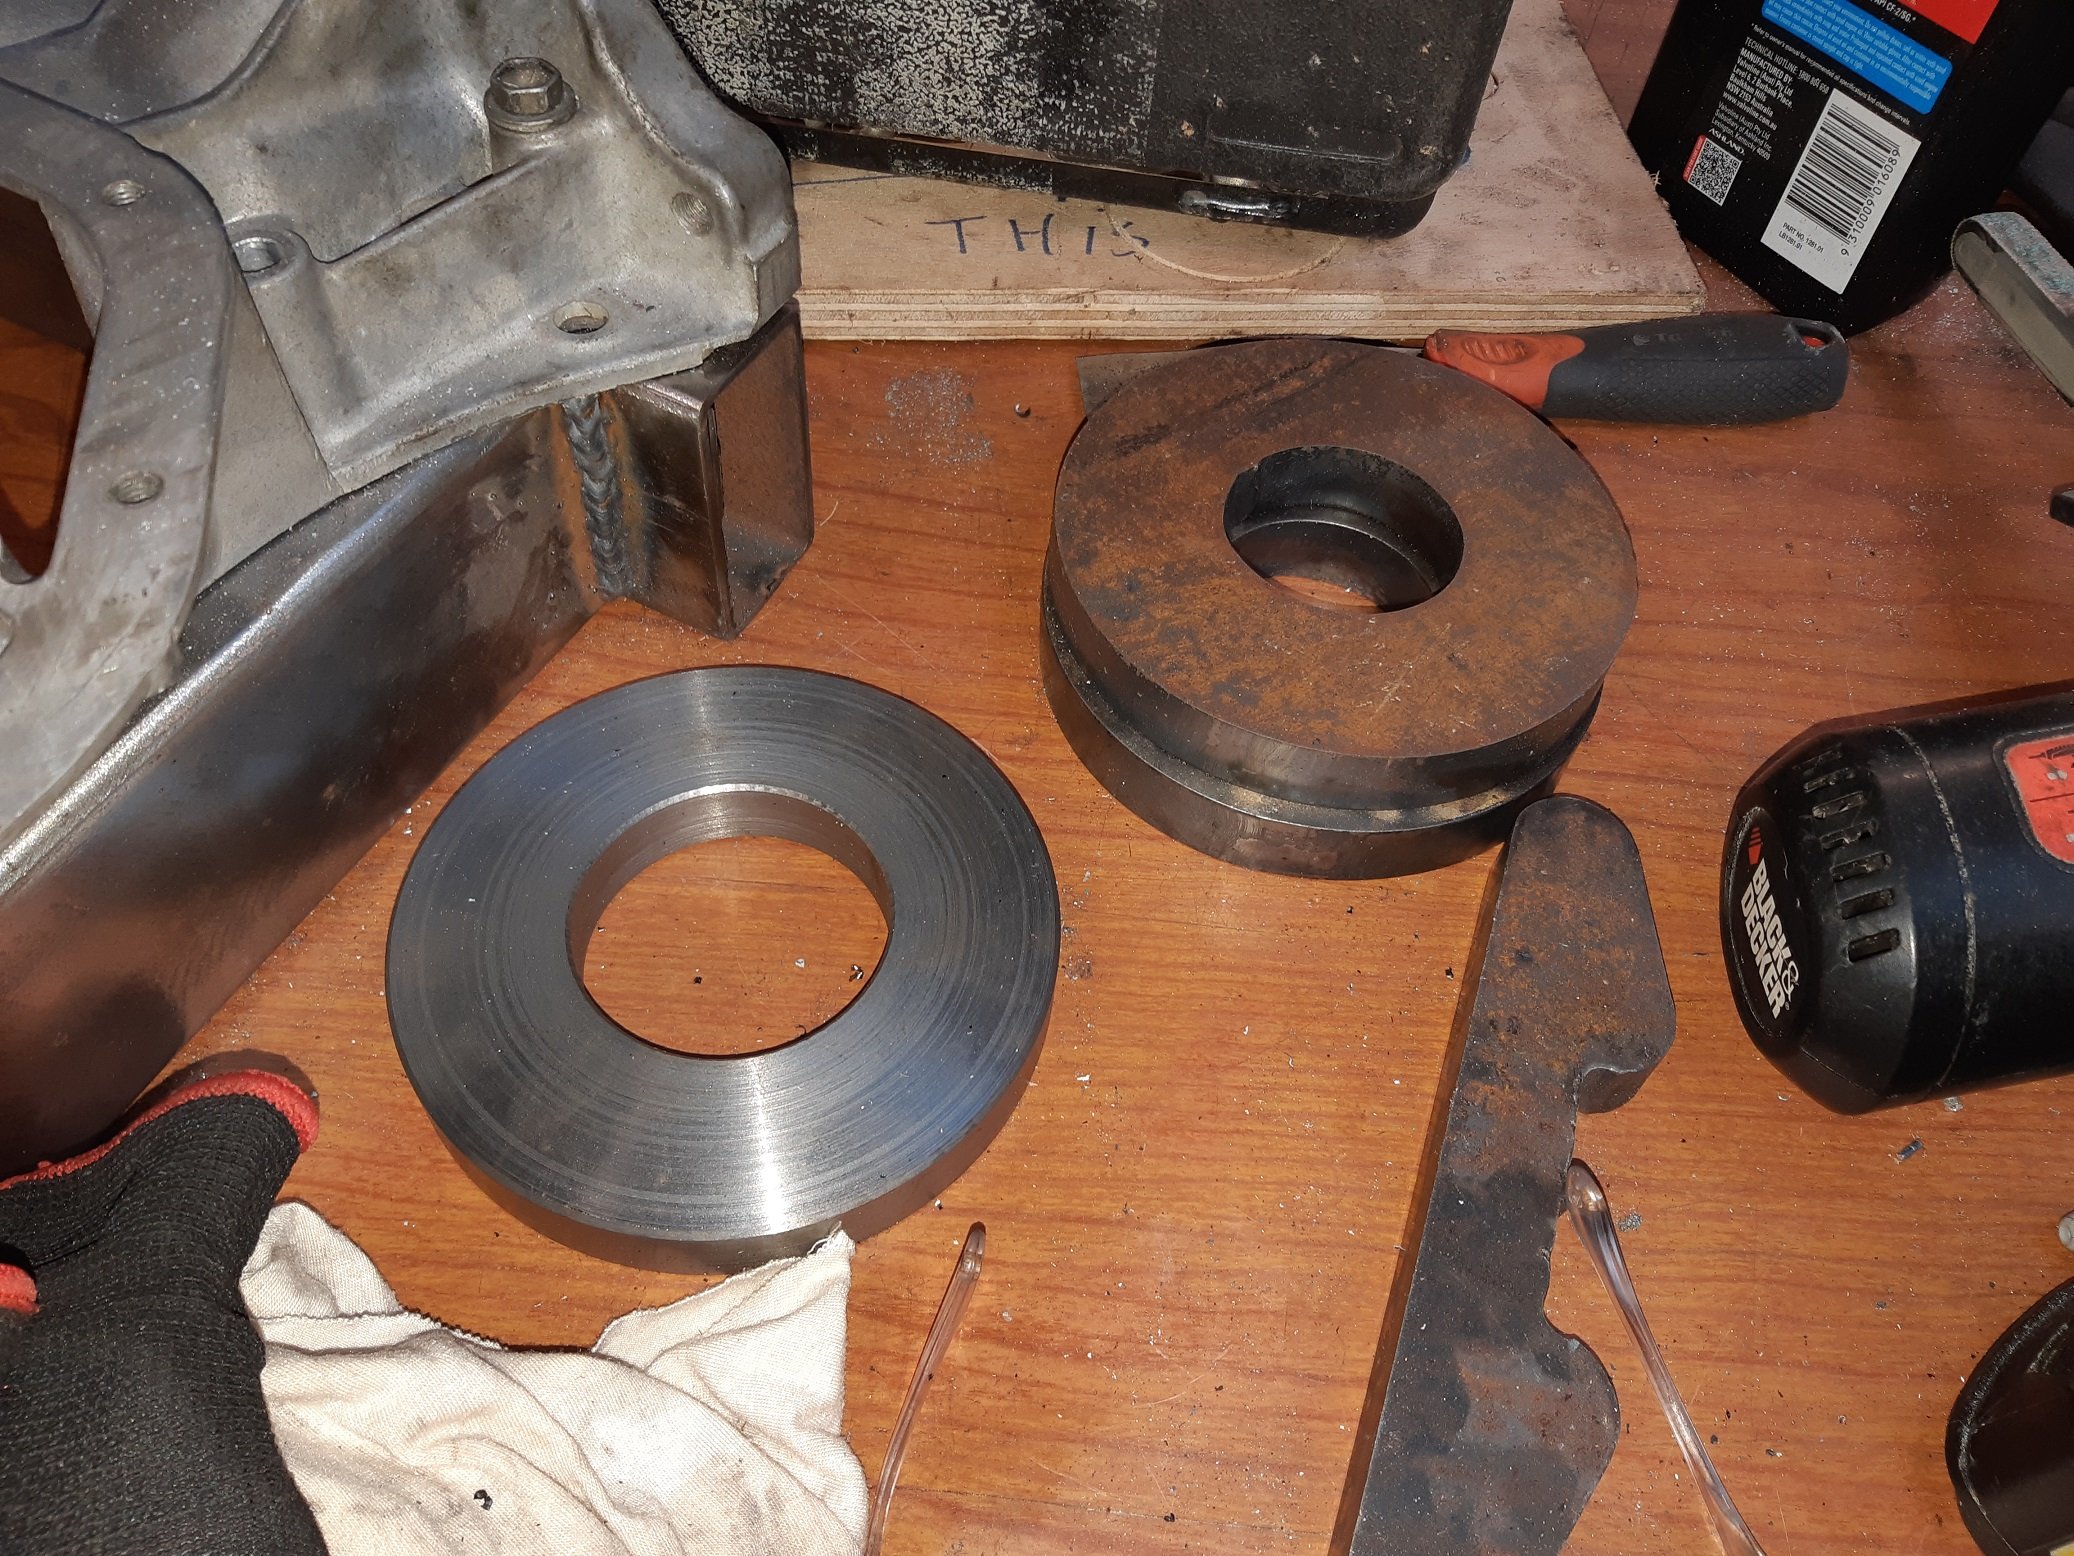
Sorted out the bore size so it's the same as the disc bore. Then I made a mandrel to stack the disc and the sandwich plate and the old disc, so I could use the holes in the old disc as a drilling guide.
-
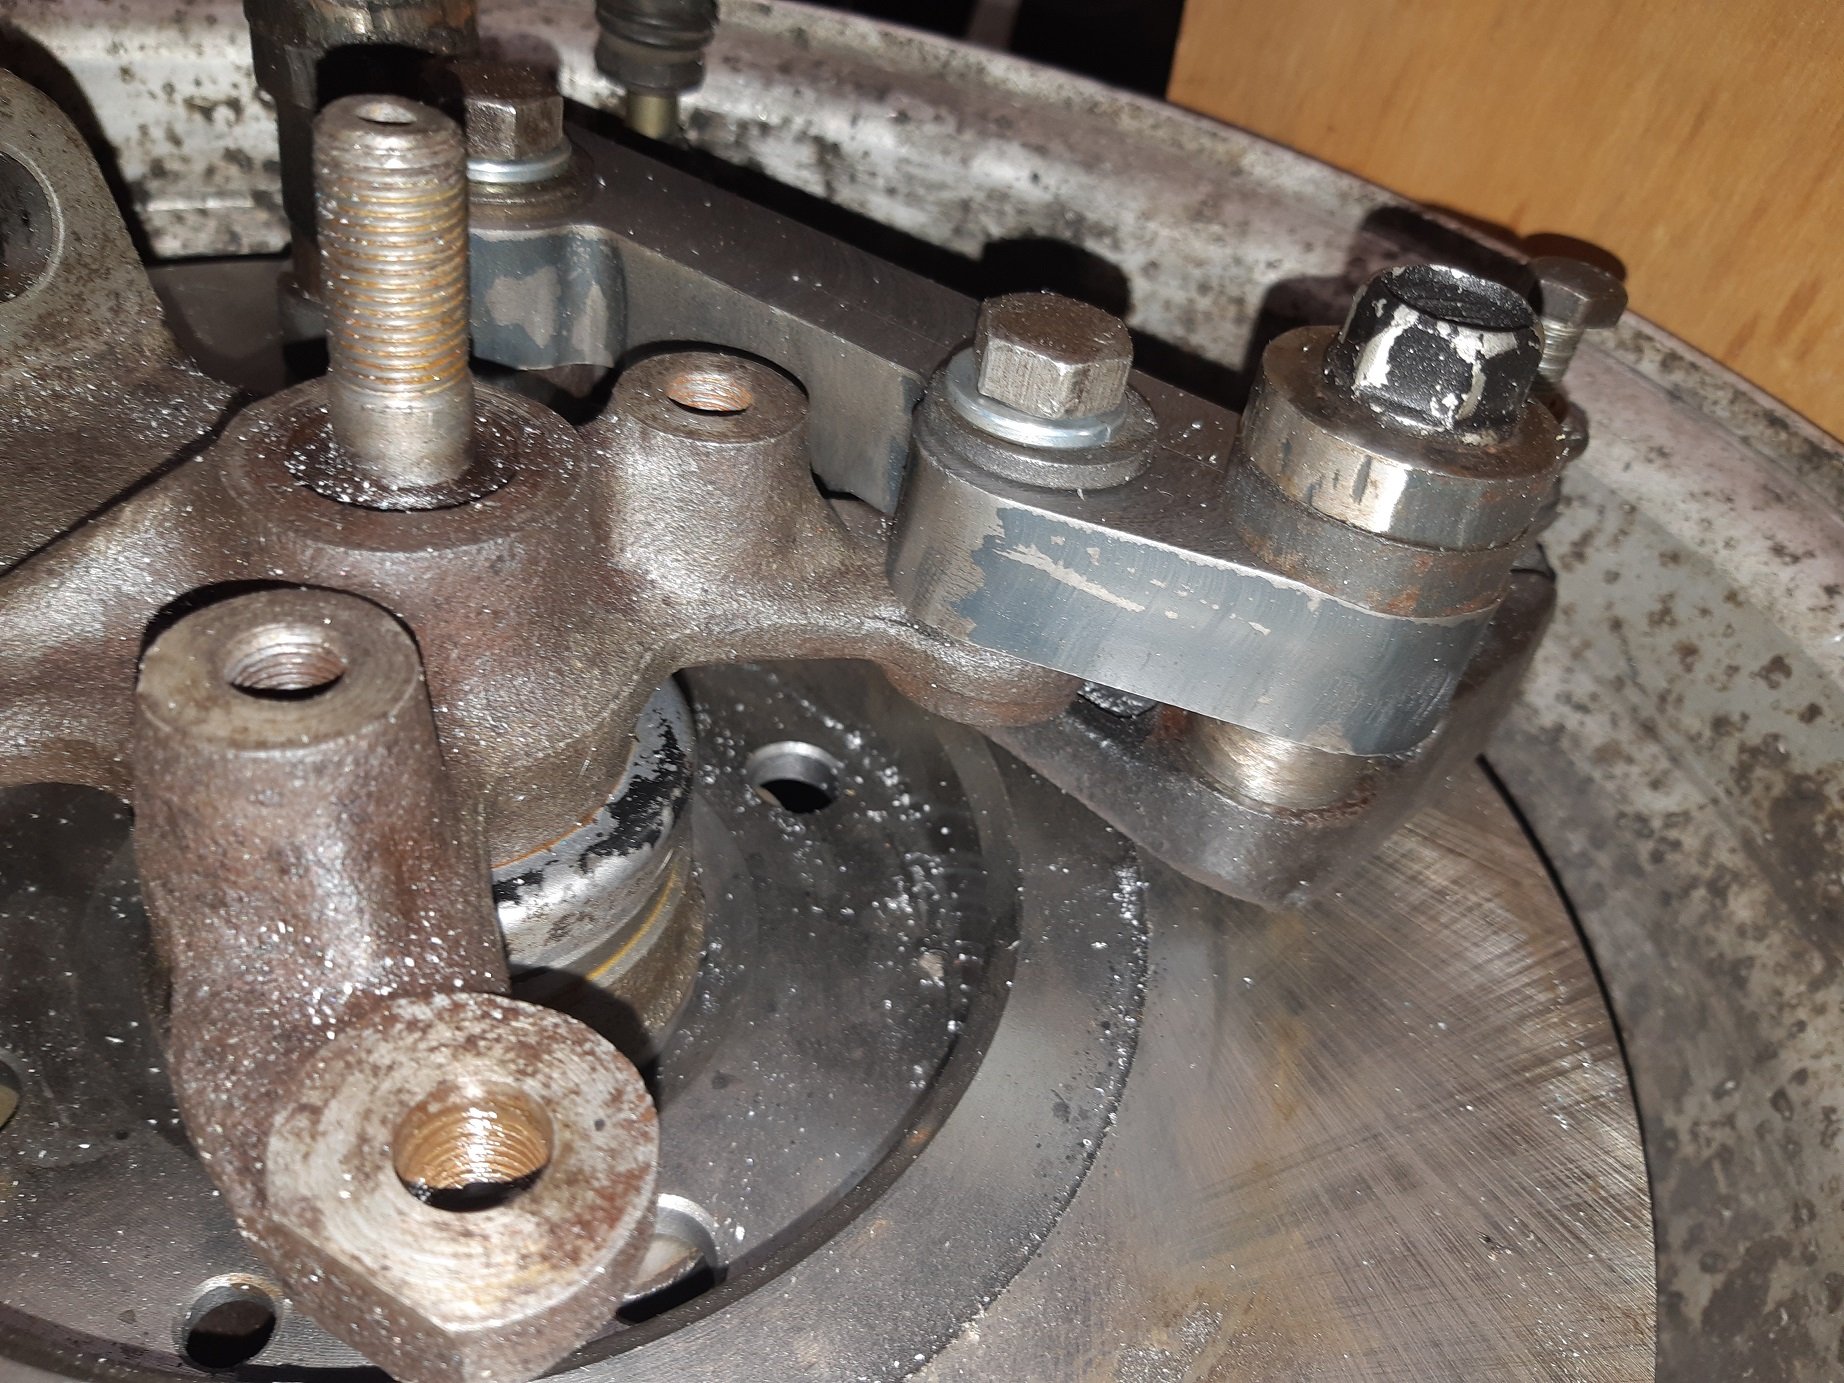
After properly measuring the thickness of the lugs on the old calipers, I could use the 50mm facing mill thing to take the bracket down to final thickness of 18mm(not 15mm). I also machined the other bracket to final thickness. I really need to sort out some parallels for the milling vice. I've been using my lathe tools as parallels :/ because they were the only things I had that were a suitable size and uniform thickness. Here's the 3rd blank which I hopefully won't need. Also the blanks for the sandwich plates for the discs. So glad I got them to plasma the 50mm hole in the middle, I would have taken forever to whittle out on my little lathe.
-
Got some 20mm plate plasma cut. I had a one spare cut in case I fuck it up. I started whittling at it with the mill. Managed to drill 4 holes in EXACTLY the right spots on the first one! I used the dial thingamies on the table adjuster wheels. I still need to machine it down to 15mm, make some 11mm spacers and get some bolts the right length.
- 191 replies
-
- 13
-
-
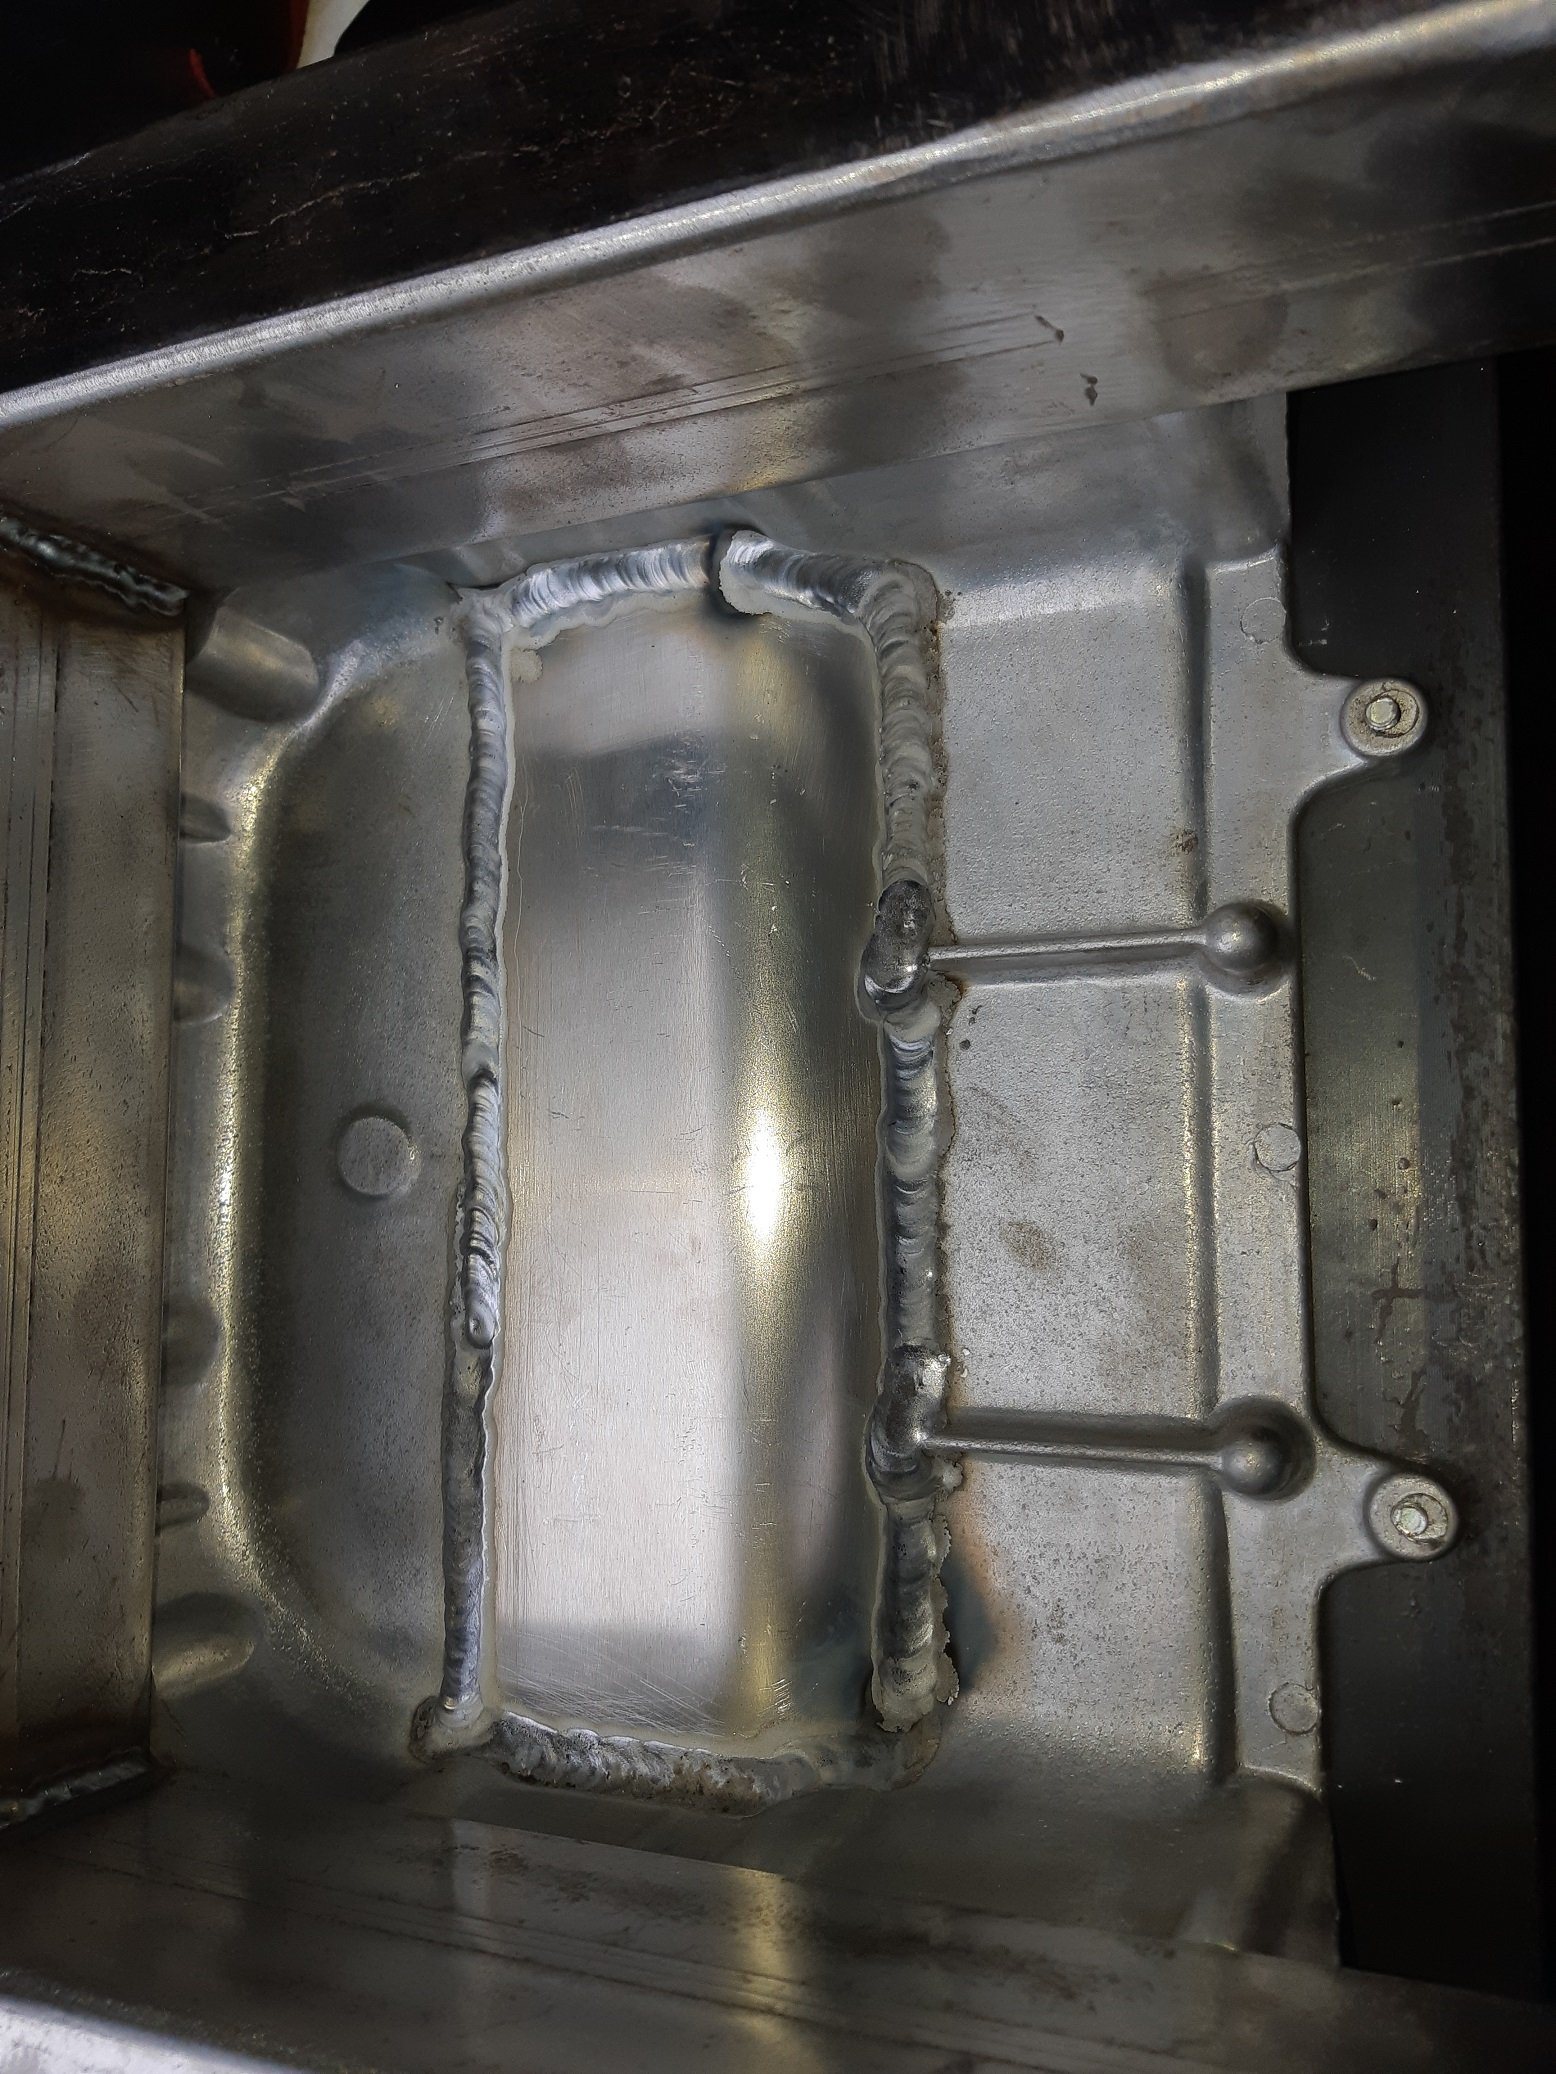
So despite bolting it to a big bit of metal, the shrinking from the welded patch has lifted the front of the sump up about 1-2mm. Pretty sure if it was not clamped down at all I would have ended up with a pringle. Not sure what I should do. Bolt it to the engine and hope for the best? Bolt it to the the jig and heat it up? With...? Found some guy on Youtube showing how to take a bow out of an aluminium cylinder head by clamping it to a plate with some shims so the clamping reverses the bow, then stick it in a 260 Celsius oven for 5-6 hours. This seems like the go, but no idea who could do this and how much it would cost.
-
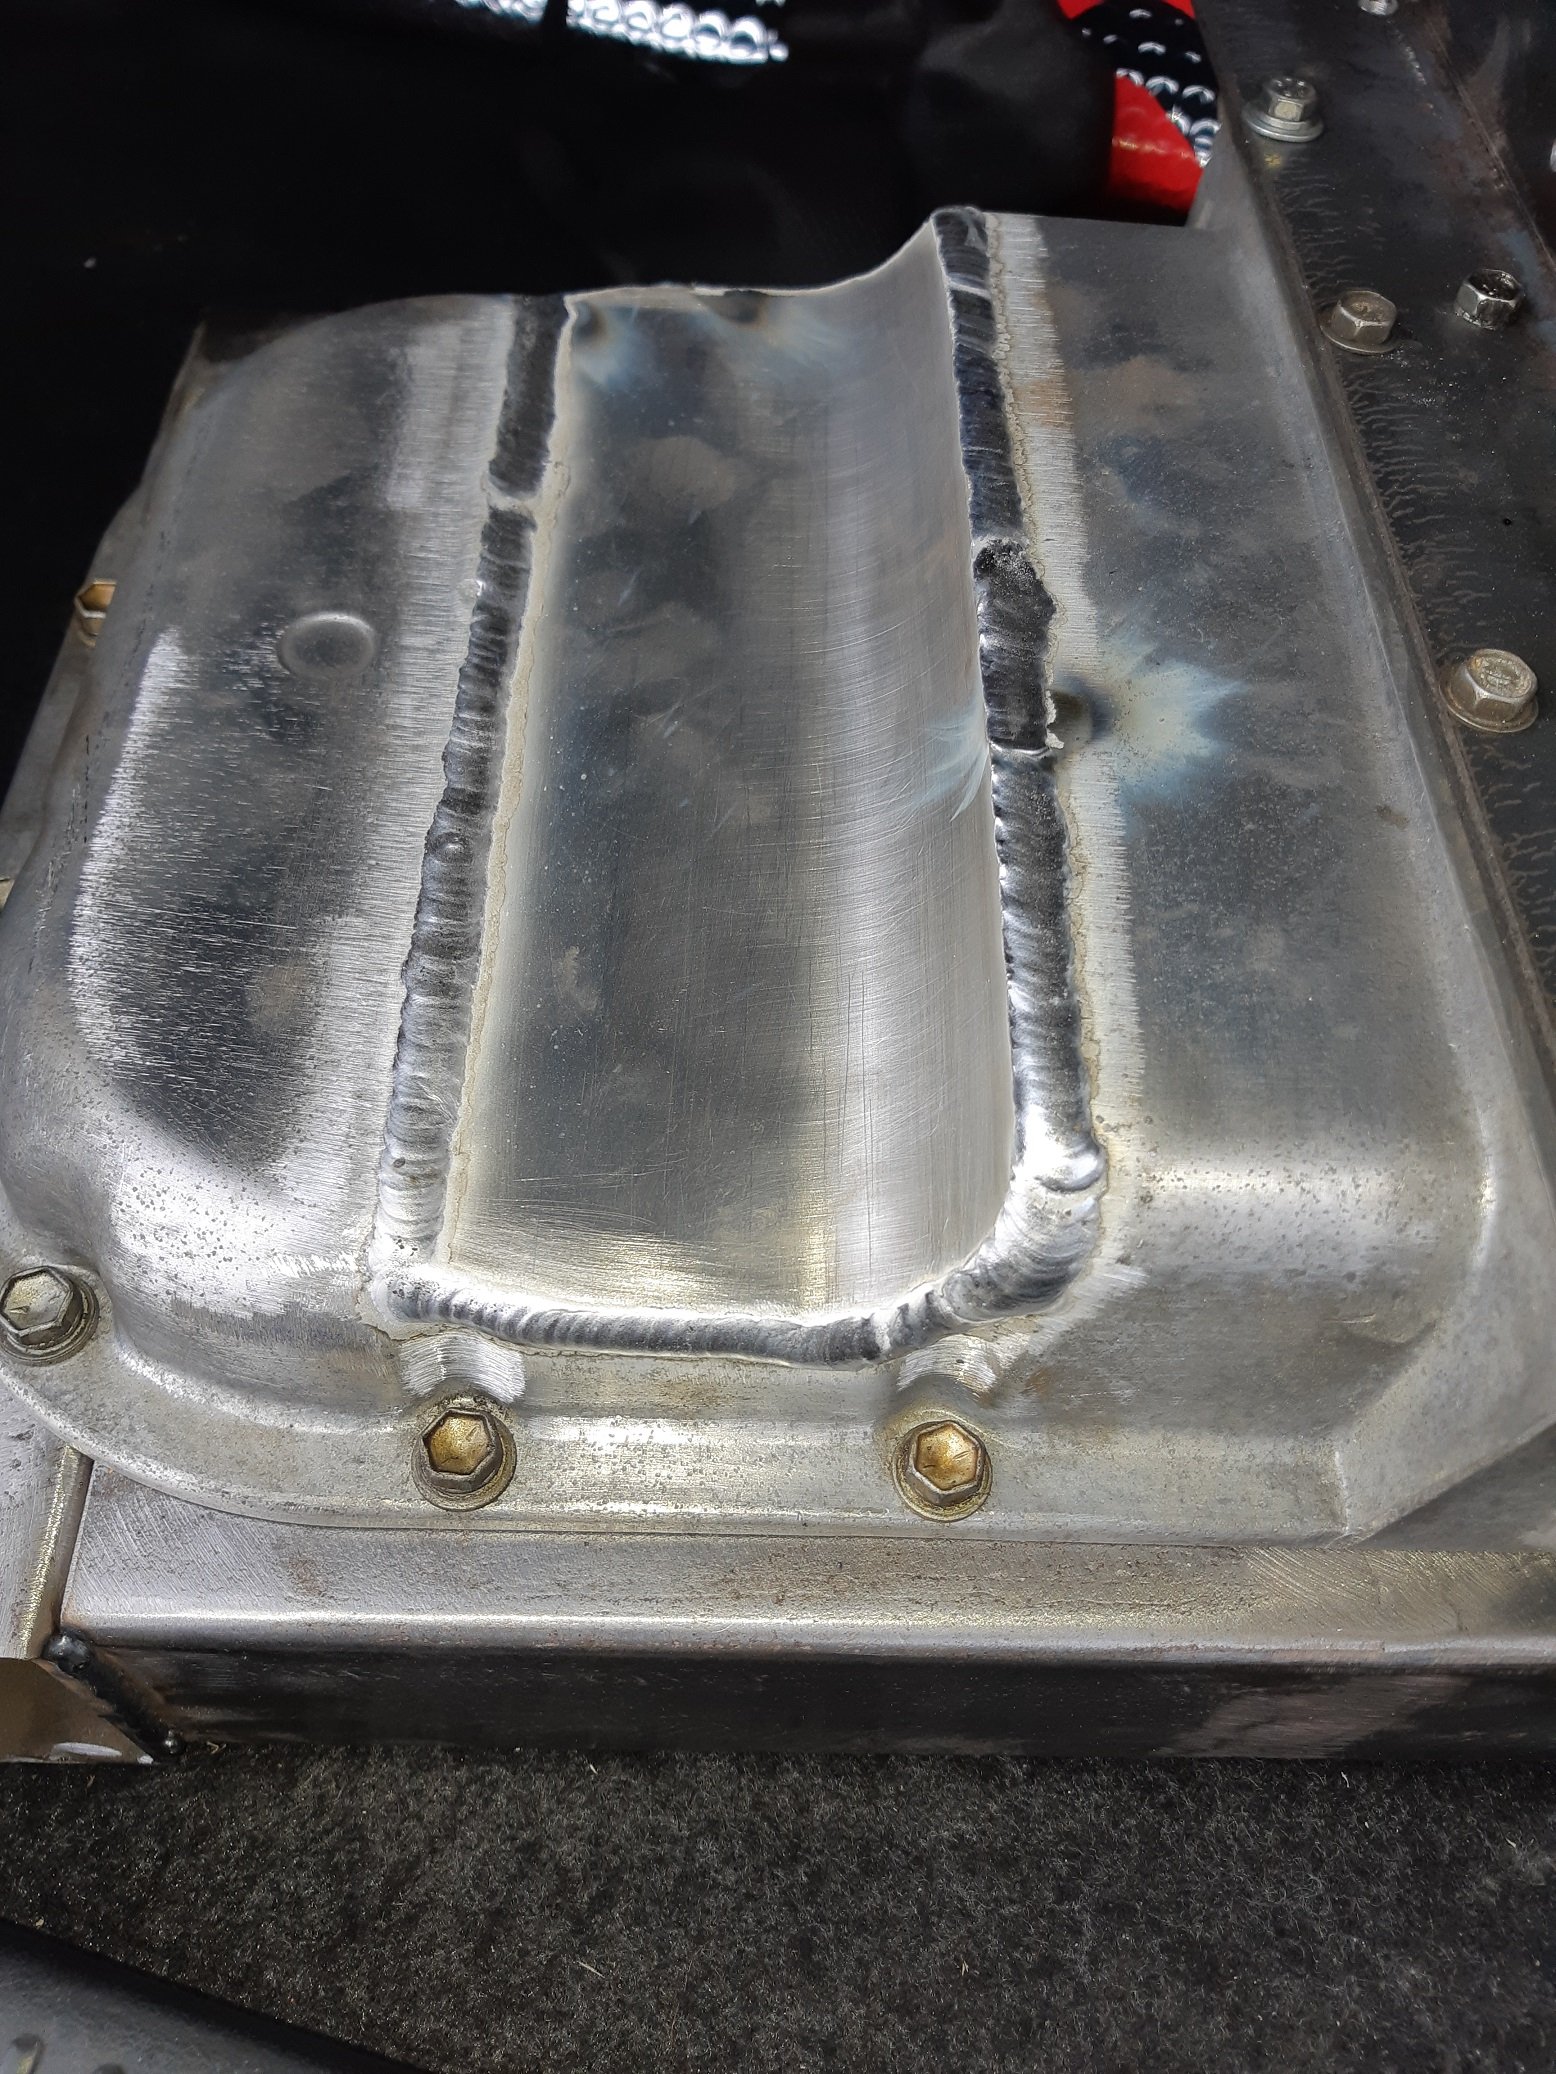
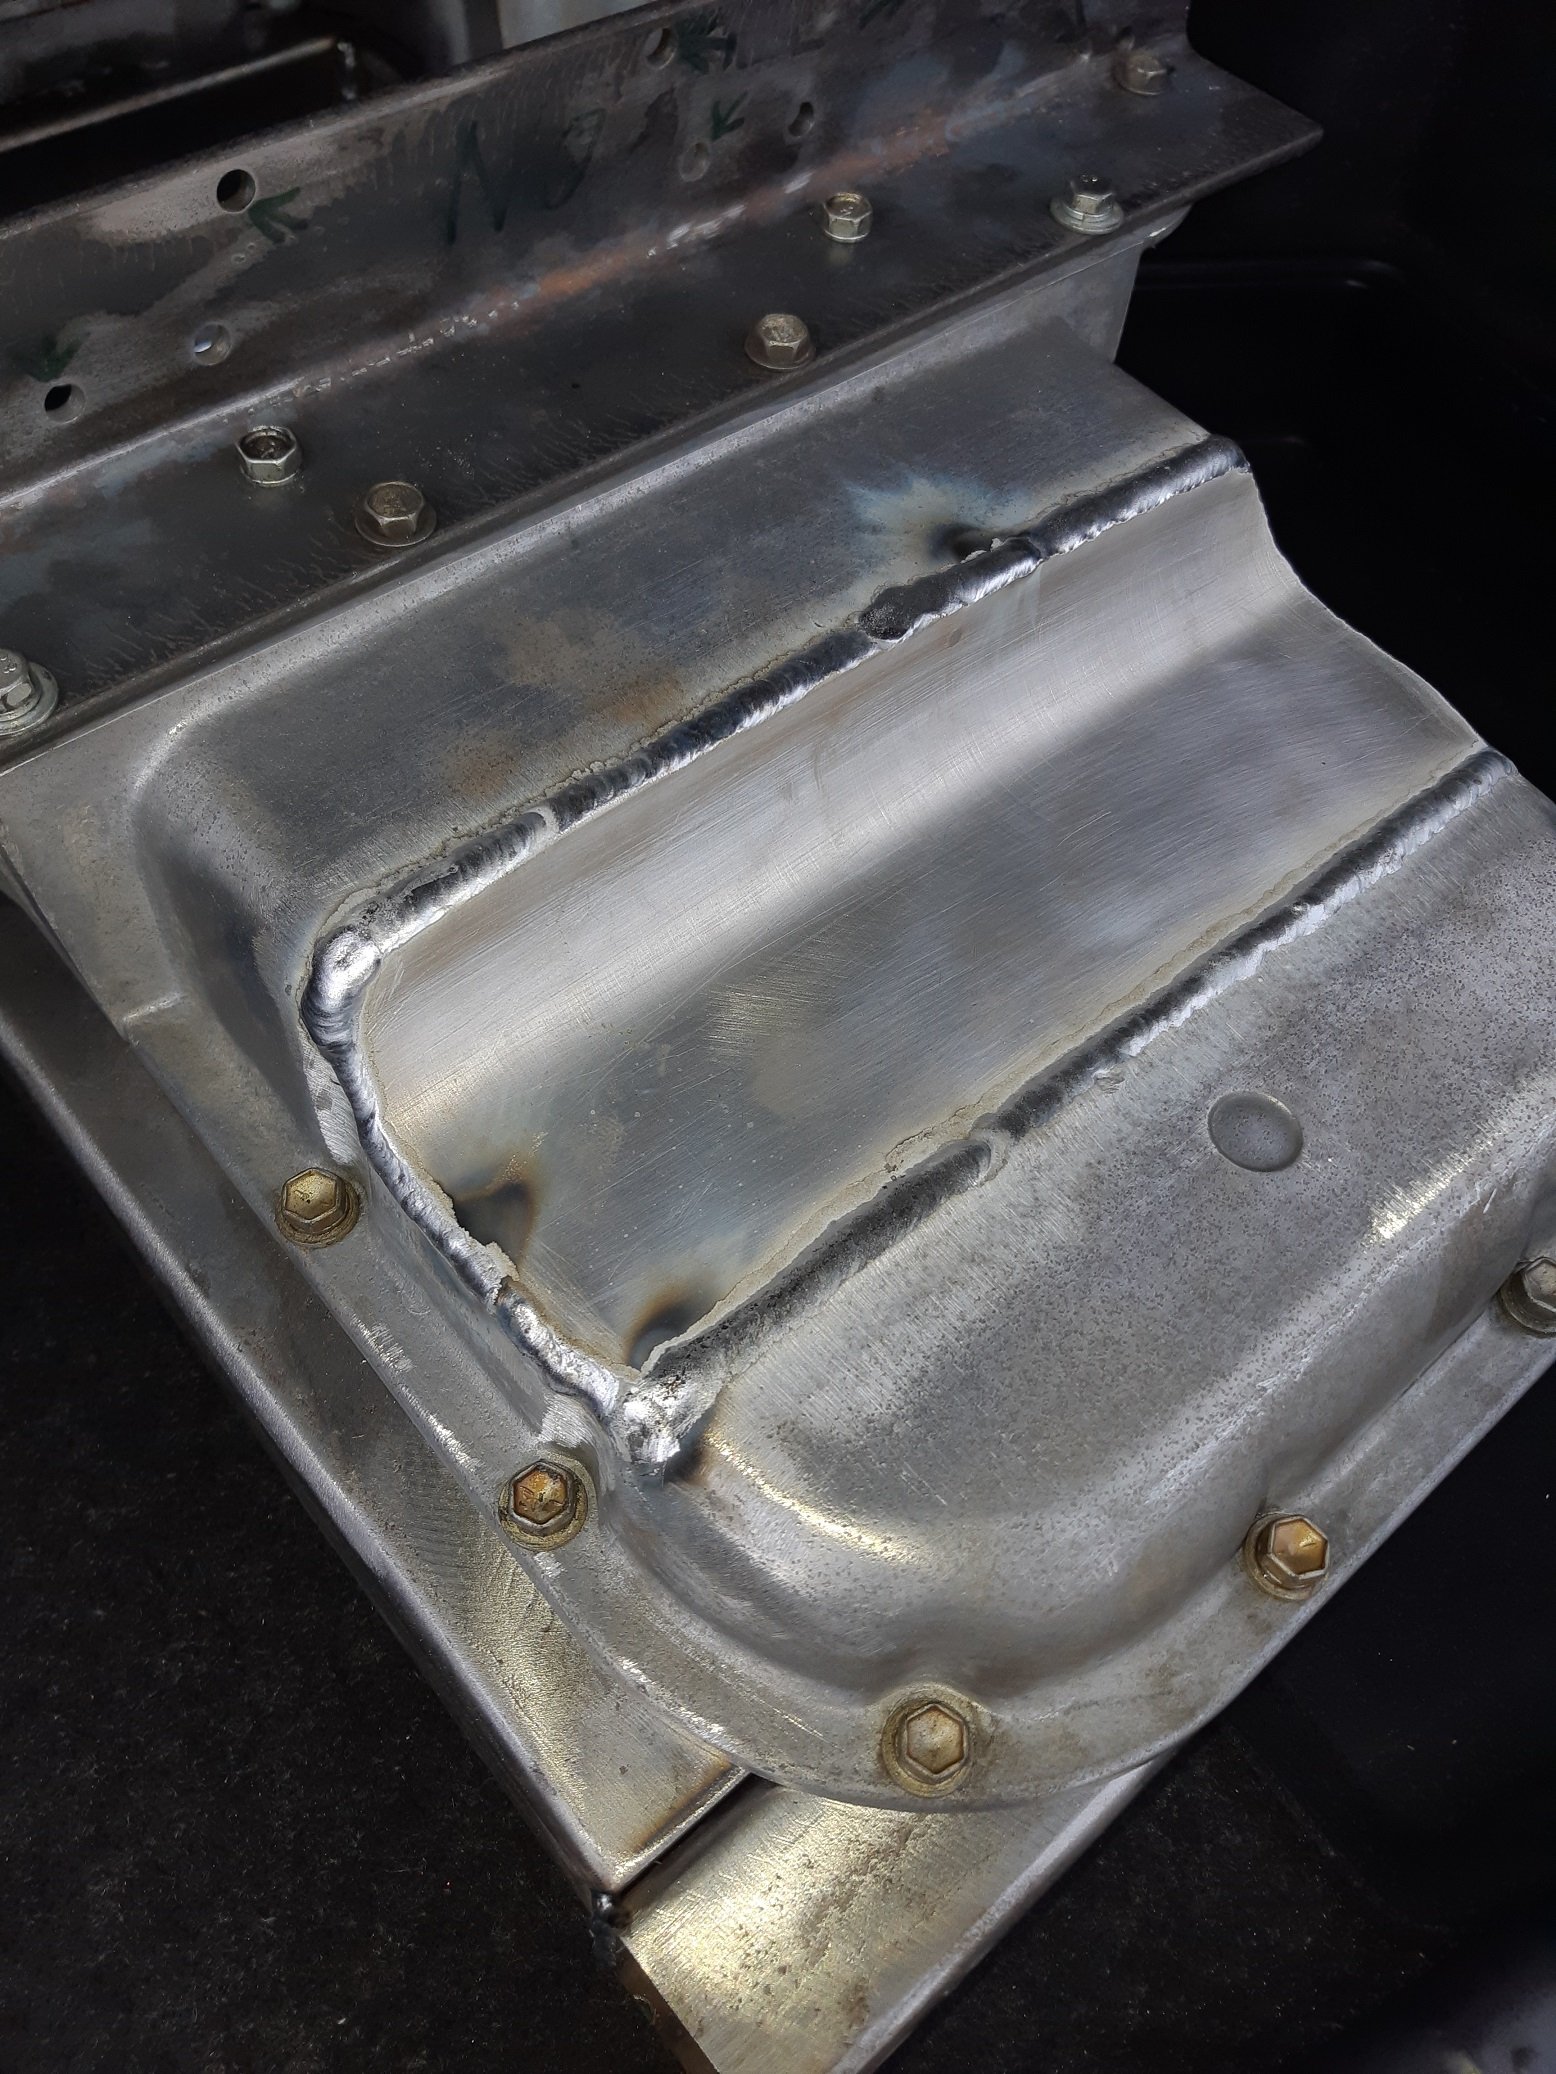
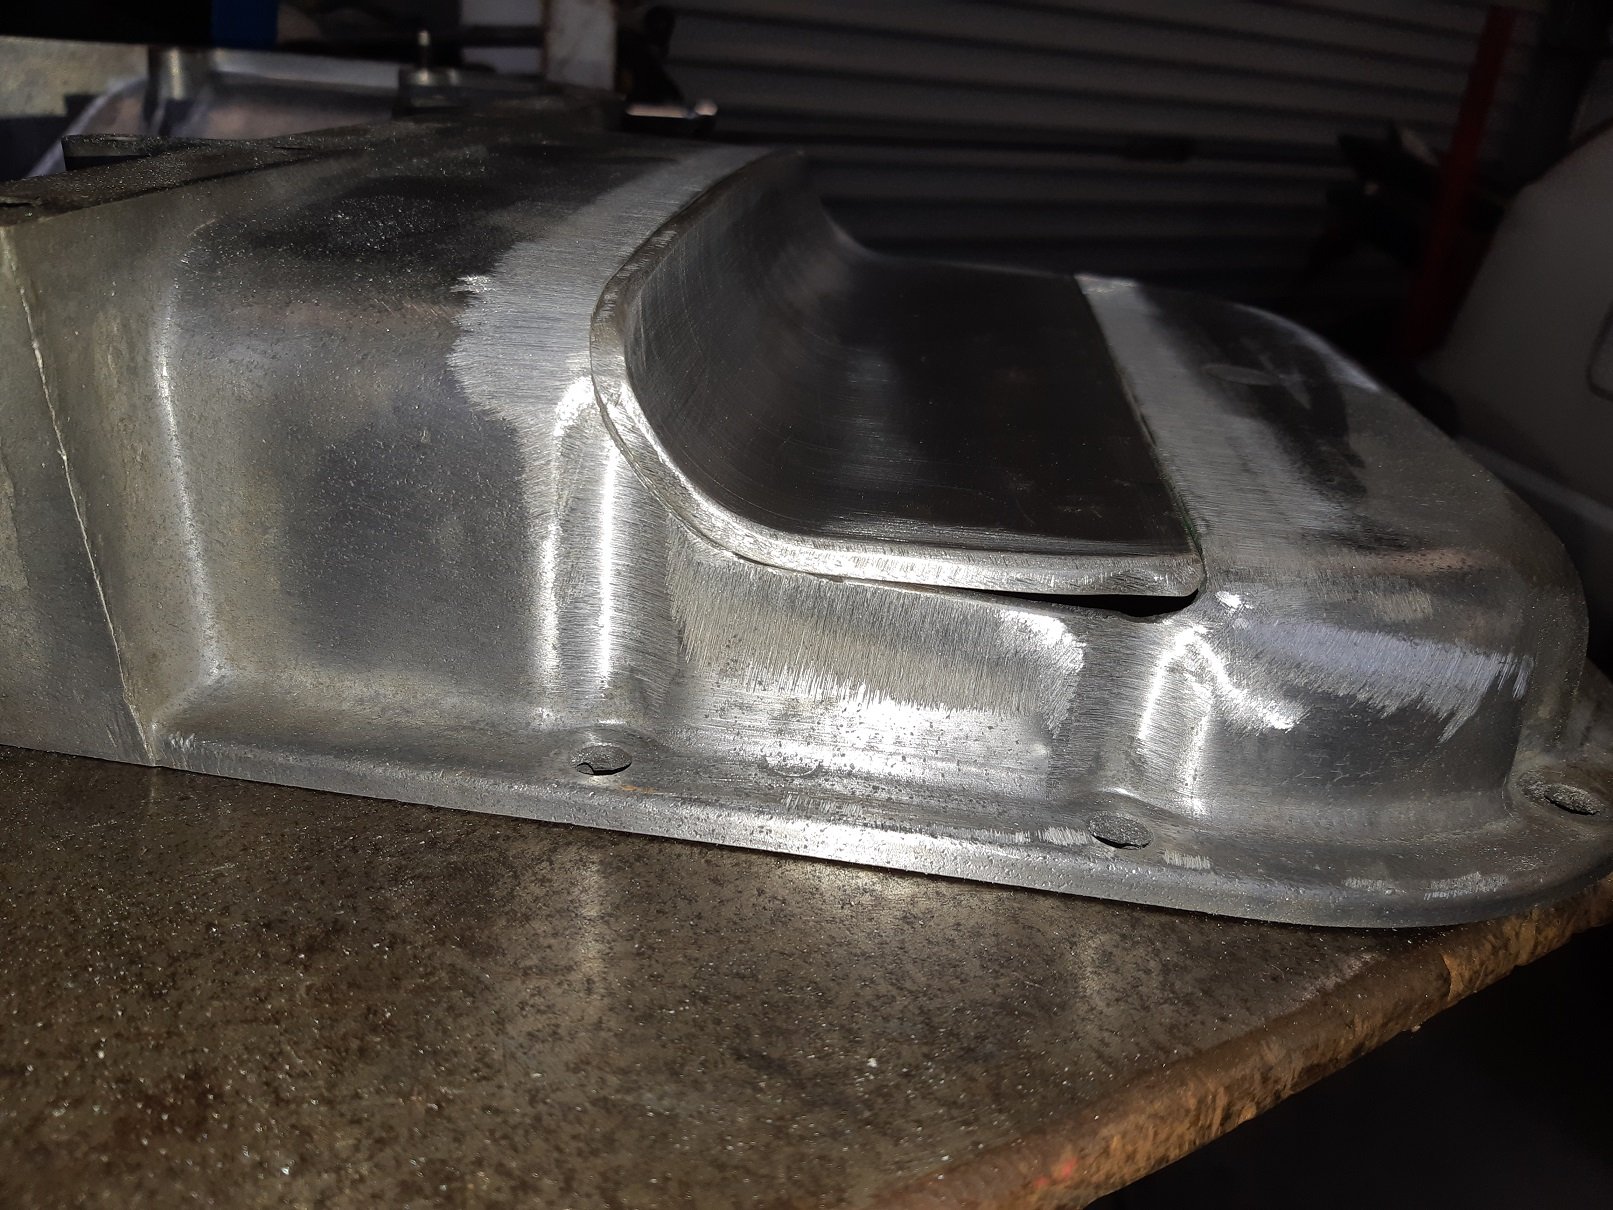
Jut picked the sump up from Brian. Welds look good. He said it would be okay to linish the outside welds so it looks prettier.
- 191 replies
-
- 12
-
-
Just dropped the sump off with Brian Howat to TIG the patch in.
-
Made an anti-banana jig. You may wonder "why so many holes in top bit?". Well, I was rushing, and you know that episode of Mr Bean where he goes to the dentist?
- 191 replies
-
- 11
-
-
File file file file file file file file file file file file file file file file file file file file file file file file file file file file file file file file file file file file file file file file file file file file file file file file file file file file file file file file file file file file file file file file file file file file file file file file file file file file file file file file file file file file file file file file file file file file file file file file file file file file file file file file file file file file file file file file file file file file file file file file file file file file file file file file file file file file file file file file file file file file file file file file file file file file file file file file file file file file file file file file file file file file file file file file file file file file file file file file file file file file file file file file file file file file file file file file file file file file file file file file file file file file file file file file file file file file file file file file file file file file file file file file file file file file file file file file file file file file file file file file file file file file file file file file file file file file file file file file file file file file file file file file file file file file file file file file file file file file file file file file file file file file file file file file file file file file file file file file file file file file file file file file file file file file file file file file file file file file file file file file file file file file file file file file file file file file file file file file file file file file file file file file file file file file file file file file file file file file file file file file file file file file file file file file file file file file file file file file file file file file file file file file file file file file file file file file file file file file file file file file file file file file file file file file file file file file file file file file file file file file file file file file file file file file file file file file file file file file file file file file file file file file file file file file file file file file file file file file file file file file file file file file file file file file file file file file file file file file file file file file file file file file file file file file file file file file file file file file file file file file file file file file file file file file file file file file file file file file file file file file file file file file file file file file file file file file file file file file file file file file file file file file file file file file file file file file file file file file file file file file file file file file file file file file file file file file file file file file file file file file file file file file file file file file file file file file file file file file file file file file file file file file file file file file file file file file file file file file file file file file file file file file file file file file file file file file file file file file file file file file file file file file file file file file file file file file file file file file file file file file file file file file file file file file file file file file file file file file file file file file file file file file file file file file file file file file file file file file file file file file file file file file file file file file file file file file file file file file file file file file file file file file file file file file file file file file file file file file file file file file file file file file file file file file file file file file file file file file file file file file file file file file file file file file file file file file file file file file file file file file file file file file file file file file file file file file file file file file file file file file file file file file file file file file file file file file file file file file file file etc... Unfortunately I cut the hole too big so there are some large gaps. I didn't want to push the patch in further to close up those gaps because it would create an area where the oil would not drain from. Hopefully the guy I get to weld it can deal with those gaps. I'll be making a jig to bolt the whole thing to so it doesn't turn into a banana.
- 191 replies
-
- 15
-
-
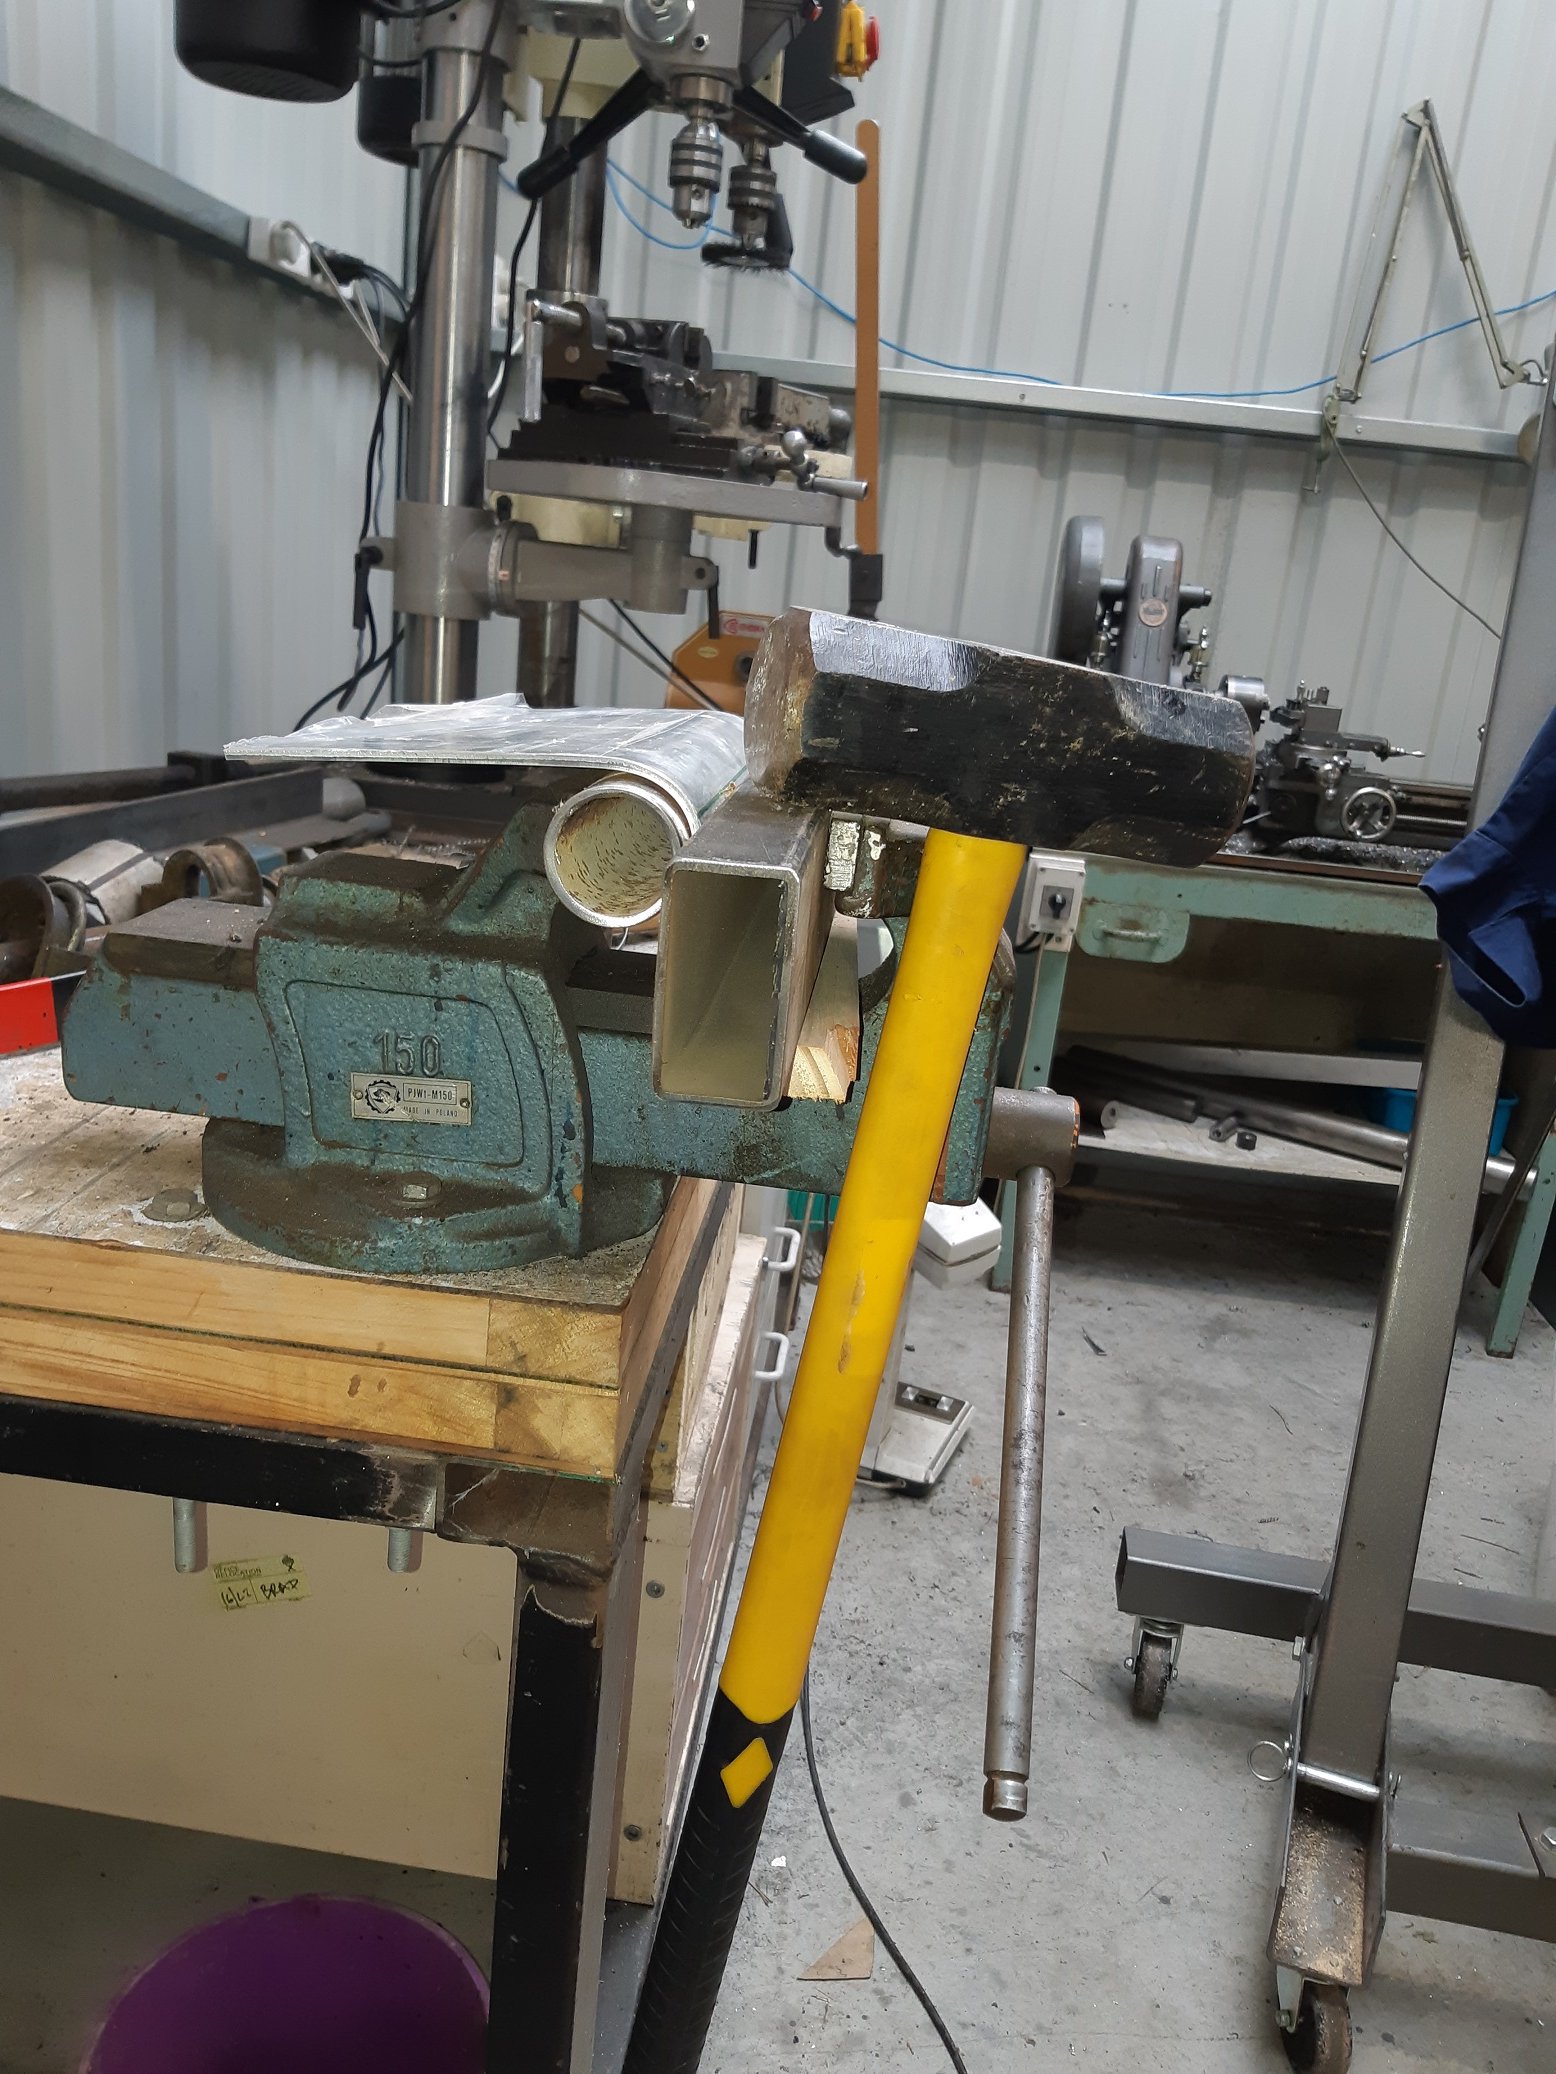
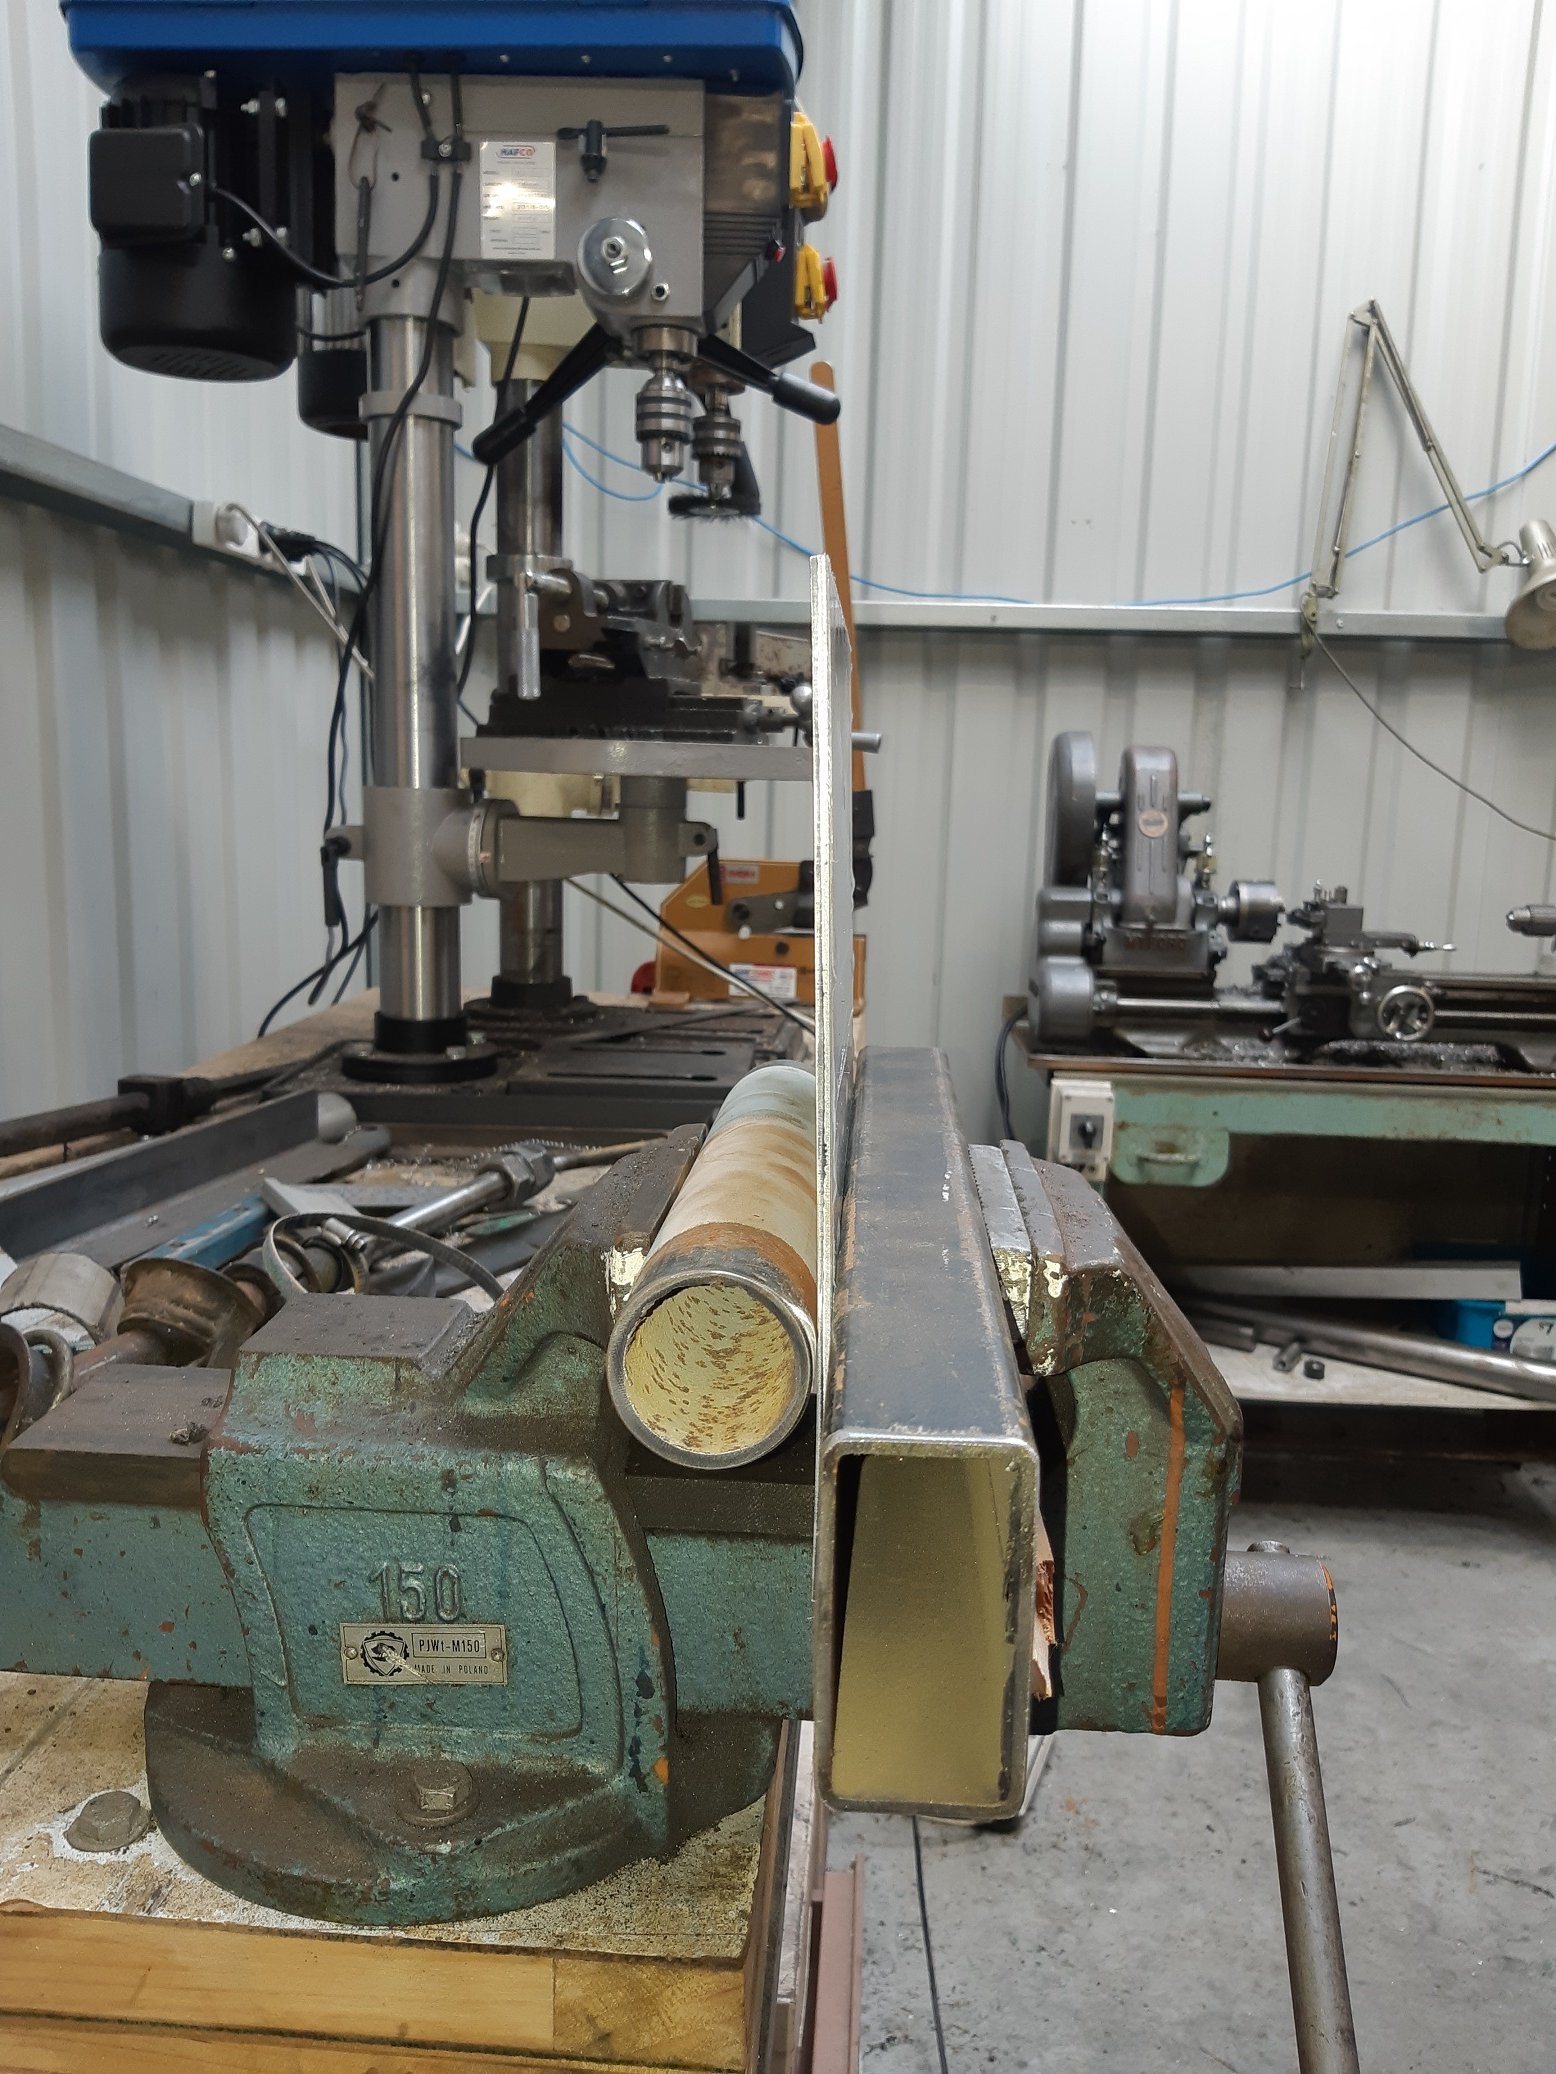
How to put a curve in a 4mm thick aluminium sheet to fill the hole you cut in the sump. Get a random bit of thick wall rusty pipe about the right diameter. Wrap it in card so you don't mash rust into the aluminium. Then, using another bit of square section, clamp it in the vice along the bend line. Put a big bit of wood against it and hit it with a mallet. Pick the wood up off the floor and put it back. Hit it again. Pick the wood up off the floor and put it back. Hit it as hard as you can. Pick the wood up off the floor and put it back. Wail on it like a crazy person. Each time, picking the wood up off the floor and put it back. Observe how much it HASN'T FUCKING MOVED AT ALL. Switch to sledge hammer, hit it literally five times. Done.
- 191 replies
-
- 16
-
-
I cut a hole in this sump I paid lots of money for. I need to get some 4-5mm sheet to fill the hole. I want to make up a jig/brace/plate I can bolt it to so there is no warping when it gets welded.
-
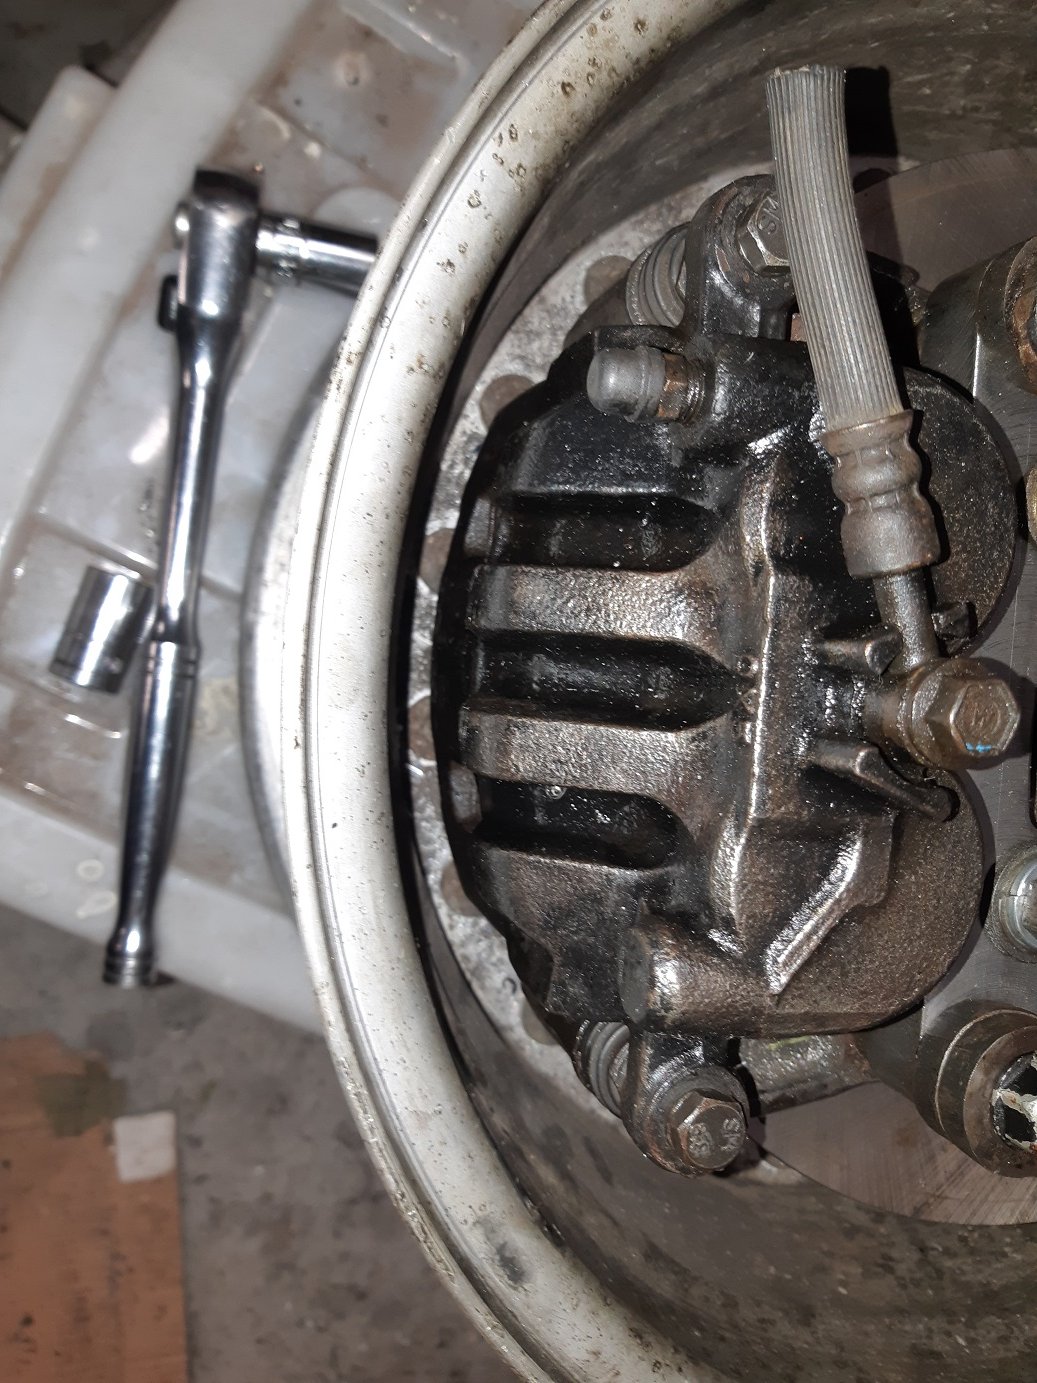
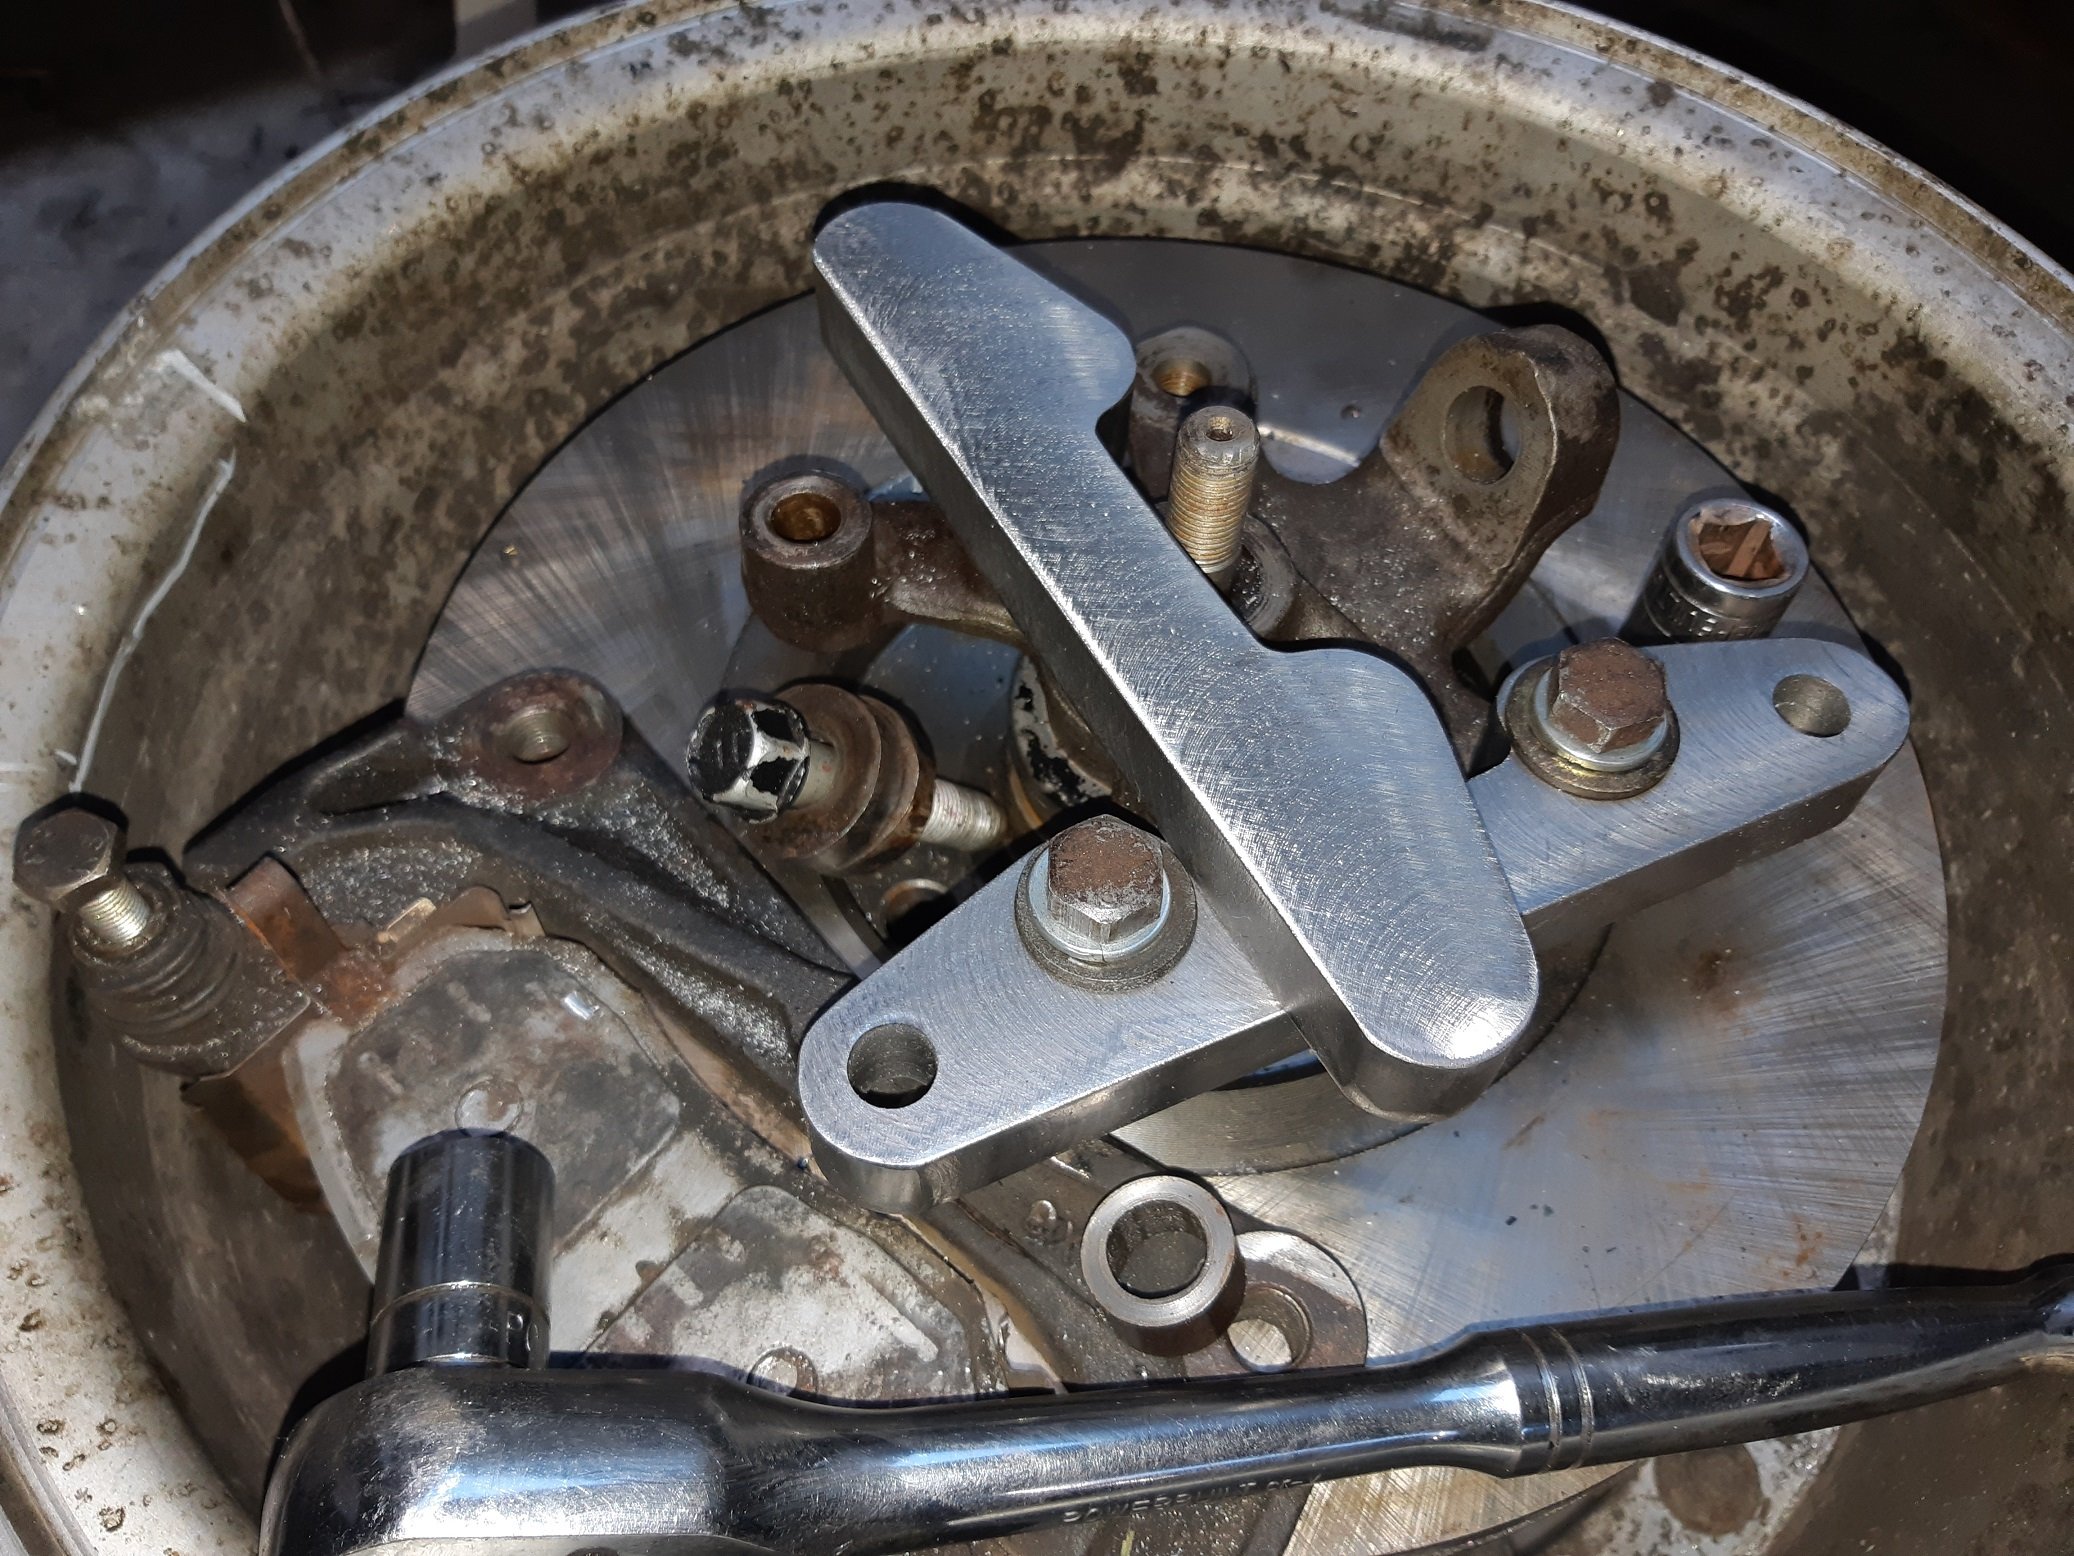
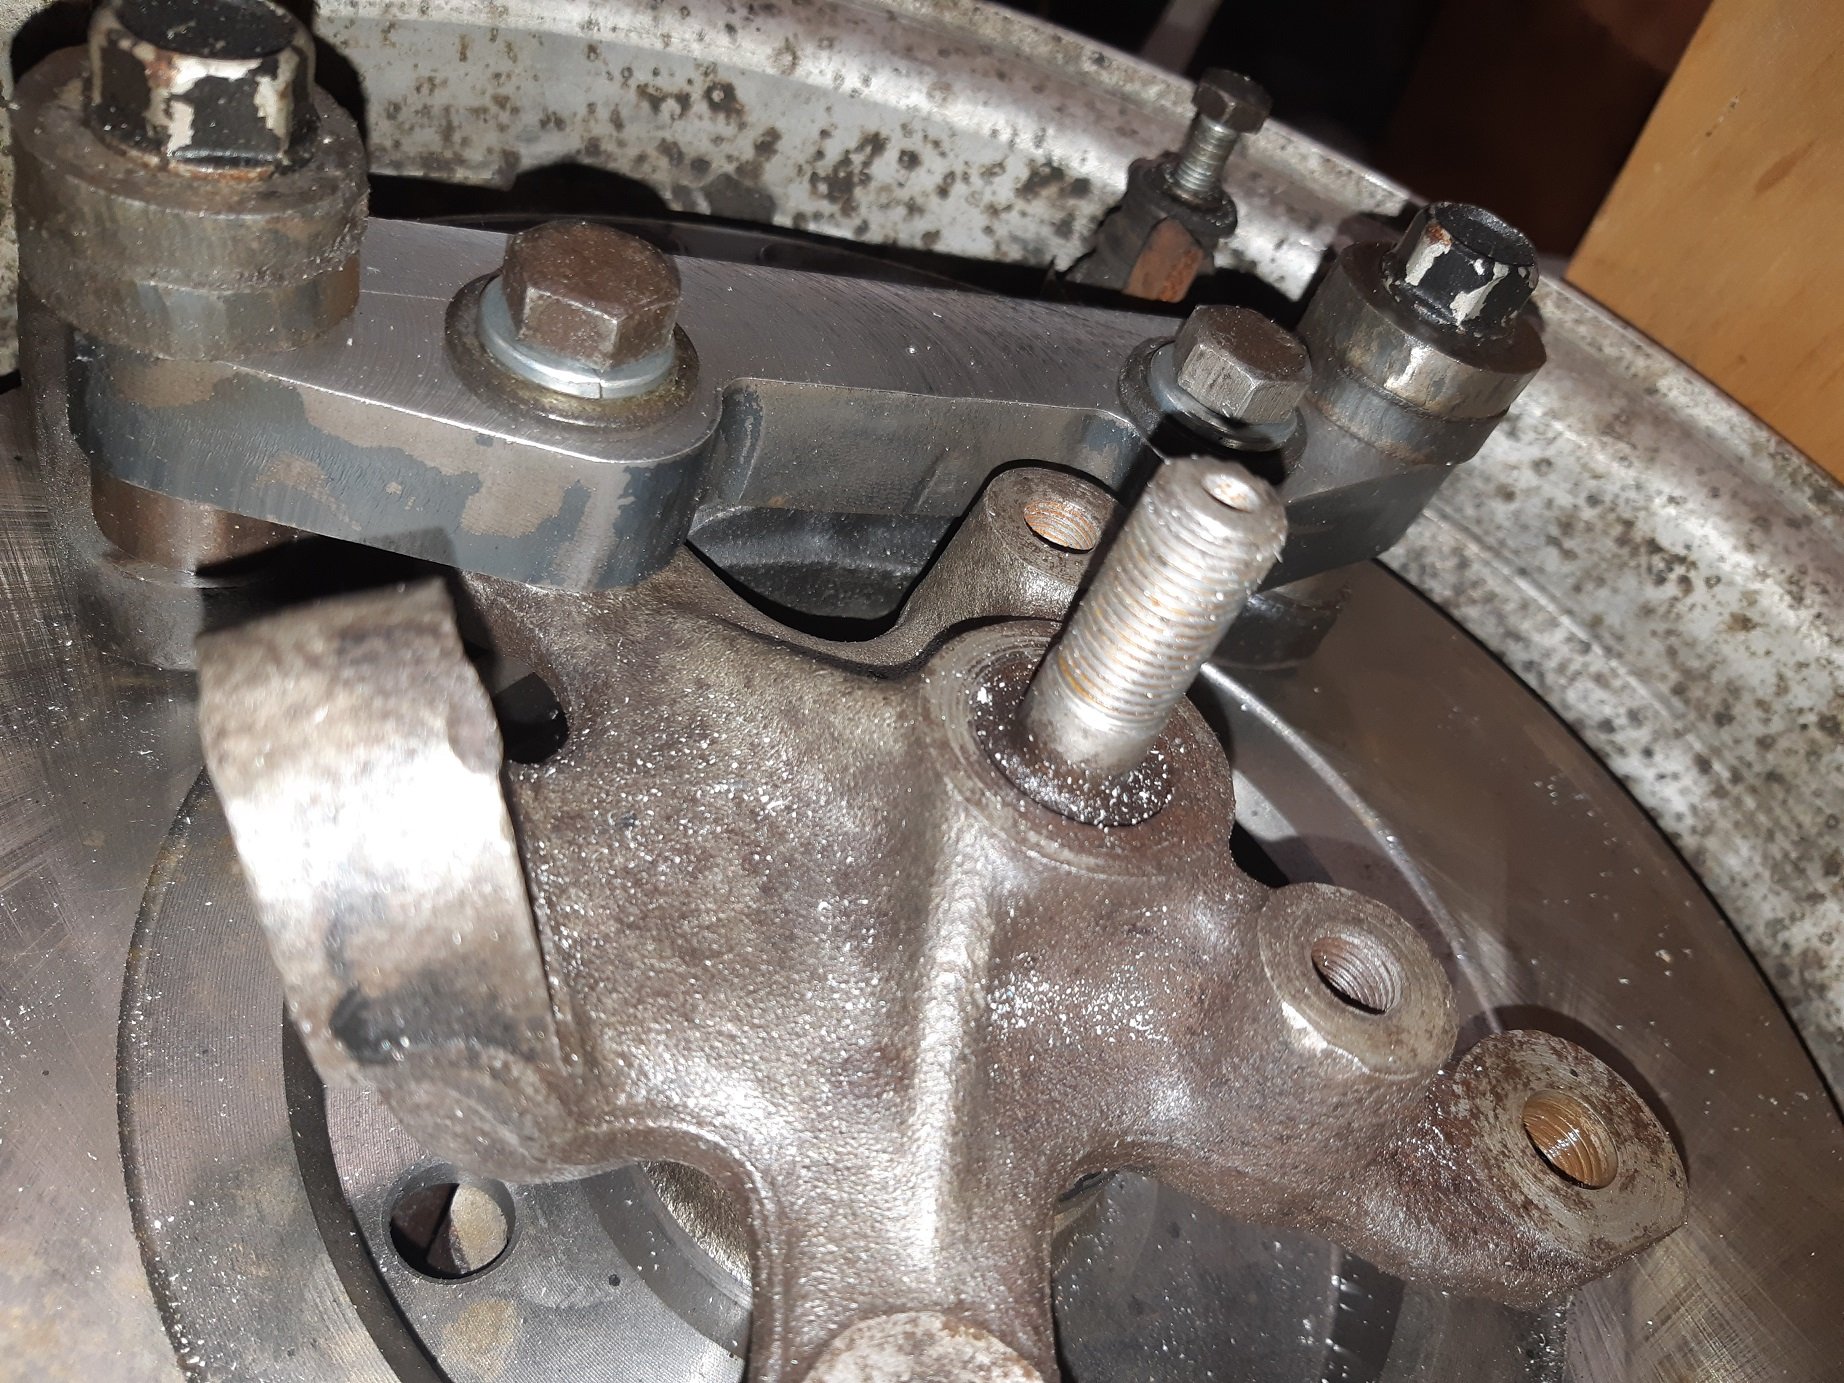
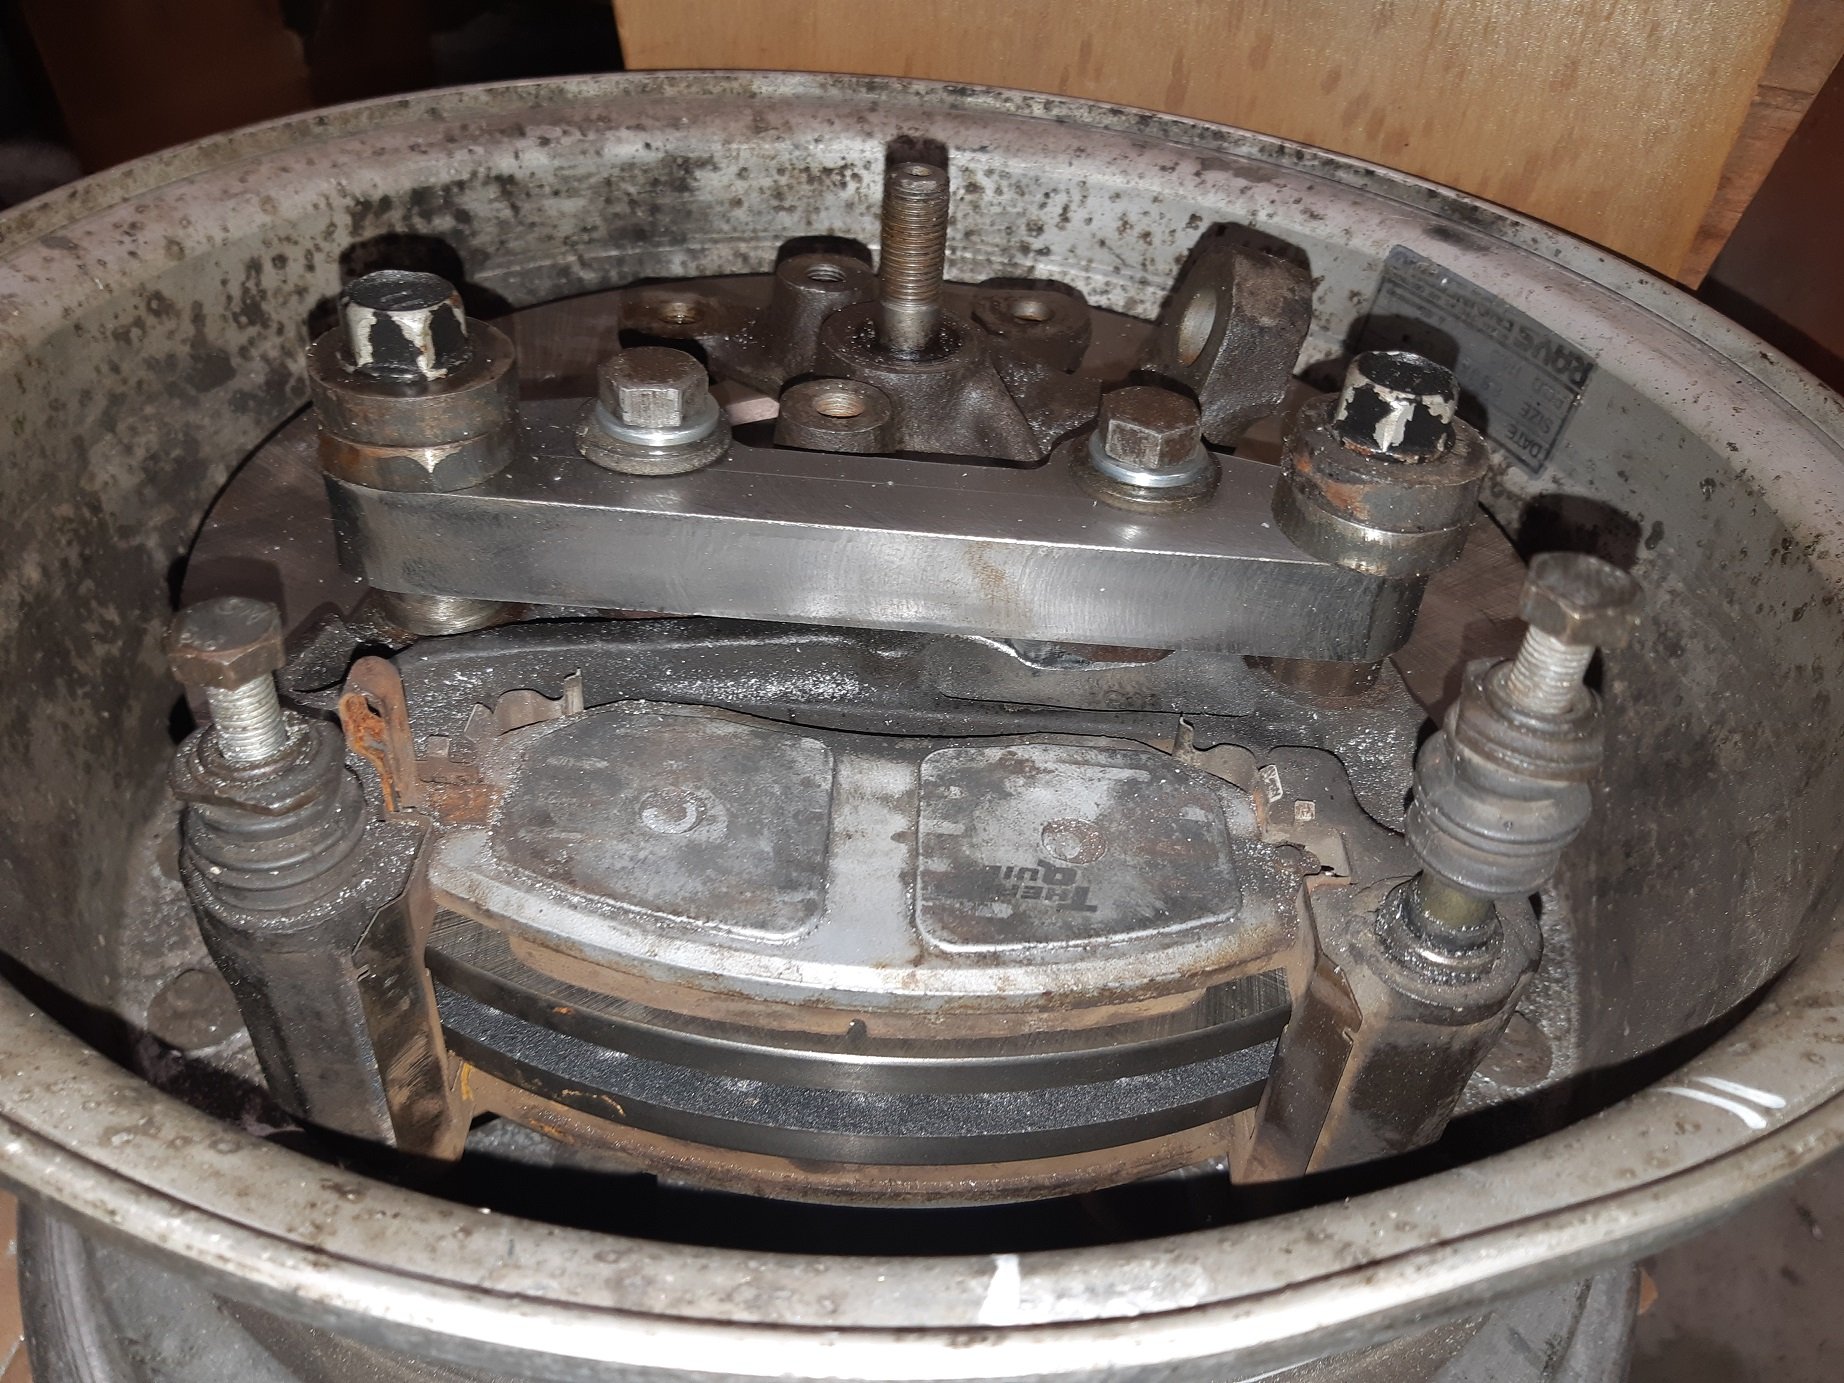
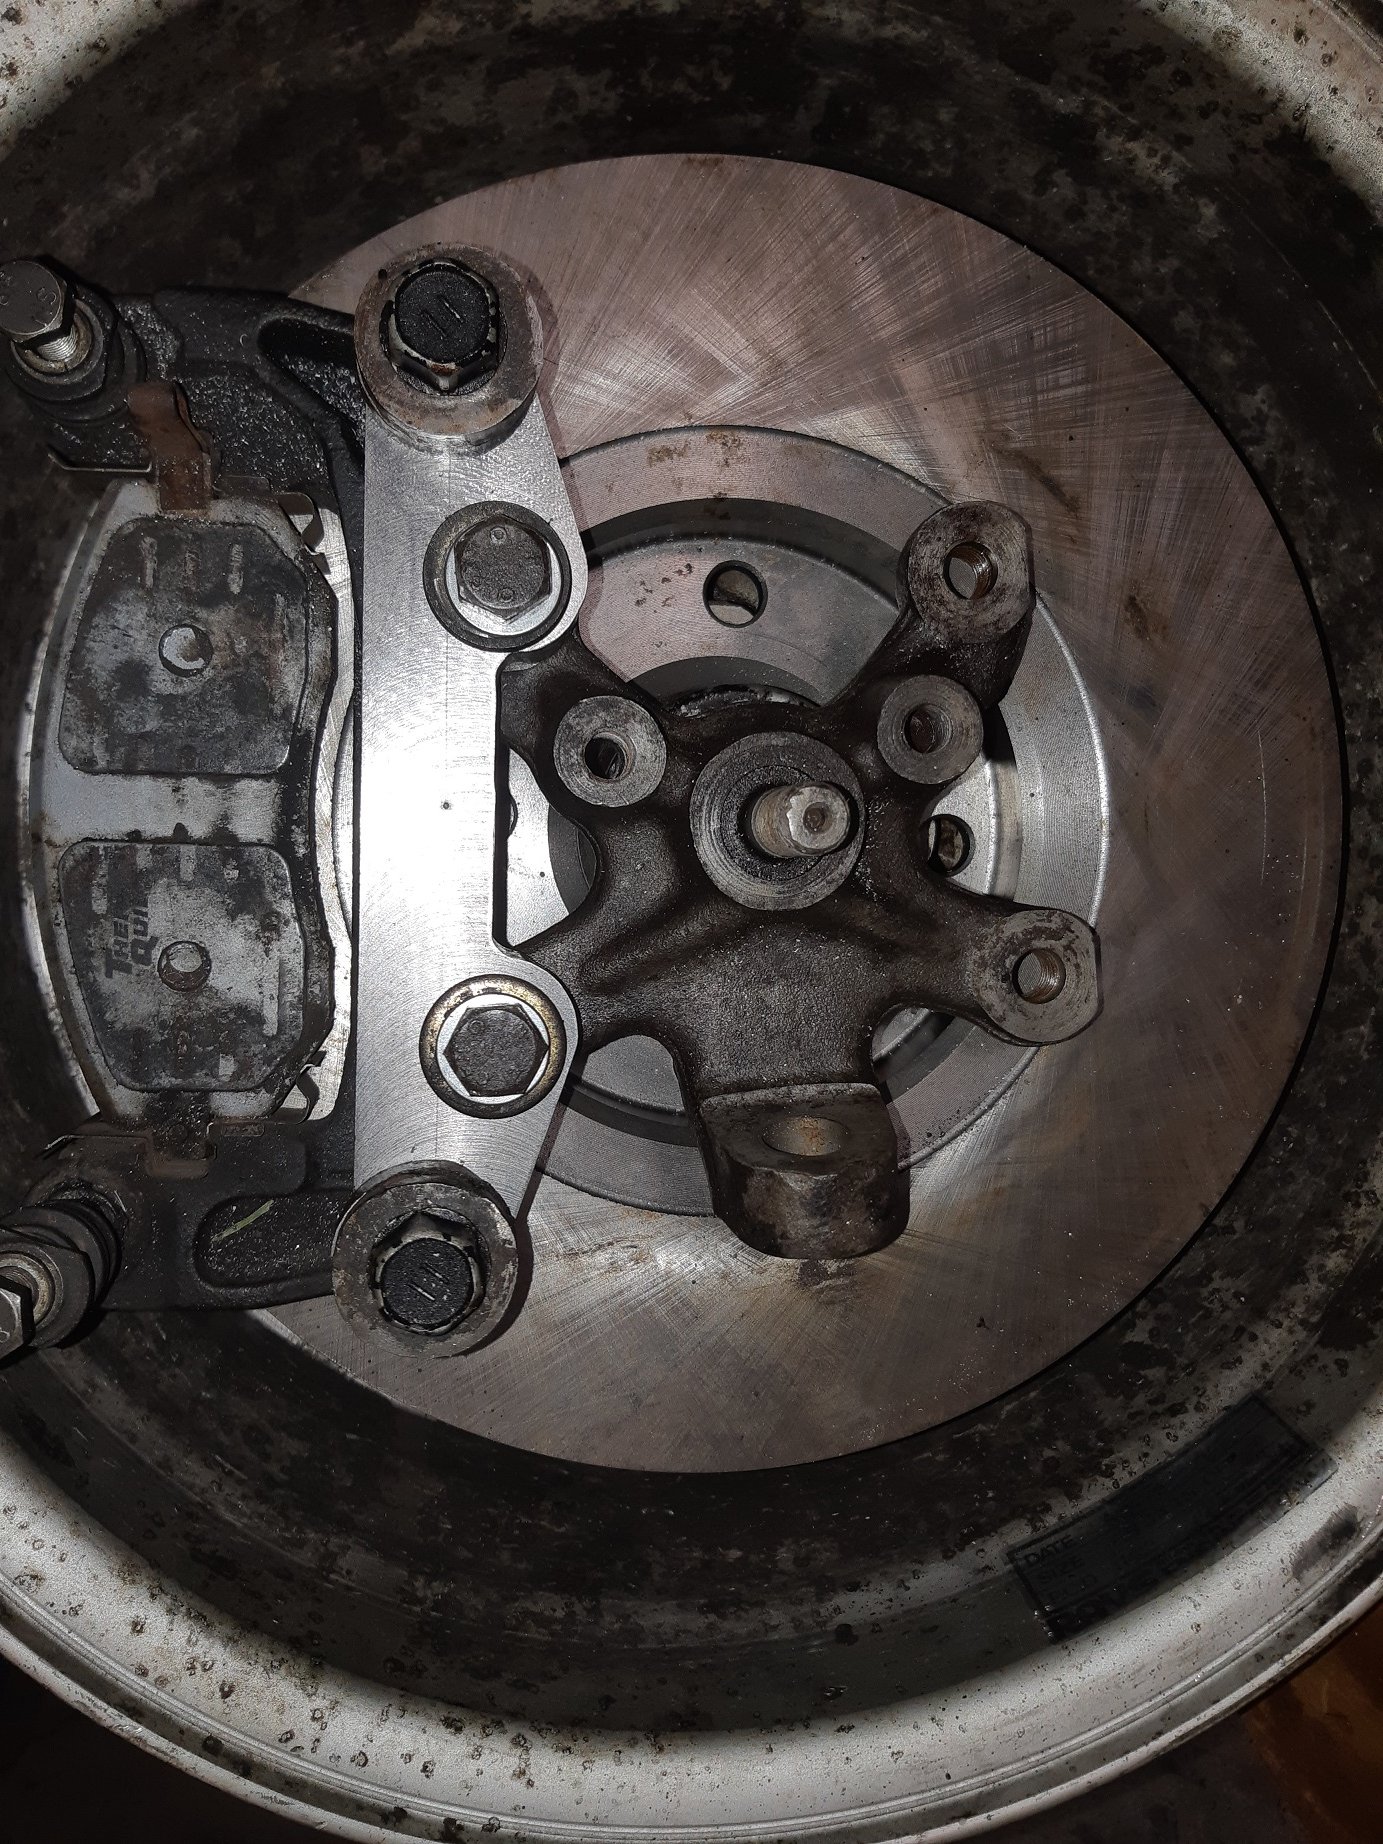
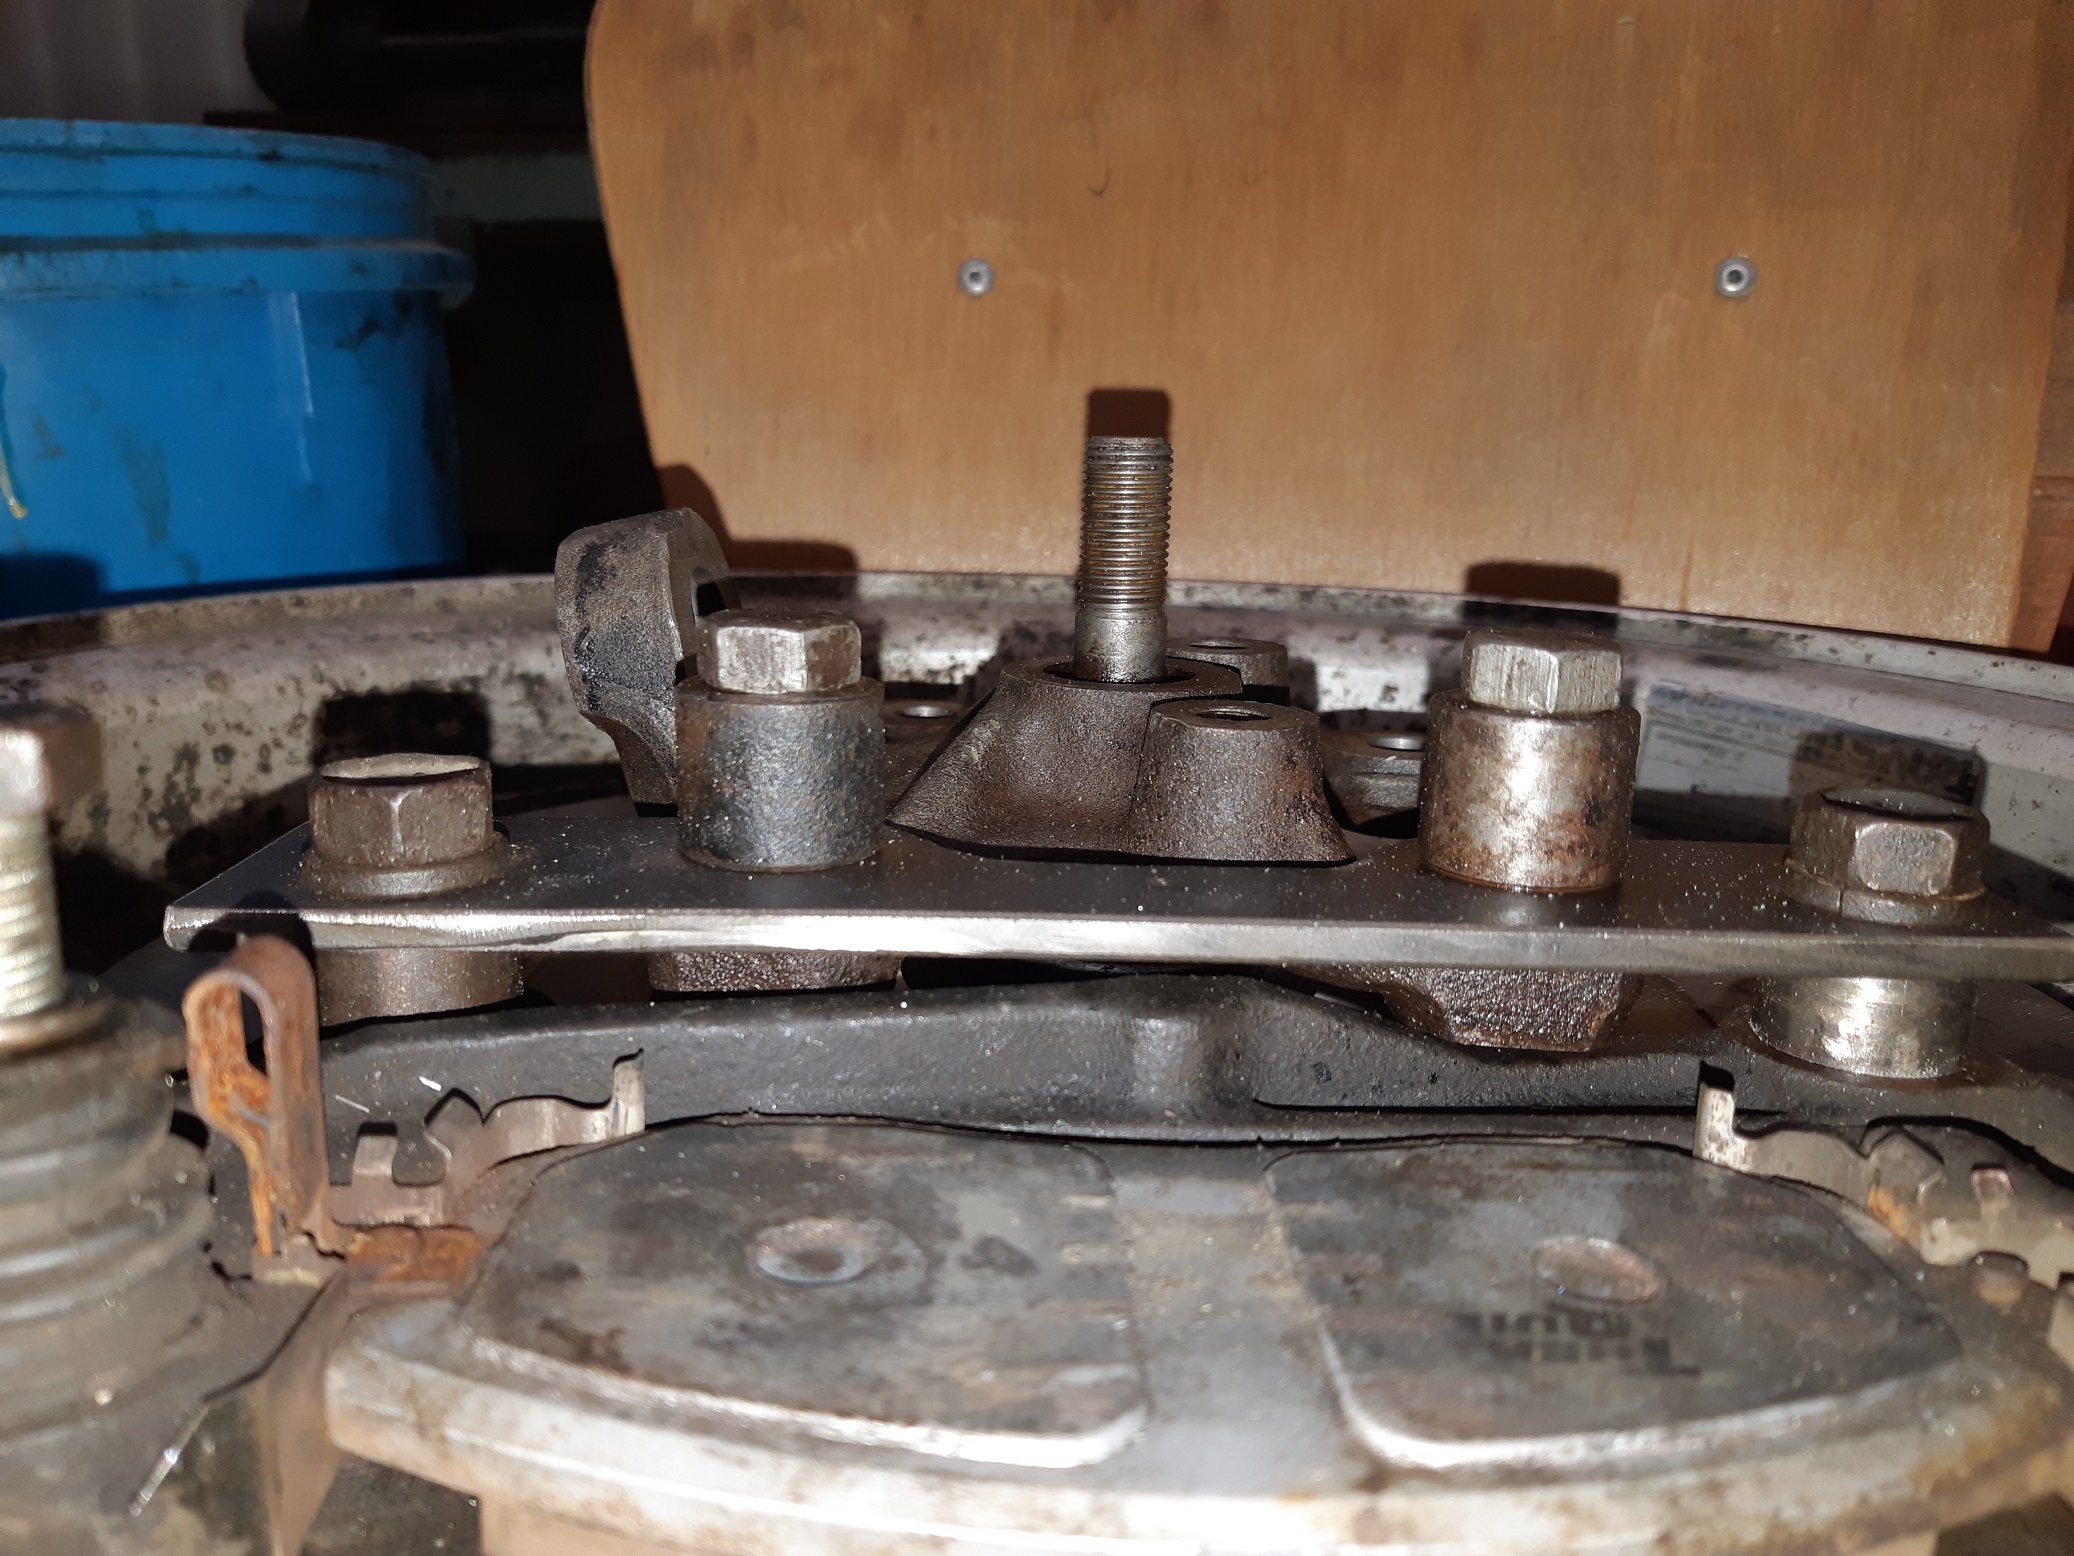
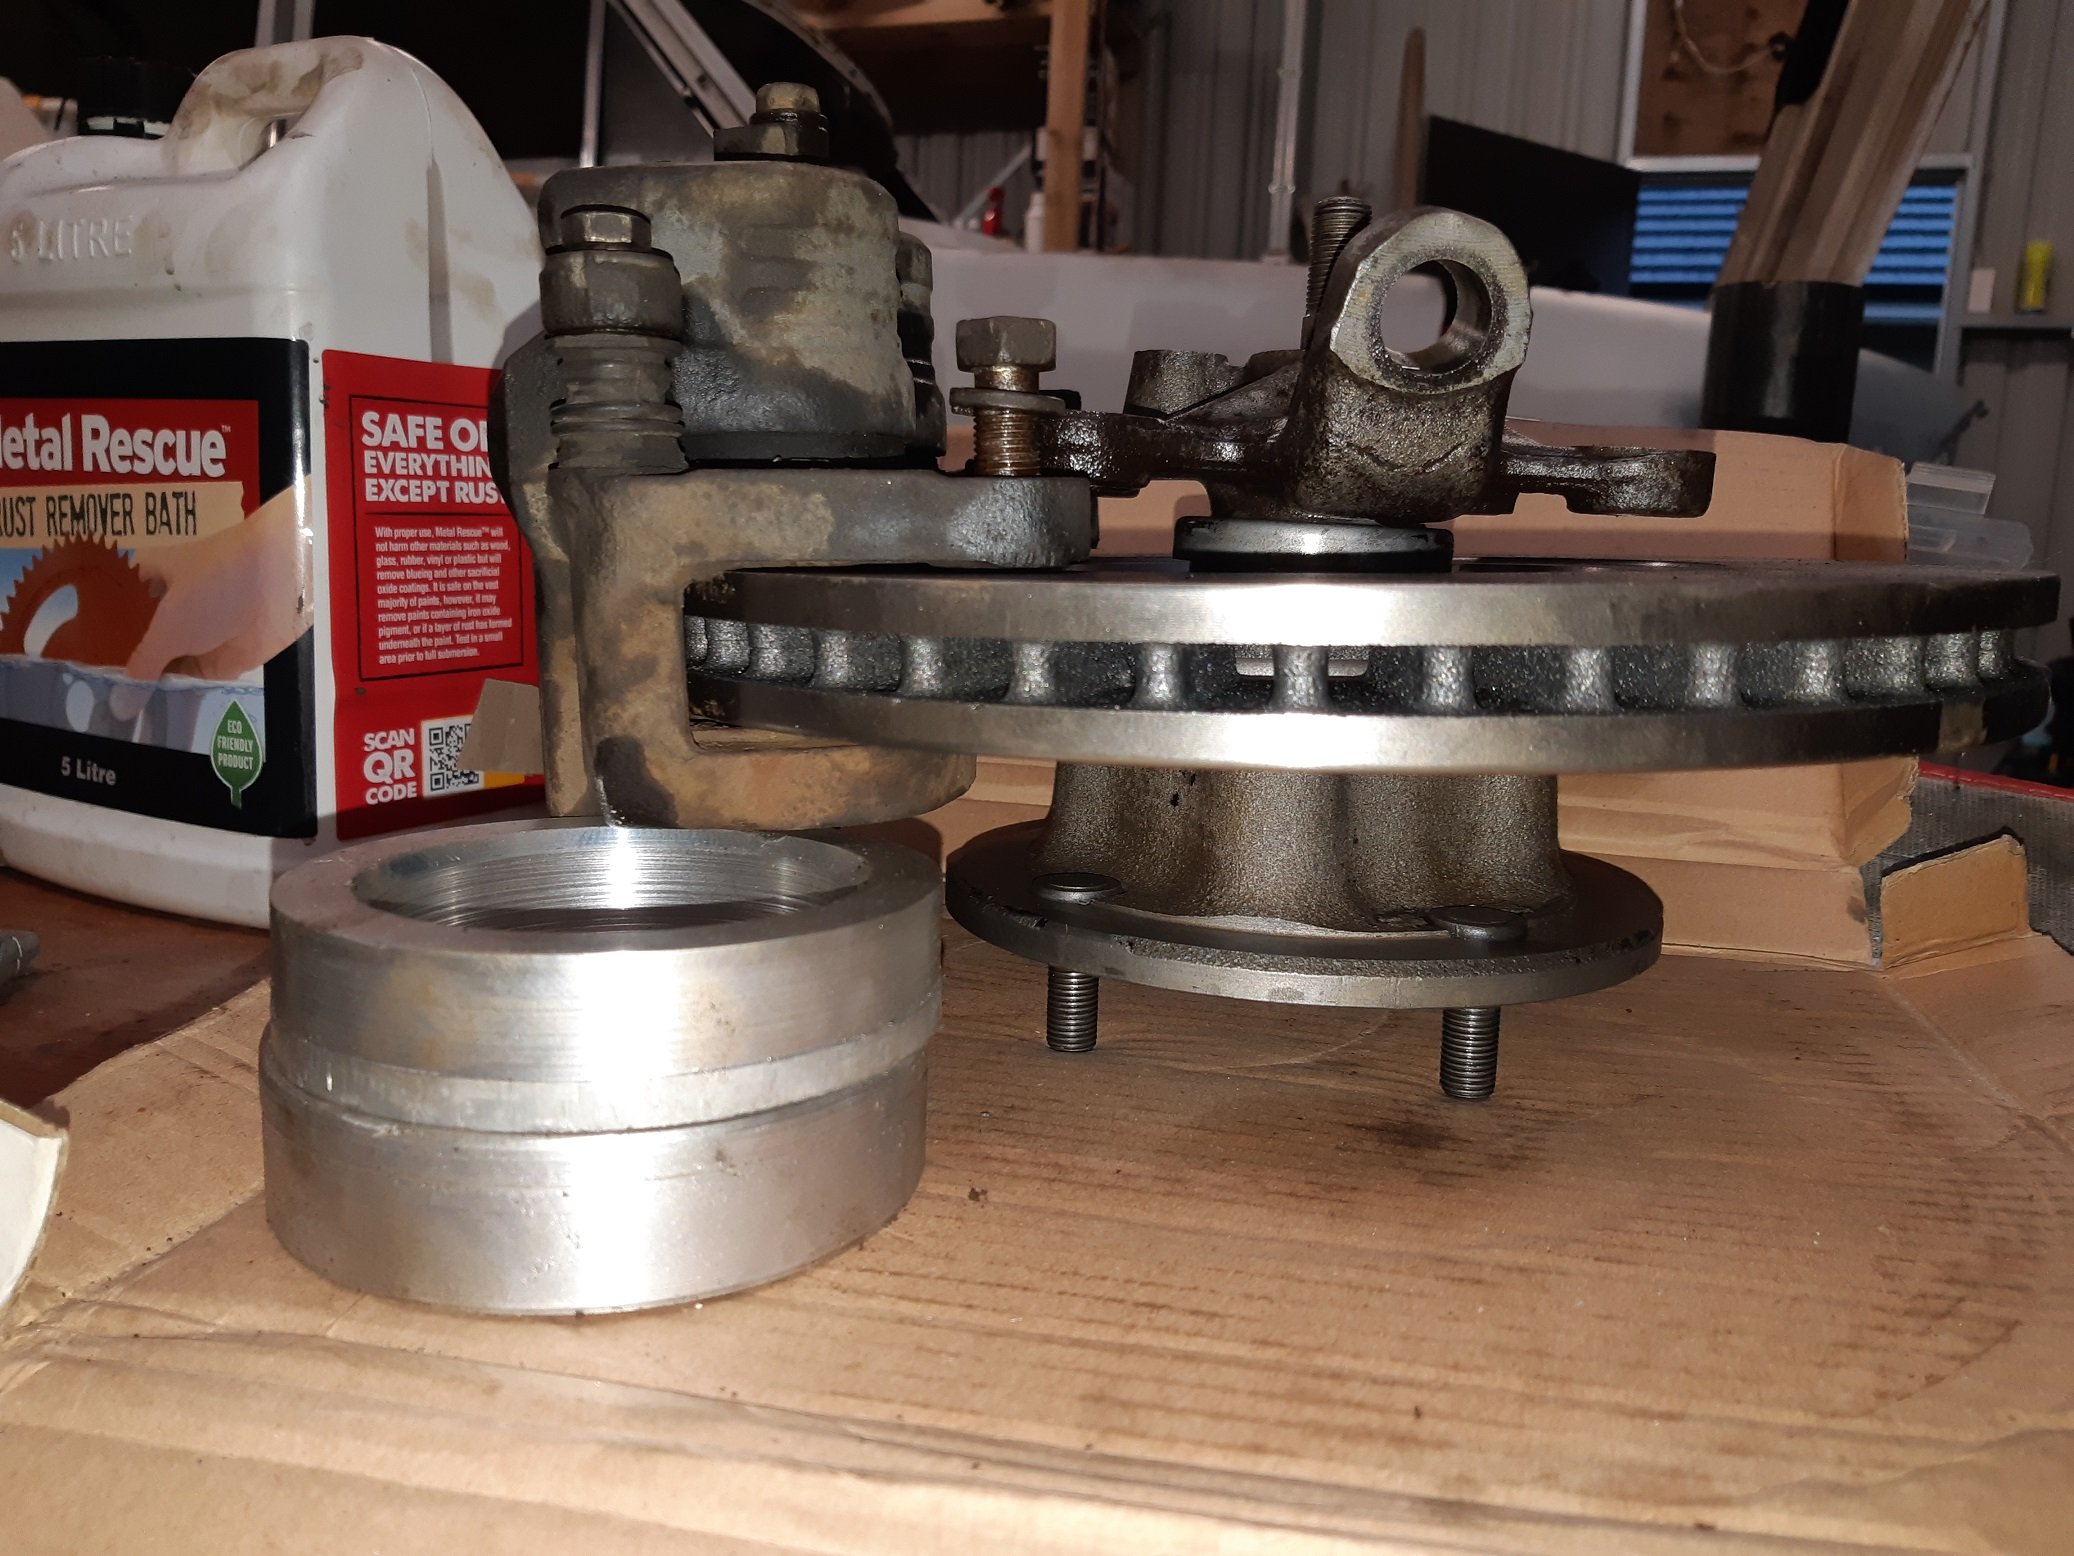
Used some 6mm flat bar to work out the dimensions and hole spacing of the caliper brackets. The caliper mount is not sitting perfectly parallel to the disc, there is a ~1mm difference between the leading and trailing end. I hope this is not because of triumph manufacturing tolerances, but by a bit of wiggle in the spacers and will be resolved with the final 18mm thick brackets. The caliper fits with heaps of room to spare. I took them off so I can use the pads for alignment.
-
1 and 3 are probably in here: https://www.nzta.govt.nz/resources/rules/vehicle-lighting-2004/ 2. My Starlet hasn't had any side mirrors for years. Hasn't been mentioned in two certs and numerous WOFs. It's kind of annoying not having one when changing lanes.
-

Diff - building in then measuring 'toe in' in a live axle.
Adoom replied to johnny.race's topic in Tech Talk
I've had it done. They put it on a wheel alignment machine, then use a gas welder to heat spots along the back or front of the axle tube. AFAIK, heating the front of the tube then letting it cool makes that side shrink the tiniest amount and gives you toe-in. It takes only a tiny bit of shrinking to change the toe angle. I don't know who might do it. Ron Scanlan did mine years ago, but he is not with us anymore. -
I'm looking at a tow bar on the tard for my 2001 corolla/allex/runx/thing. I suspect it's aftermarket. https://www.trademe.co.nz/motors/car-parts-accessories/toyota/accessories/listing-2198789113.htm Is it typical for a tow bar to be mounted using long bolts and big washers, from the boot, through the chassis rails, with no crush tube? It seems like a good way to crush the chassis rail.... I haven't found a picture of what an original toyota one looks like. I'd assume they would attach it using the bolt holes for the tow hooks.
-
Reckon it will be fine. Have done this before, possibly 15 years ago, and cop pulled us over thinking car at front was just slow and holding up traffic. Was real apologetic when he realised we were towing. He stopped the traffic so we could pull back out. I have, 3 years ago, A-framed starlet with no wof or rego, but it did have plates. Pretty sure I called the police and asked if it was okay beforehand. Guy was totally not fussed and told me to just do it. I did hook up a cable to the trailer plug so the towed cars rear lights worked.
-
What is acceptable to make a brake caliper out of? Does it have to be mild steel? Or can I use aluminium? I already have some aluminium bar stock that might do.... I made a scribble of what it might look like. The thin section will be as thick as the original Triumph caliper lugs. At least 12.5mm I suspect. Can I weld it? IE: make a flat one with spacers welded to it. Hub and caliper look like this.
-
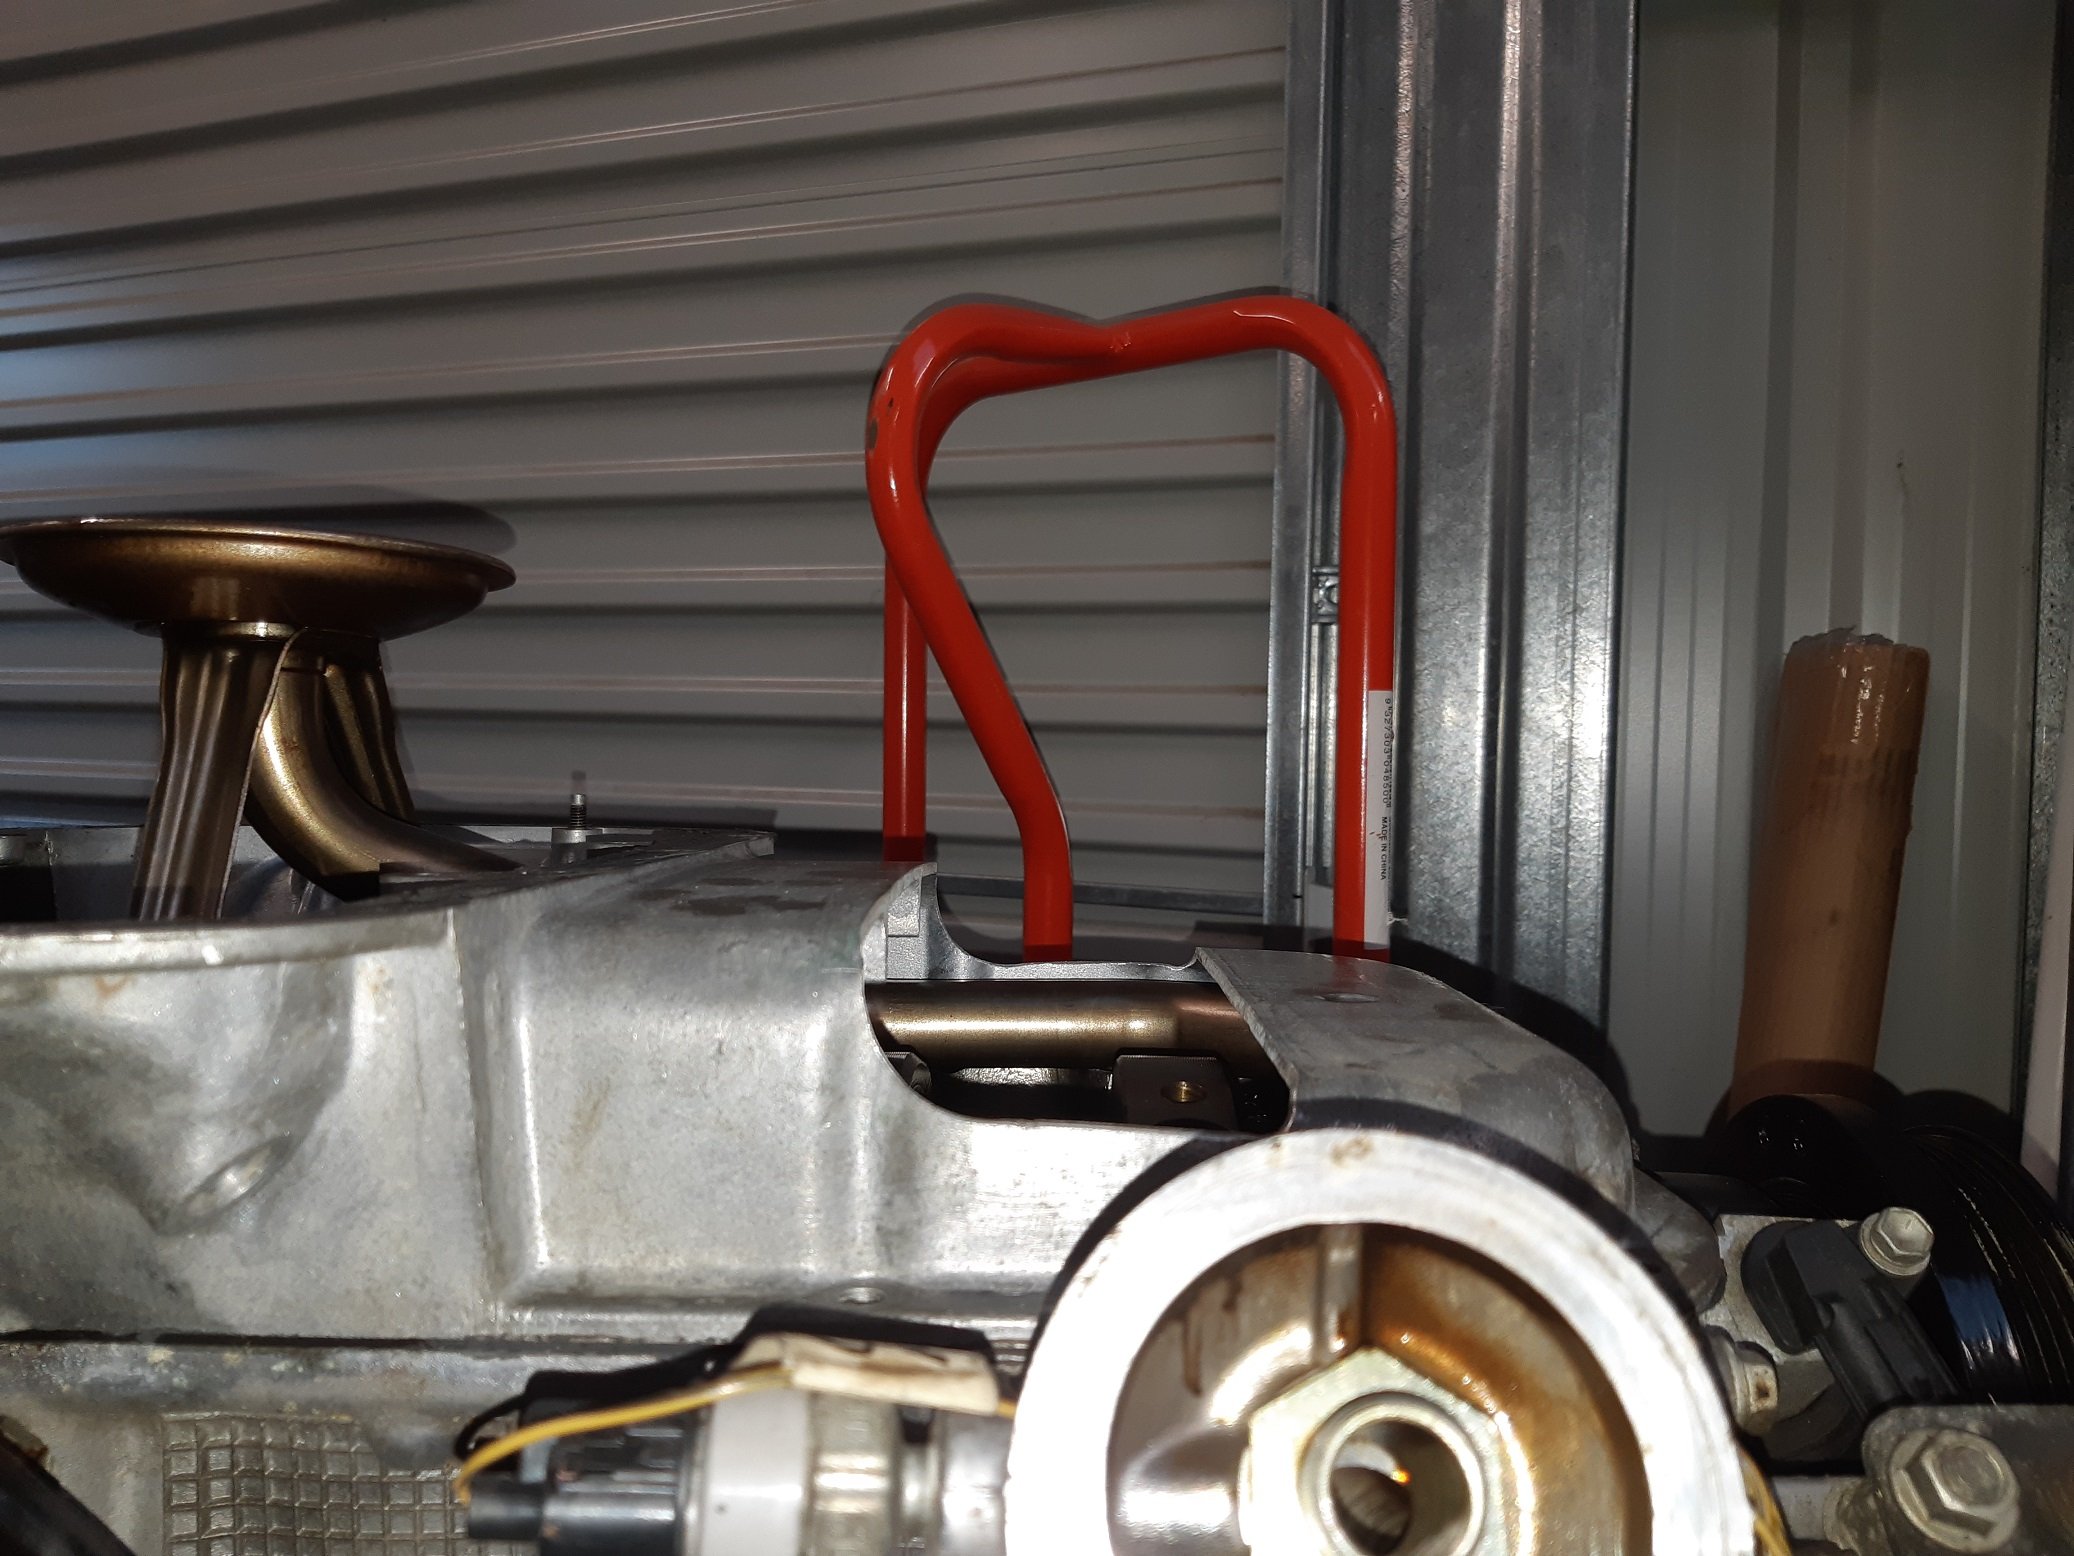
Buzzed the engine mounts on.
-
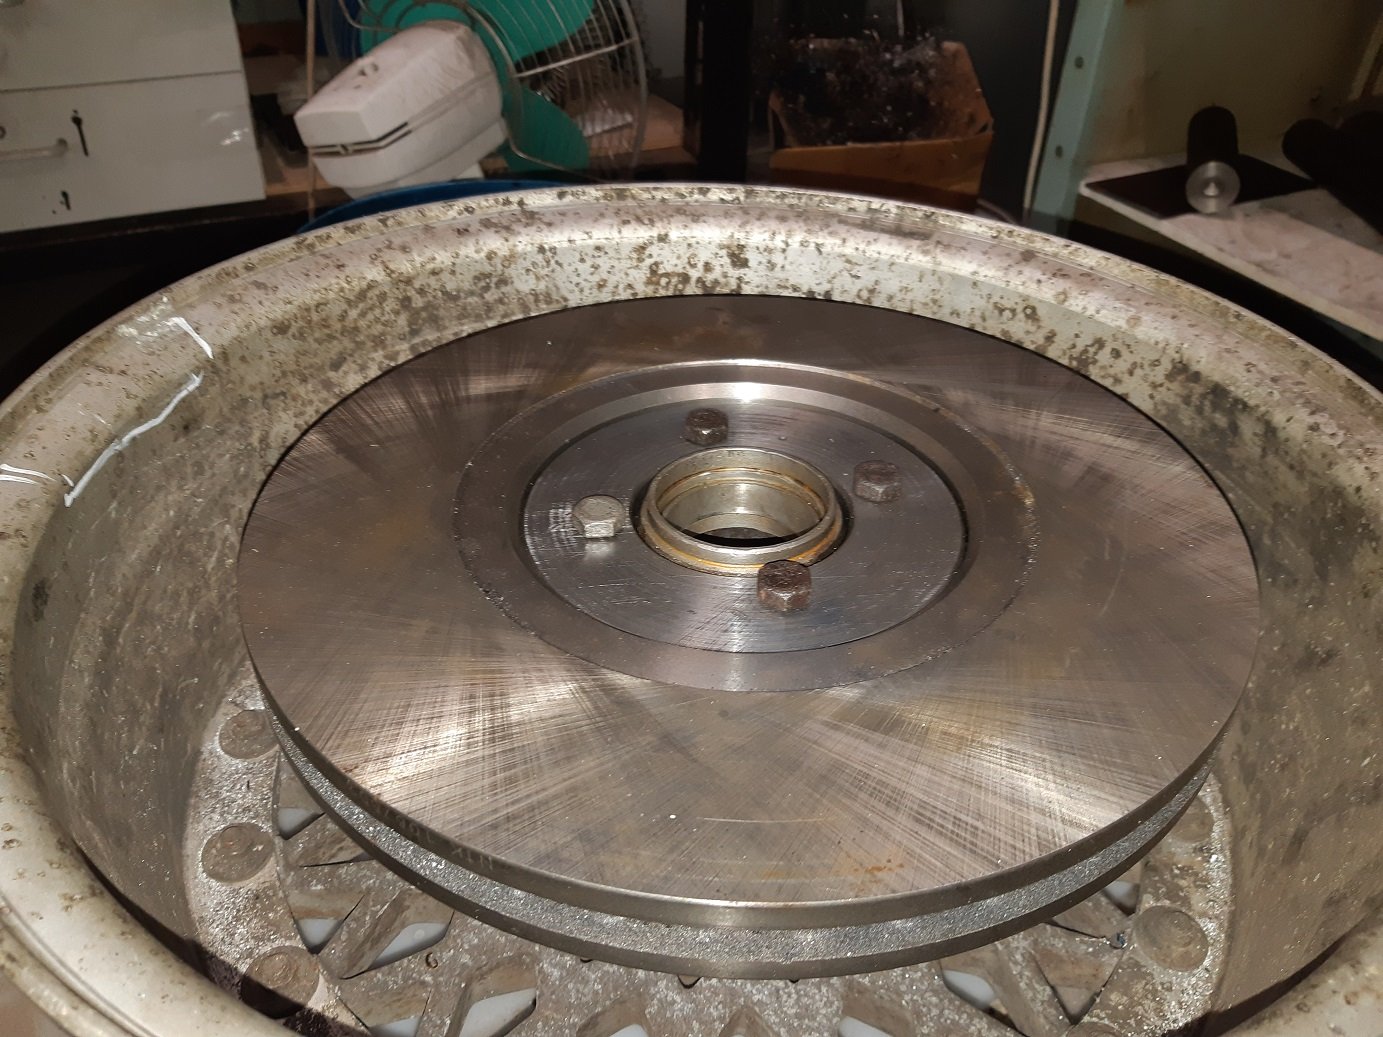
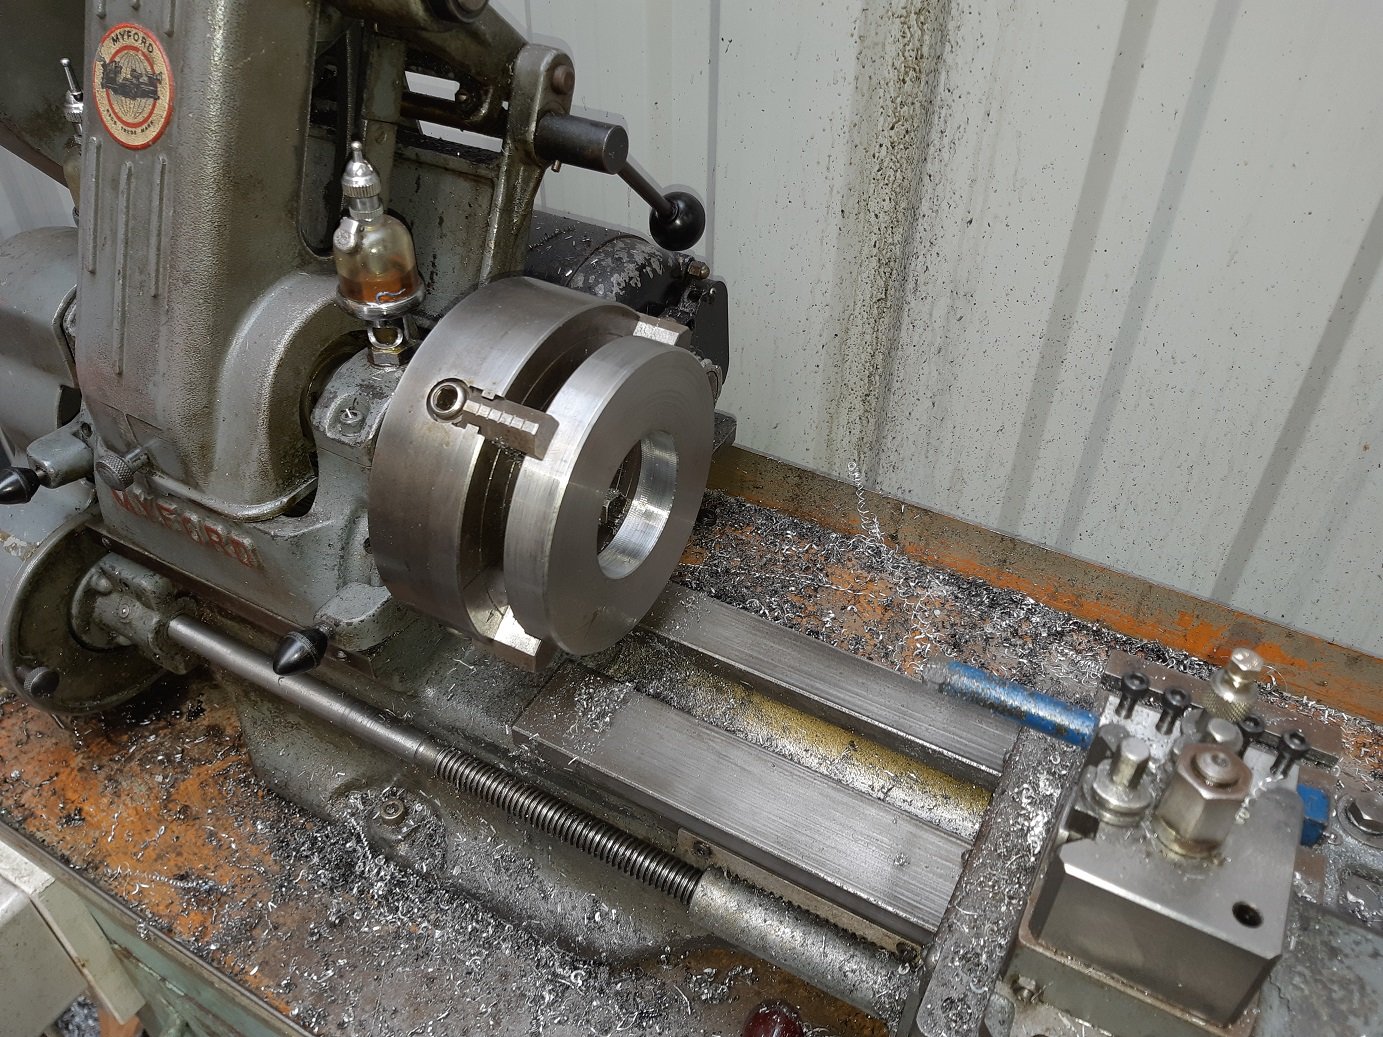
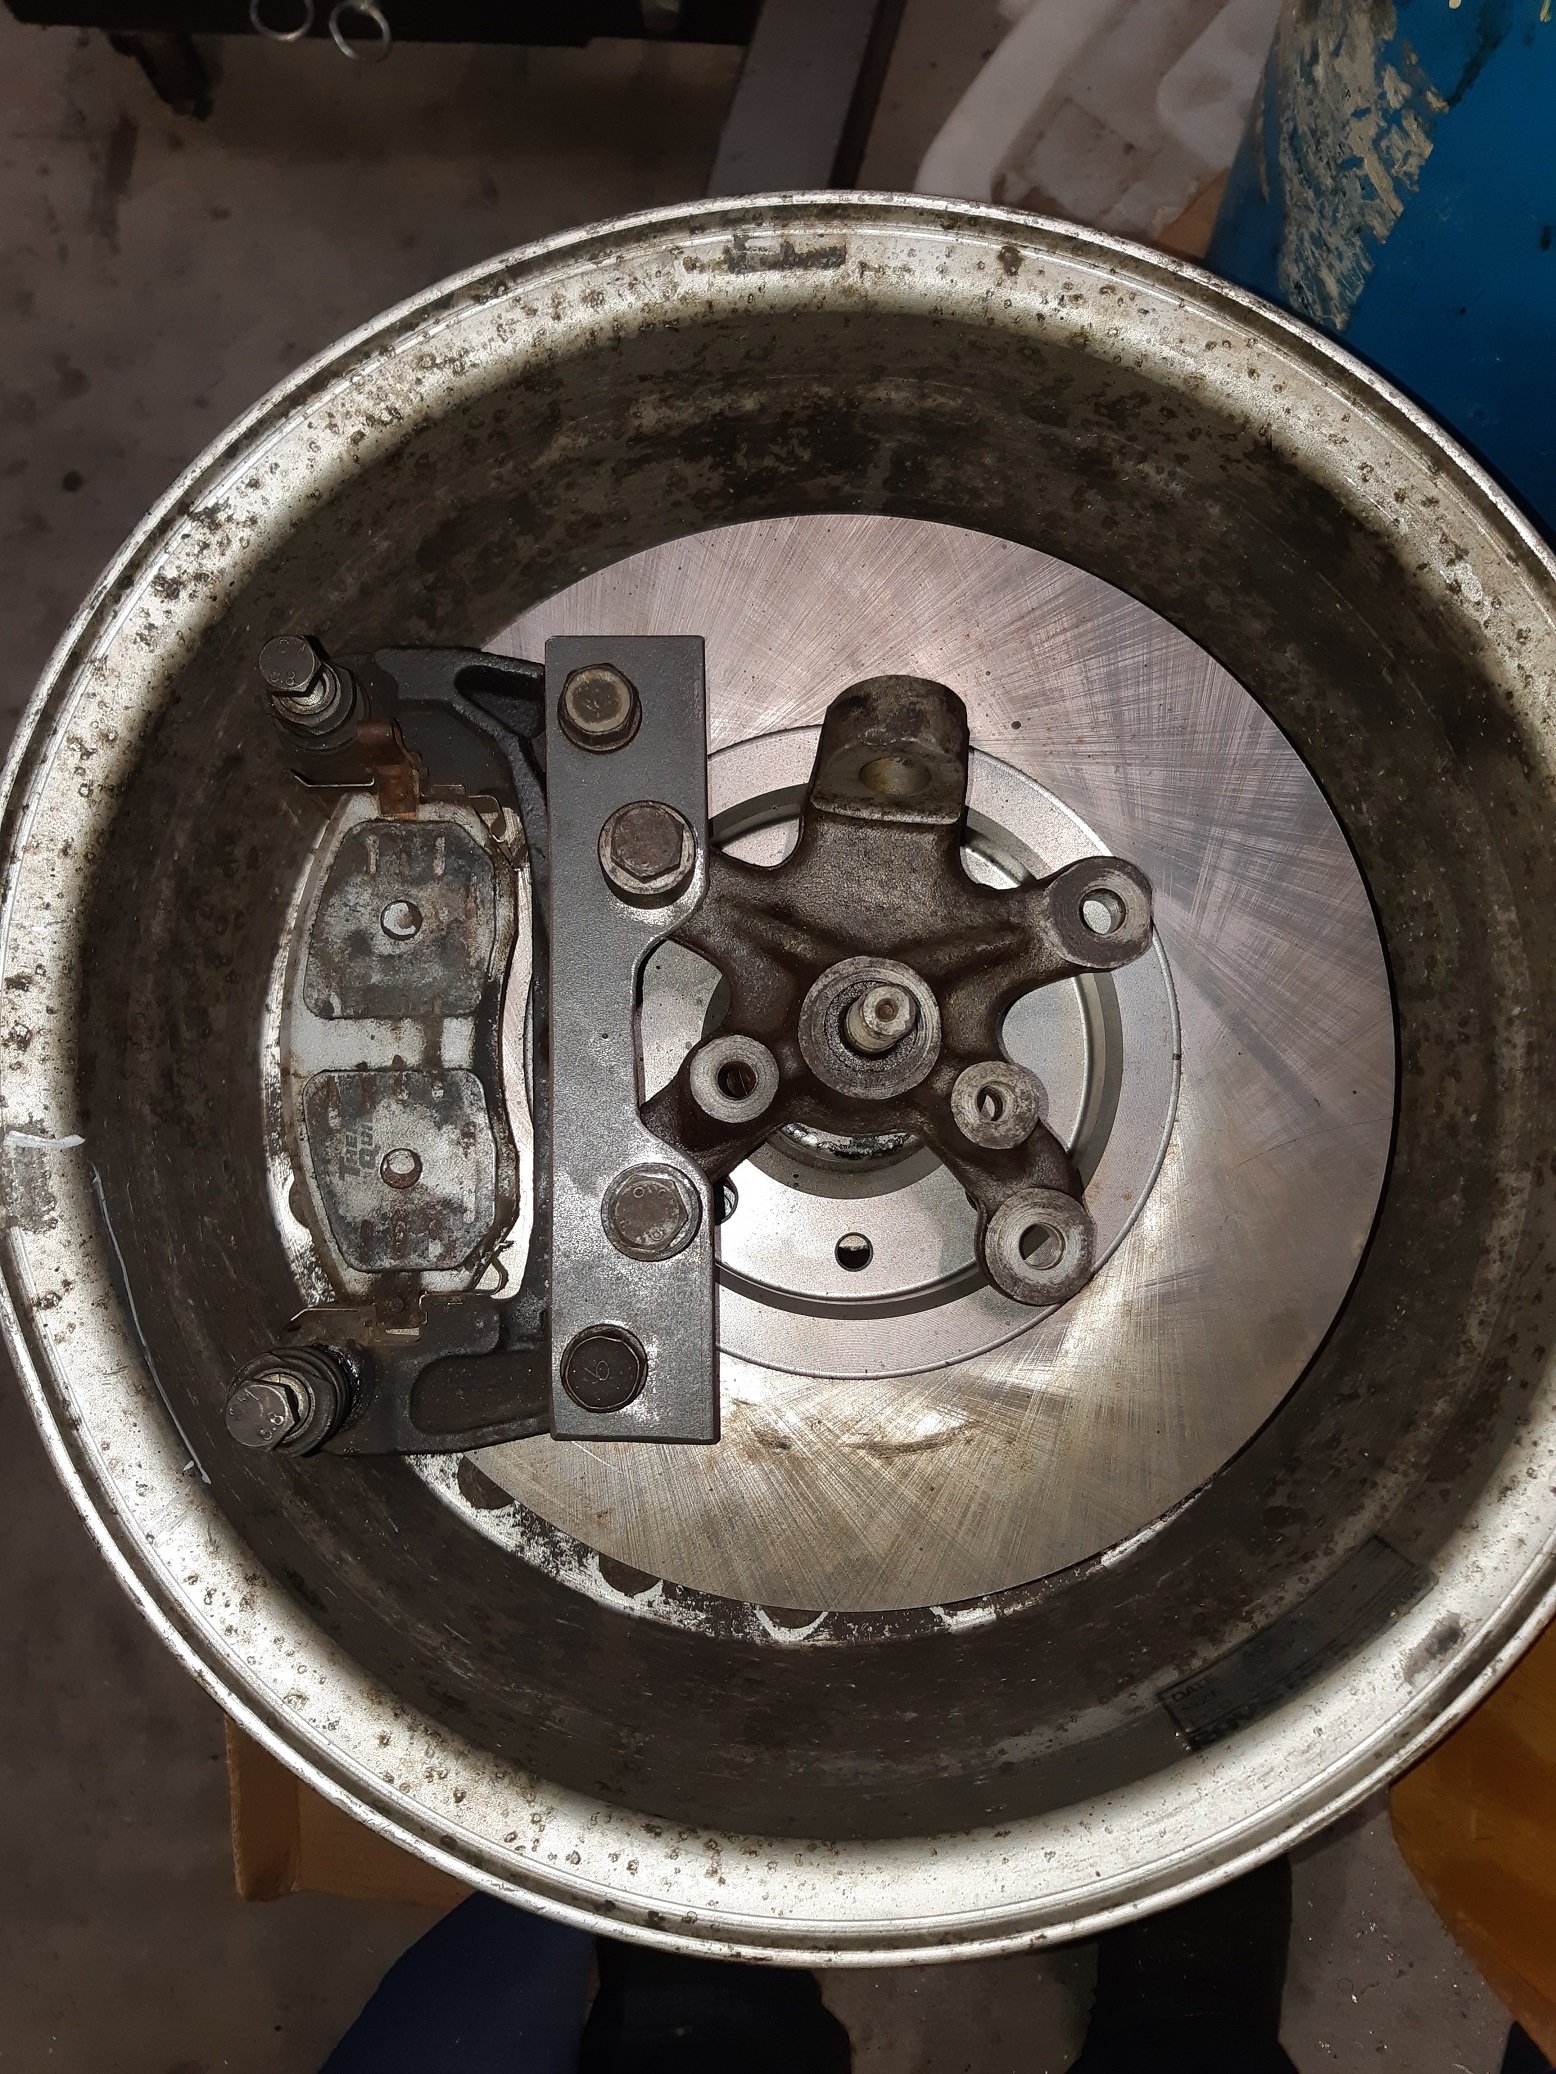
Wandering pick a part and measuring discs and calipers I decided that Subaru calipers would probably work. Also I had already decided on 26mm X 280mm discs from a peugeot and the Subaru discs were the same diameter and thickness. It was a turbo Impreza of some kind. The chassis number started with "GGA....", but the rego and chassis plate where missing. I think it would be 2001+. I still need to redrill the disc and make a sandwich plate to bolt it to the hub. Unfortunately this hub is scrap because I turned the location diameter for the disc ~0.5mm undersize. My lathe is small and I didn't want to risk misalignment by removing the hub from the chuck to test fit the disc so I just used the vernier caliper to check the size. Thinking about this now, next time I will leave the hub in the chuck, and remove the whole chuck from the lathe to test fit it to the disc. I have three more hubs, so I can only fuck up one more. It looks like it will be straightforward to make the caliper adapter bracket.
-
Same here. Cert plate and chassis plate matched, but number in system was wrong. Obviously a transcription error. I'd noticed it at one point, then forgot about it for ages. VTNZ guy also noticed and said it had to be fixed. He sorted it out. I think he took some photos and filled out a form for me. I don't think it cost anything.