


Taistorm
-
Posts
2056 -
Joined
-
Last visited
-
Days Won
1
Posts posted by Taistorm
-
-
22 minutes ago, bigfoot said:
The cordias/sigmas of the era were the same design
Hah, makes sense I suppose. Bloody mitsi's...
-
No idea, maybe the likes of a cordia or sigma or something maybe. If anyone has knowledge or spares to measure it please let me know haha.
-
That's a good idea. I'll probably still need to take a small chunt out of the wheel though. I'll see what I can grab from the shop.
-
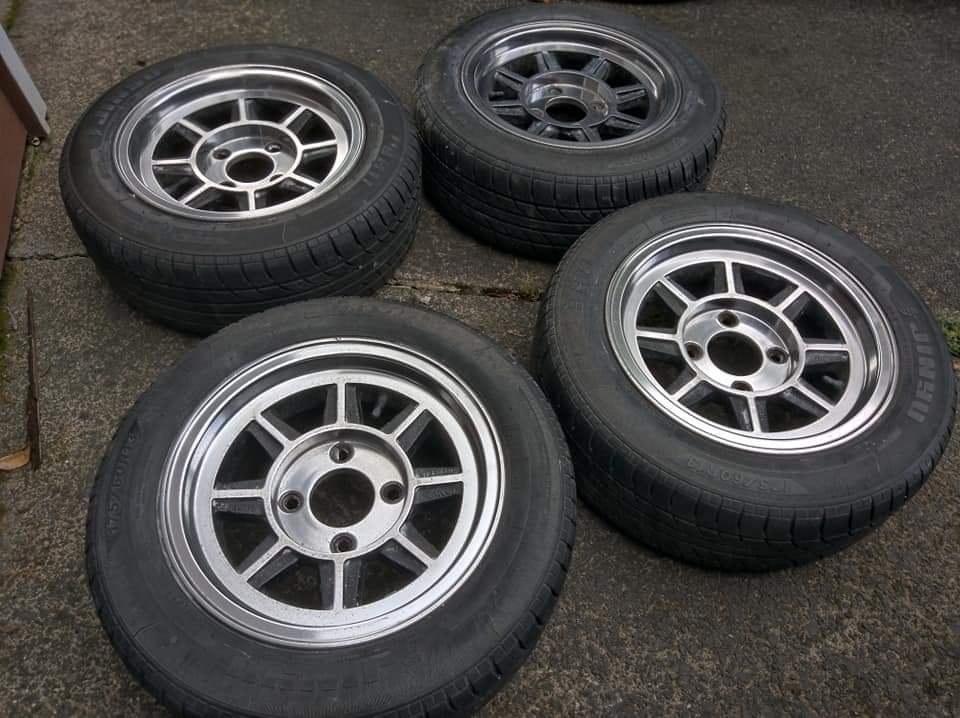
Picked up some wheels for a pretty sharp price today.

Hayashi Racing Street Fins in 13x6 +13.
These have always been one of my favourite wheels and had the privilege to visit their shop in Osaka a couple years ago which was awesome.
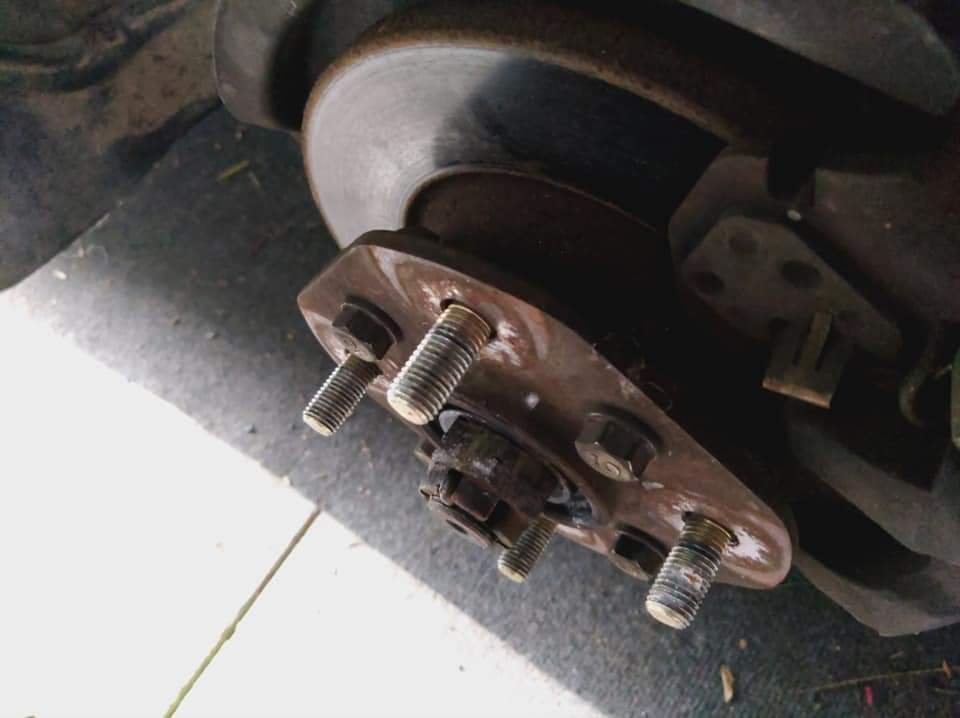
I brought these knowing that they probably wouldn't work on the front due to these cars having a shit hub mount setup as per below.
The wheels have cutouts in between the pcd holes but they only just foul on the bolts by a couple mm. I had initially planned on counter sinking the hubs but I don't think they have enough meat, otherwise milling them to suit tapered cap screws but doing this would require cert. Alternatively I'm looking to swap out the hub bolts for as small and shallow cap screws as I can, then milling out small notches on the wheels and rebalancing them. If anyone has any other ideas let me know haha.
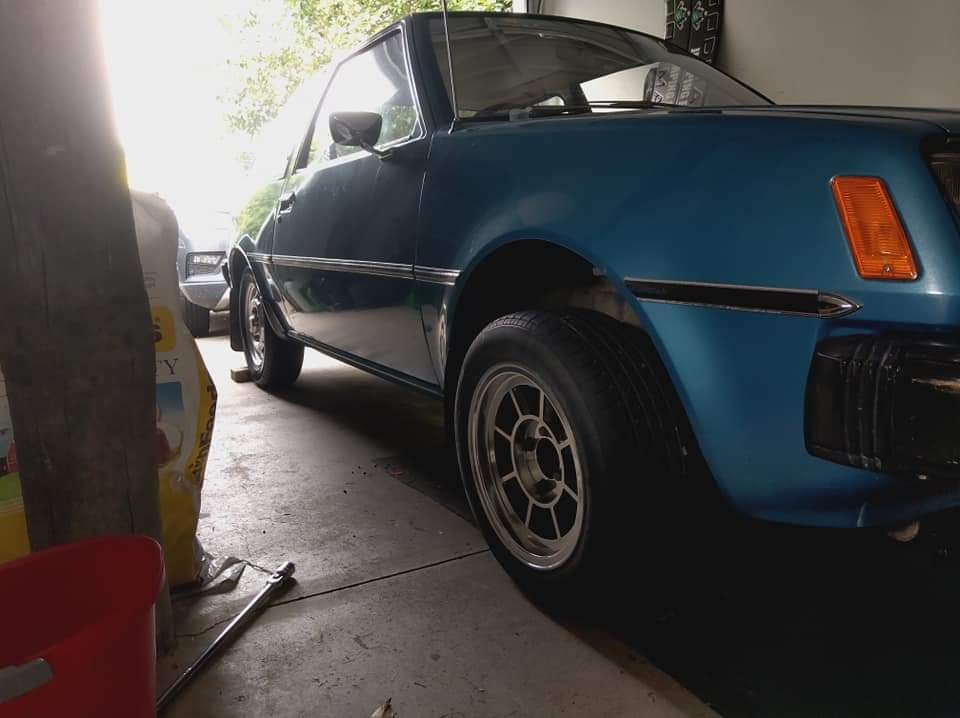
They sit just outside the guard, but once modified and fitted up properly they'll be just inside. The current ride height is actually lower than this pic shows but I'll definitely need to lower this when I have some spare sheckles.
Beside that I took for a burn up the road and it went mint! Mrs was pretty impressed with how peppy it is for a little 1200!
Chur,
Tai
-
 6
6
-
-
Figure I'd throw one of these up finally. Throw shade at me for making terrible life decisions buying and fixing an old mitsi...
-
1
-
-
Next I threw the hoses on with new clamps, filled it up with about 5.5L of coolant and also made a new overflow line.
Rechecked everything, connected up the battery then went to fire it up. Few turns of the key and a few pumps of the pedal, choke fully open and it roared into life.
Pretty stoked to be honest, no leaks, sounds like it's running well and ticking over smoothly (the valve tappets are maybe slightly louder than I'd like, me being picky I might re adjust them). Bled out the cooling system and it came up to temp well and held mint. Will throw the pressure tester on it sometime next week. Was gonna take it for a drive but it started pouring down so might leave that til tomorrow haha.
Also I didn't take any pics but I had ripped the belly plate off from underneath and gave it a good waterblast. It's not mint as some of the grime was baked on heavy but it's alot more cleaner now.
Pretty happy with where it's at now, just need to take it for a good drive tomorrow then give it a crack at daily duties. I have a few other minor plans for it in the pipeline but we'll wait and see how it goes.
And feel free to tell me how I fail with old mitsi's here.
Cheers,
Tai.
-
5
-
-
Got a few moments the last few days to spend a bit off time on this.
Firstly I took the radiator in to work, ground off a couple bits to help with clearance and then took it home, slotted the mount holes and got it to fit up mint. Took it back off, scuffed it back and threw some paint on it so it's less of an eyesore in the old engine bay.
It was supposed to be hammered black, but it ended up as more of a cast iron type colour so I'm not sure if it was labelled incorrectly. Not super happy about that but it looks heaps better. Re mounted the fan and did its final fitment with new fasteners.
I then mocked up the hoses and started cutting away to make them work with the new inlet/outlet positions.
-
4
-
-
Time for another update.
Shot off down to Queenstown for a quick holiday and on my way back from the airport I grabbed the radiator from Chris. He's done an awesome job sussing out the mounts for me.
Did a quick mock-up and it looks like it will work well, I just need to slot the mount holes and remove the original Honda spigot mounts off the bottom which I'll sus tomorrow. Also need to get some paint to black it out so it's not so much of an eyesore and keep it a bit more stock looking.
I also shot down to Repco to try get some hoses to suit the new inlet/outlet positions. Will need to cut these ones down obviously but they should work fine.
And some part numbers for reference.
Hopefully have this thing together and running this weekend and start dailying it from there.
Cheers,
Tai.
-
7
-
-
Also a few Kings woods, a couple Subaru brumbys and a lotus Excel.
-
1
-
-
Across the last few days here in Queenstown have spotted a red rx3 coupe rolling with a white 180/200b? Sedan. Also spotted a dope green datto 1200 coupe (I feel like I've seen the car on here at some stage), was lowered on period wheels.
-
2
-
-
Realised I will be in Queenstown sorry team. Also mirage won't be mobile in time unfortunately...
-
 1
1
-
-
Spent a little bit of time on this thing today. Brought my feeler gauge home so I could adjust the valve clearances and set the points gap, have also picked up random length leads from bnt to replace the old ones.
So.. valve clearances set, ignition setup sorted, rocker cover on with new gasket, oil pressure and oil temp senders replaced, new leads and plugs set, air filter replaced and airbox on (just needs a repaint).
Another issue I found is that the passenger door wouldn't lock from the lever on the inside. I carefully removed the door card, adjusted the linkage and now it's working mint.
All we're waiting on now is the radiator. Chris got a little held up last week, so he didn't get a chance to have it sorted which is all good! Might have it in the next few days but I'm off to Queenstown on Wednesday so it probably won't be going in for a few weeks anyway.
Was thinking about ripping the front hubs off to counter sink the mount bolts so I can fit capscrews (if anyone knows about these, they have hub mounting bolts that protrude on the mounting surface so rims that don't have cutouts on the backside foul making it so the rim won't sit flush on the hub). It's a pain in the ass but if I can get away with countersinking the it will make things a bit easier for wheel choice.
Chur,
Tai
-
4
-
-
Could try Andrew who works out of the Silverdale branch. He's a good cunt, worked for bnt for years and loves his Nissan's. Pretty sure he's still one of their reps.
-
I've also used gearbox international in New Lynn for synchros on a few different vehicles before so might be worth giving them a call.
-
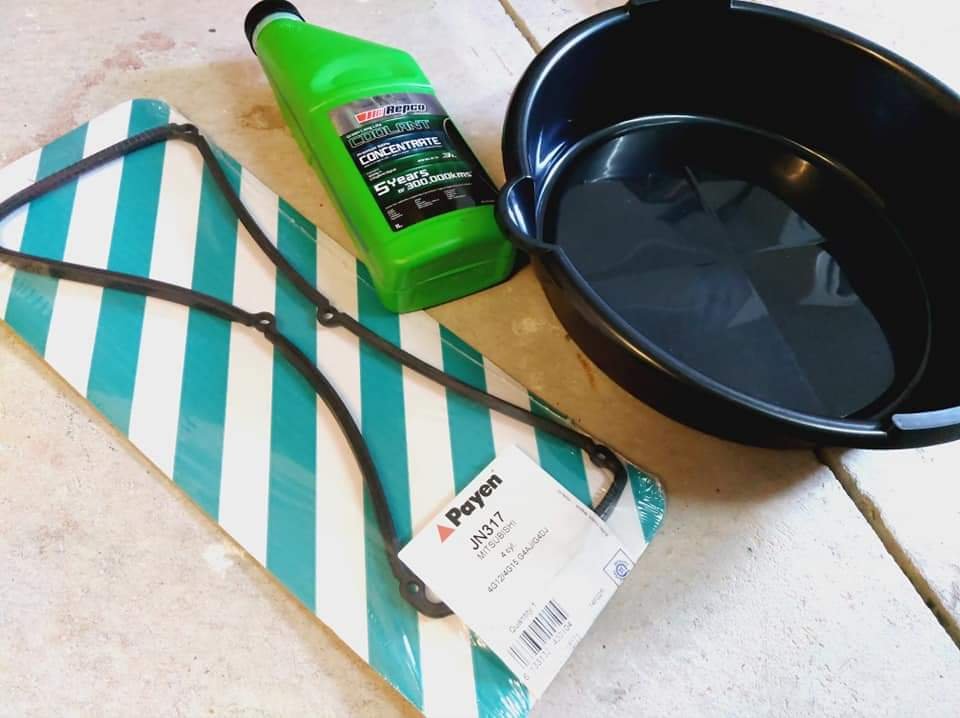
Got some more bits and did some stuff this weekend.
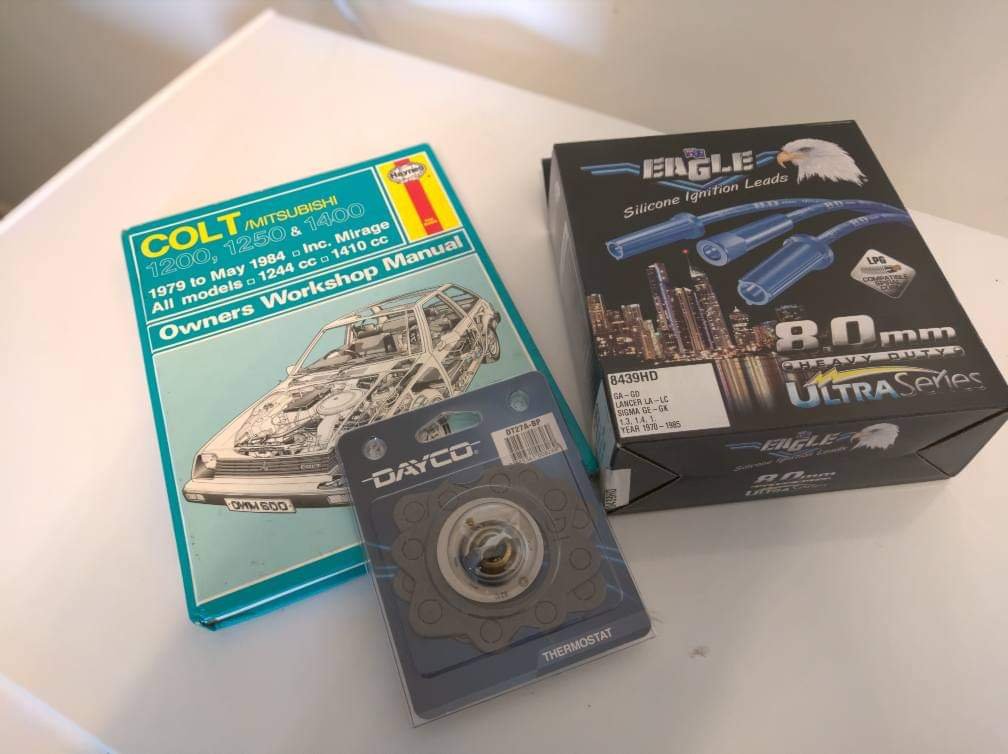
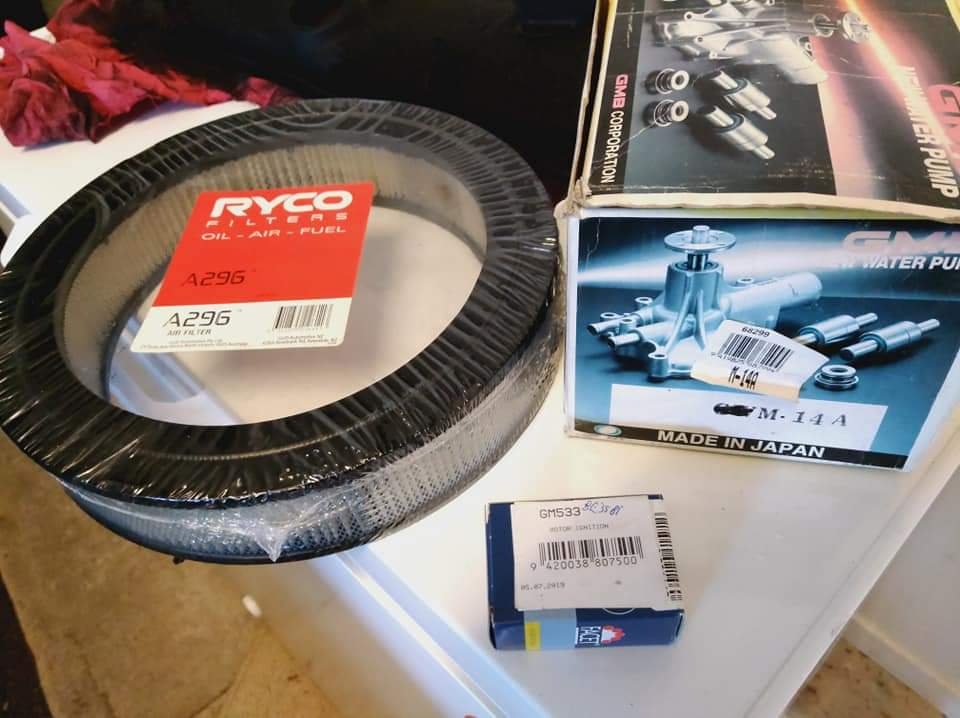
Got the correct waterpump (take note of how oldschool the packaging is haha), the right dissy rotor and thermostat. Also picked up some parts ignition leads which didn't fit, so they're now returned.
I've fitted up the timing belt, water pump, tensioner, drive belt and cleaned up the covers while I was at it.
I've also fitted the dissy condenser, cap, rotor and points (just need to bring my feeler gauge home from work to set the points gap, set the valves and also the new plugs). I've also done the filters and put some fresh oil through it (I don't think it's had a service in a very long time, the fuel filter looked like it was 20 years old!). Have also picked up some 80w for the transmission.
With the coolant system I've cleaned up the thermostat housing and fit the new thermostat. The radiator hoses felt super crunchy when I was moving them around so I ended up rolling then out and running the tap through them and so much corroded shit came out haha. In other news I've had issues trying to source a second hand radiator and the cost to recore was ridiculous so I've picked up an el cheapo chinesium alloy Honda Civic radiator from redline and having Euron8 Chris weld on some mounts and a boss so I can fit it up with the original fan and sensor. Hopefully the legend will have it sussed out this week for me :). Will have some more boring maintenance updates soon.
Chur,
Tai
-
8
-
-
Take the bearings to ABD in wairau, they're likely able to have some stocked or be able to get them in. Should also be able to get seals through them or Advance seals in Rosedale.
-
Cheapest recore I could find was $680. I can find the alloy rads at sub $200.
Factory fan is switched from the sensor/switch mounted in the radiator. The vehicle is carb so no ecu. I appreciate that Chris but trying to sort this across the weekend/within the week. Looks like I have everything lined up for this so should be sorted shortly.
Cheers.
-
1
-
-
I can possibly make this in the new, old mirage. Depending on what time I finish work that is..
-
4
-
-
54 minutes ago, Nominal said:
You can get this sort of thing here in NZ. Might eat up some of your savings though
https://daviescraig.com.au/product/mechanical-thermatic-fan-switch-relay-12v-24v-0404
That link actually shows the inline hose sensor adaptor as an option haha.
53 minutes ago, 00quattro00 said:Is the civic rad aluminium? Get a boss welded on to screw in the original thermo switch
This is a great idea, had never thought about that.
I've just been having a look at the old radiator. I reckon I can bend up some mounts to fit the new radiator to the factory mounts and have our engineer at work weld them on and also weld on a boss. Then I can chop off the original fan mounts and weld on some new ones to suit the new rad and run all the original bits. I'll just need to adapt some hoses to suit. I reckon I can sort all of this for sub $300 haha. Here's hoping.
Cheers for the help. Will see how I get on haha.
-
Hey guys, looking for some advice.
I'm now looking to retro fit an aftermarket Civic radiator into my mirage as I'm struggling to find a second hand unit and recore looks to be a hefty cost now (no way near as cheap as it used to be). I'm a bit of a tight ass at times and only want to spend half of what a recore will cost if I can so I'm working out a plan.
The idea is to get a cheap aftermarket alloy Civic radiator 'half rad', make some mounts to fit and make up some new hoses. The main issue I'm running into is how to go about setting up a thermo fan. The Civic radiator doesn't include a thermo switch mount so I was thinking to use one of the hose inline switch/sensor mounts but I'm struggling to find one locally. Another thing is would I need to run a new circuit/relay for the fan or would I be sweet to just tap into the existing circuit and get away with it? If need be I can follow the wires and see the relay setup that they run through from factory.
If anyone has any suggestions on the best and easiest way to do this then please let me know.
Cheers,
Tai
-
Picked up most of the parts today.
Cleaned up the block to fit the waterpump, the one supplied is wrong, the inlet pipe sits out about 20mm further out than it should (maybe it's 4g12 pump). The thermostat is different (mines offset) and the dizzy rotor was different as well, so have the correct(hopefully) parts on order. No biggie though. Also the second hand radiator I was getting sent turns out to have a good portion of the fins munted so I'm getting a recore on my current one priced up through my mate at Albany radiators.
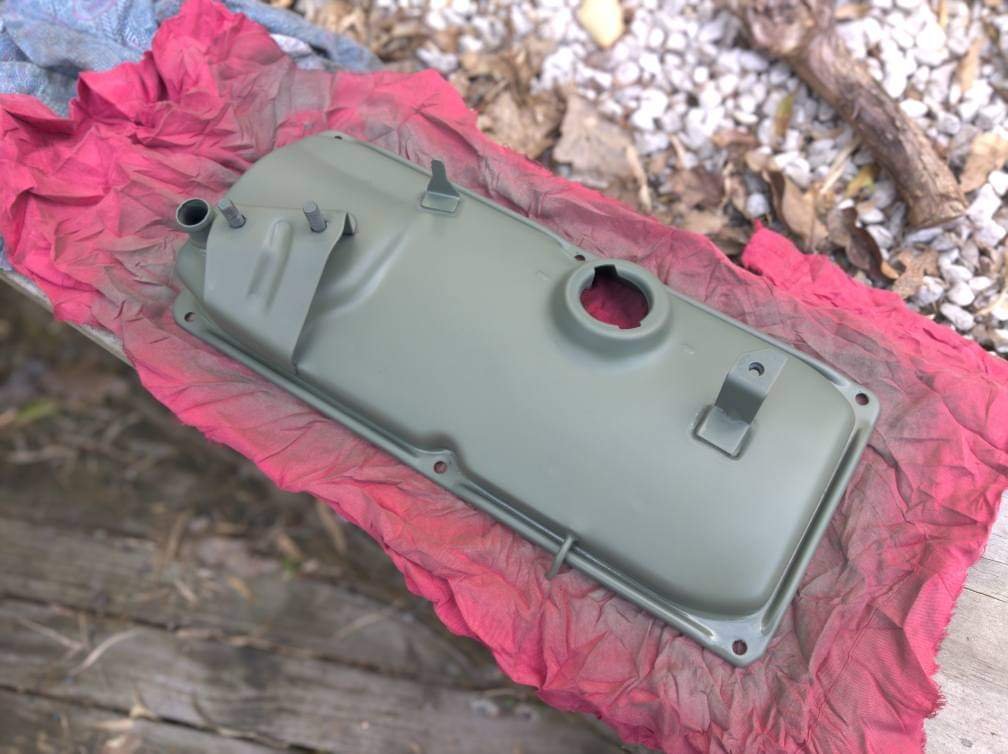
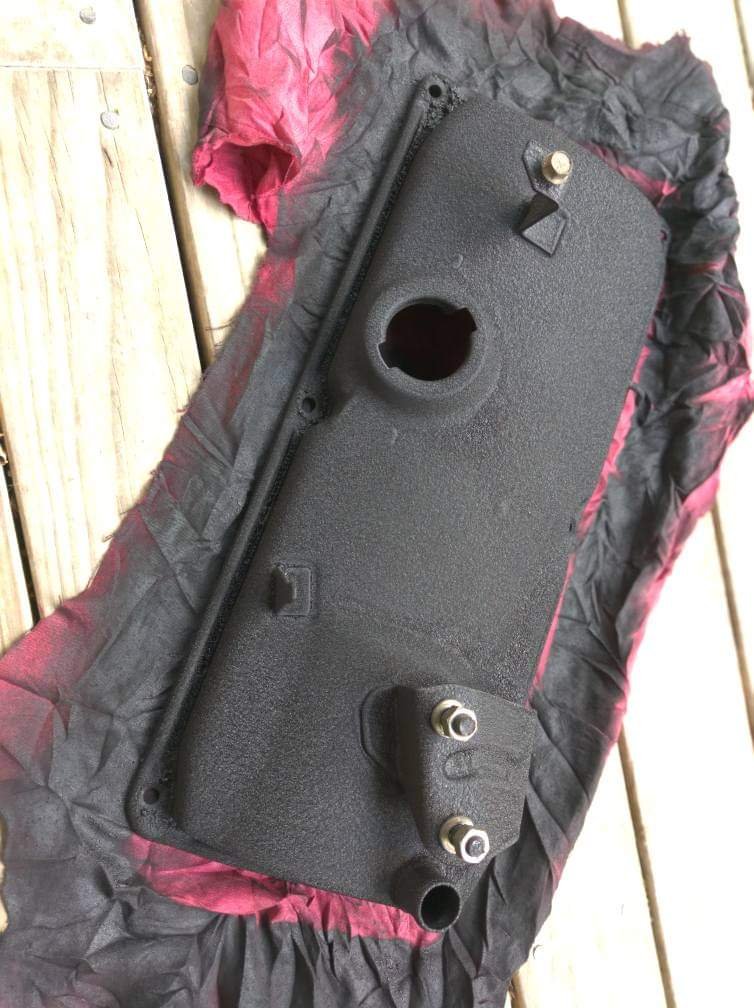
Figured as I had the rocker cover off I'd give it a strip back and paint.
This was a very rushed job, even ran the heat gun over it to try and get the wrinkle finish a bit more prominent (have found it normal sits really flat if you can't bake it). Accidentally went hunnits on the corners which made it start bubbling so I'm guessing they'll flake off pretty quick haha. Oh well.
Tai.
-
2
-
-
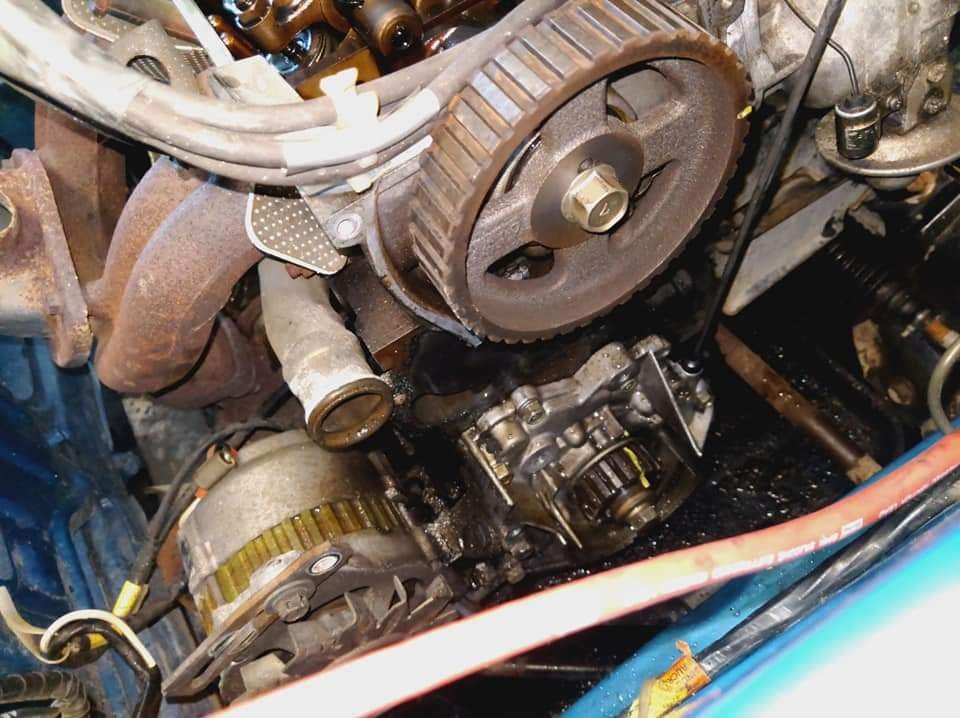
Managed to knock off slightly early today so I decide to rip into this.
Grille off and radiator out.
Here you can see the damage/wear in the corner
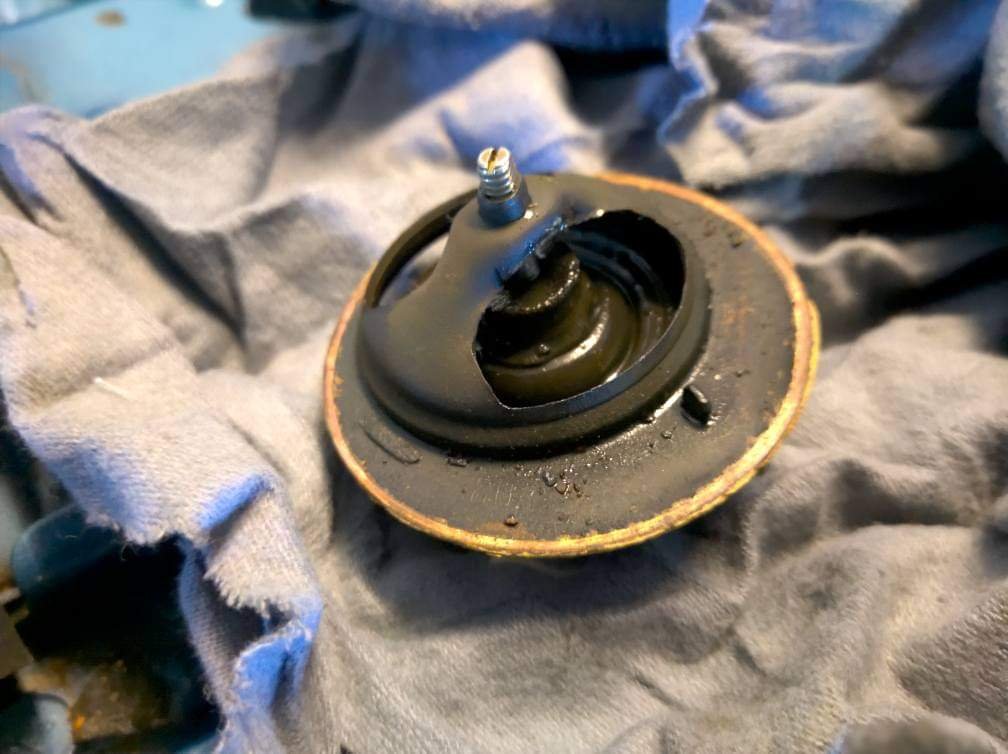
As suspected, thermostat is stuck open.
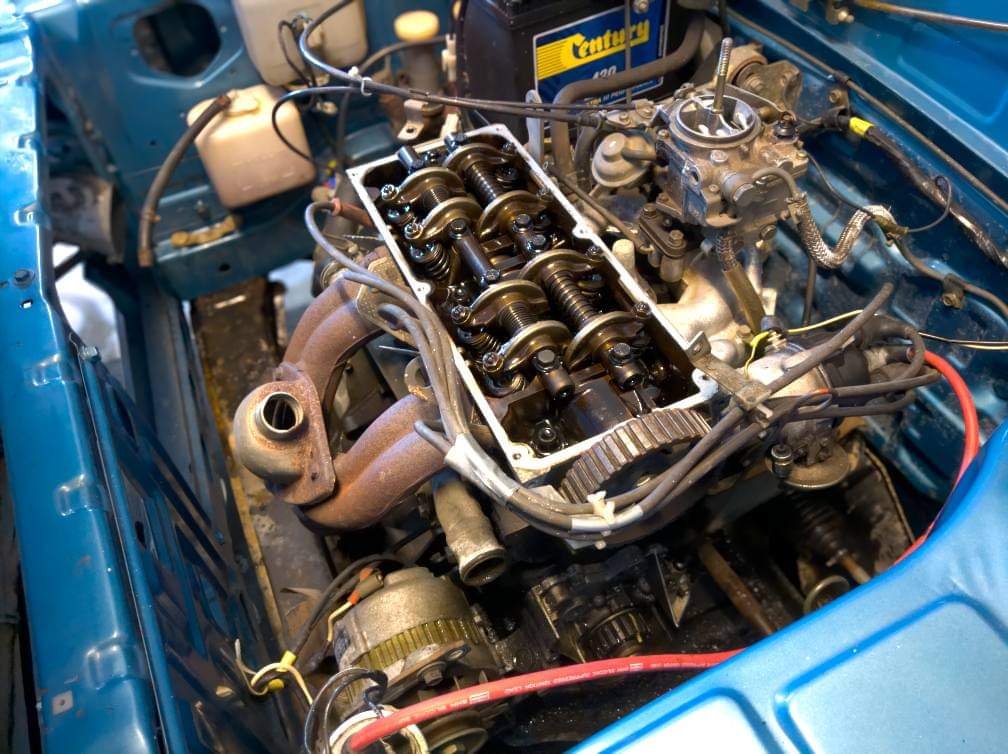
Rocker cover off. Not too bad, very slight carbon build up but pretty clean really.
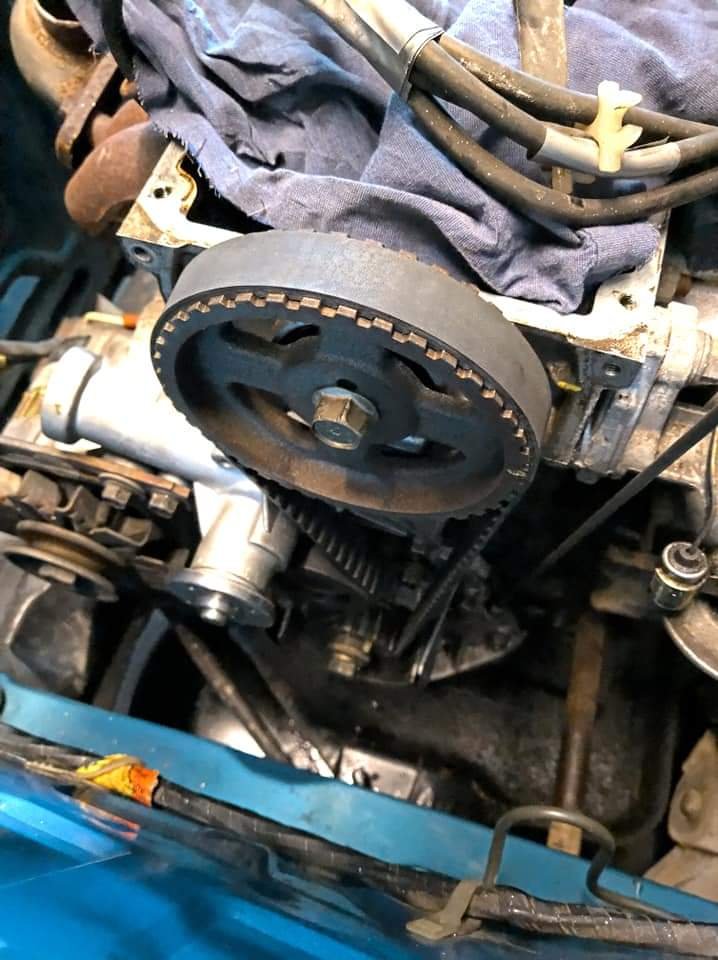
Water pump and timing kit off.
The water pump bearing feels firmer than it should be and the belt doesn't look too bad, wear starting around the edges. Would rather crash it all out for peace of mind as I'd imagine it's all the original bits. Hopefully have the parts arrive shortly so I can piece it all together and clean her up.
Cheers,
Tai.
-
7
-
-
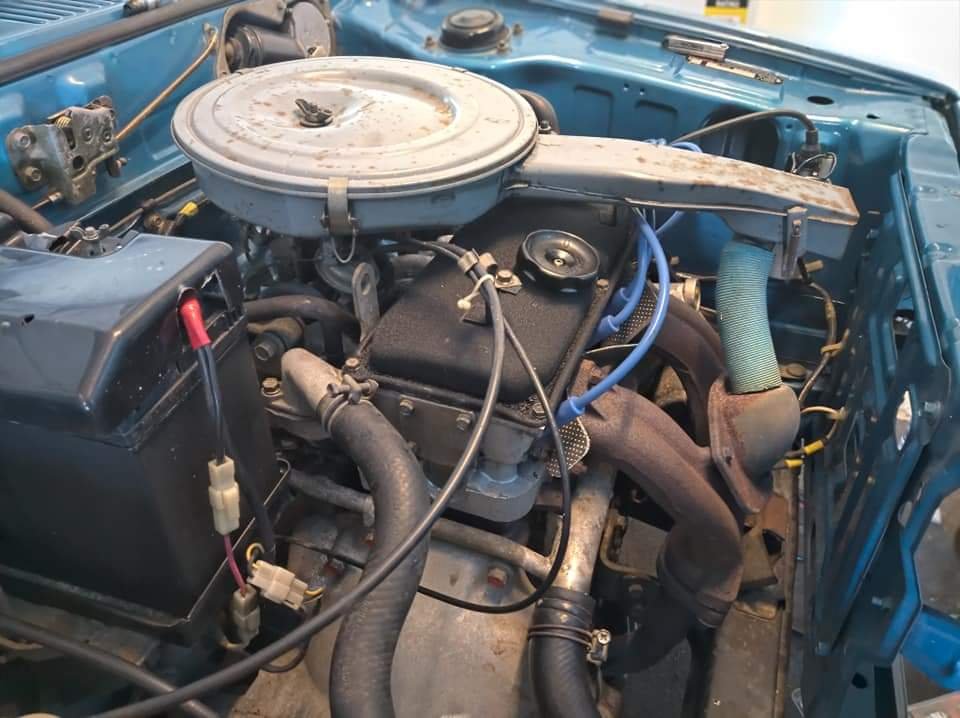
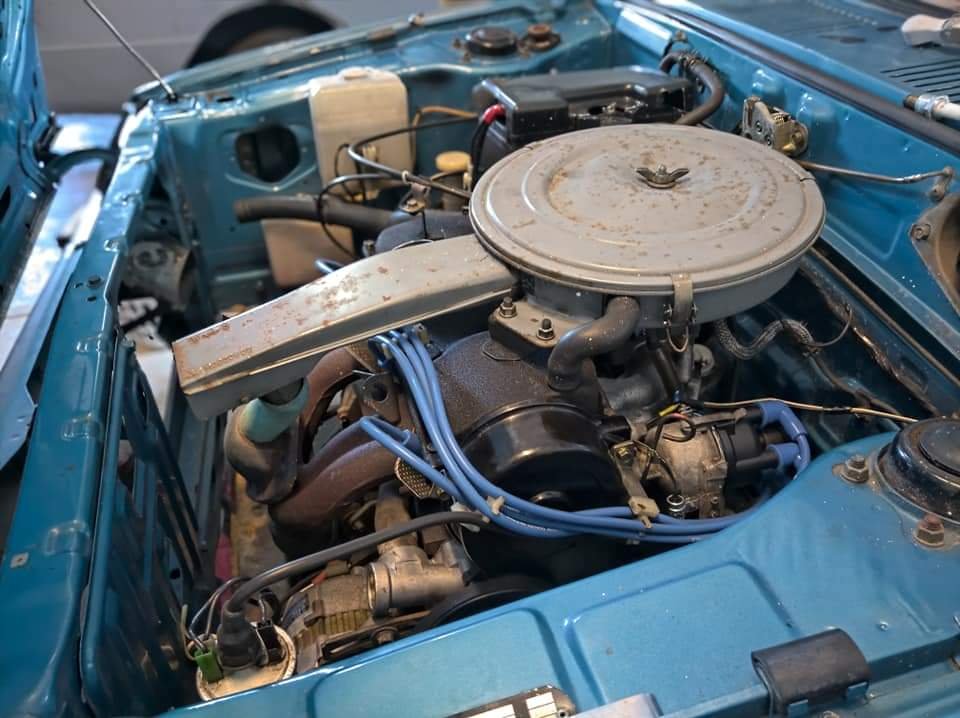
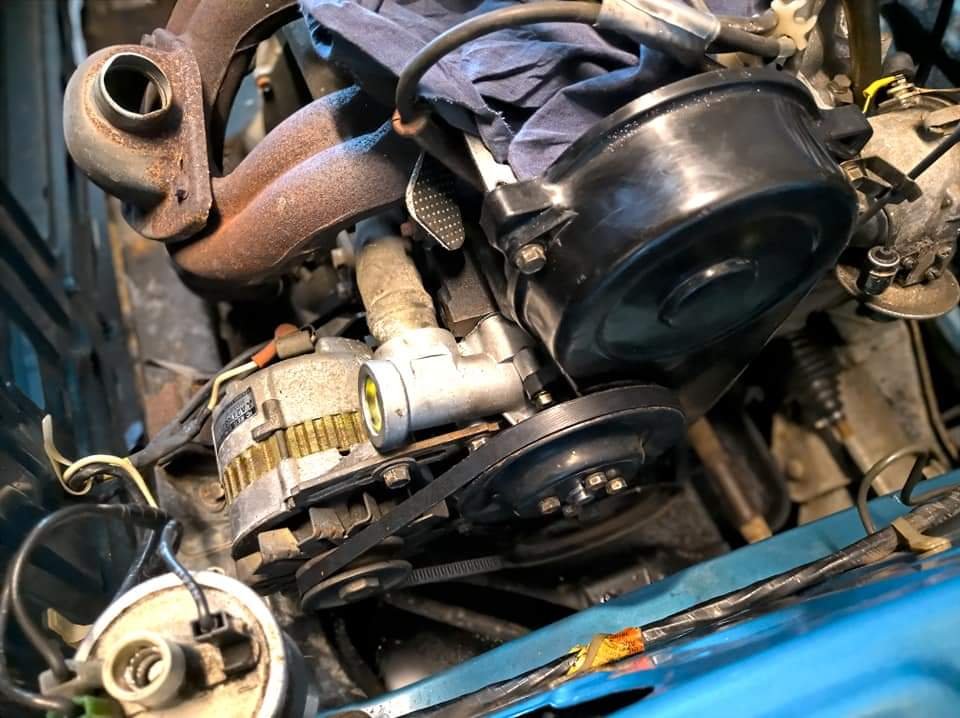
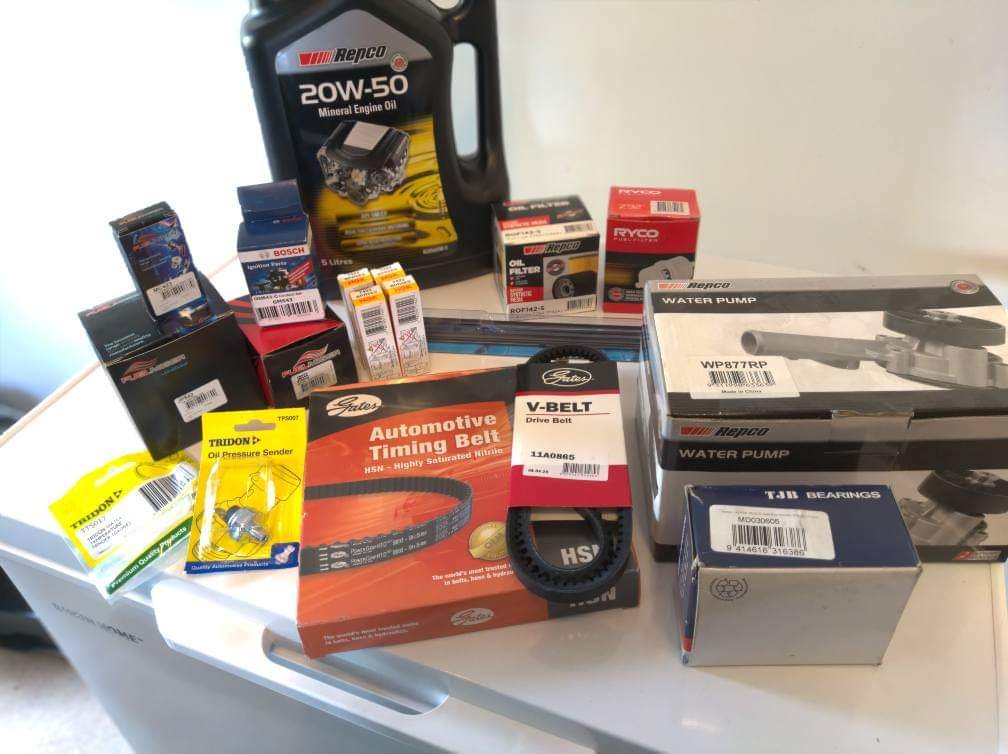
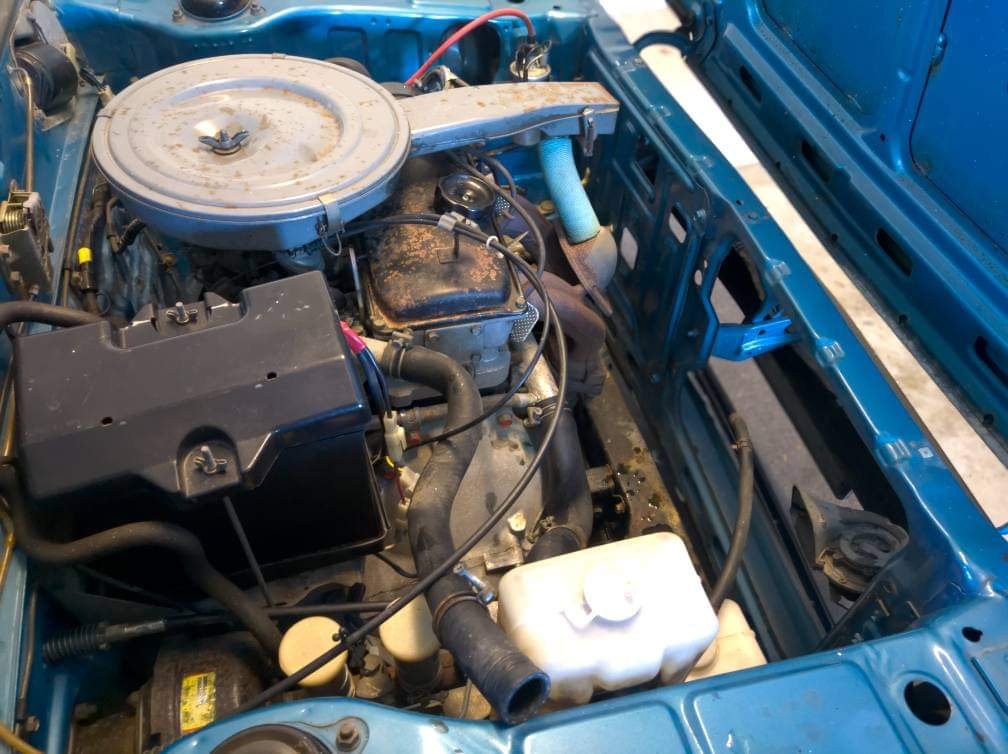
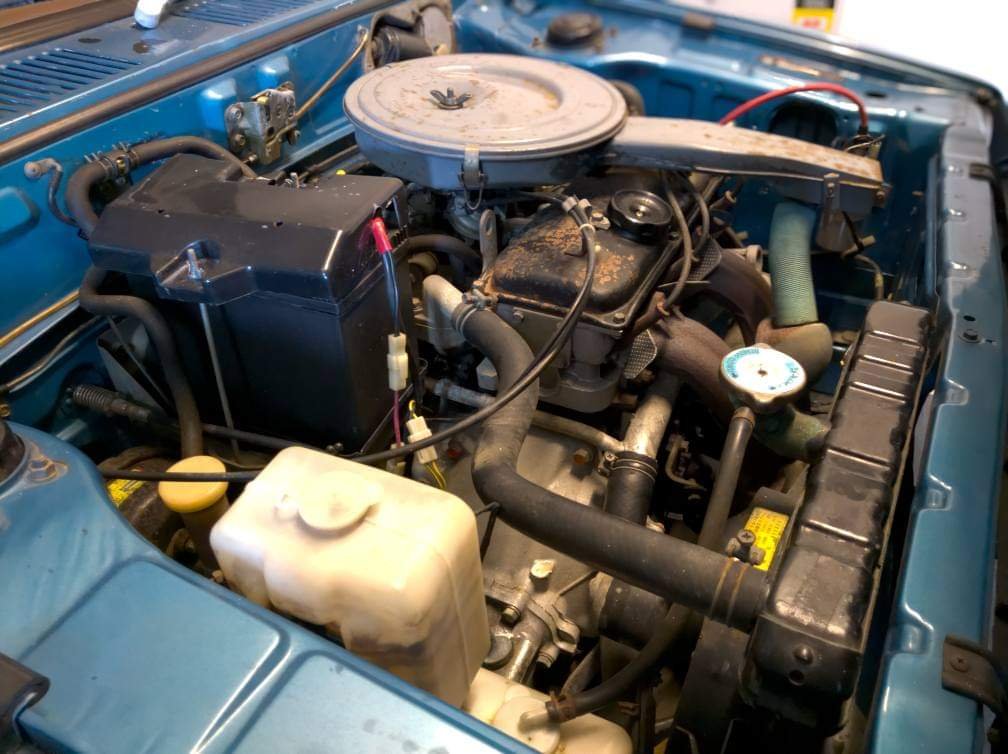
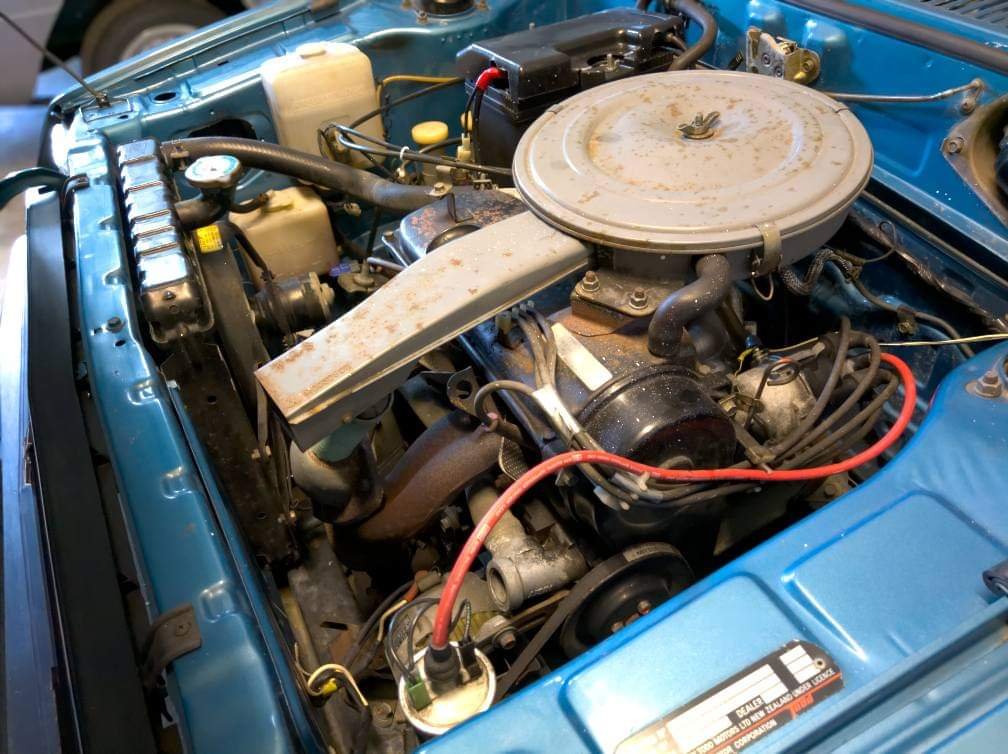
Here's some pics of the powerhouse.
Oh and some parts I picked up today.
Not gonna lie it's blood great at how cheap and easy these are to work on. Everything I've ordered has cost me significantly less than the O2 sensor I brought for the subie haha, in saying that though I have access to great discounts so that also helps. It probably won't be too much of a project, but a light build for a summer cruiser. We'll see where it goes anyway..
Cheers,
Tai
-
8
-
-
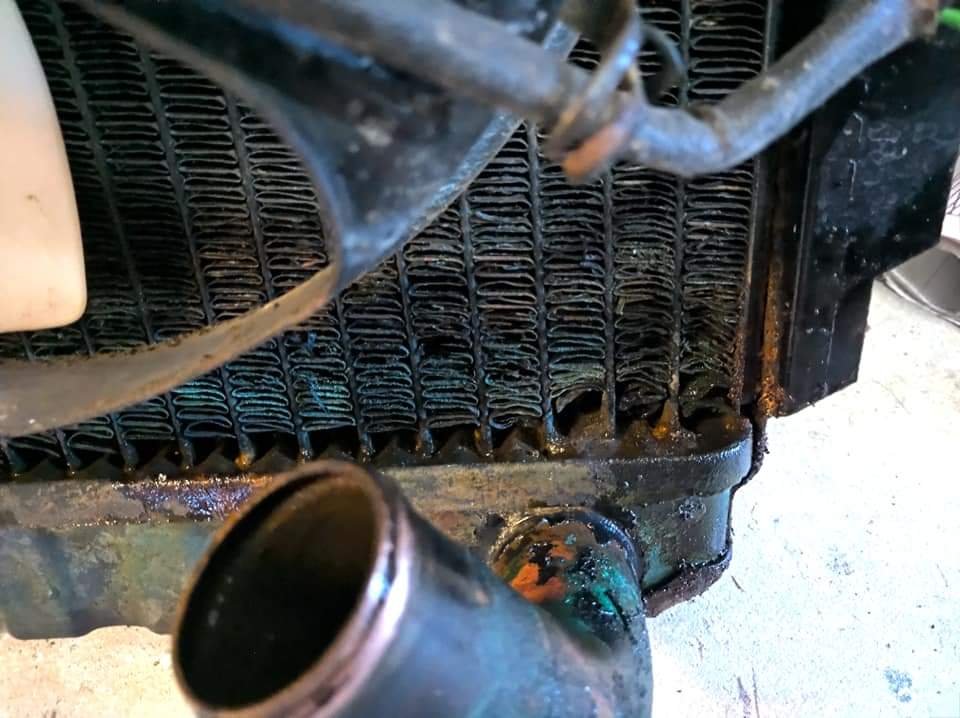
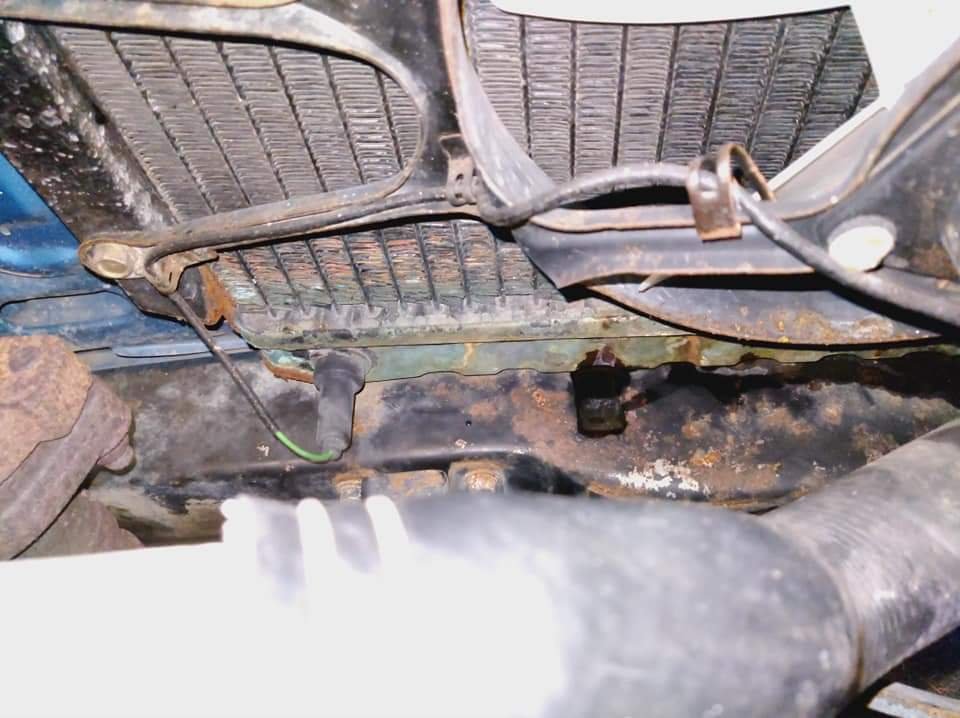
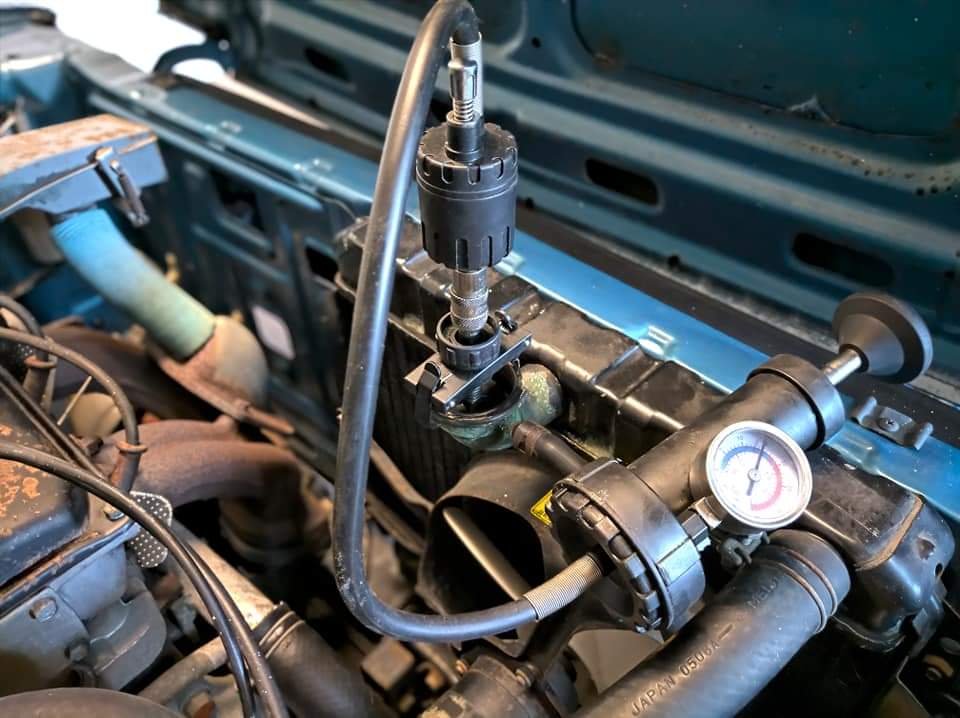
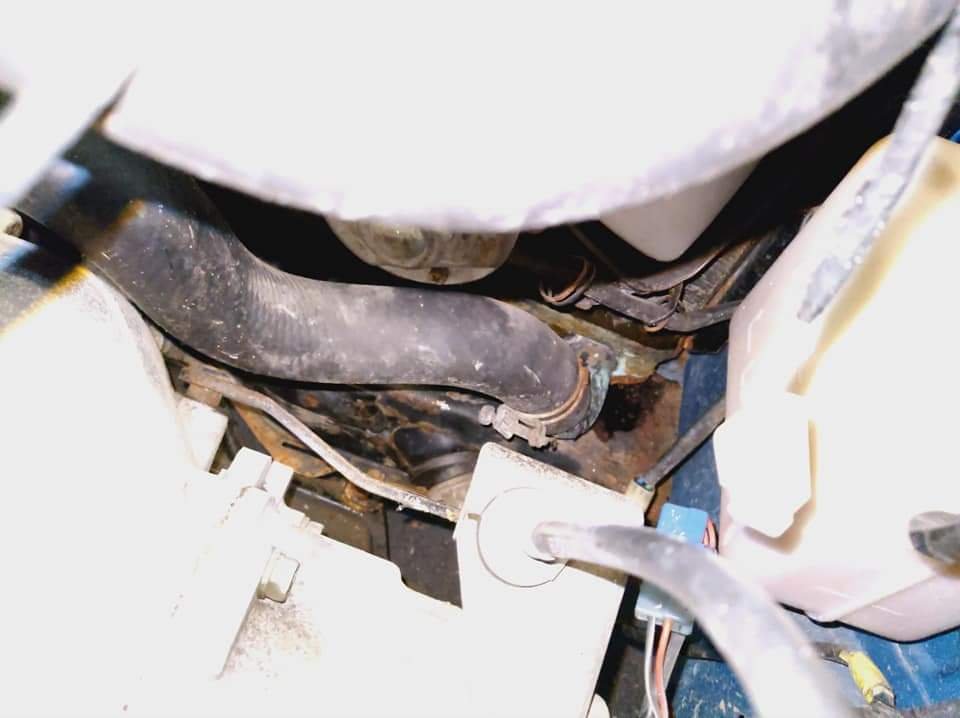
I figured id better pressure test the cooling system just to make sure the radiators playing up, so borrowed the one from work.
In the last picture you can kind of see the leak from the core in the bottom right corner. I've got another one on the way from a Mirage enthusiasts bloke from Kerikeri for a great price.
-
1
-


Aucklands Anon Burger meet!!
in Upper North Island Region
Posted
I finished work at 11pm last night. No chance when I have breakdowns to go to...