
- Popular Post


Taistorm
-
Posts
2056 -
Joined
-
Last visited
-
Days Won
1
Posts posted by Taistorm
-
-
- Popular Post
Only managed to squeeze about 1.5hrs in since Monday which sucks as I was hoped to get a few more. Ah well little progress is still progress...
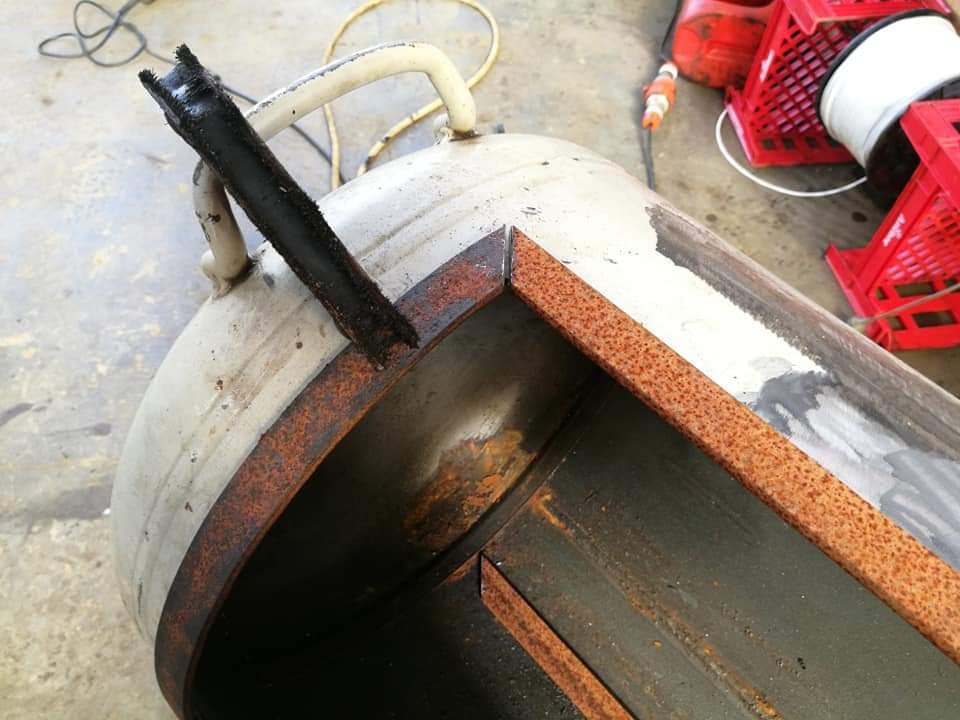
I've cut out the main chamber lid and cleaned up the edges. Cleaned out most of the sludgy build up up there's not much rust at all so pretty happy. Will need to get it burnt out pretty well though before seasoning.

I've also managed to start cutting and bend up the lid outer frame. It should over hang about 20mm so hopefully it seals well enough other wise Will need to look at some heat seal.
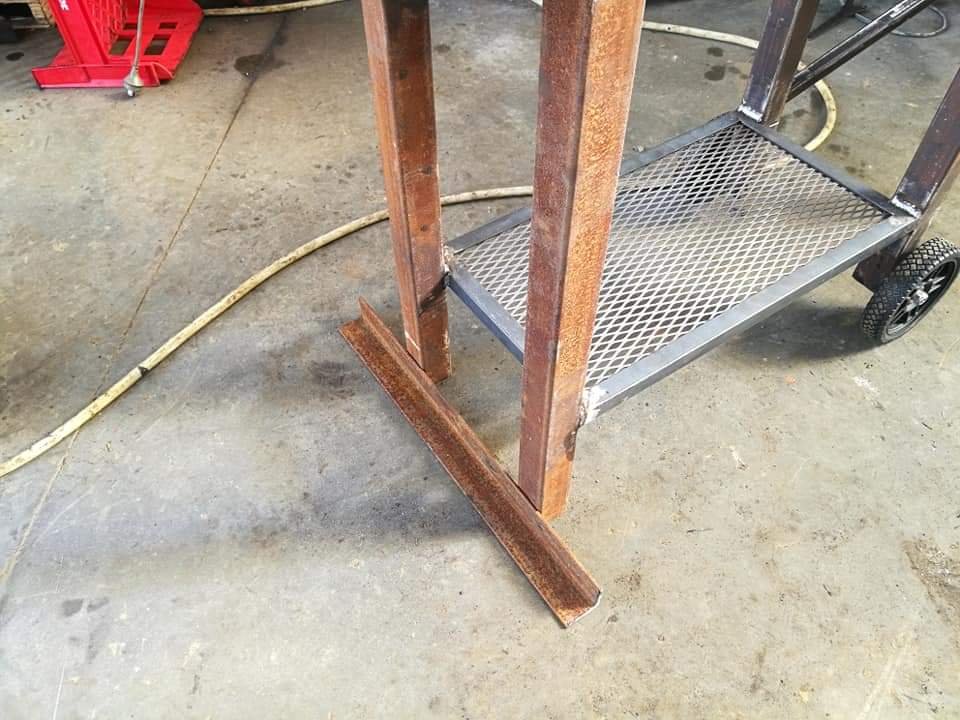
Also cut some 50x3 angle for the legs. Should help add a little more weight to the front and make it a bit more stable. Will probably tidy it up and chamfer the ends though.
-
 11
11
-
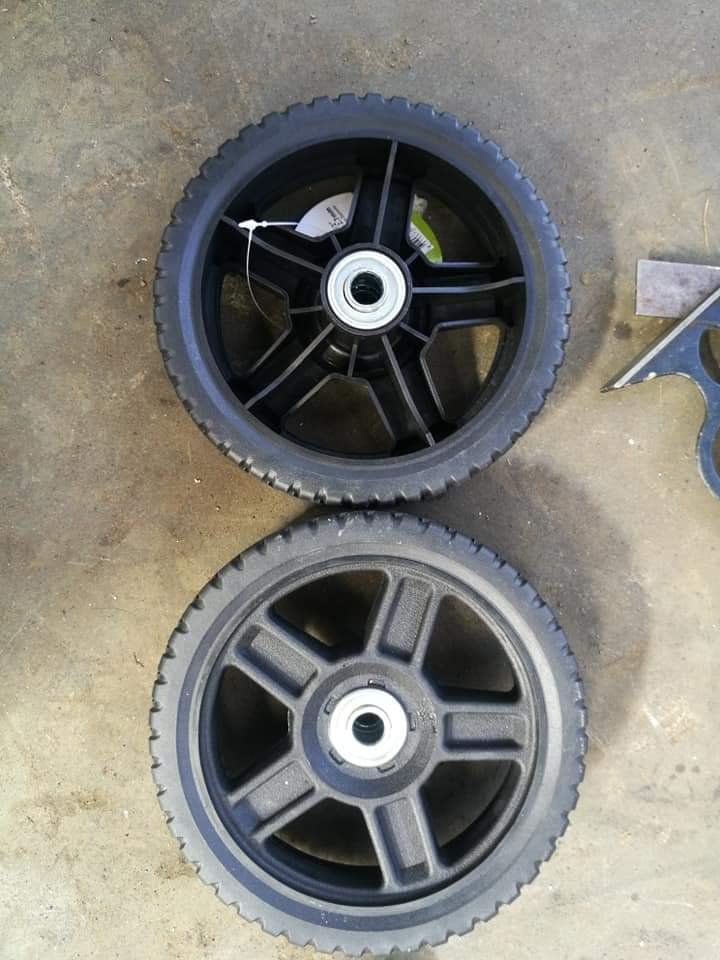
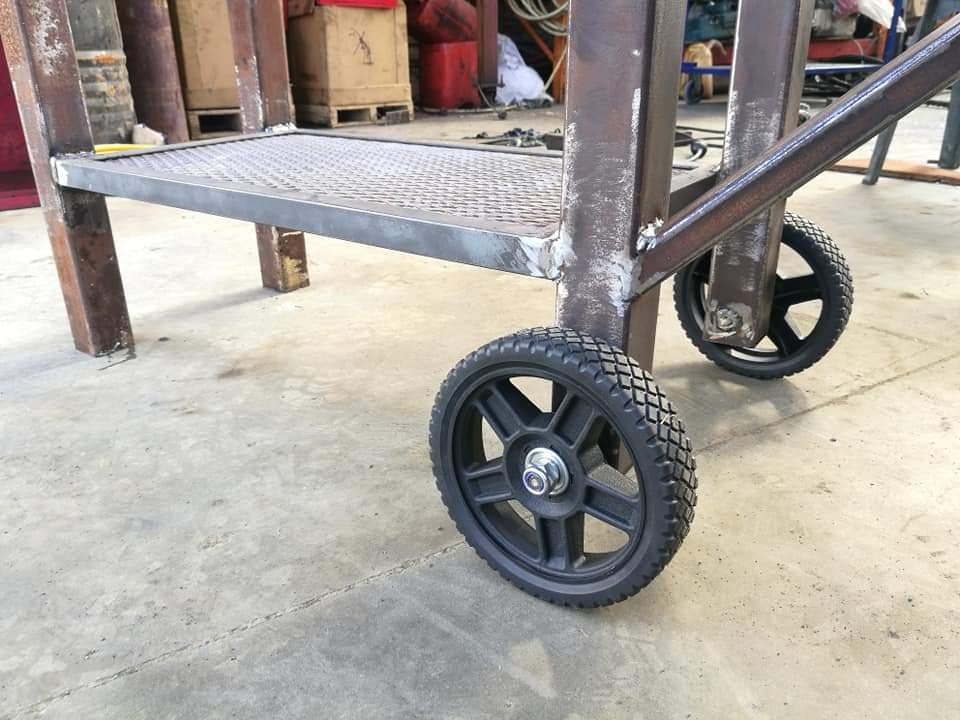
Figured this thing was getting too heavy to lift around the work shop and move out of the way so I decided to do something with the wheels. Got a pair of these for about $20 each from bunnings (rated to about 25kg each).
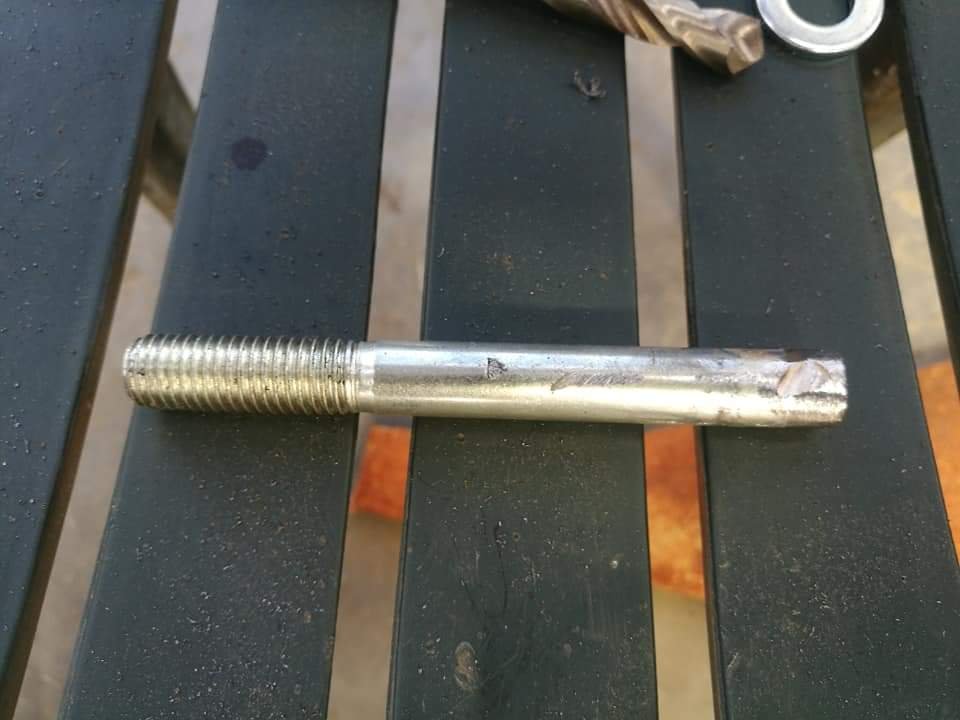
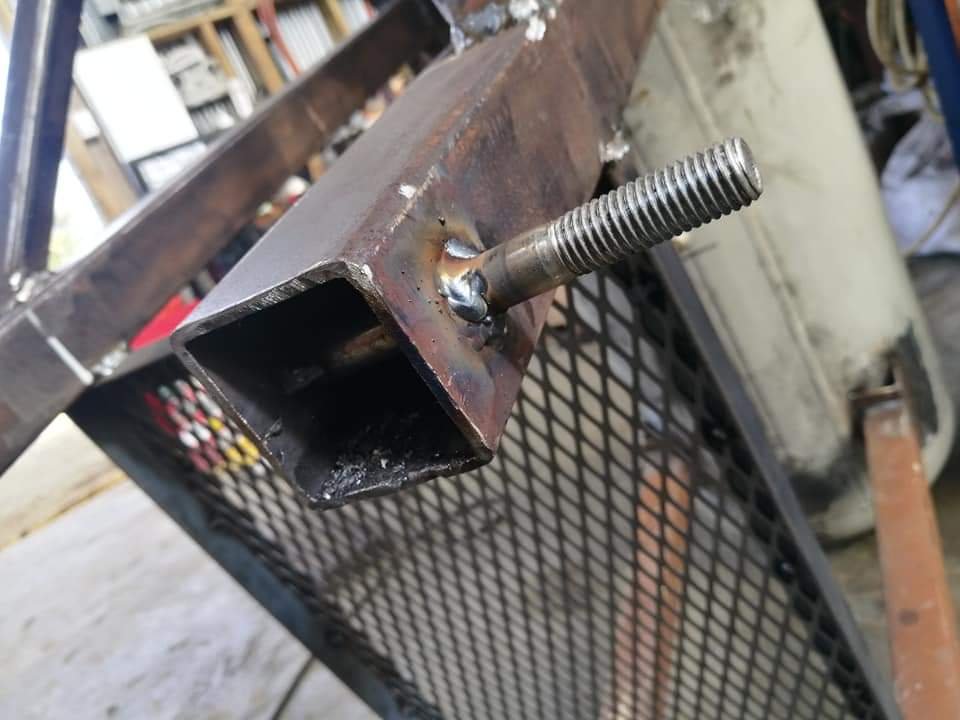
Chopped the legs about 70mm and drilled out some holes. I was going to just bolt the wheels to the legs but we didn't have anything long enough to suit so I ended up trimming the hex off the bolts and used it as a spigot on the legs. Tacked them on and the wheels bolted on perfect. Not pretty but they're functional and it's now 100x easier to shift around.
-
8
-
-
13 hours ago, flyingbrick said:
Dude, this is going perfect so far! I have a big air receiver tank sitting there to do similar.
Will you be going reverse flow? the fb bbq collective page seems to agree that thats the best way to get nice even temps across the cooking chamber.
Also, hot plate on top of the fire box?
I did some amazing beef cheeks 3 days ago. delicious.
Cheers bro ! Yeah definitely give it a crack.
Will be going reverse flow. I've never personally used one before but hear it's the business and yeah far better for maintaining a more consistent temp. Combined with a good fire box setup it should be pretty easy barbecuing.
As for the got plates there will be one on a removable shelf on the fire box for searing and will have 2 removable racks in the main chamber.
-
1
-
-
- Popular Post
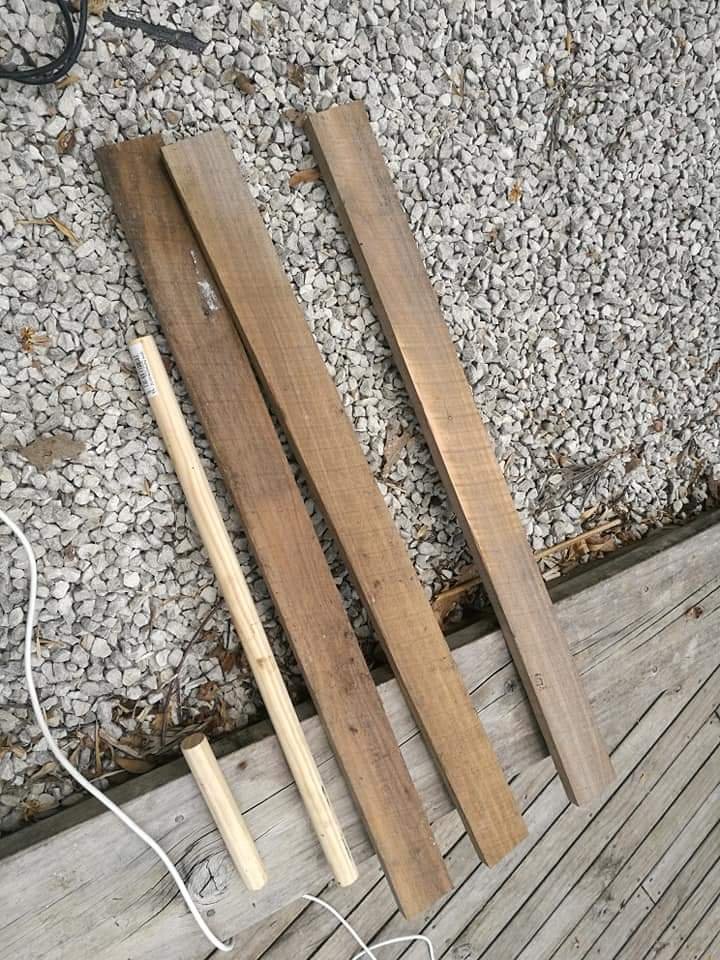
Picked up a pine dowel for the lid handles and got some macrocarpa lengths off the olds for the bench. Cut these all down to size, then with help from the other half we sanded them back and threw some linseed oil stain on them.
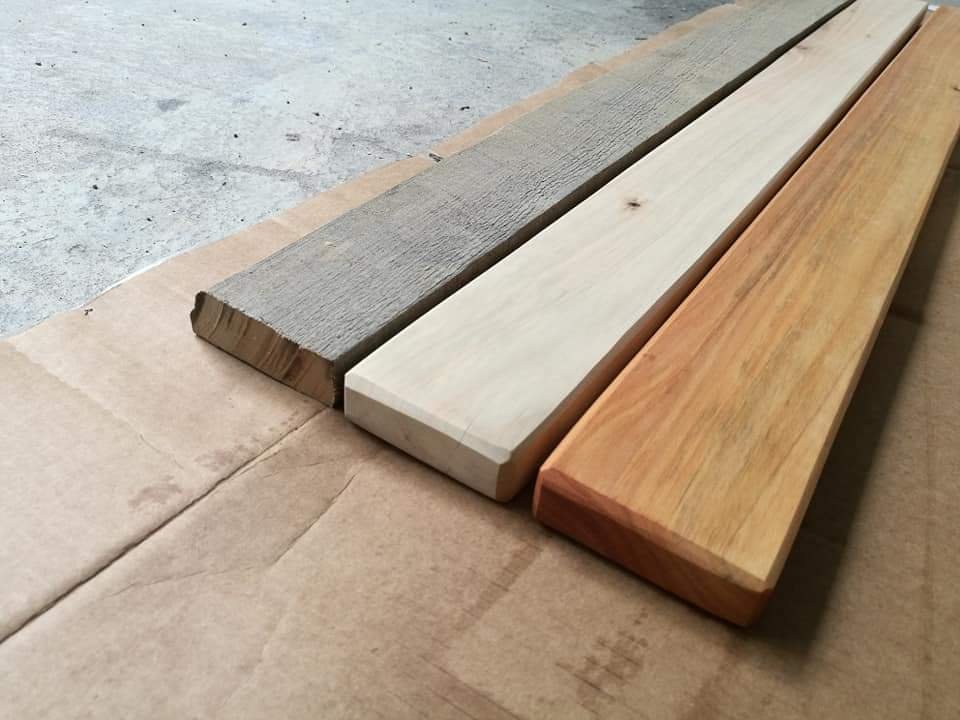
Sanded to 240grit and chamfered the edges.
First coat of oil and pieces side by side to show the different stages.
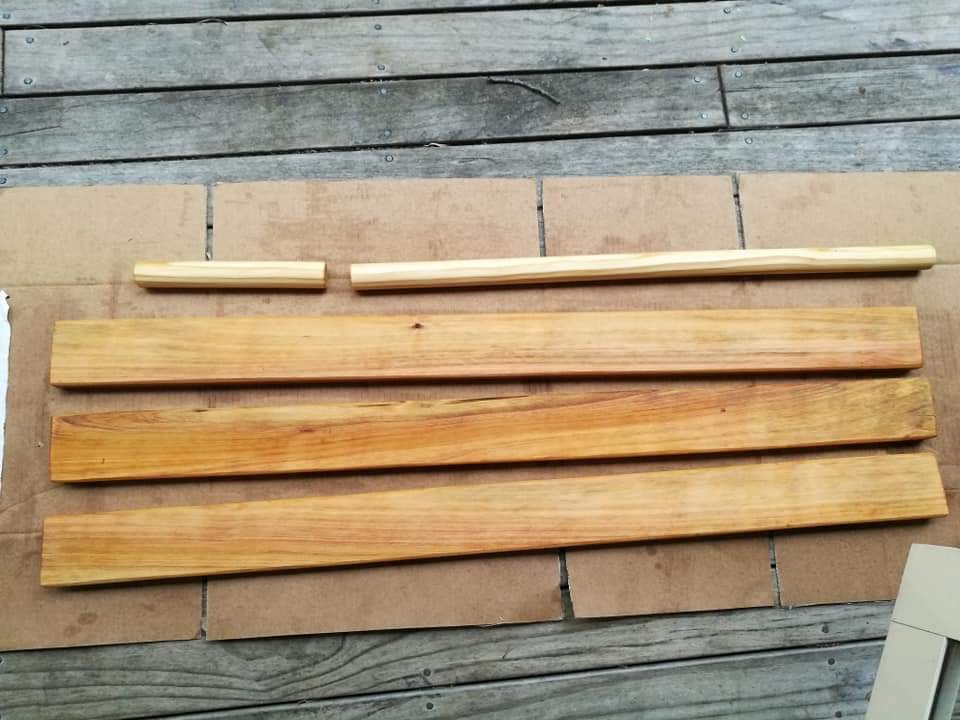
3 layers deep (on the rark).
Some sweet colour and nice grain out of the Mac. Should look pretty sweet once it's all fitted up.
This is where I'm at right now. The next stage with be the lids/doors then the main chamber baffles. Will see how we go anyway. If anyone has any ideas please let me know, just making it up as I go.
Cheers,
Tai
-
15
-
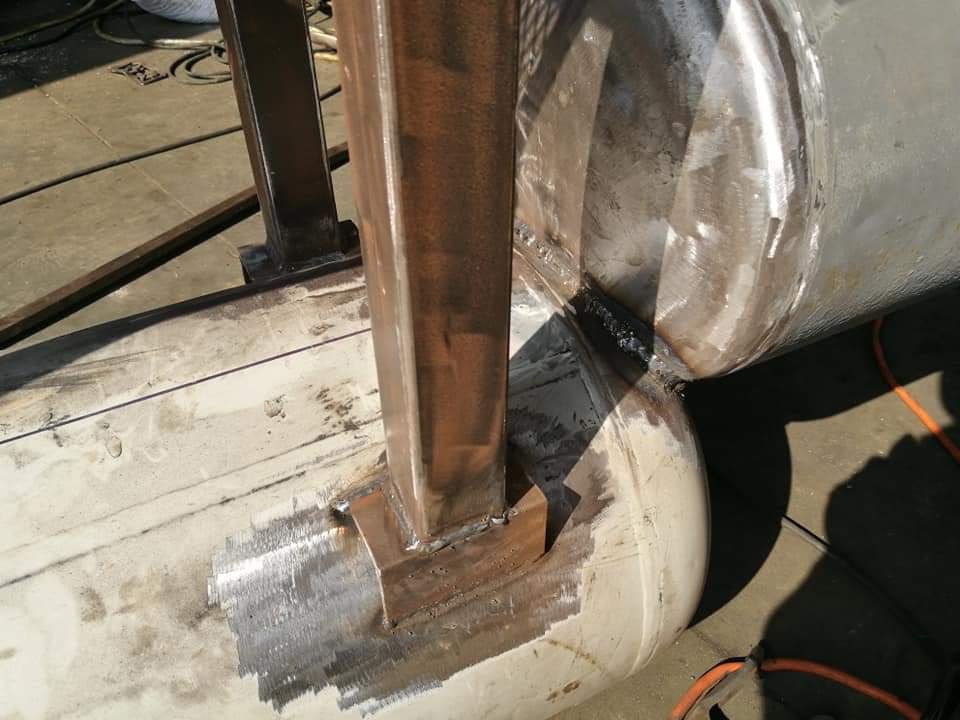
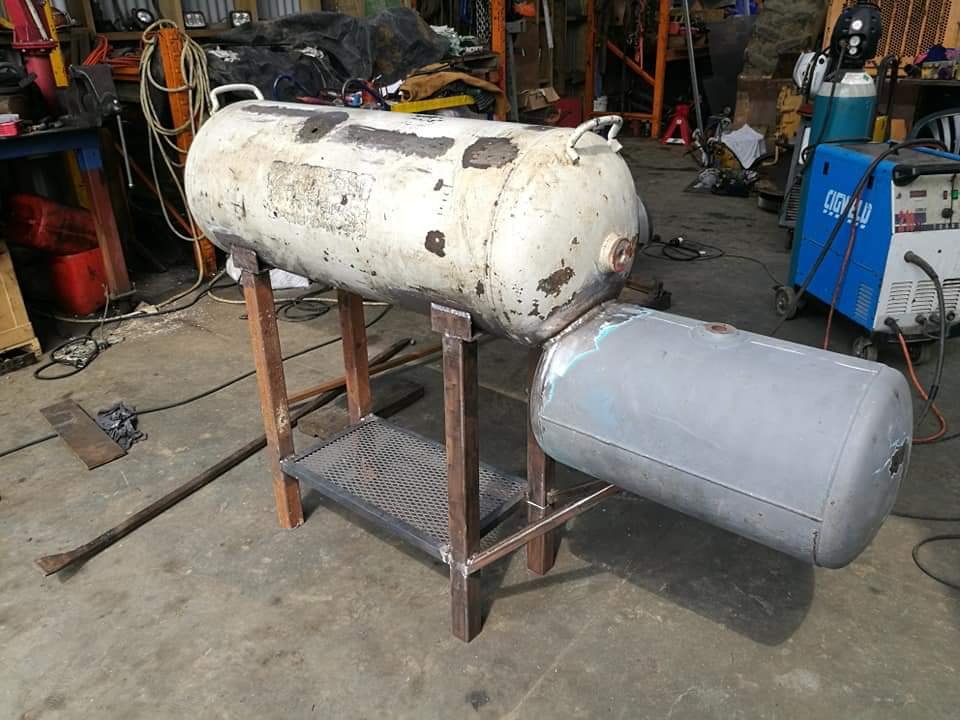
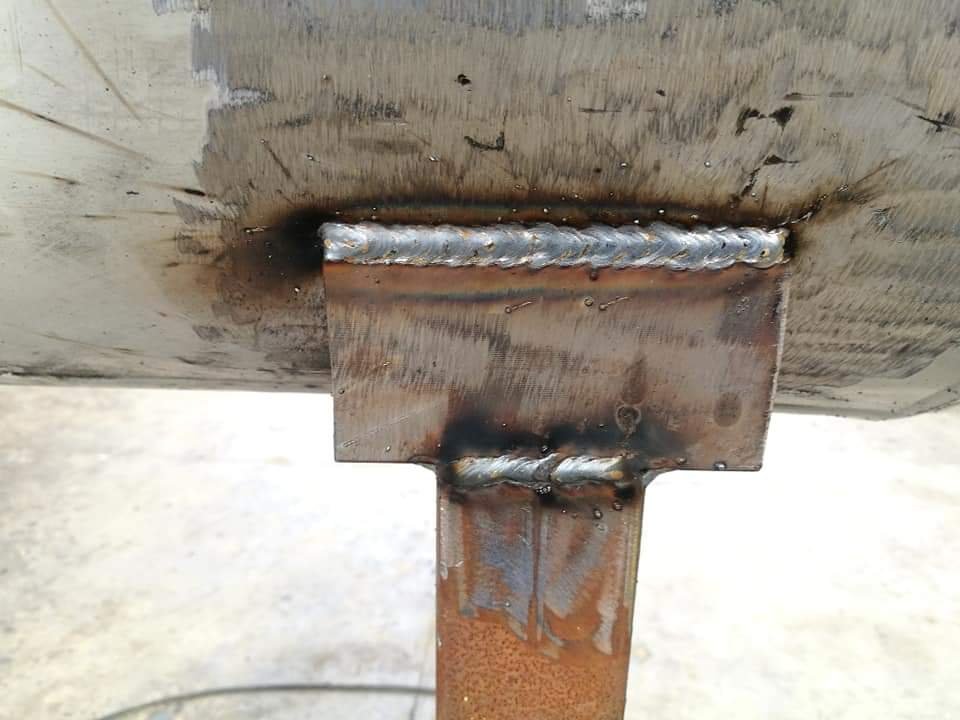
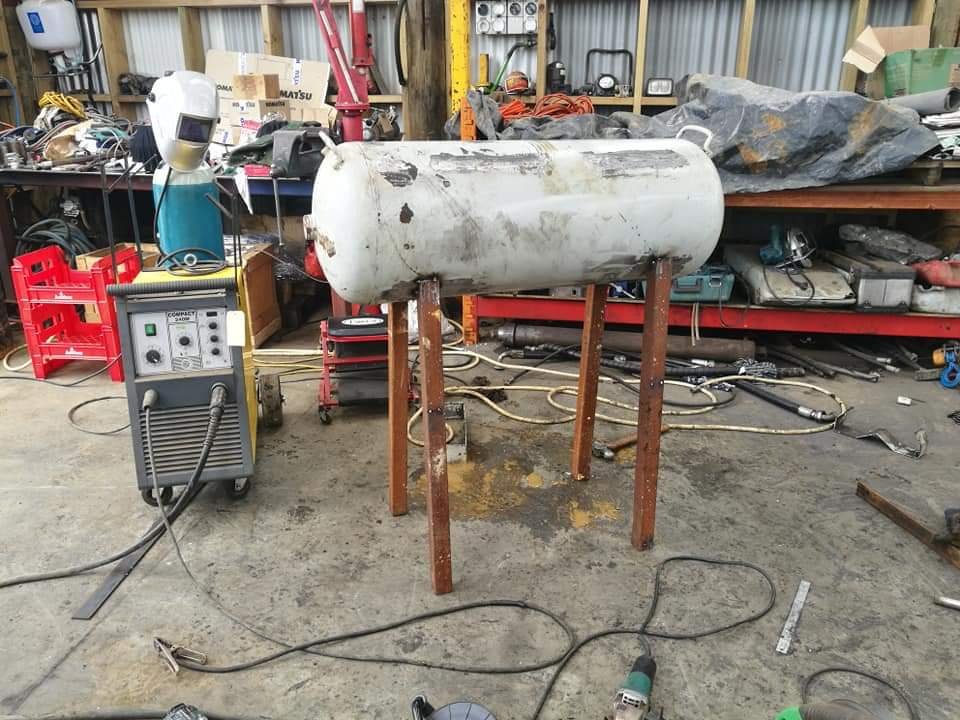
Yesterday morning I grabbed another roll of wire then tried to get my welding on, the bloody mig stopped working (bad contact on the feeder wire plug) so ended up having to use our old backup welder. The under side was the closest so had to fill a little which I'm not too happy about but it looks ok and is hidden.
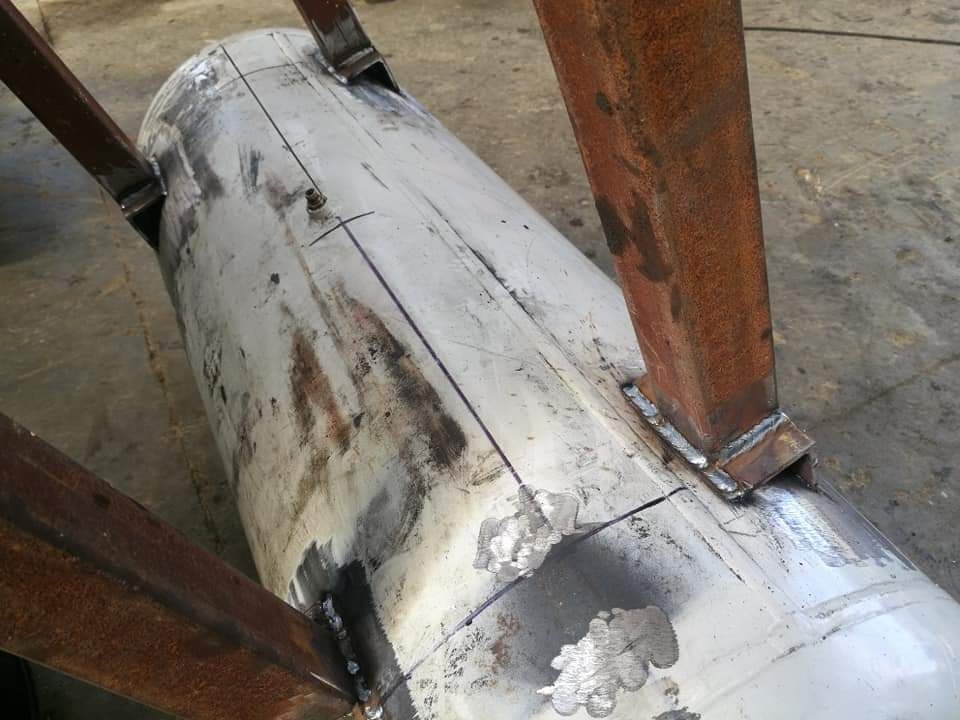
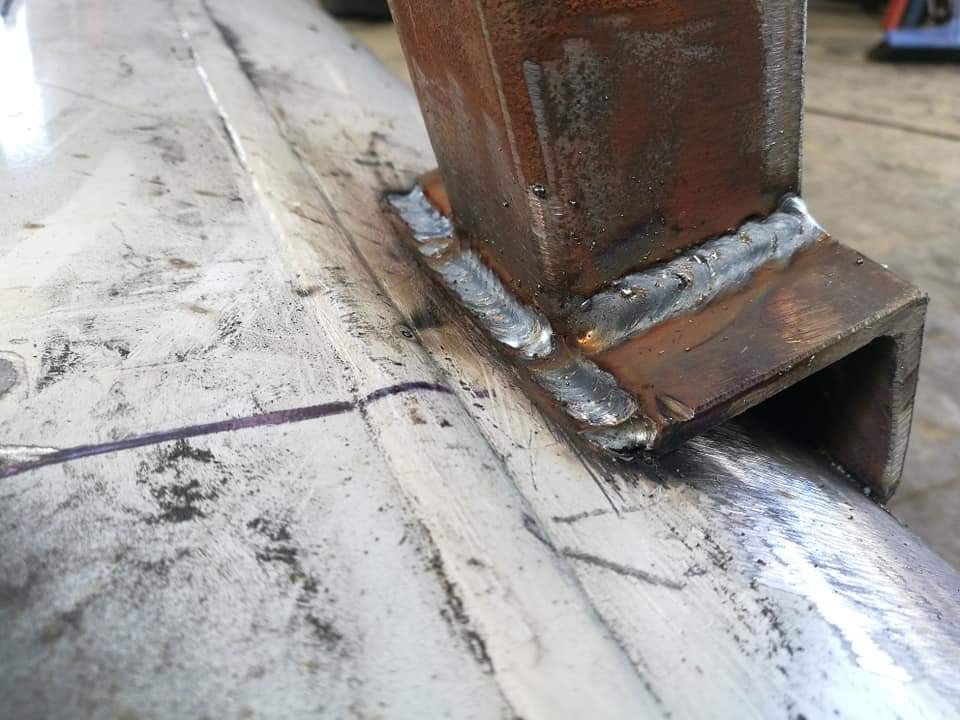
I also cut some support legs out of 20(or 25)x5. Had to piss around with getting the angles right so it sits relatively even. Mated these to angle and stitched them together.
Pretty happy with how it looks and sits. It's heavy as, maybe a bit over 60kg as it sits atm. I think the tanks are around 3mm. I'll weld in a foot brace to the front legs to give it a bit more weight opposite to the Fire box and help with lateral movement (it's pretty stable as it is however).
-
9
-
-
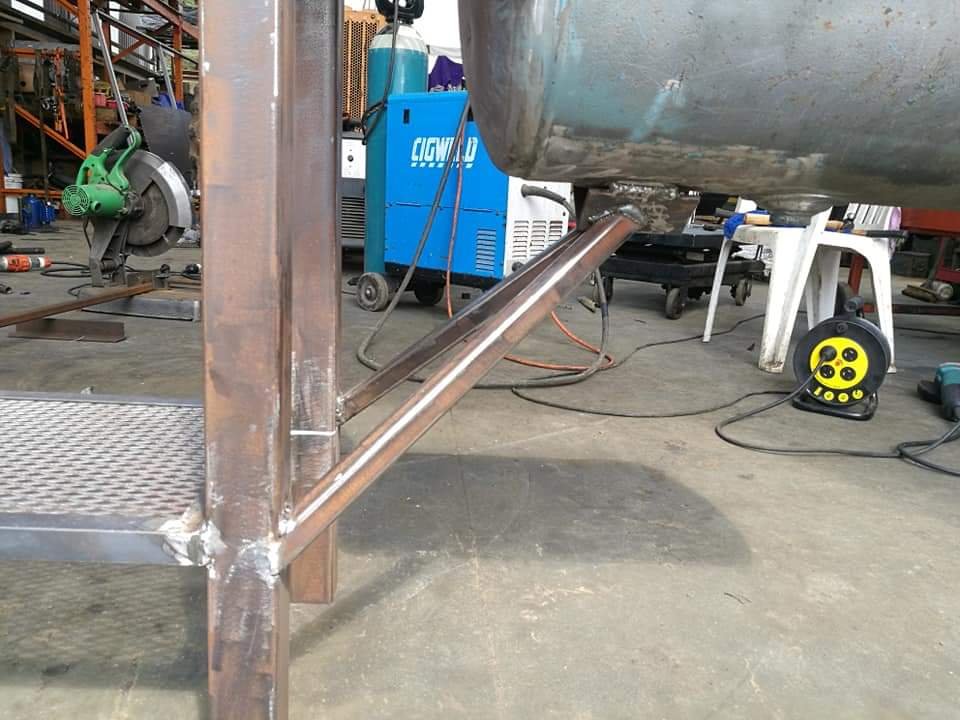
Cut out the top left section of the Fire box. There's probably an easier way of doing of this but I have had minimal fabrication/engineering guidance and have mostly learnt as I go, across the last few years through work. I just did rough marking then cut it bit by bit until it was close enough.
I cut a hole in the main chamber approx 30mm smaller than the Fire box cut out and ran a flapper wheel around the hard to reach areas (didn't take any pics sorry). I then tacked it in place and the bloody welder ran out of wire!
-
2
-
-
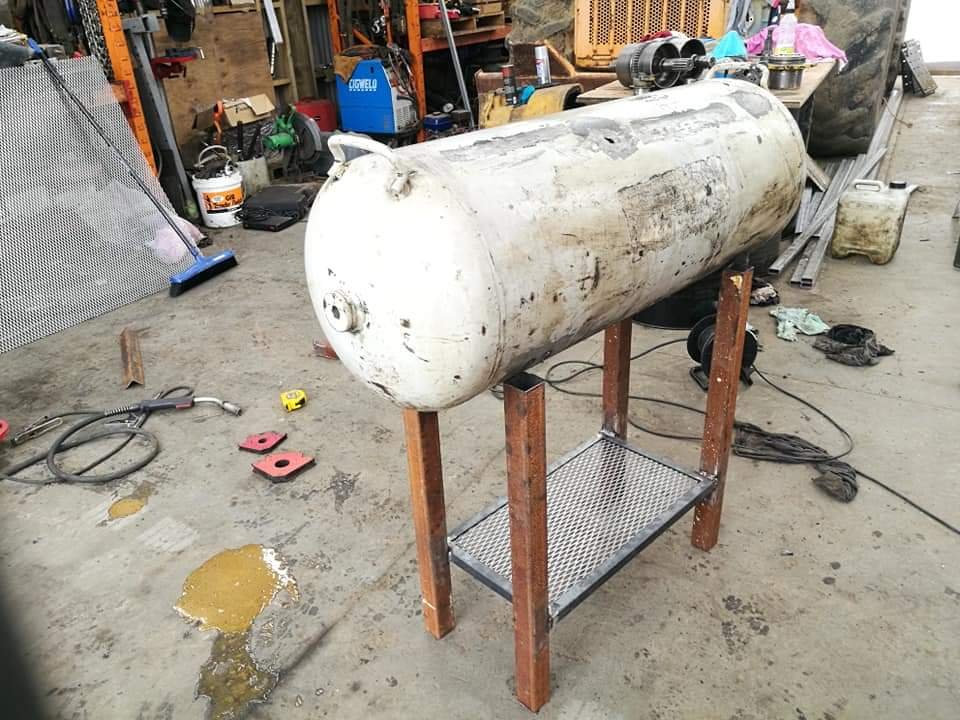
Cut some 50x3 angle for the tank/leg mounts and zapped them on.
Fire box offset tank mocked up.
-
8
-
-
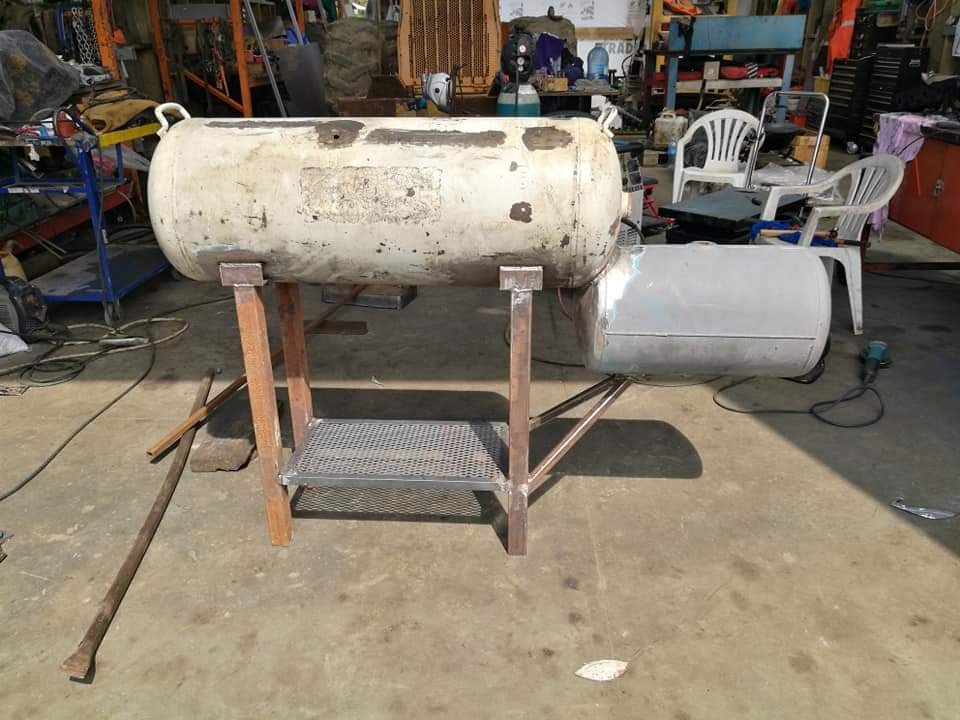
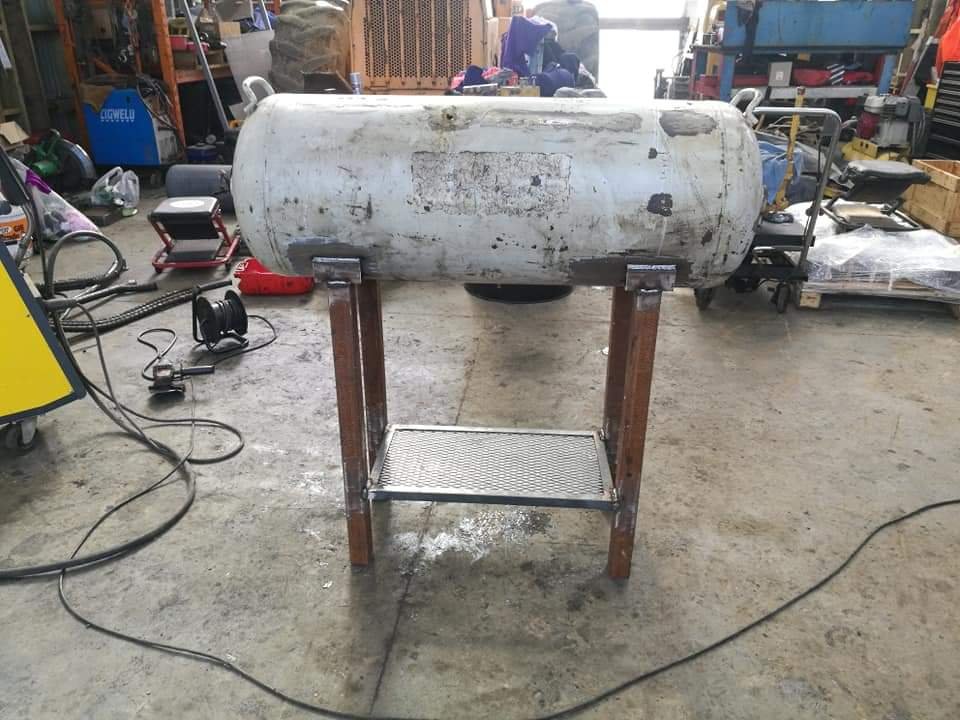
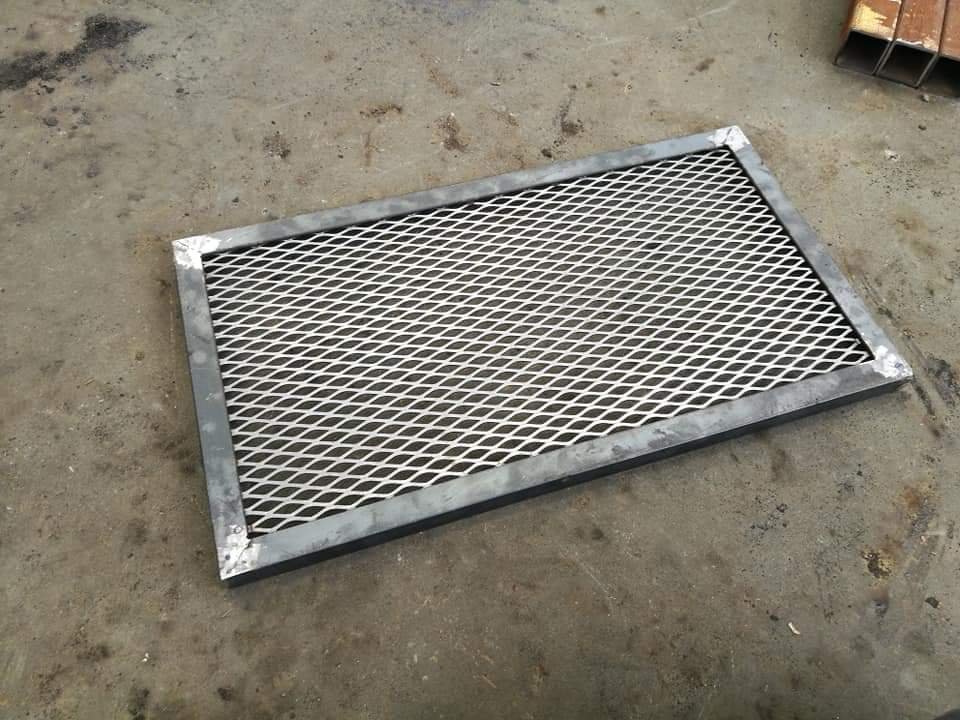
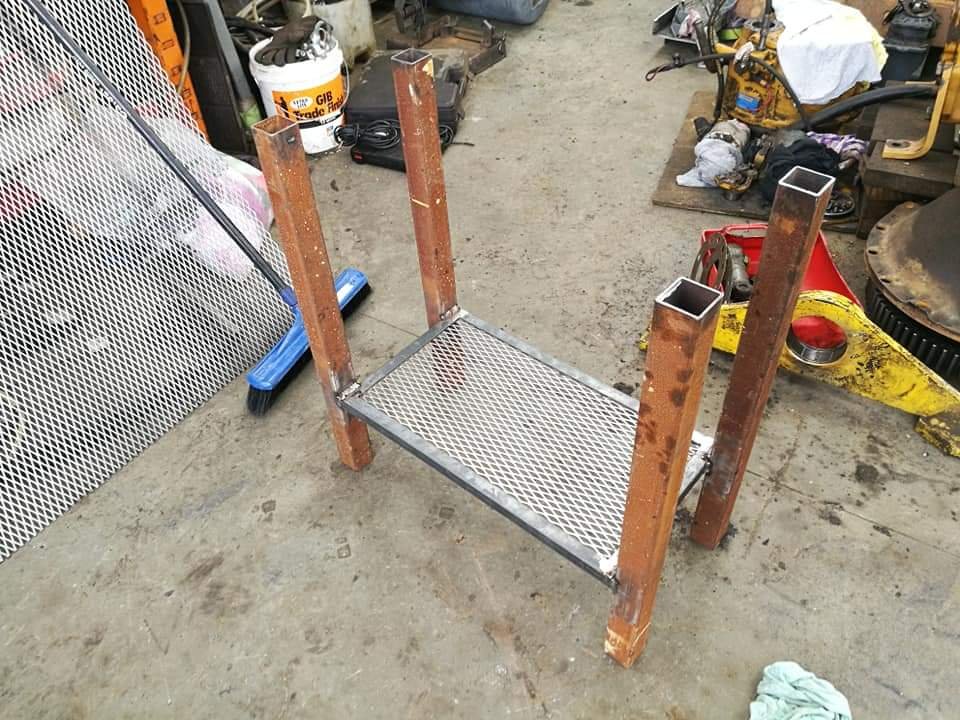
Decided I'd make a lower shelf and fix legs to it to try and keep everything relatively square and act as a frame to sit the tank on.
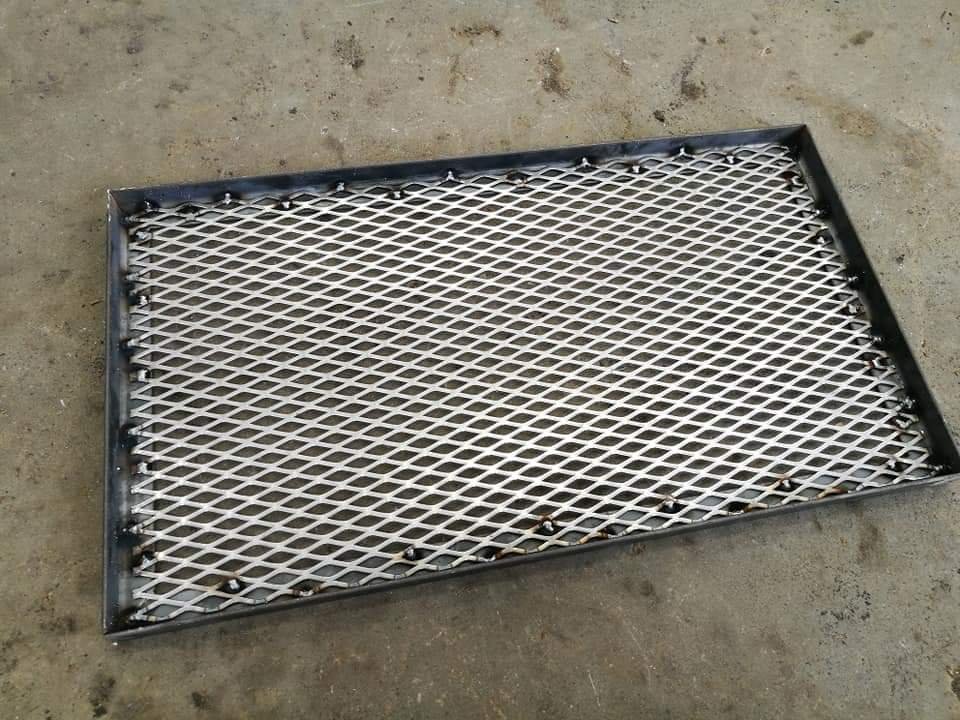
Used 25x3 angle and 3mm expanded mesh (mesh was pretty pricey as I had to buy it in a 2400 x 1200 sheet).
I just tacked the mesh on the underside. It should be strong enough but I may weld a support brace across the middle for peace of mind.
And the legs welded on.
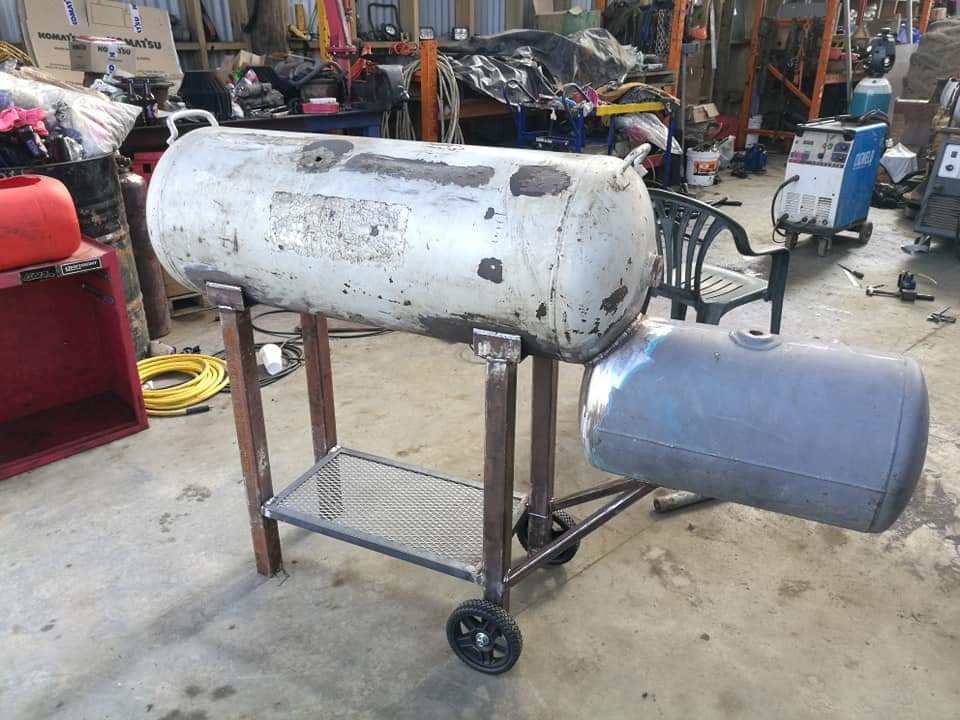
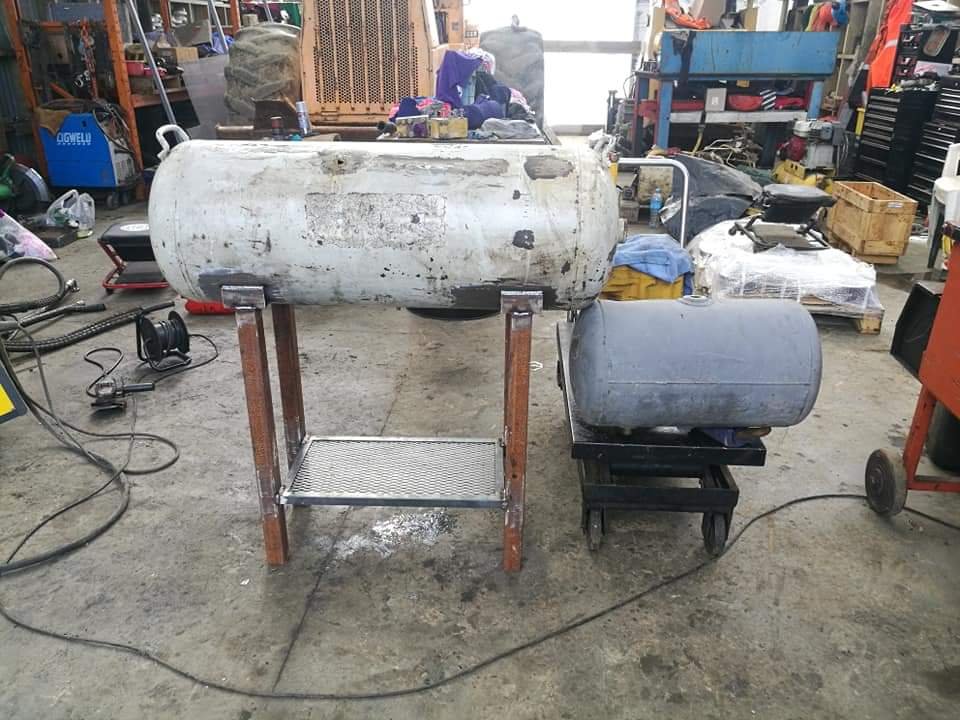
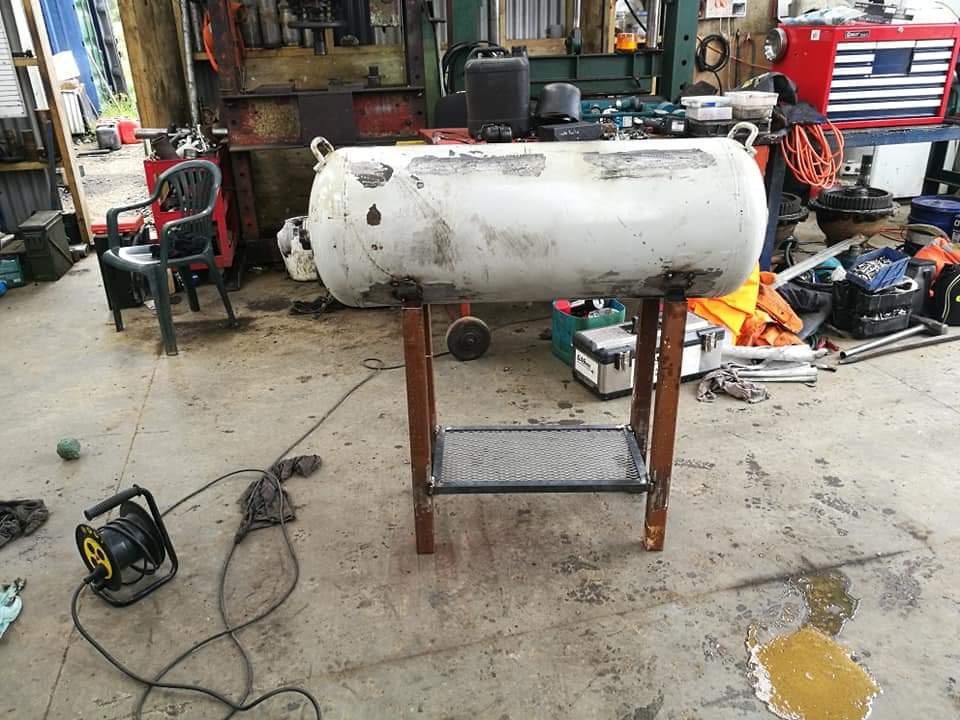
Then the compressor mocked up.
I also chopped the legs 150 so it sits at a better height (I think about 750) so it's at around waist height.
-
4
-
-
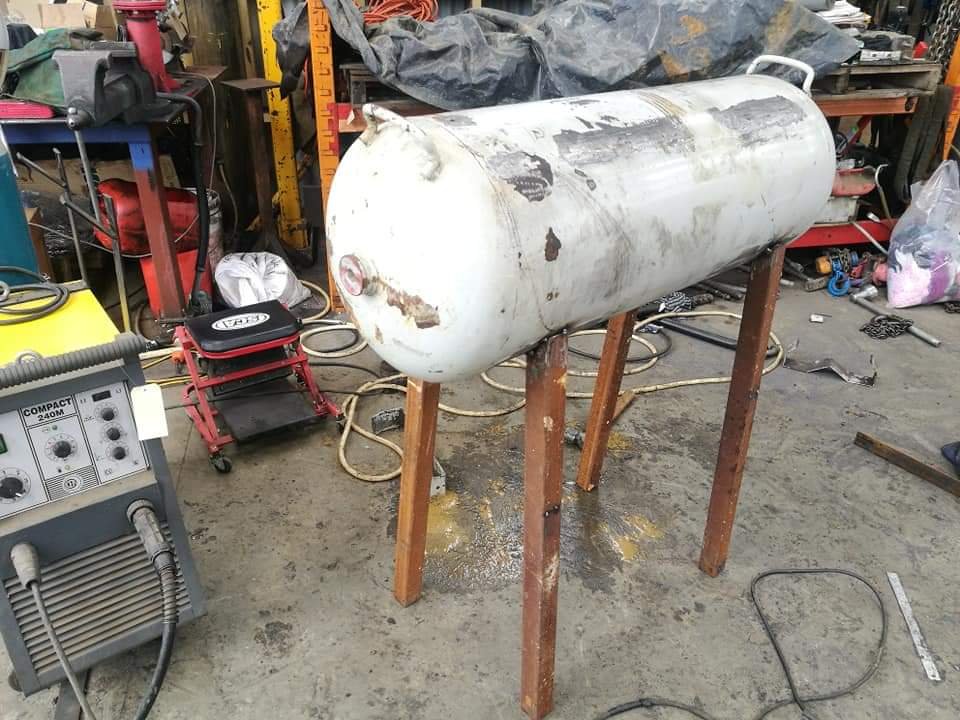
Cut some legs out of 50x3 box. Cut a 45 on the top ends to try give a tapered stance but it was a shit idea. I couldn't jig them in place easily and tried to tack them on. Everything was out and it looked like shit so ripped them back off.
-
1
-
-
So I figured a fair few of you fellow OSers are in to your barbecuing and probably also into your charcoal and low and slow.
The brother and I have been rolling a little base spec weber kettle across the last 8 years or so and with his 30th birthday coming up I figured I get my a into g and build him a proper setup. Just to give you a little background, my brother is a chef and has worked at some pretty awesome spots and operates in the kitchen as well as low and slow pits so he's pretty capable and has mean passion for it.
Anyway I had been planning to do this about 6 months ago but only just started building this last week, trying to get an hour or so in after work and a bit of time on the weekend where I've been free. All the guides and builds you see online make it look pretty easy but I've had to freestyle all of this and dick around with replanning mid build a few times and has been harder than expected, especially with it needing to be finished by the end of next week haha. Here's where I'm at anyway...
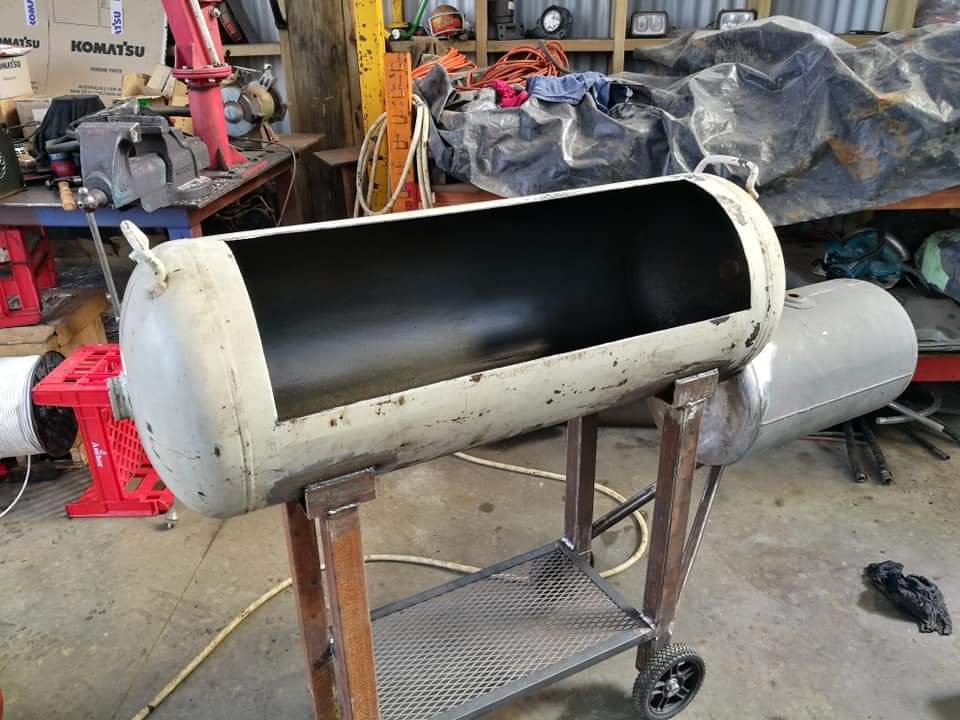
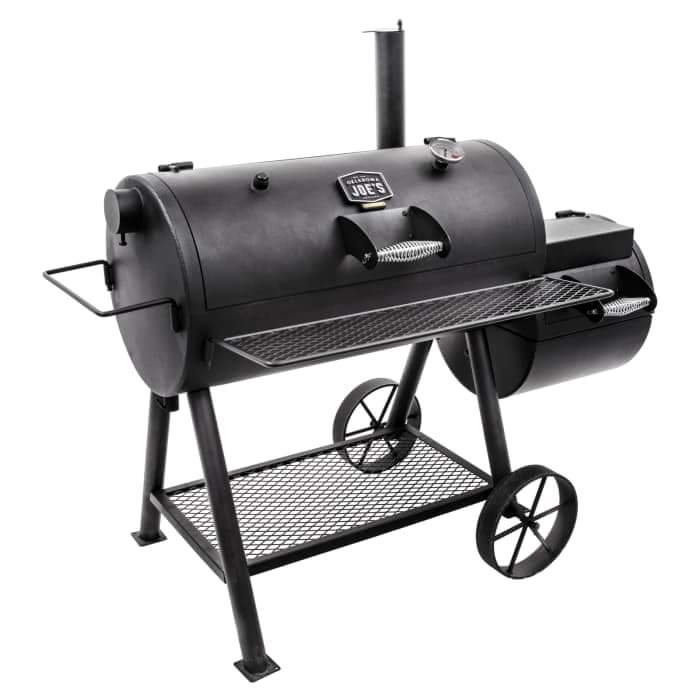
Was going for a setup kind of similar to this popular Oklahoma Joe Reverse Flow Offset Smoker.
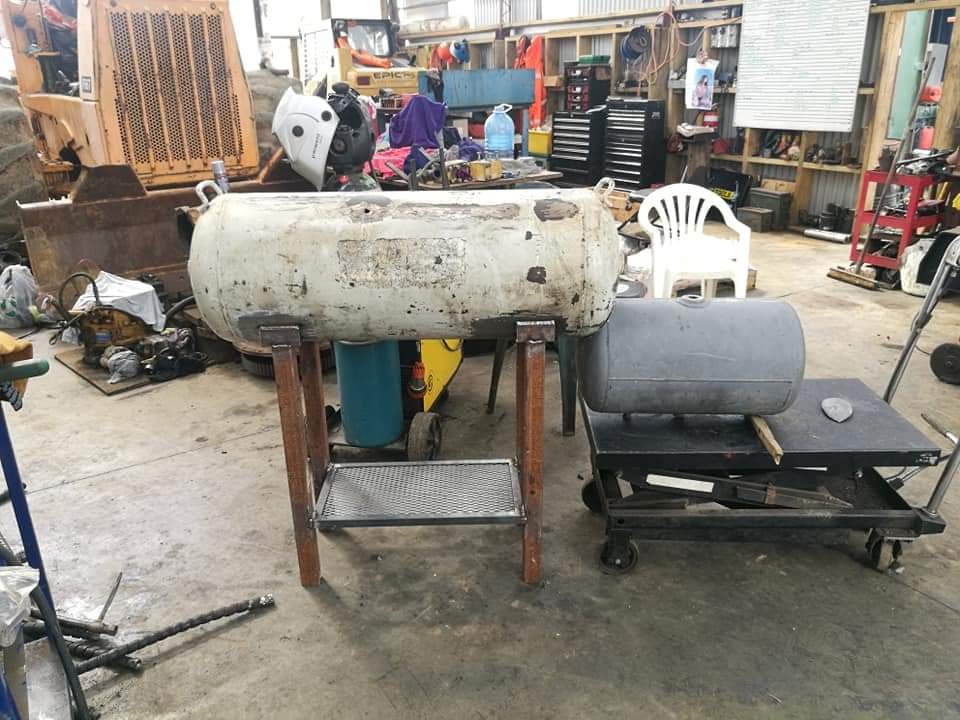
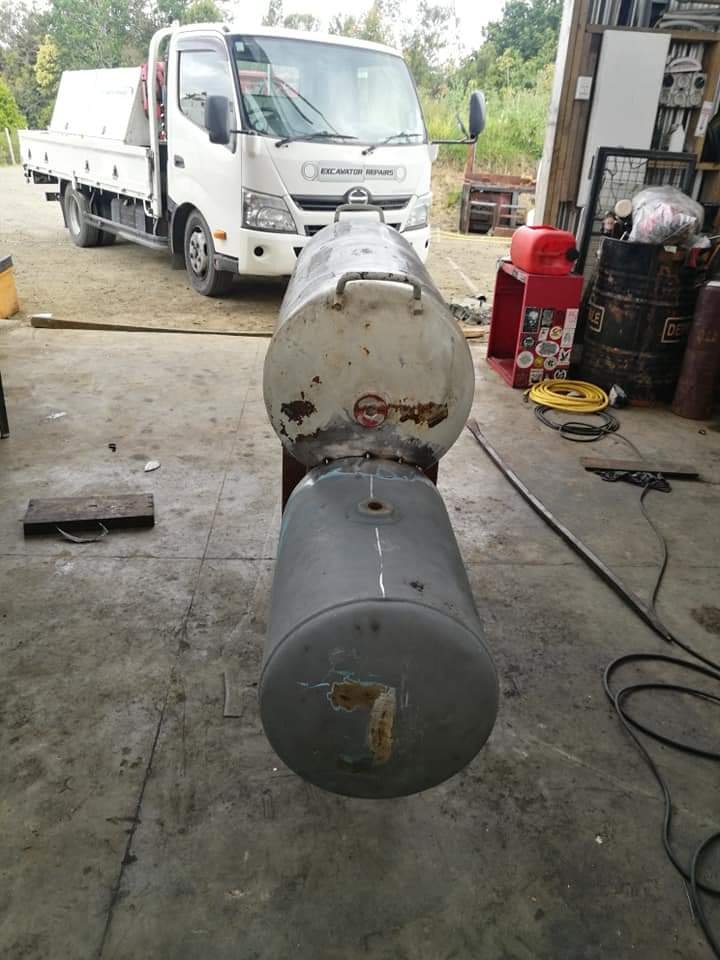
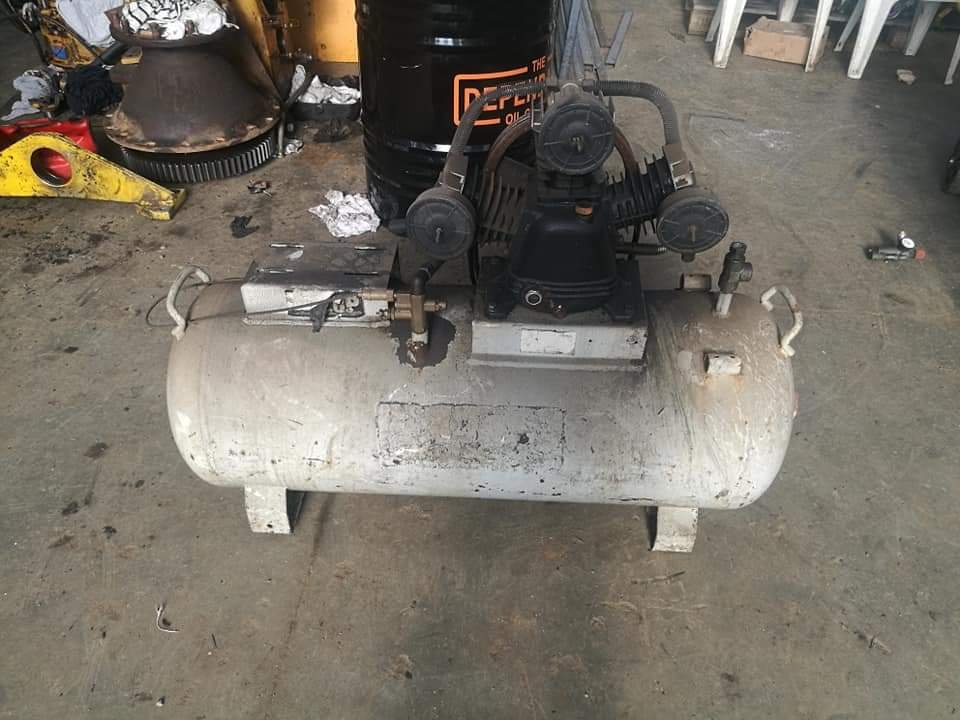
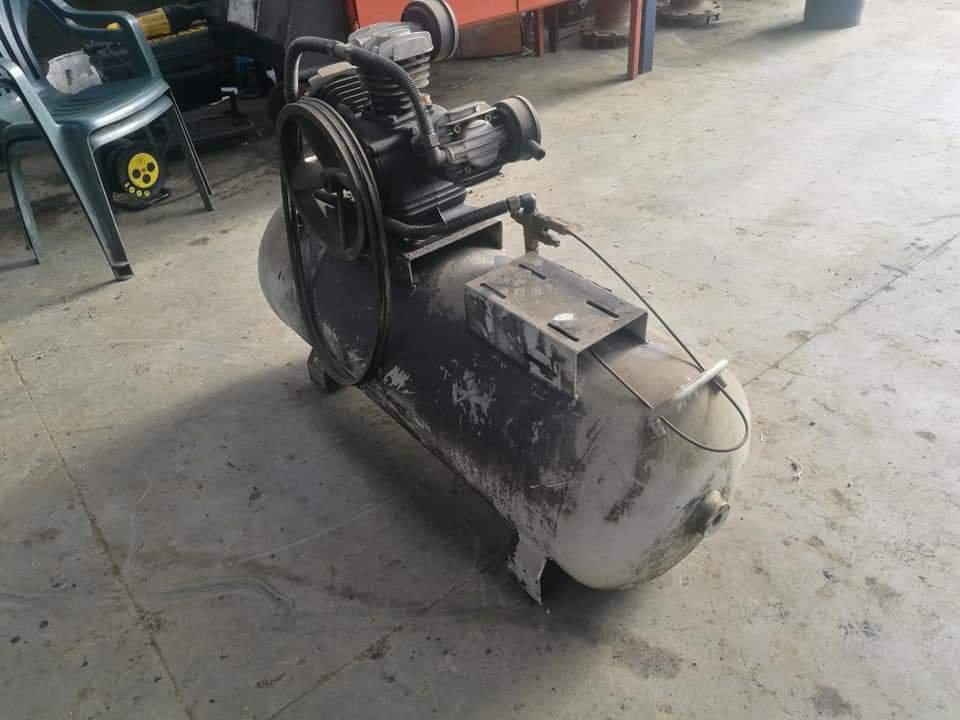
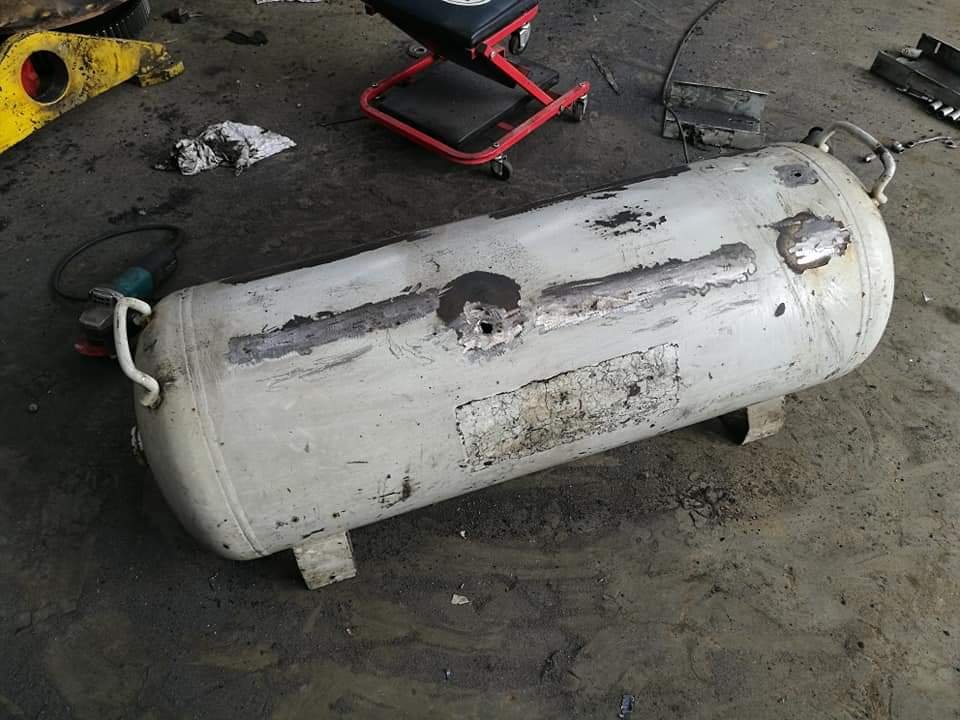
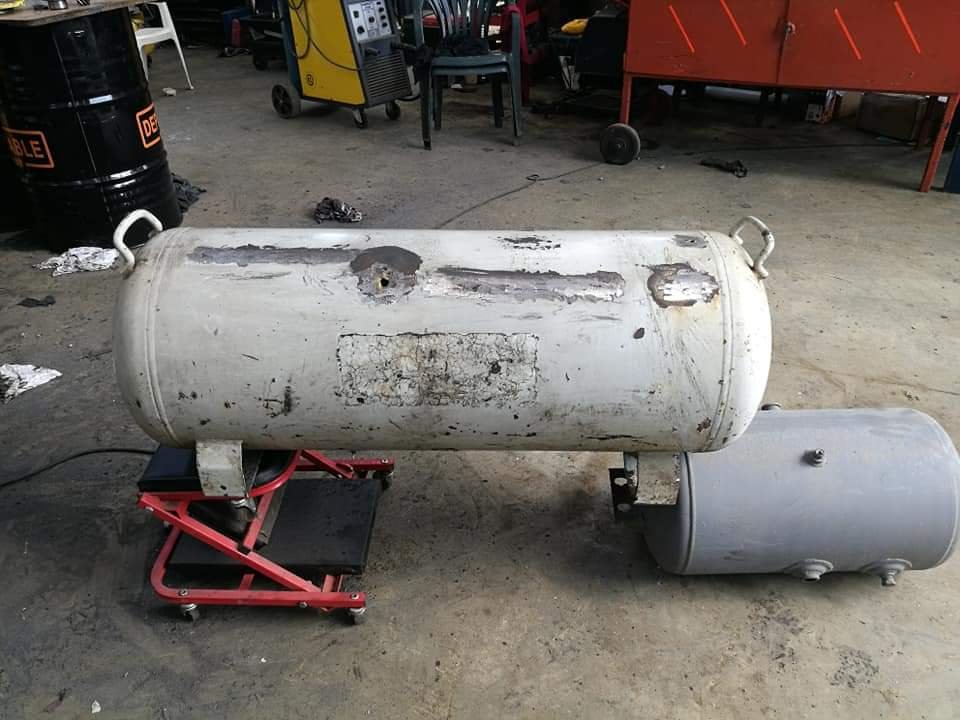
So we had an old air compressor with a seized engine at work so swapped some beers with the boss and claimed it, along with a smaller air tank that was lying around. I think it is around 100L and the smaller tank is a bit bigger than the swapper log bottles.
Stripped them down and mocked up.
-
5
-
-
Glass guys are pretty good to deal with. They're based out in Wiri but are mobile.
-
2
-
-
On 03/07/2018 at 09:26, Geophy said:
Review please am keen to upgrade my lid
Fully forgot about this. Have been using it for over a year now. Not a bad unit but tbh if I was to get another mask I'd probably get something like a speedglas. The sentinel unit is sweet for chopping in and out between grinder mode and welding but sometimes it shits itself and keeps on flashing in and out by itself. Also after not a hell of a lot of use the screen darkens very quickly for poor vision whilst cracking the arc, I've played around with the settings to make it abit more user friendly though. Also need to be careful how you put it down as the outer screen scratches pretty easy. Besides this it's pretty comfortable to use and has great adjustment.
-
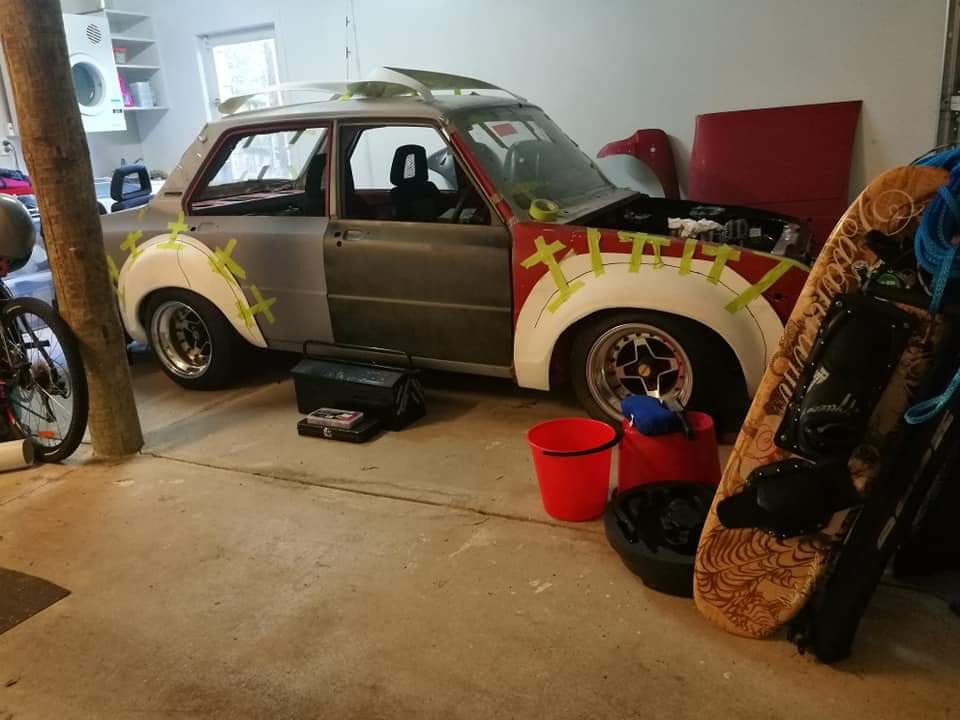
Also finally got my Escort flares off Bruce a few months ago. Going to chop them up and have a crack at fibreglass work, moulding them a bit better to the 1300 and getting the fitment right. Theoretically it looks easy enough but will soon find out. The guards didn't cost a bomb so not a great loss if I butcher them haha.
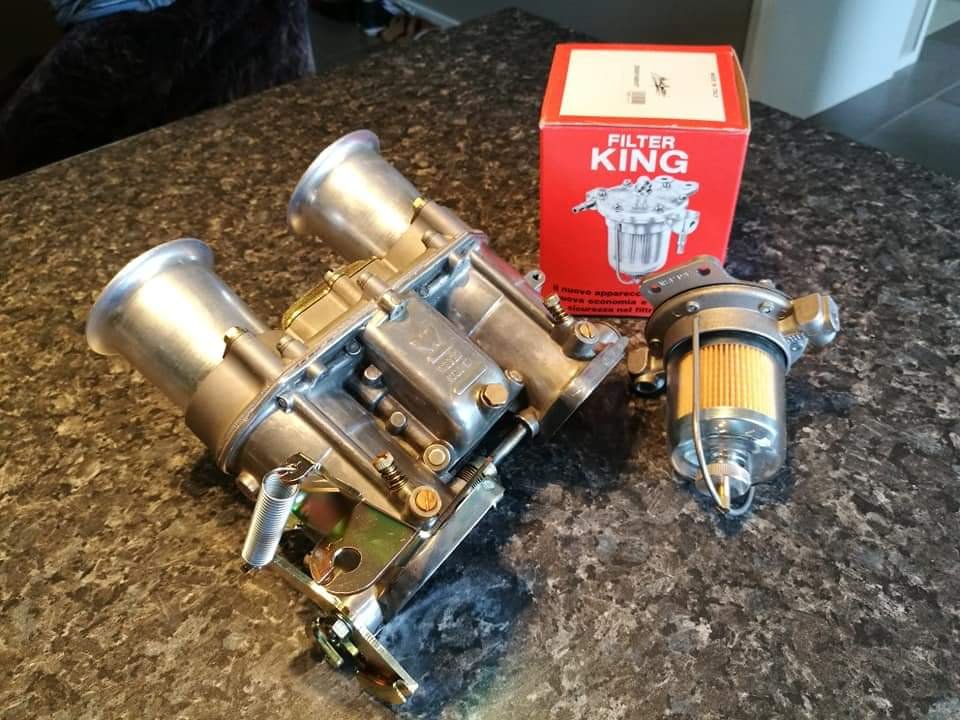
And yesterday I finally got a call from Murray at Weber Specs saying that my carb is ready so shot around after work to pick it up, along with a malpassi fuel pressure regulator. He's done a top job but damn he is expensive, even with mates rates ! Ah well gotta pay for quality so let's hope she's purring when she fires up.
That's all for now anyway, off on holiday in a few weeks so probably won't be anything to update until maybe December if I find spare time to work on the old stead.
Chur,
Tai
-
4
-
-
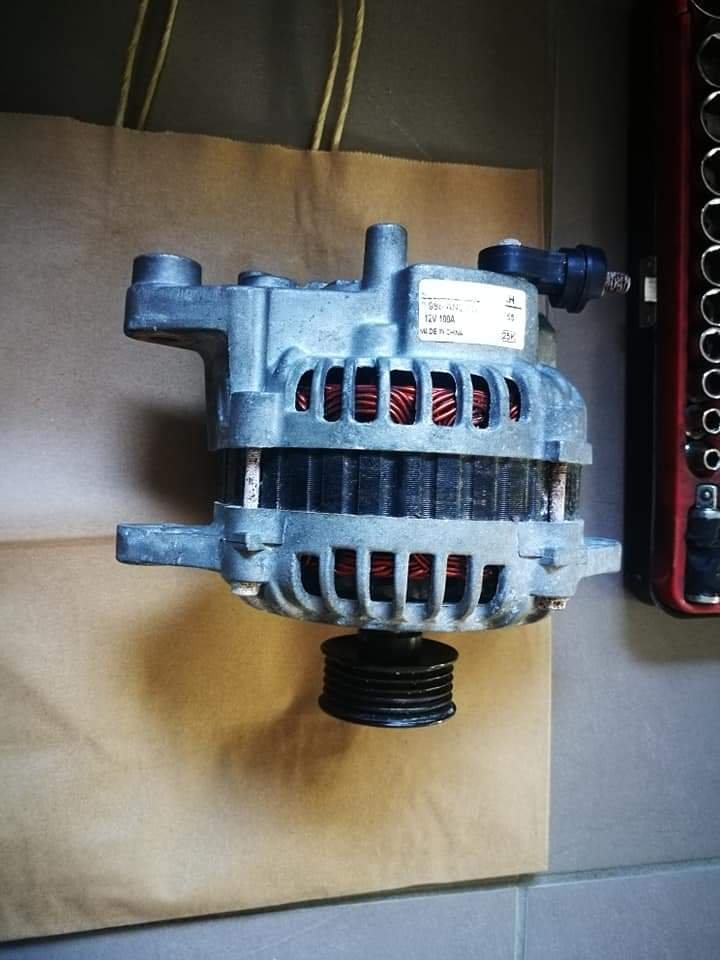
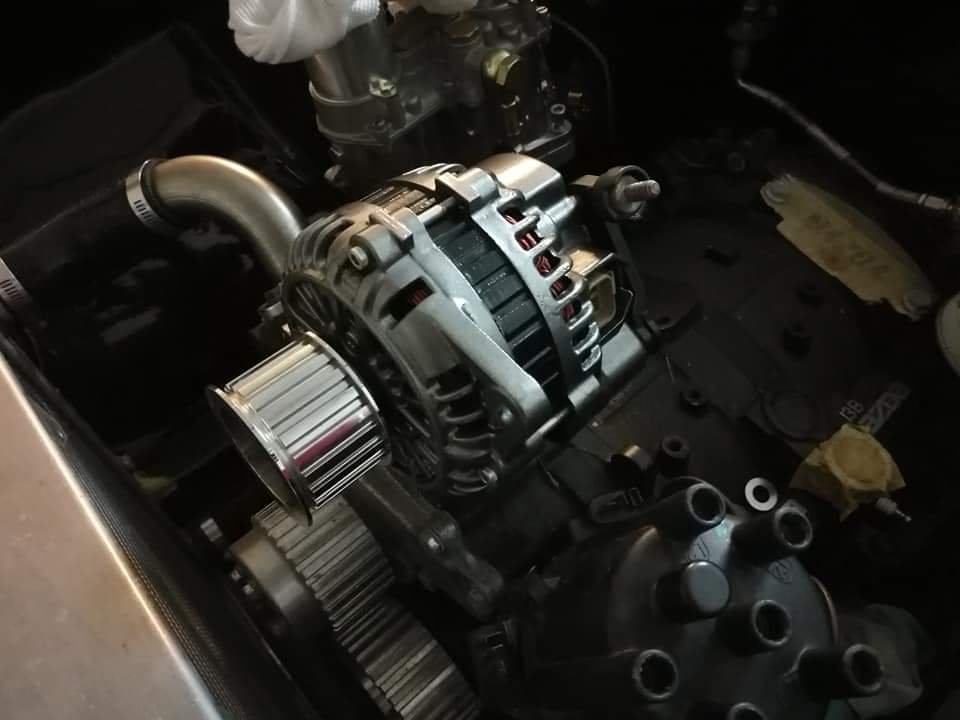
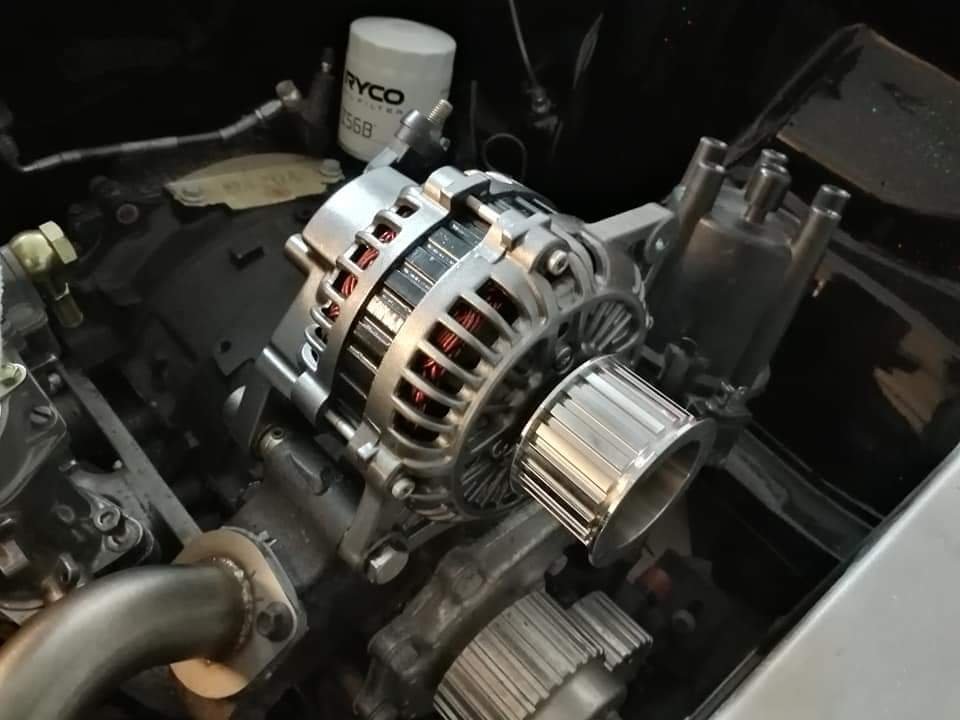
About a month ago I also decided to clean up my fd alternator. It was brand new but sat in a wet box in storage for about a year so oxidized pretty bad. I dismantled it, stripped it back, and repainted it in cast iron silver and black (looks more glossy and slightly metallic in person) and reassembled it with stainless fasteners. Came out pretty sweet for a can job but will see how it lasts.
Before:
After:
-
2
-
-
Haven't been up to too much lately. Just stuck on the grind at work and super busy, however I've picked up a few bits and pieces for the old girl.
As my old Speedhut gauges are CANBUS and am no longer running an ecu, I have purchased another set of mechanical gauges to use as well as fuel sender. Basically the same design as my other ones but have changed it a little.
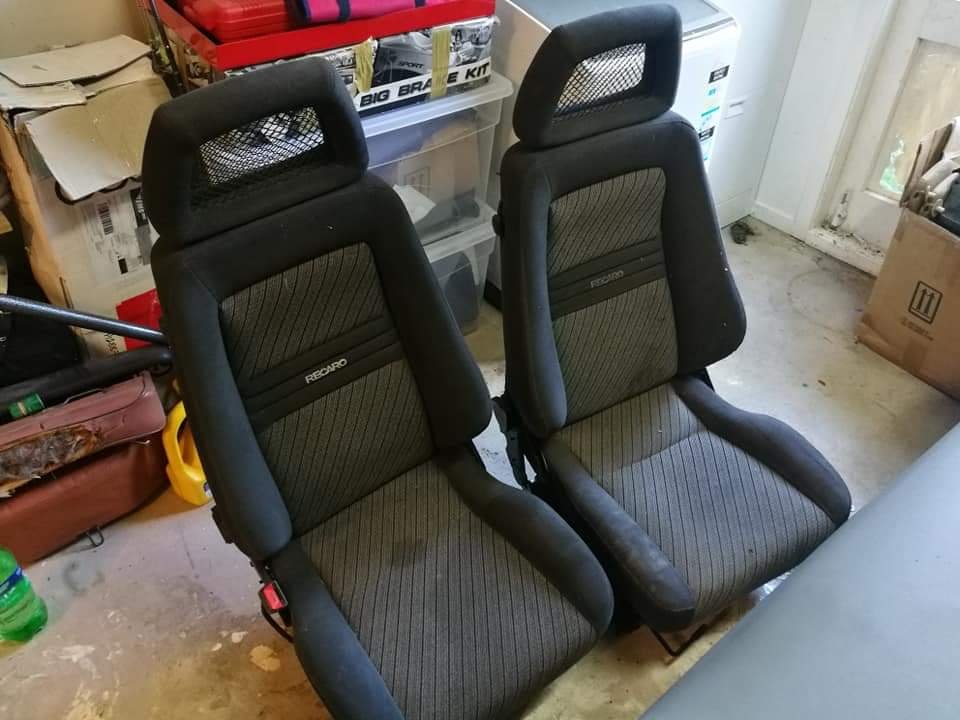
Also found another pair of Recaro fishnet seats for cheap which are in better condition than my others but are also narrower to suit the limited space in the 1300.
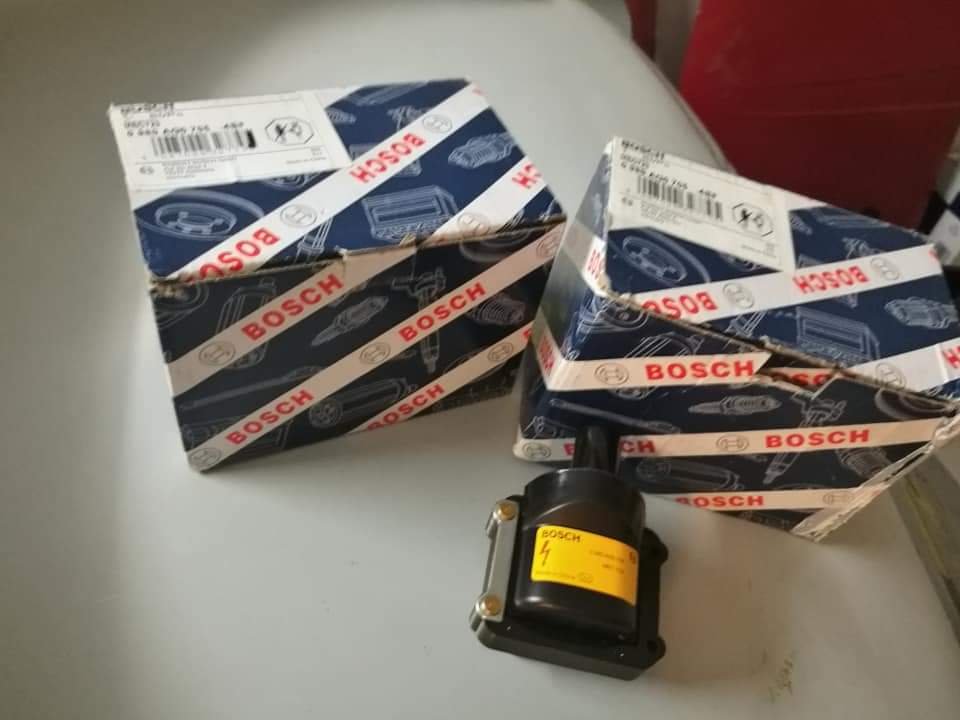
And I've grabbed a few Bosch MEC723 coils.
-
1
-
-
I know of a old boy in Dairyflat who mostly works on older vehicles, knows his ways around carbys and works from home. I don't know what rate he charges out but I'm confident it wouldn't be an arm and a leg. Can find his number for you if you're interested?
-
Might be worth contacting steel and tube as well
-
1
-
-
Cheers for the feedback guys, yeah I've been reading through some of the Ausrotary threads already. Will let you know how I get on anyway.
-
Well this thing still hasn't left the garage yet. Funds have slowed down greatly now as well as we've started saving for a house pretty seriously but still putting a bit away for it.
Motivation was on a decline so went to the shop and got it a nice and shiny air filter (actually ended up returning and getting another as the 4.5" was too tall for the little 1300).
I also dropped in to Weber Specialties to have a catch up with my old mate Murray. He's convinced me to bring in the IDA for him to have a look at as it's setup is a little unknown (previous owner had it on both a bp and pp setup), and he's going to sort a throttle wheel and help me shorten the cable. Looking to sort a malpassi fuel regulator for the old girl as well.
In the pipeline I'm also looking into the ignition setup and seeing what options are available,so plenty of reading up to do get my head around the ideal setup.
Cheers
-
8
-
-
Saw this thing about a week or so ago parked up outside a shop off target road in wairau. Knew it was yours.
-
Hey guys,
I have an ignition question in regards to setting up my s4/5 13b bp running a 48mm ida weber, will be setup for street use but the occasional track run. I'm trying to work out the best ignition/coil setup I can go for. Have been reading up on various sources and seems common setups include running the the j109 modules controlling a pair of either hec715, mec723 or gt40 coils.
It seems the hec715 provides a better spark at lower rpm so is better for a boosted setup (as opposed to na) and the mec723 shines for high revving setups and then the gt40s are a go to since way back.
I have also started looking into a dlidfis setups which are essentially a poor man's wasted spark setup and the other msd setups available.
How should I go about this?
Edit: also if anyone has suggestions on some decent thick high tension leads (10mm) or similar please let me know.
Cheers
-
Also with the exhaust repair was it a hole they welded up or did they cut out a section and weld that in? Can be a bit of stuffing around with that type of work sometimes.
-
With drum brakes the adjusters are usually accessible with the wheels still on as they are on the inner side (if that makes sense). They may have sprayed brake clean through one of the adjuster holes or through one of the shoe inspection holes. You could ask them for a print out of the brake test (if They used a roller brake test machine) to see the results.
Edit: just read they didn't. Could possibly take it elsewhere for a brake roller test for proof of braking performance.
The wheels would have been needed to be removed to repack and adjust the bearing. Hand brake adjustment is pretty simple and straight forward as well.
I'd ask them for a break down of the work they've done, hours etc and go from there. $70 per hour is a pretty cheap rate to be honest.
My 2c anyway.
-
Have t read through the build but will have a good read when I have more time.
Tony lynch used to build these. He ran his lynchbuilt workshop in Wairau many moons ago producing these and doing 305 Bedford swaps, next to the original Robert Harris factory before Robert Harris brought him out to work for him and repair his coffee machines.
He used to run these in local rallys, usually with Ken Vincent as the driver and they used to run these with 12a rotaries and slay if I recall correctly. Was Many years since I last spoke to him and about these in particular. Good to see they're still out there!
-
1
-


BBQ Build - Attempt to build a reverse flow offset smoker
in Other Projects
Posted
Ok guys I managed to get a about an hour and a half in today and now I have reached an awesome milestone and pretty stoked with what I got done.
Finished off the door/lid (bar handle and temp gauges). Stitch welded the outer section of the frame.
Trimmed and welded on the hinges, and now we have a functional door/lid. It sits pretty well, should be relatively flush once I trim the spot welds underneath and it's weighted well and sits at a good lean when open fully.
Going to get a full day in tomorrow so hopefully it will be mostly finished.
Cheers