

twisted
-
Posts
1413 -
Joined
-
Last visited
Posts posted by twisted
-
-
- Popular Post
- Popular Post
.50 cal bottle opener. Spent shell is from the long ago decommissioned and scrapped HMNZS Taranaki.

-
 13
13
-
New Seals and bushes arrived. Have test fitted in one fork and they fit perfectly. Perhaps by posting this i might get the front end done tonight?
-
i used 30 seconds last time. mind you there was minimal lichen growth on the car in question. sprayed the car down. let sit for a few mins, wash as normal. Worked well.
Might try that pool shuzz on the roof of the house though, cos its looking more like that commer than coloursteel.
-
1
-
-
So disappointed with the forks, I occupied myself with some bodywork on Friday night. Had a go at filling the indicator holes on the front fairing.
Started with these cutouts which i holesawed out of broken fairing:
To fill these holes:
Ground them down to the correct size and shape on the bench grinder:
Took the paint off in prep for welding:
Stitched it in to the hole:
Let that cool over a beer and cig, then welded it in proper:
Plastic was pretty thin here:
Welded up the backside once that had cooled:
Built up the backside where i blew that hole through with a couple of bits of old fairing, and its as solid as a rock now. Didnt take any pics of that but.
Gave it a quick sand, and this is where we're at:
The other side:
will throw some filler at it and then it will be done.
-
3
-
-
Got the forks off tonight.
Looks like I was sent the wrong upper bushings.... they're too tall which is why the seals won't seat correctly. Does anyone have a gòod source for fork rebuild kits? Got these from wemoto, who are extortionate with their shipping.
-
On 9/2/2017 at 20:36, KP_JAMES said:
Im not to fazed with it being powerful etc aslong as it is good enough to tow.
But with it also going to be my daily what are 2grs like on gas would you know?
Drove a 2GR Highlander, 5 up and loaded with gear for 2000kms over the north island recently. I have no light foot and it averaged about 9.5l/100km over the whole trip, that includes a couple of days dealing with auckland traffic.
Would trade again TBH.
-
1
-
-
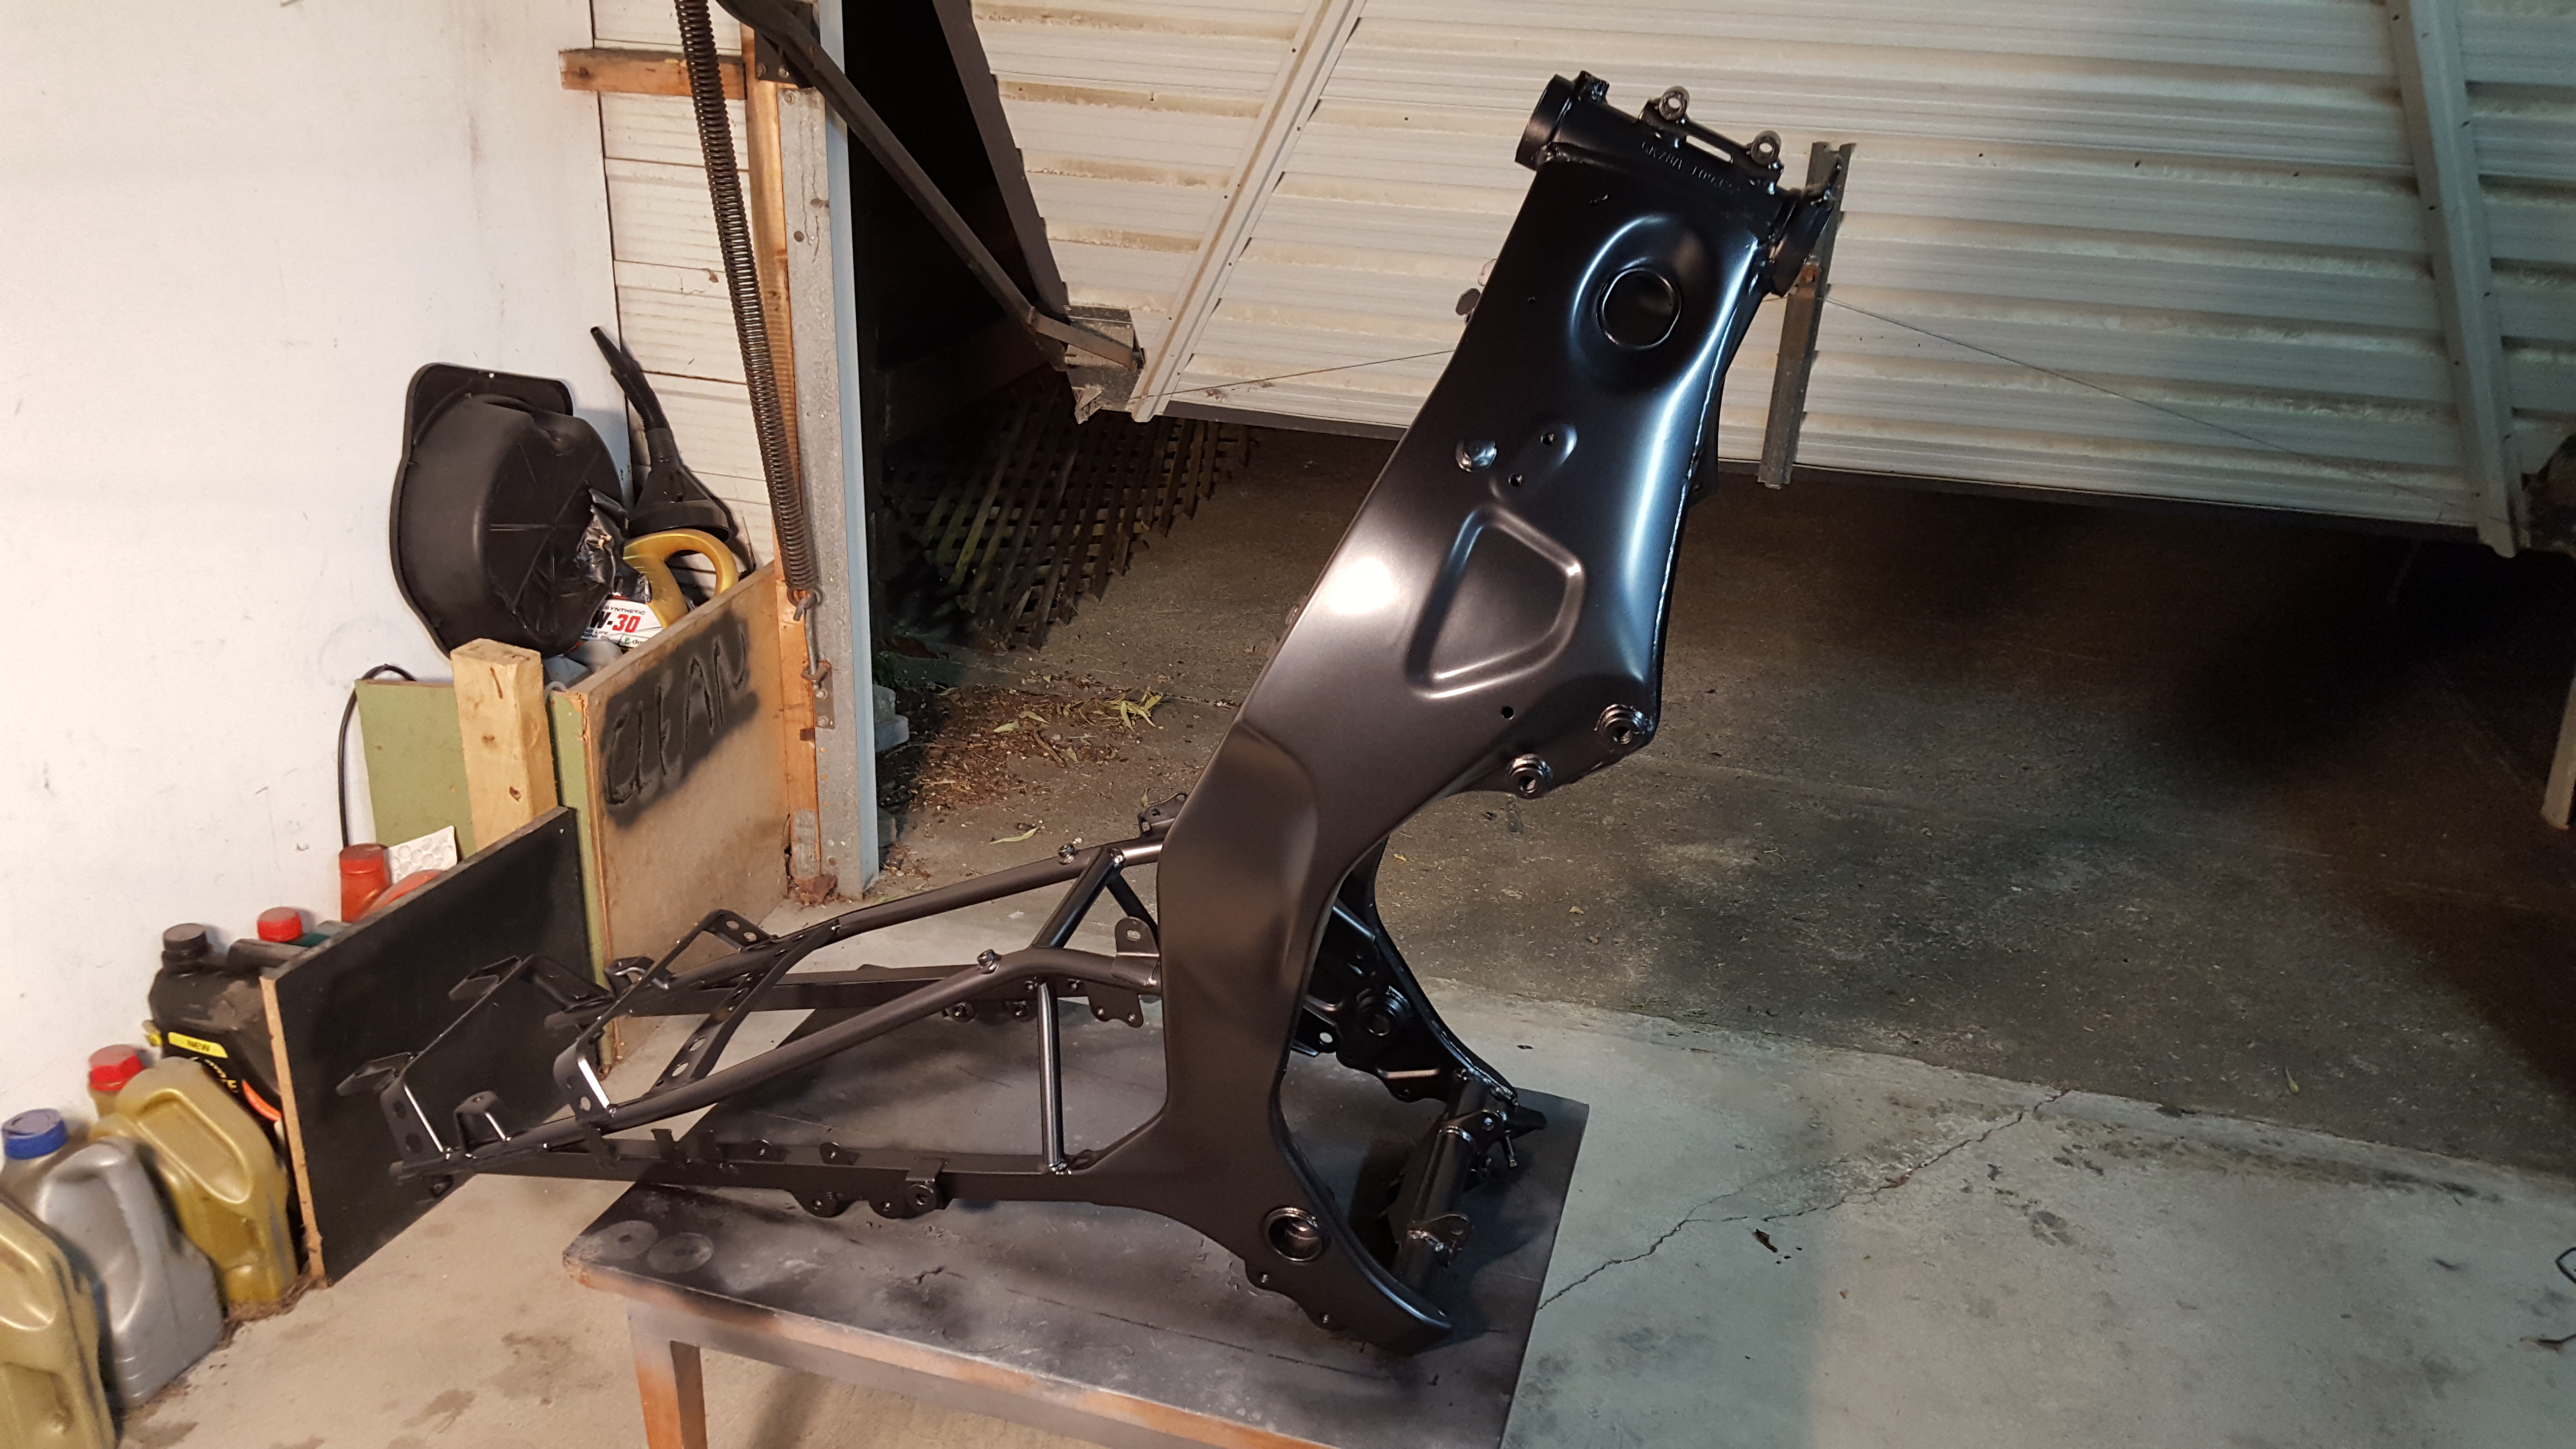
Man, i've been flat out at home and at work this month with general life mayhem. Haven't had much time in the shed at all.
Did manage to get some paint on the swingarm though. so last night i thought i'd put the rear end back together - starting to look like a bike again!
Hopefully sort the front end out this week sometime, then i can torque everything up and move on to the brakes and electrics.
-
3
-
-
Had one of these. Was lucky to get 10l/100km. Same in the carby 4af powered corona I had.
The rolla drank nearly as much oil as fuel tho as the valve stem seals and rings were fubared.
Also not much I drive gets below that. Probably says more about me than the cars I drive tbh
-
Pictureless update.
Was in a bit of a rush to get the front end together before we went away on holiday, and while i got it done, about half way through the trip i realised i did not put the retaining clips in on top of the fork seals. I'm not convinced i got the seals in correctly either, so will have to strip them again and have another go. Hopefully the current seals are salvageable, but i expect they wont be.
Two steps forward, two steps back.
-
2 hours ago, RUNAMUCK said:
Have I got a deal for you!
Note where I said v8s and big sixes m8
-
IMO, these hit rock bottom about 3 years ago.The V8's and Big sixes will be going for good money soon enough, as most of them will have been scrapped due to failed transmissions. Whats left will either be factory Manuals, Swapped Manuals or the occasional old man spec garage queen auto. It helps they're kinda OS looking too.
Of course i'm leaving the M cars out because they're already going for silly money.
-
7
-
-
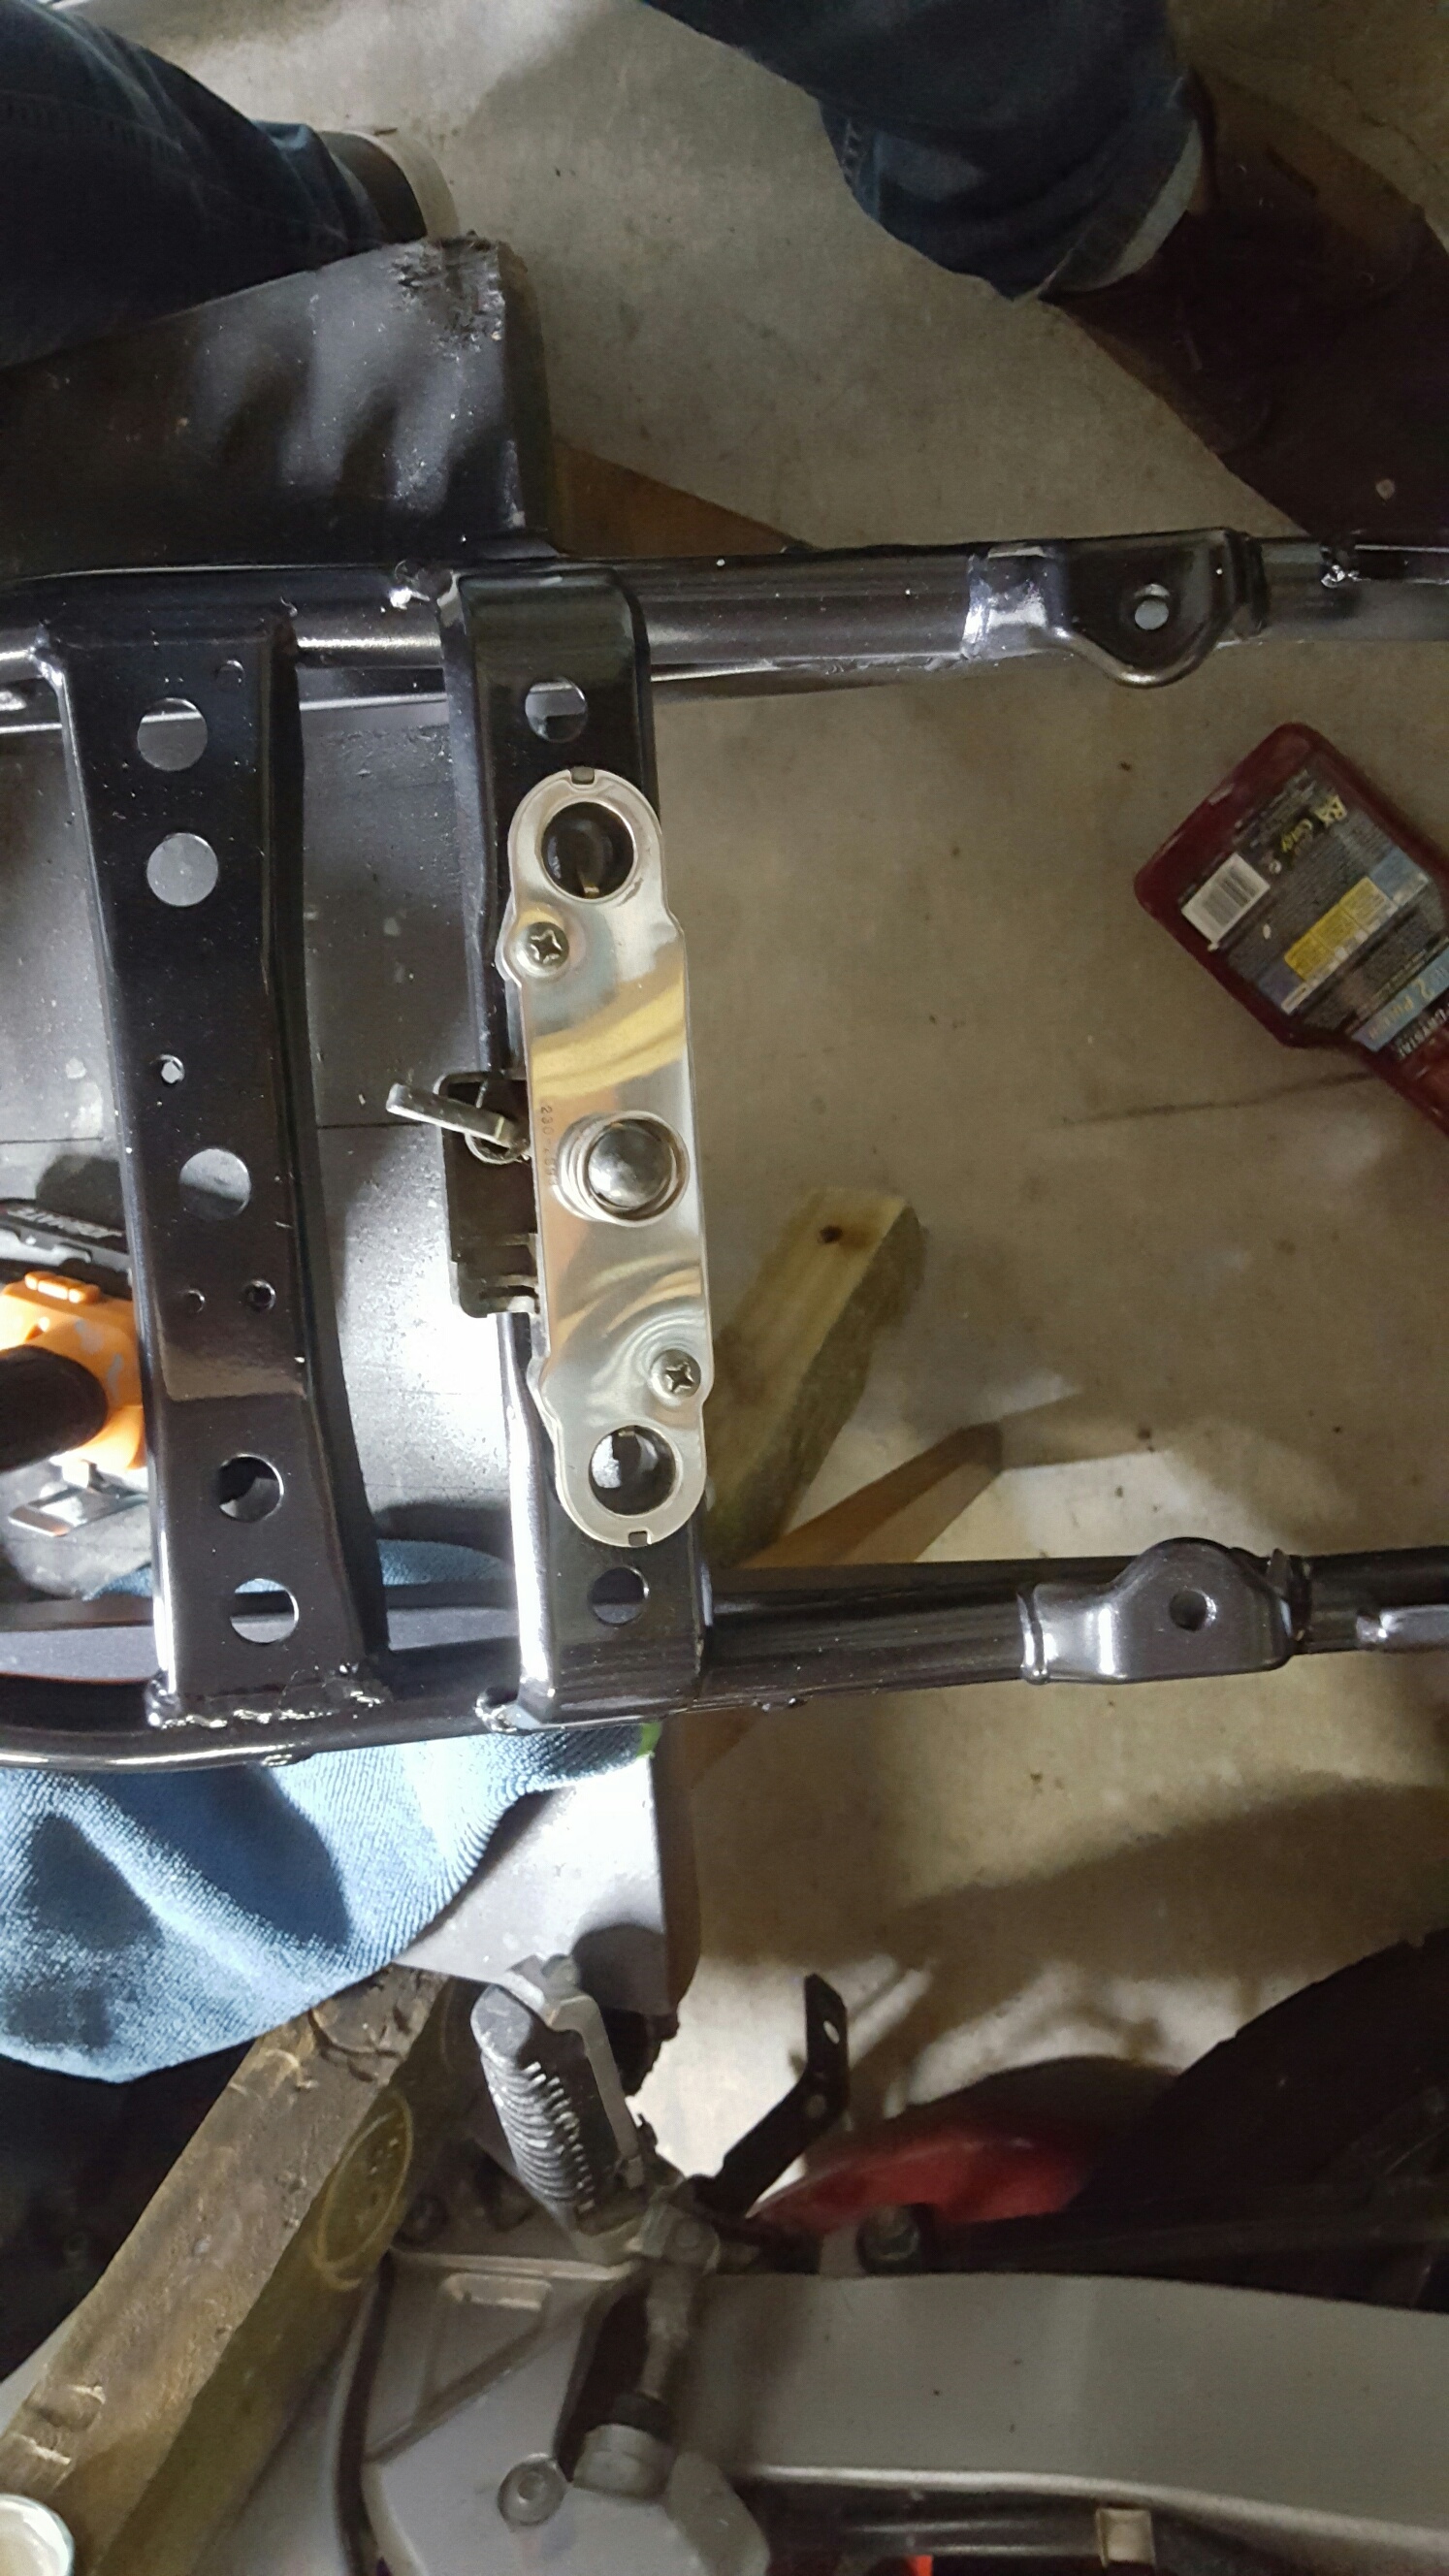
I've made a little progress on this. New steering bearings are in, upper and lower triple trees fitted. Had a wtf moment when installing the top yolk...couldn't for the life of me get it orientated correctly... it took abould half an hour of head scratching to realise that the key had to be in, and steering lock turned off in order to fit it correctly. Do'h! Also polished up the top nut.
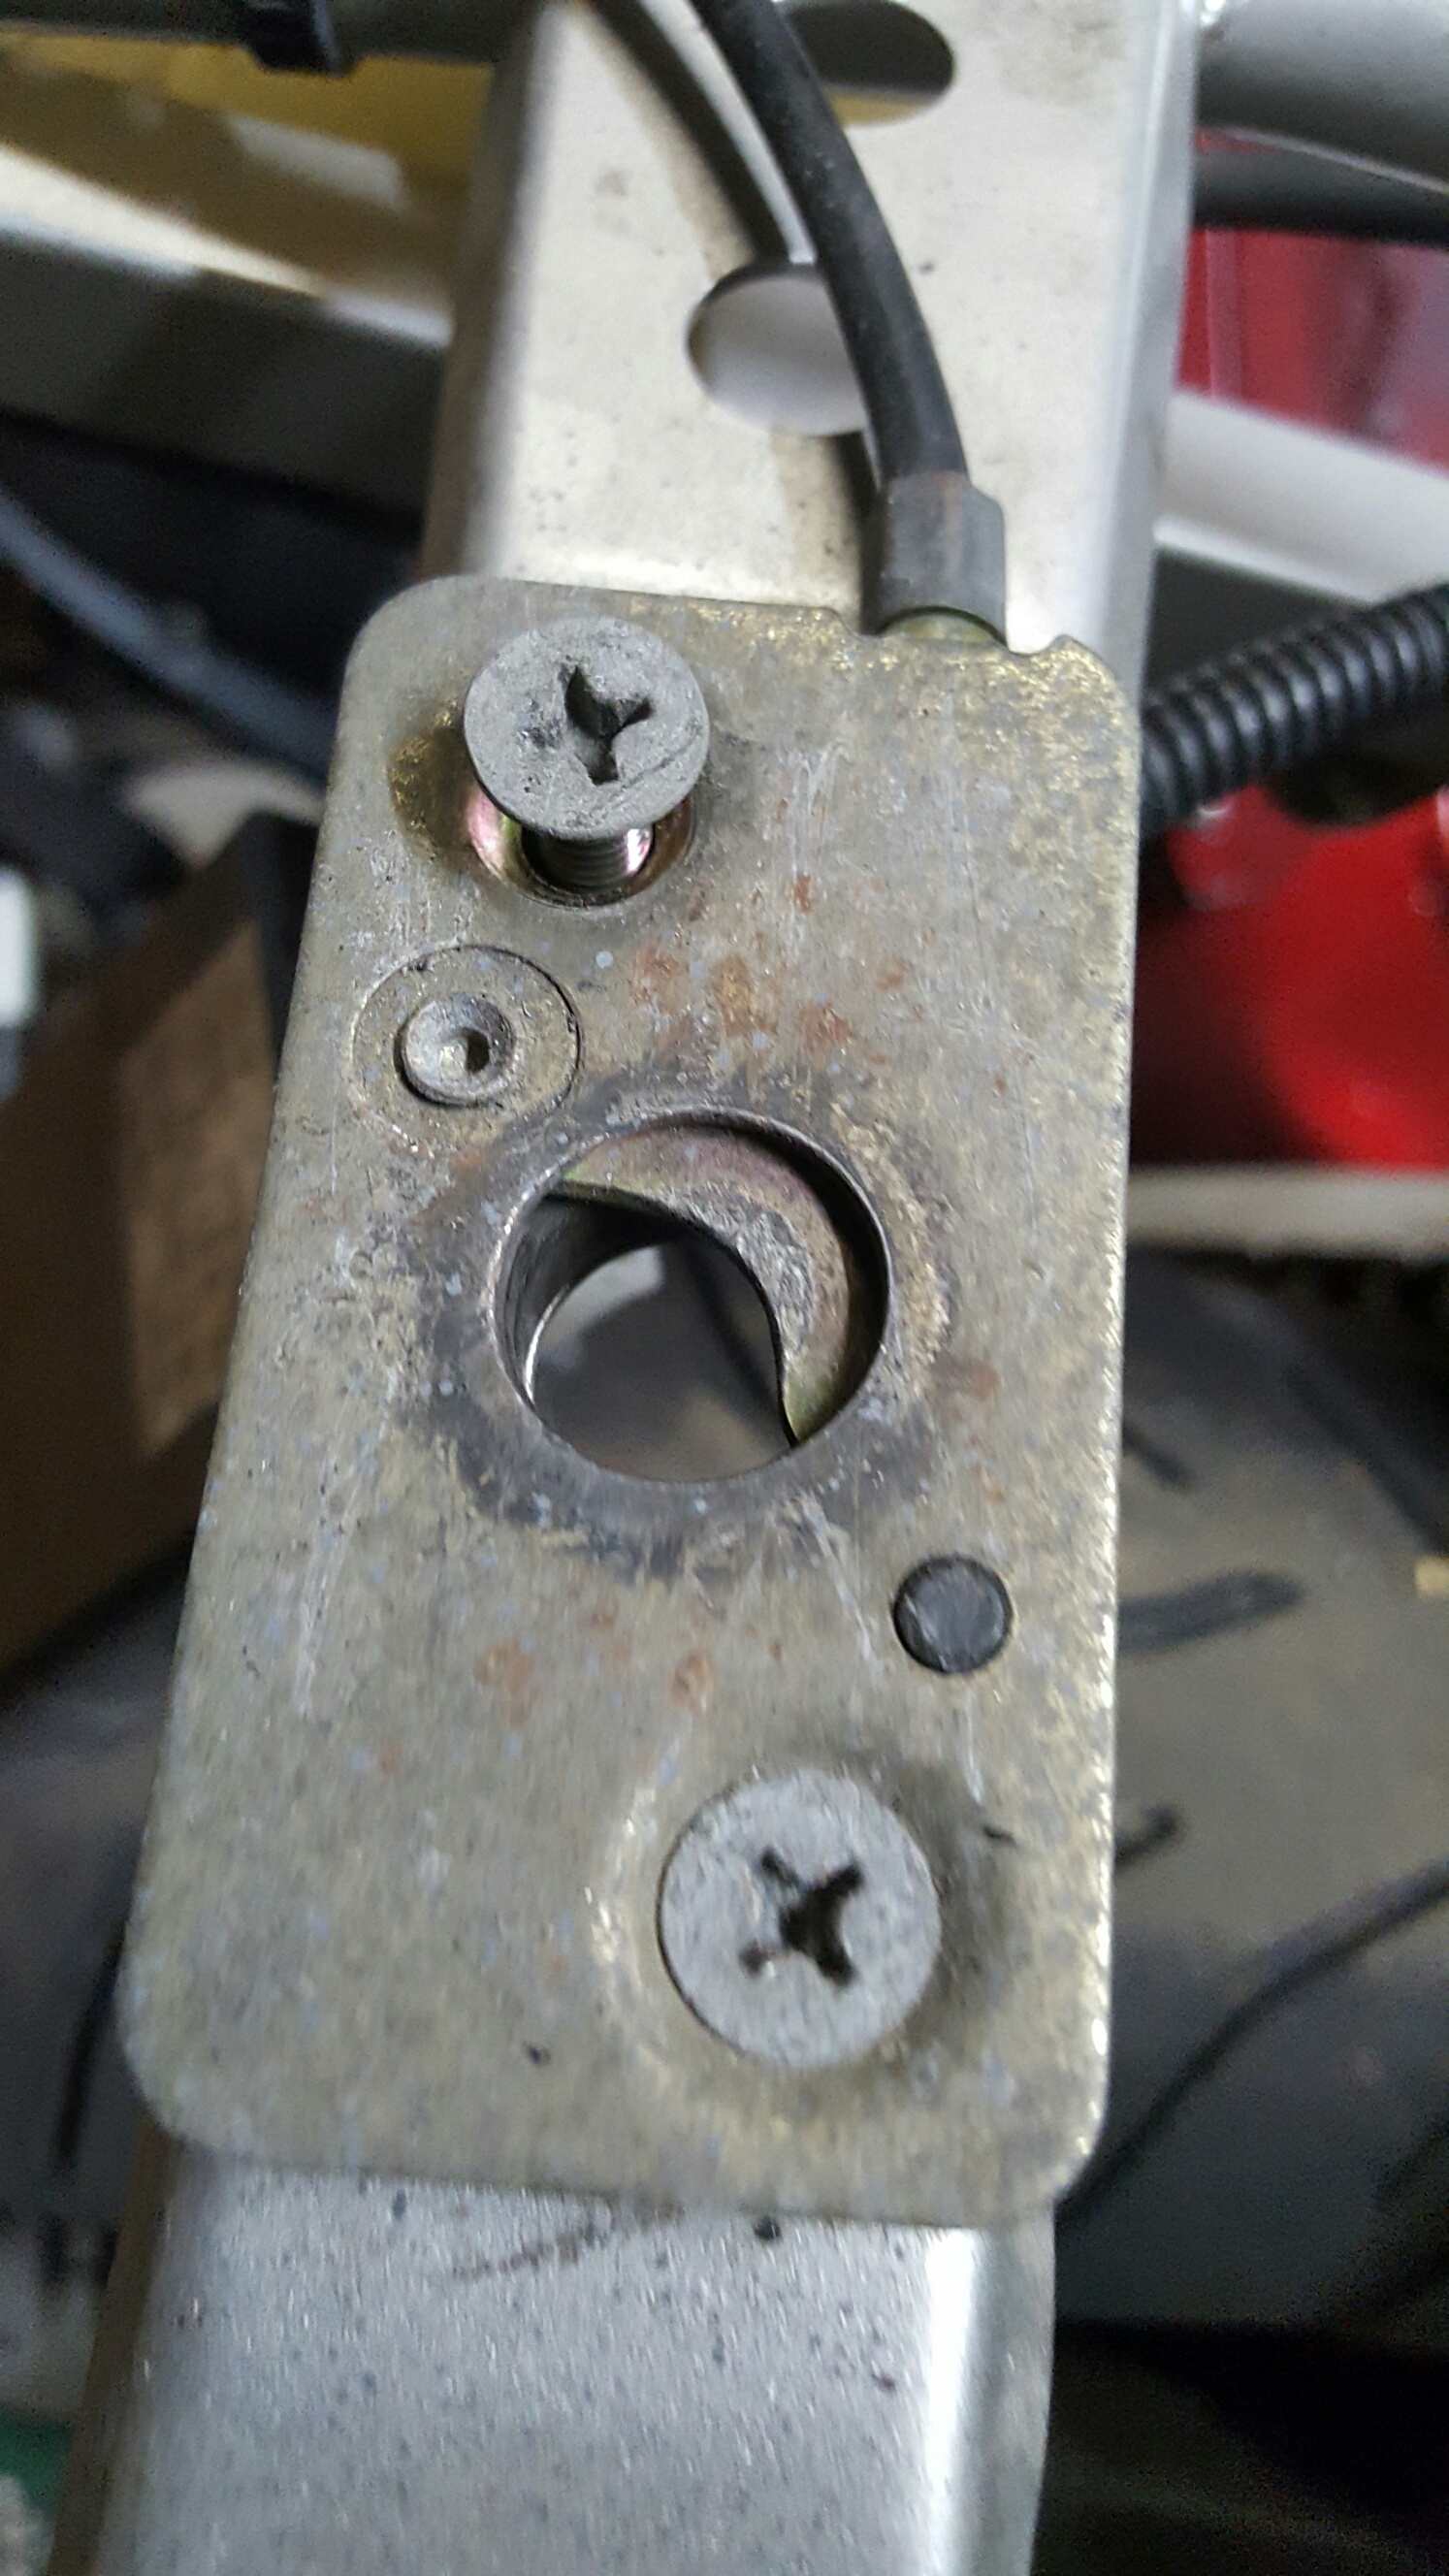
Got the Swing Arm and rear shock off:
One of the cotton reels snapped off in the crash, had a go at drilling it out while the swingarm was still on the bike, but very nearly fucked it up as you can see. Will have another go with the 'arm off the bike, but this time from the backside, at least for the pilot hole:
Rear shock has rebound adjustment which i doidnt realise, so thats a bonus!
Also started on the fairings. Welded up a few cracks, and welded a broken mounting tab back on. No pics of that process, because i'm crap at taking pics, however plenty more to do and take pics of. There's still alot of finishing work to do here, but its pretty close.
Not too long to go before i can get the front and rear ands on the new frame. Then i'll start swapping over brakes and electrics.
-
2
-
-
Need to get to coastal fastners to get a couple of 8x27mm allen bolts for the fork legs.
Threw some paint on, but had issues with the gun so not happy with the job. will rub down and repaint this weekend.
Also painted the top yolk last night. Will wait for it to cure a bit before polishing.
Getting real close to reassembly of the front end. Then i can start on the rear end.
-
So haven't had much time on this lately, as both boys have been sick, and works been flat out.
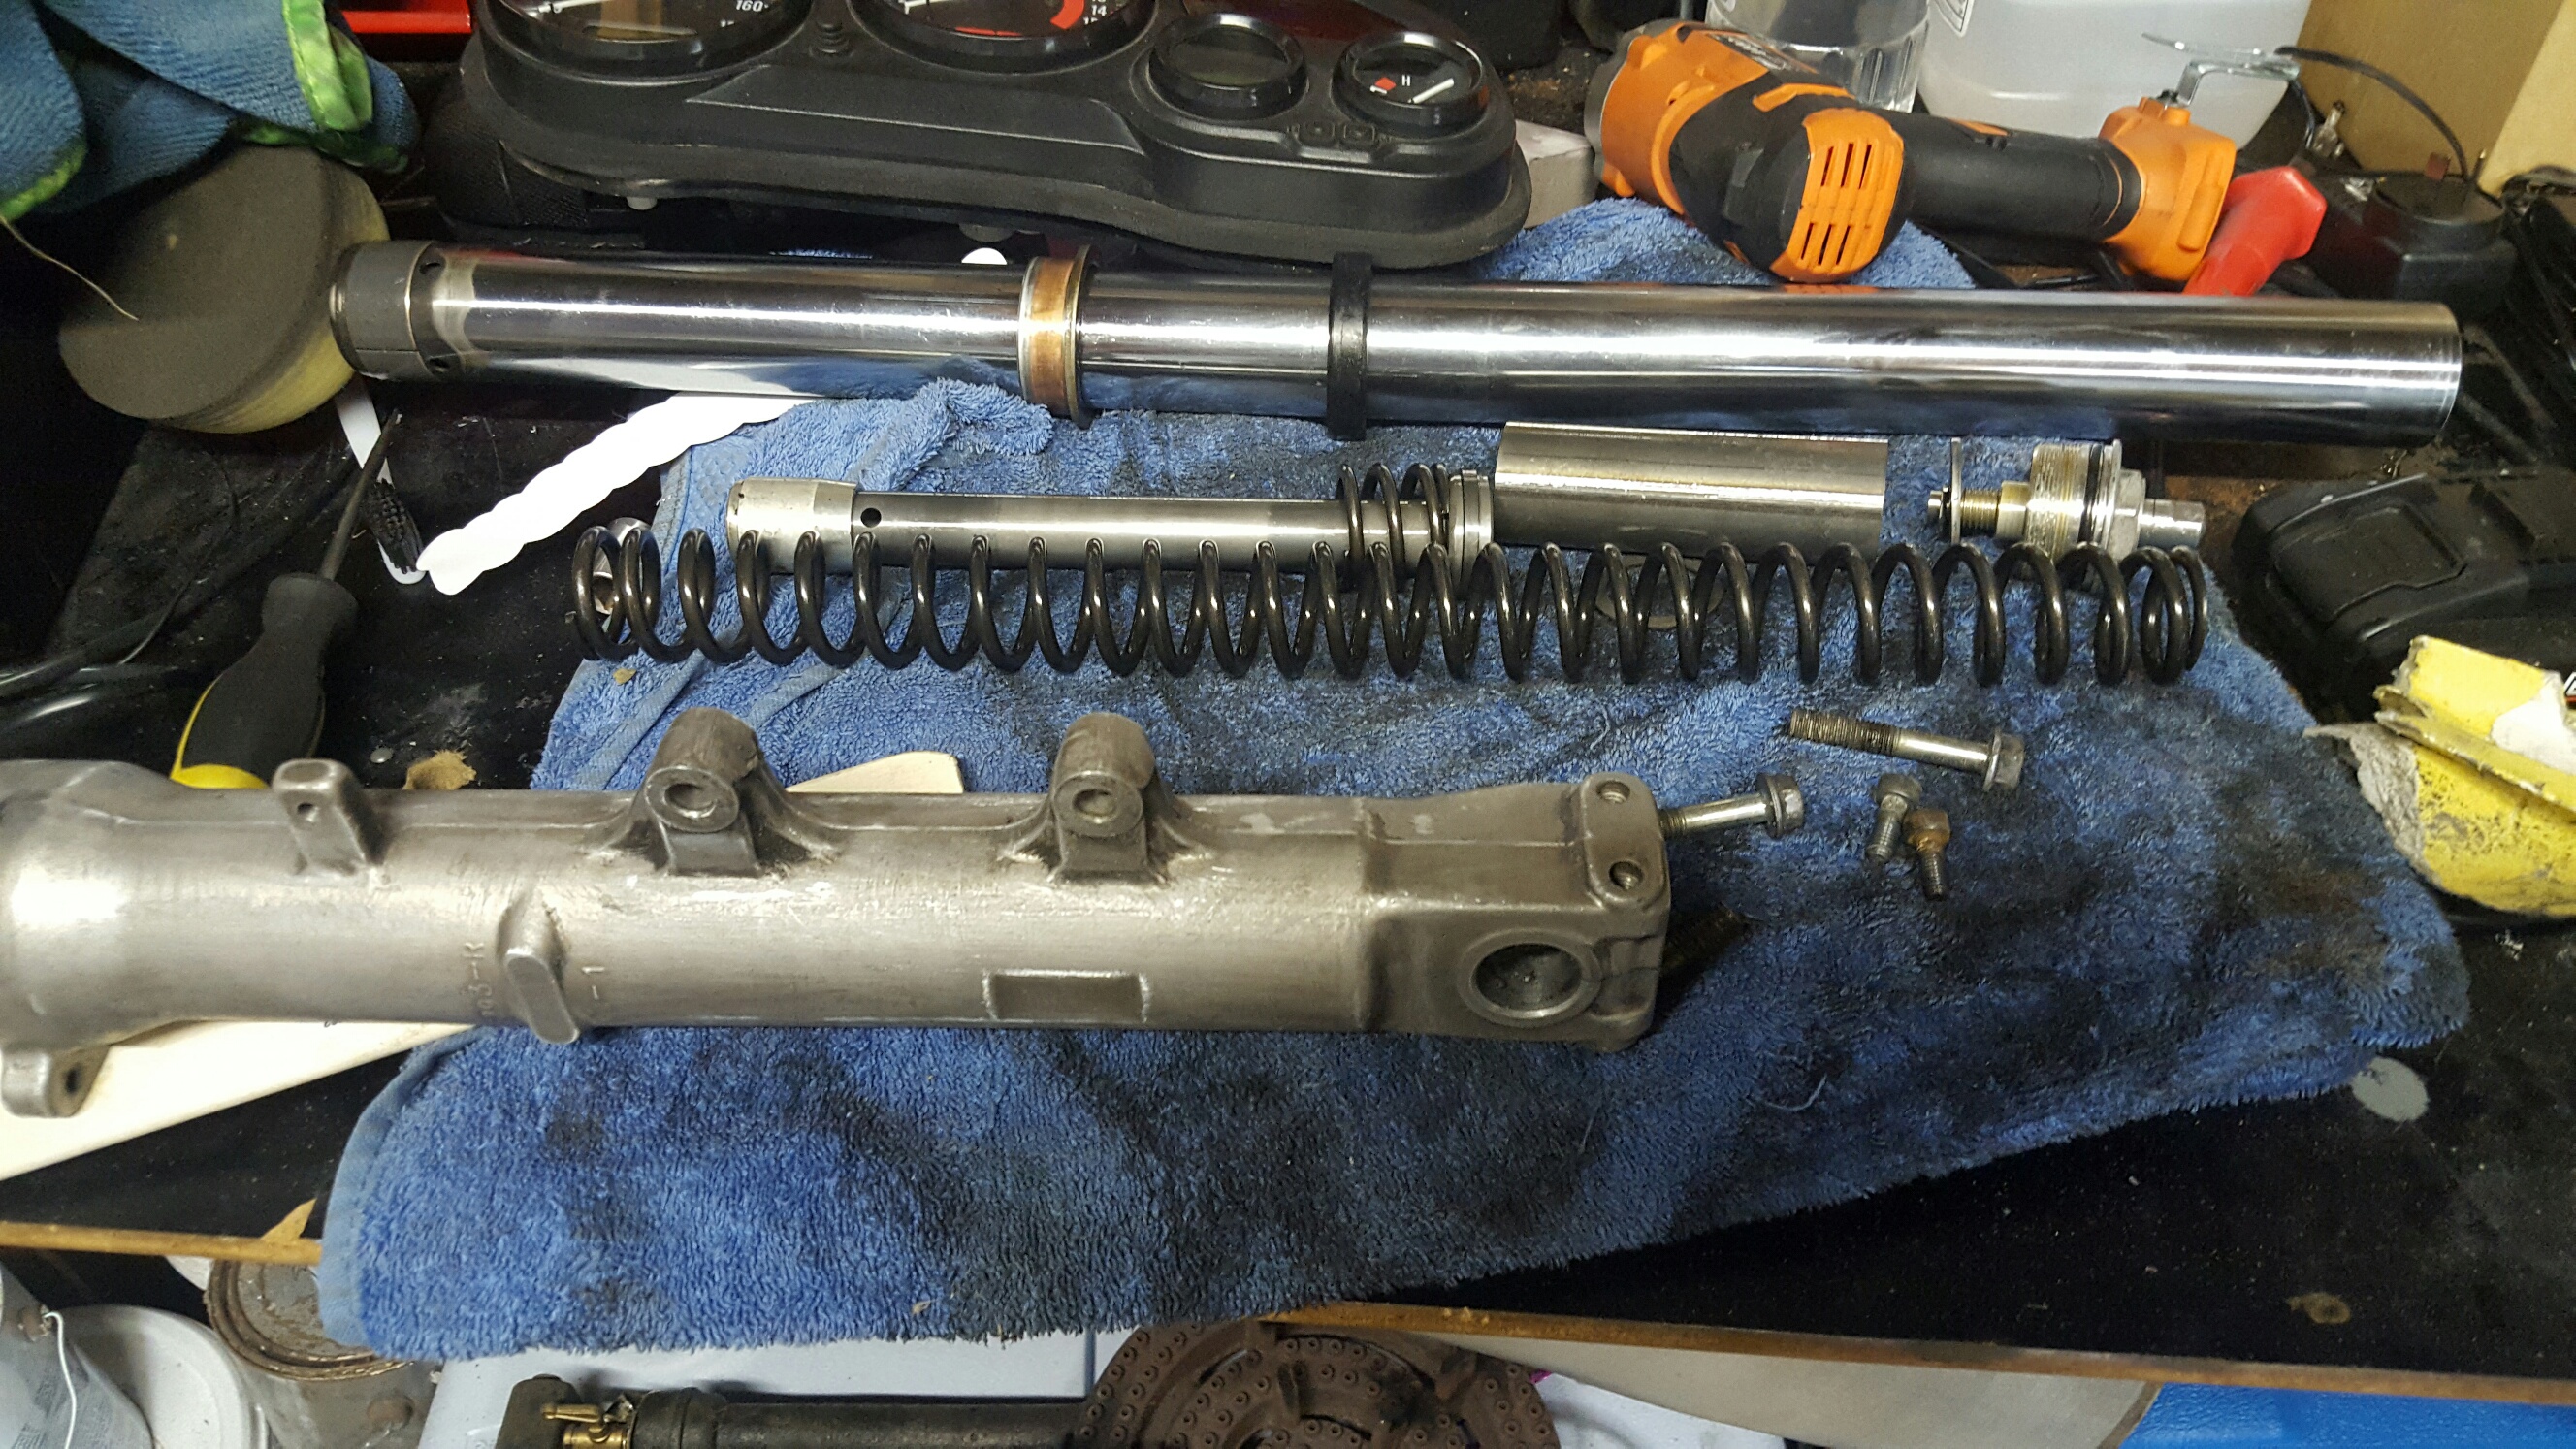
Have managed to make a start on the forks though. It seems that whoever had the forks apart last time over-torqued the allen bolts at the bottom of the fork leg that secure the damper. Net result was two stripped allen bolts. Fuck! My only move was to break out the drill. Hard to see here, but i managed to drill the head off the bolt without damaging anything else.
Then took the cap off, emptied the oil and pulled it all apart:
I tend to never be able to achieve a tidy work area!
Also stripped the plastidip off the fork leg, and rubbed it own with 80 grit and a small flapper wheel on a drill for the bad bits. couple more rub downs and it should be ready for etch priming. Will get the other fork stripped maybe Thursday night, then hopefully prime and paint on the weekend. Though I'm still toying with powder for the fork legs and rearsets. will decide before the weekend!
Edit: If i paint, they'll be getting baked in the BBQ. Apparently its a good idea to bake them a couple of times first too, to sweat out any residual fork oil absorbed by the alloy.
-
1
-
-
Keep seeing this on the weekends. Members car? (pic stolen from owners FB page)
-
1
-
-
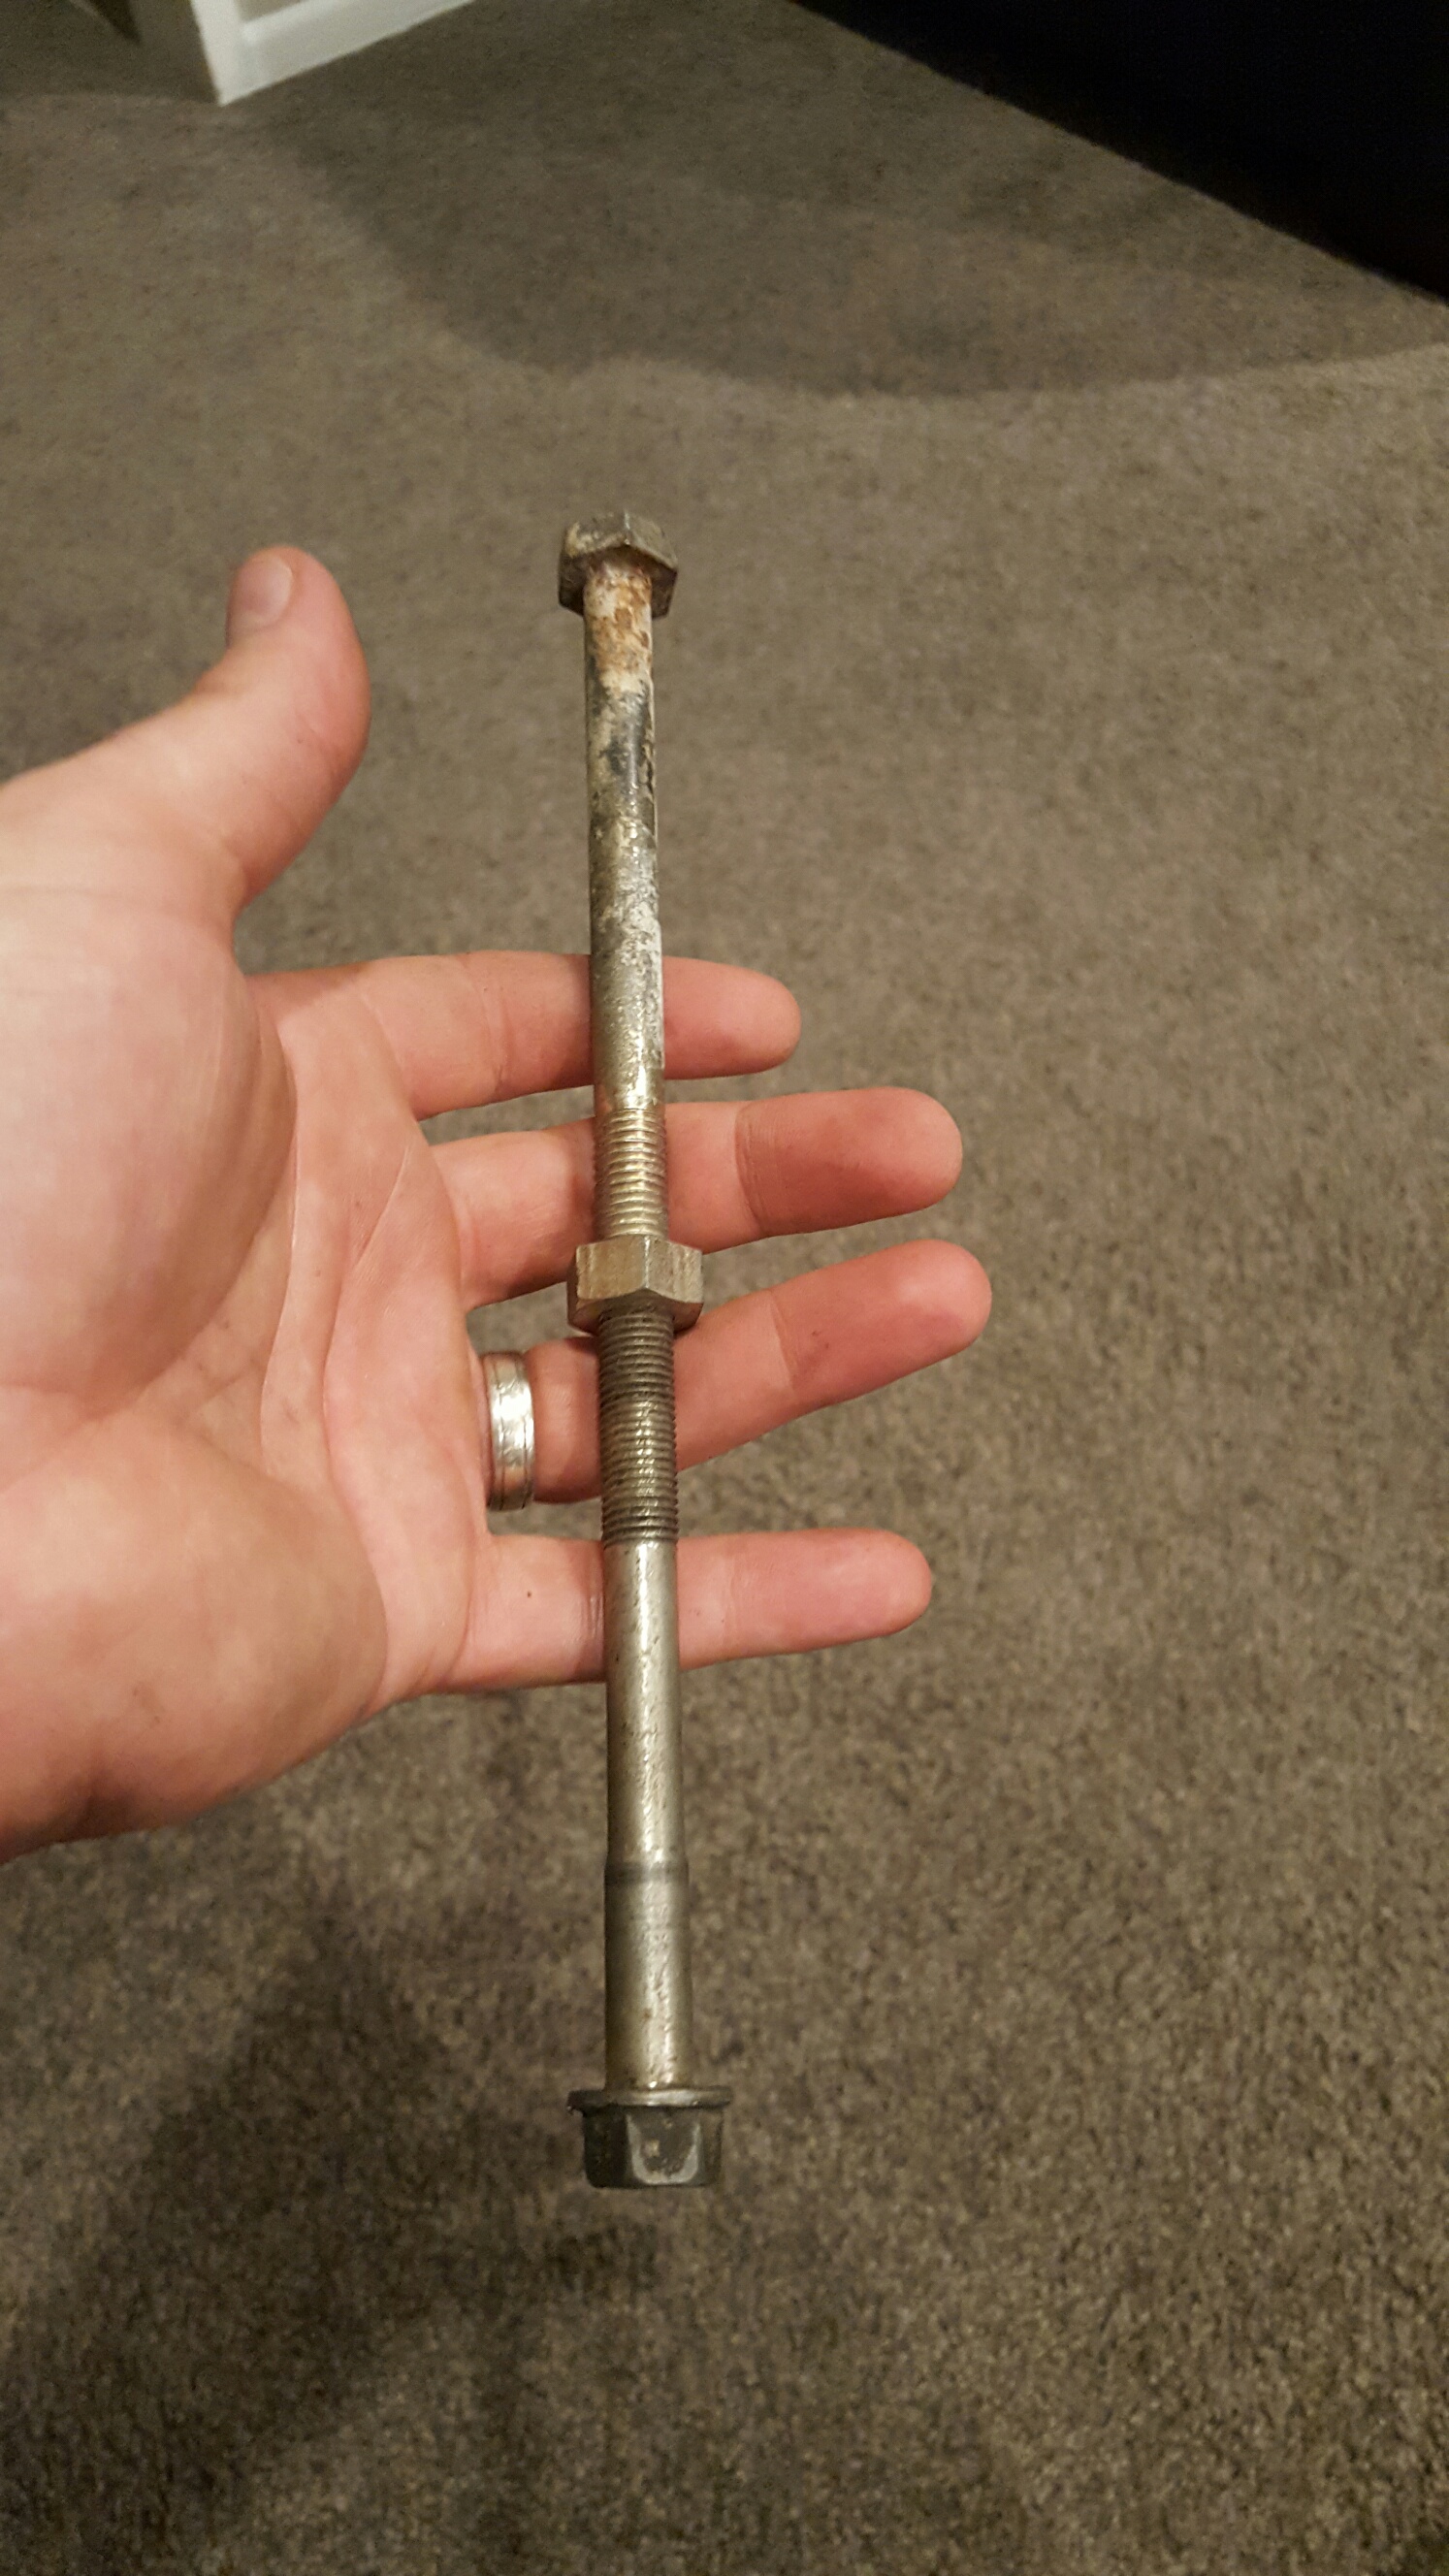
So did a bit more on this at the weekend. First up, removed the old steering stem bearing races from the frame. The upper race was easy as there's enough of a lip in the race to get a punch on with no dramas. The bottom Race however is recessed, and a normal punch wont make contact with the lip. So after a bit of head scratching i came up with this:
The lip on the lower hex head seats perfectly against the lip on the lower race. Three smacks with a hammer and the race was out. Win.
Then I had a slight diversion and decided to polish up my seat mounts. I don't have a before photo of the long one, however it looked much like this:
After a wet rub down with 800 grit, 1500 grit then 2000 grit, then some autosol:
Then i got the bike off the ground and dismantled the front end. No pics of that yet, but next up is a refresh of the top yolk, and a fork seal/oil replacement. I'll paint up the stanchions at the same time.
-
2
-
-
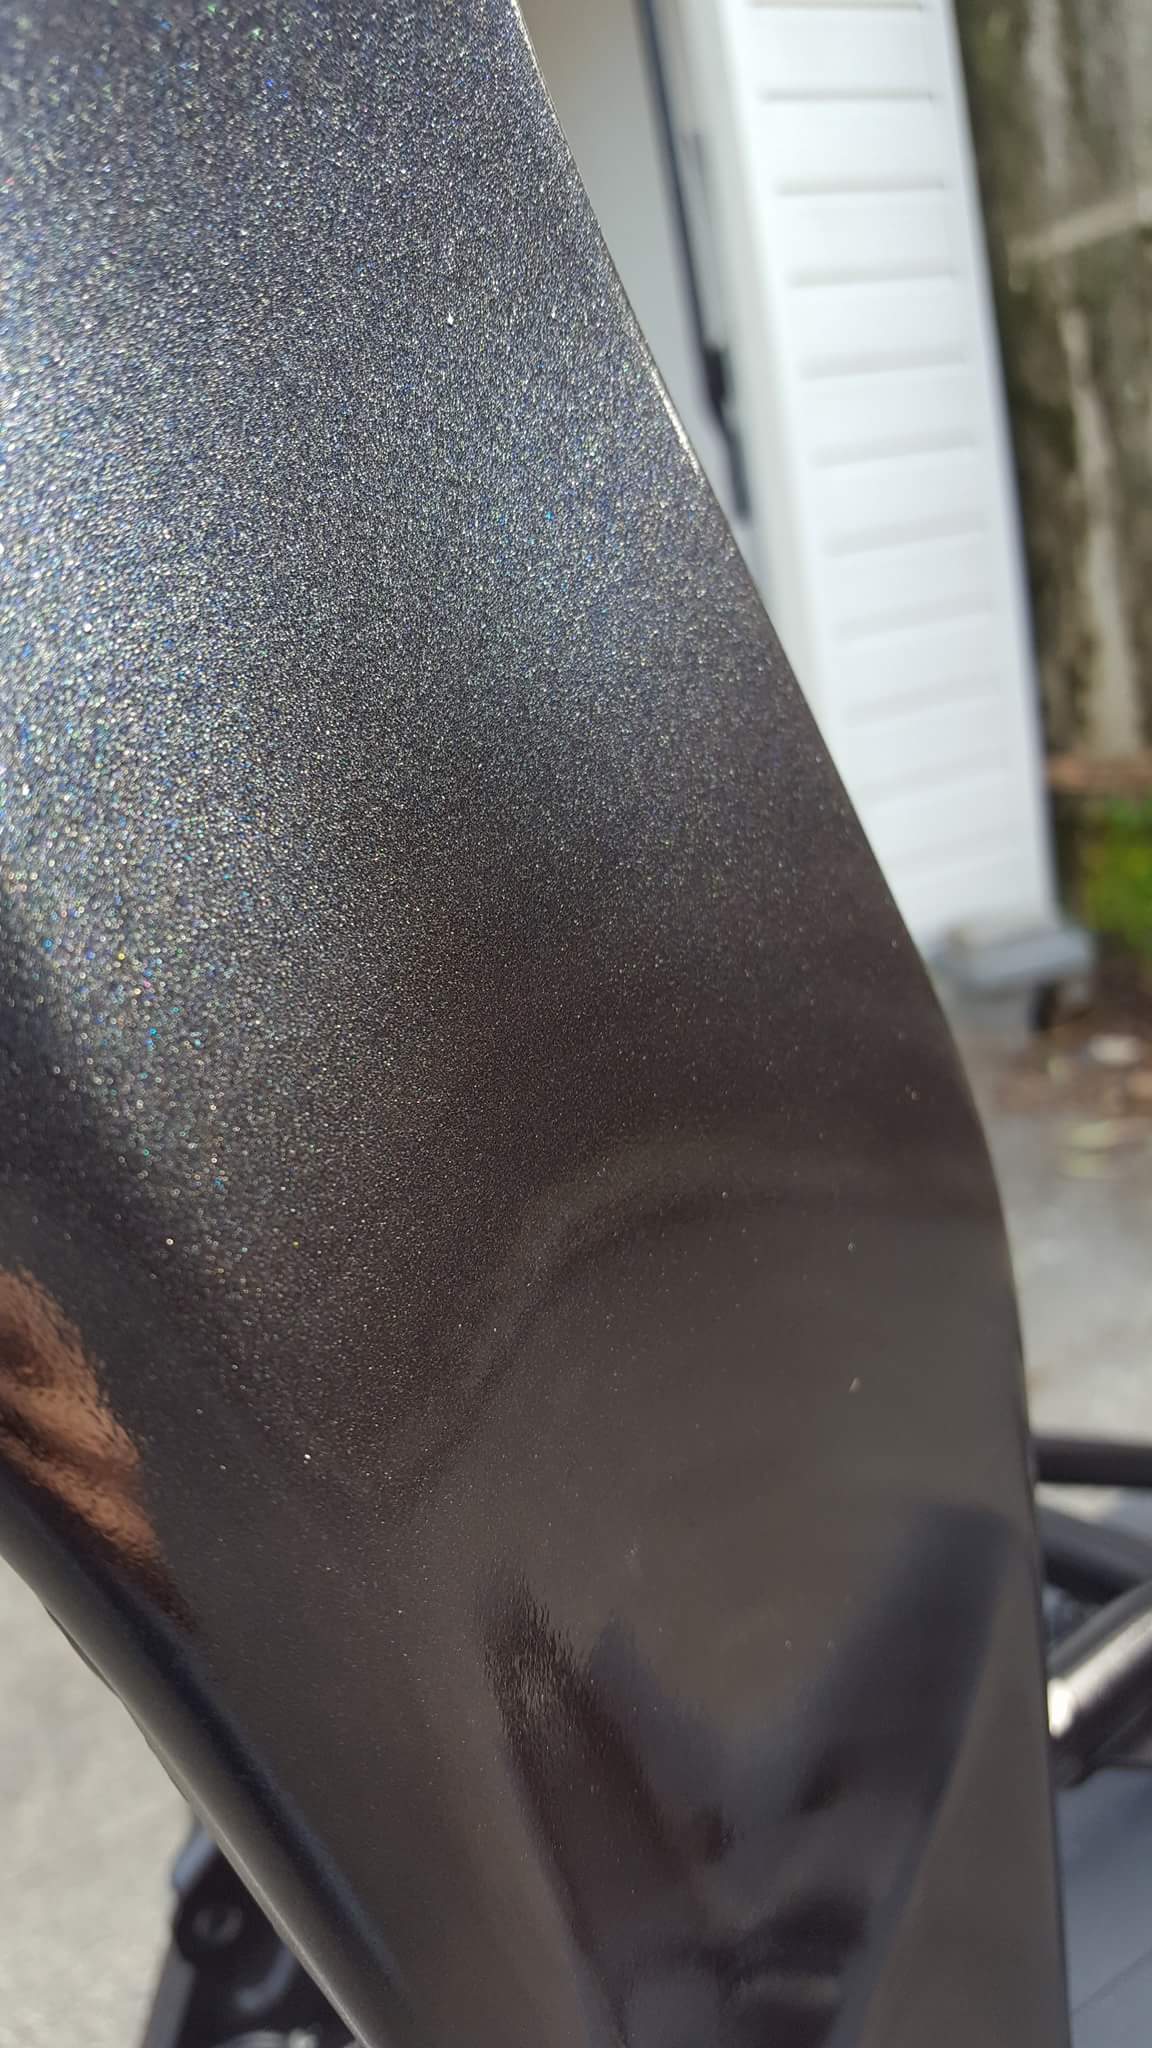
Threw some more clear on. Happier with this result:
-
2
-
-
Wet sanded this with 2000 grit, but i don't think i soaked the paper long enough and it won't cut out 100%. So i've rubbed the whole thing down and i am going to shoot another coat of clear over it. Before i do this, i'm going to finetune my gun.
I'm just not sure what size tip is the best for clear? I have a gun with a 1.5 tip and one with a 1.8. both suction cup guns. I got some good results using the 1.8 on a test piece the other night, I just wonder if i could get better results with the 1.5 if it was set up correctly?
-
10 hours ago, Firetruck said:
Wingroads suck.
Oh. I agree.
The worst thing is that the rear facing child seat doesn't fit in my car. So I have to drive the poxy cvt piece of shit.
-
On 6/15/2017 at 16:57, k-trips said:
Oh, yeah, if you want a wheel alignment in Wellington, I have 2 jokers I use, one I haven't seen in a few years but the other is magic and I would happily throw him all the work he can take.
Who do you use? Every single place i've taken our dailys to for an alignment has fucked them up royally (A Legacy and the wifes poxy Nissan Wingroad). 9 times out of ten they're worse after the 'Alignment'
-
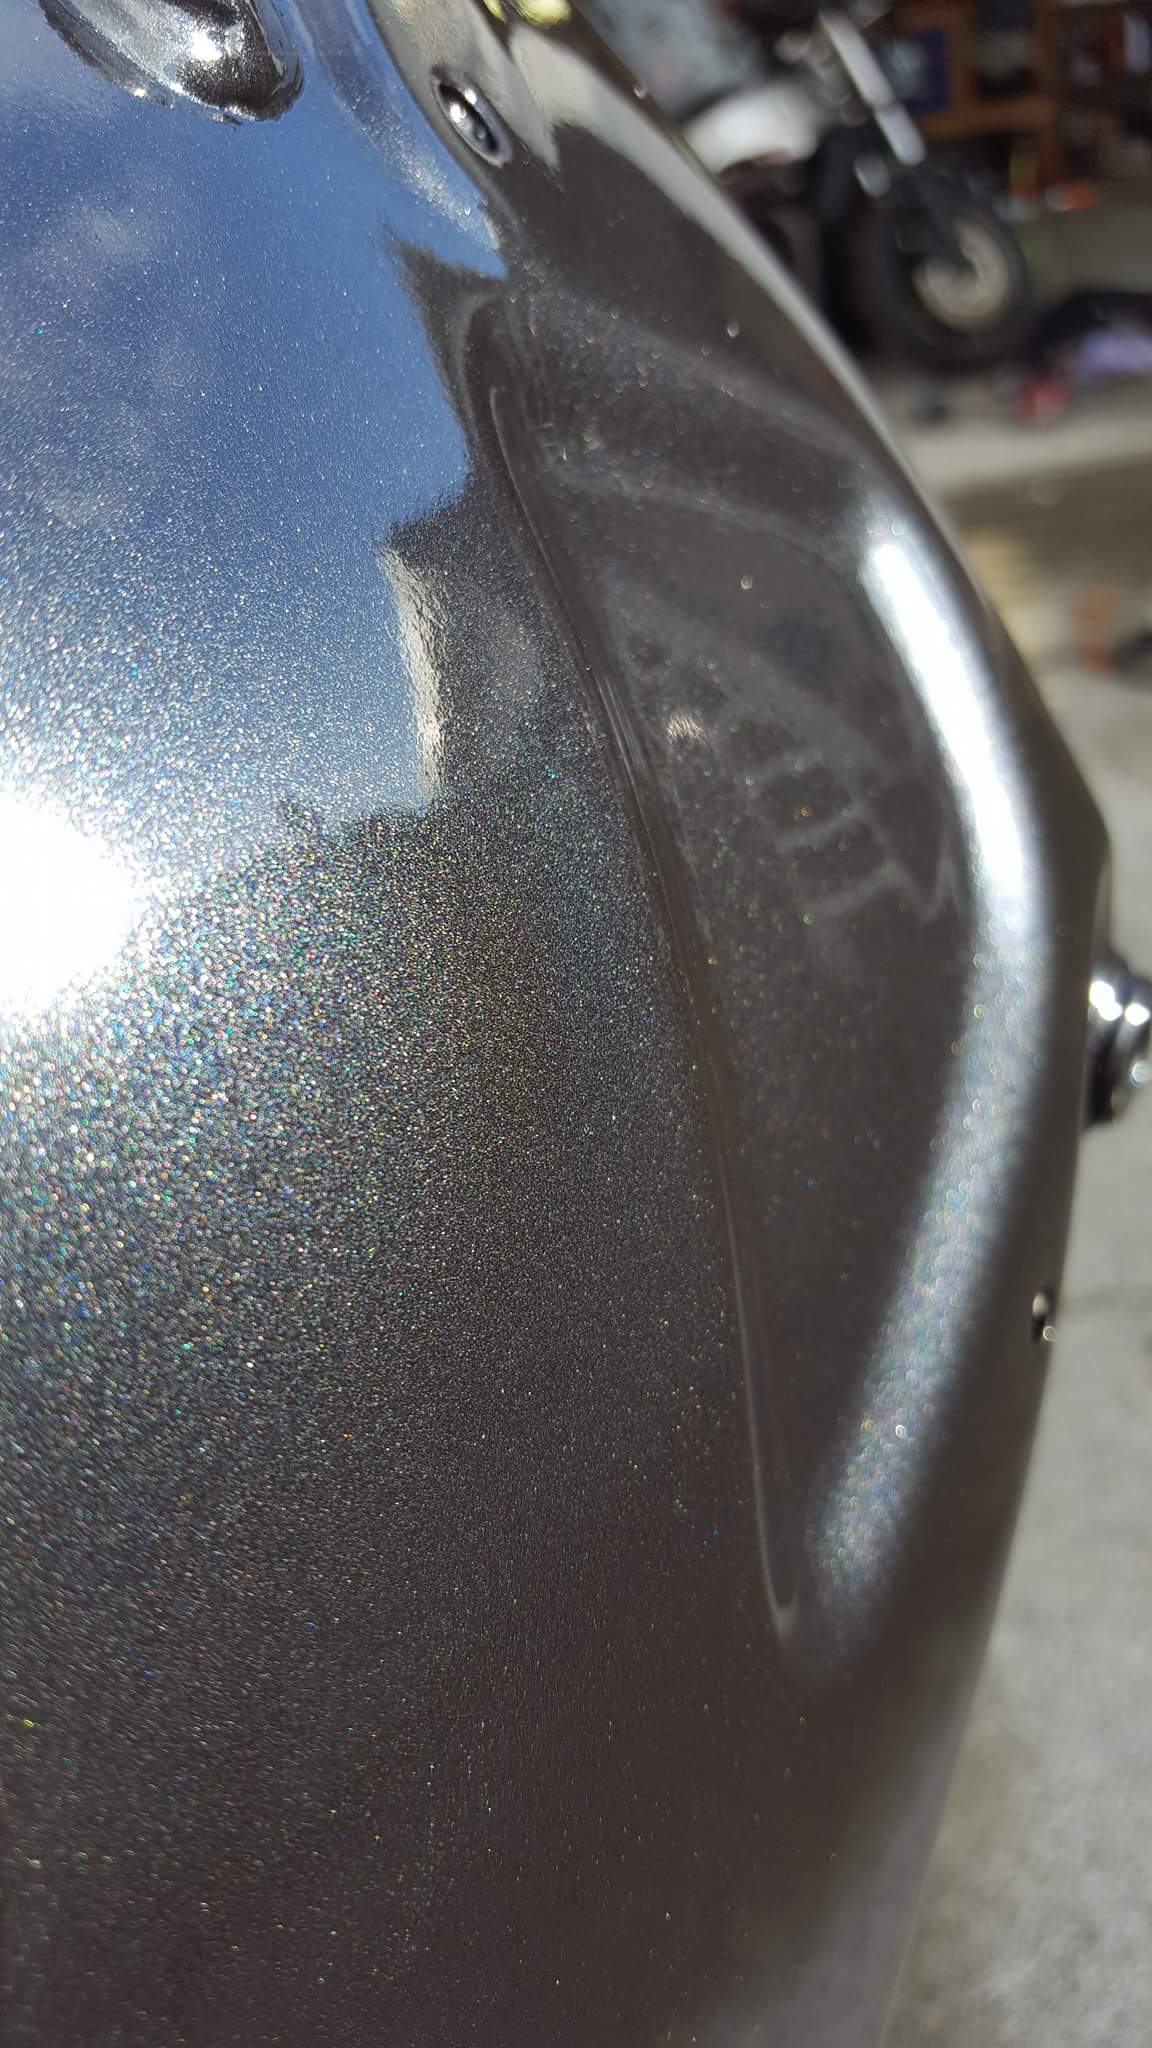
Got some clear on this afternoon. Not a perfect job but my first go painting with a gun, so I'm happy.
Close up of the colour in faint sunlight:
-
8
-
-
So, finally got some basecoat down on this. Ran out of thinners though so clear will have to wait.
-
1
-
-
13 hours ago, kicker said:
If you decide to get someone to do it for you go and see All Bumper Repairs on Tirangi Road in Kilbirnie, they don't mind small jobs. I got a tail unit plastic welded up by them, only cost $20 and they had it ready the next day all nicely finished too.
Yeah, Will keep that in mind. there's a bit to weld up, mostly around mounting points so i want to make sure its strong.
-
16 hours ago, datlow said:
And to think Ive thrown thousands of cable tie ends away
saw a bmw champagne quartz colour online today looked pretty nice, although prob not so grey but if your going with bmw colours
I was considering that colour, but i'm having difficulty visualising it on an RF. Though i do quite like the understated nature of black and grey.
Don't think the cable ties will work, as im pretty sure the fairings ABS. Test piece i did last night came apart with a bit of force.
-
1
-


Twisted's mid school RF of procrastination
in Two Wheels
Posted
we'll see. feel much better about them than the slinky glide set i bought.
been chipping away at this on and off, got the forks done finally, and have slowly been sorting body work. Also picked up an aliexpress screen for $25, they sent a double bubble which while i don't really like the look of them i think it should help with wind noise, as the stock profile screen directs airflow straight at my chin. i have however brought the fact they've send the wrong screen to their attention, so I'm hoping they'll send the correct screen so i can change it up if the double bubble doesn't help with wind noise
Thought i had the front end done, but took a look at the brakes, and decided i needed to refresh those. discs are past it (and the two from discs are different) and pads are nearly done. Any recommendations for a source for discs and pads? who/what to avoid? id have no idea who manufacture good brakes for bikes and who manufactures shit.
pic for fred