twisted
-
Posts
1413 -
Joined
-
Last visited
Everything posted by twisted
-
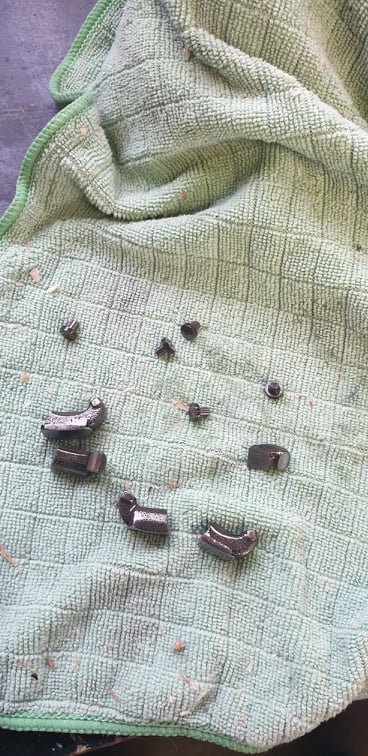
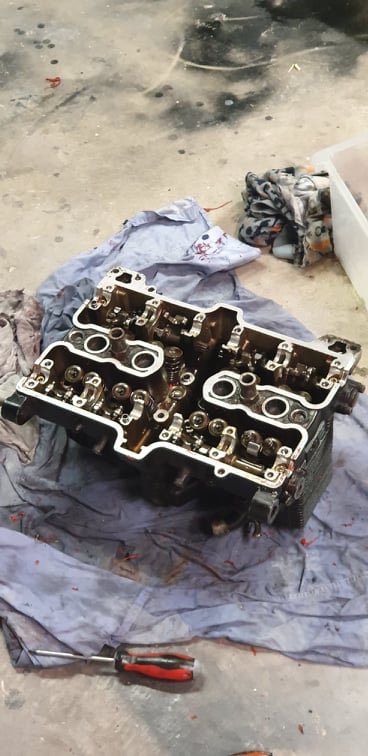
yeah, so this happened: Long story short, a valvecover bolt thread (valve cover screws screw in to a nipple rather than a hole....) split and fragmented into valvetrain, breaking all rocker arms on intake cam and scoring the shit out of the same cam So options i have: 1.give up 2. find and buy a second hand motor 3. find and buy second hand motor as a stop gap, and rebuild current motor with FZR600 pistons and cam grind making a 442cc. maybe flatsides as well. leaning toward option 3, option 1 is a no go, too much time spent on this thing already

-
Well that was easier than expected. Massive thanks to @kseries.rookie for sorting me out with some gear so I could get this done today.
-
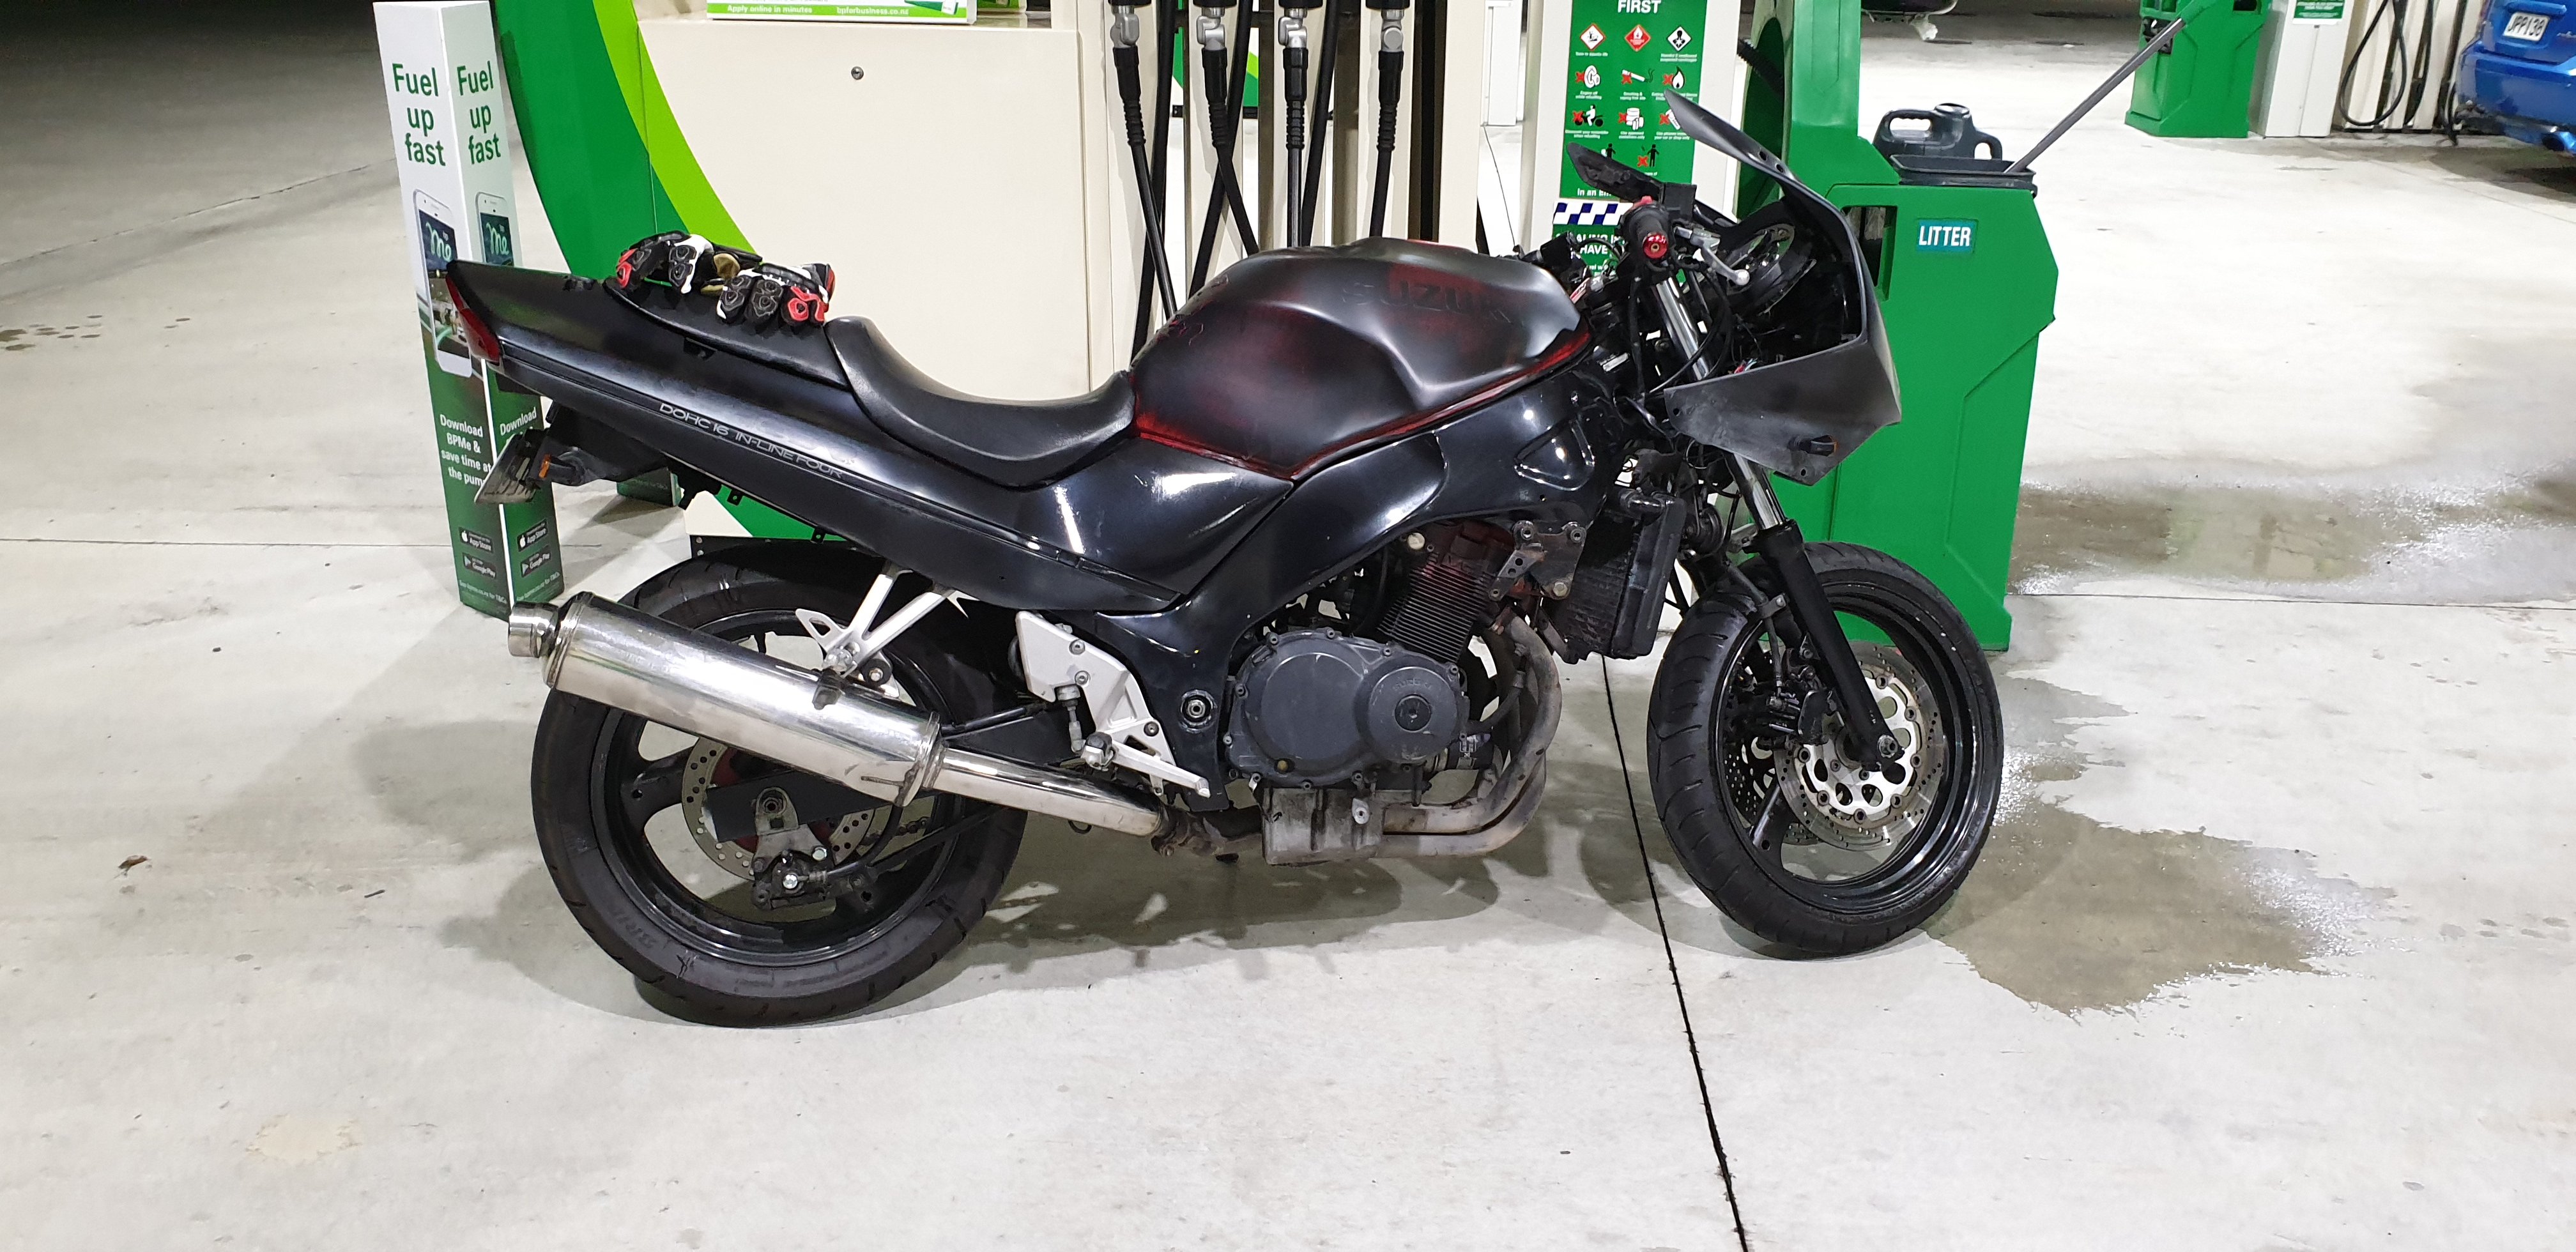
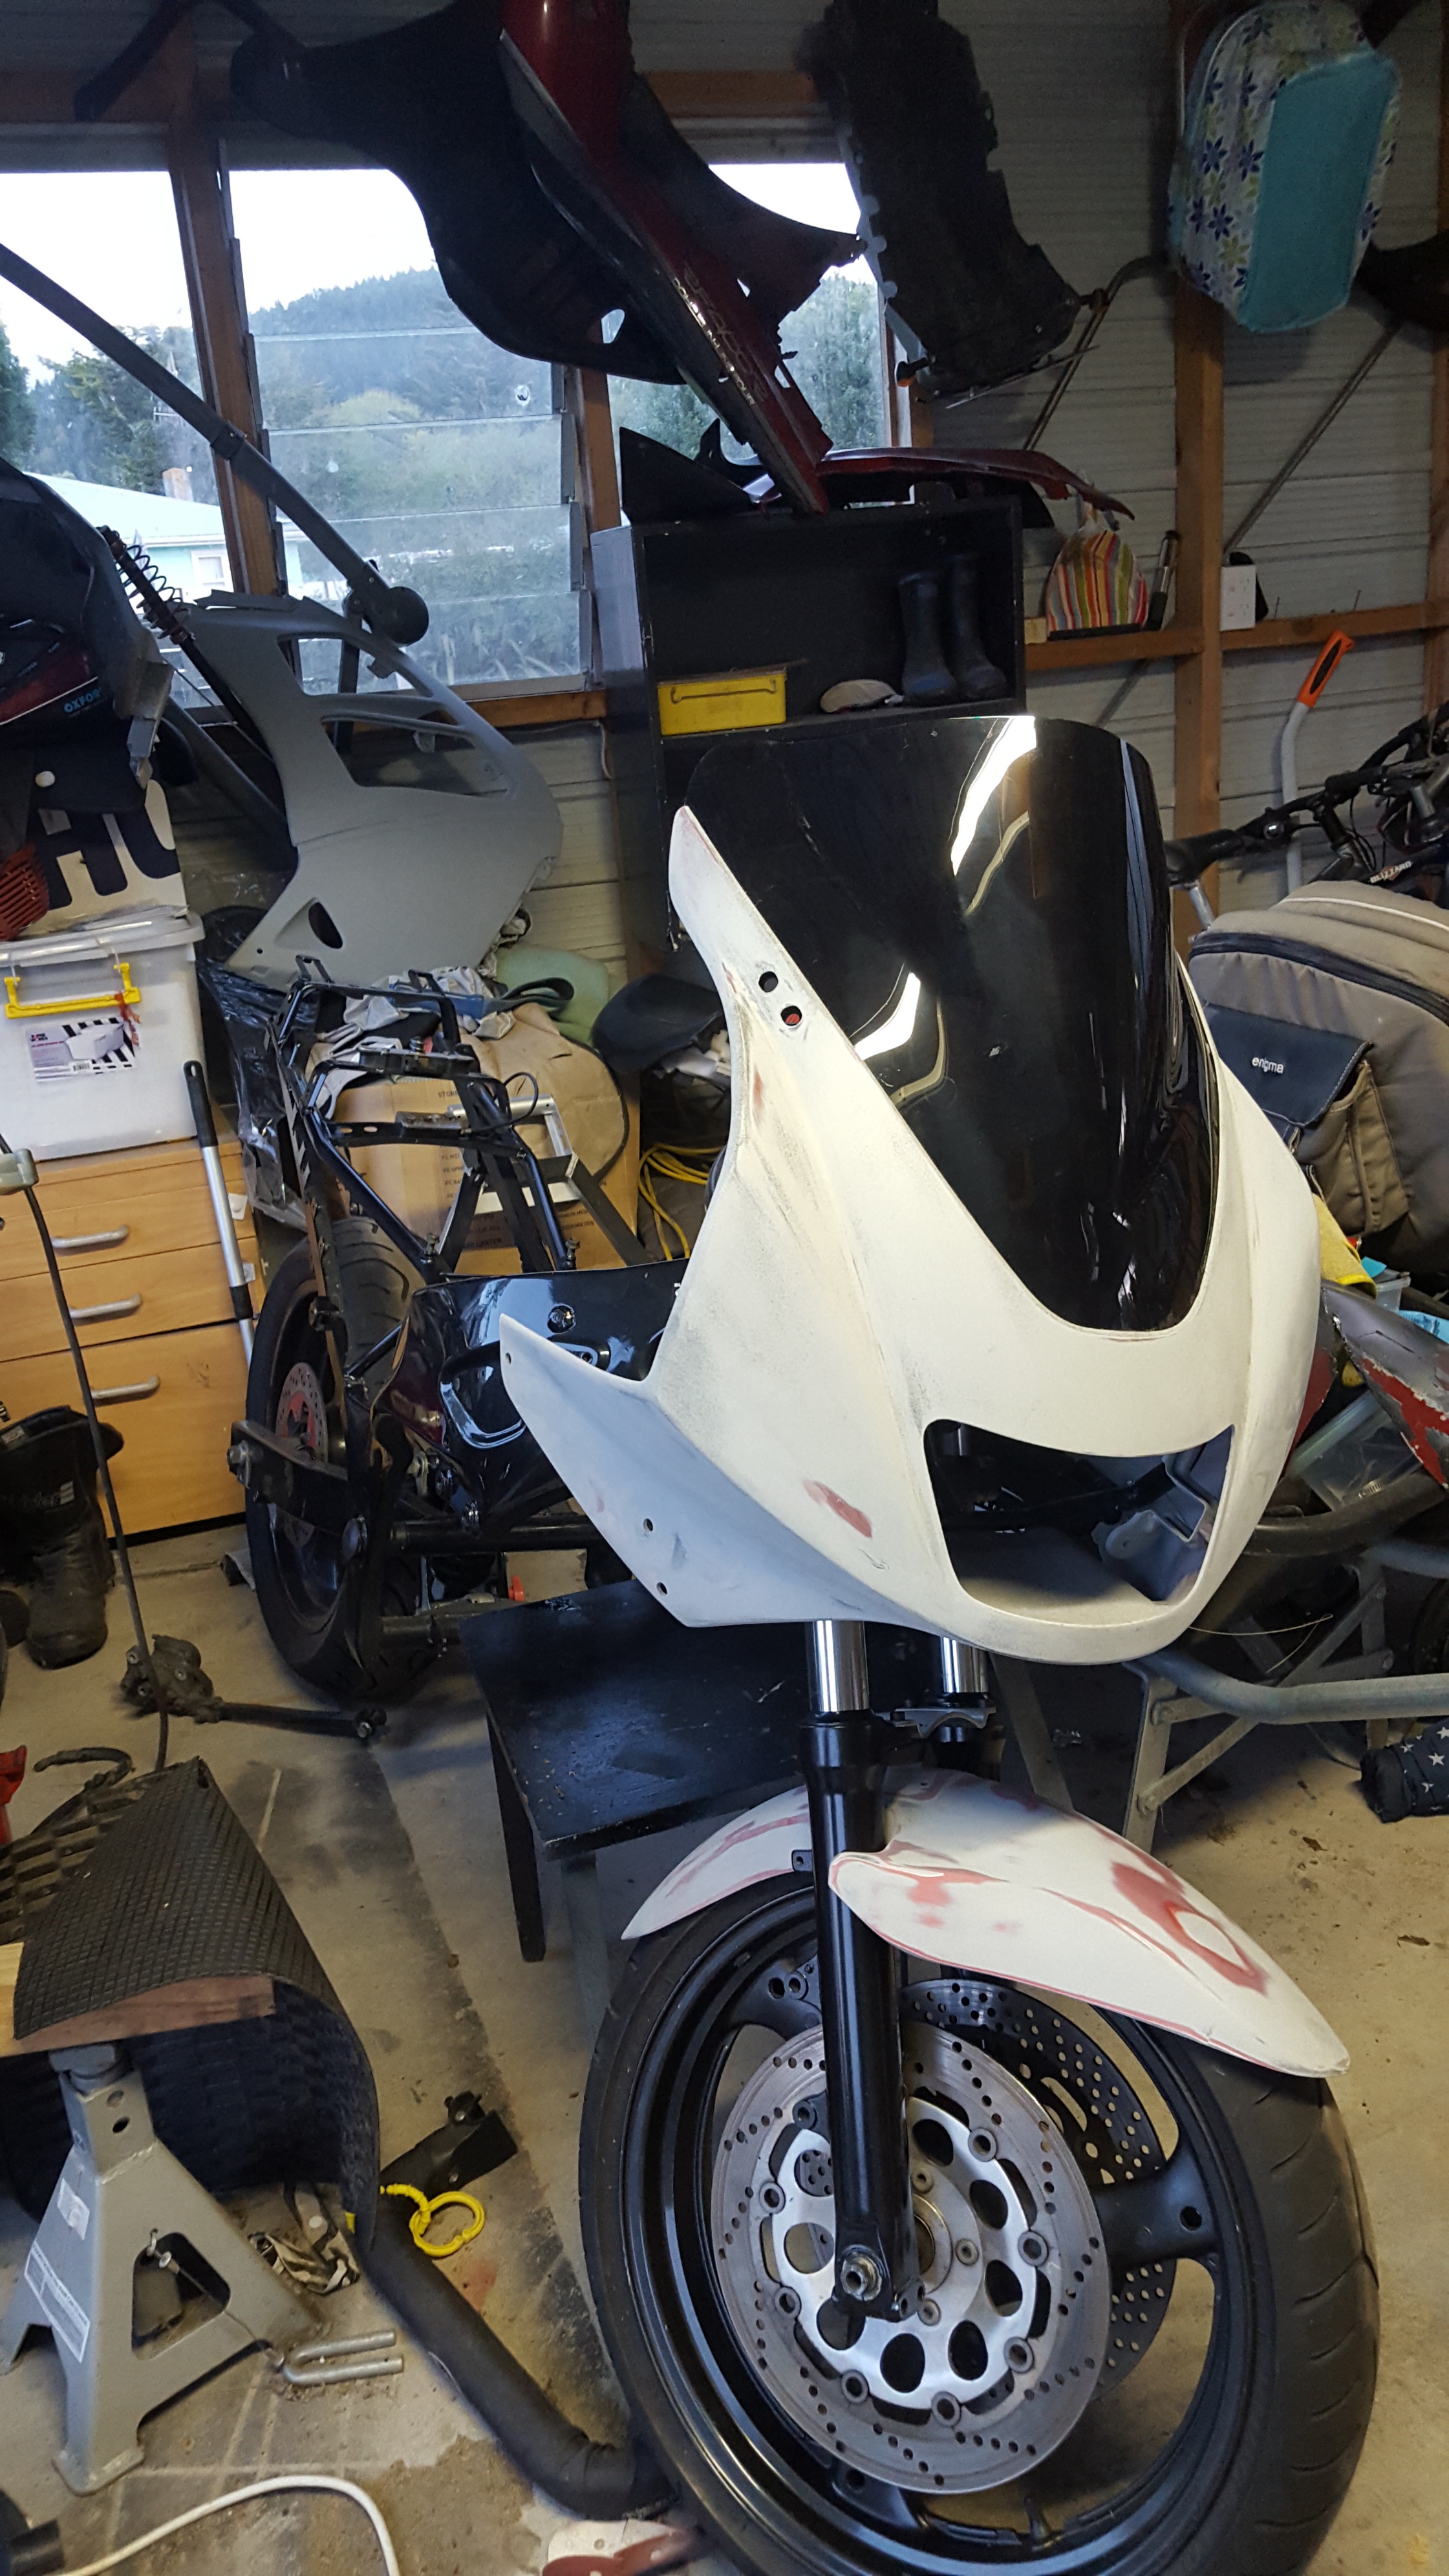
Been chipping away at this, I gave up on the perennially leaking forks, and took them to a shop on the hutt to sort. Turns out the bushes I was supplied were wrong, so genuine ones from Japan were ordered and installed with new seals. At the same time I picked up some sintered pads, and painted the front disc centres as one was red and one silver. The front wheel was pretty rough, having sat for a couple of years with fork oil slowly eating away at the paint on the lips. So I decided to strip the lips back and polish the alloy. Also polished up the top triple tree and bar risers. Also bought some mirrors for $20 from aliexpress, and have ordered a fairing bolt kit. Mirrors have arrived and bolts are on their way. So left to do is sort the front indicators out, finish polishing the rear wheel, throw on the under bike exhaust hanger and bolt up all the fairing. Then wof Still have to sort out the testarossa style side vents, and all the infill plastics which are in progress, but can also wait for a bit.
-
So. Been toiling away on this. Have been getting beyond frustrated with the paint as i was getting reaction after reaction on the tail. Took Friday off a couple of weeks ago and dusted it on outside and in the sun and success! no more reactions. Havent done anything about mirrors yet, currently deciding if i pick some up with integrated indicators, and throw some spots/DRLS where the front indicators are currently, or just blank them off. Brakes are on the to do list, along with small things like Bar ends, Swingarm bobbins, crash bungs etc.
-
-
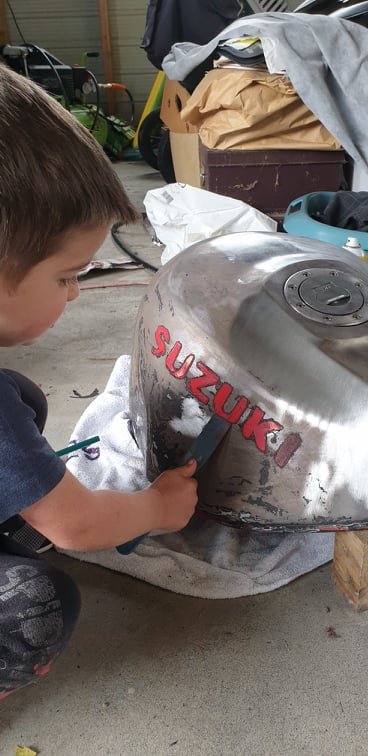
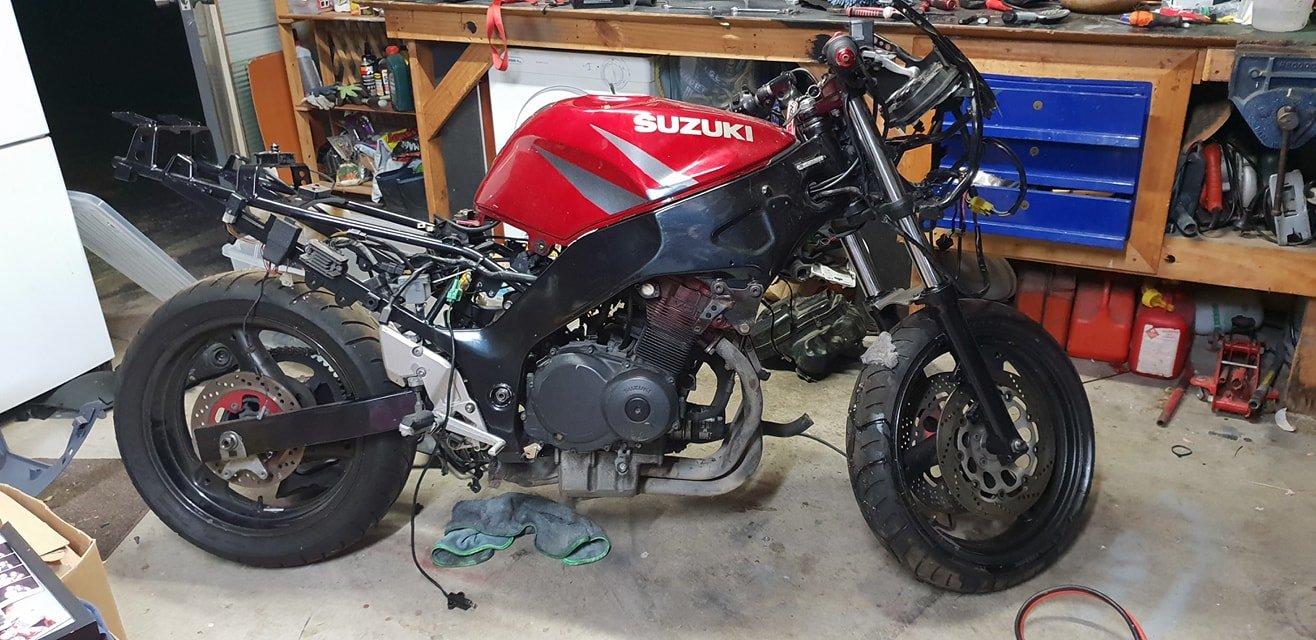
So, had it confirmed that the SV650 Speed sensor works, so have tracked one down. Expecting that to arrive this week sometime. In the meantime, i got on with the bodywork. Had a helper when stripping the tank: Got a coat of frame colour on just for now, still a number of imperfections that need to be sorted on the fairings and one small dent on the tank, but going to take my time and just rock it like this for a while. Just need to organise mirrors and i'll be good for a WoF.
-
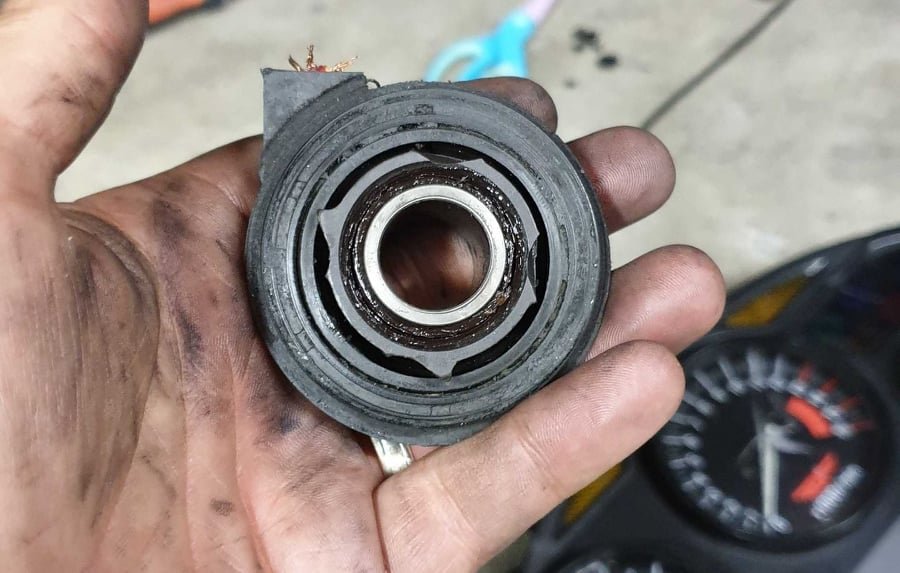
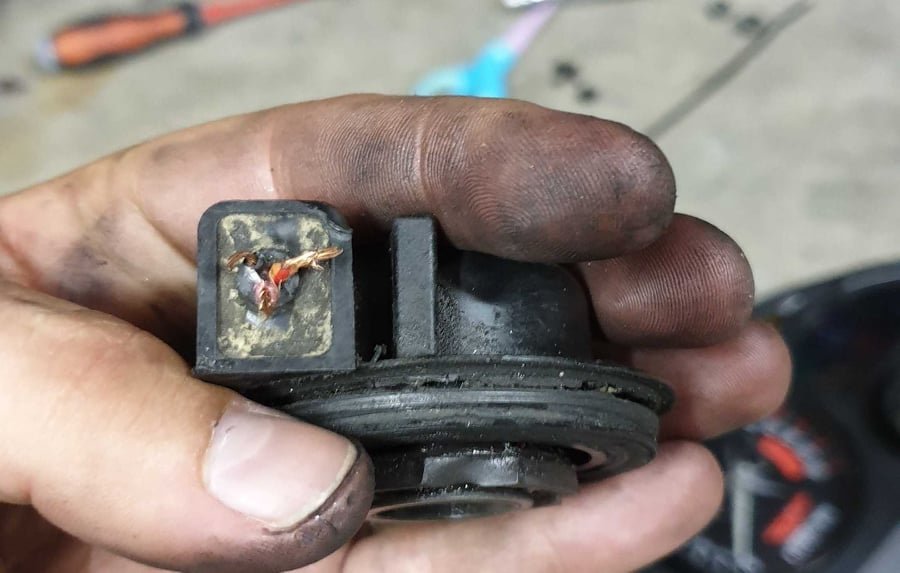
So, Drive gear arrived, and of course its a mechanical type, where mine is an electronic type. They don't seem to be easy to find, as the part number on impex.jp (54600-32c02) is for a mechanical type. It looks like the Suzuki Boulevard C50 uses the same one so will do a bit more research to ensure it will fit (looks the same) Heres my broken one, as you can see, its fubared on two fronts: First, all 4 tabs that slot in to the wheel are broken off: Second, all three wires had broken beneath the outer casing: I'm picking these are a pretty generic part, and as long as the O.D is the same and the tabs are the same, it should be sweet?
-
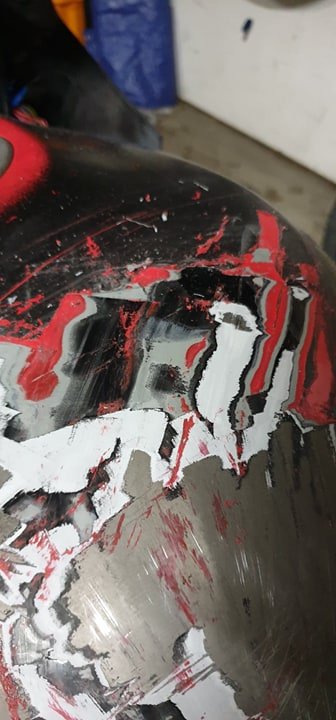
So, now i know It rides well, and i have to wait for speedo drive gear and mirrors to arrive before taking it for a wof, i thought i would turn my attention to bodywork and start stripping the tank. The red that was on it is absolutely horrible, and is melting into a sticky mess under the heat gun, unlike the black underneath it which just lifts slightly allowing me to scrape it off easily. Took the tank off after these pics were taken and did the complete left hand side. I've finally settled on a colour i think, and am keen as beans to get this thing finished, so will be spending a fair few nights in the coming weeks prepping bodywork.
-
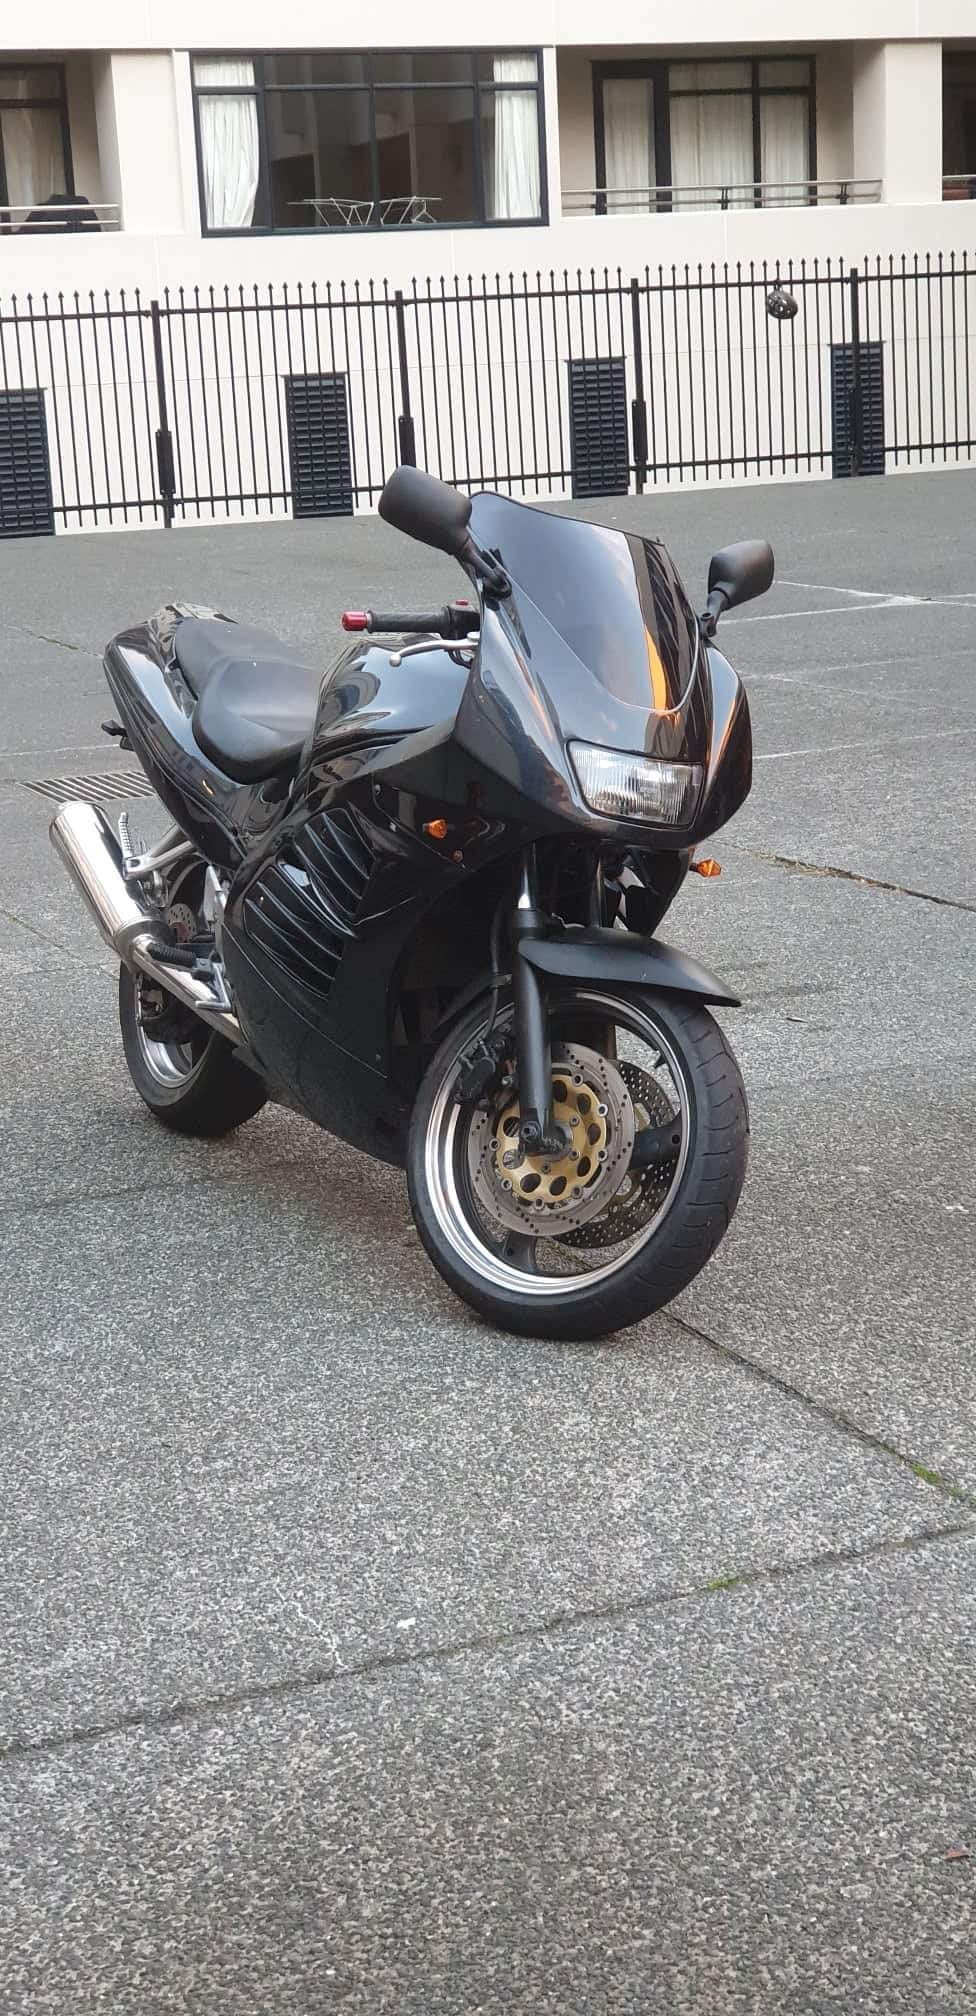
Well shit. Ugly asf but maiden voyage complete.
-
Yup keen as PM acct details and cost when you're ready
-
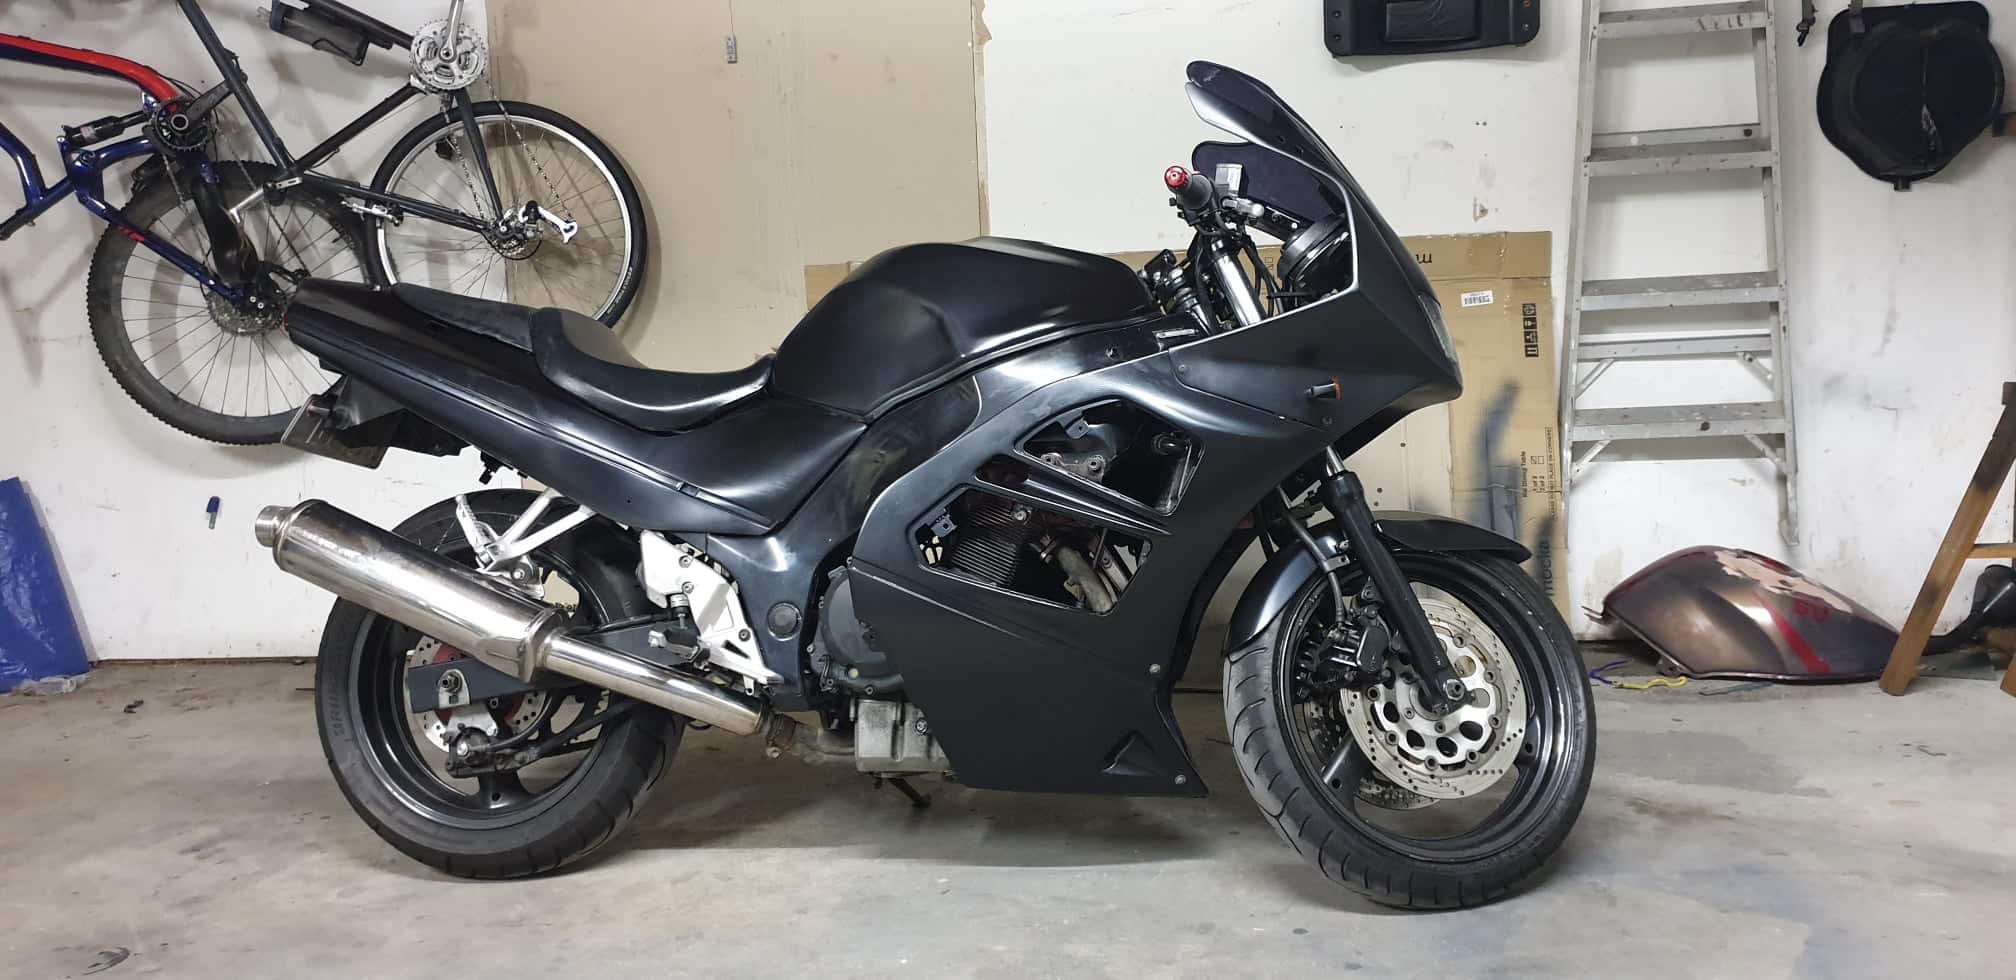
So. Got the forks off, need to get out today to grab some fork oil some long Allen sockets, and a battery Tank also arrived, shit it's big! But looks heaps better than the smaller 400/600 tank. Seat might need a bit of fettling to fit properly but I'm happy Original tank for comparison
-
Yeah, not sure if i fucked up or not but both forks are leaking badly. Have bought some Vesrah Seals from colemans which i hope to get in tonight. Picless update, but got the swingarm off again last night, and installed the chain guide that i missed last time. got everything back together, and torqued down, set the chain tension and rear wheel alignment. All thats left to do before the shakedown ride Is Fork Seals, Battery and Brakes. Might even be out on it on the weekend! Still lots to do on the fairings though, and i have a higher capacity tank arriving off a 900 sometime in the next few days which will need a good tidy up and paint, but i think in the short term i'm just gonna give it a couple of coats of mattyb until i've settled on a colour. Will try to remember to snag some pics next time i'm out in the garage
-
Yeah certainly makes the case for spending a bit of coin on a nice can when its all done. Will be giving cycleworks a call i think. Don't think i'll get away with open headers hah.
-
Got it fired up over the weekend. Scuse the potato video, broke my phone so had to employ the backup potato. Threw the radiator back on last night, filled it with coolant and let it run (with muffler) for a good half an hour to ensure that the thermostat worked and fan would kick in. Ran bloody mint and everything works as its supposed to. Unfortunately both the swingarm and forks have gotta come off again, as i forgot the swingarm chain guide when i put it back together, and the seals failed badly in the rhs fork. But thats ok, because apart from those two things all i have left to do are the brakes and bodywork.
-
Found some motivation last week. Reinstalled cables into twist grip (sorry, no photos of the actual process, i was too busy swearing at it. not my favourite job) Then finished plugging everything in. Mounted the battery tray, put the dash on chucked airbox back on and hooked up Jumper cables to the + and - terminals and checked for power. Success! Power! Checked a few more things and then turned the key and hit the starter. Wasn't expecting it to turn over, but it did. Next up i'm gonna throw some fresh gas at it and see if it will fire up.
-
Awesome. I'll be watching this as I have a real soft spot for Minis (i've had 3) have been thinking for a while it must be just about time for another.
-
grrrr i note some of my pics are gone. will fix that up at some point. Anyway. as previously mentioned, i have this rolling now. The motor is in the frame, the front and rear ends are together and i've started running the loom. I have a fair amount of re-work to do now though: I scratched the shit out of the swingarm putting it in, i had a brake fluid leak over the top yolk which has destroyed the paint (not surprised) and my forks are leaking. Anyway, to motivate myself i'm carrying on with runnig the loom and plugging everything in. Next up is to torque down all the engine mounts and then plumb it. shouldn't take long. I have a plan for the top yolk and forks, and hope to sort the swingarm in situ. pic of it with bodywork mocked up to keep me motivated
-
Lerl. 6 months later... No pics but: Motors in and its rolling. Have an agreement with the missus that i spend 3 nights a week in the shed so i can make some progress. Pretty keen to get this running in the next few weeks. Because no pics heres a pic of some sharks yep some acting pedigree right there
-
Shit yes.
-
awesome. I have a real soft spot for these, and i really like the direction you're taking it.
-
Cool wagon. I had an HQ Wagon years ago. A+, would trade again etc.
-

Yoeddynz and Hannah's HB Viva Wagon Discussion
twisted replied to Willdat?'s topic in Project Discussion
Bit spendy though yeah? Also Busa boxes have a tendancy to break, and are geared quite high. All that you really need to do is fab up a longer input shaft (assuming you had the means to do so) and bellhousing, use an MX5 box and adapt an Mx5 rear end (knowing nothing about how easy an IRS setup in a Viva would be). keeping optimum ratios for street use. Would be a blast to drive. -
Yoeddynz and Hannah's HB Viva Wagon Discussion
twisted replied to Willdat?'s topic in Project Discussion
Hayabusa turbo. standard engine is about 85kg Dry if i'm not mistaken? You'll have to get inventive with the trans and reverse, but turbo 'busa's can easily push out 500hp. http://www.motoiq.com/MagazineArticles/ID/1519/Project-MiataBusa--Part-1-What-The-Hell-Are-We-Thinking.aspx http://www.miatabusa.com/ -
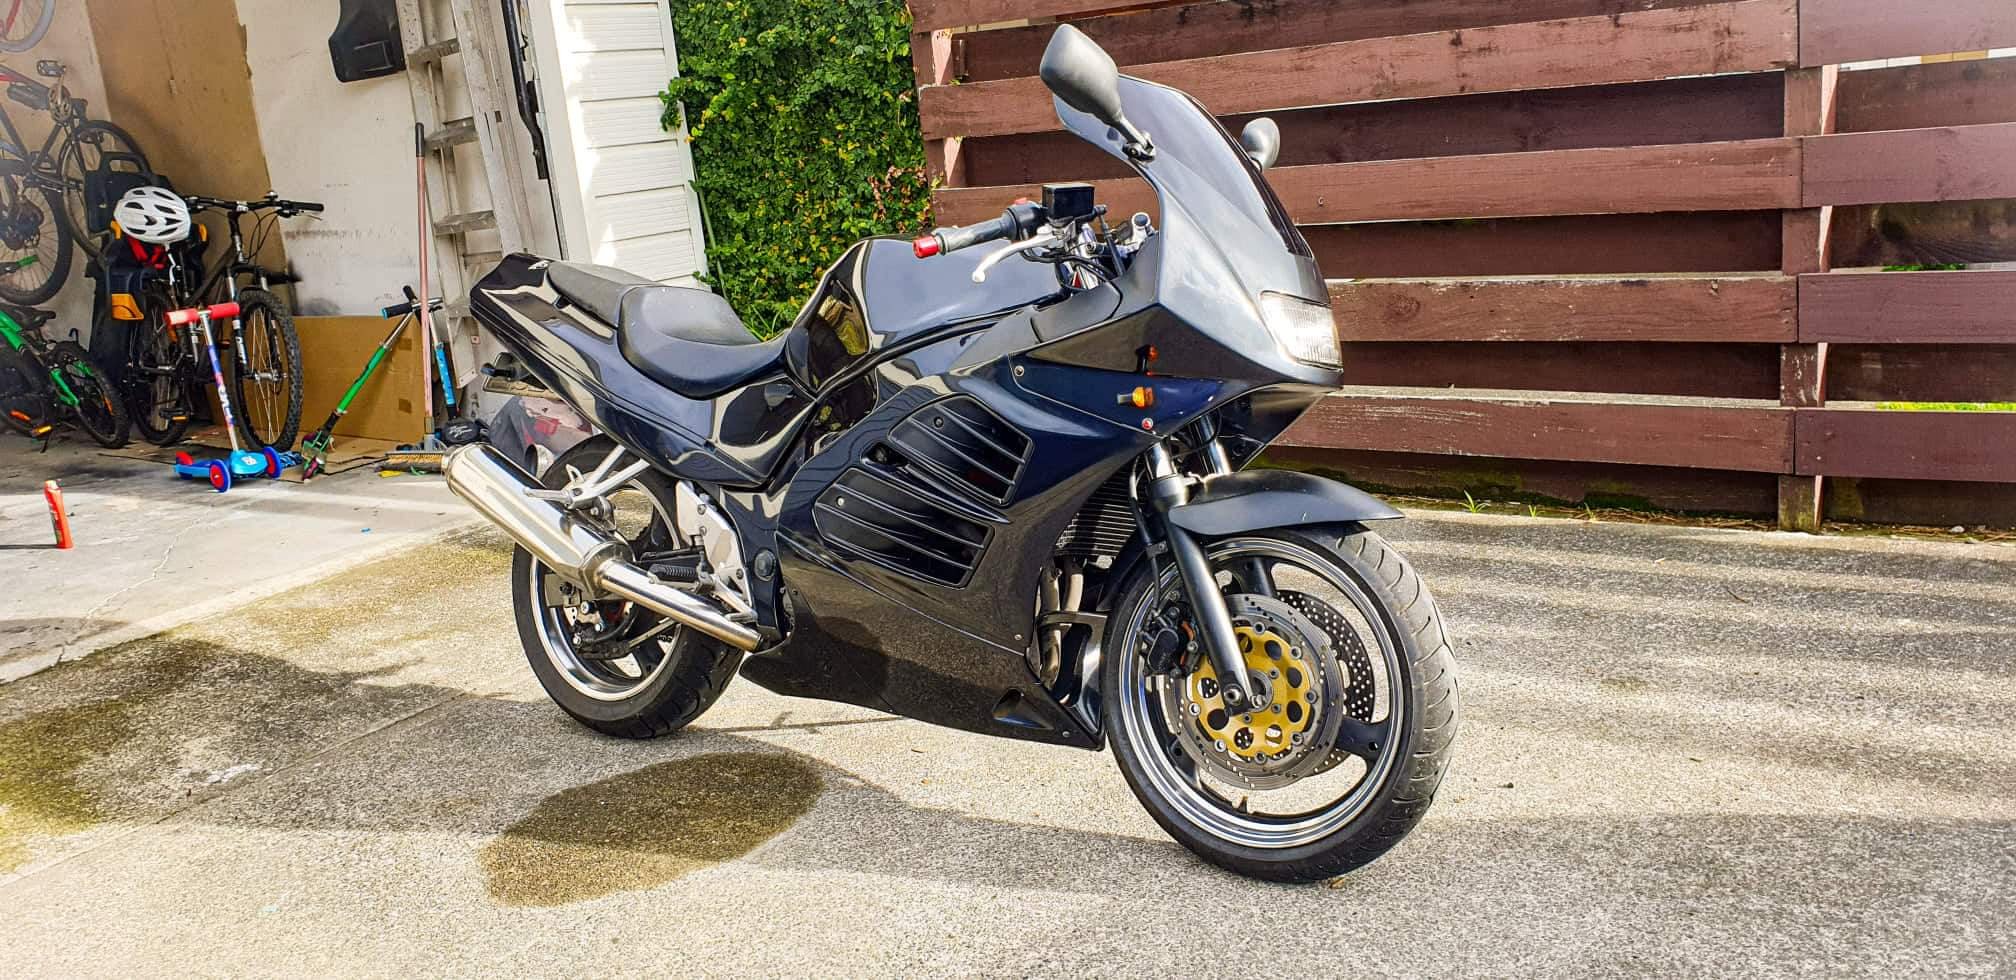
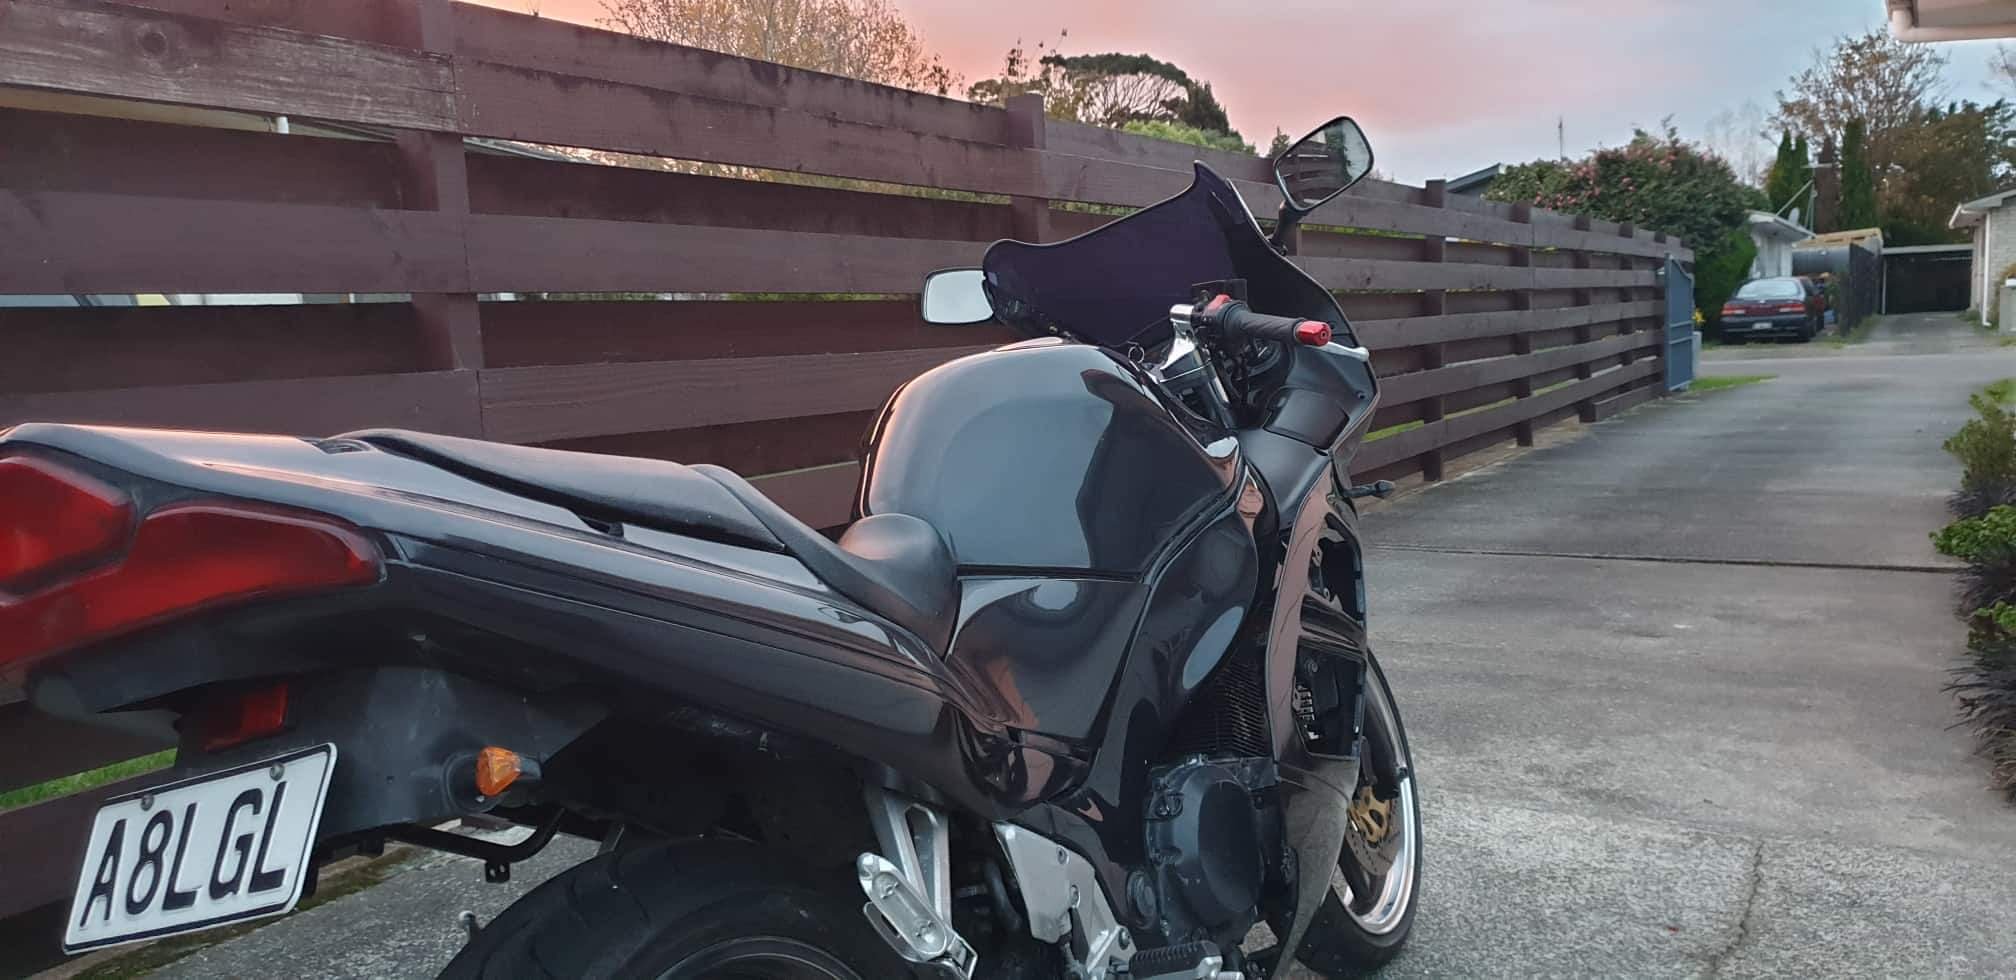
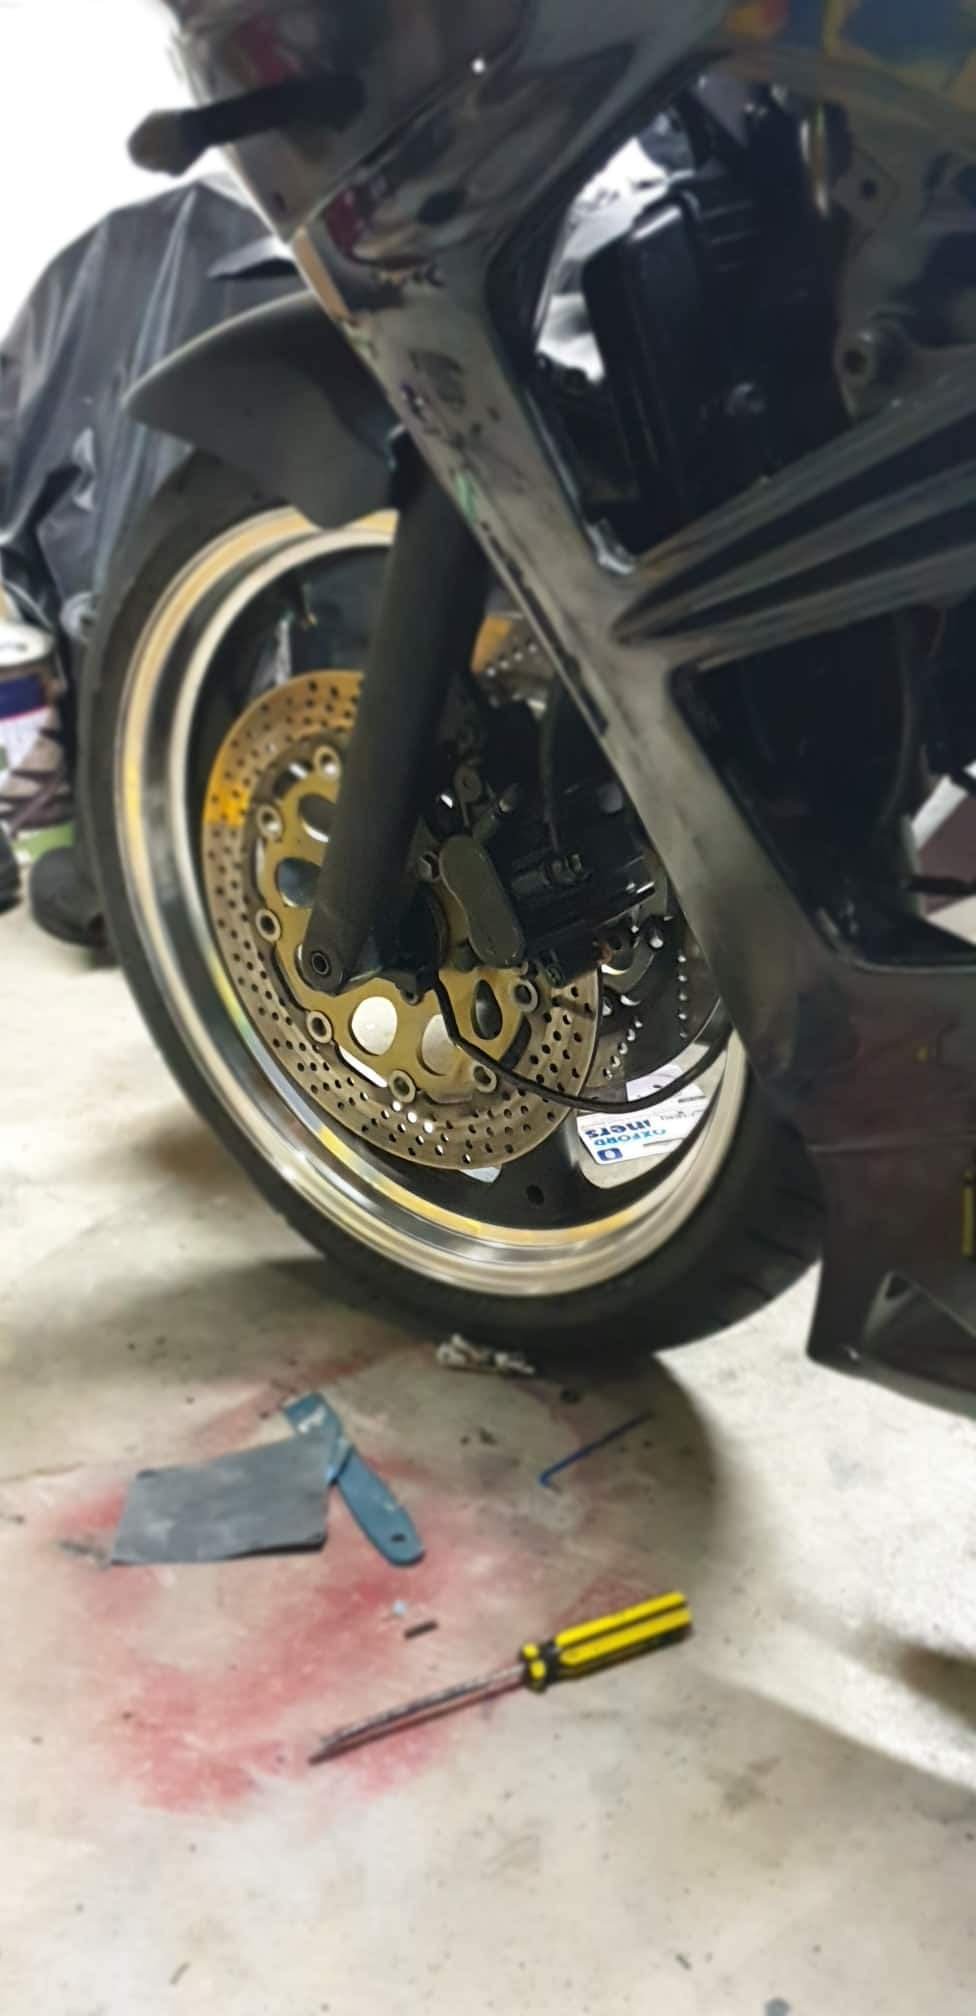
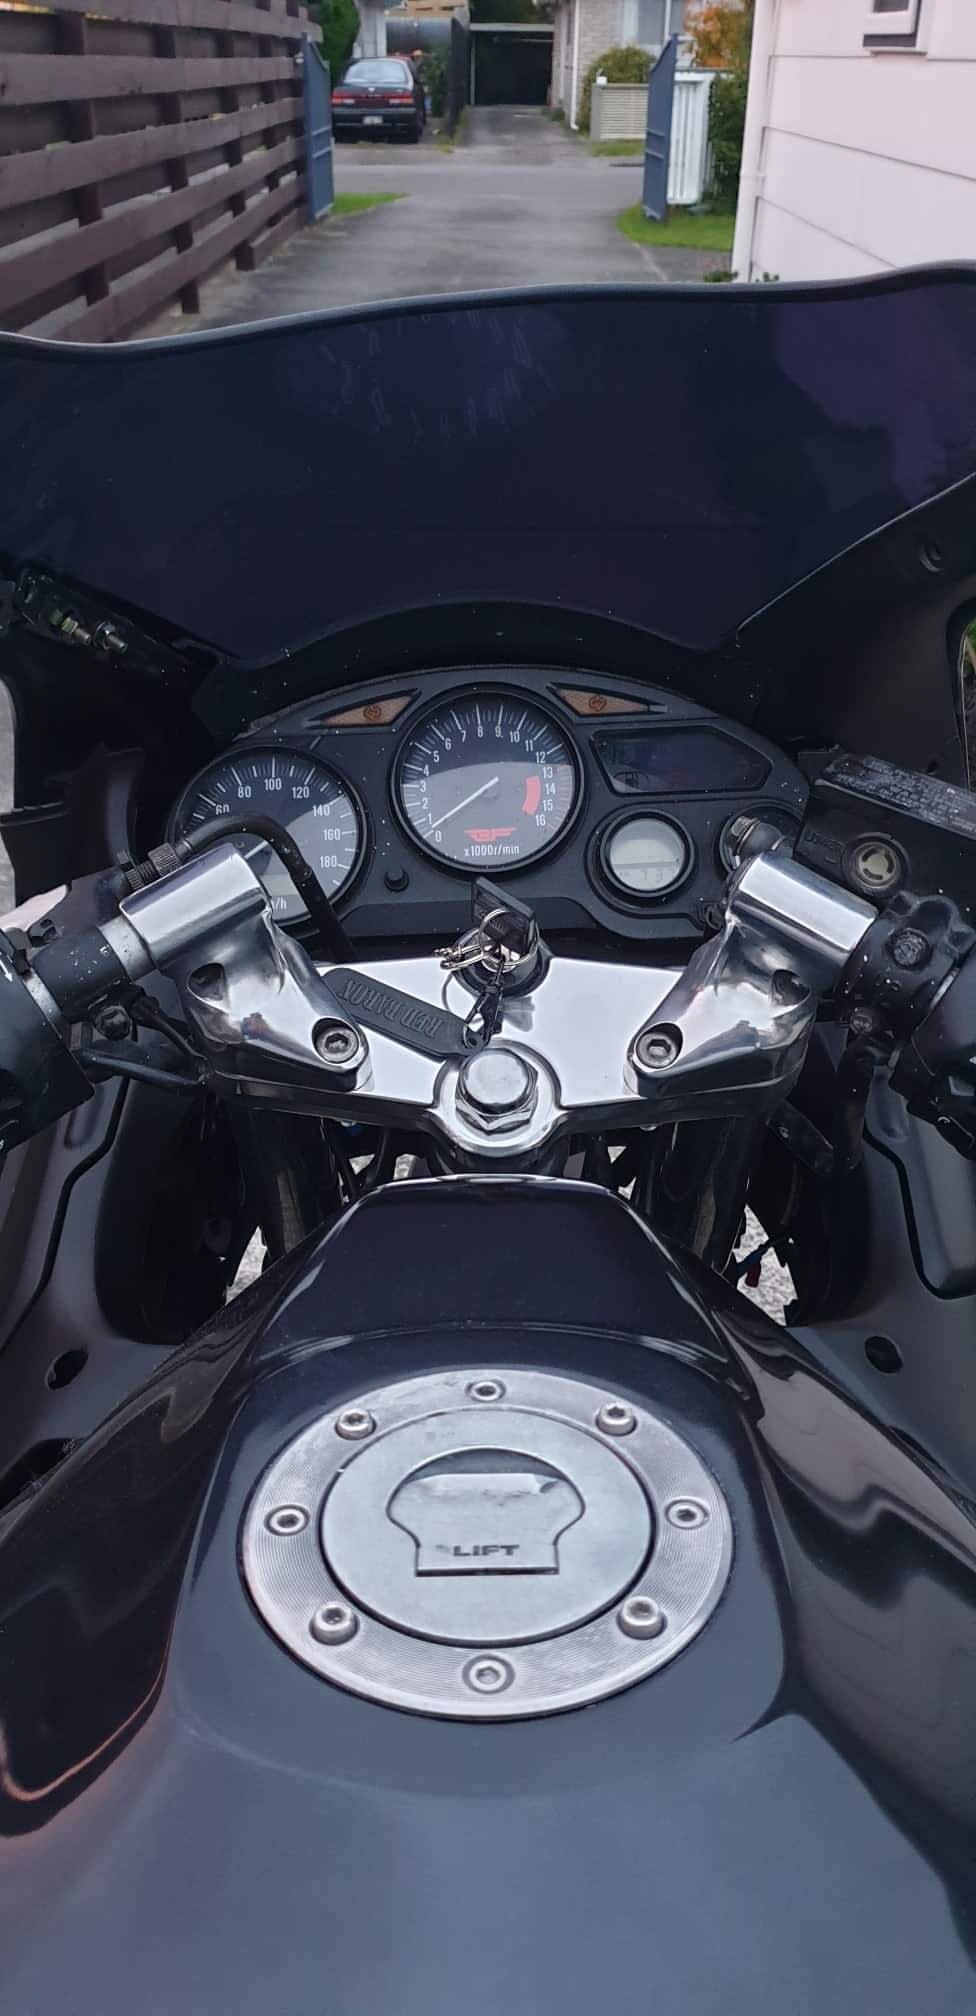
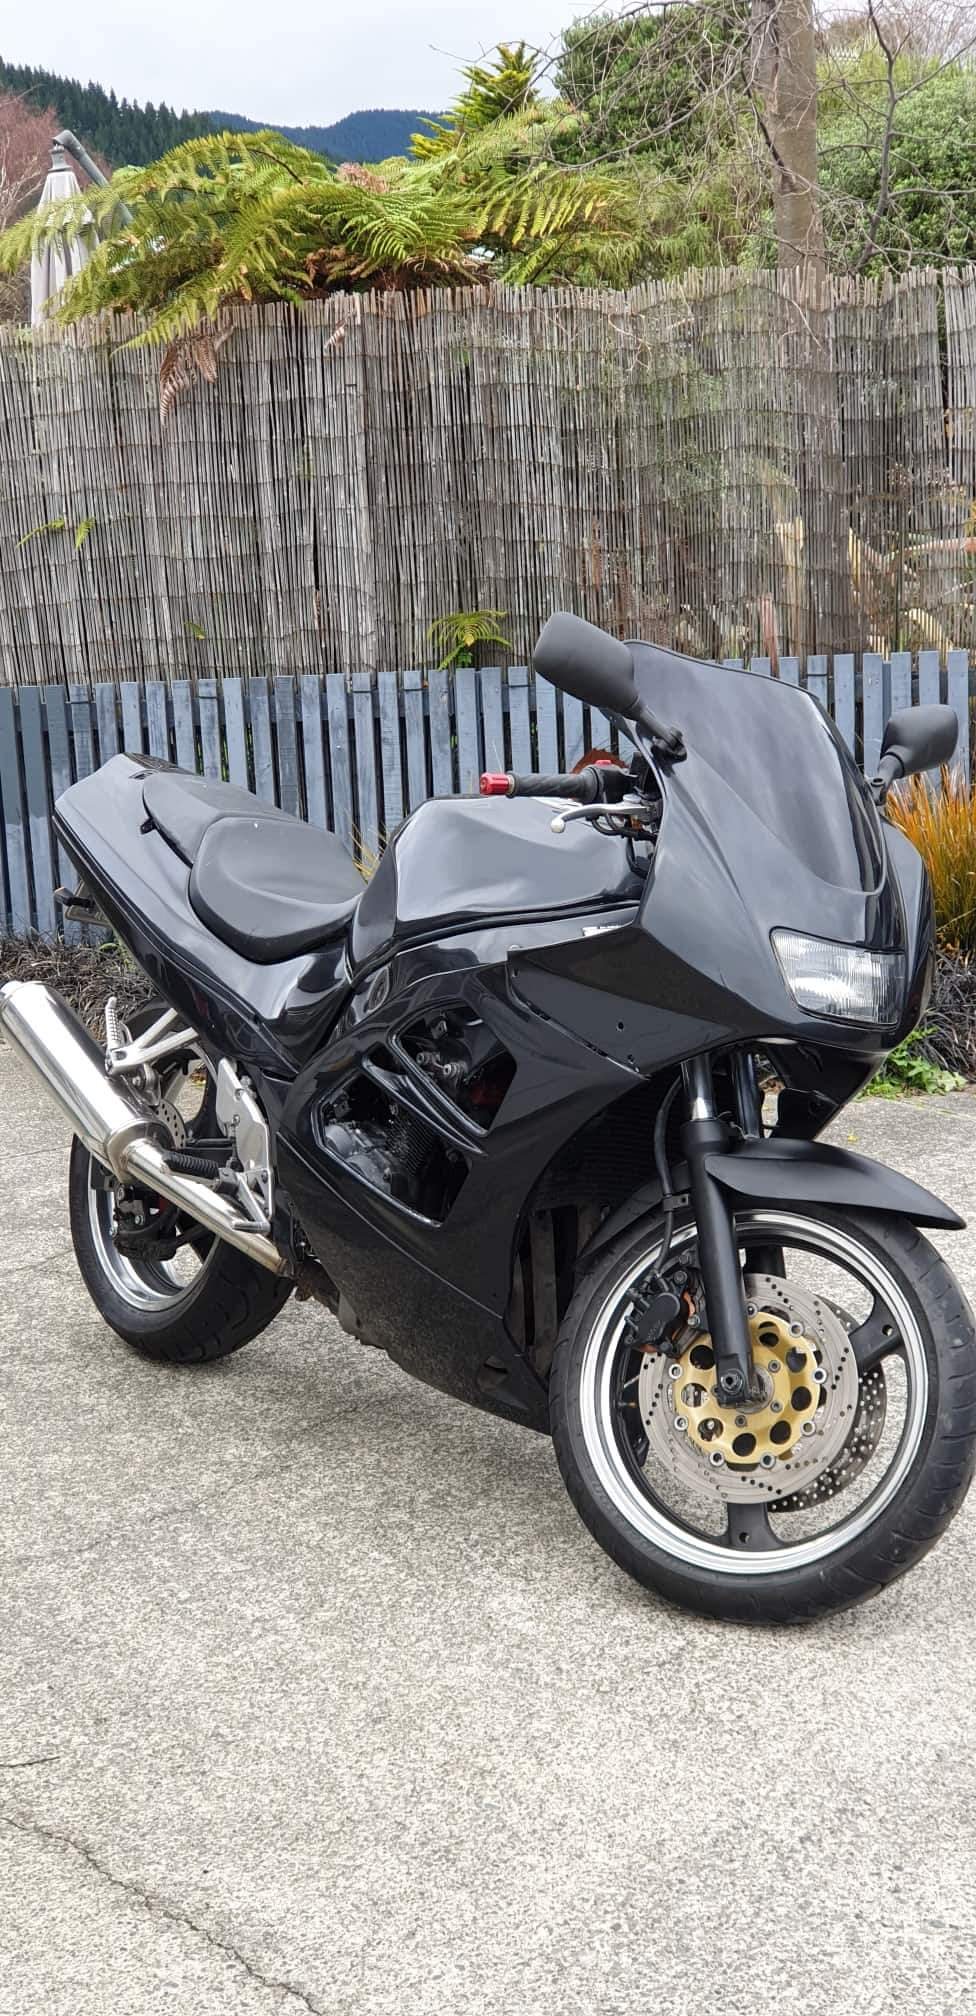
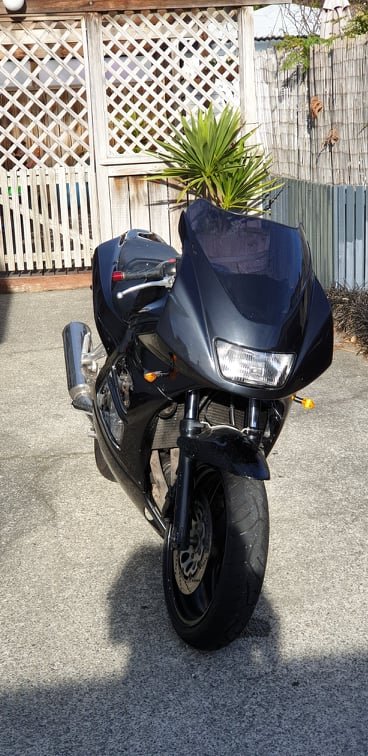
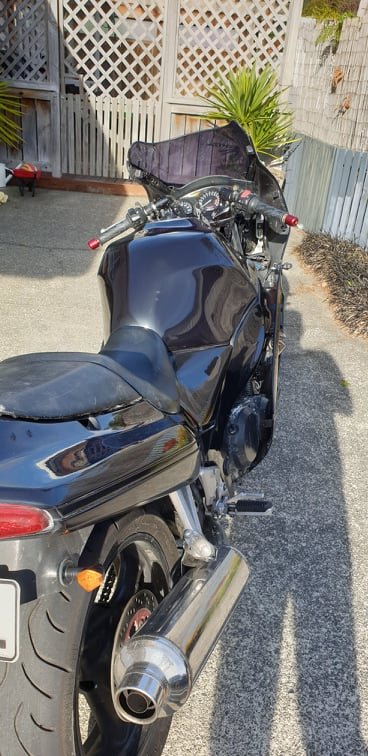
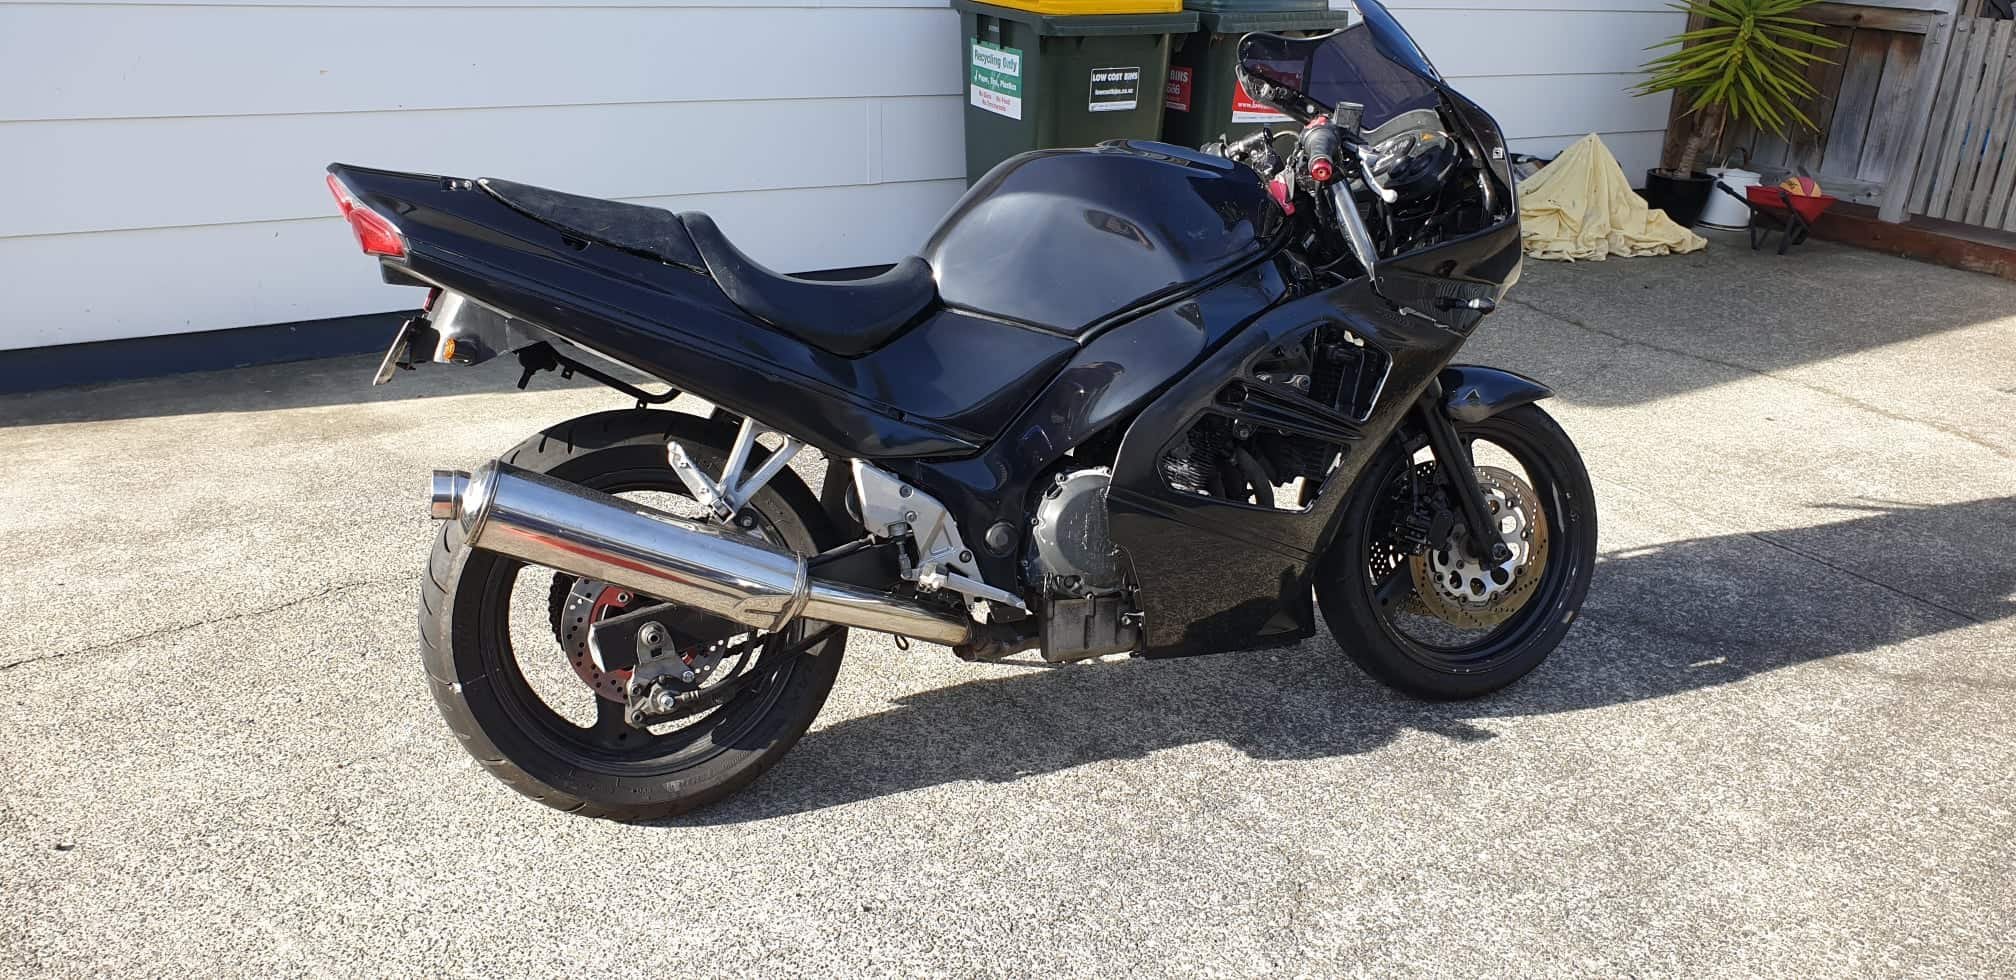
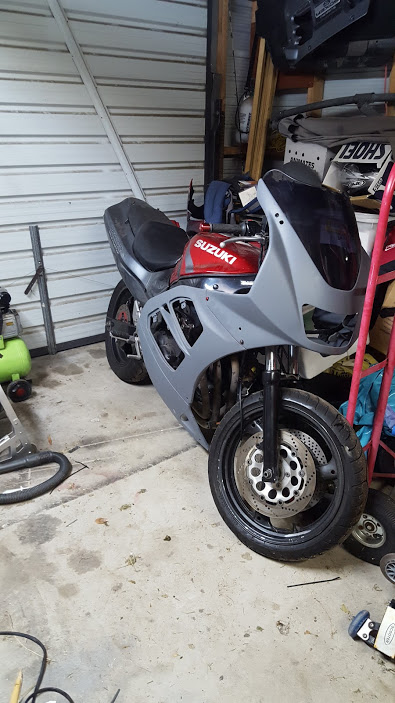
we'll see. feel much better about them than the slinky glide set i bought. been chipping away at this on and off, got the forks done finally, and have slowly been sorting body work. Also picked up an aliexpress screen for $25, they sent a double bubble which while i don't really like the look of them i think it should help with wind noise, as the stock profile screen directs airflow straight at my chin. i have however brought the fact they've send the wrong screen to their attention, so I'm hoping they'll send the correct screen so i can change it up if the double bubble doesn't help with wind noise Thought i had the front end done, but took a look at the brakes, and decided i needed to refresh those. discs are past it (and the two from discs are different) and pads are nearly done. Any recommendations for a source for discs and pads? who/what to avoid? id have no idea who manufacture good brakes for bikes and who manufactures shit. pic for fred
-
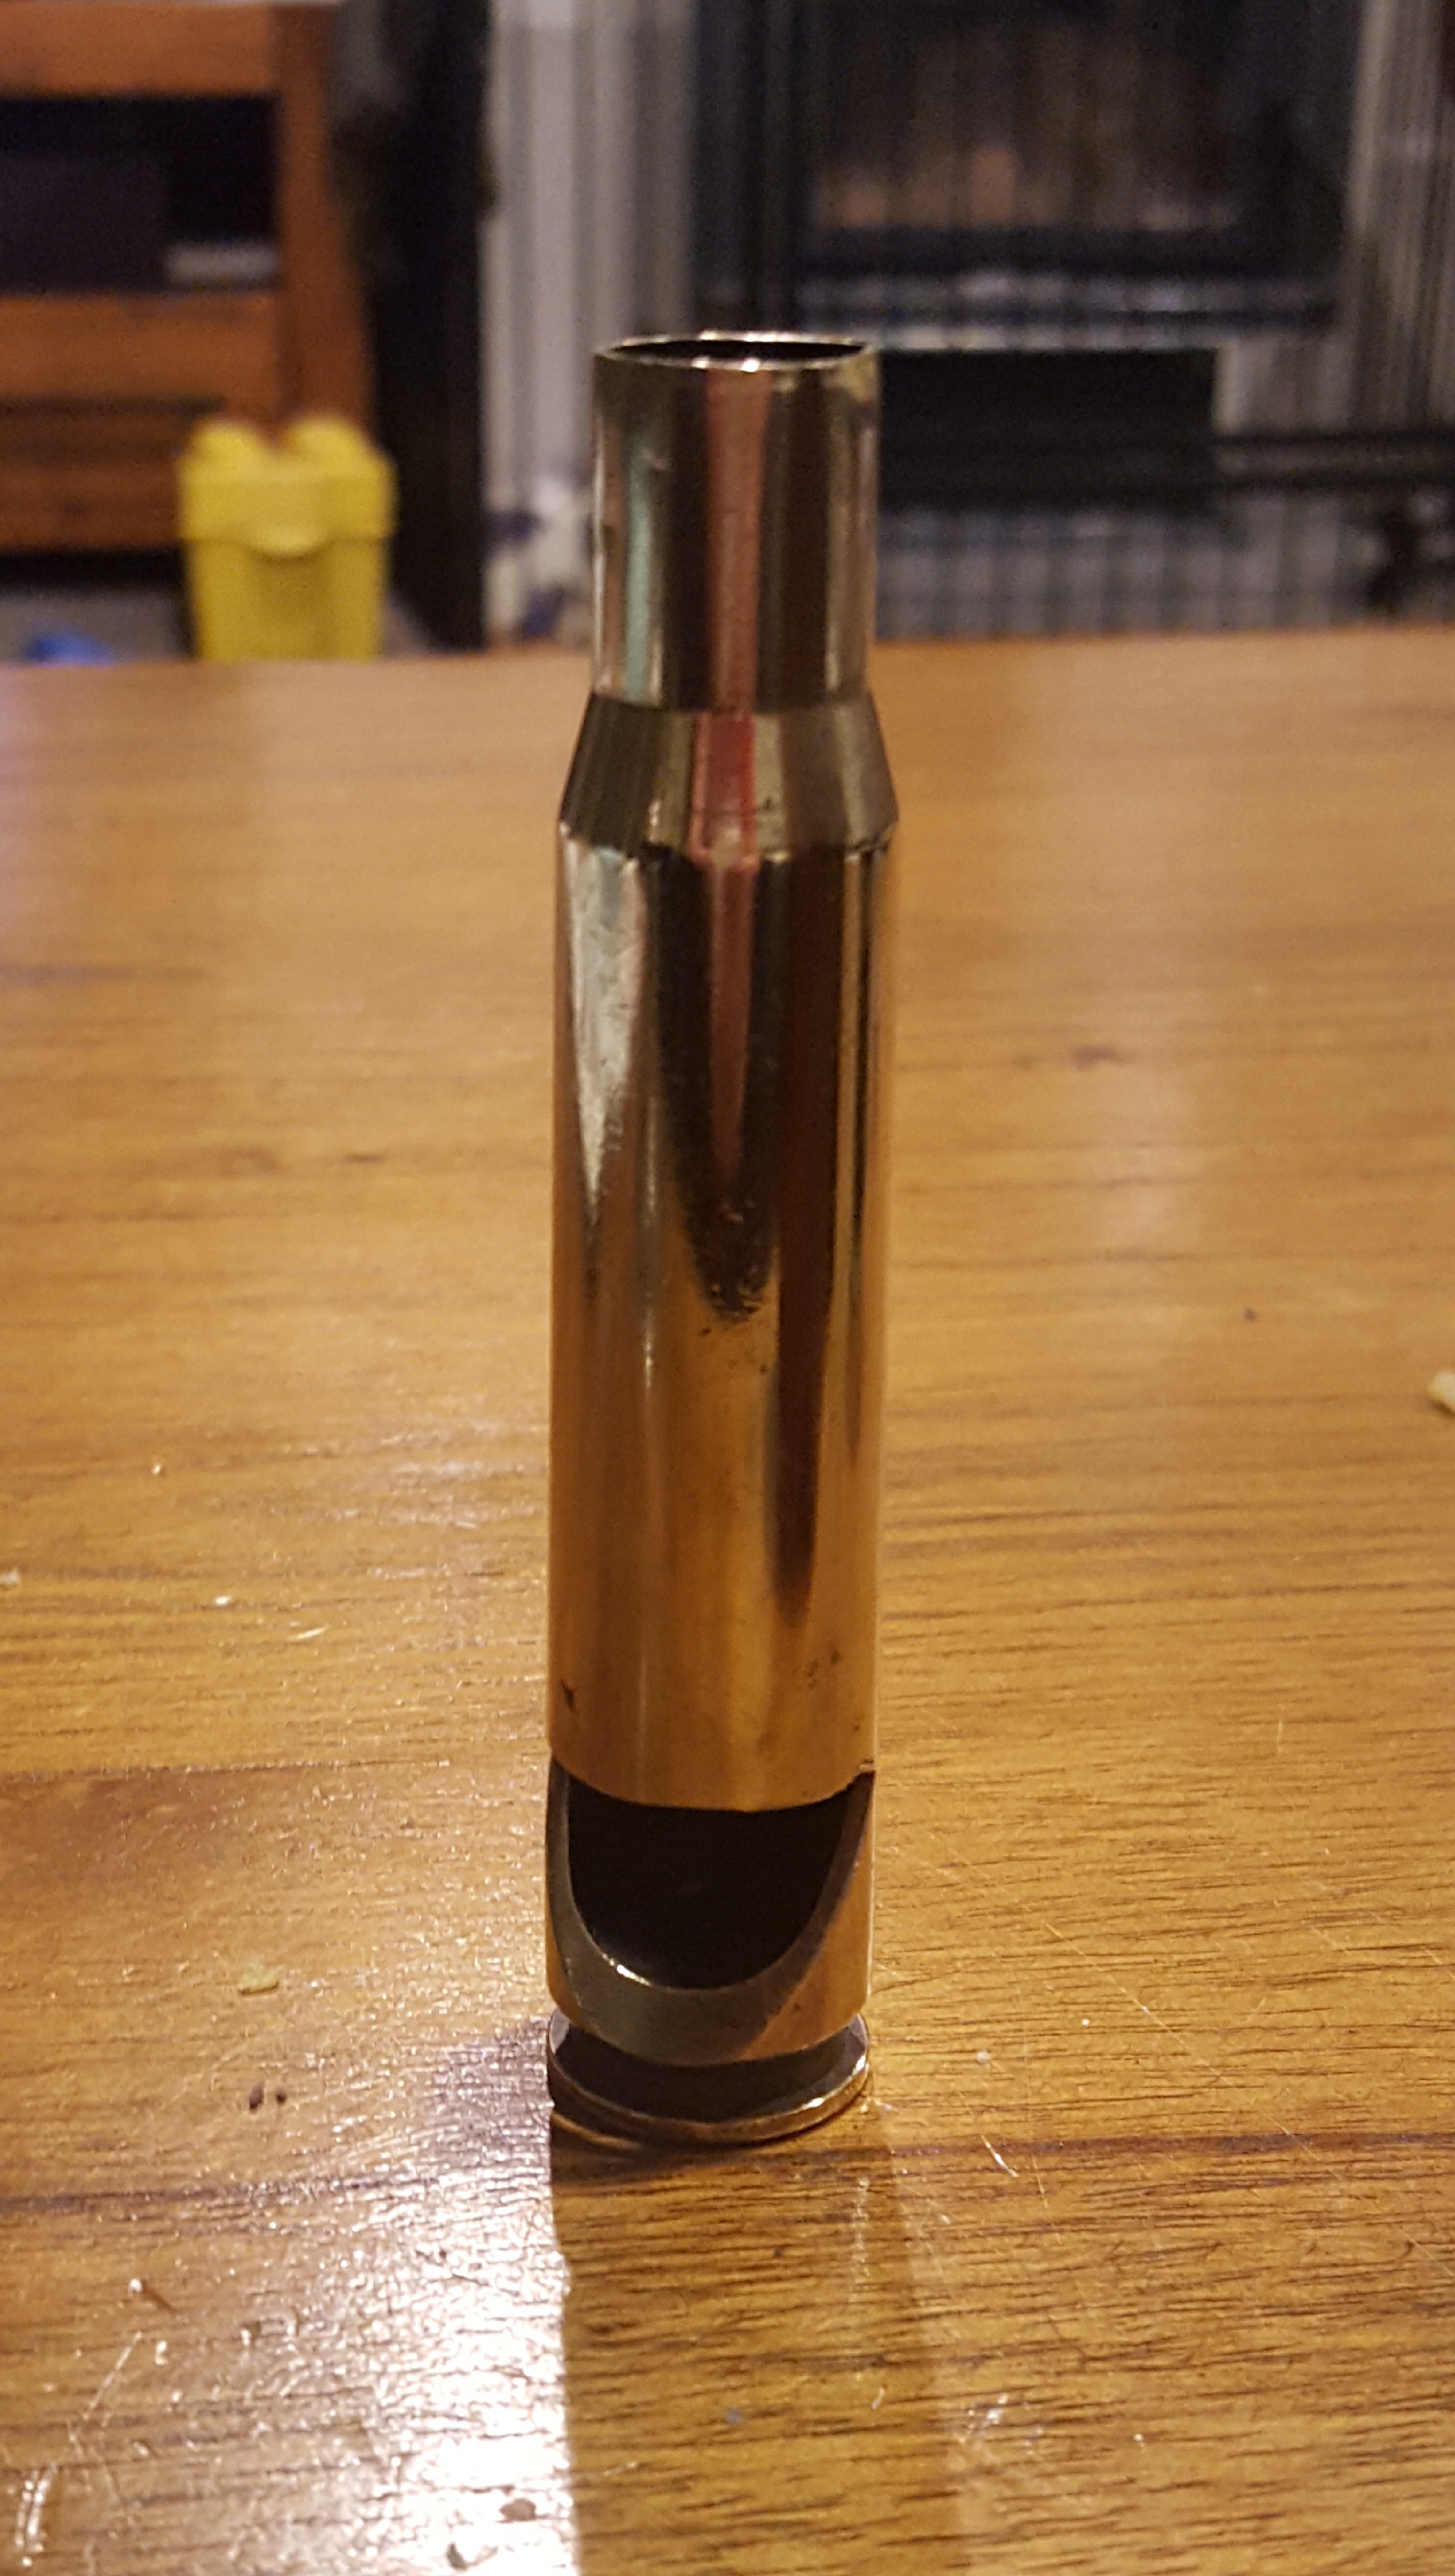
Random slightly cool stuff you built but not worth its own thread, thread
twisted replied to h4nd's topic in Other Projects
.50 cal bottle opener. Spent shell is from the long ago decommissioned and scrapped HMNZS Taranaki.
- 1288 replies
-
- 13
-