


sheepers
-
Posts
8,767 -
Joined
-
Last visited
-
Days Won
45
Posts posted by sheepers
-
-
yep, its sweet, you just pour the oil in untill it rises up to the bung plug thing, easy.
-
you can get a small round piece of wood, put it in the chuck of your drill, put your drill in the vice, wrap some 400 or so sandpaper around said piece of wood and hey presto!! home made hone!
spray a bit of crc up its freckle every now and then and give it a good reaming!!
works a treat.
give the thing a fucking good wash when your finished to get the shit out of the ports and youll be laughing like a guy who has two dicks.
sheepers.
-
SIMON
would you have any use for my patented "A1 turbo's bell housing make socket fit on head of bolt now" tool?
i can bring it in all its complexity if you can use it, but i guess you've already got yours bolted up?
anywho, let me know and ill bring it along.
also, when putting oil in your gearbox, just pour it down the gear stick hole, simple.
and to all people who have Rover V8's bring my book!!!!!!!!!!!!!!!!
that is all.
-
more progress.
brake bias valve acquired and installed so all brake lines are now finished. clutch line had to be moved to clear zorst so thats done.
extractors are at the heat treaters being normalized and stress relived.
i plugged the loom all back in and connected power to the car for the first time since Ive owned it and everything works.
got head and tail lights, brake lights, indicators, dash lights, heater fan, cigarette lighter, horn, windscreen wipers and the relay's click when i hit the starter.
got no handbrake warning light as yet and no light in my charge/oil pressure gauge. but all else is good.
i have to tidy up/paint a few things them the motor can go in for permanent. ill twist a few wires together and it should go! but somehow i think its going to be a bit more difficult than that.
sheepers.
-
one very important thing i forgot to mention.
AC welders emit heaps of HF EMF. any electrical device you place close to them will die.
also, variable down slope can make life easy if your welding thin or if your trying to finish up to and edge without it melting away, in both steel and alloy.
-
i haven't read the specs on all the ones you are looking at but i would guess that they would be all pretty much the same.
in this instance the old adage "you get what you pay for" will never be truer.
i paid 1200 for my DC only tig, it is able to weld extremely thin section with some control. this seems to be the test of a semi decent tig welder, how thin you can weld properly.
my other tig is both AC and DC (see how i cunningly avoided writing AC/DC, the worst band in the history of the world) i paid 2700 for it and it has a foot controller and a pentameter on the foot pedal (means i can adjust how much influence the foot pedal has on the overall increase/decrease of the set amperage) and it is an excellent machine. but it struggles with really thin material, like less than 1mm. when your trying to repair rusty cars and your only option is to weld the new bit to something that was rusty and because of this a bit thinner, my DC only welder is way better for this.
i think what im tying to say is spend a bit more and get something that will be a joy to use and learn with rather than a pain in the arse that has you hating tig for the rest of your life.
sheepers.
-
i dunno about the whole mig Vs Tig thing.
once in the last 5 years i have had to borrow a mig because i just couldn't reach/see to use my tig.
but i guess it just comes down to preference. a tig is a more versatile machine, you can make things (like stubborn crank pulley bolts) hot without adding metal or deforming them, you can go back over a weld and tidy it up without adding material but i reckon it takes longer to tig than it does to mig.
and cheap (lets face it, no one here can afford a decent mig) mig welders never stop having wire feed problems and generally giving you the shits.
ummm, yea, get what ever you think is best. i like tig, some dont. makes no difference at the end of the day really.
so in conclusion, i have been of no help. again.
sheepers.
-
go and see Chris at the shock shop on Great North road, just between Grey Lynn and ponsnobby/city (bout 5 mins up the road from the scooter shop)
he will know what to do. he will also be able to advise you on matters relating to vdubs being low and gay (in the steering)
sheepers.
-
zorsts are finished, O2 bosses, heat shields made and brackets to bolt them to zorsts done. the extractors are currently at heat treatments getting stress relived then ill coat them.
in other news i put the flywheel on and the clutch on. the gearbox is mounted up and i think ive pulled every muscle in my arms by lifting the gearbox with one arm while doing up the bolt with the other.
to get it to run i need,
insert engine and connect hoses/lines/electrodes and telescopes for good measure
dodge up a fuel supply (have no tank or idea where/how a tank will go at this stage but fuel lines are made to the back)
wire it up
radiator? prob start it without this.
i have some pretty good instructions and diagrams for the wiring but time will tell.
its getting very exciting now.
-
UJ, if the diaphragm was torn the pedal wouldn't change when you start the engine?
a good way to check if you have integrity in your vacuum system is to turn the car off then give you brakes a couple of pumps. you should be able to get two proper hard pedal travels before you run out of vacuum.
there are some really important points in this thread, it is imperative that you have about 0.50 to 1.00mm gap between your booster plunger and your master cylinder plunger.
the other one i can think of is bleeding your master, you can do this on the car, just crack the outlets and get the air out as much as posable.
another thing you could try is your caliper piston seals.
they look like gay square bits of rubber formed into a ring but they do an incredibly important job. they decide how much (all other things being equal) your piston retreats once you take your foot off the pedal.
try re-building your calipers with some new seals and some proper rubber grease. have a good look at the pistons. if you see any deformation or build up remove it with some 2000 gritt paper and some ÇRC.
apart from that i have no idea why your brakes are giving you such trouble. but please let us know when you find the problem.
sheepers
-
ill see you there.
all people who have toyota hiace vans should bring my book to the meet.
sheepers.
-
still only seem to be able to get single pages translated?
even using translate google, goes ok for a bit then back to jap with errors etc

i also find this to be the case.
can we get google to harden the fuck up/cook the man some eggs/work properly for every page you open????
if it wont do it im going to suplex it from the top rope.
-
its only a matter of time......................
-
i should point out that i still had to shorten my shocks to keep the rear captive. so copying the "spring perch onto the diff" idea wont help your shock length issues.
sheepers
-
thank you for your kind words, but if you could see them up close you would see the imperfections and the faults that i see. or maybe im trying to make them better than they need to be..........
anywho, drivers side is nearly finished. strange as it may sound, the longer the pipes get the harder it is to put them on and take them off. its turning in to quite the mission to get them on the motor and the motor in place to see what needs to happen next. ill be fucking glad when i dont have to take the motor in and out 10 times a night
and as for ITB's. not on this car. its a cruzer, not a racer, so ill be going supercharged at some point. i dont want to over do it.
sheepers.
oh, forgot to mention, as these jobs become complete i start to think more and more about starting it for the first time. that will be exciting.
-
passengers side finished bar O2 sensor and some brackets.
after dinner ill go and finish the drivers side, or at least get a bit closer to finished.
end of the pipes with transition pieces welded on.
collector tacked in place.
finished item.
right then, its off back to the shed for me.
sheepers.
-
id like to change my order from blue overalls to black.
shall i PM you when ive put in the extra cash? also, im still not sure if i paid for postage?
can you let em know if i did or not?
cheers.
sheepers.
-
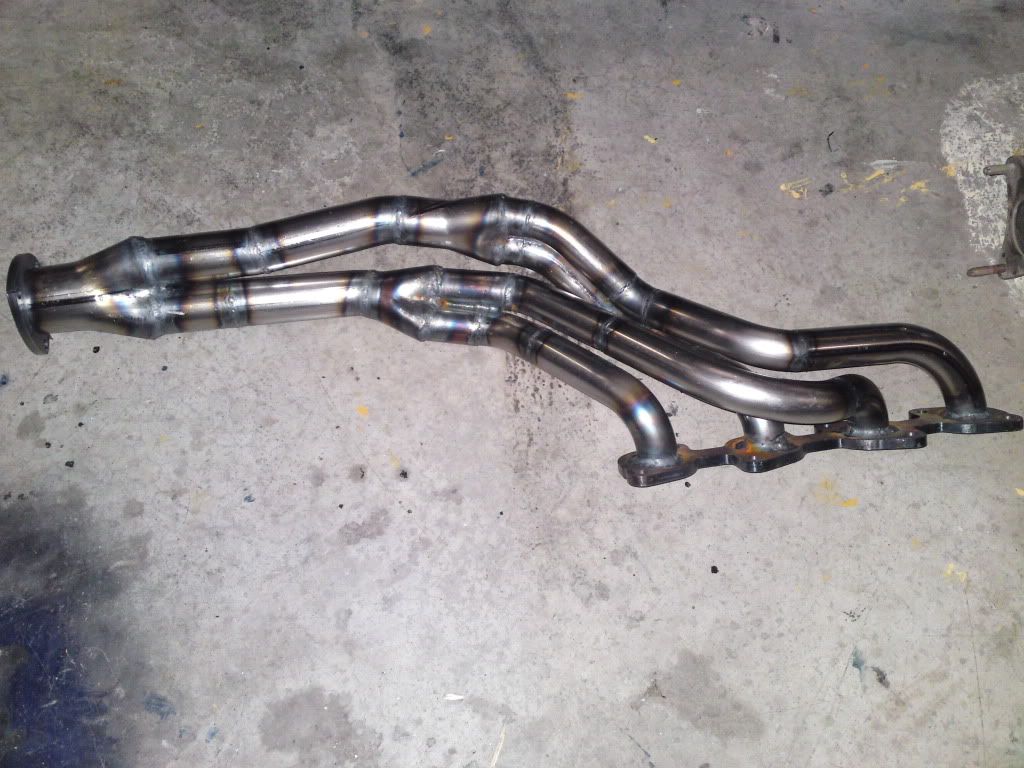
Extractors look mint.
How were they done?
Were crush bends used for the longer section of pipe where it has a hook at the end or can you buy this shape?
gas welds?
i bought tight radius and large radius bends. the rest i made myself from the bits i had left over.
the Y pieces came from Woolf mufflers. when i gat back there ill buy two more 1 1/2 to 1 7/8 Y's and i should be about finished. ill put flanges on at 2 1/2 inch so i can unbolt the pipes.
the plan is to go twin pipes and dump them just in front of the rear wheels, but my friends in auz who have done this (with a single side dump off a 6) tell me that the fumes come back if the pipe is too short. time will tell.
sheepers.
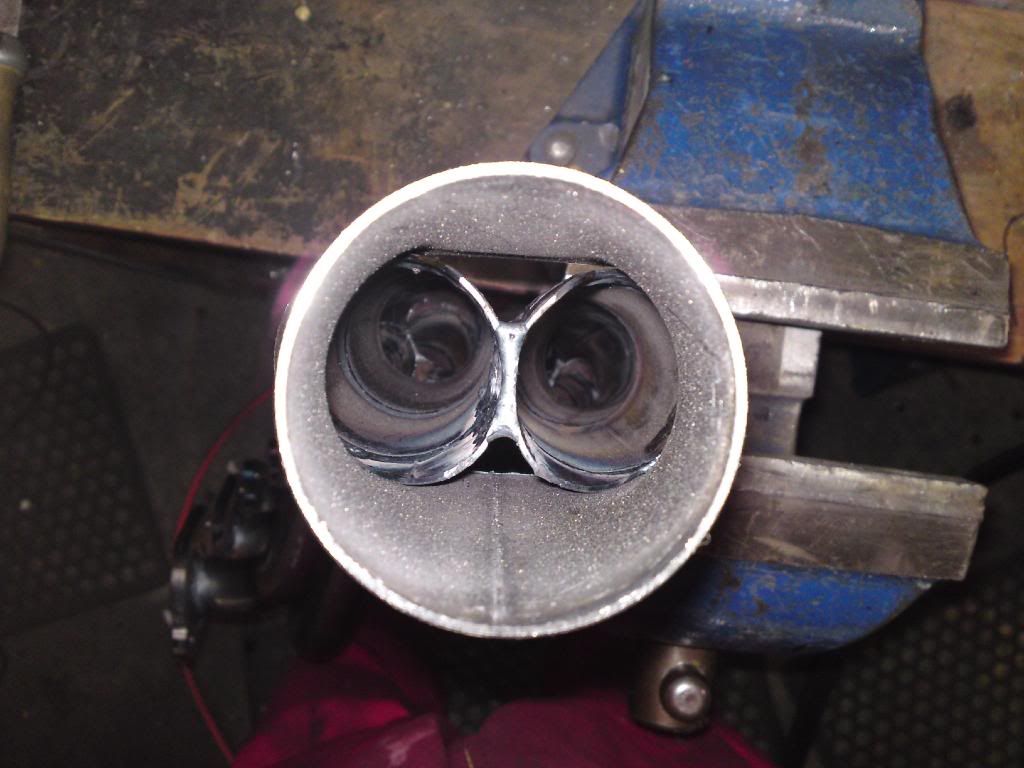
forgot to mention, tig welds.
-
for you, i will.
send up a motor and a chassis too so i can get some clearances etc.
me and the wife are talking about a road trip down to wellers. i haven't been there for 10 years. need to re-bond with the capital. and my mates who live there.
will keep you posted on plans.
sheepers (the cool)
-
sorry, i only make pairs.
-
you equals awesome - I want you to make a set of headers for me please..
no worries, passengers side will be 50$ drivers side will be 100000000000000000000000000000000000000000000000000000000000000000000000000000000000000000000000000000000000000000000000000000000000000000000000000000000000000$
-
go and see Andrew (not Kevin, he wont help you) at scooter world in newton gully. hes not there on Friday i think? but hes there most days between 9 and 3.
if the points your looking for are similar to anything else he'll know. hes the man when it comes to old motorcycle shit.
if he cant help you hell be able to point you in the right direction.
sheepers.
-
some more progress.
the extractors are a good way towards being finished. the drivers side was a nightmare with many weld/cut/reweld/recut/reweld events taking place but ive got it exactly were i want it now. there is 4mm clearance per side so you can understand how much of an arse its been. the passengers side was a breeze compared to the drivers side.
tuned length they aint, but they will do the job i require. ive run out of joiners and bits so this is as far as i can go till monday.
once they are finished ill get them normalised and stress relived to help stop cracking, then ill get them coated.
sheepers.
-
can you put up a bigger, blurrier picture?


Monthly Meat at Ellerslie Burgerfuel, 18th August 7.30pm
in Upper North Island Region
Posted
no no.
thats no problem, just pour oil all over the ground until the ensuing flood level rises enough to go in the bung hole. win.
would probably be quicker if you did it with the car in a hollow of some sort, could cost allot in oil and time otherwise, like if you tried it on the top of mount eden, you could be there for some time.
so, to recap, remote shifter = no problem to pour the oil down the shifter hole. gear box will eventually have correct level of oil in it, or too much. whatever.
sheepers.