


d.p.n.s
-
Posts
3118 -
Joined
-
Last visited
Posts posted by d.p.n.s
-
-
small job done as i start finalizing things as it goes back together in the car getting ready for wiring.
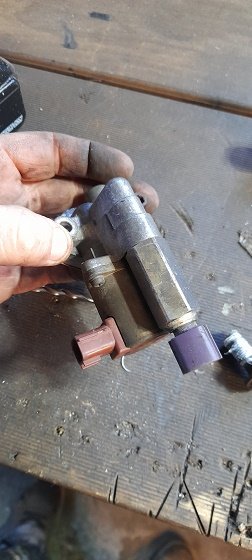
IACV idle air control valve ...this is something i wanted in place ..so i found a factory GTIR one but it wasnt working so i pulled it a part and cleaned it and now its good...nice and simple 2 wire on off job.
it has another like pressure switch on it as well that i dont need but when i removed it it allowed air to bleed ...so i just put it back in.

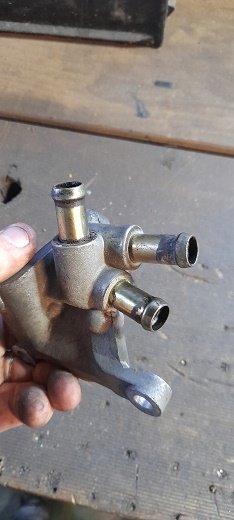
it has 3 pipes and1 is just a constant air flow
so i cut it off ..jammed a bolt in the hold ..cut the head off and added a bolt through the side to keep it all in place....works fine.
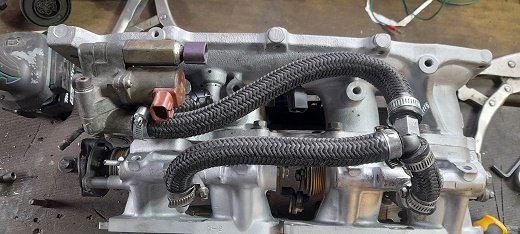
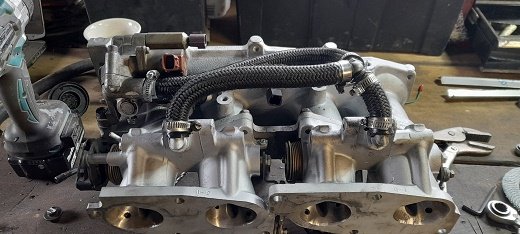
and just using stuff i have around the garage i got it all together ..its not the prettiest . ..but it is on the underside of the manifold .
-
 6
6
-
-
- Popular Post
- Popular Post
i did a few things.
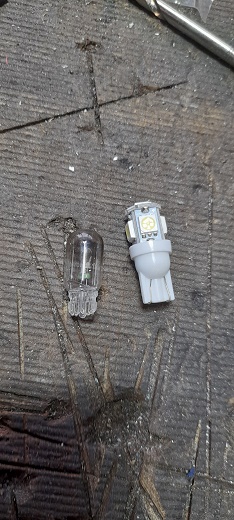
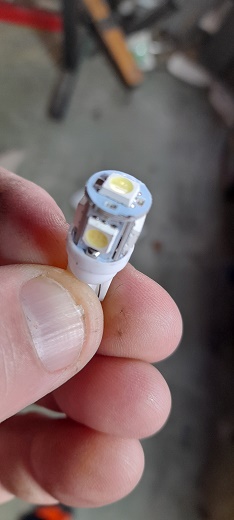
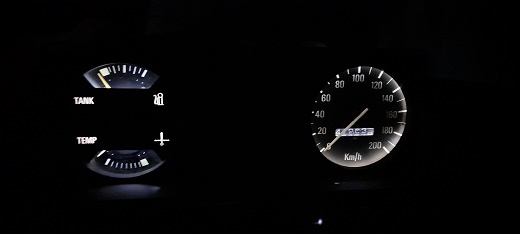
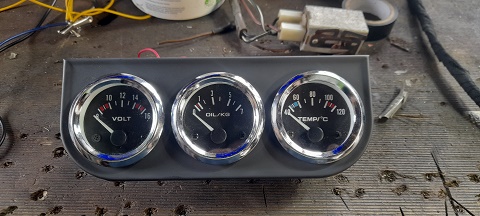
the 3 little gauge set have this real nice clean white back light and the dash is pretty crap..so i did some searching and found some T10 wedge LEDs.
lovely clean light
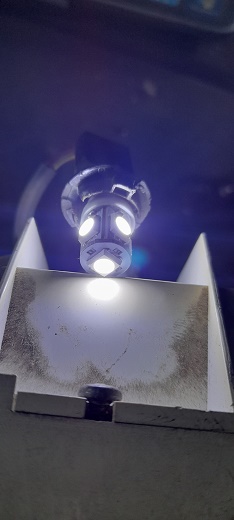
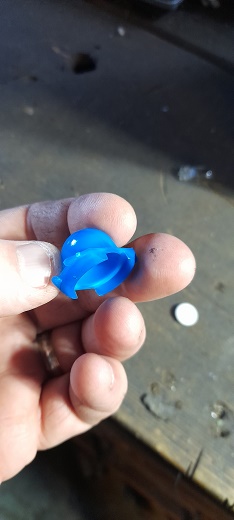
i tried them and it was much better but still pretty dark so i removed these things as well
made heaps of difference.........lights before
and after
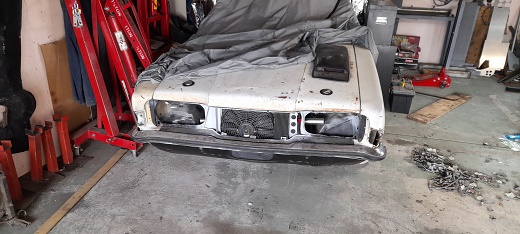
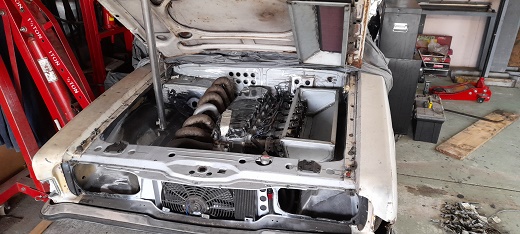
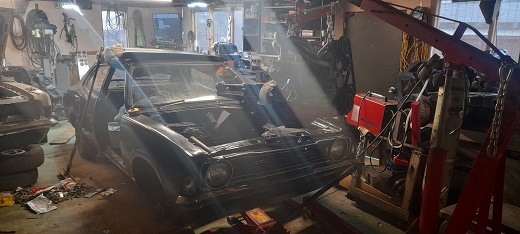
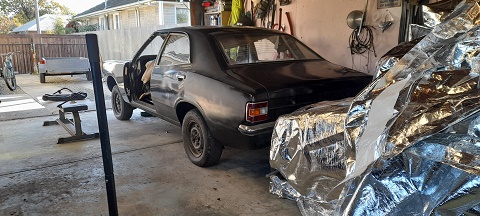
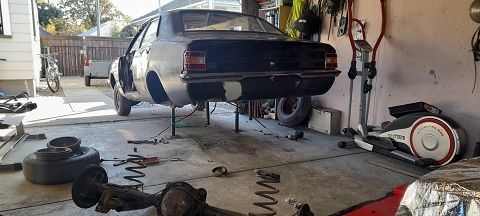
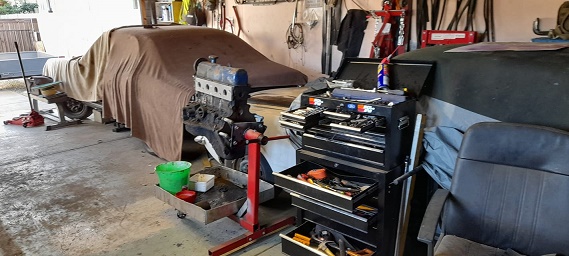
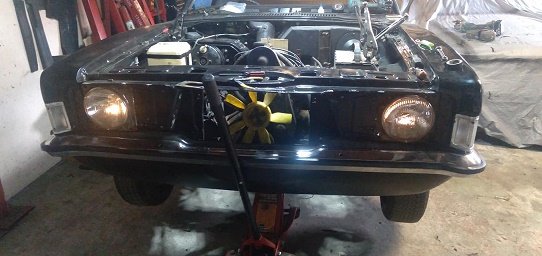
i also uncover the white mk3
as i wanted to take the subframe out and use it as it saves me having to strip clean and rebuild another subframe just yet.
i left the motor in place and just pulled it
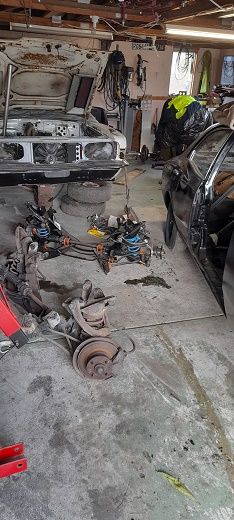
at least i know this has new bushes,ball joint,tierods and wheel bearings with a rebuilt rack.
and with the same springs i used in the back and even without a motor in it it lowered the front of the black one by 60mm.
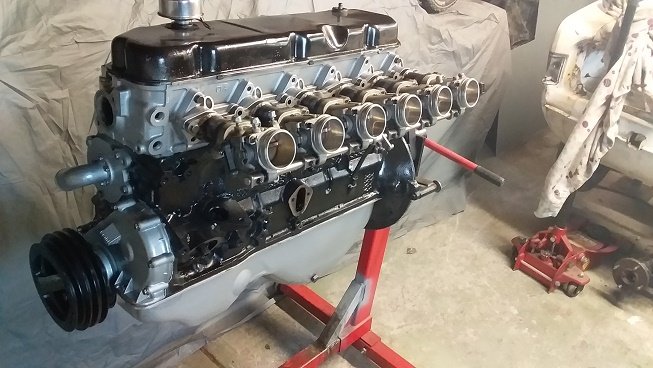
i also dug out the gearbox ...replaced the out put shaft seal put a new clutch fork with new thrust bearing in,,cleaned up an old flywheel and used a clutch and pressure plate iv had here for w while and bolted it all up to the motor and put it in the hole.......and it fits 9the tightest part is the inlet plenum to top of the subframe......but it should be fine.
and some pics i got
even have room for a 70mm thick rad and fan.
-
12
-
- Popular Post
- Popular Post
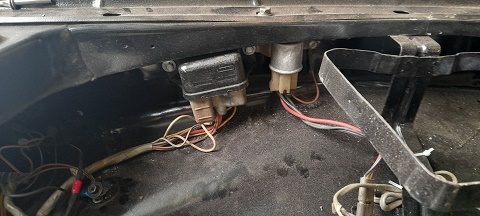
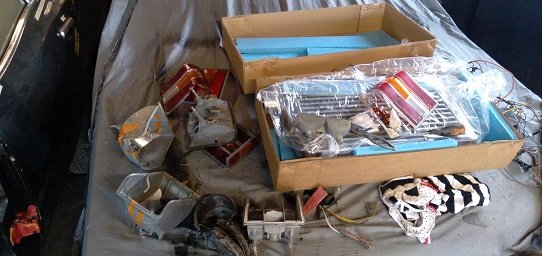
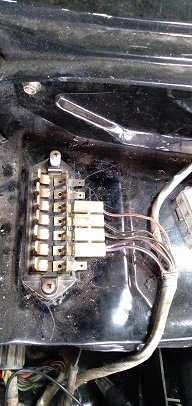
ive had a issues with the wiring from time to time....sometimes it all works .others just some of it.... it doesnt really help that most of the loom is from the rusty old wagon and the rest is made up of 2 other part looms.
it doesnt help that its old and sat in a car unused since 1984 .but i need to know the wiring is all good and up to the job before i go any further ..
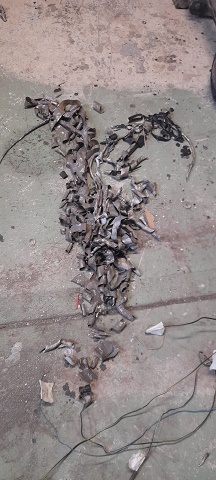
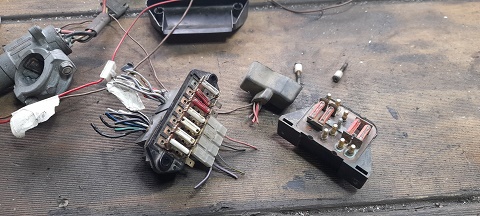
so im going to get rid of these.
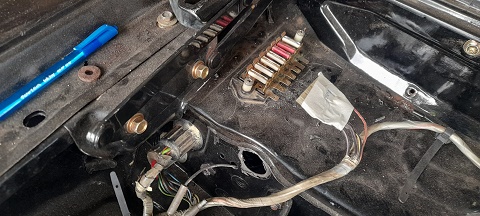
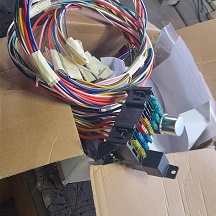
and replace it with a hot rod /universal wiring kit (its not really its just a fuse box with wires)
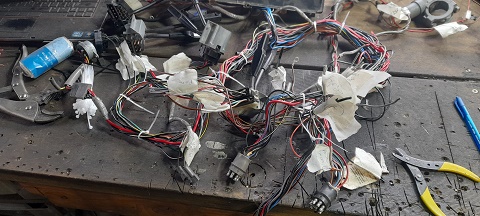
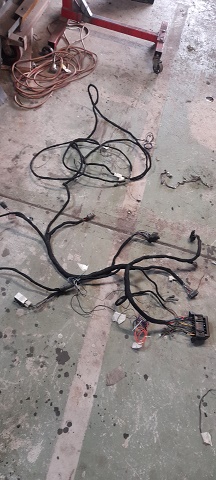
so i pulled it all out again....removed the engine bay side of it for now and started to focus on the just the main loom.
once i started peeling all the old loom tape off it started to show some treats
so ive been doing this over the past couple of weekends trying to get it all sorted and see what's what and how it all works before i remove all the old fuse boxs and label what i need .
while i was making sure it all worked and going through each wire i couldnt get the fuel gauge to work at all..tried 3 senders and jumping the wire and nothing...pulled the gauge itself out to clean it and found the small needle was stuck behind the small screw at empty lol.......few hours of my life i will never get back.
all sorted and working 100%before i add fuse box
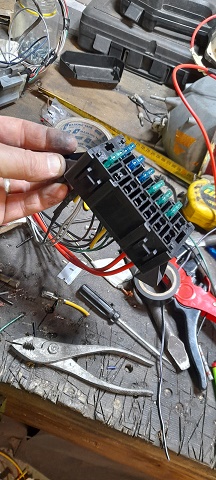
i left it over night and thought about it somemore ....then in the morning i ripped all the wires from the fuse box and made it work.
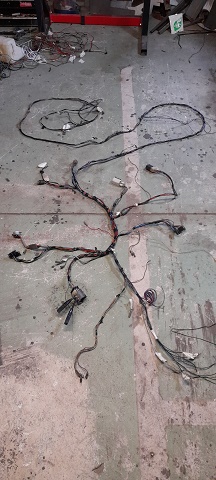
and then went through it all from the 100th time...made sure i had added extr wiers for all the extras and removed all the stuff un needed.. added wire to move fuse box into glove box (as i will with ecu and wide band gauge....and the wrapped it 70m of loom tape
and last bit found some oldschool 3 gauge set for 15 bucks and bought them.....sanded the chrome and painted it matt black......and all wires are in the new loom.
-
12
-
- Popular Post
- Popular Post
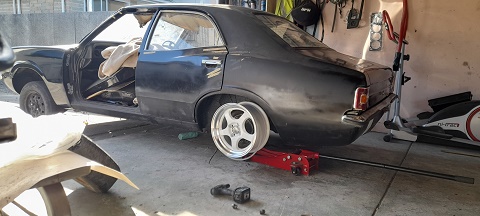
few things done today.
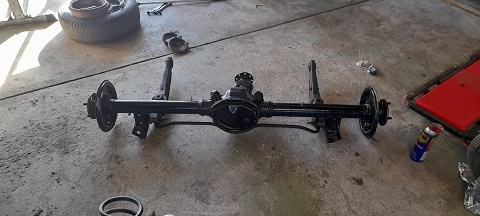
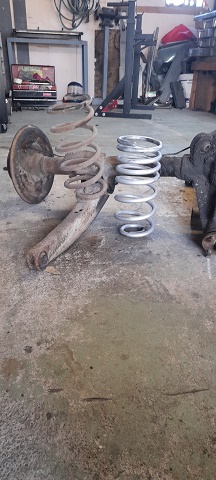
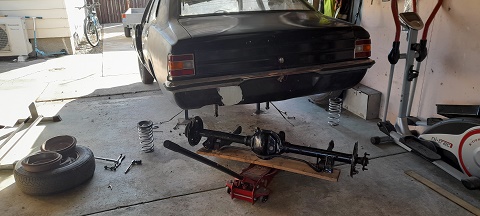
god the old diff out and rebuild LSD aussie diff in with rear swaybar..just need to sort some shocks and get the drums and rear shoes done..
l decided to put the springs in that came in the white mk3 in as they seemed lower ...not sure what make they are bur not cut and totally different to standard spring way harder and as it turn out 55mm-60mm lower
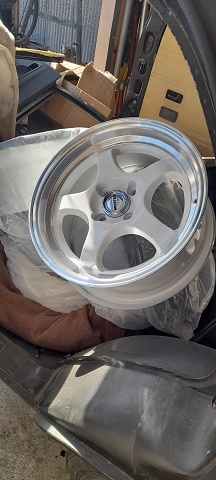
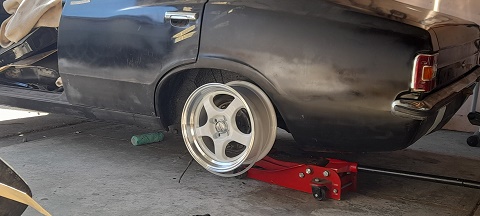
i also thought i would try the wheels i have.
now these rims arnt normally the sort of thing i would buy buuuuuut i wanted 15x7 .4x108 and 0 offset and these are just one of those .....but blood cheap and brand new..so i bought them as they are 15x7 but have fwd offset and 4x100 stud pattern so with some adapters could make the fit perfect ...and they were so cheap.
and as a mate is finding out there may be a lot of 15x7 rims in 4x10⁸ with0 offest about ...but no one has stock....so i tried them and to be honest i like it.
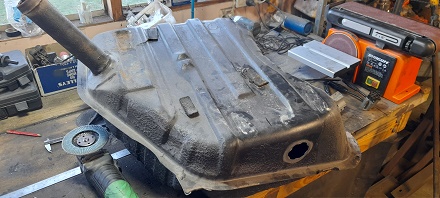
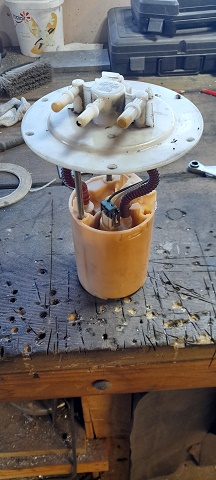
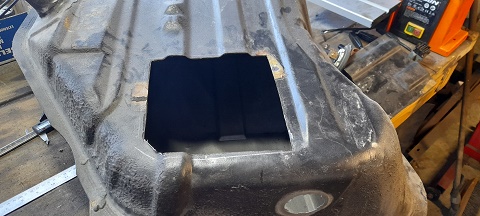
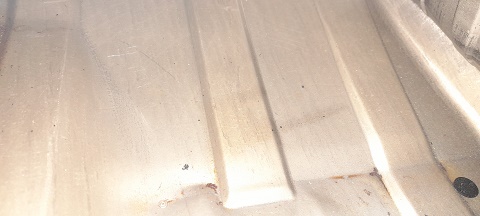
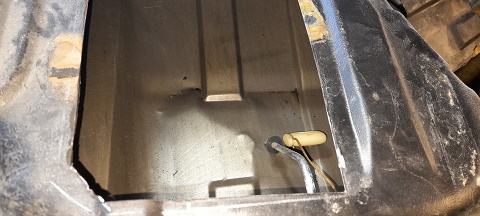
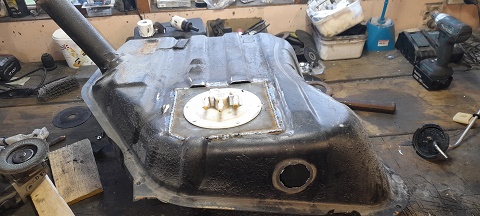
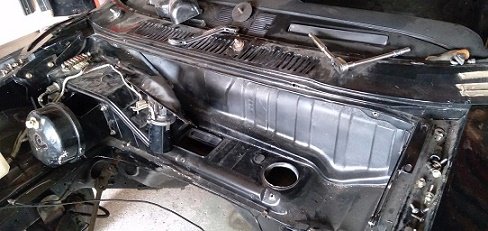
and made a start on the fuel tank.....just basically did what i did with my other mk3 but no drop tank and i keep the wheel well
BA rx6t intank pump...some plate with welded nuts on the back....made sure it wouldnt stuff with factory sender and cut a hole...,tank looks to be in good condition just has to bash some dents out...got a few small parts to cut and weld in and tack some spaceres to the top of the tank so the fuel pump doesnt hit the floor
-
10
-
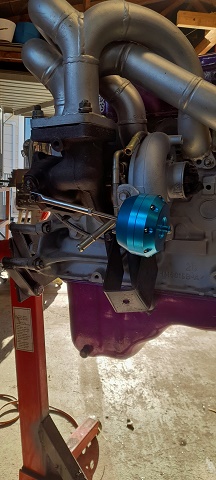
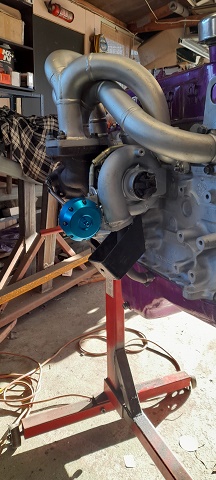
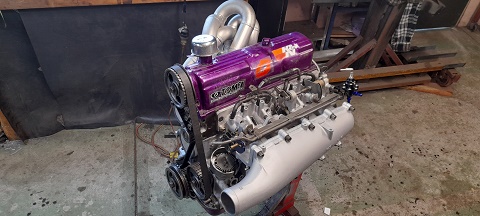
had a few bits turn up...wastegate actuator .. could find a good 2nd hand evo actuator so i just bought a universal one with a differant spring for alllllllll the boost
the only real problem i had was the evo actuator must be mounted real low judging buy the flap arm movement..
so i just cut the arm off locked the flap shut and the welded the arm back on in a better place...then made a bracket for the actuator .
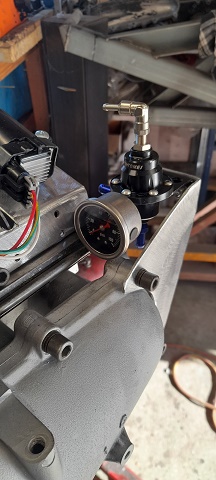
the gauge for the FPR turned up so got that sorted.
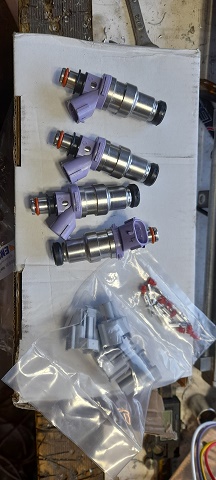
and the injectors i was told that evo injectors will fit the gtir fuel rale and work in the manifold well.
so i found a set of denso 800cc injectors for an evo 1-8.
they are 2nd hand but have been cleaned tested and flow matched and come with new plugs and was less than a 2nd hand set of untested factpry gtir injectors.
-
6
-
-
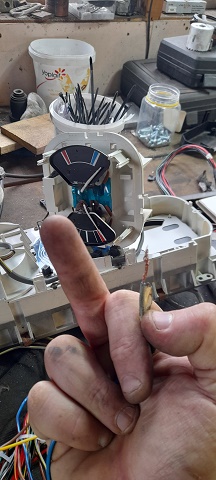
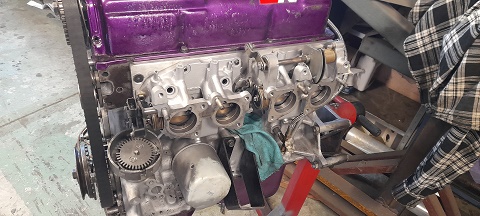
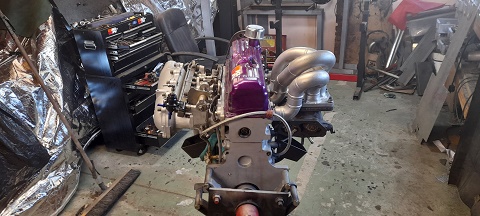
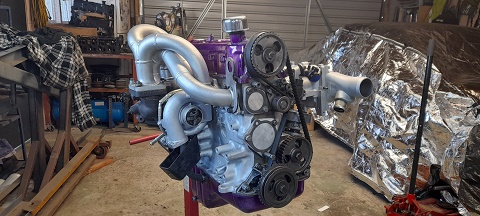
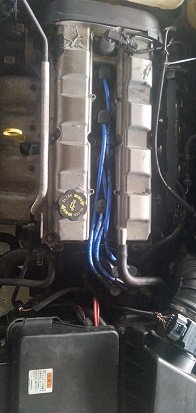
coil packs ..i went for GM/LS cop (coil on plug) with built in ignitors ..just to get things simple lol
i looked at the motor for hours wondering where to mount them as the throttle linkage is in a funny place and having 4 intakes theres a lot of moving parts and i had to think about wiring as well.
so ended up with this.
-
9
-
-
- Popular Post
- Popular Post
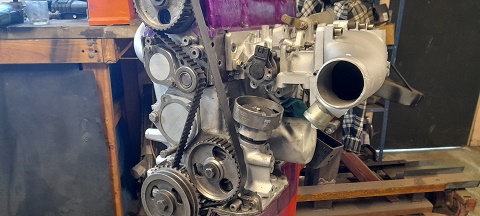
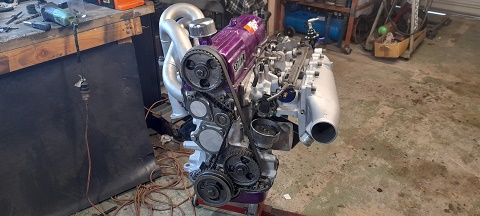
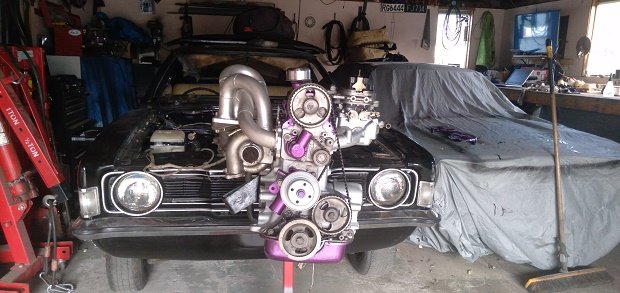
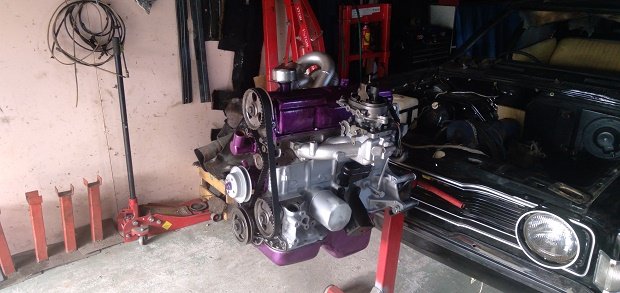
i got a few things ticked off the list today.
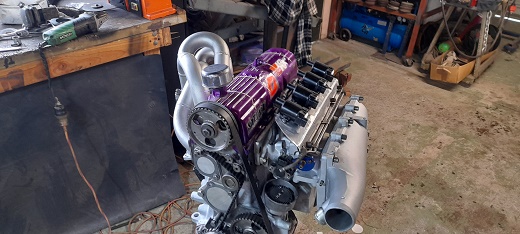
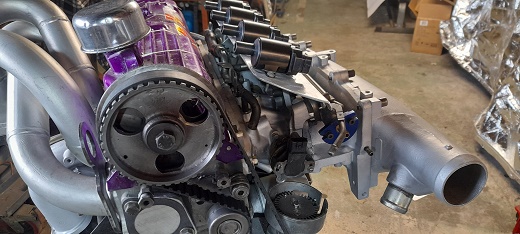
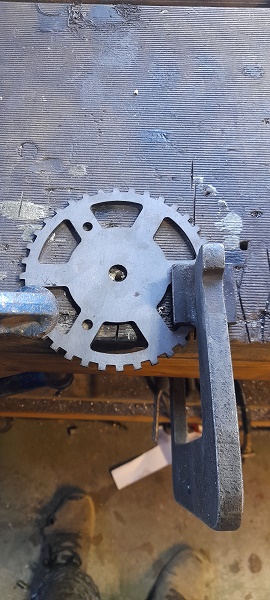
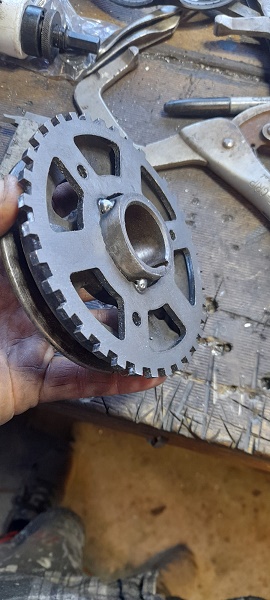
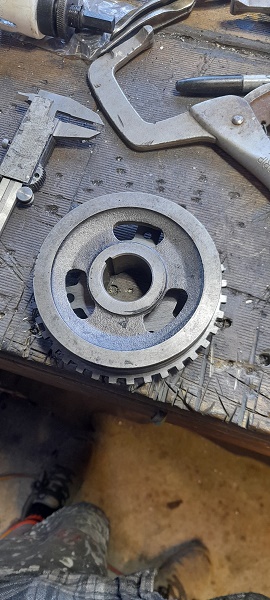
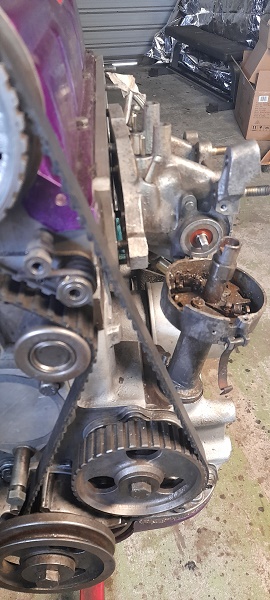
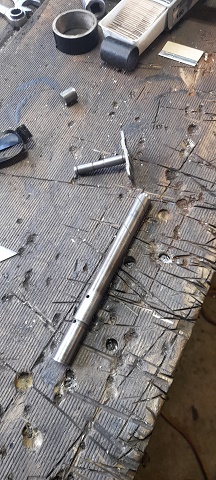
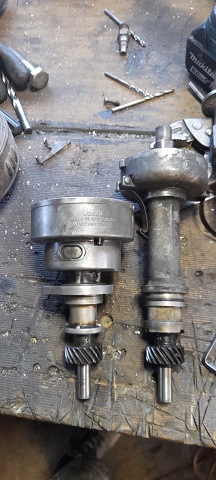
trigger 1..i bought a 36-1 trigger wheel for the pinto but it bolted in front of the pulley and i didnt like the look of it ...so i made the hole bigger and mounted it on the back...just a few tacks for now till the sensors turn up and i decide where to mount them.
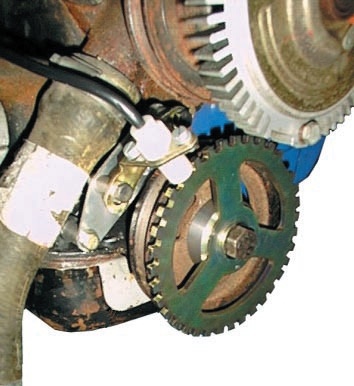
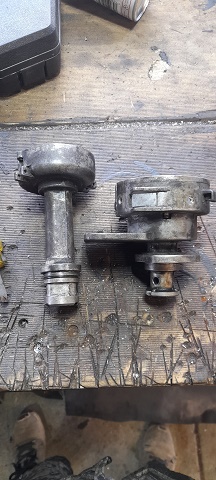
then it was on to trigger 2..i bought a 63mm 36-1 trigger wheel as it was just small enough to fit inside the pinto dizzy buuuuut.....didnt even think about the dizzy to inlet manifold being a problem....well it turns out it is.
i thought about cuttng it down but remembered i had a xd falcon dizzy on the shelf that i had gutted and used with a drill to pump oil around the 4.1 in the other cortina.
turns out it fits the hole in the block for the dizzy and it a wee bit smaller .so i trimmed all the stuff not needed off it and made a slot on the side to be able to bolt it down...i then cut the pinto dizzy shaft down and made a bush for it in the falcon dixy....made a mount to bolt the wheel to and all done...)will make a cap when the sensors turn up and i sort out mounting)....was told i could just use a 1 tooth wheel so see how the sensor works with this small wheel first.
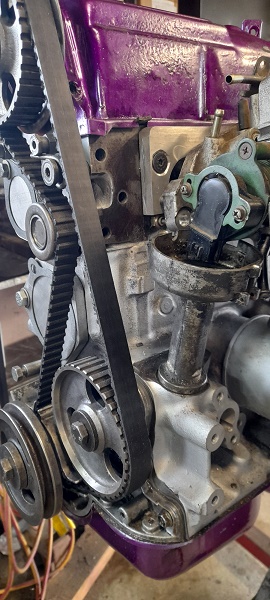
both triggers in place
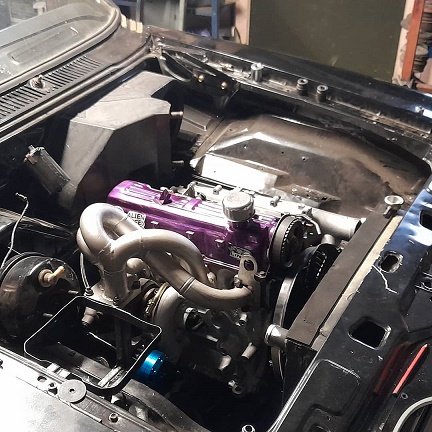
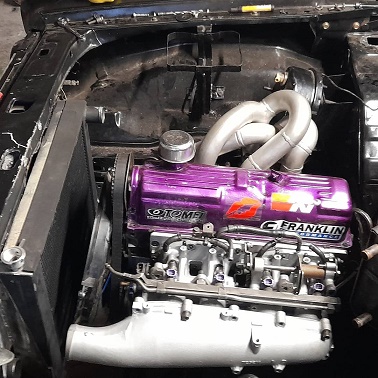
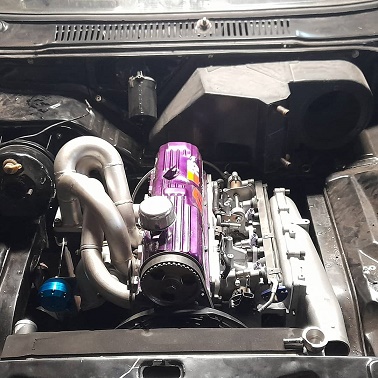
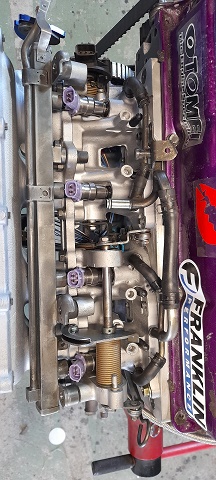
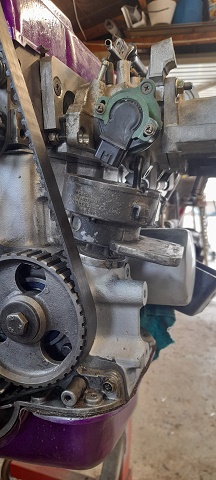
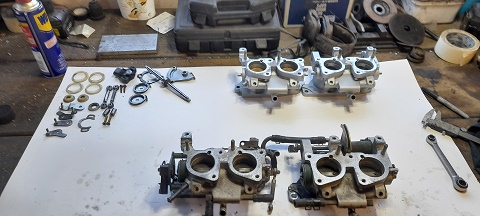
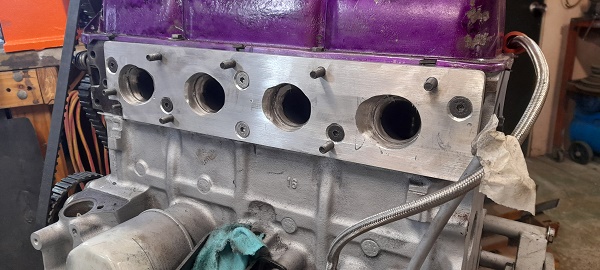
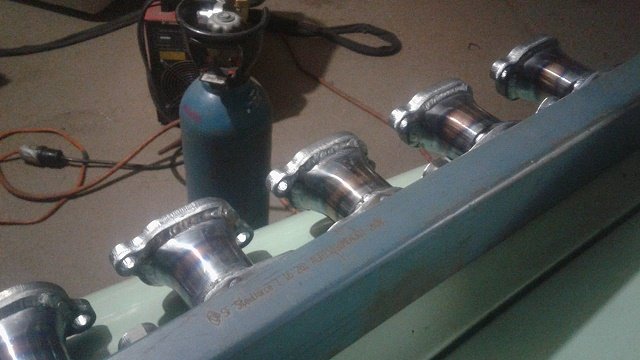
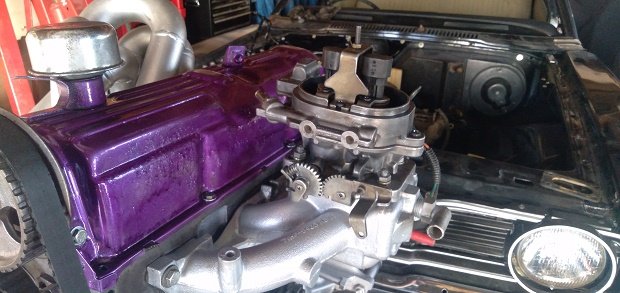
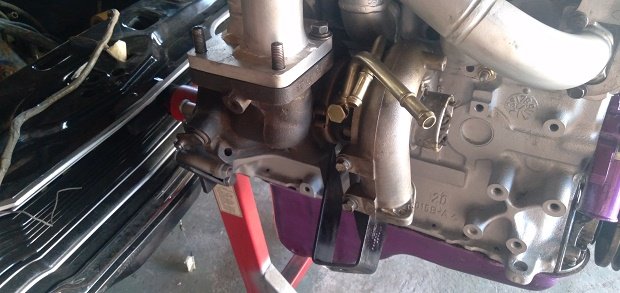
i also stripped cleaned and rebuilt the intake manifold
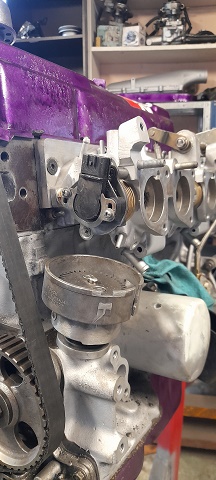
repositioned the dipstick
got the factory vacuum all together so i can even plum the brake booster in.
managed to turn the full TPS setup upside down aswell for more room.
still got to sort out idle air control.....the injectors are on the way and i need to mount the coil packs and also sort out a breather for the block under the inlet manifold .....and im thinking some sort of brace for the manifold aswell.
but its strating to look pretty good.
-
12
-
- Popular Post
- Popular Post
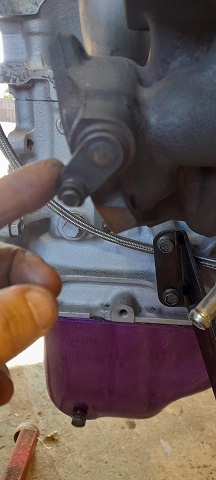
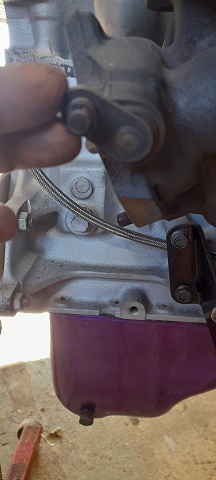
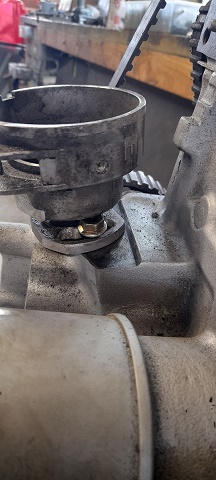
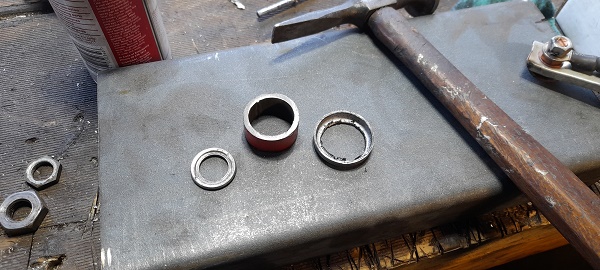
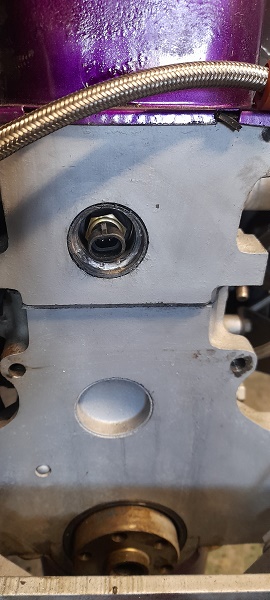
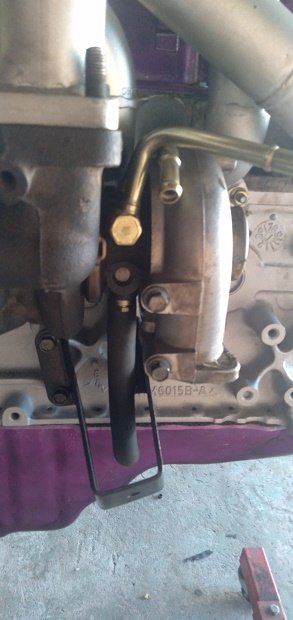
was thinking about temp sensor for the ecu and where to put it..
couldn't put iy in the factory position as the factory sensor was there for dash temp gauge..
thought about the hole in the head between #3 and #4 inlet port but there is no way with the linkages for the inlet manifold...
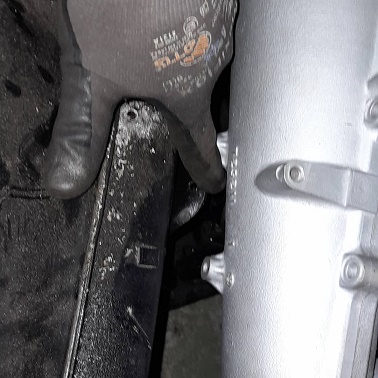
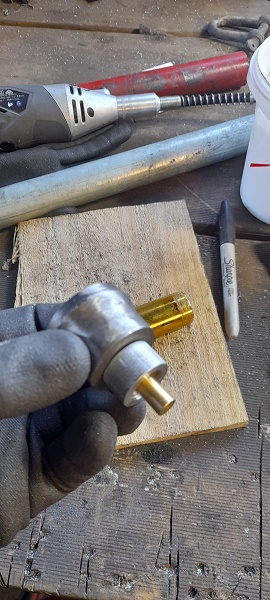
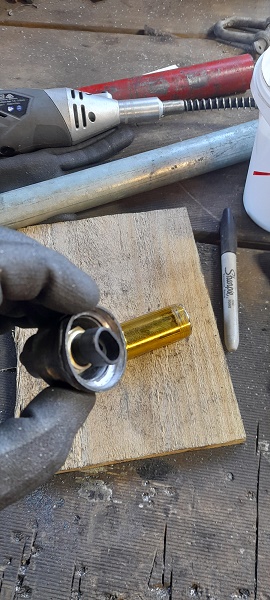
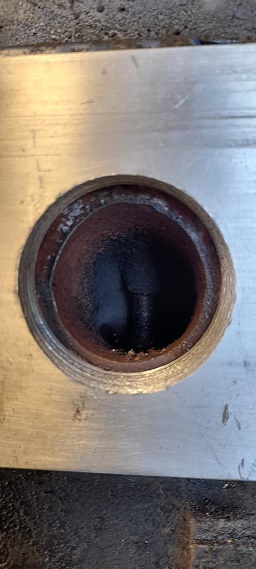
so then i thought about the frost plug at the rea of the head...there is about 30mm from the rear of the head and the fire wall and when i popped the plug out and measured the depth i had ..that was 60mm from head surface to 34 cylinder wall...........and the temp sensor itself is 60mm long.
soooo i garbed a new front plug....gutted it and got some thick pipe and cut that to size and then a washer.....welded it all up and fucking back.......sorted.. andits about 10mm of the cylinder wall.
and as paranoid as i am with it leaking and being in a spot that the motor will have to come out if it does....i plasty dipped it twice.
tapped it into place and it should be fine.
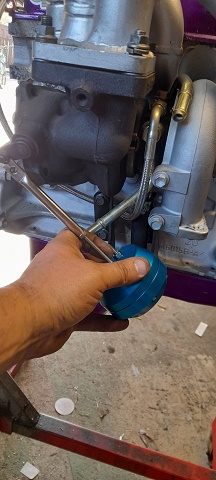
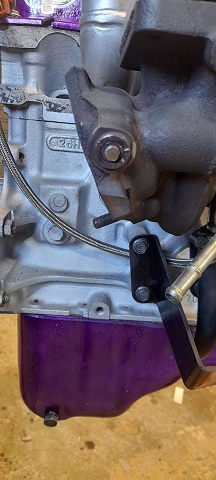
also trimmed the adapter plate for factory temp sensor. .port matched it to the inlet manifold.. port matched the head to the adapter plate (will do for now ...this motor is to only get it all running..i don't have hope for it lasting long)..gave to surfaces some belt sander love ..some lock tight on the socket head screw.....a gasket and some extra sealant and bolted it on the last time .....(well till she epode's )
cheers
-
11
-
22 hours ago, shizzl said:
Check out the Marcus Hayes channel on YouTube, he's always ducking with st170 motors in his Mk1, mk2, plastic fiesta and his old man's shitter wagon.. Quite interesting setups with its, weber and el stockos
yeah man seen most of them.
its a pretty good motor...would be way better in a lighter car.
I'm trying to get a complete head sent out from the uk to give to a mate at kennelly cams.....see if he can give me a hand to get it over 200hp at the wheels with itbs.
just hard to do with the car being daily...lol.
-
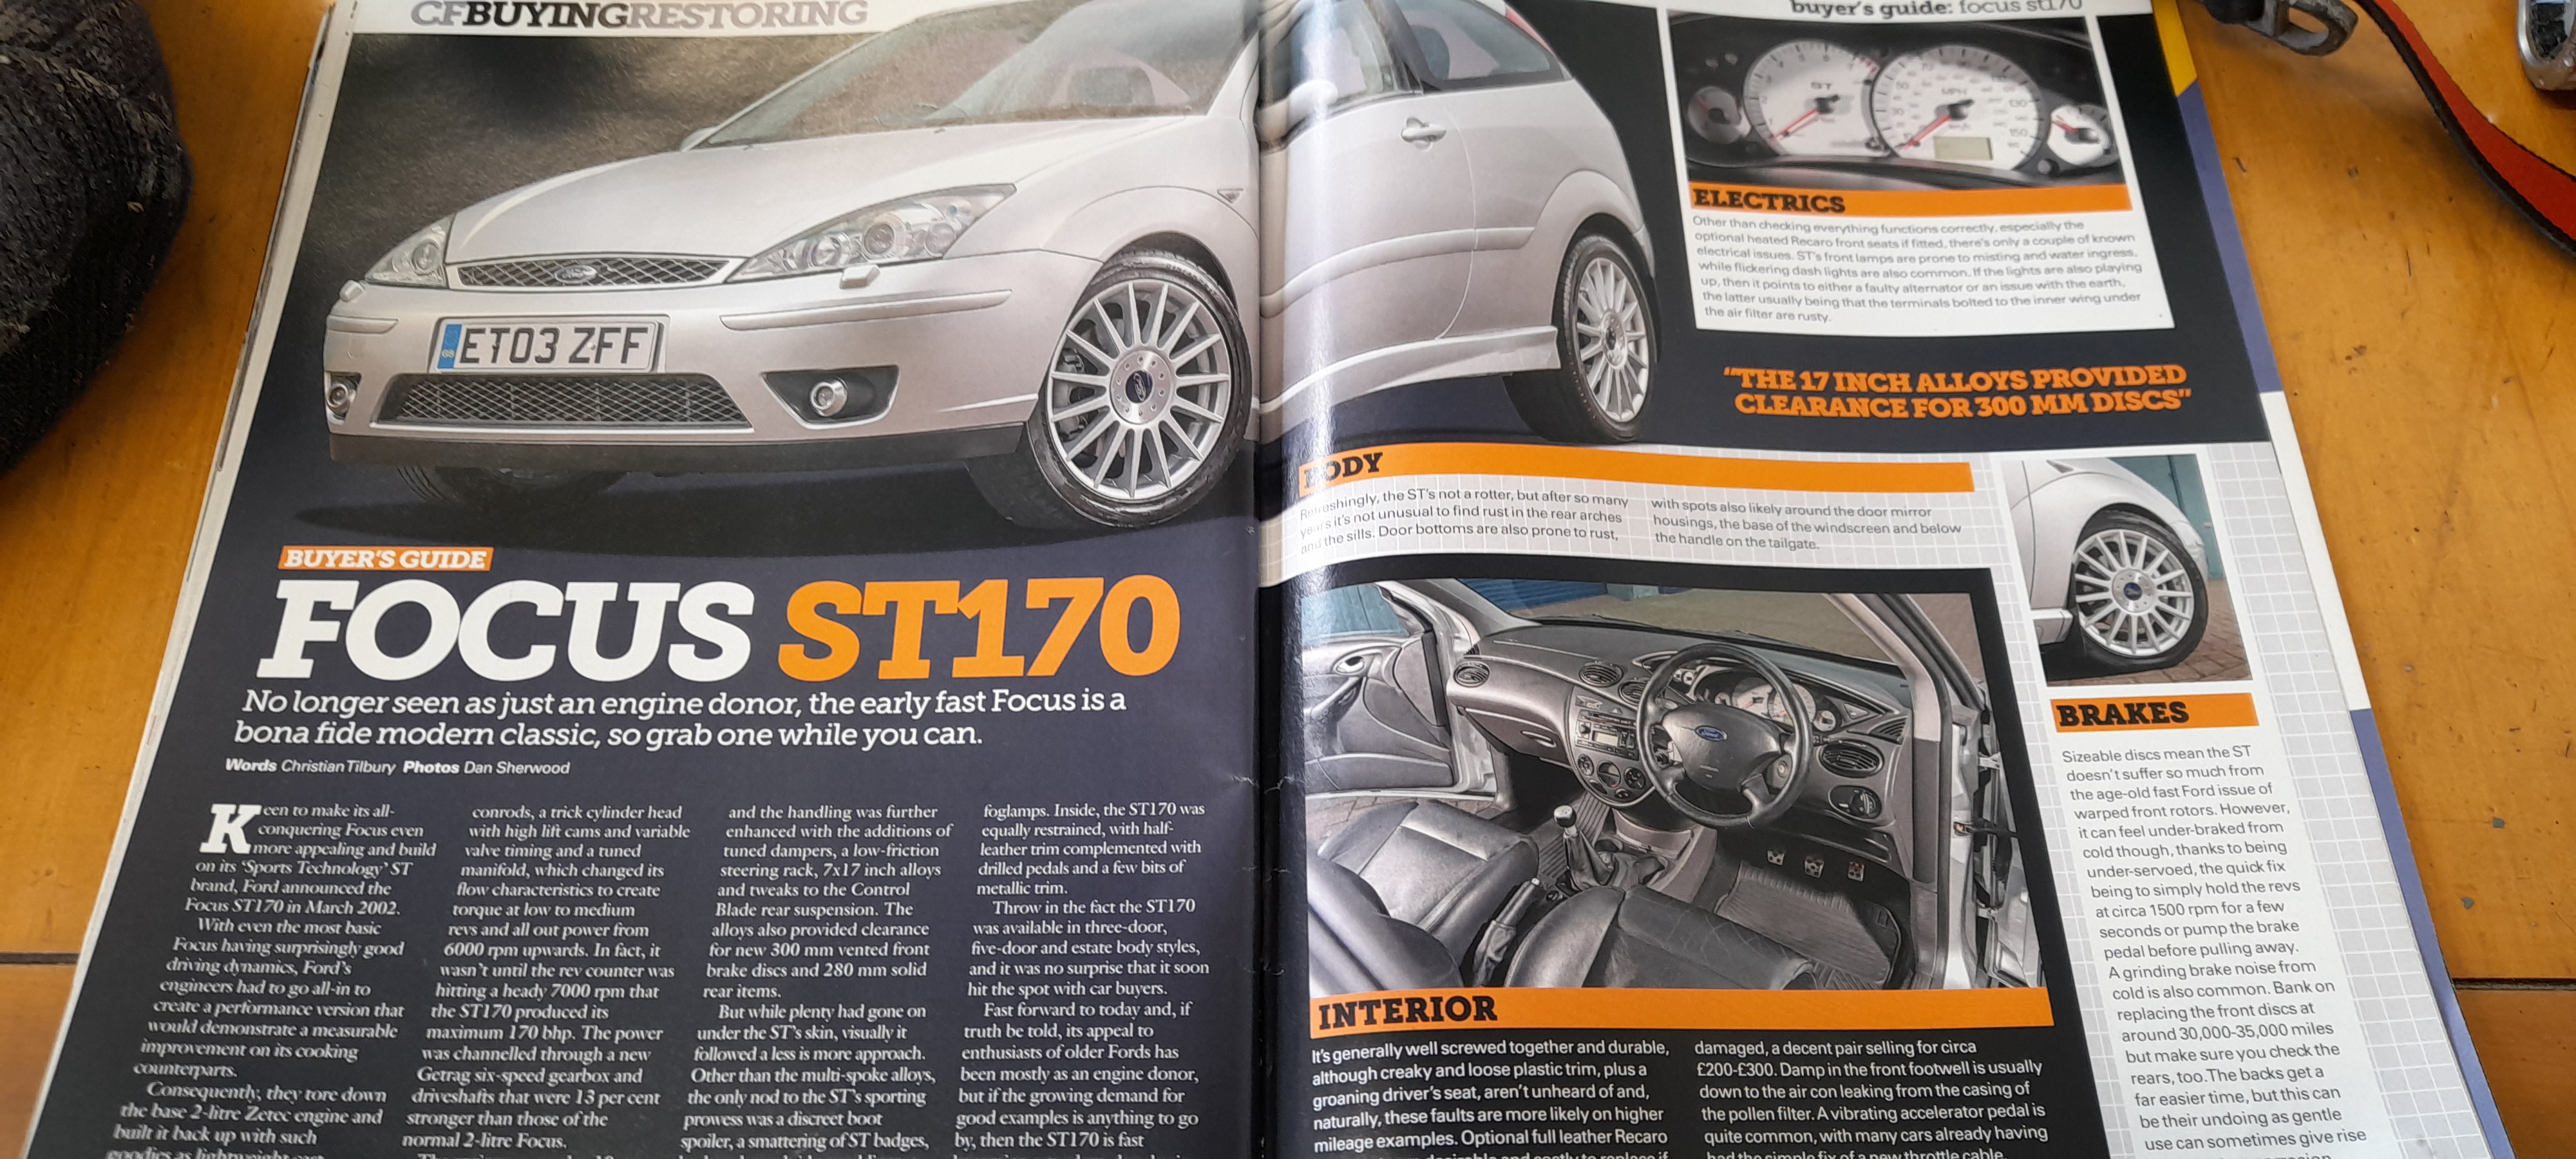
whats that classic ford magazine.
a bona fide moder classic

-
5
-
-
hi mate.
how's the car getting on now...still holing together?.
hay getting back to the oil spray bar for the bores..the issue you had with oil pressure being low.
would that lrob8still be there if it wasn't a criss drill cam.
I'm building a turbo pinto and I would like to use the cosworth bore oil squirter.
-
- Popular Post
- Popular Post
hhmmm page 6 ay... pretty slack.
sorry for lack of updates but in my defense i haven't done any work ...at all on them...due to a small health issue and my body letting me down on more than 2 occasions ..
and i have taken this year off the cars to get some stuff done around the house.....and if i try and do that and find time to work on cars ill just get fucked off...so year off.
the cars are still there
i have been playing with pintos tho as less room and just keeps my mind ticking over.
i had sorted the falcon CPI for fuel injection and was starting to make a hat for that for boost.
.....but ive had a nissan gtir inlet sitting on the shelf that i was planning on using on my focus.....but it got the better of me and i had to see.....(now it does need some cleaning up and i need to do some port matching but this was all by hand with a battary drill...and the socket head bolts cost more than the inlet manifold0
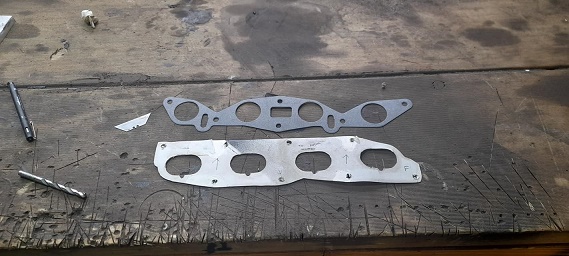
i had a pinto gasket and i made a cardboard one for the gtir..they do share a common bolt hole so that was enough for me.
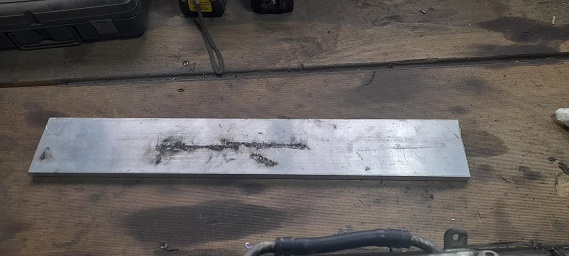
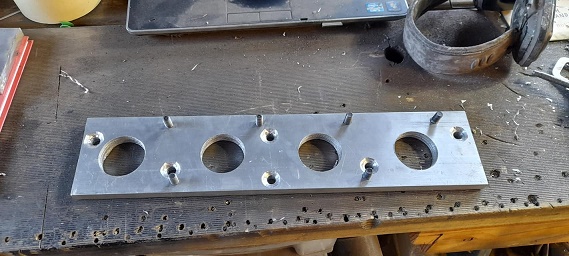
i had some 10mm alloy
so i sorted the pinto part first.
once i port match the head it will be fine....only had a 44mm hole saw
then sorted the gtir side
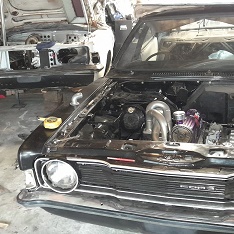
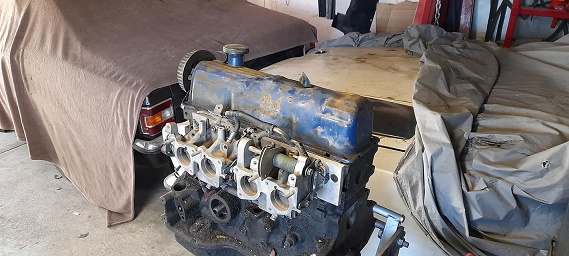
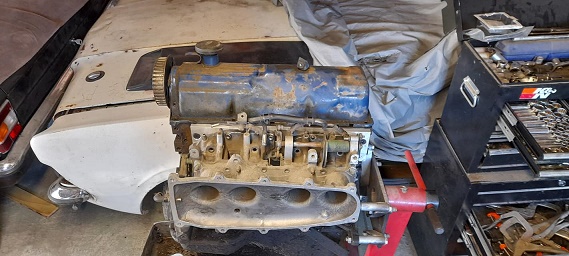
tryed it on the turbo motor......looks awesome.....love it
i just need to find a better tool to port match gtir to pinto and back and find a fuel rail and maybe some bracing .....and thats good to go.
cheers
-
22
-
- Popular Post
- Popular Post
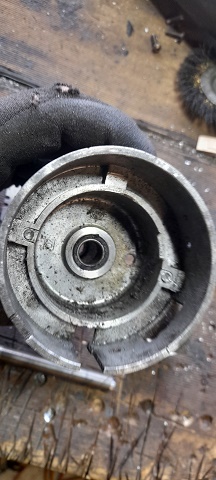
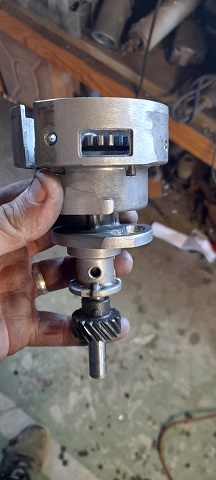
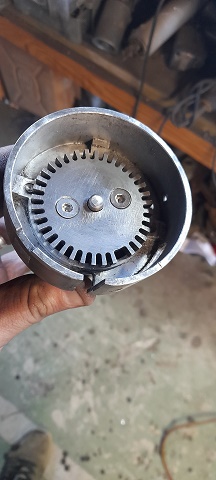
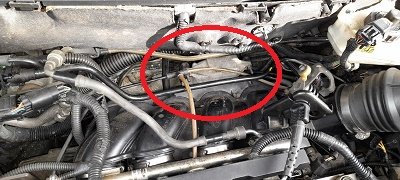
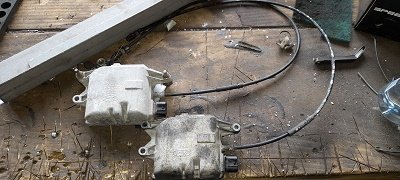
one of the issues with these is the inlet manifold runner control (IMRC)
they have a small motor in the with a spring some cogs and some other shit...they can stop working... what they do is the inlet manifold is basically a drum and the runners to the motor are on the top edge and are short ..the IMRC controls the extended runners so when you start the motor the IMRC pulls a rod with extended runners on them and rolls them up to the inlet runners (for low down torque) and then when you get about 5000rpm it removes them........its on the firewall behind the inlet and the cable snakes around and under half the shit in the engin bay to just below the TB
so i found a guyn in the uk that refurbishes them and had it landed for about 100 bucks.
i broke a few of the fragile vacuum pipes with my fat finders and massive dick beats trying to get it out....only had some washer pipe from the cortina around but that done the job and got it all back together.
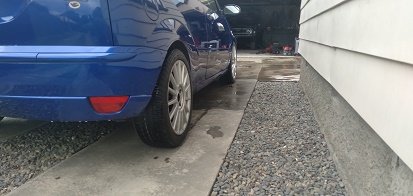
also the puma front hubs arrived and all thought i thought they spaced the front wheels out about 15mm it turns out they space them out exactly 10mm.....but still much better and easier than trying to find 17 x8 rims in a wired offset and oldschool ford 4 x10⁸ rims.
-
13
-
- Popular Post
- Popular Post
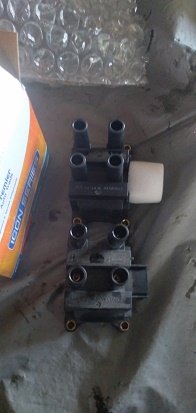
we in the vain of preempting all the problem parts ..i fitted a new coil pack and 8mm leads to go with the new plugs..(the old leads and coil pack hasnt failed YET so i put them in the spare parts box i have under the spare wheel for breakdowns lol)
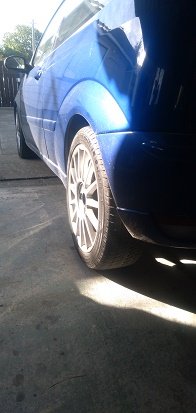
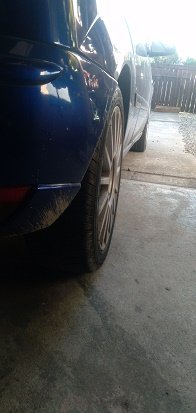
there is a thing that i actually hate and thats the rear wheel tuck ..they should have moved the axle out or gave it wider wheels...the front isnt to bad but i will do something with at somepoint ..
as for the rear they have been racing and rallying these things for years so you can get parts and people have figured out interchangeable parts ..so i got a set of axles mounts from a ford puma sent out from the uk and its a bolt on and all the st170 parts bolt onto that and it moves the rear wheels out 20mm each side......much better
-
15
-
I got mine from America of all places....landed for $400. i also have a copy of the flange i had cut from auto bend and a die a mate made to form the tubes in a press...if the helps.
-
2
-
-
the BMW me throttle bodies are around 50mm and have the injectors in the aswell as idle air tube and tps ..
can find them cheap aswell...just need to make a manifold to bolt them to.
-
- Popular Post
- Popular Post
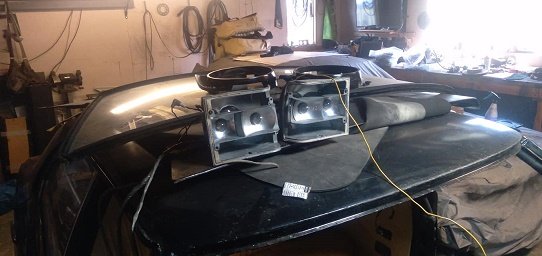
was starting to button things up on the old girl and noticed the wiper mounts lose ..tried to tighten them but they wouldn't ....so out come the heater again the wiper and the panels to get to the wiper mounts them selfs only to find no washers or anything ...so i had a look at the wipers on the white one and ended up steeling the parts from them..
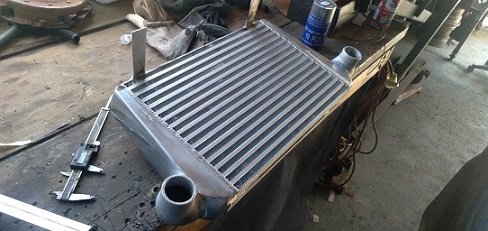
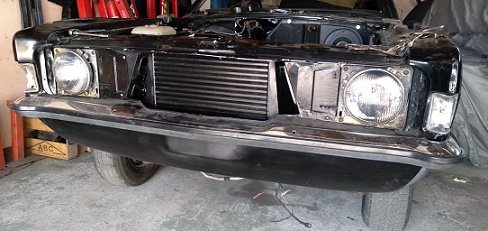
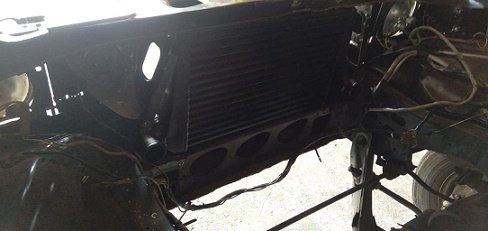
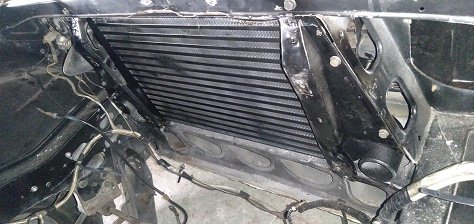
i had the ends of the intercooler cut down and some 90 reducers welded on the end..so not it fits better ;
i painted it black and finished the mounts of so it all in and secure
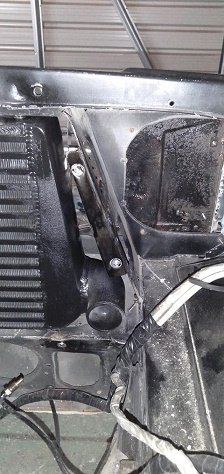
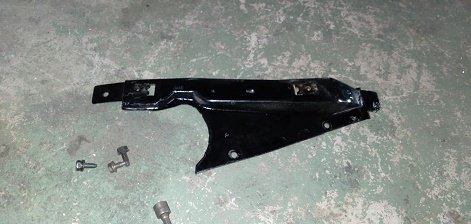
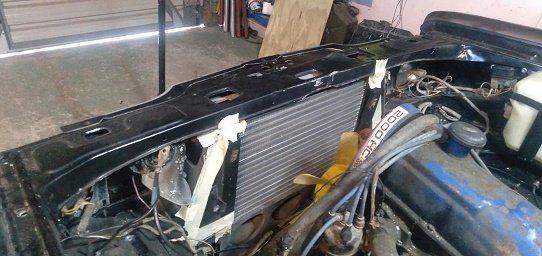
i had to cut the ends of the radiator supports off to be able to put the intercooler in ..i made and welded some tabs back on and slapped some riv nuts in
modified the rad supports and added some tabs and riv nuts
rad supports bolt back on and the rad can bolt back up in the factory spot with a nice air gap as well between intercooler and radiator
never know its there....perfect
-
13
-
2 minutes ago, locost_bryan said:
Ooh, I've got one of those in my slot car set.
")
Looks like you got a bargain there @d.p.n.s

i did mate and i willing to work through the issues....might eliminate some later on down the line with a black top head and maybe inlet ....turbo and a link ecu. lol
-
3
-
-
- Popular Post
- Popular Post
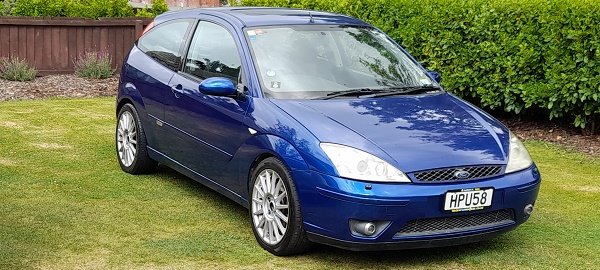
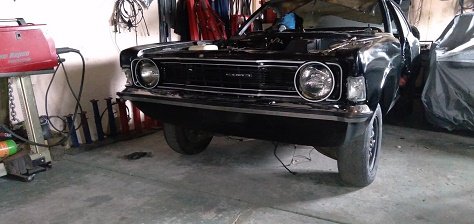
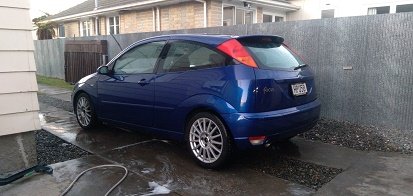
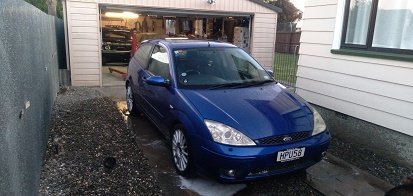
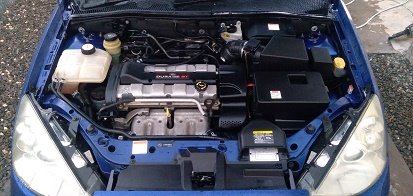
so i bought a new (for me ..actually the newest car I've ever owned ) daily driver.(had it since august now)
its a 2003 mk1 ford focus st170.
i have wanted one of these for a long time and we didnt get many at all here in nz so they dont come up for sale ...very often .. they are problematic and are known to had issues from the day they came off the production line.
but that problematic nature got me a good deal..it was $6900 from the dealer and had been traded in..(177000 odd ks.......should have imploded by now)..but evertime time someone test drove it the check engine light came on ..so they returned it...i drove it 3 times over the space of a week and the light came on within the test drive each time. (5min -30min).
so i went back and just said i would take it off they're hands for $3500 with no warranty ....just slap a wof and reg on it and ill take it...(dont think they did much reading up on it.)
few days later and probably a few other test drives they rang me and i went and picked it up...(engine light came on on the way home.) but as im pretty updo date on these things i also know that nothing the engine light comes on for will put it into limp mode....and some have had the light on for 10 years in the uk lol....they even say you should be concerned if it doesn't come on....
so a small run down on these mk1 focus st170.
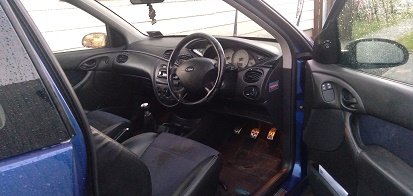
the motor is a 2.0 zetec (not duratec as it says on plug cover).the motor was developed by cosworth and is 2.0 block with forged pistons and a 10.2 compression. . alloy high flow head (the flow is shit to be honest and people have had huge gains porting them) , vvt on the intake (problematic) dual stage intake manifold (the controller is problematic ) stainless 4 into 2 into1 headers and high flow cat..and a sports exhaust ( sounds good) ..has a pre and post cat o2 seonsors (also problematic ).has a factory cold air feed to air box that doesnt acutallu go to the airbox. a dual mass flywheel 9 that i cant stand)and all of this is good for 170hp and the cut is 8000rpm.
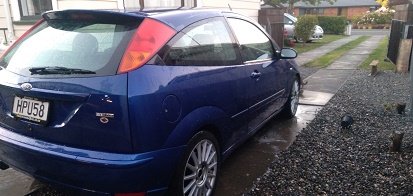
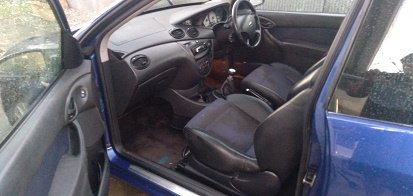
has a close ratio 6 speed box , quick rack steering , huge brakes front and rear , factory 17s with 215 tyres, traction control , factory reacrao seats , .
and being a jap inport it doesnt have the uk rust ( and these things are dropping down in numbers daily due to the rust issues.)...its a blood fun car and handles well......even cocks a leg when you throw it into roundabouts..
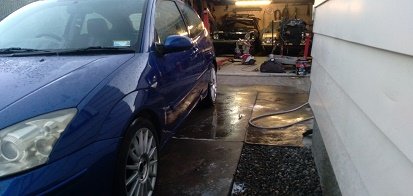
since i had it ive had the inlet runner controler apart and cleared that code...replaced the pre o2 and cleared that code....(engine light came back on the same day lol). replaced the plugs (not cheap and need to be gapped at 1mm no more and no less...runs like shit otherwise)...i do have a new coil pack and leads on the way as well... i pulled the inlet manifold off last weekend (complete arse of a job) re greased the moving parts and changed the broken vacume hoses ..made a cold air feed and thats where im upto now....
i do have some plans for it slowly as it is my daily (seems better on 100 octane as well)..and just fix things as they go wrong.........
and here she it......in imperial blue as well......mmmmmmmmmmmmmmmmm imperial blue
-
12
-
well that was an exercise in patience..
I'm not the best with wiring but I do enjoy the challenge and problem solving side of it...
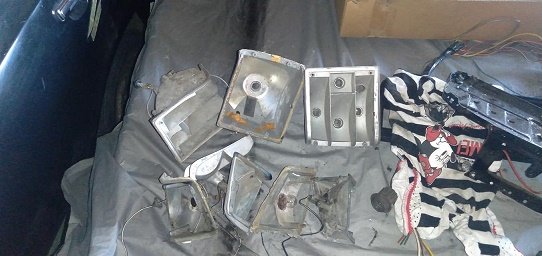
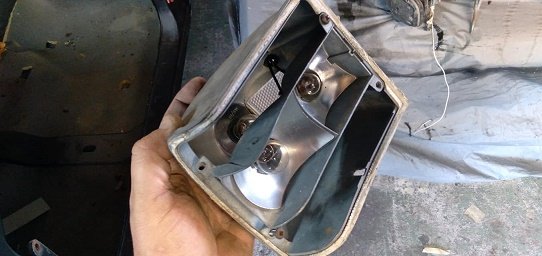
but what I thought would be a couple if hours this morning splicing one loom into the other ended up being 8 hours....but most of that is the fact that no bulbs worked in any of the housings I had....so I had to pull apart and clean every terminal included the fuse holder..
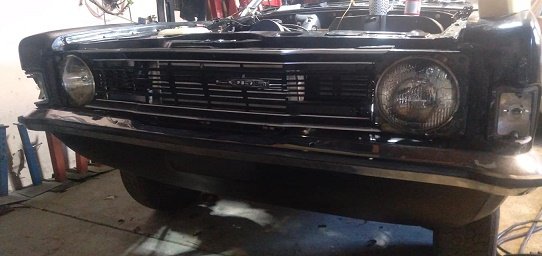
but 3 part looms later....the list of things working is better.
heater , wipers (both speeds....I know flash guy) , dash lights , glove box light , park lights (front and back ) headings and high beam , reversing lights and brake lights..oh and number plate light and horn.
just need to sort indicators out.....got them to work from hazard switch but not from stalk...( horn and high beam work on the stalk........might just be the stalk ).
even got the intercooler in.. (bit tight but once I make some tabs to bolt the rad supports to it will be perfect.
-
7
-
-
bit more done on the black mk3...
got the engine bay loom all in ( with new mounting points...all removed by previous owner)..
park.head.and high beam lights work now...wipers.( both speeds.) and starter.
heater is down an earth and no bulbs to try indicators yet...
not bad considering rear half of the loom is missing where i had to cut it ........figure the front out and then make the rear from there
its never had a loom since iv had it and the lights and loom from the rusty old sat since 84 wagon.......make it very steve kings christine like
-
6
-
-
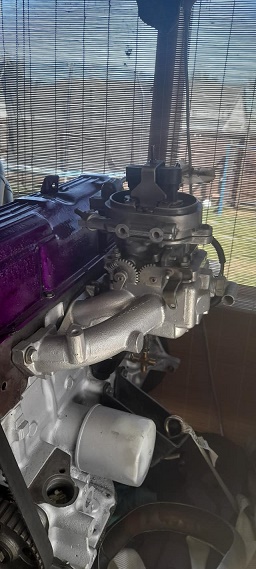
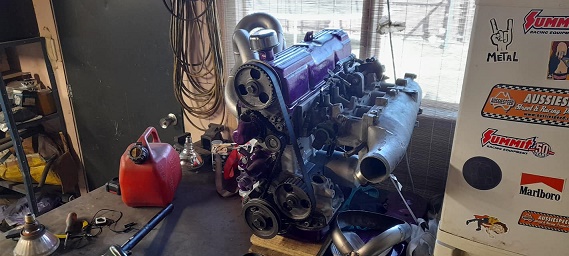
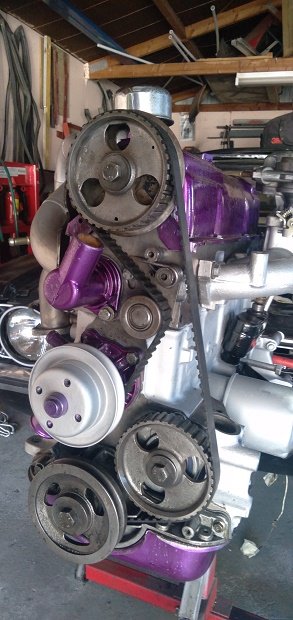
well i got the motor ("will do for now motor" completely standard) stripped down and cleaned i did end up checking the main bearings and they seem like they might last a bit as long as it has oil...so thats good.
cleaned all the parts and only ended up replacing all the seals and gaskets...put an old thermostat in it (only done 600ks) i did drill a 6mm hole in the face of it as that seems to help things .
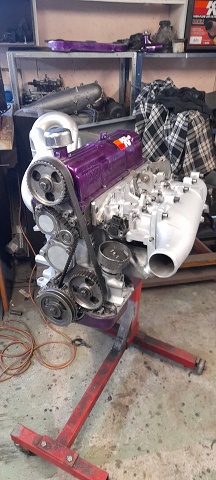
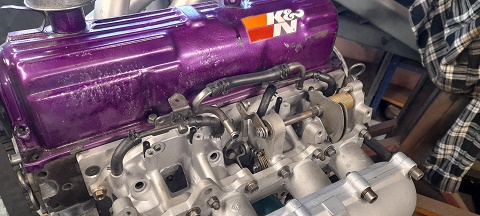
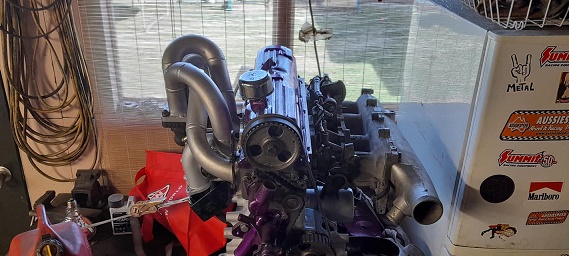
put an old water pump back on as well as timing belt and tensioner again all done only 600-1000ks.....re done the valve clearance ..drilled a welded an oil return in the sump (with a small hood over the hole on the inside).....stripped and cleaned the falcon CPI and then paint it in some wanky wanky purple......i dont hate it and i think it will look good. cars staying black and getting a set of standard wheels with hub caps on it so perfect amount of im a wanker for it...
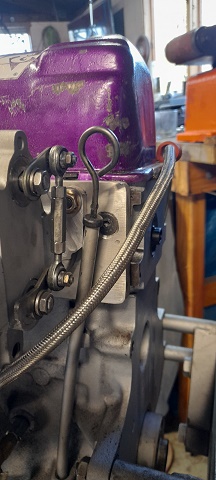
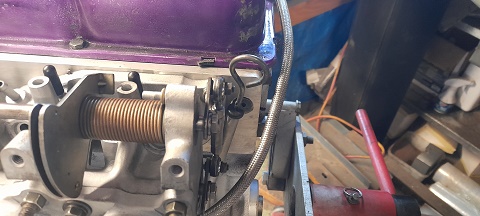
i got the oil return sorted
and i also found a water pipe kit that seems like it may work ....the hoses in the cortina normally go..water pump - heater - auto choke on carb -inlet manifold...should i go waterpump - turbo - heater - inlet manifold.?
also need to sort an oil feed...
-
9
-
-
23 hours ago, CUL8R said:
Hey mate, I saw something and then went on a tangent and did some research....
This will wet your wicket
fuck.me chris you not helping my life here....
now I have a need to find a 2.3 block and go play with some Volvo head
-
1
-
-
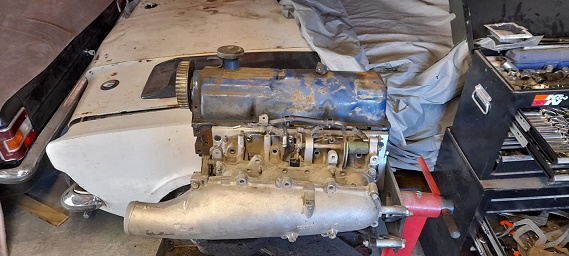
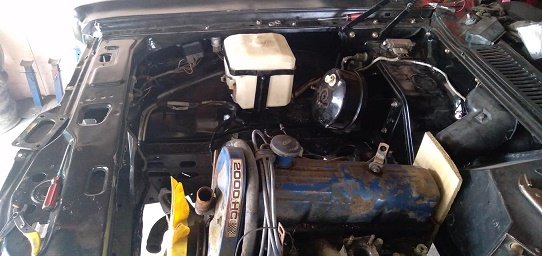
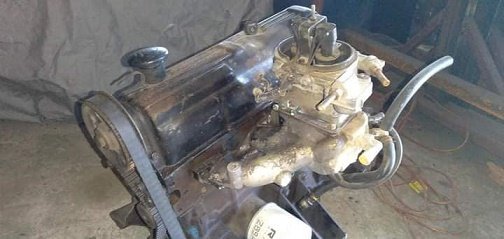
just a small update.
the motor that is in the car at the moment is just for mocking things up ...but will eventually be the motor built for the car...it came from the rusty old wagon and has been sat since 194 and looks to have been never opened so hopefully its standard bore and standard bearings.
so i dragged another motor out from under the bench to go in it and hopefully last till a build a better one...i have run this motor in my old mk5 and it went ok just had some leaks and a tappity up top..
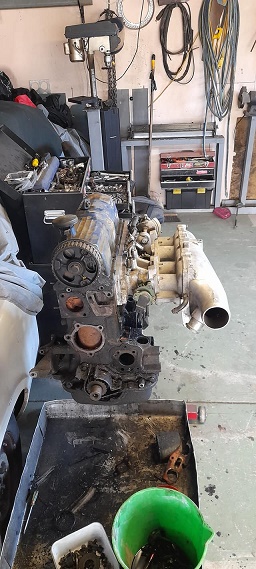
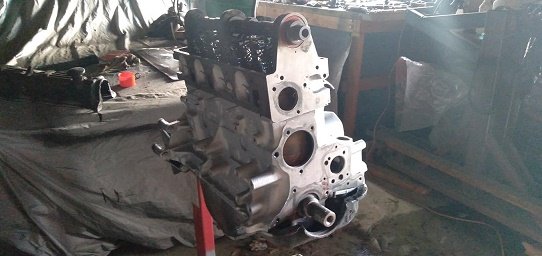
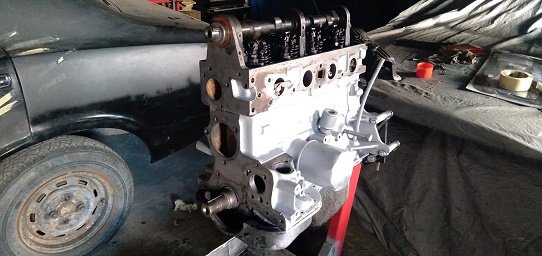
so for the sake of $100 odd bucks ill put a full gasket and seal kit threw it....so i pulled it down to a block with crank and rods and head with complete head.
i did fid the sump full off thick crappy looking oil and the pick up was pretty badly blocked so i pulled the pick up and pump off and cleaned them out.....and then cleaned the cam spray bar as well..
i cleand the gasket areas and gave it a paint (have decided not to go the normal black or ford blue as i allways do.)...painted the block in aluminum sliver.....might even paint some other bits in a anodized purple ive had sitting around for a while..
-
7
-


D.P.N.S the other mk3
in Projects and Build Ups
Posted
decided it may pay to run a oil cooler and i had one sitting on the shelf (may be bigger than i needed but it was there) i struggled to find somewhere for it ..i am trying my hardest not to just cut the shell up and remake stuff...so i removed the inter cooler trimmed 2 tabs off the oil cooler an mounted it on its side.
remounted the intercooler for the 3rd time ...even had room to just snake the oil cooler hoses out by the intercooler outlet.
i remove one of the grill mounting plates an decided to mount the airfliter there ..by the headlight an under the slam panel.. should get plenty of col air an i can make a shield to block it off from the engine bay heat..
the filter is a k&n with a 6"inlet lol....i knoe its over kill but i ha 6 filter adapters (6" - 2.25" )from the 6 cylinder cortina (was going to make trumpets out of them.......lo dint work)
also may need to move the battary tray to the rivers side so ecided to use some heat ducting for the turbo to filter .....should work well.