
Nominal
-
Posts
33955 -
Joined
-
Last visited
-
Days Won
316
Posts posted by Nominal
-
-
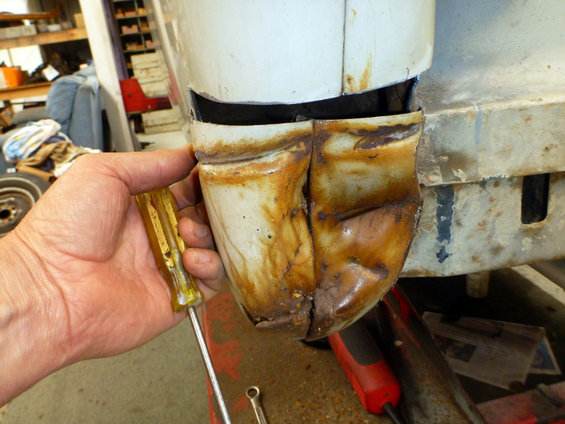
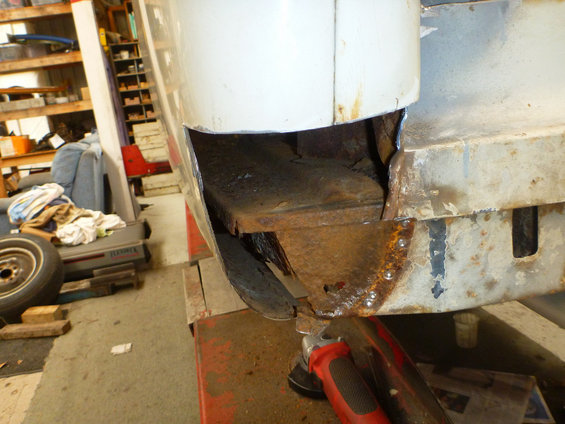
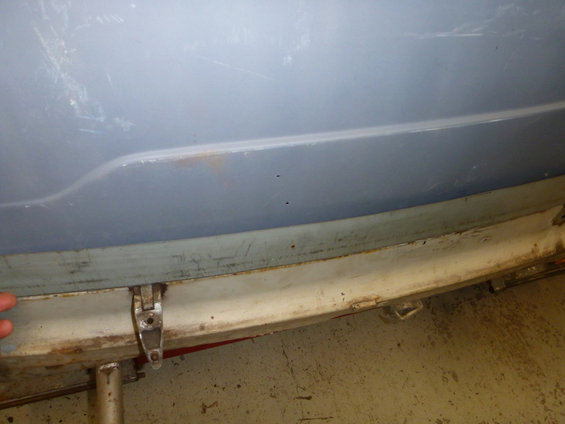
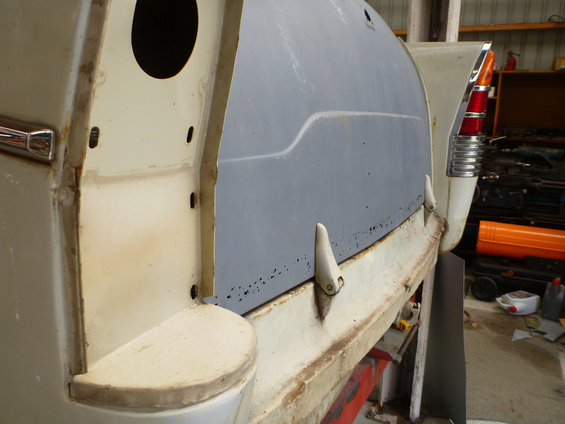
This back corner has been smacked at some point and not really repaired at all. A replacement bumper must have been fitted as it would have been damaged as well.

Off with it.
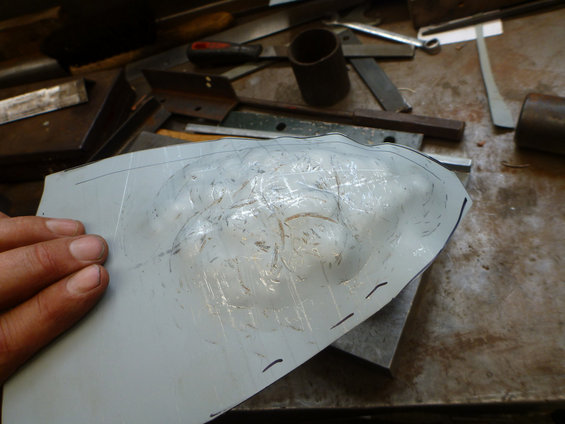
It's made in two pieces (luckily I guess), and has a lot of shape in it. I made a pattern from some low-tack tape and masking tape on the good side, then turned it inside out to use for this side.
Started beating on it with a heavy ball pien hammer over a short bit of exhaust pipe (a sandbag would be better but I don't have one)
Not pretty, but effective
-
 1
1
-
-
Messed about with the new pit for a while, fine tuning the fit. Hopefully it works out OK.
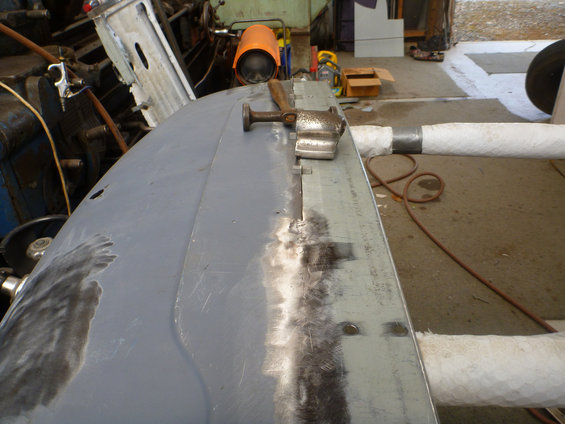
Point of no return passed. The side shape is off here as it isn't on the inner frame.
I'm trying a different approach to the welding, more like the StreetNeat bloke on FB. Welding about 20mm at a time then grinding/sanding it flat followed by a hammer/dolly session to get it to the correct shape. Seems to be going OK-ish. It's nice to have access to both sides of the panel for a change. Slow process though, I'm only about 30% of the way across so far.
-
2
-
-
Who else is doing rust repairs these holidays? Luckily the weather has been fairly crappy.
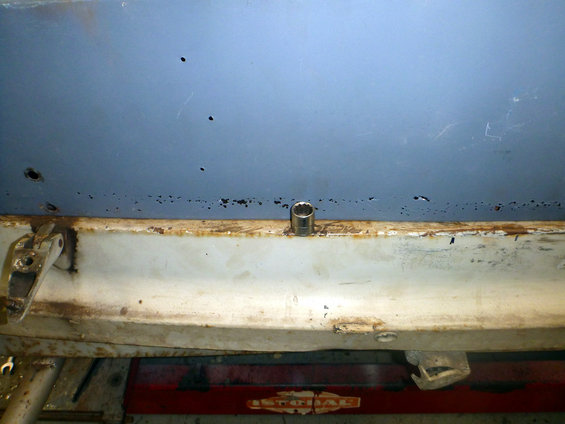
With the tailgate split, and the rust holding it together removed, the profile (even when assembled together) is way off. This should be flush, not have room to sit a socket.
I zapped some spacing tabs to the inner
and got it close again.
-
1
-
-
Daihatsu 360 by JOHN LLOYD, on Flickr
-
5
-
-
Bonnet styling says Vauxhall.
-
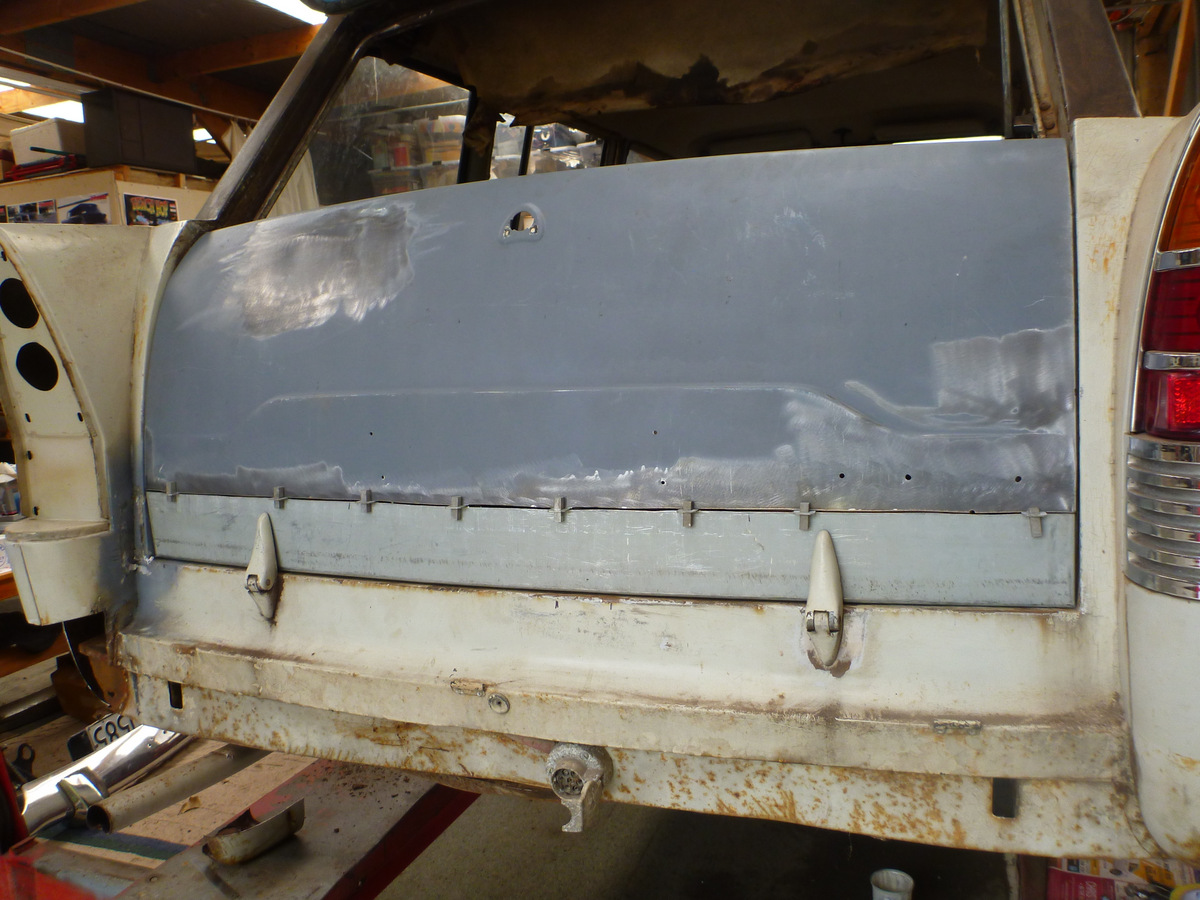
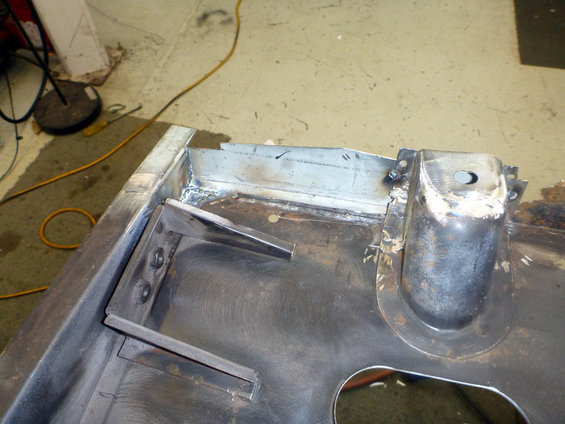
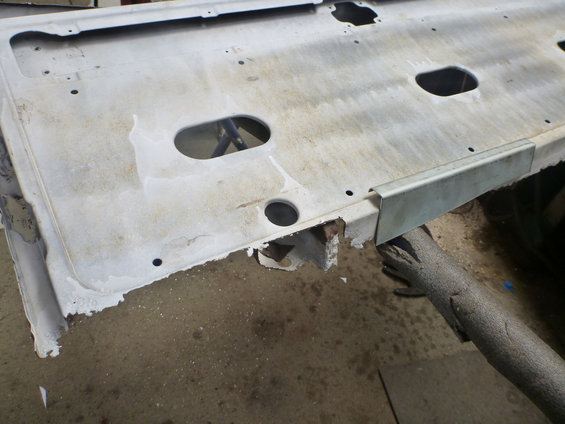
Working away on the tailgate. Pretty fiddly stuff.
Have finished repairing the inner braces and the 'inside' structure at both corners.
Started with the channel for the seal. I'm doing this in pieces to suit my folder (i.e. bench vise and angle iron). It needs to be curved to match the tailgate opening.
Taking the rest of the day off to go to the beach (even though its cold and damp, the beer will be good)
-
7
-
-
-
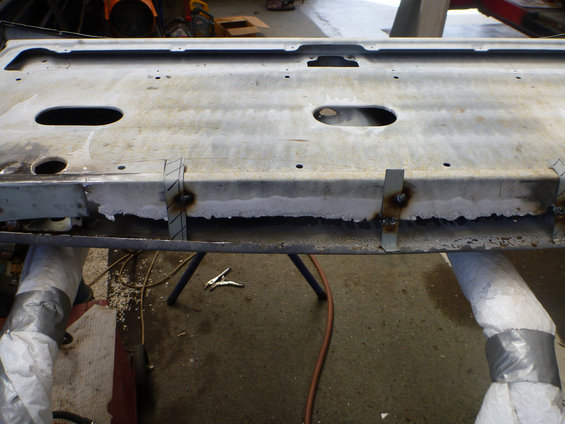
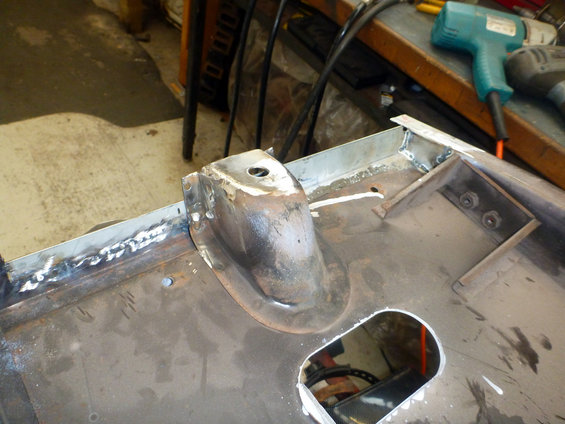
Back on the panel bashing.
There were some dents in the panel below the tailgate, so I used a clamp and some bits and pieces to push them out before a slapper session flattened things out to a reasonable level.
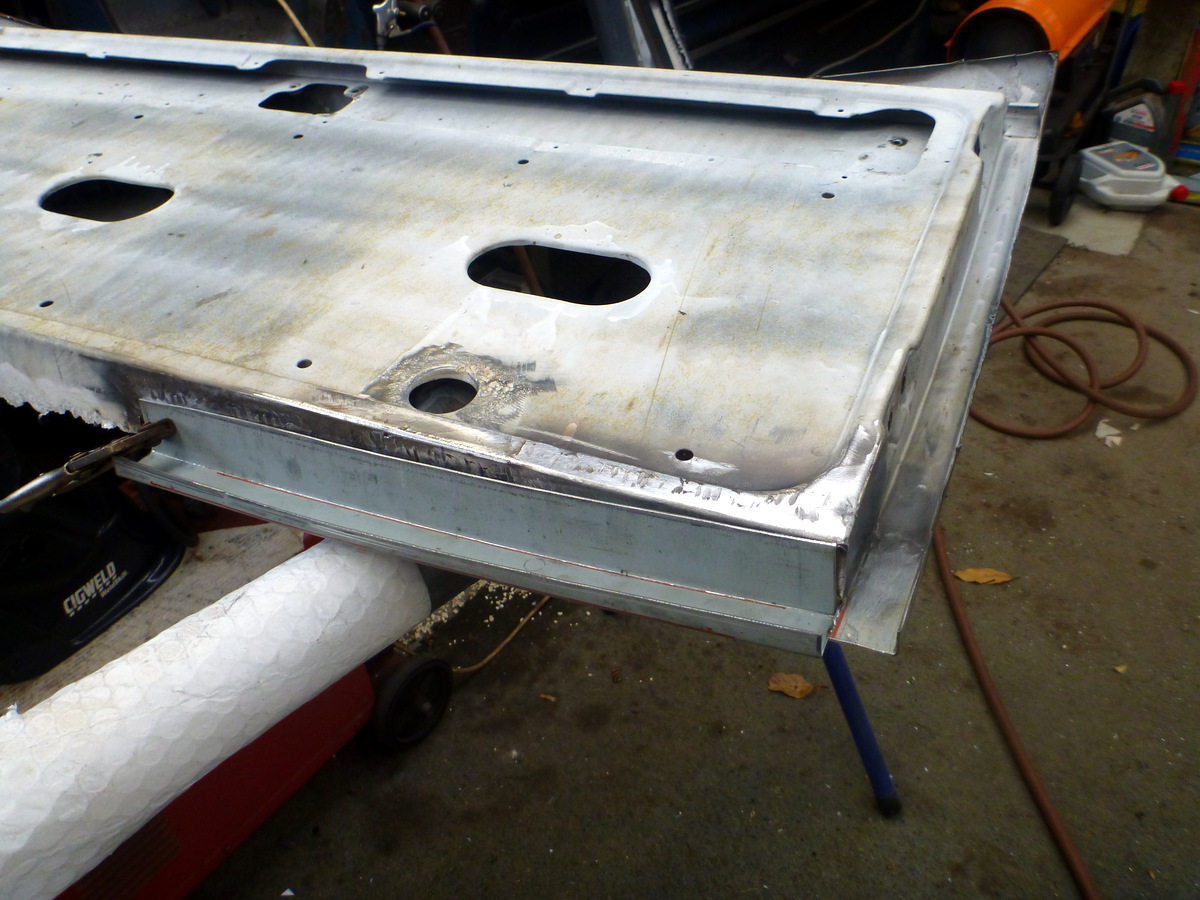
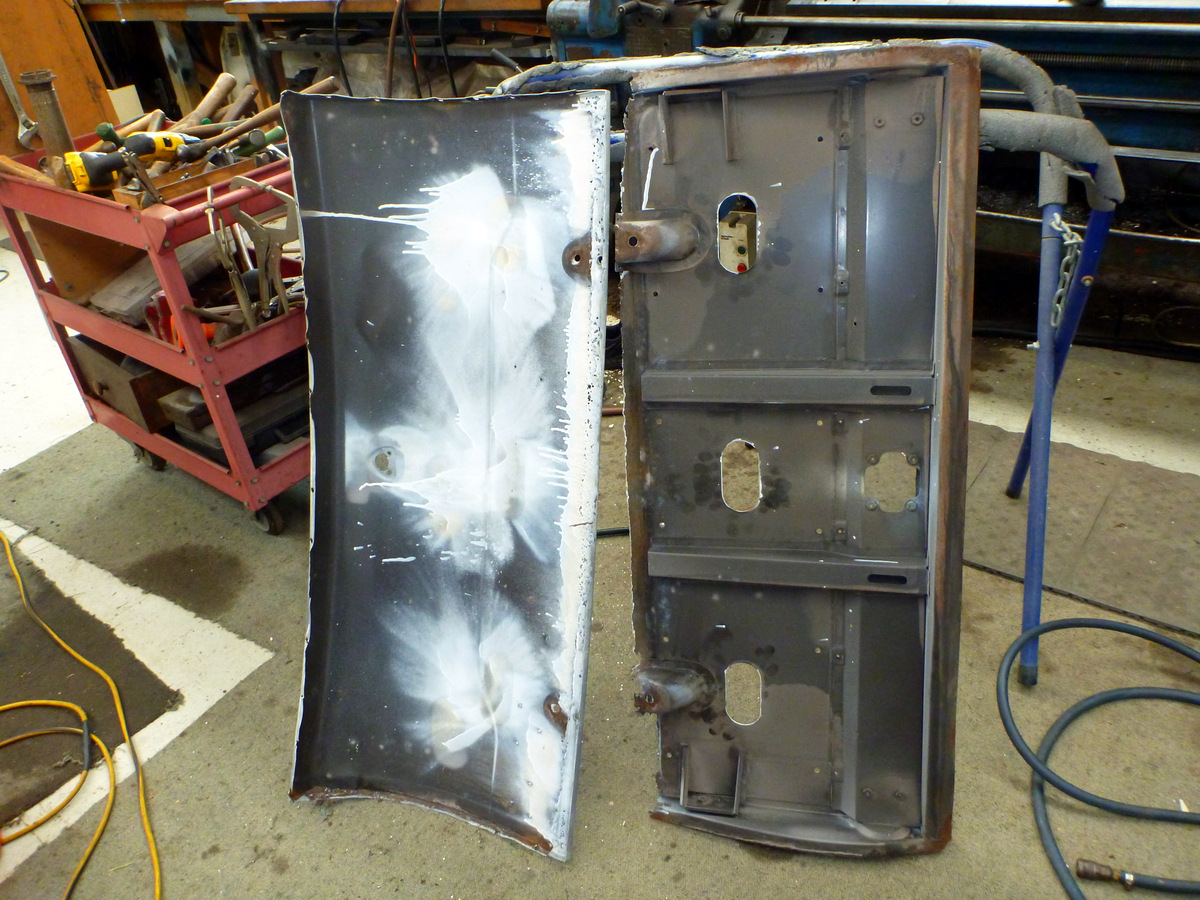
Spent money on new tools (18v brushless drill and a spot weld drill) and attacked the tailgate. Between the inner and outer rust, and dents in the outer skin it seemed best to split the two parts.
Came apart without too much trouble.
Inner frame is in pretty good shape, apart from the lower edges.
I'm going to repair it in sections, so first patch is for the worst of the inner section.
This piece will repair the shaped area at the inner bottom of the tailgate
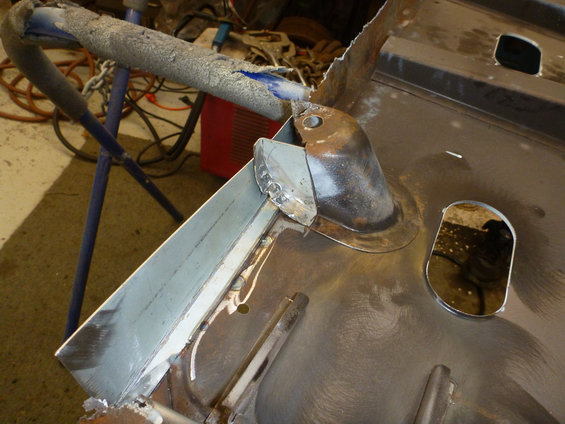
Also made a start on the hinge brace.
Probably the hardest part of this will be the channel section that I guess retains the seal. What's left of it is still attached to the outer skin. A challenge for tomorrow.
-
5
-
-
You need one of these
/sticker thread
-
3
-
-
Got a bit inspired today.
Peeled off all the covers from the HB (after i dusted about 1" of dust fron the top lol)
Hooked up a battery and cranked it over for a bit to prime fuel pump (this also pumps some oil uo and around engine before firing. Start ya bastard doesn't allow oil pressure priming). Then covered the carby intake a bit (i pissed the choke off ages ago) and cranked again for about 4secs til she coughed.
Then half throttle flicked the key and away she purred.
Been almost a year since i fired it up last...
If i can get her out the driveway later i may go for a spin. ...
Quality British engineering right there.
-
1
-
-
Design based on this (you might need to join forum to see)
-
Also, for cert
... terminate in a position where the outer end of the exhaust pipe is not directly underneath the passenger compartment....
-
Since when do campers need aero?
/lock thread.
-
2
-
-
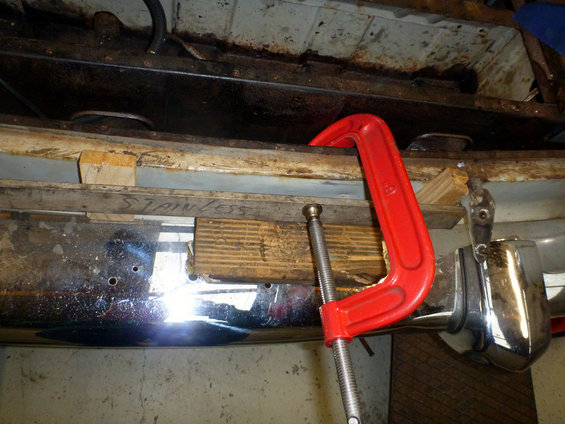
Have been busy with family activities for a few days but managed to pull the old brake flexible hoses off last night.
New replacements made at ABC in Wellington, along with some new hardware.
$170 for this lot.
The hard line to the rear needs replacing, but the front ones look OK.
-
8
-
-
- Popular Post
- Popular Post
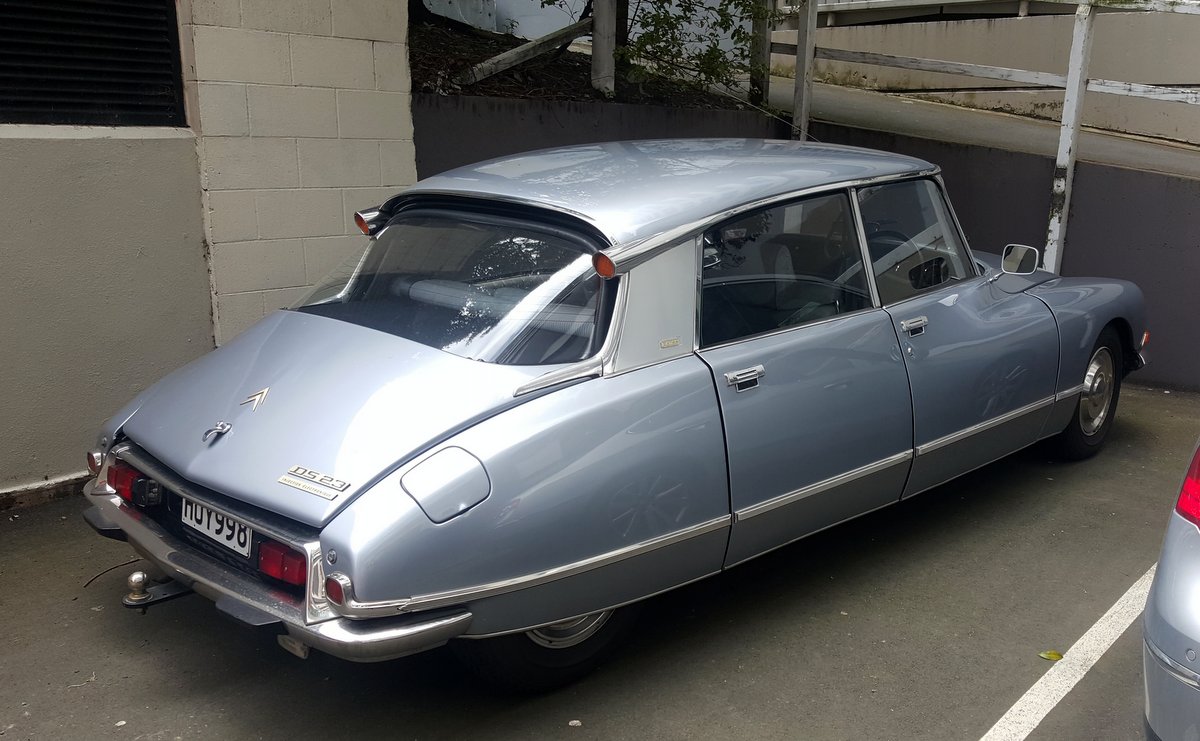
This barge parks outside where I work sometimes, mostly on sunny day.
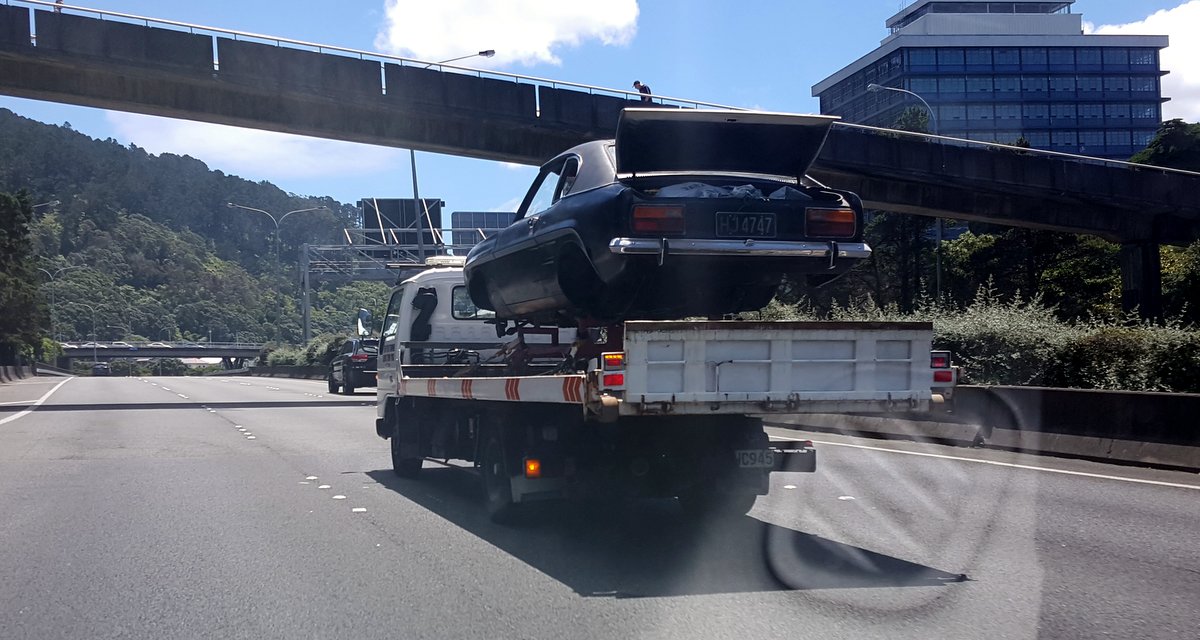
Seen flying on the motorway....
-
10
-
-
just like to mention your sweet english wheel .. homebuilt?
Yes, quite a few years ago now. Upper wheel is a crane castor of some sort. Frame is all scrap steel bits. Lowers were machined from a hydraulic ram piston rod.
Design was based on wheelmachines.com in the early days. Pretty easy to do, mostly from steel plate.
-
1
-
-
Good luck with that lot.
-
I bought some new wheels direct from the USA. They were shipped via an importer linked to mainfreight so they did the paperwork mostly. I just paid them when I picked up the shipment. You will likely have to pay gst on the purchase and shipping costs.
-
The brake pedal bit was added recently in the standards update.
-
1
-
-
Cert not required if
the OE gearbox cross-member has not been heated, cut, or welded; and
the OE gearbox cross-member mounting to the OE body or chassis members is unchanged; and
no replacement gearbox cross-member is used; and
the OE drive-shaft(s) remain and is un-modified; and
no substantial modifications have occurred to the floor or gearbox tunnel area, other than provision for gear-shift mechanism; and
the braking system is not modified or changed, including the brake pedal
So, should be OK?
-
Been mostly busy on other things the last few days, including an OS camp trip to Otaki Forks.
Had to move this out of the garage to do some WOF work on the daily.
Traveller brothers.
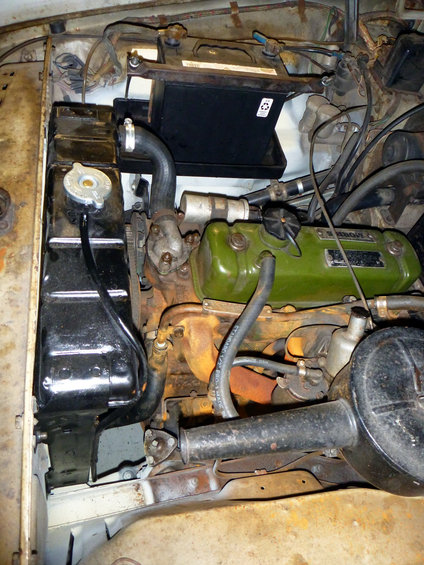
Hacked off the tatty thermostat housing and put the spare one on. It's not quite the same angle but will do the job for now.
New thermostat installed and radiator back in. Went for a test blat down the road and handled the gears better this time.
Made a start on the tailgate outer tonight.
-
9
-
-
holy shit, that metal work is incredible!
also not that keen on acid dips, having just spent the last few years removing rust from the seams of my car.
IKR, I looked through all the pics and got a bit depressed.
Anyway, the acid dipping resulted in a lot of metallic (magnetic - there is pic) crud left in inaccessible places which hadn't been neutralised. A car unibody structure is complex and it is unlikely to get fully cleaned out.
Basically, buy a less rusty one to begin with.
-
2
-
-
I can't be sure. I've had some pits done in Tawa - cost $85 for a Morris Minor guard. I also had an assembled front valence done recently.
There was an MG midget going in to the dip tank while I was there - I didn't ask the cost.
I read through the HQ build recently, it was a rusty shell and there was a lot of muck left trapped that probably would have rusted quickly.
-
1
-


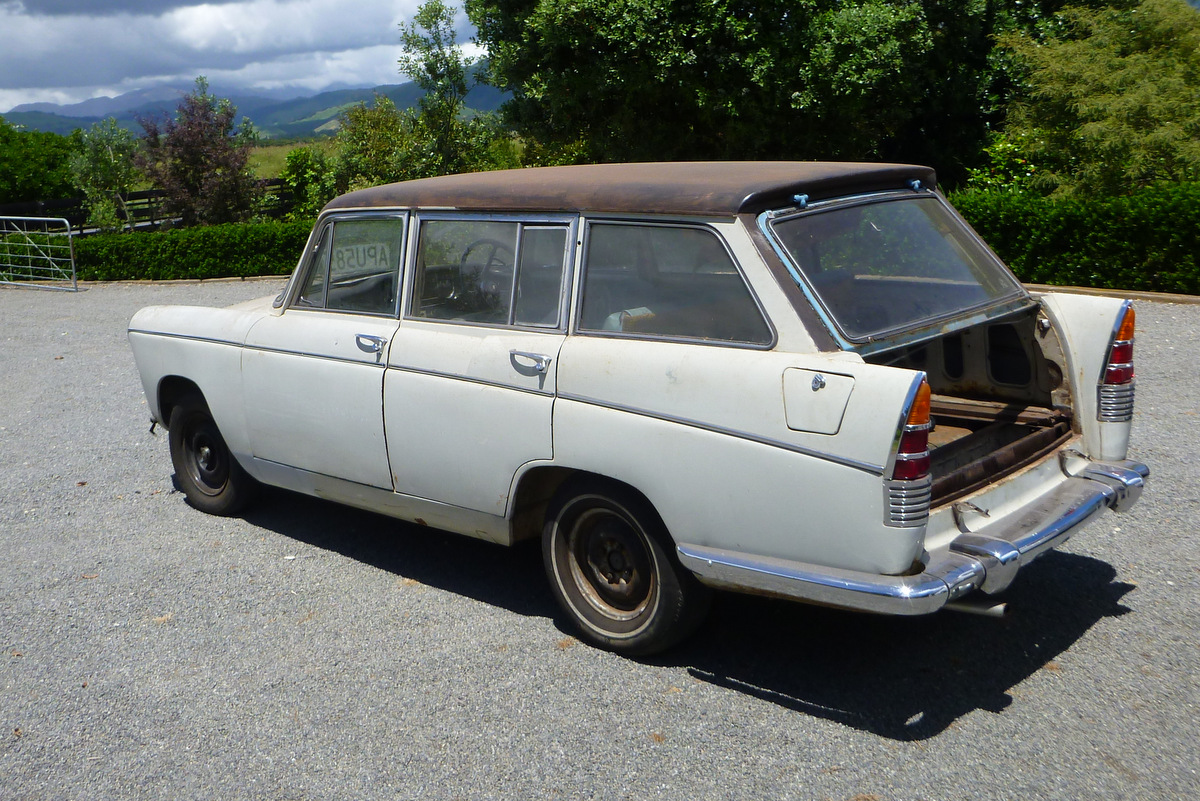

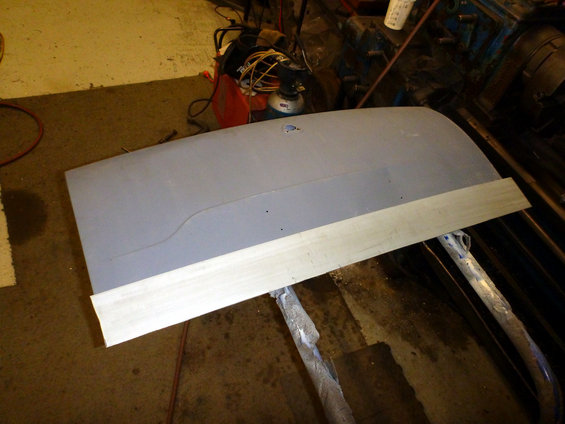
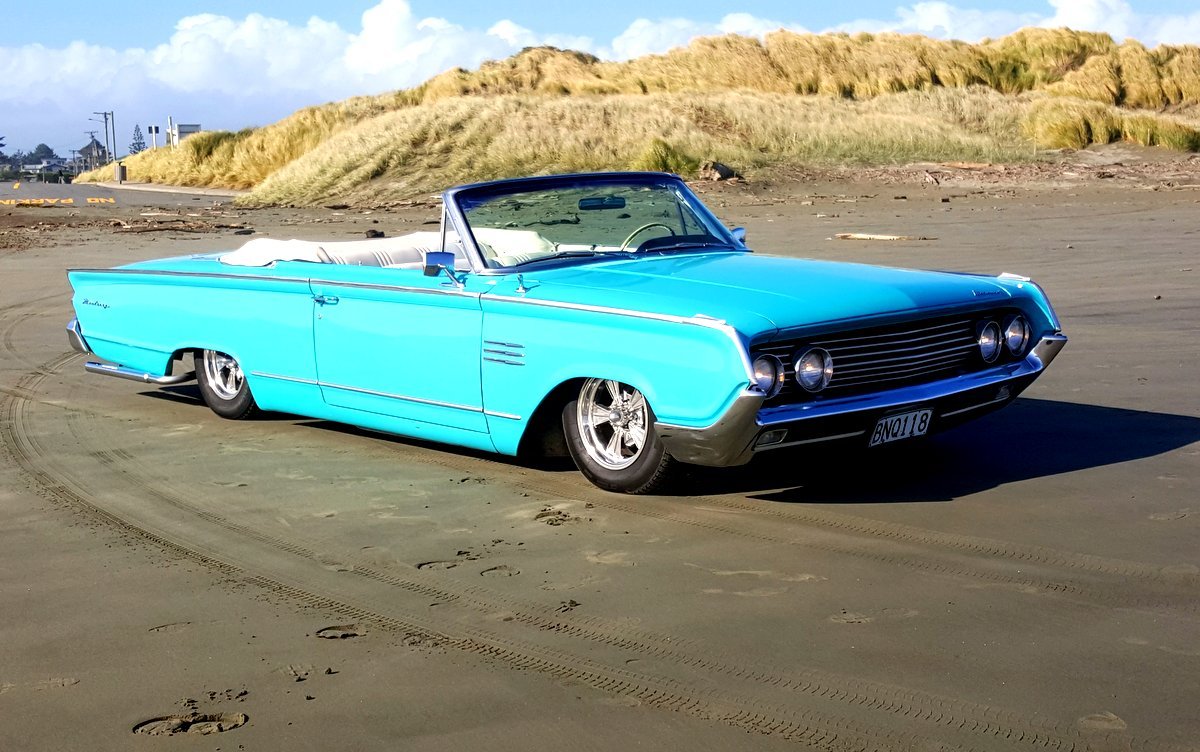
Nominal's 1961 Morris Oxford Traveller
in Projects and Build Ups
Posted
When the pattern fits closely to the metal then you are about there.
I panished it as much as I can using a rounded panel hammer on the inside against a steel block, and also bent the flange along one edge.
It's not perfect but will do for now. The pipe did a bit of damage to the surface finish but a filler skim should hide that. It's mostly behind the bumper anyway.
I need to make the other half too.