


Grizz
-
Posts
150 -
Joined
-
Last visited
Posts posted by Grizz
-
-
Complete loss of continuity here…….
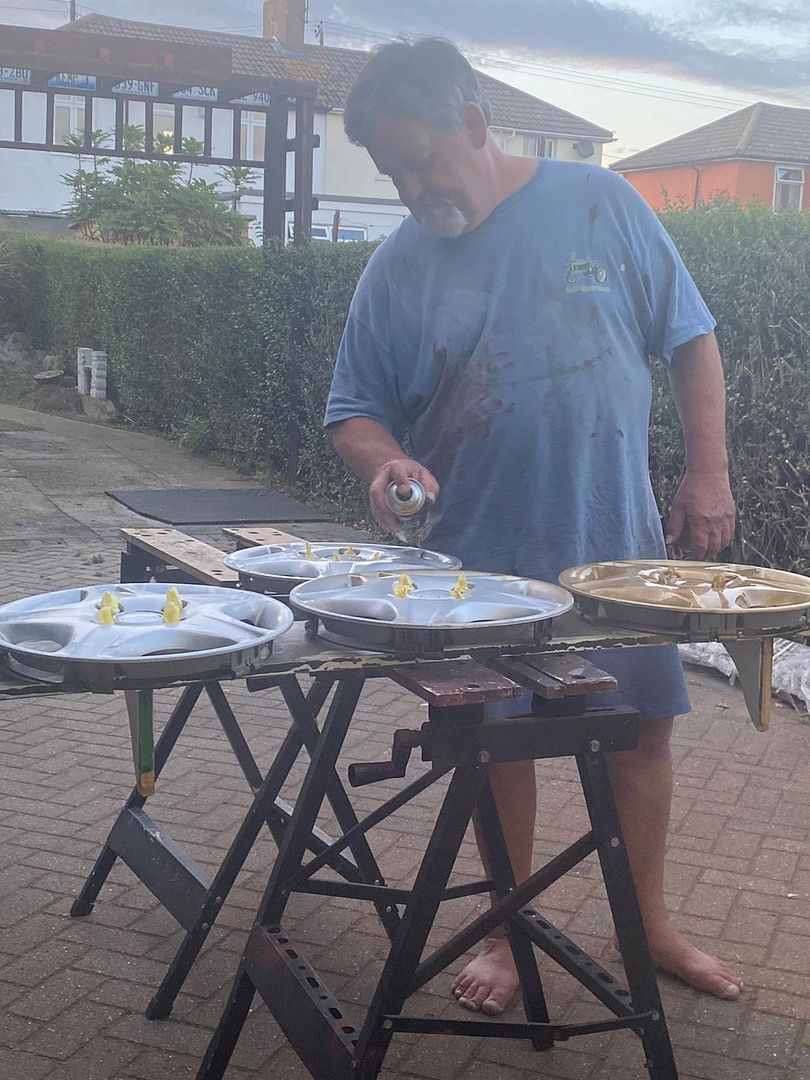
I cleaned and painted the original hubcaps and fitted them.Ass

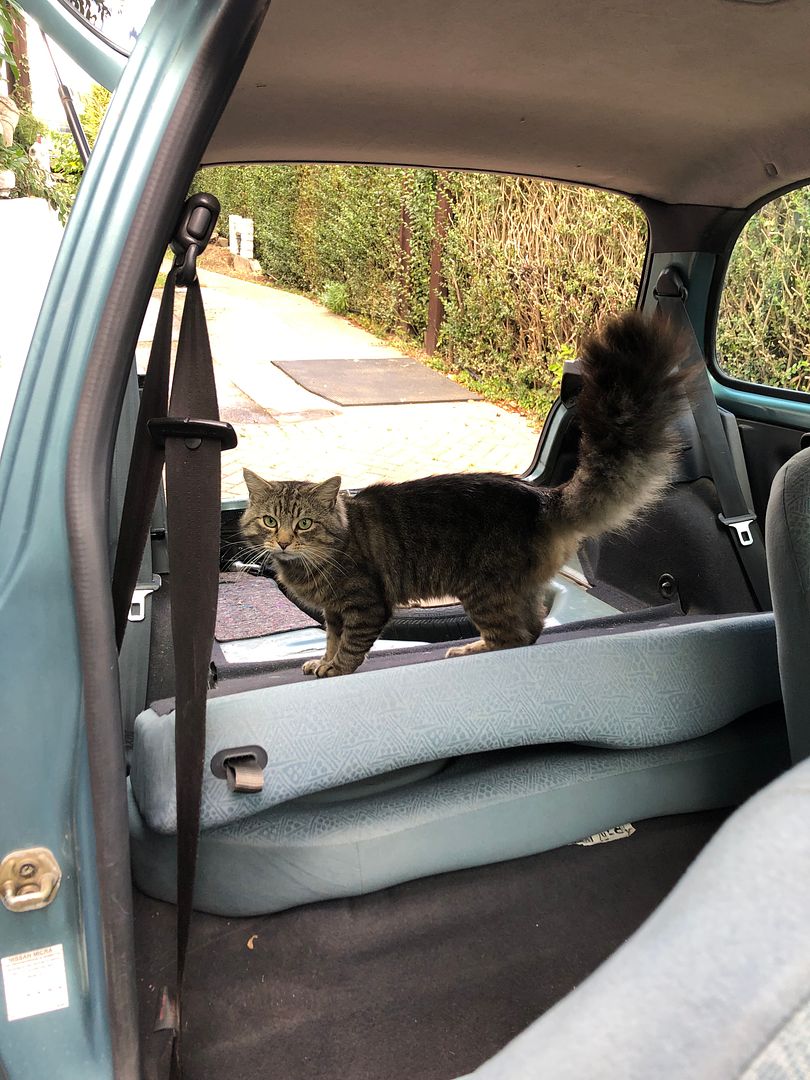
When I am working in the garage, George often joins me, finding a spot to curl up, and then at other times, he will walk around, inspecting, checking.
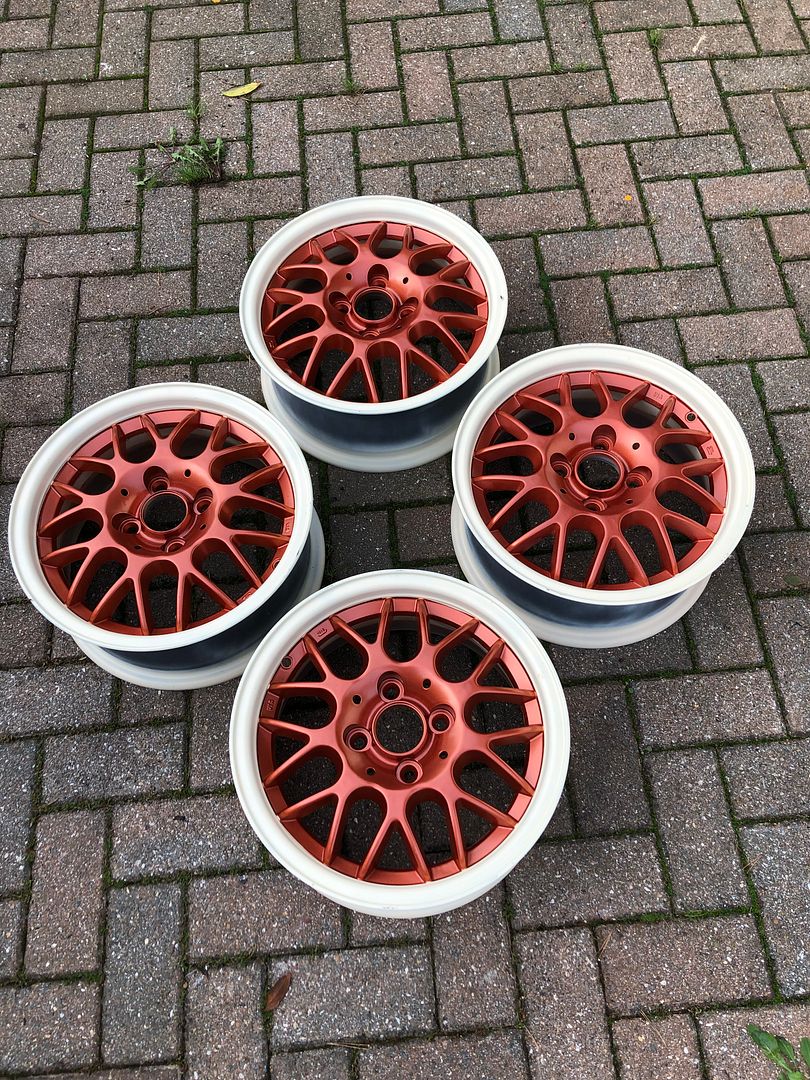
But, bought a set of wheels with tyres for the Scruffy Micra.
Blasted and painted now.
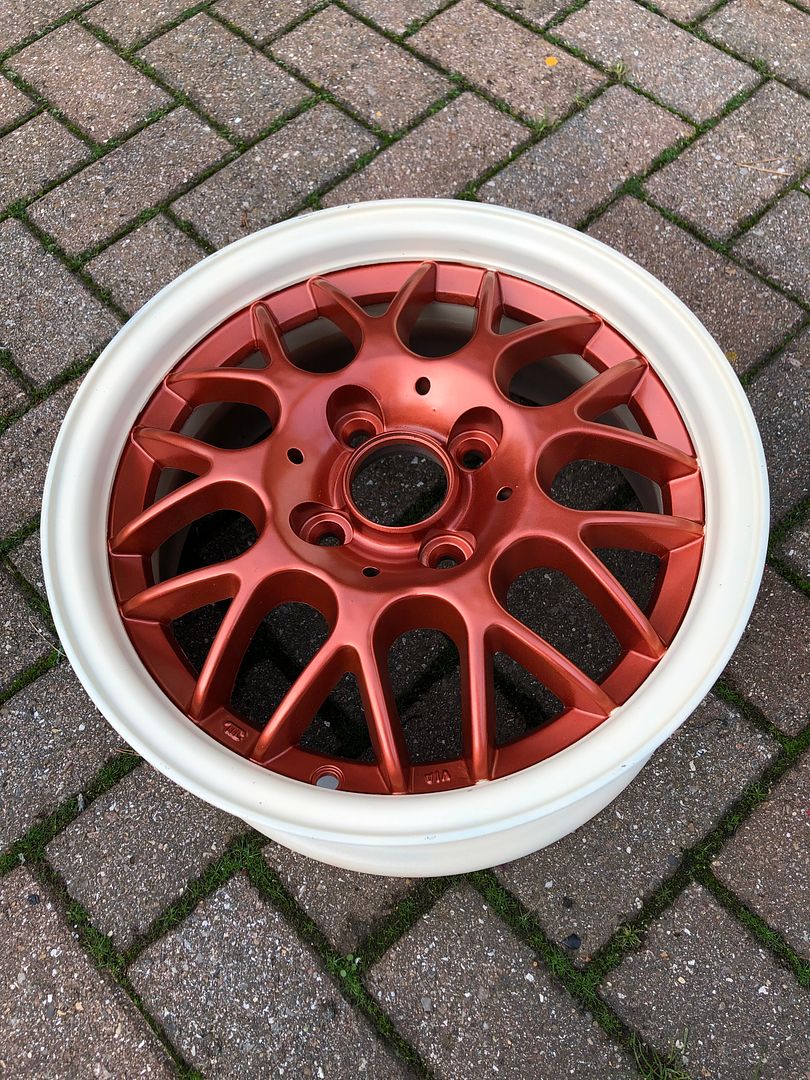
Unmasked the wheels this morning early before work.
I think I like that, a lot.
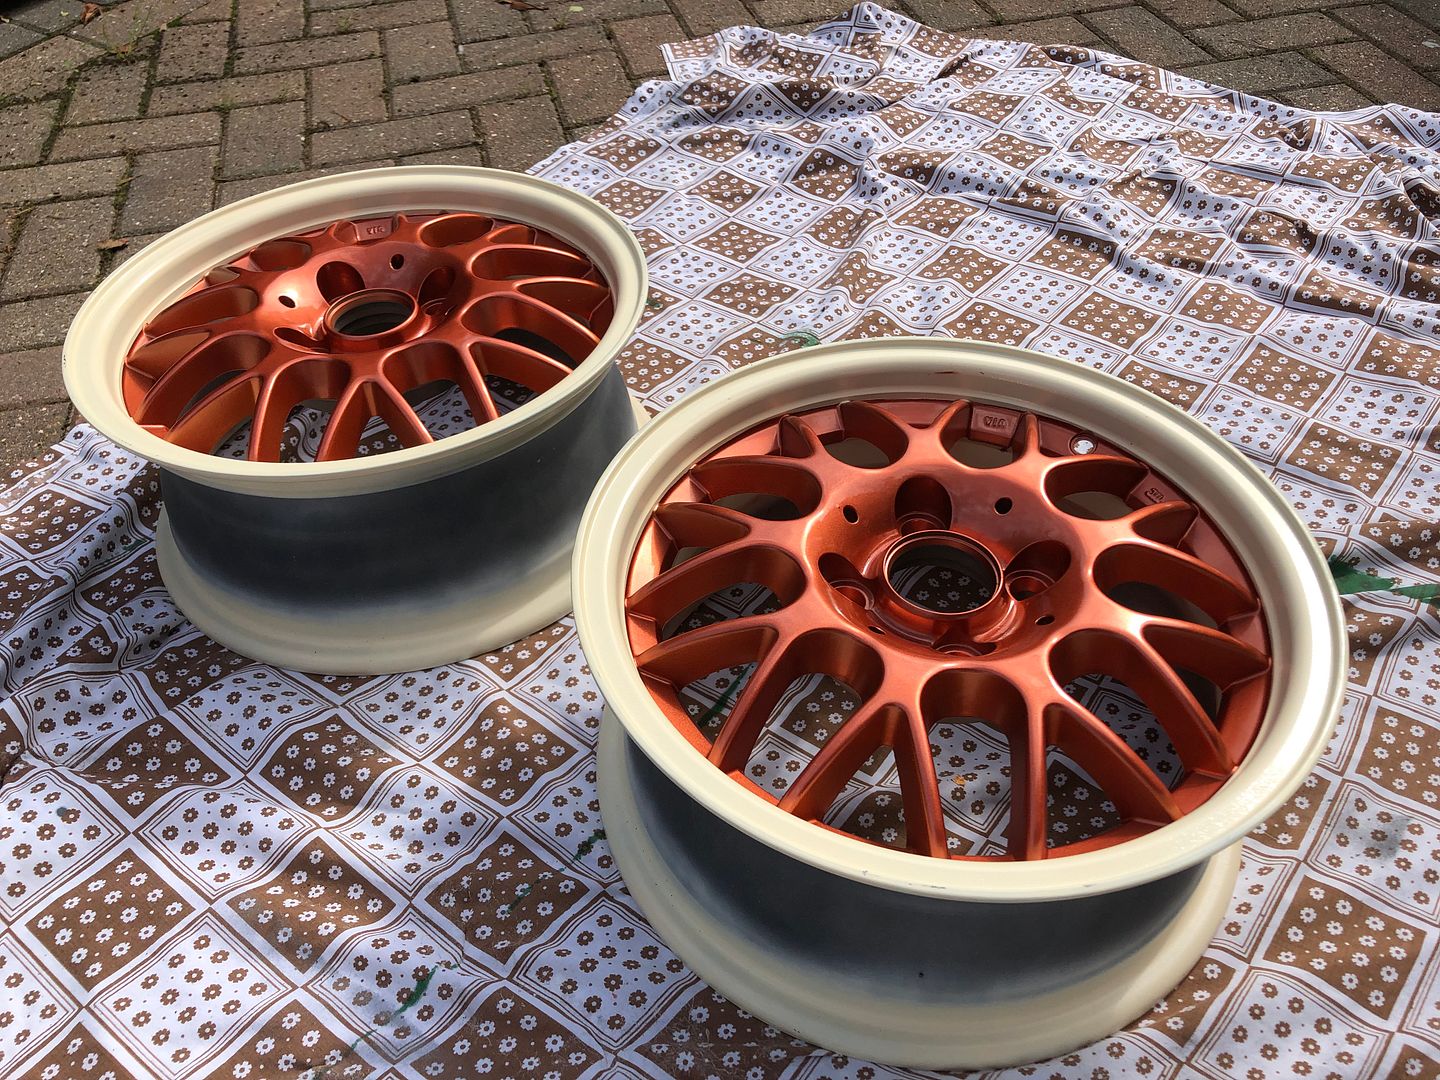
Better contrast than expected, and to be honest, the cream works better with the copper than it would have with the original,colour.
Later in the day I also sprayed all the surfaces with two coats of clear lacquer
Not sure if the photos will show it, but certainly works for the naked eye.
-
 6
6
-
-
Ready to Rock n Roll or curl up and Die.
The bolts need plating removed.
Not going to try remove the studs.
-
1
-
-
One more try.
Been tossing this idea around in my head since making the Celtic Cross.
Today, after helping a mate move some gym equipment (two trips) I came home, and got going with it as Nicola was out shopping.
First up, I drew up a rough robot to get placement and size on the block.
http://i294.photobucket.com/albums/mm90/niknakpix/rob1_zps1c346e10.jpg
Started by cutting away the excess.
http://i294.photobucket.com/albums/mm90/niknakpix/rob2_zpsbe1262b0.jpg
Hand held blade works a treat to get into tight spots.
http://i294.photobucket.com/albums/mm90/niknakpix/rob3_zpsbed5e7fd.jpg
http://i294.photobucket.com/albums/mm90/niknakpix/rob4_zpsd2501da3.jpg
Arms made thinner.
http://i294.photobucket.com/albums/mm90/niknakpix/rob5_zps26684abf.jpg
About four hours later my wife thinks I am a hero.
http://i294.photobucket.com/albums/mm90/niknakpix/rob6_zps1f744bd3.jpg
And in my opinion ...... enough of a reason to spend more than 4 hours in the garage sucking dust.
http://i294.photobucket.com/albums/mm90/niknakpix/rob7_zps7cfe9ae0.jpg
Ohhhh, and she still does not have the Celtic Cross.
-
FFS.
Trying to copy and paste from 8 years ago…..
some give pics, some don’t, seriously wtf
-
Carried on tonight, doing the sides.
Original plan was to do lattice work sides, but decided to keep it very plain, so as not to detract from the front detail that I finished as well tonight.
http://i294.photobucket.com/albums/mm90/niknakpix/cross10_zps50315d72.jpg
Side details completed.
http://i294.photobucket.com/albums/mm90/niknakpix/cross11_zps1c20ad4e.jpg
http://i294.photobucket.com/albums/mm90/niknakpix/cross12_zps8a5ea886.jpg
Altogether now.
http://i294.photobucket.com/albums/mm90/niknakpix/cross13_zpsea1e5e79.jpg
Next up will be doing Nicola's birth year in Roman numerals across the back.
MCMLXIV
Then I need to keep my mouth shut till the 5th Feb.
Carried on tonight after work.
Roman Numerals for 1964 pencil drawn, but as you can see, freehand left some space, so I just freehand carved over the pencil.
http://i294.photobucket.com/albums/mm90/niknakpix/cross15_zps37cdfce1.jpg
http://i294.photobucket.com/albums/mm90/niknakpix/cross16_zps63994539.jpg
http://i294.photobucket.com/albums/mm90/niknakpix/cross17_zps4192bfc0.jpg
Back where we started, a before and after together.
http://i294.photobucket.com/albums/mm90/niknakpix/cross18_zpscd4f9727.jpg
Now to wait till the 5th February.....
Going to be difficult to keep quiet and not show her.
-
Long overdue carving.
This COVID 19 pandemic has allowed me to take a bit of time to create a Tiki Racer garden ornament.
Inspired by Mr Tiki, nd a toy I bought t a boot fair years go.
So I went down to my -lie of blocks.
Pulled a special one out/
Basic design
Excess cut away.
Of course cutting this part between the wheels will be interesting
Baby steps.
Seat cut out.
Quick prototype Tiki driver from an off cut.
Shaped.
And in place.
At this point I come inside.
Tomorrow the hard part starts, carving and defining the wheels, recessing the drivers cab and seat.
Plus getting the front and rear curves just right.
Later.
.-
4
-
-
- Popular Post
- Popular Post
My kinda thread with the amount of random stuff I get up to.
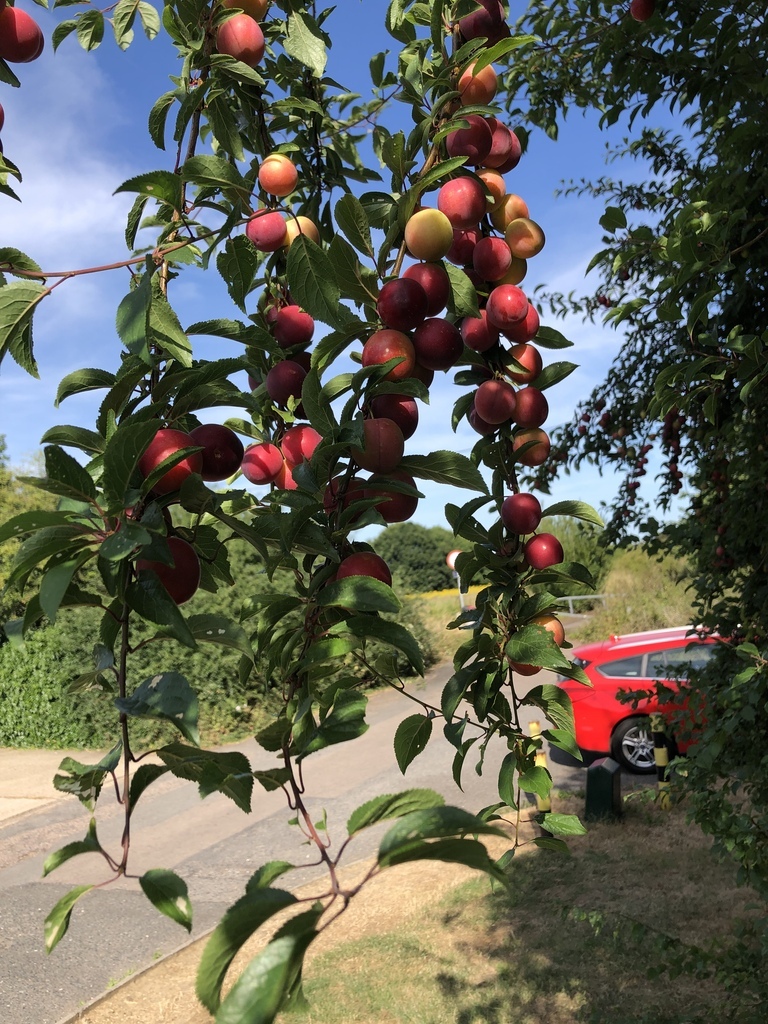
Dry summer.
Hot days, relative to monsoon weather, has made the yield of wild fruit less than usual as @kevins and I both realised.
So this year my fruit collection was in three different places.
Near the vets was good for about 1.5kg and one of Sally, Bonnie and my walks has a few trees, of which only three had any accessible, usable fruit, it gave about 2.5kg as well, so I had 4kg by Saturday afternoon, stashed in the fridge.
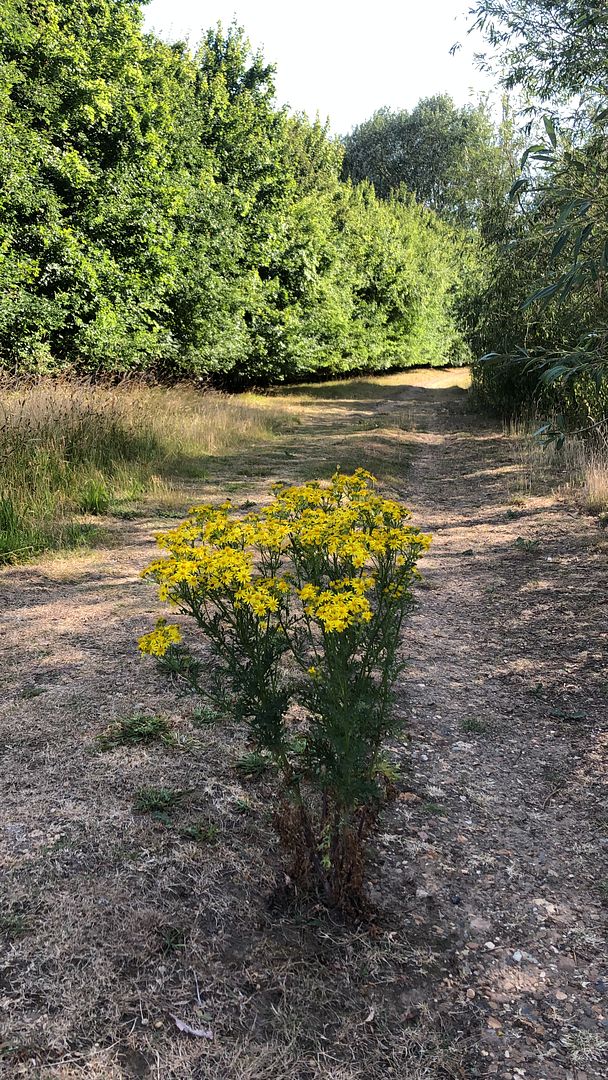
Perfect dog walking paths.
Finding the fruiting trees becomes a game too.
Sunday I went looking about 7 miles from home on the isle of grain down the road my electrician lodger goes to,work, I recalled there was fruit when he came here last year……
Booooom as @pauly says.
Jackpot.
Of course I had to share with this girl, I thought she was a boy……..
Friendly.
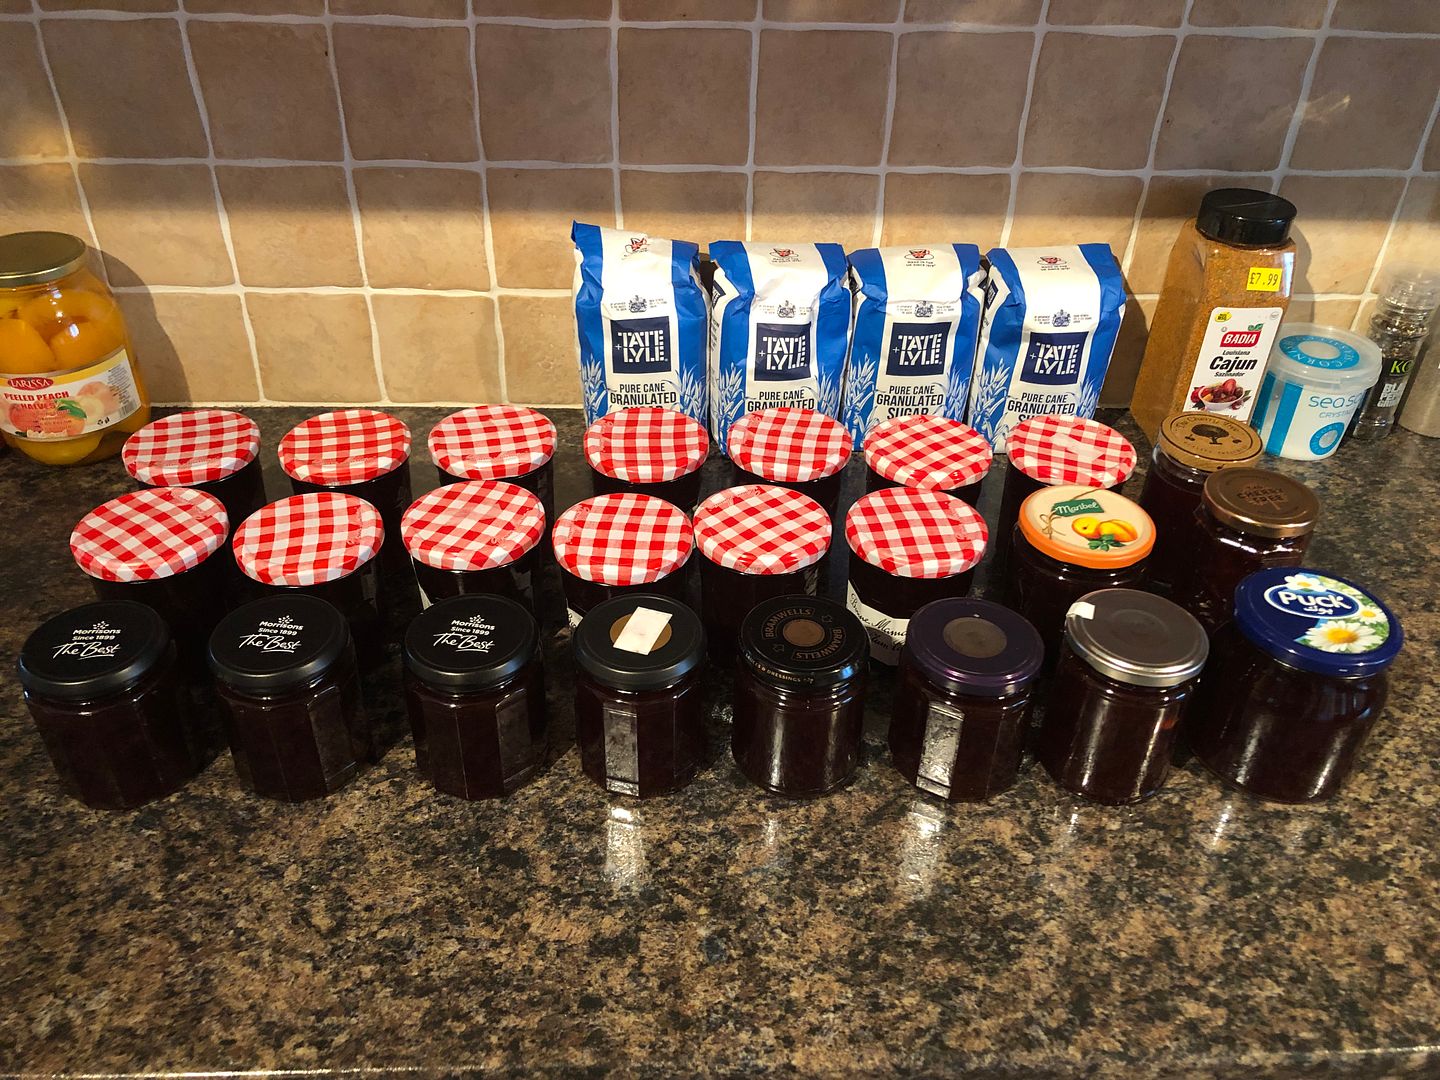
About 6 varieties of plums all told in my collection that made up 12kg raw with stones.
Back home I cleaned them all, and weighed up the lot.
8kg from the trees in the lane, of course minus what the horses had.
So a total of 12kg in fruit.
I went to the village and bought 10kg of sugar as I use less than the traditional 1 to 1 mix of fruit, sugar and a cup of water per kilogram.
Split the lot into 2 and 4 kilo and cooked them in two pots, with the stones in.
MISTAKE.But I got the stones out when halfway through.
Will do the second 6kg tonight after work.
And will remove all the stones before cooking, another spectacularly shiite job, but has to be done.
By 8.00pm I had bottled and cleaned up the kitchen.
RESULT.
-
15
-
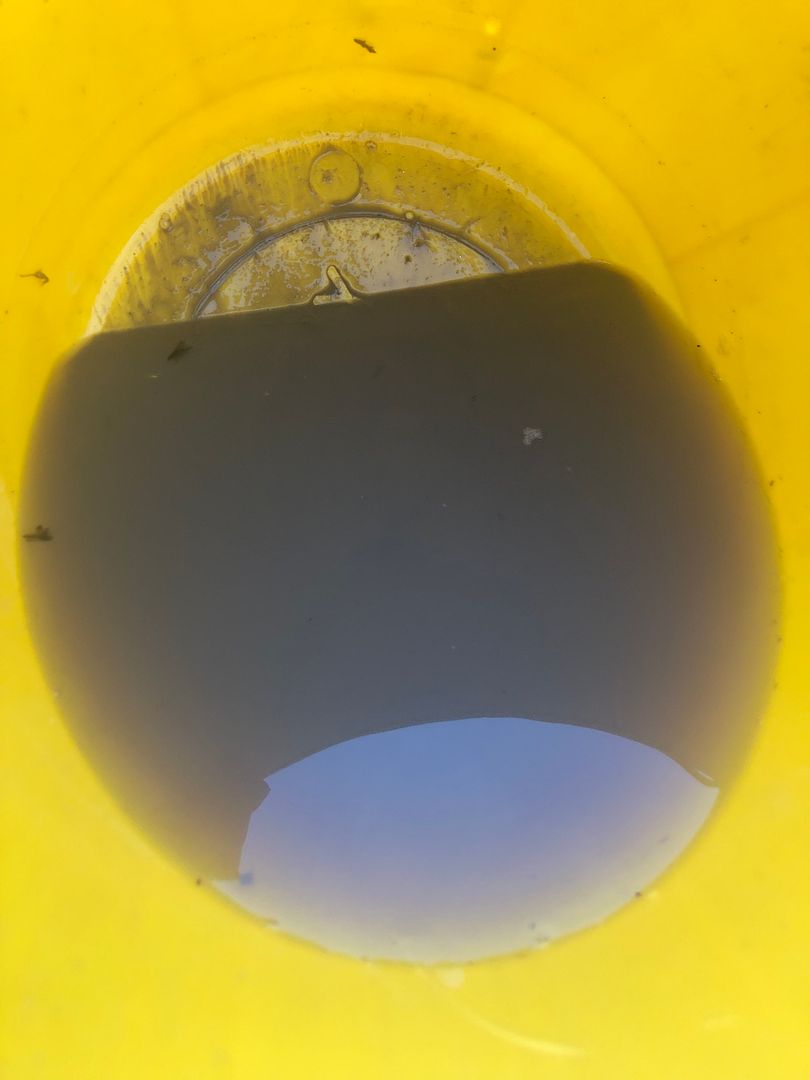
I used a Vax wet vacuum cleaner to clean the seats.
Front seats after the first cleaning relinquished a lot of dirt, settled in the bucket.
Yesterday afternoon I got the grinder in, cut wheat was left of the broken bolts off, followed by a slow grinding back with my favourite tool.
Need to replace these.
Grinding back.
So before I get it in the neck, both sides had been threaded in, one into a blind casting, the other, through the casting and into a fixed nut as far as I can see.
But I think a couple of long M8 bolts welded in place should do the job.
if not, refrigerator time.
-
1
-
-
1 hour ago, yoeddynz said:
Yeah it's a neat design (when the bits ain't corroded to that level) and yeah - bolts instead of studs are fine but they need to be just the right length of clear shank so when done up tight they protrude the same amount as the original studs. It's purely the tension on those springs that should be holding it all together.
How have you got on with this @Grizz? Or are you dead from excessive swear laden sweating in the heatwave going on there?
There you go.
So not a lot of swearing……… YET.
-
I thought I would ask the question here as there is a lot of knowledge.
Based on what I see here it is a phone call away from becoming a double door refrigerator.
And making the best decision may not always be the most popular
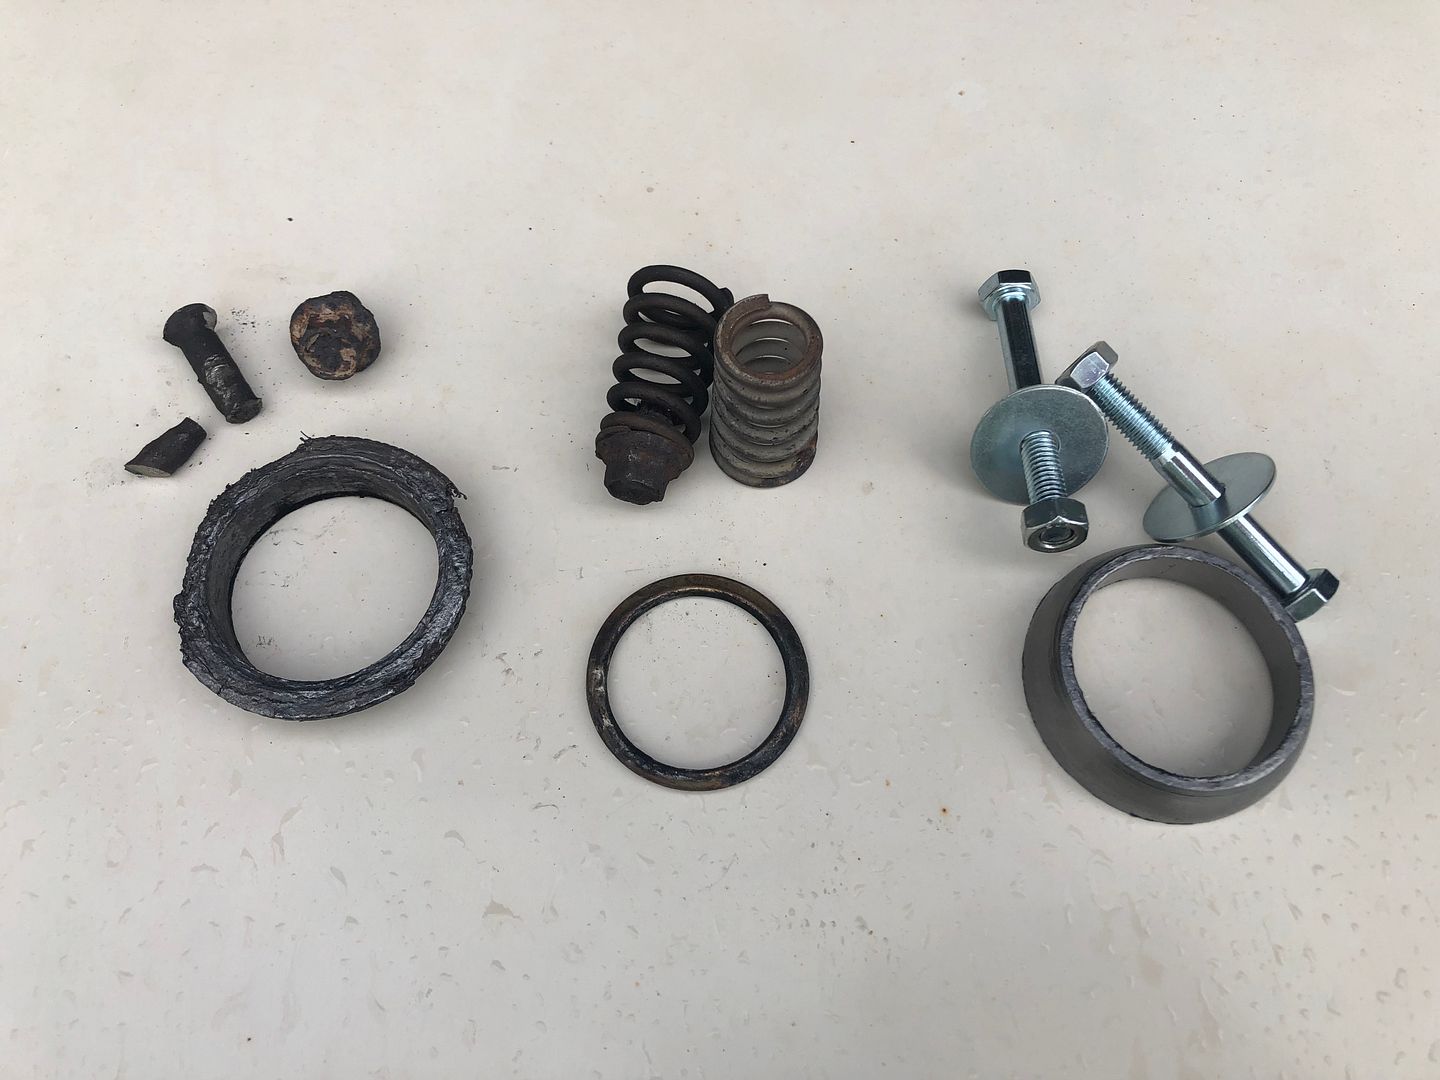
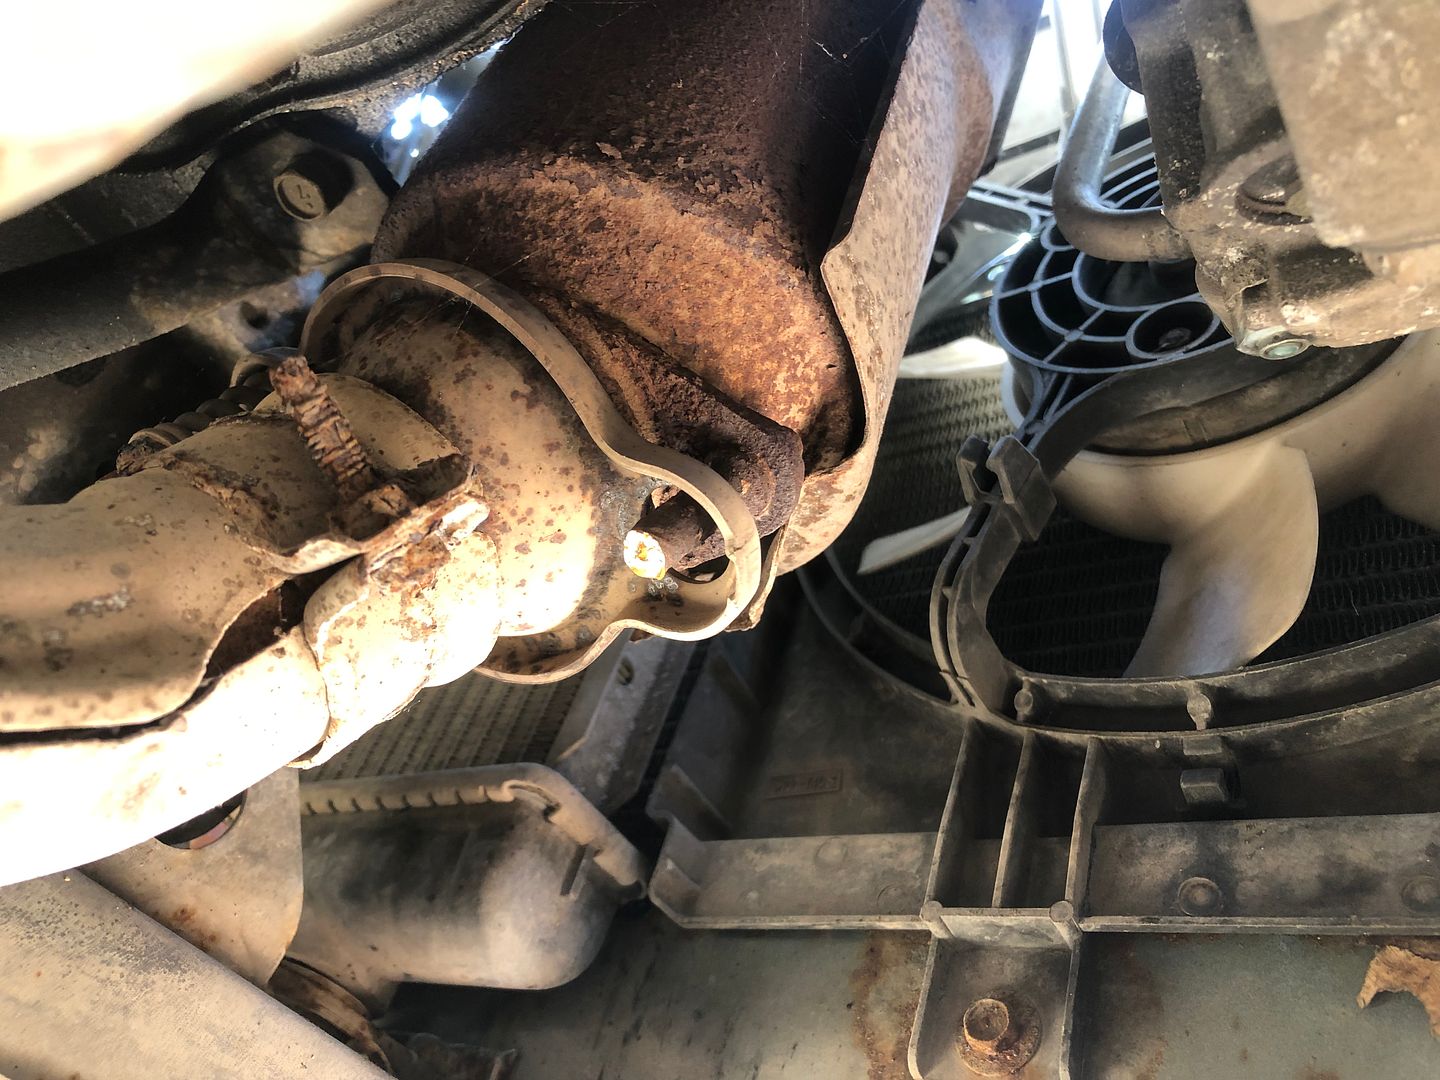
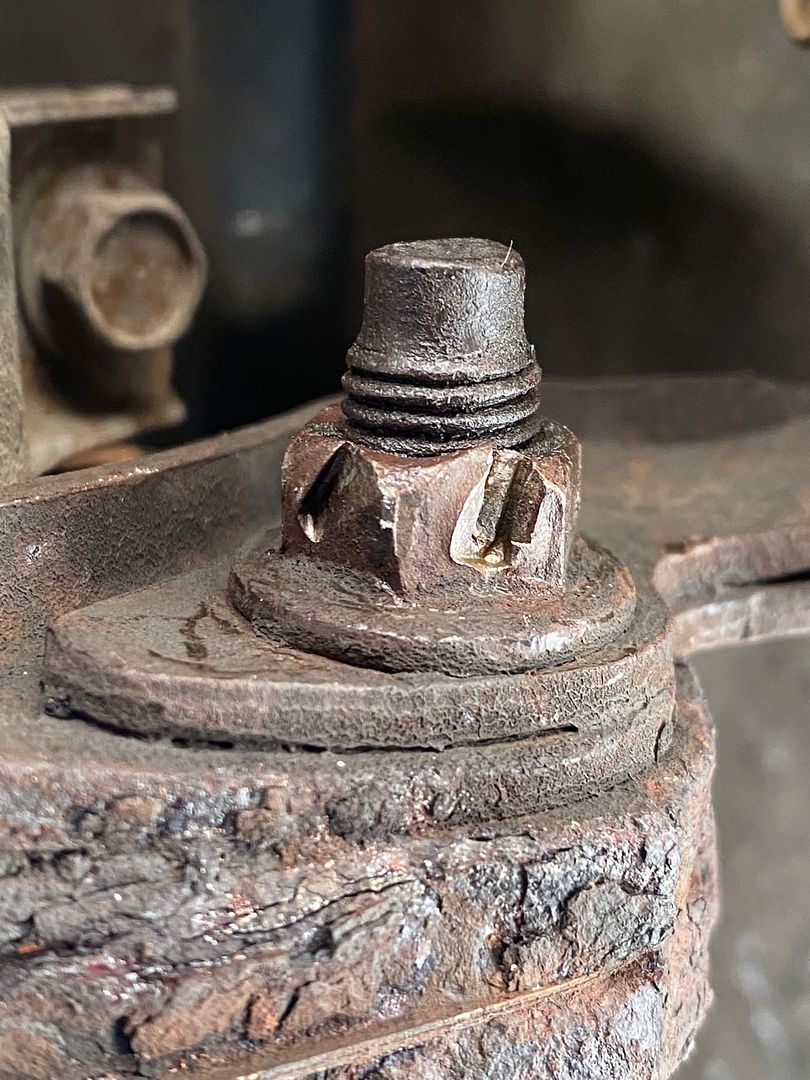
A Small engined manifold attached catalytic converter with a pair of snapped bolt heads…….
These are meant to keep a pair of springs in place to absorb the movement of the engine, against the exhaust with a cup and ball design.
At 130k miles trying to undo them, the hapless owners managed to have both heads break off with an impact wrench, despite copious amounts of penetrating oil.
Now stuck with a pair of studs protruding from the cat, one threaded into the casting, the other seemingly bolted to a nut……….
Options seem to be:
A) To cut the studs flush, centre punch, drill out and tap new threads, add new bolts
") To remove the manifold after dismantling half the front end and repeat “A” after snapping half the fasteners along the way, including manifold bolts.
To remove the manifold after dismantling half the front end and repeat “A” after snapping half the fasteners along the way, including manifold bolts.
C) Clean up the studs well, clean the catalytic converter face, make sleeves to fit over the studs with threaded ends to take new external nuts to hold the downpipe cup and then weld either Mig or Tig in position, these sleeves and return the springs, assemble the downpipe and refit the exhaust.
The evidence.
This is the general condition down under there.
And “work” prior to me seeing it.
And NO, I honestly have no idea how that was created.
-
I will post this question in @yoeddynz K11 thread in the General section in case someone has some previous experience of fixing without setting it alight.
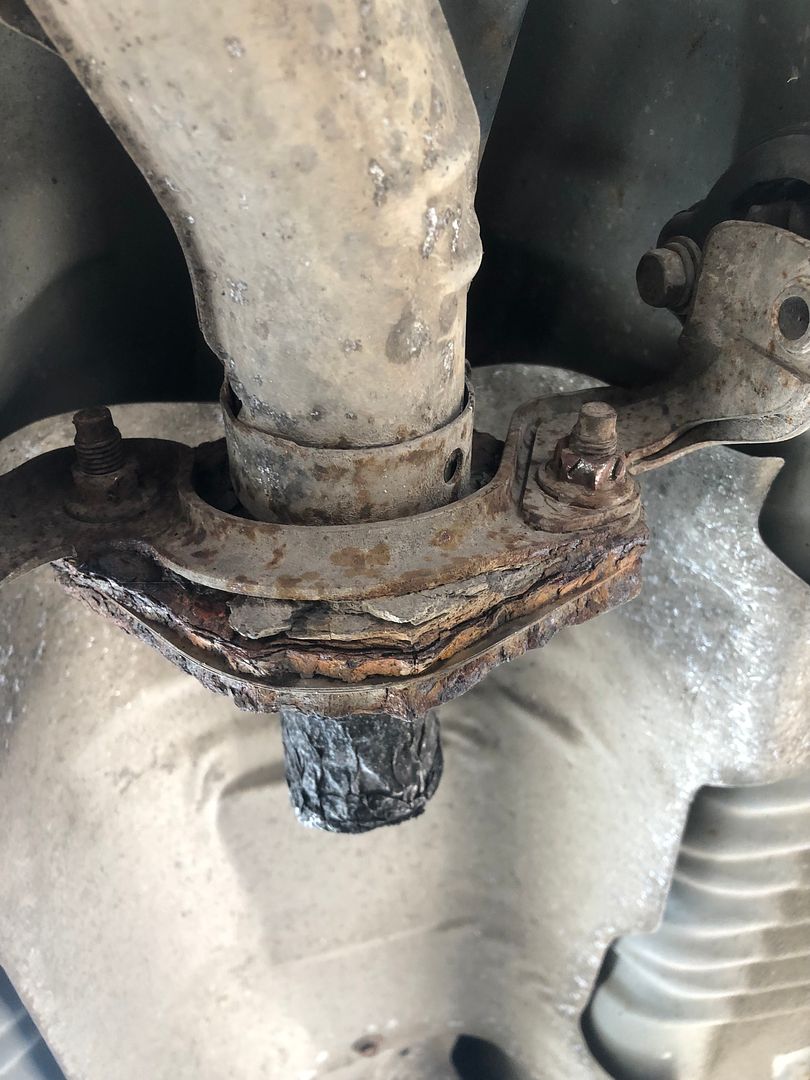
I bought the car knowing the one stud in the catalytic converter had been snapped and that the rear section of the exhaust was missing, PLUS the nuts at that junction had been attacked by an angry badger.
I suspect the flanges etc all all original so not too much finger pointing at this point.
So this is what I have right now.
Access to the catalyst is nigh on impossible for large hands and small tools.
And after 130k miles or 200k km it has possibly all fused together .
My thoughts are to grind off what is left of the studs flat n flush, then centre punch and hopefully get a drill in there with a TiN drillbit and drill put, then tap a new thread in, and replace the two bolts.
And you cannot go through as the bolts are in the casting of the catalyst body.
I hope that makes sense.
Any advice welcome, of course drinking a beer is good advice too.
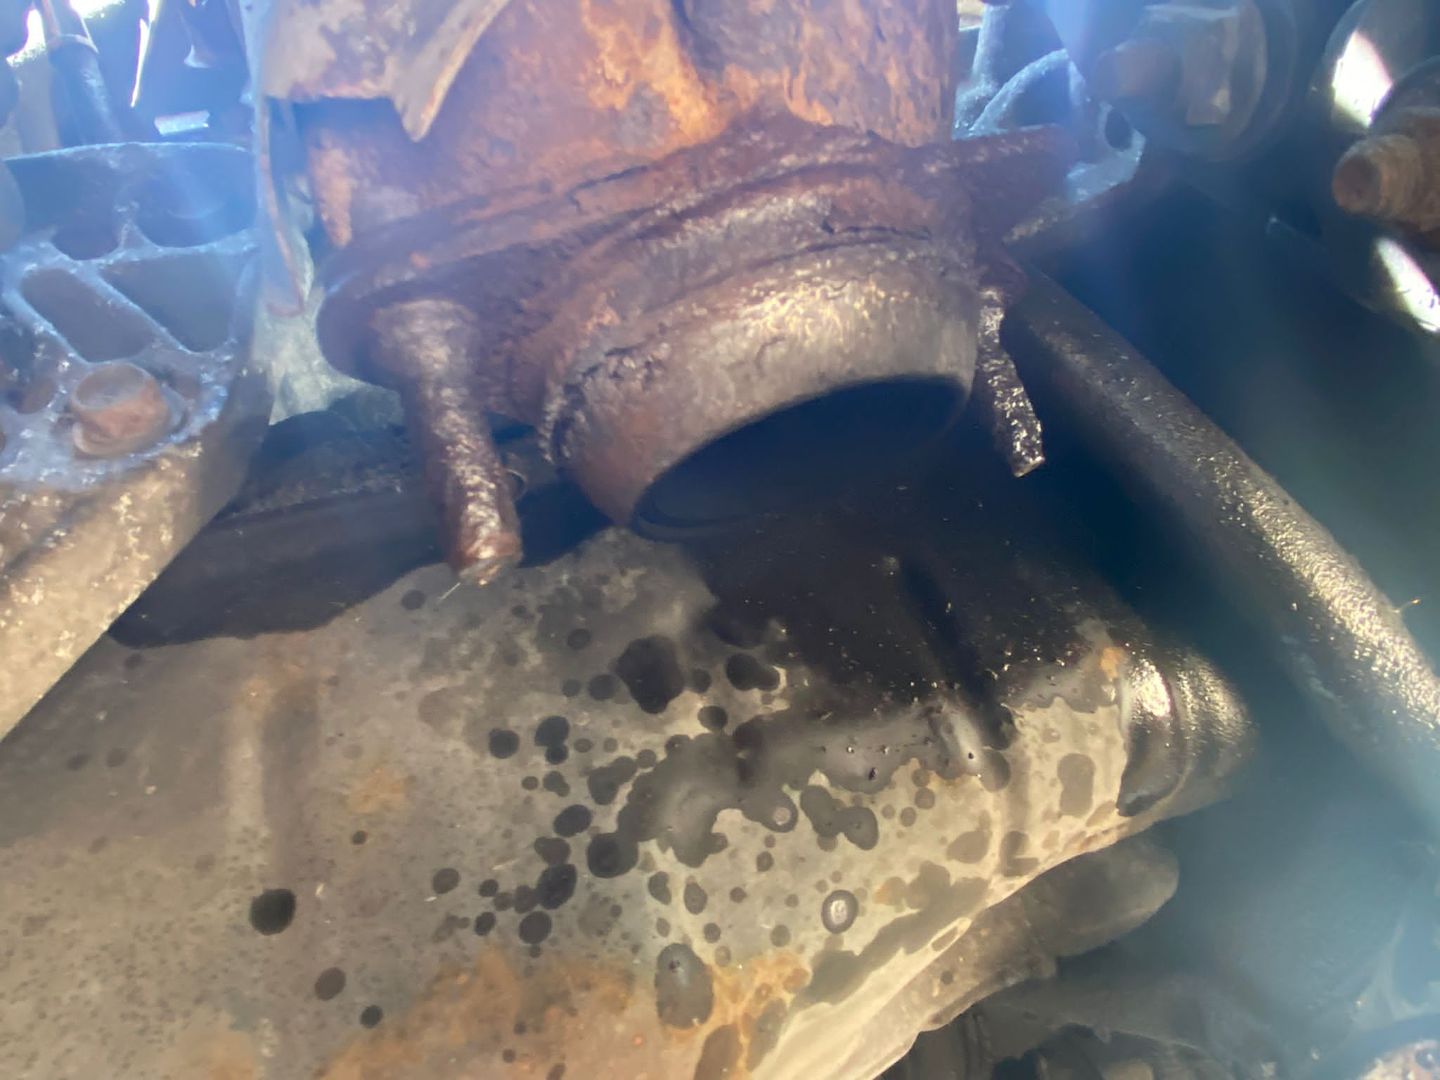
The other end of the downpipe looks like this where it is meant to have the two flanges meet.
And my face AFTER I realised what a hole I had dug for myself.
Still, who knows……. It could be easier than the pain I am anticipating.
Prove me right/wrong.
Thanks.
-
1
-
-
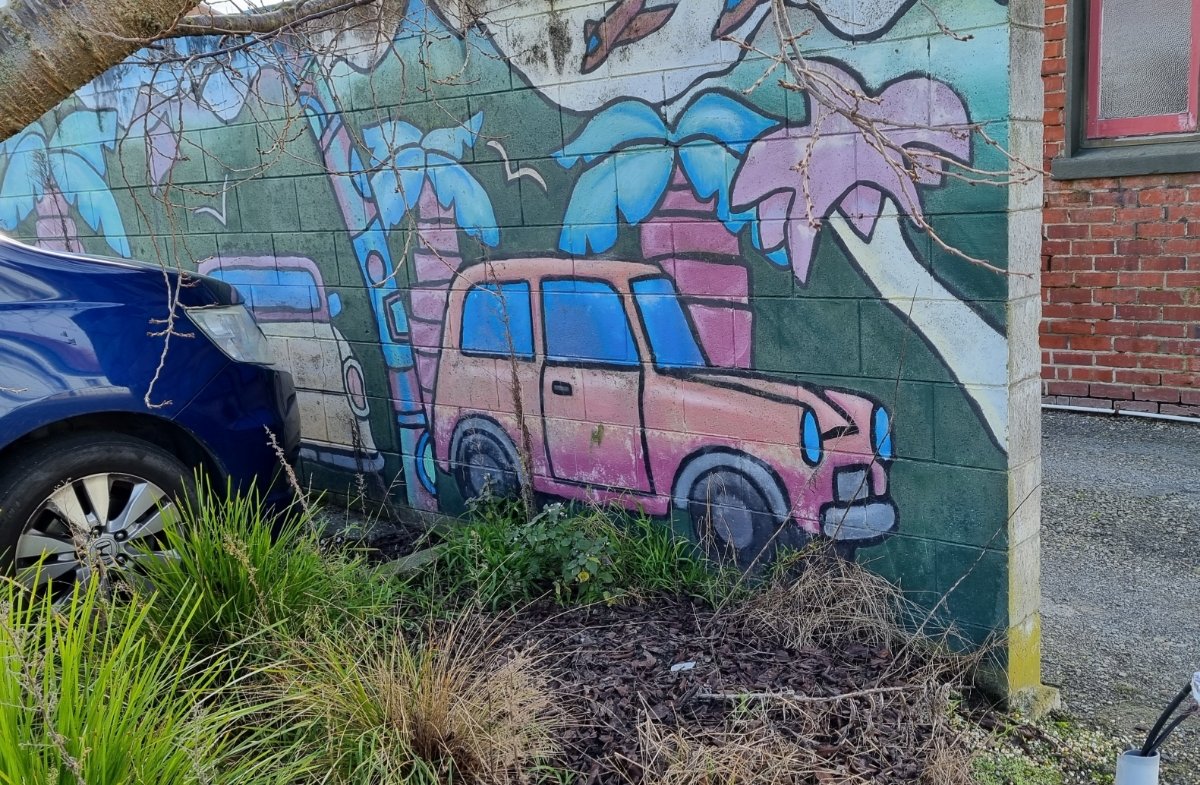
19 minutes ago, Nominal said:
Could be
16 minutes ago, tortron said:That's a commer cob
Check this link…….https://forum.retro-rides.org/thread/222462/little-rothwell-husky-legend
There may be a surprise lurking in there >
-
Some progress, loads of cleaning, polish detailed.
Happy so far.
-
5
-
-
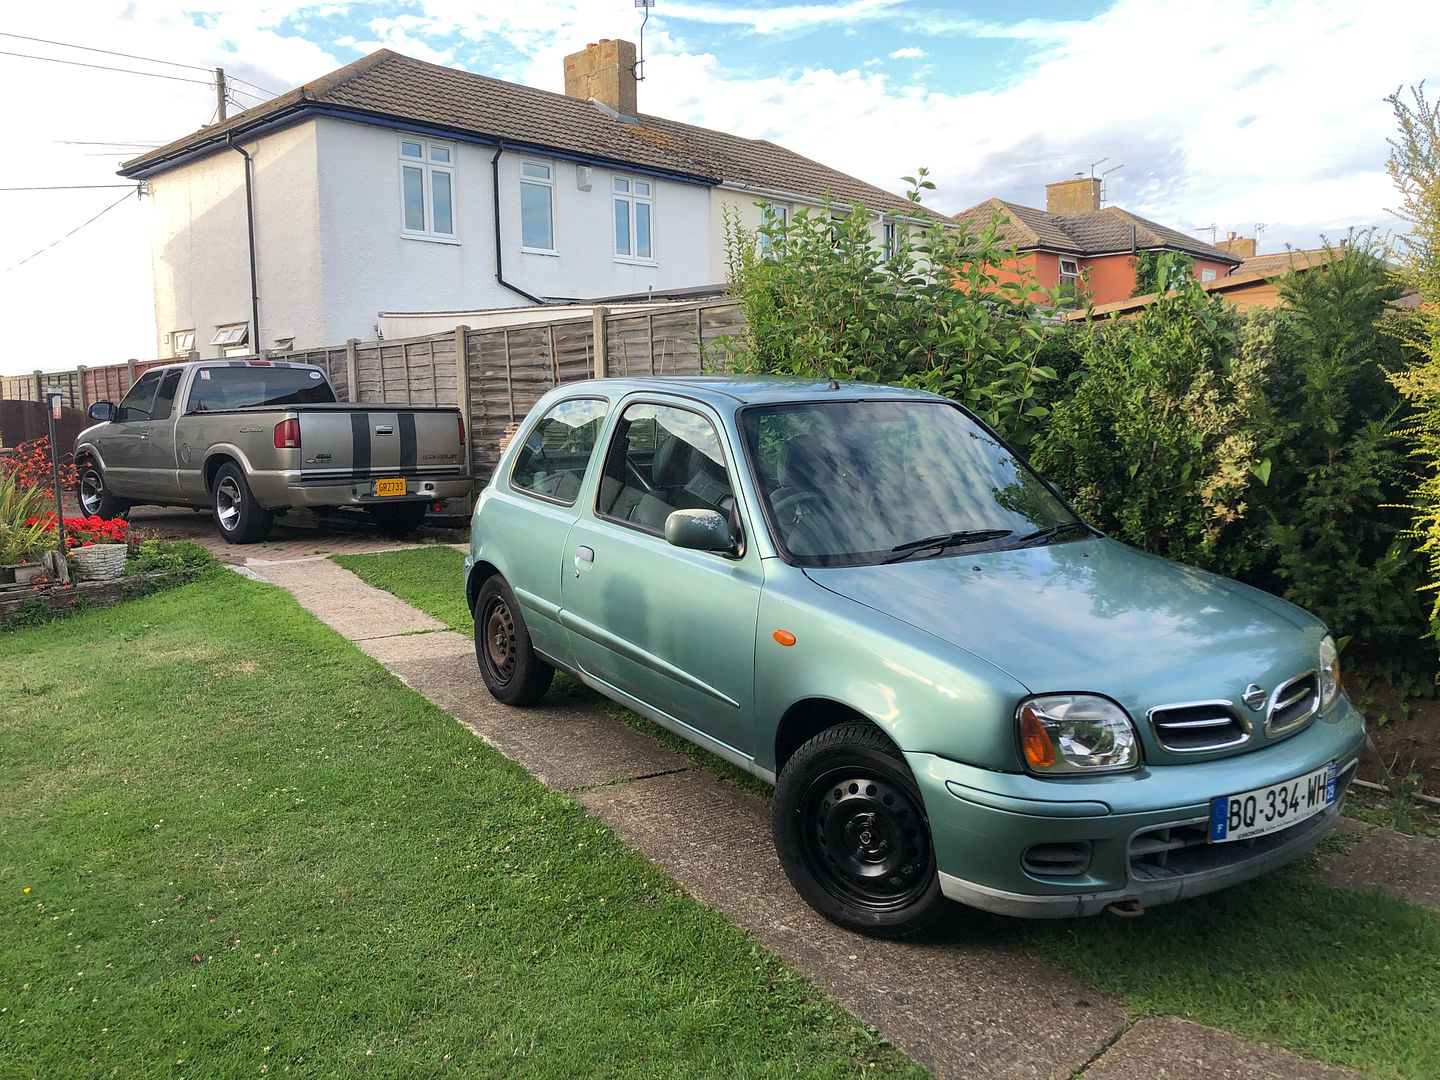
I will start a dedicated thread for this, but thought I would post this “saved from the crusher” intro here too.
But if too much Mods, please delete or move.
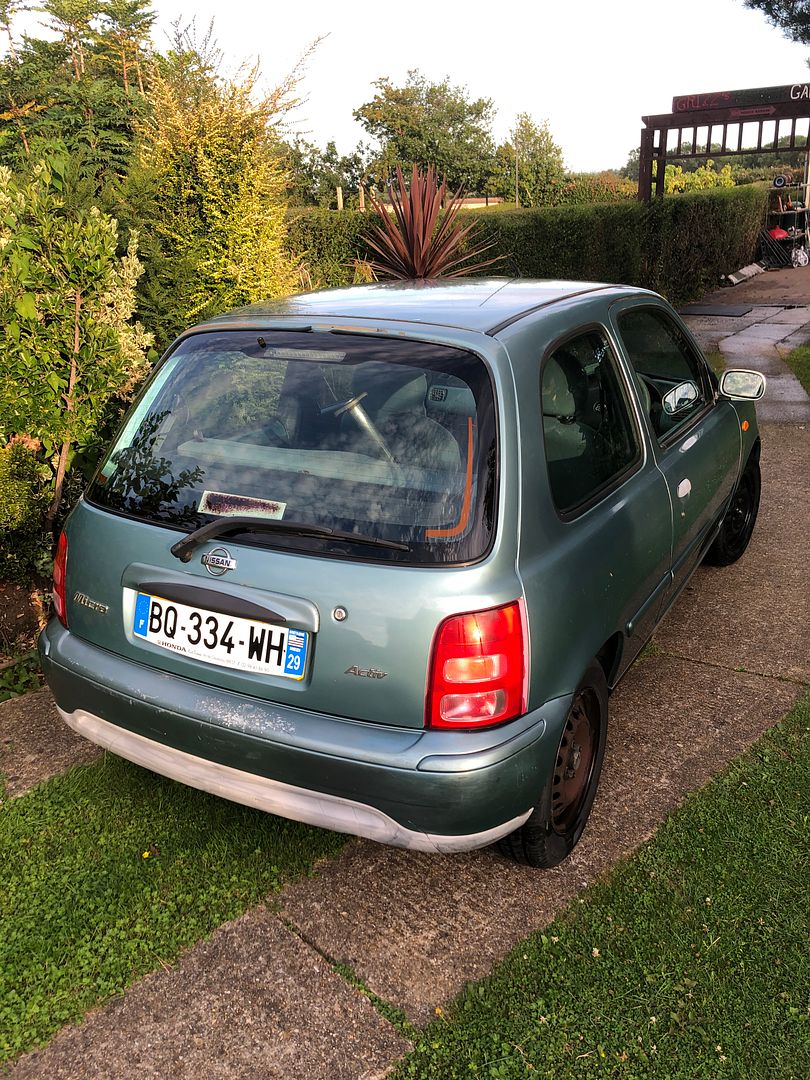
Well, it was delivered at 11.19 this morning.
Over an hour early.
Suited me, as I needed to go to town (7 miles from here, I live rurally) to sort some mobile phone data out anc collect dollars for my upcoming road trip to the USA.
Got home at 3.315 and by 4.00 a mate had been, sniffed around and offered to come buff the paint on Saturday…..
By 4.00 I had the plastic hubcaps off, washing every crevice with a brush and petrol first, followed by Swarfega on the wheels and hubcaps.
The rest of the car got systematically washed and cleaned.
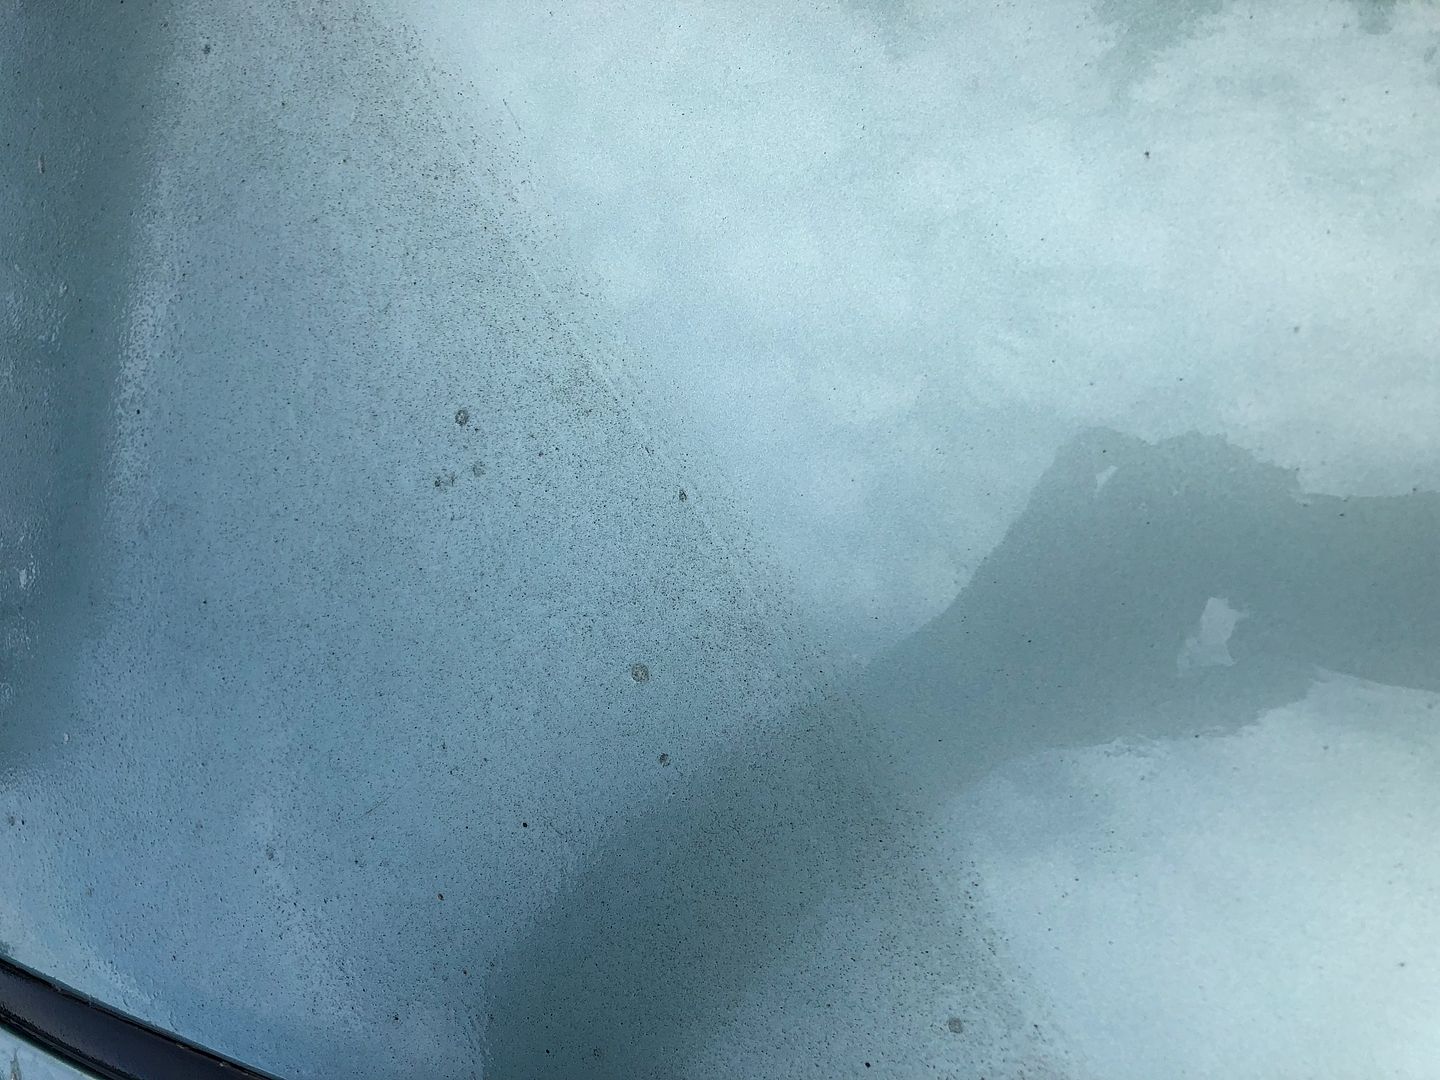
Dirty vs Clean paint.
Done by 7.00pm
Sally my lady friend brought over her VAX wet vacuum cleaner to use in the morning to do allthe upholstery, mats, door panels, which got the car it’s name “Scruffy the Nissan Microbe”
First assessment, I like it a load.
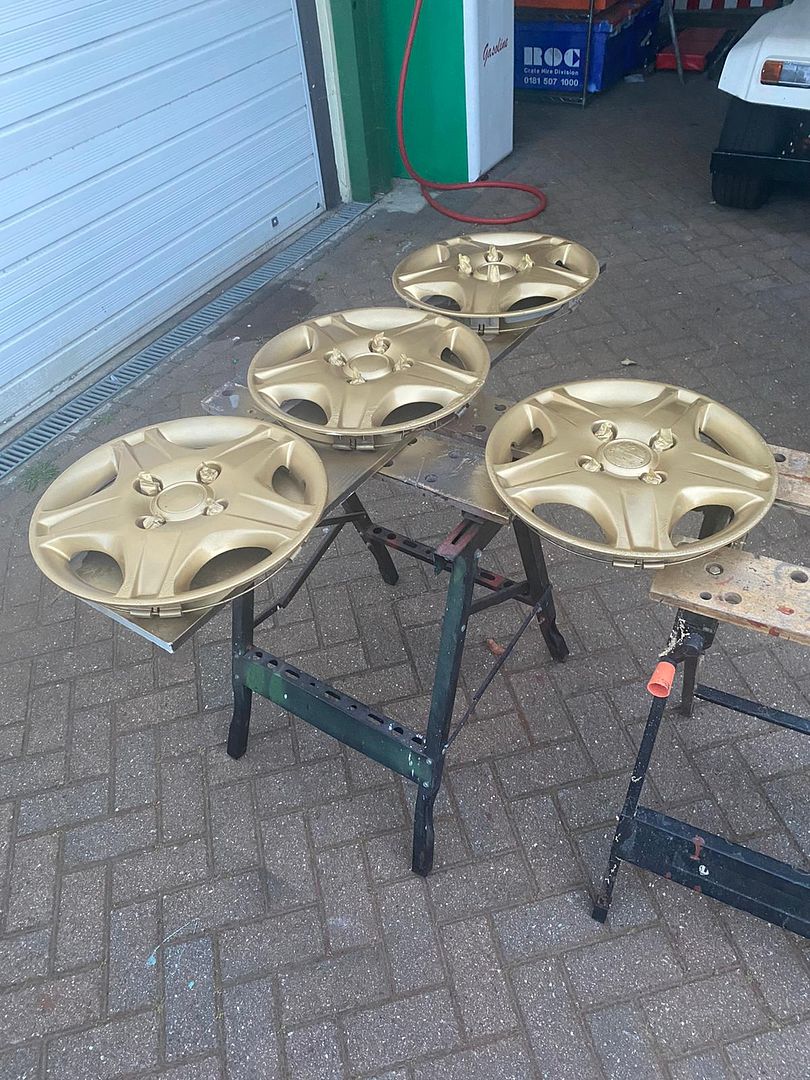
Painted the very scared hubcaps Gold tonight……… yup, why not.
-
6
-
-
Well, it was delivered at 11.19 this morning.
Over an hour early.
Suited me, as I needed to go to town (7 miles from here, I live rurally) to sort some mobile phone data out anc collect dollars for my upcoming road trip to the USA.
Got home at 3.315 and by 4.00 a mate had been, sniffed around and offered to come buff the paint on Saturday…..
By 4.00 I had the plastic hubcaps off, washing every crevice with a brush and petrol first, followed by Swarfega on the wheels and hubcaps.
The rest of the car got systematically washed and cleaned.
Done by 7.00pm
Sally my lady friend brought over her VAX wet vacuum cleaner to use in the morning to do allthe upholstery, mats, door panels, which got the car it’s name “Scruffy the Nissan Microbe”
First assessment, I like it a load.
Painted the very scared hubcaps Gold tonight……… yup, why not.
-
10 hours ago, yoeddynz said:
Heya grizz. Welcome aboard the good ship oldschool.
Be aware that we do use quite a few naughty words here. I'm sure you'll fit in
")
Alex
Naughty words…… My life is complete.
-
10 hours ago, igor said:
Welcome to OS mate. Been sort of following some of your threads on RR for some time now.
Thanks Igor,
I am keeping it a semi secret on RetroRides for now.
So once I start a thread for it, I will reveal it more.
-
1
-
-
- Popular Post
- Popular Post
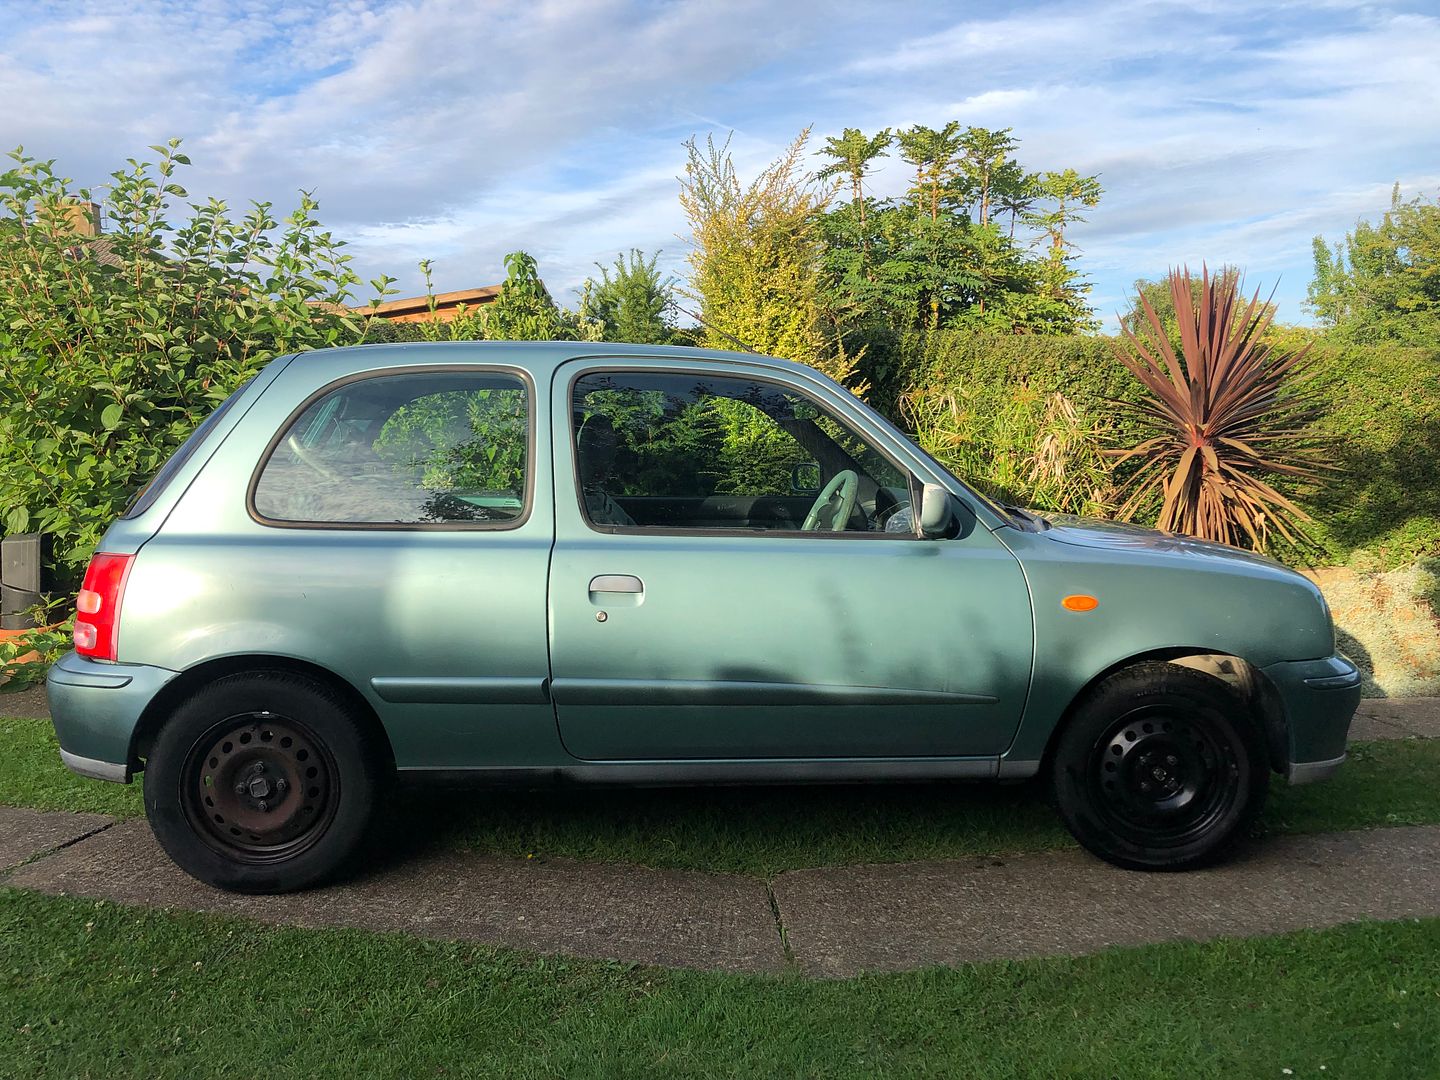
Sent here by @yoeddynz as I follow some of his actions and activities and the builds he and Hannah do.
I was going to just post the Micra (March) but it is easier to copy and paste my introduction.
Good evening from Rochester Kent UK.
Name is Rian but known on forums as Grizz.
My “home forum” is Retrorides but I contribute to American and South African forums too.
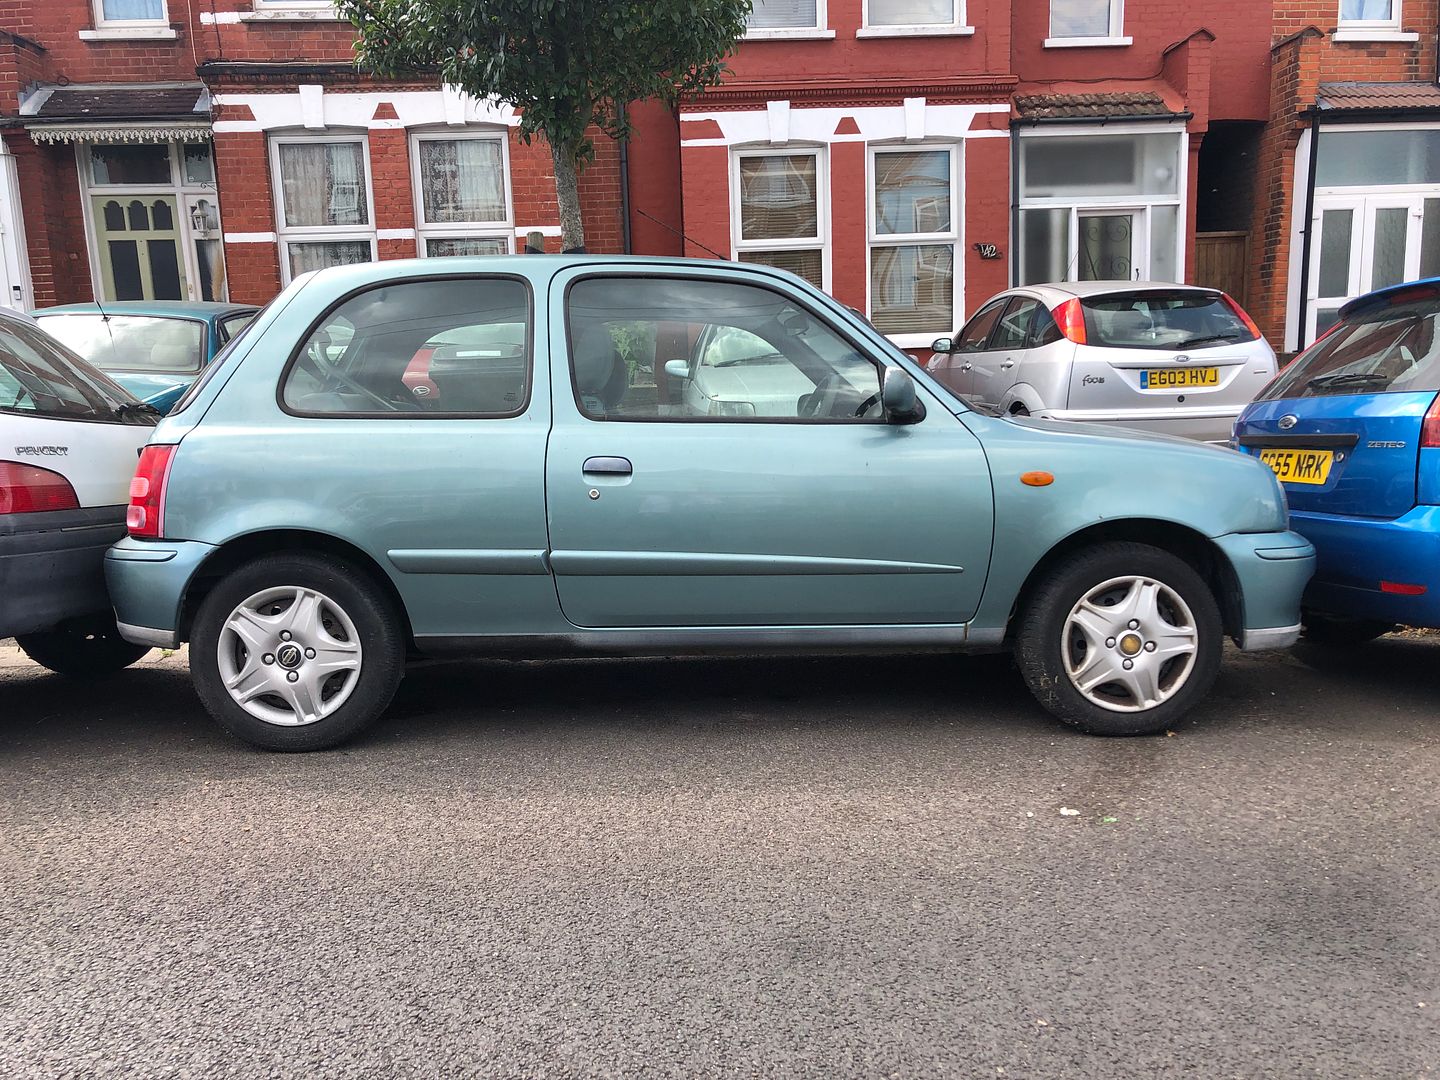
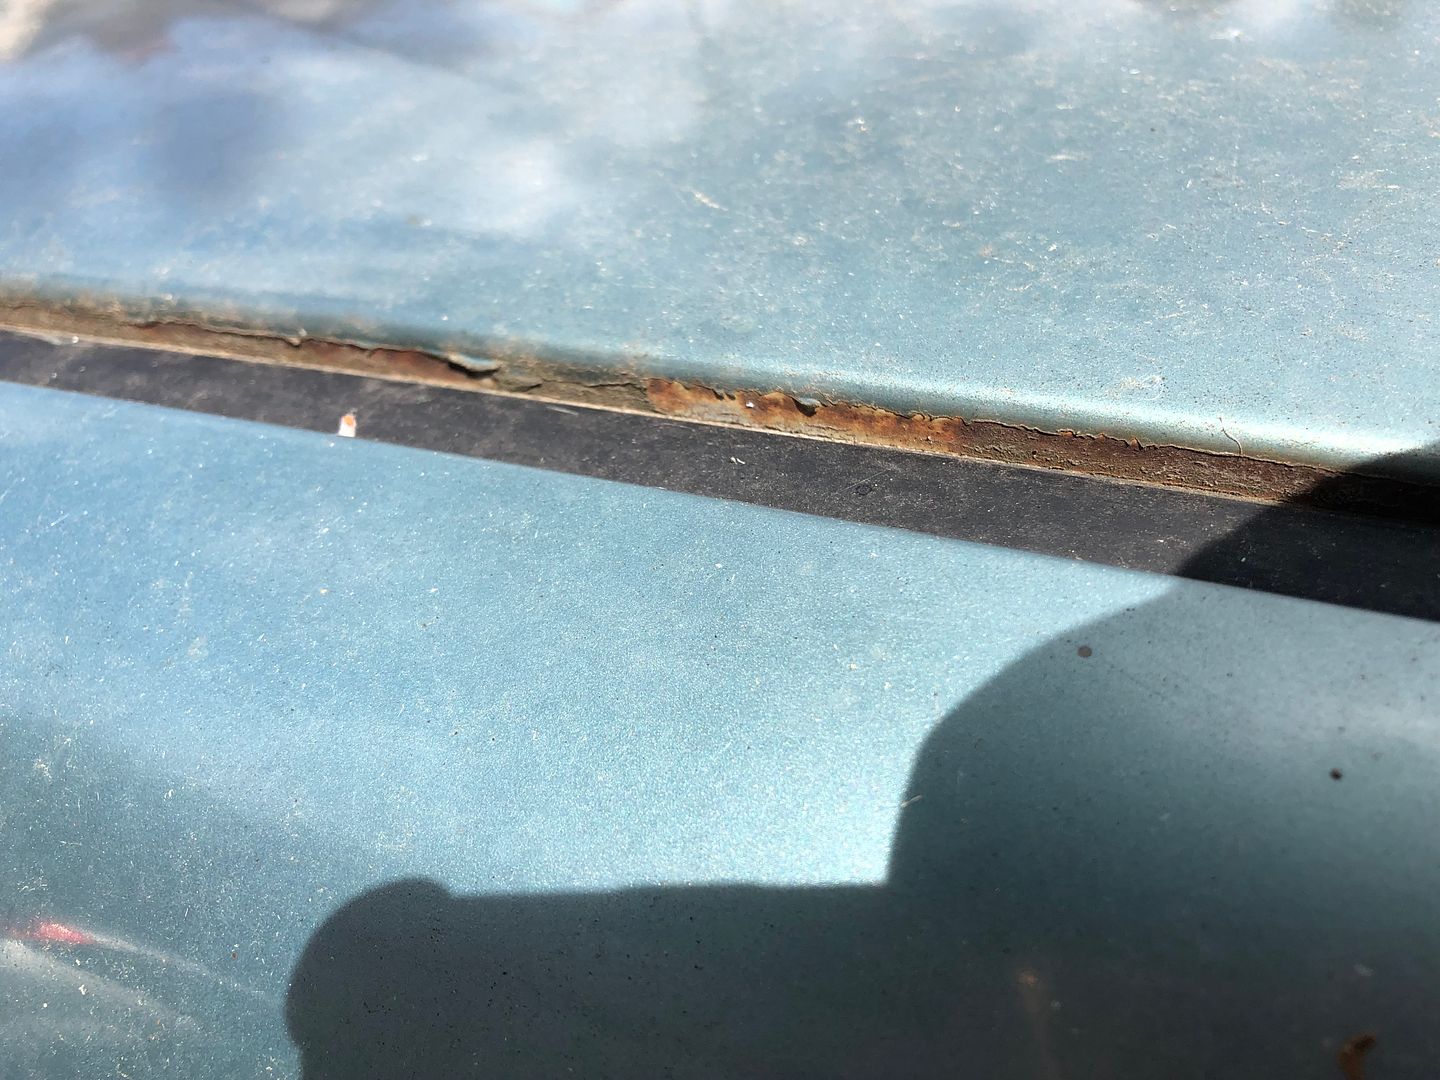
Just bought a 130k Facelift 2 1.0 Micra Activ. Needs exhaust, welding and tarting up. Delivery tomorrow around 1.00pm. I hope.
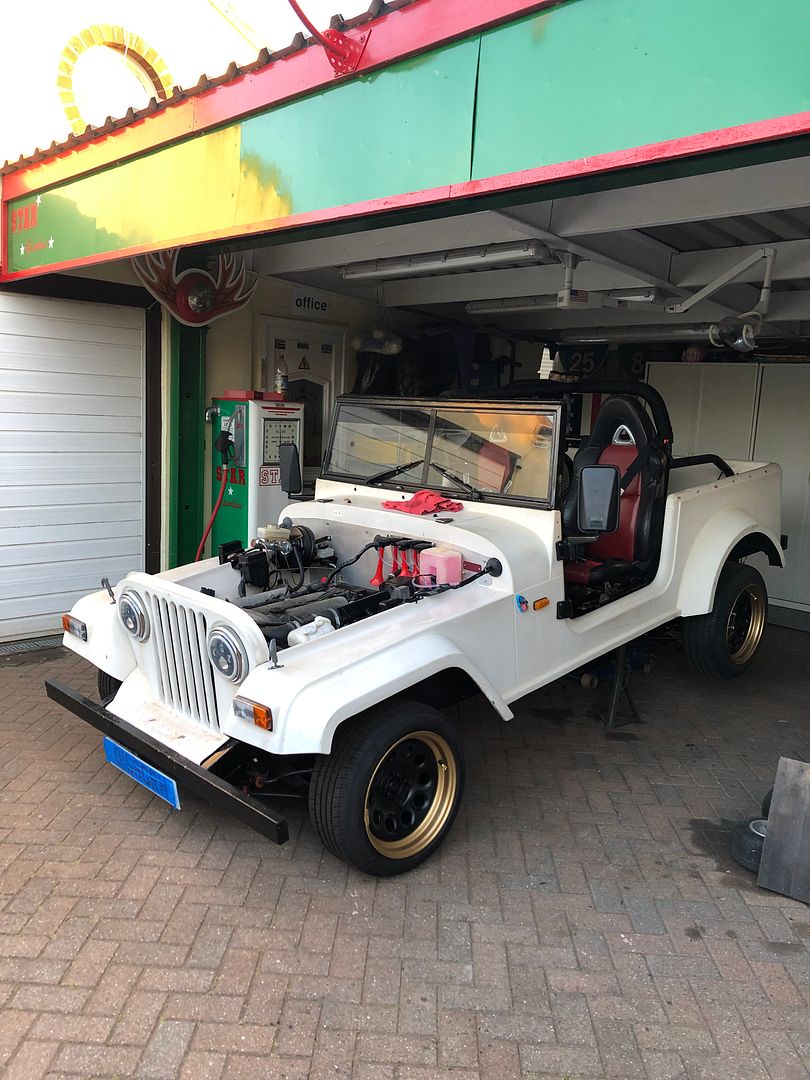
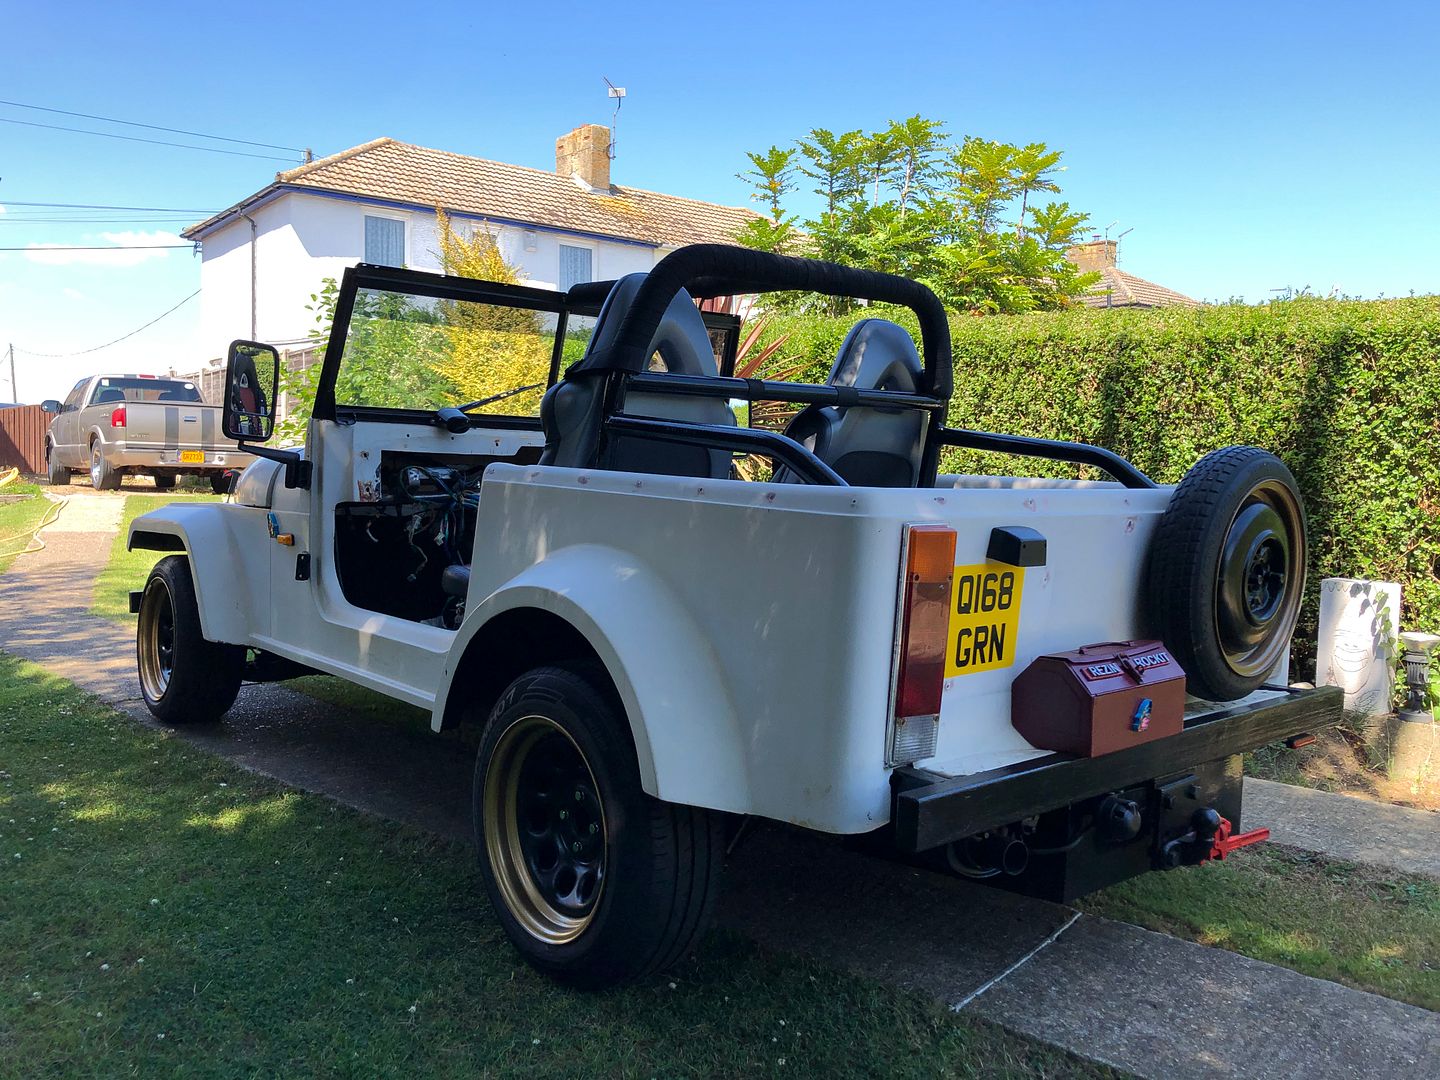
It is meant to be a side project alongy next build, a 1966 Chevy C10 that has been waiting 7 years post divorce etc.Currently trying to finish this build known as the Rezin Rockit
old 1992 Ford based fiberglass Jeep kitcar now with MX5 1600 transplant
Note the spelling is correct for the car.
Build thread https://forum.retro-rides.org/thread/215488/grizz-purgatory-rezin-rockit-handbrake
I also have a 2001 Chevy S10 4.3liter V6
Hoping to learn some dtuff from ypu guys and tips and shortcuts.
My plans for the Micra is UK MOT (Roadworthy test) and then some serious cleaning, lowering, wheels and a few small things.
Scruffy by Name, scruffy by nature it seems.
Wish me luck.
-
11
-
Good evening from Rochester Kent UK.
Name is Rian but known on forums as Grizz.
My “home forum” is Retrorides but I contribute to American and South African forums too.
Just bought a 130k Facelift 2 1.0 Micra Activ. Needs exhaust, welding and tarting up. Delivery tomorrow around 1.00pm. I hope.
It is meant to be a side project alongy next build, a 1966 Chevy C10 that has been waiting 7 years post divorce etc.Currently trying to finish this build known as the Rezin Rockit
old 1992 Ford based fiberglass Jeep kitcar now with MX5 1600 transplant
Note the spelling is correct for the car.
Build thread https://forum.retro-rides.org/thread/215488/grizz-purgatory-rezin-rockit-handbrake
I also have a 2001 Chevy S10 4.3liter V6
Hoping to learn some dtuff from ypu guys and tips and shortcuts.
plans for the Micra is UK MOT and then some serious cleanong, lowering, wheels and a few small things.
-
8
-
 1
1
-


Nissan March (micra) K11 appreciation thread
in General Car Chat
Posted
Fresh WOF.
MOT Pass.
Comment from tester was that it is a very clean car for 21 years and 130k miles or 210000km
Now of course, having kept my job and company car it will be surplus.
All up in the air.
Result.
Also no advisories, which is cool.
AND MY 4 HOURS OF INSURANCE JUST EXPIRED.
Perfect.