PatJ
-
Posts
16 -
Joined
-
Last visited
Everything posted by PatJ
-
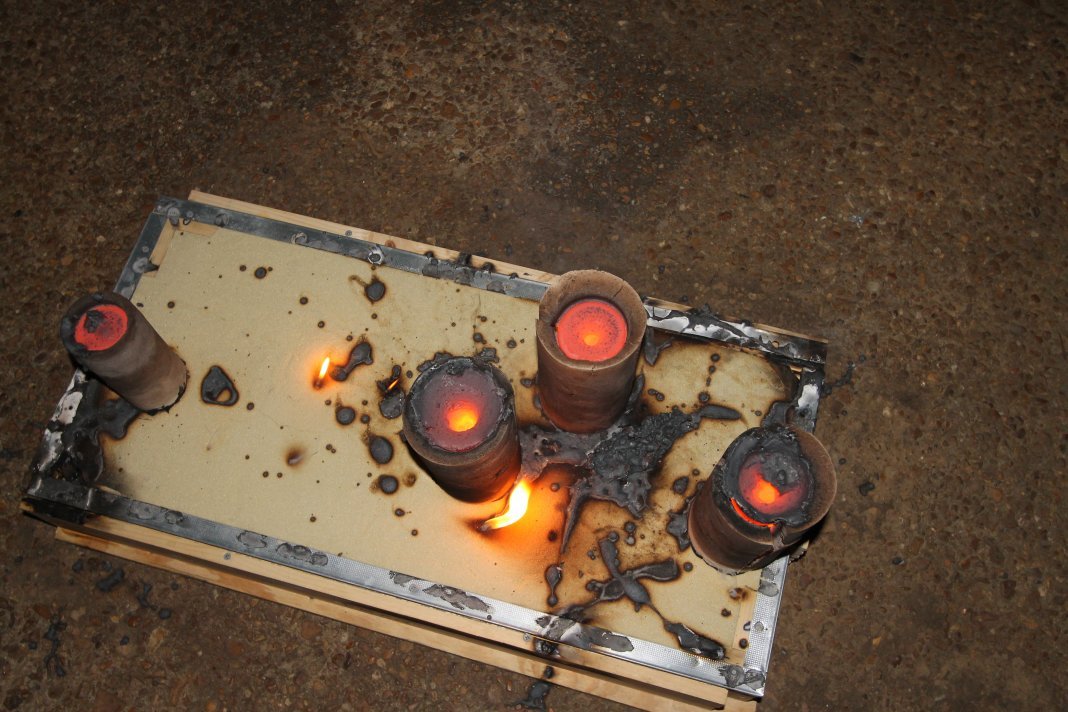
I am just catching up on this thread. Looks like you found some LinoCure; that stuff is the best molding product I have ever seen, and gives great results with a set time that can be varied widely. I use Velvacoat (tm) VA 9078. https://www.ask-chemicals.com/fileadmin/user_upload/Download_page/foundry_products_brochures/US/Coatings_USA.pdf Be aware that some of the coating material in the above pdf I think is designed to be used to coat foam, ie: foam used in the lost-foam engine block casting process, and not necessarily to be used with sand molds like you are using (check me on that). The Velvacoat prevents metal penetration into the sand, and would guess that it would work with aluminum, although I think it is specifically designed for use with iron. And it looks like you got some of the good mold cement. I bought some of that the other day. One thing I have noticed about resin-bound sand is that it seems to trap air; ie: it is not very porous, and so I vent the high points of each mold with a very small 12" long drill bit, or a thin piece of piano wire used as a drill bit. I ruined two good castings by trapping large air bubbles at the top of molds. The bubbles were about 2" long. People who have done a lot of iron castings tell me this is not possible, but then again they don't use resin-bound sand, and so they don't understand how it traps air. The partial fin fill may be due to air, or may be due to too low of a pour temperature (or something else). What pour temperature are you using. I think I generally use 1350 F for aluminum, but for a casting the size of yours, it may have to be significantly higher. As with all metals, the higher the pour temperature, the worse the surface finish. The Linocure instructions recommend the molds sit for I think 48 hours, but it also says that if you can't wait 48 hours, then the molds can be lightly flamed to finish off the cure process and drive out any uncured resin. I use my molds immediately after they set (within an hour), and so I lightly flame the interior surfaces with a 1" propane burner (no concentrated heat, but just a gentle flame). Then I spray on a layer of Velvacoat, burn that off, and then lightly flame the mold interior again to drive off any residual alcohol from the mold coat. The slightest amount of residual resin or alcohol will make a mess of the surface finish. I have used a cement mixer to mix sand before, and I use it without the blades inside of it. I use a boat paddle to help mix it. Normally I use a large commercial kitchen food mixer, but if the mold is large enough, I have to use the cement mixer. I have had excellent results with Linocure, and even better results with Velvacoat. The filters are not a bad idea if you can get enough flow through them. I have used filters with aluminum, but since I started used spin traps on the ends of my runners, I don't use filters anymore. The spin traps use more metal, so filters would minimize the crucible capacity. Resin bound sand releases fairly easily if you stay within the "strip time", but if you exceed the strip time, you will generally damage the pattern when removing it, since the resin after strip time becomes like glue. And I have found that once the mold sets, it needs to remain on a very flat surface for about 30 minutes, else it will move/warp a bit, even though technically it is a solid mass. After about 30 minutes (full set), you can do whatever to a resin mold, ie: drill, scrap, or otherwise cut/modify it, and it will not change dimensions. Another trick I have seen is to use a vacuum cleaner/shop vac to somehow pull a slight vacuum on the top of a mold. I think the vacuum works through the permeable sand. You would not want to hook a vacuum directly into the mold cavity. I am not sure how you would rig that on your mold, but it is a method that apparently works, and helps fill tall thin molds. I have not had to use the vac method, but I do vent the high spots in my molds, and I get a small amount of aluminum out of them when I pour, so I know the metal is remaining fluid for the entire mold fill, and fluid enough to fill a 1/16" diameter hole at the top of the mold. Once you get use to using Linocure, mold making becomes routine and relatively easy. Once you find the right pouring temperature, you can generally get a good casting with every mold. My success rate with resin bound sand is basically 100%. Looks like you have made some serious progress, and are definitely on the right track. .
-
I am a hobby caster, but I have had some success with resin-bound sand, so here is a "If I were trying to cast a valve cover, this is how I would approach it" ideas. These ideas may or may not work, but reflect some of the successful methods I have used. 1. Mix the sand for the entire cope or drag all at the same time in a cement mixing tub using a hoe, or some other method to mix the entire batch all at once. 2. Use Lino-Cure with the slowest set time on the catalyst (possibly no catalyst at all, to lengthen set time), so you have enough time to mix and ram the entire cope or drag. 3. Use a generous amount of either pattern wax or release agent on the pattern (I think you did this). 4. Use a generous amount of knife gates on either side of the mold cavity (you gating looks pretty good to me, but the gates could be longer/thinner, like is often used on thin pieces. 5. My solution for a thin casting such as this valve cover would be to use large runners down each side, perhaps 4 times larger than what you used. I use vents/spin traps at the end of each runner, vented to the top of the cope. The intent is to get a large mass of hot aluminum on either side of the mold cavity, in the runners, before the mold cavity begins to fill. This may require a larger crucible or crucibles. 6. Use one or two very large sprues, and fill the sprue(s) and runners as fast as possible, letting the knife gates control flow into the mold once the runners are full. Don't try to control flow into the mold using the runner or the sprues. The knife gates should be at the top of the runners, and the gates should not start to feed the mold cavity until both runners are completely full. 7. I would use a series of risers across the top of the mold cavity, round, perhaps 2" diameter, 2" tall, necked down into the mold cavity to 1". Perhaps six of these. 8. I would flame the mold cavity lightly with a propane torch, with wide soft flame, after molding it, to drive out any uncured resin. 9. I would spray on one or two coats of ceramic mold coat afer flaming the mold, burning off and lightly flaming each coat of ceramic mold coat. This will give a superb surface finish on the casting, at least that has been my experience. 10. Superheat the aluminum more than normal, and assume that you are going to lose a significant amount of temperature when you fill the runners. Choosing the correct amount of superheat on a thin casting is an art. Too much superheat and you get a rough surface finish, and too little and you get an incomplete mold fill. The ceramic mold coat will help if the aluminum is poured a little on the hot side. I pour small molds in 356 aluminum at 1350F, and so for a large mold, you many have to be well above this. Overheating the aluminum can cause a lot of gas pinholes, so don't get carried away with the superheat. The superheat may be as little as 20 F additional; I am not sure. You could experiment with a long thin rectangular test casting/mold, and see how far the aluminum will run without freezing, measuring and recording the pour temperature accurately. 11. One other thing I have started to do with thin patterns is to make the initial pattern from either a 3D print, or some other material that is not necessarily as strong as a metal pattern, and then cast a permanent aluminum metal pattern. This assumes you have the casting process down, and you use double shrinkage on your initial pattern creation. Any minor imperfections in the permanent aluminum pattern can either be buffed out, or filled with a good autobody filler. If you do things correctly, you should need little or no fillers on a permanent pattern. The beauty of using a metal pattern is that you can use it repeatedly with an automotive body-repair slide hammer, to remove the pattern from the mold, by attaching the slide hammer in various places and tapping lightly with impacts, to break the pattern/sand adhesion, without danger of damaging the pattern. Again, mold release or wax are a must on the pattern. For a one-off casting, the pattern only has to survive one removal from the sand, and so can be made of plastic, wood, etc.; assuming you get the first casting right. 12. If you let the pattern remain in the resin-bound sand beyond the strip time (resin bound sand has a set time, and a strip time), then you basically have glued the pattern permanently into the sand, and regardless of any mold-release agent, generally you will damage the pattern trying to remove it from the sand. You must finish all ramming of the sand prior to the set time, else the sand will begin to set, and ramming will cause fractures. It is essential that the entire cope or drag batch of sand be mixed and rammed at the same time, so the entire pattern can be pulled from the sand at the appropriate strip time. Hope this helps. Just my slant on how I would approach casting this piece, with the understanding that I am not a foundry person, but a backyard casting person, who has used quite a bit of resin-bound sand successfully with aluminum and iron. Good luck. You are oh-so-close to a perfect casting. Edit: I allow my patterns to fill upwards, and I think that is what your mold was designed to do. I have had to vent the high points of the mold with small holes out the top of the cope, else the resin-bound sand will trap air and create large air bubbles at the high points of the mold, like 2" in diameter. .
-
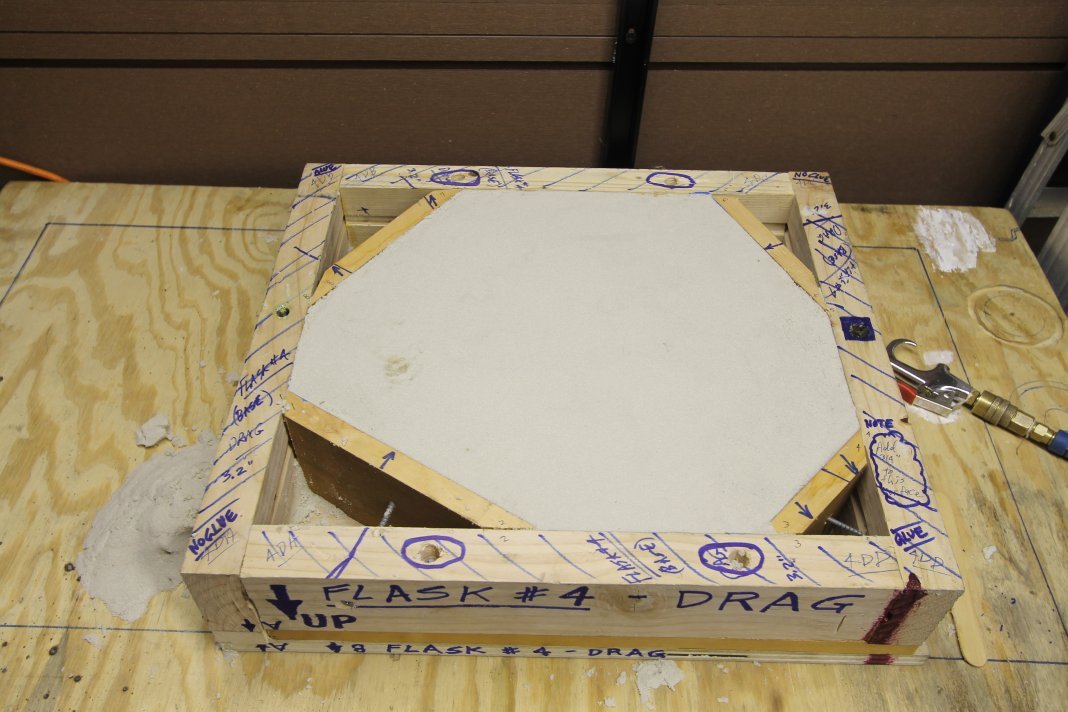
So if I understand correctly what you are doing with the partitioned flask, you ram one section at a time, let it set, pull the adjacent partition, ram the second section, etc. I tried using Adolf's inserts, and ended up just using free-floating Adolf inserts in the drag only. The Adolf's create tapered holes (two generally) between the cope and drag, so the two will realign after they are separated. Sometimes I forget the Adolf's inserts, and so I just gouge out two rounded holes, similar to what an Adolf's would be in size/depth. So as an extension of this method, if you are worried about the adjacent mold sections shifting in relation to each other, then you could dish out a few shallow divots, or even insert a few steel pins into the set part that protrude out perhaps 1/2" into the next part to be molded. A few divots in each section would at least give you some shear strength at the joint, and if the mold parts did separate, the divots would allow them to be easily realigned. Just a few thoughts. Not sure if I understand your process exactly, but this is what popped into my mind. .
-
I think if I went with a continuous mixer, I would buy a used one, or perhaps a small new one. I could not make one for what a used one goes for, and the pumps and metering system are not cheap. In the past, I have twinned molds, and glued them together, so I can pour two parts at once (I only had one pattern), but I have never thought to partition a mold. That is a rather clever idea, and not something I would have thought to do. Sometimes the most obvious solutions are the most difficult to see. I have had trouble with long runners, with getting the parts at the end of the runner to fill completely. I typically would fill from the center, and thus the run distance is 1/2 of the total runner length. I often use a spin basin that is open to the top of the mold, and locate that at the end of the runner, so that the metal and entrained air/trash/slag can sweep the runner and then get trapped in the basin. The spin arrangement keeps the metal from bouncing back into the runner system. The spin basin is as simple as drilling a 1" or 1.5" hole in the cope, and letting the runner enter this hole on one side, to create the spin. At one time I was using a tall sprue, but have since stopped using that. High velocity is the enemy of good castings, and velocity control is essential. I try to keep the lip of the crucible as close to the sprue as possible, to avoid a waterfall effect when pouring. I use a runner in the drag, and keep the gates at the top of the runner, so that the initial sweep of metal cleans the runner without any trash going through the gates into the mold cavity. I generally cut the gates in the drag as well, since it is convenient to do so, and does not seem to affect the system. Some cut the gates in the cope, but that can cause alignment issues, and so I don't use that method. I have read a lot about runner calculations, and I use to consider that, but now I just use an overly generous runner or runners (assuming you have some extra capacity in the crucible), and let the runner act somewhat as a shrink bob, where the runner solidifies after the casting has solidified. I use the gates to control velocity once the runner(s) are full. I generally don't taper my runners (although I have done some of that), but if they were long enough, I would consider that. I see the runner as a header, and once the header is full, then it feeds the gates theoretically with a constant pressure. I generally use a U-shaped runner system, with gates on either side of the mold cavity, to get a more even fill with less velocity. For thin parts, I tend to use long gates, sometimes called knife gates, which are not very tall. I have tried using ceramic filters in the past, but the spin basins at the end of the runners seem to negate the need for the filters for the most part. Gates at the top of the runner seem to be somewhat self-skimming, since slag floats on the top of the melt. Keeping the sprue full at all times without aspirating air is critical. Many use a pour basin at the top of the sprue, but just pour down the sprue. Sometimes I use a ring of metal on top the mold at the sprue. I follow many of John Campbell's methods, and have his book, as well as a book about cast iron. I use to fill down into a mold, but after reading about avoiding the waterfall into a mold, I sometimes invert my molds, and let them fill upwards, which they will do quite well, even with a tall part. The top of the mold must be vented at the high points. The upwards fill gives a controlled velocity without waterfalls. I have watched a number of fill simulations online, and I think I have a feel for velocity and the inertia of the moving metal. A smooth even fill is desirable, without sudden shocks/splashes/changes in velocity/turbulence. There are some very complex runner/gate systems out there, but my philosophy is to use as simple a system as possible to achieve the results. The idea is to make defect-free castings, not impress people with the runner system. Edit: I have seen quite a few people build furnaces and foundry equipment as if it were going to be displayed in a museum, only to make the most crude of castings. Too many people seem to focus on what the foundry equipment looks like, but not what it actually produces. The joke in my industry (construction) is that if an engineer builds a nuclear plant, he designs it to contain all radiation. If an Architect were to design a nuclear plant, he would design it to just look like it contained all the radiation. Nobody will see your foundry equipment on display once your castings are made. What they will see are your castings, and so that is what I focus on (the quality of the castings). .
-
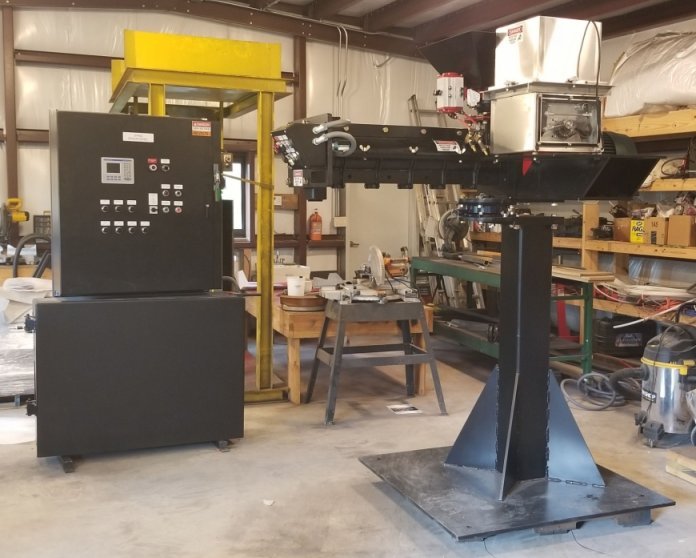
The danger for me is getting bogged down in a continuous mixer build, and then working on that only for several years, trying to debug it. Generally speaking, I go for the quick-and-dirty method of foundry equipment building, ie: I design equipment I can make in a few days, and equipment that can quickly be modified in order to make it work correctly. I have seen people go on Don Quixote type quests, and they experiment endlessly for years seeking the holy grail of oil burners. And so they never find a burner that works correctly, because they want to build a better mouse trap, and they end up with Rube Goldberg designs. My mottos are "keep is simple", "don't get sidetracked on wild goose chases", and "function dictates form". I add complexity when it can be done without trading off reliability, and when there are large benefits to doing so. I would think it a good idea to mix the catalyst with the resin first, before pumping it into the sand, but clearly they inject the three materials separately into the sand (you can see three pumps in the controls enclosure), so I guess it gets mixed regardless. And you may only be using two parts anyway, without a catalyst. The catalyst basically speeds up the reaction between the resin and what I call the hardener. I have a picture of a horizontal drum mixer, but it has watermarks all over it, so I won't post it. But I would use a water heater shell, with a pillar block bearing with shafts either end, and some mixing arms on the shaft. I could build that in a few days, and have it operational, and it would basically operate maintenance-free for a long time. The hardener tends to crystalize, and so I would assume that the pump and its feed line would need maintenance. Seems like the continuous mixer would be prone to clogging, especially when not used daily. I guess it depends on how much trouble you want to go to in order to build a continuous mixer, and how much time you want to spend on maintaining it. The paddles appear to have carbide tips silver soldered onto them, so they will last a while. Another idea is to cut the ends off of a mortar mixer, and extend it in length. Probably easier to just start with a new shell. But the motor and drive unit could be reused if it has sufficient torque and wear surfaces. .
-
I guess you could make a jumbo mortar mixer from an old hot water heater tank. Palmer seems to be one of the big manufacturers of continuous mixers. https://www.palmermfg.com/mixers/index.htm Edit: I also found a long mixer, built in the mortar mixer style, but perhaps 6 feet long, and this is what I would use a hot water heater shell for. This style of mixer would be easier for me to build and operate than a continuous mixer, since you would basically just dump in the sand, start it, pour in the resin along the length of it, and let it mix for a few minutes. You could have a bottom hatch or two, or have the entire drum rotate to dump. .
-
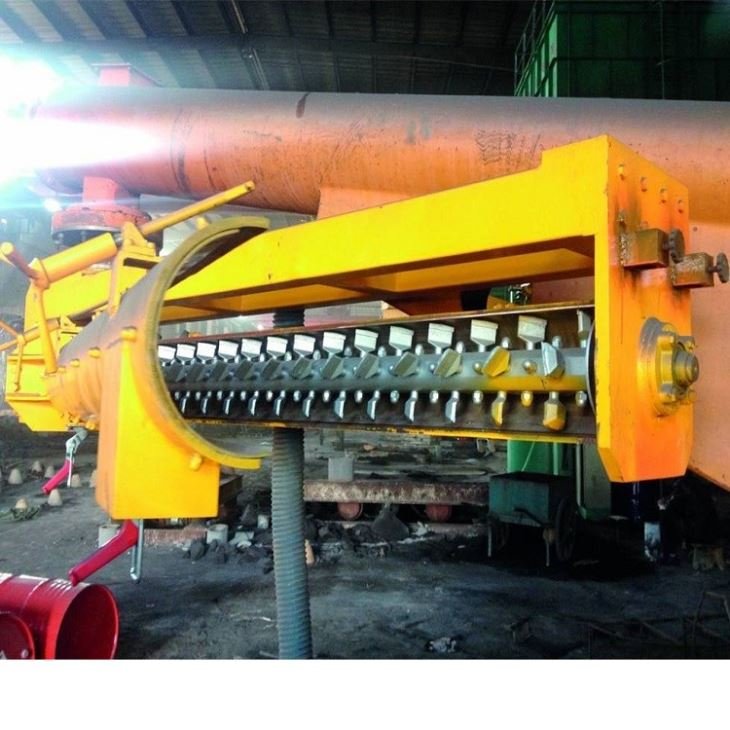
I think they are called continuous mixers. Looks like paddles on a shaft inside the tube. I think the paddles are tipped in carbide so they will last. And the used and even perhaps new continuous mixers online appear to be rather inexpensive at first glance, assuming shipping would be reasonable. Some of the mixers I see for sale are much less expensive than I could buy the parts for to make my own, and cheaper than a commercial kitchen mixer too. Not my photo.

-
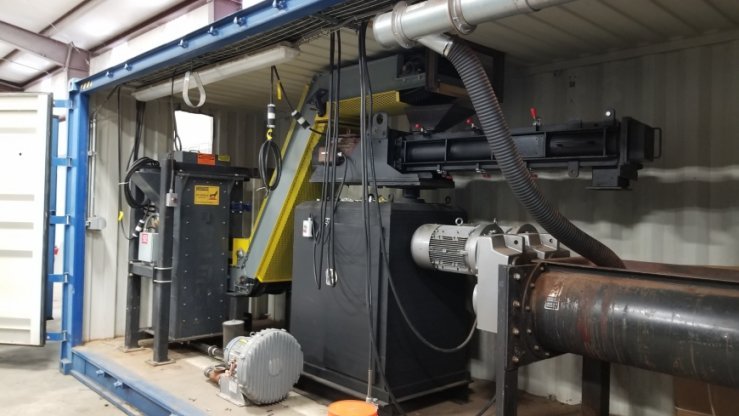
I am not sure how you would keep an auto-mixer cleaned out. Seems like it would need to be flushed with clean sand after using it. Here are a few for sale (not my photos). For lack of a better word, I would call these linear mixers. I will have to look up the correct term. I have photos of the interior somewhere. So the bottom line is that this machine eliminates the need for a mixer that is sized to contain the entire amount of sand required for a cope or drag.
-
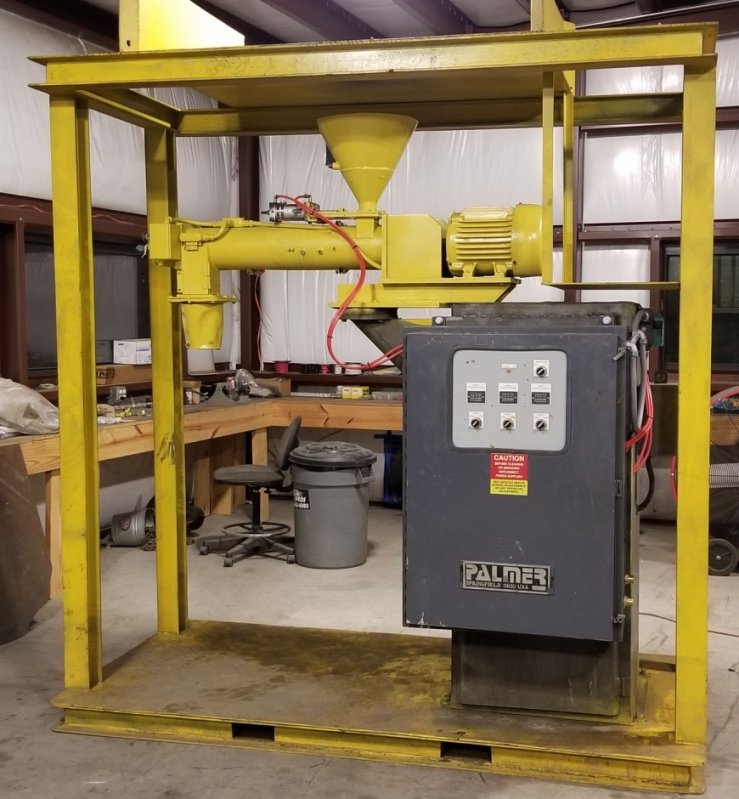
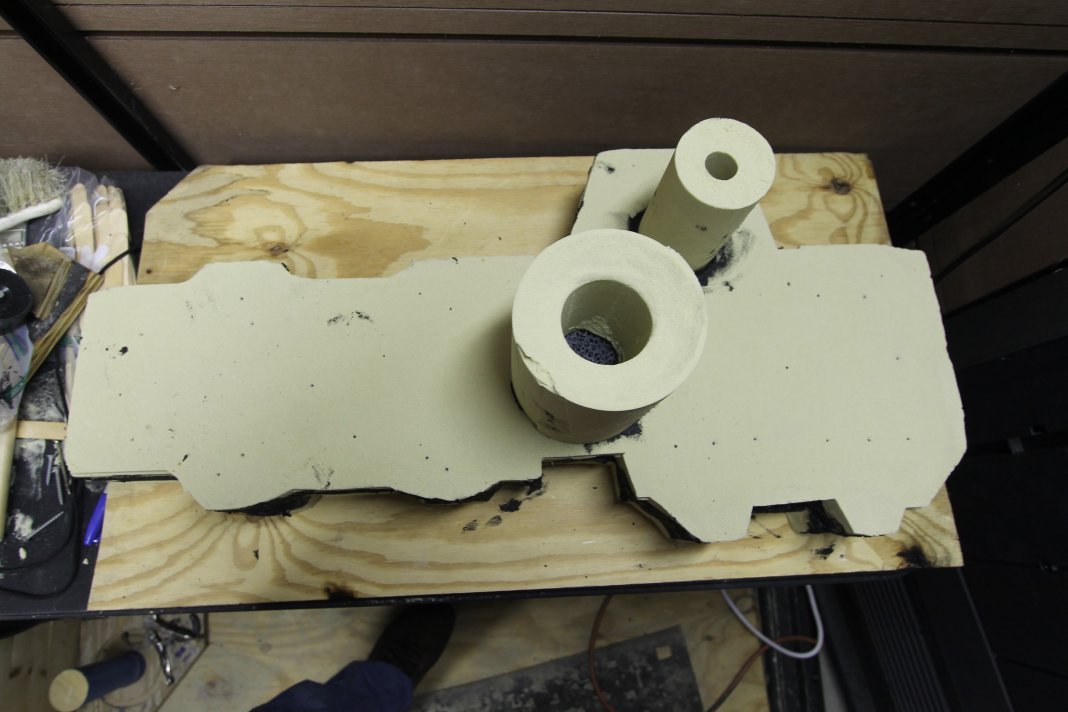
Your revised molds are exactly what I was taking about. It is akin to what the motorcycle manufacturer's do with covers and things; they shrink wrap the covers around the parts, or in this case around the patterns. No sense wasting resin and sand if you have time to refine the flask layout. And much lighter to handle, flip, etc. I have toyed with the idea of making an automatic mixer, and have looked at some commercial designs. The auto-mixers appear to have a helical screw arrangement, and somehow the resin is mixed in the process of moving through the screw/housing. Here is an example. You put the flask under the chute, turn on the spigot, and fill as much as you want. If I ever go commercial, I will either buy or build an auto-mixer (not sure what the technical name of the machine is). You can see the mixer at 2:09 in this video. It would probably not be too difficult to make one. Looks like basically a 36-48" long helix in a tube, motor driven. I have found these for sale online, but they are too large of a format for what I do. I need something about the size of the one in the video below. I have a photo somewhere of the interior of one of these mixers.
-
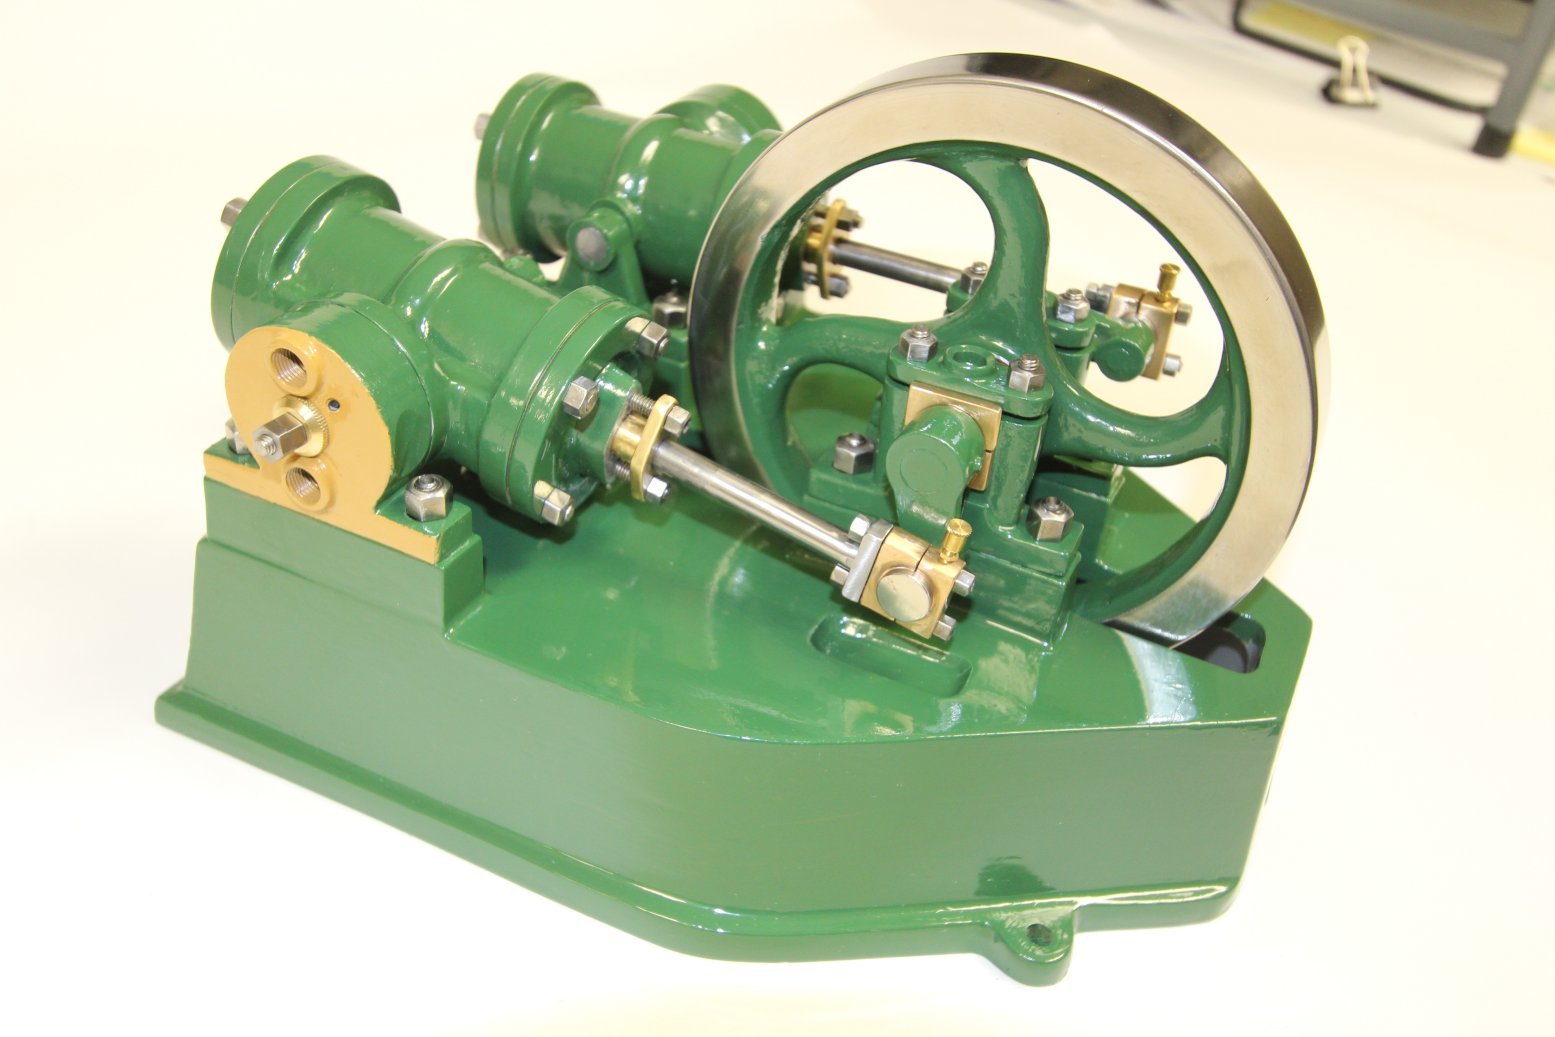
I was learning as I went, and some of the molding techniques that I use now are different, but you get the idea. At the time, I had not mastered gray iron, and so I was only able to make two flywheels in iron. The remaining parts are in 356 aluminum. These days, I can make any part in iron, no problem. Here is the finished engine that I cast. It is a 60% scale model of an engine I saw from 3 photos from the UK. 3D model was made using Solidworks. .
- 243 replies
-
- 14
-

-

-
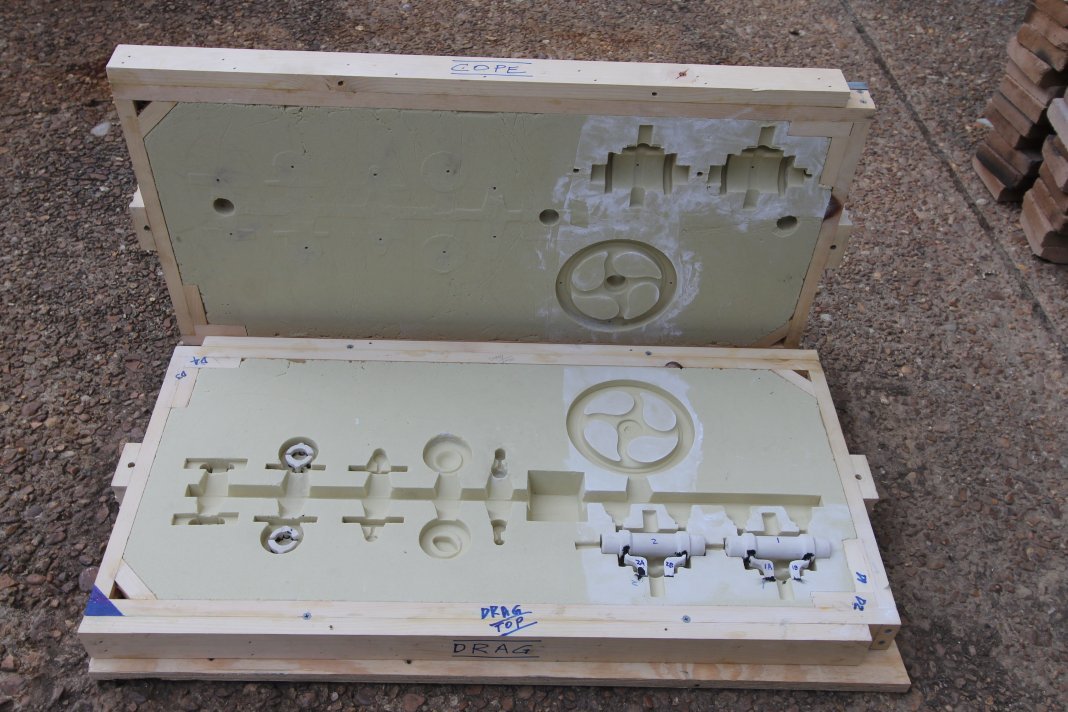
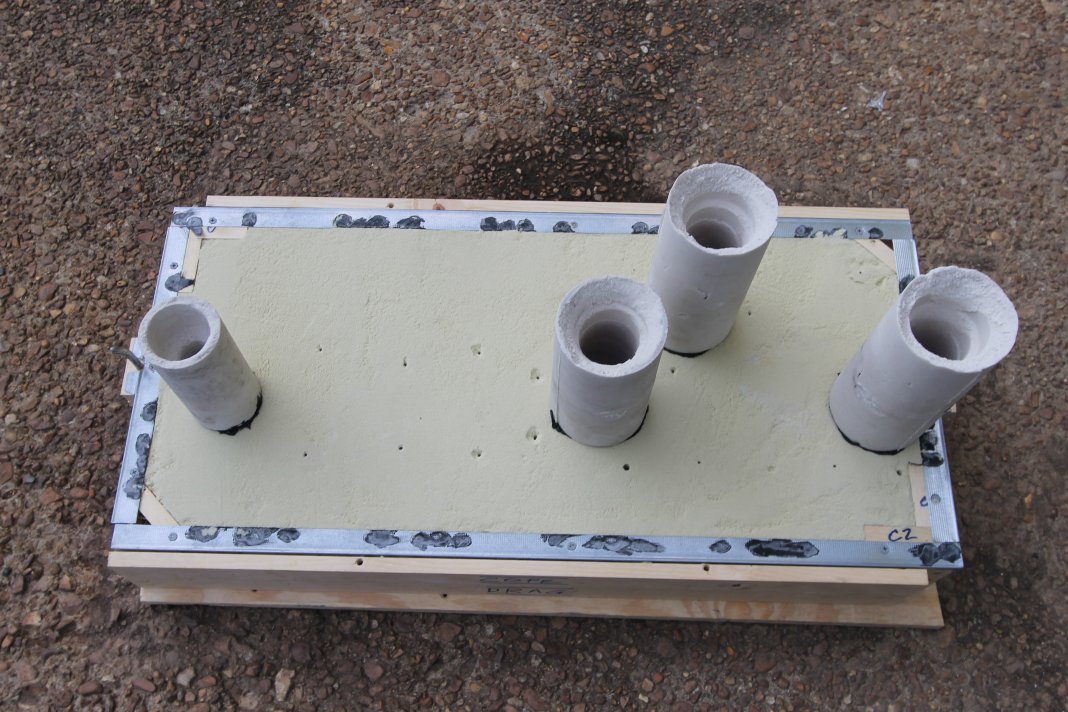
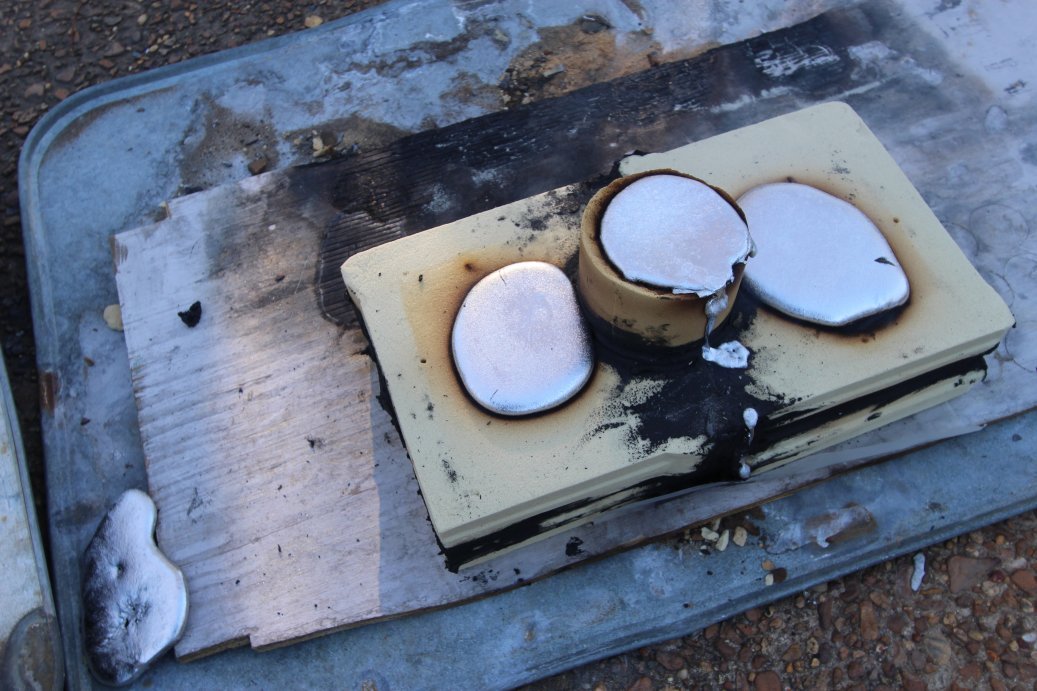
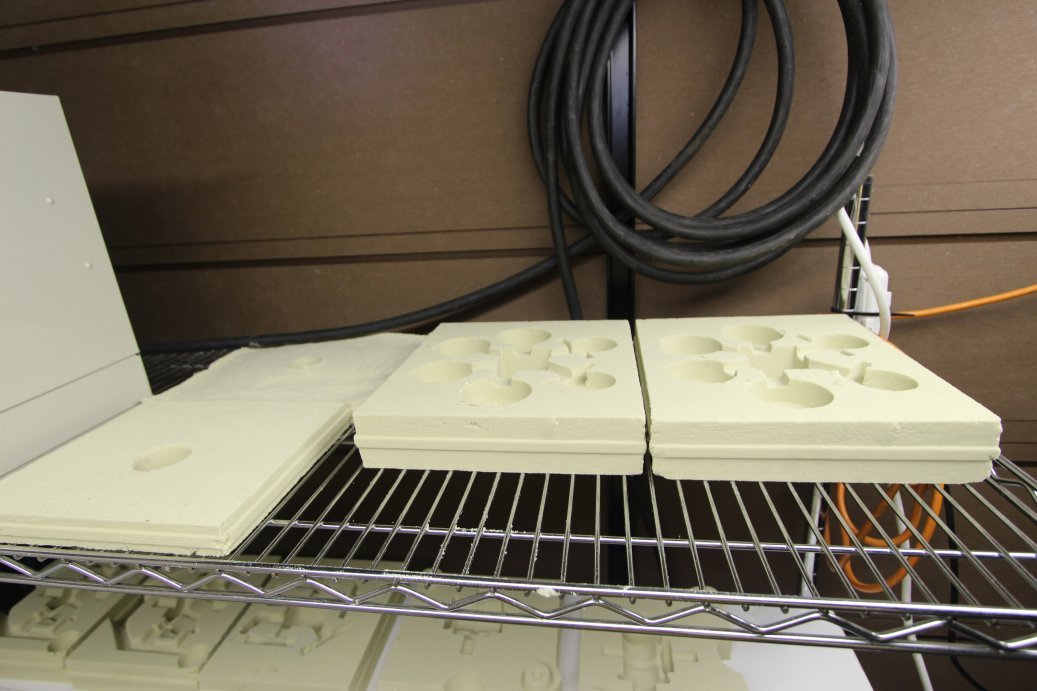
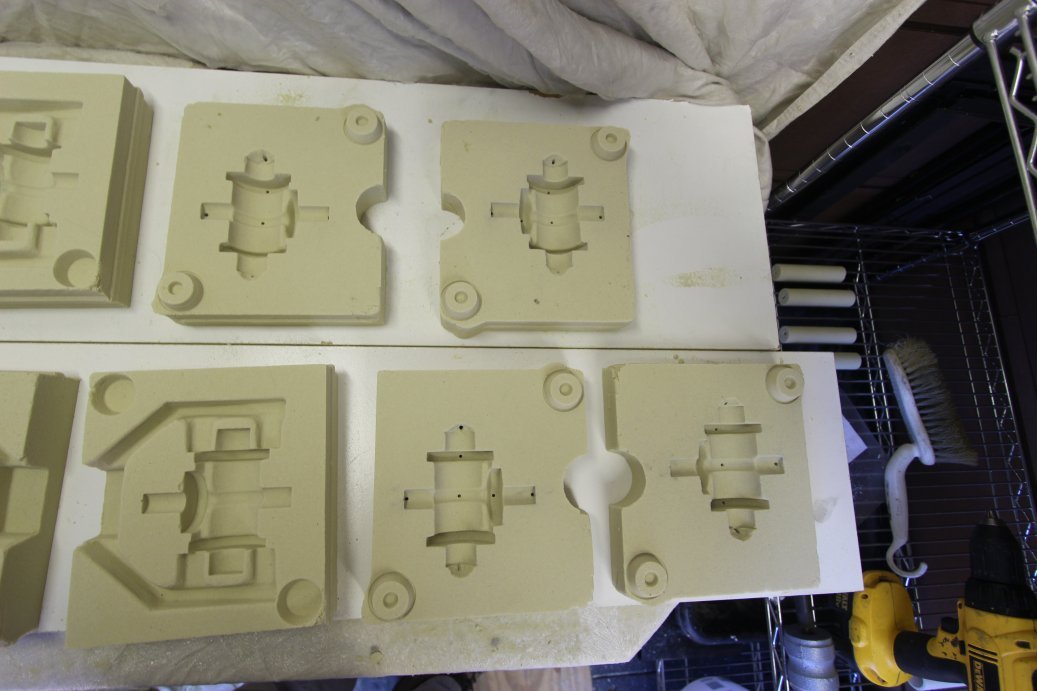
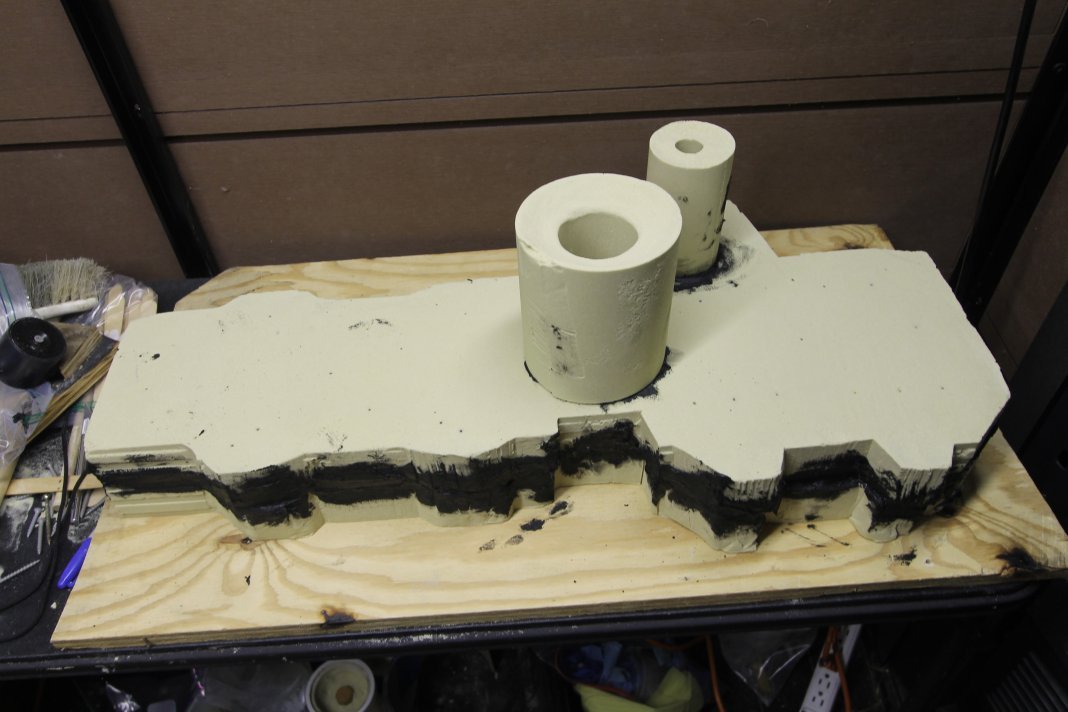
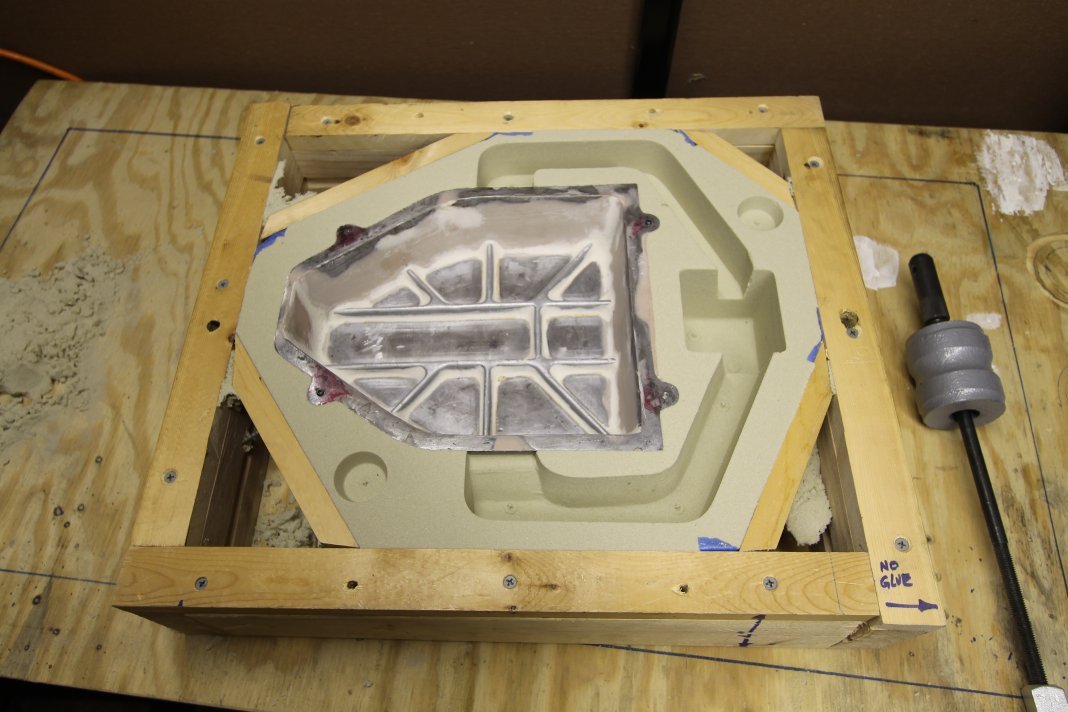
I glanced at your molds, and I would say you could probably reduce their weight by 1/2, but I don't think it would be worth the trouble. By the time you fooled around with filler blocks, and then perhaps had an irregular shaped mold, and risking one or more parts of the mold being too thin and blowing out, I think it would be wise to stay with the mold sizes you have. For me, if I blow out a mold, I can just recast the piece, and my molds are not nearly as complex as yours. I think you need extra mold strength to keep things intact during transport, and while being manhandled at the foundry. I have never had a mold fail, even with spots that are 1/2" thick, but my pours are generally 20-30 lbs of iron. I did have a mold separate once due to hydraulic pressure when I did not use enough weight on top. Below are a few molds I have made. The runner was too small on the long mold, and not all the parts filled. I typically use smaller flasks now with fewer parts in each mold. .
-
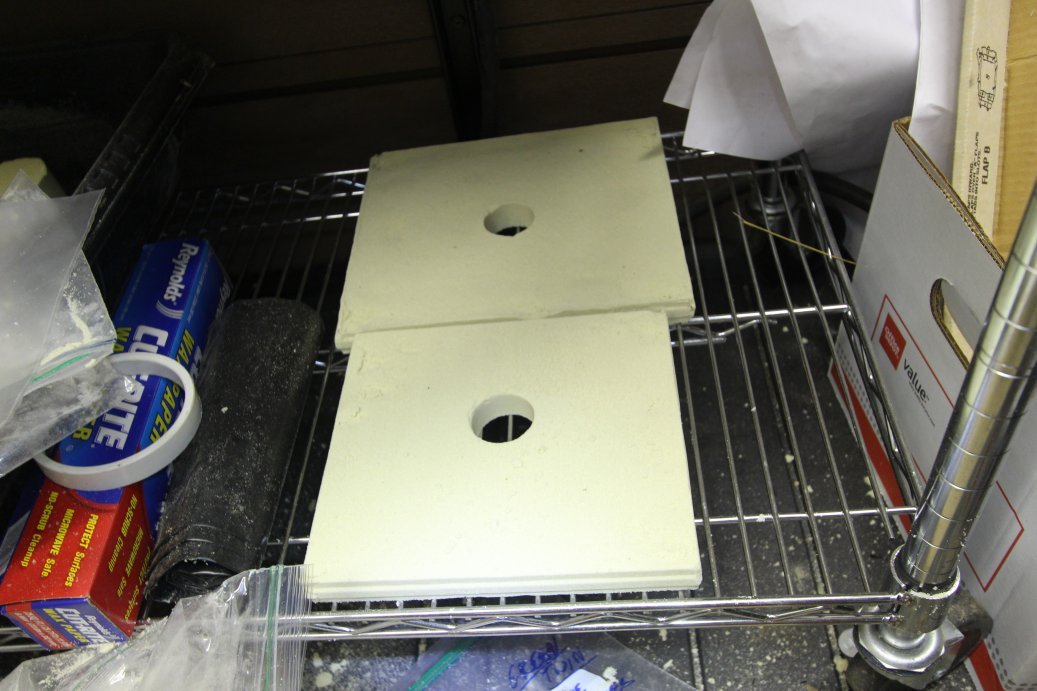
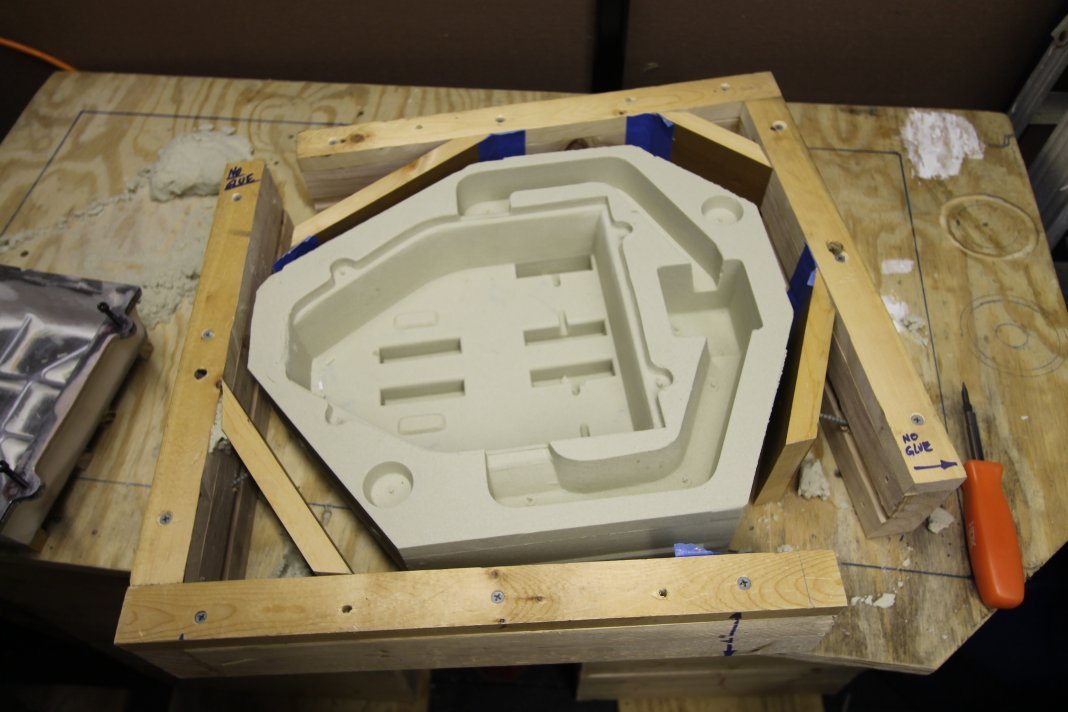
One thing I do as the molds get larger is to use spacers/filler blocks inside the mold so that I can reduce the amount of sand required, and I use painter's tape to hold them temporarily in place. The resin-bound molds are quite hard when they have fully set (they have to remain flat for a little while after set time, else they can warp), so sometimes I reduce the thickness of the mold in places down to perhaps 1/2", but generally keep at least 1" minimium. A larger mold may need more wall thickness for strength, but you don't need nearly as much sand using a resin-bound mold as you do with greensand. You can also pour with a jacket or a flask around the mold to support it if it is thin, or surround it in a box of regular sand that is not bound. So what I am getting at is perhaps you could reduce the sand required for your molds to a more reasonable/manageable weight. I will have to review your photos again to see how thick your molds are, but generally, people tend to make every mold as if it were greensand, with a rectangular flask, when in reality, a resin-bound mold could weight probably be 25% of what a greensand mold would weigh. There is a lot of hydraulic force on a mold, especially a vertically poured one. I lay my molds flat, glue the cope to the drag, and then use an significant amount of iron or steel weights on top of the mold to prevent mold float. The art iron folks use metal bands to secure tall vertical molds, but I have seen those bands fail, and send out a gusher of molten iron. .
-
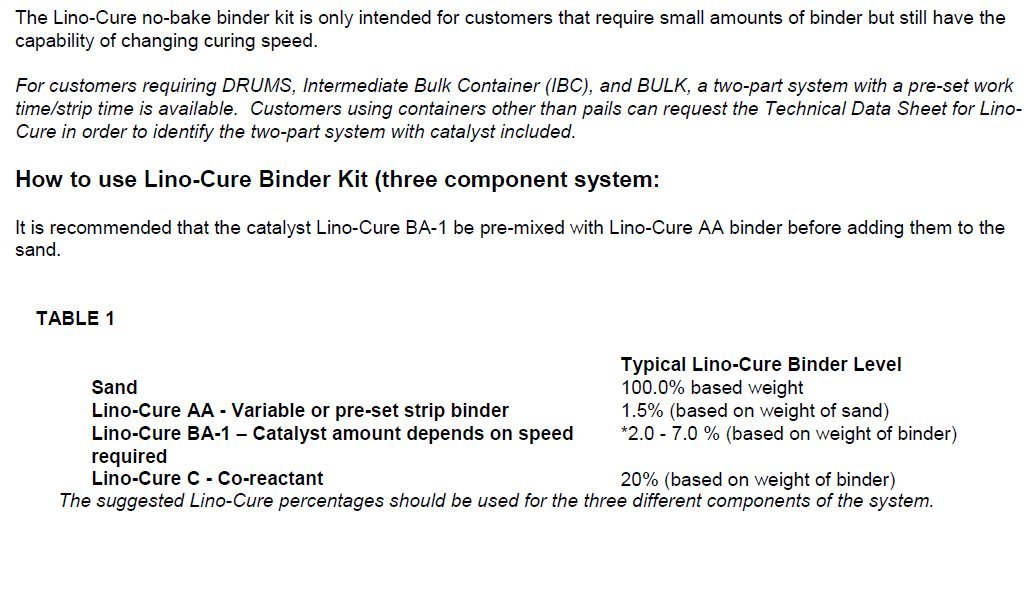
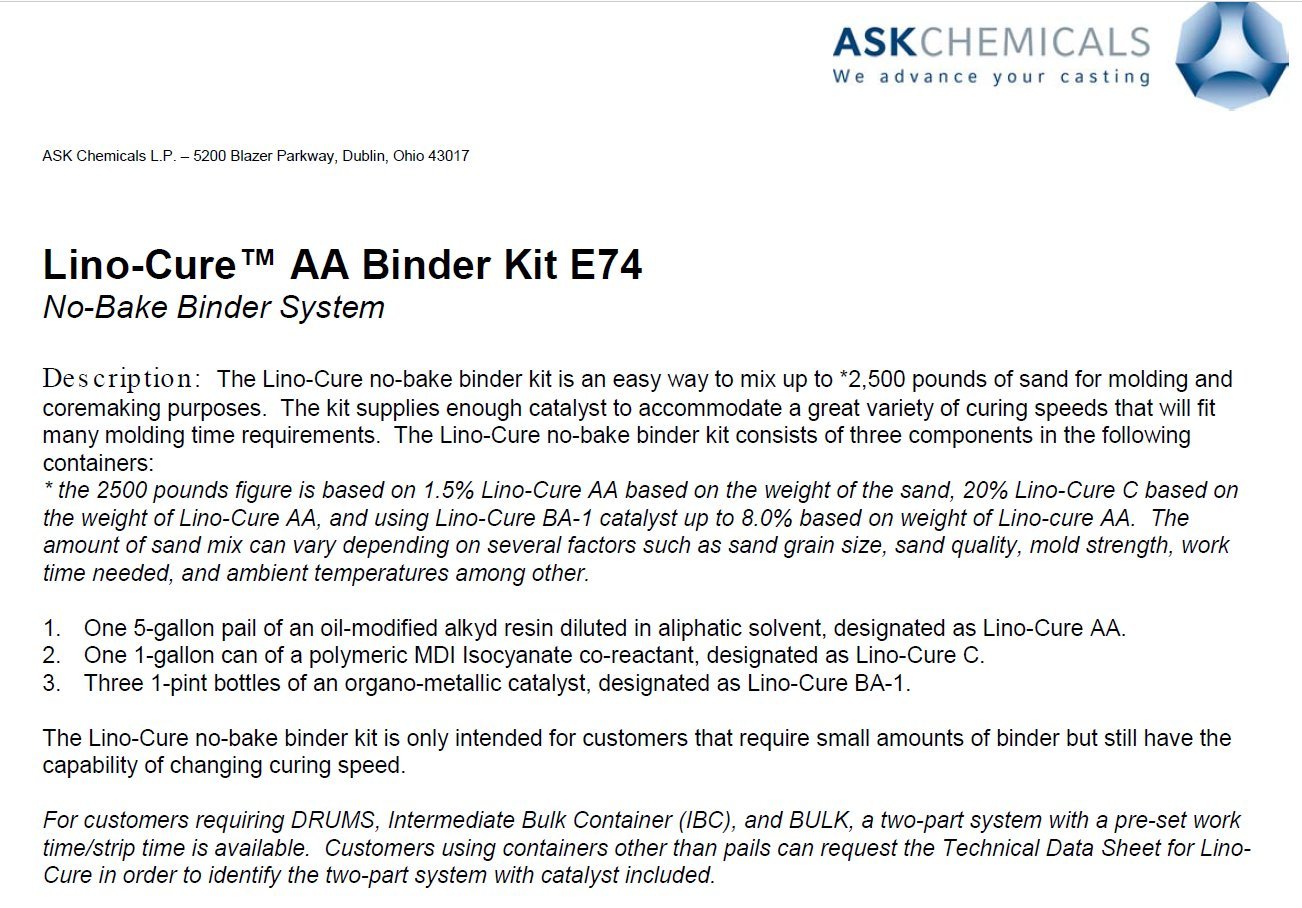
I have always used the kit, which contains 1.One 5-gallon pail of an oil-modified alkyd resin diluted in aliphatic solvent, designated as Lino-Cure AA. 2. One 1-gallon can of a polymeric MDI Isocyanate co-reactant, designated as Lino-Cure C. 3. Three 1-pint bottles of an organo-metallic catalyst, designated as Lino-Cure BA-1. The Lino-Cure no-bake binder kit is only intended for customers that require small amounts of binder but still have the capability of changing curing speed. For customers requiring DRUMS, Intermediate Bulk Container (IBC), and BULK, a two-part system with a pre-set work time/strip time is available. Customers using containers other than pails can request the Technical Data Sheet for Lino-Cure in order to identify the two-part system with catalyst included. I am not sure what the "pre-set work time/strip time" is for the bulk containers with the two-part system that they mention. I mix the "AA" resin with the catalyst "BA-1" first (this mixture does not harden), and then mix that with the sand, and finally mix the isocyanate co-reactant "C" into the sand. I use a commercial kitchen mixer for most of my mixing. For larger mixes, I could use a mortar mixing container and a hoe, but have not tried that. Some people use concrete mixers. So it gives a range of 2-7% on the catalyst "BA-1", and at the lowest amount (2%), that gives you 50 minutes work time. So it makes me wonder if you just left out the catalyst, and only used the AA and the C, then would the resin still harden, and if so, what would the working time be. I don't see anything that says you actually have to use the catalyst. I can mix up a small batch using the resin and co-reactant, and see what it does. It is a bit cold outside, so I would have to bring it in the heated shop to see if it hardens. I assume it would harden without catalyst, since I assume (perhaps incorrectly) that the catalyst only speeds up the reaction between the resin and co-reactant. The sand has to be very dry and clean, else the resin binder may not work correctly. .
-
Here are a few videos of how I make molds, and examples of the iron surface finish I am getting. Hopefully these links will play here. Binder is LINO-CUR, and mold coat is an alcohol-based ceramic material called Velacote (I think that is the name).
-
I am really late to the party, but I have just recently run across this thread. I have been making resin-bound sand molds for small steam engines for the last 8 years, and the product I use is LINO-CUR by Ask Chemical. It is a 3-part system with resin, hardener, and catalyst, and it is very easy to come up with about any set time you desire. Varying the set time is very handy since the temperature around here varies quite a bit, which affects set time. I have been using my first batch of LINO-CUR for four years, and some of the hardener has crystalized, but it is easy enough to remove that. I pour the hardener into separate mason jars, to minimize the crystalization. The resin has never gone bad, nor has the catalyst, and I don't control the storage temperature for these material, so this is really a long shelf life for binder. I use OK85 commercial sand, which is a very dry fine round-grain sand. The art-iron folks use a lot of LINO-CUR, but it works very well with gray iron also, which is what I pour. https://www.ask-chemicals.com/fileadmin/user_upload/Download_page/foundry_products_brochures/US/No_Bake_USA.pdf And I spray on a layer of alcohol-based ceramic mold wash, and burn it off, and that gives a surface on the iron that is clean and shiny right out of the mod, and eliminates any post-casting cleanup. You have a fantastic thread going here, and it is spectacular on so many levels (3D modeling, pattern making, mold making, casting, etc). I started making my own iron castings in 2012, and have that process pretty much perfected at this point, and can make iron castings without defects. I was told that quality gray iron castings could not be made on a hobby level, but that is not true. Anyway, I noticed you having issues with set time, so I thought I would share this info with you. Great thread !!!! Keep up the great work. Pat J Edit: I am working on learning how to cast ductile iron, and hope to have that figured out early next year. This will be used to cast crankshafts.