

Vk304
-
Posts
389 -
Joined
-
Last visited
Content Type
Forums
Downloads
Events
Gallery
Posts posted by Vk304
-
-
-
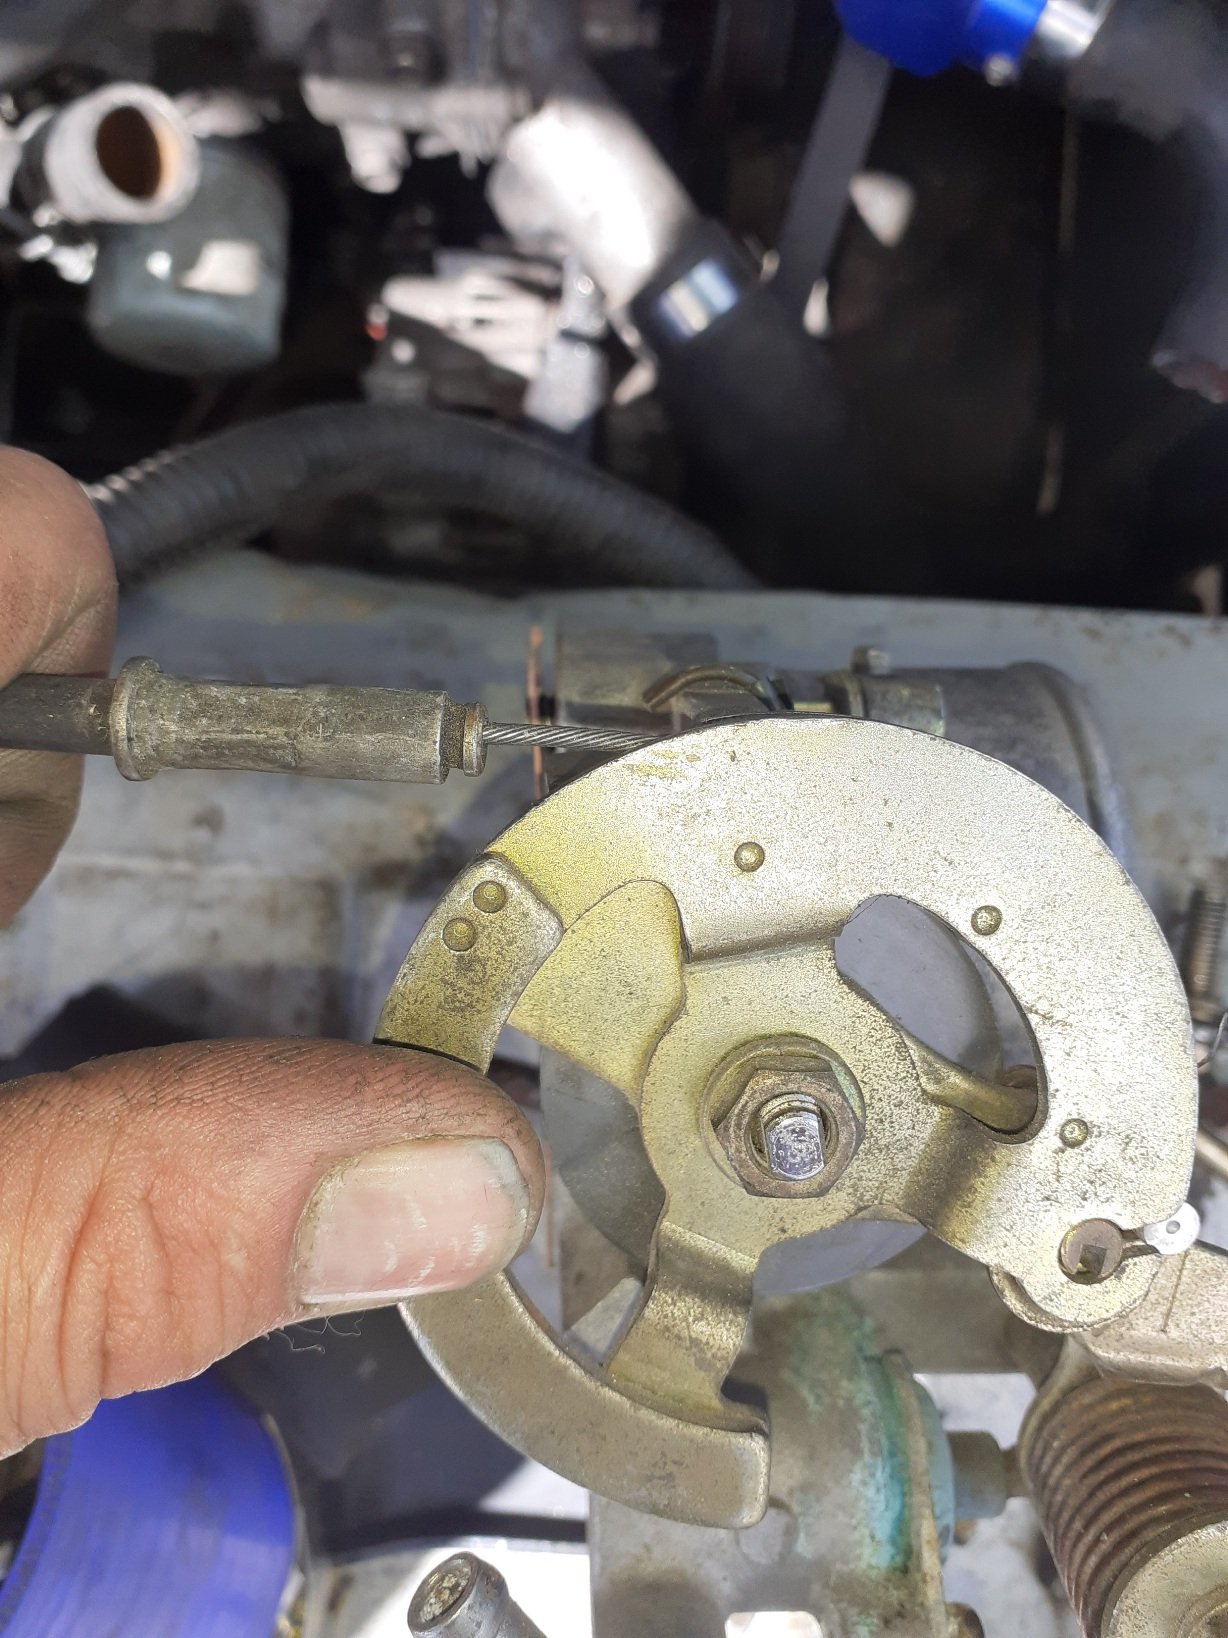
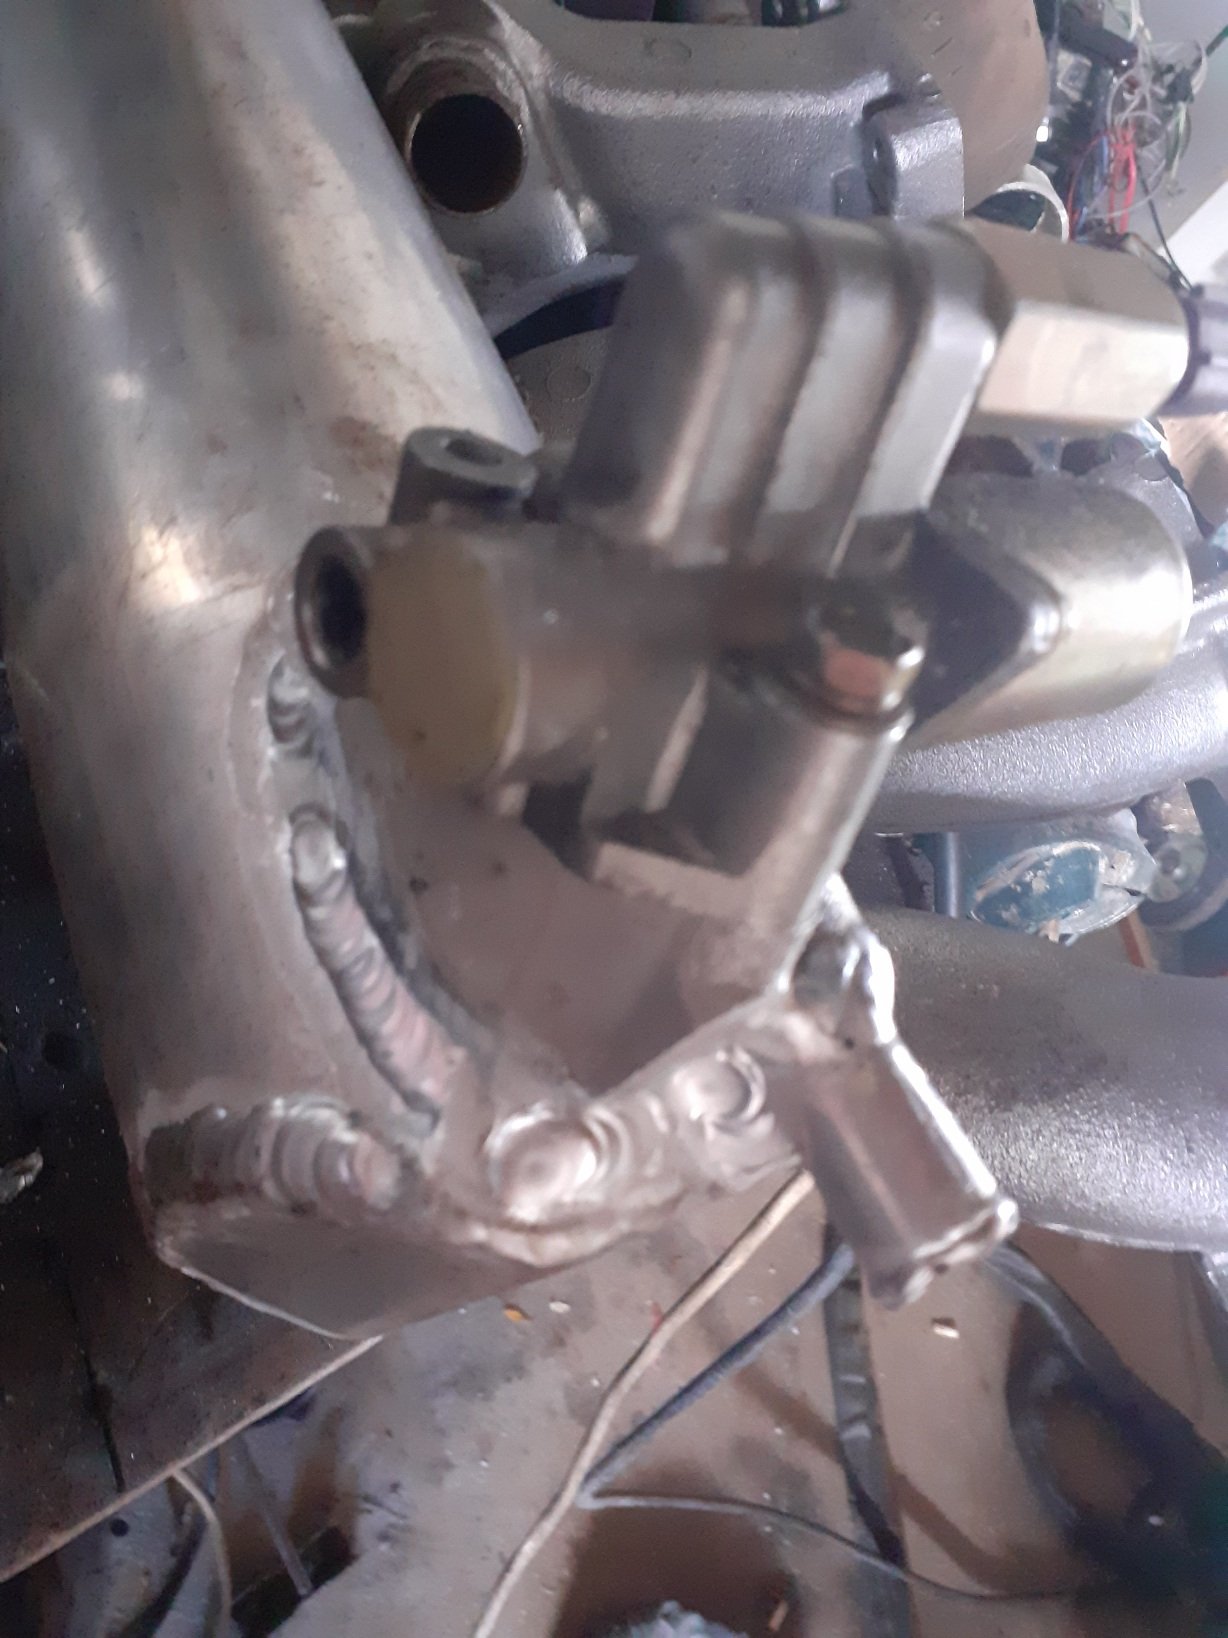
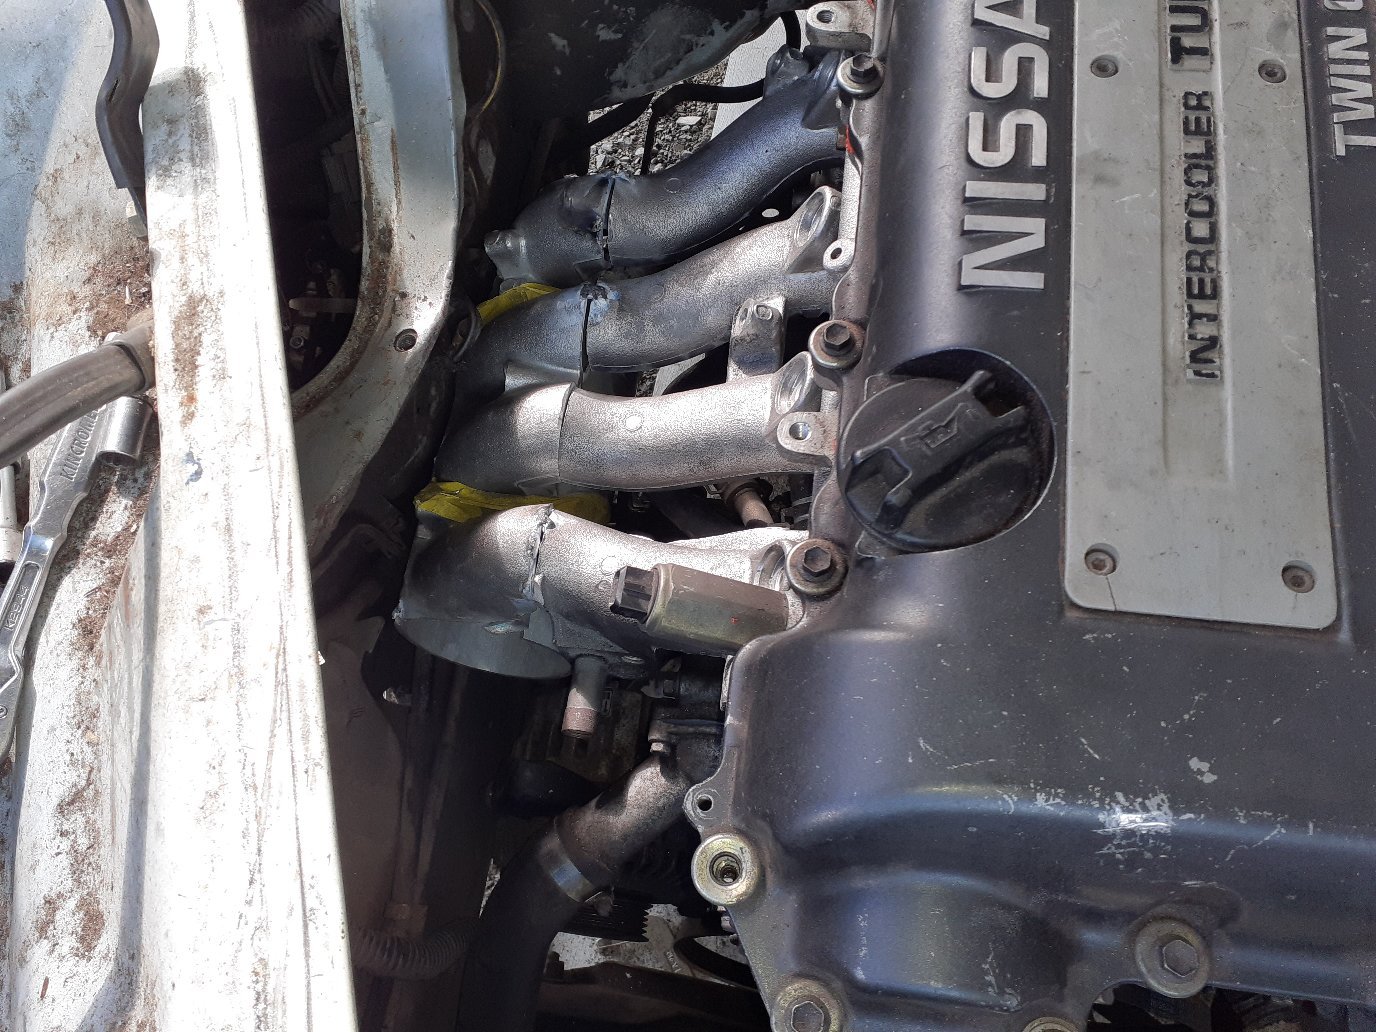
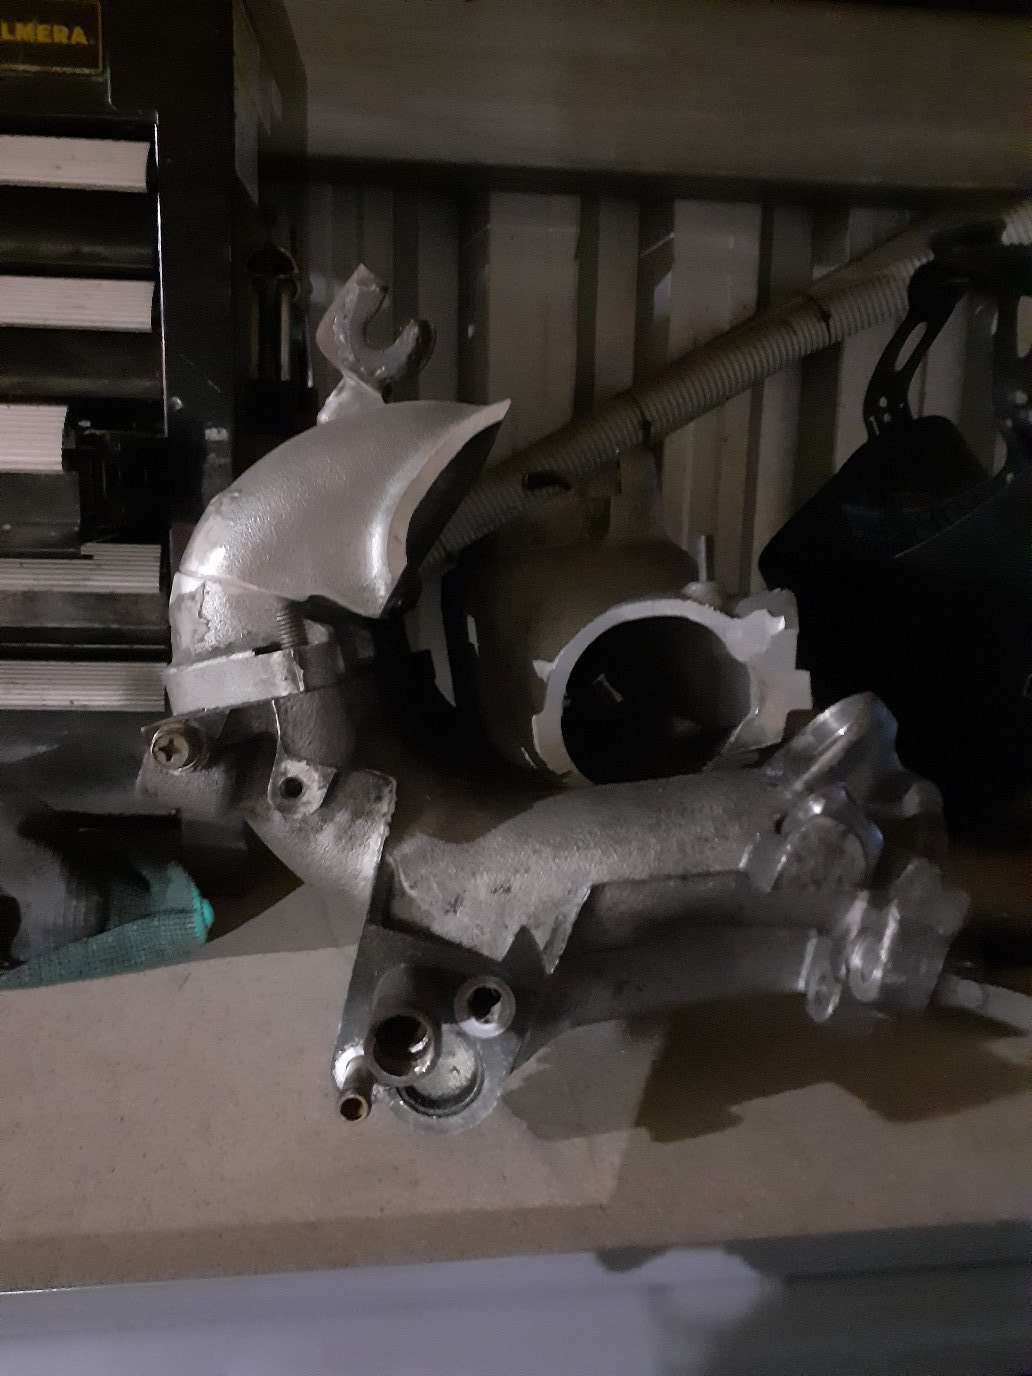
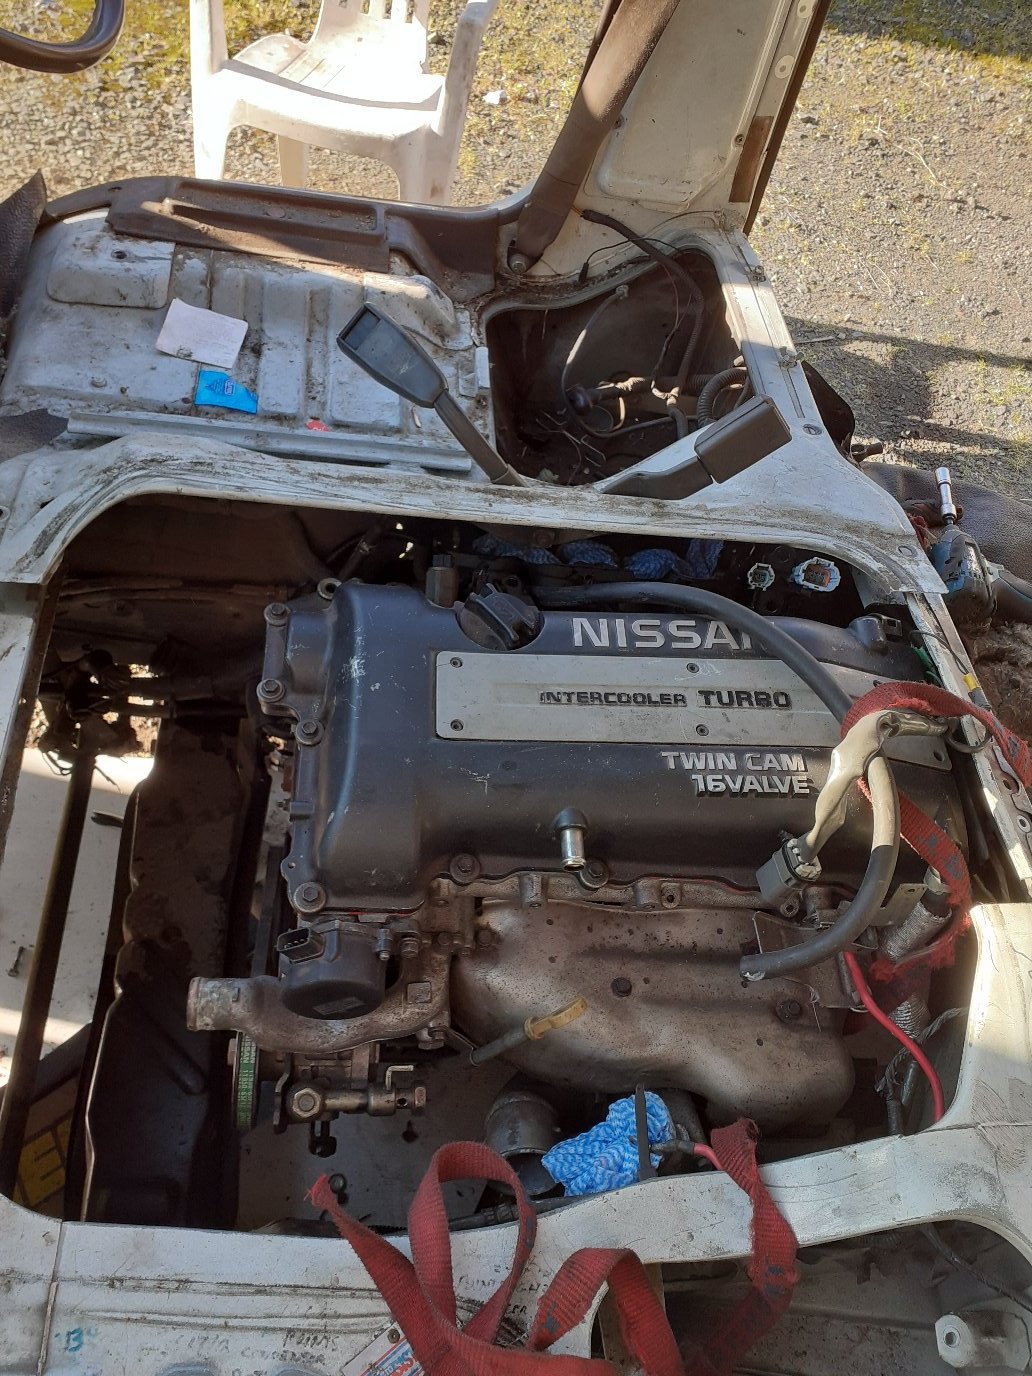
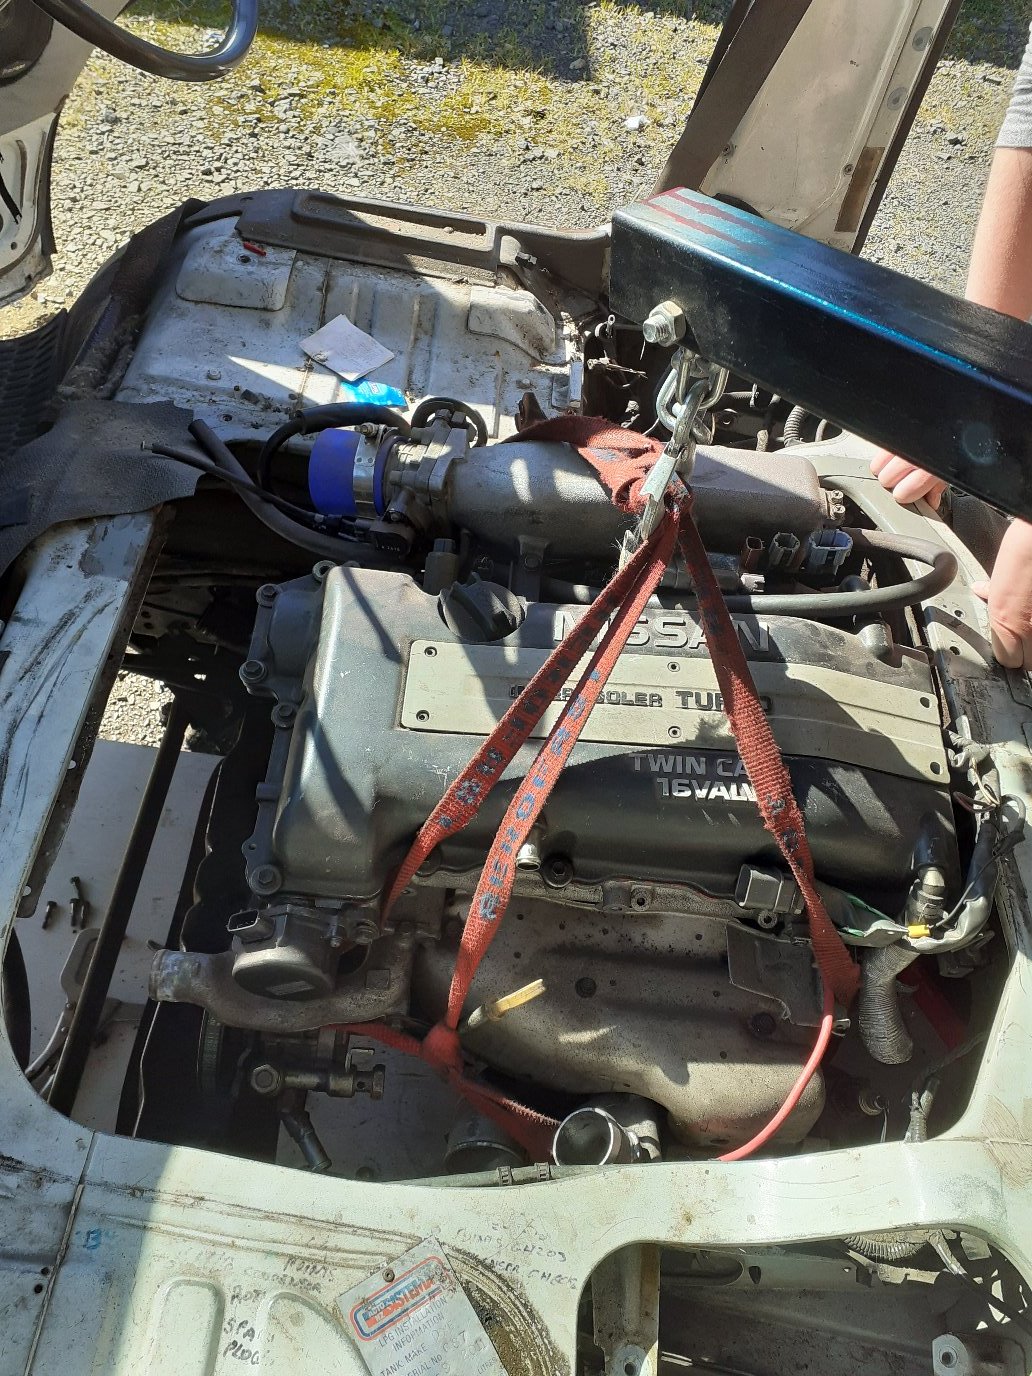
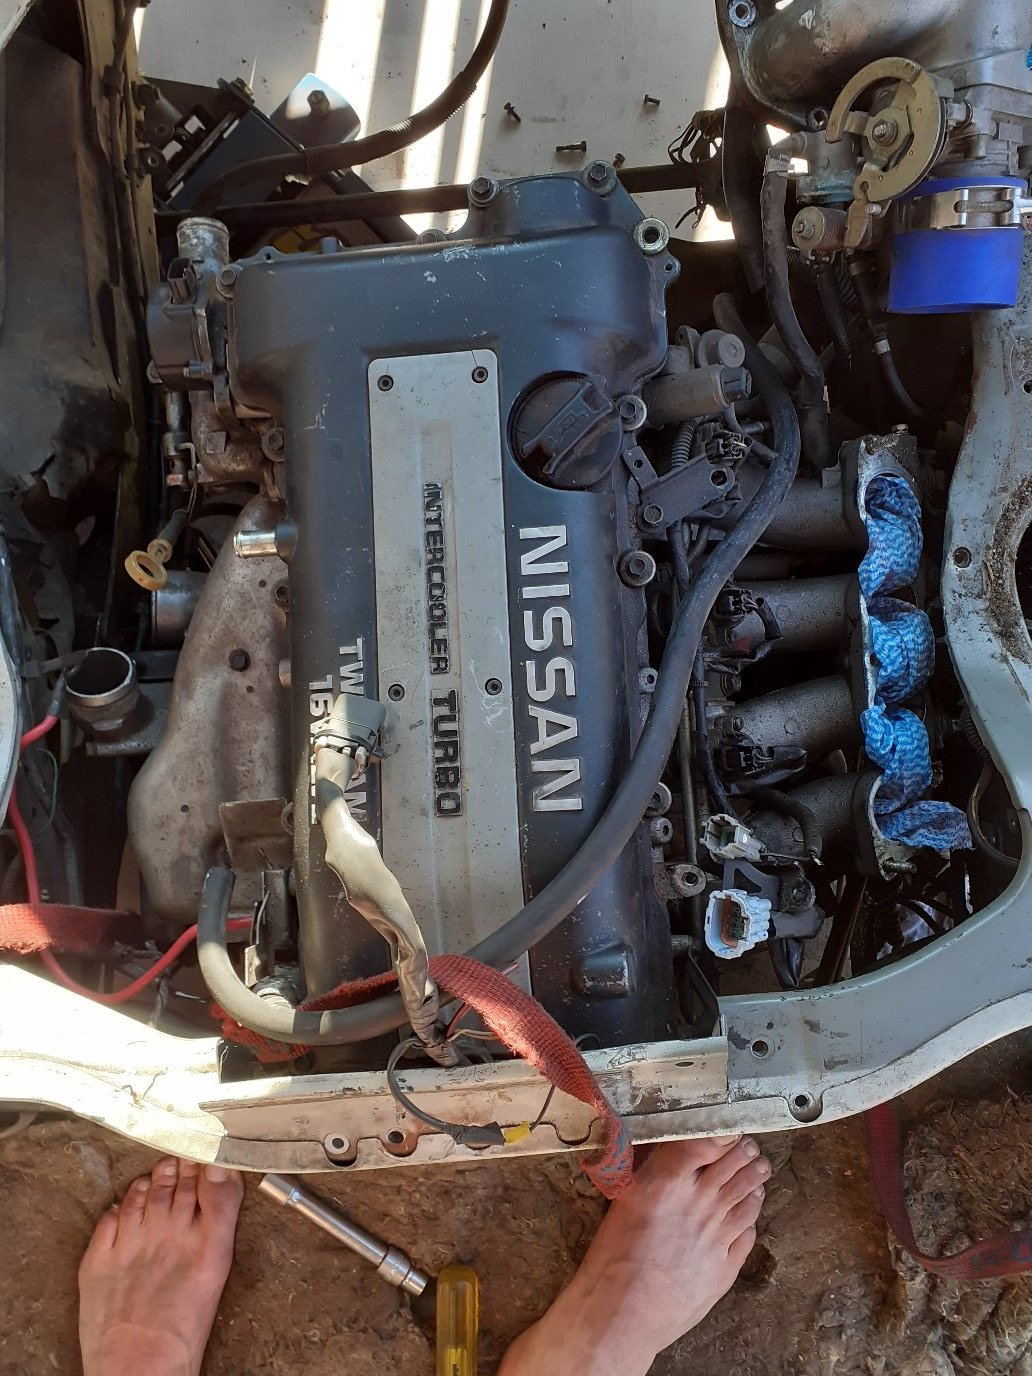
Some more intake bits, arduous work but I've got the idle air control on, as well as various vacuum outlets and the throttle mount, using bits I had from the other motor it's now as good as it will be.
Tried to flare the aluminium vacuum pipe but it wasn't having it, so found running the tig around the top made for a nice edge for the hose to grip onto the smaller one when hot flared out nicely with a punch. Will do full weld when I get some more suitable tig rods , and now my goal is to finish the engine mounts this weekend....?

-
 5
5
-
-
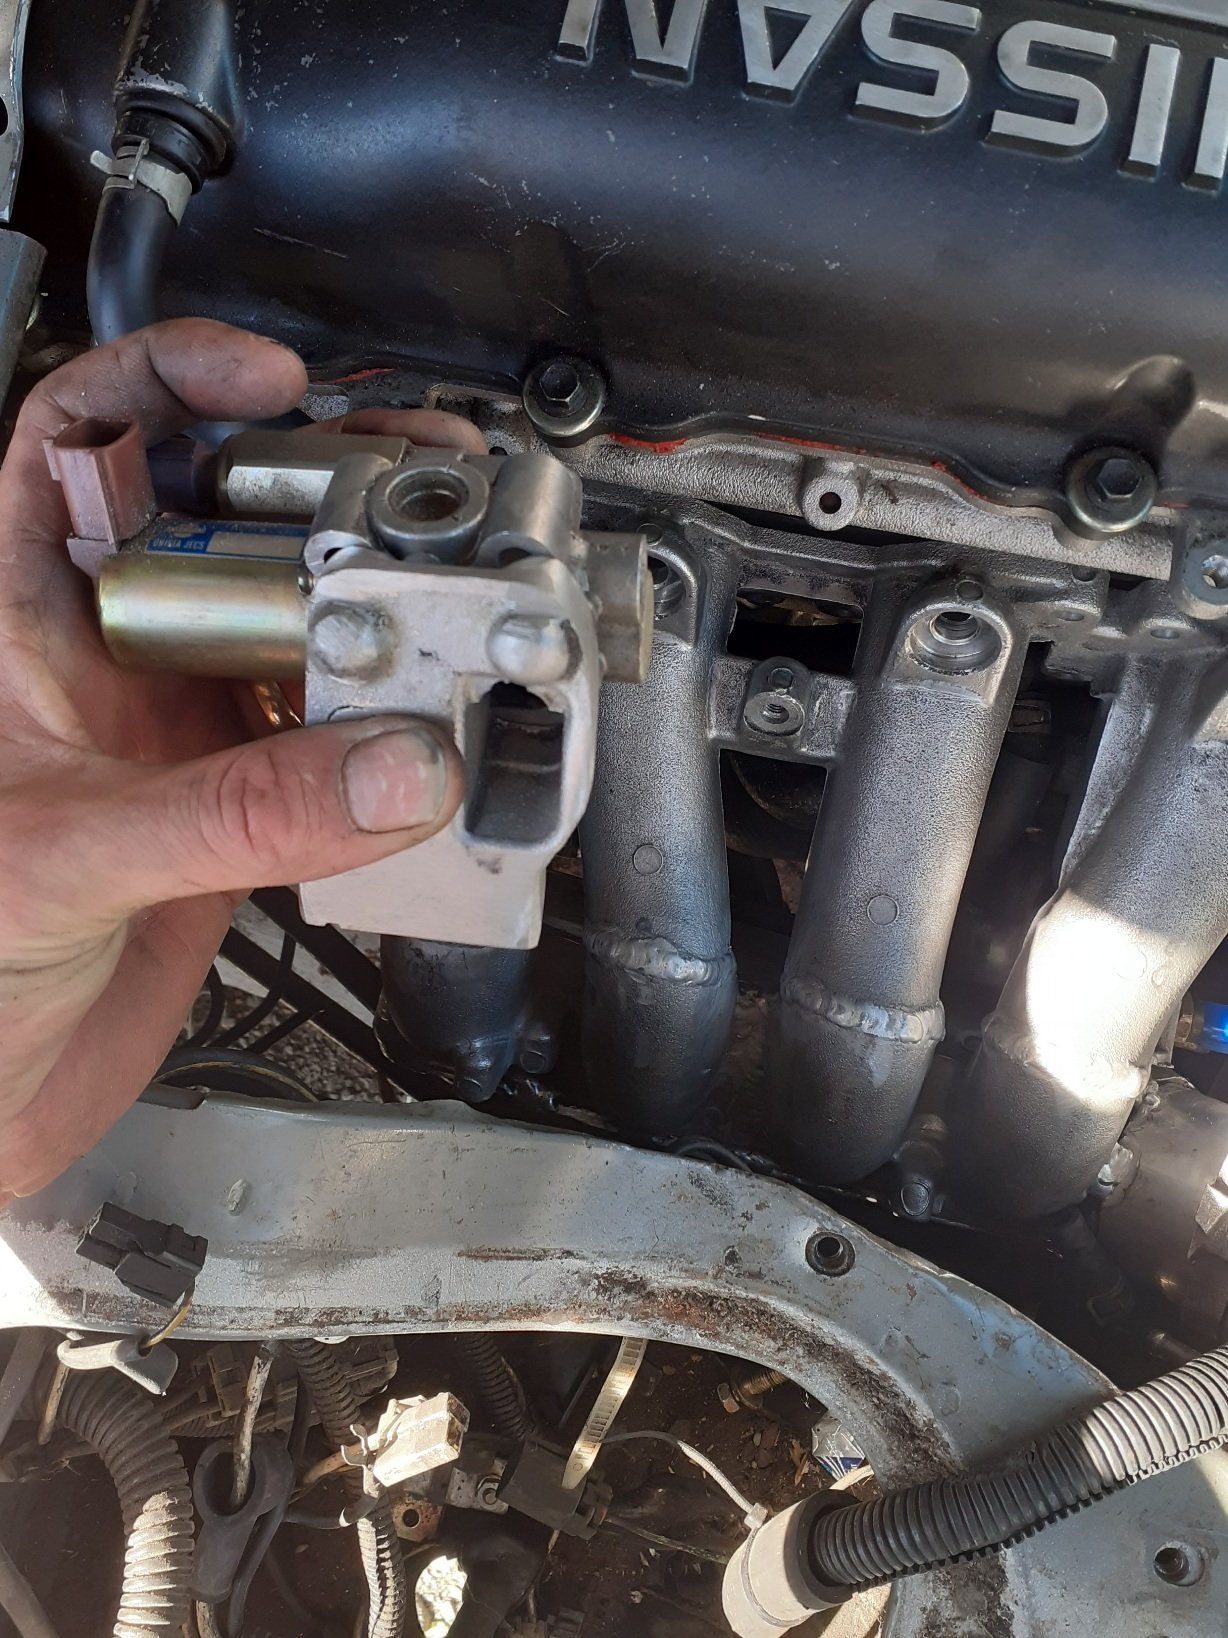
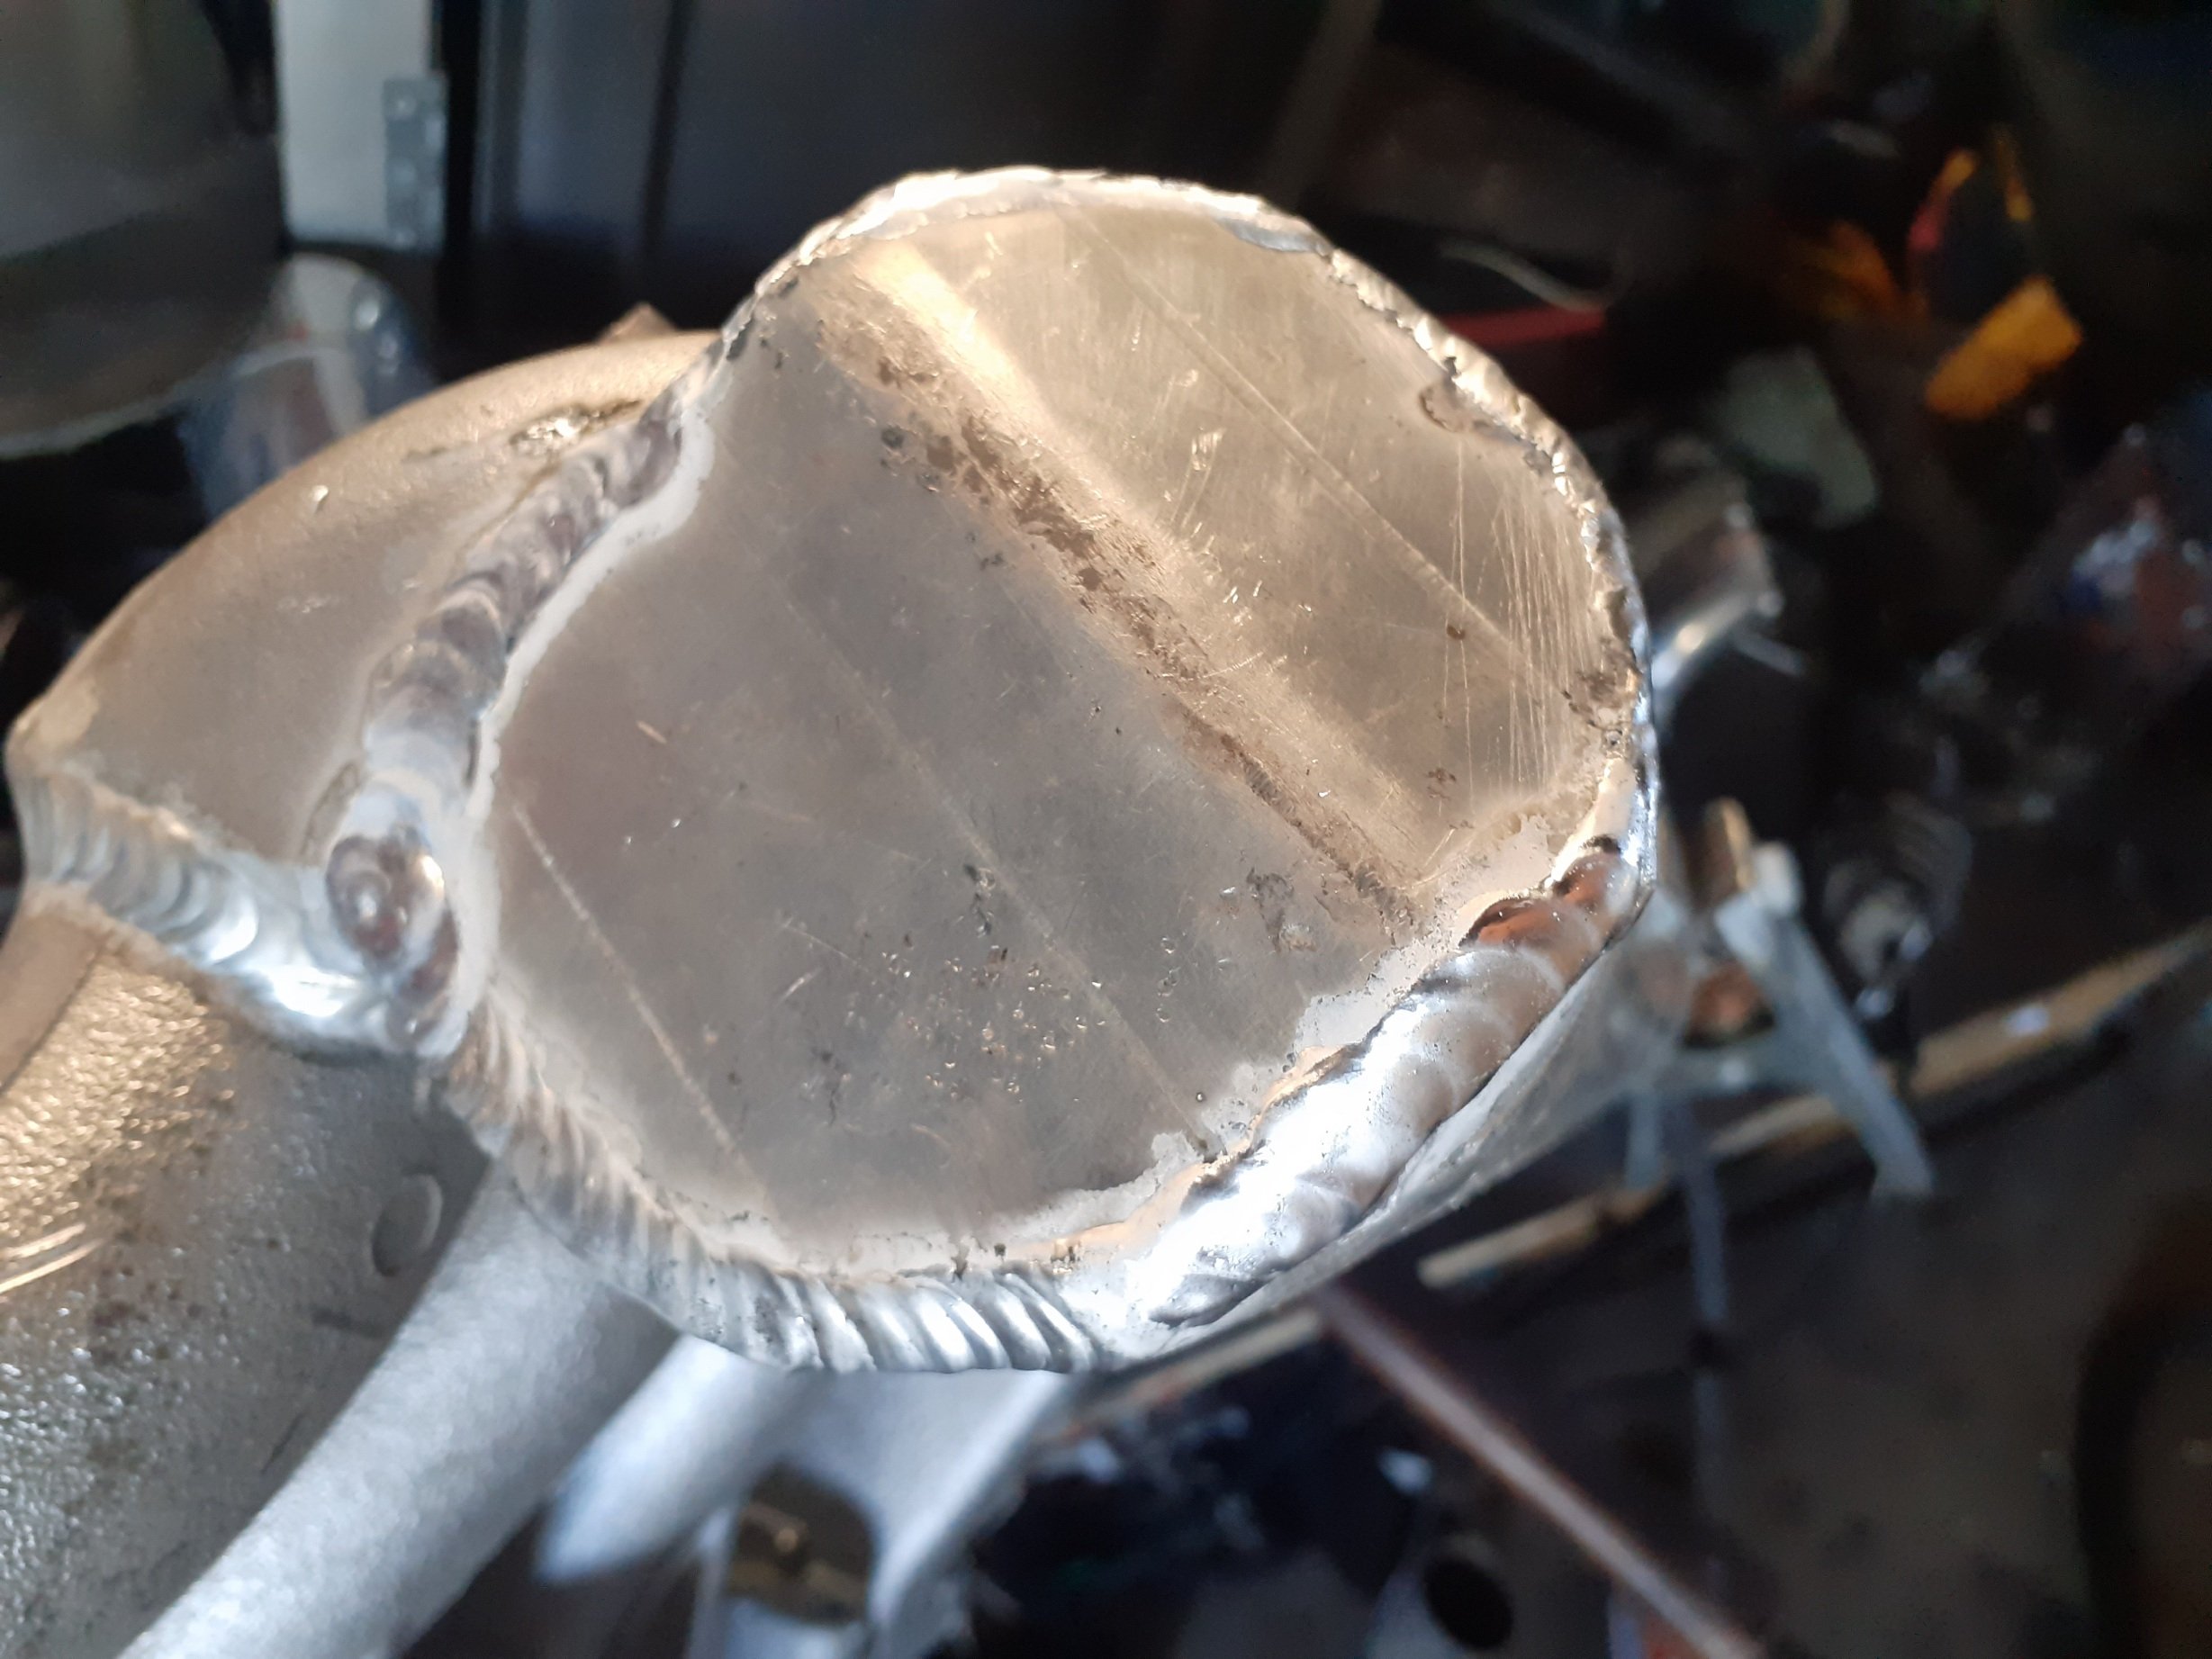
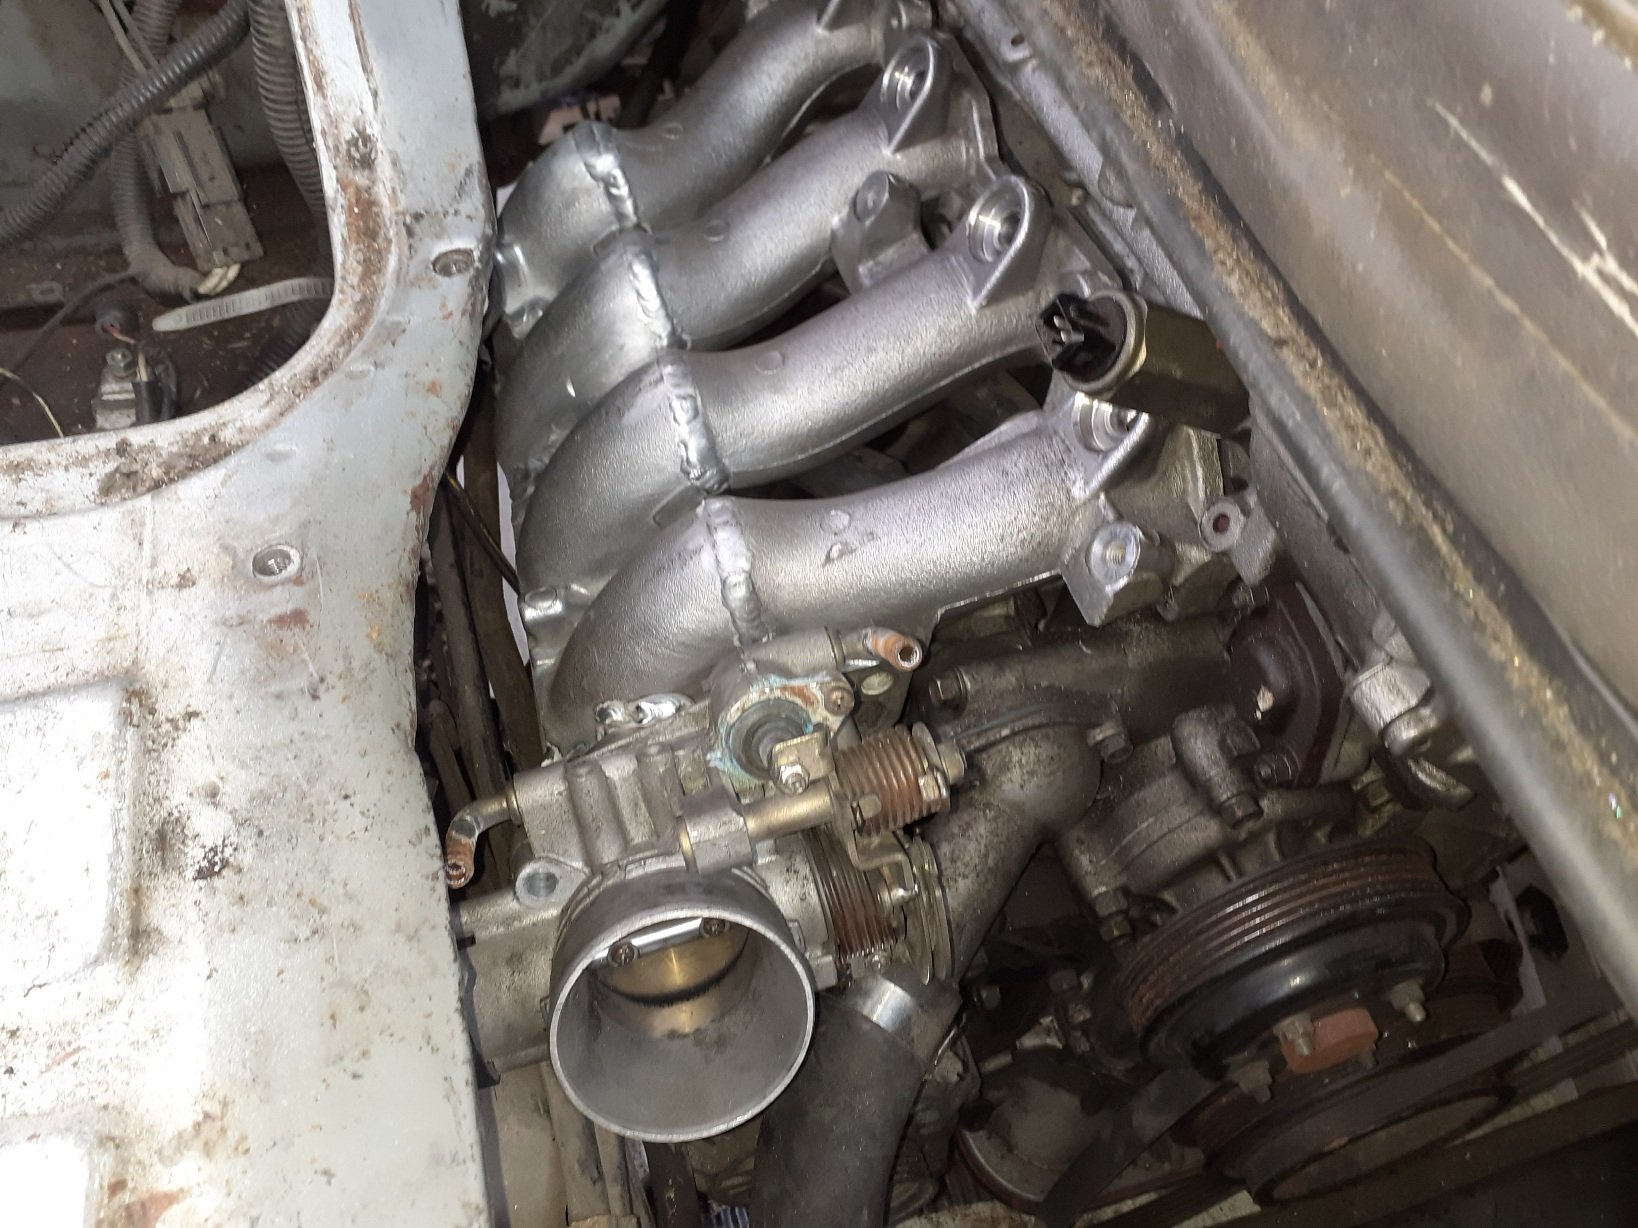
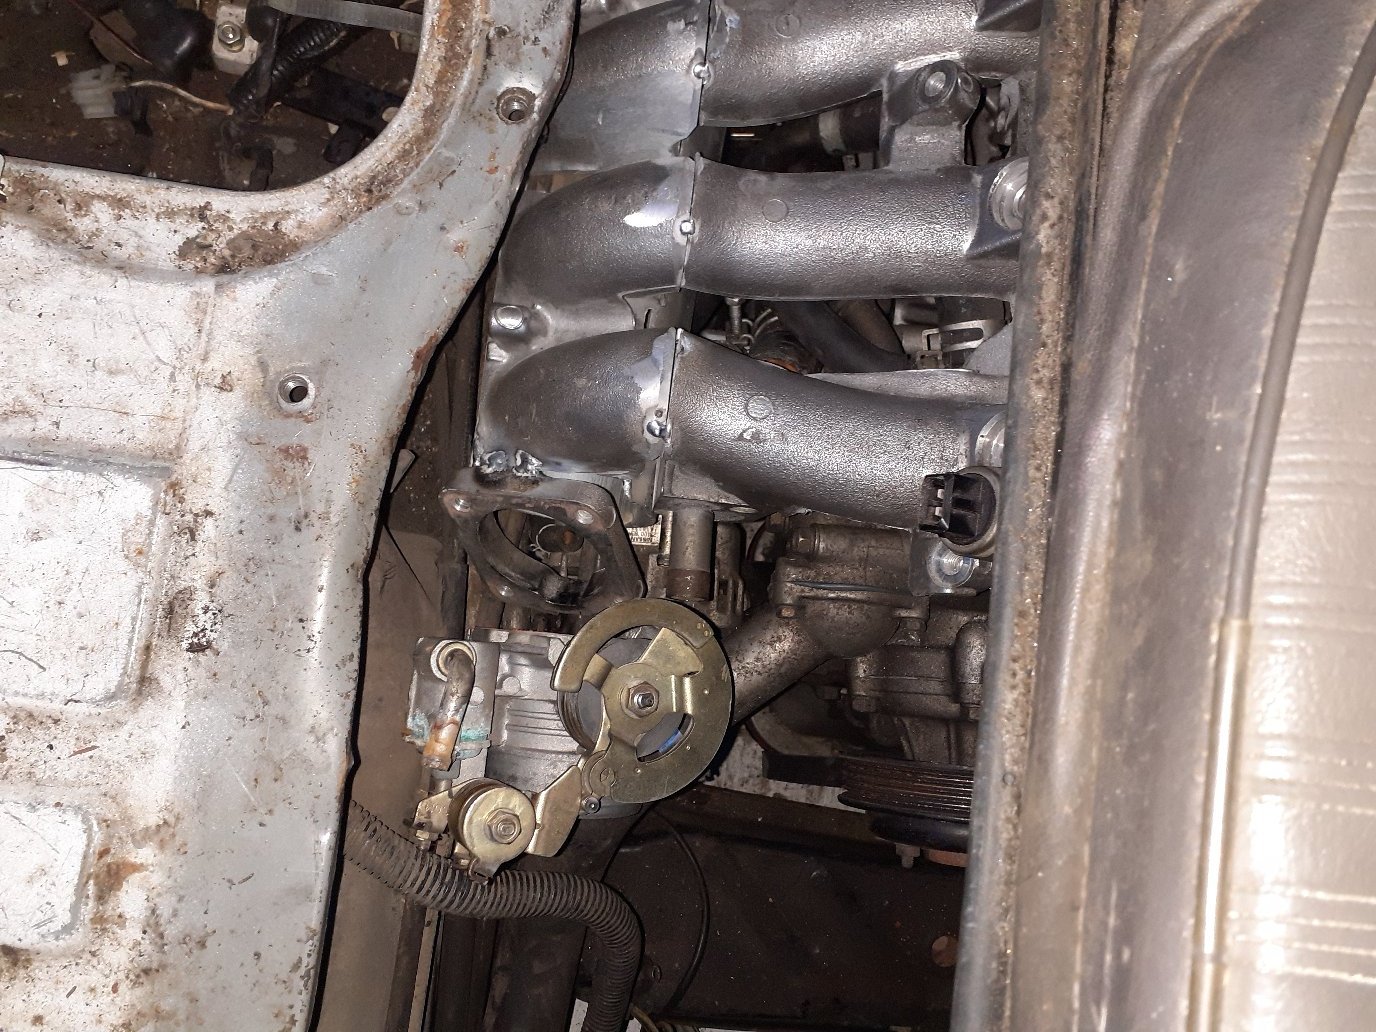
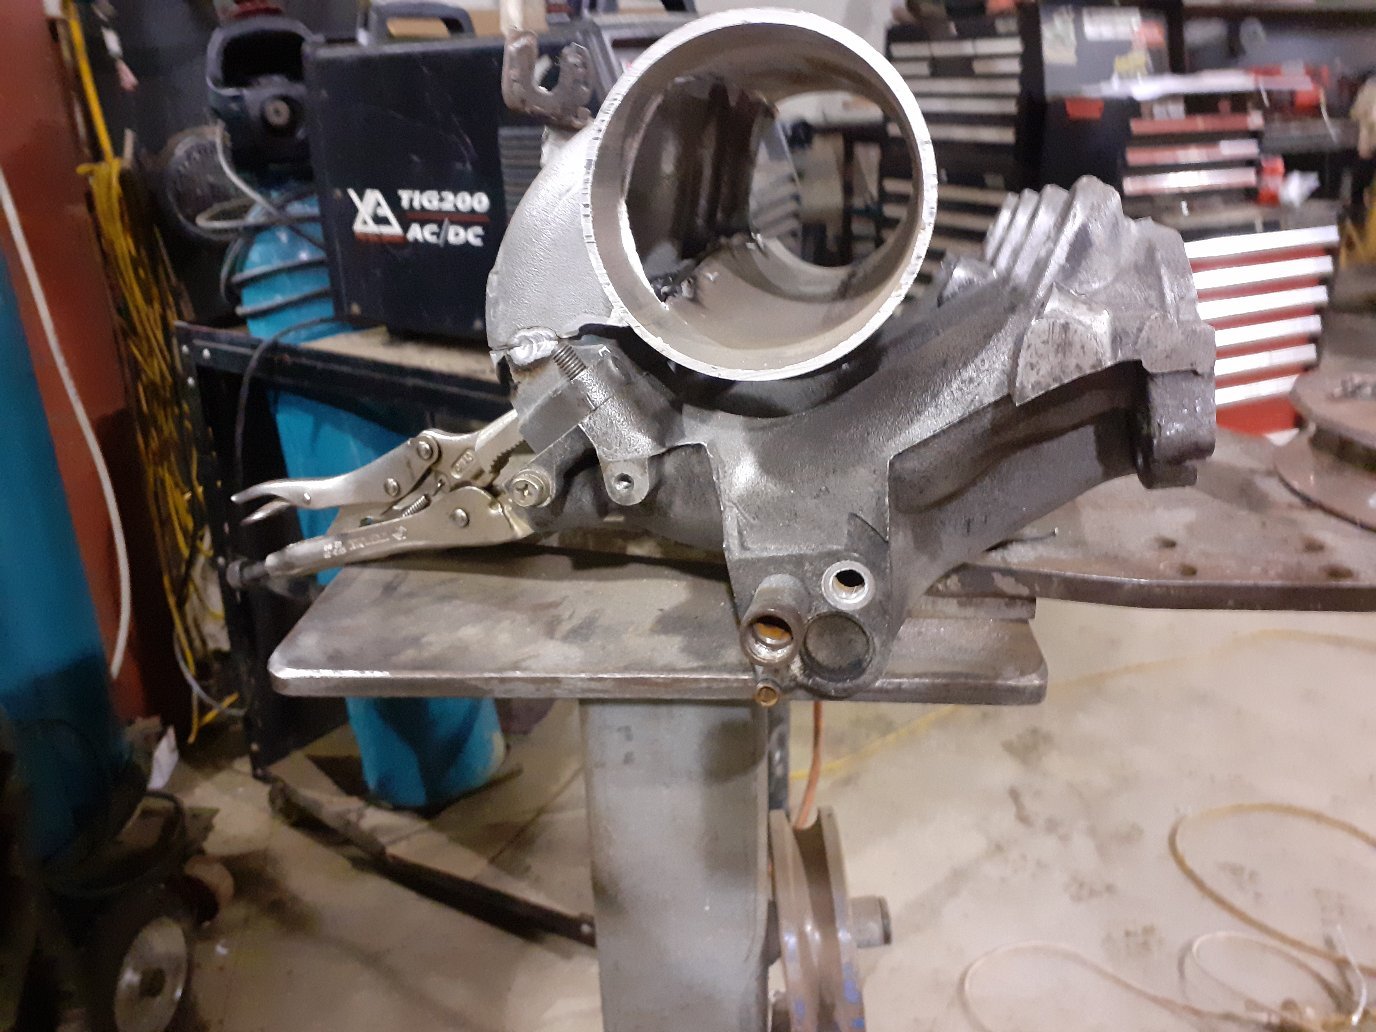
Some fabrication on the intake , nothing fancy but it will do the job
-
9
-
-
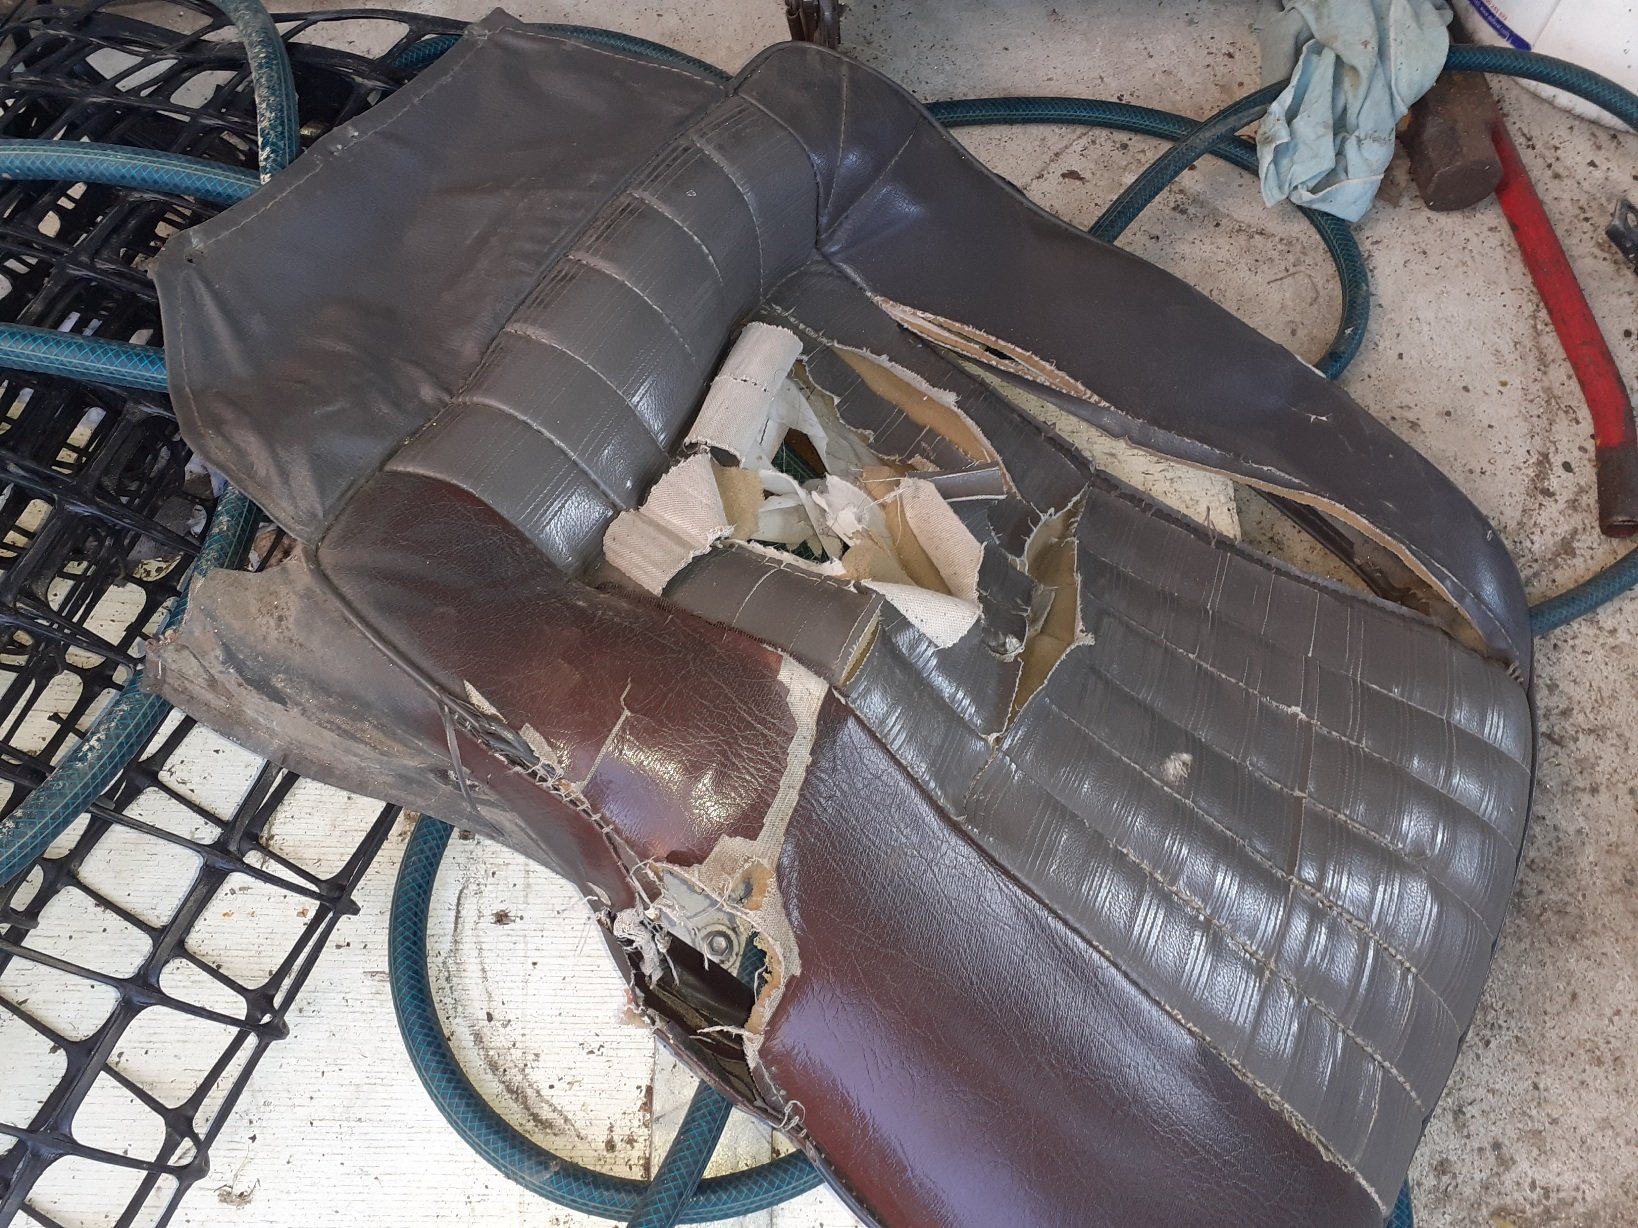
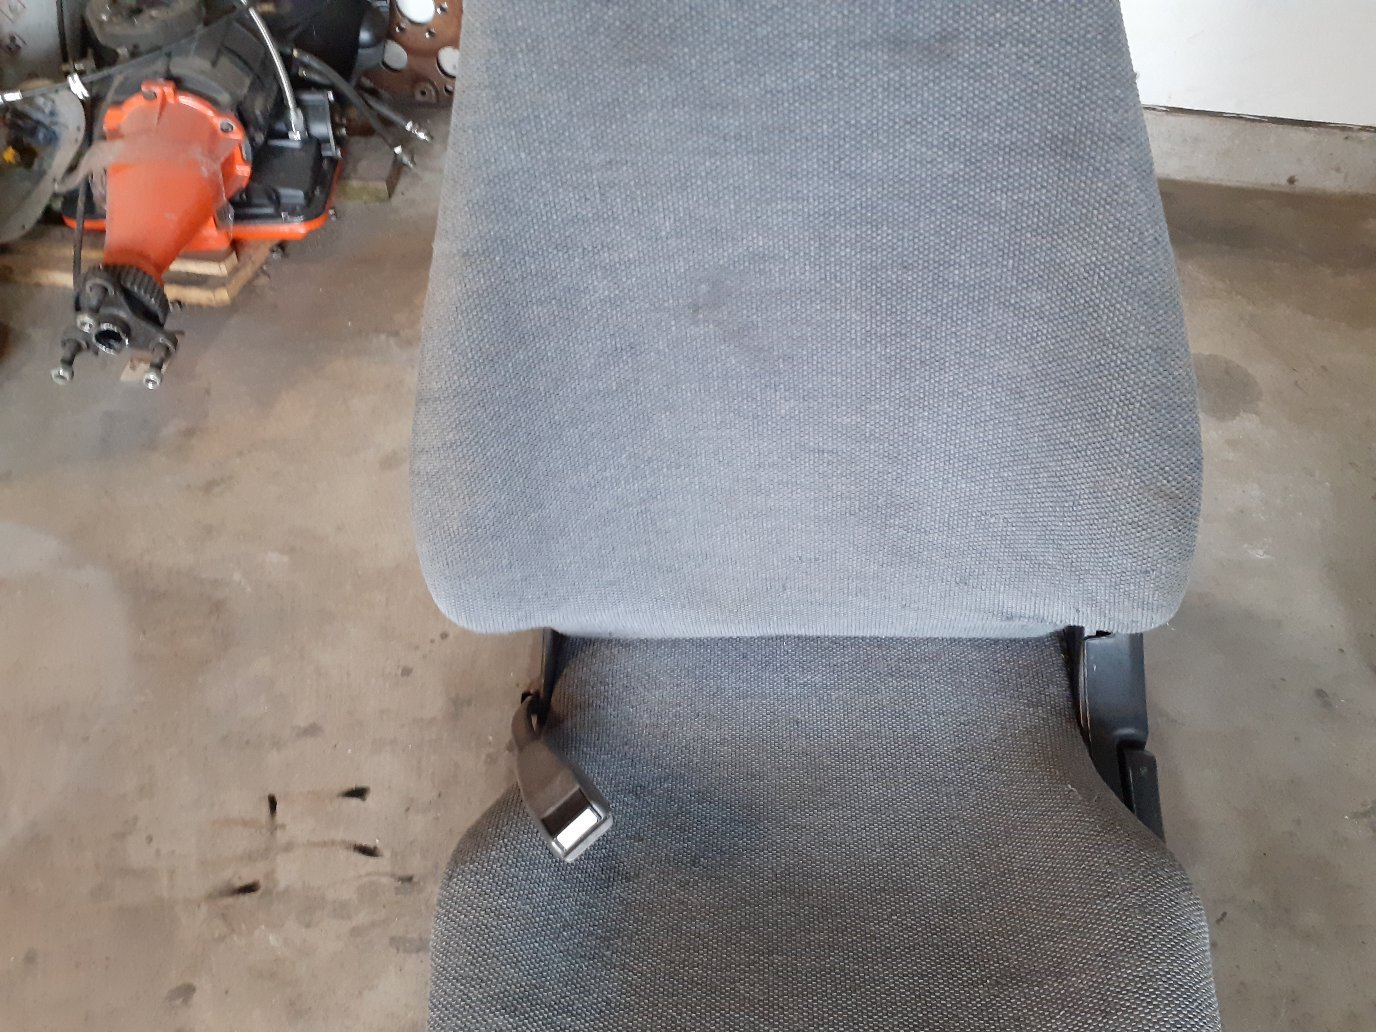
Well the drivers seats had it, I just noticed some suspect welding when I was moving it and well it got worse the more I looked at it, more shitty workmanship, and only one bolt holding the rail on, as in one bolt holding the seat in the car when you bolt the rail down!
The other side has a sliding piece of angle? Safe ???? , time to find another seat I think.
I could weld this and reinforce it etc but the seat covers blown out too, hope someone's got a 80s van seat lying around

-
1
-
 2
2
-
 1
1
-
-
Yea can't go wrong with mitre10 haha I go through a few , maybe I think that was more the throttle was only half opening with pedal to the floor... could be that too I guess, either way its gonna fly up hills soon
-
- Popular Post
- Popular Post
But yes, the intake clears everything now including the engine covers so all the seats should be factory:)
-
16
-
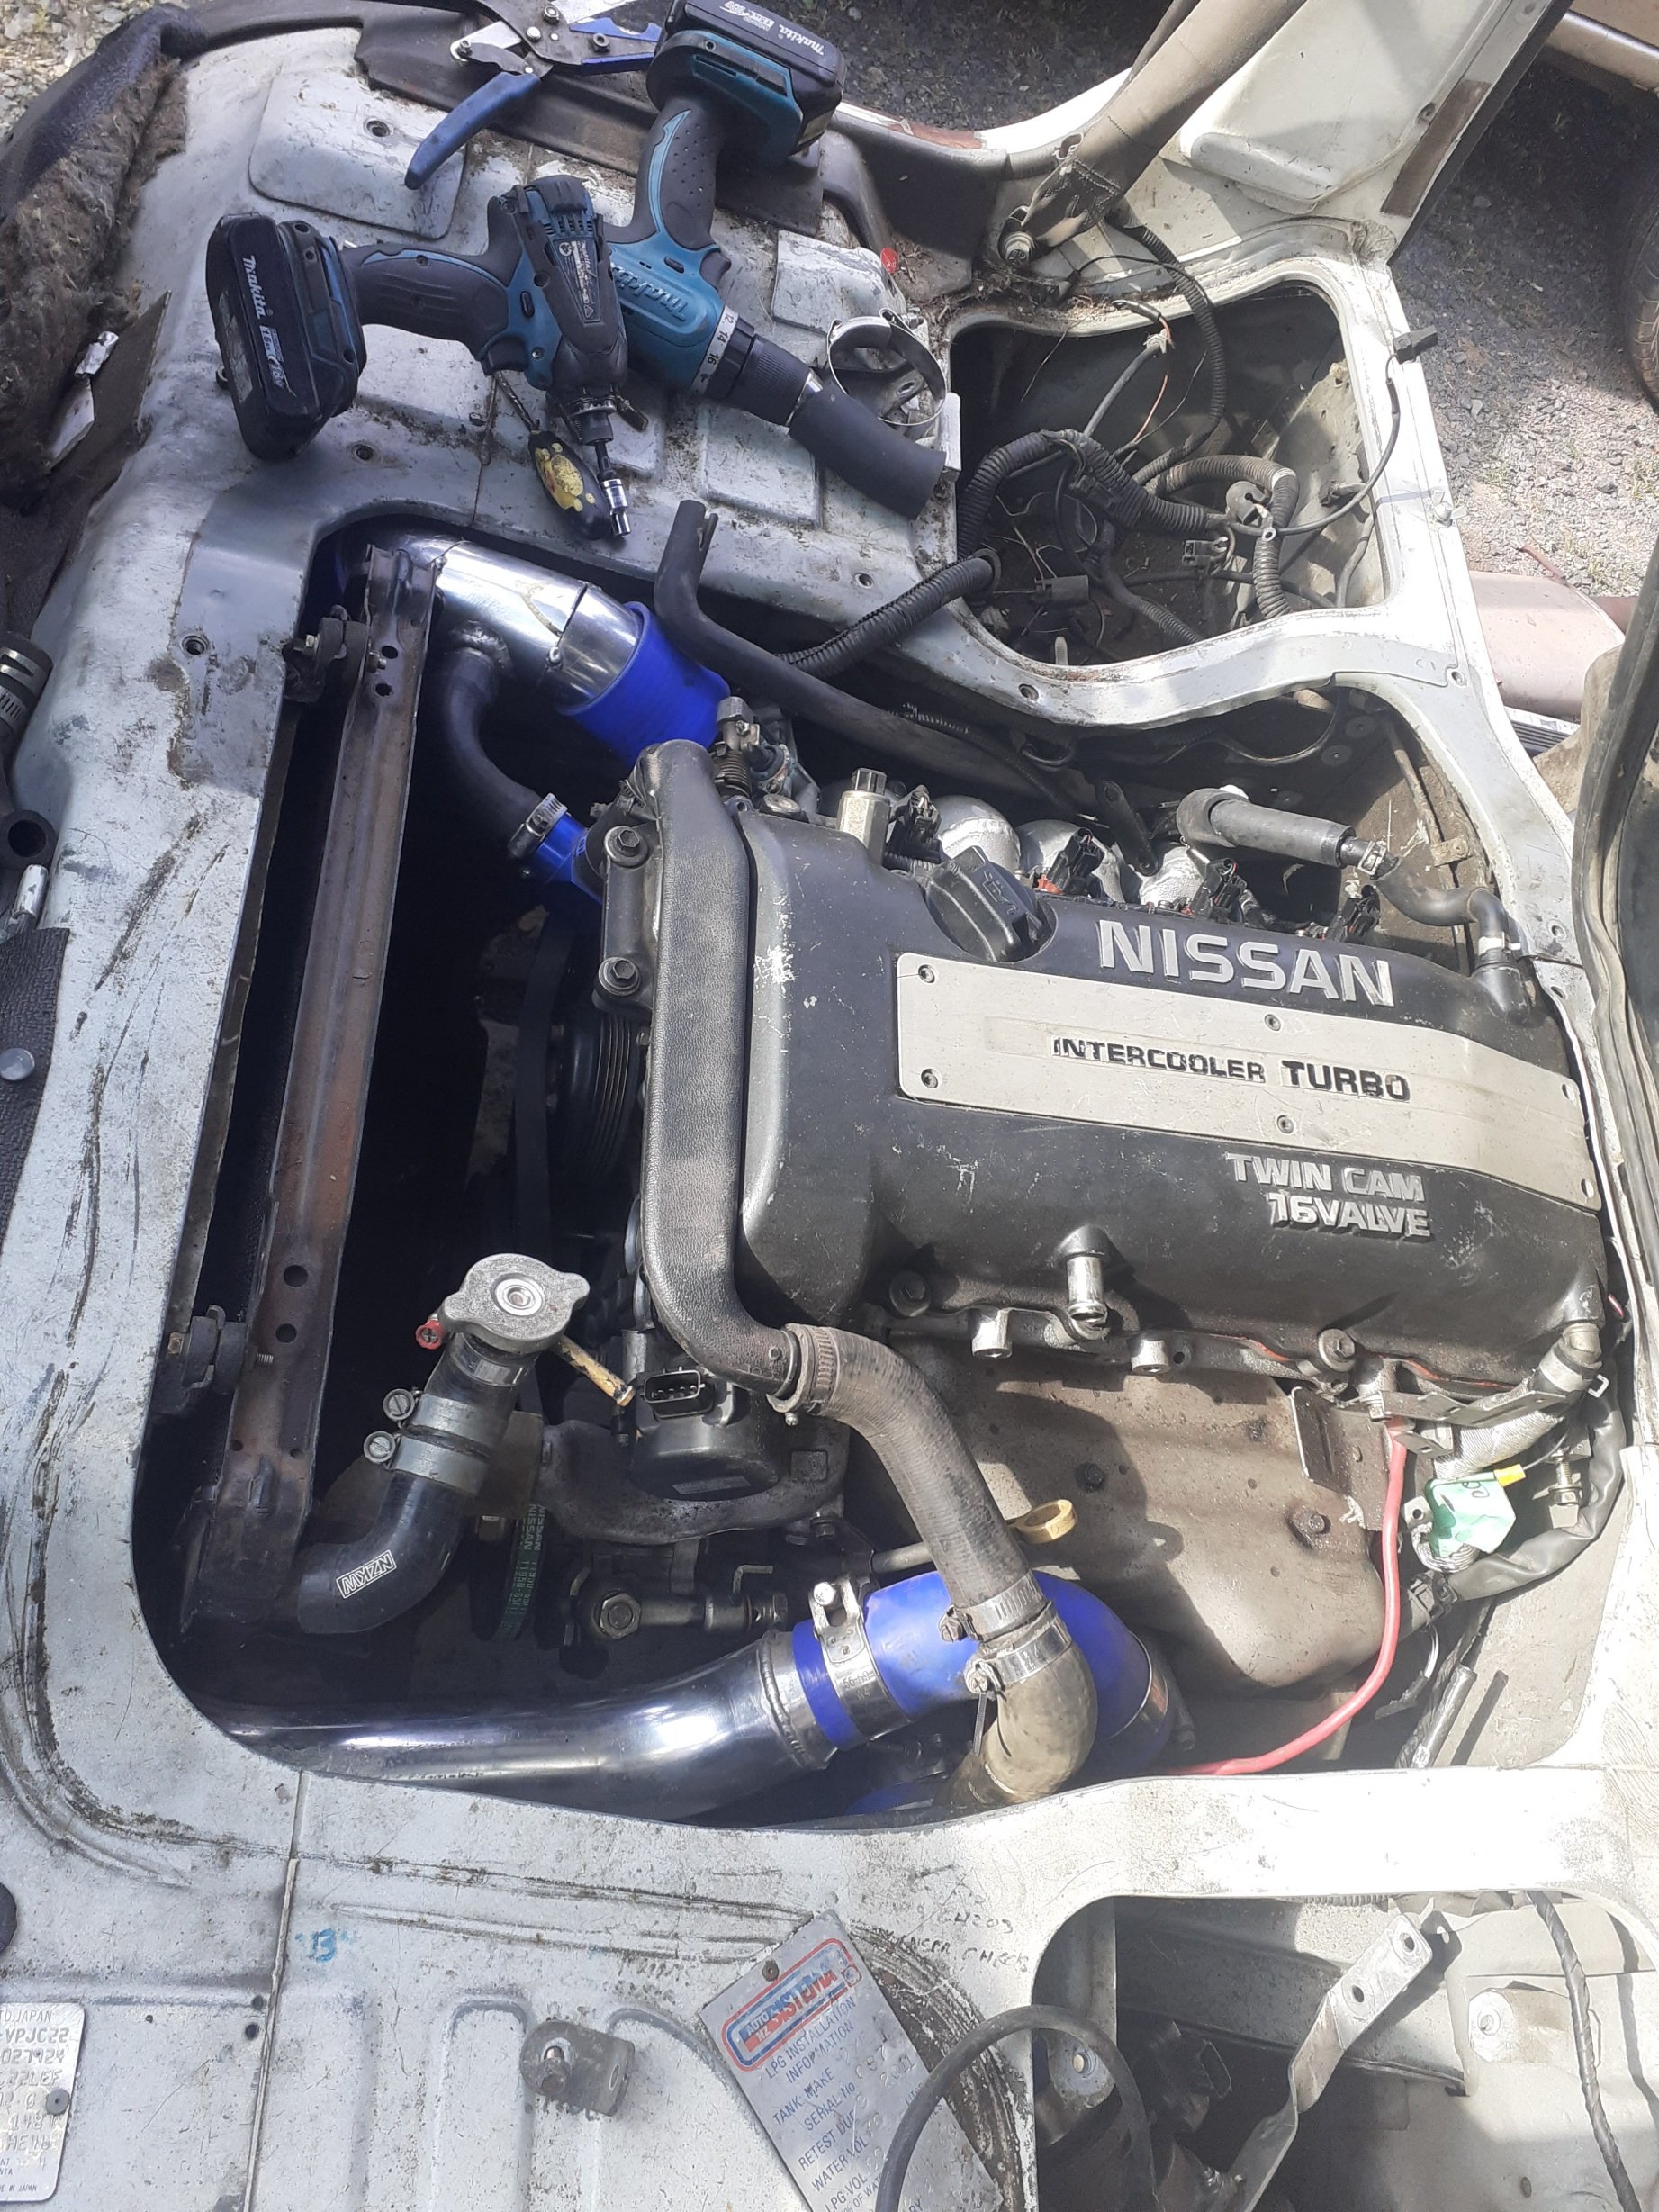
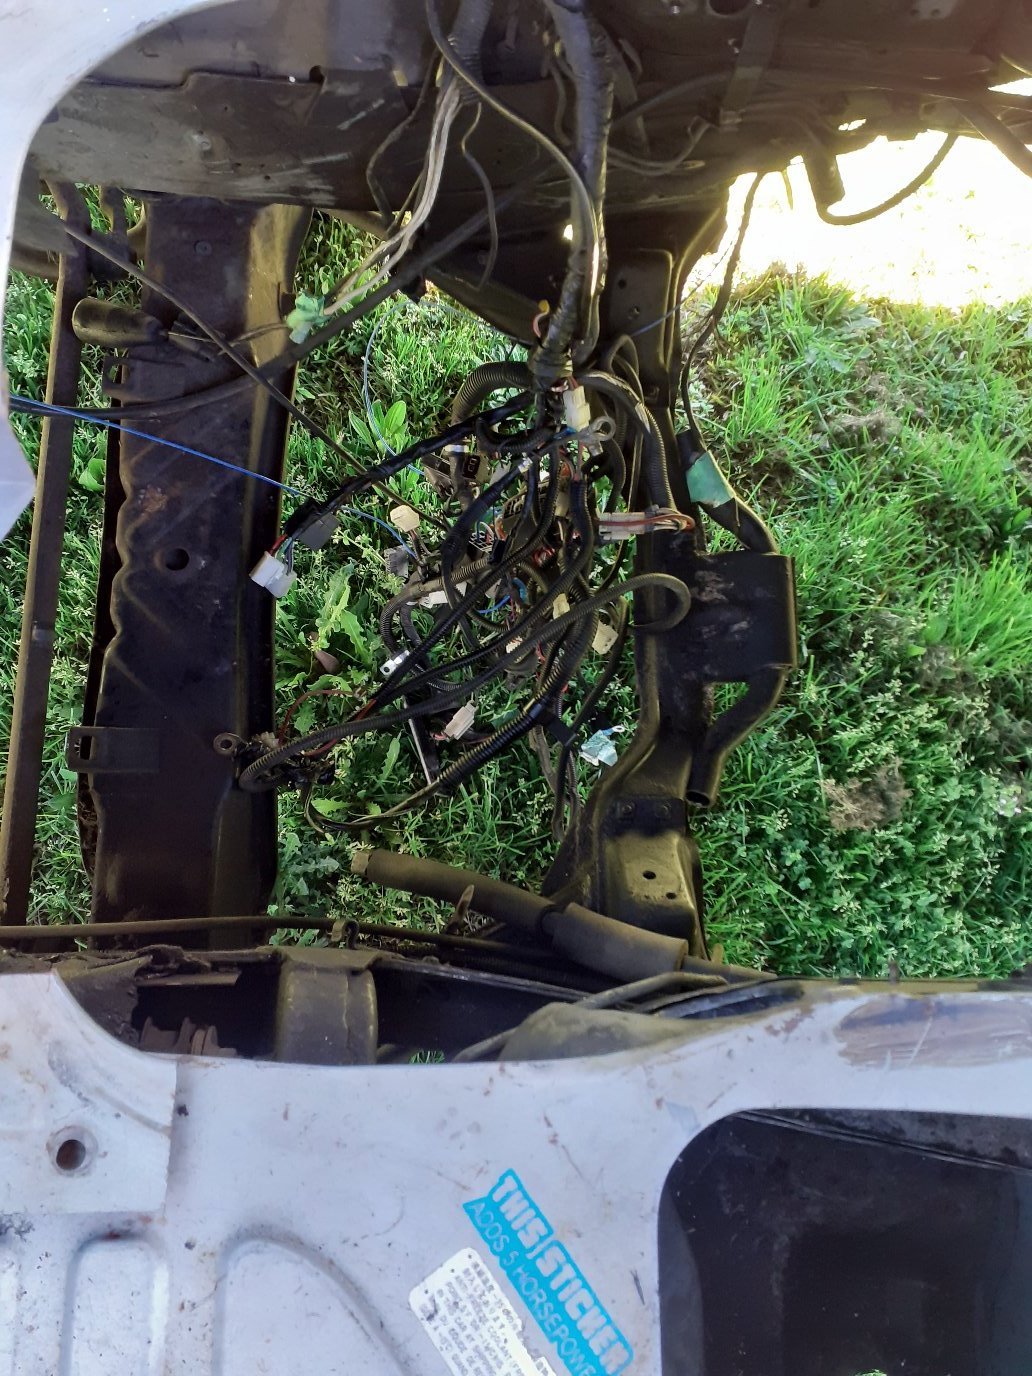
And a whole lot of mock-up, mounting radiator, routing intercooler pipes, and general placement to see if it all will fit, and so it does, still have a bunch of brackets to make which will take a bit of time such as intercooler mounting in front of radiator, radiator bottom mounting, air intake mount finalizing, engine mount finalizing, driveshaft hoop, weld back engine bay, and my most non favorite task- running wiring !
-
5
-
-
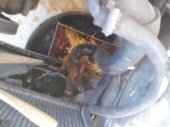
Moved some water temp sensors around as well
-
6
-
-
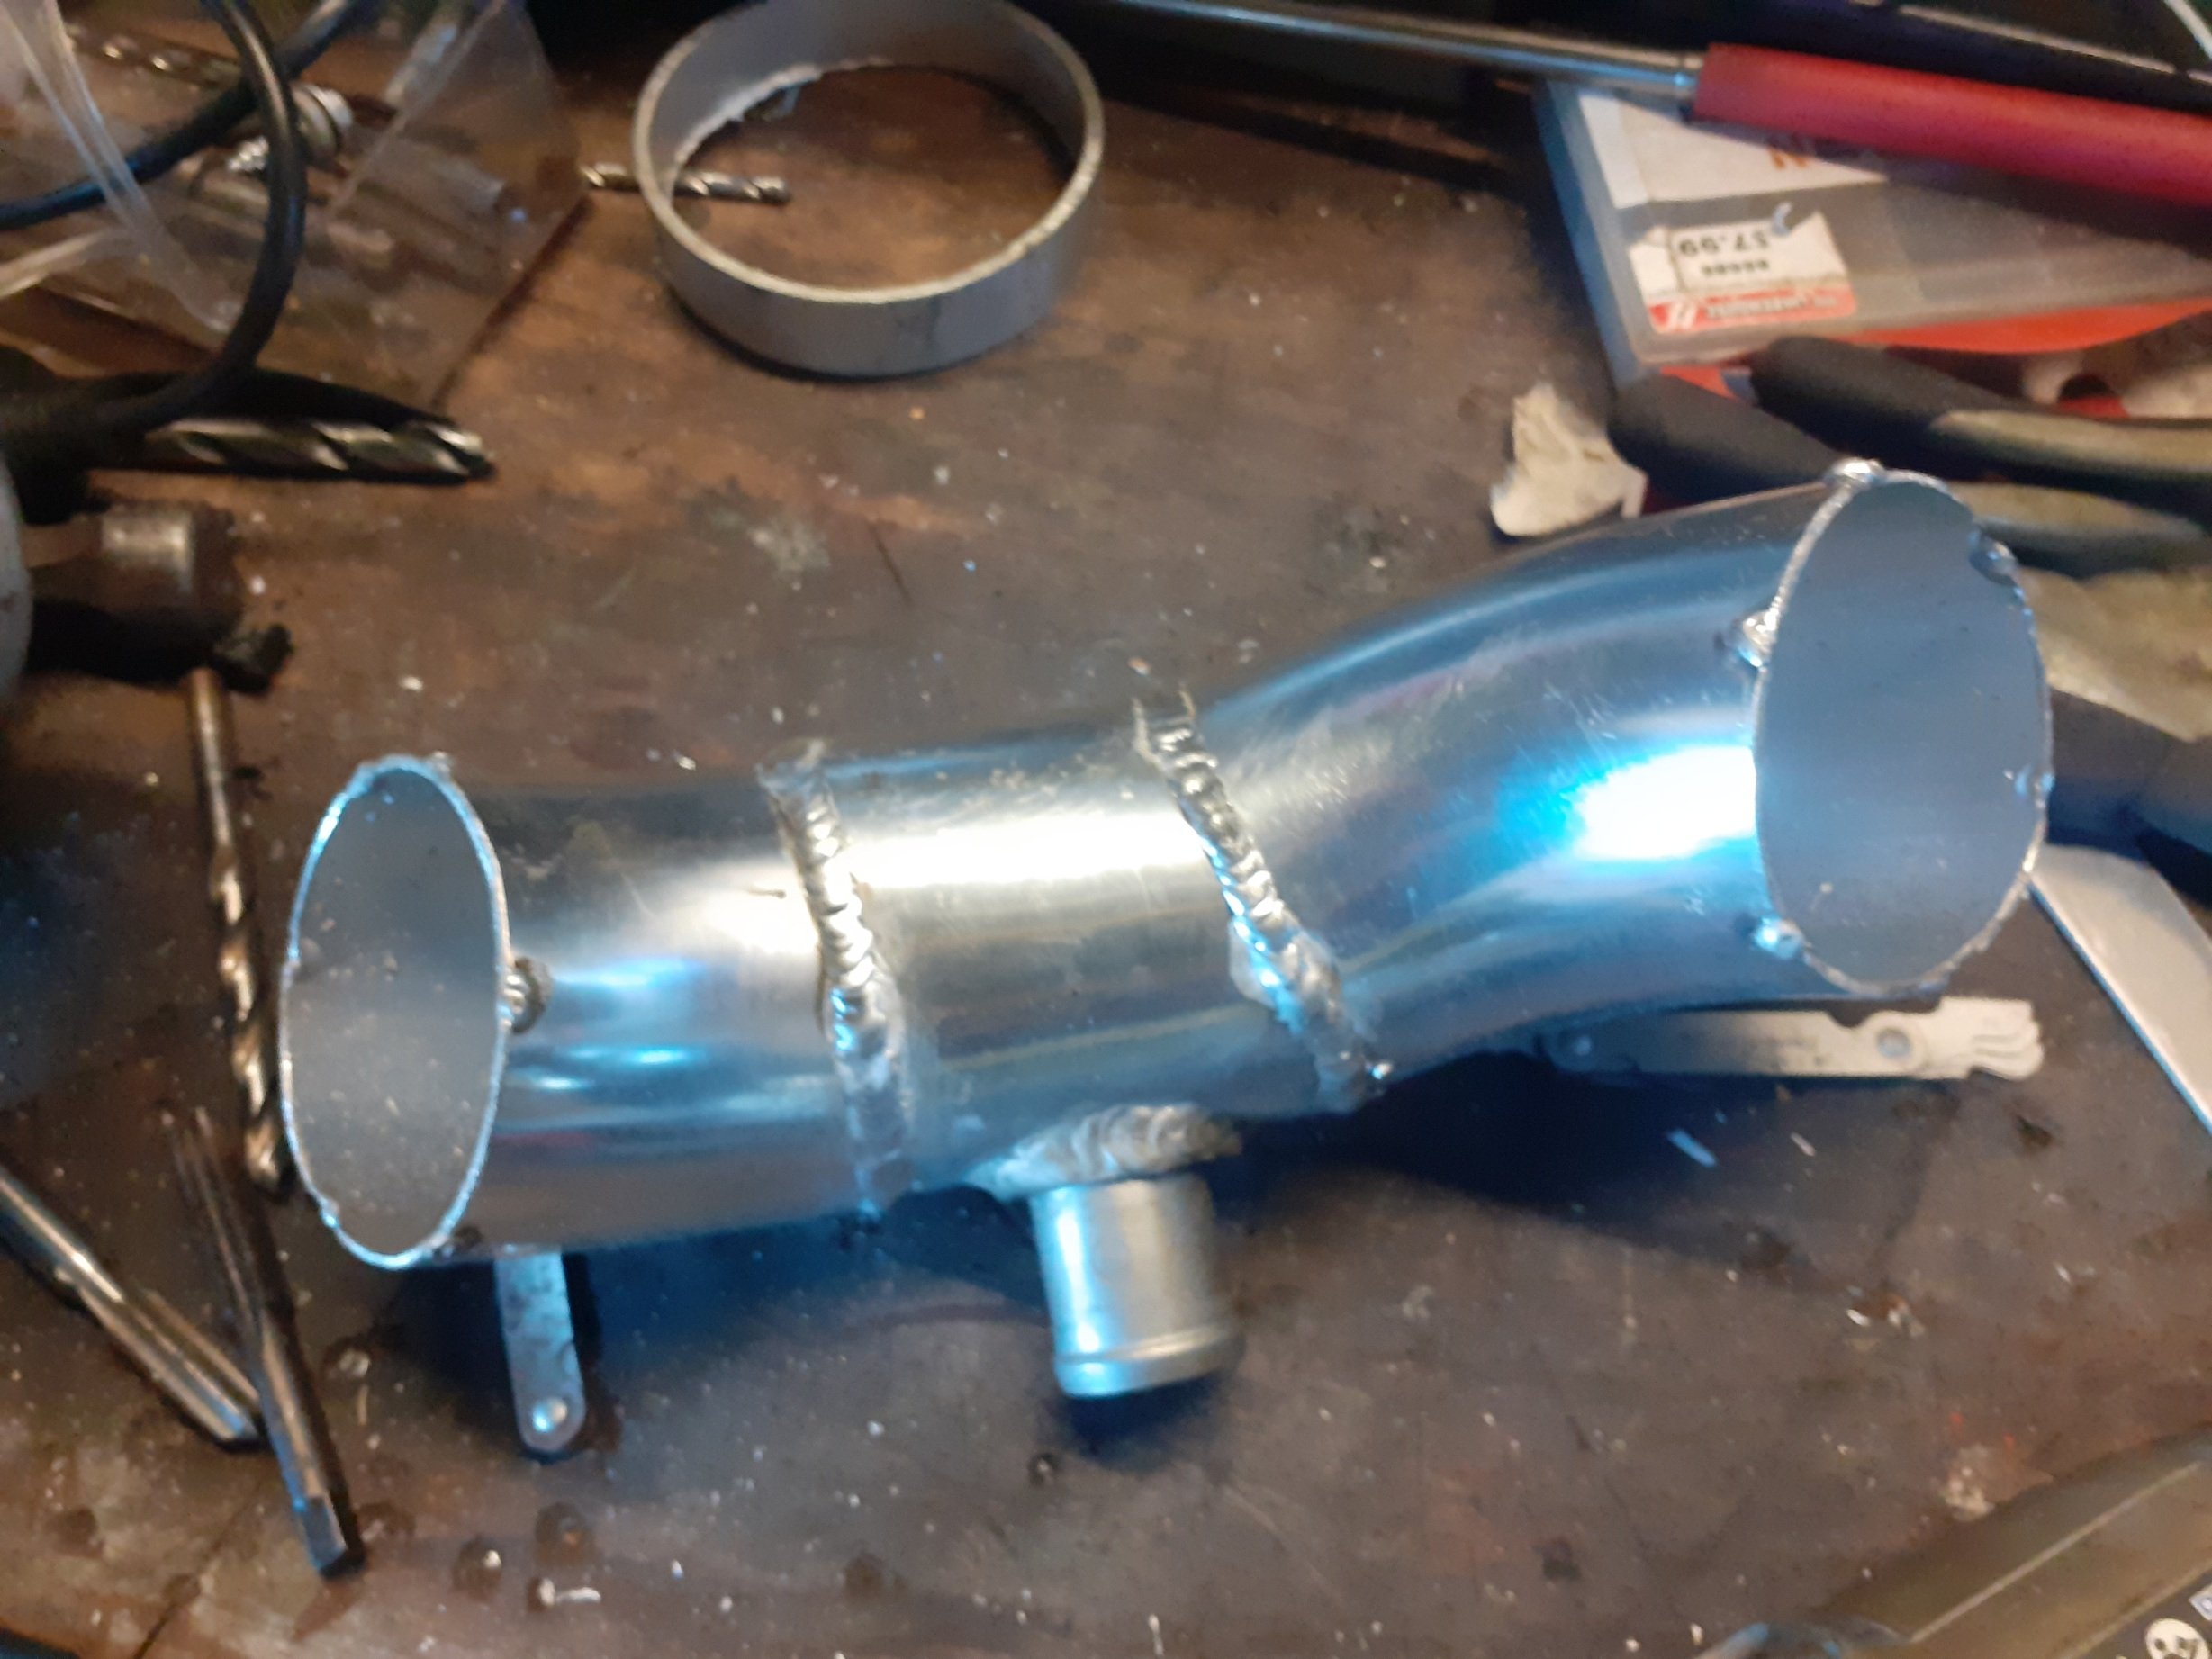
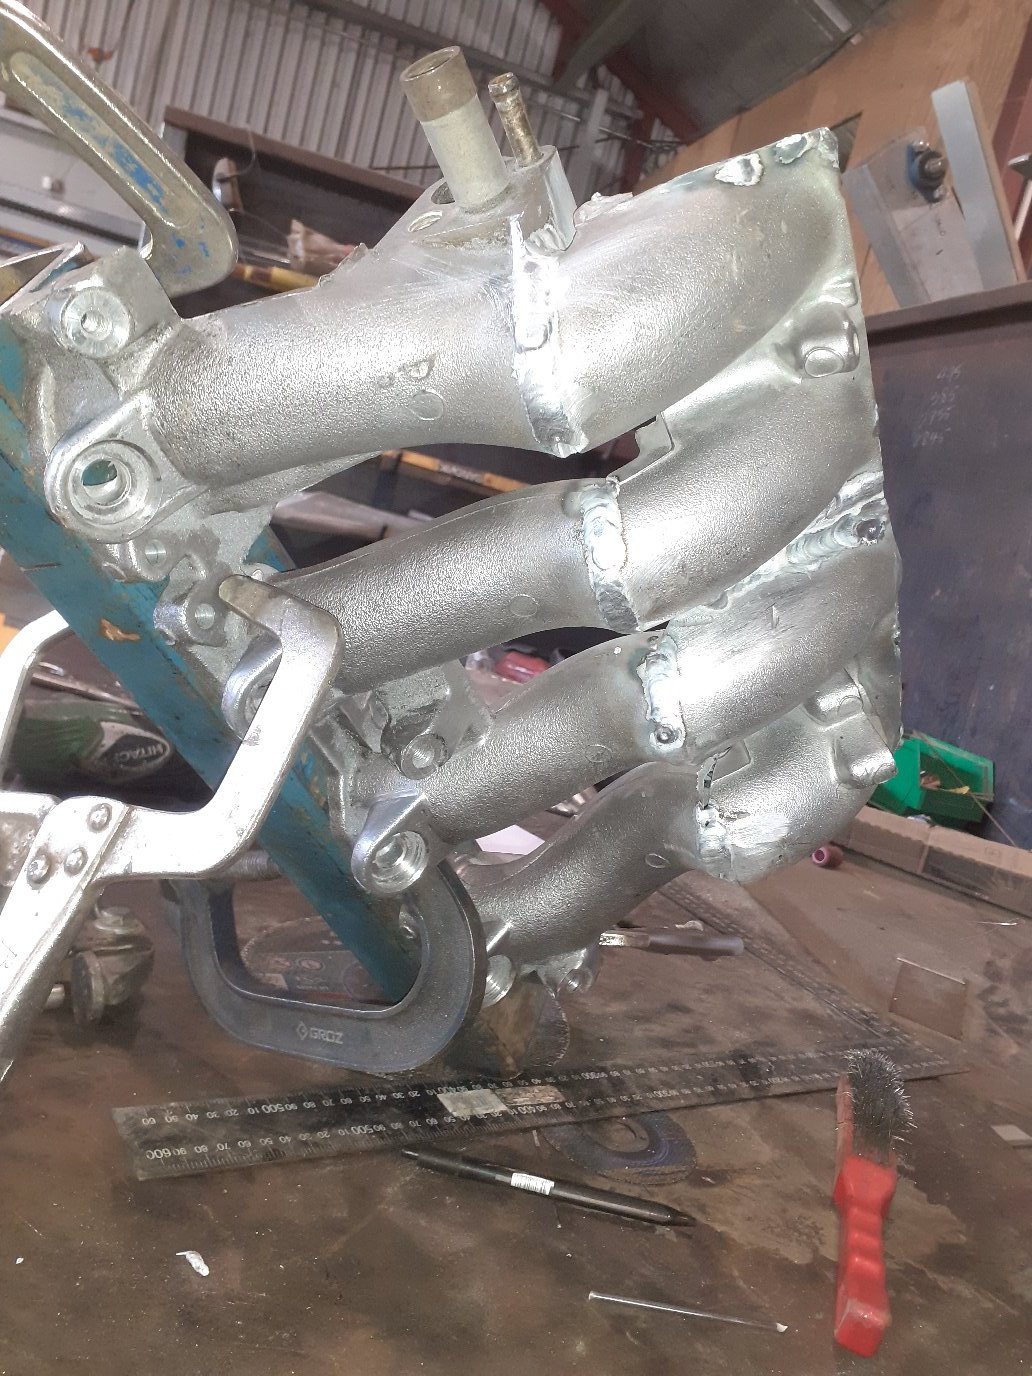
Anyhow I had been doing a bit on the intake, and flipped it upside down to make it fit, then welded the runners, and got it fitting a bit better...
-
5
-
-
-
-
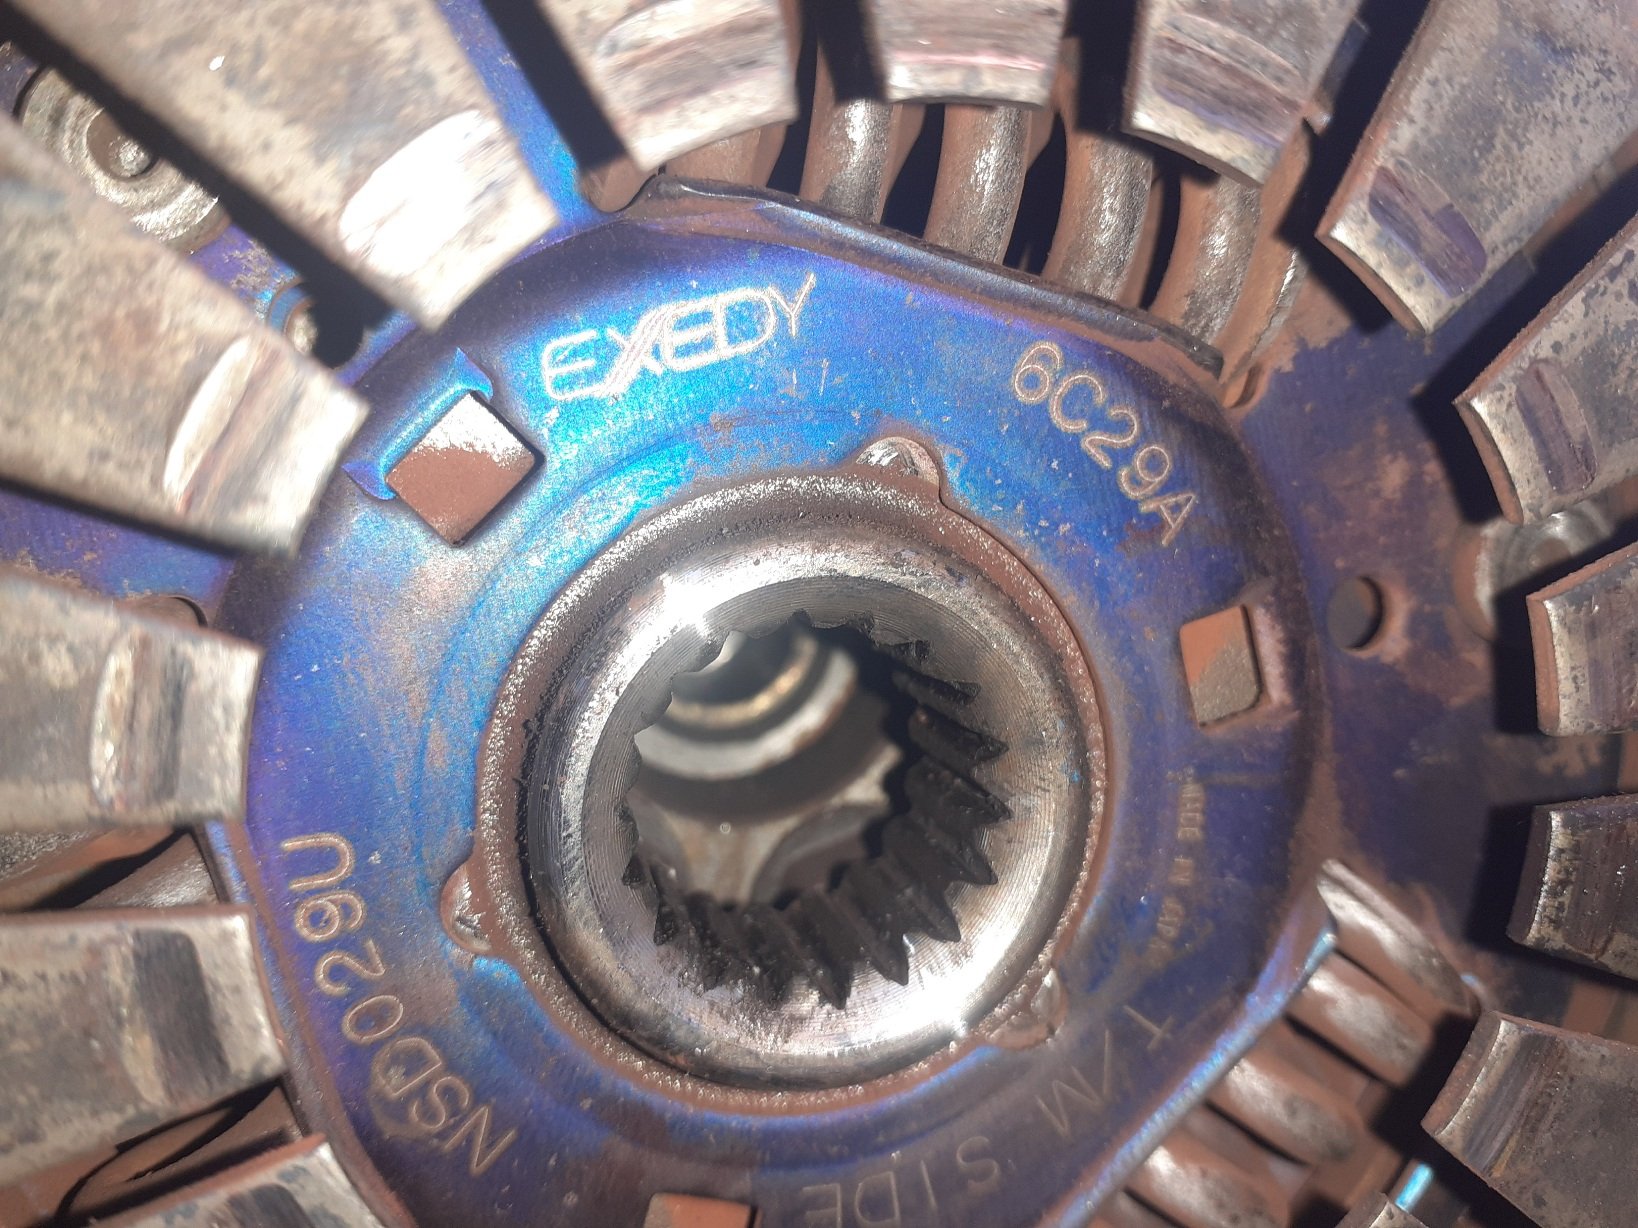
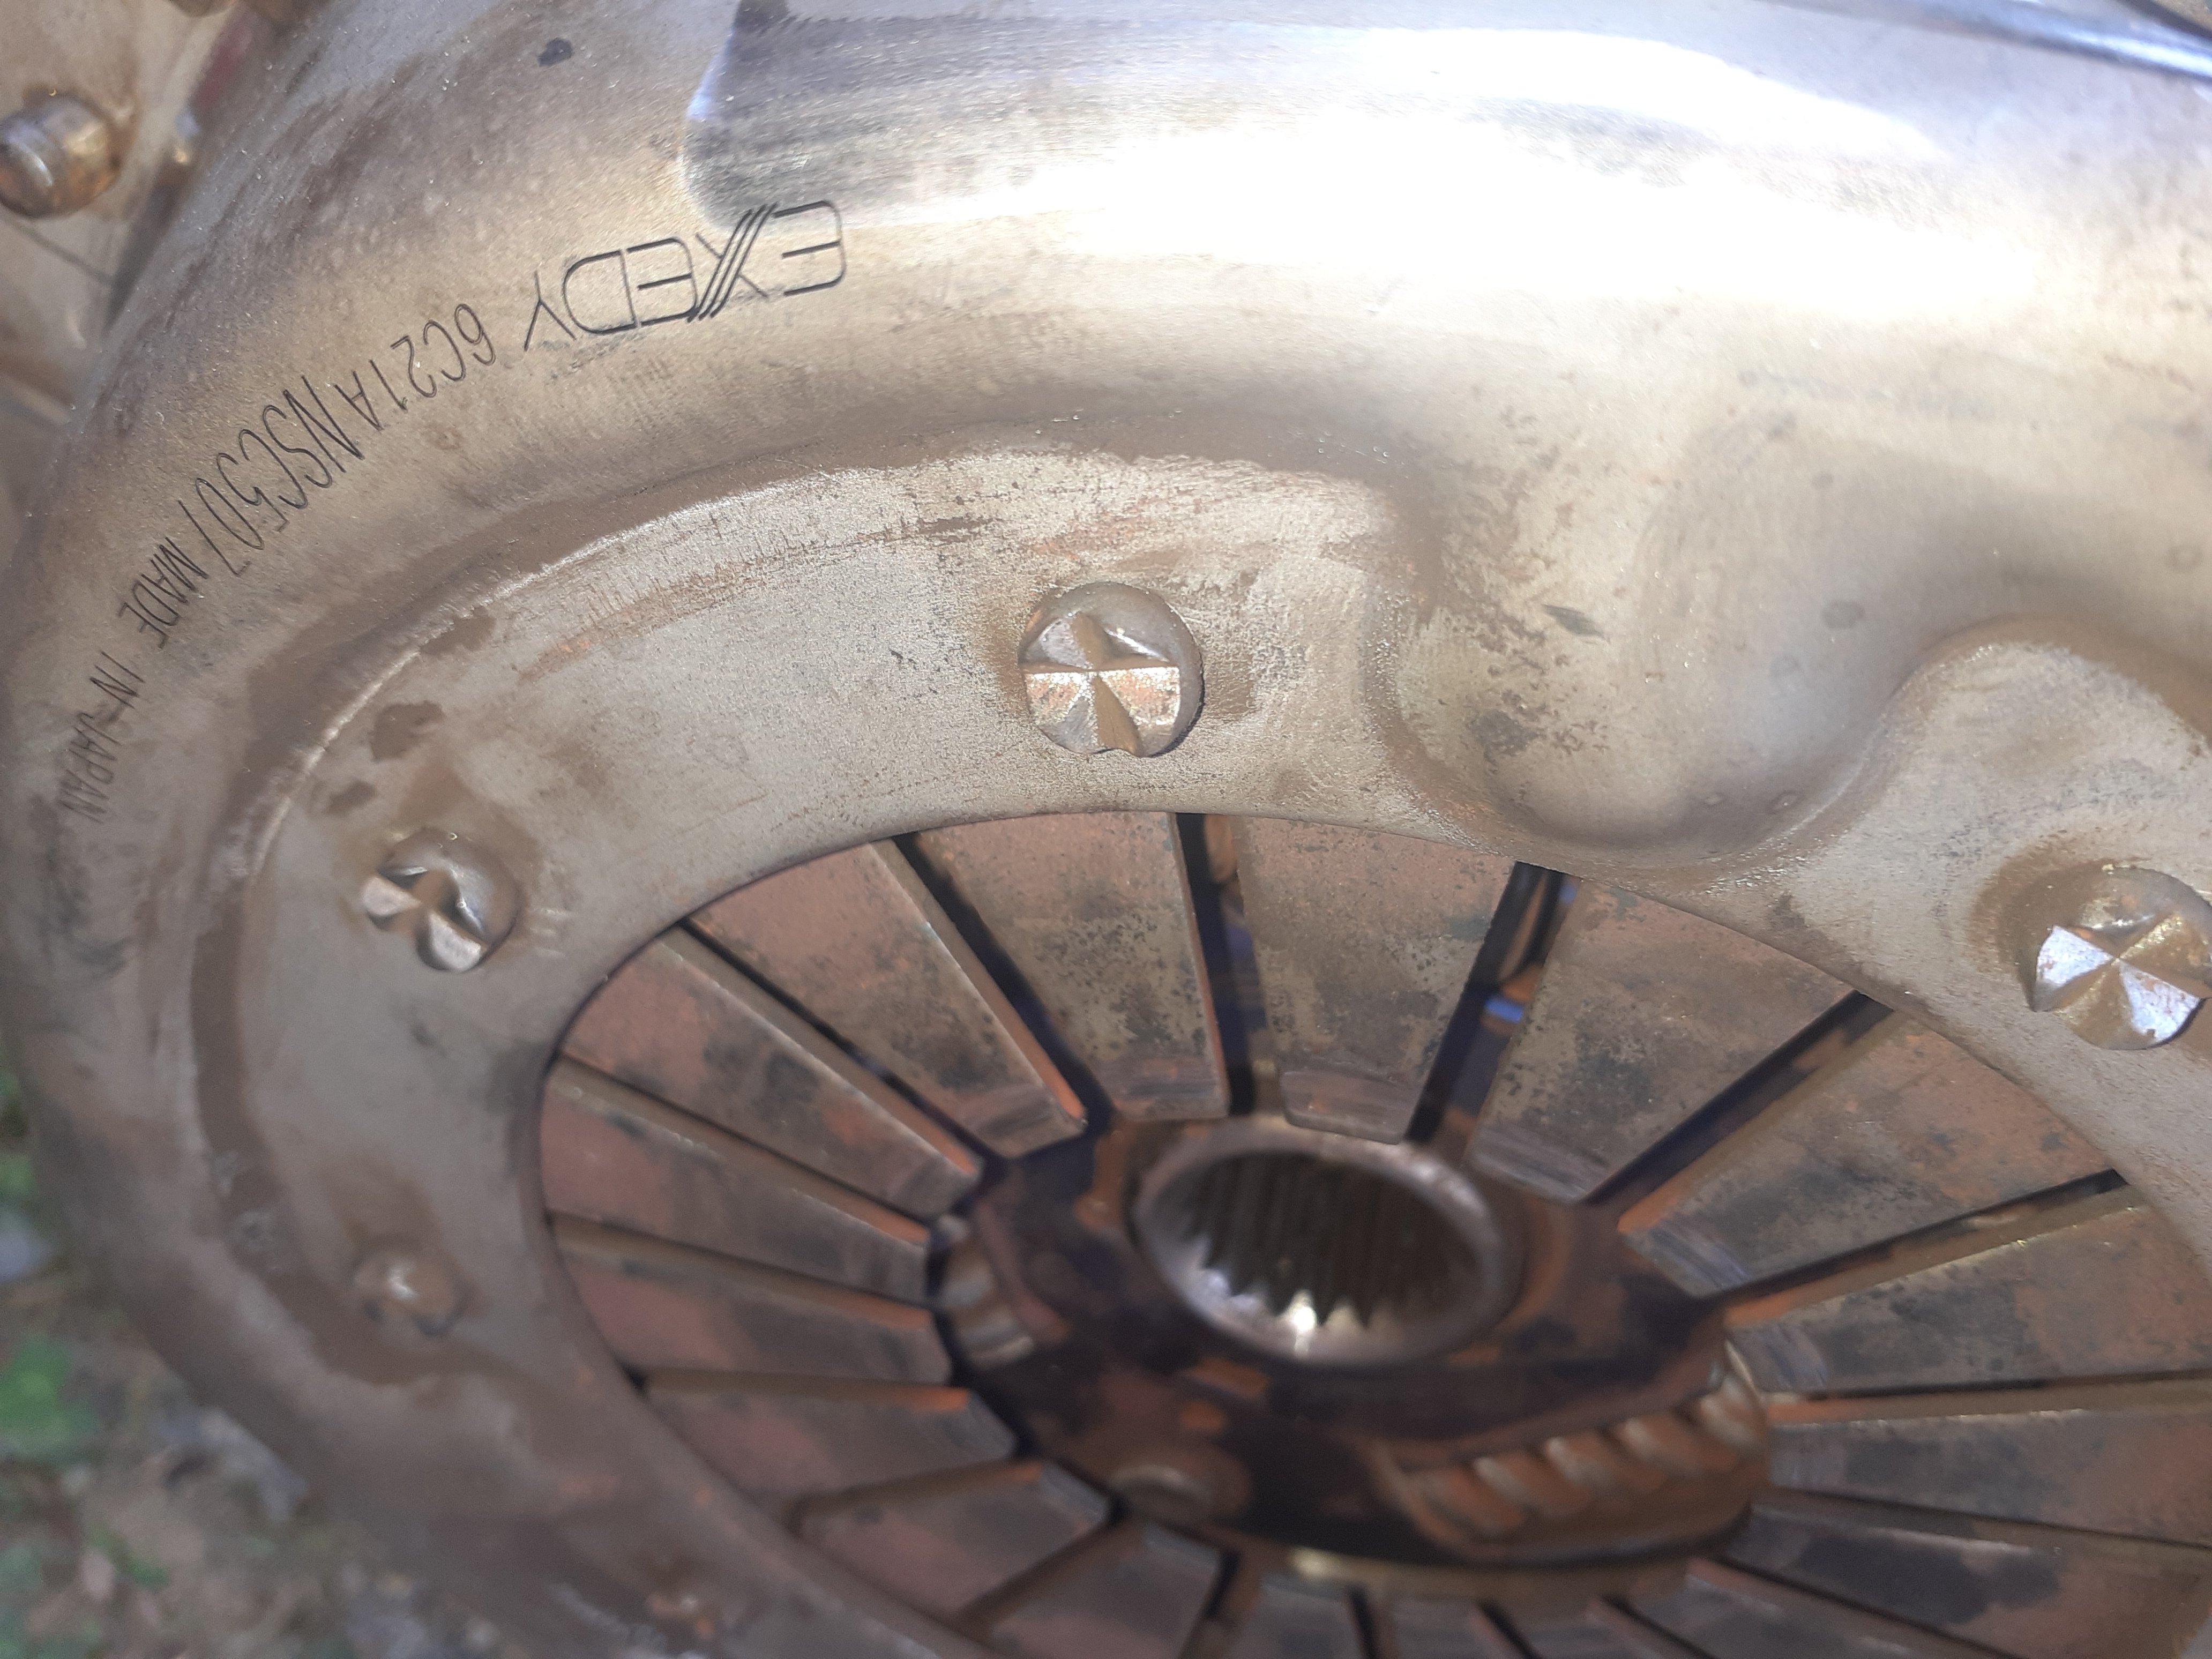
Soo I sold the old 'a15' and gearbox, but its come back, me and the buyer overlooked the code on the block, it's a a12 with a a15 head :(, i diddnt know that was a thing but so it is, so it will be up for sale again, it does have an exedy clutch and pressure plate which looks in great condition. . .
-
1
-
1
-
-
Yea I did think that, but I've heard the bolt pattern/port holes are different? Plus couldn't find one
-
1
-
-
- Popular Post
- Popular Post
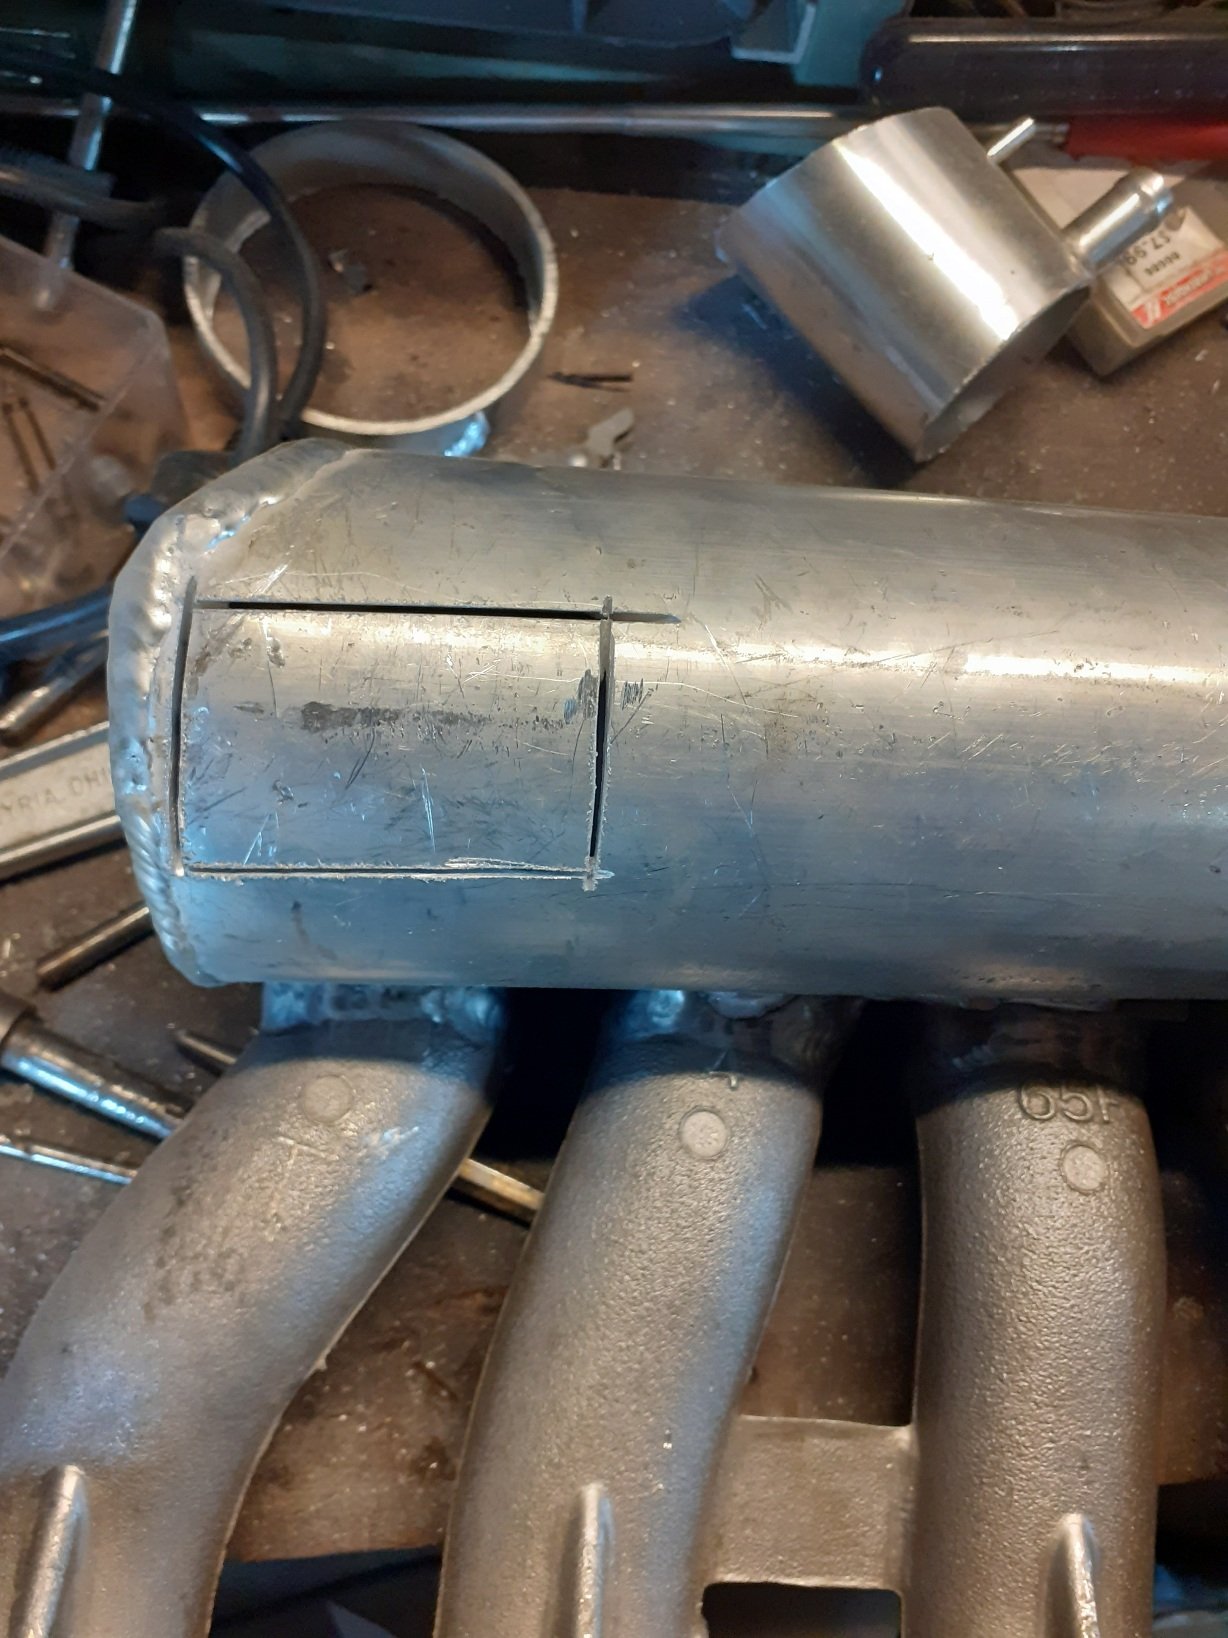
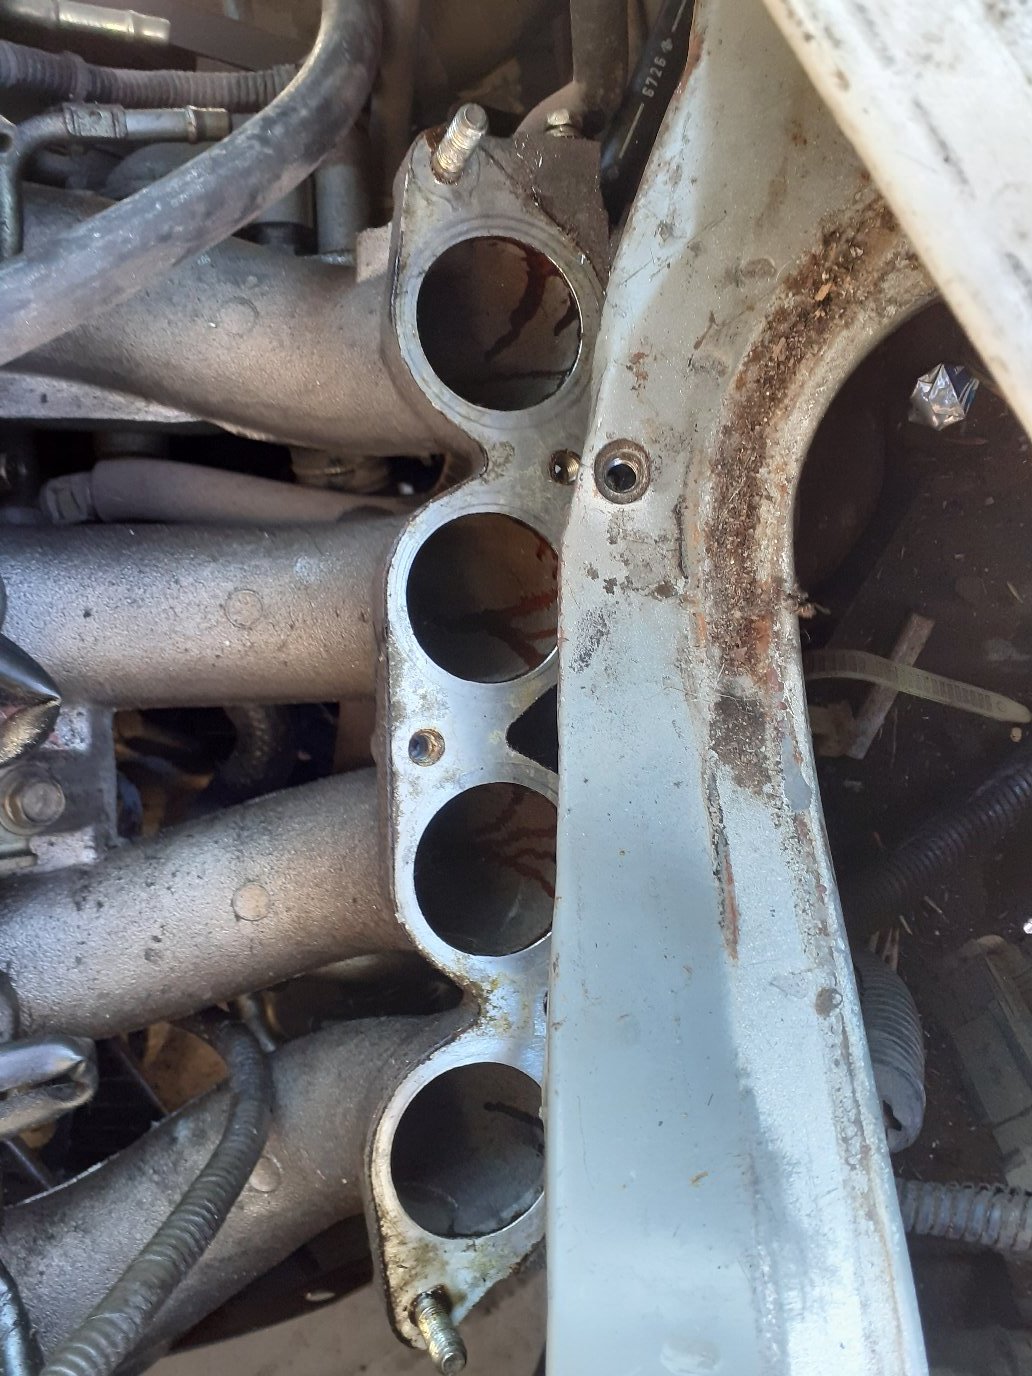
First attempt was to cut the marked lines to lower it to the point it would fit, realised that wouldn't work with the plenum... so I replaced it with a 3 something inch pipe hoping to keep somewhat the same intake volume as factory..
I wanted to keep the ports that were nicely cast into the plenum so i cut them out to keep, tacked it together and threw it in the van, but I hadn't anticipated the seatbelt anchoring dropping pretty much into the centre of what I made ... so that was not going to work.
I needed more space without compromising the van or too much factory intake runners, its tiiight
-
13
-
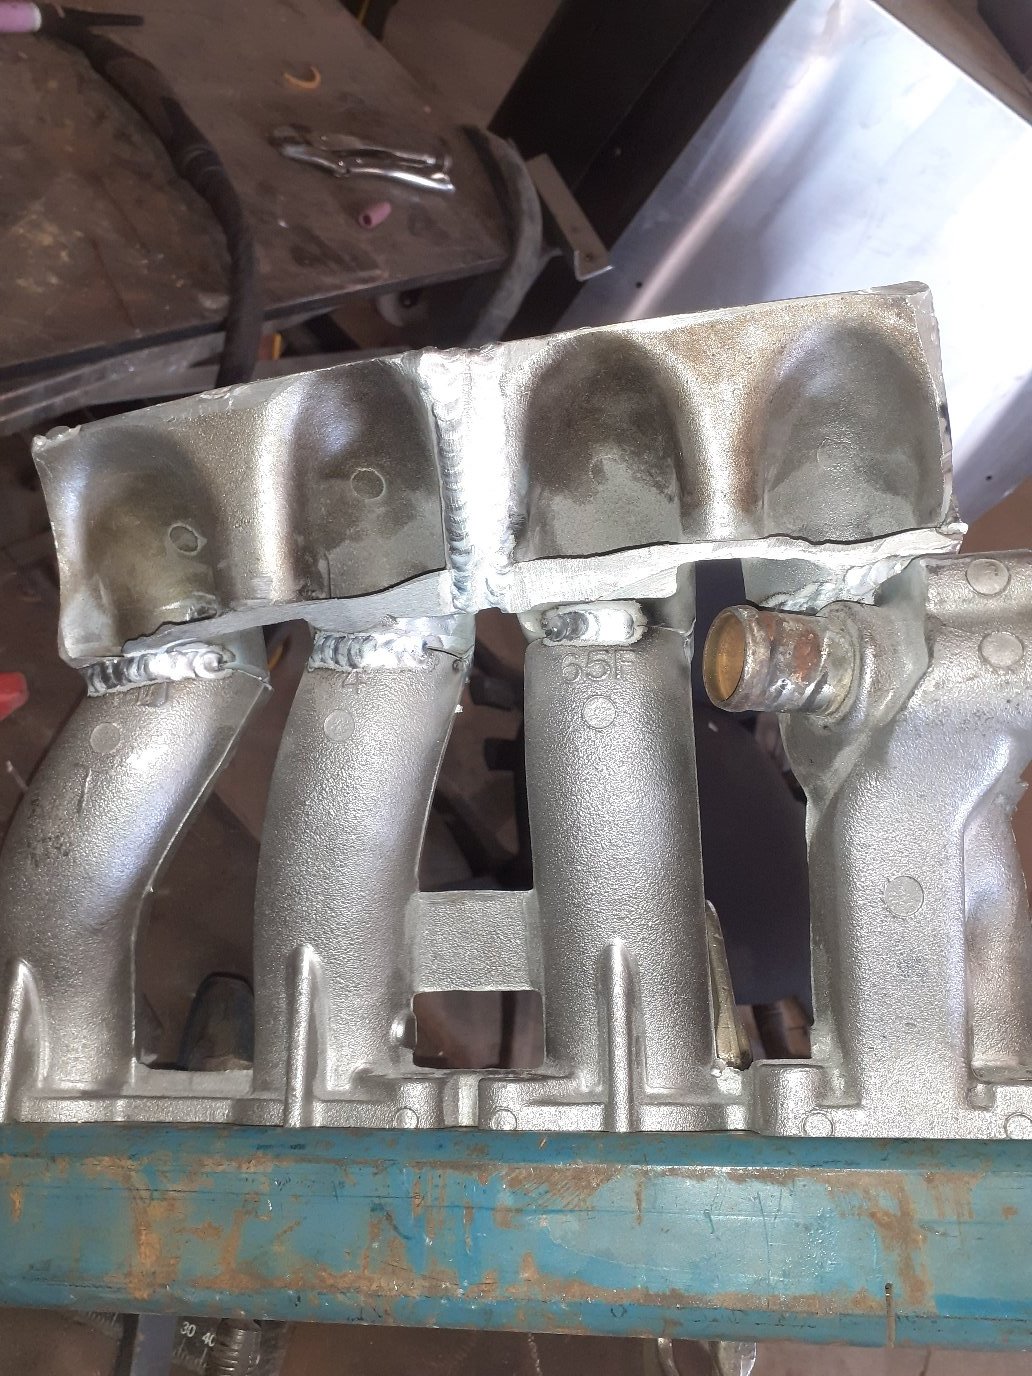
Working on the intake problem has been a challenge, to start I would have kept the original one but it's just not possible.
It too tall and I would have to modify the seat and seatbelt anchoring, not keen on that at all, so my second option was buy a aftermarket short runner one, but this van is going to be using all factory ecu turbo etc. I would lose a lot of torque across the low-mid range rpm, besides that may not fit either due to the engines proximity to the 'firewall' .
Well I can weld aluminium, so I'd make an intake to suit my needs .
Keeping the runners as long as I could fit was the goal
-
4
-
-
- Popular Post
- Popular Post
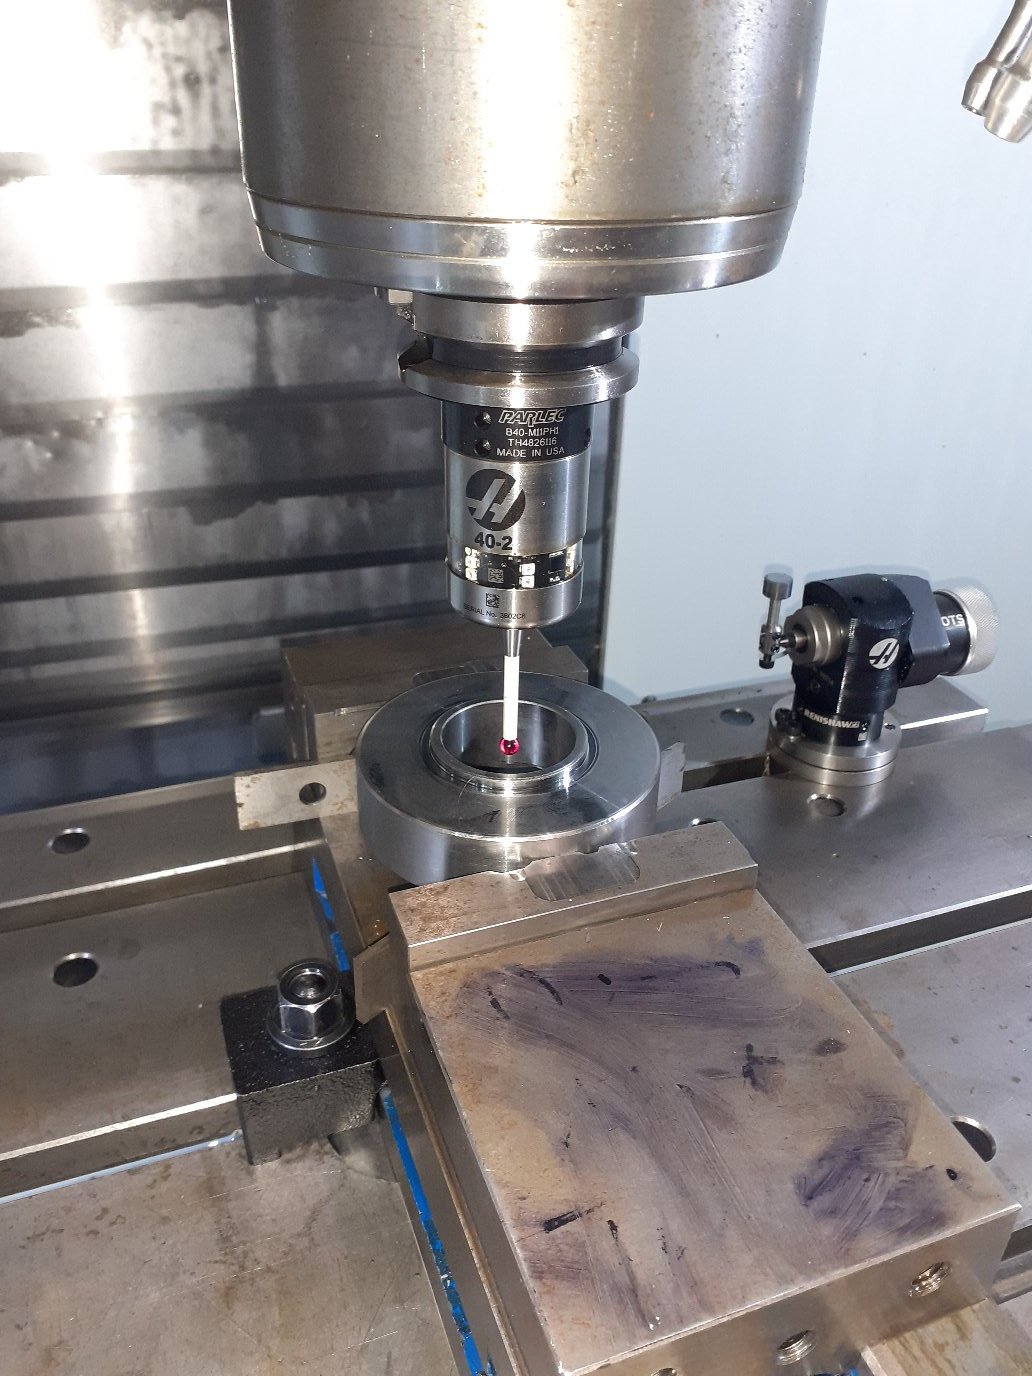
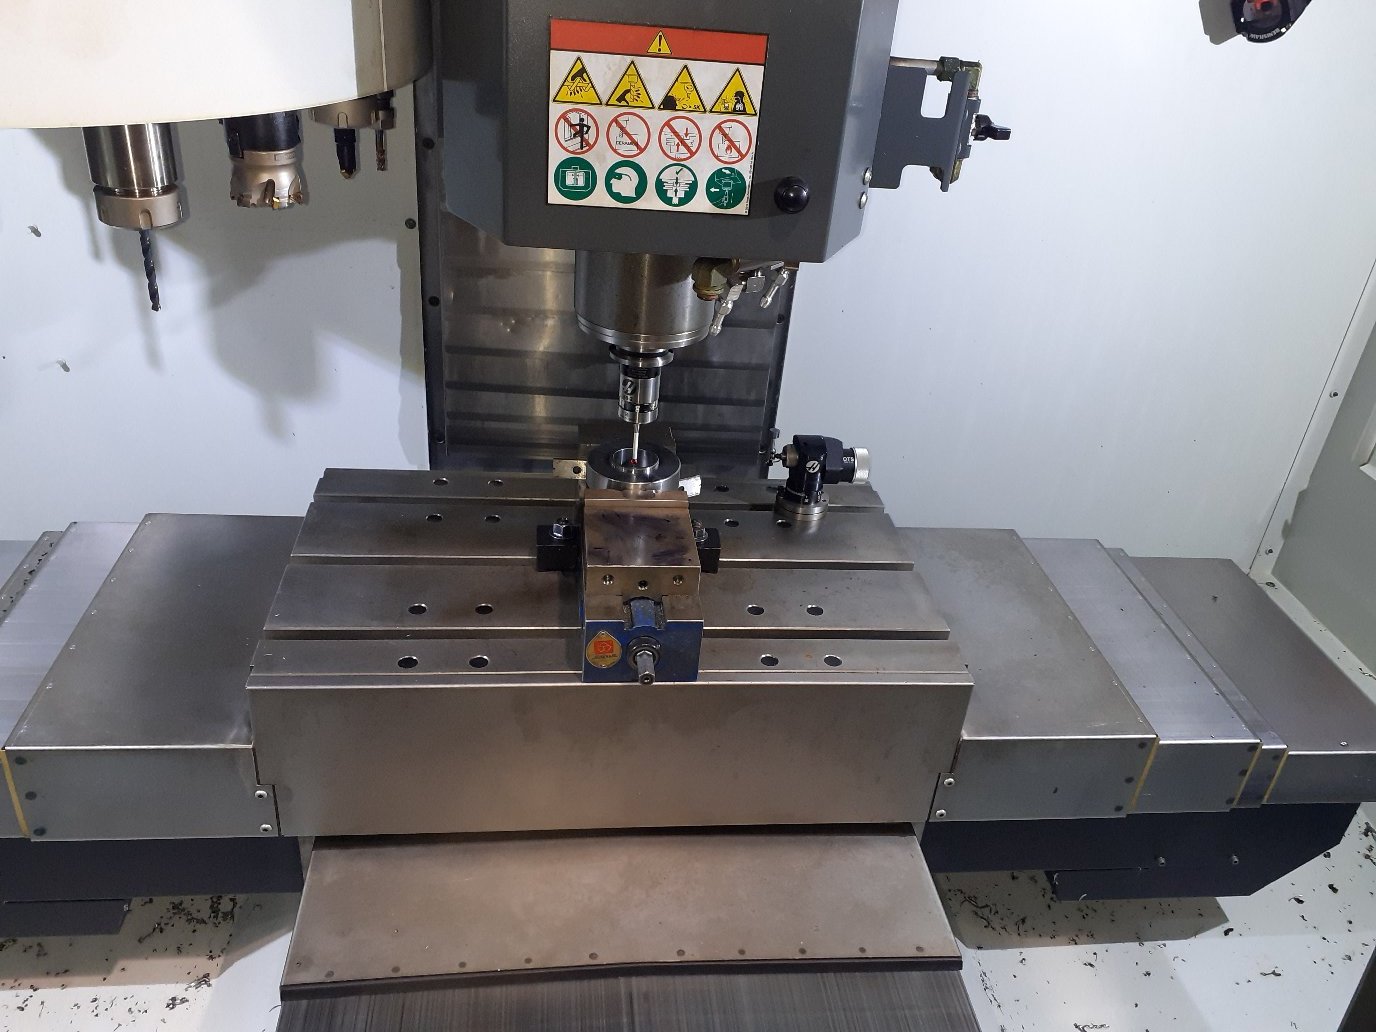
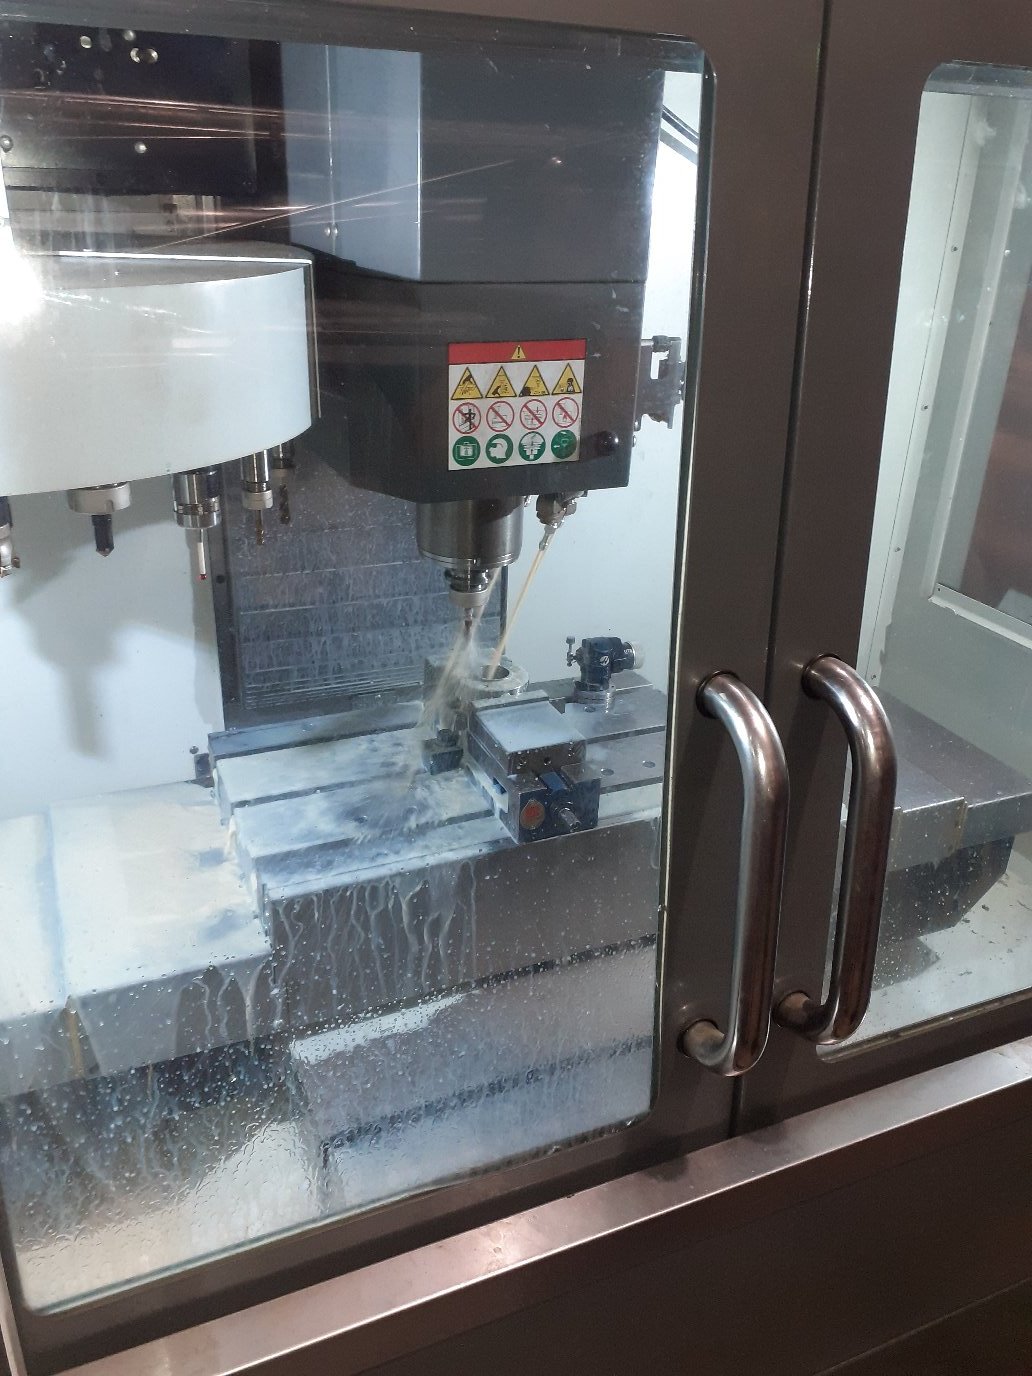
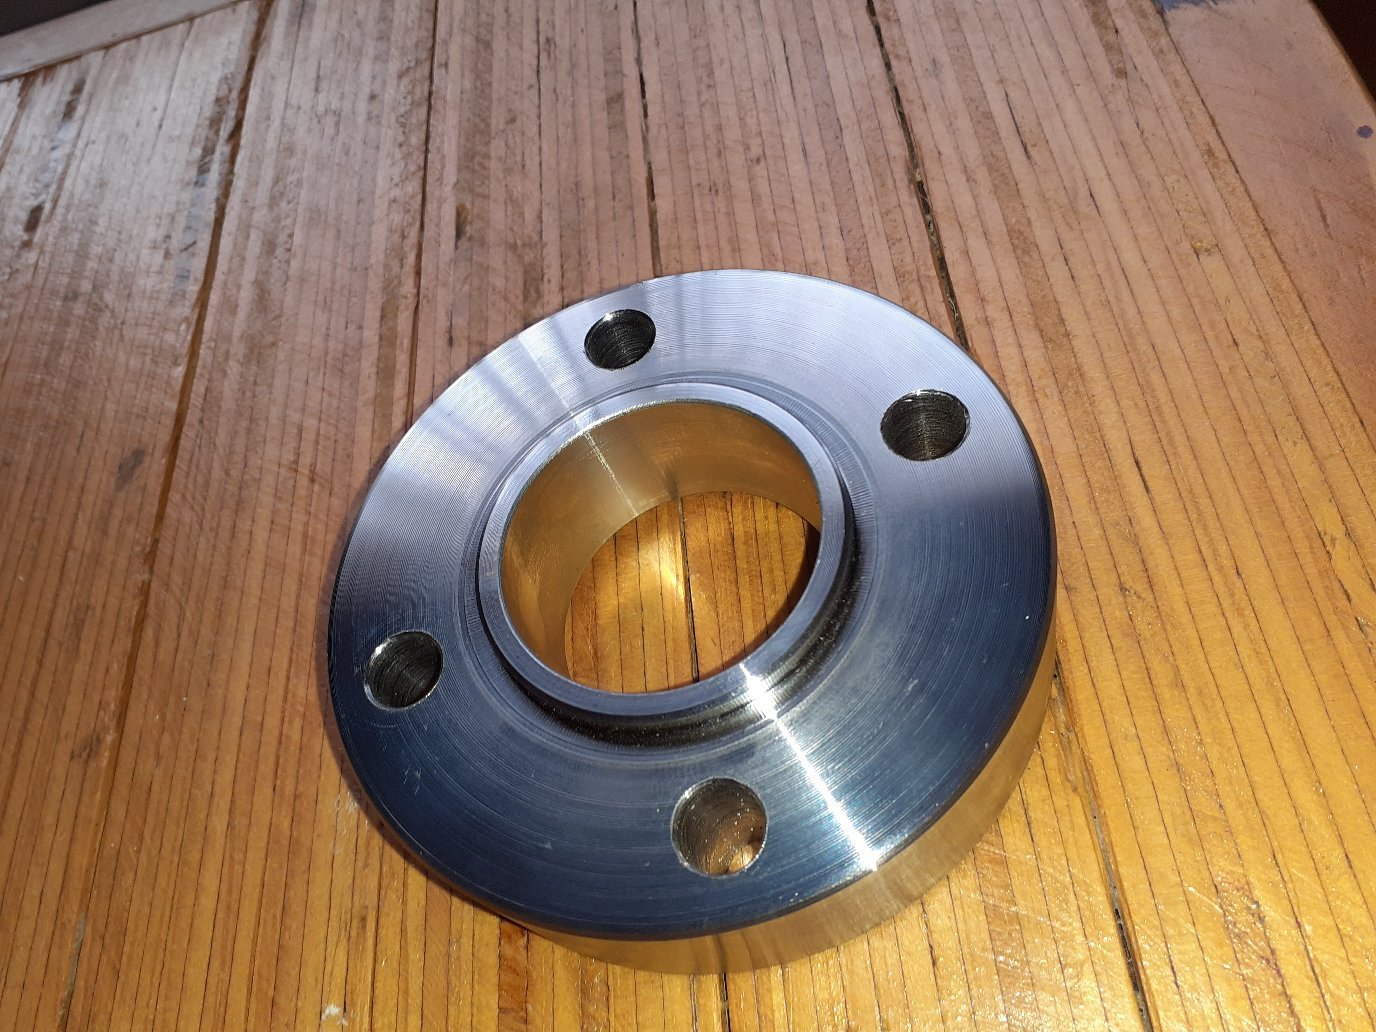
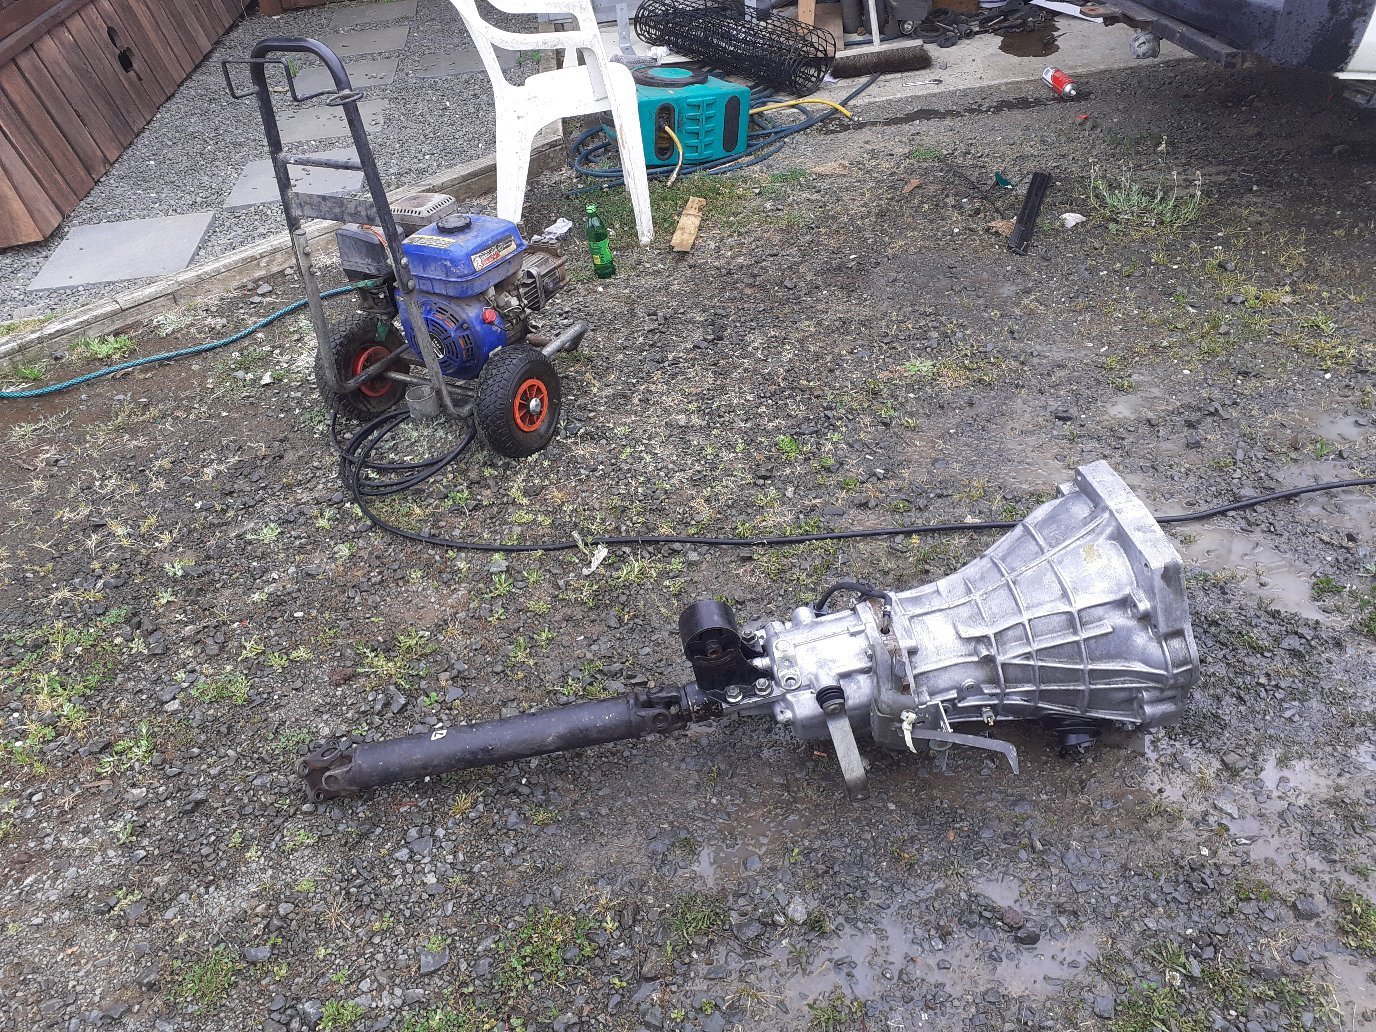
Well was contemplating a new driveshaft , when someone said why dont you make a spacer? I hadn't thought of that ,25mm is probably doable with a spacer...legal?
Couldn't find much info other than it has passed certs before .
The last thing I wanted was vibrating or it coming off and hitting some poor cyclist in the head, so I enlisted the help of a workmate who is a machinist to make it very very high quality, 4140 steel, run through the cnc mill, and once bolted-its tight fitting recess/machined surfaces locate it in the diff and driveshaft flanges! Now to get the highest grade bolts to hold it together.
-
18
-
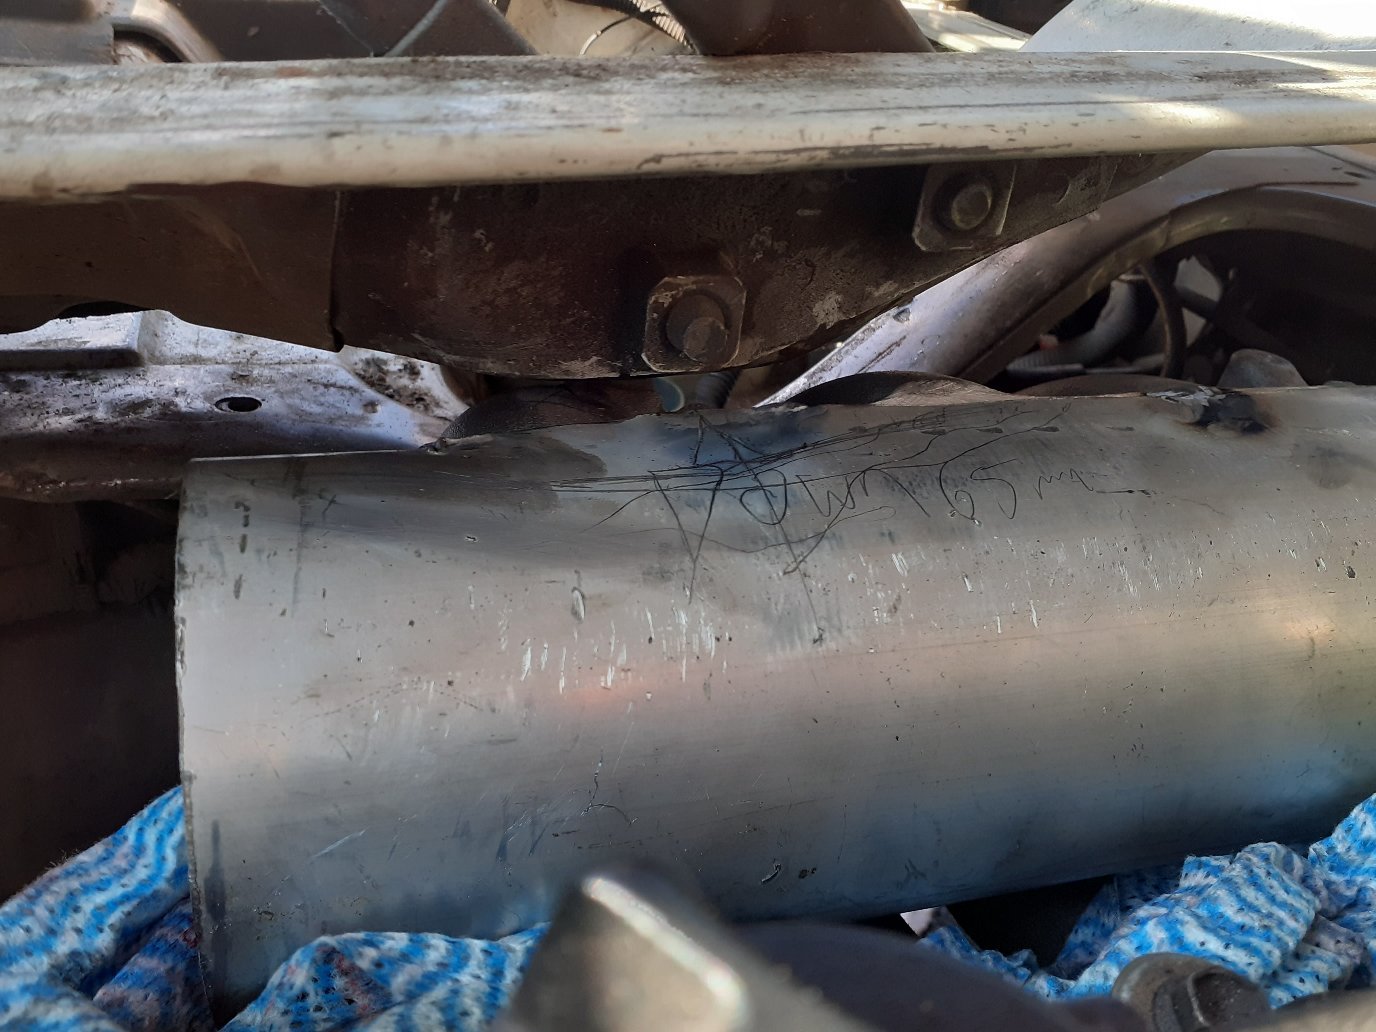
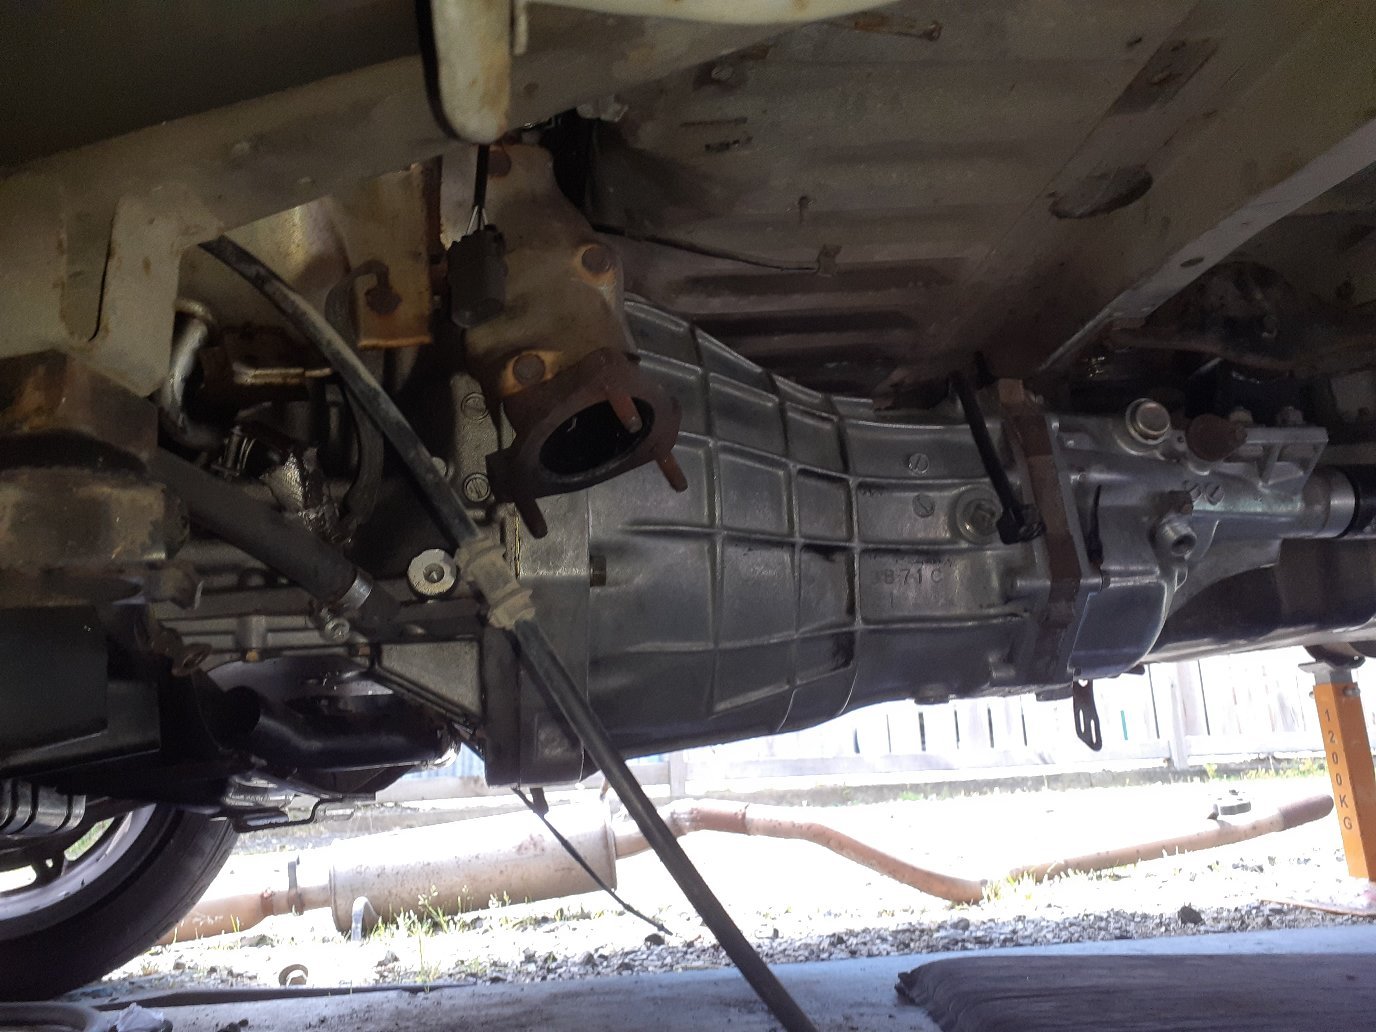
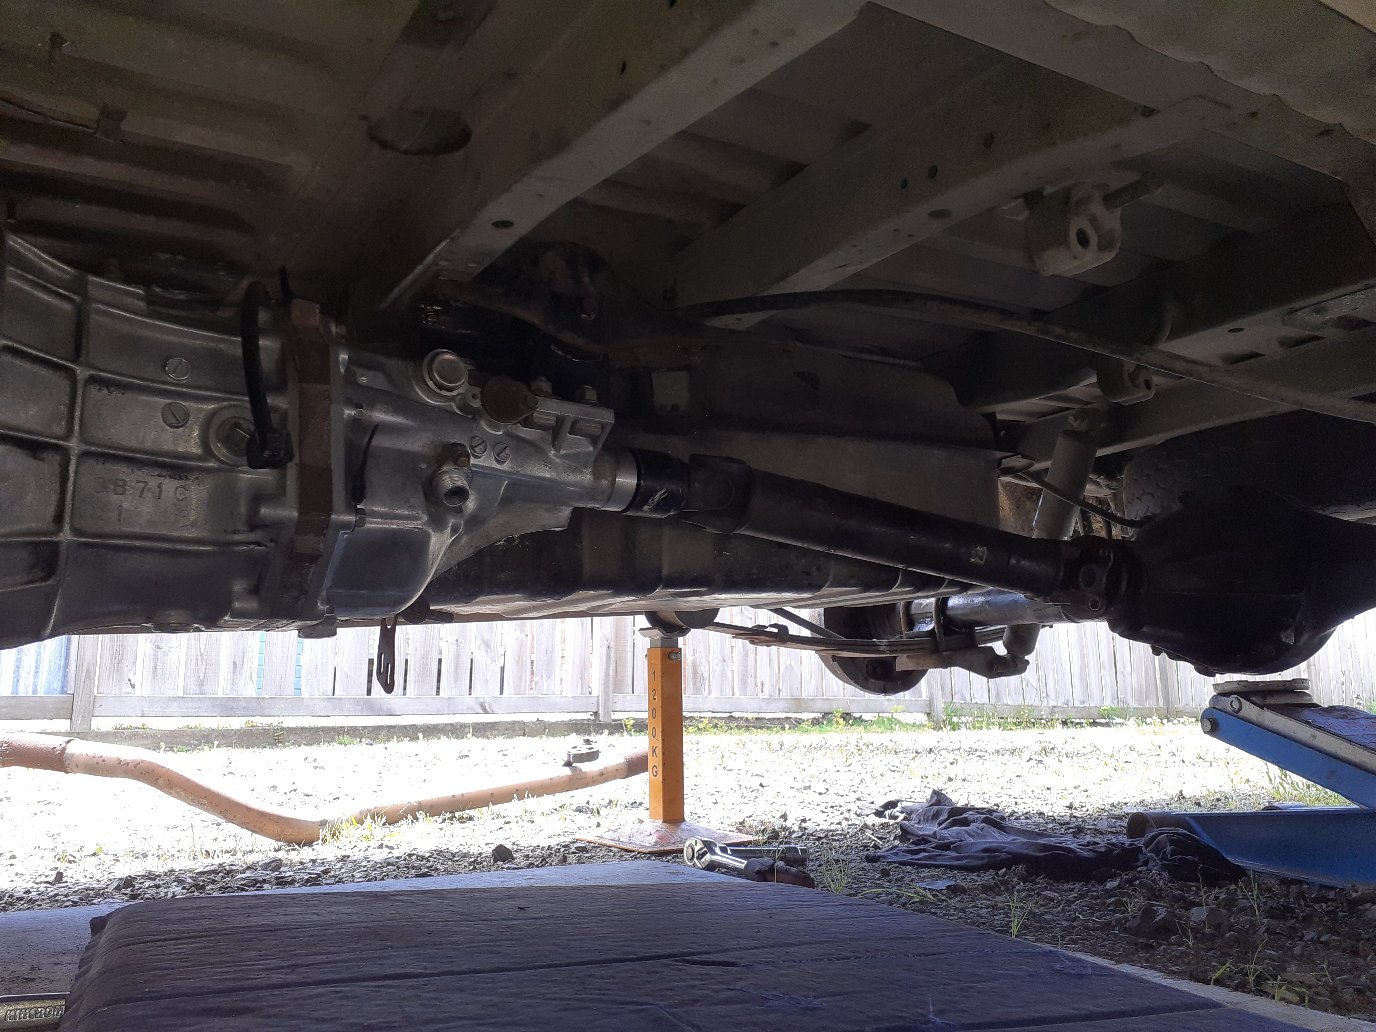
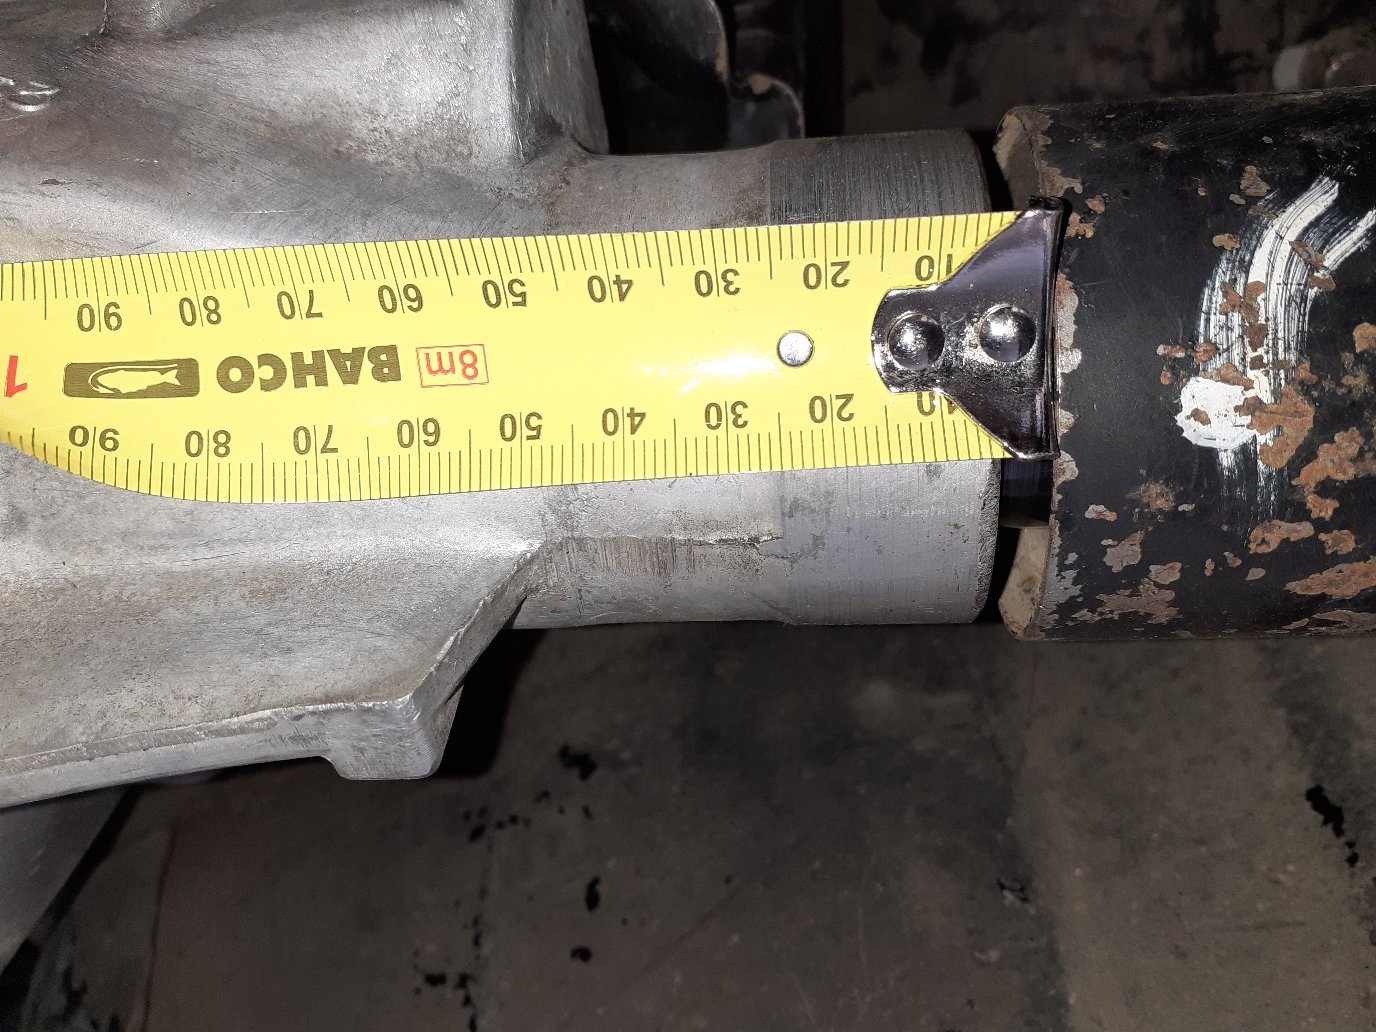
Aaand more previous f-ups come to haunt me, the driveshaft was 25mm too short , note the white marker on it, a cert fail, it was like this in the other van too and its symptoms were vibrating under load and a yoke that showed signs of wear due to excess play, and so now I had to fix this... new driveshaft?
-
4
-
-
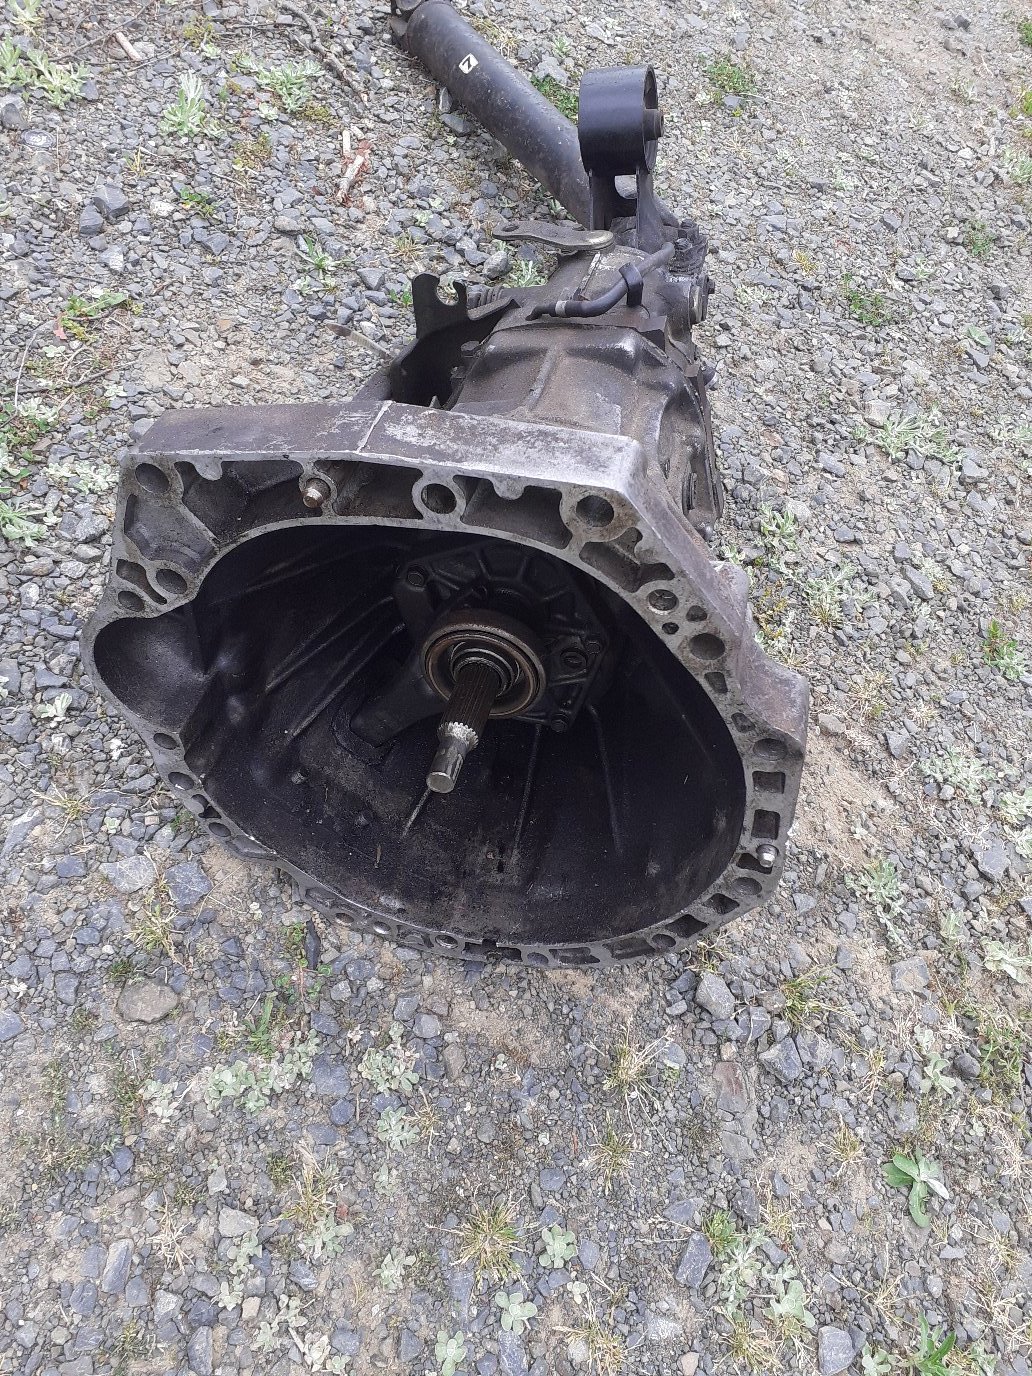
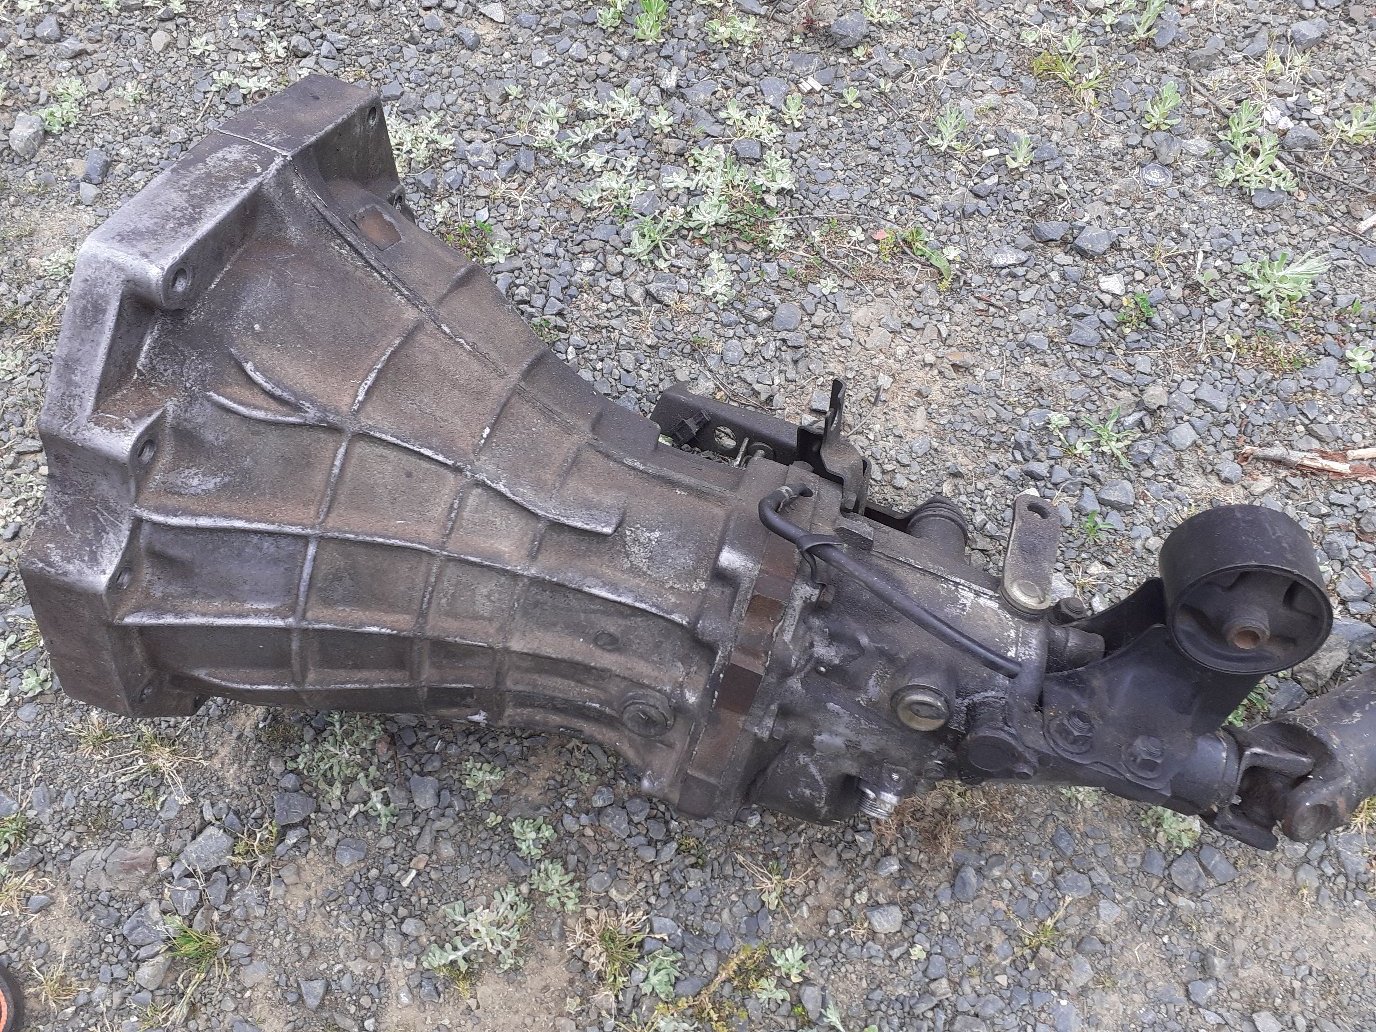
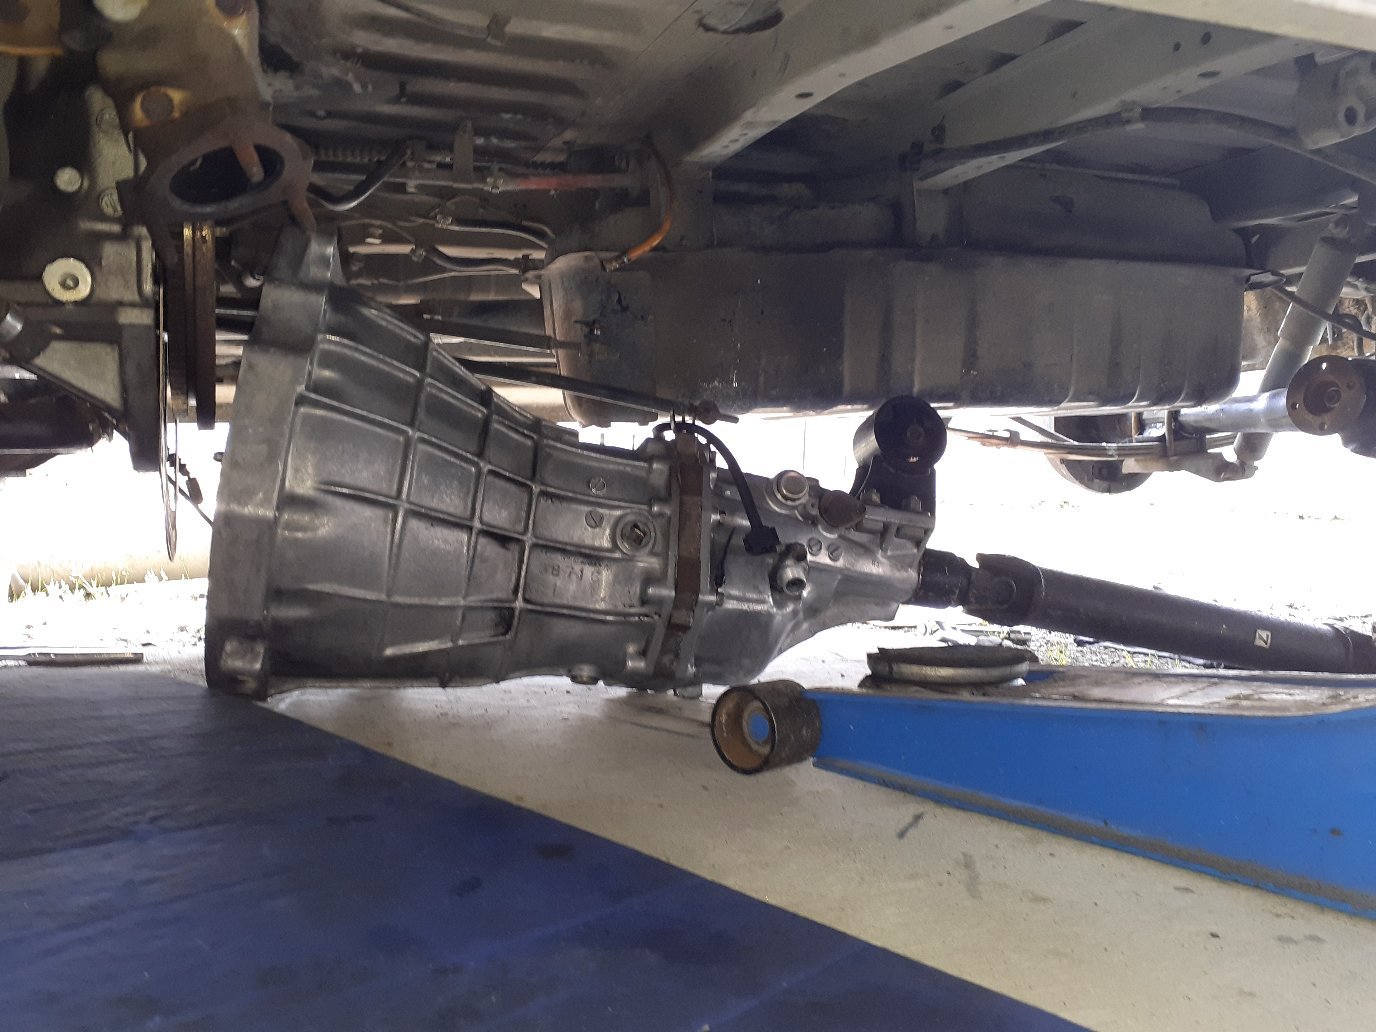
Nice and level, next up it was time to mock up the gearbox, I wasn't crawling under the van with that filthy thing so couple cans of degreaser and a water blast it came out better than I thought it would.
Put it on without clutch or anything.
All I had to do was slot the mount Holes a little and it fit right up for now...
-
3
-
-
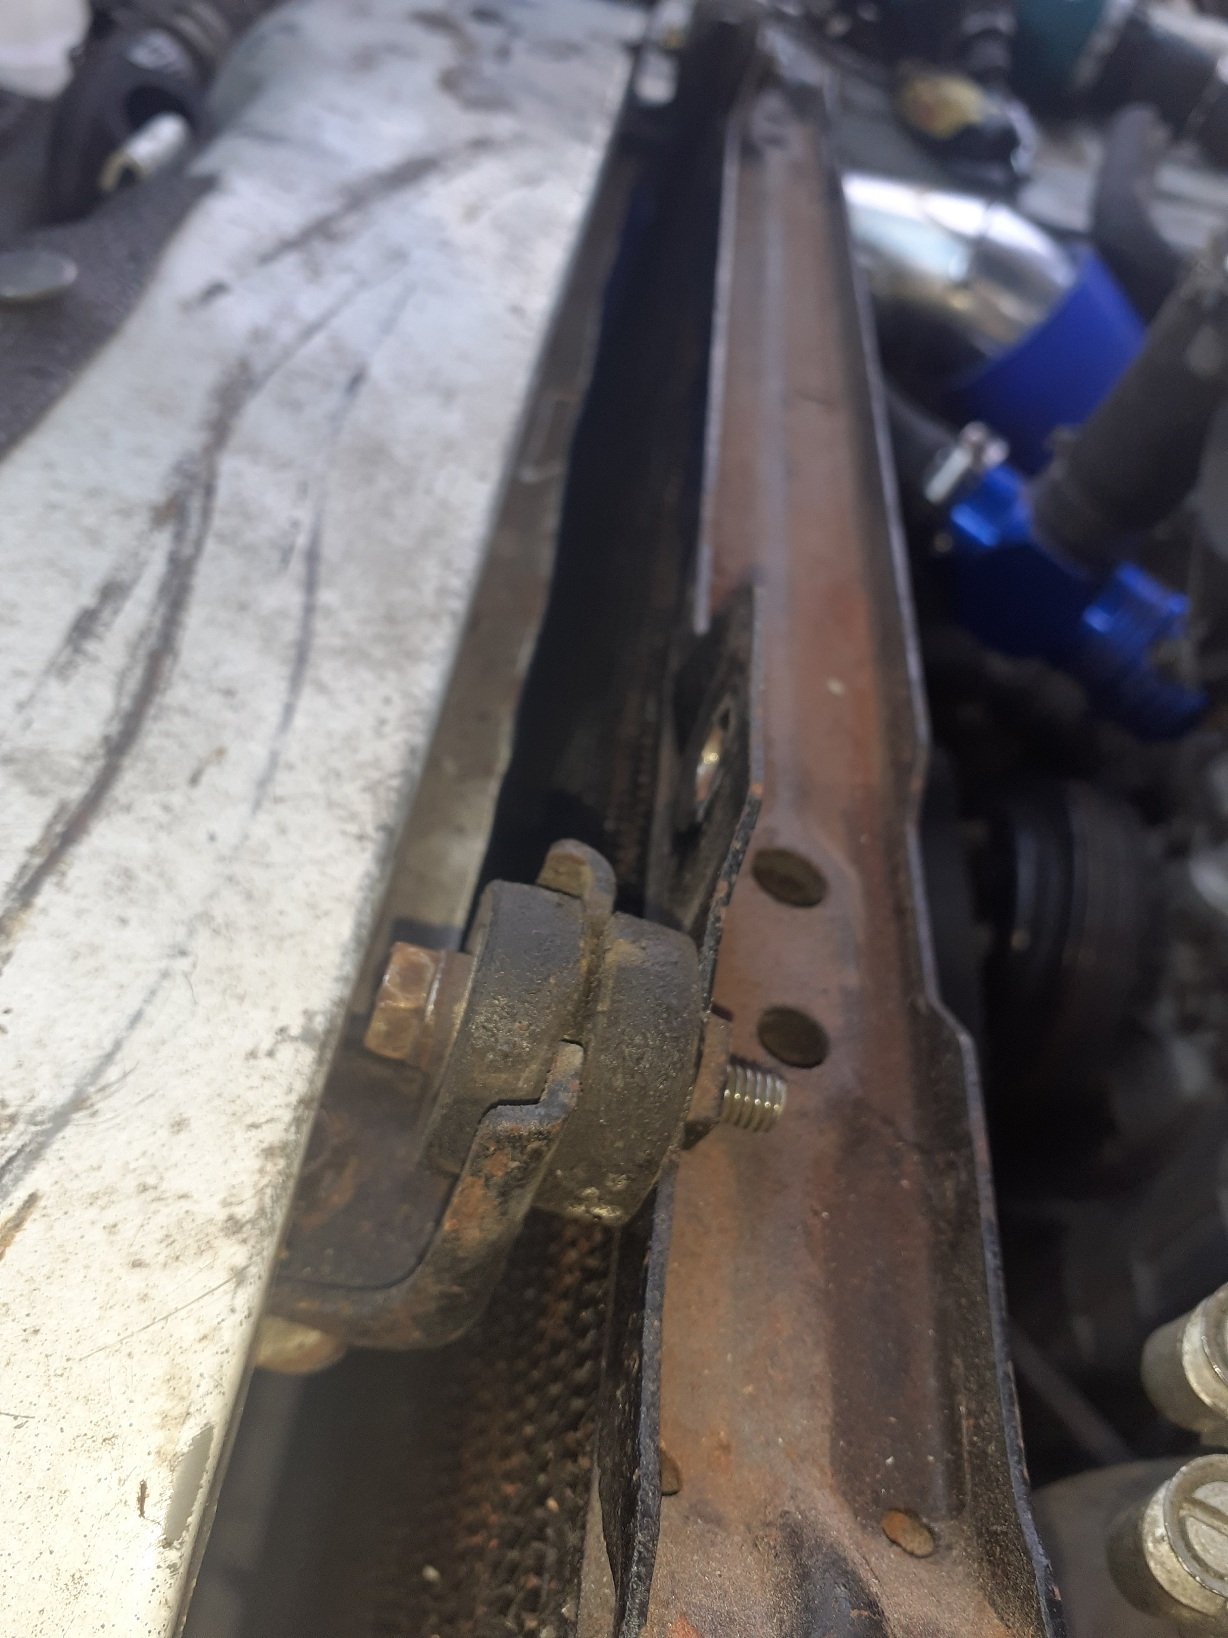
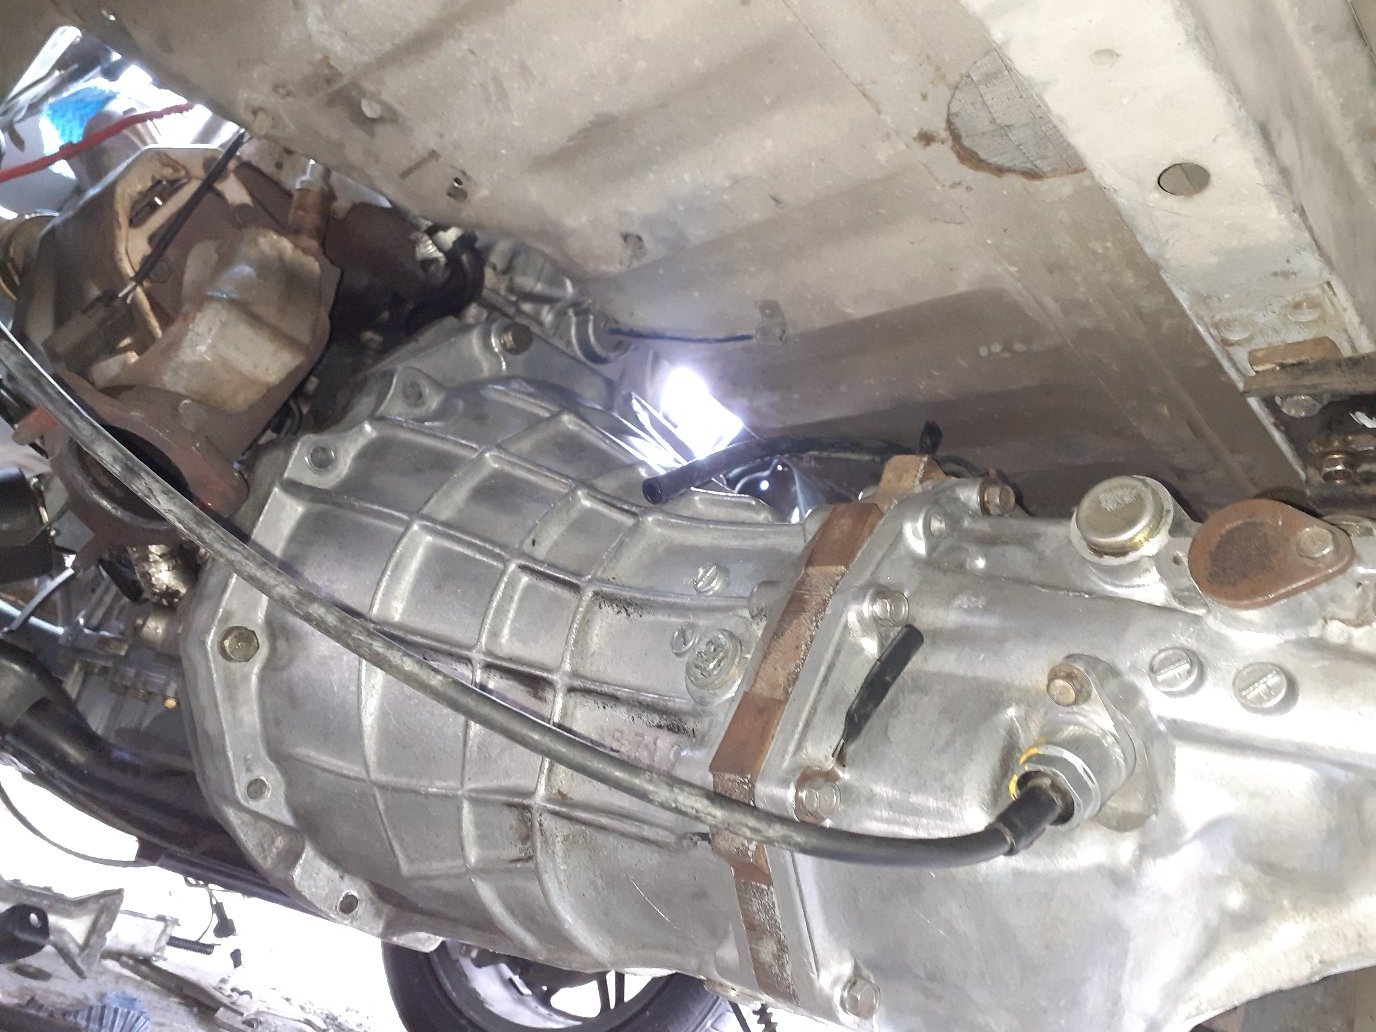
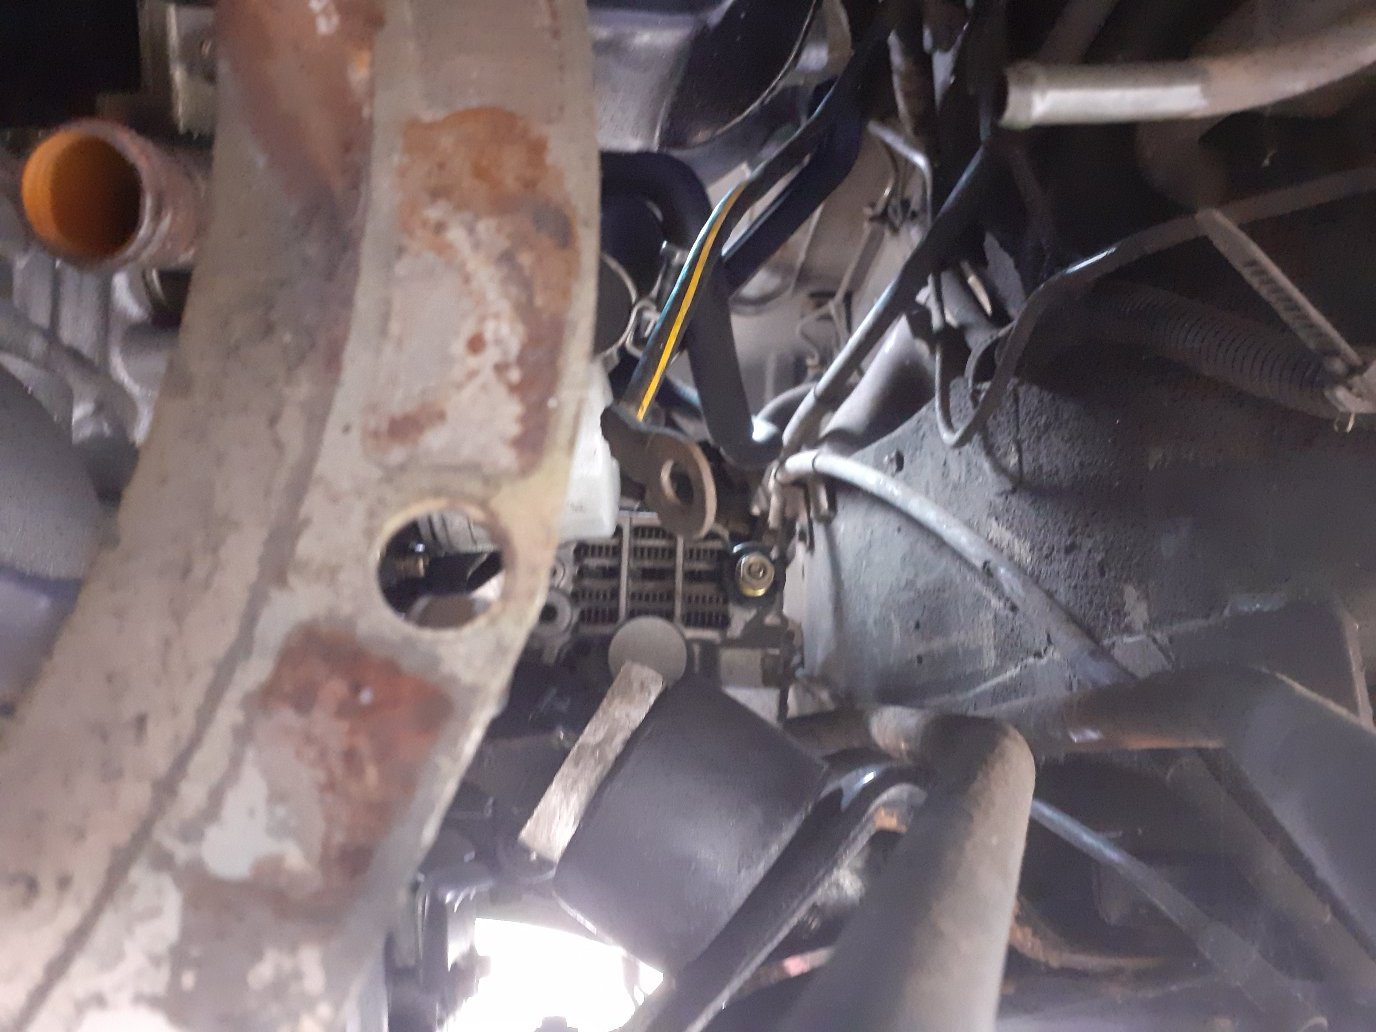
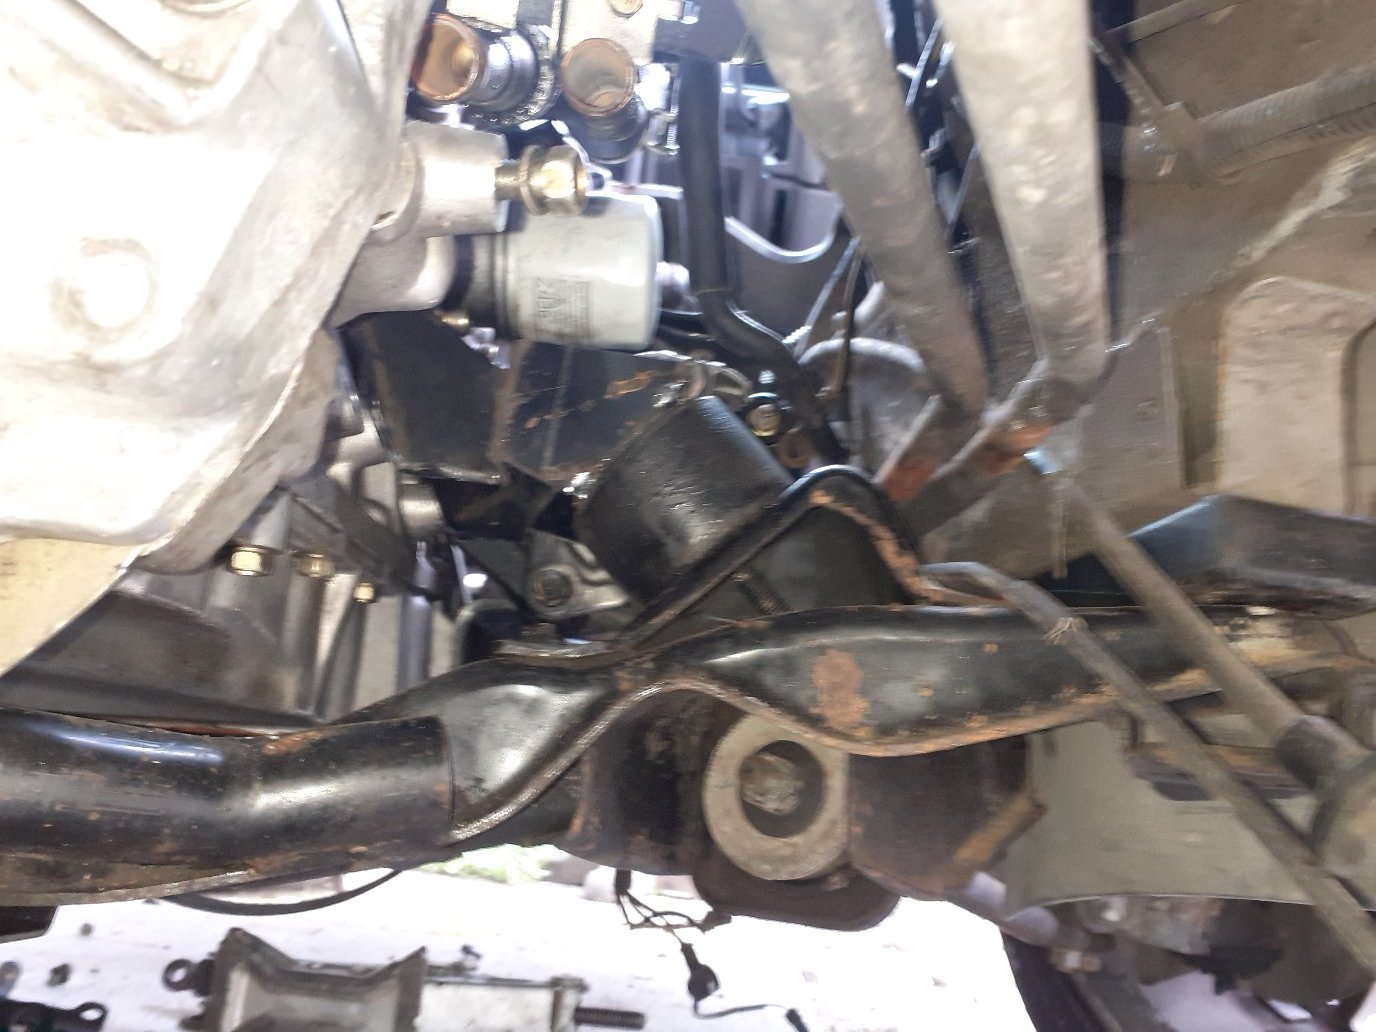
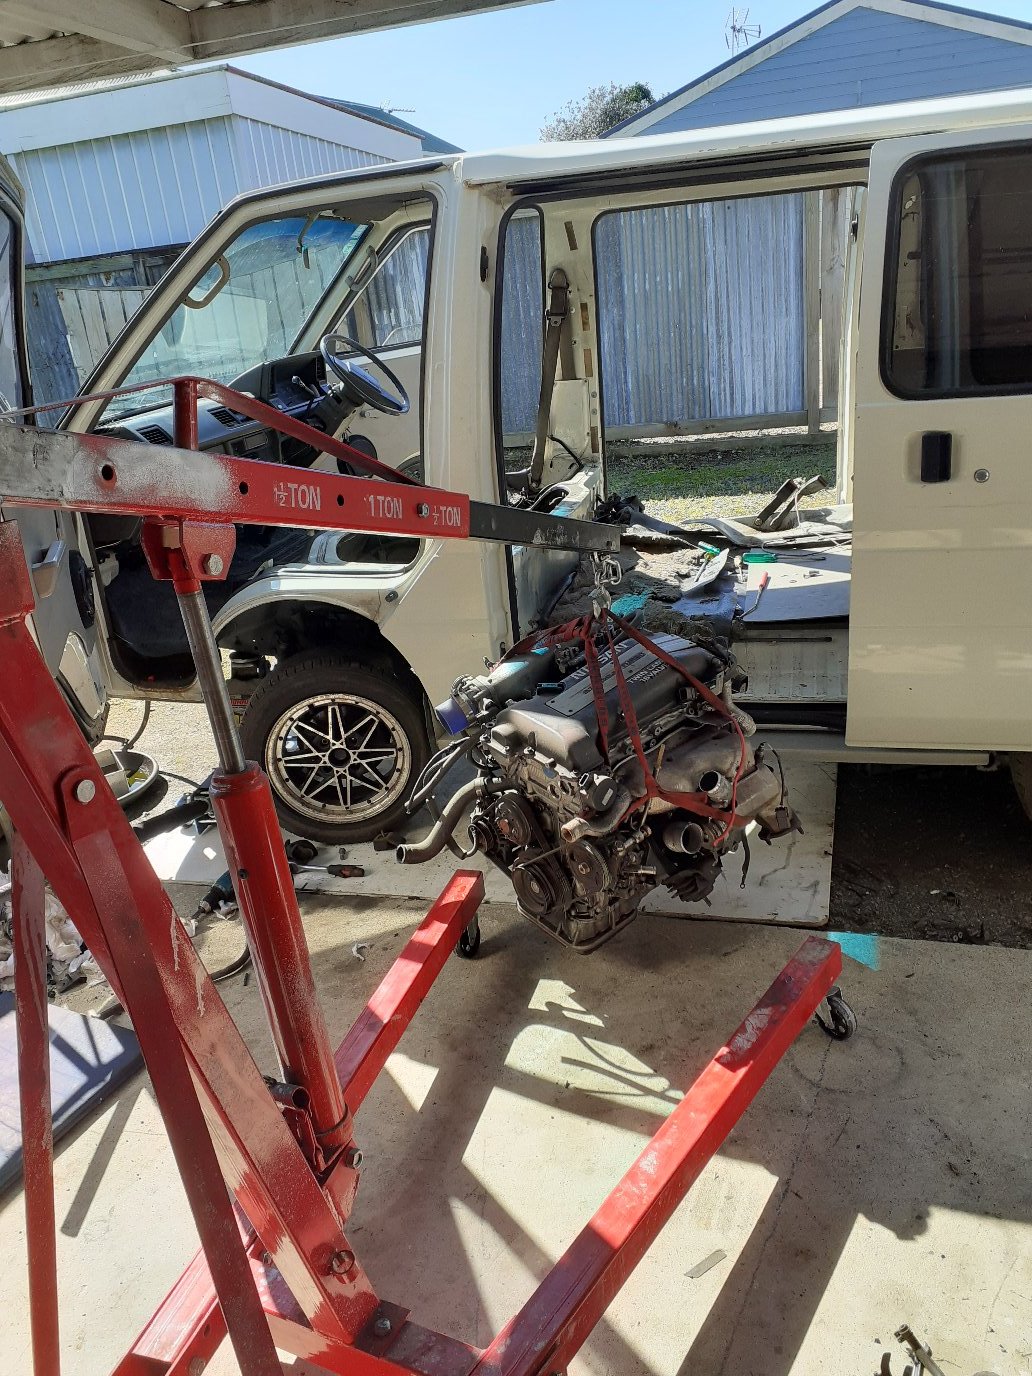
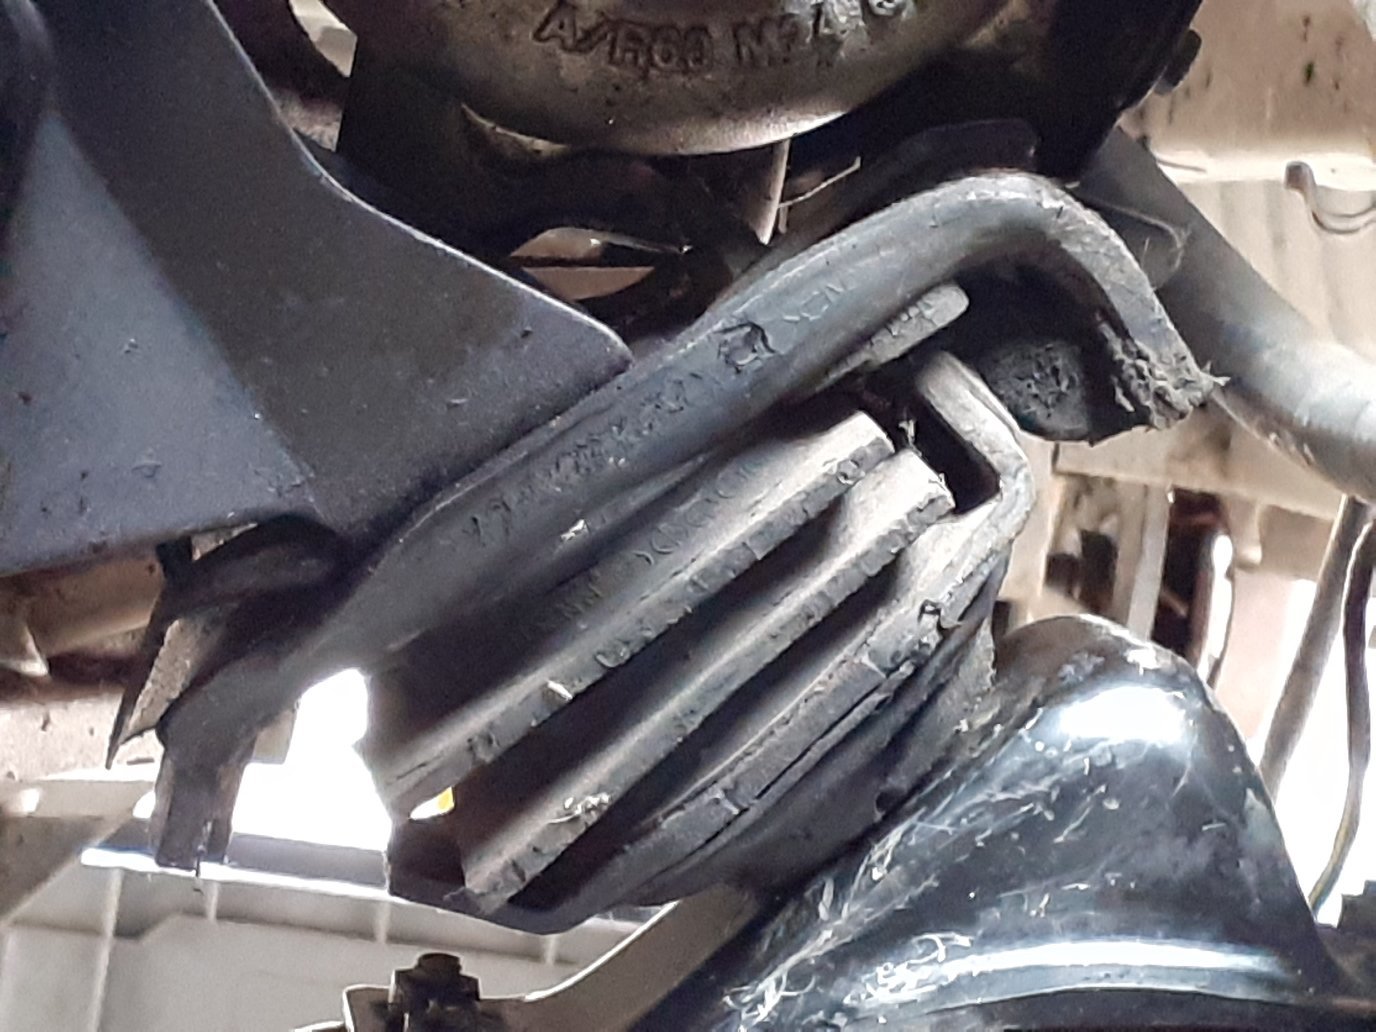
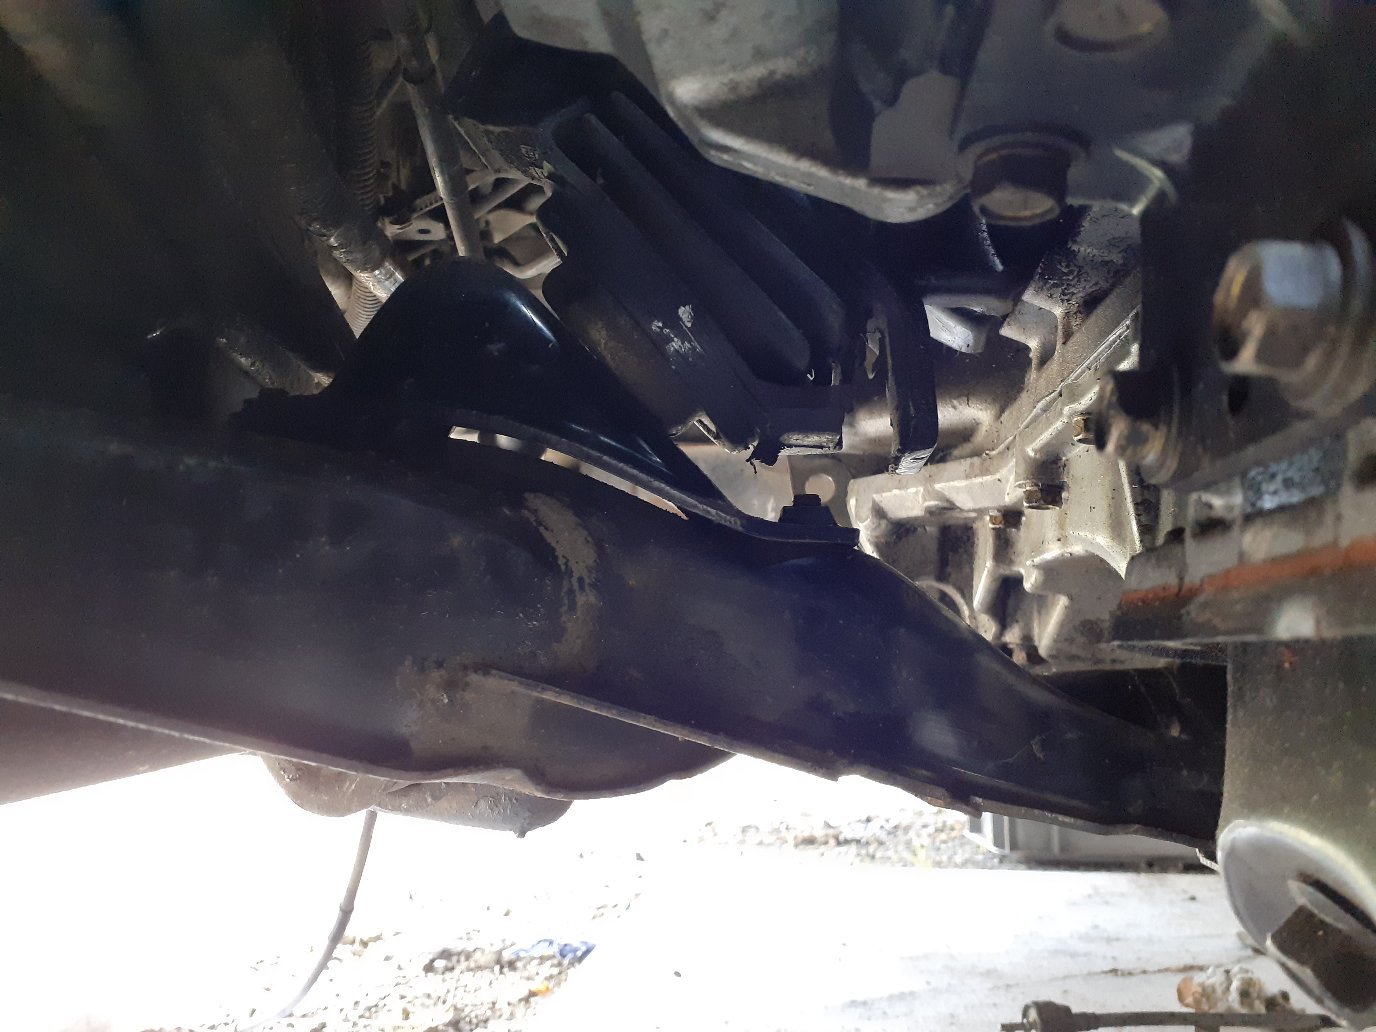
So I decided to start with moving the engine forward, and down, I tried to use the s15 mounts but they were big and chunky and were going to hit the turbo if I moved the engine where i wanted it...
Thinking that if I got some smaller diameter mounts and the tallest possible to get close to the 70mm or so the sr mounts were I'd have something close to working, there were other considerations such as not lowering the engine too much and risk the sump becoming one with the road, or hitting the crossmember and the angle it would be when resting under the engine cover lip. In other words it was faking tight.
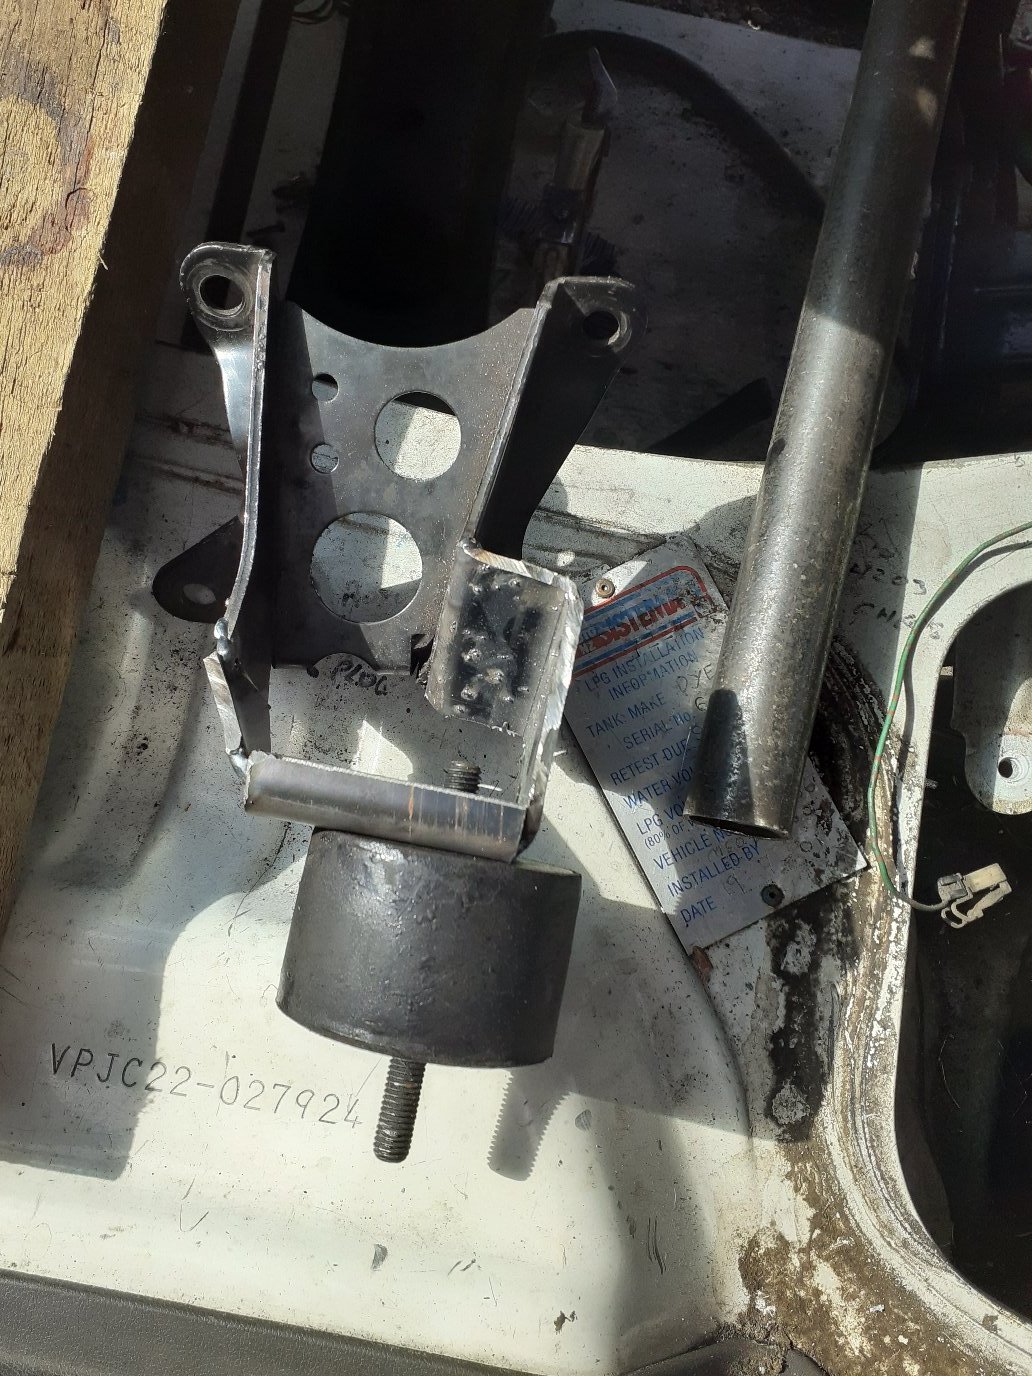
I had a look at the mount shop website and found some BMW mounts that were the right diameter, but a bit short maybe ... nothing some spacers wouldn't fix, but turns out I diddnt need spacers and after hacking some prototype engine mounts together it fits good .
-
3
-
-
A lot of problems . .. .
The van I got was not the same, it's a different engine bay ,I had to remove the intake and cut the van :/--temporarily I swear! just to seat the engine, well the mounts were on a bad angle, the engine was on a bad angle just to fit... no go ,too bad , back to drawing board!
-
7
-
-
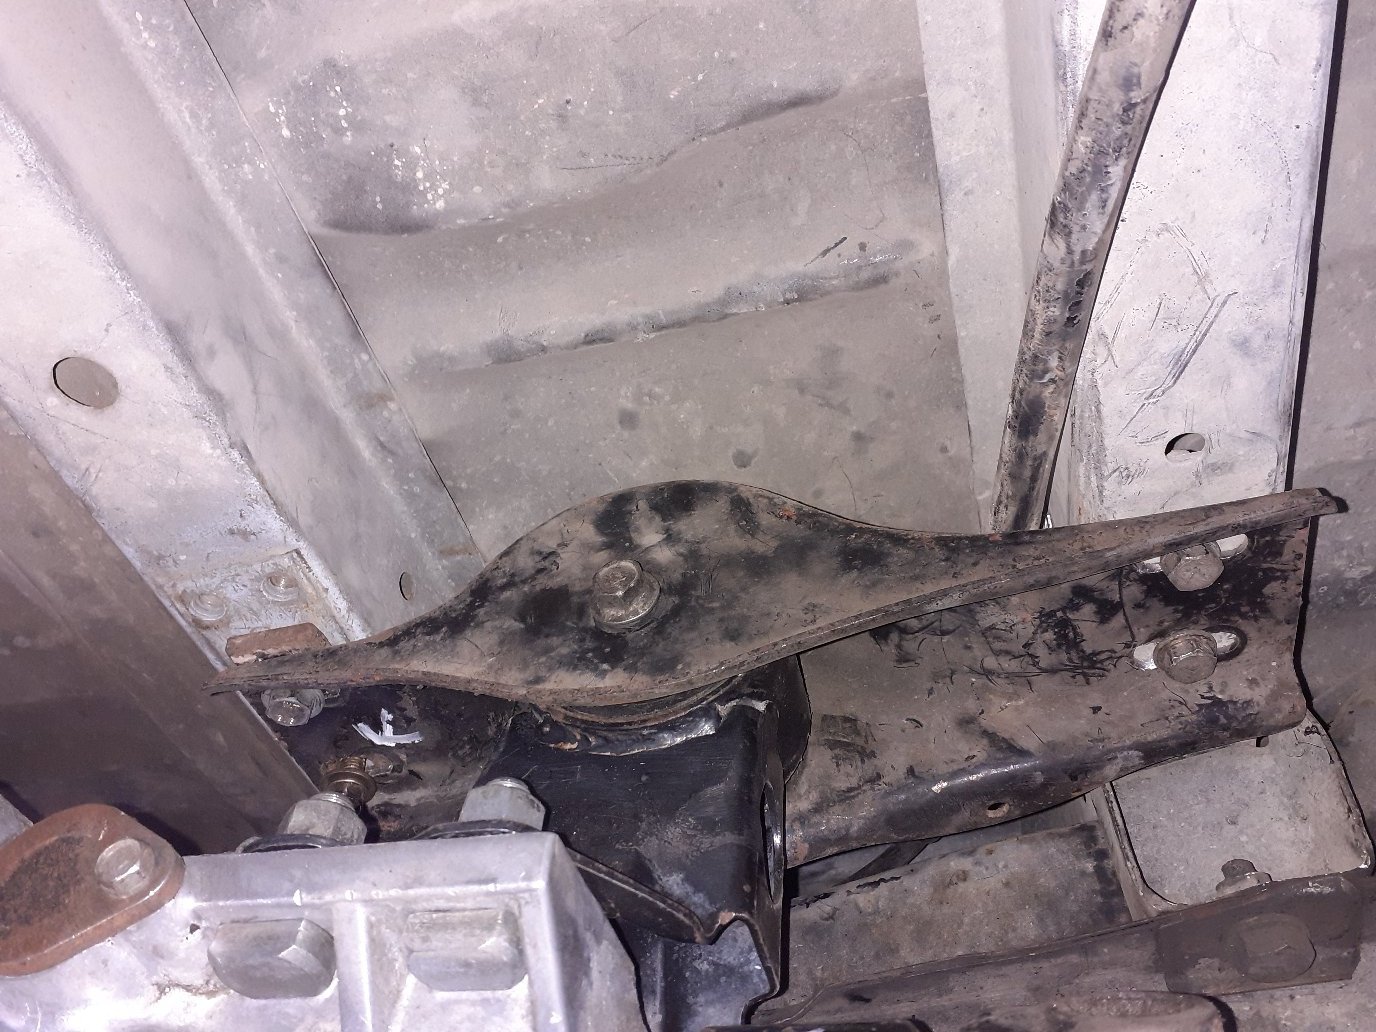
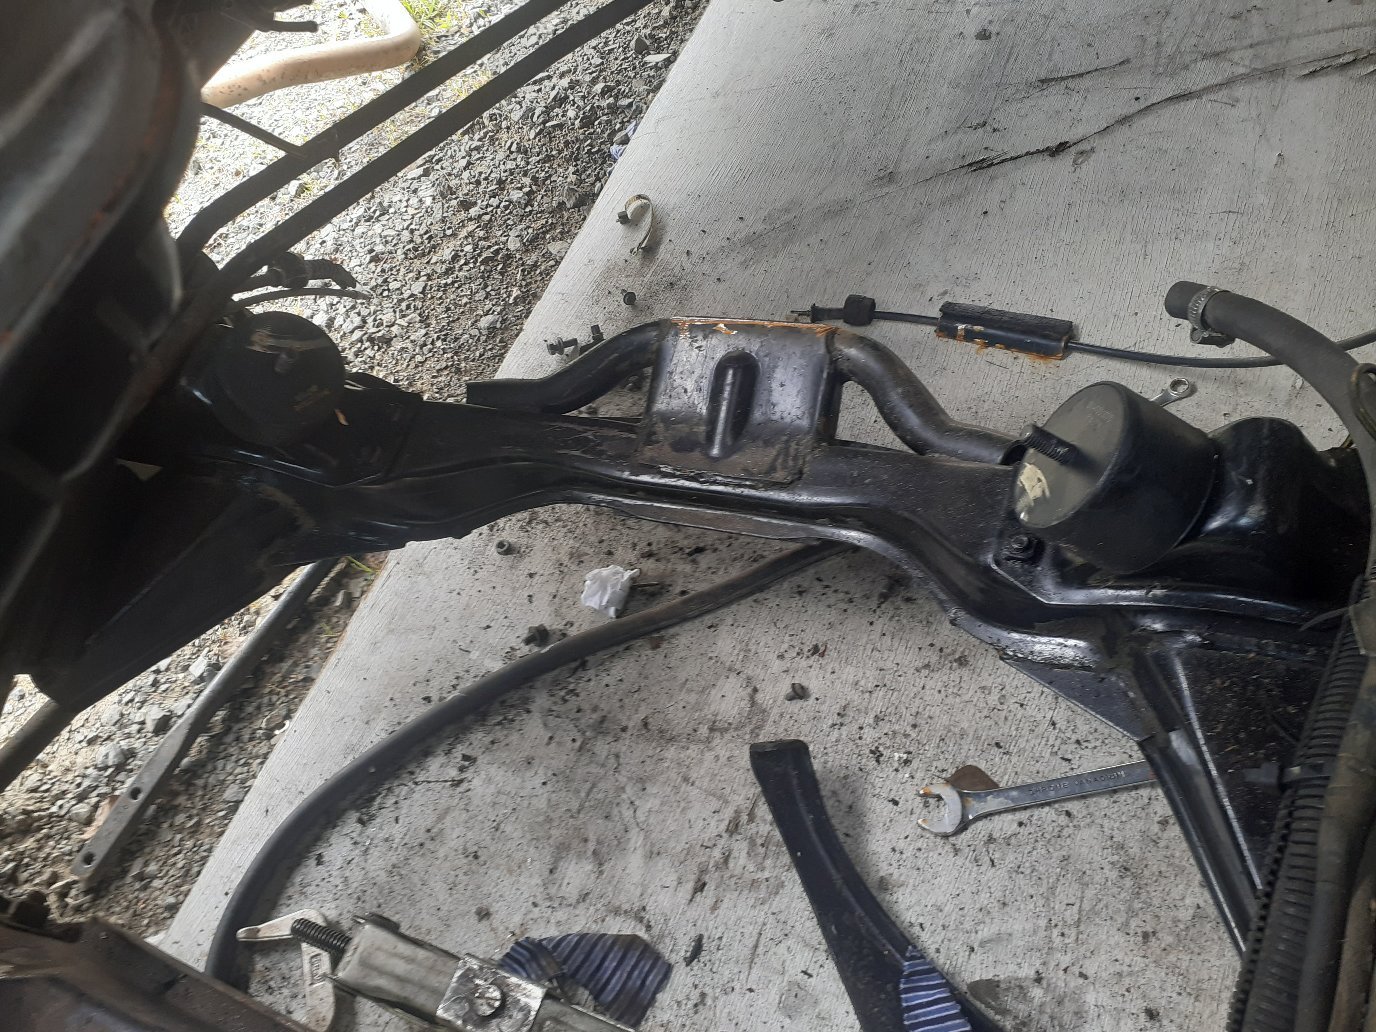
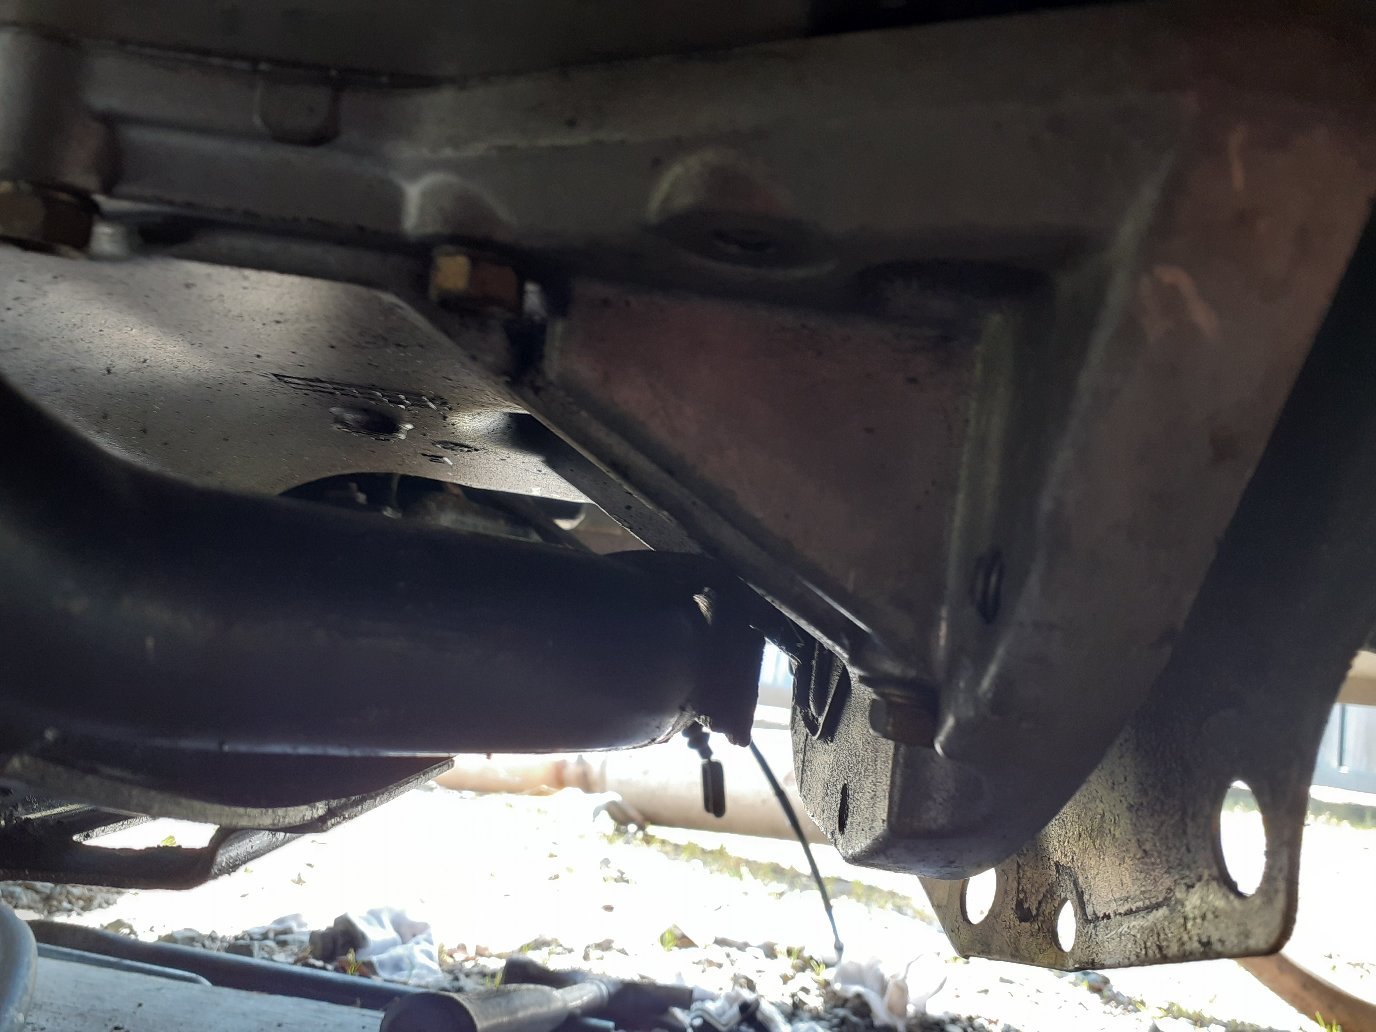
Then It got technical pretty quick, i wanted to find out if the wheelbase and the mounts (engine/box) would be the same as in the donor van... but after looking at the crossmembers, and the differences. No.
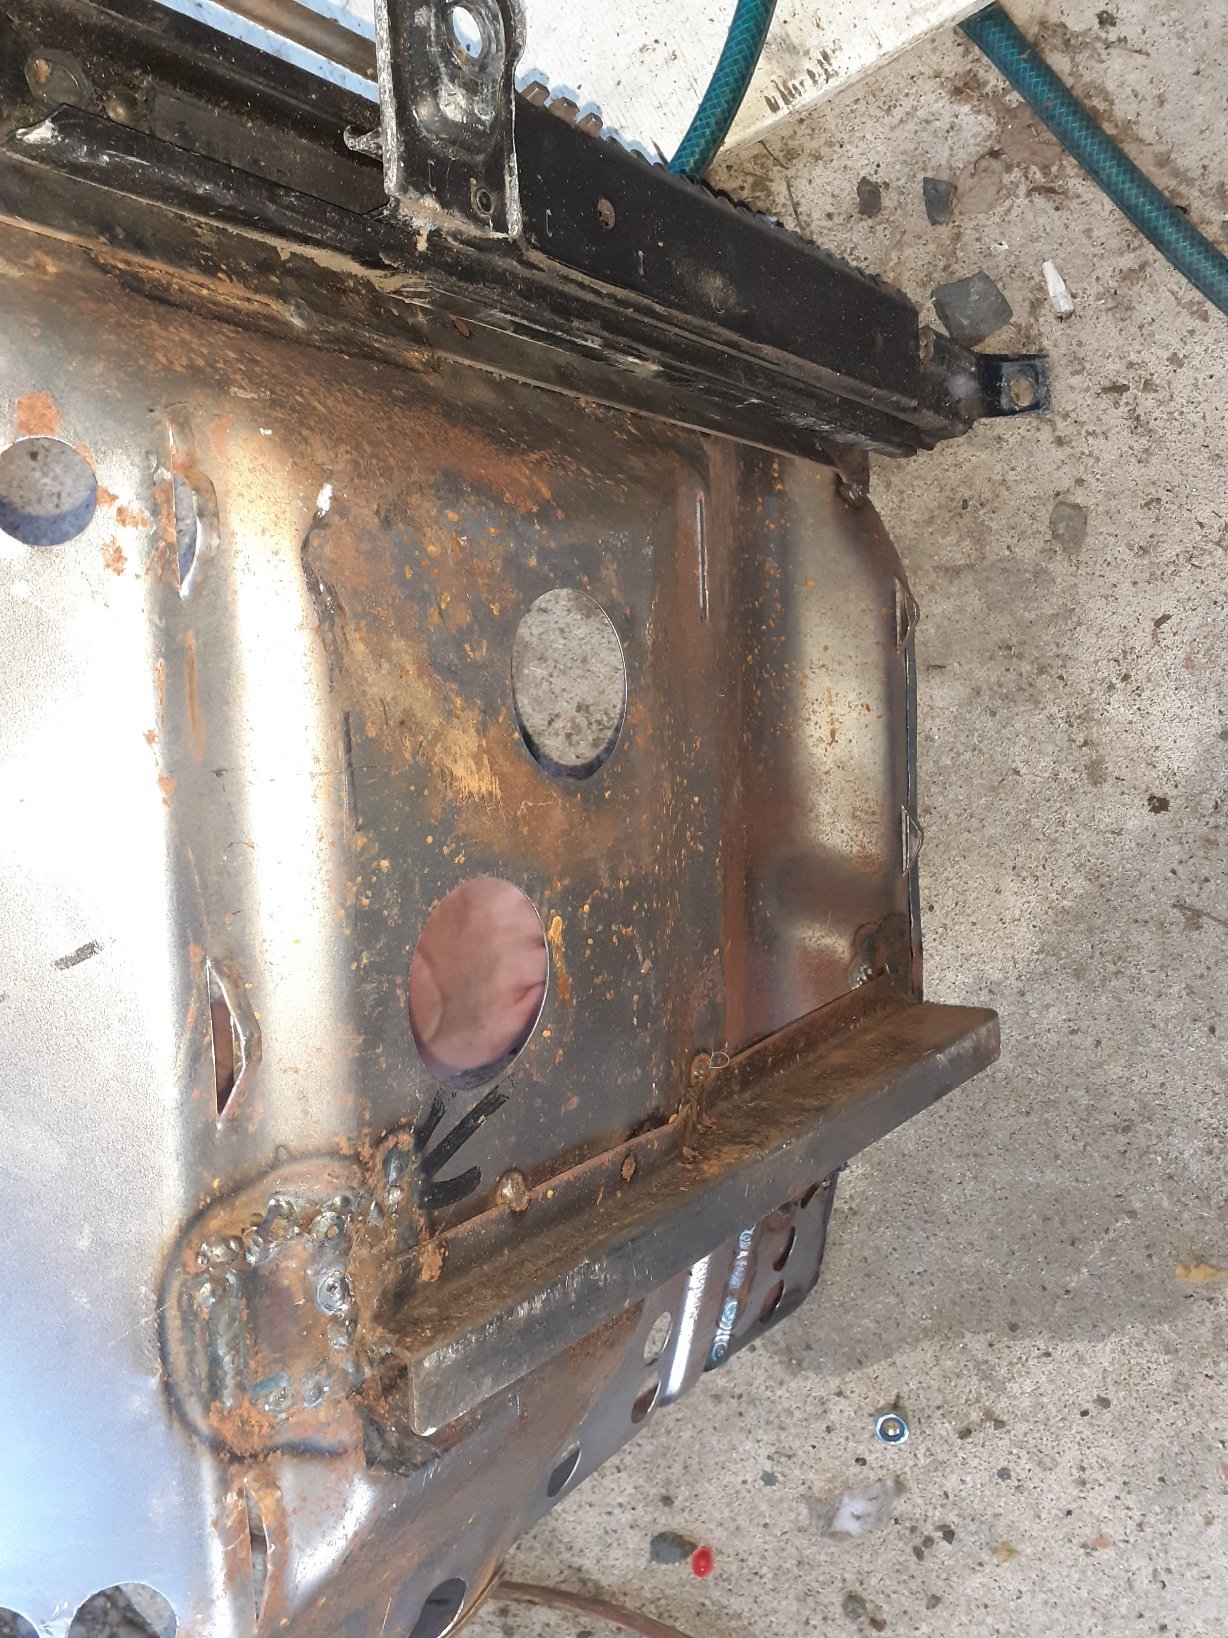
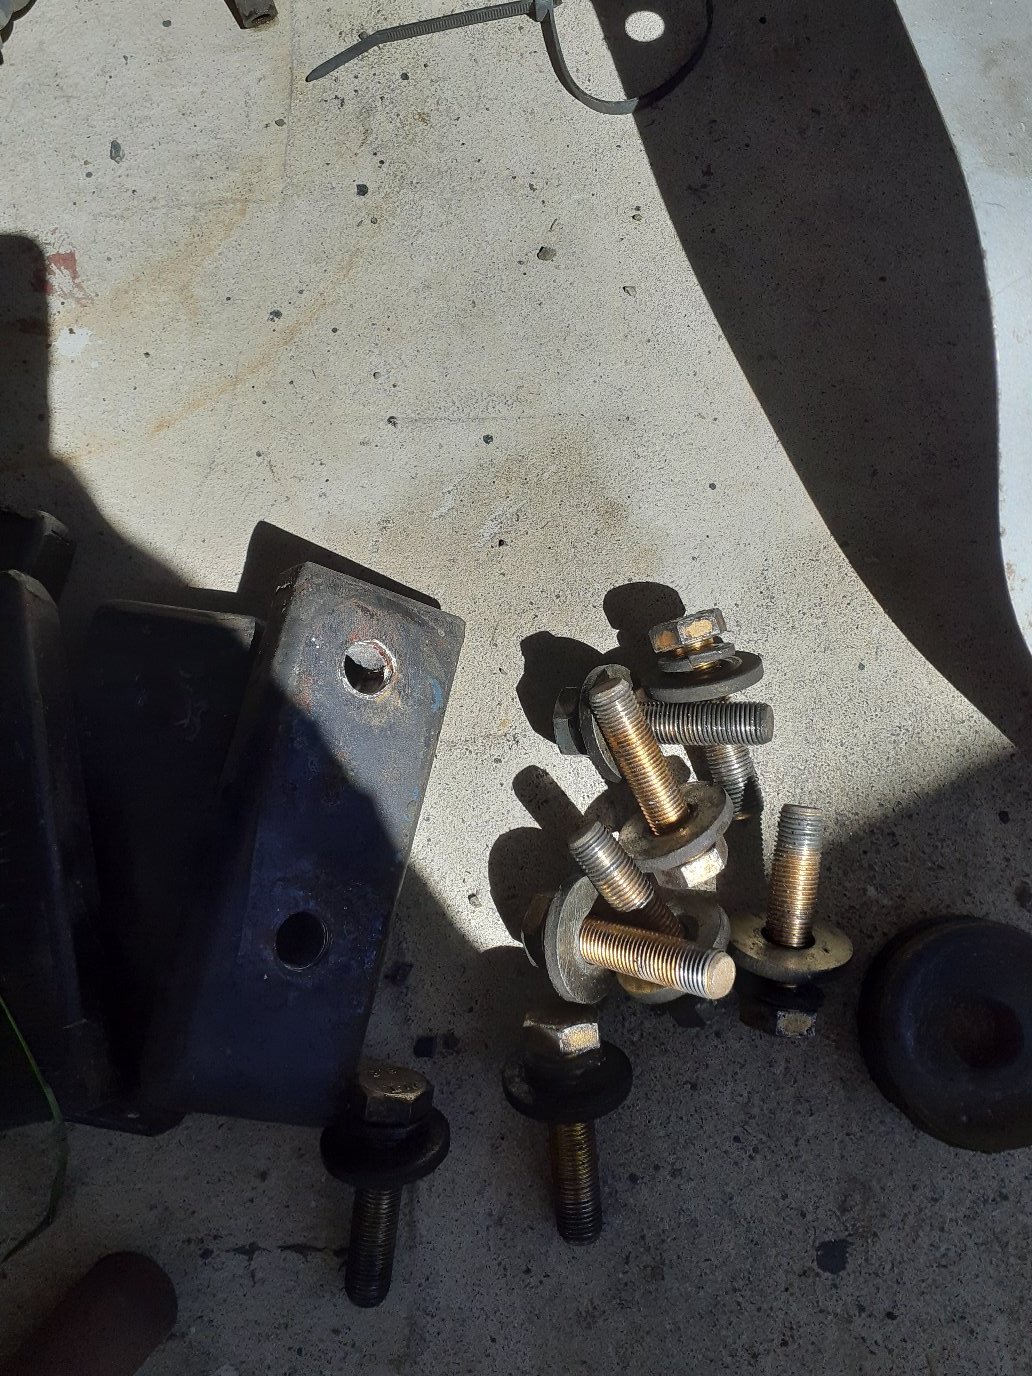
Also found the subframe had 25mm spacers to lower the engine to make it fit under the covers (sr is a lot taller than the a15 or 2litre that they had) --note in the picture they have inserts welded in the spacer, so it can't crush when you tighten the bolts, a cert requirement--- as well as quality bolts with washers and spring washers, the right size for the bolt!
Simple fix right? Swap the donor Van's crossmember with the new van..
So I put the spacers and the other crossmember in ( my goal was to keep the seats- covers- seatbelts all factory so the cert guy can't give me grief about any of that! )
Well after swapping some bushings around so it had nice bushings and cleaning the grease off, I put it in the van ready to accept the engine....
-
3
-
-
Ended up selling the seats, turns out they were s13 silvia seats and were in good shape, so they got shipped to the south island to go into a Silvia that needed original seats
")
-
7
-
-
Yea 3sge would have been a nice motor for a van
-
I've had a couple bongos before but I diddnt even know what a c22 van was untill now, only ever seen the bongos and serena's and econovan hiace (pre 90 and 90s) no c20 or c22, so it's cool to have one


VK304’s sr20det 88 vanette
in Projects and Build Ups
Posted