MARTS-PL310
-
Posts
164 -
Joined
-
Last visited
Everything posted by MARTS-PL310
-

MARTS-PL310 61 Datsun Bluebird Sedan
MARTS-PL310 replied to MARTS-PL310's topic in Projects and Build Ups
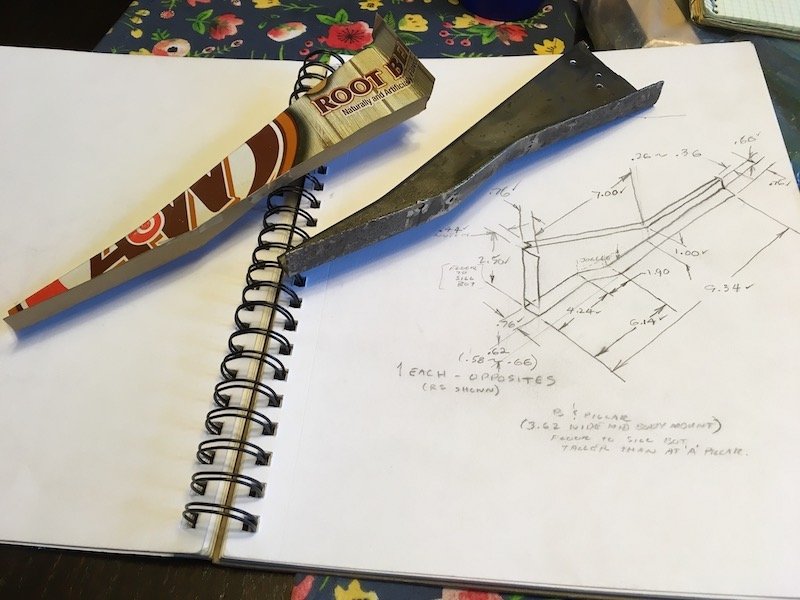
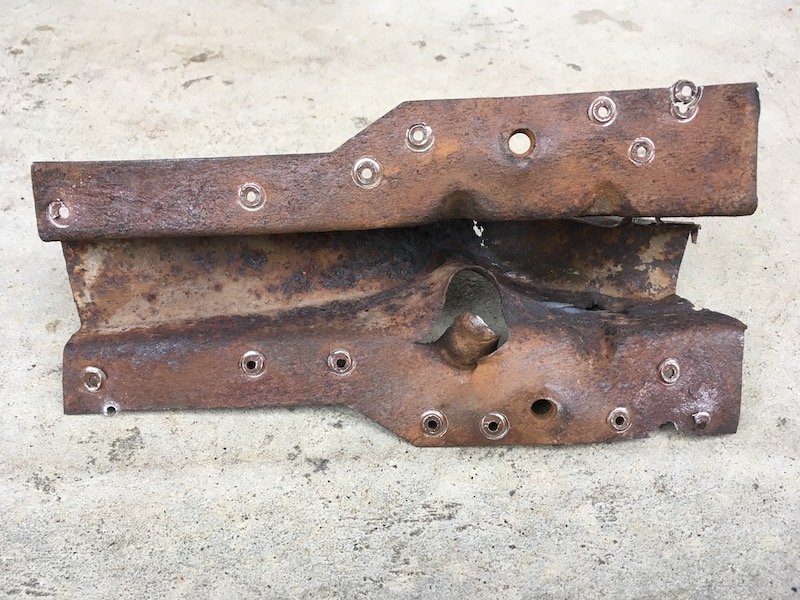
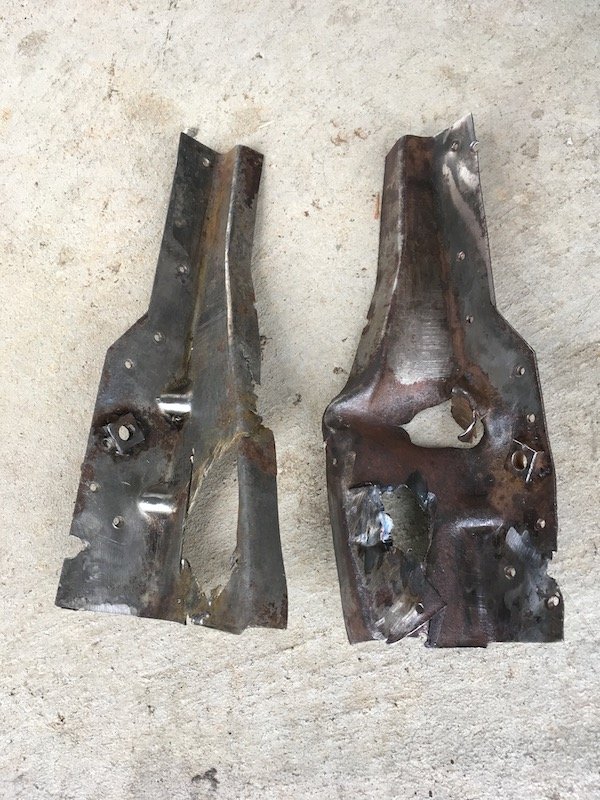
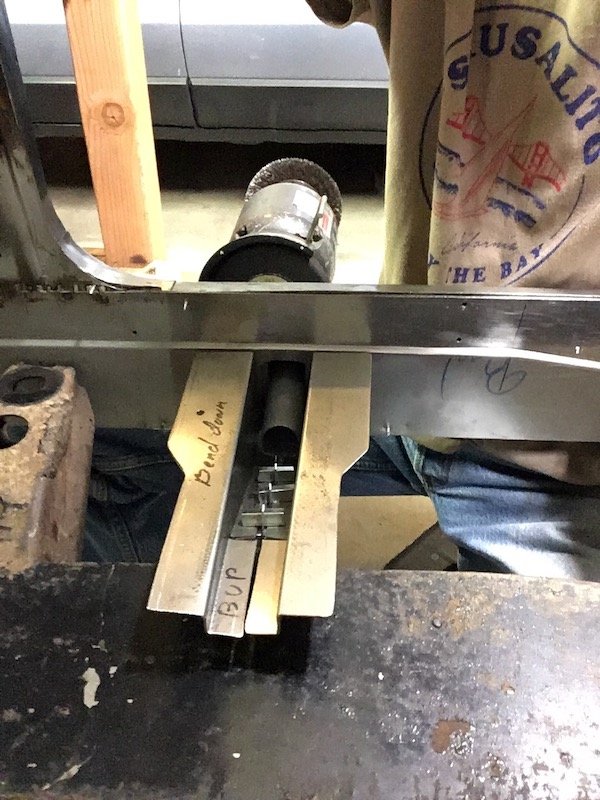
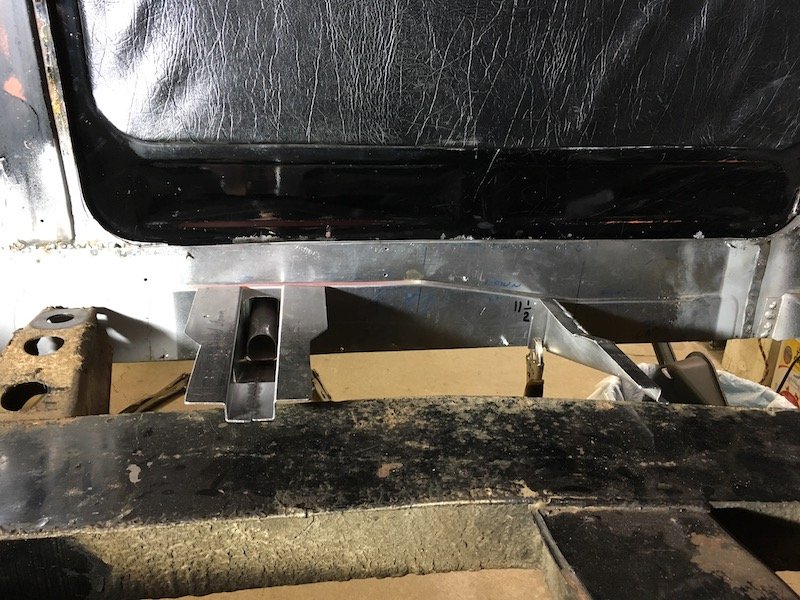
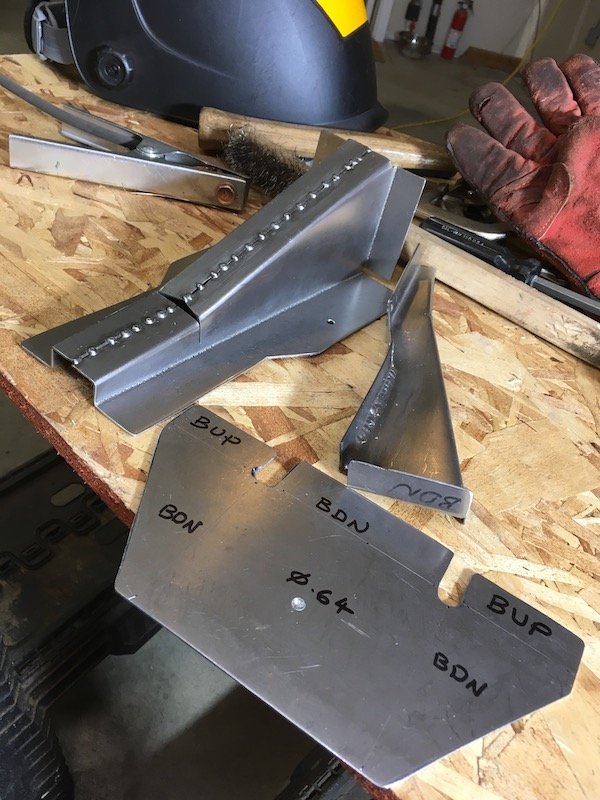
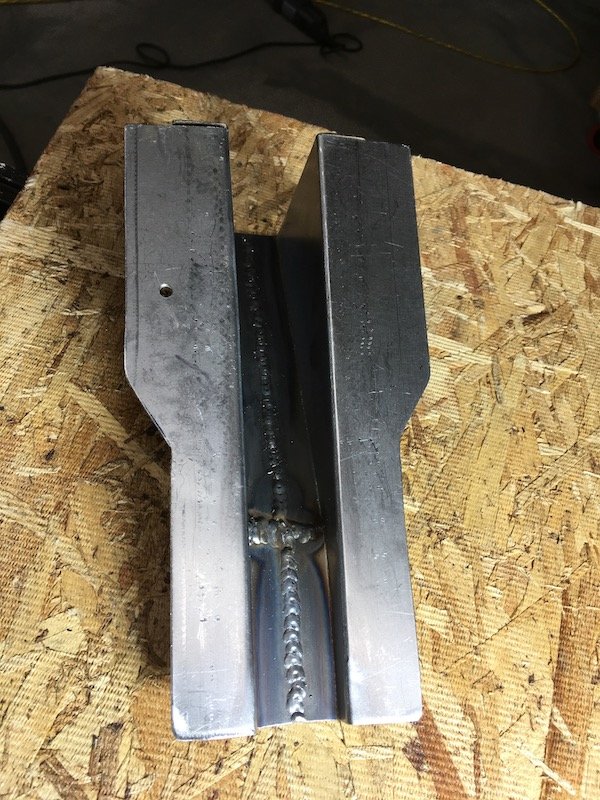
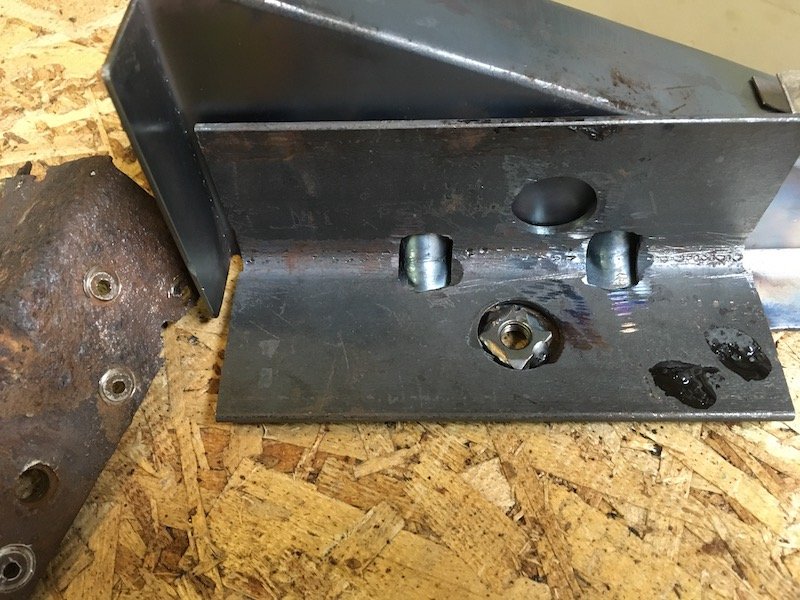
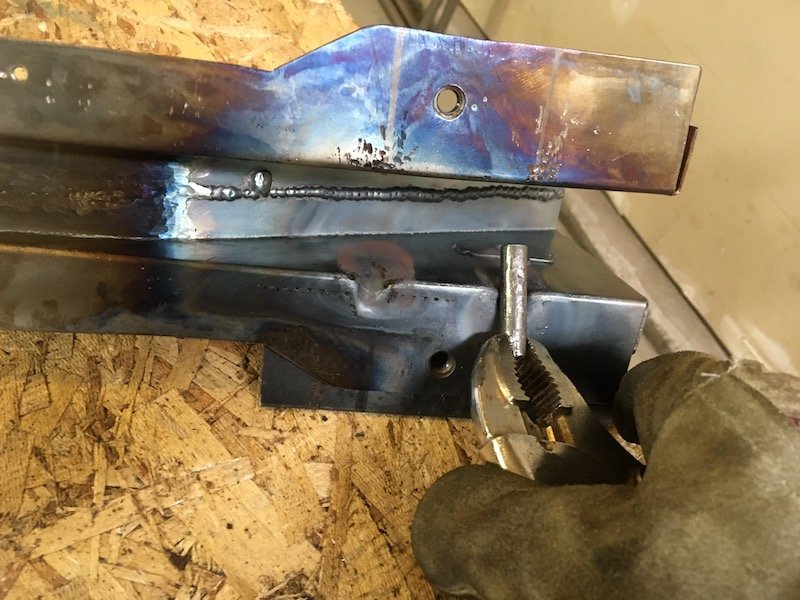
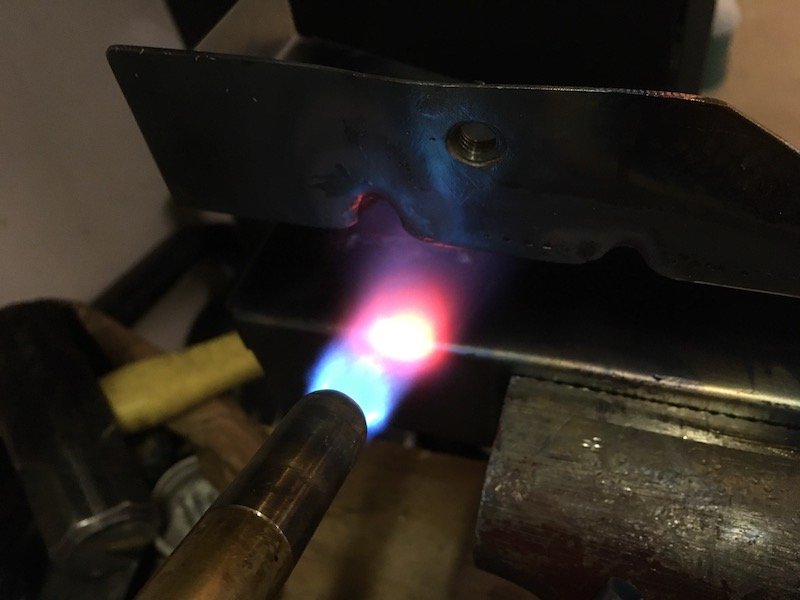
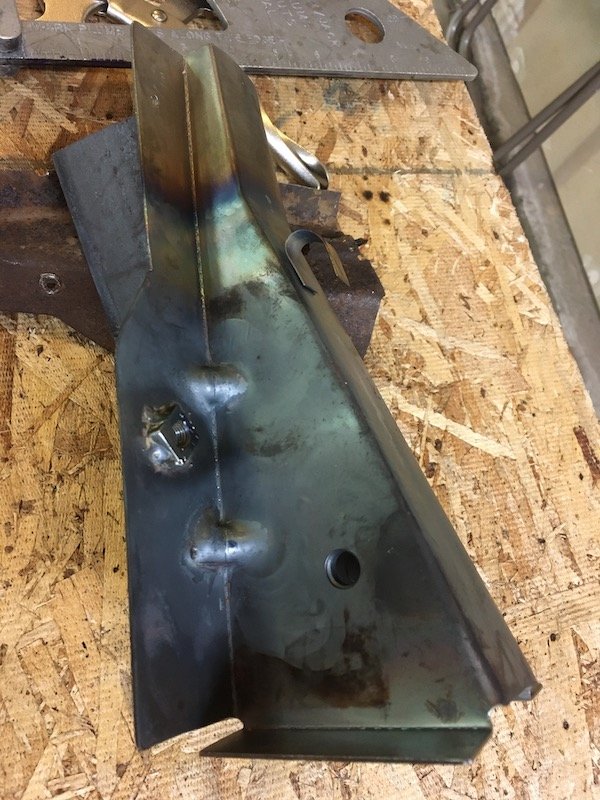
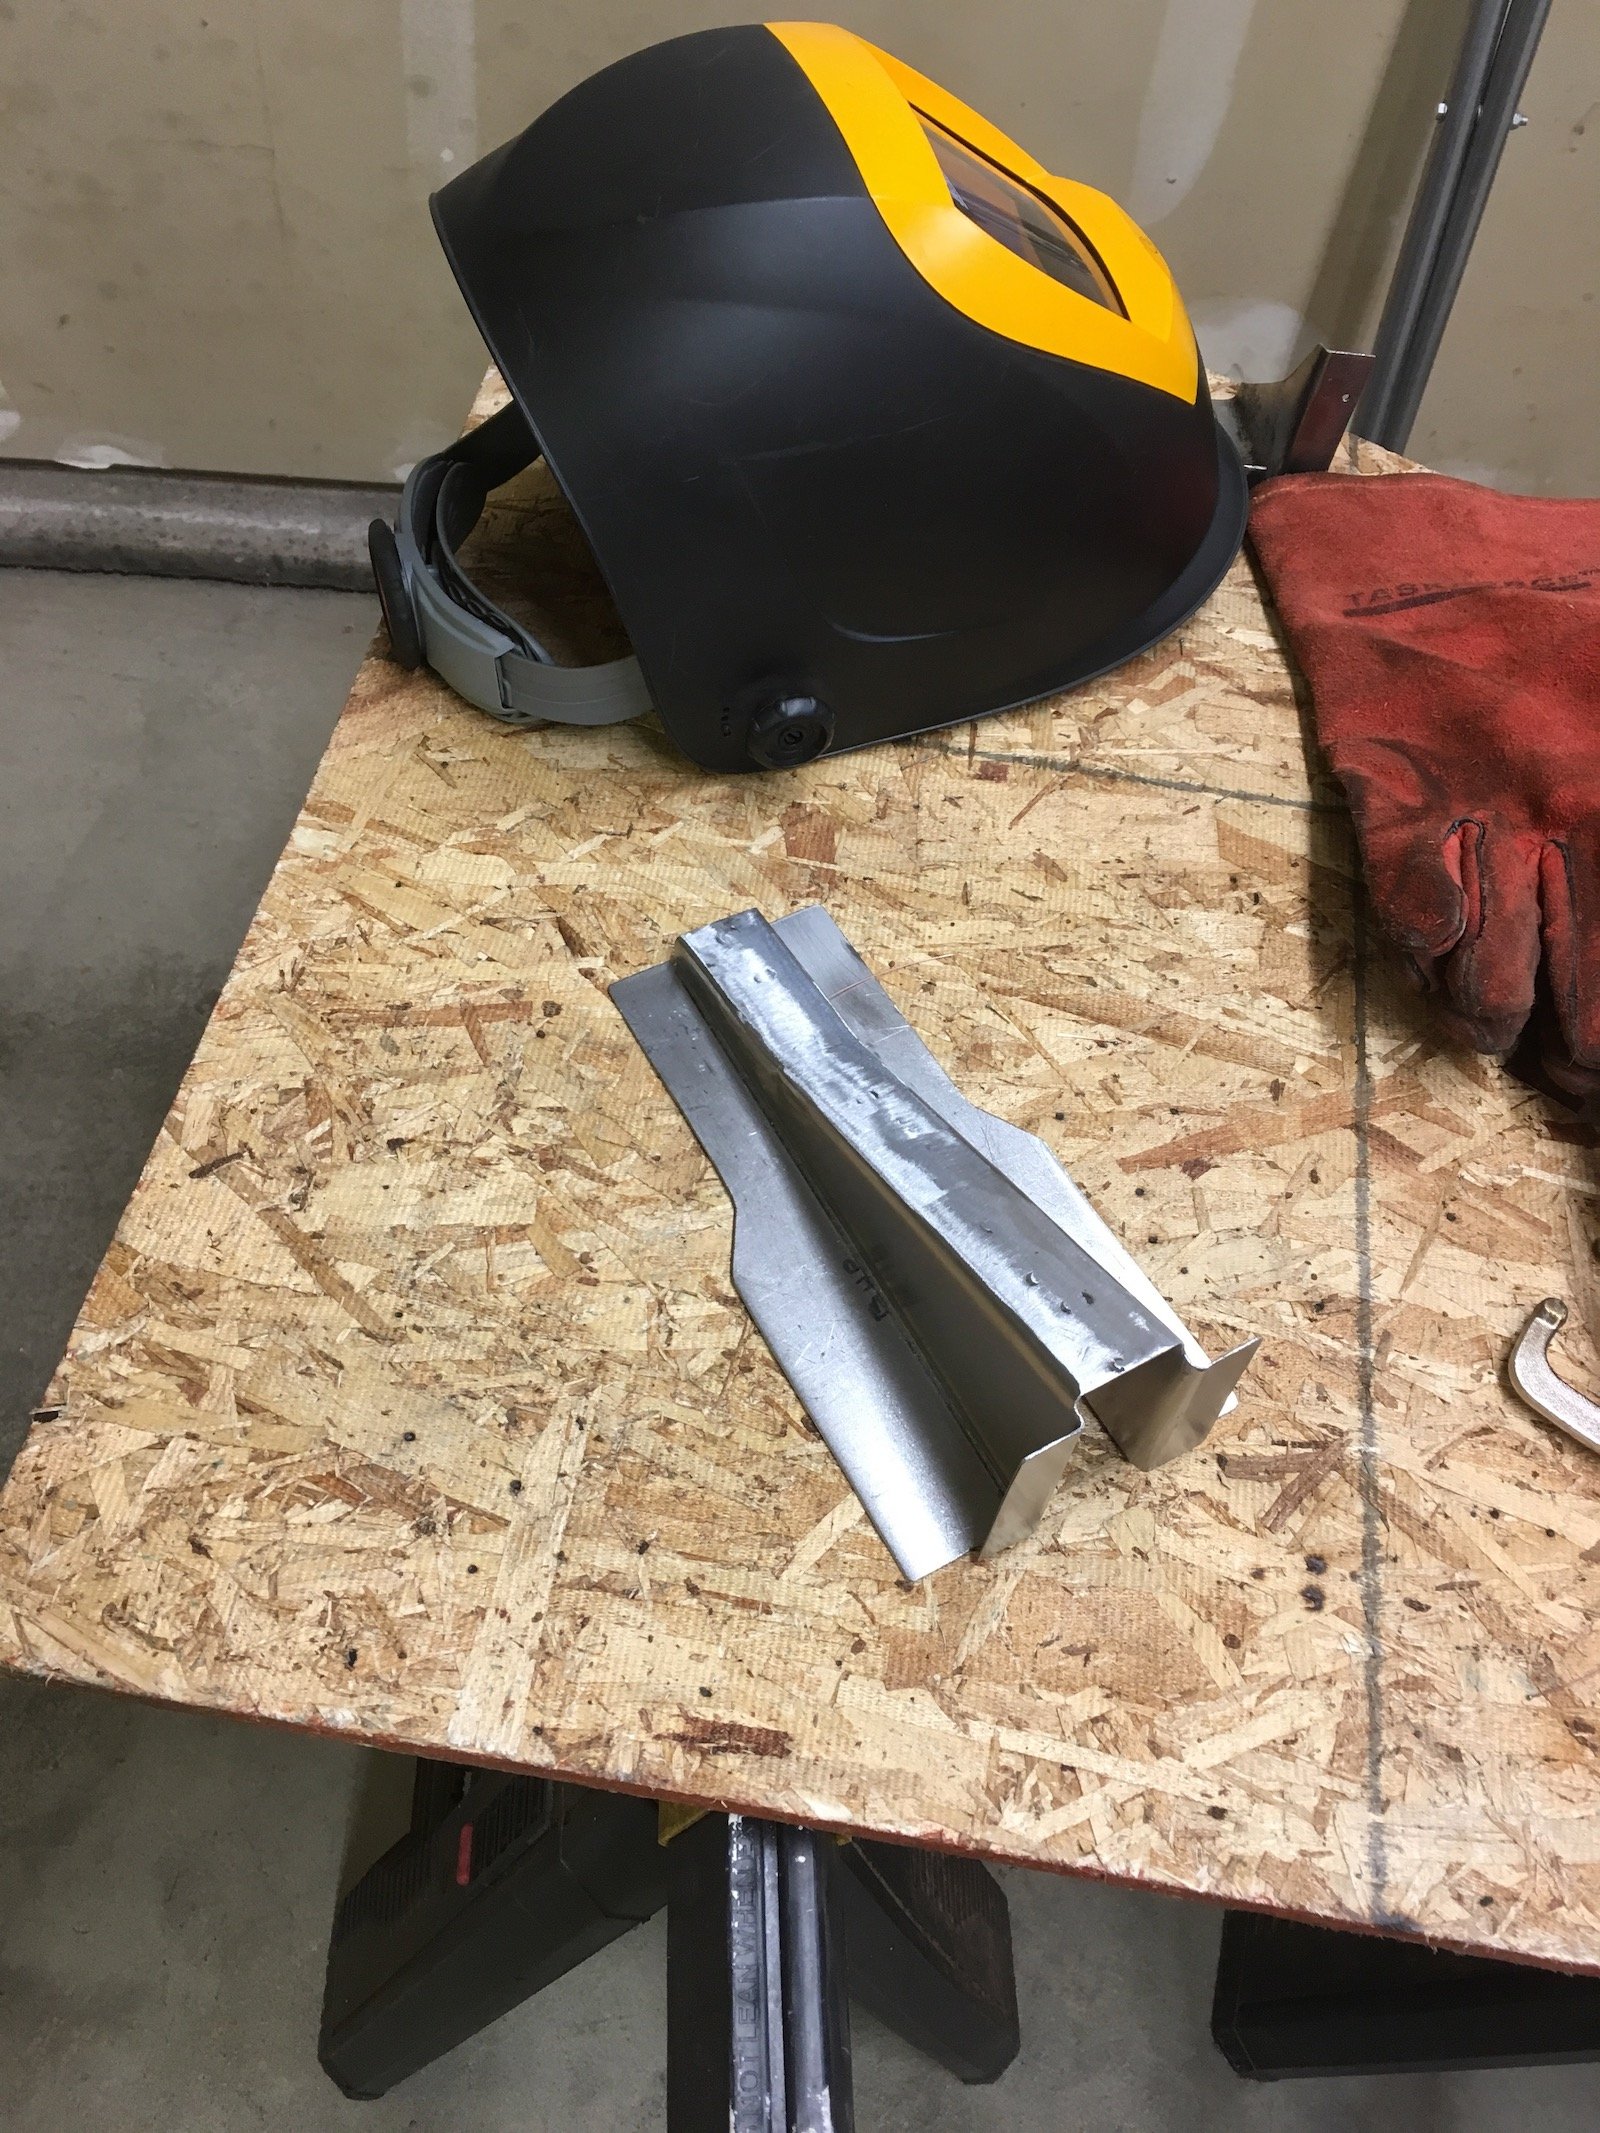
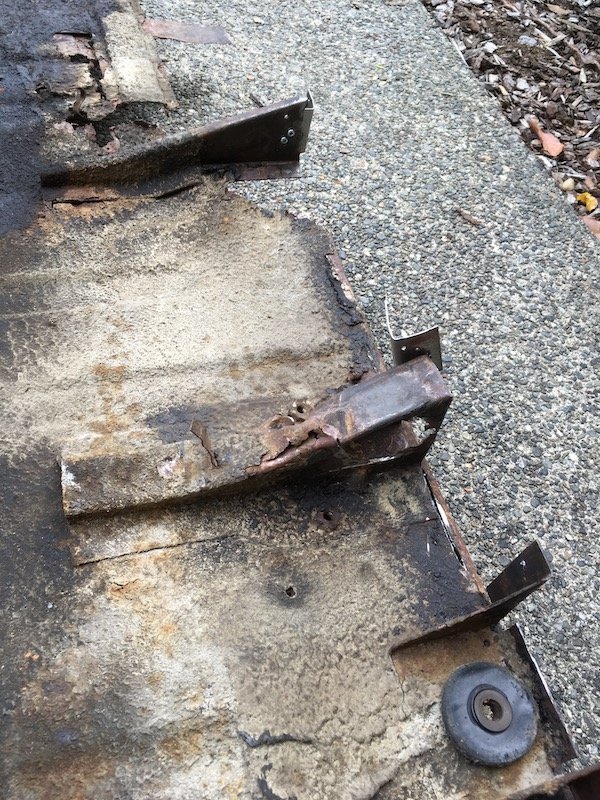
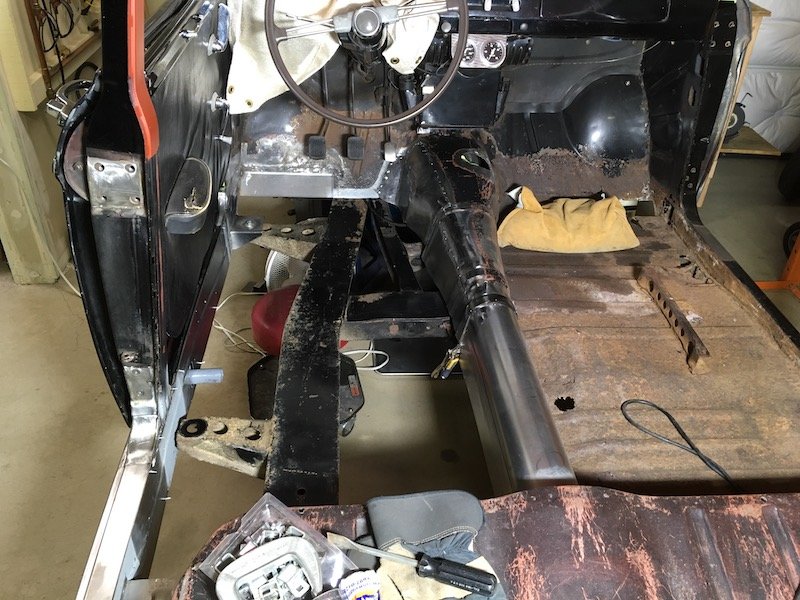
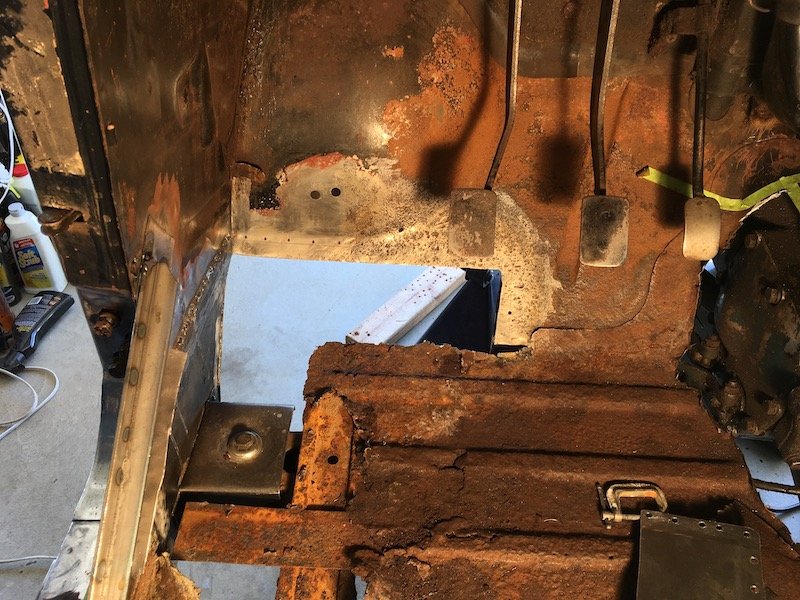
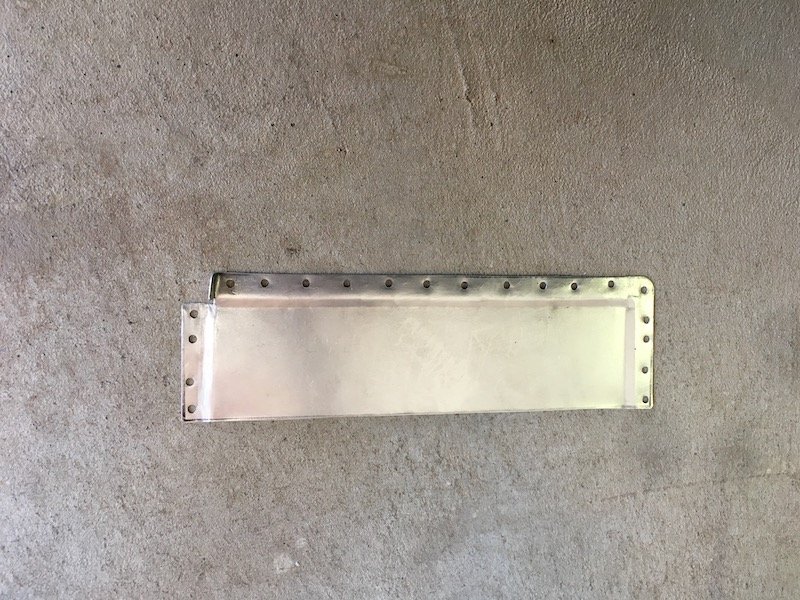
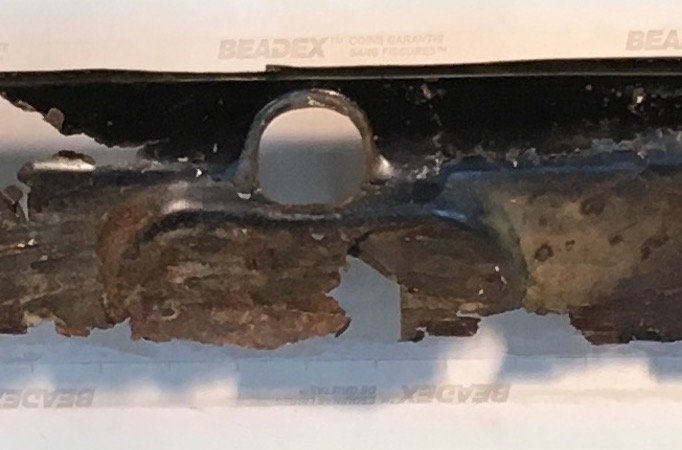
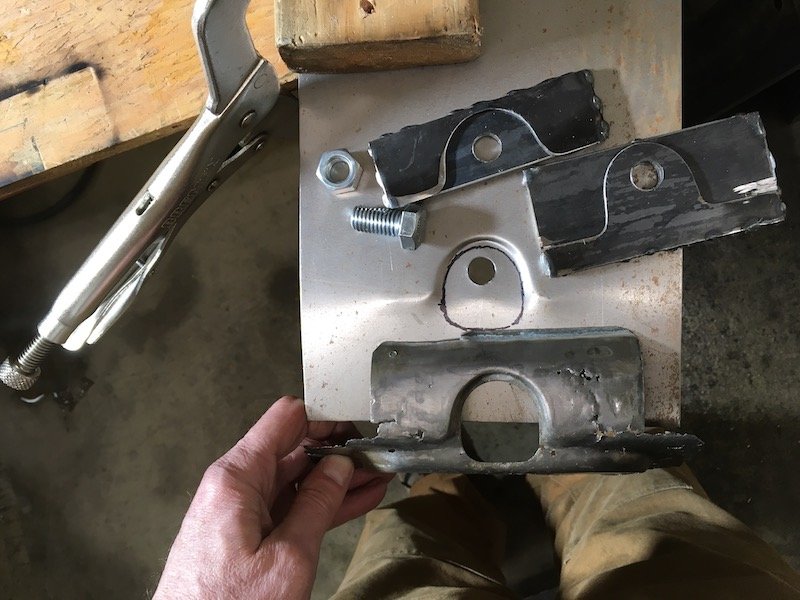
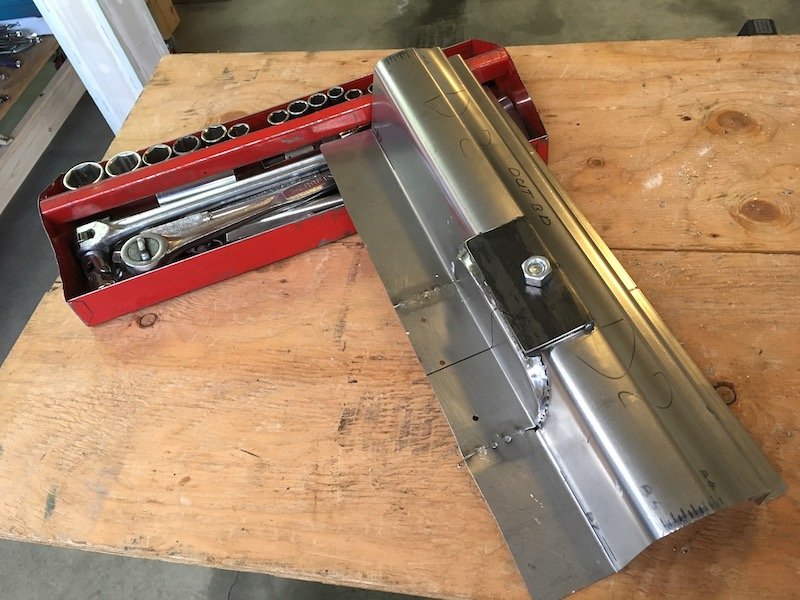
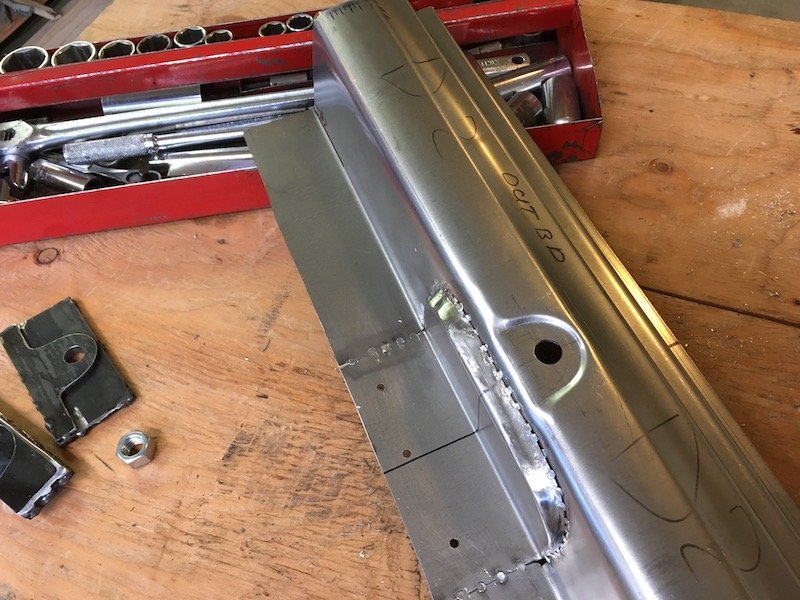
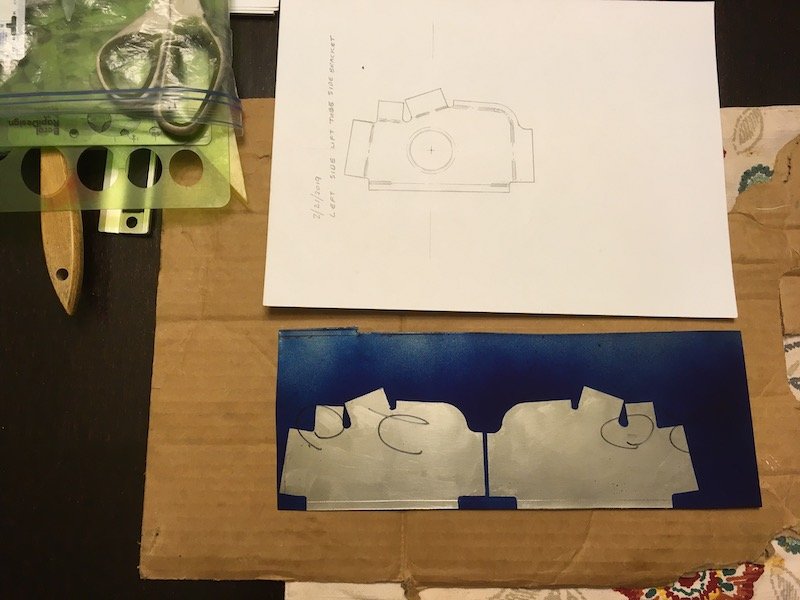
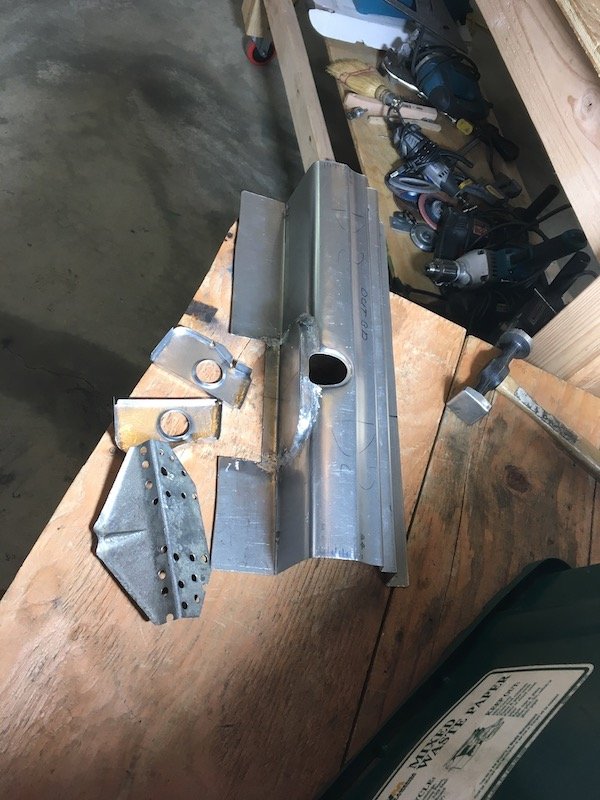
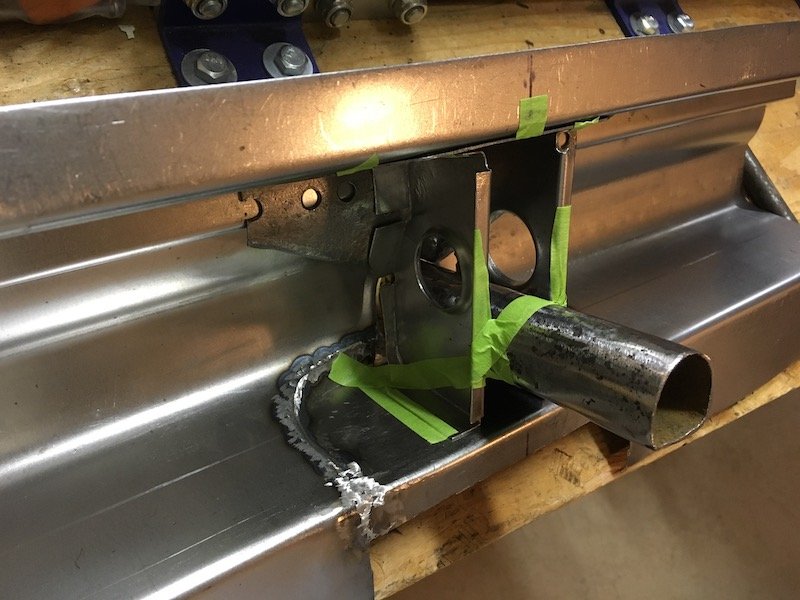
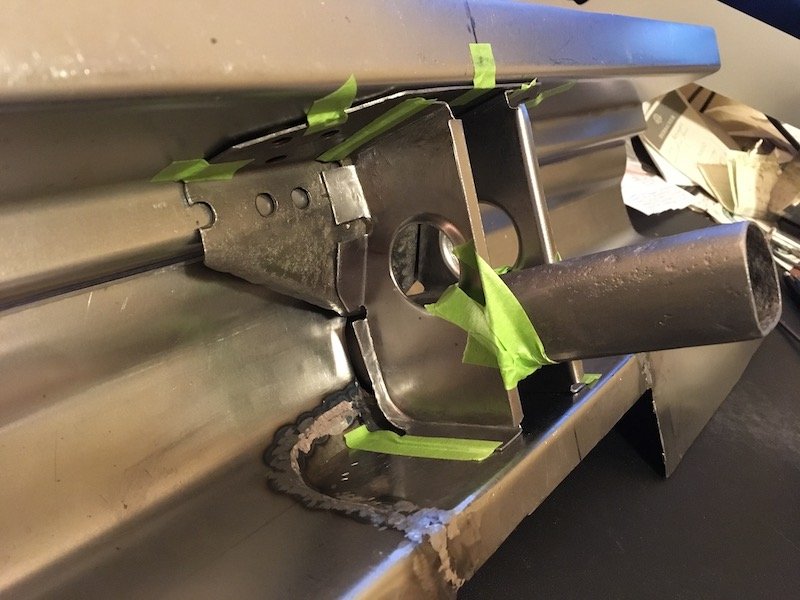
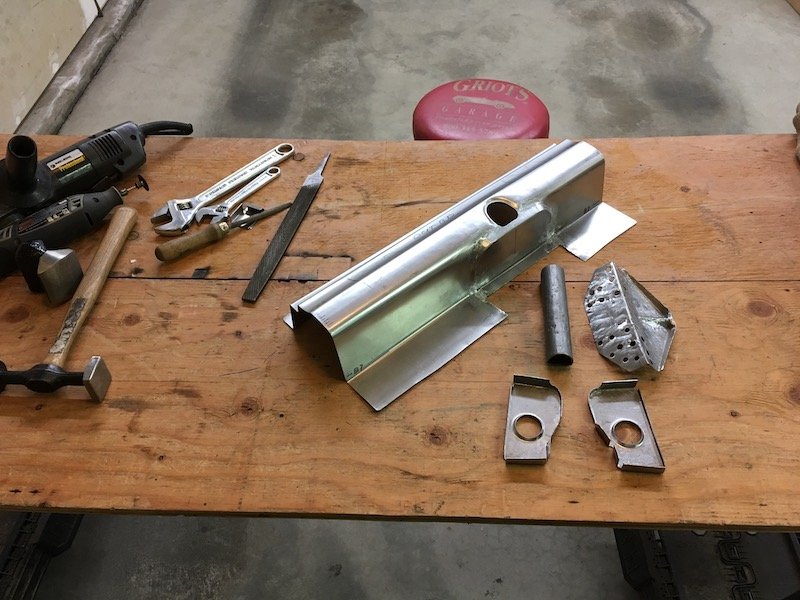
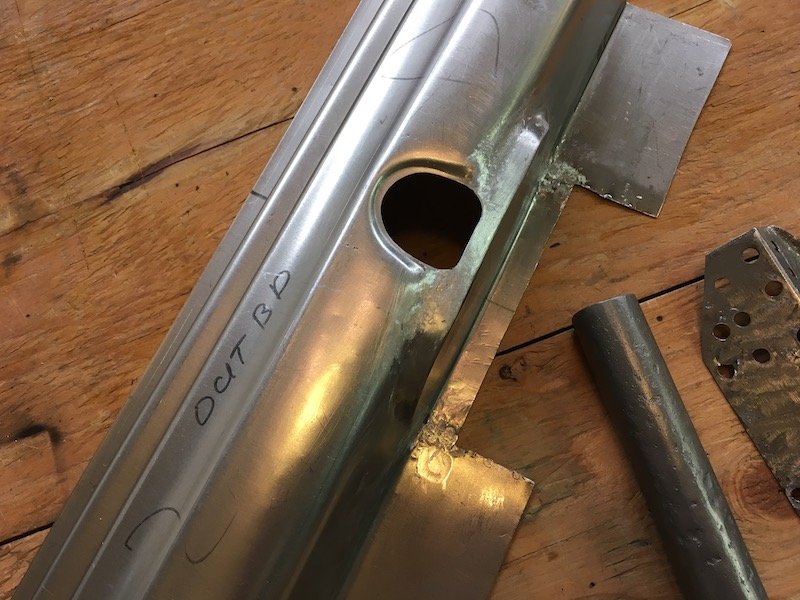
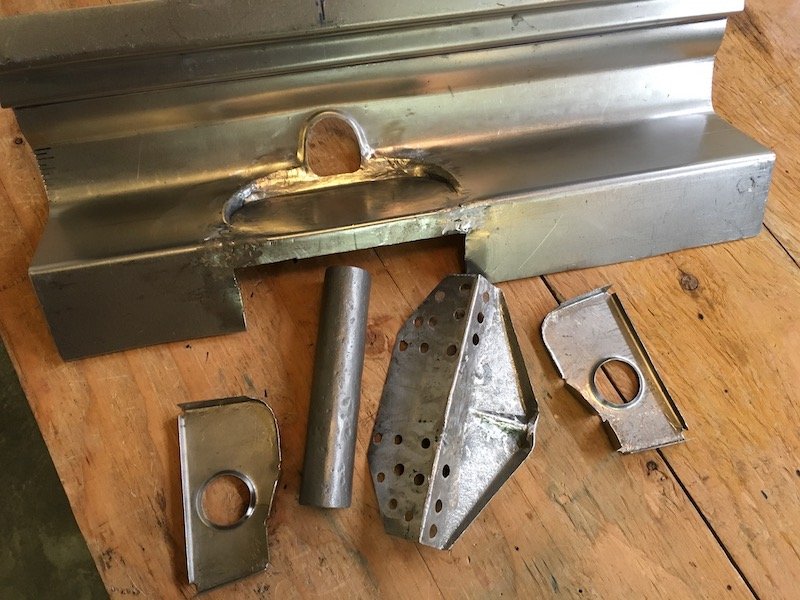
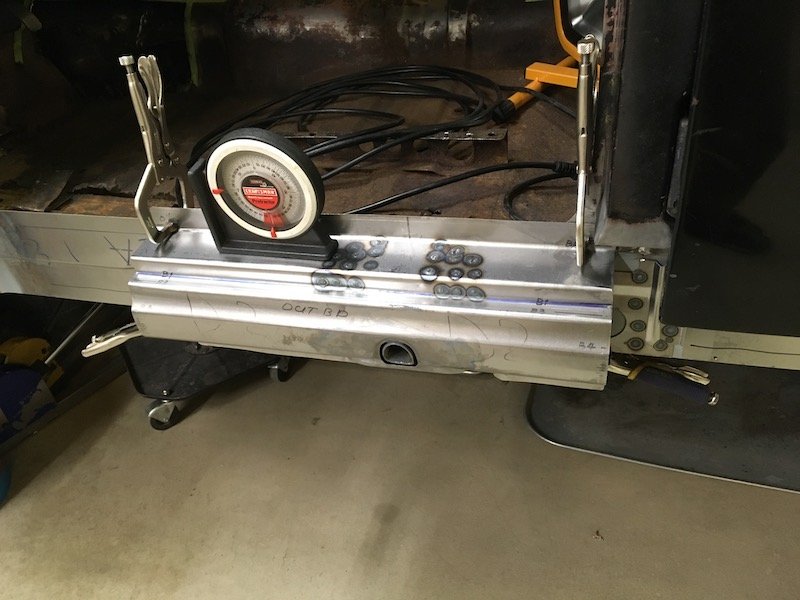
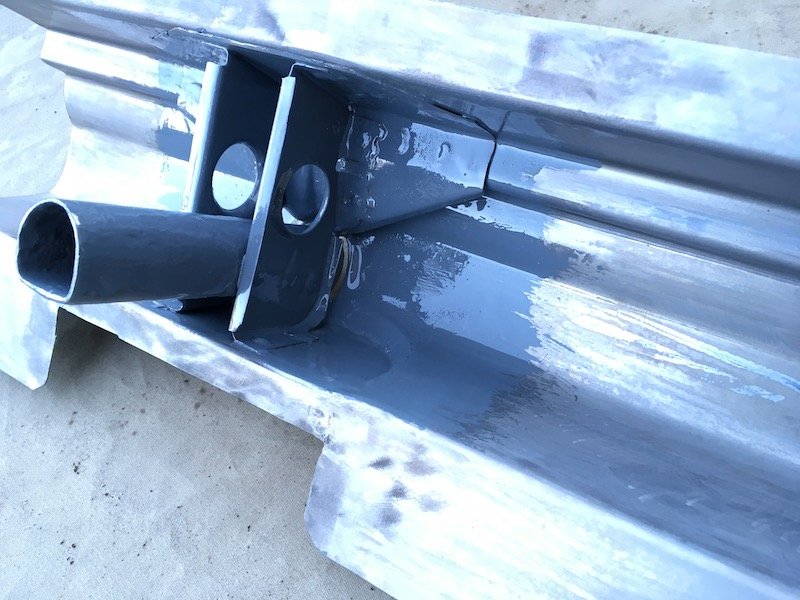
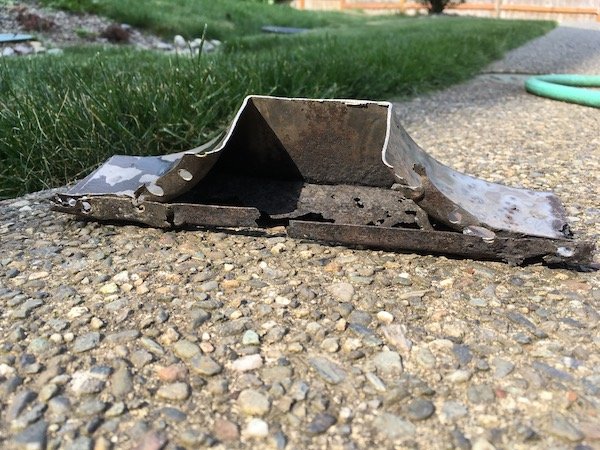
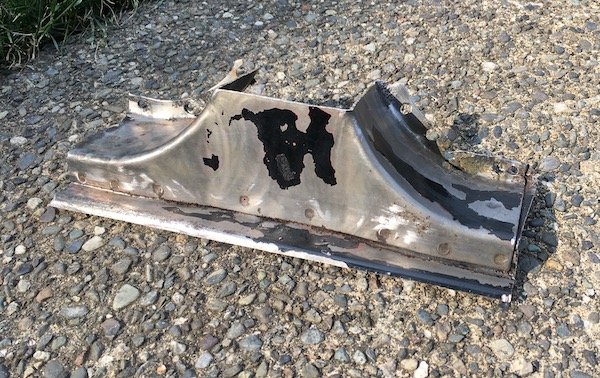
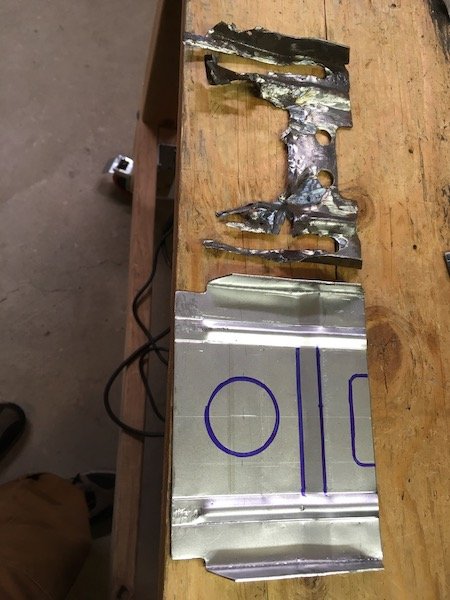
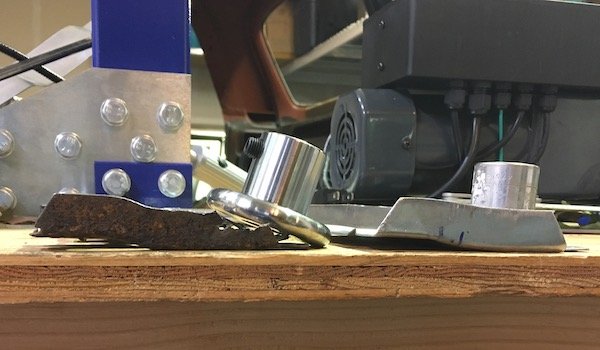
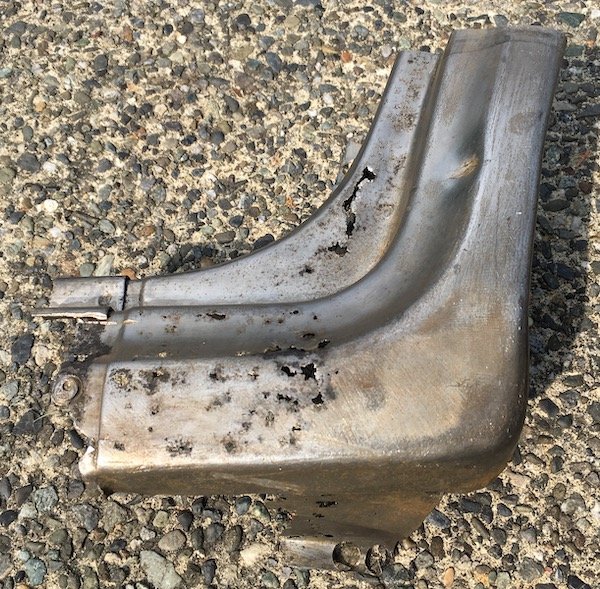
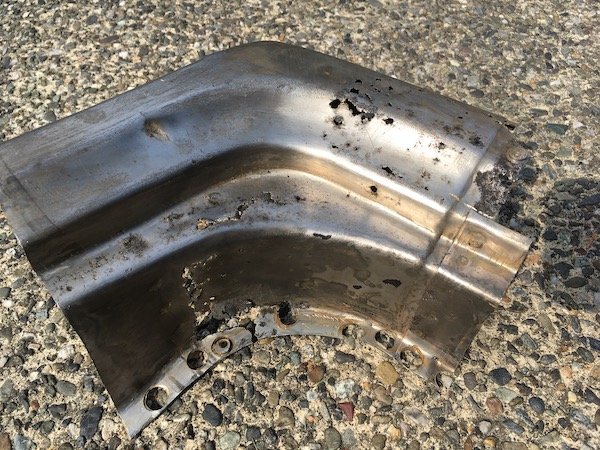
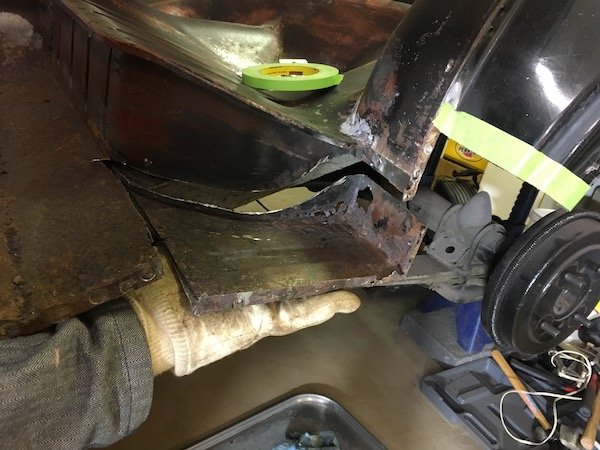
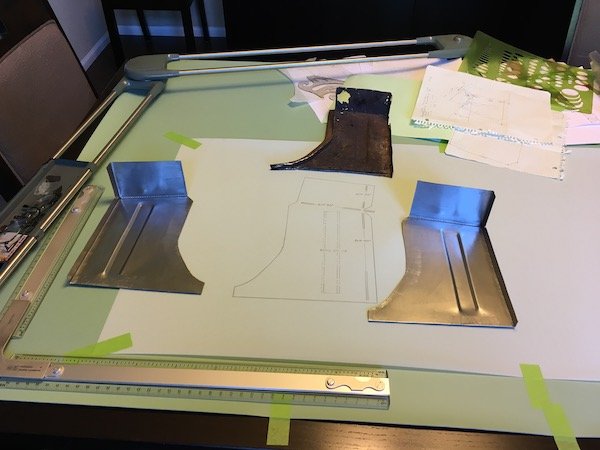
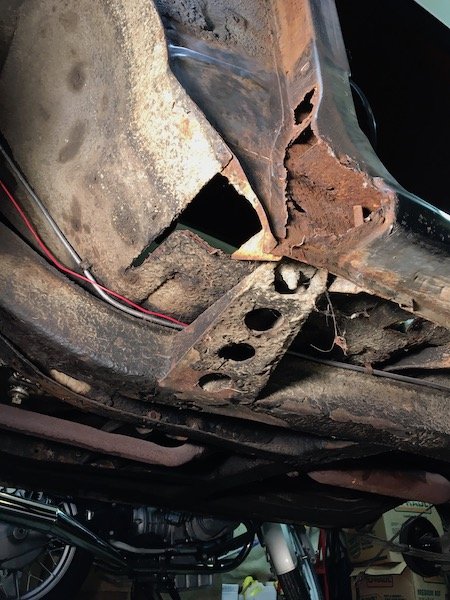
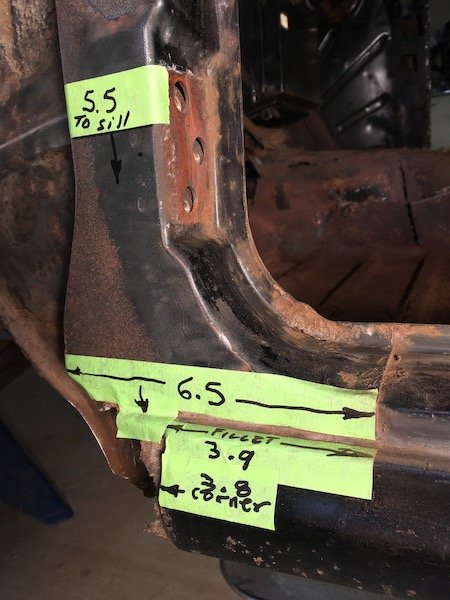
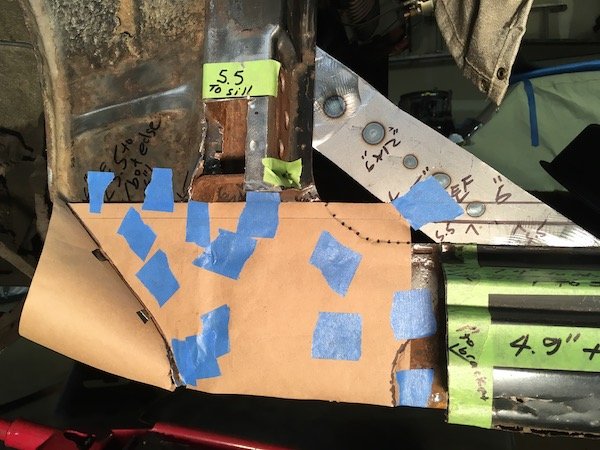
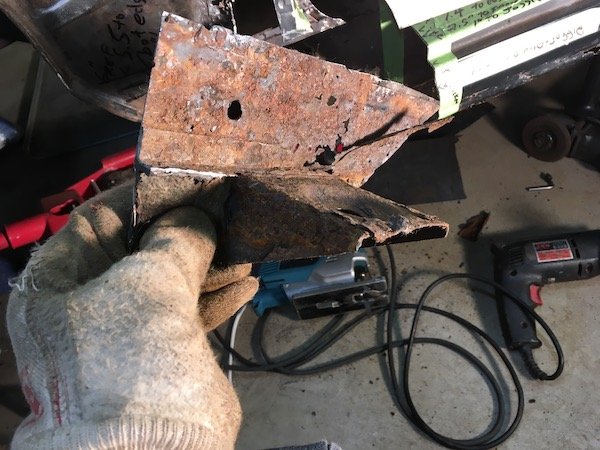
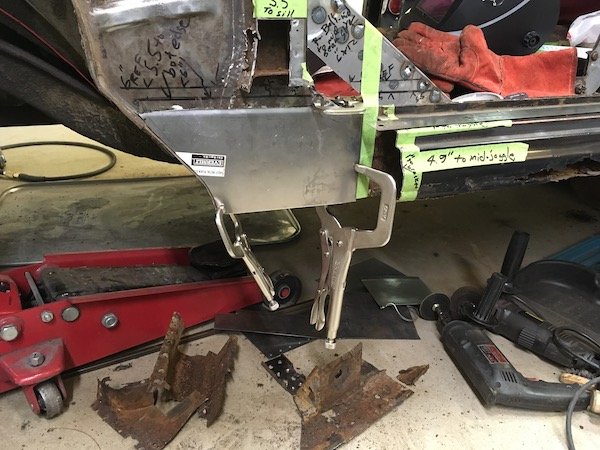
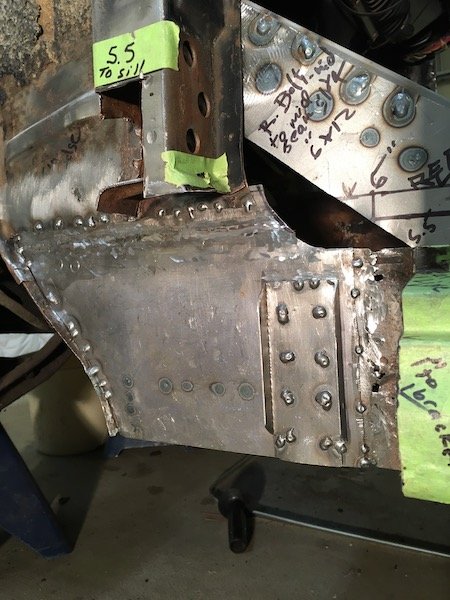
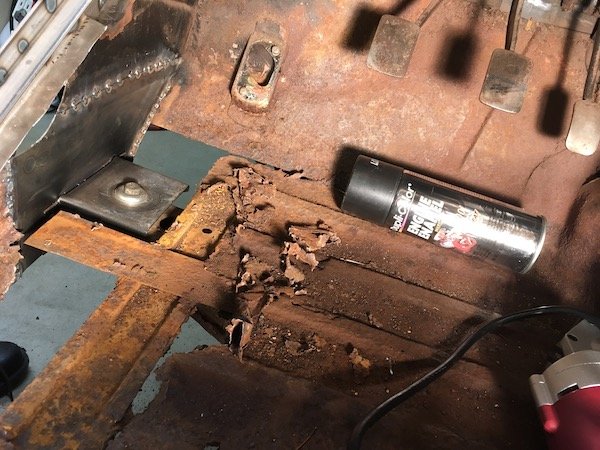
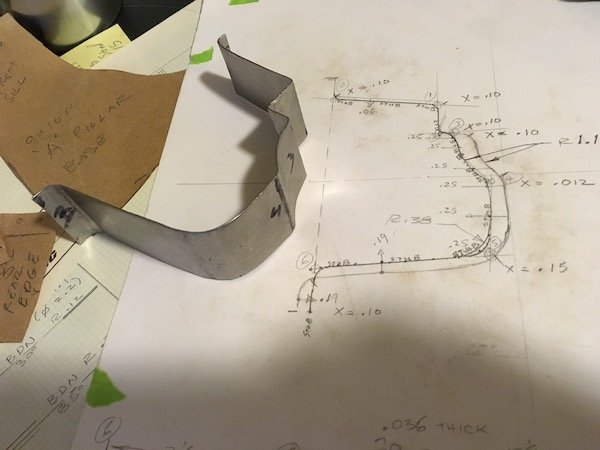
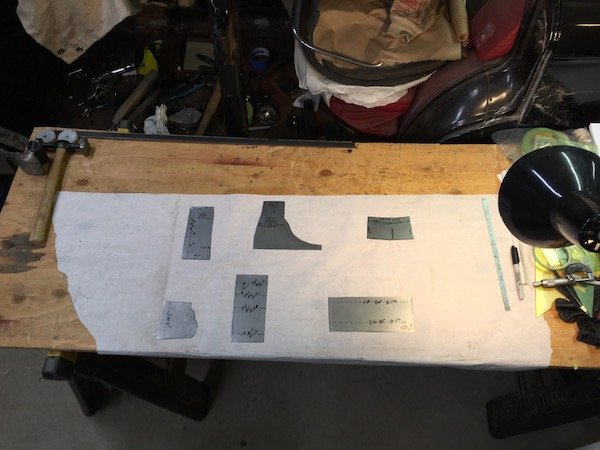
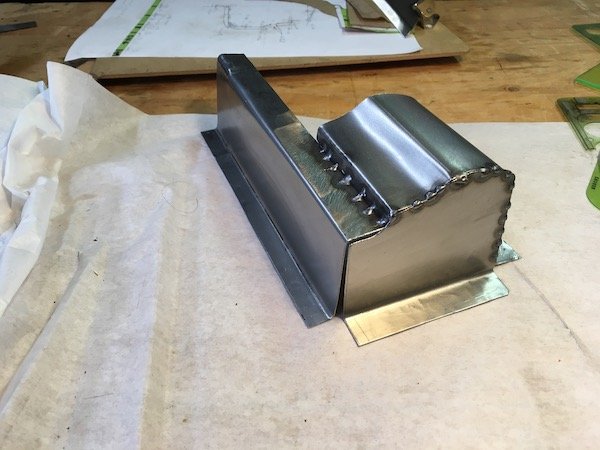
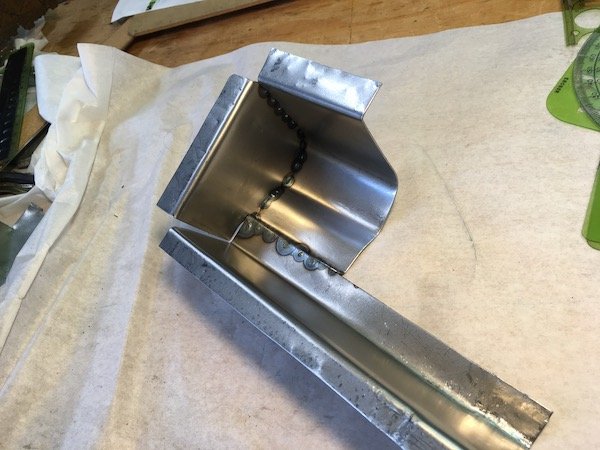
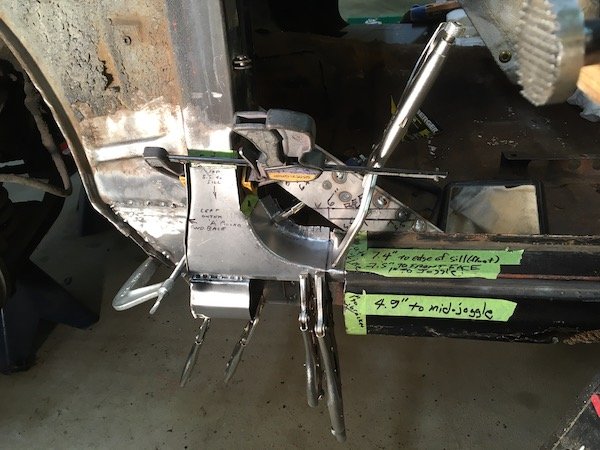
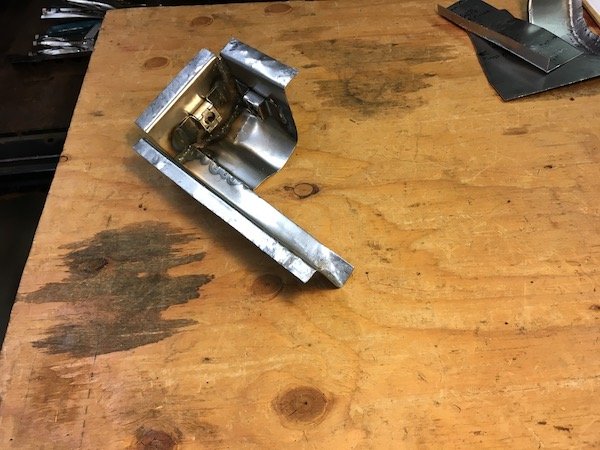
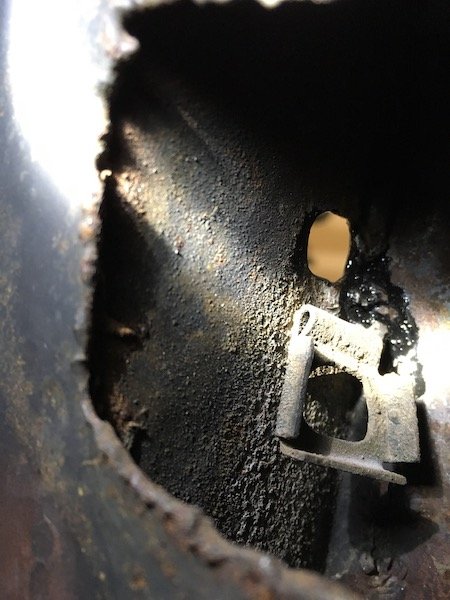
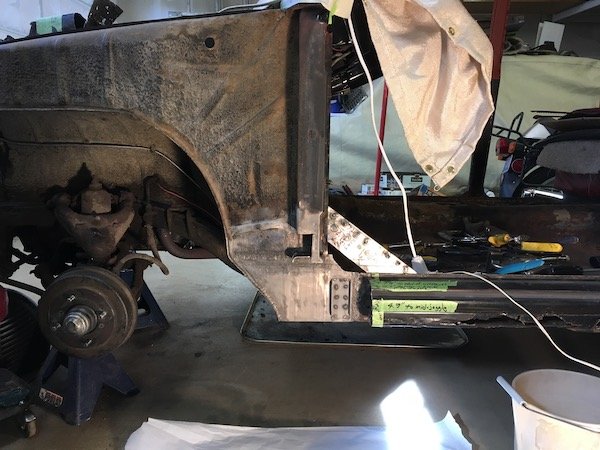
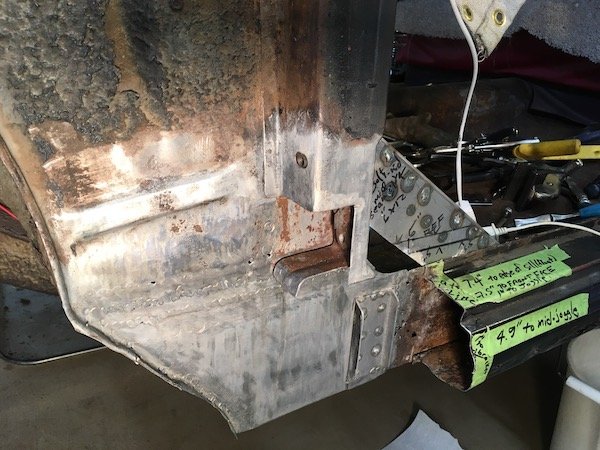
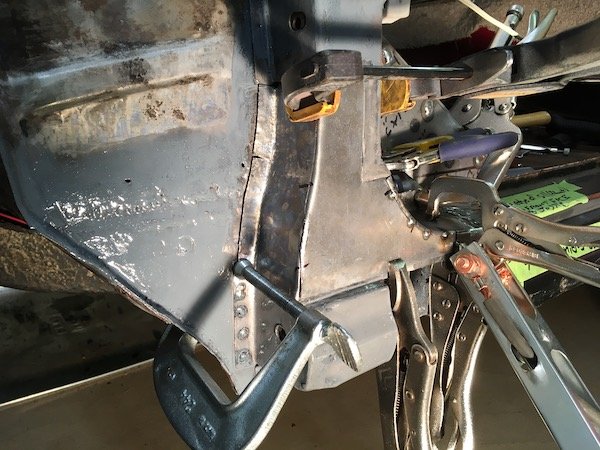
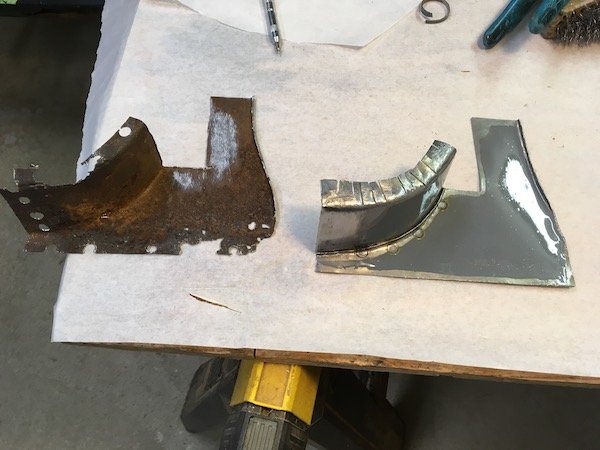
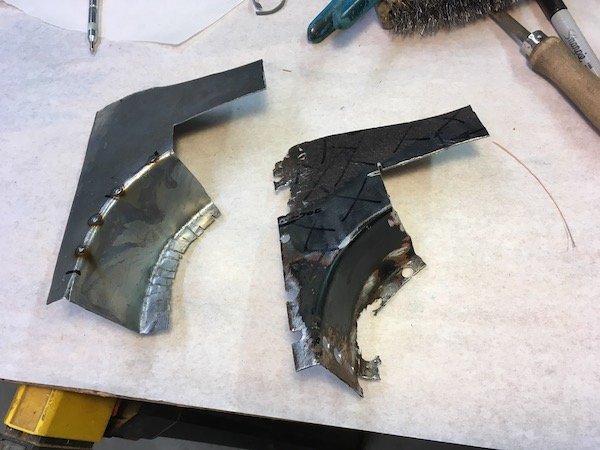
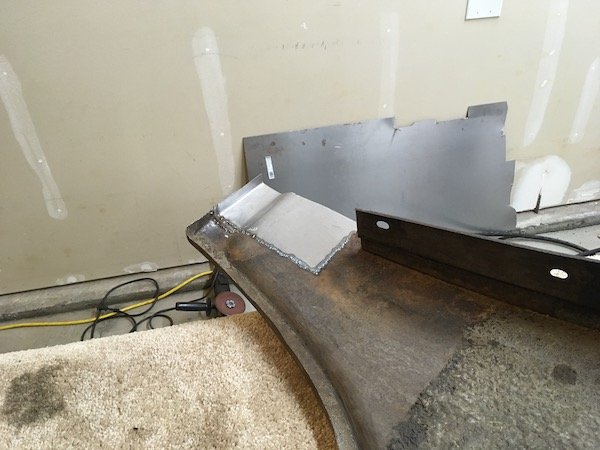
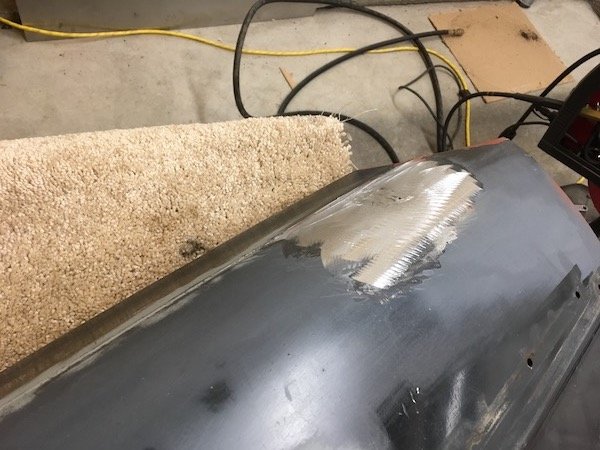
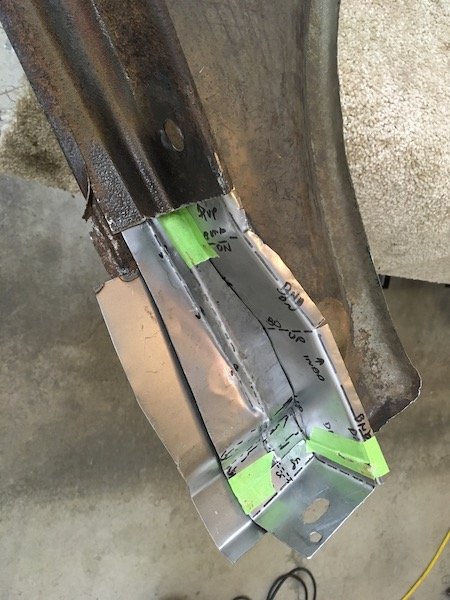
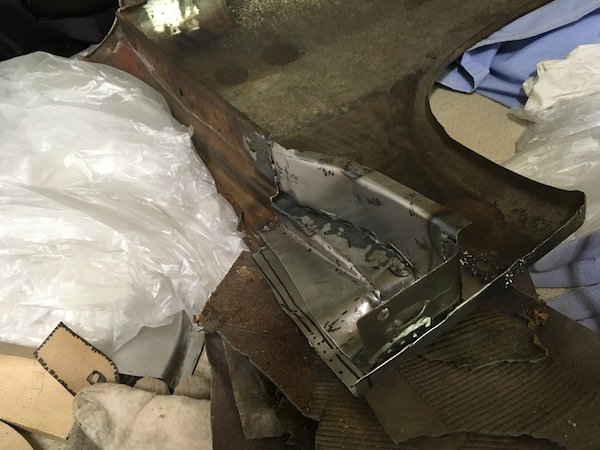
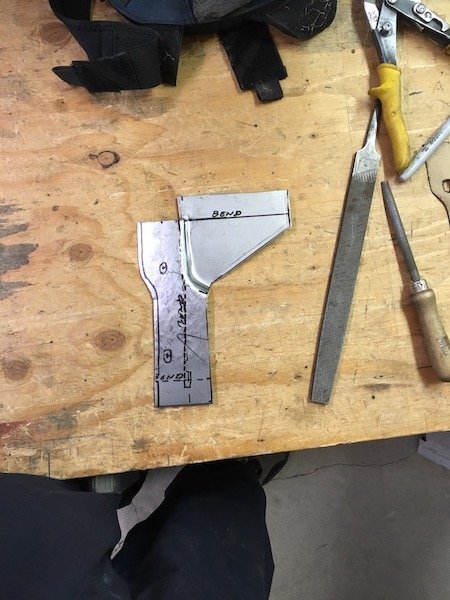
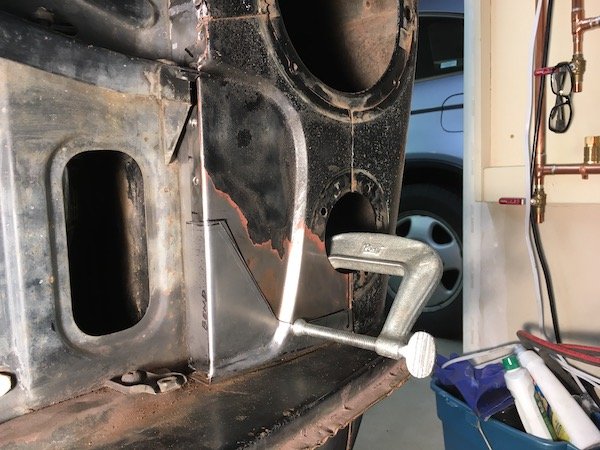
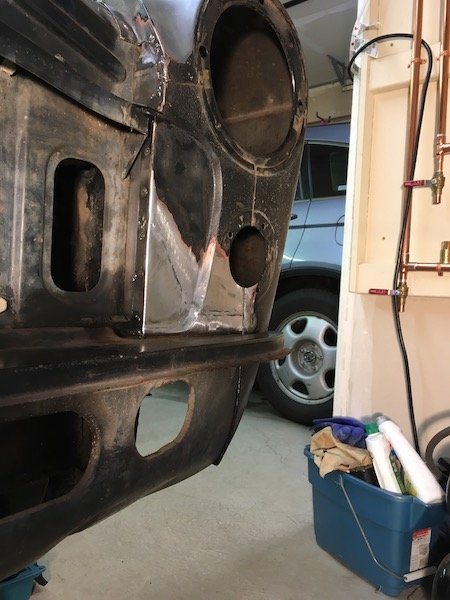
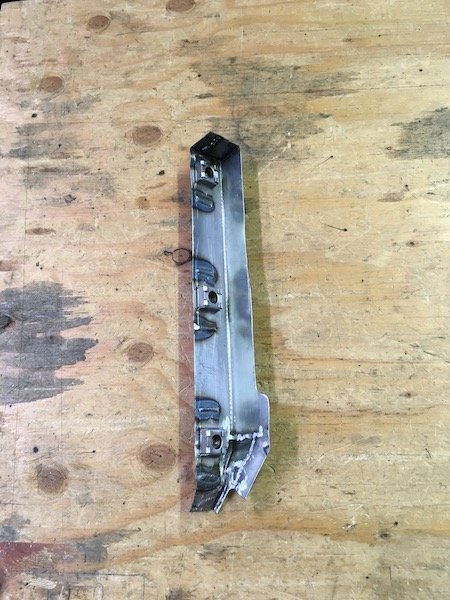
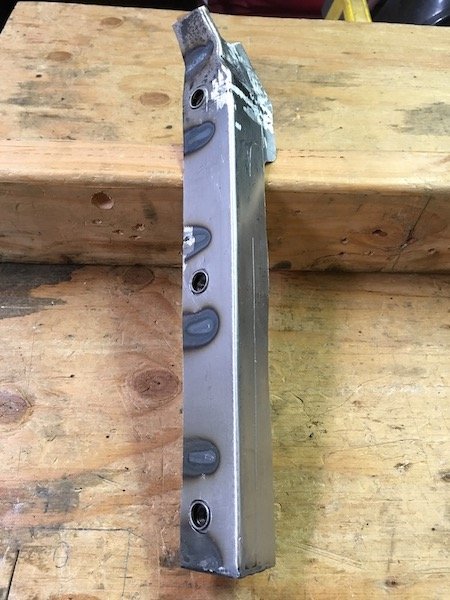
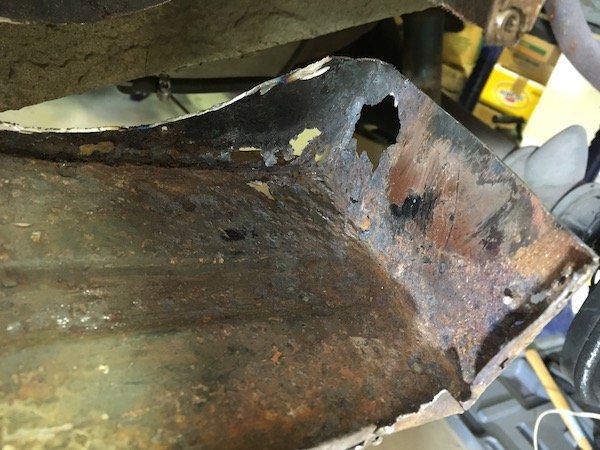
Building the 1961 Datsun 310 Bluebird Floorpan - Details. I have a large number of photos and so I'll split this update into several posts to minimize any load delay. Picking up the story from mid-August 2019, beginning with making underfloor bracket replacements. The first of two bracket replacements, all the others were salvaged from the existing floor. This first bracket is simple, but I had destroyed the original by cutting off the flange that attaches it to the inner sill. I just sketched up the right side bracket while laying under the car. Left floor bracket has the flanges bent in the opposite direction from the sketch. The second bracket that needed replacing. The underfloor support, inner attach for the lift jack pipe and parking brake lever attachment. It appears to have been destroyed by road debris that was run over by a previous owner. My guess is piece of rebar hit at 60 mph by the front tire that was kicked up and pierced the underside. The damage included a hole in the floor and a severely bent steel shaft for the parking brake. I split it in half for measurements since that's that way I'll make a replacement and then weld it into one. It includes minor complications to be duplicated such as the gusset bumps and welded on 5/16 - 24 fine thread square nuts (which are hard to find in 24 pitch thread btw). Made the halves out of 1.5 mil. Initial checks against the inner sill. Making parts and finishing up the welds. Then I welded on the square nuts, fuel line clip and forged the four gussets into the corners with 3/8 inch rod, some heat from a MAP torch, and backed up with angle iron. The hole in the middle is where it will get pinned to the lift jack pipe. Nissan had brazed the original attachment to the pipe sides but that's not practical for me since I'm welding this to the floor first and attaching to the pipe last. The heavy oxidation was later cleaned off with a soaking in muriatic (hydrochloric) acid. Additional posts soon... Discussion:
-
MARTS-PL310 61 Datsun Bluebird Sedan
MARTS-PL310 replied to MARTS-PL310's topic in Project Discussion
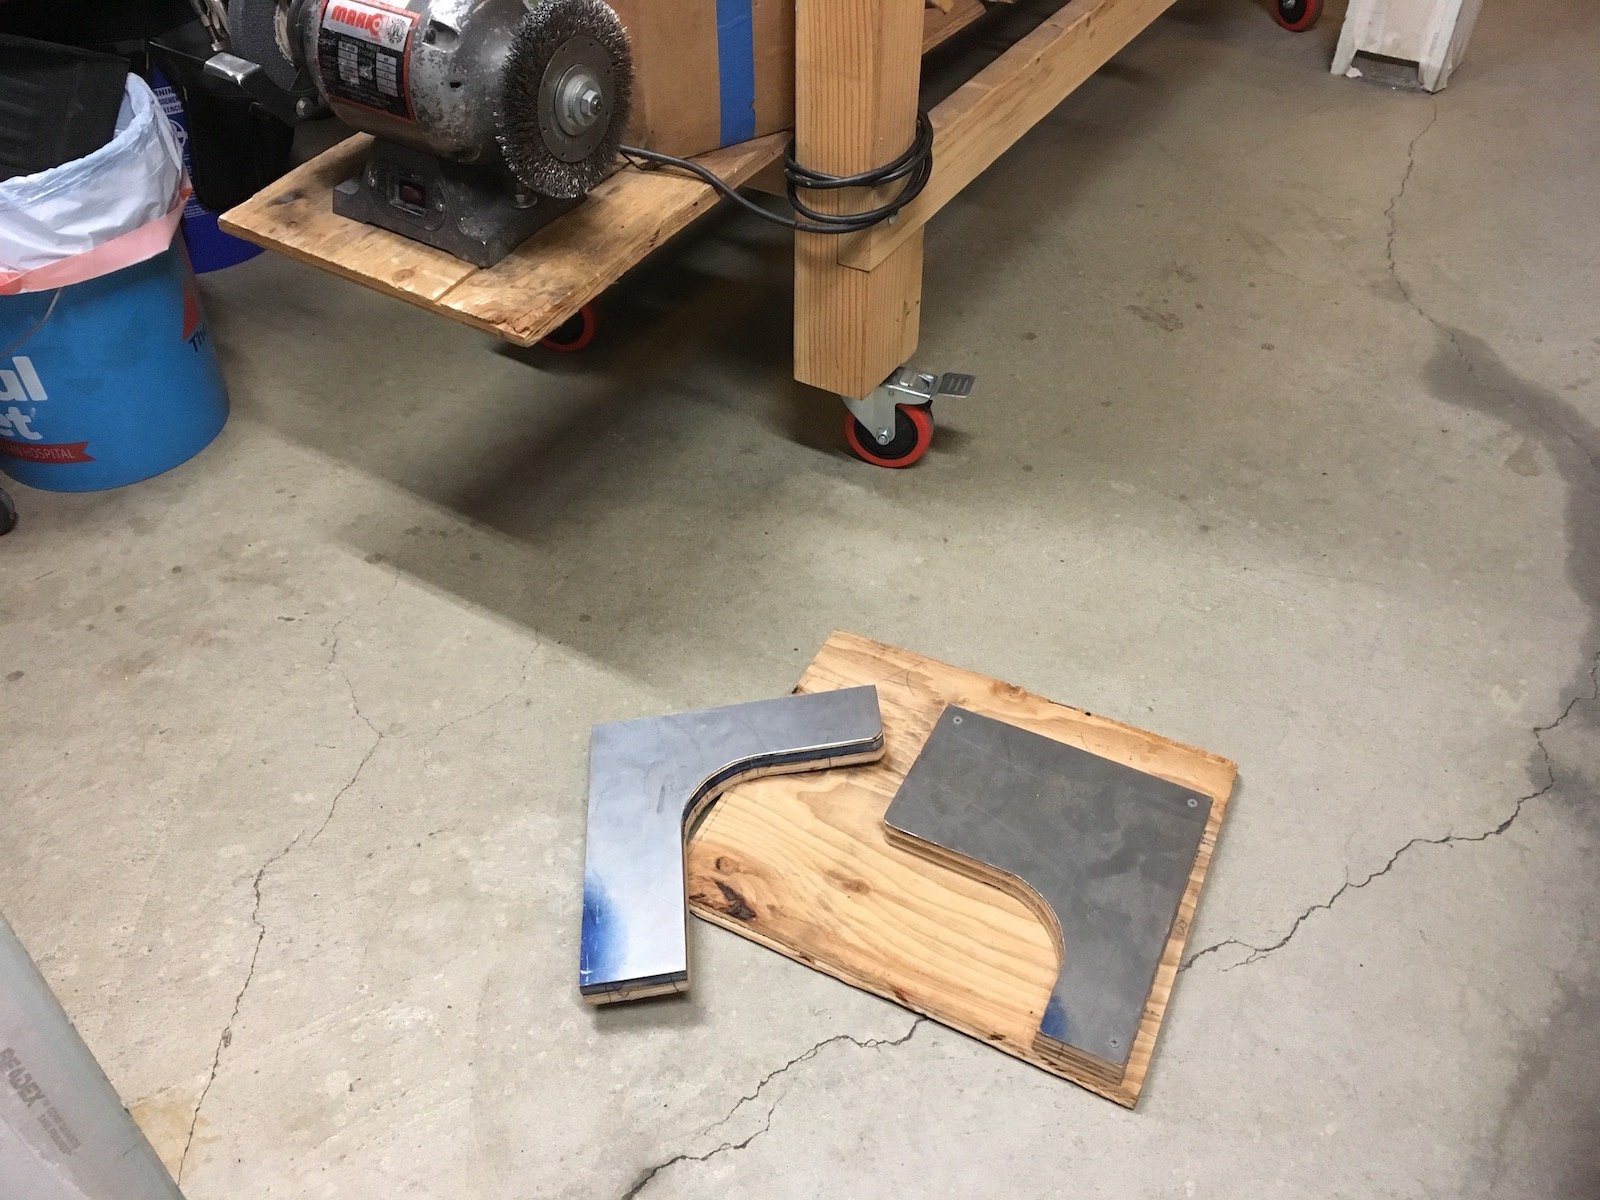
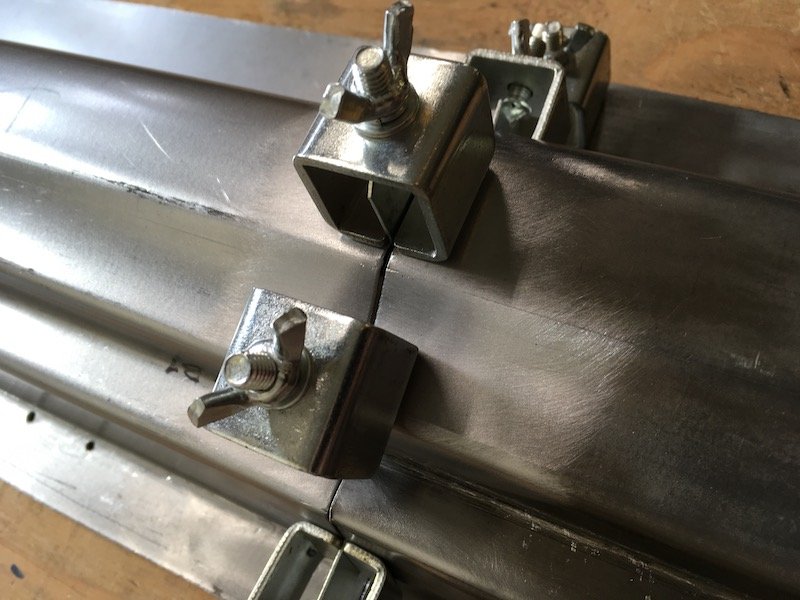
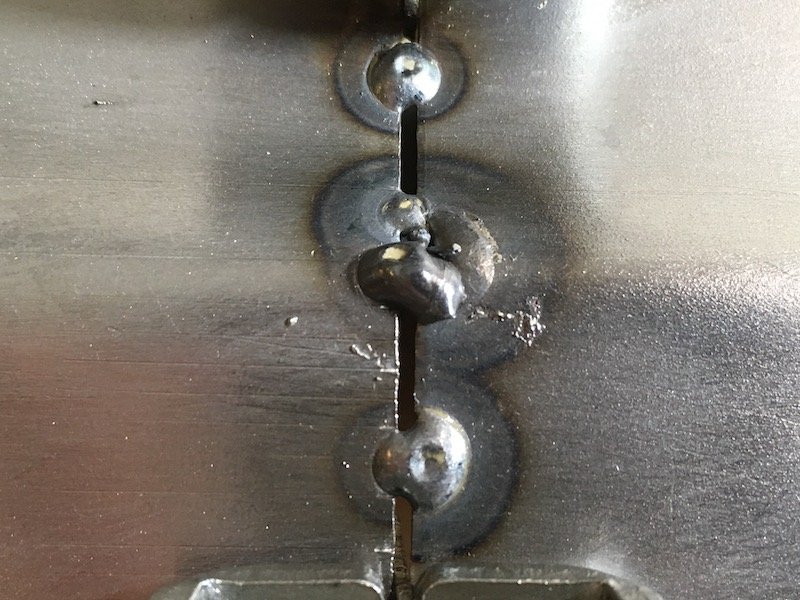
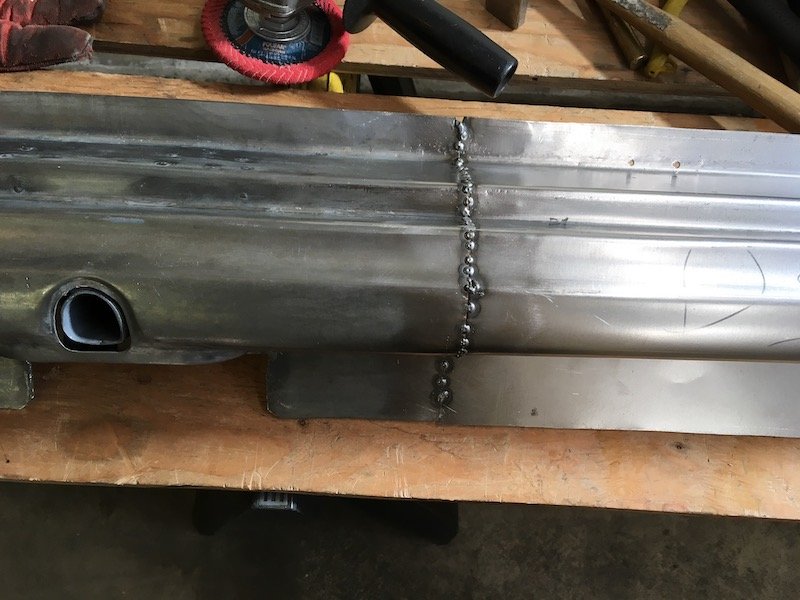
@tortron Thanks for the suggestion. I've been working on dies intermittently last couple of weeks. So far made something like this. Only part way there. Need to figure out a way to guide them together during the form operation and prevent lateral spread. More on the dies later, I've been slowed down somewhat by making a bunch of replacement underfloor supporting brackets out of heavy 16 and 18 gauge sheet. One example. Two separate bent up pieces. Then butt welded down the middle
-
MARTS-PL310 61 Datsun Bluebird Sedan
MARTS-PL310 replied to MARTS-PL310's topic in Projects and Build Ups
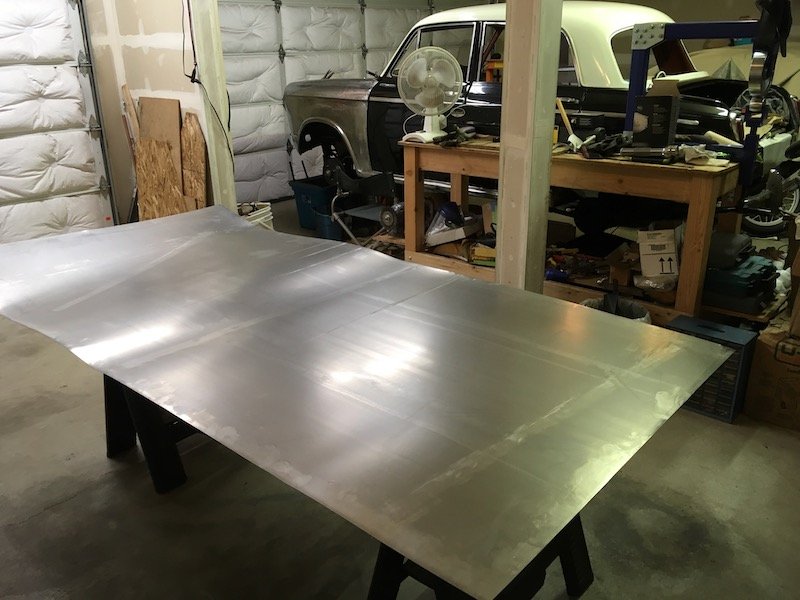
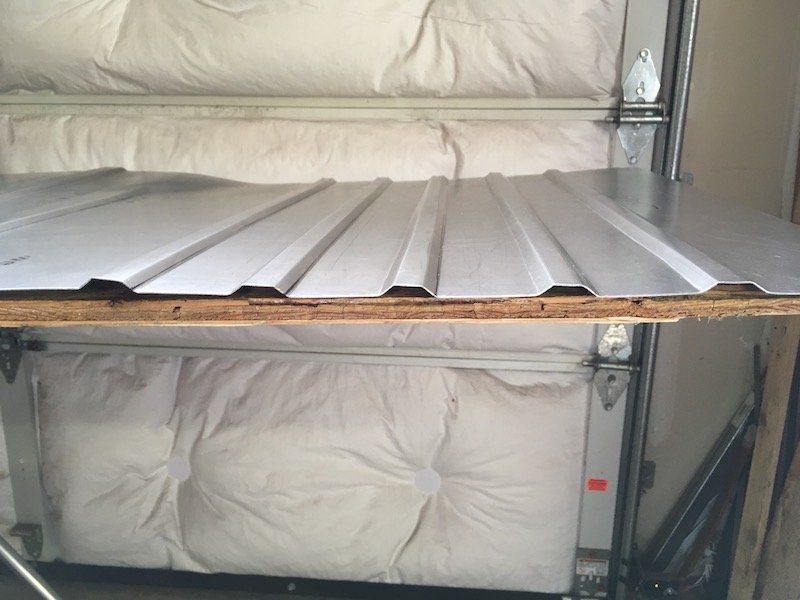
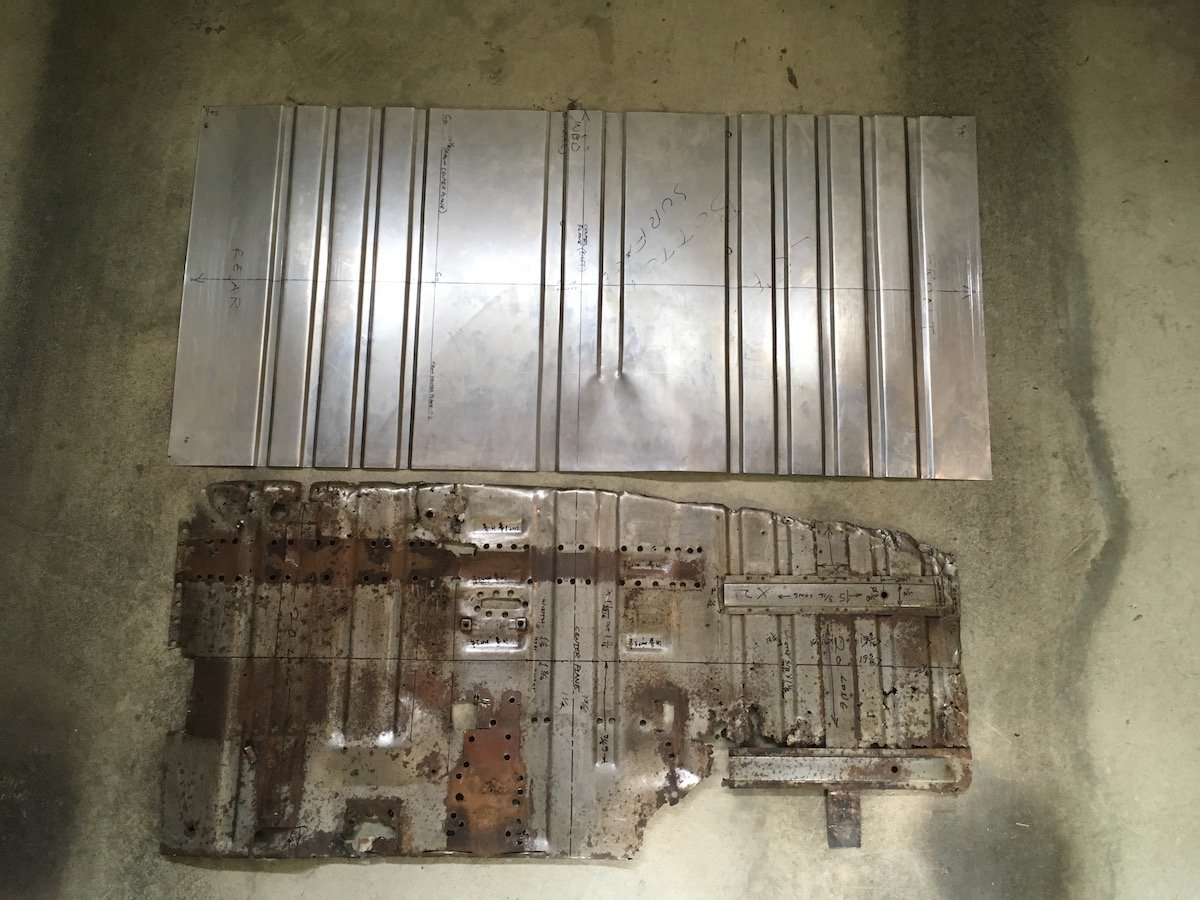
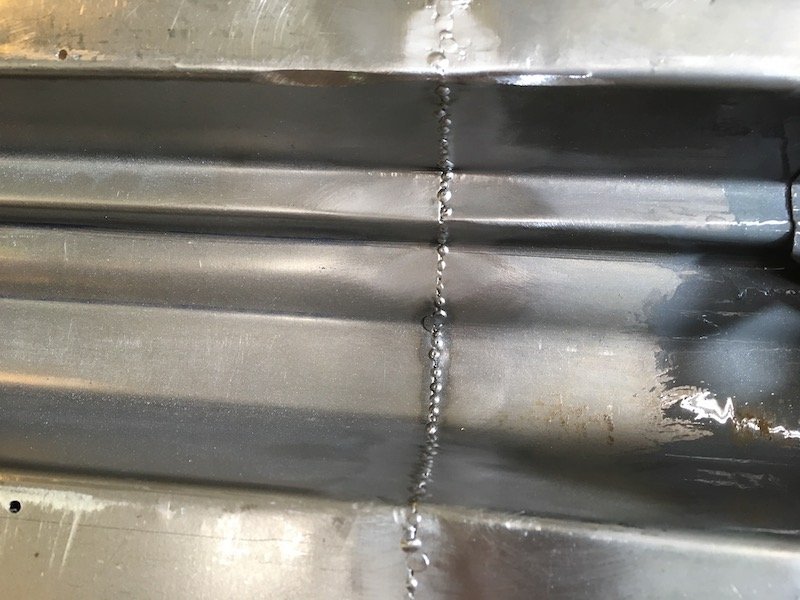
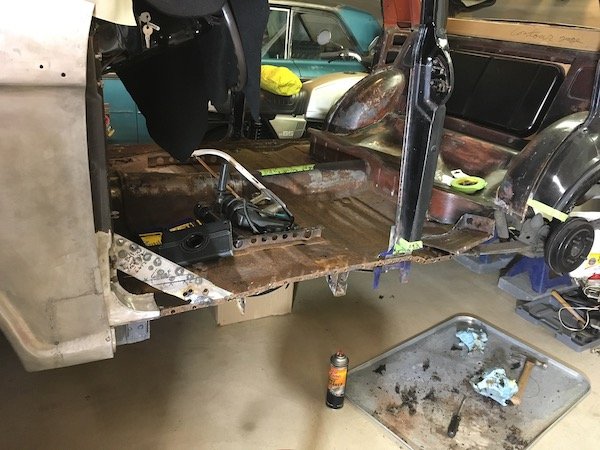
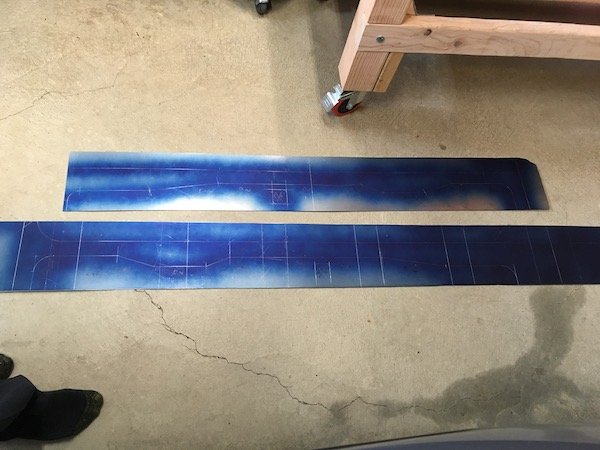
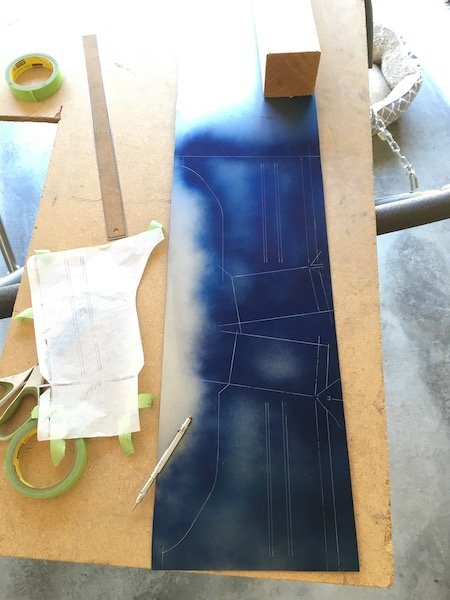
Back to work on reproducing the '61 310 Bluebird left side floor pan. First, I drilled out the spot welds to all the bits I wanted off the original floor. Top side Bottom side My collection of saved and de-rusted parts; including the seat bracket, longitudinal stiffener structure, hand brake reveal, B-pillar body mount bracket, and a couple of other brackets that are too far gone but get in the way. Bought some more steel sheet. Four foot by eight. I cut out a 26 by 56 inch blank and made some corrugated steel with a bead roller Scraped most of the under seal off the old floor pan bottom surface, did some measurements and began duplicating what was left. The bottom surface was more useful for measuring since it was much less rusty than topside. I'm leaving an extra inch or more all around to accommodate fit and trim later. Side-by-side compare Now I have to figure out a way to form some of the 3D shapes around the where the B-pillar body mount goes and the shallow depression under the hand brake lever. Hammer form over a wooden buck? Or form separate parts, cut the floor and weld in? Still have lots of work to do. Discussion: https://oldschool.co.nz/index.php?/topic/60267-marts-pl310-61-datsun-bluebird-sedan/
- 74 replies
-
- 21
-

-

-
MARTS-PL310 61 Datsun Bluebird Sedan
MARTS-PL310 replied to MARTS-PL310's topic in Projects and Build Ups
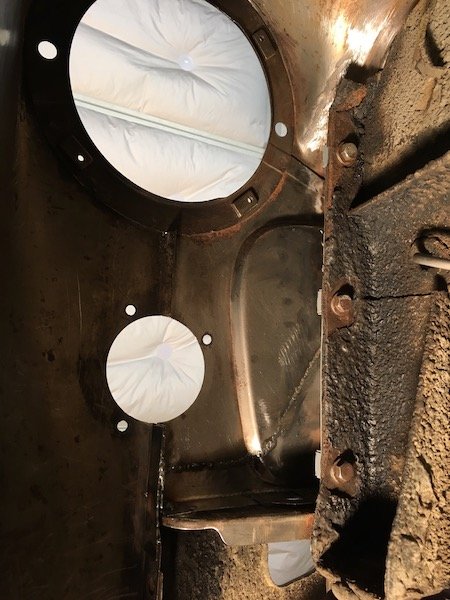
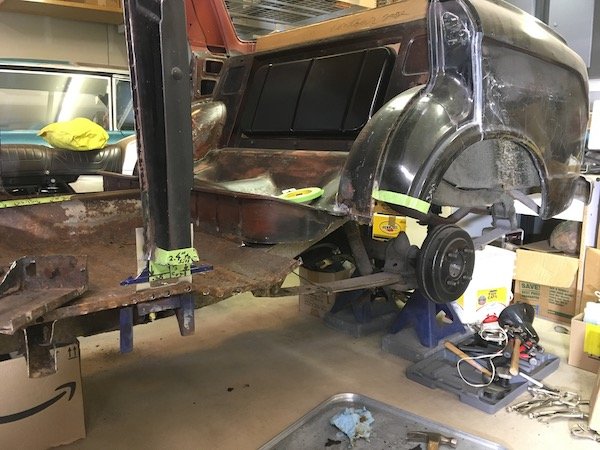
A tale of two Bluebird transmissions. Had to take the trans out to continue and detail the tunnel weld work. I suppose I couldn't wait months to post something else. The all synchro side loader coming out. It was wedged against the firewall and momentarily stuck until I tilted the engine some more. The all synchro 312, 311 Bluebird side loader trans. It's a beast. Longer, wider and heavier than original 310 top loader trans. Side-by-side trans compare. 310 Bluebird top loader on left and 312 & 311 Bluebird side loader on right. The 310 trans uses a carbon hockey puck release bearing whereas the 312, 311 trans uses a rolling element bearing type. Sure wish I could find a verified source for otherwise unobtainable replacement parts for these two trans. Top loader needs a new 2-3 shift fork (completely worn out), input shaft for 2-3 (sheared off) and external lever arm for 2-3 (lost). Otherwise, as a last resort, I could get them made with expensive machine shop fabrication. I believe the side loader is is going to need a 2-3 shift fork soon as well since it does not always stay fully engaged in 3rd (high) gear on rare occasions. I actually prefer to use the top loader with its non synchro first gear as it is the much slicker shifting and shorter lever throw trans. Without repair parts though, it's not going back in anytime soon. As the situation stands, I'll reinstall the side loader after completing the tunnel underside details including epoxy primer. Discussion: https://oldschool.co.nz/index.php?/topic/60267-marts-pl310-61-datsun-bluebird-sedan/
-
MARTS-PL310 61 Datsun Bluebird Sedan
MARTS-PL310 replied to MARTS-PL310's topic in Projects and Build Ups
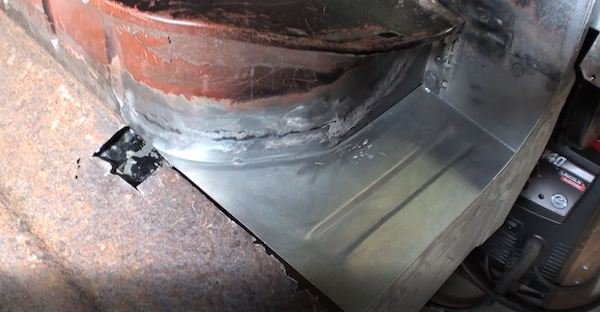
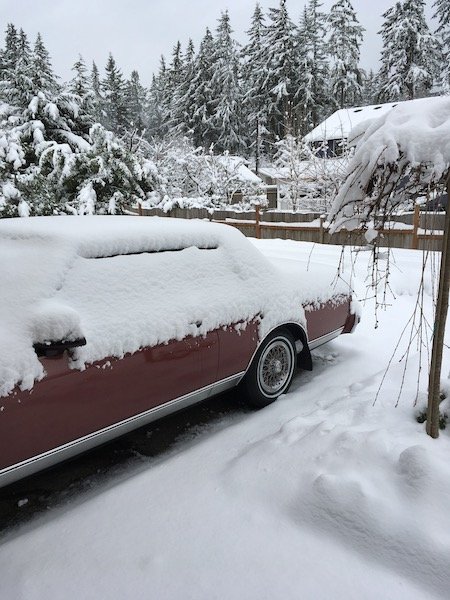
Continuation of the previous post with several more pics. The left middle/side patching of the rusted trans tunnel. As it started out with the fore and aft sections already tacked in. Made a patch to try and duplicate the existing contours and set an upper tape trim line. The black sharpie line was only a guide for torch heating the metal and asphalt undersealant on the other side to get it soft and scraped off. I didn't want my cutting tools getting gummed up. Cut the rotten metal out. Rubbish now. It would have been difficult to get a good weld against it. Cleaned up the surrounding metal. Did some test fitting to determine the trim of excess material on both ends. Final fit and ready for tack welds. Initial tack welds completed. With all the surrounding metalwork taken care of, I proceeded to cut the left hand side floor out. The seat mounting bracket will be salvaged. Same for the reveal or surround for the hand brake penetration. The underside. Planned underside salvage items include the long fore and aft 'Hat" section and body mount bracket. Other brackets are too badly bent, battered or rusted to be salvaged. There are four other simple flat or nearly flat parts that will be duplicated. I'll double up on whatever details are made to be ready for building the right hand side of the car. Never made a scratch built floor before, only patches and brackets. It's going to be challenge with the wide stiffening beads, elevation changes and 3D shape near the mid-body mount and rear footwell. No guarantee of success. Some random extra pics. Sleeping Bluebird with dreams of many road trips past and to come. I've now completely used up a four foot by eight foot piece of 0.9 mil thick sheet metal and need to buy more. Still got a long ways to go just to get the left side of the car finished. I'll post again later with more progress when I get the left side finished. It could be three, maybe four months or more. Discussion: https://oldschool.co.nz/index.php?/topic/60267-marts-pl310-61-datsun-bluebird-sedan/
- 74 replies
-
- 16
-
-
MARTS-PL310 61 Datsun Bluebird Sedan
MARTS-PL310 replied to MARTS-PL310's topic in Projects and Build Ups
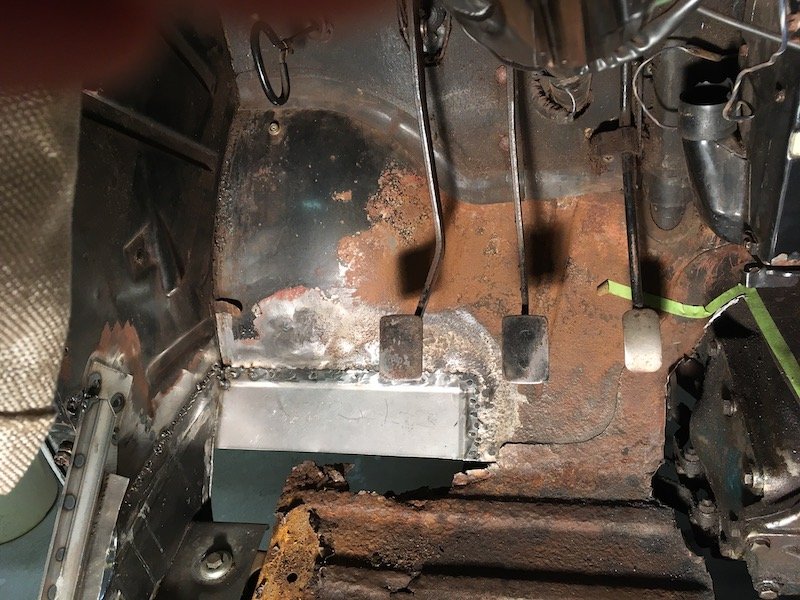
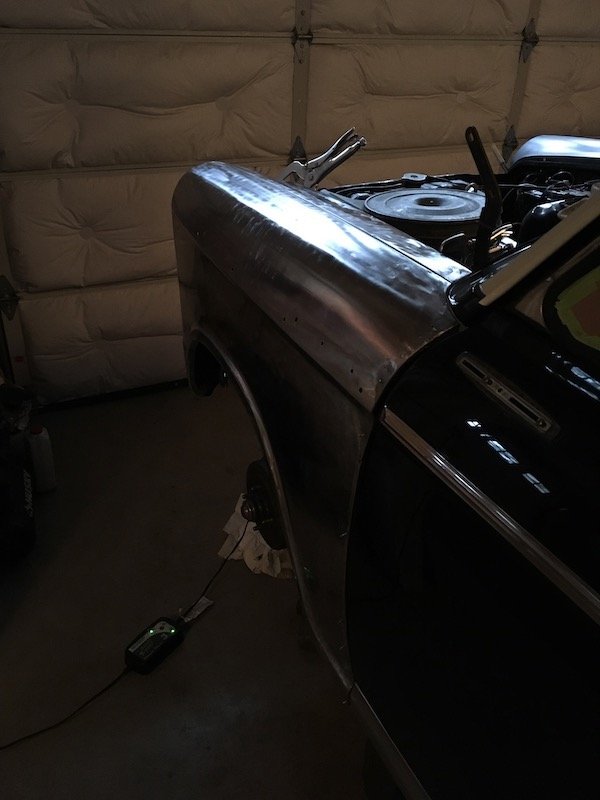
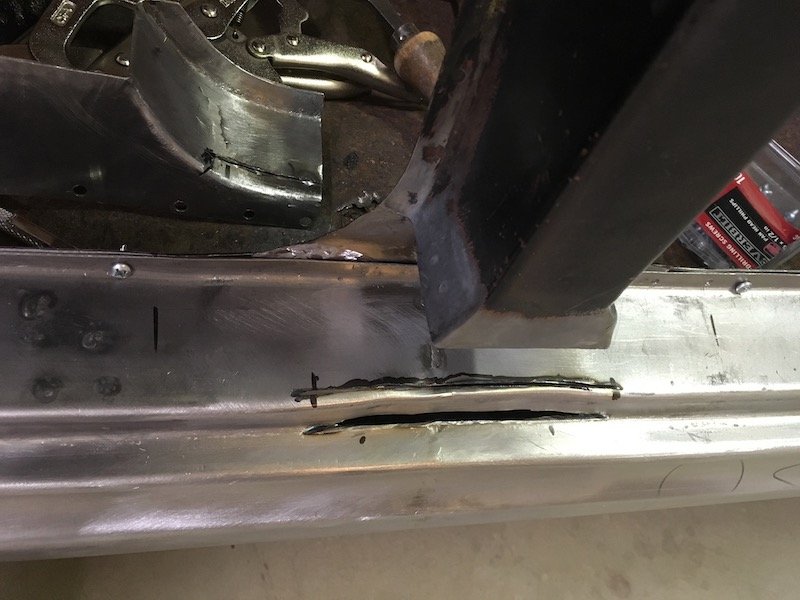
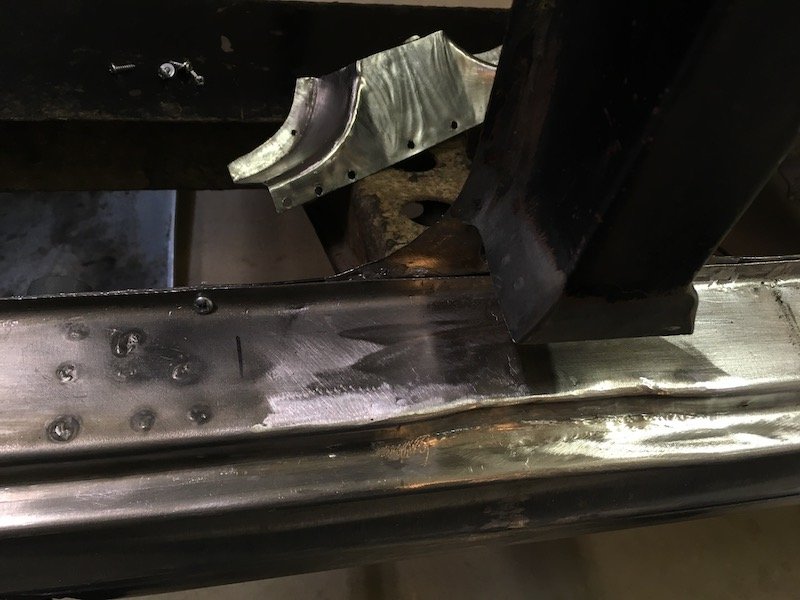
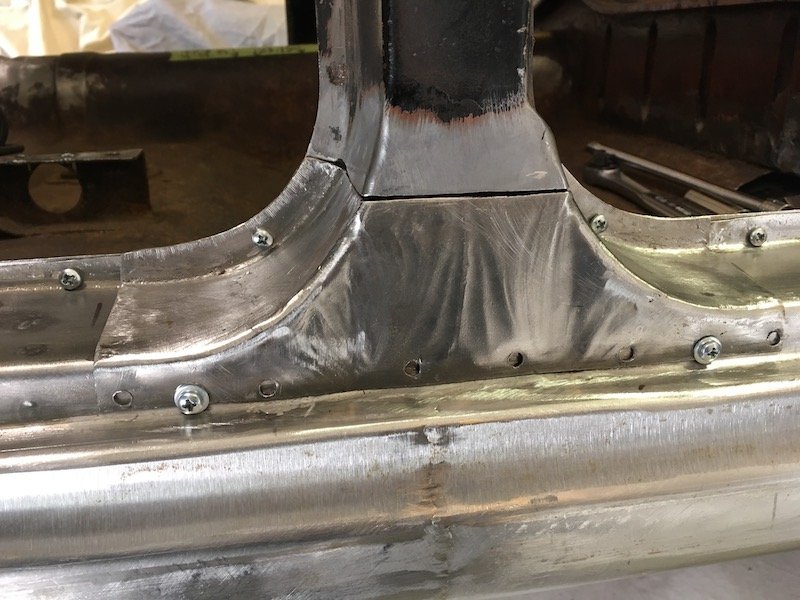
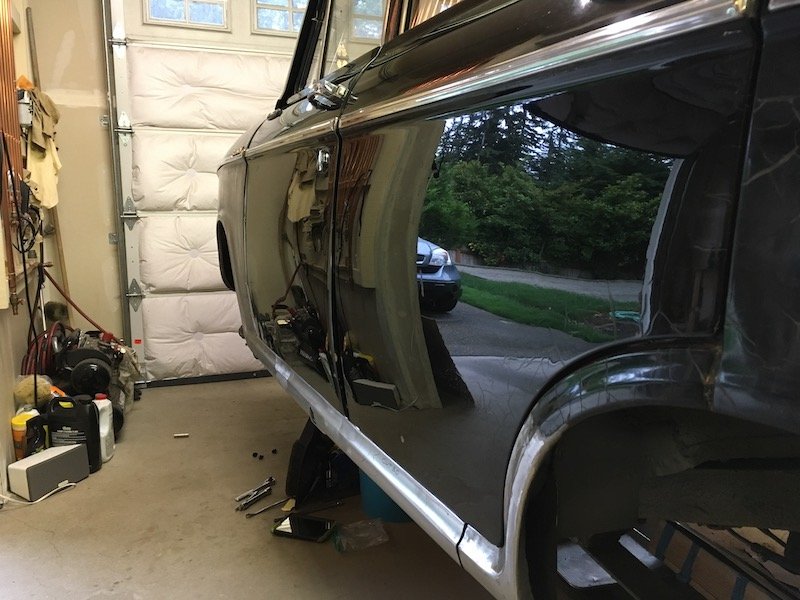
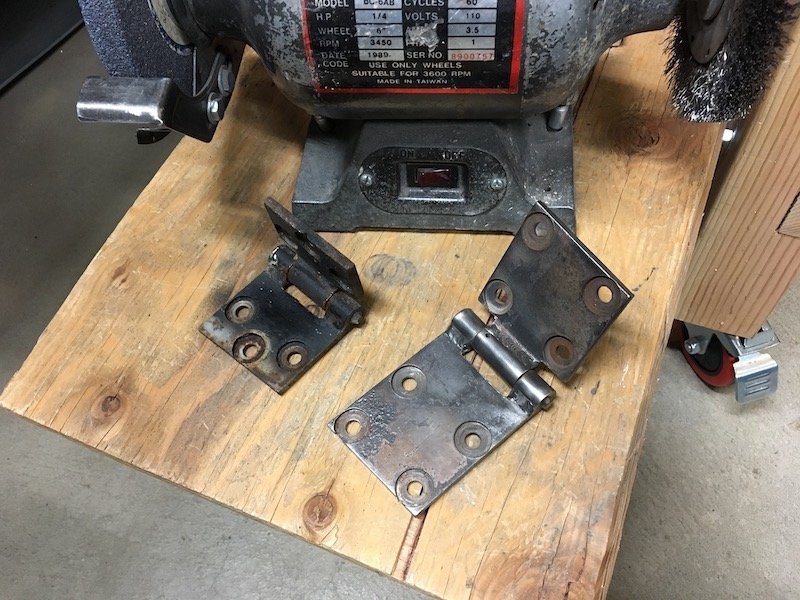
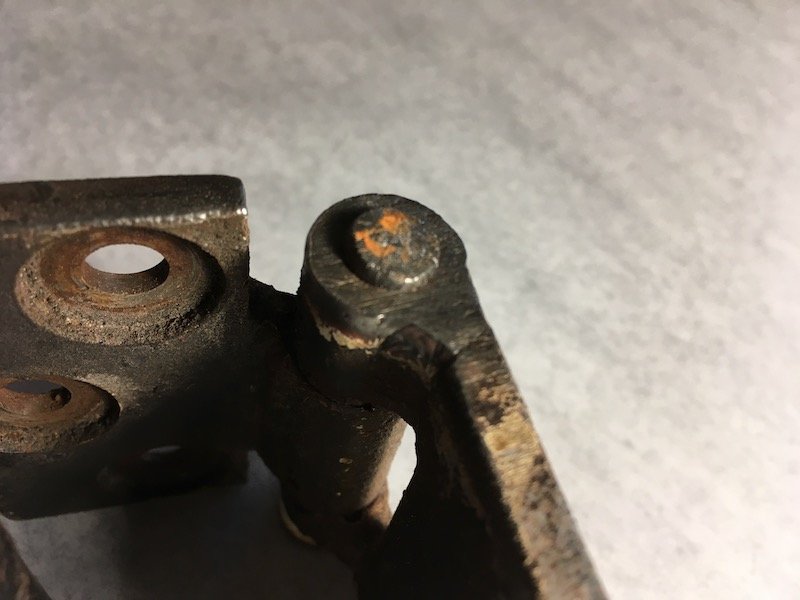
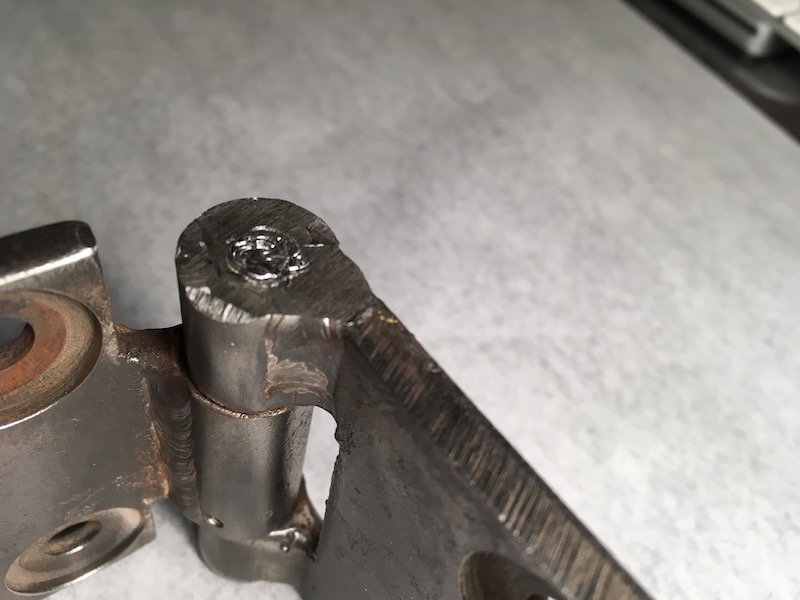
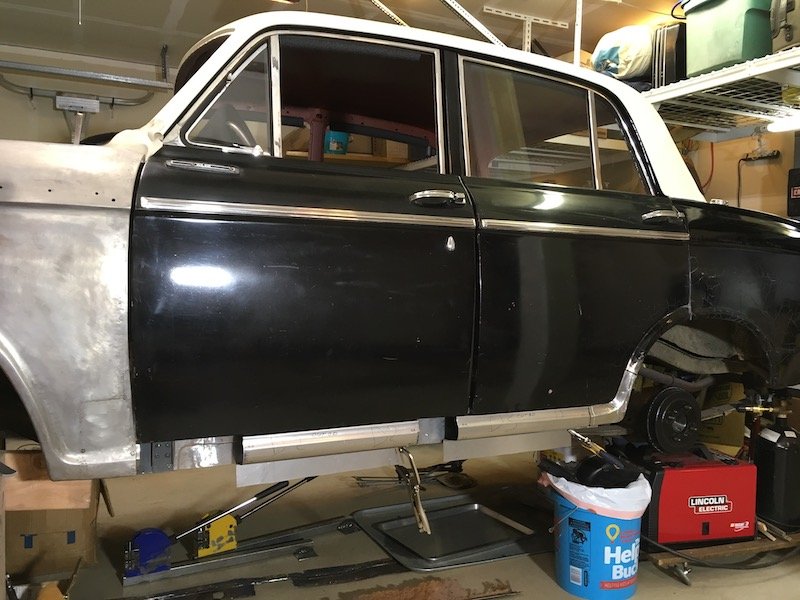
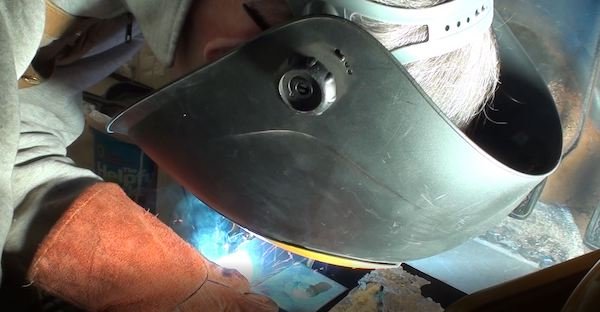
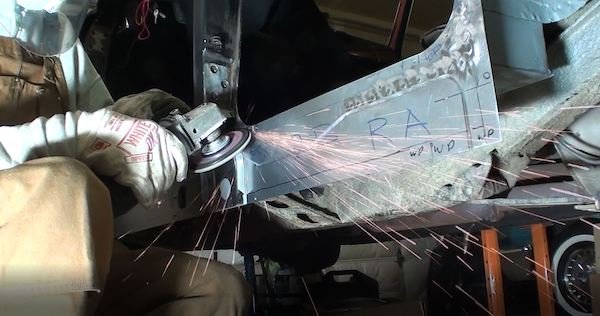
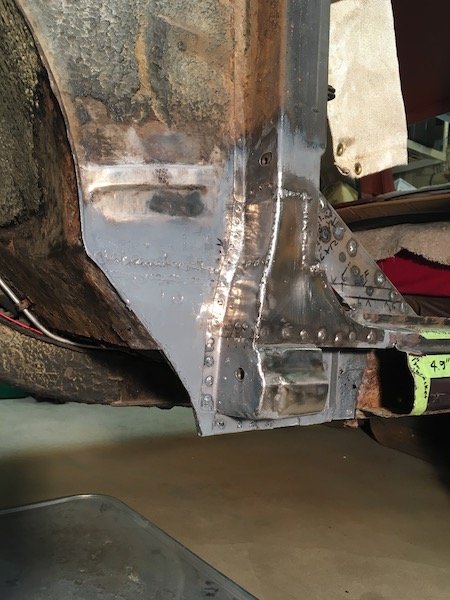
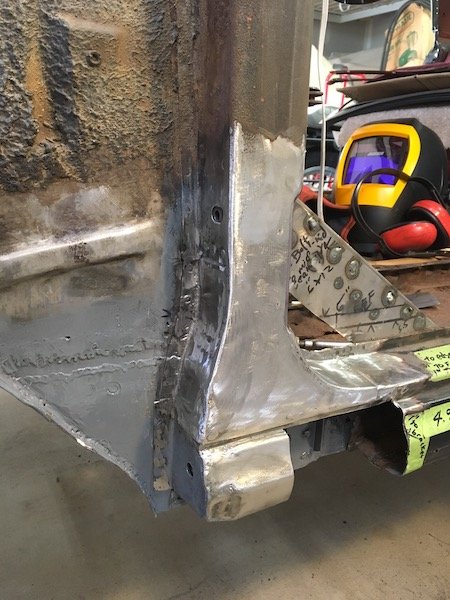
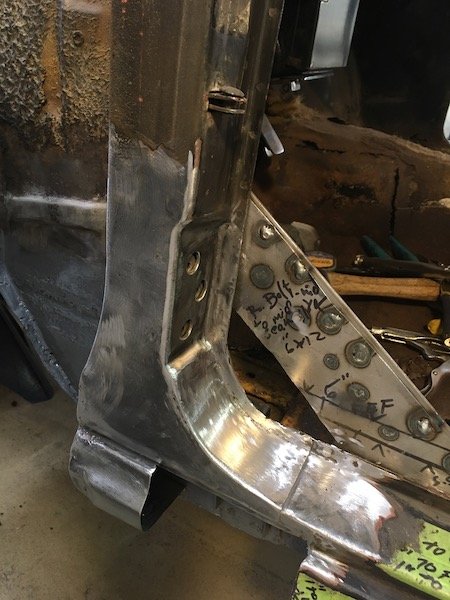
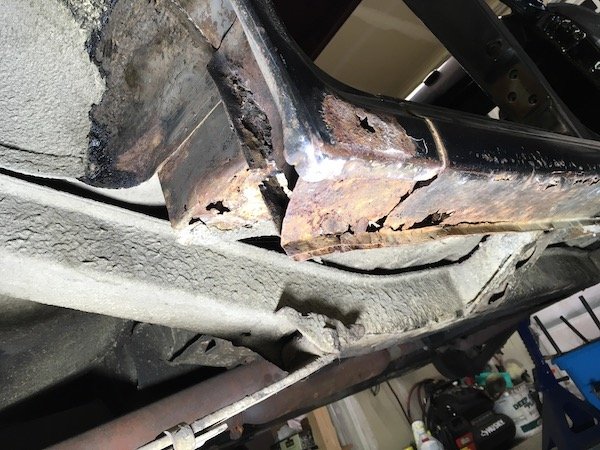
Catching up with progress today. Beware of this, my favorite tool over the last 26 years, the good old knotted wire wheel and angle grinder. Very handy but dangerous. Took a nip out of my flesh the other day. Ripped right through the glove. I should reinstall the guard of course. So I went to work by finessing the fit of the forward end on the outer sill by forming a lip on the end, making pie cuts and welding up the gaps. The objective to set it up for a flush contact with the A-pillar stub. Btw, the outer sill assembly will not be welded to the body until the floor is fabricated and installed so I can get a coat of epoxy primer over the resulting welds on the inside of the sill box. I've got it fastened with screws temporarily. Next, I had to make adjustments at the base of the B-pillar by joggling the upper surface of the sill inboard. Did this with some cuts, pushed metal in and welded shut. The top flange of the sill was originally joggled as shown in these left and right B-pillar base pics. Next I adjusted the C-pillar or dogleg. The bottom of which was tucked in way too far inboard. This resulted in an unacceptable mismatch with the outer sill profile. So I cut a slot in the bottom plate and welded in a 1/4 inch strip. Then had some fun time buffing out and polishing the now 42 year old repaint job on the doors. Don't ask why, I just did it on impulse. The doors do need repainting but it does not show that in the pics. I wanted to rebuild the hinges to make sure thing are fitting correctly. I grabbed the hinges off the right front door to experiment with. It did not go well with my attempted pin removal methods. First I tried pressing the pins out with a hydraulic press but it just began mushrooming the pin. Same for the big hammer and drift pin technique. And yes, I was pushing on the correct (not splined) end and supported the hinge properly on the other side. It looks like the pins will have to be drilled out. I'm not going to do that with a hand drill and not without sourcing new pins and bushings first. It appears I'll have to send them in for rebuild at a shop somewhere. Before I pushed against this end of pin Fail Fail Then worked on the left front fender some more. Welded the two halves of the aft inner vertical structure together with a lap joint for a rigidity. Cleaned, acid etched and painted rust scarred and pitted areas on the inside with POR-15 gray. Polished the outer surface with 3M scuff pads on the angle grinder to help see the waves and indentations better and work it smooth with hammer, dolly, rubber hammer, etc. I'll weld the inner structure to the fender once everything is coated with epoxy primer. And finally I set about repairing a bunch of damage on the trans/driveshaft tunnel. This 310 Bluebird has had the wrong transmission swapped into it back in the early 80s. The original trans wore out the 2-3 shift fork and this spare unit was installed but would not fit. So the side of the tunnel got torched out and it was made to fit. There is a huge difference in size between the two trans. The all synchro trans is a side loader, which is not only much wider but also longer. The original 310 trans is a top loader. Anyways I had to fix the gapping hole and make it adaptable to either trans since I still have the original and it is repairable. Then I went on to replace the aft section the covers the driveshaft. Then patched the rusty area midway between the other patches. All is just tack welded for the moment. Pics below tell the rest of the story. Below pic is looking up at side loader. The original 310 top loader trans. Above pic. It was no fun trying to do those three plug welds upside down. Notice the parallel hat section reinforcement structure or beams running fore and aft, I don't think these were installed on later 312 Bluebirds? Looks like I hit my maximum upload limit here for this post, and it is a late work night. Plan to catch up on the remainder tomorrow. Discussion: https://oldschool.co.nz/index.php?/topic/60267-marts-pl310-61-datsun-bluebird-sedan/
- 74 replies
-
- 12
-
-
MARTS-PL310 61 Datsun Bluebird Sedan
MARTS-PL310 replied to MARTS-PL310's topic in Project Discussion
That sure would have been a nice parts car for me if I had storage. It may be too nice though to break it up. I've got my limited space, time and labor maxed out with one rusty Bluebird. I'm back to work at posting a bit more progress on the build page tonight. 61 Datsun Bluebird PL310 De-Rustification Project. Build: https://oldschool.co.nz/index.php?/topic/60264-marts-pl310-61-datsun-bluebird-sedan/ -
MARTS-PL310 61 Datsun Bluebird Sedan
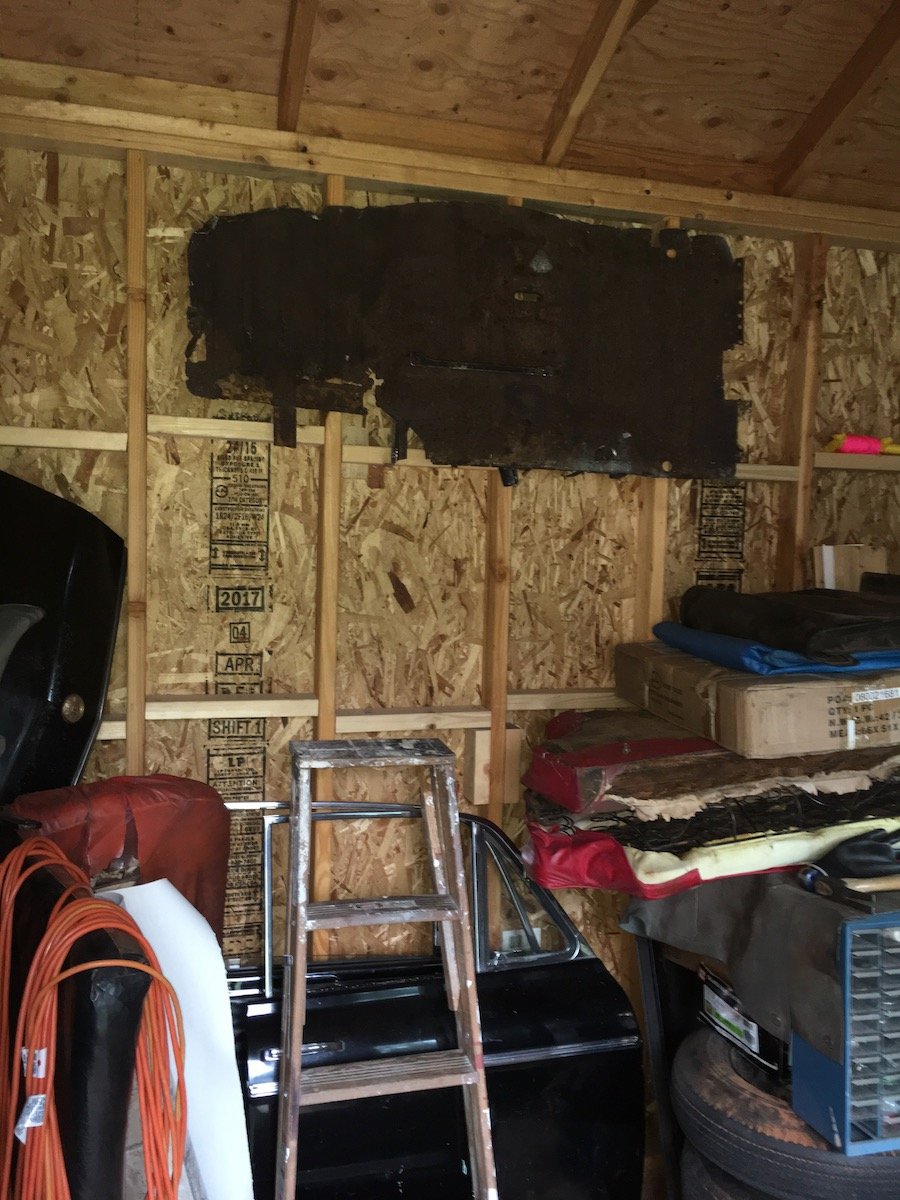
MARTS-PL310 replied to MARTS-PL310's topic in Projects and Build Ups
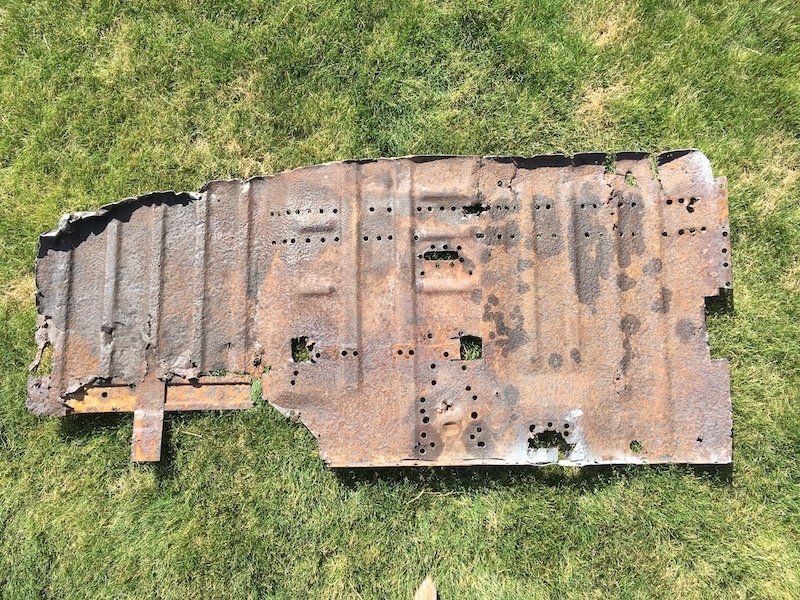
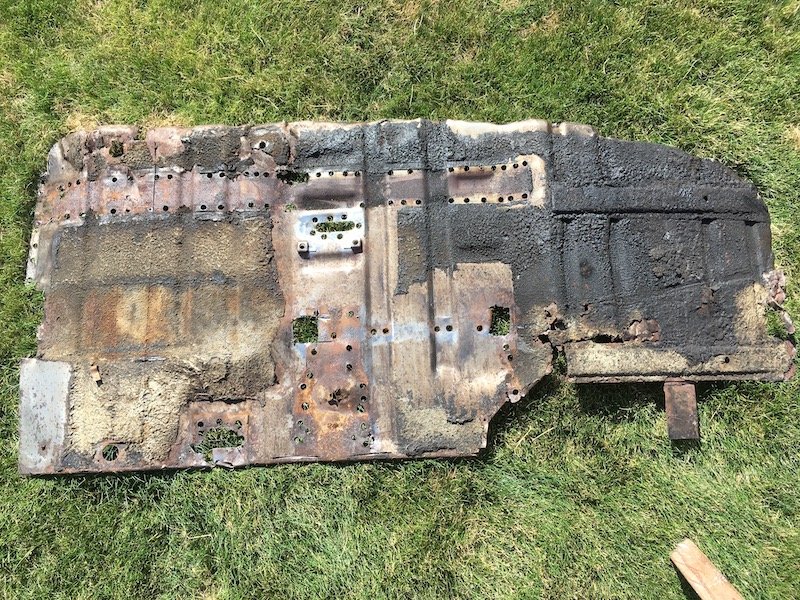
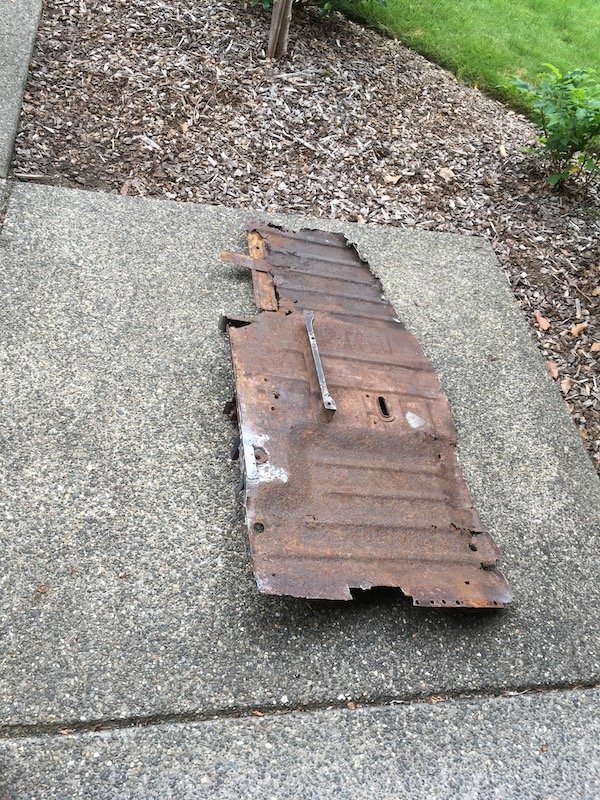
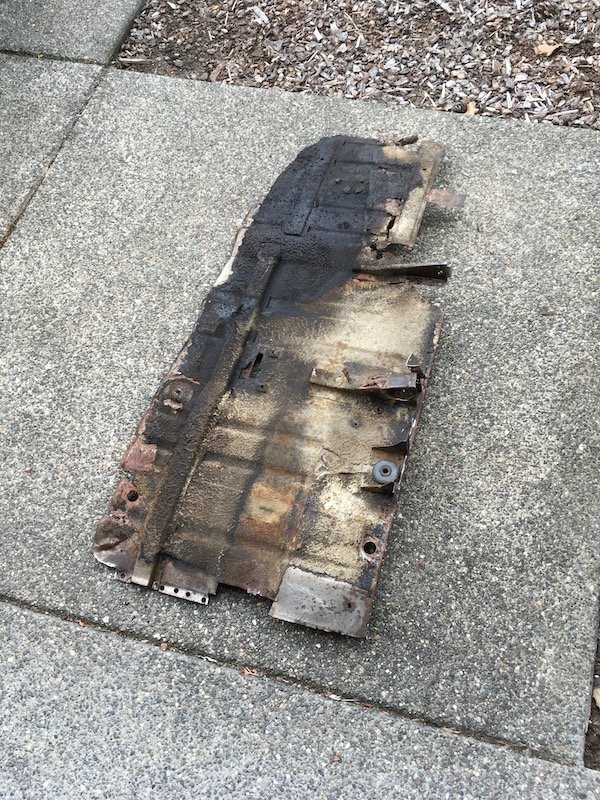
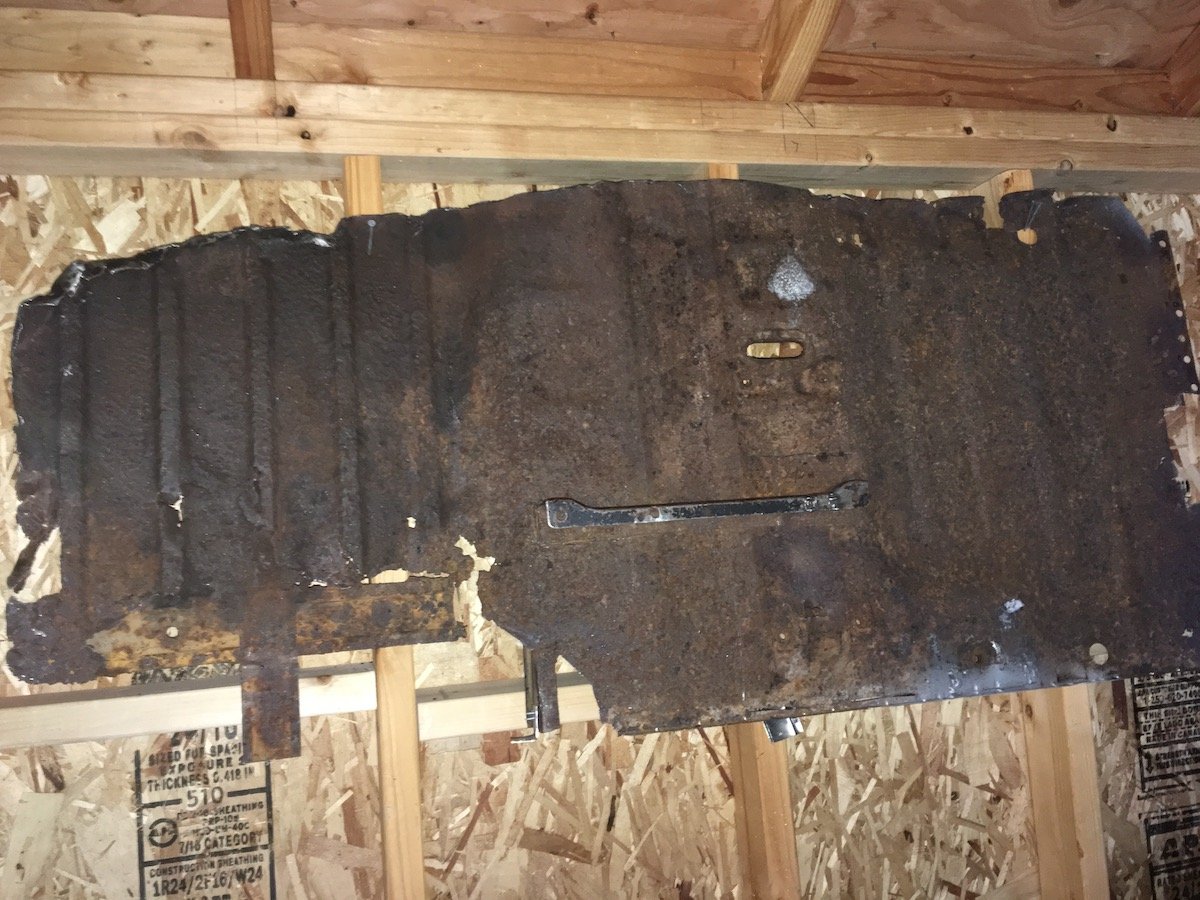
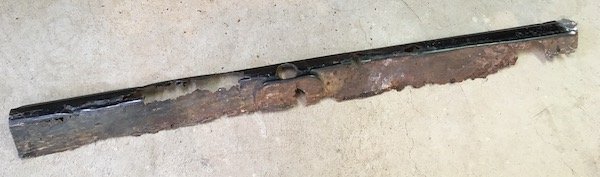
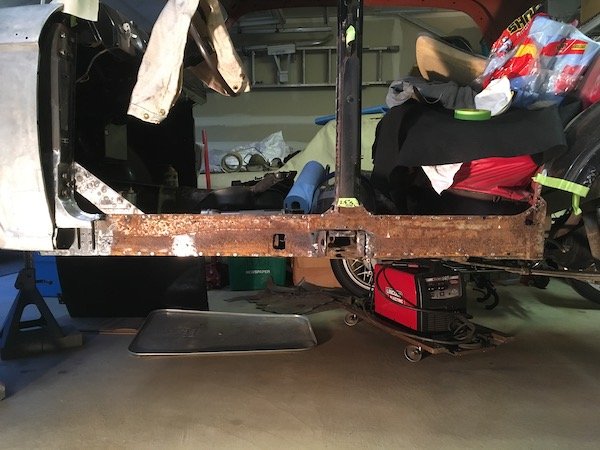
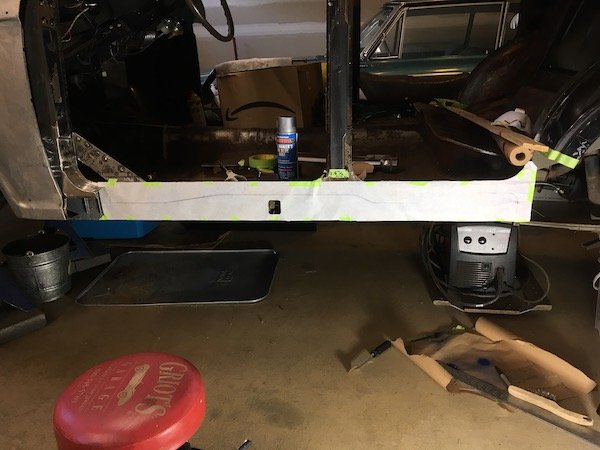
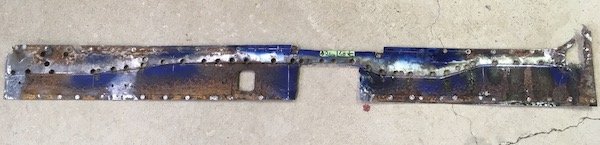
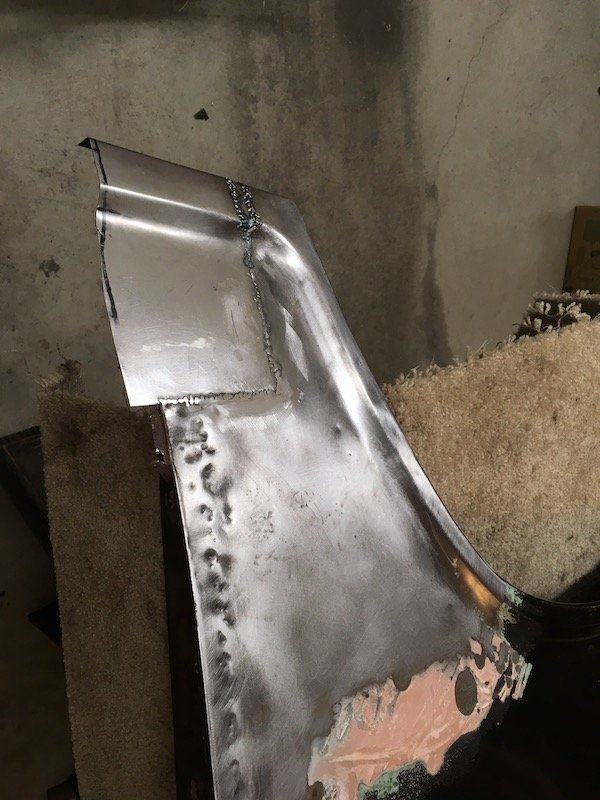
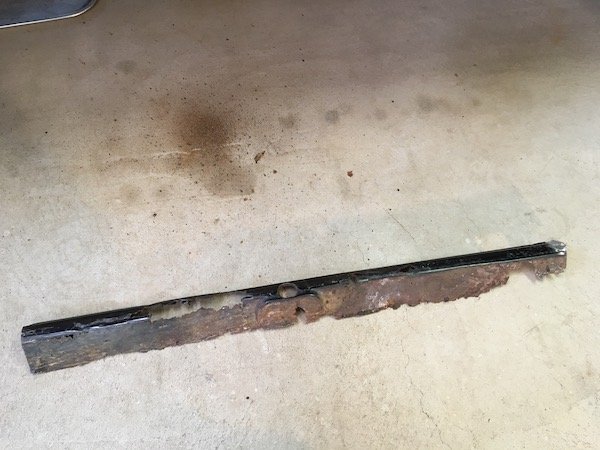
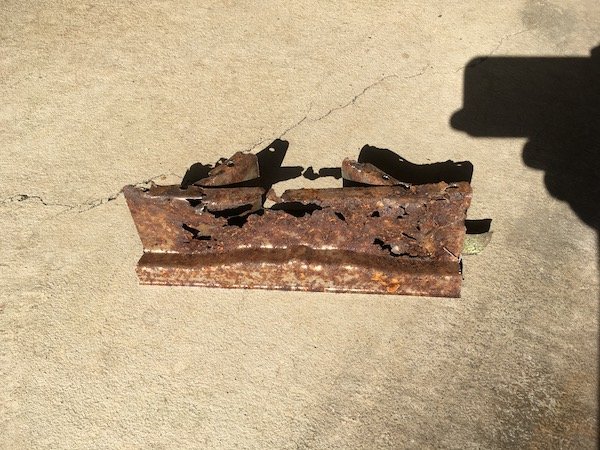
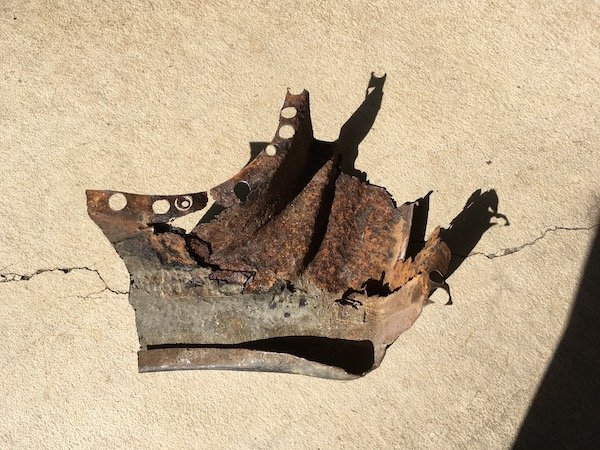
Hung some new wall art in my storage shed today. It's the remains of a '61 Bluebird left floorpan. There is a practical reason for temporary wall hanging it. I was just going set it on edge in storage so I could salvage a few items off it later but it began folding over from its own weight. Plus, it was generating all kinds of crud such as; dirt clods, large rust flakes, under sealant, and greasy blobs anytime it got touched. Just had to get it out of my garage and isolate it. My "wall art" came from here. I'm hoping to make a few more posts soon to cover the last couple of months other work activities that led up to this "epic" event. Making the trans/driveshaft tunnel solid, investigating door hinges, finessing various fitments and preparing the fender and other bare steel sheet metal for epoxy primer. Discussion: https://oldschool.co.nz/index.php?/topic/60267-marts-pl310-61-datsun-bluebird-sedan/
- 74 replies
-
- 12
-
-
MARTS-PL310 61 Datsun Bluebird Sedan
MARTS-PL310 replied to MARTS-PL310's topic in Projects and Build Ups
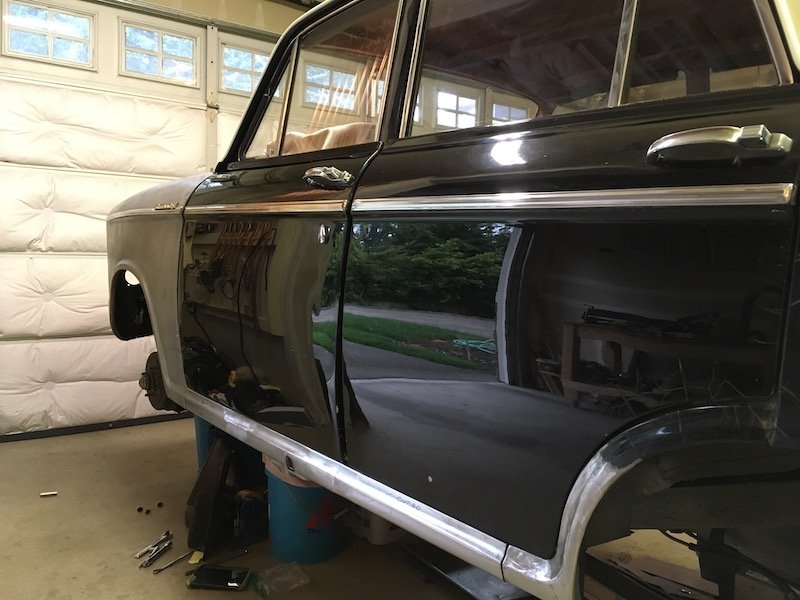
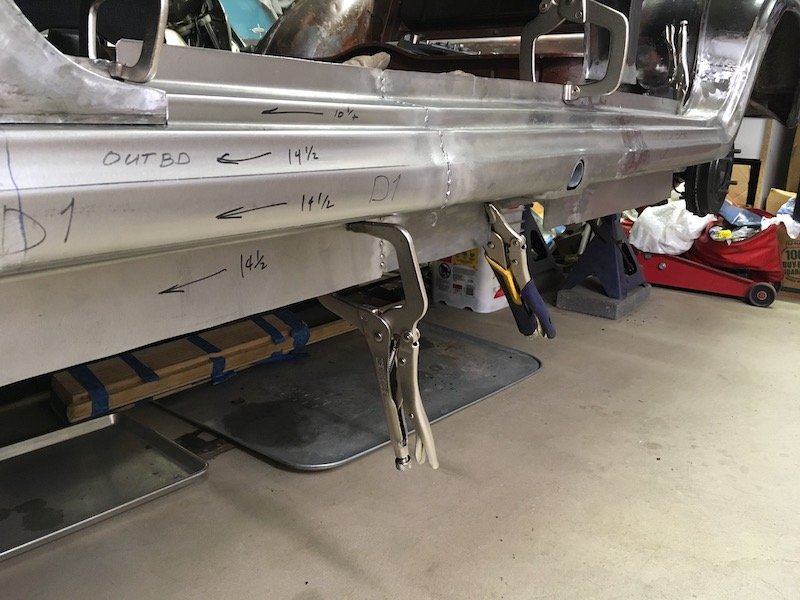
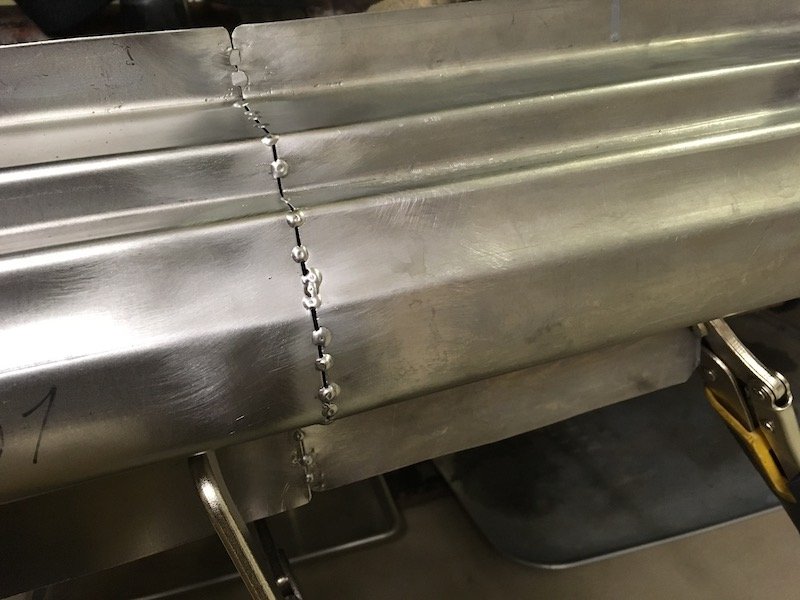
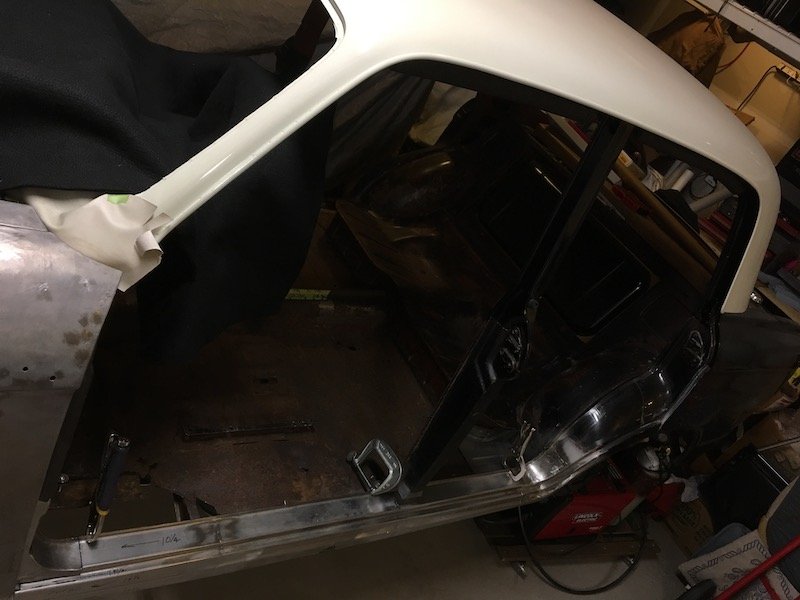
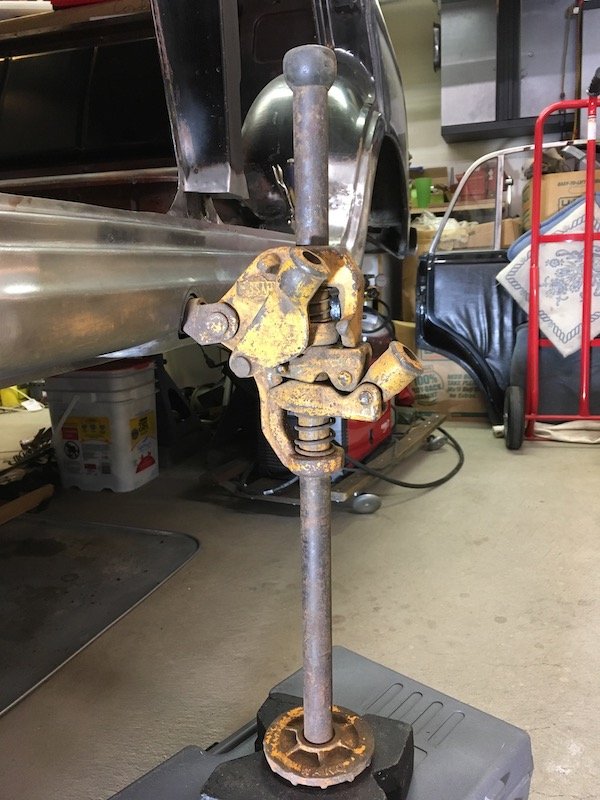
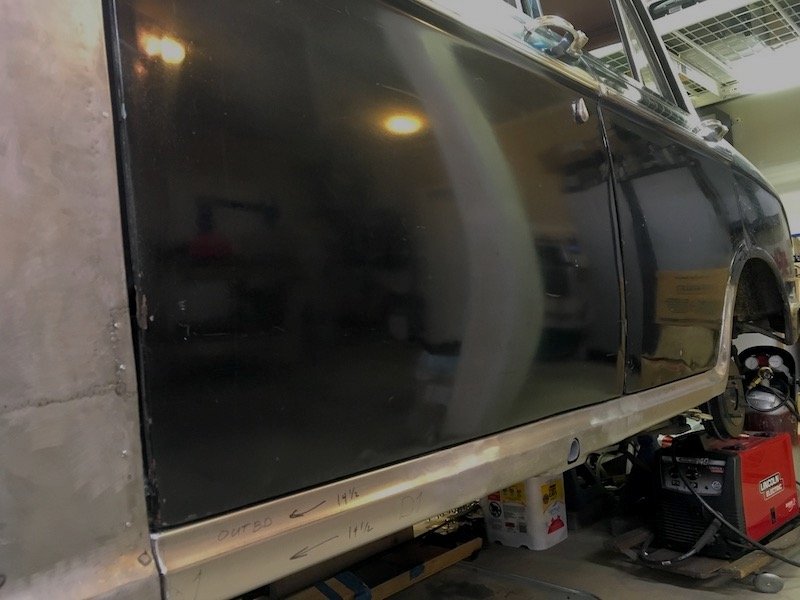
More progress with the Bluebird left side outer sill. Welded the three outer sill segments together. Started with these two shown previously Then I fixed the sill segments together with these little clamp things. These set up a nice gap to make good weld penetration to the back side. Then starting making tack welds. The first strikes in the center of pic were really bad and missed. Remainder of tack welds were usually on target. About 70 percent complete in these pics. Front and back side shown with good penetration. Front side will eventually get ground and sanded flush. Back side gets left as is. Initial grinding and sanding. After that I held the assembly against a bright light and check for pin holes, fill with weld and complete. It looked pretty good in a fit check against the car body. No weird wrapping or anything. Then on to the joining of the third sill segment to the assembly, same as the first. Except I was checking against the fit to the inner sill on the body before tacking, and after initial series of tacks, because there is a slight bow or curvature on the body fore and aft and I wanted to make sure of no issue. Did a little more rough trimming of the forward end as well so as to permit tailoring a nice fit up against the A pillar and lower stub later on. Finished weld of the last segment. Overview of the situation Then I decided to play with this. No, I did not actually try and jack the car up, just having fun with it. Later on I bolted the doors on again, probably for the fifth or sixth time, and did a final check for gap along the lower edges. Plus I formed the forward edges of the sill assembly to mate up with the A pillar stub with just the right gap next to the fender (or wing, right?) As seen underneath in above pic, there are several joggles along the lower flange to accommodate fit against several parts that are layered on the vertical inner sill plate. Below, the gaps look decent and body lines of door to sill are flush. Installed some trim to show off for the camera. Discussion: https://oldschool.co.nz/index.php?/topic/60267-marts-pl310-61-datsun-bluebird-sedan/
- 74 replies
-
- 27
-
-
MARTS-PL310 61 Datsun Bluebird Sedan
MARTS-PL310 replied to MARTS-PL310's topic in Projects and Build Ups
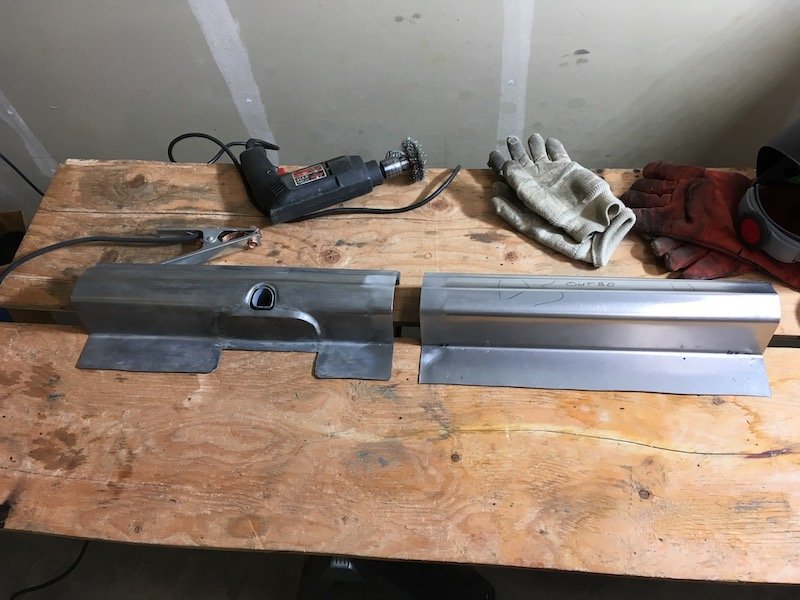
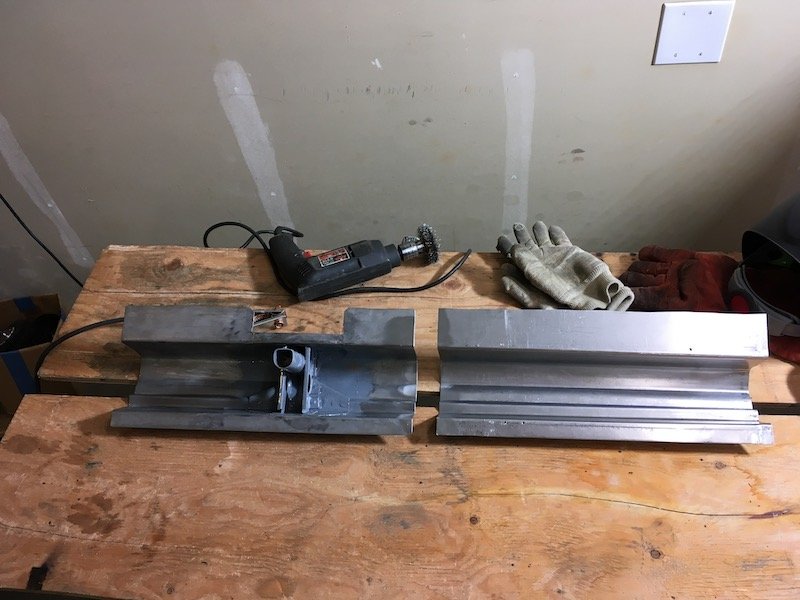
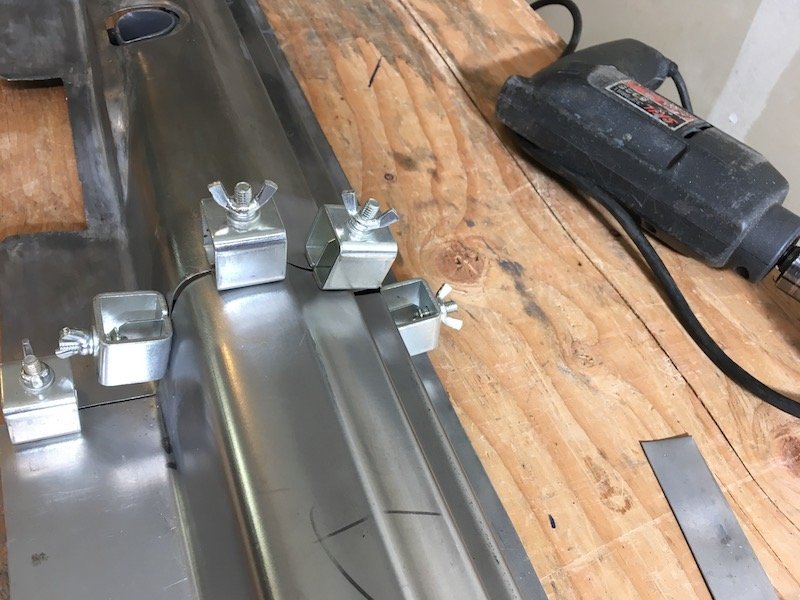
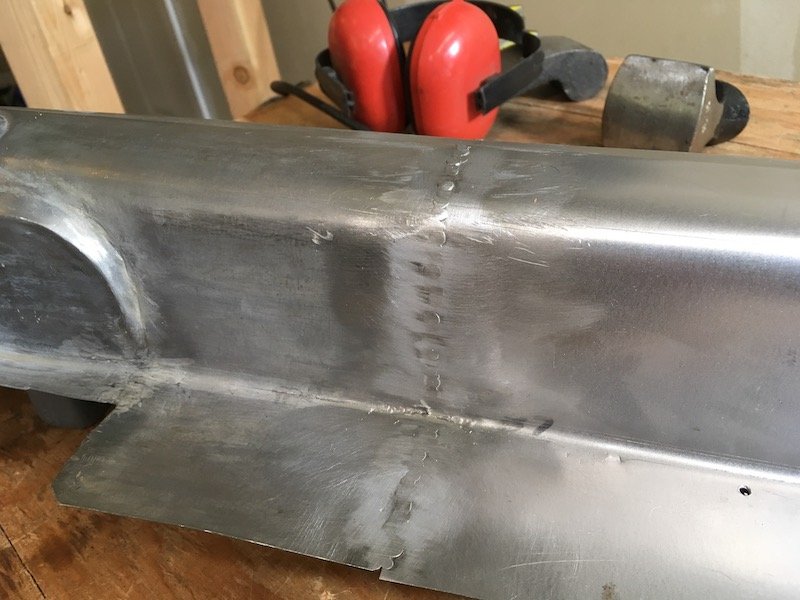
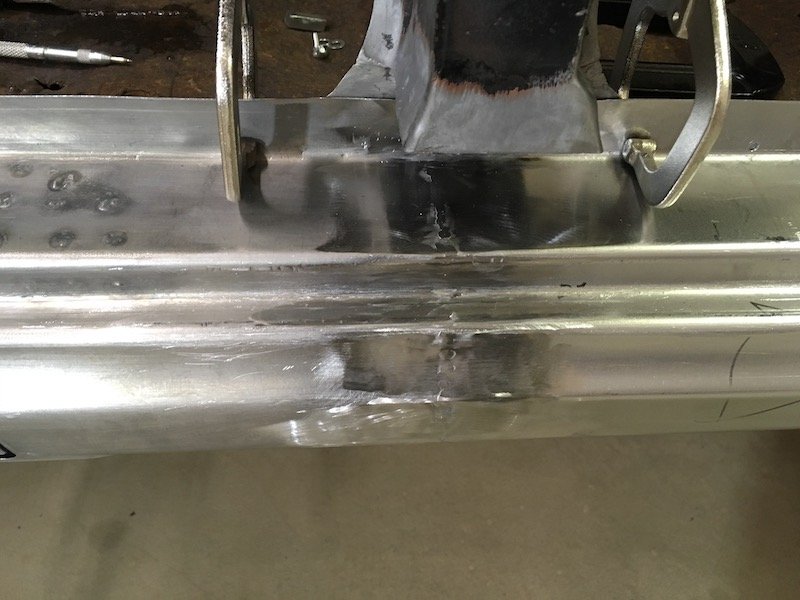
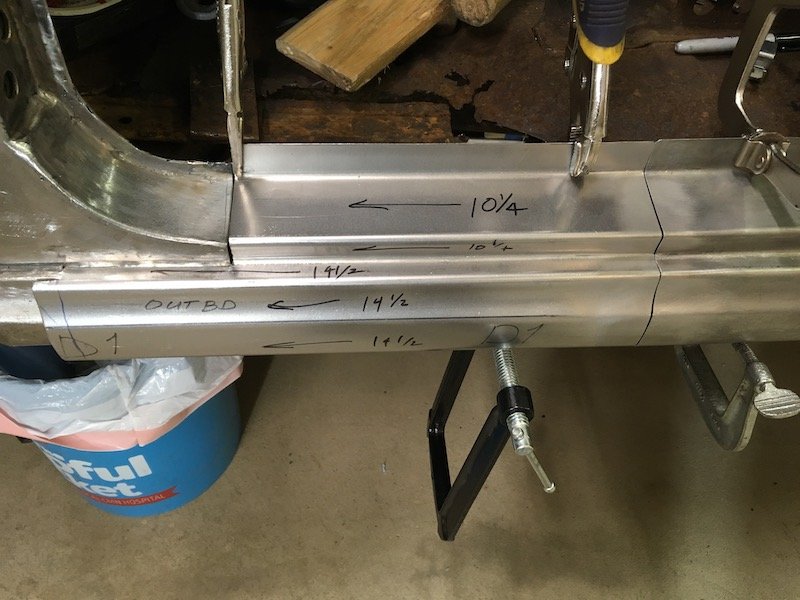
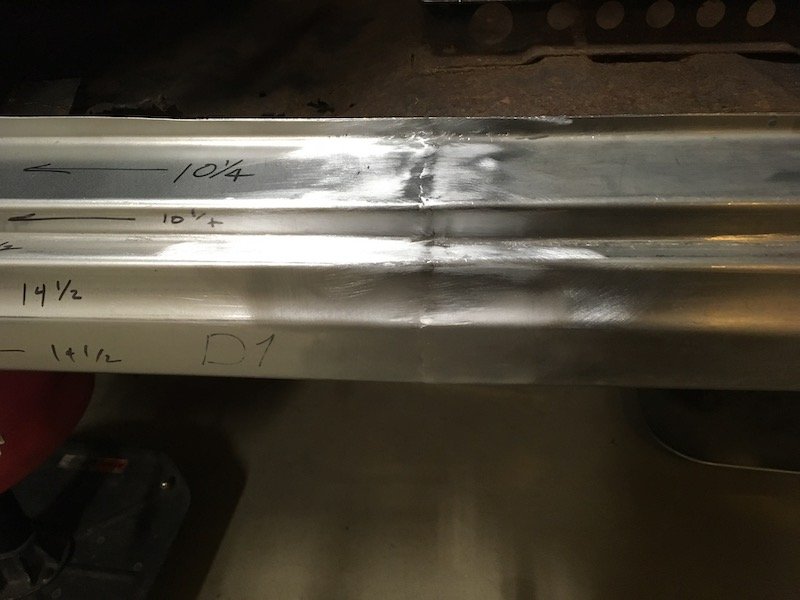
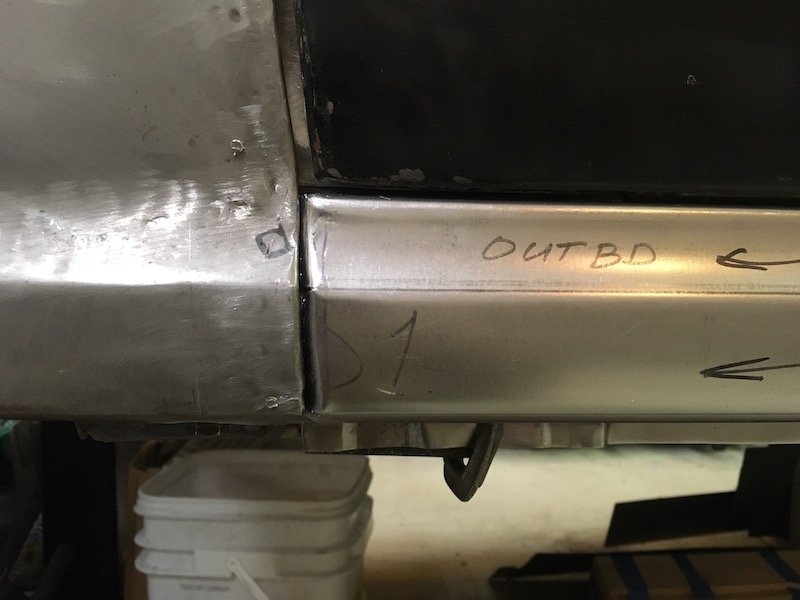
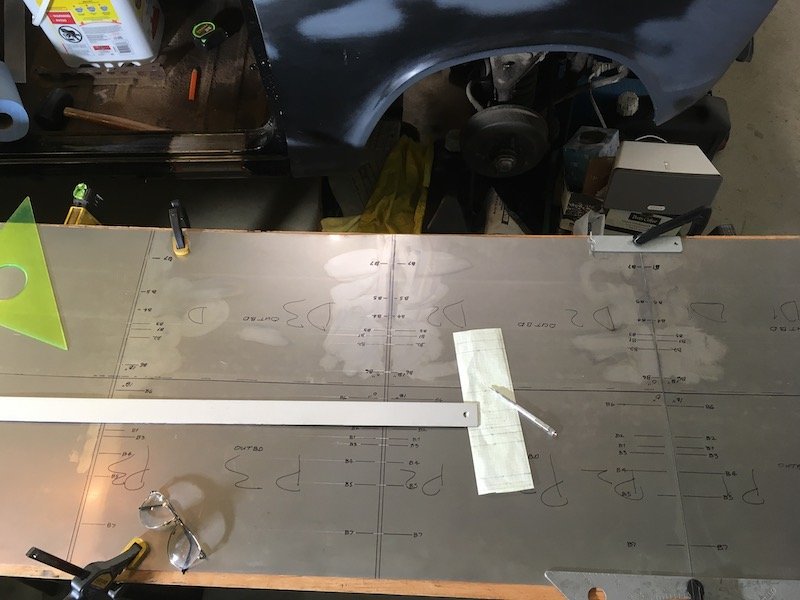
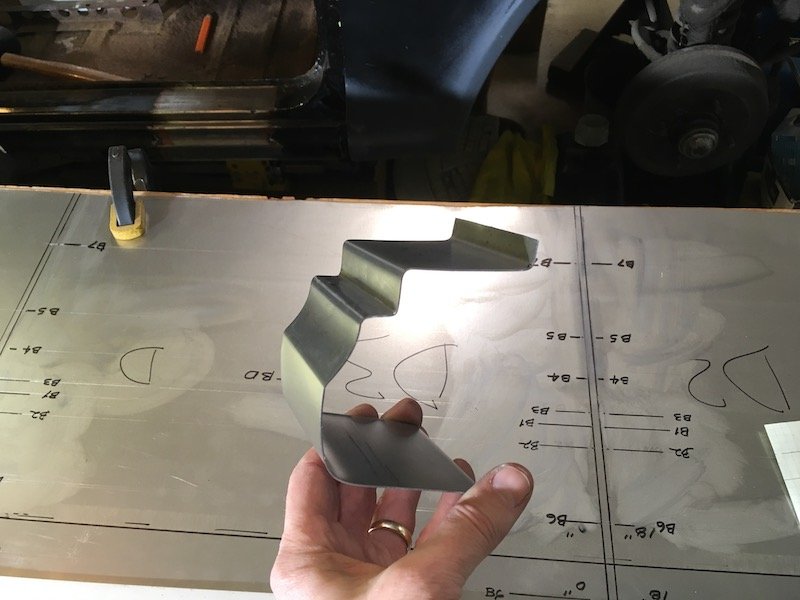
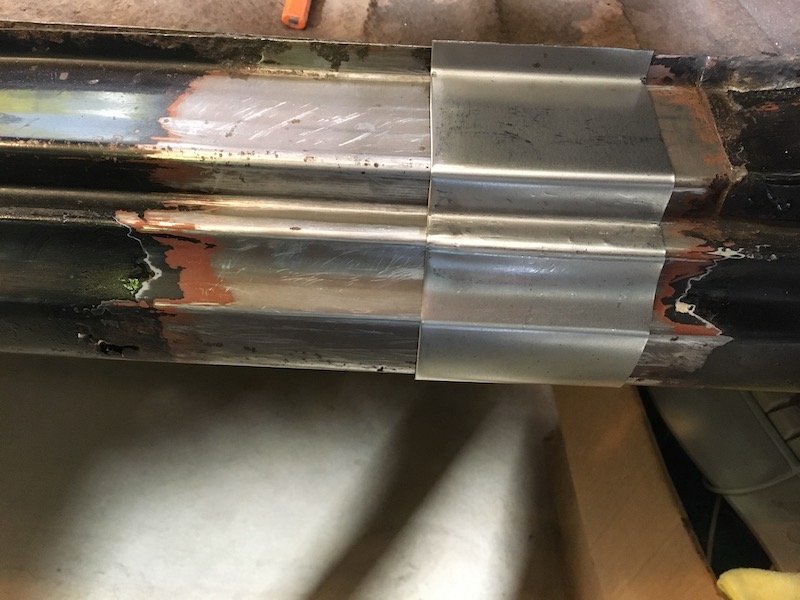
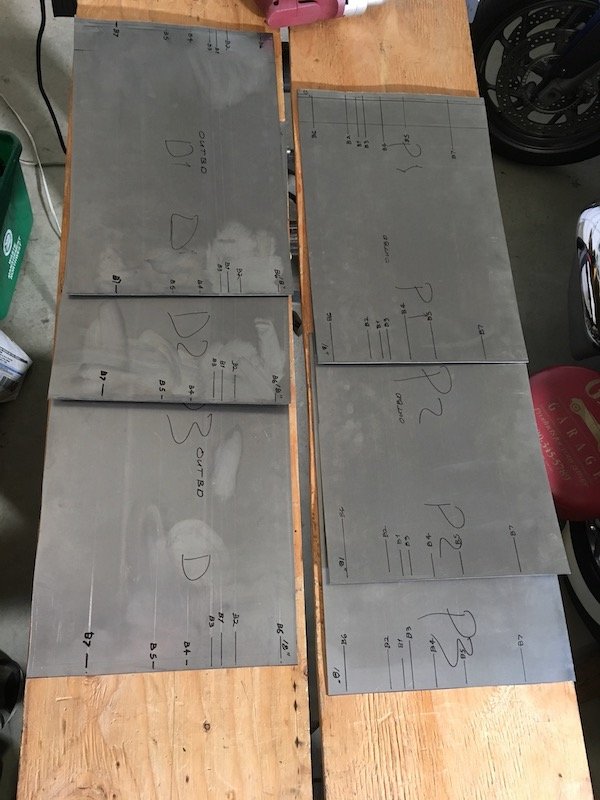
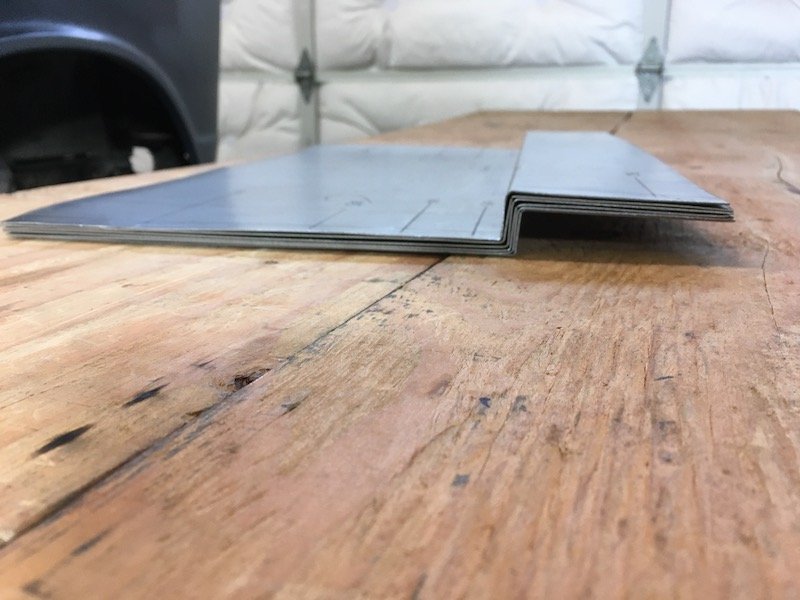
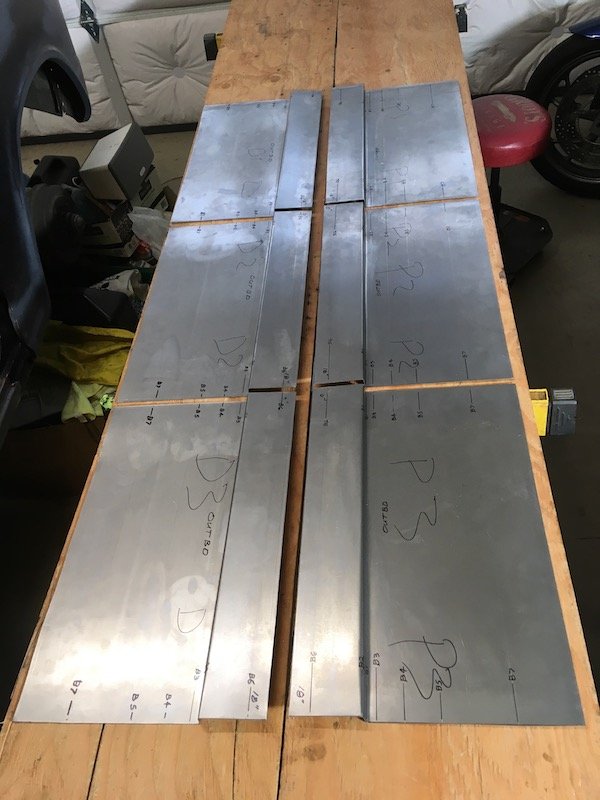
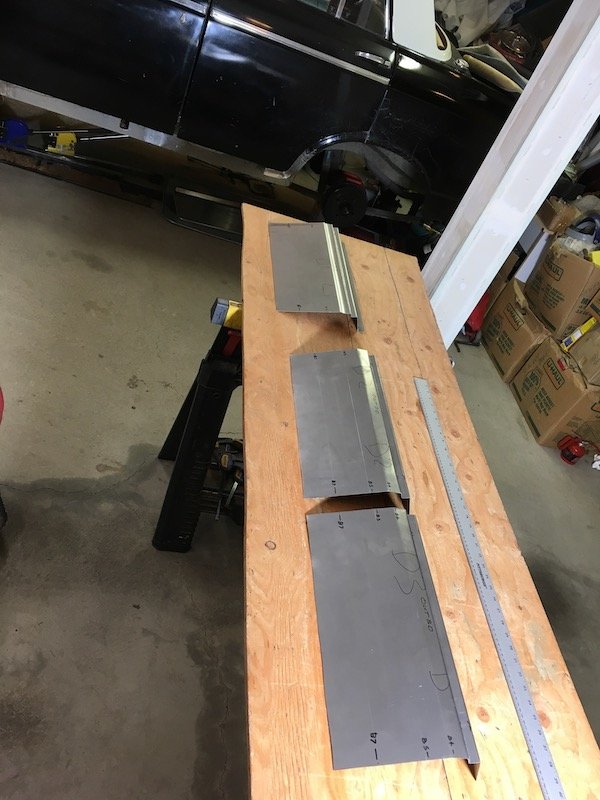
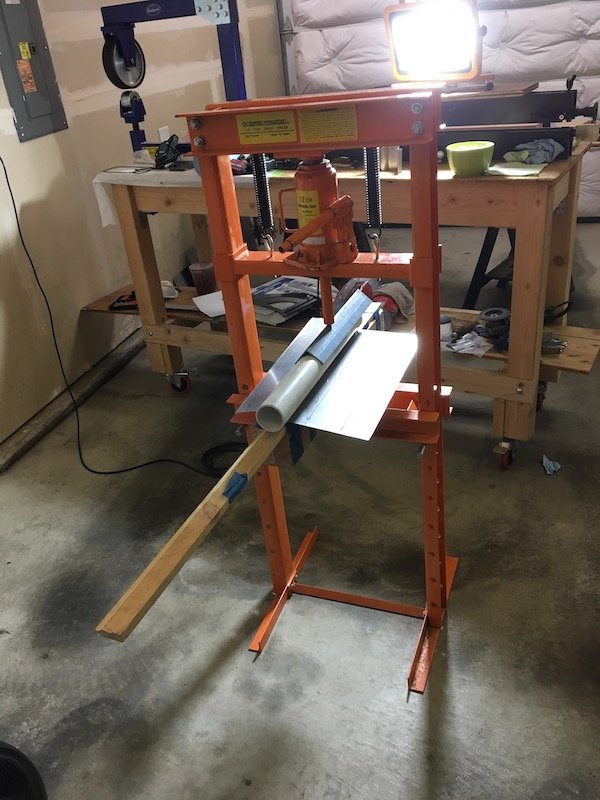
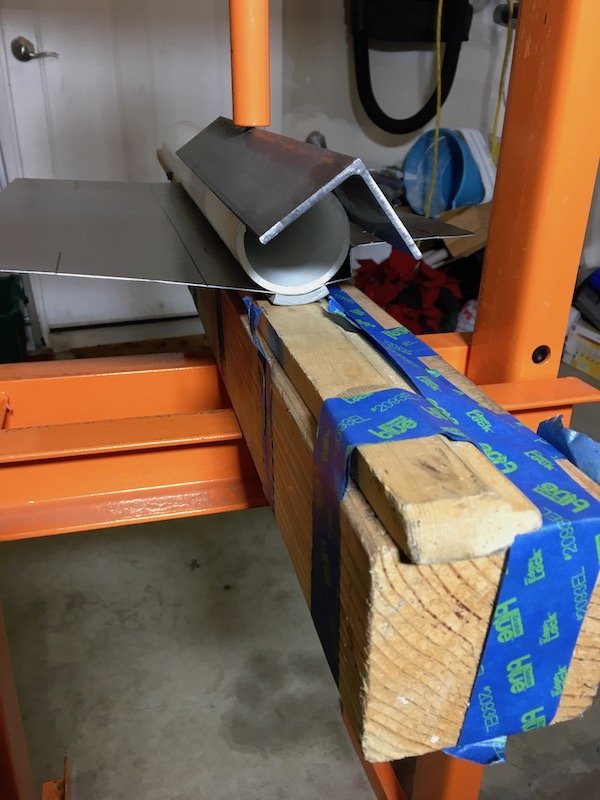
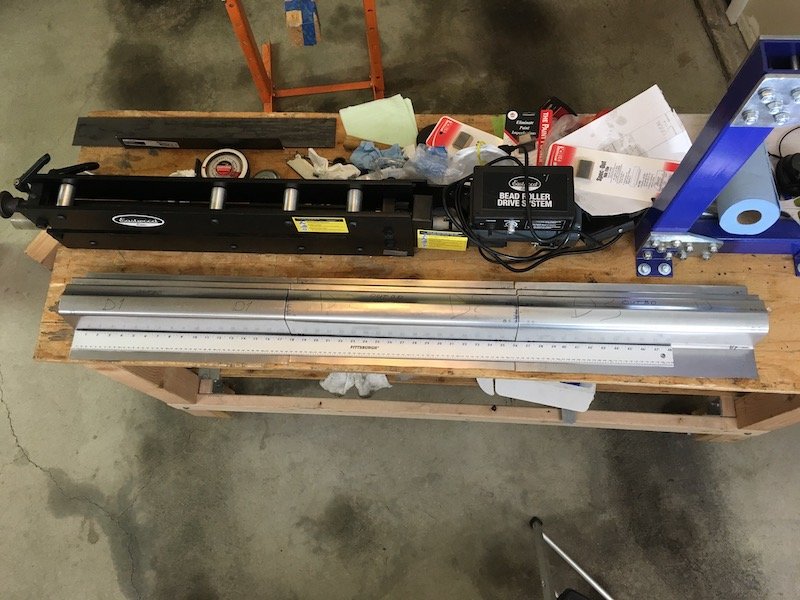
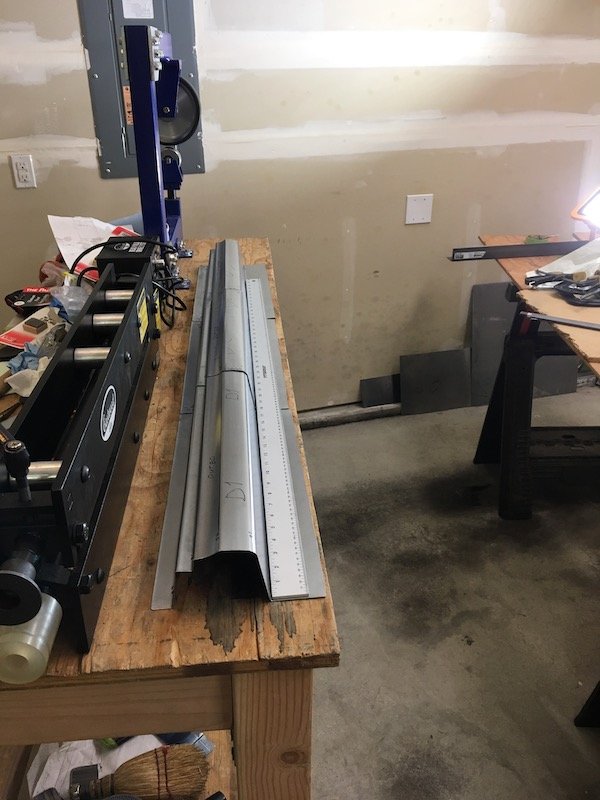
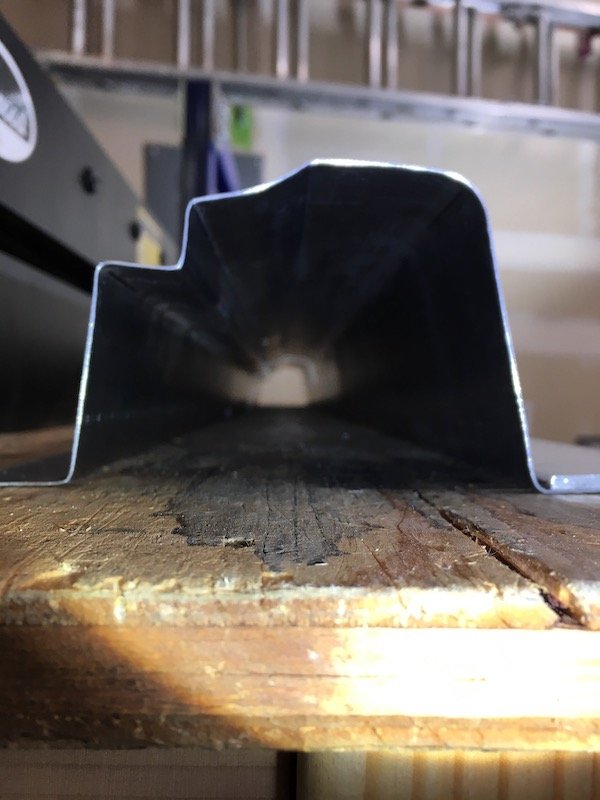
I got a little out of sequence. I should back up a little and show the making of the three outer sill segments that began about six months ago. Three segments because the metal folder tool only can do a 20 inch length maximum whereas I need about 54 inches total length. I also need to make offset bends. So there are a lot of challenges to make the sill. Makes it all the more interesting to have a go at it. Anyway, I have run into difficulties in duplicating the exact profile but it's good enough for usable parts on the left side. Maybe the technique can be improved upon for the right side. On the righthand side of the car I carefully measured and made a card template of the least rust damaged profile. Then began experimenting with and adjusting the seven bend line locations to figure out a way to make a sill. This is unlike a usual and simple sill that just wraps under the door more or less. The Bluebird has several visible body lines and a concave shape in-between. Plus there is the side of sill penetration for the jack lifting structure shown previously. This Bluebird outer sill is made of 20g sheet. Layout of bend lines The prototype profile Fits like a glove on sanitized right hand side Cut out six 18 inch long panels of 20g for left and right (D for driver's side or left, P for passenger side or right). Bend lines are marked more sharply by scribe marks so I can get good alignment when it comes to joining the segments together. B1 and B3 bends are offset bends and very close. This proves to be a problem Made the offset 3/4 inch bends for all panels (B1 and B2). Not perfectly uniform but close enough So far so good! As mentioned above, now I start having a problem at bend 3. This needed to be a tight offset bend from B1 at just over 1/2 width. The folder will only do 5/8 minimum (yet it was advertised as capable of 1/2 inch offset). Not good. I have to start compensating by moving the other bend lines to keep the visible body lines on target. The plan is to adjust the pillar bottoms to fit the adjusted sill profile, at least on the left side. I'd like a better plan for right side to get the true profile so I can leave the pillars unaltered. I'm considering having the folder plate milled down to get a true 1/2 inch offset bend, but that still leaves me with three separate segments to weld together. Either that or start over and make the whole thing as one hand formed piece by hammer forming each bend over a solid 90 degree edge of some sort. That might be wishful thinking. My crude setup for making the concave curvature between bends 3 and 4 Sandwich the sheet between plastic pipe, angle iron and squash it Checked out the fit of a couple of segments relative to the doors and the lower edge. Checked out as good. Three completed sill left side segments lined up on the rollaway workbench. Decent alignment of three segments. Looks like I can make it work when it comes time to join them End profile view of three outer sill segments all in line, just for kicks Discussion: https://oldschool.co.nz/index.php?/topic/60267-marts-pl310-61-datsun-bluebird-sedan/
- 74 replies
-
- 21
-
-
MARTS-PL310 61 Datsun Bluebird Sedan
MARTS-PL310 replied to MARTS-PL310's topic in Projects and Build Ups
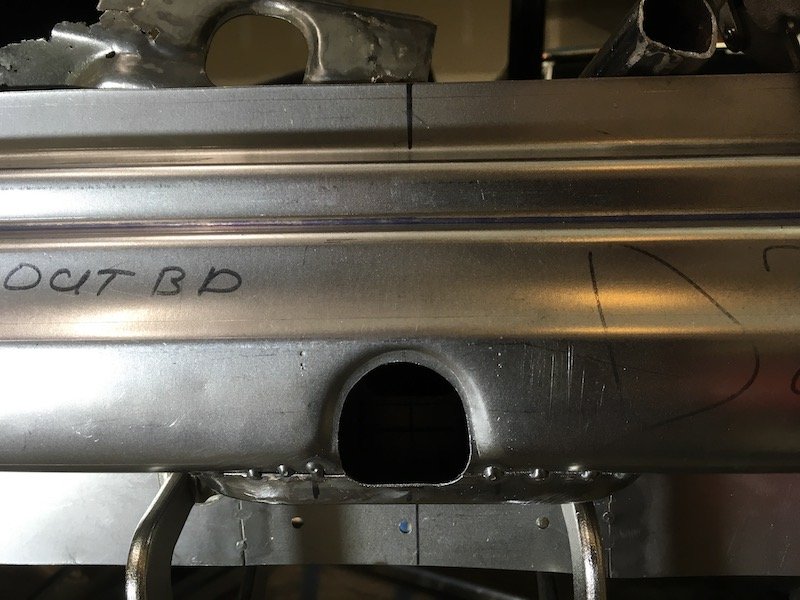
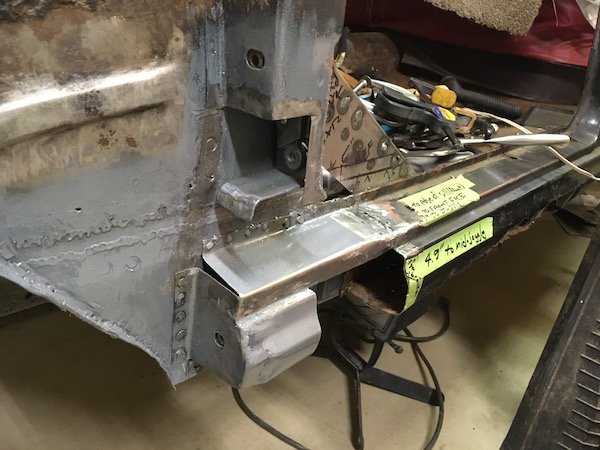
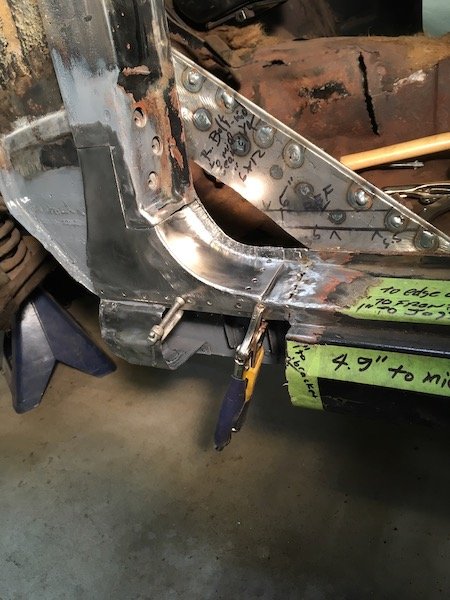
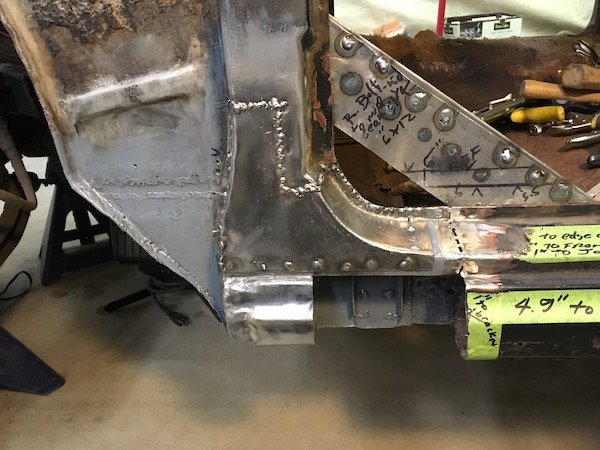
Build of the lifting jack structure Original outer sill panel where the lifting jack pipe was Inside the sill are the remnants of the jack bits Made a forming die to recreate the indented outer shape, test looked good on scrap piece so went ahead Simple as sandwich the panel and tighten the bolt Looks not too bad! Closer examination. The extra metal around the bolt hole gets trimmed out to match original. The lower pop out section (to left) is welded on and then cut off. Wrong position darn it ;( Straight on view after trimming Moving on to recreate the inner vertical stiffening brackets. Takes a bit of imagination since only about half of the originals remained Bits getting ready for weld Checking bits out for fit Sand blasted the original pipe free of rust Now really ready for weld Welded and checking results for fit against inner sill Coated with POR 15 for future rust protection. Turns out this coating can catch fire real easy and sustain flames. Next are the three outer sill segments to be welded together. I've kept a lot of extra flange widths, top and bottom, to resist warping. These flanges gets trimmed back to about 1/2 inch. Discussion: https://oldschool.co.nz/index.php?/topic/60267-marts-pl310-61-datsun-bluebird-sedan/
- 74 replies
-
- 19
-
-
MARTS-PL310 61 Datsun Bluebird Sedan
MARTS-PL310 replied to MARTS-PL310's topic in Project Discussion
Yes, I'm still in the Pacific NW. Interesting about the Oregon show, never been there. Too bad about the Canby situation. I'll look into the new venue some more and see if it could be worthwhile, or would I rather keep making progress in the garage? My car absolutely will not be complete. I'm beginning to think in terms of years to complete rather than weeks and months, and just be satisfied with making incremental progress. At some point in the near future the body will even have to be lifted off the frame to fully access the floor repair welding. I know what you mean about the cold. I go into my garage for just a few hours with at three or four layers of shirts, sweaters, etc. I keep most of my detail bare metal part fabrication collection inside the house to ward off flash rusting. We still have snow and ice mounds from four or more weeks ago that just won't quite disappear. -
MARTS-PL310 61 Datsun Bluebird Sedan
MARTS-PL310 replied to MARTS-PL310's topic in Projects and Build Ups
And then the repaired dogleg and base was welded back on. Still not happy with the quality results. Some tweaking of the lower outside body line is needed, finish welding and small holes to fill. First early trial fit checks, outside and inside views: Then flange adjustments, to fit more flush with the not so perfect outer sill panels I had made, and weld. I also decided to add a splice plate behind the butt weld. Then I find my end cap plate is now just a bit too wide. It can be adjusted and cap welding will wait for last anyway to close out the sill box. Got some more work to do on this
- 74 replies
-
- 19
-
-
MARTS-PL310 61 Datsun Bluebird Sedan
MARTS-PL310 replied to MARTS-PL310's topic in Projects and Build Ups
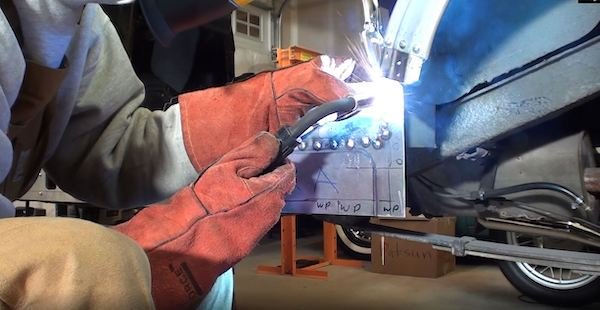
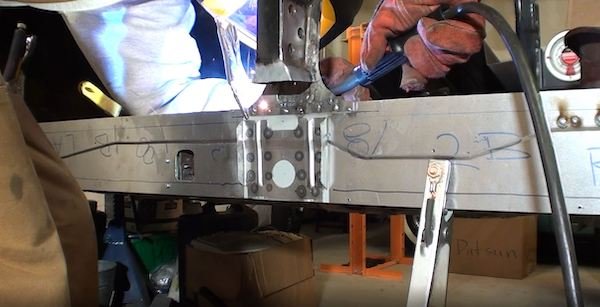
A few more pics of the inner sill. Construction the inner sill was simple. Carve it out and run it through a bead roller to make the step that the floor pan flange nests into. Except, in this case I had to do it twice because I made the mistake of using 20 gage instead of 18 gage. Second one turned out better anyway when making the bead rolled step. Welding action on the inner sill. Screen captures from my videos. Starting at the aft end and working forward. First attach to new side-of-seat floor pan.
- 74 replies
-
- 12
-
-
MARTS-PL310 61 Datsun Bluebird Sedan
MARTS-PL310 replied to MARTS-PL310's topic in Project Discussion
@yoeddynz. Working the project at home in my off work time. My workshop is basically a home built wooden table, on wheels, containing an assortment of tools. Move the other car out, roll the table and welder out and have a go at it. MIG welding is fun, almost addictive, whereas forming flat bits of metal into original shapes is hard and is probably 95 percent of my labor time. Often the parts are made into rubbish and I start again. I feel like the welding action is my reward carrot for getting parts made well enough to look and fit good. Currently, I've about finished reconstructing the jack lift point structure that nests inside the outer sill panel. I'll try and post some more pics on the build tomorrow, time permitting. -
MARTS-PL310 61 Datsun Bluebird Sedan
MARTS-PL310 replied to MARTS-PL310's topic in Projects and Build Ups
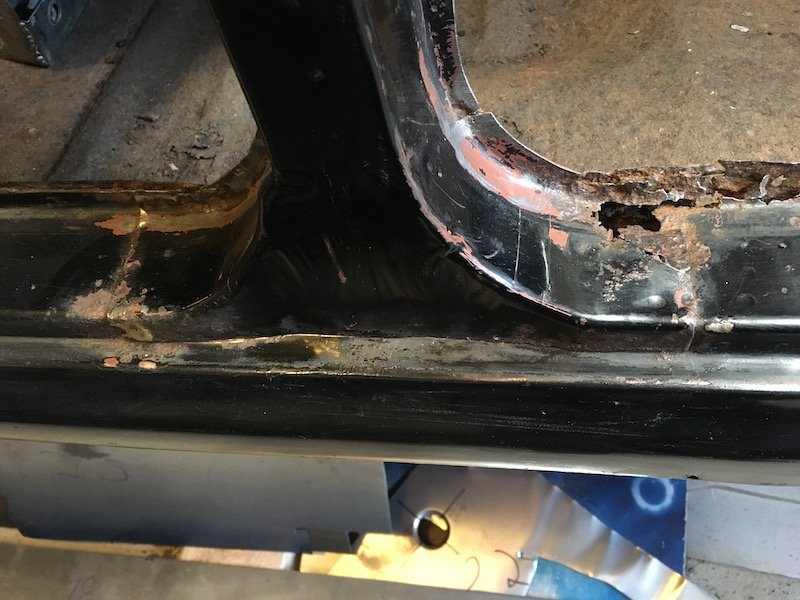
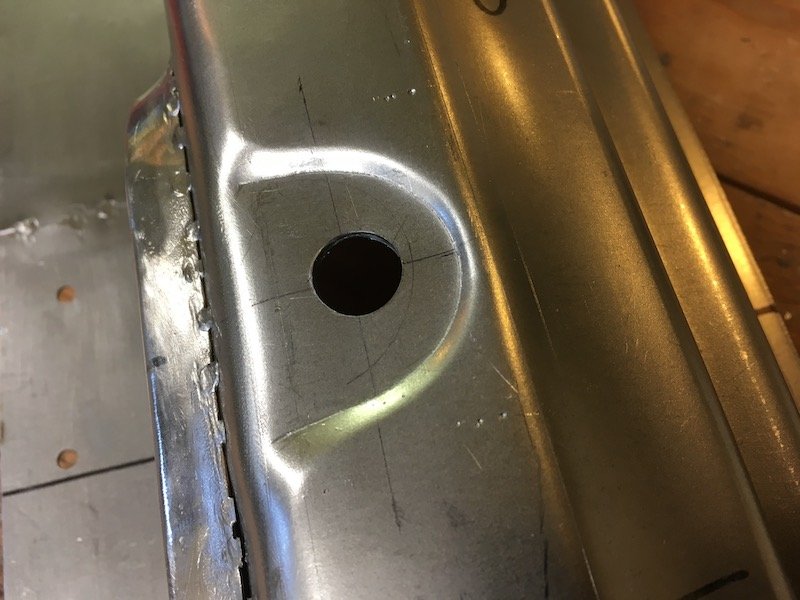
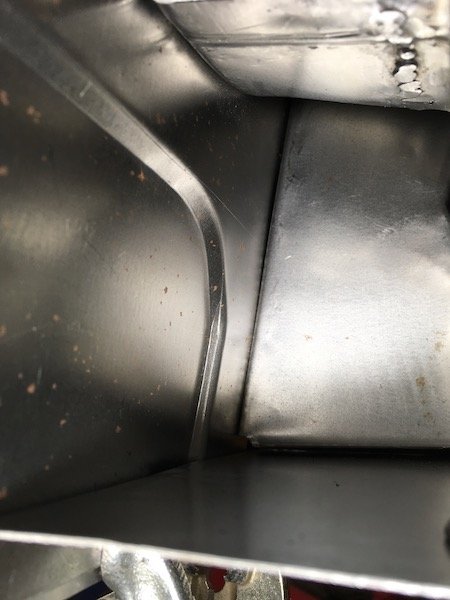
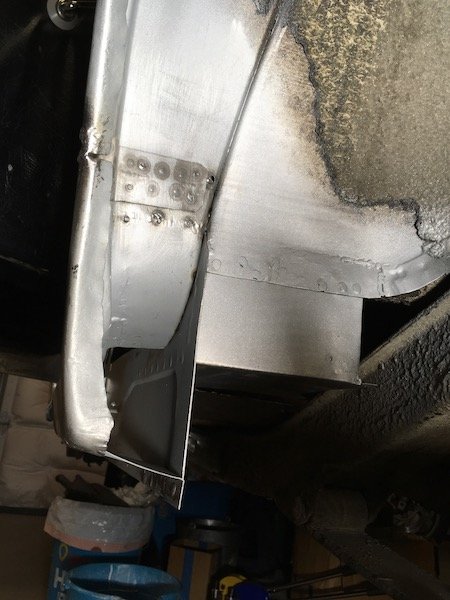
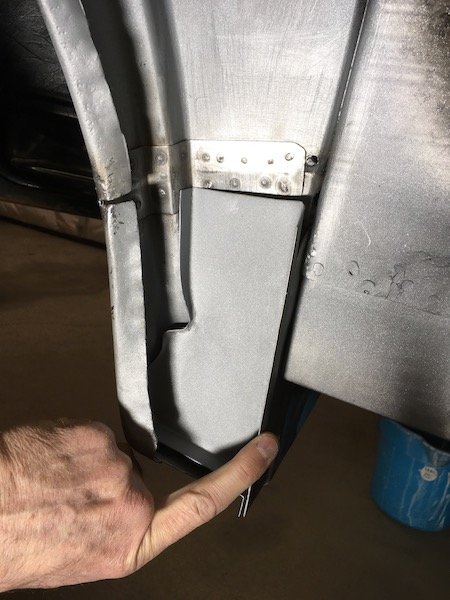
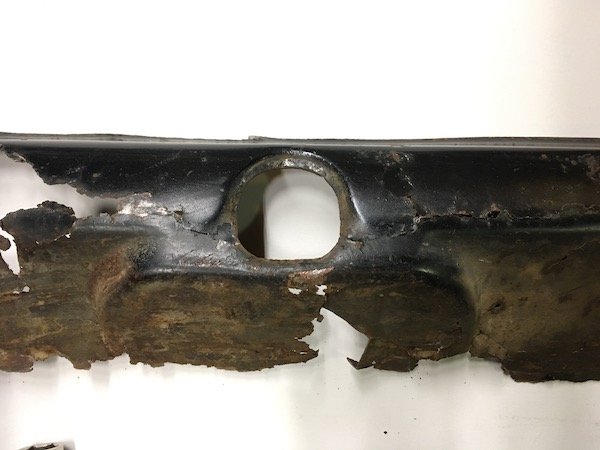
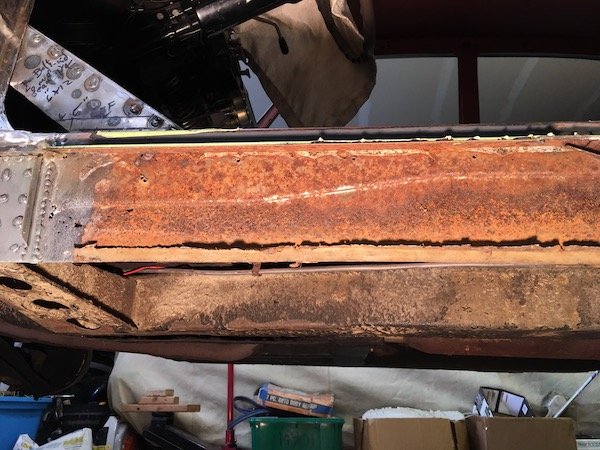
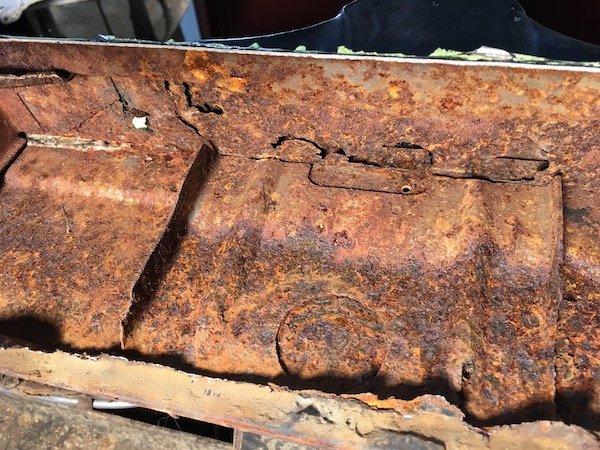
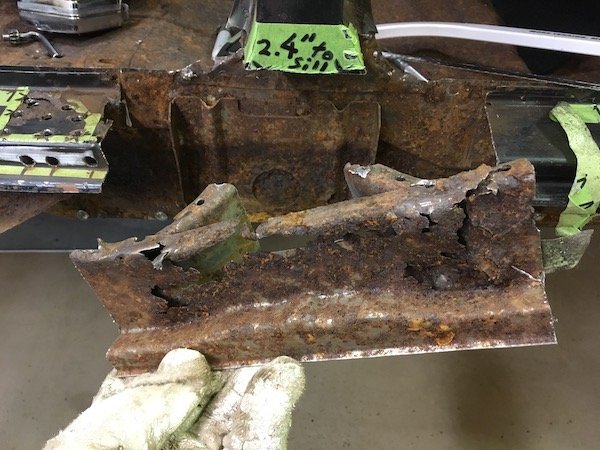
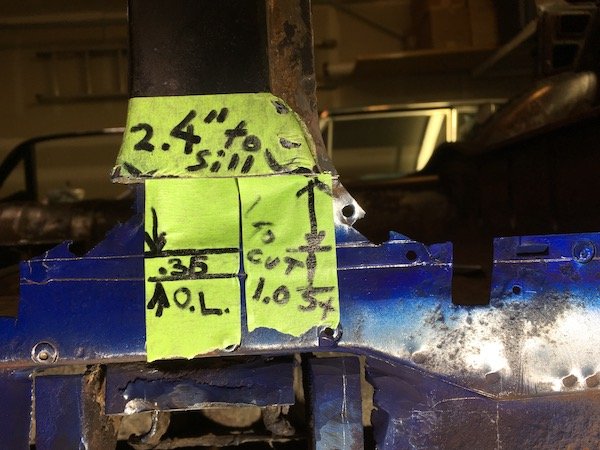
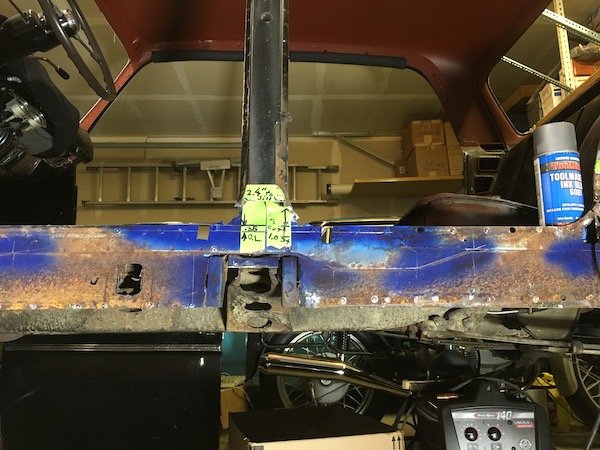
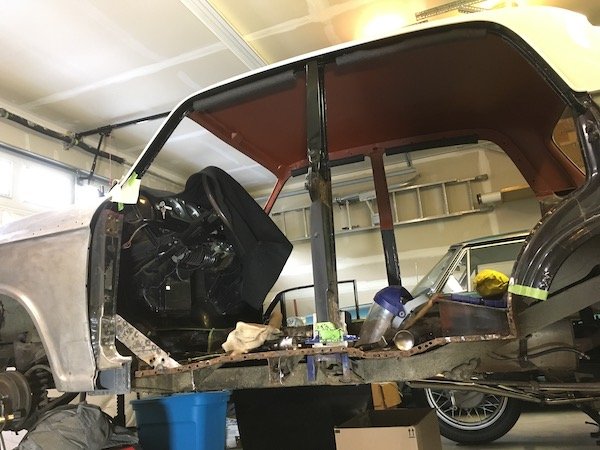
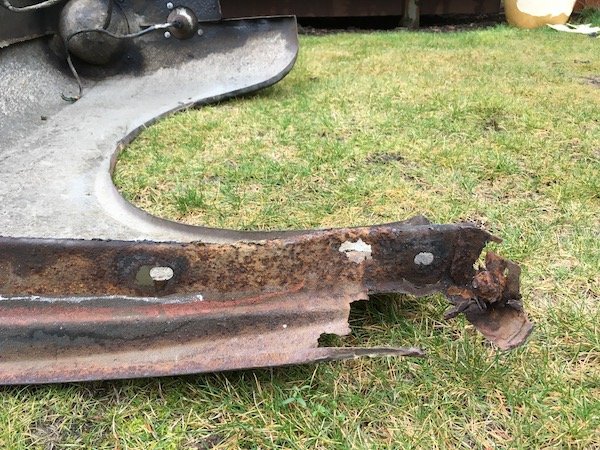
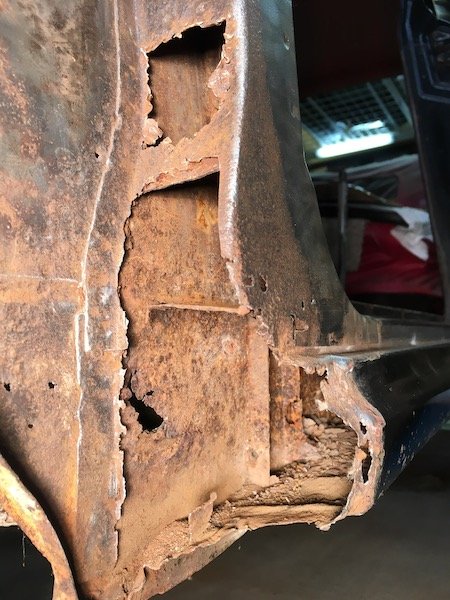
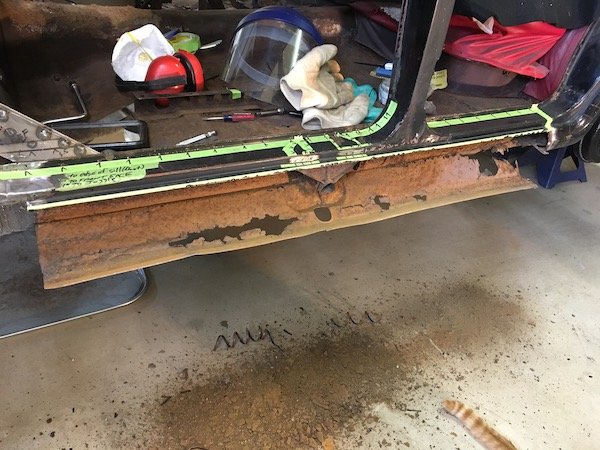
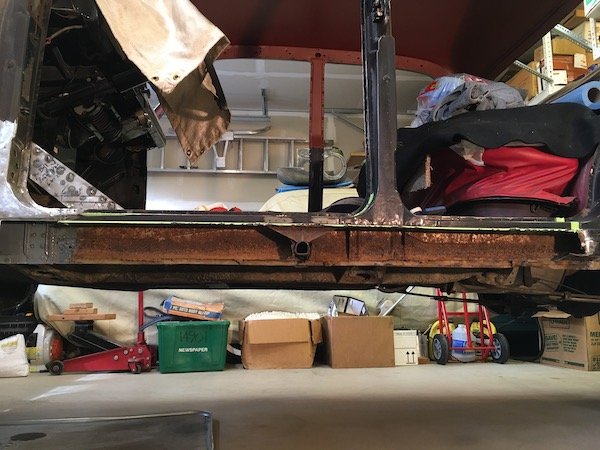
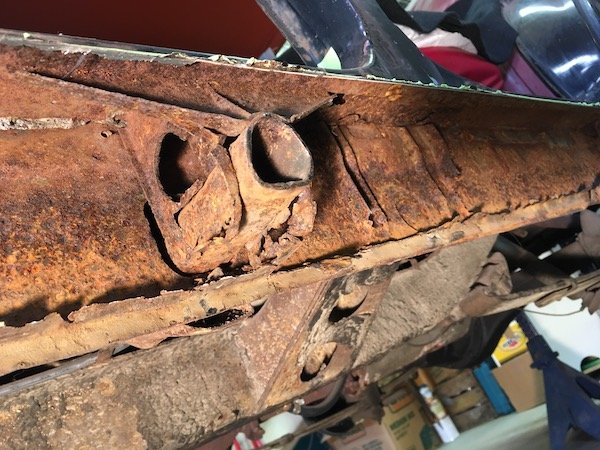
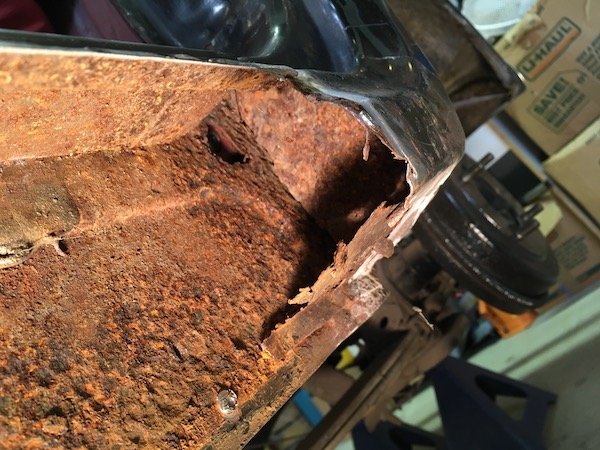
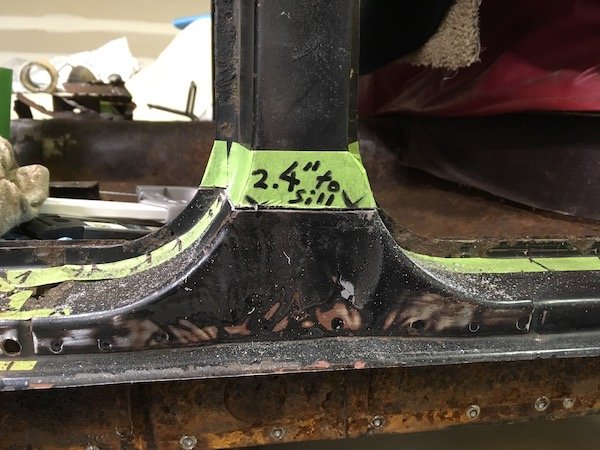
Removal of more rusted metal from the 61 Datsun Bluebird left hand side outer and inner sill, 'B' pillar, 'C' pillar and side of seat pan. A huge hole in the car structure is the end result. This gets very ugly and you may want to look away if at all squeamish. No need to panic! Almost of this is going to be replaced with new steel, but it is a very slow step-by-step process to make these parts from scratch. There is nothing here you can just go to your computer and order or even find in good condition in an auto wrecking yard. It is a heck of a learning process that will be applied to the so far untouched right side of the car. I get started by using electric metal shears, slicing and splaying open the outer sill for internal rust inspection and to understand what details are inside with respect to the side of body lifting point. I had hoped at least the upper sill and inner would be salvageable so I cut a relatively clean line against a tape edge at the body line. The outer sill immediately swung open at the lower pinch weld and then just falls off. Notice the slightly bumped out area below the body lift penetration point. This will be duplicated in the new steel panels later even though I may never use the factory lift jack tool. I do still have the jack but it is worn, unstable and deemed unworthy for safe use. It would either lose grip internally and slide downward suddenly, or the small base plate could kick out at the ground and punch the upper shaft end against the door and make a big dent. Maybe the old lift jack can be repaired and improved or maybe not. Sheet metal form detail of outer sill lift jacking point Eventually, the rusty inner sill is to be separated at the left next to the new 16g steel from the previous 'A' pillar repair and new metal lapped in at the back side of the gusset shown. If you look closely, you see the fuel line and wire to the electric pump. That line is soon removed to avoid a fire hazard. Moving further aft, we see the reinforcing structure around the lift pipe, or what remains of it anyhow. And behind that what I call the joggled gusset. This upper gusset, the near one with the three ribs, is heavy gage steel and salvageable. I thought incorrectly, that to remove the upper part of the sill, that the upper gusset would have to be separated first from the pipe. Actually the top of the pipe is not welded to the upper gusset at the notched contact point. Only the side brackets are welded to the pipe and they are weak enough to just pull apart from the pipe. I could have just lifted the upper sill right off once the regular pinch welds were drilled out. The salvaged lift pipe gusset plate. I ended up with a lot of holes from spot weld drill outs that will be used for plug welding later on. This is the joggled gusset plate that is on the opposite side of the inner sill with respect to the body mount bracket on the other side. This gusset is deemed too badly cratered and rotted and will be reproduced. I cut it out before removing the inner sill by cutting around the perimeter after a futile attempt to search out and drill out all the spot welds. Things aren't looking to good above at the base of the 'B' pillar. Lots of otherwise hidden rust damage. I'm going to cut 'B' pillar base off and repair. The damage and repairs needed to the now cut off 'B' pillar is shown in the light. I subject the 'B' pillar to an electrolysis bath to remove bulk rust and identify the salvageable sections. A lot of it is still good and will be cleaned up and reused. Portions near the pinch weld are bad and the flat horizontal section deep inside is shot. Outward facing sections are perfectly good. Jumping ahead here a little bit since I did not have a good pic of the freshly removed gusset plate. As you can see, it was total destruction to remove it. A real light show with all the flying sparks! Shown above is the newly made replacement. The joggle or step was made under force from a hydraulic press and an opposing stack of offset steel bars. The aft end inside the sill is heavily cratered and holed. Thus I go to the extreme of cutting off the 'C' pillar, aka dog leg, for complete repair as the hidden damage inside is total rust out which will otherwise just continue. Where there would be an end of sill block off plate in the far back is really just rust powder stuck to the asphalt undercoat. At the lower pinch weld, the flange of the outer sill moves upward leaving just the inner sill plate poking down about a half inch. Why? Just looks a bit odd. Probably to match and fit the slight difference in contours at the 'C' pillar. The now cut-off dog leg ('C' pillar base). About 60 percent or more is perforated or too thin to reuse. This part proves difficult to reproduce. It is still not quite right after patching it up section-by-section off the car. I tried, and will tweak it a bit more now that it is welded back on the car. I might do it differently when I go to work on the right side of the car now that I know which areas should be cut out. The now fully exposed inner sill plate. This was a bit of fun. Before drilling the spot welds and removal, I cover all the step contours with blue machinist paint and scribe on the metal the intersection points to permit accurate measurement of the sill. The inner sill steps out about a tenth of an inch where the flange of the floor is butted against it for nested fit. In addition to recording measurements prior to removal of the inner sill, I make a paper overlay as a secondary backup to sometimes flawed note taking. I've also made a full size drawing on mylar as yet a third method to help reproduce the part. Key measurements at the 'B' pillar overlap (O.L) and inner sill. It's starting to look pretty messy and getting worse soon. Inner sill is drilled of the spot weld connections to the floor flanges and removed. The underfloor brackets are cut off at their flanges because these brackets are severely beat up from impact damages. The bracket for the body mount is planned for reuse, if it is good, so the flanges are left intact. Not reusable! As final act, the side of rear seat floor pan is cut out. Is there a name for this thing? This proves to be a relatively easy and fun part to reproduce because of the straight bends and box shape. Just a little challenging to butt weld into the side of the seat pan later on. A rust hole big enough for a mouse to climb through. And they did, sometime stockpiling grass seed and such here and there. And now the huge ugly hole in the car! A preview of making new parts and closing this chasm up. Making left and right hand parts where possible. I'll probably focus on the inner sill next post. More later.
- 74 replies
-
- 21
-
-
MARTS-PL310 61 Datsun Bluebird Sedan
MARTS-PL310 replied to MARTS-PL310's topic in Projects and Build Ups
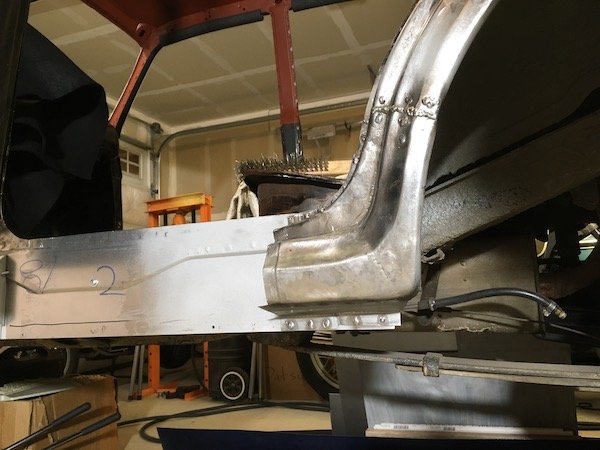
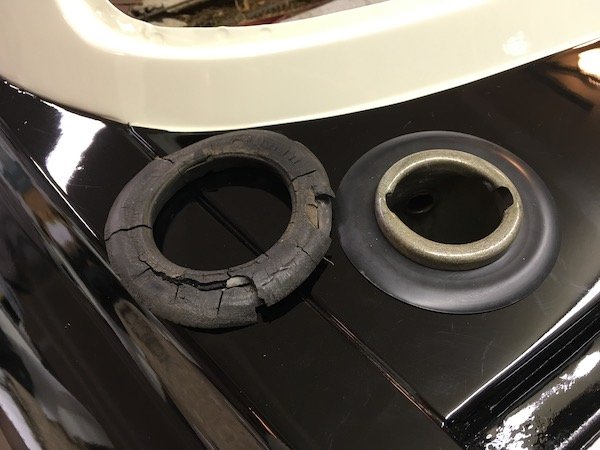
Repairs to the 61 Datsun Bluebird left hand side 'A' pillar (or post) The starting situation. More than a little rusty. Several portions are completely gone. I started by making reference measurements Cutting the remainder of the forward sill stub off Reinforcement was added before cutting the inner sill plate out. Making a paper template for an inner sill patch Cut it out Sizing up some 16g steel sheet Finally the patch, gusset plate and body mount bracket (on inboard side) is welded. Had to do it twice as it was placed crooked the first time. Still learning how to weld with the MIG. I should have turned up the heat for these welds against the 16g, still a bit cold with too much build up. The rest of the inner sill going aft will get cut and replaced later. Inboard side Did some sketching and cut out some flat bits to make the rest of the pillar They may not match perfect, since some of these cover undefined areas, but they are better than empty air space! Beginning of the outer sill forward stub Forward sill stub inside Initial fit checks, and adjust and fit and repeat Added the floating nutplates A view of an original style retainer for the square nut. Bent over 180 to get a wrench on the nut after torching a hole in the inner panel. Notice only one tab is welded to the metal. From the right hand side pillar that is toast. The area is phosphoric acid etched and prepped for weld and protective paint where it can't be reached later Another viewpoint Beginning to weld it. Finally I'm getting the plug welds hot enough to penetrate well and lay flat. The reproduced upper bits. Didn't like the pie cuts but it worked Same as above, flipped over This metal work was getting tedious. For a diversion, I located a Nissan rubber grommet to replace the rotted rubber on left. This is the typical state of the rubber parts all over after nearly 60 years. Okay, back to the business of welding the parts onto the Bluebird... Prepping more of the soon to be hidden innards Get it welded! It's taking shape Getting there Now to just grind and sand the welds flush It looks not too bad. Solid metal again! The rest of the outer sill will be reconnected at the stub joint much later. Next posting will be removal of multiple parts, including; outer sill, 'B' pillar bottom, 'C' pillar (or dog leg) and remainder of inner sill.
- 74 replies
-
- 26
-
-
MARTS-PL310 61 Datsun Bluebird Sedan
MARTS-PL310 replied to MARTS-PL310's topic in Project Discussion
And why am I in the house messing with old photos on Saturday morning and not outside or working on the Bluebird in the garage? Because the weather has taken a turn for the worse and it's just too darn cold. My poor 86 Chevy Caprice is outside. Brrr.
-
MARTS-PL310 61 Datsun Bluebird Sedan
MARTS-PL310 replied to MARTS-PL310's topic in Project Discussion
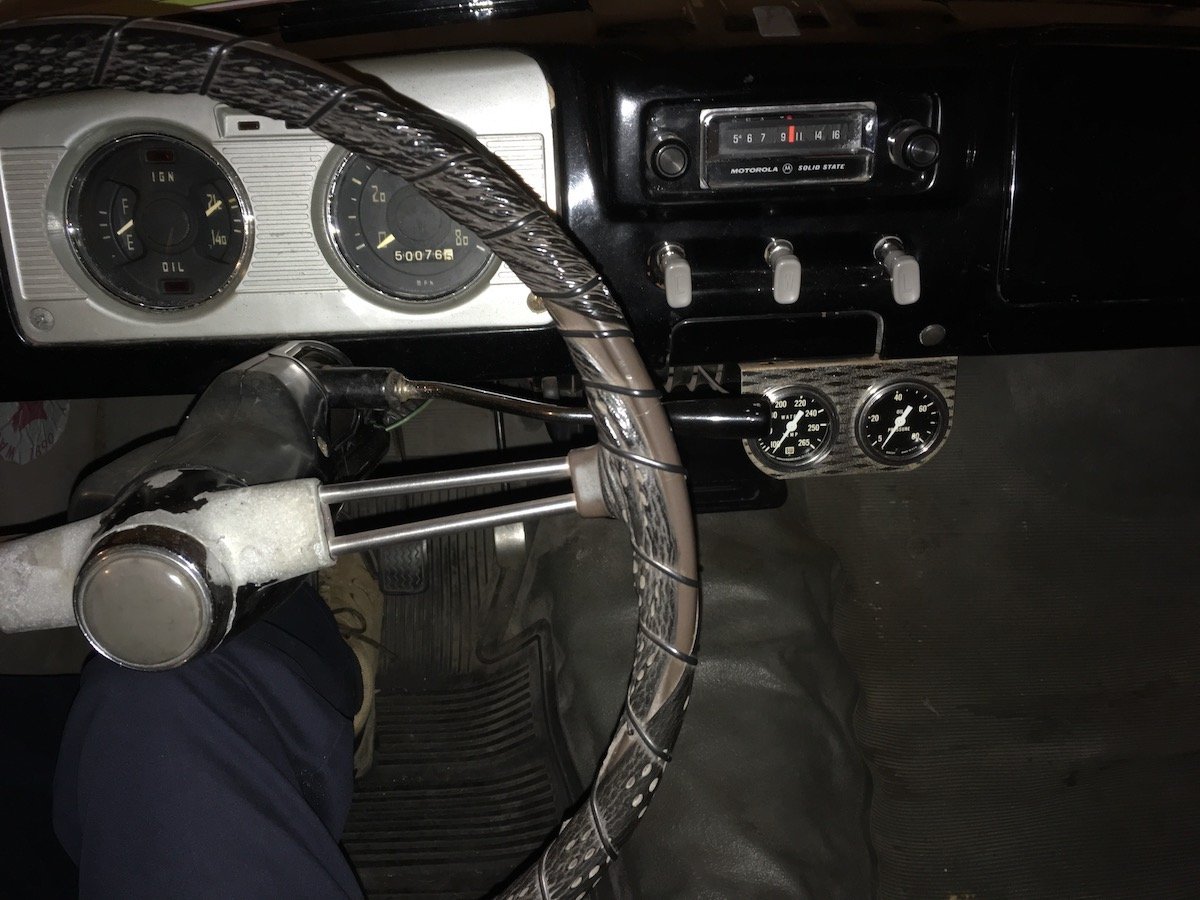
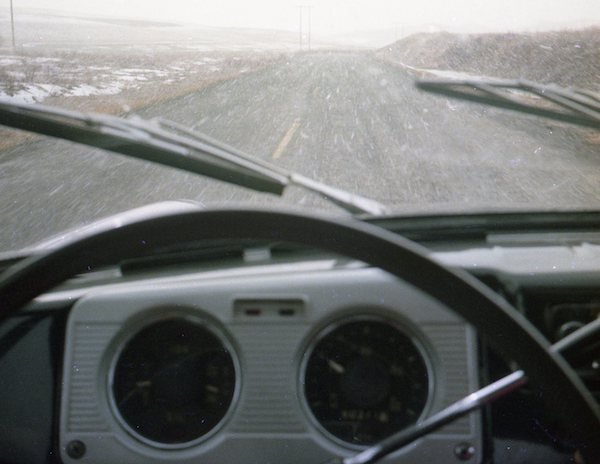
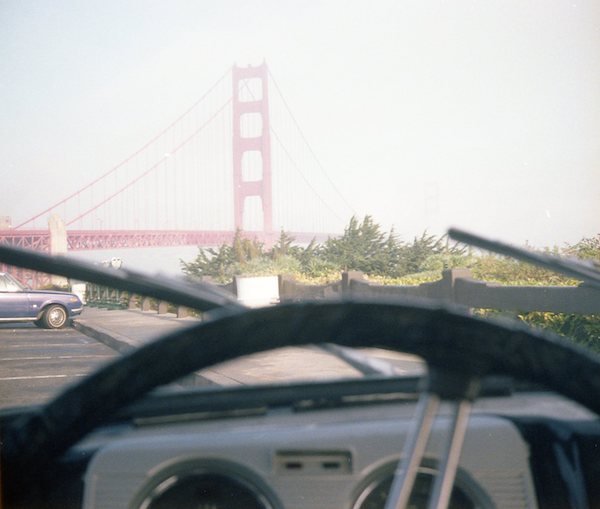
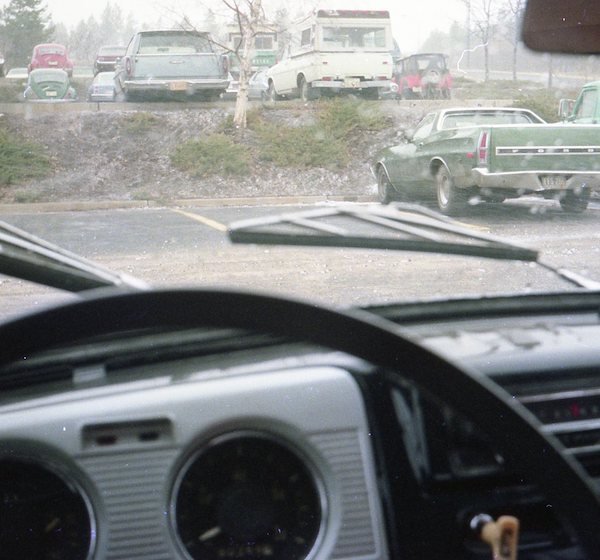
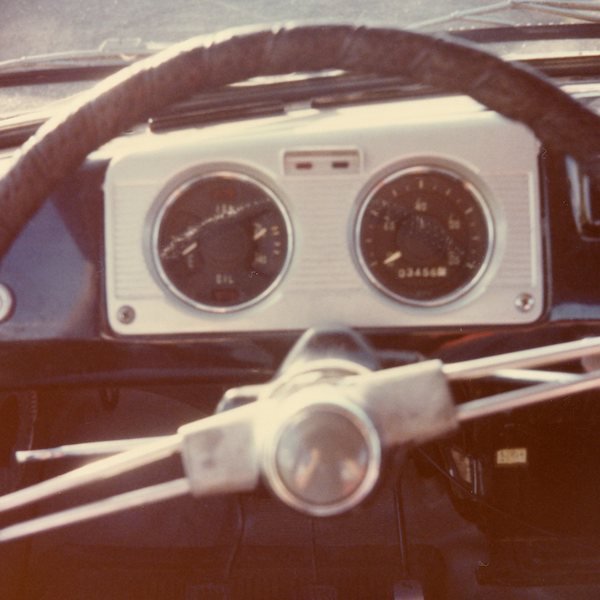
More history. I could move this to the project build but I'm not building or changing anything. I'm content with leaving the instrument panel about the same as it was and is. It all works except the inop radio which was probably damaged by the maximal cruising revs and resonance from the engine. Some historical photos follow the current as is photo. The 61 Datsun Bluebird dashboard or instrument panel. How do you like those stainless steel rods supporting the steering wheel rim? Classic! But probably deadly in a crash. 1970's photos: Just another snowy day. Inspecting the Golden Gate bridge. This radio couldn't hack the vibes. It failed a couple of months after I replaced the previous failed unit. It's still installed only to fill the hole.
-
MARTS-PL310 61 Datsun Bluebird Sedan
MARTS-PL310 replied to MARTS-PL310's topic in Project Discussion
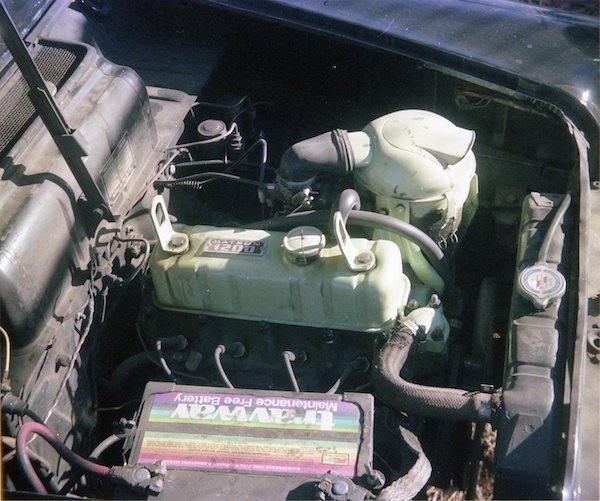
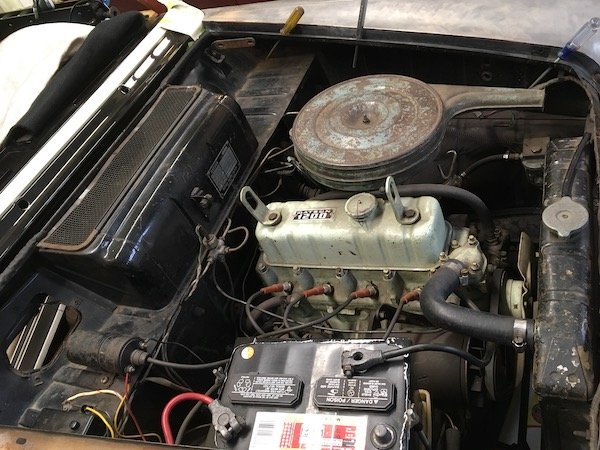
A historical engine comparison. The 61 Datsun Bluebird engine then, 1975, and now, 2019. The 48 HP engine back in 1975 The same engine bay 44 years later with the 60 HP engine in 2019. Same radiator, valve cover, distributor, battery hold down frame, etc. The 60 HP engine was salvaged from a wrecking yard PL311 Bluebird in 1976. Still missing the second fan blade! but does not affect cooling at all. Generator is from a 59 Chevy truck.
-
MARTS-PL310 61 Datsun Bluebird Sedan
MARTS-PL310 replied to MARTS-PL310's topic in Project Discussion
What 40 plus years did to a tire on my 61 Datsun Bluebird! A slight bit of tread separation from the tire inner carcass and belts. Tossed it away of course.
-
MARTS-PL310 61 Datsun Bluebird Sedan
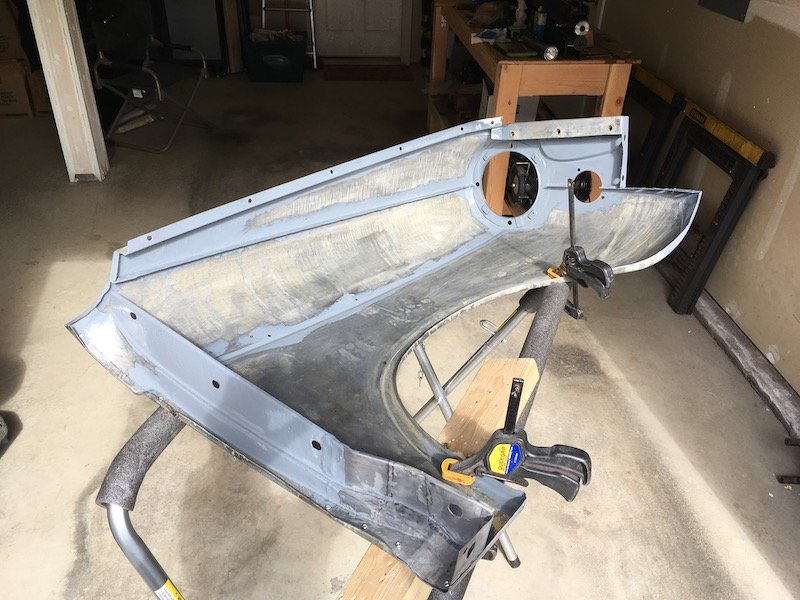
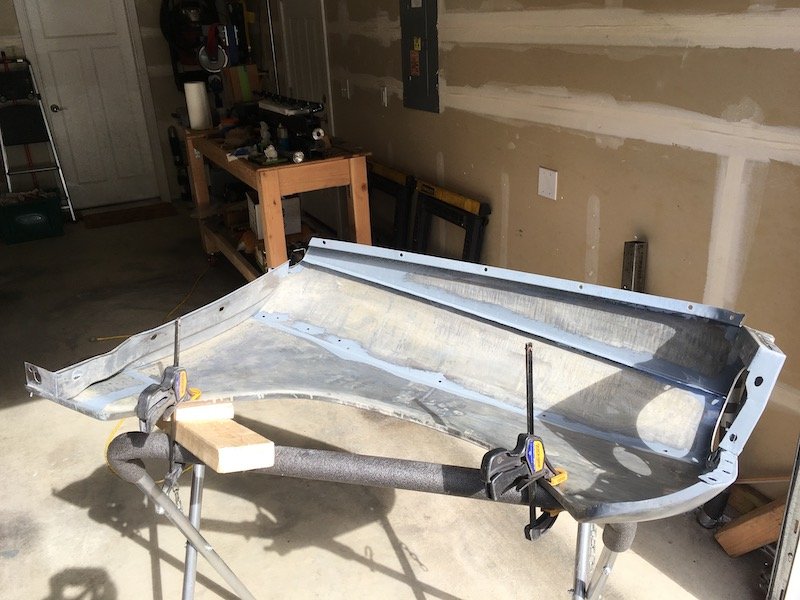
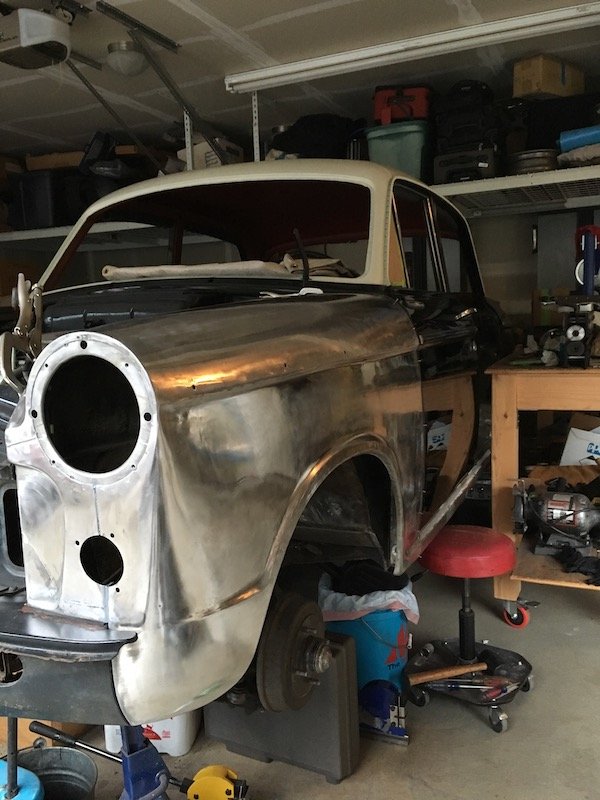
MARTS-PL310 replied to MARTS-PL310's topic in Projects and Build Ups
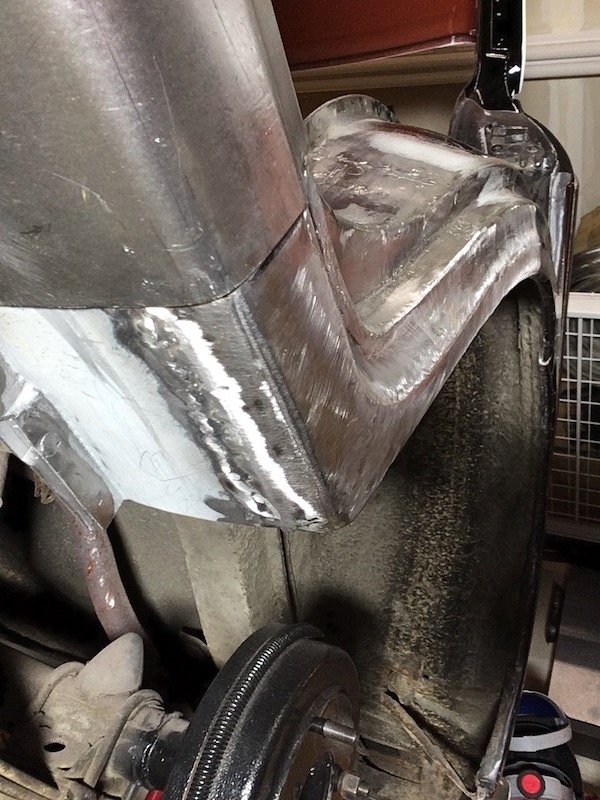
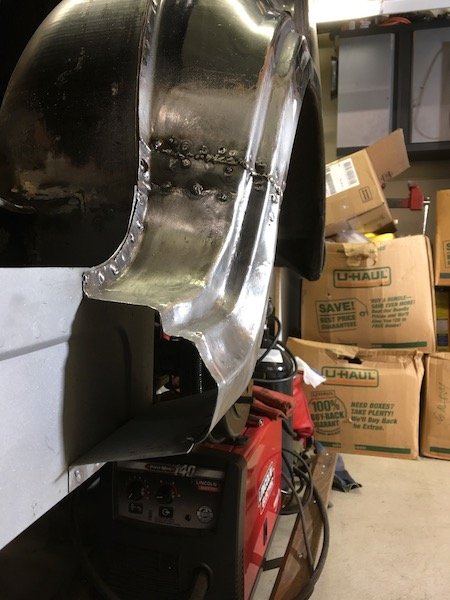
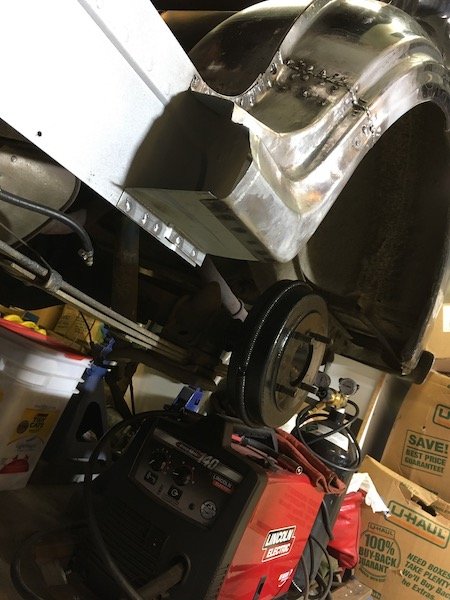
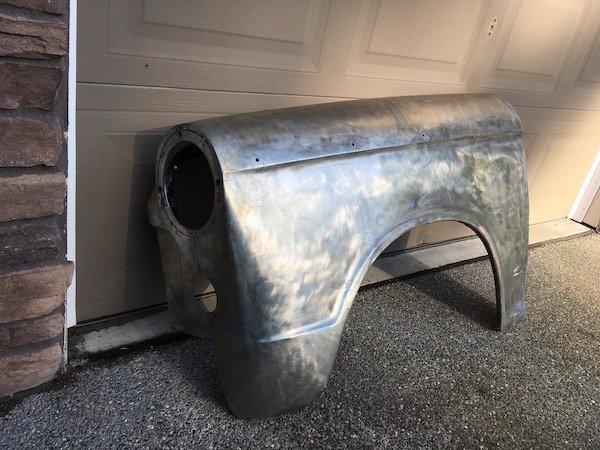
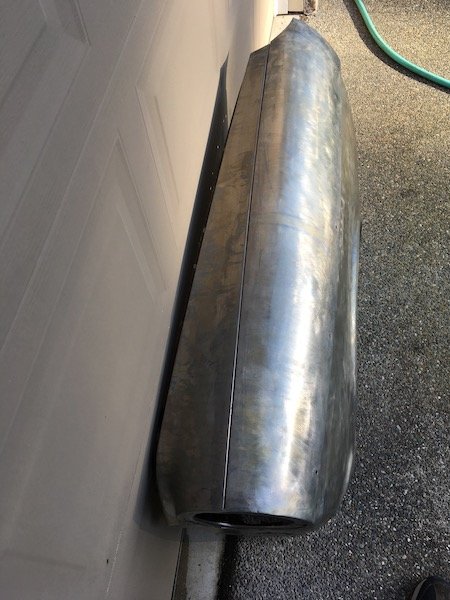
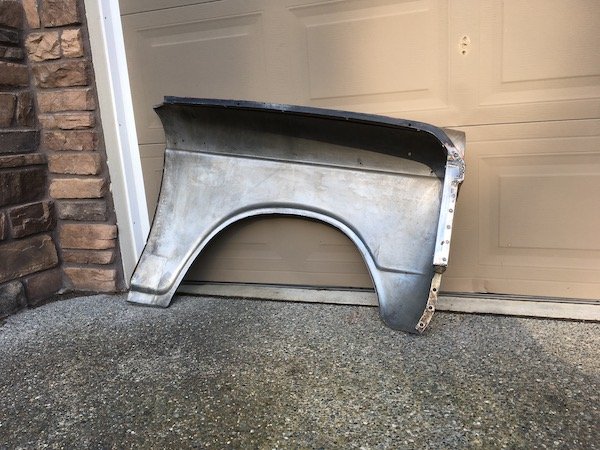
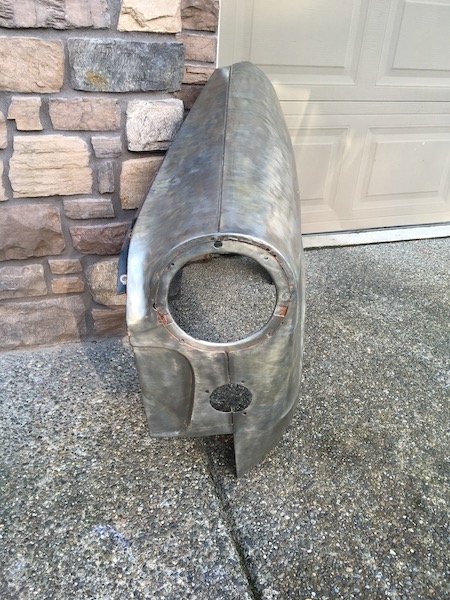
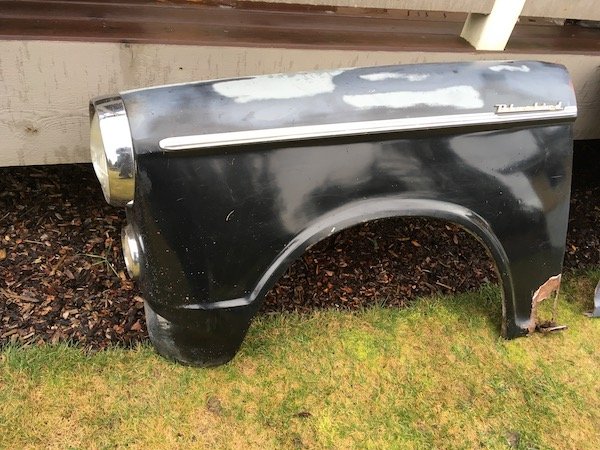
Repairs to the left front fender. Starting with this gaping hole in the lower panel. New outer skin. My first real use of MIG except very minor tack repairs to other stuff or the years. It didn't weld too well next to very thin metal. I had to weld at the coldest setting and do backside as well. Inner Welded up the antenna hole. No use for that anymore. Kept burning holes in the metal again until using some flattened copper pipe to back up the weld. Inner aft structure. Here it is compared to the other good fender. A somewhat complicated shape. The lower 5 inches or so have to be cut off. Repair iteration one. No good, try again... Second try, again no good Third try. It might do but will wait for weld to the fender after it can be fit checked in combination against a repaired 'A' post, sill, and with the door installed. Notice I've removed the remainder of the upper structure to get all the rust removed and work the numerous dents in the fender skin flush. What's not shown here is the random bouncing back and forth between various other small repair work when one area gets a bit challenging. On to the front of the fender... This got a lot worse as you can see once I wire wheeled it. A little patch panel beating work with a wooden form block and lots of hammering. Checking the fit and marking the cut line. Okay for first iteration. Welded in Then proceeded to fabricate a complete new forward inner fender structure These new floating nut plates aren't going anywhere. No tearing out of the single attach tab on the original design. Not that great of a view. It shows where the back of the inner fender structure attaches to the body shell. Then I stripped the paint, asphalt undercoating, body filler, residual rust, etc down to shiny steel inside and out. Plugged a few pin holes with weld. It will still need some panel beating and straightening later on. And of course reattachment of the aft inner structure. Finished with this fender for now. Next posting will be the left hand side 'A' pillar repair.
- 74 replies
-
- 20
-
-
-
MARTS-PL310 61 Datsun Bluebird Sedan
MARTS-PL310 replied to MARTS-PL310's topic in Projects and Build Ups
The left side Bluebird rust damage survey. Right side is about the same except much less damage to the front fender and more damage to the 'A' pillar or post. Starting with the left front fender and working back to the rear dog leg and side of rear seat floor. And a then preview of the right side.
- 74 replies
-
- 11
-
-
MARTS-PL310 61 Datsun Bluebird Sedan
MARTS-PL310 replied to MARTS-PL310's topic in Project Discussion
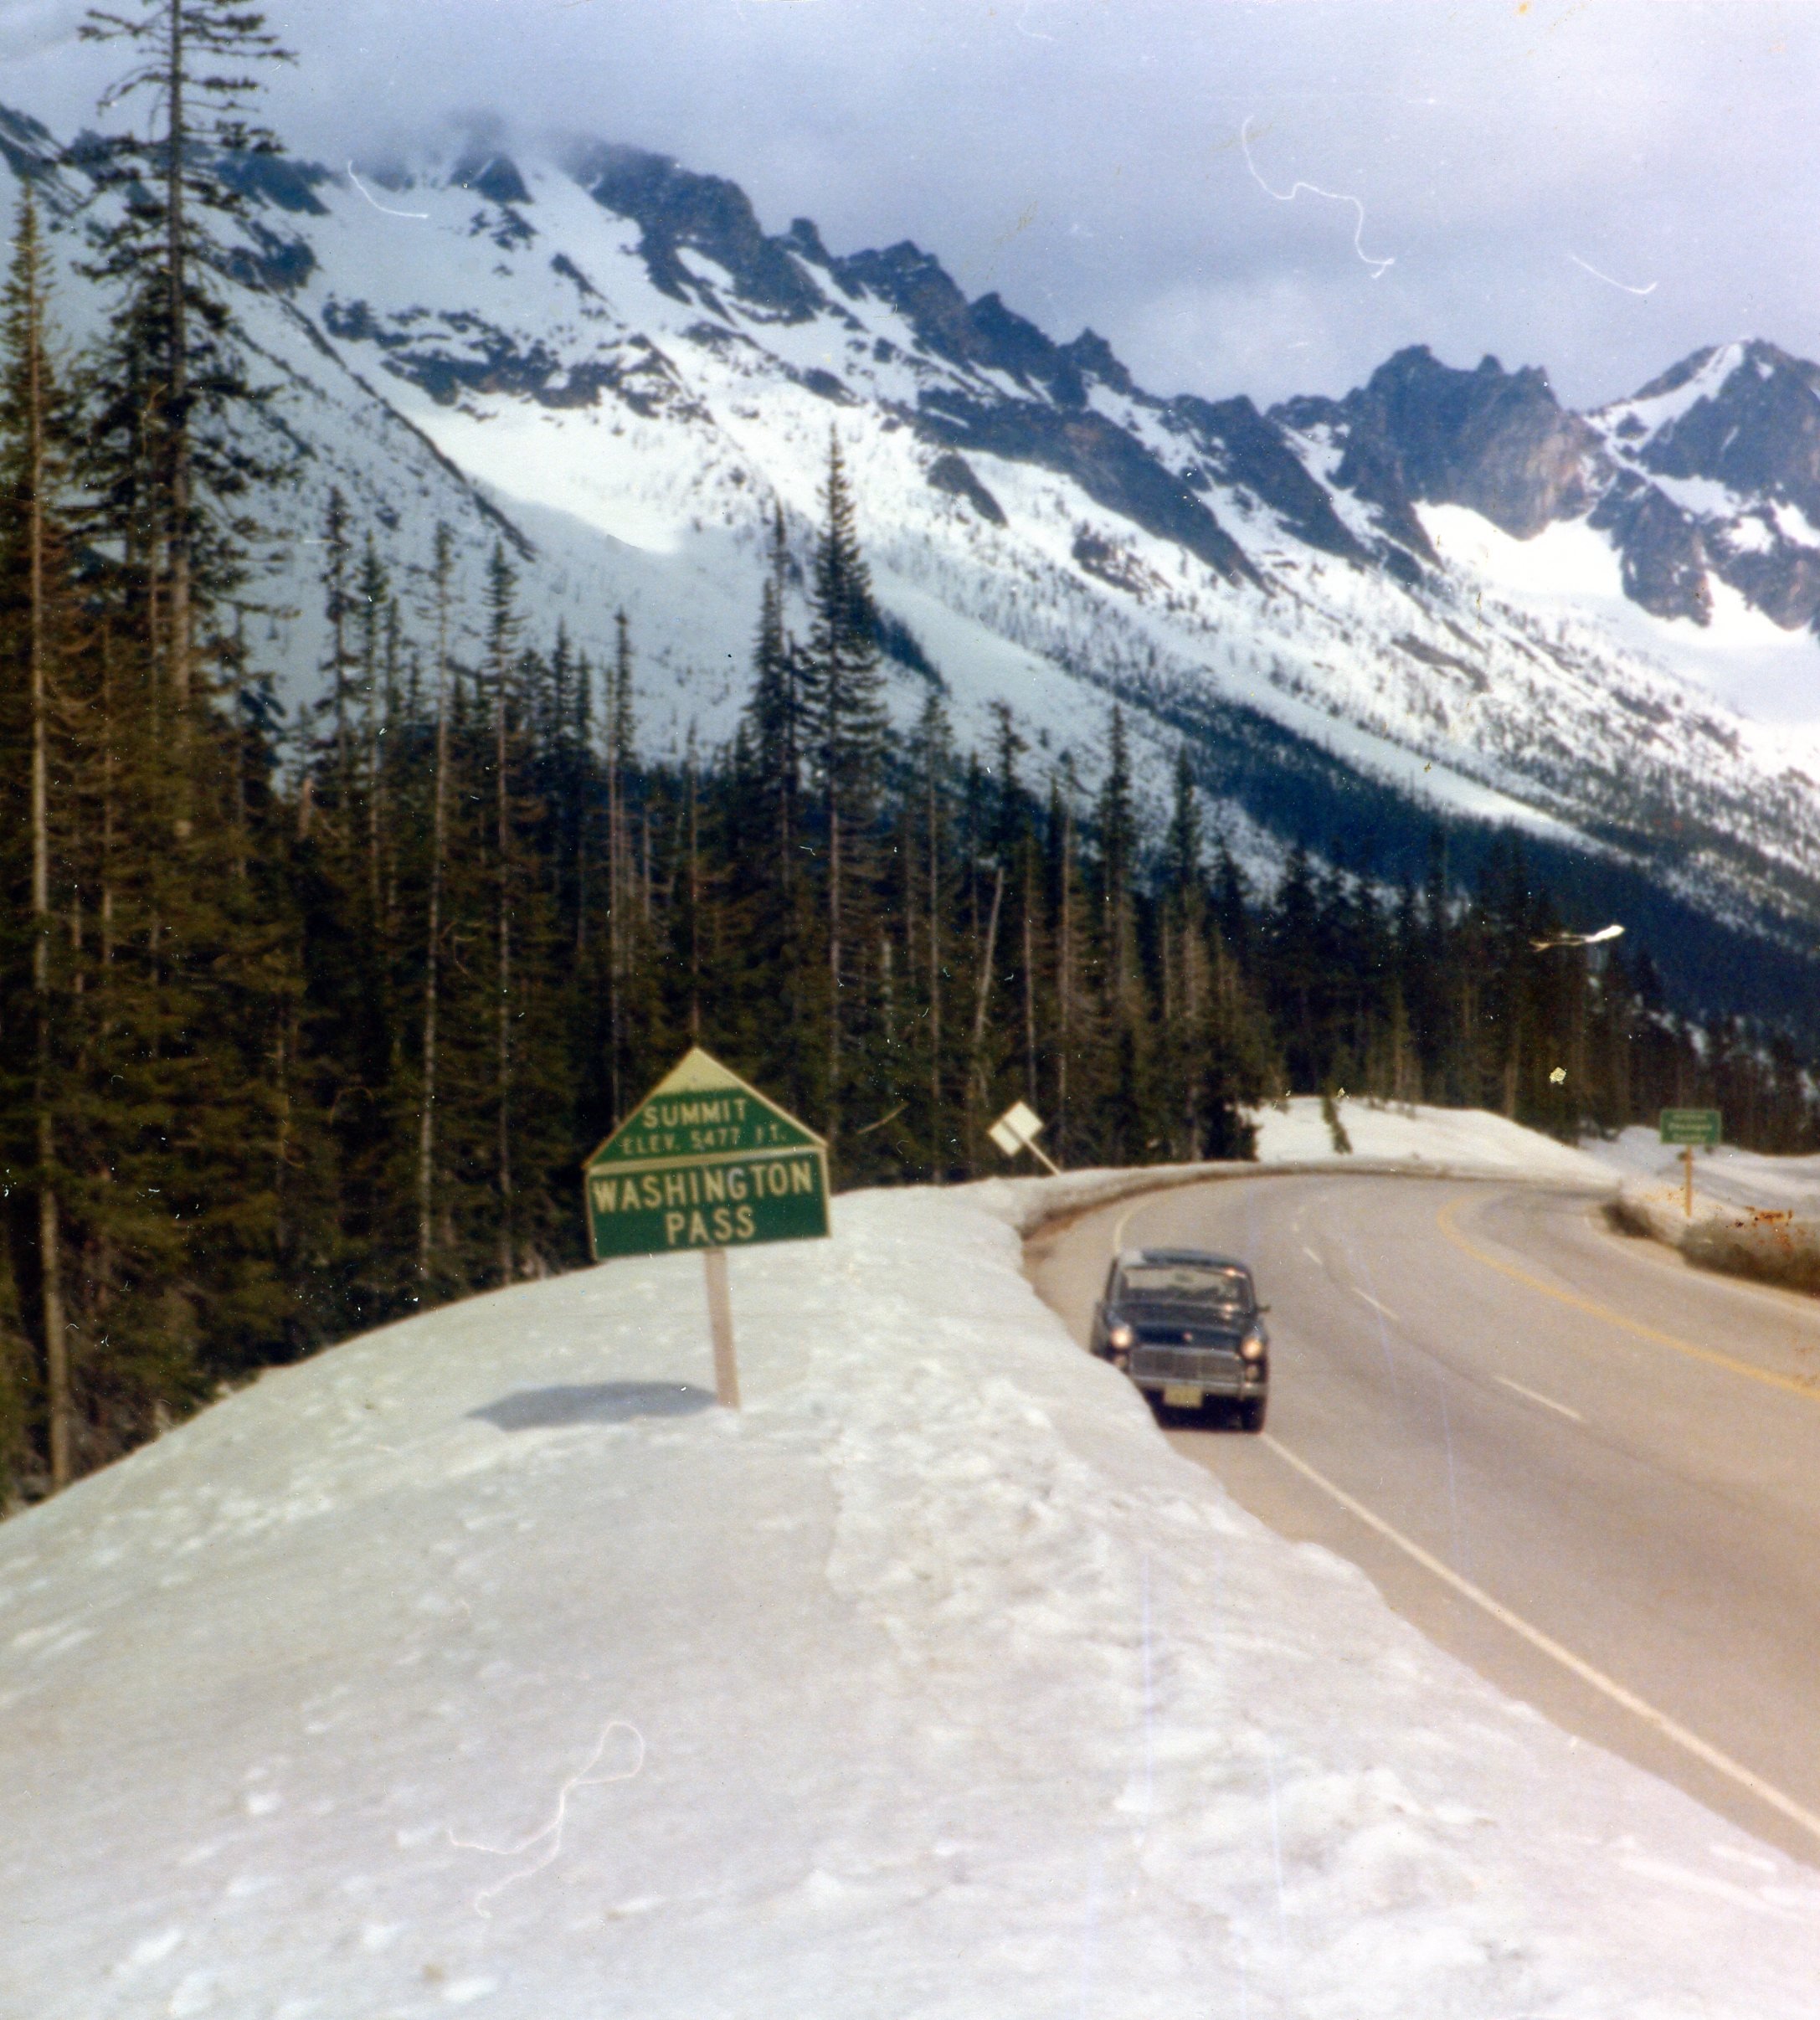
More Bluebird history. I love driving up into the mountains. Then, now and always. One of my favorite Bluebird mountain pass crossings back in June 1976, westbound on beautiful highway 20 through the Washington North Cascades. For the 48 hp Bluebird on the steeper grades, this was nearly always a maximum power event, pedal to the floor and changing down to second gear very early.
-
MARTS-PL310 61 Datsun Bluebird Sedan
MARTS-PL310 replied to MARTS-PL310's topic in Project Discussion
@yoeddynz. It is likely that there are no running examples of the 310 left in the U.S., including mine, at least while it is down for major rust repair. I've noticed numerous examples of the later model Bluebird 312 with the wider grill and larger taillights. Some 312s are preserved in very good condition. The 310s though are indeed very rare Datsuns. Only one has been witnessed in traffic in my entire life. It could have something to do with a significant axle weakness and low numbers of the 310 type (sedans and wagons) sold. I managed to break two axles in one year before upgrading to the stronger Bluebird 311 and 312 design. This necessitated swapping the entire rear drive assembly due to nearly all the part designs changing. Maybe only the wheels studs carried over? ; ) Nissan quickly engineered many of the rear drive assembly parts to be more robust, and to accommodate the 60 hp engine, including; axles, bearings, ring and pinion carrier, differential, axle housing, brake backing plates and drums. Yes, there are clubs with a few of the early 60's pickups, some later 312 Bluebirds, and all the other popular models that followed, but no members owning running Bluebird 310s that I know of.