

Bluebear01
-
Posts
198 -
Joined
-
Last visited
-
Days Won
2
Posts posted by Bluebear01
-
-
- Popular Post
After all that the wedding went without any issues. We covered about 50 miles in total that day, running around for photos etc. At the end of the day I parked her up at the reception and collected many Barry's, all eager to tell me their Austin stories and lamenting that they ever got rid of theirs. Luckily this Austin's previous Barry had the forethought to not throw her away.

-
 25
25
-
- Popular Post
Finally, now she was mechanically reliable again (for now) it was time to focus on the paint. After a few evenings buffing all the panels, running steel wool over the chrome and waxing it all for the first time in probably 50 years it came up really good! Better than I'd hoped to be honest. And most importantly the view from the drivers seat was restored to the best it has ever been.
-
14
-
 1
1
-
- Popular Post
The last issues in the drive line were the driveshaft and the torque tube support bush. The driveshaft UJ's were out of phase which was probably not helping with the "high" speed vibrations. Easy enough to line them up. The bush takes the full load of rear diff twist on take off, so it's no surprise it had collapsed with all that clutch shudder. New bush cut down to size and fitted means it's now running way better and is super smooth on take off again!
-
12
-
- Popular Post
The input seal on the box is a scroll seal, and a pretty worn one at that. The female input shaft is capped with a welch plug which is also letting oil out along the splines and flicking through the lining. It was a pretty easy job to lathe out the nose to accept a modern lip seal, and for the shaft & cleaned it right out and made a plug of RTV in the end to seal it up. Gearbox went back in and tested great! Before I removed it I was able to simulate the shudder on take off by releasing the clutch very slightly and holding resistance on the output flange with the driveshaft off. It had a steady pulse that is now completely gone.

-
12
-
So me and my boy wipped out the floor and removed the gearbox. It's super easy to work on this thing! Almost like a model car. The clutch was covered in oil and the clutch fingers were badly worn. The clutch lining was new however and not buckled, so I used a heat gun and plenty of break clean to draw out the oil till it was nice and dry. Then I went ahead & replaced the pressure plate fingers, giving them a few adjustments to make them sit at the same height.
The oil in the clutch was gear oil, so even thought the engine is leaking a heap I focused on getting the gearbox front seal dry.
-
8
-
-
It's had a nasty shudder on take off for a while now. I'd been driving around the problem thinking it must be a clutch issue and I'll sort it after the wedding. On the way to work however it decided to sudenly loose almost all drive! I managed to limp home and after a quick look figured I'd broken an axle. On closer inspection the rear hub had fractured clean in half. It looks like the wheel bearing had walked off a fraction, loading up the hub until it gave up. Luckily it happened now and not on the wedding day!
My boss is into his Austins himself and came to the rescue with another hub. After replacing and securing the wheel bearing, and closely inspecting the other side we had drive again. I now thought it might be best if I go through the whole drive line & get rid of that shudder to try and reduce the chances of another issue.
-
6
-
 1
1
-
-
- Popular Post
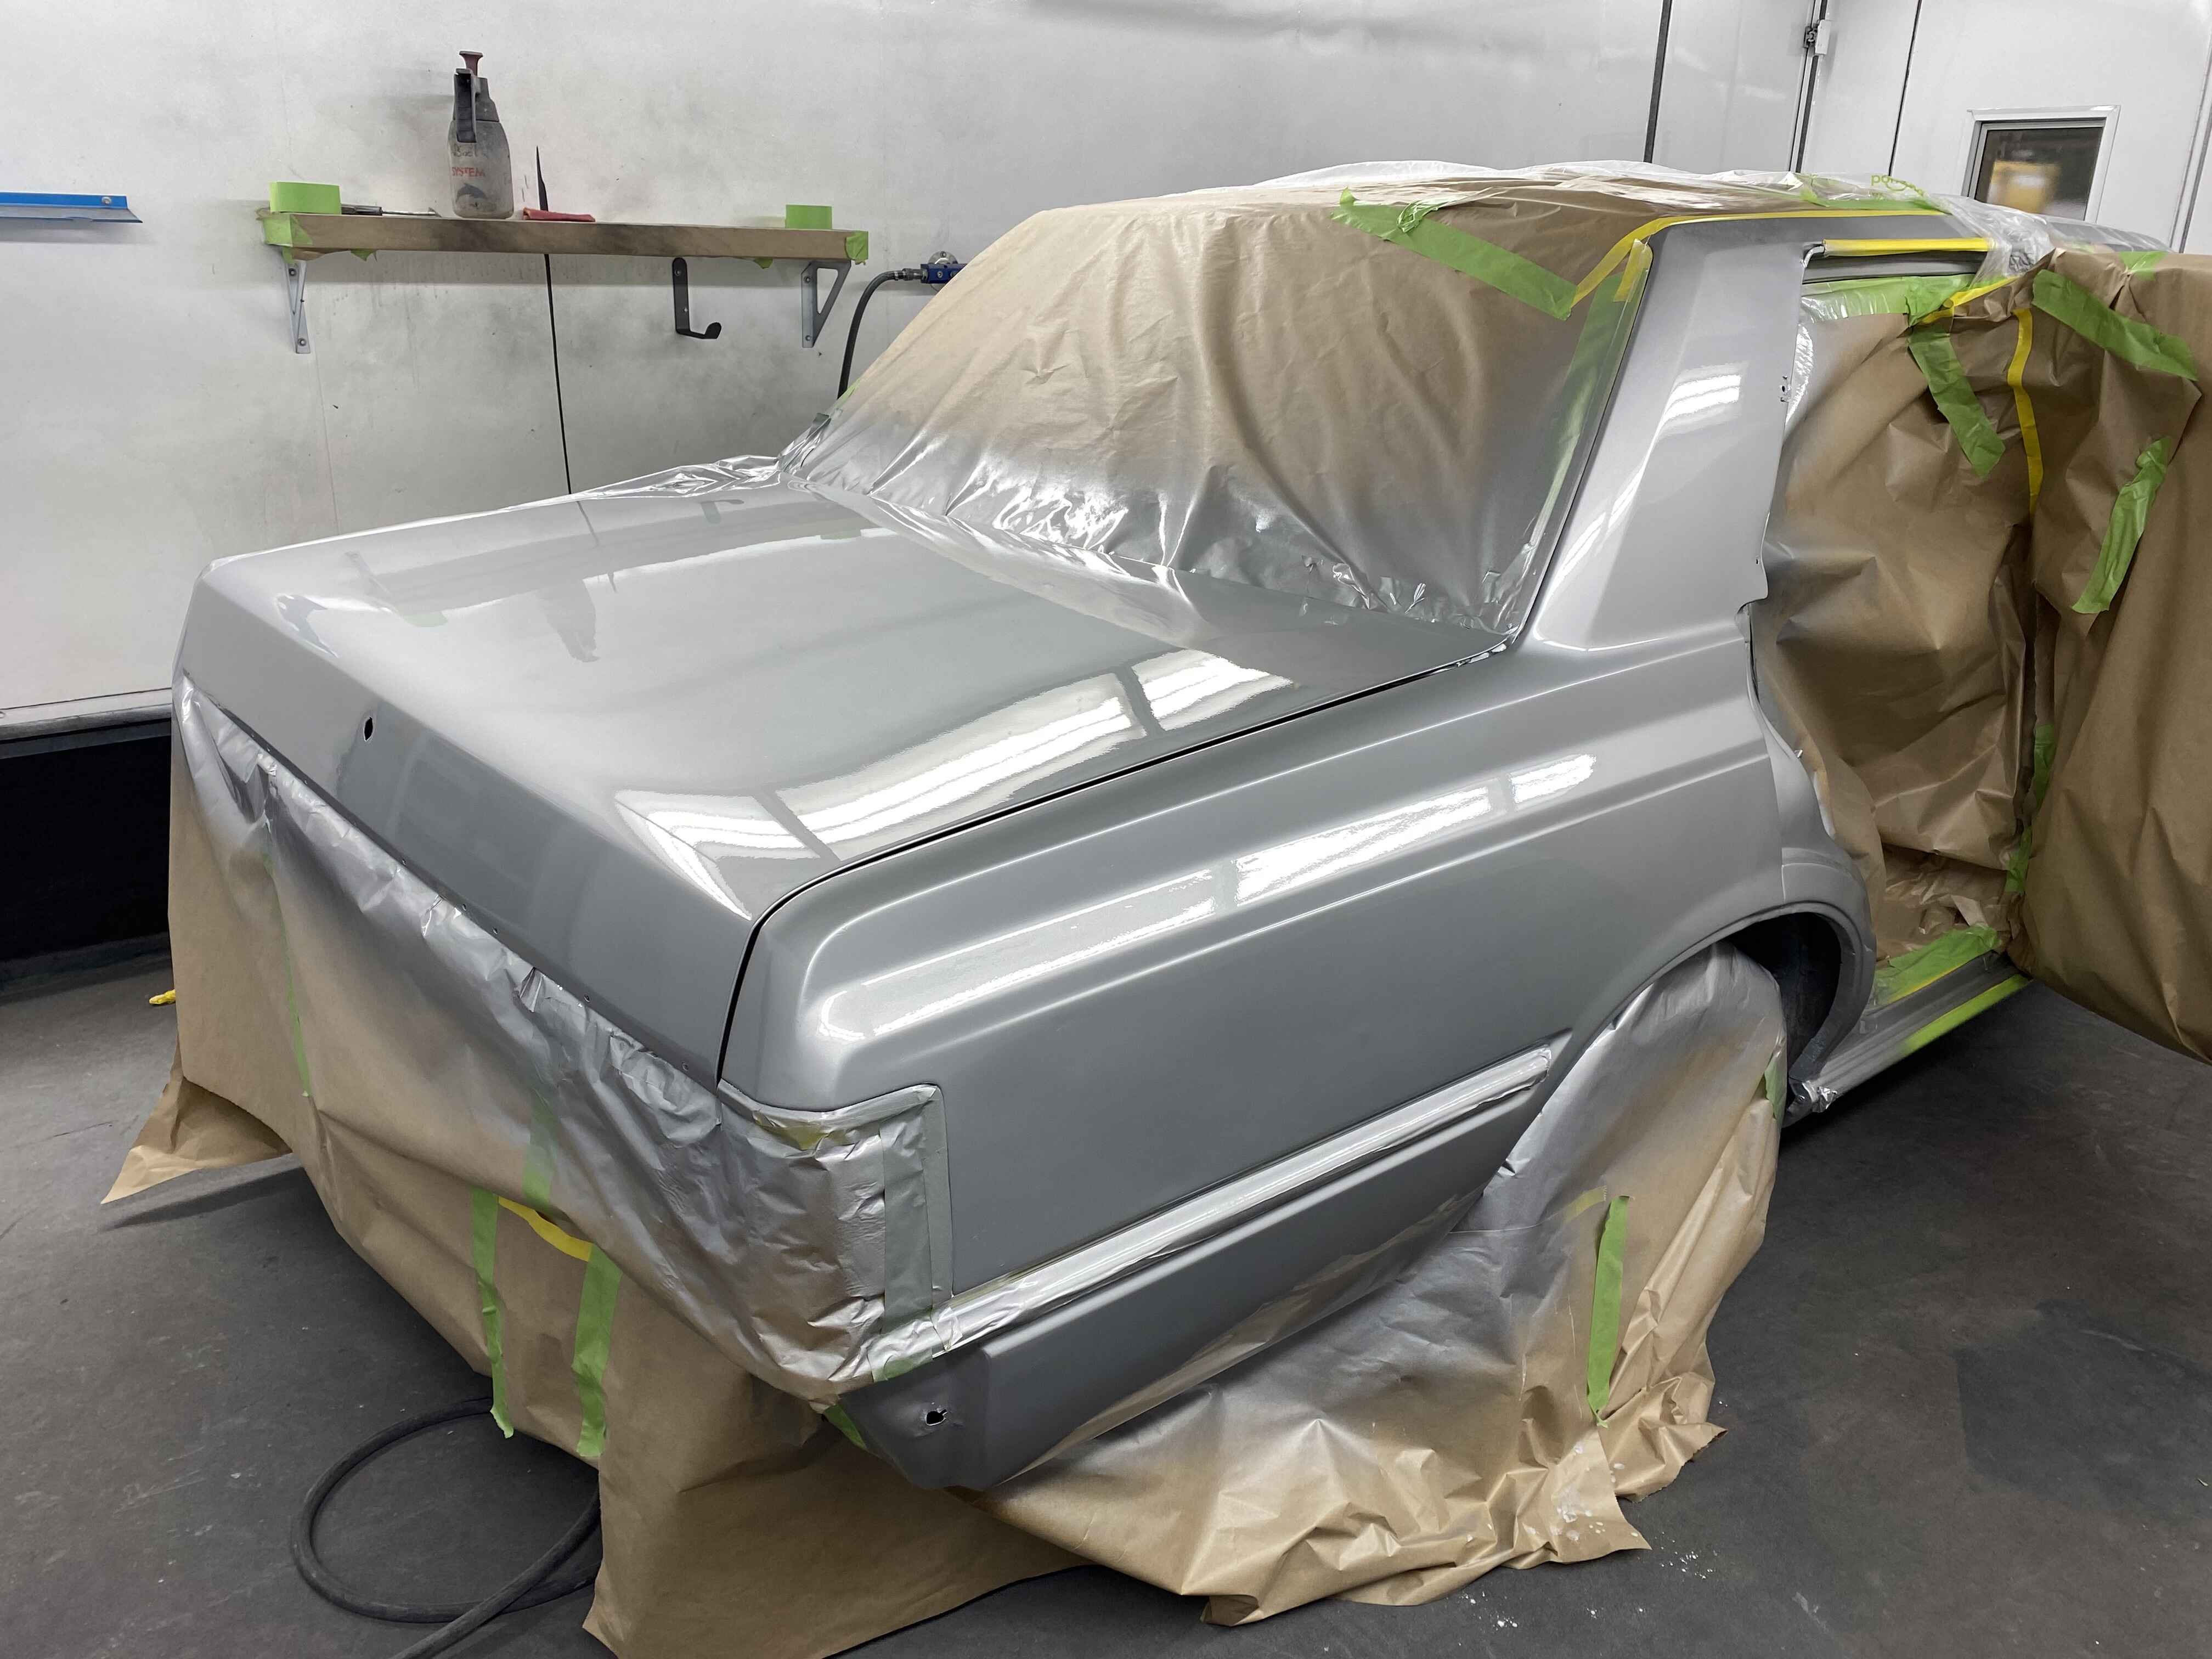
Next job was sorting the paint. The view over the bonnet has been getting pretty sad, the paint has been coming off in sheets! The rest of the paint seems to be ok but it has oxidized quite badly and needs to be cut back. So bonnet off, repaint the top and flick some paint onto the scuttle to help it blend in.
Now the challenge will be buffing the old paint to hopefully match the new! But before I could get to that stage she had another mechanical disaster...
-
12
-
- Popular Post
I had a mate request the Austin for a wedding recently, what an honor! It was also a really good excuse to sort out the growing list of needed repairs. First up was the ignition coil. The old Lucas sports coil had failed a while ago but I love the look! so I carefully gutted it and managed to fit a modern coil inside quite nicely.
After doing that and fitting some NOS points the ignition system seems to finally be reliable. For some reason the new "Lucas" points were only lasting maybe 200 miles before burning out.
-
9
-
1
-
- Popular Post
- Popular Post
While that's going on a work colleague has tidied up the right rear wheel arch and flicked some silver over the boot and rear corner. I took this opportunity to fill the trim badge holes. I'm not sure what I'll put back there yet but I've always felt the factory setup is very busy, with "SuperSaloon" "Toyota" "Crown" and "2.8" all jammed in there. Once the rear doors are done we'll flick some paint up both sides to blend it a bit, and perhaps touch up the roof where the clear is coming off. I'd like to strip it back and do a proper job one day but I know I'd probably end up with the car off the road for years.
-
25
-
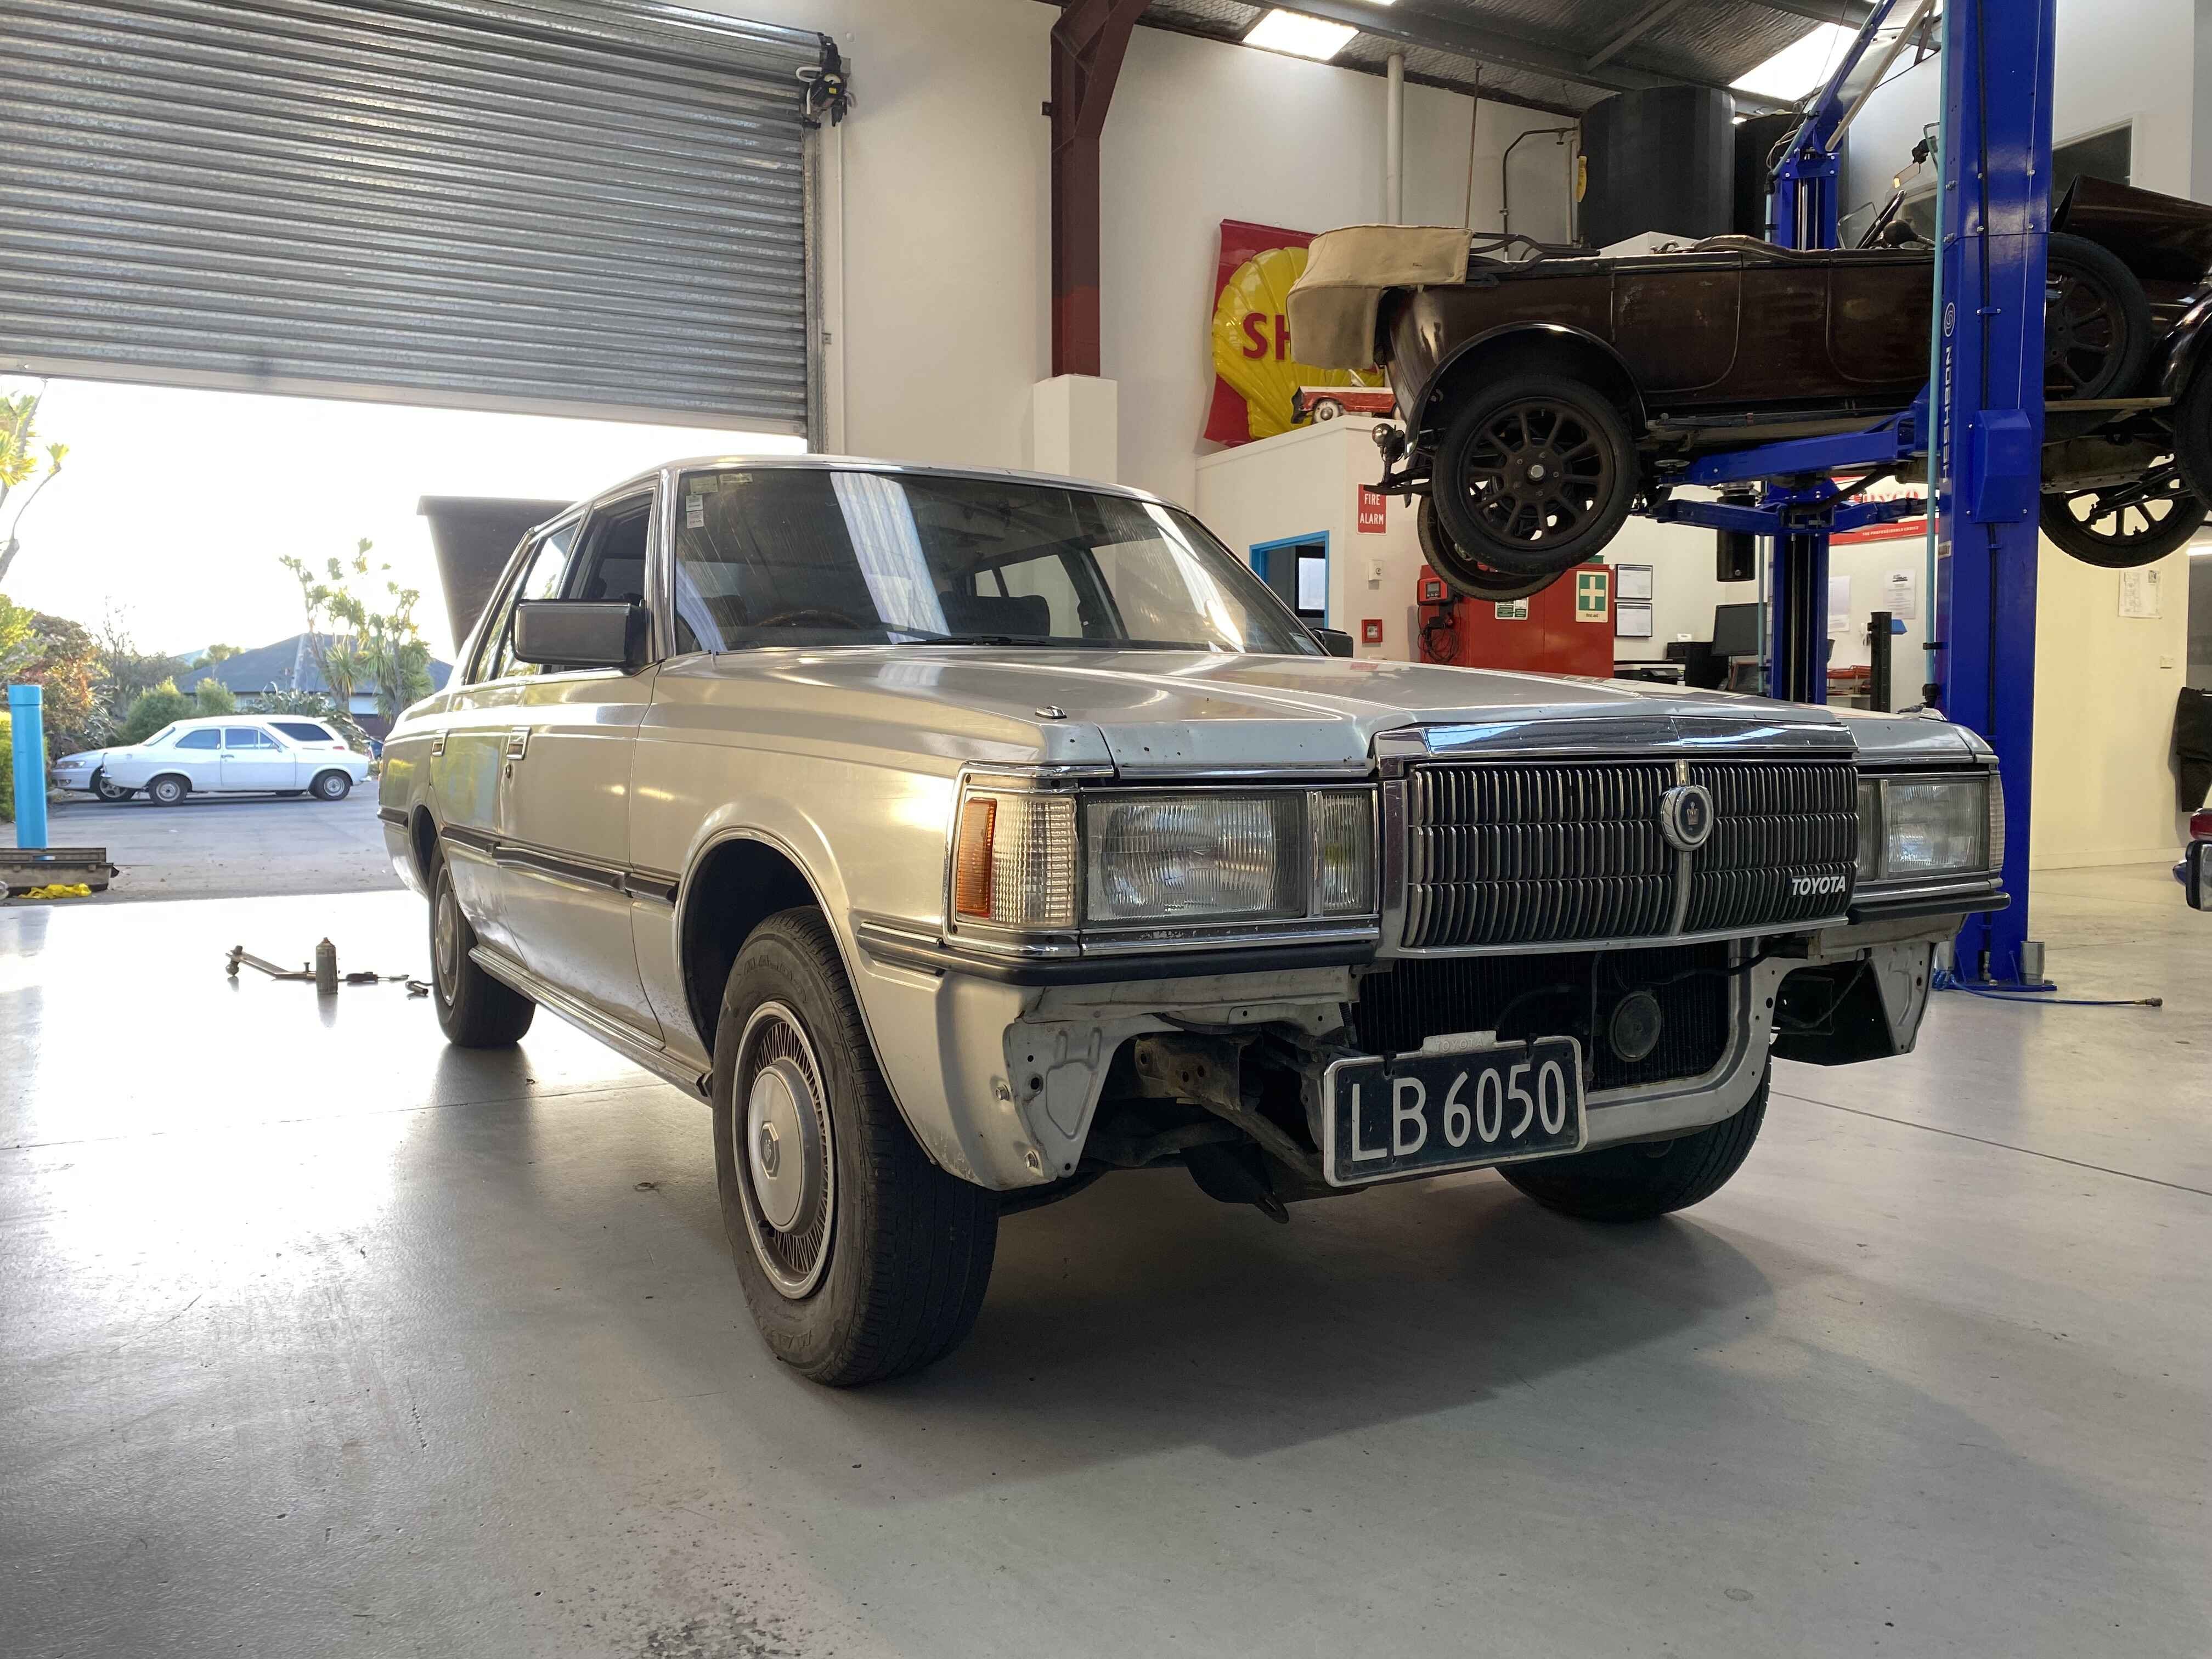
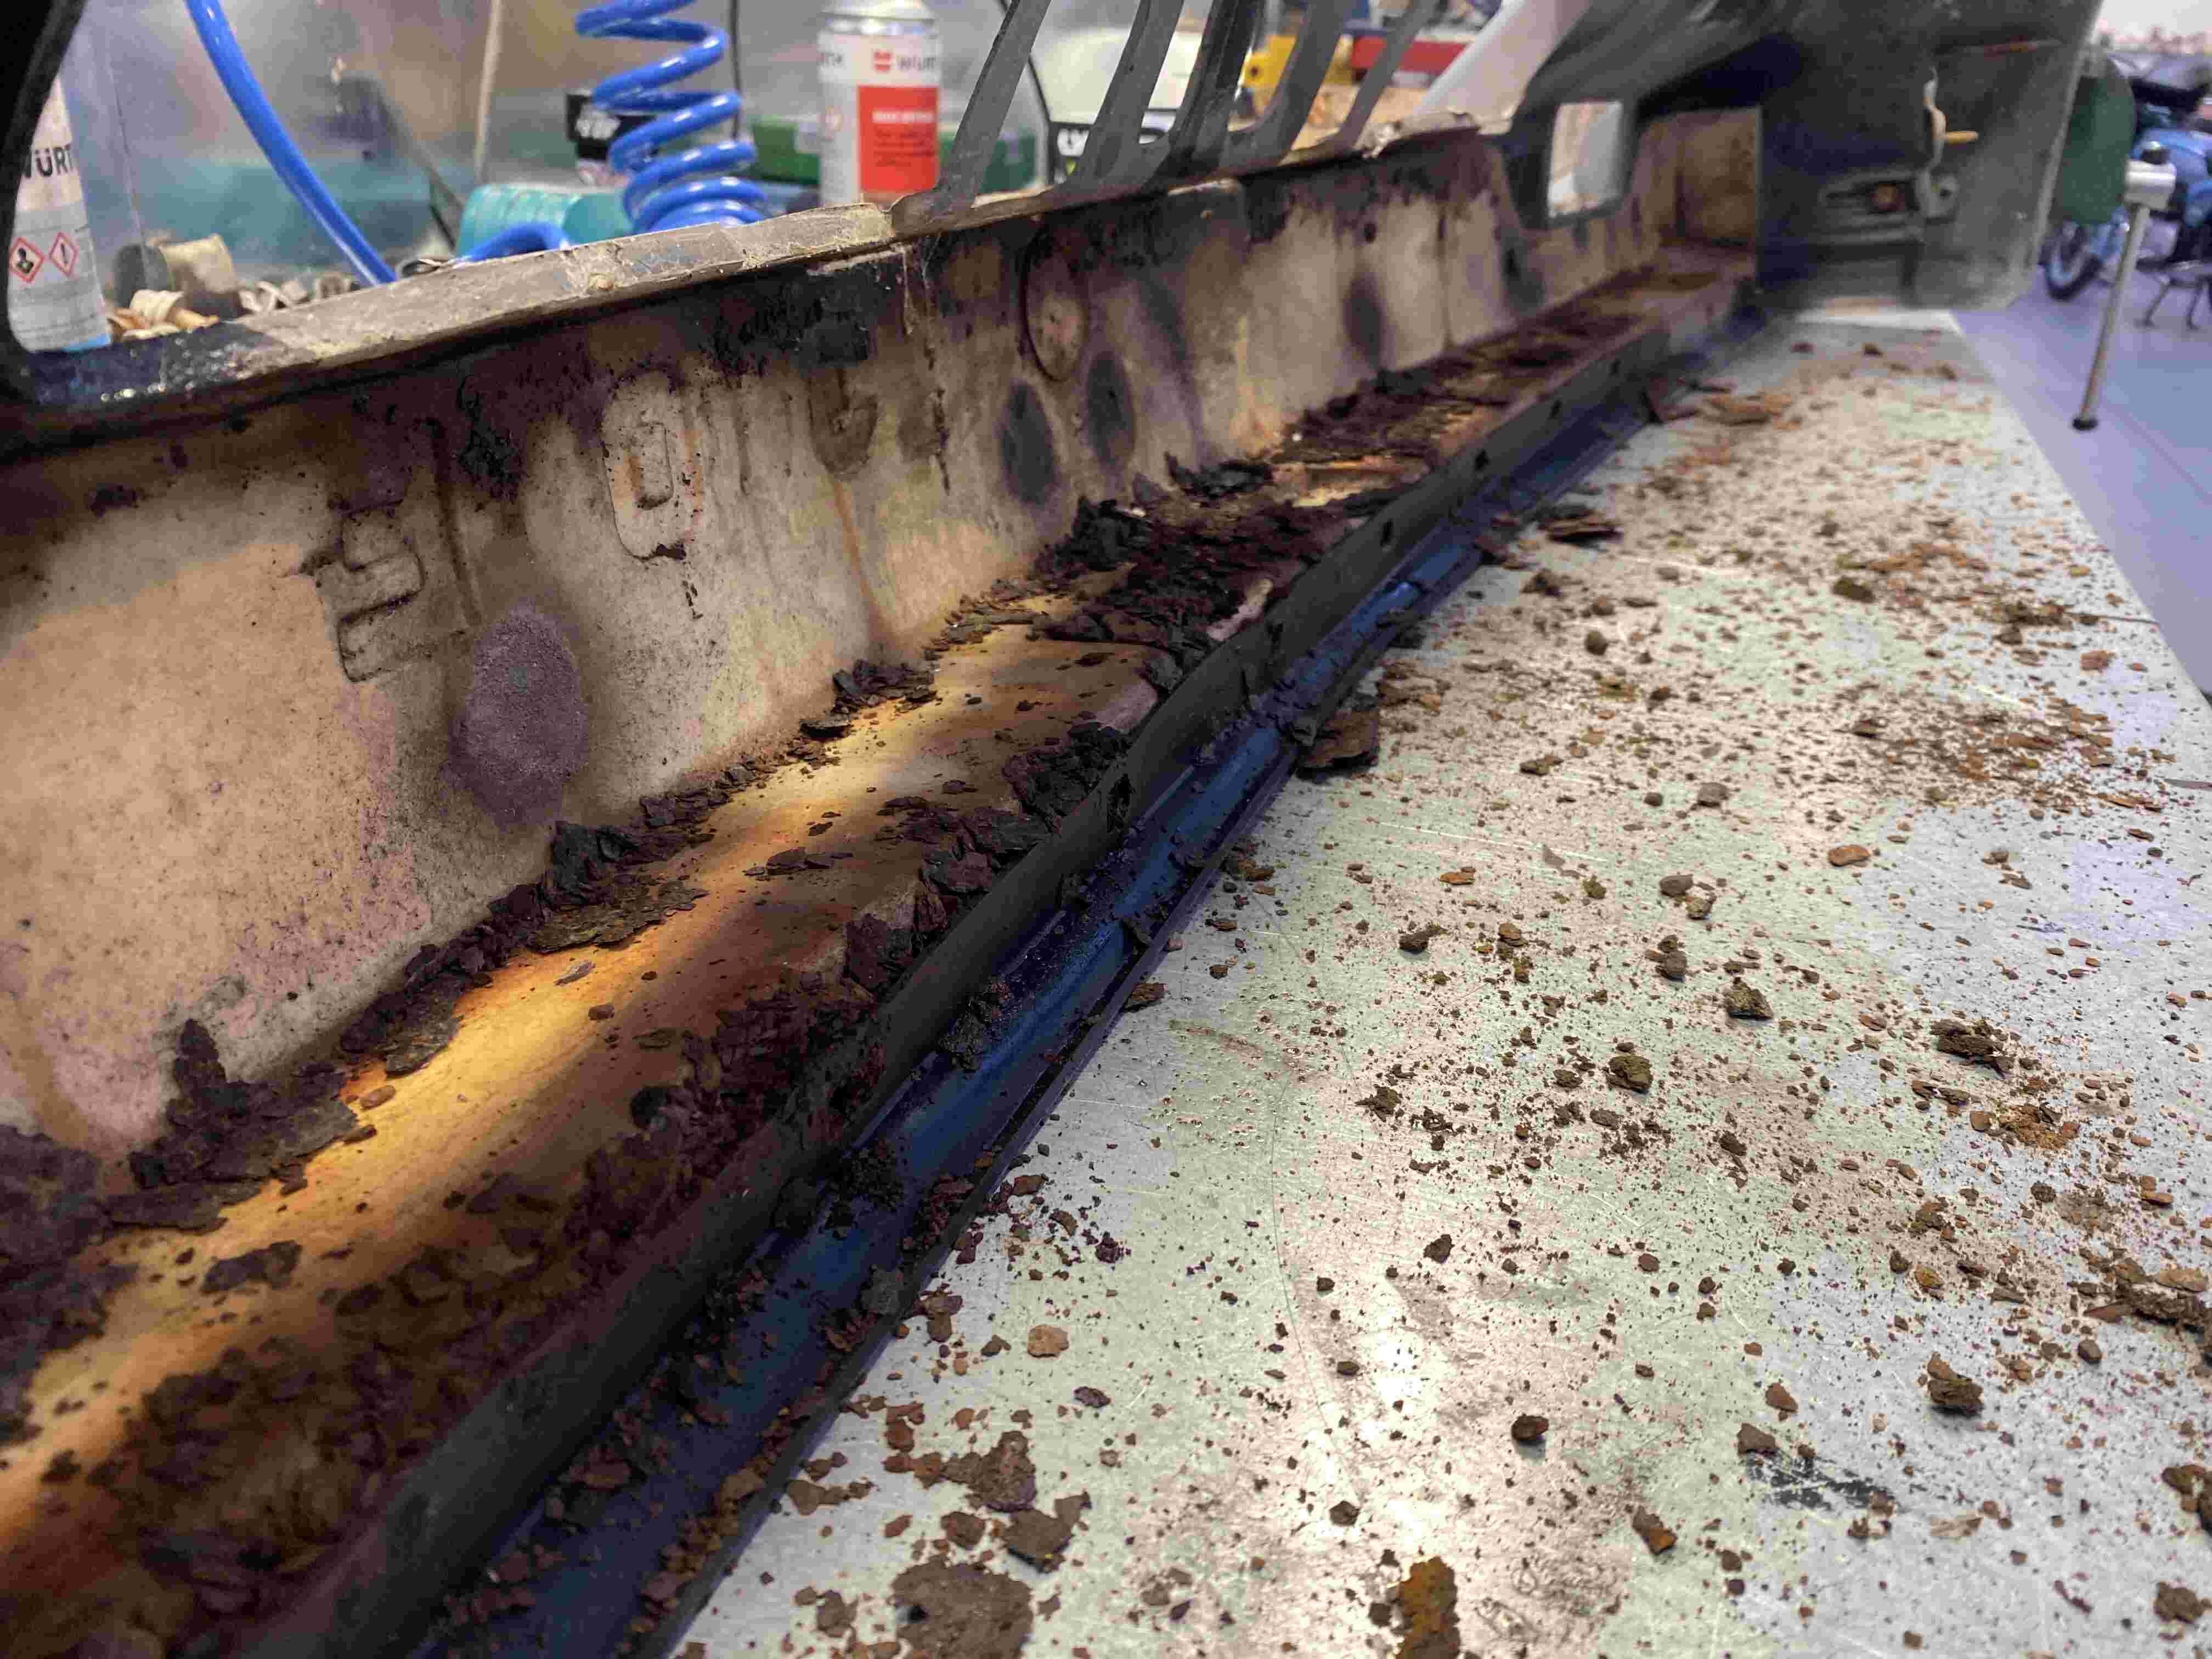
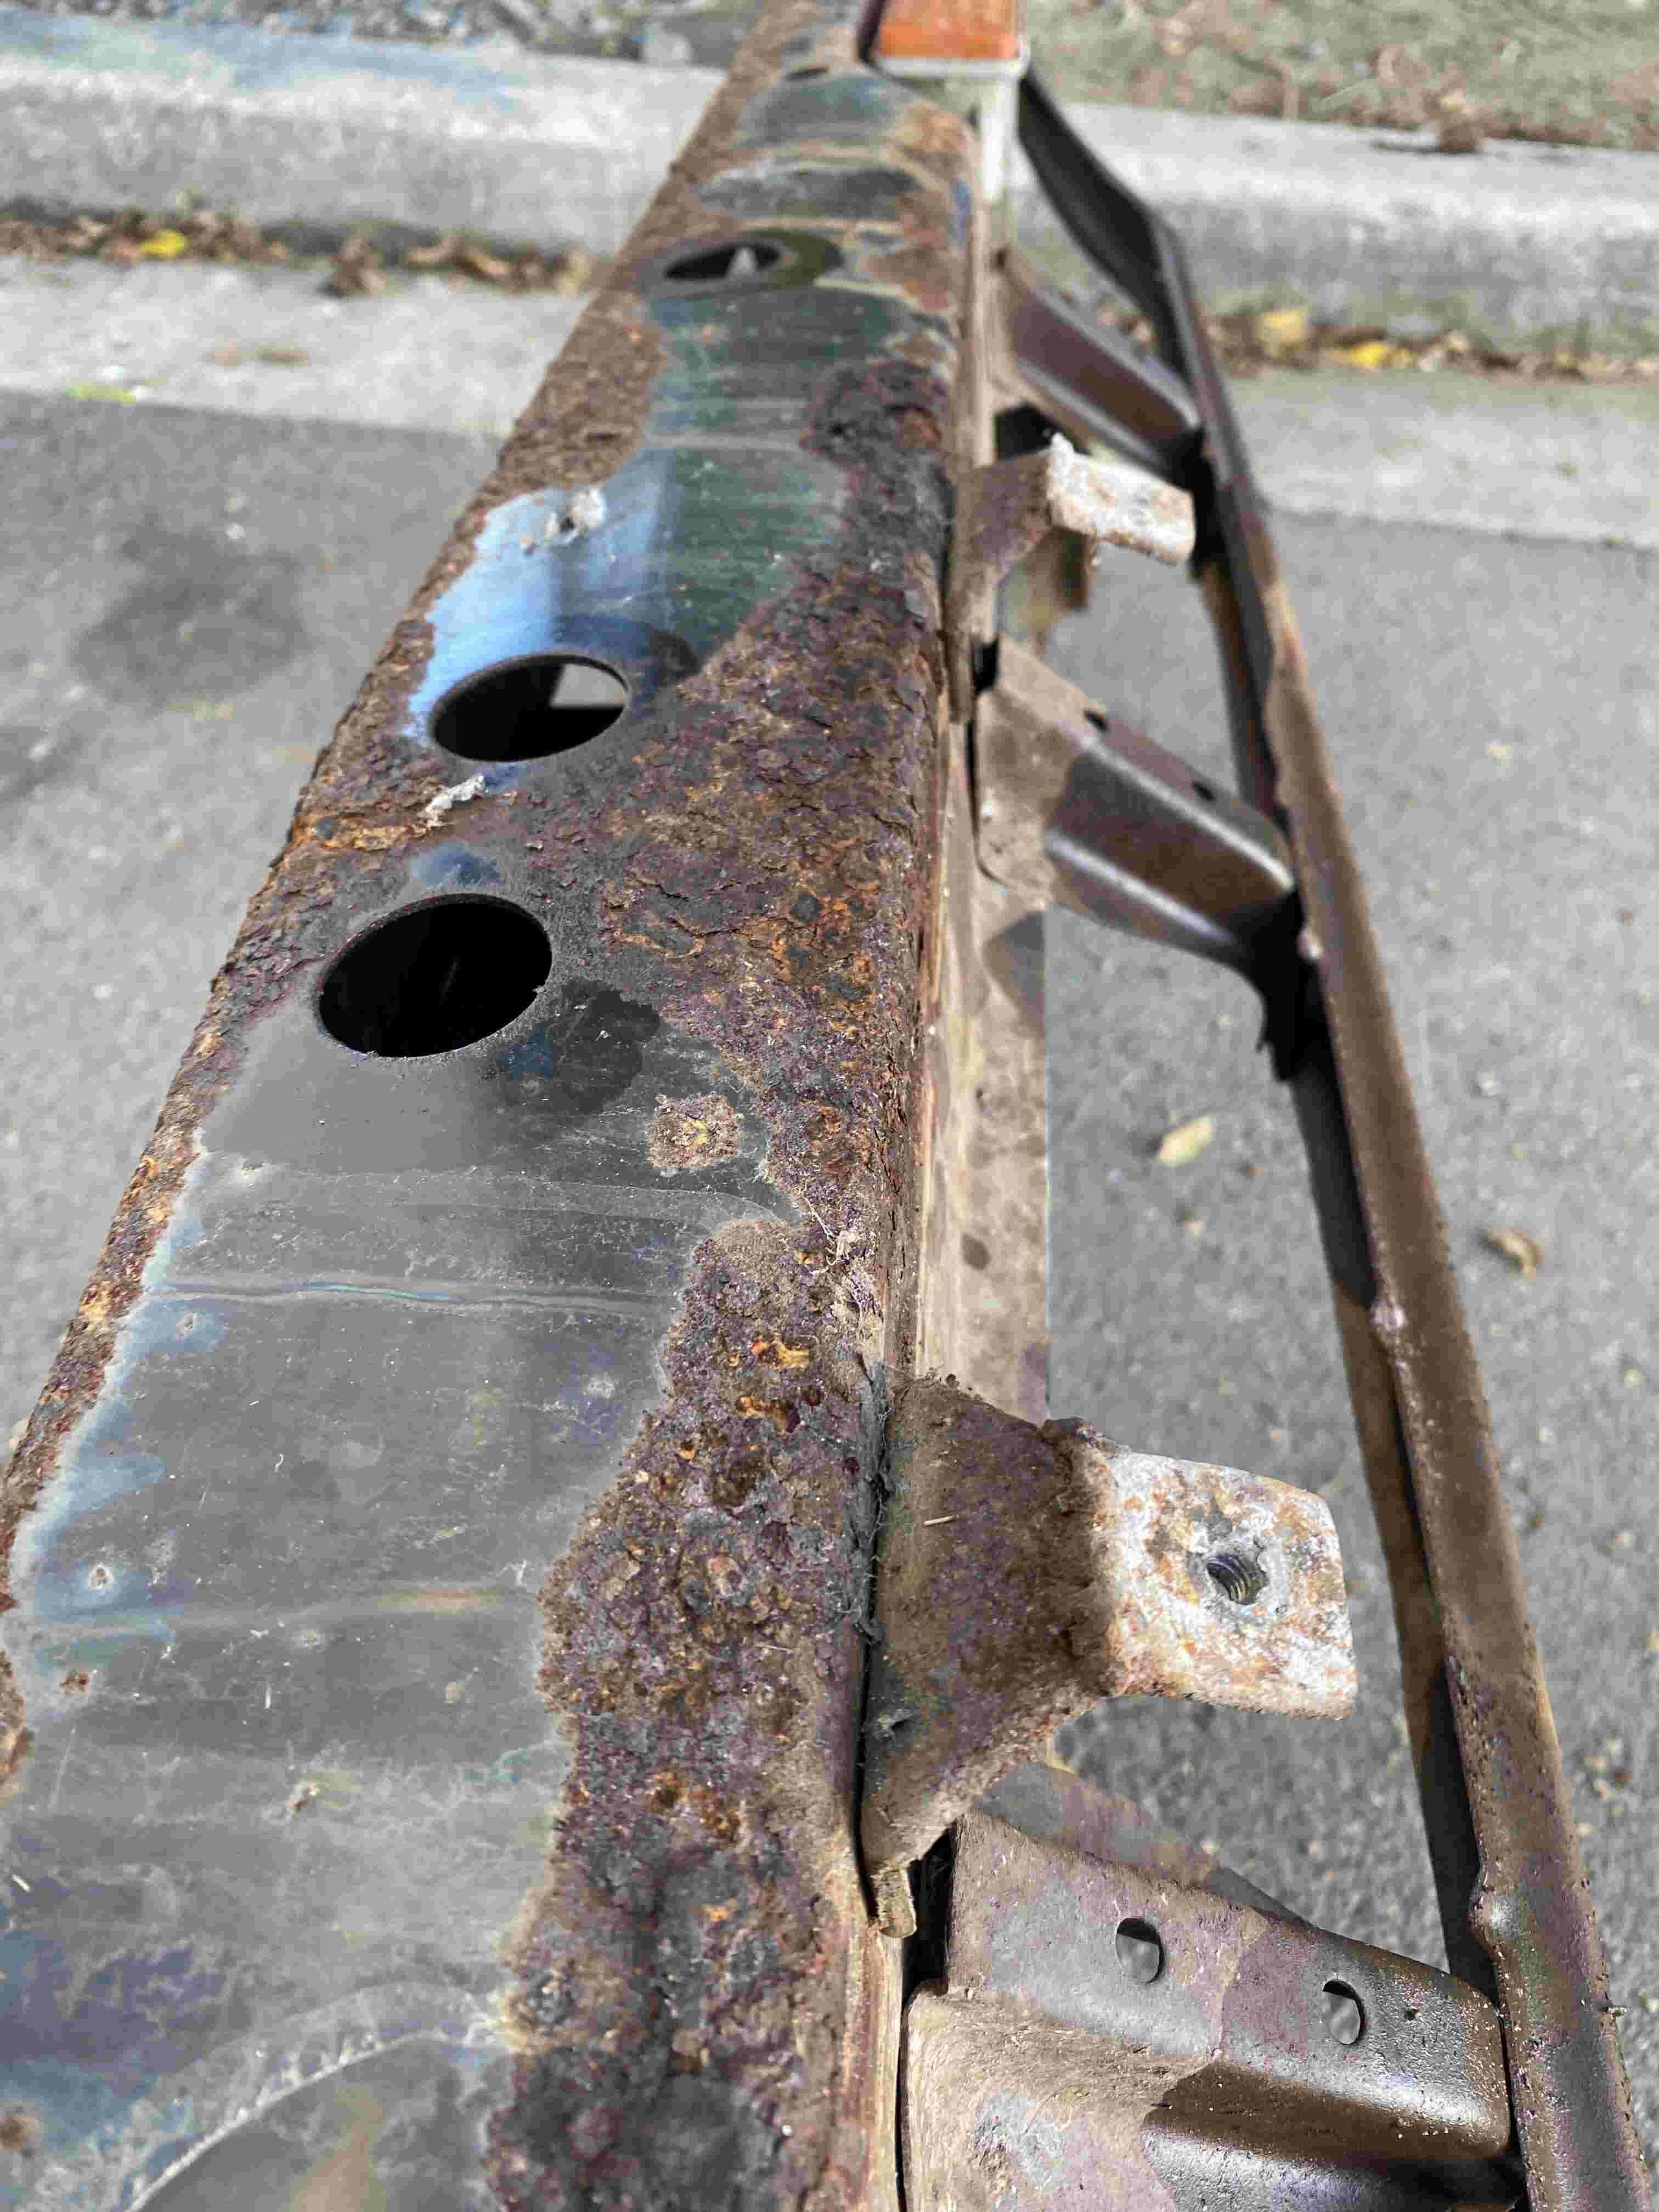
Bumpers off completes the bogan look! I kind of knew the bumper bars had a bit of rust on them, but man the front was bad! It's been holding moisture between the foam and the steel, pitting it badly and completely rotting away the clamping brackets.
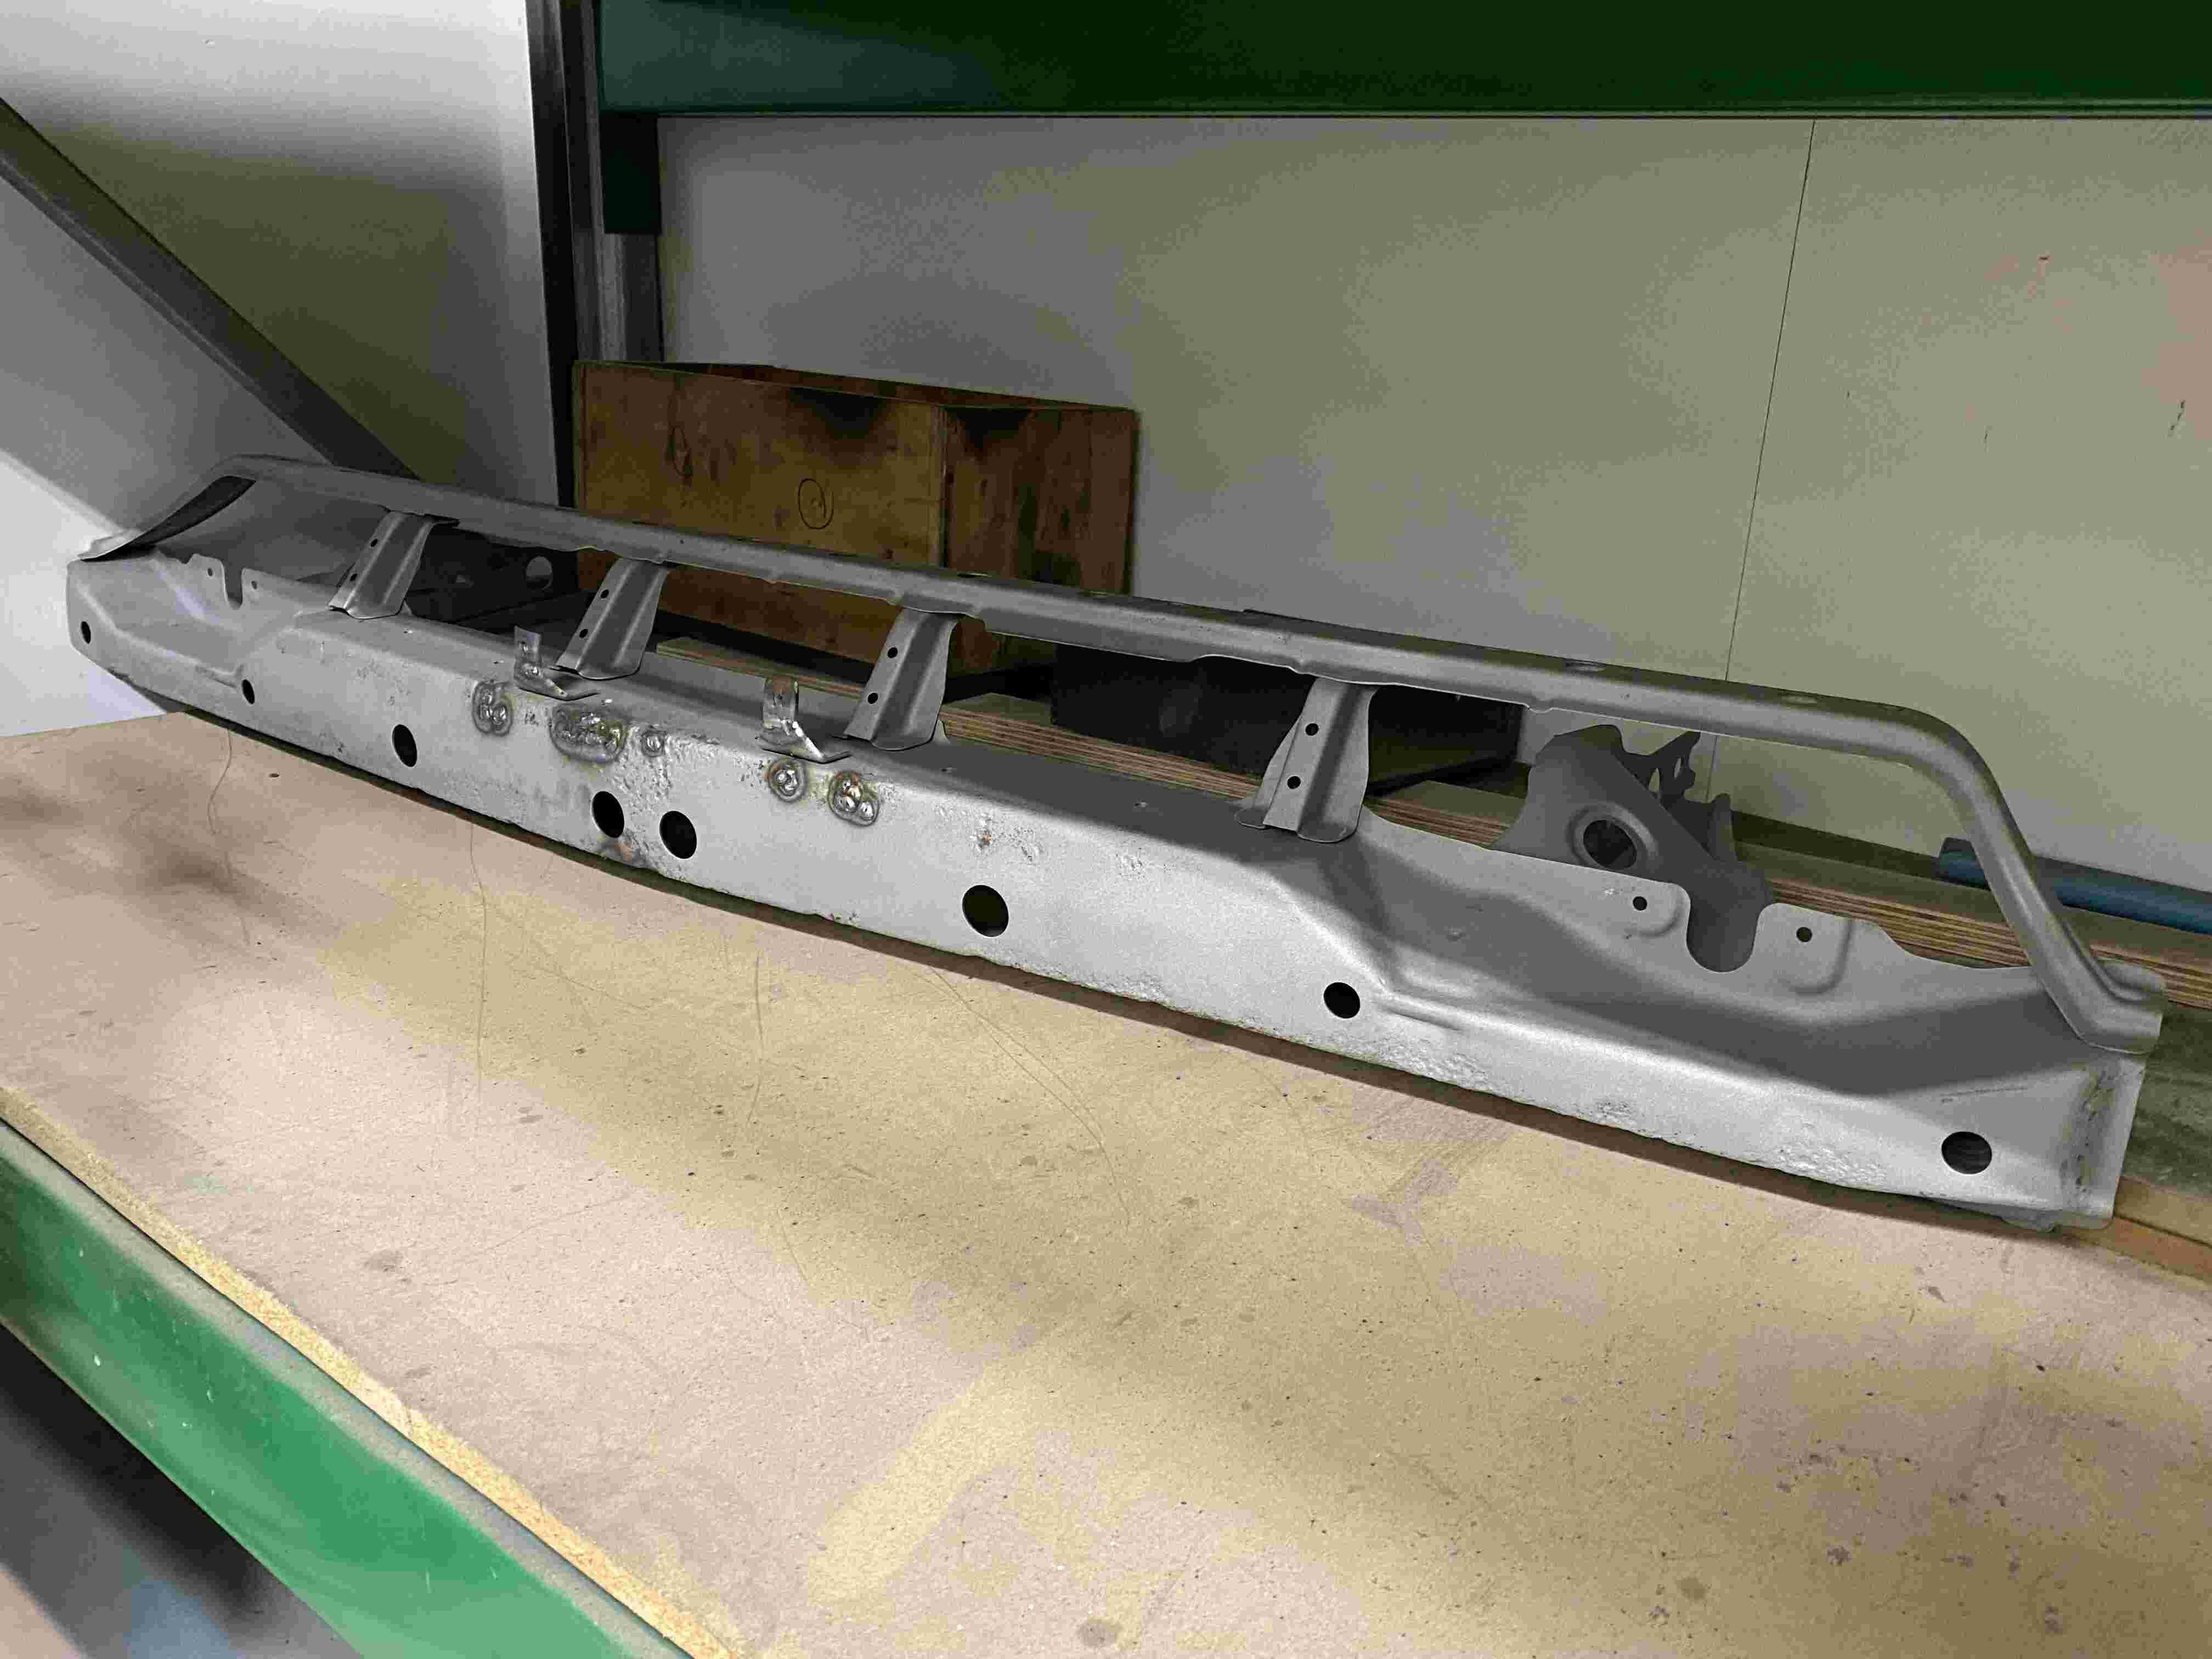
I've had the bumper bars blasted and gone and welded up the holes in the front one, next will be a bit of epoxy and making up some new brackets to put the skins on securely.
-
5
-
-
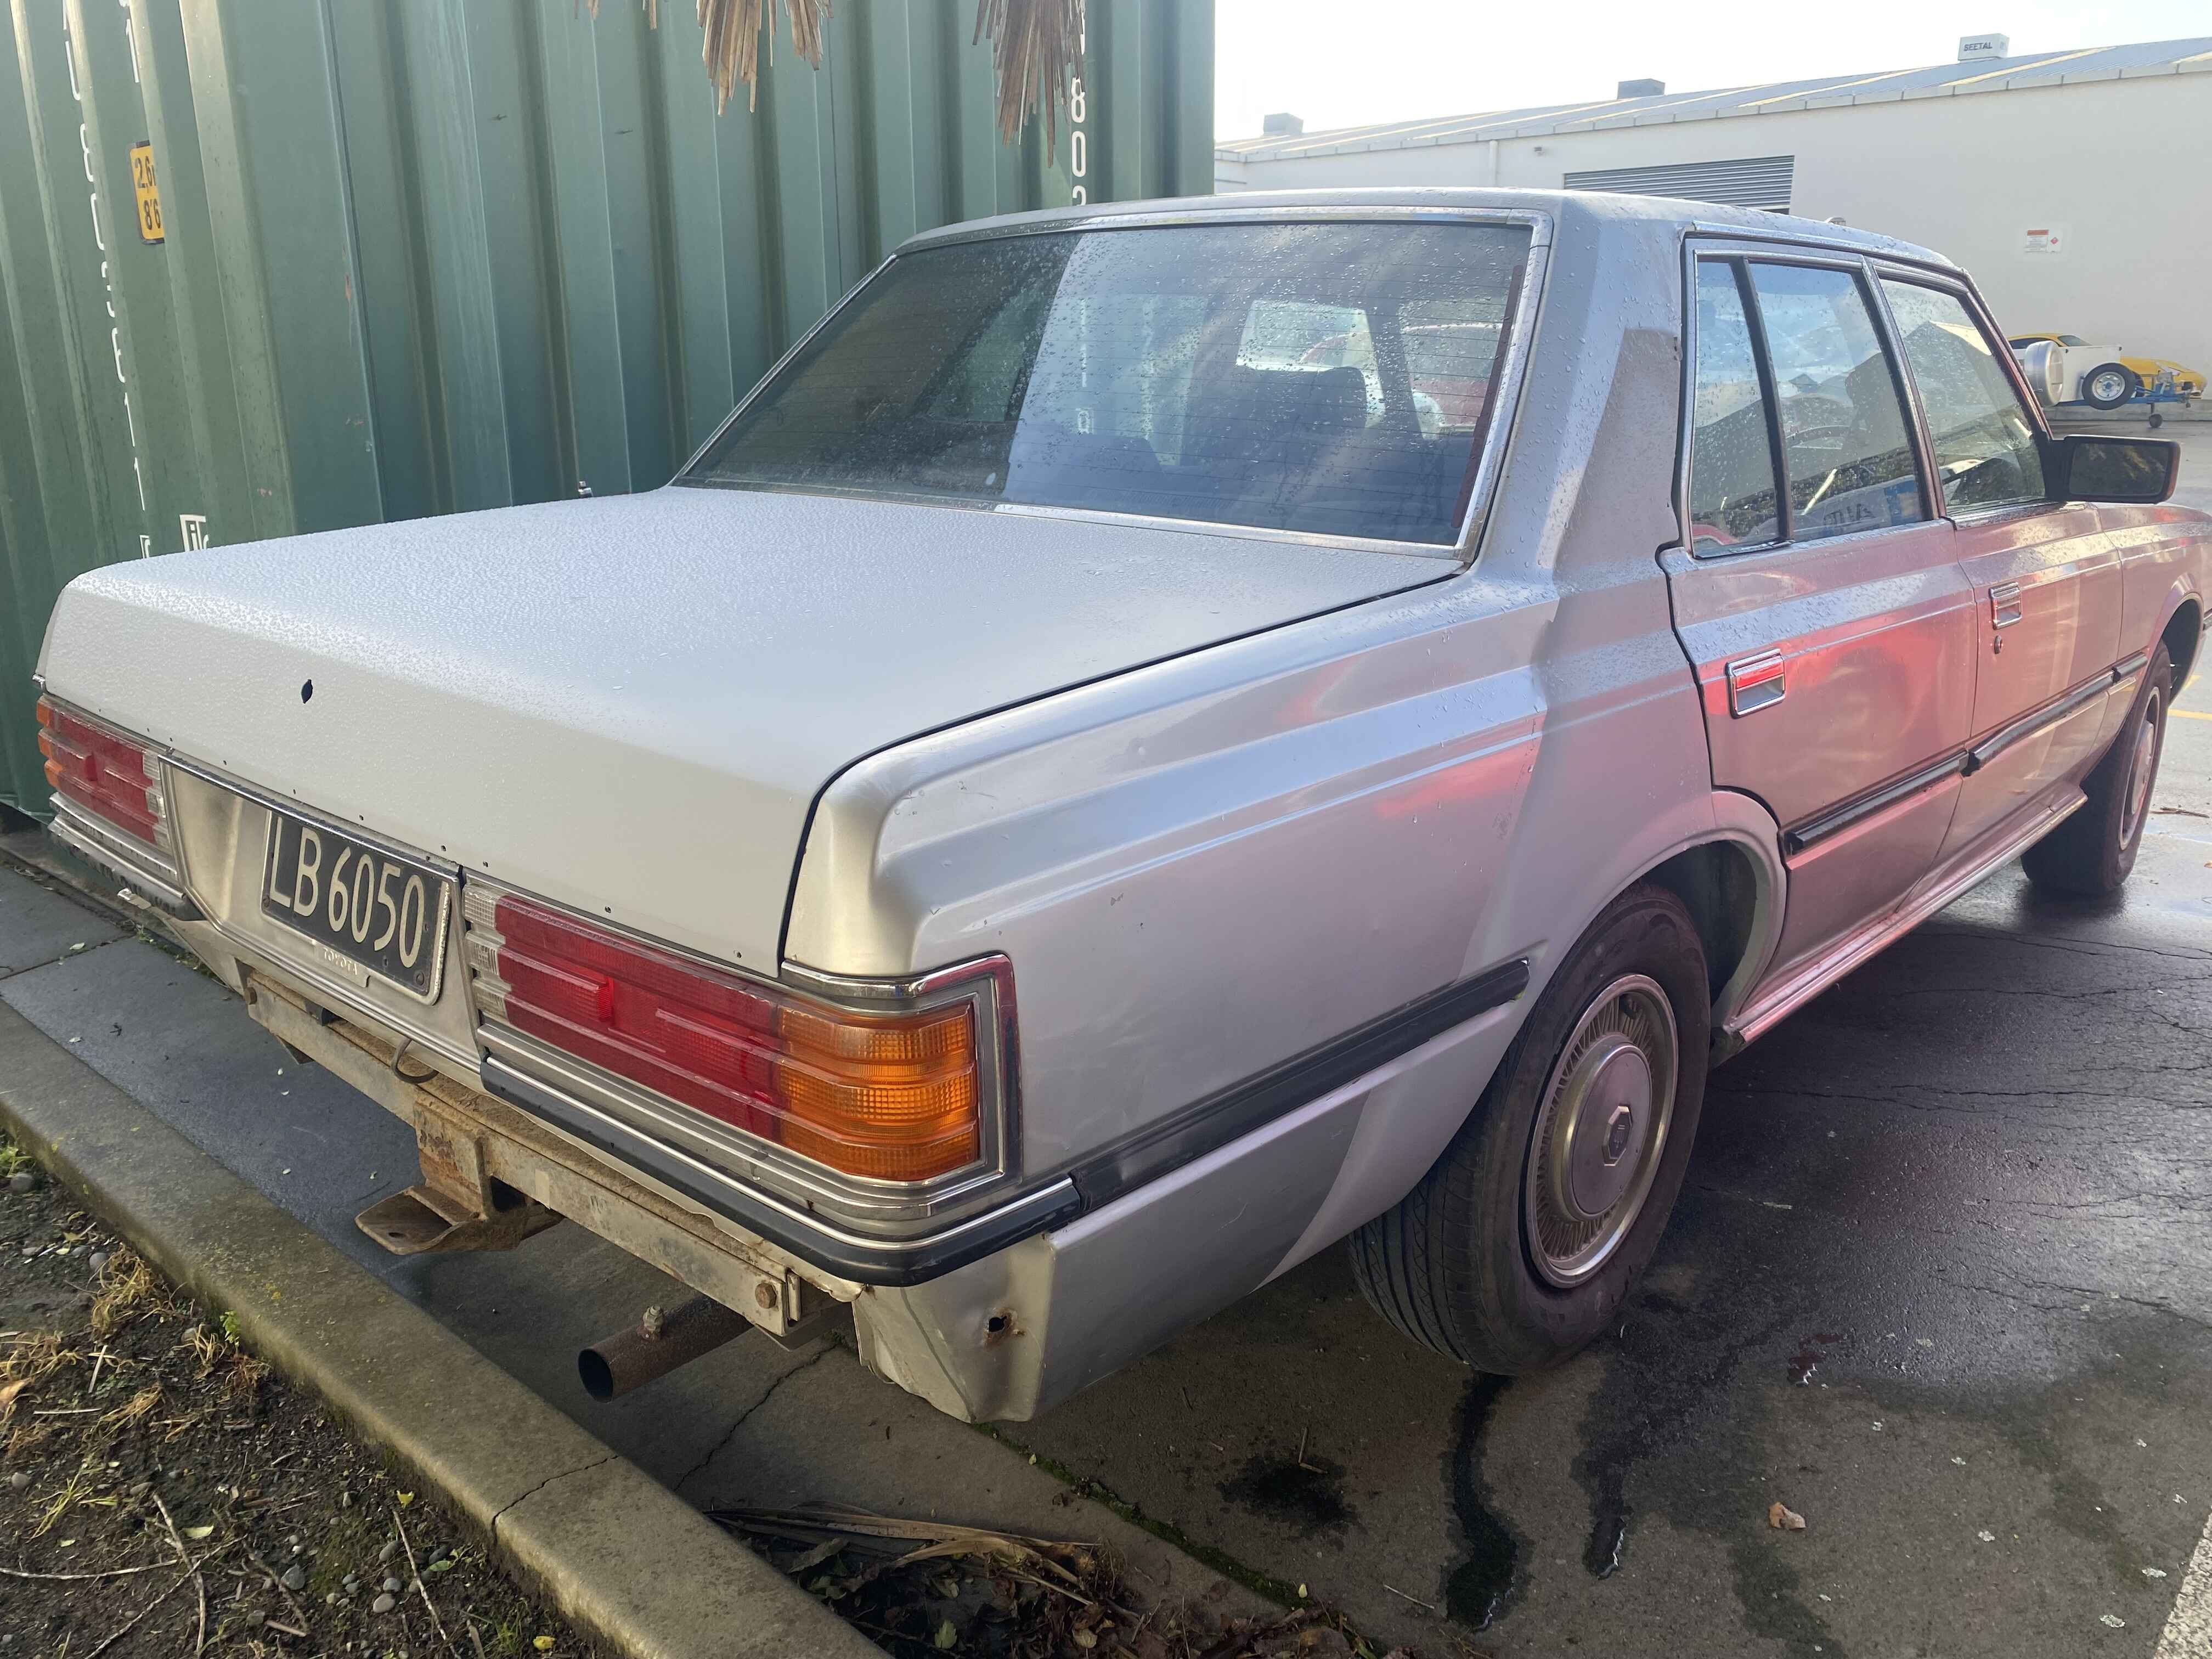
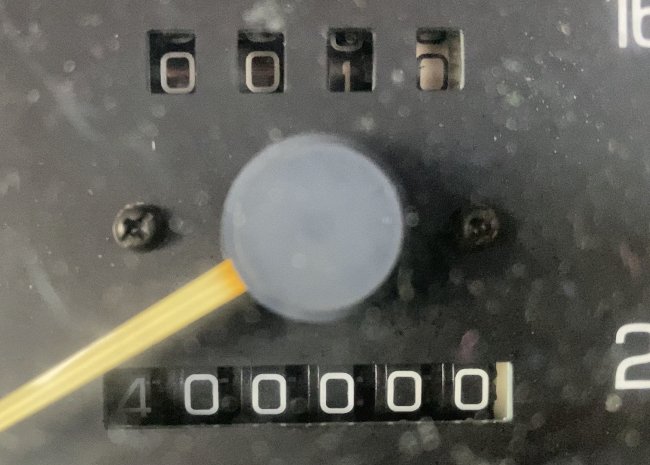
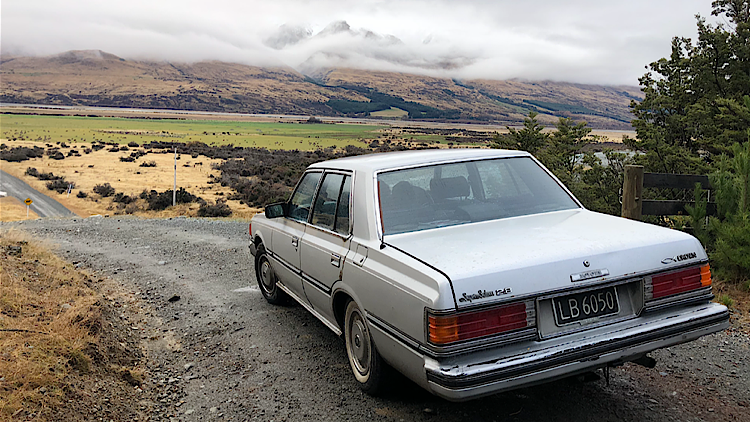
It's been a while since I've shown the Crown any love, but we have put 20,000km on it since the motor swap. It hit the 400,000km mark the other day! I stopped for a pic at the exact spot it clocked over.
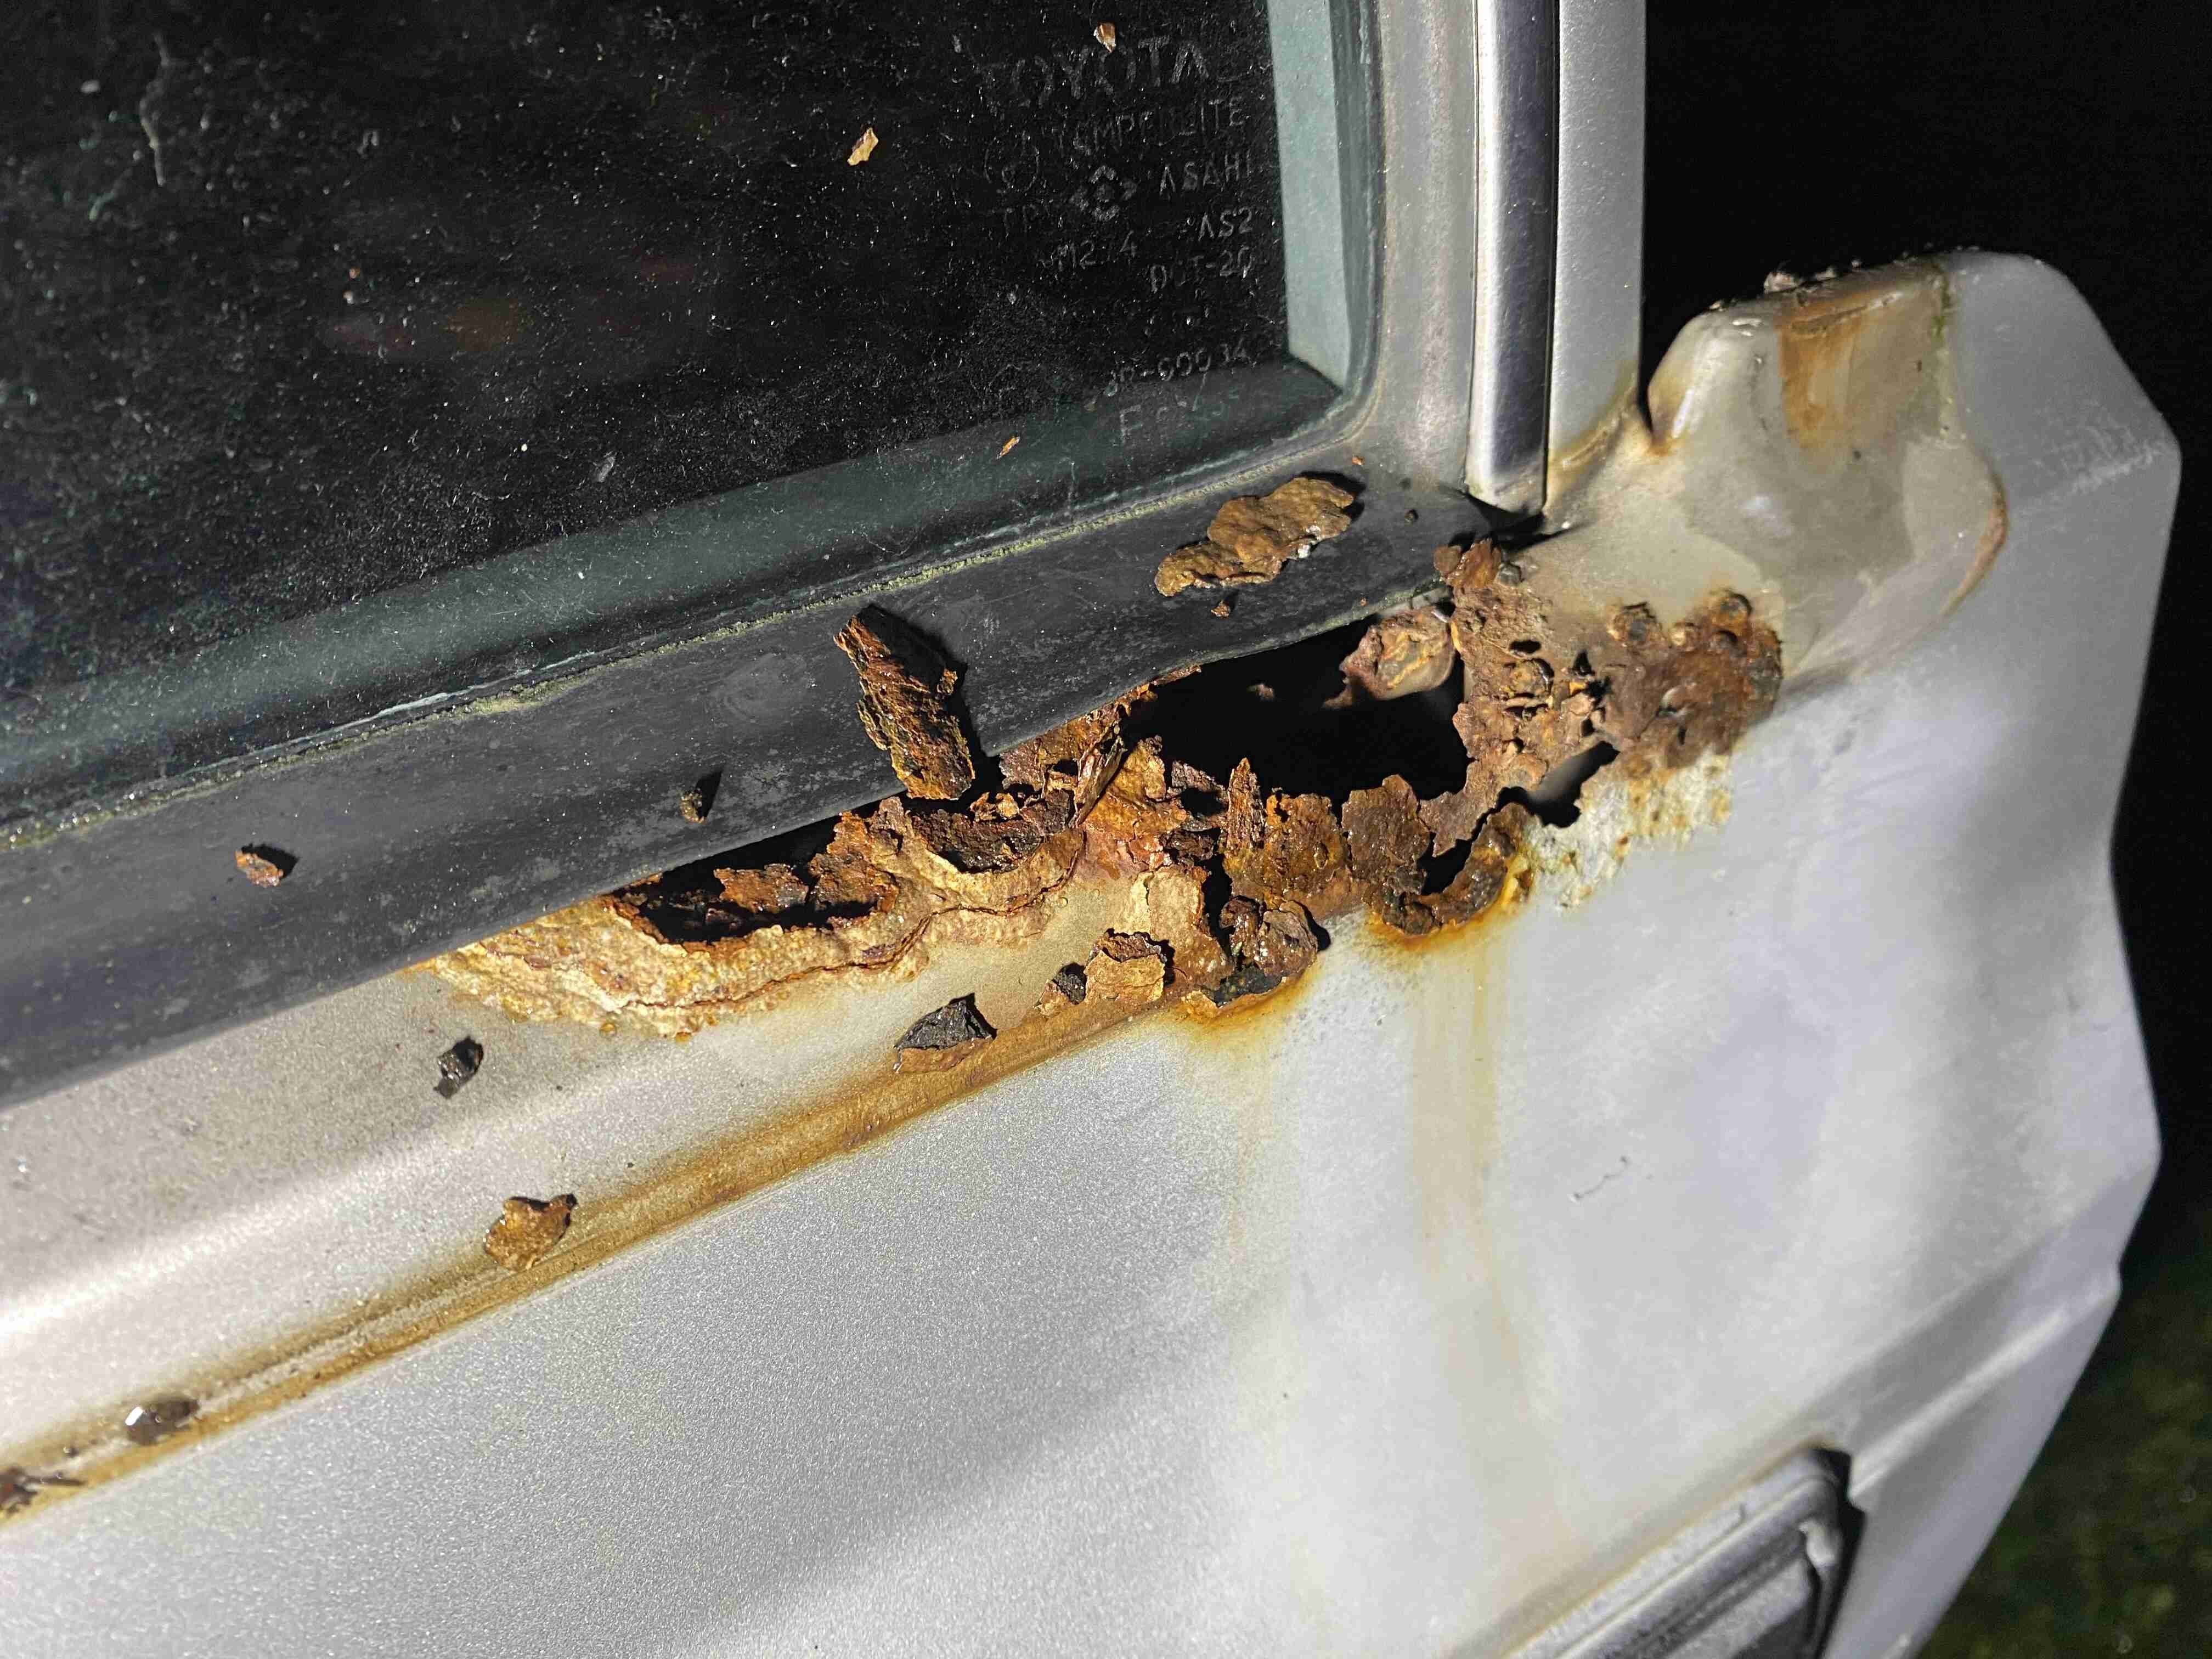
Mechanically its been going like a champ, but the rust has been creeping up on me. Keen eyed viewers may notice the black boot, courtesy of @JustHarry. He's been helping me out with some relatively rust free panels from a decent donor car. The boot lower lip was gone and both back doors have some issues. The left rear is the worst with some big holes hiding behind the trim!
Time to stop ignoring it I think. I've also got to clean up the right rear panel which has been in primer since I welded in some new metal 2 years ago, and the bumpers need a respray also.
-
6
-
-
2 hours ago, JustHarry said:
@Bluebear01 how much power does a 1uz in a ms112 make
Probably a better question would be how much power does an Austin 7 make?
-
1
-
1
-
-
Congrats on the purchase! I've done a quick scan of the charging system section & the radio section. No info regarding speaker removal but i can run you through that if you like, just PM me. I am keen to get the whole lot into PDF, when that happens it will be up here.
For now here's a link to the 2 sections:
https://drive.google.com/file/d/1fzJmHisp1K75IAeEkB7hEhEP93Ja0T7T/view?usp=sharing
-
1
-
-
Man, I might need to get one of those! I wouldn’t have guessed half of them...
-
I work with @JustHarry at Auto Restorations. We do see some pretty cool cars come through

-
2
-
-
Cheers guys, yea I was surprised to se electronic ignition is available in 6v positive earth. Although regular breakdowns are a great way to teach the kids about car maintenance!
-
- Popular Post
I've found this thing great as a daily! It's easy to drive through town, gets parks easy, uses almost no fuel, seats 4 adults and is also good for runs to Bunnings. The problem with driving it daily is you have to watch out for the other muppets out there. I had a Tiida give me a little nudge in the rear in town. He must have known I couldn't catch him because he took off the other way never to be seen again. Fortunately Classic Cover were great and it was all sorted through work without any probs. It was also a good excuse to cut and polish the paint to see how good it could get.
It came up better than I was expecting! Although I'm aware I'd better not get the car looking too nice, this thing is too much fun to park up in a shed again. Next winter the engine may come out for some oil leaks, a shuddering clutch and refit that crank handle, but for now we are just going to drive it and keep fixing any issues that pop up.
-
44
-
1
-
- Popular Post
After getting the WOF and the bloody cheap rego we took it all over the place, slowly increasing the distance from home as breakdowns became less frequent. Over the last 6 months I've had to replace the intake gasket and carb needle & seat. The points burn out regularly, I think the New Old Stock condenser is too Old. The front dampener fell off and the crank handle fell out. Various other components have come loose so a regular tightening of everything was needed for the first wee while. The fuel sender float would slowly fill up with fuel, that took a few goes to plug up. Other than that i changed out all the fluids & adjusted the brakes a few times as they settled down.
After all that we took it out to Oxford for the big snow they had. It did pretty well with the wife, 2 kids and the dog! It clapped out at 50mph with no issues. It was a bit sketchy coming home in the dark though, the 6 volt headlights don't do much. We took it out to Oxford a few times after that, and also dragged it up to Godley head. That one did stretch the thermo-syphon cooling system!
The biggest cost came when the front tyres wore down. Turns out they were retreads from 1978, so they did pretty well. A pair set me back $400!
-
28
-
Eh, the other day can be a loose term
")
-
1
-
-
- Popular Post
The engine had a bit of work done 40 years ago, but only around 4000miles ago. After winding over on the crank handle it was obvious it only had compression on 3 cylinders. Luckily it was only down to a stuck valve. Next was fuel. The tank had a quarter of rotten gas so it came out and I gave it a thorough steam clean. The fuel pump diaphragm was stuffed so a new one went in. Then no spark due to stuffed points and condenser was sorted. After that and a new battery and she flicked into life pretty easily.
After that it was just a case of cleaning some switch contacts, getting new keys cut, wiring up the generator correctly and getting a WOF sticker on.
-
22
-
2
-
Feel free to tell me I'm doing it wrong here!
-
- Popular Post
Discussion here...
As mentioned on another thread, I picked this up the other day. It was restored by a character by the name of Burt Williamson some time in the early 70's. He loved the thing and made a very detailed diary of all the little modifications and repairs he did on it. He then had the diary copied and bound for the other Austin boys to reference for their repairs, a true Barry. When he passed in the 80's my wife's Grandfather took it on and got a few thousand miles on it. When he passed in 2001 the family weren't sure what to do with it so it was parked up. That's when I said it's about time it was enjoyed, so I got the job of getting it back on the road. So 20 years after it was parked up, with air in the tyres from last century, I hooked up its little a-frame and dragged it across town.
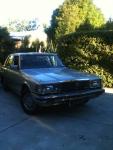
First was to give it a good clean. It was in really good condition from its dry storage, no real rust to speak of. The right side of the car took a little bit of UV so the rubber is a bit sad. The paint came up nicely after getting rid of the priceless barn find dust.
So I'm slowly finding out more about these things. It's a '38 Austin 7 Ruby with the stronger 3 bearing crank & a 4 speed box. It even has syncros on 3 gears! The brakes are mechanical cable so no pesky hydraulics to overhaul. As you can see old Bert had thrown a few extras at her with indicators, a reverse light and an optimistic tow ball! Thankfully they had the presence of mind to keep the rego on hold all this time, so it's just a case of getting it running and get a WOF...
-
23
-
- Popular Post
- Popular Post
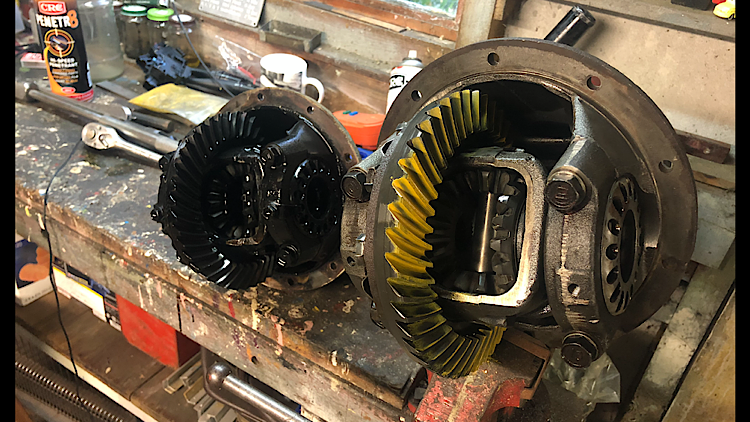
I’ve done close to 5000km since last year, we’ve had it all over the island and it hasn’t missed a beat! The 4.1 diff was great for beating people off the lights, but not great for open road cruising...
I had a lot of fun setting up my first diff. I had a spare f series and a 3.1 gear set, which I swapped in with new bearings, seal and crush tube. The new bits cost me around $300 from Toyota and ABD. After I swapped that in it dropped the rpm at 100km to 2800, much better.
We also picked up a new project the other day on an A-frame, I’ll need to get around to posting that soon...
-
16
-
2
-
Might be time for another update me thinks.
.jpg.f3ec0ccab5bdfe9ae511ff27222a1e57.jpg)
.jpg.8cf8c07fc73dd20697809dc815f87860.jpg)
.jpg.d4b3faea582220898d56b9345ccfaa98.jpg)
.jpg.a76830422dddfbb29270756cf54779dd.jpg)
.jpg.d0c695ea8473ead9ea056852a1fec303.jpg)
.jpg.420deb7c90a3e03932553ddd385ab69a.jpg)
.jpg.14c6330988729a3f4468099267b61bed.jpg)
.jpg.315d22c8ccb545bc7b71de3e69e7b39d.jpg)
.jpg.5abbd76da1b07ea44b8a667513378095.jpg)
.jpg.b82ffc27f4332d502b9b21e599c2ffdb.jpg)
.jpg.0d1d0bada155571651a74019a2330edd.jpg)
.jpg.ba8751315cfb886b332fbc21be1631d8.jpg)
.jpg.d5248bebd17adb6c032db7f69b4b1b3b.jpg)
.jpg.4e373badbd9140e255fe32abb7977c6c.jpg)
.jpg.b30032c90cbbfb6eafb3a18e60c5026d.jpg)
.jpg.c7d771beb47fd644d979211915a6da11.jpg)
.jpg.93eb0e1246a84932faccce31269082ec.jpg)
.jpg.ea7dedc0bef5799a39aef957ebbbcdf8.jpg)
.jpg.815367b229fb8405b0dcbd9792799b53.jpg)
.jpg.45eb3d6c5c42a18351b967f40943a3e5.jpg)
.jpg.809191c10e93108491d59f56532ad06d.jpg)
.jpg.7564ac48725a6ac7eb8bf57cff6488e8.jpg)
.jpg.31b1ac3d498277b30ee8eb2d62b1953e.jpg)
.jpg.fd43d23158ca200c6d87d98226397870.jpg)
.jpg.f6c2b82061f273d5cc7a4893a7fce317.jpg)
.jpg.8873c0ef7977892e7550d28fdc7bcb42.jpg)
.jpg.87801df4a21f0638b8dbad4787ad3d9a.jpg)
.jpg.e5472208cfcf2e5edb60c580a89573cb.jpg)

.jpg.10ac1528cdaef611fdc163973a2a5bb4.jpg)
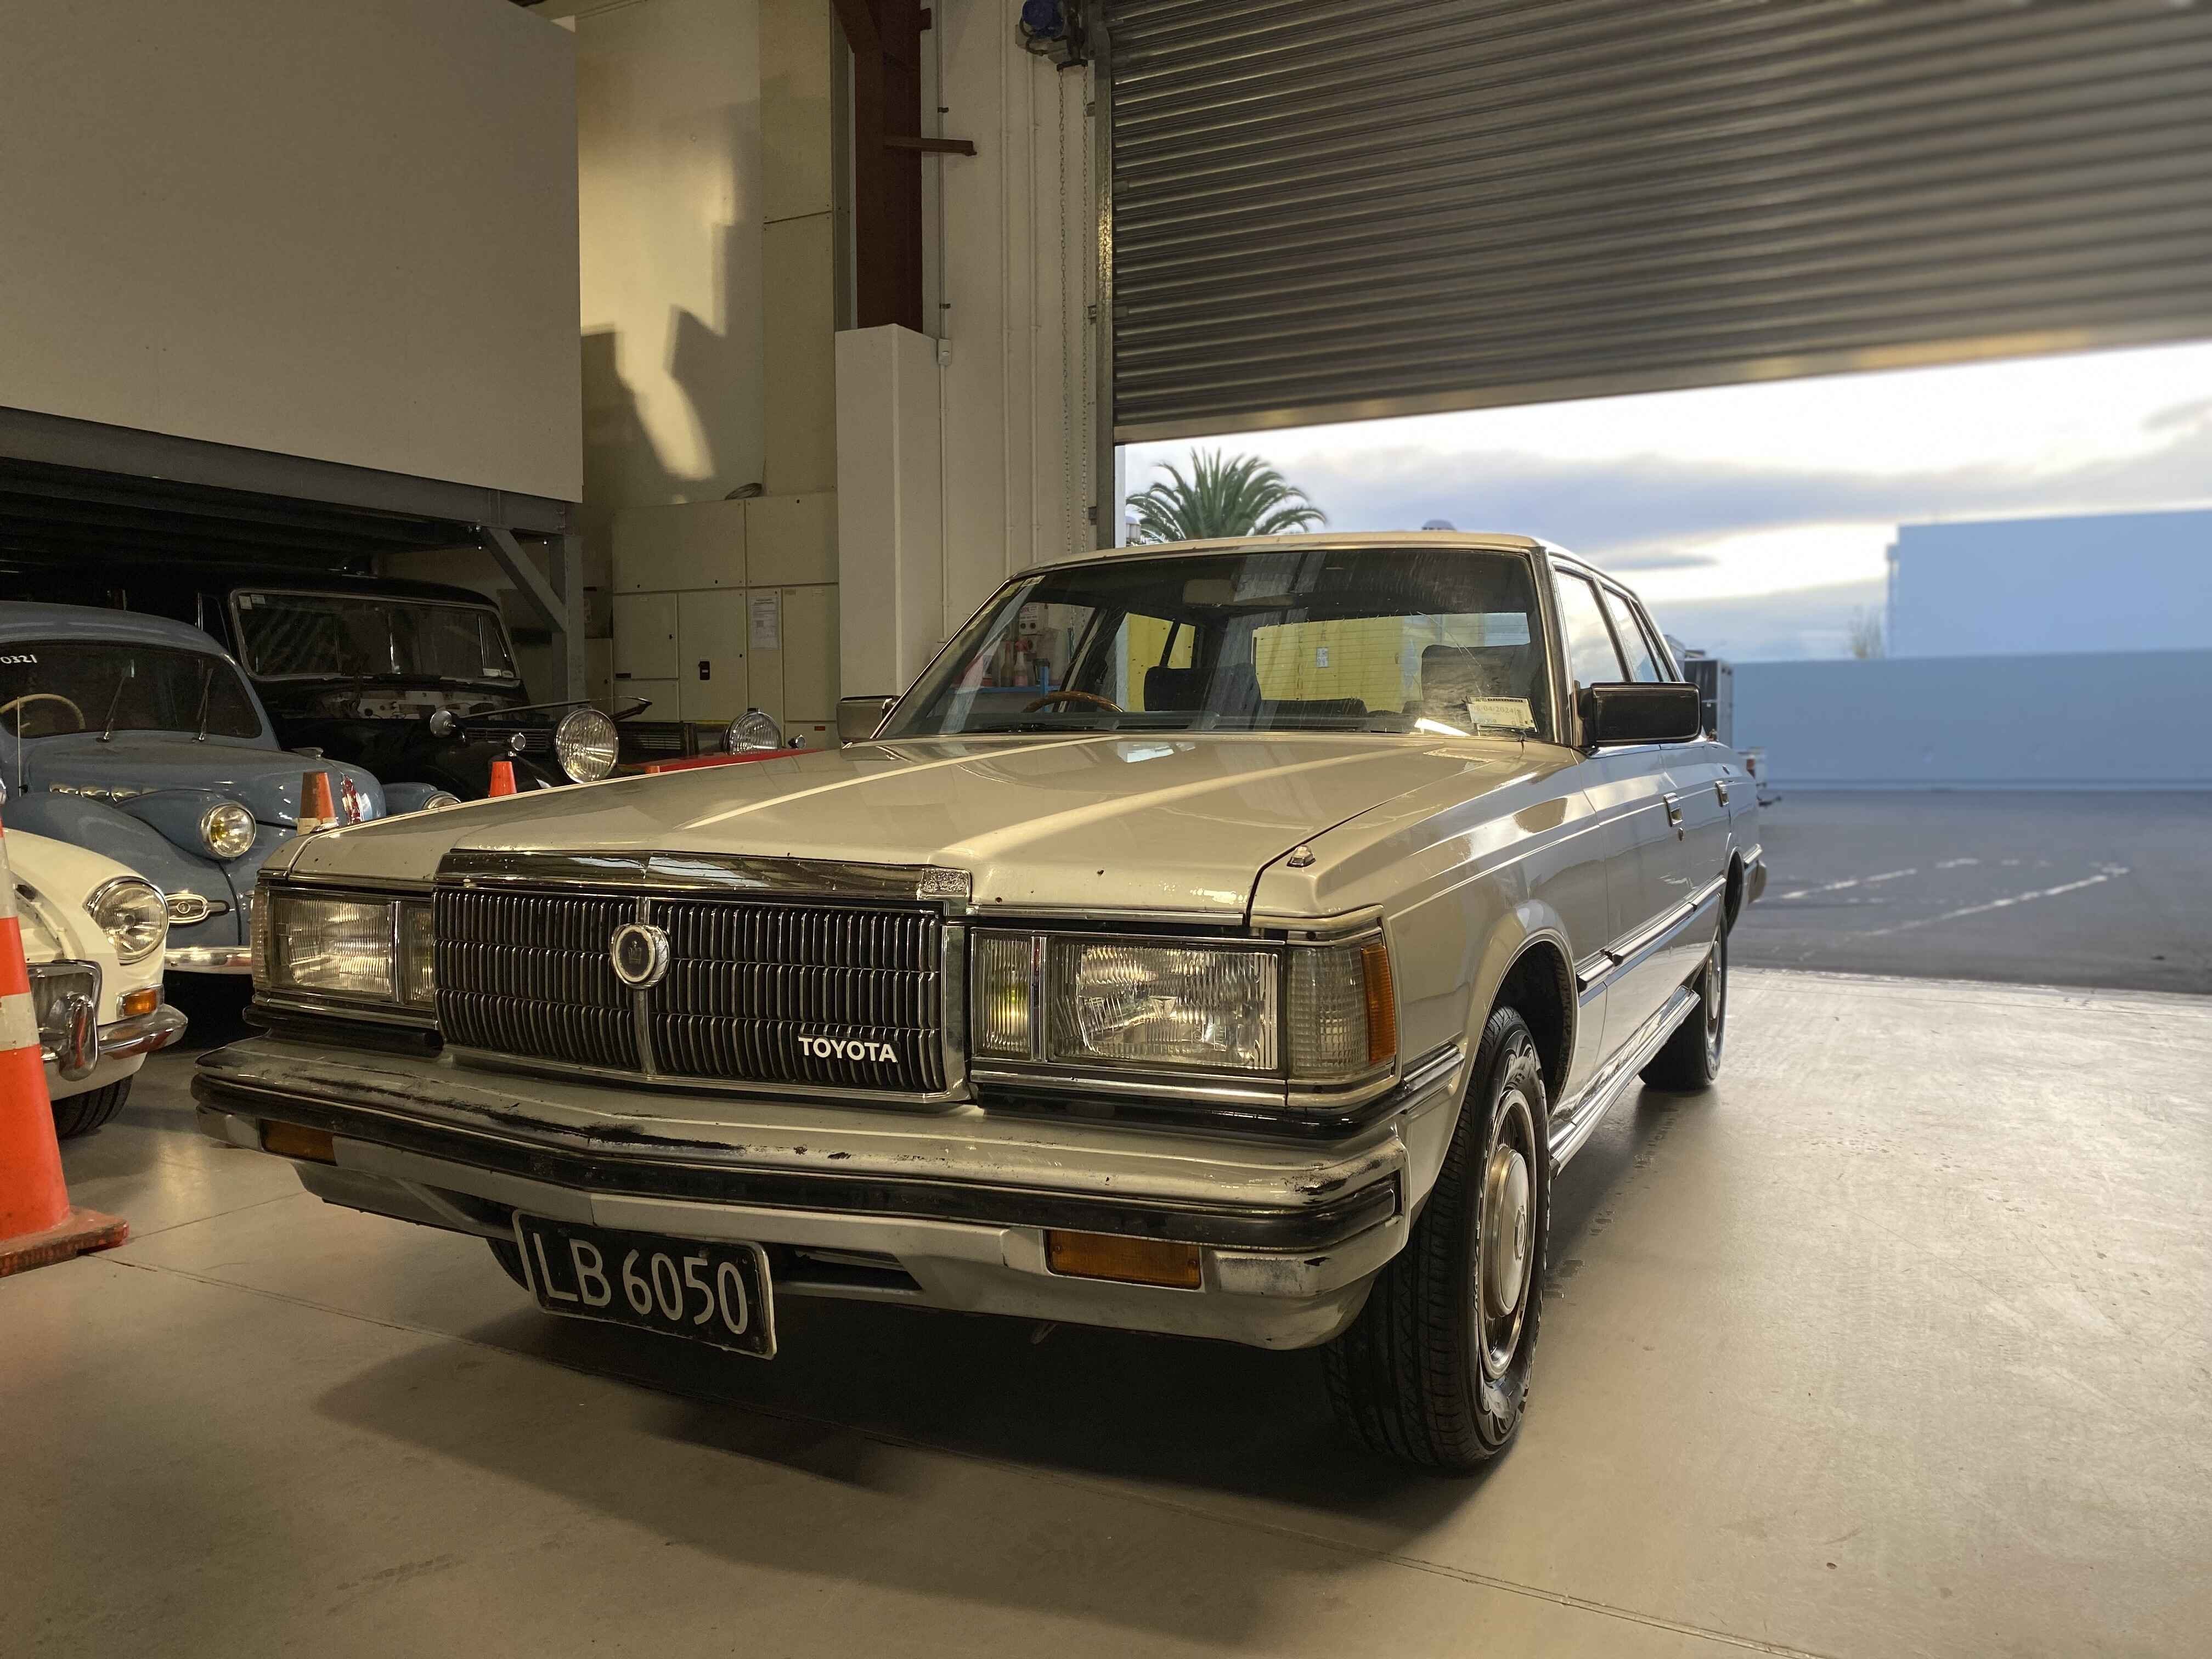


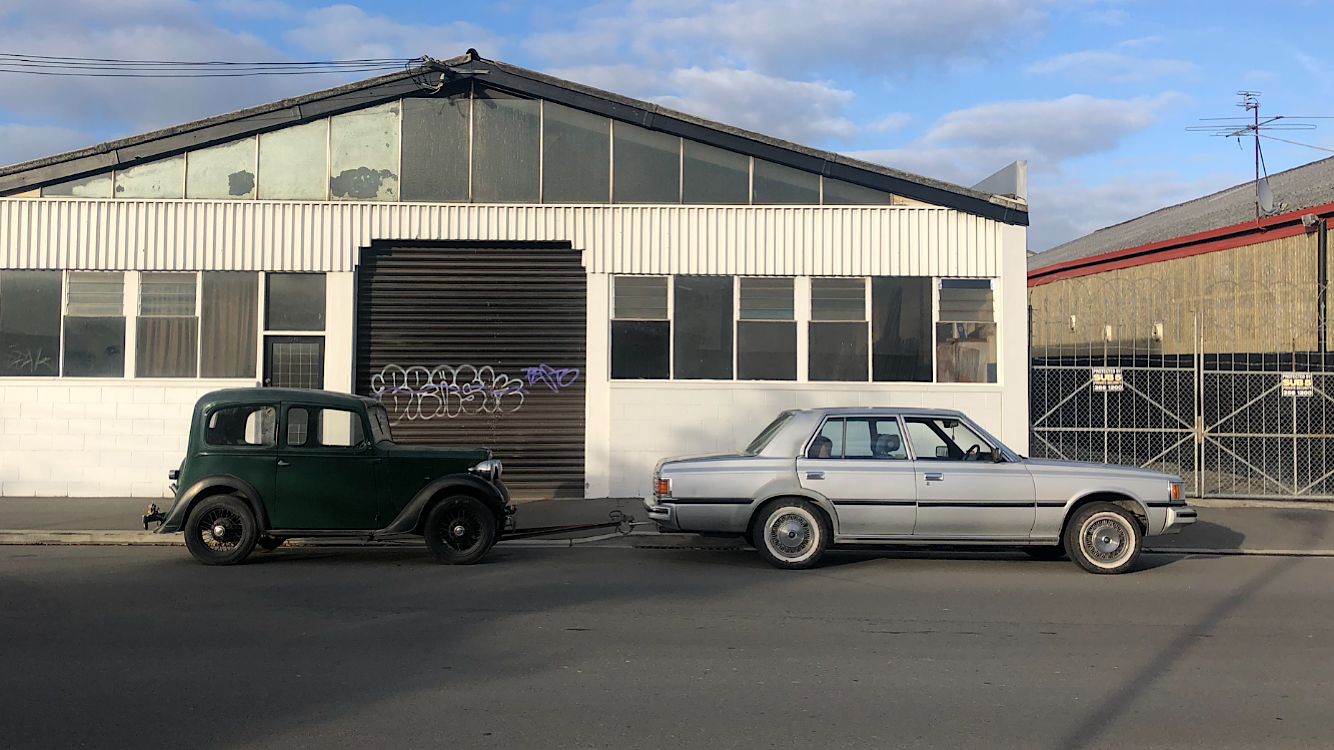
Bluebears01's '83 Toyota Crown
in Project Discussion
Posted
Thanks man. Being young and broke is just an opportunity to learn a tonne if you’re working on your own car! I’m in Chch, I’ll flick you a dm and you can have a closer look if you like.