


kempy
-
Posts
2,352 -
Joined
-
Days Won
2
Posts posted by kempy
-
-
What are you going for, a wooden or metal deck?
-
New favourite thread ever with the RX2 rebuild
-
1 beer later...

-
 3
3
-
-
ugh, Forgot this model has loads more stuff to go wrong with all the electronics.
-
1
-
-
Yea it'll be the usual stuff, seals and a general clean up, feel free to bring it over.
-
Keep looking at the other Faema Legend sitting on the shelf.. should I strike while the iron is hot or can I really be bothered? It's just as bad as the first one was.
I'll have a beer and ponder it.
-
Oh...
hah just kiddin, head seal etc? yep not a prob, might even have some in stock
-
Peet, whatcha got?
-
nvmyvl that would be awesome, they're not deep, just from cups rubbing against them etc...
Invite for Shed tour/ regulars I know : This thing needs a workout, Shed coffee's in a couple of weeks time, weekend morning/afternoon better?
Kempy
-
2
-
-
Thanks for all the suggestions, The original guy after nearly 3 months of promising and waiting has gone AWOL, so back to square one.
I'll give tube bending and Sandvik a call, cheers for that.
-
On their way mate.
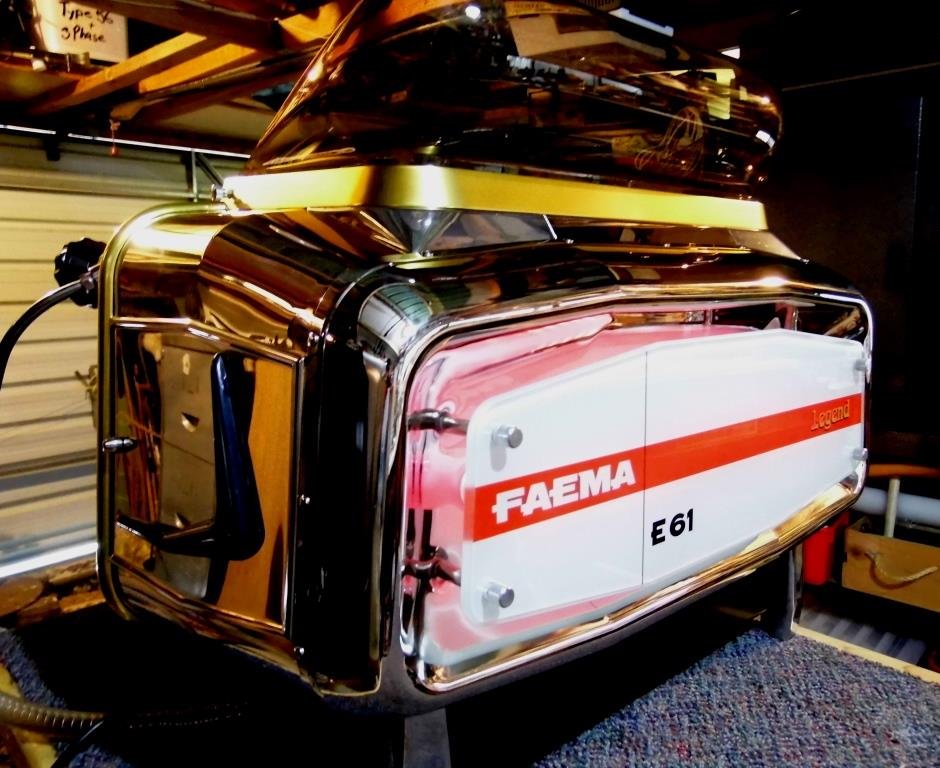
Here's a couple of pics with the stainless all polished up and after a couple of coffee's made.
Still have the final decals and brass nameplate to go on as well as the flexible steam wand, various bottom section covers and somehow polish the scratches out of the perspex cup holder on the top.
I like the bottom section left black as you see it now with the under body showing so I'm pondering painting the stainless covers black... ( the covers you see with 'FAEMA" written on them in the first phoyo on page one)

-
7
-
-
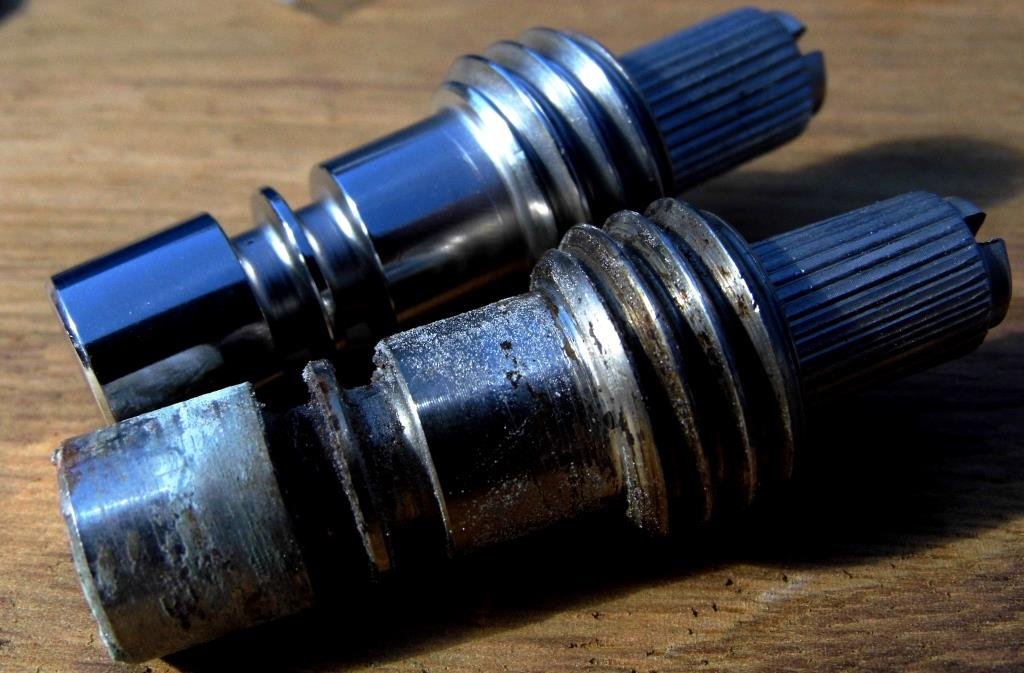
Had a fellow OSGC drop in this morning so an early morning effort for a trial run before putting it all back together..an epic fail
Motor bearings which were about the only thing I hadn't replaced and they decided it was time to seize solid (top one in the pic), managed to fly through the door 10 minutes before Saeco bearings closed, awesome that they had them in stock.
Runs a lot smoother and quieter now.
-
1
-
-
I need to paint the rims of the quad bike, it's been done before by someone and peeling off so I'll strip them back and repaint.
The rims are really deep and not that wide, for scale it's almost like painting the inside of a bucket , so I was wondering what the best way to attack them was as I can imagine getting heaps of cover on the outer edges and not much inside?
Cheers
Kempy.
-
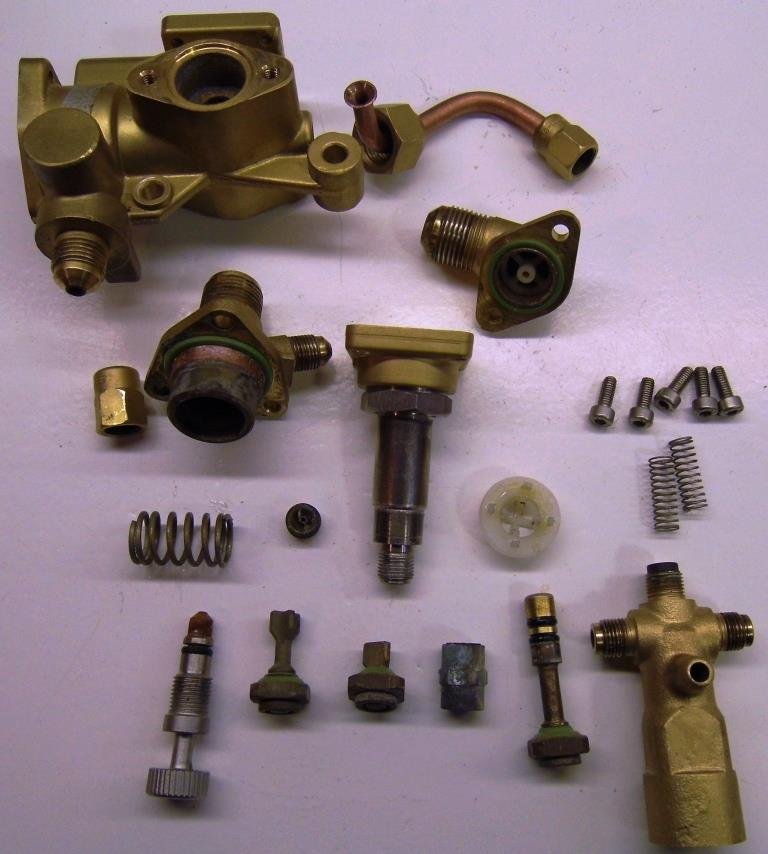
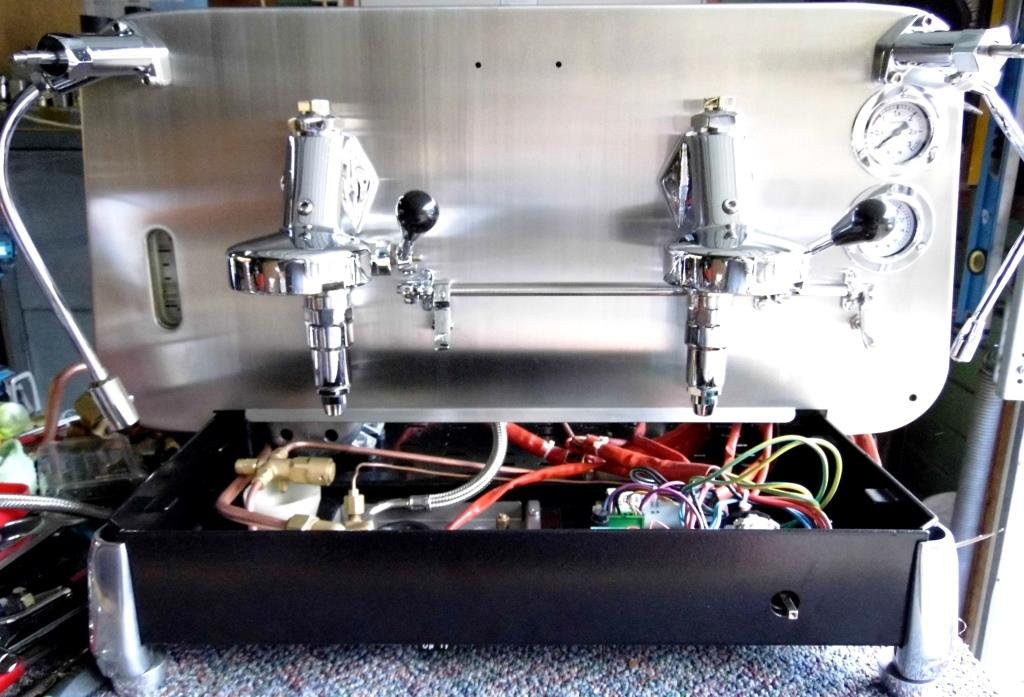
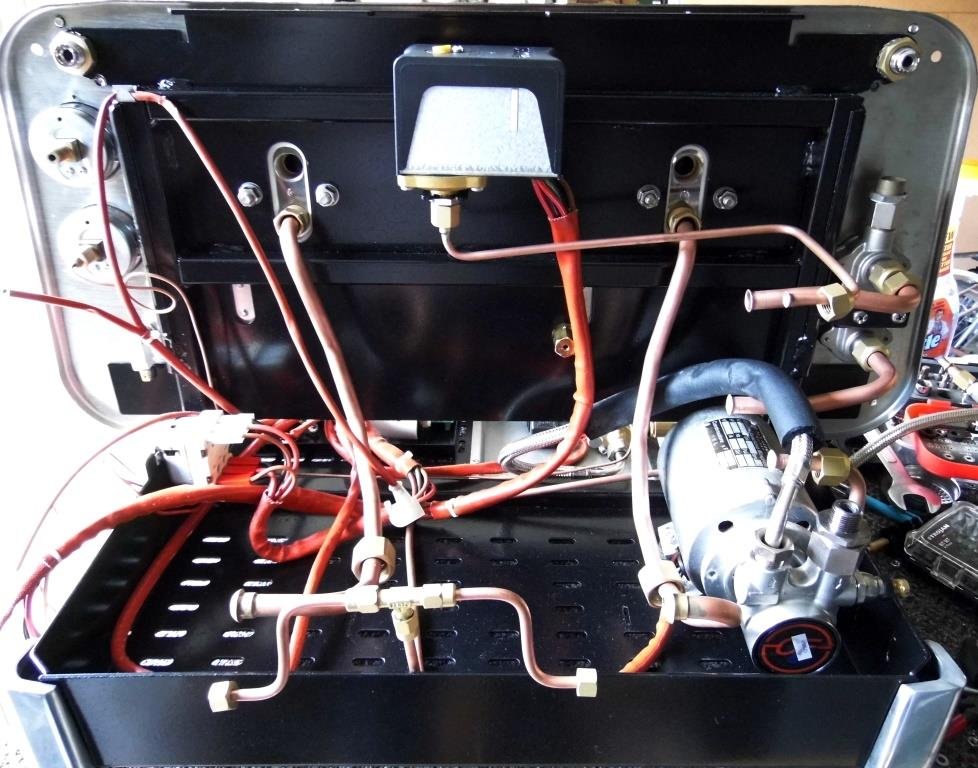
Before it all goes back together it's time to have a look at the auto fill and thermal expansion valve, as expected their titles fairly well describe their function.
The Auto/Manual fill block it the large Brass block at the top left and about 85% of the bits here go into/onto that component, Auto-fill is by means of a water level probe that is height adjustable from the top of the boiler, the probe in turn connects electrically to a electronic sensing circuit and this in turn actuates an electromagnetic valve to add water to the boiler until the water reaches the probe again.
This machine also includes a manual fill option for the purpose of initial filling of the tank, as the element needs to be immersed in water before it gets switched on, or, a manual fill in case the electronics die.
On the bottom left in the picture above is the thermal expansion valve, it connects to the heat exchange side of the circuit and normally drips out a small amount of water as the water expands under heat, it's essential as there's normally no air in the circuit to act as a pressure buffer
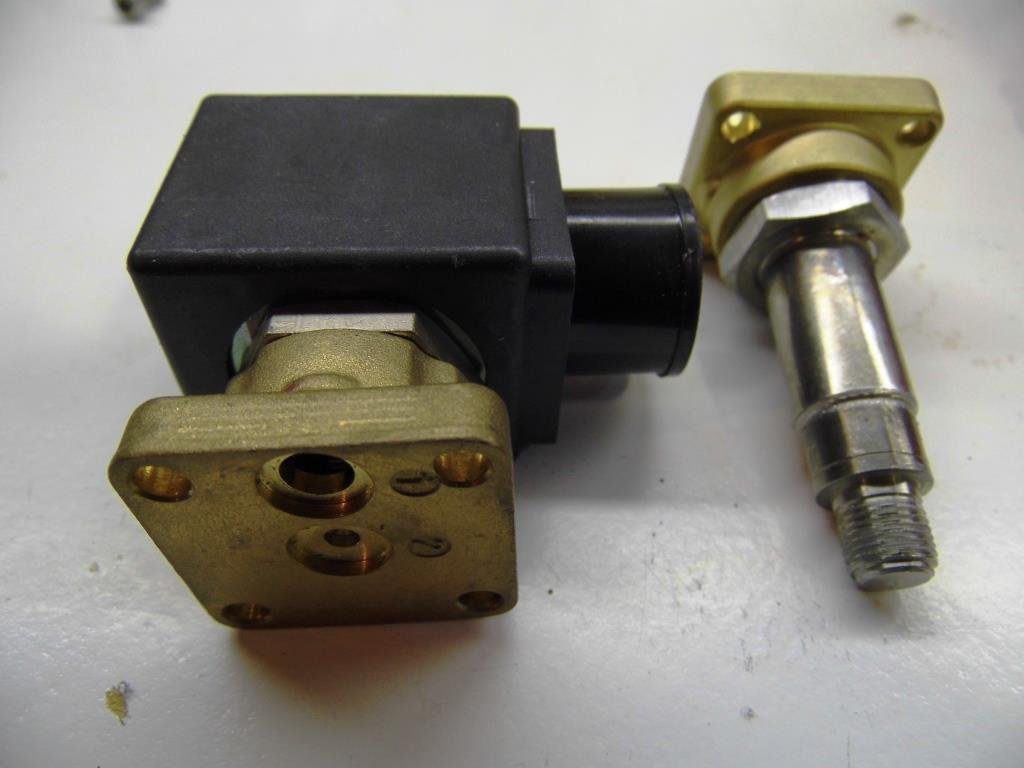
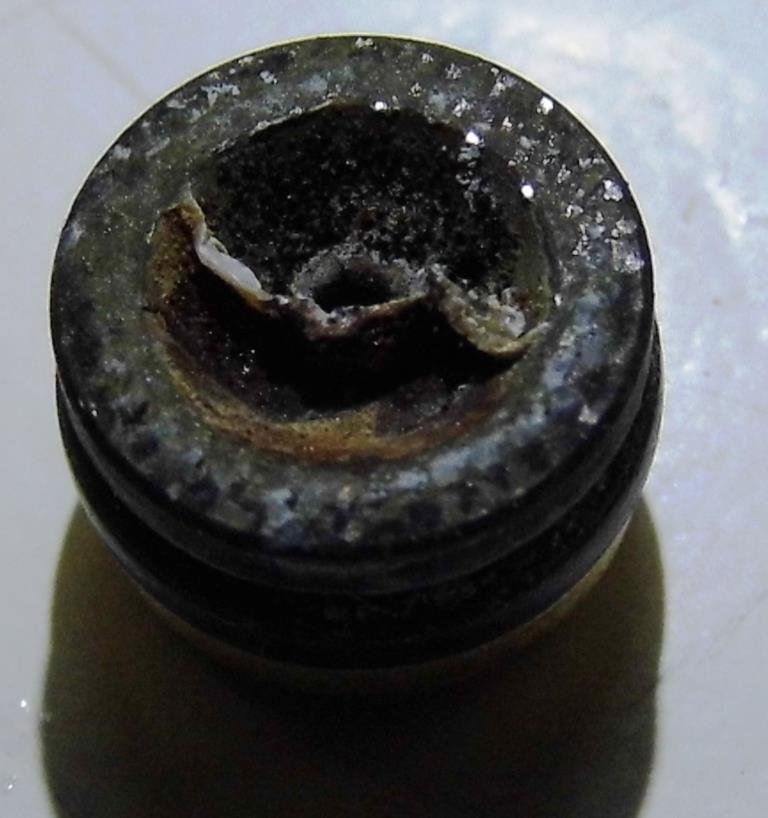
In the picture below is a closer look at the rear of the electronic fill valve and the jet that attaches to it, both are pretty manky.
Electronic Fill valve. (new one on left)
Surprise Surprise, another blocked Jet. Thit fits in the No.1 hole on the auto fill valve in the picture above.
Looks like it's time to start up the bead blaster again!
-
Haven't seen or used one of those for years! can you explain what you are using for a signal and how its hooked up?
To me, this looks like a dry joint for a starter, I think that is connecting to the wire link on the other side? try soldering that up better but be careful not to cook the diode with excess heat.
If you're close to One Tree Hill you could always drop by and I can stick it on the Sig Gen and check what's happening + deal to the dry joint.
-
2
-
-
Sounds to me like the thermostat isn't opening with the top being cold, or an airlock., or both.
-
artyone I'm definitely interested as this rebuild is coming to an end, I've always wanted to do a one off build.
Speaking to getting closer to finishing today's effort lead to a pre-fit of everything before I get the sealants out and fix stuff in place.
-
6
-
-
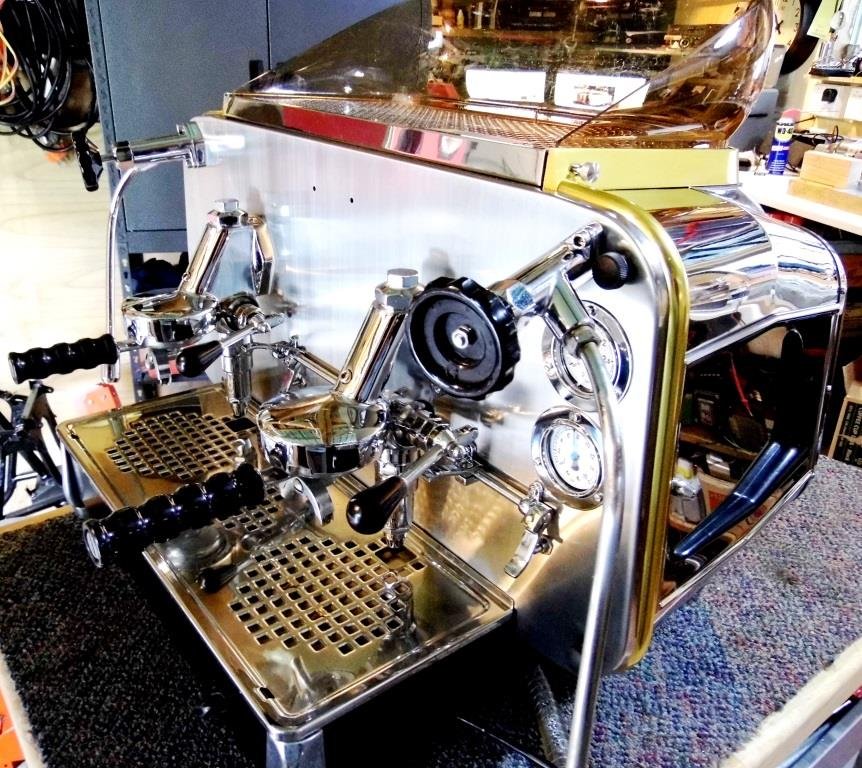
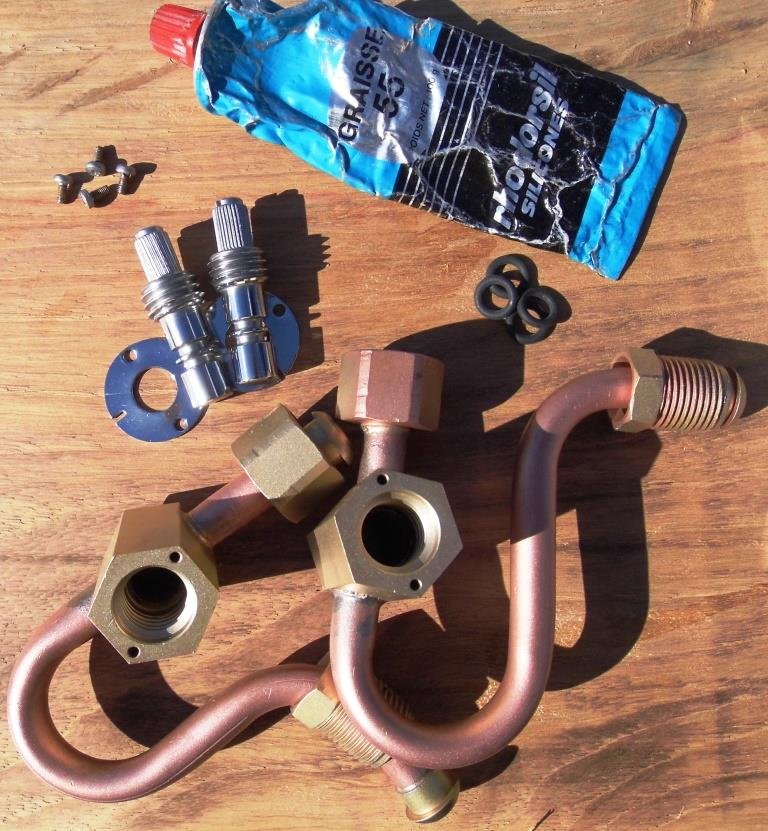
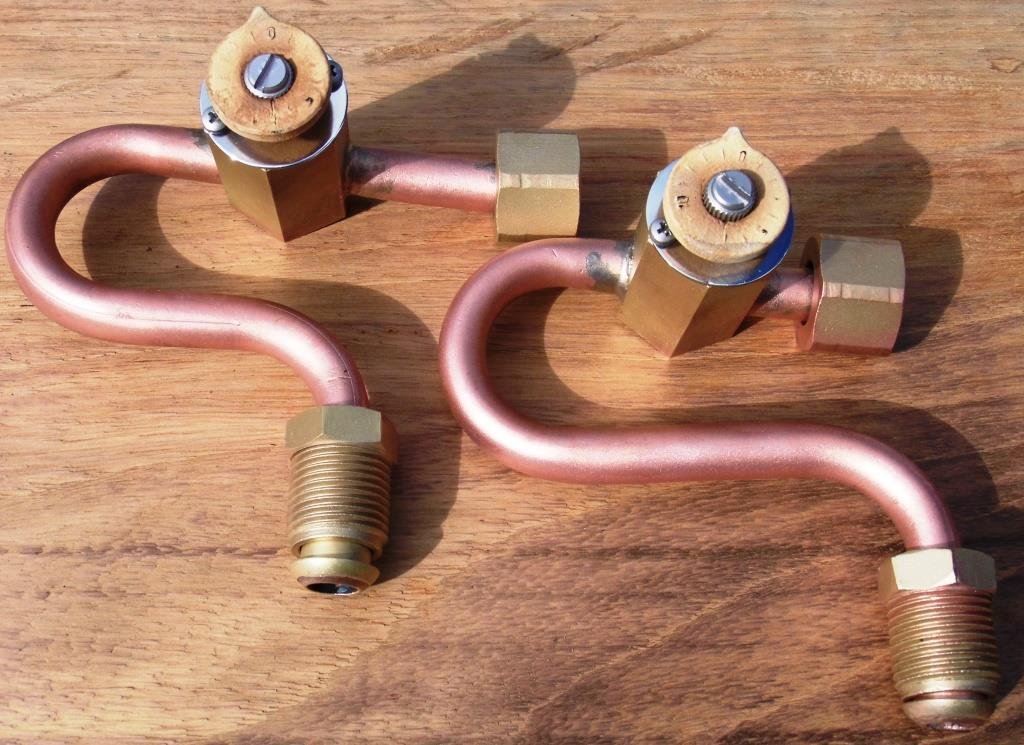
Group Head thermal syphon control valves.
Having a group head thermal syphon adjustment is one of the more unique features of the Faema Legend, it lets the user make adjustments to the flow of hot water that heats the group head and fine tune the temperature.
Here's a quick bit run down on their maintenance which is overlooked in a lot of cases, the condition of these ones is pretty much what you'd expect from several years of little to no maintenance exhibiting plenty of mineral deposits (with some added glass beads from the external clean) which will affect the flow and reduce the temperature.
There was an external tell tale sign of the flow problem with someone trying to open the valves too far, this in turn bulged the thin stainless steel covers outwards from their seats and had to be beaten flat again before being reinstalled.
One of the valves bead blasted and a quick polish in an attempt to reduce future deposit build up.
Here's what is essentially the service kit, 2 O-Rings per valve and some high temp silicone grease
All done and ready to install.
-
5
-
-
-
Oh crikey, I was kind of expecting an answer like it contaminates the copper etc. Thanks for the heads up. I'll make sure I change the media when blasting ferrous metals and chuck some magnets in for good measure!
-
1
-
-
Haven't so far, but what's the deal with ferrous metals?
-
how do you work out FAD if the manufacturer doesn't specify?
Ive got one of these http://www.nardicompressori.com/en/?option=com_hikashop&ctrl=product&task=show&cid=209&name=extreme-4d-90-litri&Itemid=947&category_pathway=60
Supposedly a 480l/min compressor, Ideally I'd like it to be able to keep up with the small sand blaster I have, but it cant, not sure if its not performing as it should or I'm asking too much of it but it doesn't feel like its double what my previous compressor was on paper.
I guess on the positive side, is nice and quiet and the automatic dryer works well.
A bit of an update..
Got a bit frustrated with the output of either compressor not being able to keep up with such a small sand blaster, so I started from scratch again
This time I picked up an unused 2nd hand cabinet that 's a bit larger, added a dust recovery system and instead of using garnet I'm using glass bead.
Wow, what a difference, it seems the glass media cleans 2-3 times faster than garnet on the copper/brass/aluminium and ssteel bits I'm doing and I can see in the cabinet at all times, often with garnet it just turned a sandstorm in a box.
I'm blasting at lower pressure which means the compressor can keep up too.
Cant help but keep rummaging in corners of the shed for things bead blast
-
1
-
-
- Popular Post
- Popular Post
Having a bit of fun with the bead blaster and polishing machine.
Gauges polished, tested and back in place.
-
12
-
Awesome, thanks for the link Corbie!


Flat deck Dyna Truck
in Other Projects
Posted
Make sure you use a good grade of Ply, seen some of the cheaper stuff it De-laminating after a couple of years, the extra $ you spend on good will be worth it in time, Also seen a few decks going for shiplap 19mm hardwood (vitex).