DirtyThirty
-
Posts
110 -
Joined
-
Last visited
Content Type
Forums
Downloads
Events
Gallery
Everything posted by DirtyThirty
-
DirtyThirtys 1984 Toyota Starlet KP61
DirtyThirty replied to DirtyThirty's topic in Project Discussion
No worries, I was hoping it'd help some people! Msg me and ill send my insta. Also I will be continuing on with this build shortly! -
Unluggy uce, drivers side plugs had been cut off. Extended and sorted so all lights are going. Lubed all window guides and mechs as per other side. Managed to not break any clips again so thats a bonus. ....and someone filled the bottom of the window channel with black MS

-
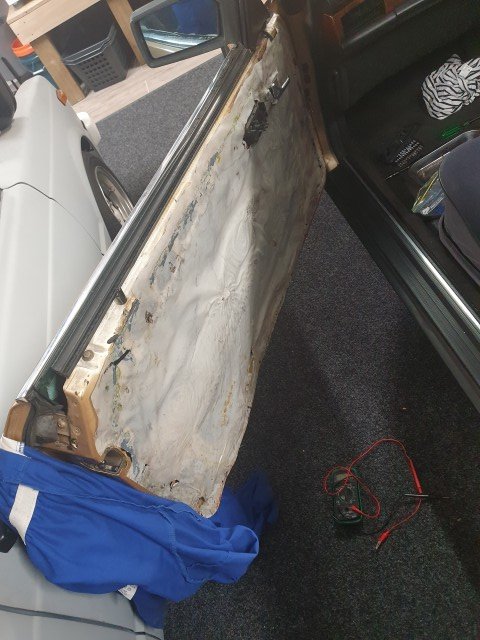
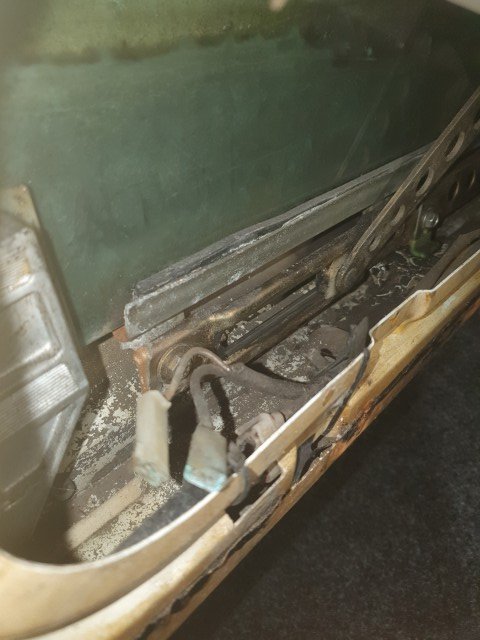
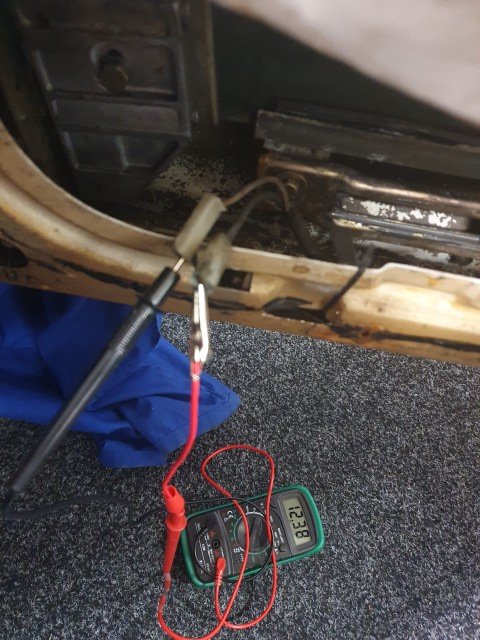
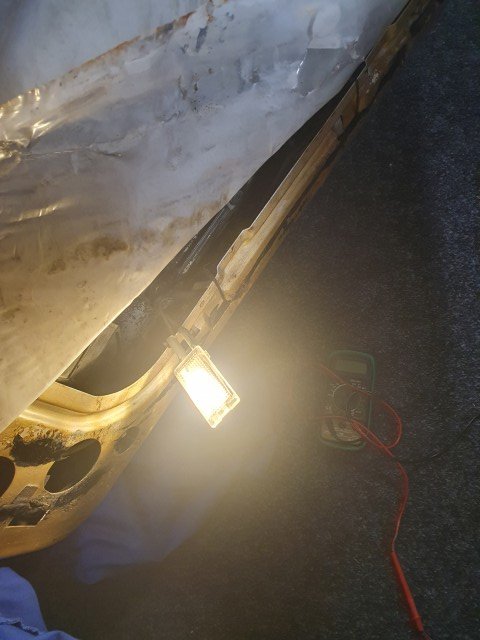
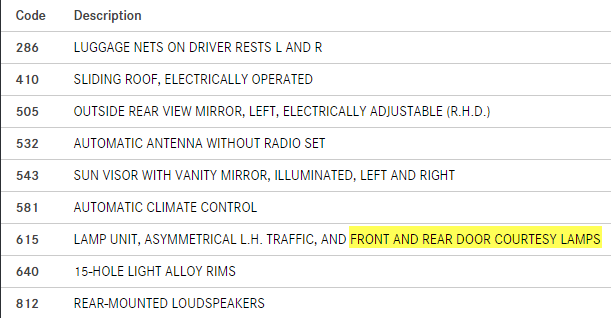
Courtesy lights I knew the car had the under door courtesy lights from the factory because the handy VIN decoder told me, however in someone's wisdom (probably when doing the interior swap) they removed them and cable tied the wiring inside the door. Dunno how rear door anything works on an SEC, but I'll take it! The door card had to come off, managed to confirm the wires were in fact there which is a relief. Tested to see if it was actually working before I start getting too excited (I have a nice new loom waiting from an SEL if it wasnt), thankfully its all working The top clips on the door card are molded in, which is stupid because they break and they're not meant to be replaceable. All but 1 seemed intact and that looked like it was a PO breakage. New courtesy light wired, fitted. Window guides and mechs all greased while I was in there. I've been replacing all the bulbs with a warm white LED. Door card fitted all back up.....but the door doesn't want to close properly as the vent in the door is hitting the duct on the side of the dash. Which is a problem because it wasn't like that before I started and there is no adjustment in the door card to slide it back. That tonights problem to solve, along with tacking the drivers side. Also tested the clock, its getting 12v so it'll be the capacitors needing replacement, might as well do the tacho ones as well since theyre about $0.80 each. While doing this job, I realised how solid the hardware and fixings Merc used really are. Its a very solid door card, the insulation inside and materials are pretty sturdy! Built like a tank. The way the world is going, might need to install a turret to the sunroof. Looks pretty smart I think. Not a huge fan of ice white lighting, or big Mercedes logos shining down onto the ground.
-
This makes much more sense. To be honest, in that case its probably working. I havent had a need to use it yet, just found it odd it was a momentary switch in the first place. Ill give it a go and see if it works.
-
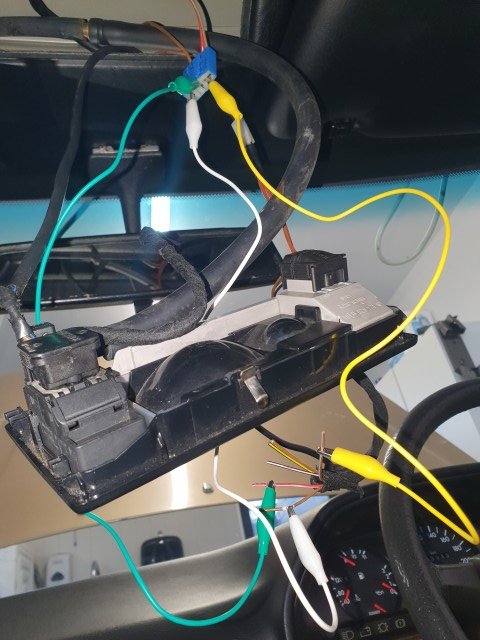
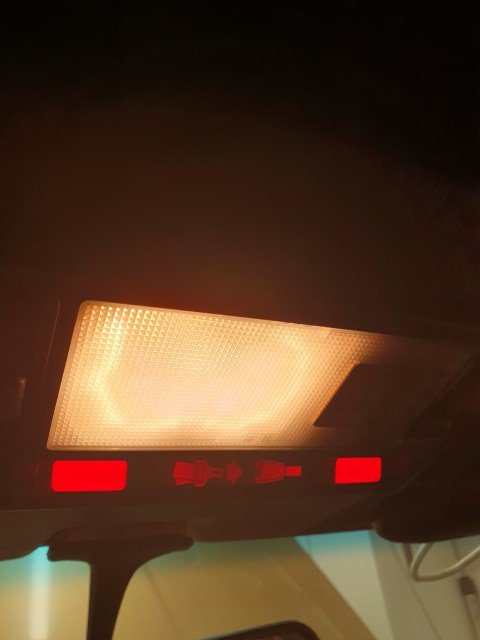
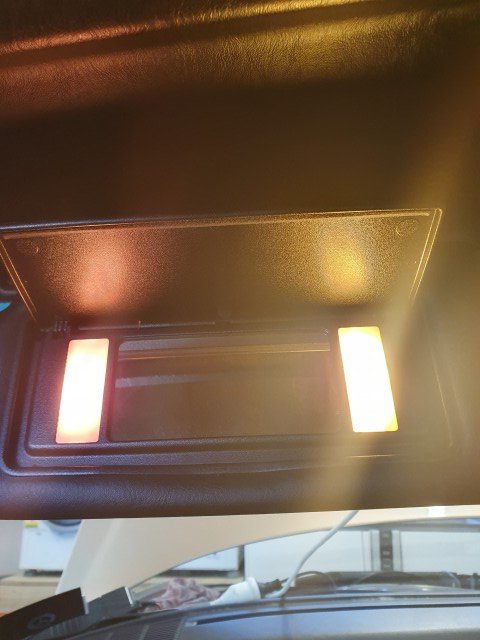
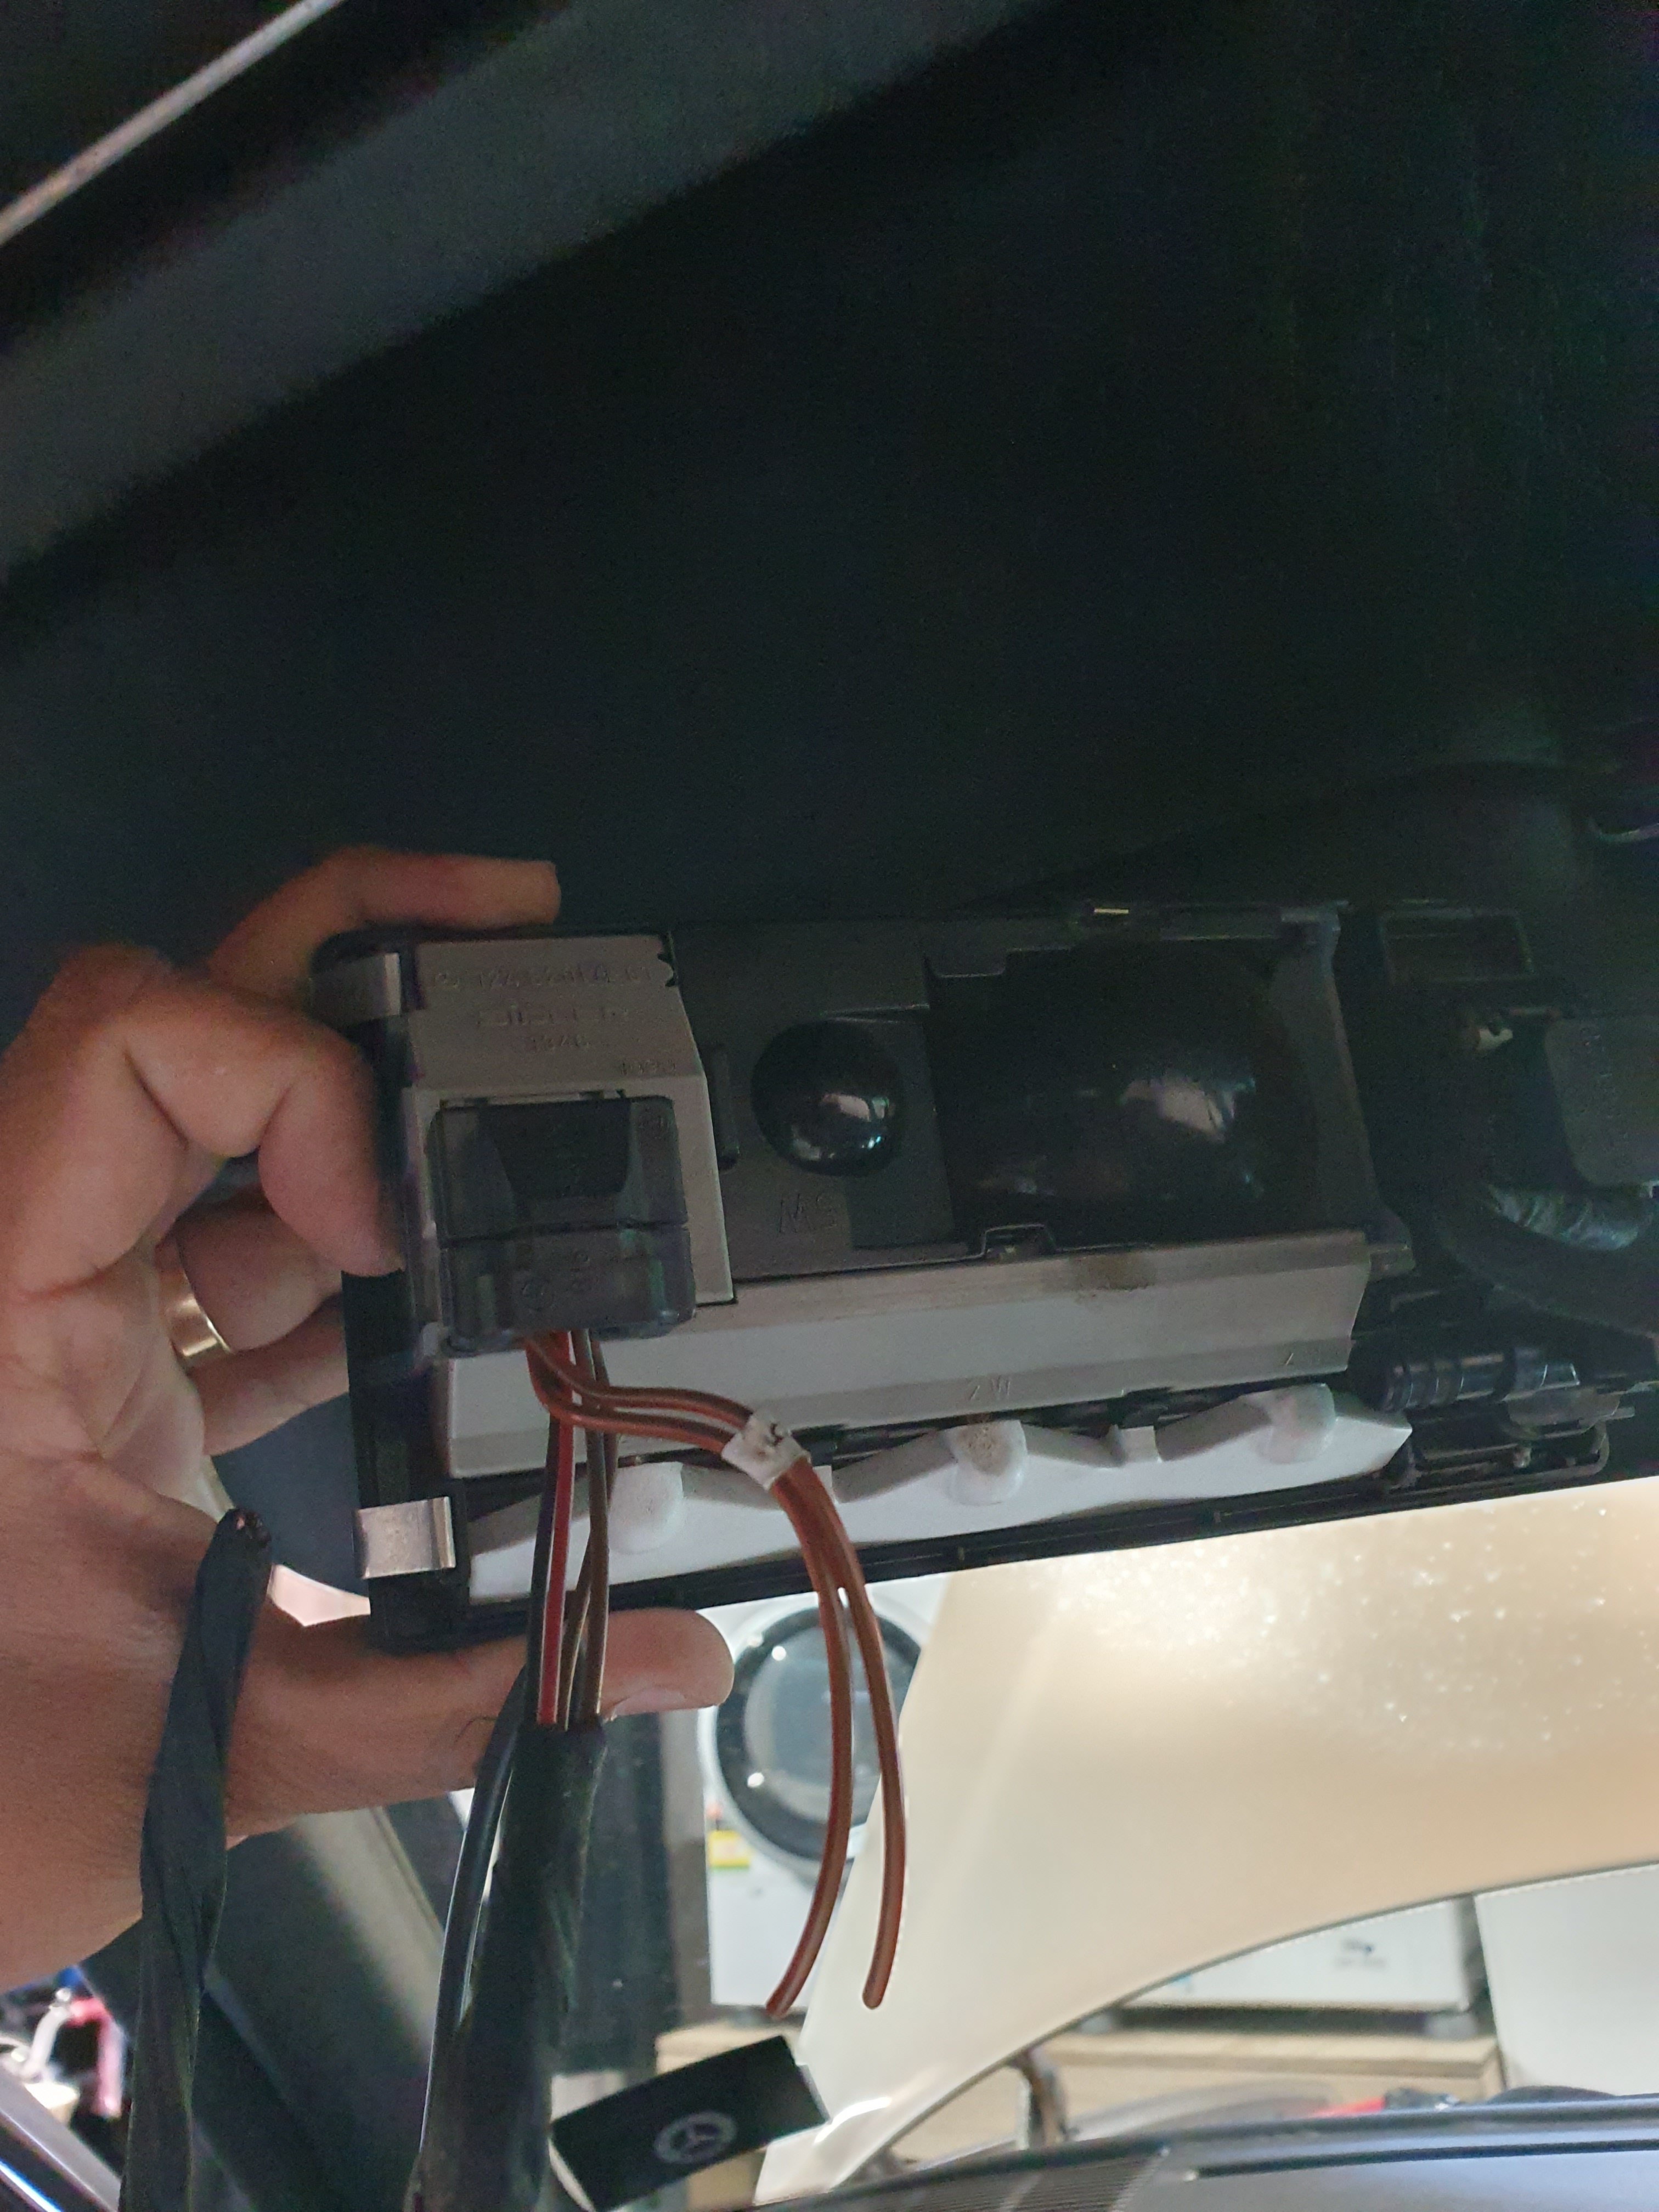
I've come a step closer to my dream of owning a Porsche.......I used a 500E wiring diagram to wire in a W124 (which may or may probably most likely NOT be from an 500E) dome light. At this rate ill work myself up to a 930 in no time! Managed to make the W124 dome light work, all vanity lights on the visors work, door light delay, seat belt warning, all dome light functions all working. Surprised myself! Only thing remaining for the lights are the under door courtesy lights. Whenever the rear blind goes in, ill have to move the sunroof wires to the dome light sunroof switch which is an easy move, only so I can use the existing sunroof button for the rear blind. My janky test setup.... RESULT: Little subwoofer installed, worked for about 30 seconds then died....fault finding puts the actual built in amp at fault. Easy replacement. UPDATE: Amp was dead (loose wiring) AND the RCA's I used had a break in it somewhere, checked continuity and nada, so replaced and all working now. Found some locations for doubler plates, the inner ones are blank, any ideas? I thought maybe some diff or sway bar type mount? ANSWER: Its for the towbar support, which I now have. Seeing @Gator's run up Leadfoot ranch inspired me to start back on the 4AGE KP. What a sound! I better get onto it so it can be used next year
-
Cheers man, good to know! I got a new boot seal too while I was at it so good to hear they're decent. Everyone has said only use OEM, but thats possibly Merc elitist things. Getting fancy having a WORKING oil pressure gauge. I like the analogue gauge because you can catch it early. By the time the light comes on as its usually too late. Modern cars I suppose are supposed to do away with the consumer actually checking/doing things and more just drop off at the dealer to get everything checked and done.
-
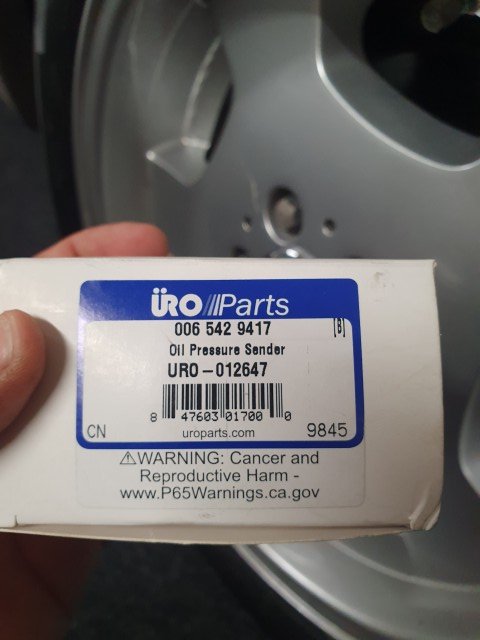
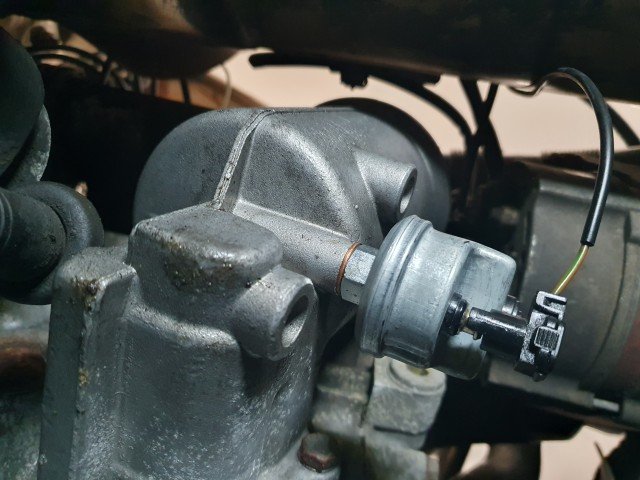
Had a constant dripping of oil since I got the thing AND oil pressure gauge doesnt work. Turns out the sender wasn't working and the drip was due to no crush washer. 2 birds stoned at once.... They don't have tapered NPT type threads which is annoying but a new sender and we're all sorted! I tried getting OEM but the shipping was insane from Rockauto so settled on the "economy" part, see how long this lasts.
-
Not sure if it was, apparently the guy who did it was a bit of a mad scientist type so could be a one off. Im due to put the car up on stands soon so I can have a proper look. I would prefer to keep it within the family and have a Merc box but such is life
-
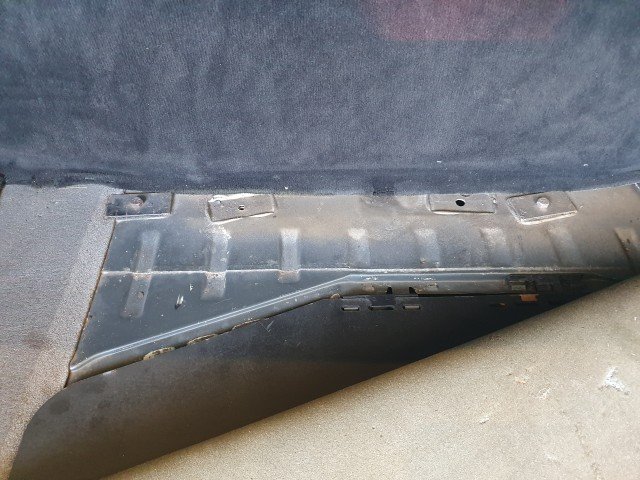
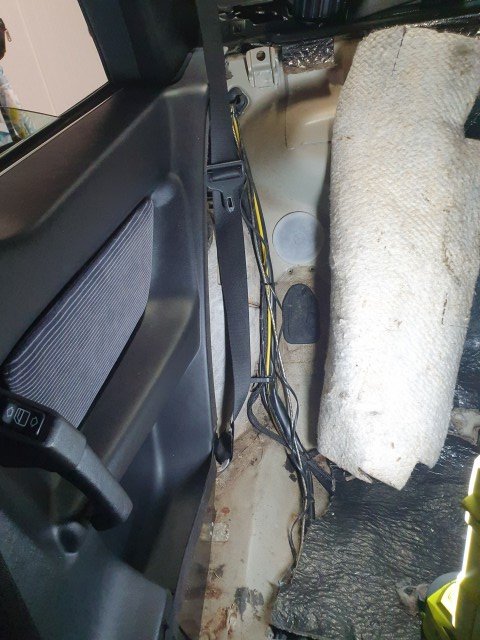
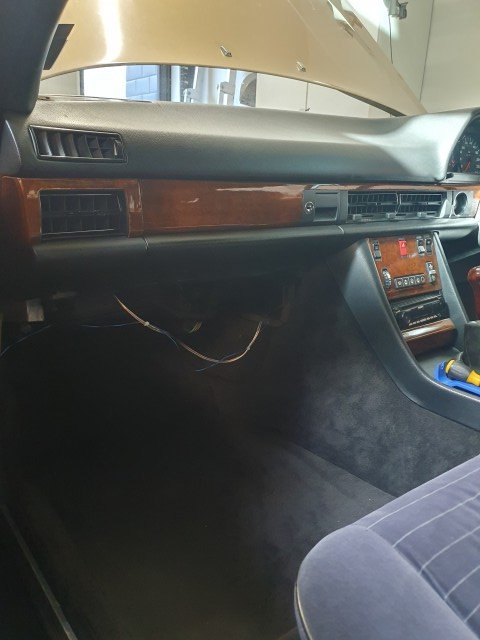
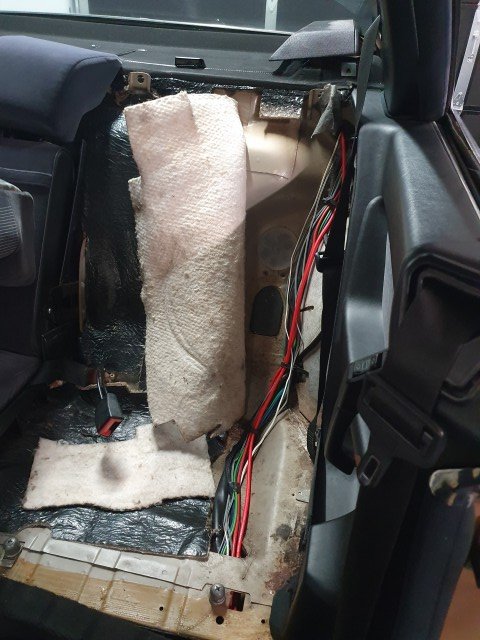
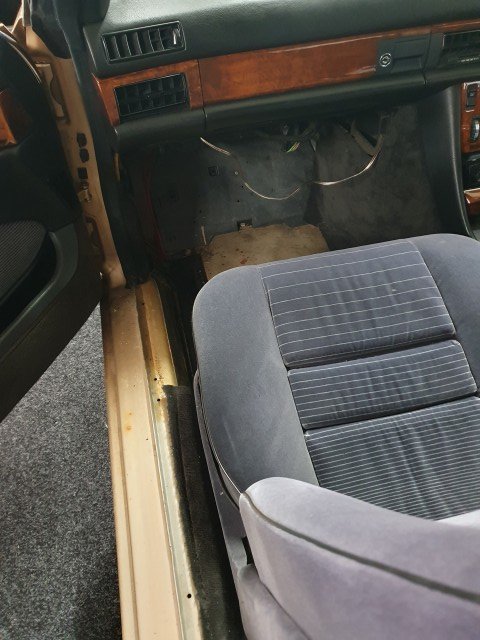
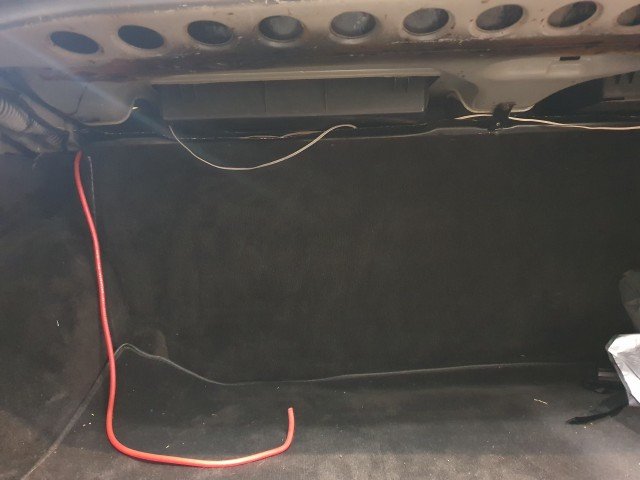
Subwoofer infrastructure/Dome light Decided to pull up the carpets and trim and run a power cable, remote cable and RCAs to the boot in preparation for a sub. Pretty simple but it also gave me a chance to tidy up some of the carpet and tuck it back under the trim. I've since found out that it has the wrong mats on the passenger side, its a drivers side one as it has molded foam underneath to "flatten" out the floor over the HVAC ducts. Found the old Alpine alarm system lurking. The plan is to build a subwoofer enclosure under the parcel shelf so its not taking up boot space. For now I will hook up my 10 year old Fusion under seat sub in the boot. As you can see from the photo below, I was thinking a bolt with a large fender washer though the existing punched holes in the parcel shelf that holds a big "U" shaped bracket which the sub is then bolted to. Should be no issue as Ill use flat bar and bend it up to suit. And all isolated with rubber to stop any unintended vibration. Finished product feat. bluetooth mic and subwoofer control. Again, need to sort a fascia for the head unit to tidy it up. Currently struggling to wire up the Gen2 dome light to the Gen1 car, but ill figure it out eventually, electronics are the worst. The plan is to move the sunroof button to the dome light location and use the existing sunroof button on the dash to operate the rear blind. I also found the rear screen demist button is a momentary switch for some reason, unless its REALLY fast at demisting. The temp sensors for the cabin seems to already have been relocated to the dome light area rather than in the dash so thats a bonus. I've worked out the passenger door switch for the dome light works but the drivers doesn't. I also have a full loom for the door courtesy lights from a '89 SE. That'll be a job when the car is on stands over winter. It already has 2 door switches each side, so the plan is to tap into one of those Also included is my prototype for fixing the seat belt presenter. Its a touch too tall, so im cutting it down to 10mm so it can fit into the slot on the extender arm rail. I think some small, short countersunk bolts will work and strengthen the area.
-
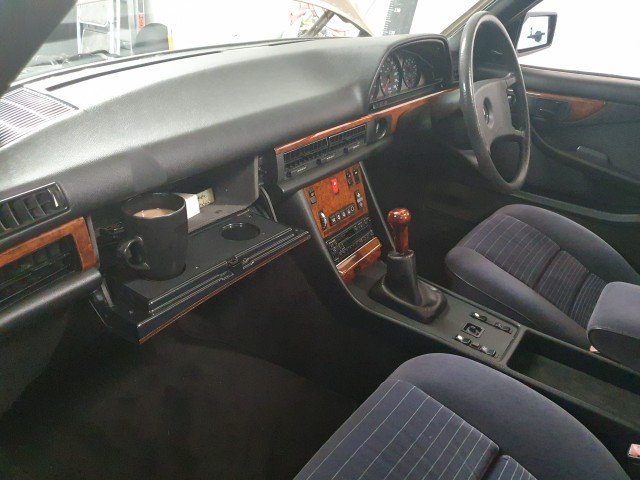
I didn't do it myself but it's a T5 box with a custom bellhousing, I need to see what flywheel and clutch was used. I think pedals would've been either a W123 or 124 retrofit. The shifter isn't ideal because it's so far forward towards the firewall that they've made a billet arm that bring the gear lever back roughly to where it needs to be. Diff ratio was never changed so its not an easy drive
-
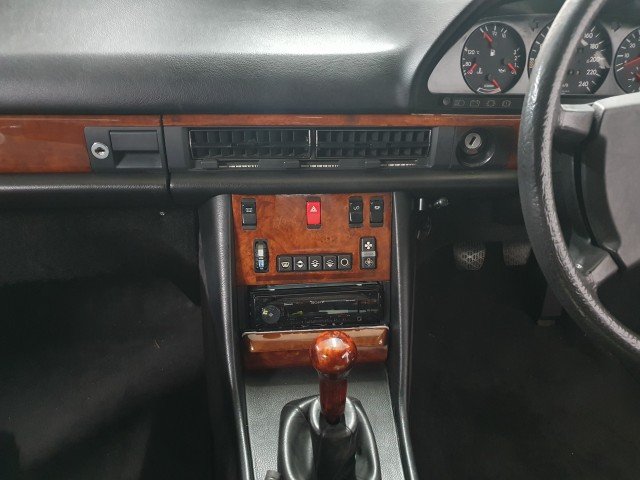
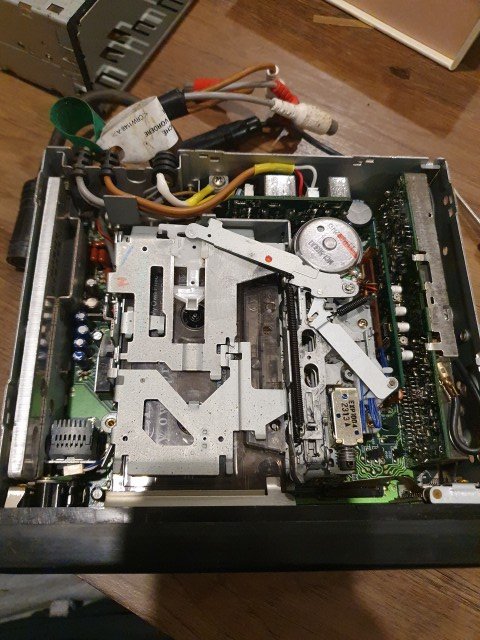
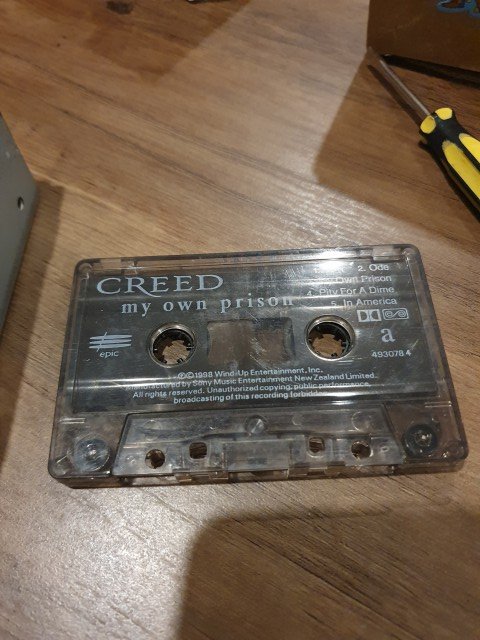
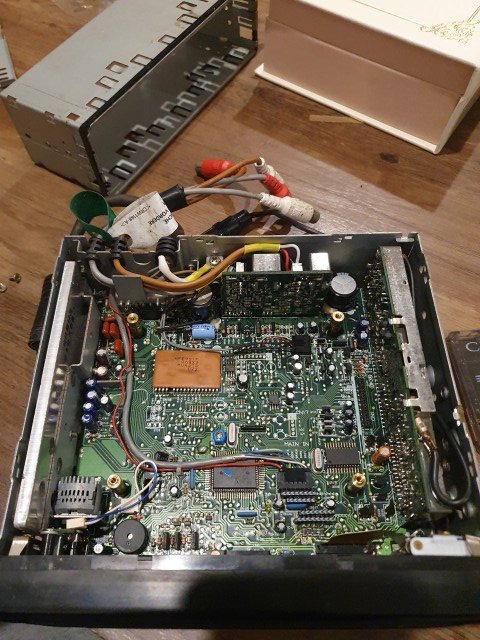
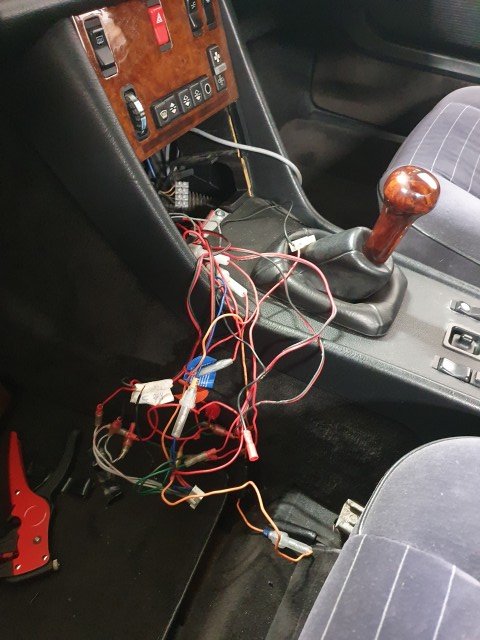
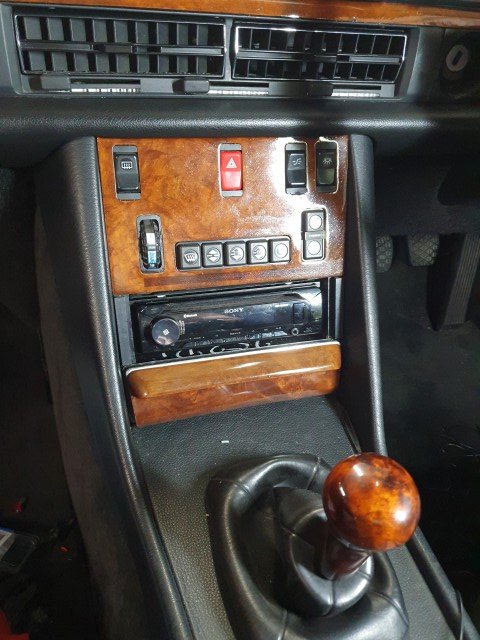
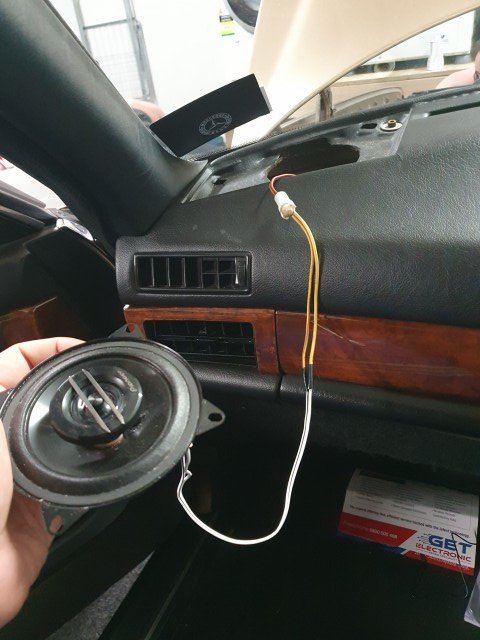
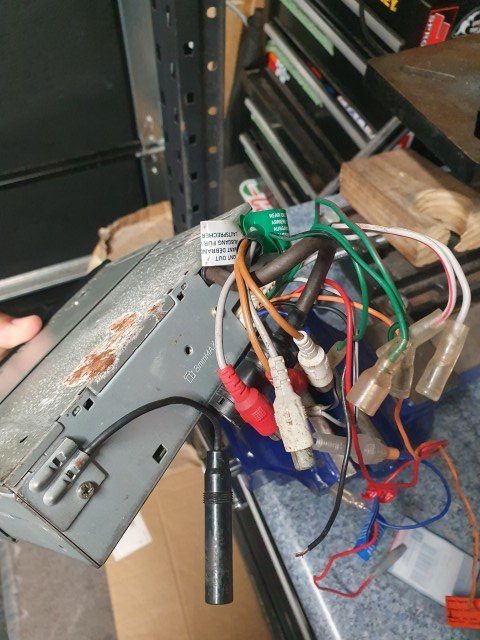
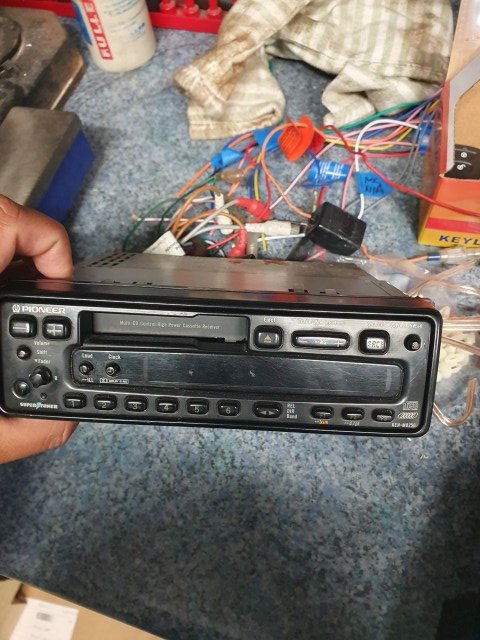
Head unit time. I love the period correct look however we also like listening to music via Bluetooth. Old Blaupunkt units or even the new ones are far too much $$$. Old Mercedes Becker units even without the Bluetooth mods were $$. So I found something subtle enough which you can match the stock illumination to. I chose the MEX-N5300BT for a couple of reasons (and found a boxed one on marketplace): 1. Has Bluetooth 2. Has a decent (for our purpose) built in amp, with direct subwoofer outputs 3. Looks not too out of place 4. Has an app to open the vast options menu rather than scrolling through the head unit 5. Added bonus of a CD slot Took the Old Pioneer unit out, which had a cassette stuck in there which wouldn't play or lift out. So I opened it up to find the following.... Ironically, I did release it from its own prison. I'm glad I didn't have to actually listen to it at any point. Next the rats nest of wiring, lucky the original tags on the head unit wiring were in tact for power, acc, antenna. I could figure out what's what, but then I found an old scanned copy of a wiring diagram. I tidied it all up with bullet connectors and the new head unit plugged in and worked right away! No smoke or fire. BONUS: Power antenna works. Ill just need to sort the speakers out as my next step. I have an old "under seat sub" which worked well in my MX5 so I kept it. My idea is to install it under the parcel shelf without drilling on some drop brackets, we aren't audiophiles just need a slight boost in low end. I've got some random bits and bobs arriving from Scotland, so hoping to sort the dome lights and install the courtesy lights that seemed to have been removed. Left front speaker wiring had to be completely rerun as it just wouldn't work. Uncovered how the shifter mechanism has been done, and an "Alpine Radar Sensor" which is attached to the old alarm. This alarm may or may not work, but once I figure out how tf to wire the new remote locking mechanism, I'd like to get the alarm updated. Final product (I need to get a proper fascia which I might get 3D printed)
-
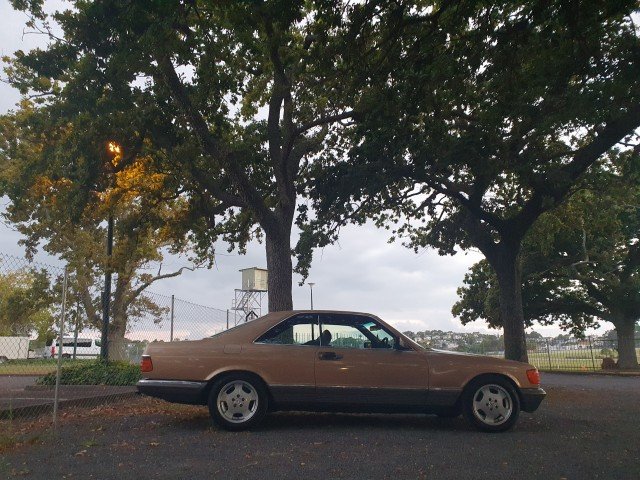
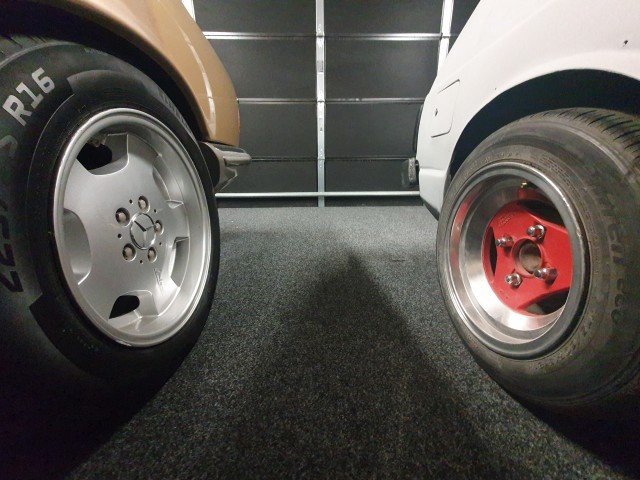
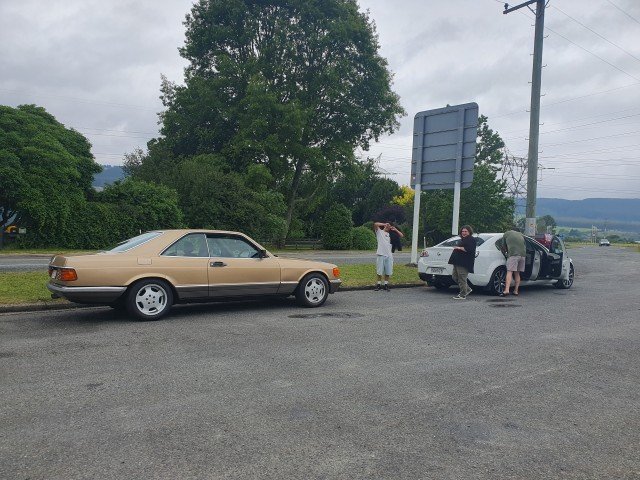
Ellerslie Car Show: I didnt enter as the paint work sucks. But I did volunteer so was at the front gate directing every car through. Great spot to be! Get to catch everything thats on display and have a chat with the owners. 6am start time meant some prime parking and photos before we kicked off. If Larry Chen were blind, he'd probably still take better photos. Side by side action
- 24 replies
-
- 12
-

-
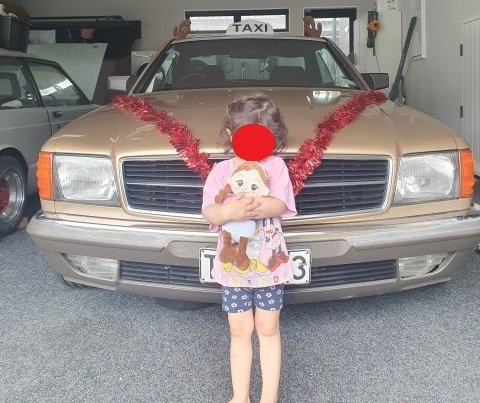
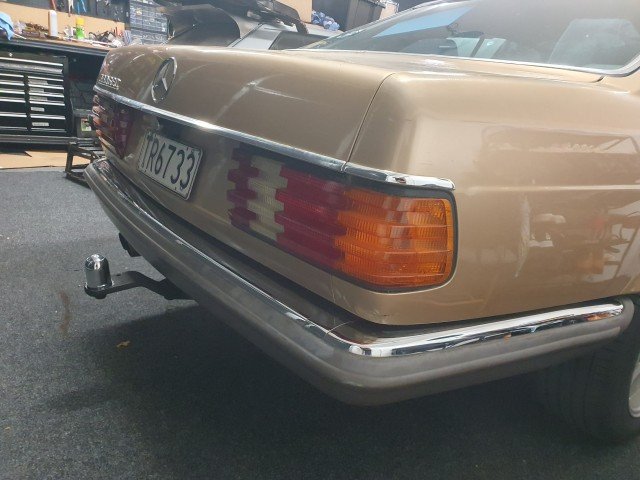
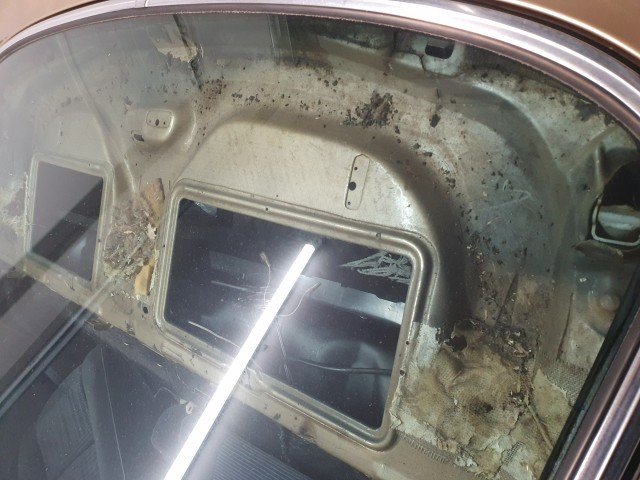
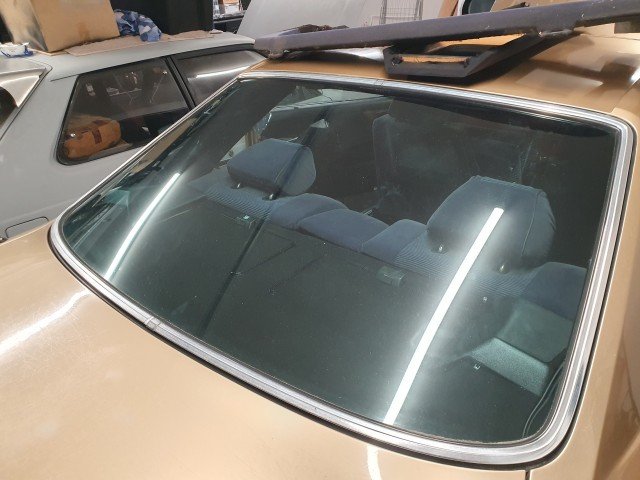
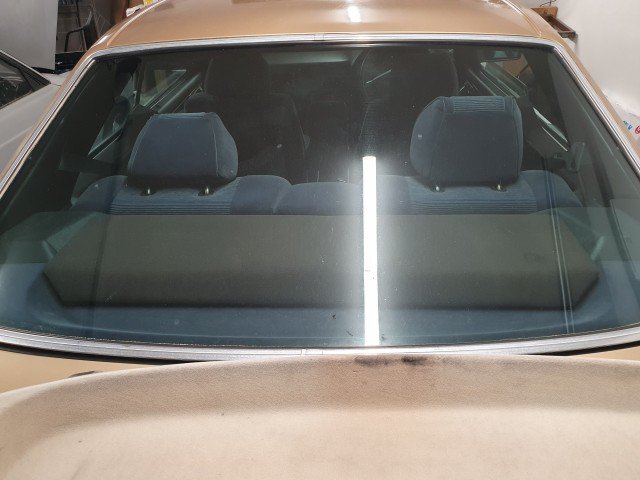
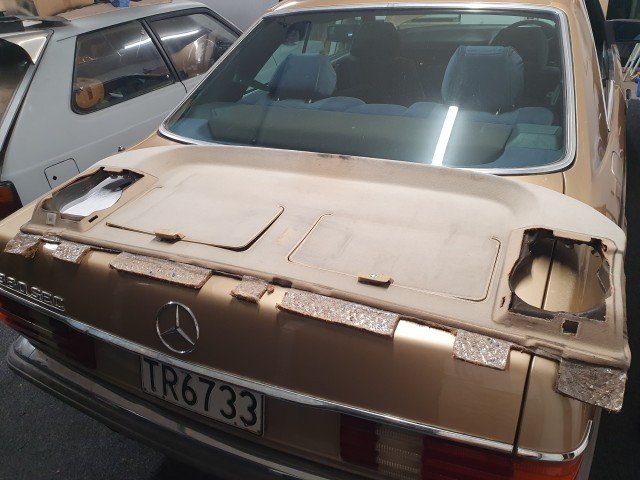
Christmas came round! My daughter didn't really like the "Gold Car" as its "too noisy" but we've come around to it now and love it! Initially to make it more likeable, we dressed it up as Santa's German sleigh. Anna from Frozen is usually suction cupped to the rear window as well. I can report though that a car seat fits perfectly and with the windows all down, its easy to get her in and out of her seat due to the lack of B pillars. A perfect 80s family motorcar! Claus the German Santa Taxi (thinking about wiring the illuminated taxi sign to the dome light and leaving it on the parcel shelf) First thing small job was sorting the 12v cigarette lighter plug. Someone had taken its switched power and used it for the head unit install, nice. Pulled the cluster to find the "economy" gauge vacuum line was popped off. Another nice easy one. Tested the oil pressure gauge by disconnecting then grounding, turns out the sender is the issue. Cheap enough from overseas but the shipping and terrible NZD has meant I've put this off. Found a towbar off a sedan, managed to fit it easily enough. Wont be for any towing at all, just a good parking sensor. The support that bolts to the underside of the wheel well needs some tidying up as its a bit rusty so I haven't bothered installing that yet. It'll get welded, painting then installed. Before vs After Also got the parcel shelf out of that car with the factory storage bins. It wasn't the right colour and unfortunately I couldn't find a Navy Blue fabric spray paint so made do with black. Its come out pretty nice and might fade a touch, but its all installed. While removing the MDF 6x9 shelf, I found a monumental amount of rat shit. So I donned the full PPE needed and cleaned all that up, the car had been living outside at some point in its life. The paintwork gives that away. New parcel shelf in, 6x9s in the original speaker locations with the grilles just sitting on them for now. I need some 6.5" speakers for the rear with the stock Gen2 risers which are hard to find. The front dash speakers are 4 inch coax speakers, I need to sort out why the left wont work and find a suitable replacement. Upon removing the front left, its got 3 colour changes in wires within a space of about 500mm, they did however keep the OG Becker plugs which I'm grateful for, for no reason other than its original. The "new" parcel shelf (hat shelf) from a sedan, pre fabric dye. Before - during - after install Marty while at PaP found a W140, which had the rear electric sunshade in it. After a swift uninstall from the man himself, its sitting at home waiting to be dealt with. The motor works once we tried it, its a bit longer than I thought it would be, but it still JUST fits. I've got the old parcel shelf out to test it on. It'll need to sit on top of the parcel shelf rather than inside and recessed unfortunately, as the curve of the rear screen and angle make it difficult otherwise. Ill have to build some sort of a box to hide the mechanism as best as I can.
-
Perfect colour for such a late model too! I managed to badger the PO of this car to sell so here's hoping you get the same luck! Last night at the ECC cruise a guy offered a '10 E500 as swaps but they just don't have the same feel as this old barge.
-
Later cars are much better equipped to be honest, I'd prefer one but pretty happy with this score for now! Highly recommend
-
Uncle line up
-
Its comfortable enough to sit and have a cup of tea (builders, thanks) in the evenings while parked in the garage (yeah im old asf now). Needs proper cupholders though, thinking of doing something through the seat mount bolt so its out of the way and low. I've been enjoying having it in the garage, plus I can stop it from rusting further. My very understanding wife seems to love the car, thats always a win!
- 24 replies
-
- 11
-
-
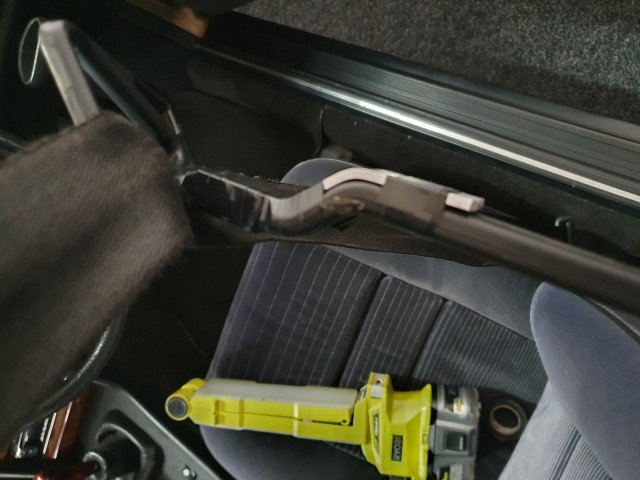
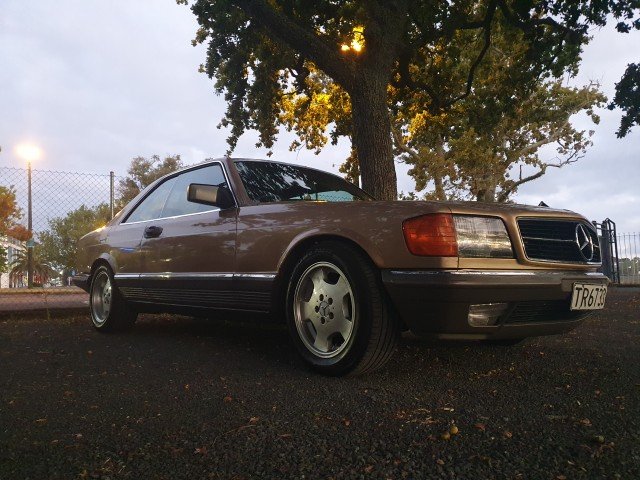
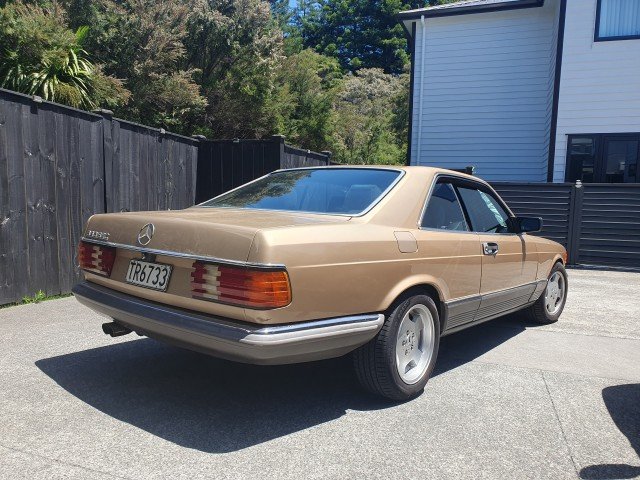
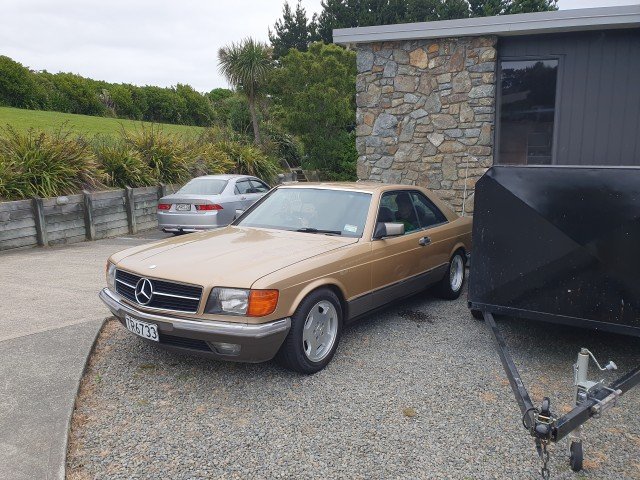
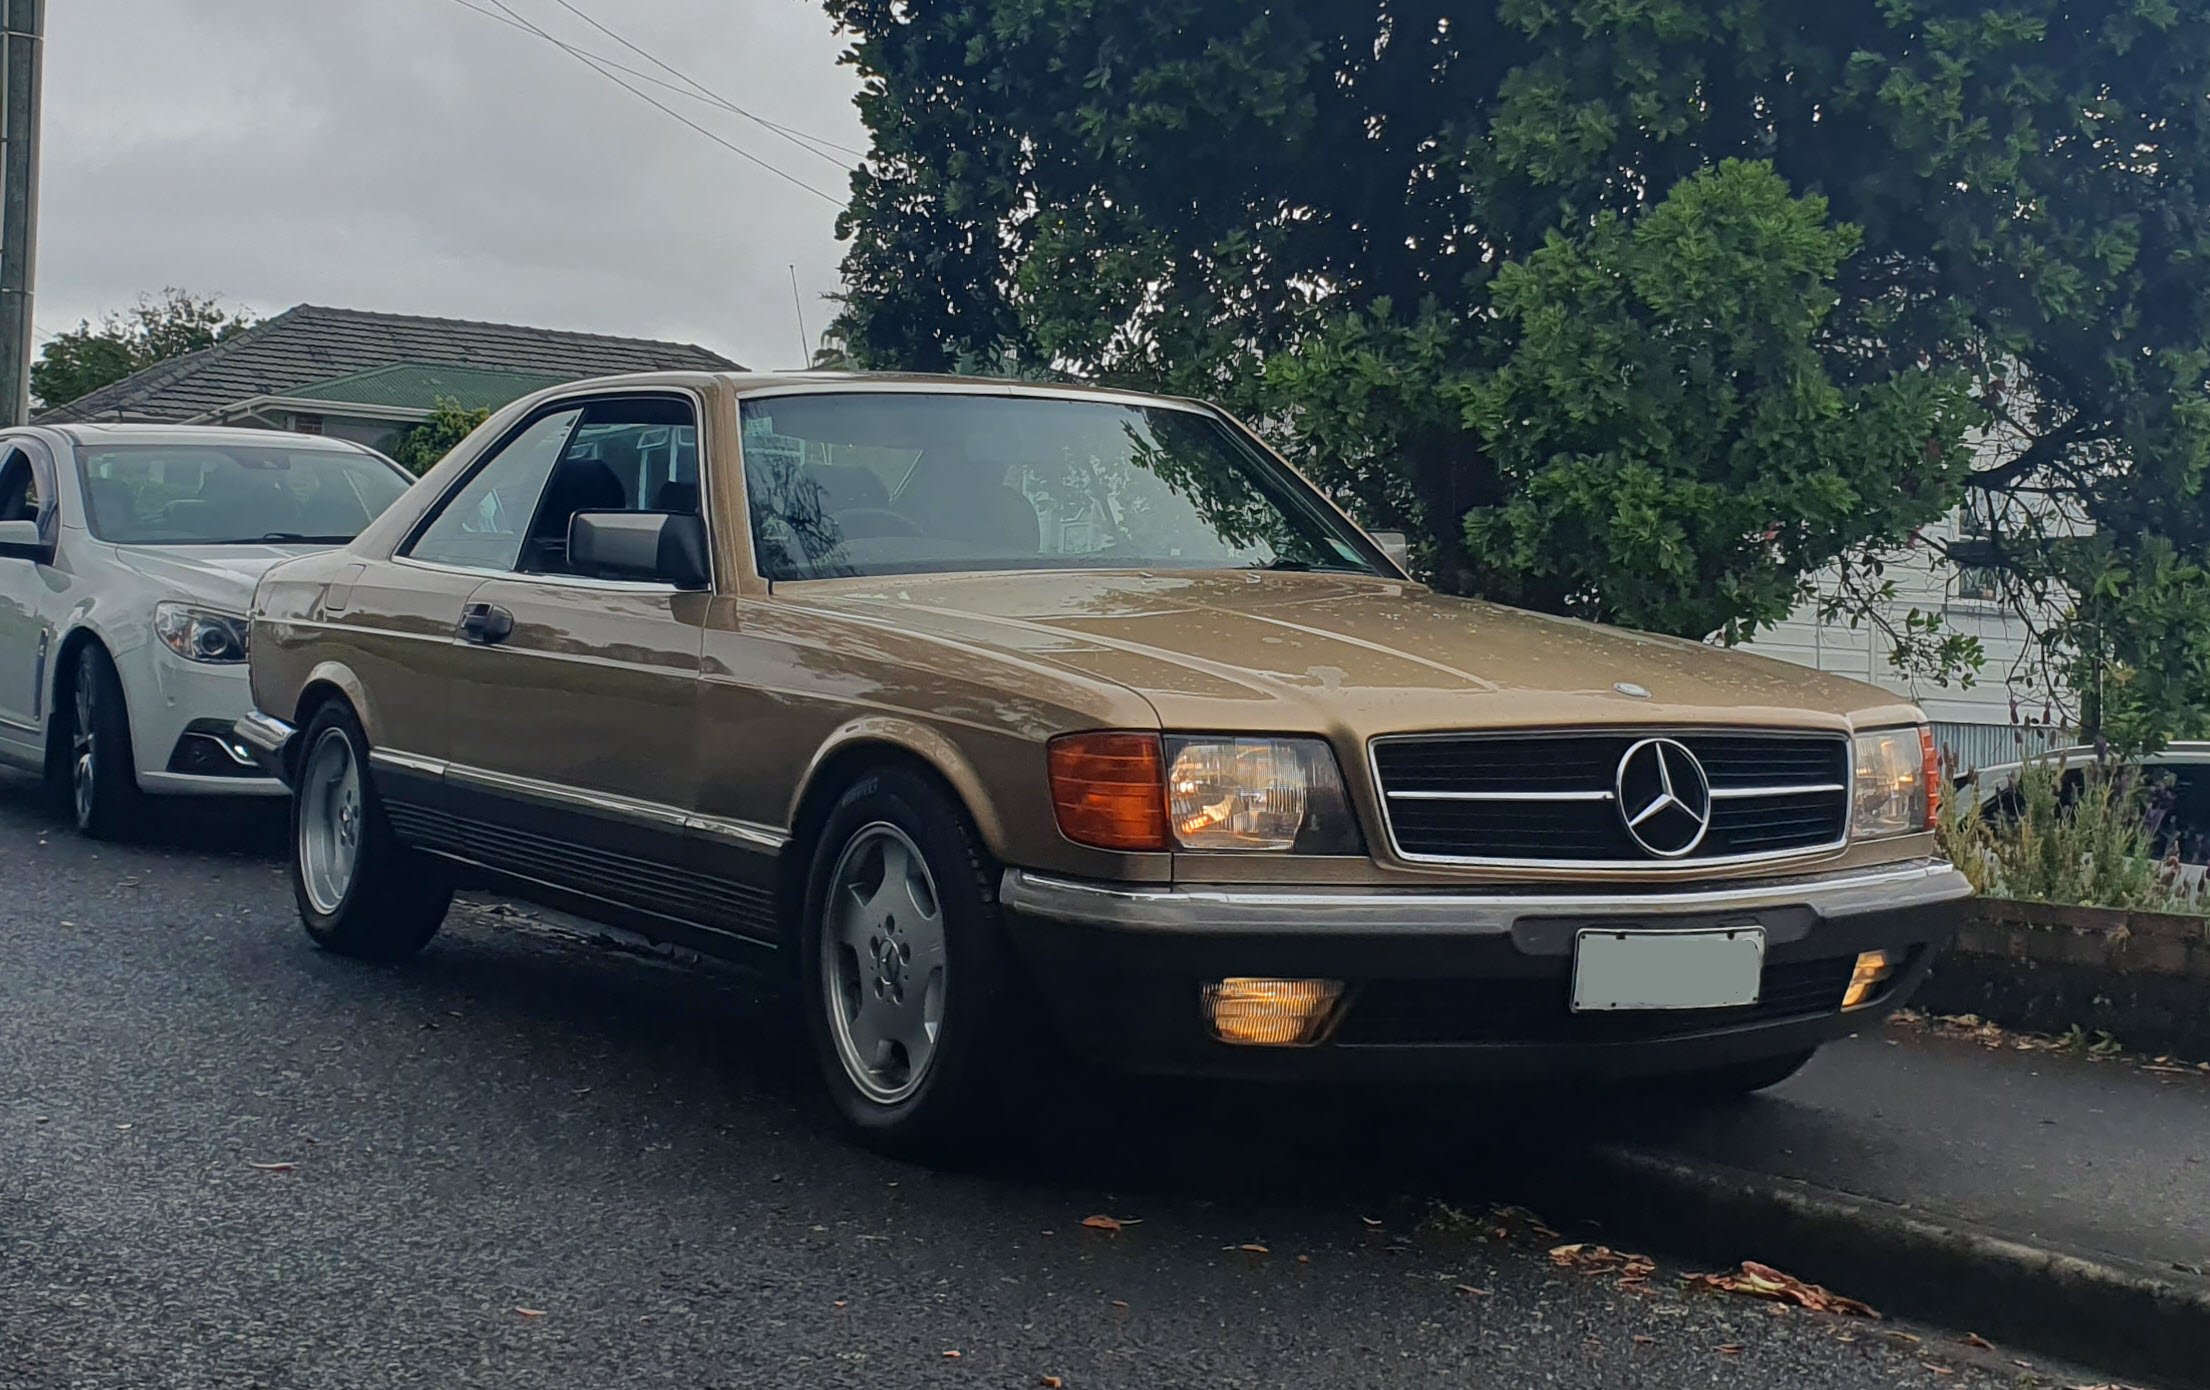
What impulsive decision have we made now? (That a few months later we may or may not regret) A NZ New C126 with at least 300k on the clock with a 5L M117 mated to a T5 gearbox. We were looking for something running and driving to enjoy over summer with our 2.5 year old daughter. The KP in bits wasn't going to cut it, we needed something a bit more lush. Something reliable with enough around for parts etc. (I got this latter part seriously wrong but oh well). This came up for sale in Wellington many months ago, which is when I spotted it. Suddenly after an hour it was taken down. Apparently due to being inundated with requests, but he realized he needed to tidy it up a bit before he could let it go. Luckily I had messaged the seller in time, and we actually kept in touch over a few months just chatting about general car stuff and life (with a few light prods of "when are you going to sell?"). He was an absolute GC, couldn't have asked for a better guy to buy a car off. So the stars aligned and eventually he said he would sell it to me. Flights booked to Welly with my little brother in tow and we went to collect it. As it sat in his driveway: The battery was dead from sitting for starters, but that was easy enough. On our first drive, I stalled it a few times. The clutch bite point isn't where you would normally expect, the tall diff ratio isn't helping. But it was very lush, comfortable and sounded good! The deal was done as soon as I booked flights, but we got another few hundred knocked off as the PO broke the drivers seat belt presenter as we went for the test drive. The Lorinser staggered wheel setup is quite a bonus, I'd be keen to find another pair of rear wheels to put on the front. Made it back to Auckland with no issues! The real MVP was the Bluetooth transmitter @mk2marty lent me. Really love the cloth seats, I was a leather seat convert but I've gone back now. Its a giant couch on wheels, the seats are next level comfy. The ride in general was exactly what I was after. Chunky tyres help, I dont plan to slam it on 19s or anything like that to preserve ride quality. About 2/3 of the way home Home! Few issues to be sorted in time but identified right away: - Warm Up Regulator needs rebuilding. I have the kit, just need to do it. Basically it occasionally takes about 30 seconds longer to start when cold, otherwise starts first pop. I cant be bothered doing this myself as its about 6 pages of instructions and requires pressure testing. - Driveshaft hanger bearing - low RPM taking off it shudders slightly - Shorter ratio diff (the OG 380SEC auto is far too tall) - Get the A/C working again - It sounds great especially on the overrun but I need a better muffler installed - Drivers seat belt presenter is snapped - Front seat controls don't work except sliding the seats front and back - Cluster needs bulbs and tach/clock/oil pressure to be sorted - Headliner has sagged - PS leak The idea is to keep it OEM but do some small mods to make it a comfortable car to cruise in. First "mods" to look into: An original parcel shelf with the storage bins because someone cut the old one up to fit 6x9s..... Would like a reissue Blaupunkt head unit to go in (but mega $$) with an amp and small sub Under door courtesy lights Sunroof seal (ideally replace whole sunroof with a Gen2 car so it can tilt and slide, or a C140 moonroof....) If anyone is ever parting one, or knows of one being parted, get in touch!
- 24 replies
-
- 16
-
-
DirtyThirtys 1984 Toyota Starlet KP61
DirtyThirty replied to DirtyThirty's topic in Project Discussion
I havent yet as I got side tracked! Ill get time in the next few weeks to get into it. That seems the most likely combo on the plug given everyones answers so far -
DirtyThirtys 1984 Toyota Starlet KP61
DirtyThirty replied to DirtyThirty's topic in Projects and Build Ups
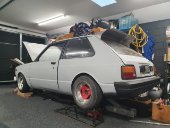
KP progress has slightly stalled due to a certain German tank entering our lives.... Picked her up from Welly and drove back the next day in convoy with @mk2marty Didnt miss a beat! M117 and............. 5 speed manual! Huge list of stuff to sort, need a better diff ratio as the current one is far too tall, so something out of a 280SE would be ideal. Needs AC sorting ASAP as its the family car. So if anyone knows of or has any W126/C126 parts please message me! Have a lot of things to source.
- 44 replies
-
- 17
-
-

-
DirtyThirtys 1984 Toyota Starlet KP61
DirtyThirty replied to DirtyThirty's topic in Projects and Build Ups
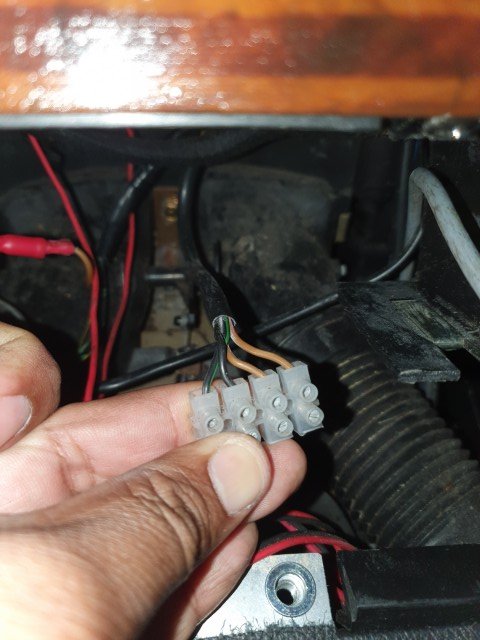
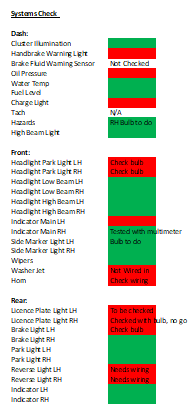
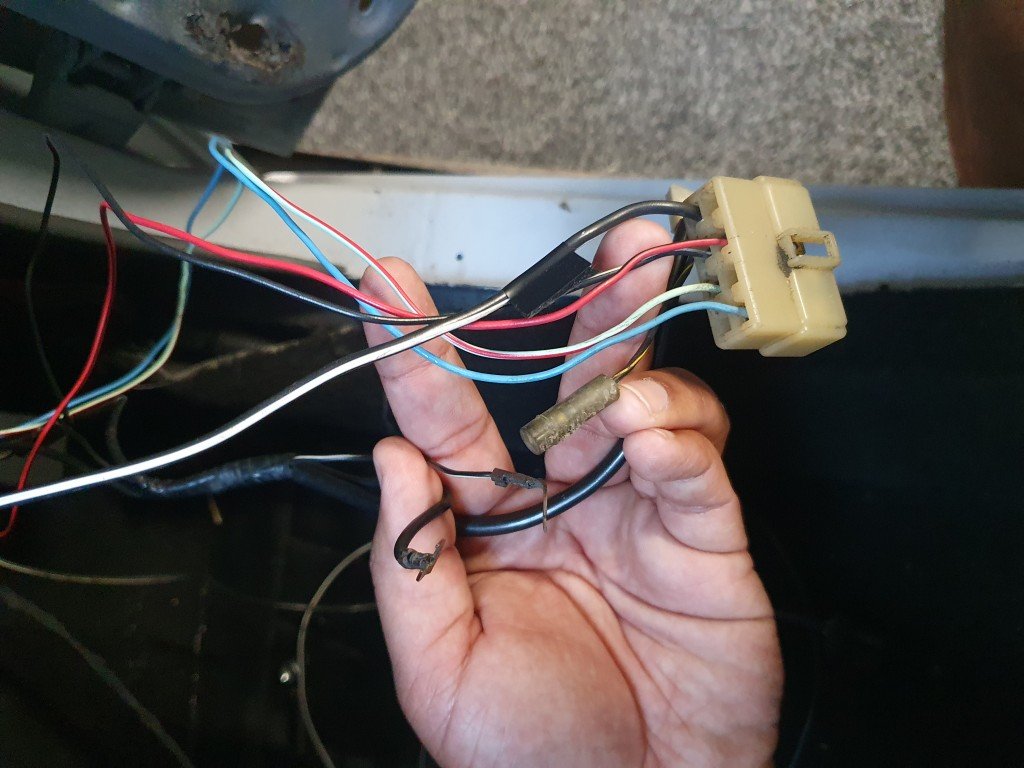
Systems check, I've gotten as far as my spreadsheet below. Still a bit of a mystery on the plug above as no wiring diagrams I can find online actually match any colours in my car. Im pretty bad with the electrical side of things but we're slowly getting somewhere
-
DirtyThirtys 1984 Toyota Starlet KP61
DirtyThirty replied to DirtyThirty's topic in Project Discussion
I do plan to have the least things to poke at even with the cert! The more things I can do properly the less people will poke at it haha -
DirtyThirtys 1984 Toyota Starlet KP61
DirtyThirty replied to DirtyThirty's topic in Project Discussion
Yeah just had that same advice from kseries.rookie. I'll have to get 2 more points welded in and get the extra bolts in, worth doing I think. -
DirtyThirtys 1984 Toyota Starlet KP61
DirtyThirty replied to DirtyThirty's topic in Project Discussion
Cheers man! Thats odd because the reverse light switch wiring seems to be already 2 plugs near the gear stick for the 2x bullet connectors on the gearbox and my cluster has all the connectors in with no wires matching any of these colours. I've yet to find a good diagram so hard to compare. Mind sending me through a photo? Also to add, if its for the fans thats no issue as mine are now thermo controlled via ECU. Si if I can eliminate needing a few wires that would make life easier. -
DirtyThirtys 1984 Toyota Starlet KP61
DirtyThirty replied to DirtyThirty's topic in Projects and Build Ups
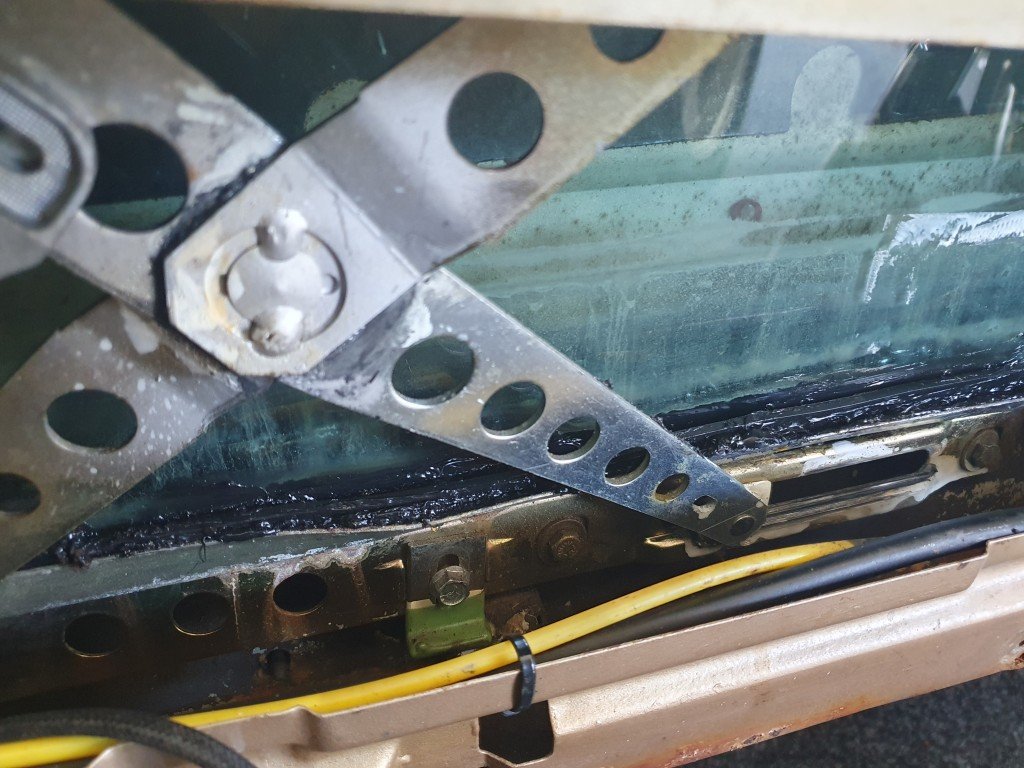
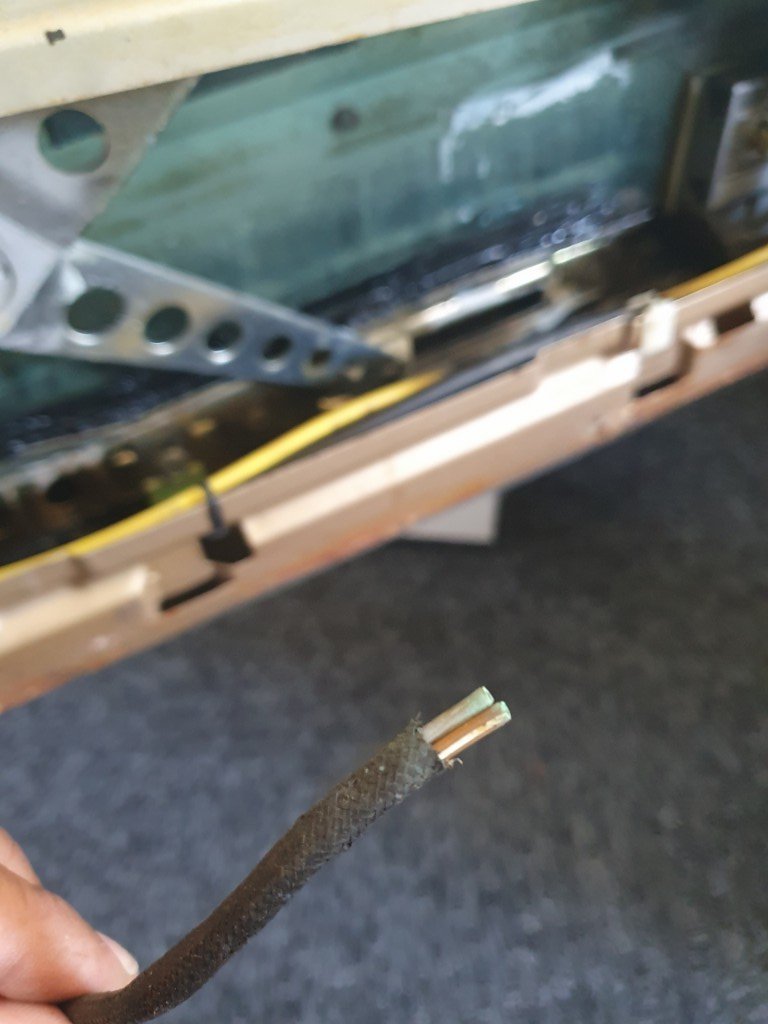
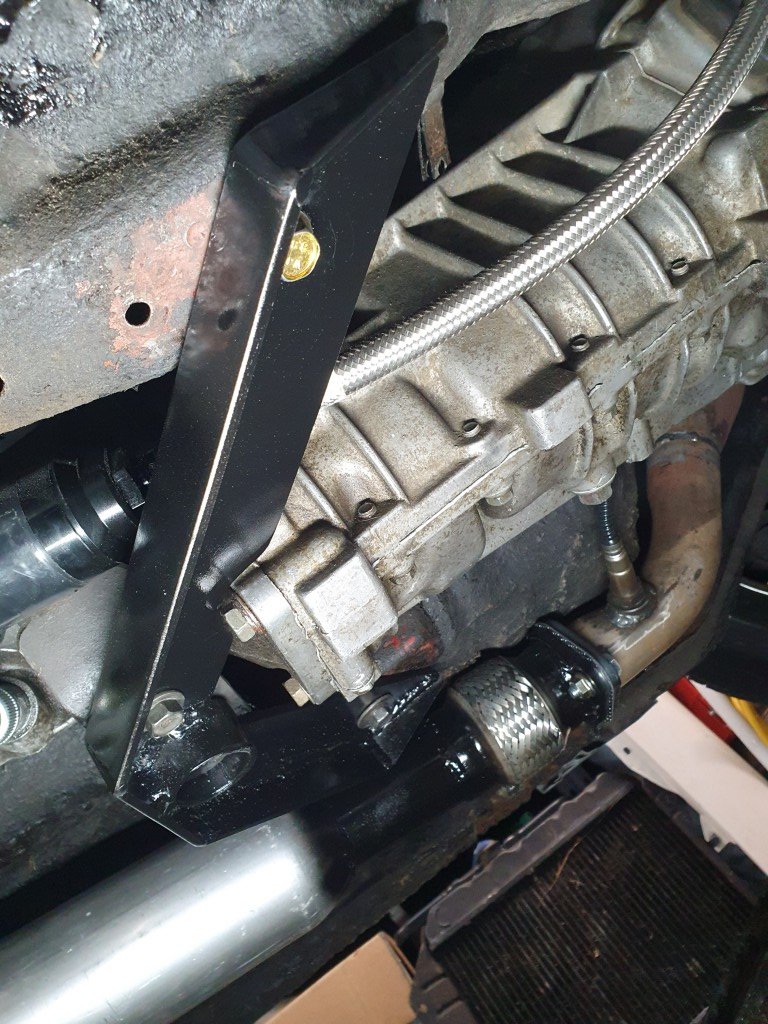
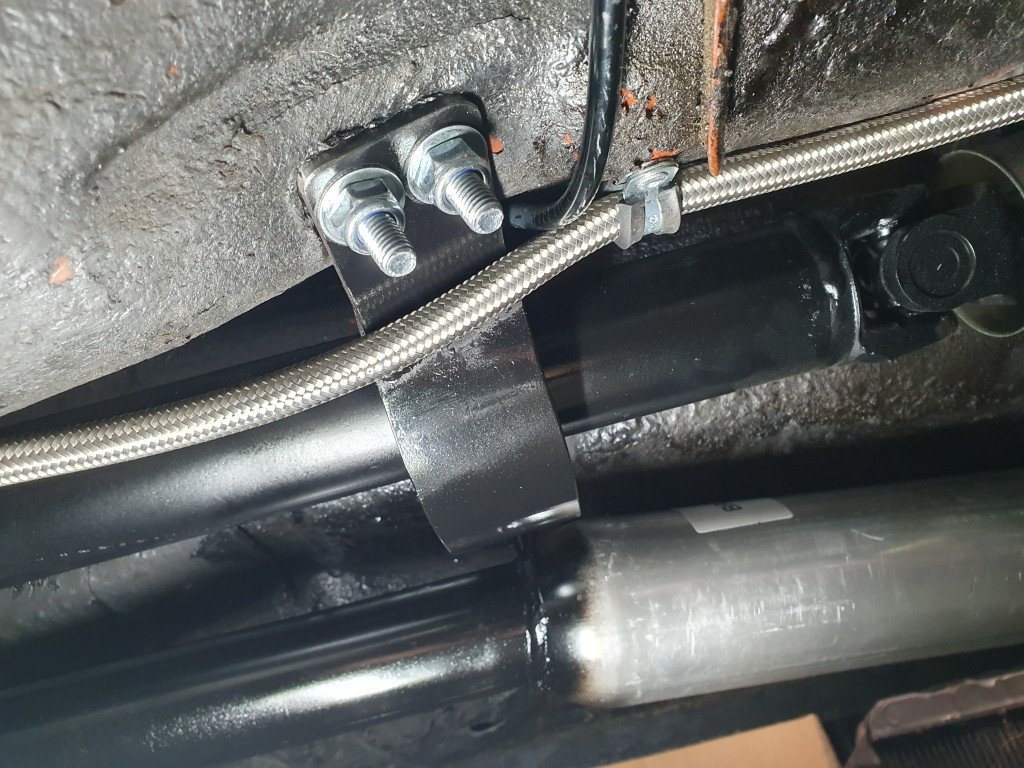
We've got an exhaust! Ended up 2.25" which is ideal. There's a driveshaft hoop and the clutch is sorted too. Gearbox mount V2 is much better and a lot stronger so cheers RSL! Still valve stem seals and all the other niggly bits to go, however in theory it does drive. And anyone know what this particular plug and sub loom with it is for? Looks like a few grounds, but comes off near the fuse box/dash? Its really the final wires besides the reverse light switch I need to connect up.