


Kimjon
-
Posts
2,350 -
Joined
-
Last visited
-
Days Won
2
Posts posted by Kimjon
-
-
6 hours ago, Mof said:
Have you thought about taking the sleeves off the rear wheels and starting a racing series?
I like the way you're thinking. However they won't turn a corner at all without sleeves on the rear...the kart tyres grip so much that the front end just ploughs straight ahead.
With sleeves they still do about 40-50kph...and stop amaisingly well. And sideways is just a bonus:)
-
 1
1
-
-
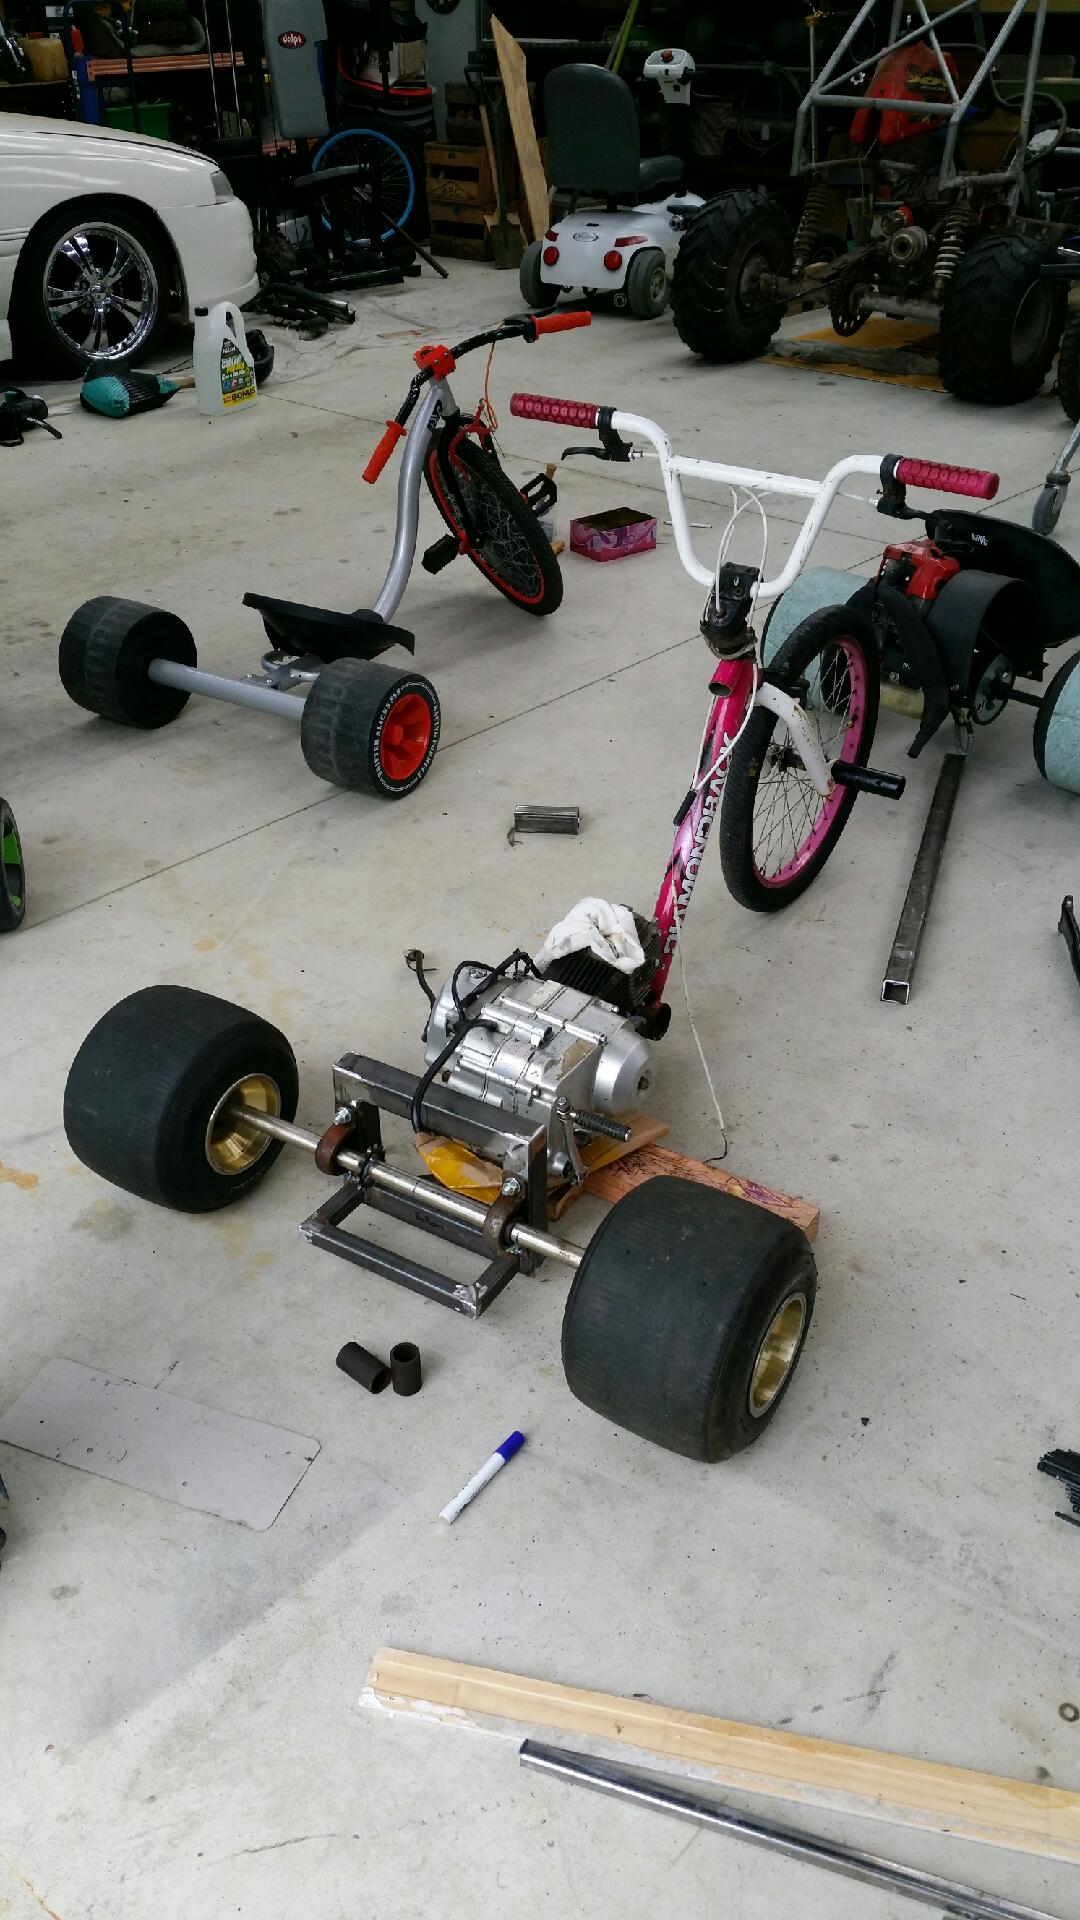
What' better than 1 drift trike? How about 5 more?

Oh yeah...
-
4
-
-
Block in place. Needs a tidy up...but concept works.
I think I'll call it a day here. Finish up the little bits another day.
-
3
-
-
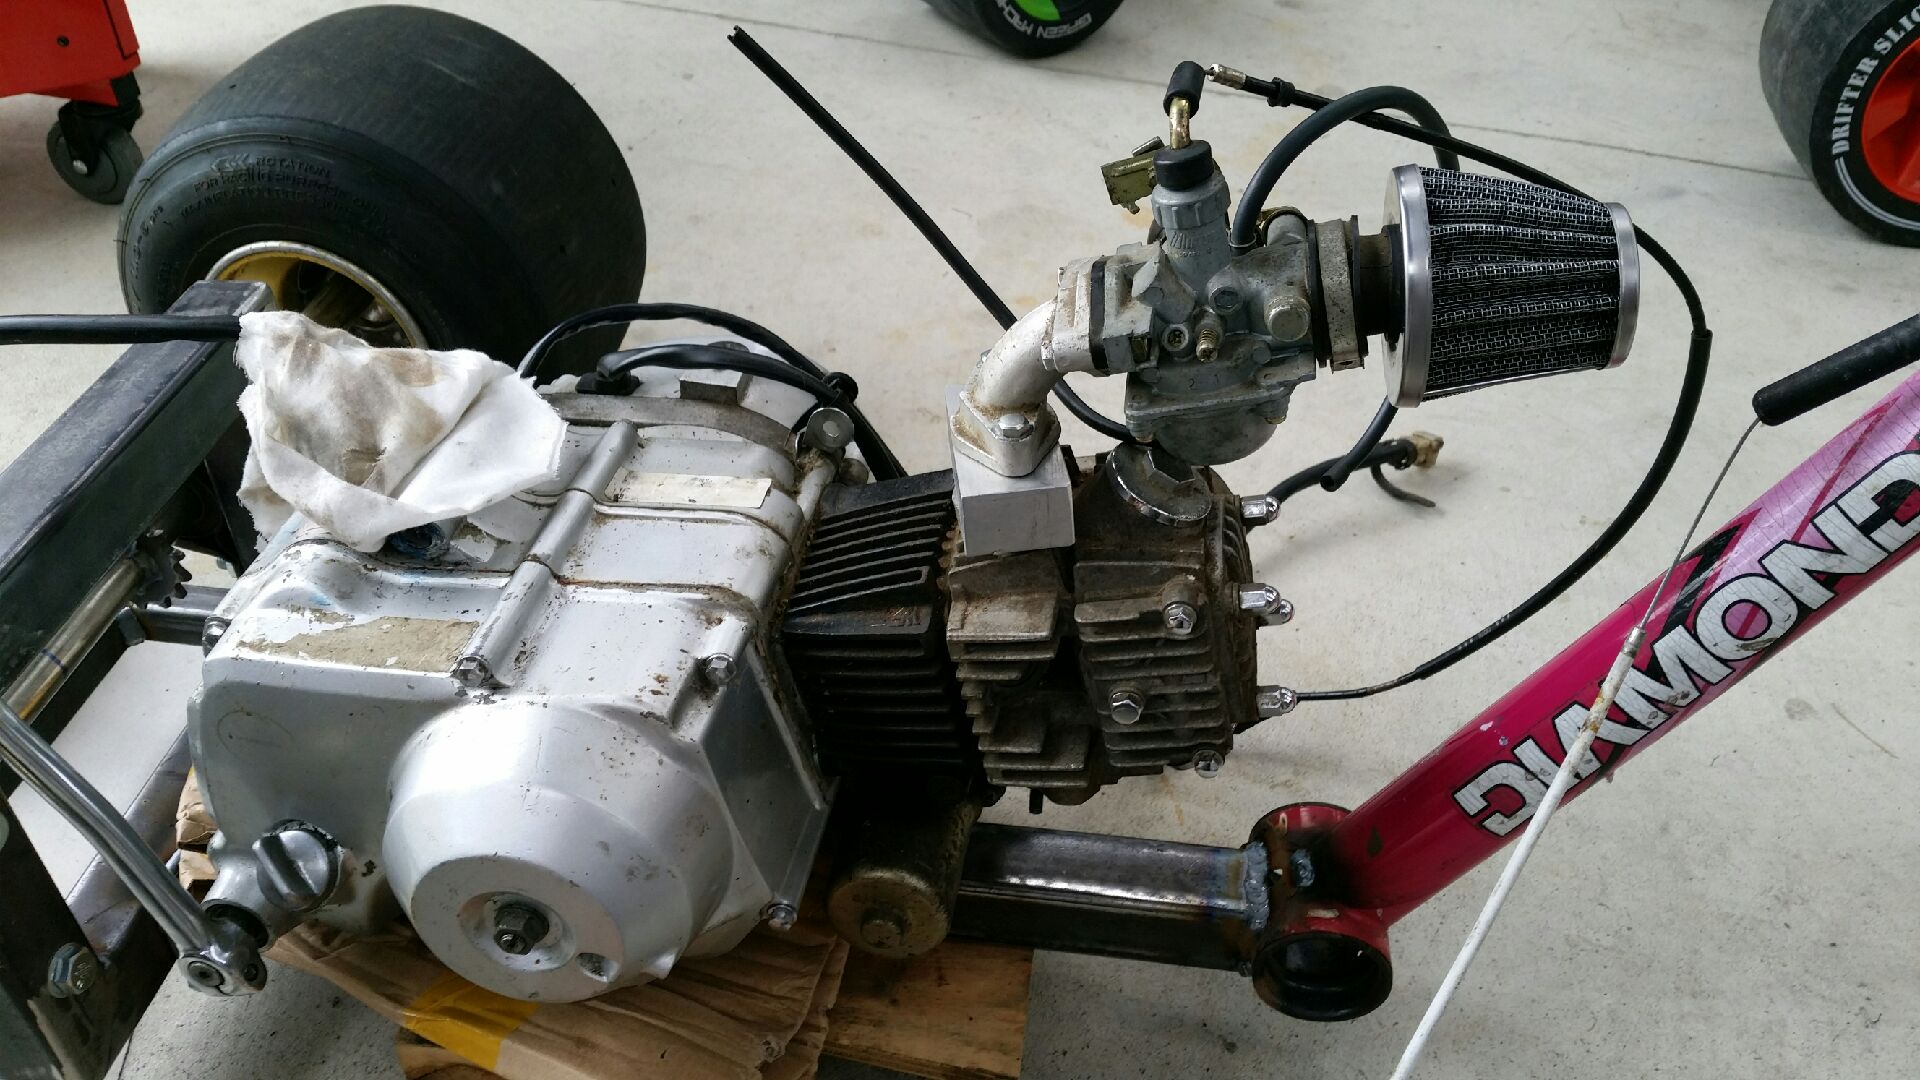
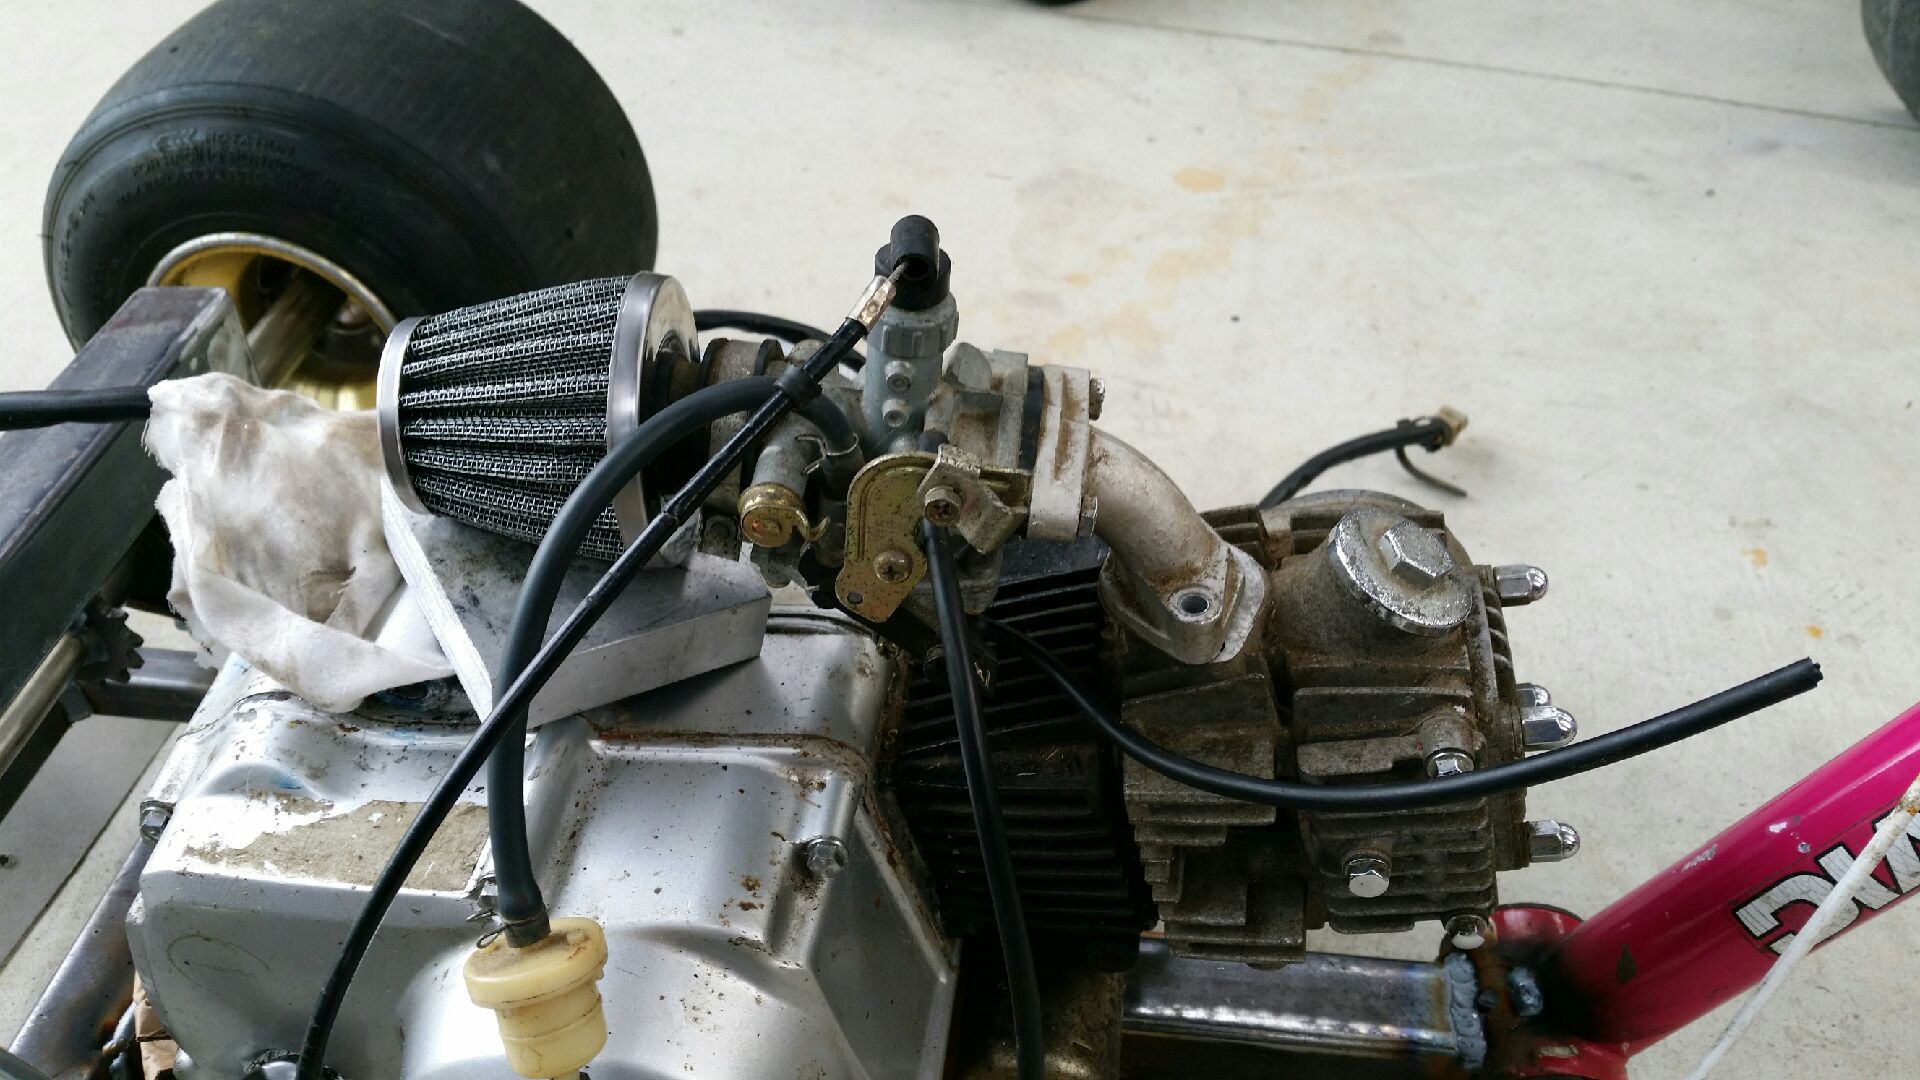
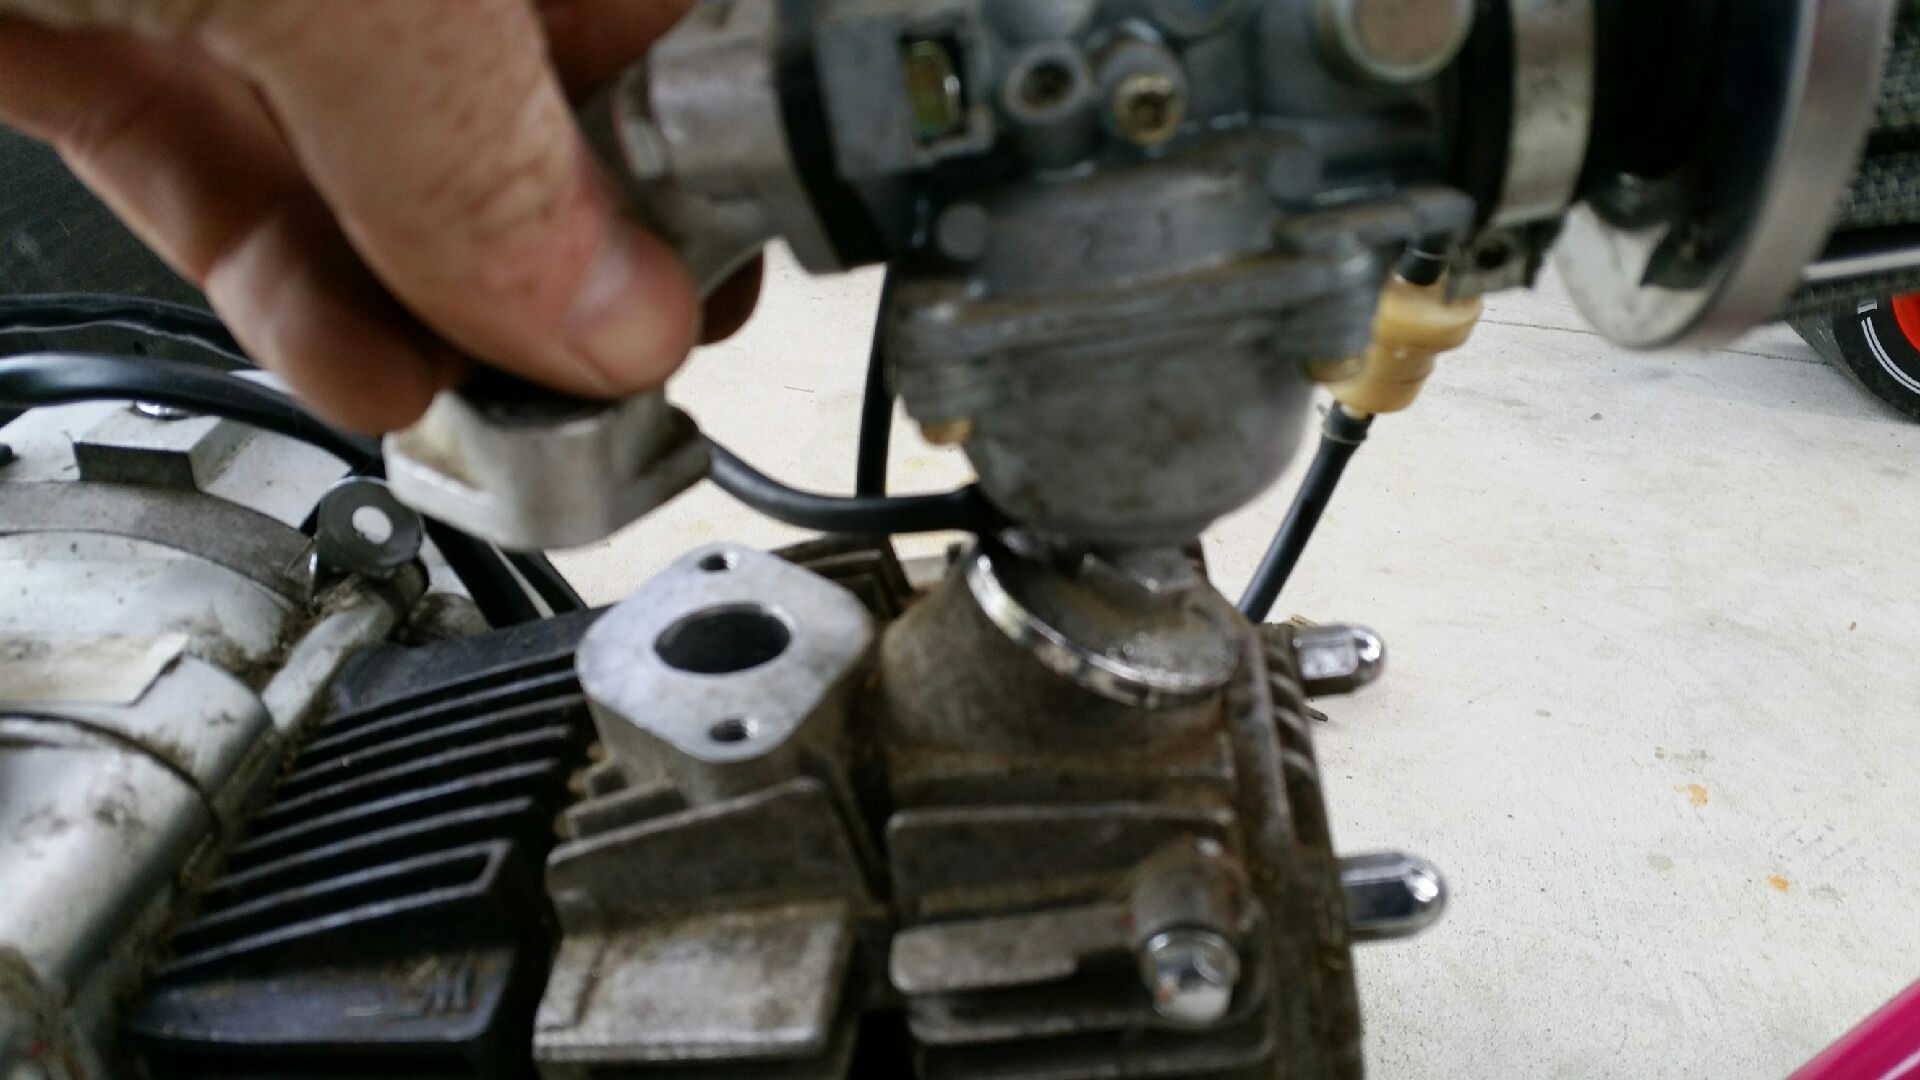
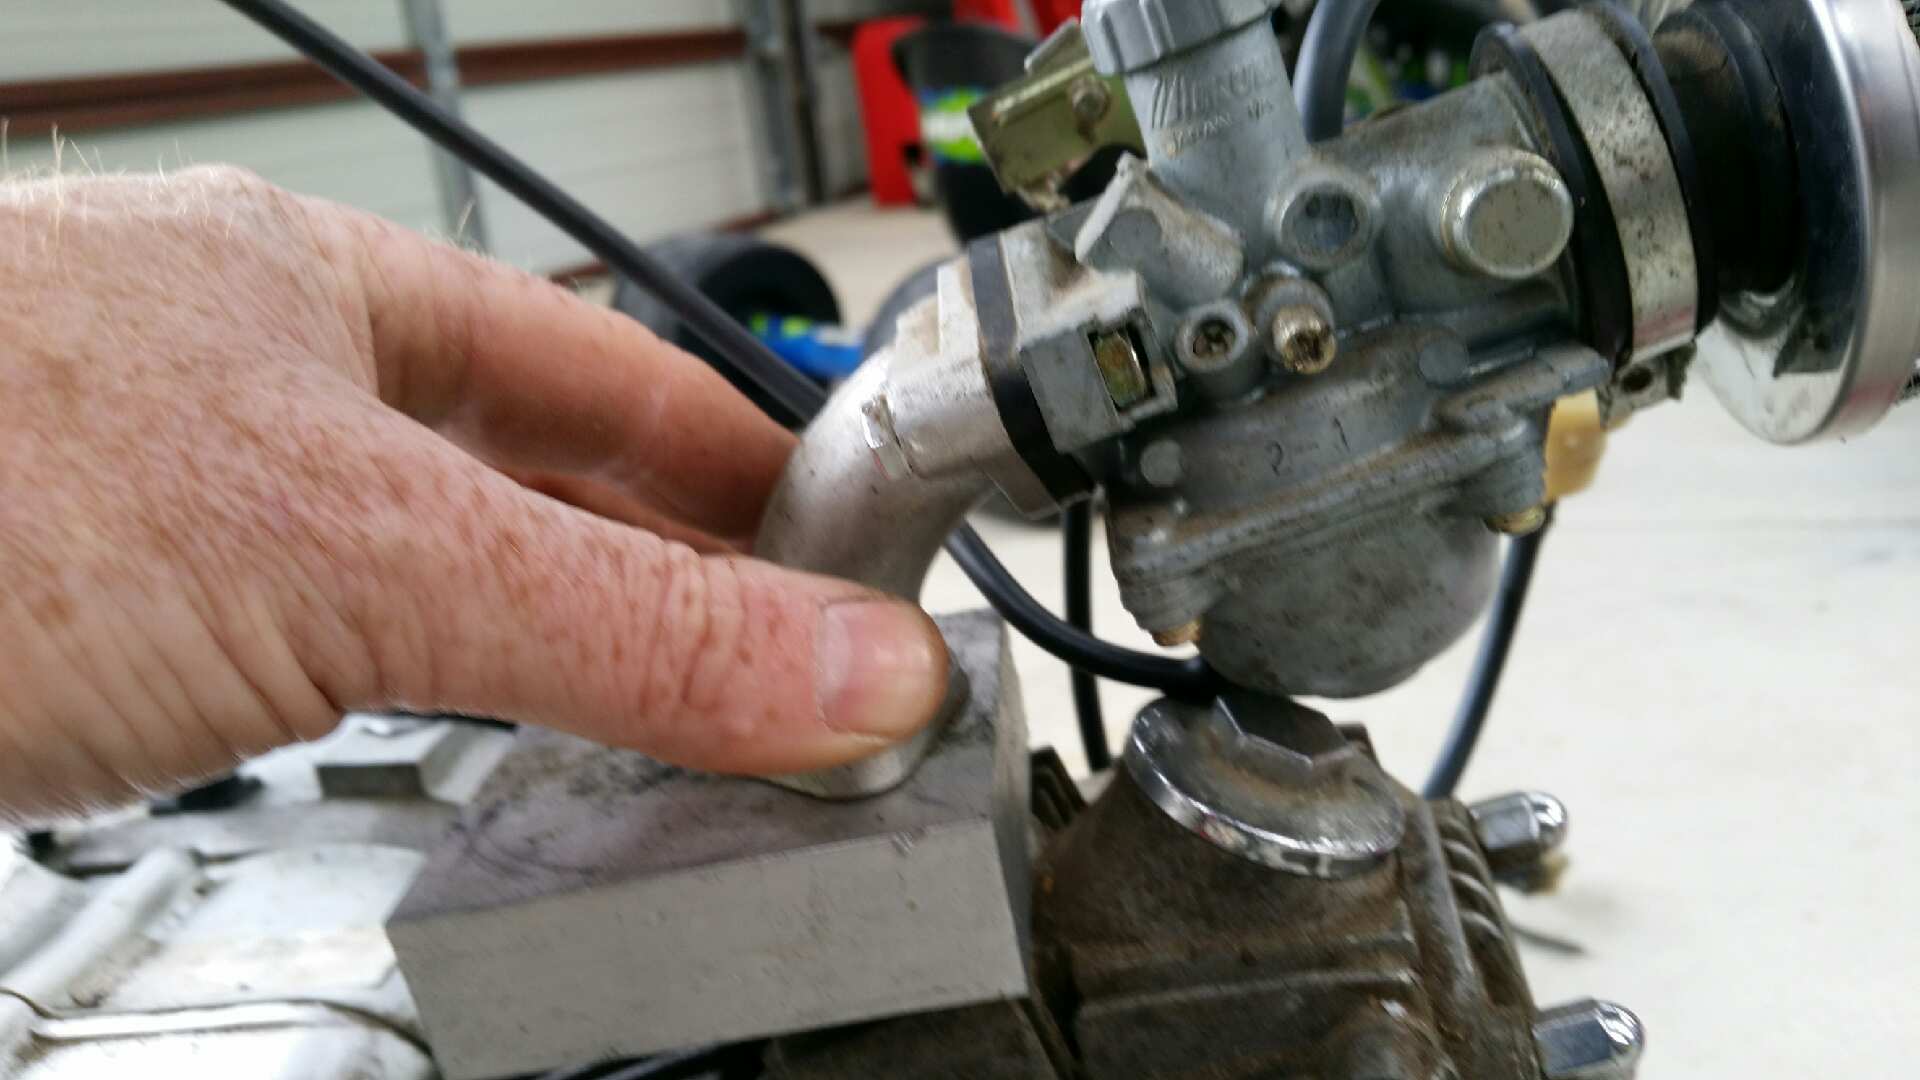
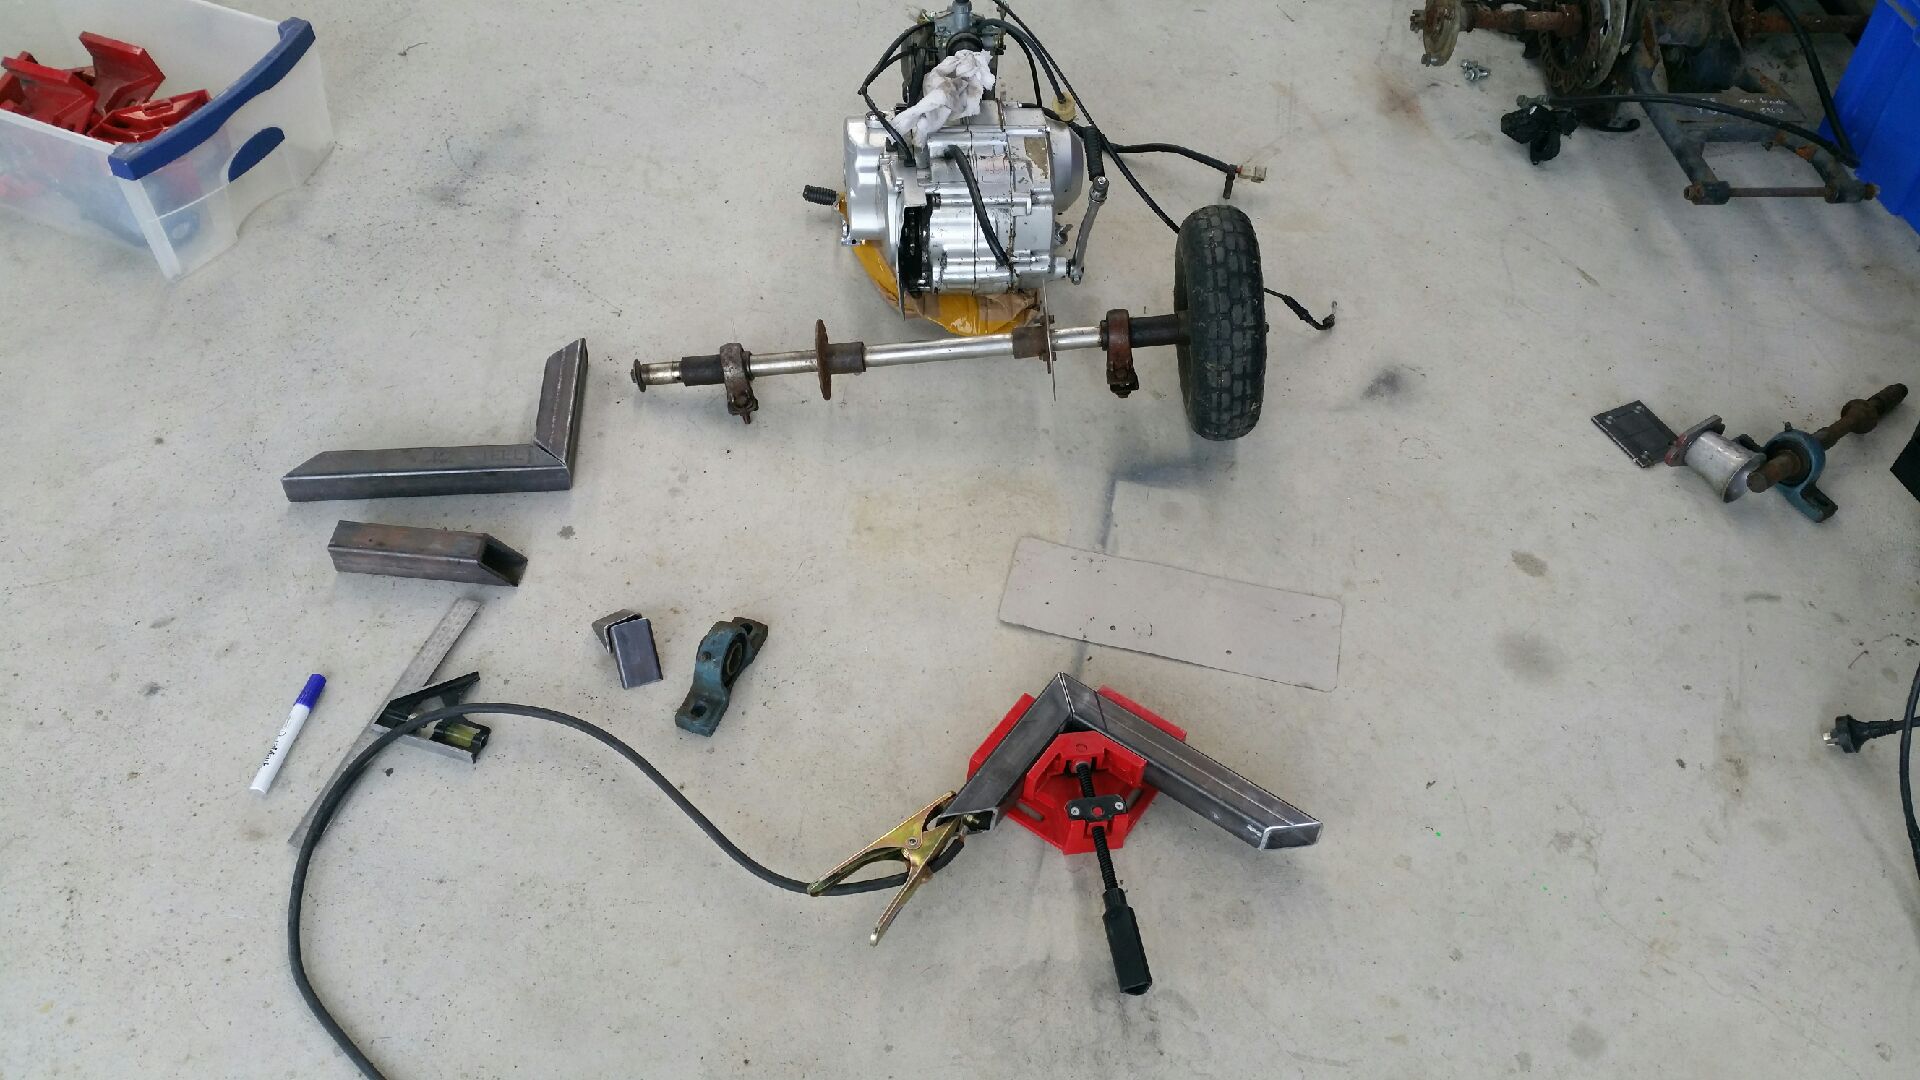
Next up is to figure out carburetor.
Carburetor in normal position.
This is the way it needs to face...but the carburetor bowl hits the motor.
"The Furze" cut and tig welded his intake at a wonky angle so it faces forward and on a 45° angle to the side of the downtube. Functional...but ugly.
I'm going to machine a manifold out of this block of aluminium to space it high enough to just clear the motor. It will is give me an opportunity to machine in a vacuum port so I can run a diaphragm pump to a petrol tank mounted lower than the carb.
-
4
-
-
Here we go...
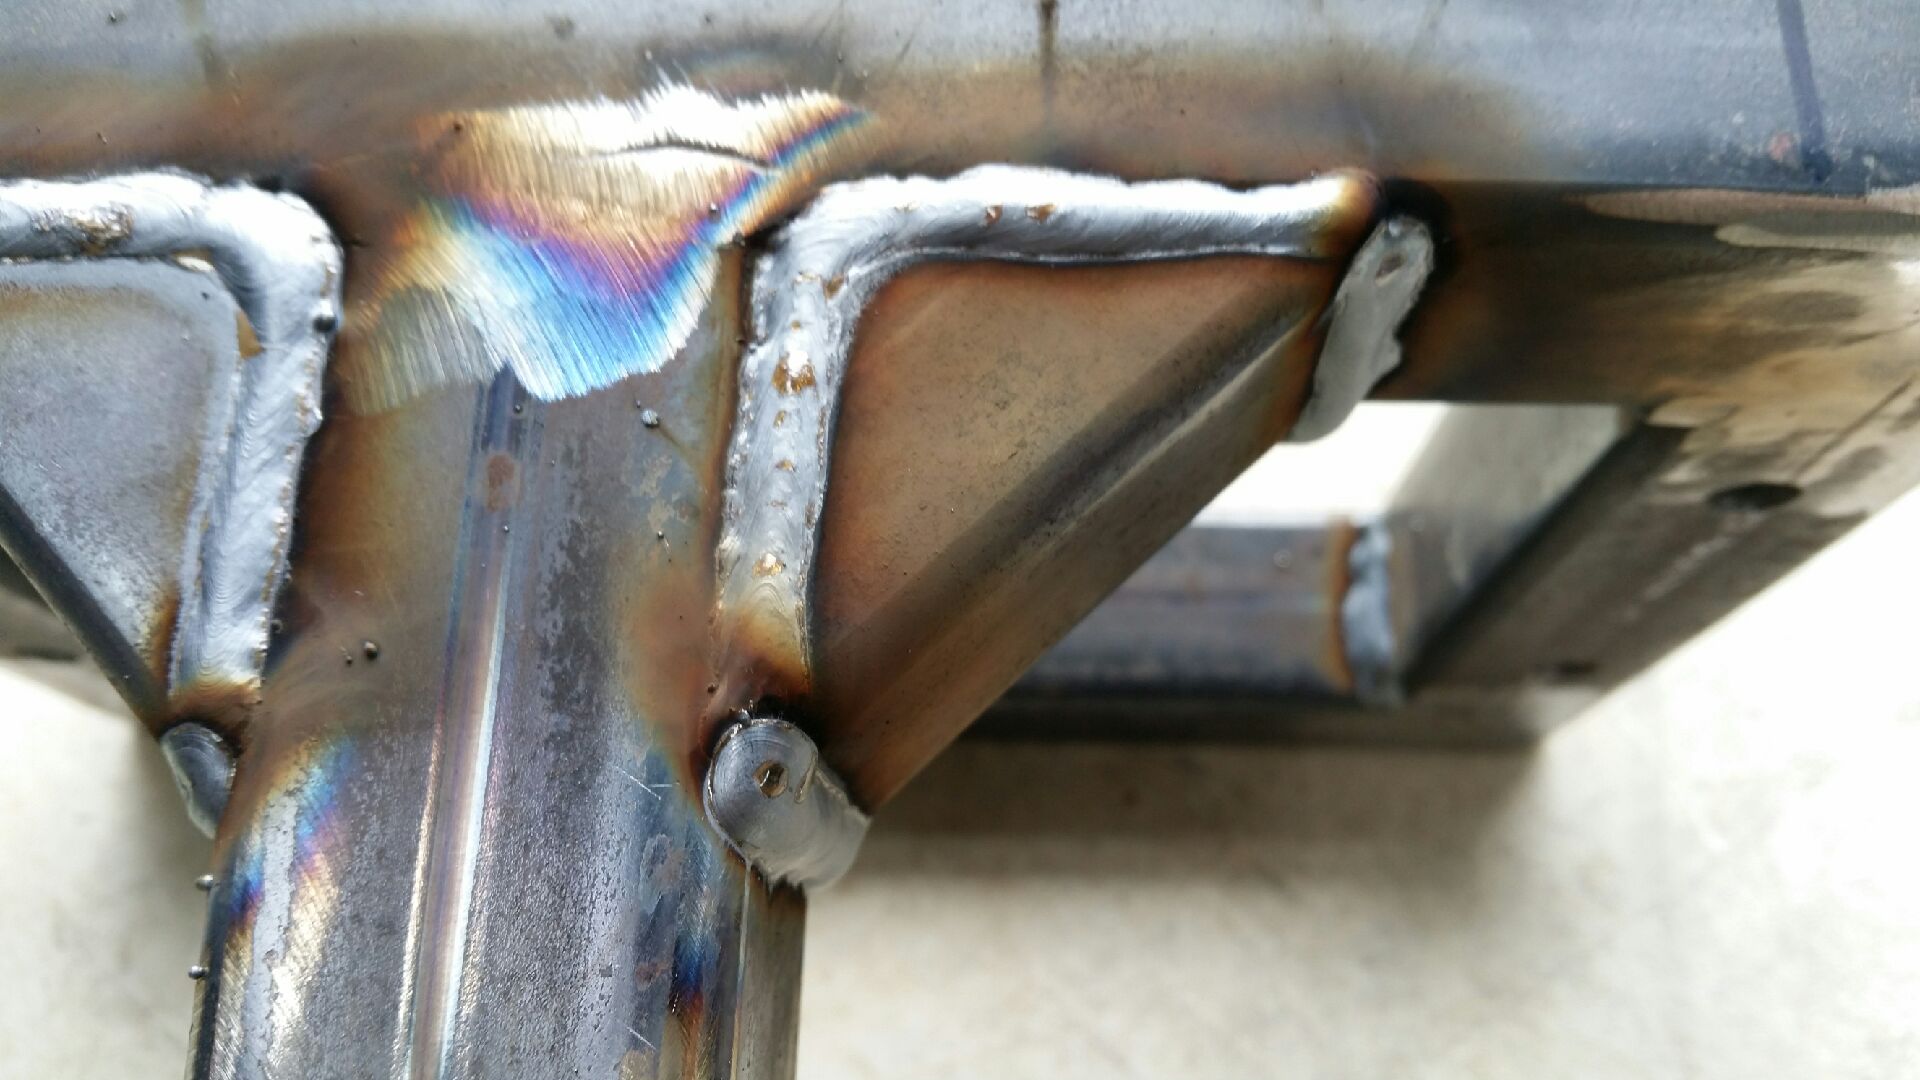
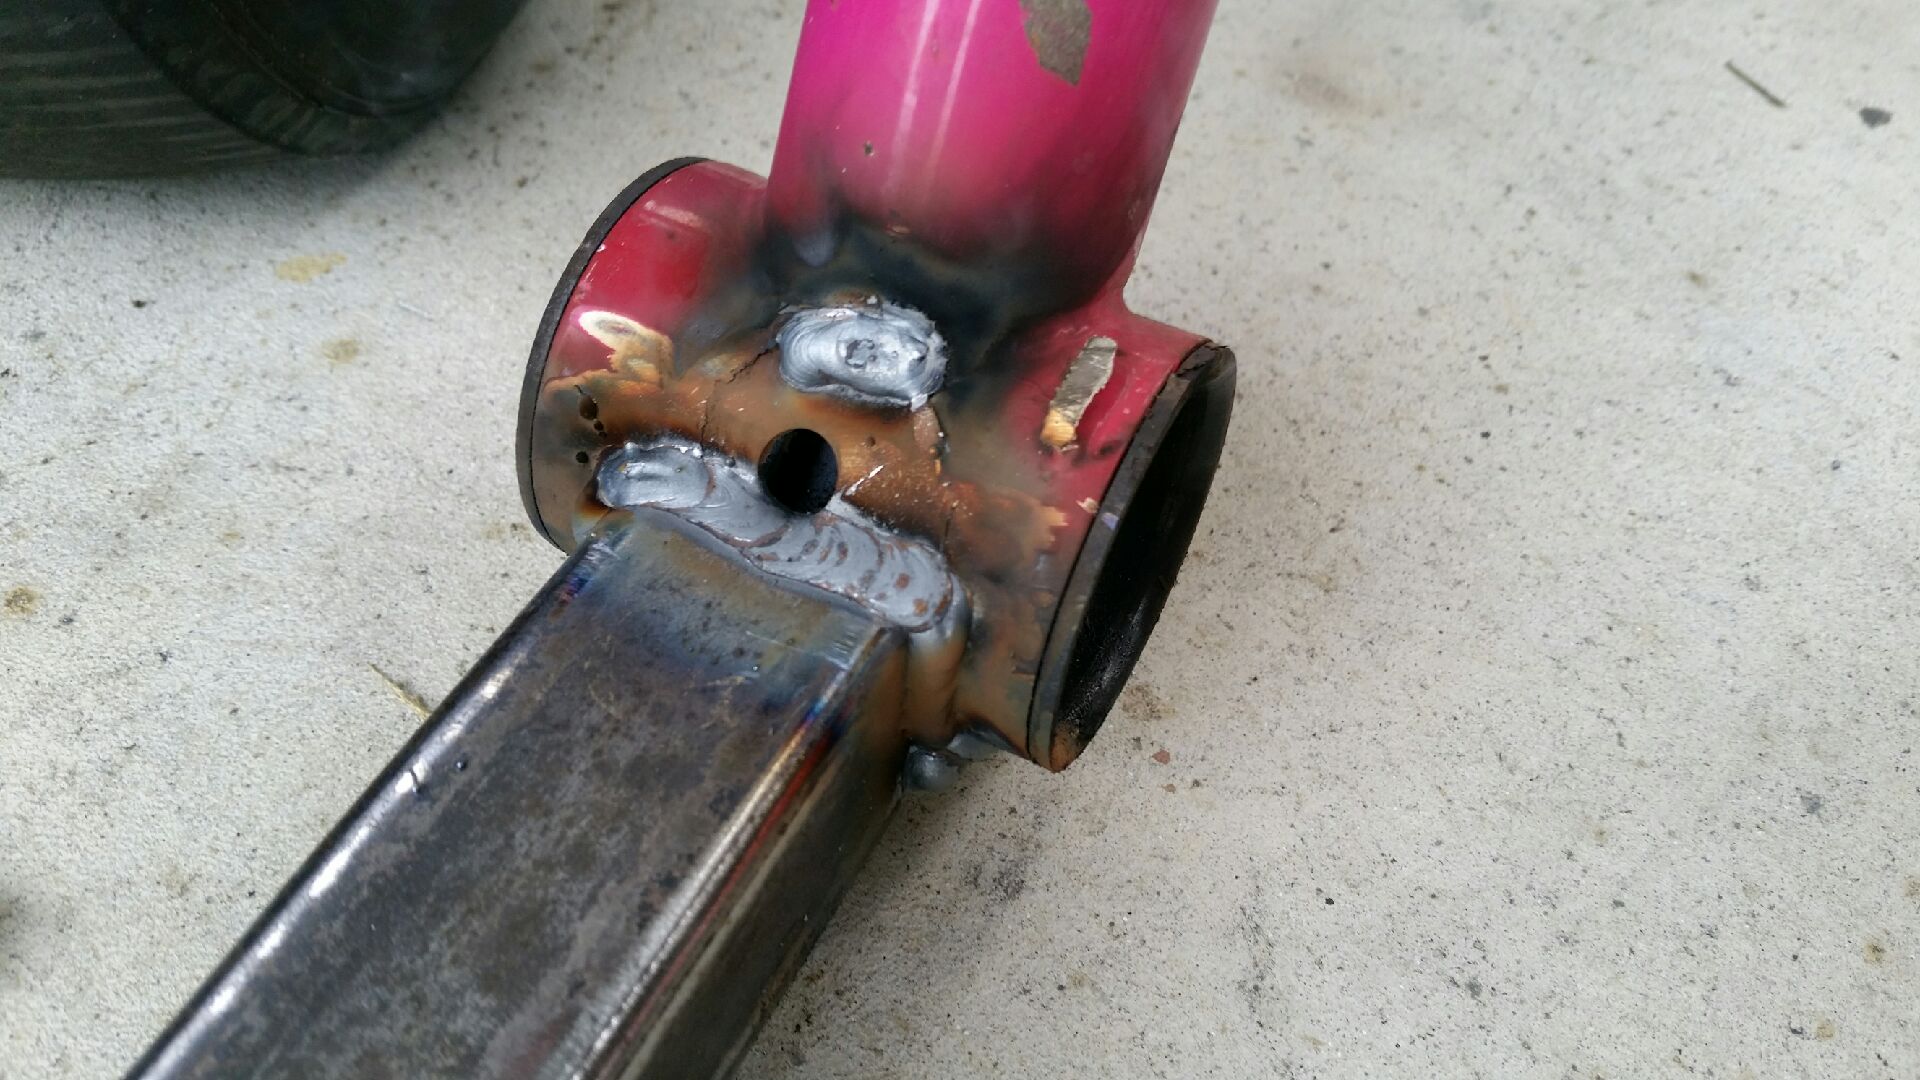
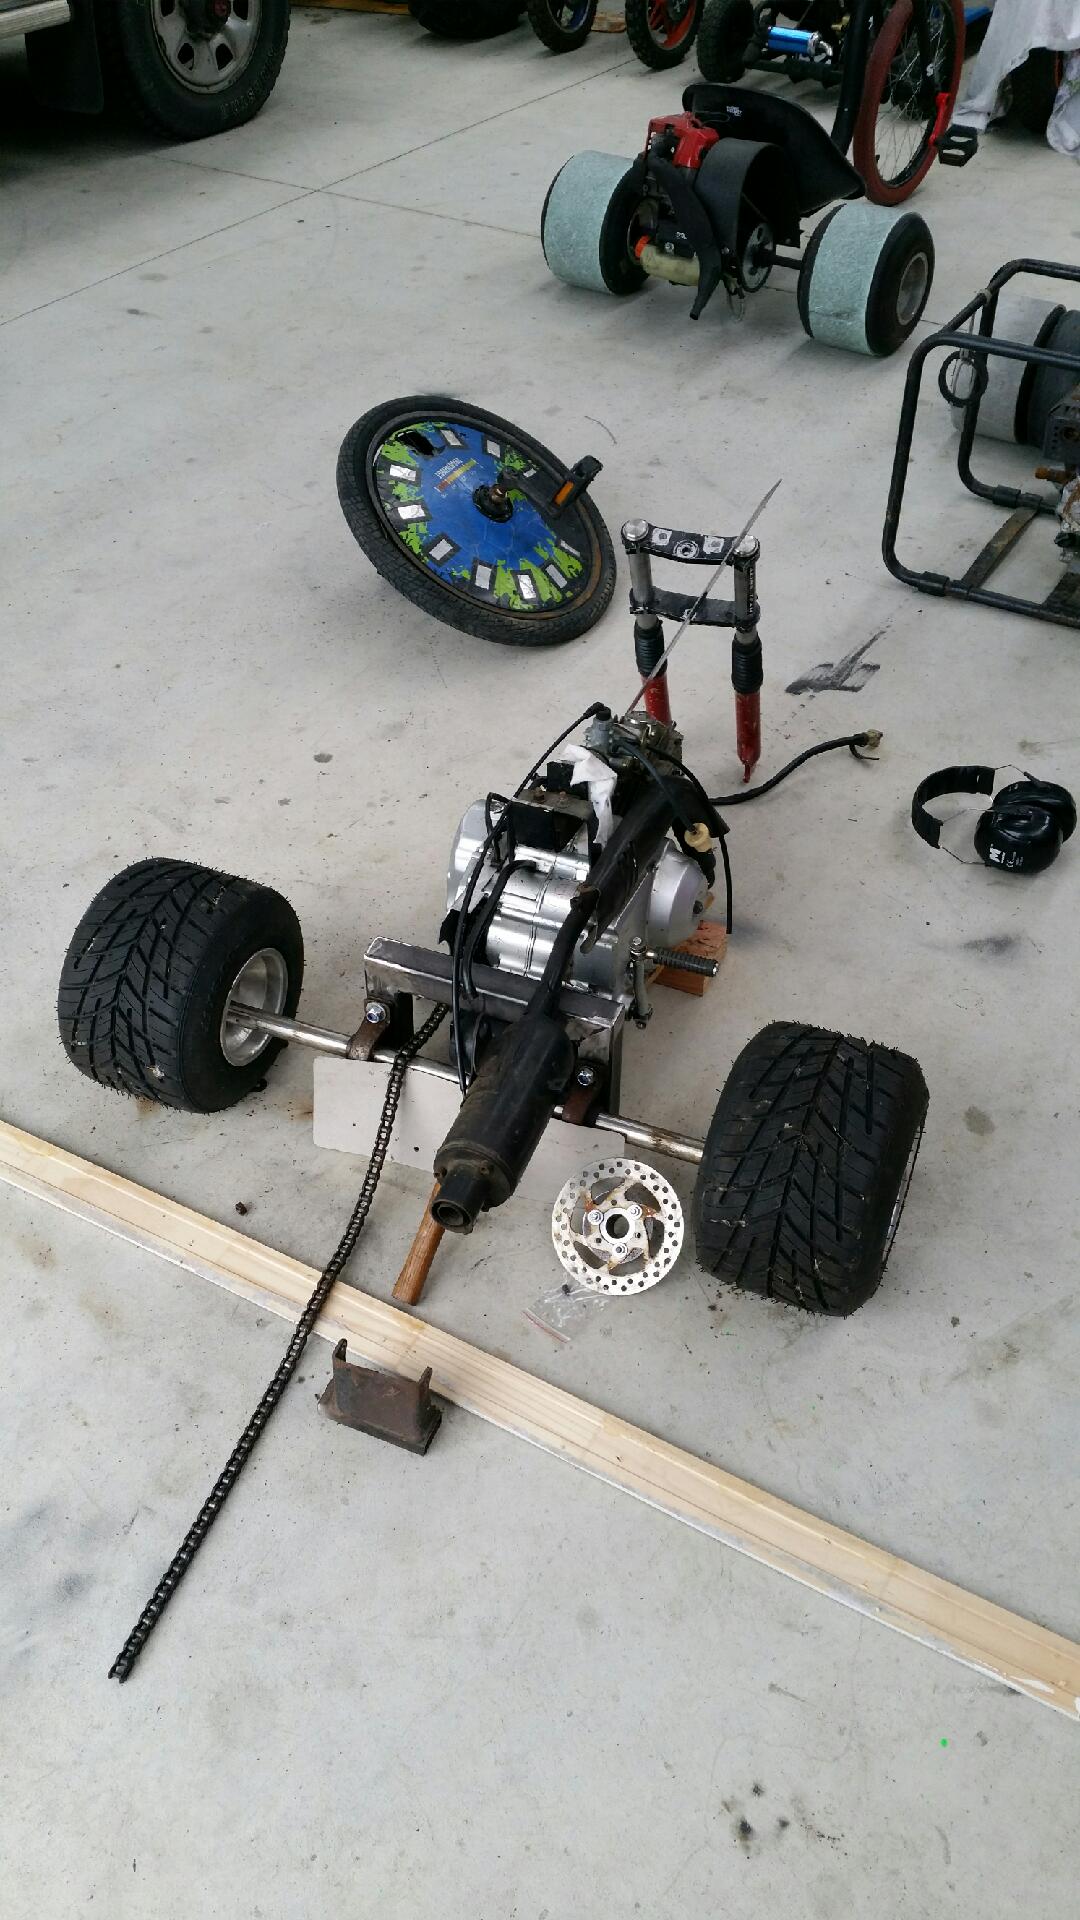
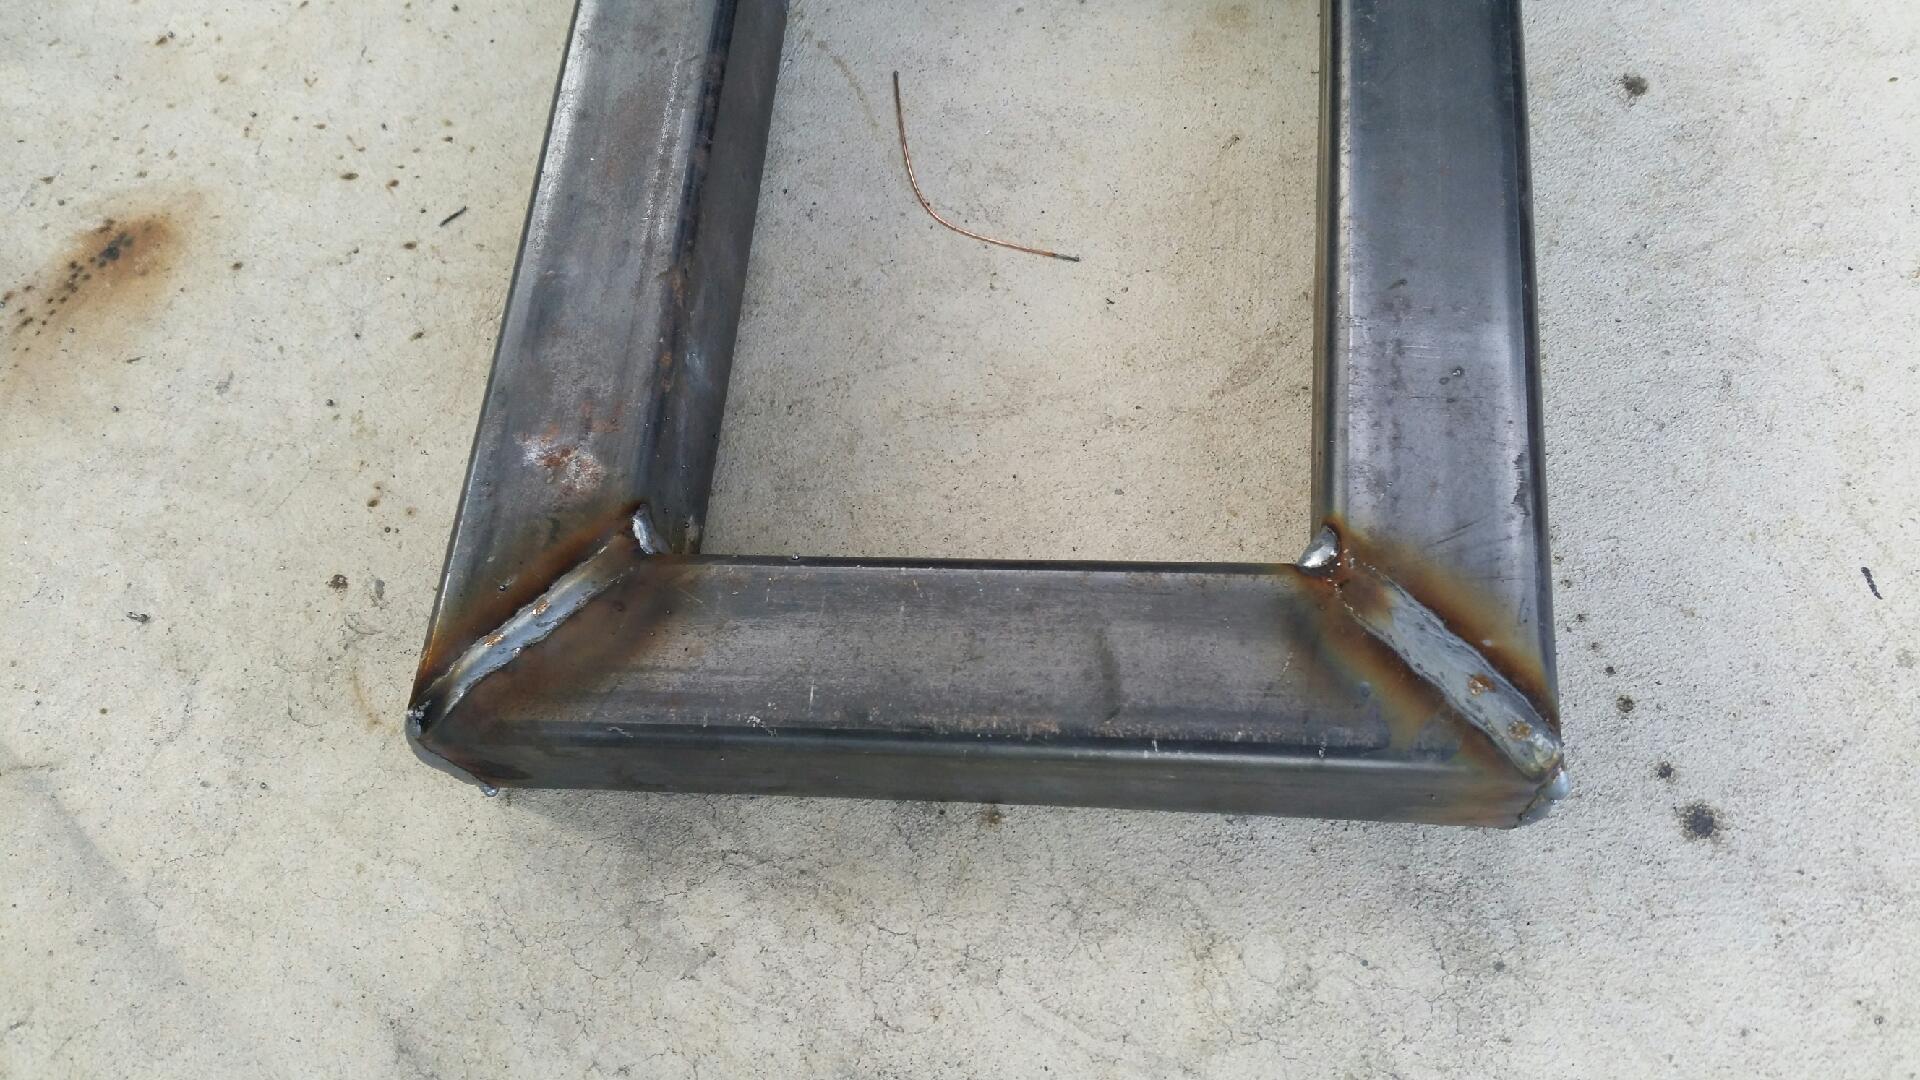
Gusseted frame.
Pink bits exposed and well penetrated with a butt weld...hehe...
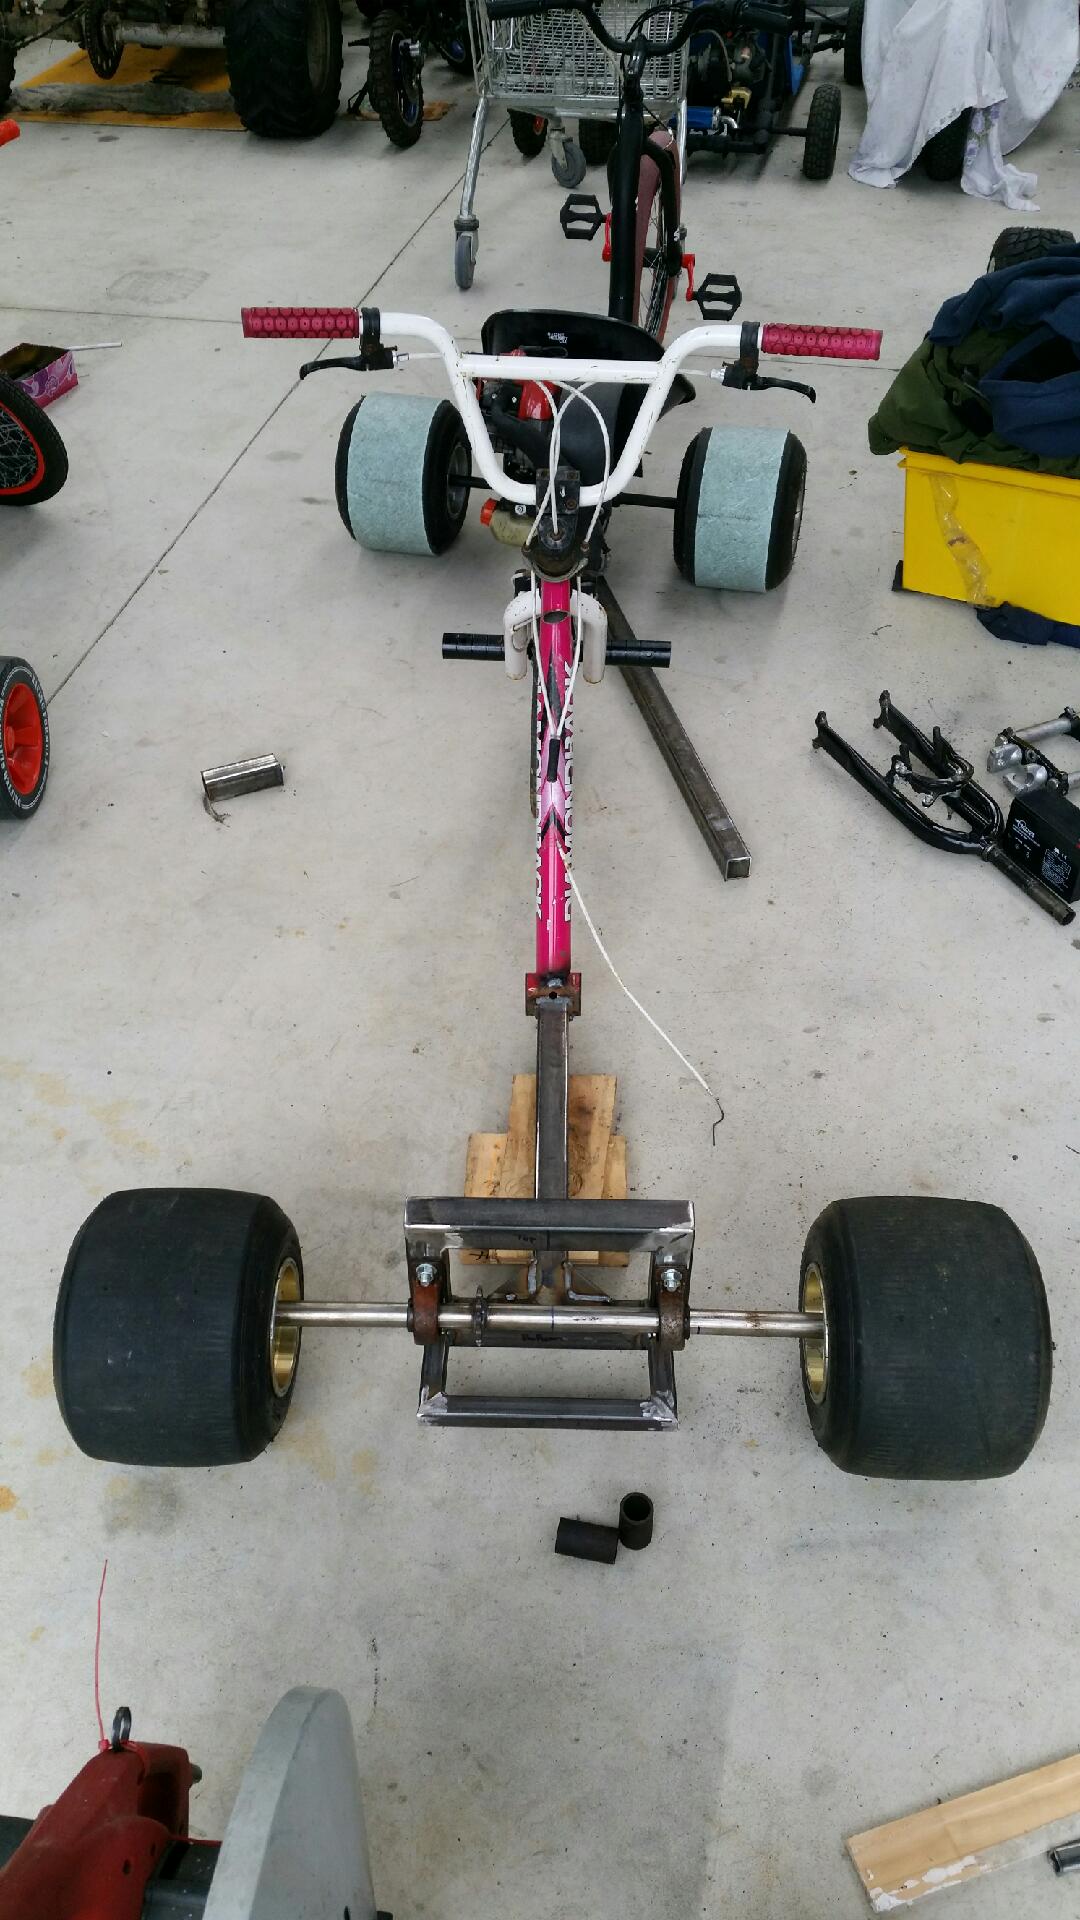
We have a roller.
Axle and sprocket sorted.
Motor just sitting there for inspiration.
-
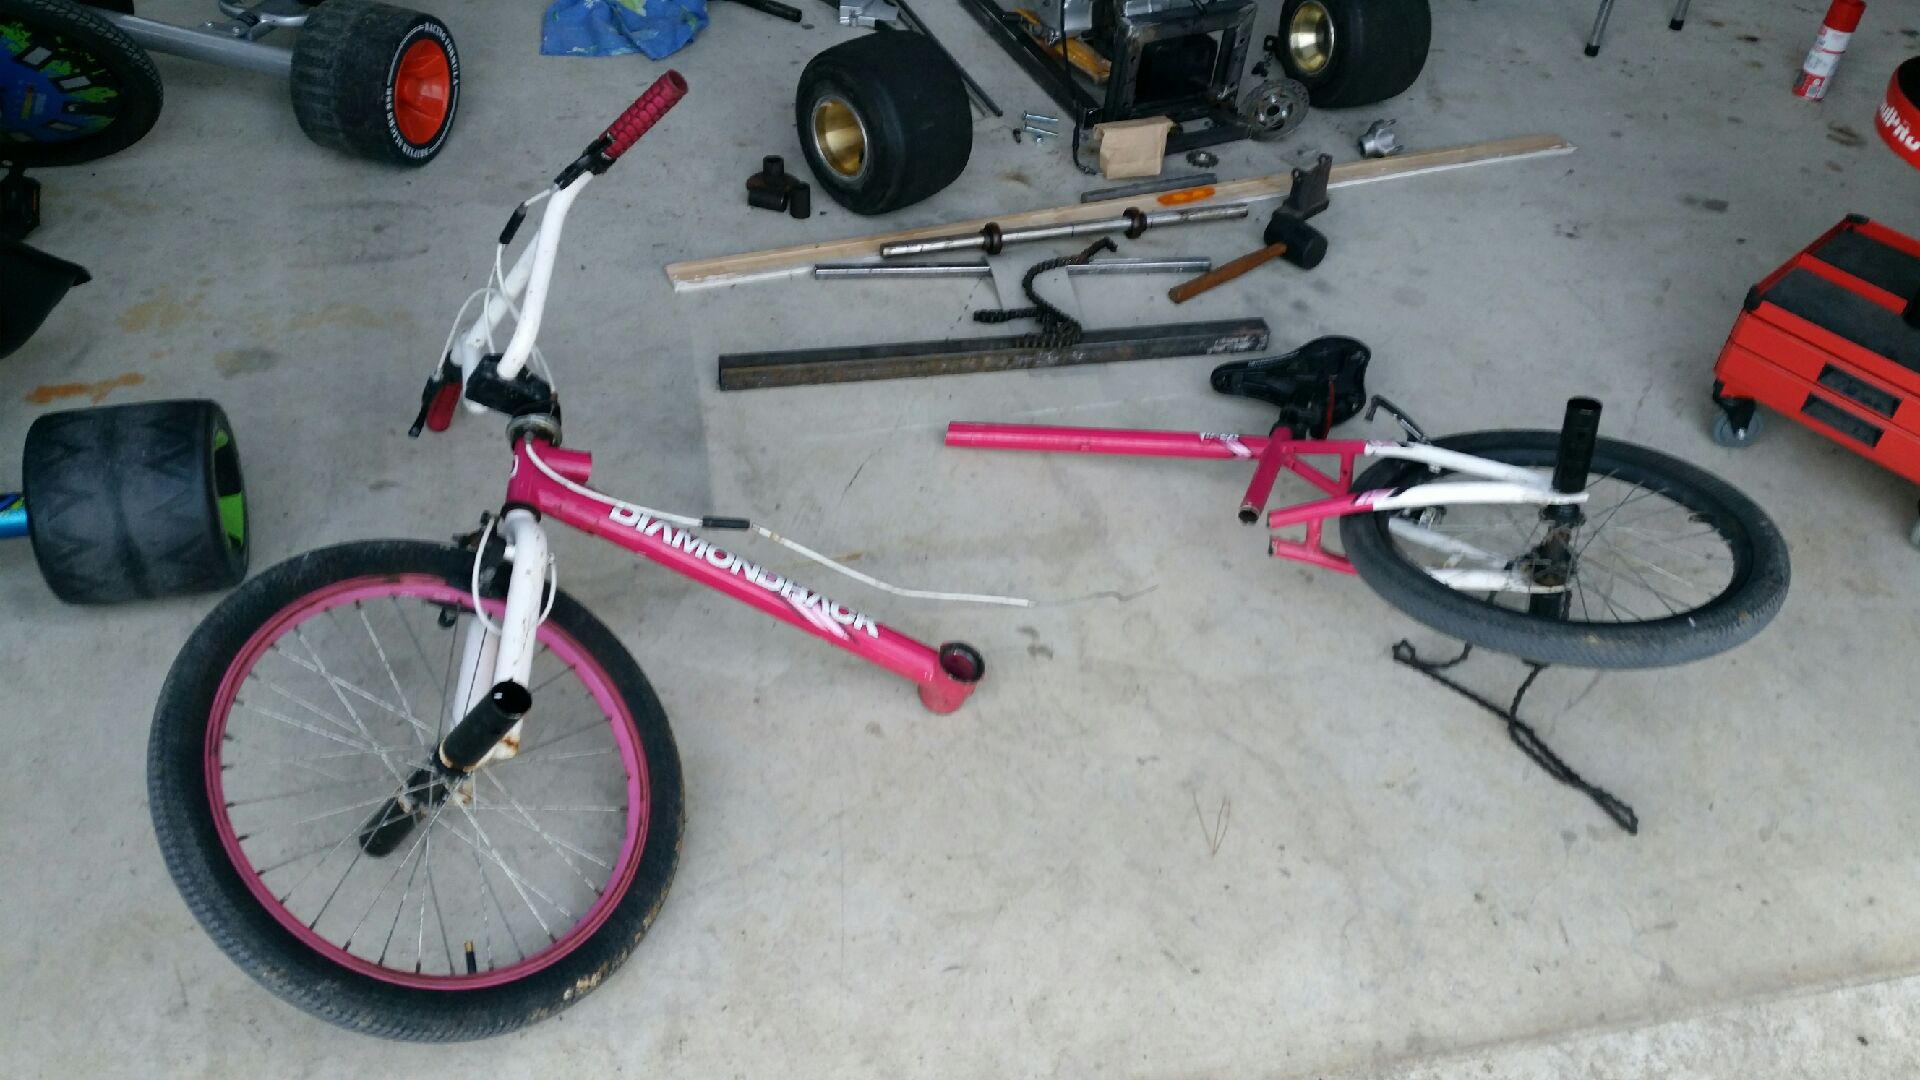
Bom bom. Bom... bom bom...bom....
No more diamond in the sky...the diamondback is no more...
Lest we forget...
-
I'm procrastinating...I just can't bring myself to sentence this bmx to death! It's just so much fun to ride.
But all good things must come to an end, so my dear bmx friend...it's been fun while it lasted...but your time is up buddy!!!
-
1
-
-
1 hour ago, Valiant said:
Hope it's not an 80s NZ Bmx to be cut up.
Nope...nothing that cool. Though I did search for a supersport for nostalgia reasons
-
1
-
-
3 minutes ago, nvmyvl said:
I've asked about bmx bikes, thru my brother who works for avanti.. if your still keen on some, I will let you know what happens.
Thank you. I'm sorted now...but really appreciate the thought.
-
19 hours ago, Valiant said:
Colin Furze would be truly proud!
Where did you get the motor from? how much was it?
Totally. 100% credit to the furze!
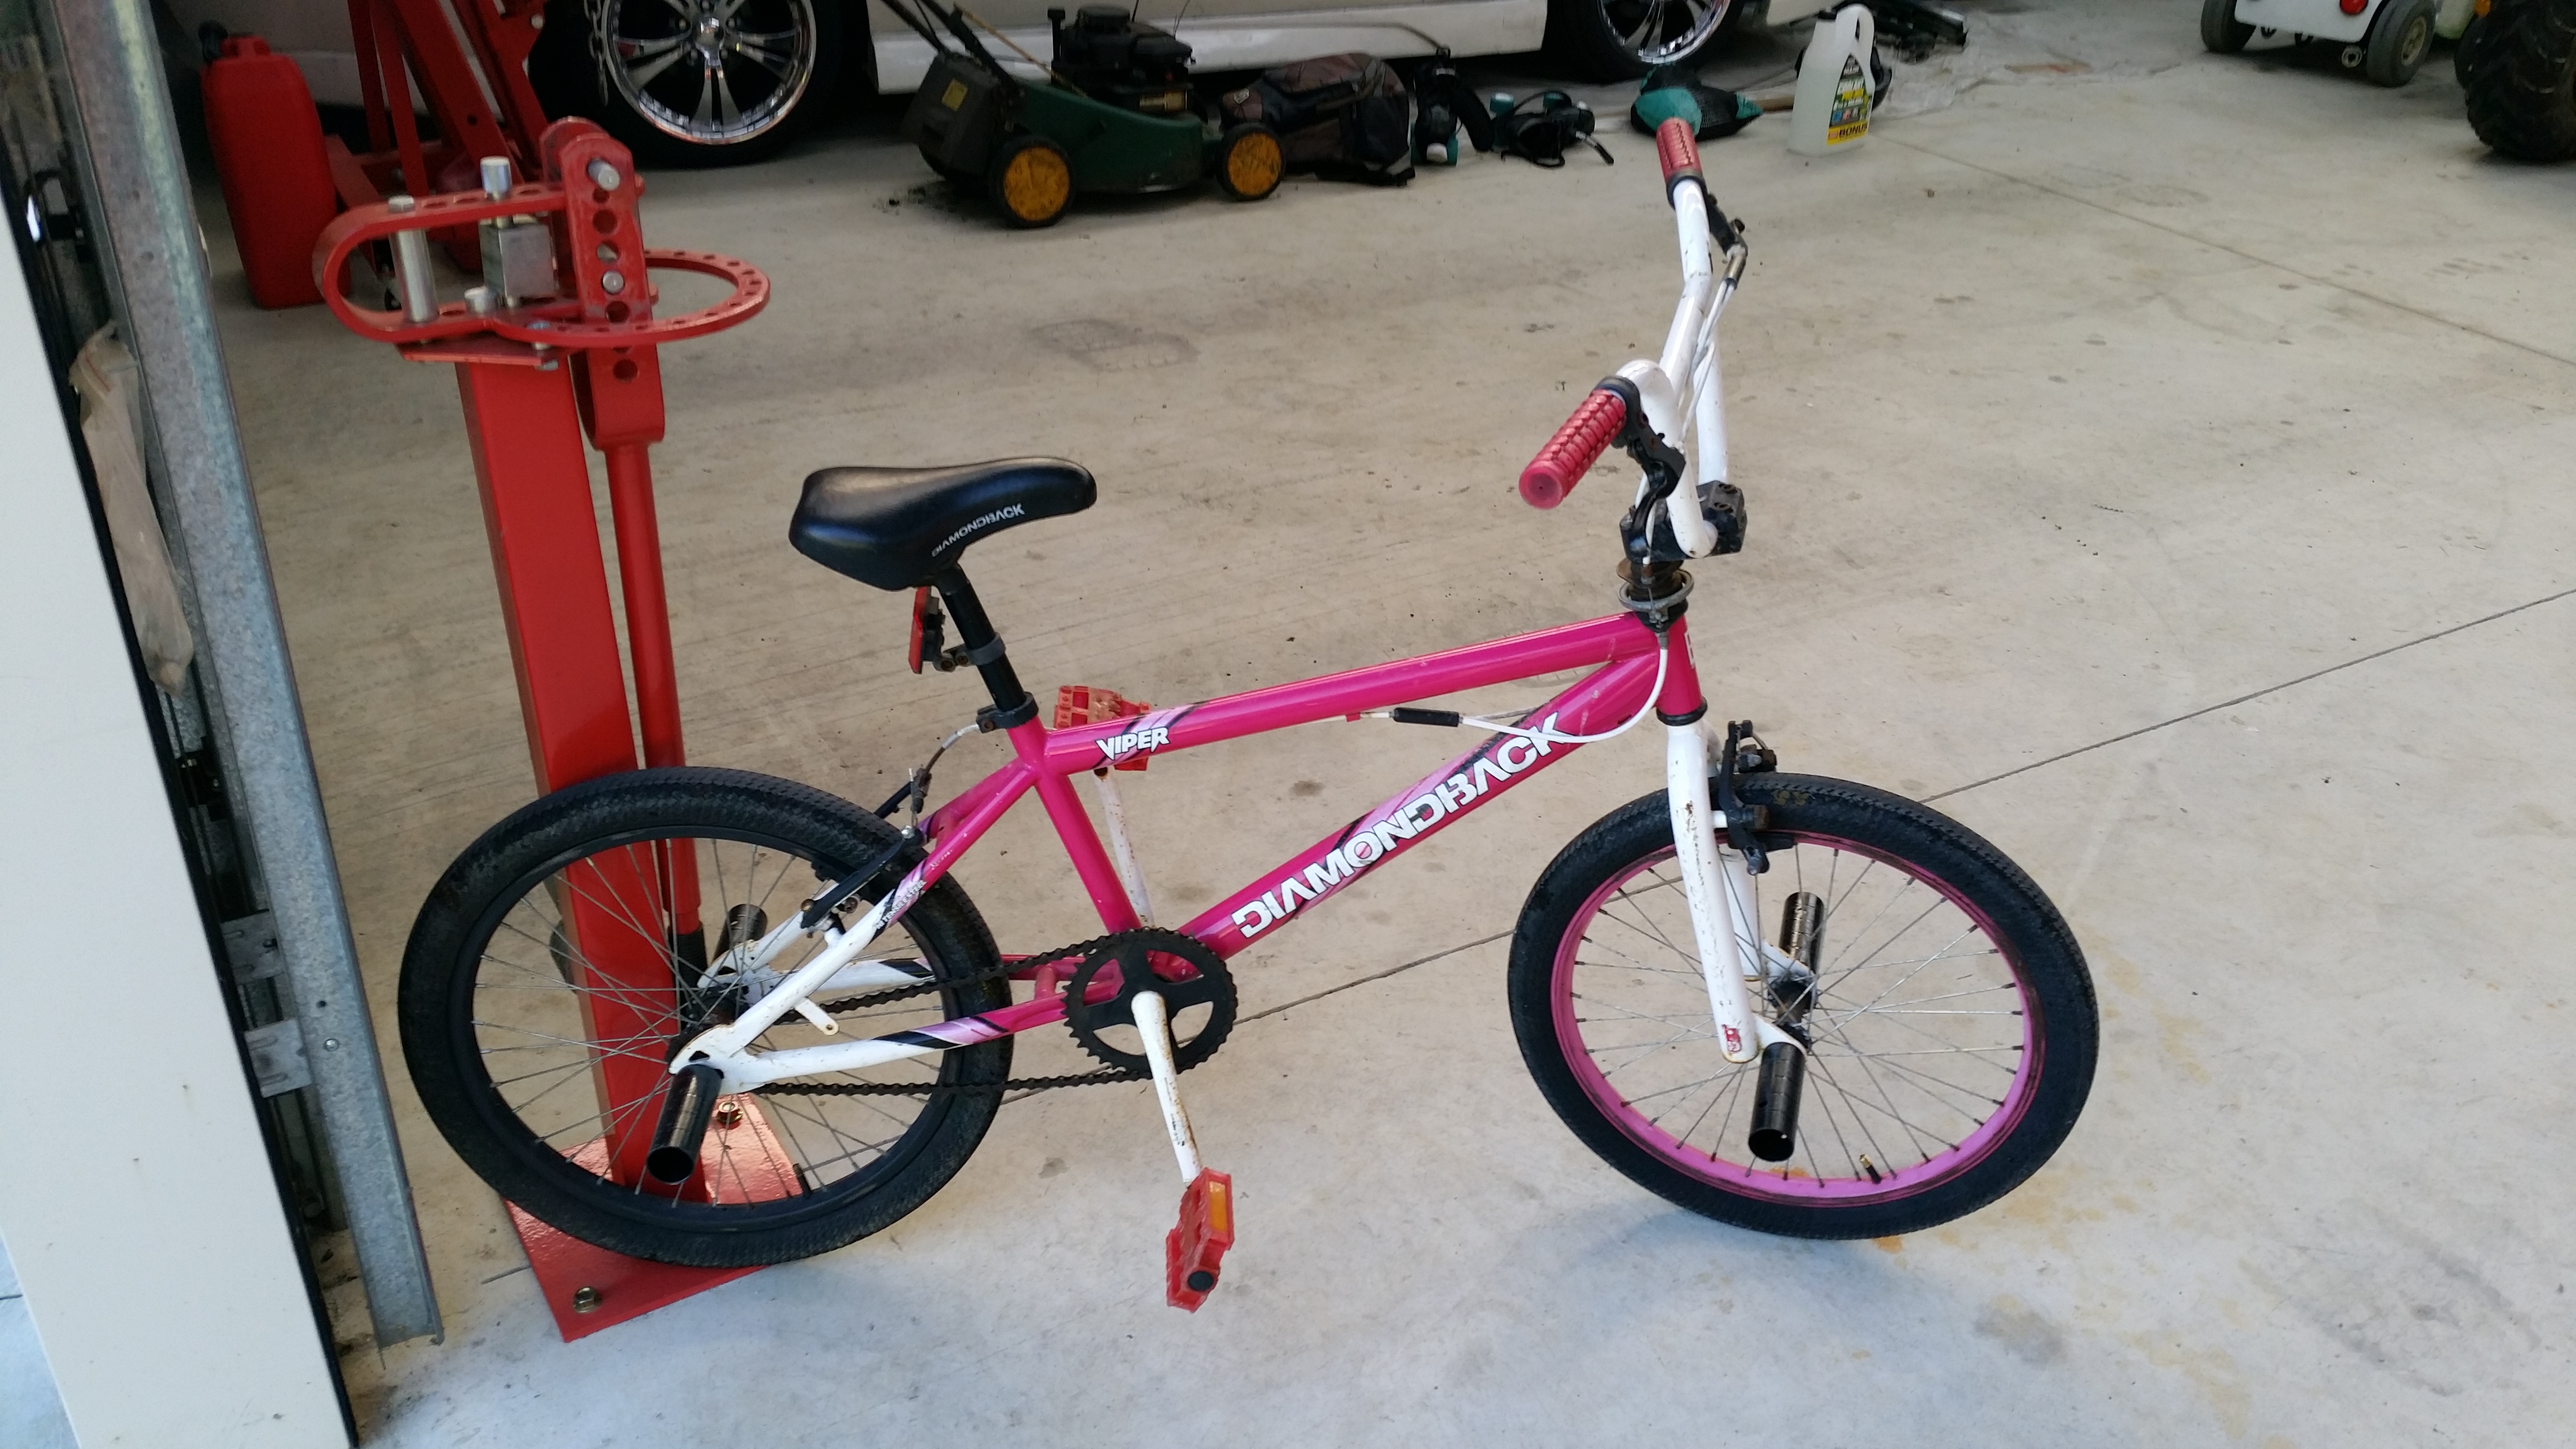
I got the motor off trademe. $75 and came with a very smashed pit bike. Dude must have tried back flipping it or something as only the front wheel and motor were salvageable...the rest was bent or twisted.
I brought a bmx last night. It' way to cool to cut up...but fuck it...I'm going too. So everything is coming together.
-
1
-
-
Cvt is best. And belts are cheap to replace.
Clutch is okay...but a disposable item. And if geared incorrectly won' last long at all.
Either way will be fine though. Your project is looking pretty sweet!
-
Love it!
-
1
-
-
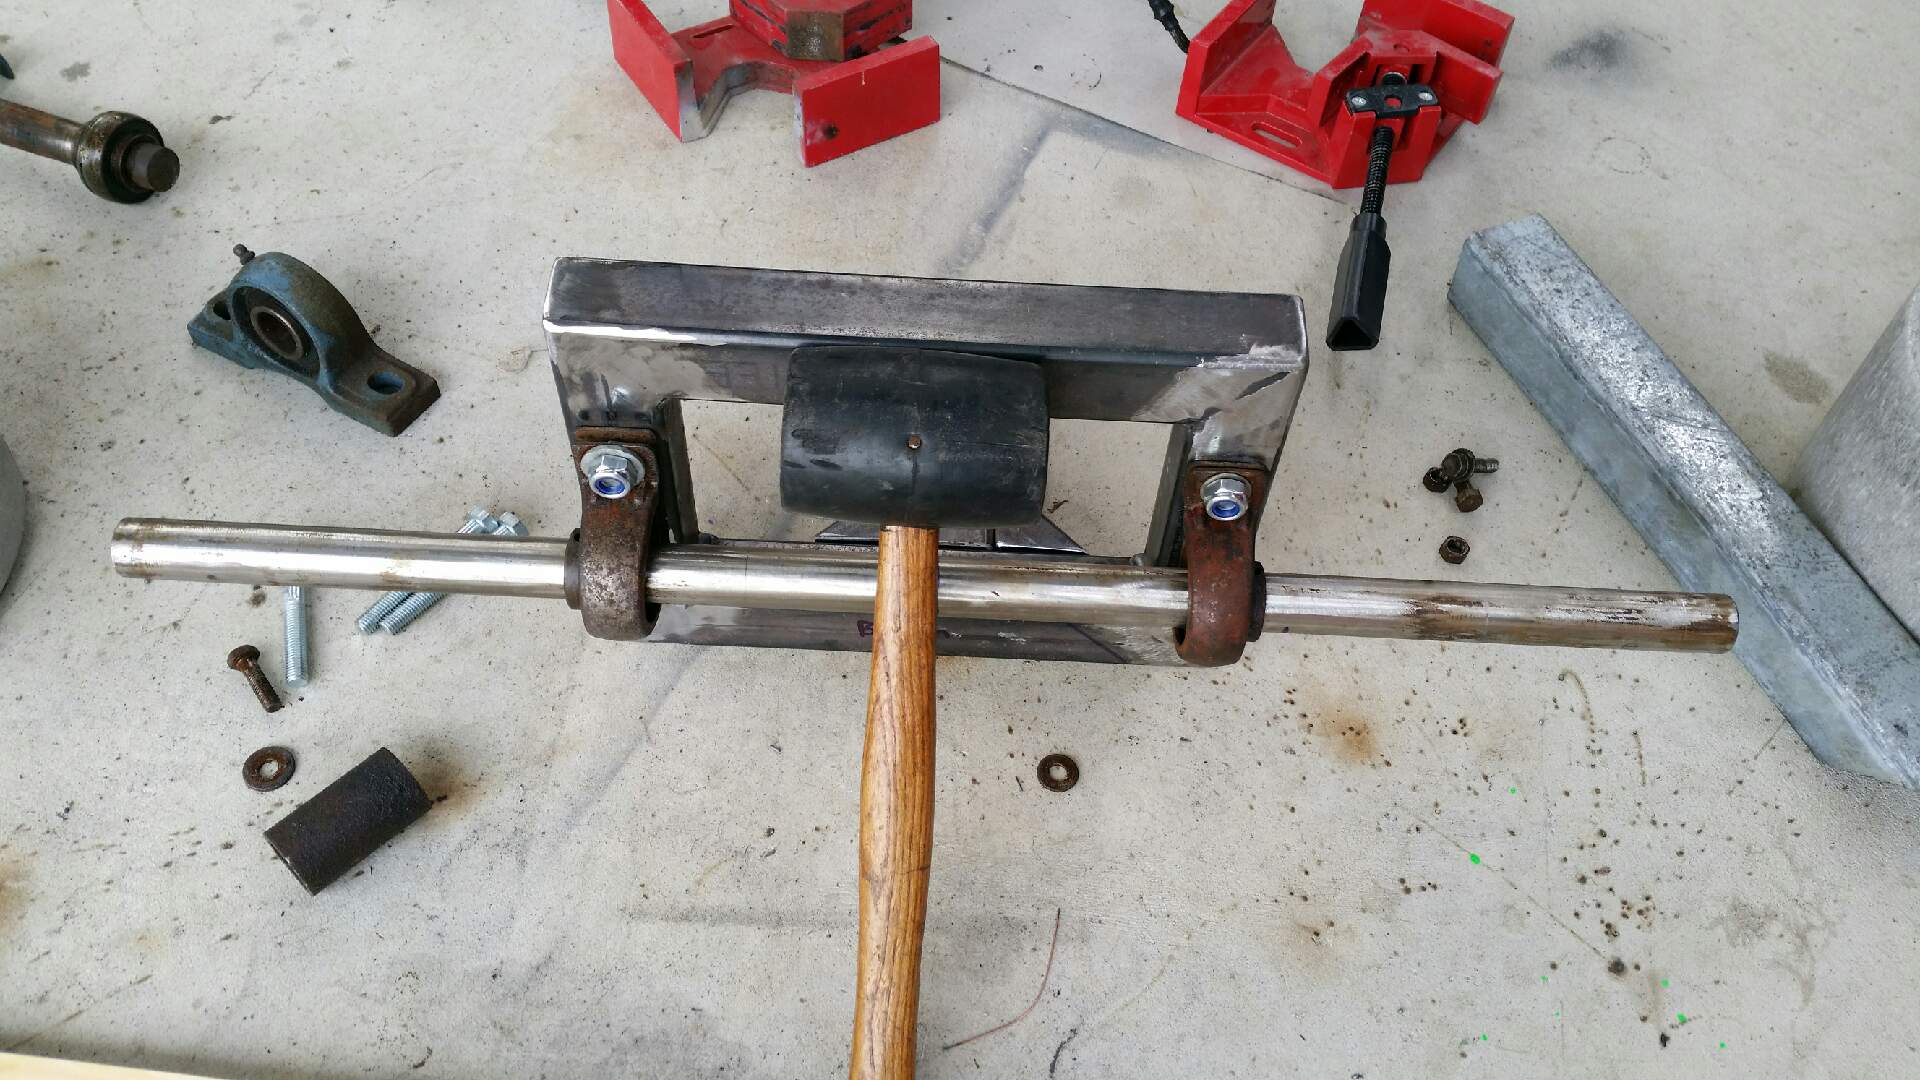
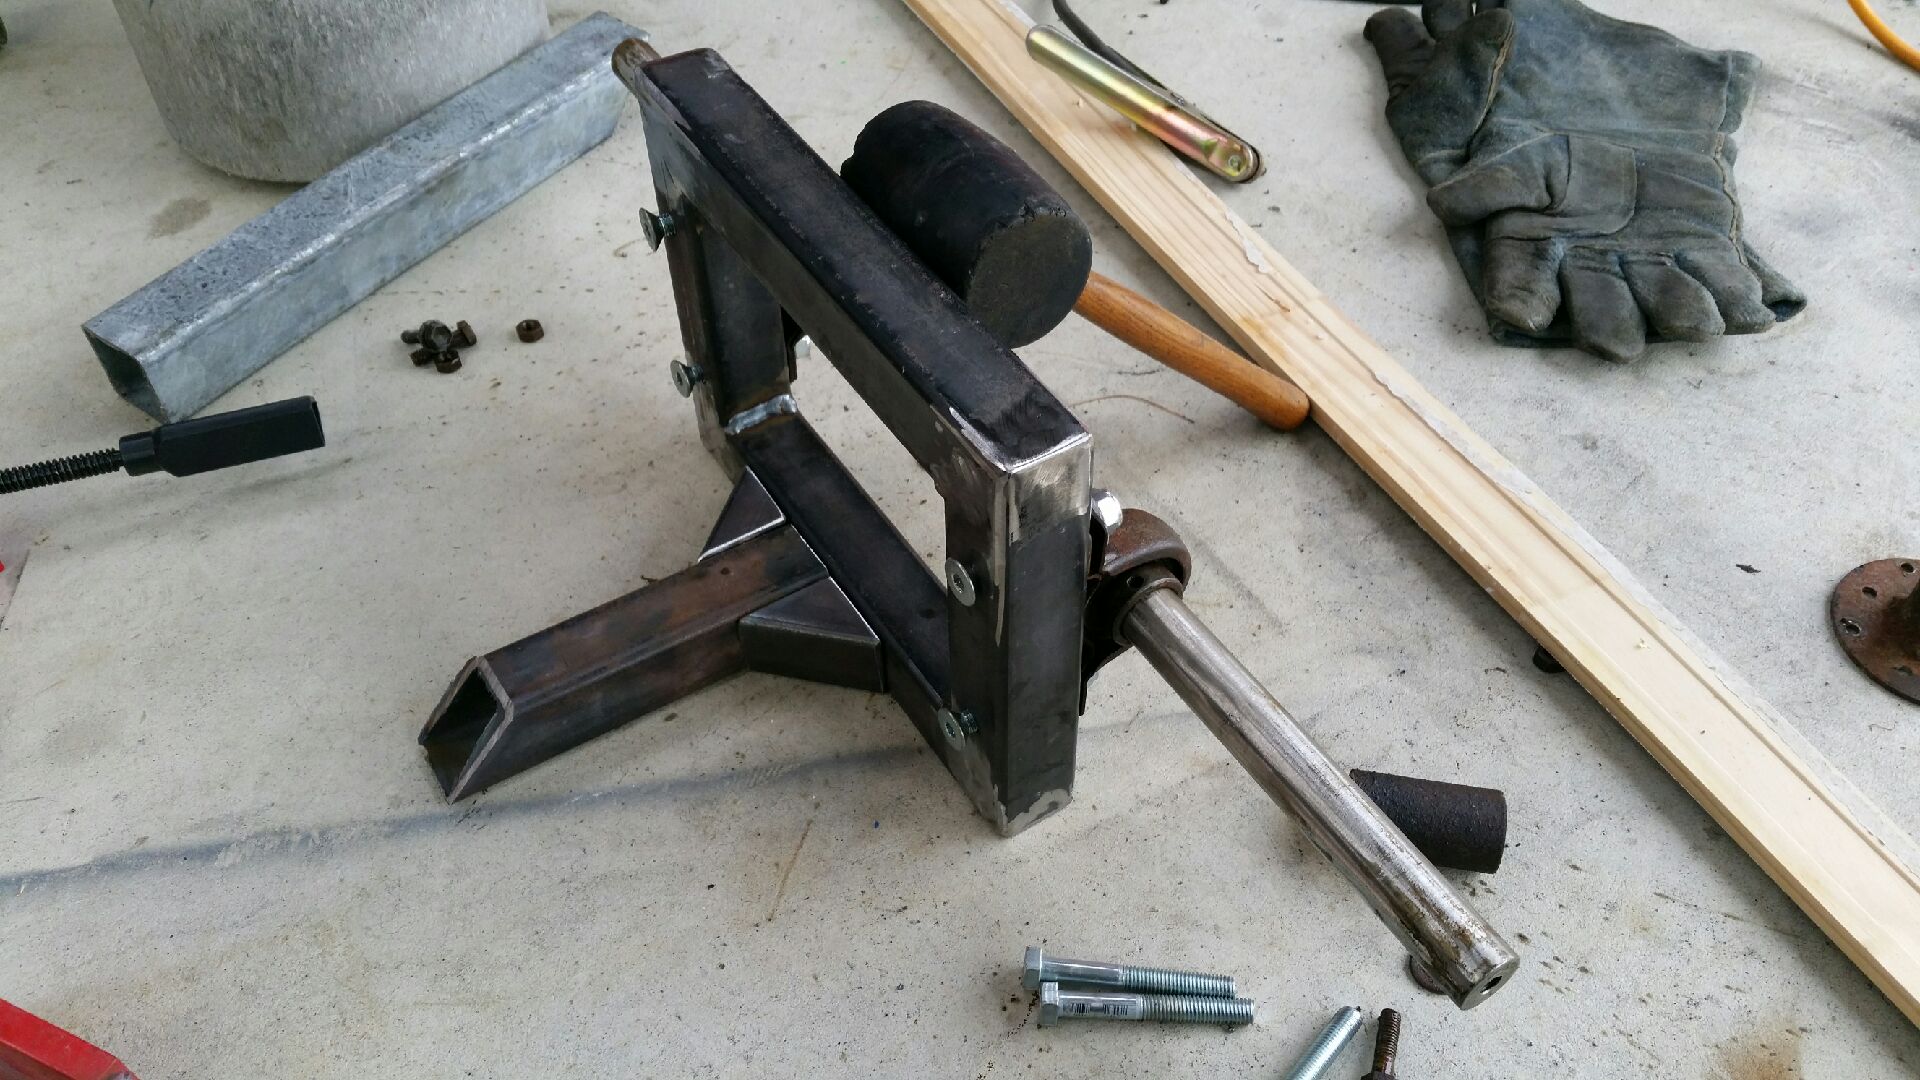
And a licence plate holder/rear bumper/ something to hold on to when lifting it out of the ute.
This will make more sense later on
-
2
-
-
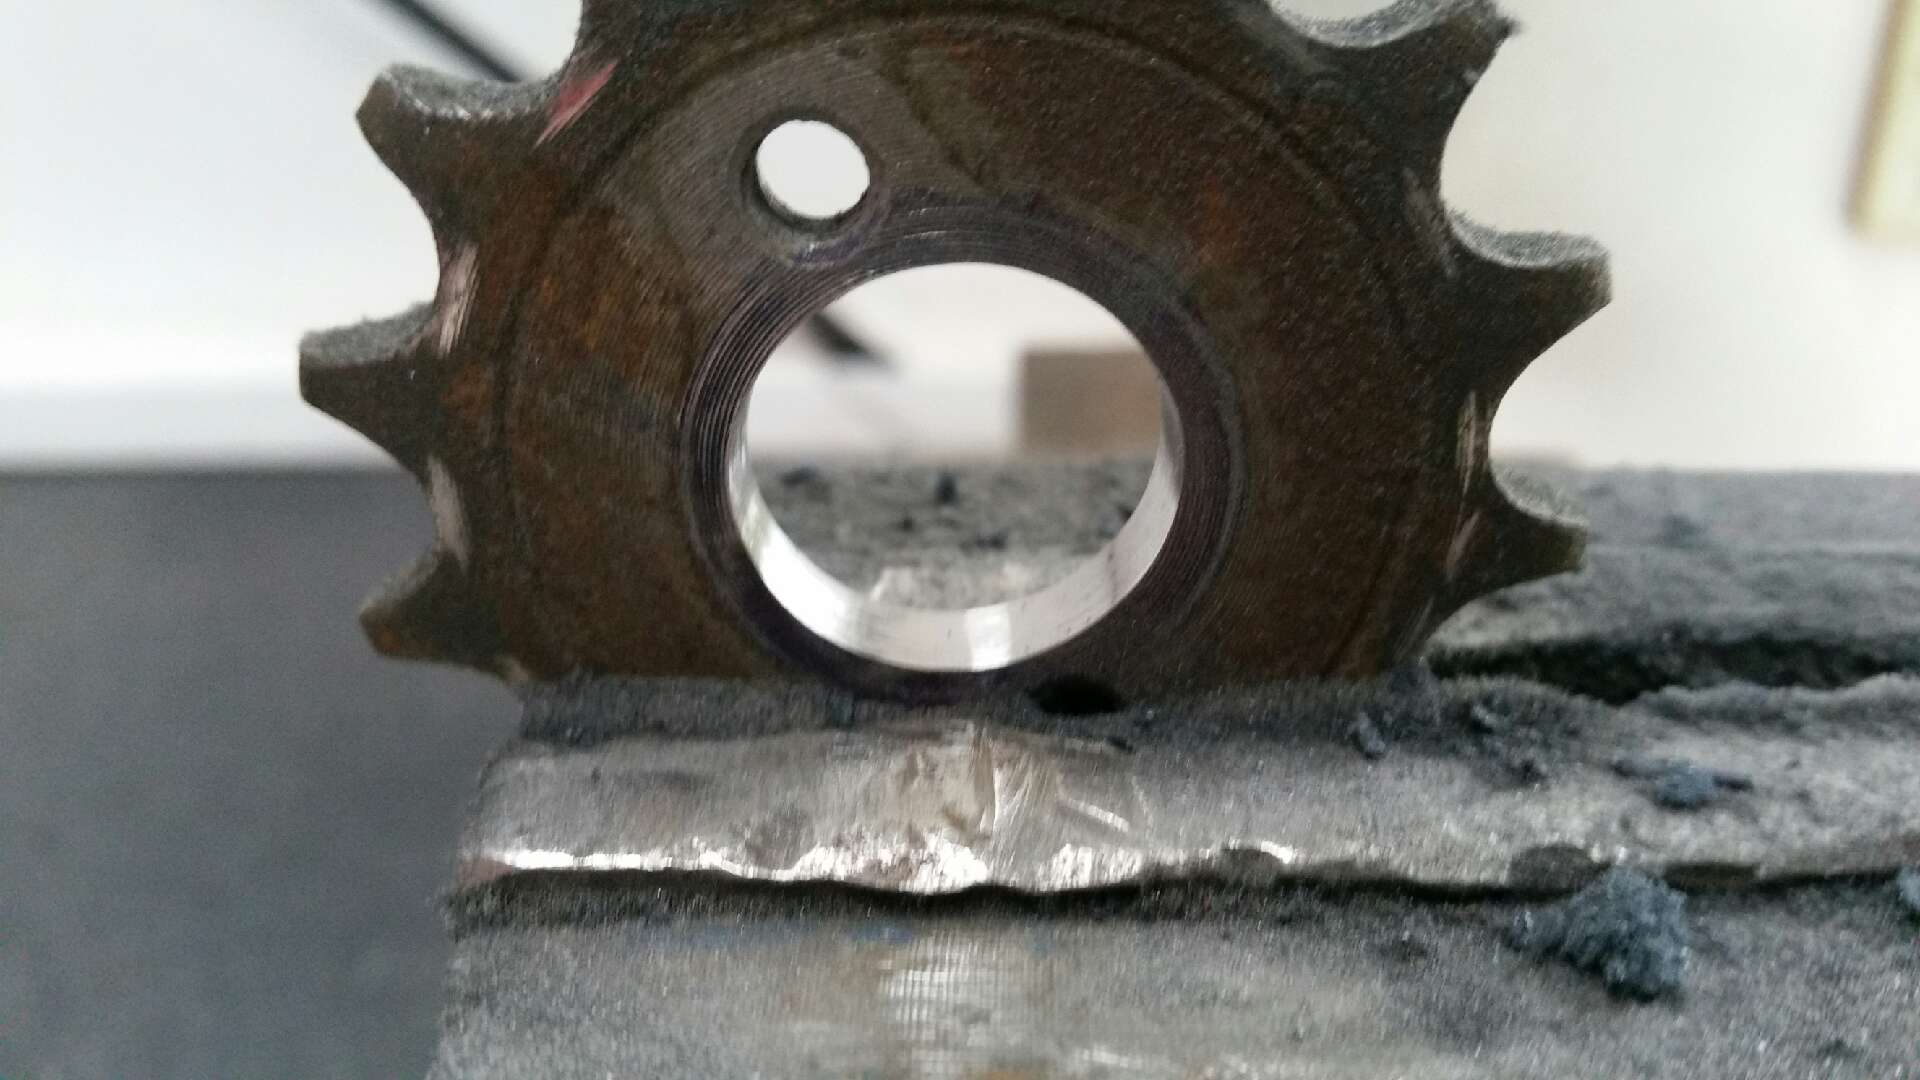
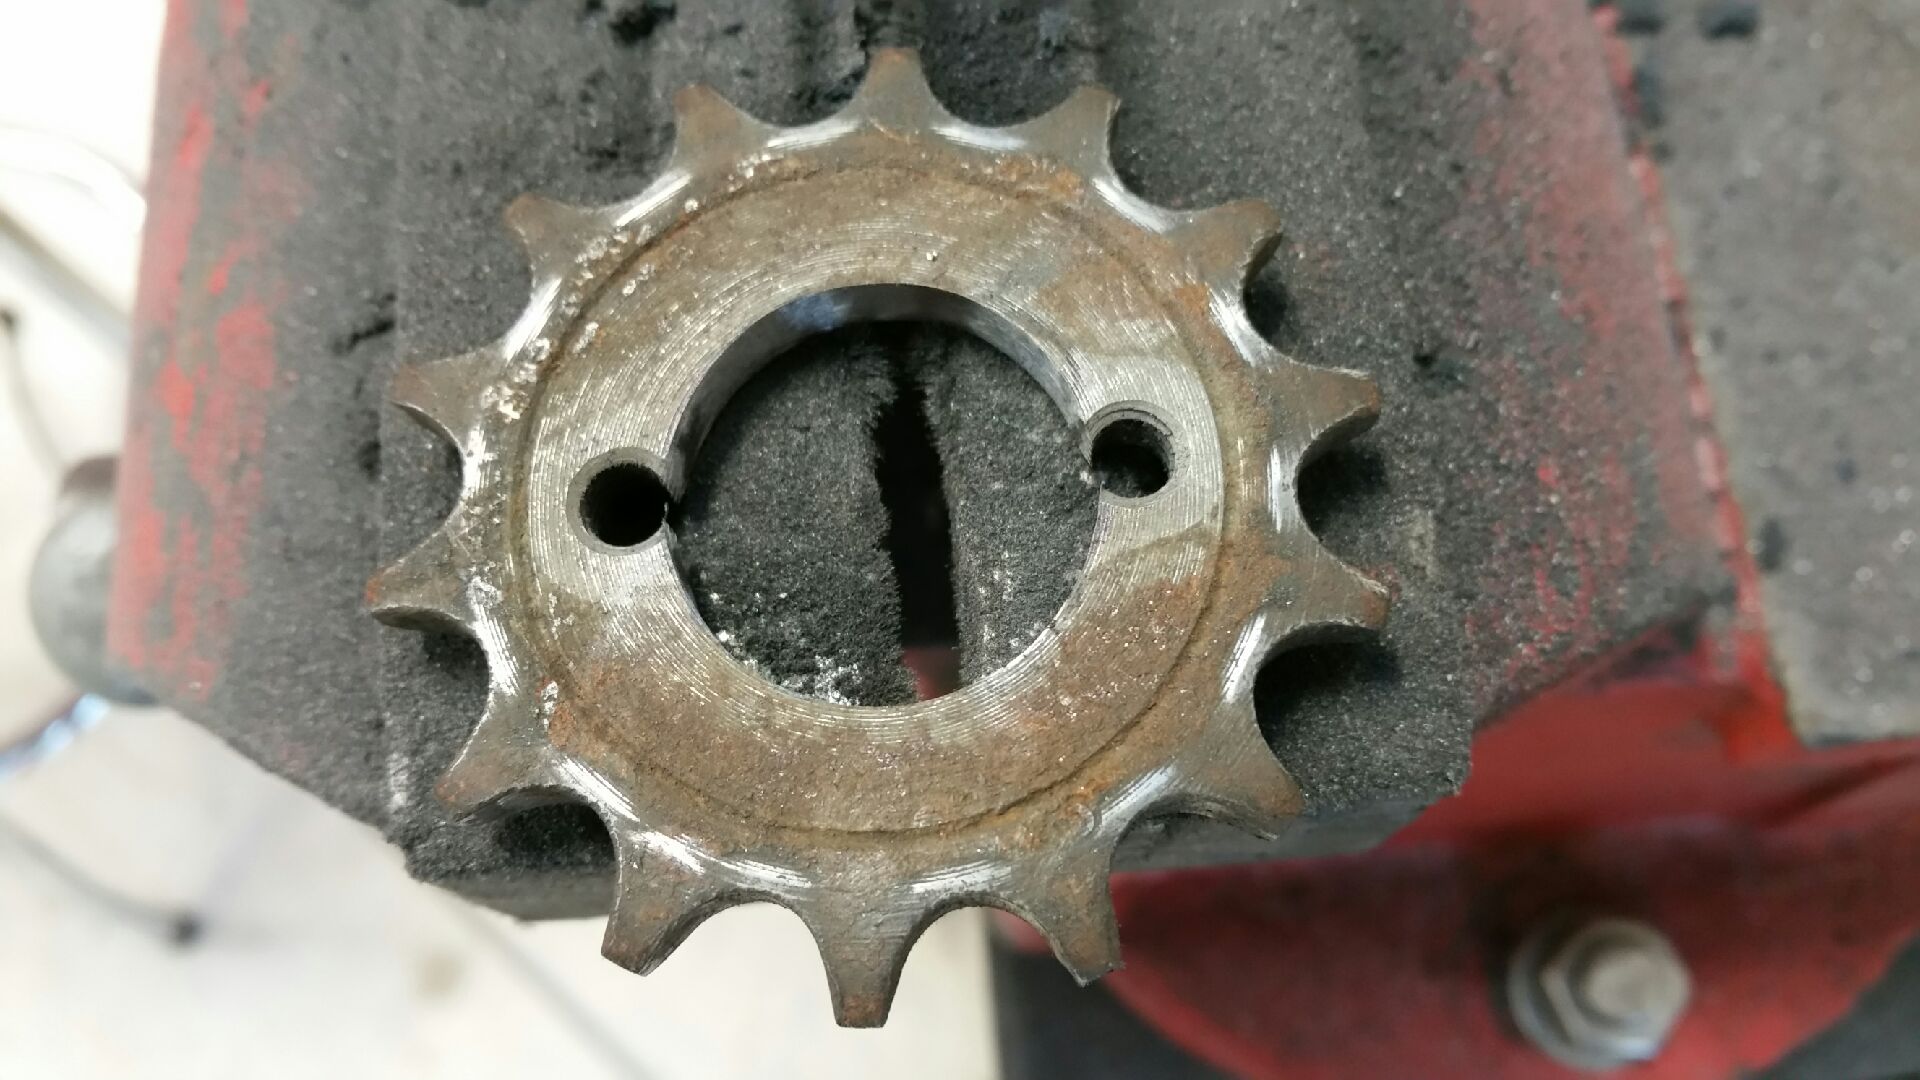
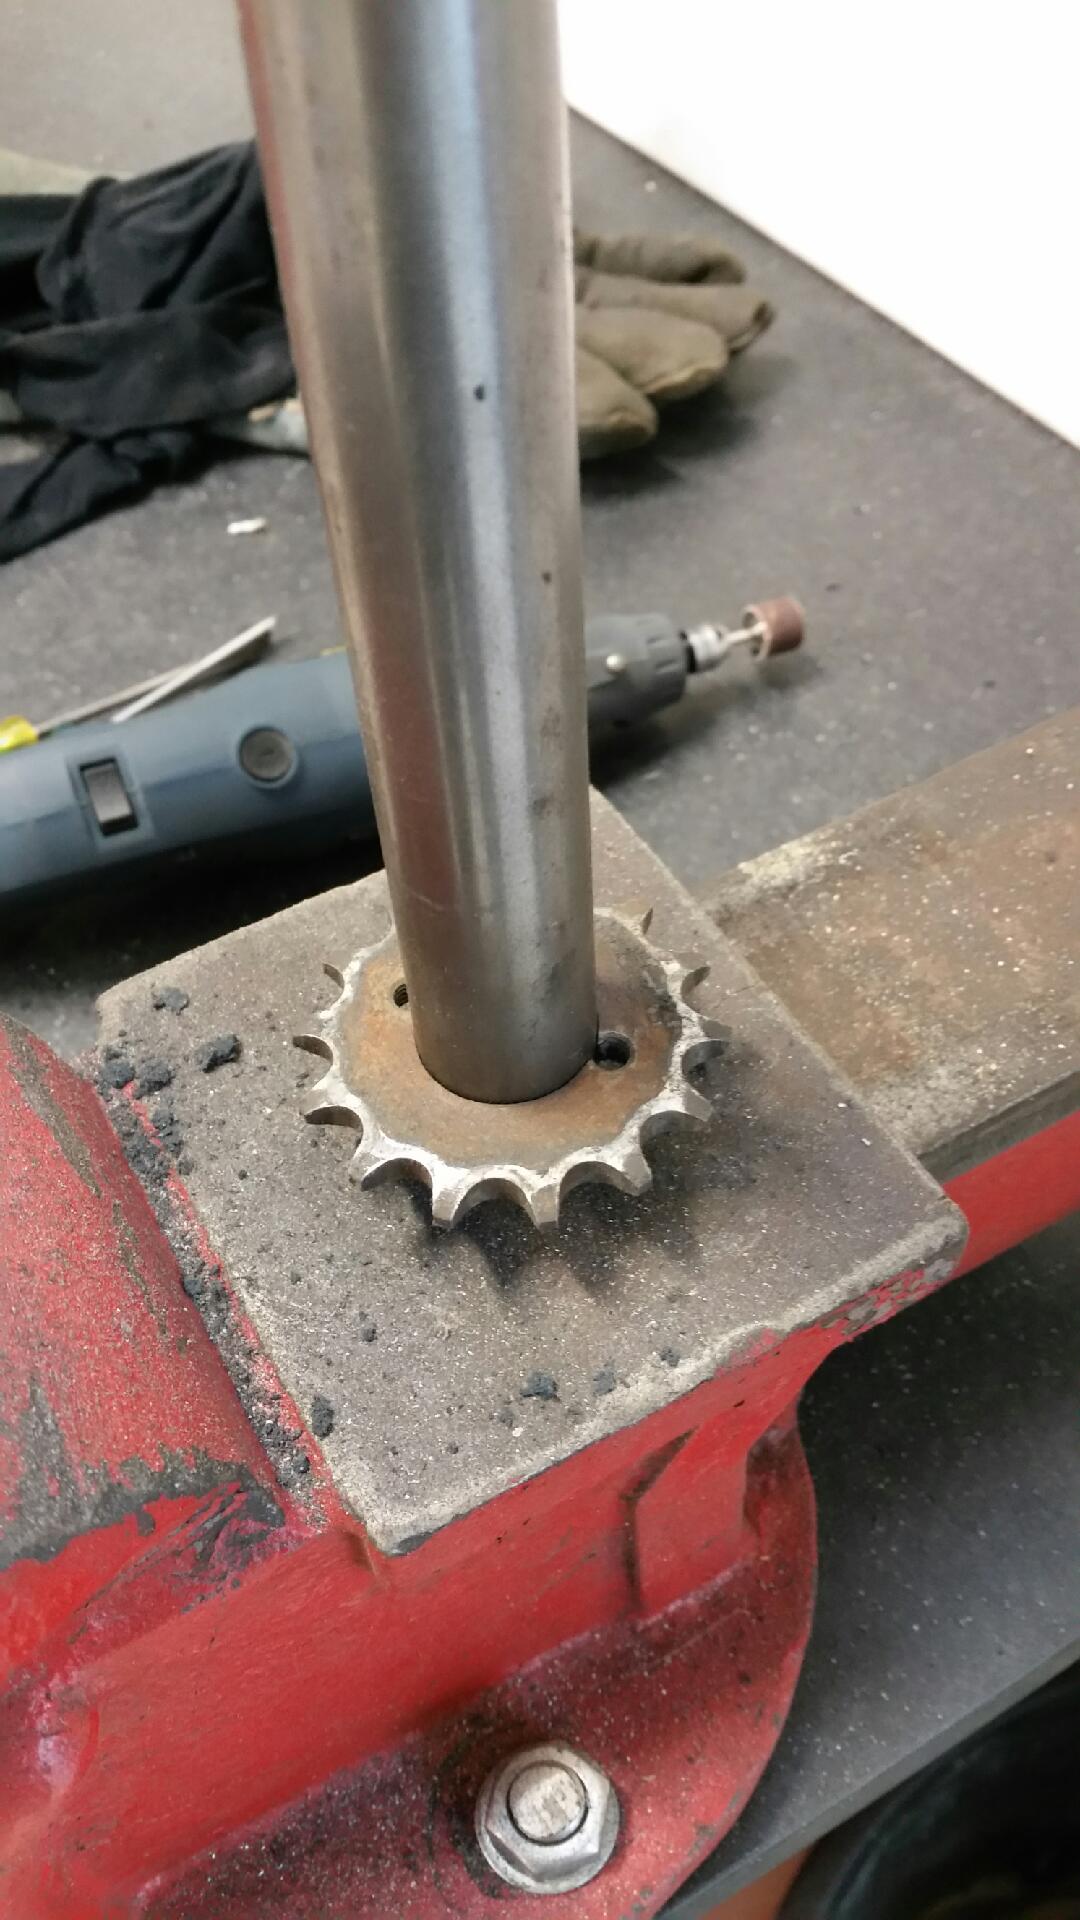
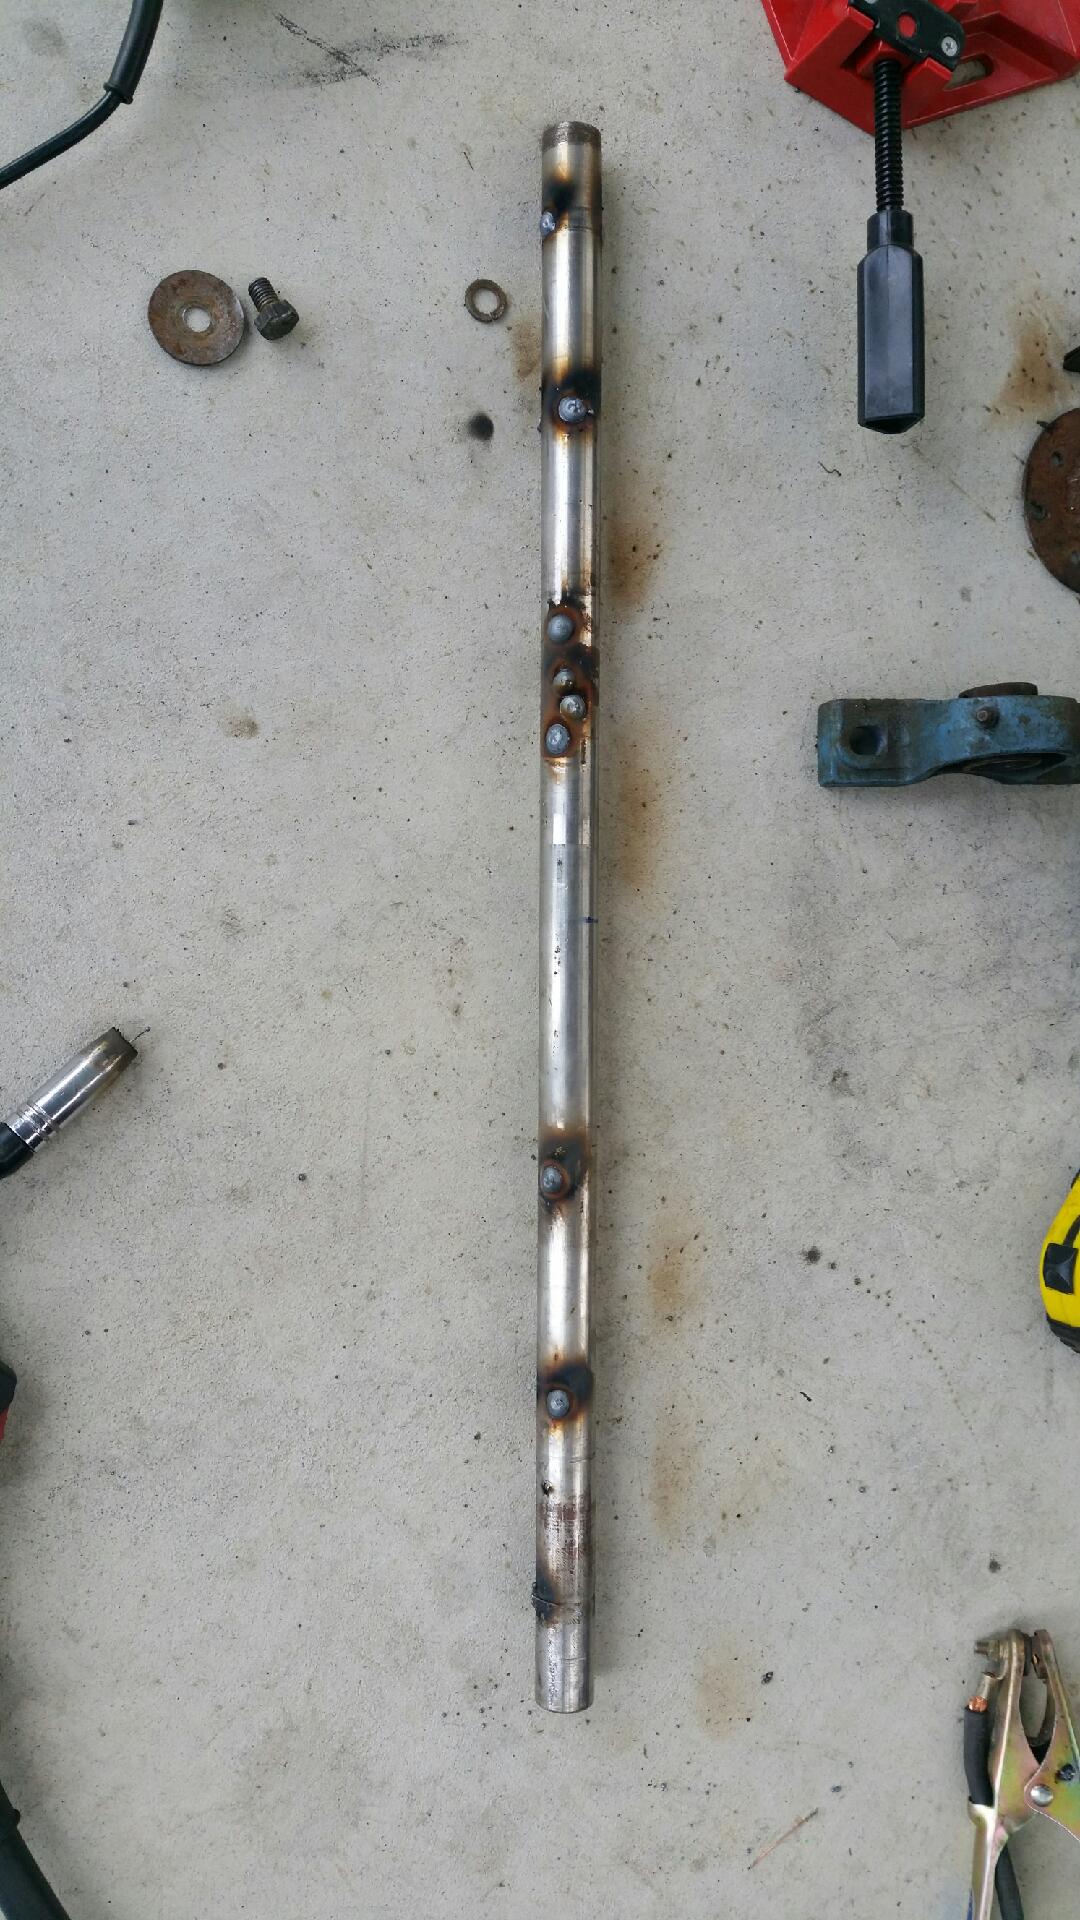
So I need a 1:1 ratio from motor to axle based on wheel size.
This is the sprocket off the gearbox output shafts.
So it's as simple as using another one the same eh...yeah/nah... problem is, its fucking harder than hell! Most likely some kind of cyanide harding treatment after machining. That's awesome for wear resistance...not so awesome for me to machine out to 1" to fit my axle.
Solution: dremel time!
After an hour...and I'm slowly loosing the will to live. About now I'm thinking 30K for a cnc laser isn't that much money to find???
Another hour later, i have a strange sense of achievement... i can smell succes near by...
Queue celabration song:
Just a small town girl
Livin' in a lonely world
She took the midnight train goin' anywhere
Just a city boy
Born and raised in south Detroit
He took the midnight train goin' anywhereA singer in a smoky room
A smell of wine and cheap perfume
For a smile they can share the night
It goes on and on, and on, and onStrangers waiting
Up and down the boulevard
Their shadows searching in the night
Streetlights, people
Living just to find emotion
Hiding somewhere in the nightWorking hard to get my fill
Everybody wants a thrill
Payin' anything to roll the dice
Just one more time
Some will win, some will lose
Some were born to sing the blues
Oh, the movie never ends
It goes on and on, and on, and onStrangers waiting
Up and down the boulevard
Their shadows searching in the night
Streetlights, people
Living just to find emotion
Hiding somewhere in the nightDon't stop believin'
Hold on to the feelin'
Streetlights, peopleDon't stop believin'
Hold on
Streetlights, peopleDon't stop believin'
Hold on to the feelin'
Streetlights, people-
2
-
-
53 minutes ago, chris r said:
No and yes
Bugger
-
2 stroke goodness...yes...yes...yes!
There's gotta be something that'll fit with bit of cutting and welding. Hmmm cogs are turning in my head???
-
1
-
-
14 minutes ago, chris r said:
You want a freee pink girls bmx thing?
Maybe... Are you in the waikato? And does it have 20" wheels?
-
Slowly taking shape.
Ironically I'm struggling to find a cheap donar bmx to form the front end. Trademe bikes are lsited at ridiculous prices for junk. I want junk...just don't want to pay new prices for it. But I'm sure something will turn up soon.
-
Wow I'm tired after writing that title... I'll let the pictures do the talking:
And that' half a days work. Progress was slowed by starting with cheap shit that I had to fix...nastyness at its best...
Pressing seized on crap off the shafts. ..only to reviel some monkey drill about 11 holes in the shafts to try "key" the components on...what a fucktard! Anyway...left with no alternative other than scraping it...I resorted to welding in the holes and linishing it back...actually worked quite well.
That's it for now...but taking shape nicely.
-
3
-
-
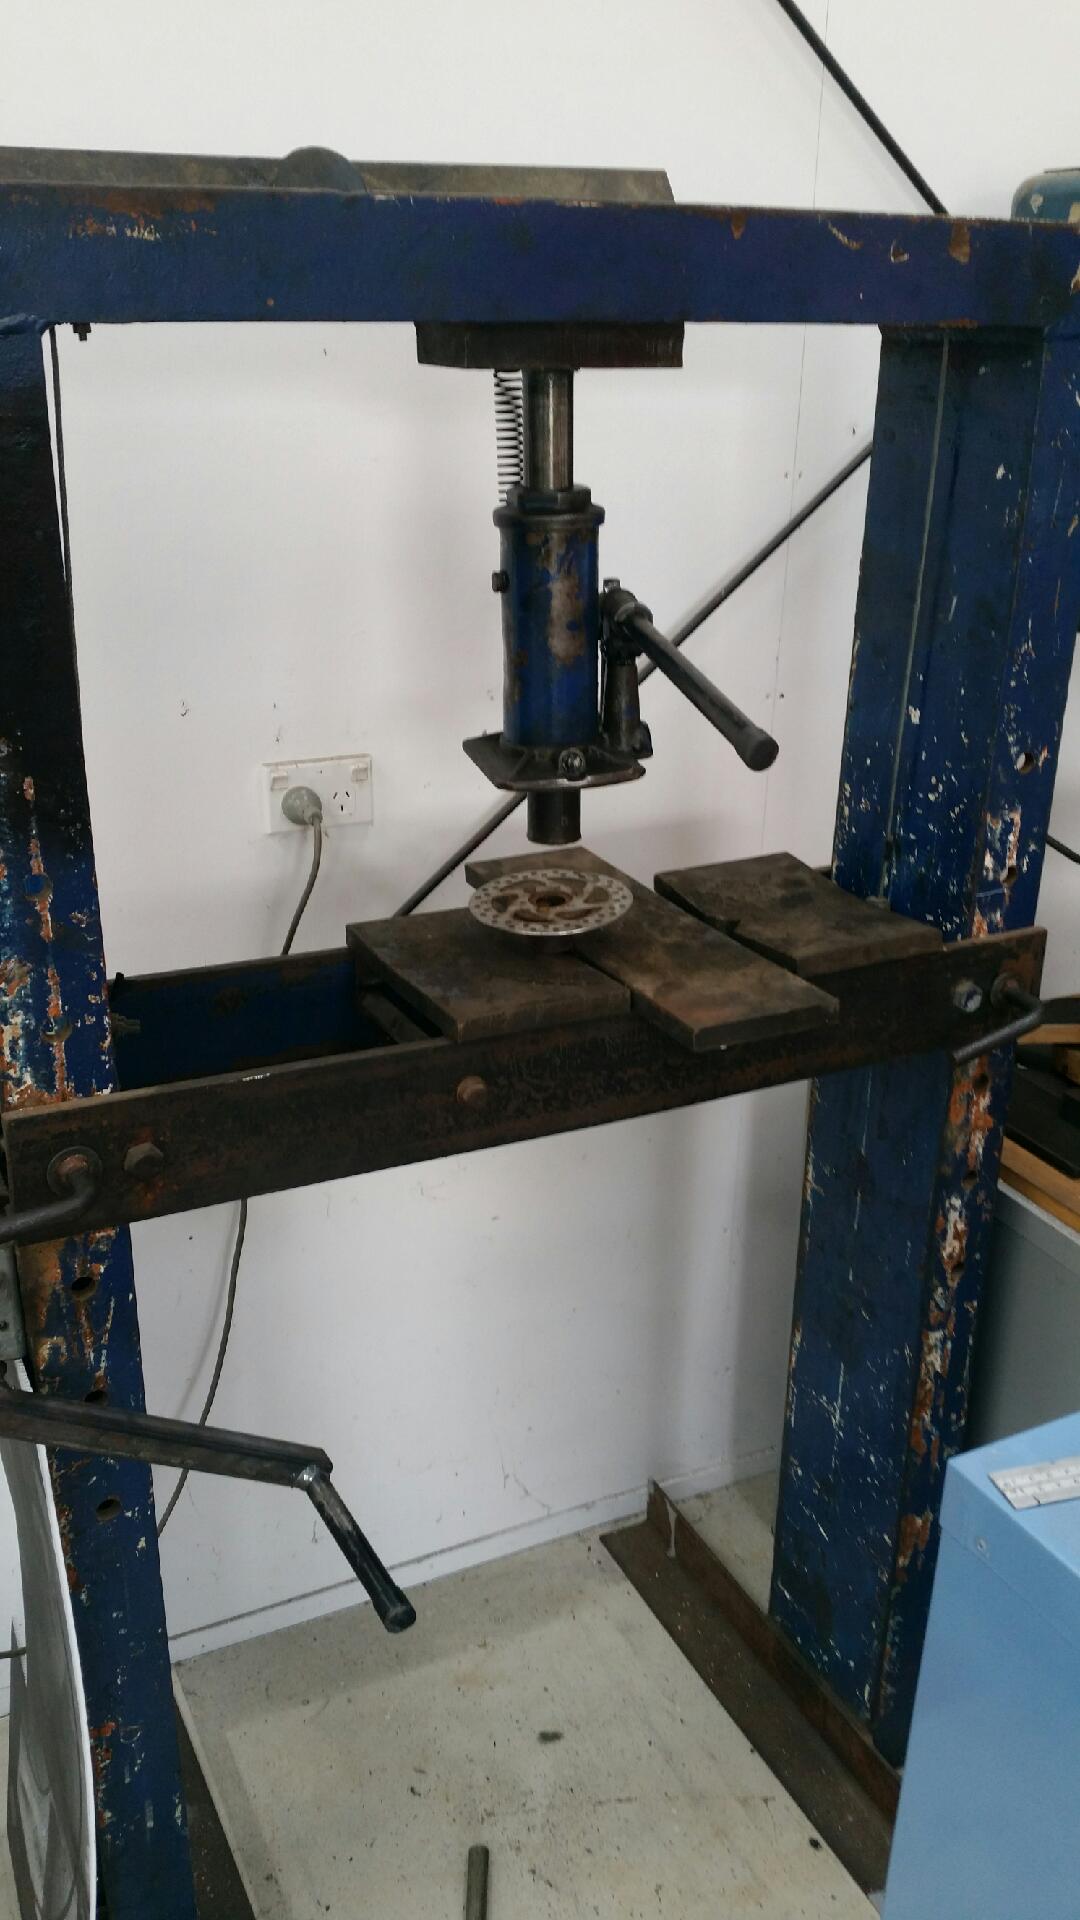
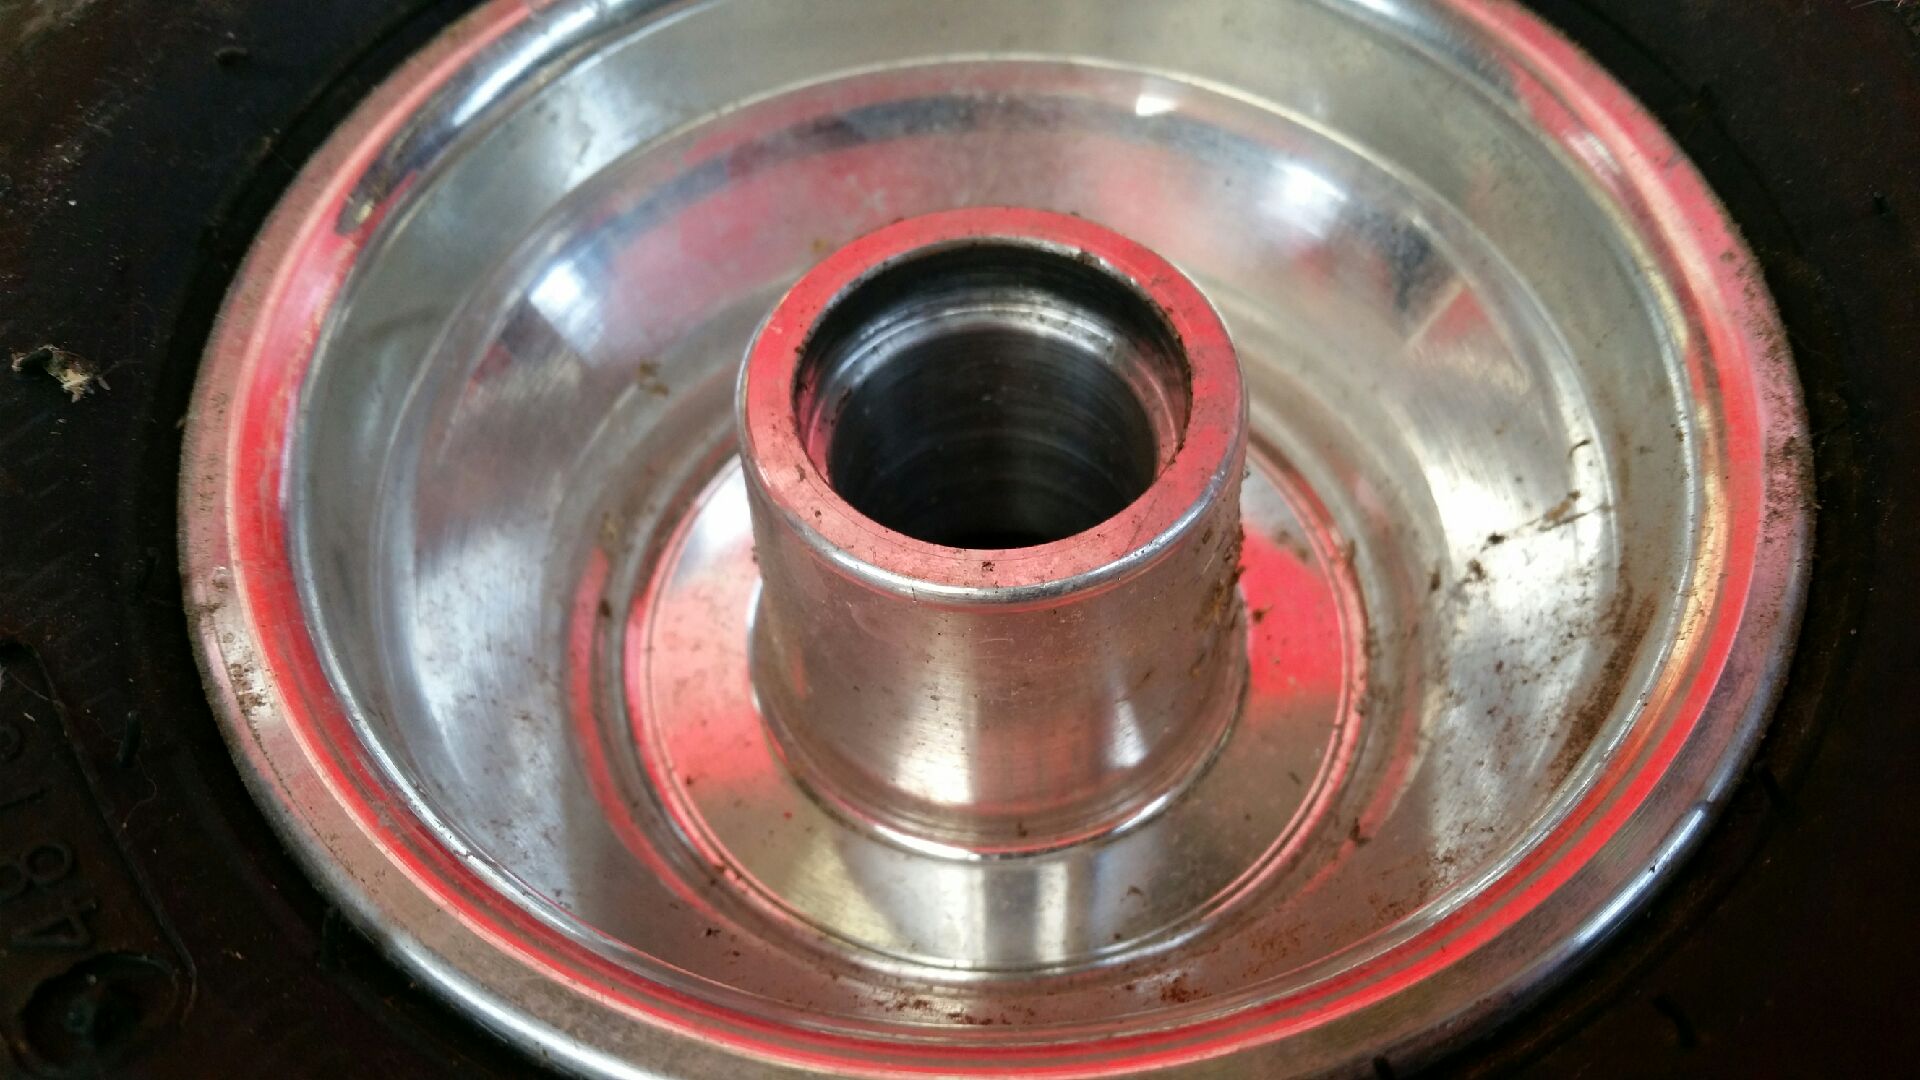
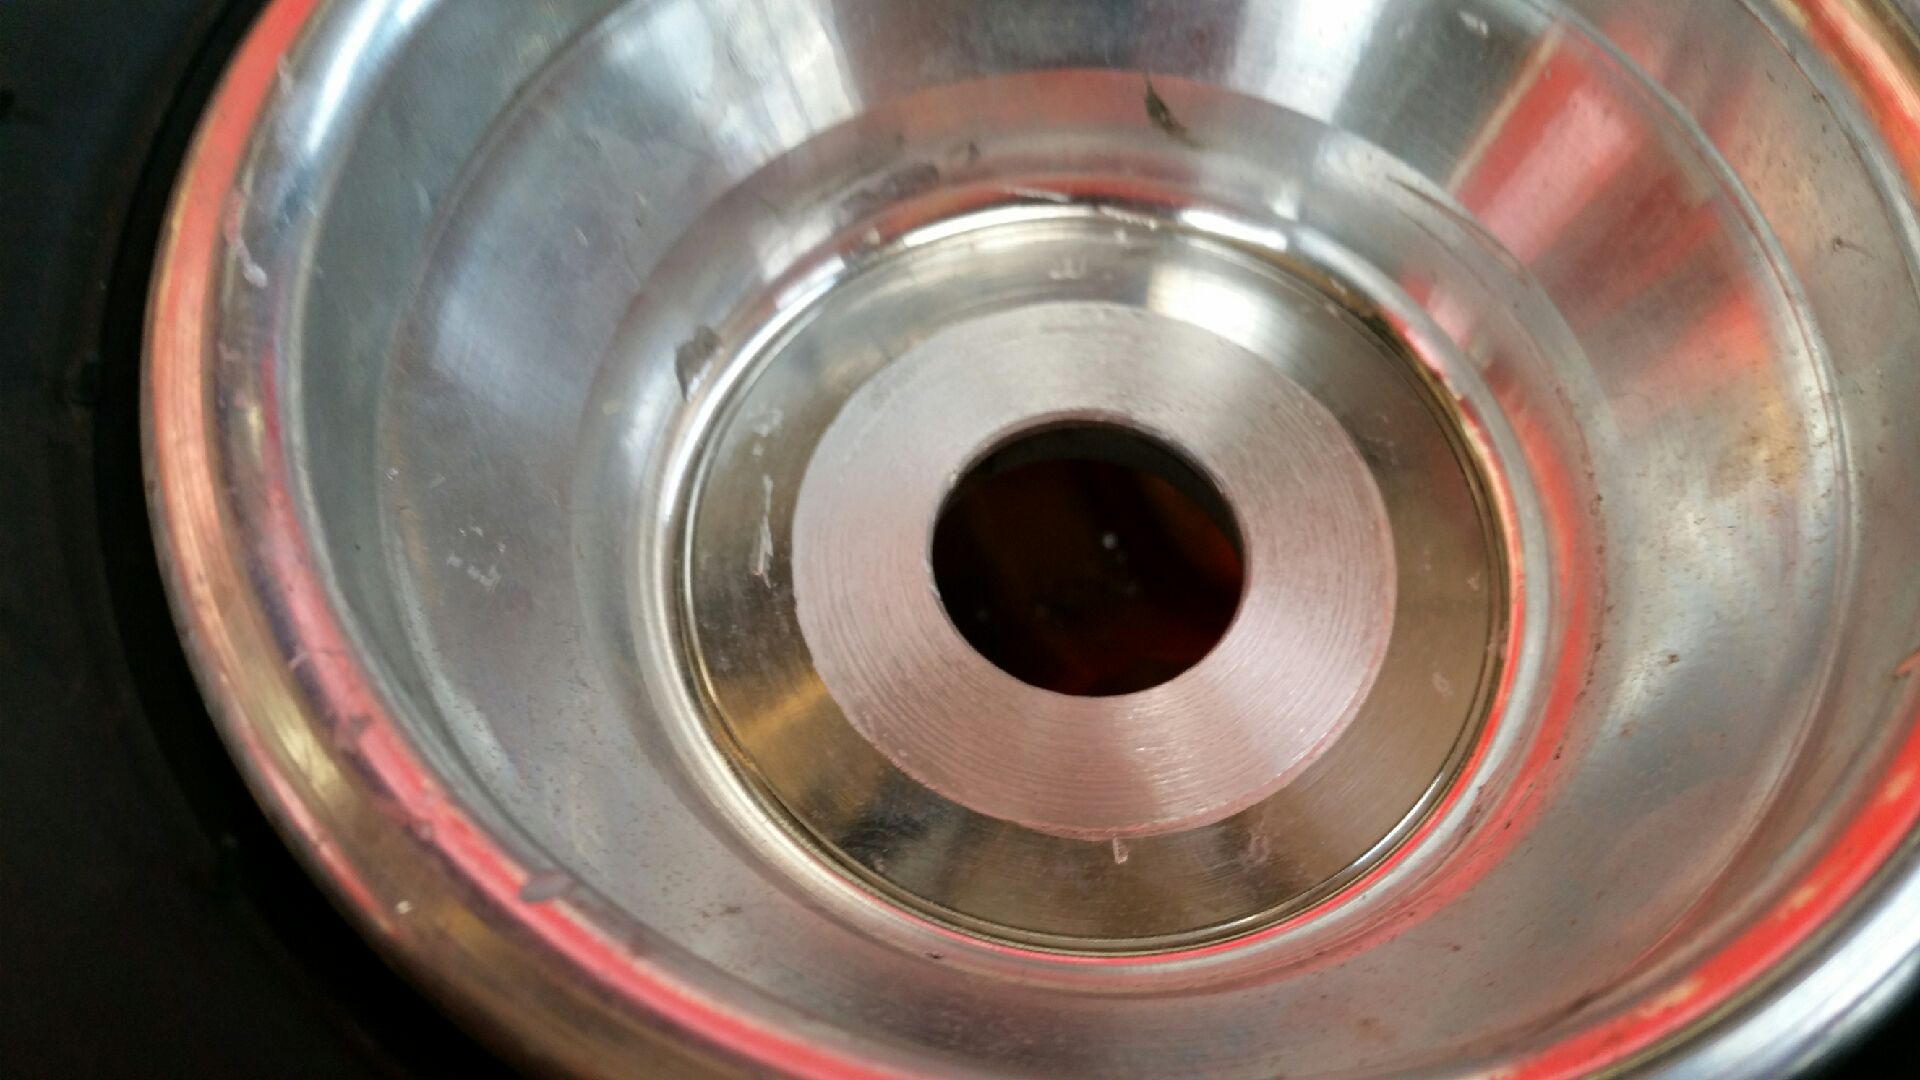
Okay...going to all efforts to save spending actual, real, genuine...cash.
Got these for free...but they are front hubs designed to spin on a bearing. I need rear hubs that can be made to bolt up to an axle. So I've machined them to work.
Before:
After:
Was it worth the effort to save about $220??? Fuck yes!!! Was it fun, safe and trouble free...ummm...ahhh...hmmm. ..hell no.
-
2
-
-
Looking good. You're going to want 2 or better still 3 layers of ply on that bad boy.
The transition between flat and curve tends to get a pounding and holes in the ply develop really quick in that area if there's not enough layers.
-
2
-
-
Badass!
-
 1
1
-
-
That motor in a gokart would be the berries! That way you could make use of its rediculous torque.
Have you seen my "somali battle wagon"?
This thing is so much fun and I'm constantly amazed by where there can go. It only had a DT200 motor in mine geared real low...your motor would send it into orbit!!!!
-
1
-
-
3 minutes ago, cletus said:
your frames you make for your trikes, tickle my ideas gland for making a 4 wheeled version... like you say, with better geometry for drifting than a race kart
Go on...be great to see what you come up with?
You'll need about this much articulation to really have fun. You can get by with less...but controllability will suffer.
-
2
-
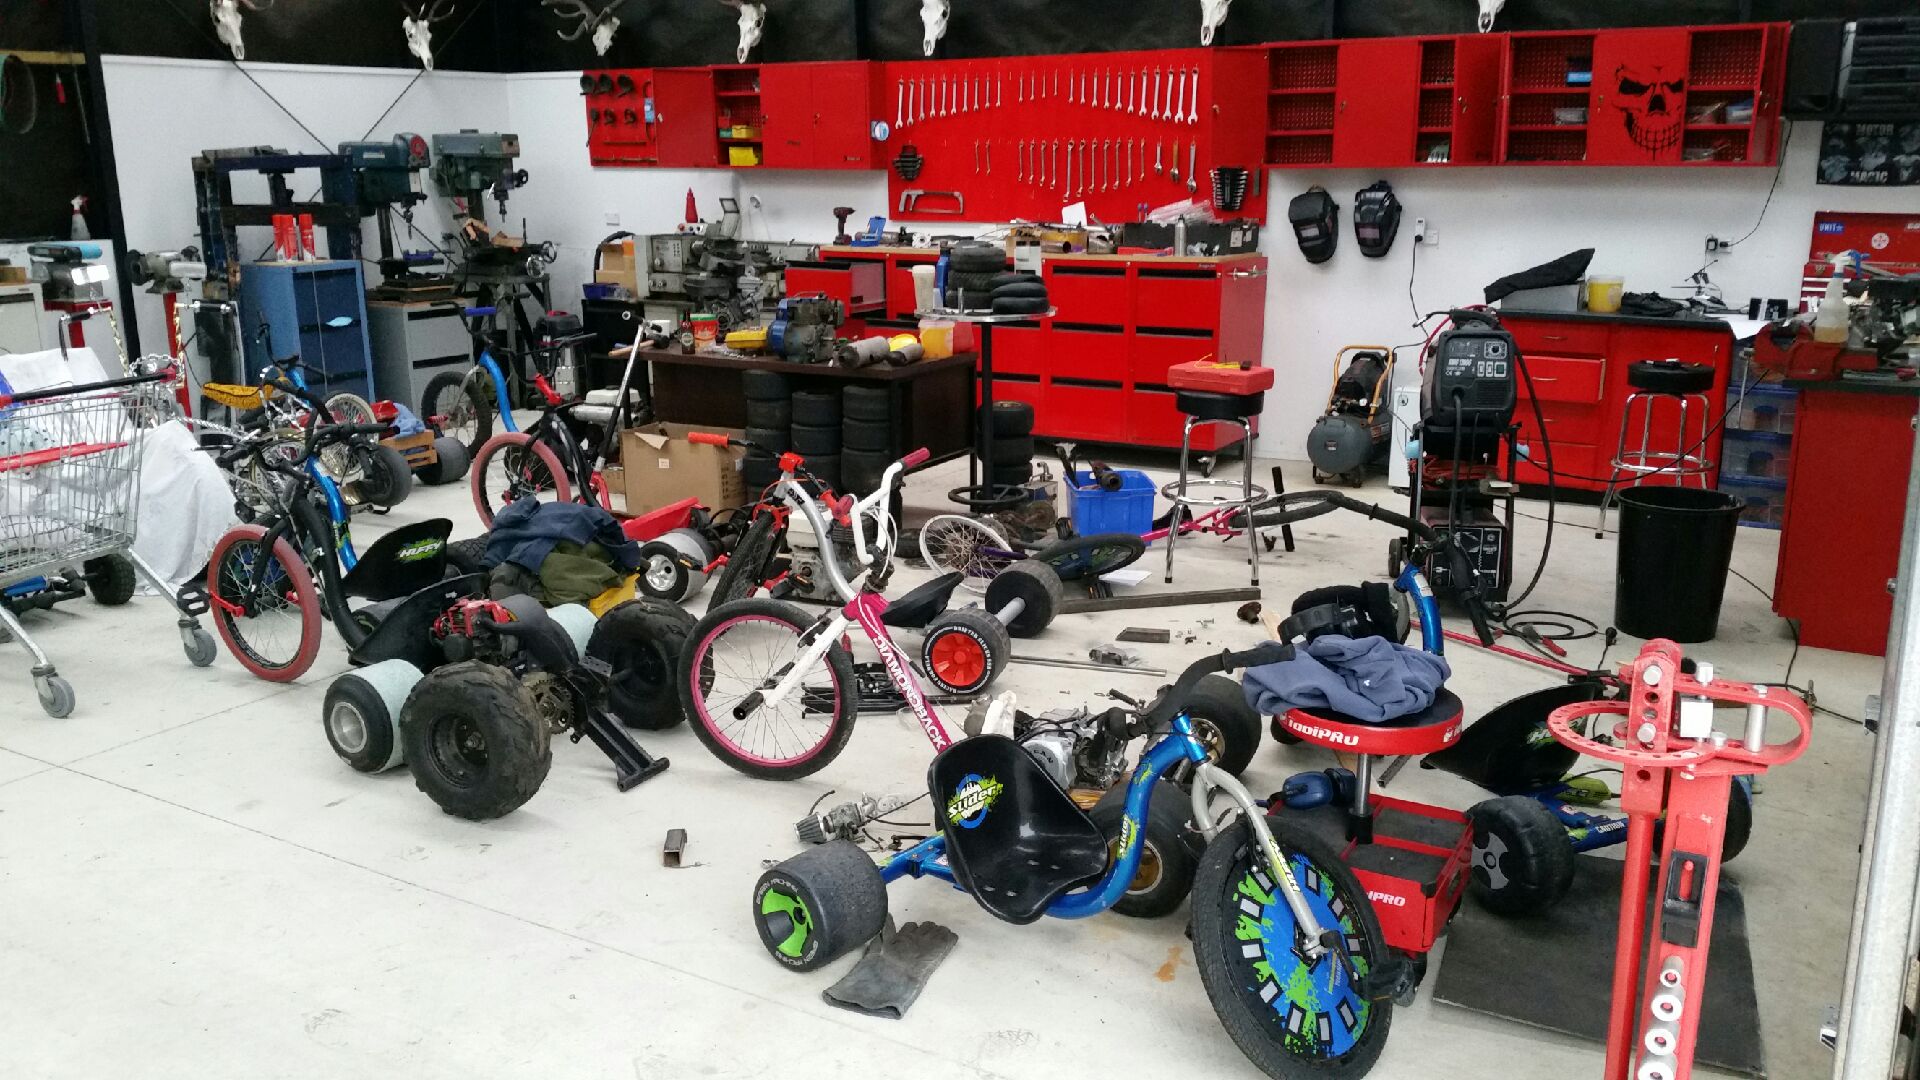


Kimjon's 110cc 4 speed pit bike motorised drift trike build
in Other Projects
Posted
Oh I do like the way you guys think. Someone ditched the trolley not far from home...I drove past it everyday for a week, until I couldn't resist anymore. The kids love it!
I work a full week like most guys do. I'm just very lucky to have the space and tools to do things with, whenever the urge is there.