Kimjon
-
Posts
2,354 -
Joined
-
Last visited
-
Days Won
2
Content Type
Forums
Downloads
Events
Gallery
Everything posted by Kimjon
-

Kimjon - No13 (twin 49cc motors on a drift trike)
Kimjon replied to Kimjon's topic in Other Projects
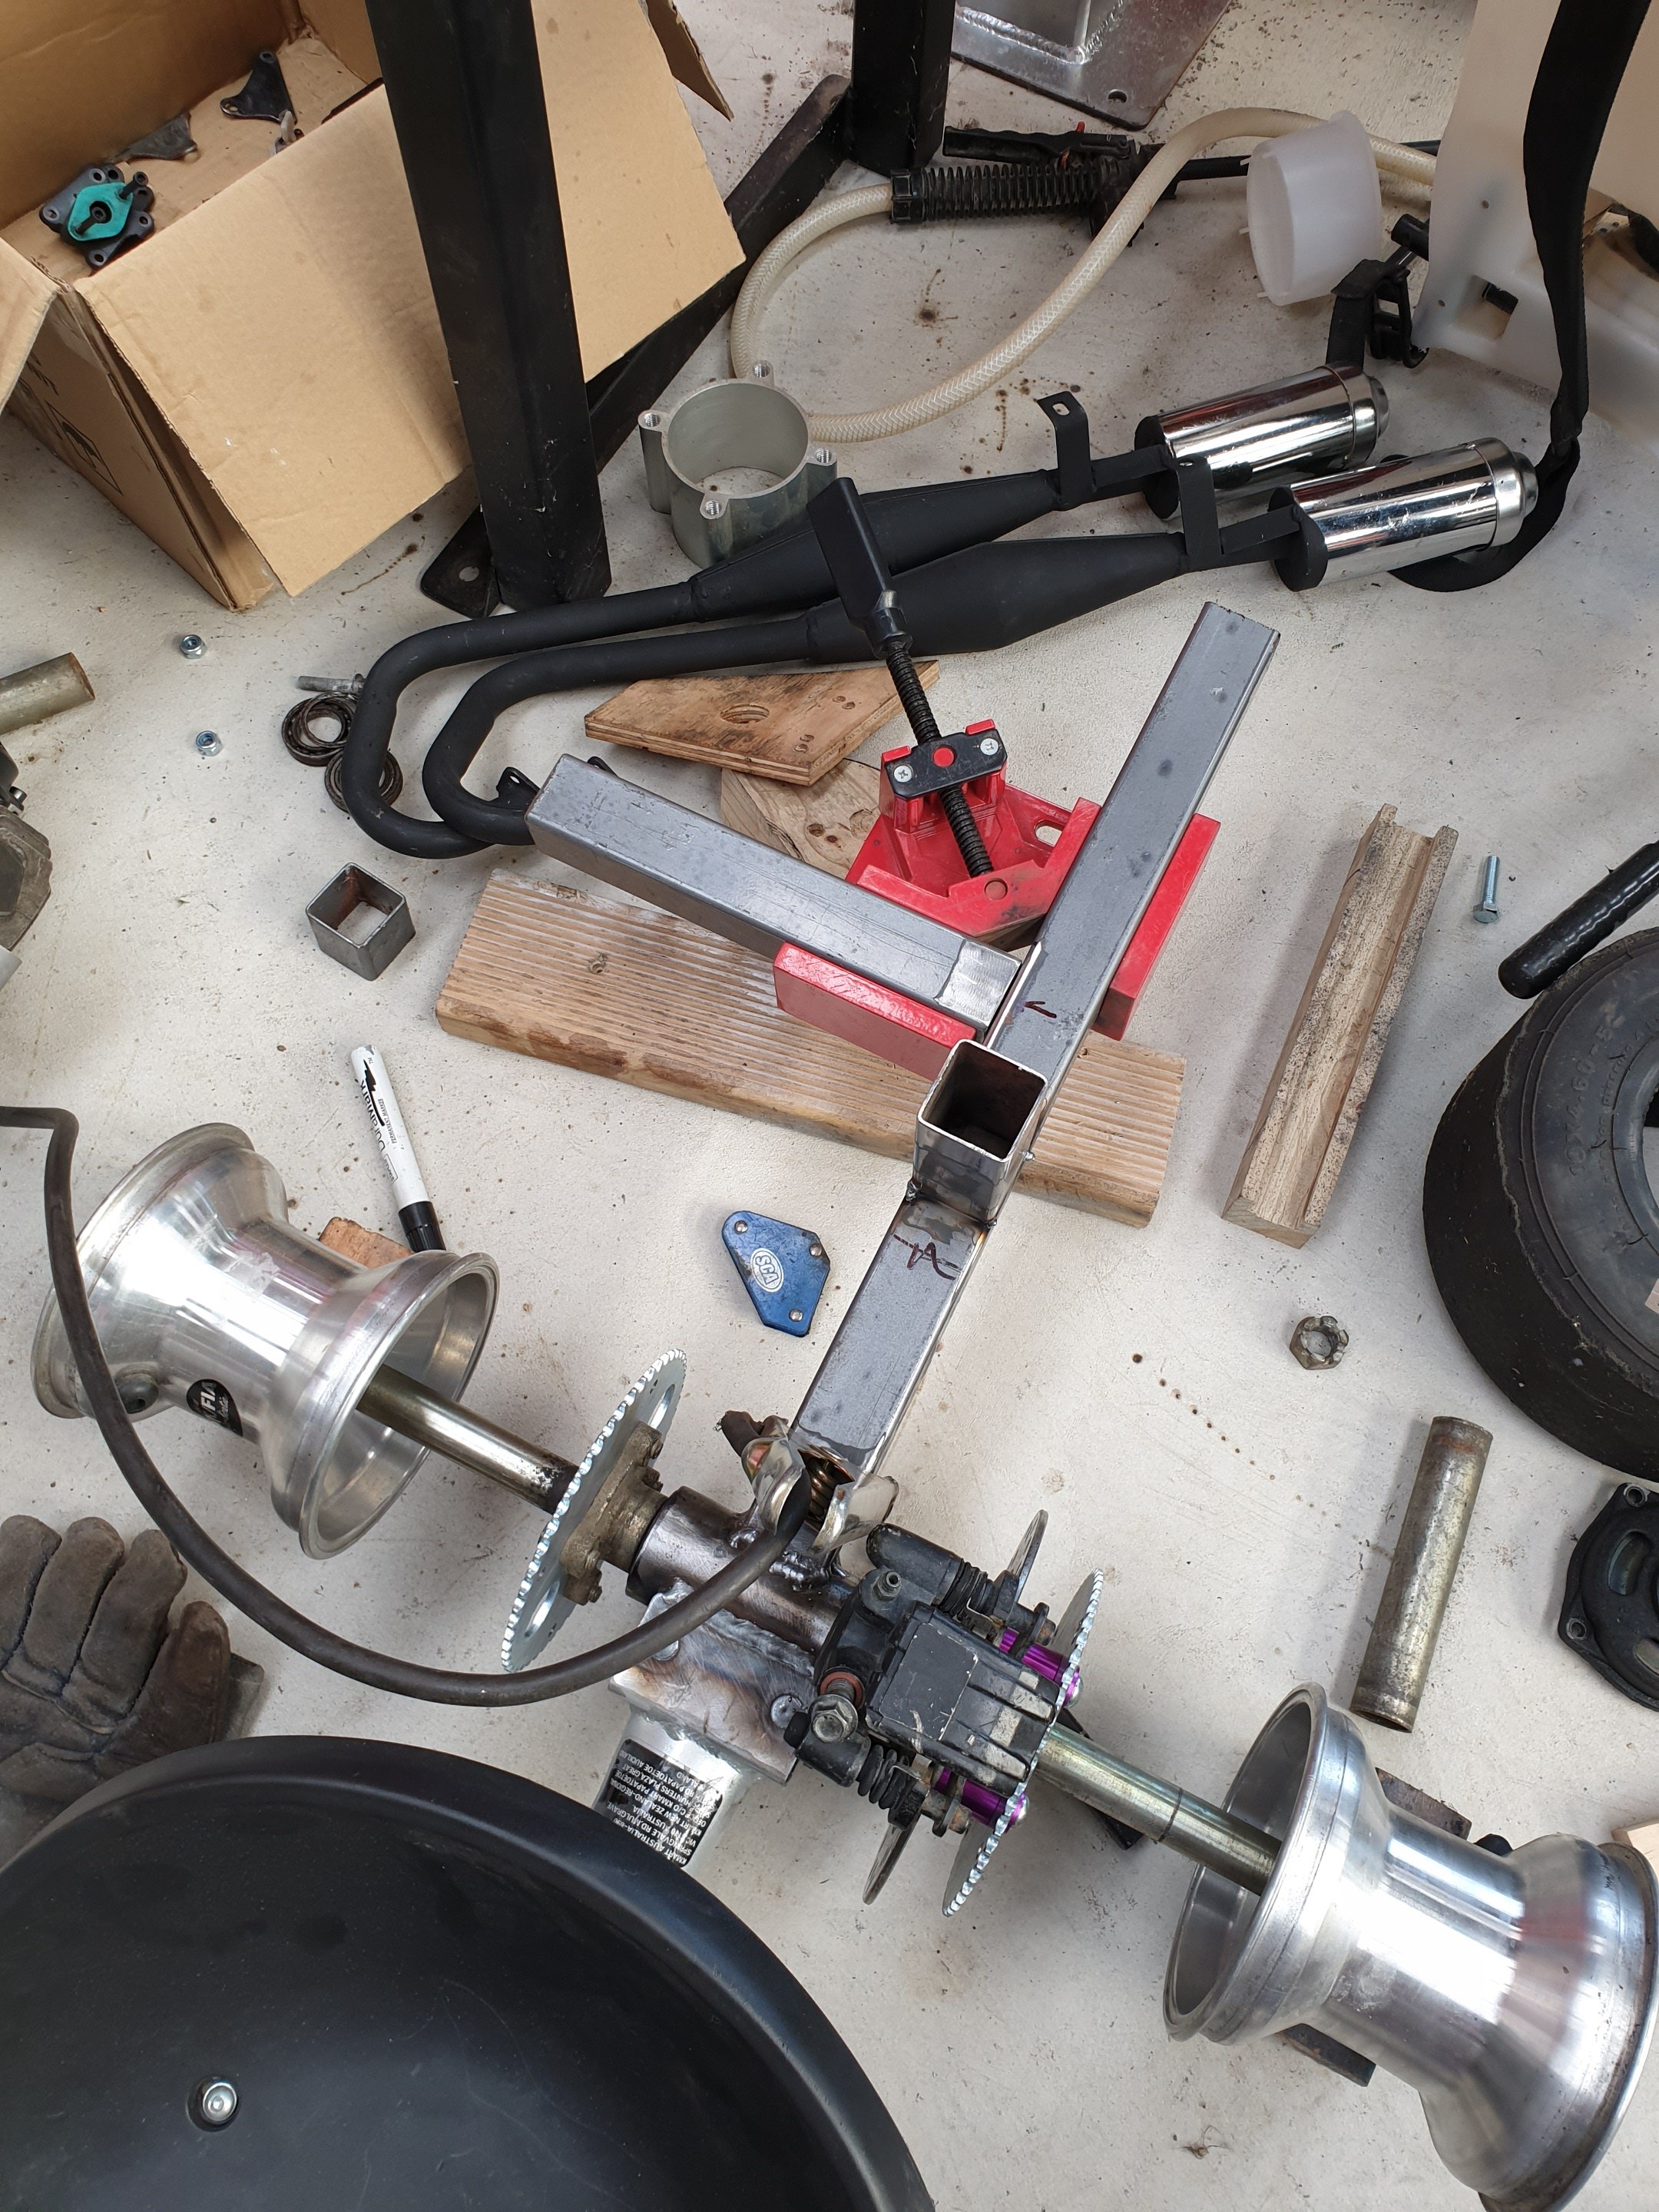
Then got the frame all tacked together. I'm out of argon/co2 gas, so can't finish the job. But happy with this, as it's a step forwards regardless... Still waiting on a few Ebay bits like chain etc to finish it. So I'll park this project up for a few more weeks and revisit it then.
-
Kimjon - No13 (twin 49cc motors on a drift trike)
Kimjon replied to Kimjon's topic in Other Projects
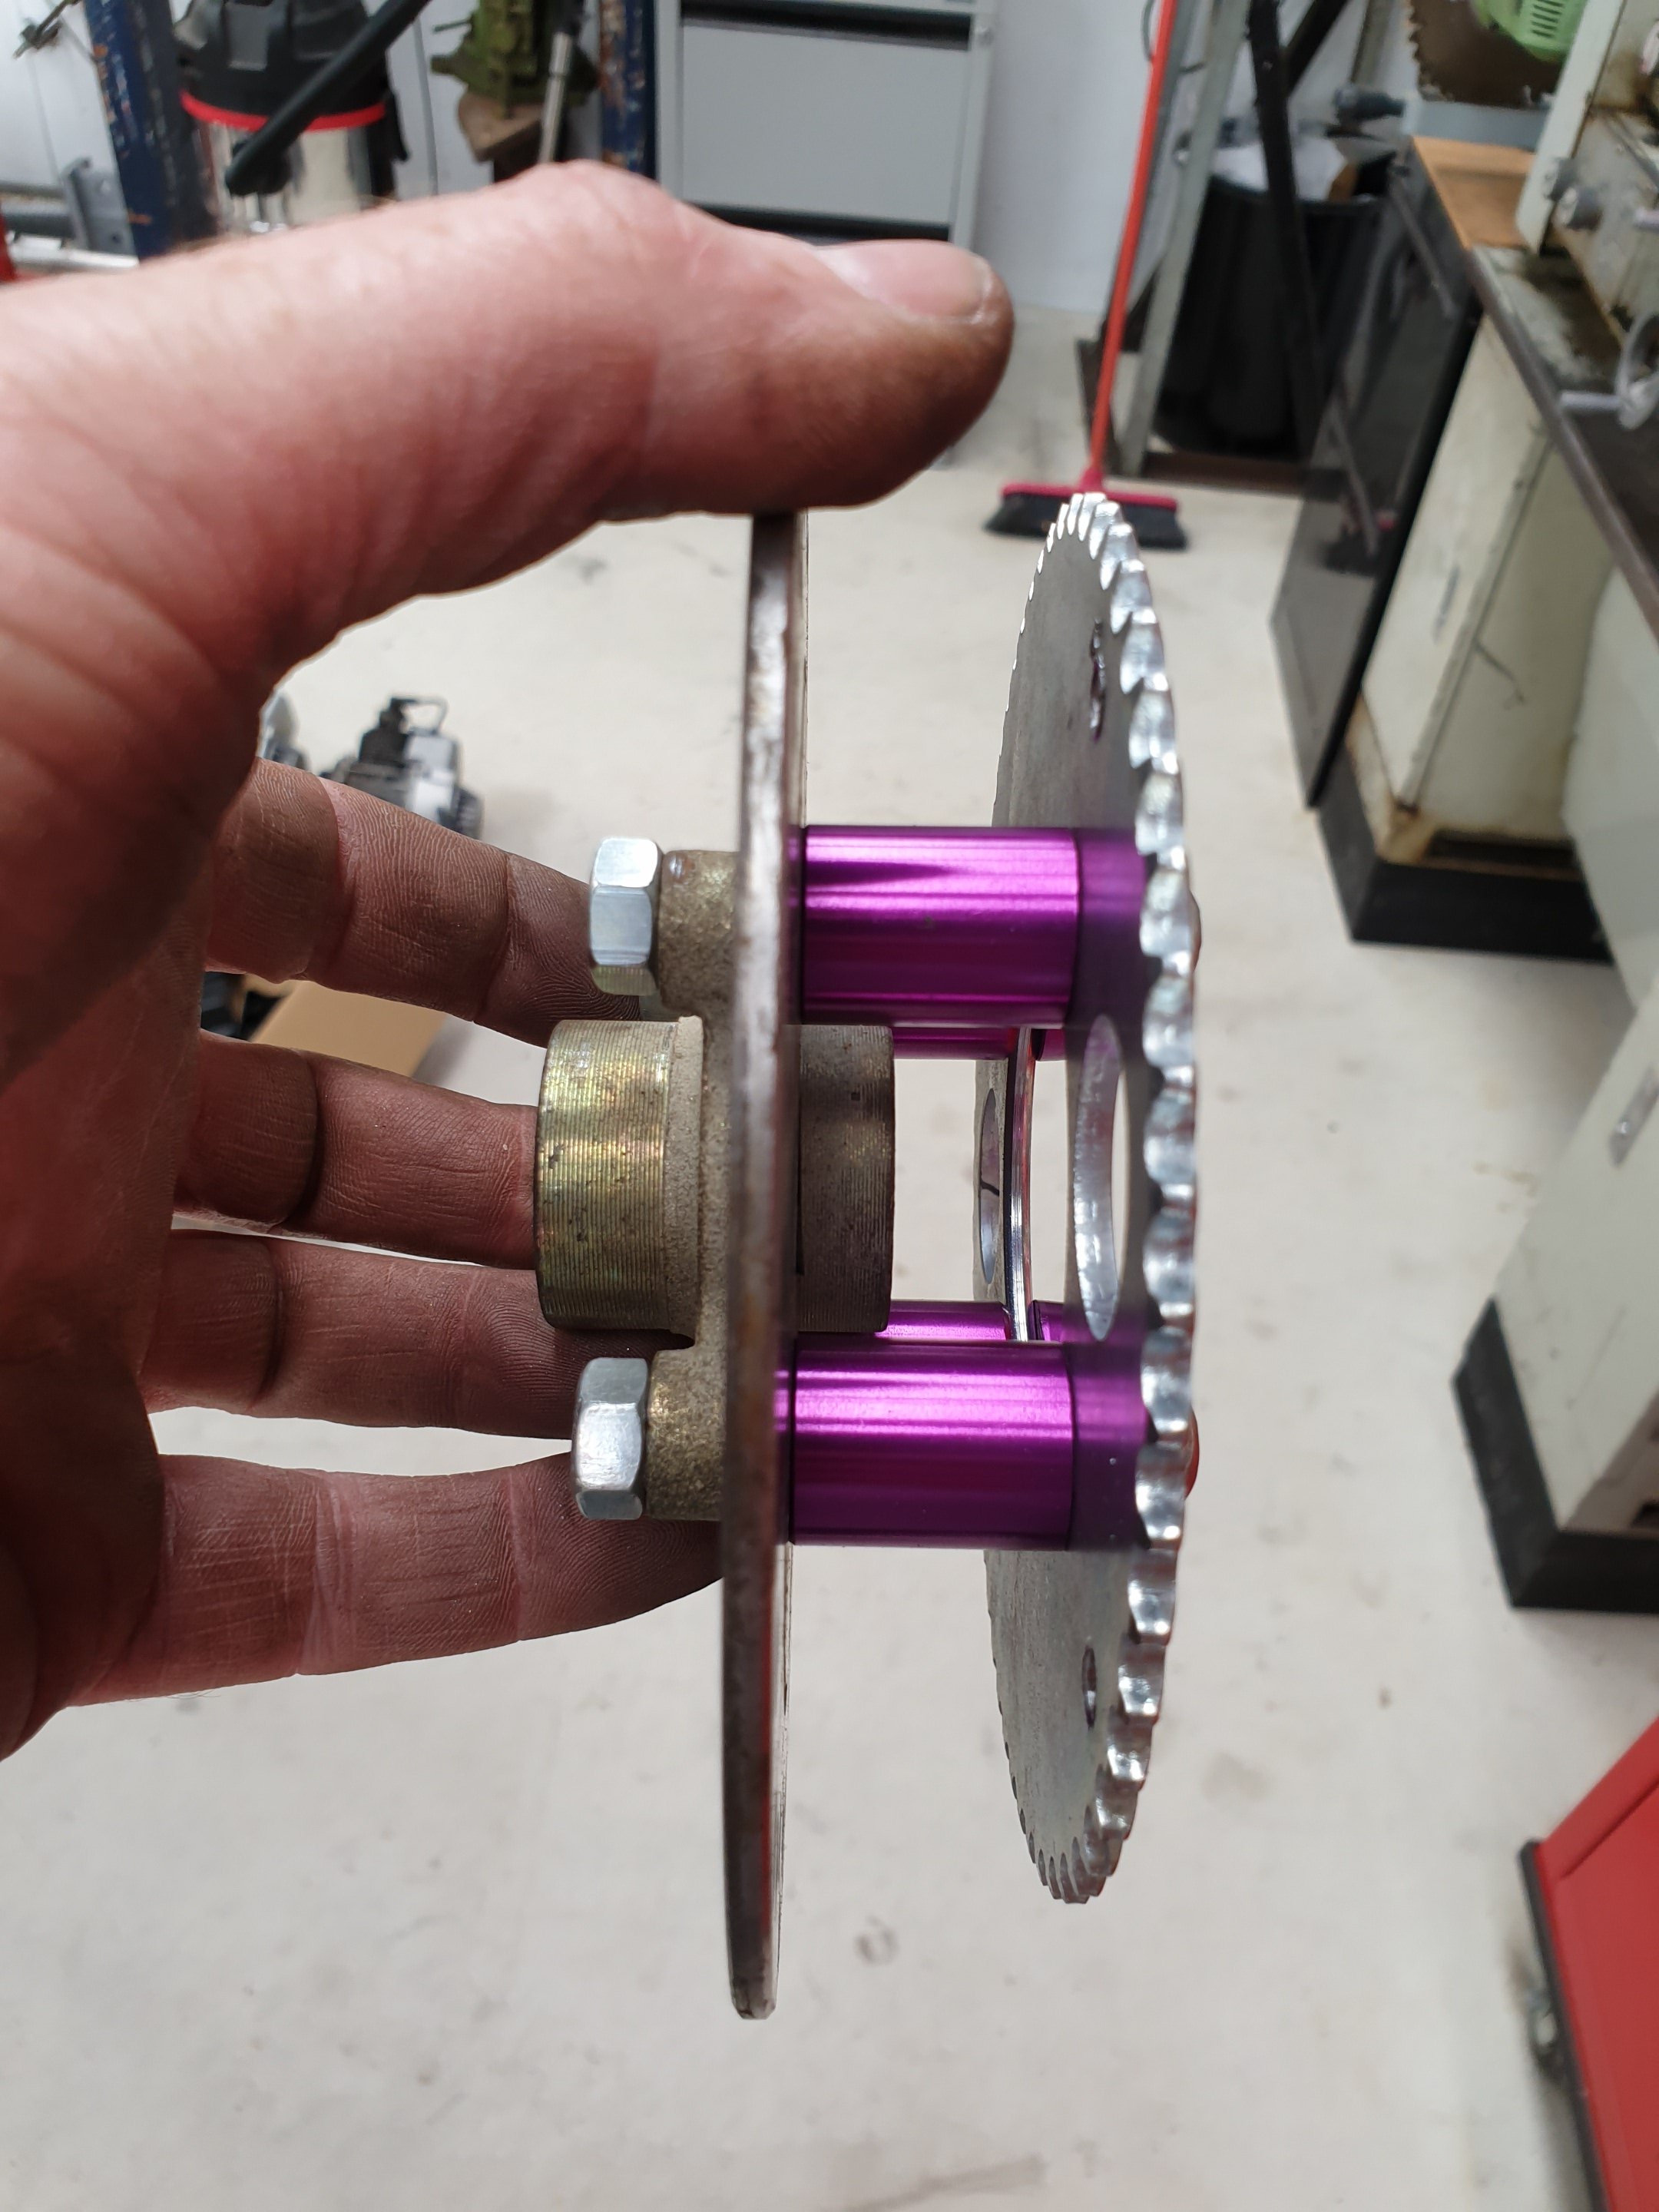
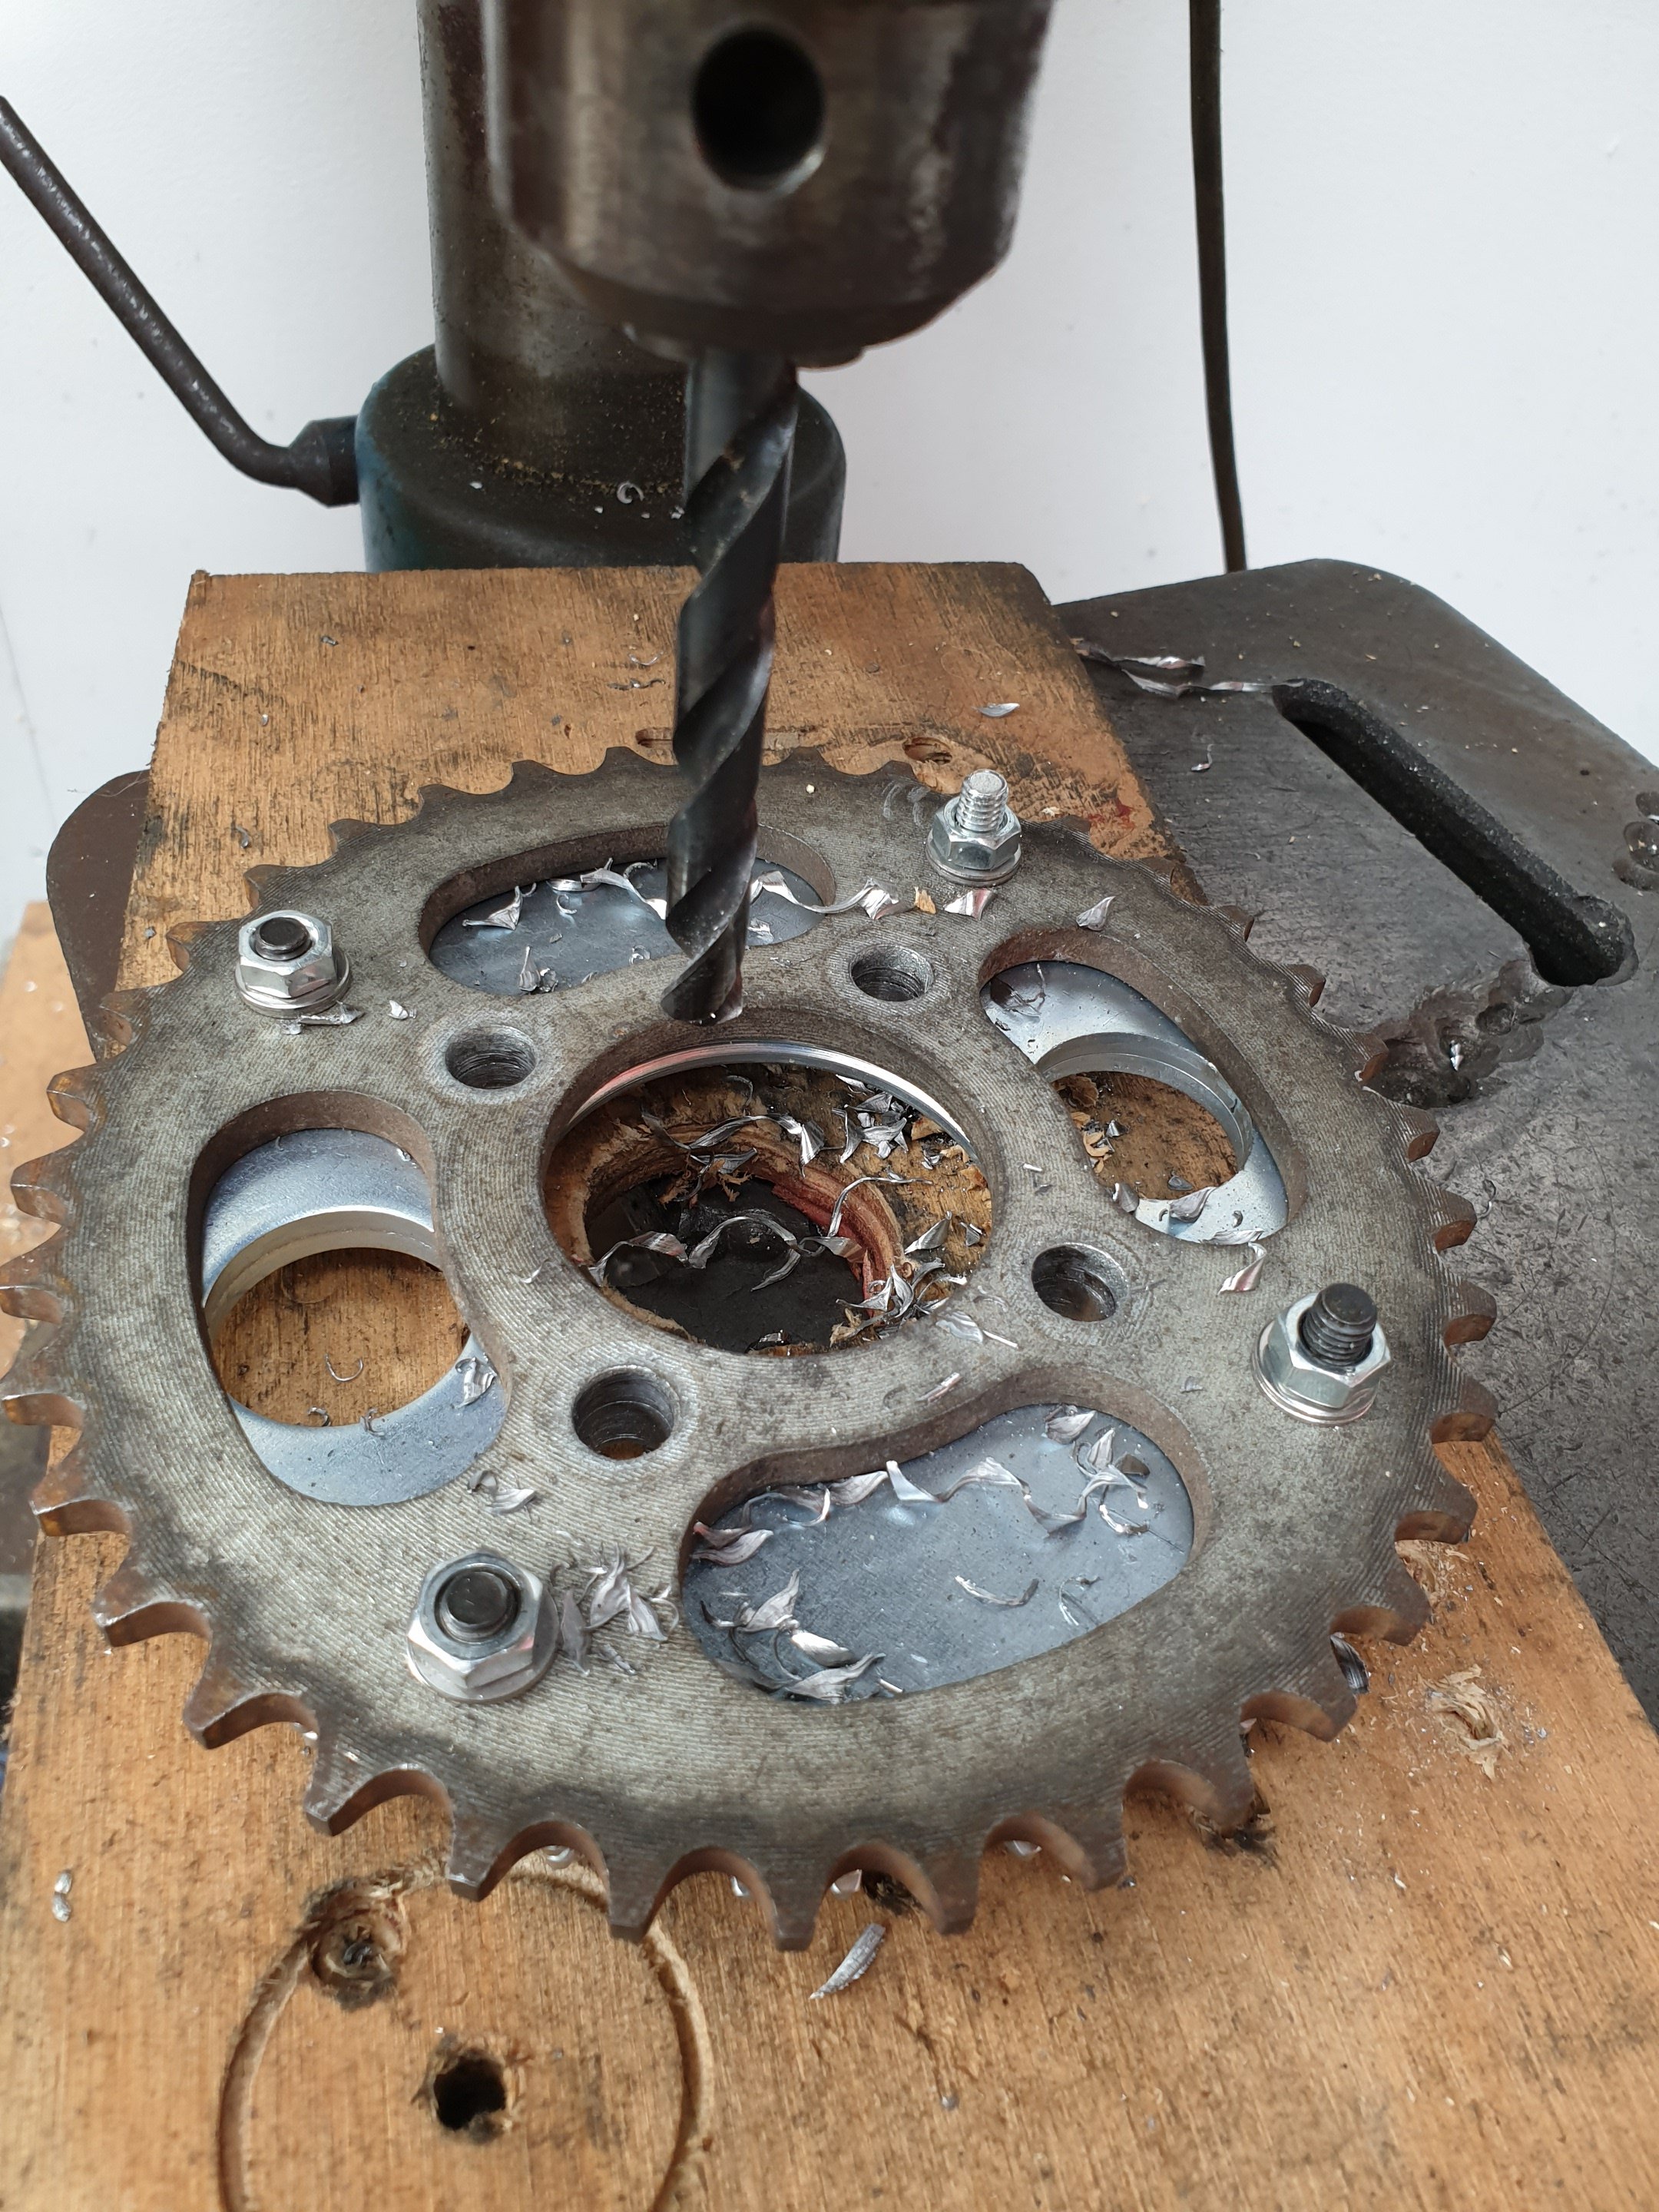
Got a few things done, as the parts trickle in. made this jig up for drilling both sprockets simultaneously. The holes weren't on the same pcd, and this idea got it right on first pop! Finished "sprotar" (sprocket/brake rotar)
-
Fuck yeah...you nailed it! That's about as good as you'd ever expect to get. Nice work.
-
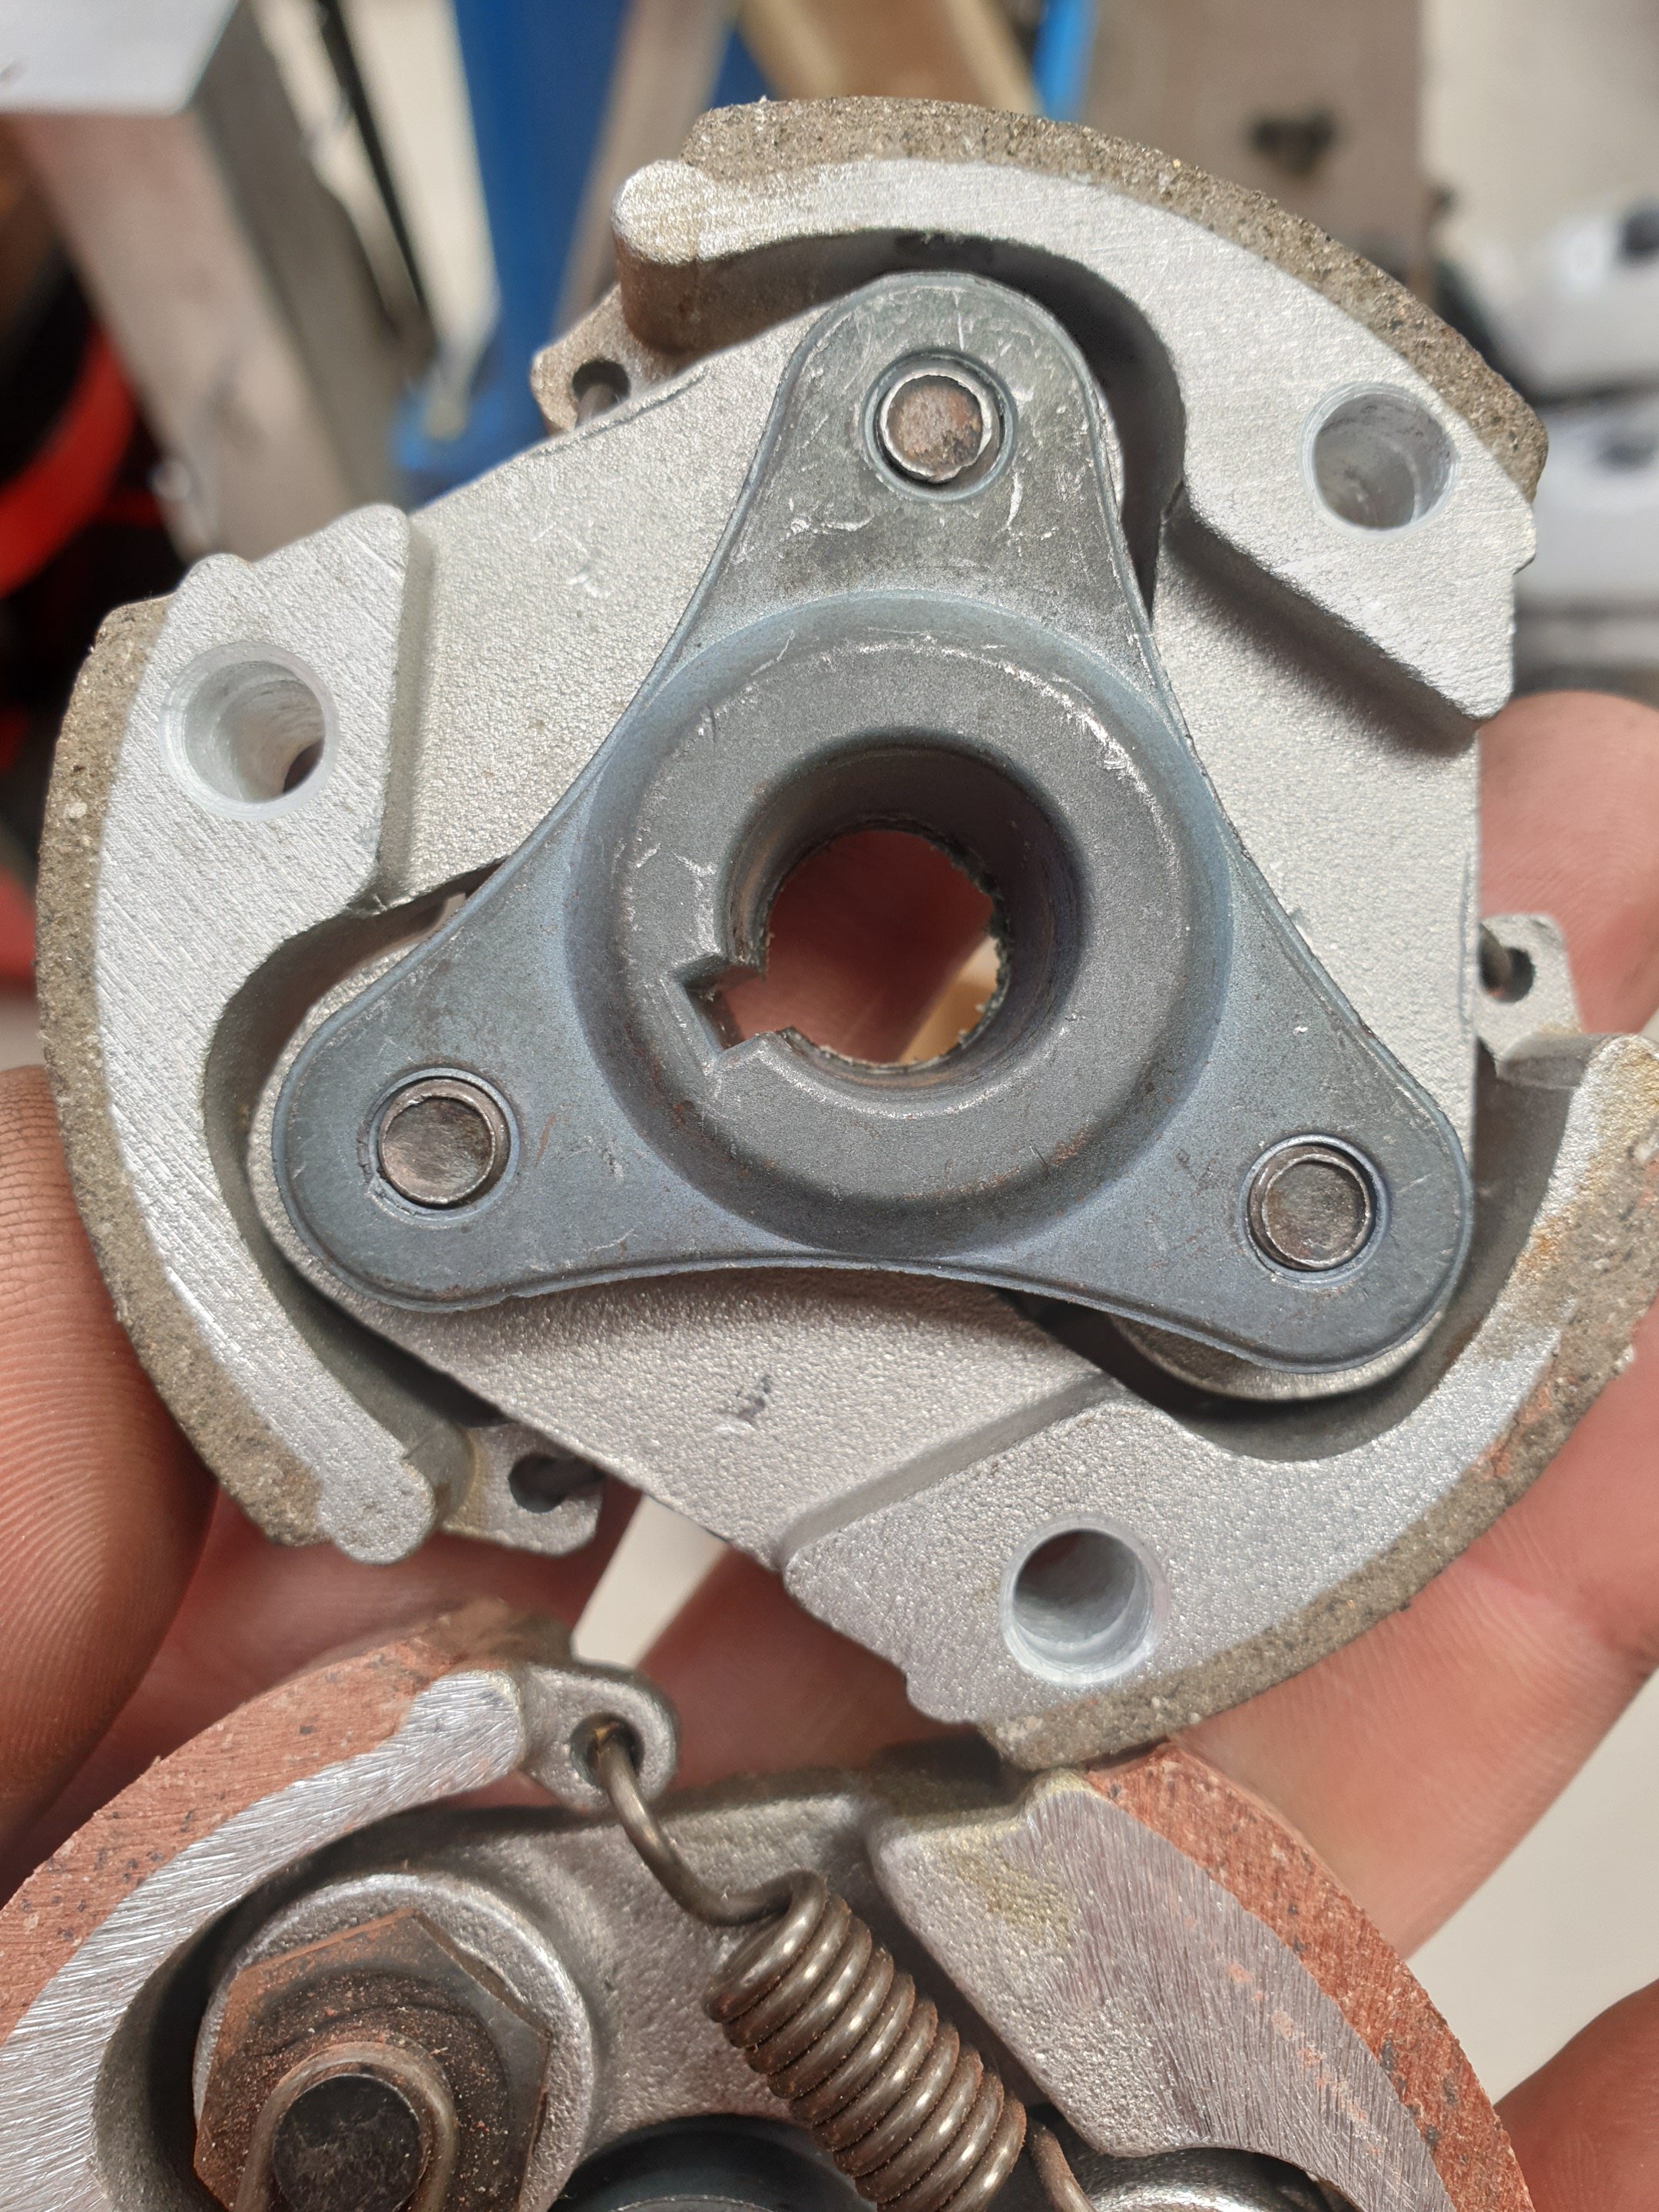
Drilled out some weight from the clutch arms to raise the engagement rpms This is something I've done before and it works wonders. Makes a world of difference in riding feel.
-
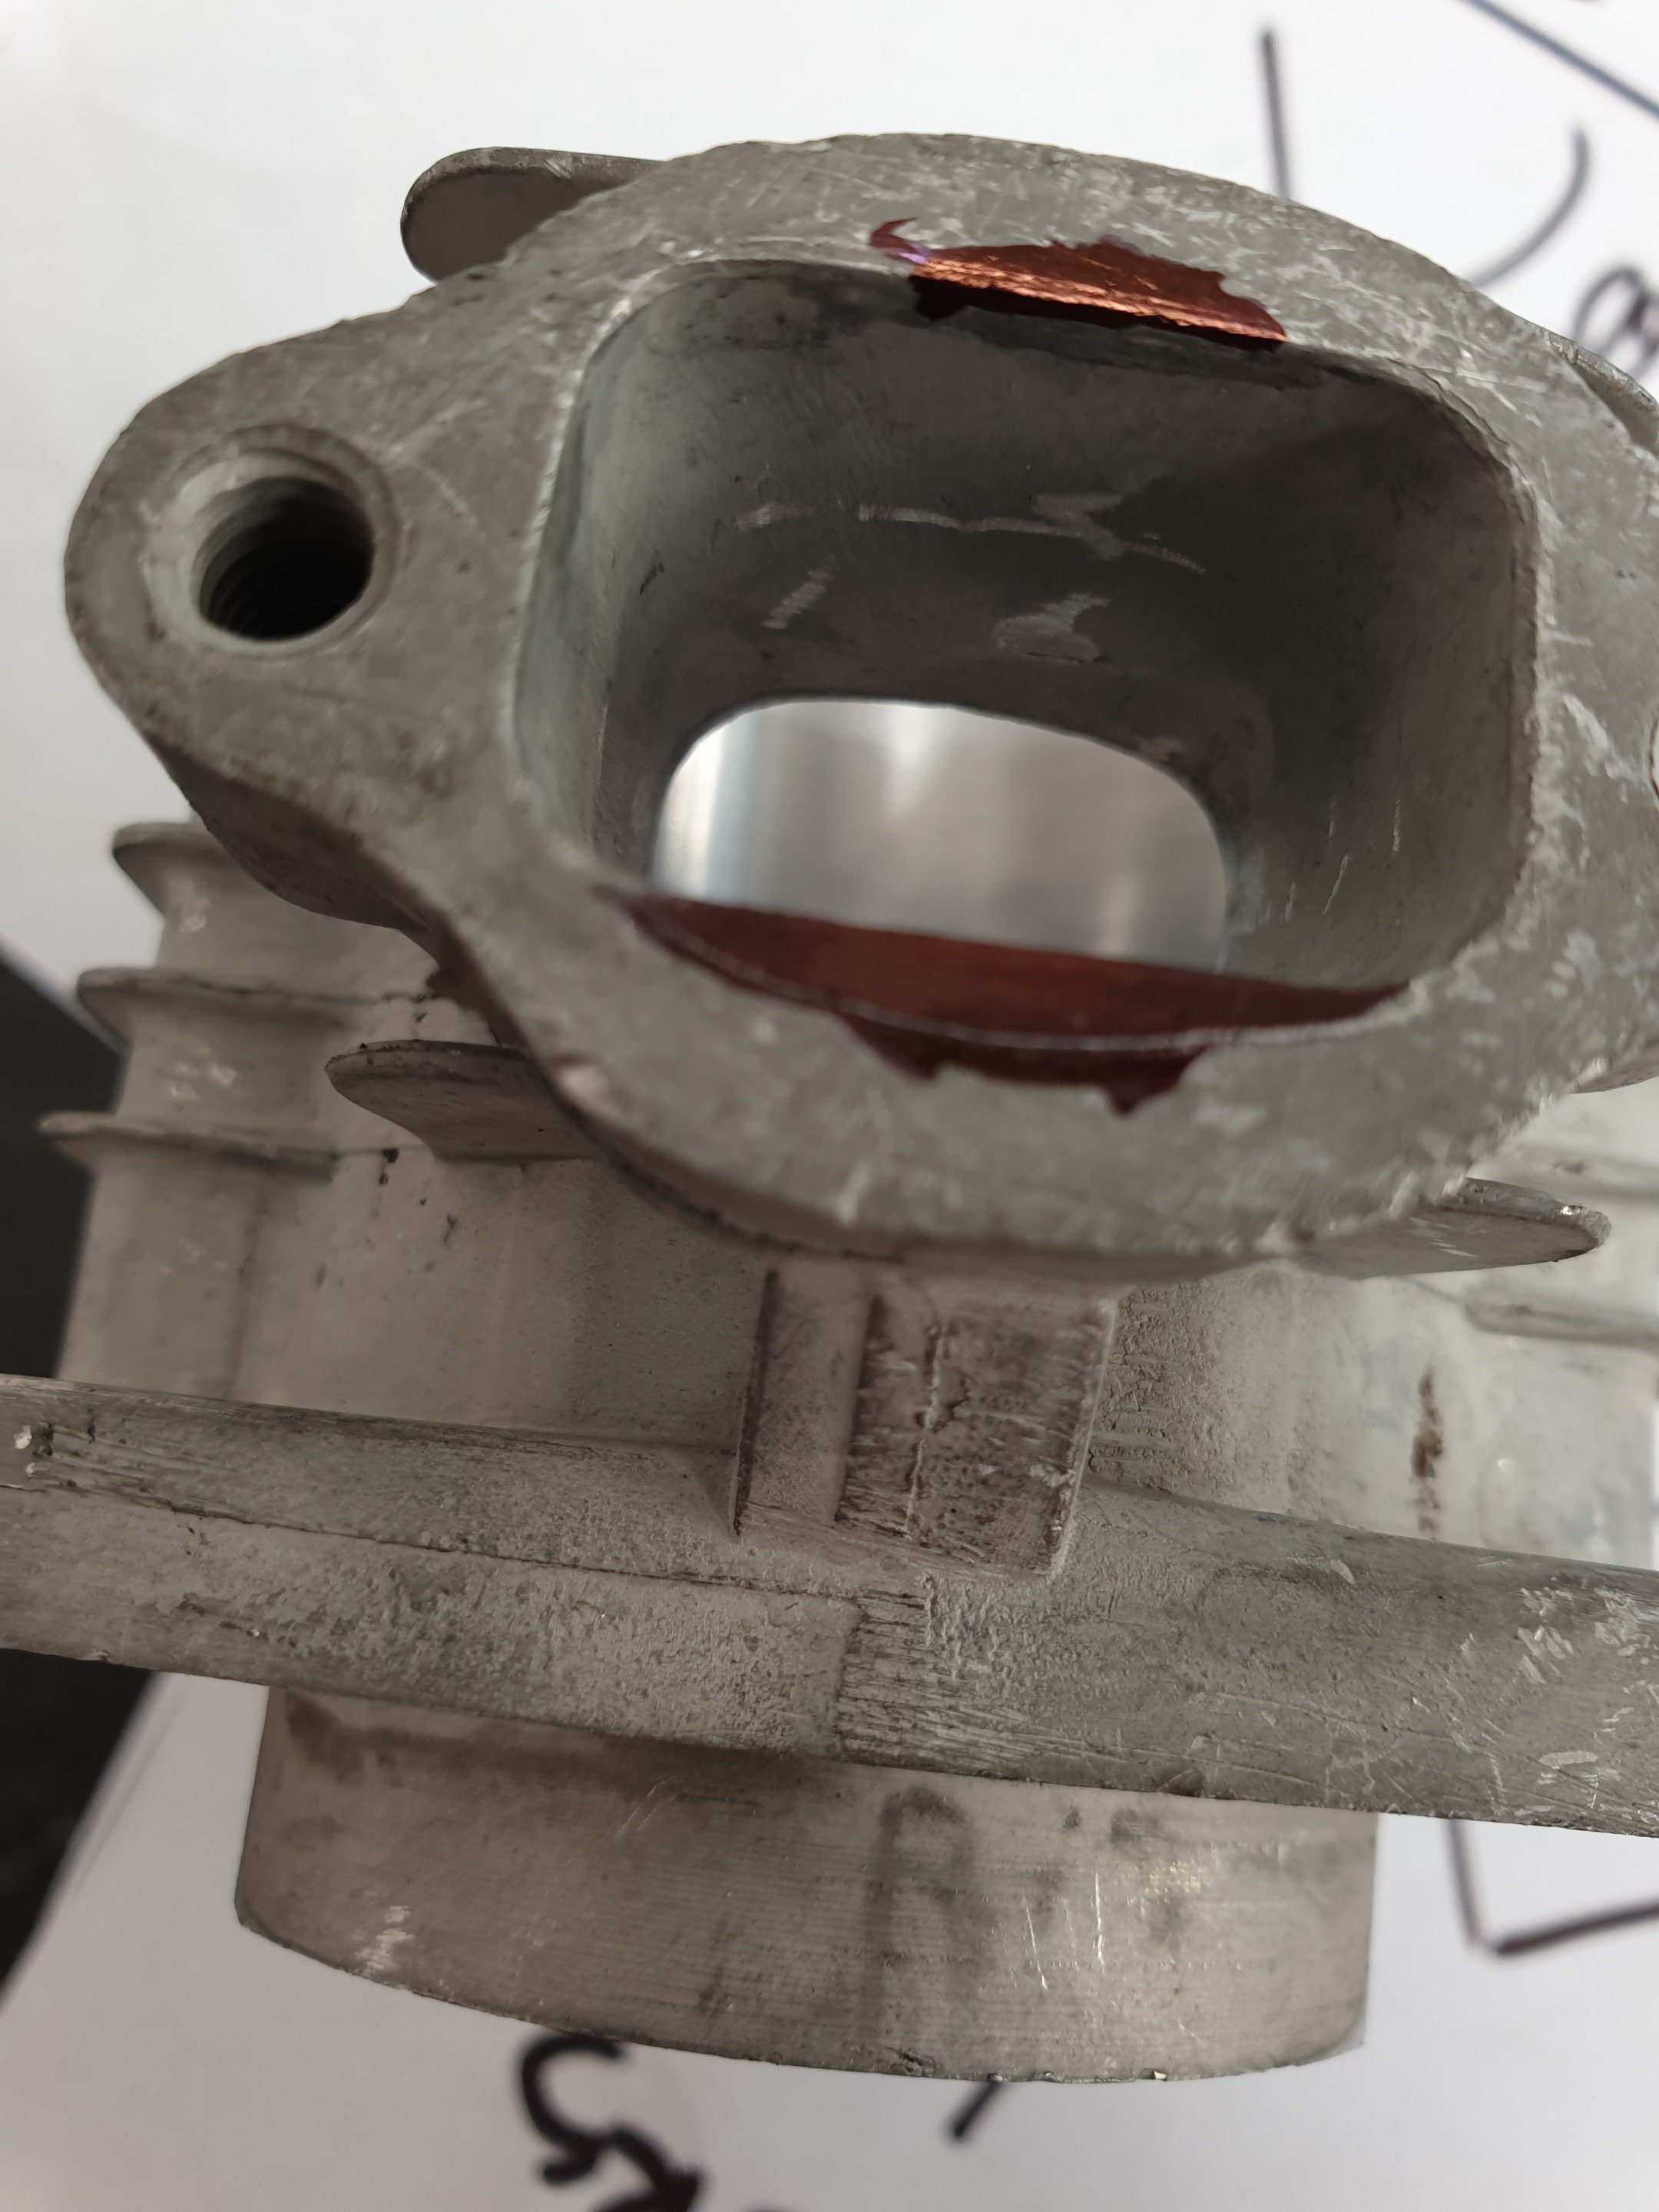
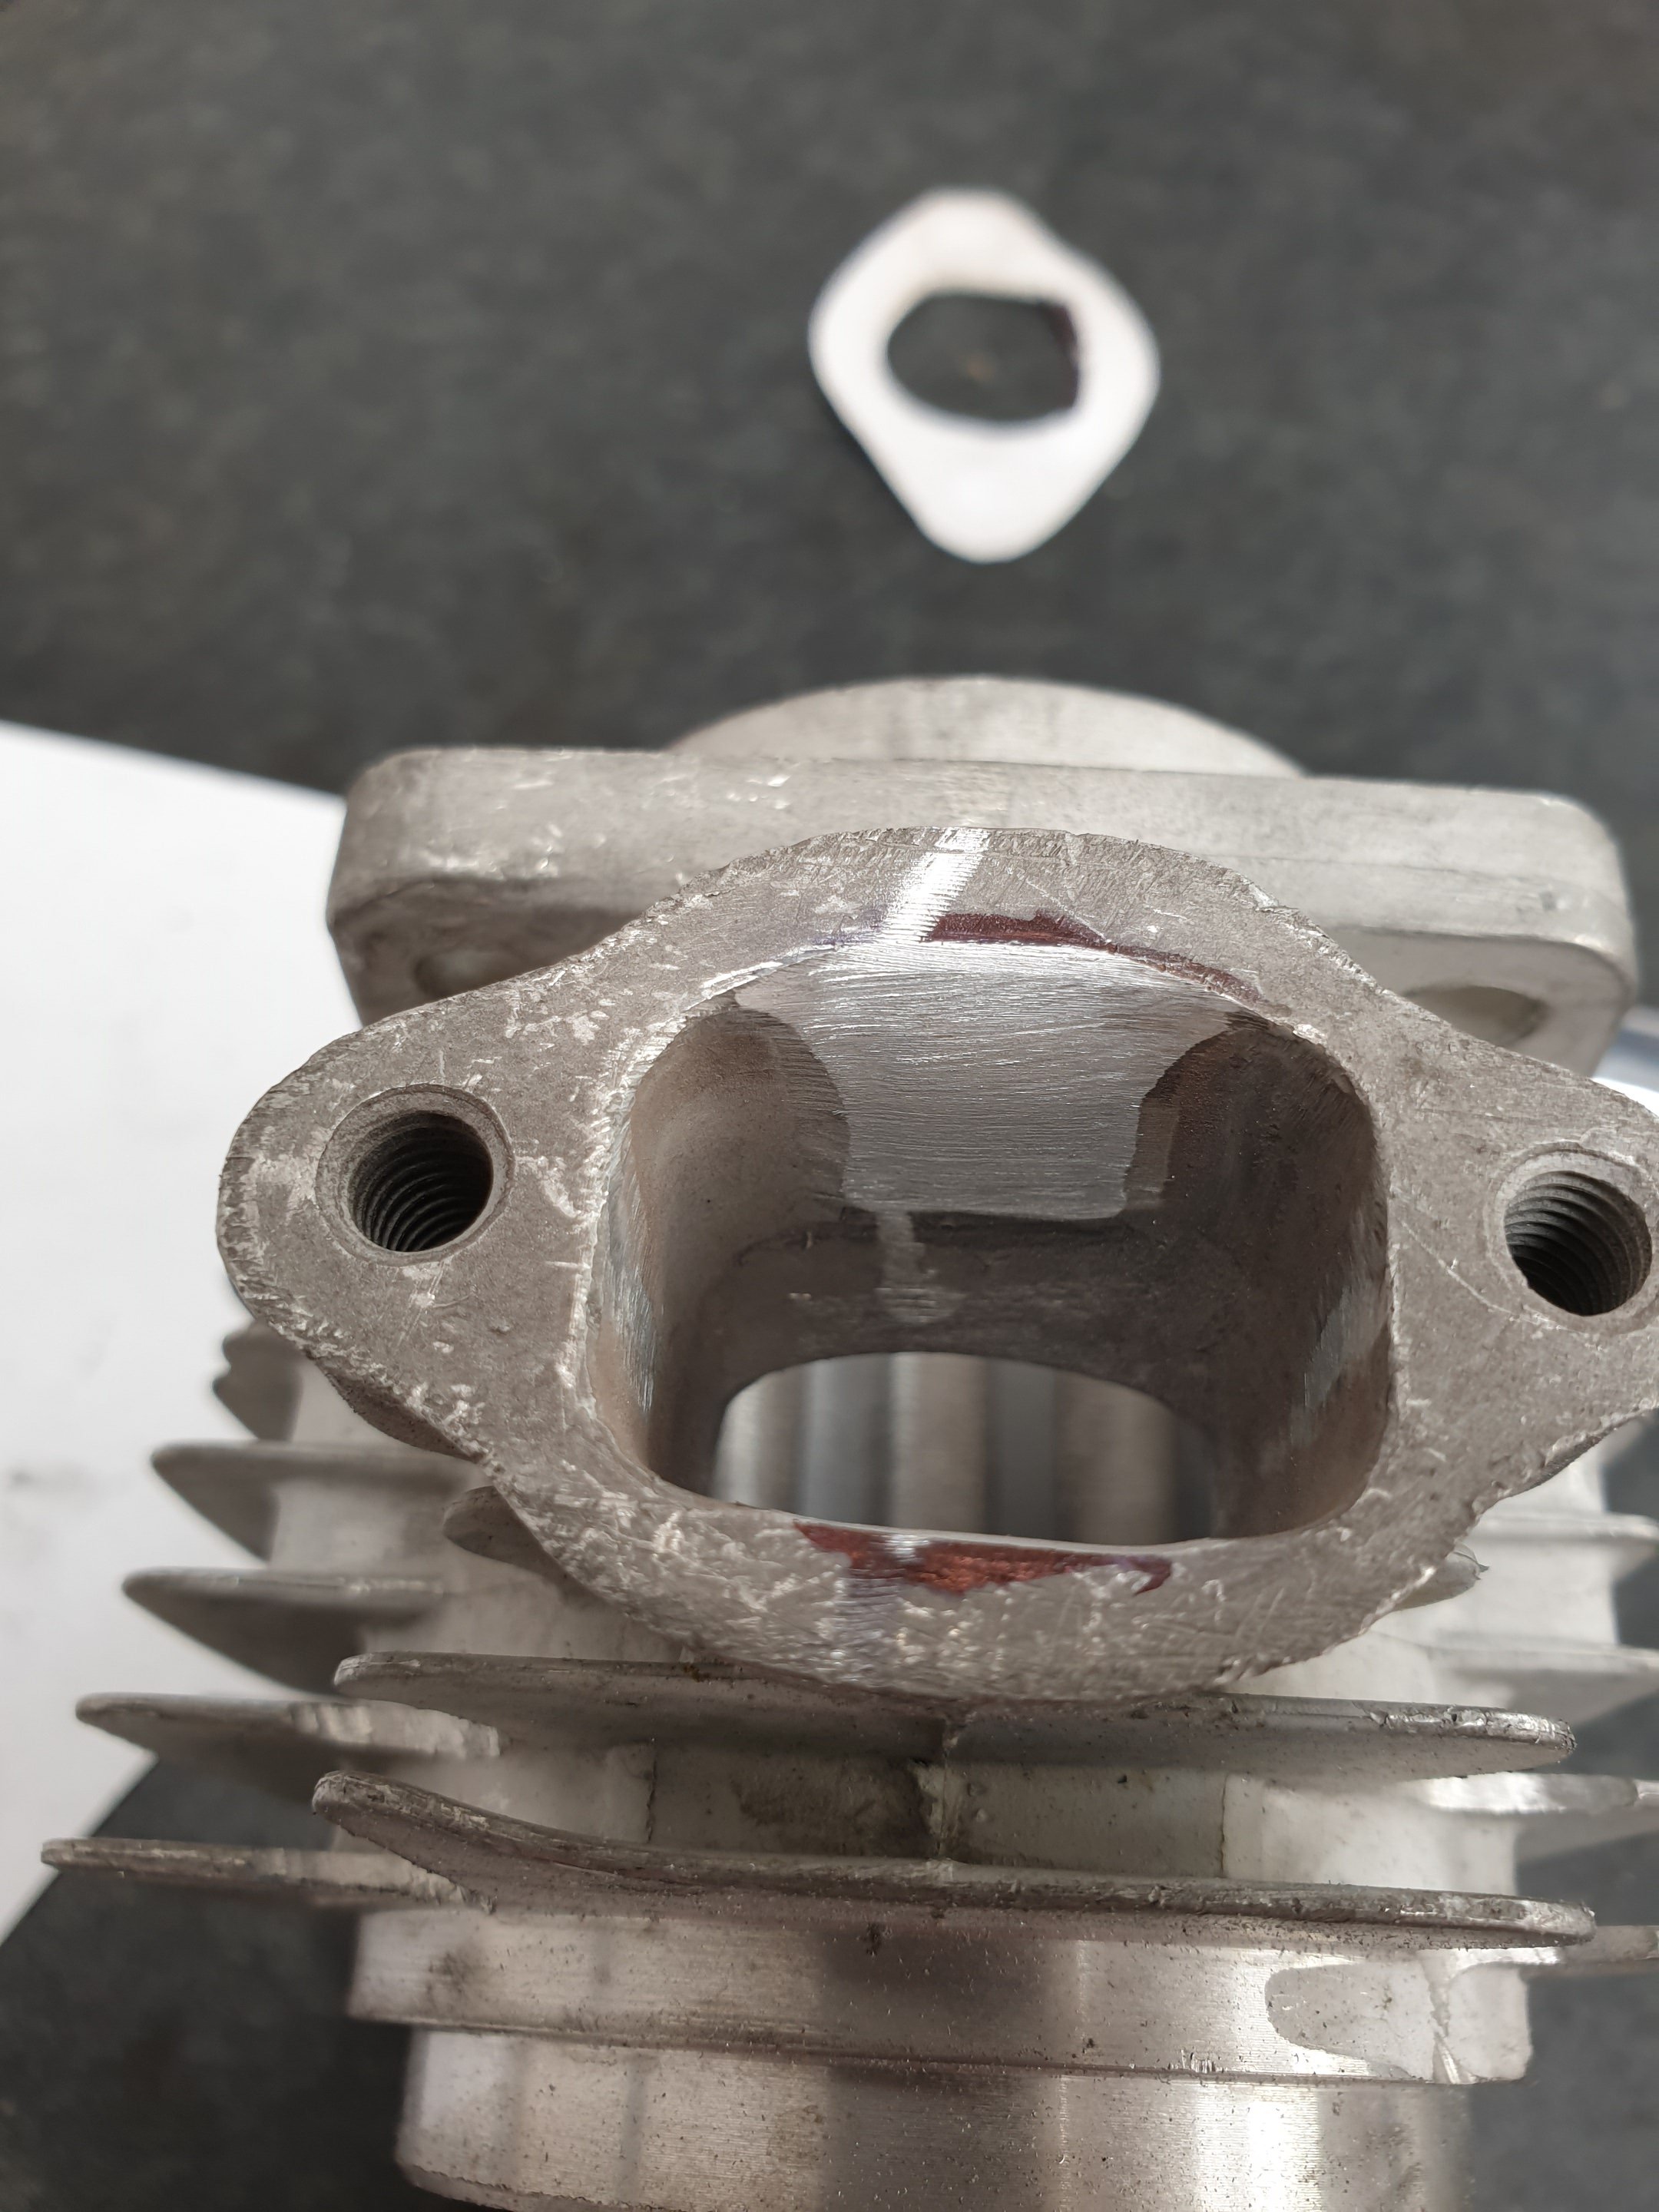
Then matched the exhaust port on the cylinder to also match/blend in smoother than it was. Much better now. Gotta remember the exhaust flows out into the expansion chamber, then bounces back into the cylinder again...so the transition has to flow reasonably well in both directions at this point. There's limited material thickness here to work with, but it didn't take much to much a huge improvement.
-
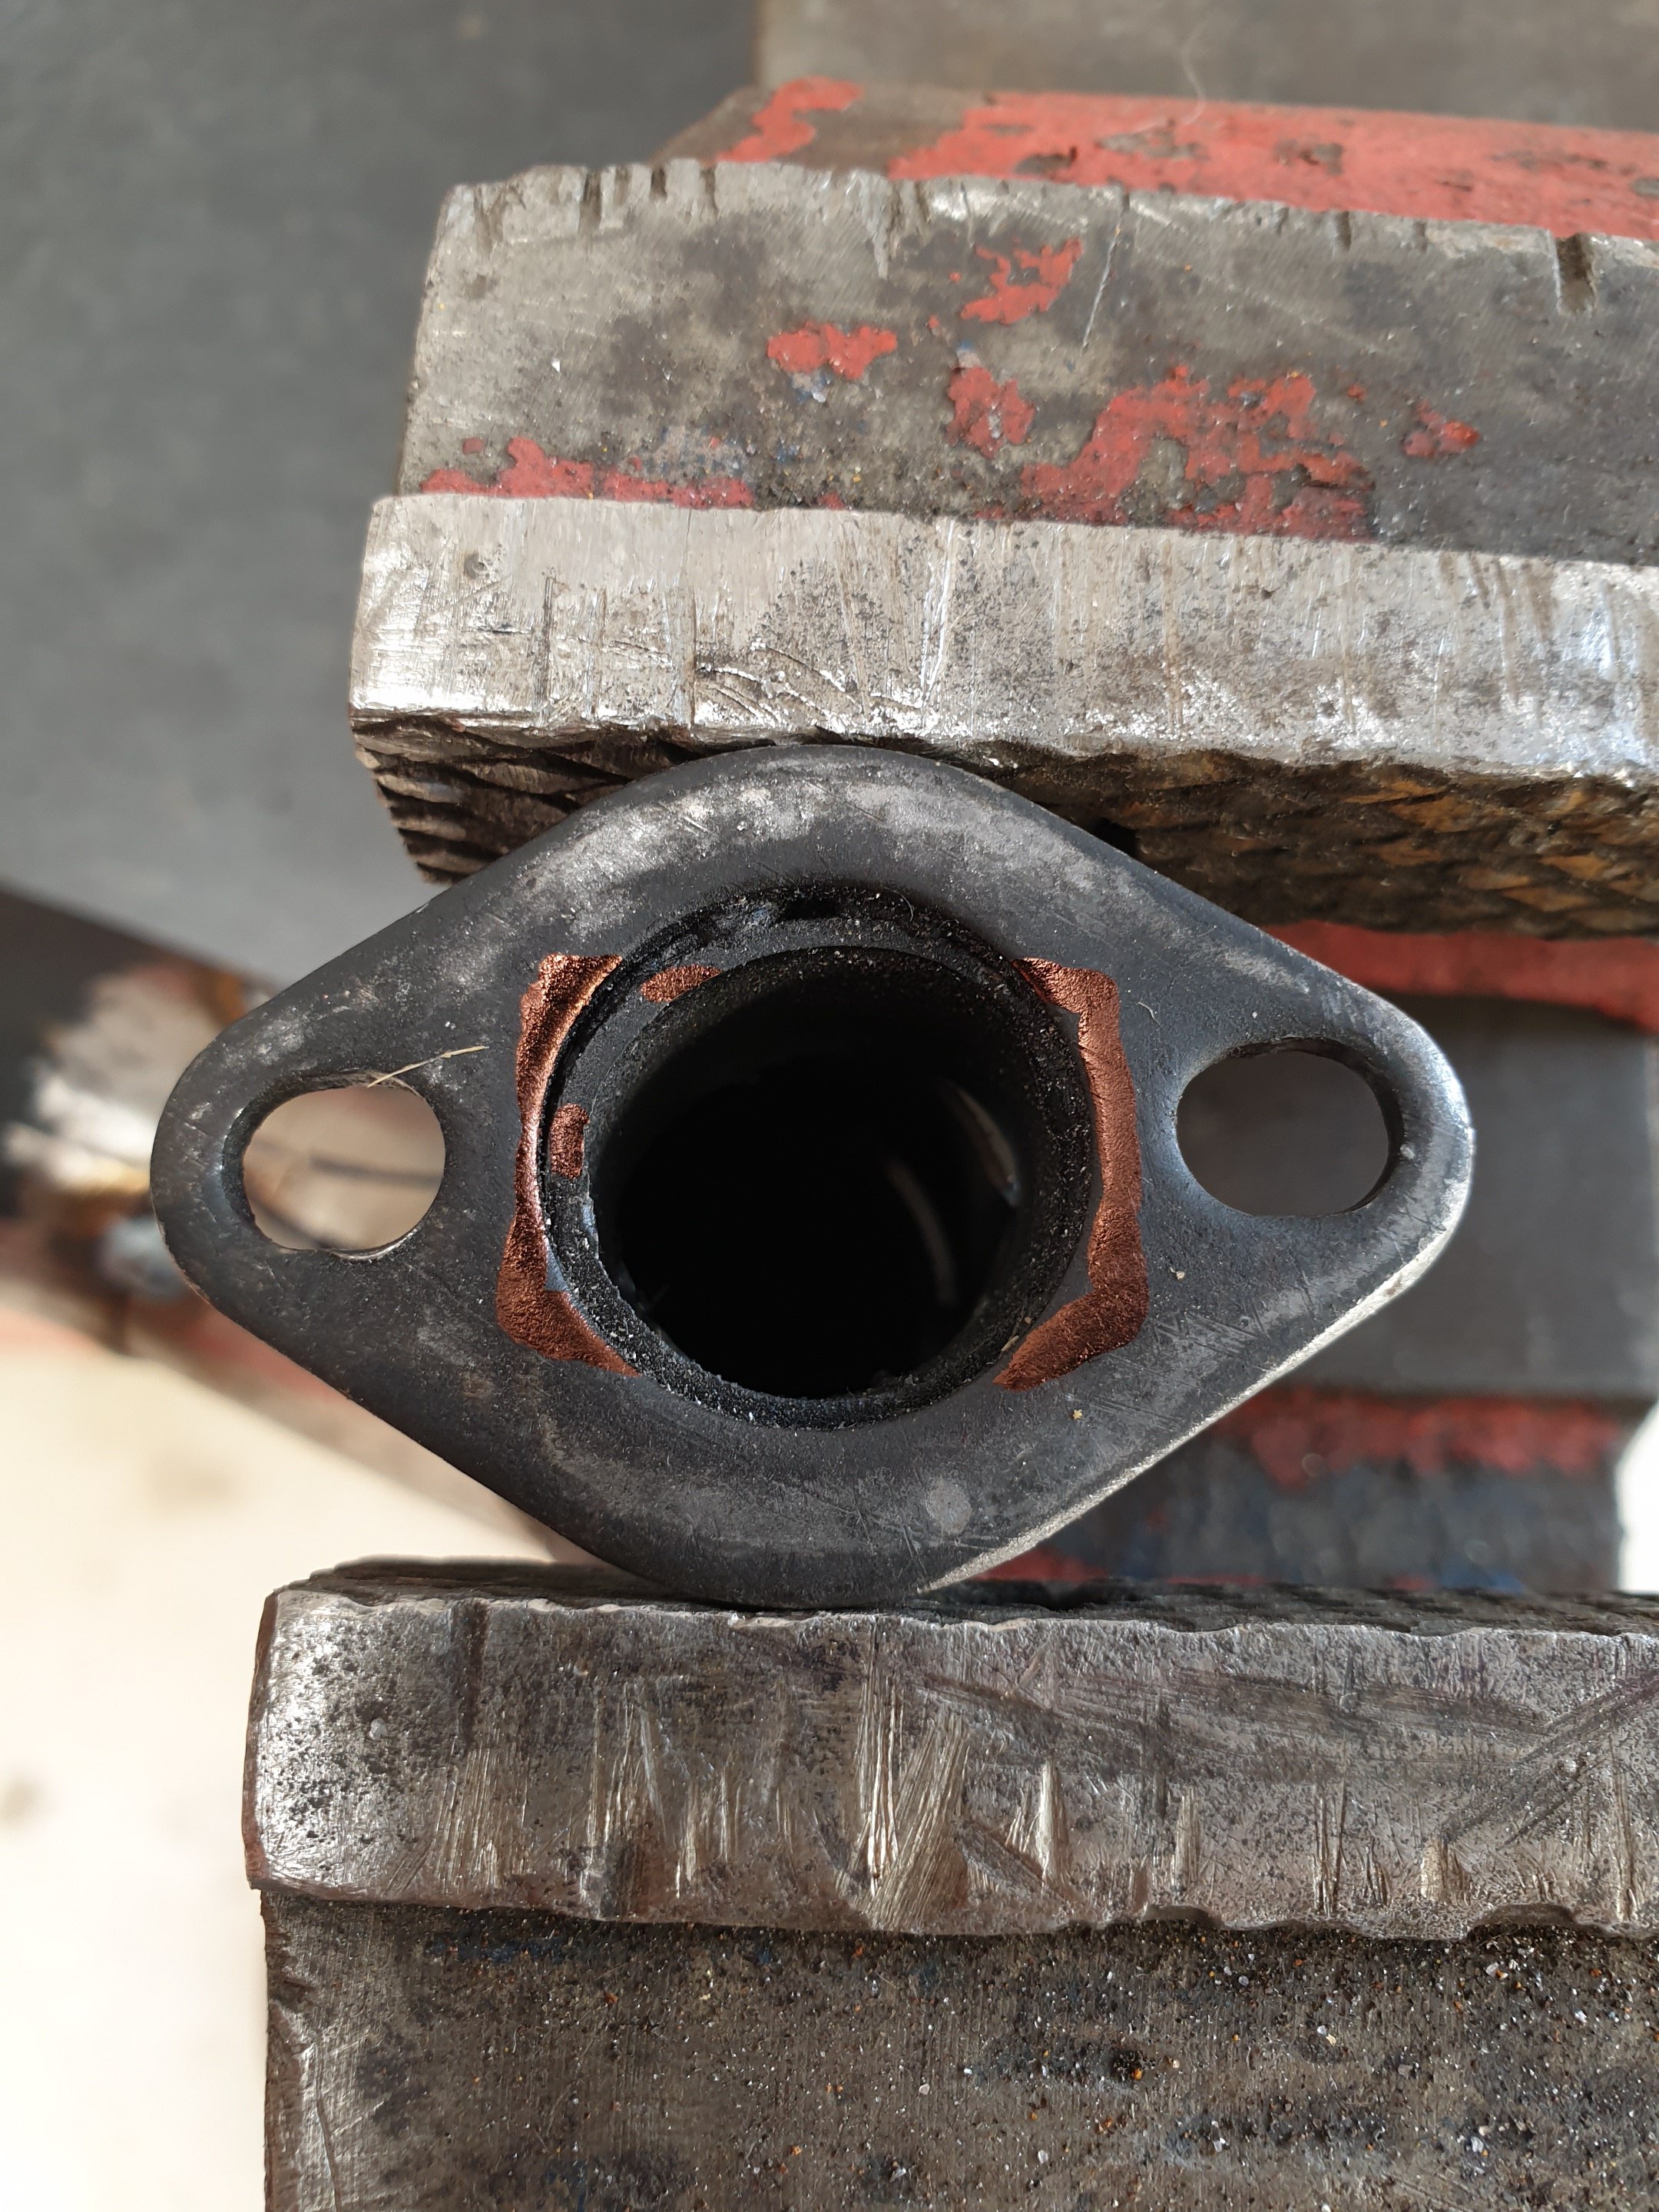
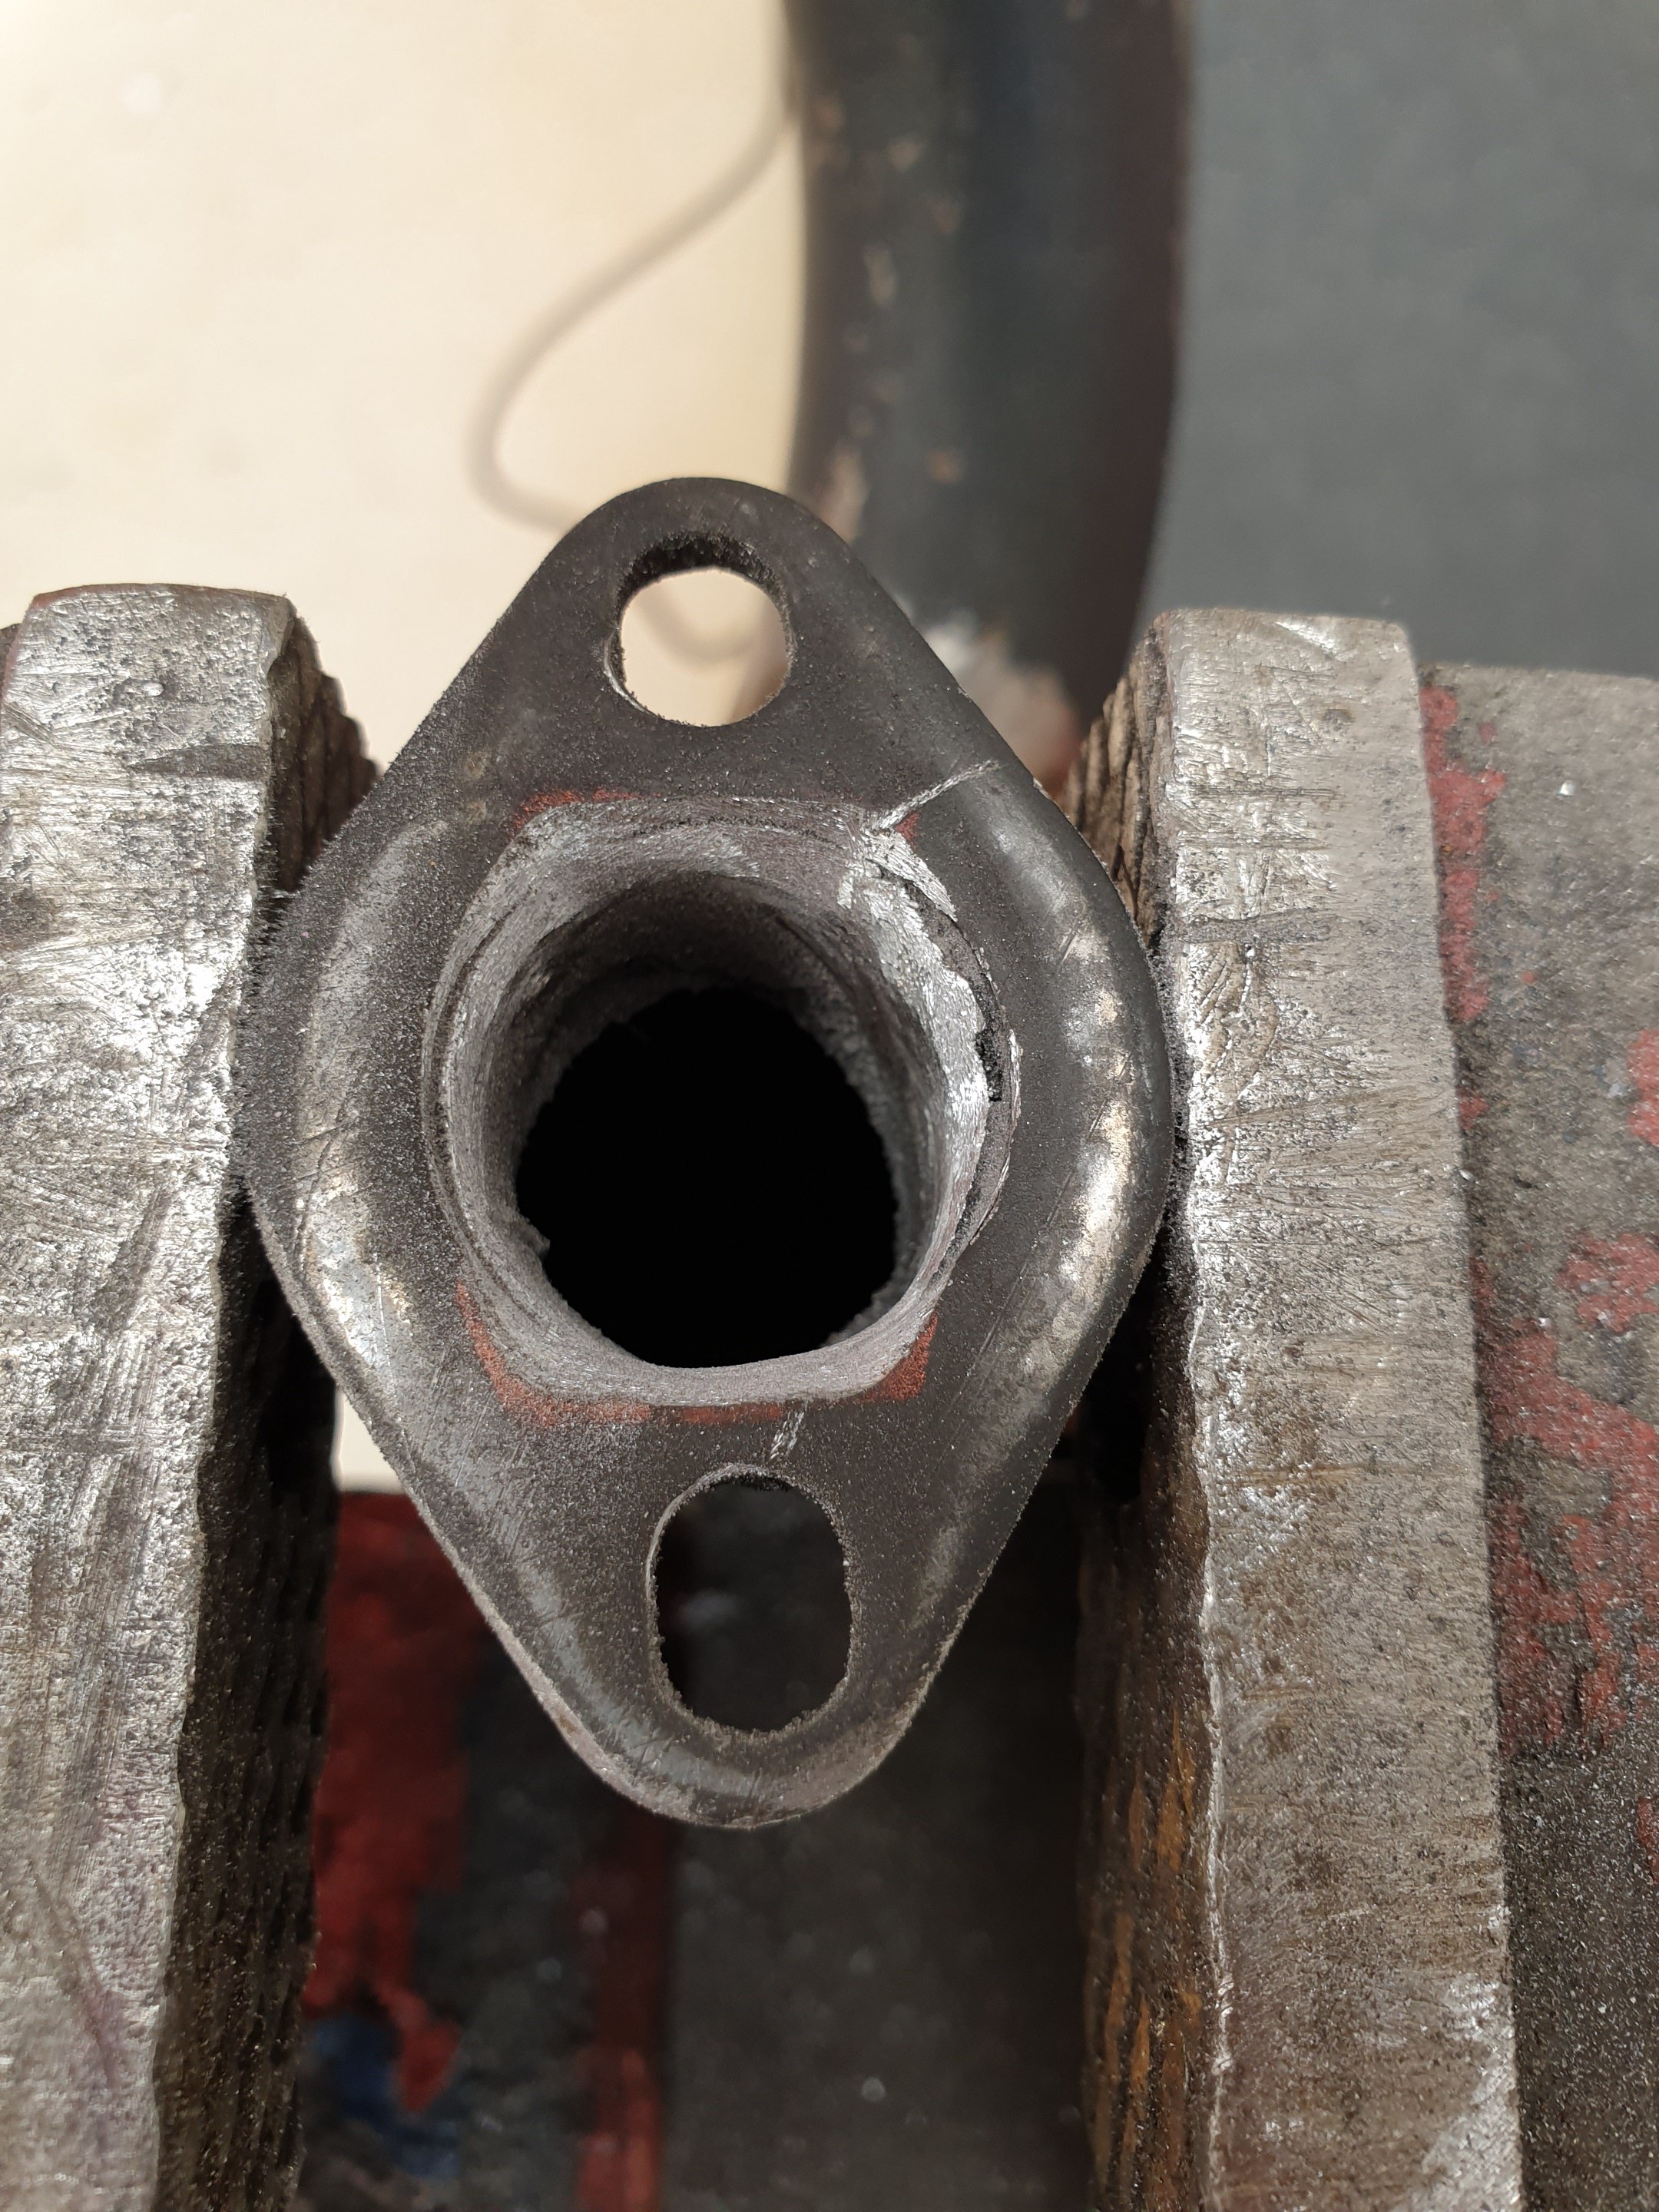
Exhaust port on expansion chamber transitioned out blended from round to rectangle in shape. This will flow much nicer without the harsh sharpness on the edge.
-
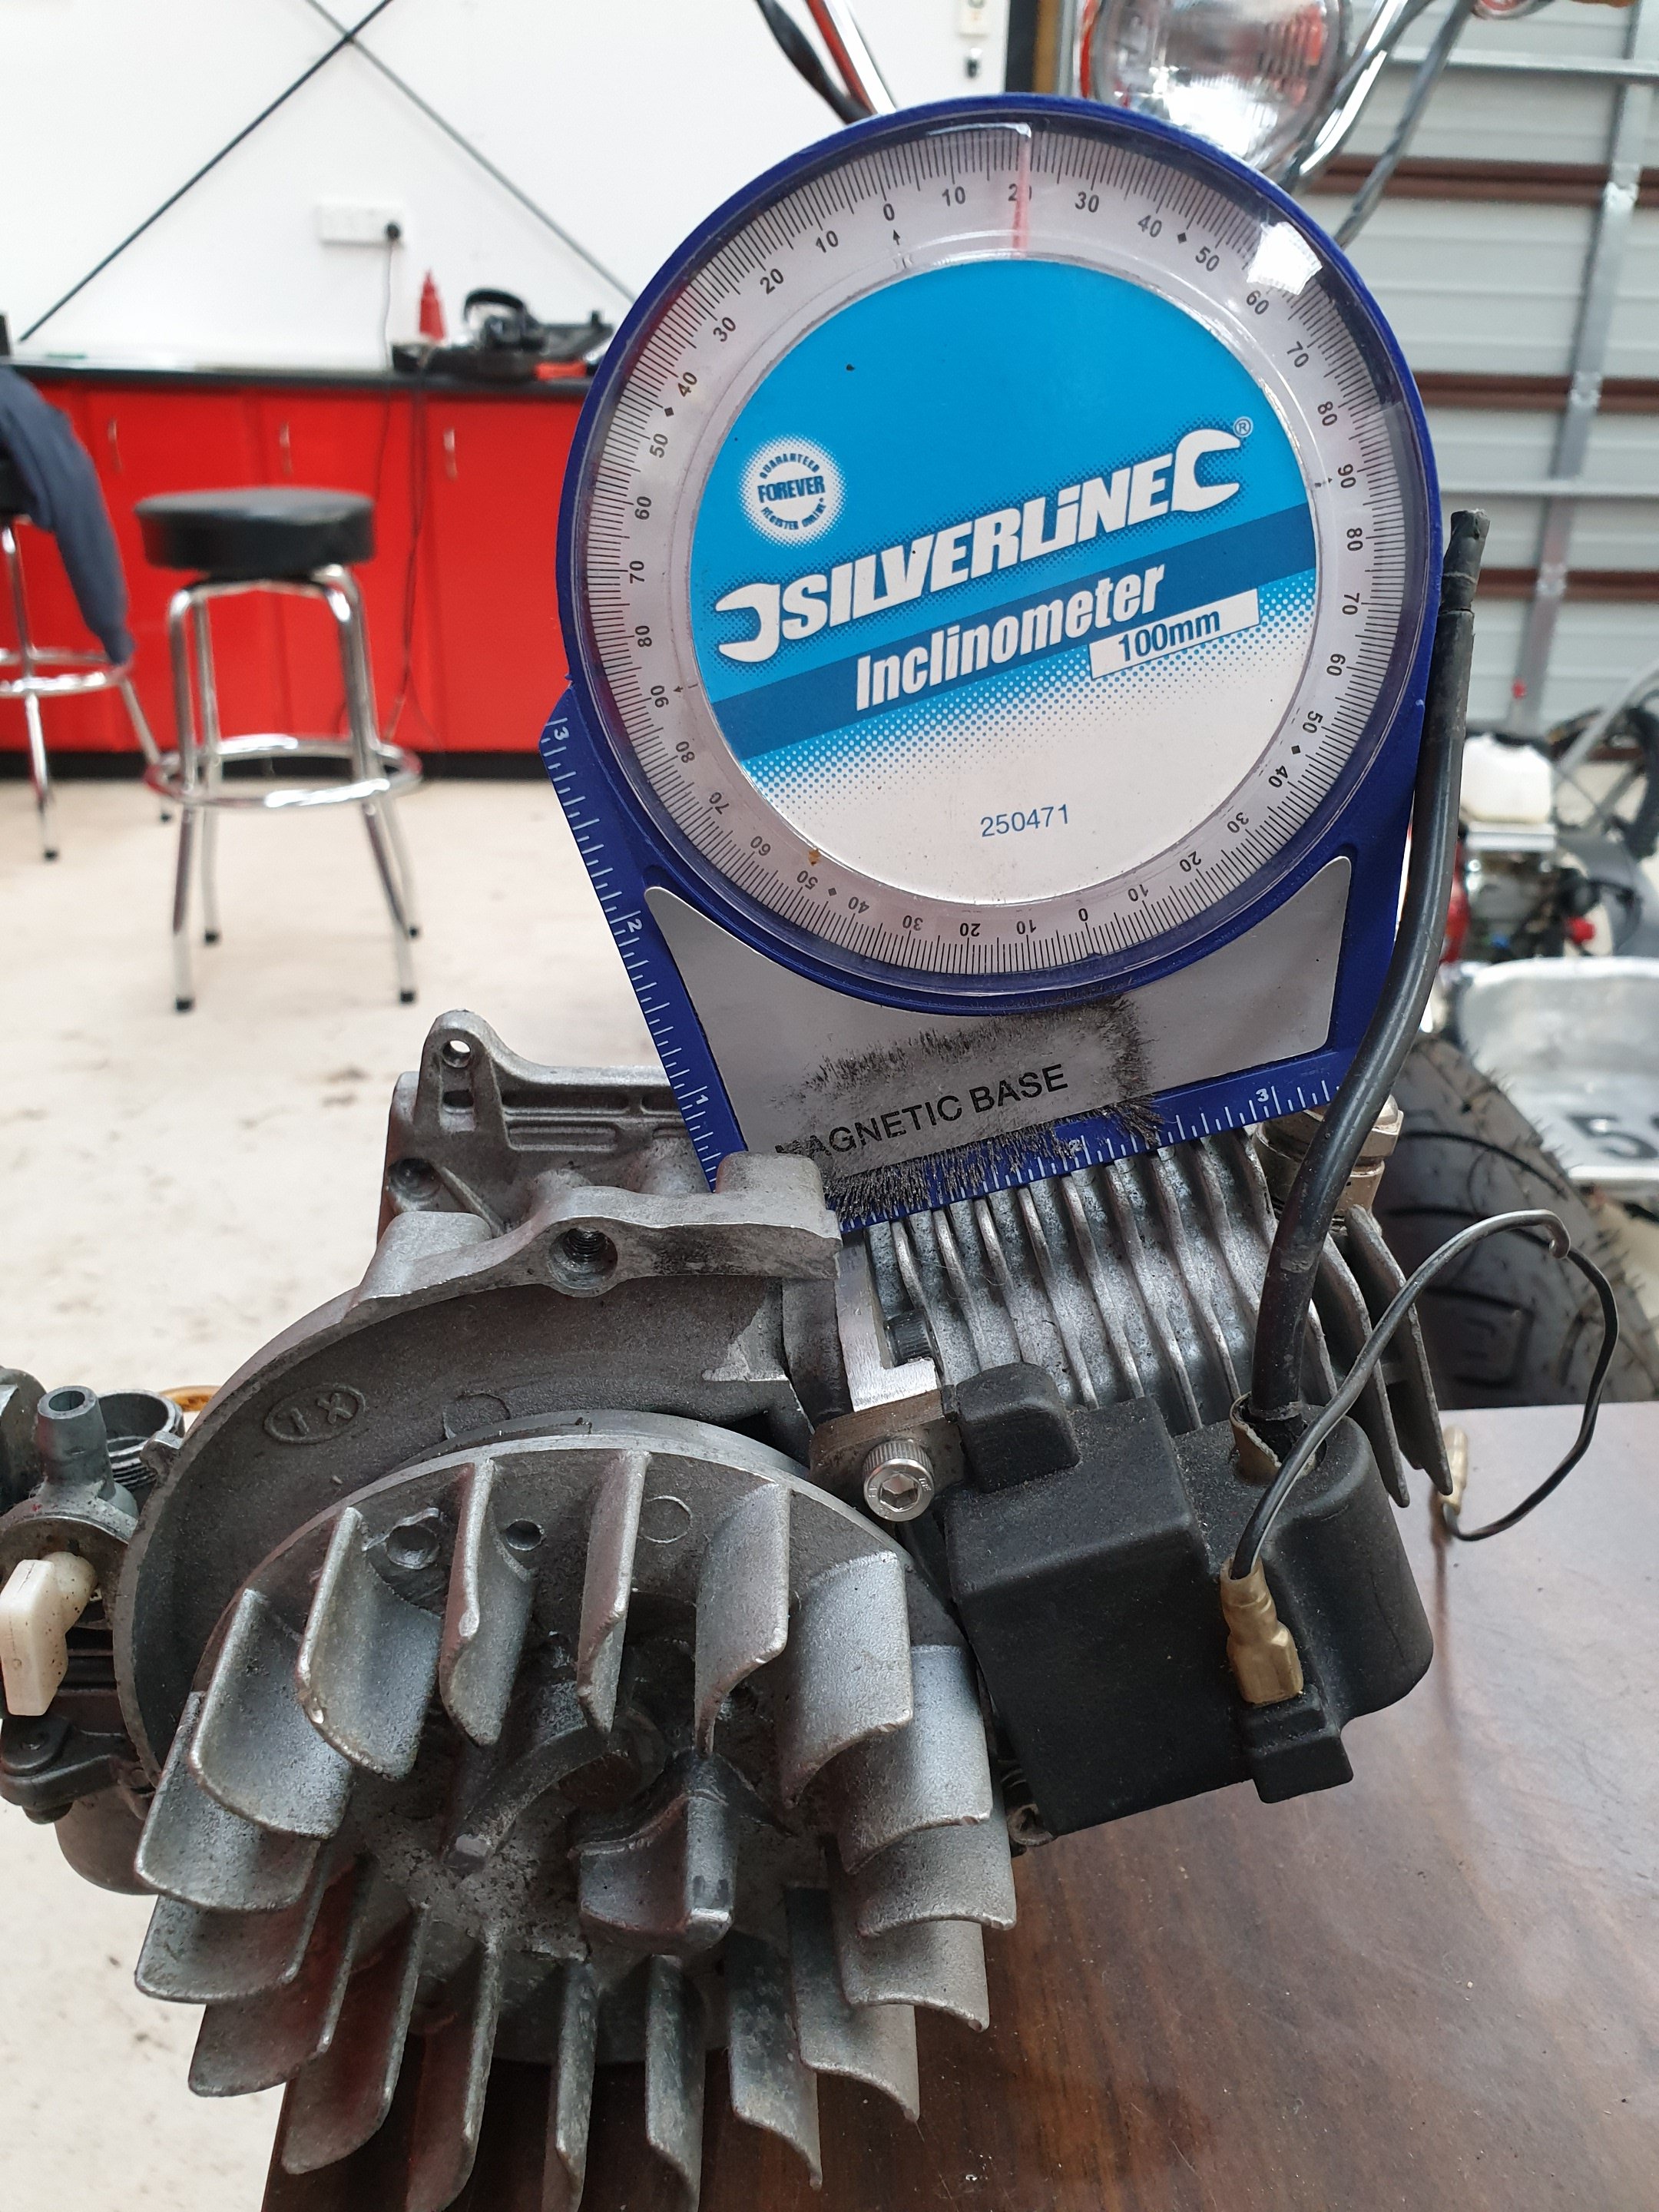
Out of interest I measured the stock cranks balance factor and was surprised to find it was 38%. So 40% isn't looking too bad all things considered. Remembering that this isn't pure science - more just getting it to feel good on average, as its impossible to balance a single cylinder motor like this. So like everyone one does in this day and age...I googled enough times to support my own opinions and ignored the sites that contradict my viewpoint. So 40% it is;)
-
There's a school of thought that FCC's aren't the best idea for this style of motor due to the FCC further blocking the flow path of the air/fuel. But I personally think that's not the real reason why the FCC's get a bad wrap in these motors. They are so far out of balance that they rattle the shit out of the motor and that causes no end of issues like bearings failure and poor rpms. Most users are teenagers with a pocket bike and without the ability to fix these problems. My logic is to balance the motor the best you can and those issues should go away (ish). I guess someone will be right. If it's not me...then so be it, I've wasted time and money on dumber things before and it won't be the last time...
-
In most 2 stroke applications the FCC fills the case more, and this increases crankcase pressure in return. The increase in case pressure speeds up the transfer of the air/fuel into the cylinder when the ports open and more of it gets into the top of the cylinder before the ports close off...this makes more power. Now the catch, this motor is poorly designed and is more for tools like weedwackers or chainsaws where its designed to run at near peak rpm all day long. The flow of air/fuel has to get past the crankshaft which is right in the way. This is the most restricted path and fundamentally will inhibit this motor from ever being awesome. For a chainsaw having restricted flow doesn't matter as long as enough power is made to do the job, but compared to a European motor of equivalent cc capacity these motors are way down on power, ie. This 49cc motor in stock form is likely to be 1.5hp-2hp. A 39cc (yes 39cc) air cooled polini could be as high 6.5hp straight out of the box! I'd like to get 3.5hp or higher, which isn't as impossible as it may sound, as simply adding an expansion chamber alone with no other mods could get 1hp additional power just like that. Bigger carburetor adds a bit more, raising the compression, setting tighter squish band, changing the port timing, flowing (blueprinting) the cases and matching the case/cylinder ports...etc etc...all adds up. Main advantage with these motors is they're cheap, and produce acceptable power...and they're cheap, oh and cheap too. When all done, this motor will owe me fuck all V's a starting price of $1500 for a polini or other European motor. For someone like me, who enjoys mucking around, cheap is good, as if you take a gamble and it doesn't work...who cares, you wasted $40 for a replacement part and a bit of your time. Not a bad price to pay for an education...
-
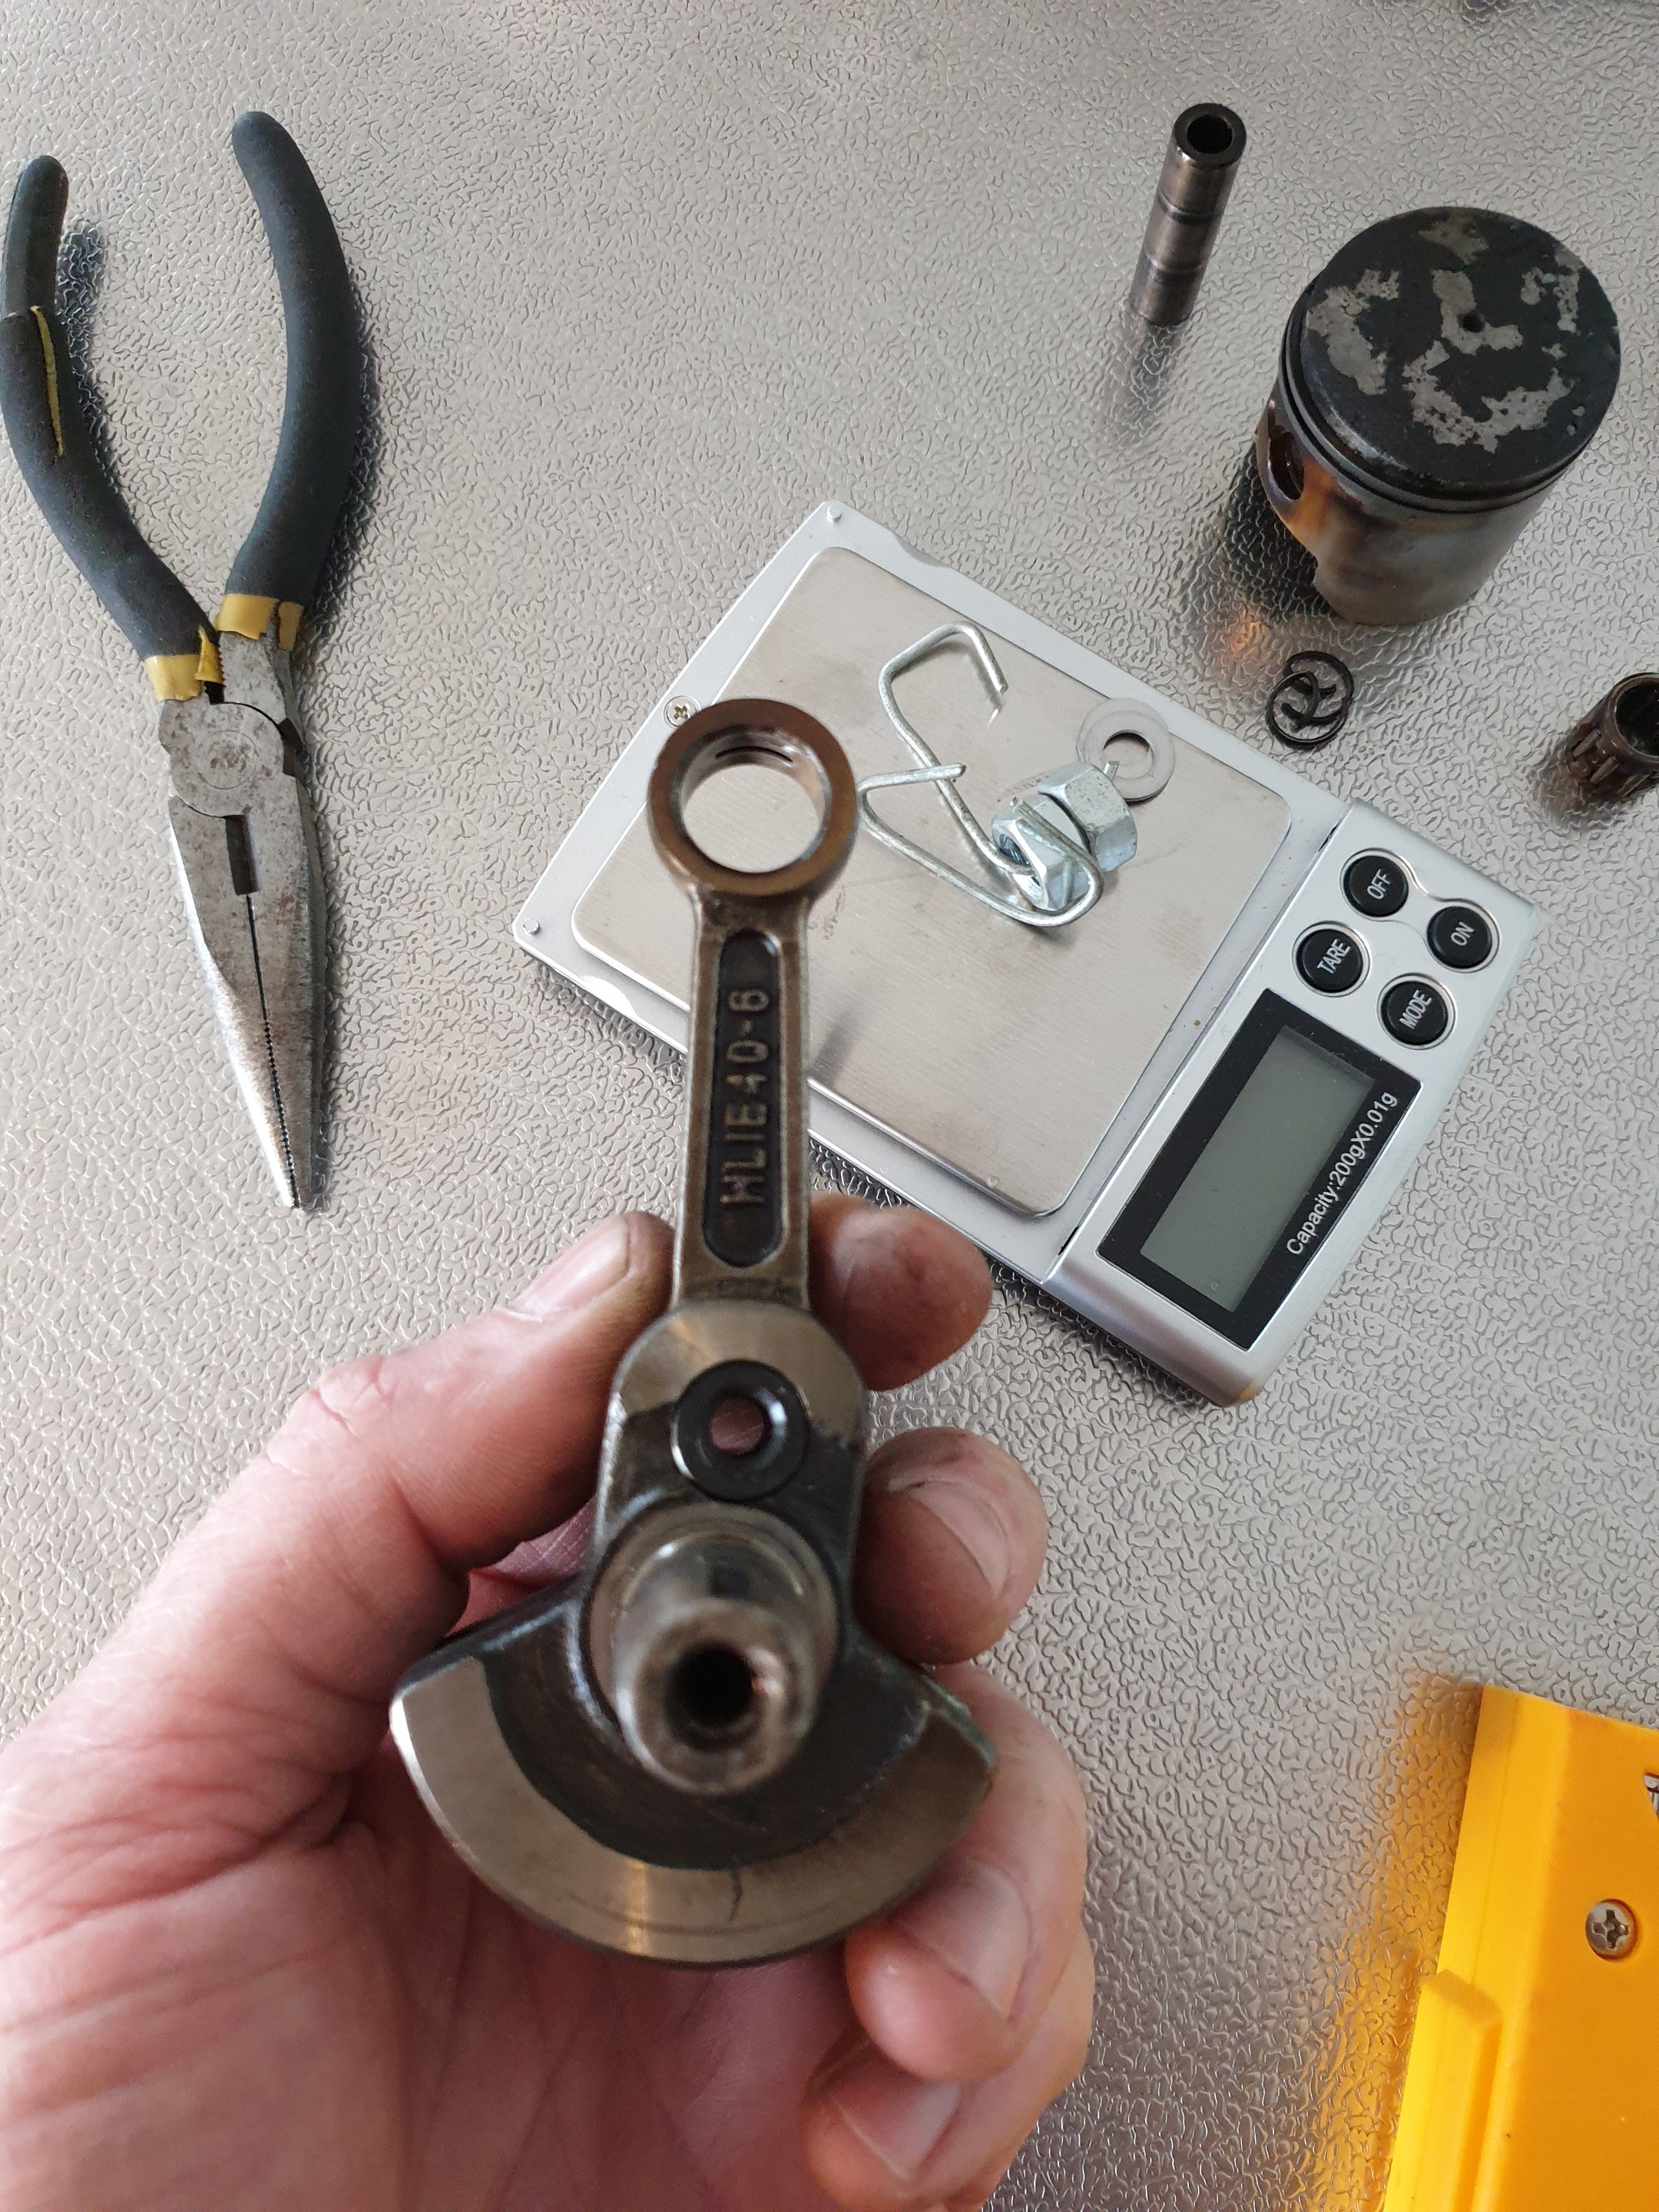
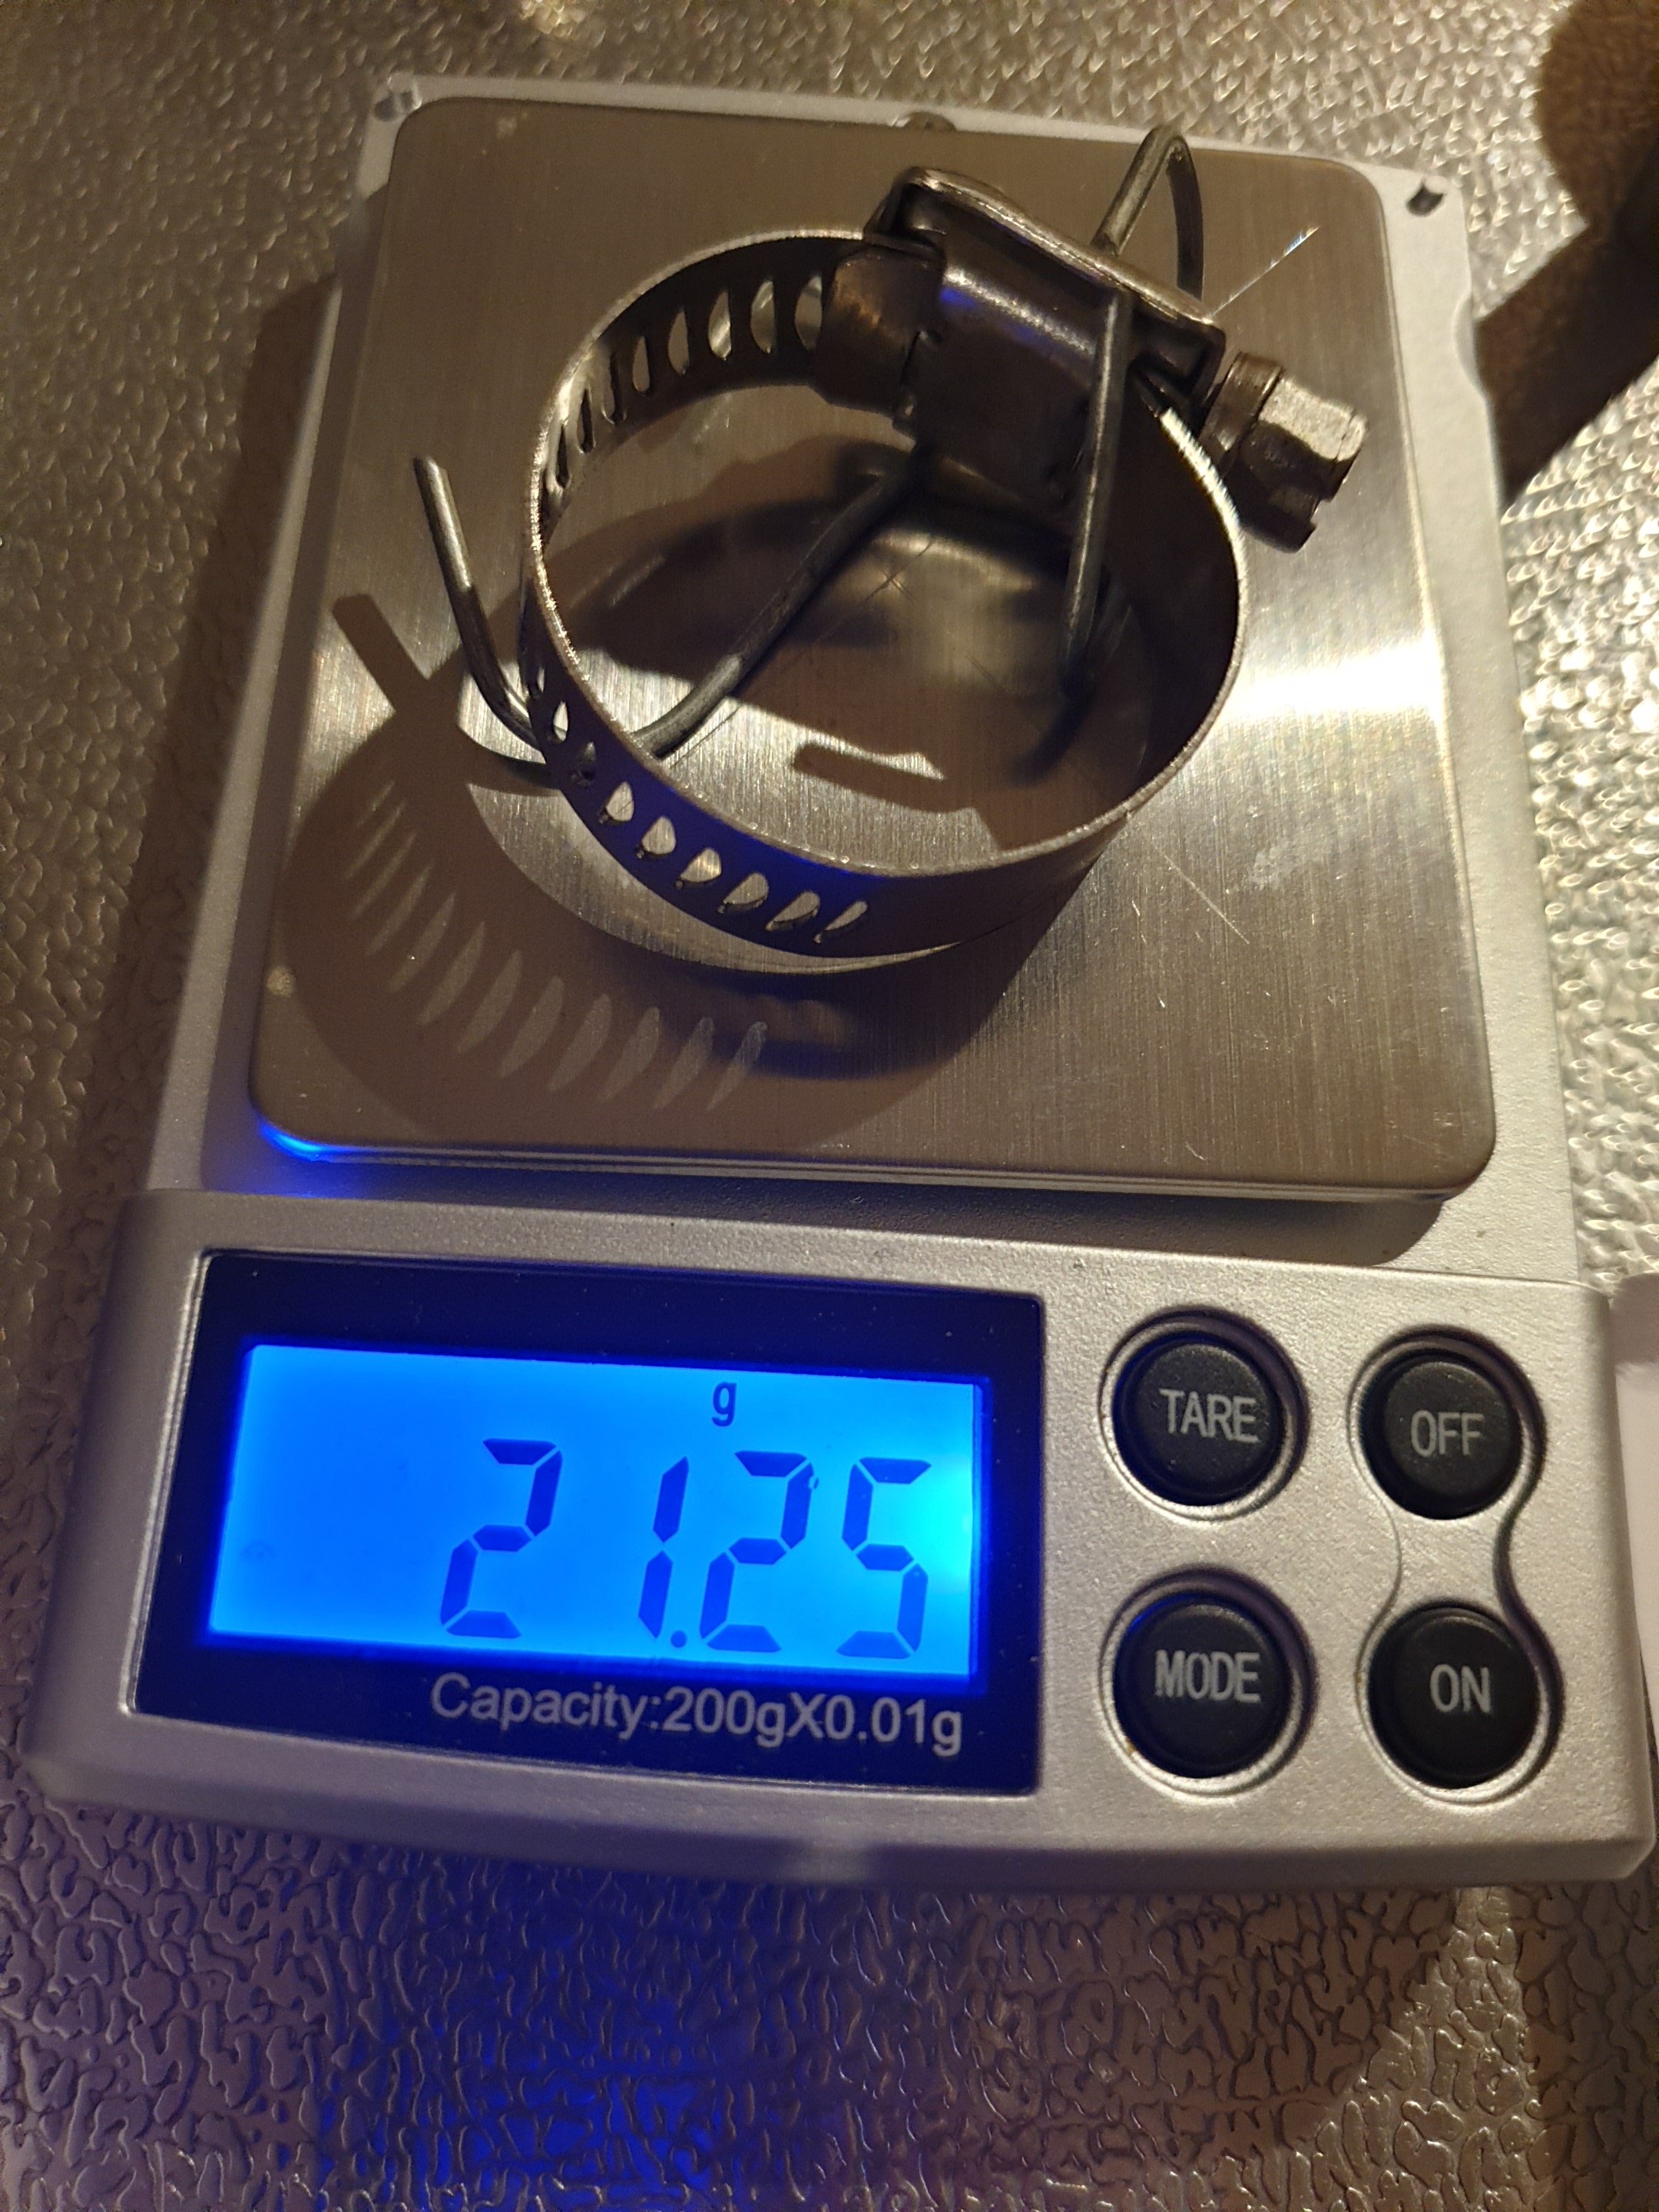
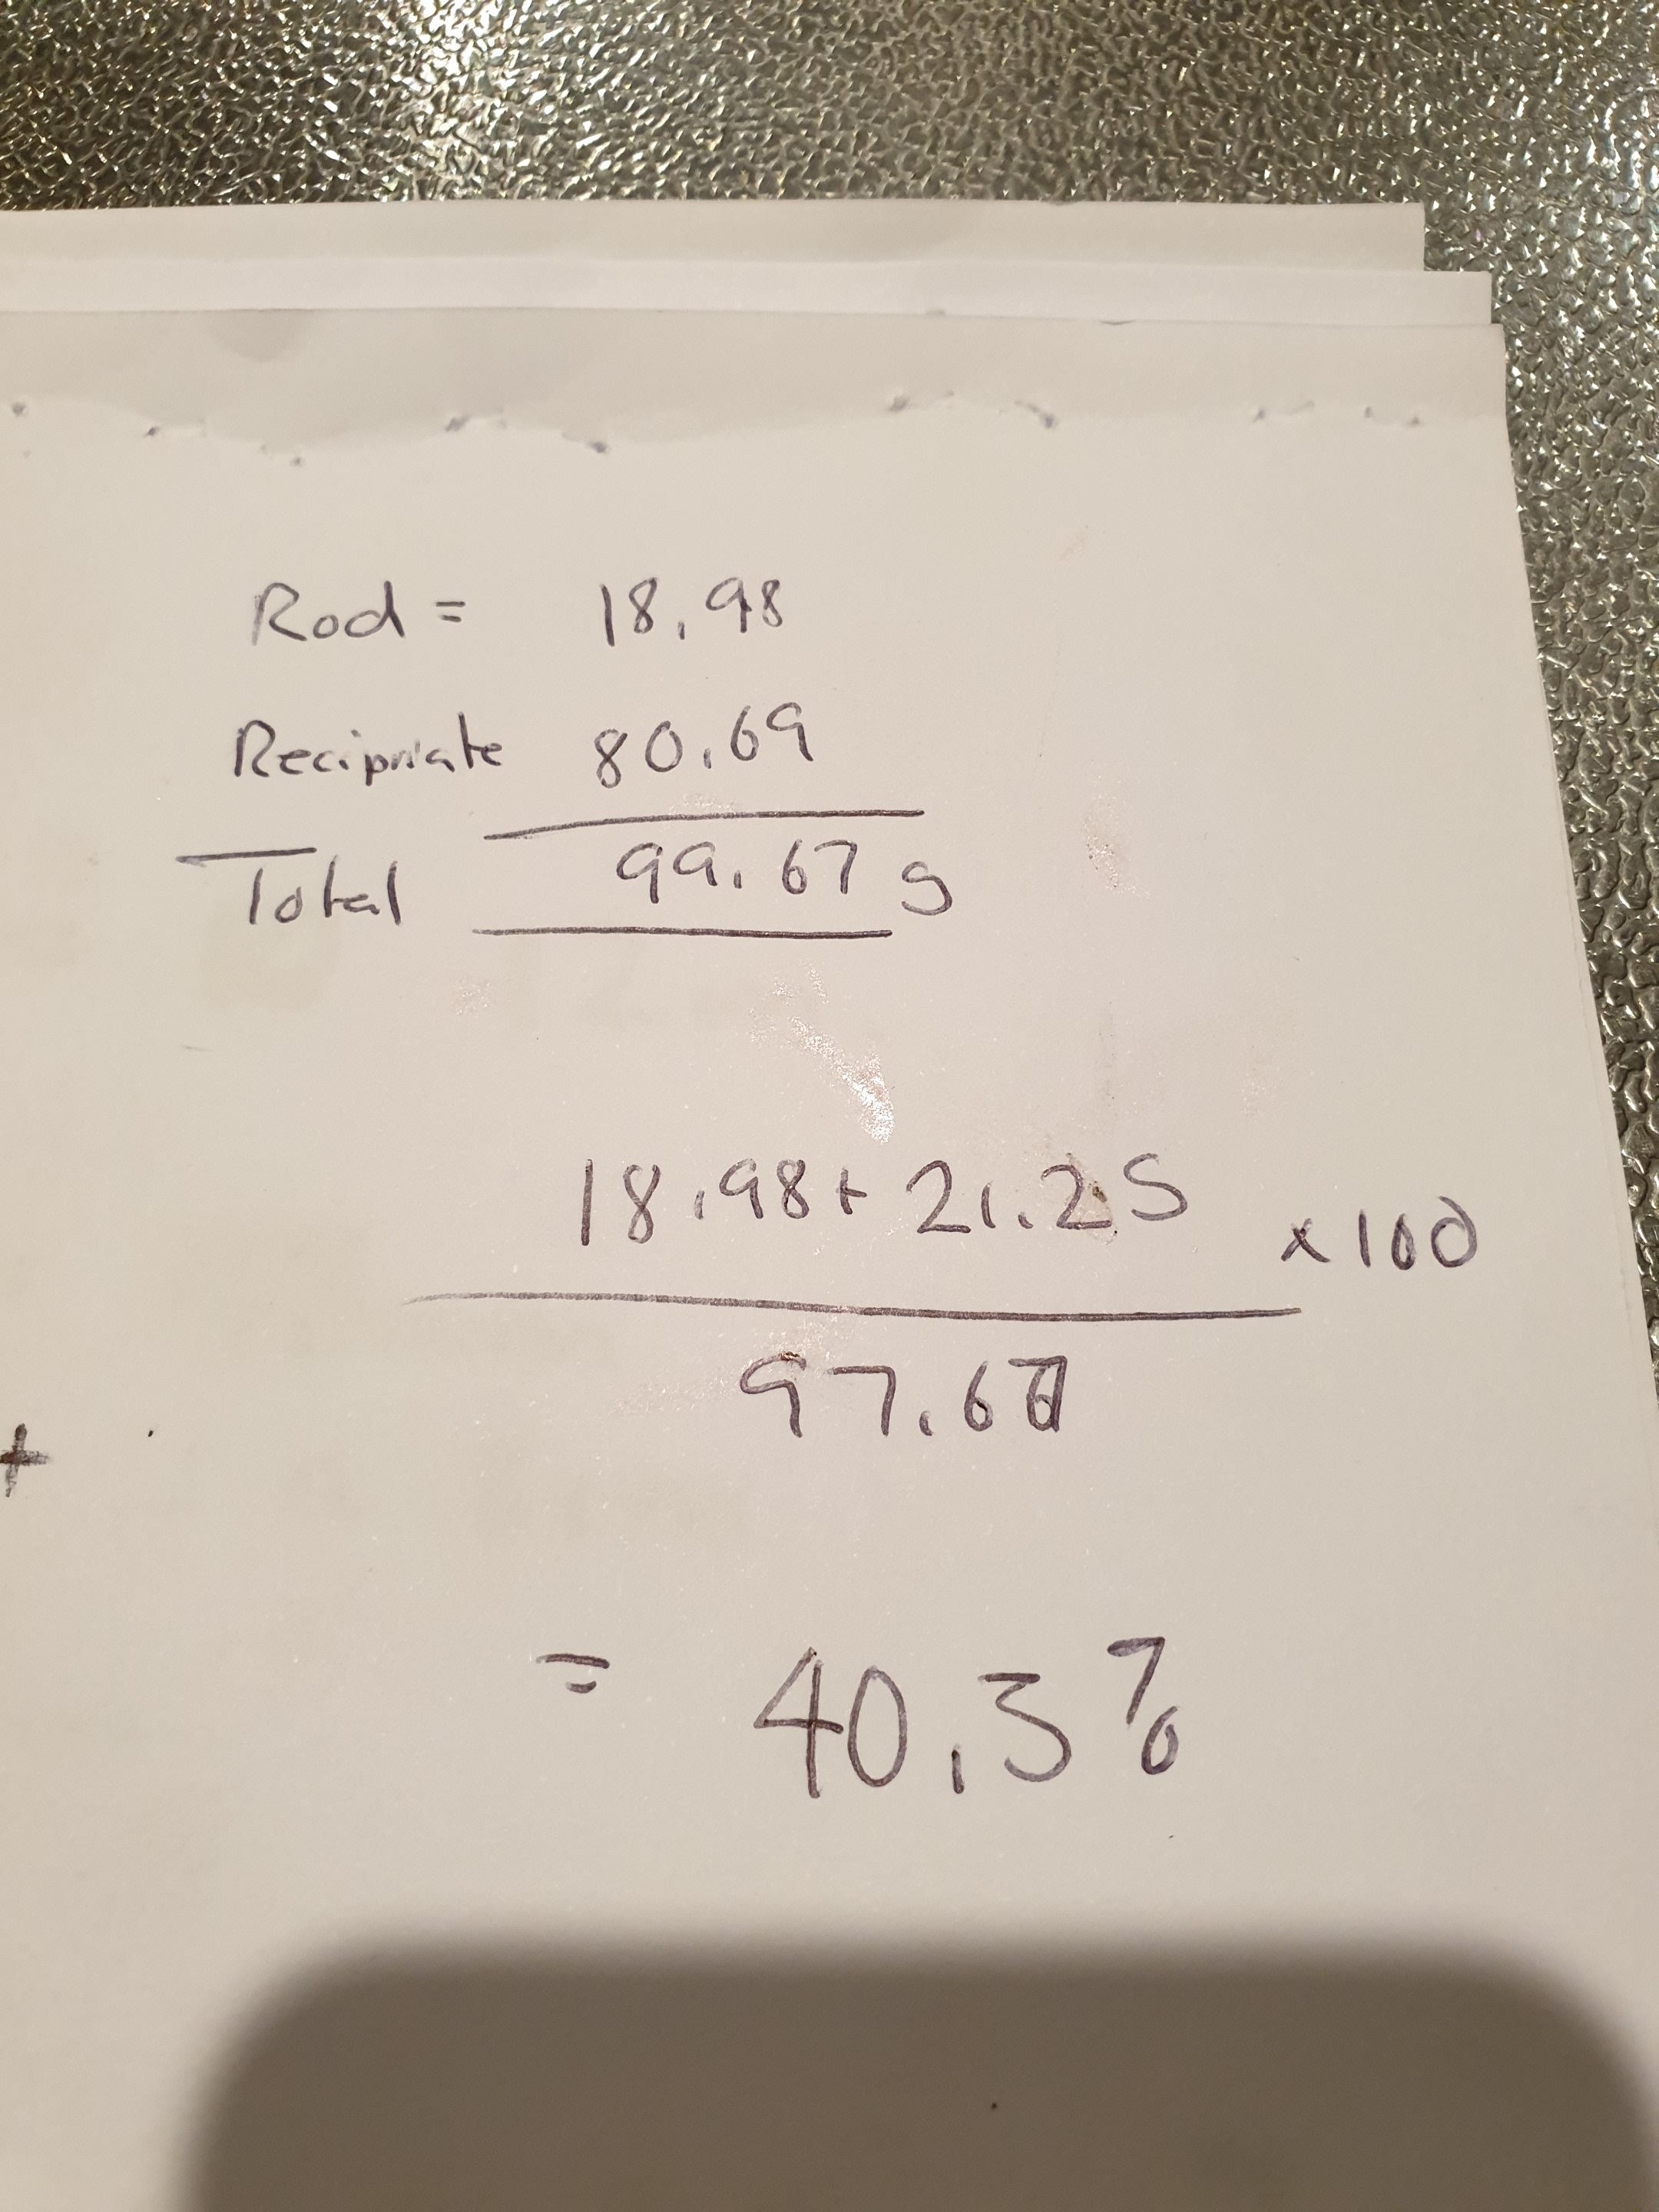
Balance weight was 21.25g, and I got slightly different rod values by probably taking more care leveling the rods etc. So sloppy calculations say: So 40.3%. I was hoping for 45...but will take 40.3% as it was free to achieve and is a shitload better than what I started with. I could drill more holes on the top...but for now that's going to be sweet as!
-
Here it is all press fitted in with loctite. Gotta be happy with that. So onwards with the build...
-
Cheers @UTERUS thanks so much, you're a GC for sure. No fucking around then... Hard as hell to cut. Took a full 125mm cut off disc per cut and about 2 minutes per cut...far out!!!! But got it done.
-
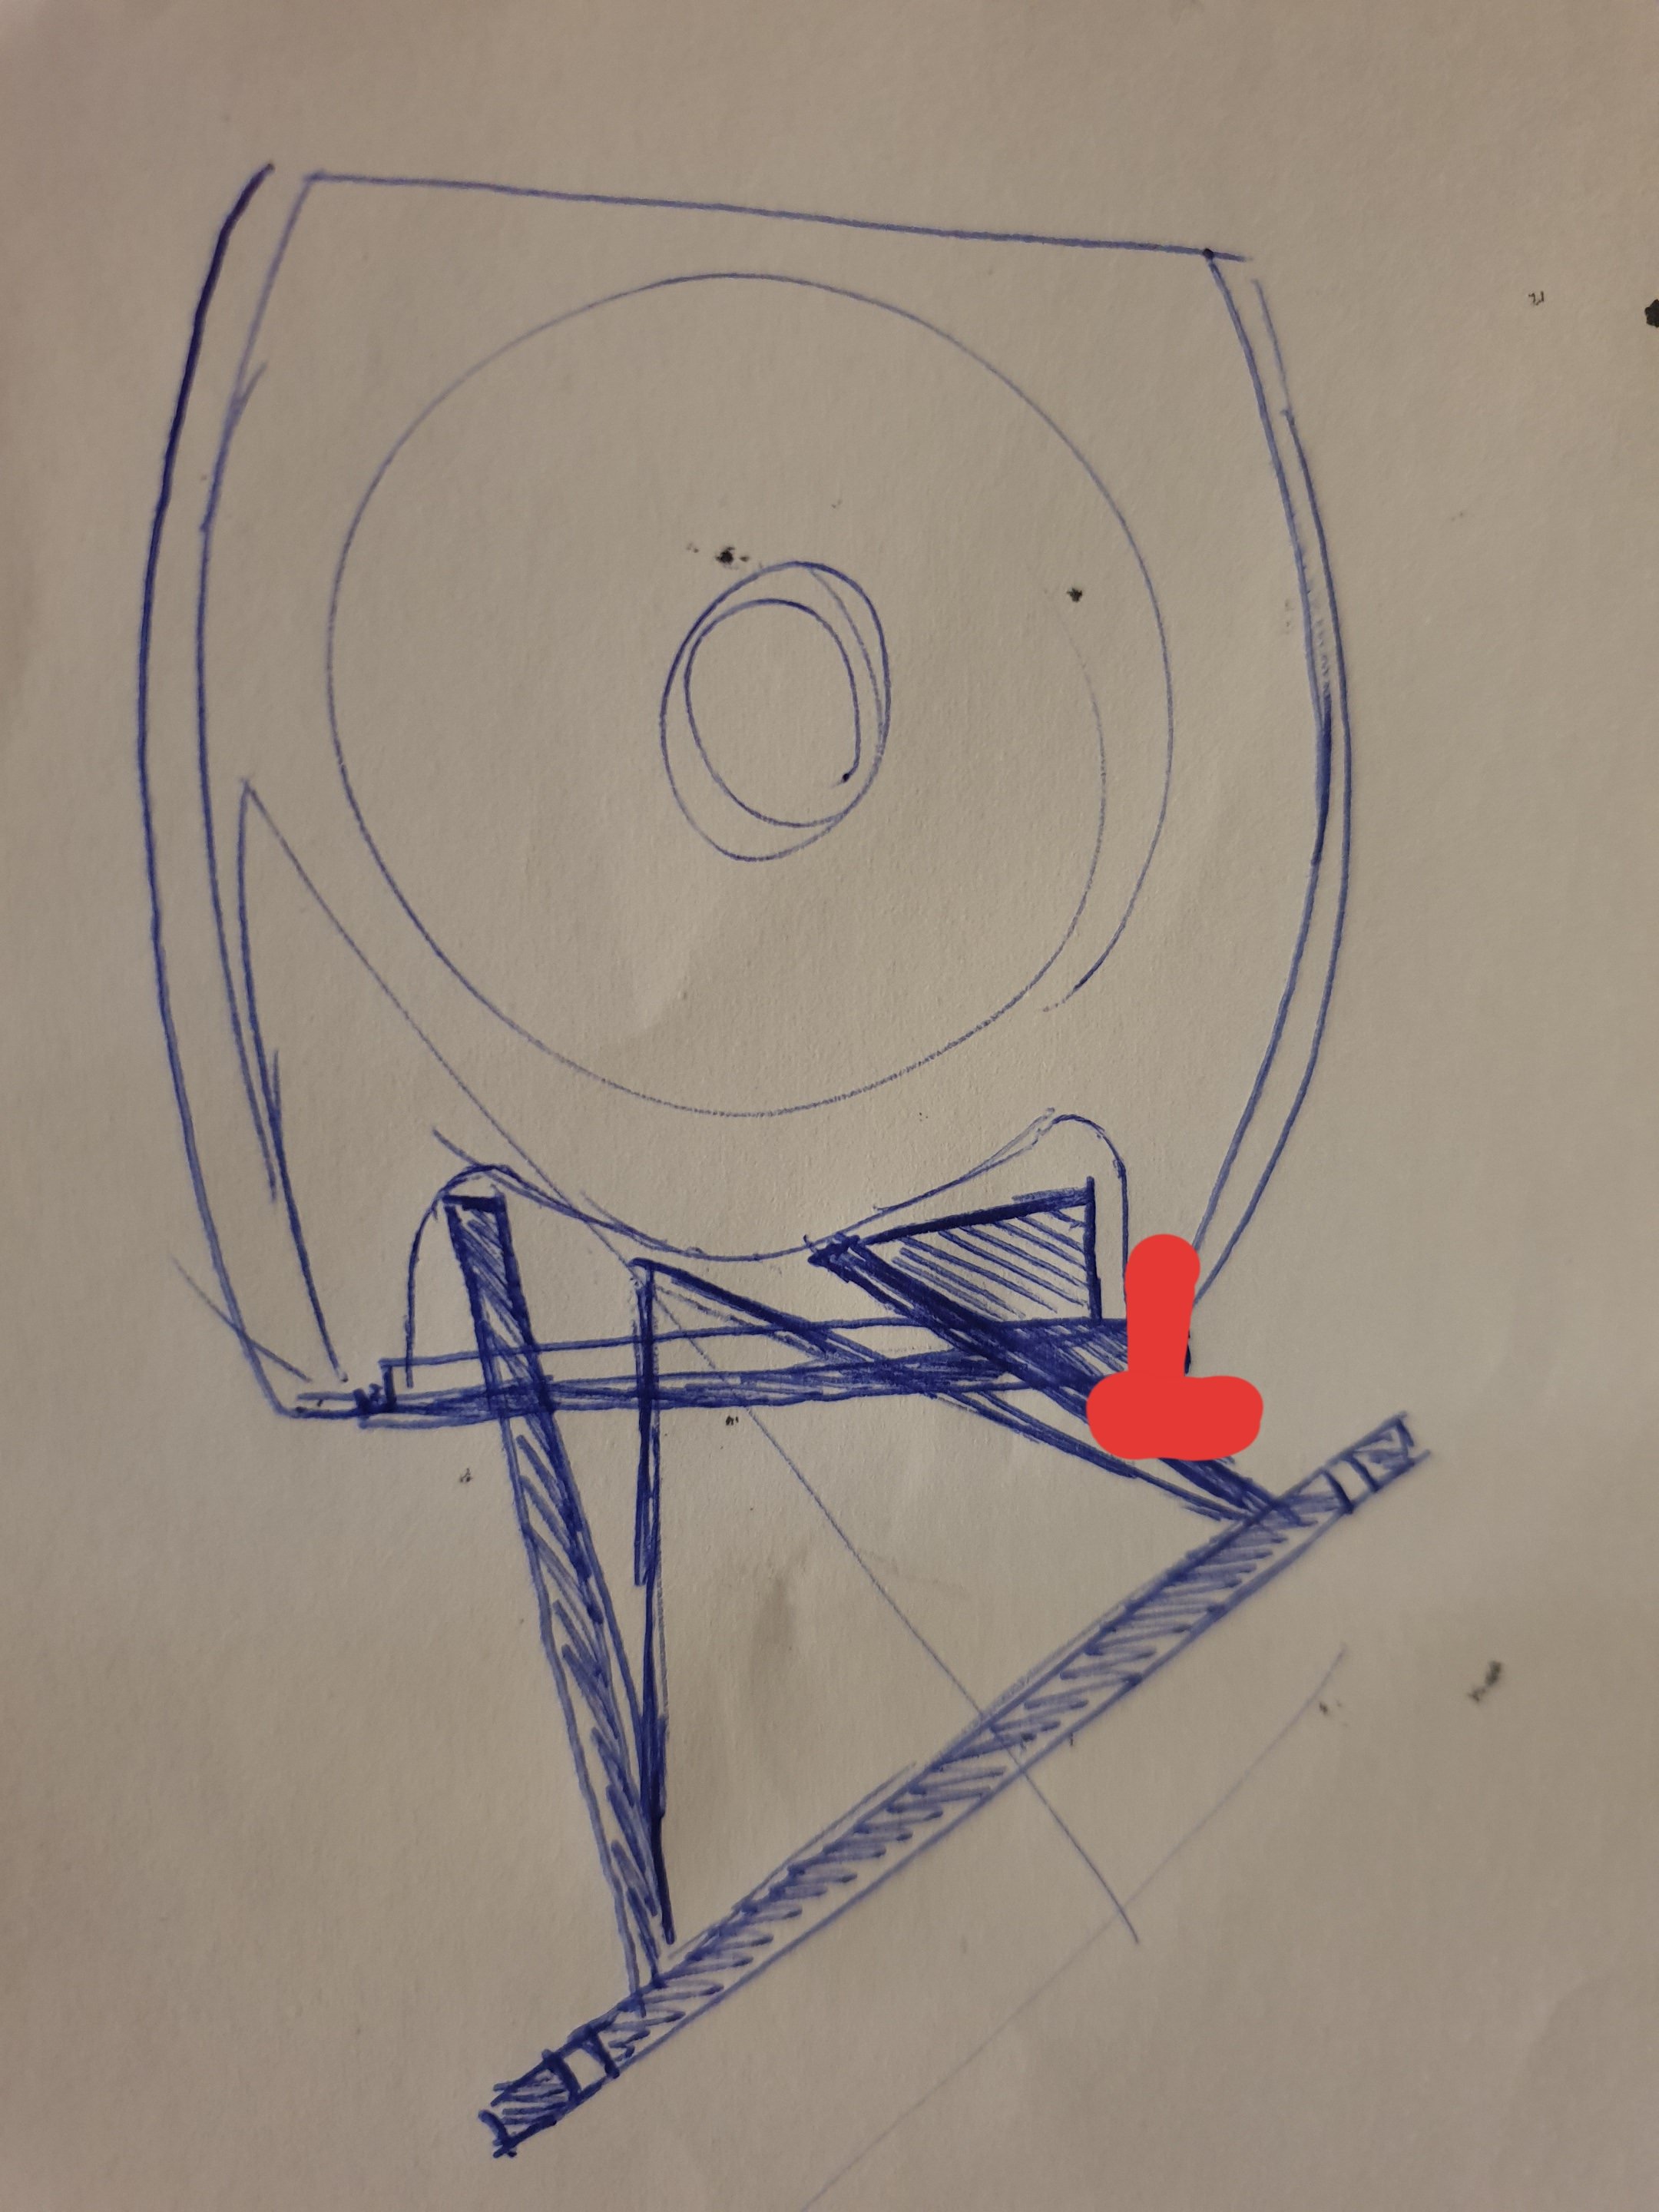
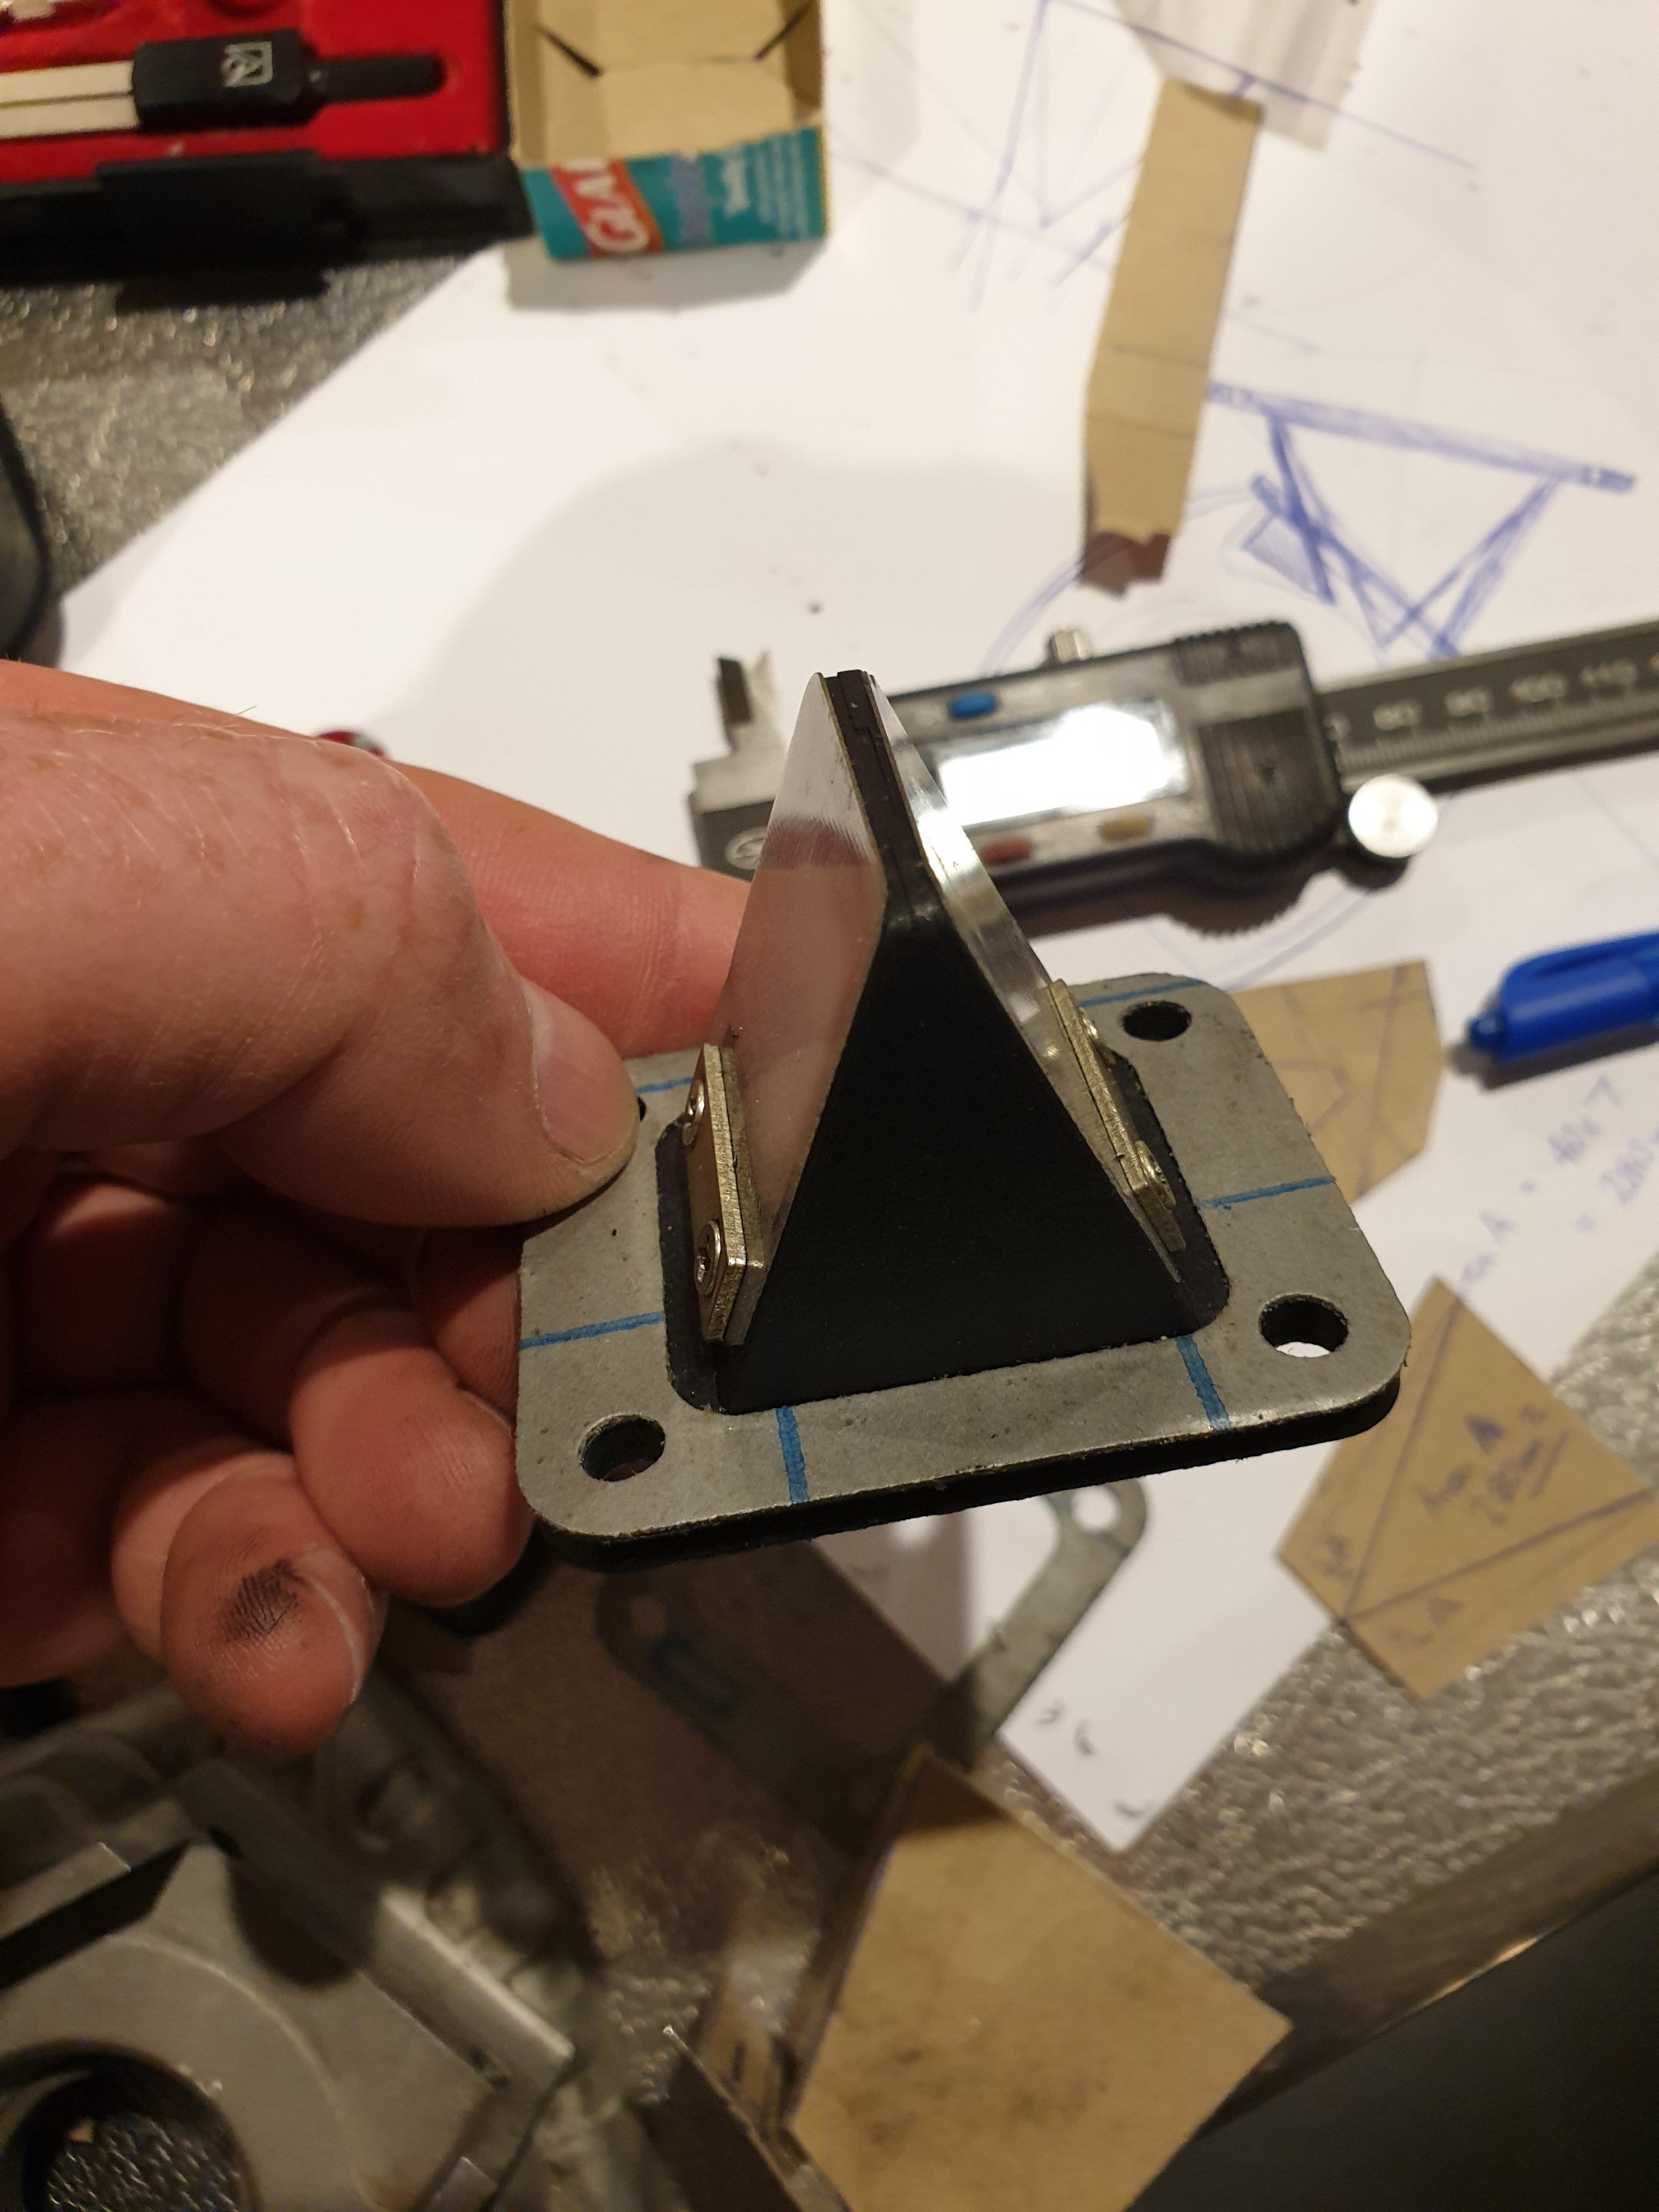
A good nights rest and feeling more positive about my reed block idea. On the FCC motor (which my test motor was not), the FCC will fill (stuff) the cases a lot more than a stock half crank does. Plus I'll fill this area shown in red to further stuff the case. This was always my plan, just couldn't help trying it on a different motor first. Here's my first sketch. Unfortunately this design couldn't work for a couple reasons. I couldn't get a bolt into the area with the red shown. And my reed block was physically too large to fit inside the cases like I wanted by a couple millimeters...but if I fill the cases it will essentially achieve the same thing. So still going to try this idea on the new motor I'm currently making and see if it works out better?
-
The Reed block sucked! I put it on this motor which goes pretty sweet normally...and lost performance. Too much case volume. I knew this would be an issue on this motor, but wanted to try it out anyway. It worked...but not great. I'll still try it on the motor I'm currently making as it has a FCC and that would offset the gain in case volume...but thinking this was maybe a flawed idea to begin with??? But hey, not ever idea turns out to be a good idea...
-
Playing around with ideas. Though I'm not sure if its worth the effort?
-
Mmmm, boost ports....mmmmm 3 of them.... plus extra large transfer ports making this a 5 intake port motor, all nicely port matched with good flow. Compared to a standard cylinder with only 2 transfer ports.
-
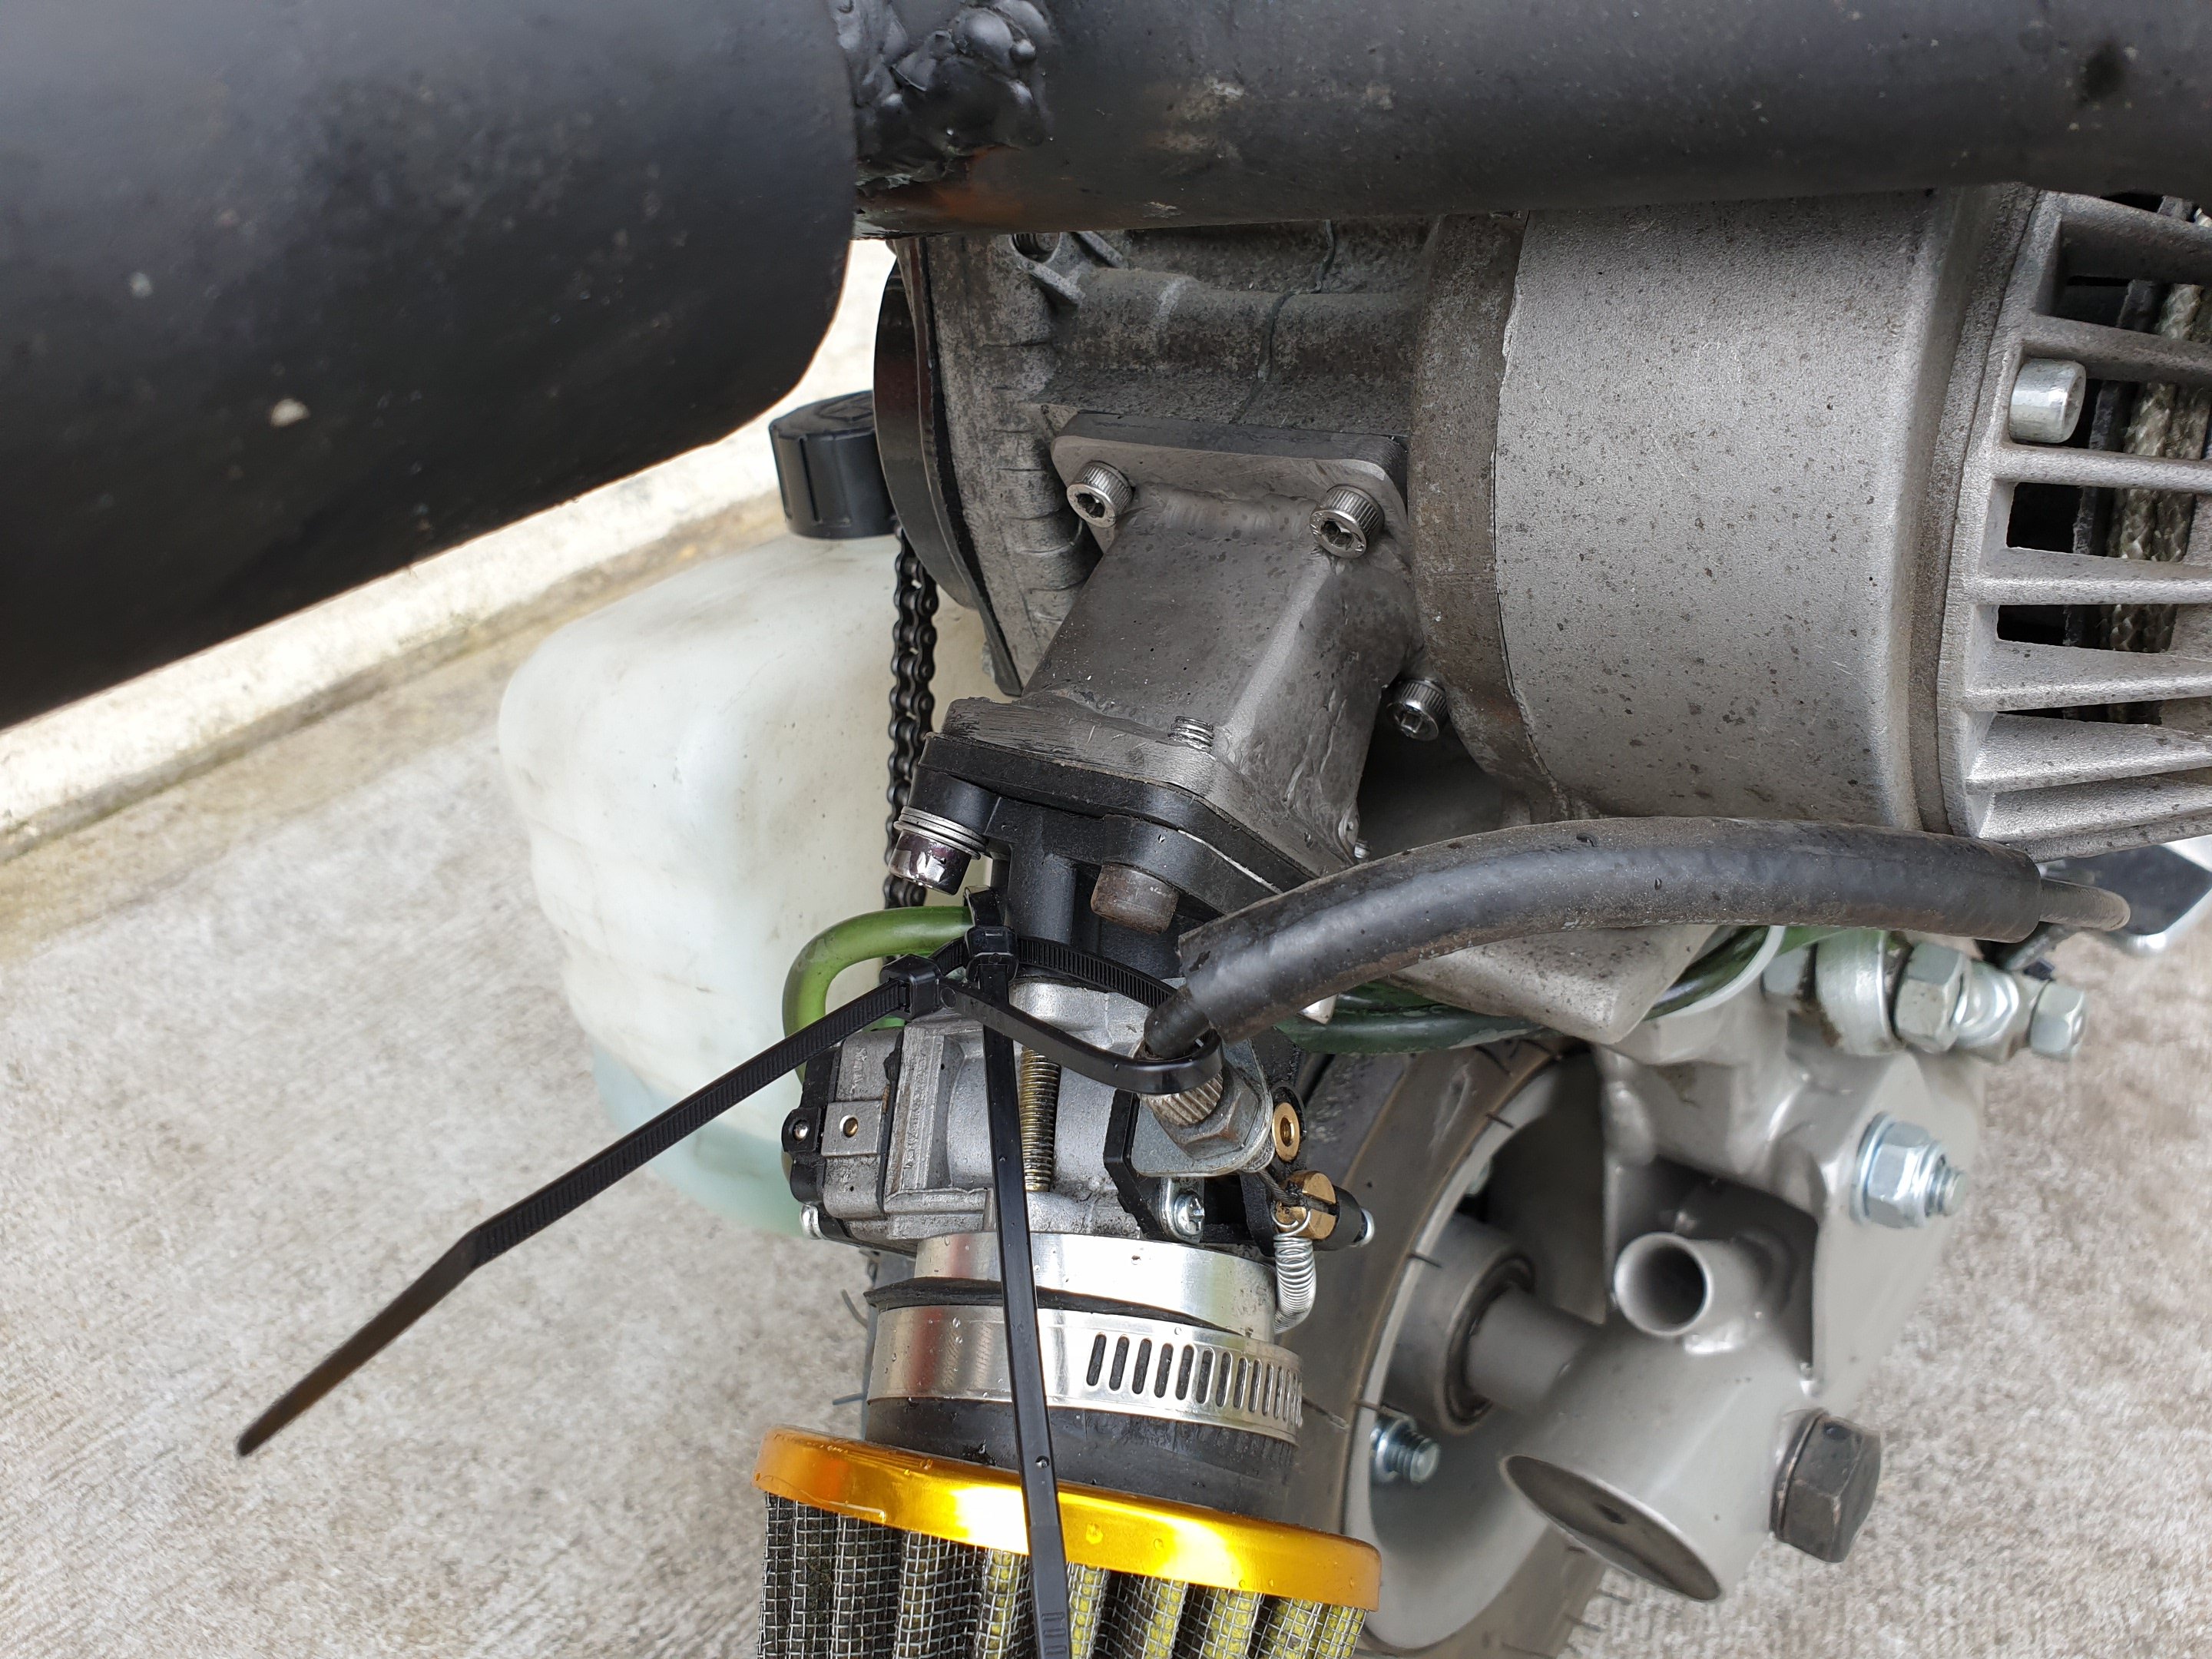
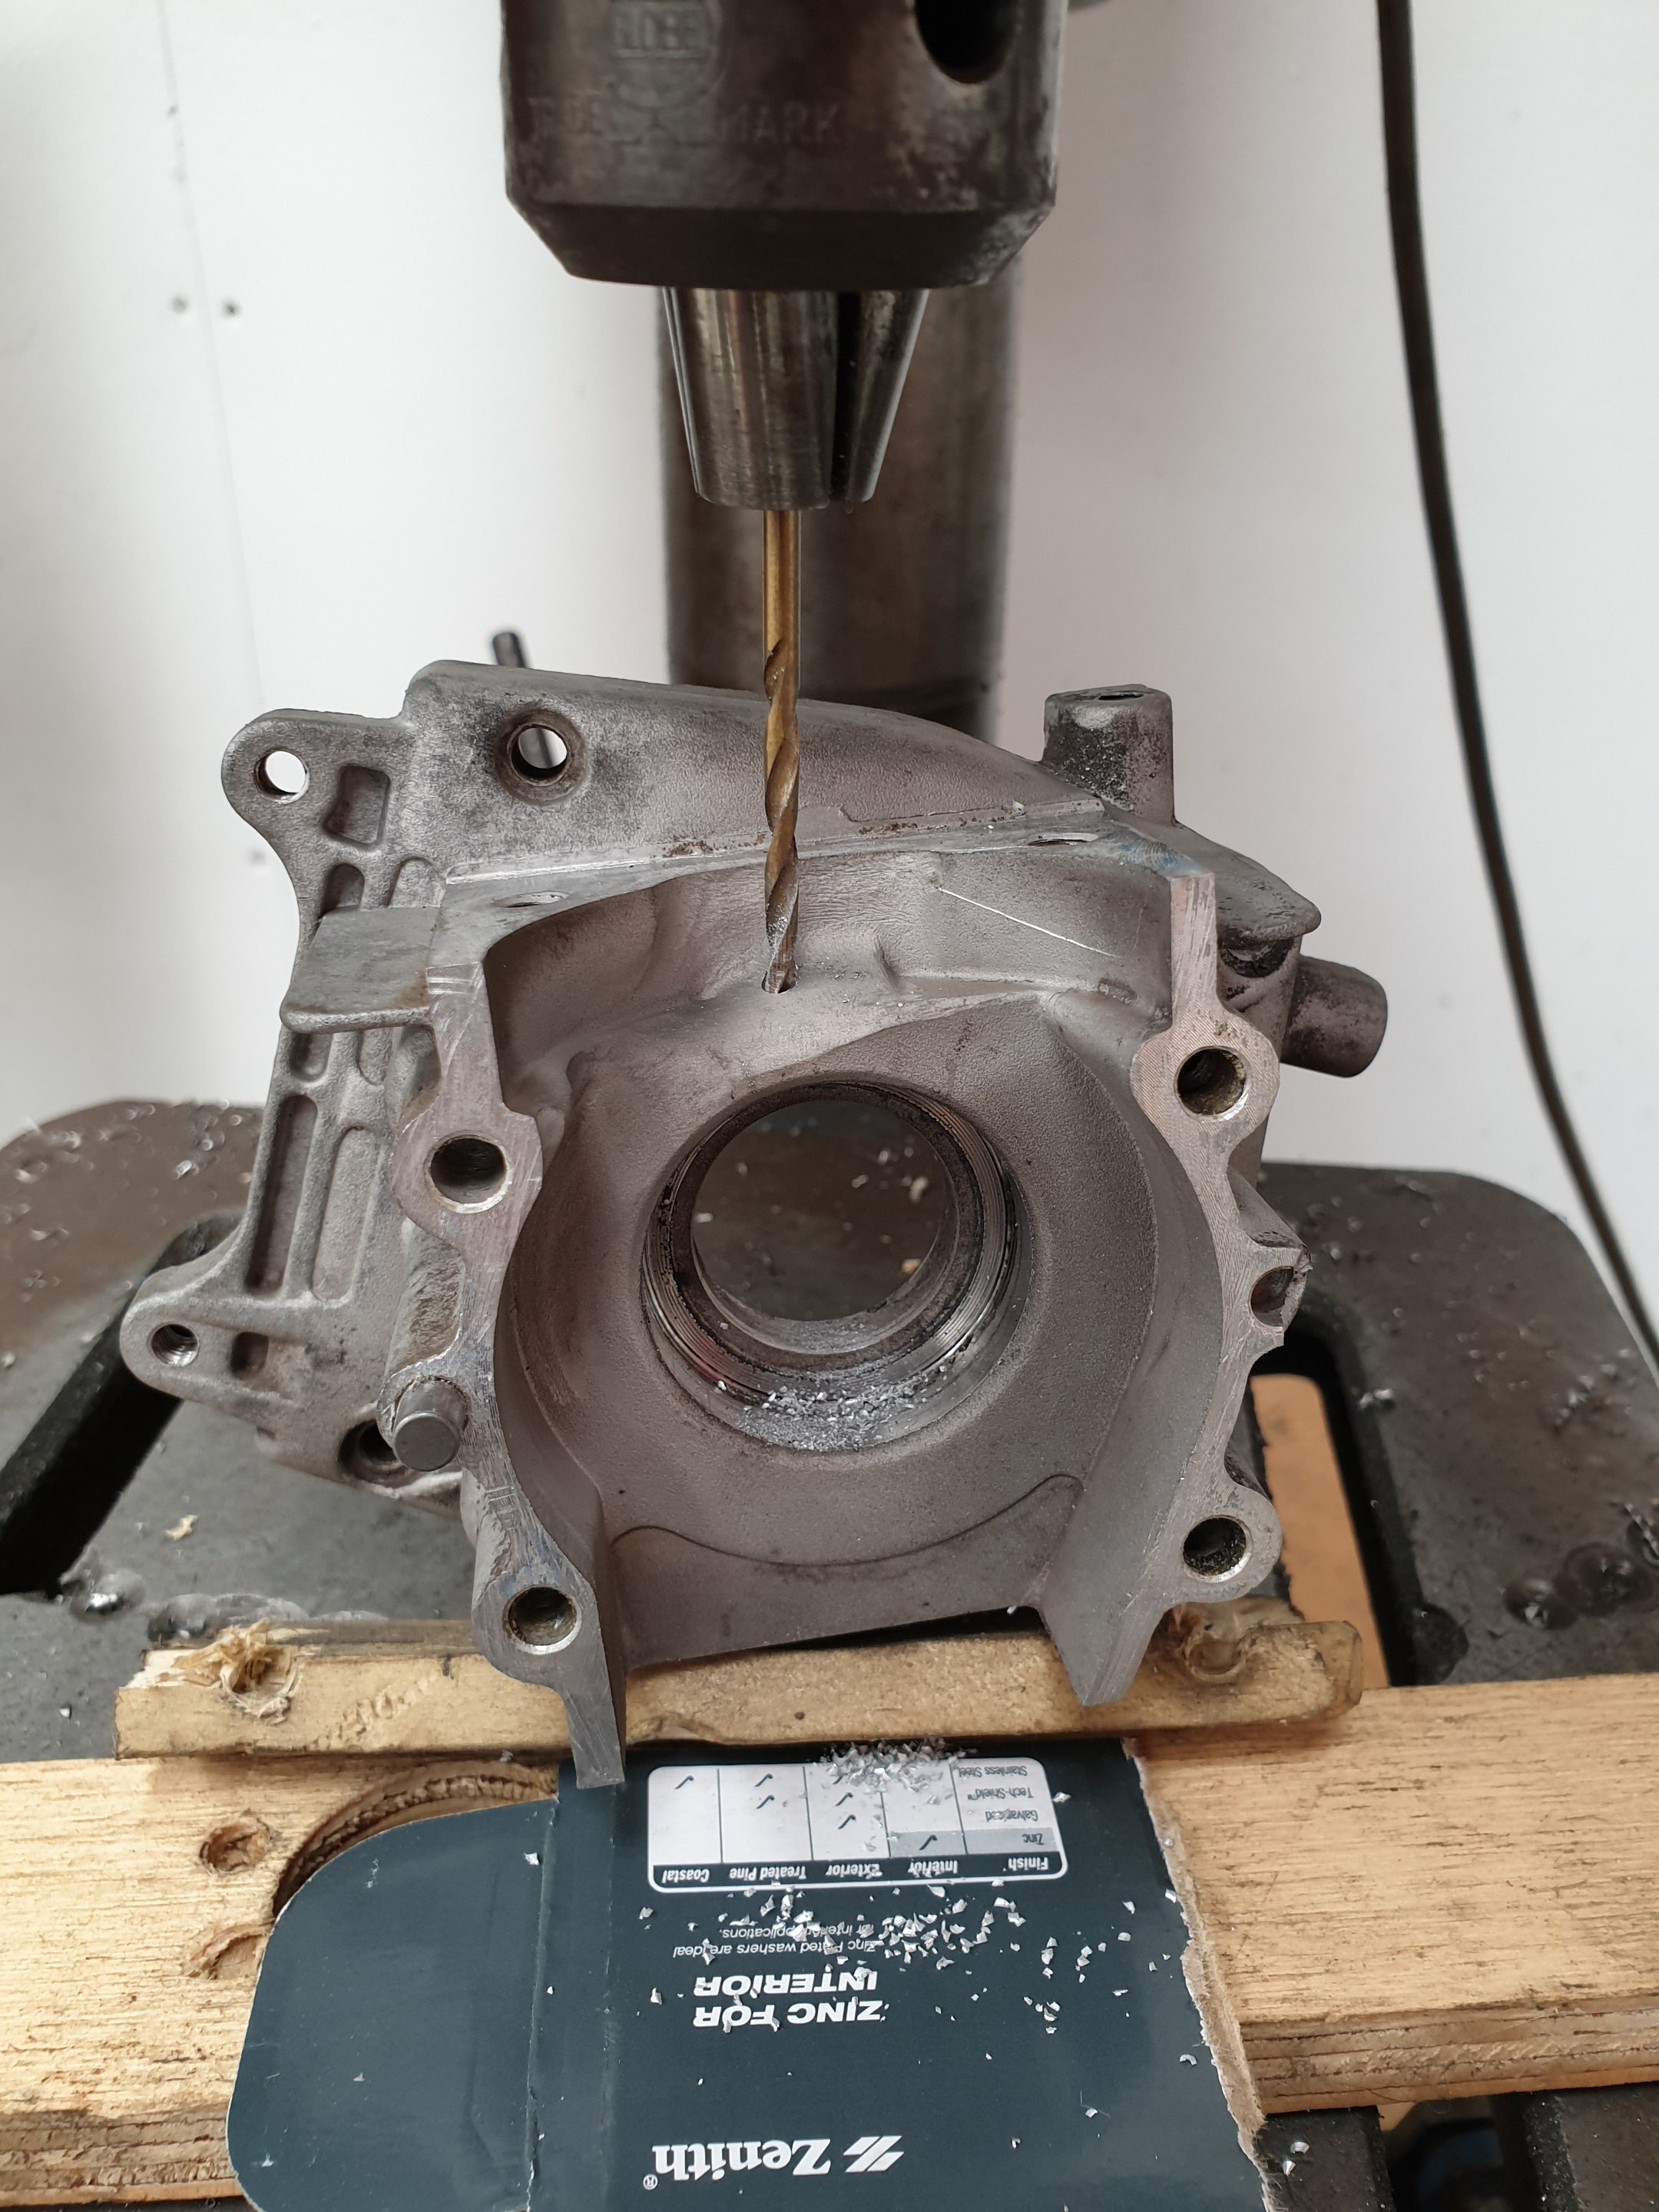
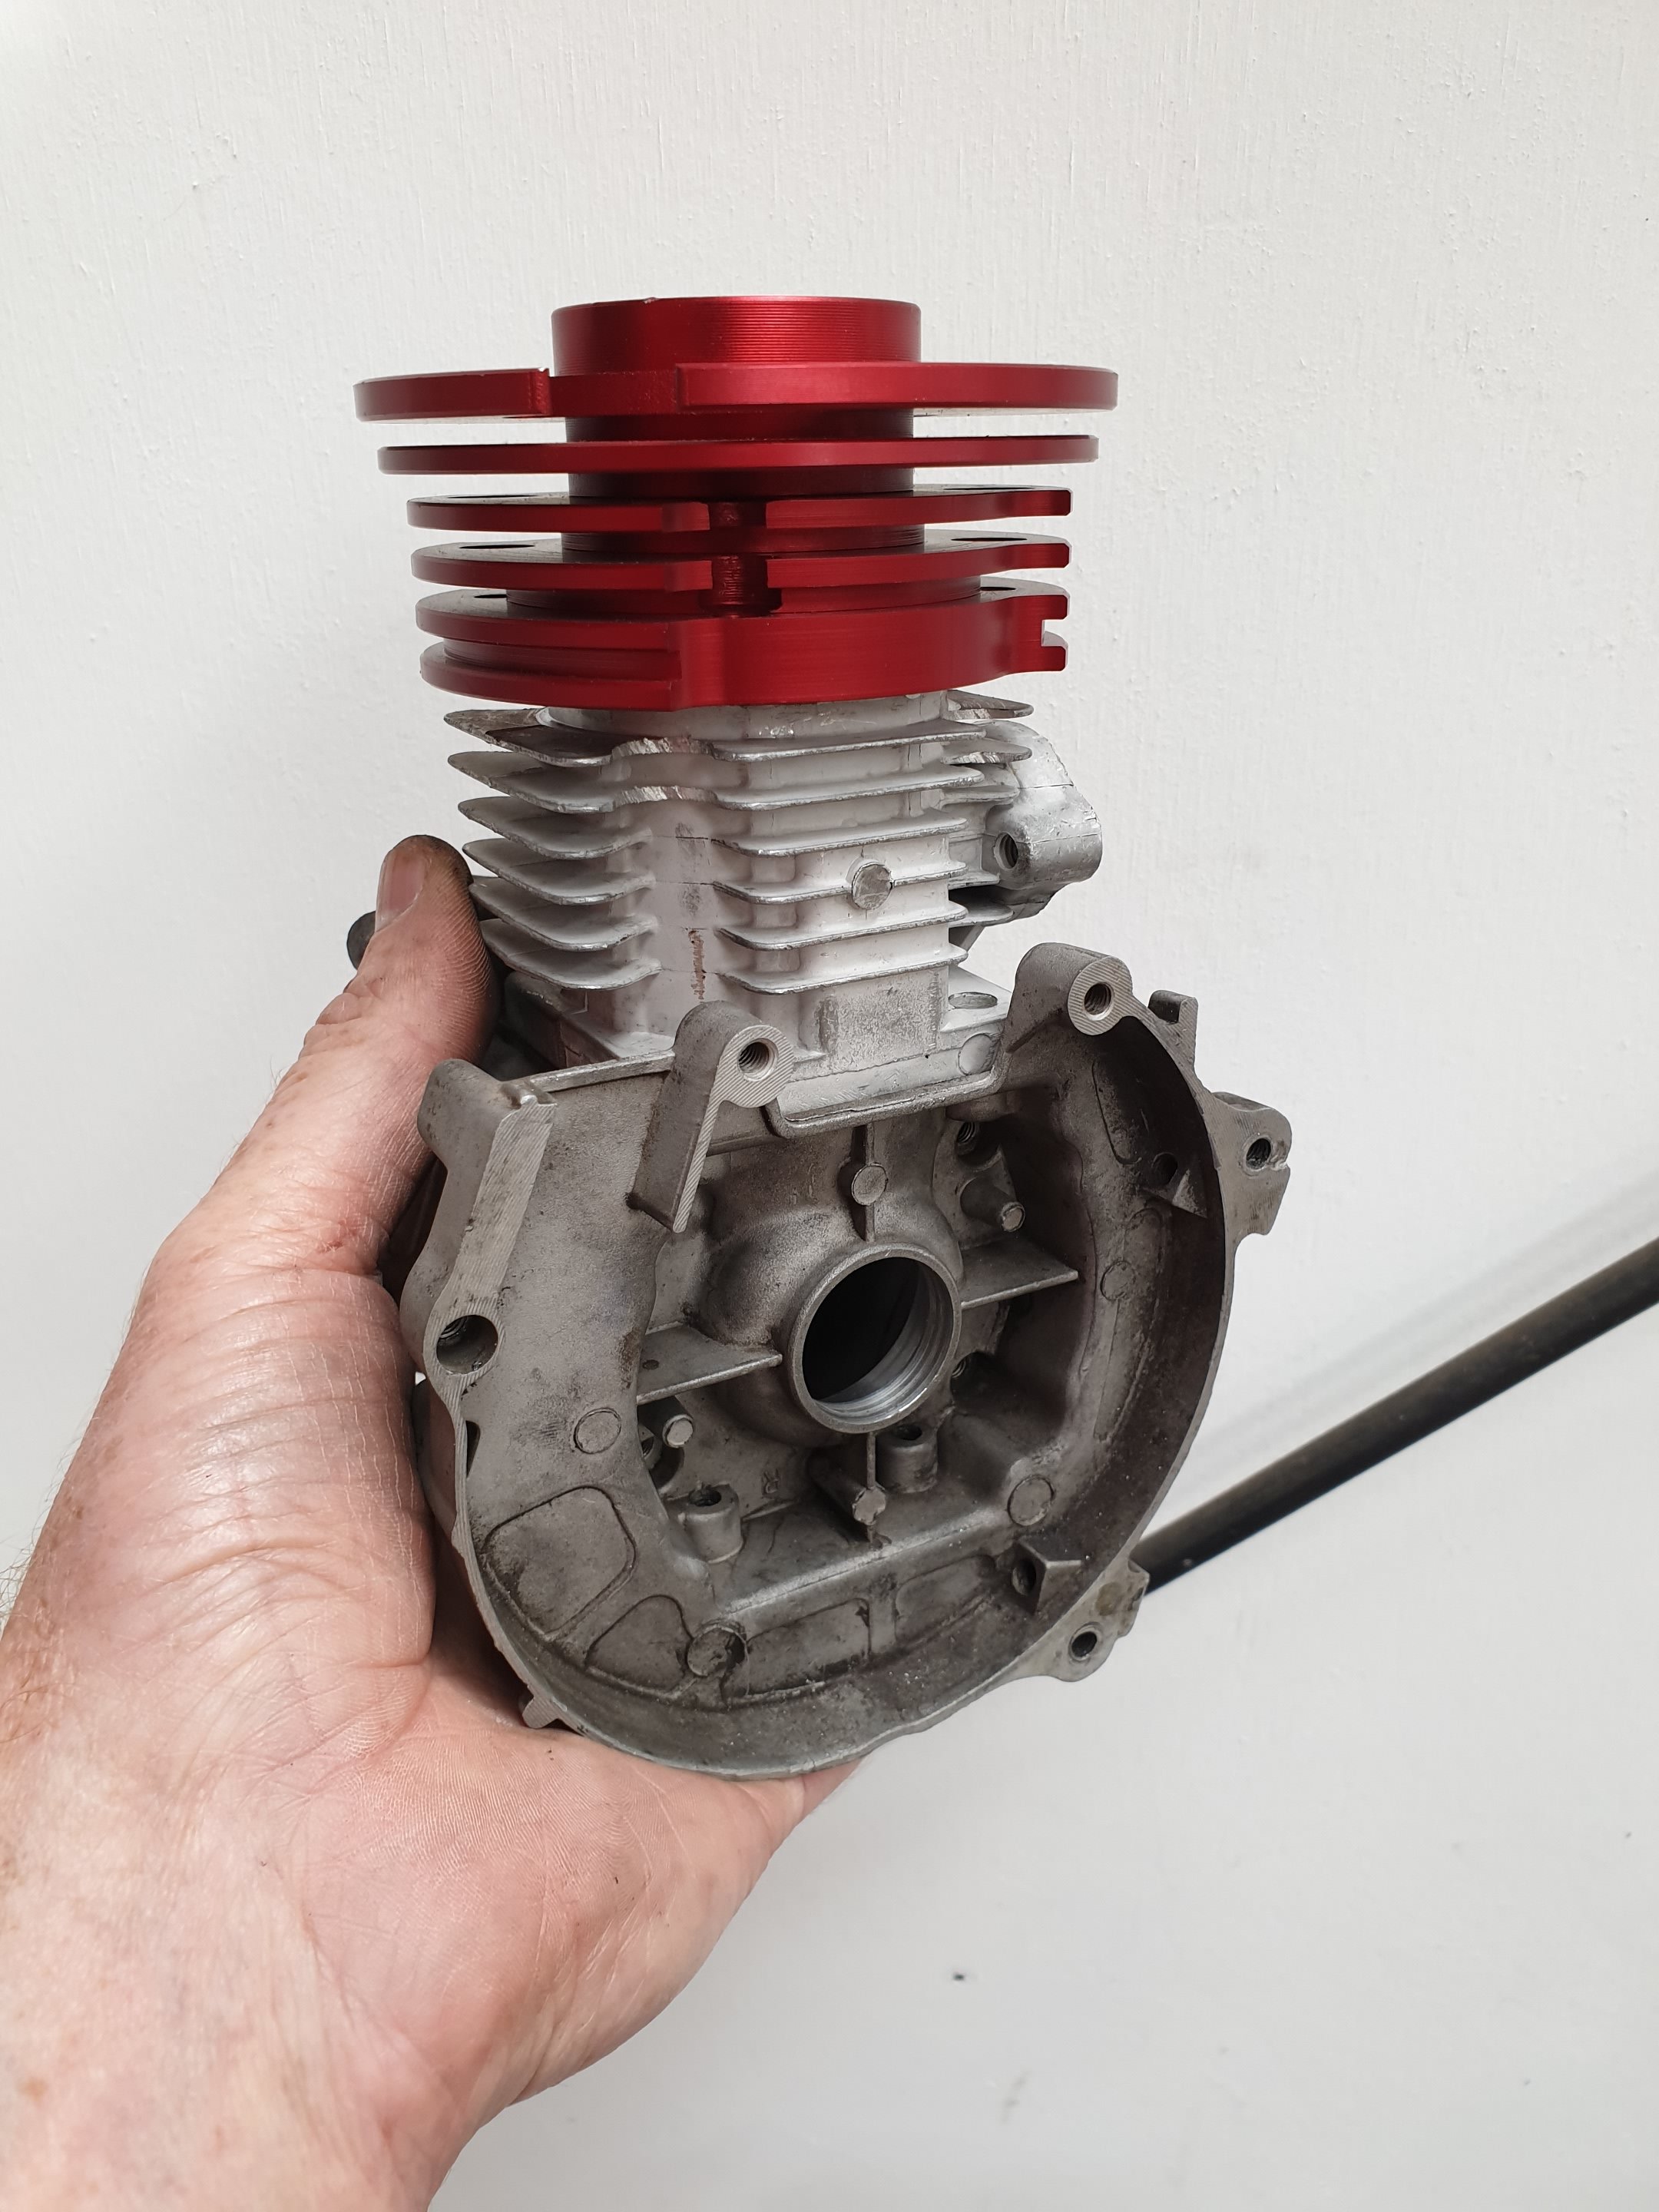
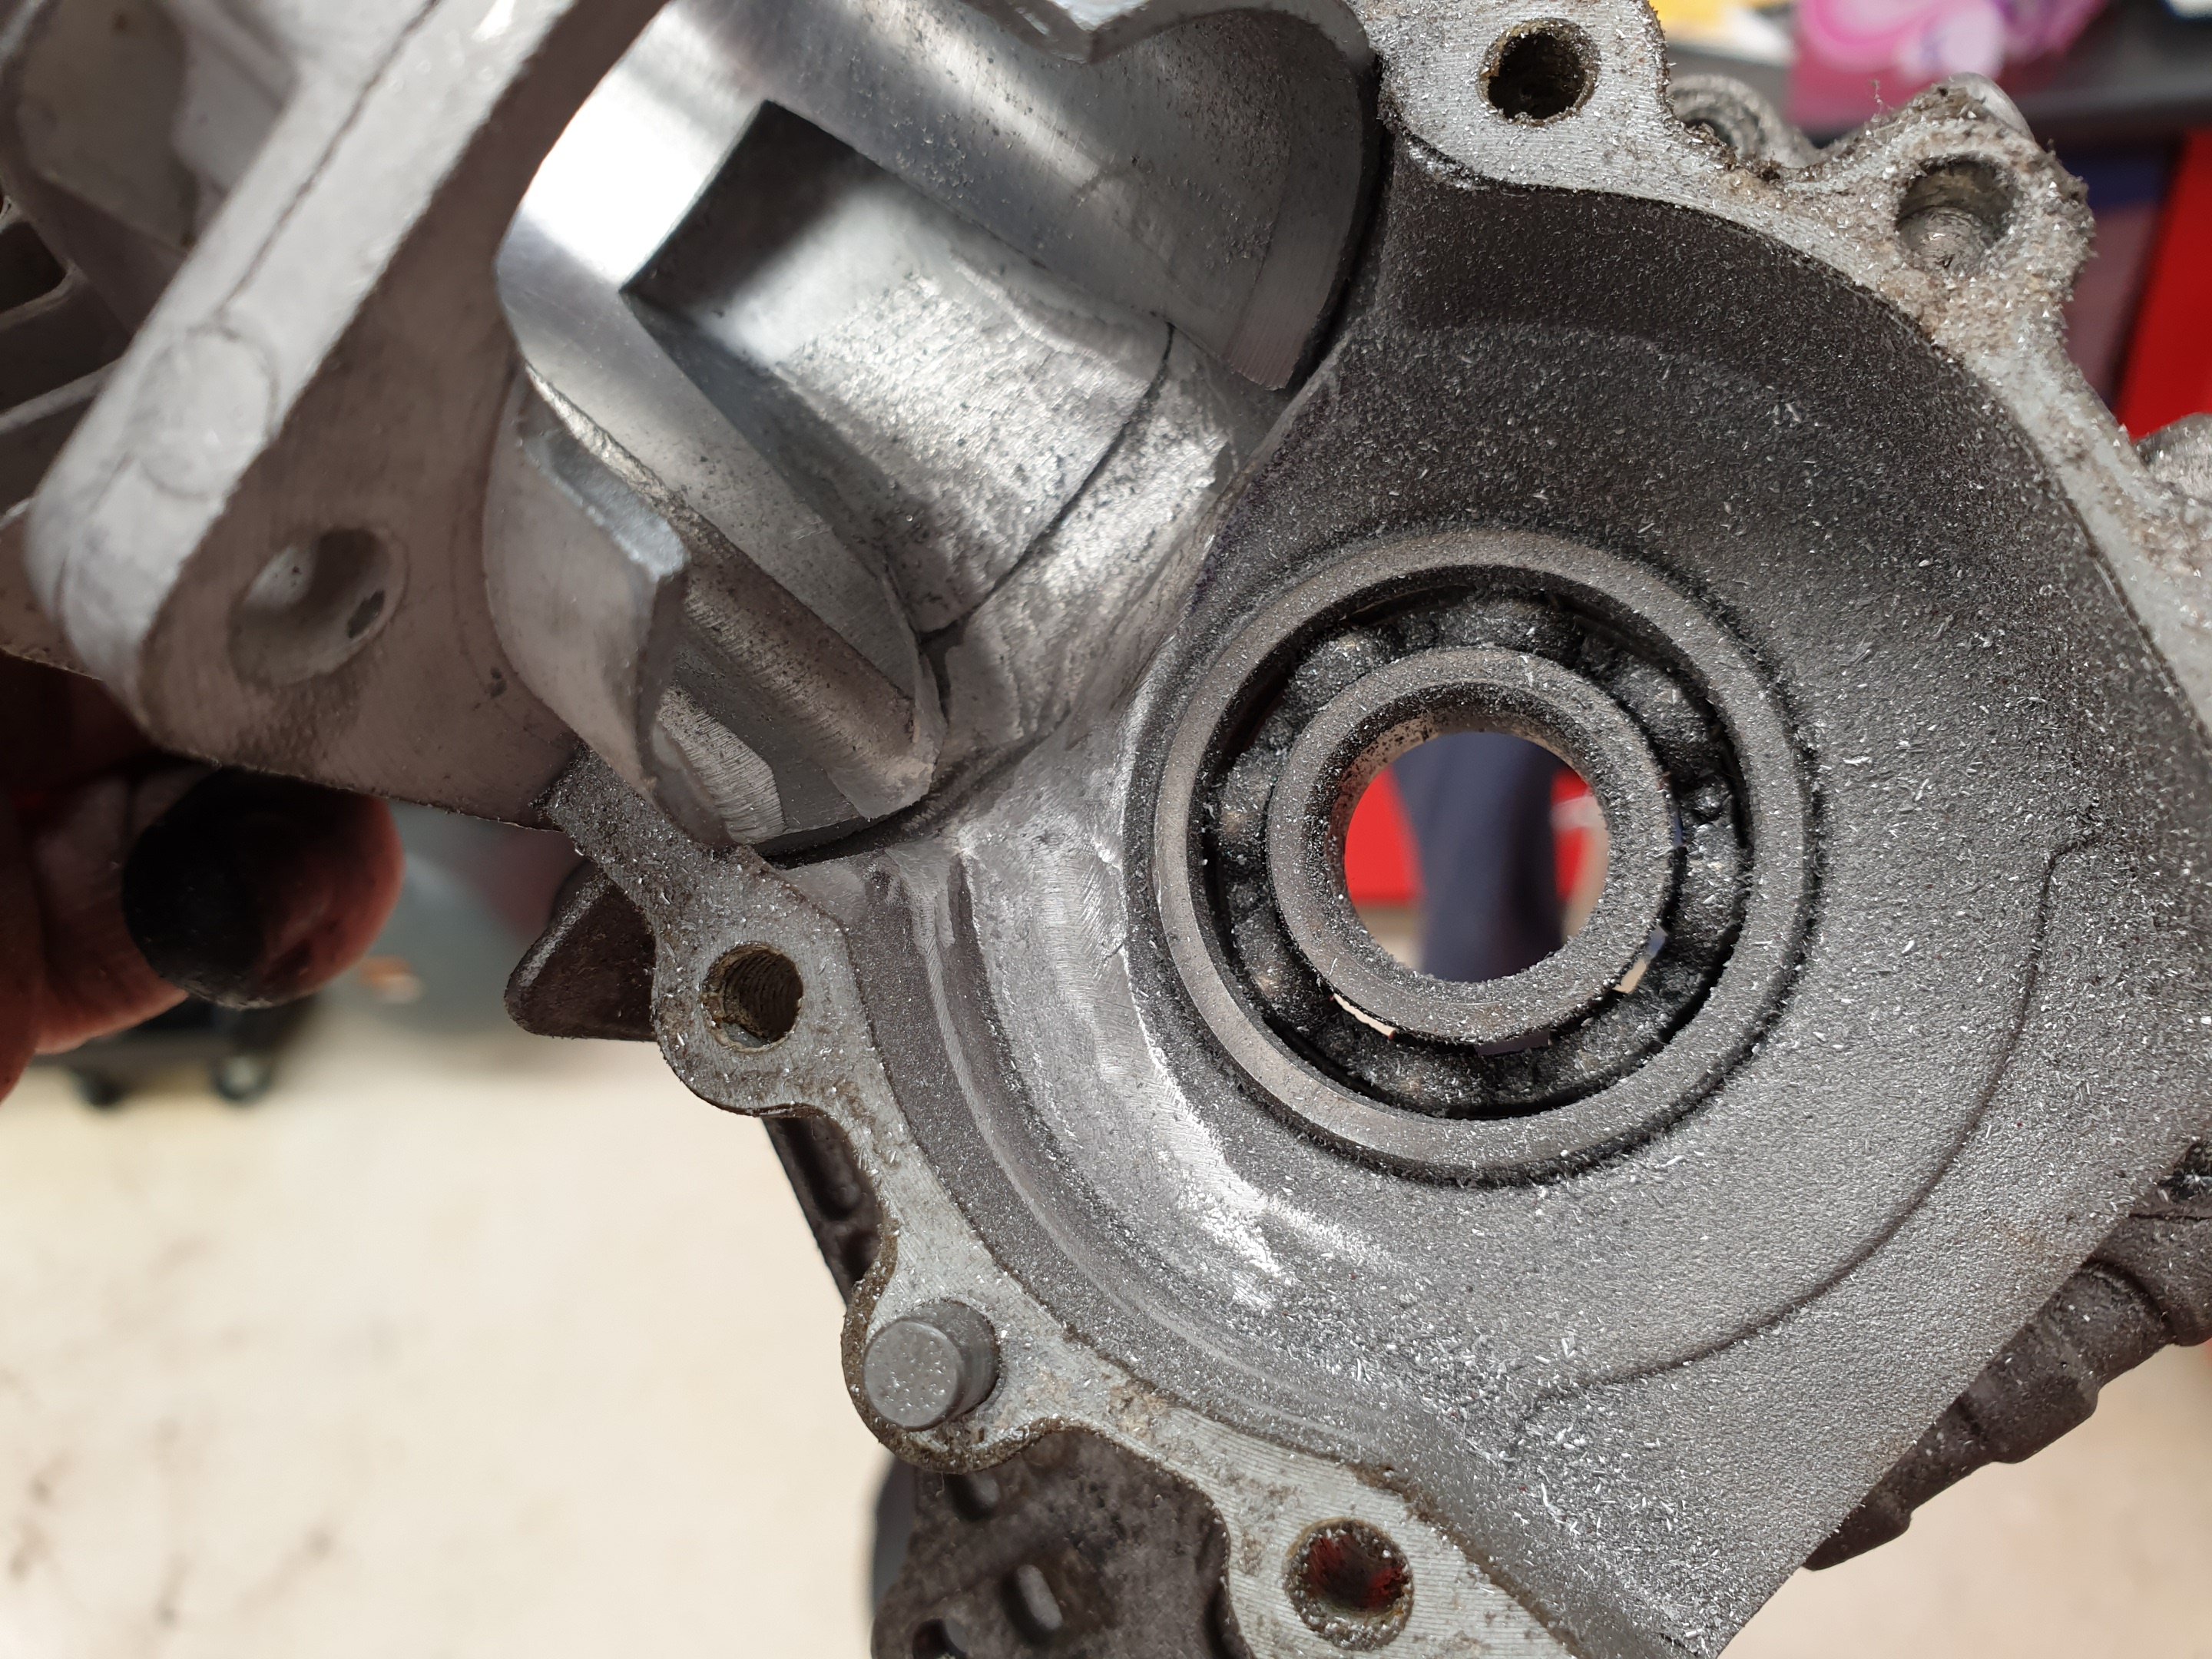
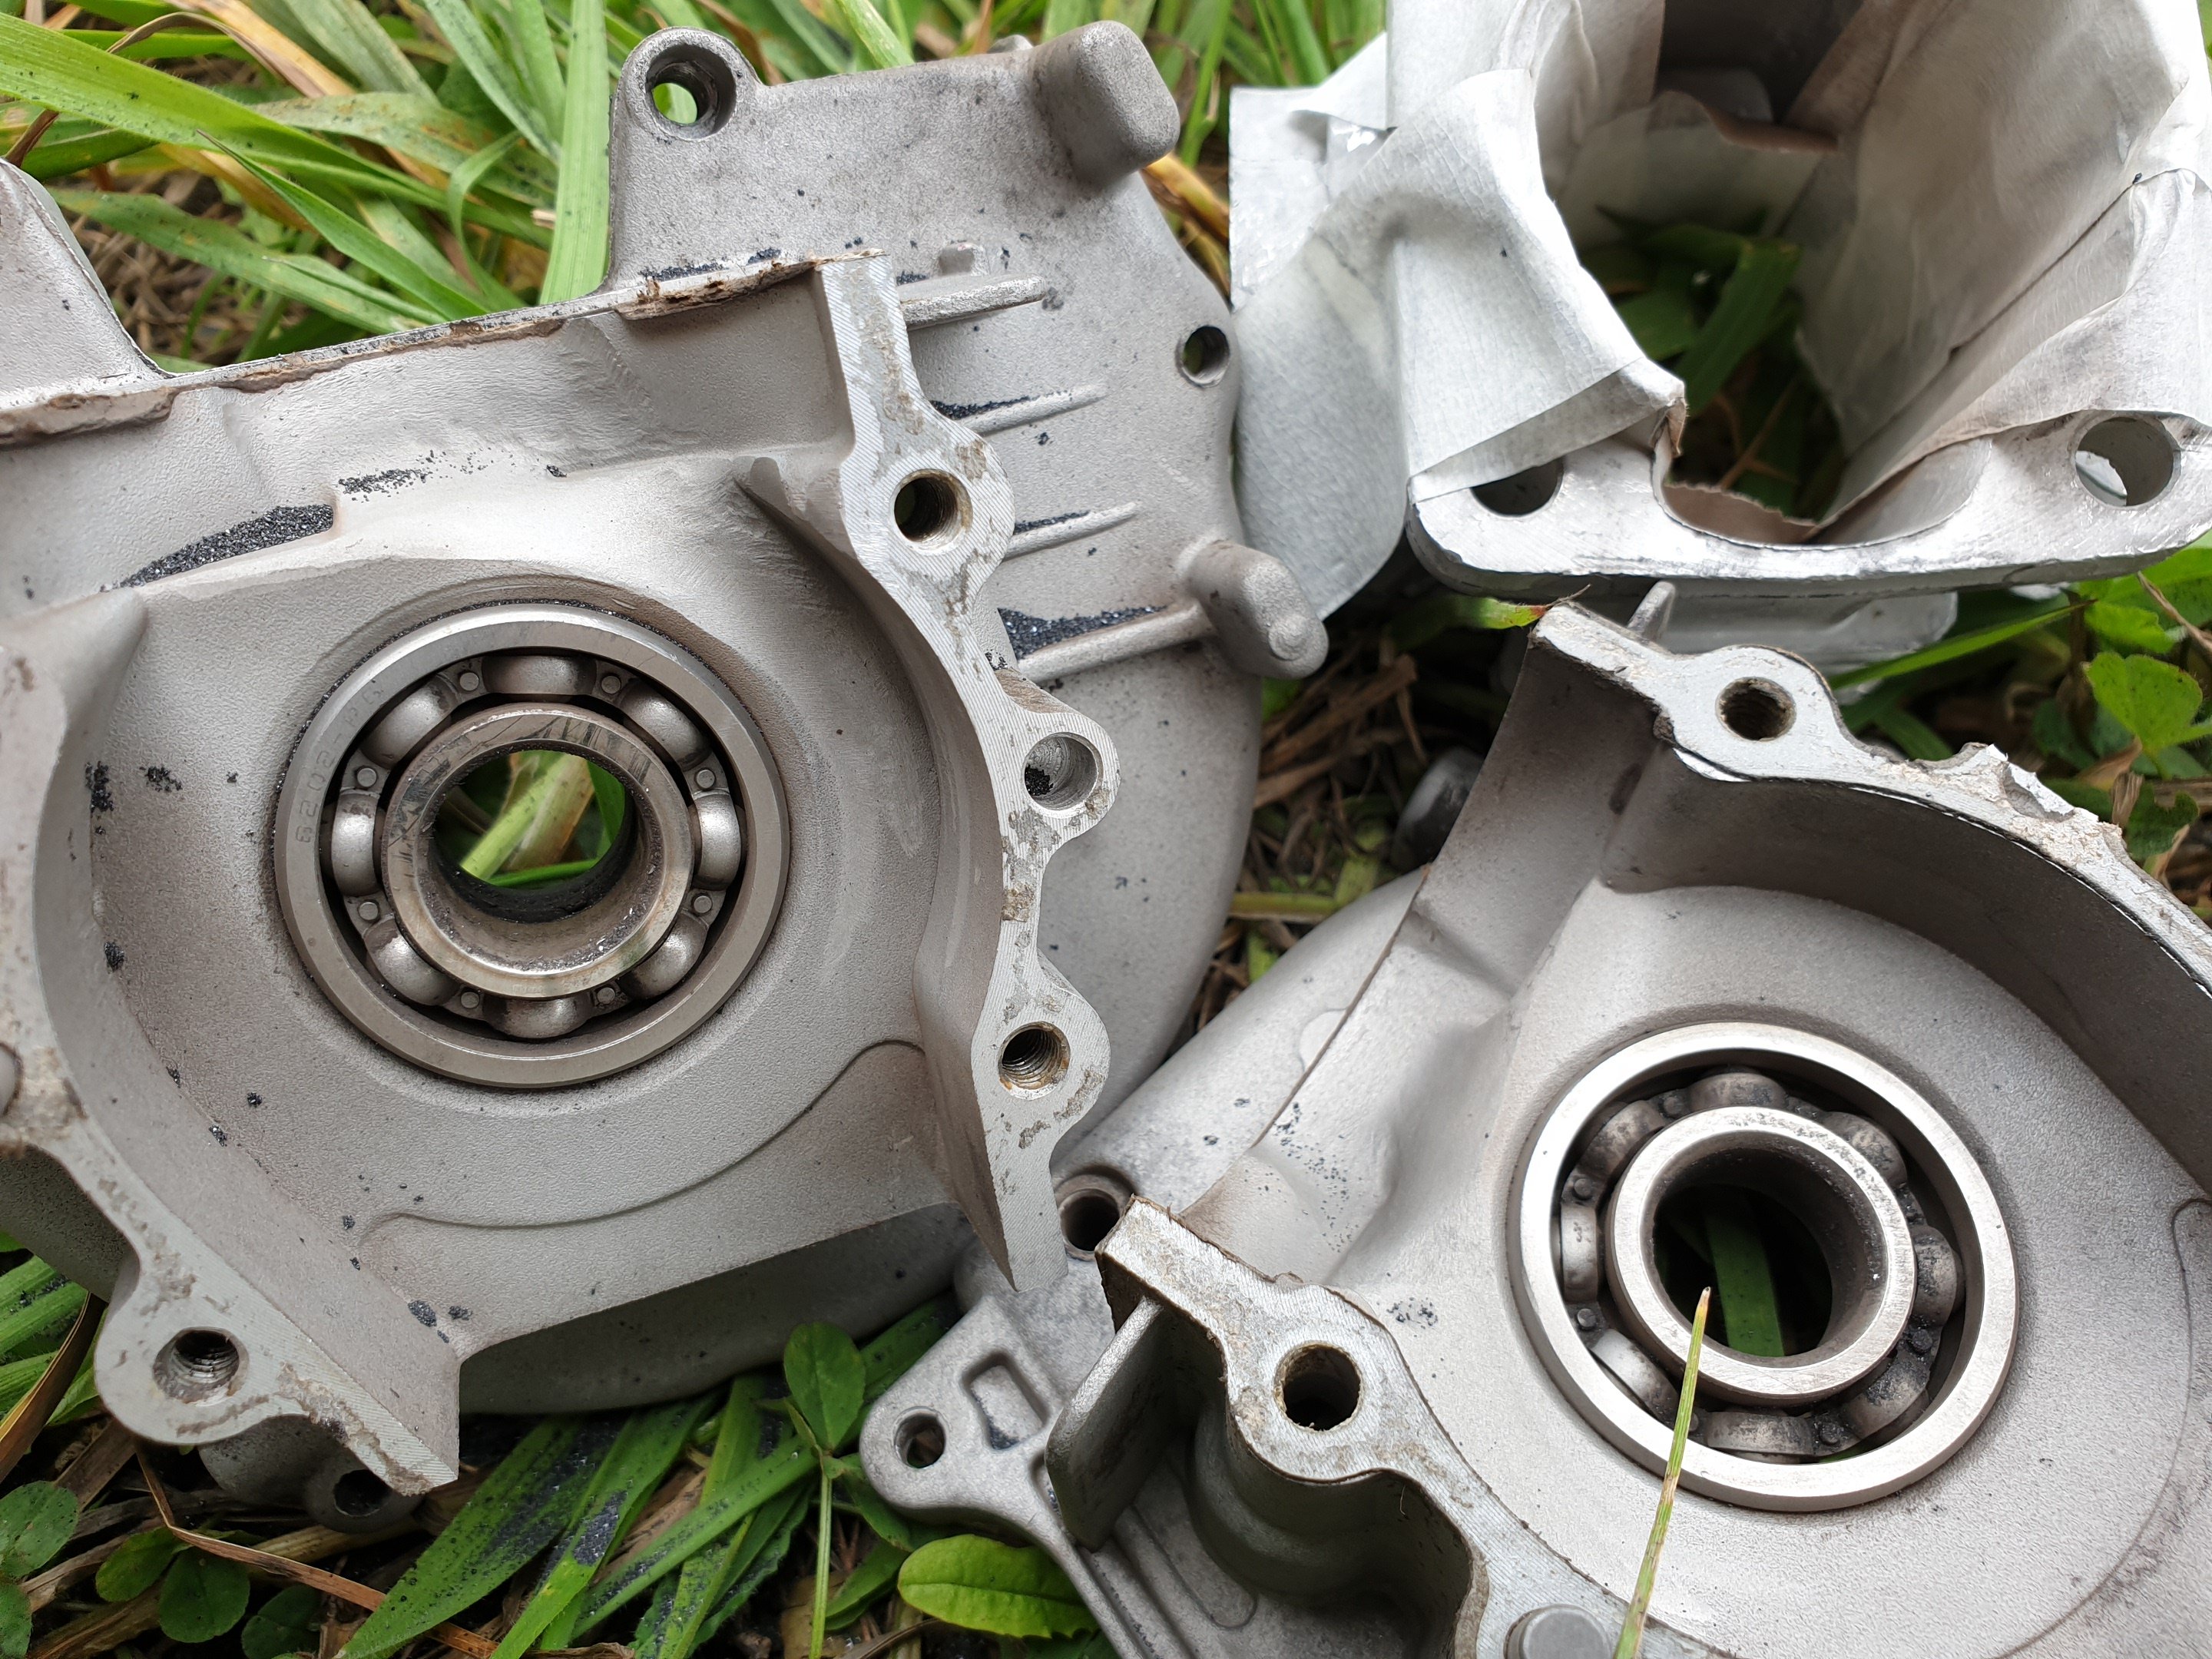
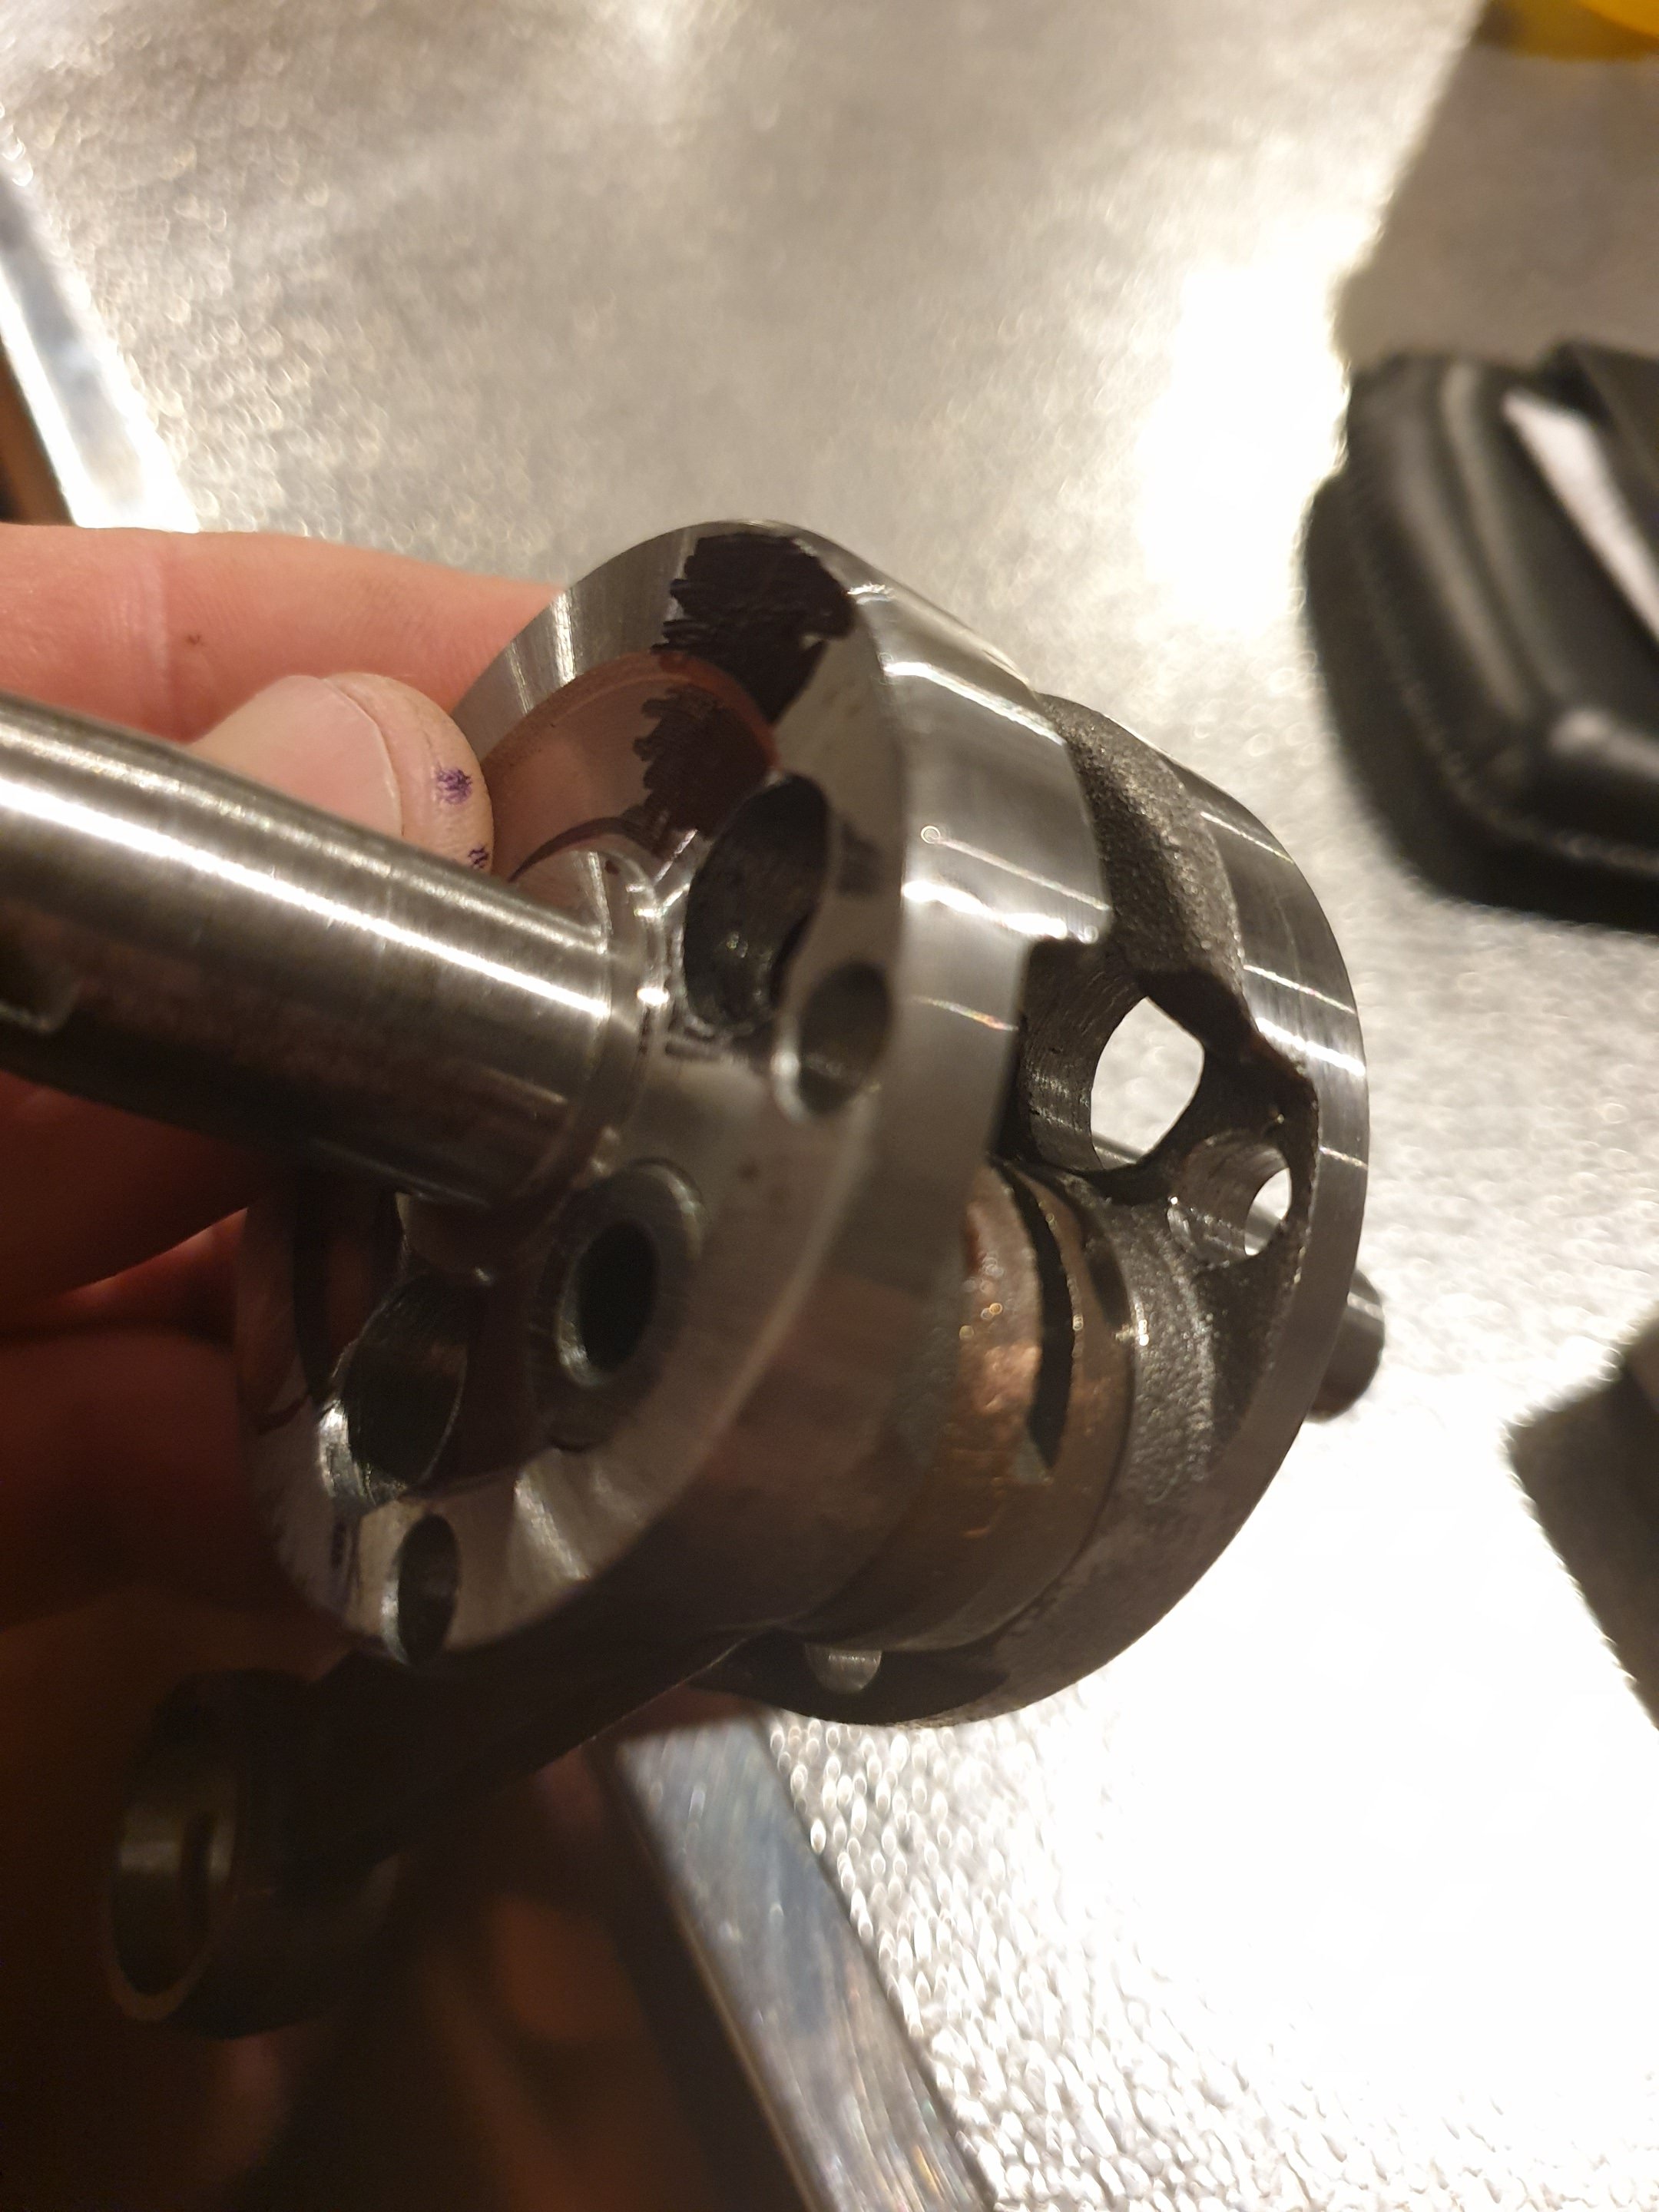
Next I drilled in a bearing lubrication circuit on each half to feed the crankshaft bearings. And all done...with dremelled hole on bearing housing side that allows air/fuel mix to get past bearing, but not the oil seal (same as any other motor using this idea). Hope that helps prolong the clutch bearings that everyone says won't last if using a FCC in this style motor? Time will tell I guess??? Then I chucked the dome on (no internals) just to see what the overall look will be like.
-
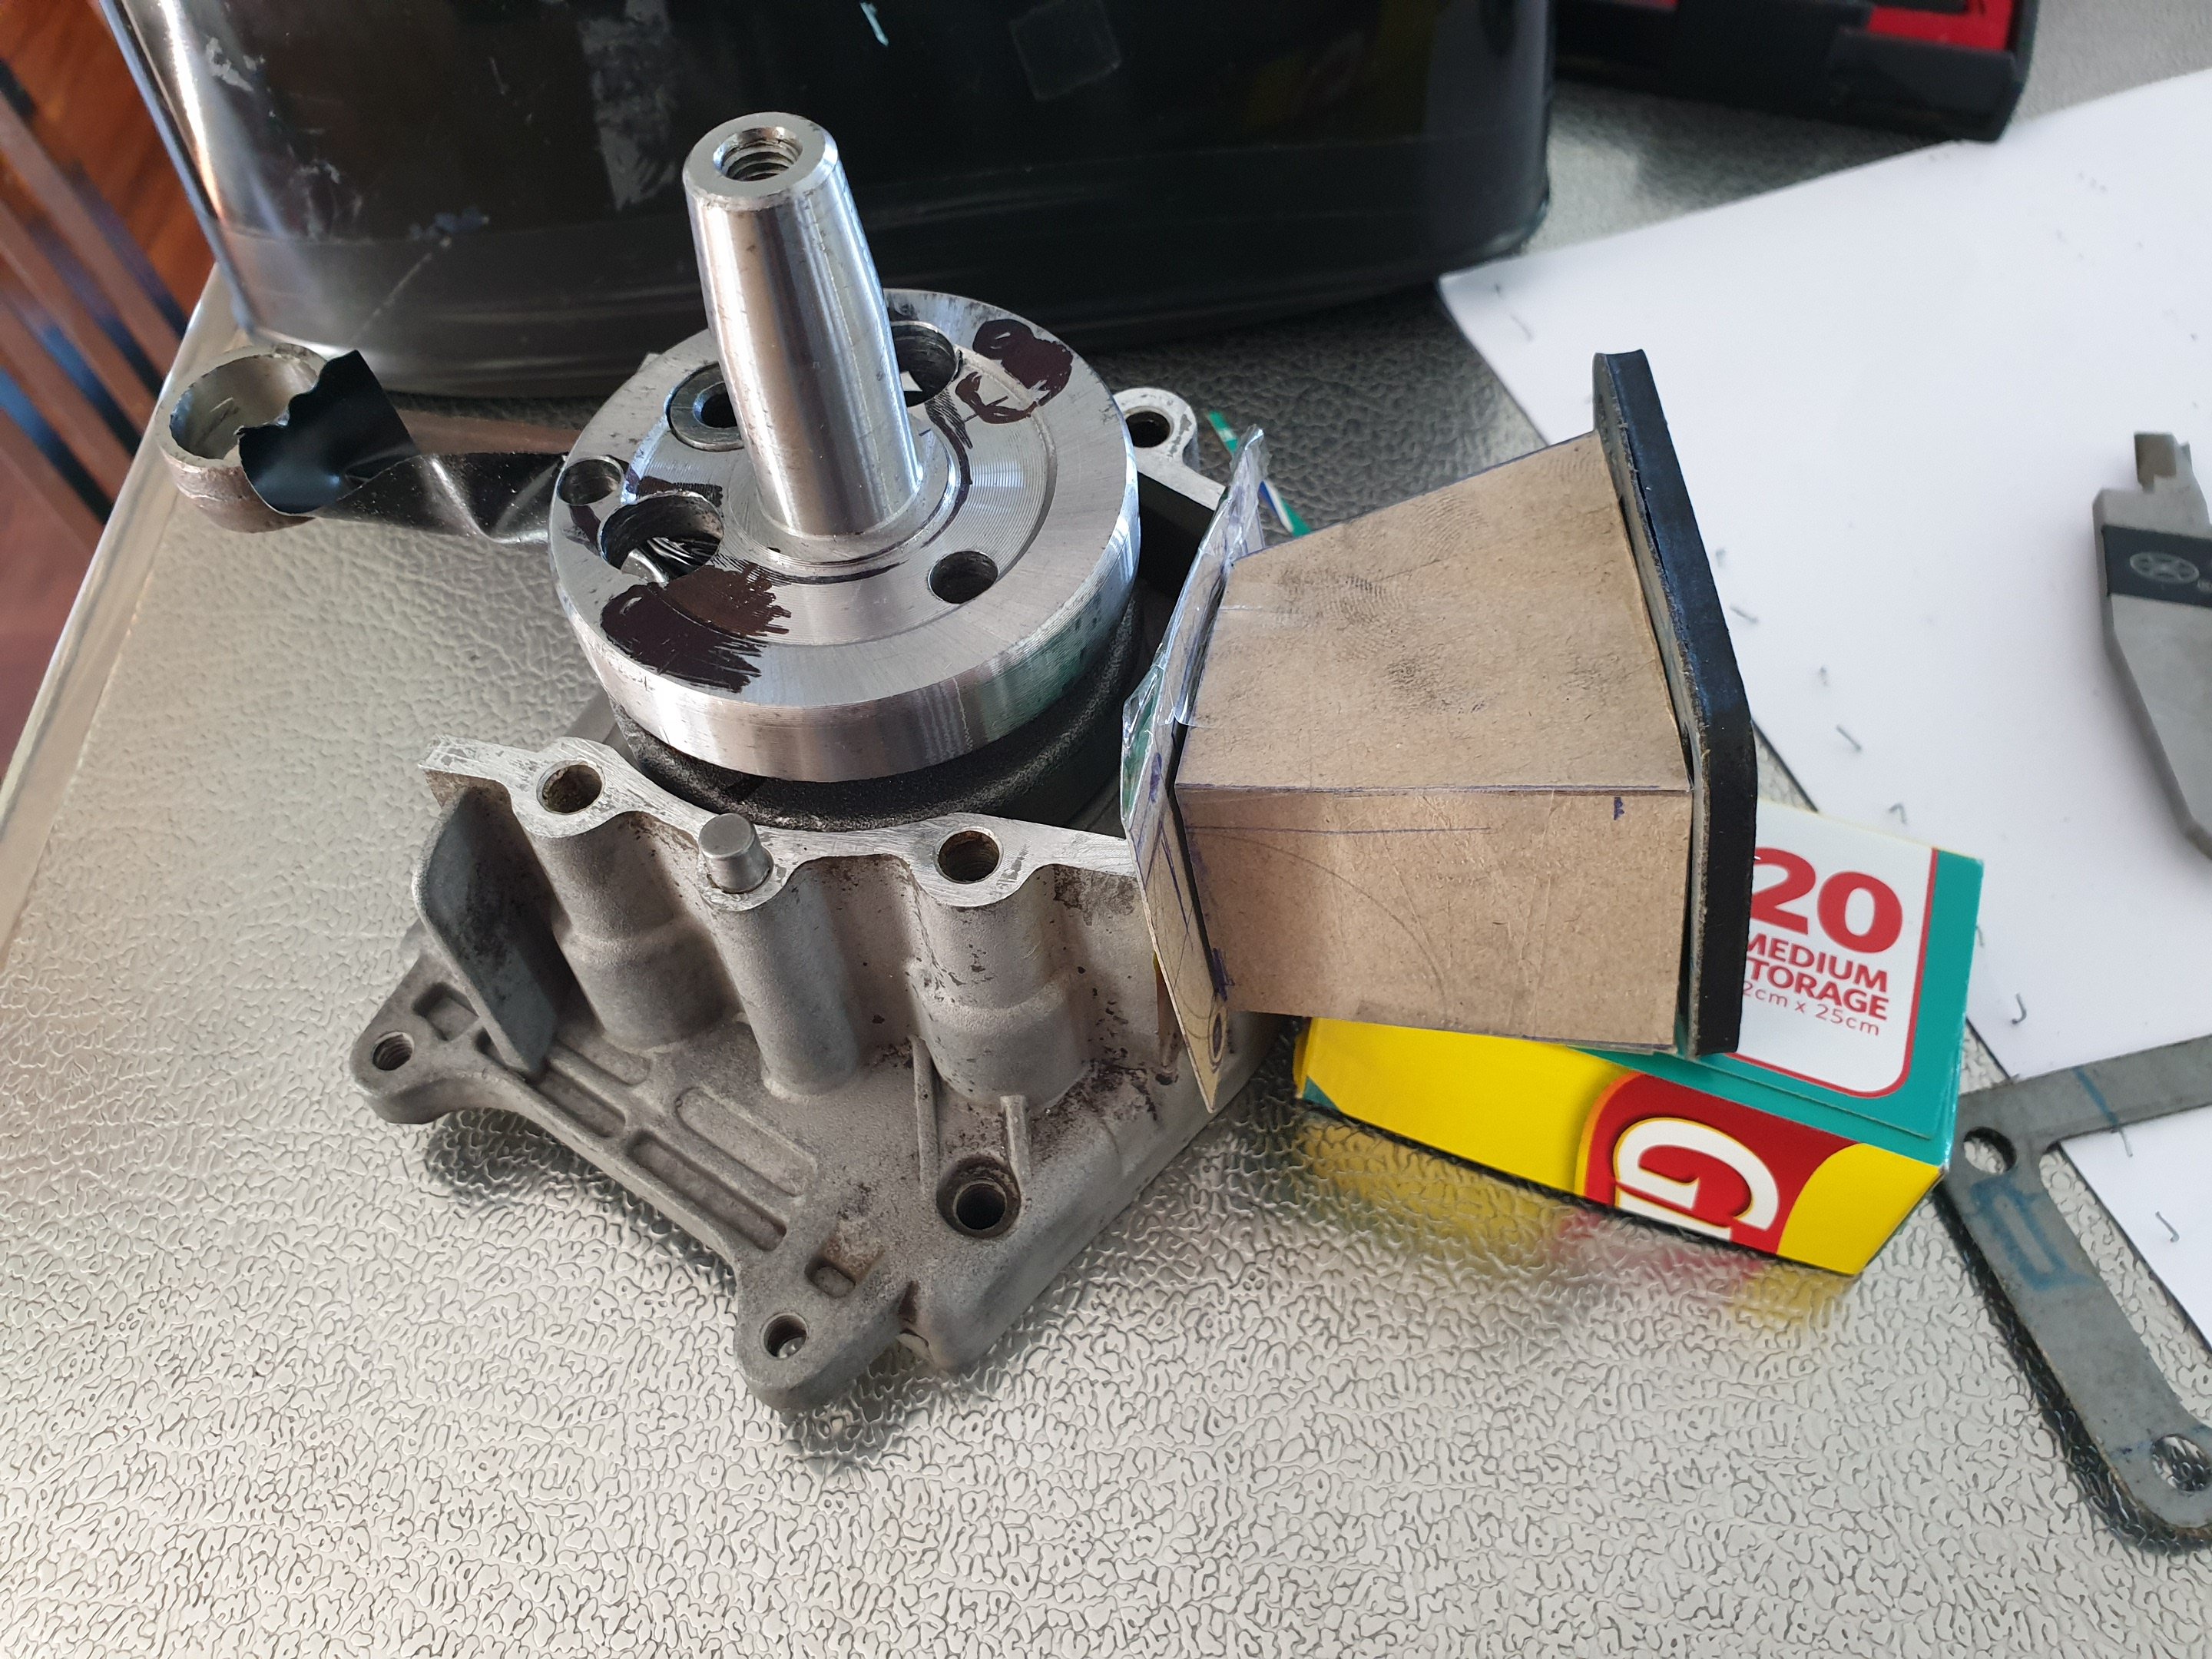
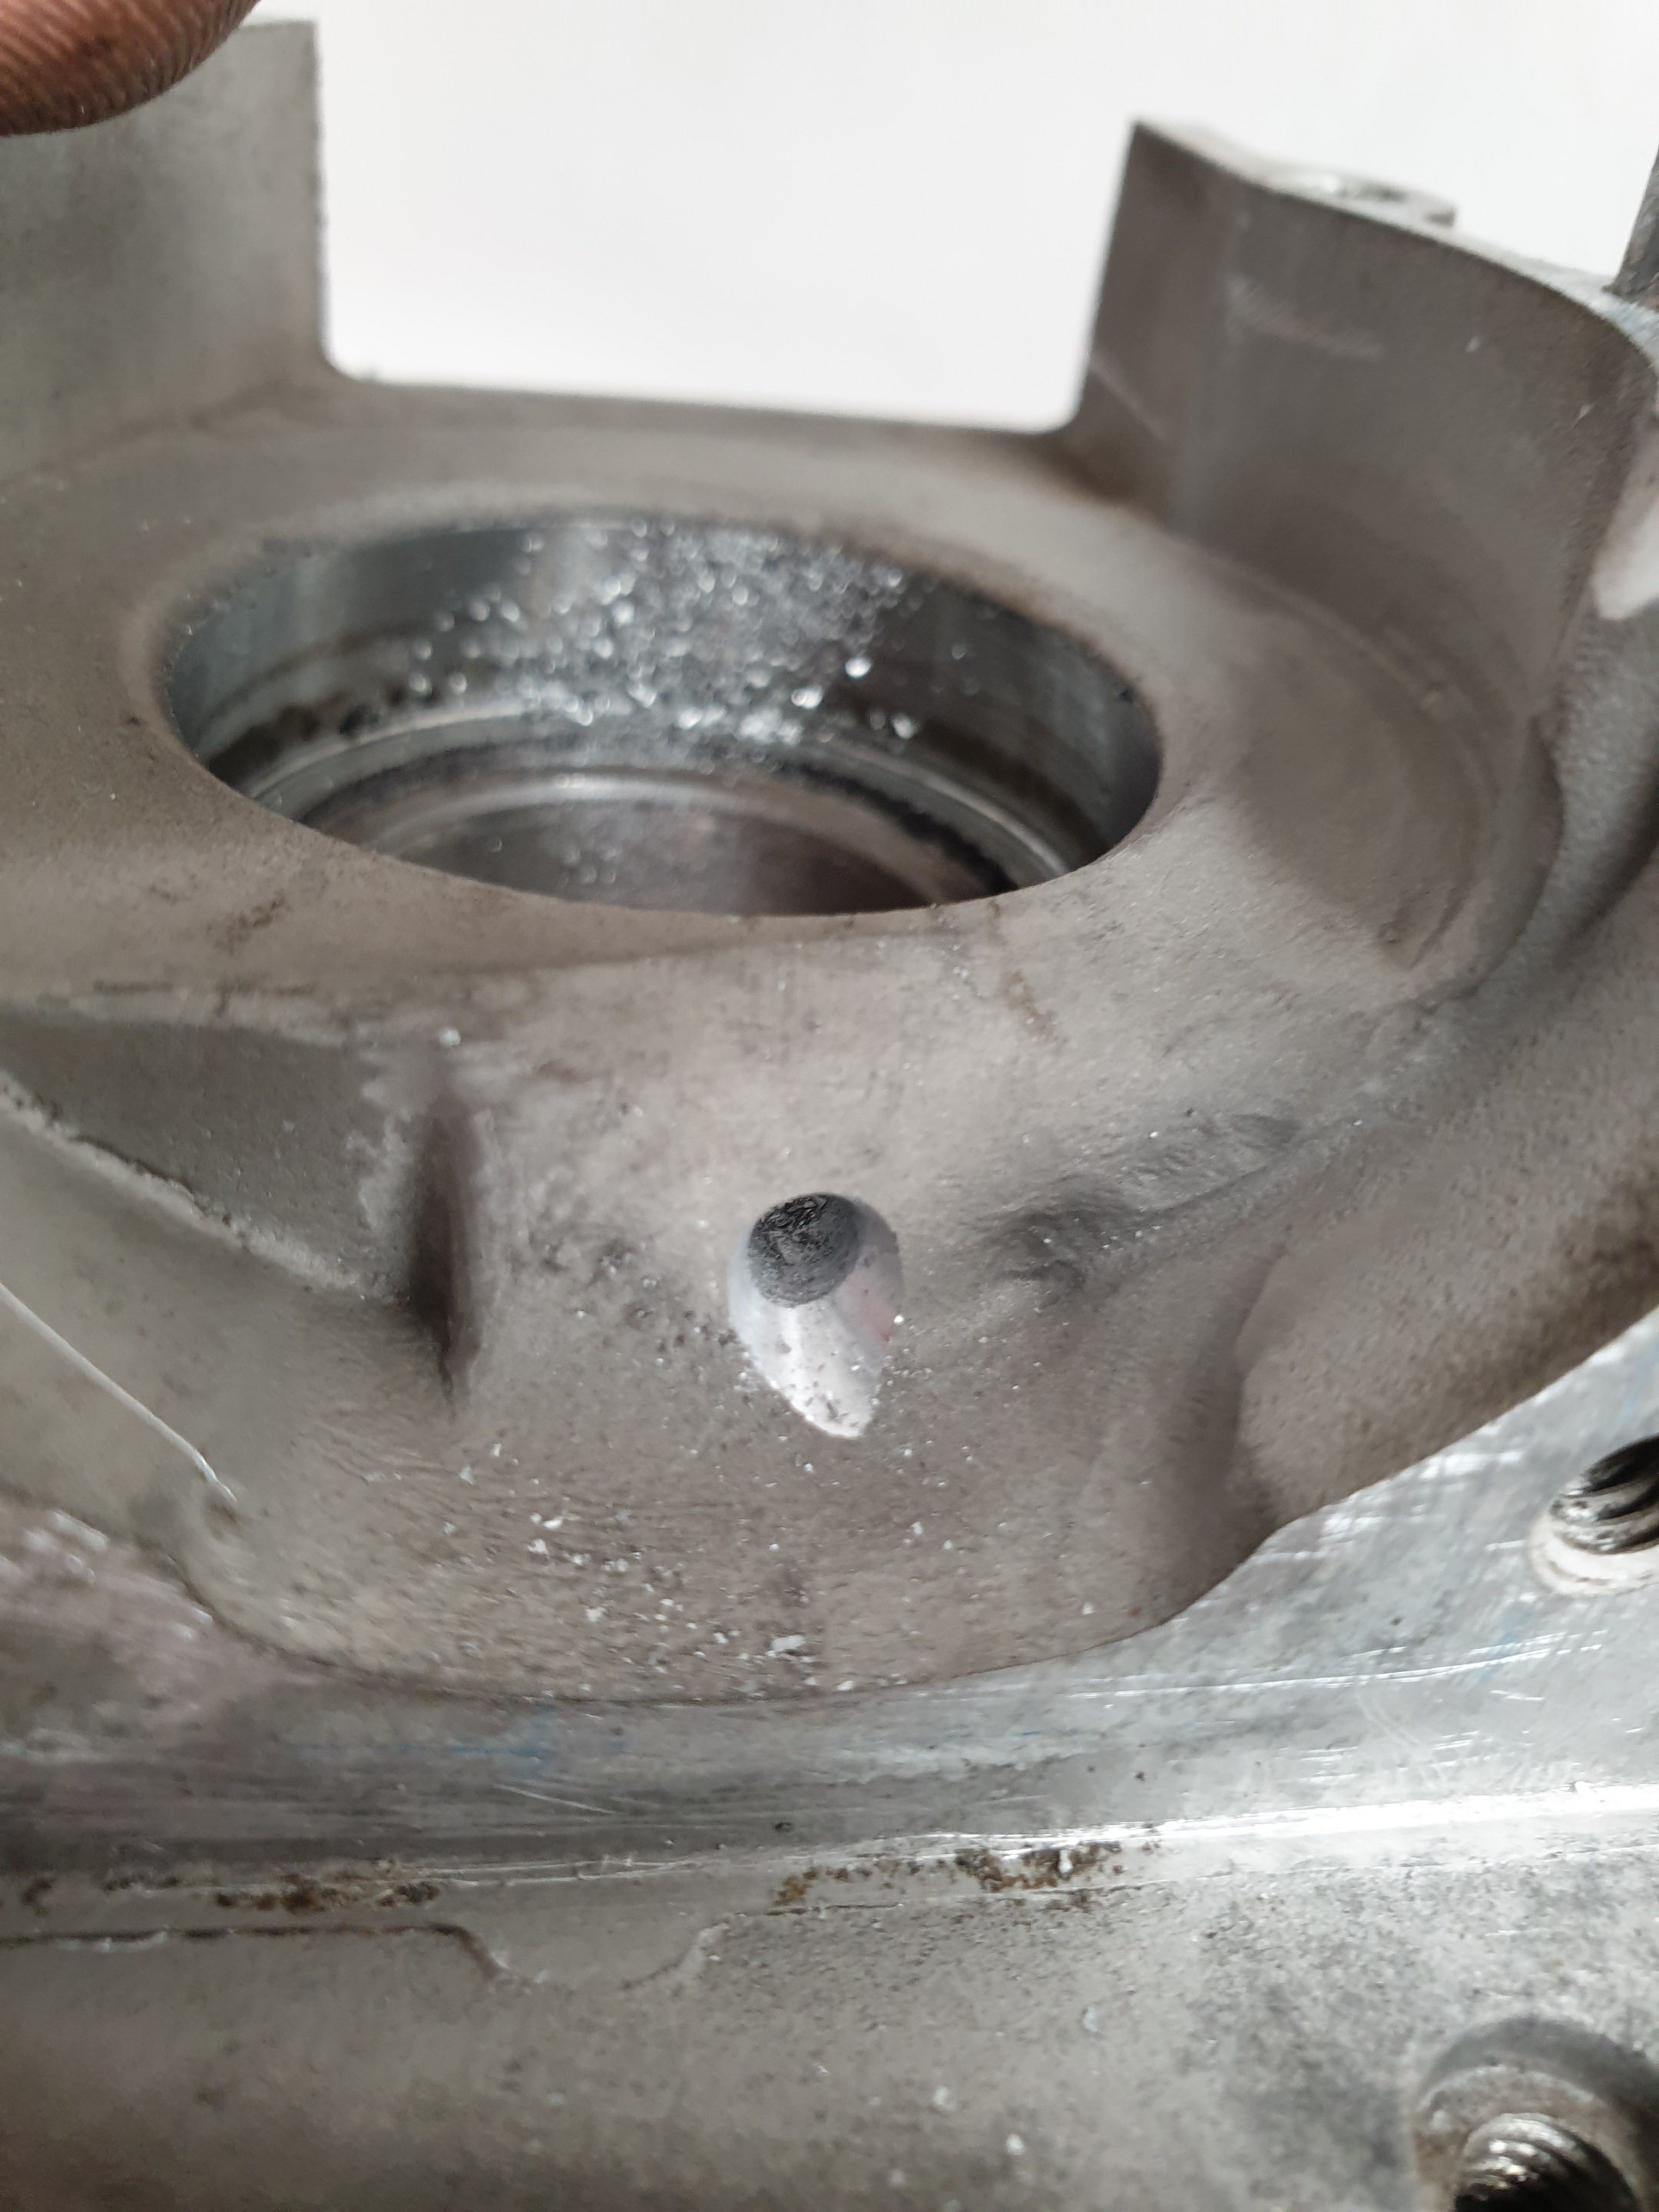
I just got this done during the last 4hrs: Roughly ground in with a dremel, then I tidied it up by sandblasting it. Came out pretty nice I think. Bearings will be replaced...don't panic...
-
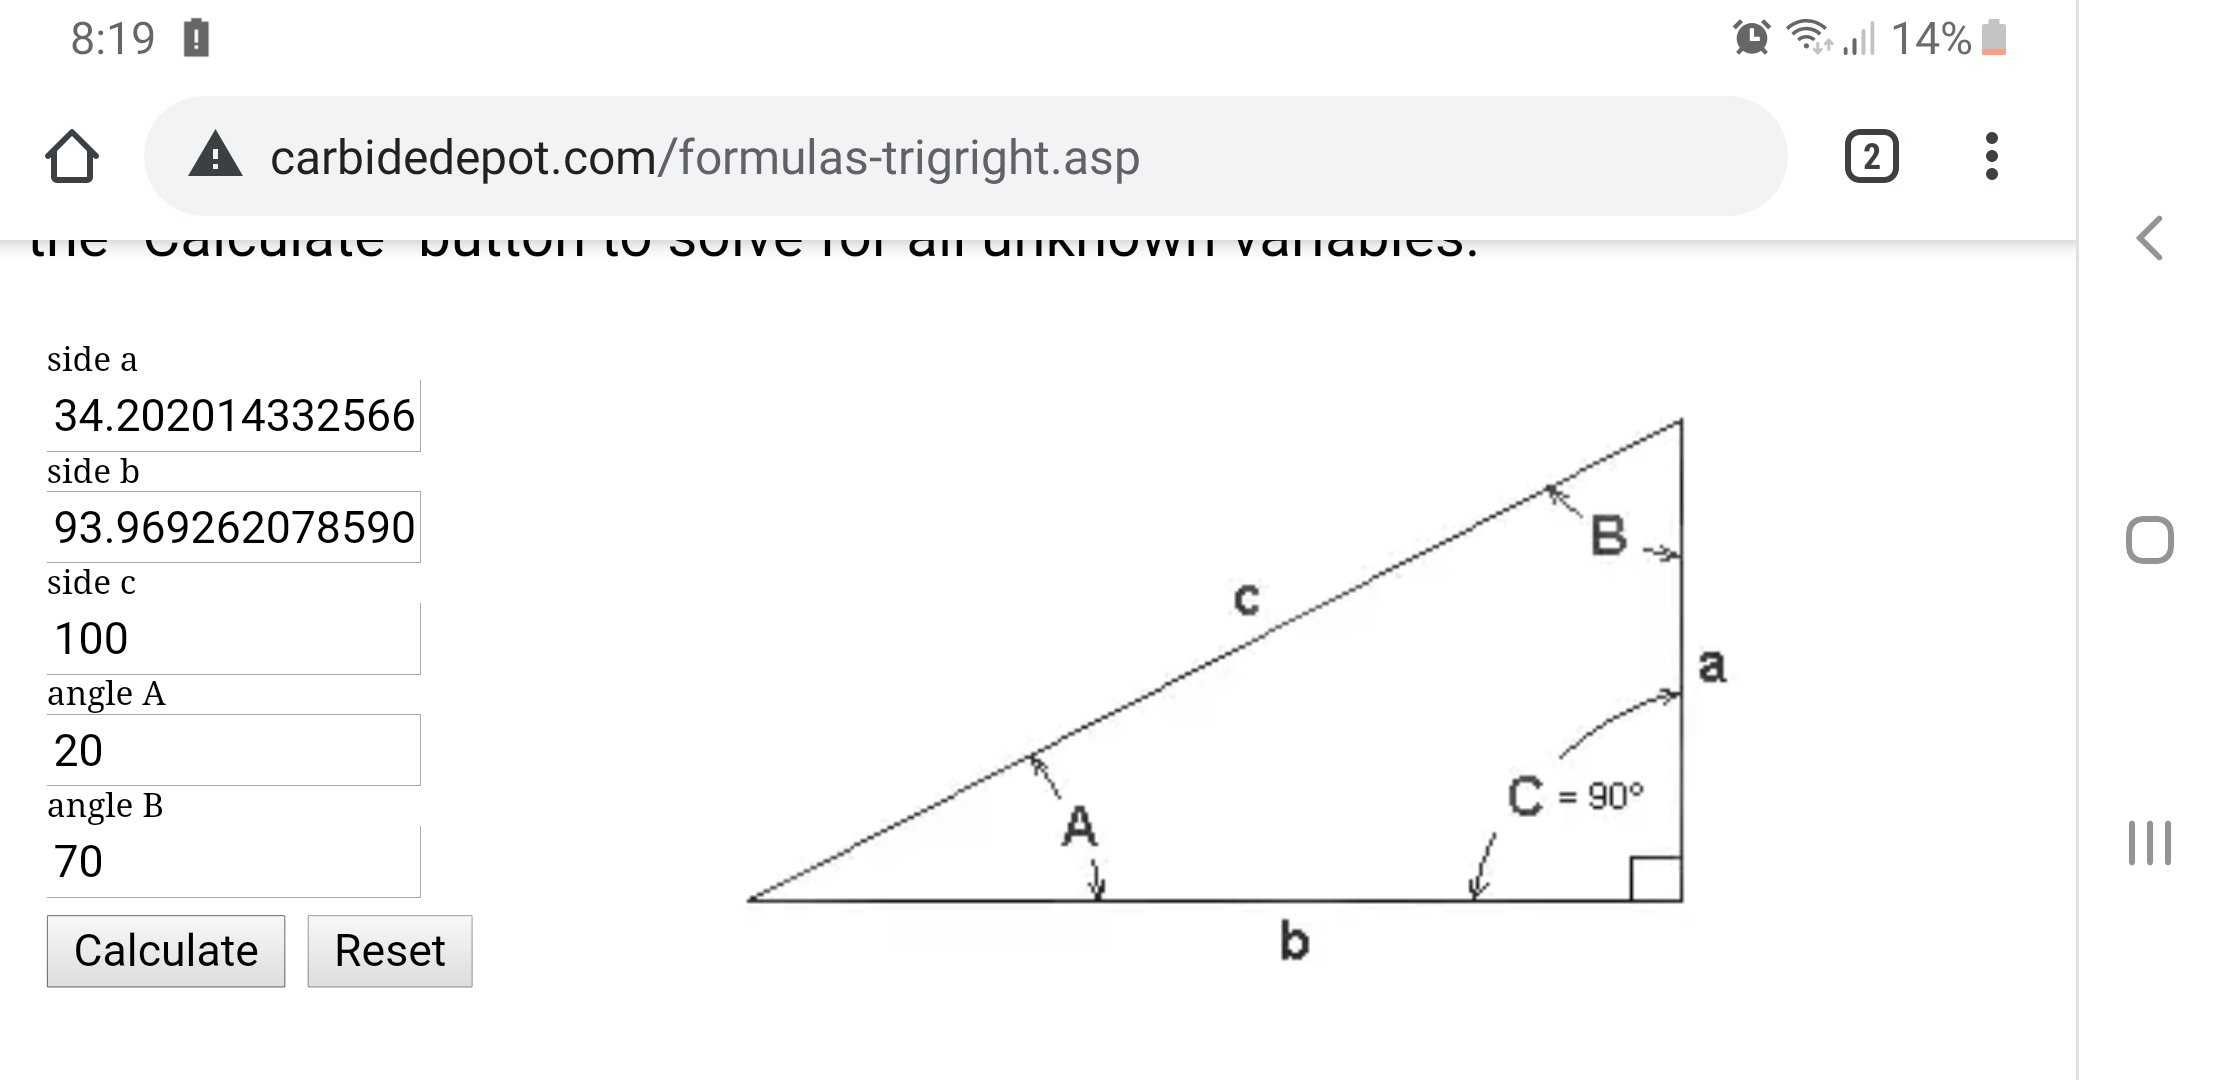
I've googled and googled obsessively for the past week everything I can find on balance factor. My engine is basically horizontal, and unfortunately that's not to common when it comes to small engines that people tinker with. The best information tends to be RC car or boat forums and they tend to use vertical cylinder engines. The performance mods are impressive as to is the passion for experimenting with these little motors...so a lot of good learning can be gleaned from these sites. However it doesn't 100% translate to my immediate needs. There was an article on one of these websites that used a constant (K) for calculations. For horizontal cylinder engines K=0.67 and for vertical cylinder engines K = 0.75. Basically the article said the pressure within the cylinder when all things were considered made the orientation negligible. As the weight of the piston was only a fraction of the force created by the fuel/air. This makes sense. It's the only article I've found that actually qualifies it, lots of other people mentioned there would be a difference in balance factor between horizontal v vertical, but didn't give it a value. I realise that the value changes with rpm as rotational inertia and reciprocating inertia values mathematically change at different rates - so as rpms change so does the relationship between these balance points...but I'm happy to work with an average (rule of thumb) for a set value. All my reading says balance factor can range from 20% to 80%, it all comes down to the way the engine transfers the vibration through the chassis. It's more about the felt vibration and biasing it to your favor. Up/down vibration is normally less desirable than back/forward. At some point the harmonics "will feel nicer" and that's about all you can actually achieve with a single cylinder. The general consensus was around 53-55% for vertical engines gives a nice overall result in most situations. So my way of thinking is to convert the 2 constants into a percentage and then convert the vertical values to horizontal? That's the cool thing about a constant (K value) in an equation, all the other variables cancel each other out leaving just the K. So if: K(vertical) ÷ K(horizontal) x100 = % 0.67 ÷ 0.75 x100 = 89% Therefore if 55% is the most common vertical balance factor used, then to roughly convert it to horizontal it would be: 55% x 0.89 = 49% The cag motor is actually 20° cylinder orientation. So using a bit of trigonometry you could say its roughly equivalent to 93% horizontal. So adding it all together 0.93 x 0.89 x 55% = 45% corrected balance factor. So that's the goal now, I'm aiming for 45%BF. Note BF could also stand for "bullshit factor" as I realise this isn't exactly science here, more a factor of a factor of an approximation...but the numbers seem in the ballpark of what others have arrived at too...so fuck it - going to just do it and see what happens?
-
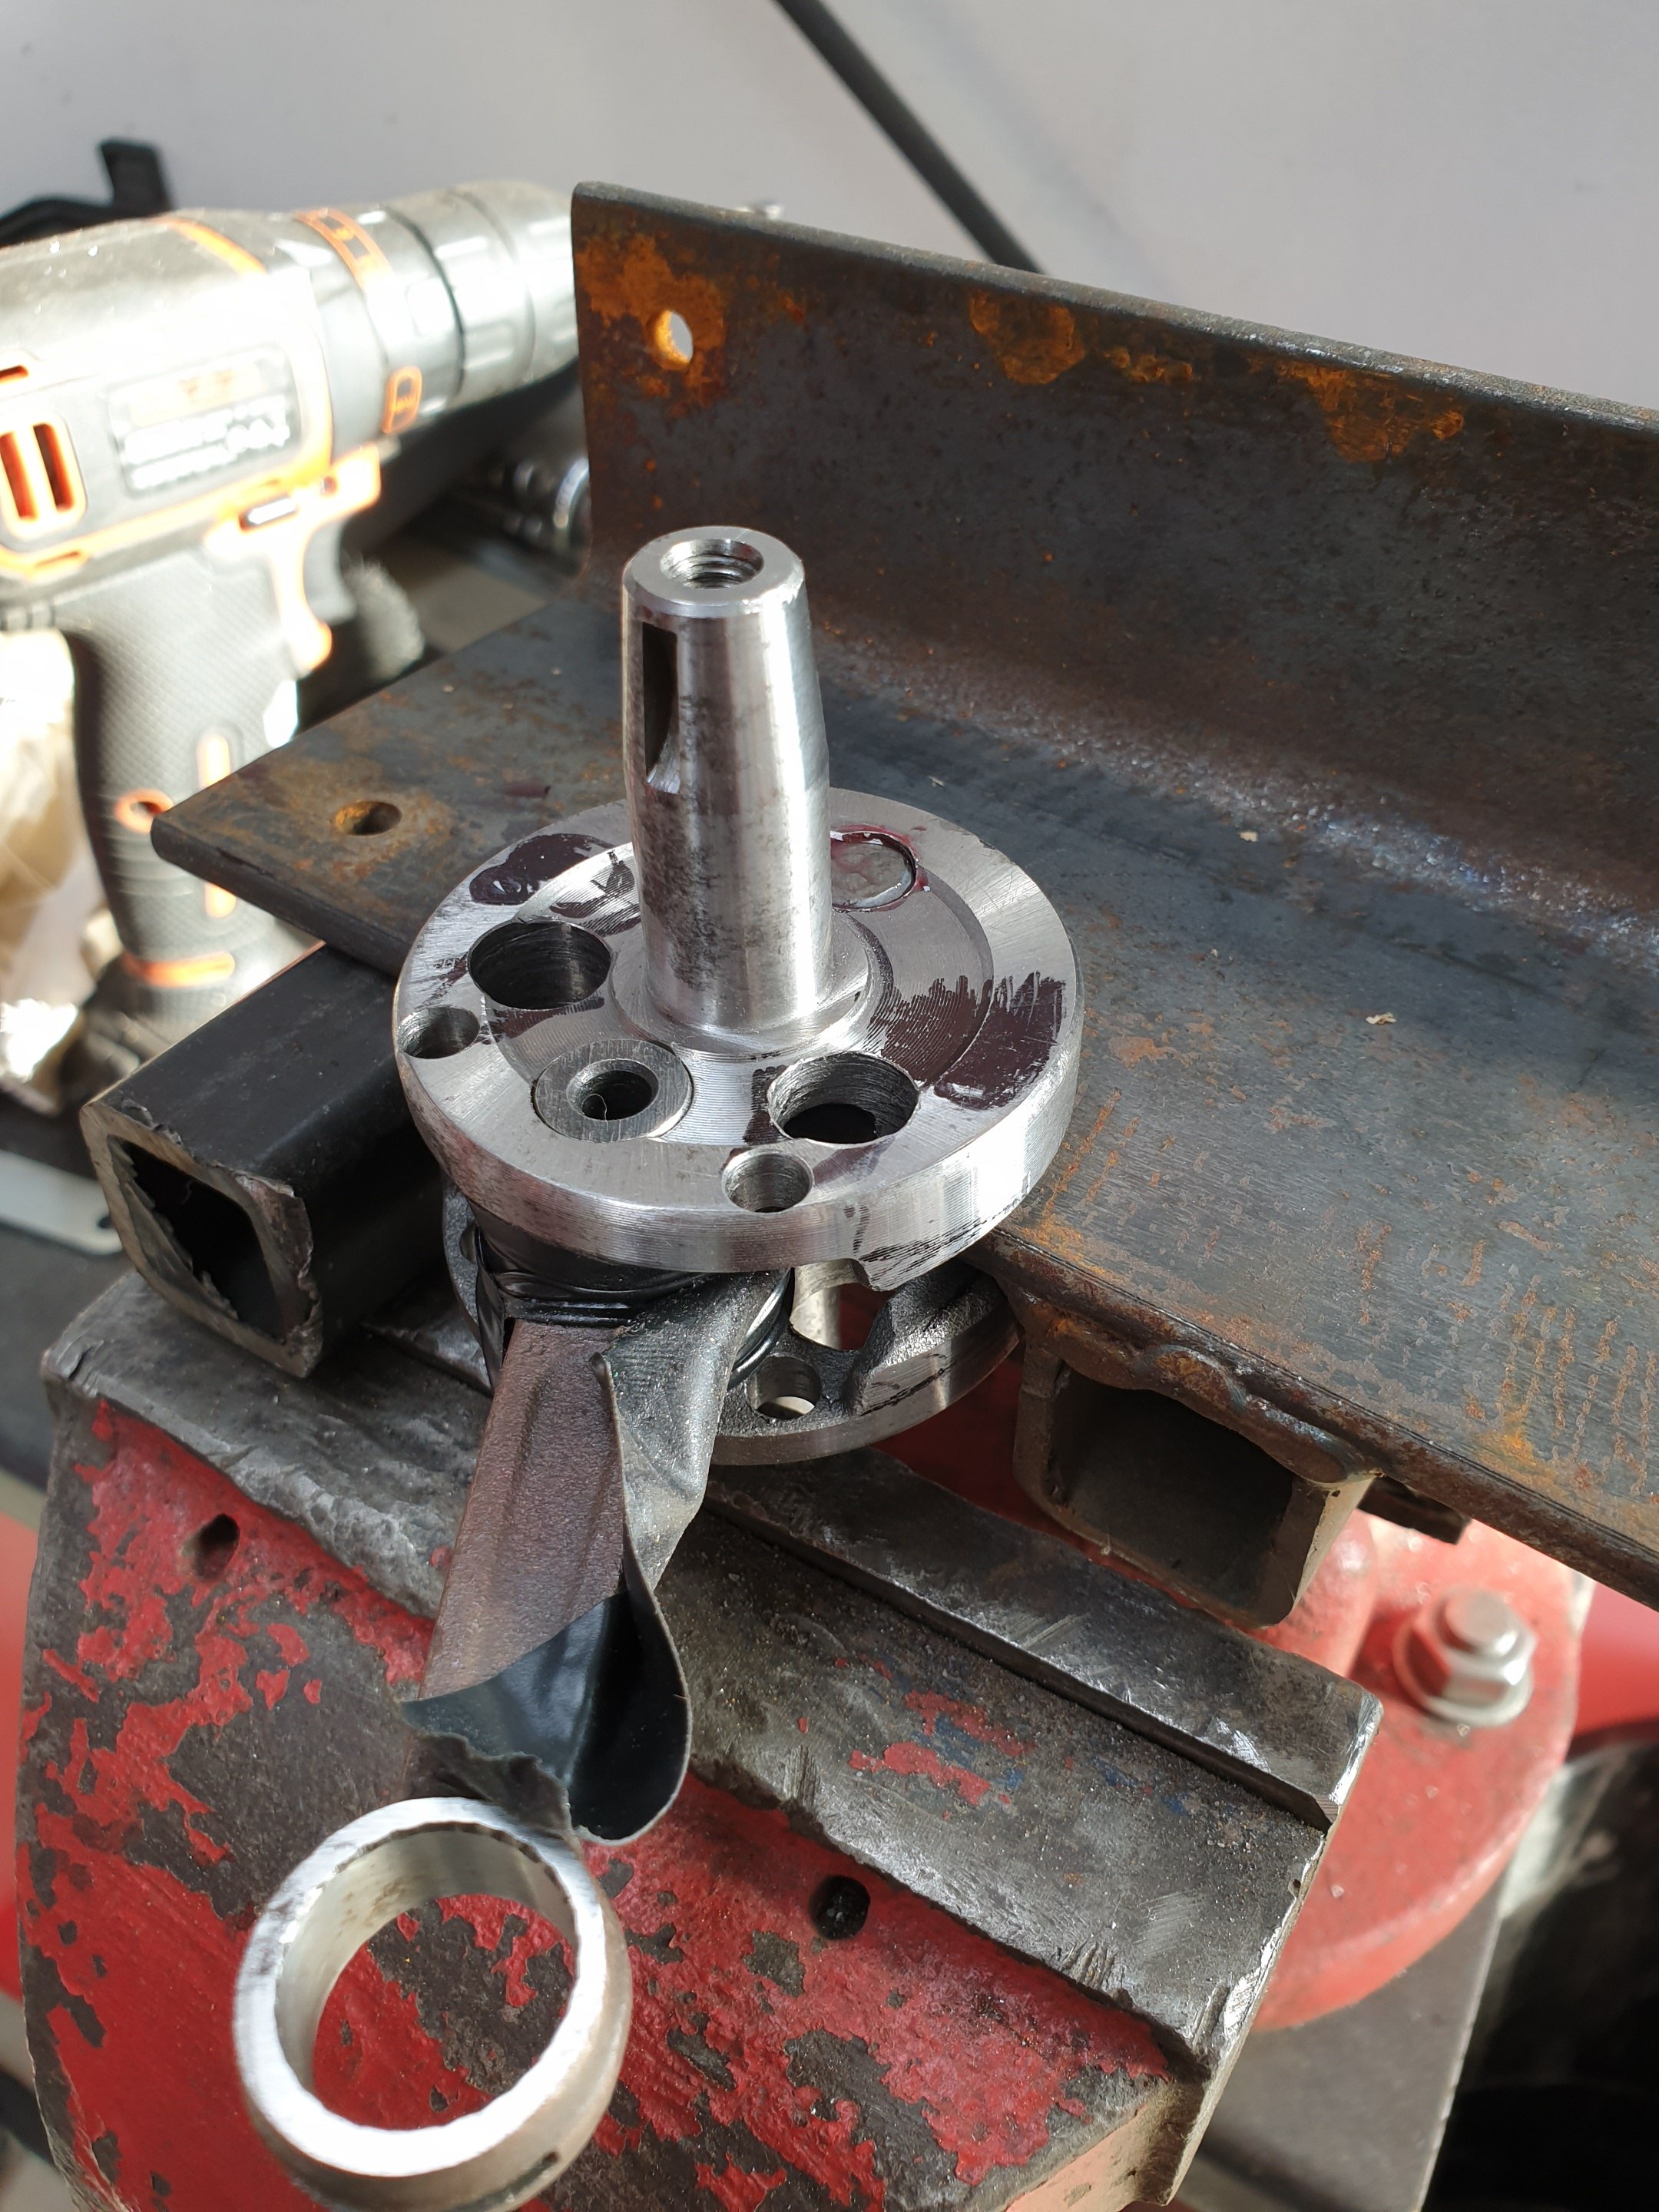
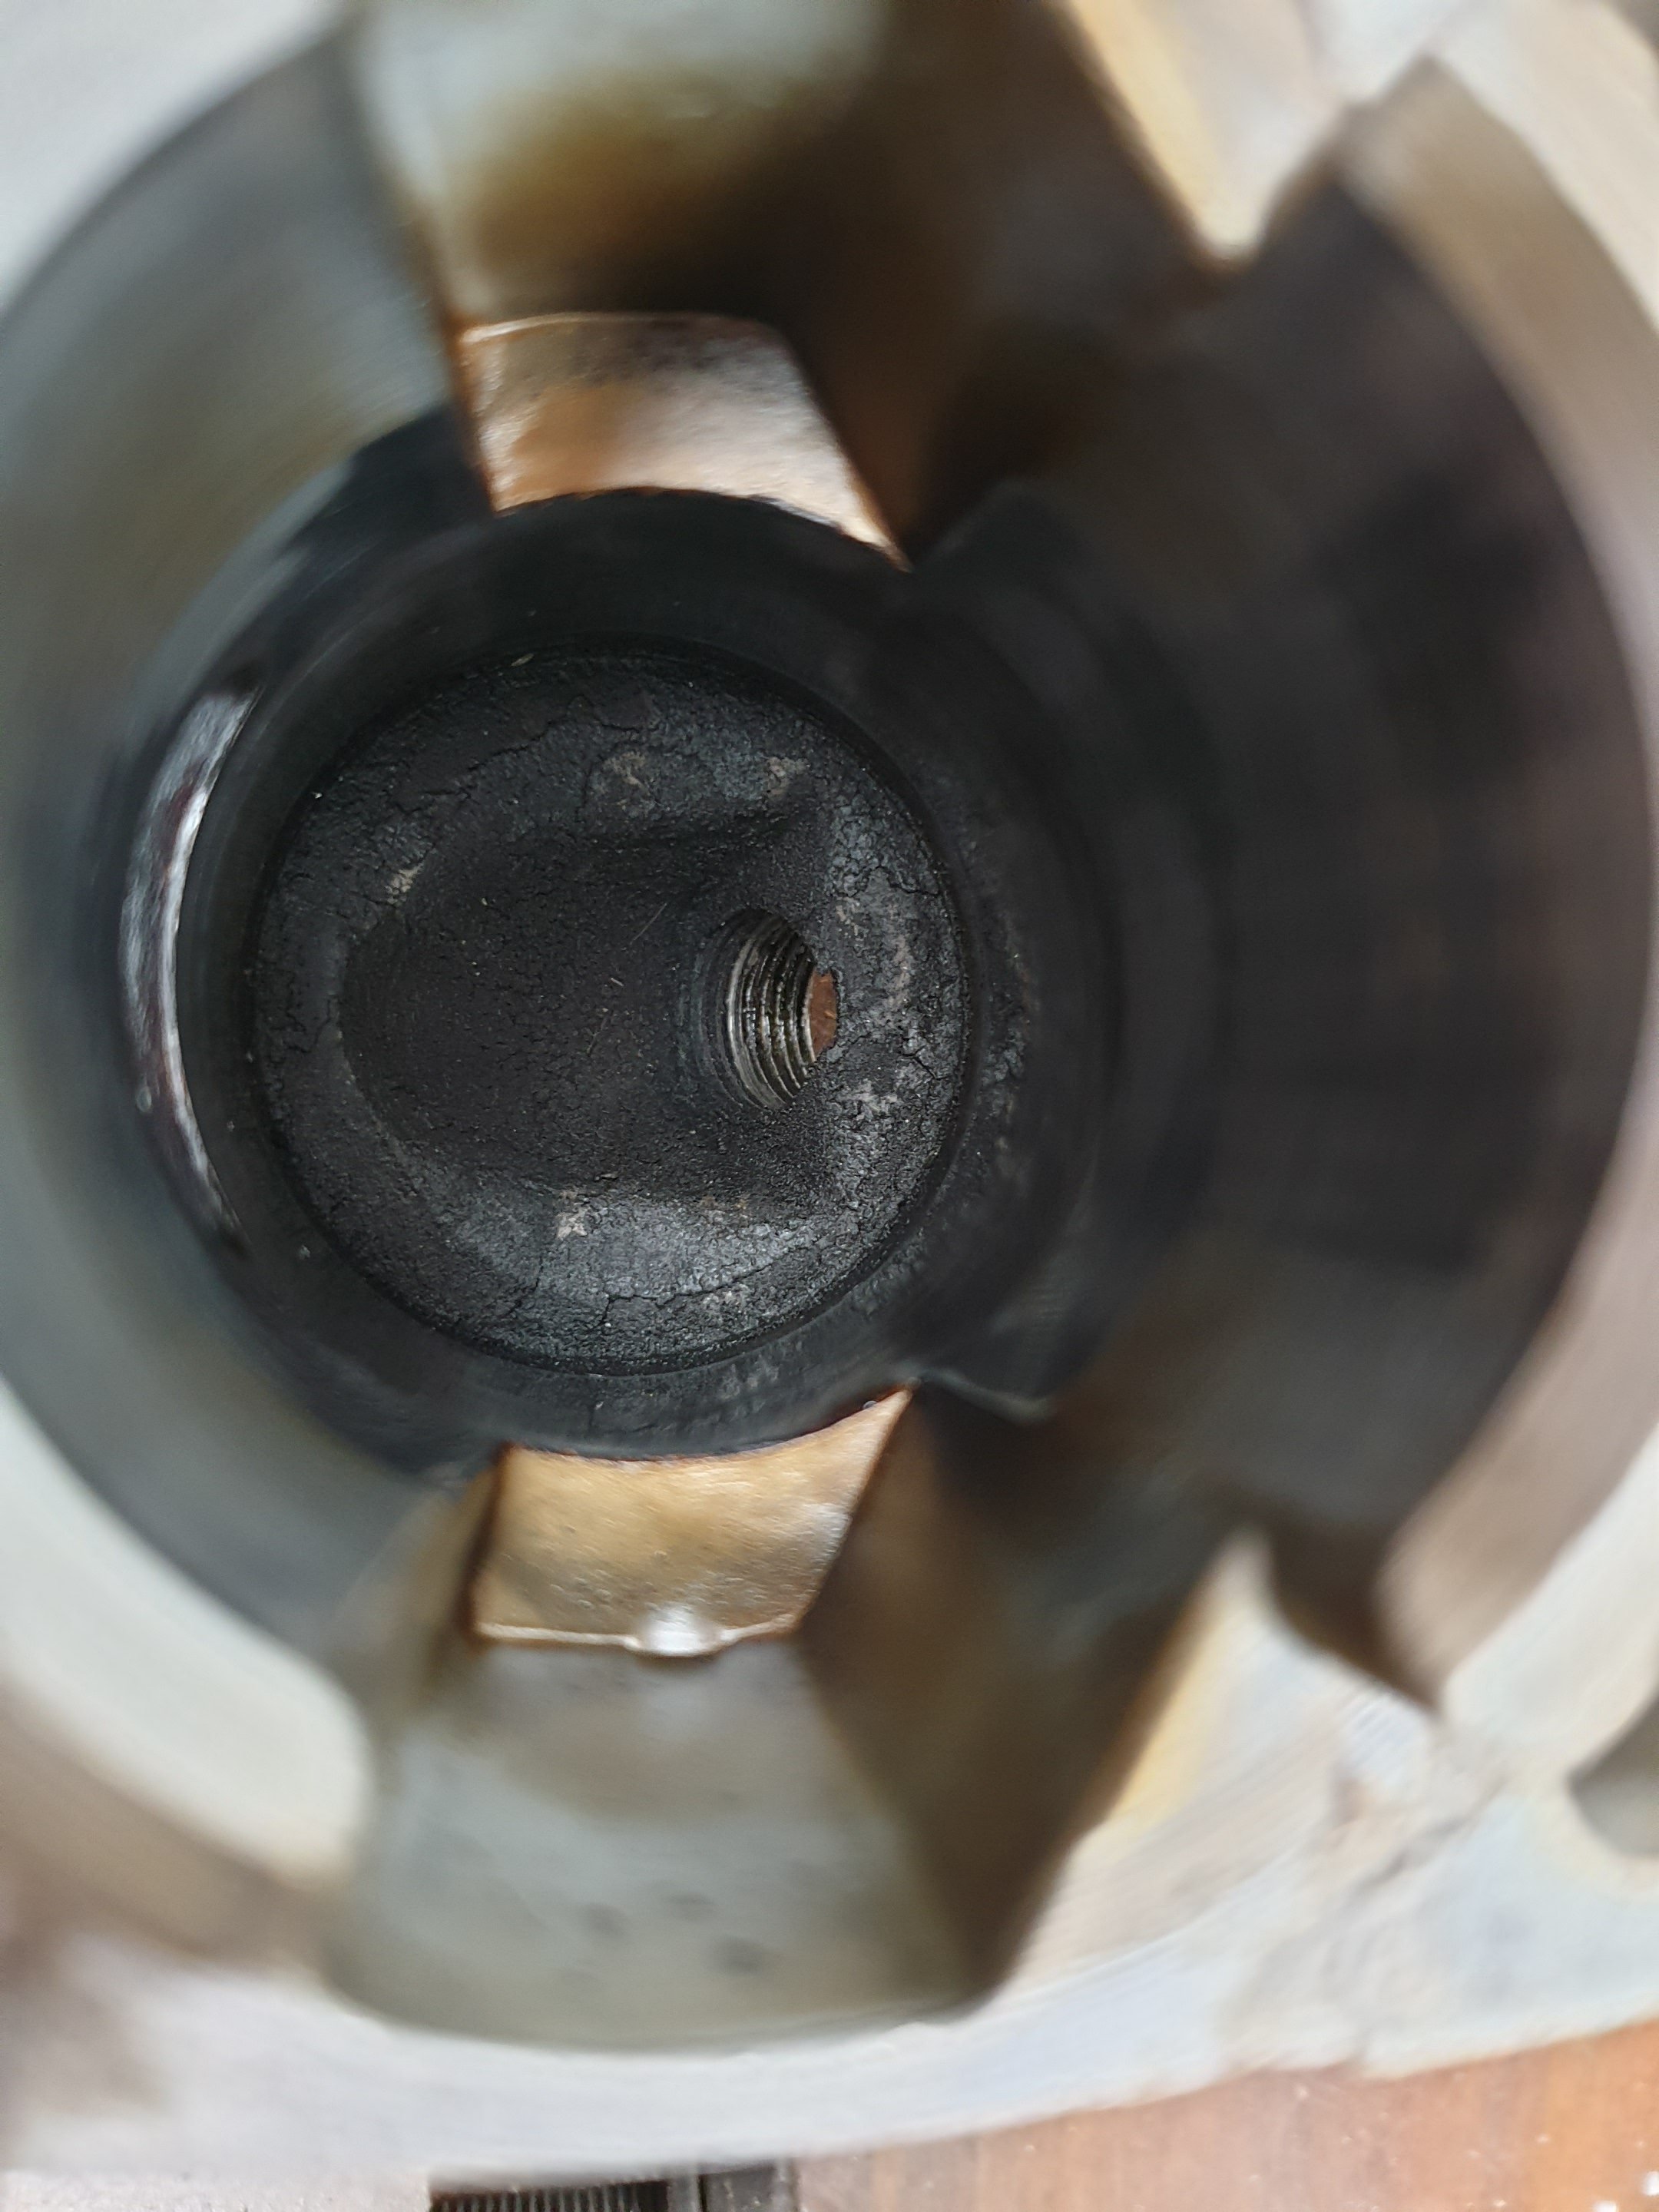
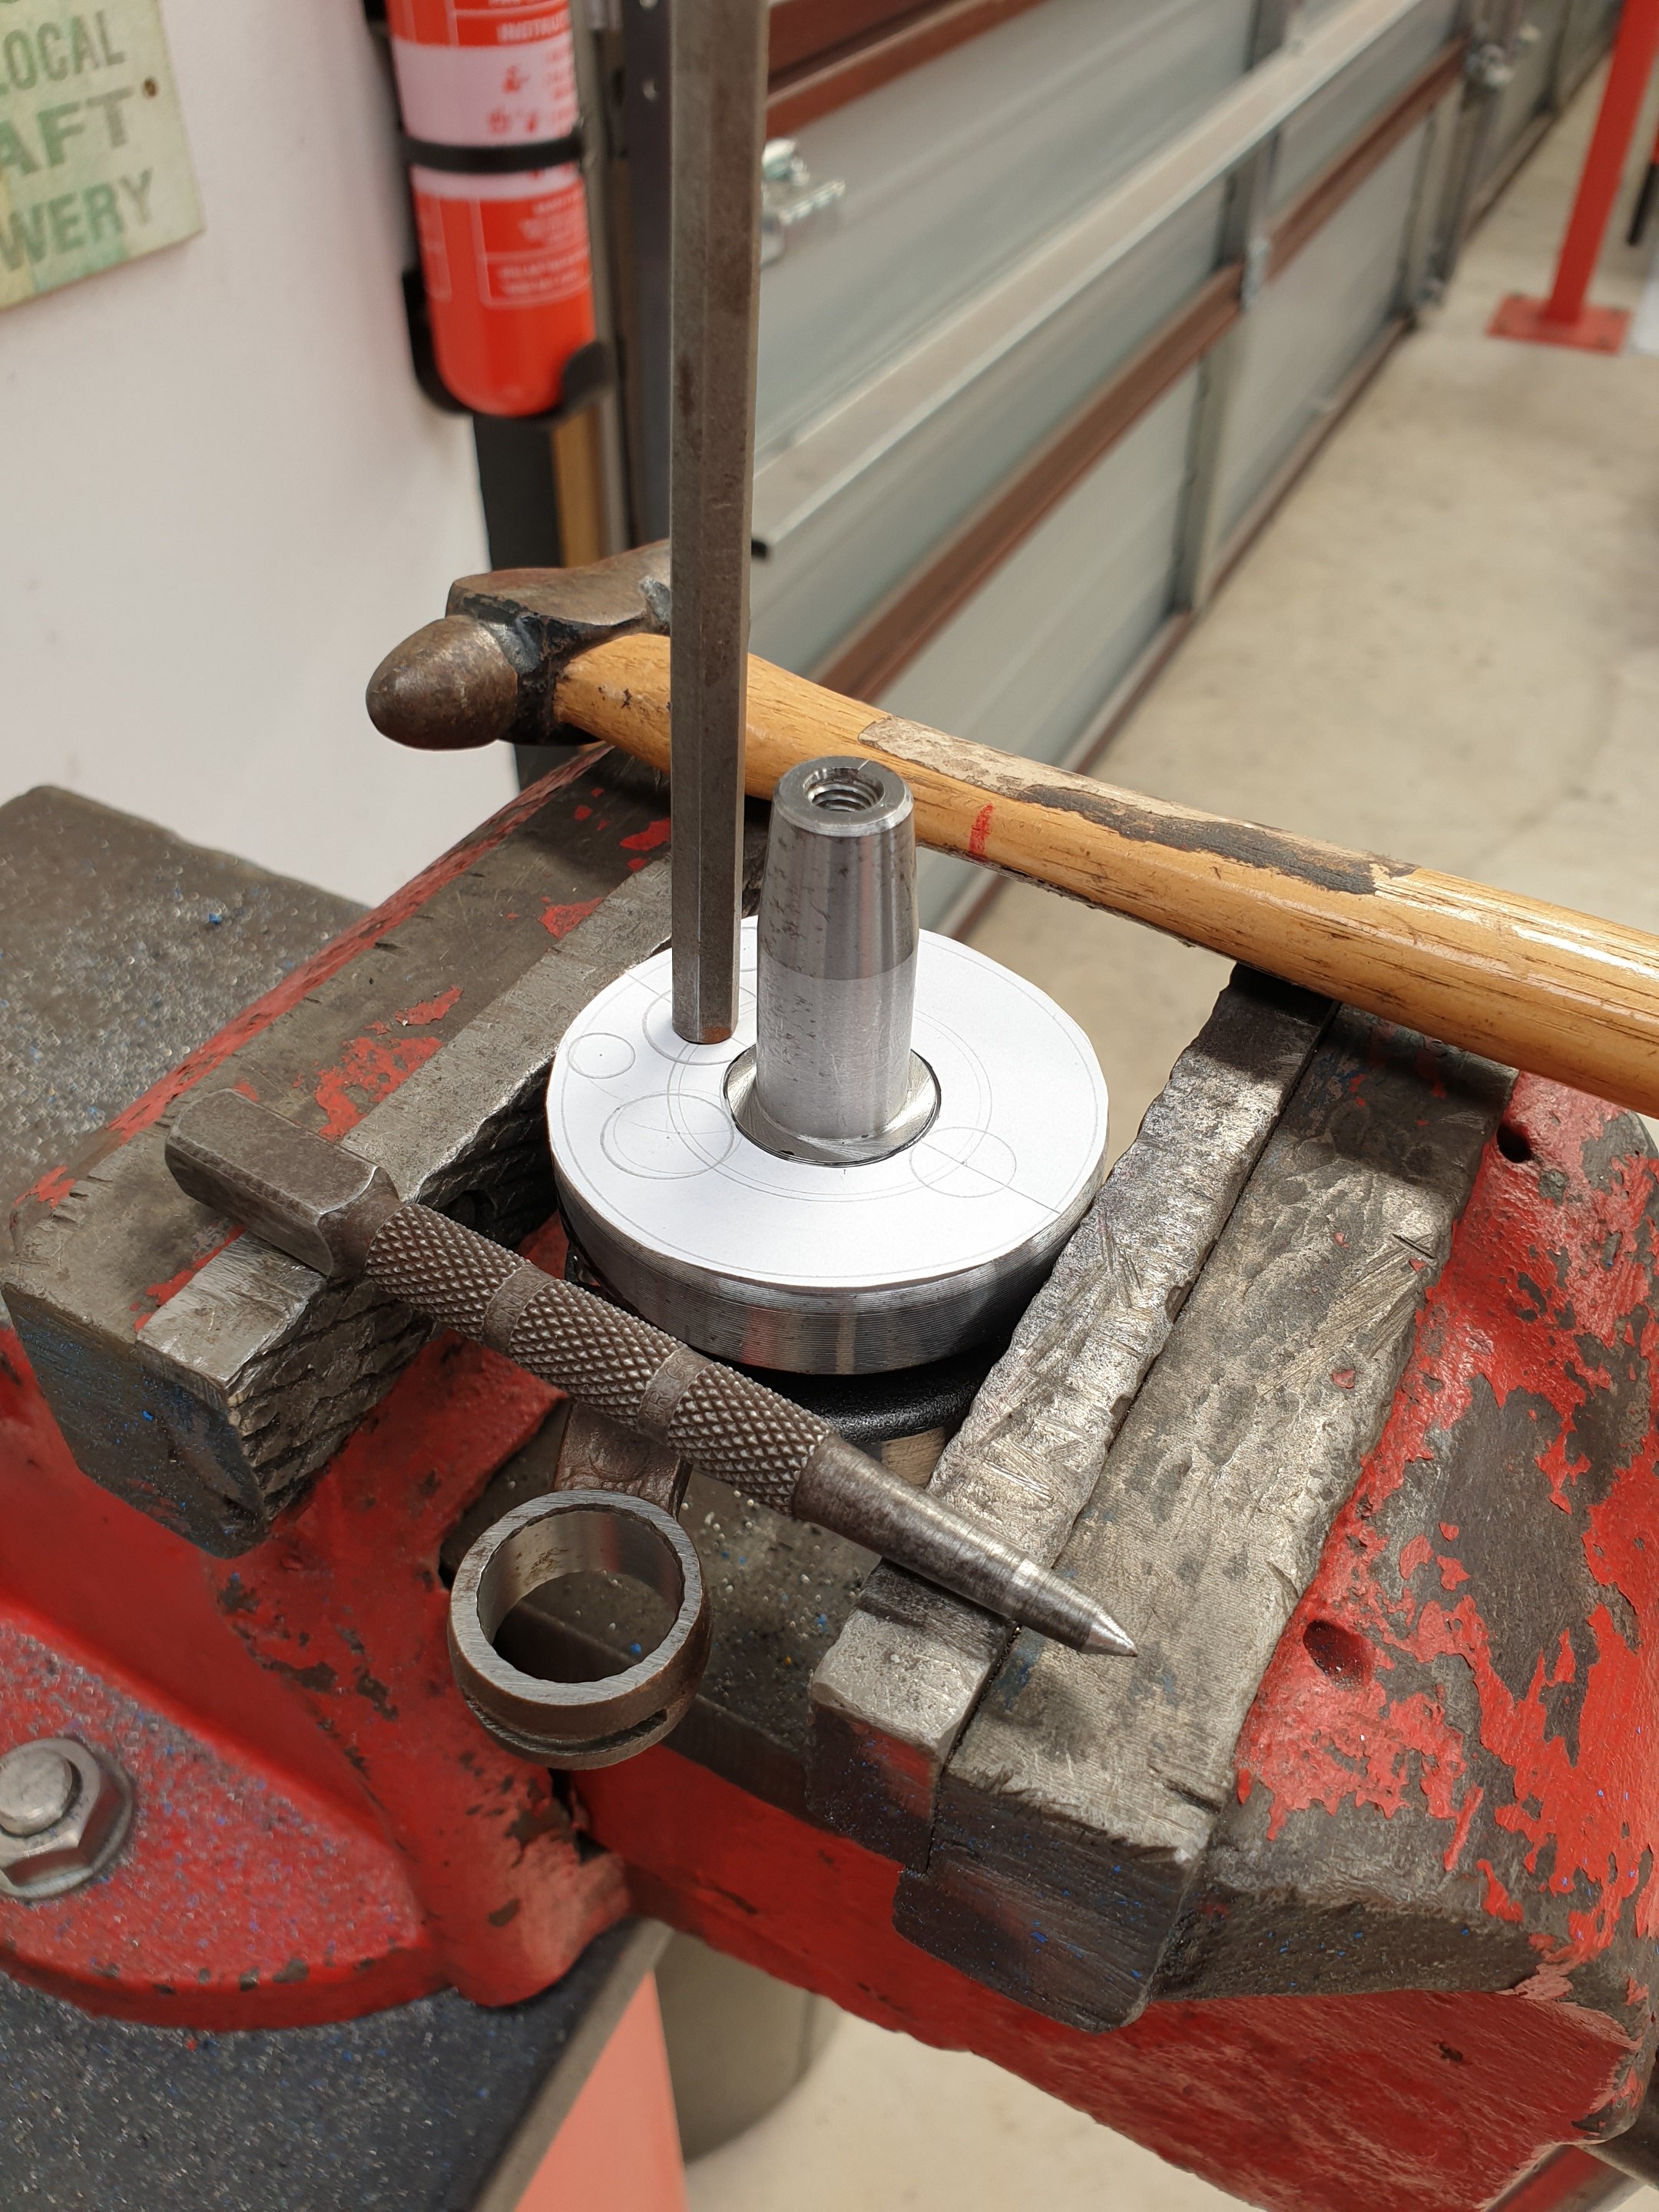
Put the starter hole for the tungsten inserts in the crankshaft. Holes will be upsized to the correct press fit once I get the tungsten carbide. Then tested it for run out. Pretty much bang on!
-
Will an angle grinder cut it? Guess I'm about to find out???
-
That could be perfect! Thanks
-
☆funny, wrote below at same time you wrote above. Had an idea. Tungsten carbide is about 15g/cm3 and readily available in the form of drill bits or milling cutters. I'll run the numbers again and it may need to be 10-12mm diameter, but at least it's going to be cheap and easy to get.
-
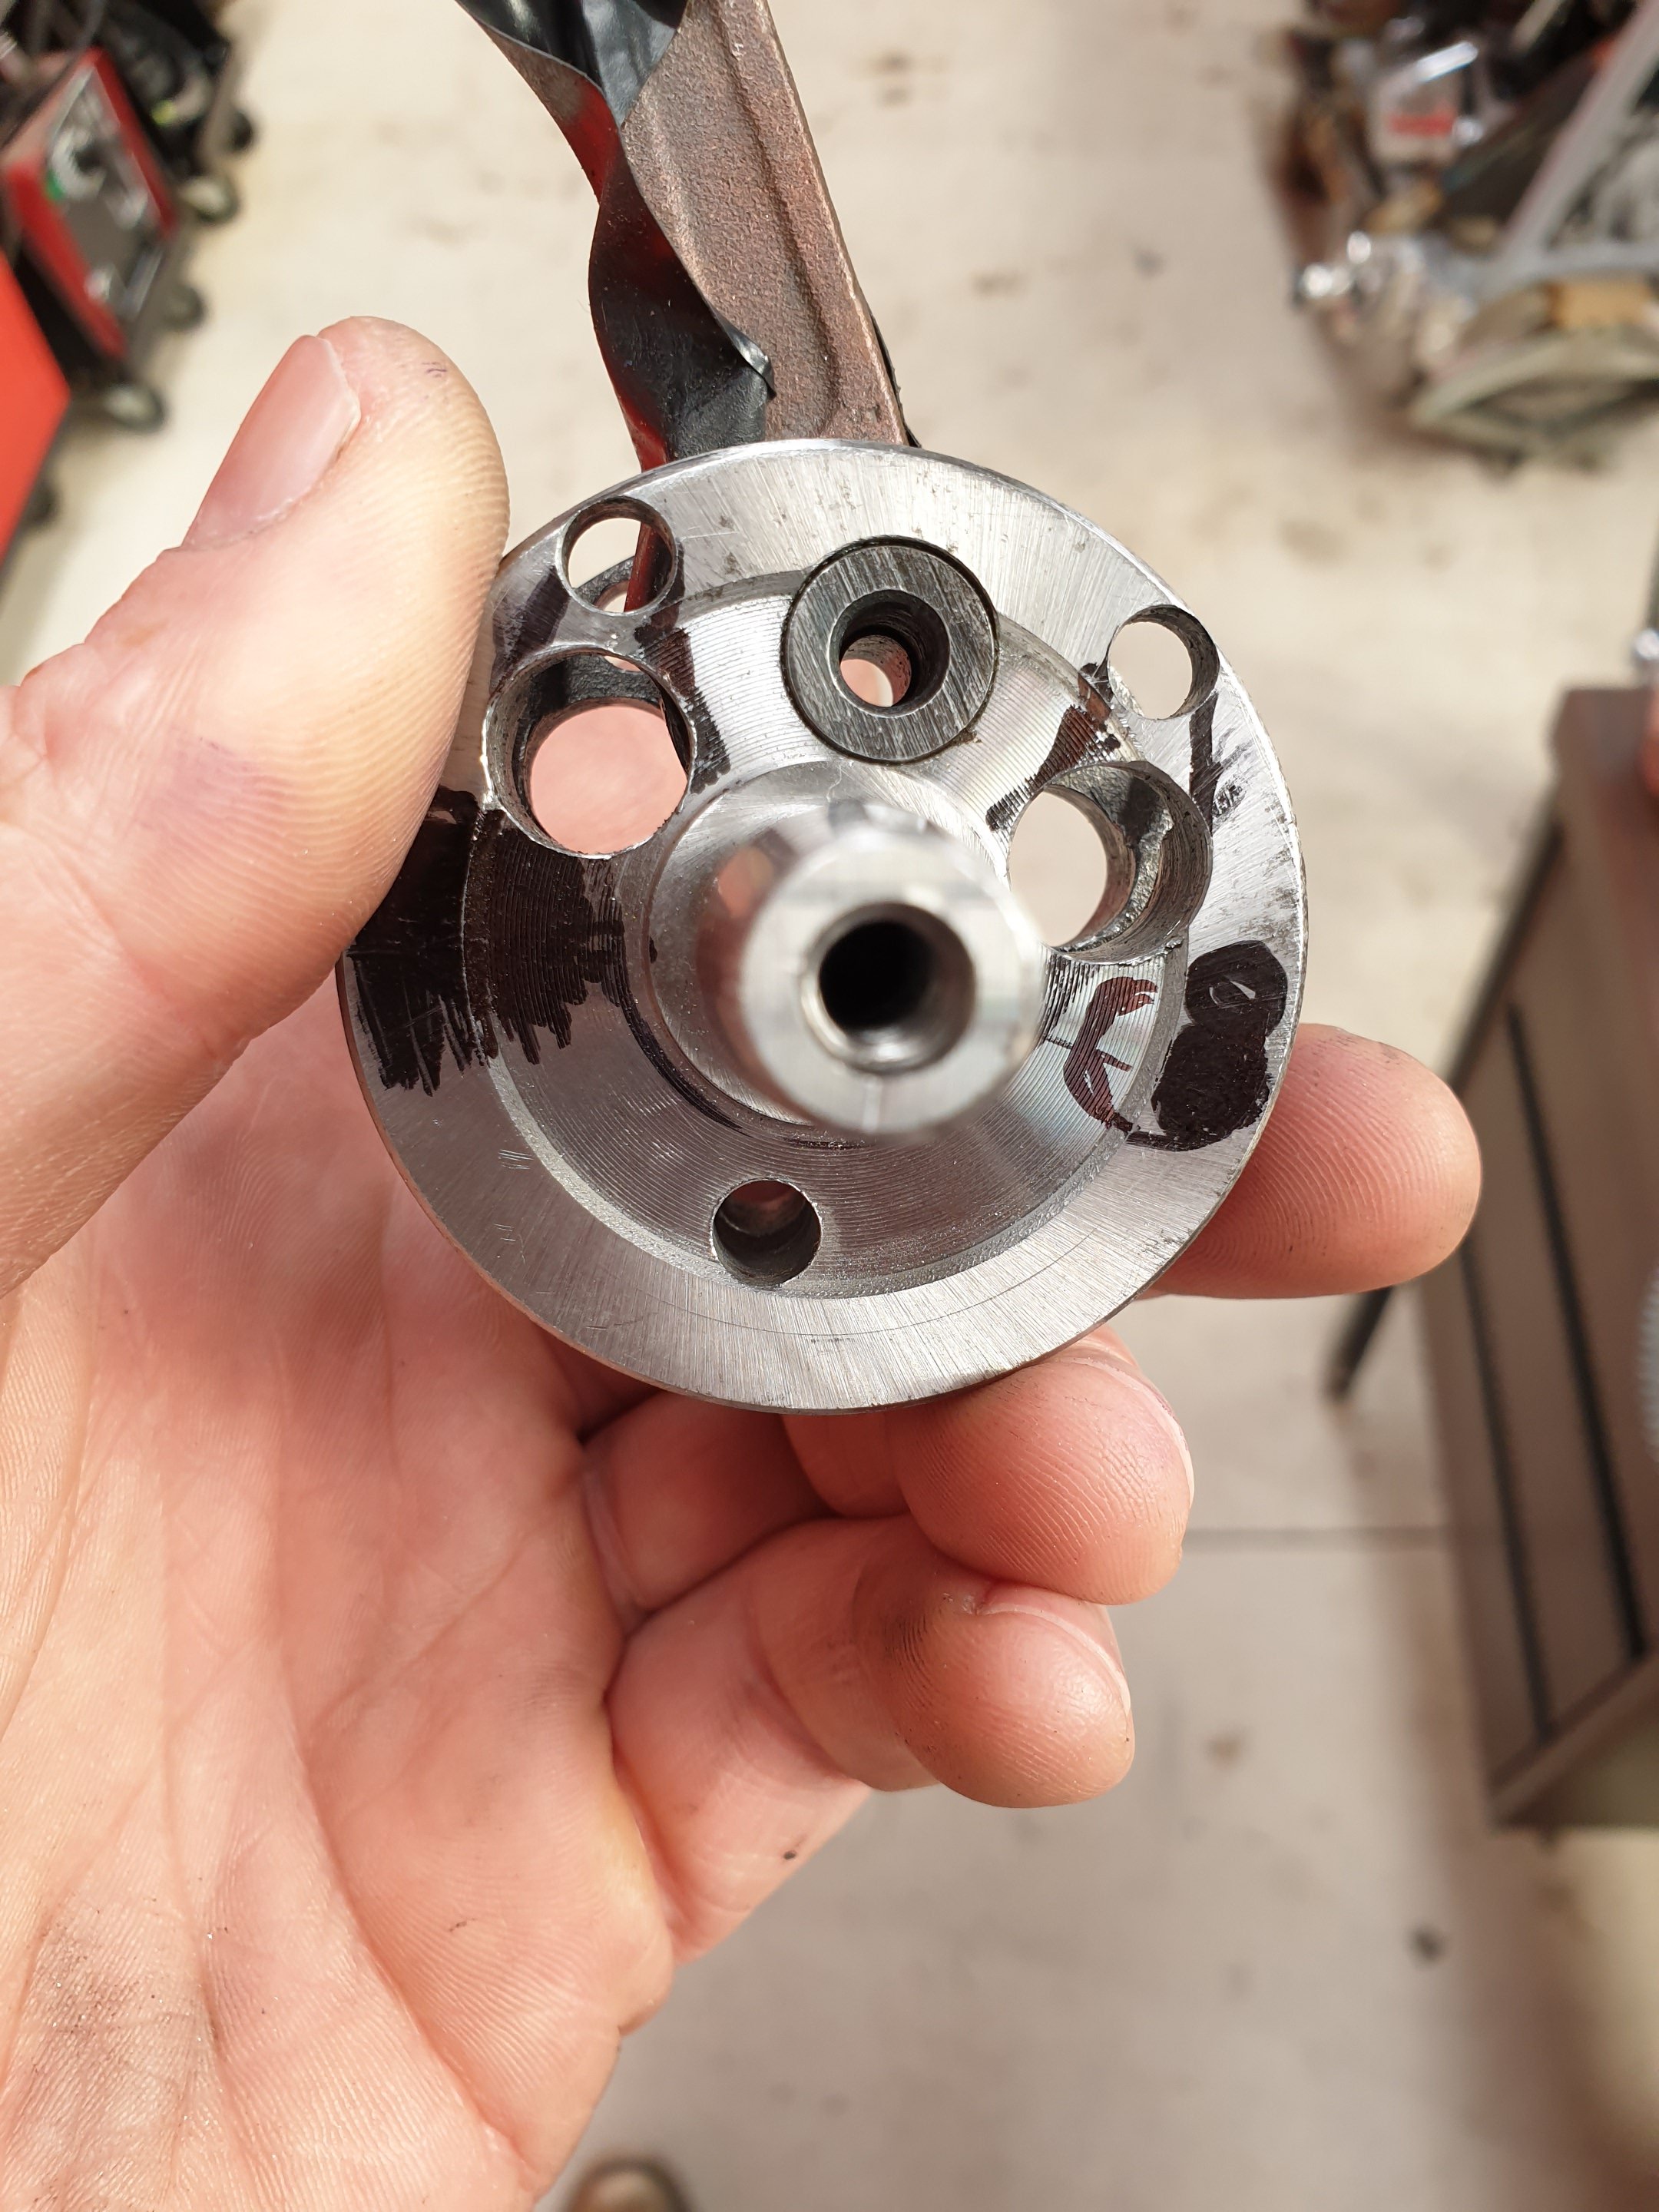
Thanks, yes lead is 11.342g/cm3 so only an increase of 3.332g/cm3 over steel. I looked online and tungsten is much heavier, which was a surprise. Tungsten is 19.25g/cm3 so more than double the weight of steel. I ran the numbers again a few different ways and if I drill a hole right through both sides of the counterweight at the same radius of the big end pin, I need a 10mm hole to add exactly the amount of counterweight I need. So...I'm now on the lookout for about 24mm (2x 12mm long bits) of diameter 10mm tungsten.
-
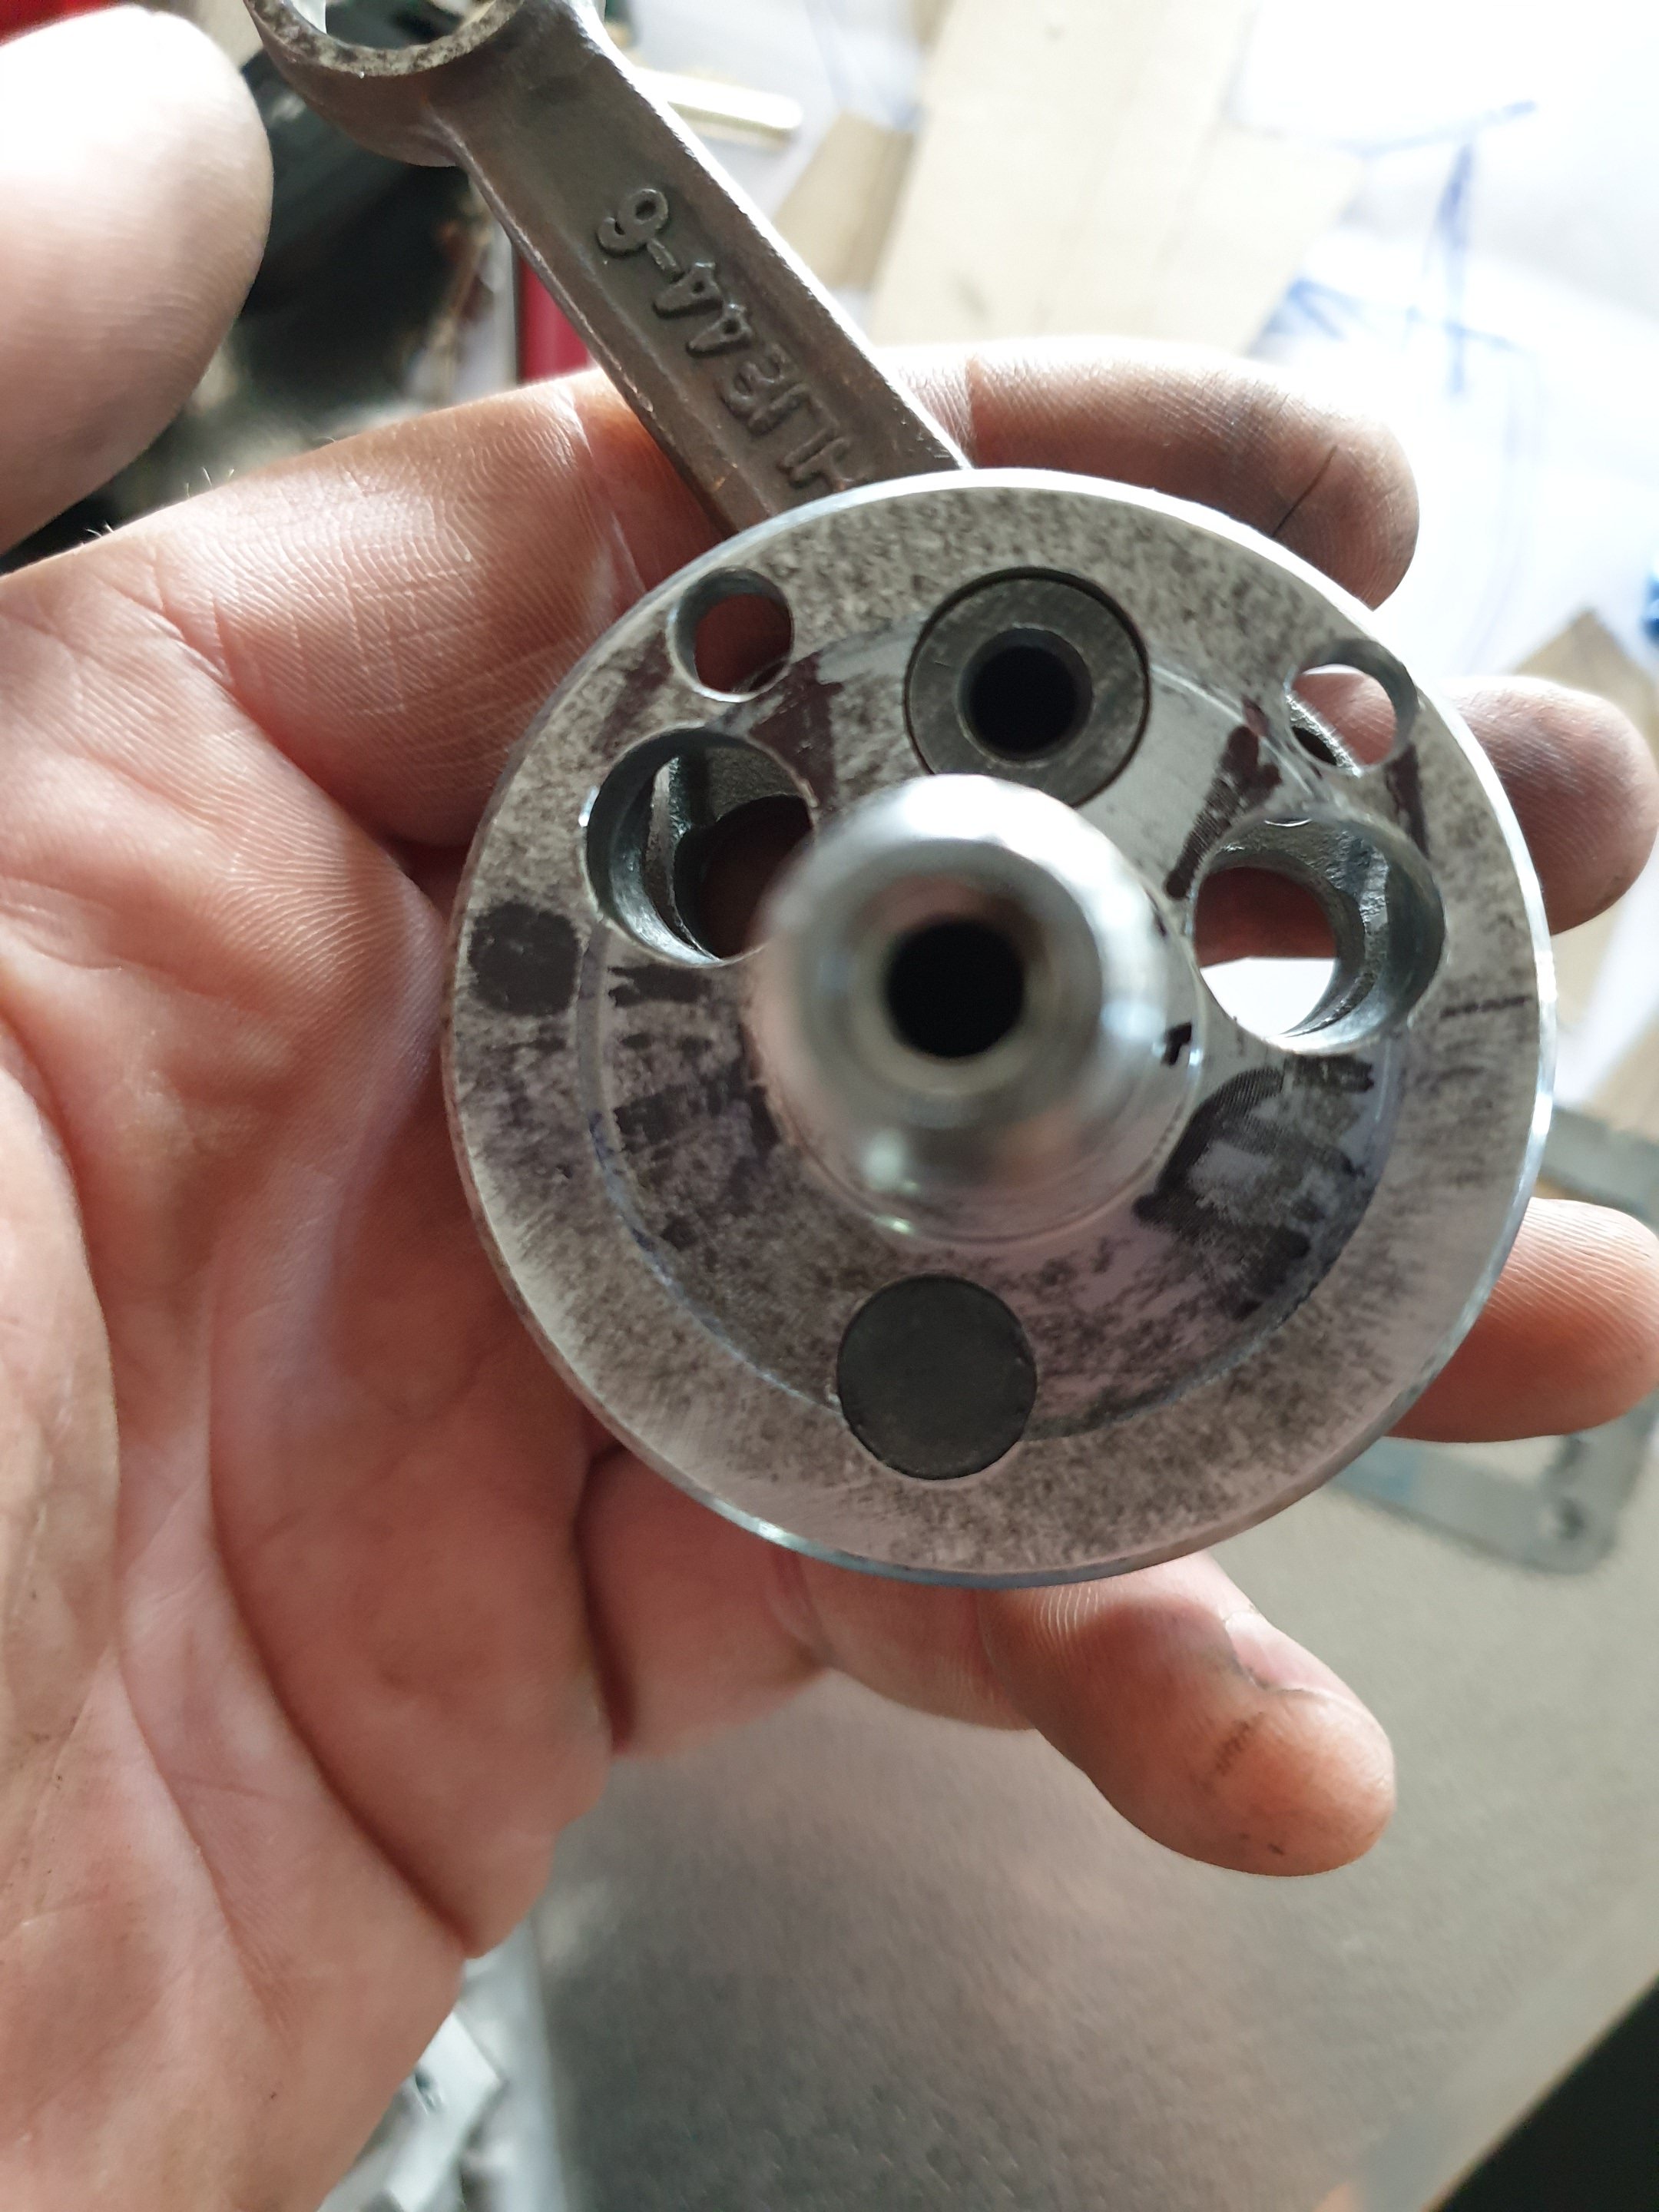
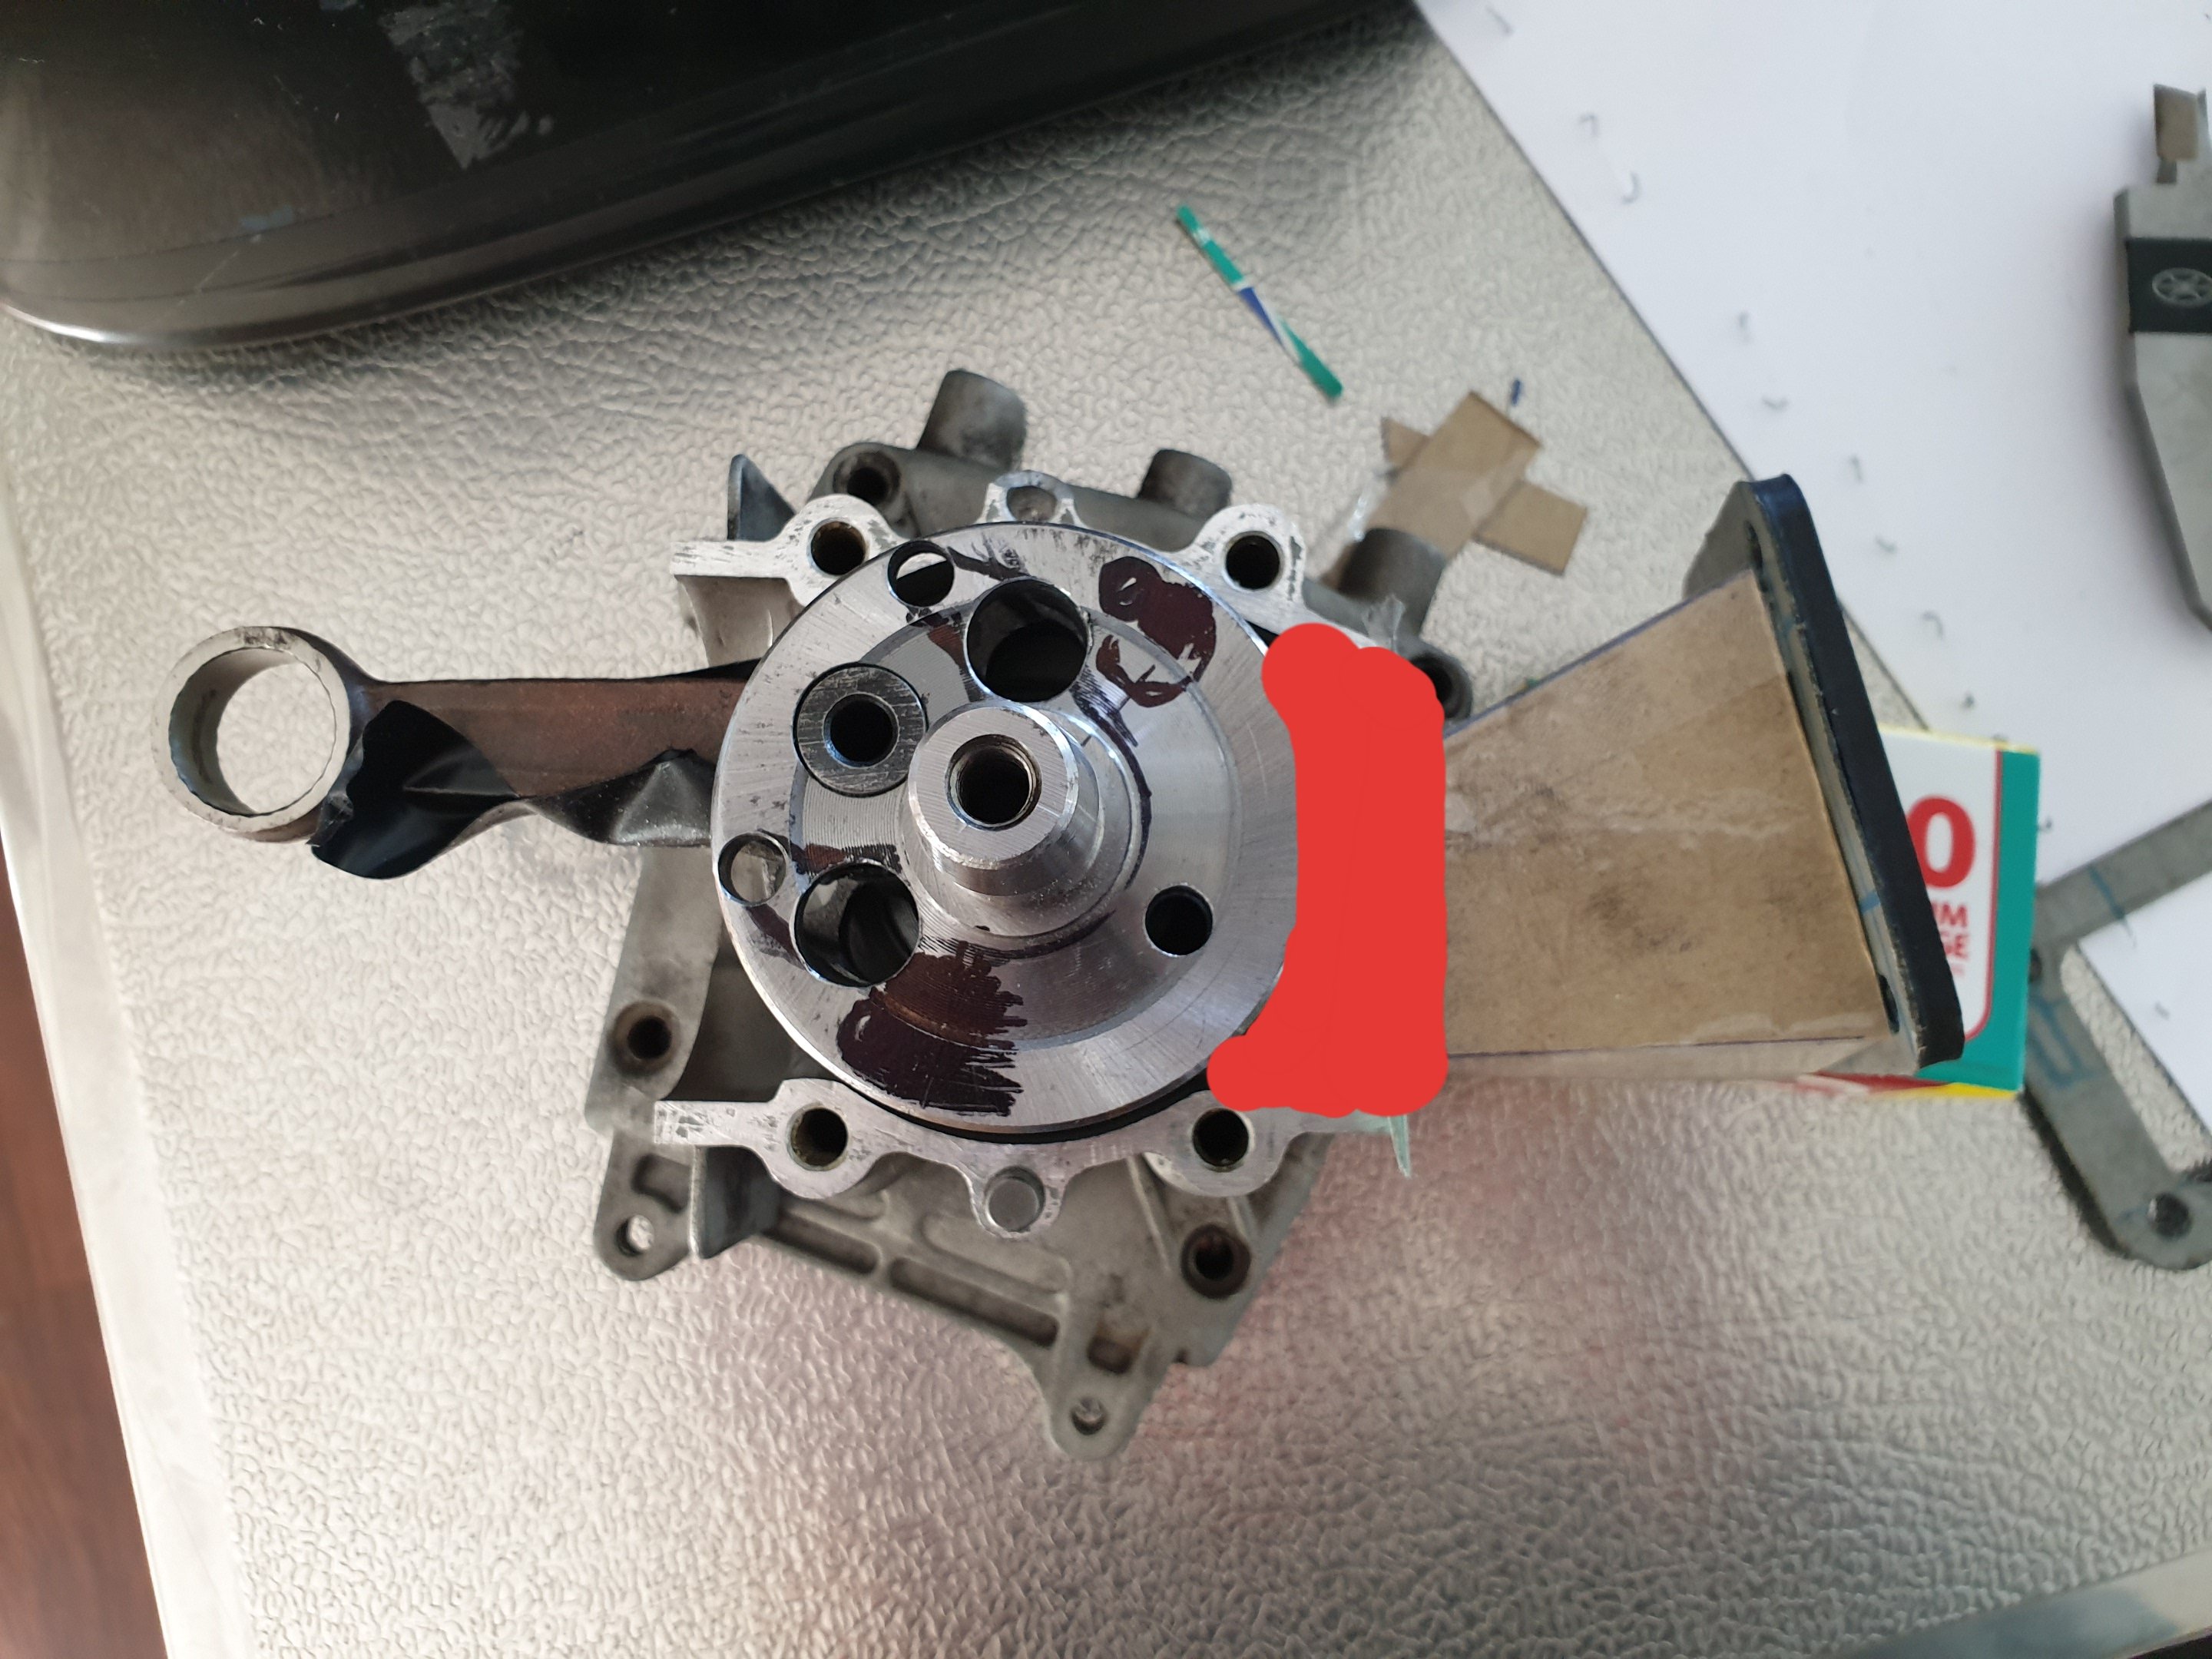
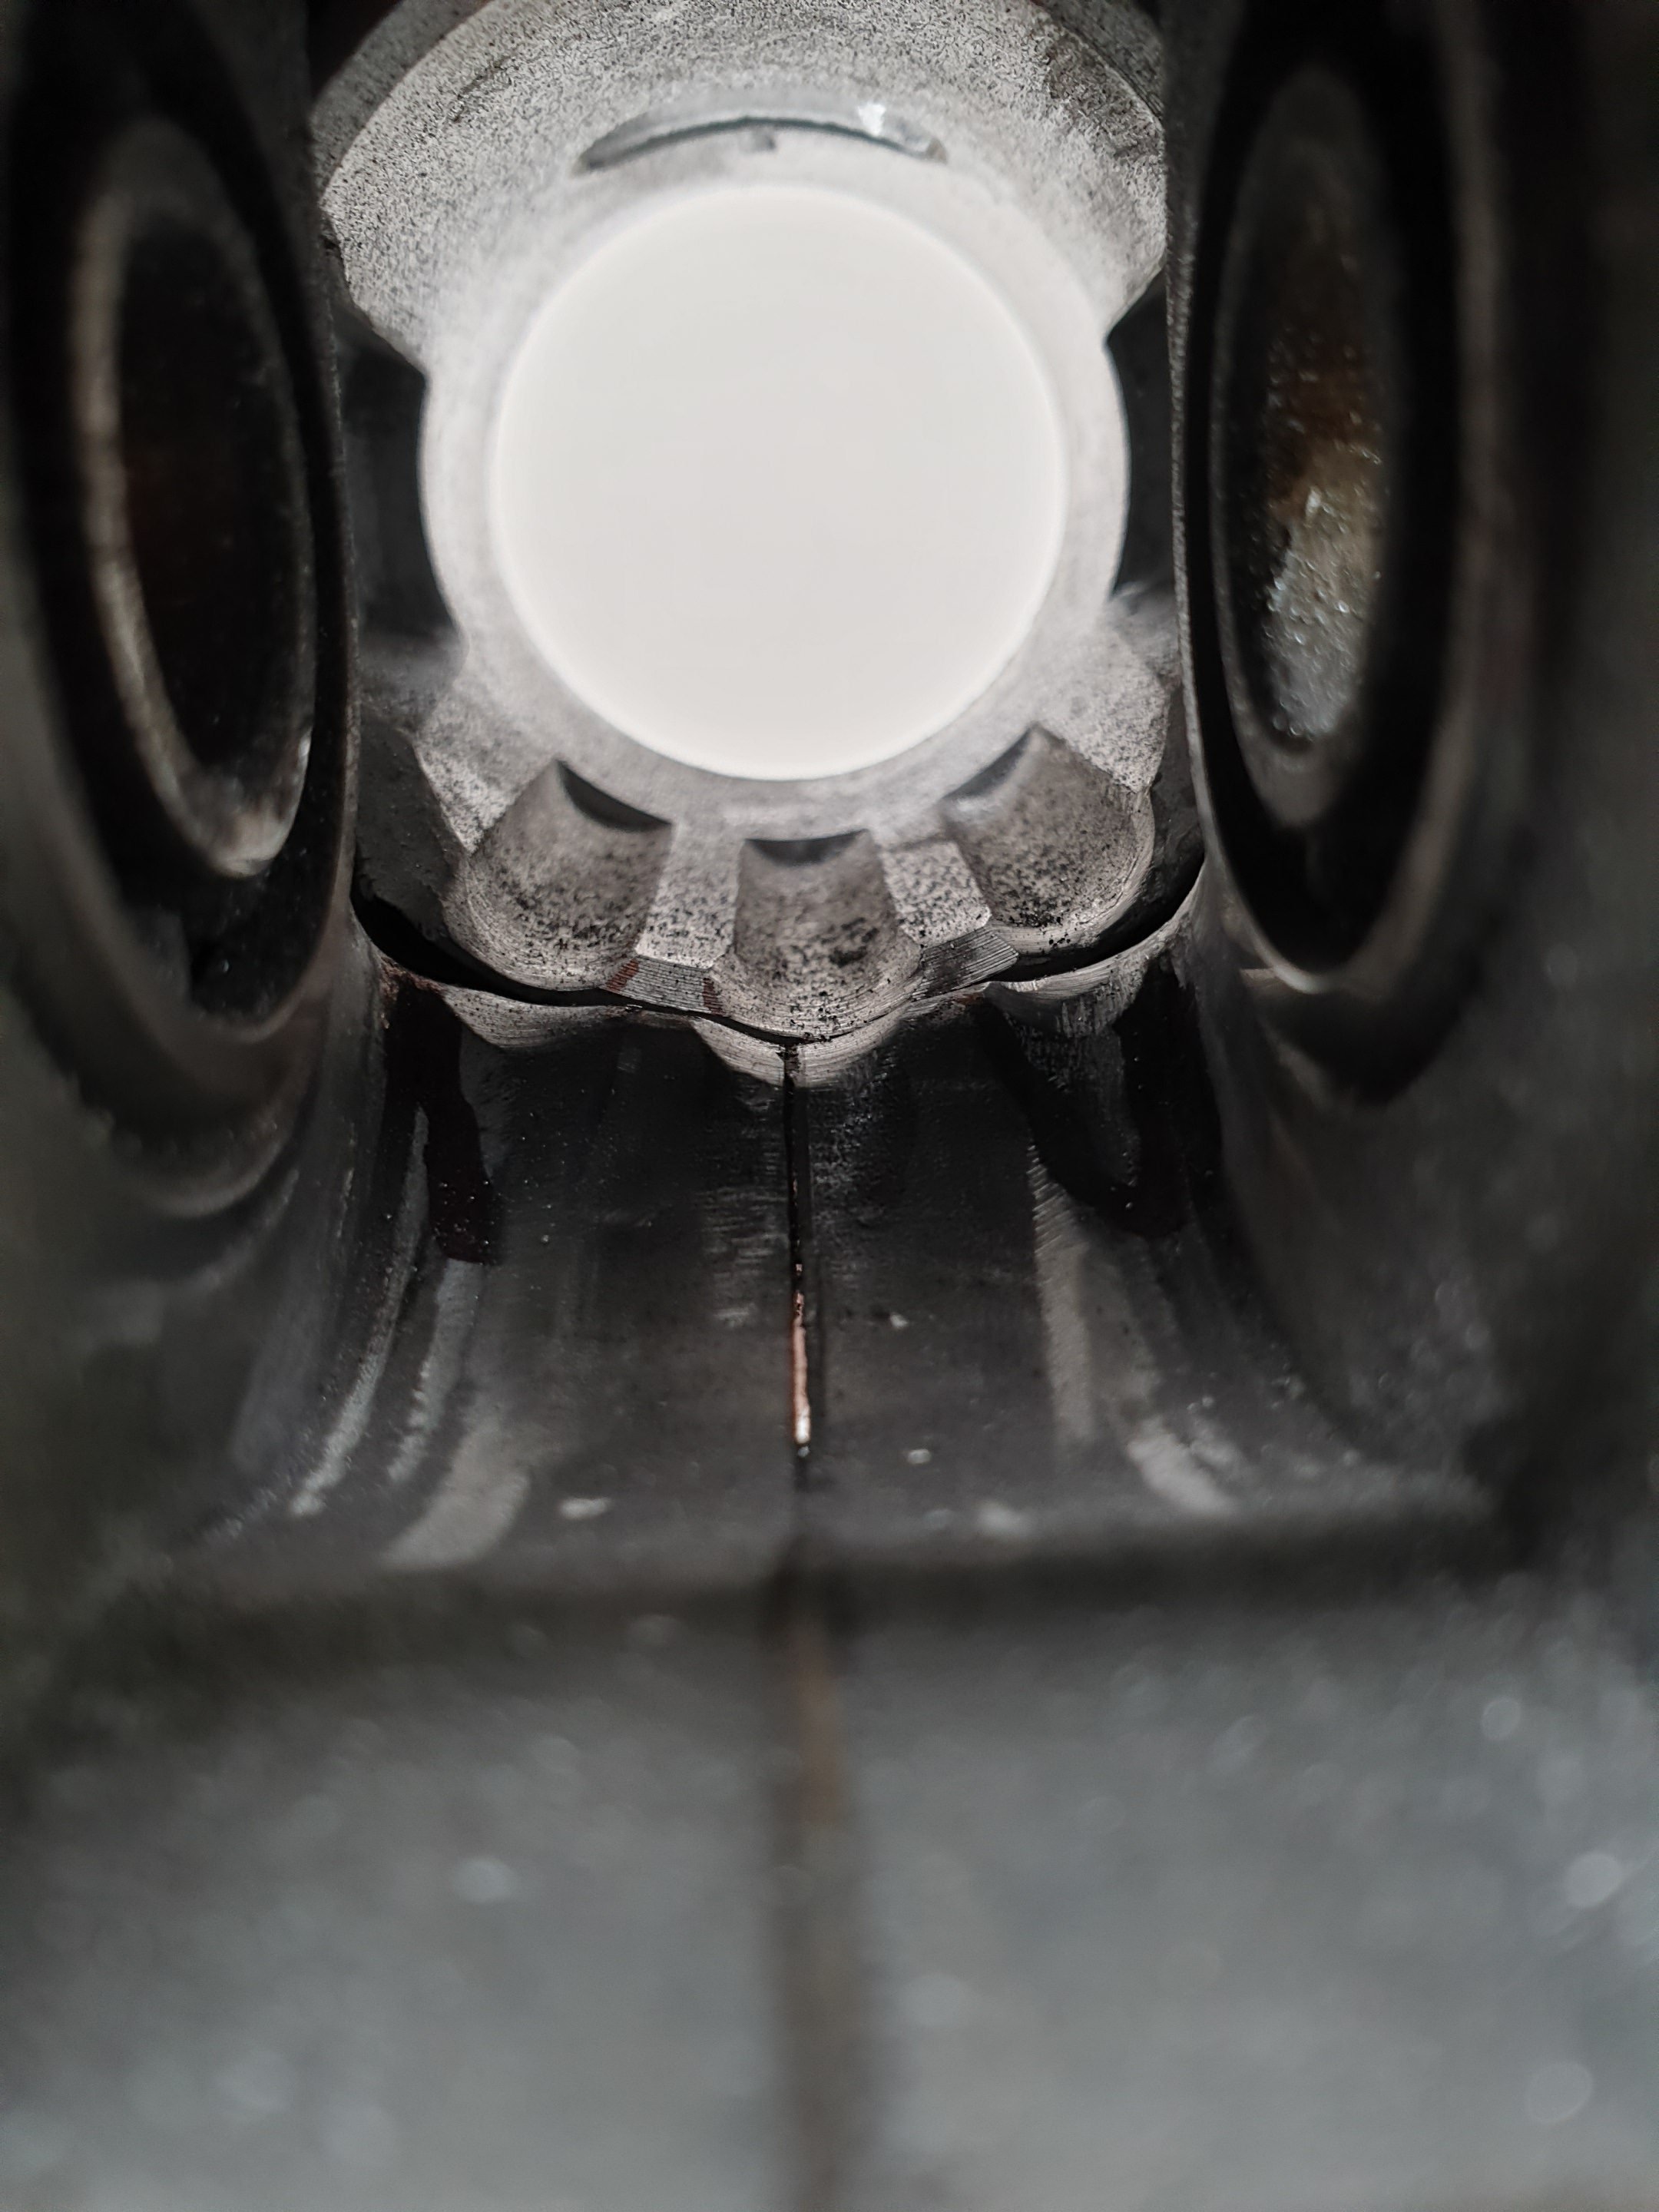
This photo shows the issue I have trying to find places for bigger holes: The con rod boss/webb the pin is pressed into can't be drilled into, or it would weaken it too much. Those holes I've drilled (in the photo above) have maxed out that location already. So pretty limited space where I can put holes. if I drill it where the vivid circle is, it would be counterproductive, as it's on the side I need to keep weight on, or possibly even add weight. Remove material here and it would have a negative effect. There's just enough room to put another set of 6mm holes, but it's not ideal and won't achieve what I need...but I guess every little bit helps.