


Kimjon
-
Posts
2181 -
Joined
-
Last visited
-
Days Won
1
Posts posted by Kimjon
-
-
Ive still got the wajax bike.
-
 1
1
-
-
Got bored watching paint dry...who knew it wasn't the spectators sport its made out to be?

Pretty happy with this install.
-
3
-
-
Ignition key:
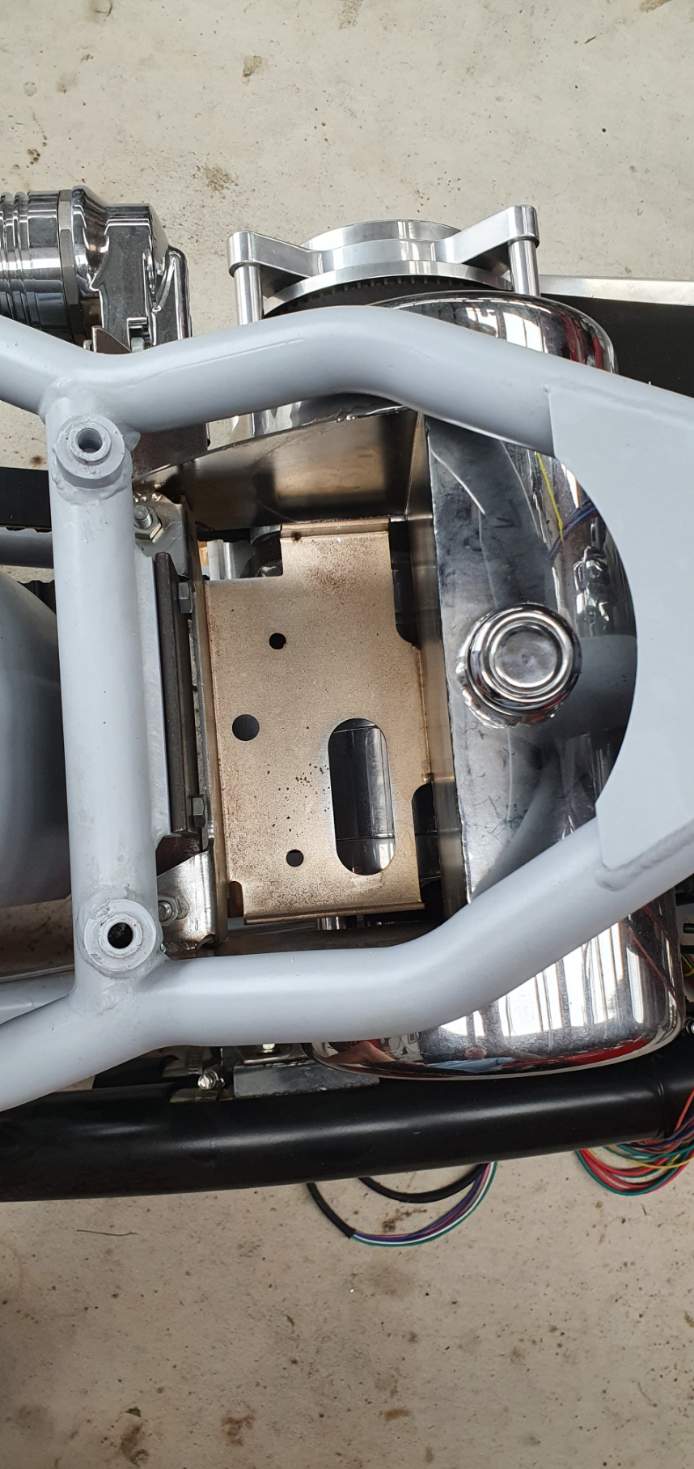
The battery needs room, so I chose a spot "outside" that area. Obviously the oil tank side was a no go.
Marking out the edges of the battery box compartment, plus clearance around the rubber cotton reel mounts.
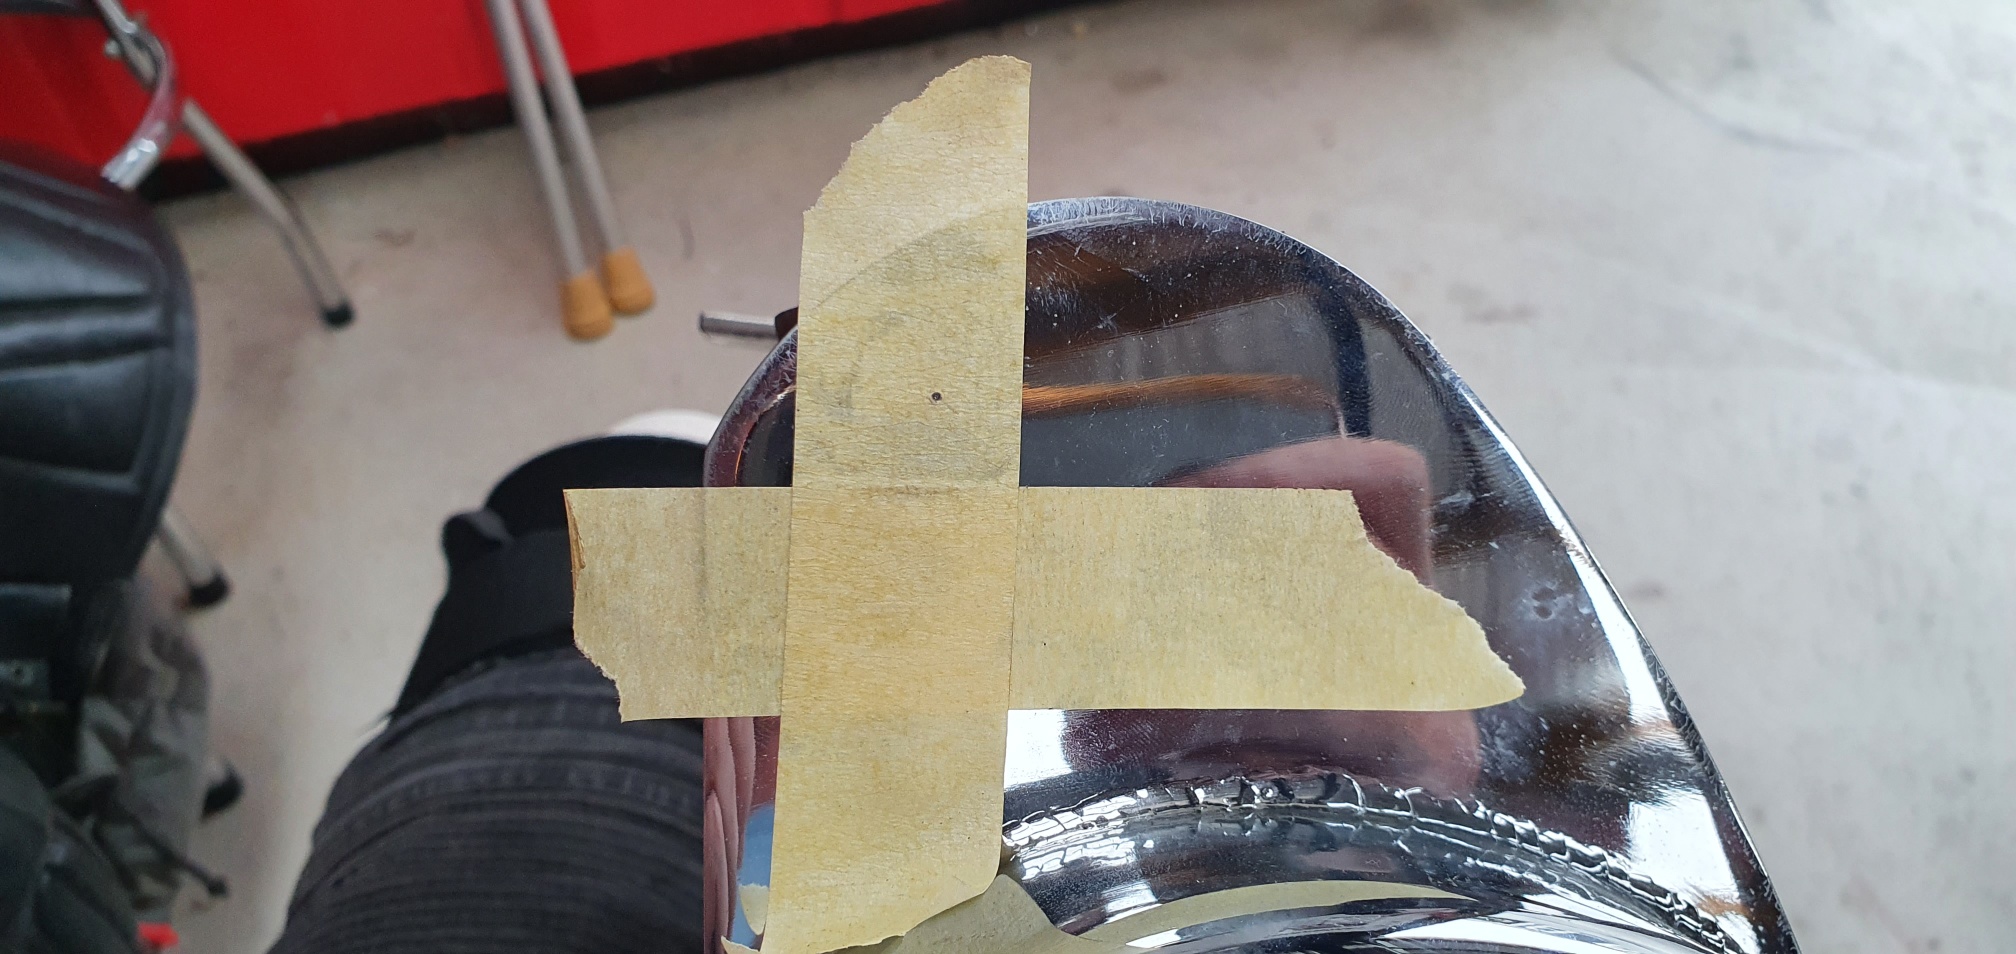
Full send, first drilling a 14mm hole with step drill, then a ton of dremel work to create the right flat sided shape, to prevent the key twisting the barrel.
I cut this cotton reel down, test fit, needs another 2mm off it.
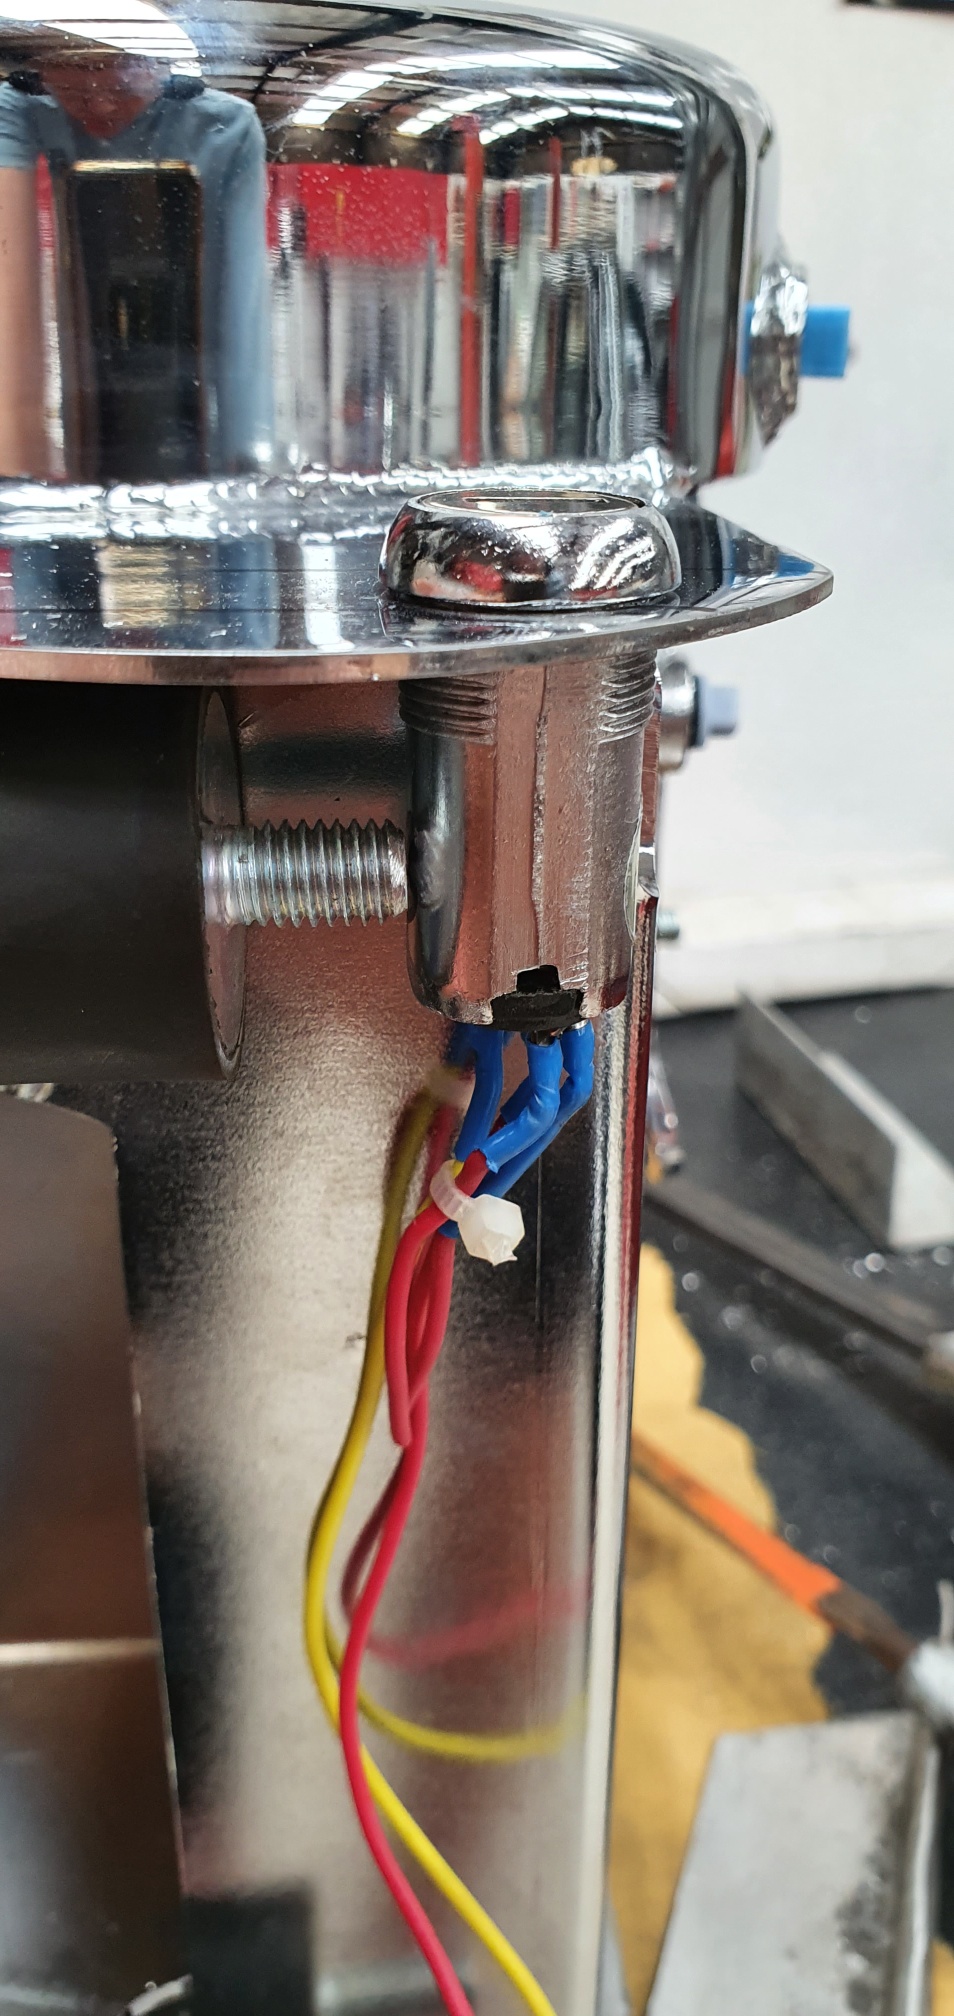
This double seam interfered with the nut, since interfering with little nuts should be left to scout leaders and catholic priests...I quickly remedied this terrible situation.
Quick spray of "chrome" paint to stop rust. This is unseen, but still good to do for longevity reasons.
All done, might watch the paint dry all day for entertainment now???
-
3
-
-
Cunts!!! Fucking America and the god dam imperial system. Turns out m10 is to easy for harley, as unlike the rest of the world they use 3/8-24 banjo pressure switches.
After 30 minutes of Google searches didn't show any hits, I thought fuck it and ordered one from the USA. Should be here in a few weeks
-
1
-
 1
1
-
-
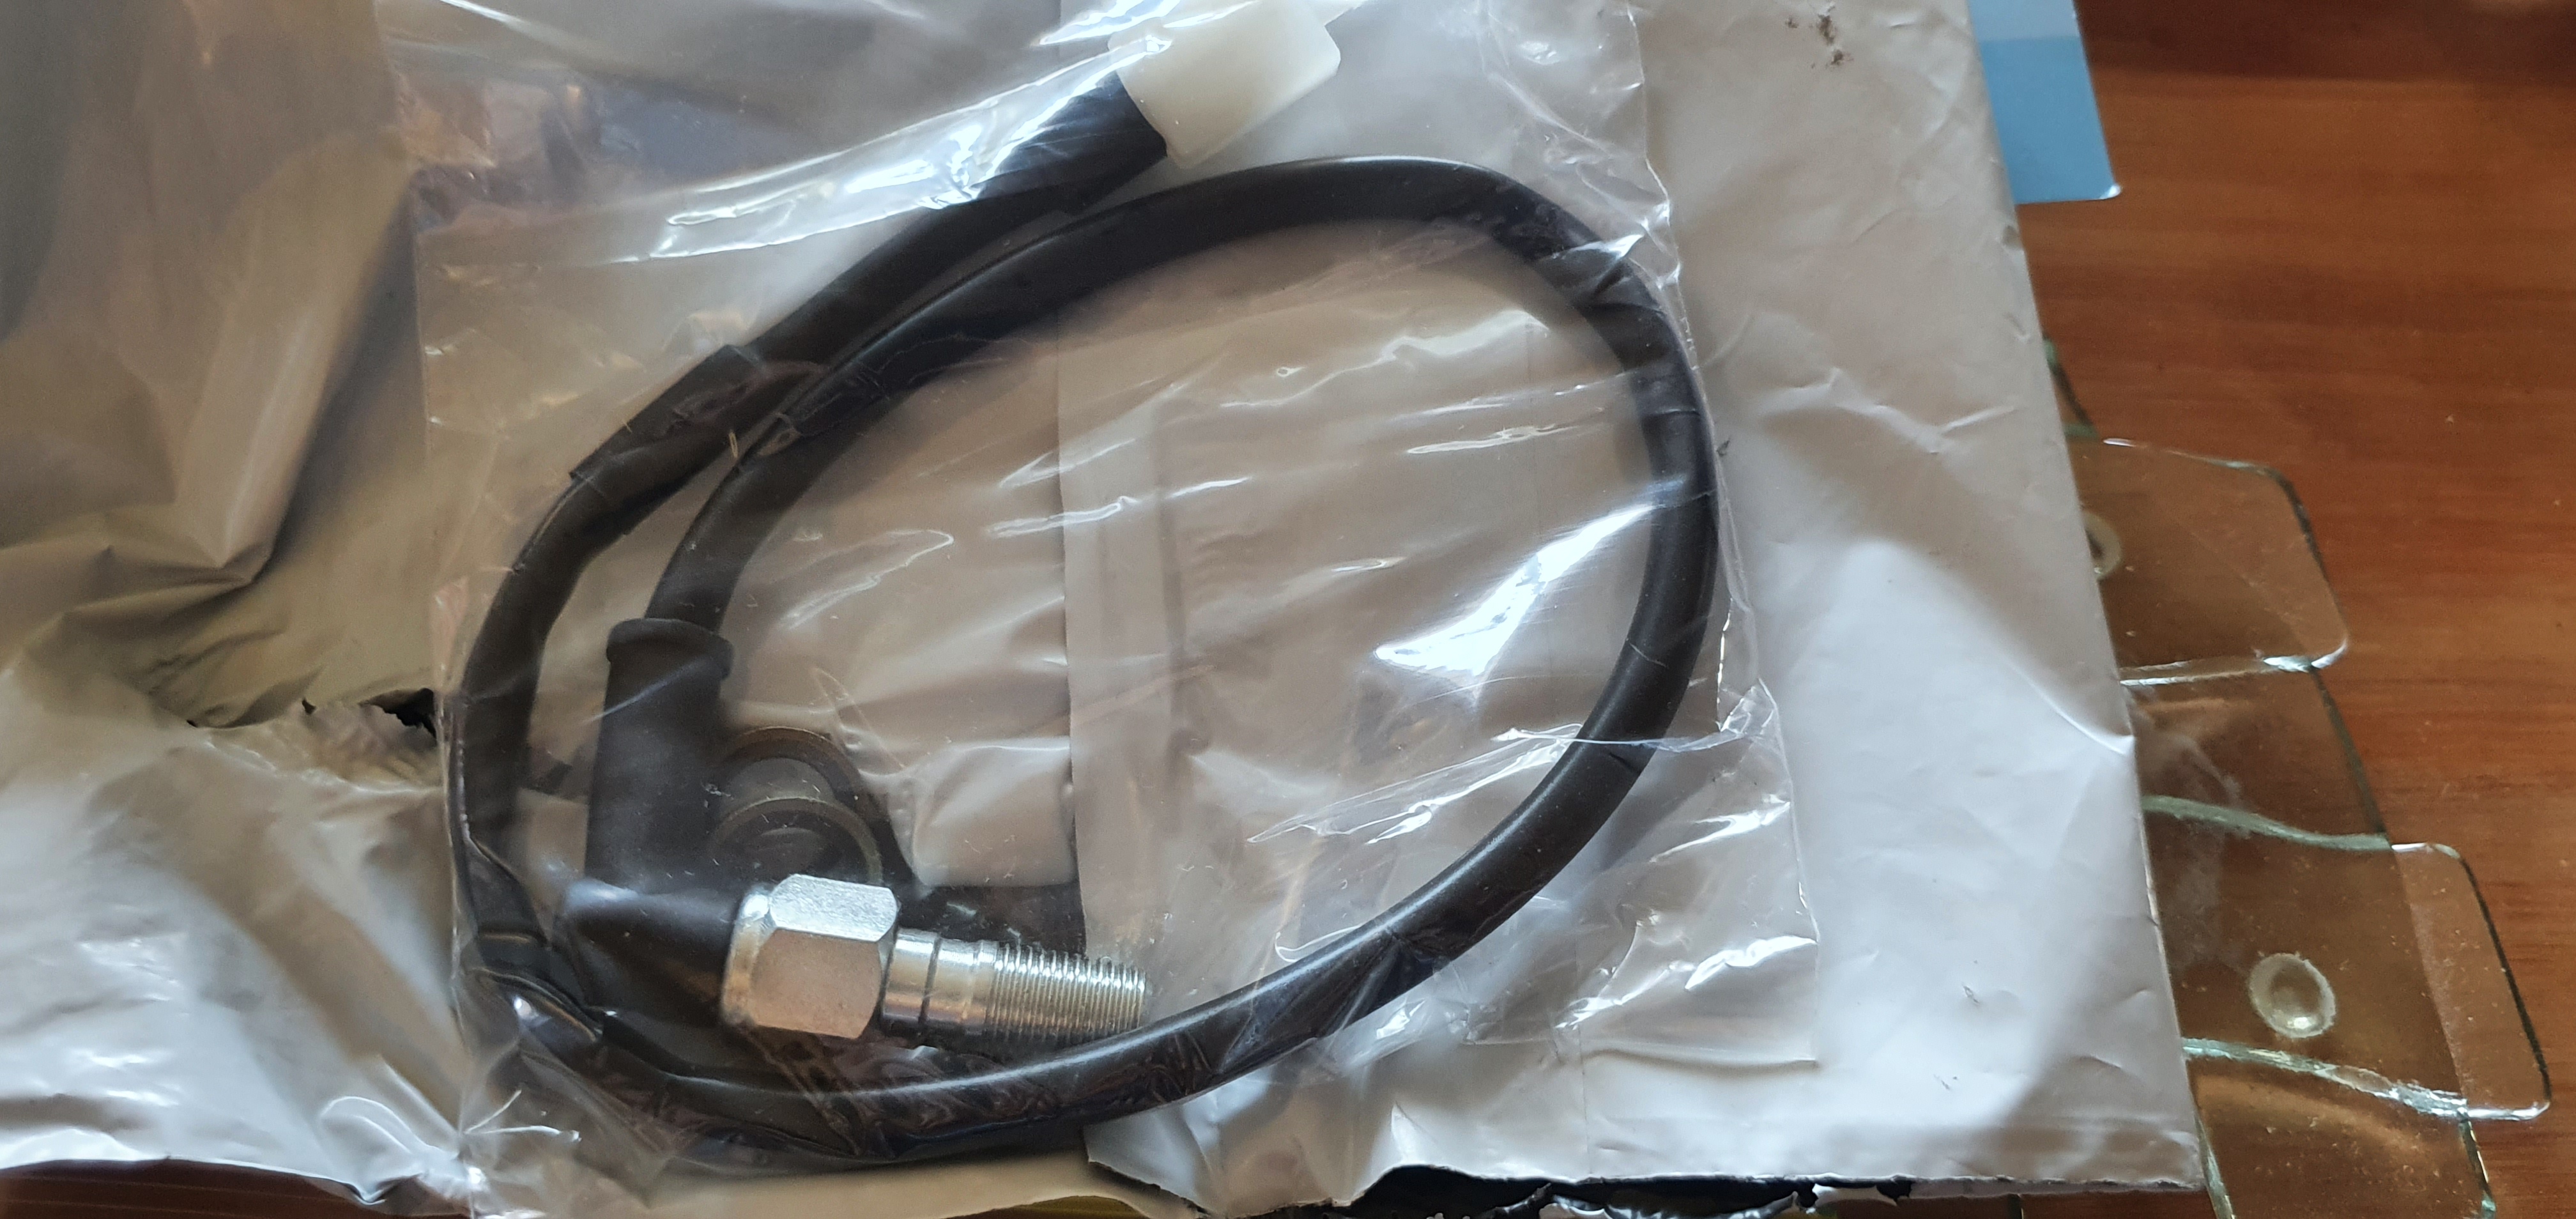
This arrived. It converts brake pressure into a closed switch, hence giving rear brake signal to non electric sensor brakes.
Think it'll do the trick.
-
2
-
-
10 minutes ago, Lord Gruntfuttock said:
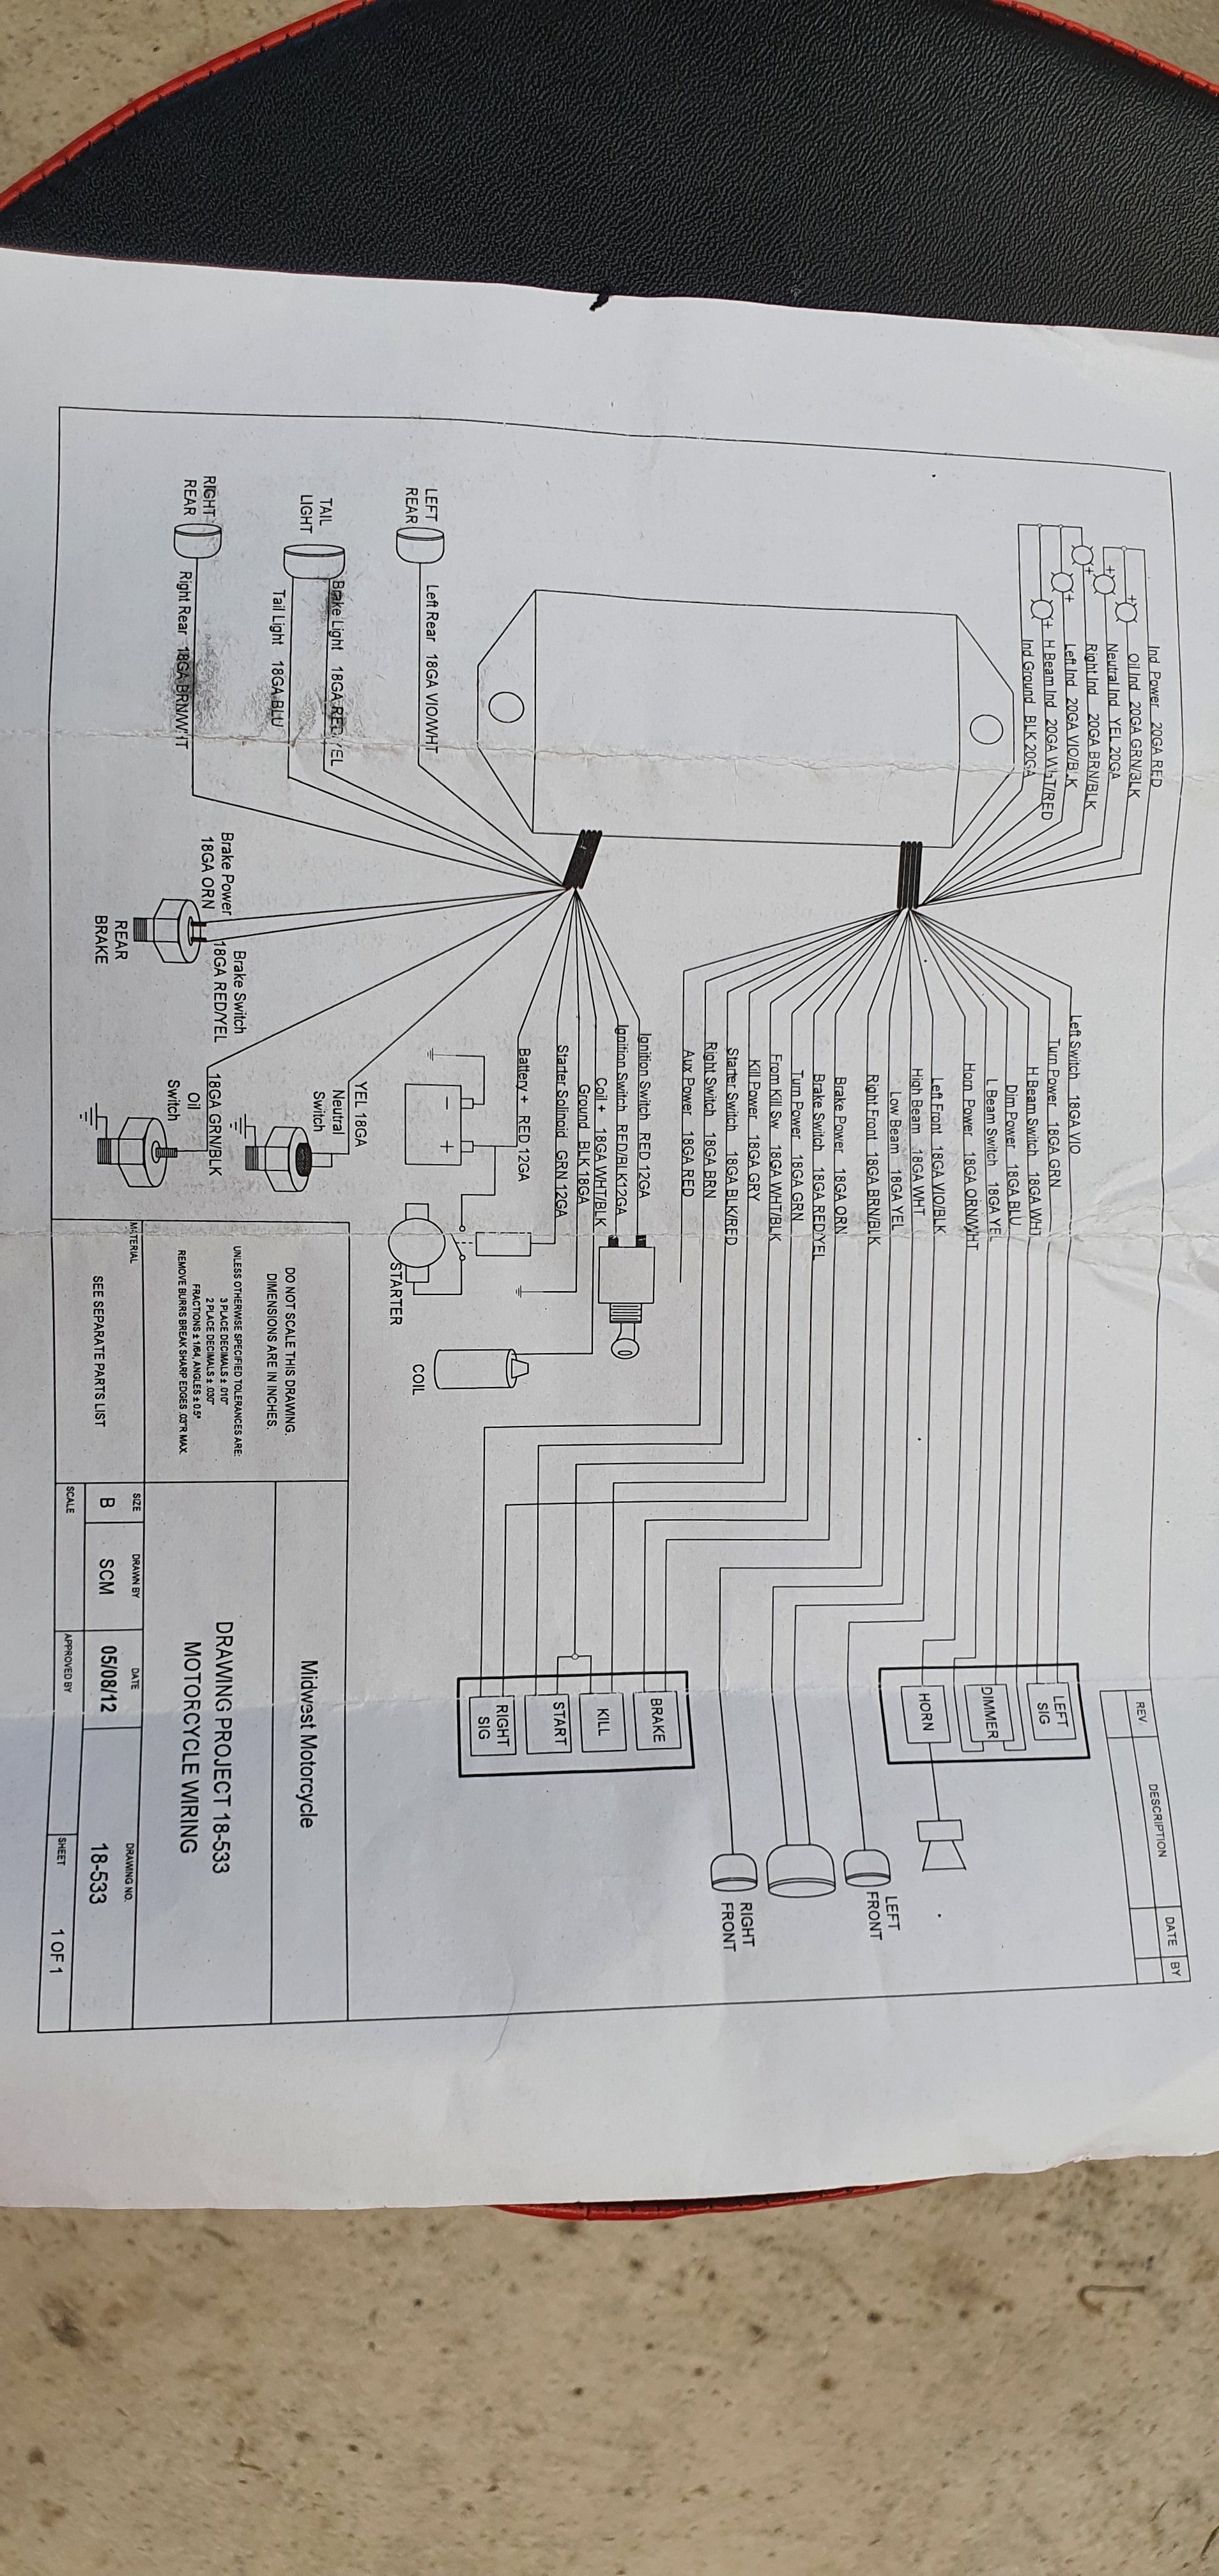
Quick Google search says the Ultima 18-533 has protection built into the circuitry, which you'd expect for the money, but can't guarantee for Merican stuff...
")
Yeah, zero customer service and pretty poor information. I'm not 100% sure what I've got.
But still believe that this is an easier way to go, given i have nothing to begin with, so I'm kind of painting a picture of something I've never seen if you get what I mean.
I've got all the layout sorted,cknow where each wire goes. Just waiting on parts to arrive. But a little bit of knowledge can be a dangerous thing, so very happy to receive any advice or warnings thanks.
-
1
-
-
5 hours ago, Lord Gruntfuttock said:
Yeah make sure you have some sort of fuse/breaker protection. Don't know if you are running a battery or not but there's a lot of potential for fire there without something to break a fault circuit.
Happy to look over your diagram if you can post it up? Won't be till next week though as still on holiday and will have no reception soon...
Thanks, yes I'll post up diagram. Any advice will be much appreciated thanks.
Part number is 18-533 ultima wiring harness.
-
 1
1
-
-
5 hours ago, rusty360 said:
From ali? Rs components do a massive range of plugs and sockets if ya don't wana wait, they ship overnight from oz
These were on trademe, nz stock, so should have by Friday? Same price as Aliexpress but $10 freight, so about $60 for 2x sets including freight.
Repco and jaycar were like $30-$70 per fitting and I need 7 plugs, which adds up stupid fast!!
I found a few other shops selling them for around $30, but nothing really cheap.
The kits I brought were $25 per kit, and include about 20 random fittings per kit.
Considering I'm not working to NASA tolerances, I think these cheap plugs will be fine. I'll just try them and see.
-
4 hours ago, Lord Gruntfuttock said:
You do have a fuse block yeah...?
Not yet. I'm unsure if my relay box has built in fuses, information is sketchy at best. The wiring diagram doesn't show any additional fuses. I was going to put some in to cover the main parts. More reading I guess on Google??
-
18 minutes ago, Raizer said:
I've used those plugs on a few scooters, they work well!
Just don't over squish the crimpsAwesome, good advice thanks.
Its not like I'll take it out in the rain, so I could pretty much twist the wires together and wrap in tape and it'd be fine hahaha
-
 1
1
-
-
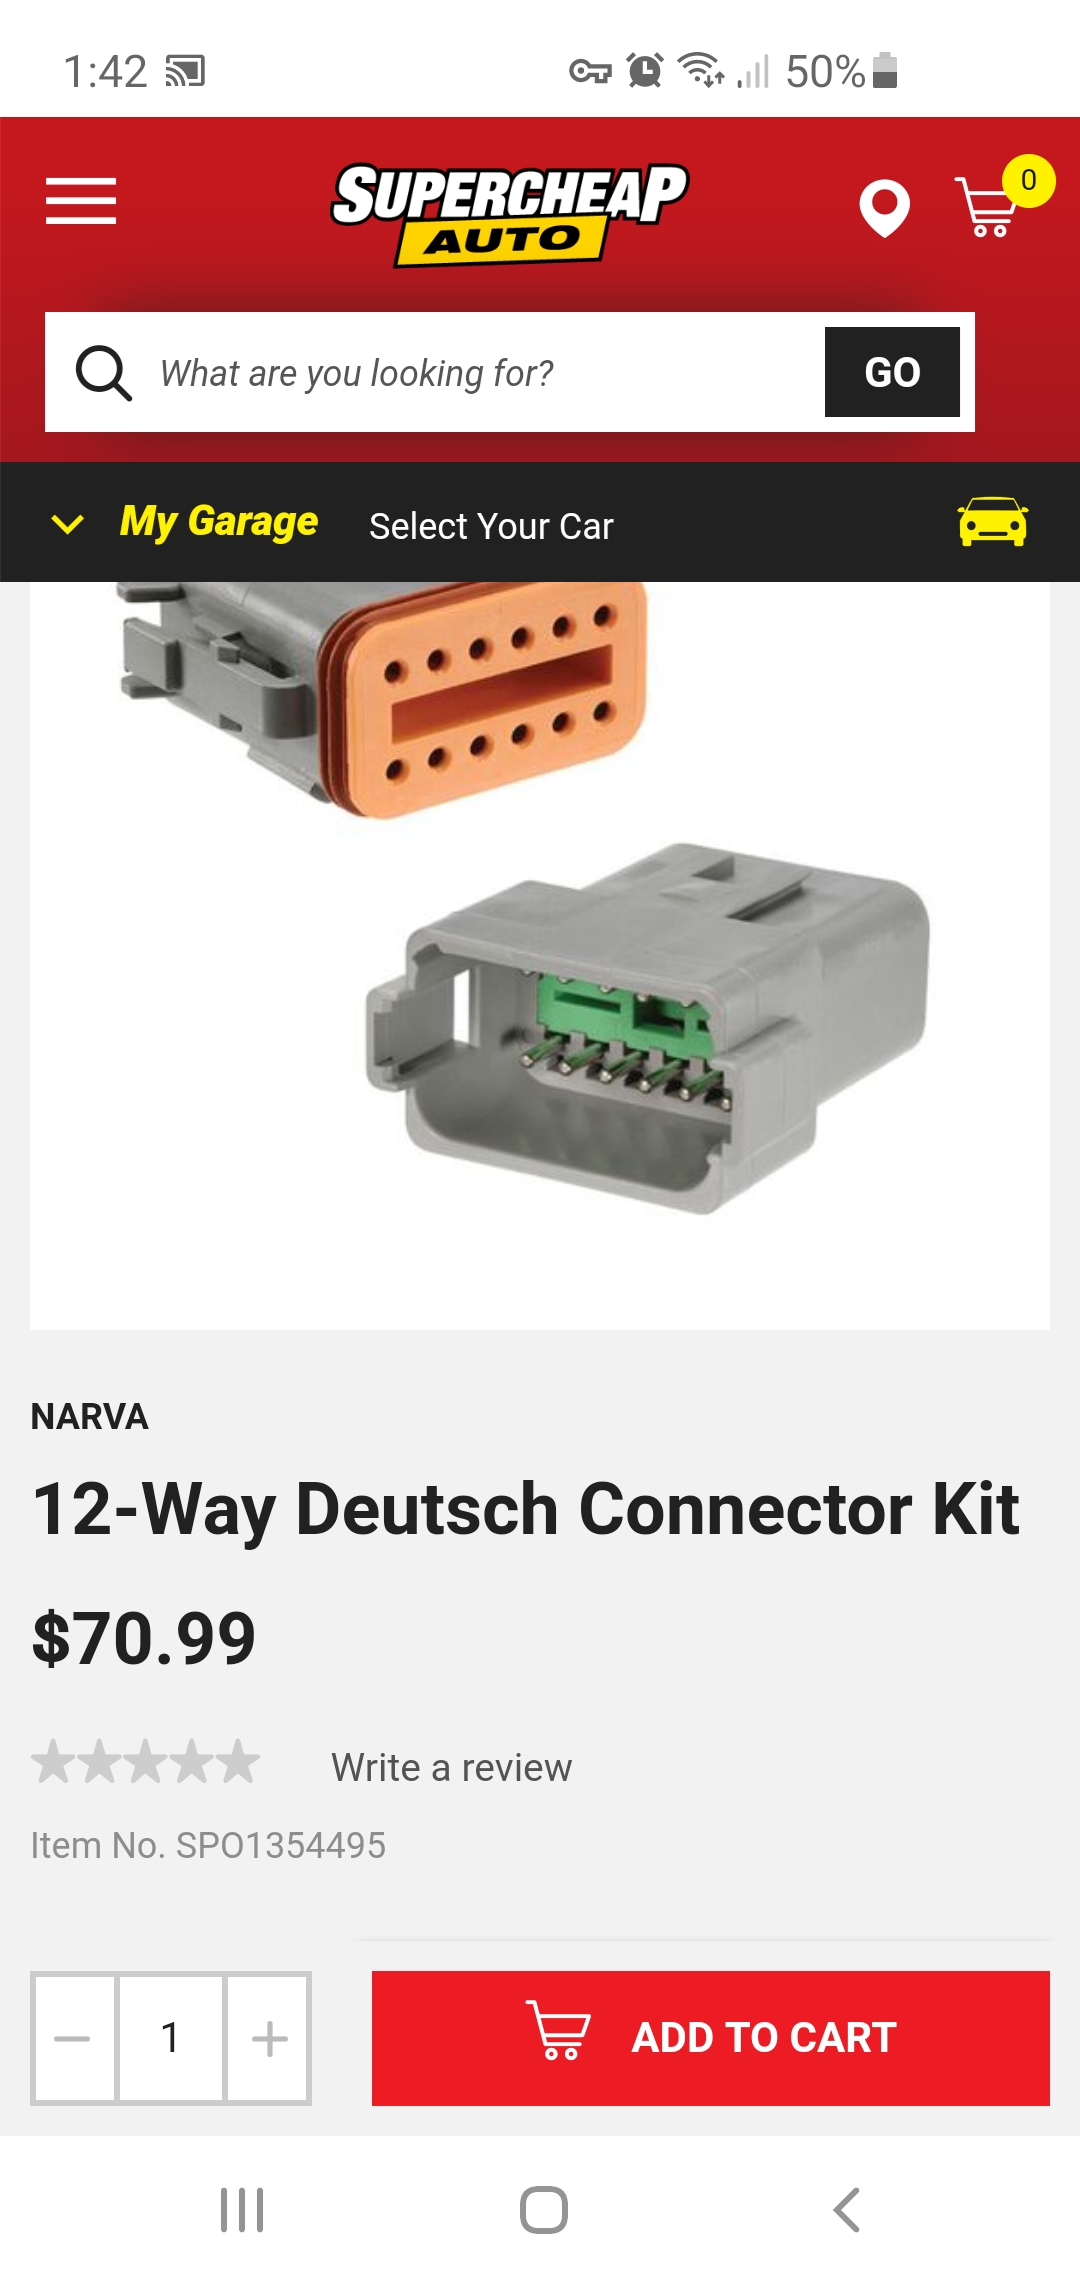
Ordered 2 of these kits. Should get it done.
Works out much cheaper than paying $30 a fitting at jaycar or repco etc.
-
5
-
-
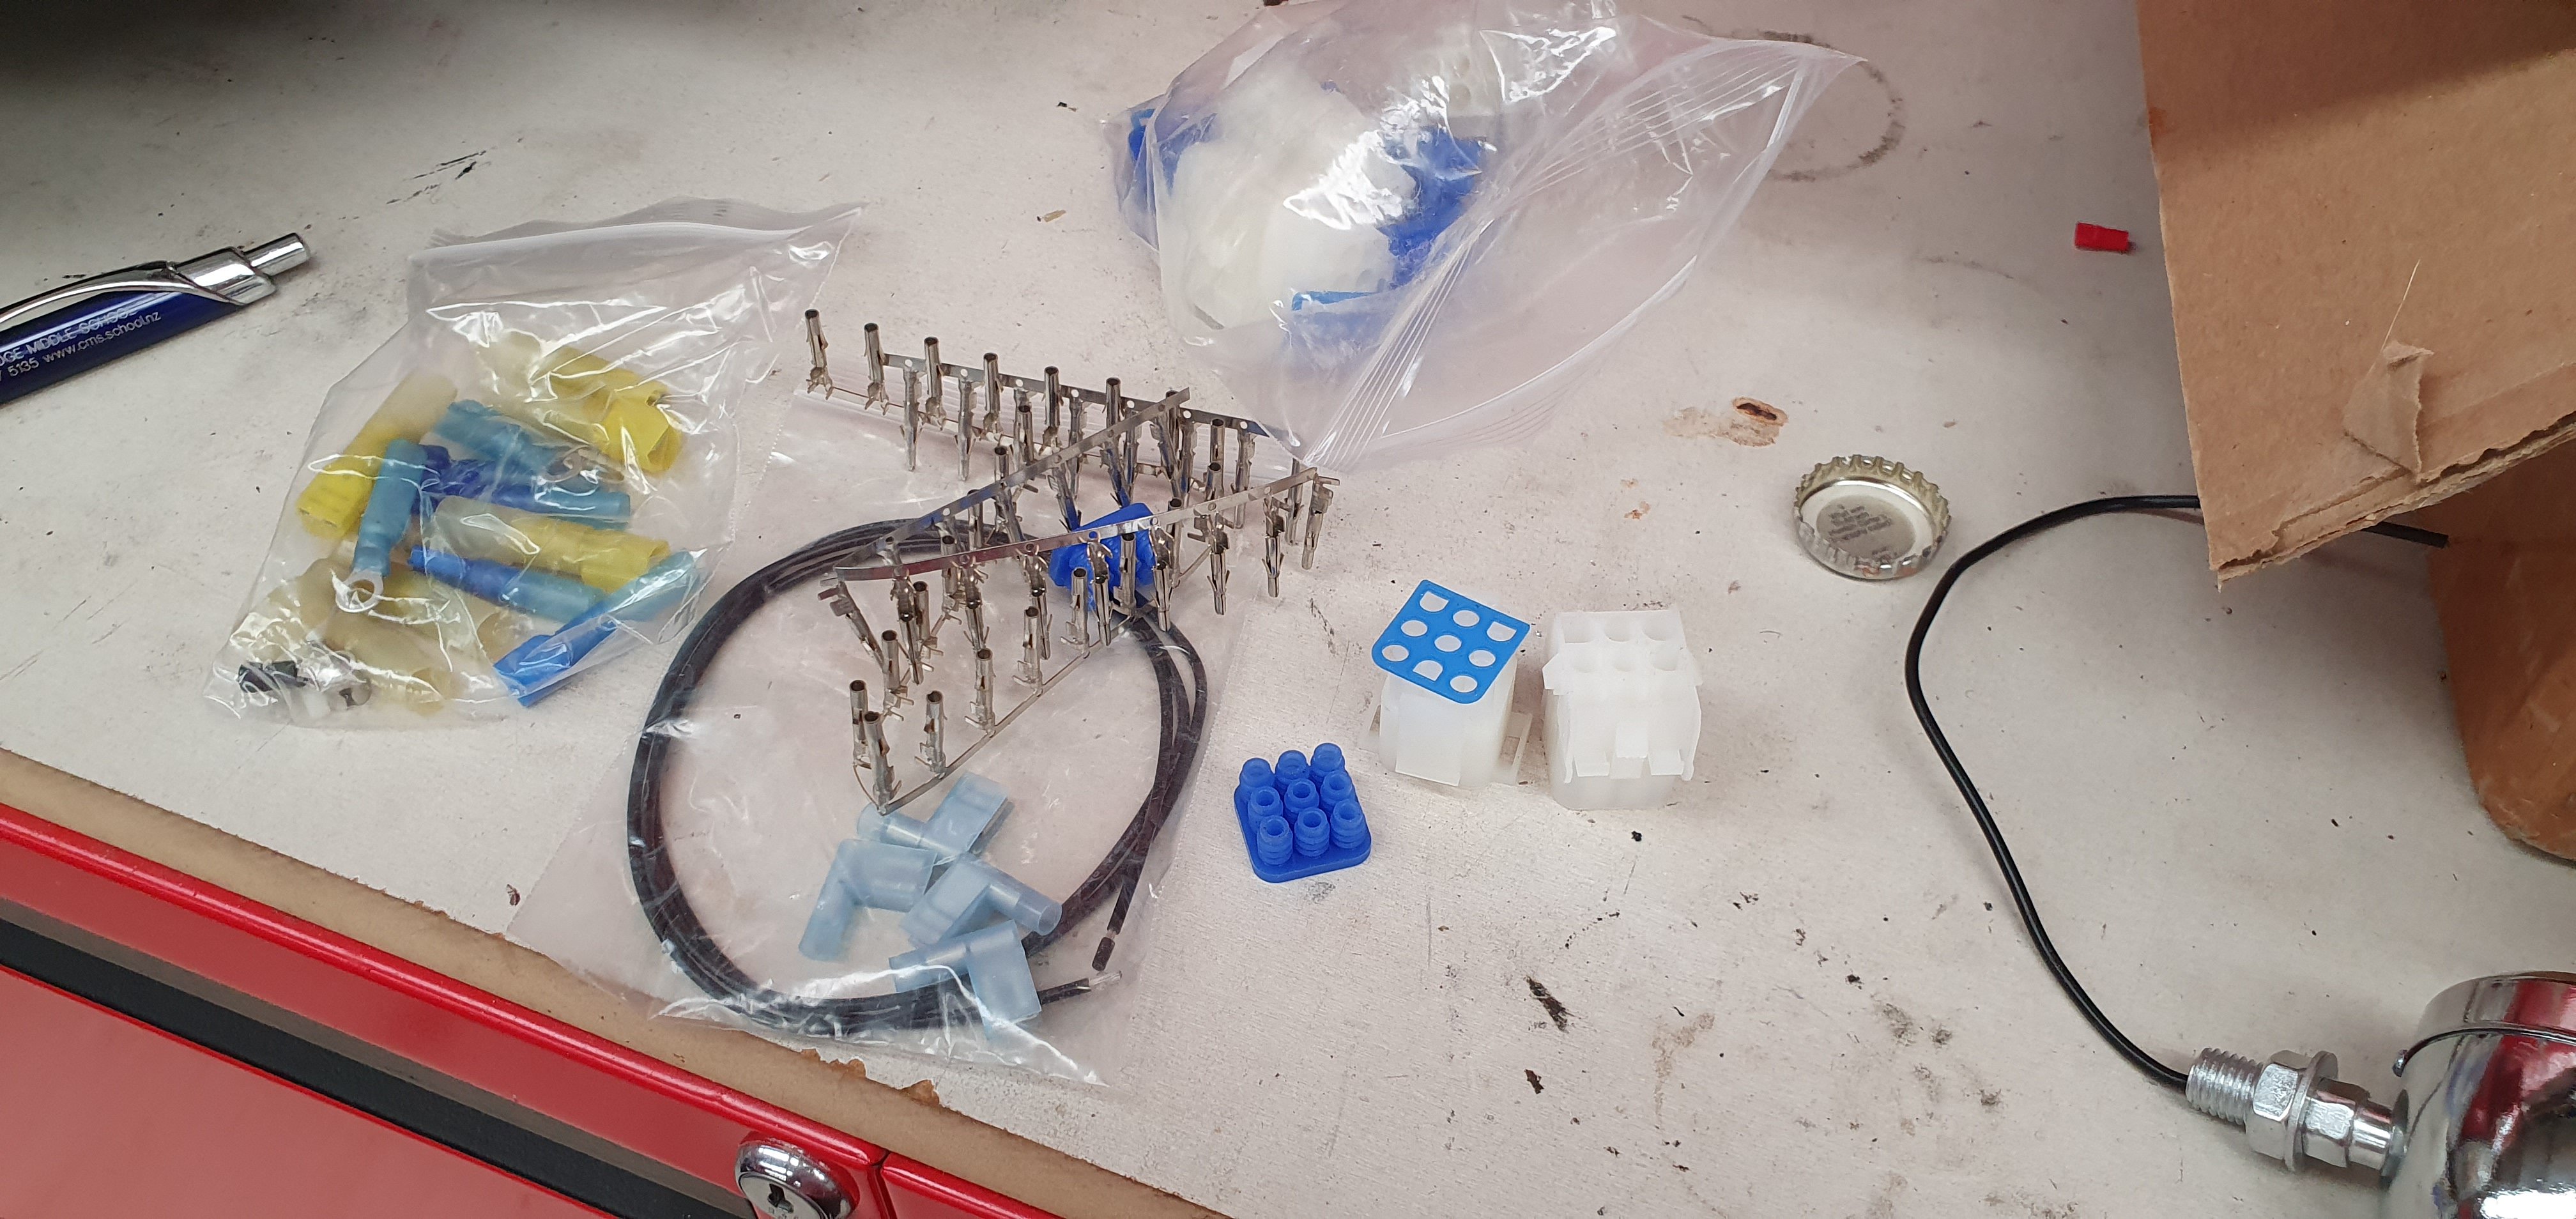
Okay, neither maths nor English are my strongest attributes. However there are 48 wires that need a connection block, required to make this wiring loom work.
There's an additional half dozen that need an eye terminal for things like battery, coils, starter motor, horn etc.
So when you buy a "complete kit" that has in excess of 50 wires and that kit only has enough connectors to do 22 wires, it leaves you scratching your head wondering if the difference between American English and the Queens English we use in NZ is really that far apart?
FFS this kit has 50+ wires, but only 22 connectors!!! WTF. This is a carburetored engine, no ECU or injectors, sensors to consider, its as basic as it gets. A handful of their shitty connectors would have gone a long way towards finishing this today.
So off to jaycar with my crippled arse I go again.
-
2
-
-
Mail arrived, so my list of excuses is fast running out!
Strangely satisfying click sound and accompanying mechanical movements...hypnotic...
-
2
-
-
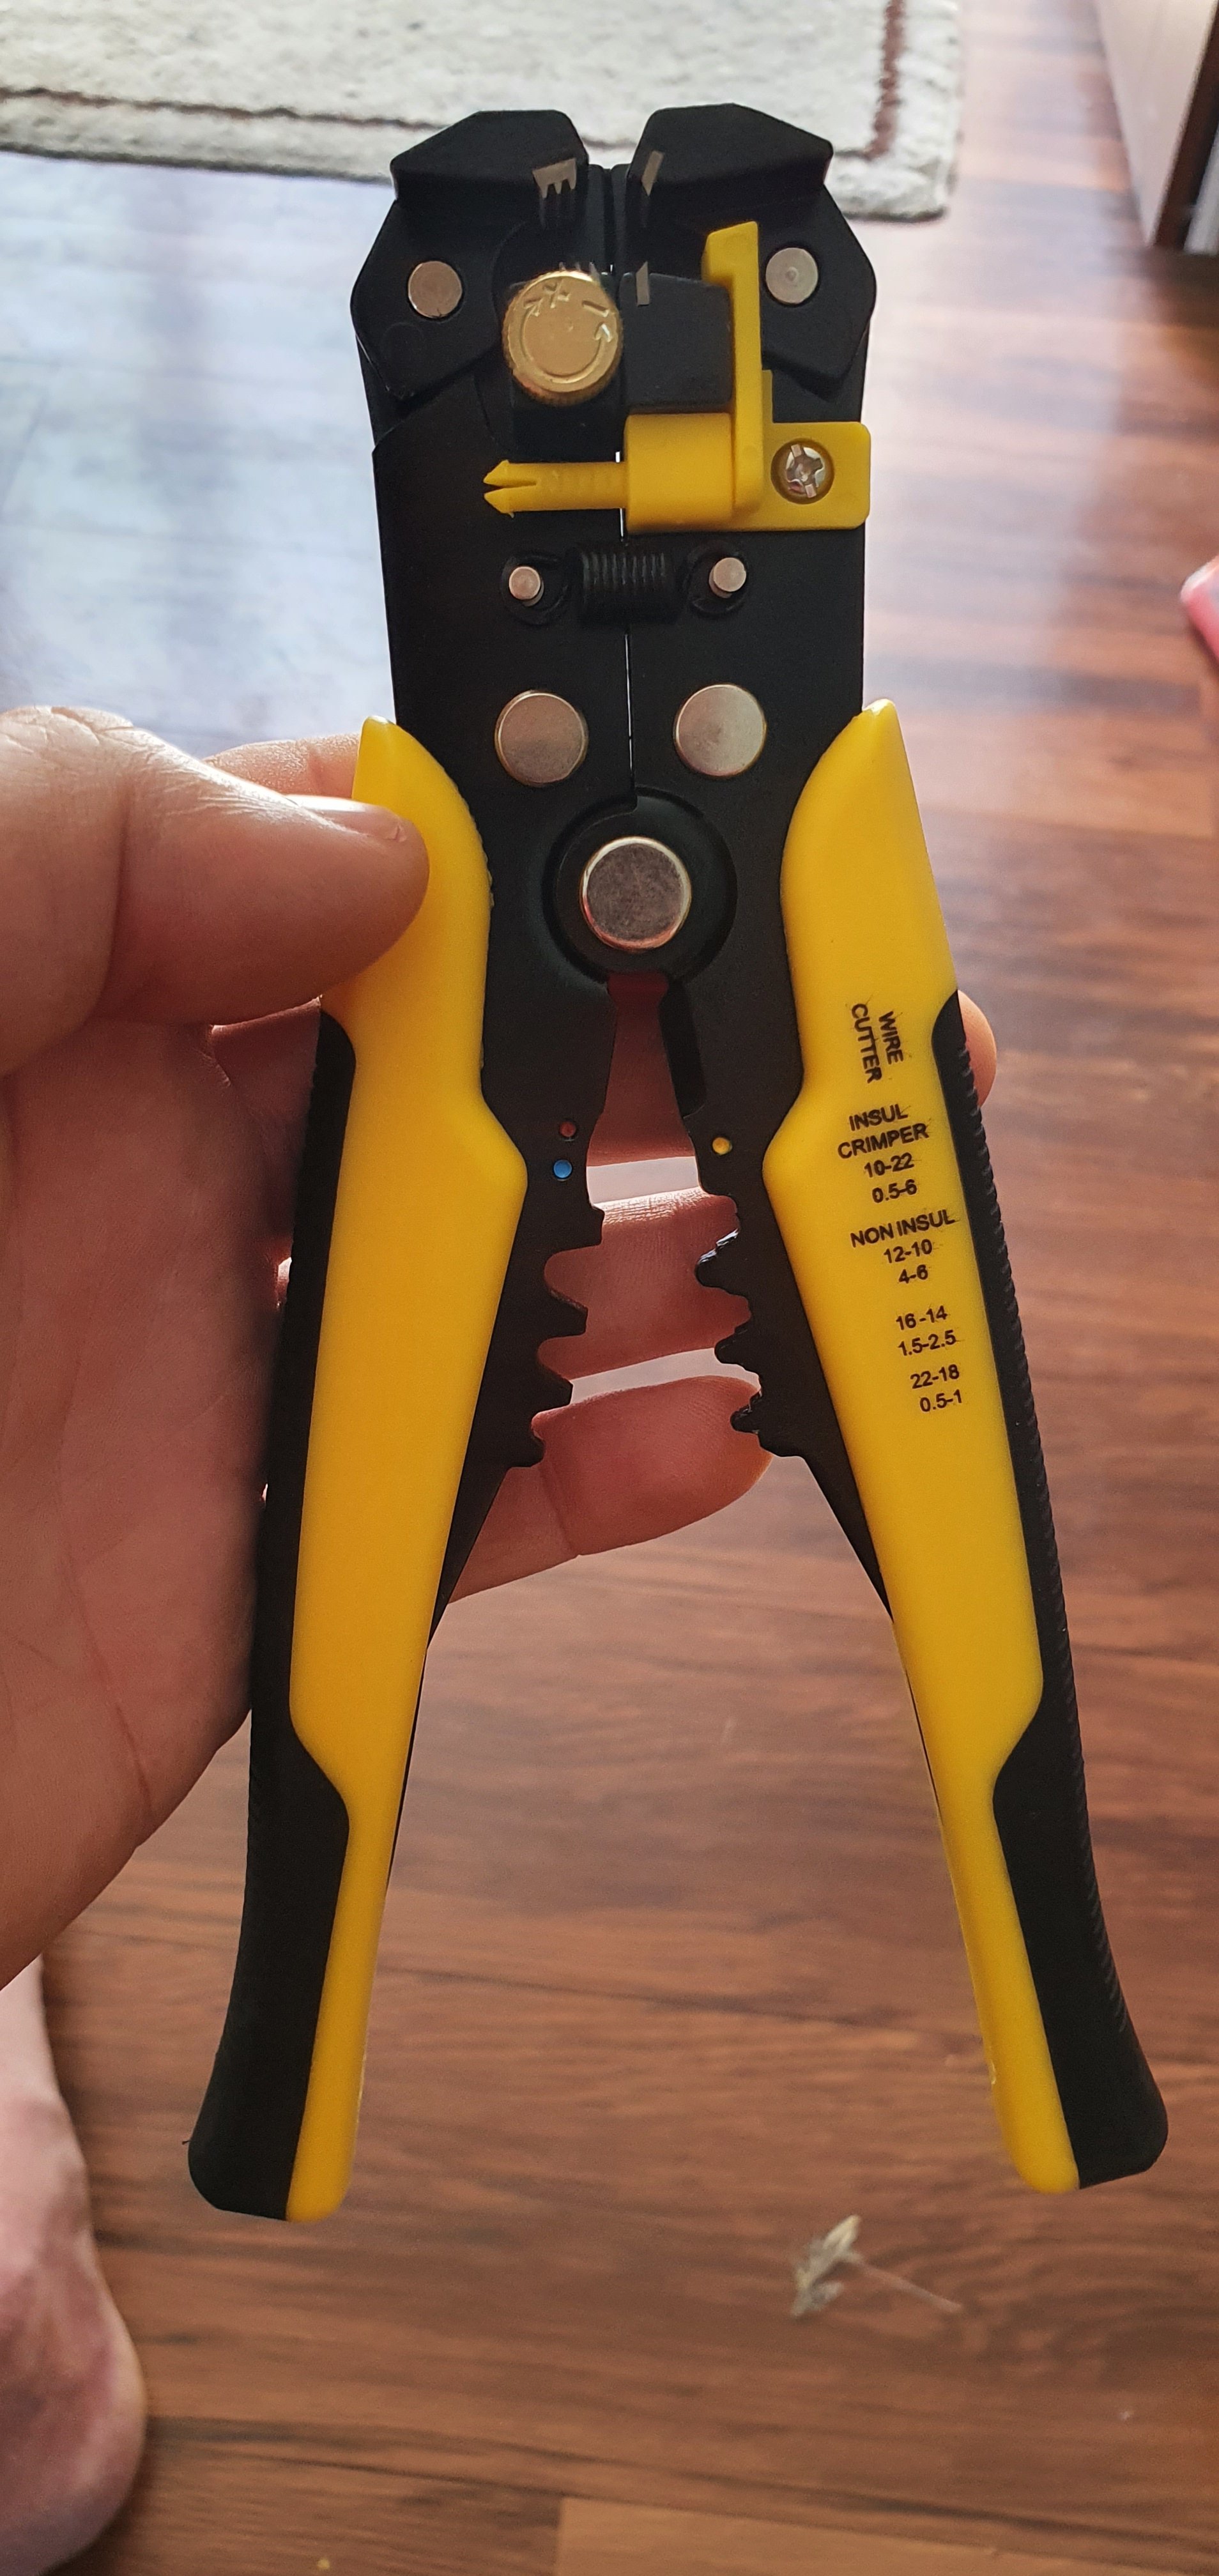
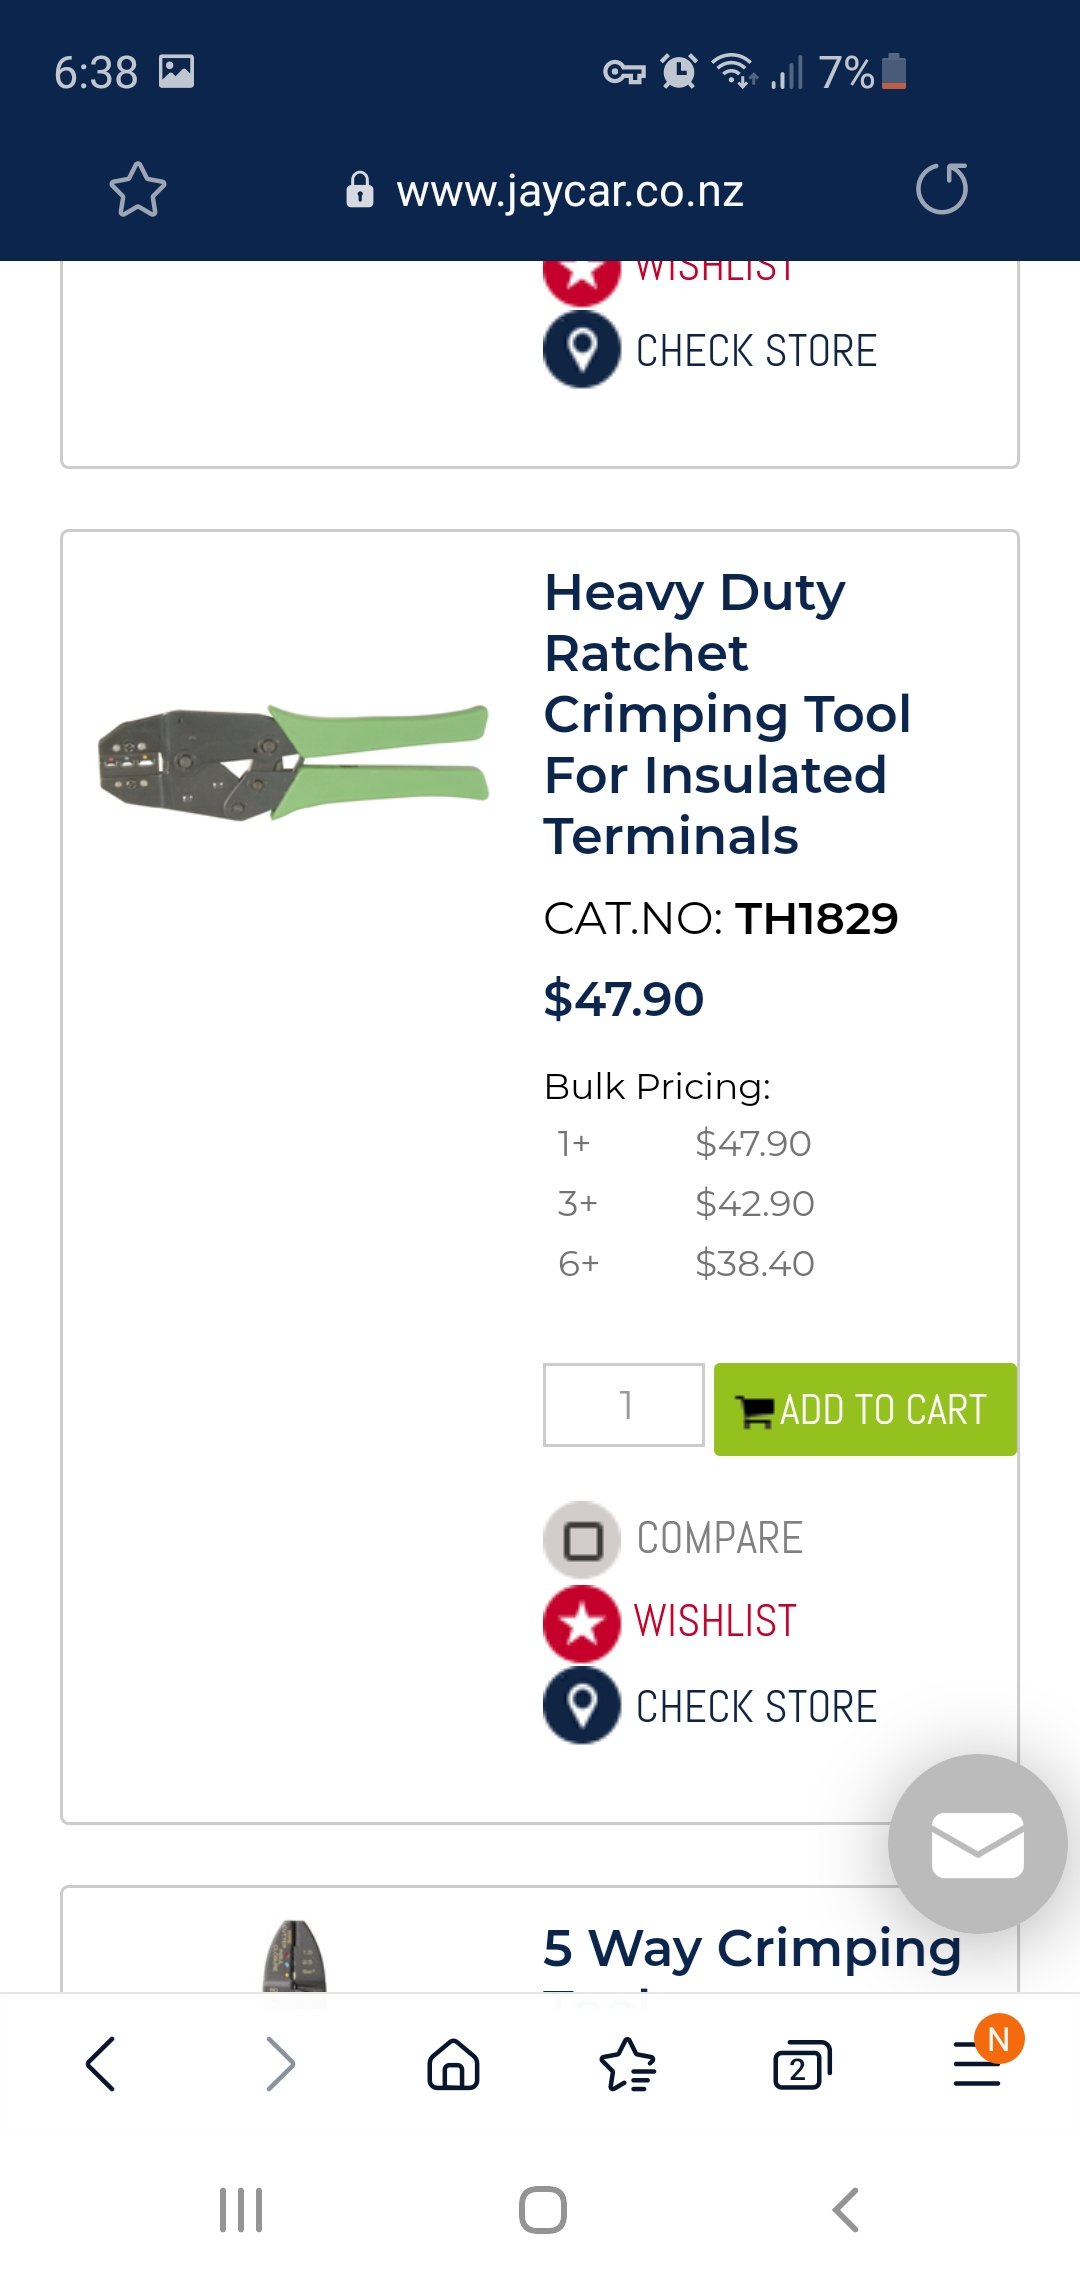
Brought these from jaycar. They work amazing!! Only $20, super happy with them.
Im sure there's much better ones, but even on insulated connections they make an unbelievable tight grip. Wish I'd had these years ago. I have 4 other sets of crimping tools...they're all just rubbish compared to this.
-
5
-
-
Brought these today. They work amazing!! Only $20 from jaycar, super happy with them.
-
1
-
1
-
-
Thanks for the responses ^
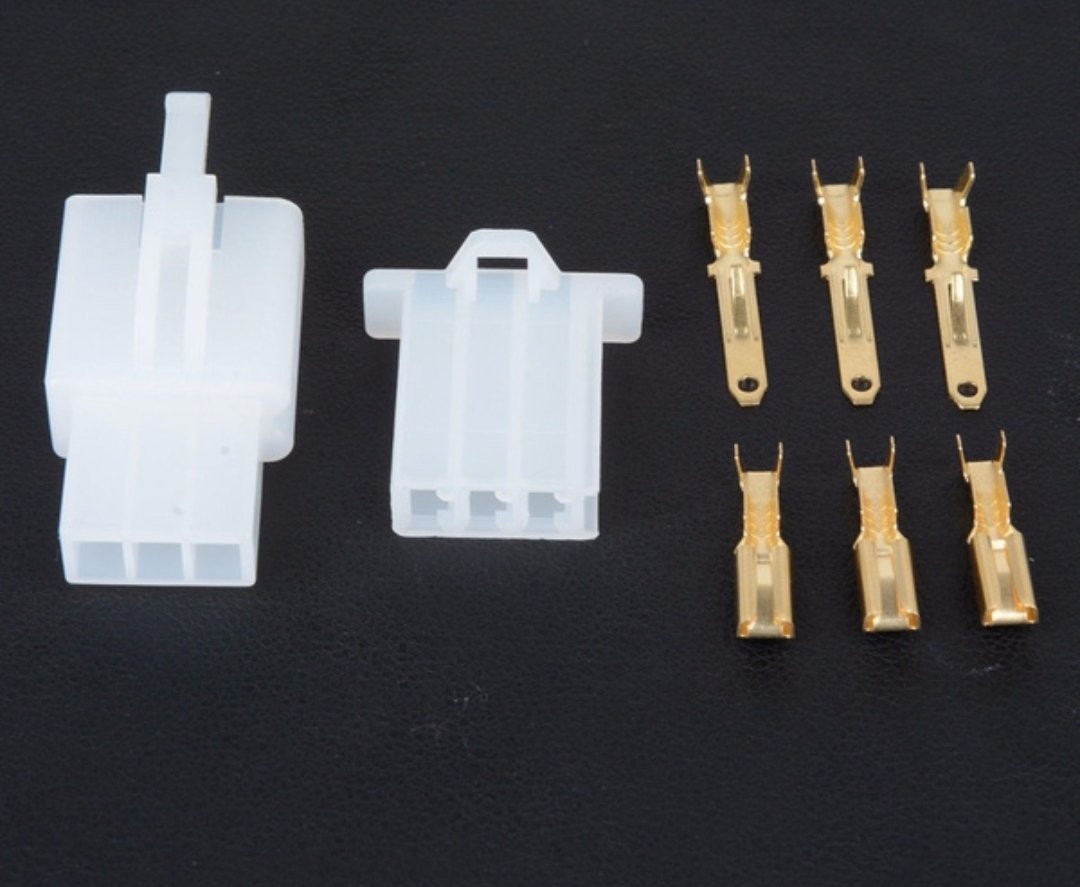
This is the kit I brought.
I'll pick up some of those non insulated crimp tools as per links supplied.
Cheers
-
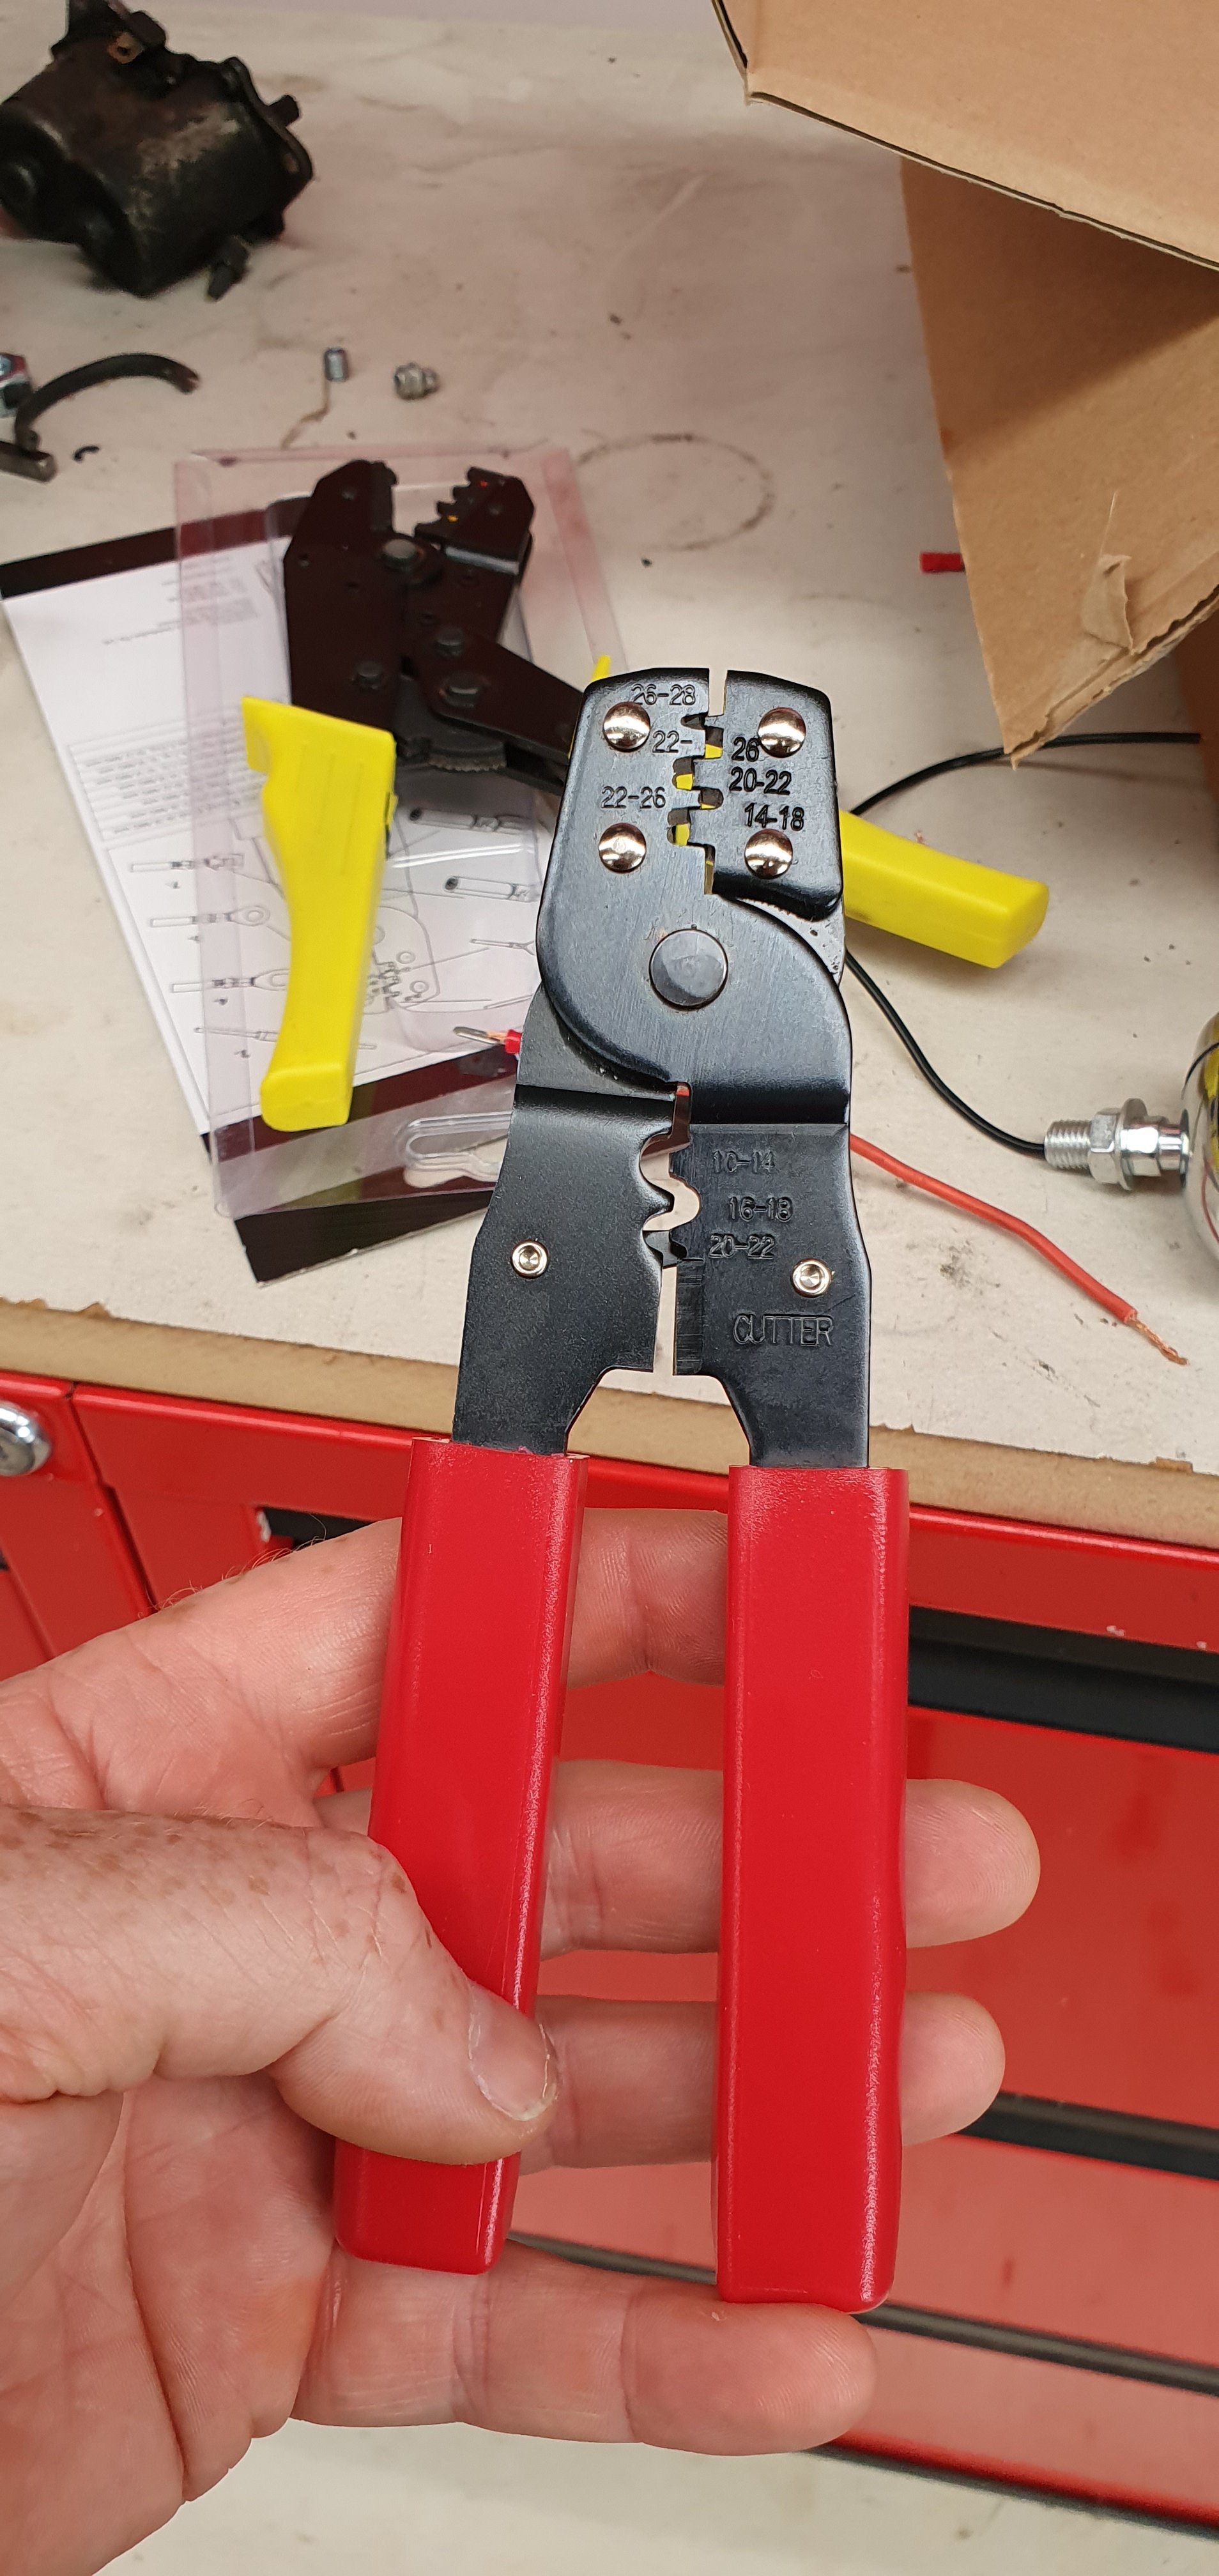
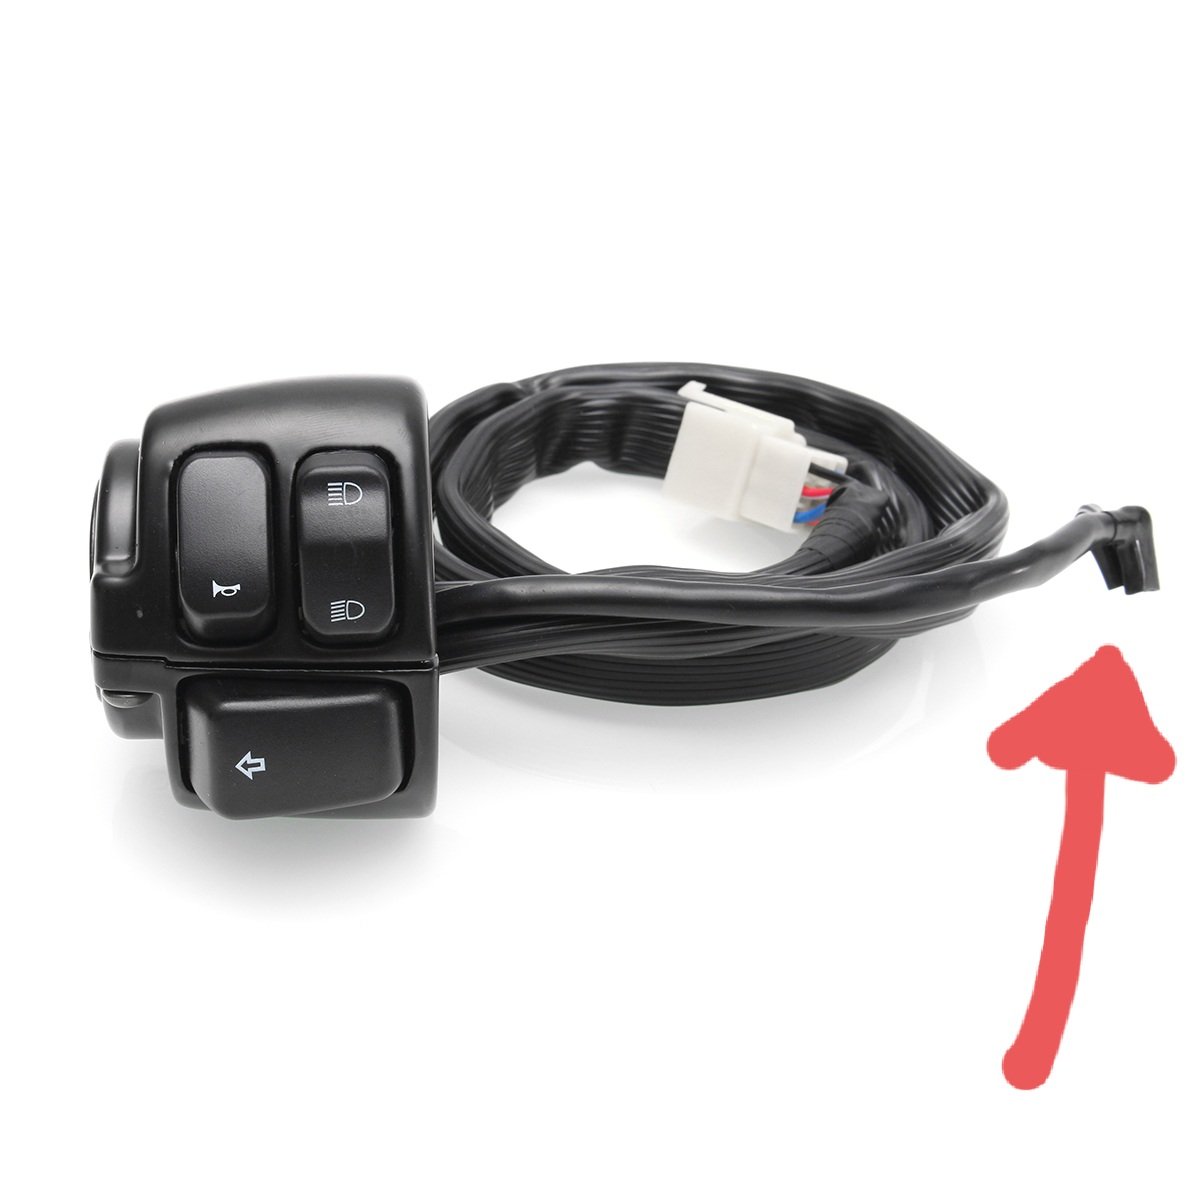
I need to crimp small pins onto wire. The type that go into plugs like this:
What tool do I need?
I have one of these, or close to this:
... and I've had zero success with it on those shitty multi packs of insulated connector kits you get from Repco.
Any advice????
Cheers
-
Yip, thats how I was feeling as I figured out that a lot the wires are spliced and share common power/earths etc. But by testing the resistance (ohms) through each circuit using a multimeter, i got there in the end. Pretty common shit I guess...but for an electrically retarded person like myself, self teaching as I go along, its a lot of condensed learning to fit into my already closed mind.
That said, I'm there now. Each wire labeled and each corresponding circuit tested and working via its switch.
so I'm now ready to buy expensive tools to strip and crimp the wires and then try installing OEM style connectors, yet another thing I've never done...but will soon have to figure out quick smart If I want it to work.
-
8
-
-
All they do is bung (a cork) it and put low pressure compressed air into it while holding it under water and look for bubbles. If you had compressed air at home and a recycling/rubbish bin full of water you could test it yourself.
-
2
-
-
6 minutes ago, tortron said:
yes that goes on a clutch switch (which are identical to a brake lever switch just a mirror image)
your lever mount may have a little nub and a threadded hole underneath it. but why would you want a clutch starter lock out, worse than a sidestand switch
Excellent, thank you.
I can't see anything on my clutch control lever. The brake one is obvious, but nothing here?
I'll delete it.
-
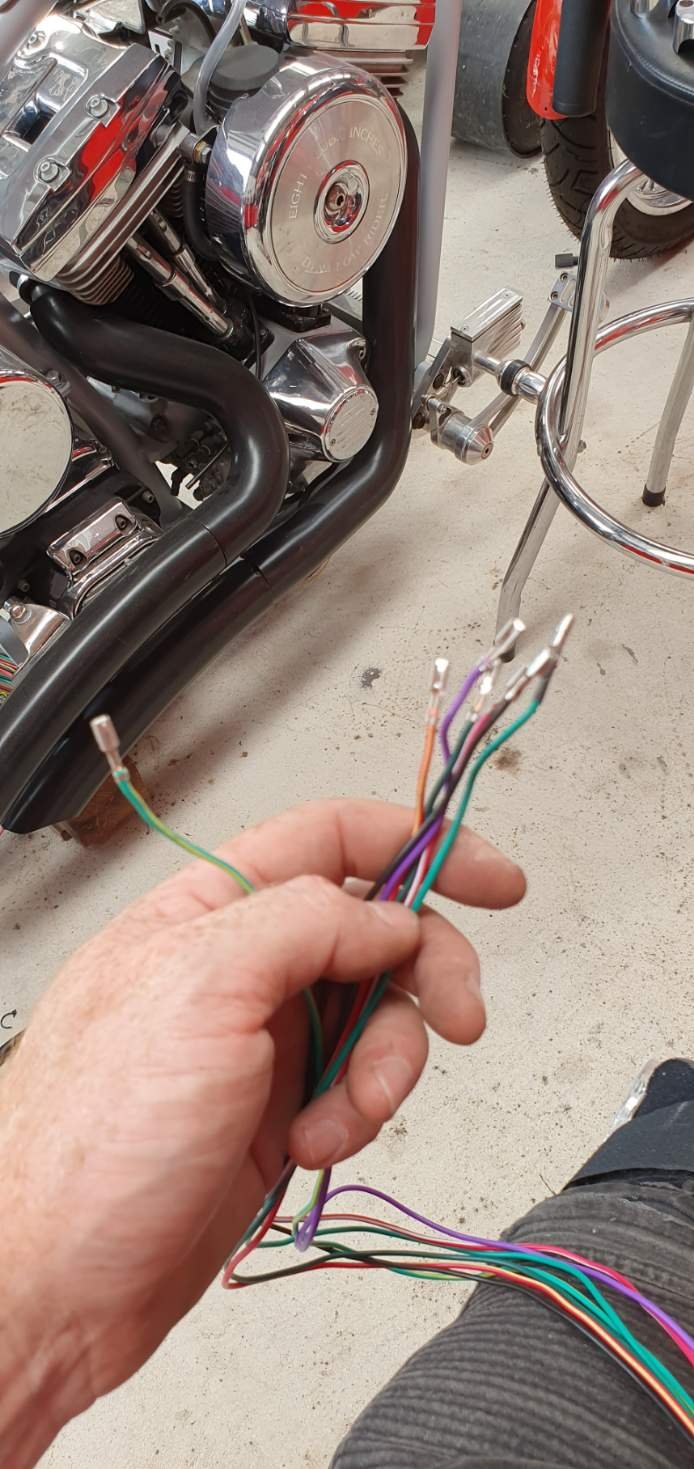
Okay, Longshot...but does anyone on here know what these 2 wires are for?
Im at a bit of a loss? Maybe a clutch switch so you can't start it without clutch in?
My clutch lever has no switch on it and it's a factory part off a harley. Maybe a model without this feature? Fucked if I know?
Help???? Anyone????
-
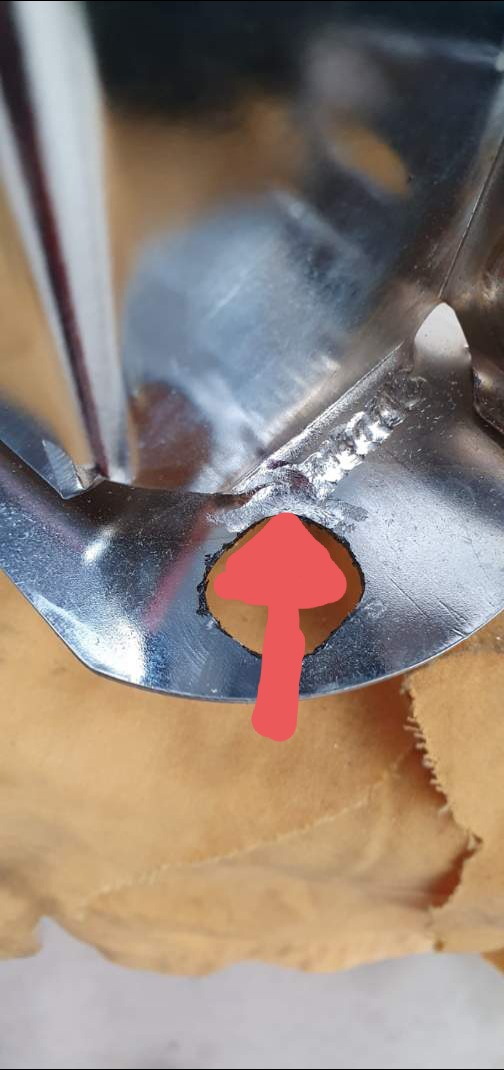
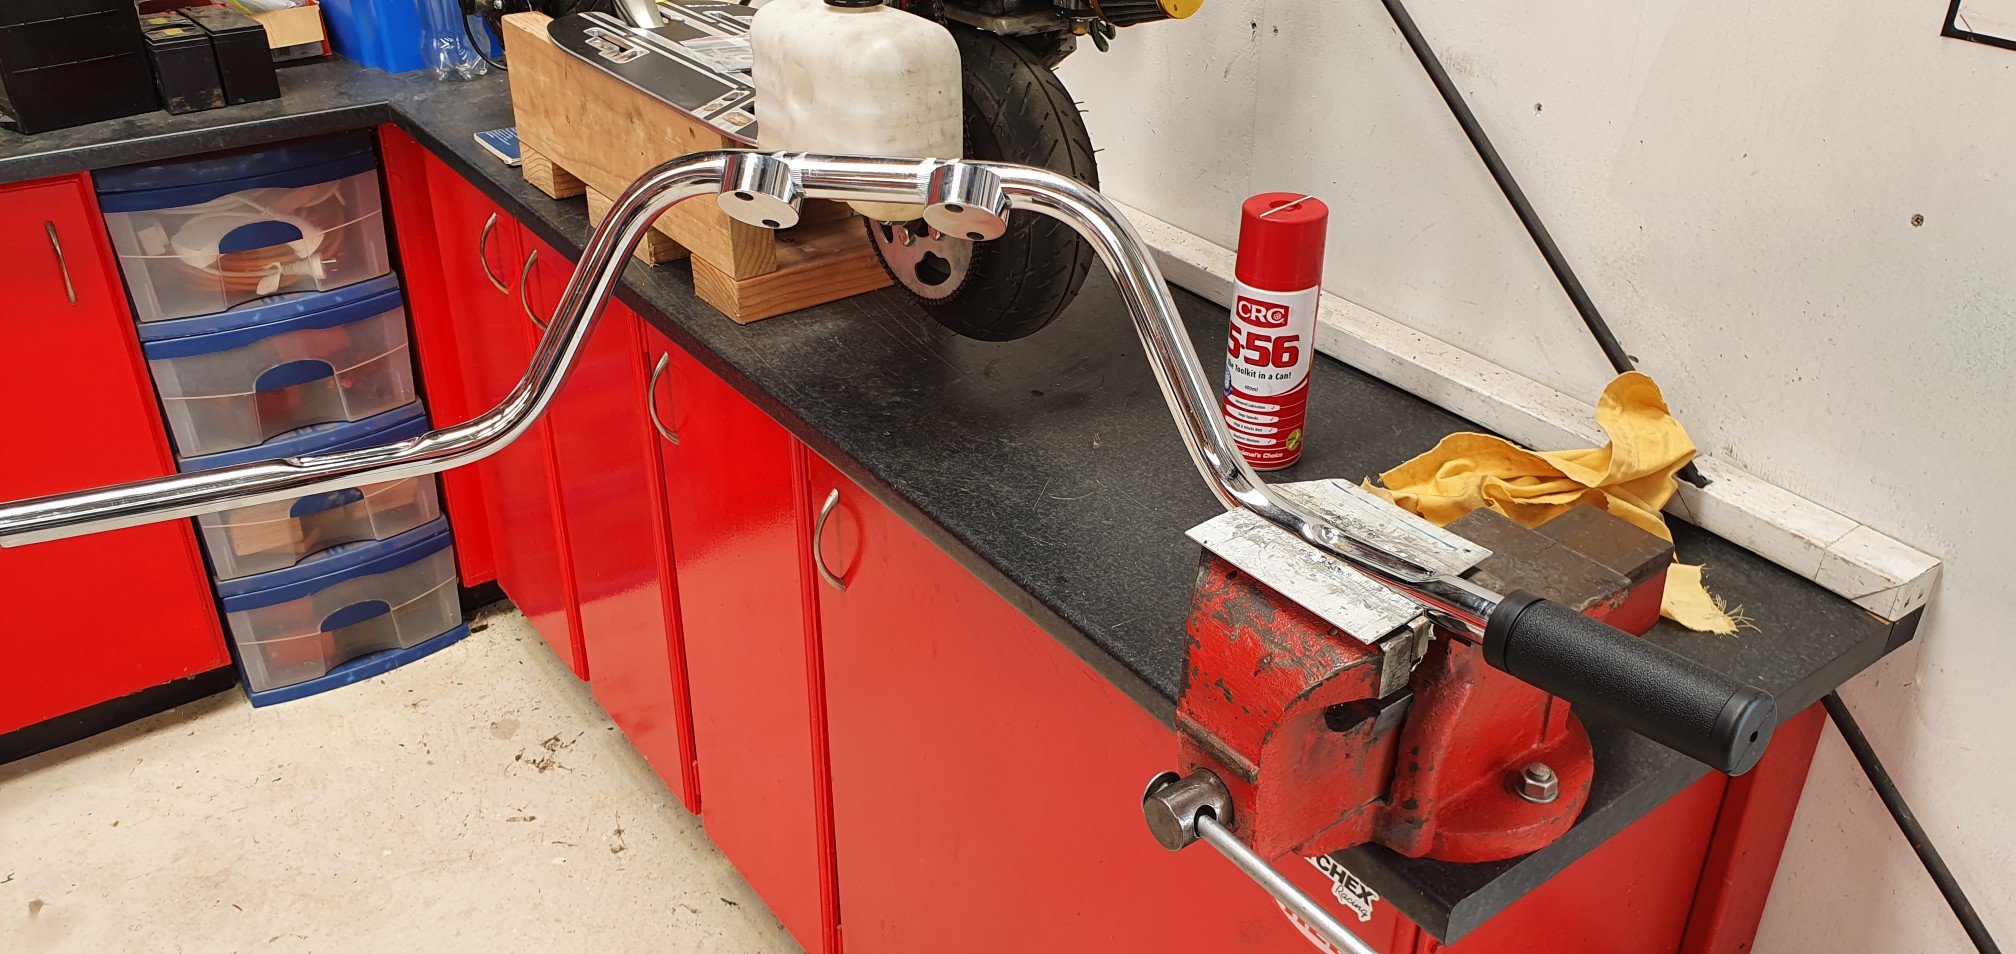
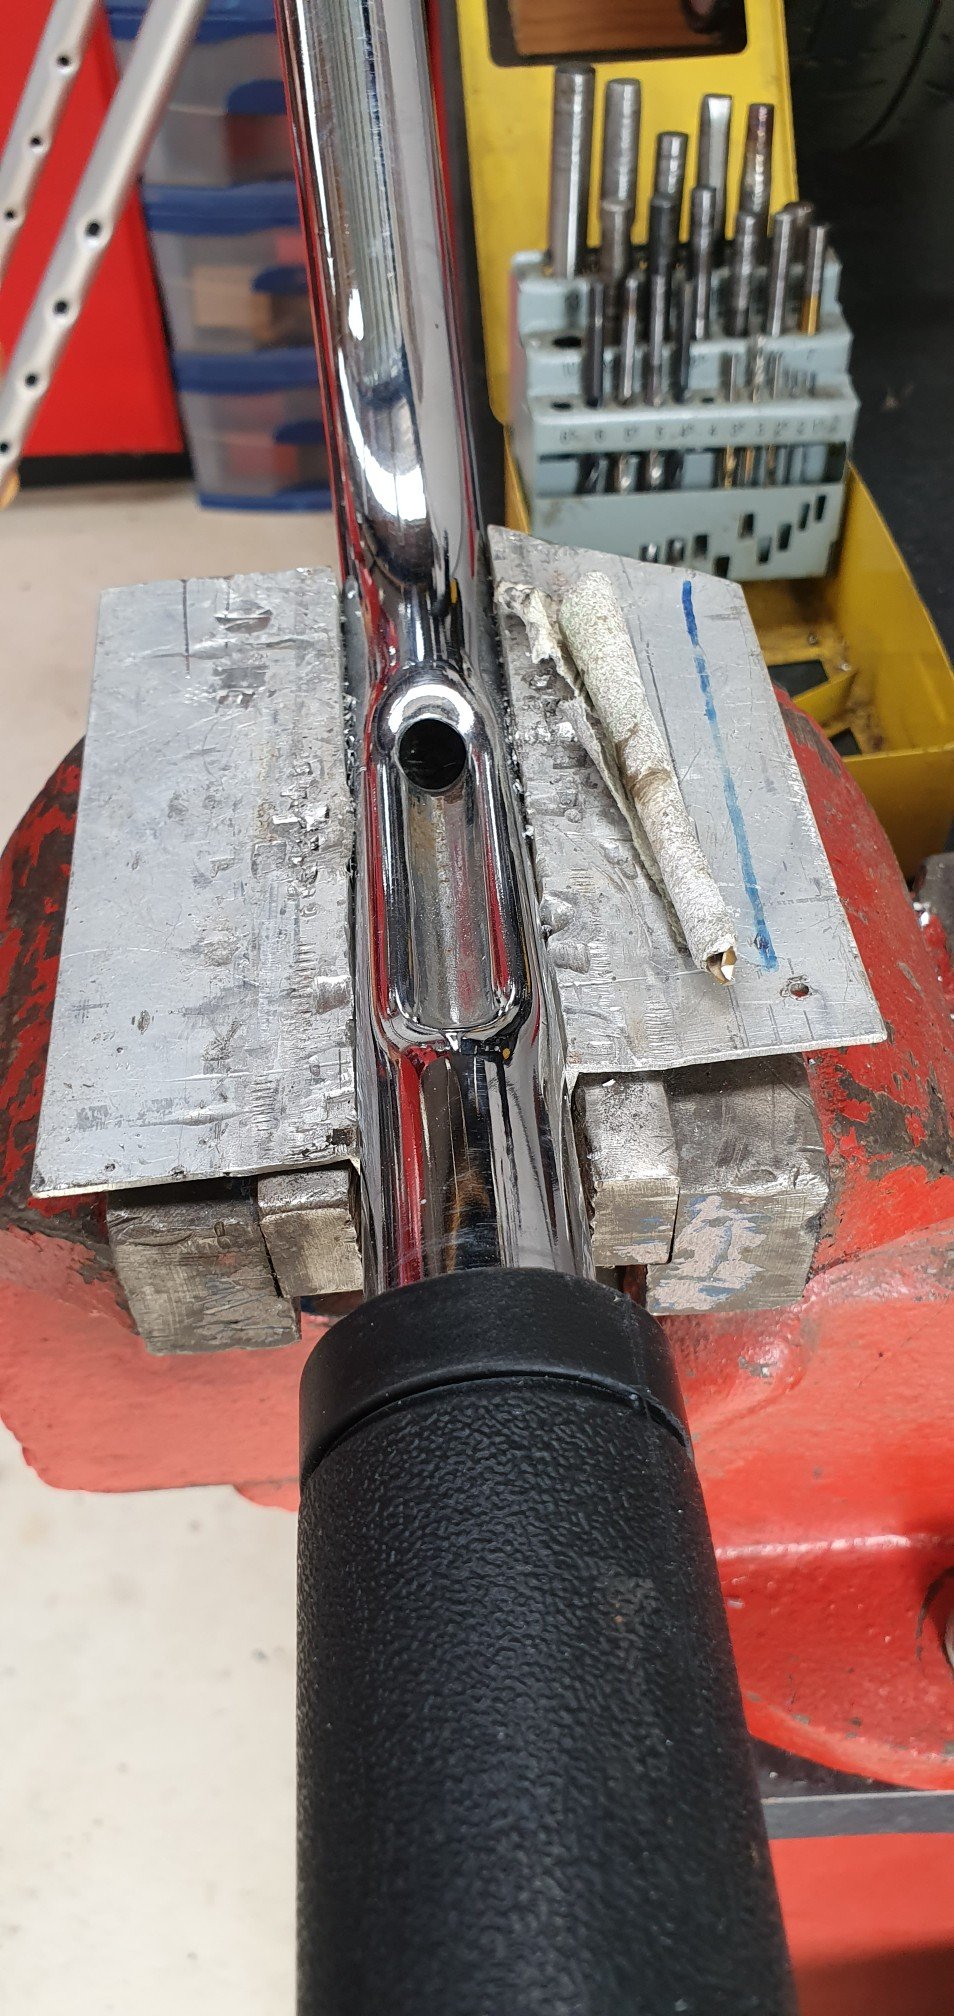
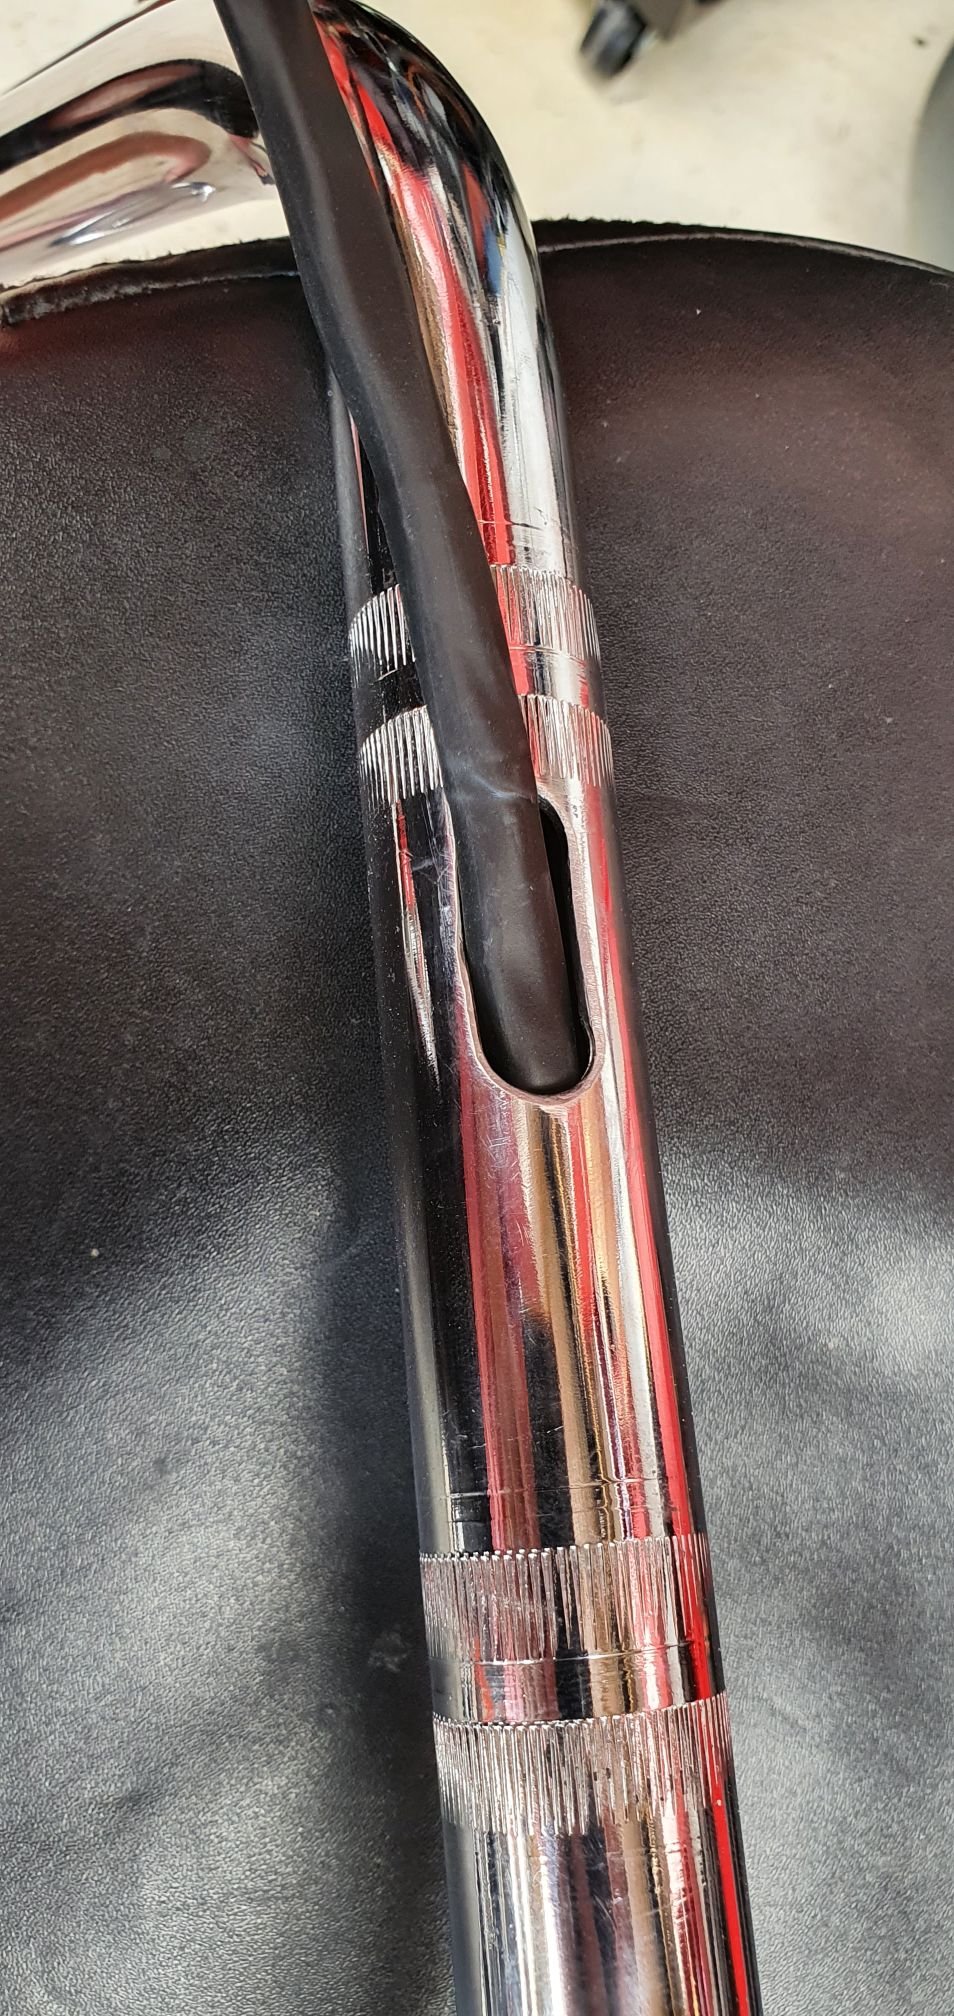
Doing the practical thing and hiding my wiring, so if there's a problem its impossible to get to it...oh, fuck...yeah...ummm...why do we do this again???
I googled and googled and the general consensus was that upto 1/2" (12.5mm) hole is fine, people have been doing that for years without any issues. I decided that 3/8" (10mm) was enough to get the job done and would leave a little bit more meat on the bone, so thats what I did.
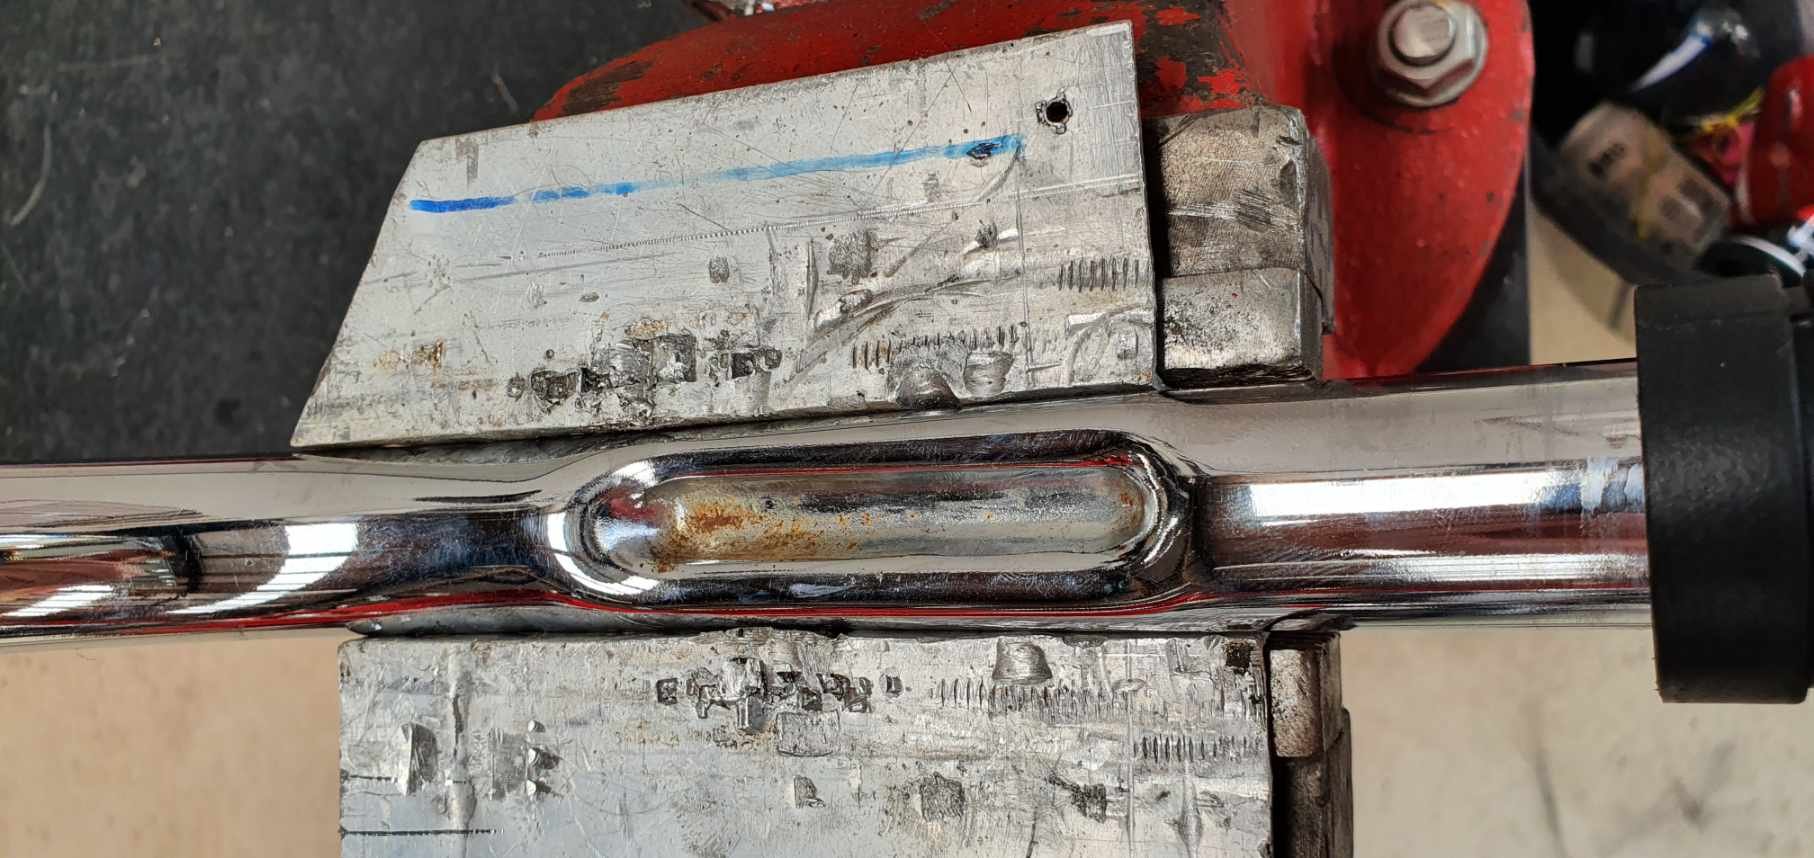
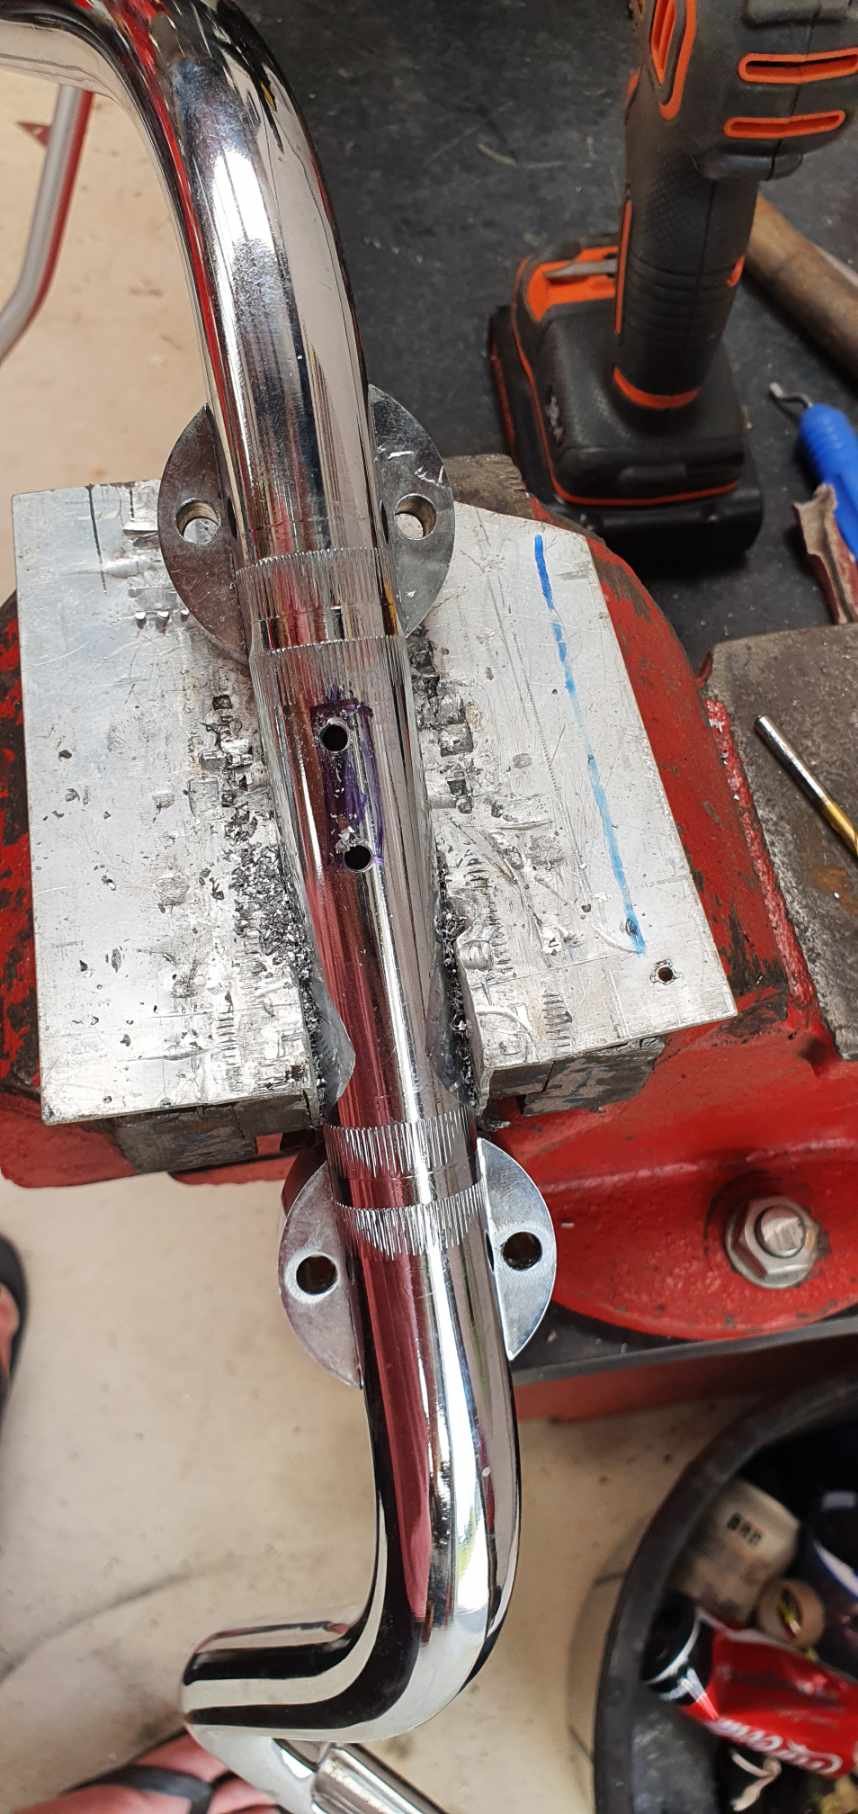
Offset slot to the left. Everything is going to run down the clutch cable once done. I spent ages sanding everything down so there's no sharp edges to cut the wires.
Now I've just gotta heat wrap this mess and shove it down the inside of the bars. Oh and the other side has double this amount!!
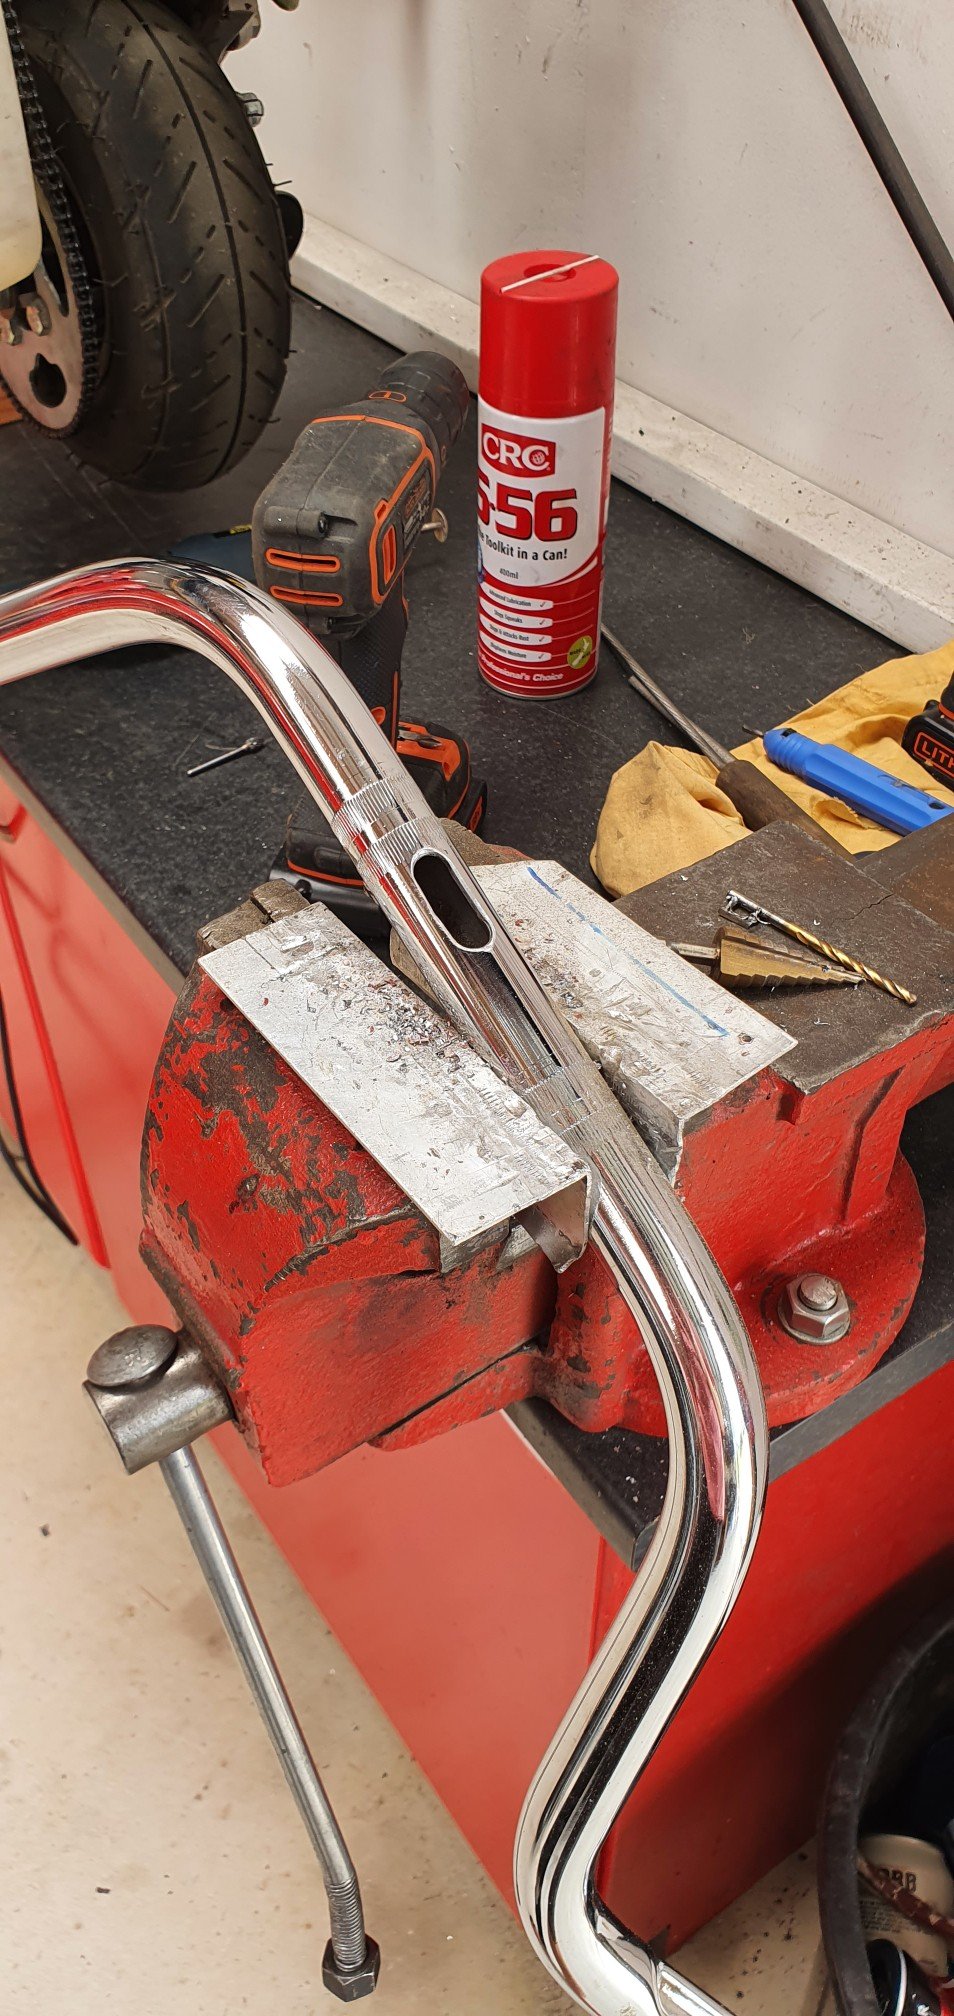
Ummm... for want of a better phrase this was my "first pull". Hey, sounds better than "tug"??
Boom, both side done.
New loom pops out right by clutch cable, I'll cable tie it together and run it down to my new wiring under the transmission. So that's a good start on something I've been very much procrastinating.
Winner, winner...chicken dinner!!
-
7
-
-
Just brought a banjo bolt with inbuilt pressure switch, this will send a signal to indicate that the rear brake is applied. And a nice little ignition switch (key).
I realised I would need these parts after reading the wiring diagram fror the 50th time and wondered how to get a brake signal to the rear, I figured there'd be an existing solution for this problem, so happy to pay the money for it.
-
3
-
-
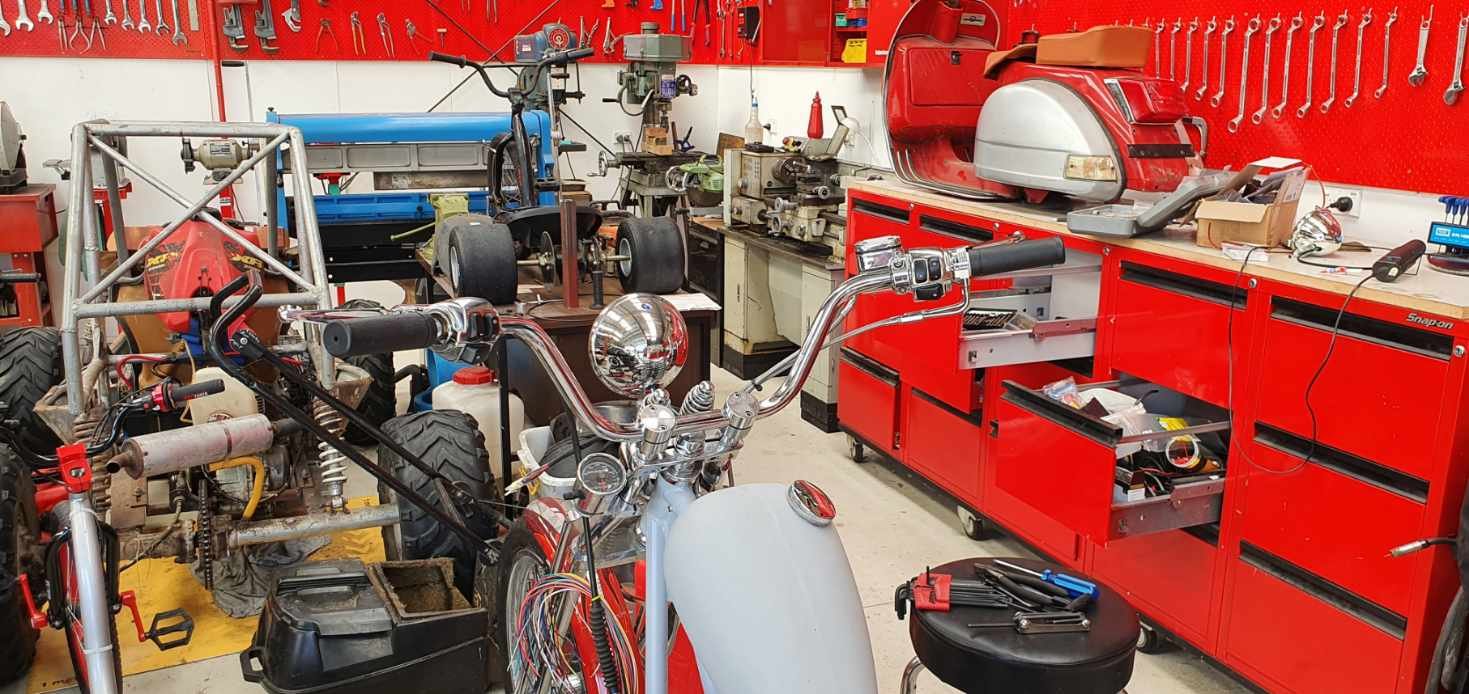
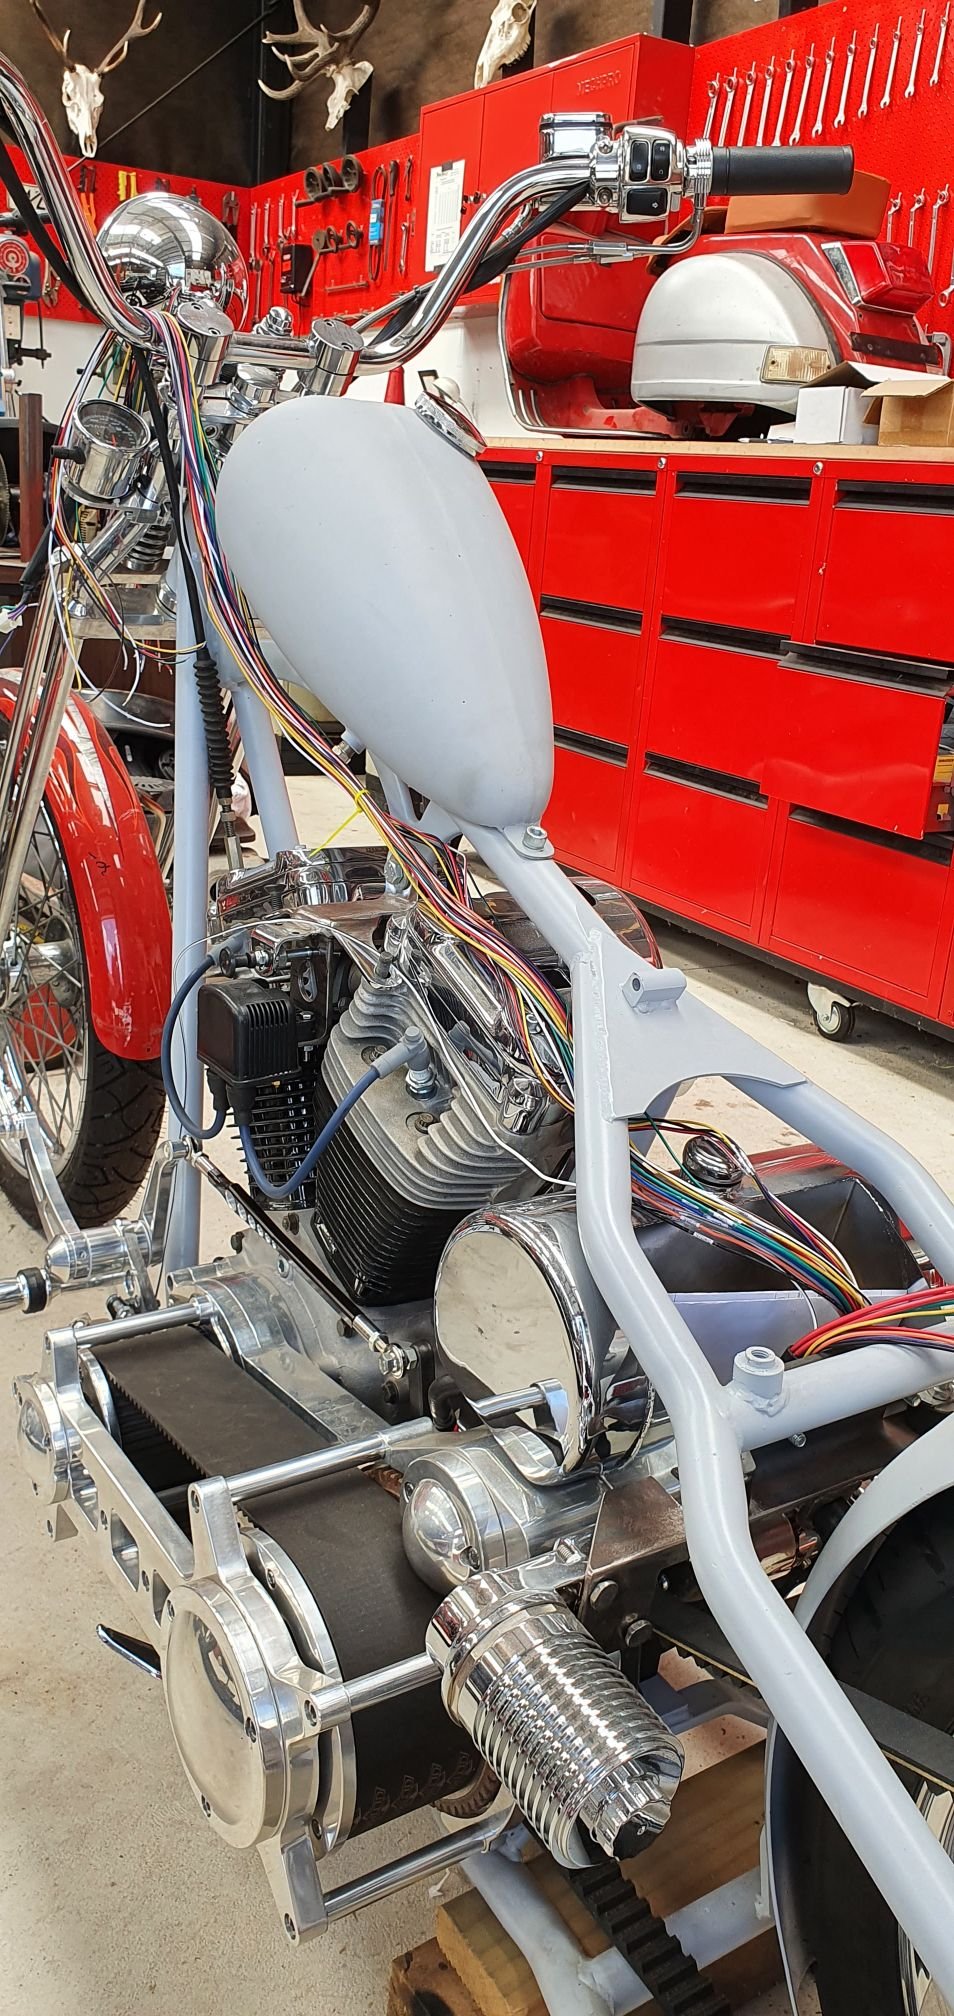
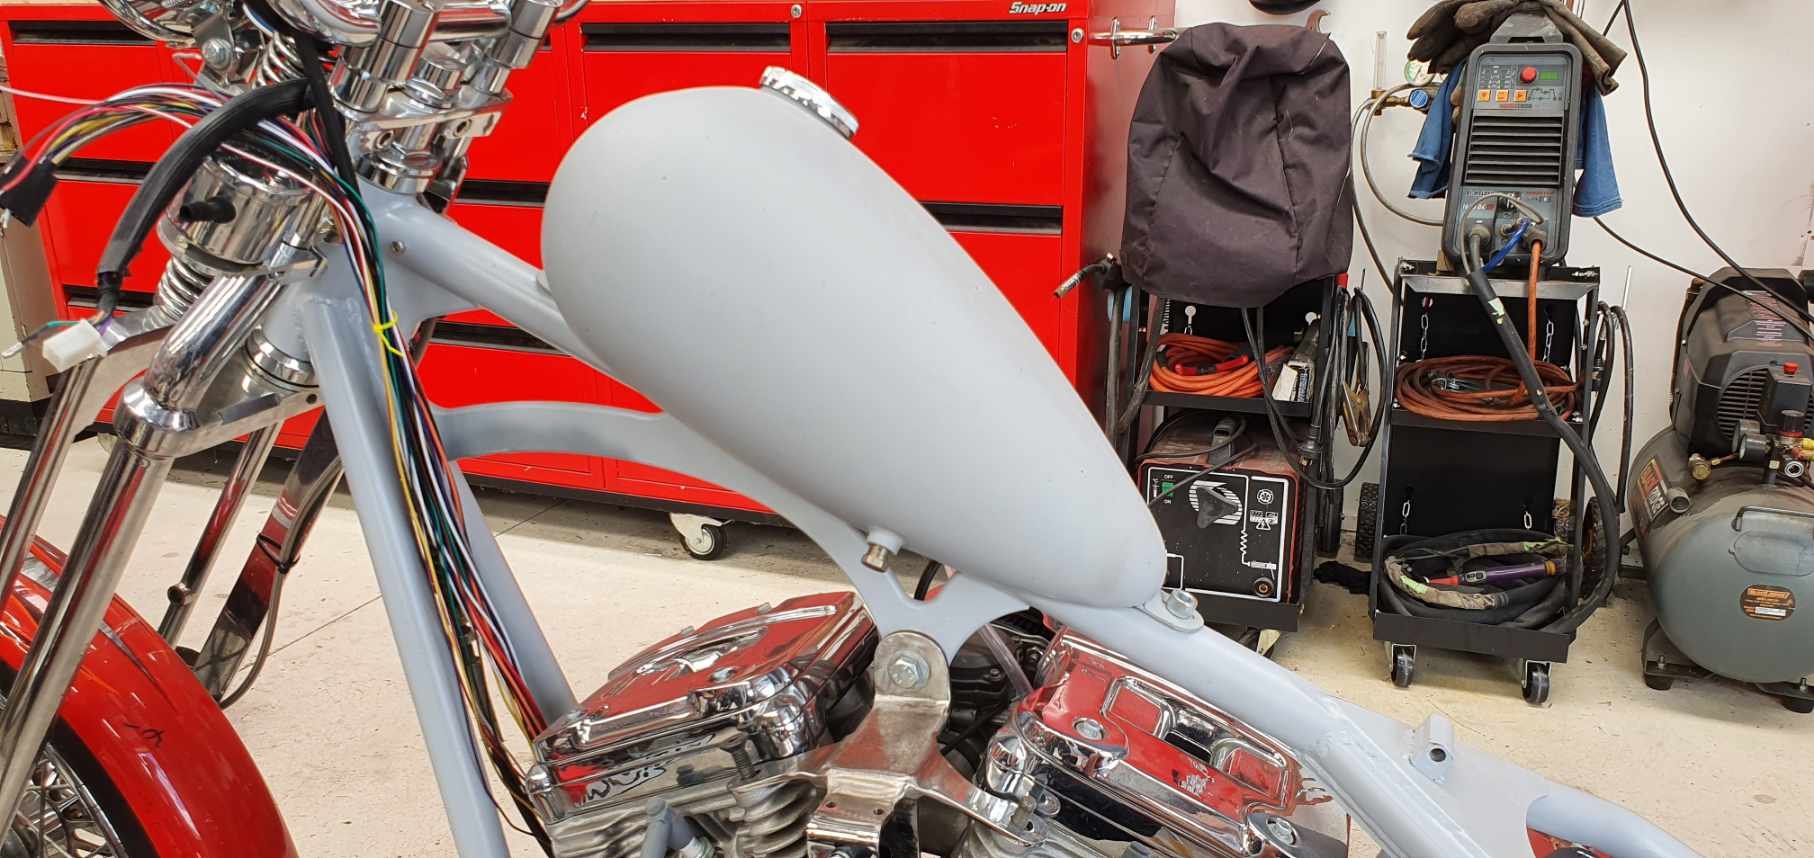
Wiring is for dicks!! I wish I just kept my "Bluetooth" Wiring as it looked much better without real Wiring...
Anyway, reality dictates I will actually need to do it, despite how much I want to avoid it.
Take 1:
Relays in the battery box. Seemed like a good idea, and was reasonably tidy.
However I was unable to run the wires internally up the backbone of the bike as I envisioned, as the loom has too many wires to all fit in there with other stuff going on like fuel tank threaded inserts and the way the saddle tube connects and blocks the spines opening...arghhh...grrrr!!!
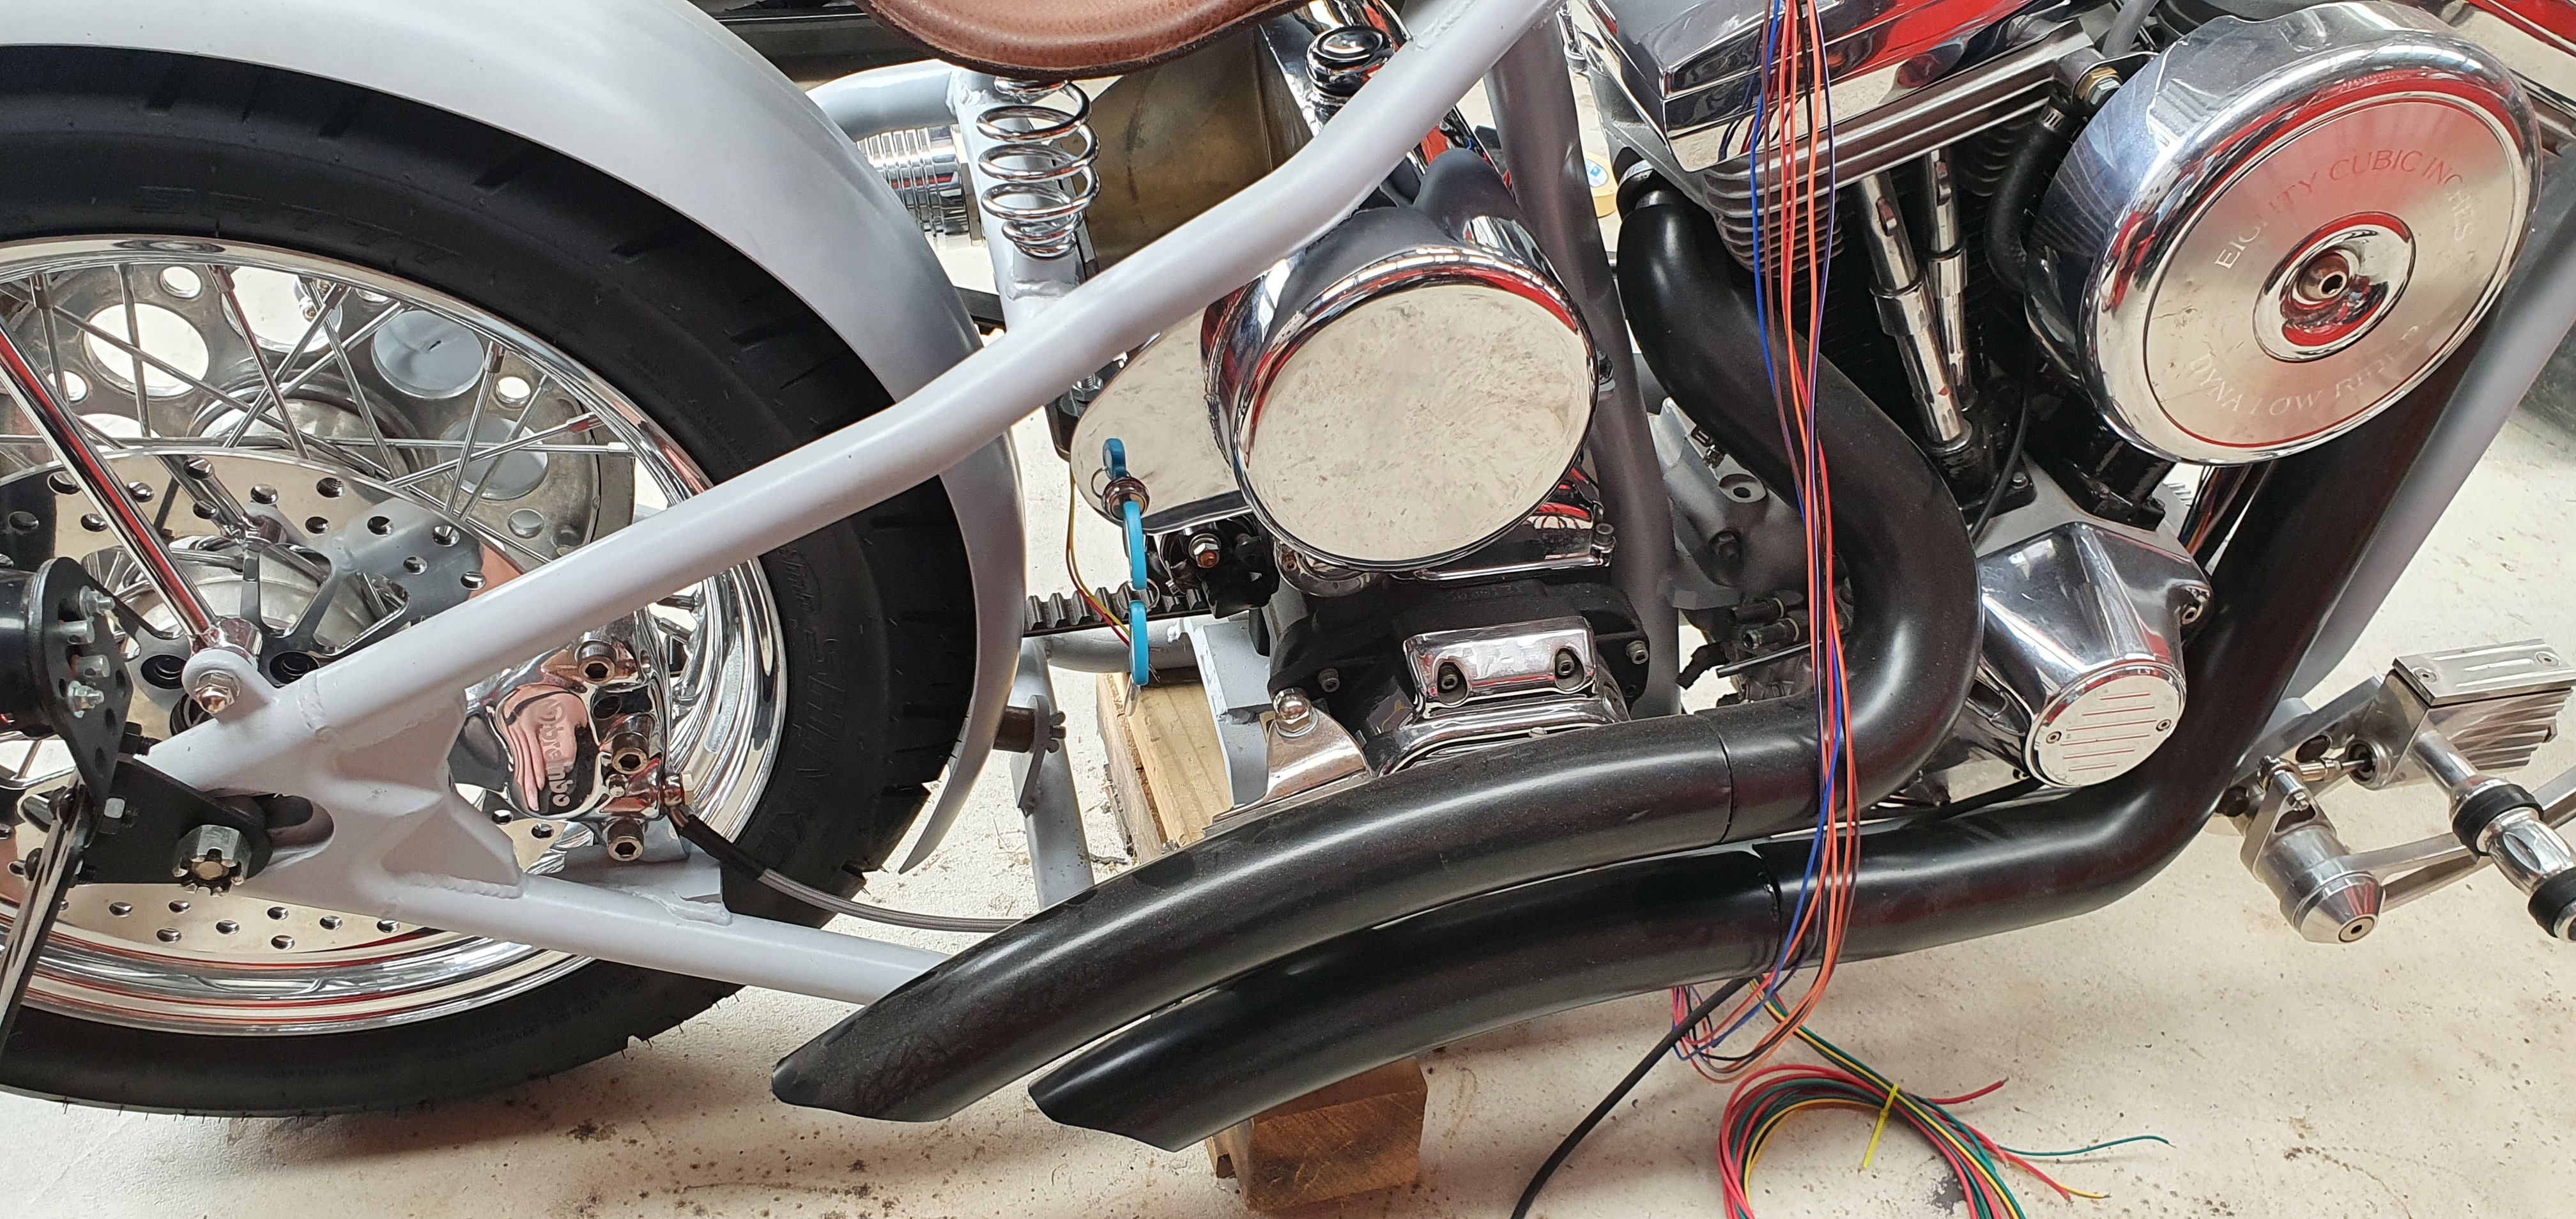
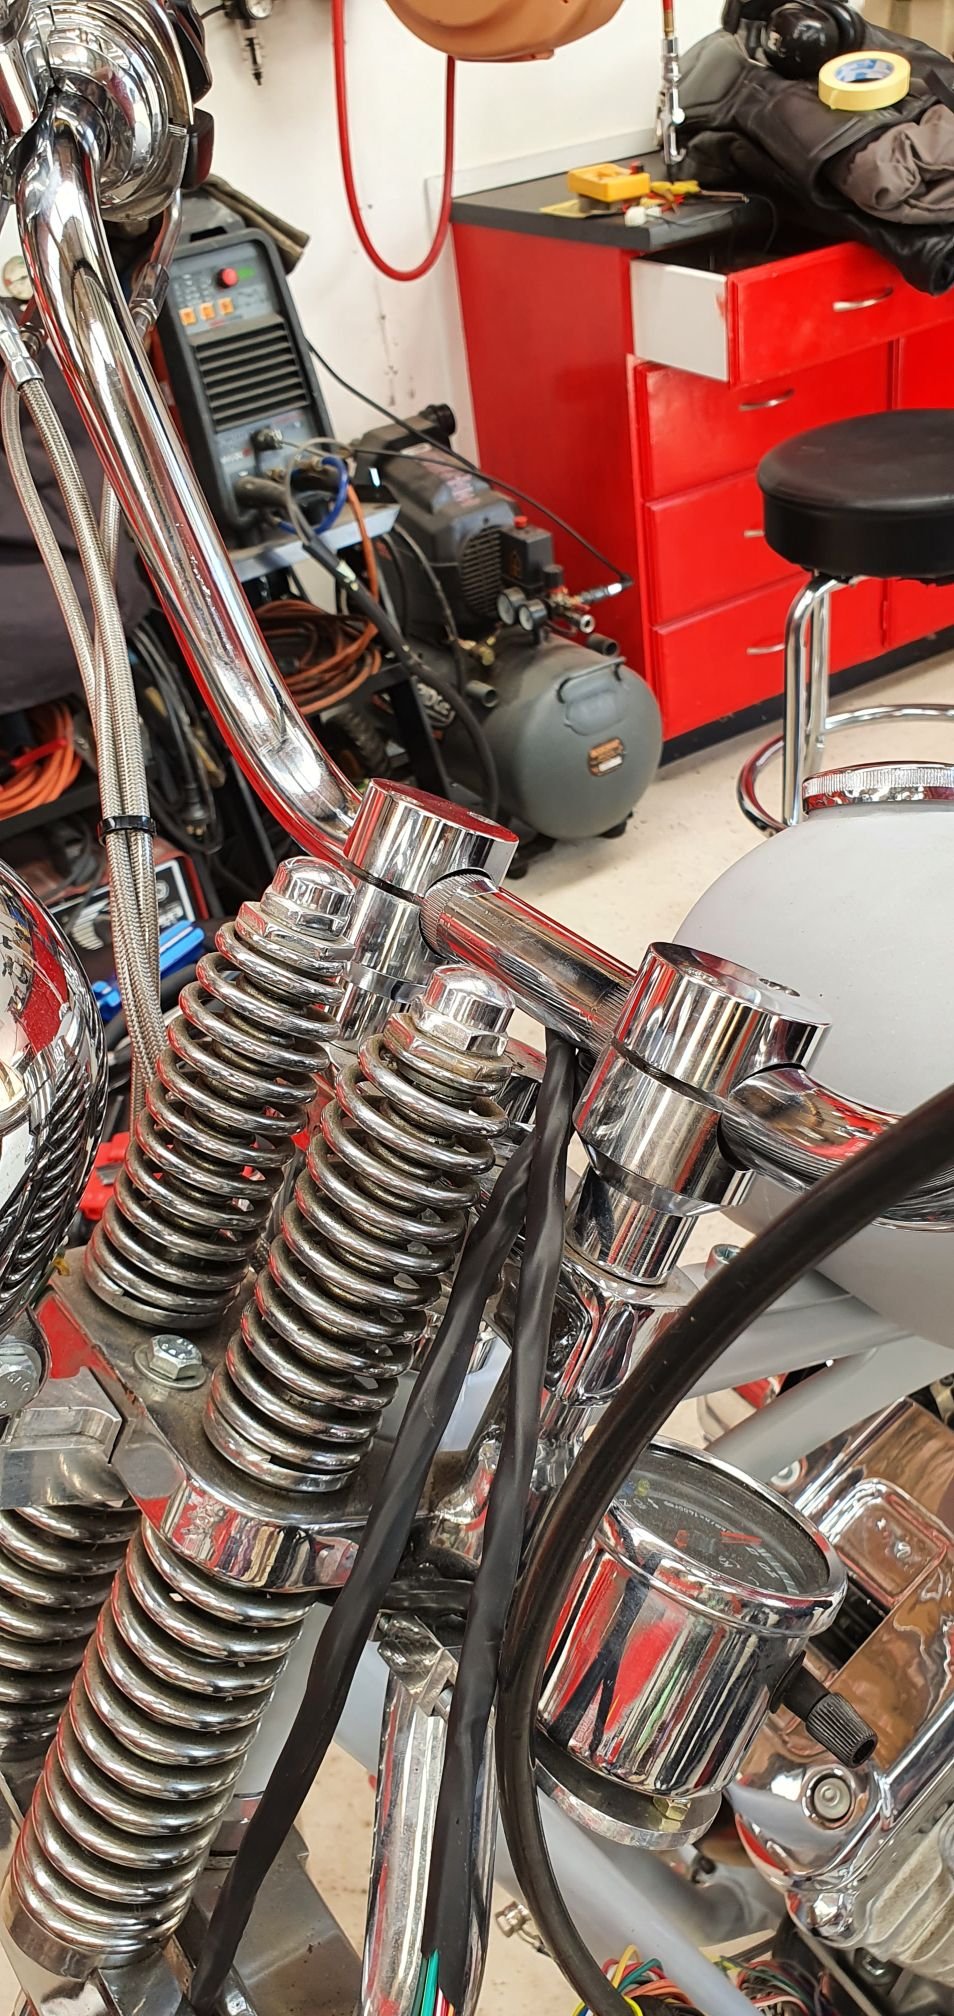
So, take 2:
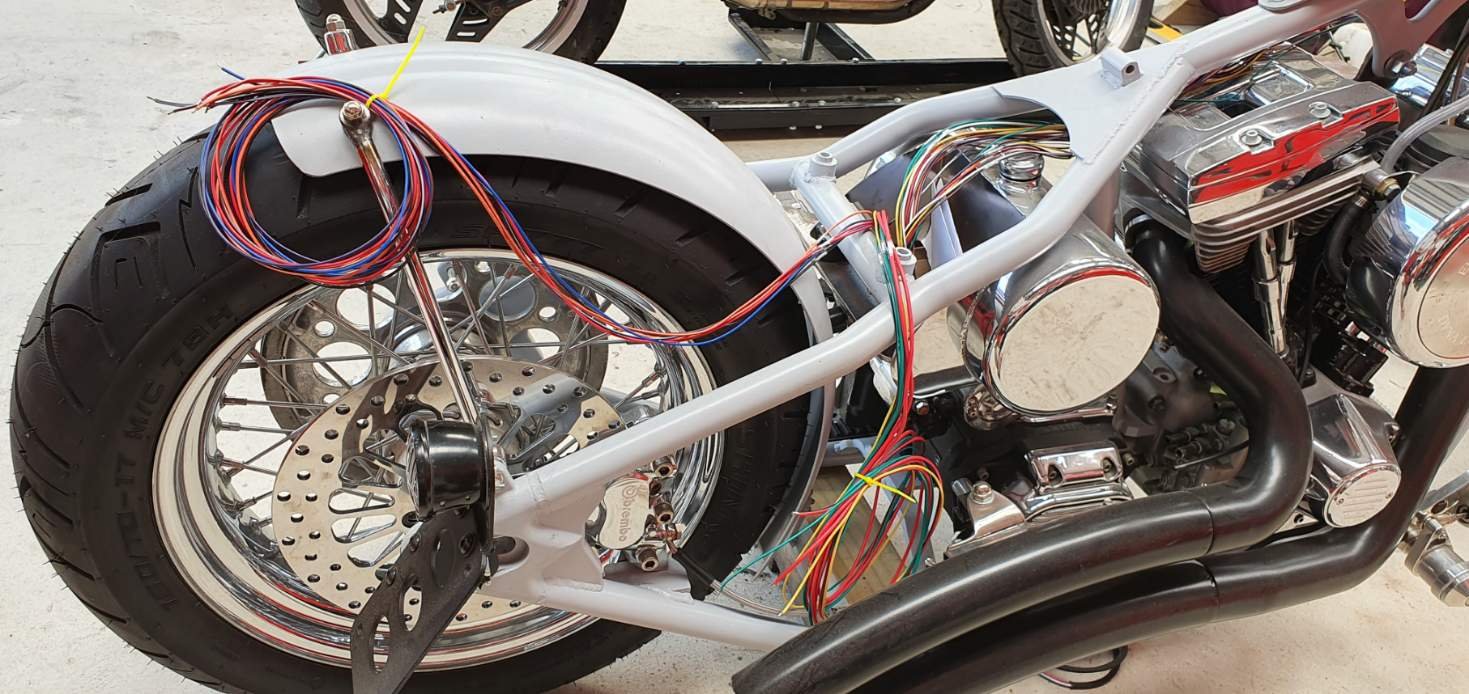
Try shifting everything under the transmission.
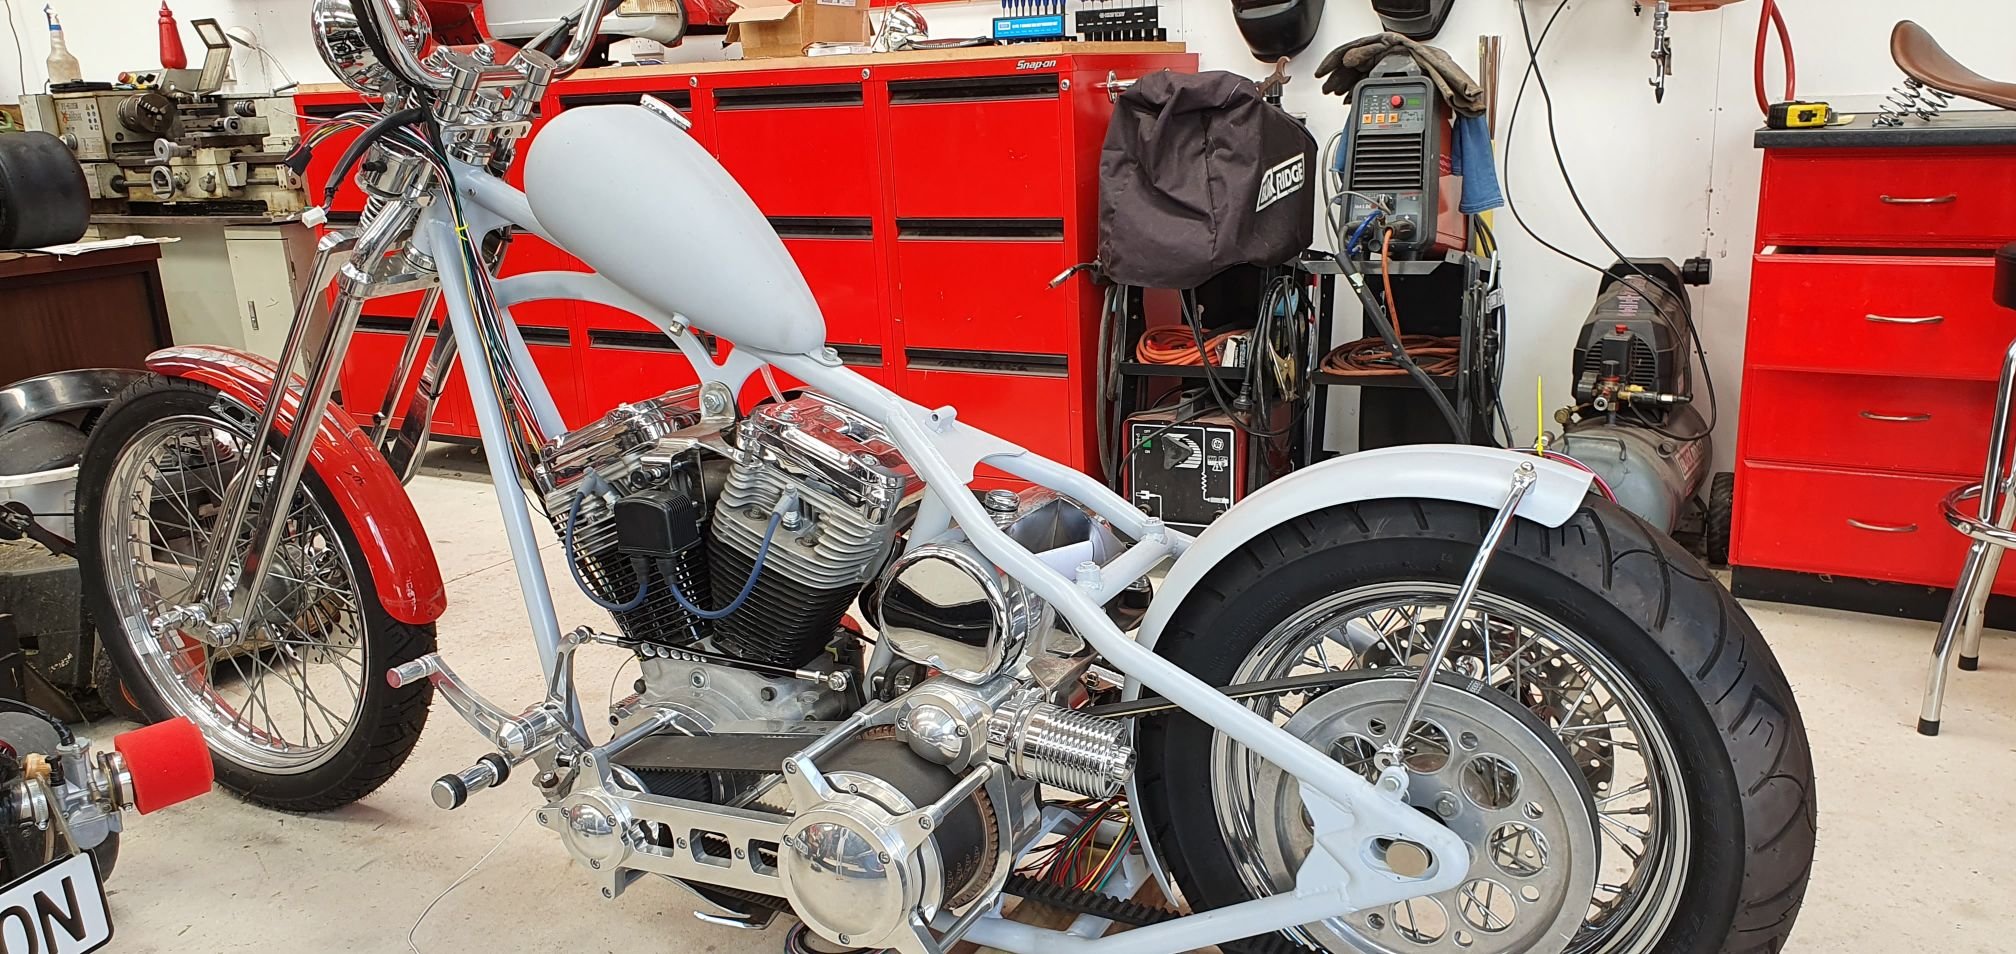
Sweet, rear wires = very tidy, I can easily hide those.
Front wires can be run alongside the clutch cable (heat shrink to keep it all coved of course). I can even use OEM fittings for connecting everything up, which was always my plan if possible.
Yip, standing back it looks fine. 100% better than my first attempt, which was just fucking ugly. This is much better, no ugliness along the backbone distracting from the clean lines. The naked spine and tank are this bikes main feature and cable ties and a honking big wiring loom there would have looked shit!!
Calling it a win.
-
8
-


Kimjon's 50cc (then later ... 150cc and 400cc...then 1000cc) of awesomeness!
in Two Wheels
Posted
My hospital discharge notes didn't specifically say not to ride a 1000cc harley sports bike??