


Flash
-
Posts
1615 -
Joined
-
Last visited
-
Days Won
2
Posts posted by Flash
-
-
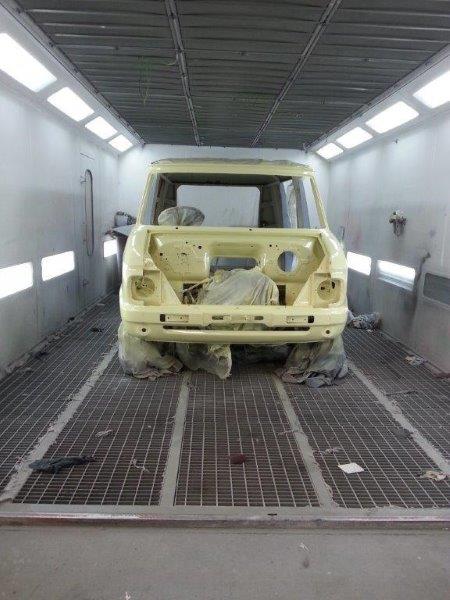
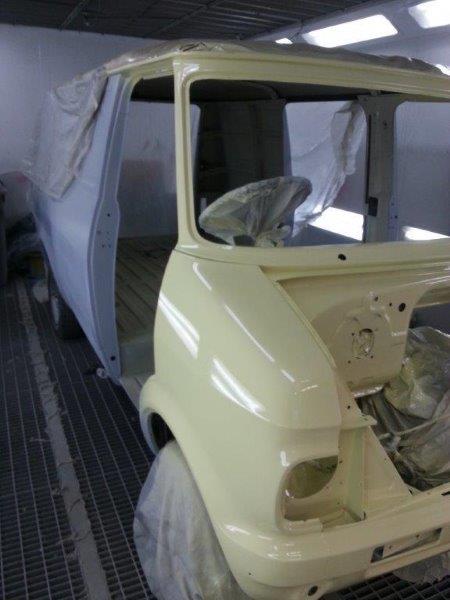
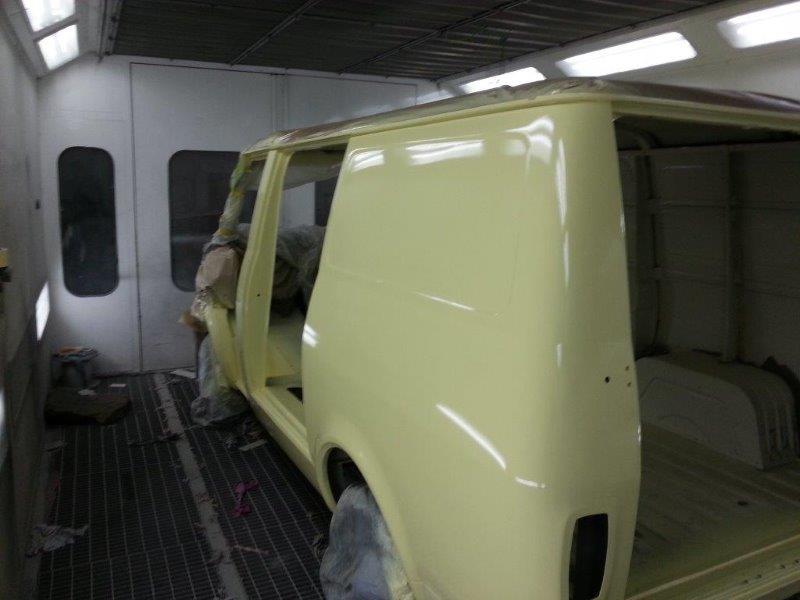
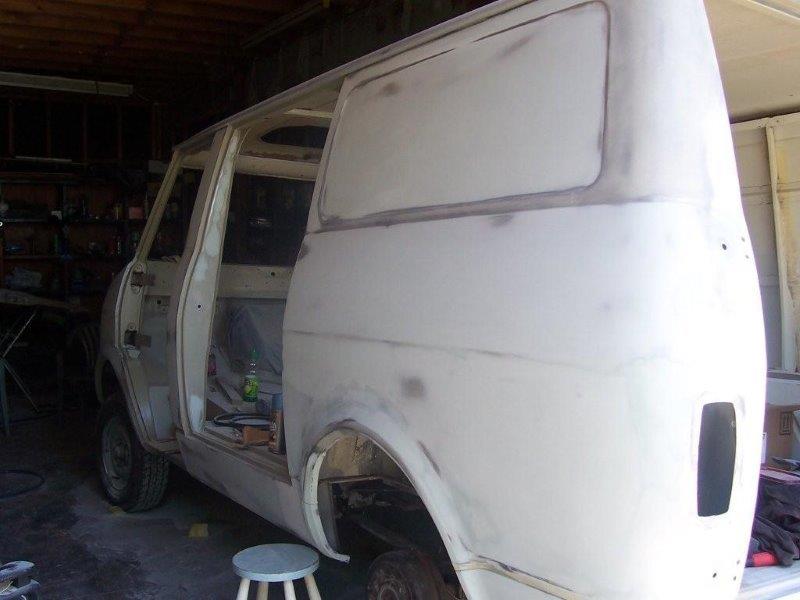
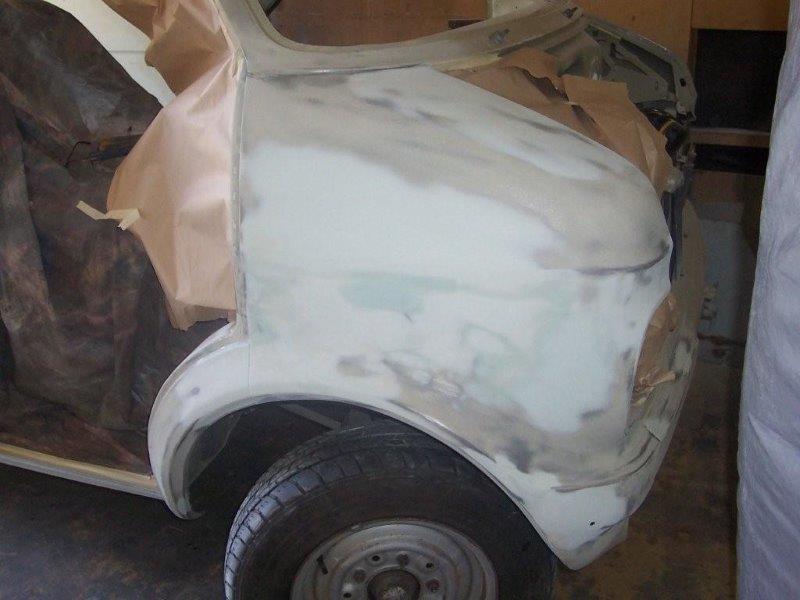
I spent every spare moment of the next week at Warren's place getting the rest of the body ready for the second paintings session. We rolled the van into the booth about midday on Saturday and by 9:30pm on Sunday night she was done and dusted.
I skipped work a few days the next week and Barry came down to help re-hang the doors. I had already sourced a new windscreen rubber from the UK and decided to use Warren's contact to get a new windscreen fitted whilst the van was still at his place. I wasn't on site when the screen went in, but got quiet a pleasant surprise when I got back as the windscreen turned out to be fully tinted. ... bonus.
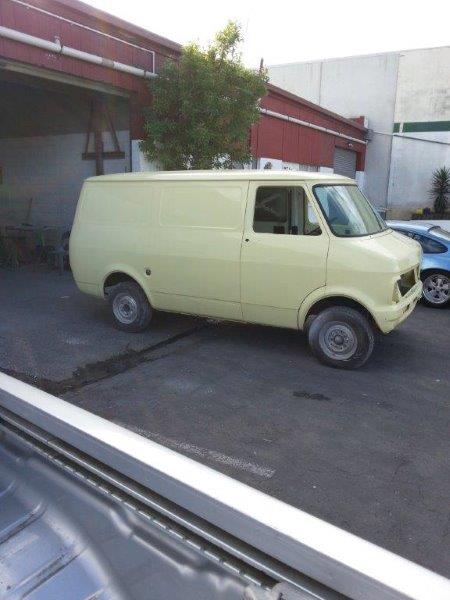
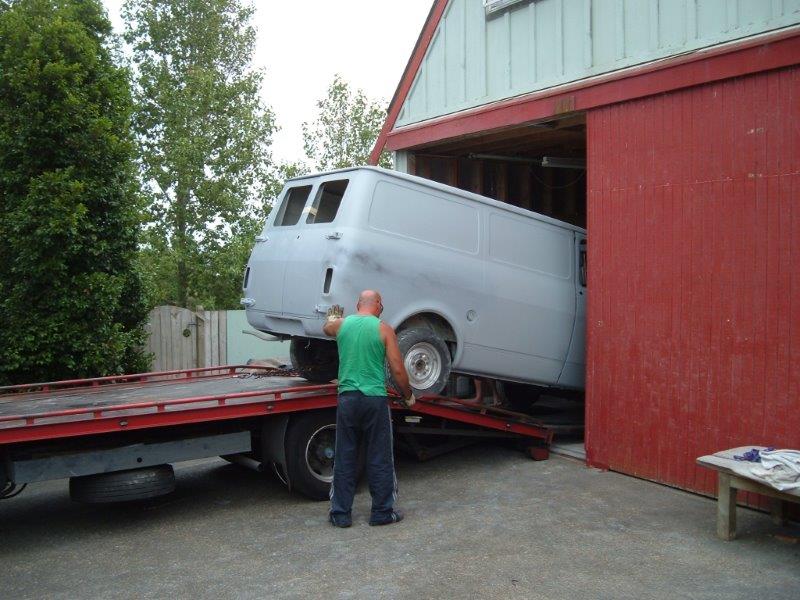
By the end of the week I was ready for the transporter and the van made a short trip back to base camp.

-
 1
1
-
-
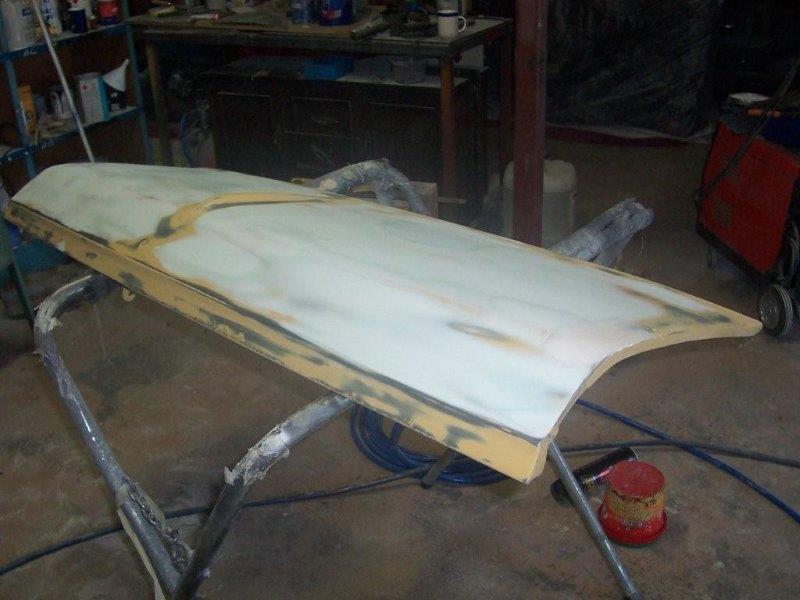
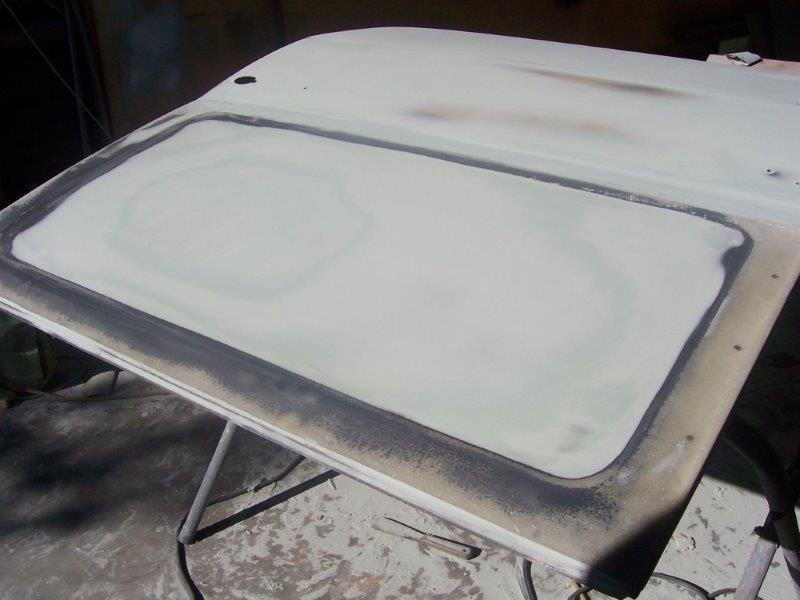
So while Barry was finishing off the body work my thoughts turned to the final painting. I'm a dab hand with a compressor and have painted my fair share of cars in the past, but I really wanted to do the van justice by going base coat, clear coat and anyone who has tried that without using a spray booth will tell you just how treacherous it can be. This coupled with the fact that our house is located on a 300 square meter section would have meant incurring the wrath of our neighbours if I was to do it at home.
I got three quotes from professional painters, but just couldn't justify the huge costs quoted.
My plans weren't to build a show pony, just a clean looking old van that would be regularly used as an optional daily driver as well as weekend trips away.
I thought about hiring a booth and doing the paintwork myself and that is when I met an old mate of Barry's called Warren. Warren runs a small shop and after a good chat he agreed to squirt the van in his booth one weekend. The agreement was that I would do the final prep work with some cash his way for his time and the use of his booth.
I spent two days at Warren's place preparing the firewall and dash, but then got called away to a client so Warren got one of his mates to finish off the roof as we were under pressure to paint these areas that weekend.
-
1
-
-
In another moment of weakness Barry agreed to do the final coat of primer and after investing another 140 hours in body prep, primer and door hanging the van emerged from Barry's workshop.
-
3
-
-
So things turned into a bit of a joke. Barry's business is called The Rust Guy, and at the time of doing my van he was working from a double garage with his house on the level above. It didn't take long until the whole place was covered in a fine layer of bog dust. Barry's missus was pretty good natured about the whole thing, but she started calling him The Dust Guy.
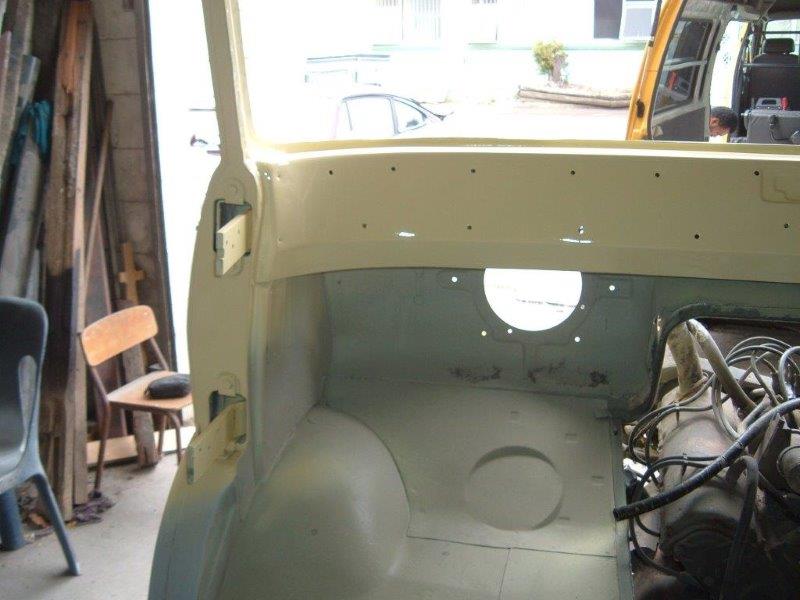
I wanted to keep the classic interior look which consists of acres of color matched metal dash and windscreen surround, much to Barry's delight... not.
-
1
-
-
While the van was across at Dave's place I had a chat to Barry to see if he was keen to do the rest of the panel beating and prep work prior to paint. Although he is a qualified panel beater this isn't part of his current business offering, but his workmanship is really superb and I was keen for him to take it through the final steps. In a moment of weakness he agreed, so the plan was to get the van back to Barry's place for the final bits and pieces of bodywork.
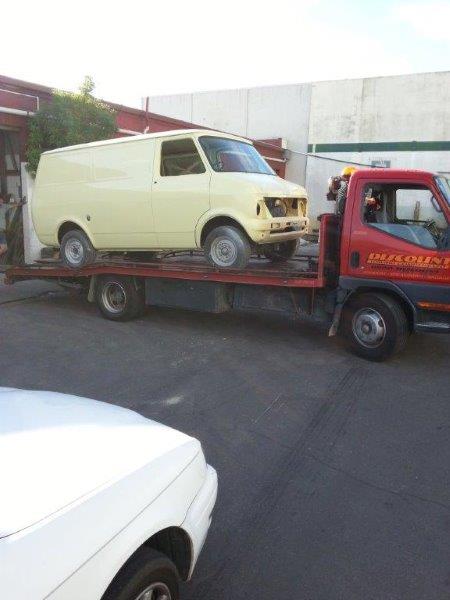
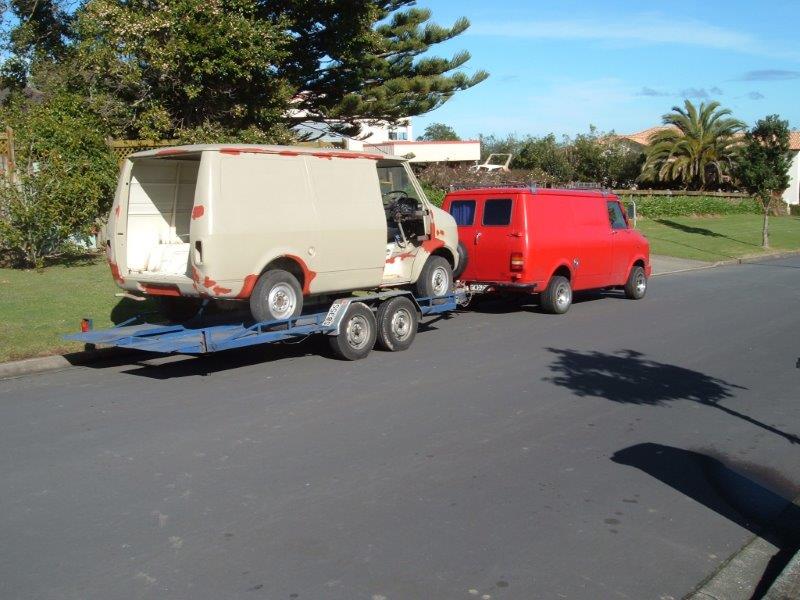
After working out what the trailer hire and my fuel had cost for the trip to Dave's place I phoned around a few budget towing companies and discovered that it would have been cheaper to get the van transported. I'm an hourly paid contractor so it also meant I didn't have to take time of work ... bonus.
So a few days later the van was safely back in Barry's workshop for a bit of slap and tickle.
-
1
-
-
Needless to say I have plenty more images of similar repairs in a number of other areas, but I'm guessing that you have seen enough by now so I'll move on to more exciting aspects of the build.
So after just over two months and 133 hours of repair work it was time for me to trailer the van over to Dave to have the new patches sand blasted and metal sprayed.
The donor van certainly earned his keep that day dragging that load across the Harbor Bridge.
-
4
-
-
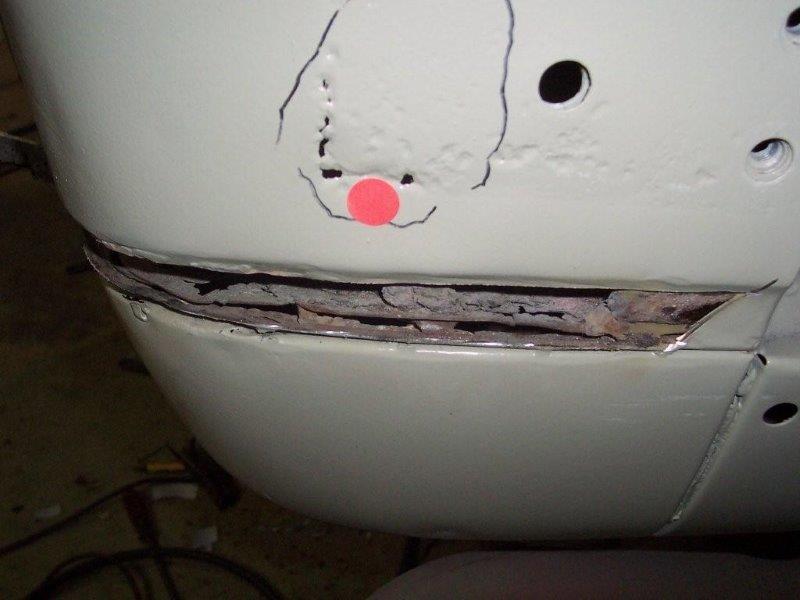
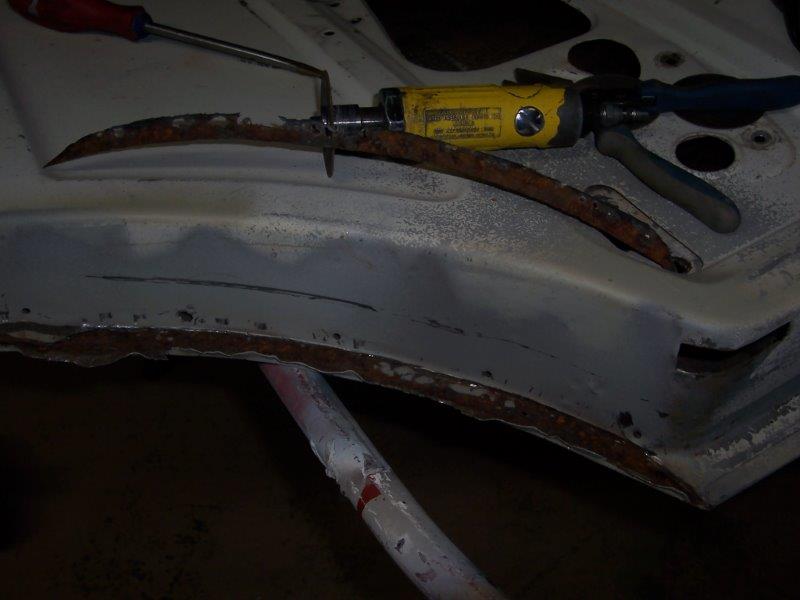
I also took a decision to remove and replace the dodgy metal repairs from the right hand side rear fender.
-
Both head light buckets are an ideal trap for moisture. The left hand side was a relatively easy fix but the right hand side needed a new lower panel fabricated.
-
1
-
-
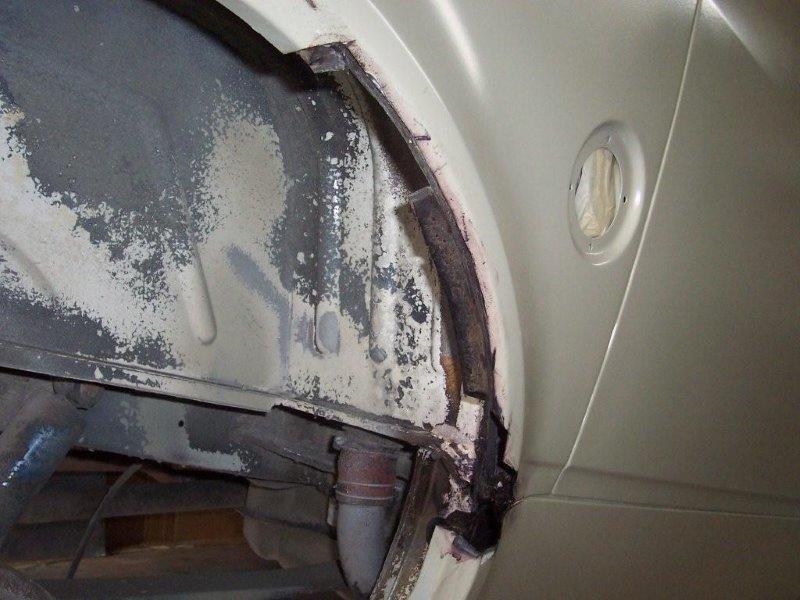
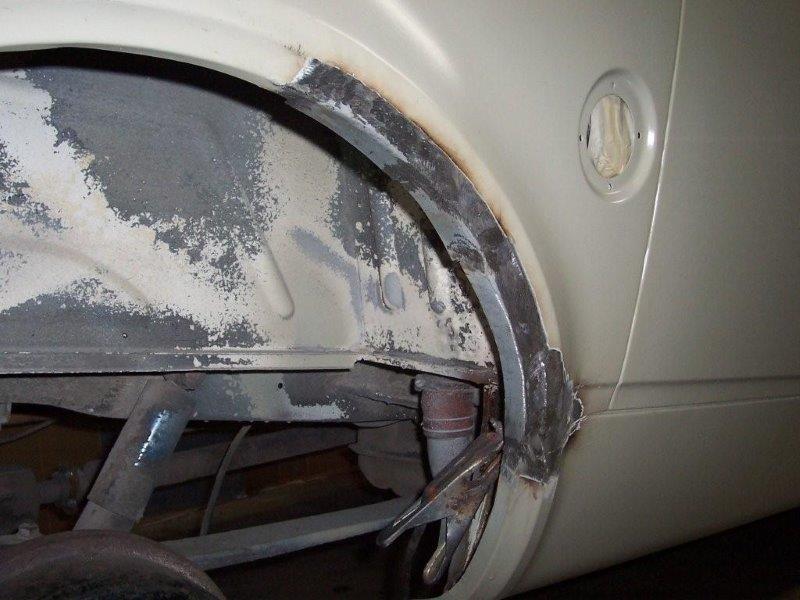
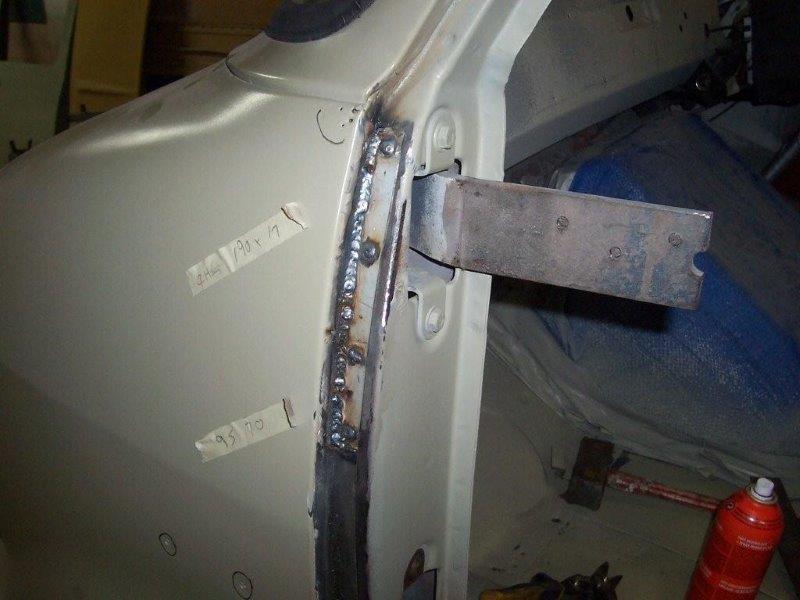
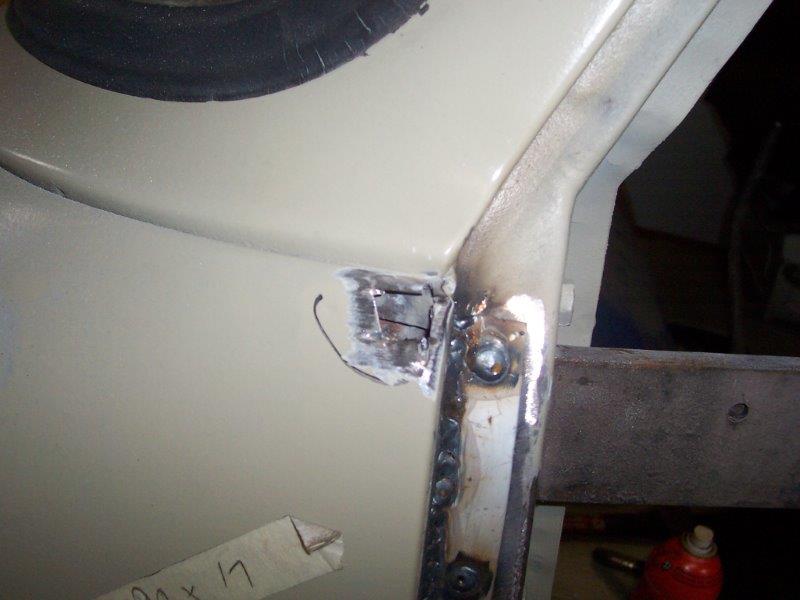
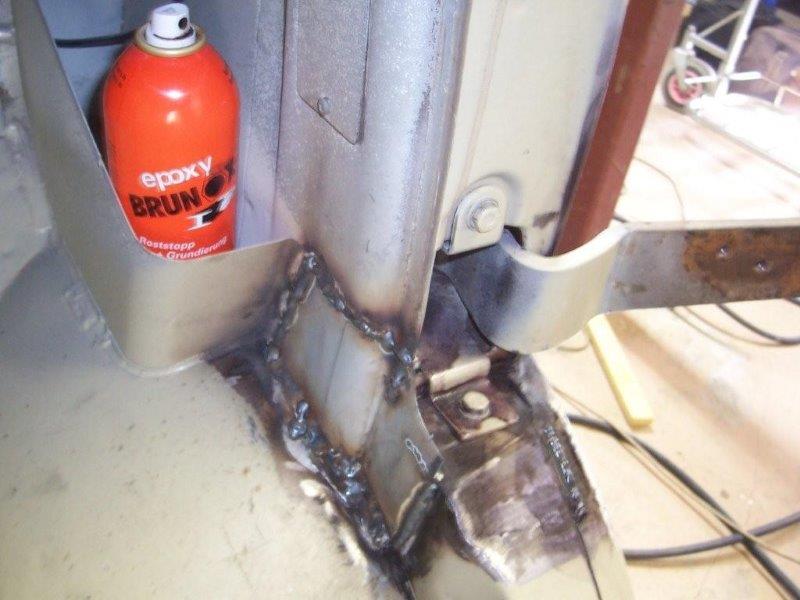
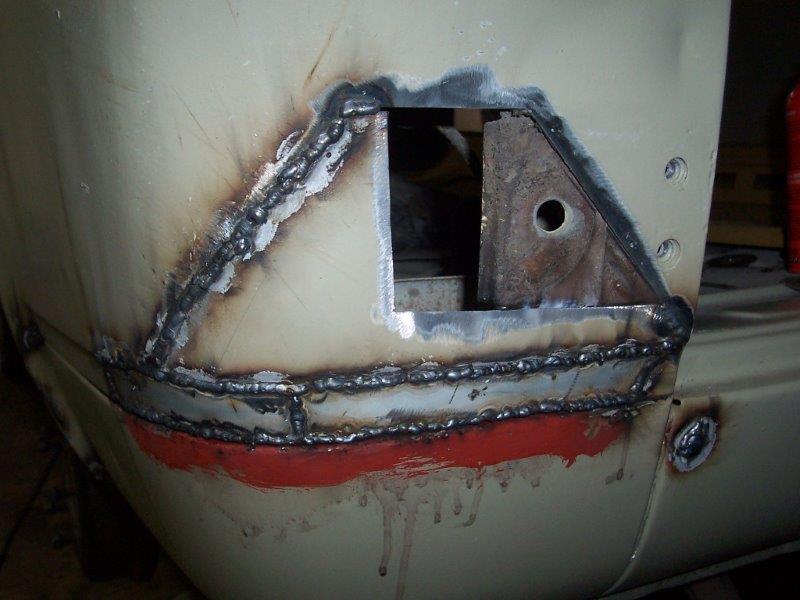
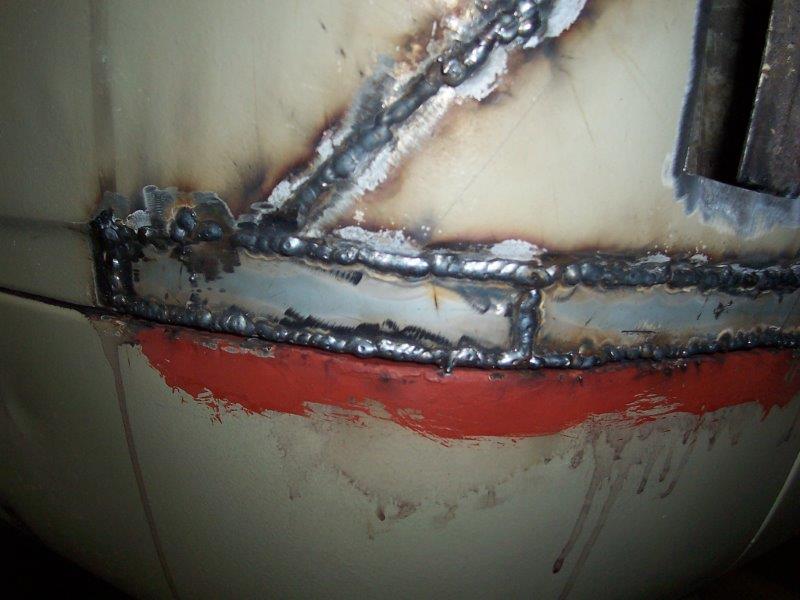
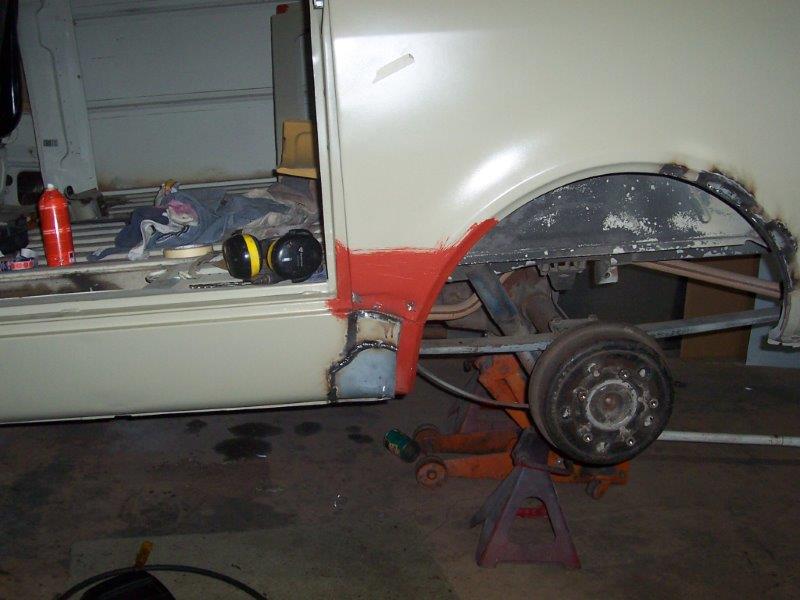
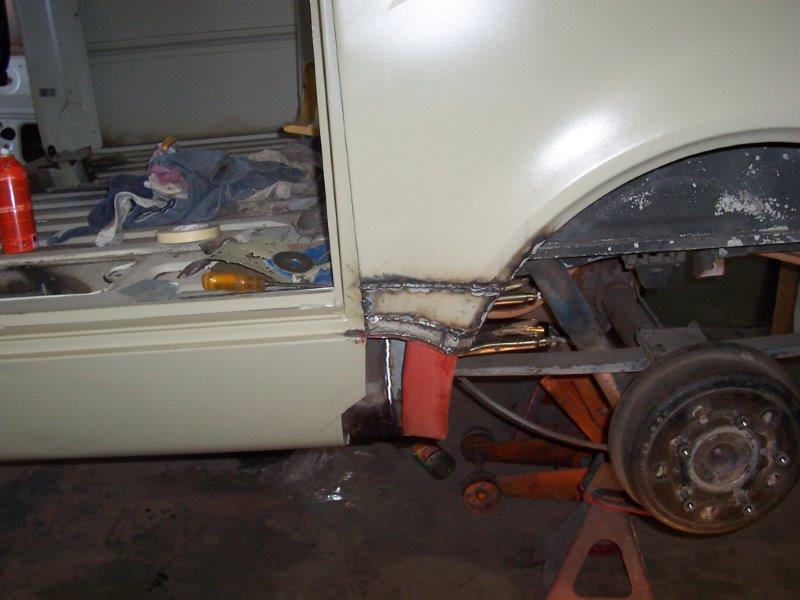
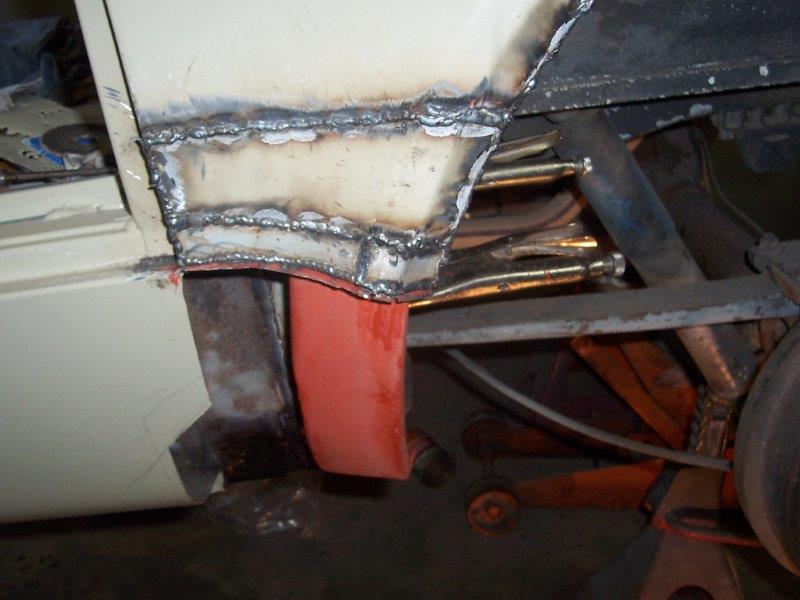
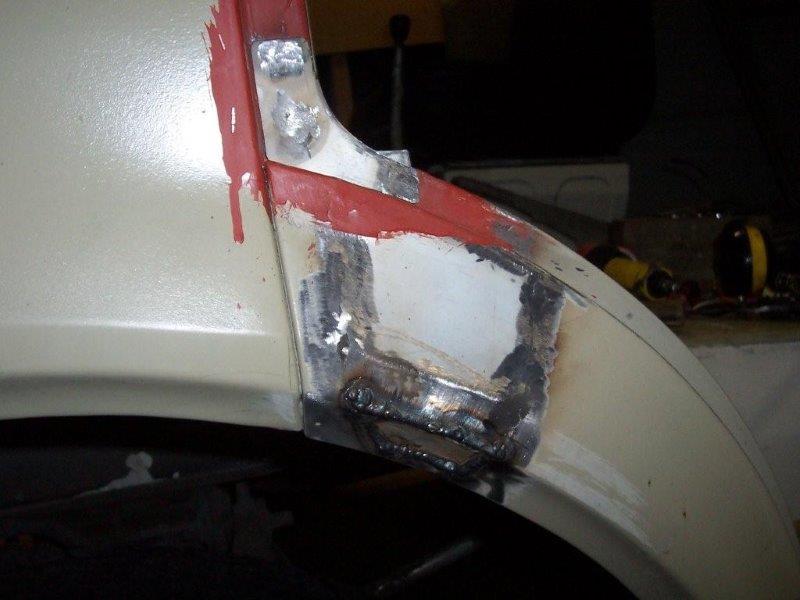
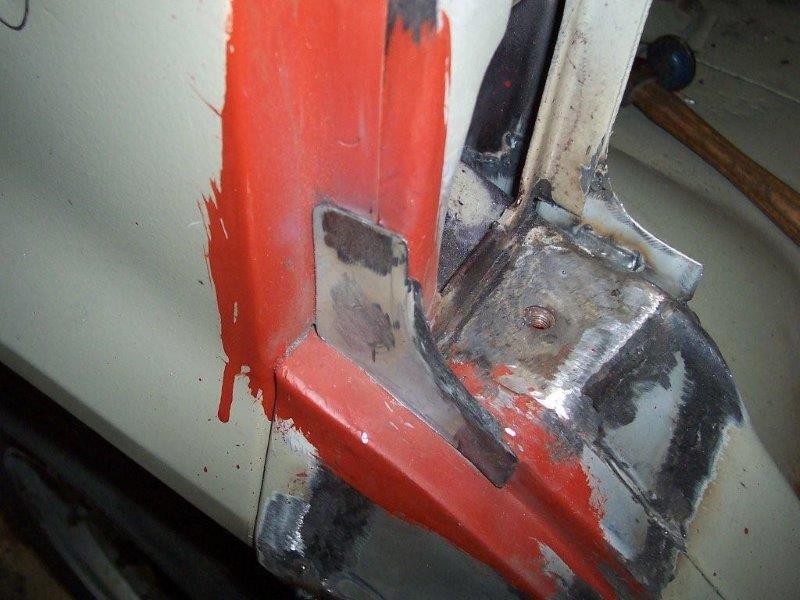
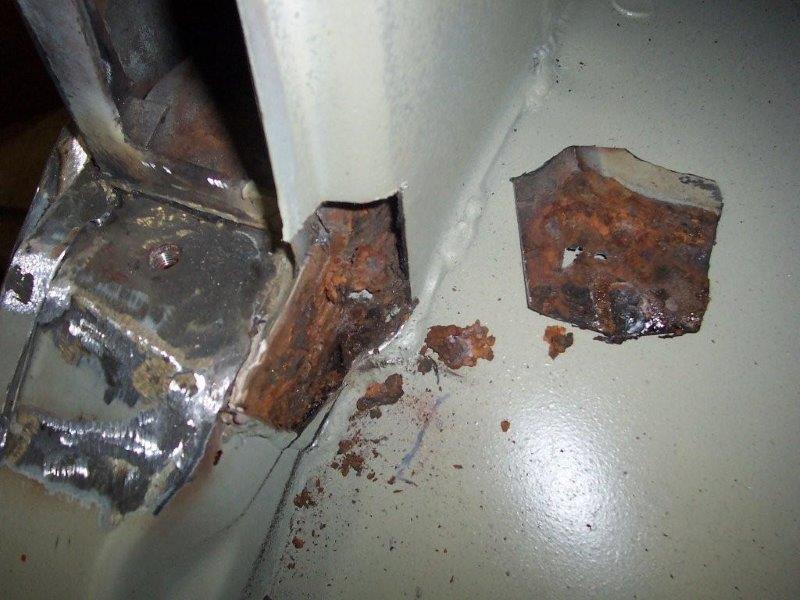
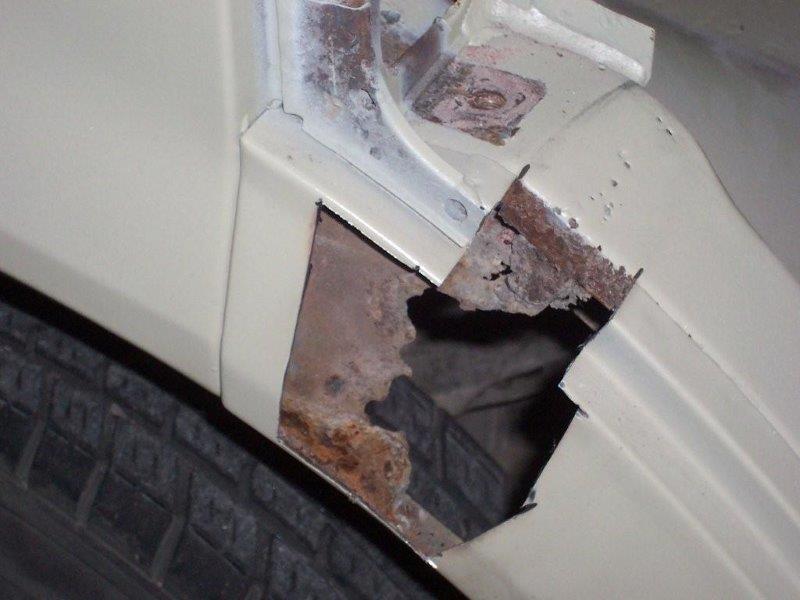
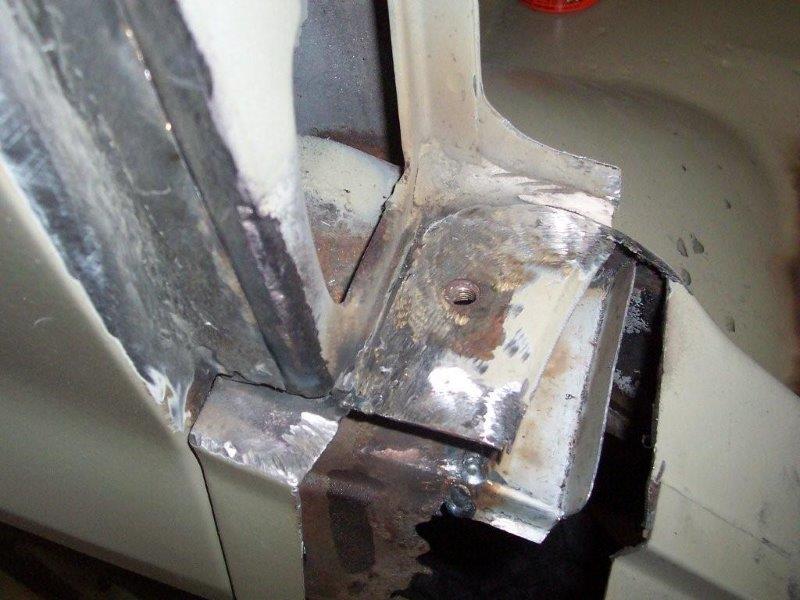
The joint between the left hand front fender and A pillar was also showing some slight pitting from the outside and after a quick on site discussion I gave Barry the nod to open it up for a closer look.
Throughout this phase of the project I stuck to the "when in doubt cut it out" philosophy. It probably added to the cost, but I figured I was only going to get one shot at getting this right.
-
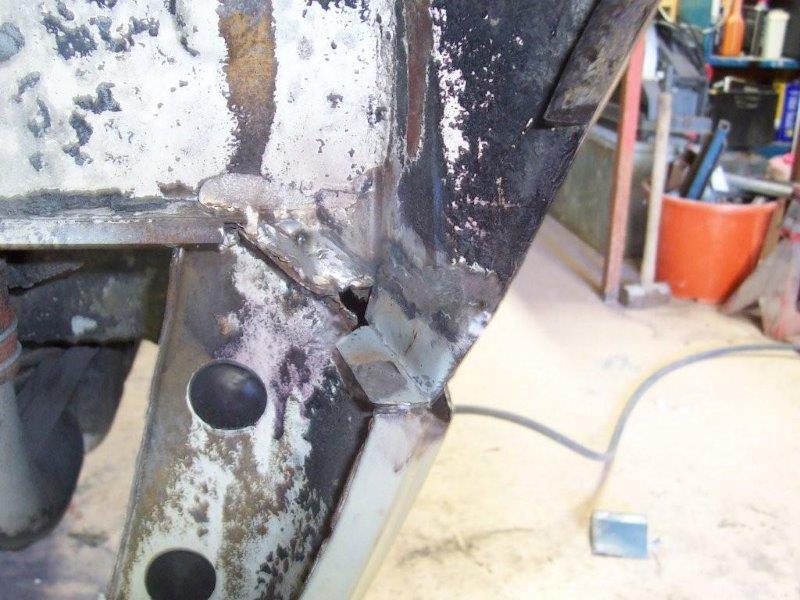
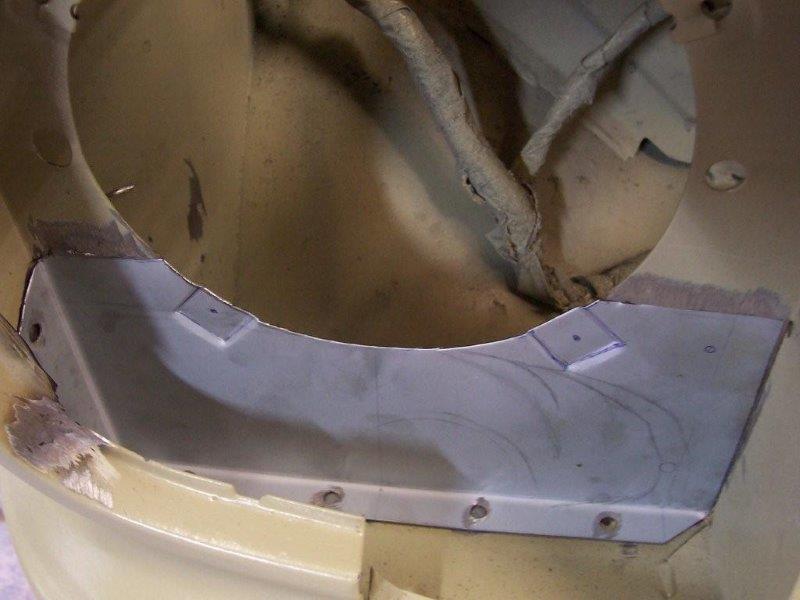
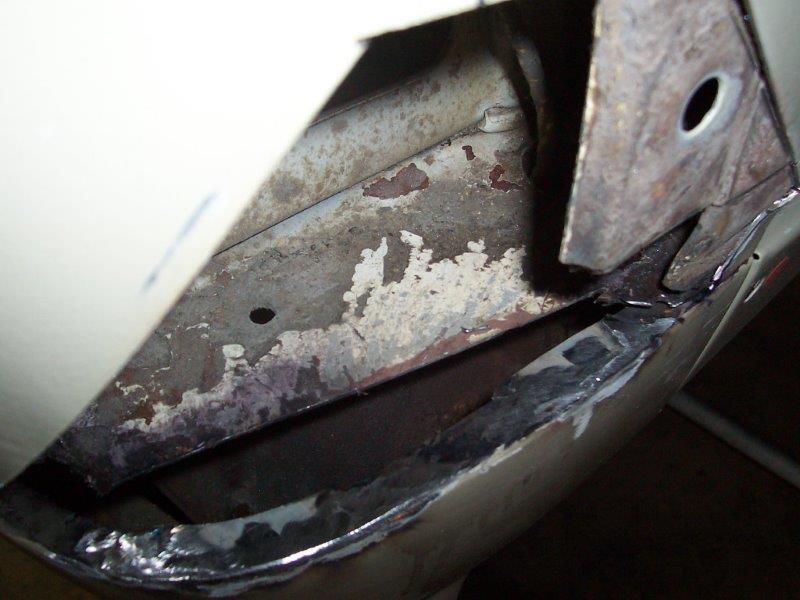
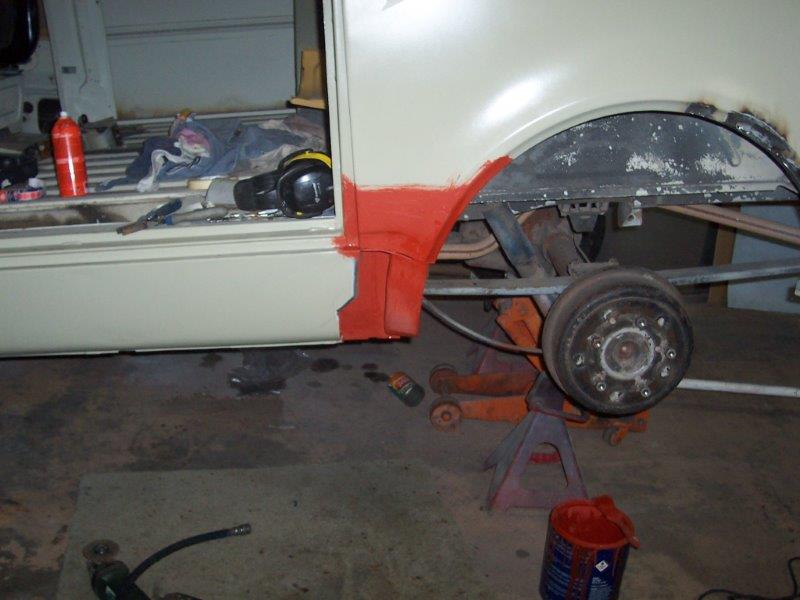
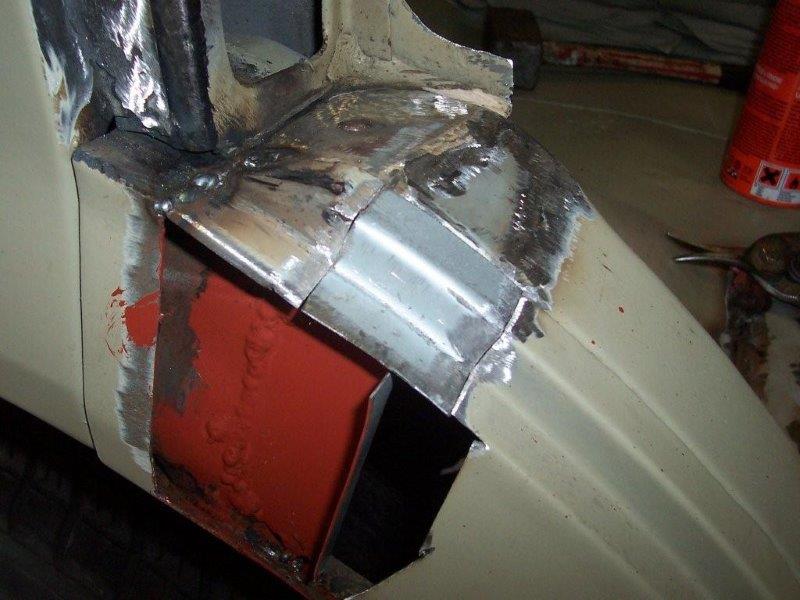
Next on the "to do" list was the right hand front wheel arch. The blue inserts were cut out of a mint spare panel that I had. It was the only piece of second hand metal that we used.
-
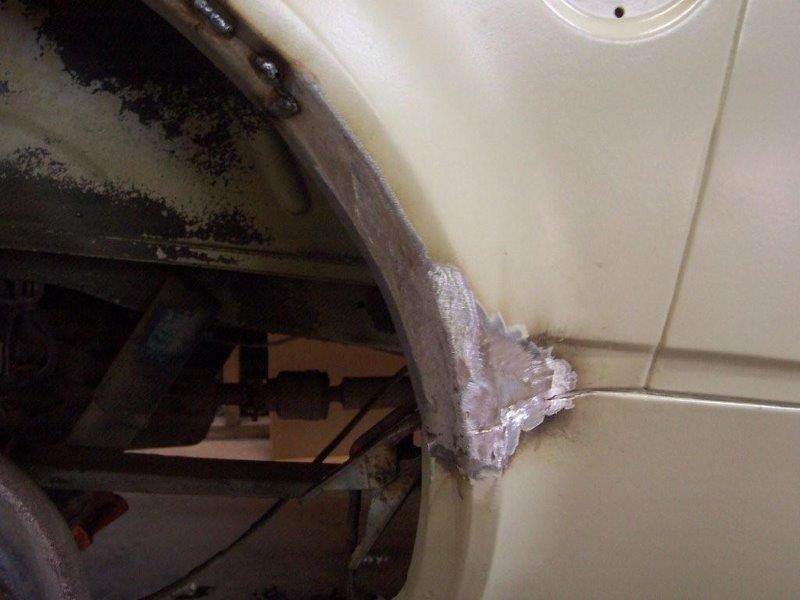
The beaver panel only showed signs of slight rot from the outside, but opening it up revealed the true extent of the rot and some replacement metal sheeting was grafted in.
-
1
-
-
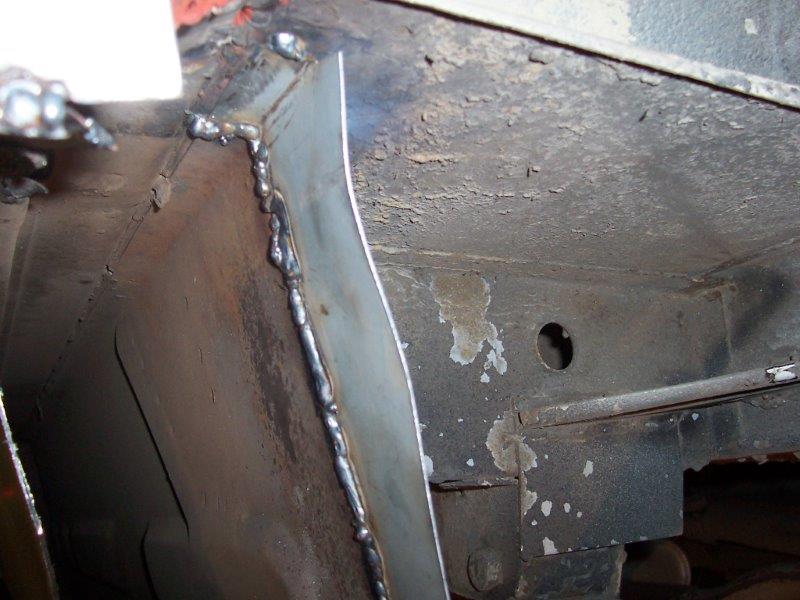
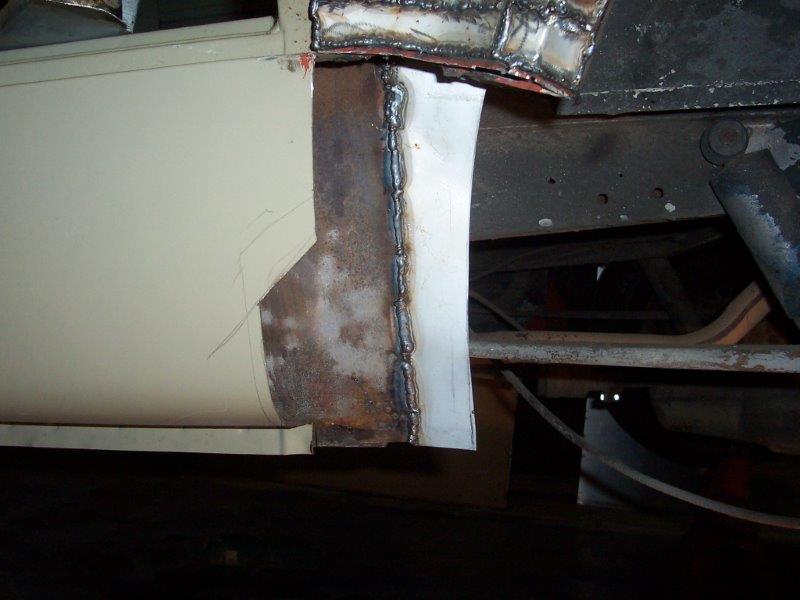
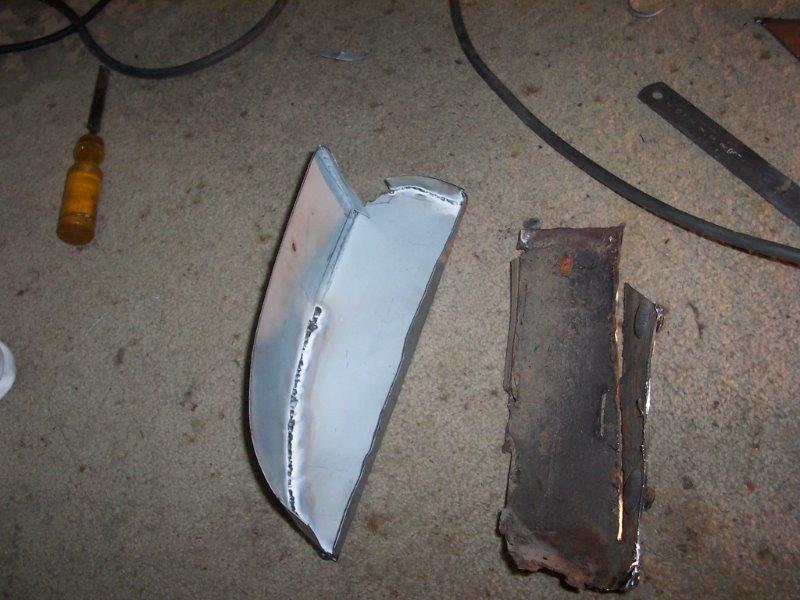
In most cases wher I need to make a decision on just how much to cut back, I probably erred on the side of caution. We would cut back until we couldn't feel any more crust on the back of the panel before Barry started rebuilding each section.
This post covers the work done on the driver's side A pillar base.
-
1
-
-
Wow...that's a heap of energy being spent on the bodywork....respect for getting it done right!
Cheers for that.
-
I have been to one of the burger nights a couple of months ago. When are they again?
Interesting about the 350 Holley. That's a very good gain in MPG! You know that you can trim the idle mixture on these quite easily? Just wind the idle screws fully in,(one each side of the metering block) then back them out until idle is smooth. Usually 1 1/2 - 2 turns is about right on these. Would be good to get mine to 15L:/100 kms. But I think the diff ratio is hurting mine at the moment. And all of my running has been around Auckland, I haven't really taken it on a good run yet.
I think the next burger night is on the 19th November. Would be good to catch up if you can make it. Stu my mate with the 302 in his Bedford should hopefully be there too.
I'll play around with the idle mixtures and will let you know how it goes.
-
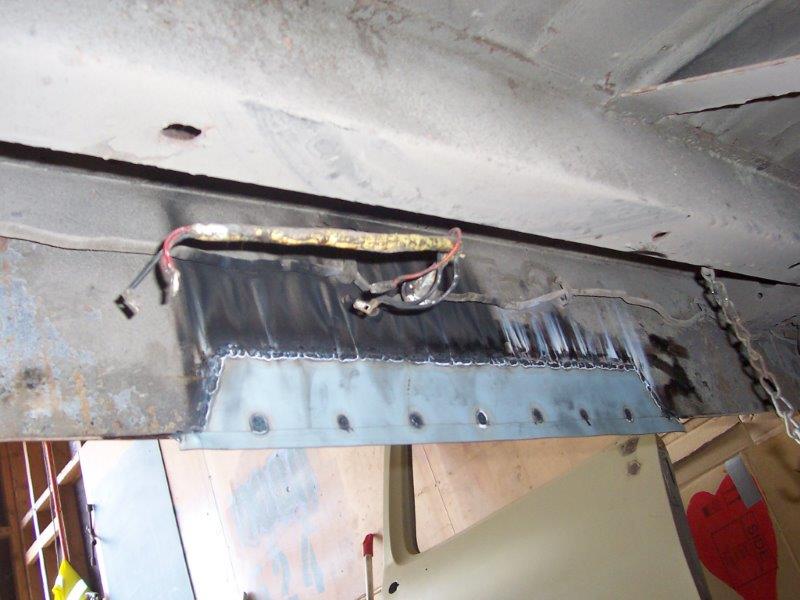
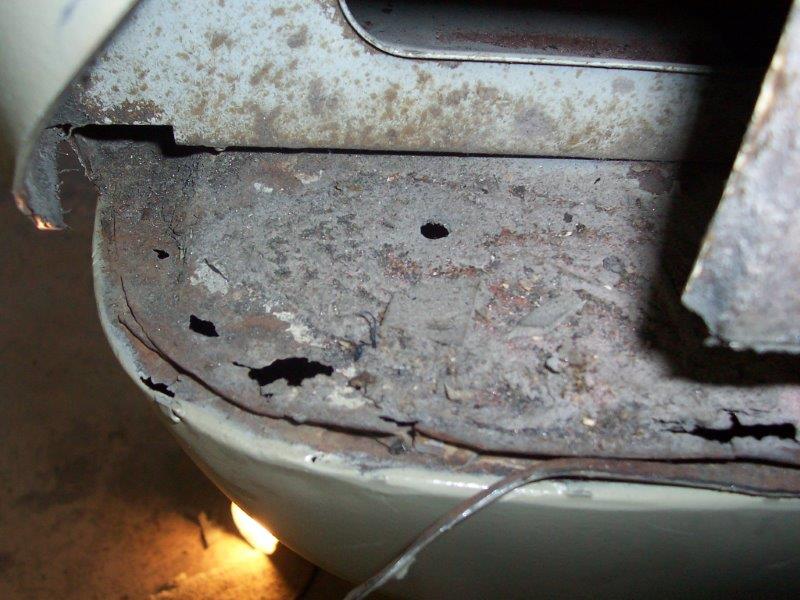
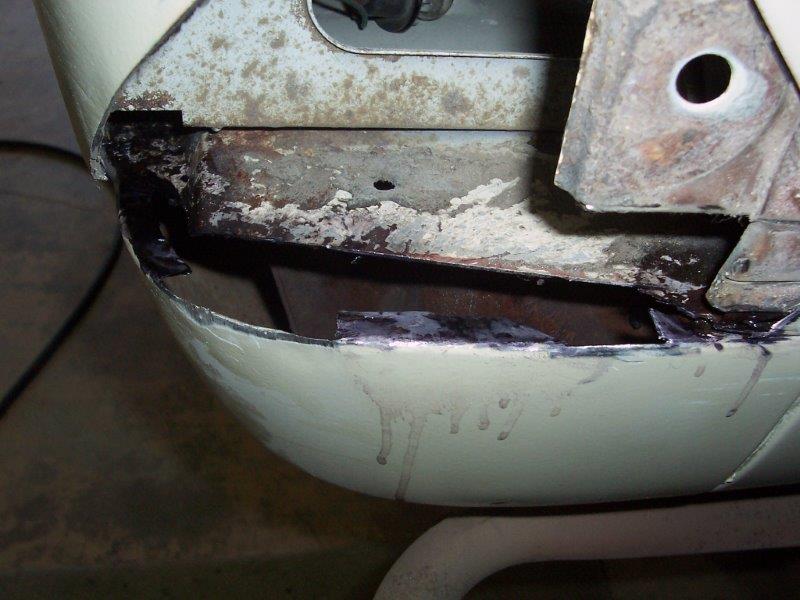
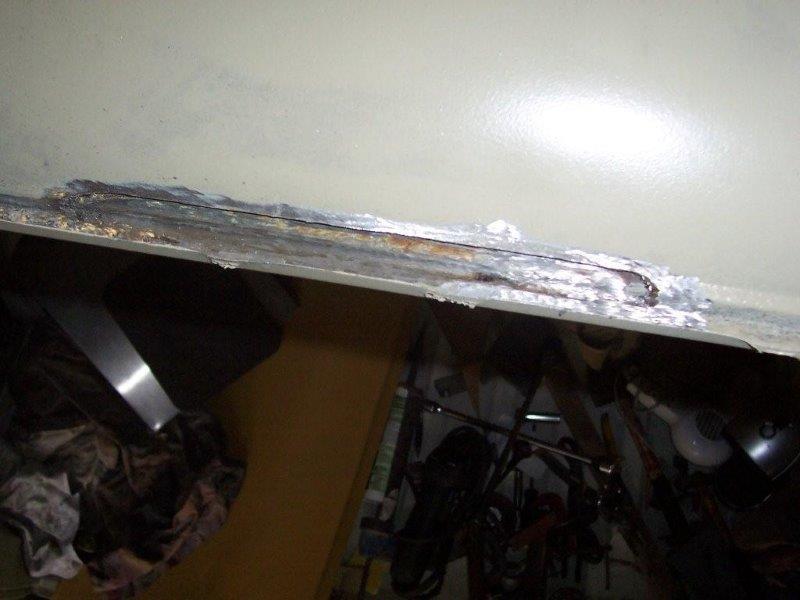
The back corner below the tail lights are where 3 pressed panels converge. Absolute carnage in this particular case.
-
3
-
-
By this stage I was visiting the van three times a week to review progress. Barry would cut open each section and we would then discuss the best approach to each repair before he continued any further.
This door was a classic example. The outer skin looked good, but there were signs of pitting on the panels edges. We decided to separate the skins for a quick look see and boy was I glad we did. What lurked beneath was a ticking rust bomb.
Apologies for the crap picture quality, but hopefully you get the idea.
-
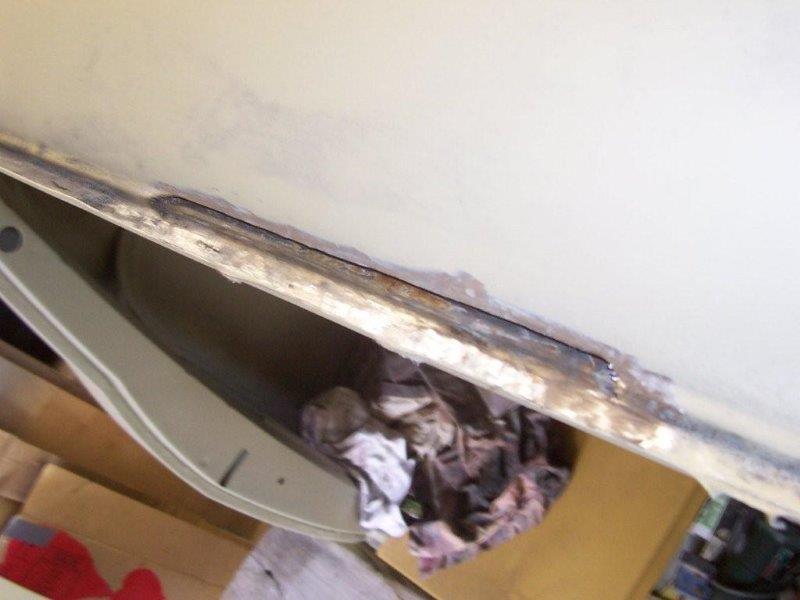
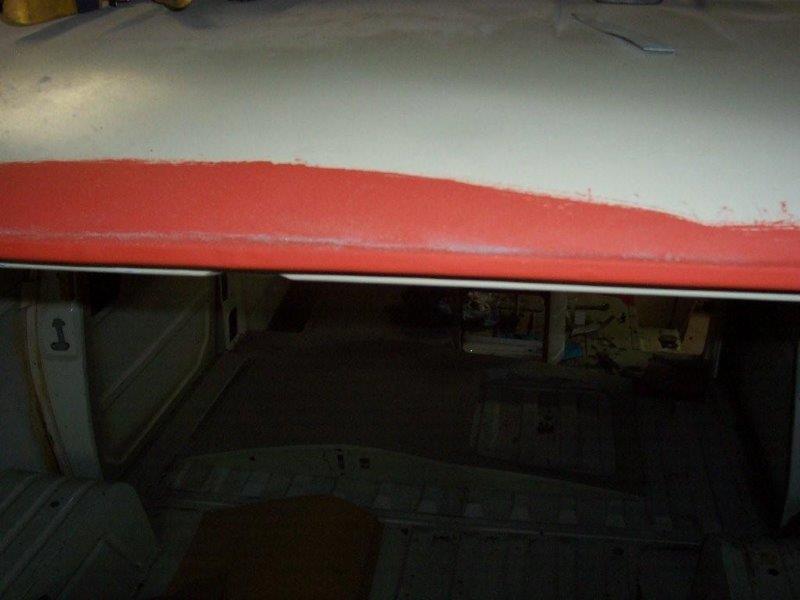
Bedford vans are notorious for rust in the roof gutters. By some small miracle the gutter rust on my van was limited to the gutter above the rear doors and a short section on the right hand side.
-
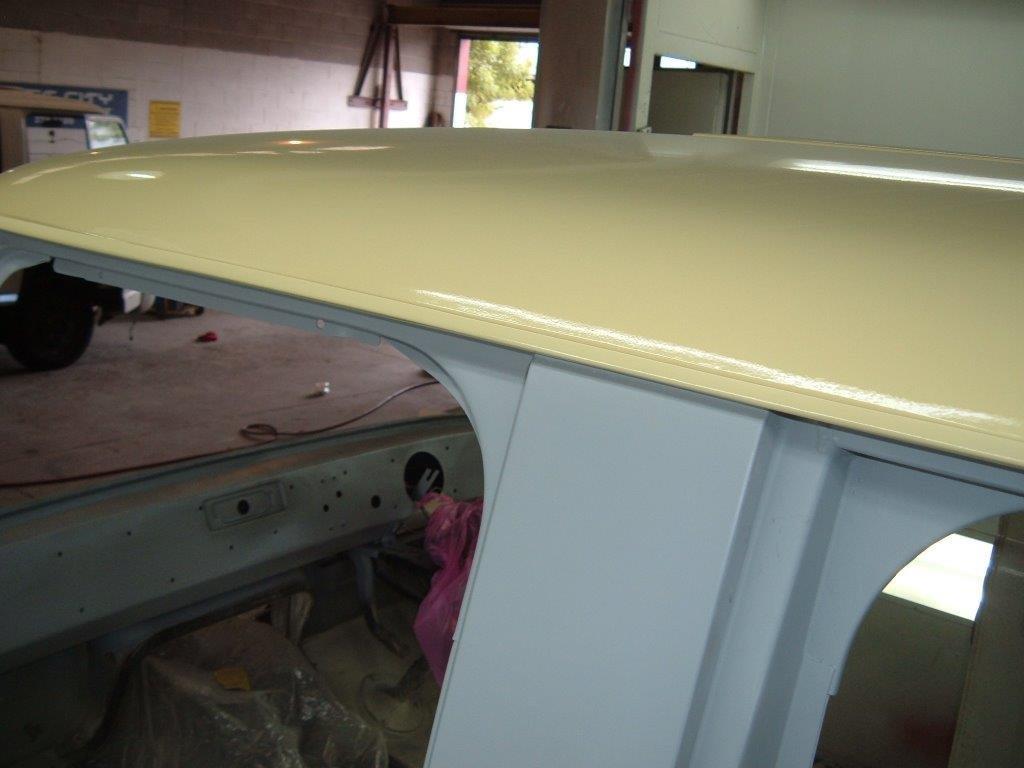
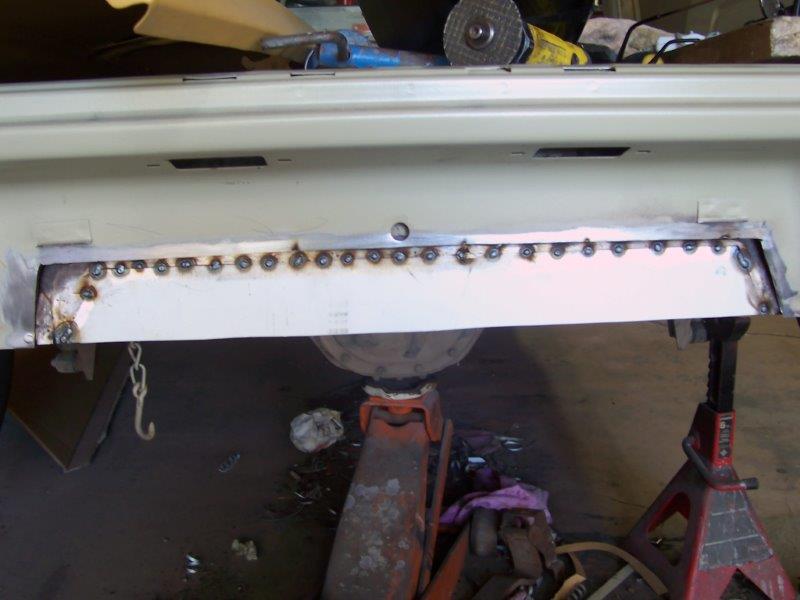
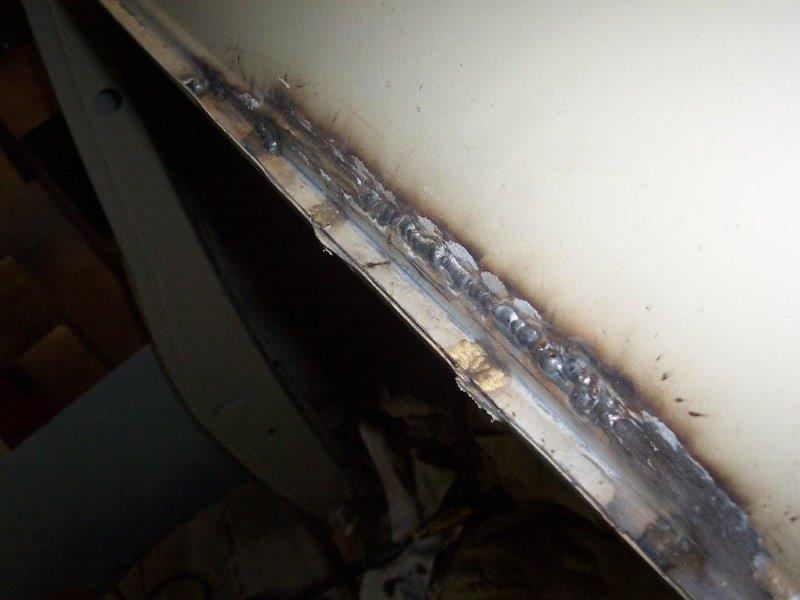
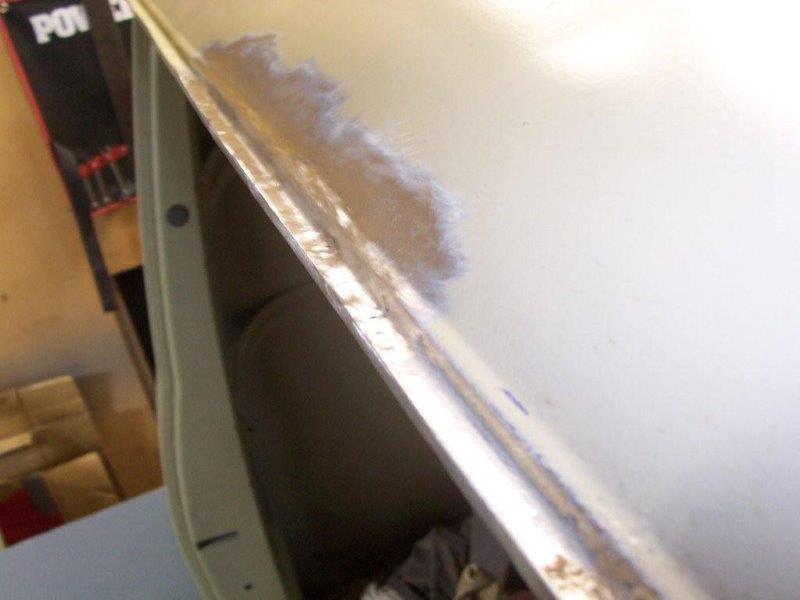
Some of you may be wondering why the epoxy primer has such a textured finish. The reason is that I took the plunge and had the body zinc metal sprayed before the temporary primer was applied. It results in the textured finish that you can see in the close up pictures.
My daily is over 30 years old and was factory galvanised. It has held up well over the years so I'm a big fan of anything that could give the metal a fighting chance. Metal spraying is not as good as the factory dipped galvanising process, but it was an option that I thought was worth investing in.
-
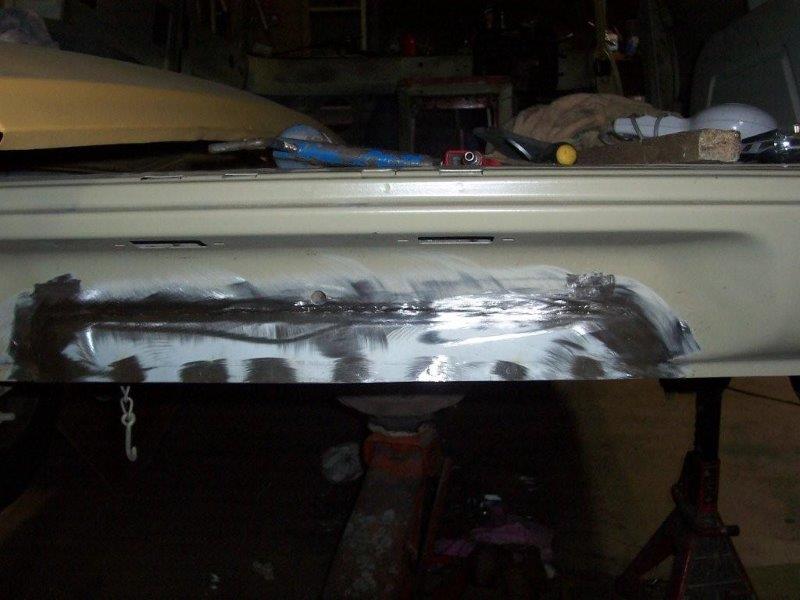
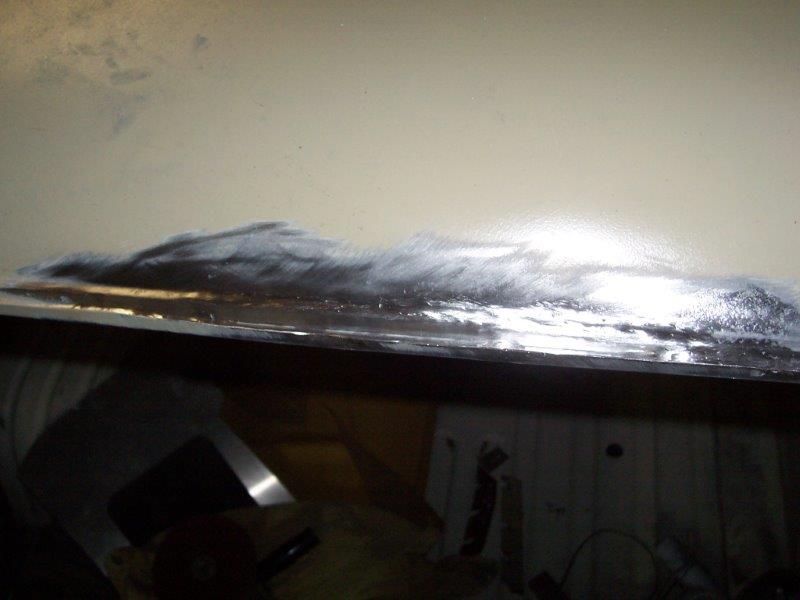
More of the same.
-
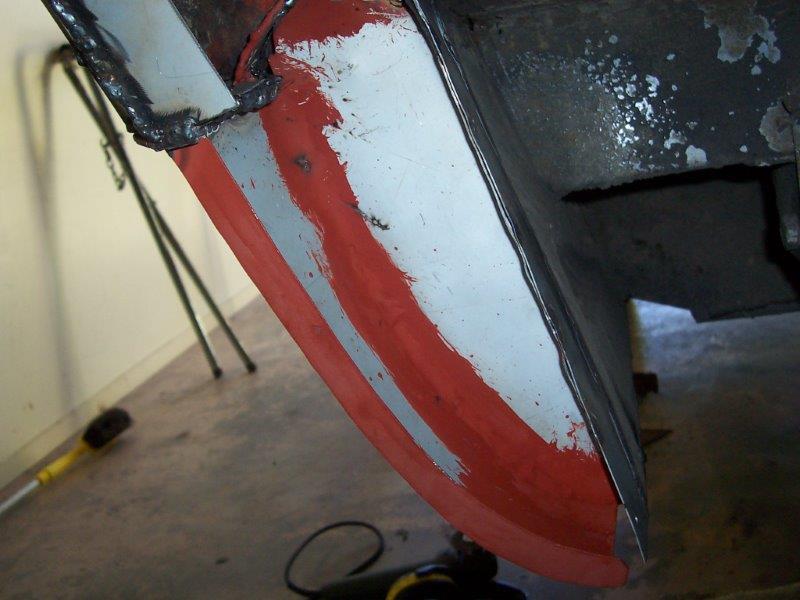
The leading edge of my left hand rear fender was probably the worst bit as both the inner and outer skins were badly ravaged.
First step was to cut all of the rot out and then start building things up from the inside working outwards.
-
Cool, do you come thru to the monthly burger nights? Would be good to catch up.
By the way I invested $30 in an adapter plate and last night I chucked a spare Holley 350 2 barrel onto my van just for shits and giggles. I ran out of time so it was straight on with no adjustment and it sure smells like it is still running rich at idle. Earlier today we did a cruise out to Orewa and I gassed up when we got home. Worked out to 15.5 liters per 100km. I didn't really notice much reduction in performance either.
-
1
-
-
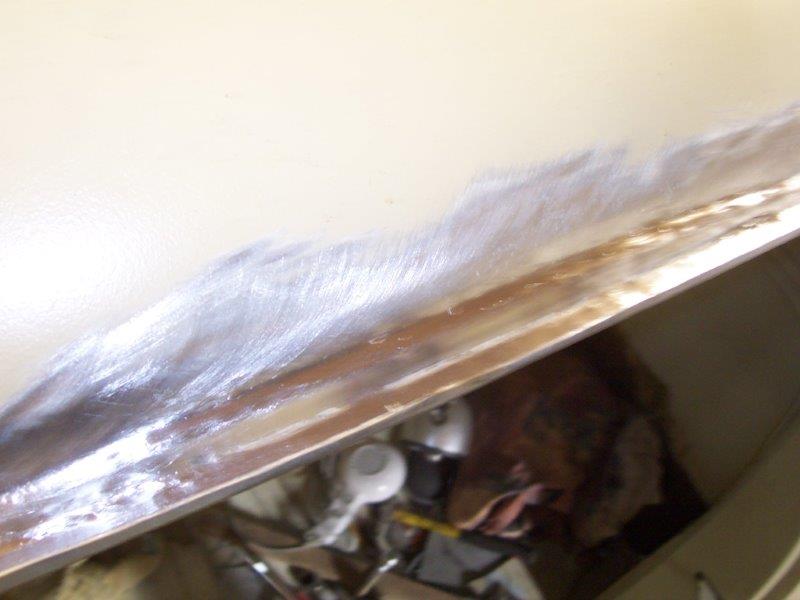
And more
-
In my meanderings through everyone's build postings I've seen some amazing workmanship and have been blown away by the skills that some of you possess. Sadly I am not as gifted. At first I toyed with the idea of doing a welding course and buying my own kit, but soon realised that my quest to get the van on the road as quickly as possible meant outsourcing this work to someone who already possess the skills and time to get the thing done within an acceptable time frame.
I'll now showcase some of Barry's workmanship.
-
Hey browndog, it sounds like we are both on the same mission. Would be good to compare findings. I'll keep you posted on my progress. You based in the big smoke ?


Flash's '78 Bedford Panelvan
in Projects and Build Ups
Posted
So my plan was to get the van back together in standard format as quickly as possible, chuck a fresh WOF on it and then start the rest of the mechanical transformation.
For the many months while the van was at Barry's place and stripped down to a shell I had slowly been going through all of the removed items either replacing bits or refurbishing where needed and then packing everything back into boxes ready for reassembly. By doing this Mrs Flash and I were able to re-assemble the whole van over a single weekend.
Notice the new chrome work on the front bumperettes and light surrounds, the colour coded MX5 exterior mirrors, my new griffin badge imported from the UK and heaps of stainless steel nuts and bolts to replace the old standard items.