


Flash
-
Posts
1615 -
Joined
-
Last visited
-
Days Won
2
Posts posted by Flash
-
-
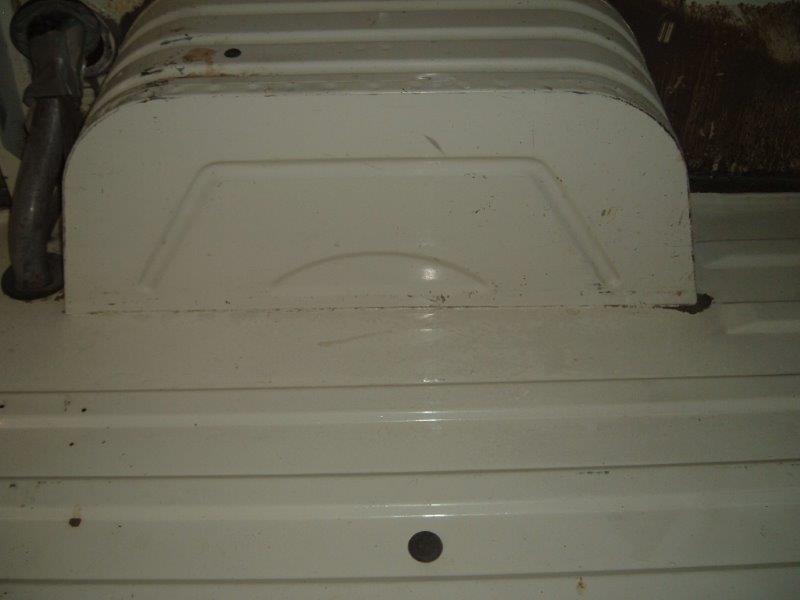
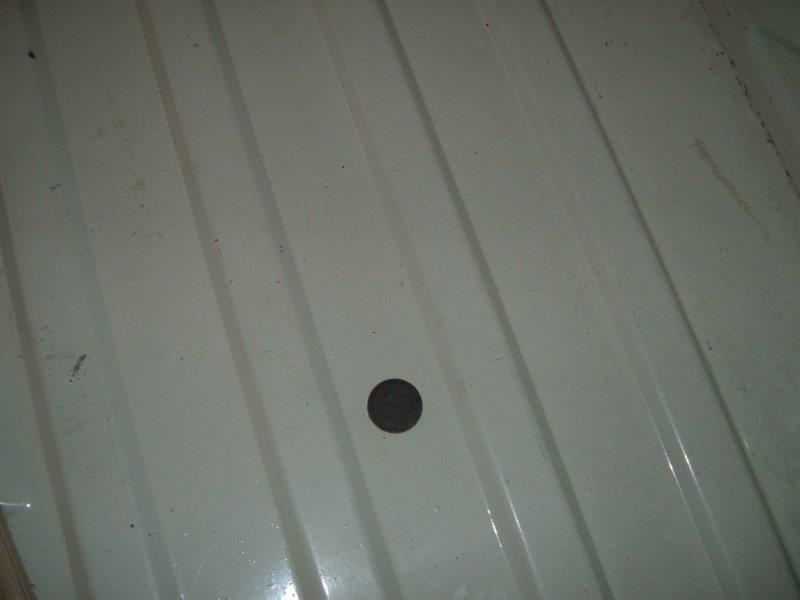
So first step was to strip the interior back to a bare shell.
Here are a few pics of the floor with its factory original paintwork. As previously mentioned the first owner laid down a plywood floor covering on the same day that he picked the van up from the showroom, so the floor was in pretty good condition.

-
Awesome van looks like its got heaps of character.
I'm looking forward to hearing what you have got planned.
-
I so want to see a proliferation of vans at Nats next March and I want them rocking and rolling all weekend.
Every time the doors open in the morning I want to see clouds of smoke drift out of them and a bevvy of beer cans sprinkle out noisely onto the ground.
Damn I need to get me a van STAT.
I'm getting flash backs (excuse the pun) to the "Up in Smoke" movie by Cheech and Chong with the classic "Hey I didn't know your name was Alex" line in the rocking van scene. You've gotta watch that movie if you haven't already.
Van's rock .... literaly
-
 1
1
-
-
okay thanks for that, I will pay him a visit and get a quote, also need the dome head bolts plated. . My front bumper is NOS, but painted, so not requiring any prep work apart from stripping the paint. I was lucky enough to score a NOS pair of chrome rear quarter bumpers a while ago for about $300. I have straightened the bumper irons and had them coated matt black.
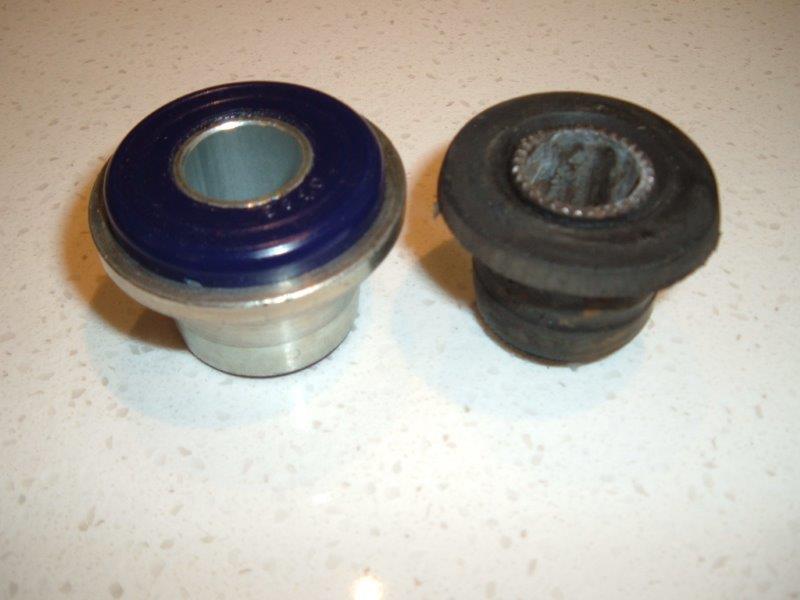
Luckily my bolts were still mint, but one was badly seized and no amount of CRC would help. Sadly I didn't get it out in one piece. I found some new Morris Minor domed bolts on eBay and brought in a set, but the head is a smaller diameter, so I'm running a button head stainless steel bolt as a temporary measure until I can source a proper replacement. Its not really noticeable until I point it out, but it sure bugs me.
-
With the mechanical work now at the stage of Certification readiness and everyone off enjoying their Christmas Hols, Mrs Flash and I turned our attention to the interior of the van.
As with the exterior, the idea was to create the illusion of a mildly customised "shaggin wagon" from the late 70's, but at the same time it needed to be relatively practical and comfortable to sleep in.
So earlier in the year after spending hours pouring over some books dating back to the hey day of custom vans in the USA, we came up with a crushed velvet theme. We were looking to create a clean and uncluttered look with hidden fixings and a simple colour scheme.
So armed with some measurements we hit the local fabric shops to see what we could find. Shock and horror when we discovered that crushed velvet runs around the $30 to $40 per running meter locally, far more than we were prepared to invest. A quick squiz on eBay revealed that there were bargains to be had for the same product in the UK. Only issue was that we couldn't view the material in person, so we short listed 3 colours and ordered a running meter of each. It was well worth the investment and our final choice was a dark grey. The seller agreed to post the material in 5 meter lenghts so each parcel came well within the minimum charge for international post. Total cost for the velvet was $250 including postage about a quarter of the cost of the local suppliers.
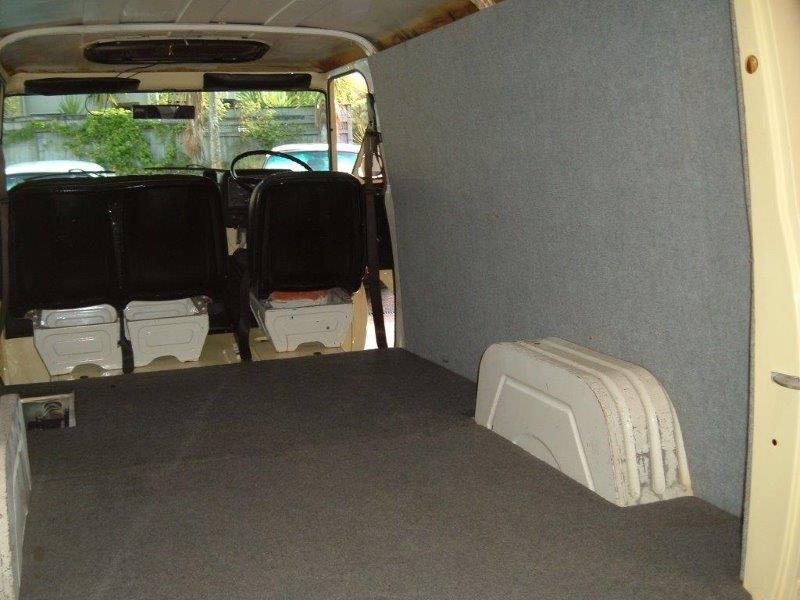
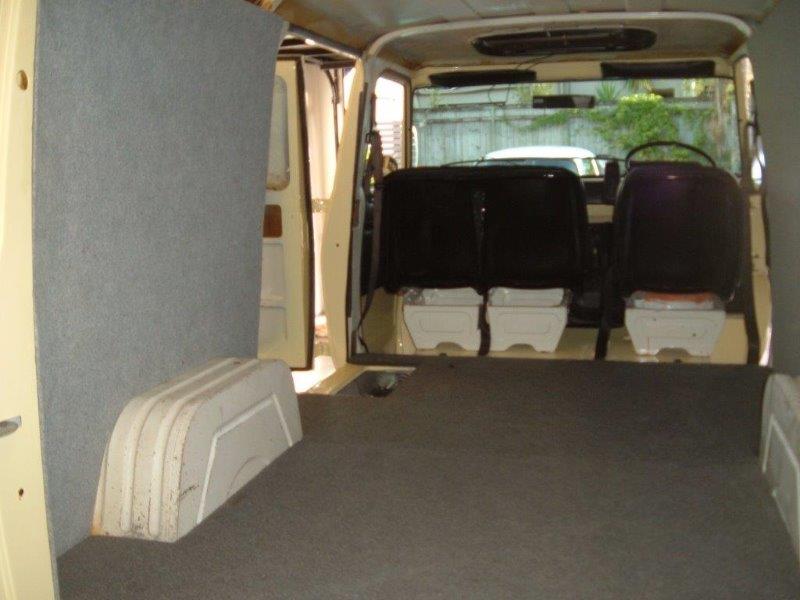
Anyway, enough words for now, so I'll start off by showing you a few pics of the original interior.
-
5
-
-
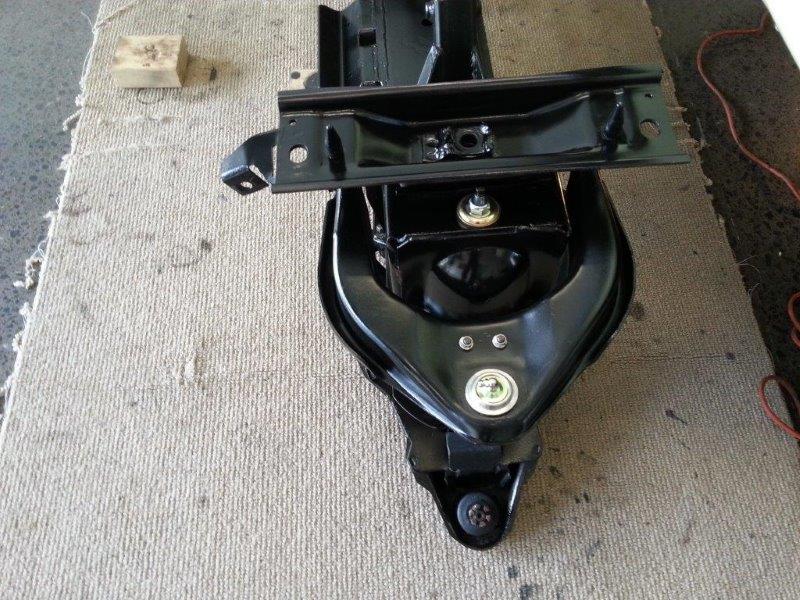
So on getting the van home, the next job was to strip out the front suspension in order to paint up the new engine mounts. At the same time I fitted new bushes, shocks and ball joints.
-
1
-
-
Sadly I don't have any in progress shots of the work done at Barry's place, but I can confirm that with all of the welding completed, we fired up the new motor and I drove the van home a week before Christmas Day 2013.
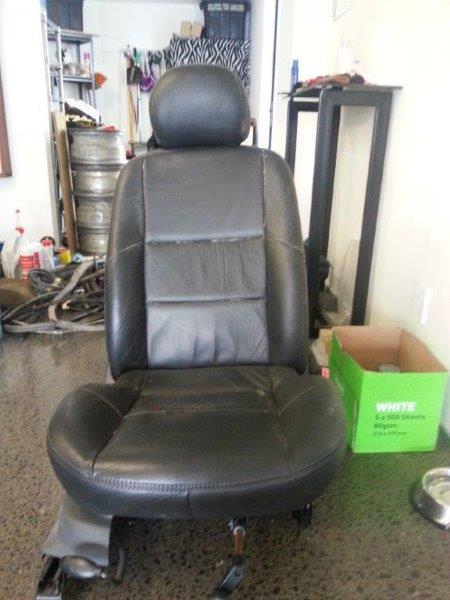
I can share a picture of the new bucket seats that went in. They were pretty dusty and dry in this picture but with a clean and some leather cream they came up brand new. I was told by the seller that they are out of a Ford Focus.
-
Okay back on track now ...
So with the engine mounts worked out I was amassing a shopping list of items needing welding namely:
- New engine mounts complete with required gussets and reinforcing plates
- Extra large engine box to cover the wide hipped V8
- Relocation of the rear shock mounts on the Galaxy 9 inch rear (for some reason the shocks on the donor van were mounted outside the chassis rails and on my van on the inside) ... bizarre
- New seat bases for the luscious leather bucket seats that I had scored on TradeMe for $100.
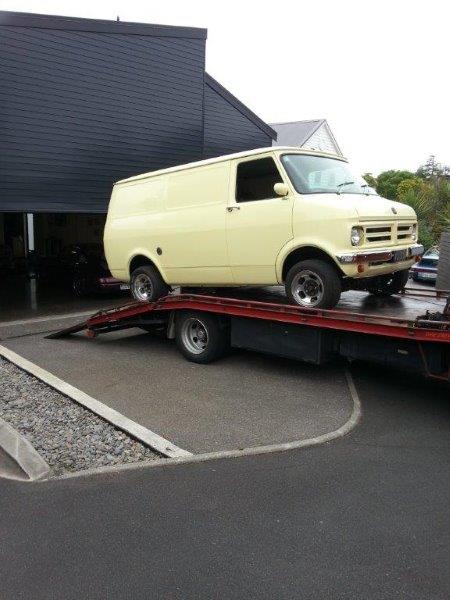
A quick chat to Barry revealed that it would be far more cost effective to get the van to his place rather than him having to leave his workshop to work at my place, so I braced the motor and box in place and we loaded her back onto the transporter for the short trip to Barry's workshop.
-
So a quick step back, to cover off a phase that I had forgotten about.
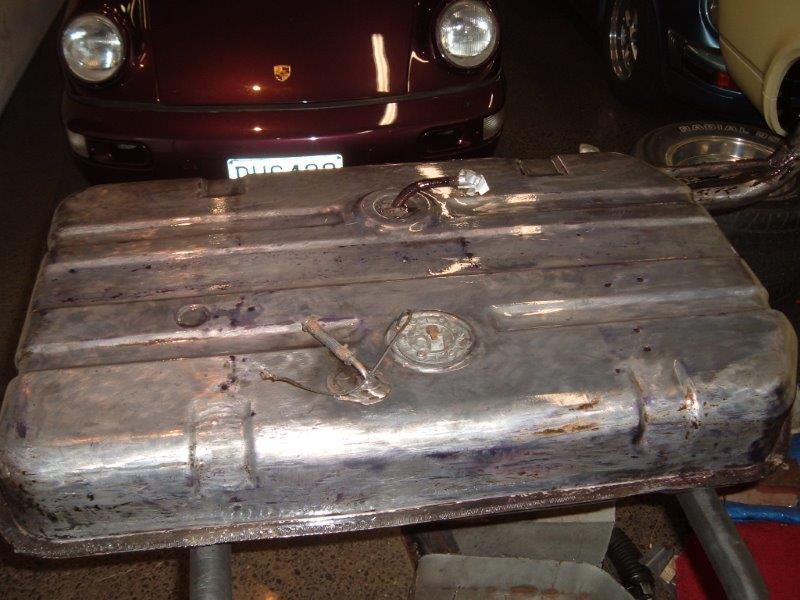
With the crate engine sitting on its trolley and me running around gathering all of the bolt on bits and pieces and the gearbox getting fresh seals and paintwork, Mrs Flash and I took the opportunity to tackle the underside of the van. It was in really good condition with only a little surface rust. I reckon all of the oil leaks from the Vauxhall engine had given it a fighting chance against any rust, but had resulted in 30 years of accumulated gunk covering the underside.
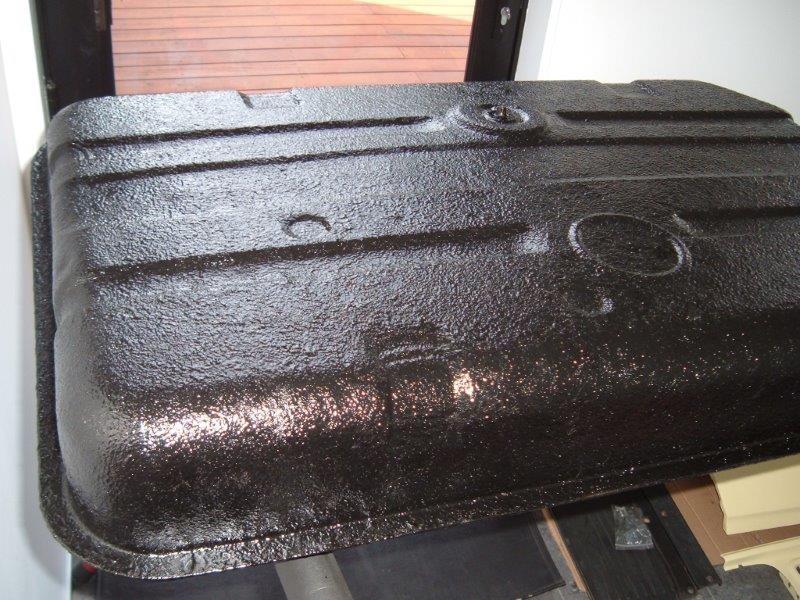
I stripped the fuel tank and everything else off the underside of the van leaving only the wiring harness in place and we proceeded to water blast and scrape the entire underside. It then came back inside and I dropped both the front and rear suspension leaving us open access to its bare bum. Mrs Flash and I spent two long months of weekends flat on our backs cleaning and painting the underside. Once we had the underside completely clean we started off with two coats of brush applied Brunox to neutralise the surface rust followed by two coats of brush applied rubberised under seal and then two top coats of gloss black just to finish it off.
Sadly the pictures that I took are too dark and have too much reflection to really do the job any justice, but these images of the fuel tank that was done following the same process will give you a rough idea.
-
AWESOME build quality there bud, much respect!
I know this will be costing you a truckload to build, no matter how many good deals you do on the way. Yeah I am still a bit shocked at how much "runner" engines are advertised and sold for on TM. That old Chev would net you $100-$200 in the US. Clever move that. Who did you get to chrome your bumpers, and what did they ping you if you don't mind me asking? I have a new front bumper for my silver Transit (painted) that needs chrome, I was quoted $650 to get it done. Was a bit shocked, but believe that is quite normal!
Nice to see you have some Transit parts fitted!
Thanks for the feedback browndog. My front bumpers were the originals so they showed a bit of history, but they give the van so much character that I was determined to get them looking as good as I could. I've had chrome work done in the past that looked bloody awesome when fresh, but sadly didn't last the distance, so this time around I figured pay the extra for a decent job. So I took them along to Nigel at Otahuhu Chrome Platers. The stripping of the old chrome was around $100. He outsourced the hammer and file work which cost me $240 from memory and the chrome work for both front bumpers was just under $600, so around $940 all up. Not cheap, but the quality is top notch, so I would highly recommend him.
-
Hey All, thanks for the positive feedback. I'll be sure to keep the updates coming.
-
1
-
-
Really rather enjoying the details and direction you're taking here,
Looking forward to seeing the finished product..
Early fronts look so much better than the late model / "jumbo's"!
Thanks for the feedback. Yep I also prefer the classic lines of the older model.
-
Awesome build story!
So the red van only donated gearbox and exhaust? Bahahhaha
Also used the aluminium radiator, Ford 9 inch diff, disc brake front conversion, Momo steering wheel and boss and a few other minor bits. I flicked on the donor van and the overall cost was $300 for the parts I took. Not too bad and I got to use the donor van for 18 months while my van was off the road.
-
1
-
-
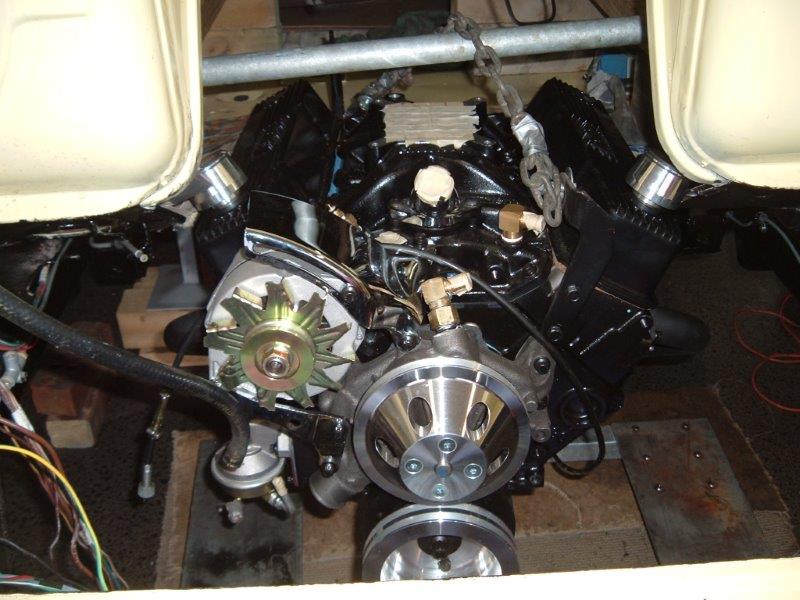
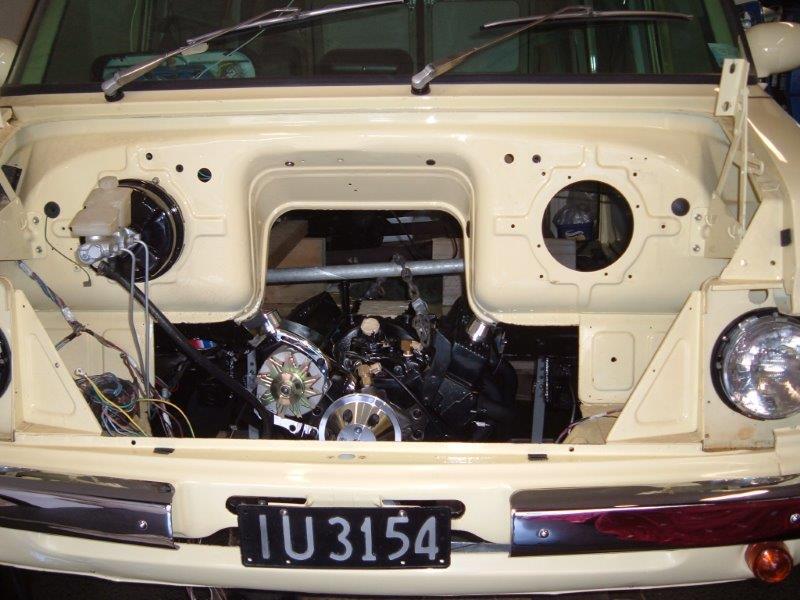
Luckily squeezing the V8 under the van just enatials some cutting of the floor boards with no changes to the firewall required.
I cut a quick cardboard template using the red van and set to work on the yellow van's floorboards with a jigsaw.
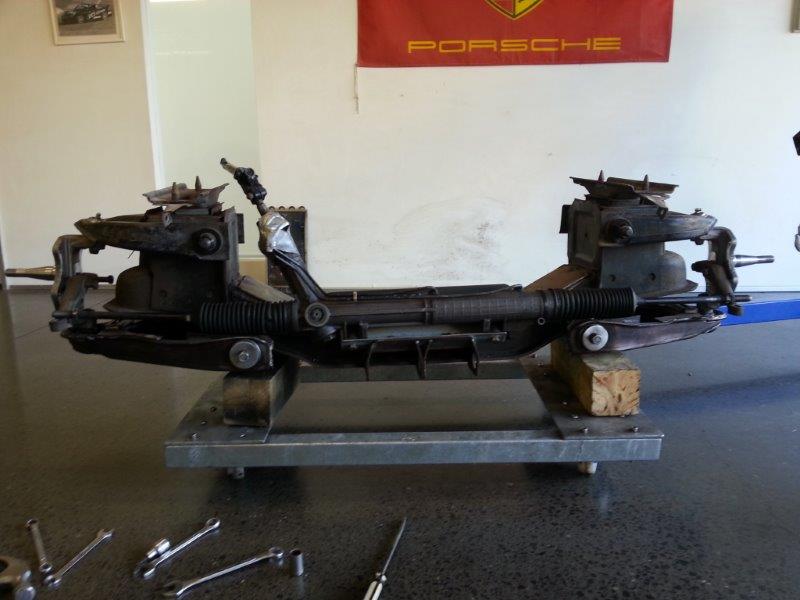
After lifting the new engine into the hole and test fitting the front beam complete with Transit power rack I was able to work out the height for the new engine mounts.
-
8
-
-
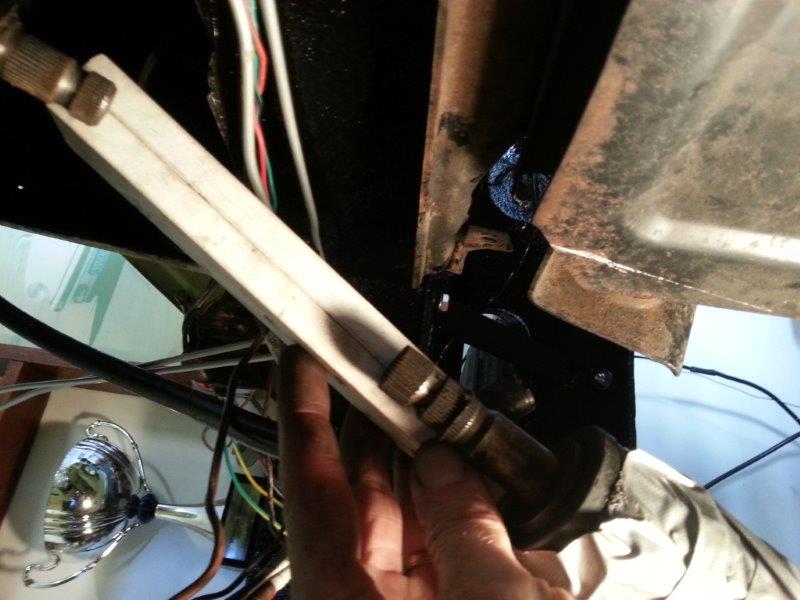
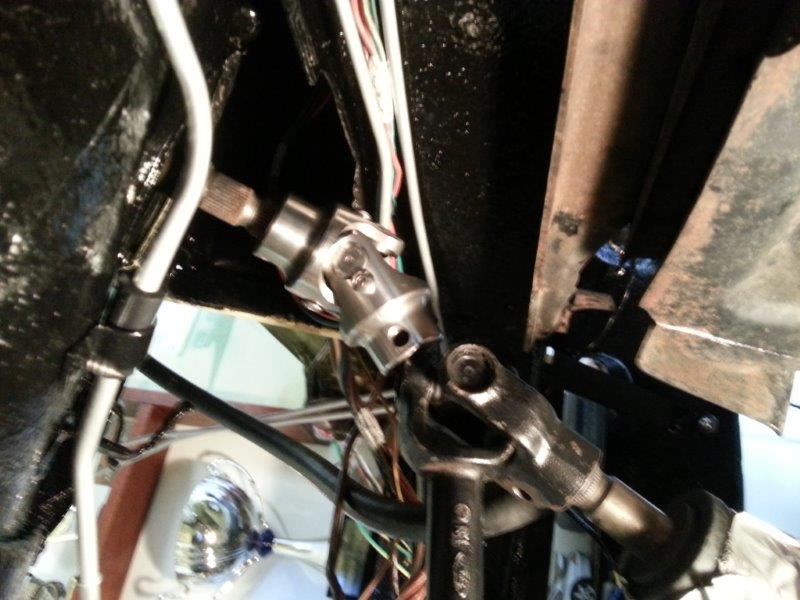
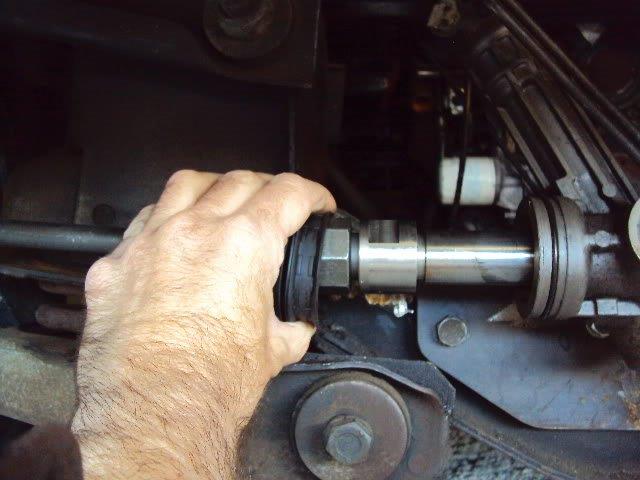
With everything mocked up and fitted back under the van I was able to assess the angles for the universal joints. The plan was to use the Transit lower universal and then machine the shaft to take an after market upper universal that would mate to the standard Bedford steering column.
The alignment looked pretty good and all that was left to do was to work out the measurements for final machining of the shaft.
-
The red van had been converted in the late '80s and was on a deceleration. I wanted to get a Certifier involved early in the piece to prevent rework so armed with a number of pictures off I headed. Turned out that the V8 engine mounts on the donor suspension beam weren't up to scratch with no gussets and the weight concentrated on the thin top plate. Since I was planning to do a power steering conversion the motor would need to be lifted slightly to accommodate the thicker diameter steering rack anyway, so a decision was taken to pull the old mounts off and start from scratch.
I'd researched my power steering options and the most popular choice for the Bedford seemed to be the rack from a '97 Transit van. A quick visit to a local wrecker netted the power rack and universal coupling for a cool $85.
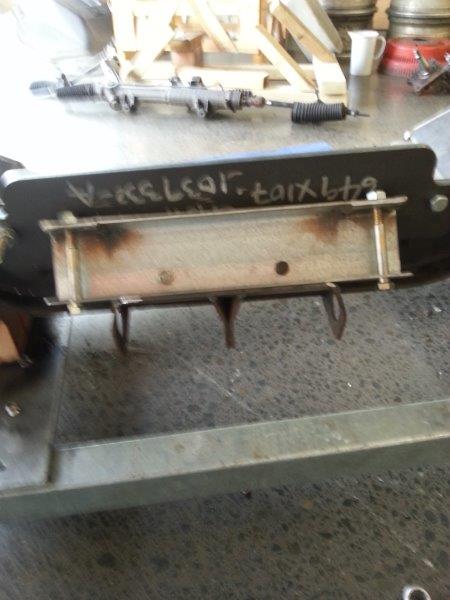
I then proceeded to mock up a mounting bracket and after a test fit I got the plate plasma cut. Certification requirement was for a double sheer setup. I used the original rack mounting points to make it simple enough to convert back to manual steer if ever required.
The Transit rack needed to be extended by about 30mm on each side in order to prevent bump steer. So a mate of mine who owns an engineering shop stepped in to help me fabricate these. The standard Transit rack arms were then machined and threaded to take a standard Bedford tie rod end.
Apologies for the quality of the pics.
-
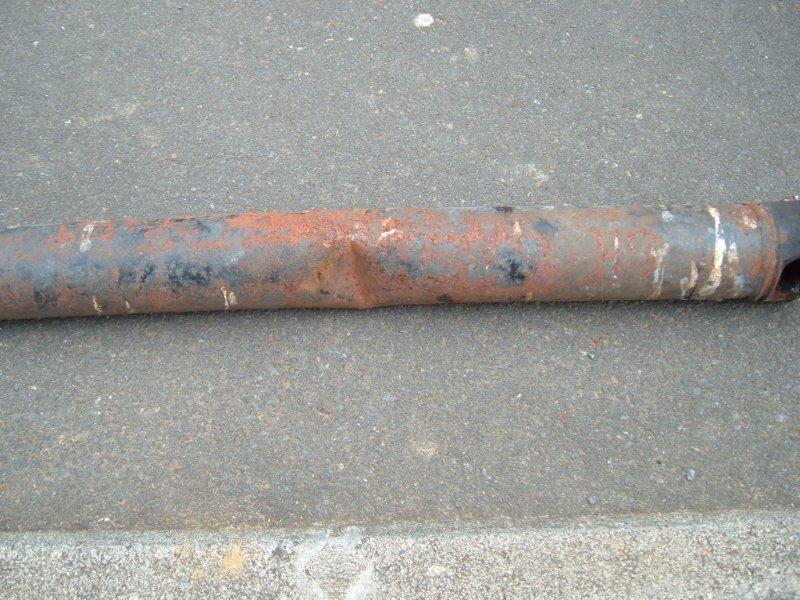
Shortly after buying the red van I noticed a vibration at speed and a quick poke around underneath revealed a sad looking drive shaft.
A quick visit to Russell to get the drive shaft re-tubed and balanced and she was sweet as a nut.
-
1
-
-
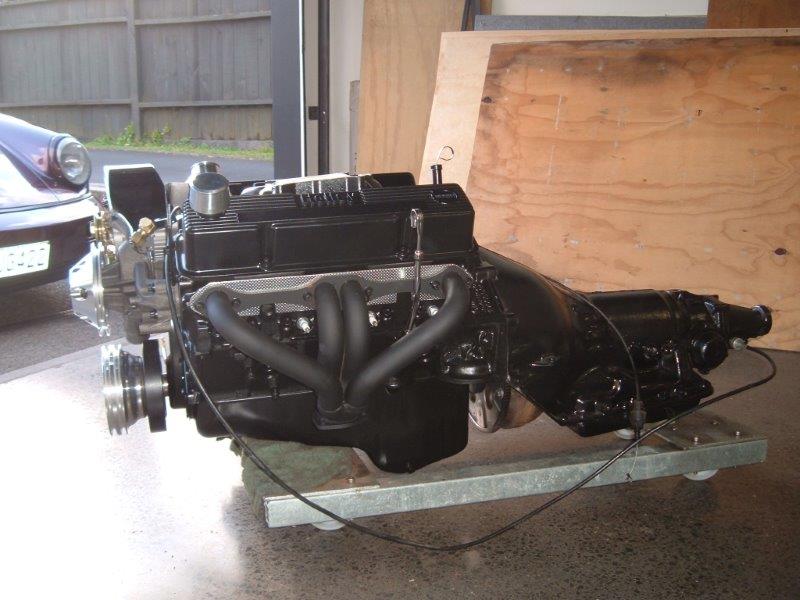
I quickly invested that cash in a brand new set of ancillaries for the new motor and its started to come together nicely.
The TH350 auto box had already been shift kitted so I ended up just replacing all of the seals, the filter and a brand new vacuum modulator.
A quick lick of paint made it look like a million bucks.
In hindsight I should have invested in a new torque converter as she started to leak from the main seal shortly after getting the van back on the road. I suspect excessive wear on the torque converter neck. Its still on my list of things to sort out.
-
In the mean time the head went back on to the old 350 with a new gasket set, the plan being to auction it off on TradeMe to the highest bidder. I'd also taken a decision to leave all of the existing ancillaries on the old 350, the only change being to remove the Holley rocker covers and replace them with the standard tin items off the crate engine.
So onto TradeMe she went with a whole splurge on the current condition and the findings on removing the head. I then sat back and watched in awe as the hammer fell at $1,600. Bonus !!
The successful bidder owned his own Engineering Shop and was looking for a donk for a jet boat project, so was happy with his new purchase.
-
2
-
-
The next day we slapped the Vauxhall motor, gearbox, drum based front suspension and diff back into the red van and parked it back outside.
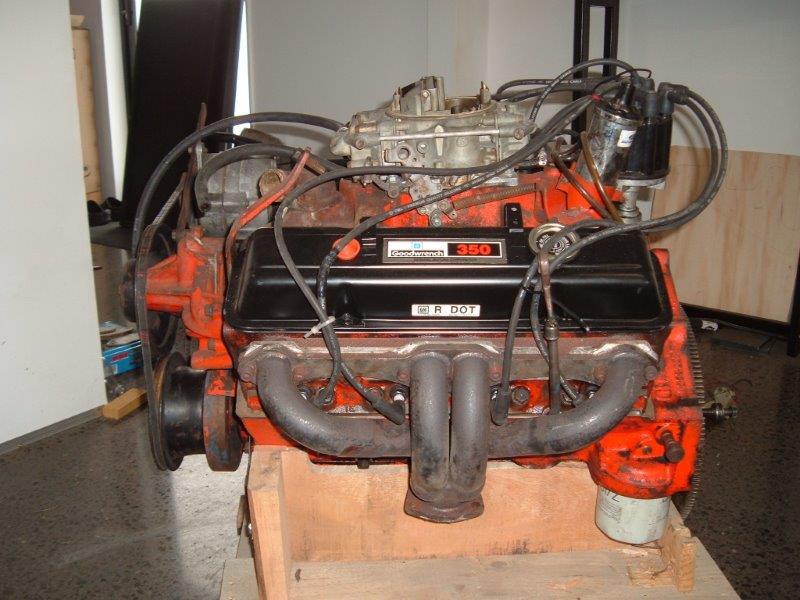
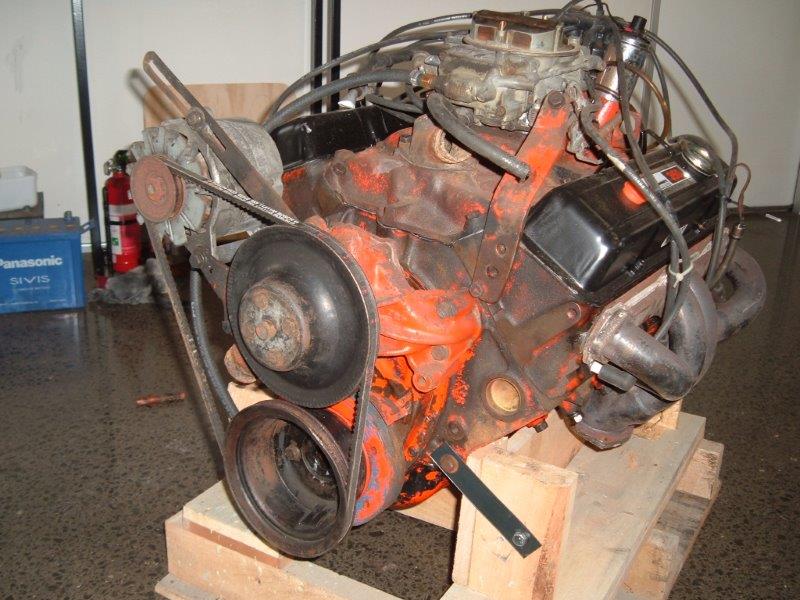
With the red van out of the way I now had enough space to give the 350 the once over.
The initial plan was to tidy the 350 up a bit before installing it into the yellow van, but over the previous few months it had developed a noisy lifter so the decision was made to open the motor up for a closer look at the internal condition.
On pulling off the first head we discovered that the bore was already 40 thou over and there were definite signs of overheating and blow-past oil around cylinder 3. There was no way I was putting this motor in as is.
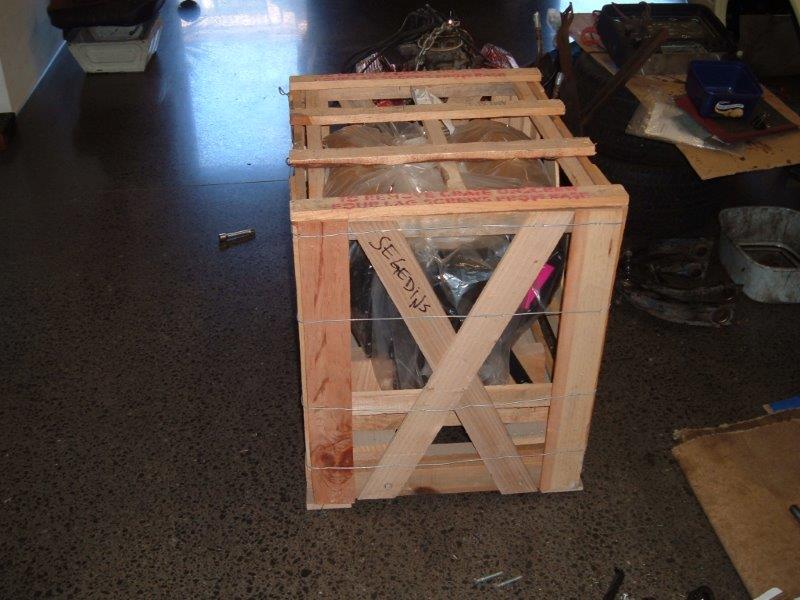
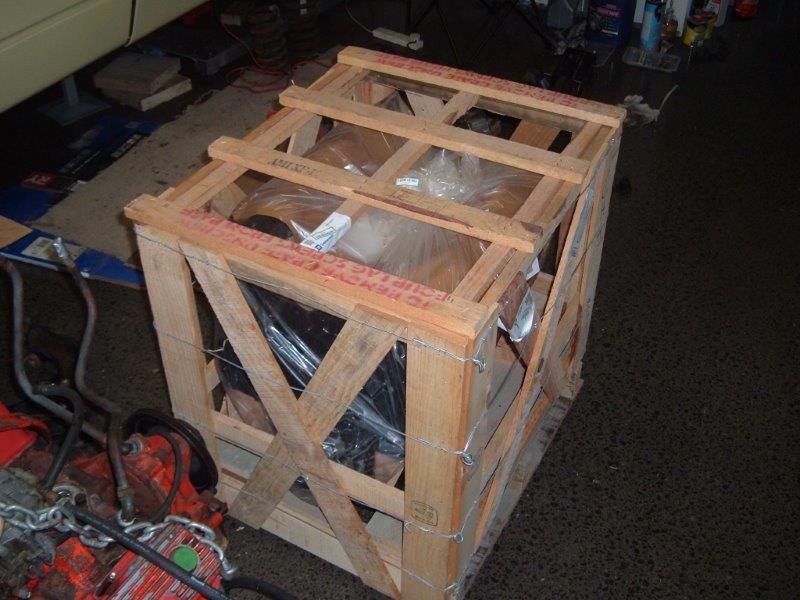
A quick chat to a couple of engineering shops gave me a good idea of costs, but my concern was investing in a block that would possibly have to go to 60 thou over. I then decided to do some sums on a crate engine as another option. I wasn't looking at building a race machine, so the 250 HP cast head GM unit at just over $3,000 sounded like the way to go and a deposit change hands for an engine that was already on the water.
A few weeks later I took a short trip in the now Vauxhall powered red van (affectionately renamed "Puff the Tragic Wagon") to pickup my newly landed crate engine.
-
I then temporarily fitted a spare front suspension beam and axles and pushed the yellow van into a corner of the shed to provide sufficient room to pillage the donor van.
The newer CF2 model has a removable front panel which meant that I didn't have to use my OSH compliant axle stands this time around.
Let the pillaging begin ...
-
So with the 4 day Easter Weekend fast approaching we decided it was a good opportunity to pillage the V8 and associated mechanicals out of the donor van and to slap the Vauxhall awesomeness in as a replacement.
First step ... Vauxhall be out !!
Note the OHS complaint axle stands needed for that extra bit of clearance.
-
1
-
-
I've got a HEI distributor in my ride and my old bullet style tacho still works perfectly.
-
By this stage the poor old Vauxhall motor was really sick. Despite my best efforts I think it had ingested heaps of sand blasting garnet, bog dust, spiders. small children and anything else that had been lying about. It coughed and spluttered its way down to my local WOF station, but the tester was so busy admiring the bodywork he didn't seem to notice that it was far from well. It sailed through and the next day I took the donor van down for its last WOF before the big strip down.


Flash's '78 Bedford Panelvan
in Projects and Build Ups
Posted
The planned layout was a fixed "day bed" running the full width of the van from the rear barn doors all the way forward to the edge of the side cargo door. The front of the day bed would house a full width pull out storage drawer that could be pulled out at night to extend the day bed into a full size queen bed. More storage space under the bed for tools and other camping gear would be accessible from the rear barn doors.
Swivel down lighters mounted over the bed would provide night time illumination.
Entertainment would be provided by a flip down LCD screen facing the bed and the plan was to build a small roof console above the dashboard containing a head unit for playing DVDs or streaming music via blue tooth. A metal chilly bin located directly behind the driver's seat would provide a handy place to store a few cold bevvies.
The existing flip up sunroof would provide night time ventilation with a removable insect screen protecting us from mozzies and sandflys.
Privacy would come in the form of magnetic backed custom shaped PVC sheeting for the front door windows and a standard folding sunshade to cover the windscreen.
Power for the lights, sound system and LCD screen would be supplied via a second deep cycle battery that would be squeezed in next to the starter battery in the under floor battery box. A voltage sensitive relay would ensure that the house and starter batteries remain isolated during park ups.
So with the plan all worked out, the first step was to line the floor with sound deadening. With such a huge area to cover I used a cheaper Dynamat copy to keep the costs down. I then stripped the old carpeting off the original ply and re installed the floor boards using stainless steel nuts and bolts.