


Flash
-
Posts
1615 -
Joined
-
Last visited
-
Days Won
2
Posts posted by Flash
-
-
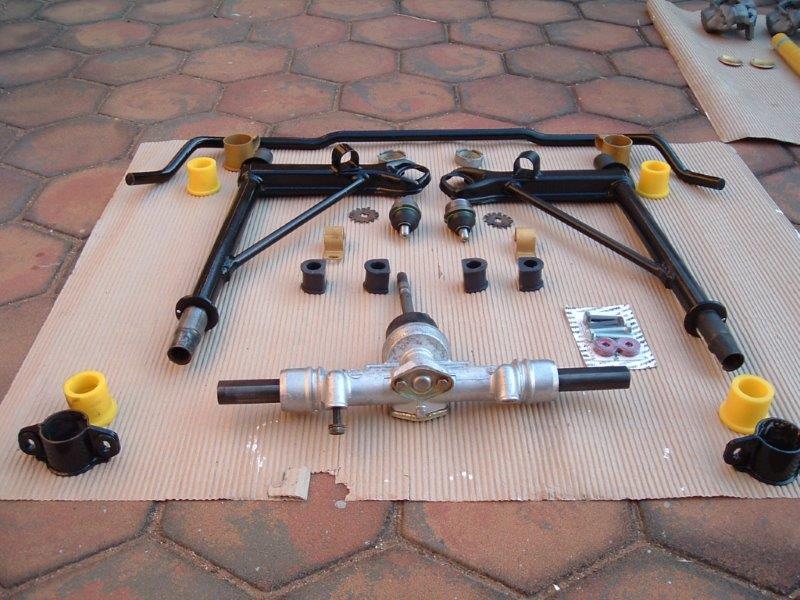
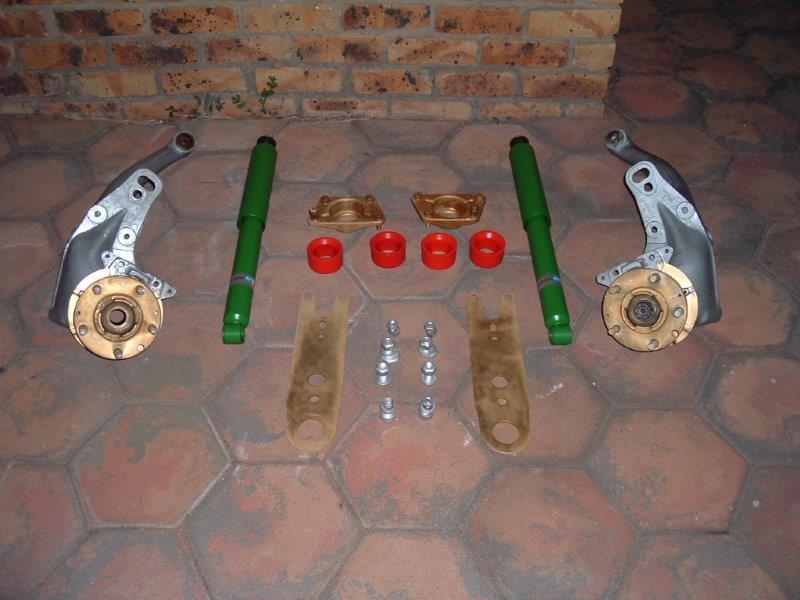
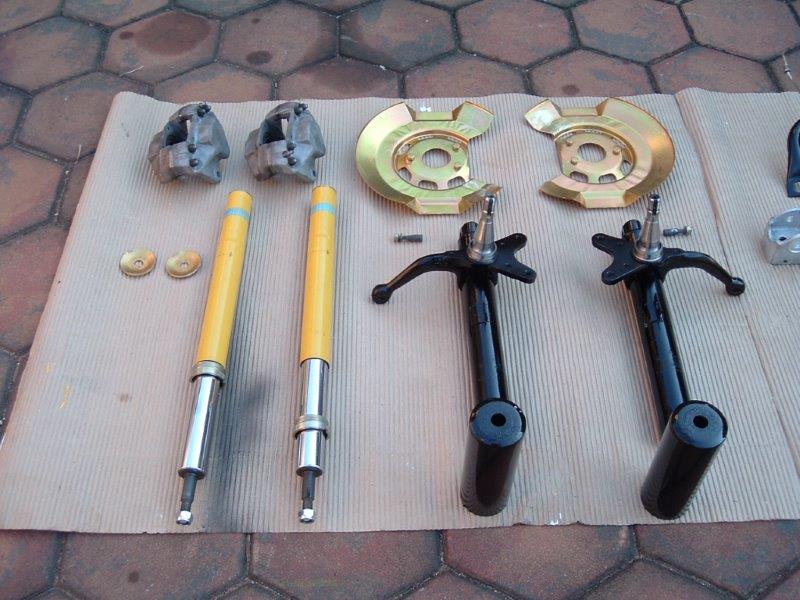
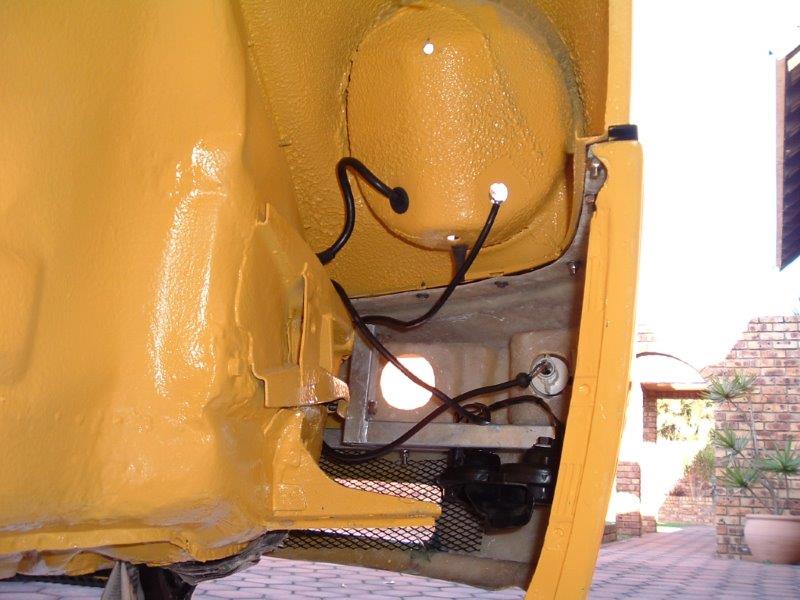
We had also been gathering a few new suspension related bits and pieces and refurbishing other parts before final reassembly.

-
 2
2
-
-
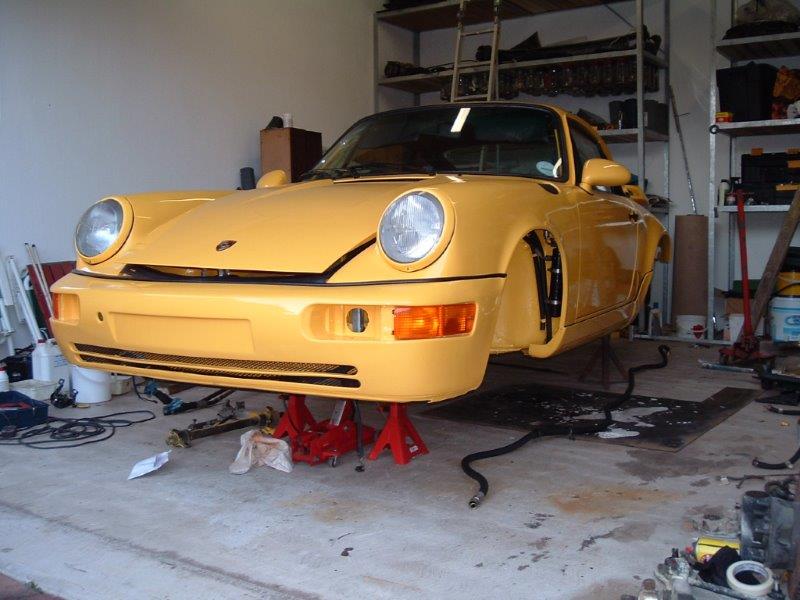
With the bonnet all sorted the next step was to fit the lightweight front bumper.
But before that check out the left hand fender. This is the original unit that John had managed to repair. The right hand front fender was second hand replacement unit. We thought about going for fiberglass front fenders, but the cost was excessive.
The indicator lights are genuine Porsche 964 units. We deleted the bumper mounted spot lamps in favour of a set of RS brake cooling ducts.
-
3
-
-
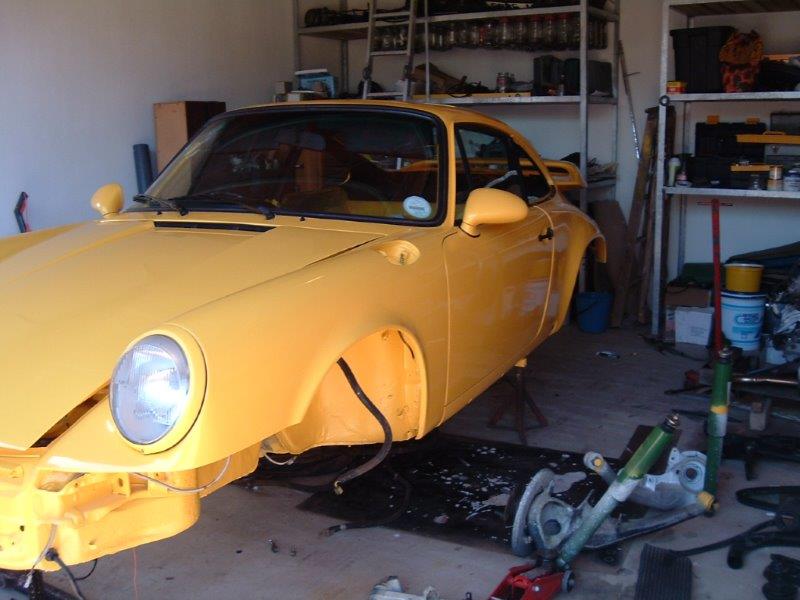
Unfortunately we don't have any pictures of the rest of the work done at John's place, so I'll jump forward to the work that continued once we had the painted shell back home.
With the freshly painted shell up on stands I made quick work of fitting the new lightweight bonnet. Hope you like the new colour. It took us ages to make the final choice, but we both agreed that since the car needed completely repainted we may as well change to something more racy looking than the original white.
Notice the tear drop light weight mirrors. These are fiberglass 964RS replicas without the heavy electric motors that the original SC mirrors had.
Porsche's come from the factory with a colour matched underside and fender wells and there is nothing nicer than working under a clean looking race car, so we decided to keep that look.
-
3
-
-
So shortly after the accident Mrs Flash and I had agreed that if we were going to rebuild the car we may as well go all out and create the ultimate club racing car. So the focus would be on getting the car as light as possible with some trick suspension bits and pieces.
The plan was to replace the front and rear bumpers with light weight fiberglass replacements. A light weight fiberglass bonnet would replace the damaged original and we would strip as much excess weight out of the car whilst still keeping it relatively road friendly.
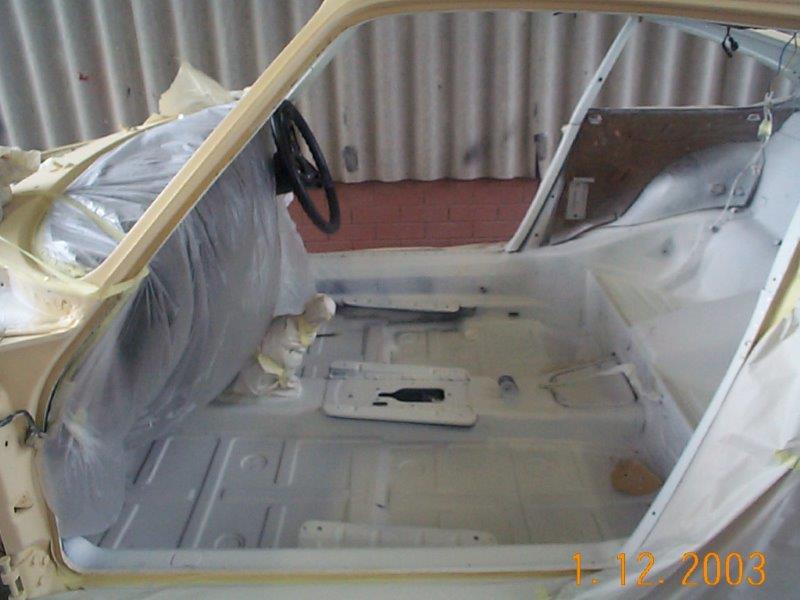
John agreed to give us access to his workshop over weekends so that we could fit the aftermarket panels before laying on the new paint. The first job was to remove the thick sound deadening from the interior floor and underside of the body pan. Mrs Flash got to work with a heat gun and scraper whilst I fabricated the light weight bumper mounts to mount the new panels. Over the next few weekends we removed 22 kilos of rubberising and other sound deadening material and replaced it with a thin coat of water based textured under seal.
-
2
-
-
John agreed to come out to our place on the Saturday to assess the damage and after crawling under the car whilst it was still on the trailer, he optimistically announced that he was pretty certain that he could repair the body. To save on costs it was agreed that Mrs Flash and I would strip the car down to a bare shell before getting it transported to John's shop for further assessment. Things would have to wait a few days though as we were both due to participate in a local Autocross event on the Sunday, this time using my blue SC.
Over the next 10 days every spare moment that we had was spent on stripping the car down until it was ready to go to John's. We followed the transporter through and helped John's team manhandle the shell onto his Celette chassis bench. Once it was secured to the bench I pulled out what was left of the front and rear suspension and John's team set to work.
In an attempt to retain as much body integrity as possible John had taken a decision to cold pull the chassis in small daily increments. The shell spent almost two weeks on the bench before John pronounced it straight. As had been previously agreed with John I had arranged to have the shell transported to another panel beater who owned an electronic chassis alignment system called a Car-O-Liner to verify that everything was within factory tolerance. So once again I installed the suspension and we loaded the rolling shell onto a transporter. The good news was that it was all within factory specs and the shell returned to John's place so that the cosmetic repairs could begin.
This is a pic of the shell back at John's place.
-
7
-
-
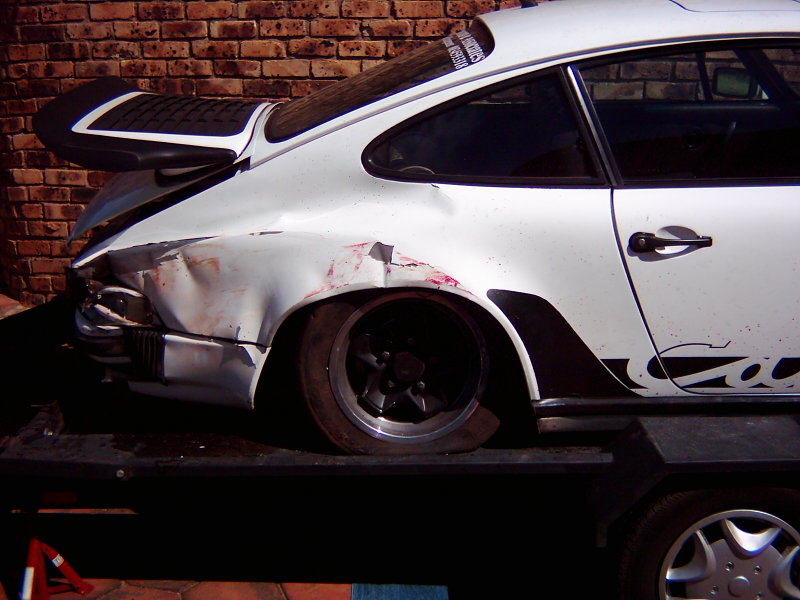
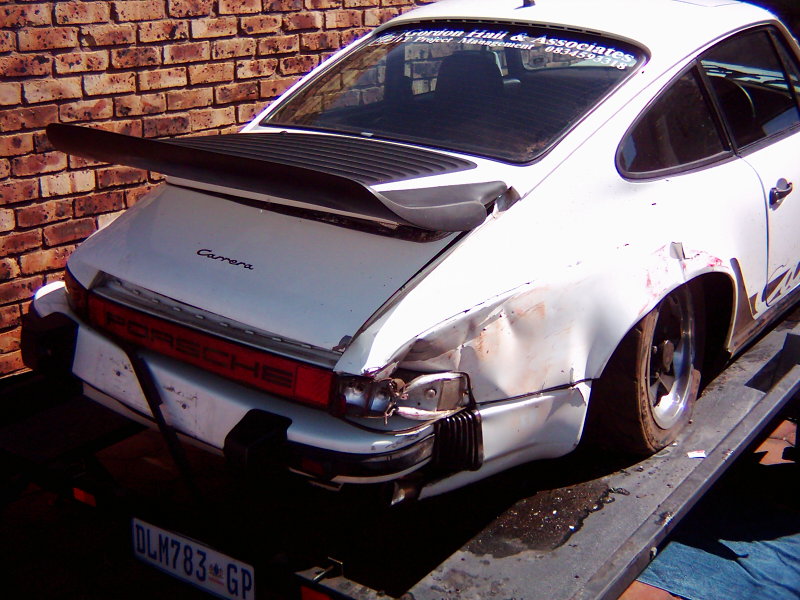
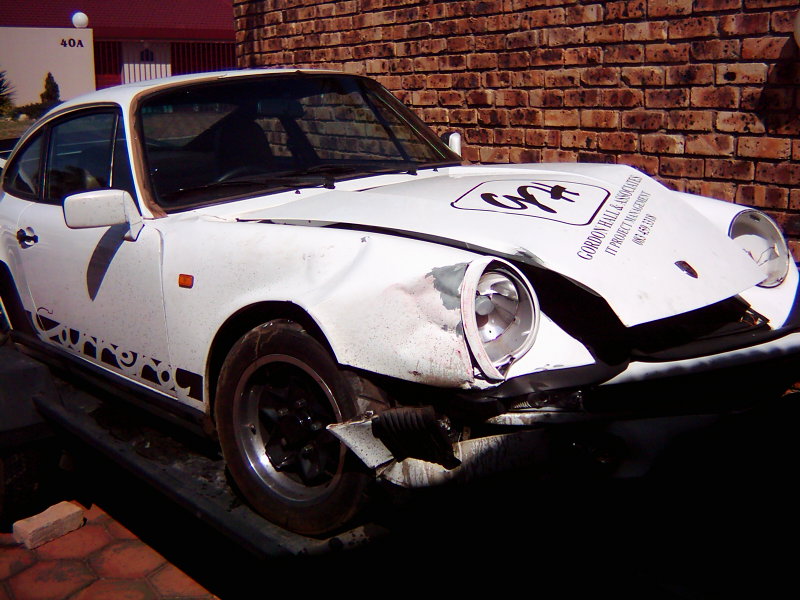
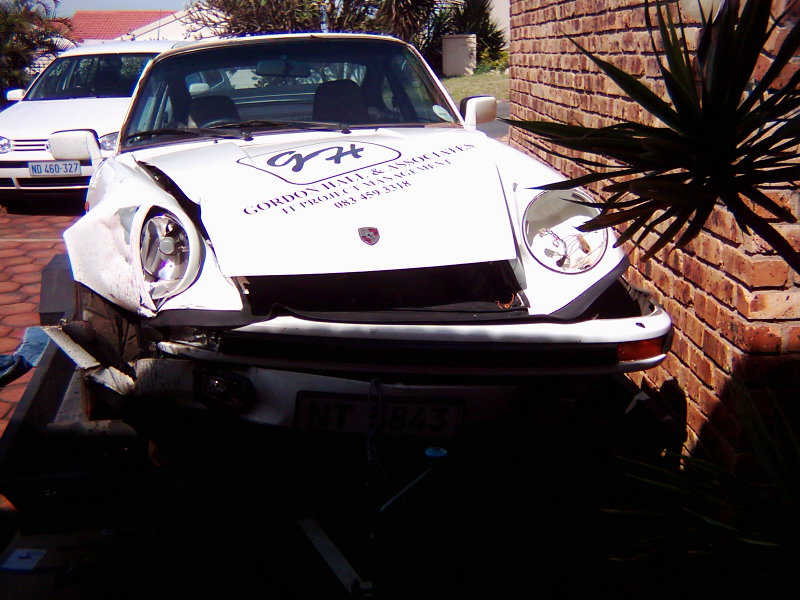
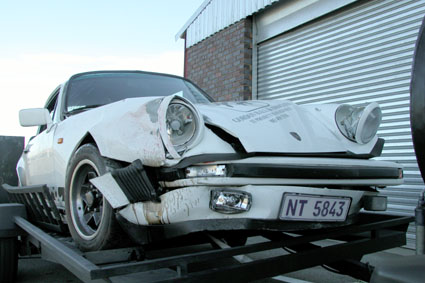
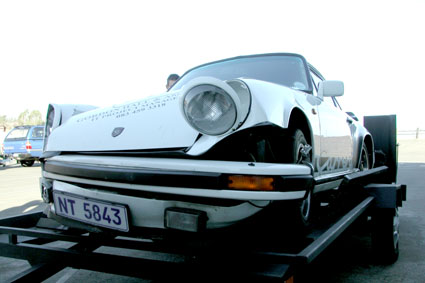
More pictures of the carnage taken in our driveway before we offloaded the wreck.
-
Next morning another racing mate who owned a second hand car business lent us a Mitsi Pajero short wheel base off his showroom floor and we hit the road home with the wreck still on the trailer. 8 hours later we were back at base camp. Having to catch up on work we left things as is until the weekend.
When we first started out with our Porsche 924 racer we picked up sponsorship from a local panel beater called John who did quite a bit of paint and panel work on the 924, so naturally we called on John to give us his opinion on whether the SC could be saved. My biggest concern was the obvious signs of structural damage. the picture below that was taken in our driveway clearly shows the bends in the left hand side back fender caused by the whole back of the car being pushed across. That being the second point of contact with the wall you can only imagine how bent the front was. The windscreen pillars were so badly twisted that the windscreen wouldn't fit back into the opening.
-
She entered the 90 degree right hand sweep before the main straight clipping the apex perfectly, but sadly she was carrying too much speed and the car drifted across the tarmac onto the kitty litter. A quick jerk on the steering wheel brought the car back onto the good stuff, the tyres bit in and promptly catapulted the car straight into the concrete pit wall front end first at about 100k's per hour. The car kissed the wall with the front right corner, spun a full 180 degrees and kissed the wall again with the rear just for good measure.
At the time I was standing behind the pit wall with a stop watch so this all unfolded right in front of me. Mrs Flash was knocked out by the impact which had been so fierce it had pushed the windscreen out of its frame and broken the engine and gearbox off its mounts. The Marshalls red flagged the session and the medics proceeded to extricate Mrs Flash from the wreck. By this time she had come around and her first question to me was "What was my last lap time ?" I looked down at the stop watch which was still ticking away.
As a precautionary measure they put Mrs Flash on a backboard and we headed off by ambulance to the on track clinic so that they could check her over. After giving her the once over they fitted her with a temporary neck brace and sent us on our way.
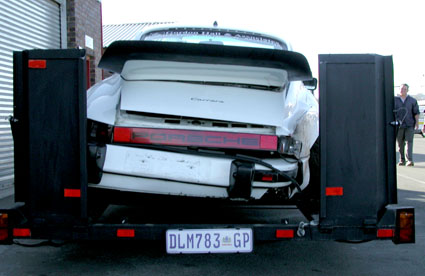
Whilst all of this was going on the Marshalls and a group of our racing buddies had managed to lift the remains of the Porsche onto a friend's trailer and those first pictures of the wreck are what you see above.
So in summary, we are 700kms away from home with a mortally wounded car that we had driven up to the track. We have no way to get home and I have client meetings scheduled for the next day. Fun, fun, fun ...
There was no way that we were going to get the wreck off my mates trailer so a decision was taken that he would tow the wreck to his place whilst I followed behind in his race car. Luckily he was a local, so stayed relatively close by.
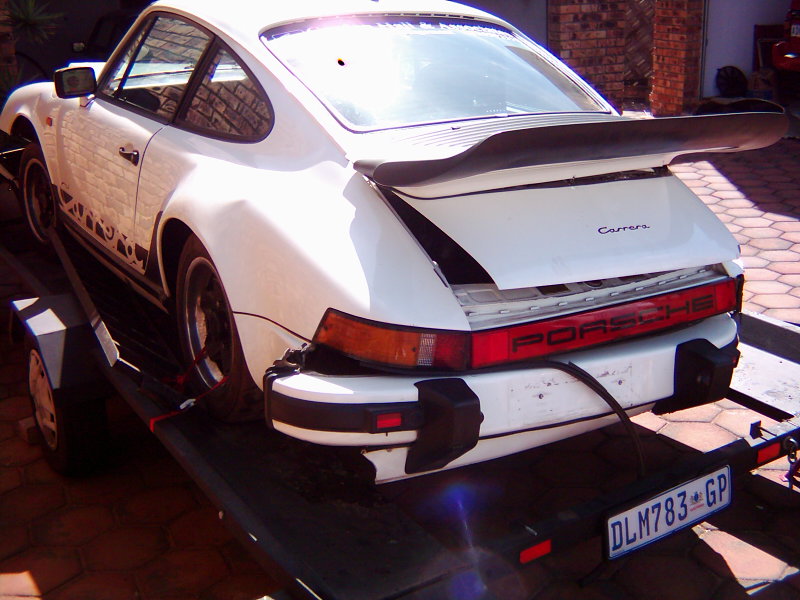
These pictures were taken at my mate's place that night.... much of the same.
-
5
-
-
We were now well and truly hooked and spent the next six months attending every event we could find. We had both signed up for the national racing series hosted by the Porsche Club as well as a regional autocross series being hosted by a local Sports Car Club. In order for both of us to race in each series we entered the car in two different categories. We were literally racing every weekend and attending mid week open sessions that a number of the larger race tracks hosted. Some weekends we were traveling up to 1,500km to participate in an event. Every spare bit of cash that we had was going on tyres, fuel, hotel bills and entry fees. Even our business took a back seat to this new obsession.
During this time we made a few more improvements to the car. We were now running R rated semi slicks, a set of RUF oversize front and rear sway bars, custom made exhaust headers and a free flow exhaust.
On this particular morning we left home at around 3:00am to travel 700km to a track that was hosting a mid week track day. At shortly after 4:00pm that afternoon Mrs Flash was out on the track in the second to last session of the day. She had been setting a blistering pace all day and had improved her lap times by almost 3 seconds a lap. Then this happened:
-
2
-
-
- Popular Post
- Popular Post
Discuss here : //oldschool.co.nz/index.php?/topic/45898-flash-porsche-boe/
Okay, so this particular build took place a good decade ago and half a world away, but hopefully it will be of interest to some of you.
So I'll start off with a bit of background:
At the time I'd owned a metallic blue 1982 911 SC coupe for a couple of years. In addition to being my daily driver the car was also used for track days, autocross events and club sprints.
One day whilst participating in an autocross event, I encouraged Mrs Flash to give it a go. Never having done any form of motor sport prior to this she nervously climbed behind the wheel. I stood anxiously watching from the side lines as she proceeded to thrash my pride and joy like a woman possessed. The smile on her face when she climbed out of the car made me realise that I was in serious trouble.
Little did we know that this single moment would change the focus of our lives for the next 3 years.
With the two of us punishing my SC every opportunity we could get, we soon realised that we were going to need to invest in another car that we could dedicate to competition use.
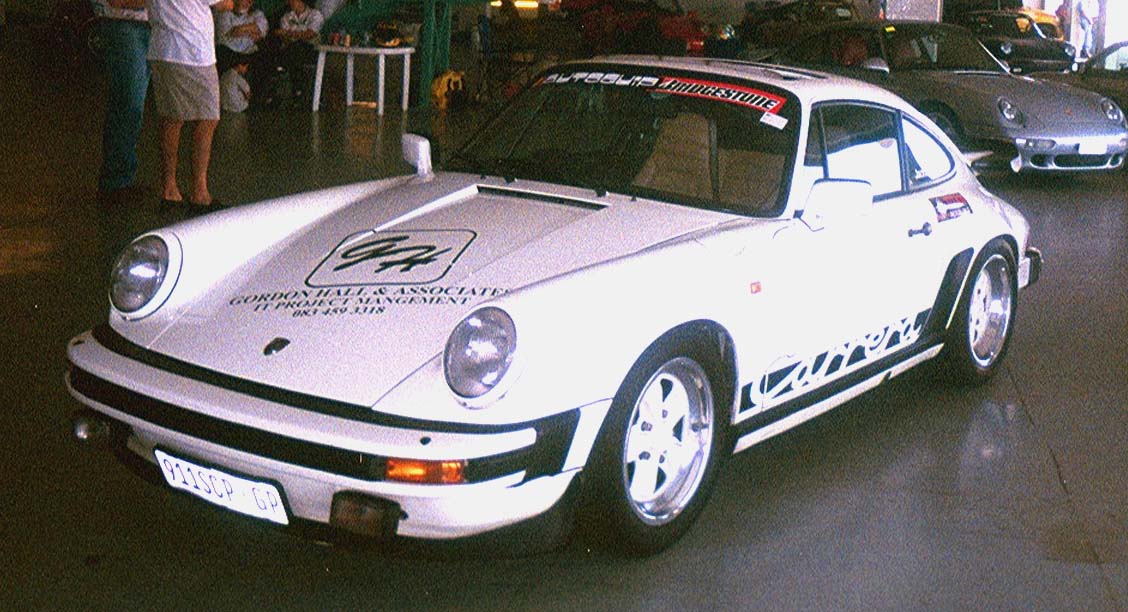
For a single season we shared an under powered Porsche 924 that we poured bucket loads of time and cash into to try to make it go. Then one day a chance conversation with a fellow competitor resulted in an opportunity to purchase another ’82 SC coupe, this time in grand prix white. A deal was struck and we found ourselves the proud owner of another 911.
It was already fitted with Bilstein gas shocks, but was running standard road height, so we pulled out the rear shocks and front inserts, had them re-gassed to Clubsport specifications, reset the torsion bars for extra low and had the car corner weighted. The white paintwork looked a bit plain so we added a set of Carrera script graphics along the side.
These pictures were taken at our first track day with the new car.
-
16
-
You should start a build thread for your Porsches, I'm sure lots of us are keen to hear the story!
Sweet, is there anyone else out there in oldschool land who wants to see a Porsche wreck rebuild ?
-
3
-
-
..............I'm in awe of you both.....very very cool
Cheers. Sadly Porsche drivers have a bit of a reputation for being posers. Not true in our case I promise. We just love the classic lines of the older generation Porsches and have modified and restored a few in our time. One we resurrected from a badly damaged write off but that's another story.
-
Since you like vans then I will swap you my Hiace workvan for your porsche, its only fair
Tempted ... but I'm guessing you would be wanting a bit of cash your way
-
1
-
-
Any van with the original flat side panels in place gets a big thumbs up from me.
-
1
-
-
I like that you have 2x porsche sitting in the background of 2x bedfords being worked on
A contractor from around town here has a 71' (I think) Bedford with a 350 Chev, used to idle around the site I worked at with two massive exhausts exiting just in front of the rear wheels sounded cool as hell
Cheers for that. We are both lucky enough to be able to use our Porsches as daily drivers. People would probably cringe to hear that my '82 SC has just over 370,000 km on the clock and Mrs Flash's '93 964 Carrera 2 is not too far behind at almost 260,000km on the clock. We do all of the maintenance ourselves so running them is a lot cheaper than people would expect. Air-cooled rules !
-
3
-
-
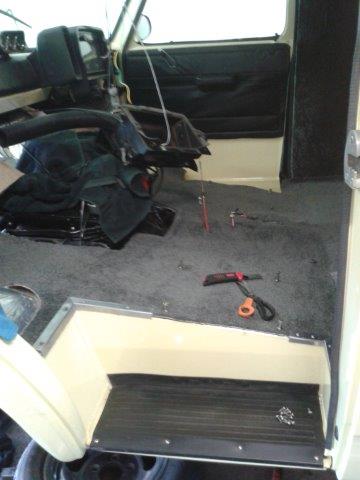
With the panel work all sorted we headed down to a local carpet shop and scored a luscious off cut from a thick pile carpet.
I used the old marine carpeting from the side panels to cut a template and then dived into the good stuff.
It was a bit of a bugger cutting all of the openings for the seat belts, seat mountings, gear shift etc, but with a good dose of patience it came out pretty well. I covered the storage drawer front with a bit of the same carpeting.
We then removed the carpet and took it along to a professional upholsterer that stitched on a beading around the exposed edges.
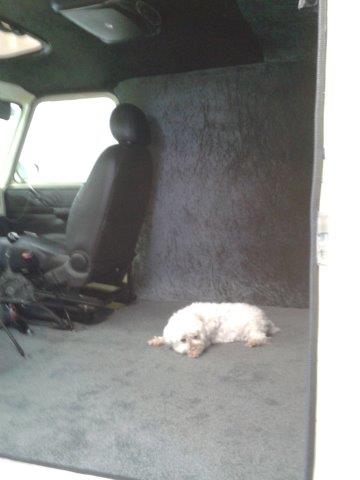
My little helper gave the new carpet a big thumbs up.
-
5
-
-
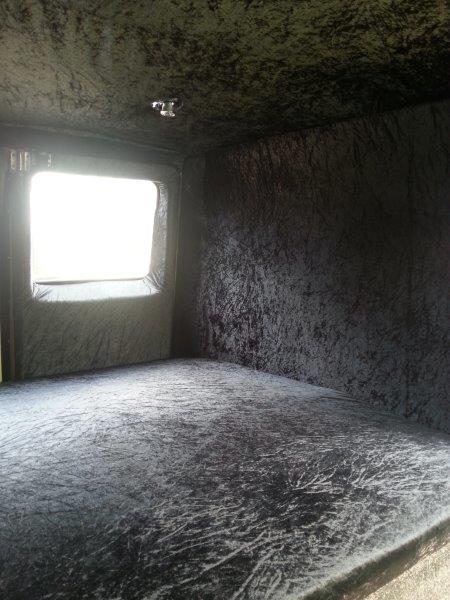
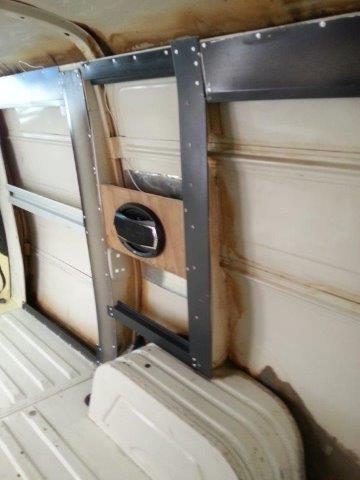
With everything test fitted, the next step was to strip everything out again and to then pad the panels before covering them with the crushed velvet.
I started off by gluing standard foam carpet underlay onto each panel which I then wrapped around each edge. In hindsight I wouldn't recommend using the carpet underlay for this job as it starts to break apart when wrapped around the thin edges. If I had to redo the job I'd invest in a proper thin panel foam as it gives a much smoother wrap around edge.
I needed a way to be able to open as well as lock the side door from inside the van so I mucked about with some old VW Beetle parts left over from my veedub days and it works like a charm. I've subsequently fitted a pull handle from a Land Rover Defender to the inside of the door to make for easier closing.
-
3
-
-
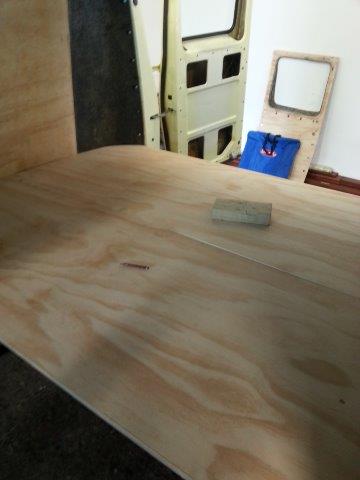
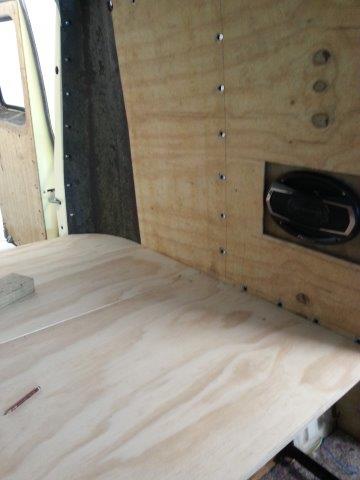
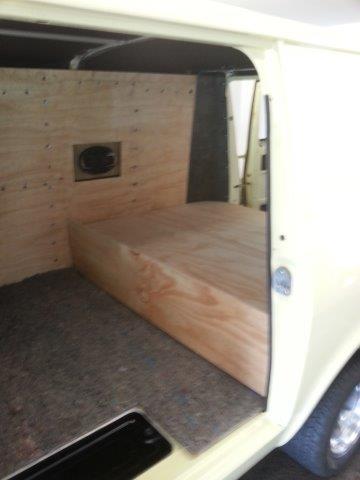
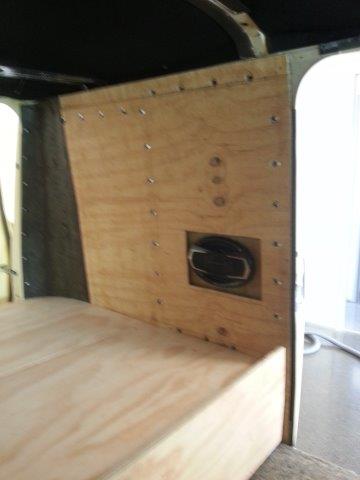
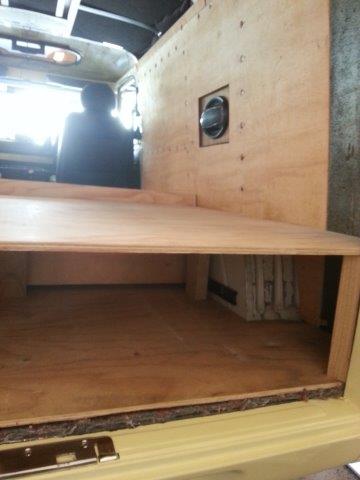
With the panels all in position the next step was to build the fixed day bed. I initially used 13mm ply, but some boisterous activity on our first overnight trip proved that the ply wasn't up to the task and this has now been replaced with 18mm ply.
The images below show the day bed base, the under bed storage space that is accessed via the rear barn doors and the pull out storage drawer that is accessed from inside the van.
-
1
-
-
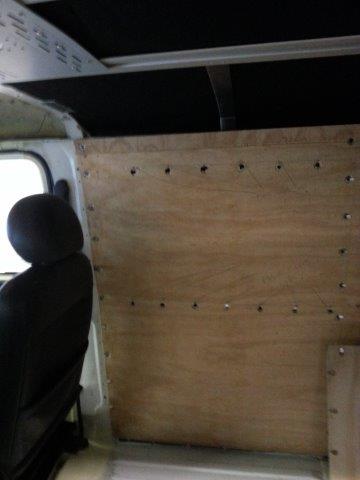
With all of the insulation in place it was time for me to start mounting the side panels.
First step was to remove the existing marine carpet from the side panels leaving me with a blank plywood surface.
Those of you who have had experience with VW Beetles will know that the clip holes in the door panels don't line up with the mounting holes in the doors, they are slightly offset, so I needed to come up with a way of replicating this in the van.
I grabbed a spare length of aluminium flat bar and made a template strip with 3mm pilot holes offset by the correct distance. With the side panels temporarily fixed into their final position using a few self tapping screws I proceeded to move my template strip along each mounting point drilling hundreds of pilot holes through both the ply and the aluminium frame.
Then it was just a case of opening up the correct hole on the ply and the corresponding offset hole in the frame to the correct diameter, slipping the clips onto the ply and then test fitting each panel.
-
Cheers for that, I'm a regular visitor to Anzor East Tamaki, so good to know.
-
Good tip browndog, yeah, I hadn't thought about trying a coach bolt. I wonder if I could find one in stainless steel ?
-
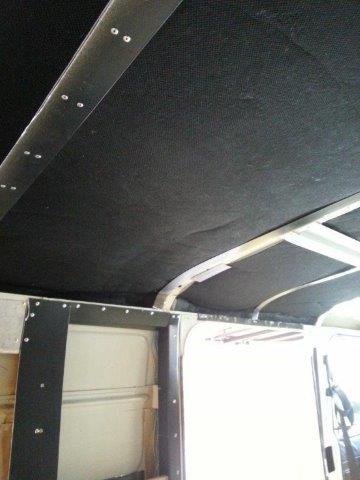
So I sourced some 10mm diameter hollow aluminium tube at my local Mitre 10 and curved the ends to make up the roof hoops. We then worked out where the hoops needed to be sewed into the velvet and with Mrs Flash slaving away over her sewing machine I started cutting and installing the insulation that would go behind the wall panels and roof lining. I used a product called Novahush from Forman Insulation. Its fairly rigid so is really awesome to work with and comes in various thicknesses and R ratings . The black fabric covering that you see in the image is the acoustic barrier that forms one side of the insulation.
As you can see in the image I held the insulation in place by pop riveting a wider strip of flat aluminium onto the existing roof ribs and then sandwiching the insulation between the roof panel and these plates.
Sound deadening is critical in a van as you don't want to scare small children and animals with the sounds that usually accompany periods of vigorous suspension movement.
-
3
-
-
So how are you going to tackle the hood lining Flash ? I hear you all asking.
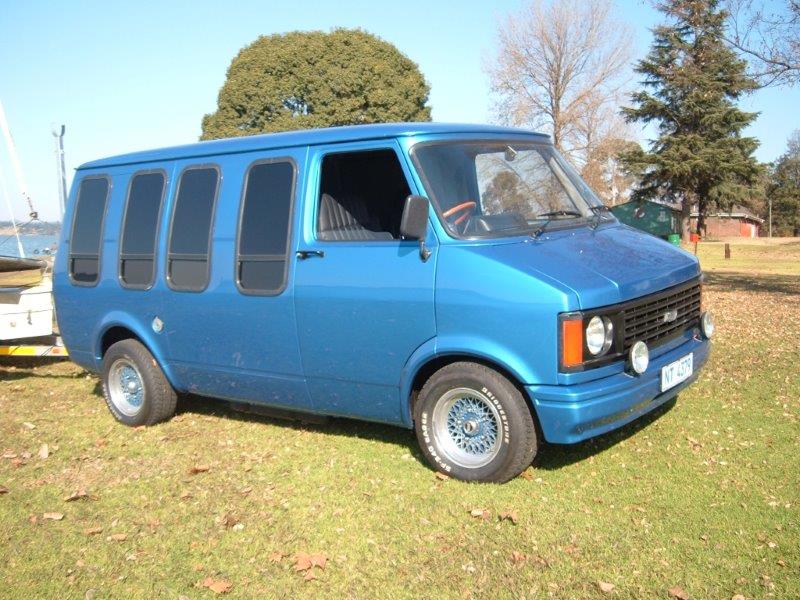
Well, its now time to confess that this isn't the first van that I have built. My previous van was a newer shape Bedford also running a 350 Chev. In that van I installed a ply roof with bonded leather covering, but I've got to admit that it was a mission to get the curves right and I had to use self tappers to keep the boards in place. Even although I managed to hide the self tappers I was never really 100% happy with the finished result.
So this time around we decided to use the old metal hooped and stitched roof lining found in most old school rides. Again using the velvet material that Mrs Flash would run up on her sewing machine.
Some pics of my previous van and its roof lining, just to give you the idea.
-
5
-
-
With the first phase of the flooring completed our attention turned to the side paneling. The existing panels were installed by the second owner. A pretty professional job had been done as the panels had been shaped to fit the tapered back. However they were externally fixed using self tappers and my plan was to fix them using hidden clips similar to car door panels.
The clips would need to be fairly meaty to handle the hug panels, so I elected to go with old VW Beetle / Volvo metal clips rather than the plastic clips used on modern door panels. I sourced 300 clips on eBay and proceeded to build a frame out of left over aluminium off cuts.
In keeping with the "clean look" theme I built mounting panels for the 6 x 9 speakers that would be hidden behind the velvet panel covering. This also meant that the speakers were solidly mounted and wouldn't wobble about in the flimsy side panels.
A bit of dynamat type sound deadening was placed behind each speaker.
Note the lashings of cavity wax that I gave the panel folds.
Some useless information for you:
A little known fact is that these vans rust from the inside out. The internal temperature builds up during the day when the van is sitting in the sun. At night things cool down and the condensation then runs off the inside of the roof and down the side panels and sits in the catchment areas being the inside of the roof gutters and the point where the floor panels join the side panels. After years of the same daily cycle the result is rusted out roof gutters and a rusty tell tale line running along the exterior seam at floor level.
Anyway, enough of this boring chat about rust, lets get on with the task at hand.


Flash's 82 Porsche 911SC
in Projects and Build Ups
Posted
And then came the assembly work.