Flash
-
Posts
1615 -
Joined
-
Last visited
-
Days Won
2
Everything posted by Flash
-
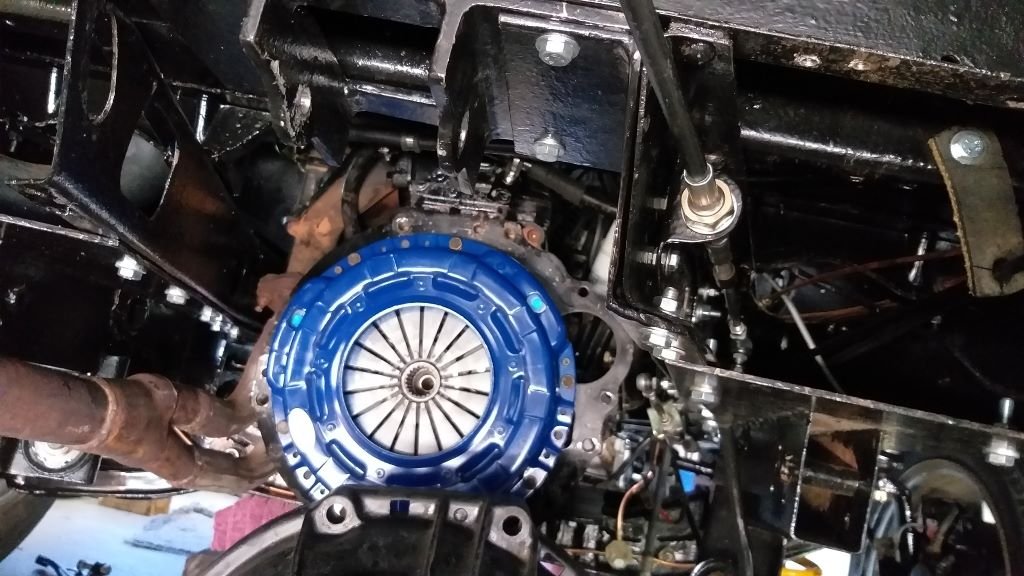
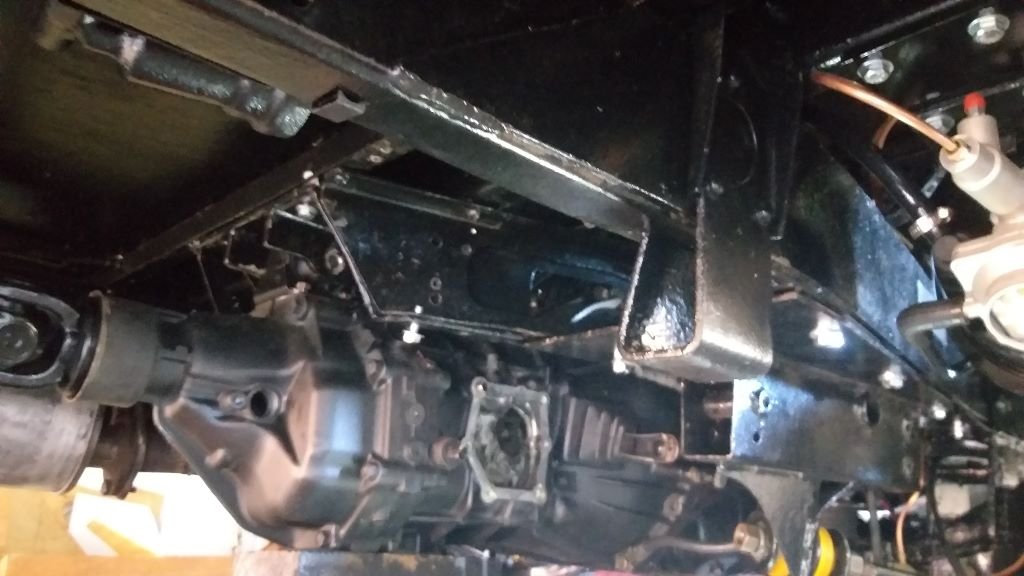
First thing this morning I swapped a few of the external bits (shift levers, new rubber mount, etc) across from the old to the replacement gearbox and then dragged the thing under the Thames and wrestled it up into place. Lunch stopped play but at least the hard part is done. Just got the starter motor, shift levers and the remaining bolts in the cross member to fit and I can call it done.

- 715 replies
-
- 13
-

-
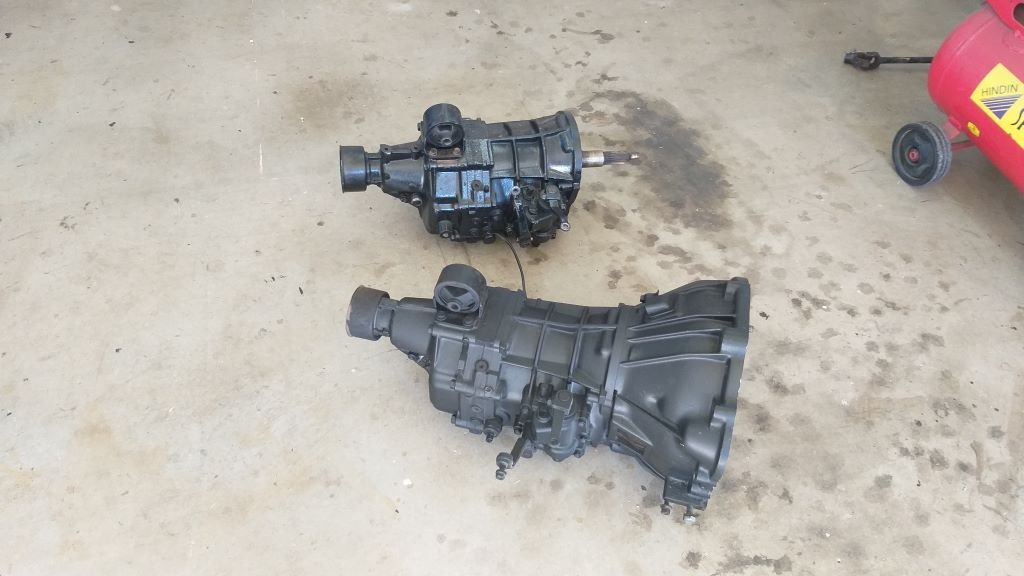
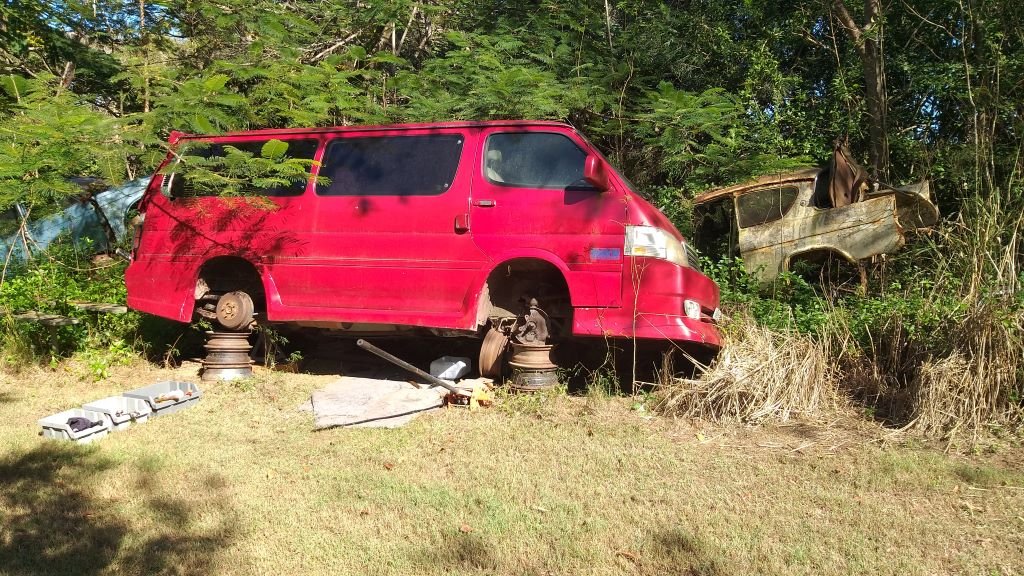
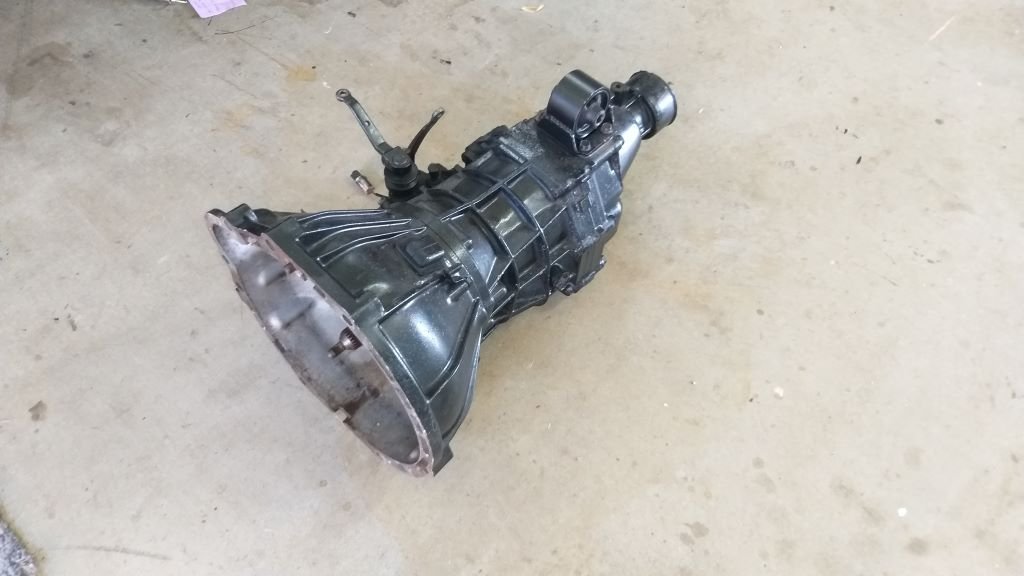
With the offending gearbox now on the floor it was time for me to make a decision on the next steps. Those of you who have been following my build will have realised by now that I am not that technically competent and as result doing open heart surgery on a gearbox is way beyond me. This leaves me with two choices. Either open my wallet widely and outsource the rebuild to a professional or take a chance on a second-hand replacement. My Scottish ancestry pointed me in the direction of the wreckers so off to town I went. I struck out at the first wrecker, so headed across town to the remaining wrecker. Unfortunately, all that they had in stock was a 4 speed jobbie sans bellhousing and gearbox mount. Not wanting to contemplate the possibility of having to compromise with a 4 speed, I headed on home with my tail between my legs. Then yesterday arvo my mate Grant gave me a buzz and whilst I was sharing my tale of woe with him, he happened to mention that he had a newer 1RZ powered HiAce sitting in his paddock that he had taken off the road due to rust issues. The van was Grant's daily before it got parked up and he reckons the gearbox is a good un. He took a quick gander at the build plate and it turns out that the gearbox is a G55. I wasn't sure what the differences are between my existing G54 and the later G55. Uncle Google wasn't much help, so I posted a quicky under "General Chat" to see if any old schoolers might know. Anyway, first thing this morning I loaded my duff gearbox, driveshaft, an old clutch plate and tools into my Bongo and headed across to Grant's place. Crawled under his van with a tape measure and things immediately looked promising from a general layout and outer dimensions point of view. Quickly pulled the driveshaft and offered my driveshaft up to the output shaft. Perfect match. Threw a few spanners about and in next to no time I had the G55 on the ground. Offered up my old clutch plate to the splines on the input shaft and that was another winner. Chucked my vernier on the tip of each of the input shafts to compared pilot bearing sizes. Perfect match ! By now I was foaming. Did a quick bellhousing swap and it looks like we may be on the right track. Dropped the oil and it was still nice and light in colour with no signs of glitter. Grant has been eyeing out my HIF44 SU carby for his hot Mini engine for a while now, so a quick deal was struck and I'm now a G55 gearbox richer and a SU carby poorer. Let's just say that both Grant and I are very happy with the outcome. Thanks for reading.
- 715 replies
-
- 18
-
-
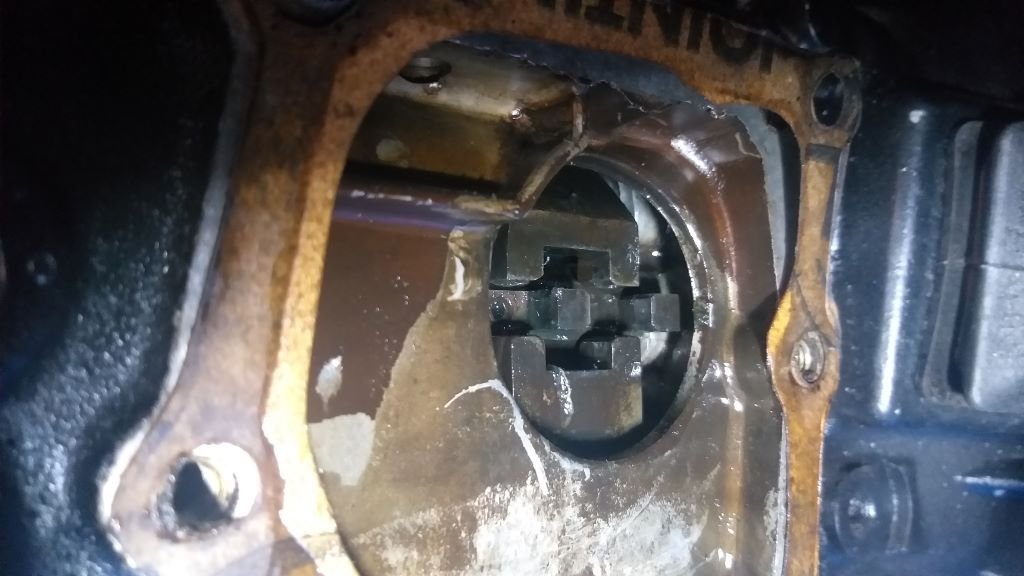
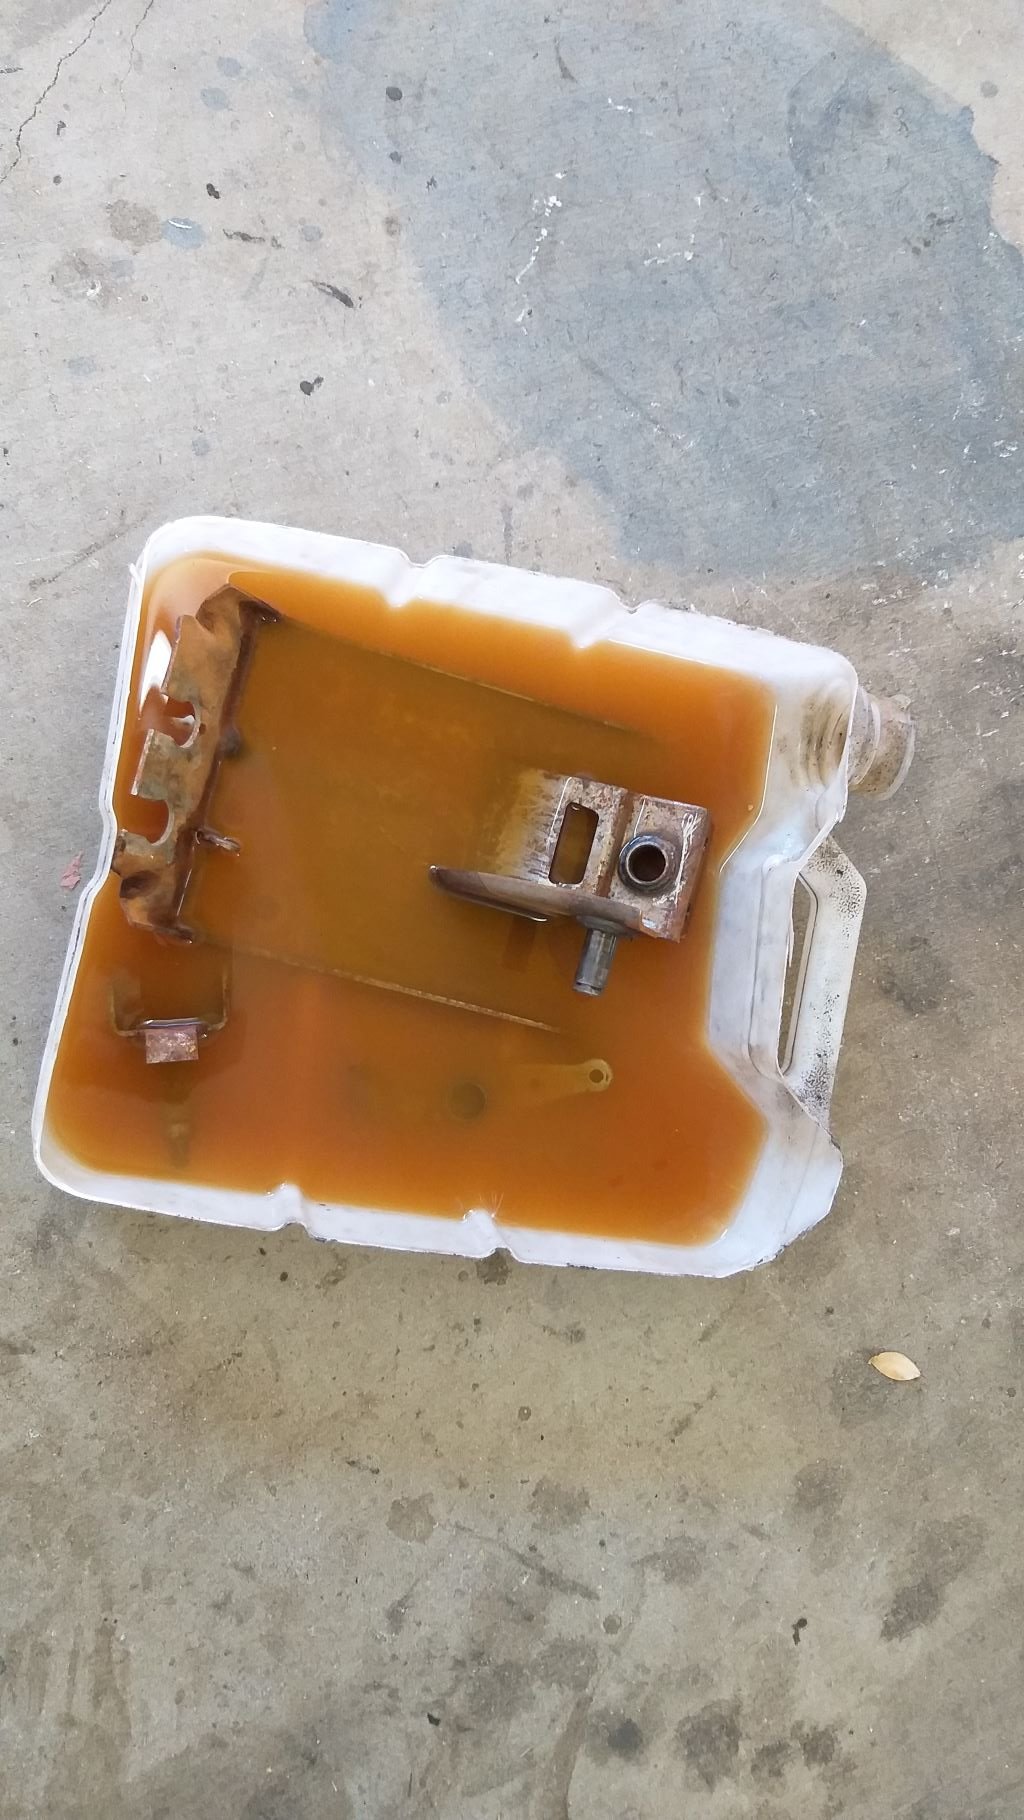
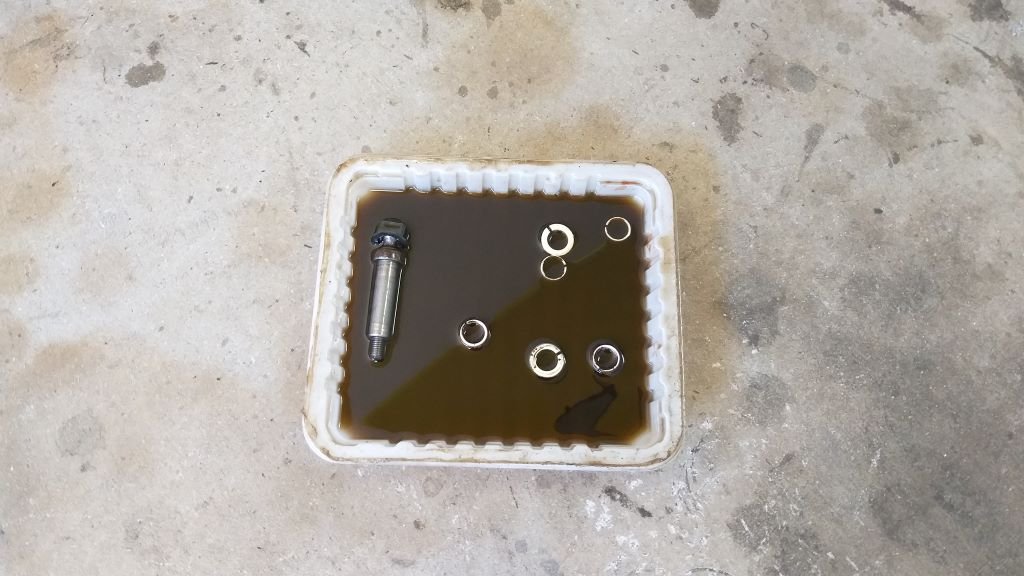
I started off the morning by draining the gearbox. Before installing it, I'd given it a flush and some fresh oil, so I was keen to see its condition. Sure enough, the oil is loaded with glitter. I spent the rest of the morning pulling the box out and its now on the floor.
-
Well now that the dust has settled on Sunday’s start up and test drive and I’ve been able to finally get the grin off my face I thought I’d put together a summary to share with each of you so here goes: The Good The engine is really smooth and responsive. I'd previously had the sump off and was able to confirm that the previous owner's claim that is a reconditioned unit is correct, and although I’d got it briefly running in the HiAce donor van, I still wasn’t 100% sure how it would perform. It idles nicely and accelerates really well. The power steering is absolutely brilliant, but I'm getting a slight chatter on full lock. The fluid level is good so I’m hoping it just might need a proper bleed. The brakes are brilliant, and the van pulls up really well under normal braking conditions. I haven’t done any emergency stops so I guess the jury is still out on overall performance, but for something that I just cobbled together I’m pleasantly surprised with how they perform. The pedal is a little lower than I would like, so I’m hoping that a little adjustment on the pedal push rod should solve that issue. The clutch pedal is lovely and light, so it looks like the Hillman Imp master cylinder was a good choice. The accelerator pedal has a really nice action too. The Bad As mentioned in an earlier post, the starter button located alongside the engine box is sticking so I've disconnected it for now and am using a temporary wire directly from the battery positive terminal to "excite" the starter. Rather than trying to source a replacement starter button I've decided to replace the dash mounted key switch with a conventional ignition switch from a Mini Mk1 and will wire the "exciter" starter wire directly to the new ignition switch thus bypassing the push button. As suspected with a driver and passenger on board the front tyres are rubbing on the bodywork so the offset on the front wheels definitely needs to be addressed. I’ll share more on my plan to address this in future posts. The news back from my local wheel supplier is not good, so I'm back to the drawing board from a wheel choice perspective, but I'll share more about that in a future update. I have a water leak that I need to trace. It's on the engine somewhere and I suspect it may be from the block drain, but I need to investigate further. Luckily, I had only put in water for the test run, so at least I'm not having to face puddles of coolant everywhere. I've got a brake fluid leak on the fluid reservoir for the front brake circuit. The reservoir is a new repro unit that I sourced from the UK before the Thames Club folded. It looks like its weeping from the outlet fitting on the reservoir itself. From what I can see this outlet is pressed into the metal cylinder during manufacture and has some type of O ring seal, but it can rotate rather freely which is a bit of a worry. I’ll need to drain the reservoir and pull it out for a closer look. I need to fit steering stops as it’s currently turning the wheels too far on full lock. The electrically operated automatic choke on the carb is not working so the choke remains constantly on. As a result the idling is high and she is running rich. I'll need to look at that. The Ugly The gearbox is absolutely shagged. There is a nasty whine from second gear and I’m also not able to consistently select reverse gear. The gearbox condition was unknown from the start and I had decided to take a chance on it rather than opening it up. Looks like that was a bad decision. Yesterday I played around with the morse cables to try to solve the reverse issue and have traced the fault to something inside the actual gearbox itself. With the gear selector cover plate and selector arms removed and using a large screw driver to force the reverse selector rod into place sometimes it goes smoothly into reverse and sometimes the rod locks up completely. During tests I'm getting similar results with some of the other gears. Definite signs that something inside the gearbox is not happy. No wonder I battled for so long to get consistent gear shifts when I was playing around with my various shifter options. I'm well practiced at getting it in and out, so the plan for tomorrow is to drop the gearbox to see what I can do to solve both issues. Anyway, sorry for the long-winded story and thanks for reading if you have reached this far. No one likes a pictureless update so I’ve included a photo of the selector plate removed and with 4th gear selected as part of yesterday’s fault-finding exercise. Thanks again for reading.
- 715 replies
-
- 14
-
-

-
Thanks fellas, yep pretty stoked. I've got a few things to fine tune for cert, but at least now it's on the road.
-
And then this happened ... Sorry for the poor quality.
- 715 replies
-
- 20
-
-
-
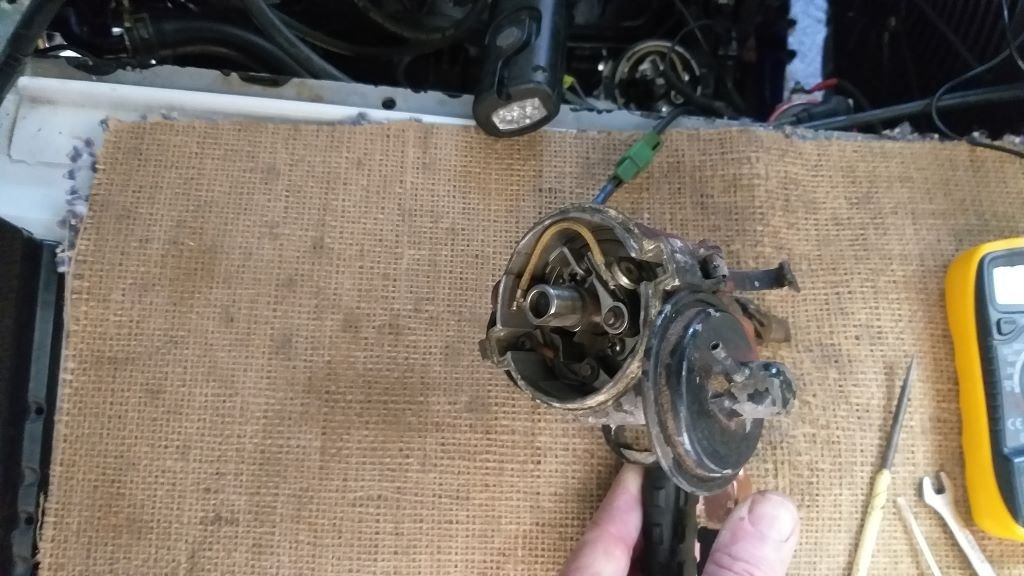
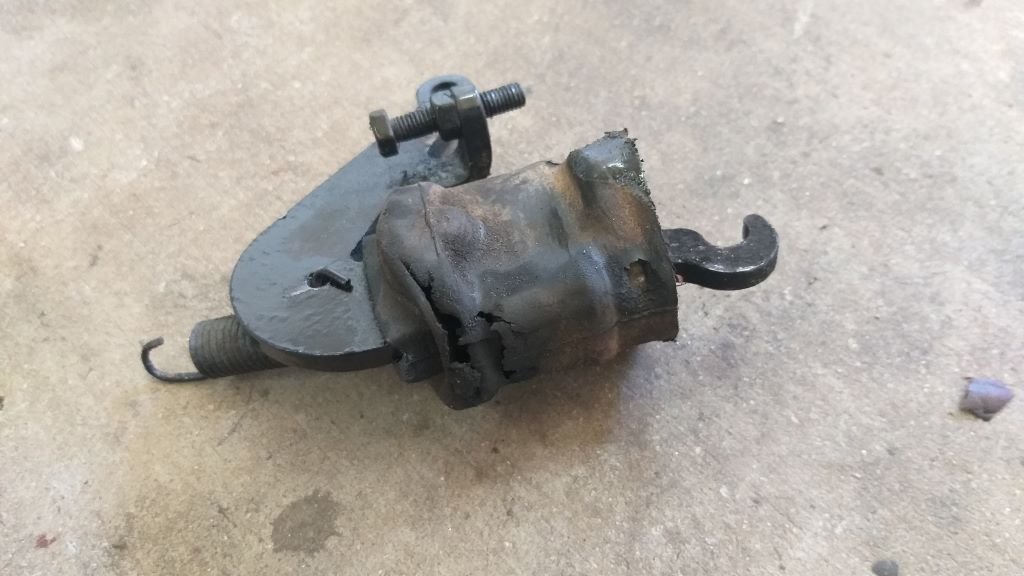
So, a bit of an interesting day today. Chucked a battery in the old Thames and hit the starter push button. Engine turned over but when I let the button go starter carried on. Looks like the old push button has got a bit sticky. Bypassed the button for now and then gave it another try. Turned over grand but wouldn't fire. Pulled a plug lead off .... no spark. Pulled the dizzy cap off ... no spark at points. Checked voltage at coil ... spot on. Checked voltage on thin wire connected to dizzy terminal ... voltage good. Checked voltage at points ... nothing. Scratched around in the shed and found the old dizzy. Clipped in the wire from the coil, chucked on an earth and spun the dizzy by hand. Got spark across the dirty old points. Took the dirty old condenser off the old dizzy and put it on the new dizzy and ..... she fired straight up. Go figure....
-
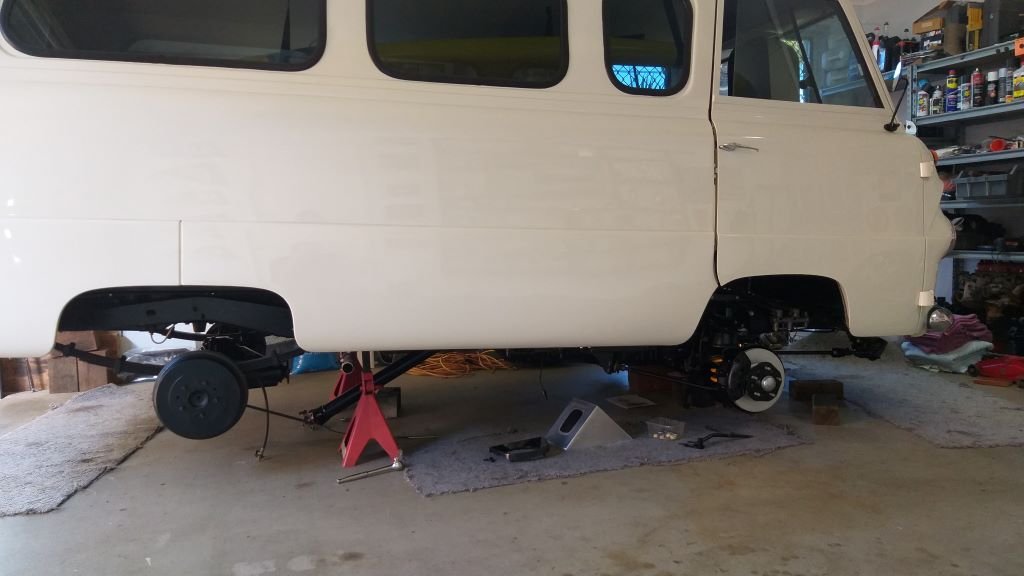
You can tell that the test flight is getting pretty close when you start putting back the seatbelts and other little interior bits and pieces. Finished that, then looked in the back of the van for the next part to fit and lo and behold all that was left was the steering wheel and the front seats. Took the seats out to give them a good clean and couldn't resist sharing a photo of the interior which hasn't been this empty since the middle of 2019.
- 715 replies
-
- 13
-
-
Thanks for posting @Tiger Tamer. Apologies for my poor use of words in my earlier post. It is bubble flares that are required on the remote booster. I've gone back and fixed my typo.
-
And ... the answer is don't be a wuss and just tighten the hell out of them Flash. Nothing like a bit of "brute force and ignorance" to solve an issue. And no one likes a pictureless update so here is a photo of a sign that Mrs Flash painted for me.
- 715 replies
-
- 12
-

-
-
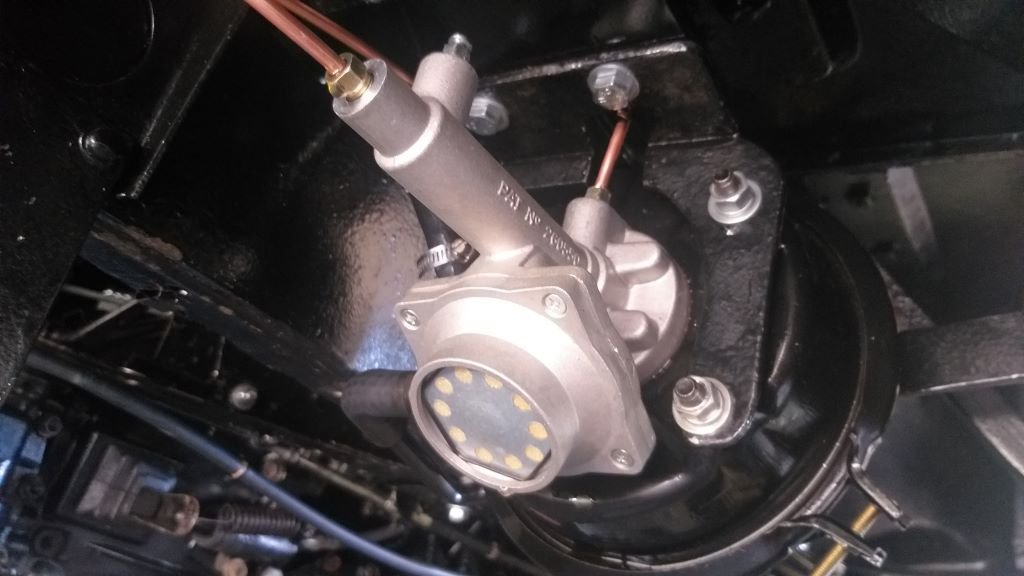
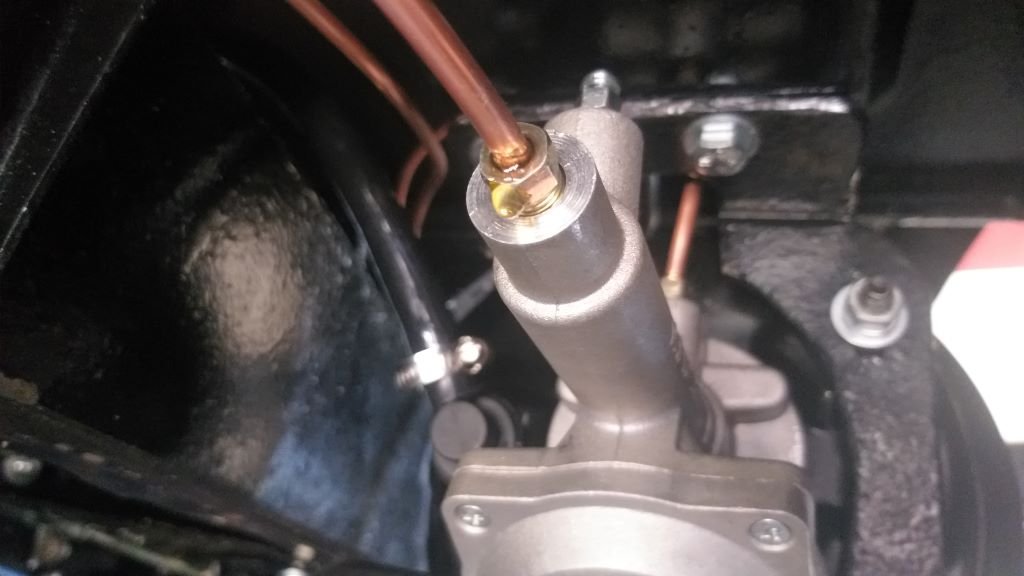
Jeez, this remote brake booster is doing my head in. It needs a bubble flare on both the input and output lines, and I just can't get them to seal properly. I've remade both pipes twice, but the bloody things are still leaking. Would appreciate any suggestions from those more knowledgeable than myself.
-
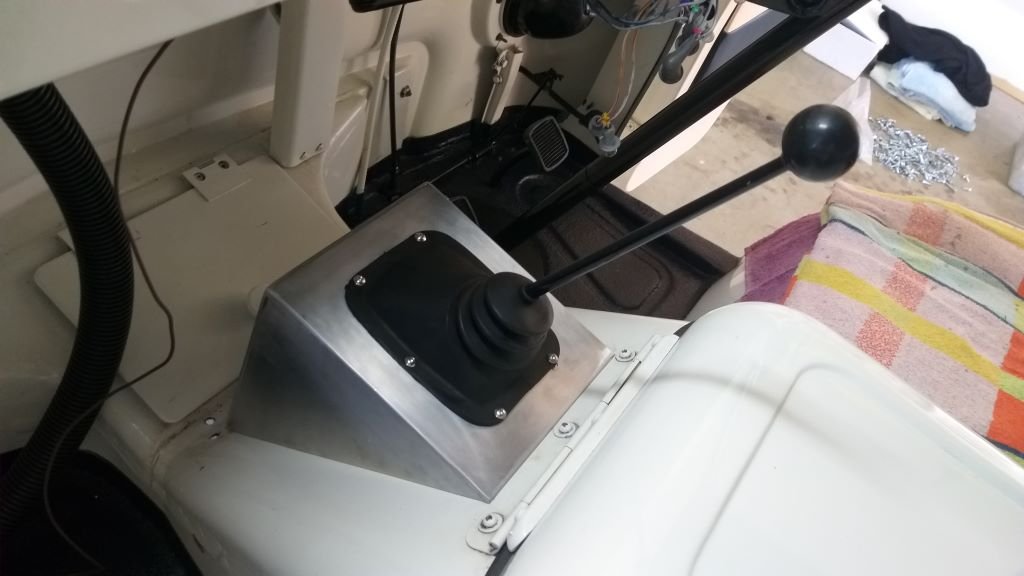
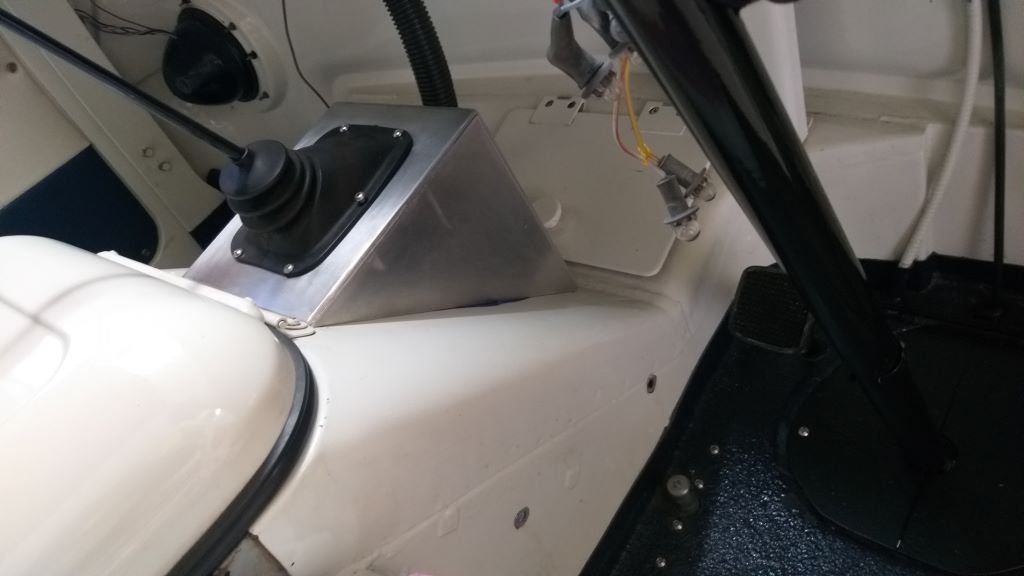
When I bought the Thames, it came with a box of spares that included a small amount of touch up paint. Fired up my compressor this morning and gave the gear selector cover a quick 3 coats. Came out pretty good. I'll chuck a few coats of clear on it next time I have some in the gun.
- 715 replies
-
- 11
-
-
I had half a gun of primer left over from something else that I was painting, so I chucked a few coats onto the gear selector cover.
-
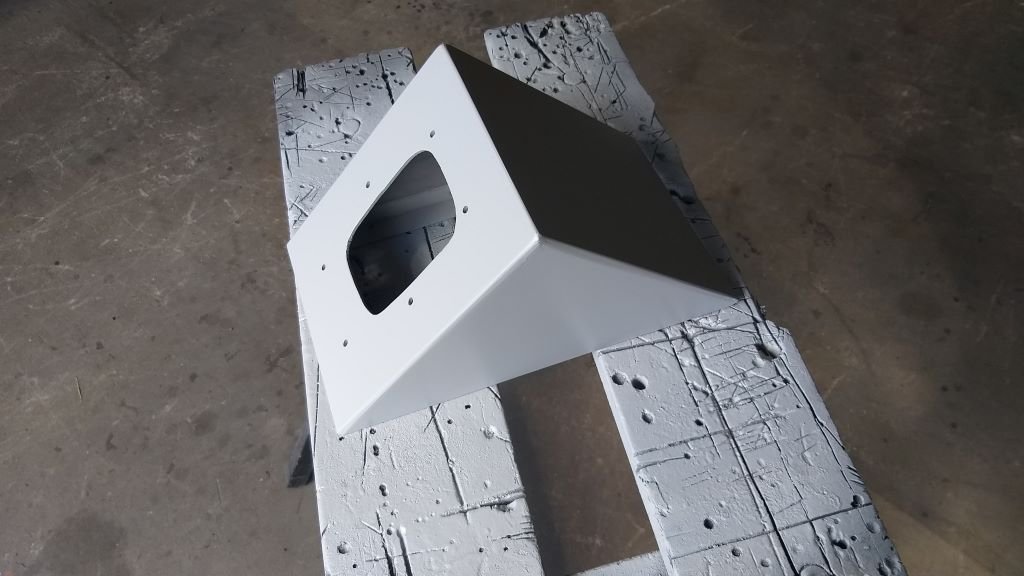
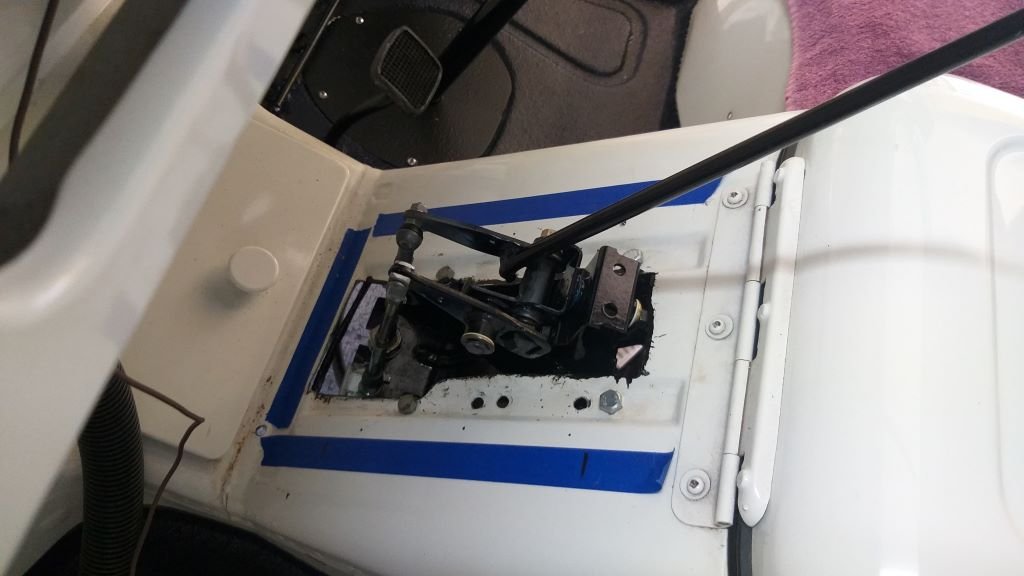
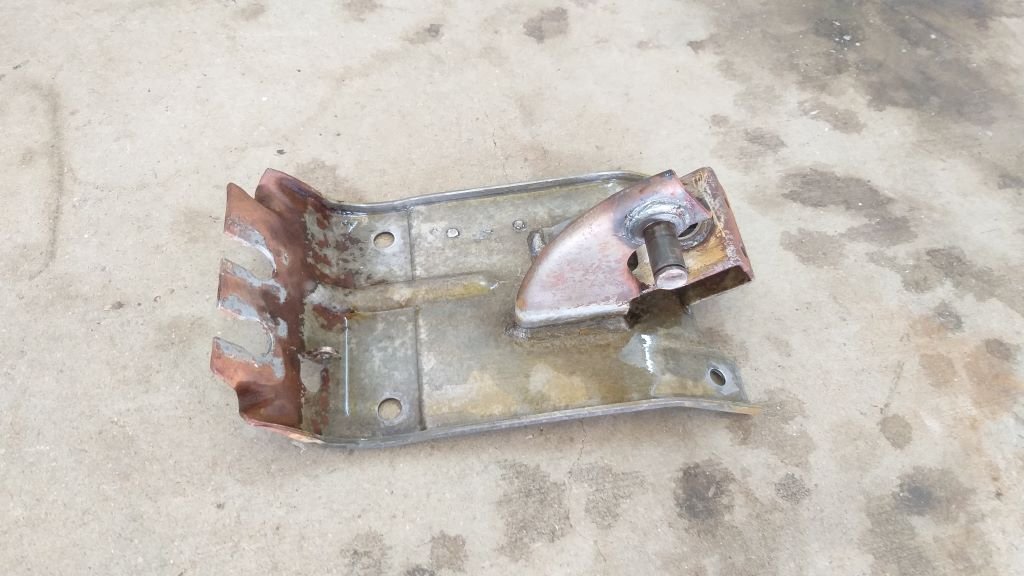
In between mucking around with wheel options today I also managed to fit the refurbished gear selector mechanism. I held it in place whilst Mrs Flash chucked some masking tape around the edges, so I'd know where to drill the mounting holes. I've used a series of self-tapping screws inserted from underneath to give it the clean look that I was aiming for because ...... OCD Just needs a splash of paint to match the rest of the tunnel and I'll be a happy chappy.
- 715 replies
-
- 18
-
-
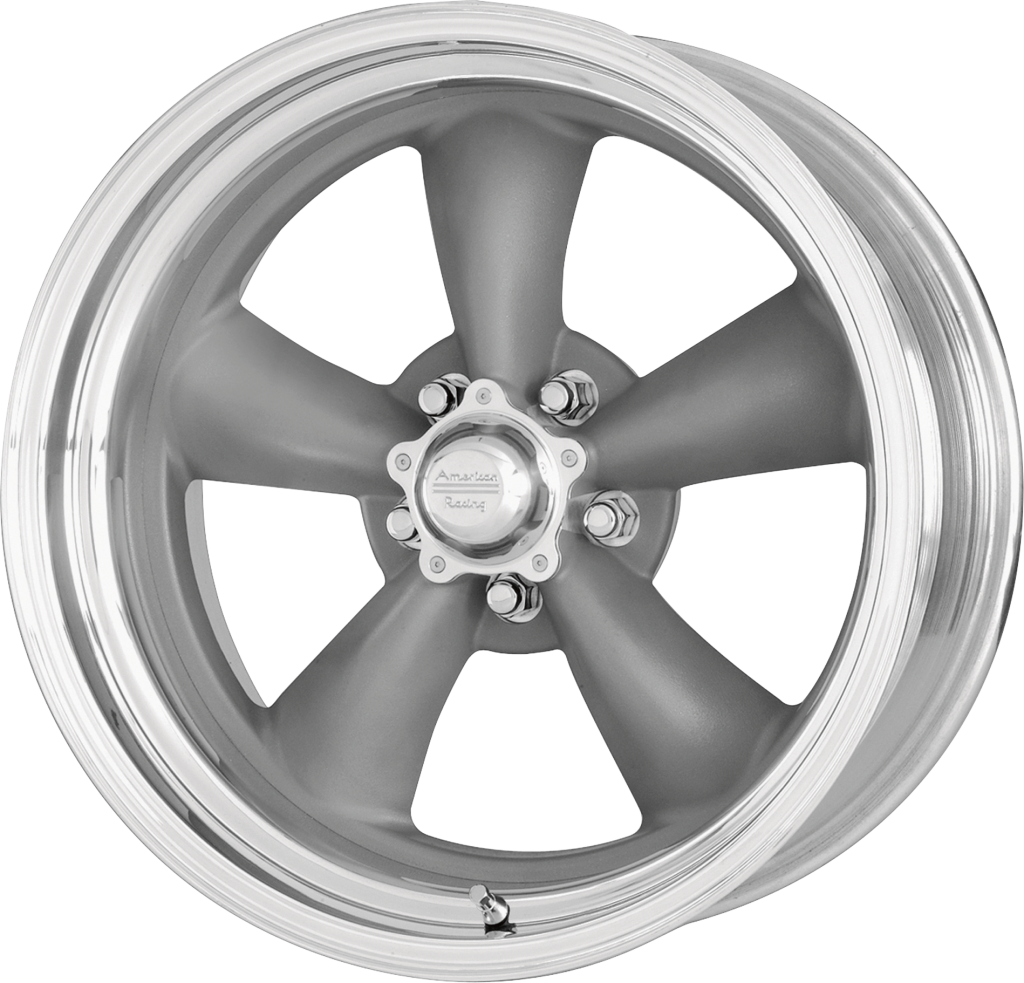
Wheels and tyres - Chapter 3 For those wondering what style wheels I am looking at for the Thames, here is a quick preview:
-
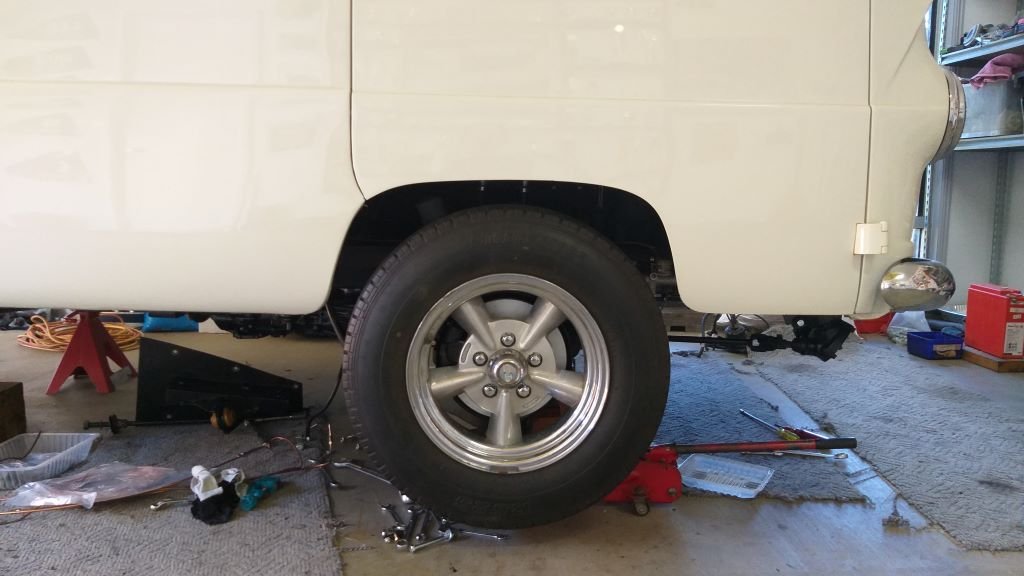
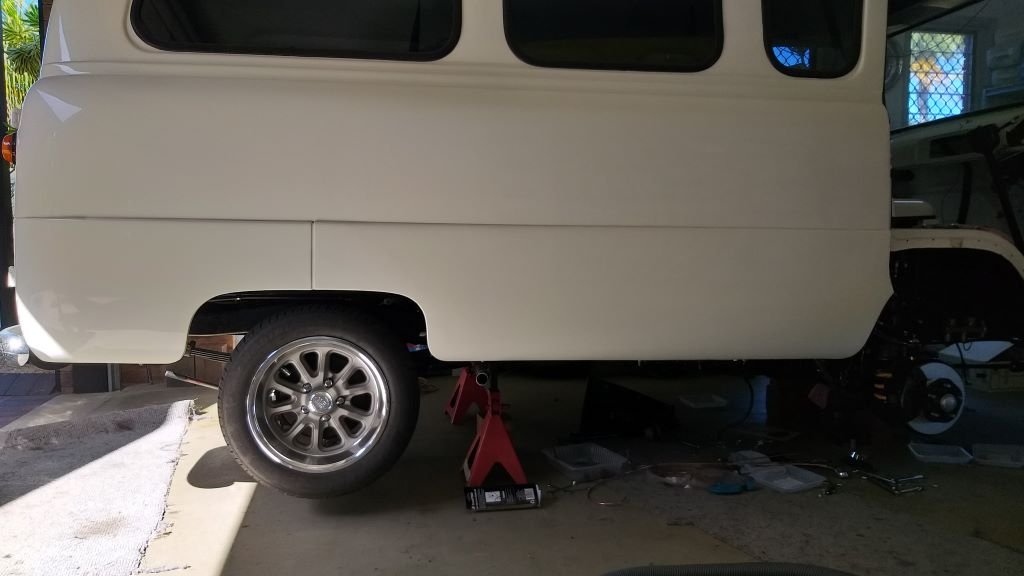
Wheels and tyres - Chapter 2 This morning I spent a bit of time focusing on wheel options for the front and this is where I have hit a bit of a snag. The L300 front suspension has a wider track width than the original Thames unit which results in the existing 6J Dragways extending slightly past the body line. The current tyre is a commercial grade jobbie that is 175mm wide, but even if I was to drop to a 165mm tyre I'm still not going to be legal. To make matters worse I can't get anything narrower than a 165 in the diameter, profile and load rating that I need. So, the other option that I have is to look for a narrower wheel. My local supplier only lists my new wheel of choice in a minimum width of 6J with a N6 backspace which leaves me with the same issue. I was hoping that the existing Dragway would have a larger back space, so I took some measurements but sadly it's also a N6. Bugger ! After lunch I thought I would ask The Google for some options and as luck would have it I ended up on the wheel manufacturer's website in Merica and they just so happen to list a 4J x 15 in the style that I am chasing. Grabbed the manufacturer's part number and gave my local supplier a ring to see if he can source these for me. I'm currently awaiting a call back, so fingers crossed.
-
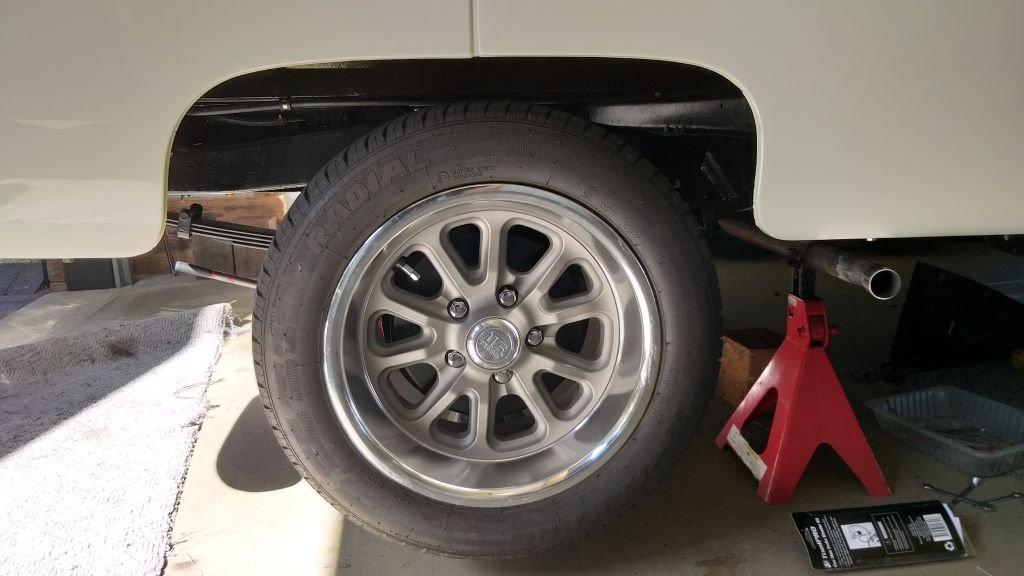
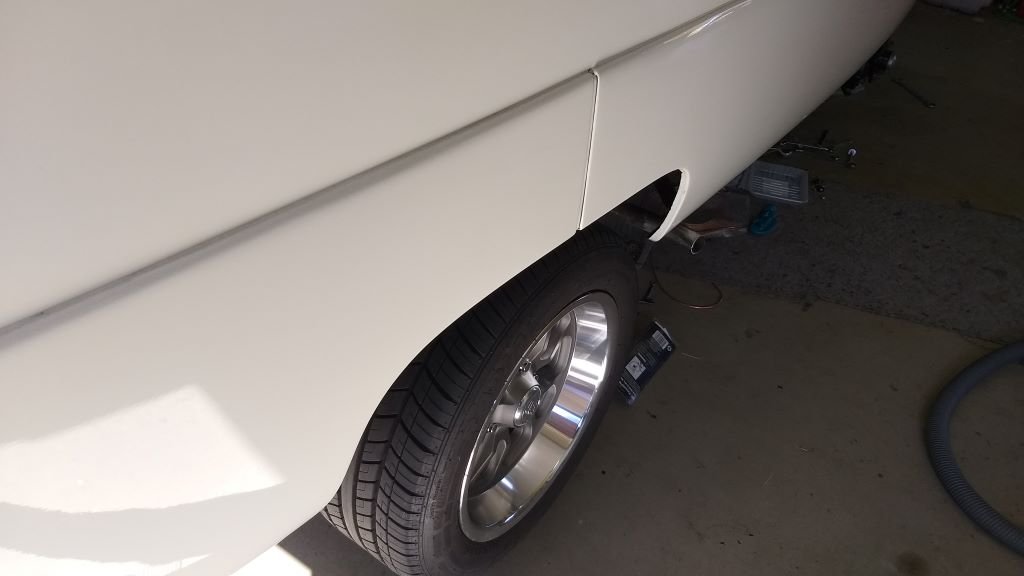
Wheels and tyres - Chapter 1 I needed to tidy up the edges of the floor cut where the gear selector pokes through and then touched up the paint. Being in a bit of a holding pattern until the paint dries, I thought I'd play around with some wheels. Started off by focusing on the rear which currently runs a rather crusty looking set of old school 14 inch Dragways in the decidedly anorexic 6J width. I'm thinking of going up to 15 inch diameters but width wise I wasn't quite sure what I would be able to fit under the guards. Borrowed a 7J Hotwire off my mate Grant that has been fitted with a 205 tyre, but there was still heaps of space so I then decided to pull the 8J wheels off the Mustang to see how they look. Started off by trying one of the Mustang fronts which is fitted with a 225/50/15 tyre. Looked bloody good. Next I tried one of the Mustang rears which is also an 8J rim but is fitted with a 245/50/15 tyre. Whilst the 245 looks killer it's just a smidge over the limit from a cert perspective so I'm going to stick with the 225/50/15 tyre.
-
Time to grovel under the Thames to slap this baby in:
-
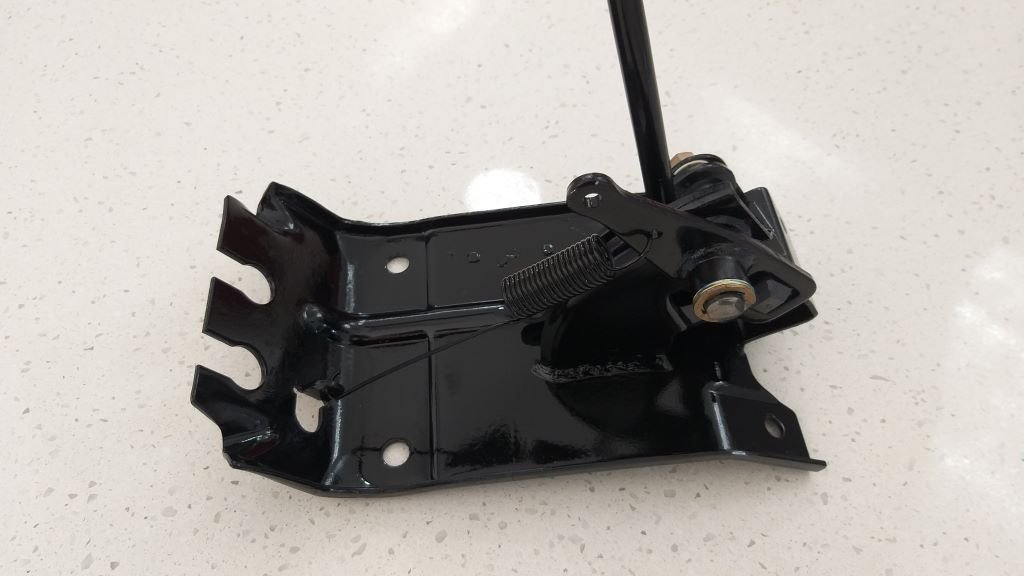
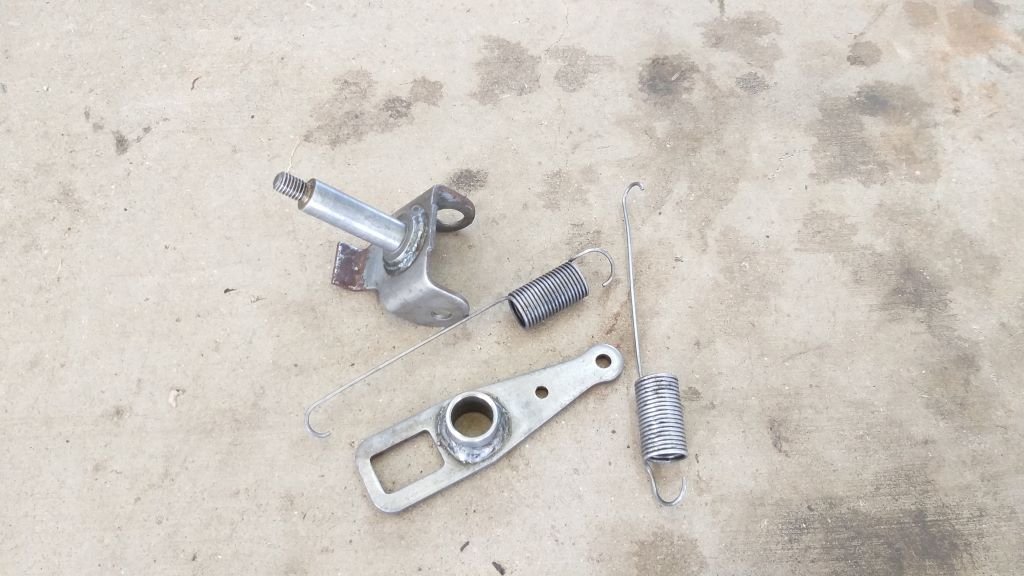
And that's the gear selector mechanism all refurbished. I'll chuck it all together with some fresh lube and it should be ready to install.
-
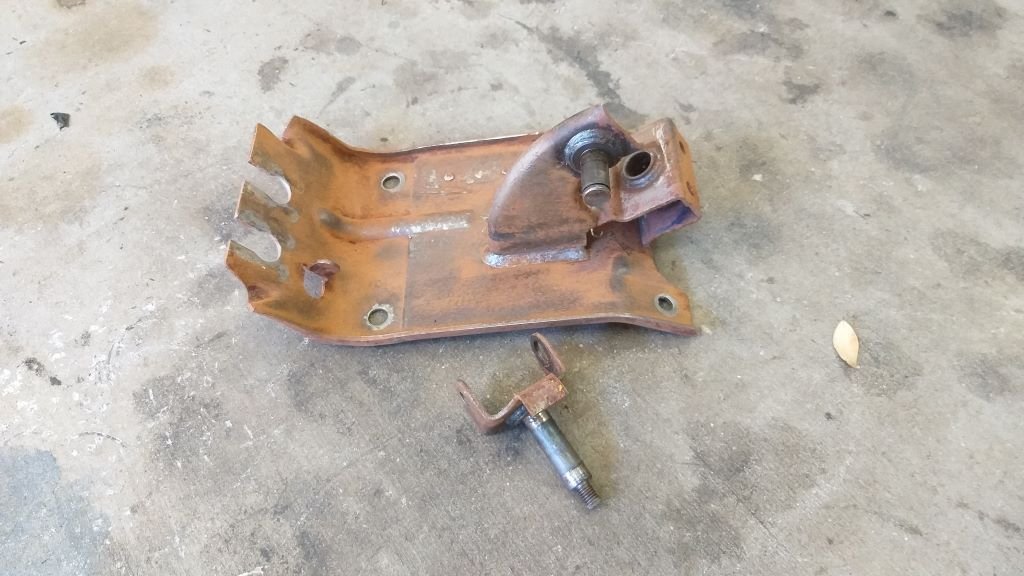
First thing this morning I pulled the gear selector base plate and pivot pin out of the vinegar bucket. Front end of base plate is looking mint as is the pivot pin. I've put the other end of the base plate back in the bucket and hopefully that will sort out the last of the rust.
-
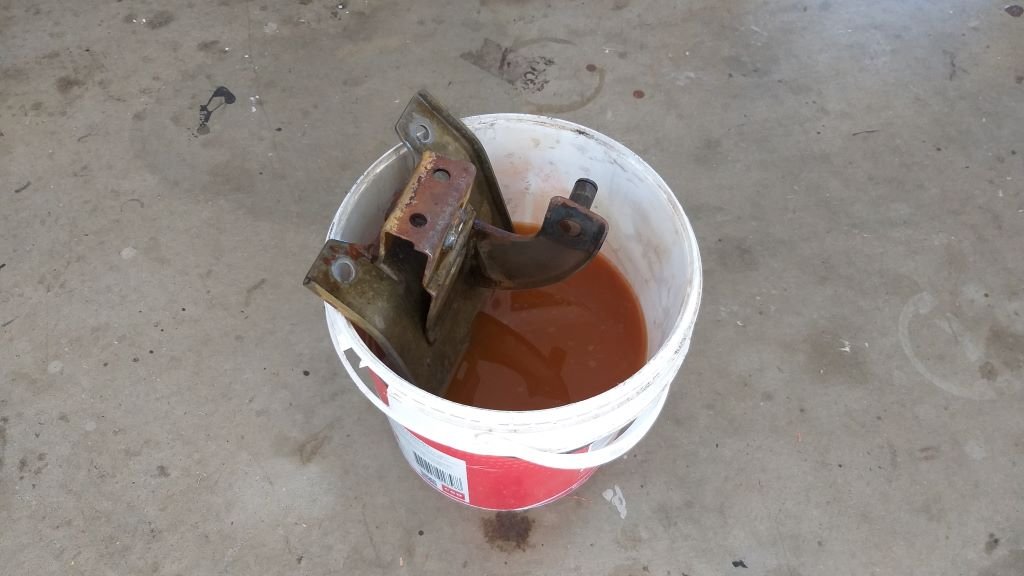
Kicked the day off by pulling the gear selector bits out of the vinegar bath. Gave them a quick rinse in warm water and they are looking lots better. The base plate is back in a vinegar bucket to do the front part that hasn't been in the solution yet. I also dropped in the pivot pin as the flat end is still looking a bit crusty.
-
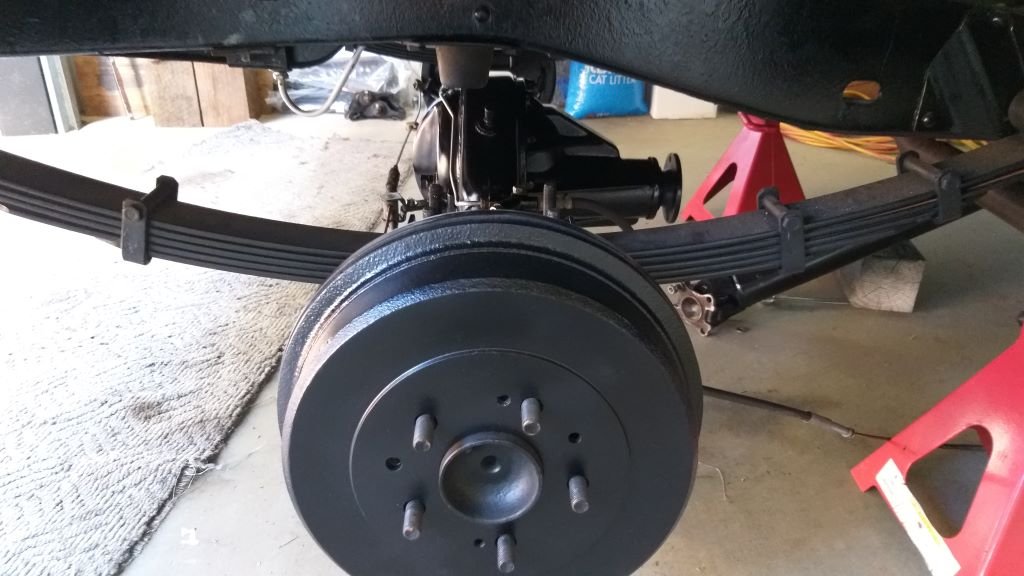
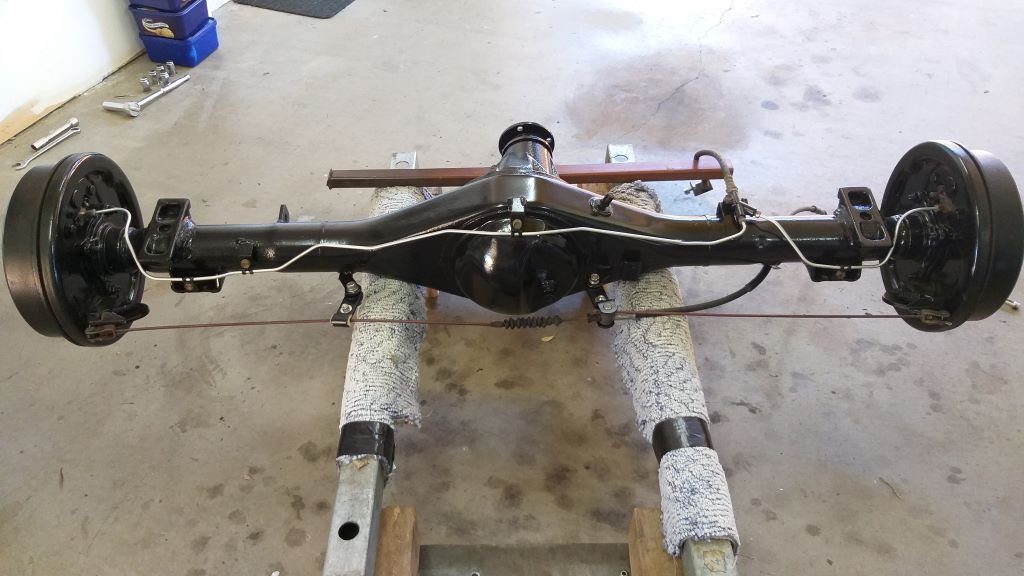
And some more photos of the rear:
- 715 replies
-
- 14
-
-
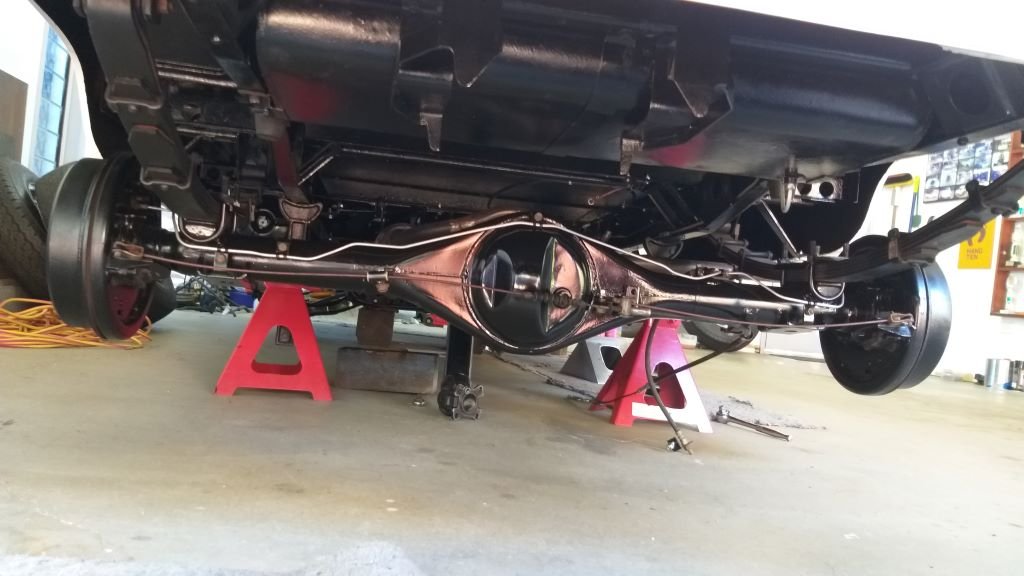
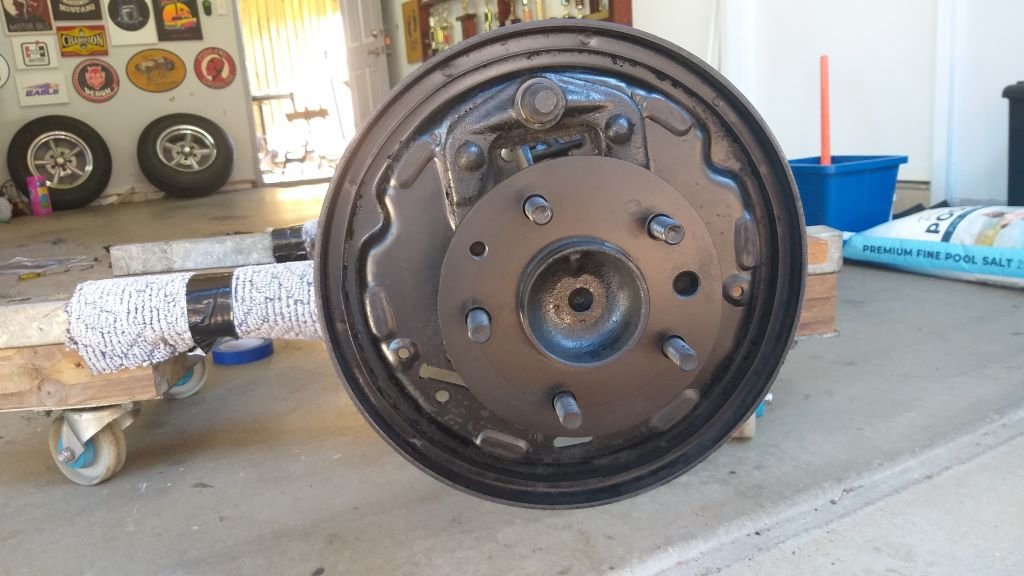
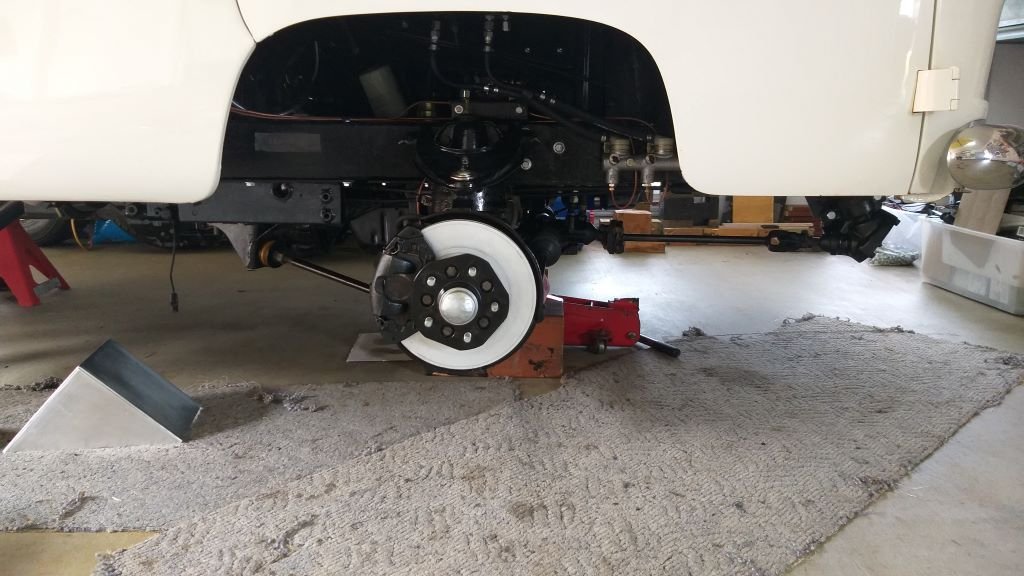
I've spent the last few mornings rebuilding the rear brakes with the best bits harvested from the two Toyota back axles that I have. The backing plates needed a good clean and I gave them a protective coat of fresh paint before assembling everything. Managed to get the back axle re-installed just before I packed up for the day. Tomorrow I'll install the drive shaft and back shocks and then it's just a case of connecting up the rear brake line. It's going to be interesting to see how bleeding and testing the brakes goes.
-
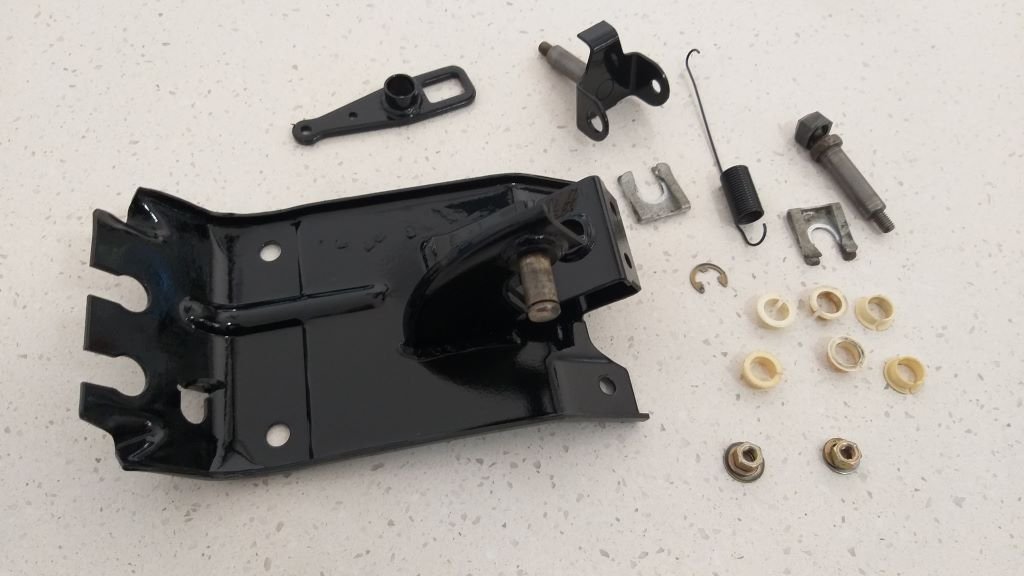
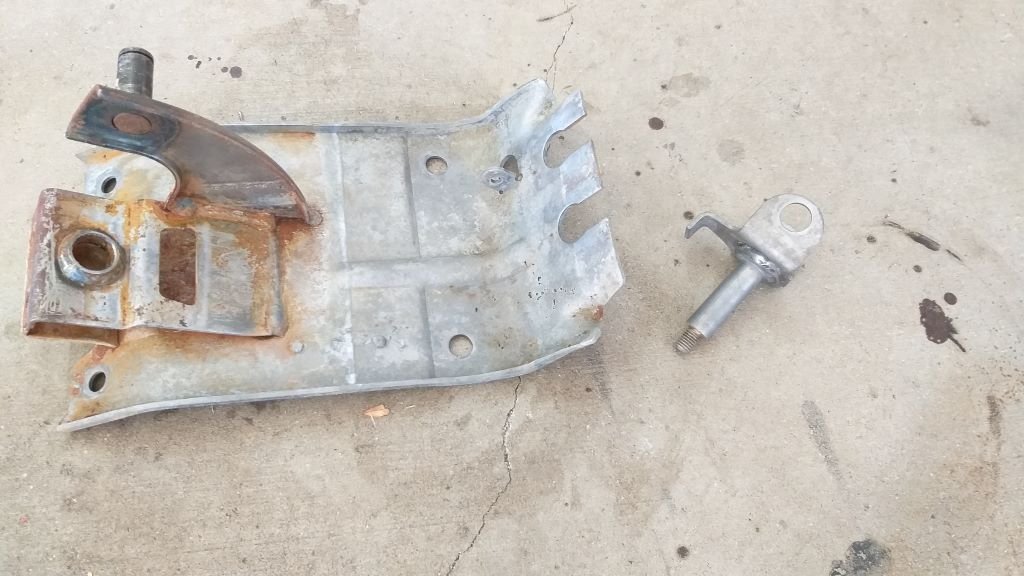
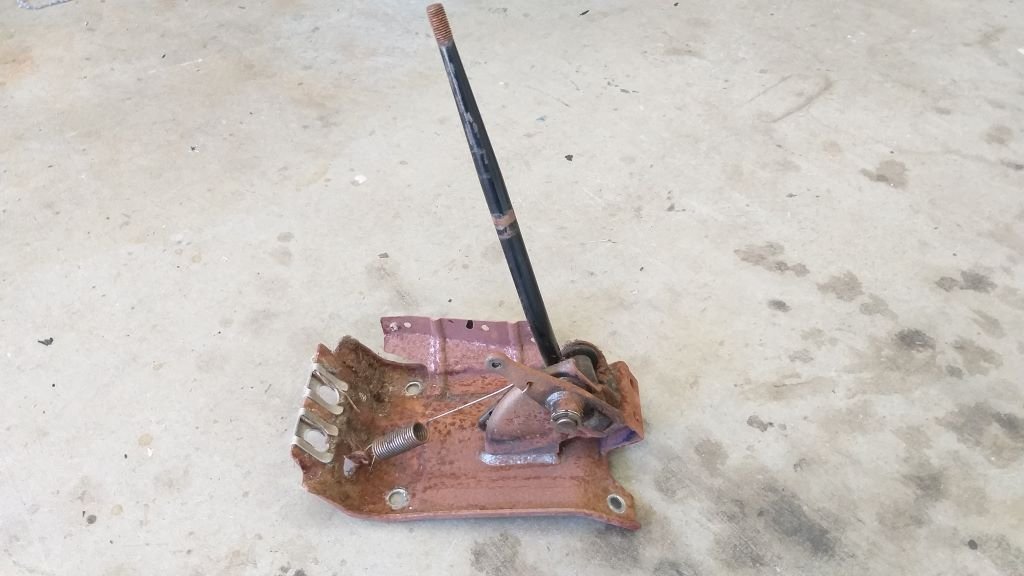
Took a trip to the local wreckers today and picked up a replacement Mitsi Express gear selector mechanism to replace my current one which has seen a bit of hackery in the past. Looked suitably crusty but I stripped it down and then gave it a tickle with a wire wheel and its now languishing in a vinegar bath. I've got the bushes and swivel pins soaking in degreaser. Will give them time to mellow and then a quick spritz of paint and it should be good to go.
-
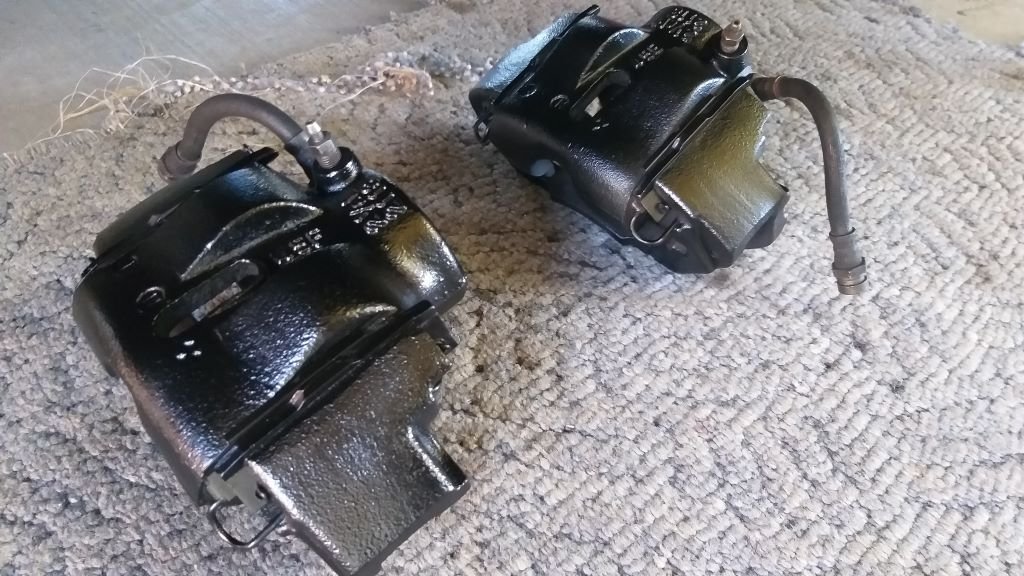
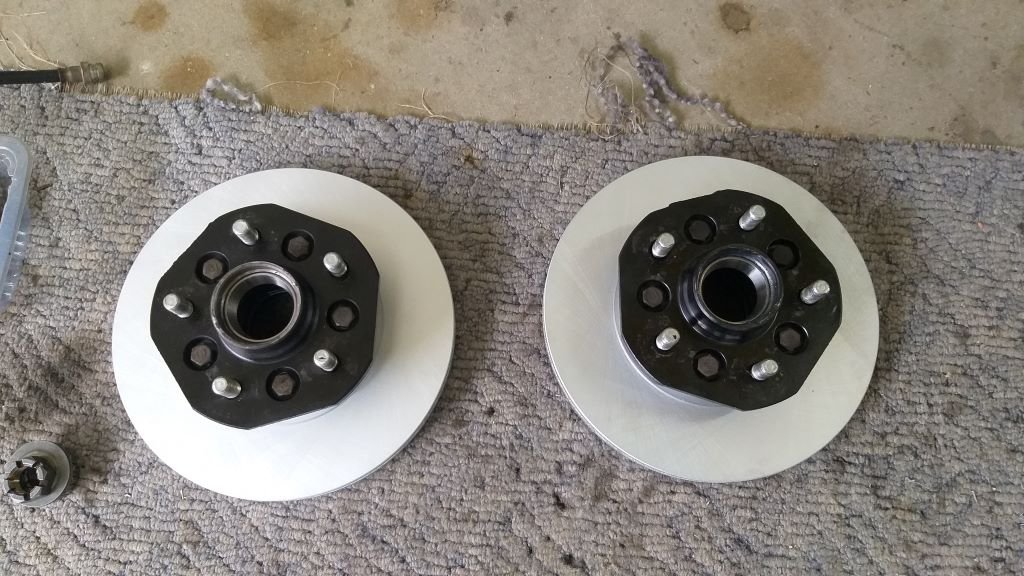
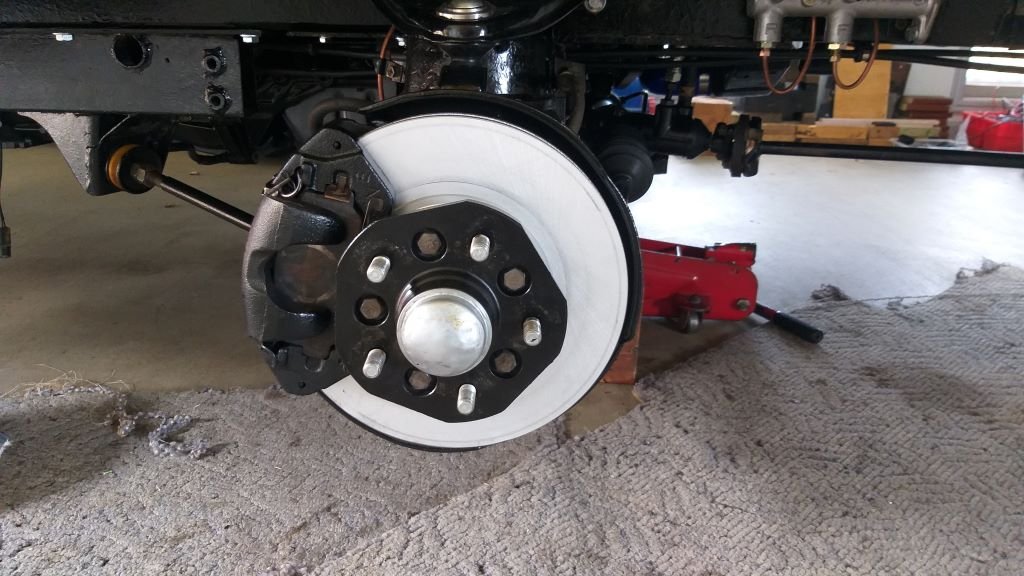
Assembled a few fresh and shiny parts today. I'm glad I splashed out on a new set of rotors.
- 715 replies
-
- 14
-