
- Popular Post


Flash
-
Posts
1614 -
Joined
-
Last visited
-
Days Won
2
Posts posted by Flash
-
-
- Popular Post
- Popular Post
However, during the pre purchase inspection I picked up a few things in the engine bay and suspension wise that placed some doubt on how far the mechanical restoration had been taken. Nothing major, but just little signs that some items still needed attention.
On getting it home, the first thing that I did was to fit an electronic unit to the existing distributor in the hopes of resolving an intermittent misfire. We then clocked up about 1000km during which time I was almost constantly fiddling about to try and get the timing right. In desperation I eventually pulled the dizzy out for a closer look and discovered excessive play in the shaft, so I ended up ordering a brand-new distributor from MiniSport in Adelaide. The new distributor came with its own set of electronic internals already fitted so the old unit went into the parts bin. This solved the misfire, and we ended up enjoying another 500km of trouble-free motoring until one day the Moke just suddenly cut out and left us stranded at the side of the road. Luckily, we were close to home, so I walked the rest of the way and returned with our Holden ute and a tow rope. After a bit of troubleshooting, I pinpointed a fuelling issue which turned out to be a faulty float valve. Got a new one sent up from MiniSport and we were back in business. Shortly after that the actual carby started playing up - again excessive wear - and we ended up ordering a reconditioned SU from MiniSport.
Since then its literally been an annual oil and filter change and the fitting of a new battery and we are now up to around 2400km of travel that we have undertaken since purchase.
And that pretty much brings us up to this point in time.
In my next update I'll cover some additional maintenance work that has happened over the past few weeks.
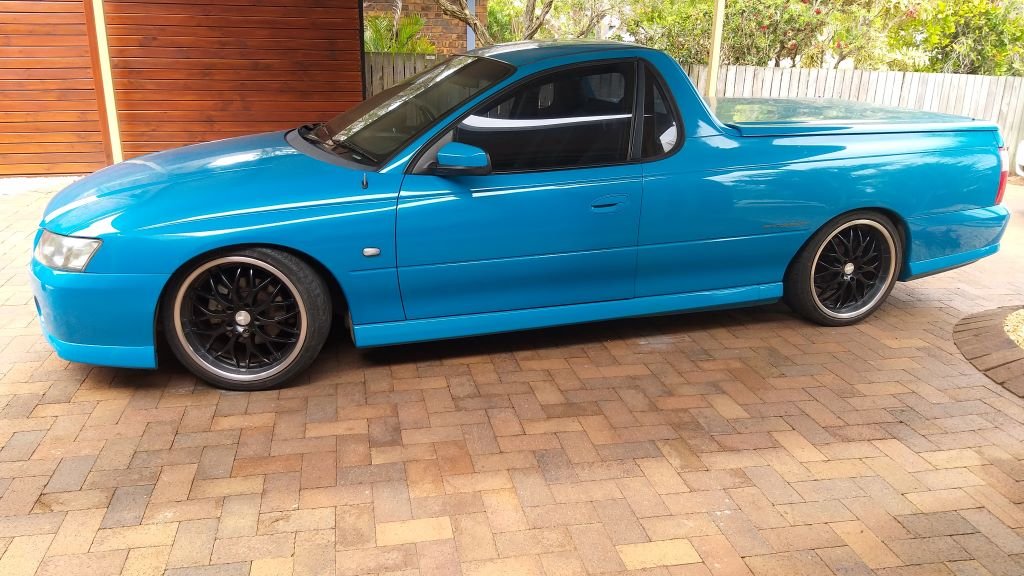
And no one likes a pictureless update so here is a group photo of our small fleet:

-
 29
29
-
- Popular Post
- Popular Post
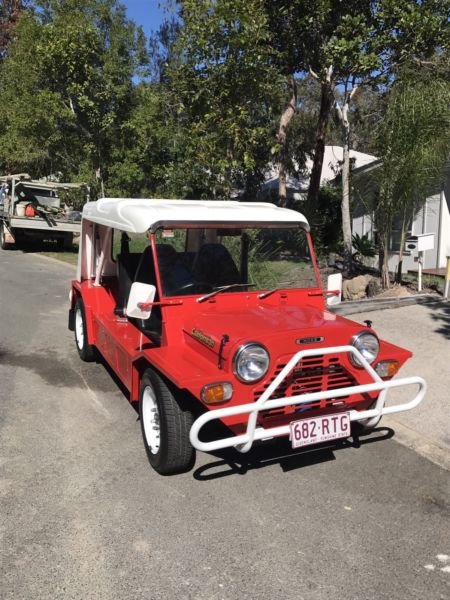
When we purchased the little Moke it had only travelled 1614km since being restored born witness by the odometer reading on the brand new Speedo. The story goes that a father restored the Moke for his disabled son. The son was wheelchair bound and old mate had even fitted 12 volt rams to the rear hinged fibreglass roof so that he could get the youngster in and out of the passenger seat. Problem was that the youngster didn't have much upper body control either and nearly fell out of the Moke on the first outing. The family got such a scare that the Moke got parked up for a while before they sold it on to a young fella from Noosa. I think that the new owner fell in love with the idea of owning an old classic without realising that it isn't like driving a modern hatchback with all the mod cons. He was also not mechanically minded so he ended up farming the maintenance out to a local mechanic and after receiving a few repair bills the novelty of owning the Moke wore off. And its at this point that Mrs Flash and I stepped in to take over the reins.
So, both inwardly and outwardly the Moke looked absolutely immaculate as borne out by the below photos that I saved from the original advertisment:

-
17
-
- Popular Post
- Popular Post
We have owned this little Moke for about 4 years now and since I'm starting to do a bit of work on it, I figured I'd start a thread as it might be of interest to others.
So, first up a bit of background.
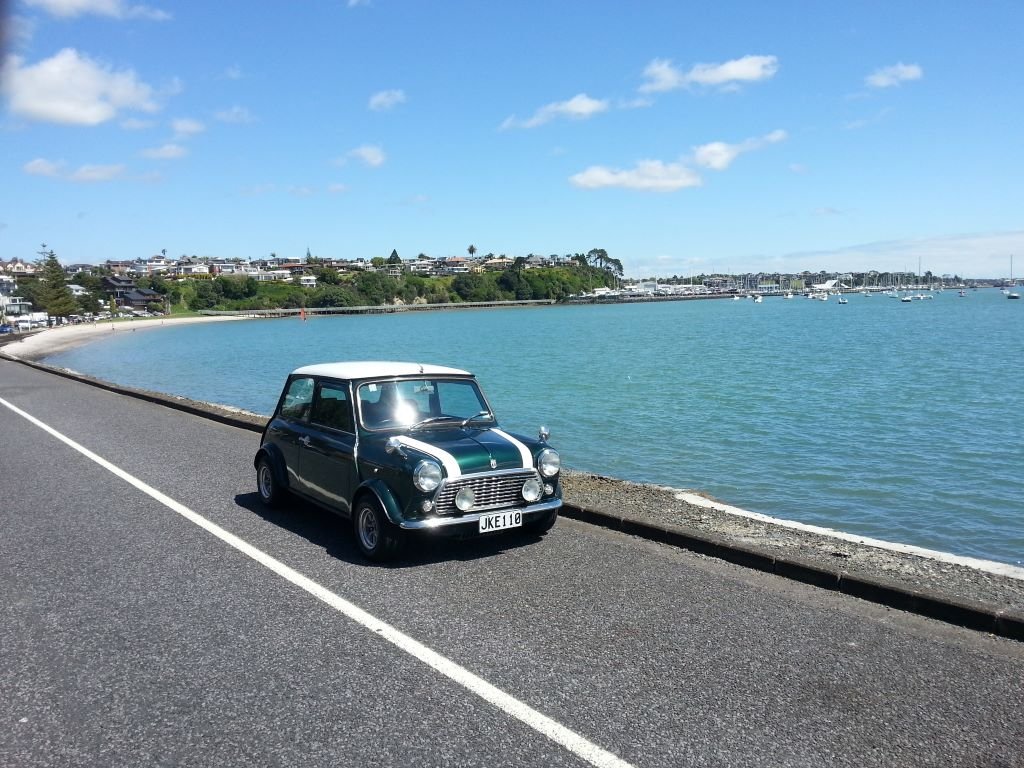
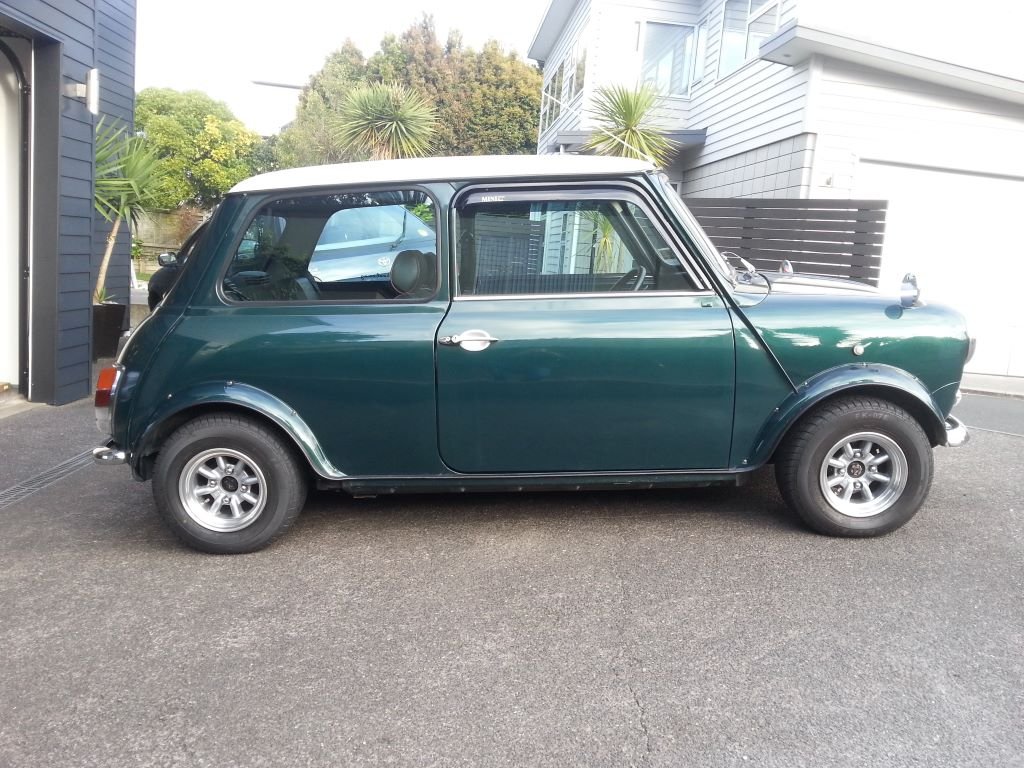
When we lived in NZ, Mrs Flash owned one of those newish 1275cc SPI Rover Minis. It was a Jap import that someone had done quite a bit of back dating on. A lot of the changes were fairly subtle, but the most notable things were the fitting of 10-inch Watanabe rims to replace the original 13-inch units and the removal of the modern dashboard that was replaced with a classic centre mount speedo. The car was a little rocket and super fun to drive. Sadly, we made the decision to sell it before heading off on our Australian adventure and last I heard it was somewhere in Christchurch.
So fast forward a few years and we are now permanently OZ based and looking to get back into some classics. We often thought back to the fun that we had with that little Mini and decided that owning another little Leyland would be good. The climate over in tropical Queensland lends itself to something a little more open and so we set our sights on a Moke. After checking out a few we ended up pulling the trigger on a fully restored 1100cc powered 1974 Californian look alike that was going for reasonable money. When I say reasonable I really mean that after doing my own sums I concluded that I couldn't have restored a clunker to this level for the money that was being asked.
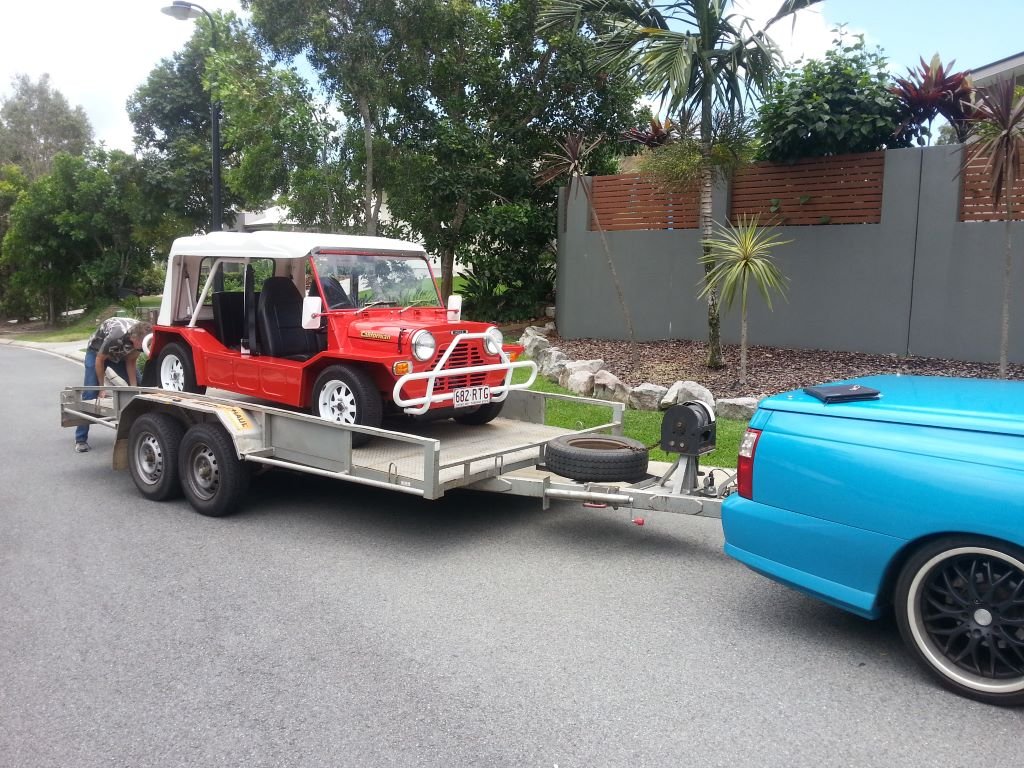
So, after swapping a few calls with the current owner together with the studying of some detailed photos a "deal in principle" was struck pending final inspection. We grabbed a hire trailer and headed south down to Noosa hoping to be returning with a loaded trailer.
Gave it the once over, took it for a quick drive, some cash changed hands, and this happened:
In my next update I'll talk about the maintenance undertaken to date and then a little bit about the current work being done.
Thanks for looking.
-
22
-
 1
1
-
- Popular Post
- Popular Post
Over the last few weeks, I've noticed a steadily increasing stiffer steering and during last night's burger cruise it felt particularly bad. Figured I'd do a bit of fault finding today.
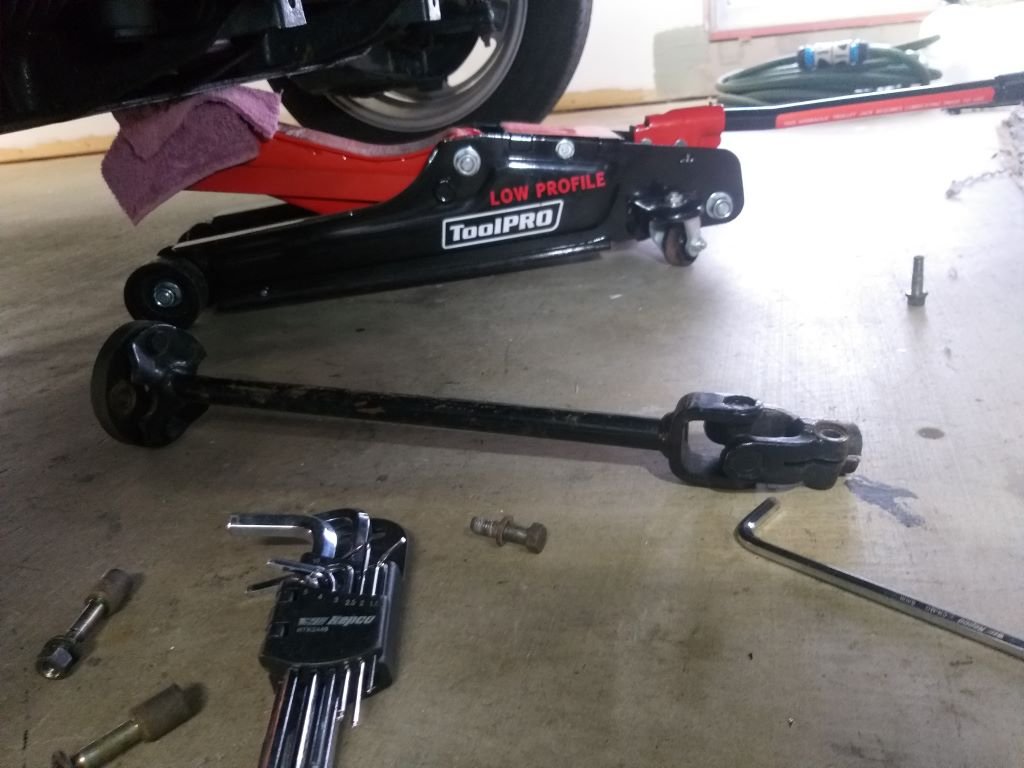
First step was to remove the intermediate steering shaft to determine whether the issue was on the steering rack end or the column end.
With the intermediate shaft out I fired up the engine and waited the few seconds for the Astra pump to come online. What a relief it was to find out that the issue is not on the rack/pump side of things.
So turned my attention to the angled steering gearbox and the steering shaft itself.
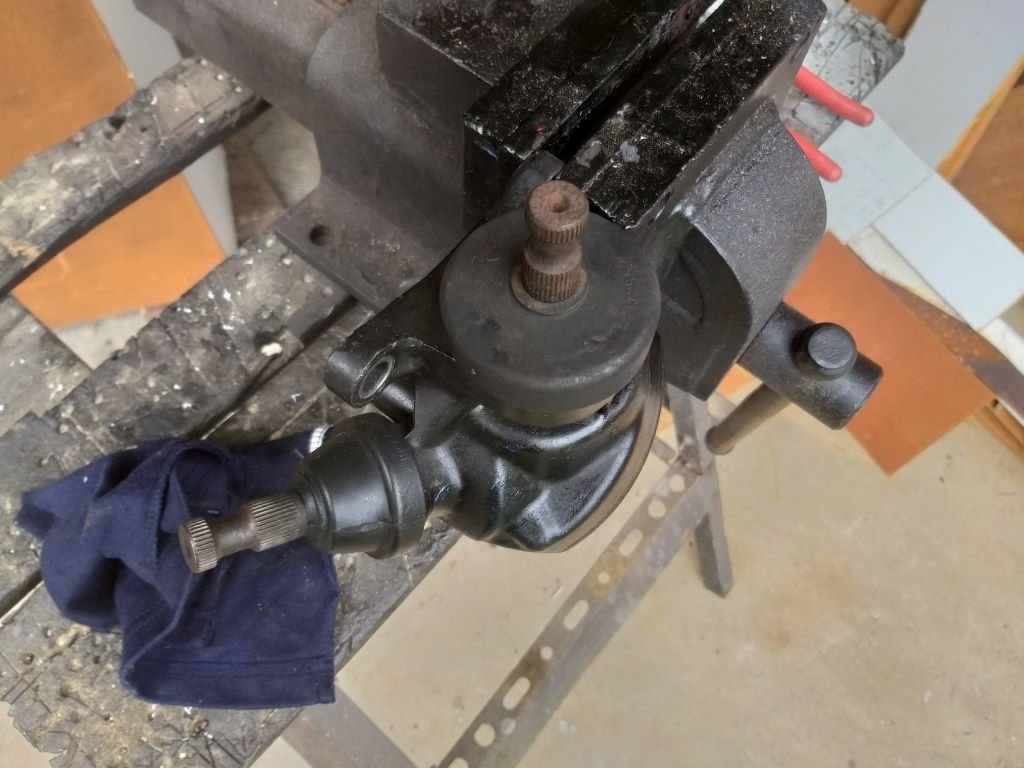
Pulled out the angled gearbox for a closer look.
Popped the cover off to check the lubricant level. Turns out it uses grease - or at least mine is filled with grease. I'm hoping that is factory and not some previous owner's bodge job. Anyone know ?
Anyway, I neglected to take a photo, but it looked like some of the grease had shifted leaving the top half of one of the gears dry. The grease looked to be clean and still in good condition, so I just topped up the level and fitted the cover plate back on.
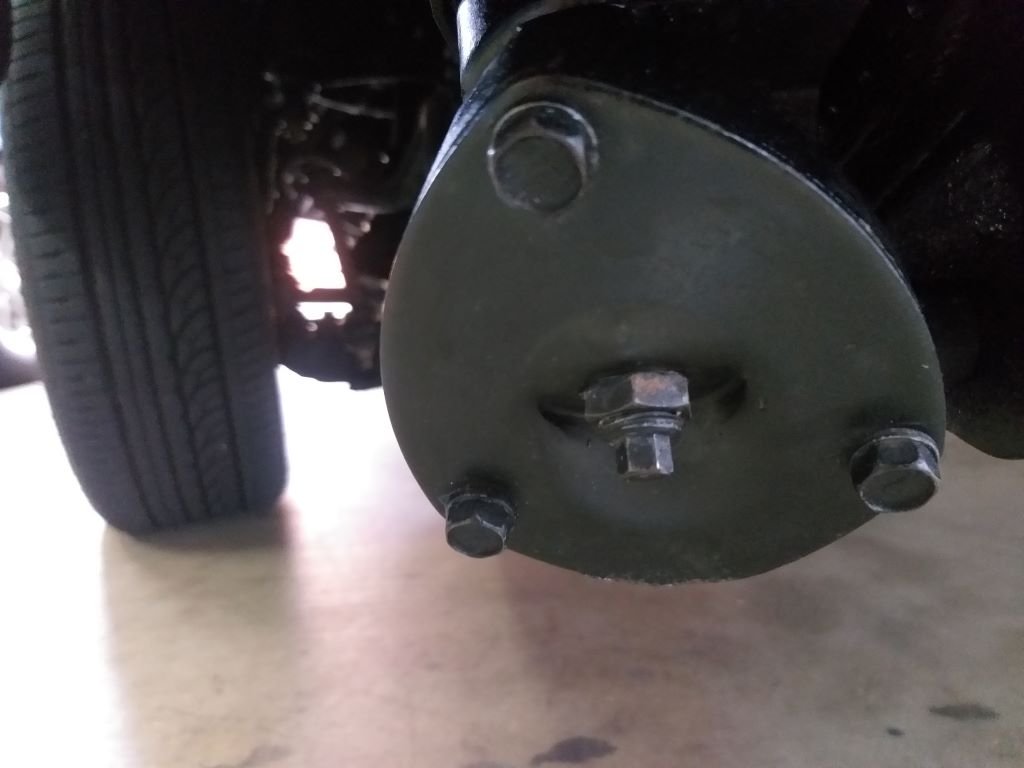
At the same time I spent a bit of time fine tuning the little adjusting thingy till I got the mechanism turning smoothly:
While I had the angle box out, I pulled off the steering wheel and dropped the shaft so that I could grease the upper and lower bushes. They were pretty dry.
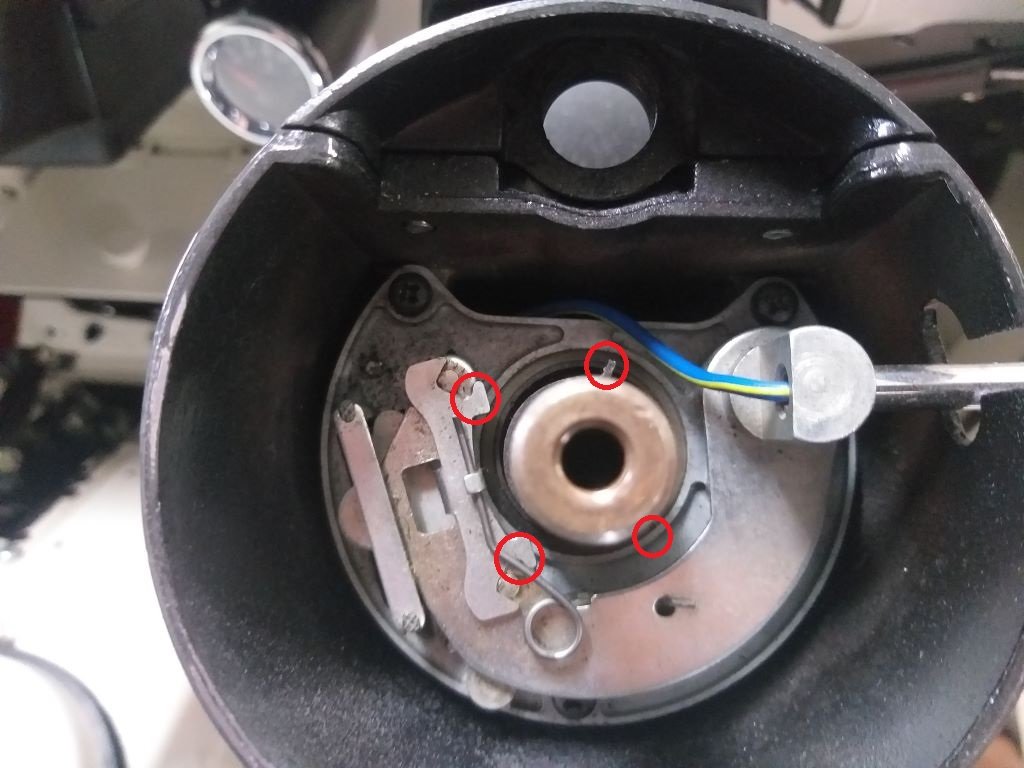
With the steering wheel off I figured I'd tackle another annoying little issue. For a good while the indicator self cancelling feature on left turns hasn't been working. Works perfect on right turns though. Really aggravating as I keep forgetting to manually cancel the flashers and also pretty unsafe.
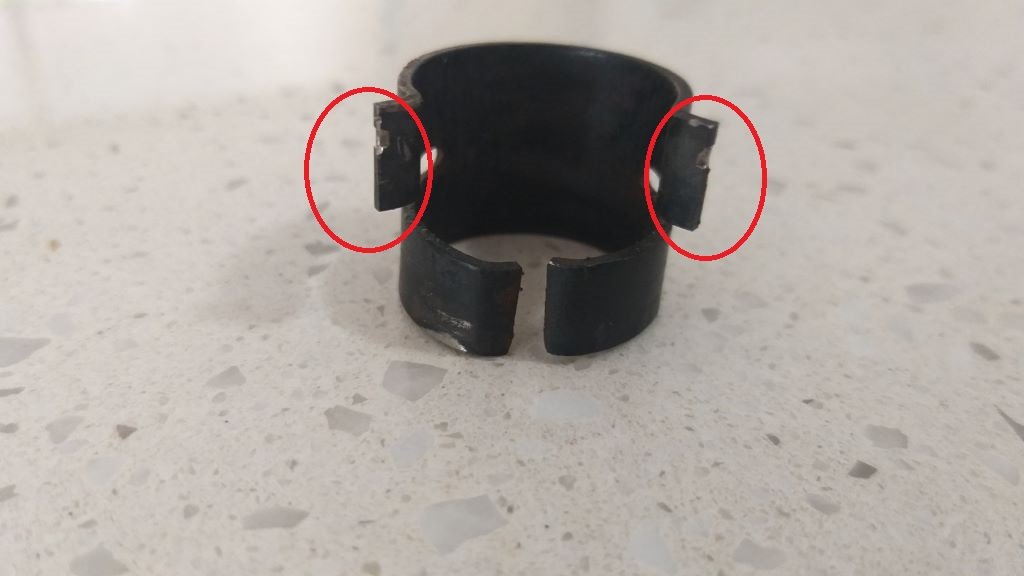
Anyhoo, I took a closer look at the mechanism and it was visibly okay. There are two little "ears" on a spring steel collar that press fits over the inner steering shaft. Looks like so:
Each little "ear" engages with a double ended lever attached to the indicator mechanism. One of the "ears" isn't visible due to the angle of my photo, but I've marked up where it is supposed to be.
With a visible inspection not showing anything untoward I enlisted Mr's Flash's help to watch what was going on while I turned the steering shaft from below.
Turns out the little "ear" on left turns was not triggering the self-cancelling lever.
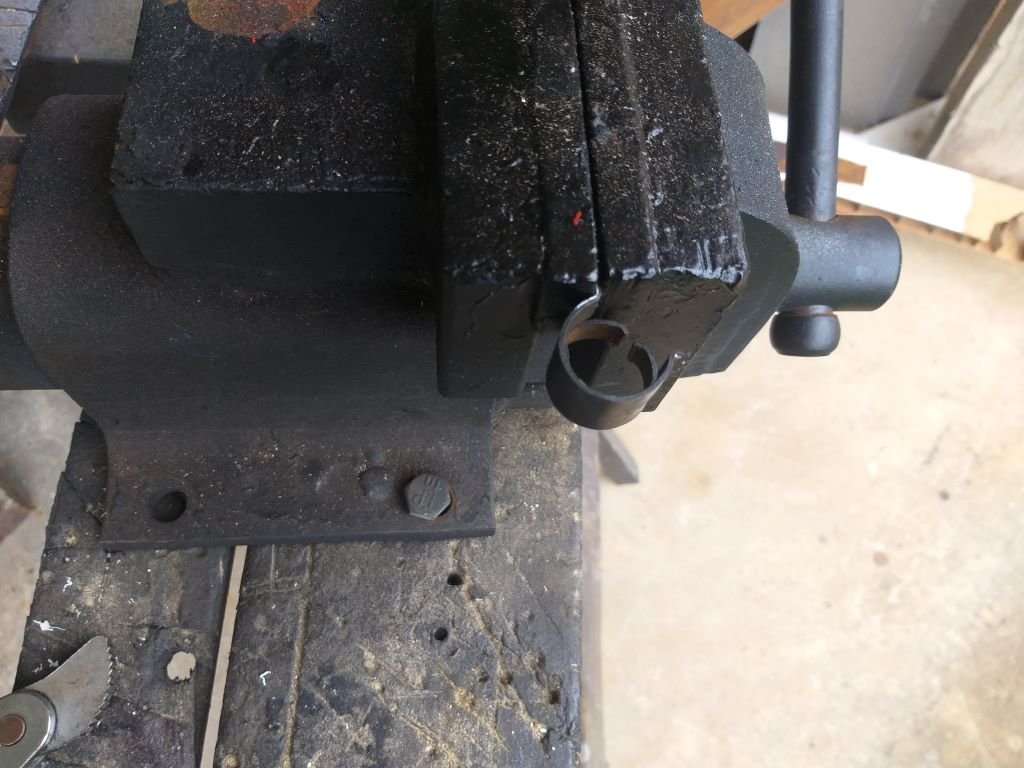
Pulled it out the collar for a closer look. Both "ears" are showing signs of wear with noticeably more wear on the left one. Thought I'd try and give it a tweak, so clamped the offending "ear" in my vice:
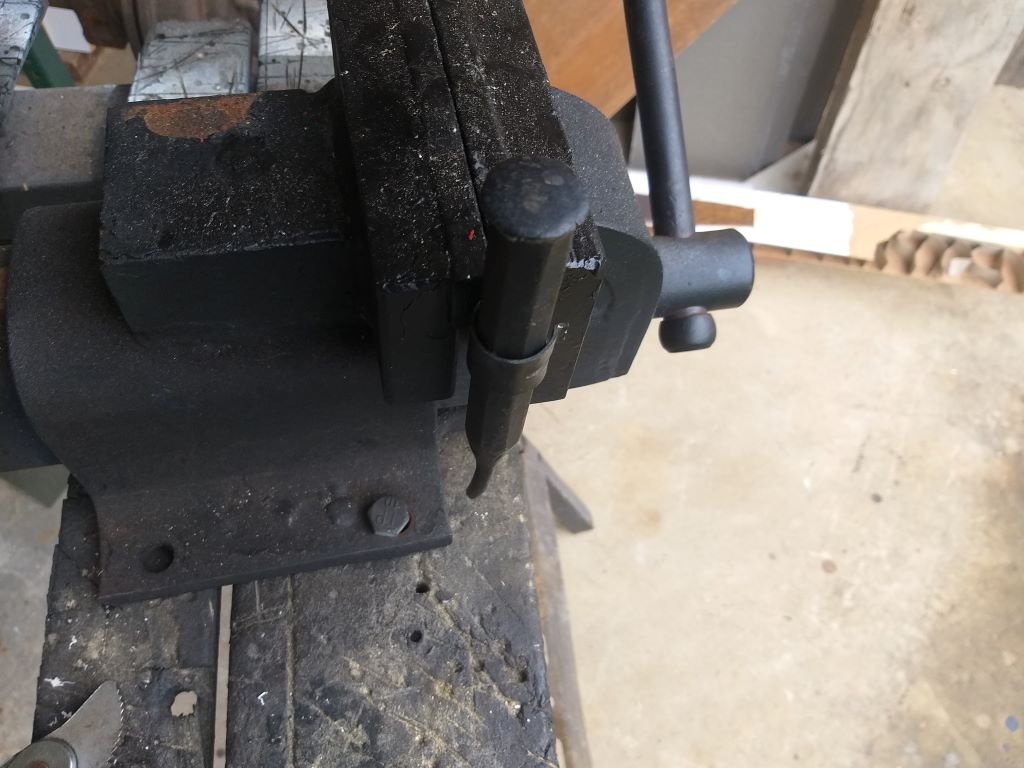
Chucked an appropriately sized punch down the centre of the collar to maintain its shape:
Then gave it a little bit of loving with a hammer.
Popped it back on the column for another test and ... success!
With the self-cancelling issue sorted I reassembled the steering and dropped the van back on its front wheels for a quick steering test.
Nice and light once again.
Loaded up my ratchet with the appropriately sized socket and headed out for a road test and also to re-centralise the steering wheel. It took a few goes until I got the steering wheel perfect, but I'm happy that things are now back to normal.
Thanks for looking.
-
11
-
Pinched this photo off the 400e FB Group page, which is largely UK based, but the rego plate looks to me like a kiwi one.
-
7
-
-
Last week we headed off on a supply run in the pouring rain and as we got into town, I noticed the temp creeping up above normal. Quickly pulled over and switched off and when I cycled the ignition key to the aux setting I noticed no noise coming from the thermo fan. WTF.
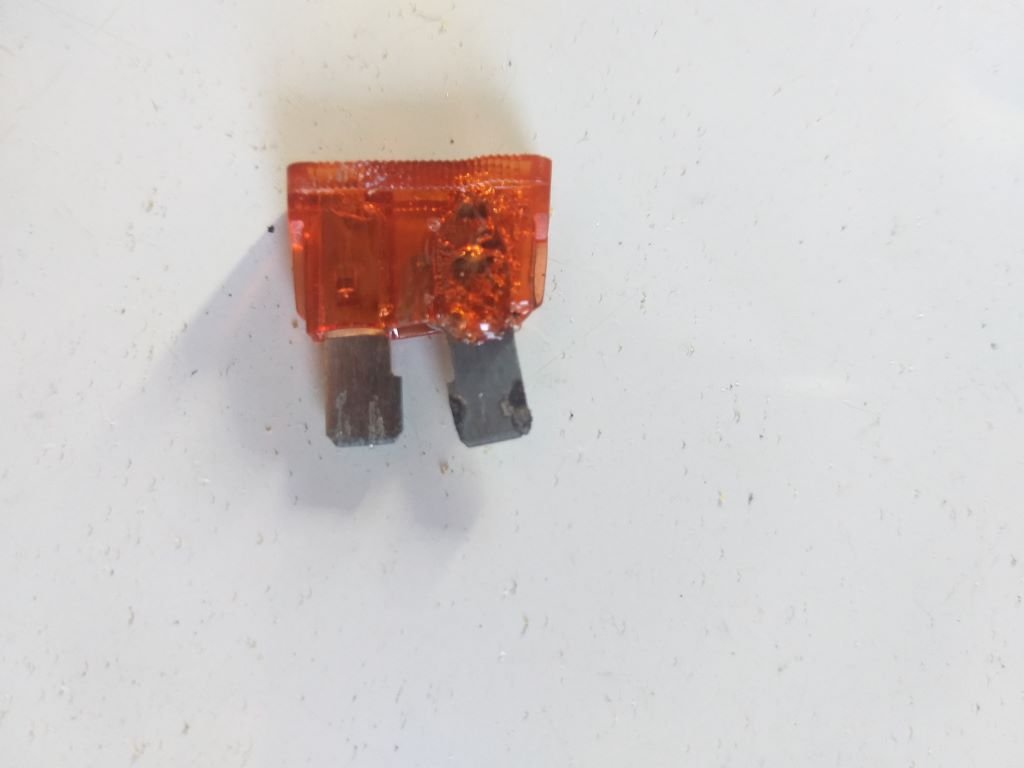
Checked the under dash fuse panel and the fuse for the thermo fan relay exciter wire was still good. Lifted the engine cover lid to get a closer look at the inline fuse on the relay power feed. Bloody fuse wouldn't come out. Grabbed a pair of longnose pliers from my tool kit and gave the fuse a bloody good yank and out she came.
Yikes, definite signs of overheating, but the fuse itself was still intact.
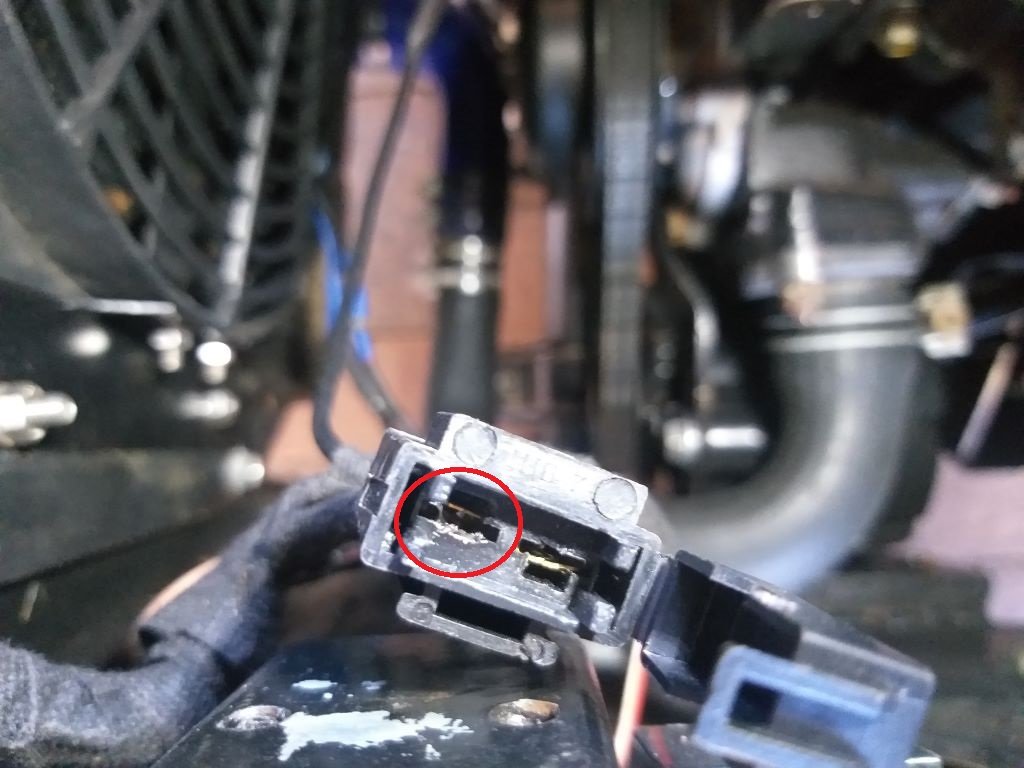
Fuse holder looked decidedly shabby too.
Looking at the back of the fuse holder and I could immediately tell that the input wire on the connector had dropped.
Managed to push the connector back into the housing and with a working fan we were back on the road again.
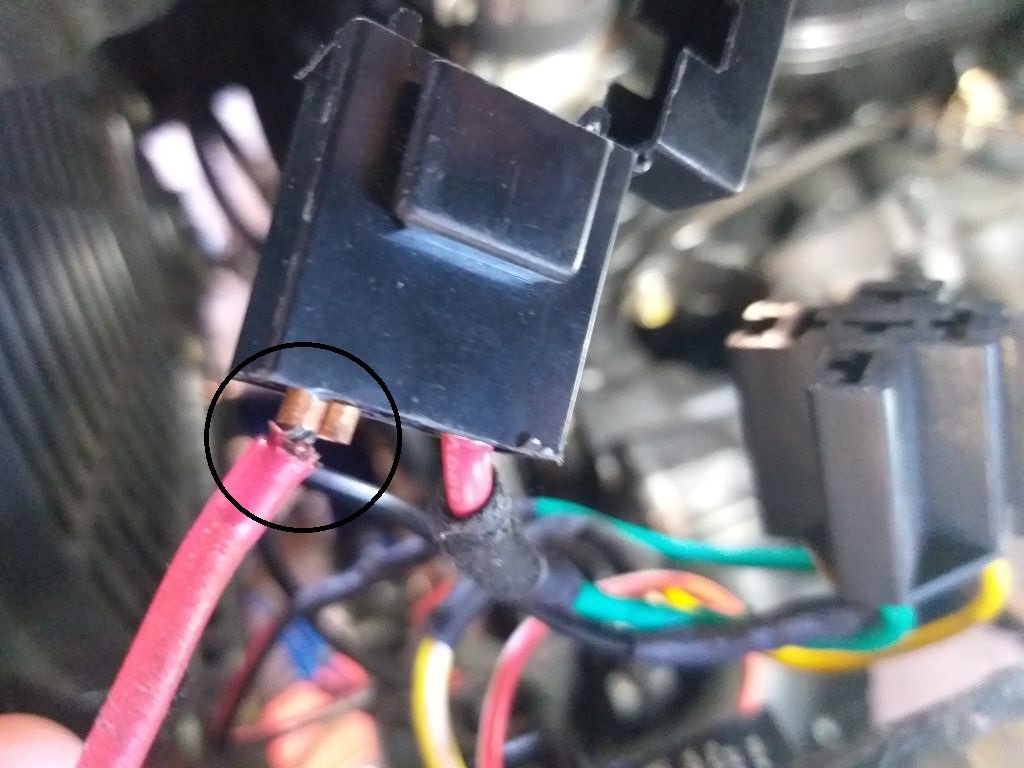
Fast forward to today and I figured I'd best do a proper fix.
Luckily, I had one of those fairly robust auto reset trip switches in stock, so I've mounted that in the battery box and have run a new relay power feed directly from the battery. The relay trigger wire is still ignition switch activated via a separate fuse from the under dash fuse panel.
Longer term I need to replace the crappy thermo fan with a decent Spal unit as the cheapies sure do suck up the amps.
-
9
-
-
It's been a few months since my last update. The Thames is still going strong although I've got a few niggly bits to sort out. My a/c unit is on a 30-amp fuse which occasionally blows on startup so I'm thinking of fitting a auto-reset circuit breaker instead.
Also looks like my decision to fit the second-hand a/c compressor has come back to bite me on the arse. The a/c works well but there is excessive drag on the drive belt resulting in lots of rubber dust and I have to keep adjusting the belt as it starts screeching after about 100km of travel. Dropped by my a/c guy a few weeks back and after checking it out he confirmed that the compressor needs replacing.
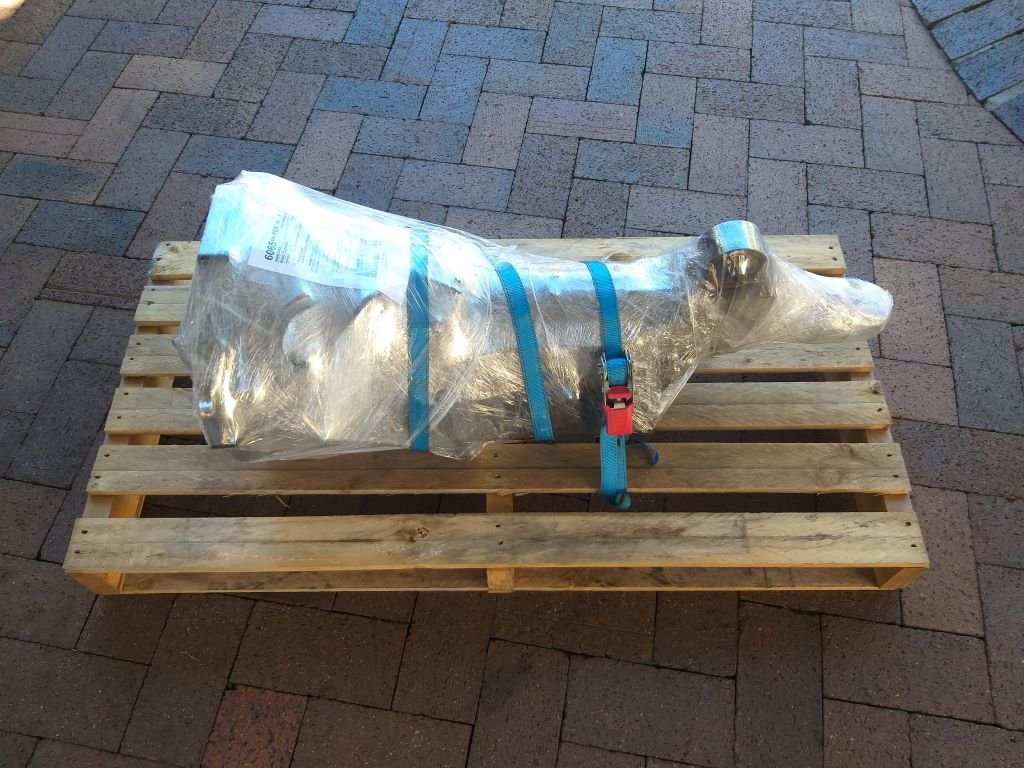
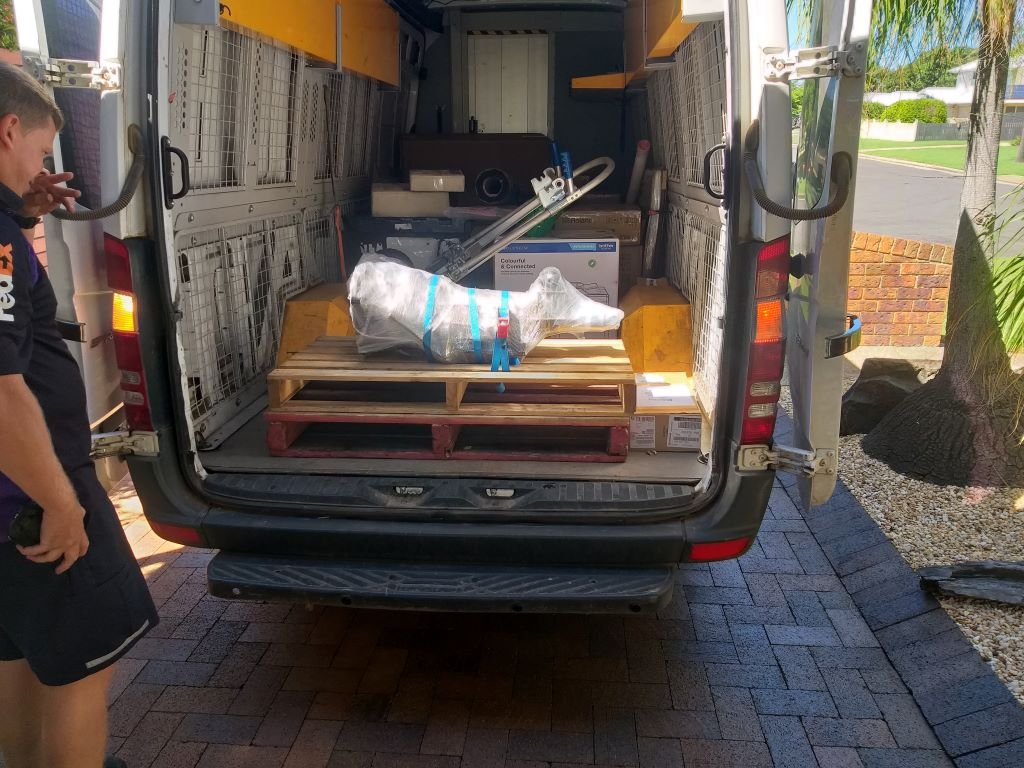
In order to free up some cash for the new compressor I chucked my auto trannies on Marketplace and one of them sold to a Gearbox Repair Centre in Western Australia. Hopefully the next one goes soon.
-
6
-
-
I bought a VZ ute to use as a mule while we were doing a house reno about 5 years back. 6 speed manual, V6 Alloytec and 200,000km on the clock when I bought it. She was a thirsty beast around town. A bit better on the open road. In short order I had to replace the coil packs and the injectors and then at around 220,000km the ECU crapped out. Holden in their wisdom decided that mounting the ECU to the engine block was a really good idea. Multi layered circuit boards thrive on heat cycles apparently. $1.700 later she was back on the road, and I moved her on before anything else broke.
-
1
-
-
@Gee, in terms of the EFI setup I've just been experimenting on my own. Got to admit that I'm a total newbie when it comes to EFI. I'm not chasing performance at all, mainly focused on economy and driveability. The car runs really well apart from the fumes at idle issue and I'm now suspecting that I may have a dicky Idle Air Controller as I've set it up a number of times according to Fitech's "how to" video clip, but for some reason the IAC count at idle seems to climb after a bit of driving. Fitech use a "no name brand" copy of a genuine AC Delco part out of a mid 80s Camaro. I tried to order one in from Rockauto but the Delco one is NLA. They do list some other brands for the same part so I might just order one in when I've got some spare cash. At least then I can rule that out as the issue.
-
1 hour ago, cletus said:
More positive caster makes a big difference, a lot of cars of this era had minimal or even negative caster settings from factory, with wider wheels and tyres they are not great to drive
Yep I reckon you are bang on the money Clint. The normal tyre places used the standard Mustang settings, but the suspension guys did their own thing and it made a massive difference. Next time I'm in town I'll drop by the shop as I'm sure they will have a record of the settings they used. This might help @Gee out with his setup.
-
4 hours ago, Gee said:
Just play. It feels like a notch where it moves and you feel a little clunk in the hand before it moves. It does make sense that the shaft will need to move slightly before the power valve is engaged. It does not feel like an issue with ball joints or normal steering play.
Yep, that's pretty much how mine feels too, so maybe that's how they all are with the ram type p/s. How new is your front rubber and I'm assuming you have had a pro do your wheel alignment? I took my car to 3 different wheel alignment guys before I got it right. The first two were just your usual tyre places, but the 3rd guy was a suspension specialist and whatever he did it made a huge difference to the road feel. Before that it would wander about a bit on a straight road and feel a bit iffy in corners, but now it feels better in corners and runs true if I let the wheel go when I'm travelling in a straight line. Unfortunately, the 3rd guy didn't give me a printout so I can't compare the settings that he did with the others, but I was hanging around while he did it and it looked to me like he spent a good bit of effort on the caster settings.
I'm still struggling with fumes but it only occurs at idle when I've pulled to a stop at a traffic light or stop sign and only when I have the front windows open. Having EFI I'm able to just about infinitely tune the bloody thing and I've been playing around with the idle fuel settings at various temperatures as well as my AFR targets, but I still can't shake the smell.
-
5 minutes ago, Gee said:
Hi Flash,
did you fix your steering clunk? I have basically done the same fix on my steering as the hydraulic stuff was all shagged. There is no play in mine at low speed and smooth lock to lock but at 60mph on the motorway it clunks back and forth in the centre. It will do this in high speed corners too which is slightly unnerving but as the power valve has to move 5mm before the hydraulics assist I'm not sure if this is normal. I don't have another one to compare.
I have the opposite issue to you with fumes. Stopped at idle it is pretty good, just normal carby stuff. At high speed with the main windows cracked it get a bit fumey but just using the front quarter windows it is ok. I think for mine I just need to check the tune to clean up the tailpipe.
Yep, my steering is good now although I do get that slight play in the wheel when the power valve is at rest (ie travelling in a straight line). When you say it "clunks" are you hearing an actual noise or is it just the play ?
-
- Popular Post
- Popular Post
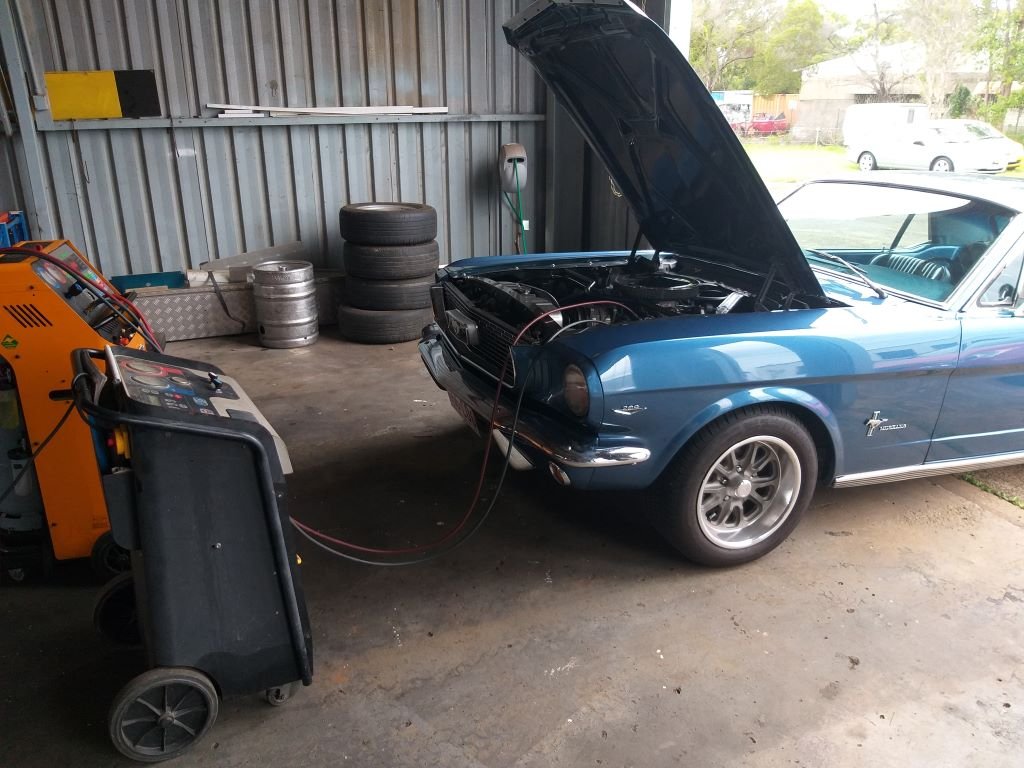
First thing this morning Josh gassed up the a/c which is now back in perfect working order.
Hopefully that's the Mustang sorted for the next few months.
-
11
-
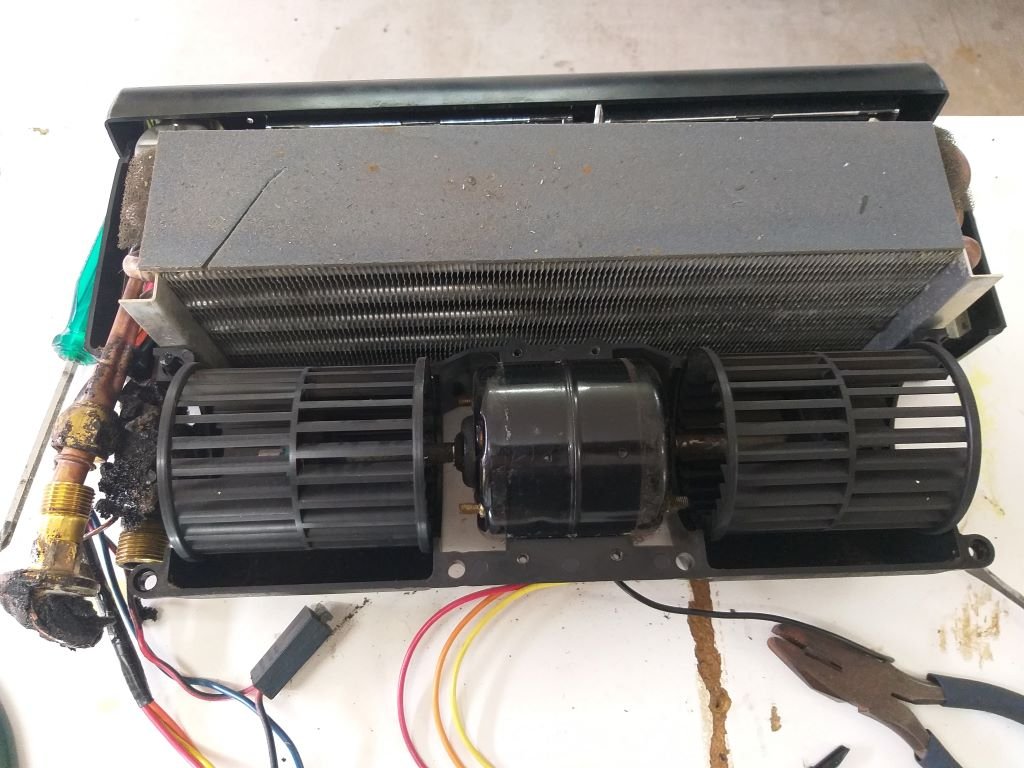
Recently the a/c blower fan has been making an intermittent grinding sound which has been getting steadily worse. I figured it was a sign that the motor was on its last legs.
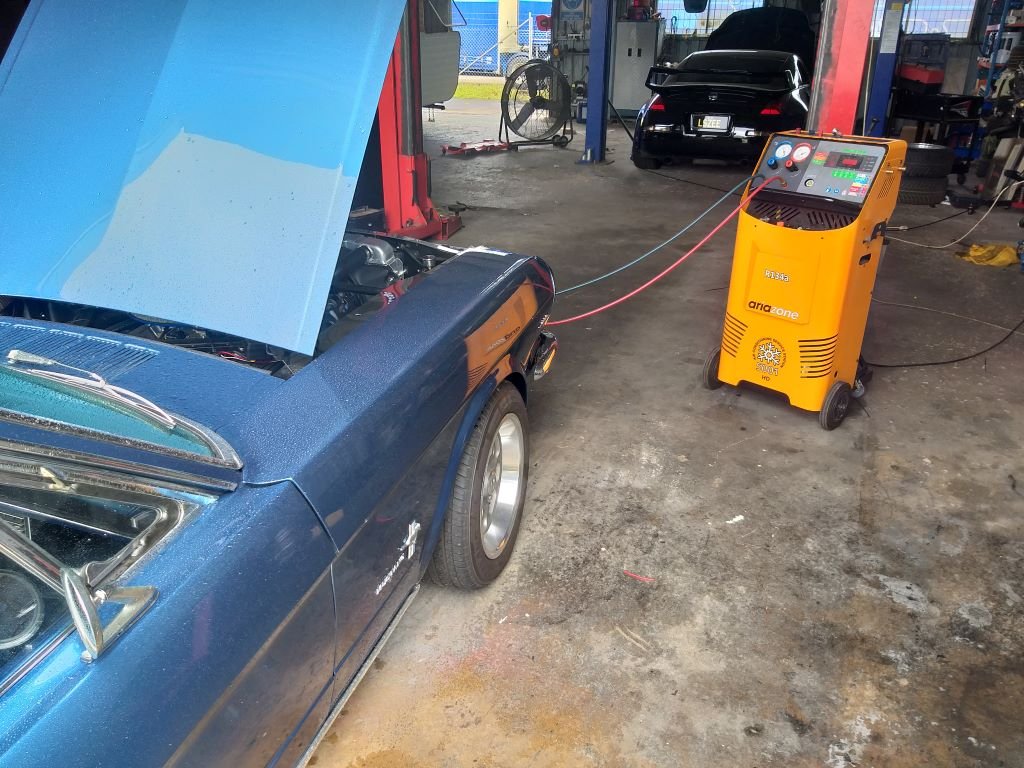
So, on my way back from the alignment shop I wheeled past the a/c place and Josh quickly dropped the gas for me.
Oh, by the way, that black beastie in the background is an LS3 powered 350Z that is in for some a/c work.
Anyway, back home I pulled the under-dash unit out and opened it up:
Chucked a battery on it and fired up the motor. Sure enough grinding sound started up almost straight away.
Turns out the hamster wheel on the left was just touching the inner rim of the casing. Yikes can it be that simple I thought.
Removed the small holding clamp and slid the wheel slightly outward till it cleared the casing a bit more before reinstalling the holding clamp.
Tested it again and it was running smooth as silk.
Unit is back together and reinstalled with fresh o rings on the a/c lines and a brand-new receiver/drier.
It's booked in for a re-gas first thing on Friday morning.
-
9
-
-
First thing this morning I headed into town for a hot date with the wheel alignment boys.
AAA+++. Would trade again.
-
7
-
-
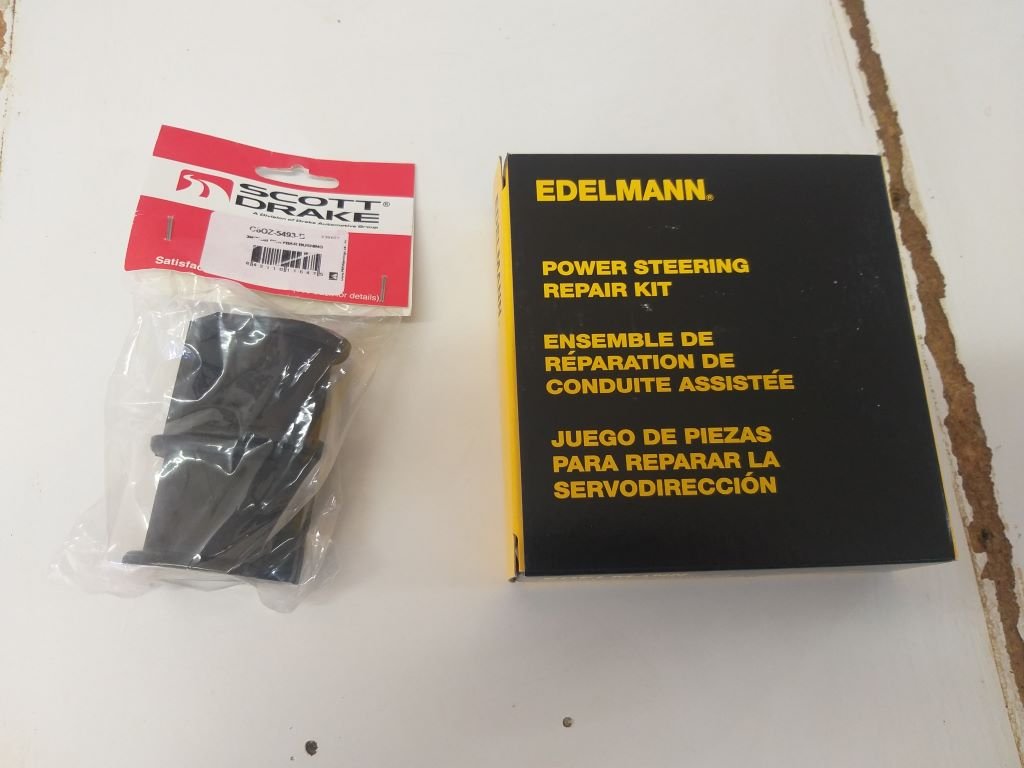
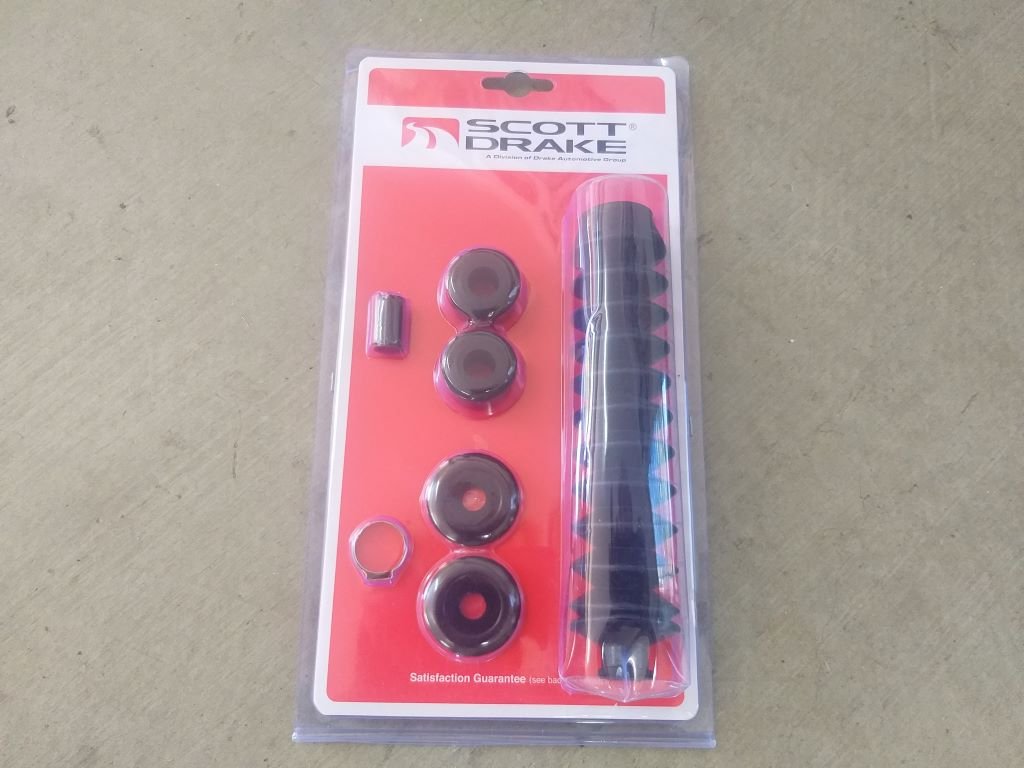
The rebuild kit for the power steering ram and a new set of sway bar bushes pitched up yesterday arvo.
So, this morning I cracked straight into it.
Nek minnit:
Yummy.
-
9
-
-
- Popular Post
- Popular Post
Our usual Friday night cruise followed by burgers at the beach.
-
15
-
2 hours ago, Gee said:
have you tried going lock to lock? As the power valve moves the lines move as well. No different from you original setup but I hit the chassis rail on one side and the header on the other.
Yep, lock to lock and the closest I get to the header is 40mm. Guess I just got lucky.
-
5 hours ago, Gee said:
The power steering looks familiar. My lines looked older than yours but were in really good condition apart from being burnt on the header. My new lines look exactly the same as yours, standard aftermarket I guess. I am still a bit paranoid about burning and melting the lines so I added fire sleeve. Clearance for the lines is a prick. I also had to replace my power valve and ram as both were stuffed.
I never did answer your question about the alternator. I think it was a single wire technically as the extra wires were for the electric choke not excitation or regulation. I have heard since that single wire alternators sometimes don't come online without a few revs. My current setup gives me the 'belts' light until blipped a few times.
Thanks for the info on your alternator.
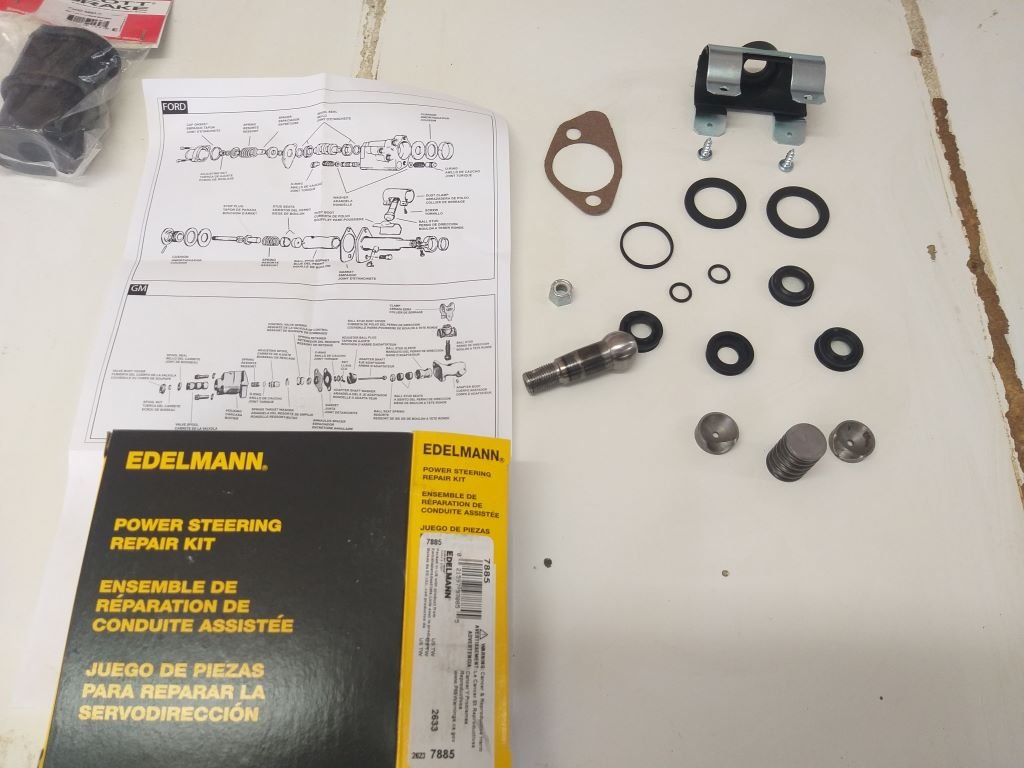
I've just finished rebuilding the power valve with the kit that arrived yesterday. Not too bad a job once I'd watched the CJ Pony Parts "how to" Youtube clip a good few times.
Just measured and I've got 40mm clearance between my header and the power steering pipes which sounds okay. Things can be a bit hit or miss with the aftermarket headers. My RHS one is an absolute shocker in terms of clearance. For added protection I might just wrap that LHS header so it matches the RHS one and it will also give the power steer hoses a bit of heat relief too.
-
Put the Thames through a few more heat cycles this morning and still no coolant drip.
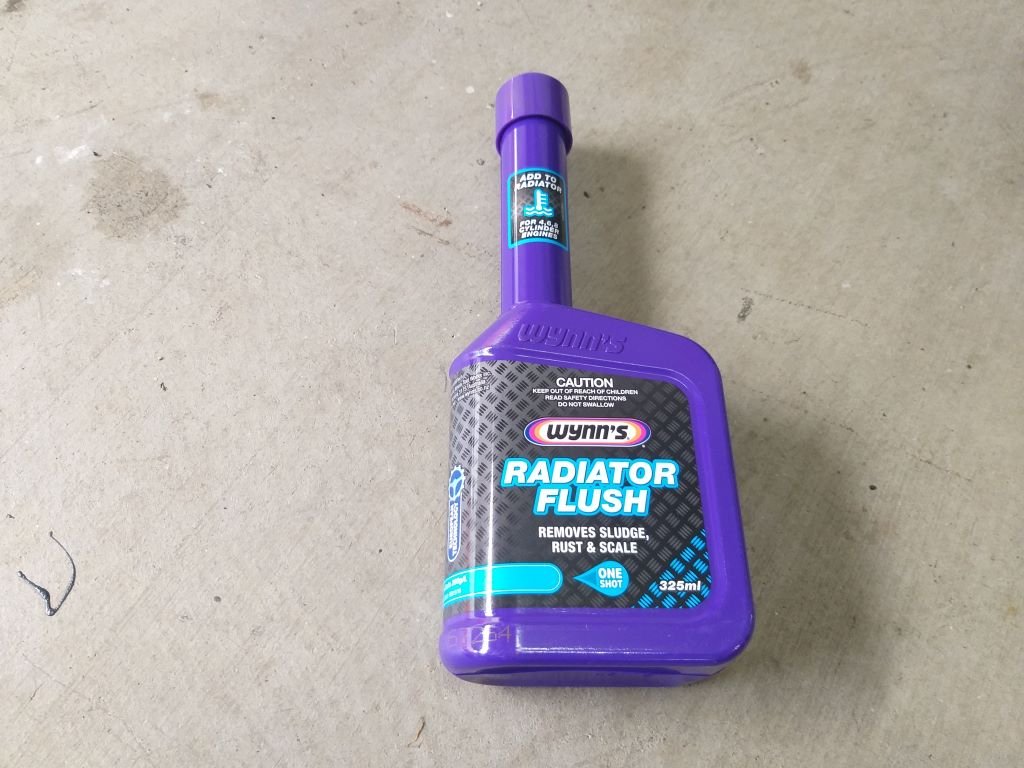
Flushed with success I thought I'd give the system a spring clean:
Hope you noticed what I did there. I'm just so funny ..... not.
Anyway, after doing that I figured I'd tackle another little leak, but this time of the oil variety.
Again, tell-tale signs of a little drip, nothing alarming, but enough to be annoying:
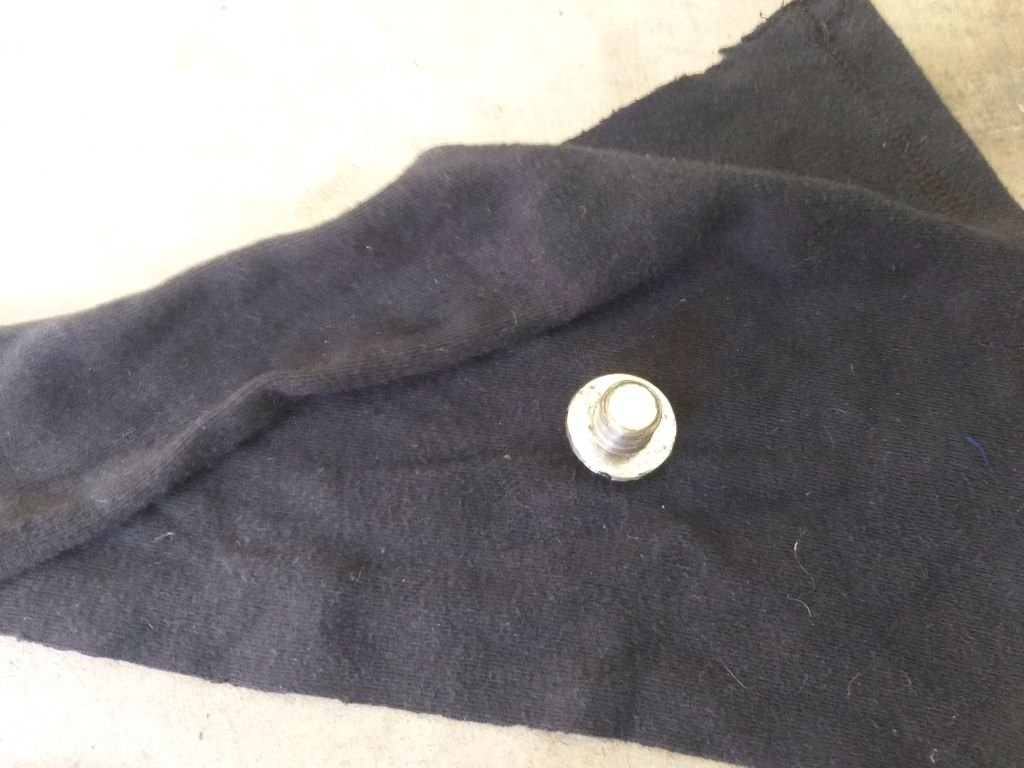
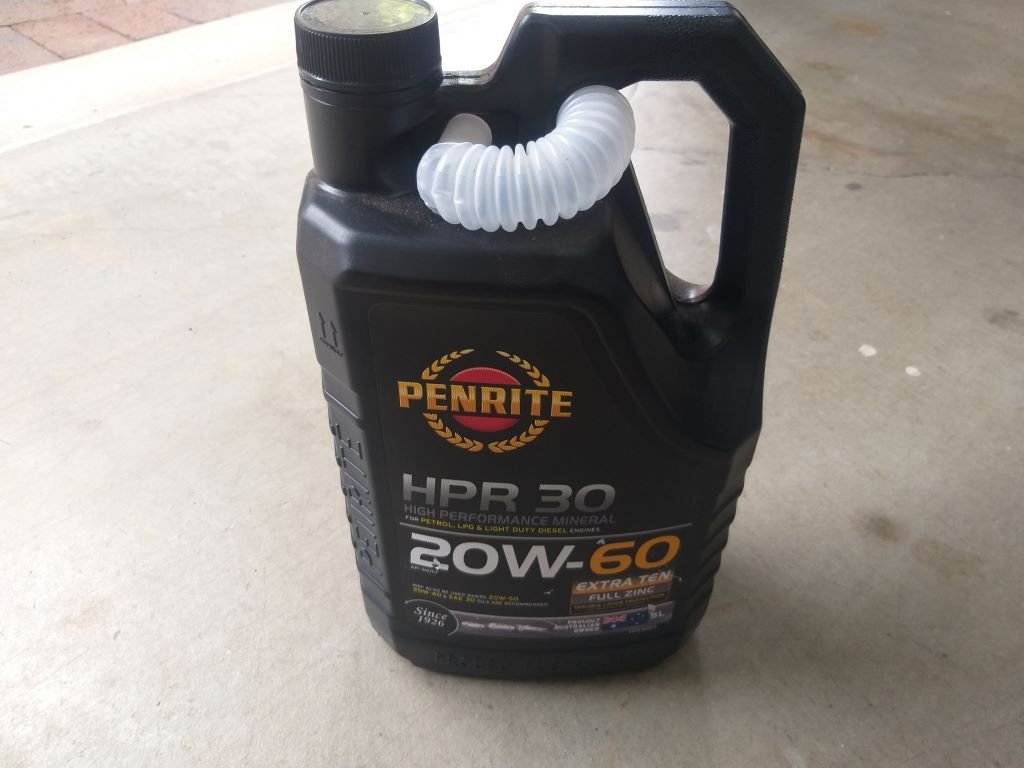
On closer inspection it looked like it was coming from the sump drain plug and since I've now got 1000 km on the freshly rebuilt 3Y I figured I'd do an oil and filter refresh while I'm about it.
Pulled the sump plug and yep:
No sealing washer fitted. What a numpty I am.
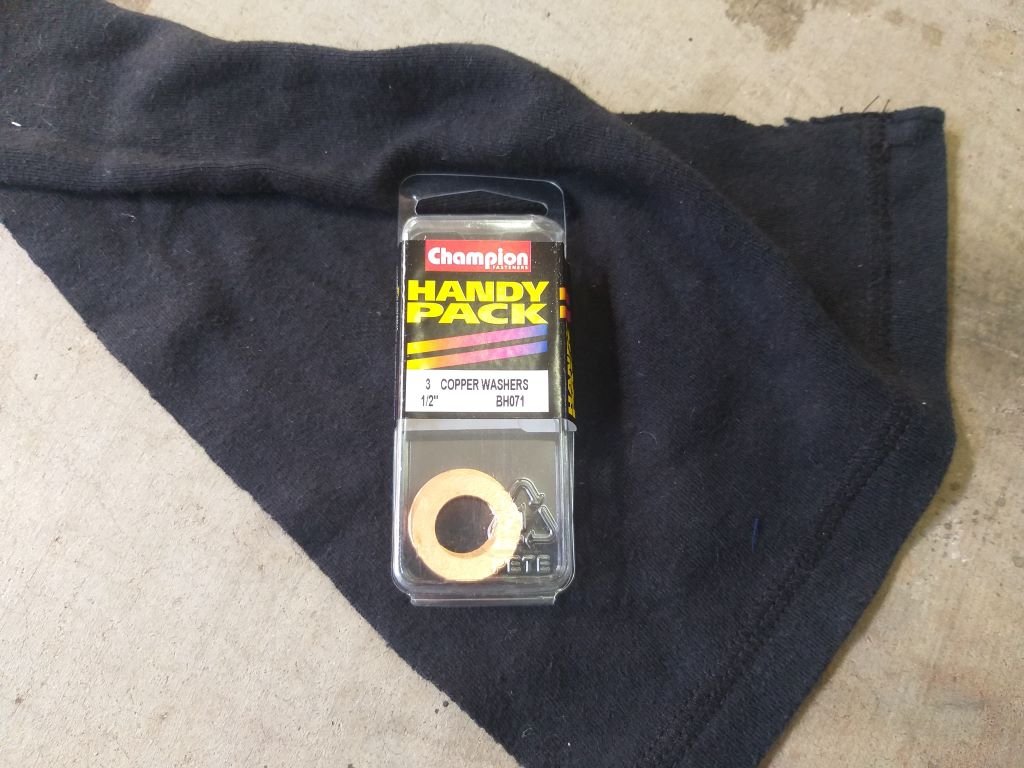
I've got this pack of appropriately sized copper washers in stock, so I'm going to give one of them a go:
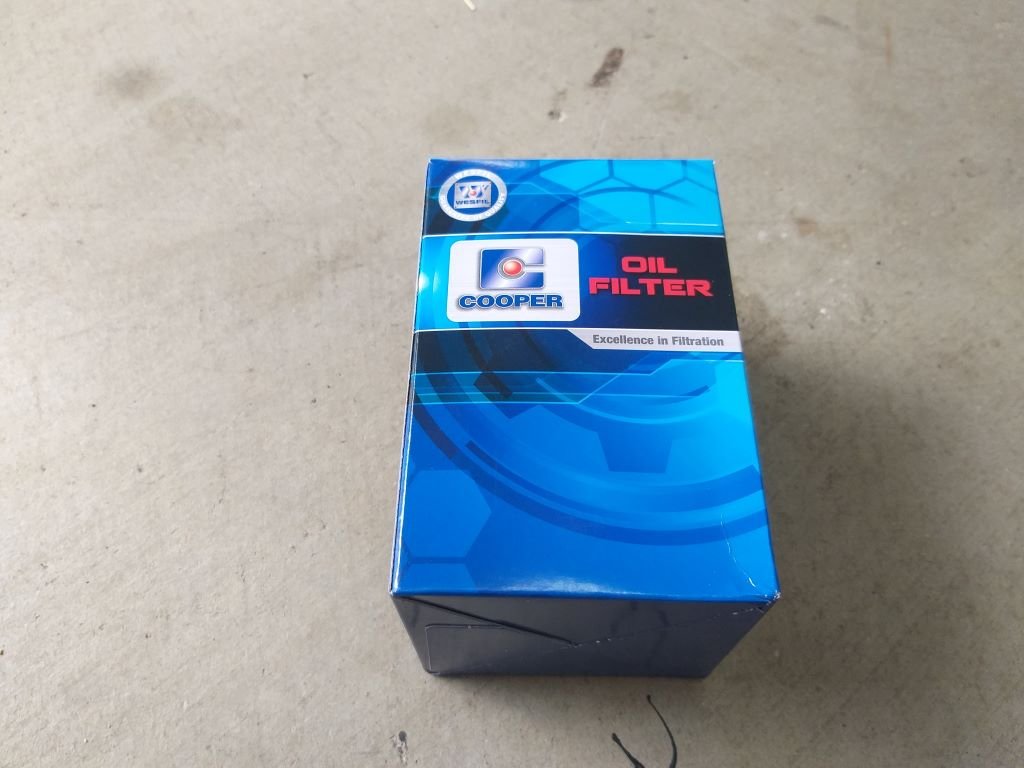
I'd also picked up a new filter and some oil on my last town trip, so everything was good to go.
And that's another job jobbed.
-
6
-
 1
1
-
-
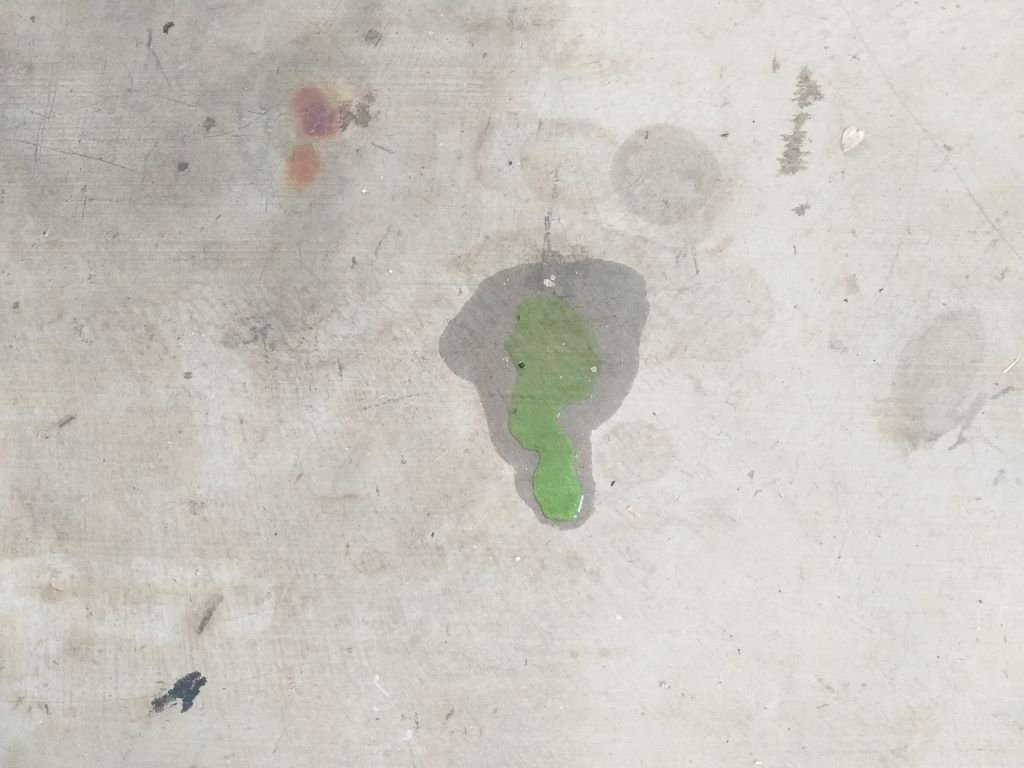
The van has been running really well of late, but I've noticed that it tends to leave a a few drops of coolant on the floor after it's had a hard run.
At first I assumed that I had overfilled the radiator after replacing the radiator cap and figured that it would sort itself out over time. However, it's been getting steadily worse and this morning I woke up to this:
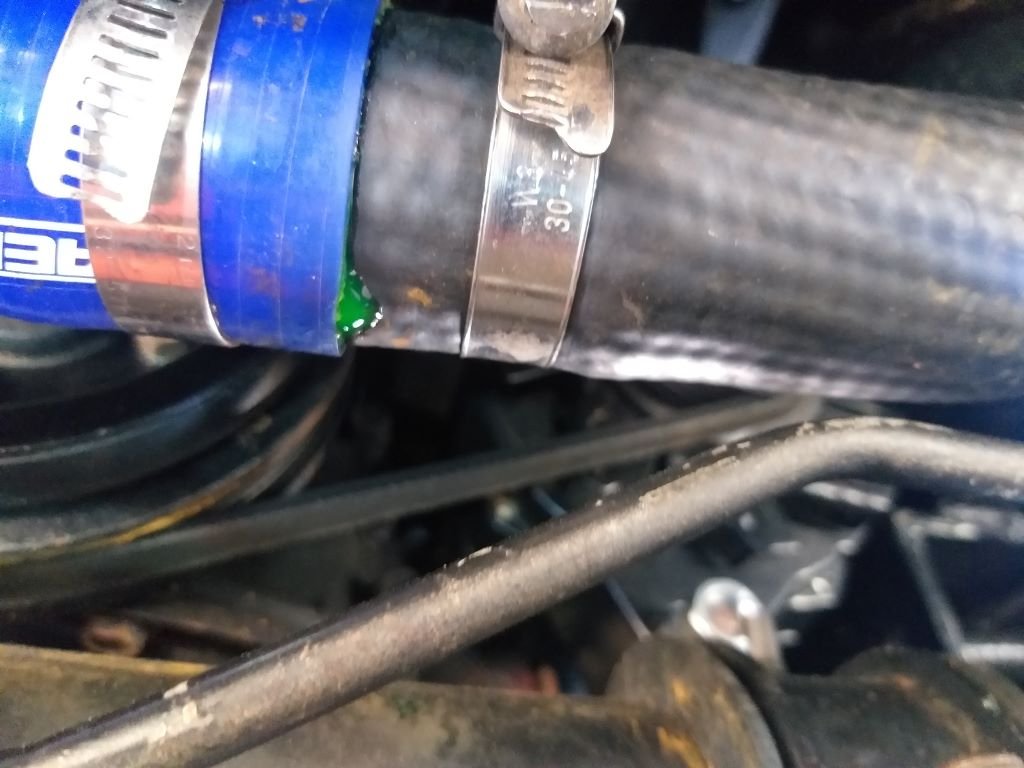
Lifted it up for a closer look and noticed this:
Bugger .... it's not the first time I've dealt with weeping from this joint.
Anyway, wiped the drip off the hose, ran the engine up to temp and no sign off a leak. With the system now under pressure I switched off and sure enough after a couple of minutes the first drop of coolant appeared on the hose joint. Grabbed the black hose further away from the joint and gave it a good squeeze and the coolant drip turned into a steady trickle coming from the joint in the hoses.
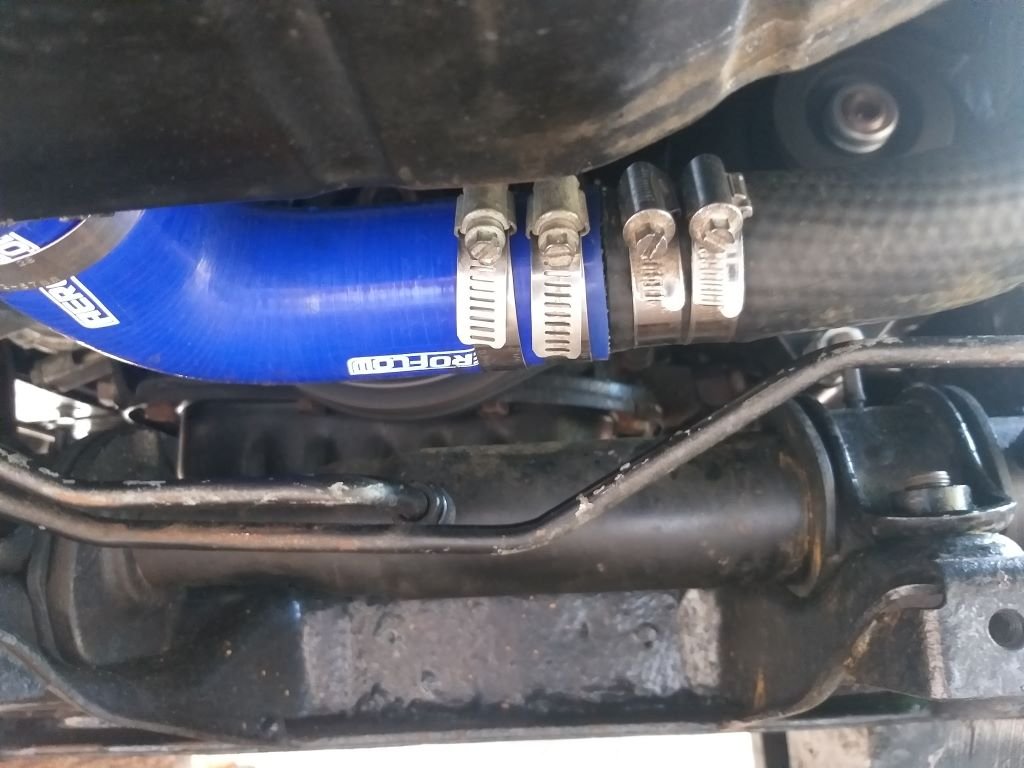
Last time this happened I replaced the hose clamps and the problem went away for a while, so this time I got desperate in true "Rough & Ready Restos" fashion:
Looks bloody awful but I've gone through a few heat cycles and some more vigorous squeezing of the hose with no drips experienced so I'll take the win for now.
Time will tell, I guess.
-
8
-
-
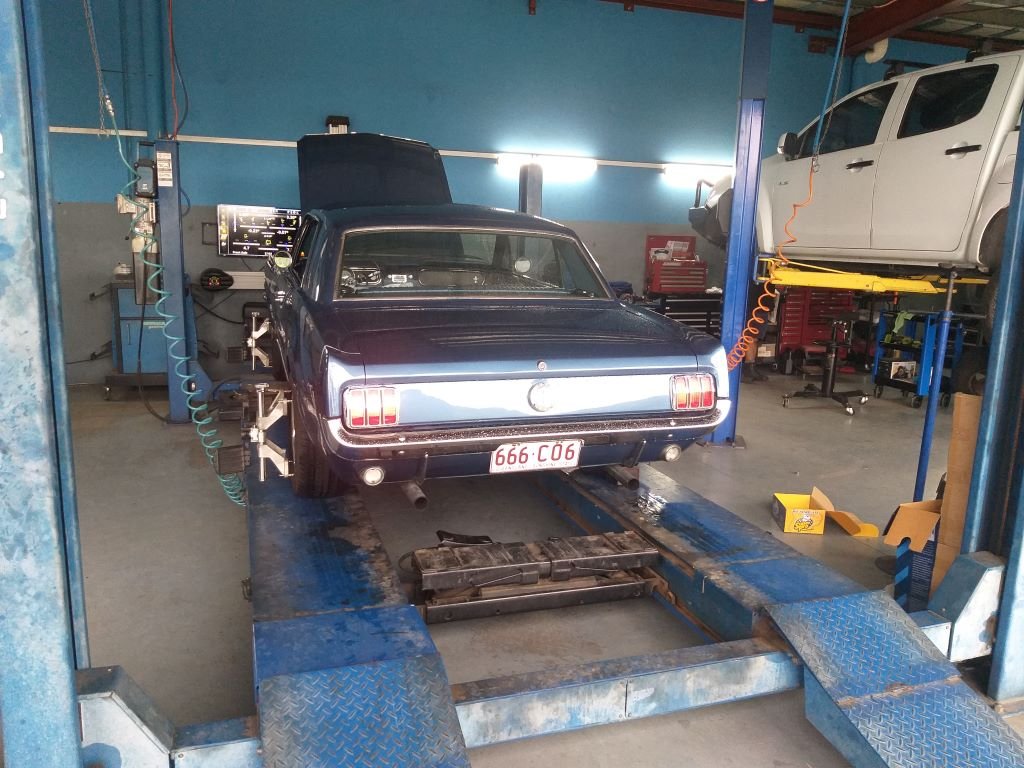
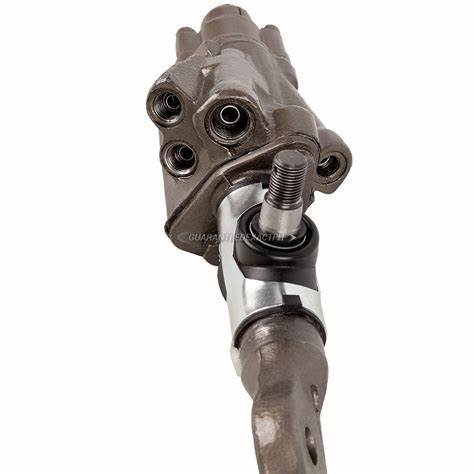
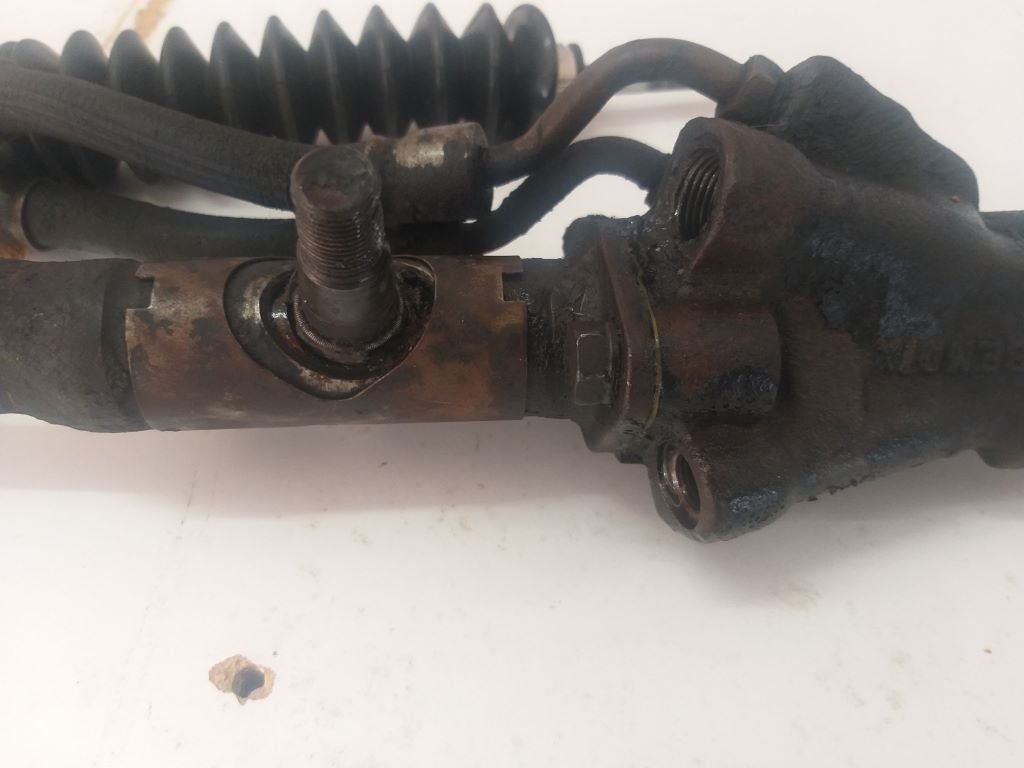
I've been trying to track down the source of an intermittent steering "clunk" for a while now and yesterday I finally got a chance to chuck the Muzzy up on my mate's hoist for a good look see. It didn't take us long to identify the source as a worn ball joint on the power steering valve -this being the only ball joint that I haven't replaced thus far.
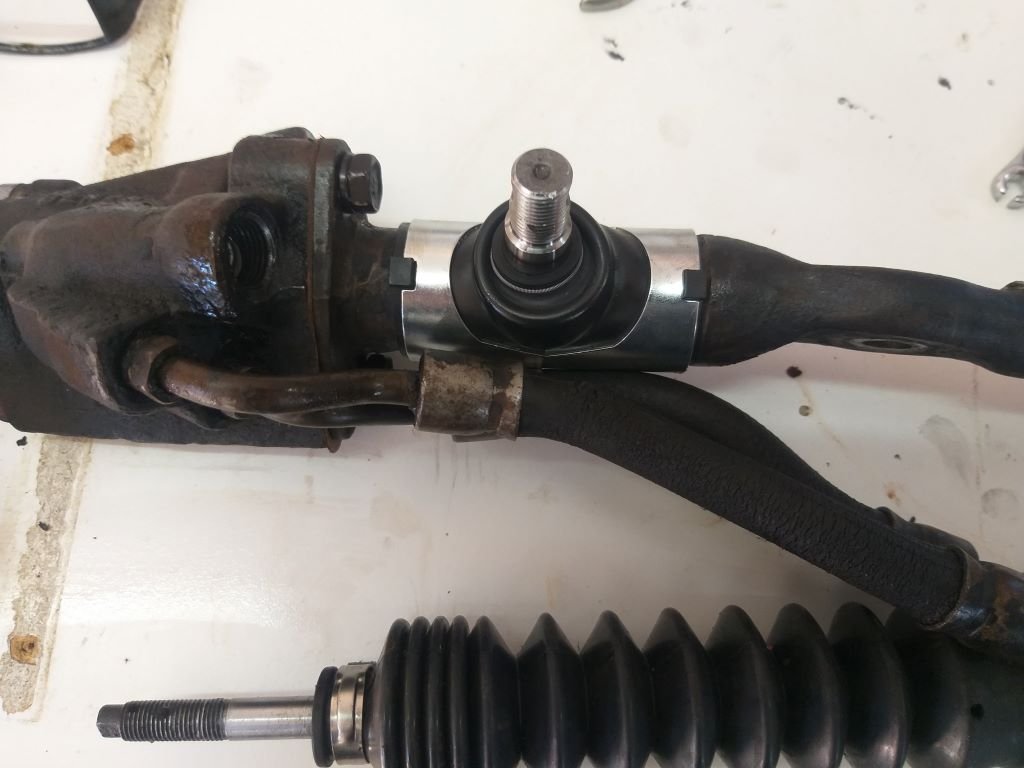
Using a photo off the web the offending ball joint looks like so:
So first thing this morning I pulled out the centre link that incorporates the power steering valve and ... yep... my ball joint is well knackered:
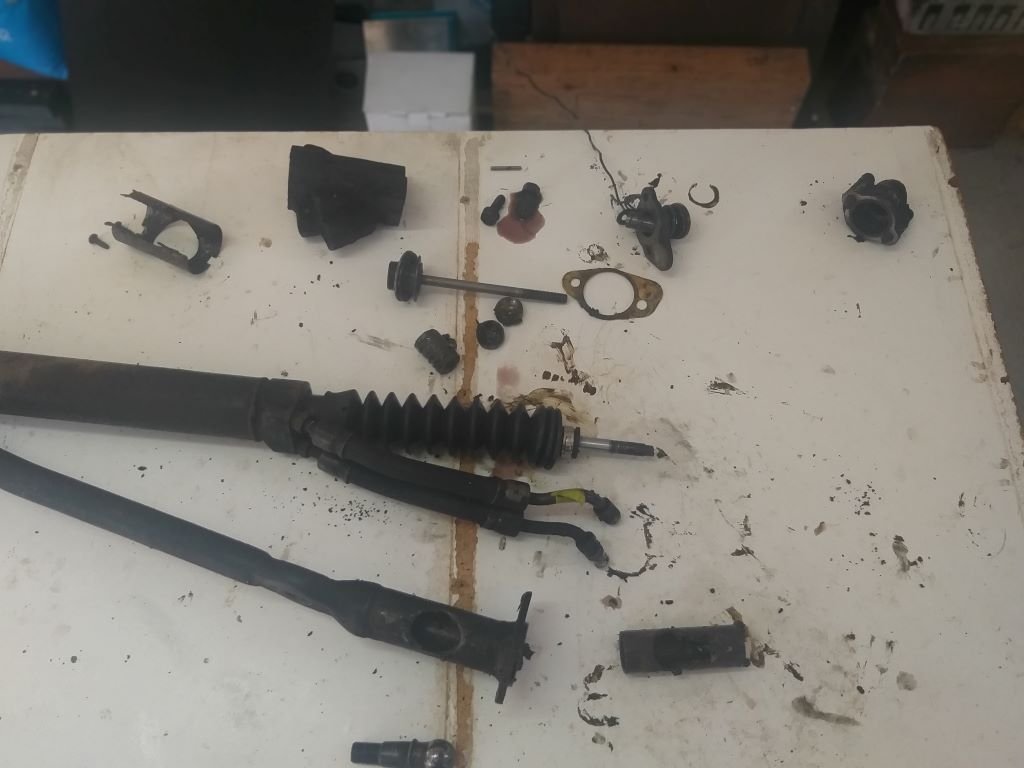
Ended up ordering a steering valve ball and stud rebuild kit from Sydney Mustang which is winging its way to me as we speak, but I thought I'd get a head start by stripping the nasty thing down.
Gave everything a good clean and now I just need the new bits to arrive.
-
9
-
-
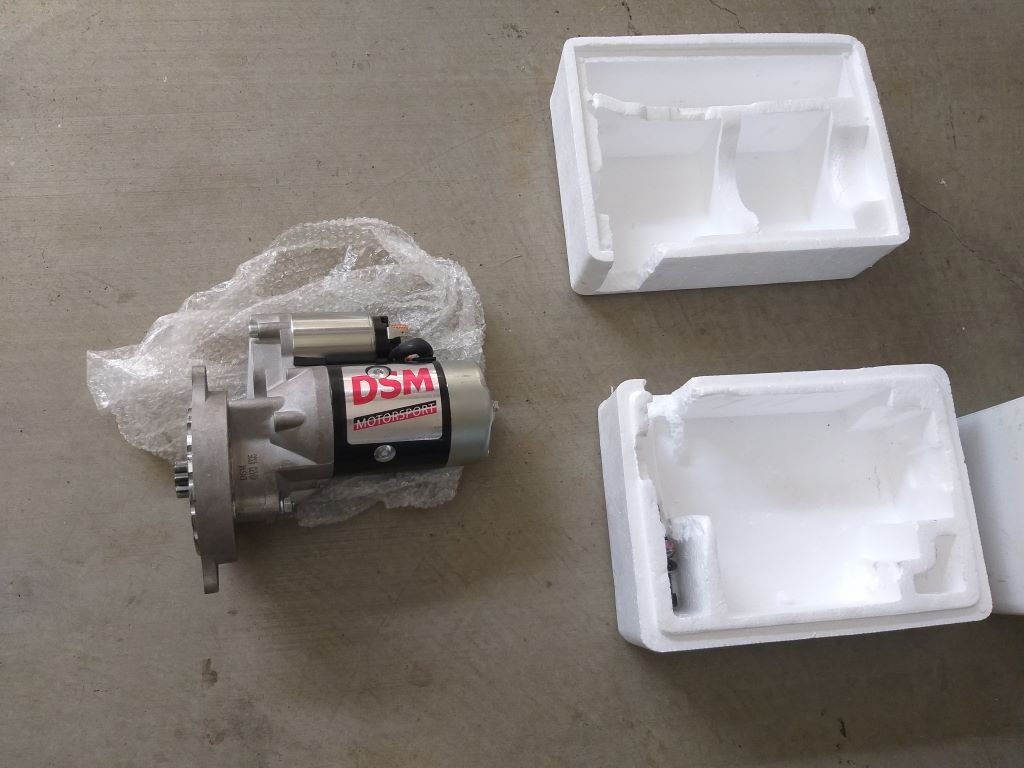
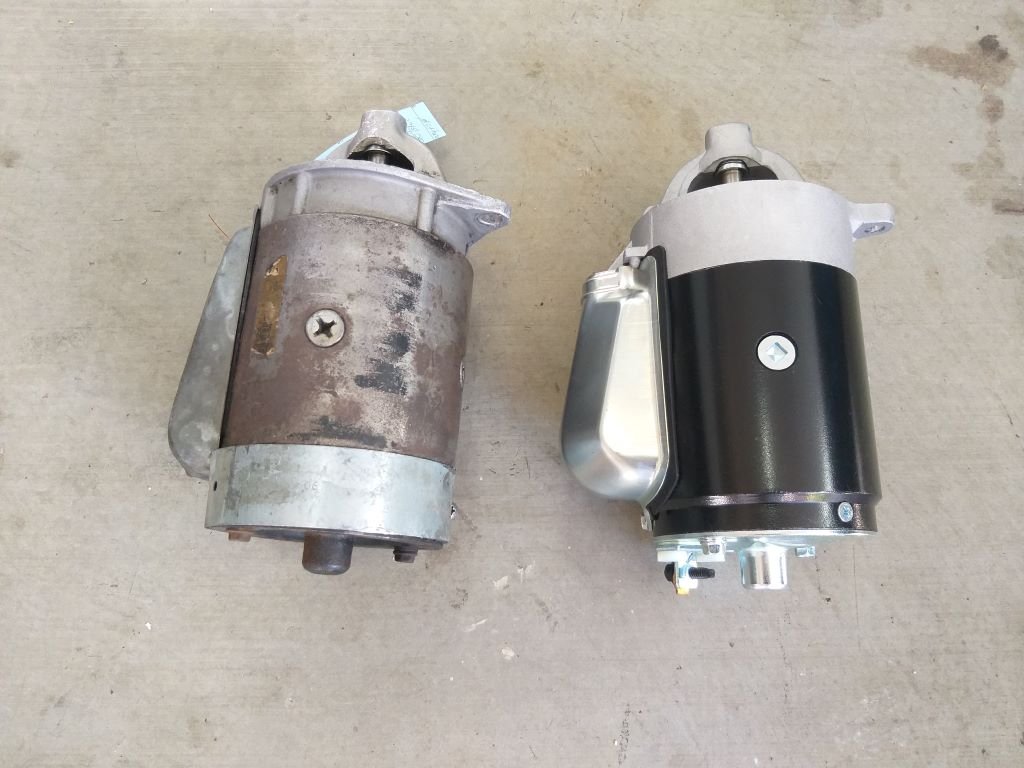
In terms of ongoing maintenance, the poor old Mustang has been taking a back seat to our Thames van for quite a while now, but the recent failure of its starter motor has finally pushed it to the front of the queue.
The old clapper style starter that these are blessed with has been slowly getting lazier and lazier, especially during hot starts. The main reason for this is the fact that it sits so close to the RHS exhaust header that it slowly gets cooked. A good 18 months back I bought one of those mini high torque jobbies as a replacement.
These are supposed to be fully adjustable to provide extra header clearance but in this instance it actually ended up making things worse to the point where the header would no longer fit. So, I ended up wrapping the original in one of those thermal blankets and putting it back. Unfortunately, the damage had already been done and she didn't last too much longer.
I toyed with the idea of buying another high torque example marketed by Aeroflow, but after seeking advice from our local auto electrician I ended up going for another clapper style unit.
New and old together:
The newer unit is a slightly improved design with the main terminal located at the rear of the unit rather than on the side closest to the header.
I tweaked the header slightly with a BFH and ended up wrapping it in some of that thermal bandage. There is a good 15mm of clearance now so hopefully this will give the new starter a fighting chance.
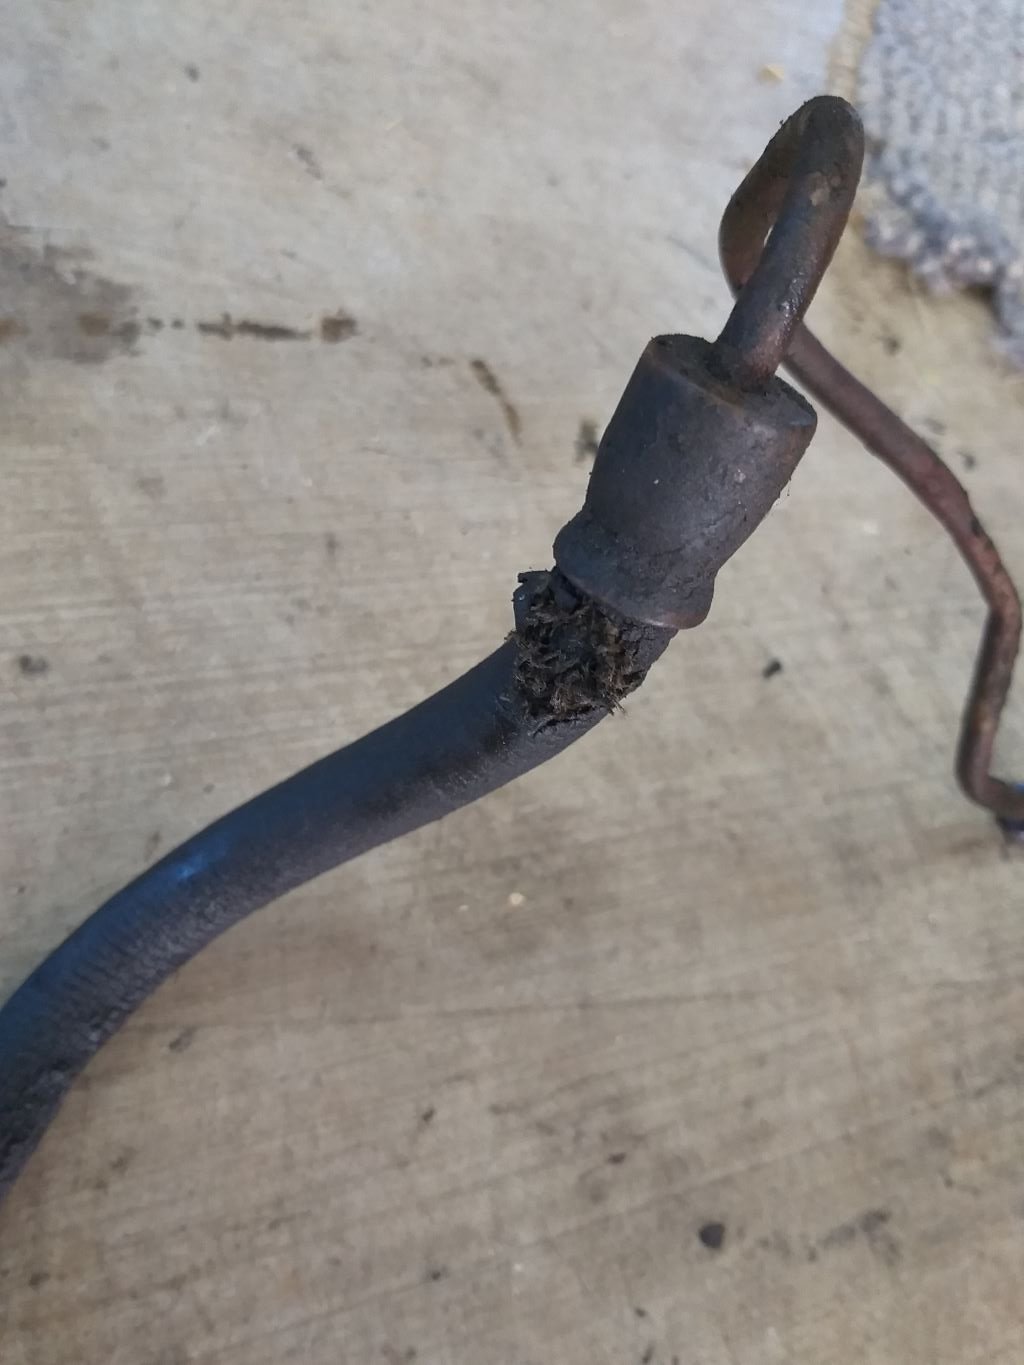
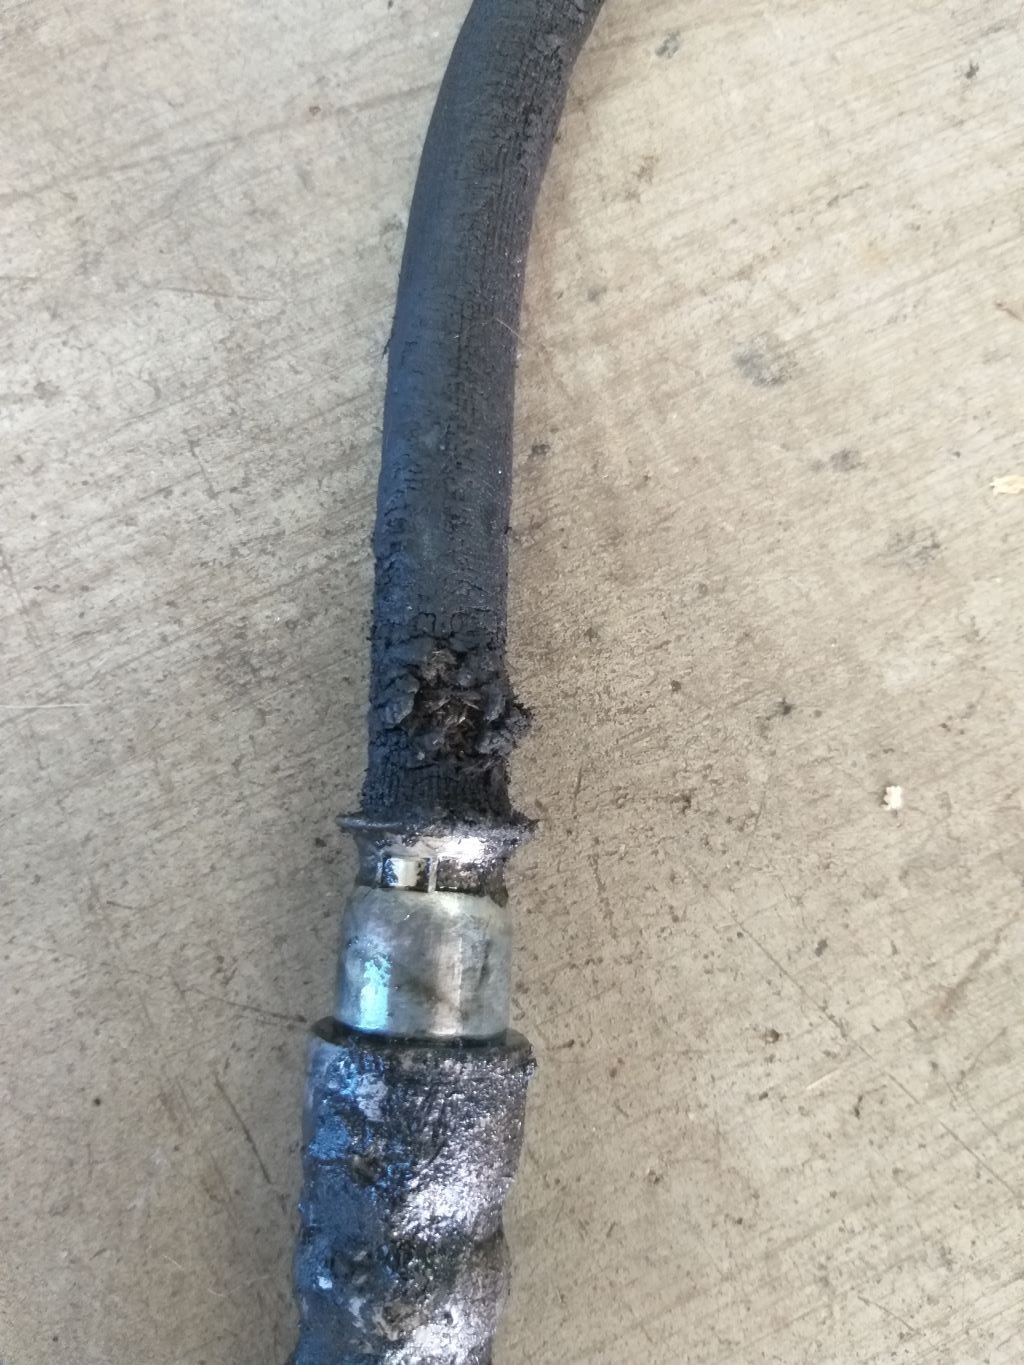
While I was grovelling around under the old girl I noticed that the power steering pressure hose was looking a bit tatty. Here:
And here:
The hose moves back and forth as its attached to the main ram which in turn forms part of the steering centre link so it ends up with this kind of wear at both flex points.
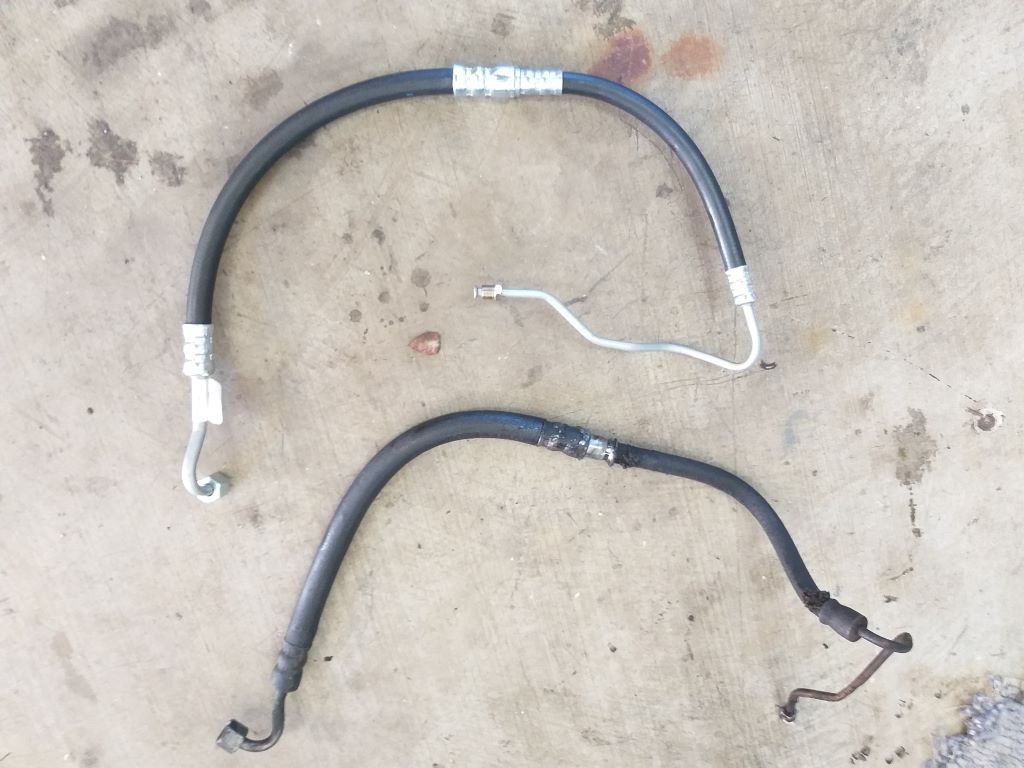
Replacements are cheap as chips, so I added a fresh unit sourced from Rob at Sydney Mustang.
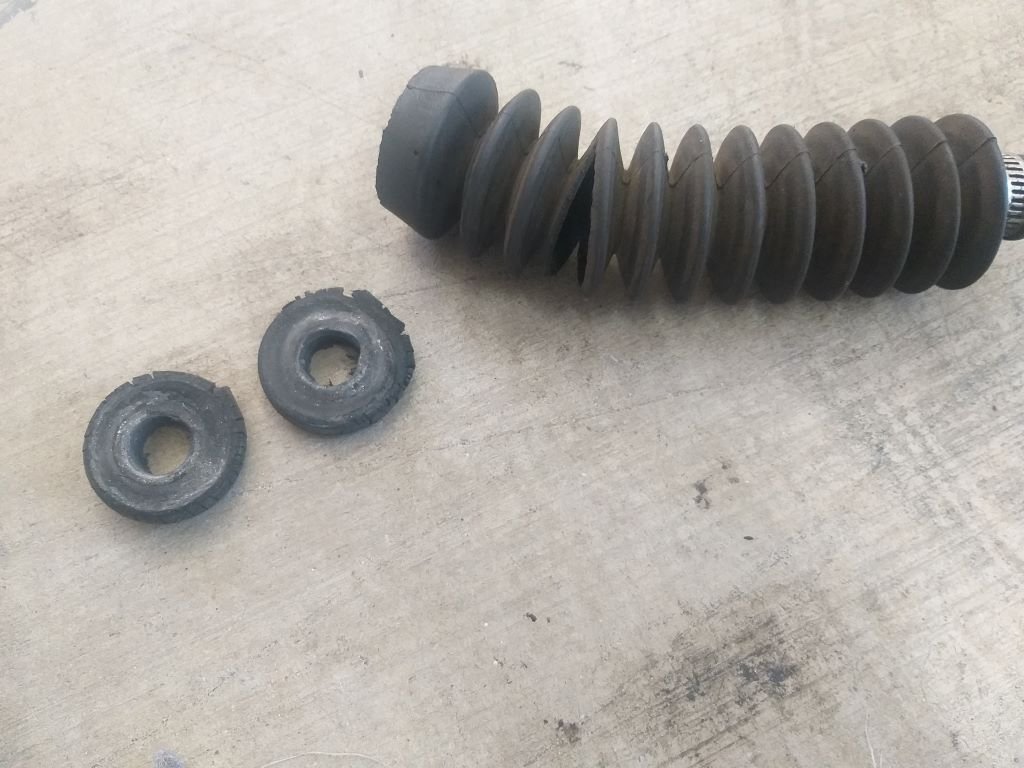
Another thing that looked well flogged was the dust boot and end rubbers on the power steering ram.
Ended up getting a fresh kit in the same parcel with the hose, so I chucked that in too.
I'll give the Mustang a bath sometime next week and hopefully then all will be forgiven.
Thanks for looking.
-
7
-
-
2 hours ago, zep said:
Question though - do you reckon they will handle power? Like 400hp/1000kg car?
I guess a lot depends on your driving style. If you are going to lay rubber all the time no tyre is going to last that long.
-
1
-

.JPG.911996a57340489b89409222facd1532.JPG)
.JPG.32ca8111e8a98af724dd0f2e2c95b891.JPG)
.JPG.893e17939e59eecb0ff27421c7b47d00.JPG)
.JPG.4314fad55b635779c2c647b6d56b1709.JPG)
.JPG.5224b5e07dac0595316b8abde0085eb5.JPG)
.JPG.d527fed8e5a257d86f52d15d2c74e985.JPG)


Mrs Flash's '74 Moke
in Projects and Build Ups
Posted
Since day one of ownership the Moke has always whiffed of fuel when parked in our garage. At first I attributed the issue to the cork gasket on the fuel cap which was badly shagged. I ordered a new one from Minisport but it made no difference.
I began to notice that the smell was particularly bad when the tank was anyithing above about half full.
We lived with the problem for a good while until one day I decided it was time to do something about it. Crawled underneath and removed the under tank cover plate for a quick look see. Sure enough there were signs of old fuel drips on the inside of the cover plate.
At this stage I suspected the problem to be the sender unit rubber seal that sits on the side of the tank. So out came the tank and I removed the sender unit and replaced the seal. Sadly still no luck.
In desperation I decided to drop the tank one more time, then filled it up with fuel to just past the sender unit to see what would happen. And .... a slow leak from one of the spot welds that hold the tank sender locating collar in place.
I ended up chucking some JB Weld over the spot and that solved the issue.