arswenson
-
Posts
41 -
Joined
-
Last visited
Content Type
Forums
Downloads
Events
Gallery
Everything posted by arswenson
-

PALMY SWAPMEAT 2025: 1-3 AUGUST (20 Year Anniversary!!!)
arswenson replied to Bistro's topic in Upcoming OS Events
More than welcome to par it in my shed however I'm about 15 mins out of town so probably not ideal. -
PALMY SWAPMEAT 2025: 1-3 AUGUST (20 Year Anniversary!!!)
arswenson replied to Bistro's topic in Upcoming OS Events
Yes have moved in there so doubt it will be available, could suggest the Tainui school hall, its pretty close to Feilding and dirt cheap. -
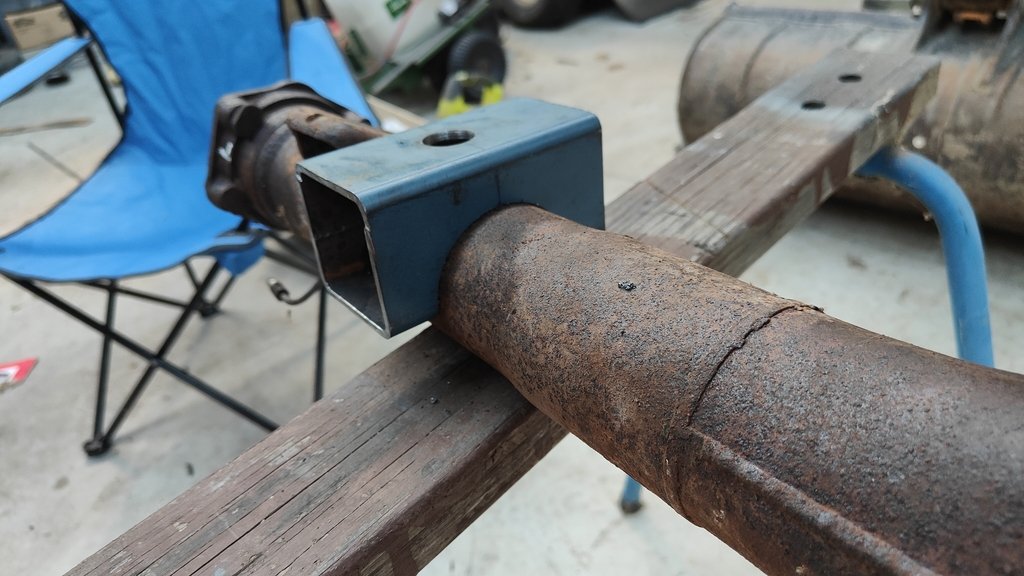
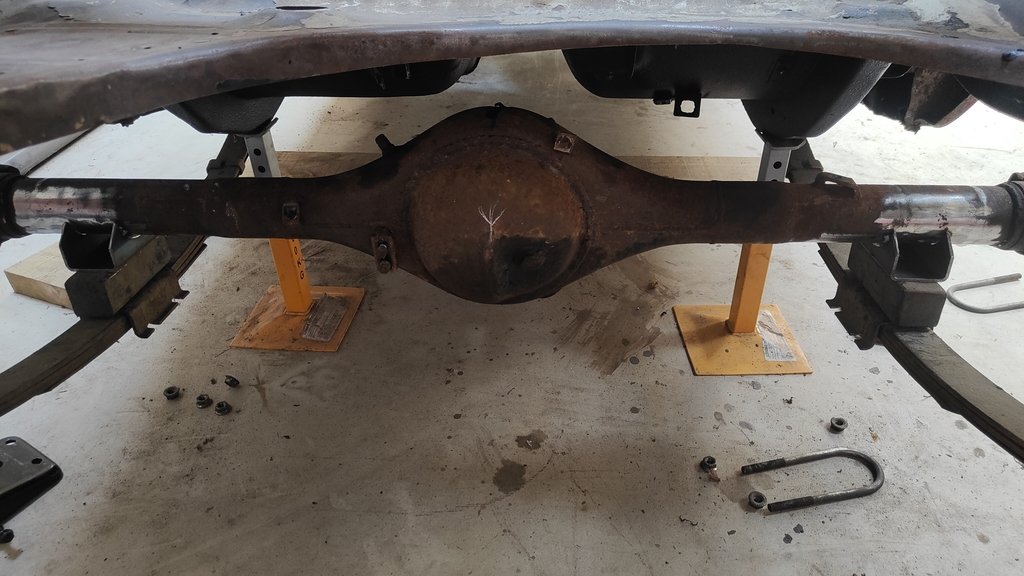
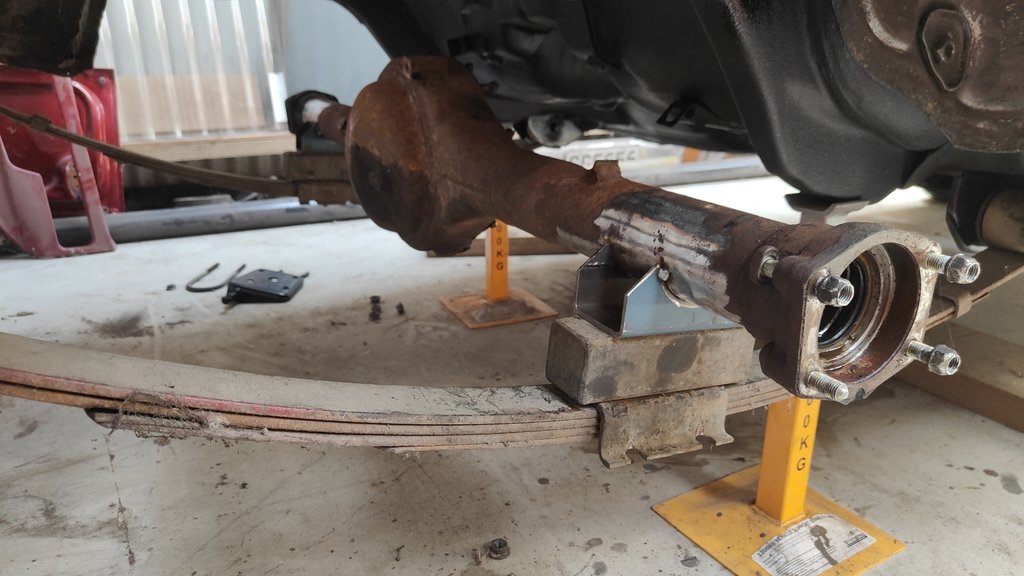
I managed to score a leaf sprung liteace diff off market place and re-made the mounts (temporary) to get a gauge on width. She's a bit wider than id like so will need to be shortened. The liteace axles have a taper just after the splines so shortening them wont work so will track down a pair of estima axles and get them re-splined and redrilled to suit. Just need a set of wheels to get measure right width, aiming to run 15x8 with either a small flare or if i can get away with it no flare but good fitment. Also chucked the new guards on to get a bit of motivation to get it done.

- 18 replies
-
- 13
-

-
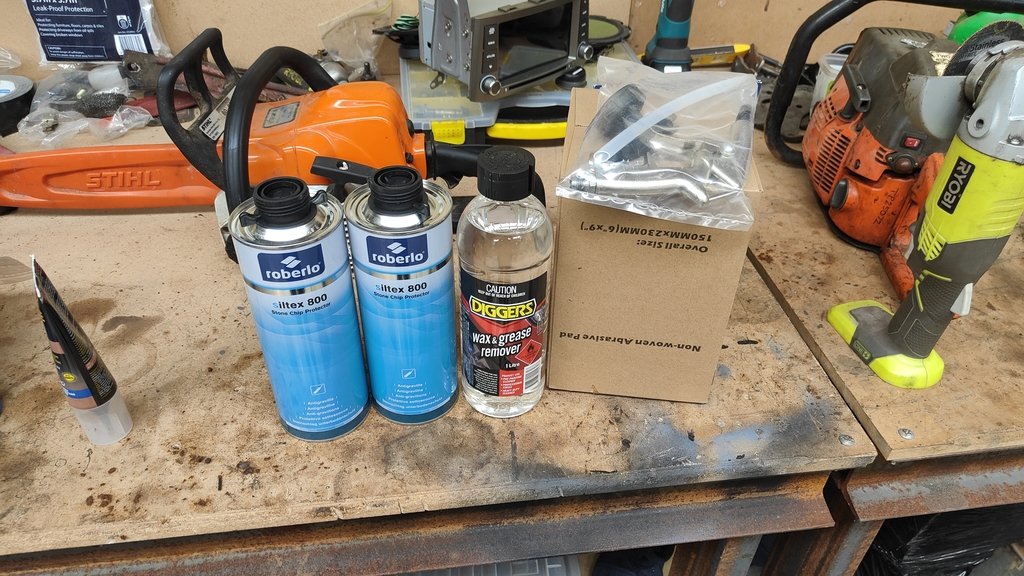
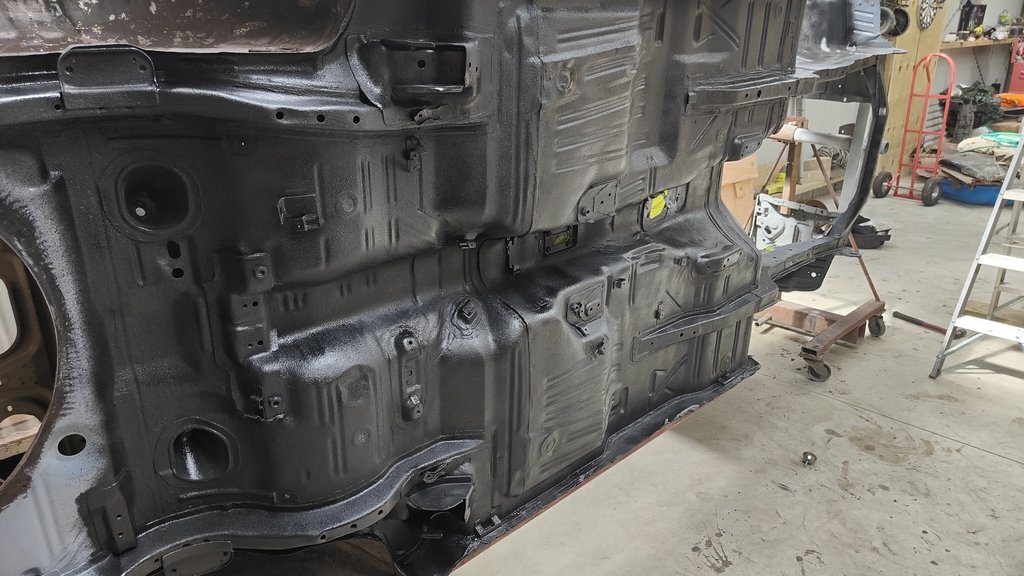
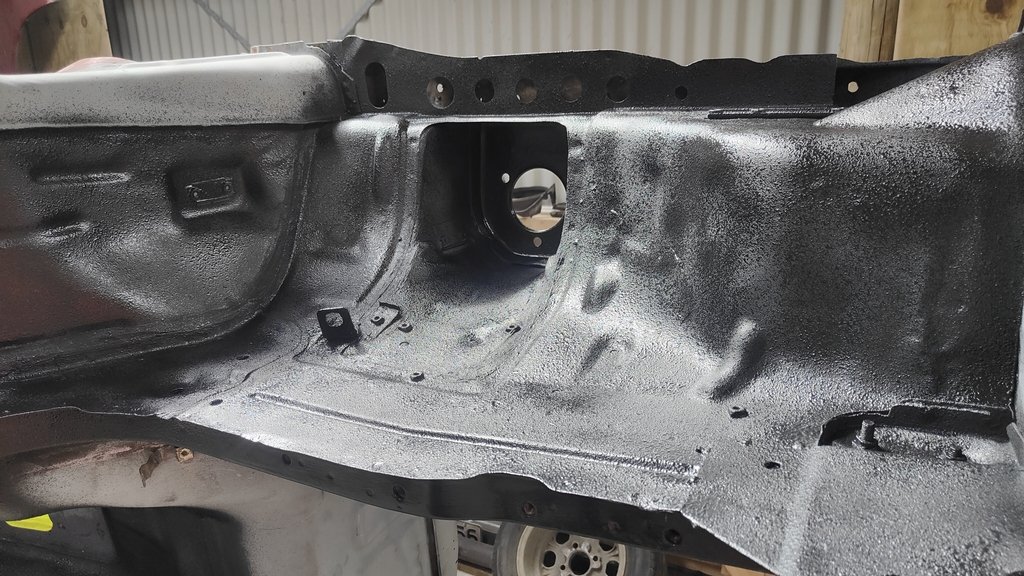
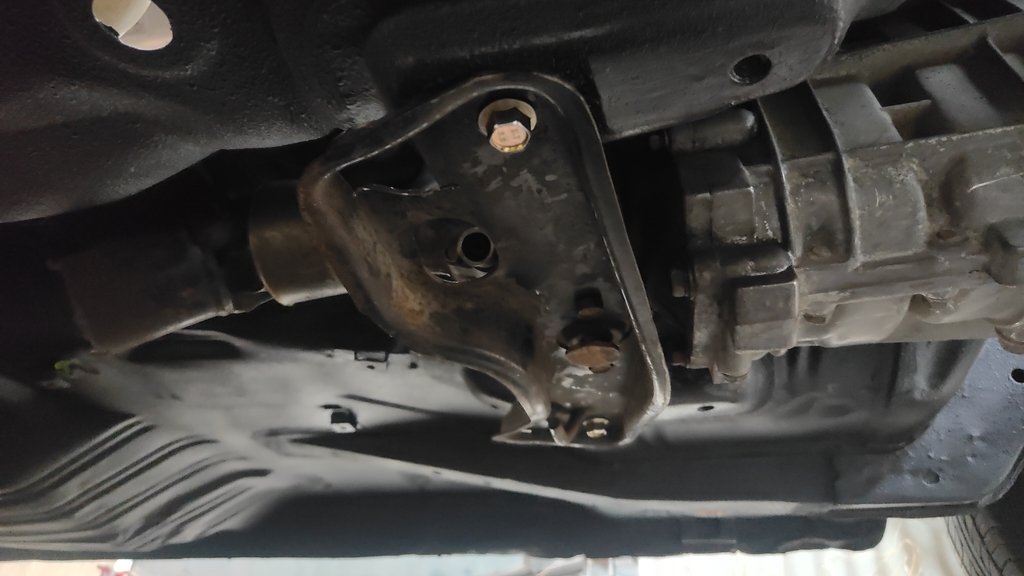
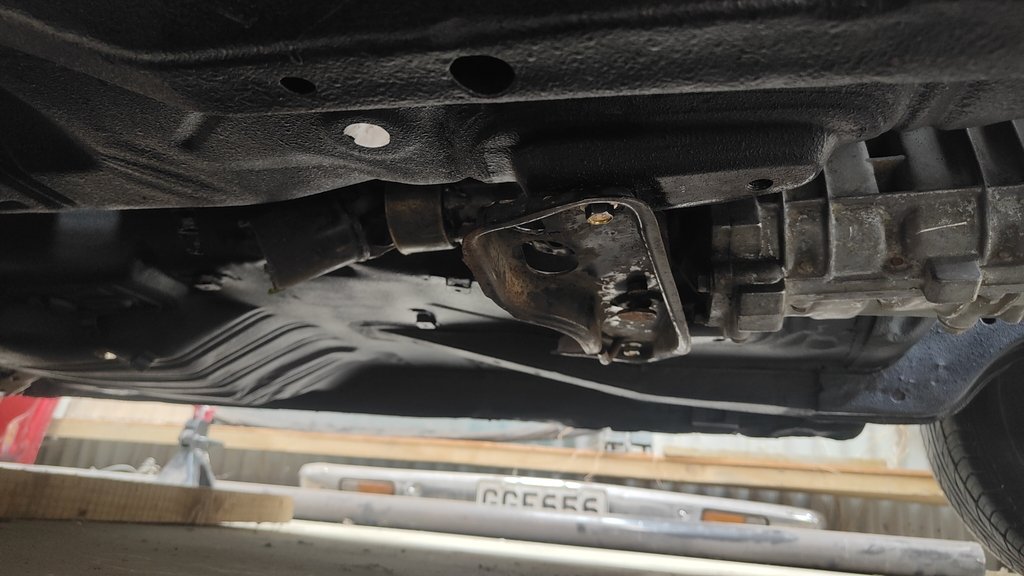
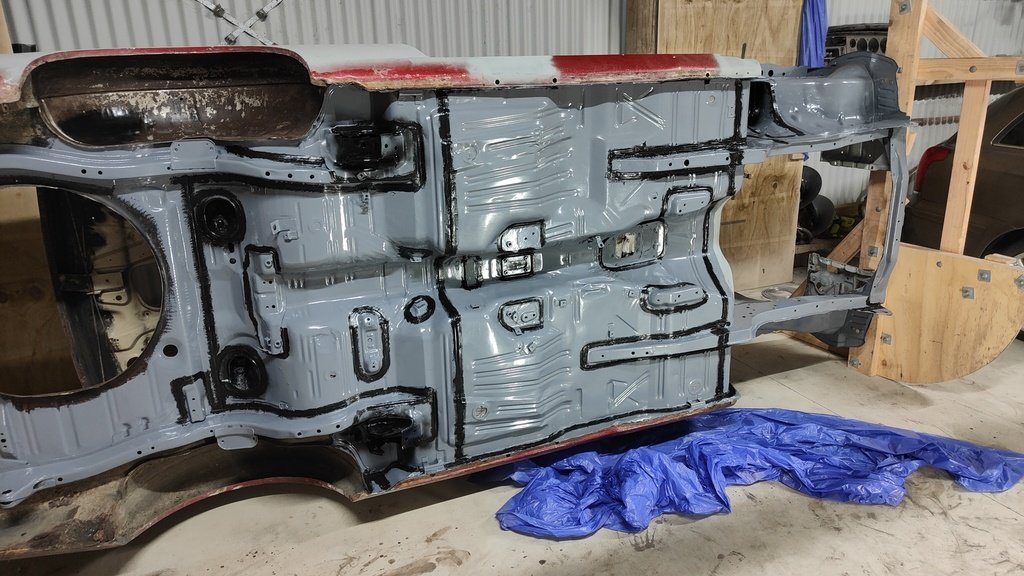
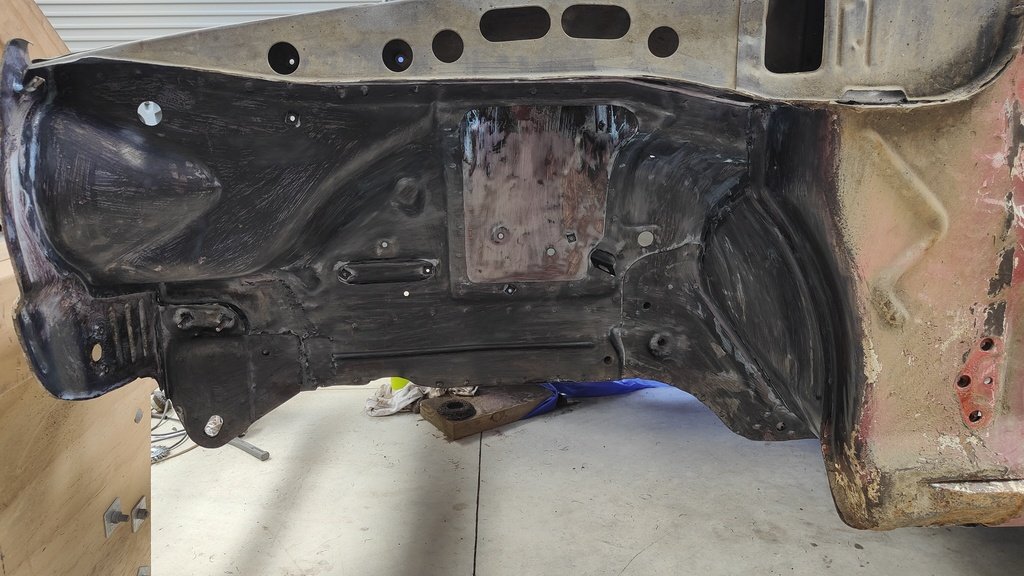
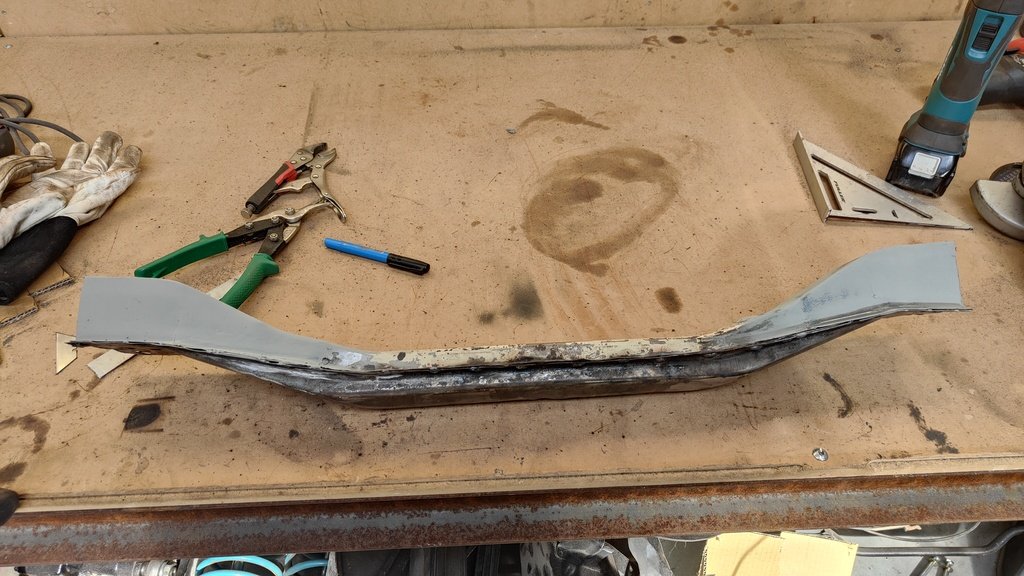
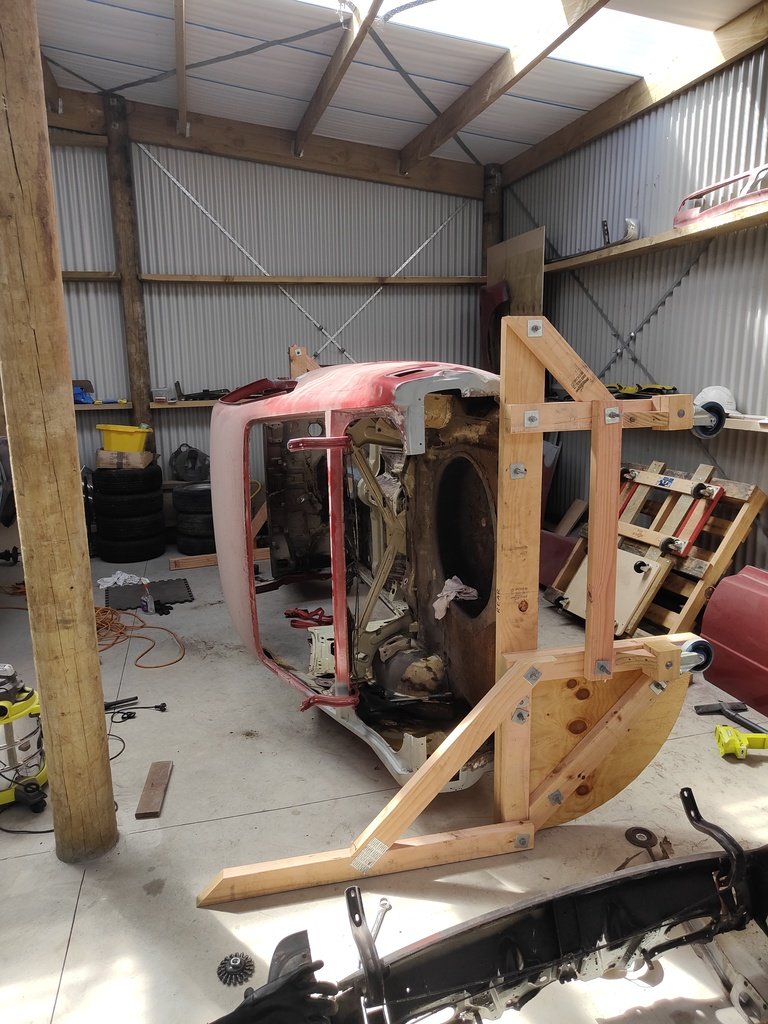
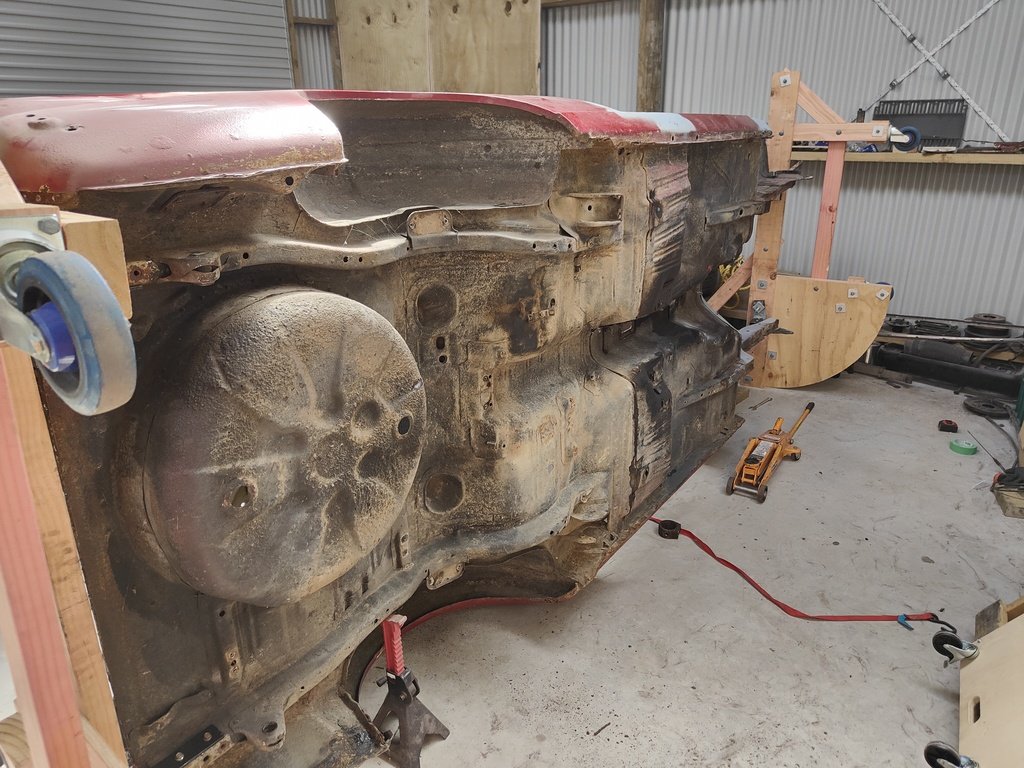
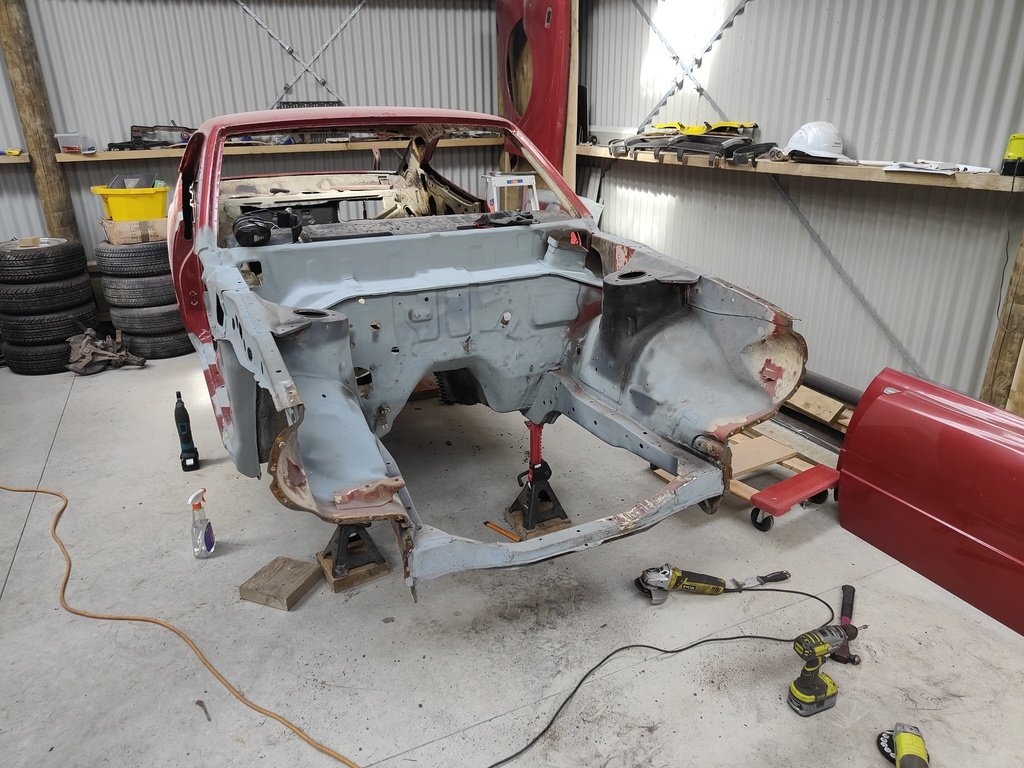
So its been a while since i have done anything major with the KE but i have ticked a few things off. Managed to get 90% of the underside sealed. This stuff was good to use, went on well and has a nice texture to it, will leave the wheel well area until i decide what I'm doing with the huge hole. I put the engine and trans back in and had a play around with the trans mount. Modified an AE86 cross member which actually lined up 95% so only a small amount of modification required. Will weld in plates to the front to pick up on the front mount holes if need be, the factory cross member only used the 2 holes so may be ok.
-
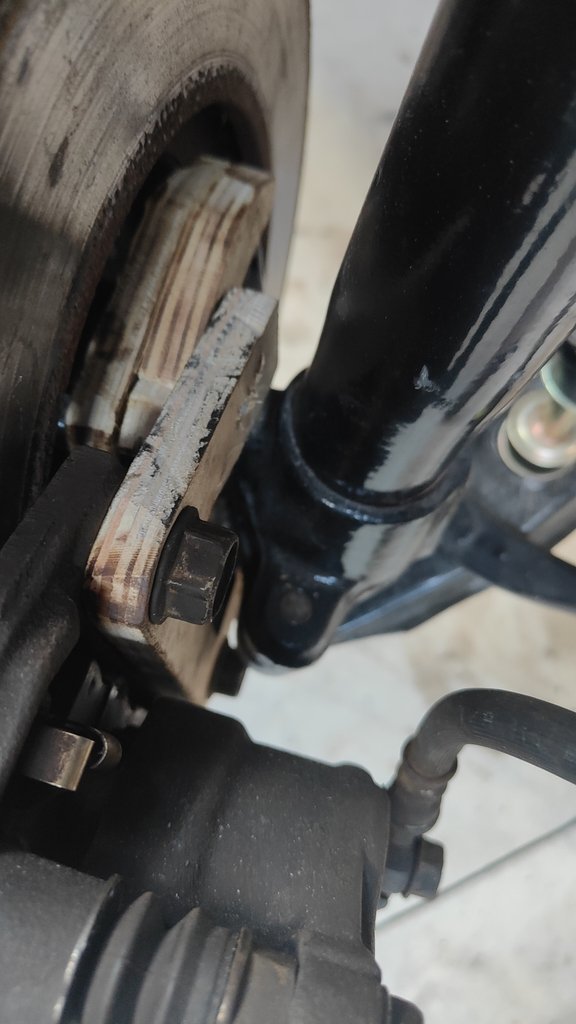
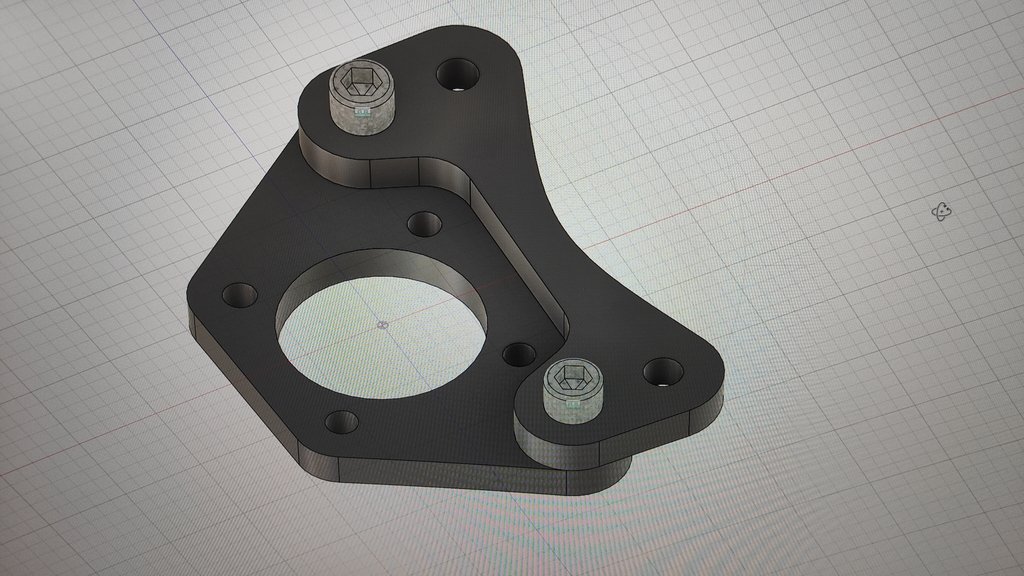
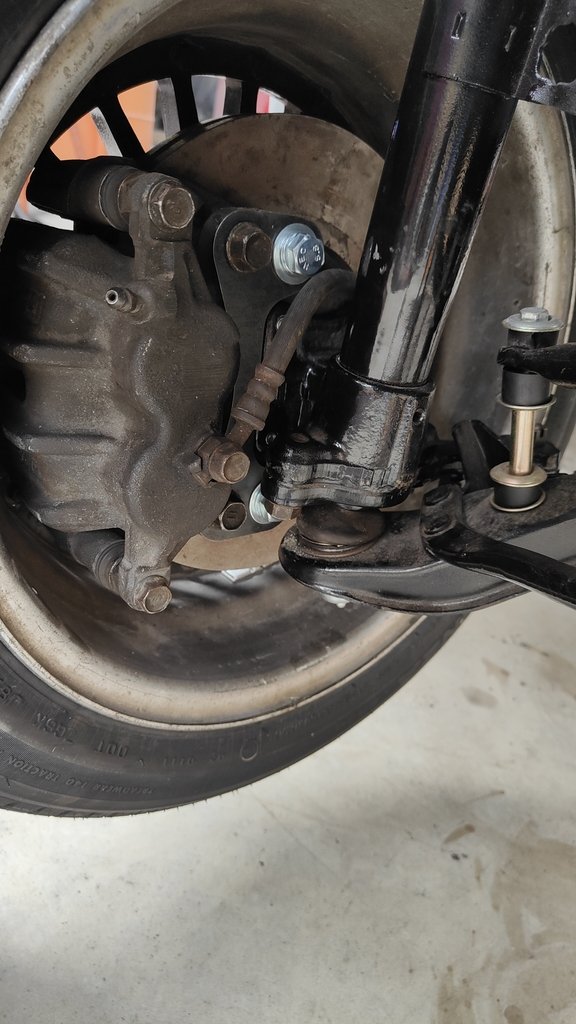
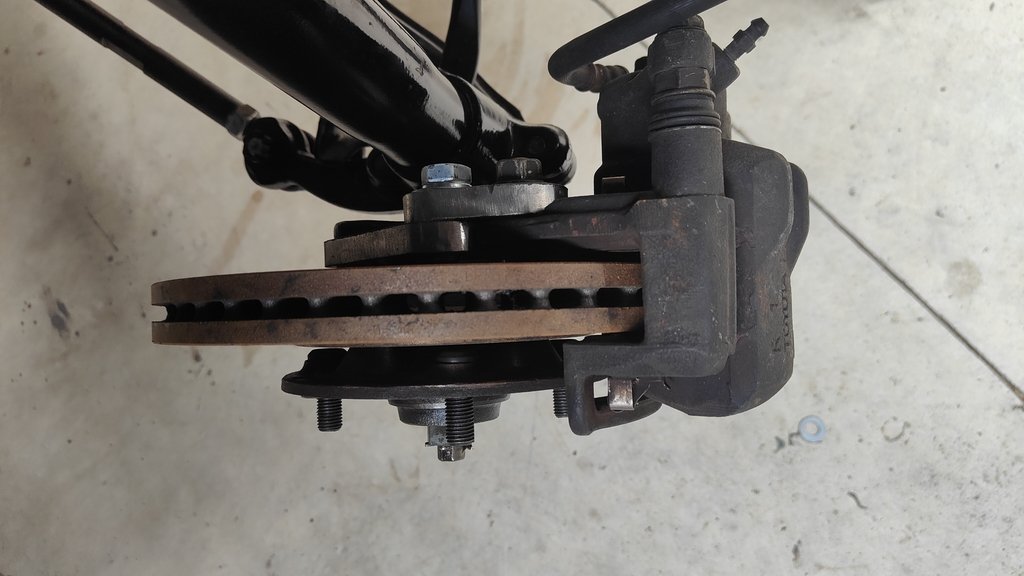
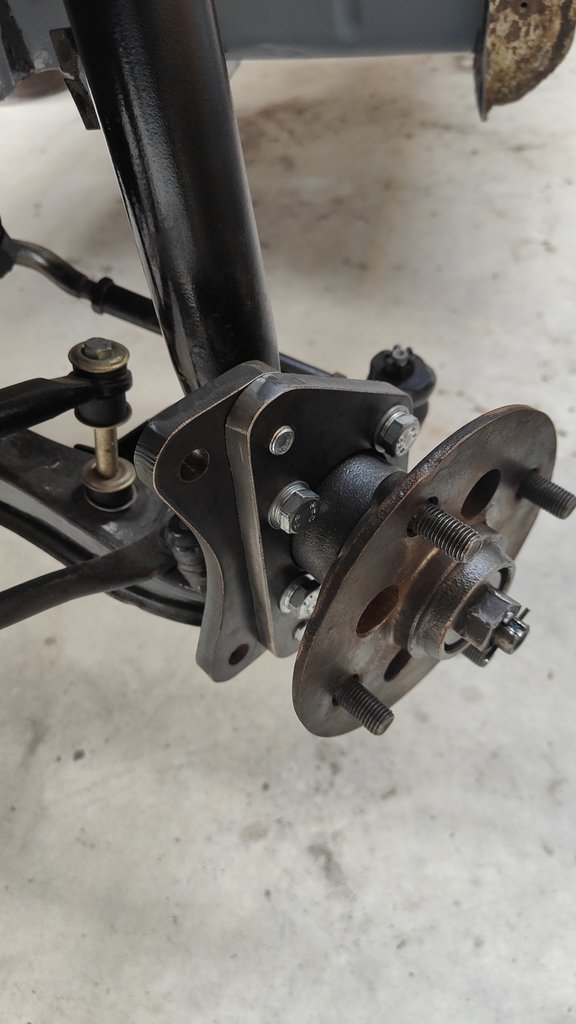
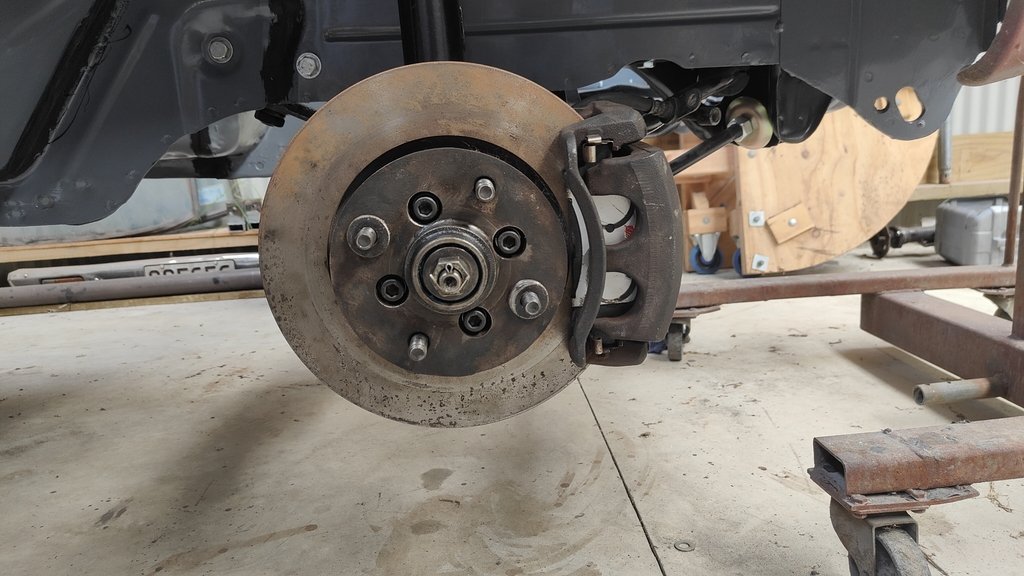
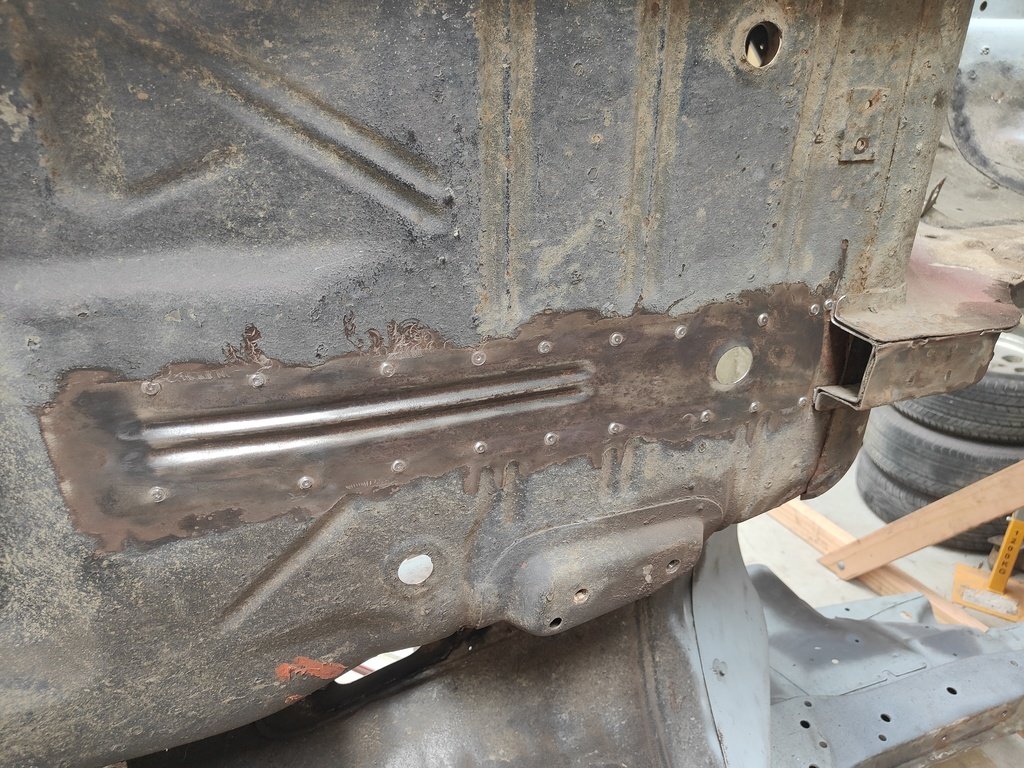
A little while back I picked up a set of AE111 twin pot front calipers and rotors for a pretty good price, I was originally planning on buying a pre-made kit from somewhere like MRP but thought id give it a go first before I sink big money into something I could do for less. I started with the factory bracket to get a gauge on placement and caliper rotation then moved onto mocking up with some 12mm ply. The factory bracket wasn't far off from being useable but the thickness of the plate is far too thin so would require a re-design anyway. I did some digging but couldn't find any designs that I could use, all the images were hard to get a measurement off or only gave one angle and I played around with a few designs with the AE111 rotors but nothing seemed to work well enough for me, I remembered reading something a while back about using Peugeot rotors as they have the same height as the factory rotors so with that I picked up a pair of Peugeot/Citroen 283mm rotors which meant I could get away with a 2 piece design that wouldn't require any weird spacers or stepping of material that required a CNC. With 12mm ply and a jigsaw I got to work mocking things up until I had something that looked the part. This gave me the basis for the design so started mocking up in fusion and ended up with this design, 12mm plate bolted together with 12mm bolts picking up on the factory hub 10mm bolt pattern and the factory AE111 12mm mounting face. I wanted to keep the weight down as much as possible without affecting the strength. I think this should be plenty strong enough. I had it 3D printed in plastic and it needed a bit of massaging to get right but after a few versions (5) I ended up with the final product which I had plasma cut locally. After drilling the holes and smoothing the uneven areas I test fitted a few times, each time getting closer to the final result which I think turned out pretty good. The clearance for the 15 inch wheel is close and will require a 5mm spacer but these aren't the wheels I'm using so may not need it with the right wheels. Its a pretty simple design that doesn't have many failure points, I'm a little worries about the center hole that the hub runs through getting shit in the gap and causing some issues with wear but time will tell. I installed new bearings and races as well as I found one hub inner bearing seal was about 5mm out further than it was meant to be making it seem like i had made a mistake and needed to space the caliper out but crisis averted.
- 18 replies
-
- 14
-
-
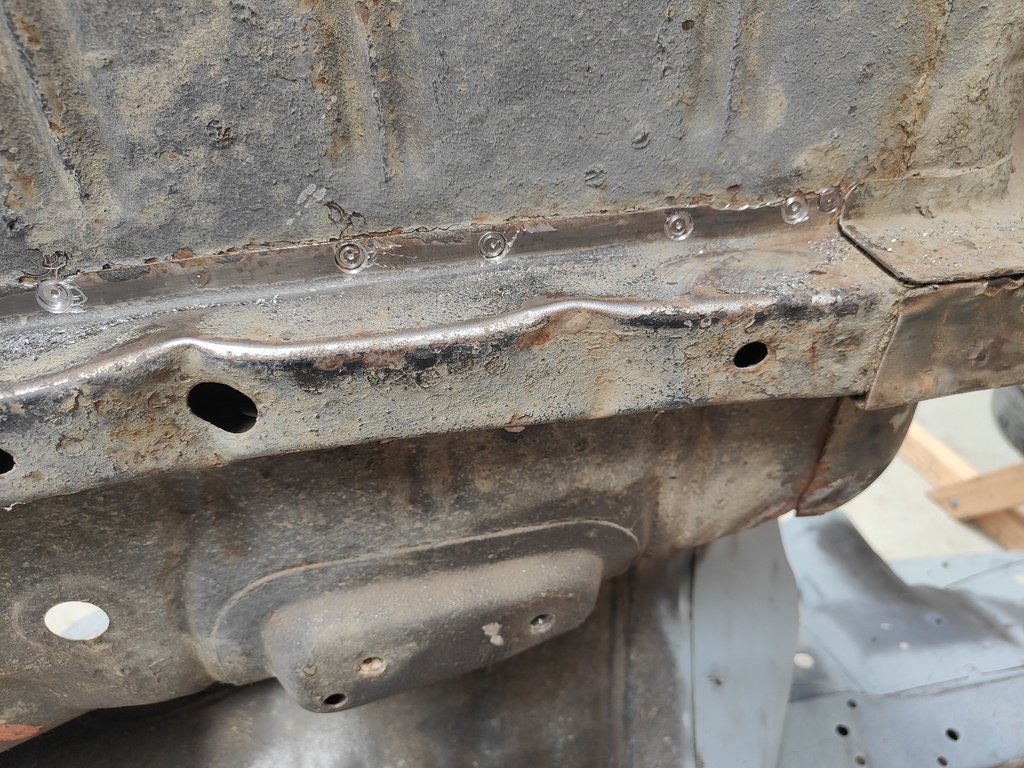
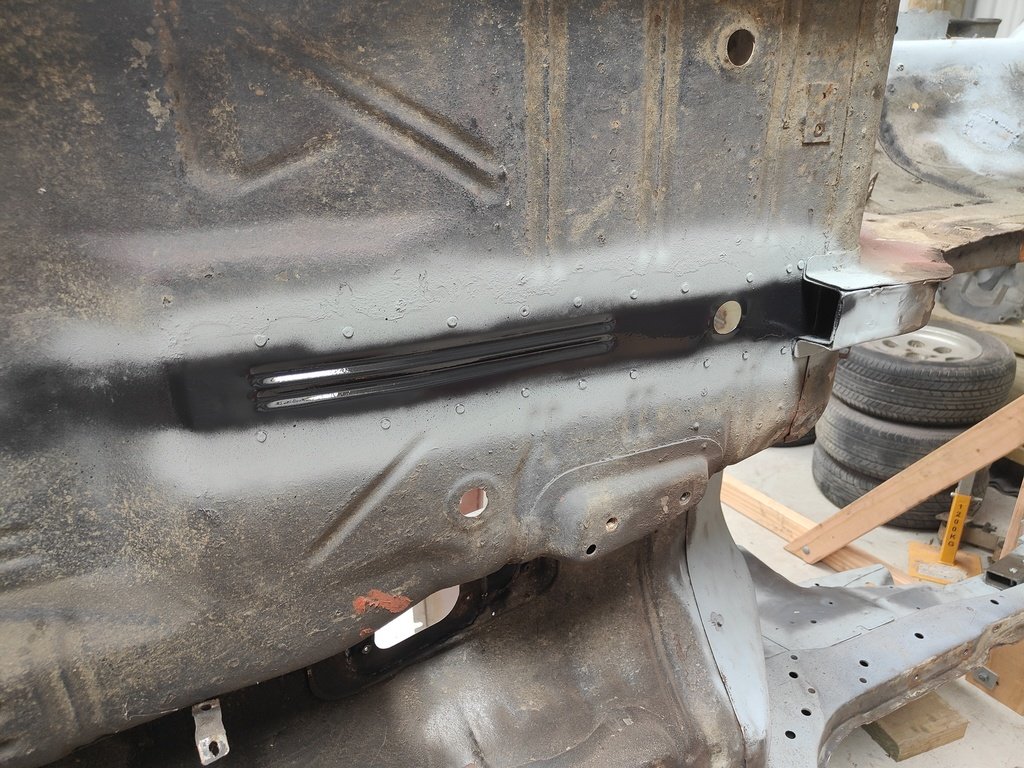
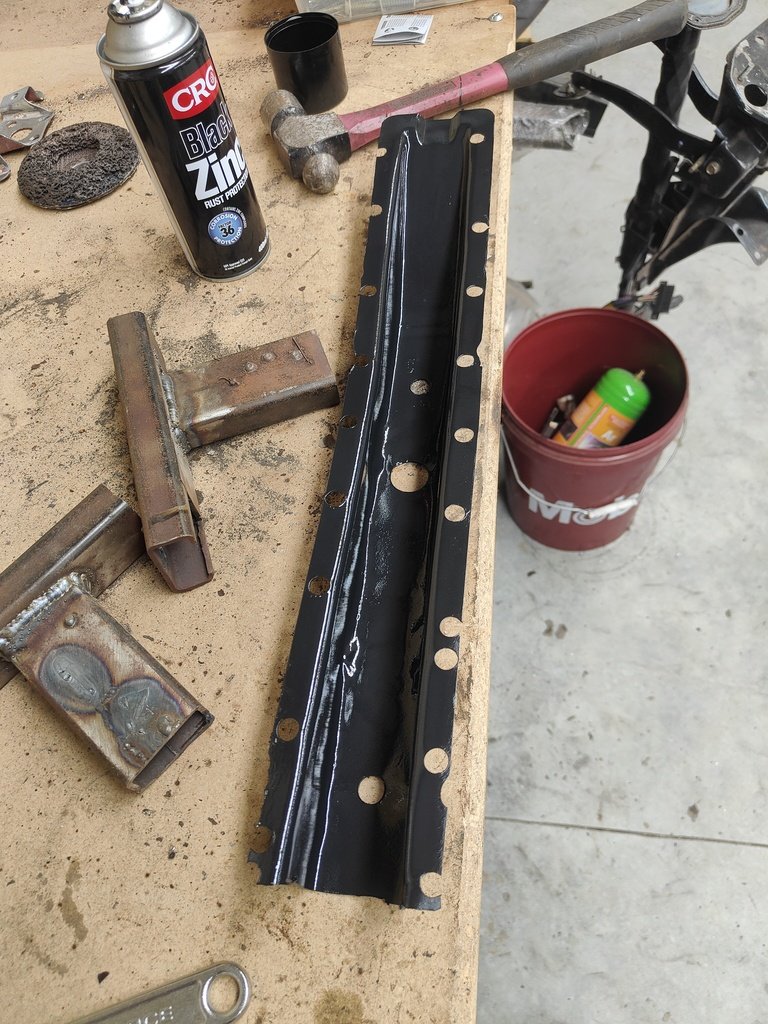
Spent Friday night going over the seam with some sealer, this stuff is a shit to work with but should stop some unwanted moisture and eventual rust. Also painted a few areas that wont have undercoat. Surprised these cars never came with factory seam sealer on the underside, would have saved a heap of them from rusting away.
- 18 replies
-
- 19
-
-
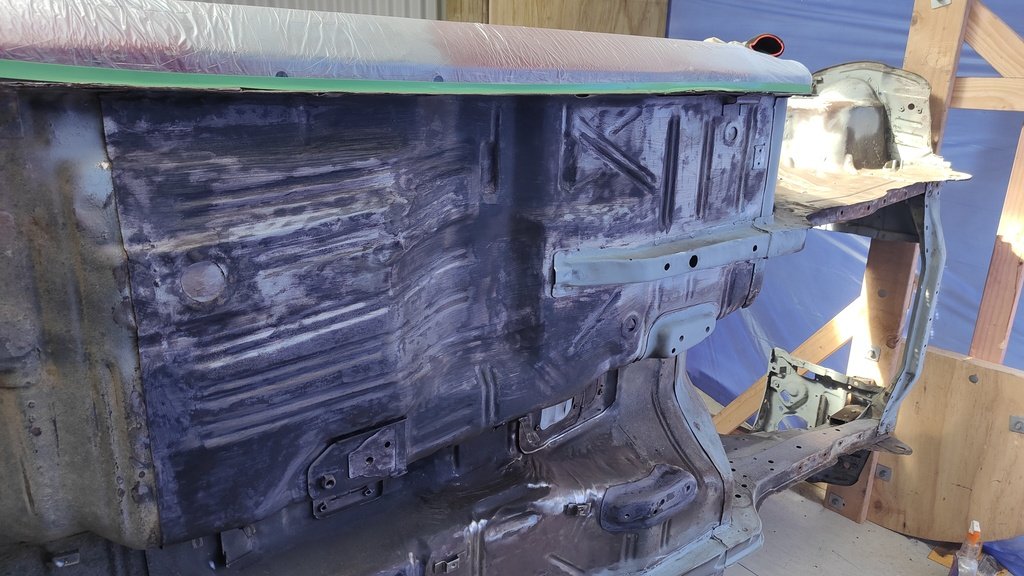
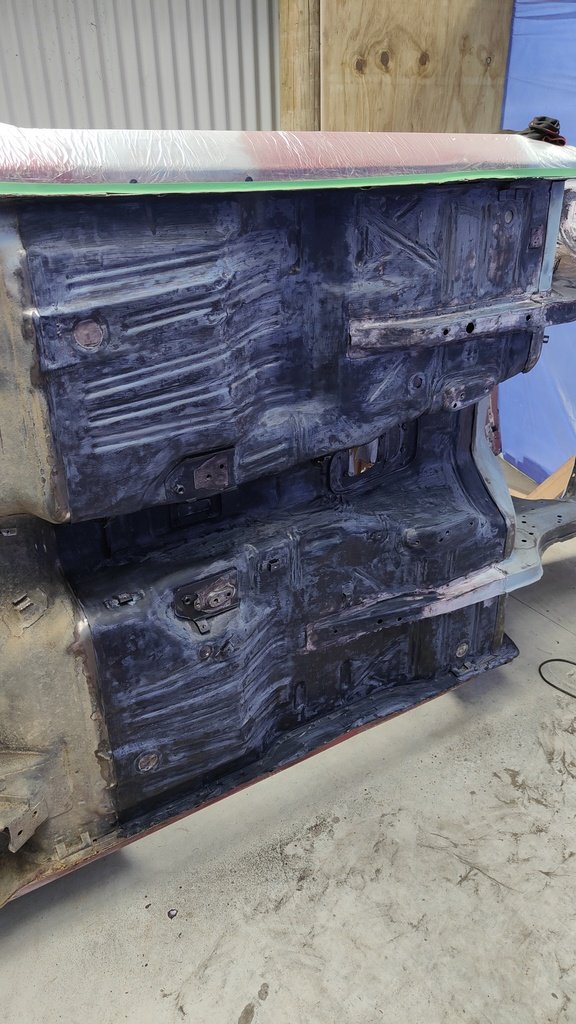
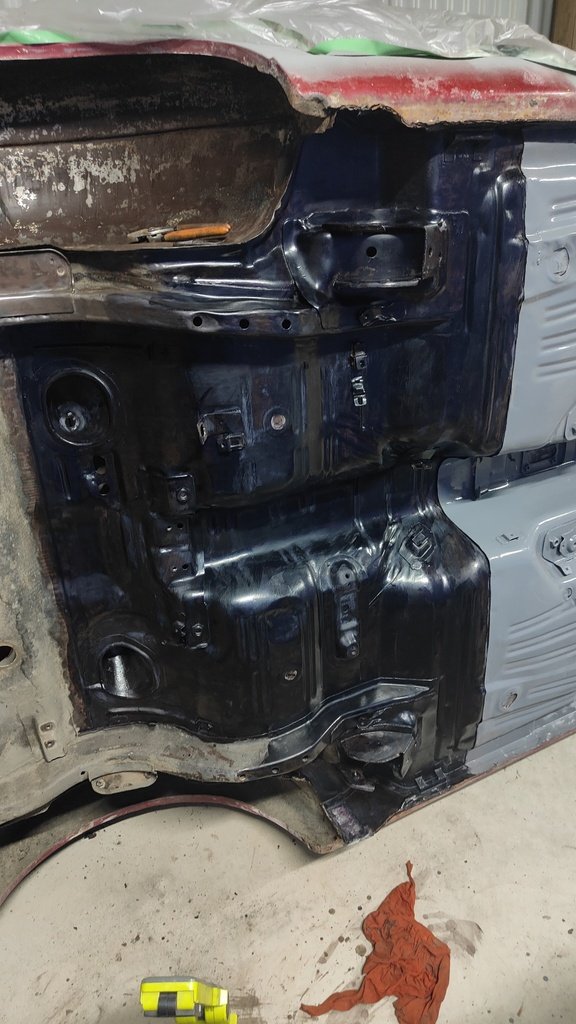
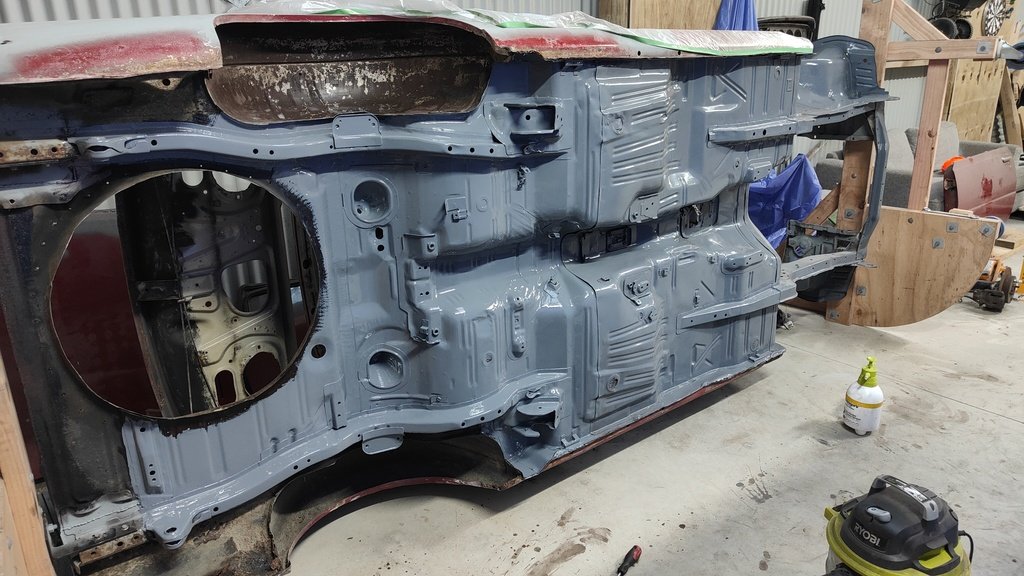
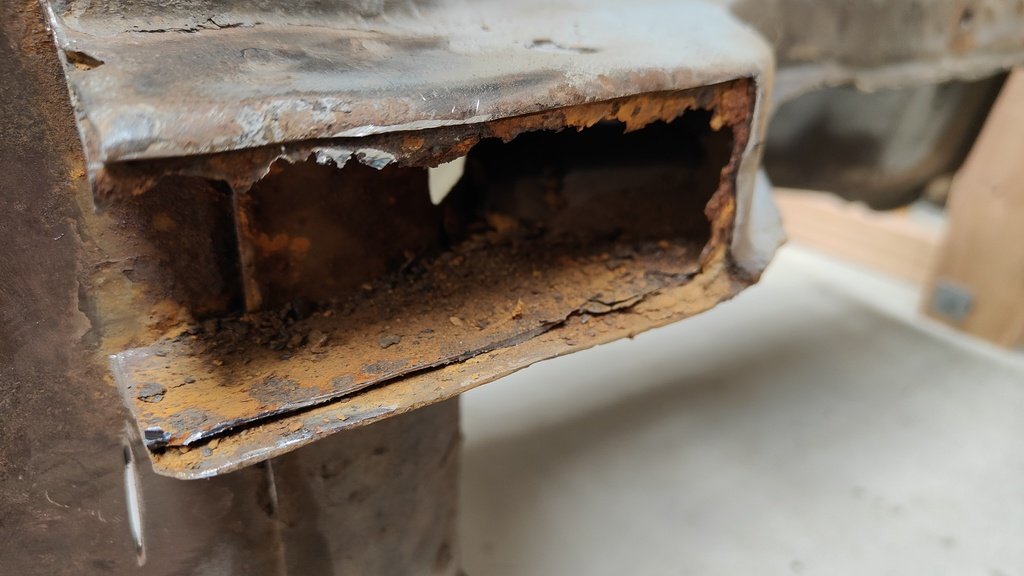
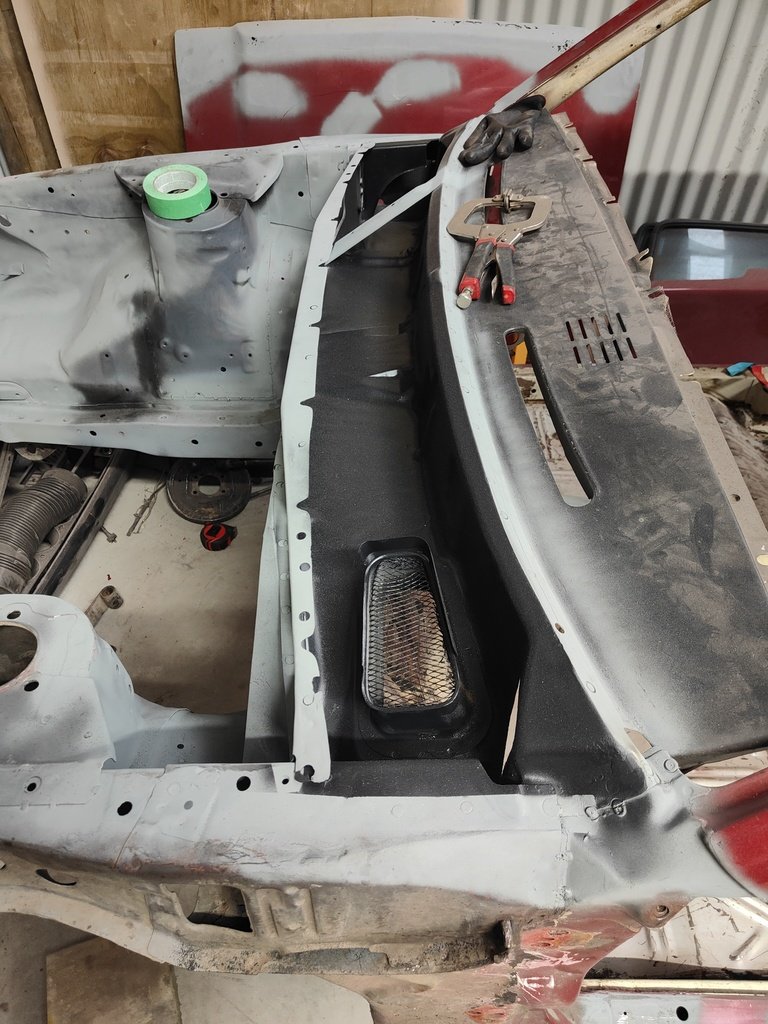
Been a little while since I updated. Made a start on the underside. I removed all of the old underseal and rust converted, it wasn't too bad for rust but a bit of rust converter wouldn't hurt. Once the bulk of the rust converter was done I hit the underside with an epoxy enamel, will then go over this with a textured underseal and seam seal the joins.
- 18 replies
-
- 16
-
-
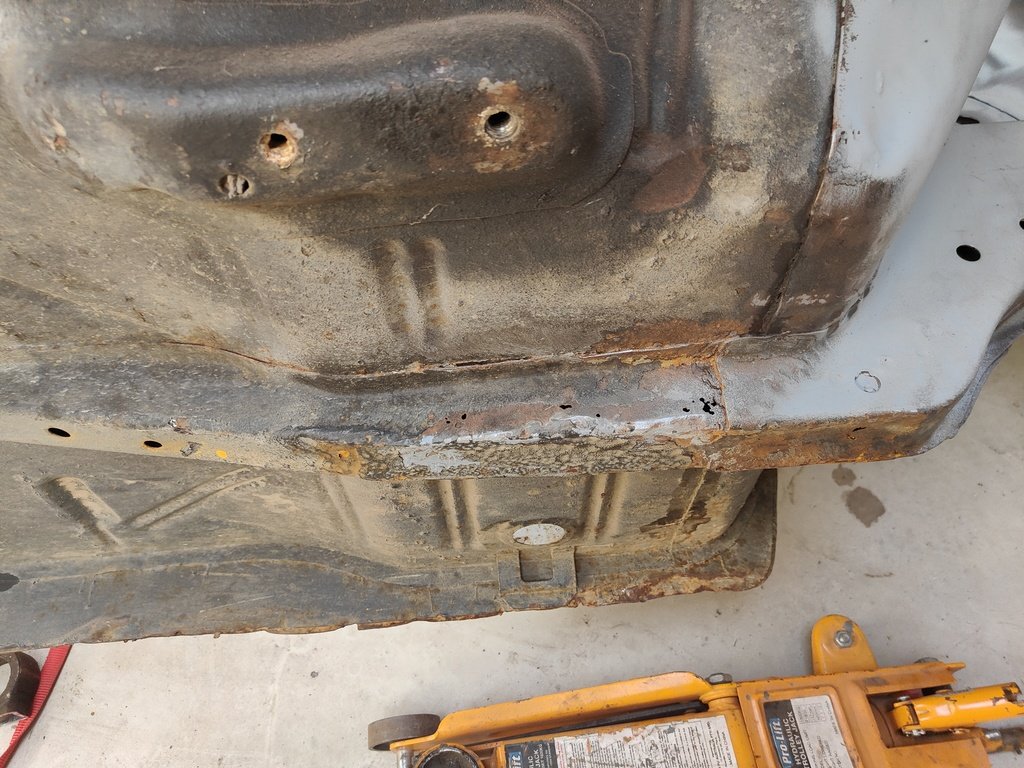
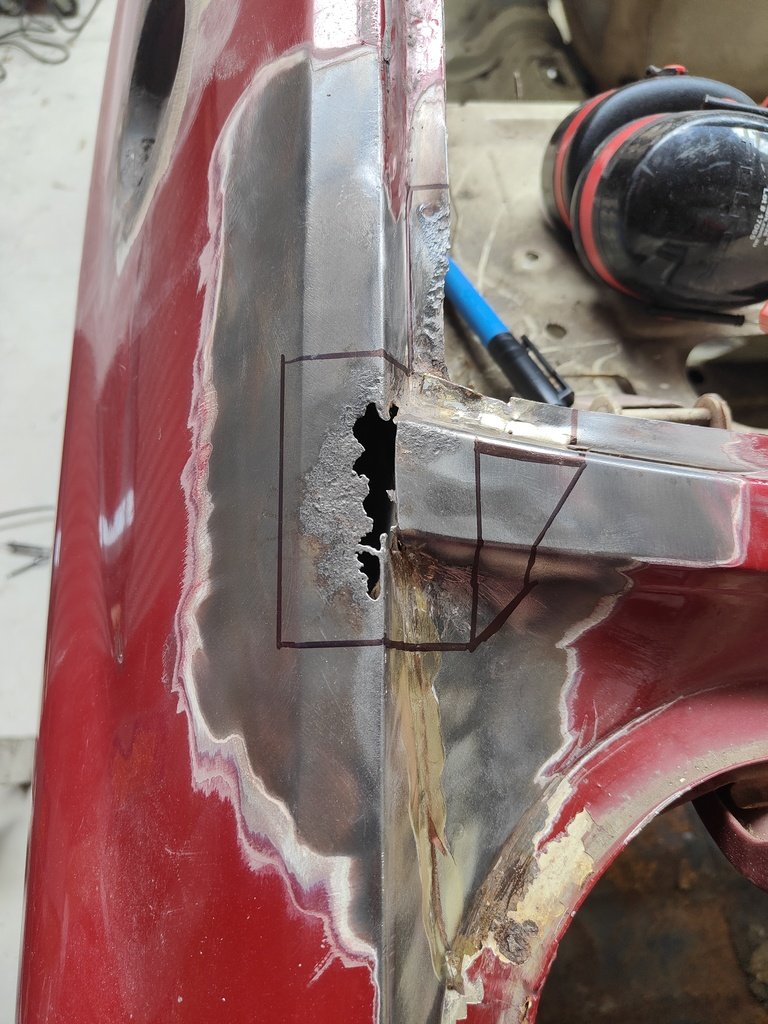
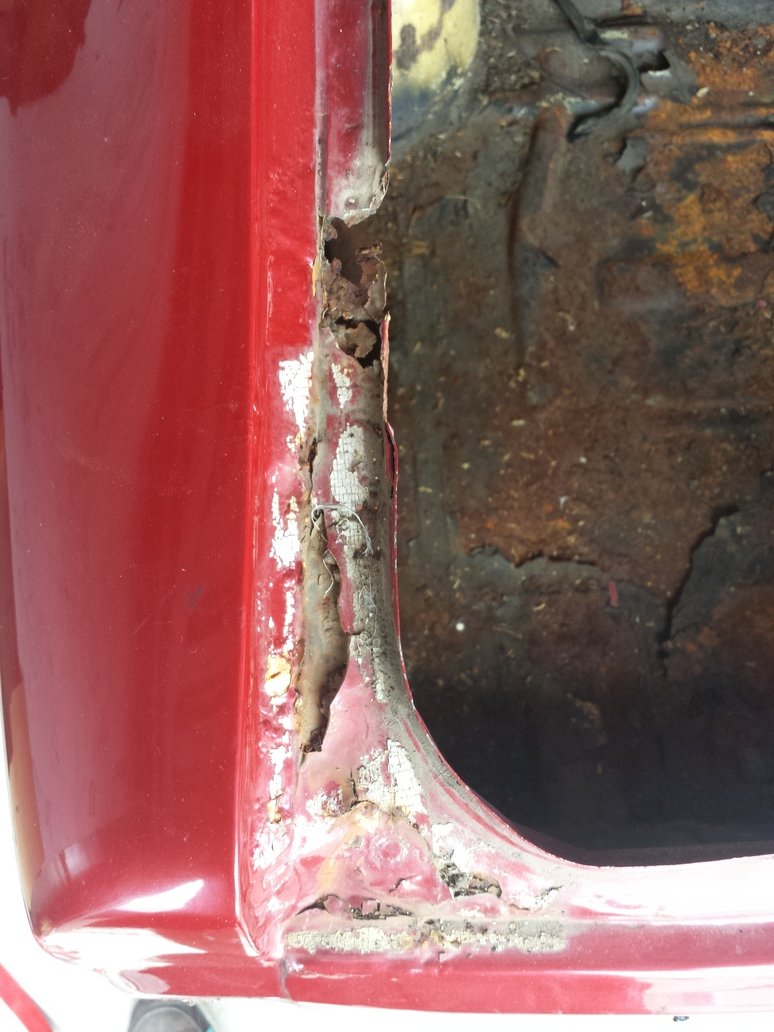
My mate has a couple of 35's one is a parts car and seem to be rusty in the same places. There does seem to be some extra rust off the back of some dodgy repairs and im guessing a shunt to the passenger rear at some stage. Around the fuel filler, sills, rear panel around the lights where the back panel joins to the rear quarters seems pretty common too.
-
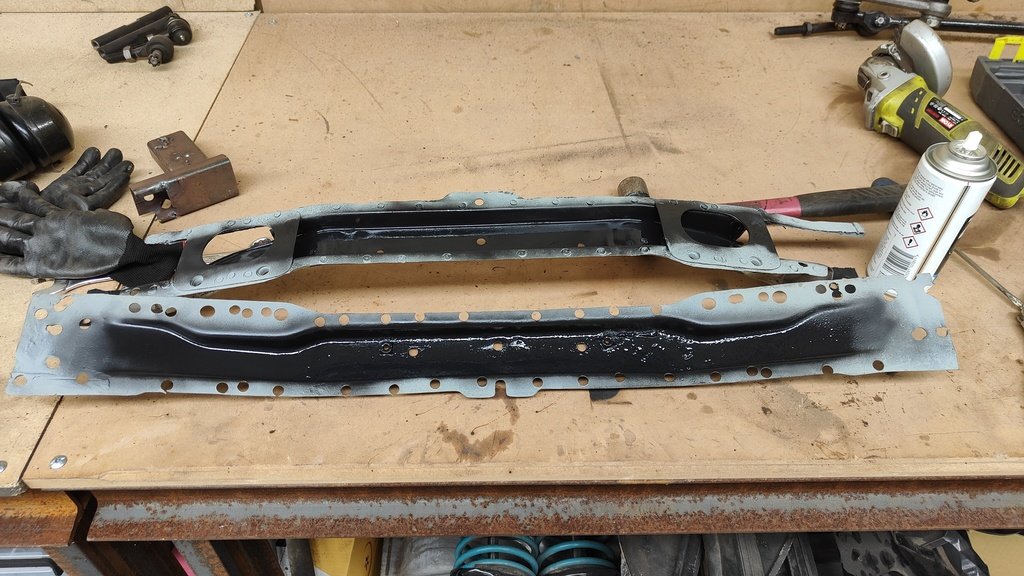
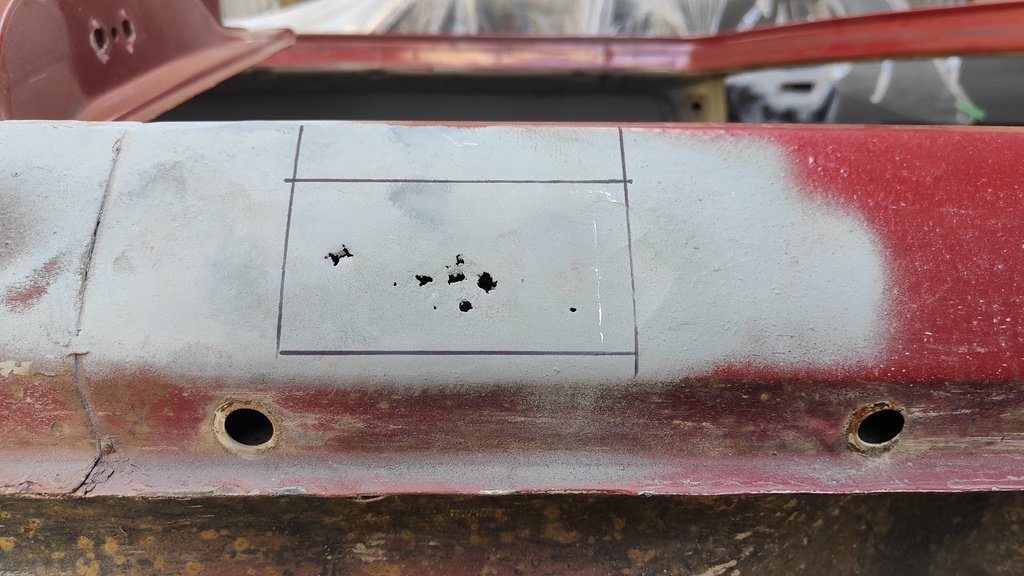
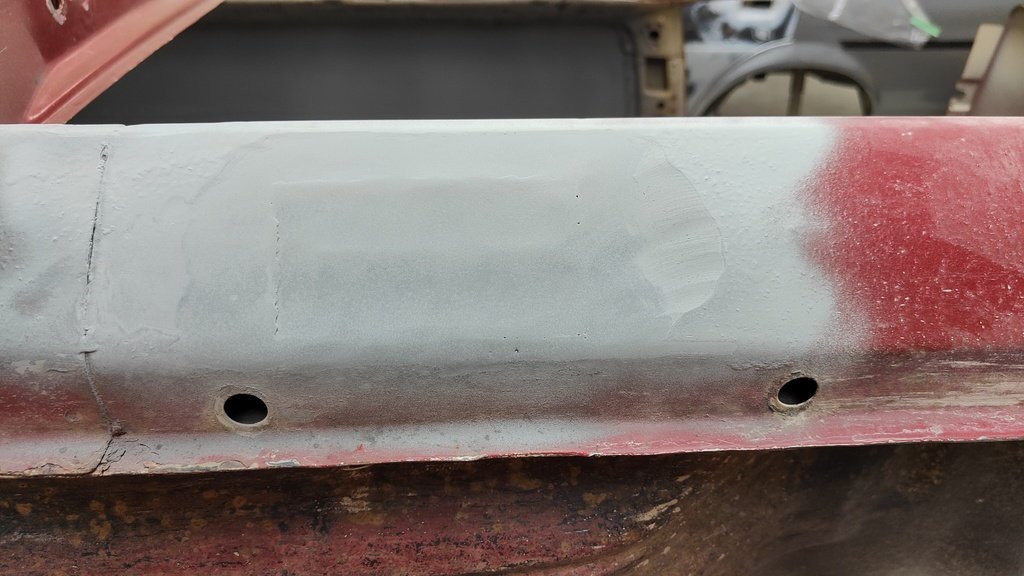
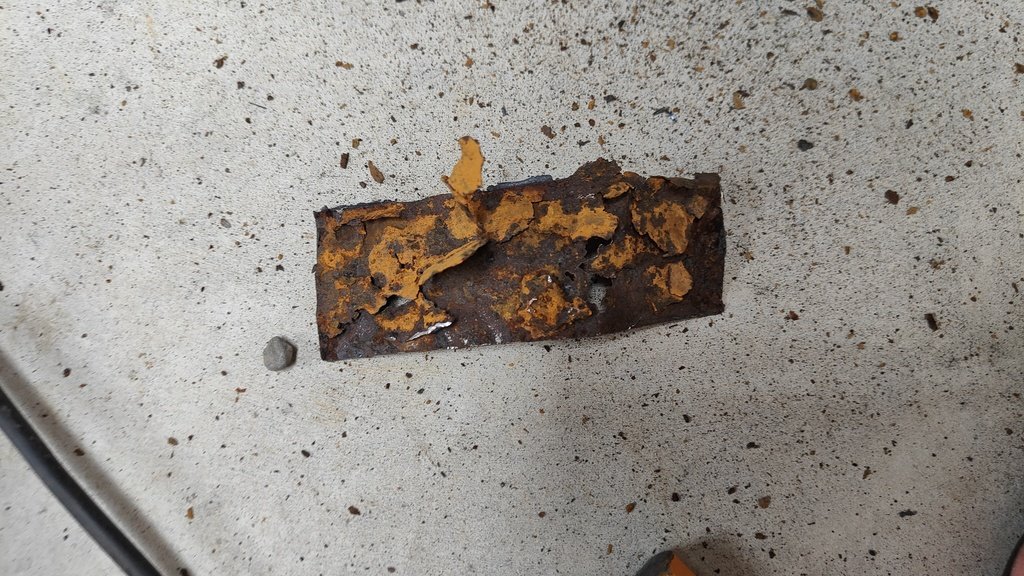
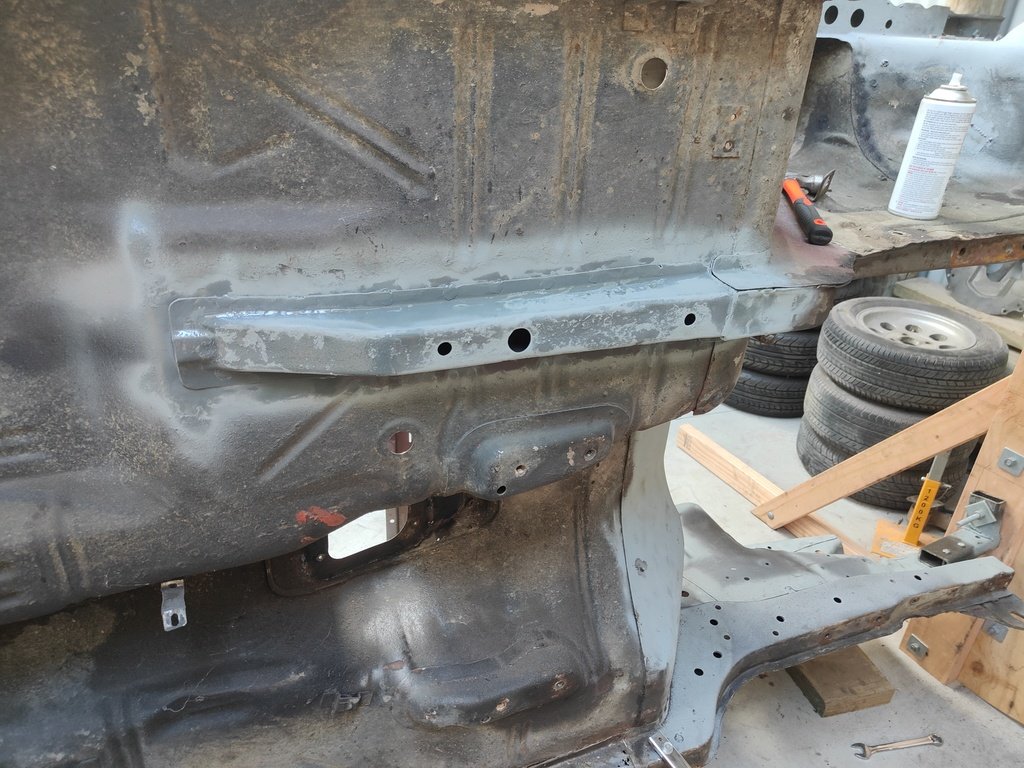
This weekend i also had a look at the radiator support, got this apart and cleaned the inside up. There was a few little pin holes in the lower section so welded these up, coat of zinc and welded it back together. I needed to replace both front parts on either side, made these in two parts since my metal working skills wouldnt allow me to do it in one, welded these up and a coat of zinc to finish it off. The last thing I did today was tidy a small part on the drivers side sill. I cut the small square out that was affected by rust, coated the inside and welded it back up. This part had a compound curve in it that I couldn't quite get right but a skim of filler will sort this out no worries.
- 18 replies
-
- 12
-
-
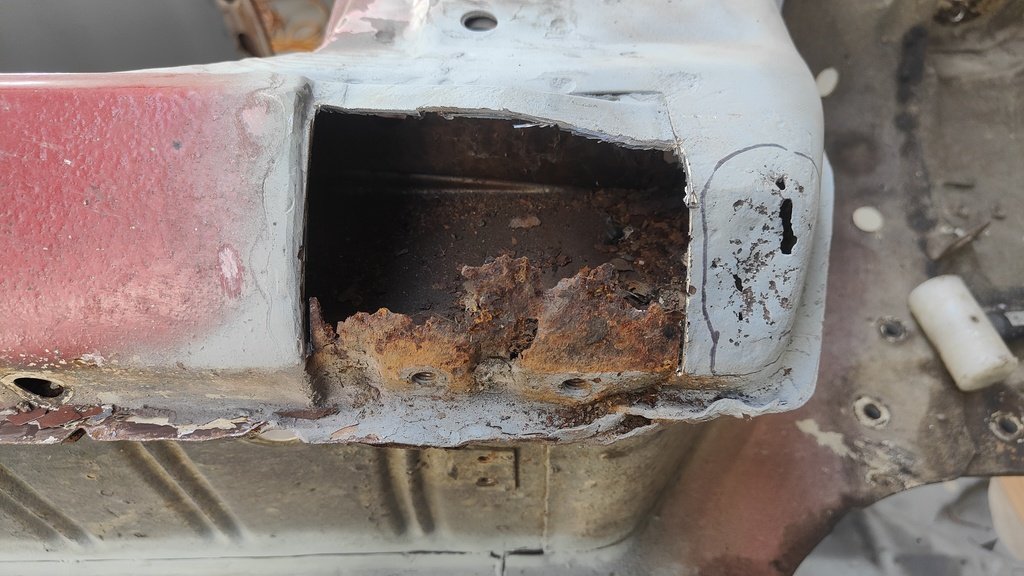
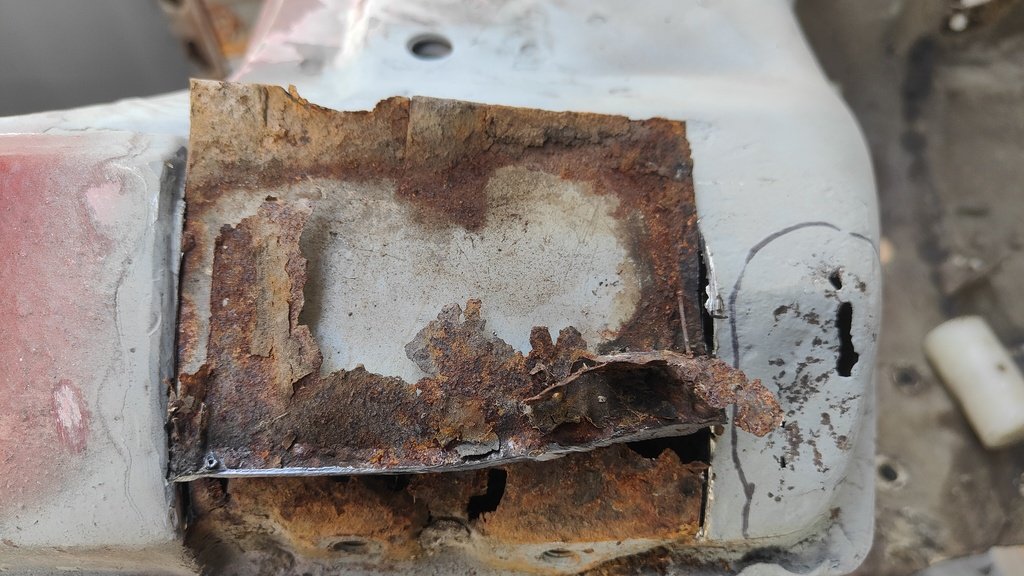
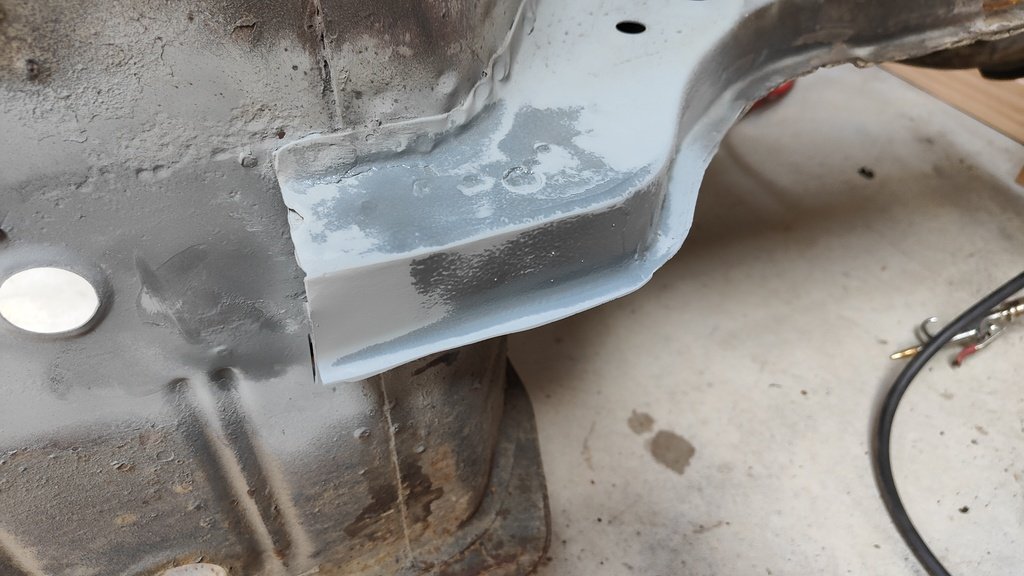
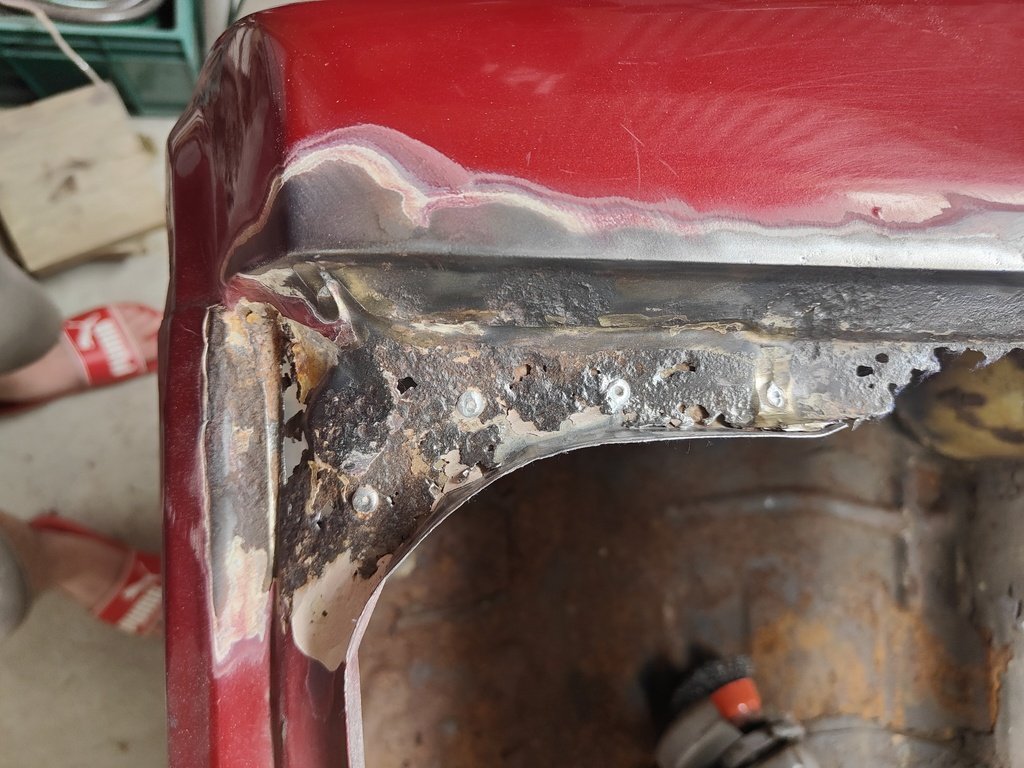
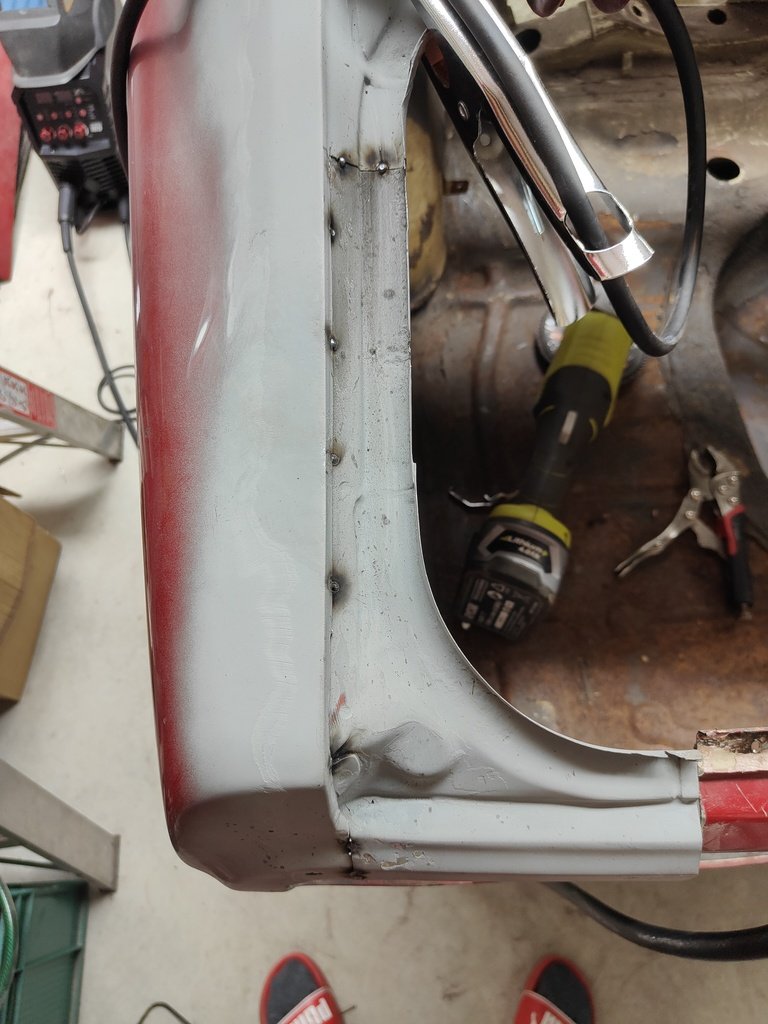
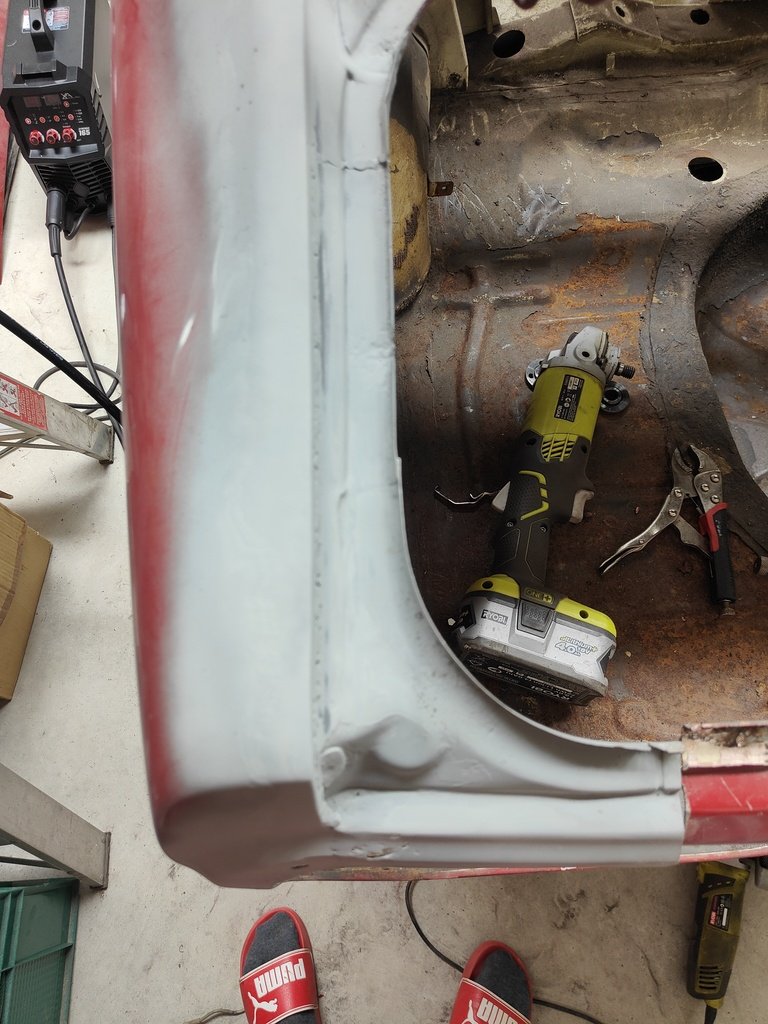
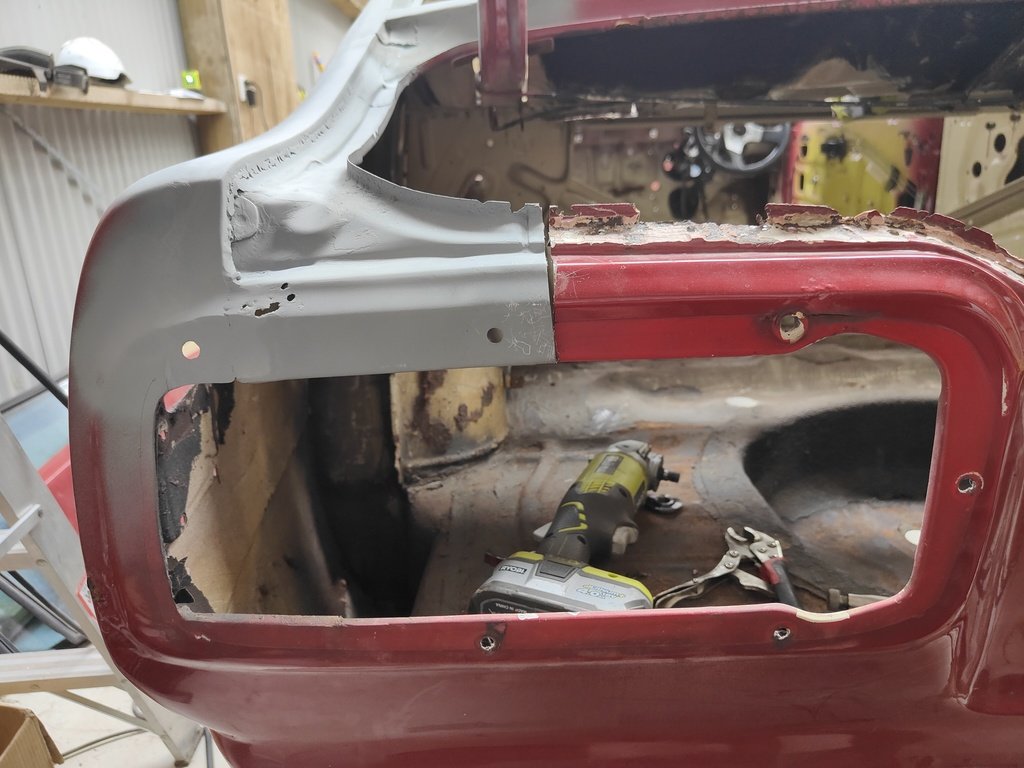
So its been a pretty productive long weekend. I decided to get stuck into the front drivers side inner guard part that was full of holes. Someone had a go at repairing this in the pasty with pretty poor results. I gve it a good clean inside and hit it with some zinc as usual. Then i moved onto remaking the part that holds the captive nuts for the fender to bolt to and welded it in. The next part was pretty tricky for me to replicate as it had a few different curves in it. I managed to get something close and welded that in, here is the finished result. Don't look too close at the welds, this will be covered by the fender anyway.
-
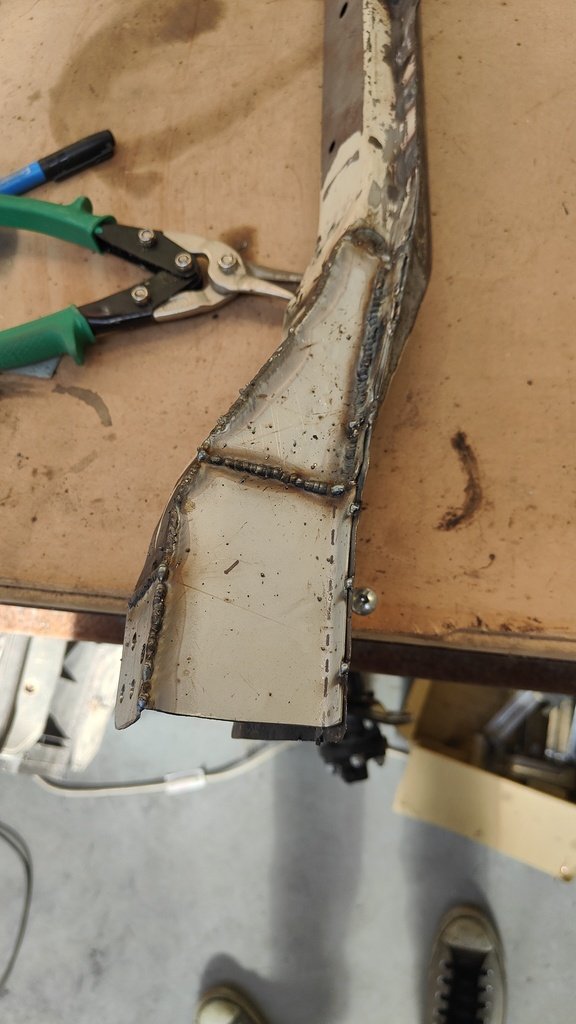
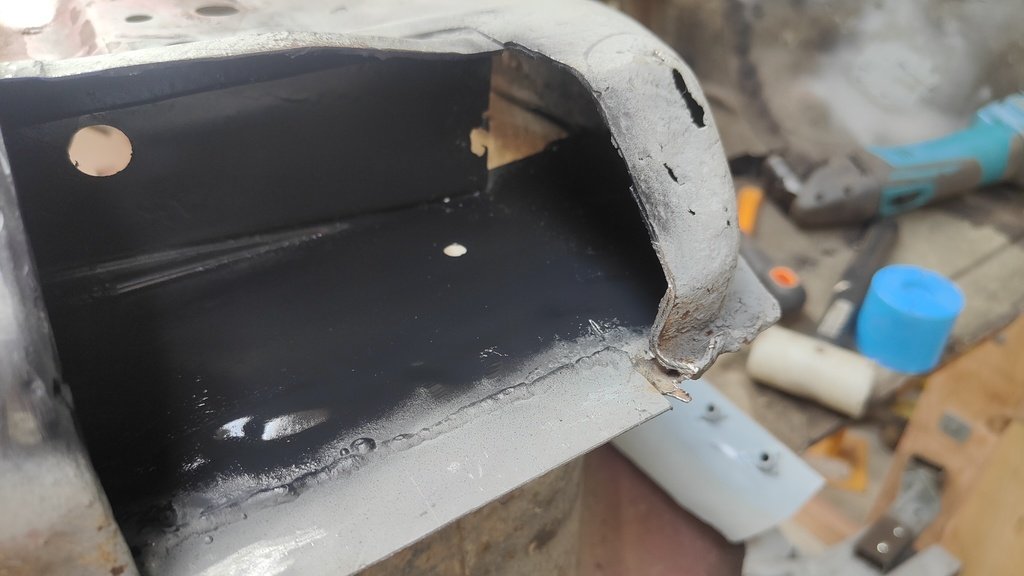
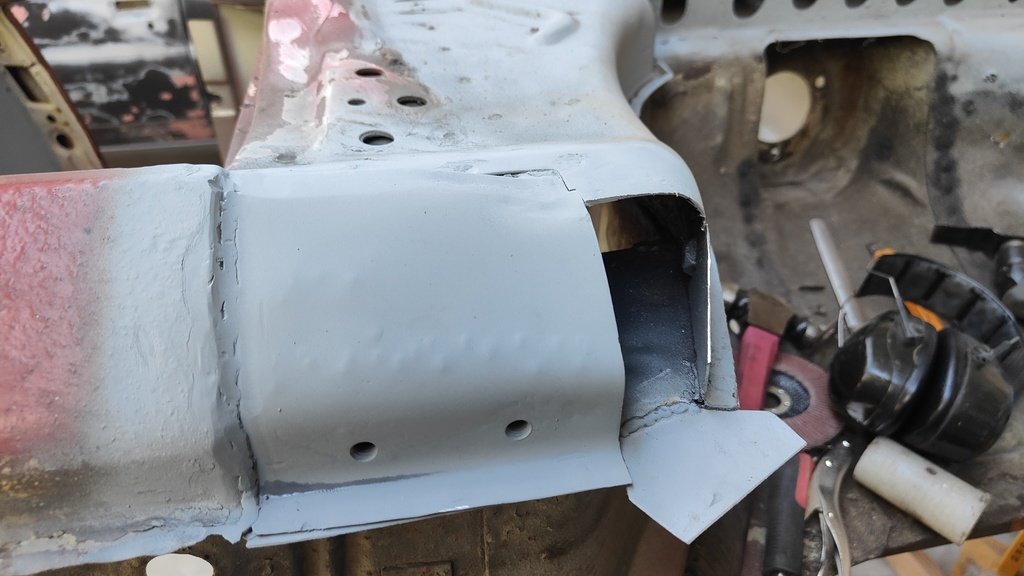
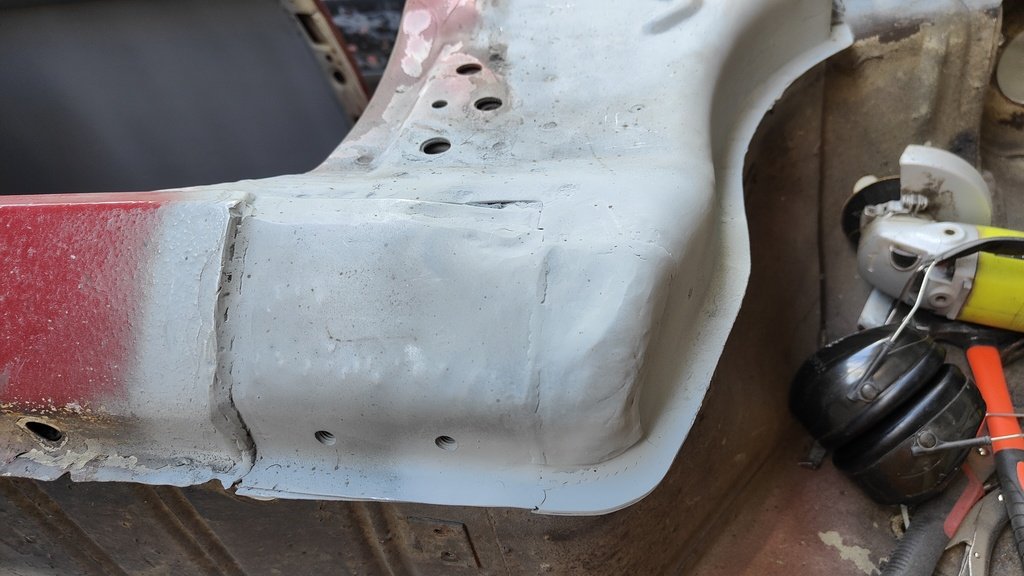
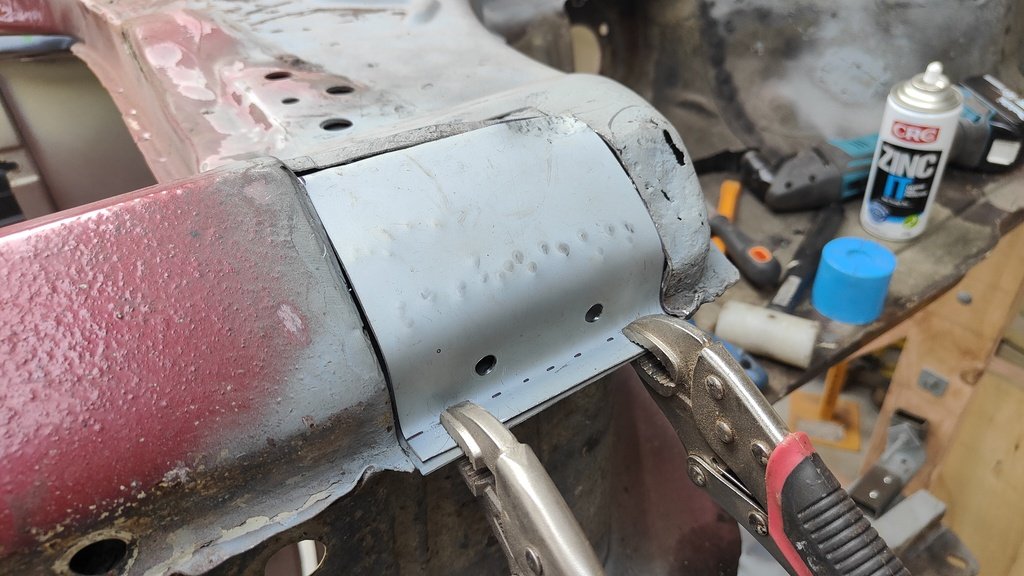
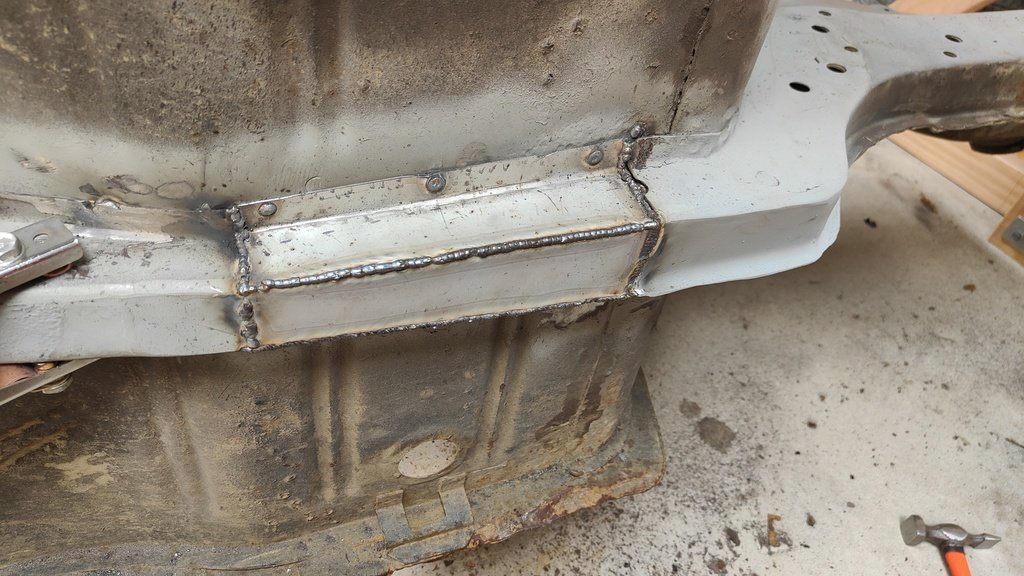
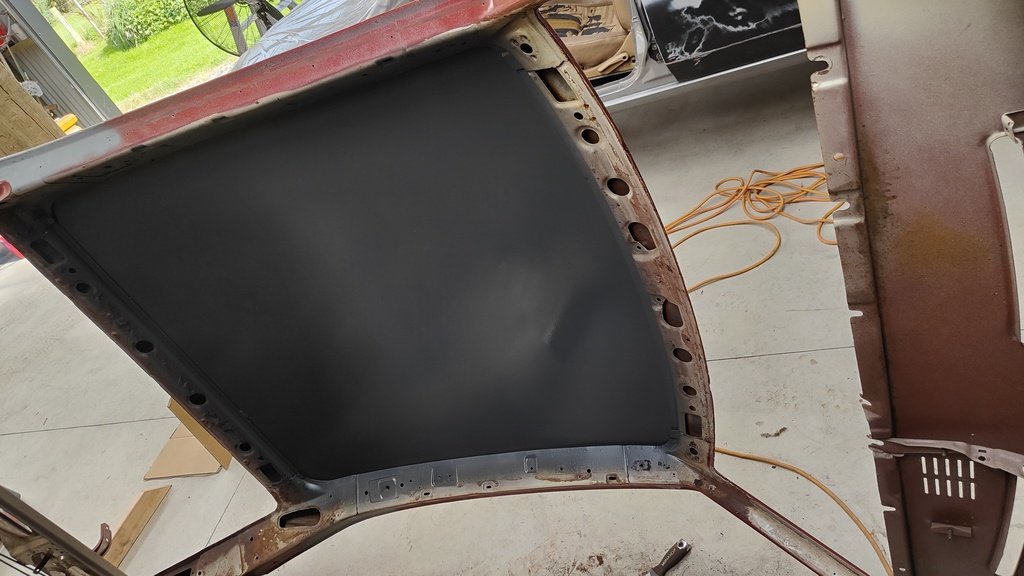
A quick update on the chassis leg repair. I managed to use the rear section that was in pretty good shape and made a new middle section. I think it turned out pretty well, as usual, coated the inside with a coat of zinc and black zinc. Shouldn't have any issues with this for a while. I also stripped the inside roof back as it was covered in the old glue and some furry left overs from the roof liner and gave it a coat of etch primer to protect it until its gets painted fully.
- 18 replies
-
- 15
-
-
Thought I would start a discussion page for my build if anyone has any questions or suggestions for what I am doing. Happy to take advice on any of the work I'm doing.
-
The passenger side however was a bit worse, there had been a repair some time ago and they have simply welded a plate over the rust which then ate away at the new panel and made and even bigger mess. This one i will have to do in stages as its an odd shape. I started with the front most part which is relatively straight. Again just cleaned it up inside as much as i could gave it a good coat of zinc and welded a panel back in. This one took a bit of massage but i think it turned out pretty good.
- 18 replies
-
- 13
-
-
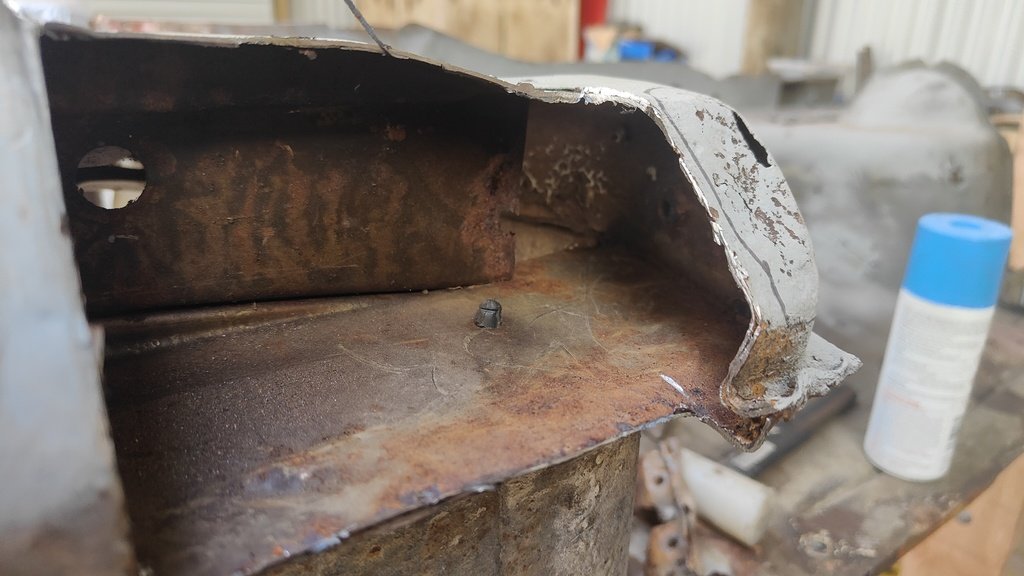
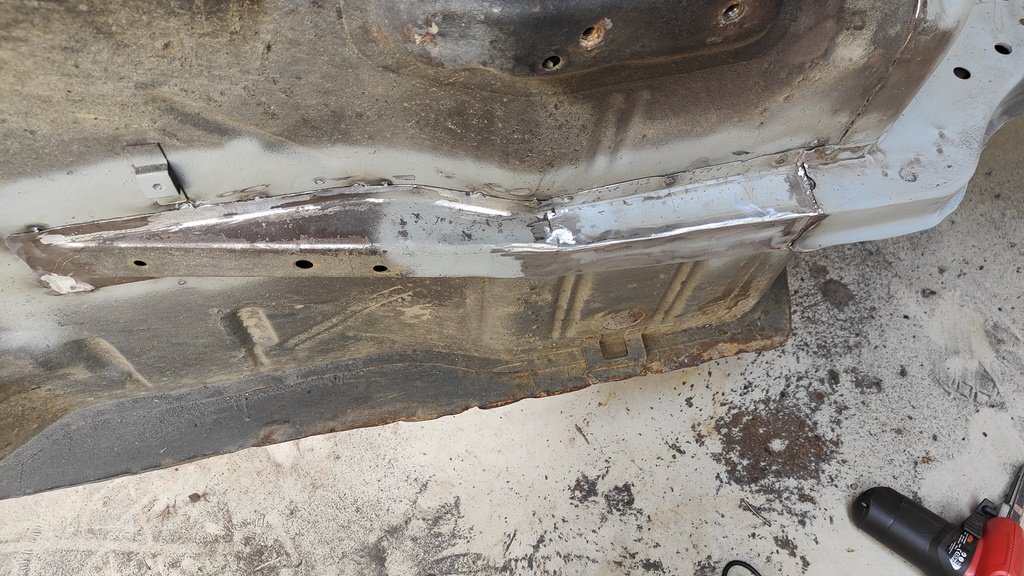
I borrowed a tip jig off another mate and decided to get stuck into the underside of the car. Most of it isn't too bad but the front chassis legs have seen better days. The drivers side chassis leg was ok but was bent out of shape, I removed this and cleaned up the inside of the leg and the underside of the car, gave it a coat of zinc and welded it back on.
- 18 replies
-
- 10
-
-
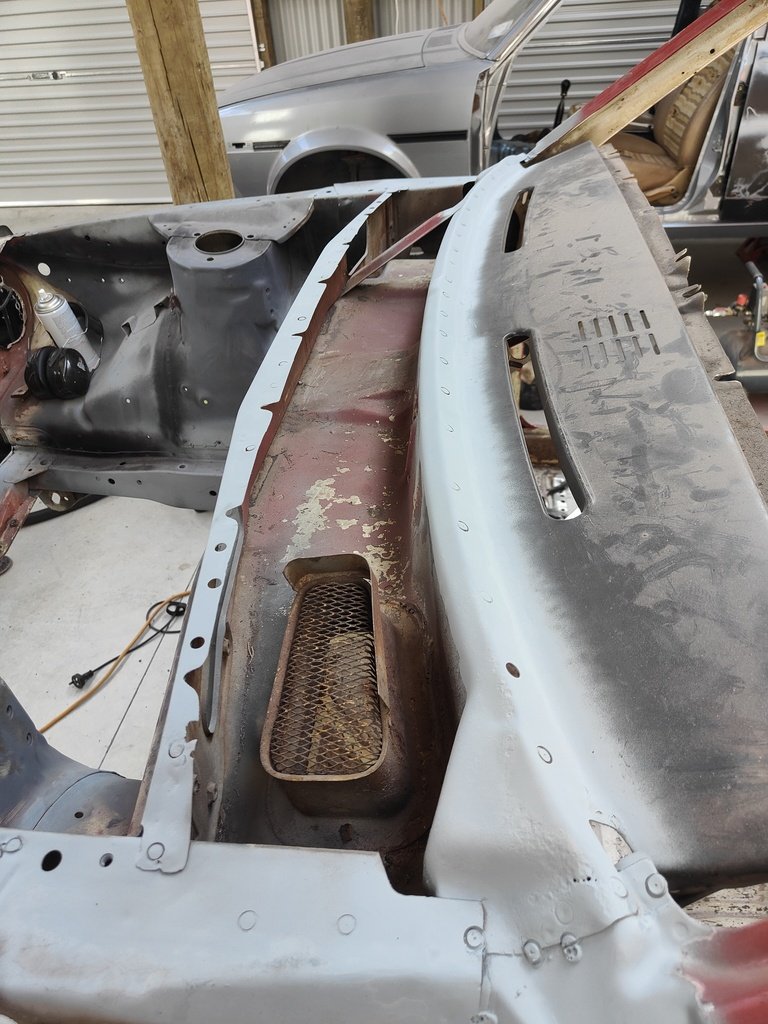
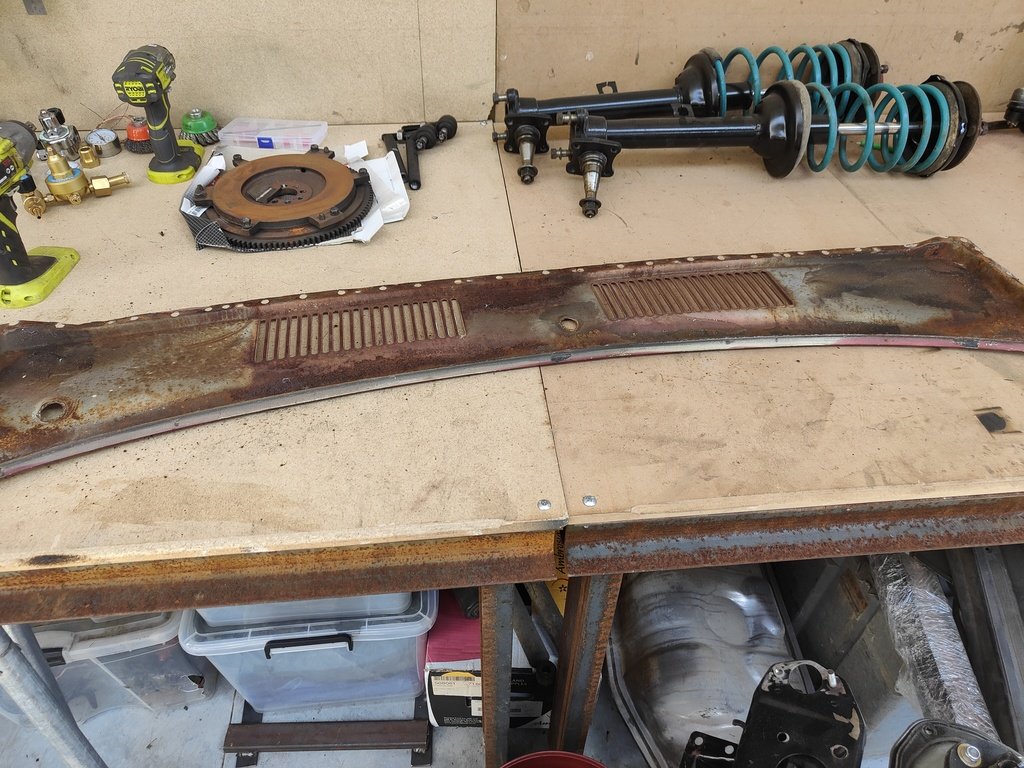
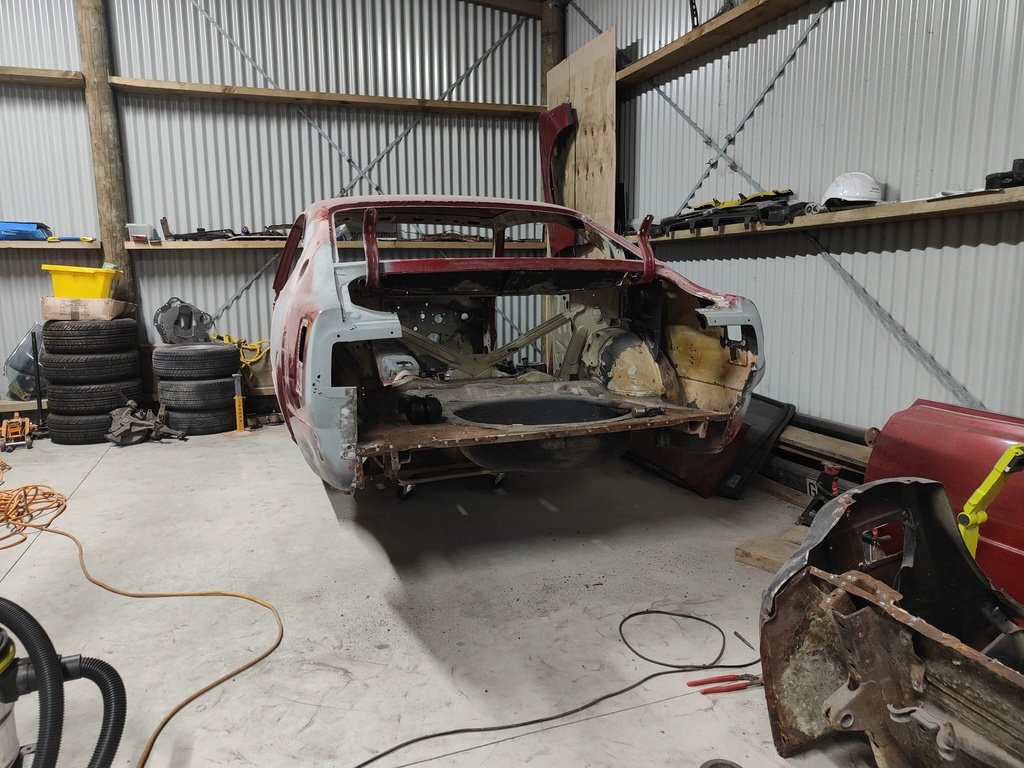
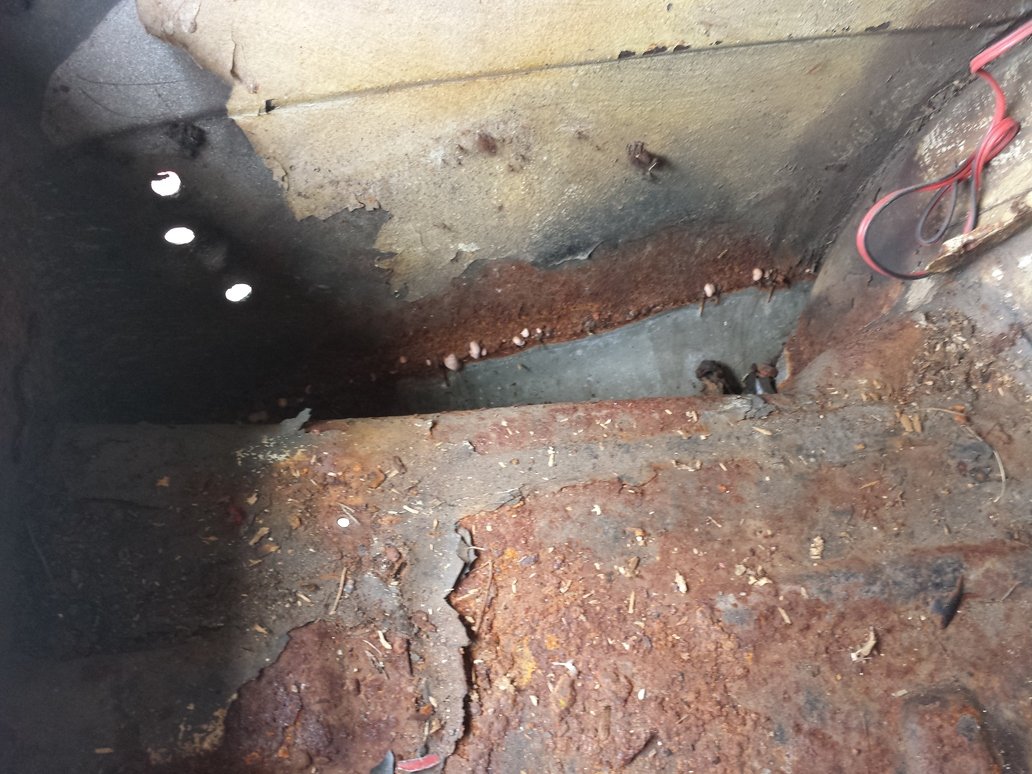
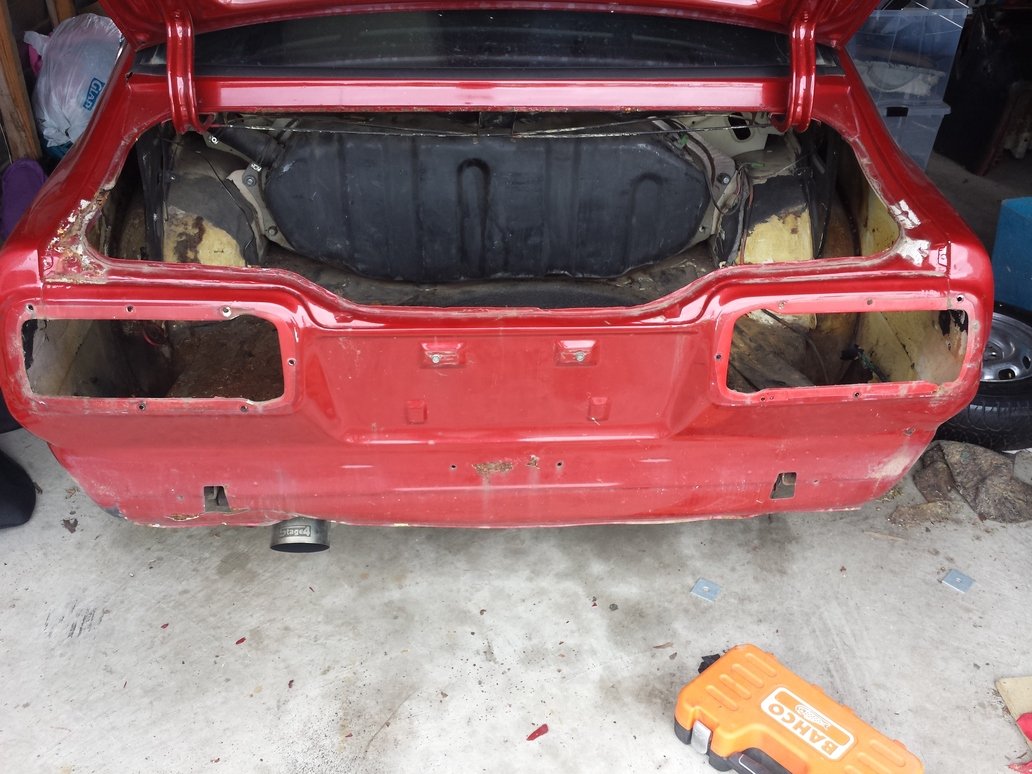
I have booked the car in to be blasted in a few weeks time so i decided to start taking some of the larger panels off to make sure i got right in to the bad spots. I started with the scuttle panel. The inside wasn't too bad but the underside of the top panel was a bit rough. I tidies up the inside with a wire wheel and small sand blaster and painted with a coat of grey zing and a couple coats of black zinc. I then moved onto the front panels, these had some horrible epoxy paint on them that wouldn't come off with the wore brush so ill get these blasted as well. I also removed the lower radiator support as this was pretty rusty, ill see how I go after blasting I may need to buy a new one. Lastly i removed the rear panel, I originally wanted to repair it in place but after much discussion with a mate I decided to remove it and start from scratch. Luckily i did, the drop panel in the boot is really bad and will make it a lot easier to blast inside the boot with the panel removed.
-
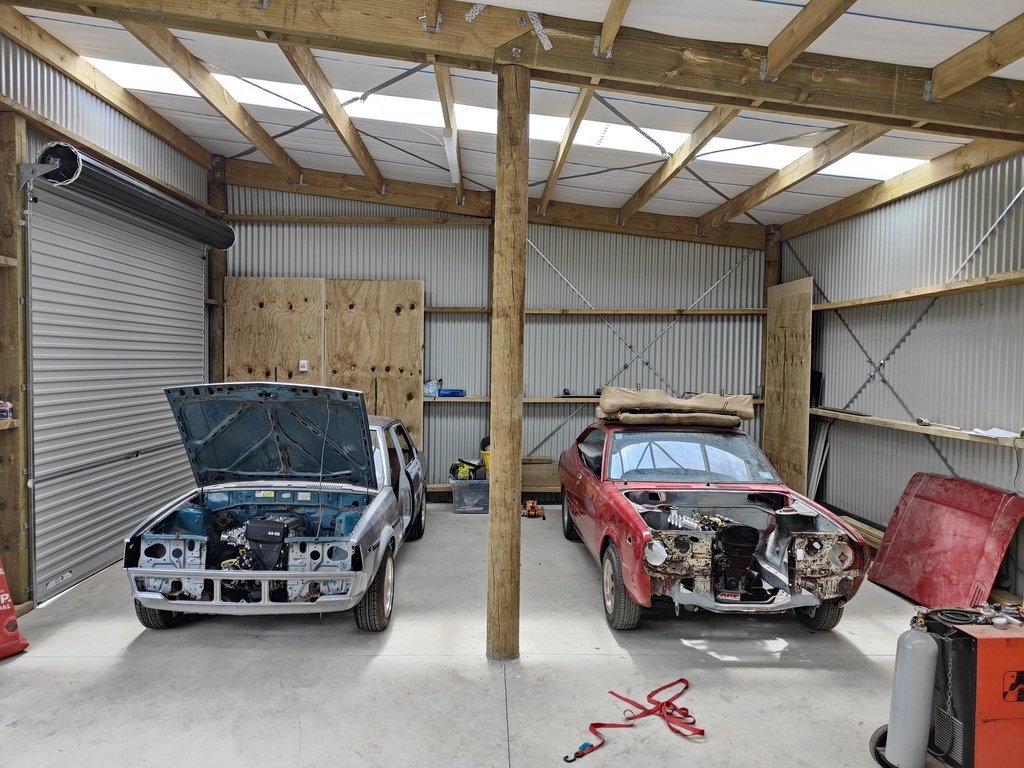
Finally got the old girl into the new shed along with my mates 1981 KE70 sedan, time to make a start on the rusty parts of the body. There was a large hole on the passenger side of the rear window which i cut out of the spare tail end I have. When I started on the passenger side taillight I found an old repair that was done with rivets and bog, looking further into this, the entire bottom of the boot seal lip was also riveted and bogged over, going to be a bit more work than I first thought.
-
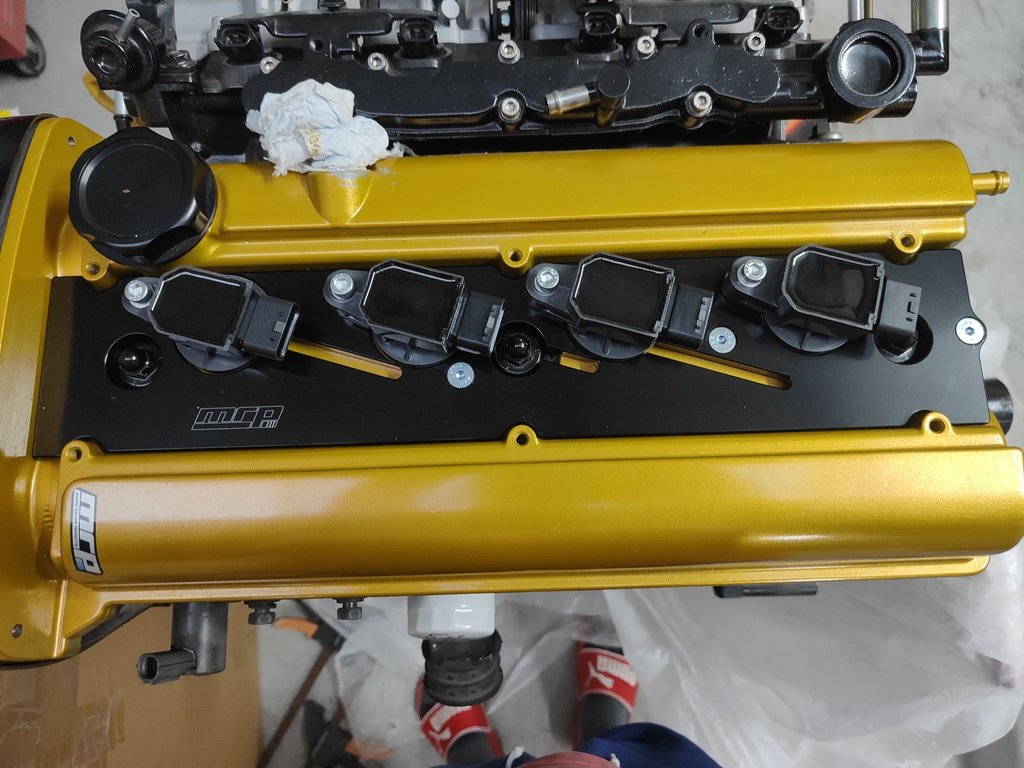
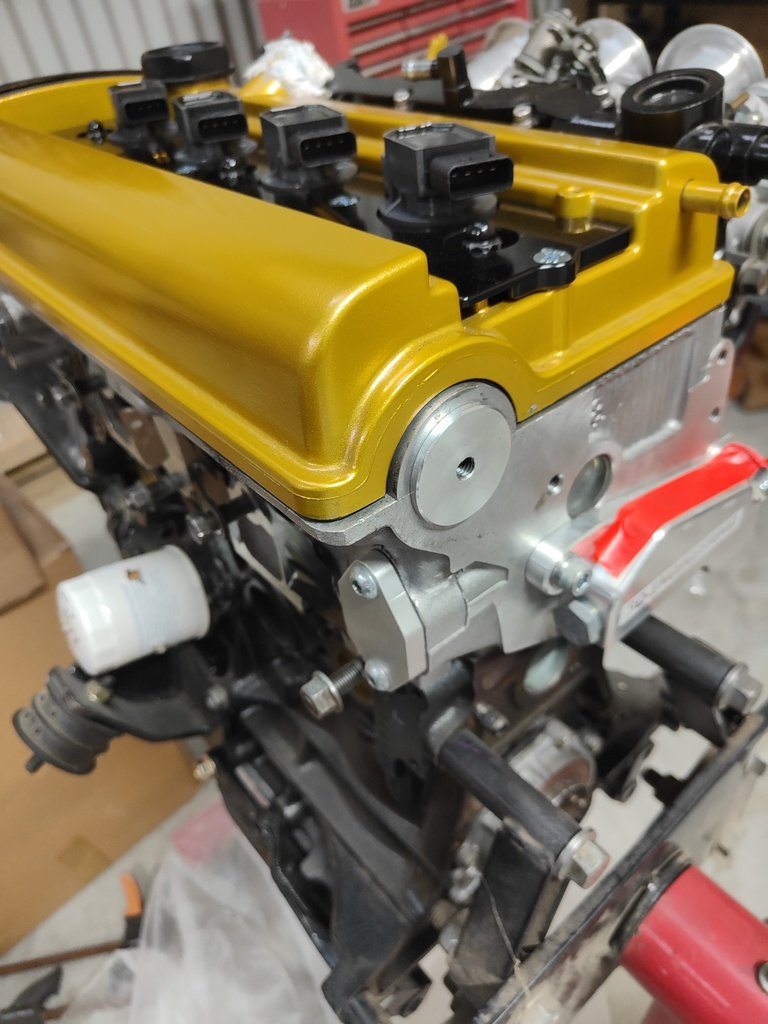
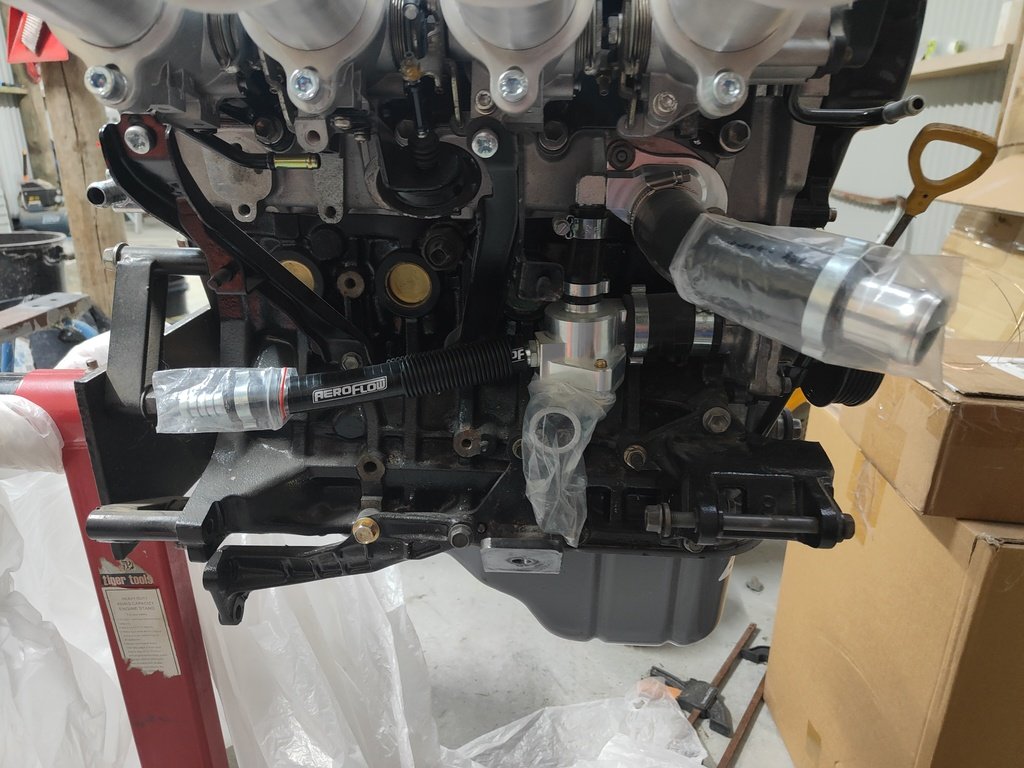
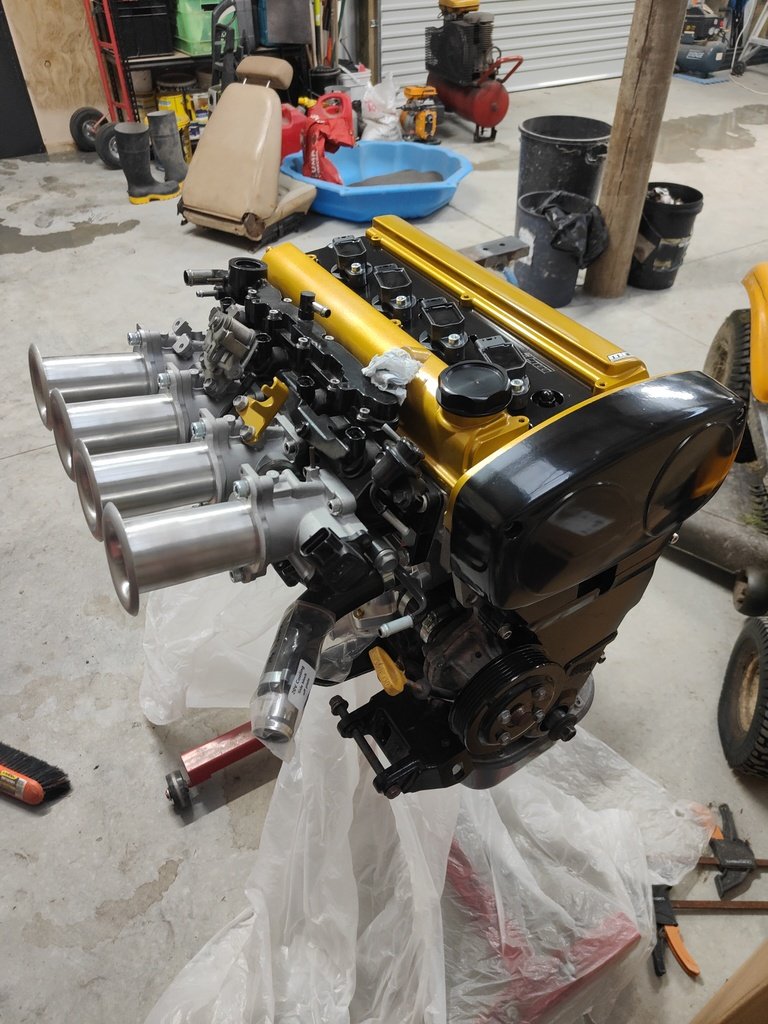
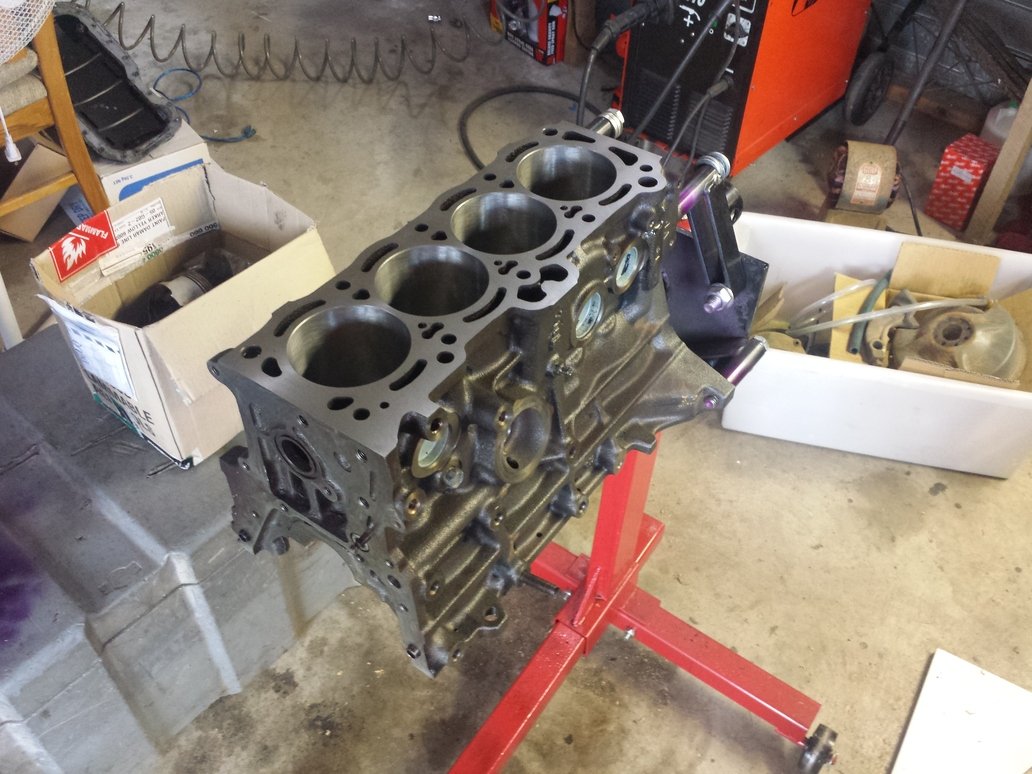
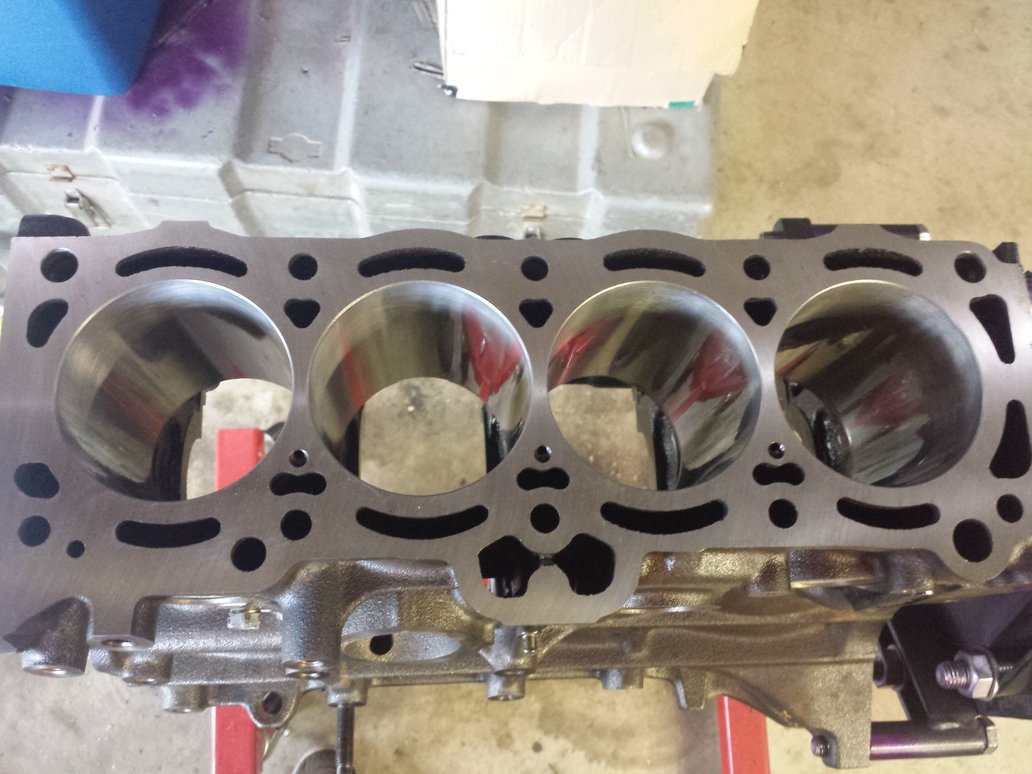
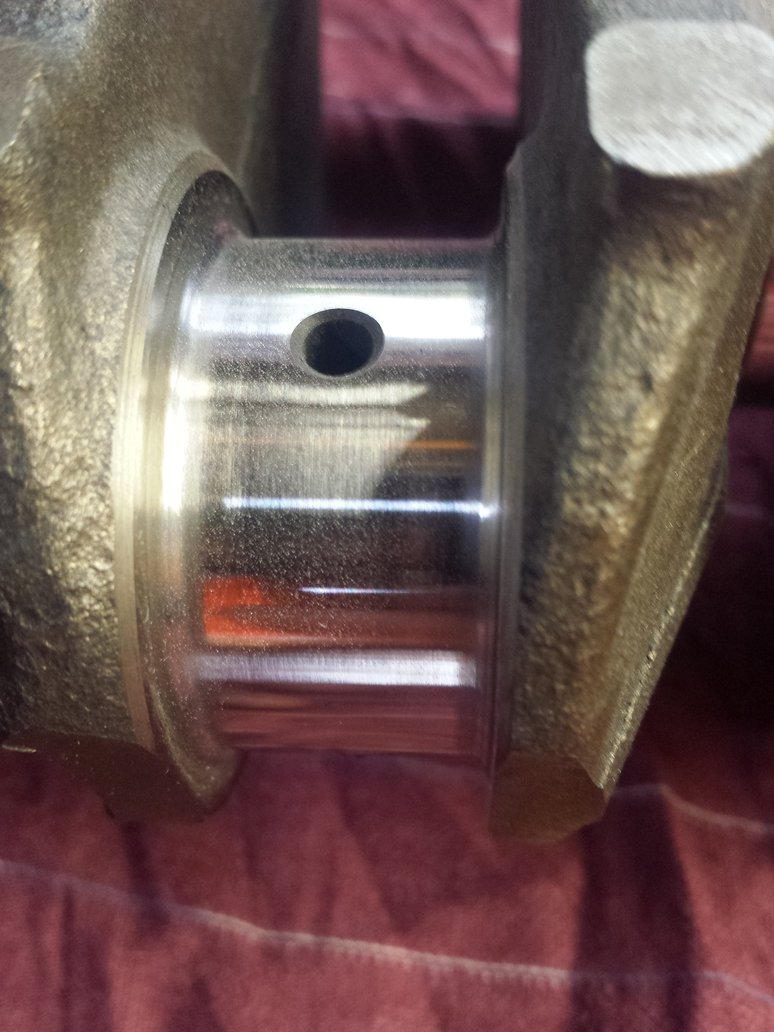
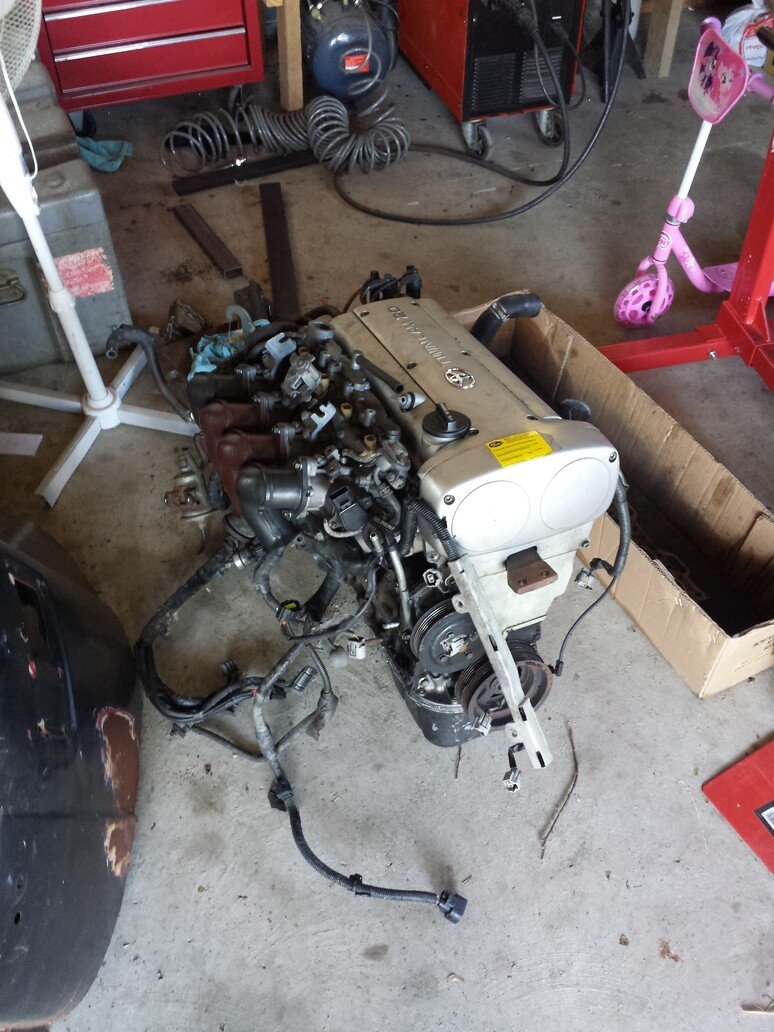
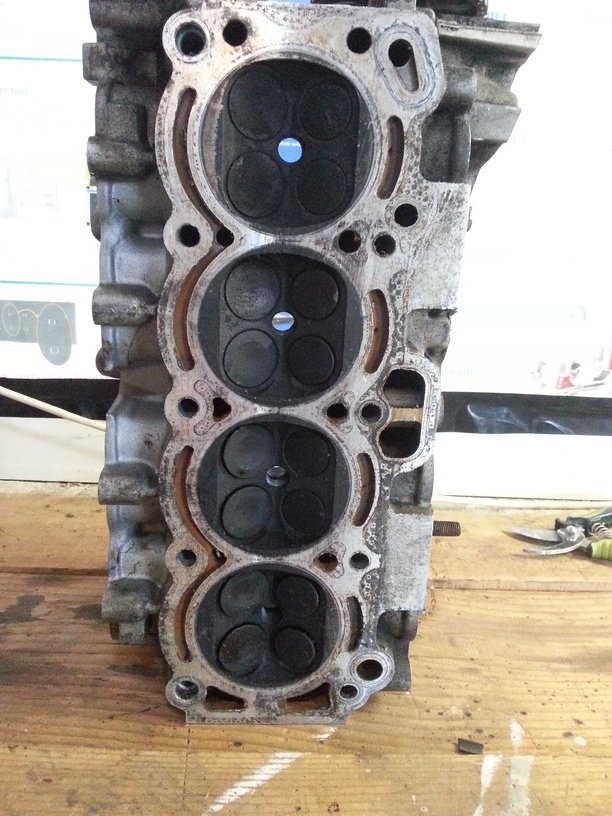
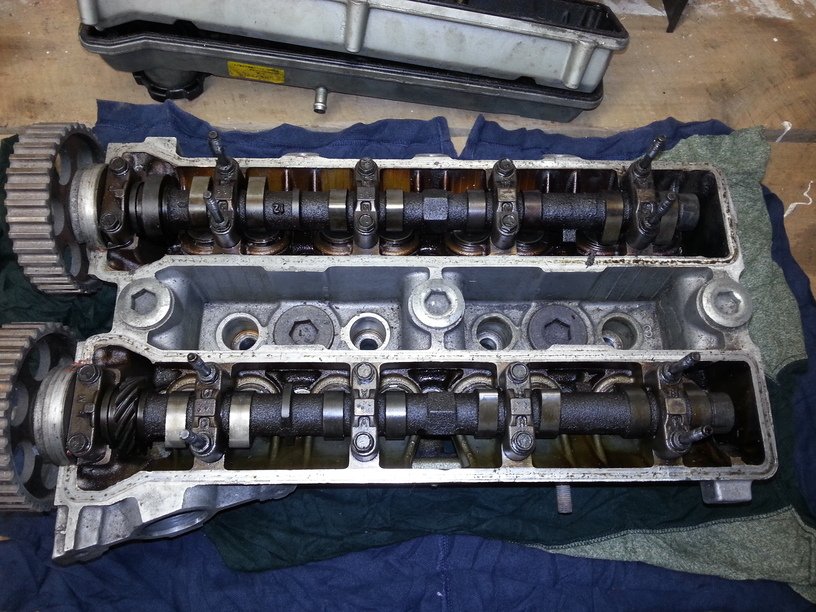
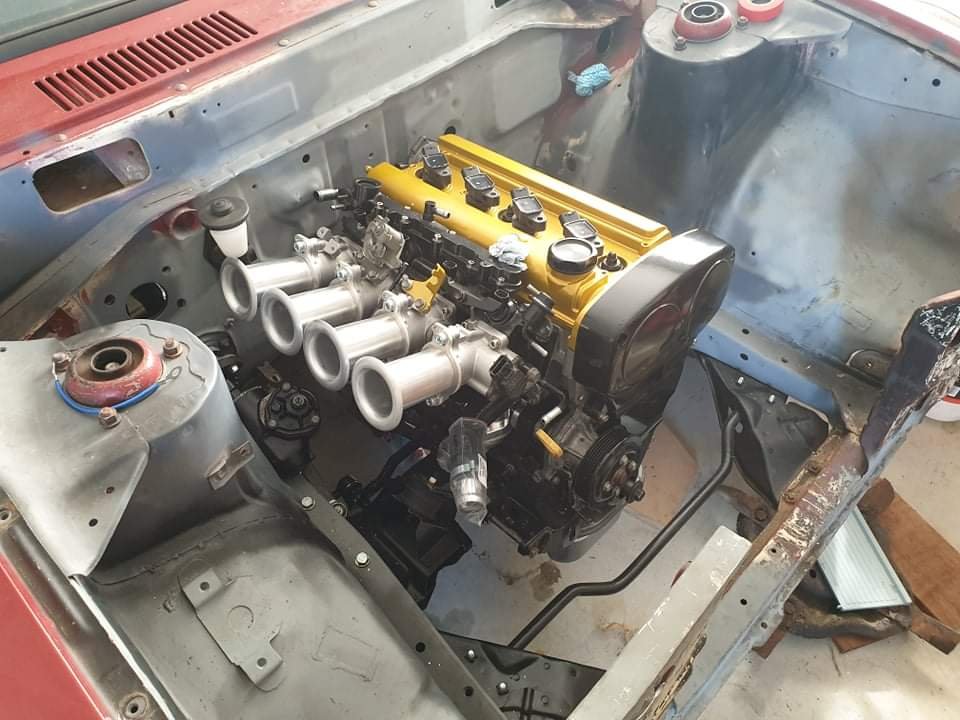
The 20v long block is now all done, with some extras from SQ engineering and MRP. I had a mate turn up a small pug for the dizzy block off as having the dizzy in place with the MRP cover would hit the firewall. The head got a light porting and some polishing which turned out pretty nice. I scored a 22 spline T50 for a good price with an S series bellhousing but scored a cheap T series bell housing for it. I got the trumpets from guy in Tauranga, they are hand spun and a really nice bit of kit. Next on the cards for the engine is a trigger wheel setup and single row pulley.
- 18 replies
-
- 28
-
-
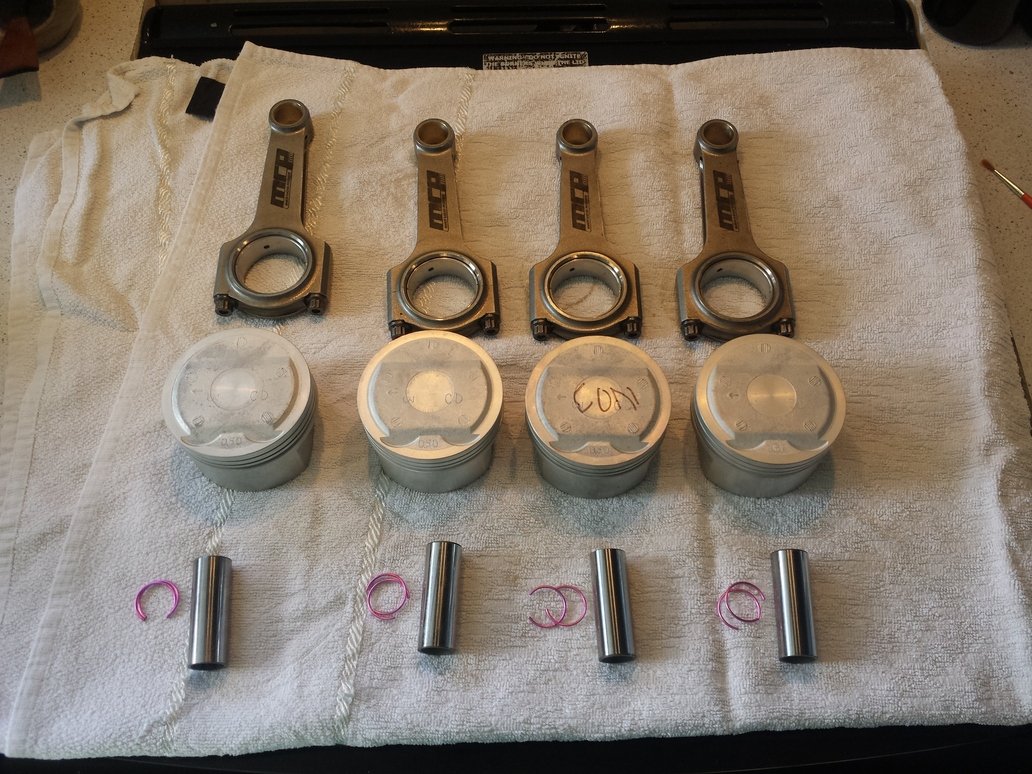
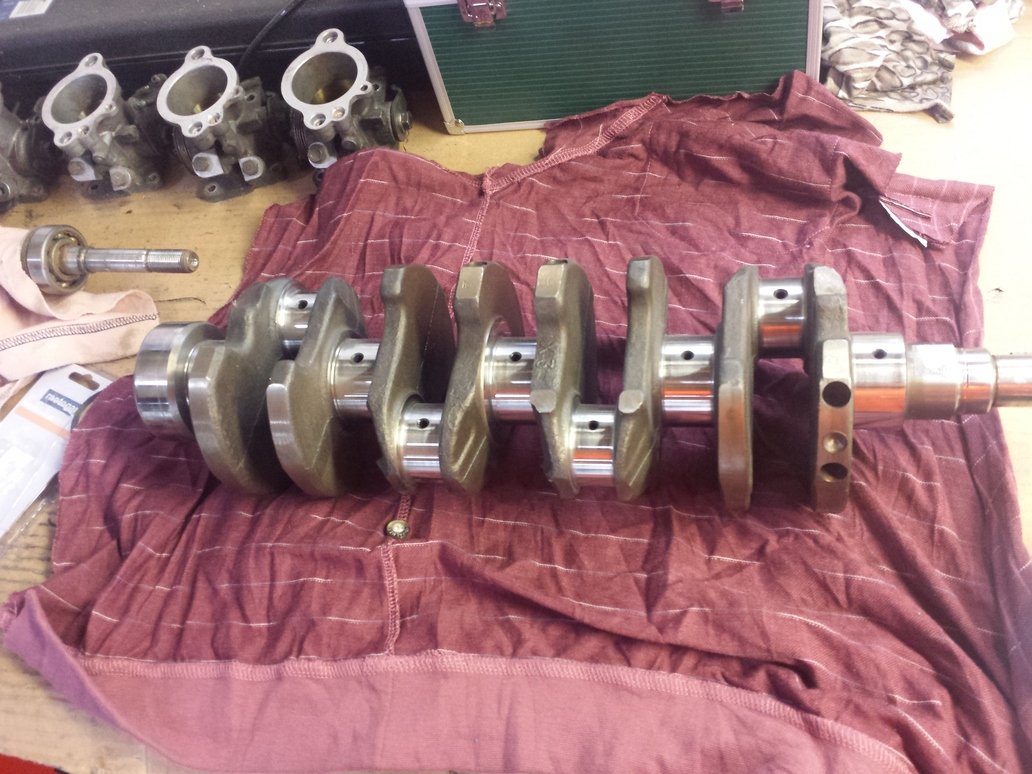
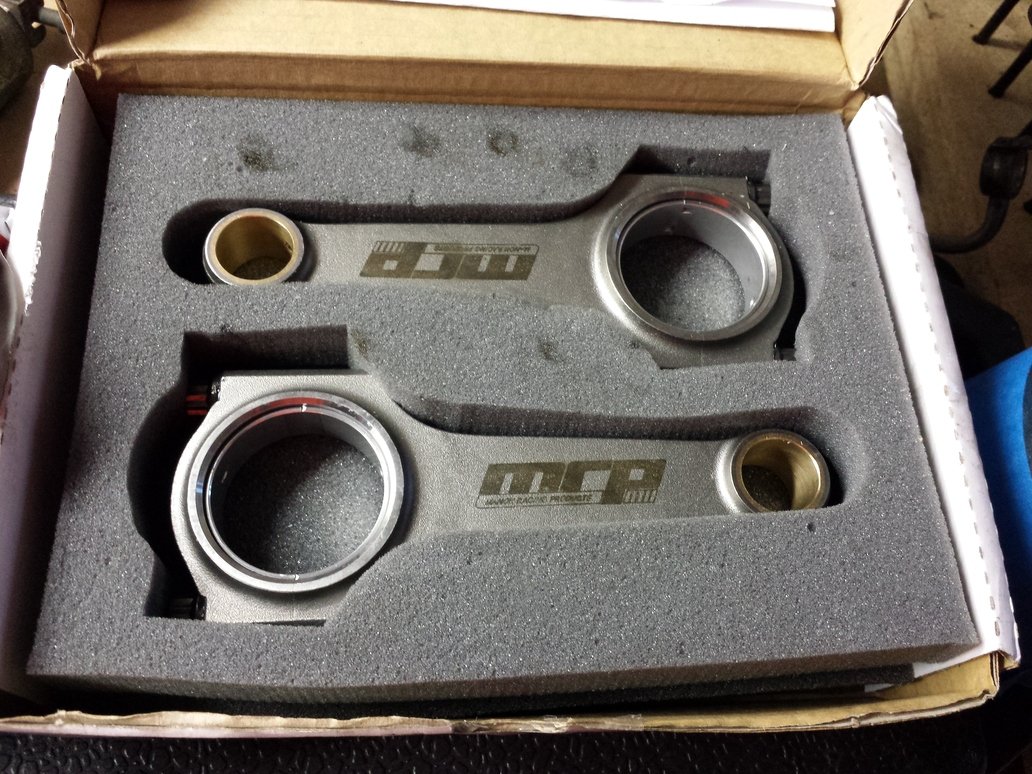
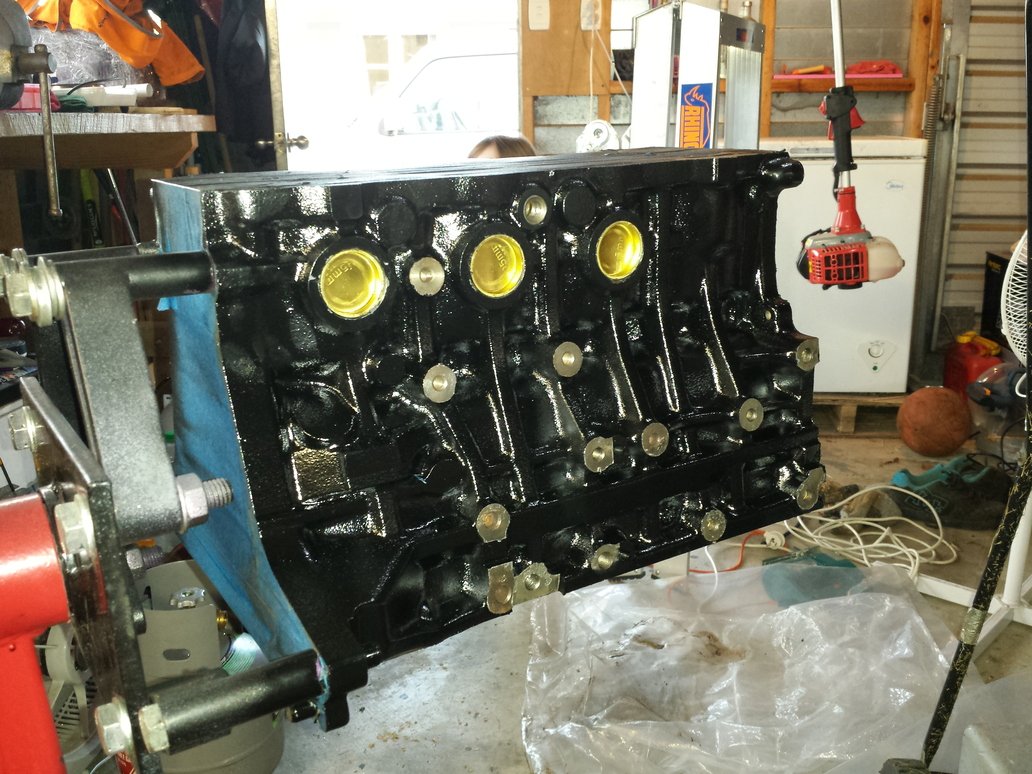
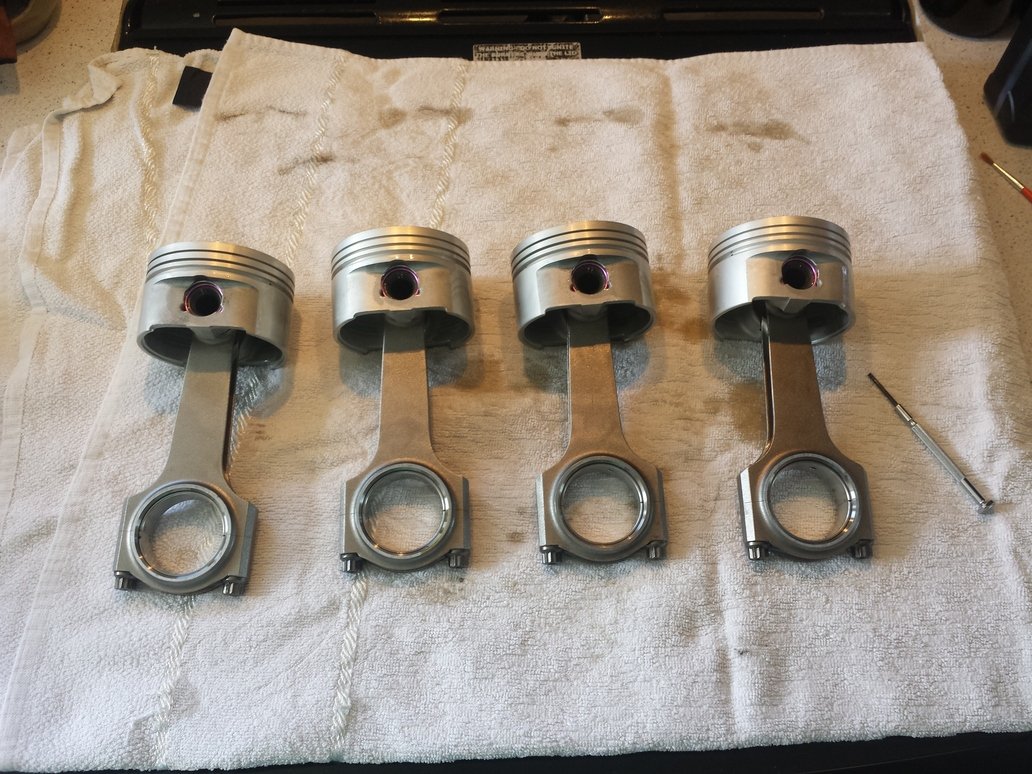
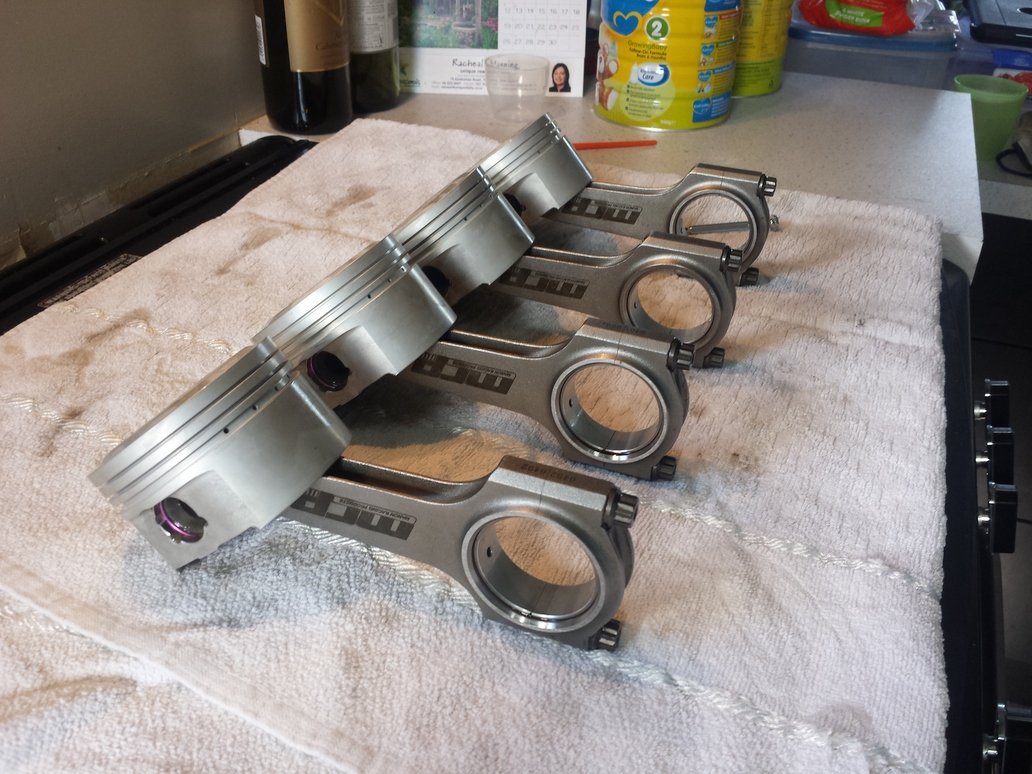
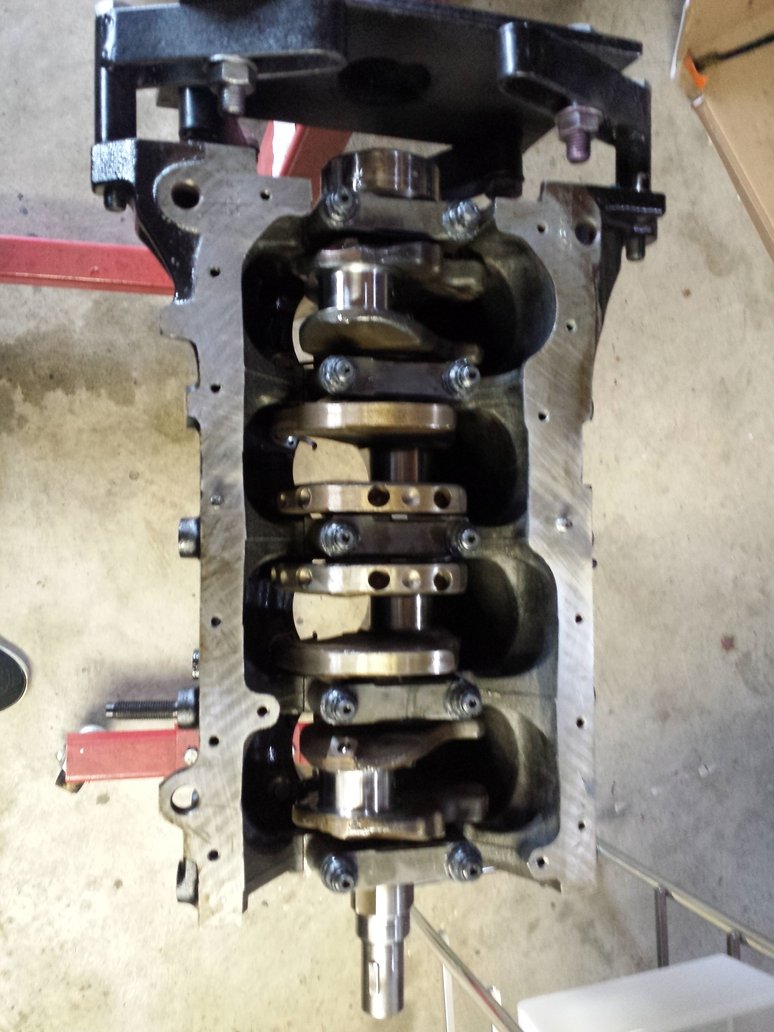
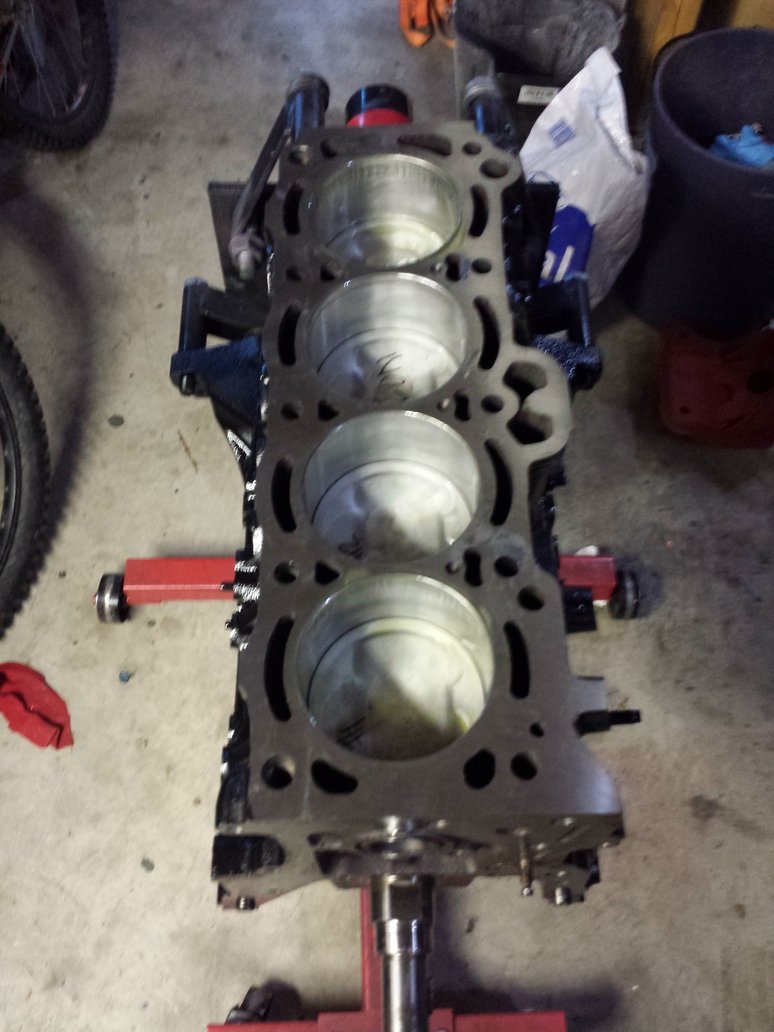
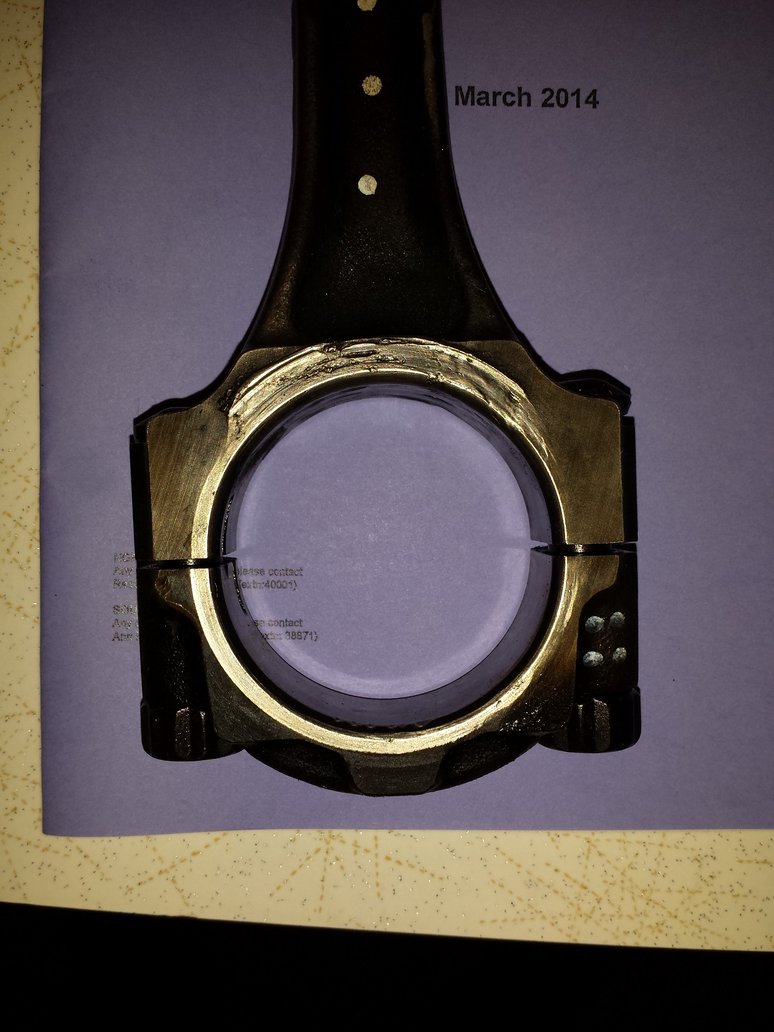
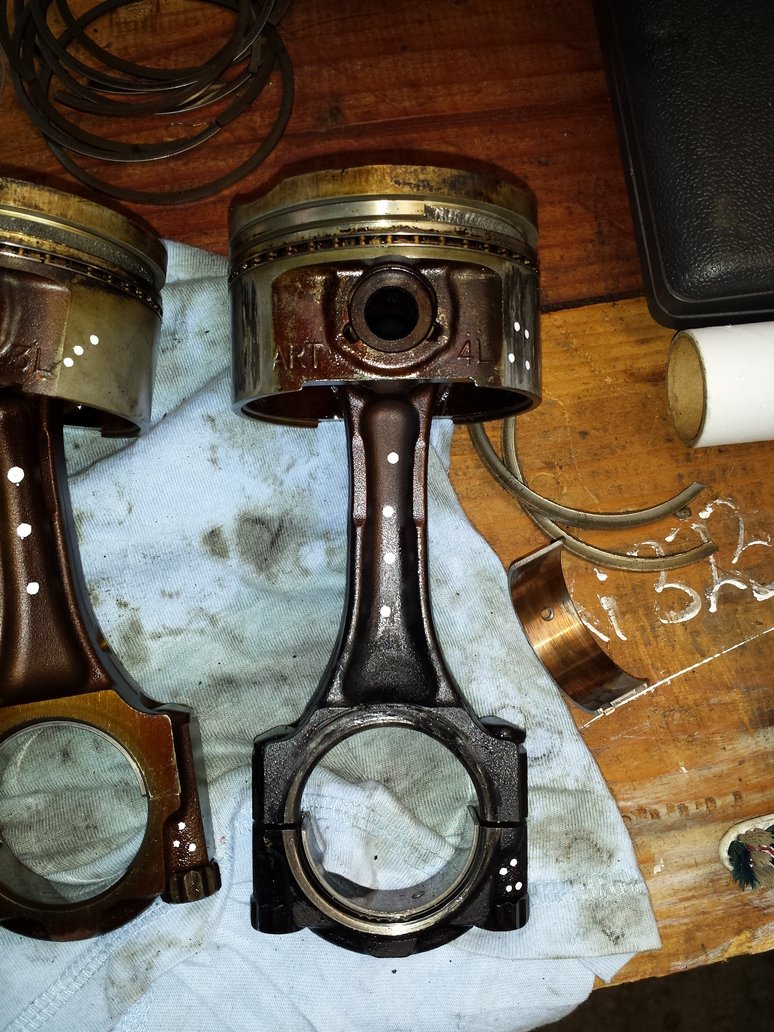
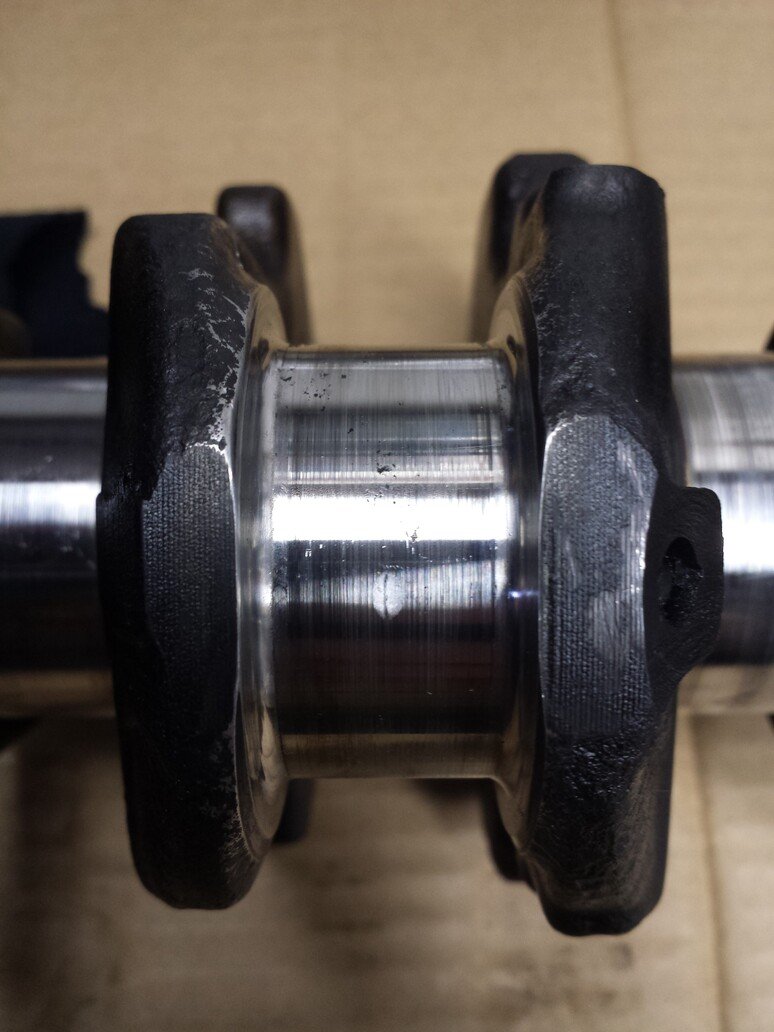
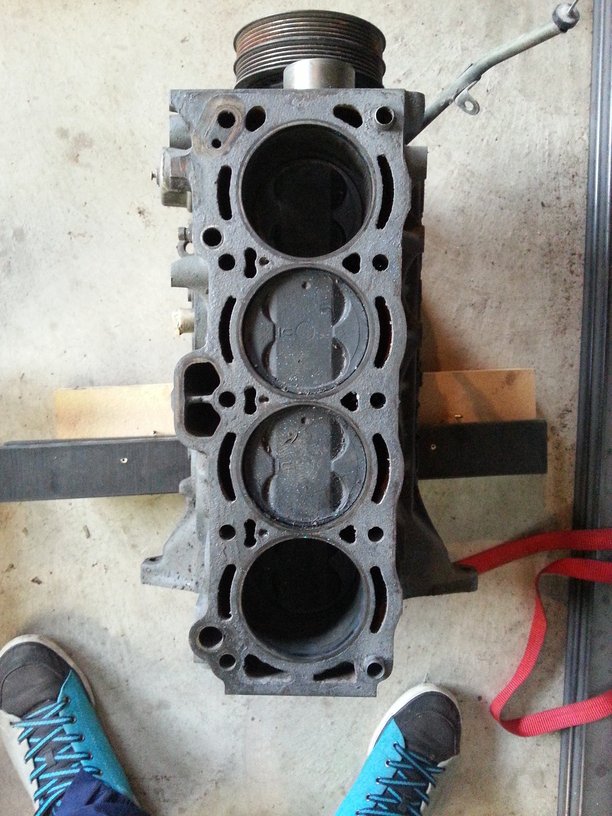
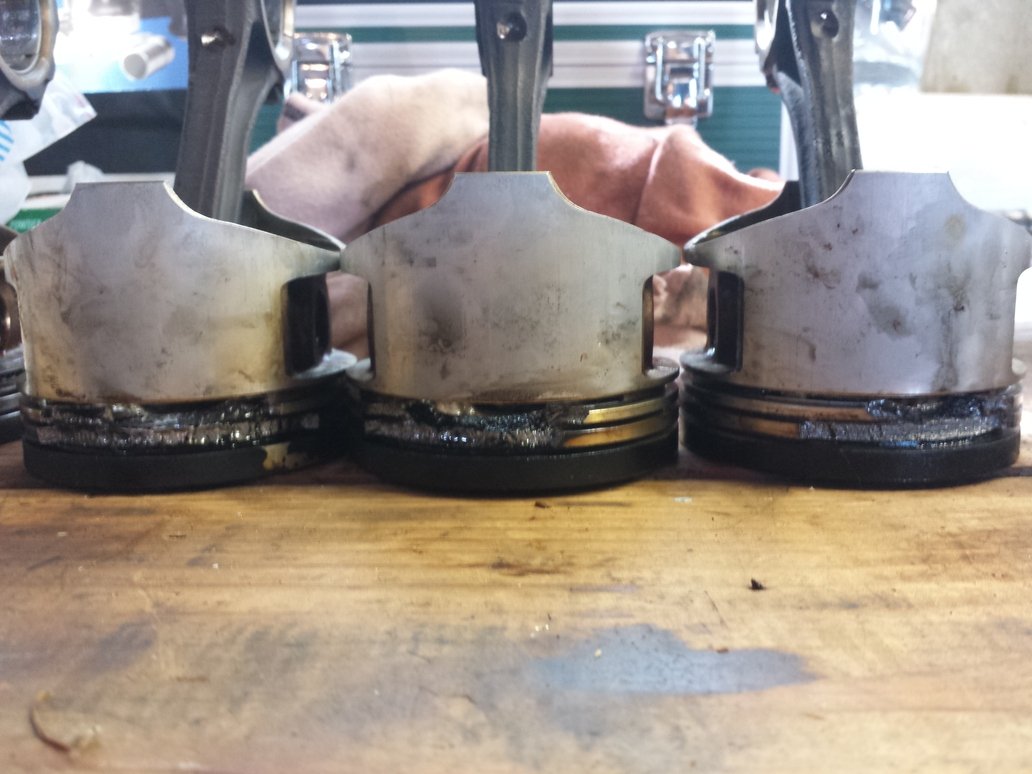
I had all the machine work done locally, new pistons from Toyota and rods from MRP as well as a replacement second hand crank. Bottom end turned out really nice and felt great to get another step closer to going in the car.
- 18 replies
-
- 13
-
-
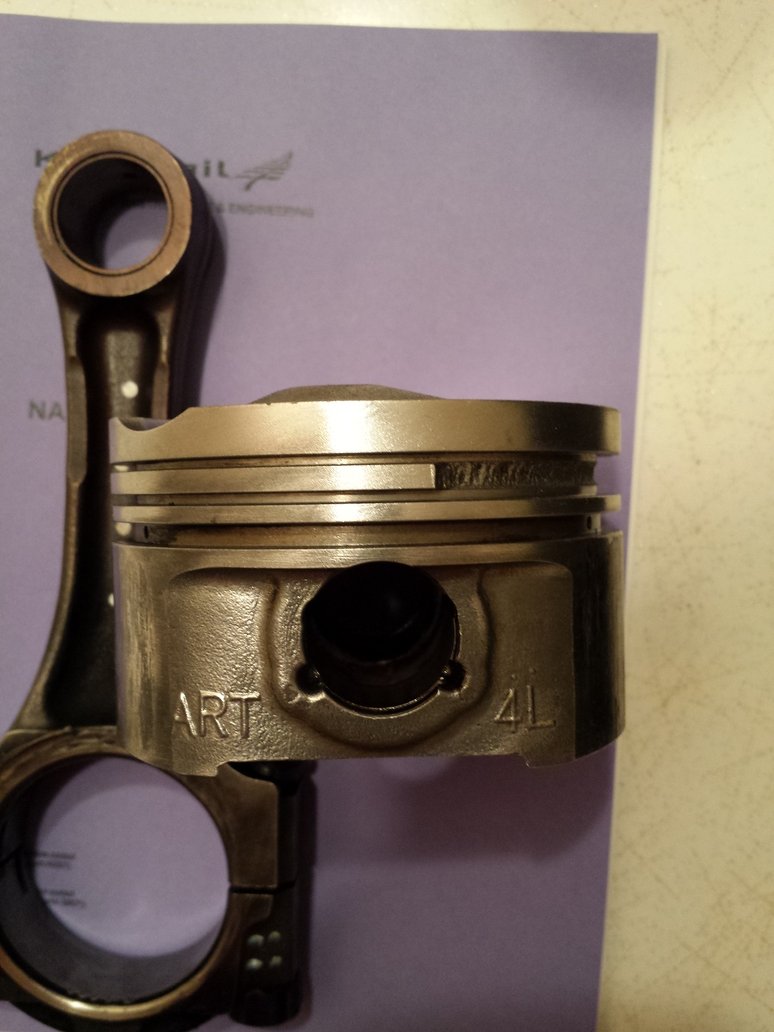
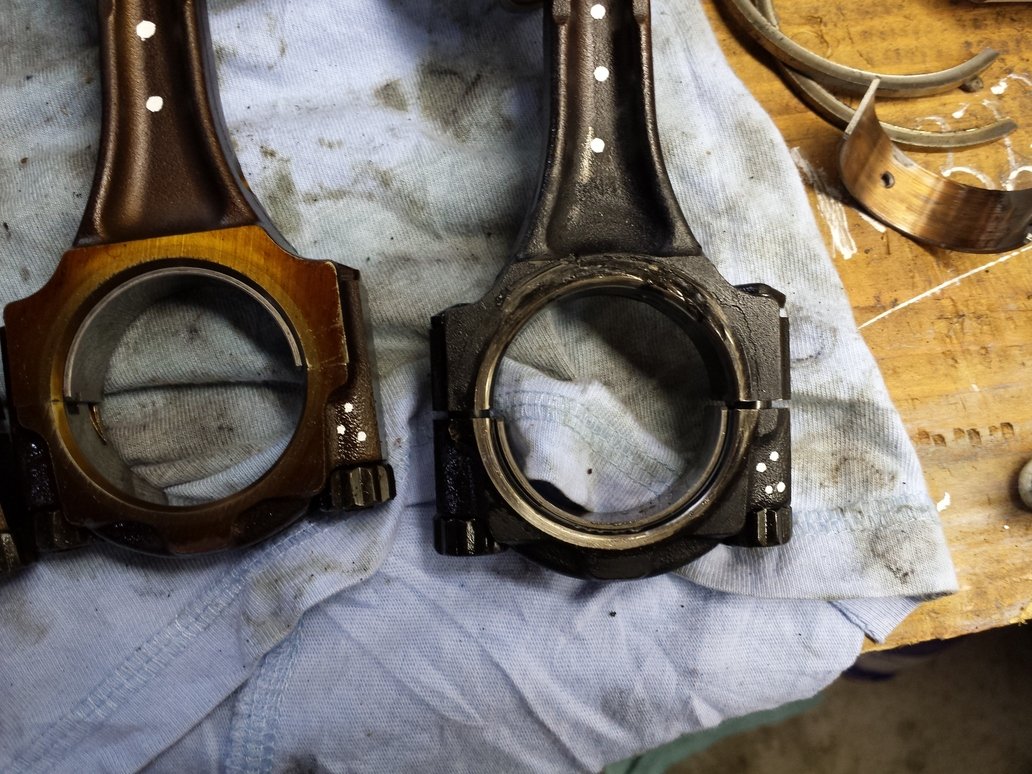
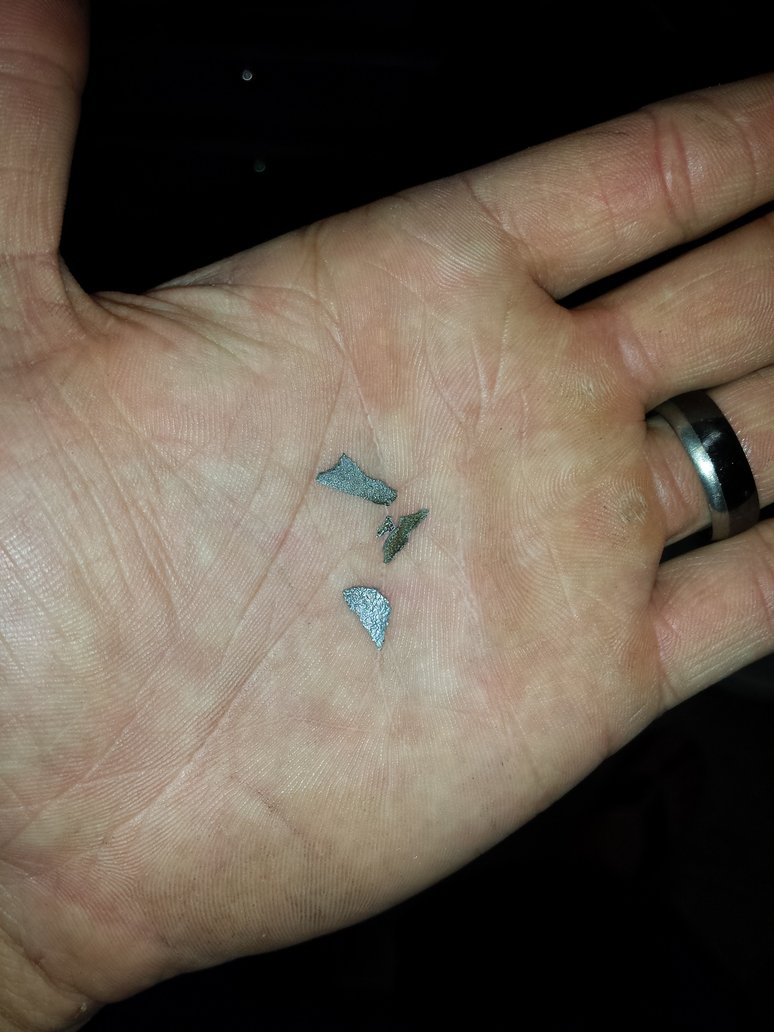
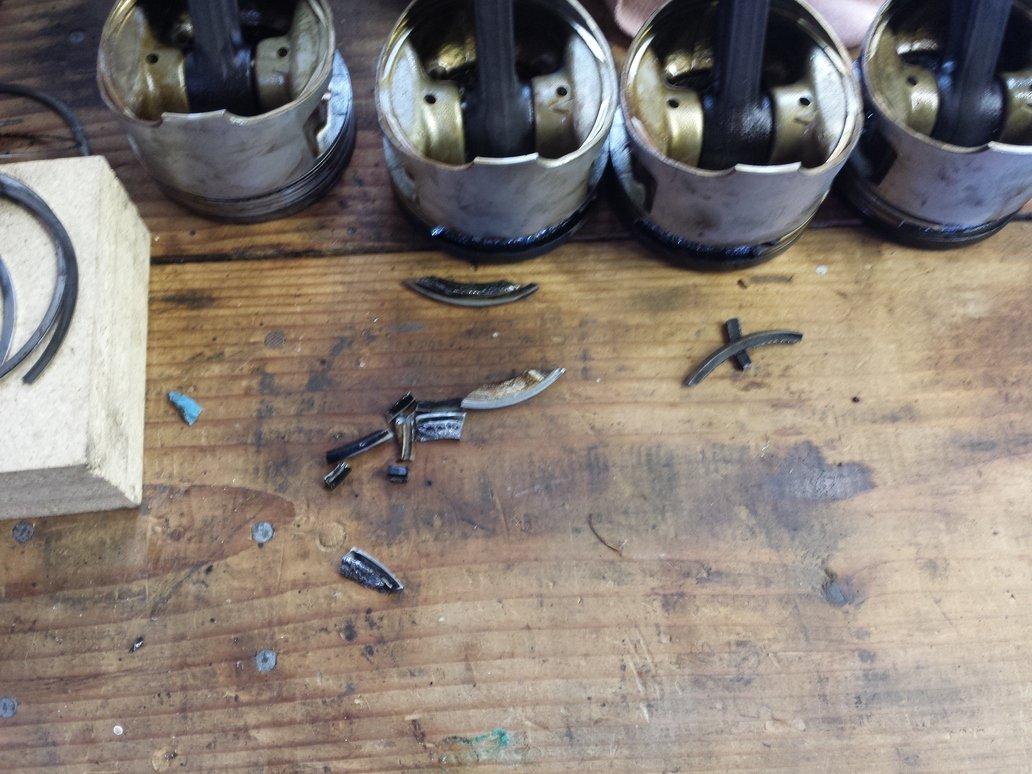
After some though and discussions i decided to forgo the 16v and look into a 20v option. I found a running engine that was fairly well priced (should have been a give away). The seller mentioned that it smoked a little but this was normal for 20vs with high kms, having owned a levin I knew what he meant. On tear down inspection a few alarm bells started ringing, yet another set of pistons held together with the rings and rods that had seen better days and a crank with some deep pitting and damage from thrust. I decided that i would make this work and buy replacement parts for the 20v.
-
I purchased a big port 16v 4age with the hopes of a simple rebuild and could start the process of repowering the car. Once i got the engine apart I started to realize that the engine i had bought was a complete dud and would be a big job to rebuild. I imagine the engine had a hard life and 3 of the 4 pistons were held together by the rings, the head was warped and the cam journals were less then ideal to rebuild, off to the scrappy with this engine.
-
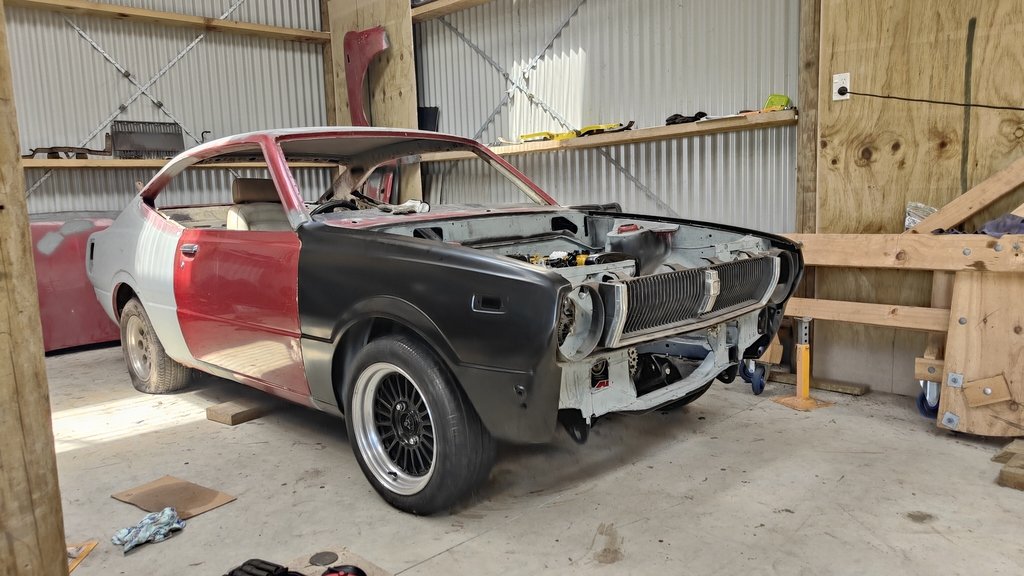
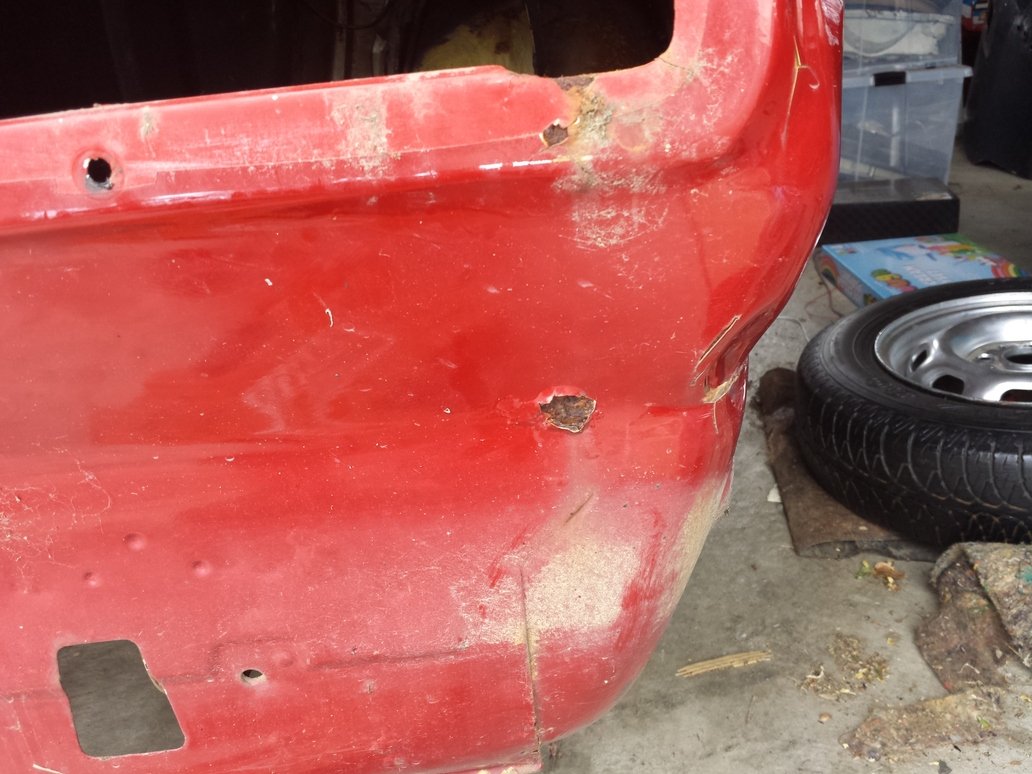
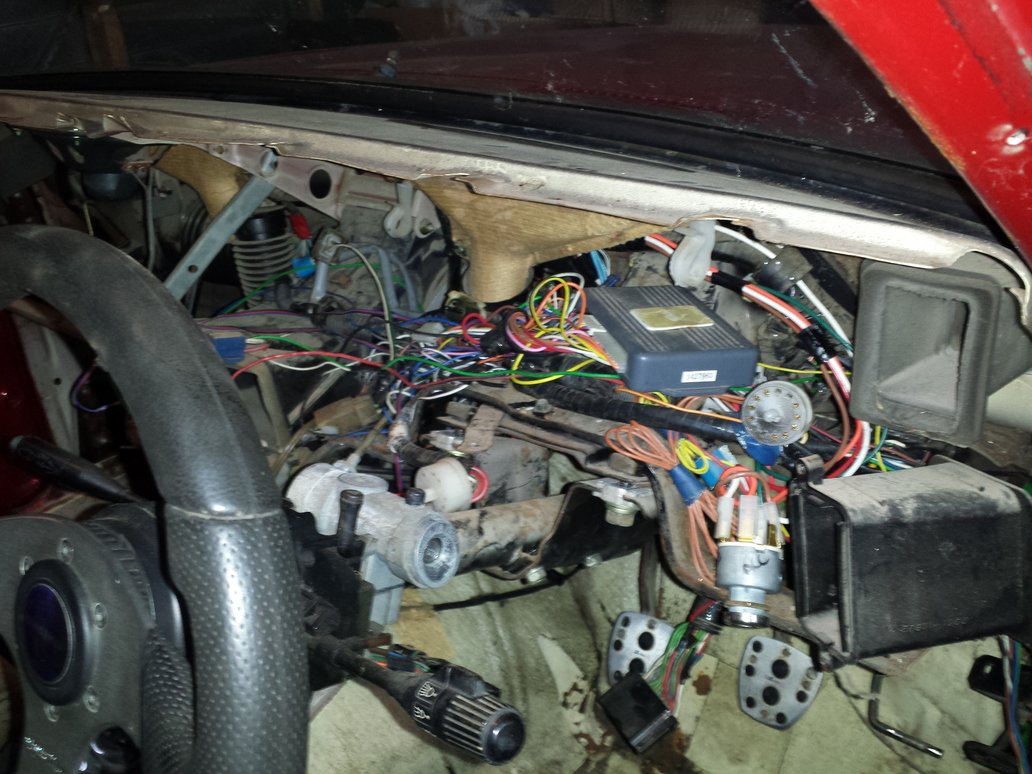
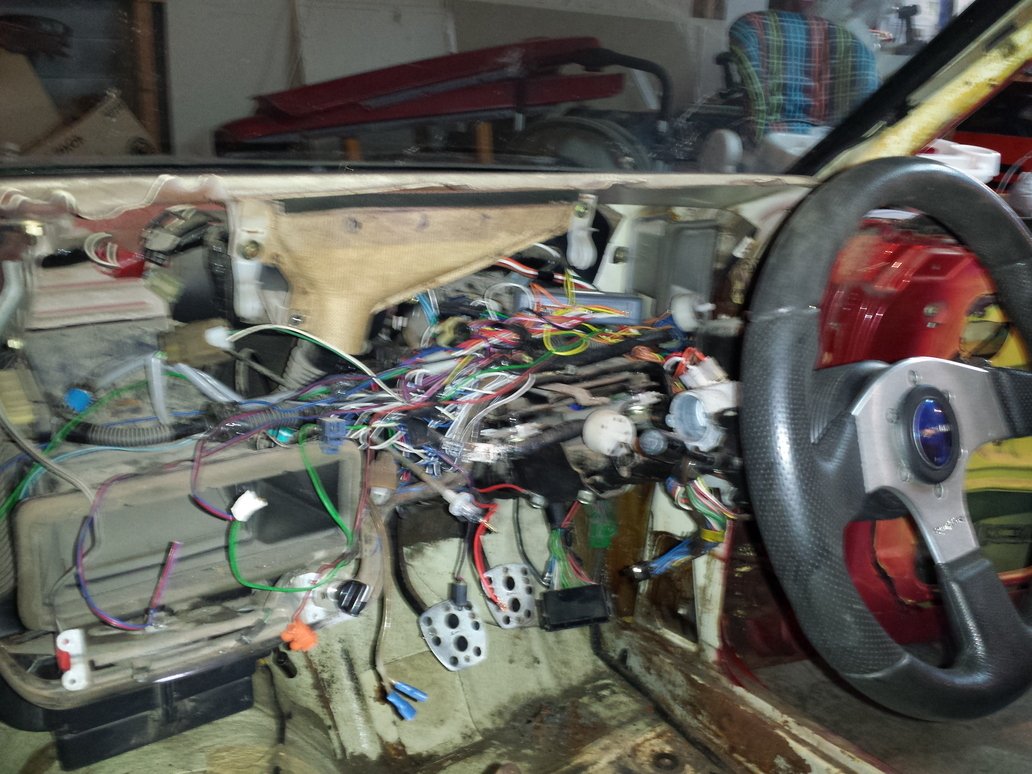
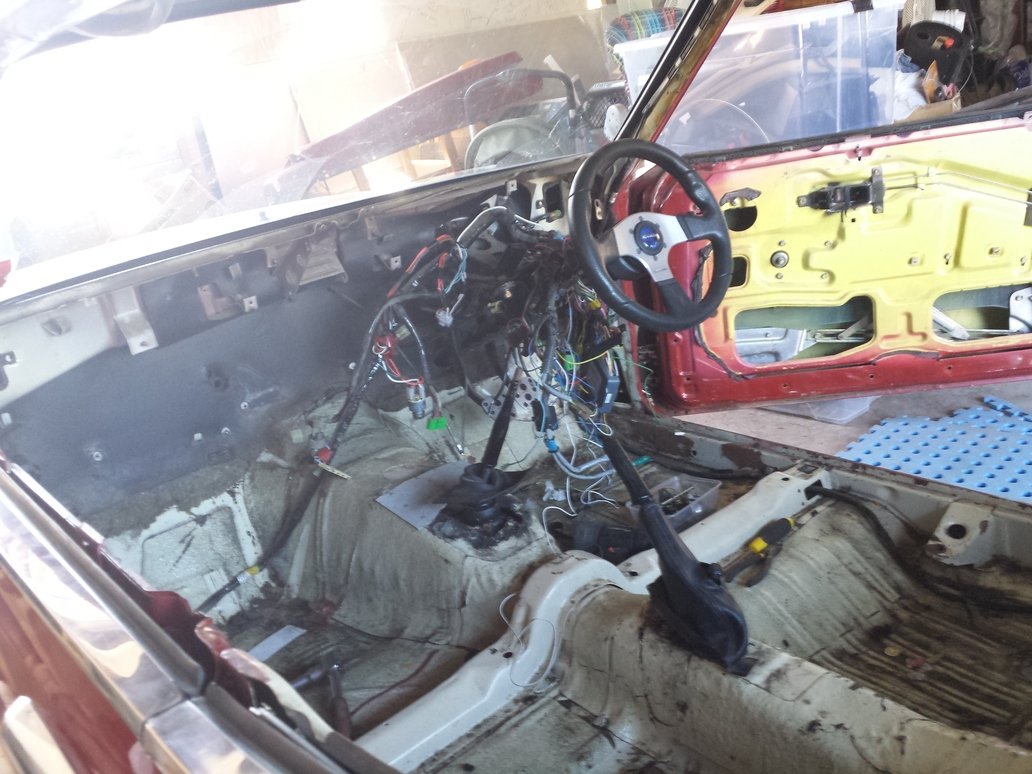
After driving the Ke35 around for a few months i decided to start stripping it out to have a good look at how much rust was in it. Most of the rust is in the rear section of the car and the usual places in the front guards and radiator support. I got another tail section with the car so planning on taking rust cuts from that as much as I can. The other thing I found was the wiring behind the dash was a mess, the loom was cut up in places and a half ass job done to reconnect.
-
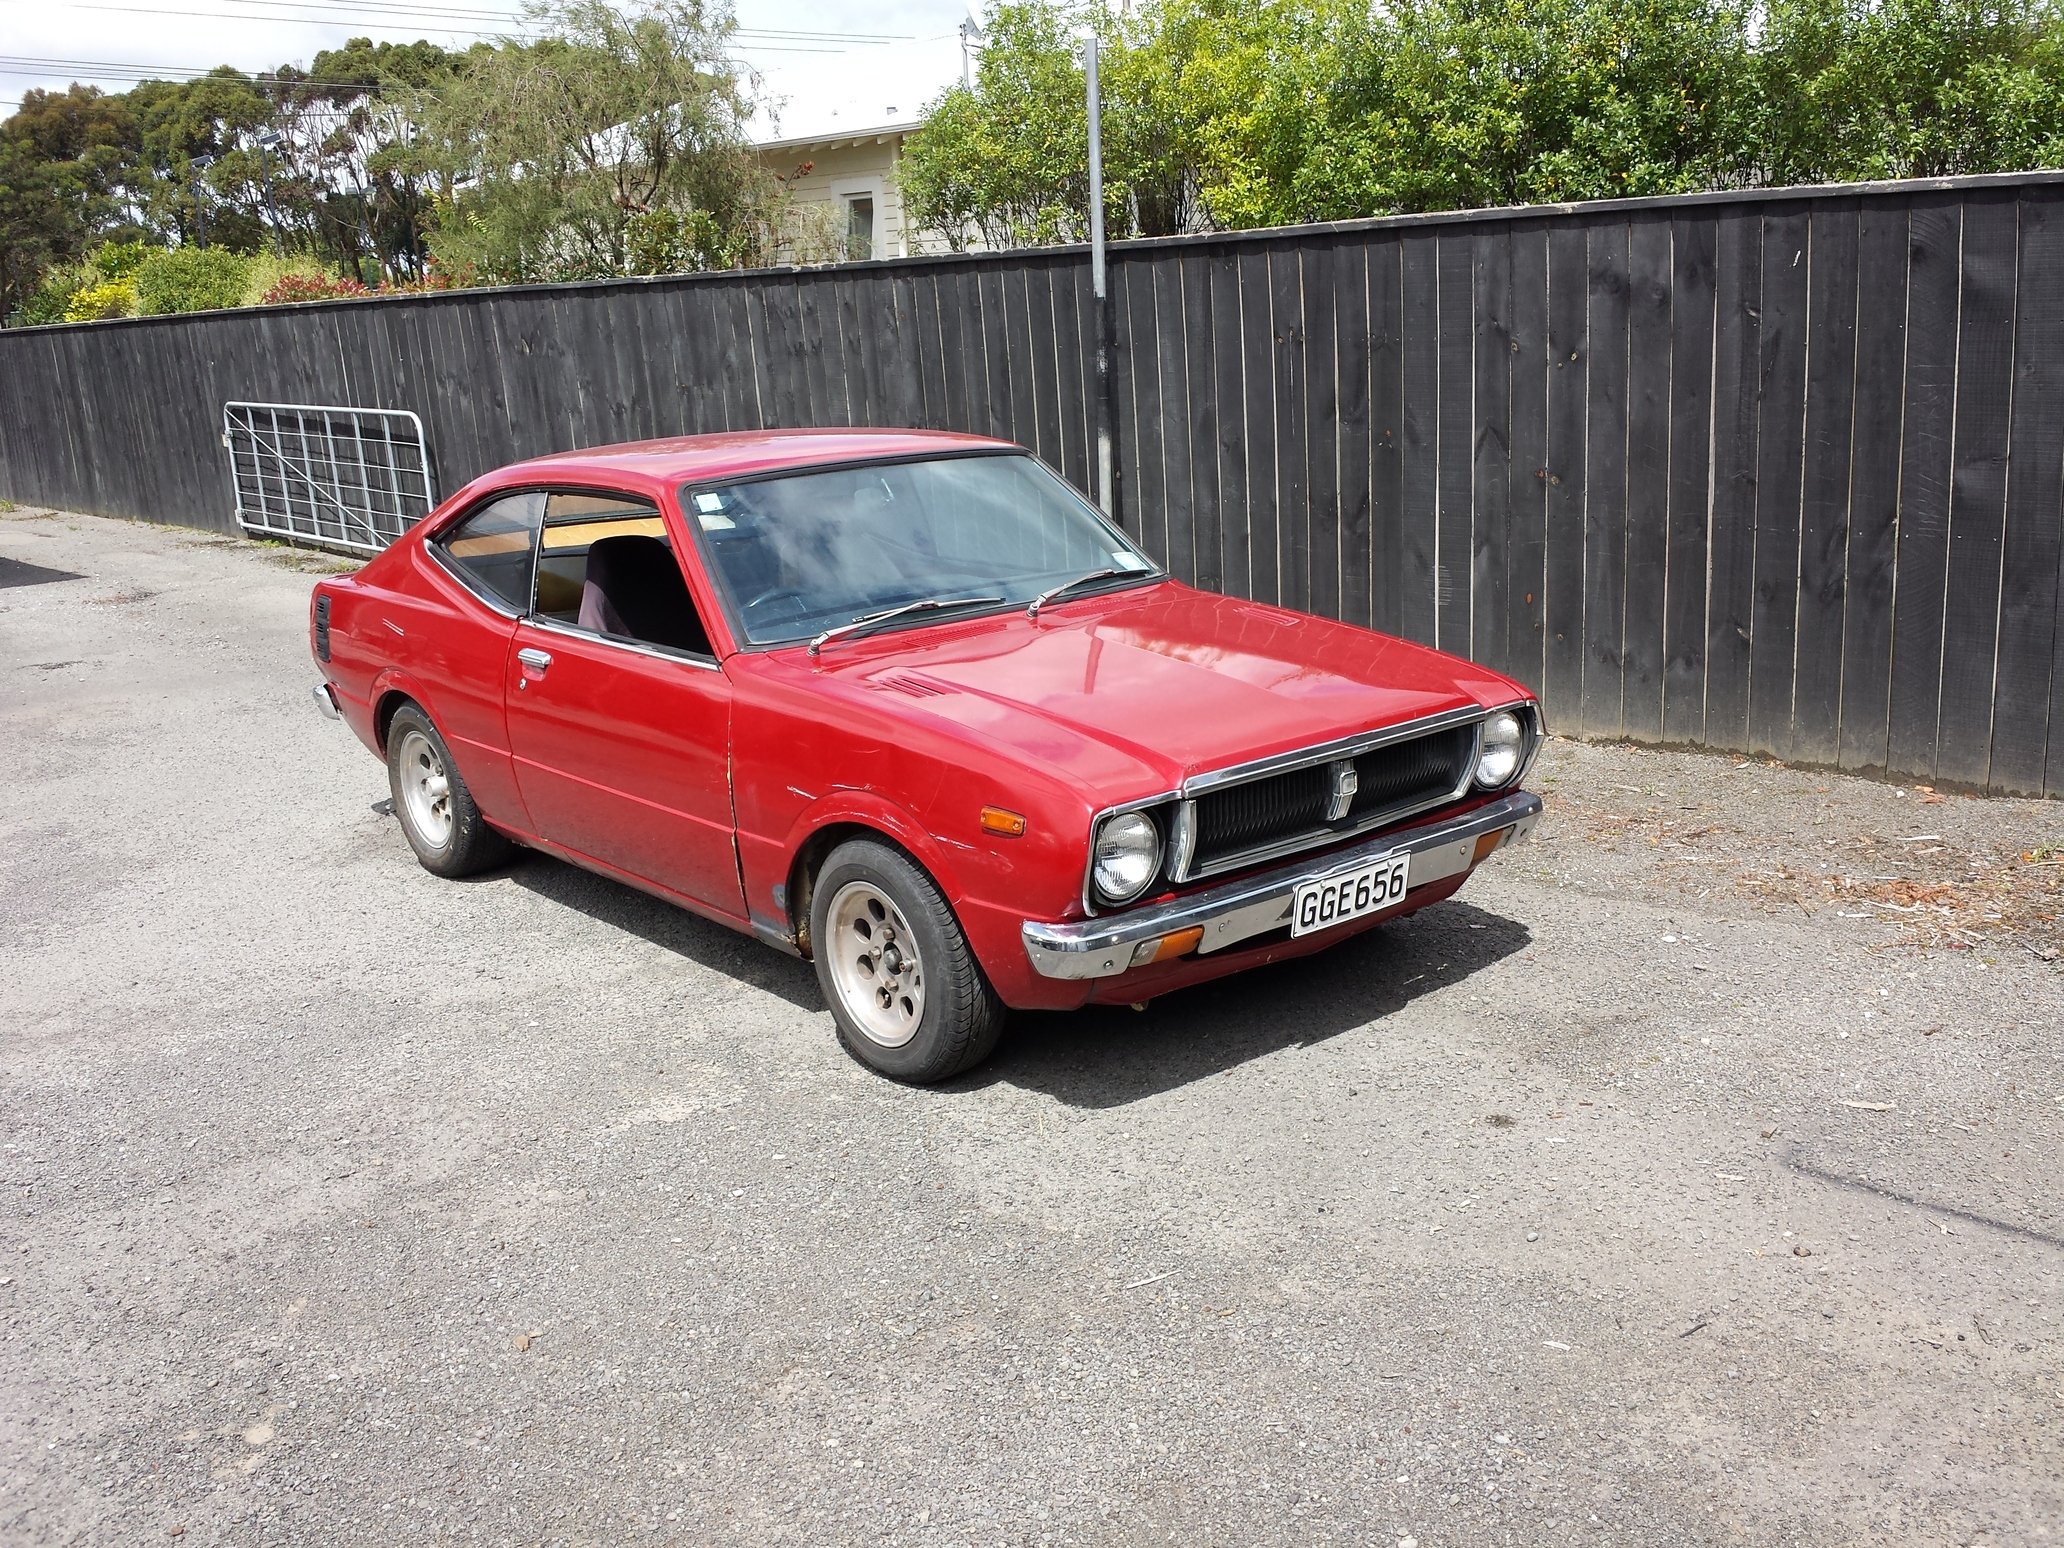
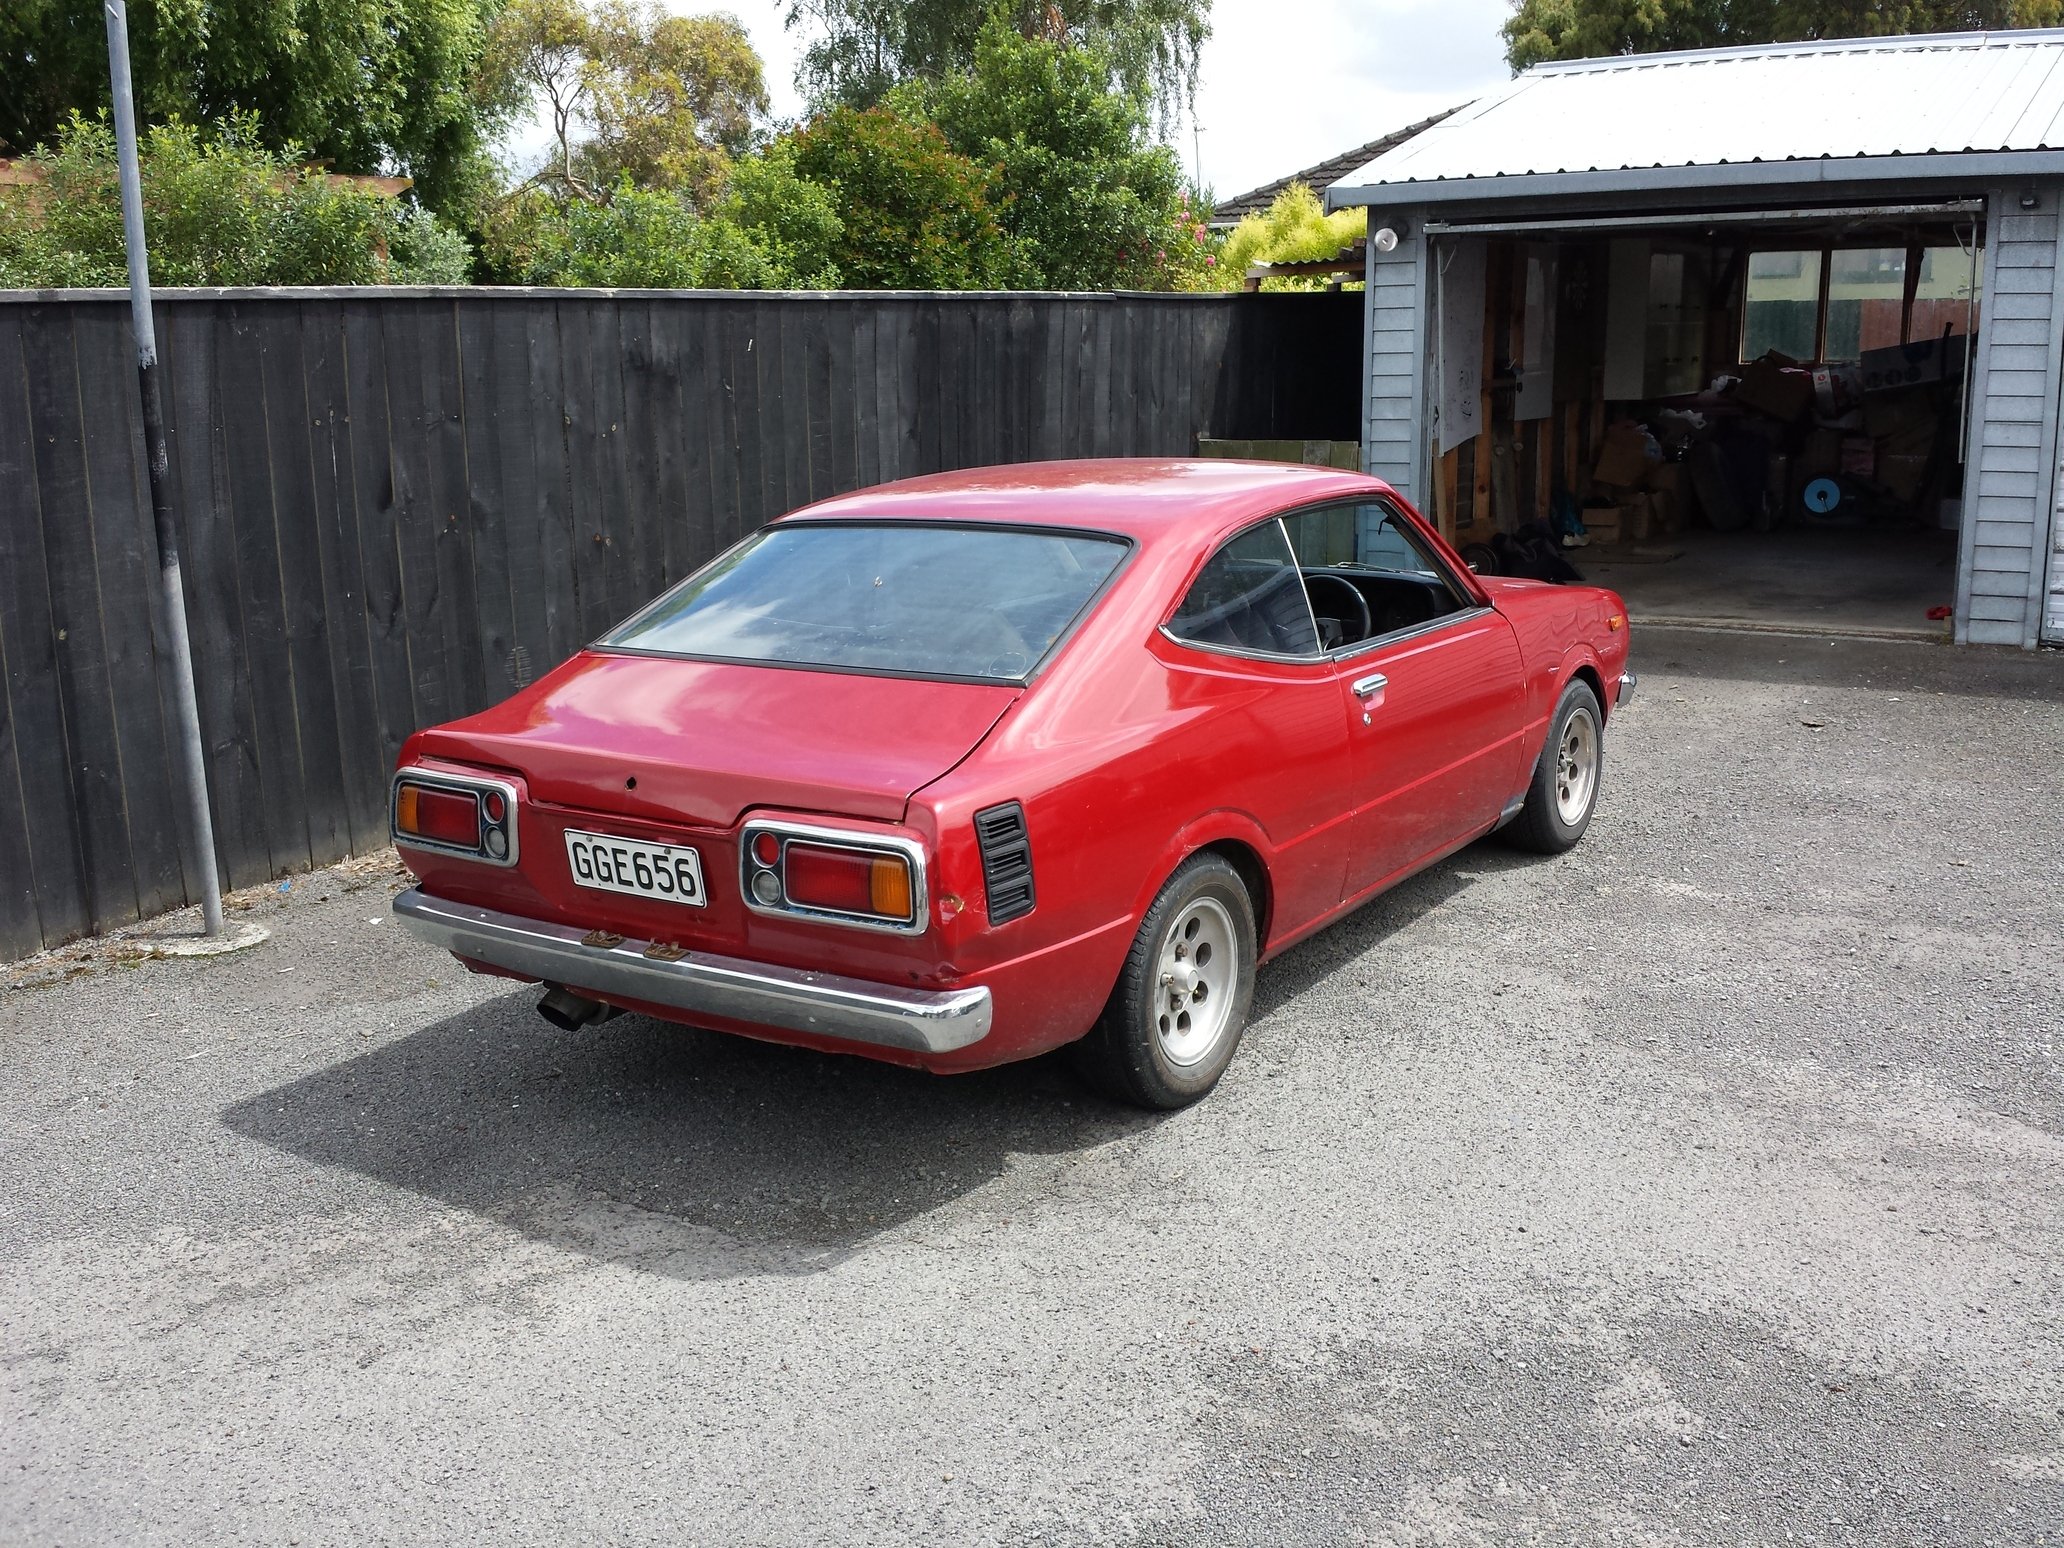
So this is the Ke35 on purchase day, January 1st 2014. Drove up to with a mate in his Mazda 1600 Ute and drove this about 400kms back home. The trusty 5k didn't miss beat, apart from having to wind the windows down due to the exhaust leak.
-
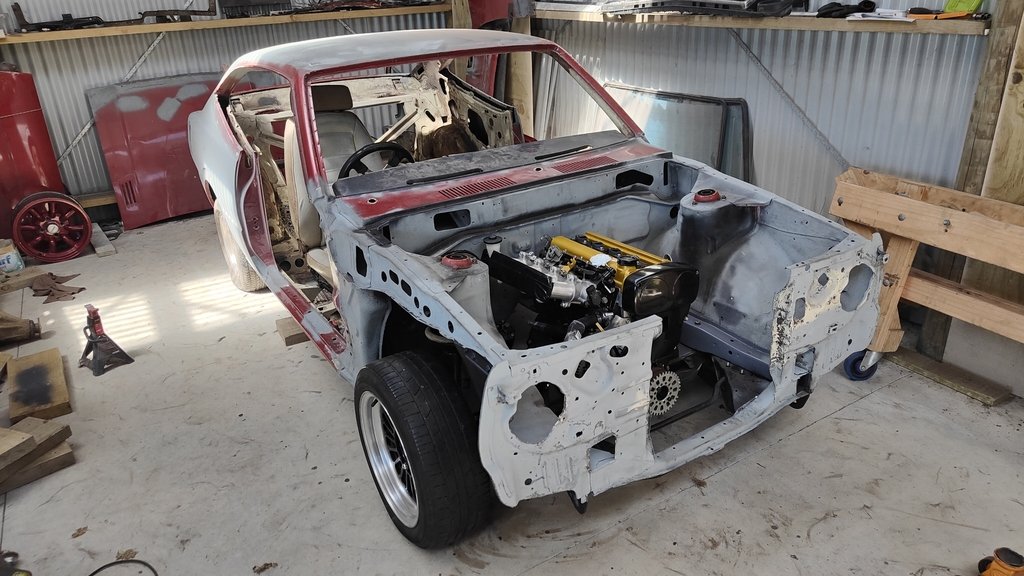
A bit of a thread to follow my 1979 KE35 build. I purchased the car back in 2014 with plans to restore and repower with a 20v 4age. I will add notes and pictures from the start to where I am now.
- 18 replies
-
- 11
-