

piazzanoob
-
Posts
1247 -
Joined
-
Last visited
-
Days Won
1
Posts posted by piazzanoob
-
-
is the plan to swap over the running gear and bits to the gold one now?
i somewhat think the gold one looks more honest and isn't hiding much.
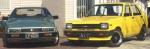
always had a soft spot for these especially with the factory livery
sweet ute for a 1kz conversion
-
 1
1
-
-
yeah cap has no sides.
that could be a go. i wonder if hunting and fishing have them go and test them haha
-
1 hour ago, cletus said:
For the hook? I used a coat hanger wire from memory, small hook one end and a finger sized loop on the other
yeah.
sounds like it would of stood out like a sore thumb that way?
-
9 hours ago, cletus said:
I had the same problem with widened steel wheels and hubcaps, I ended up drilling a small hole in the side of the cap and made a wire hook that went in the hole to pull the cap off
cheers
I did think of doing that also. did you use stainless safety tie wire and tie the ends together on the inside?
-
-

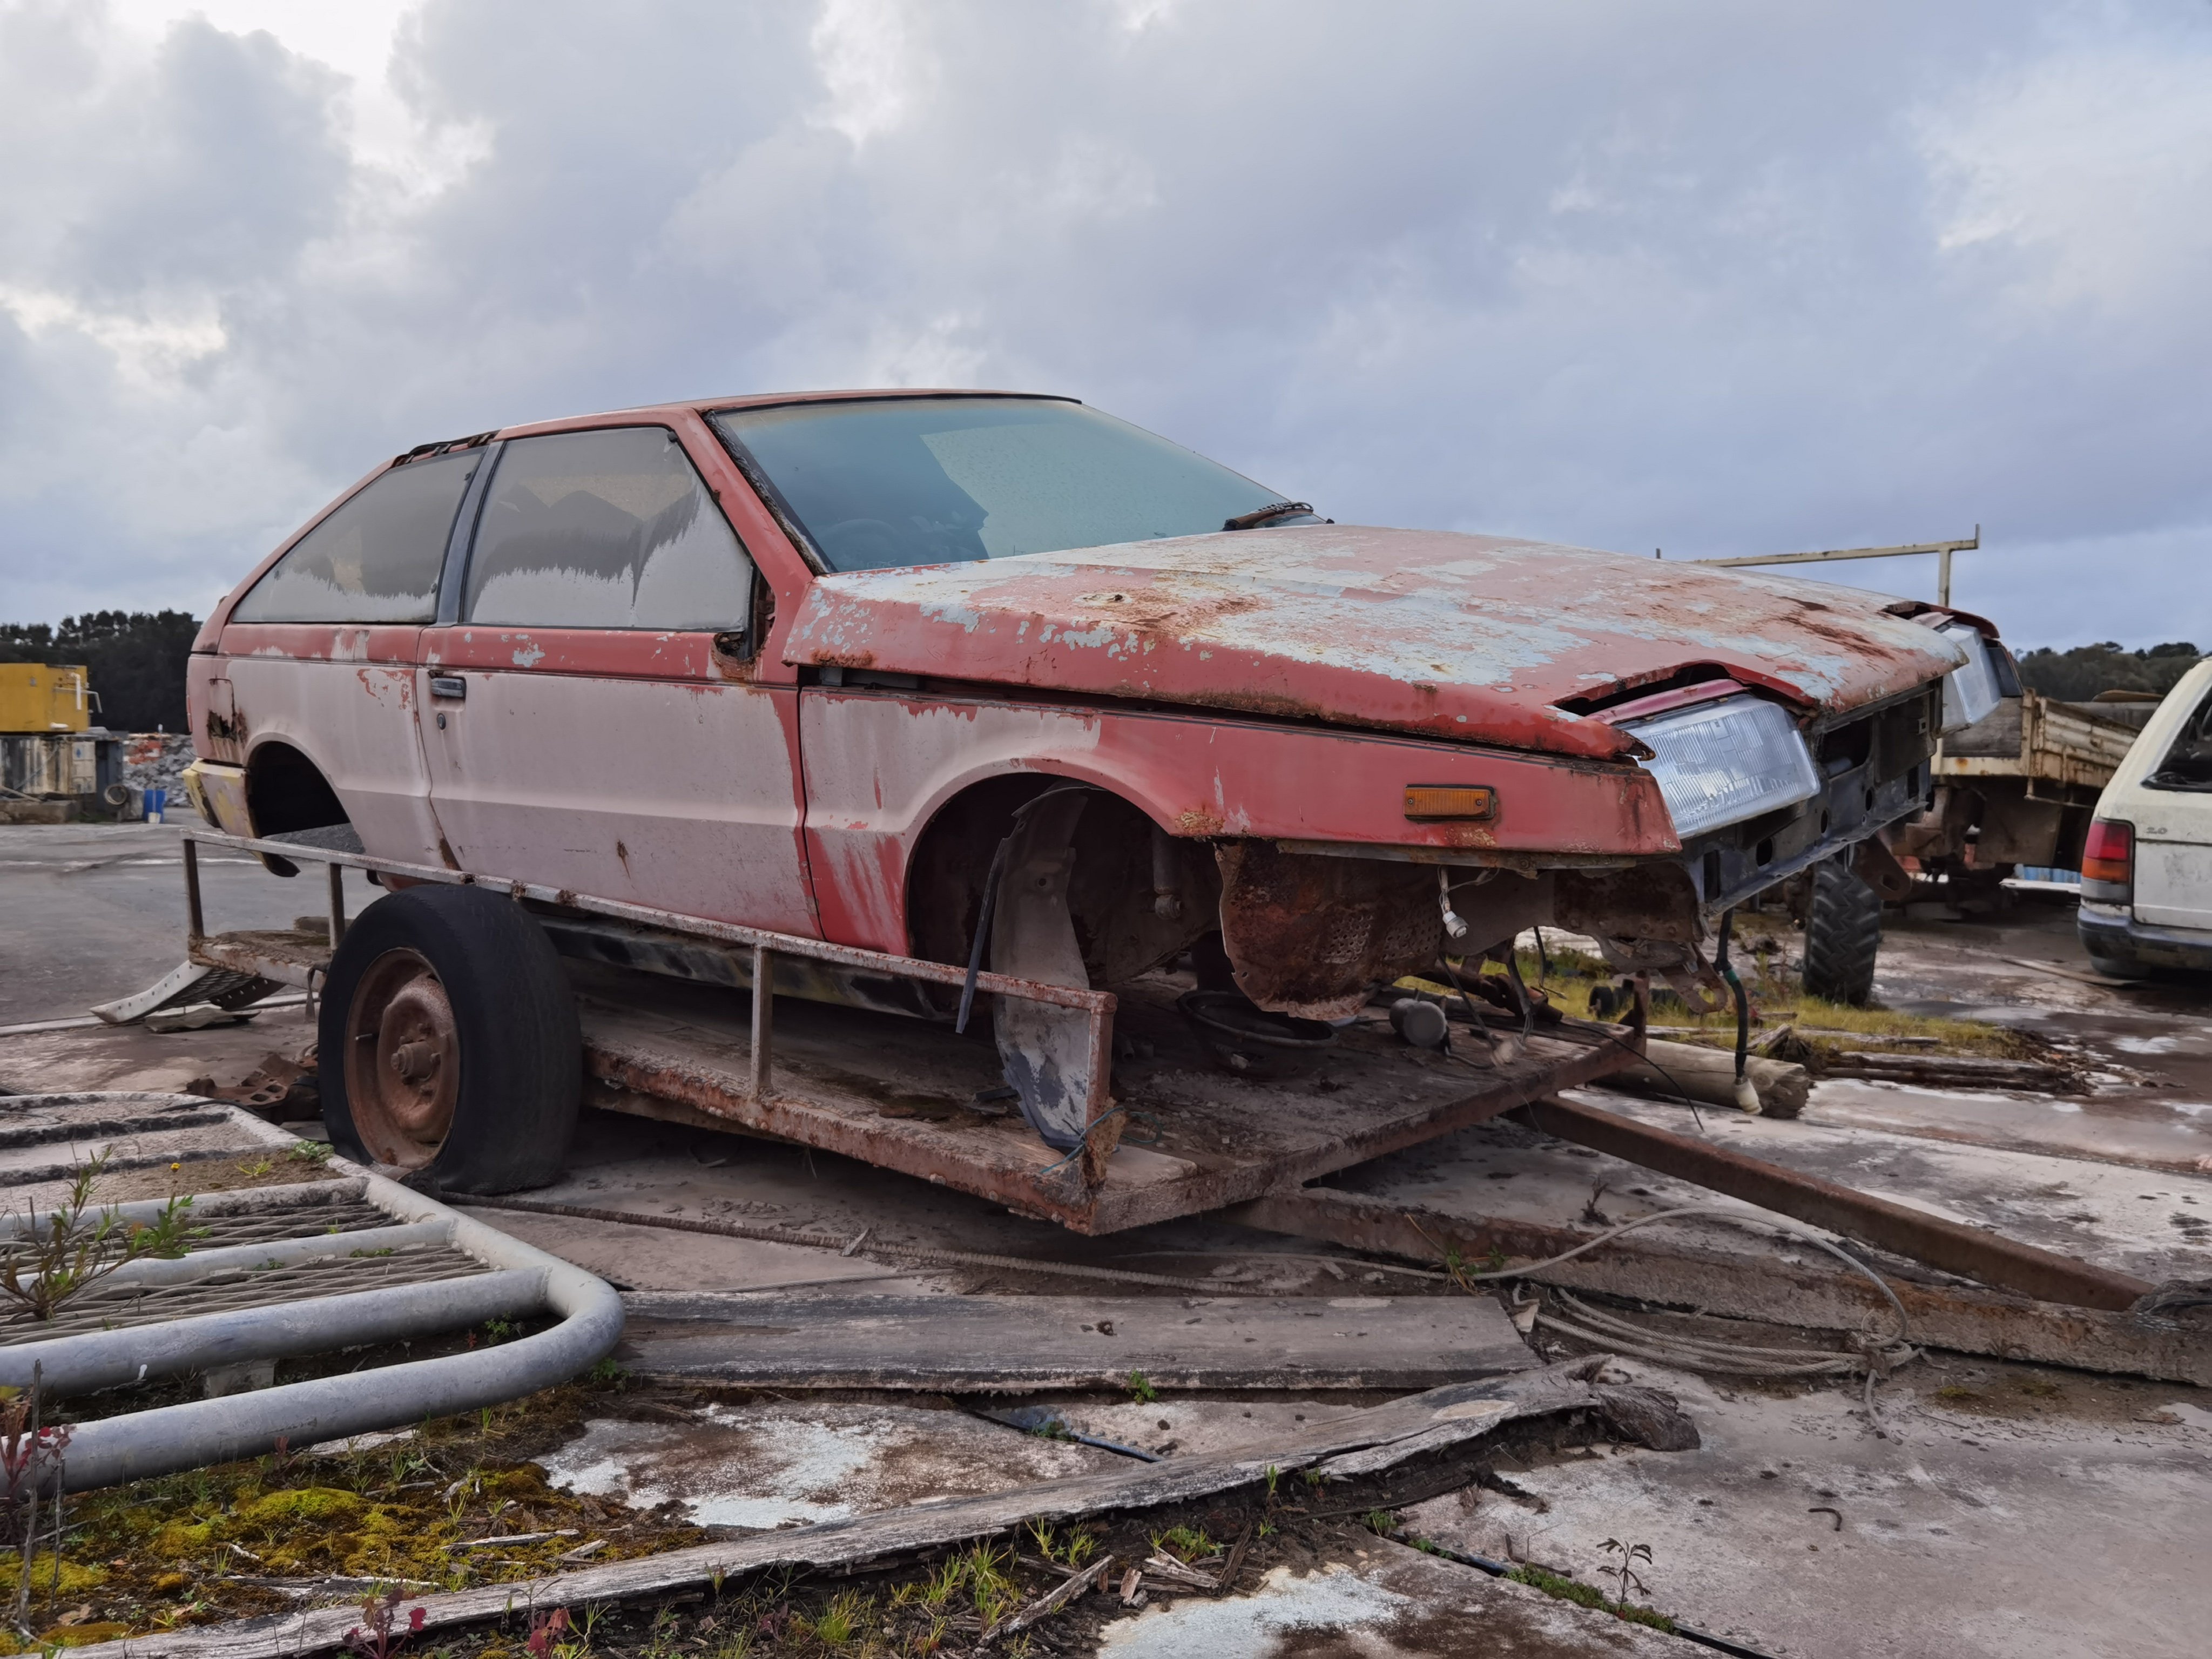
A piazza in the wild
-
5
-
 1
1
-
-
12 hours ago, Nominal said:
Nice work one power steering leaks. Mine's terrible.
For the steering wheel, can you center it up by adjusting the tie rod ends? I haven't had much luck with getting the steering wheel right, I just live with it being wonky.
For the hubcaps, this gadget came with my new car, not sure if it's a home-made or commercial thing?
The steering wheel is half way off centre. but the wheel isnt flash and bits are all broken on it around the edge. so was going to fit an aftermarket smaller one. but suspect someone in the past has crossed threaded it on the splines.
that tool may work but not sure how well. the one tortron put up looks like a much better tool on not damaging the paint.
-
- Popular Post
-
13
-
- Popular Post
- Popular Post
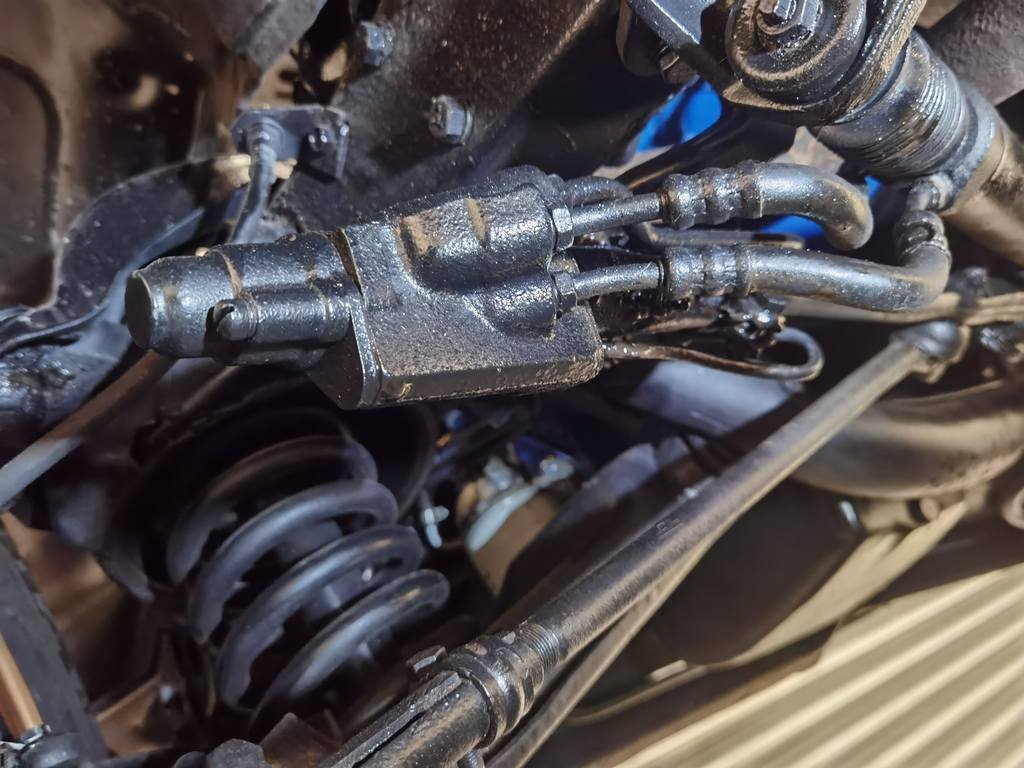
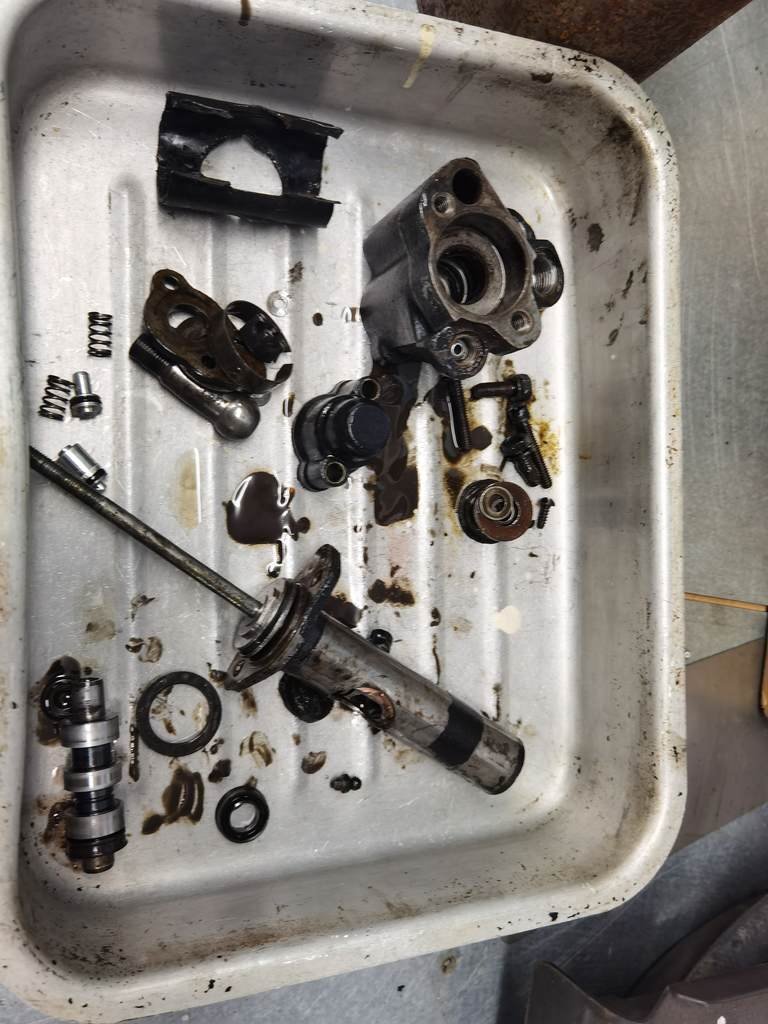
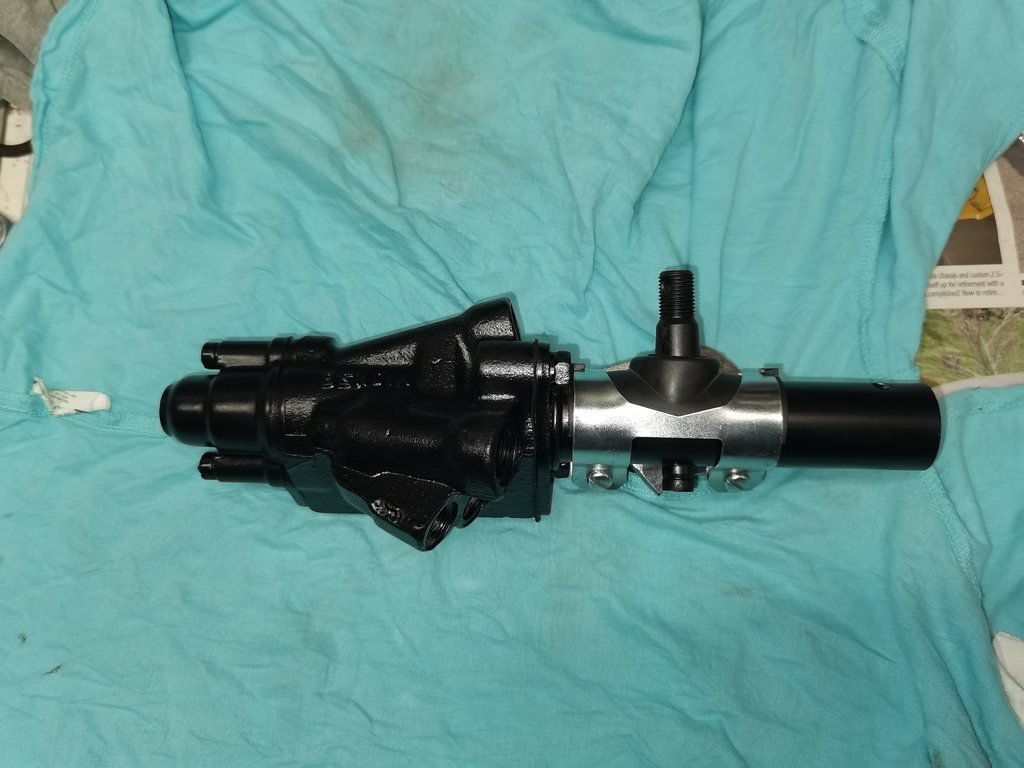
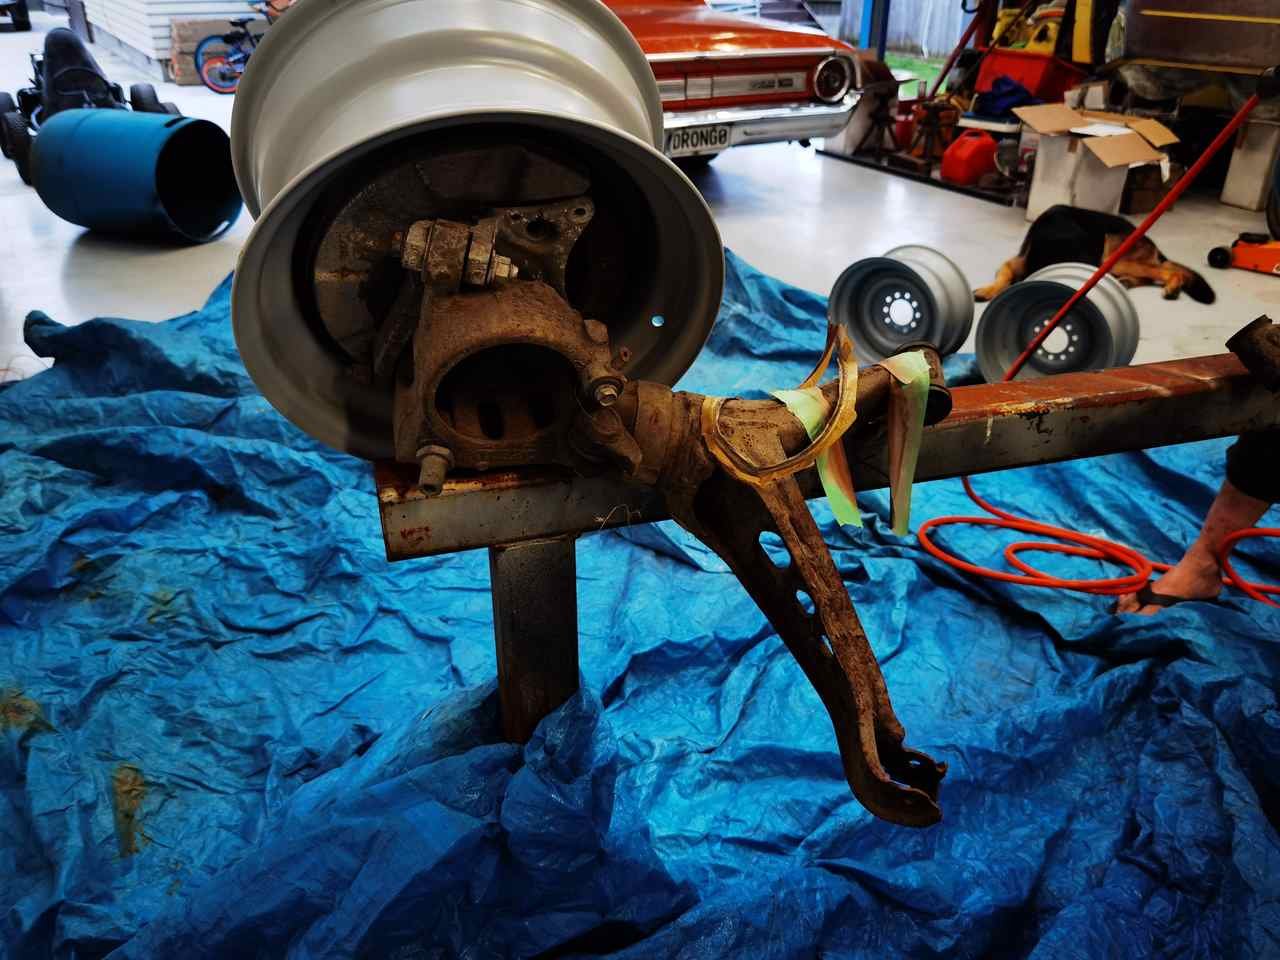
Since forever this car has always had a power steering leak from somewhere. currently I've rebuilt the power steer ram fitted new p/s hoses from ram to control valve and low pressure hose. rebuilt the p/s pump and fitted a new front seal on the pump 3 times. not sure why it still leaks from there as seal has a good interference. the only thing left to do was the control valve which i had ordered a seal kit a few years ago. it didn't leak a huge amount but did become annoying having to wipe up the fluid or place a drip tray underneath.
This job i had put off for some time due not doing one before and that if not set up correctly can cause the vehicle to pull to one side. And things like steering and brakes if touched by the wrong person can cause an accident.
After doing one on a 70s corvette i had a better understanding on how they worked and how to set them up. so did mine.
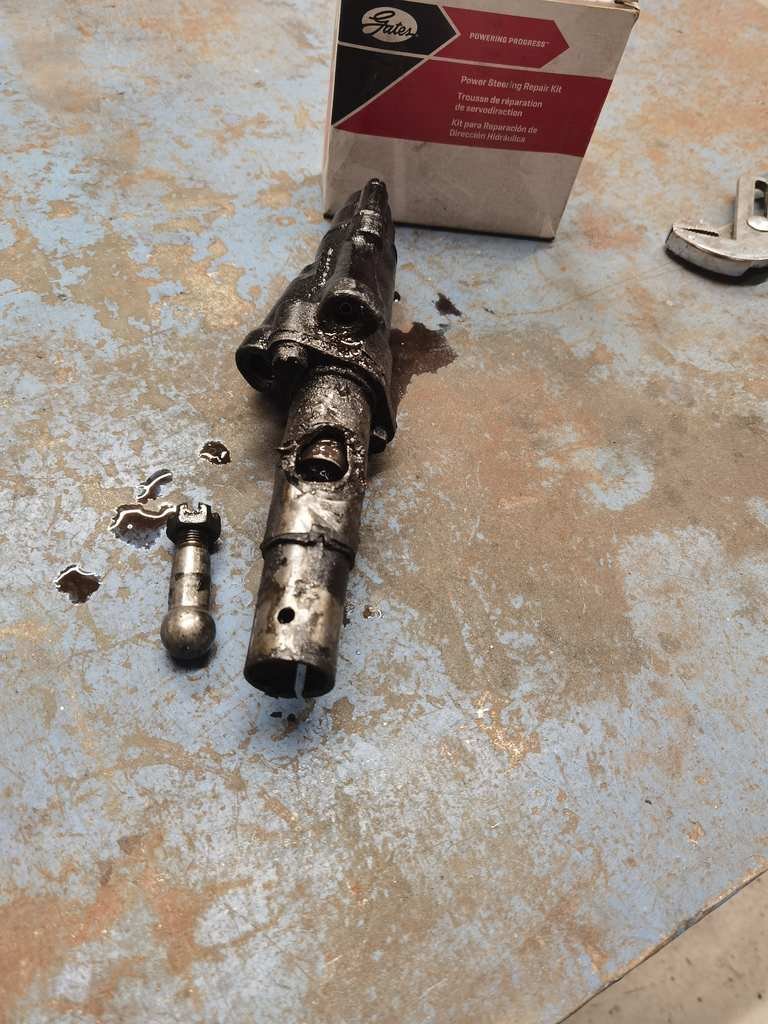
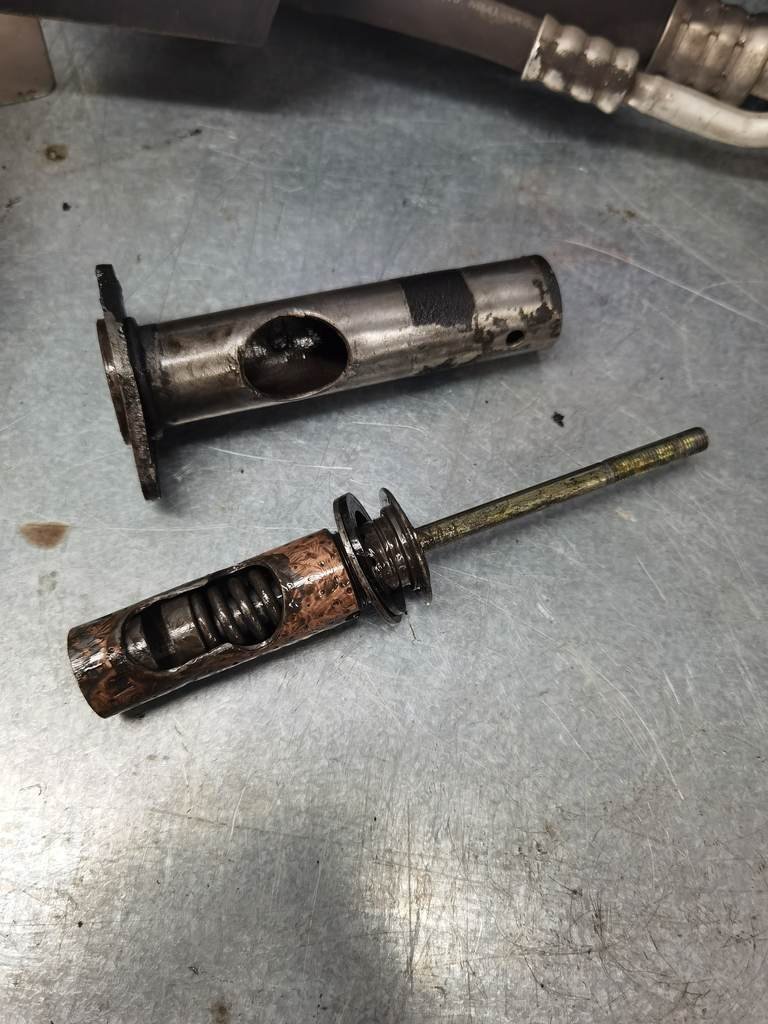
well the balljoint wasn't meant to come out of the bronze sleeve. unfortunately it hadn't been off the steering link for some time. i had applied crc and some heat to help it pop off while giving it a good shock with a hammer. ended up using a ball joint fork which can damage boots and do this but can be affective on tight joints. ended up using a hammer and working the balljoint off the steering link in the end.
strip and clean
when i had ordered the parts i had only ordered a seal kit. so got a new balljoint and sleeve from northwestern ford in palmy. but it happened to come with another seal kit.
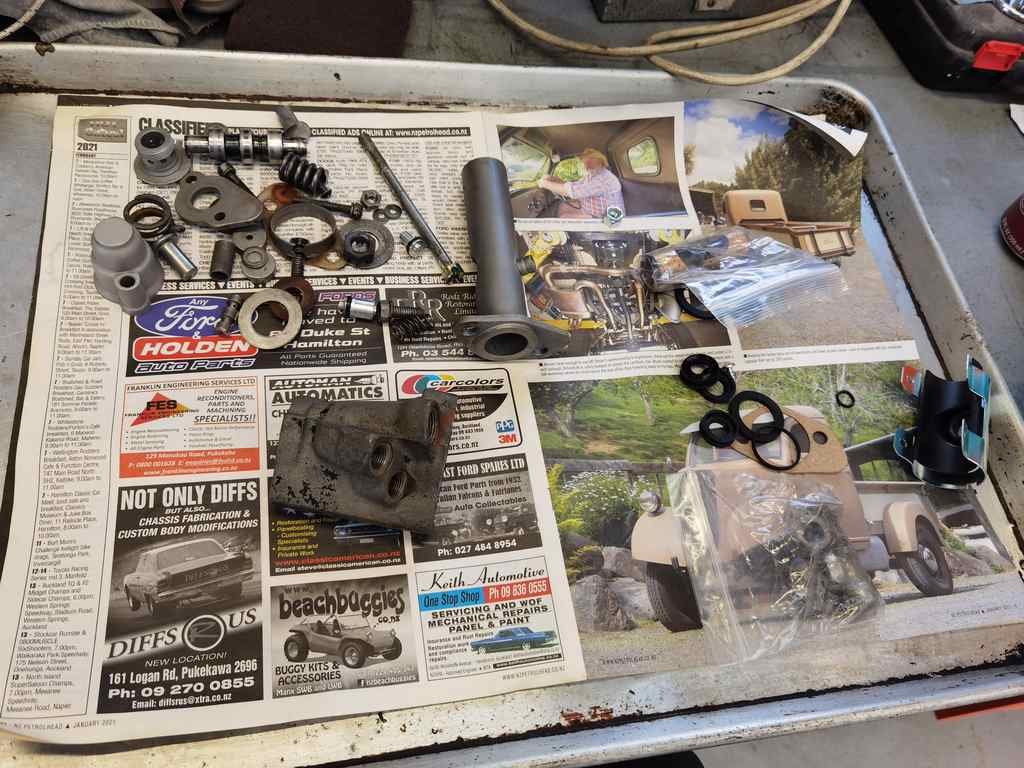
cleaned everything down and beadblasted a few items
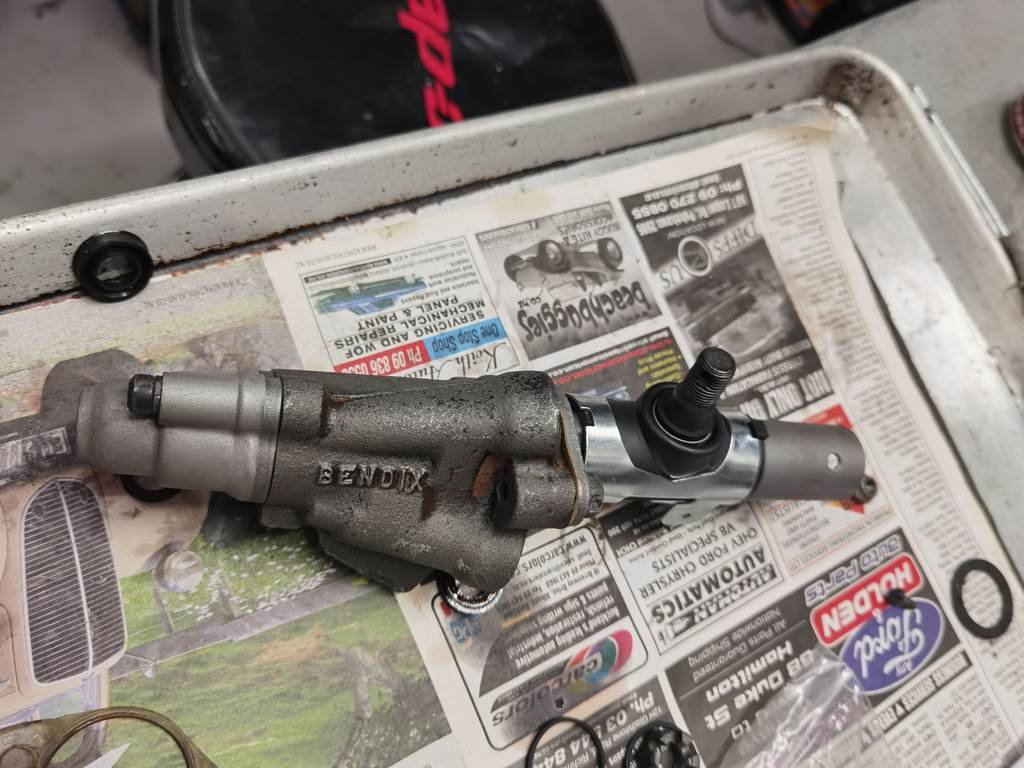
after some time later everything had been fitted back together and i adjusted the nut which controls when the valve opens to where i thought it would be.
gave it some paint.
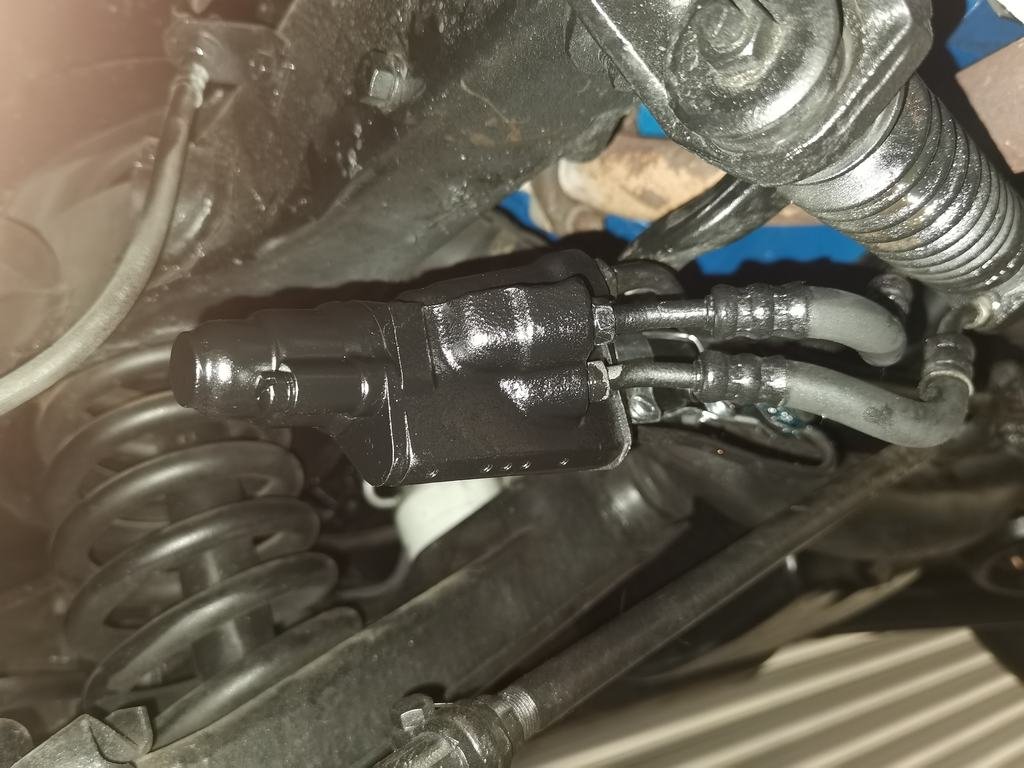
after some time and going into lockdown i decided to stop looking at it and fit it onto the car. when i had removed it i counted the amount of turns it when onto the steering so did the same amount when refitting.
After being fitted on the car and connecting the hoses i cleaned off the excess power steer fluid from the hoses with brakeclean which took the paint off the control valve. so had to touch up the paint in place. refilled the powersteer system and bled the system best i could prior to starting. greased the new balljoint and sleeve then ran engine and checked adjustment appeared good because if adjusted wrong the wheels will naturally stay off centre until adjusted. roadtest of vehicle showed my guess was good and didn't get any pulling and steering wheel still remains off centre but a puller and heat and crc and it still won't come off. and now has stripped threads in steering wheel from trying. will try again some other time.
one thing on the list is now down and hasn't leaked any fluid from the control valve yet.
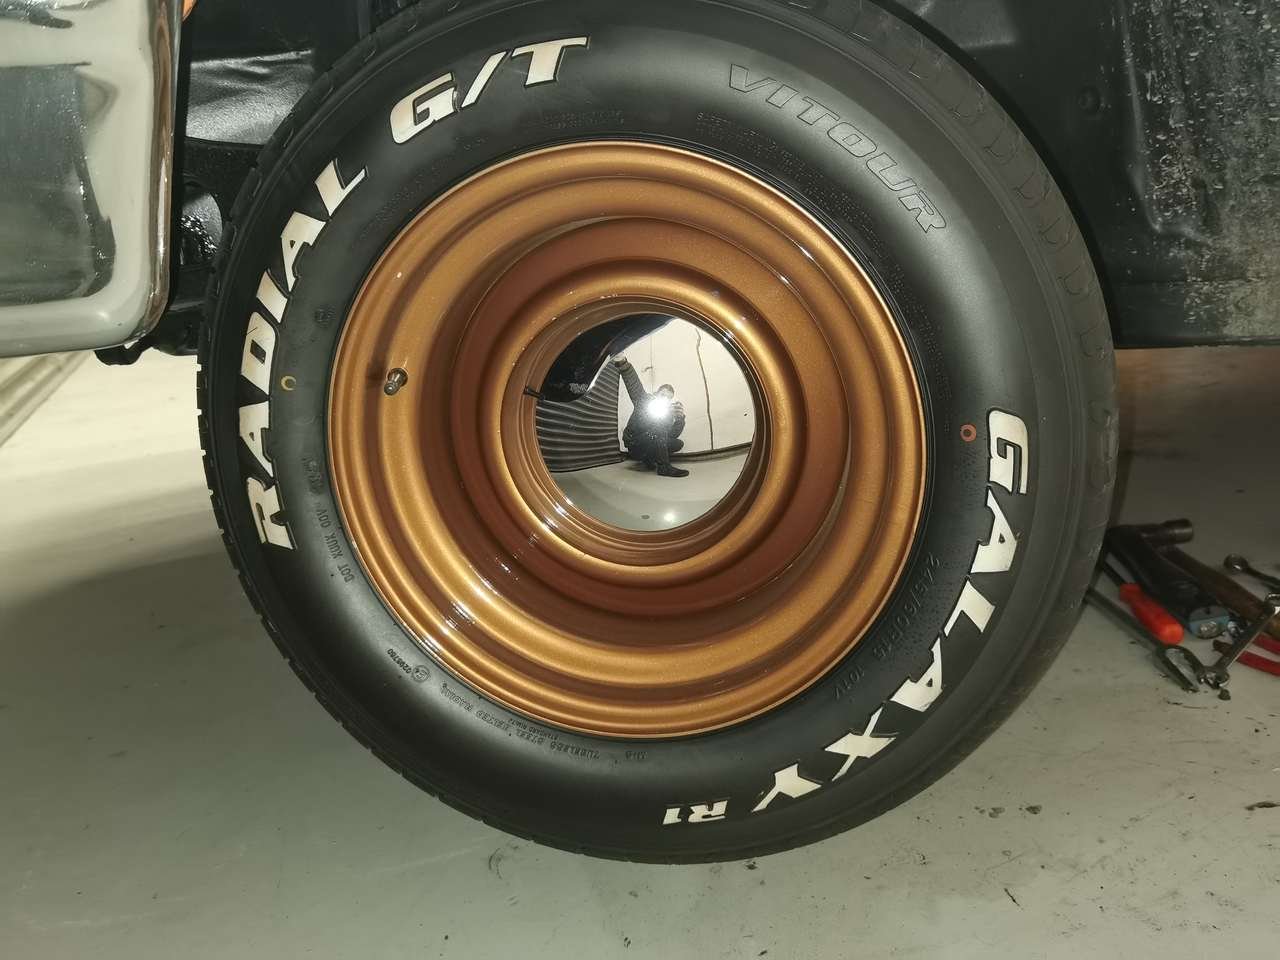
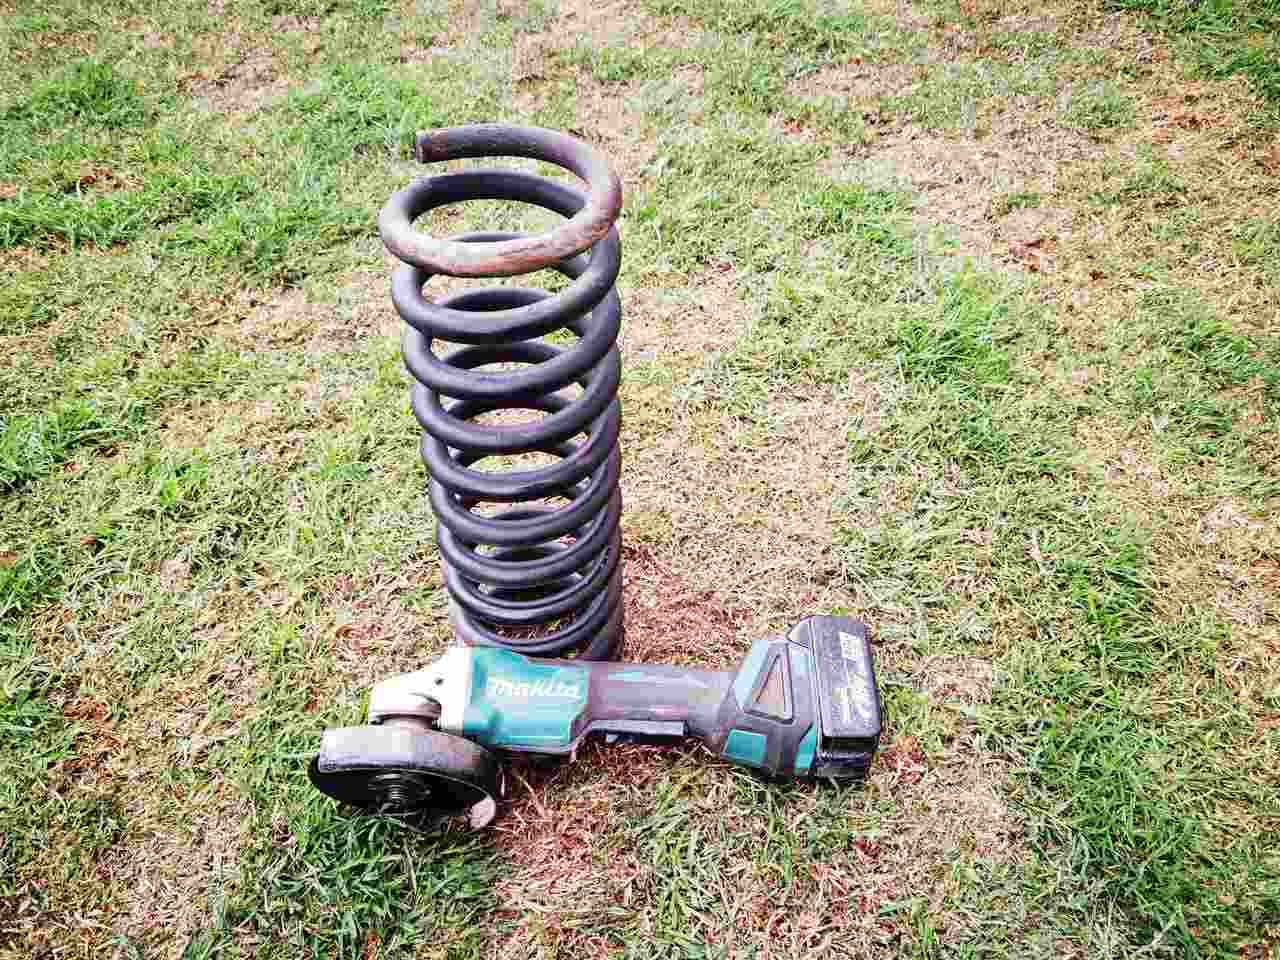
And my drivers side handbrake cable is sticking now so have de adjusted the one side brake drum and put the handbrake in a non operation status. will have to do it for the wof i guess. but involves removing the rear wheels but removing the hub caps isn't easy as last time i chipped the paint getting them off to retorque the wheels. they are on there tight. so need to figure out a easy way of removing them without damage
Also my trans pan leaks too. when the car goes back for the shop to change my trans fluid ill get them to sort that also.
better living everyone
-
19
-
 1
1
-
-
- Popular Post
- Popular Post
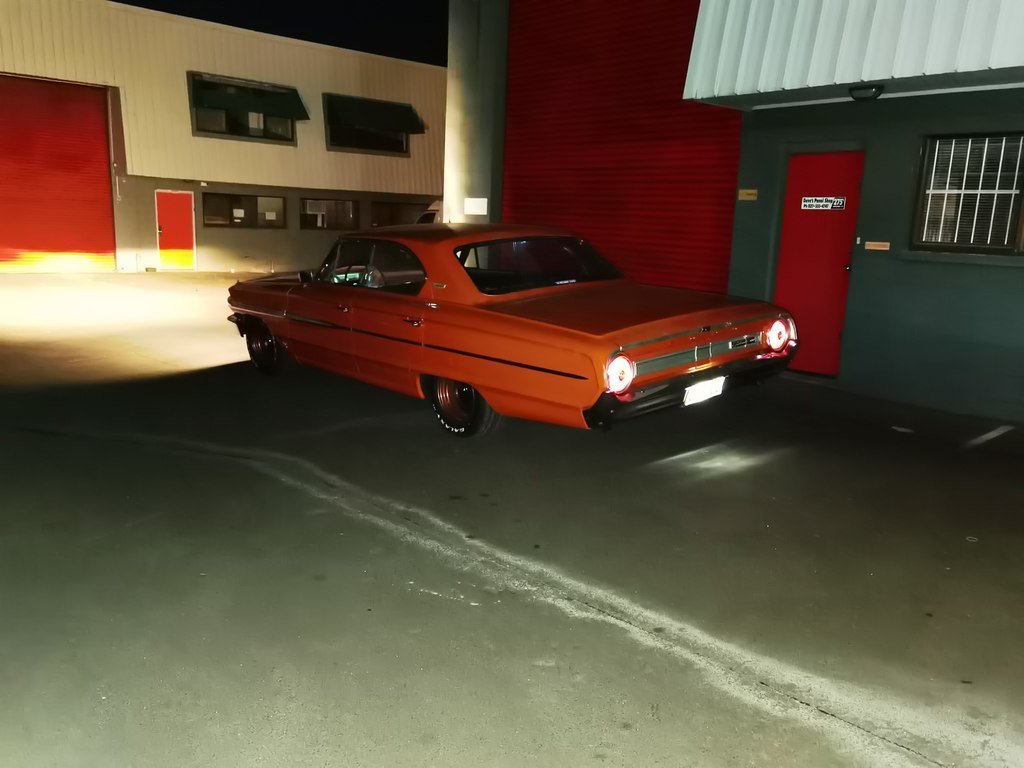
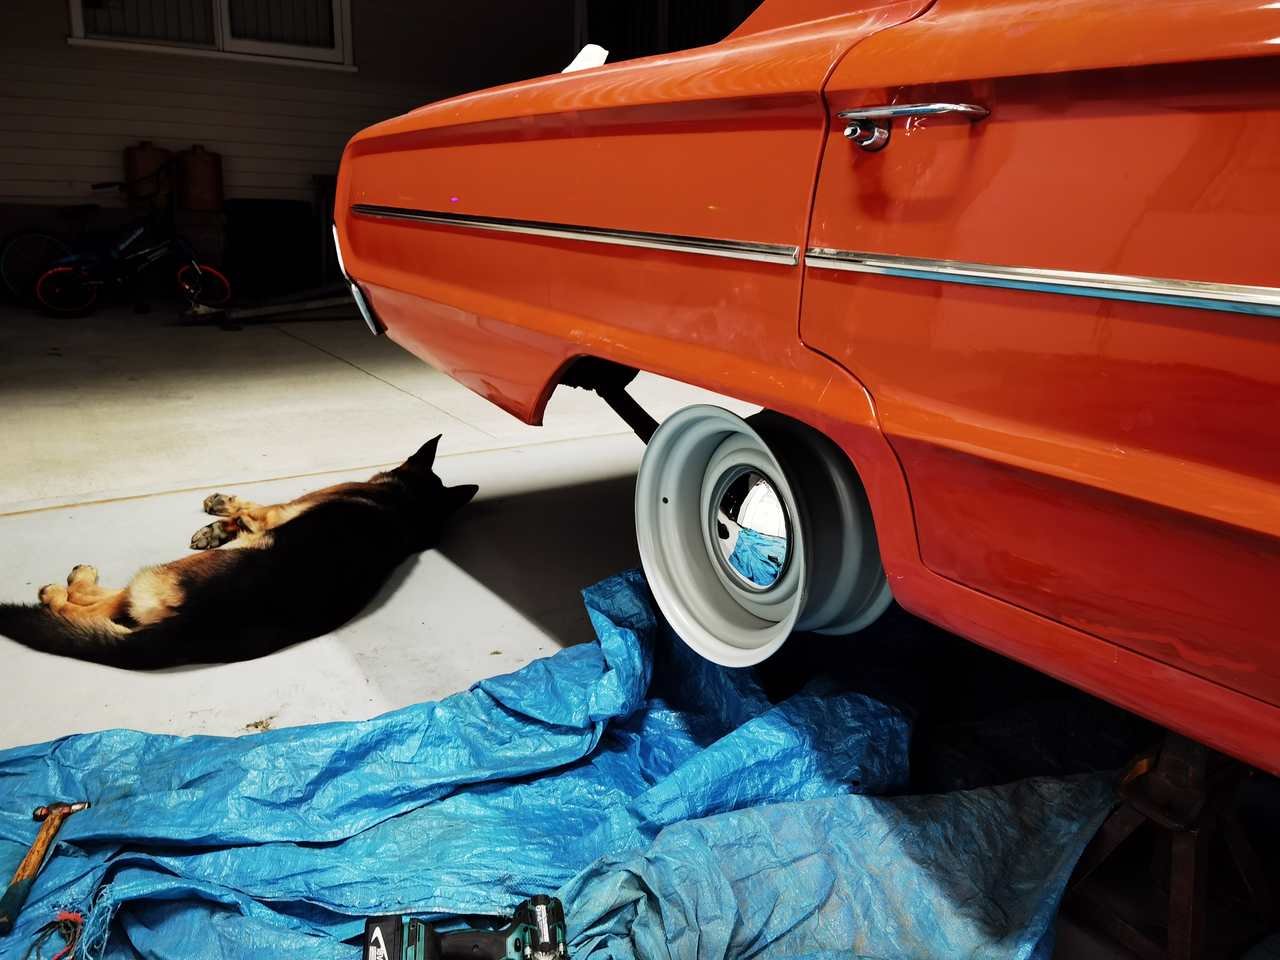
so after a road test revealed a few things. ive lost alot of steering lock due to the wheel touching the inner lip on the gaurd. i will be getting a metal expert to roll the lip on the front gaurds.
the rear only rubs on extreme angles but hasn't on a bumpy highway drive.
in terms of steering lock it means i can only go around big roundabouts but it scrapes haha so now that it means i go round the block than around the roundabout
i may do down to a 235 width tyre but will wait until the gaurd is rolled.
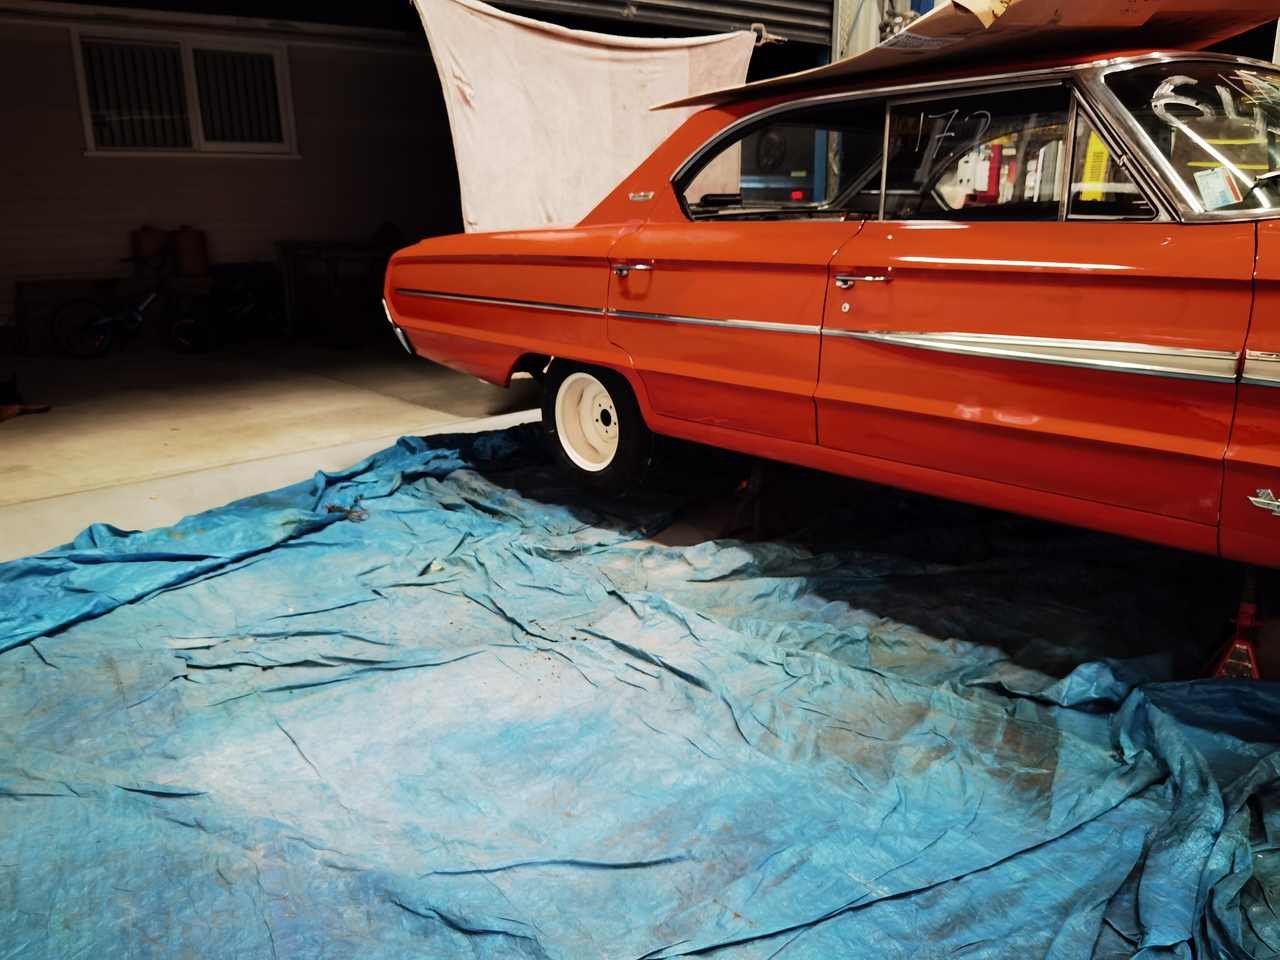
a couple of days after picking up from the trans shop i did a bolt check and a wash and went for a drive.
went to whakatane for some mainies and back the next day
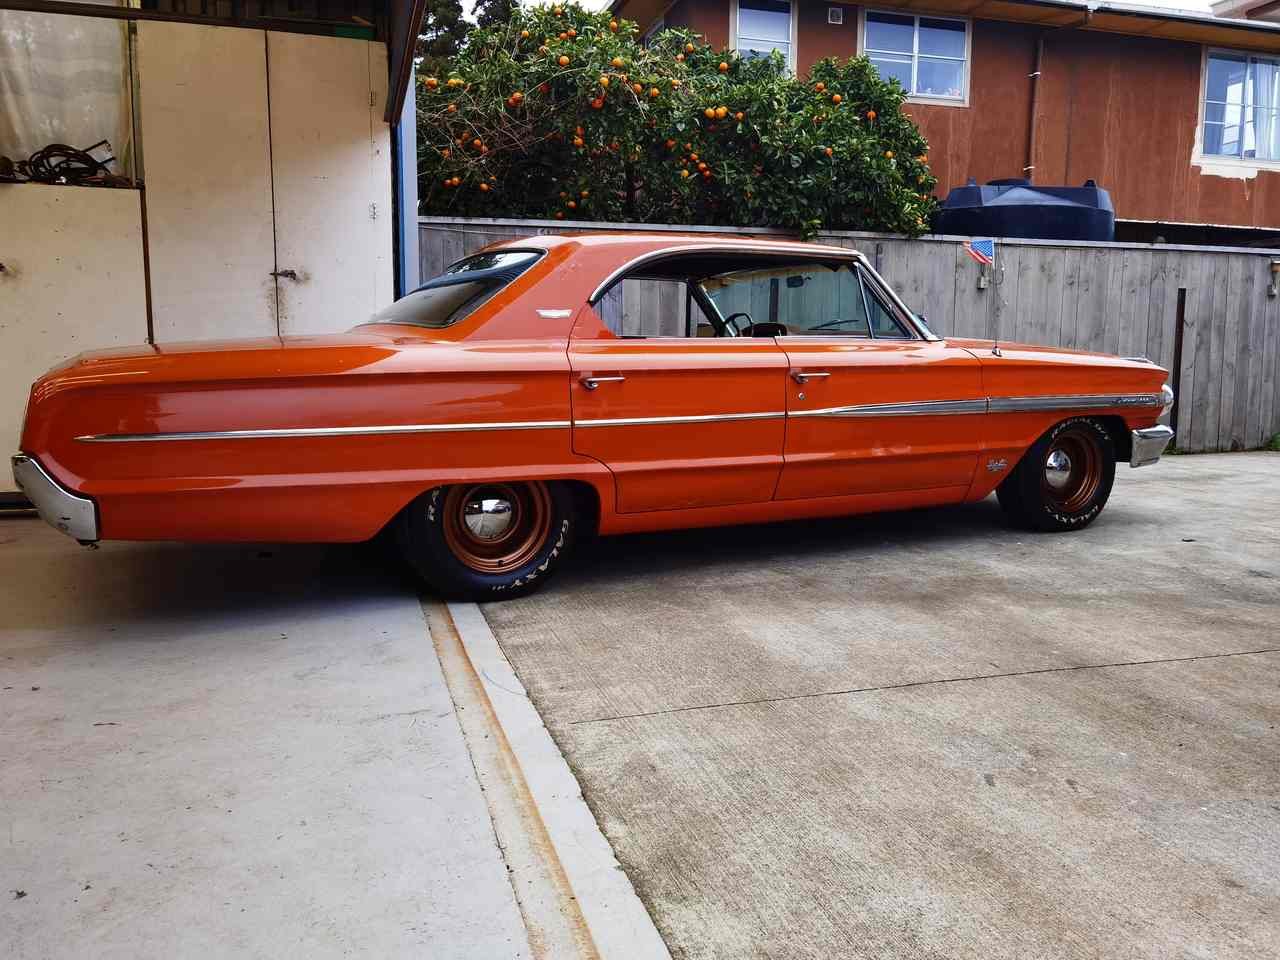
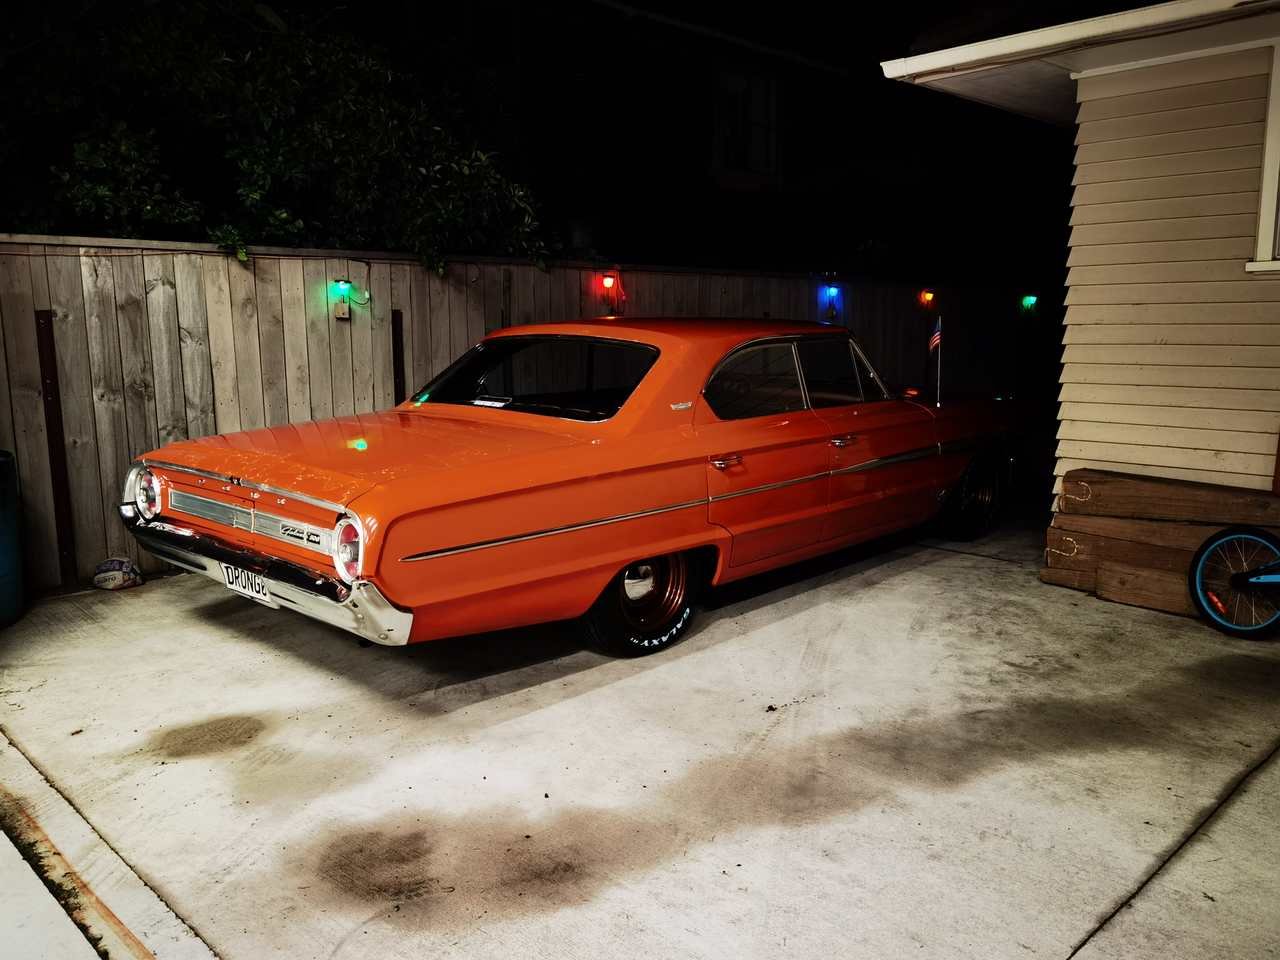
you will notice the car is still a tad higher in the front than rear. its not so noticable in person unless looking so will keep it this way.
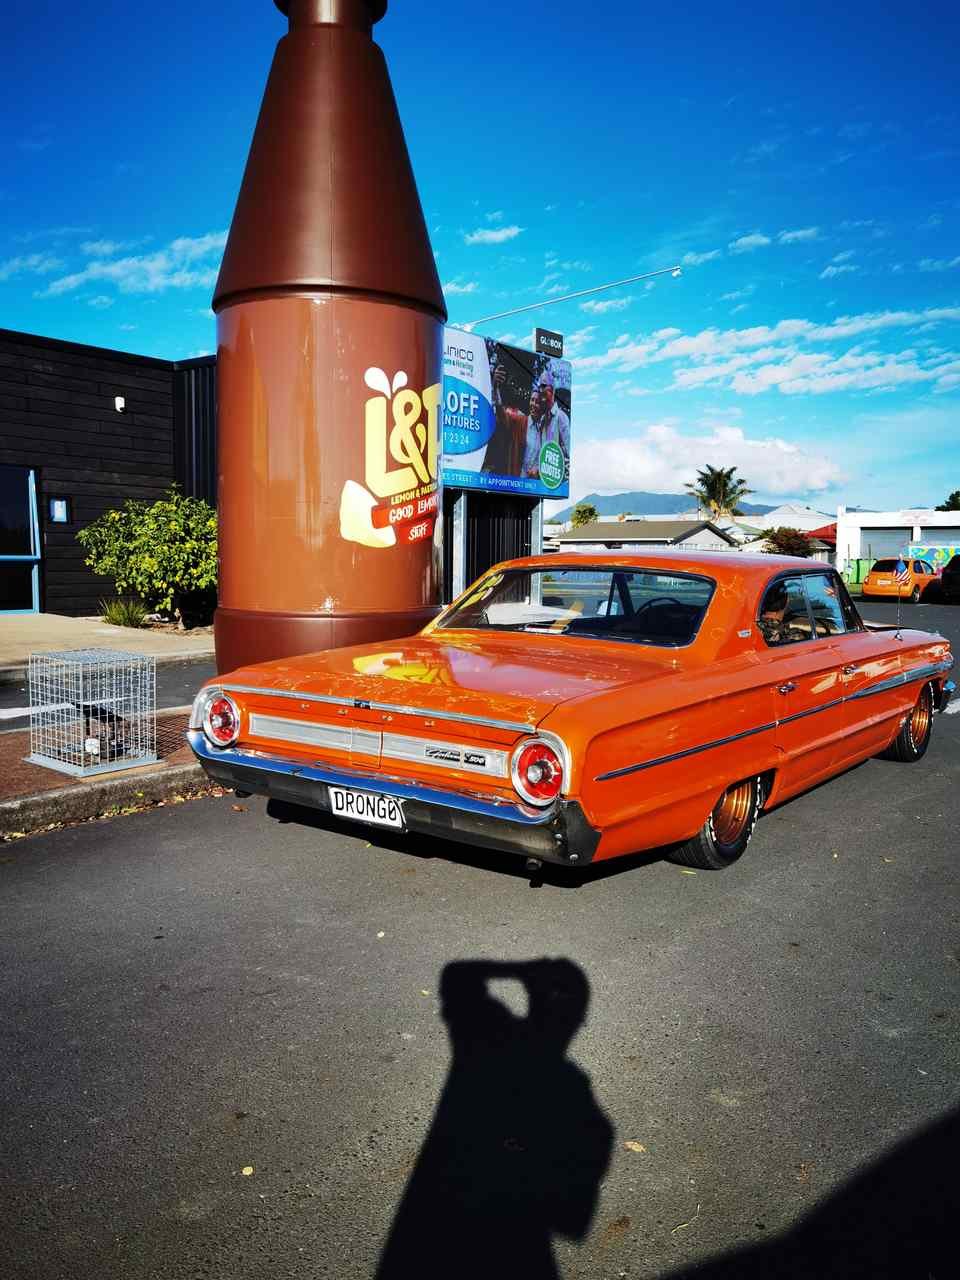
quite stoked with the colour and fitment combo. first trip in this involved someone at the gas station coming for a perv at the wheels and asked a few questions about them. also vehicle handles a huge amount better now less of a boat feel. gave me a huge amount more confidence in driving it around corners too. but should really upgrade the rear shocks to something stiffer and a good wheel alignment too
yes you can tell me now how ive ruined my barry car
-
34
-
- Popular Post
- Popular Post
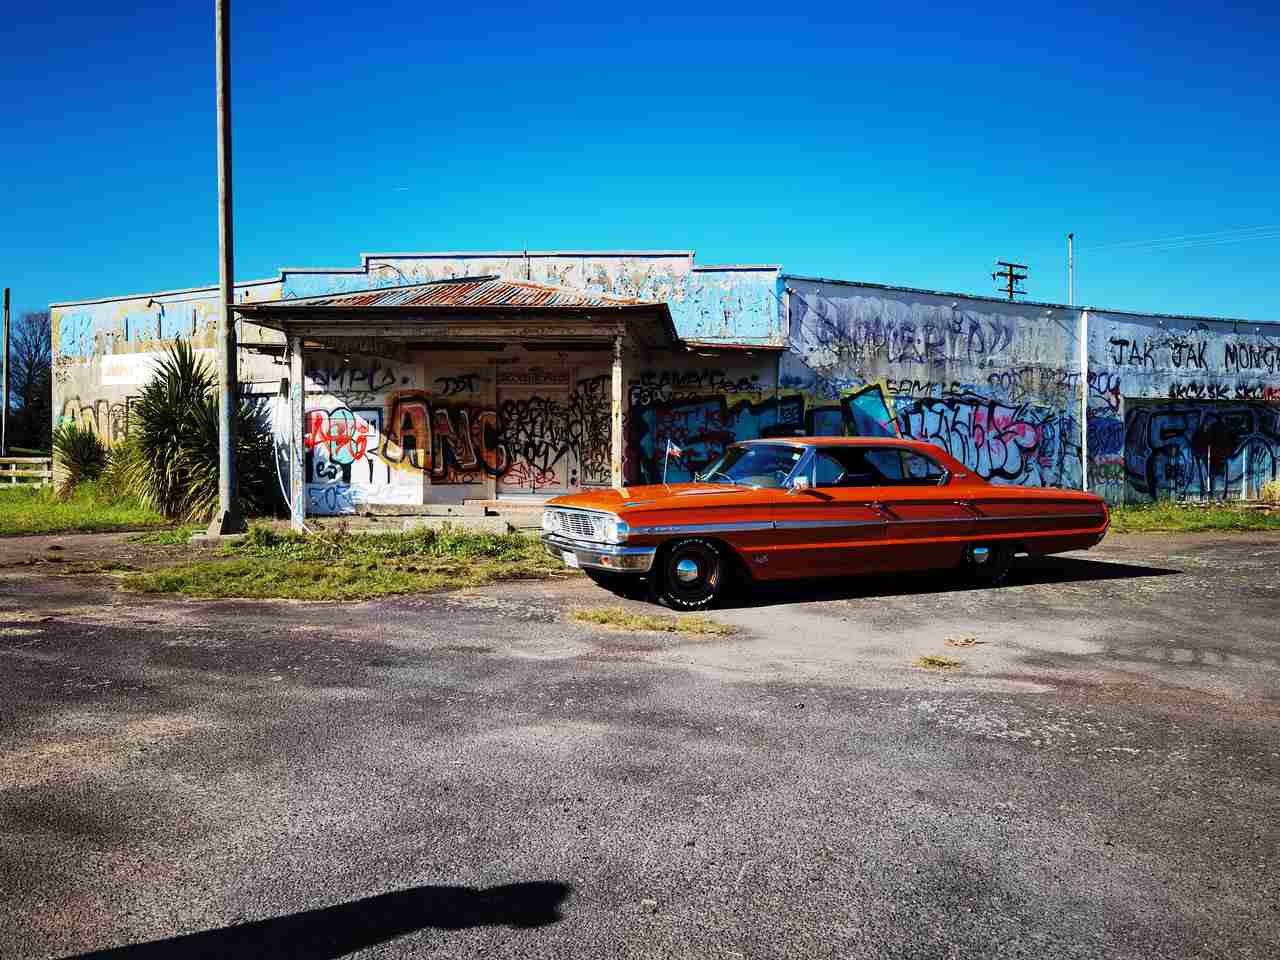
so because i told you i would fill you in with the progress i will.
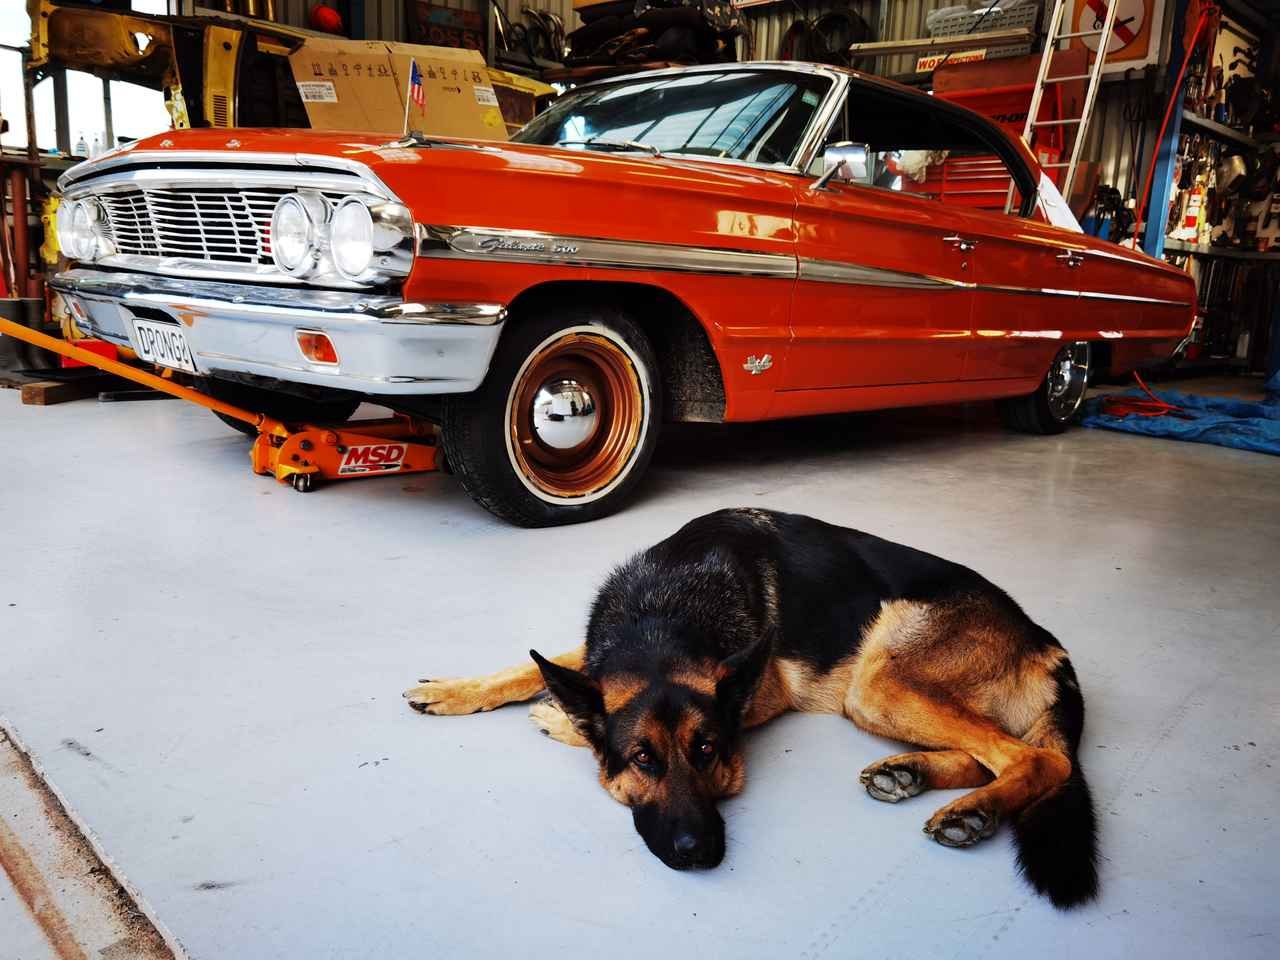
This would have to be the highlight of doing this old girl up and being able to use it. from getting this car back home i was never really happy with how the car sit or how the wheels didn't fill the guards but the priority was to get it legal and drive it. but liked the style of the car and wheel combo.
hummed and ahhed for abit and a work friend had a contact that did mag wheels so contacted him and told him what i wanted. wanted to keep the same wheel centre caps i had but after doing some measurements i was shit out of luck.
did a quick measure on the car to what wheels were available. and paid and waited two months for them to turn up.
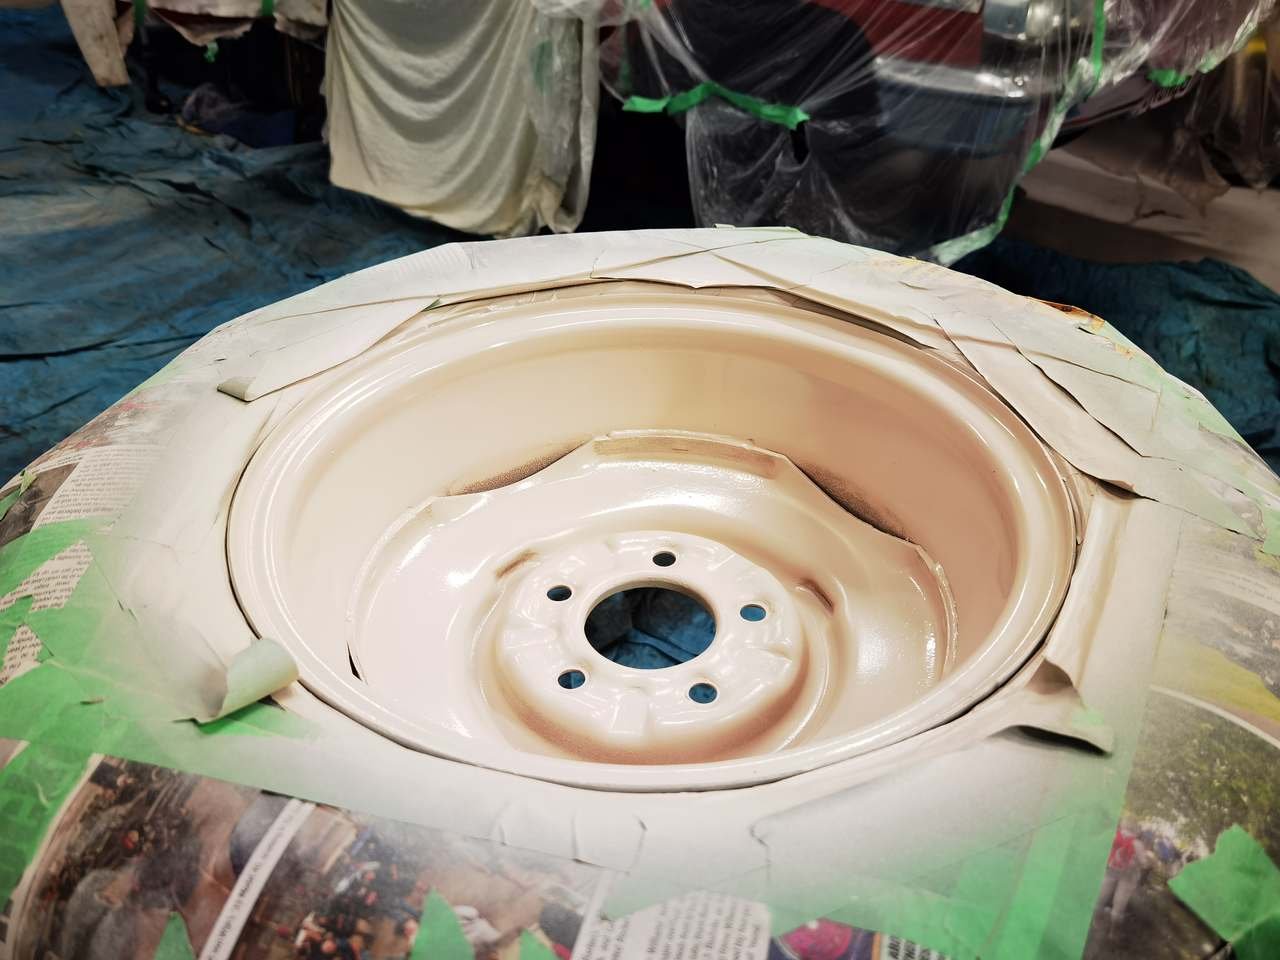
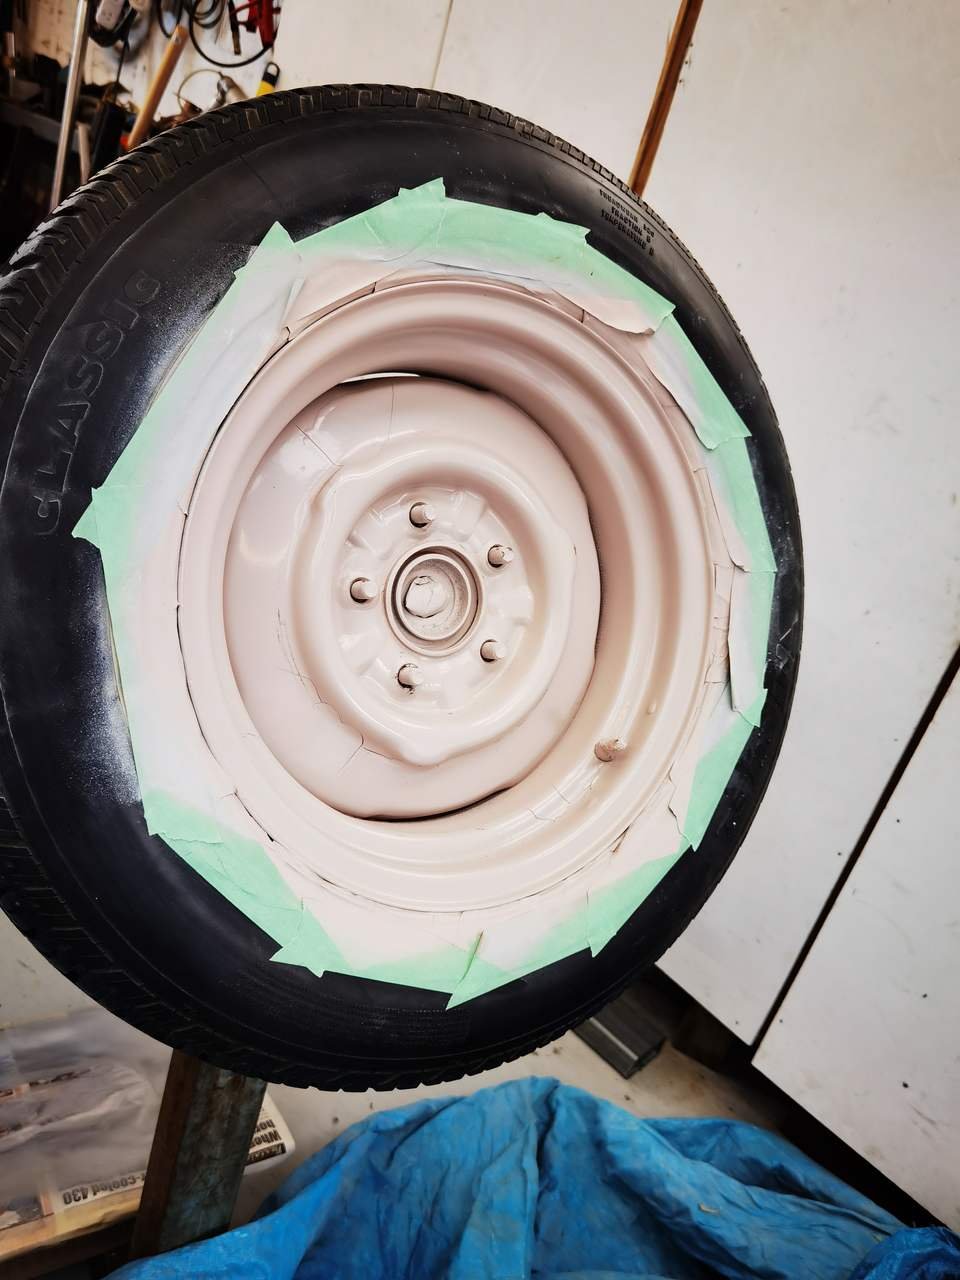
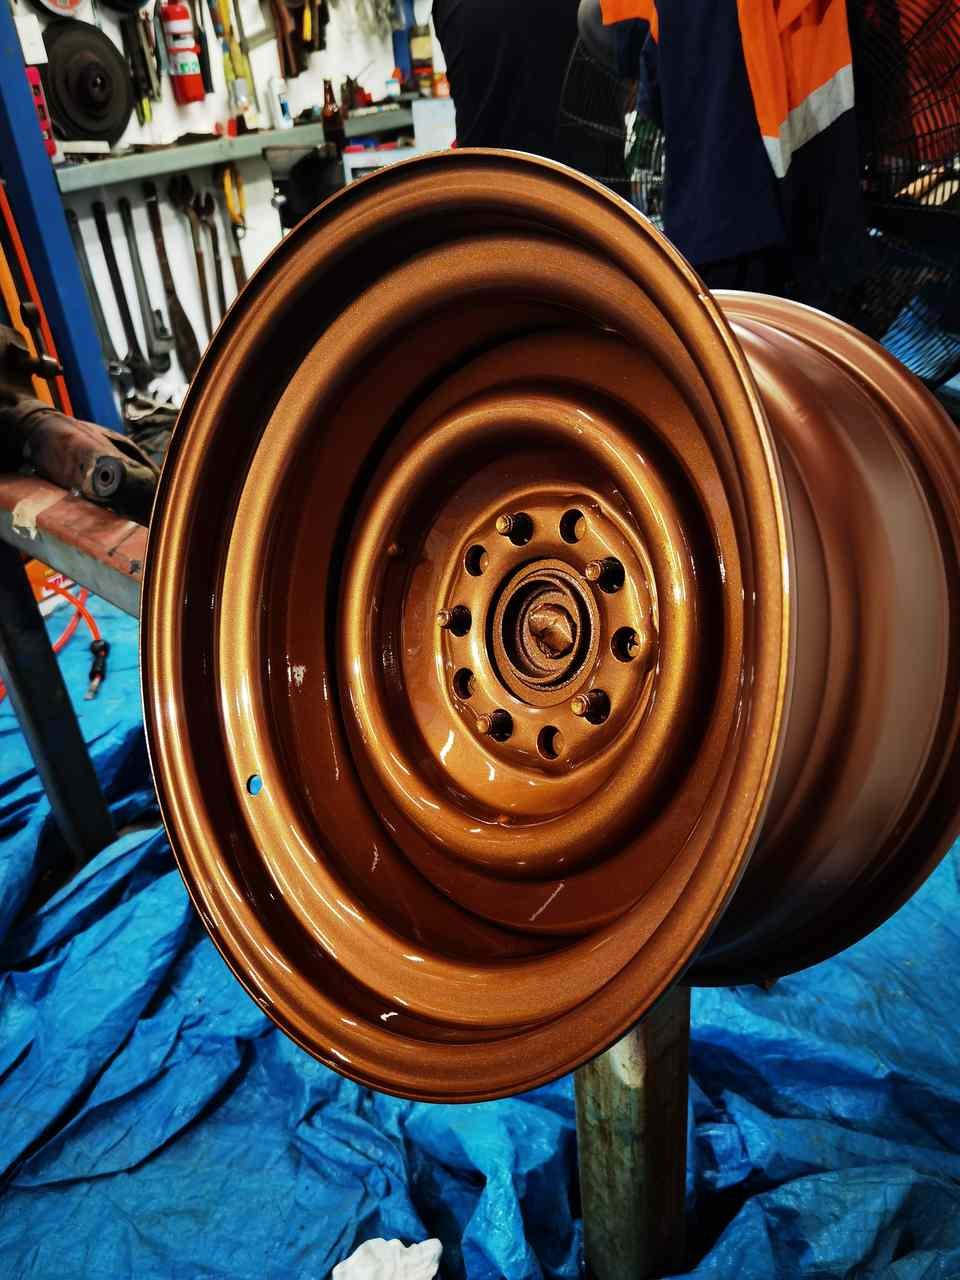
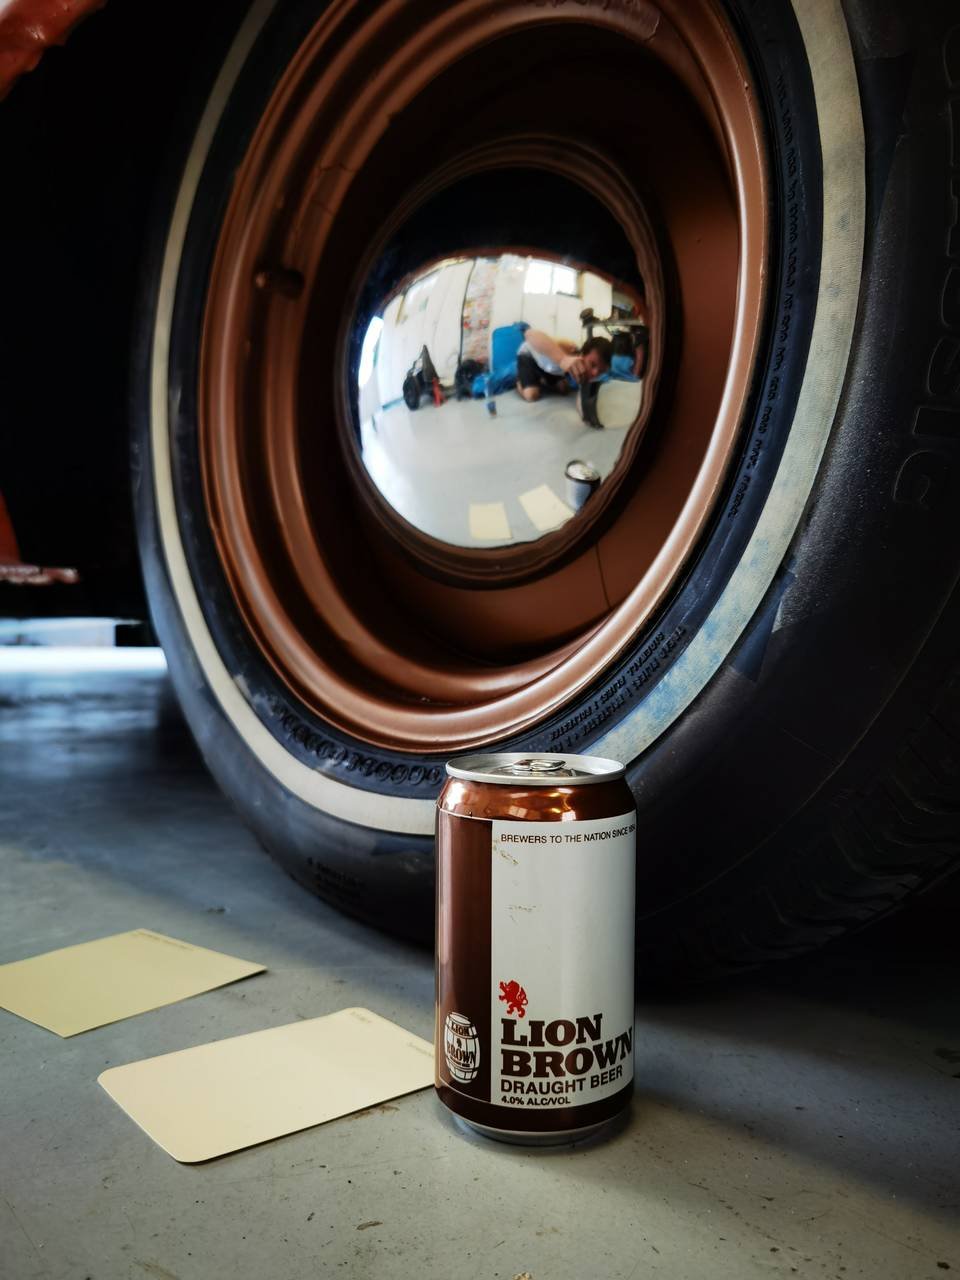
Ended up with specialty wheel smoothie in a 15x8 all round in primer. I got these through BG Marketing and got this brand over a cragar because the centre cap quality is better and i could get them in primer. special order from the US with a 7.5 inch baby moon cap
now to pick a colour right. black or chrome is fine. Nah go away barry im here to not be like you.
this was the hard part of the wheels i had a few colours in mind but the car being orange made it abit more difficult.
so after i cleaned up a old wheel and primed it i went to the paint shop for a colour sample. asked for a colour chart to look from. couldn't find something that stood out. old indian joker says he will mix something up so calls me outside to take a look at the colour and gets it bang on first time. buy that and give it a spray.
Note Don't put too much filler primer on a wheel because it cracks
how about cream right
this photo also shows where i had previously painted and blended it in.
Unfortunately i liked the colour but just didn't suit the orange of the car. seemed too light for me
so i went back to the paint shop and had the colour changed after going to bunnings and mitre 10 and going through the colour charts on a sunday.
sprayed the modified colour on
Found this colour was more like salmon not what i was after.
so found something lying around in the shed in a different colour i liked. slept on it and went back to the paint shop with another colour to be matched. so they made me a small sample and i gave that a test spray and fitted to the car.
Hmm brown you say..
so had some more mixed to paint the wheels and figured if i didn't like it ill just paint them black and be done with it.
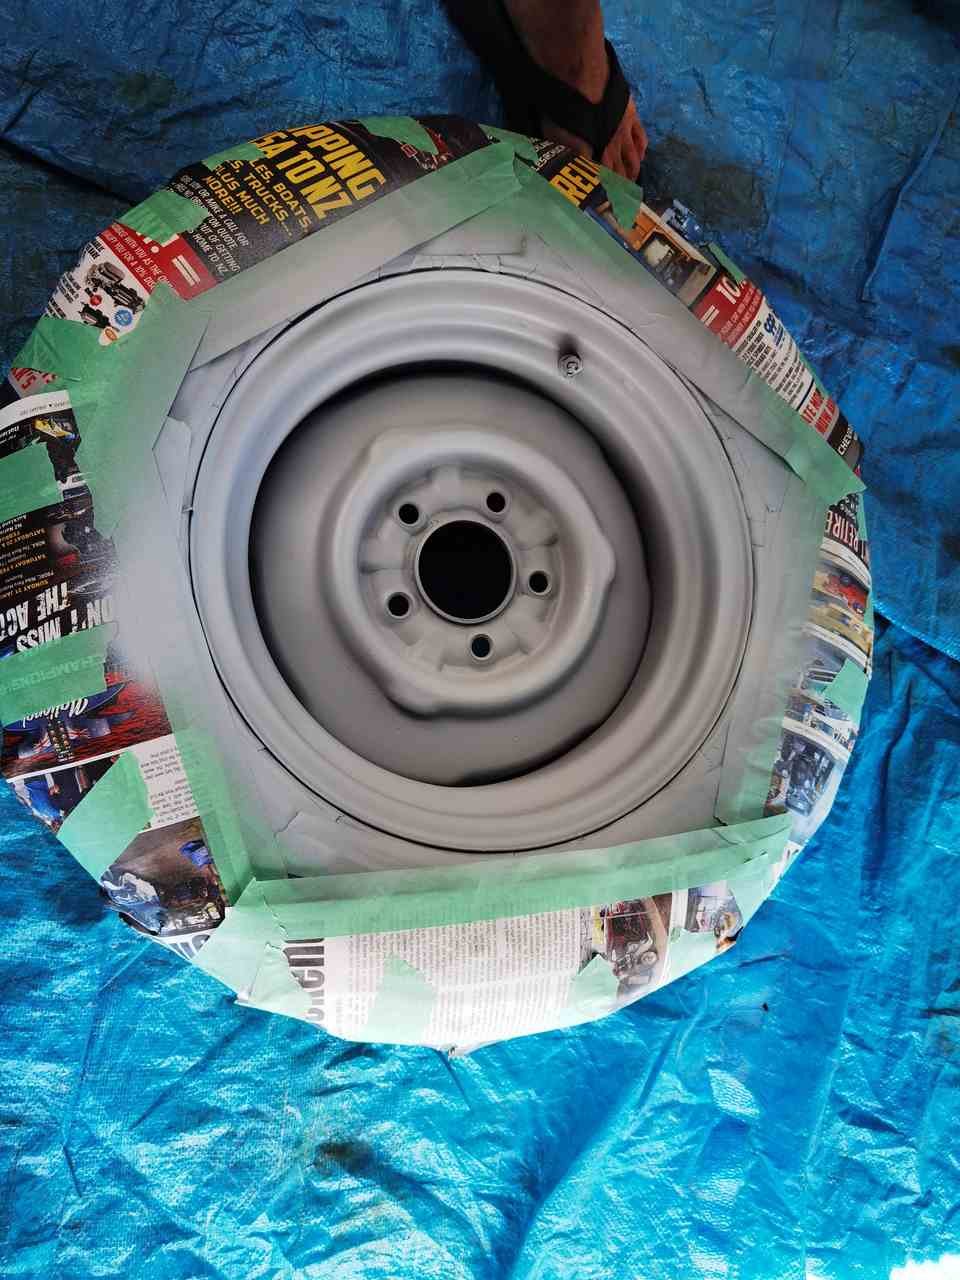
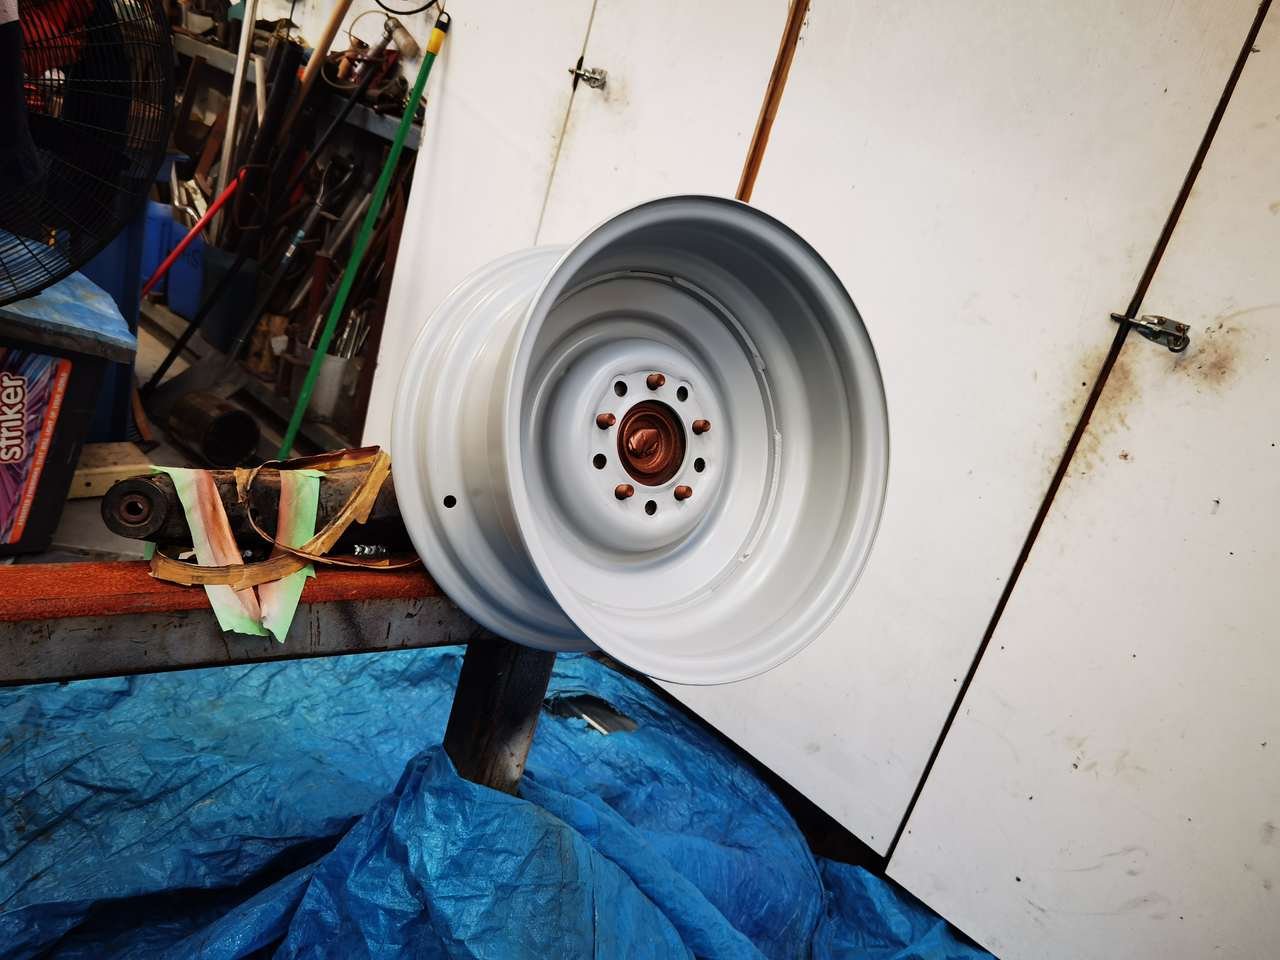
so figured ive got some nice new wheels how will i paint them nicely. figured its not easy on the ground and had an old hub lying around in funny enough the same stud pattern.
so welded the hub to a steel stand
And i happen to have two hubs so meant i could weld two at a time choice
so a splash of this colour over all 4 wheels then gave them a shot of clear coat. couple of ugly bits but nothing much noticeable and wheels can be tricky to get all the paint into spots
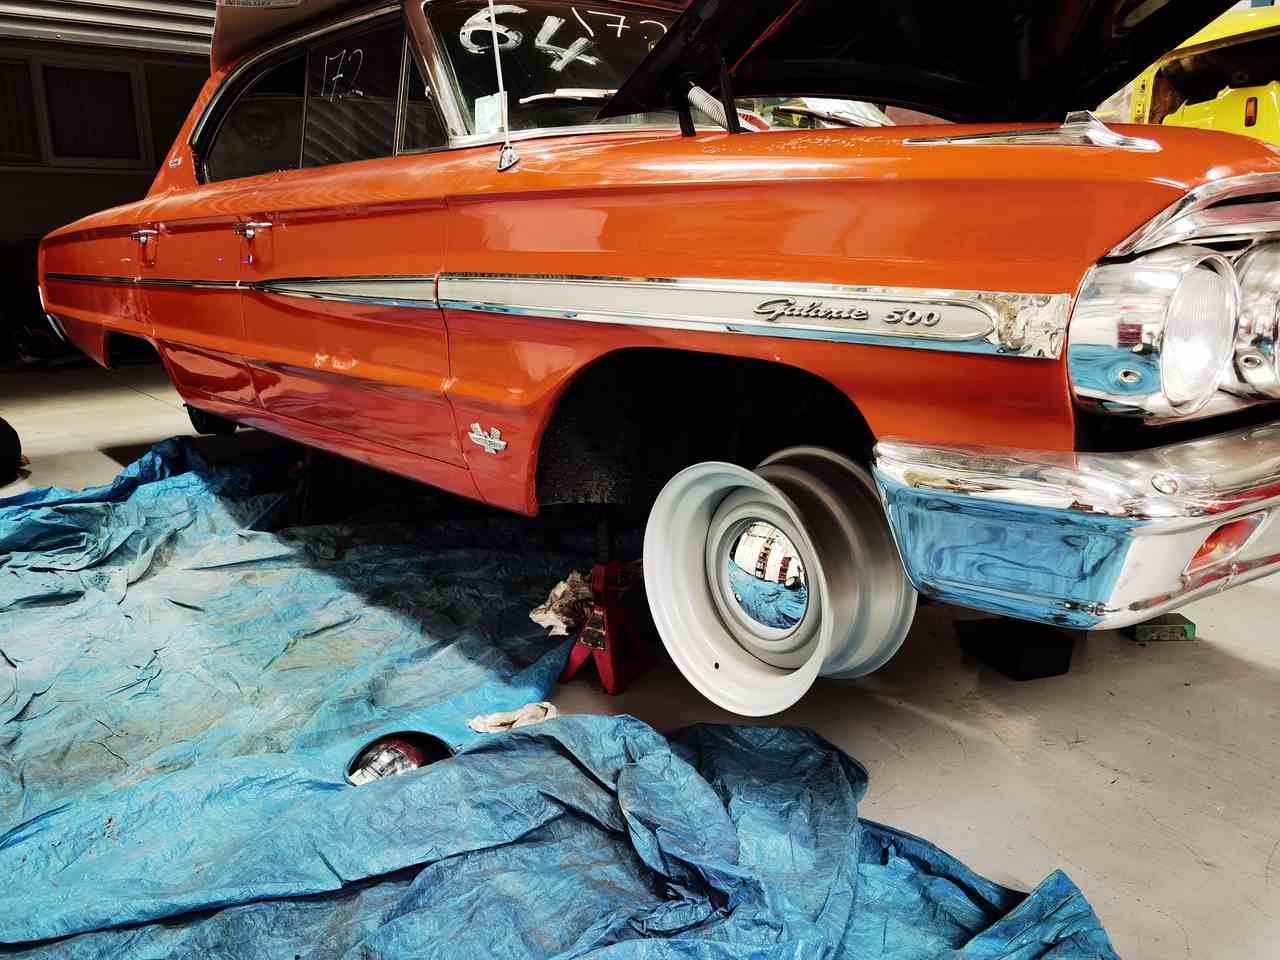
test fitted the wheels revealed the enviable.
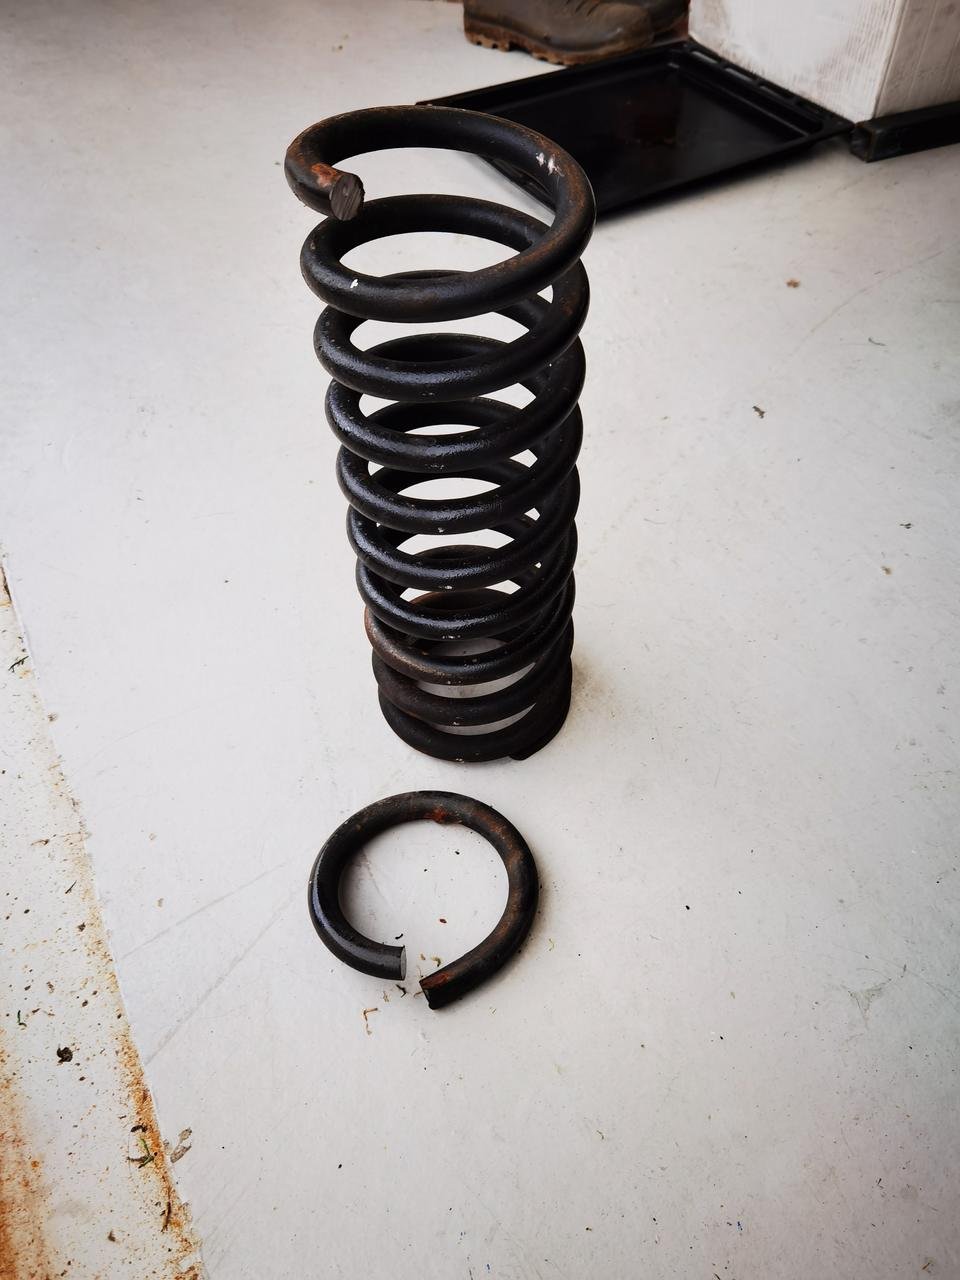
cut cut the front was never level with the rest of the car so this had to be done. plus it wasn't low enough
painted the cut bit and put them back in for a level test. level looked good would be nice if it was much lower but the car has to be able to be driveable or get in the driveway which involved a 45 degree entry on the old wheels
for tyres i purchased some vitour galaxy 245/60/15s from sta parts. i was lucky enough a good mate had a tyre machine and fitted them for me on a sunday. will balance them if they need them but currently they are good.
so after the wheels were fitted i washed it and left it outside for the night where i got it towed to go back to the trans shop the next day. unfortunately i got it back 3 months later. upon me driving away he did say the wheel did scrape oops haha lets find out for myself.
And if you wanted to know the colour
lion brown mate makes for good beer battered fish
-
25
-
1
-
gilmore setups are not as reliable as a standard v or ribbed belt setup.
if your not a fan of the noise there are plenty of kits to convert your motor to a 4 or 5 ribbed belt setup.
but i like the sound myself.
with motors with a top mount blower setup the belt tension doesn't want to be alot because as the motor warms up the tension increases.
but if your pulleys are aligned good and not too much belt tension they work well and provide much more grip over a standard v belt.
although running a spare gilmore belt is a must do. As they wear over time and quality of belt can vary. but if its a weekend car and you have no other belt setup then its a cost affect way to get it sorted.
well 95% of rotary's ive seen run them so they must be good right
-
4
-
-
stacked appear to be doing quite a lot for overseas buyers and have noticed a abit of stuff coming here. maybe some others have used them and have some useful advice to offer
otherwise i have been looking at cars on https://www.goo-net-exchange.com/
-
with photos i just resize all mine to 100kb and under. i then don't appear to have any issues. and post them straight on here.
with the stripping thing your going well. its a time consuming job but its got to be done.
with media blasting prep and strip any flat parts of the body yourself. like roof and quarters saves you money and flat panels will get warped easy getting media blasted. happens alot more than you think.
then just prime the bare bits yourself. blasters or painters or yourself can prime the rest of the body. also any oil or grease needs to be cleaned off prior to blasting will spread and cause the paint to not stick.
also some cheap panel hammers and dolly's are useful for shaping metal
also i would leave much of the trim at home. panel and paint guys shouldn't need it unless they are fitting it. but wait until they do need it otherwise can end up lost or damaged.
And more you do yourself saves you money and will give you much more satisfaction
-
2
-
-
12 hours ago, j.e.d. said:
Fantastic work right there man.. paint job looks shiny & that's all that matters right?
yup
As long as its shiny and colour is close enough im a happy lad
-
-
-
-
-
-
nice work. not going to paint rest of frame?
ill be waiting for round 2 notch when its not low enough haha
-
4
-
-
-
Wow what a gem.
Its probably good that its been dry stored for that long as it wont be rusty right.
Also think would look good with the old strips back on.
looking forward to progress


Jesse's winning liteace discussion
in Project Discussion
Posted
After removing sound deadening in a 80s Toyota myself during the lockdown
i didn't find any rust but did found some under the seam sealer as such but its a shit and painful task. i just did it with a sharp chisel and tapped away. tried with heat gun and its easier to get off but leaves much more residue and the fumes really get to your head.
was going to do dry ice but now BOC gases have a minimum order of 10kg and require it to be ordered before 12pm the day before for a saturday pickup. and wanted 100 or so dollars. but that's BOC gases for you
i then cleaned all the small bits remaining off with chisel and used a brush and rags with petrol and works well.