Corona_man
-
Posts
105 -
Joined
-
Last visited
Everything posted by Corona_man
-

-
-
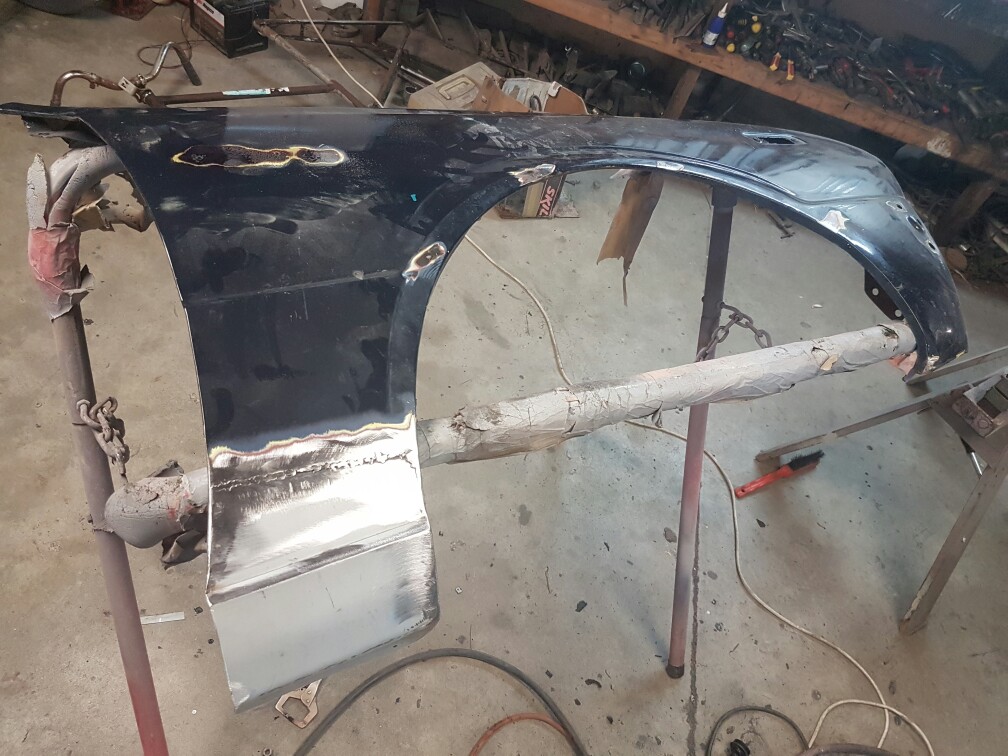
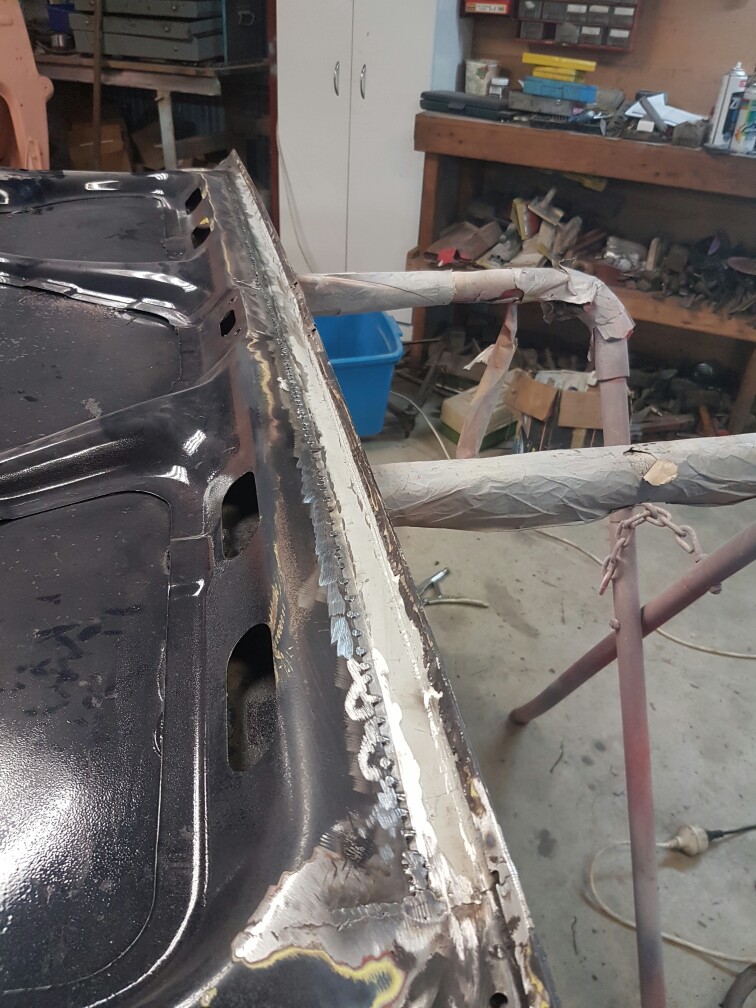
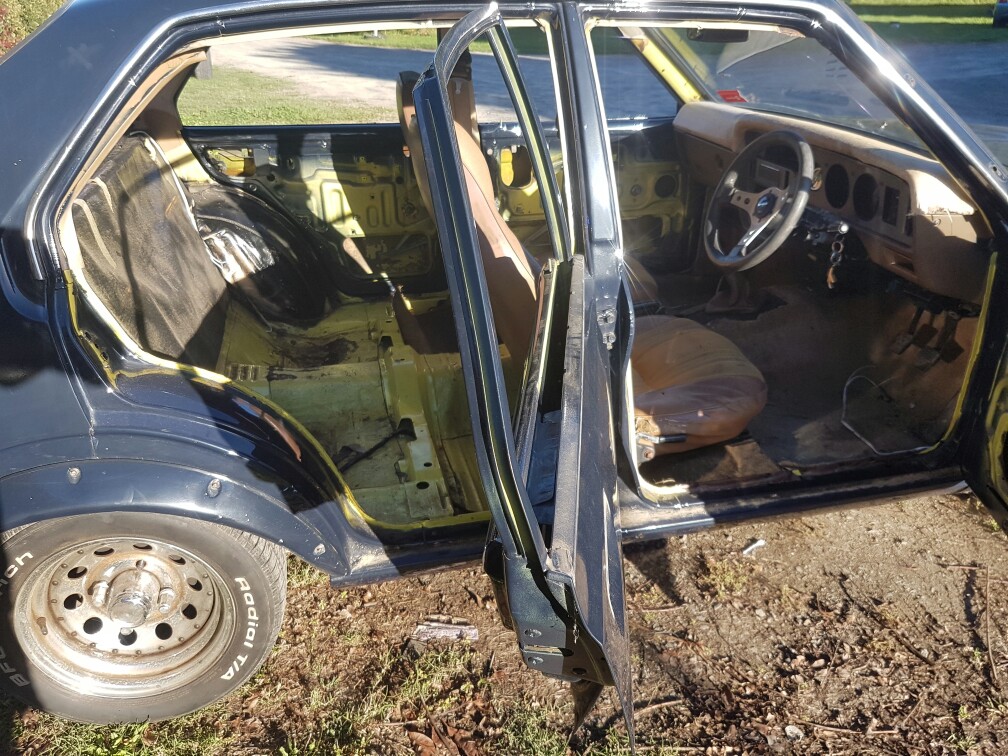
Started stripping out the car today. Insides of the doors look good, no nasty rust hiding away in the bottoms as they usually do. Had to replace both bottoms of the gaurds , and the inside of the boot lid. And started doing panel work on the gaurds boot and Bonnet. Also removed the bolt on flares , as they aren't my cup of tea.
-
Project discussion: //oldschool.co.nz/index.php?/topic/55789-corona_man-1979-toyota-ke30/ I thought I'd start a build thread on the recently purchased Ke30 Corolla I have just purchased. I'm off work at the moment so am going to try and restore it back to original condition within a month. The car is in pretty.good condition, has minimal rust in it , but the 4k motor is stuffed. I will just be putting back in a 3k or 4k motor. Interior is a bit old, no carpet and seats are ripped up. I will be doing all the work myself, panel and paint, engine work, re upolstry, the lot. I will keep up regular updates if anyone is even interested in it. Here's a picture of it as is
- 27 replies
-
- 11
-

-
Hey man , where Did you get your LC-1 wide and from?
-
Hey mate Iv got another whole spare car sitting , you still after some?
-
And FINALLY! I got it running. It's not running right, it won't hold it's idle. It starts to die so I have to stab the gas to keep it from stalling. The carb is probly full of shit. I might throw a rebuild kit at it. I also have to get a different fuel regulator. I must have a high low pressure one. I can't get the fuel pressure below 6.5psi, it should be no higher then 4psi for a bridgeport. Here's a link of the first start up Sorry about the shit quality
-
I also fitted some gauges to my original dash. The 3 main ones for a rotor, oil pressure, water temp, and oil temp. I cut out the old heater controls and out in my new gauges. It doesn't look original, but then non of the car does so it doesn't matter I have to fit these in here So first things first, remove all the brackets and crap behind it All removed I cut out the dash to fit in my new panel Measured up where to cut the holes Trial fitted them. They fit well I needed to make up another bracket to hold the gauges in. They have little 3mm nuts on the back, so used these to hold them in I also need a switch for my radiator fan. I decided to put it where the old heater fan switch was Cut it out and glued in new switch The dash is a textured look. I didn't want to just paint the new panel black as it would look out of place, so I decided to use that wrinkle paint. It came out the same texture as the original day. Quite happy how it turned out And the finished product
-
Got all my wiring done. Everything works which is good. I tidied up all the original wiring as well . Just a picture of the wiring for the alarm I used a lot of these plugs as well. They are great and make things really tidy, and are easy to disconnect if need be in the future
-
My alarm turned up as well. I am up to wiring up the inside. I'm going to install the alarm myself. I will take a few pictures but not to much. Wiring is boring and most of the people won't know what's going in anyway. A lot of people stay away from the wiring jobs on there car but I like to learn as much as possible and do everything myself. I used to be a house sparky so that taught me a lot and I can just use all I learnt when it comes to car wiring. Next update will hopefully include a video of the first start up...if it's going to run that is.
-
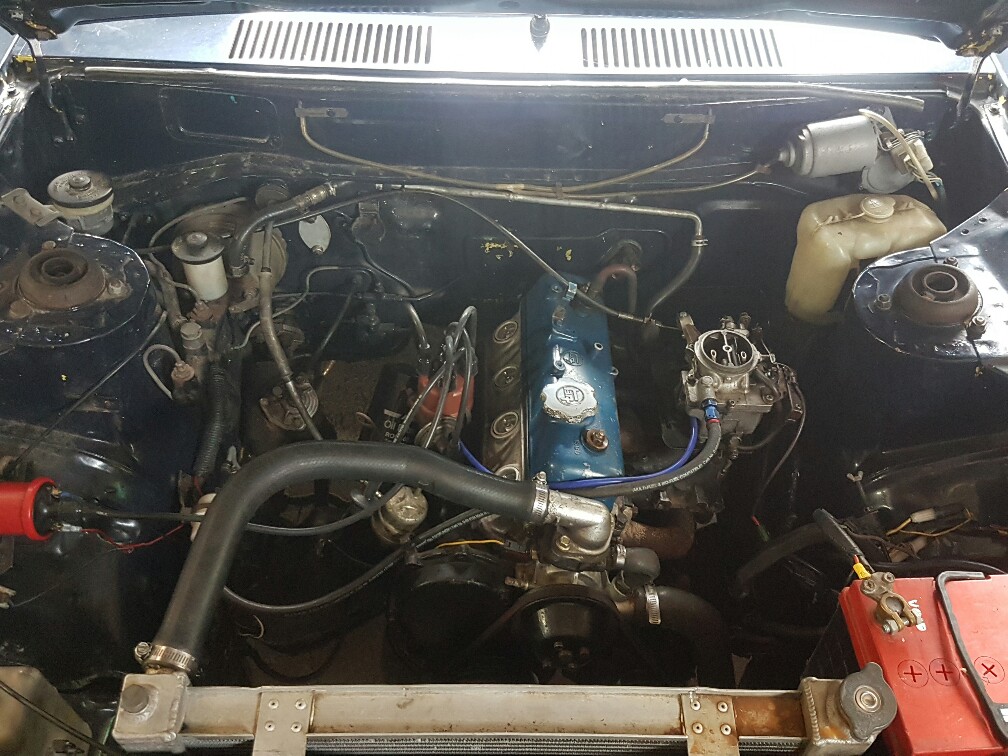
Here's a picture of the engine bay all done. I have wired it all up and ran all the hoses. I didn't take pictures of wiring. I should of though, there was a lot of wires that needed running. I tidied them all up and put them in split case tubing. It looks clean and was what I was after
-
Installed radiator and got some hoses. The hoses in it now are just temperary, I will get some blue silicon hoses. Also a picture of the front of the car with the oil cooler Also got some window tints. And me being me, decided to save on money and do it myself. Didn't take much photos if the process, it's pretty straight forward. Just clean windows throughly, and out heaps of bubbles in it when u install tints, that way you can move it around when u apply it Got all new window and door rubbers off ebay for the car. U pay half the price off ebay as you do from New Zealand. Installed the front windscreen. If u haven't done one before, it can be quite a mission. U out a small rope in between the rubber then pull it out to install rubber. Way to hard to explain and couldn't be bothered taking pictures of it. All glass installed
-
Got a new waterpump. Put the Gilmore pulley on it and it looks the part Brand new ally radiator turned up. So did my radiator fan I also polished up the radiator, it came in like a Matt silver finish. I like shiny so gave it a quick hit with some metal polish. Came up good Mounted the fan onto the radiator. That's easy to do Also the radiator I order is a RX2 radiator. Originally they have one of the heater hoses going to the bottom radiator outlet. I'm not using this so I had to weld it up
-
Oil cooler mounted. I also had to cut the support panel that runs down from the latch to the bottom of crossmember. I needed abit more room for oil cooler Mounted in with oil lines hooked up
-
Oil fittings turned up. So got my oil cooler mounted up. Originally I had it mounted up behind the grill, but I decided to mount it just behind the front bumper. Cut a hole for the lines to go through Add up to brakets to weld to the car, so oil cooler can be removed if need be Brackets welded to the car
-
Got my clutch lines made up. And brakes master and clutch master cylinders put in. I used a Mitsubishi sigma brake booster, it bolted up with hardly any modifications. And used a clutch master cylinder from a series1 RX7. Got some pipe and flare nuts, and made up pipe and flares myself.
-
Next was the accerlerator cable. The one on the right is the corona one, and the one on the left, is out of a starlet, that's what I had to make it look like. I used a modified cable and it wasn't to hard to mount up. The accelerator pedal was easy as well. Just made up a piece to weld on the end. Drilled a hole in it for the cable to fit into. Pedal modified Cable installed in the car, works good Also got a K&N filter. It didn't fit so I just modified the rubber bottom of it. Marked out the hole and cut it bigger. Drilled a hole in the centre for the bolt to come through, and put a nut on it , to hold it in place. Done
-
Got some new Bosch coils. And also made up a bracket to mount them Bracket made up to hold coils, then il bolt it to the firewall Coils mounted.engine bay is abit dusty
-
Out my new fuel line back in the car, and got all the fuel lines hooked up. Just mounted a inline fuel filter before the fuel pump. I just put the fuel pressure gauge on the side of the fuel regulator. I had to cut and re-tap the fitting to make it fit, but it was no drama. Also used braided fuel line to make it look shiny
-
I decided to re carpet the boot, and make it look abit more better then factory. Usually the coronas just have a flat piece of foam in the boot floor. So I had to make up a whole new boot lining out of plywood and the carpet it. It wasn't to hard, just made templates out of cardboard . Drew the template onto the wood then just cut it out, pretty straight forward More cutting and making it fit Doing the other side Most done. Just going to mount battery box in the boot, and the fuel pump in the boot. Hopefully the fuel pump won't be to noisy And the finished design I might have to redo carpet. I left a battery sitting on it, and it's flattened out the carpet and it looks abit rough
-
Righteo, it's been over a month since I posted anything. I did say I was going to get this done before I do any other cars, but I can't help my self. I bought another ke70 and am putting a sr20de into it. I am going to make a small build thread for that shortly. But I do have a month of updates for the corona. First off I got everything painted. Doors, and guards are all done, valance all done. Everything is put back on the car. Iv started getting lazy with the photos though, But will still try take them when I remember. Doors in my make shift bake oven. I put the doors in my van for a couple of days, and this baked on the paint good
-
And finally got the body all painted. I really need a spray booth, doing it outside, you get a lot of shit in the paint. But it's still came out nice, my flares on my guards came out nice as well And started to strip all the inside of the doors, little bits of rust that I want to get rid off And that's where I'm up to, hopefully today or tomorrow I'll get the guards and doors painted. I also hard to order more oil fittings as they didn't work. My oil cooler is hitting on the inside chassis.
-
With the motor sitting in there, one of the main things that stand out in a rotary is the alternator. I decided to pull it out and give it a bit of a clean up. I planned on getting it polished but when I found out the price, I quickly decided that's not a option haha. So stripped it all apart and decided to give it a paint. Once again not to hard to pull apart, luckily the screws and bolts came undone rather easily, I know some can be a b#%*h to get apart While it was apart I put new bushes in as well, the old ones were quite worn and at only $4 ,why not. And my alternator all painted and put back together with the new pulley on it. Looks brand new if you ask me haha
-
Also a few things turned up, my new Gilmore drives and all my oil fittings with braided oil lines of course. I also got some chrome strip, you will see later what this is going to be used for .
-
Put new wheel bearings in the front. One was fine, the other was abit noisy, decided to do the. Both now while there out. Another perk of working on old cars, most things are simple to replace, including the bearings. Just pull the hub off, pull the rear oil seal out, take out inner and outer bearings and hammer the bearing caps out with a punch, then out the new ones in, in the reverse order, and done. I also painted up my brake booster, got to have everything looking nice and shiny haha.