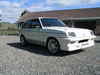
friendlyfire Posted May 2, 2009 Posted May 2, 2009 Discussion: viewtopic.php?f=18&t=18573 heres the pic of the car as i got it from andrew lamont down south in Geraldine (bad phone camera so its not very clear) then i put on a proper HS front airdam from Foxton Fibreglass in chch, because i was driving on the motorway and a rock from a truck shatterd my window screen and i could not see anything infront of me because the whole screen shatterd into really little cracks but not fall apart i didnt know the person infront of me was braking and i already braking hardout but i didnt know/ didnt see and i hit the back of them but luckly it was a tyre truck and only hit his towbar didnt do any damage to him but wrecked the front of my car old kit was custom made by previous owner, i have the mold for it but i wanted the real deal, also got a free front window screen thanks to full insurance new front kit the heart of the beast a 2.3 slant from a vauxhall hc viva(same engine from a bedford cf van) with twin sidedraught Strombergs! prety standard engine(not for long!) but with electronic dizzy, electronic fuel pump, custom headers, few little things. also put on some new school rims which look prety good i recken but im pretty keen to get some wide oldschool ones. also redone the interiour trim black, was originally Huntsman red with tartan seats and put on some chrome mirrors, locking petrol cap, new boot carpet, new custom made high torque 2.2kw starter motor to start the old 2.3 slant (the original starters were always crap) and i burnt out the old one put in gas shocks all round and kingspring superlows in back and cobra lows in front. parts iv got from andrew shrimptons old engine which was in his rally chevette(he now has a works 2.3 twincam 2.3 slant) theres a standard shortblock, big valve,ported head, agressive cam(dont know the specs but been told its prety angry) portmatched inlet manifold for dellortos, adjustible cam gear thats all the things iv done to date that i can think of. next things todo: recaro fishnet seats(reupholstered) dished stearing wheel shorten gear stick new carpet in front put my head,cam i have on my engine at the moment just to give me some more power untill i repower the beast! also have 2 other chevettes =) my chevette daily driver and my dads chevette HS with full flaring which is certed for a 350 chevy but needs ALOT of work before its going to be on the road Quote
friendlyfire Posted May 16, 2009 Author Posted May 16, 2009 pulled my old head,cam off last night found out that my old head actually has bigger valves then the one i was replacing it with! also has a much better porting job but its not setup for my new cam so i still put the other head on new cam on left compared to old one on right notice the duration on one on left and old one has slightly more lift my twin strombergs =) strombergs on the new head and put it all back 2gether alot lumpyer and has a much nicer induction sound, havent been able to fully compare it to my old setup because its not running right yet and wont idle, all in a matter of time! Quote
friendlyfire Posted May 17, 2009 Author Posted May 17, 2009 video of me having a bit of fun in the paddock with the new setup still need to tune the carbs properly and do something about the dizzy its not advancing fully Quote
friendlyfire Posted May 24, 2009 Author Posted May 24, 2009 what an absolute sh*t day had a real bad hangover in the morning, went and droped my bro off to pick up his car then went out into the wop wops to have some fun with my car was good all good untill i was accelerating hard redlining the beast spinning the tyres smashed her into secound revving her up there then BANG grrrrrooooorrrrr engine died, i pulled over was thinking "damn i just killed the standard bottom end" got out of the car opend the bonnet and my cam belt was off my cam gear then i felt around a few things, tuged on my cam gear... it pulled right out.... it broke the damn cam and the whole snout had came off, well now iv f'd my new cam and prob bent all my valves(hopefully not will have to see). then i went to ring my brother to come tow me home... no reception so i walked up the road a bit more... still no reception so i keep walking and a guy in a blue ute pulls up and asks me if i need a ride(what a good sort) so i accepted his offer and got droped off at the top of the hill, thank god he was so nice and picked me up because we had to go at least 10km to get reception. rang my brother, turned out my dad had had the tow rope and stuff with him(took the torana to timaru for the weekend for the muscle car show) so i rang the AA, explained where i was and what had happend and then a tow truck was on its way, while i was waiting a cop pulls up and asks what i was doing and if i needed any help( who knew cops could be so nice? ;D) so tow truck came picked me up and went and got the car, put it on back of truck and took me and the car to the nearest mechanic/petrol station and got my bro to pick me up, left the car there untill later tonight when my dad comes home(hopefully its going to be ok there :-/) soz for the bad quality pics, damn camera wouldnt focus properly got the car home, pulled the tappet cover off and the verdict is..! smashed a follower, which jamed the cam, munched up the cam box which riped the cam gear off the cam :-[ was pulling around 6300rpm and going from that to a dead stop has to do something brutal lol some nice bits of cam follower which was all in the engine along with little bits of metal everywhere and prob a nutsload in my sump now... on the bright side i now have an awesome looking ornament! Quote
friendlyfire Posted May 30, 2009 Author Posted May 30, 2009 better quality pics on the cam box took head off today this is what i found the grooves in the pistons are not Really bad, not sure if im going to need new pistons :-/ and all the exhaust valves are bent. not really sure what i want to do now... fix up the chevette and sell? repower the chevette? or build up a 2.3?.. only reason i was thinking of selling was because to make these things fast u have to do shitload, spend a shitload and not many aftermarket manufactures for parts.. was thinking of getting like a vc commodore or HQ kingswood or mitsubishi starion or old school celica or s12 silvia, heaps of cars i want ;D Quote
friendlyfire Posted March 5, 2011 Author Posted March 5, 2011 wow long time since iv updated this... chevette has been sitting in garage without an engine for nearly 2years- jesus time flys... dad had plans of putting a 350chevy into it and using it for drag racing, but i couldnt let him turn such a nice clean classic car into a drag racing car which would just be a shell with the running gear... now finally going to get the chevette back on the road, just got 2.5turn lock to lock quick rack from yoeddynz so first plans is to install that, then to give the beast a new heart, thinking of powering it by 4age with a w55 box? or any other recommendations? Quote
friendlyfire Posted May 7, 2012 Author Posted May 7, 2012 righto.... been pretty busy with moving house and trying to find space for cars and focusing on finishing my apprenticeship but now thats all over i have finally started on the chevette! so i started my stripping down my old runaround/paddock basher blue chevette which i am parting out and keeping a few spares then taking to scrap metal, so if you need anything give me a yell i also have for sale is the standard radiator from it which i had a custom recore done to it as there was nothing factory to fit it.. costed me $200+.. its in mint condition, look for $50 then started on my white chevette which is getting a 3sge beams, just trying to source a altezza front cut for it as i want more than just engine,box and im planning on modifying and using the dash so i dont have to piss around with getting sensors working and such, what was the best way to remove the rubber underseal crap on the floors? freeze with it dry ice and chisel it off? both cars have been in dry storage in my girlfriends hay shed so have been dry, and only rot i have found so far is from when previous owner wielded in these strengthening pieces on the chassis and it penitrated through and had no coating put on the inside Quote
friendlyfire Posted May 21, 2012 Author Posted May 21, 2012 removed and stripped down my steering rack to install the quick rack, going from existing 3.7 turns lock to lock down to 2.5 turns new at top old at bottom new on left old on right, is this what you were talking about having to cut out for the locating bolt alex? will take them to my girlfriends dads place whos a engineer to get the piece milled into it instead of trying to cut it out myself haha, also have two new tie rod ends and ball joints coming, just replacing them while im already here Quote
friendlyfire Posted May 29, 2012 Author Posted May 29, 2012 quick rack all finished and in, forgot to take photos... but new engines arrived car is now at my mates whos a fabricator, smoothing out engine bay, doing engine mounts, sump, gearbox mount, pedal box. progress pics soon... Quote
friendlyfire Posted June 10, 2012 Author Posted June 10, 2012 this weeks progress, front strut towers double skined for strength, engine bay smoothed out, removed battery tray, accelerator linkages and useless standard brackets, cut off ugly panal overlap on firewall, little bit of rust under battery tray and under water reservoir which will need cutting out, also removed old sounds deadening on inside of car using dry ice, worked awesome, also found little bit of rust in spare tyre well which will need repairs, other than that its pretty clean! Quote
friendlyfire Posted June 15, 2012 Author Posted June 15, 2012 weekly progress update. all holes welded up on firewall for a nice smooth look in the end hopefully, patch on pasenger side firewall due to rust stich welded along bottom where chassis rail meets body panel for extra strength, front panel completly cut away so i can sit my radiator right in there out of the way with a remote filler cap interior stripped out, first remove old sound deadener with dry ice, then wire wheel back to metal and removing all the underbody seal previous owner painted in there then prepsol to remove then rest of the grease/wax, little bit of pitting from rust and previous patch jobs done in the foot wells but its not bad, floor will be getting a coating of por15 next week. also what do you all think of black engine bays? thinking of using por15 black in engine bay as the white colour always looks so dirty and turns a cream colour haha, tank is also being modified to run a hilux surf intank fuel pump as i didnt want a loud external pump Quote
friendlyfire Posted July 22, 2012 Author Posted July 22, 2012 so progress update.. flywheel came back from being machined dizzy blanking plate.. but may need to redo this, as i might need to make some sort of cam sensor for seq injection. sump modified and tacked up, will be making a wing out the side of the sump to gain some extra fluid, engine mount gearbox cross member(bad photo) 4age silvertop throttle bodies vectra clutch and standard new old stock pressure plate, will do for now untill i go for more power interior floor finished, rust cut out, painted, was done using this product, same a por15 but cheaper rust still to fix in the boot some pictures of the c20xe looking sexy next to come... fuel system and pedal box, hydraulic clutch setup, wiring! Quote
friendlyfire Posted July 29, 2012 Author Posted July 29, 2012 pedal box arrived got through customs without any charges! so all up only cost $800, very cheap compared to a tilton/willwood one is $800 alone with no cylinders/reservoirs (and they dont even make a 3pedal hanging reverse pedal box) bits of other shopping, bulk pack of dynamat alarm, central locking, battery box new black carpet set should be arriving sometime next week Quote
friendlyfire Posted August 6, 2012 Author Posted August 6, 2012 been thinking of exhaust ideas, main problem- standard exhaust exit is on the drivers side at the back which is on the wrong side for the c20xe, and i dont fancy having to cross over sides under the car making more bends and making the exhaust longer.. second problem- no room to run exhaust over diff on passengers side.. couple of ideas.. cutting the floor to give the exhaust more room.. or the idea a like most is to exit the exhaust behind the passenger door the red dot on the photo anyone know the requirements for exhaust exit position for cert? or any other ideas on where to run the exhaust Quote

Recommended Posts
Join the conversation
You can post now and register later. If you have an account, sign in now to post with your account.