

vivaspeed
-
Posts
14146 -
Joined
-
Last visited
-
Days Won
7
Posts posted by vivaspeed
-
-
The old chestnut that is Class A reg...
A car is, and will not be an ATV. However, there used to be a way to put a passenger car on exempt class A without re-registering it as a different category of vehicle.
Had my Viva on it for a while until I put it on hold. It is registered as a car, but was under exempt A licensing not the standard one (G, I think).
Got a letter from LTNZ earlier in the year saying they were changing rules and only an ATV or certain earthmoving equipment/off road equipment could be licensed under A and that at the next time I bought a license it would need to be back on G. They made it quite clear that it was not suitable for passenger cars.
Heaps of guys used to put class A reg on their race cars and A frame them around / dodgy drive. There was a clause in the conditions of the licensing rules that said the vehicle could be used on the road under class A "for purpose of inspection or repair" - I kept that page in my glovebox! You just had to know a mate with a workshop in each corner of the city to say that's where you were going for "repair".
A little older and wiser I realised that the fines and consequences could be $400-$600 plus insurance hassles so I bought a better insurance policy - a car transport trailer - sorted.
The amount I now spend keeping everything WOF'd/REG'd for only a few days driving per year makes me cringe.
There should be a special "low use" license category.
-
Great progress. It's looking good.
The photo of the gearstick/handbrake closeness reminded me of mine - I cut the length of the handbrake down - from the 4 ribs on the rubber bit to 3. Just have to open it up and pull the actuating rod out and shorten by same length. Pretty quick fix if you've got a mig at home. Although how often does the handbrake need to be applied when you're in 2nd or 4th?
Are you going to run a standard dizzy or a -GZE CAS and coil pack? Look pretty tight for a full dizzy near the turbo (or could just be angle of the pic).
-
lol
They're foreign so not sure they'll get the car scene thing... although as they are engineers/from engineering companies I would expect they would have a healthy interest and appreciation of the fine machines. The drivers, maybe not

-
Are people making their own way up, or forming some sort of convoy ex-Welly?
Not sure if going to turn up as have to escort dignitaries around work in the afternoon and might run late.
-
Harliquang ride on mower?
Develop into ride on mower racing? Use the velodrome NASCAR style with mowers (sans blades)...
The old man's ride on recently ran a bearing and he bought a new one, old one is knocking around and would be an excellent chassis for some conversion.
What kind of vertical shaft small engines can you get / modify? Turbo a Briggs and Stratton?
-
When the rail was Tranz Rail they had car transport (rail depot to depot) that was quick and easy, but not ideal if you're wanting door to door or car is broken.
-
Old school convoy up on sunday as lots of ppl seem to be heading up sunday?
I'm going up Sunday for a look, keen to do convoy or share car, but might not cruise oldschool because my daily driver has far less noise, vibration and harshness, and is generally a nicer car to travel in (plus it has iPod compatible stereo). Will decide on the day.
-
...we can share a dealer plate and bring the HB
haha tempting - it's awesome on the road - but has a lack of night time forward illumination thanks to me butchering the engine bay chassis loom. Rewiring headlights is a future project.
Celica it is then - murphy's law dictates it will have a flat tire and battery when I get it from my workshop tomorrow...
-
I'm a newbie, don't know anyone, but might swing past for this.
Nothing oldschool of mine is road legal (because they're projects or racing cars) except an '85 RWD Celica - I wouldn't really class it as old-oldschool but it's kind of old - so might bring that along.
-
Well done on Cert.
RE: Bushes - I have posted part numbers for someone else on here once,
The superflex/superpro ones are awesome - got some from Stocks when they were the agent. Cost arm, leg, and other minor body parts but so easy.
Part number cross references to something from the British Leyland stable from memory, maybe Triumph?
Other thing you can do and I tried this once was find someone that sells rubber/nolathane/urethane rod - there was a place in ChCh that I got some from possibly Mulford Plastics, or Ludowici - and you can turn it up to suit, but its terrible to machine. Just pop your old crush tubes back in.
-
Good luck with the cert Alex - should all be sweet with the quality of workmanship you've put in.
Because they have 185/65 tyres I have had to do the clearance mods to my footwells as per the DTV sports part manual. It involves very careful, controlled swinging of a large hammer.I like your references - is that the book Tuning Vivas and Firenzas by Coburn and Blydenstein? Also tells you where to gusset everything on the chassis so it doesn't put apart due to the sheer power produced. Wheel clearance is an essential mod, mid sized club hammer works well. No fancy cut and weld necessary - just bash it until required clearance is acheived! It's always more than you think becuase if you turn in under brakes more clearance is required.
-
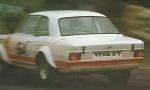
Awesome pic, thanks Truenotch. Are there event pics up somewhere?
I think that was when I stuffed up my entry to the corner, was in the wrong place, turned in too sharp and the back came around... good fun
Nicely shows new DTV door decals, drivers side one I lined up on the top line of the door, not the bottom line so it looks a bit skewed. Passenger side is better though. Vinyl transfers are really crap to put on a car.
New 4AGE went well apart from gremlins that crept in and loosened the exhaust manifold bolts during my runs
-
They are 7/16" UNF from memory, smaller than Escort which would be (by some dodgy logic) 1/2" UNF.
-
Superflex bushes UK do a kit of 2 (30 quid) of 4 (60 quid), which you could get through Stocks - and I think Supercheap do Superpro which is the Australian version of it.
Part No is SPF0070K
When converted back to Kiwi that still puts a set at $60-120 depending on how many you get, but still cheaper than $160/side.
Check out their website or Stocks.
Also, from memory the listing cross references with Triumph something, maybe Dolomite.
Second hand arms would probably be all worn out and poked so if the car is any good then probably worth getting new.
-
Dizzy problem is sorted, homemade puller bracket jig, welded a threaded rod on, some heating and just wound it out. Couple of false starts, and for some reason at one point I decided to grab something I had just welded becuase it was in the wrong alignment - ouch! - brain fail (tip: wear gloves).
Time is now my enemy - engine ready to drop in, but haven't got back into it yet.
I'll take some pics of the water system before I drop it back in. Can't recall exact pipe connection detail. I've routed my water lines round the back of the engine and put the thermostat housing on the back of the head (similar layout to FWD). It is certainly a unique setup, but doesn't look too bad.
-
Ha, just came across your van thread.
I admire your persistence!
Custom housetruck: lots of work = awesome
Rotary Viva: lots of work = awesome
Diesel van: lots of work = still a diesel van (but a reliable and warm diesel van)
I'll shout you a ferry ticket if you want to come and do one in the other half's Corolla? Into the second winter of no heater - it is a serious visibility, safety and comfort issue!
They are just such a crap job to change - you would think engineers would be more practical and say, "hmmmm one day that will fail so lets make it easy to remove and replace" - but alas no.
-
In one of my original setups, actually an injected slant 2.3 not a 4AGE, I used a carb lift pump from the original tank pickup into a surge tank in the boot, with a return into the top of the fuel tank - drilled a hole in the sender unit and poked a pipe through. Then did a new steel line to the front and return was the original line, used an old VL commodore pump.
Just got 3-4m of steel bundy tube from BNT (like $30 or something) and just laid it next to the original line with some new P-clips.
I think you can put both IGN1 and IGN2 together from memory, as you say just 12V, provided you have a good clean source. Had a look at the diagrams I have and none specifically have IGN1 and IGN2 that I can see, there is IG2 and IGN which can go together - one only operates the EFI main relay - depends how much of the original loom you use. You can prune down the loom to only a few non-engine wires required.
*Disclaimer - not liable for electrical shit that blows up*
-
Its my viva, so yes, OS, RWD, and british
Don't think my rear main seal is leaking, though I suppose it could be.
LOL it's a Viva - like any good British car the rear main seal was only good for keeping the oil off the showroom floor when new, as soon as it was sold and driven up the road the seal died and oil spewed forth.
Sounds like clutch. I've had many a Viva/Chevette with clutch problems. They were bad for clutch problems. But at least the electrics usually kept going unlike other cars of that era, they would start and idle before you realised you weren't going anywhere...
-
Thanks for the tips everyone, it is now out.
Shagged about with a couple of ideas and in the end I welded a piece of flat, with some threaded rod welded on, into the bushing and a bracket on the outside and wound it out. Needed a bit of heat though to make it move...
Very tight so not sure how they got it in originally.
-
Cool, a couple of leads, will call tomorrow...
Also Mico Metals do exactly what you describe.I didn't realise Mico did steel, I thought they were more ali, brass, etc.
-
Hey all,
My pile of scrap/project steel is running out and I need some short lengths of steel for projects. In particular some small diameter tube and some 25mm RHS.
When I was in Hastings, there was a place Central Metals that sold any shape/profile or part sheets by any length/size - you could buy a metre or so, or half a sheet if you needed. So far haven't found anywhere like that in Welly.
Obviously Fletcher Easysteel etc will sell me a full length/sheet of anything but I never need that much.
Any recommendations of where to either buy short lengths, or GC engineering shops that will sell lengths for cash (or let you raid their scrap bin)?
Cheers
-
Awesome, thanks guys.
Might start with the shrink weld, hadn't thought about that.
A few good options there, might leave the rough stuff till last
-
Time for the new engine, has only been sitting for a couple of months but this was the first free weekend I've had for a while. Thought I'd get this in before the next Road and Track round in June.
Made a start, pulled the old 4AGE out to make some space (and to give the workshop floor a nice oily, damp texture).
Swapped over the relevant parts to the new engine, with many problems - first the knock sensor fell apart due to being brittle so a Pick A Part tripped followed - $4 and a greasy arm later we were back in business. Then the usual things not coming apart easily, not going together properly, etc
Then the dizzy wouldn't fit because of a stupid bushing the last owner used with his 4K dizzy. I got frustrated and went home. I have 5 weeks to get it going... no rush.
See this problem here: http://www.oldschool.co.nz/phpbb/viewtopic.php?f=2&t=27276
-
Hi all,
A quick engineering advice question - how the hell do I get this out...
I have got this worked 4AGE that was run on carbs and had a 4K dizzy in it. Previous owner/builder put this steel bushing in the dizzy hole to take the 4K dizzy. Now I'm going back to injection I want it out to fit my dizzy back in. Of course I didn't realise this was there until just as I was swapping over everything from my old engine to this one.
It's tight as hell, and I can't get anything in behind it to drive it out. Tried the basics to pull it out but it's not going anywhere in a hurry. There is a slight lip that can be accessed behind it.
Engine is fully assembled / head with cams in it so I'm reluctant to do much that may involve disassembly or drilling and creating too much swarf.
I could probably remove the exhaust cam and get behind it, but really don't want to.
I'm thinking -
1. Internal bearing puller with a slide hammer (which I don't have)
2. Weld someting threaded on it and wind it out but it's an alloy head, not sure about heating and distortion etc.
I think a bearing puller would do the trick, but I don't own one, and good kits cost many hundreds of dollars. Diameter might be a bit big for a puller though.
Any ideas welcome.


Revolution - Japanese performance car culture NZ (book)
in General Car Chat
Posted
Great christmas - I've now got two copies of Revolution.
Someone want to offer on one? Going rate is $5 I hear, but scarcity factor may kick in...
As has been said earlier, reminds me of all the NZPC magazines I bought in the late 1990s/2000. Good read but not really representative of the entire scene.