
- Popular Post


Adoom
-
Posts
2196 -
Joined
-
Last visited
Posts posted by Adoom
-
-
FYI: I used about 5kg of dry ice to remove the sound deadening in my triumph. If I had to do it again, I'd get a bit more. Near the end, enough of it had disappeared that I didn't have enough to freeze complete sound deadening sheets and had to do them a bit at a time.
Much easier at the start when you have enough to just fill up each floor area with dry ice.
-
 1
1
-
-
29 minutes ago, ~Slideways~ said:

Looks like a Field Hospital. 'Cause so much white in a white tent.
-
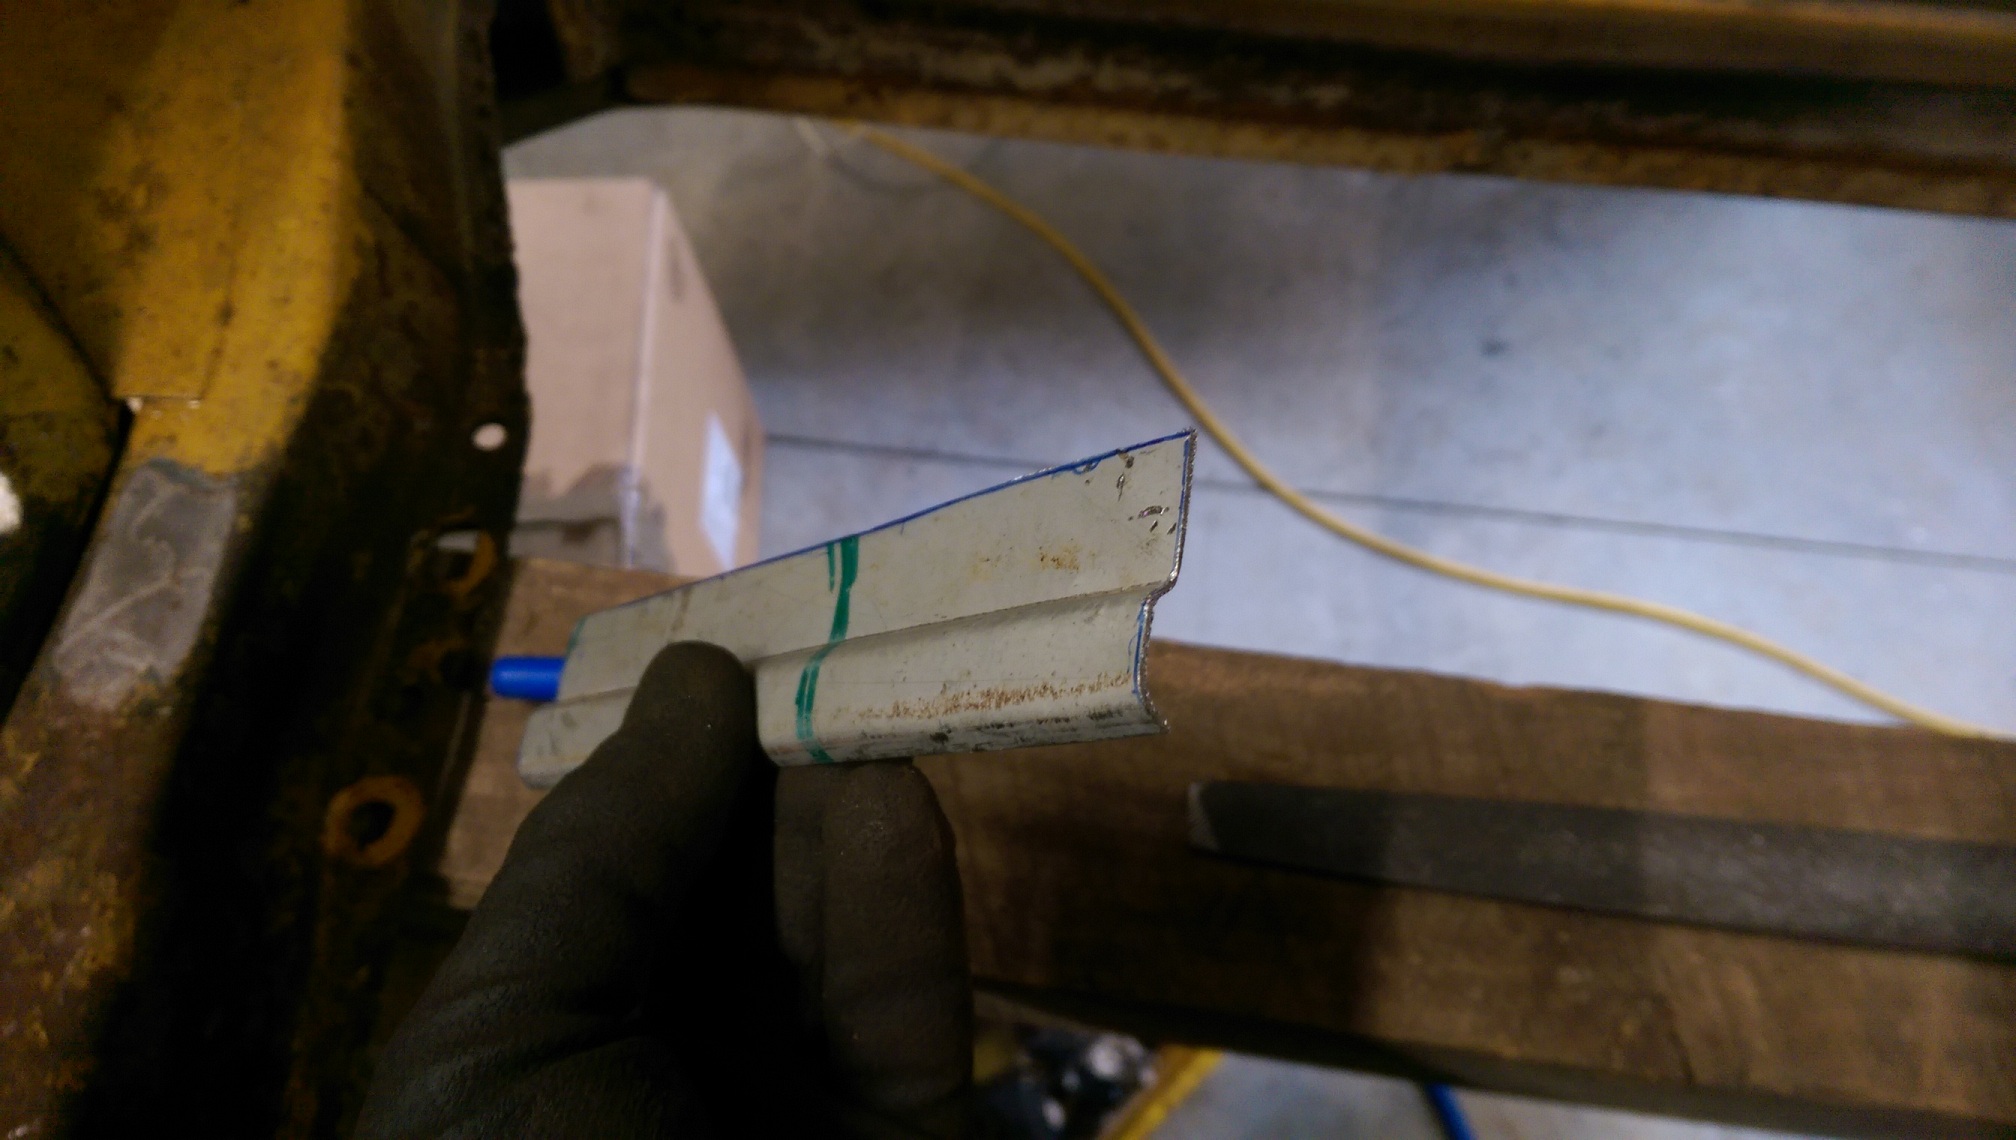
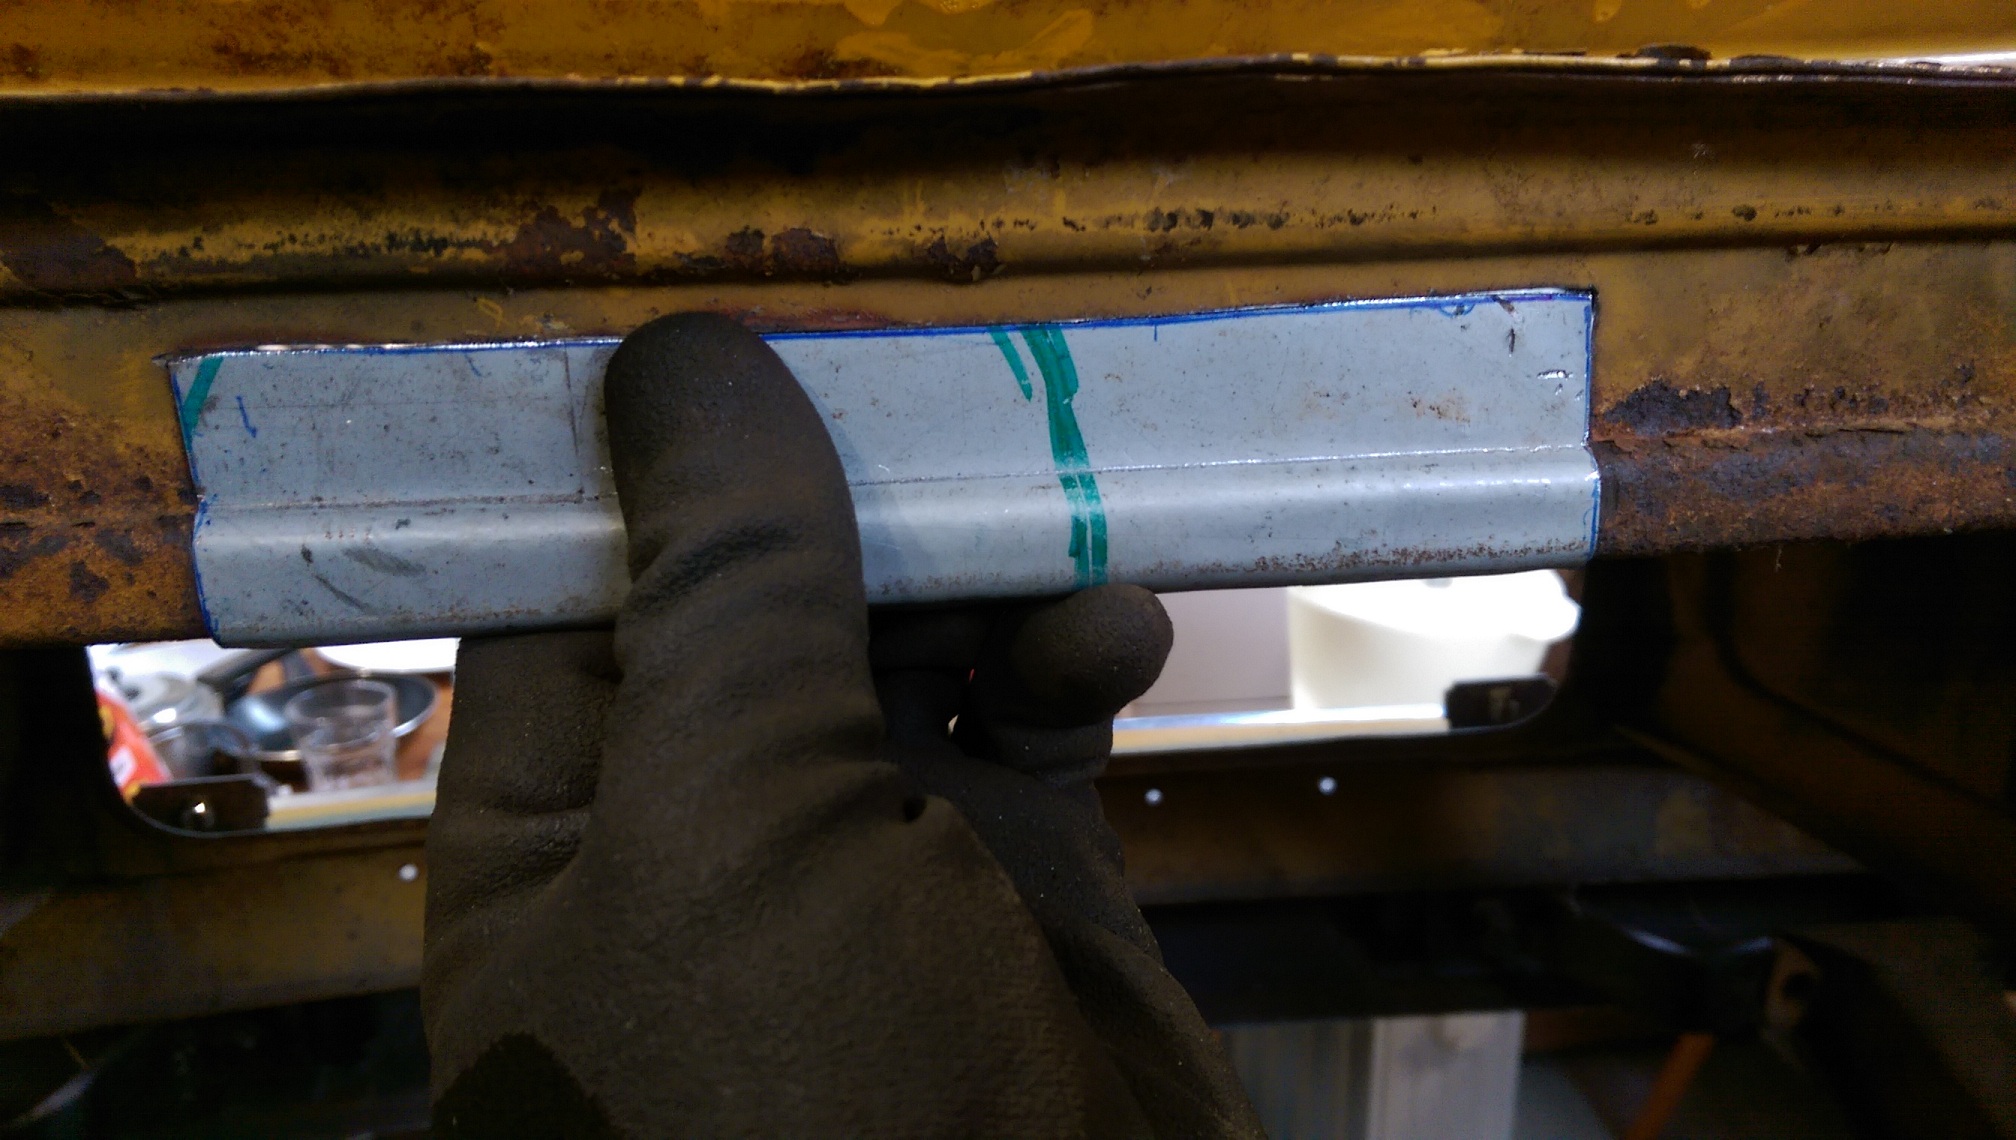
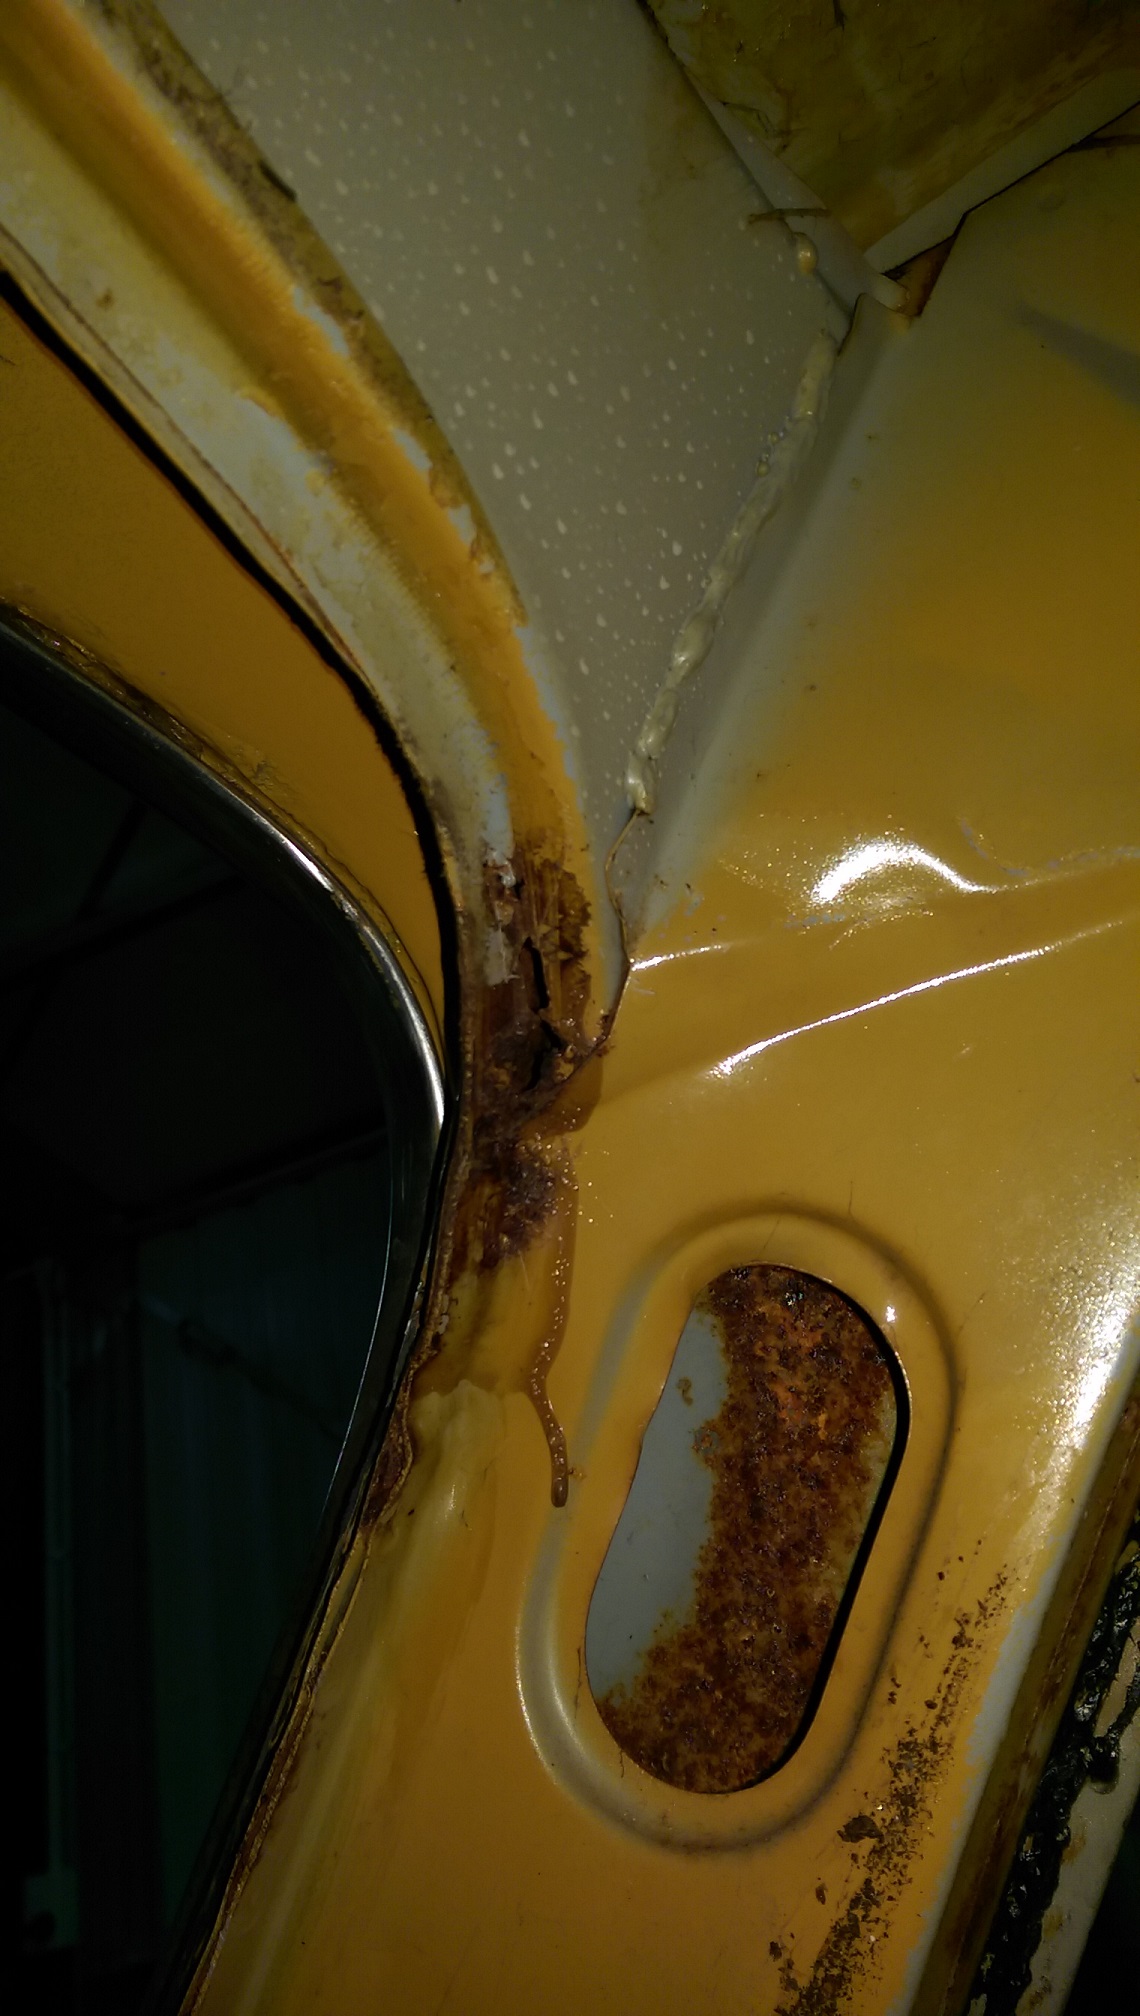
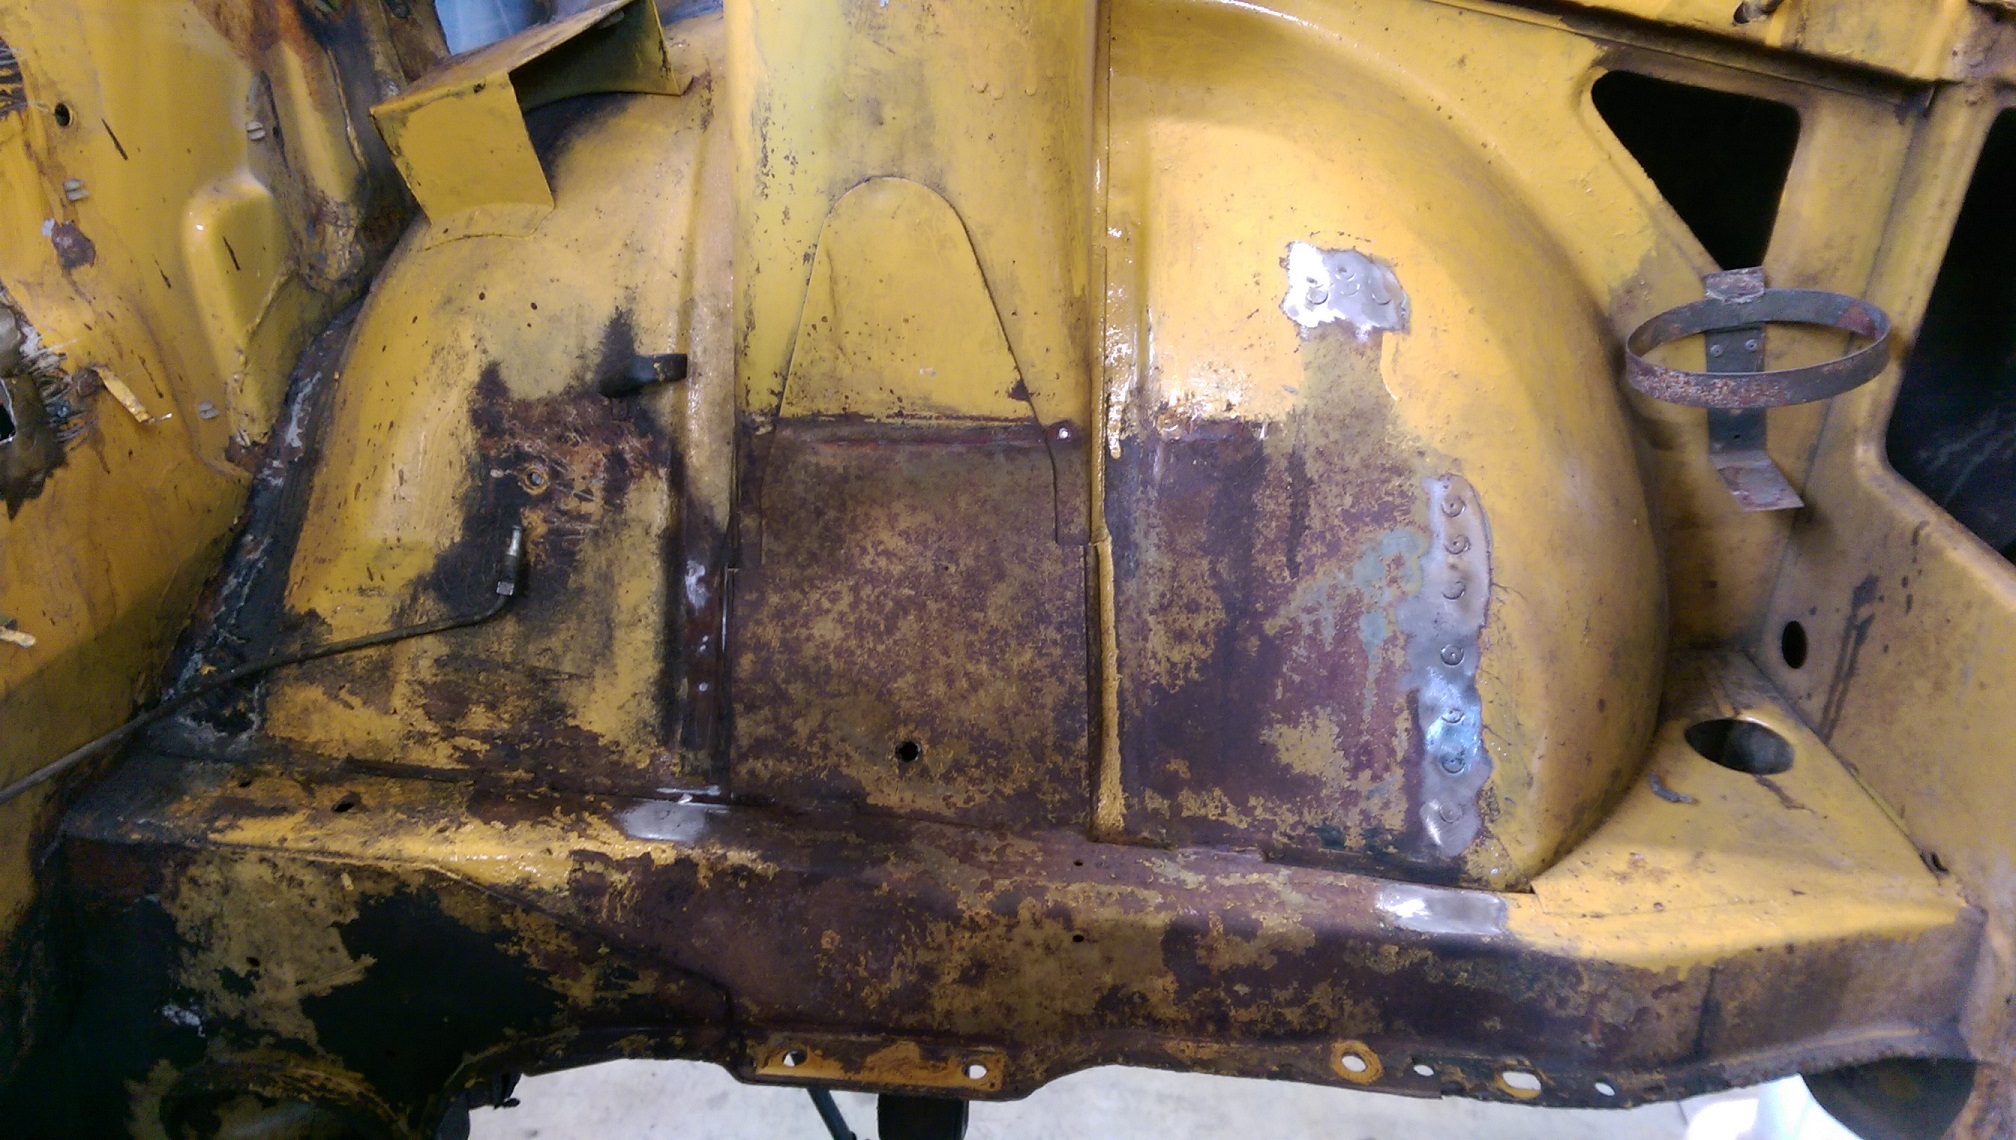
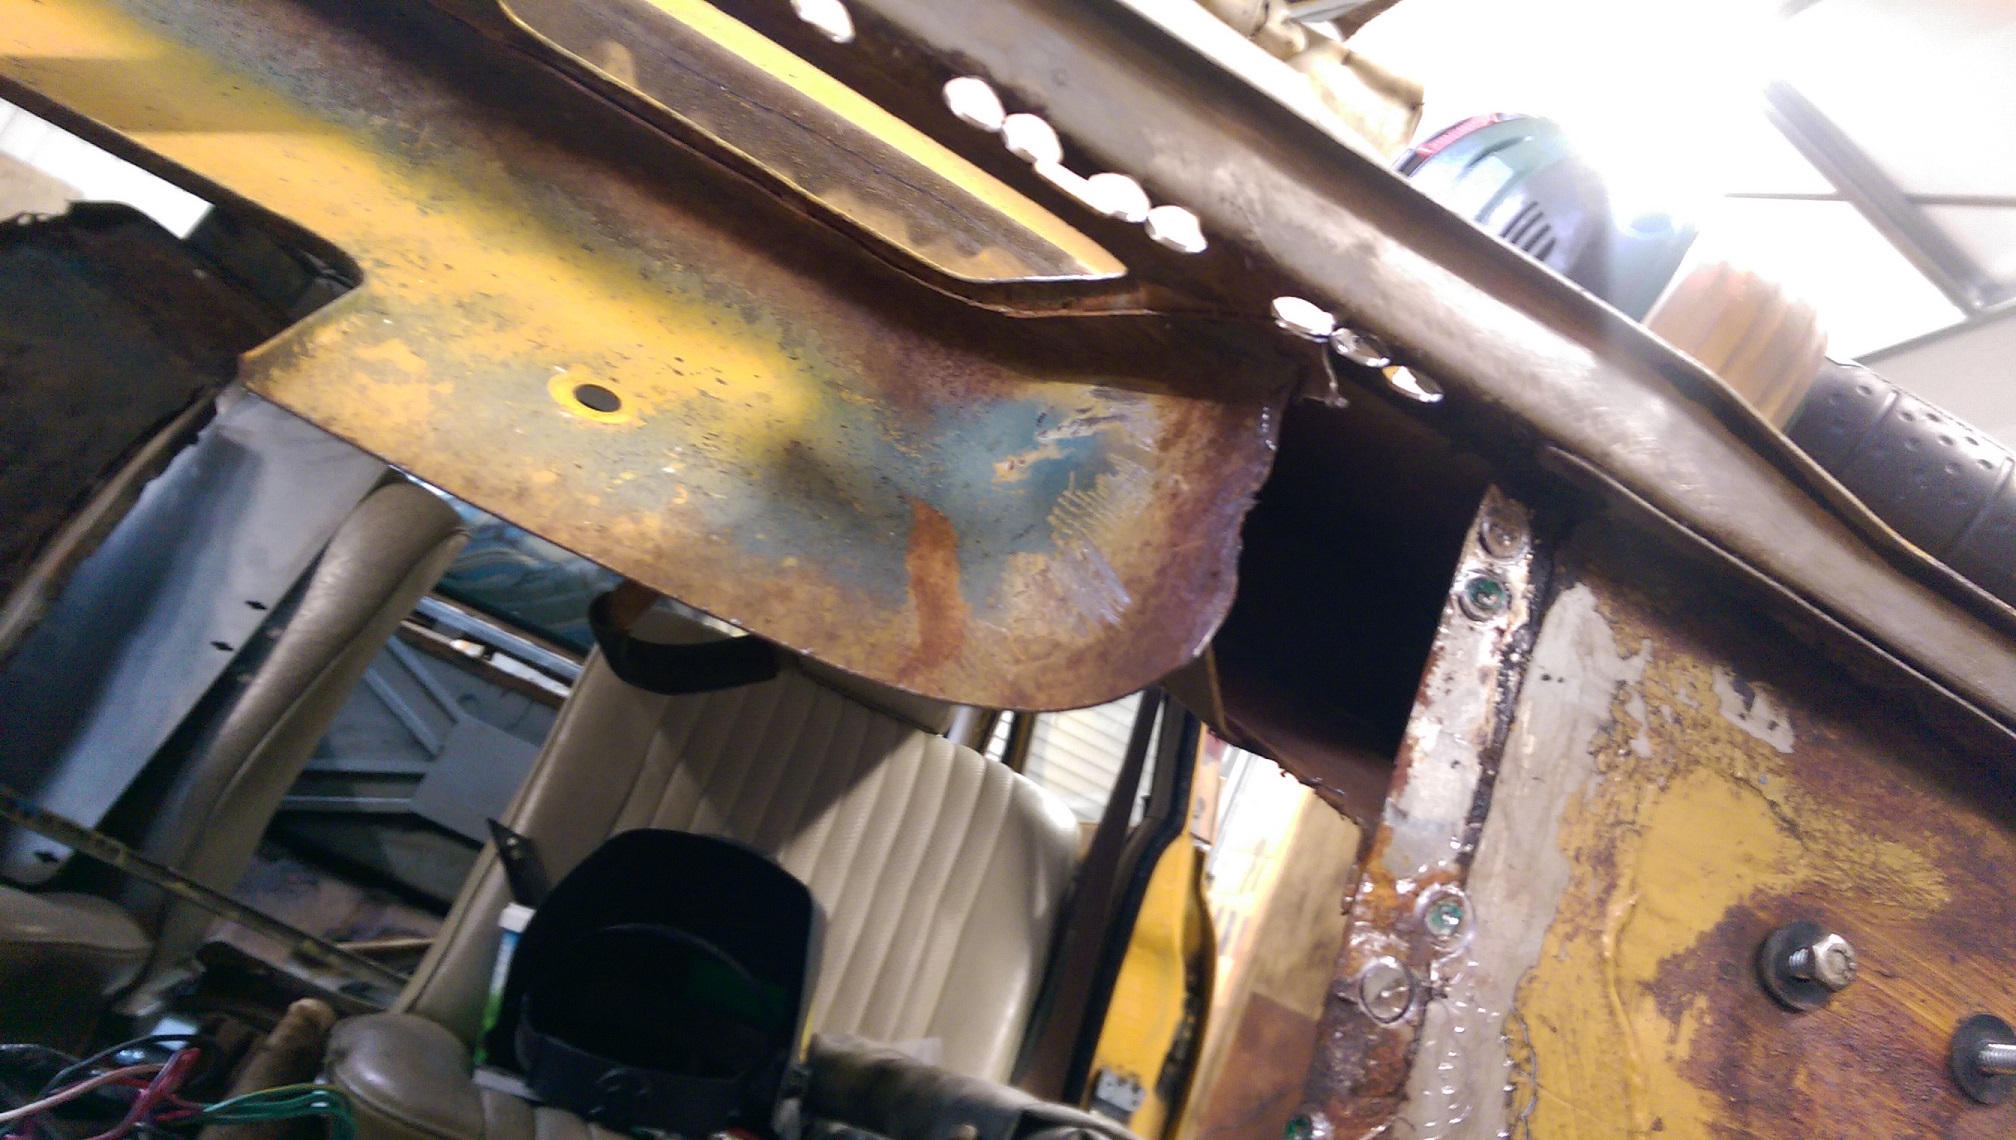
I cut out that rust behind the radiator.
And made a patch.
This took at least an hour to make and it's the second attempt. The first attempt took longer and was all wrong. Those little bends were hard to do so close together. I also don't have a bender.
I ended up clamping two bits of plate that were just the right thickness to the bench, then clamping the patch over the 'groove' that created, then hammering it into the groove.
Would be a PITA if I end up needing to cut that bit of panel off because it's in the way of something.
I also made this patch where there was some rust pitting that went through. Those round things are magnets.
-
3
-
-
Cracked the uncracked dash I had bought while moving it onto a shelf. sigh. It's a 15mm cracked dent on the top on the dash. The vinyl is so hard and brittle from 40 years of sun.
-
13 hours ago, Seedy Al said:
He has a hoist setup in the corner of Graham kidds workshop in upper hutt, behind the Yamaha dealer. Been there may be 6 months now coming over once a week doing certs. Made it a lot easier doing my crown cert that's for sure.
Dang it. Cheers Autos, is 3 minutes up the road from my house. Buuut, it's only open while I am at work.
-
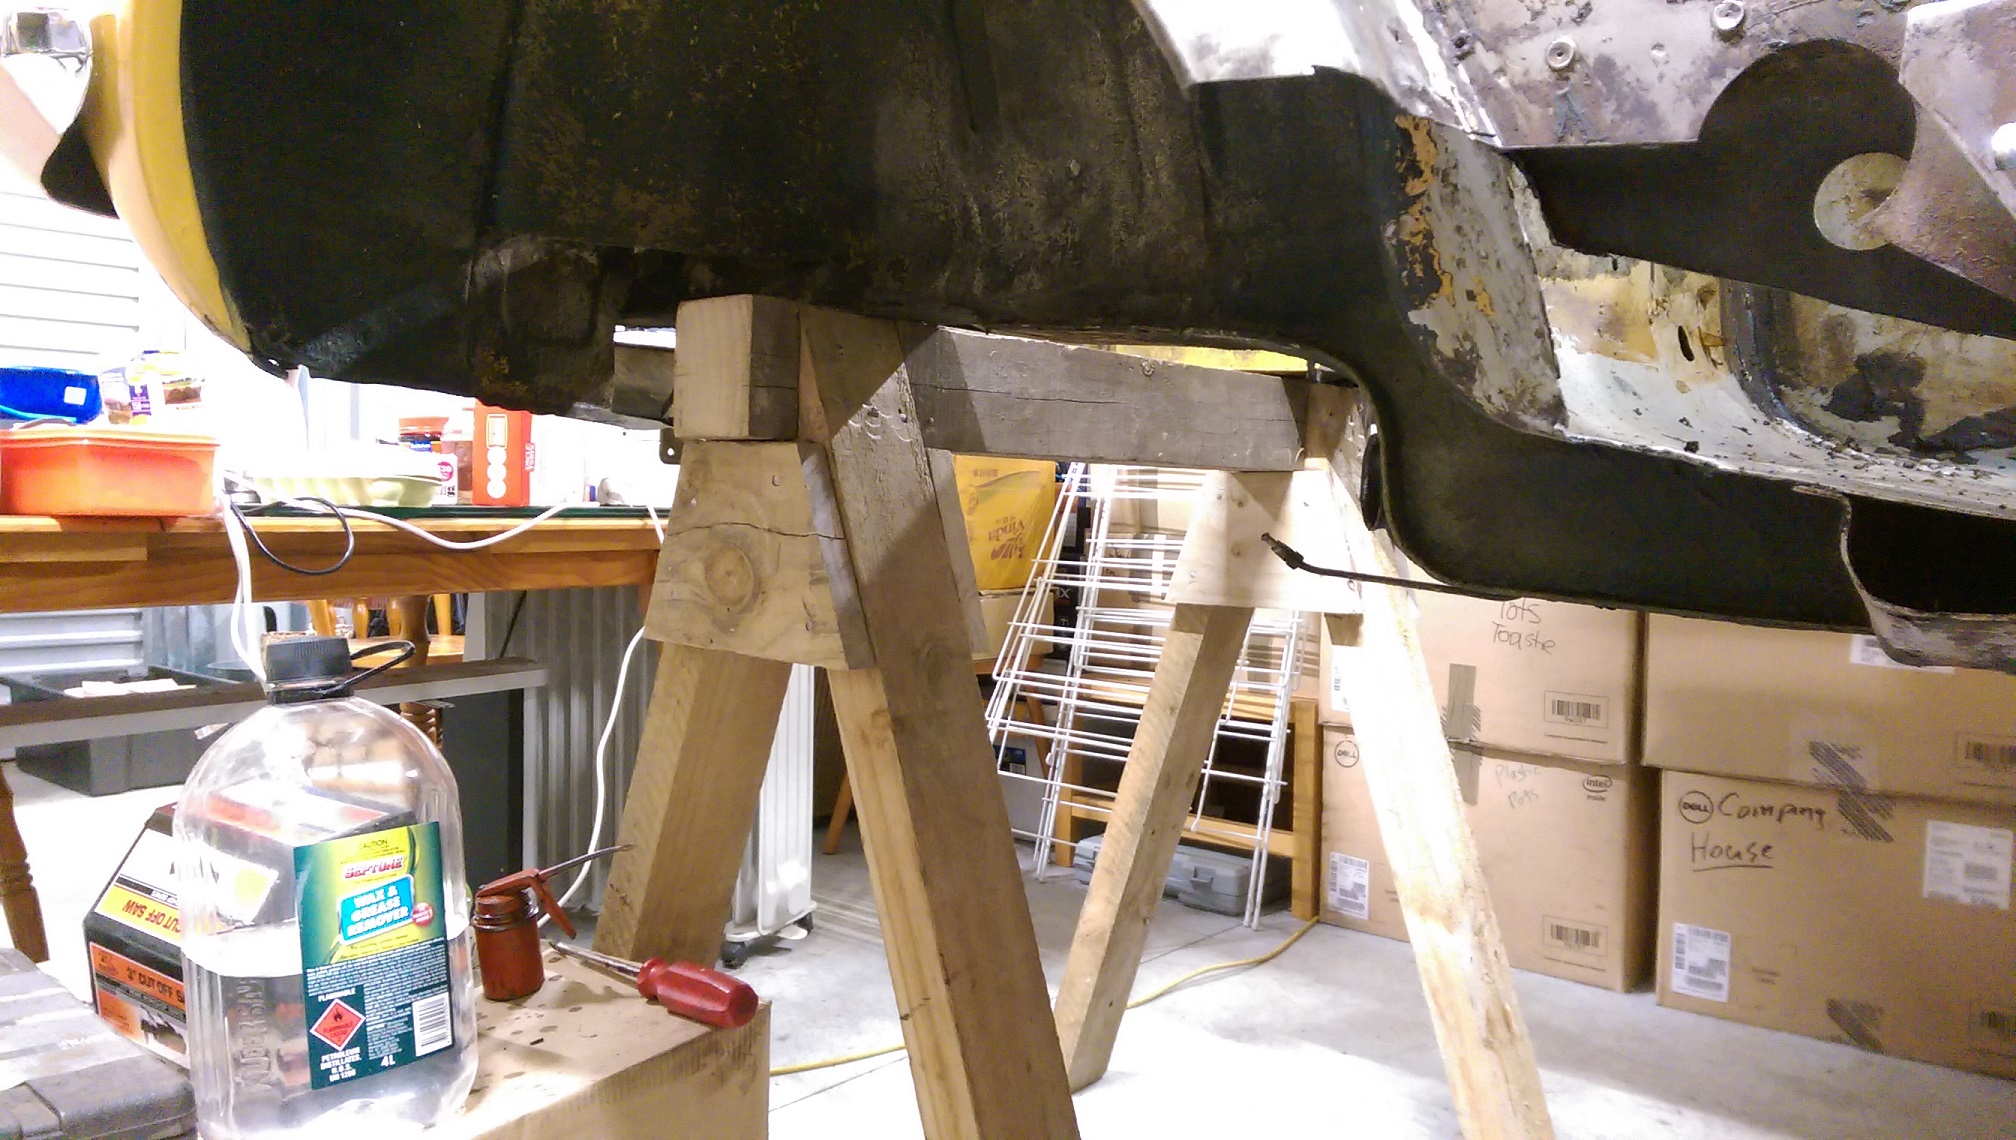
I wanted to be able to get my starlet or bike out of the garage. But I was using the wooden ramps/planks as spacers under the axle stands holding the Triumph up. DOH!
So I made a tall 'horse'.
It's 900 high. Which is higher than it was with the big axle stands under the front. Easier to work on the sills.
This meant I could remove the axle stands from the front. Then jack the back up as high as I could and use the big axle stands at the back, with 2X4 jenga style spacers(nailed together) under them. After removing the small axle stands from the rear, I had my ramps back!
I wanted to be able to drop the rear sub frame sometime, so the axle stands are not as far back as I'd like. There seems to be sfa at the rear of the car to support a jack or axle stand. With the subframe, diff, etc in the back and nothing in the front, I reckon there is only 10kg on top of the horse. It's REAL easy to lift the front.
I had a got at cleaning up the underseal at the front end of the left sill, so I'd be able to weld there. It didn't come off as easy as the inside stuff. The wax and grease remover didn't soften it much. Might need to get a heat gun to warm it up before using the solvent.
Made the mistake of using the flappy sanding disc on the grinder where the underseal is... well, that sanding disc is fucked now.
-
Just now, yoeddynz said:
Update time on Viva two.... Lesson learned. Don't leave Vivas parked up for two months on damp ground. I went to move it the other day and the clutch is stuck !
I have tried all the usual things to fix it and no luck. Its now sitting out there with a stick holding the clutch pedal down. Funny thing is that I have only recently worked on a mates Viva HC and it had come in with the same problem, which meant we had to remove the box and free up a very corroded clutch.
Jack the back up. Start the engine with it in gear. Do a bunch of revs. Push down the clutch pedal, then stab the brakes.
Yeh??
-
1
-
-
Could have a terrible accident with the bonnet pins....
-
1
-
-
HAAHHH!!!
PUZZLE MASTER!!!!!..
I cut the end off the triumph exhaust to get it in there.
Now I have to walk all the way down the other end of the garage through my 'living quarters', the storage piles and the 'workshop area' to get the the other side of the car. Might be faster to just crawl through the doors.
Motorbike battery was nearly flat, wouldn't start it, same deal for the STARVIA battery.
I put the motorbike battery on charge.
-
6
-
-
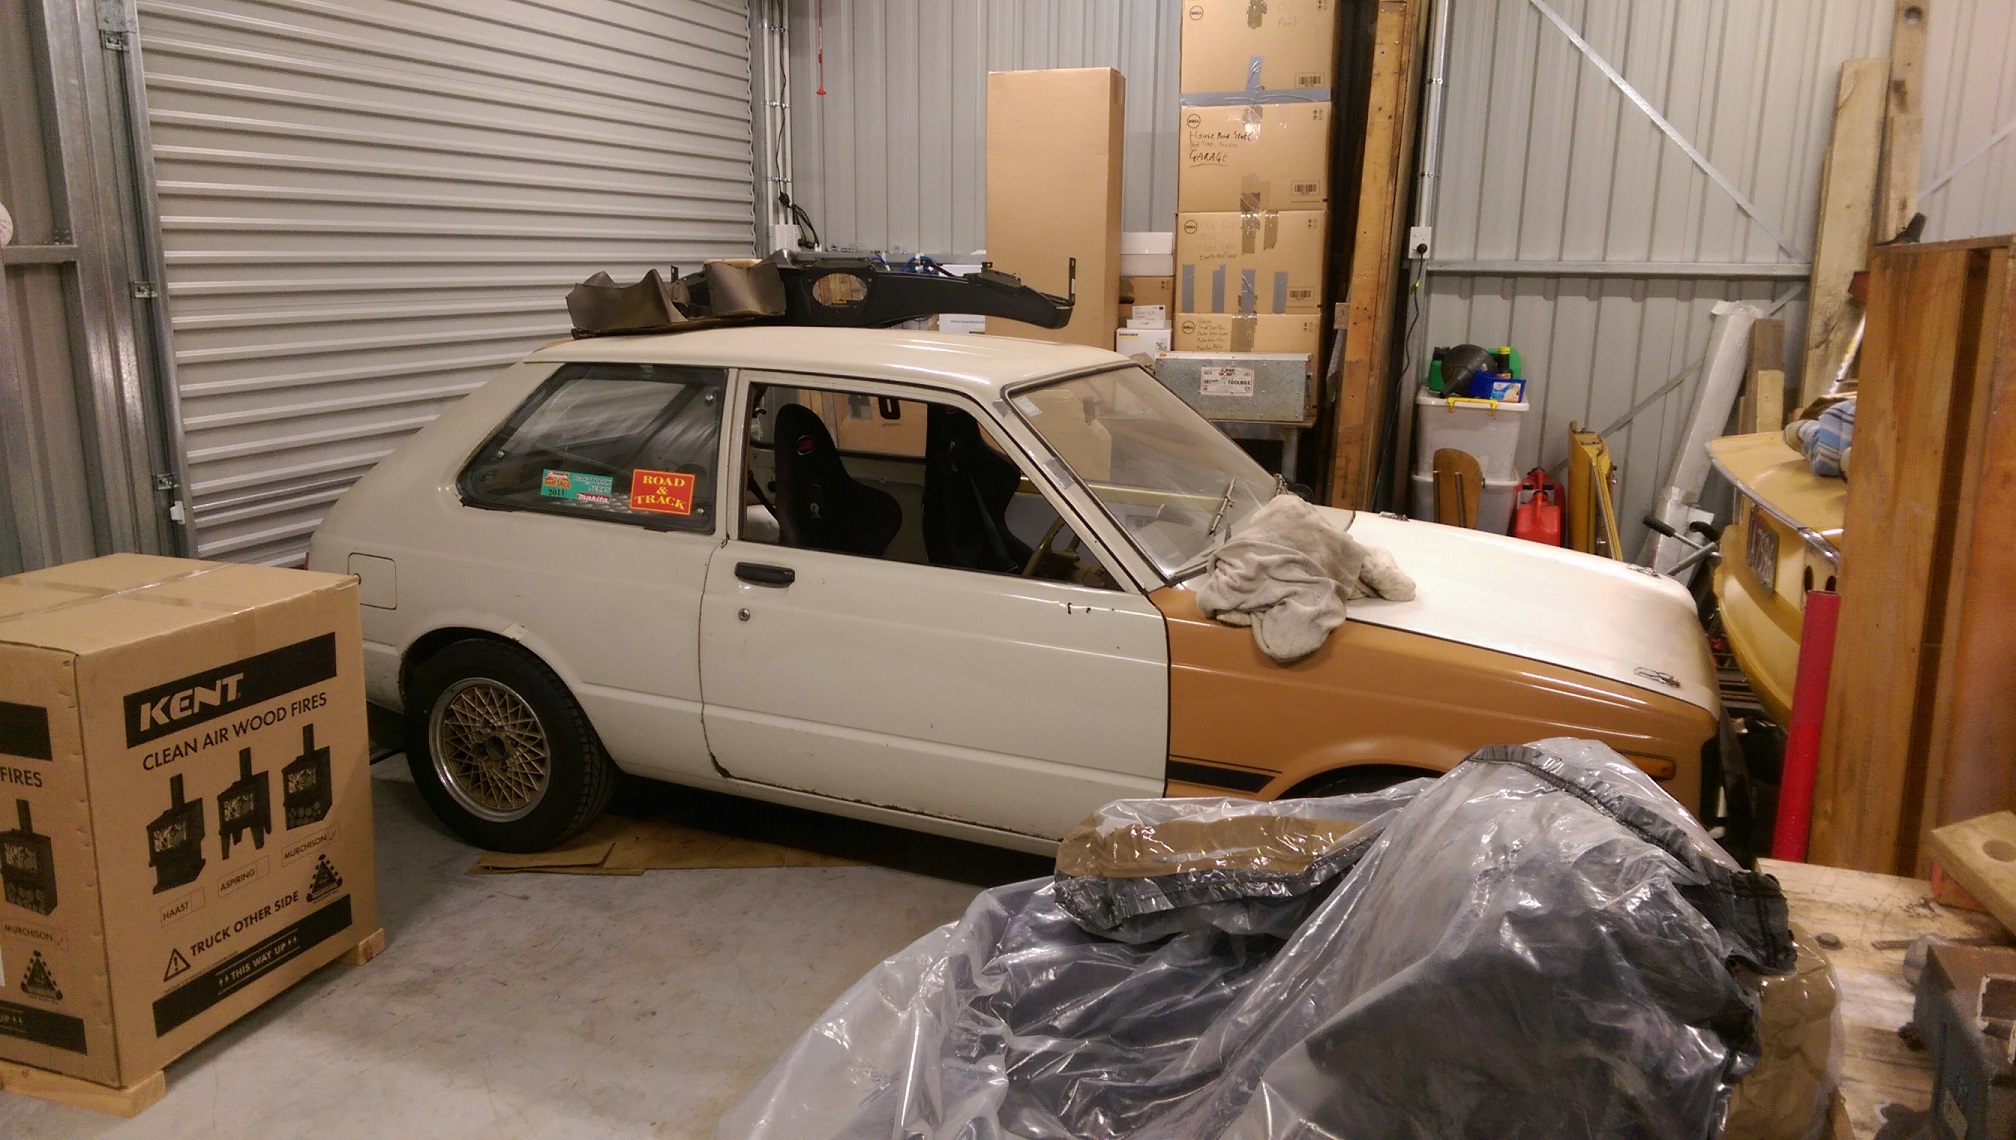
So I want to try get the STARVIA into a position where I can get it out of the garage. Maybe I can take it for a WOF so I can drive it!!
Unfortunately, the STARVIA is the first thing I put in the garage then I put all the rest of the crap in. The garage is full as because all my house stuff is in here and I am living in it while the house is built.
There is no driveway, there is just a ~30cm drop outside the roller door.
I want to avoid moving things outside for this exercise, it's wet and muddy and currently dark.
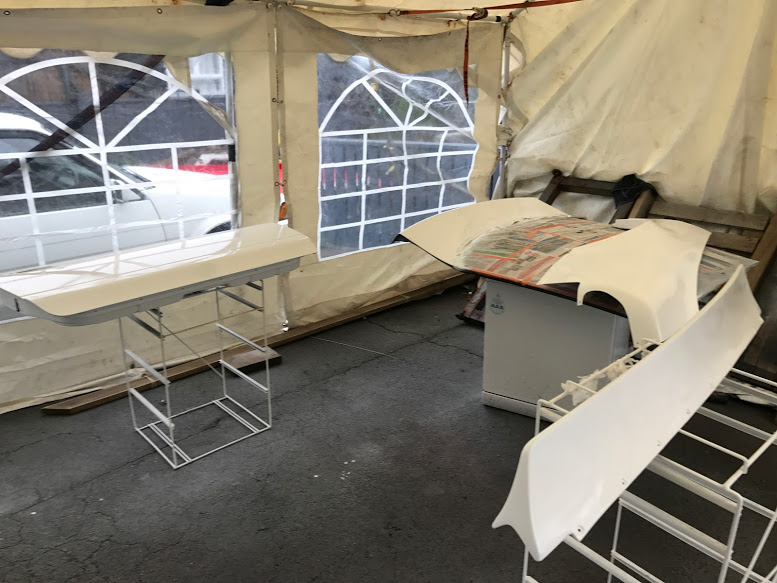
I'm standing on a bench to take these photos.
I think there is JUST enough room to fit the STARVIA behind the Triumph with its arse pointing out at the door.
I somehow need to get all the stuff behind the STARVIA to in front of the STARVIA. Then use the trolley jack to pull the front of the STARVIA around behind the triumph....
Problems:
That big box behind it is a fireplace on a pallet... it's fucking heavy. It's too wide to fit down either side of the triumph.
There is also a flue kit there, it's not heavy, but it's big.
The thing in the bag behind the bike is a lazyboy, it's not heavy, but it's a big and awkward.
The bench by the roller door is too heavy to move.
The triumph can't move, it's on axle stands with no suspension.
I need to lift the drill press onto the bench I was standing on without breaking my back.
Feels like one of those sliding puzzles with the one clear space and you have to move the different size shapes around.
-
2
-
-
Sort of on topic. I noticed Cheers Autos in Carterton is for sale. Bayleys ad says "because health". Anyone know if Julian Cheers is still going to be doing certs?
-
Used a bunch of wax and grease remover and a lot of rags and a little wire toothbrush and cleaned the underseal off around where I need to weld the firewall in.
I thought I might make a little patch for the floor to make me feel like I'd made some progress. But then I realised that I still needed to remove the underseal from the underside of the floor where I need to weld the patch in.
-
2
-
-
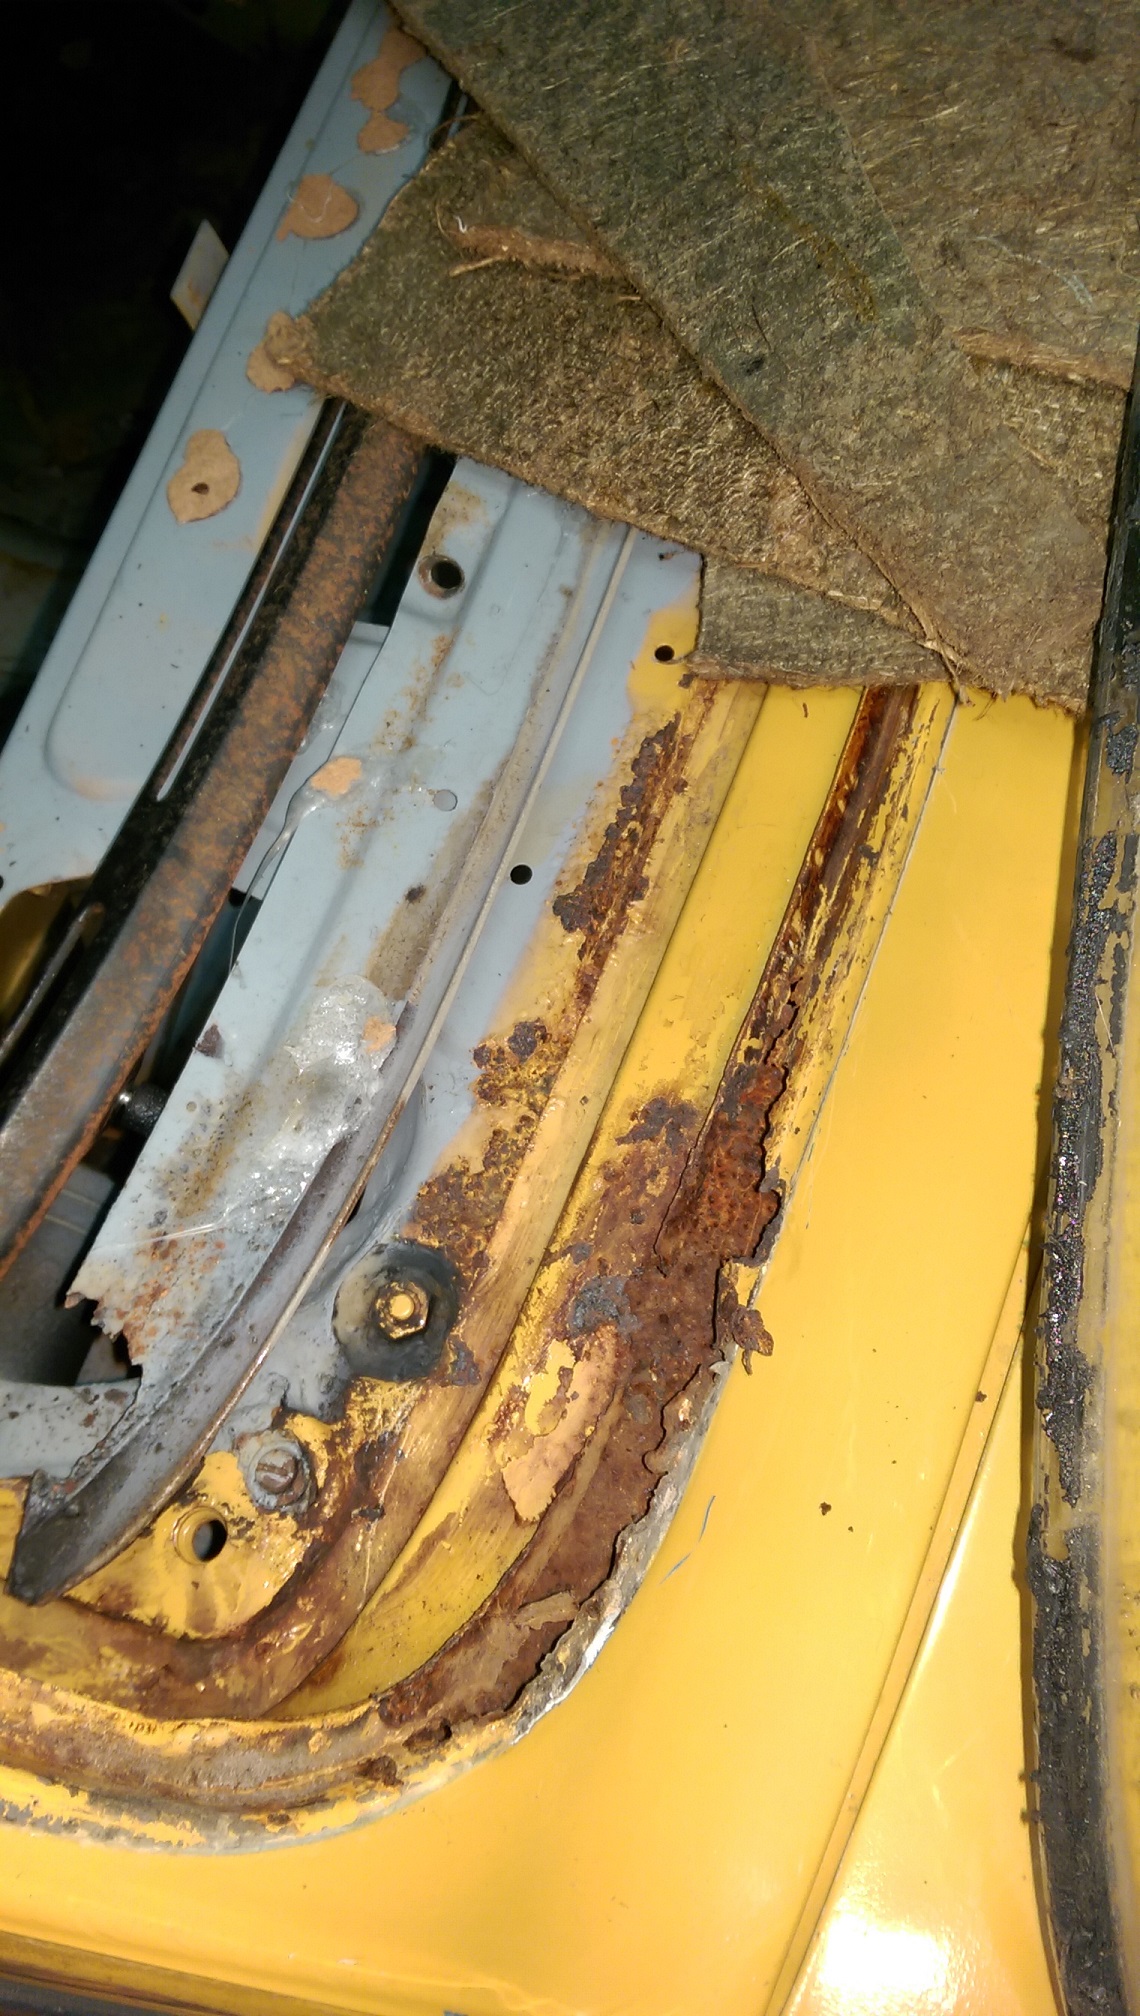
Removed the rear screen. Found some rust.
I knew there was something going on under there because where the trailing edge of the parcel tray meets the gutter around the boot, it's just crumbly rust. I thought I'd have to try repair that from underneath... inside the boot. Now I'm just going to cut this whole thing off, repair the parcel tray, then patch these panels and put them back on top.... well that's what I think I can do....
I also removed the roof lining and found a mouse nest!
And some more rust.
Same place on both sides. Maybe it gets condensation there and it just sits on the panel....
Also removed the front screen. Didn't damage the stainless trim! They used a shitload of mastic. No rust at the front. yay...
-
1
-
-
Woken up at 1am this morning by my shoulders reminding me about how unfit I am and the 3 hours of work I made them do last night. Fuuuuuu. Took like an hour for the ibuprofen to kick in and I could get back to sleep.
-
I wanted to remove some of the sound deadening bitumen pads from the floor because it was in the way of welding, it looks really horrible and I was looking for any more rust.
So I bought 5kg of dry ice today and removed ALL of the sound deadening after work. Was 3kg of the stuff. I think It took about 3 hours. Didn't find more rust. There is a mystery tear in the floor, like it was lowered onto something sharp...
I'll clean the remains up with solvent and wirebrushes and paint it with POR15.
There is a really ugly repair to the floor where the handbrake mounts. I want to cut that out and do a tidier job of it.
-
1
-
-
The paint job on this car really is half arsed. I think the chrome trim was removed, then GLUED back on, but they didn't bother removing the lights or grill.
Last night I started removing the fuel tank and drained it. I removed it the rest of the way tonight. I think I found out why the fuel gauge didn't work. The sender float doesn't.... float, it's half full of fuel. Inside of the tank looks to be surprisingly good.
I also removed the rear lights and the rear loom. And cleared out all the carpets and stuff that I had just put in the boot.
I really need to start putting metal back into it.... taking parts off to look for rust doesn't feel like progress.
-
On 8/9/2017 at 18:40, oldmatedan said:
Haha nah I've had it just over 18months
Only just got the internet on at home lol
Drove it from mastyton to Hampton an back
For toyotafest
Jeeez, and I was thinking you were some kind of rust demolishing god for getting from rusty mess to metal in like... a week!
-
3
-
-
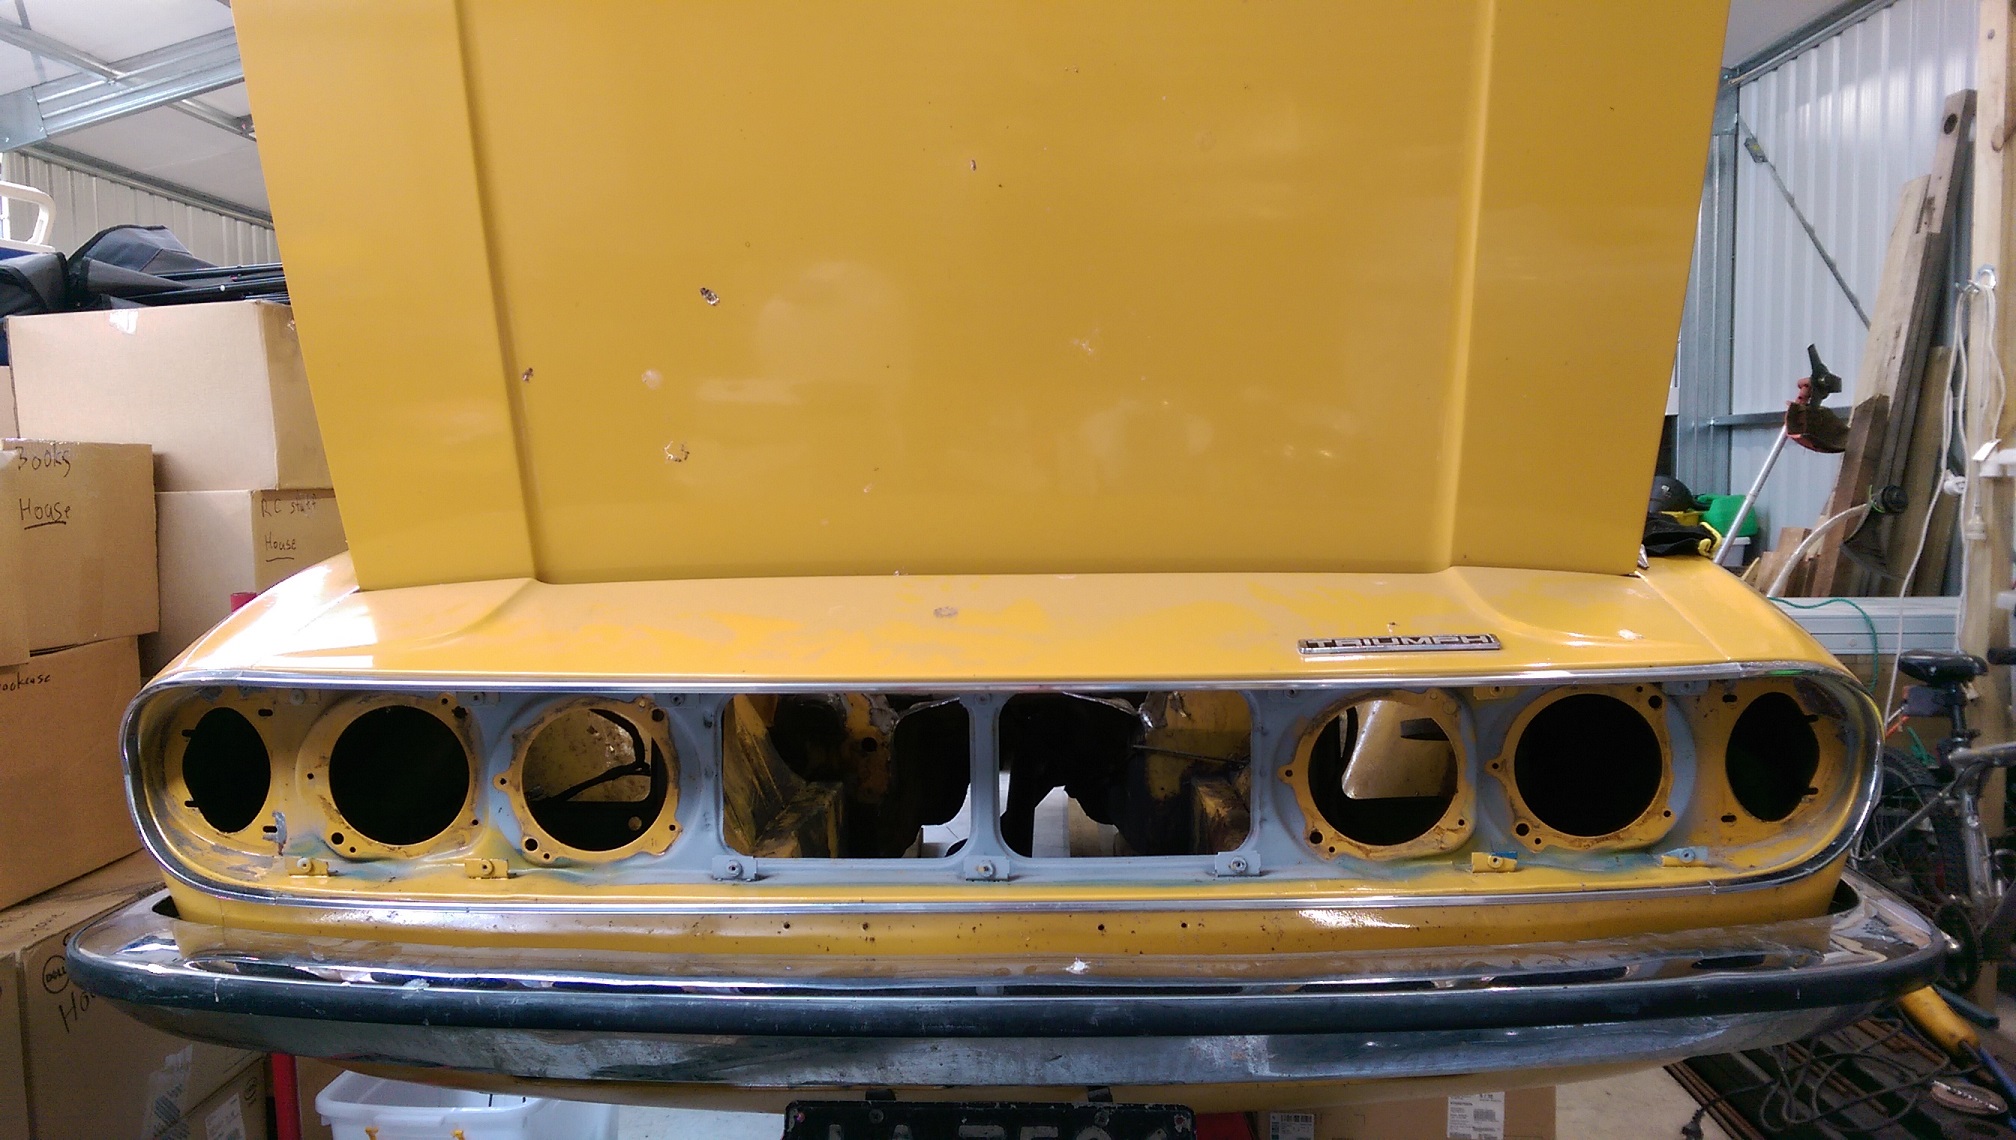
Not loads of progress...
Took the lights and grill out. Had to drill out some rivets to remove the headlight bowls. Didn't find any rust there!
Used my mallet as a dolly and straightened this flange, just because. Scroll up to see how wobbly it was.
Used the flappy sanding wheel on the grinder to remove the old welds.
I'd like to go nuts in the engine bay with the paint/rust removal abrasive pad on the grinder, but the dust goes everywhere. Maybe I need some drop cloths for my 'kitchen'.
-
1
-
-
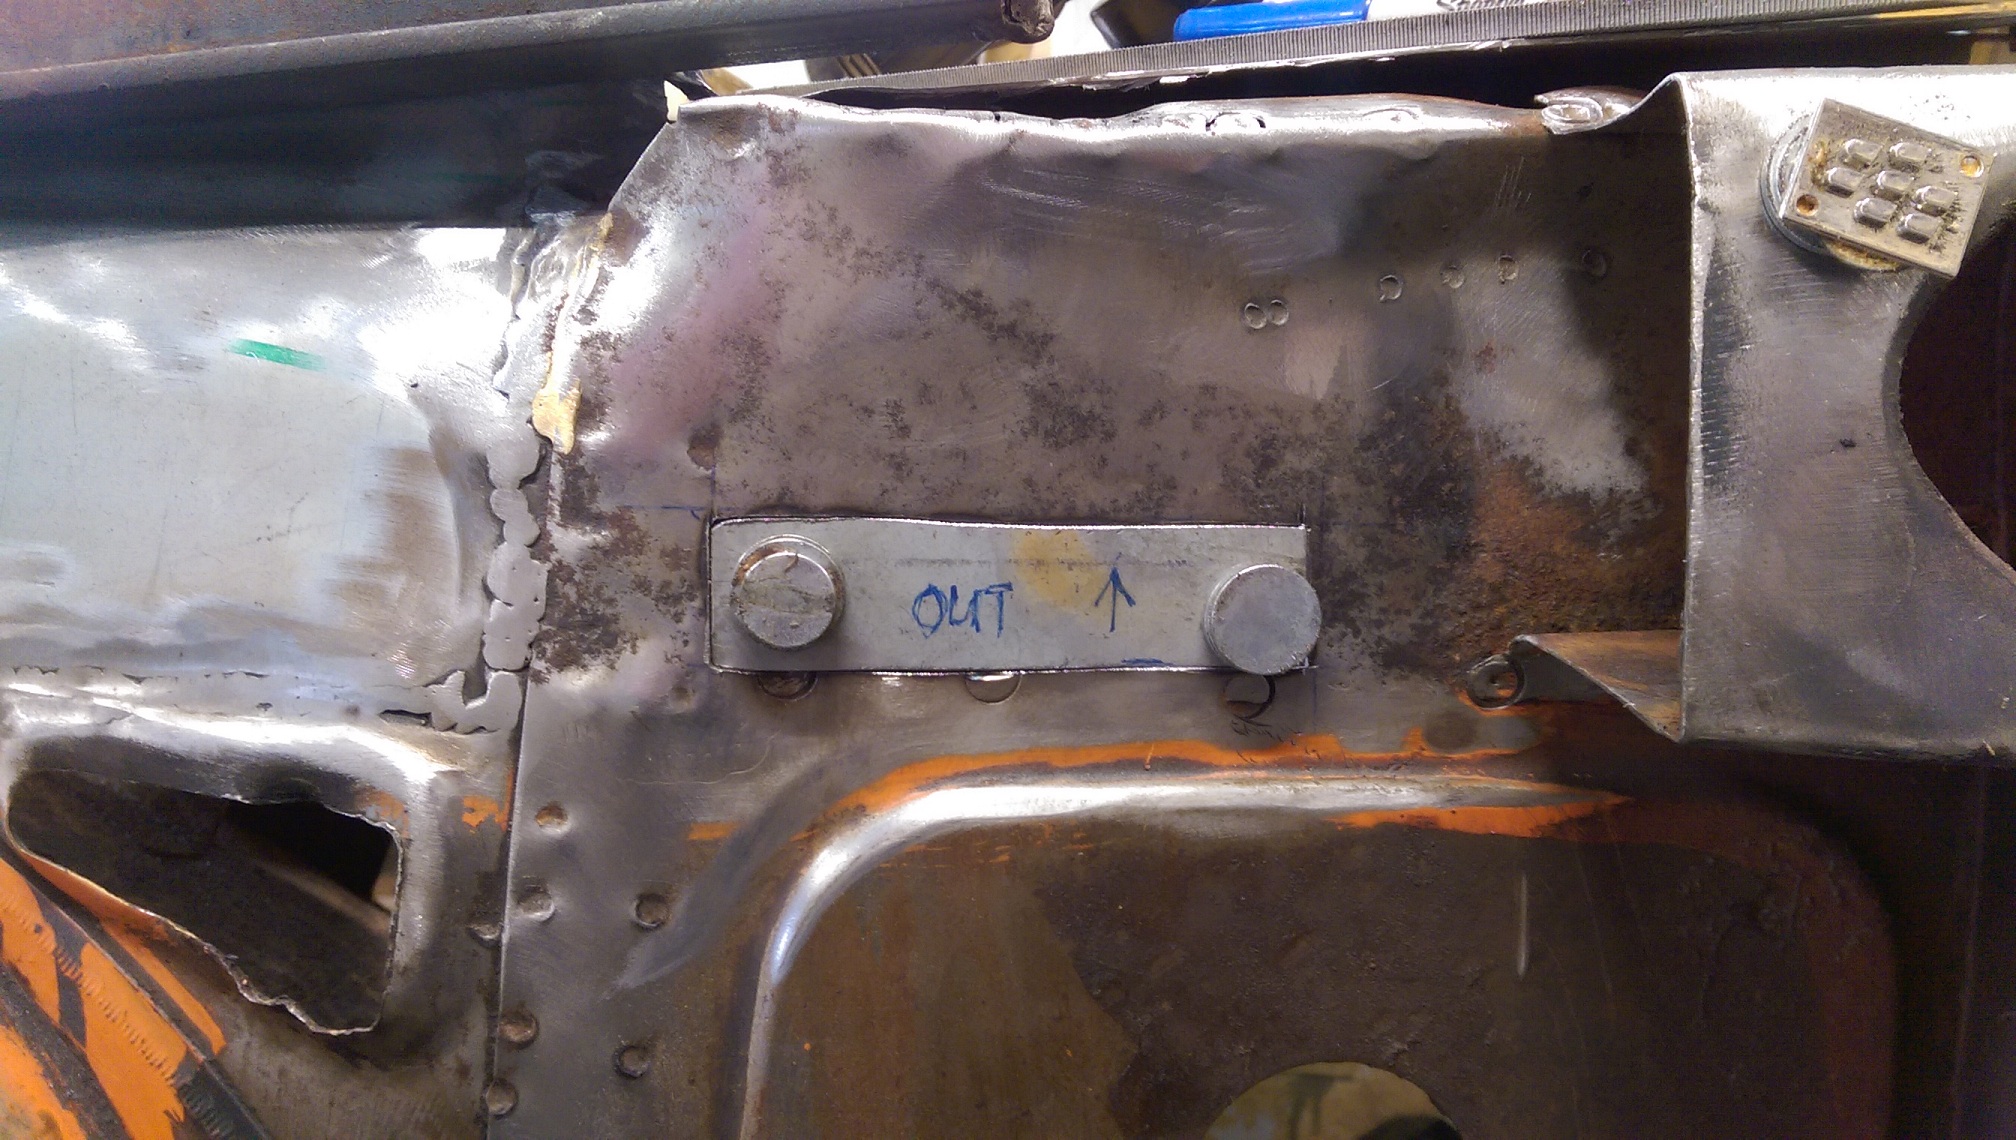
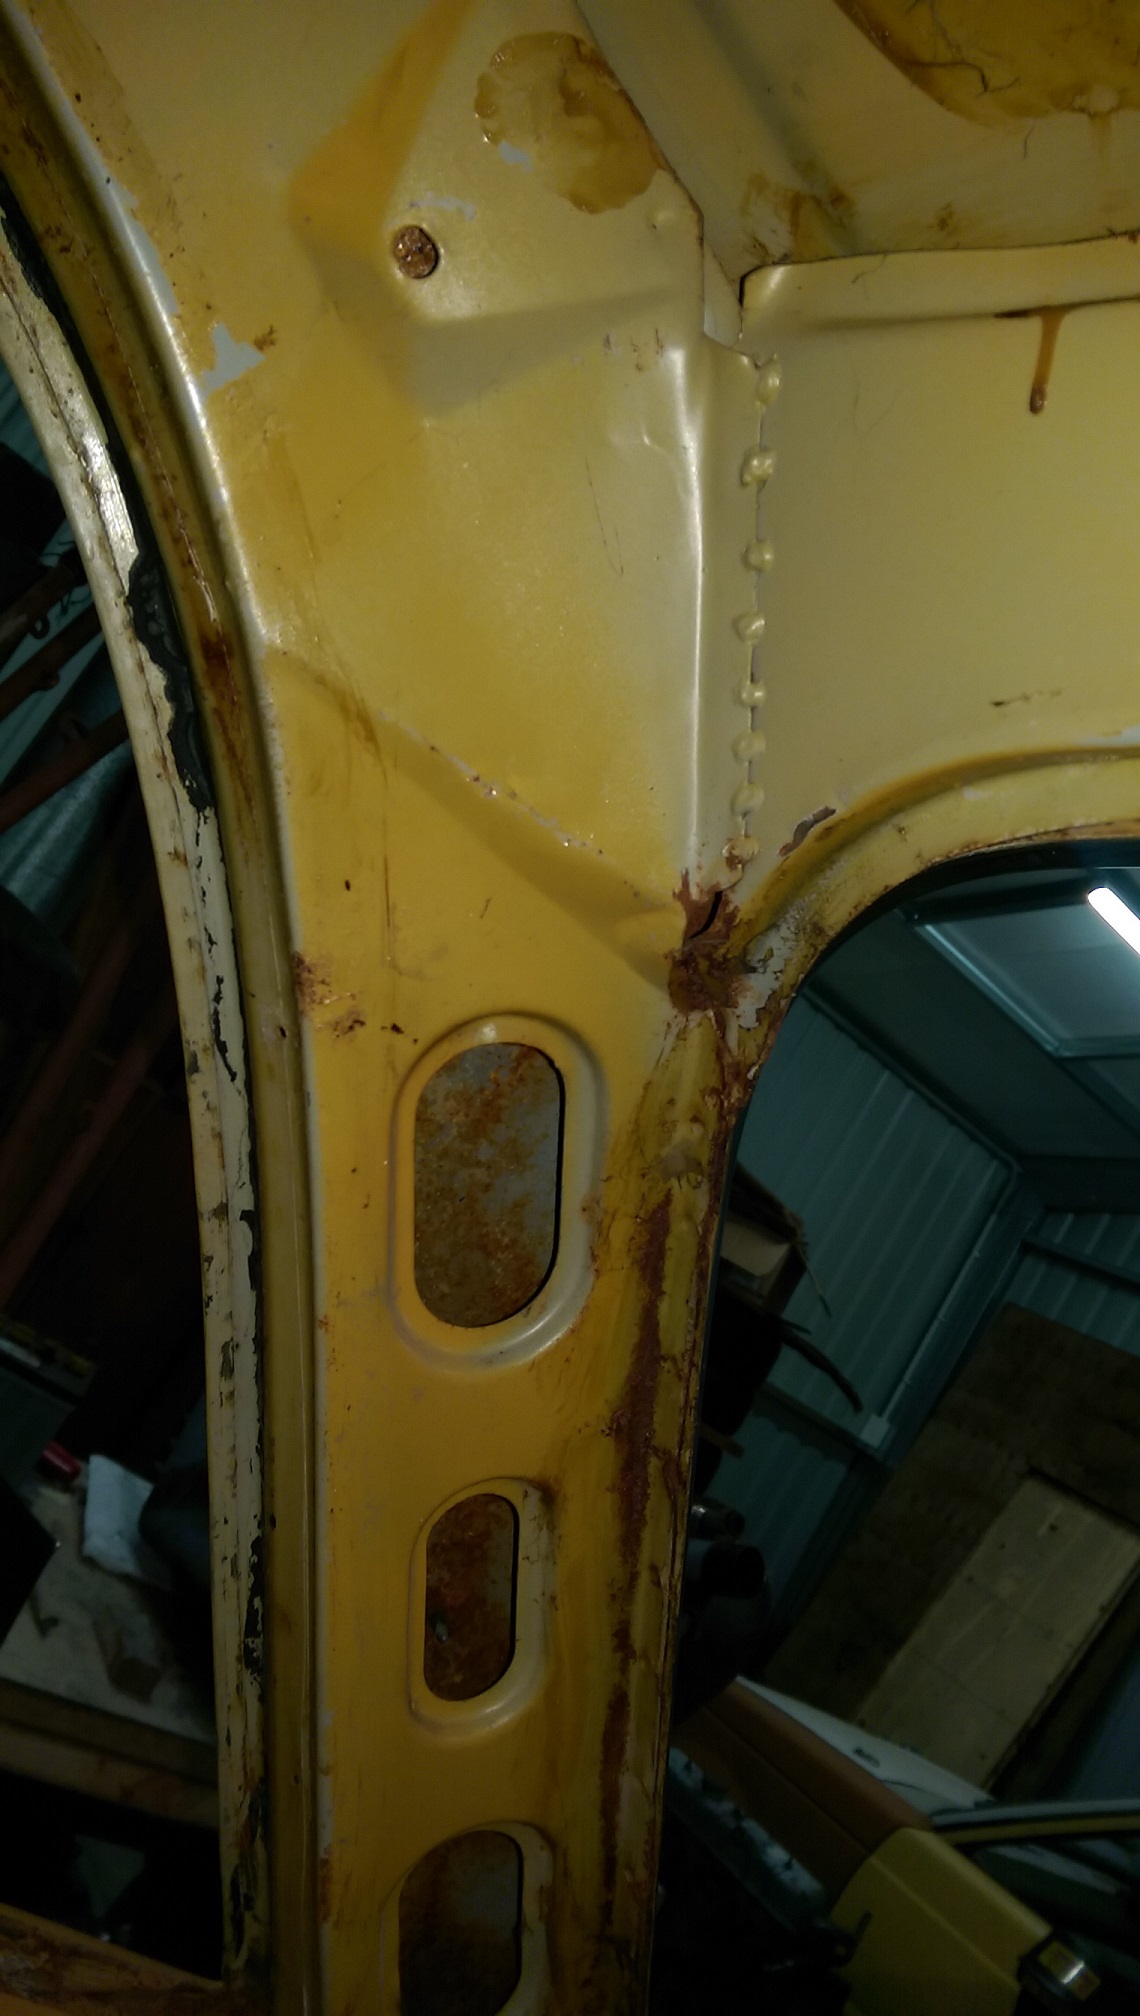
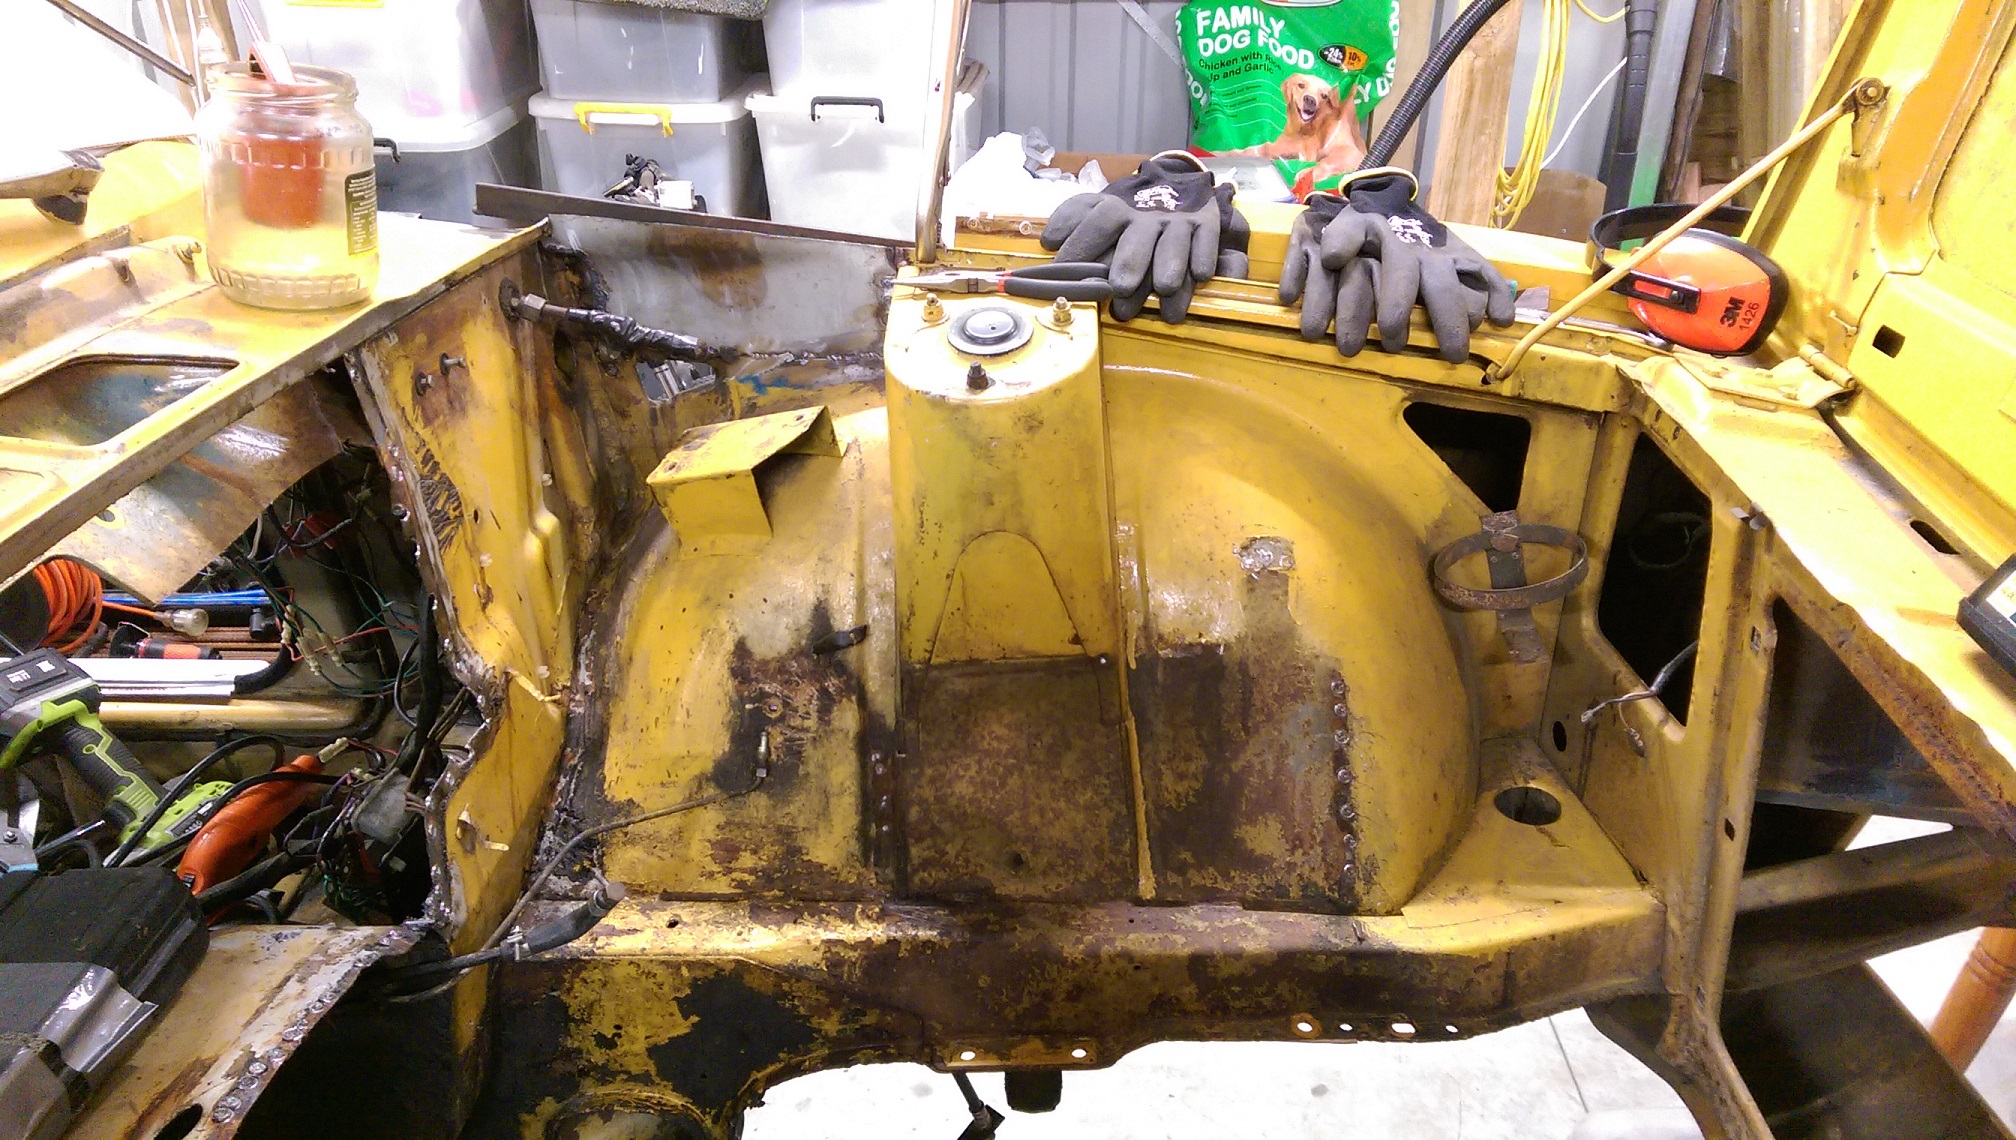
Drilled out the spot welds to separate the two parts of the firewall panel. The smaller panel needed to come off for access the weld the bigger one on.
Removed the remains of the old firewall. And removed the brake, clutch, pedal box and steering column. And scraped some shitty old seam sealer off.
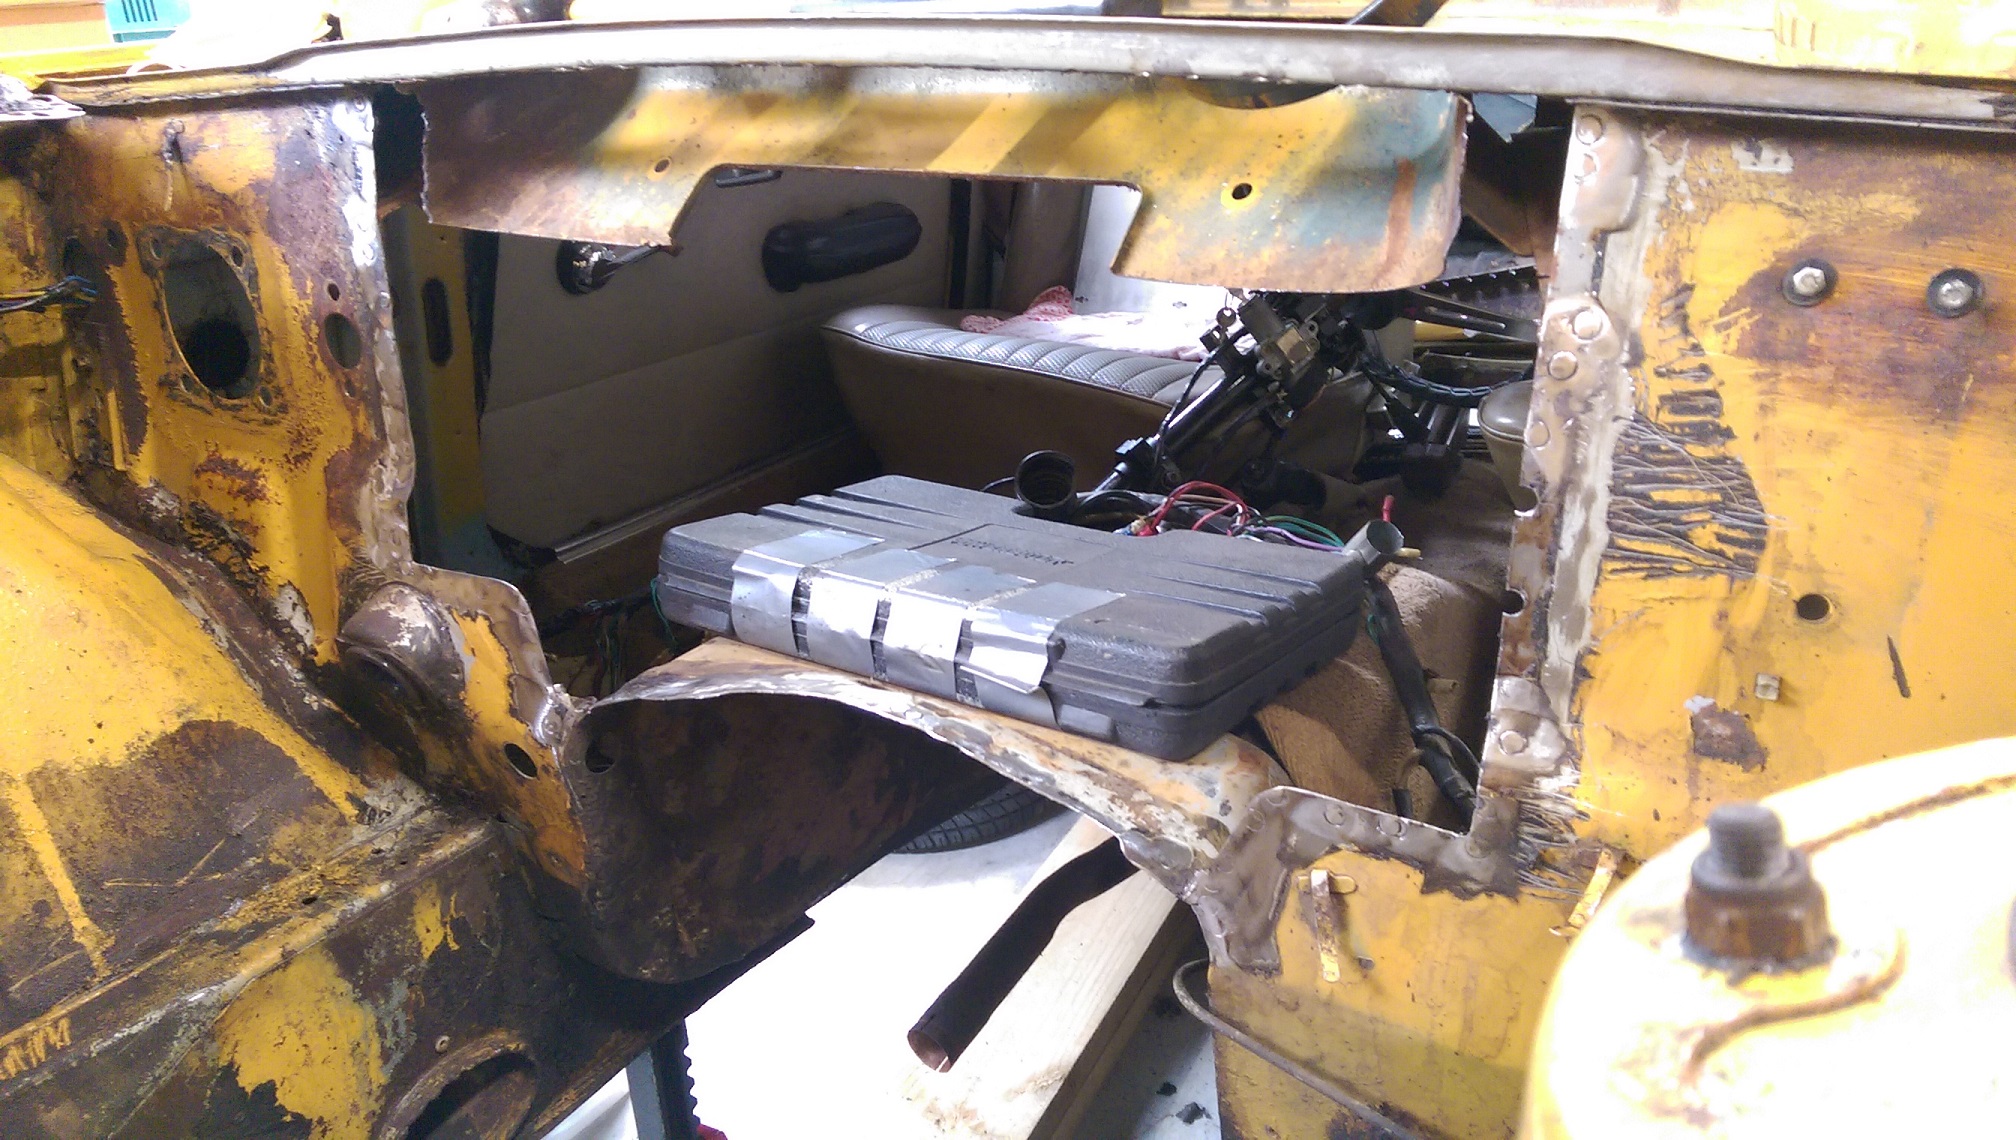
Removed the battery shelf to make more room. I think I will bare metal the engine bay cause all the paint is fucked, then seam seal all the joins cause most joins are not sealed and the stuff that is is horrible tar stuff.
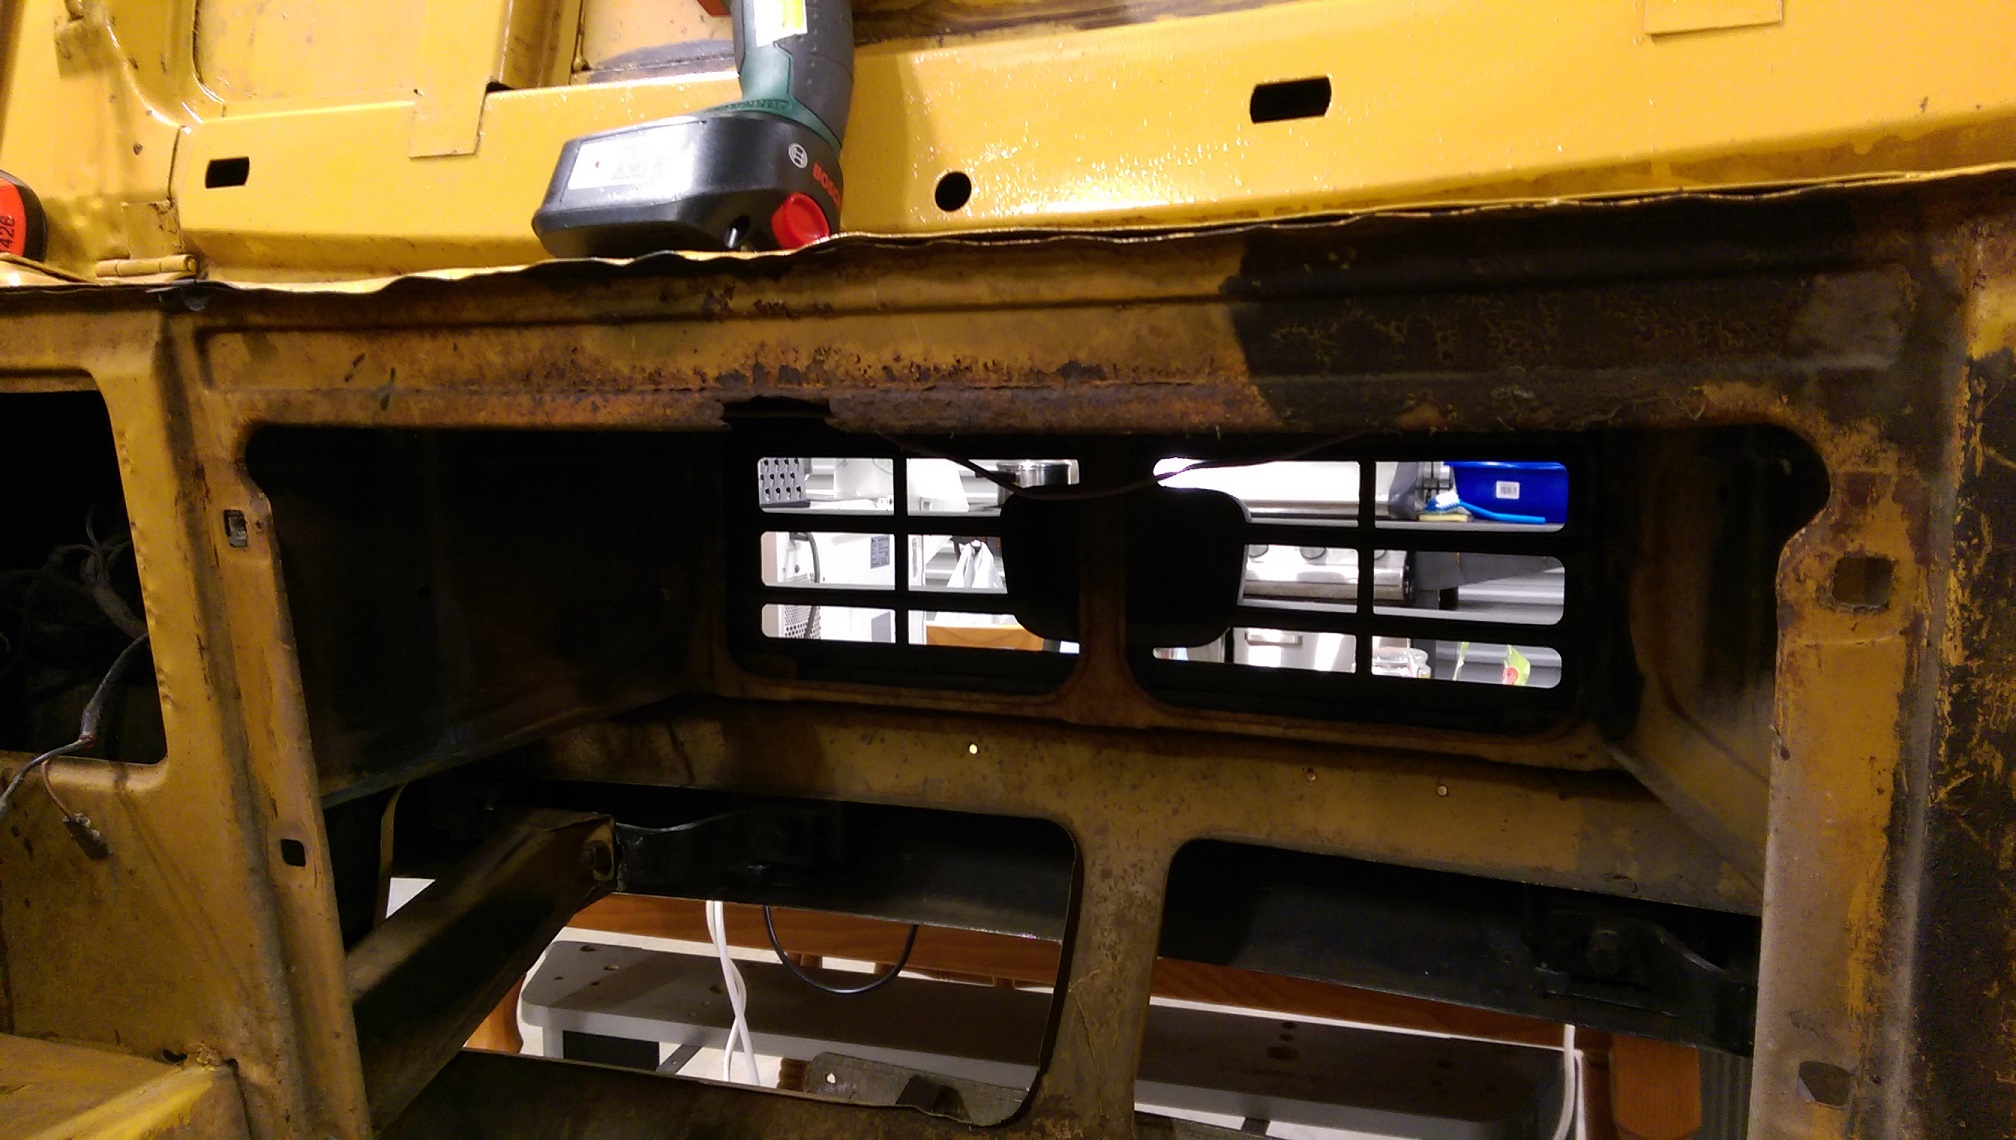
Found some more rust after removing the radiator.
-
5
-
-
1 minute ago, scooters said:
yea it's interesting you say that. A alloy skin aircraft is full of bloody seams!
Maybe it's not such a problem on aircraft. You would hope they have much tighter seams than a car.
-
1
-
-
Isn't aircraft stripper just paint stripper with dichloromethane as the active ingredient because it doesn't react with aluminium. It also works real good to clean carbon off pistons without scratching/damaging them BTW.
Supercheap paint stripper has dichloromethane in it. And ammonia, I think that's what makes it gloopy and stick to surfaces, and STINK. It's horrible stuff, don't get it on your skin, even the tiniest speck burns. Put down lots of news paper to catch the stripper and paint that comes off.
Apparently it's not a good idea to use it on seams as it can seep in and fuck up the new paint later.
-
Before I did that, I removed the underseal used as seam sealer, so I could located the spot welds. Underseal...Dicks. I used petrol, a rag and a 3M paint removal thingy on the drill(on go slow so I didn't spray it everywhere). My choice of solvent was possibly not a fantastic idea cause I had to put all the rags outside and vent the gara...bedroo...kitche...lounge, by opening all the doors for a while, to clear the fumes.
-
2
-
-
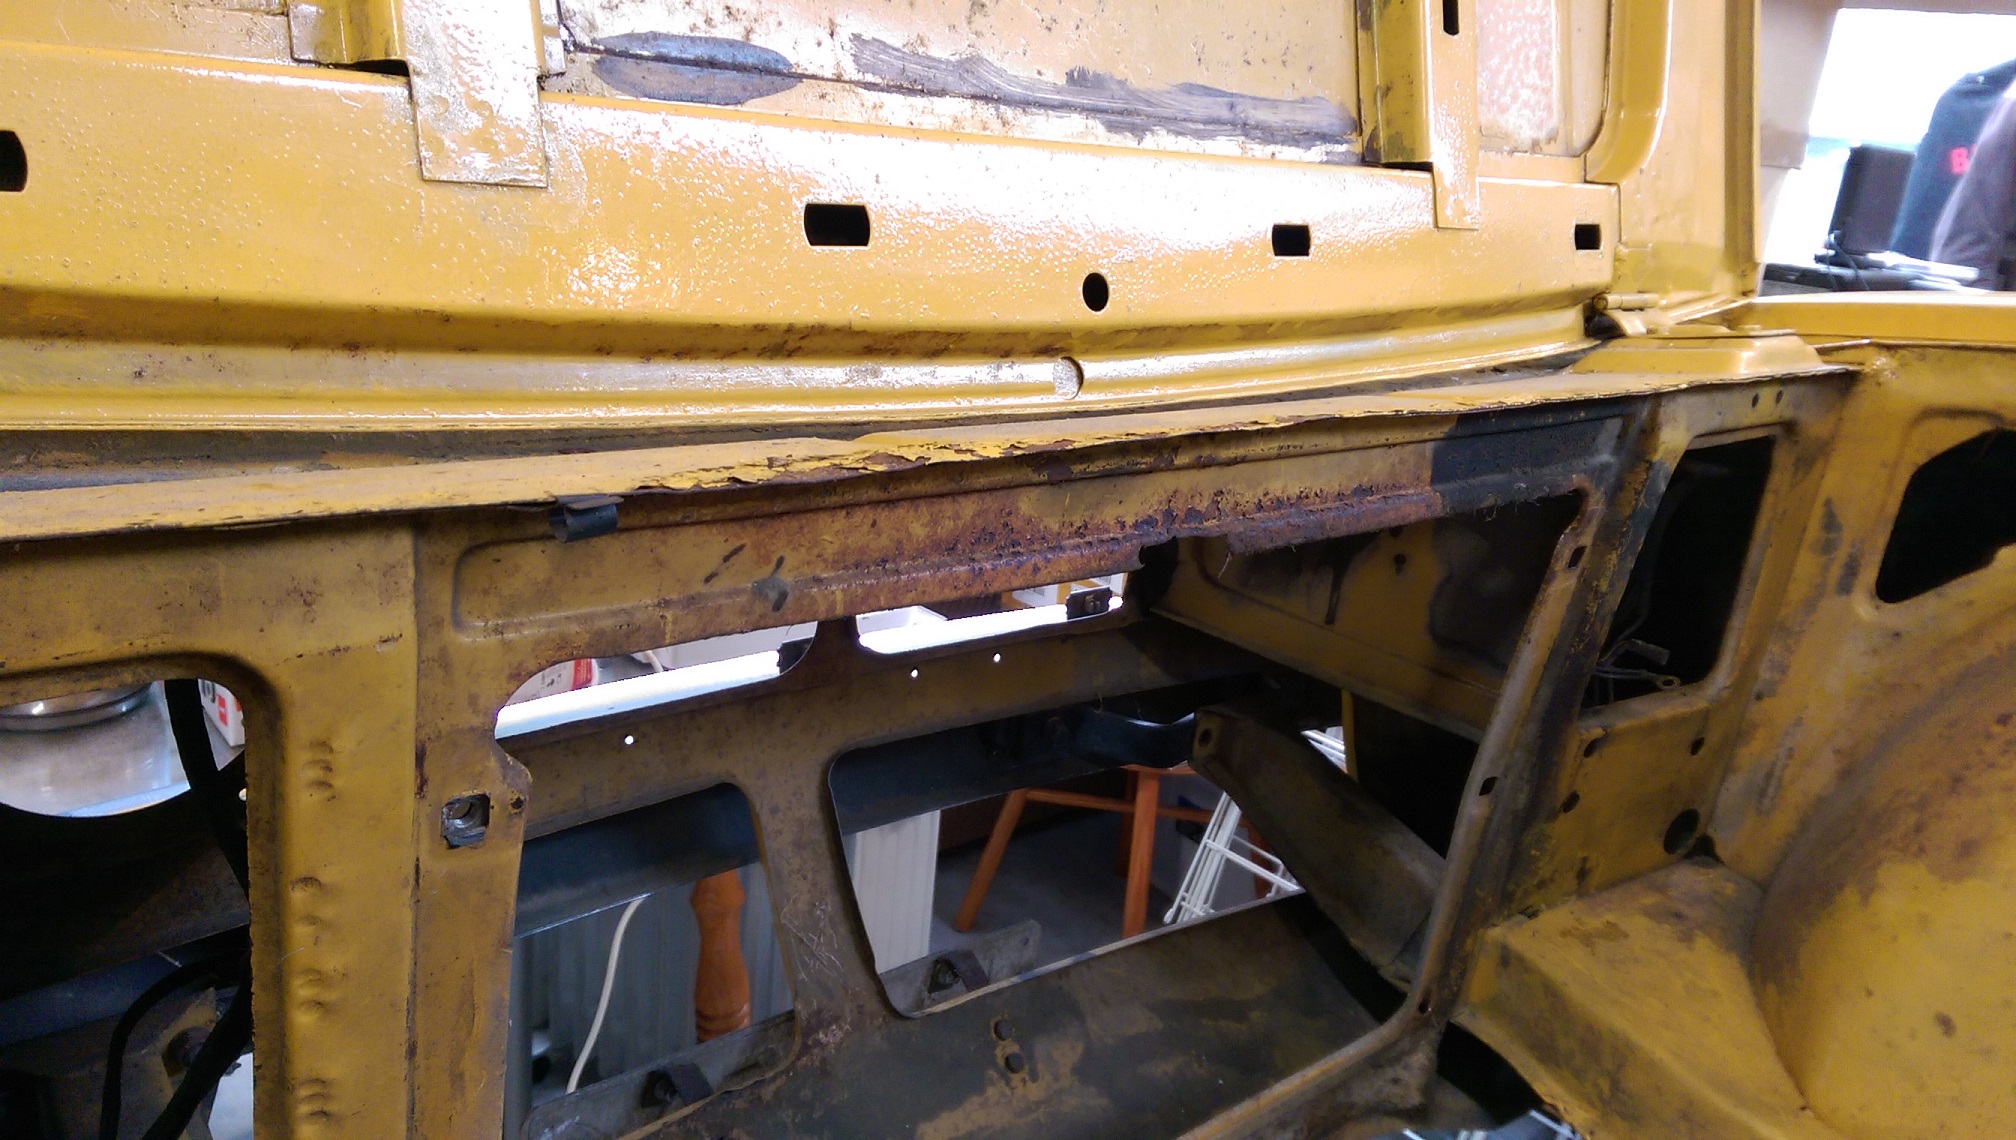
Since the engine was out... And it's the last day of my 4 day weekend. I thought I'd remove the rusty firewall.
I still need to remove this bit, I couldn't get in with the spot weld drill, so I just cut it off.
The air box thingy for the heater was rusted up the sides too. Fortunately my donor panel does have those bits, but not all of the air box thingy, so I will have to weld it together.
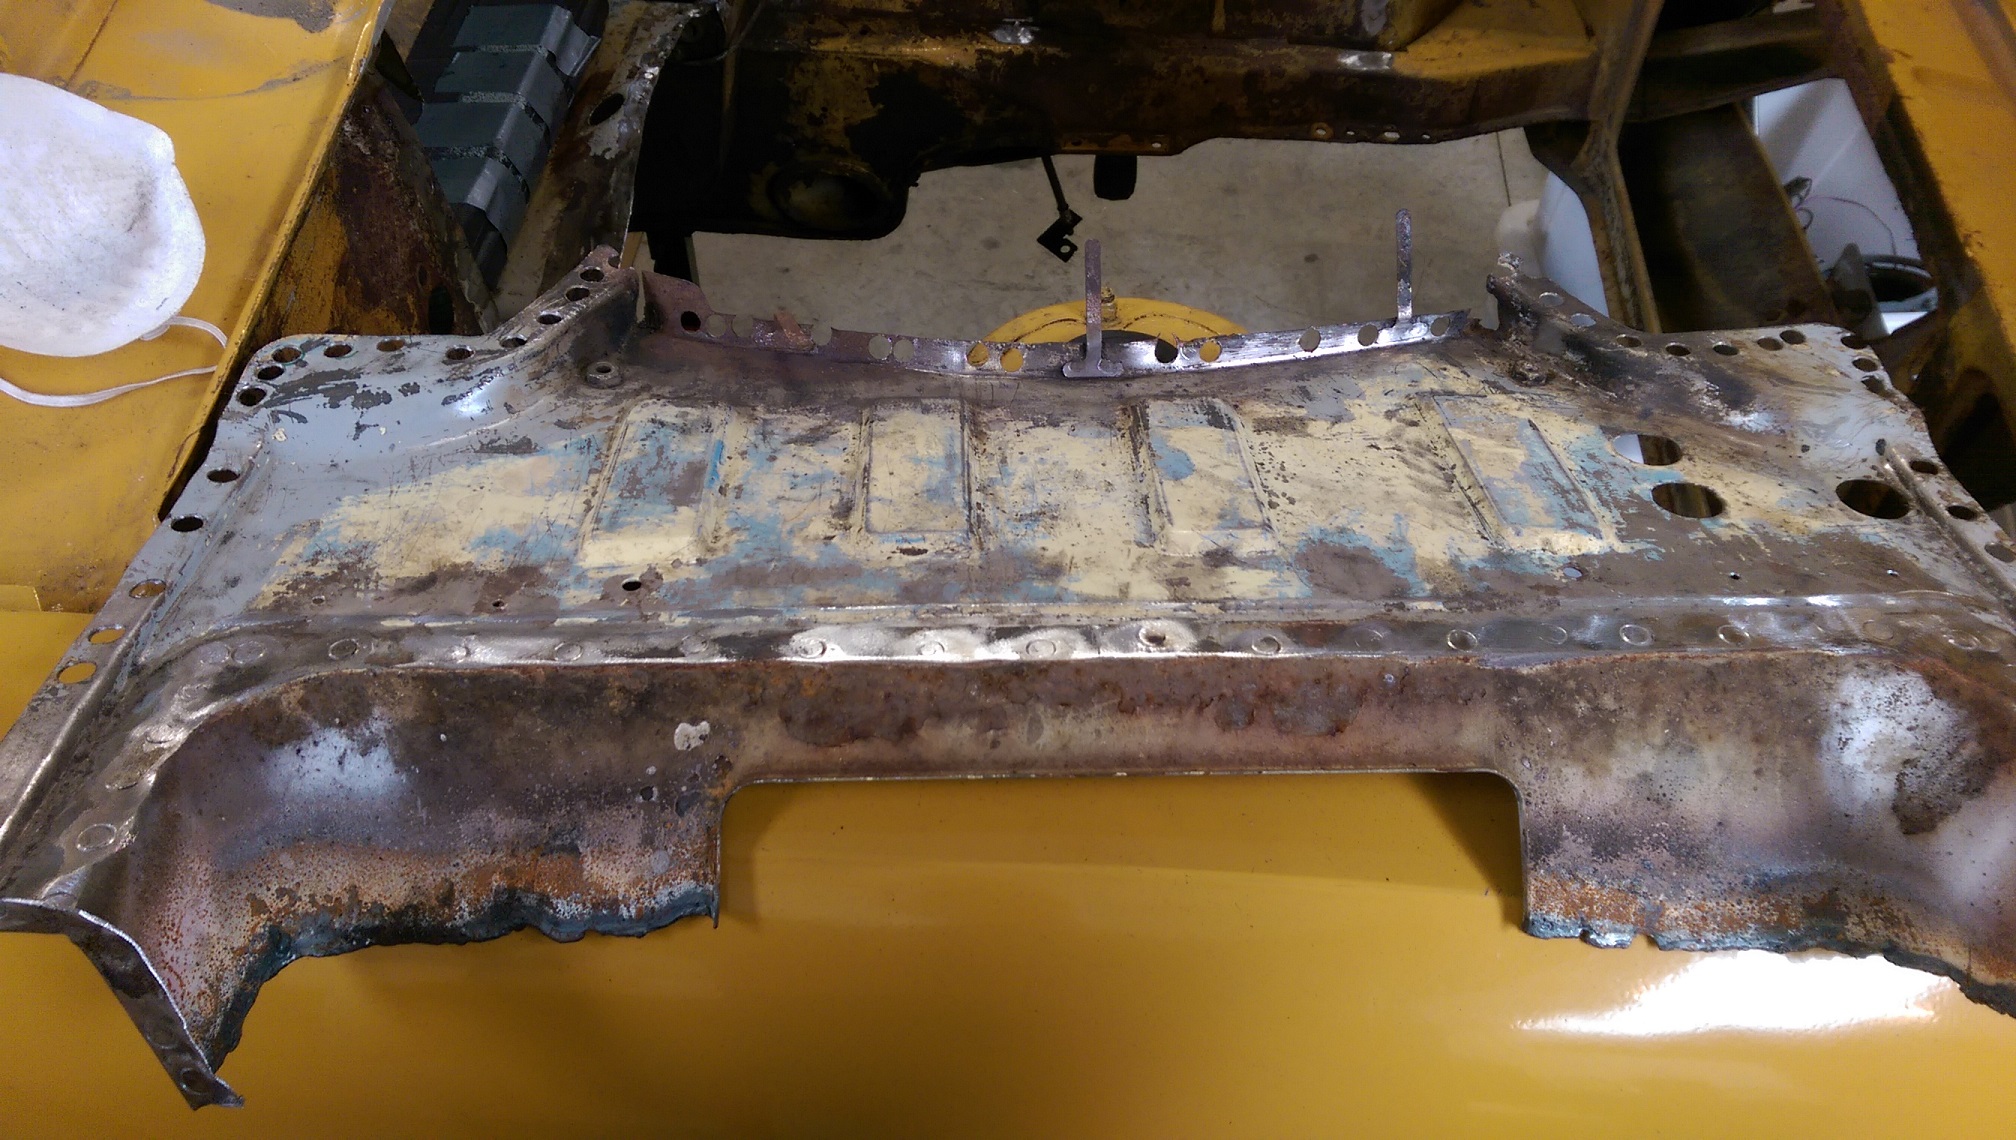
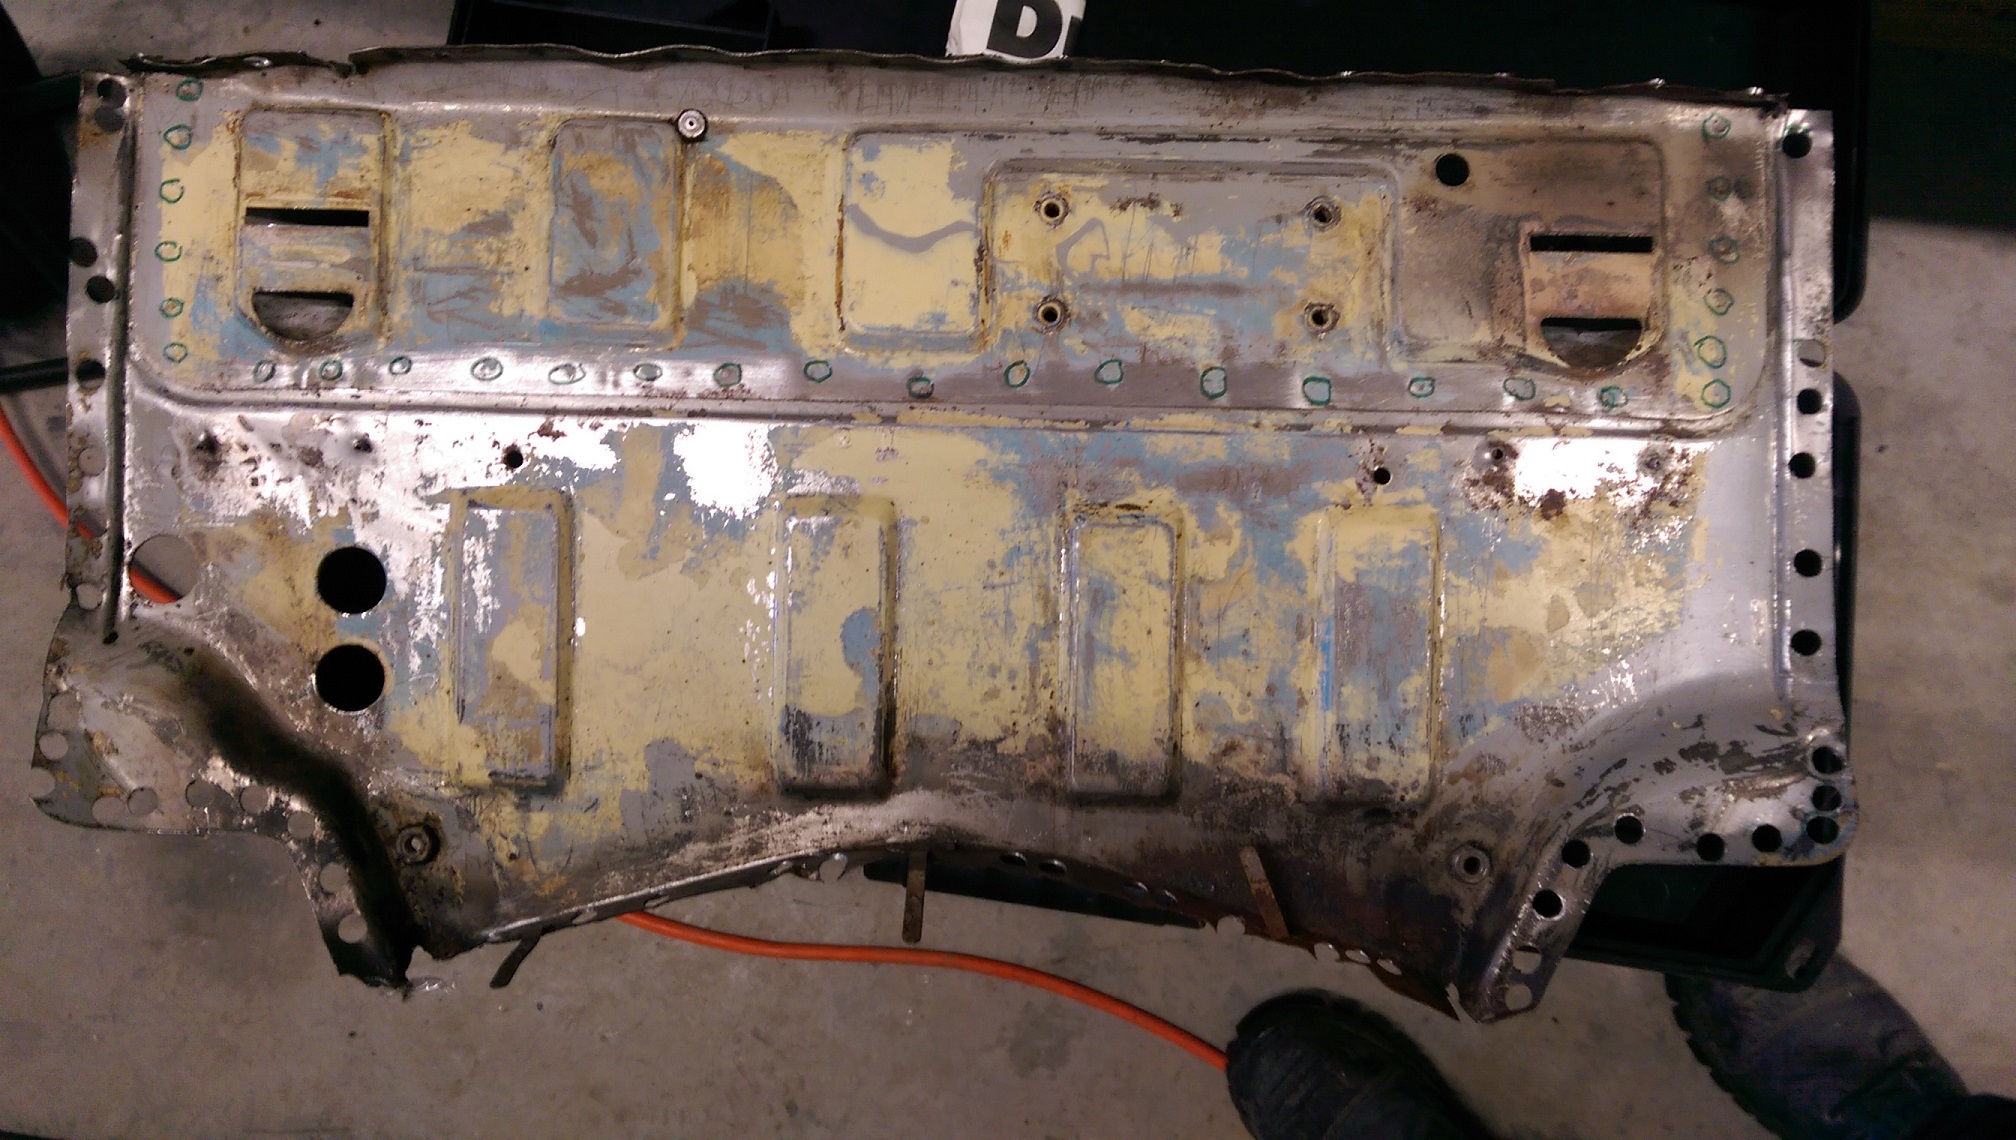
Aaaand the donor panel. The edges need some hammering to straighten them out. I'll need to drill out all the circled spot welds to remove the top panel so I have access to weld this to the remains of the air box thingy. I'm considering changing the bottom flange so it's not a shelf for water and crap to sit on. I would bend the end of the tunnel up, to make a flange and cut the flange off the firewall. It will also give me a tiny bit more clearance off the back of the engine.
-
2
-
-
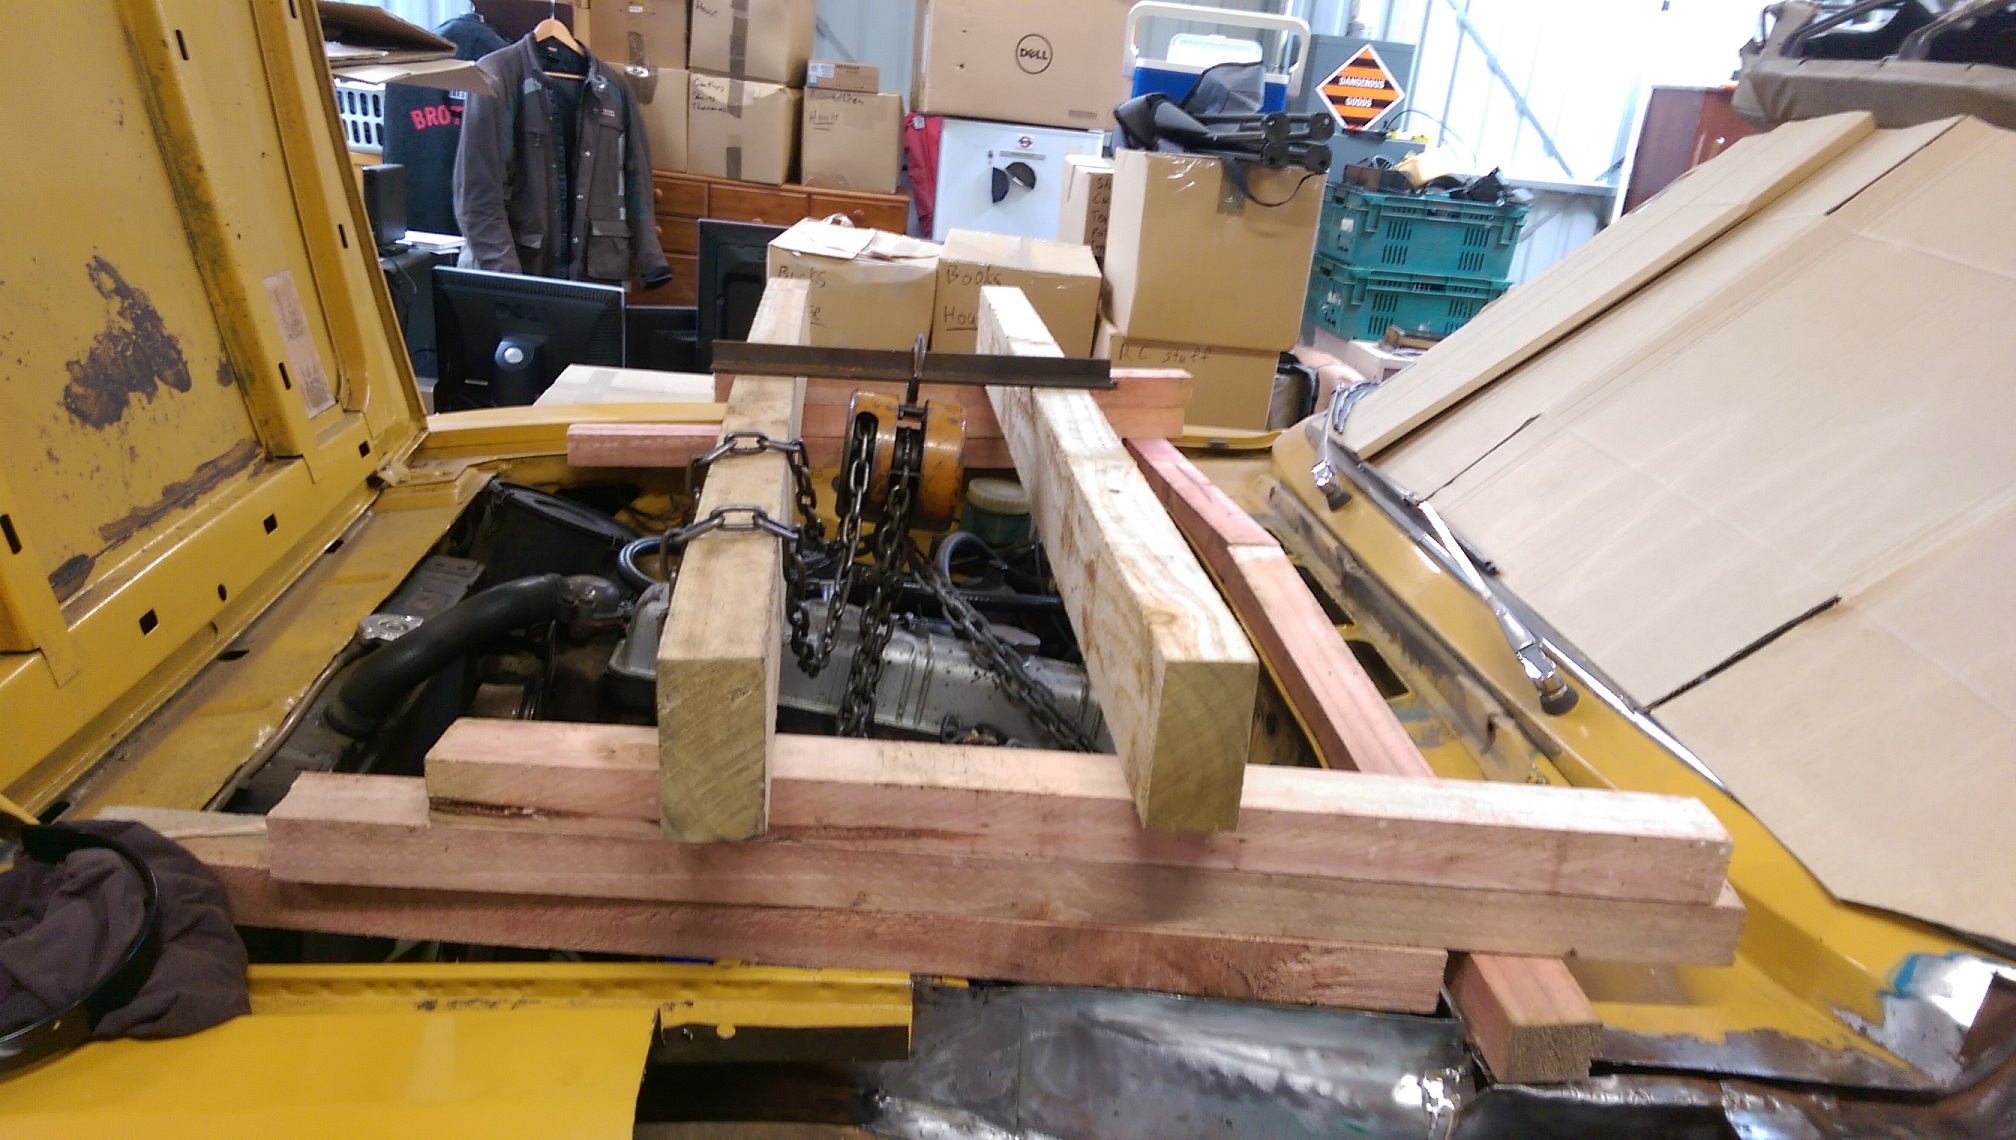
I am having a 4 day weekend. So... instead of doing my laundry yesterday.
The bits of wood spread the load enough that nothing bent. Most of the weight is on the strut towers.
And out. Much easier to access the rusty firewall now.
There was just enough room to roll it out from under the car, I had to take the gear lever off though.
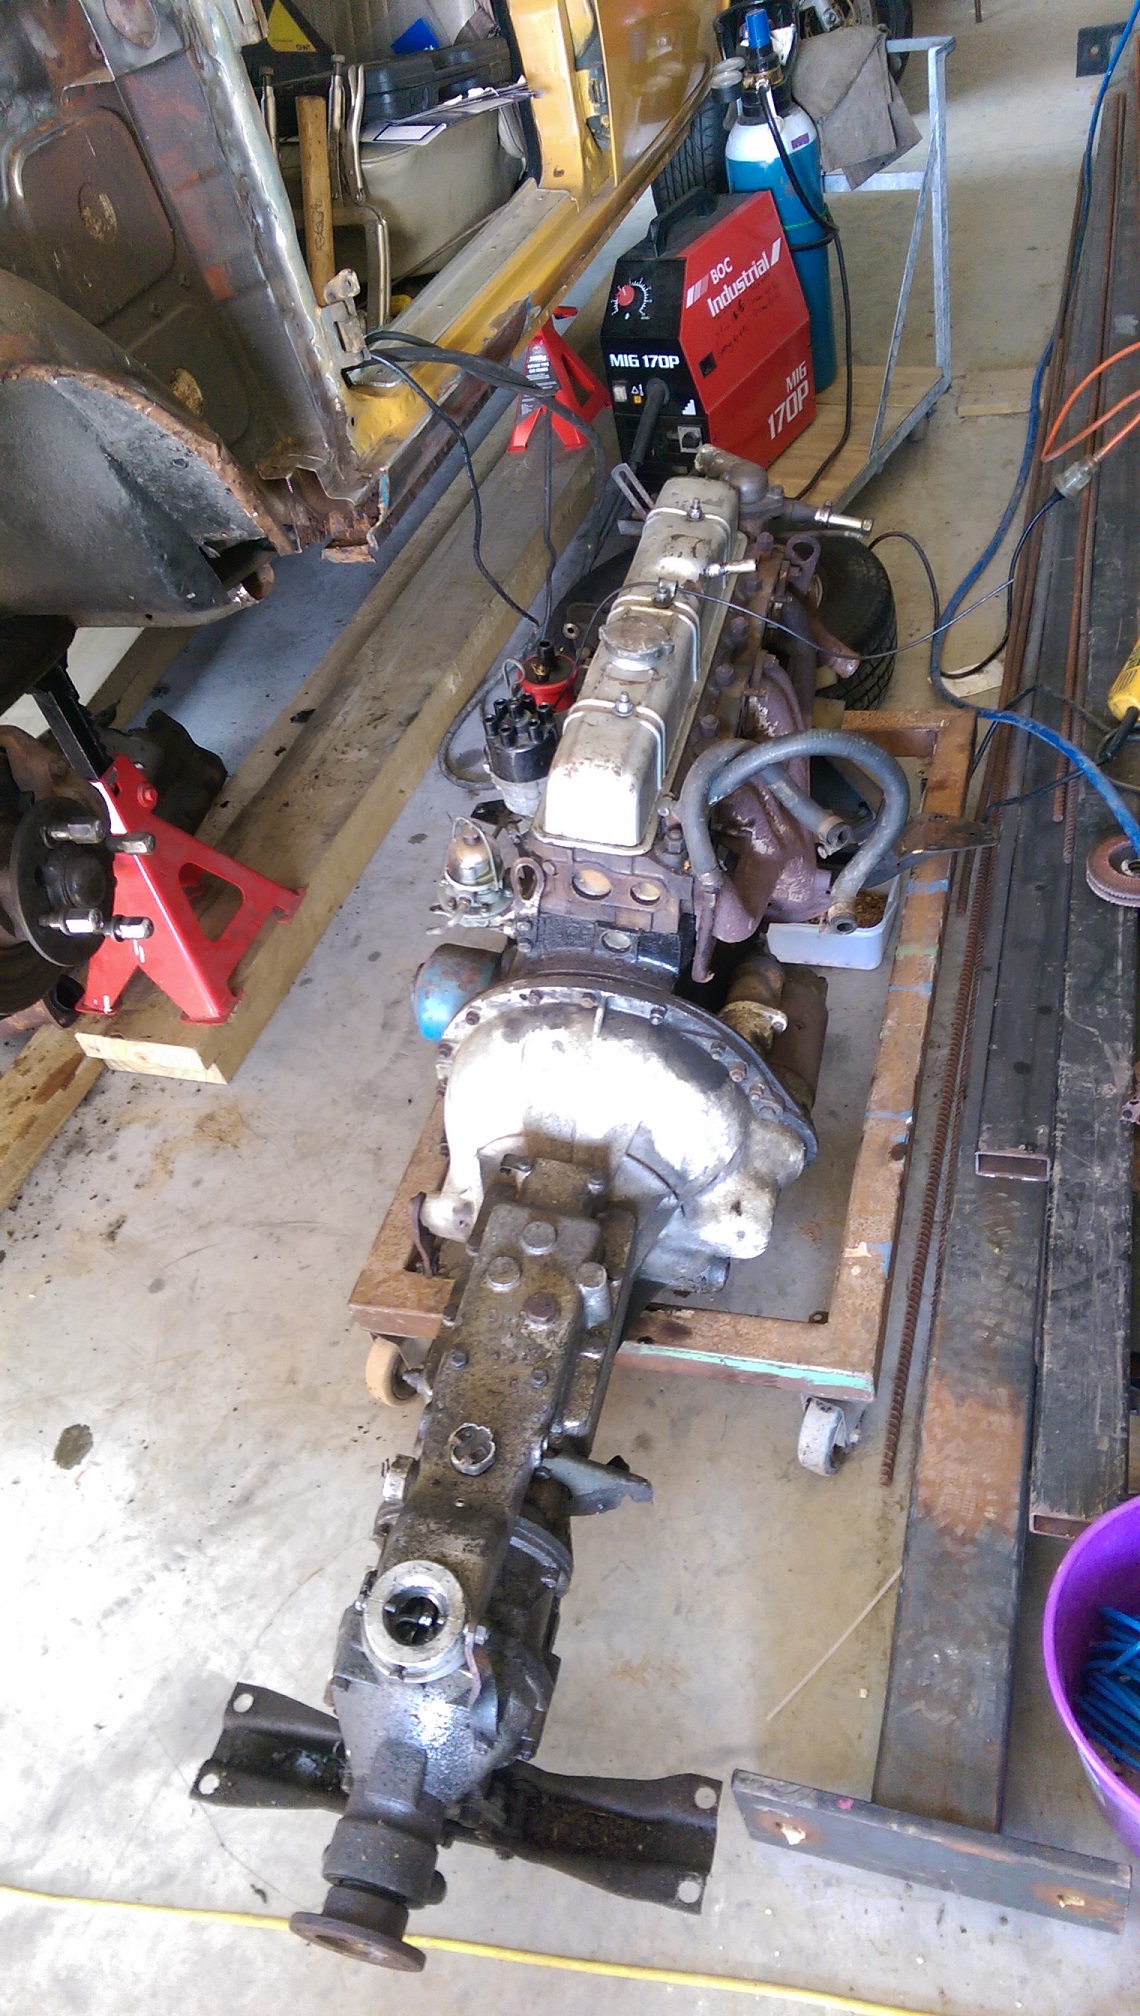
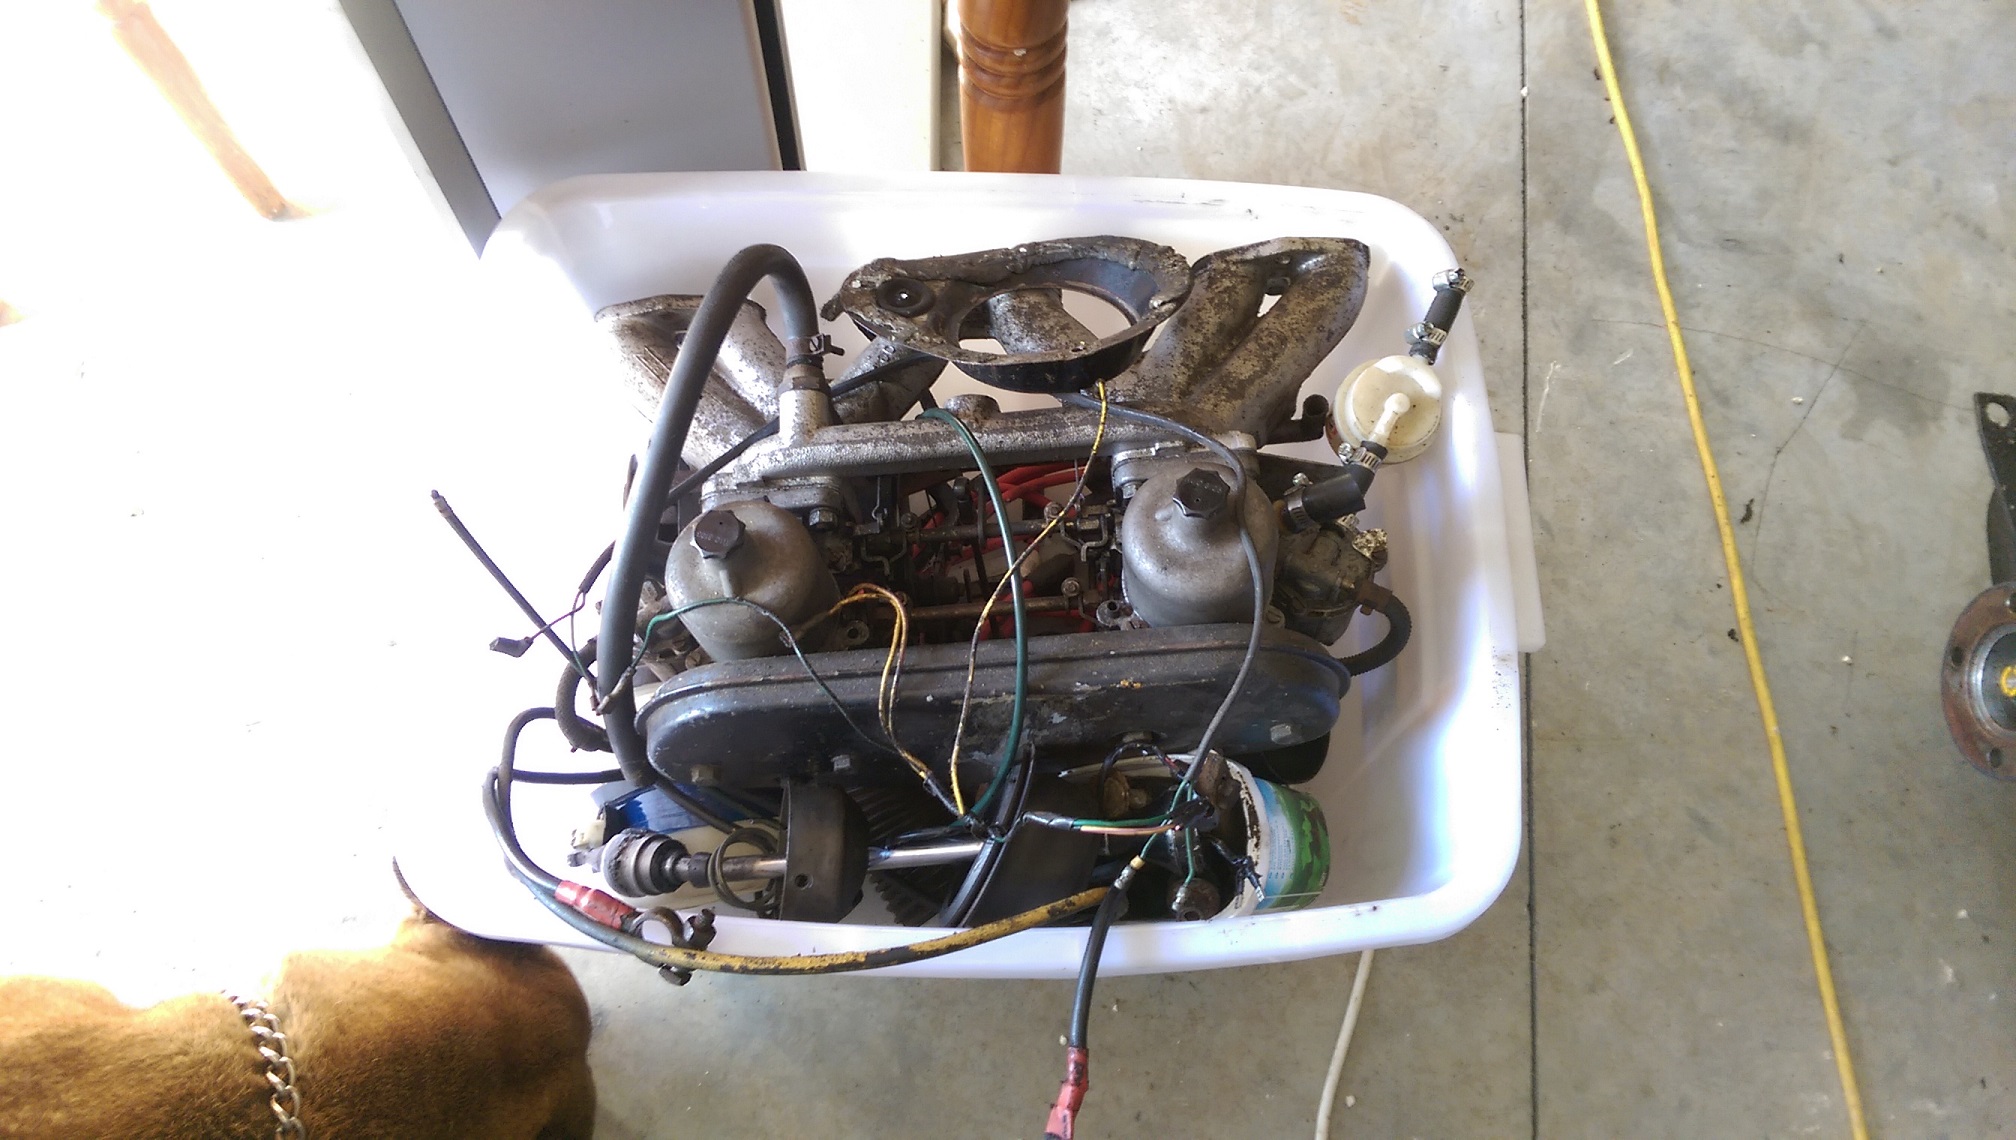
Anyone want to buy the engine and gearbox? It ran alright when I drove back from Auckland. Gearbox wasn't crunchy and it stayed in gear. Overdrive works. I don't know when it last had an oil and filter change.
-
1
-
 I have tried all the usual things to fix it and no luck. Its now sitting out there with a stick holding the clutch pedal down. Funny thing is that I have only recently worked on a mates Viva HC and it had come in with the same problem, which meant we had to remove the box and free up a very corroded clutch.


Adoom's 1976 Triumph 2500 TC
in Projects and Build Ups
Posted
I bought a thingy. Got a $50 voucher for signing up to MachineryHouse, so it was basically free freight.
So much easier than using the vice and bits of angle iron. It does up to 1mmX610mm. The majority of stuff I will be doing is 0.8mm, so it's fine.