


77magnum13hundy
-
Posts
853 -
Joined
-
Last visited
Posts posted by 77magnum13hundy
-
-
Tell me it's a worthwhile exercise
-
- Popular Post
- Popular Post
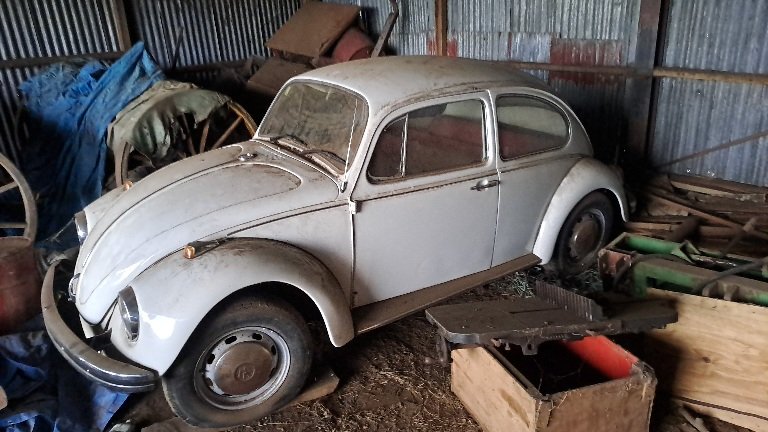
Not too long ago around Xmas I had heard that there was developing interest in my Auntys beetle and so in oldschool fashion I acquired another OS machine to add to my collection.
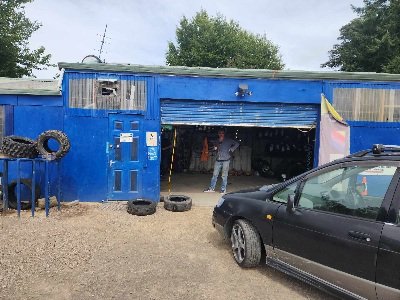
To fill in some blanks we need to go back to 2007, I had a brush with the law lost my license and moved to Surfers for a few months for a cool off period.During my time there I got the use of this thing to commute around I had 2 jobs over there one a part time job at a tyre shop and another washing dishes up in Sanctuary cove at a high end seafood restaurant. The Lil bug was great and I only had issues with fuel delivery when it got too hot. I'd push it over to the side of the road between surfers and Miami and wait a while for it to chill... once I got fed up with part time work I managed to get a fleet job with Baurepairs down in west burleigh. First day on the job being kiwi got the general hazing from the lads and they got it back in equal amounts, they all enjoyed commies and falcons as long as it had a v8, so here we are with the Lil herby puttin about with a raspy exhaust note. Couple weeks later one of the lads had car issues and broke down and was resorting to the bus. I offered a lift as it was on the way home. Needless to say he was reluctant. Oh well suit yourself. Next day I offered again and he decided ok sure. We cruised along and headed up the coast towards his stop. At one of the lights I was waiting to turn right and this guy was beside himself, next to us was a beach blonde in her own bug waving at us. I wasn't paying attention and so I finally had a look and she was alright to look at. I played it down, so the next day he gets to work telling the crew about the ordeal and the bug is now dubbed a pussy wagon. The crew then insisted we do a Roady to Byron Bay via nimbin. It was a great time had by all and a few yarns about nimbin could be told. Better to not sharn on about that too much... back to the main yarn. A few years later... and a few more to be exact
Since then it was exported to NZ about many years ago where it got parked in an old hanger and left to gather dust. I developed a curiosity about will it go and maybe putting it back into operation.
At xmas last year I headed down to drag it out and see if it was still in one piece.
Someone had wired fuel pump on backwards as I heard it bubbling into the tank so seemed like someone had borrowed the fp and then put it back.
Got a fresh battery and a while later it barked into life.
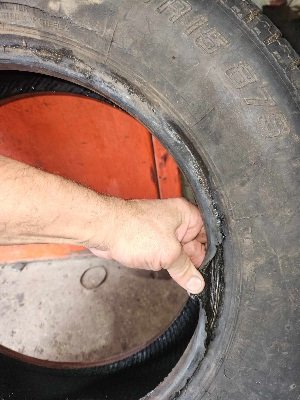
Dry rotted and coozed tyres were next on the list. 60 bux later we had a set of roadworthy treads the fronts were bad but they held out.
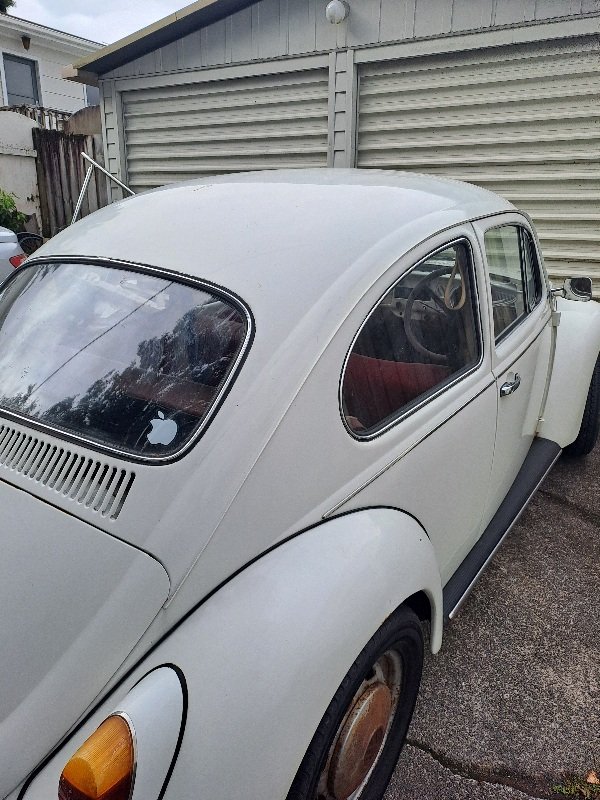
5 Hours later rolled into the 09 and parked her up. The was a mean mission.
It's been parked up for the last month just waiting for garage space to accommodate this so we can begin stripping and assessing in conjunction with the viva

-
 19
19
-
Loving the fuel tank shenanigans proper design and thought out... not that you do anything less than awesome
-
2
-
-
- Popular Post
- Popular Post
So chipping away I've found that having the options to sand blast the nooks n crannys works well and reduces the amount of dust and sand everywhere. On surfaces with underseal the petrol and rag method seems to be most effective. Followed by wire wheel or strip disk. I've started to tackle drivers real wheel well in this episode.

-
12
-
Yeh any areas I'm able to get at are being dealt to with strip disc on grinder and wire wheel, the hard to get to areas as in pics are getting blasted. Have a heat gun and scraper and a butane torch to help get shmuts off as it clogs strip disc on the thicker areas of tar or underseal. Not in a big rush so sections only will soon have it sorted. To prevent rust im coating with crc weld thru zinc paint.
-
1
-
-
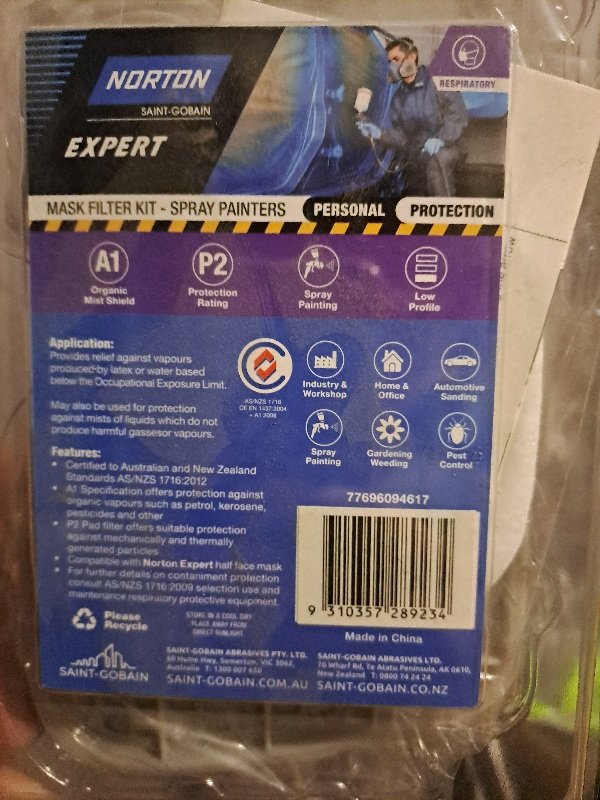
OK the P rating says that P1 is basic P2 is OK and P3 is the best... il check on the web what else is available but yeh thanks for looking out.
-
2
-
-
Oh thanks for that, I was using a painting mask Norton branded which should be suitable?
I do use a normal Fibre mask for grinding smut as black boogers accumulate...but yeh I can see a lot of airborne dust hovering after I've done a bit and wait for compressor to build up again.
-
- Popular Post
- Popular Post
So time to attack the underside so I looked into how to do this.
Acid dipping was going to be 1st option a place nearby but that was no longer around and closest place was tauranga with a 6 month wait?
Next plan was sand blasting, the entire shell quoted was 3k so out of my budget.
I decided to just go cheap and learn along the way.
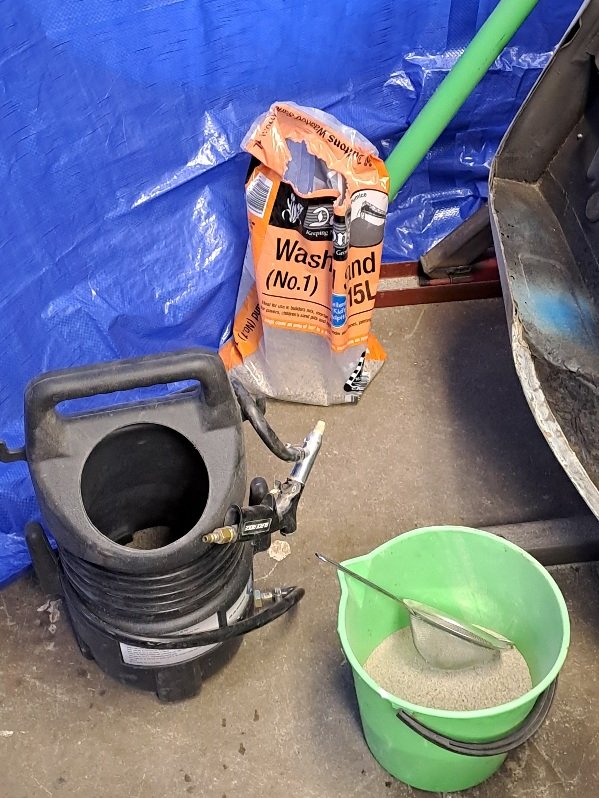
I first got a sandblaster unit from super cheap. For sand I bought a 10kg bag from bunnings.
I fired up compressor and it was a fail. Sand would not flow, it was damp... adding water to it was a worse idea it blocked it entirely. I undid hose and blew it out. So wet sand and water was a no go. Dry sand only.
Tipped the entire bag out on clean concrete floor to dry, then sifted it into bucket ready for launch.
I then made slight increases to the diameter for sand input and the air hole.
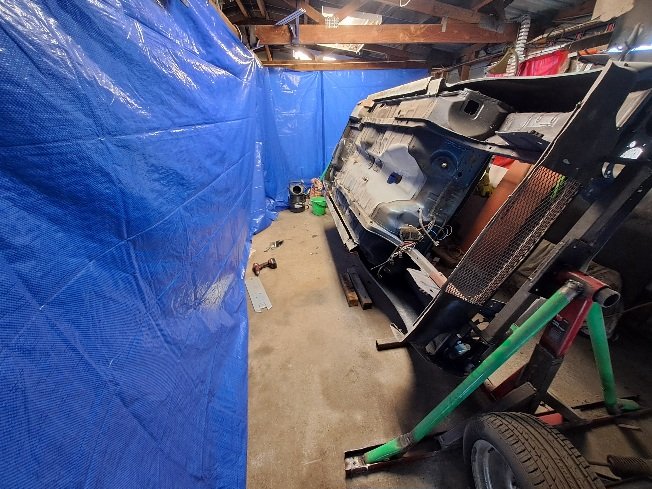
Since this stuff goes everywhere I put a tarp up and wore a mask and welding helmet for protection. Had the fan blowing dust outside and got cracking into it.
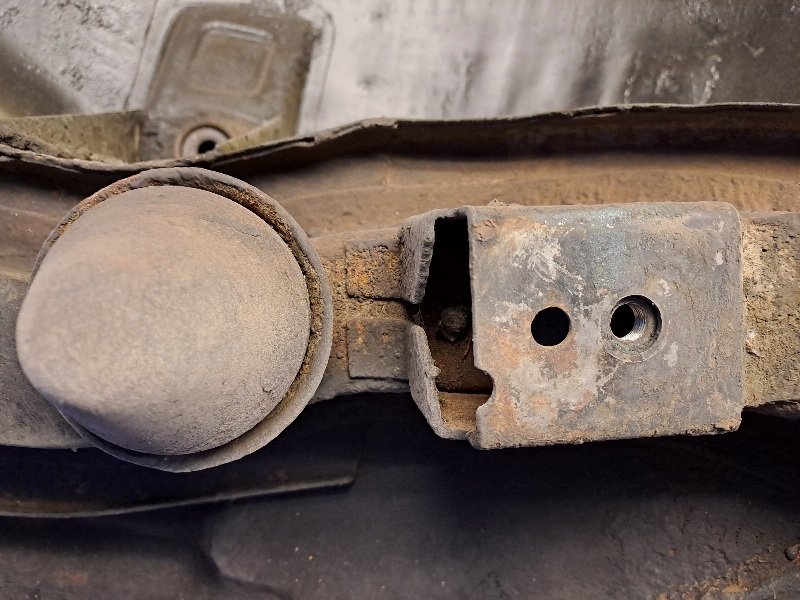
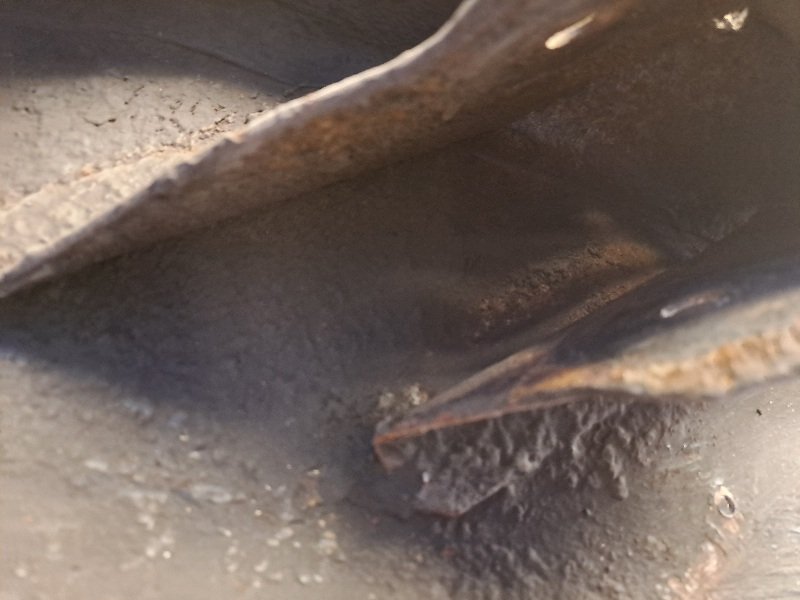
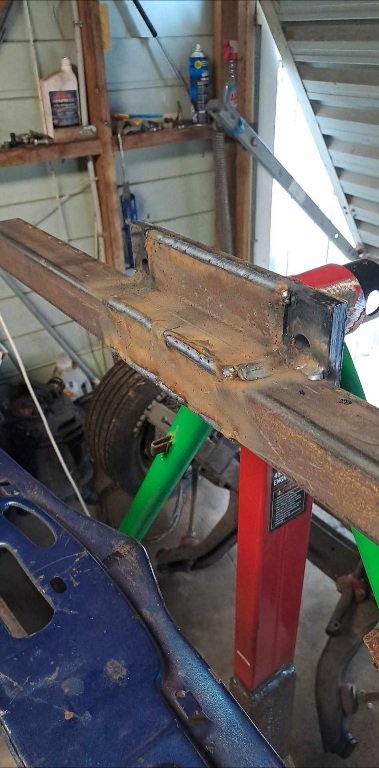
These are the 2 sides as a comparison, check out the horrid welds? These are factory or before my time...
-
15
-
- Popular Post
- Popular Post
Some things fell out and that's ok
-
16
-
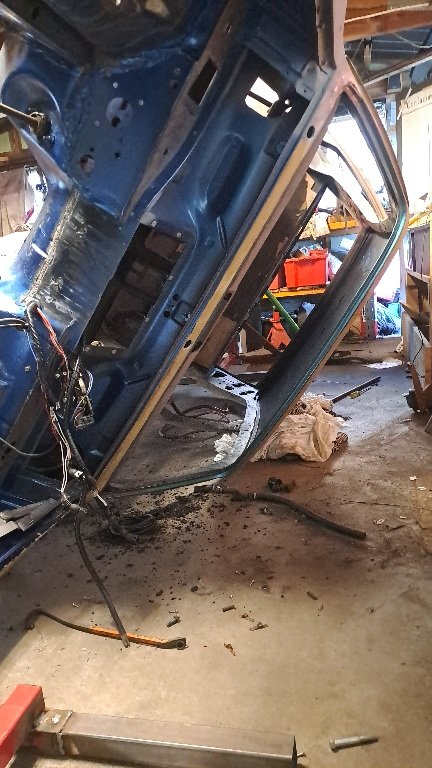
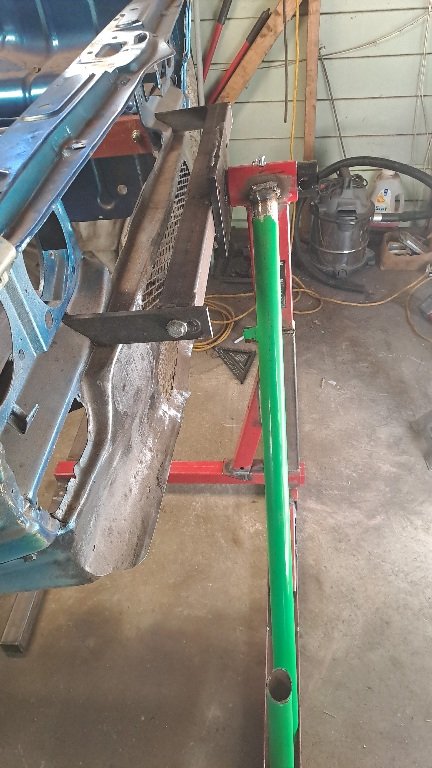
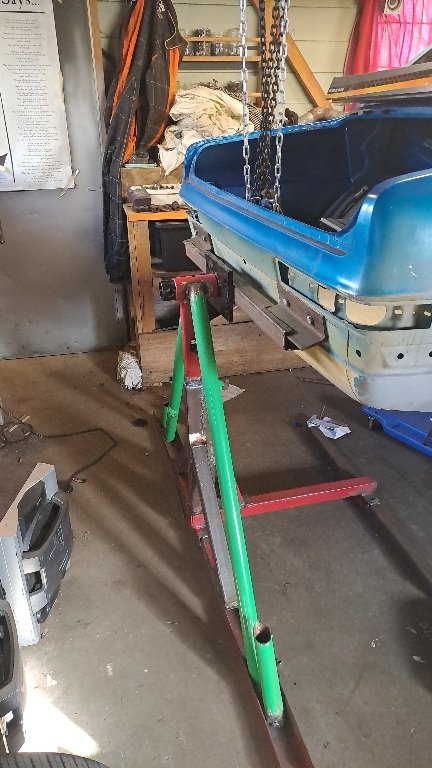
The end result was something that could only be described as it worked.
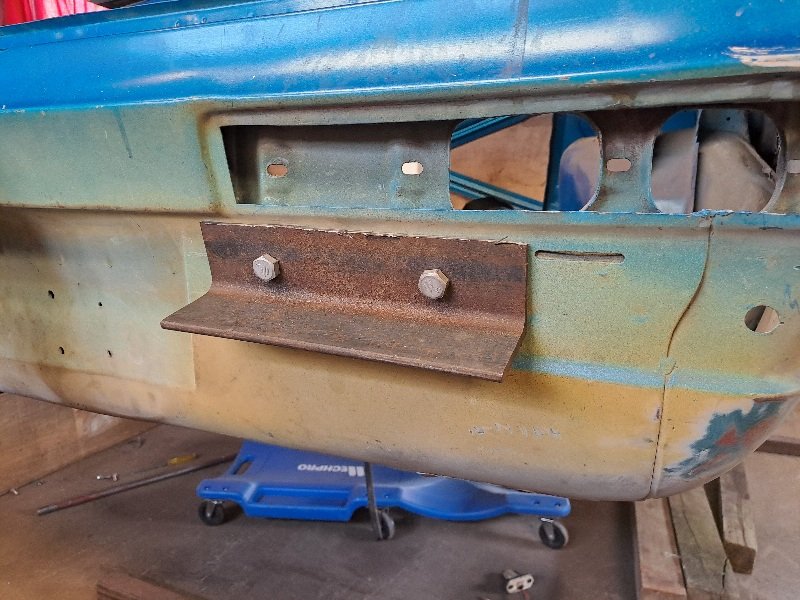
The back end would be fixed bolted to some steel plates sandwiched between shell. The front needed to have a pivot so could lower to axle stands for removal later. Here are the results.
-
3
-
-
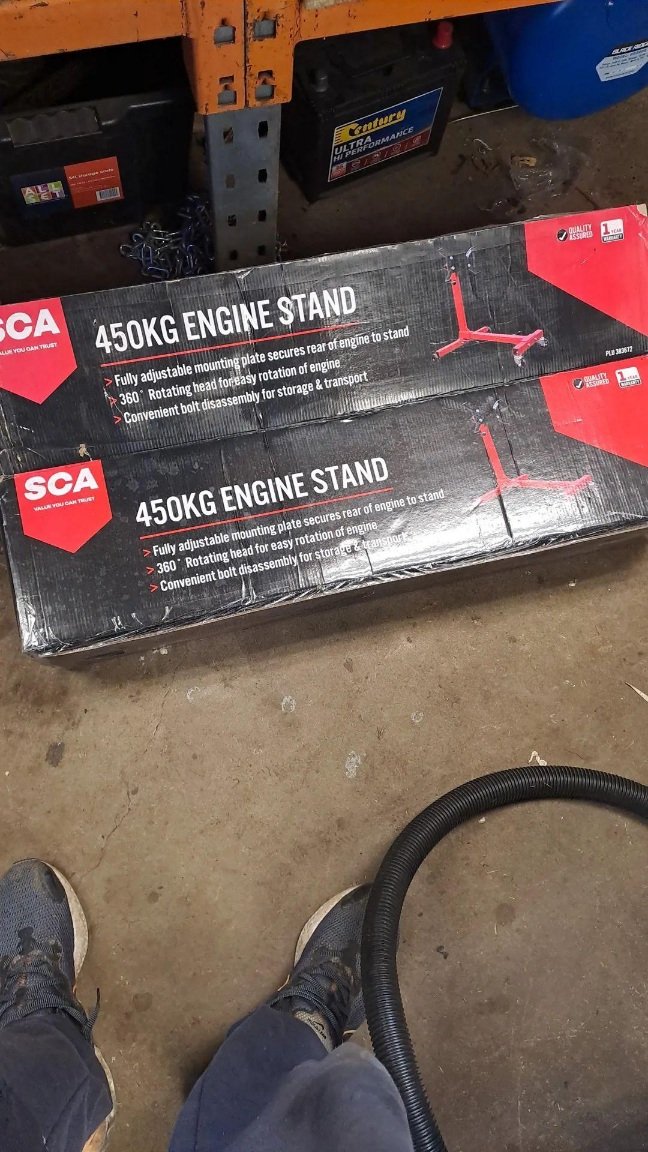
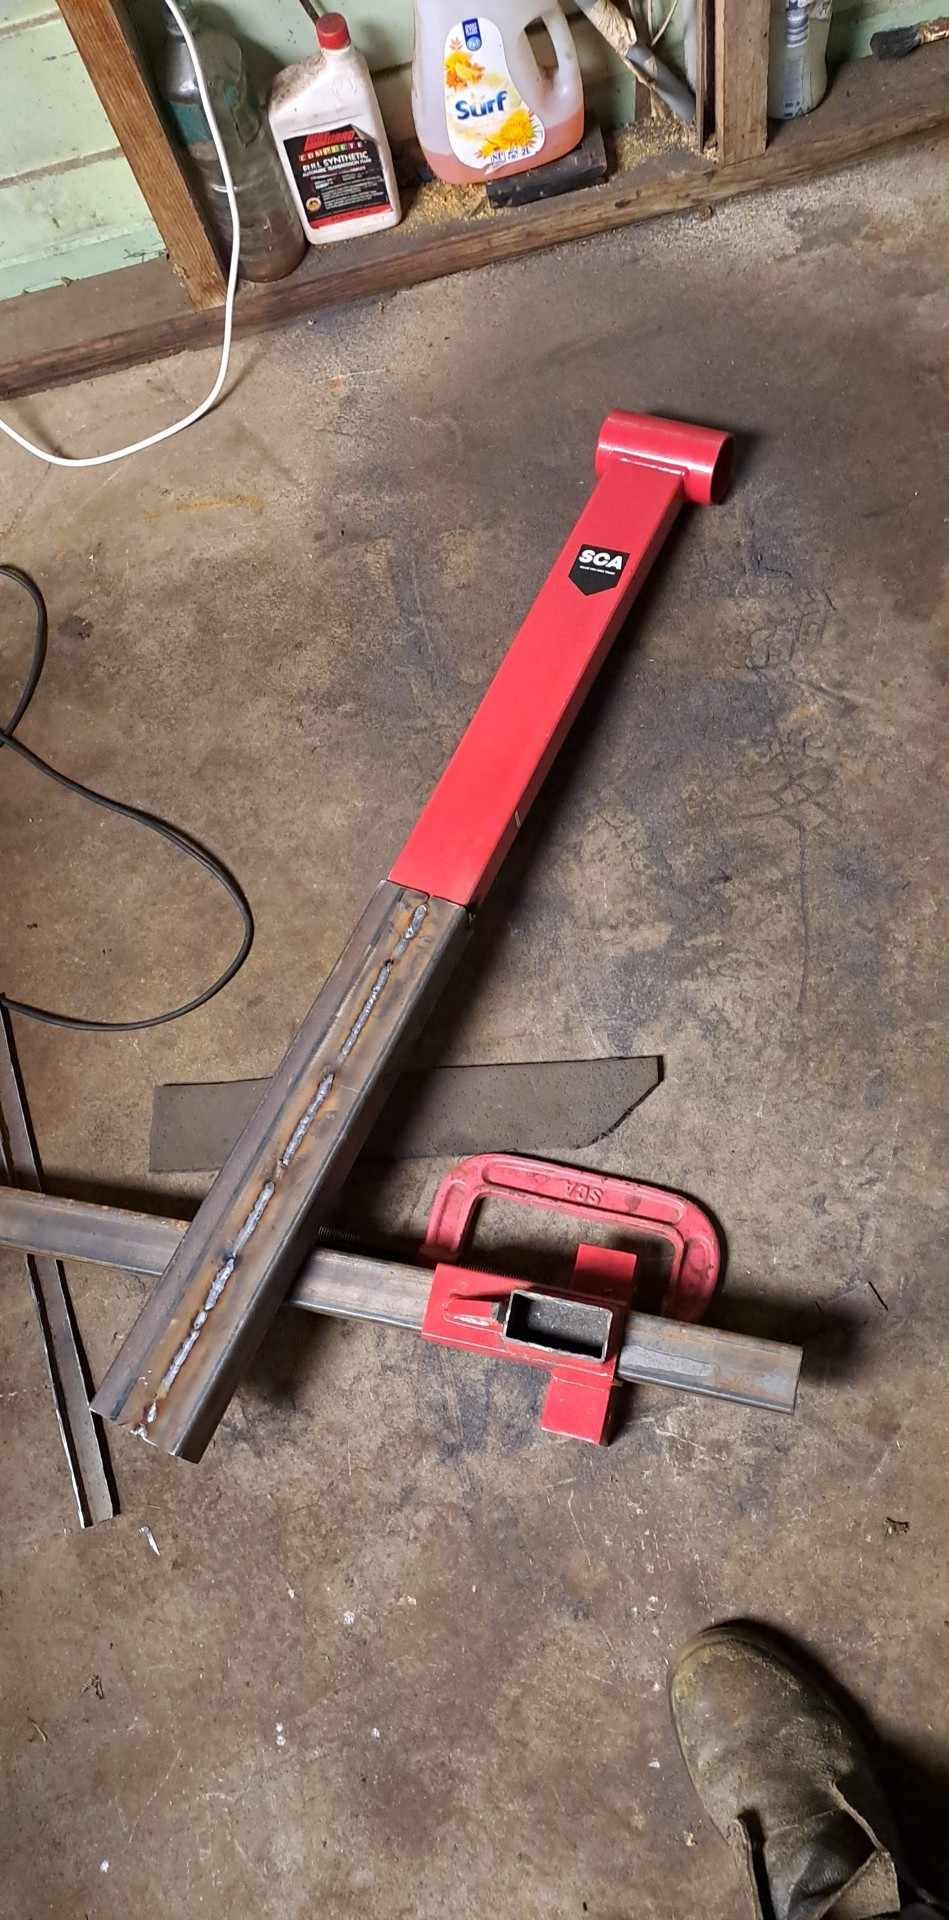
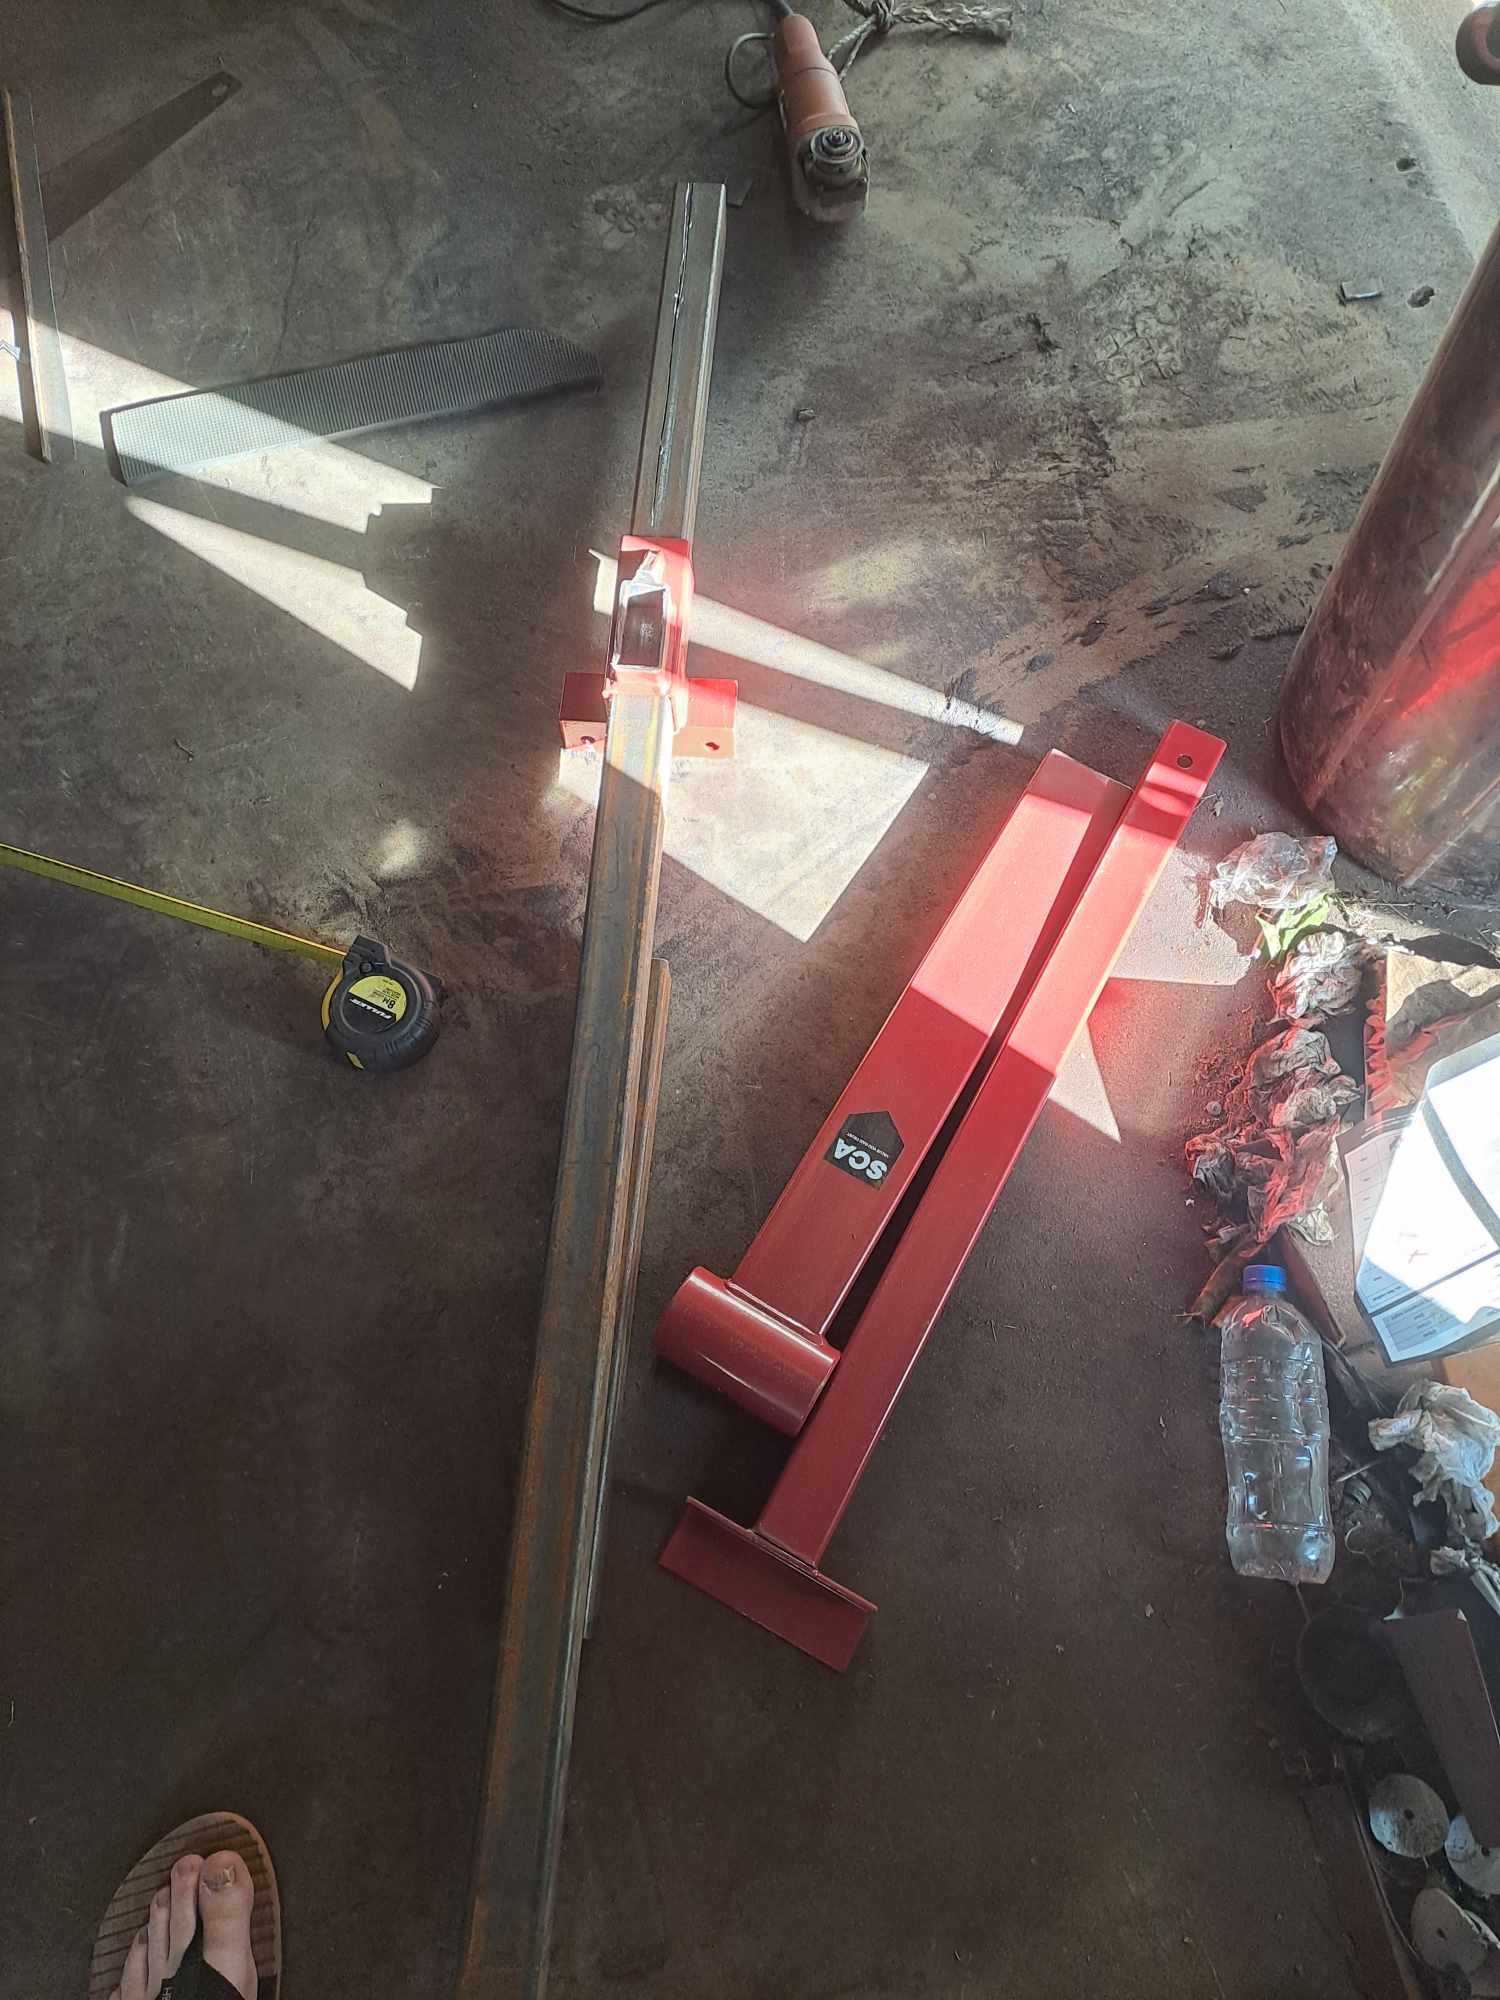
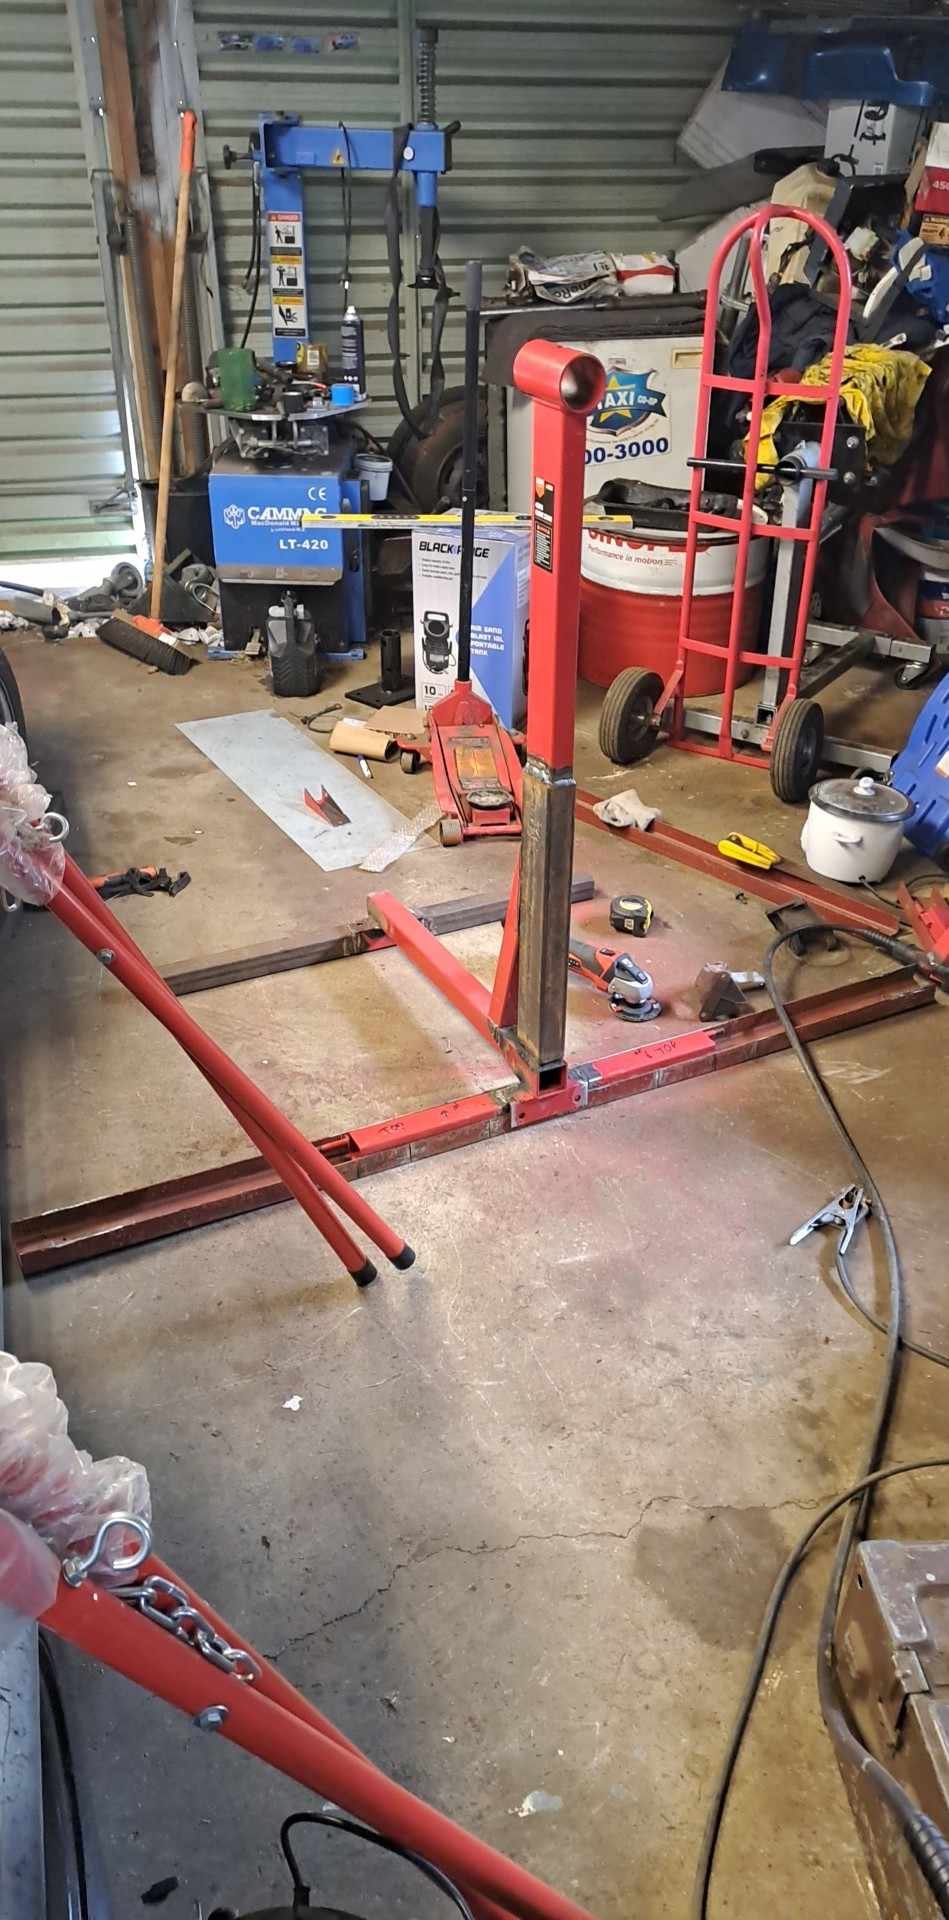
After that it sat for a while and I ignored it in the back of my mind I needed to keep going even if it was just a small thing to contribute. I went to pick a part found a Silvertop engine and got it stripped out for bits I needed. The rest of the engine could be used for a rainy day such as fitting a 20v to my 4af spacio but I digress. I saw a panel beater guy down the road who I wanted to farm the work to, he had someone's shell outside with the tarp half hanging off so didn't think much of that place. Another guy came to my place and yarned for 2 hours about what we could do but he's on the shore and I ain't keen to ship it that far. We basically decided I would do the work and it went from me farming the work out to me committing to proceed myself. Dang. Shit. OK. Supercheap had deals on engine stands so grabbed 2 of them. I bought some 50 x50 3mm wall and decided to make a rotisserie. The carnage follows.
-
2
-
-
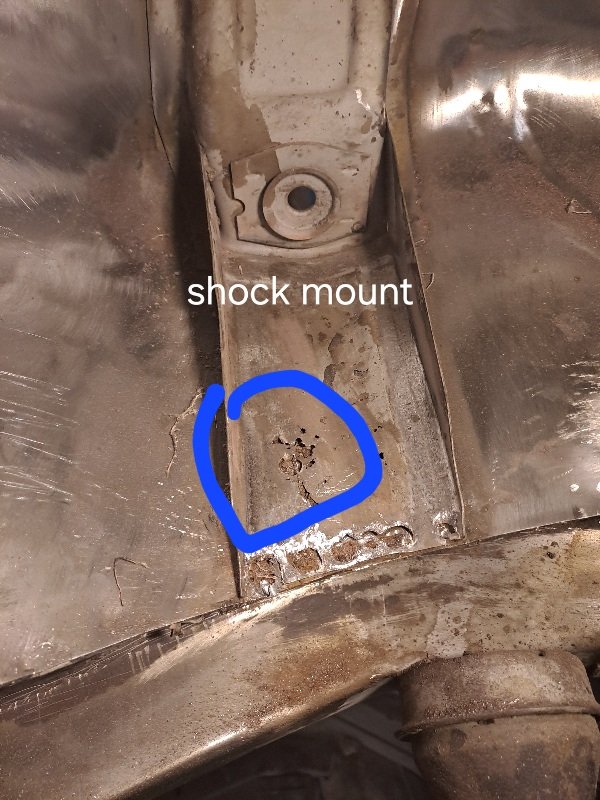
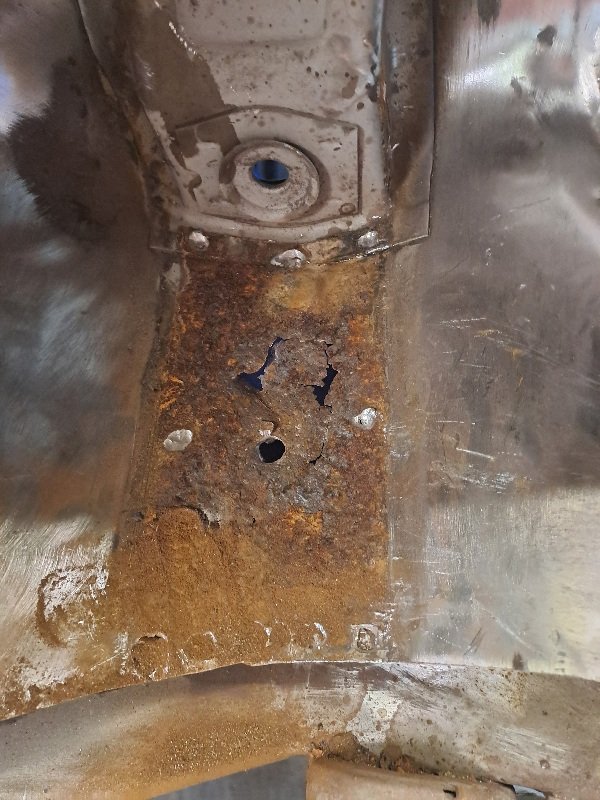
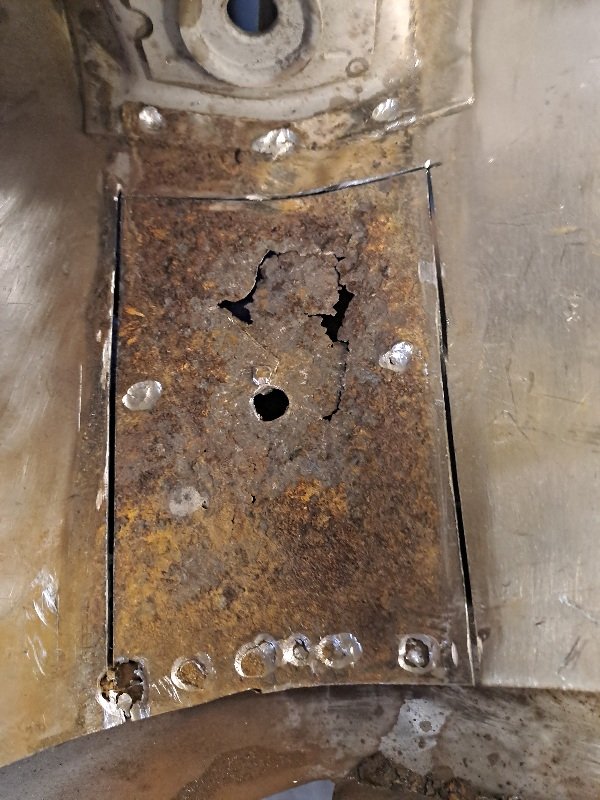
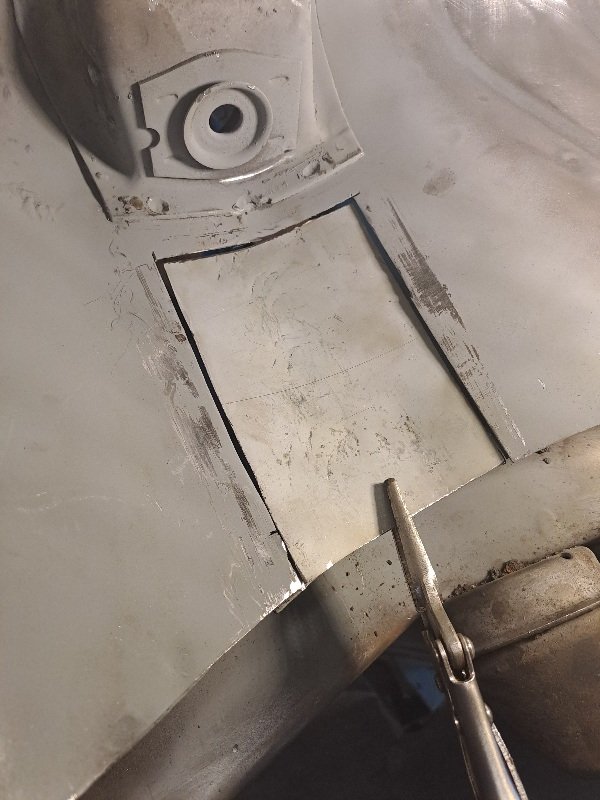
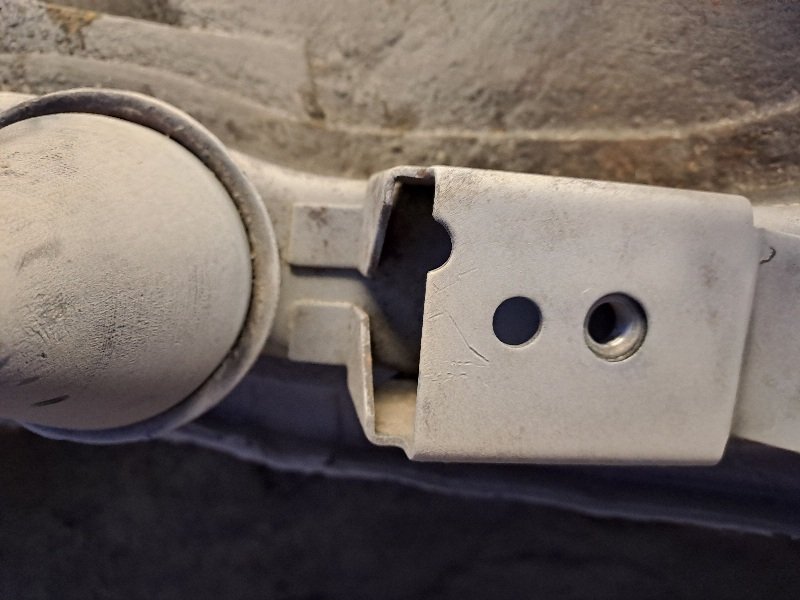
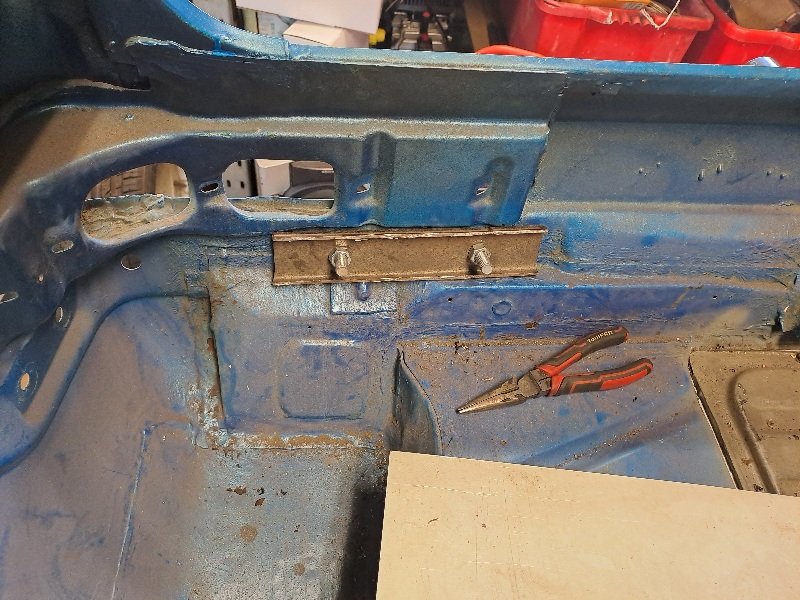
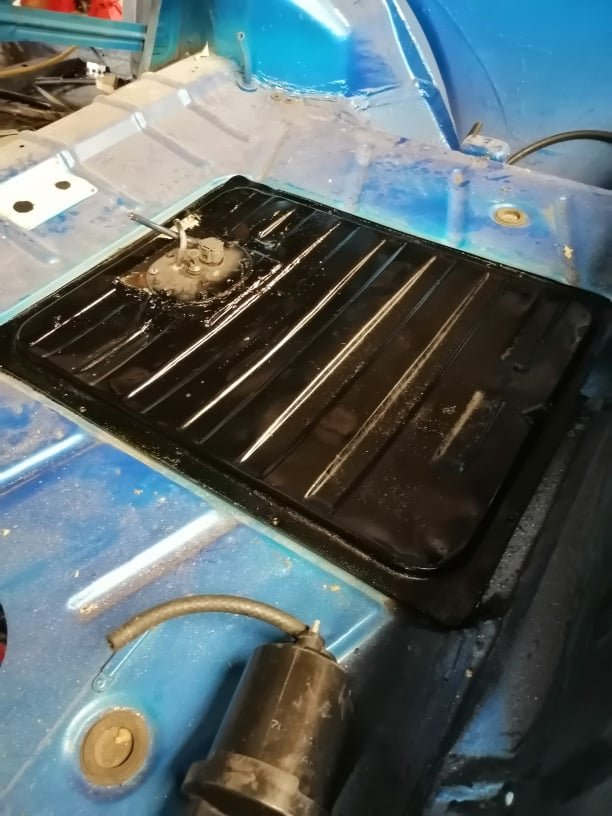
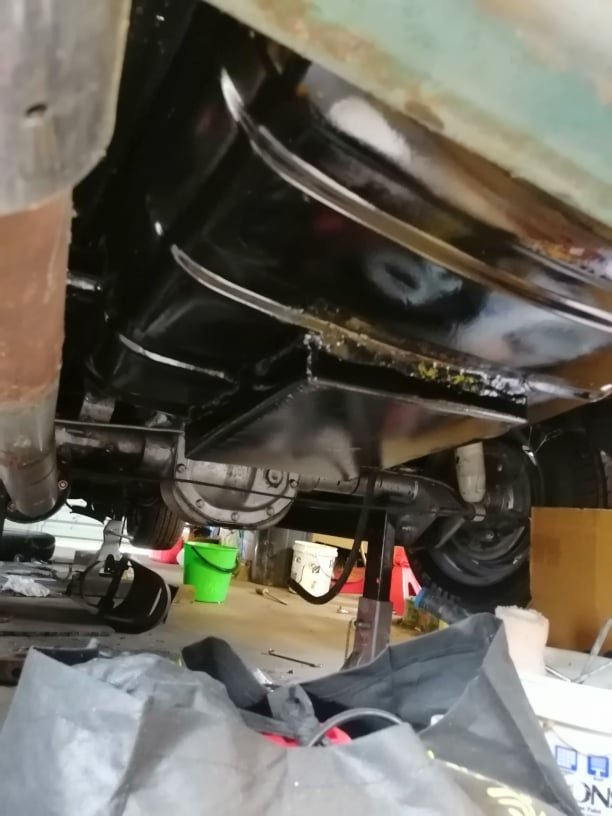
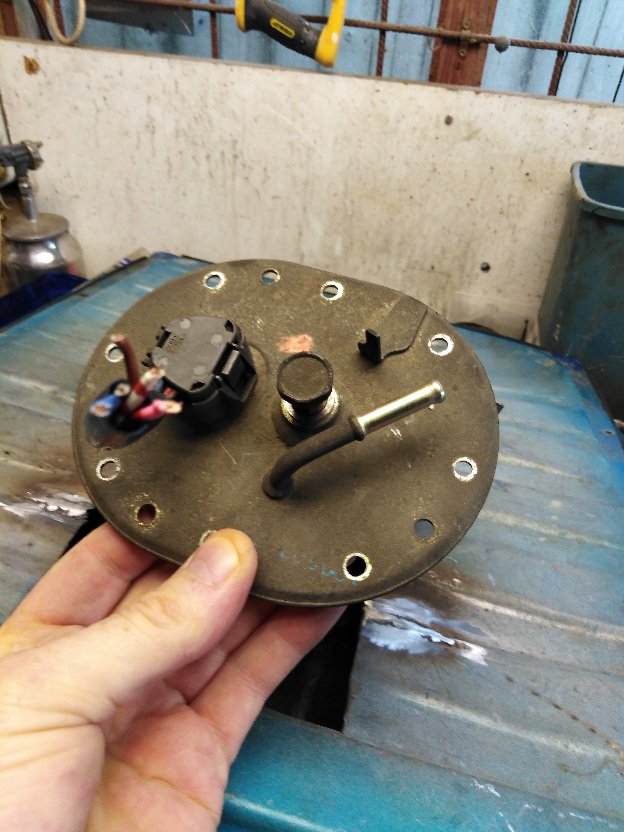
The original tank had a small hose for fuel delivery and a fuel guage made by everyone's favorite Lucas. The bones of the guage ie variable resistor and the float rod etc were attached to the new sender. I was In 2 minds whether it would be worth using the older Lucas one and was thinking to modify the dash cluster to use a toyota guage and decided no harm in trying to use original dash guages. I had to ensure the float could get a full sweep from e to f and would not foul on the edges of the tank where the recess was. Few bends and changing the orientation of the floats rod had this working a treat. I didn't chuck any gas in it but tied a string and pulled it up once it was in its place. On the other end I mucked about with the dash cluster and bench tested with a battery and the fuel guage came alive. That shiney paint on the tank was the rad shops default and falls off when petrol gets near, for now il just leave it there but will need to sort one day soon. So with that in mind I was keen to then get gas to the front and start the engine that way I would have motivation to excel to be the envy of my former self who sits in garage looking at the thing and fixes dailys while it weeps in silence. So anyways here we are 2 x 3/8 fuel lines haggerdly bolted into chassis rail... crusty brittle fuel line and the underside looking like the hull of an old fisherman's boat. Yeh that won't do. This is where I went into the spiral of thoughts... you haven't gapped the rings yet soon as they expand your pistons are toast, you still haven't got Silvertop rods and that needs to be done... shit... OK engine out box out. Fuel lines out.. might as well attack the underside make it pretty for future me and have not doubt about how the paintwork is or how fuel lines are attached.
-
3
-
-
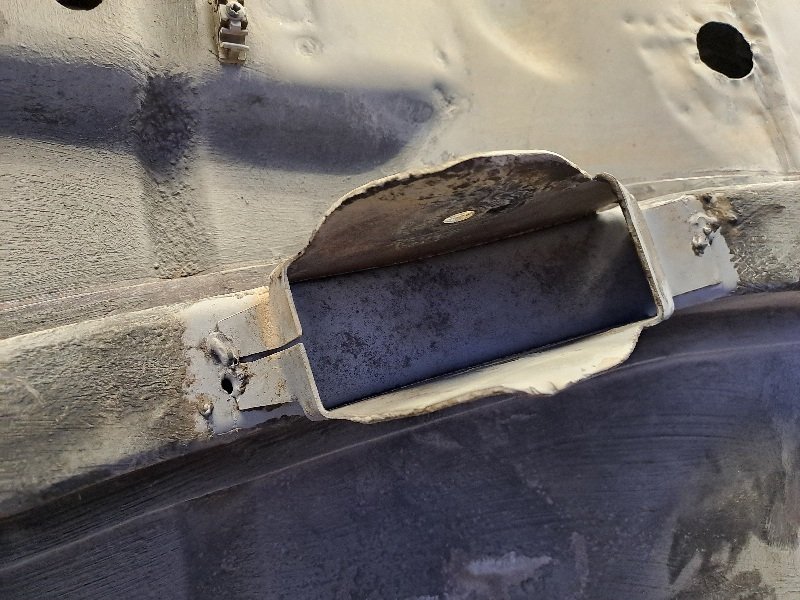
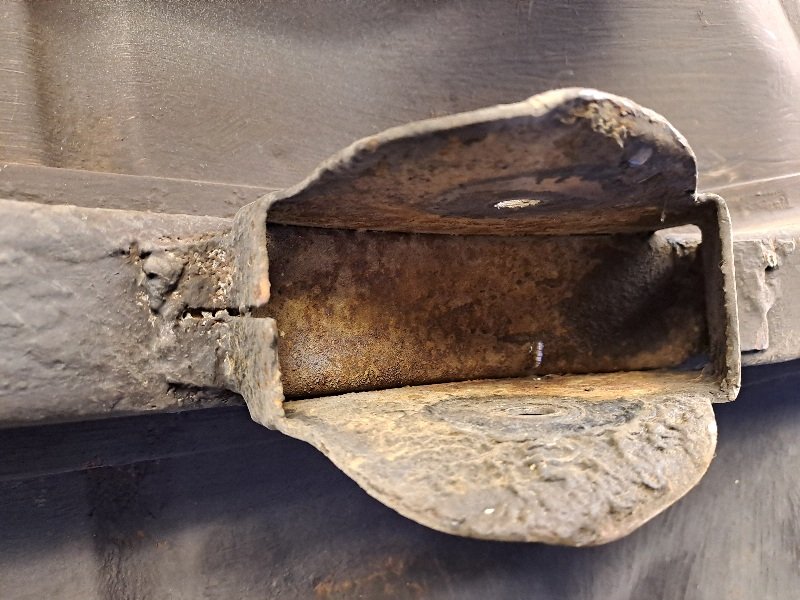
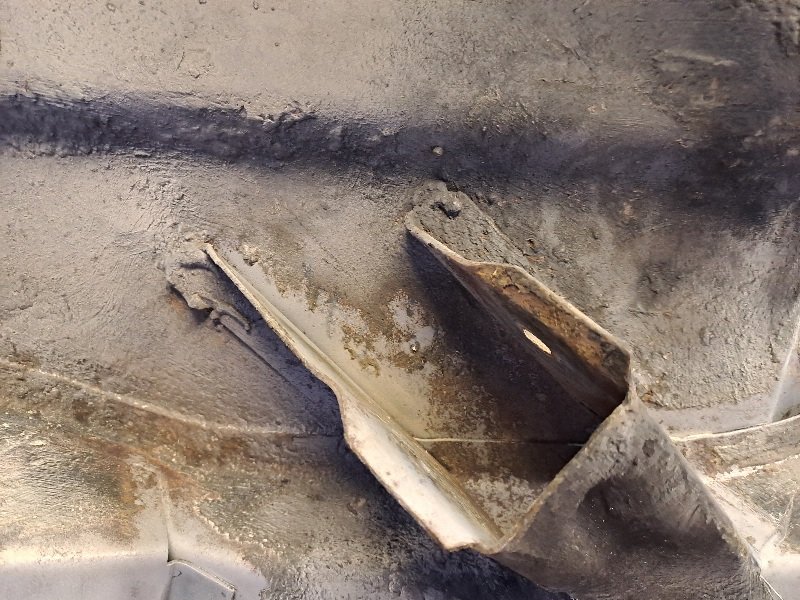
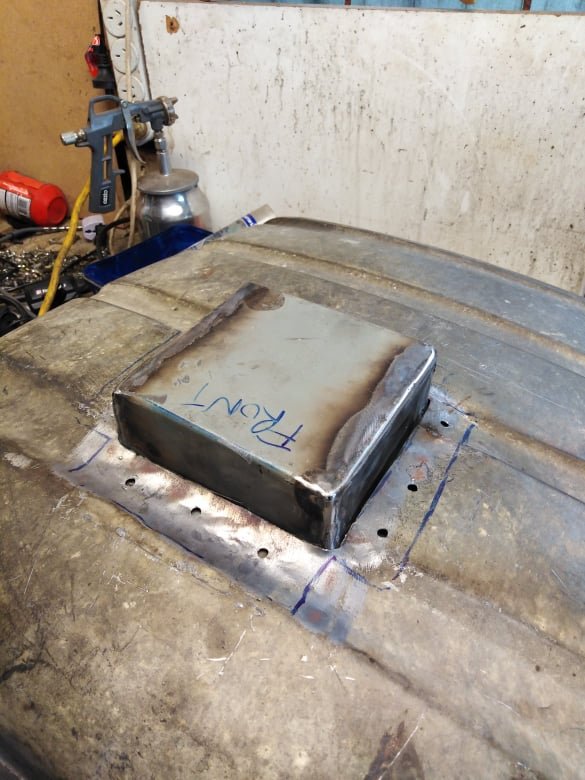
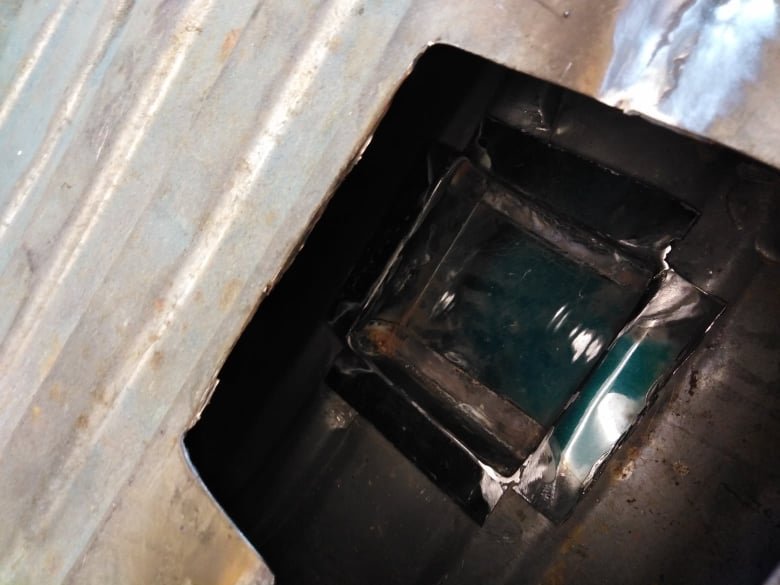
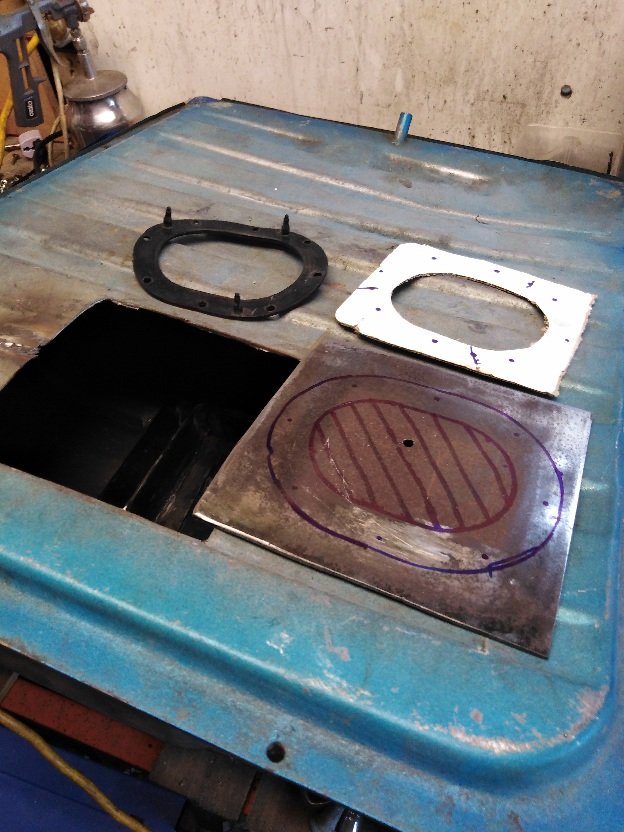
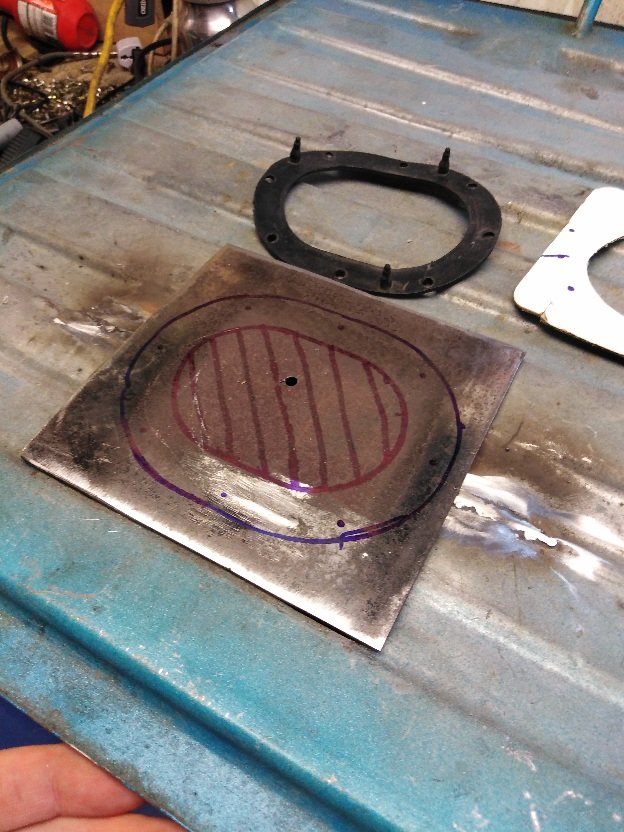
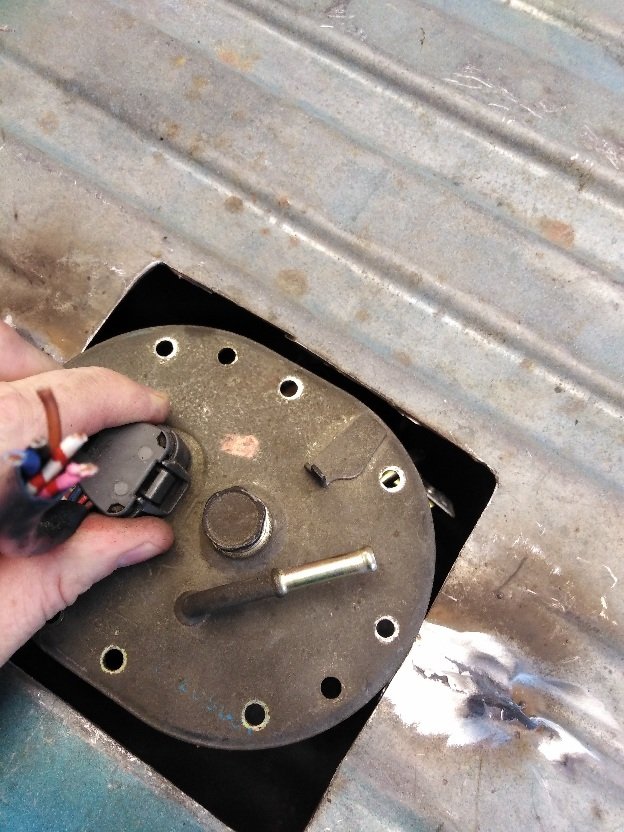
Also I needed a baffle for cornering so it would not suffer if it gets peddled hard. Since the sender unit was too tall the next step was to create a recess on the bottom side of the tank. I still trimmed the sender down but also needed about 50 mm for an area for fuel to be readily available.
After getting it close took it to radiator shop and they welded it up blocked off a few holes and then I painted insides with fuel tank paint as best as possible to stop further rust
-
7
-
-
So been a minute since I've been posting on this one, still at it, however as the saying goes life gets in the way
During lockdown I fiddled with fuel system and retro fitted the old tank with a drop in system from a toyota of similar Era as the engine, this way it can have more room in boot and remove surge tank clutter...
-
6
-
 2
2
-
-
I have a couple of clutchplates here and are surplus to requirements, any good to you Alex? Cover the freight and they are yours
-
1
-
-
Oh man pretty keen to have some things fixed and
Be able to make noises from This car again.
Can Help or would like a hand tooooo
Need, rewire, plumb fuel, fit oil cooler, panel weld, paint, rear brakes.
Require custom seat brackets, some crimp joins for the wiring, find leak in banded wheel/replace broken bead or tube it.
I have a tyre machine if you want to swap some rims over.
-
1
-
-
Annual update, building a fuel shell to house the surge tank and lift / main pump in the boot using an old mortar shell box.
Also what would be good option to make LSD happen in this?
And yes I have a spare diff to weld, does anyone make anything that would fit into this housing or should i go shortened hilux type deal..
Keeping in mind the custom widened wheels, the 4x4" stud pattern, and just generally the least amount of fucking around involved.
Been pretty down in the dumps lately so mojo and overall production takes a seat while i sort life out...
-
1
-
-
who is the bloke to make the brake rotors? i have some required that are no longer around, what did it sting ya if you dont mind me asking?
-
looks like a fun times machine. perfect setup, someones time and money indeed invested in this beast.
-
Slotted side goes against the crankshaft or moving parts and the flat side is against the fixed block/bearing cap...?
Manual says facing outwards
I have compared to the old one's the thickness seems the same... I don't have a measuring device to Mic them with
NDC one's I bought.
Cheers
(will have another go, just wanting to know if the parts would be the same a cross the A series)
-
So rebuilding 4age 20v bt and I got all the bits off segeez when it came time to chuck in the new crank bearings and thrust bearings it was binding even before I talked it up properly , I have since removed the thrust bearings and the mains don't bind so I believe it's those thrust one's... on the new bearings packet it says for 1a 3a but I'm thinking they not for a 4a block, or even for a 20v bt... anyone know if the thrust bearings for 4a are the same or would the 20v bt one's have a different one
Part no.tw1400a..
-
Yeah nice to have a high roof for the Ol hoist... And heaps of areas... was a squeeze to find room for this thing because it takes about half a car width so now had to re-jig garage to allow for 2 cars and shelves and bench.... Getting there....
-
2kish, maybe cheaper crappier ones out there but hell, fuck it... wheel balancer i have acquired but its a no-goer, needs to be tweaked, but seeing as how i bought it for $200 its a bit of a gamble... i think it needs calibrating or something... need to get some electricity pros on the case... then i can also balance the wheels which is the important one
-
oh hai there, this thing still in my shed, and although i haven't really been that involved or focused on finishing i have been doing other things, house stuff, 2 dailys to sort out, basically i have been occupied with valid reasons for this to not be done yet.
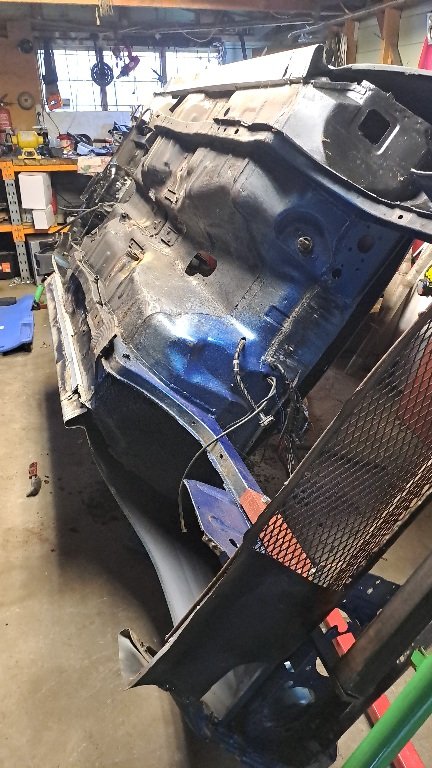
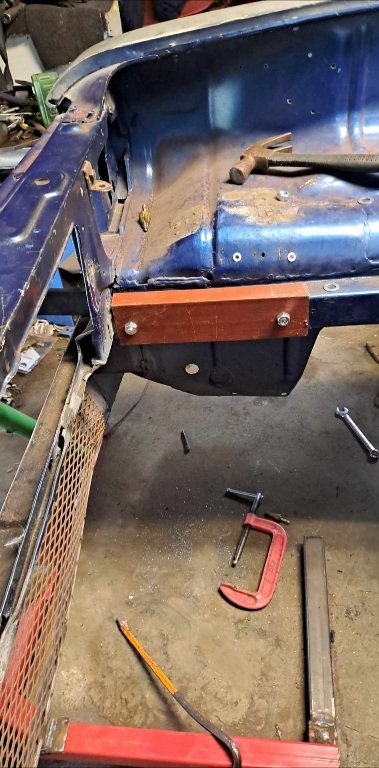
I have put it back together, and now towards the finish line. When i say put it back together i mean ive started to do this...
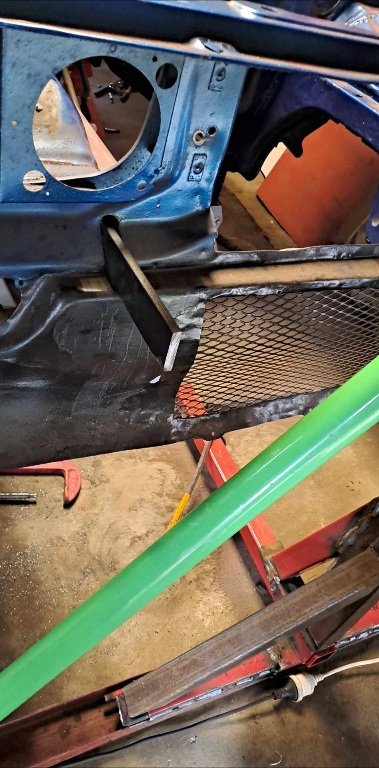
So this is the back end, where i'l be making the fuel setup go. Before i put the surge setup back in it needs some paint etc...
Also i got one of these when i re-jigged my mortgage, i know its a silly thing to have... so if you need to get your wheels swapped over for skids i will accept donations towards the silly purchase fund
Hopefully I will see more action in the shed now, bought 6 x fluro lights with 3 bulbs so should be sweet to see after hours now.
Thanks for reading...
-
4
-


A bug of sorts 77's 69 beetle
in Projects and Build Ups
Posted