mlracing.co.nz
-
Posts
529 -
Joined
-
Last visited
Content Type
Forums
Downloads
Events
Gallery
Everything posted by mlracing.co.nz
-
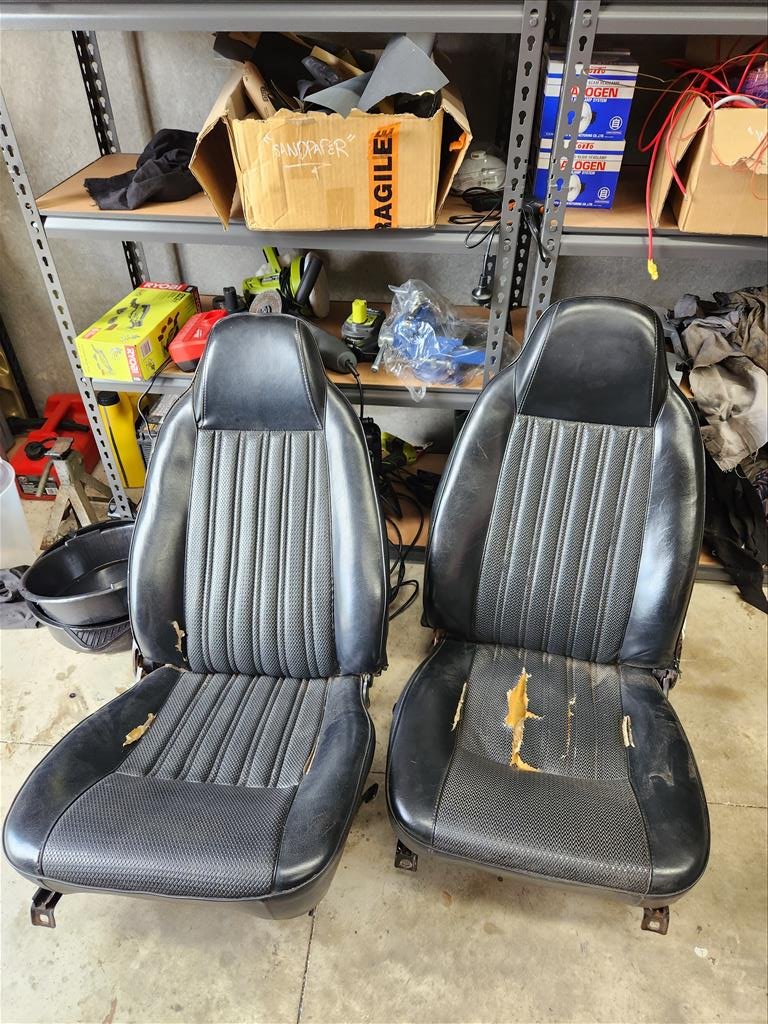
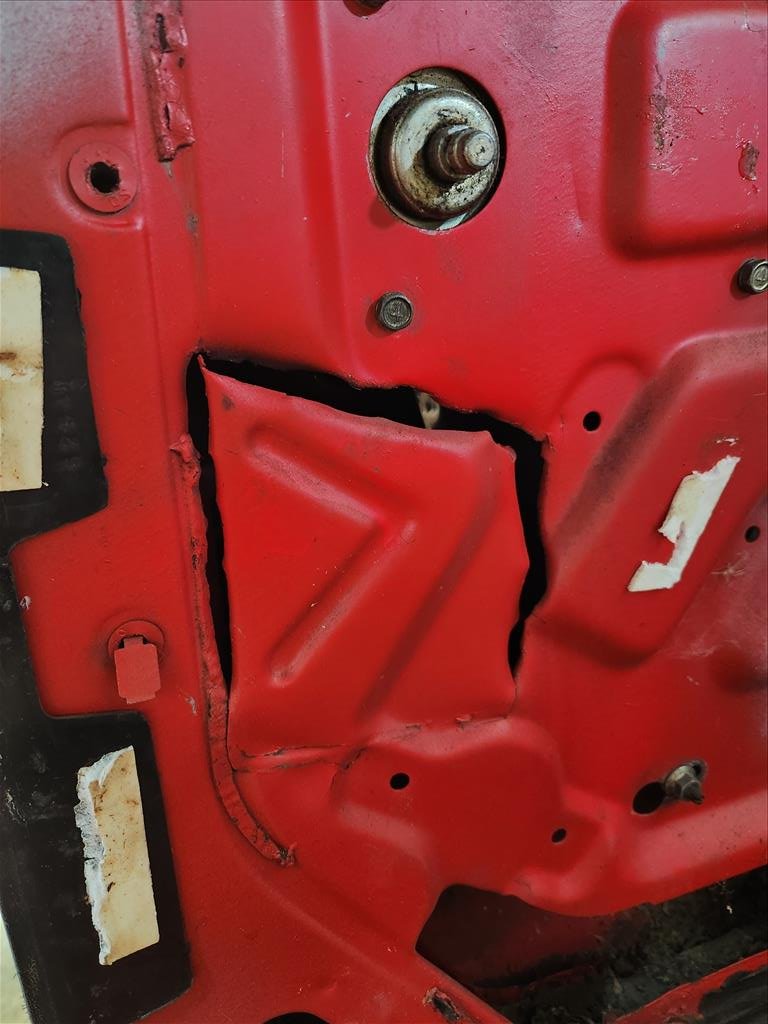
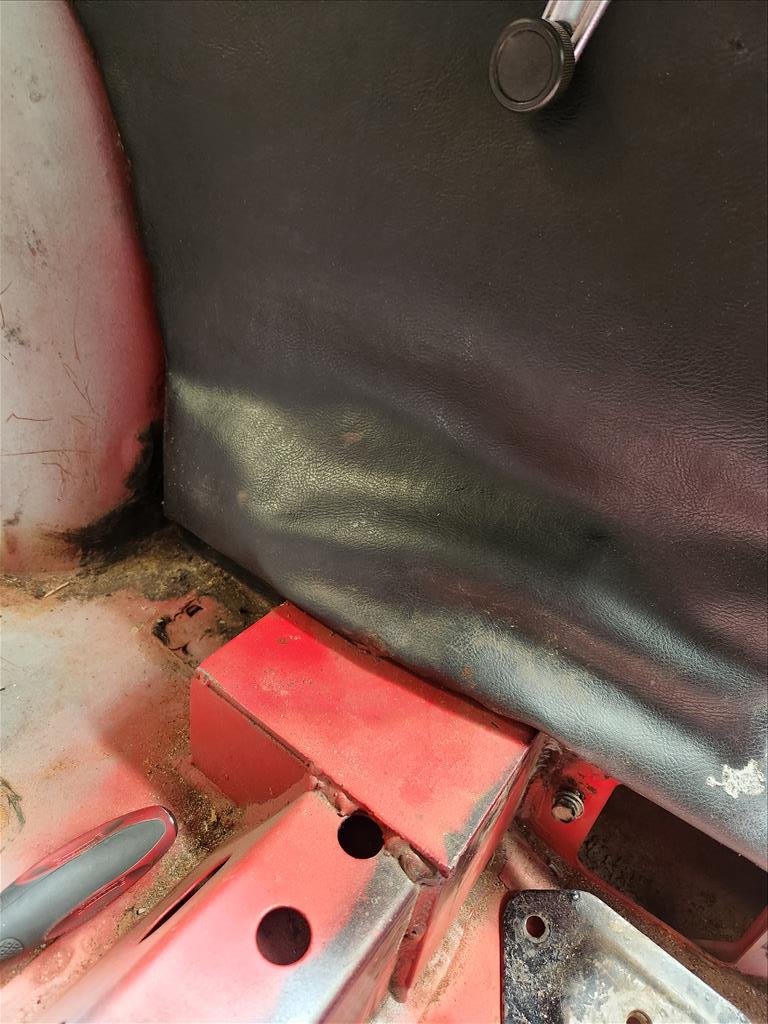
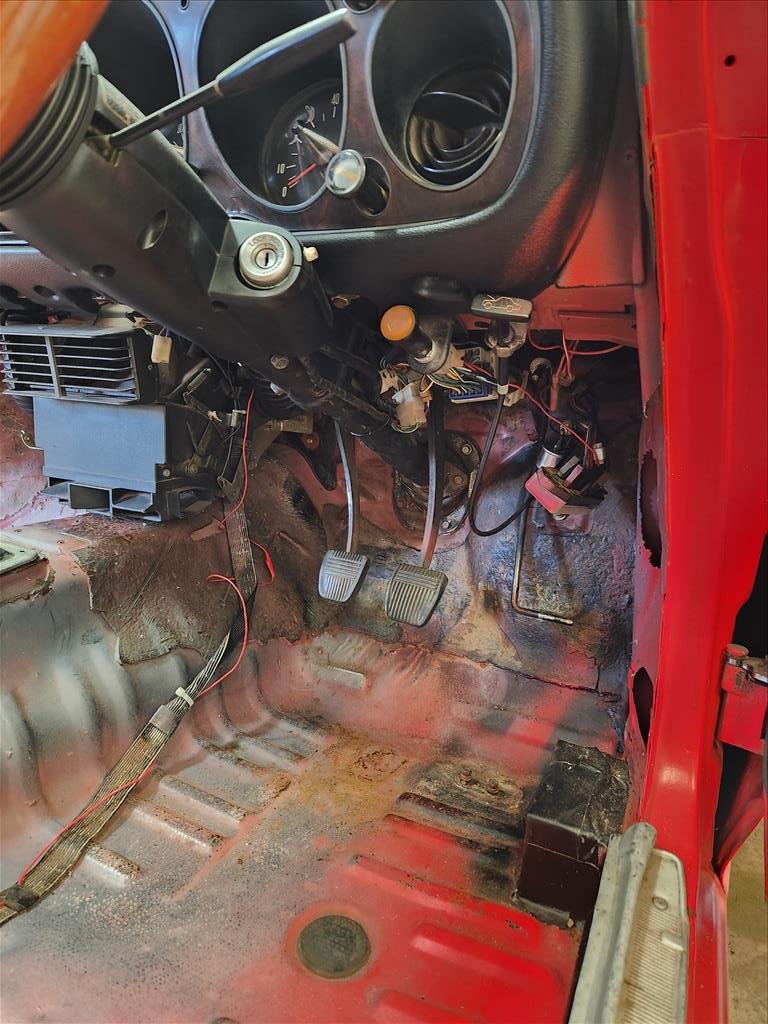
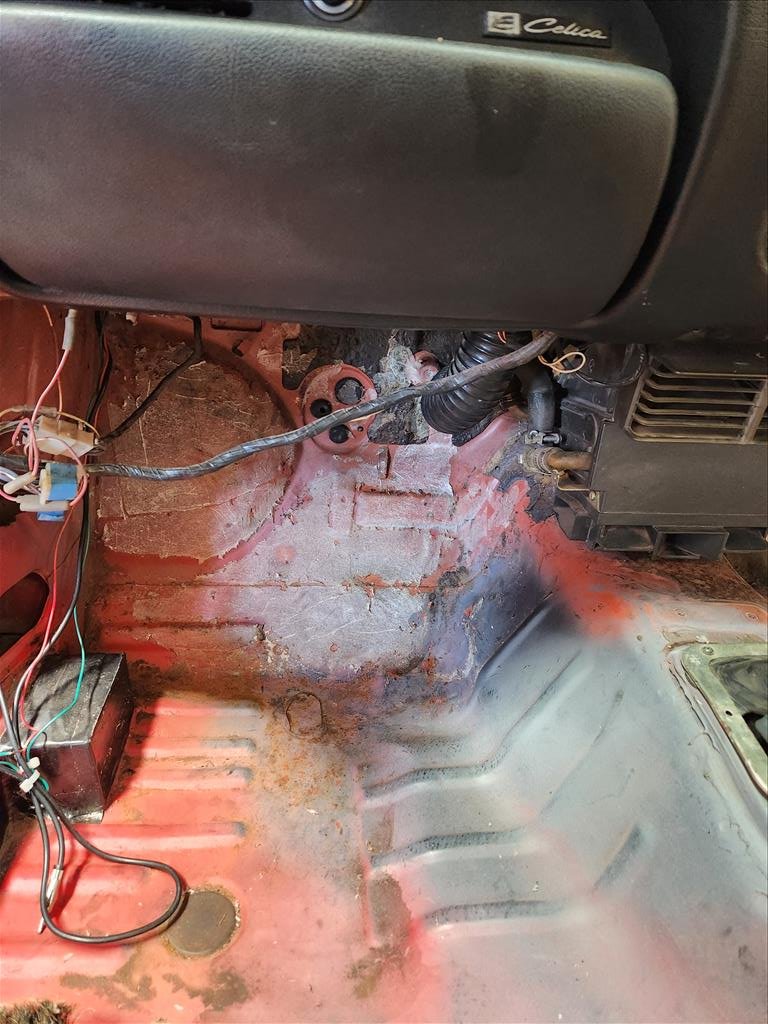
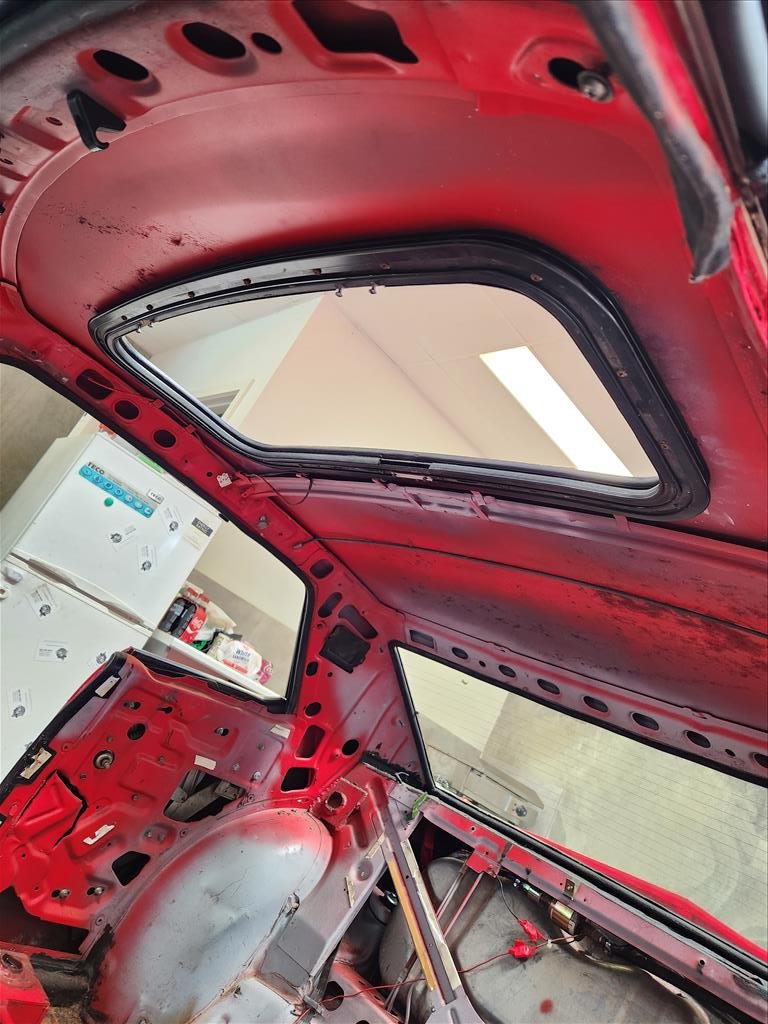
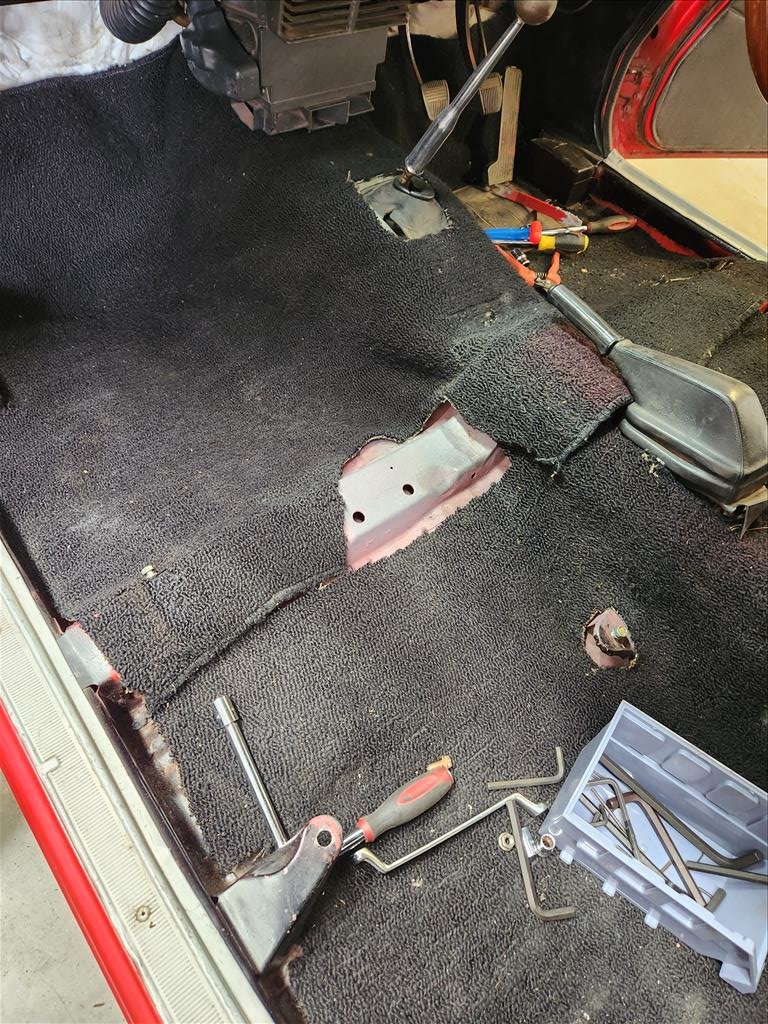
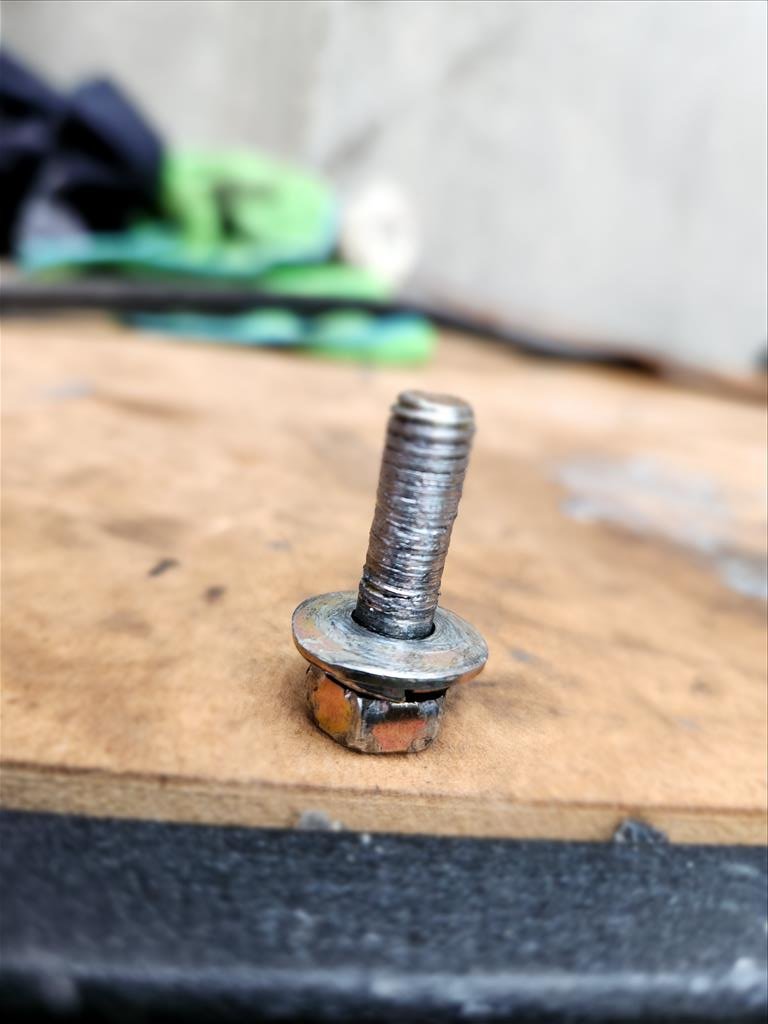
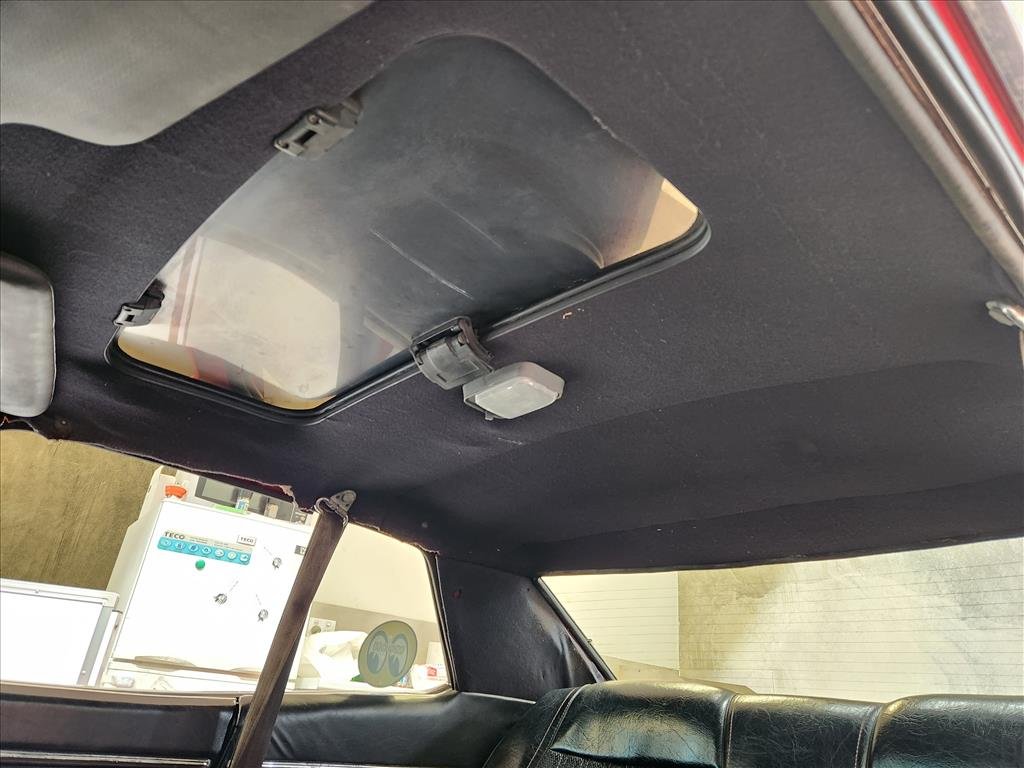
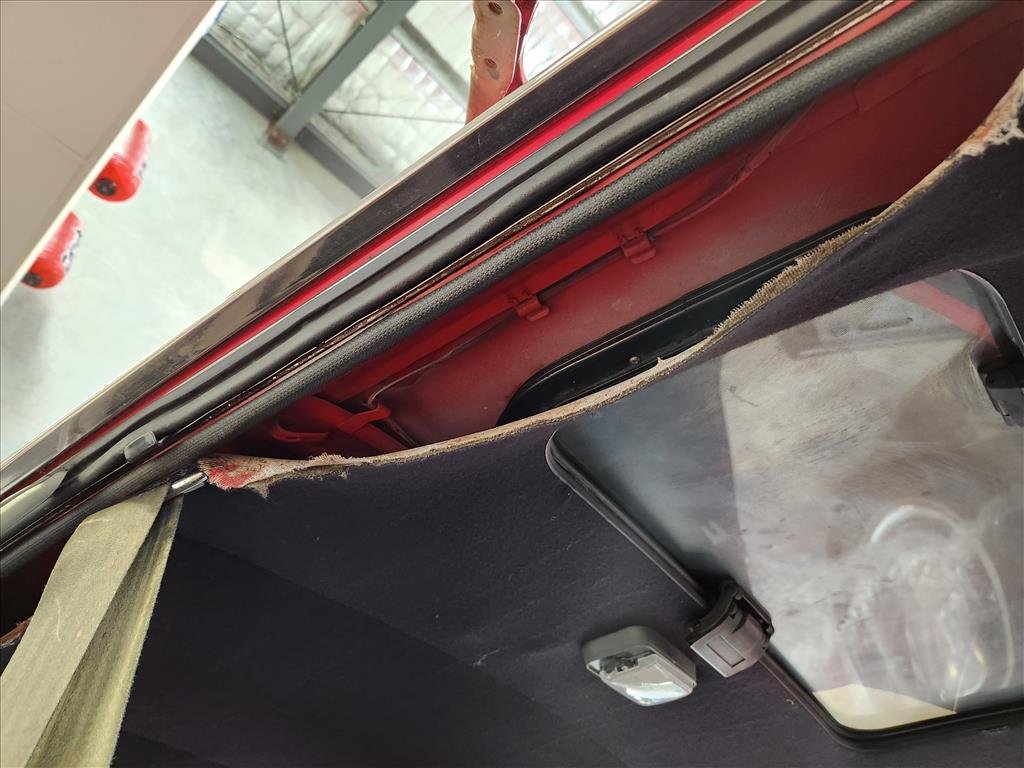
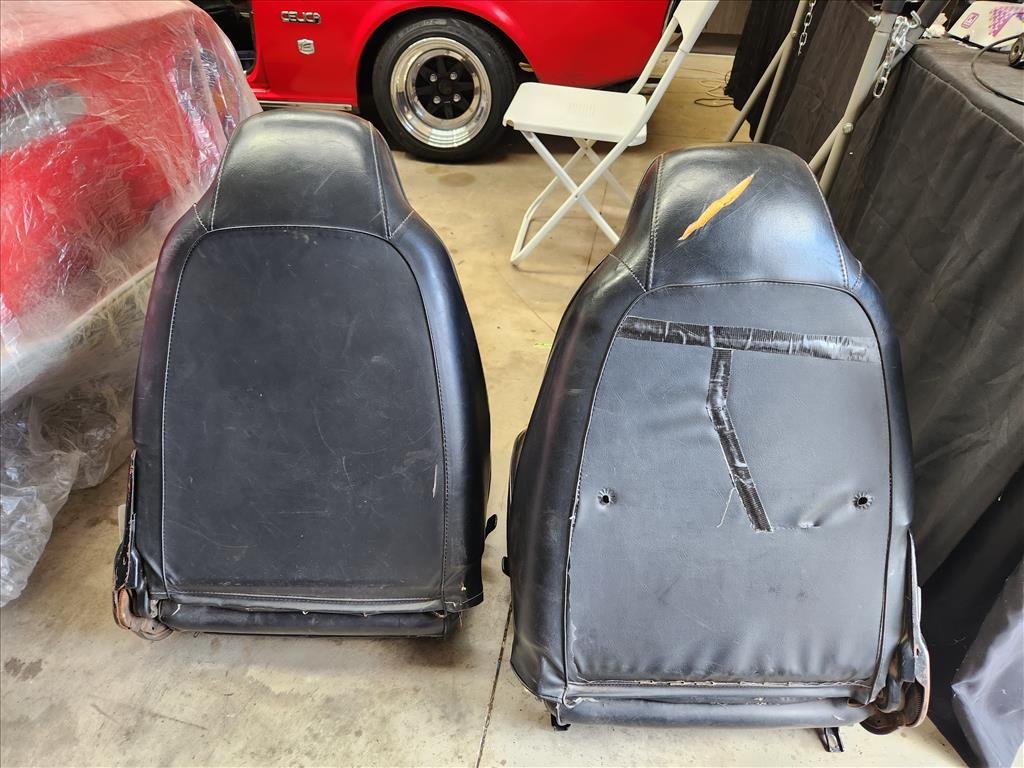
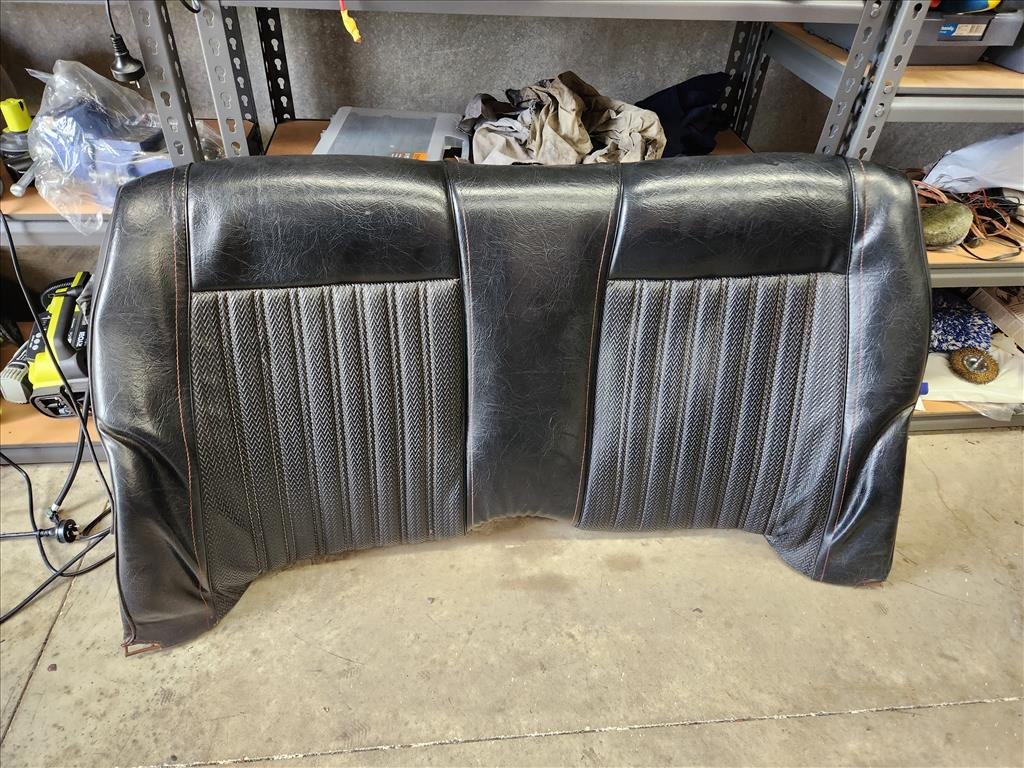
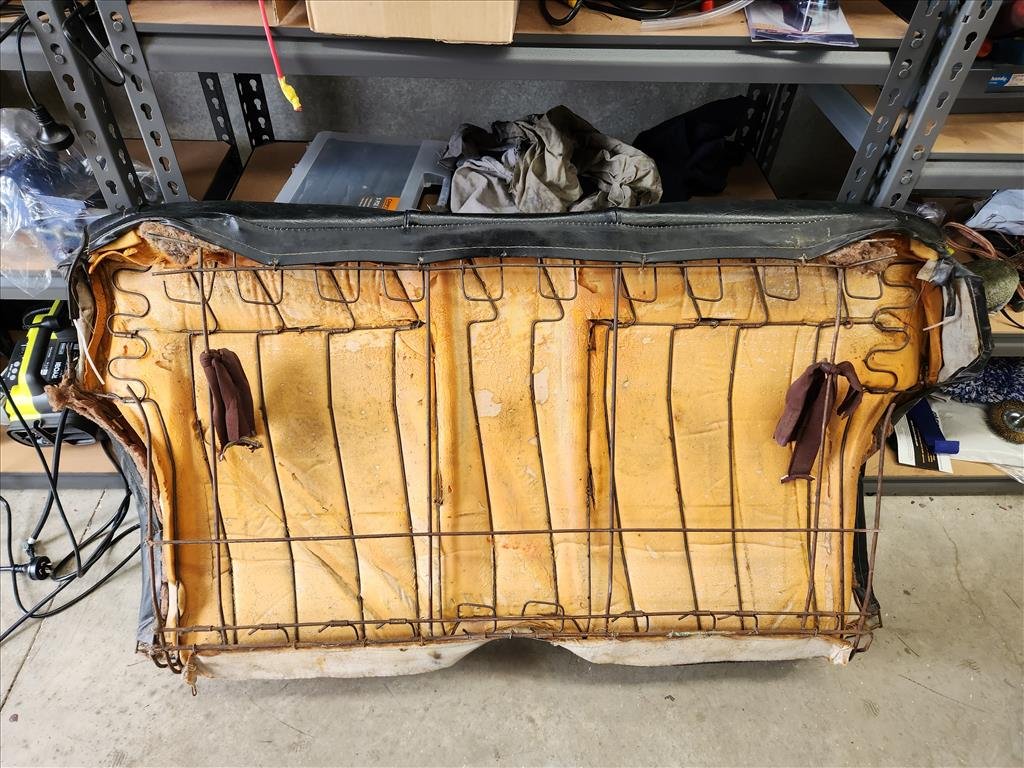
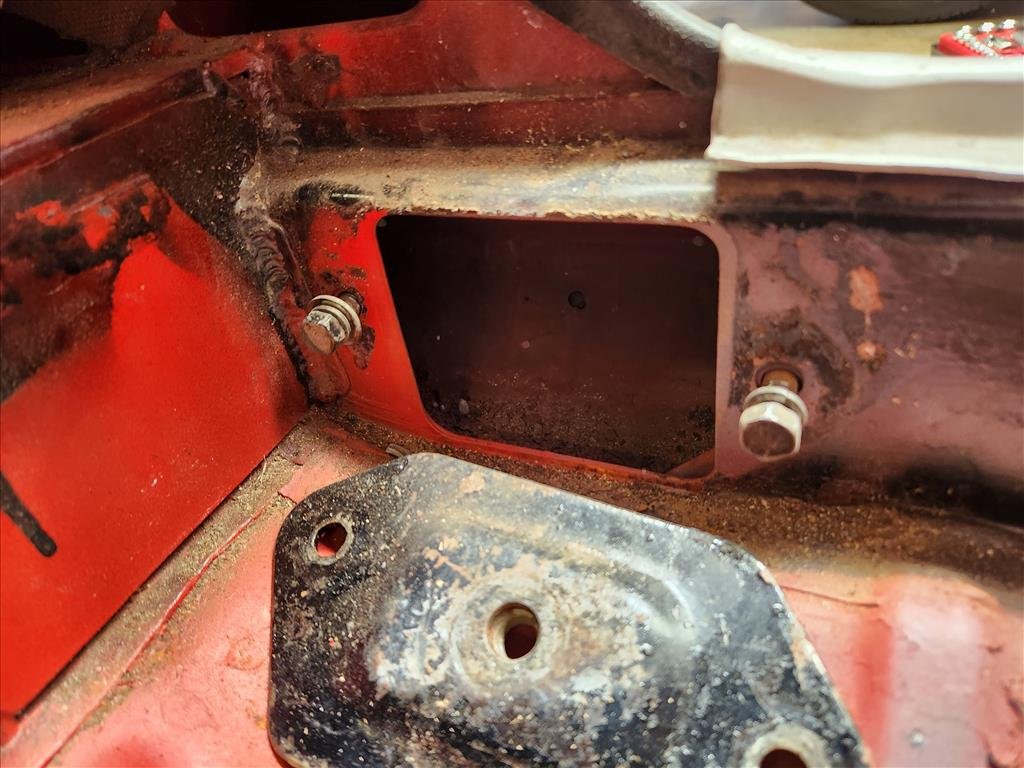
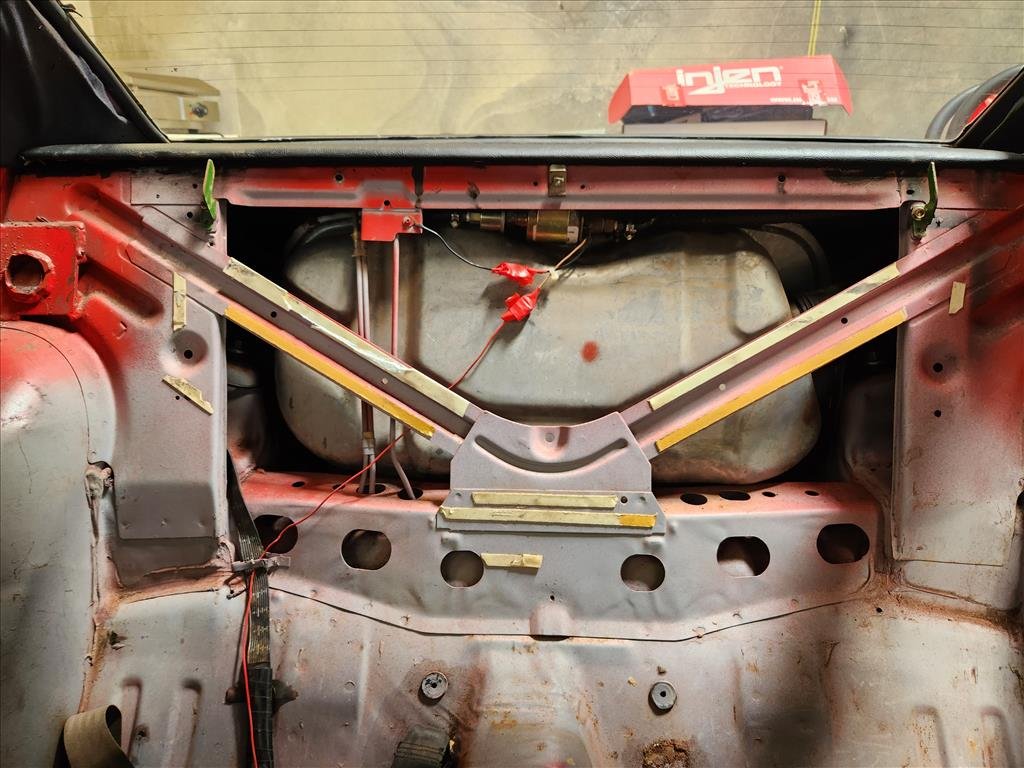
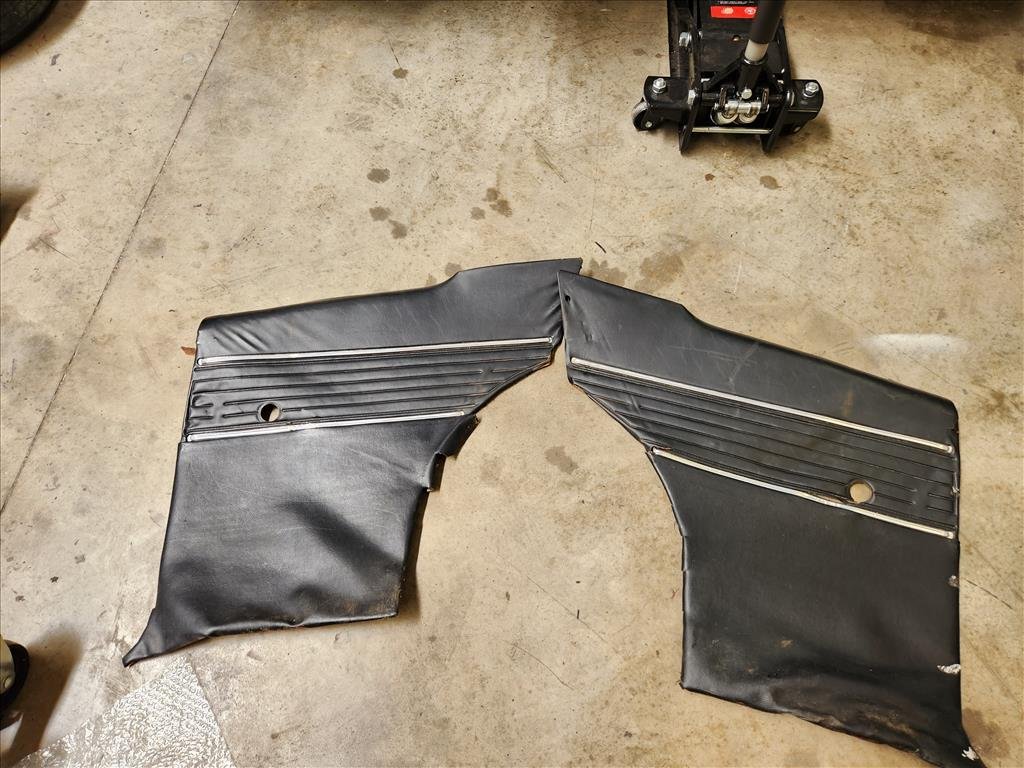
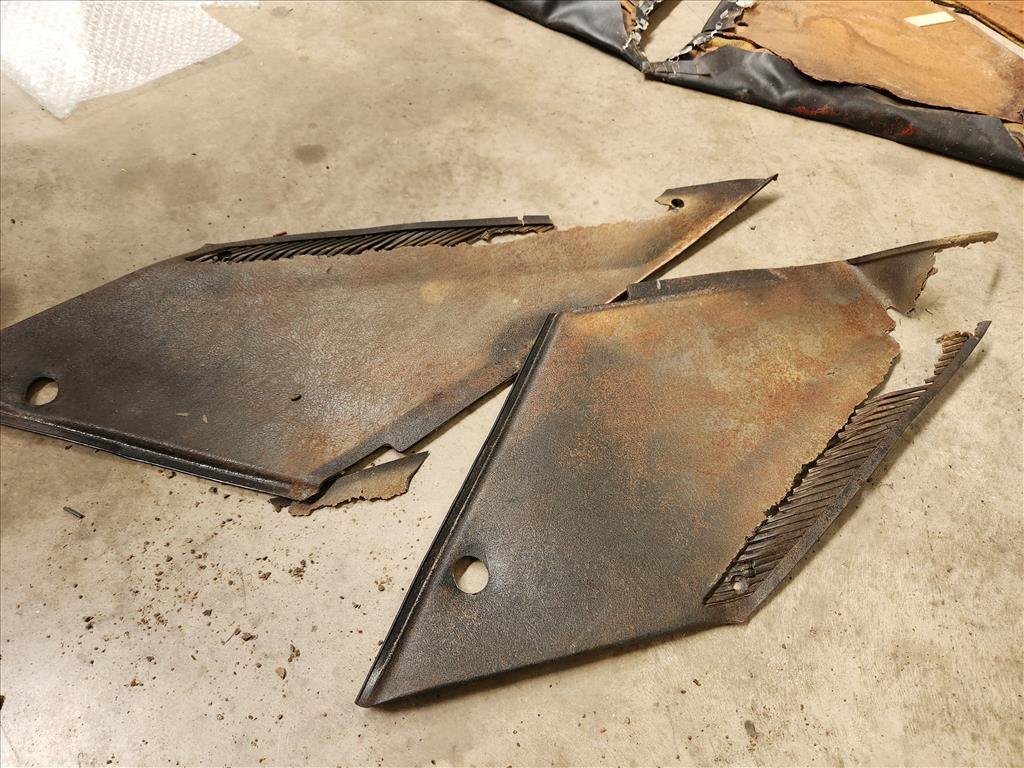
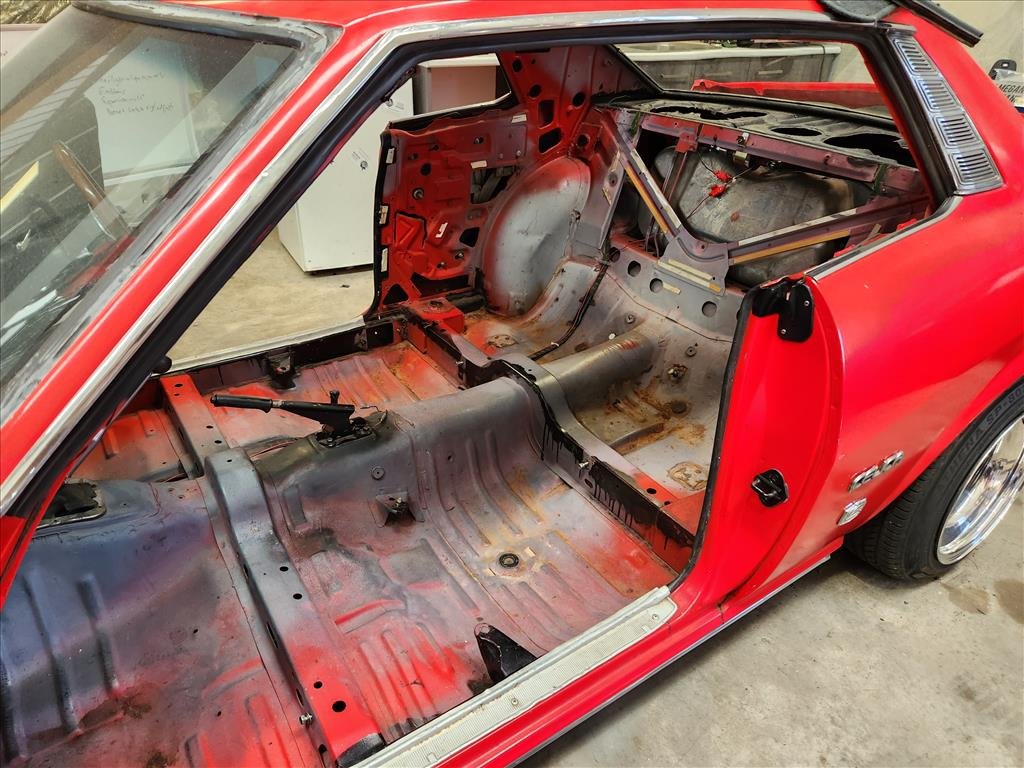
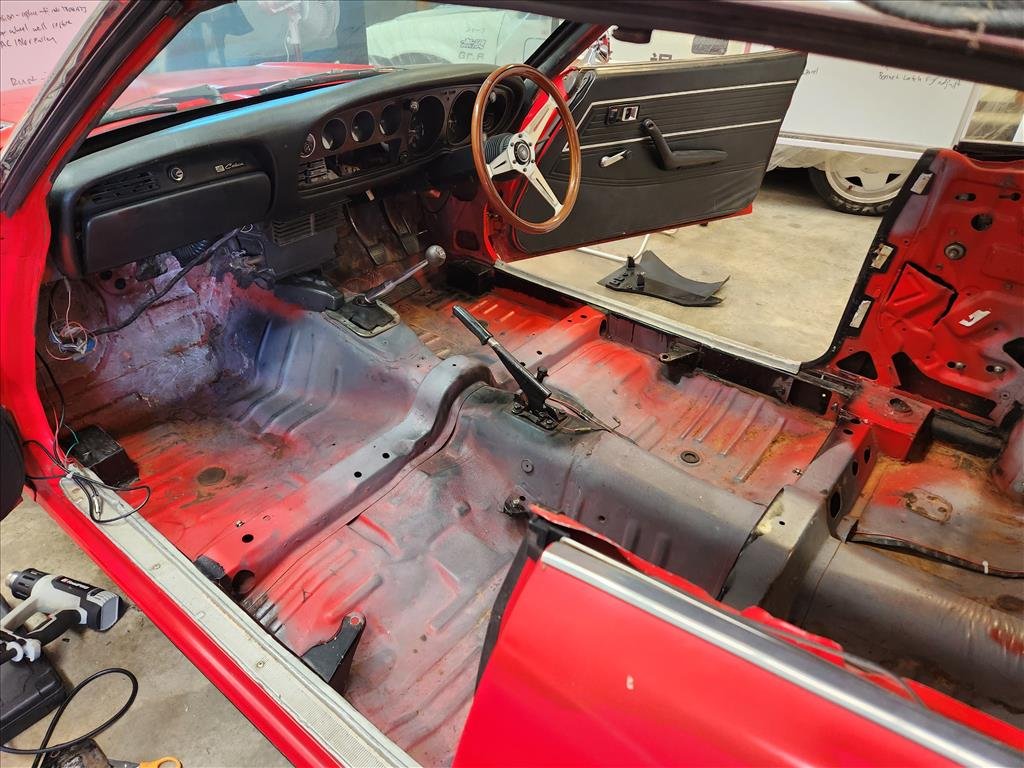
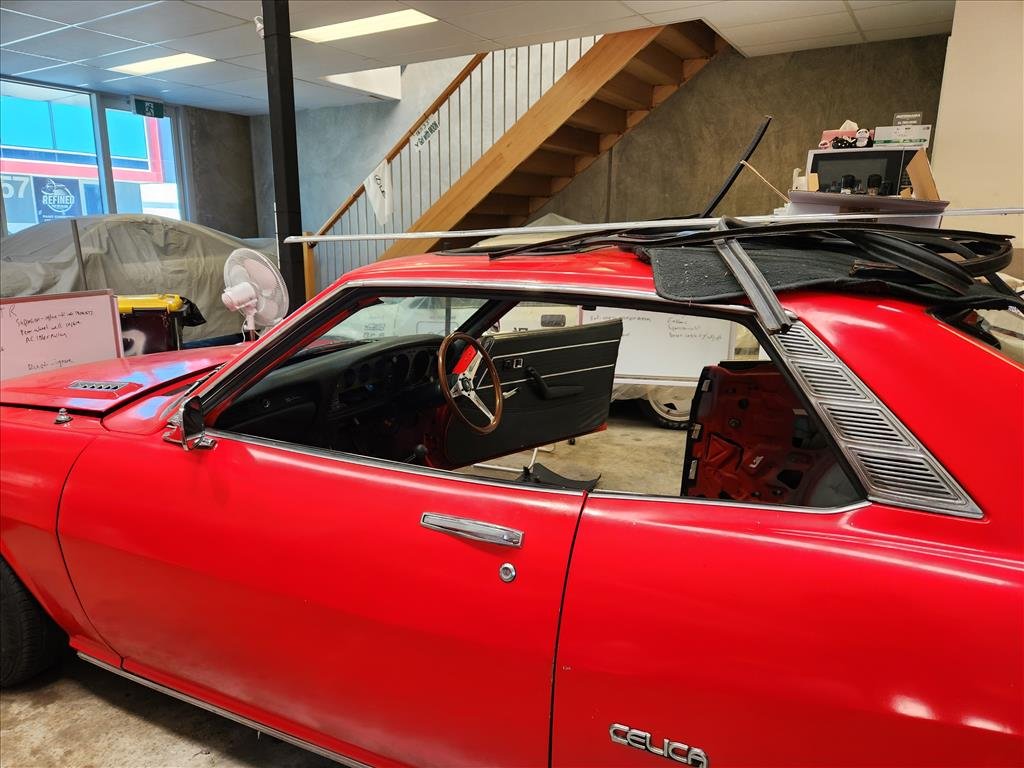
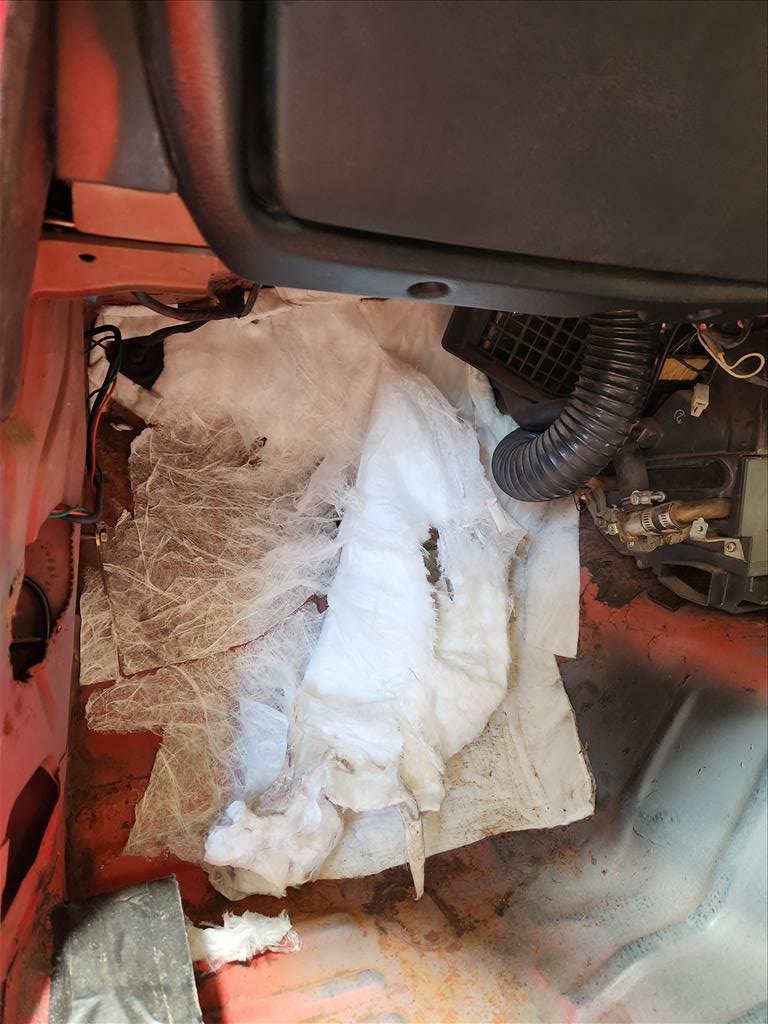
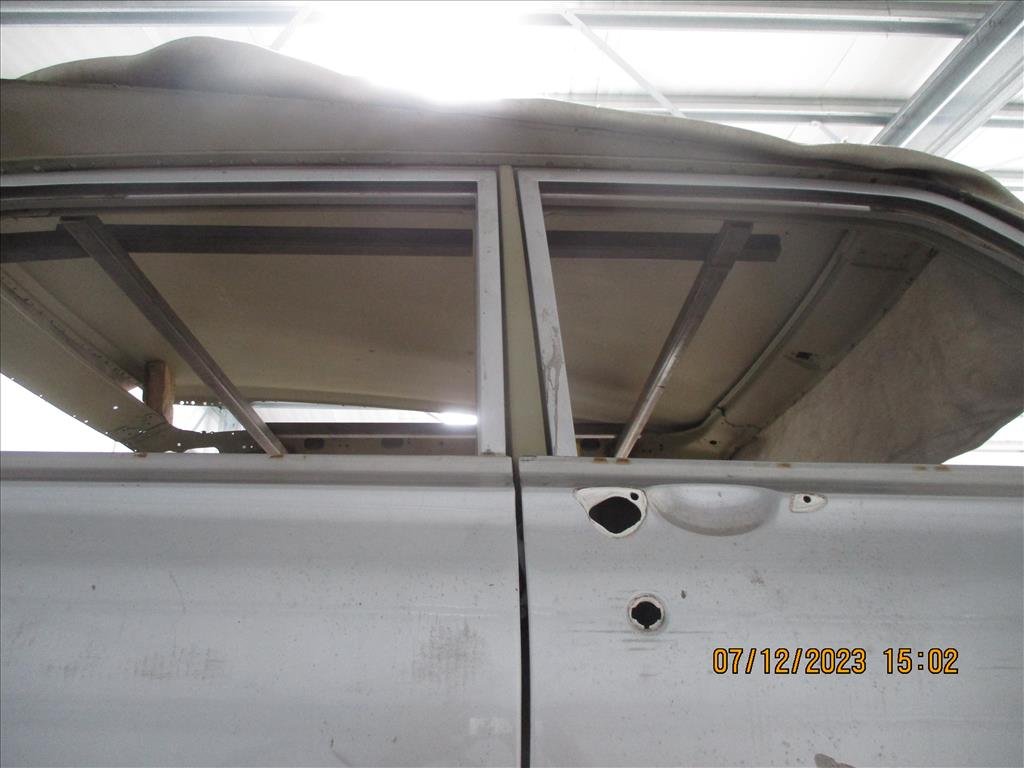
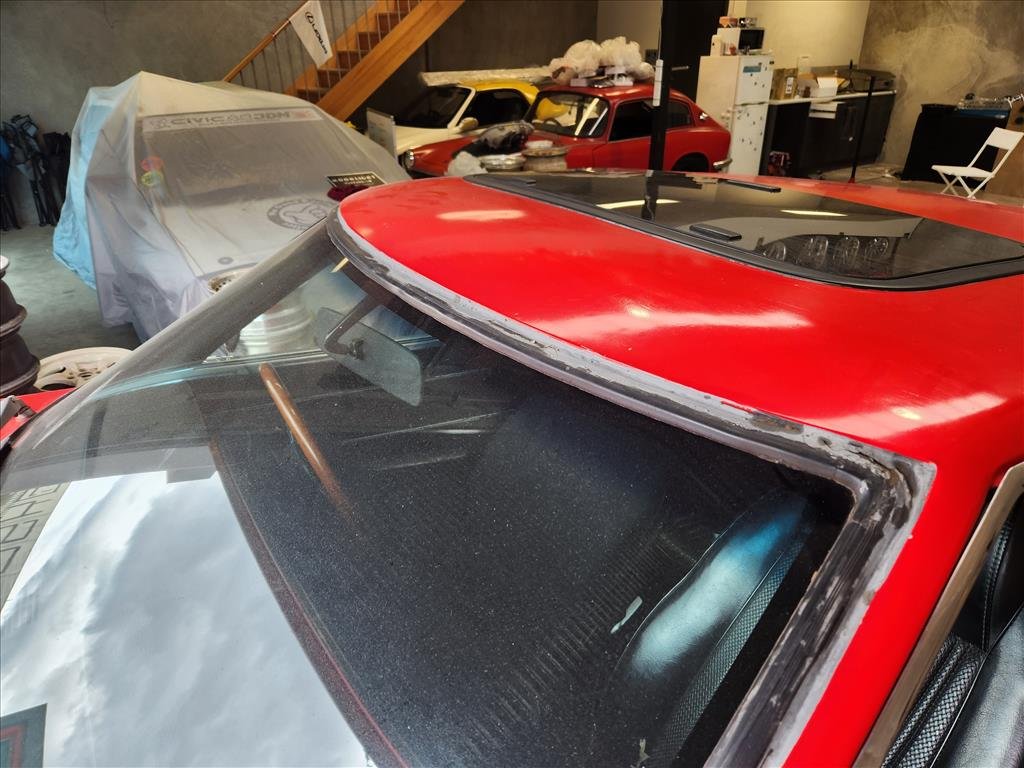
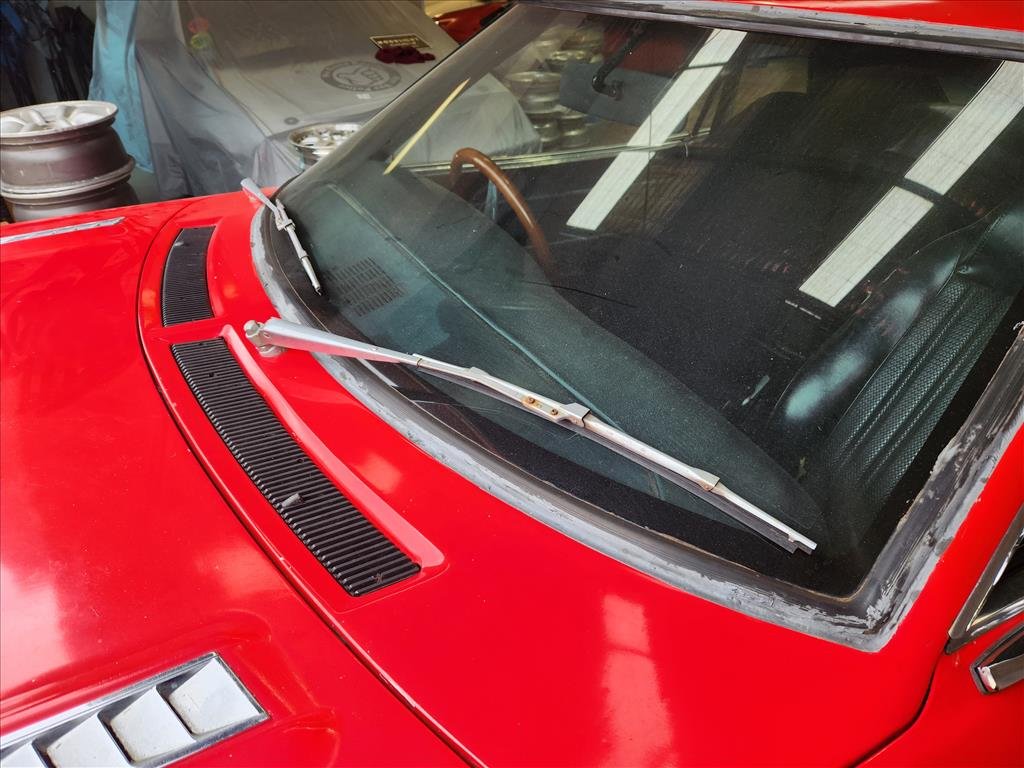
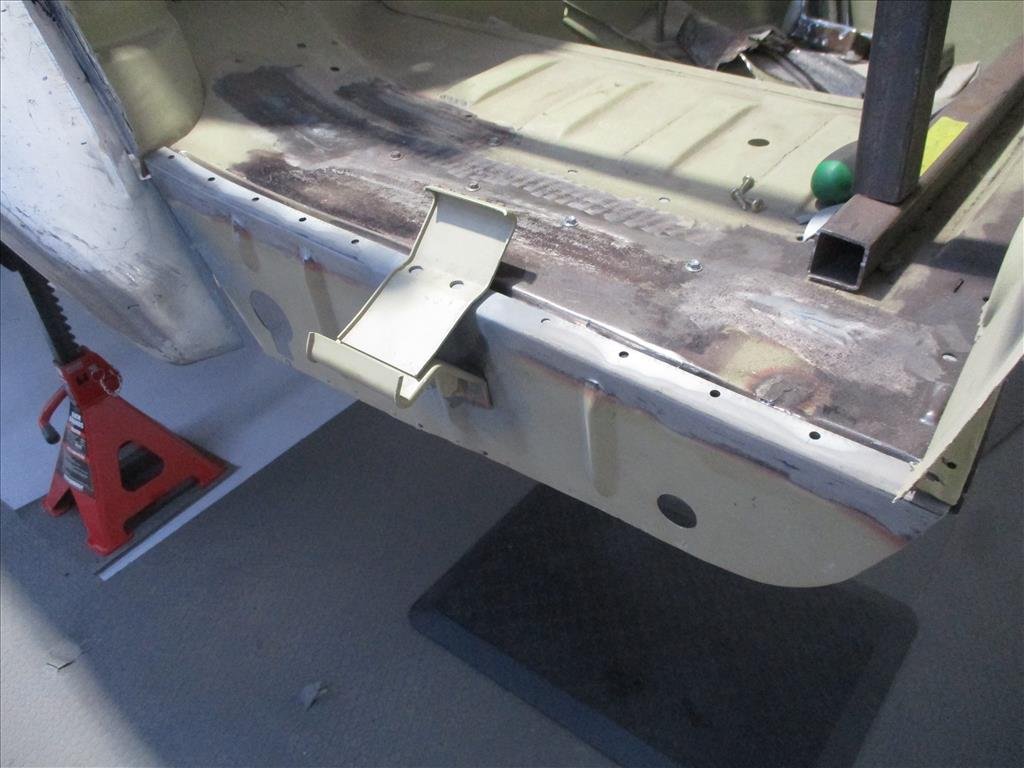
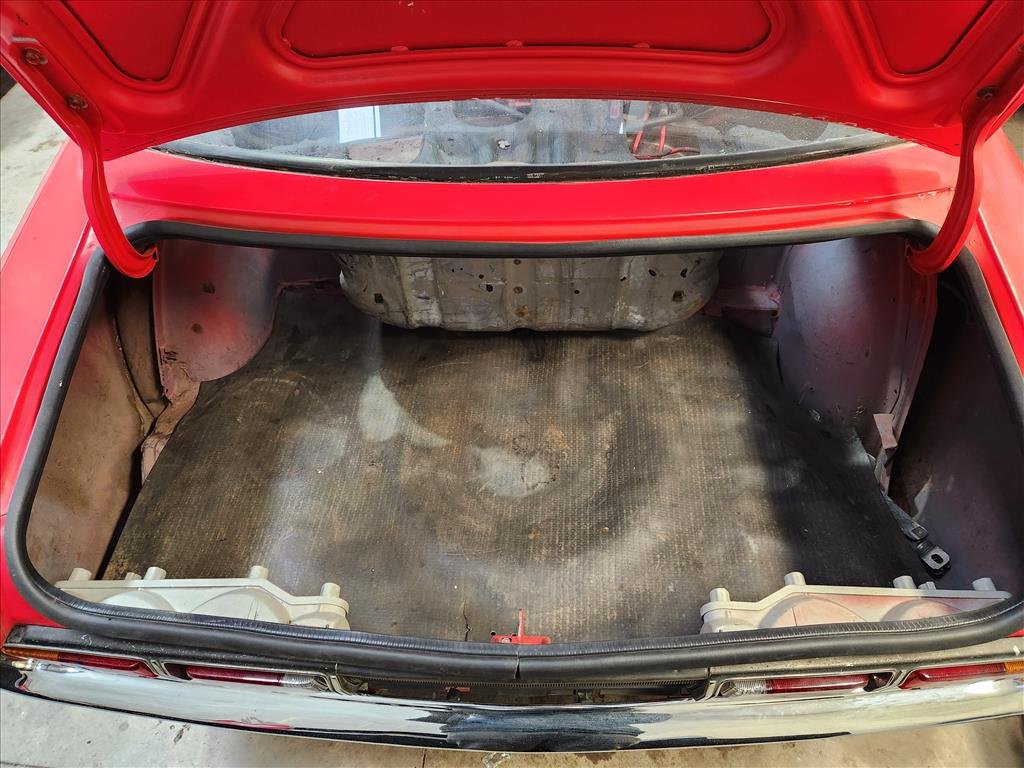
56k Warning (hahaha) there's a few photos and a whole lot of carryon in this post! As I mentioned before, this year is interior year for the Celica so the first thing to do is tear it apart. Unfortunately the front seat covers are pretty mangled, rear covers may be salvageable but there's a guy here that does really nice OEM-spec covers for front and rear so might just get a set of those eventually. I will need to get a new rear seat set before I can do that though as it's been bent up and cut for the roll cage that was in there before. This roll cage also means there were mounting blocks around the place like these ones which cause the side trims to be a little messed up at the bottom. I don't think I will be able to cut this one out easily so might just have to live with it. I have to get all new trim panels anyway as you can see these are completely mangled. Thankfully these seem to be available as well. Something else that's mangled is what was behind the trim panel on the rear driver side. This window winder is stripped meaning the handle doesn't work. It looks like sometime in the past they might have tried to think about fixing this by cutting an access hole. It's not fixed so I don't really know what happened there but I would like to try and fix this so I can get sweet pillarless action. After I saw the dramas with getting in here from the Speed Academy videos maybe I'm a little bit happy they decided to do some bush mechanics on this part. Speaking of access panels, thought this was interesting. This car is perfect for running drugs as it turns out. In reality I think this may have been a hole for retractable seat belt? Unsure exactly as the replacement seatbelts mounted to this extra panel that bolts over the top of it, bit odd and probably put in for ADR approval or similar. Seatbelts will need replacement as well but I think I'll just pretend these cars did not have rear seatbelts and do the front only until someone tells me off. The front driver seat was interesting, I can't even blame anyone else for this one as I was the last person to put this seat in. Suppose I did the old "it's future Alex's problem", yeah future Alex isn't super fond of that as it turns out and yet, there is no effort to change habit. Threads are for losers anyway. Another thing to get sorted while things are all apart is the fuel system. Once upon a time an electric fuel pump was wired in, wiring job looks like something I would've rigged up honestly but it needs to be properly done. For one the pump is in the wrong place so that needs to be relocated and it's not on any kind of relay or anything so it runs all the time as soon as you click it over to accessory on the key; I don't think that's correct. I'd like to install a fuel pressure regulator as well to keep it in check. The roof lining has been cactus since I bought the car and probably has been screwed for years before. It's just some cheap fabric that has been kind of glued up there and would've been done when the sunroof was installed; probably in the 80s. I tore it all out and will have to work out a plan to replace that. I won't be coating the roof portion but I wouldn't mind slapping up some squares of sound deadening. Carpet needs replacement as well; I think this was a kit once upon a time but honestly it looks like leftover garage carpet, yuck. Replacement carpets are available in much nicer material these days. Also this white insulation looking stuff under the front got me a little worried. 50/50 on it containing asbestos according to Google images so I masked up with some gloves and tried to tear it out. Frustratingly it's stuck down really well on the passenger side so even with the wire wheel on drill I couldn't get all of the stuff off without spending all my life in there. It's good enough to coat over I reckon. Thankfully driver side was much easier as they were lazy with the application. I plan to remove the dash and everything anyway to get it cleaned up under there as there's a bit of messy wiring as well as the heater core seems a bit locked up (I can't change the heat on the slider) so want to have a look at that, or maybe remove it? Don't need heat if you don't drive it. You'll notice the little boxes in the front as well that I need to cut out which will be a super fun (not) job before I can start coating so that might be one of the next jobs on the line. That brings us to the end where it sits now. Stripped out mostly, vacuumed but not cleaned up yet. I will get the brush and anti-rust spray out for that little surface rust that's kicking around. As for the coating I plan to use bedliner then decide if I want to add additional sound deadening or not; haven't quite decided yet. Bedliner is hardy, it's fairly cheap and it will be covered by carpet anyway so should be fine. I haven't decided exactly how far up I want to go, whether I do all the areas without trim or just the floor areas. This is why I need to get the rear windows working, how sweet is that pillarless life.

- 79 replies
-
- 16
-

-
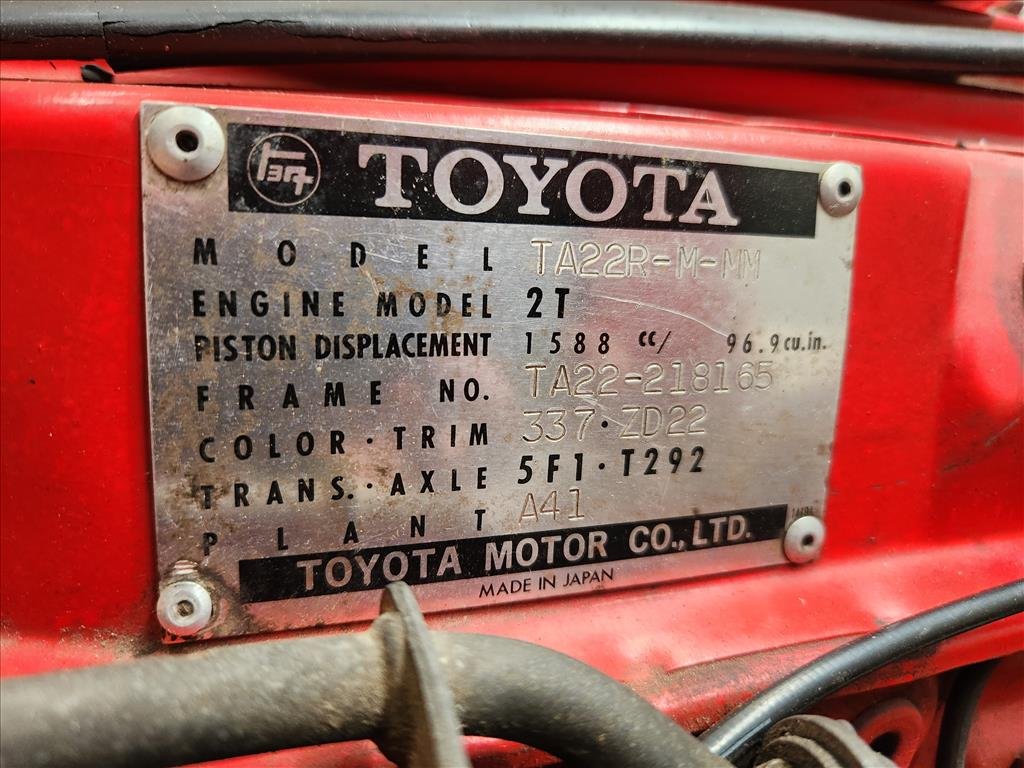
Awesome so the trim might be OEM, that's cool. I wonder if that plant offers a tour.. thanks for that, most appreciated! Good info about the tag number, I'll have to check it next weekend. According to Vicroads that frame number is in their records so presume it's the same.
-
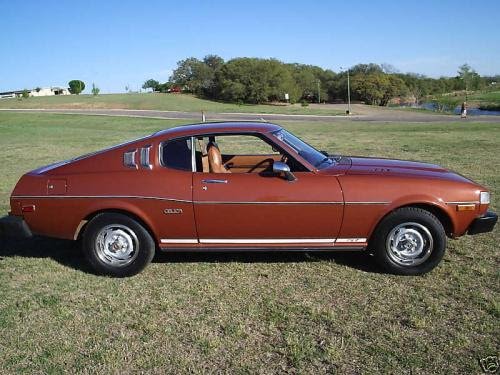
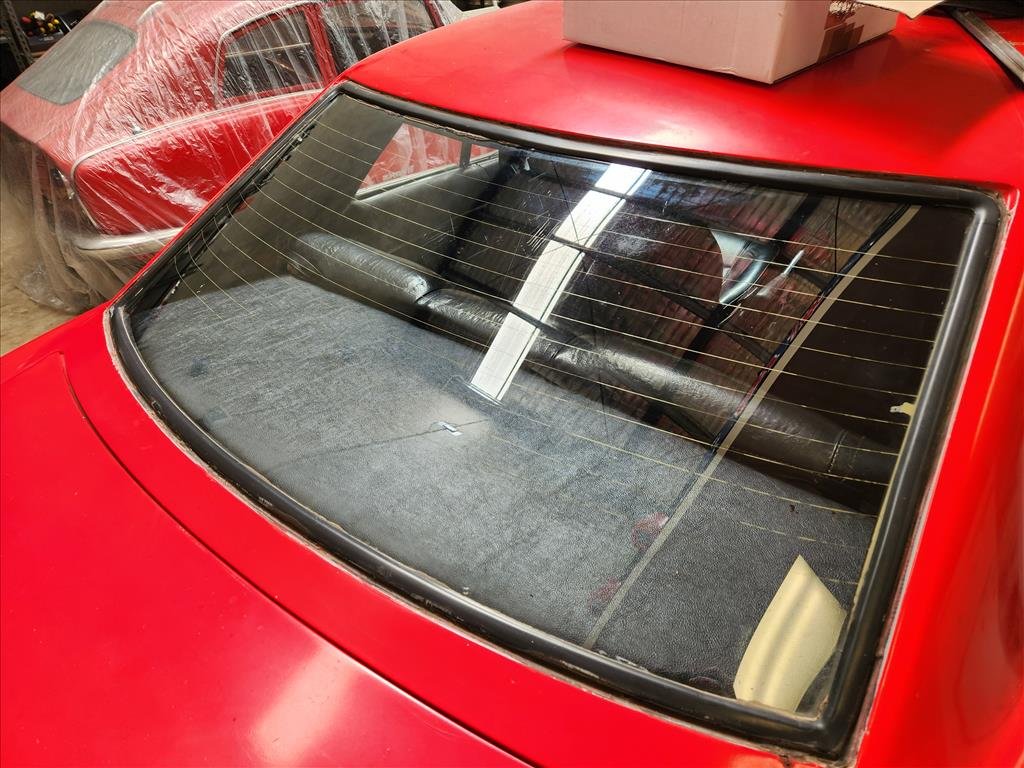
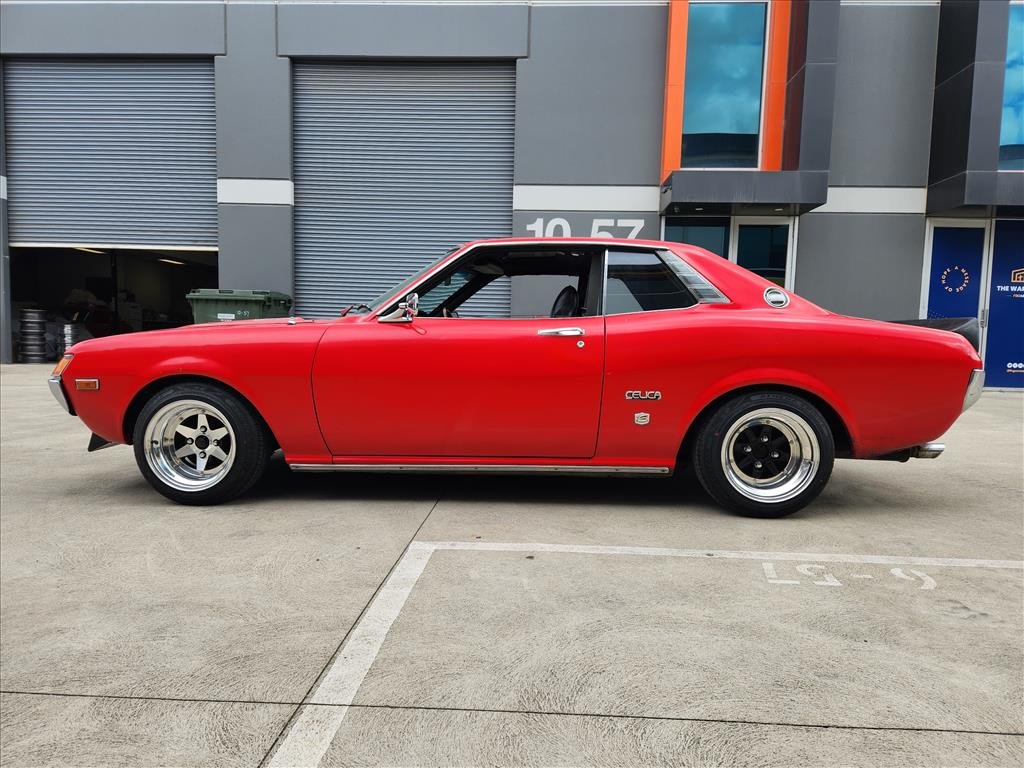
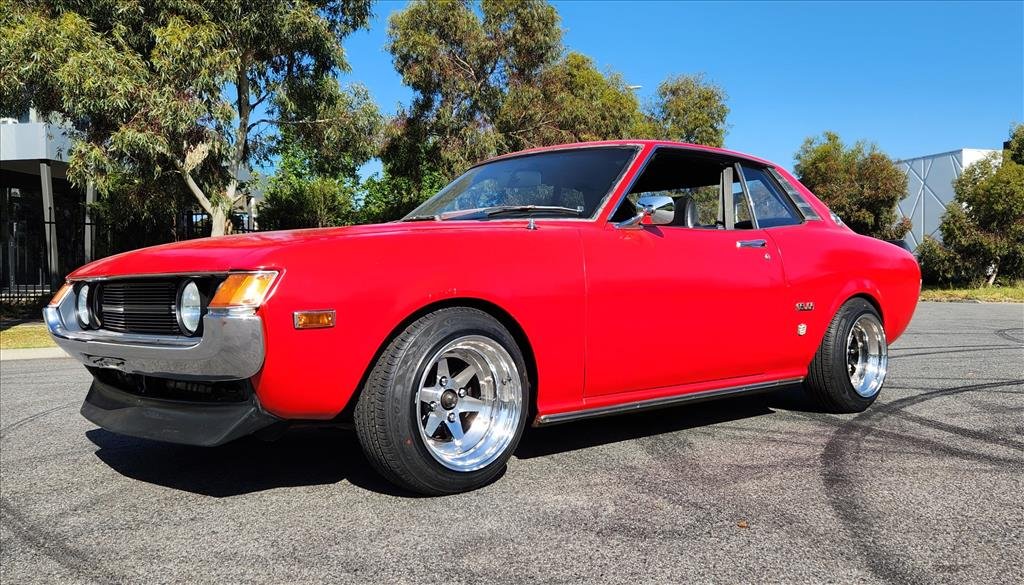
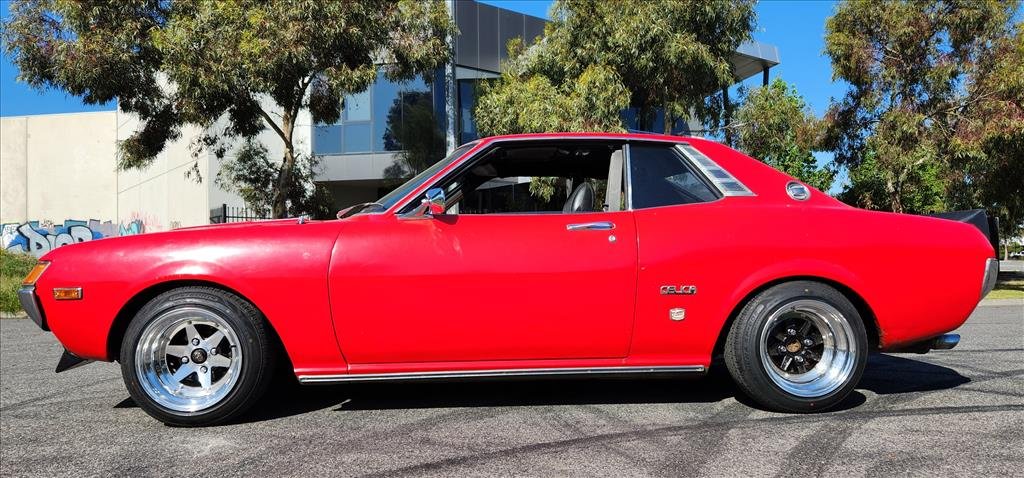
Goals for the Celica this year are get the wheels/suspension fitment all dialed and fix up the interior. The exterior panels are not great but also not really a concern for me this year. The interior however needs work. Finally I was able to find a parcel shelf locally on marketplace which someone had recreated and trimmed up really nice. Obviously it doesn't fix up the actual parcel shelf disaster but if I can't see it then it's fixed. Next I'll take it all out again including all the carpets, seats dash, interior panels etc and replace everything I can. The seat covers are all torn up and the rear seats need to be fully replaced due to the frames being cut up for roll cage installation. I can get new covers as there's a guy in Aus that makes OEM-spec stuff which is awesome. I believe the door panels and side trims are not too difficult to get either. I'm not sure what to do with the roof yet as it had some shanky carpet-type stuff put up there I guess when the sunroof was cut into it. Any Toyota nerds able to decode the trim from this tag? I found the body colour which is that brown looking colour so I presume the trim will be the beige/brown interior that usually goes with it. Being that my car is red with black interior there's every chance this tag is not even from this car but be interesting to know.
-
Cleaned it up as best I could around the edges, still a bit poo but oh well, good enough. Looks like it'll stay on there so that's the main thing. I slapped it and said "that's not going anywhere" so I can't see it falling off. One day I might paint the car so it's the same colour.
-
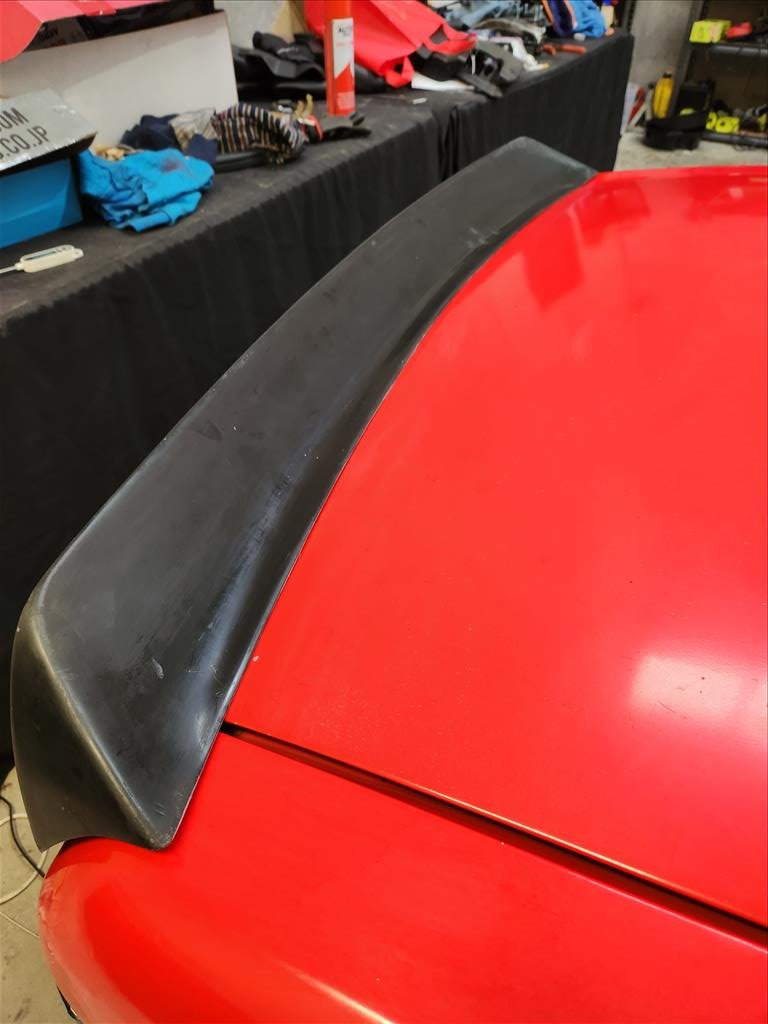
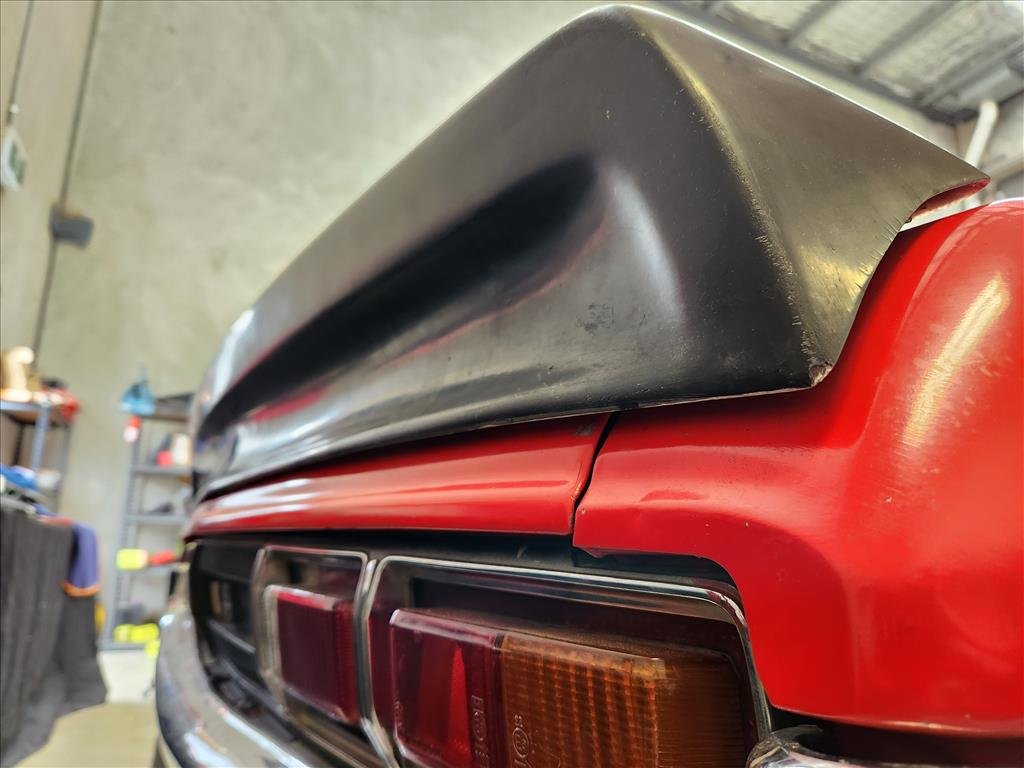
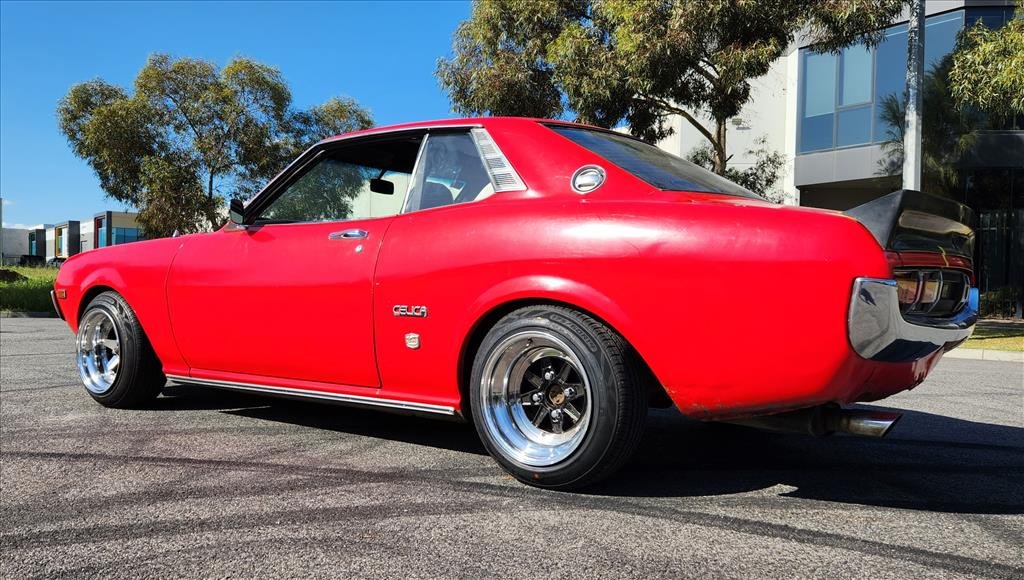
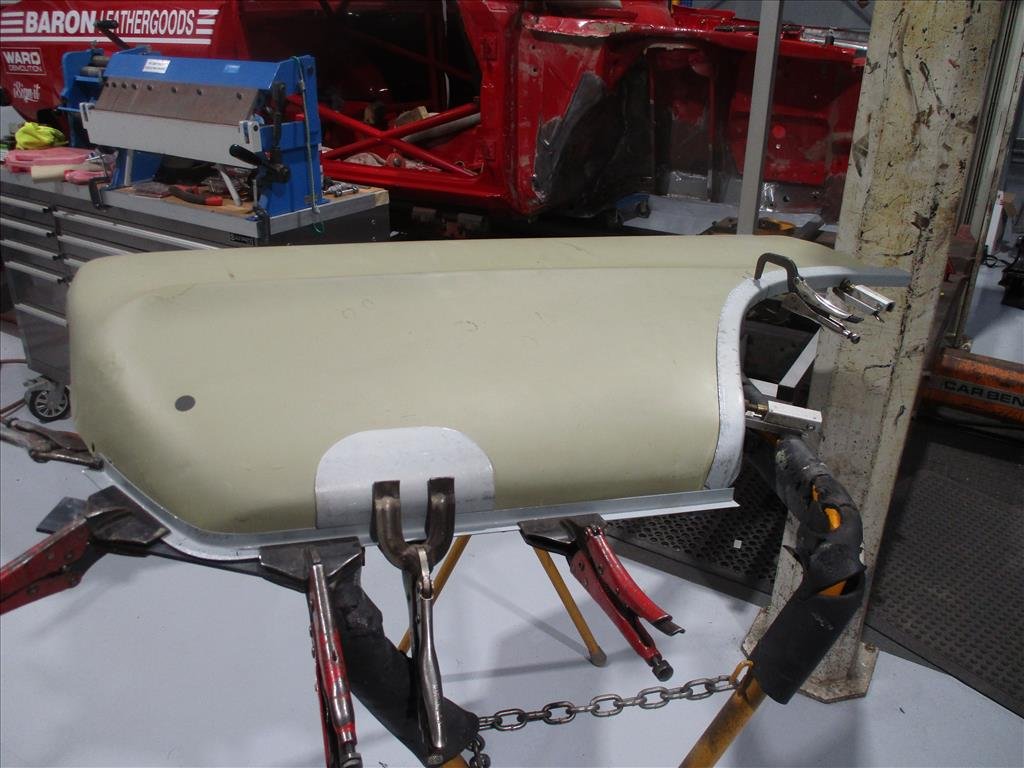
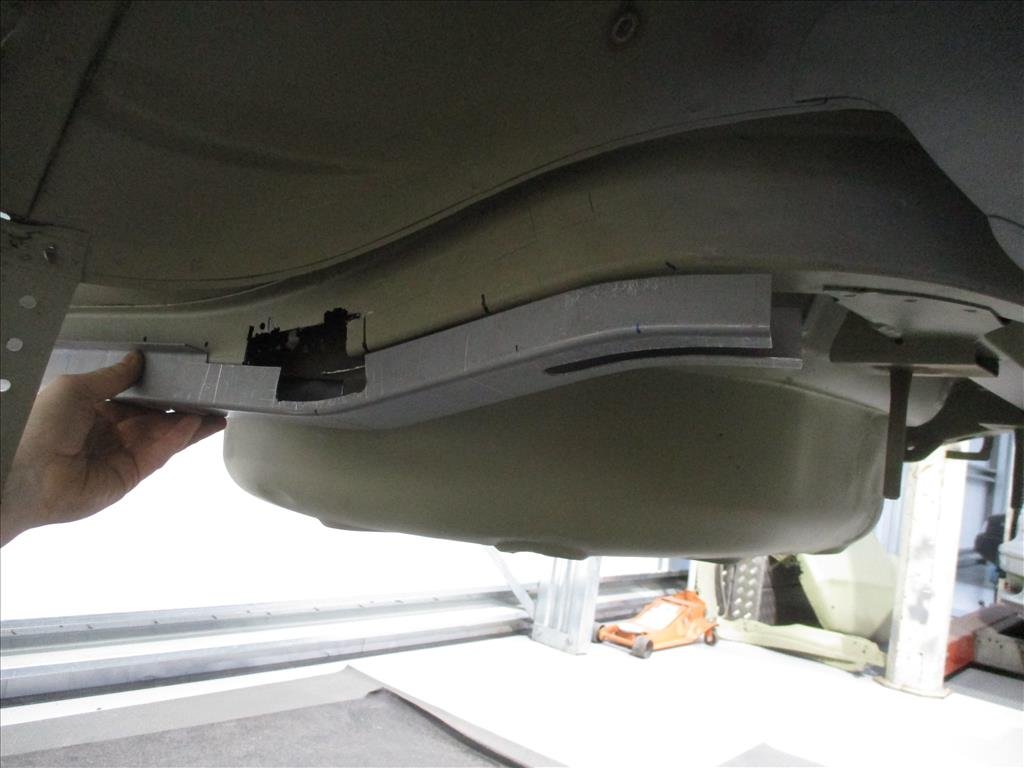
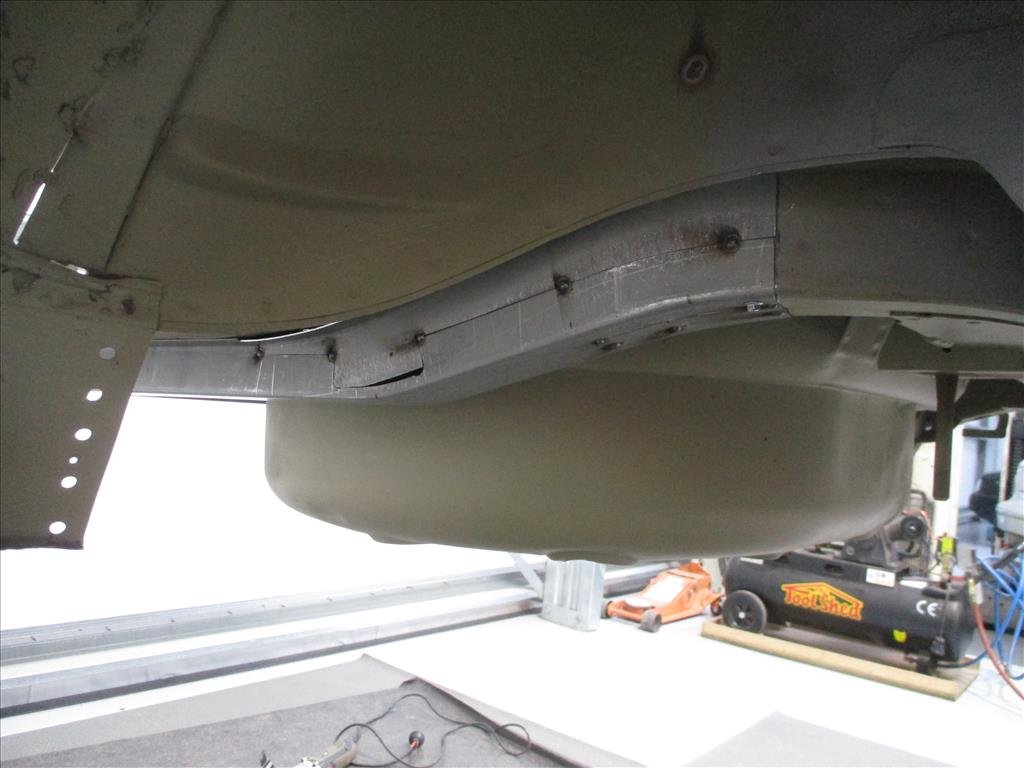
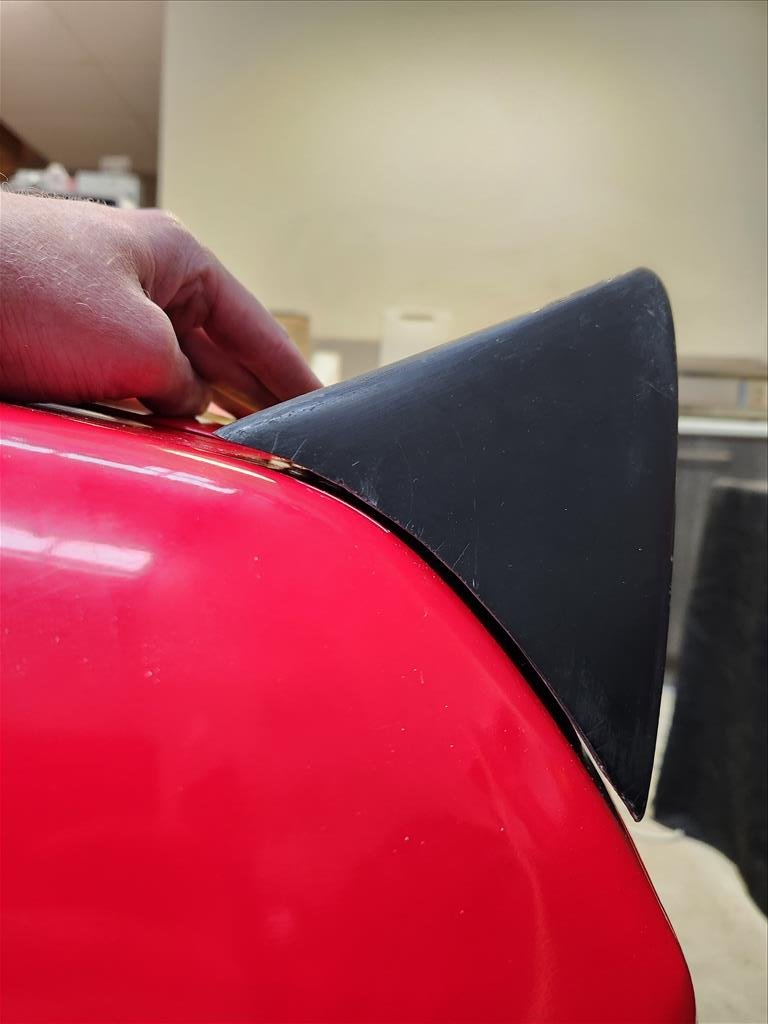
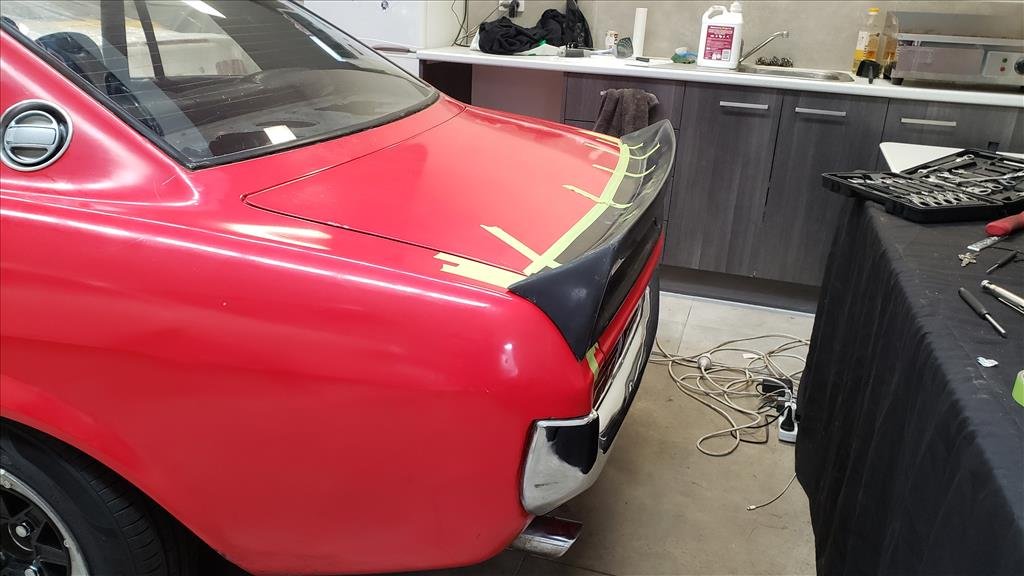
Last week I gooped the shit out of this wing on the Celica as I was sick of it just getting in the way of everything. I had to do a reasonable amount of trimming on the edges so it wouldn't hit the car when I shut the boot but now I can close the boot without contact on the sides. Now I have this overflow goop so not sure if I'll do a RWB style make a big goop line all the way along or just try cut it off.. I'm thinking I can just trim it. Problem is, this spoiler is warped to hell. That could be from a shit mould, could be from sitting in my warehouse/various places for 2 years; who knows. But there's a giant gap on the driver side now. Also I just realised how bad the boot is aligned LOL Naturally I'm doing some sketchy shit to see if it fixes it, or at least improves it a little bit. I used some heat to try and relax the resin but it's pretty well set in shape so I don't have high hopes for it staying stuck down.
-
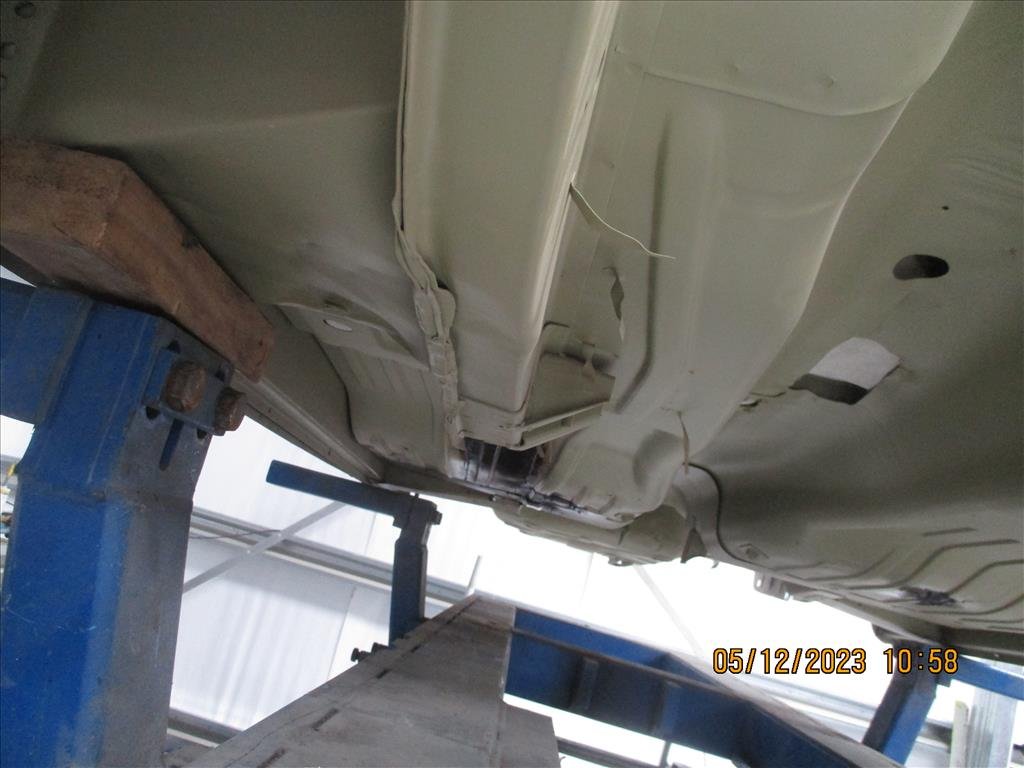
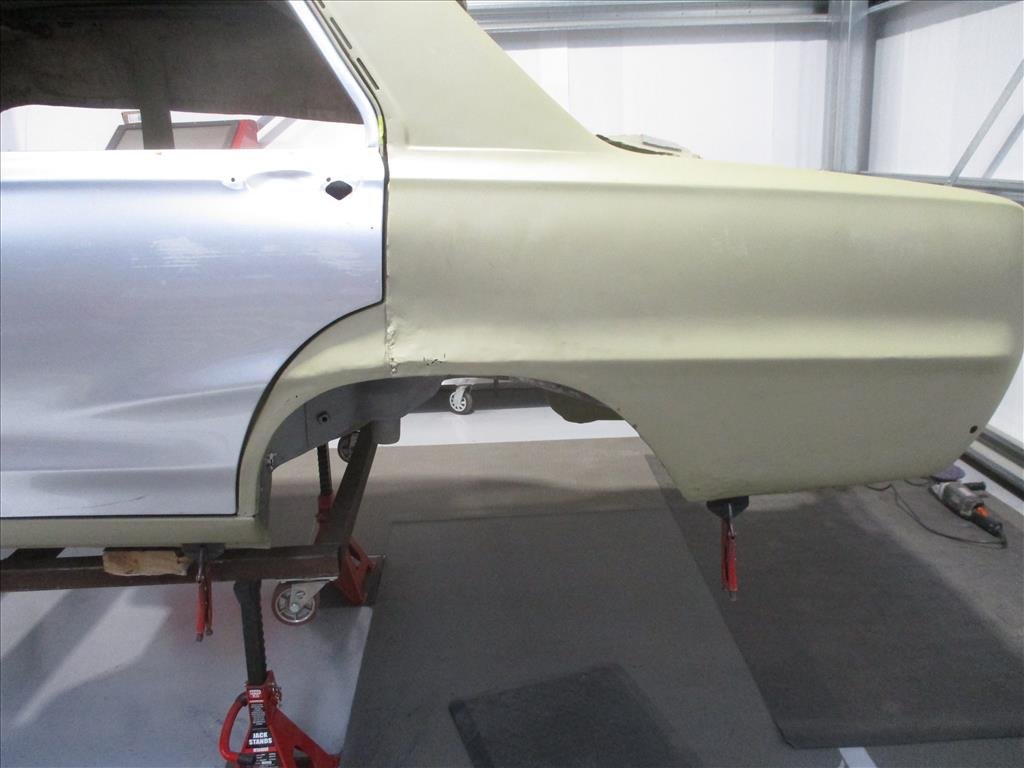
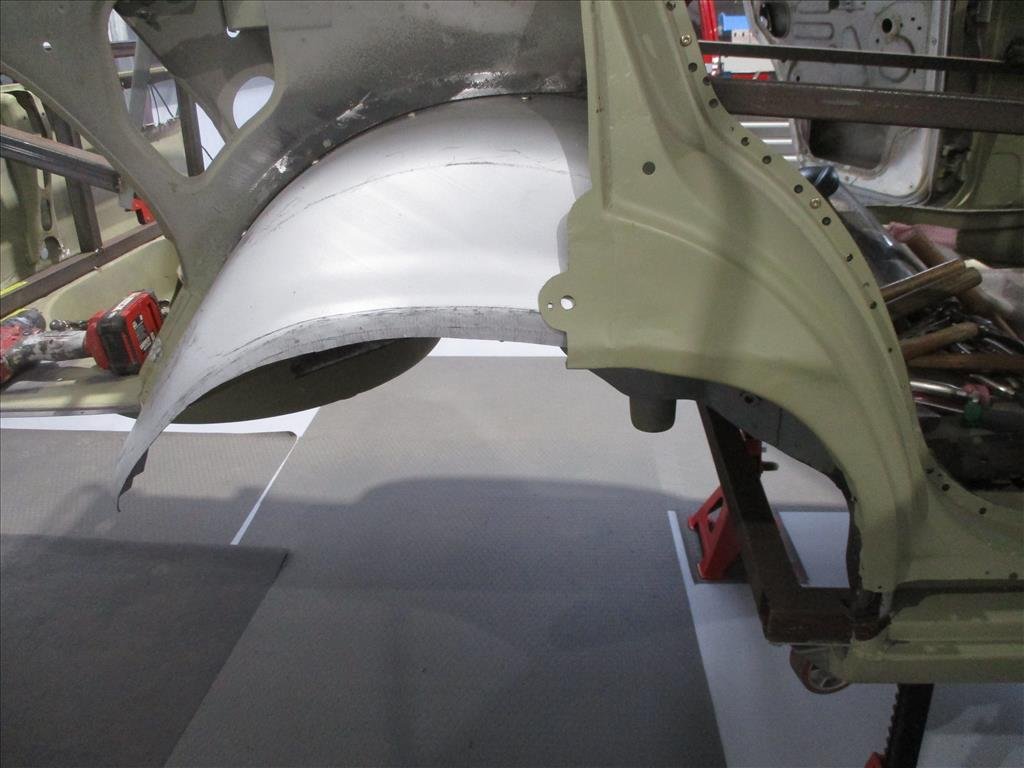
Another Panel Barry update has arrived in my inbox. He's now finished up all the rear quarter work which was quite extensive. The edges were rebuilt on both sides as well as some of the inner parts where it met up with the side panel and inner arch to make sure it was seamless. Next step as mentioned earlier was to get it on the chassis machine which much to our surprised it seemed fairly straight but there was marks from where it had been previously pulled. Not really a huge surprise, the car is old so it would have been ambitious to presume it had never been in an accident before. He's also been busy doing some re-alignment on the side sills and the doors to make sure they all line up and close properly before having the doors dipped and see how much of them are just filled with bog. He also found some damage on the chassis rail at the front and underneath a bit, probably from a forklift lifting it which is unfortunately common in Japan so that's being fixed up too.
- 79 replies
-
- 22
-
-

-
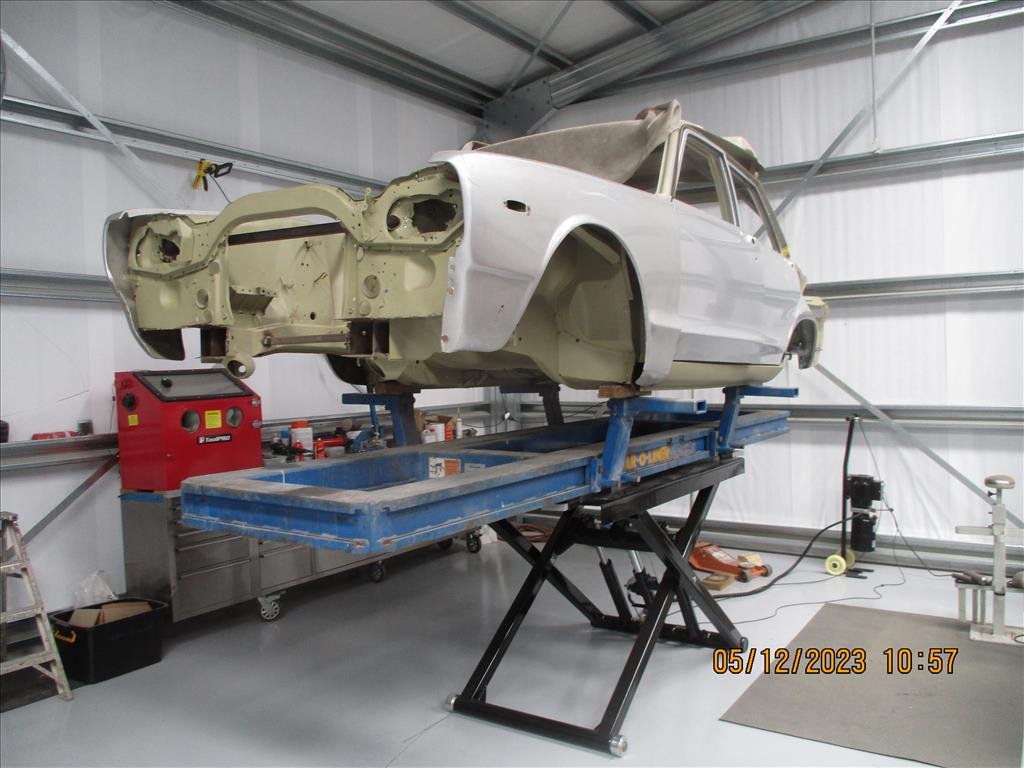
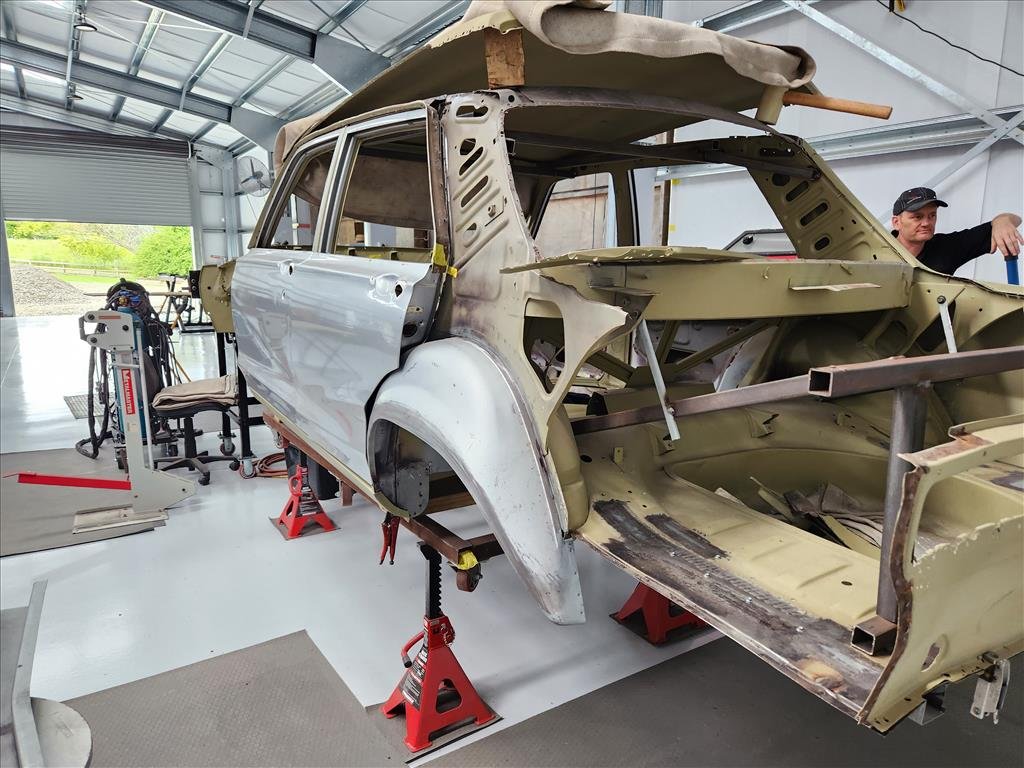
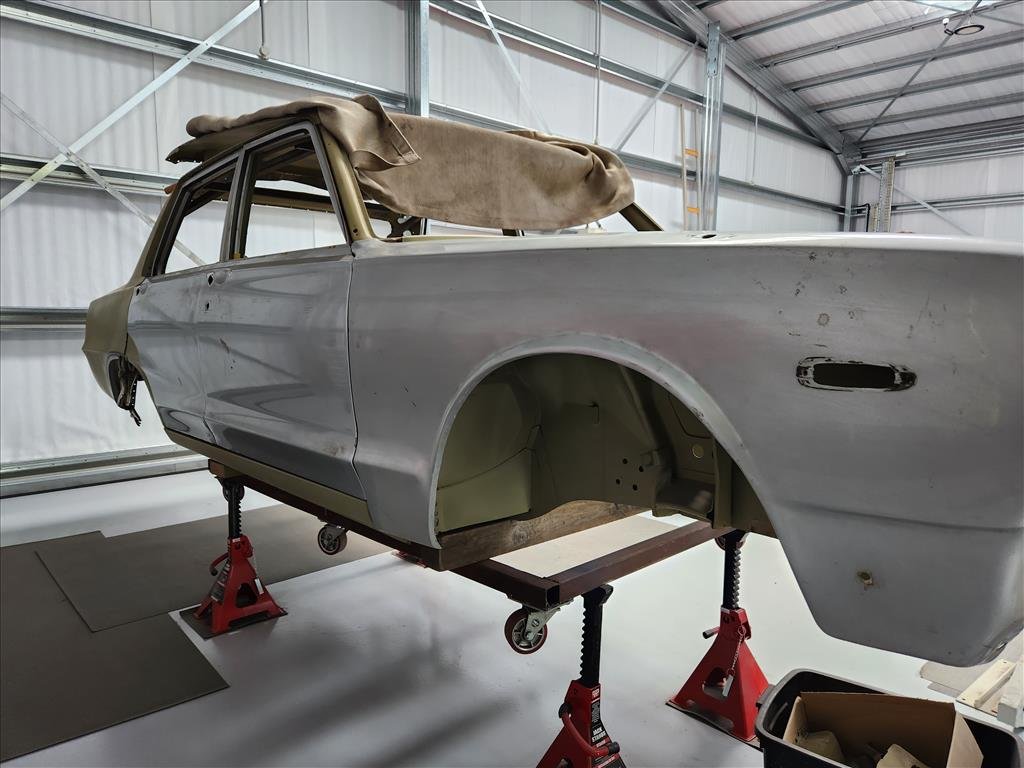
When I was back in NZ recently I made a trip down to see the old girl at panel Barry's shop. Nice place he's got and it's sure a long way out of the way! Can't imagine the fun transporters have going down there. She's come a long way and yet, there's a long way to go. We went over what's been done and what's still to be done and he was happy to show me things that he's worked on and the tools etc, nice guy and extremely knowledgeable. I'm happy the car is in his hands. Next step once he has completed up the other rear arch edges and lined them all up is to put the car on a chassis machine to get it as straight as possible, he happens to have one in-house. While that process is taking place the doors will be dipped to see what we're working with as a couple of them are messy around the bottom and one for sure is definitely full of bog.
- 79 replies
-
- 18
-
-
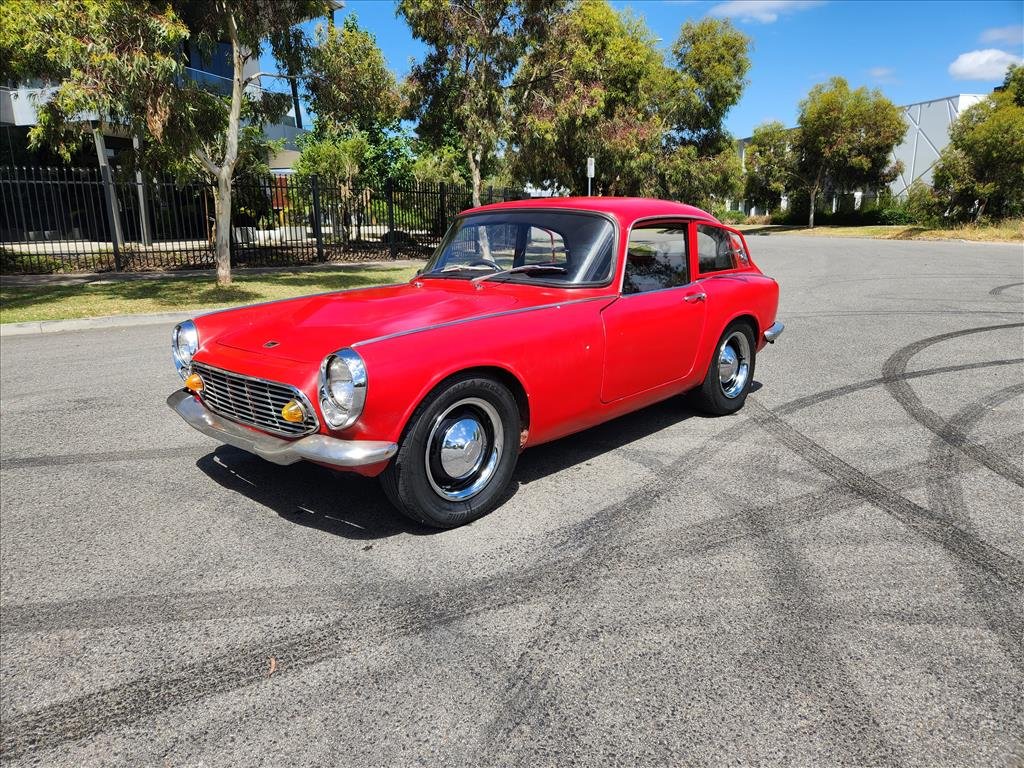
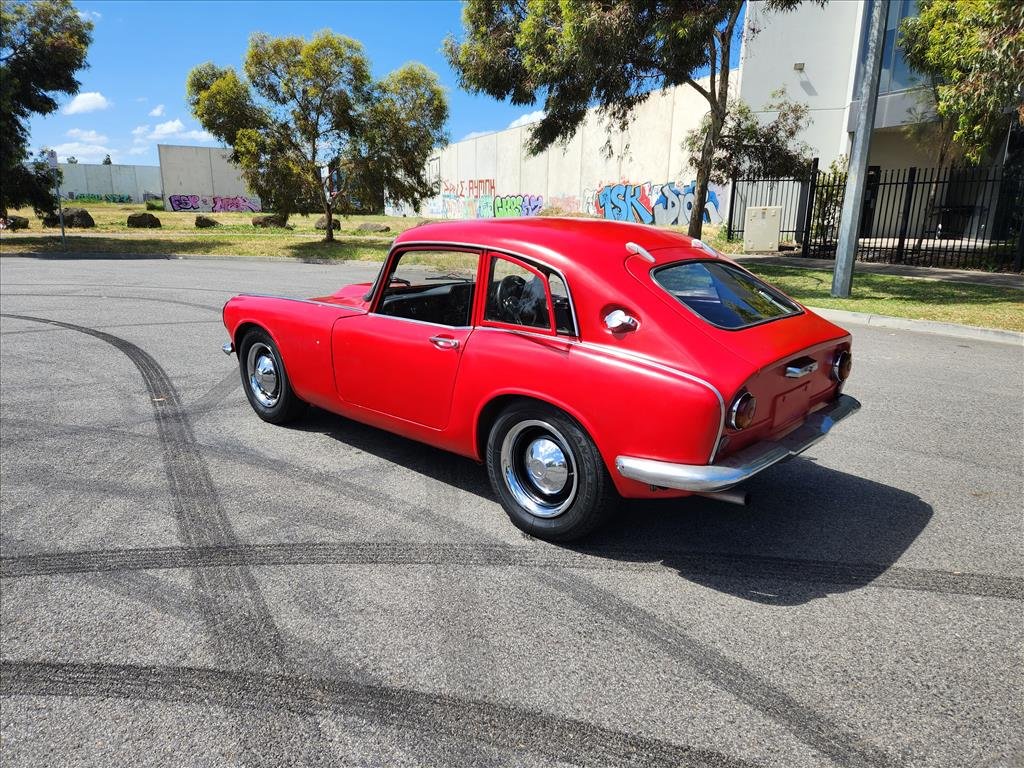
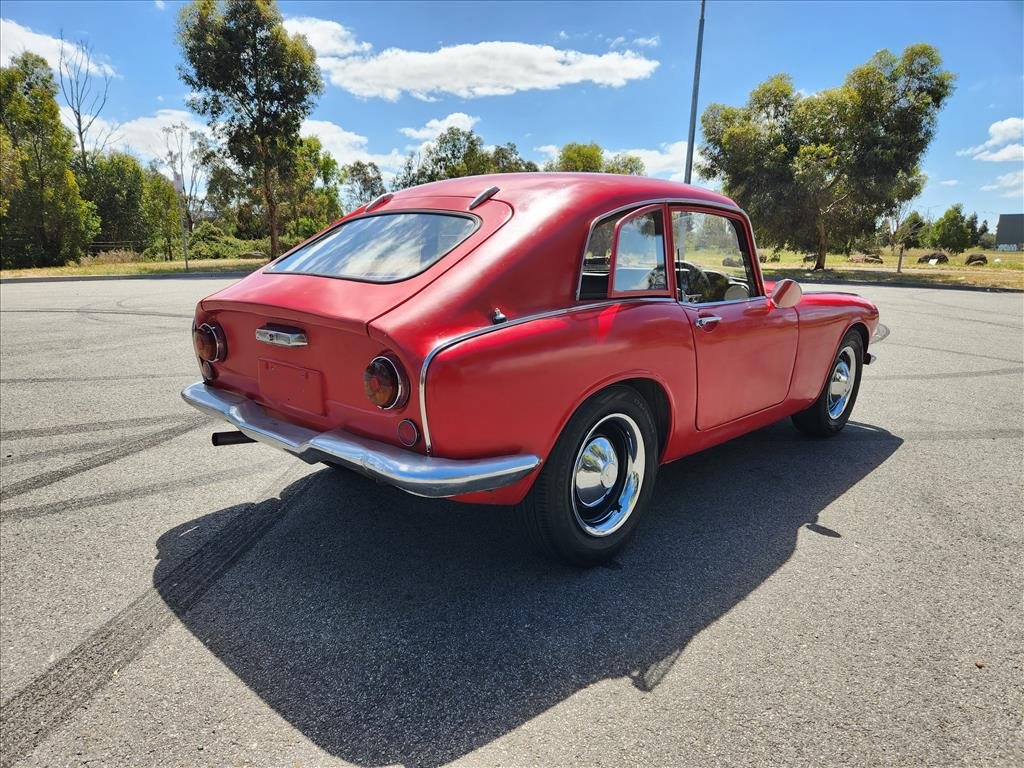
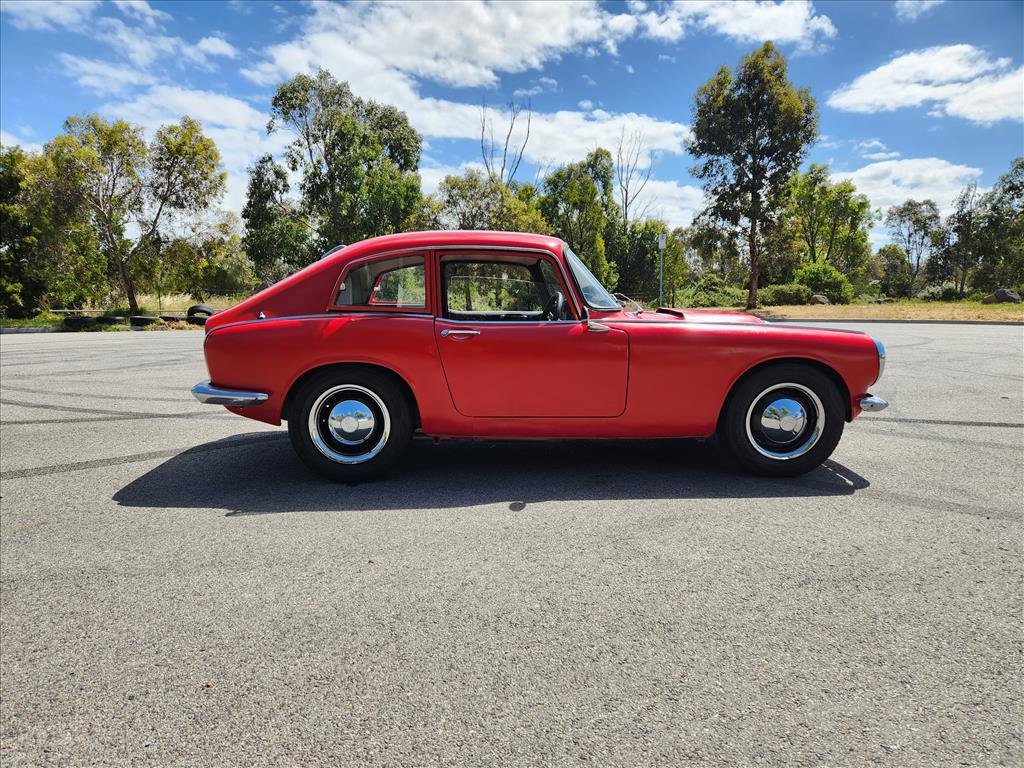
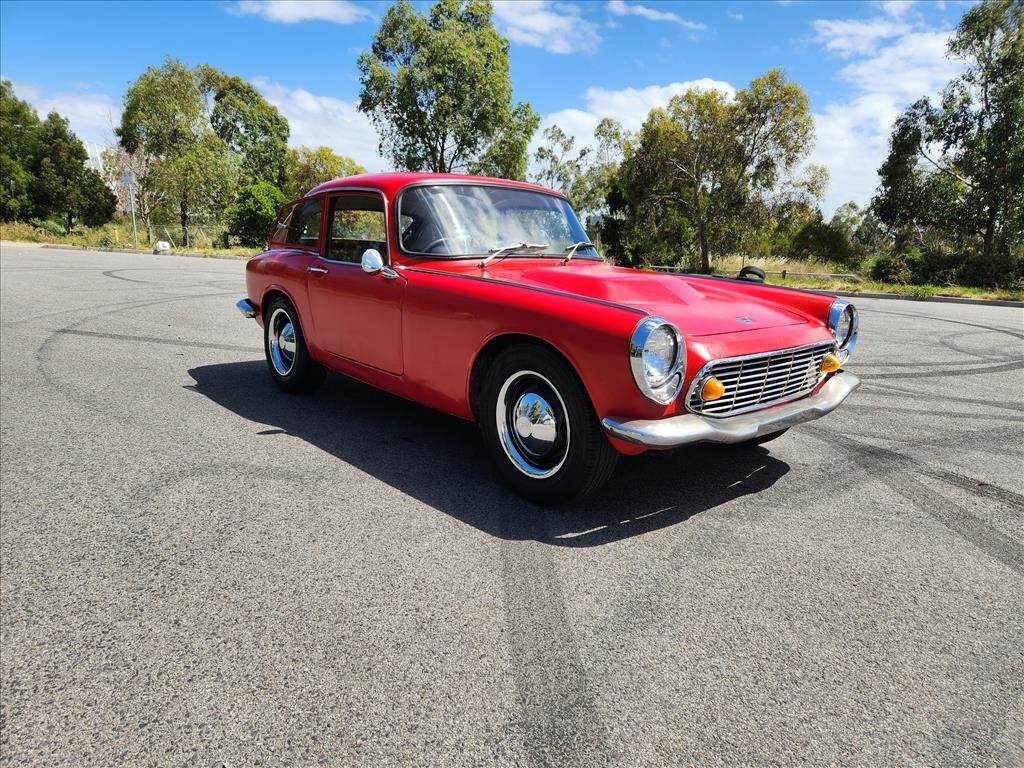
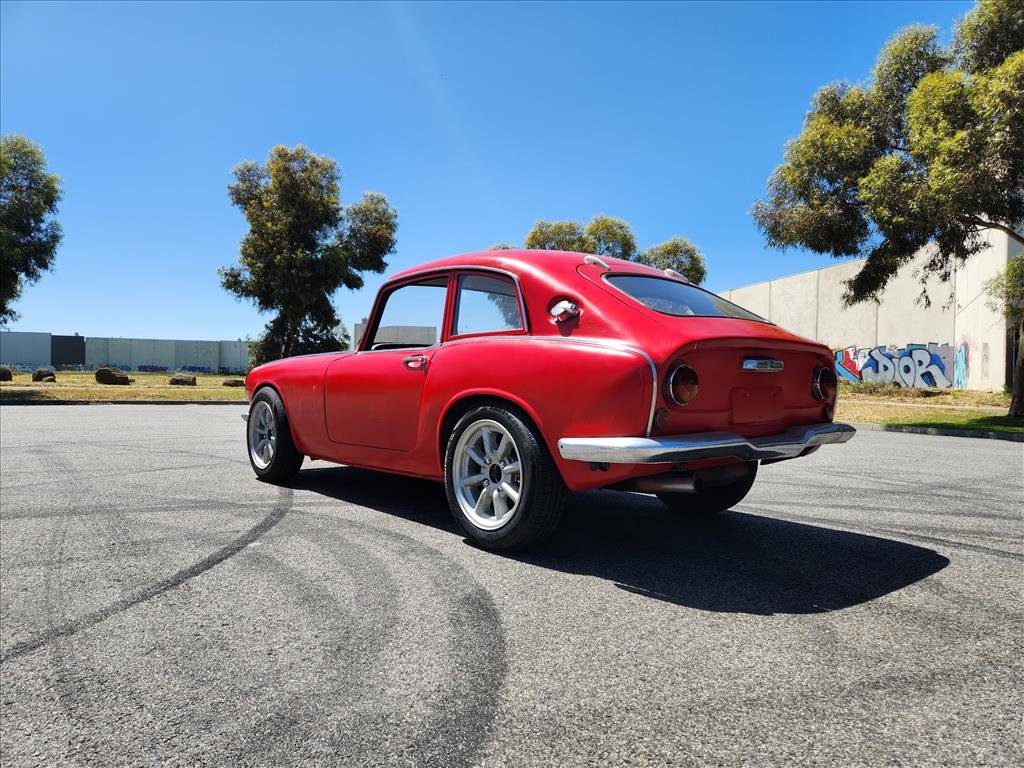
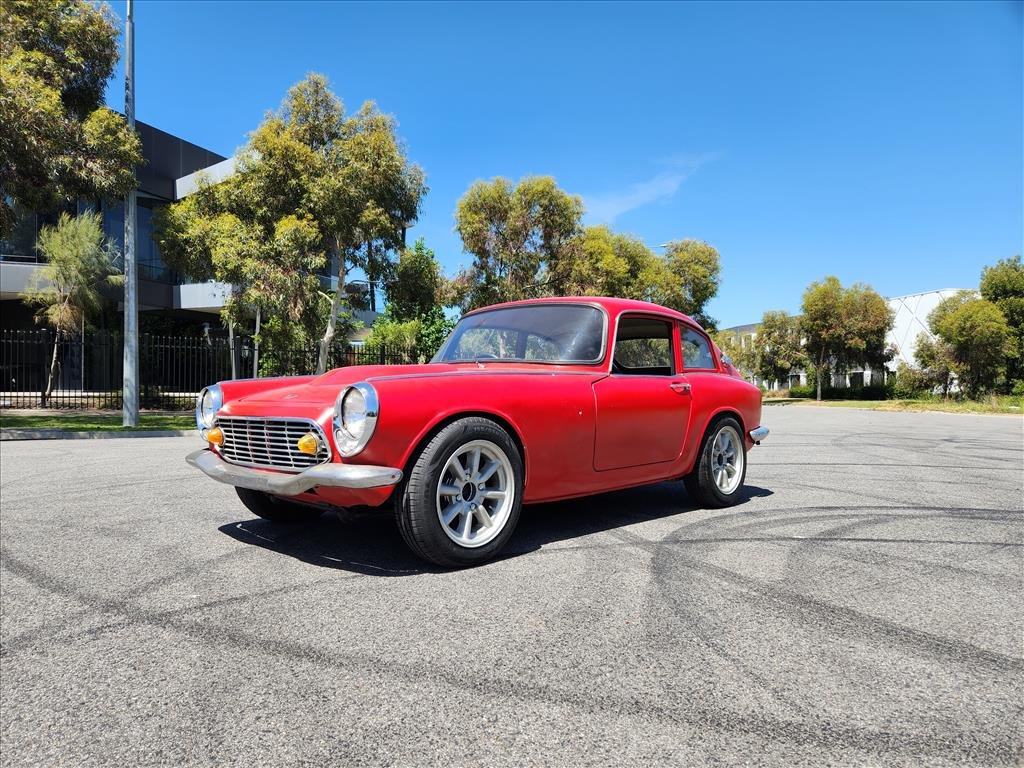
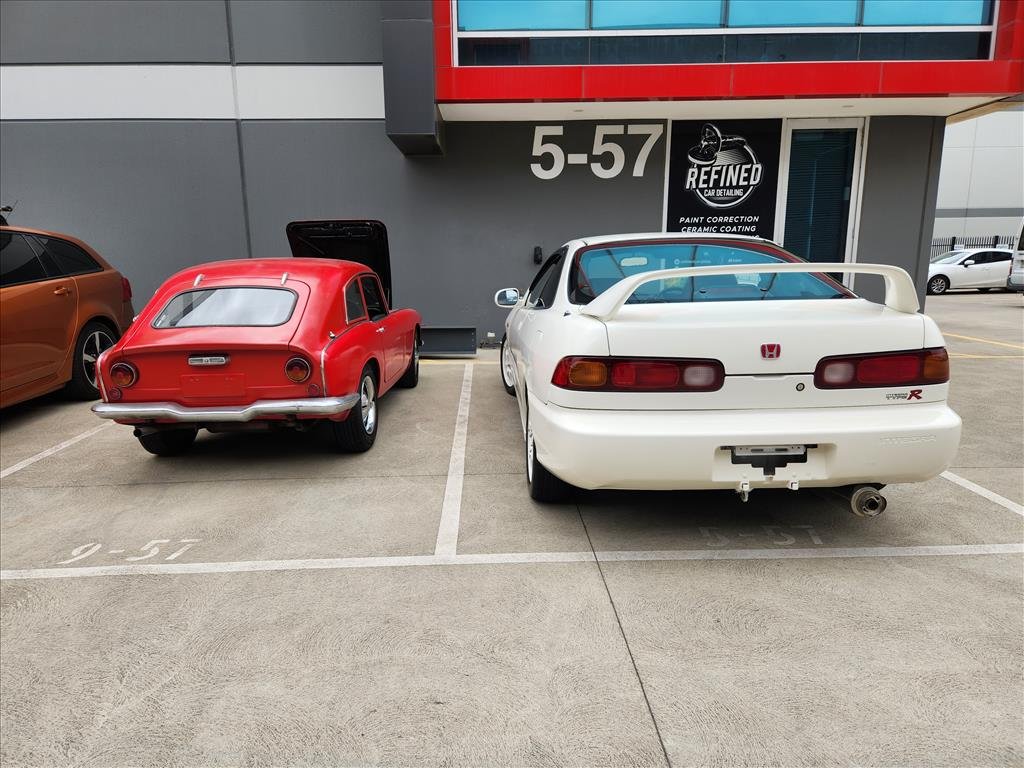
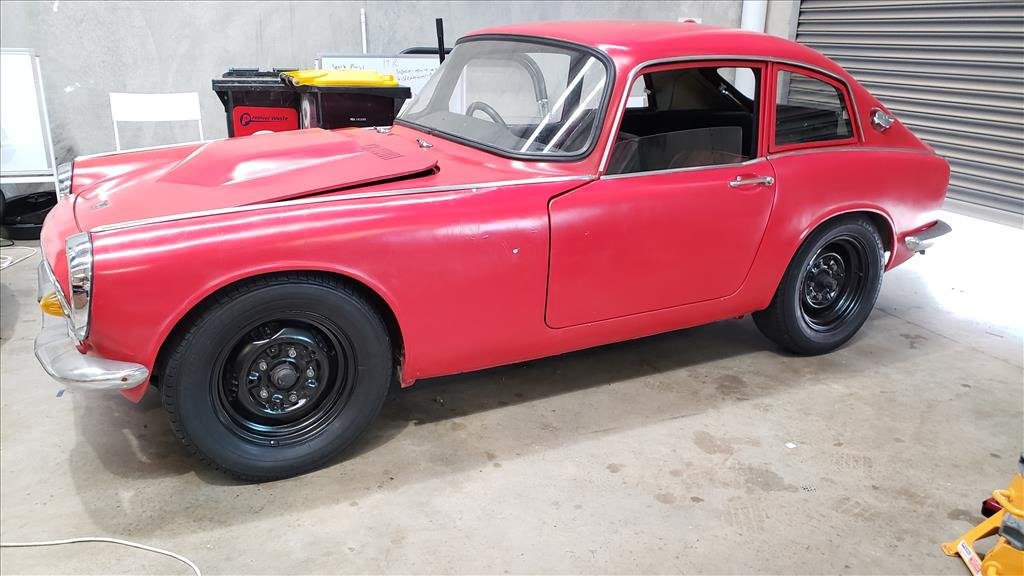
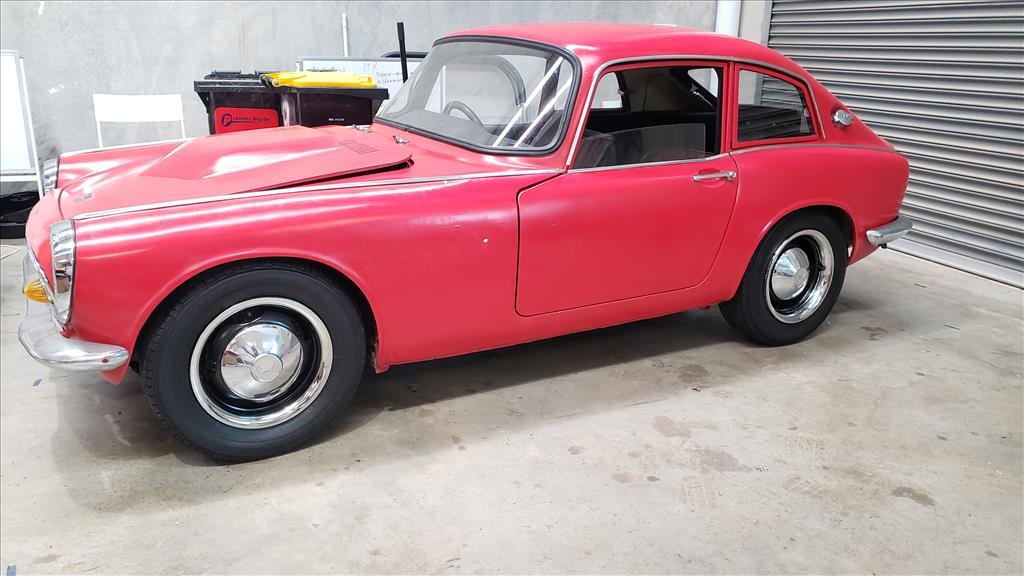
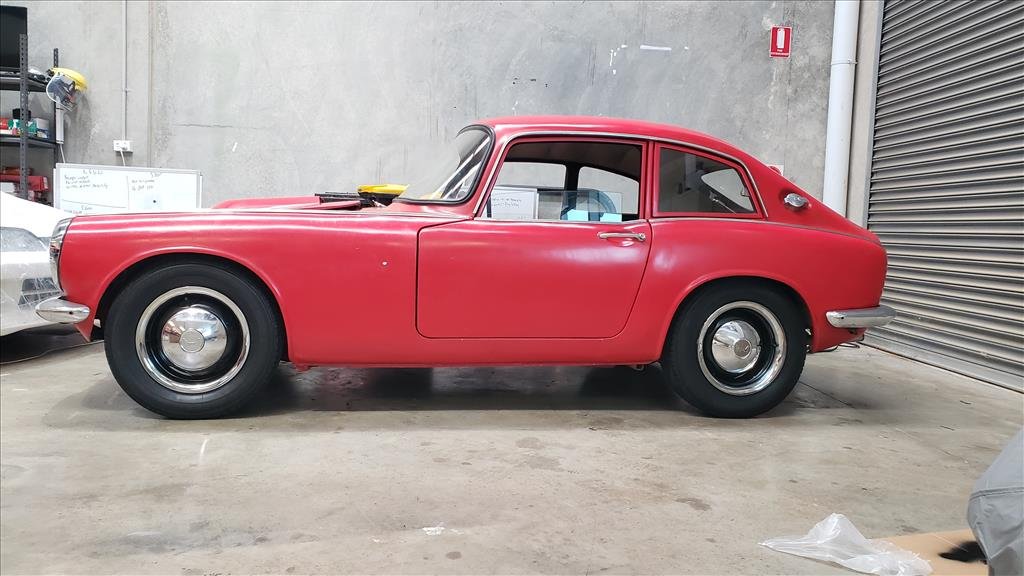
Not much to update recently as I've been doing things on other projects too new for Oldschool but today I cleaned up Barry the S600 and put some of the interior back together as I'll be looking to sell it soon. Just don't get the time to work on it with the other projects and honestly it was more of an impulse purchase being that my mate had it available. So here's some beauty shots.. if anyone is interested or knows someone that may be, I'll be happy to assist with shipping to NZ.
- 79 replies
-
- 14
-
-
-
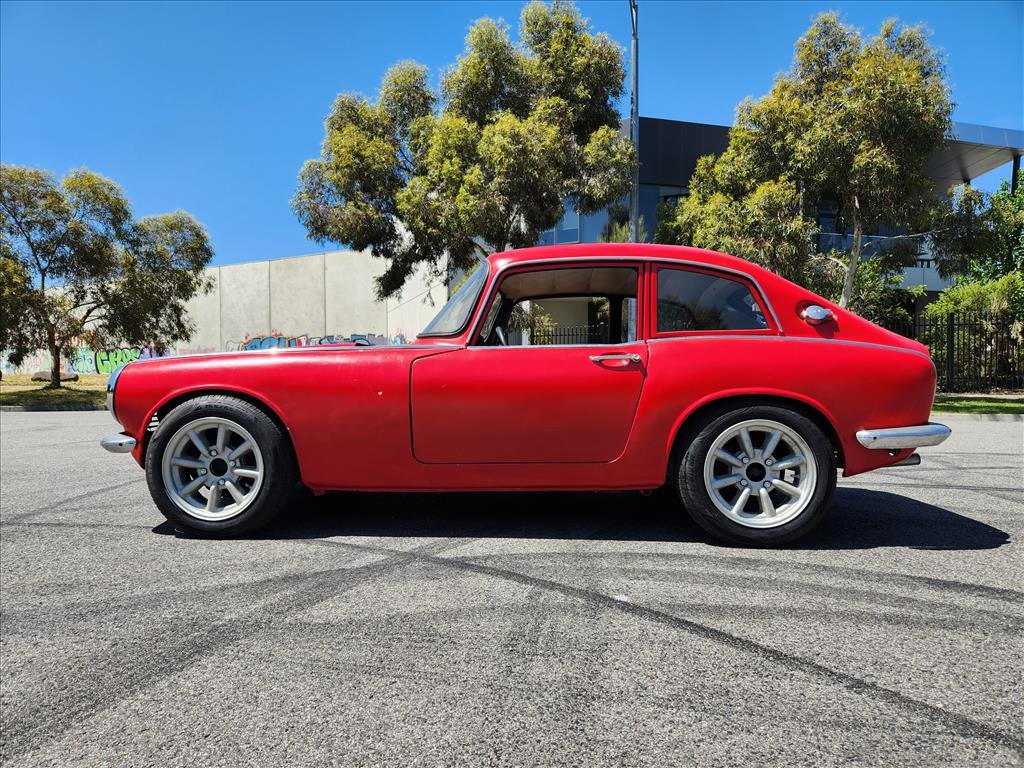
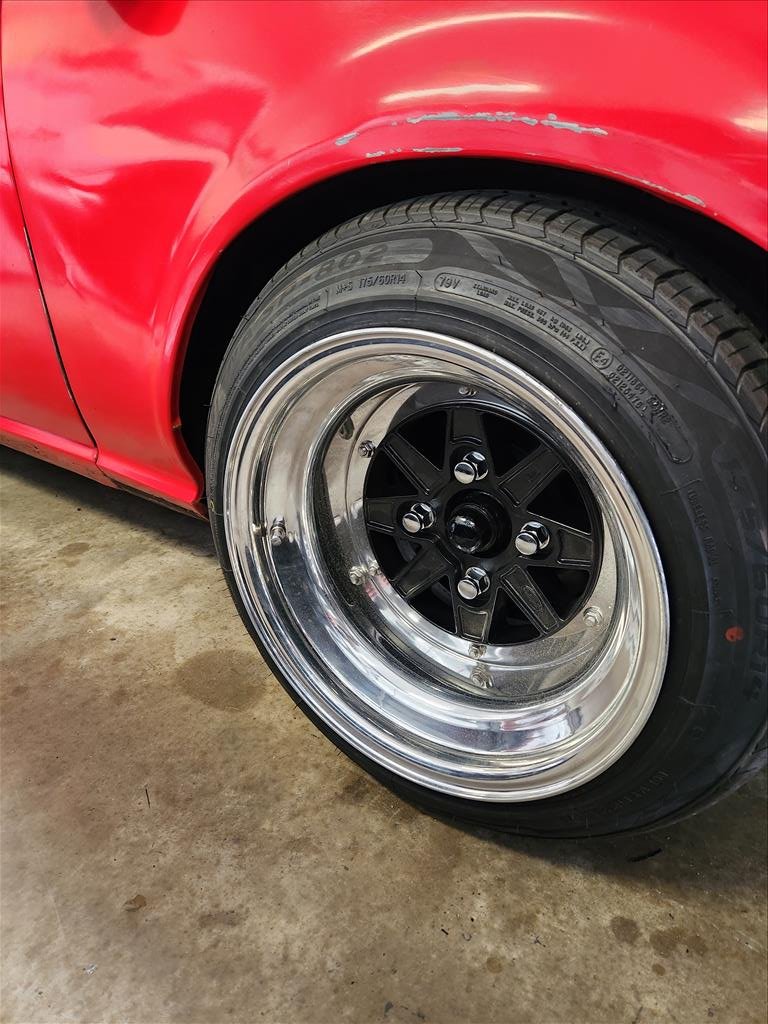
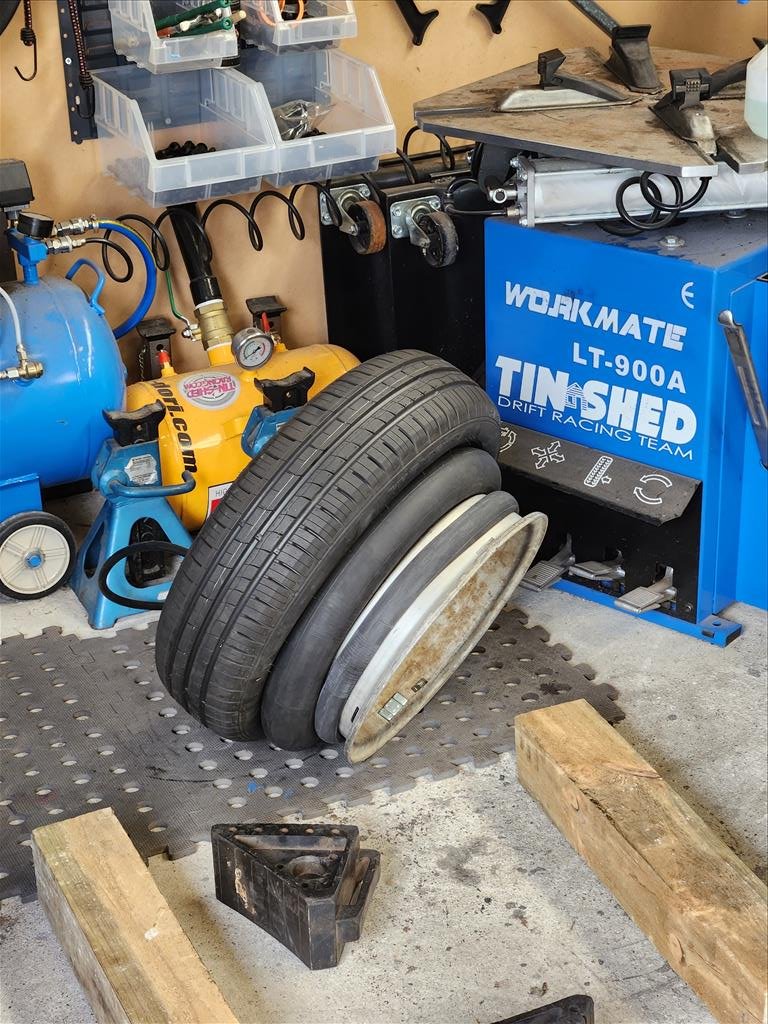
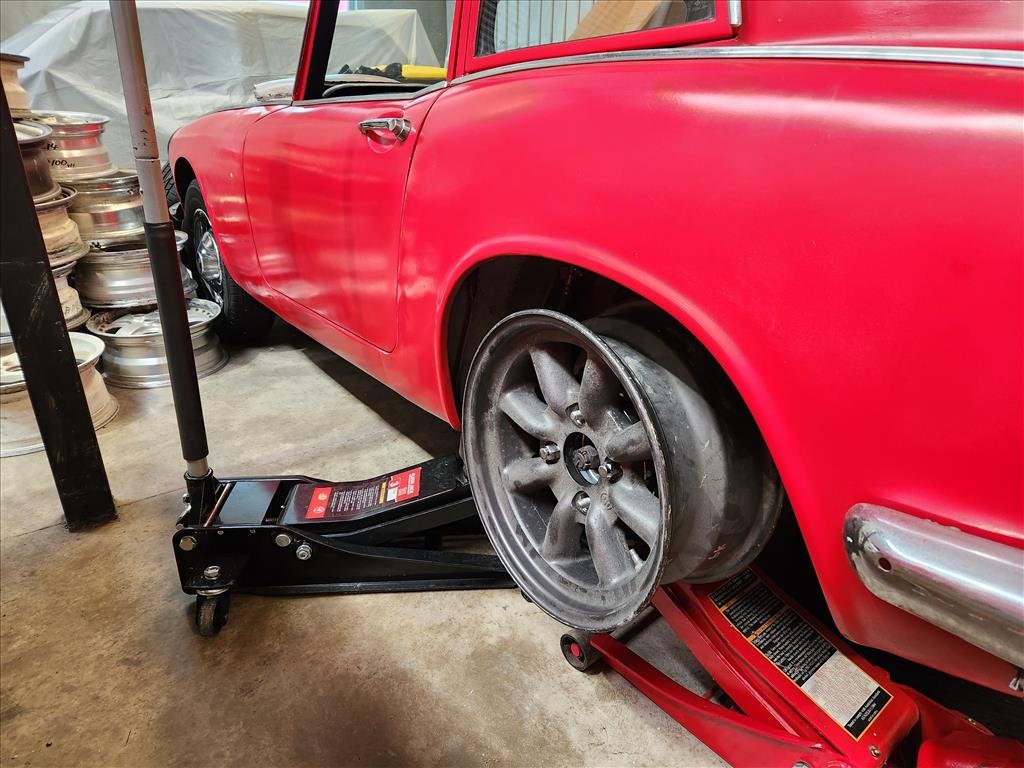
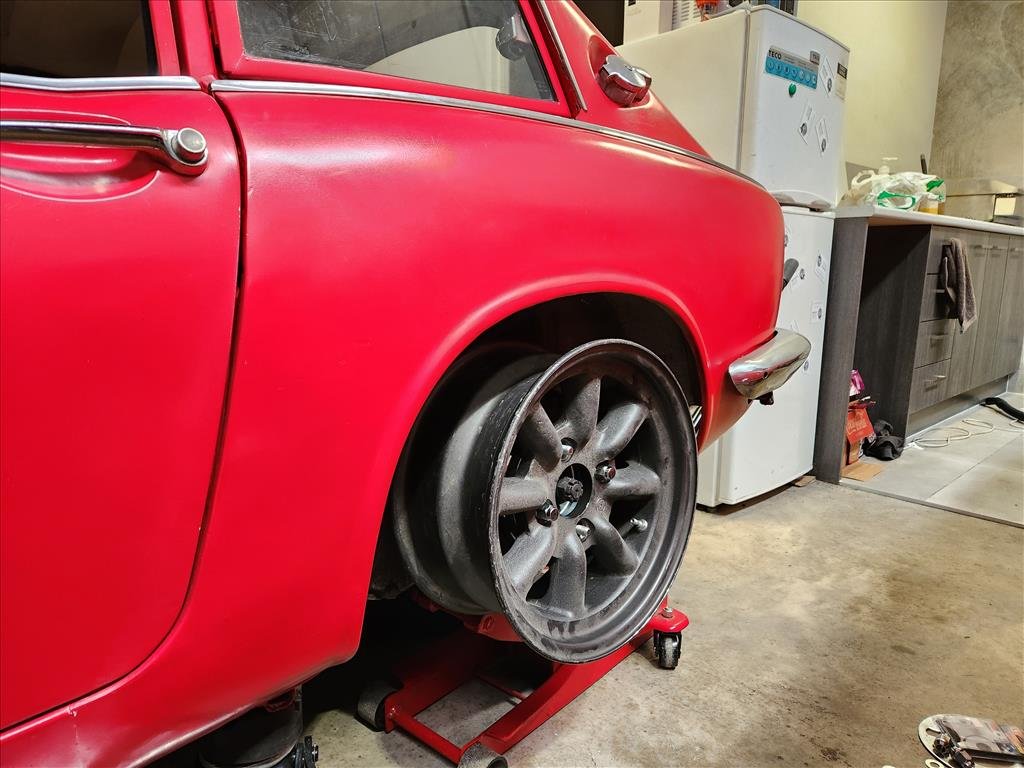
I found a use for the tyres that didn't fit properly on the Celica wheels.. these! They are 14x5.5 B-Type Watanabes which I was hoping would fit on the S600 but sadly the spacer adapters mean on the front no bueno. The spacer adapters are multi-piece (I think I posted about it somewhere earlier) and I had to get somewhat large ones to clear the nuts (deez). Why do I need spacers? Oem is 5x130 remember! Actually in hindsight probably looking for 5x114.3 wheels would have made adapters easier but the available range is way less. Well it looks cool but unfortunately couldn't really turn properly so had to put back the OEM wheels.
-
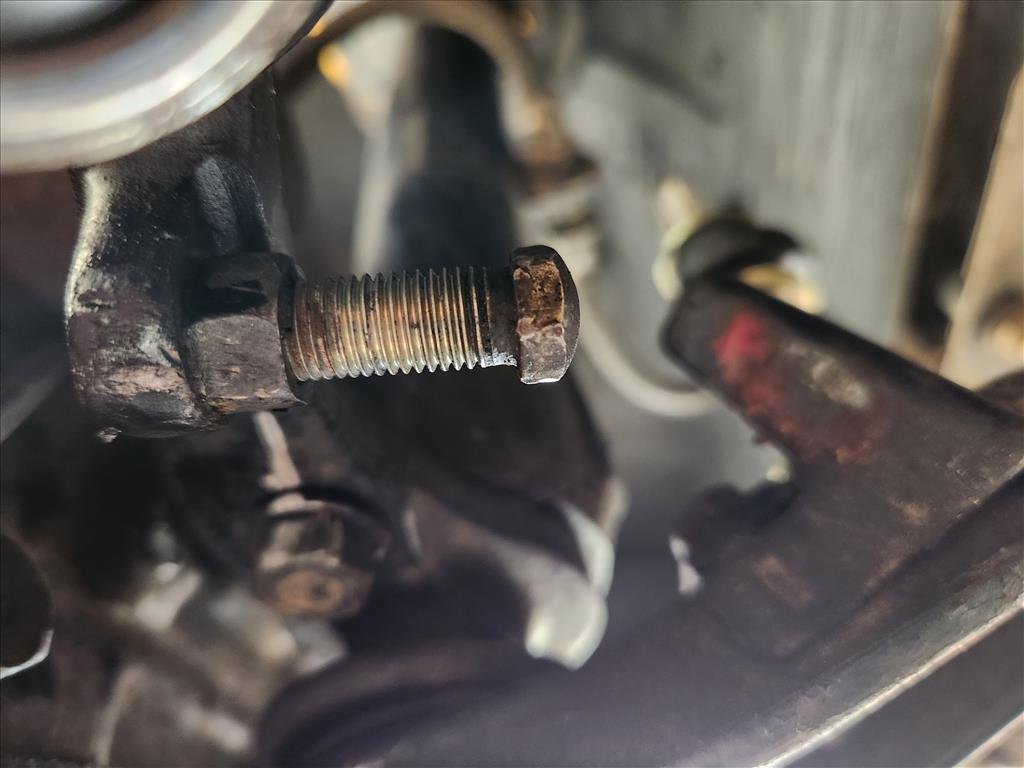
No leaks so far underneath.. I haven't really driven it around since cleaning up though. I did have a closer inspection at the front arms and sure enough there are some lock stops on there. Both of them were wound right in so I wound them out about as far as I could without them falling out but still it hits the inner guard. I could get longer bolts or could just ignore it, probably will choose option 2 as it's the most cost effective solution. Also while I was in there I tried to replace the grease caps for the front hubs but seems like my replacements didn't fit so I just blasted the old ones with some super cheap black paint, turned out about as you'd expect. I'm thinking I need to find some proper toe arms for the front as those old style ones are a bit of a bitch to adjust and the toe definitely needs fixing up. lol S600 is so small
- 79 replies
-
- 11
-
-
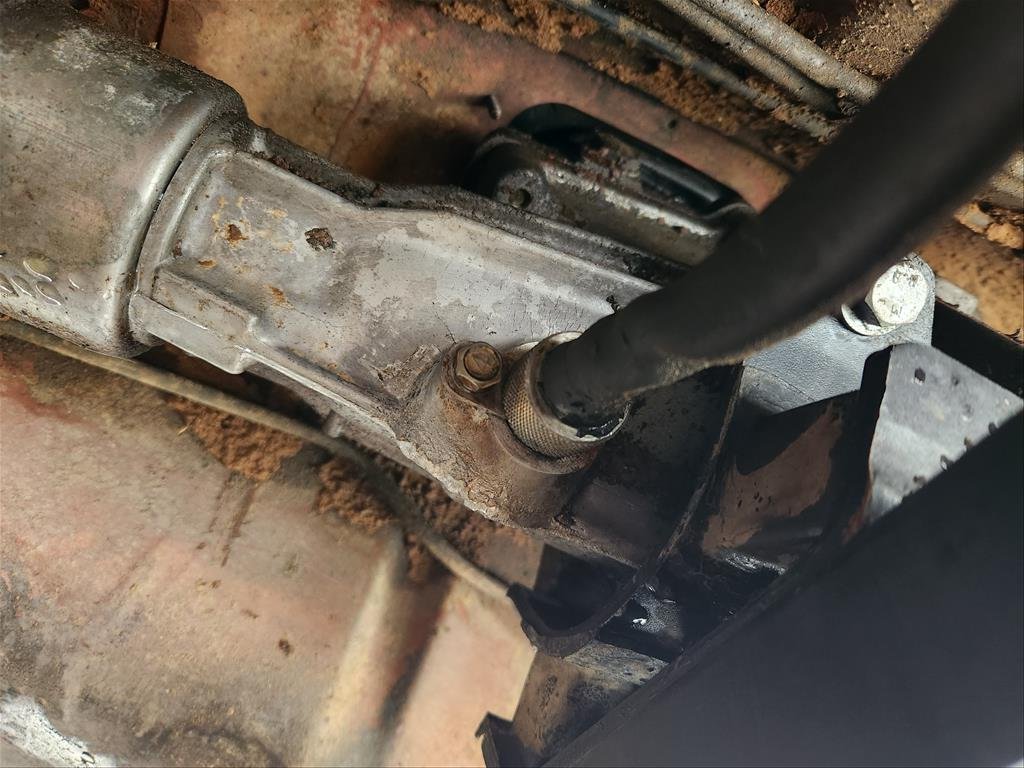
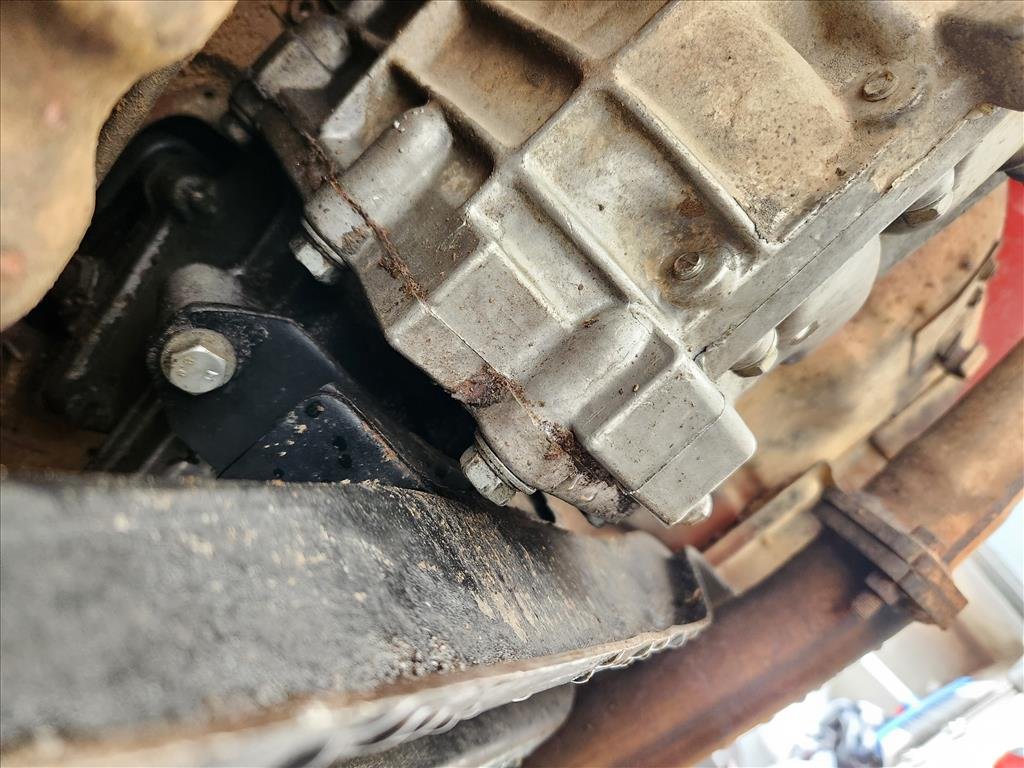
So the last post showed there was a rubbing issue on the right rear. The proper way probably would be to get the adjustable panhard rod to square it up but I thought of a free way to get by for the time being. Spot the difference? Front and rear switched on the driver side. This works because there is around 10mm offset difference between the two. I'm sure there are probably some detrimental handling characteristics but driving up and down the road it felt exactly the same. The widths are the same after all. Looks even enough considering the car probably isn't even. Not entirely the easy fix I was hoping for though.. with the change in offset now it rubs on full lock to the right. I smashed it down a little bit after which helped and probably made it less offensive so I don't care about it anymore. Maybe I'll smash it down further in the future if it really gets annoying. This car has always had a super slow leak from the gearbox area too and I don't think it's ever had any kind of cleaning underneath; definitely not in my ownership. I didn't change this but I did douse the general area with brake cleaner and hosed it down to clean up possible areas of leakage. Perhaps it will show up next week so I can try to work out where it's coming from. I really hope it's not the output seal because that would mean it's probably never going to get fixed. I also decided I'll paint these crusty seals with some bumper black paint. I do have some chromes for it but it's a windows out job so probably will also never get done. At least if they are painted black it will get rid of that yuck grey sealant.
-
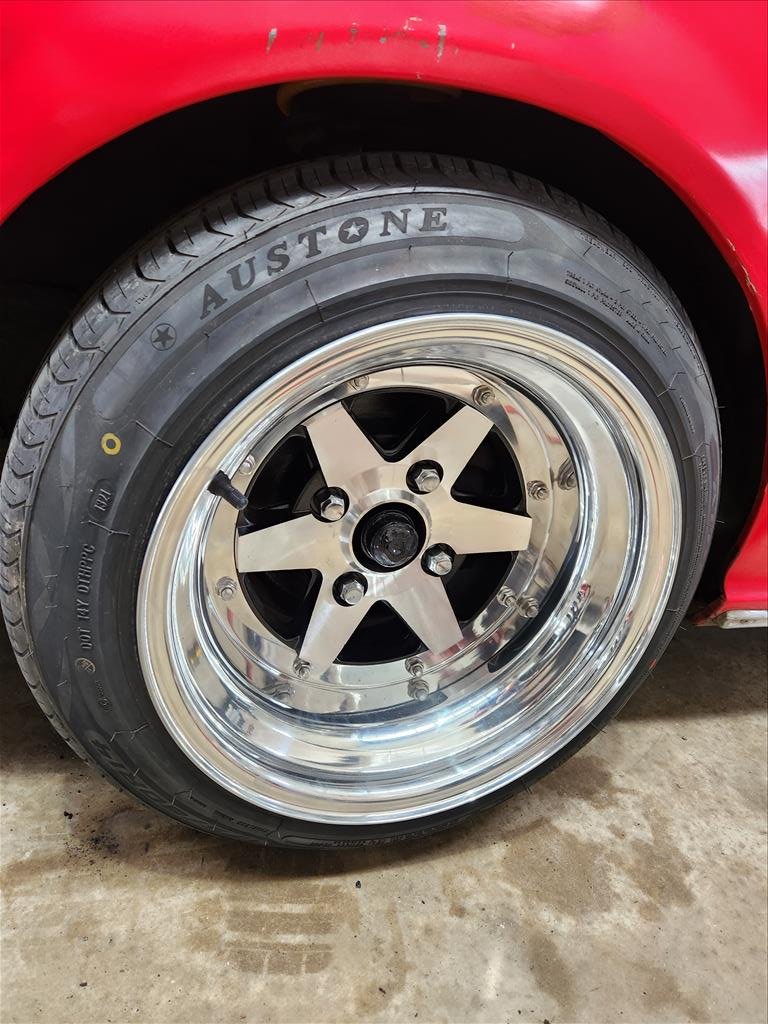
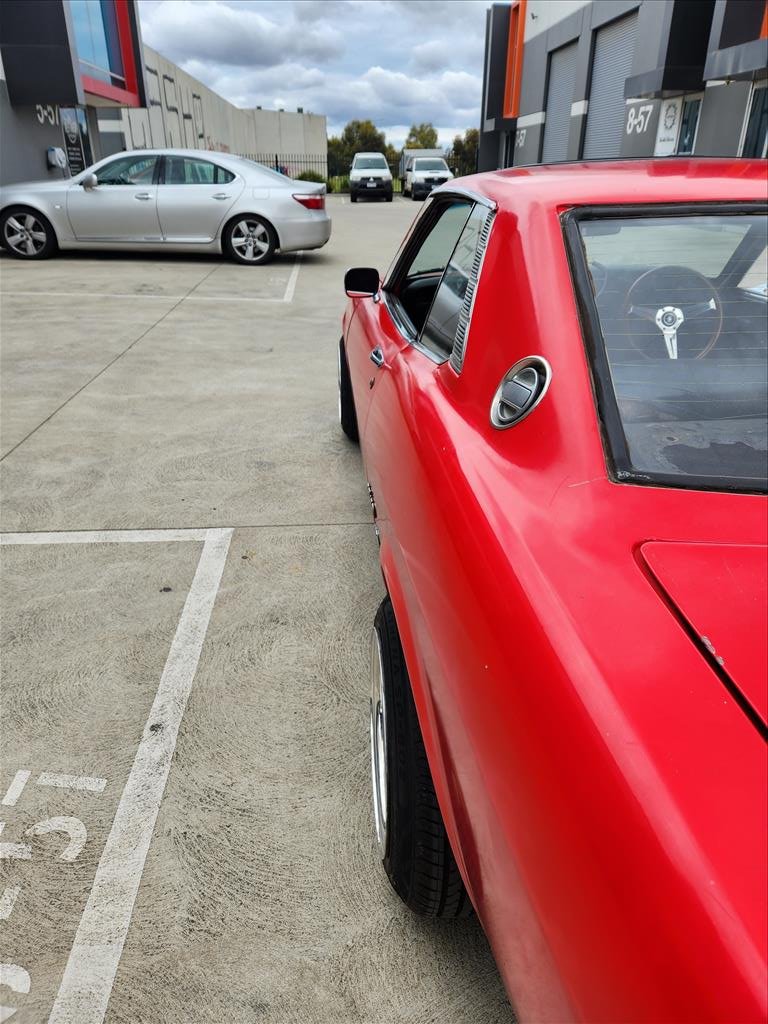
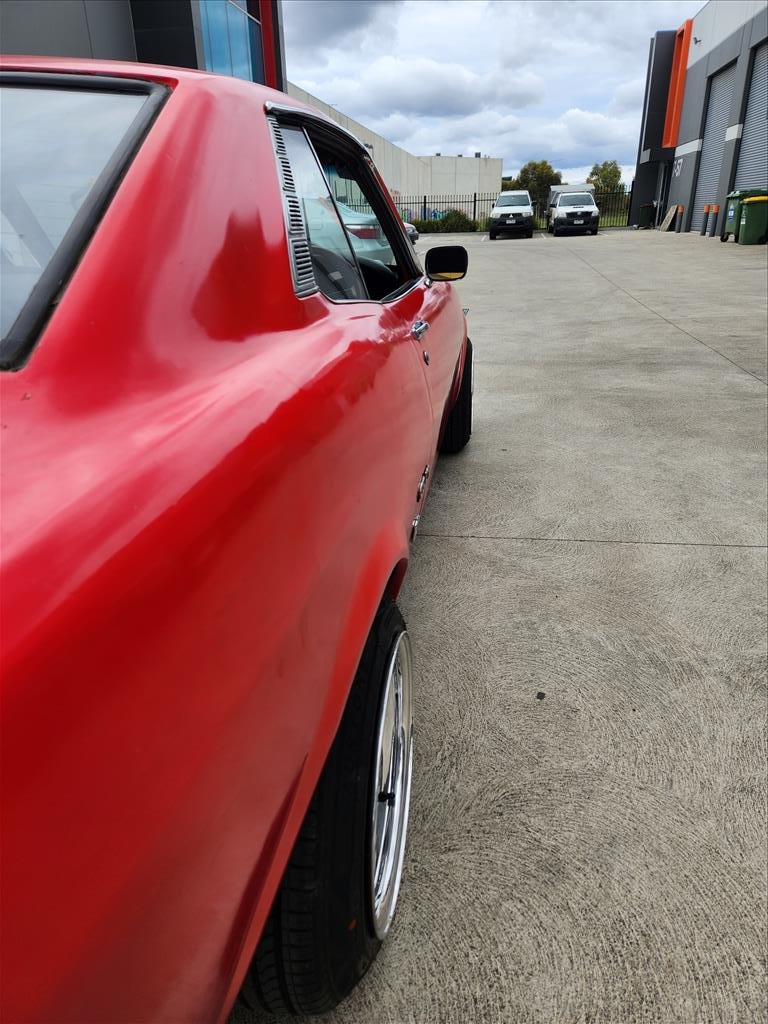
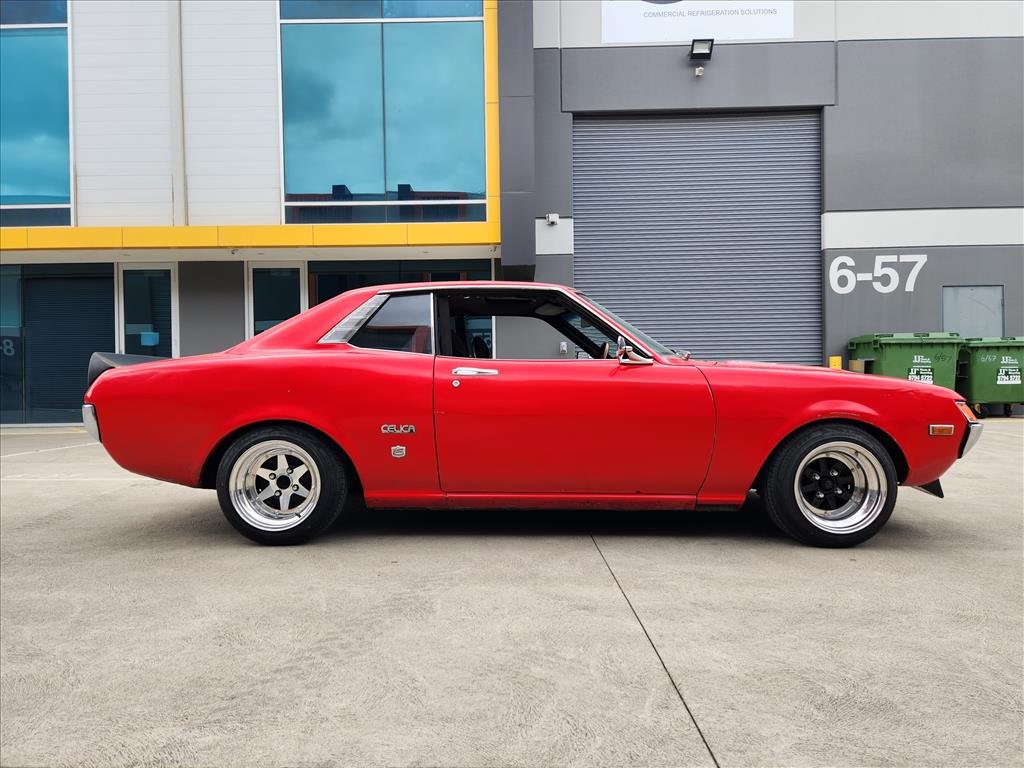
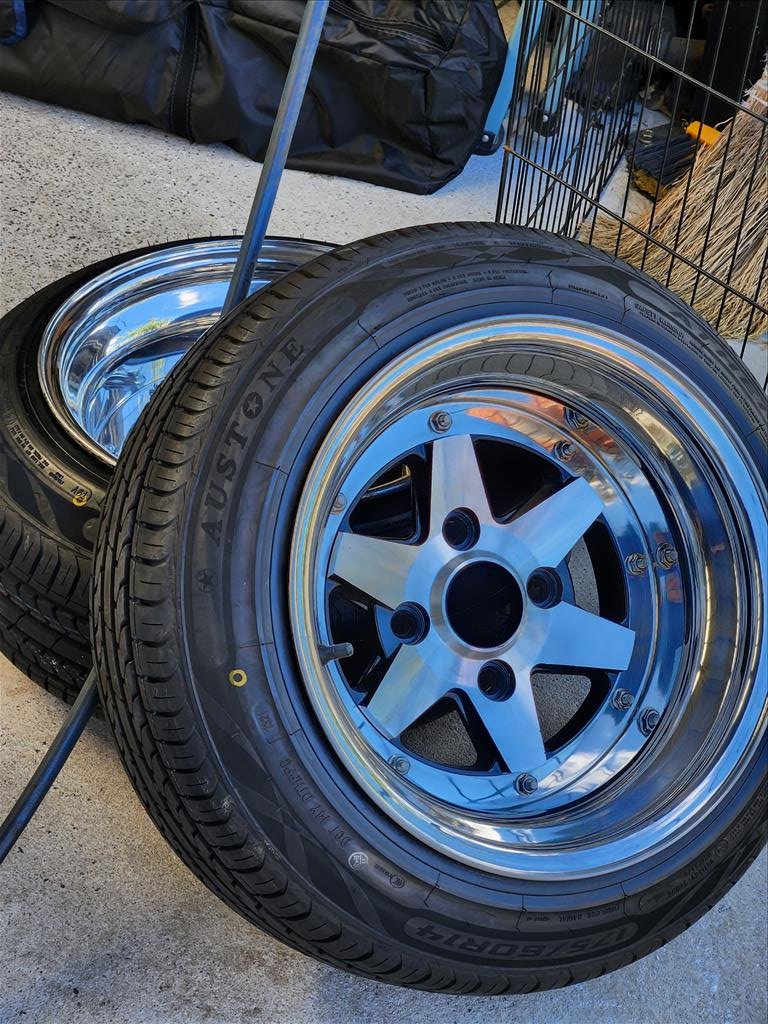
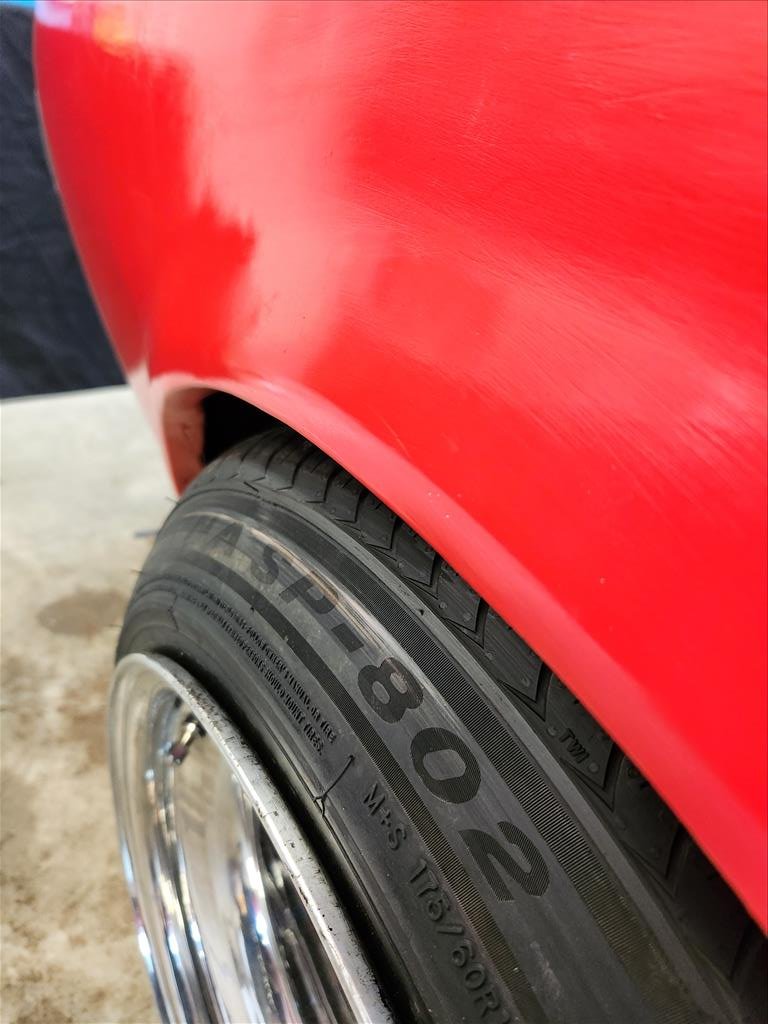
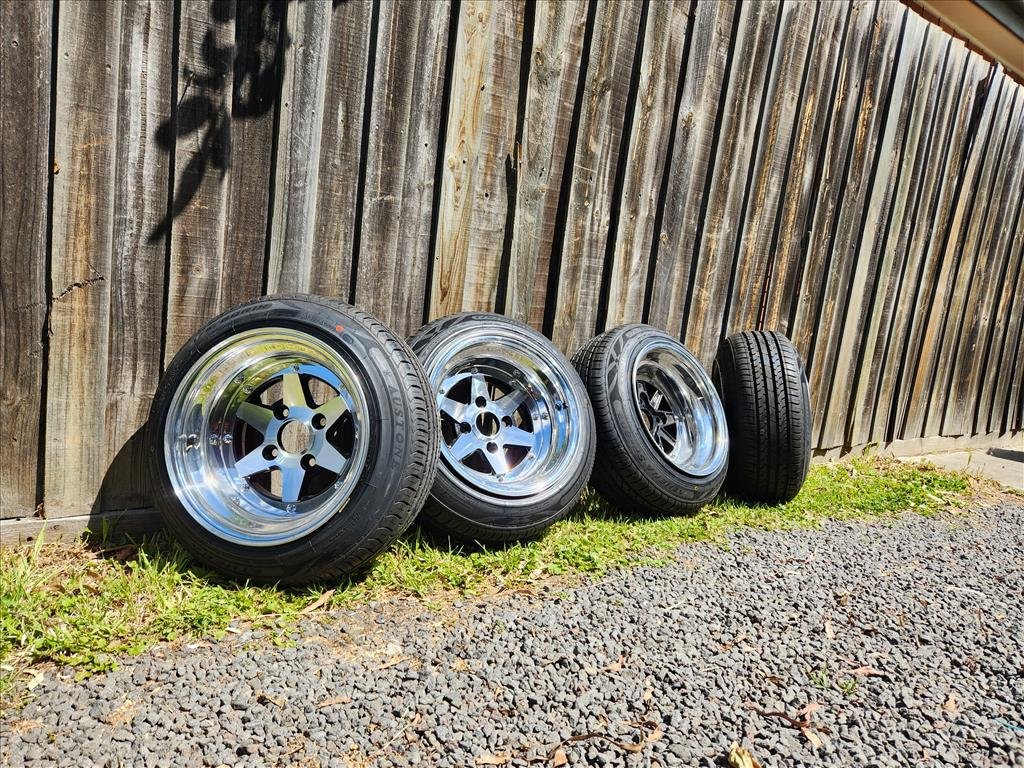
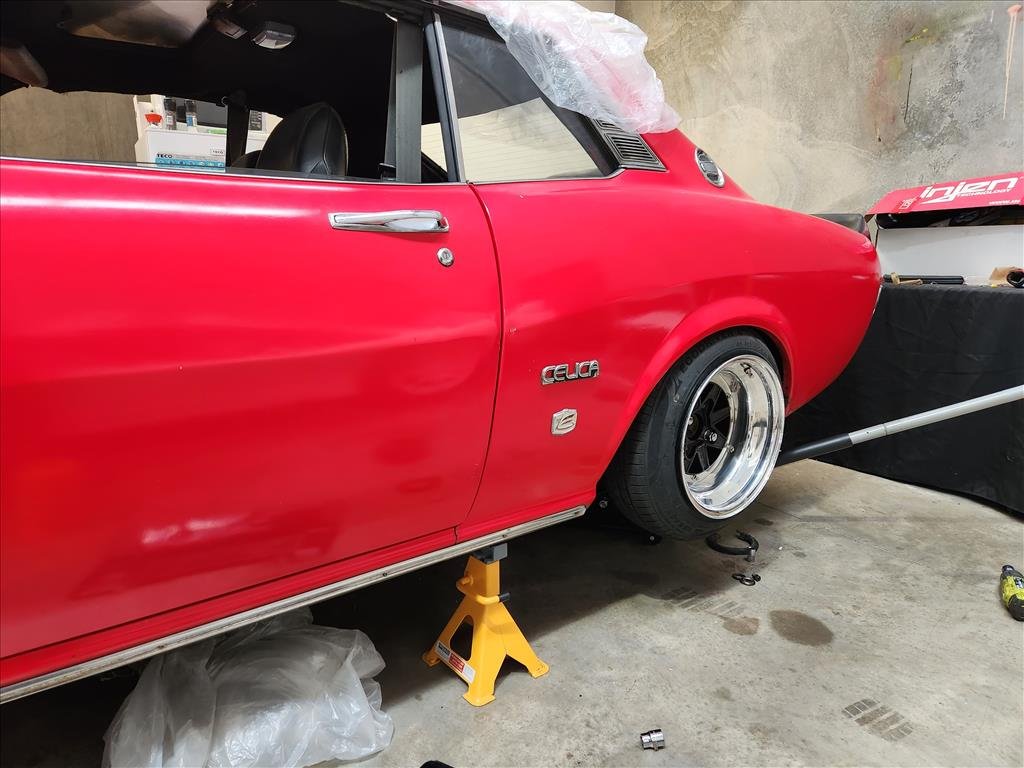
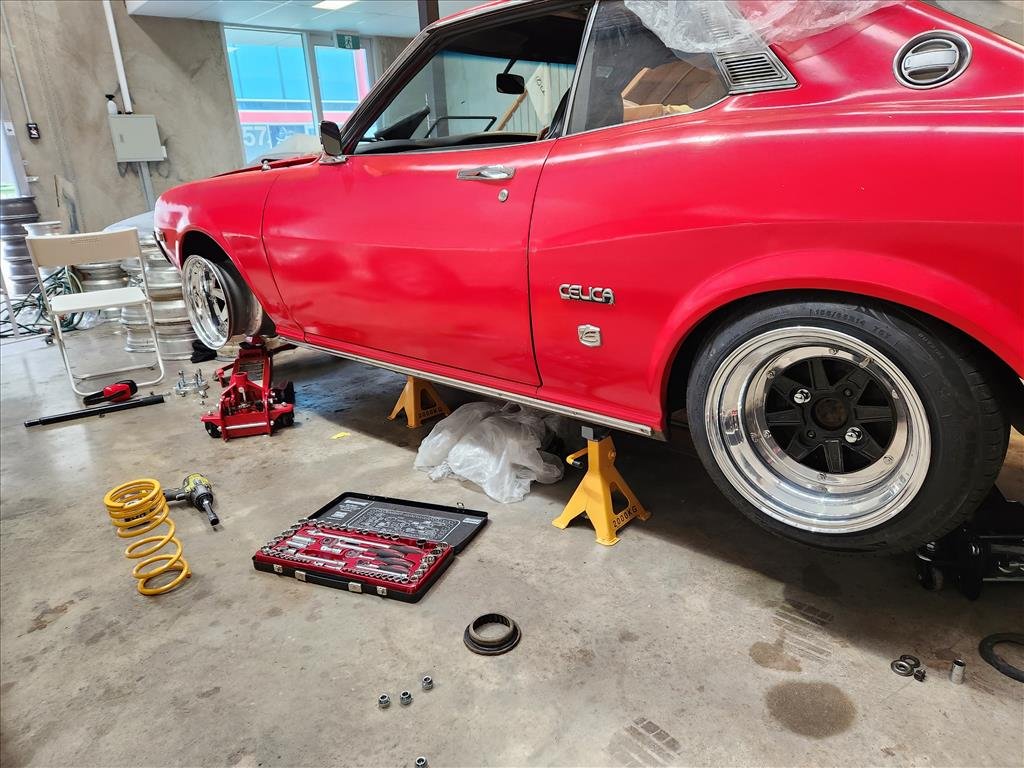
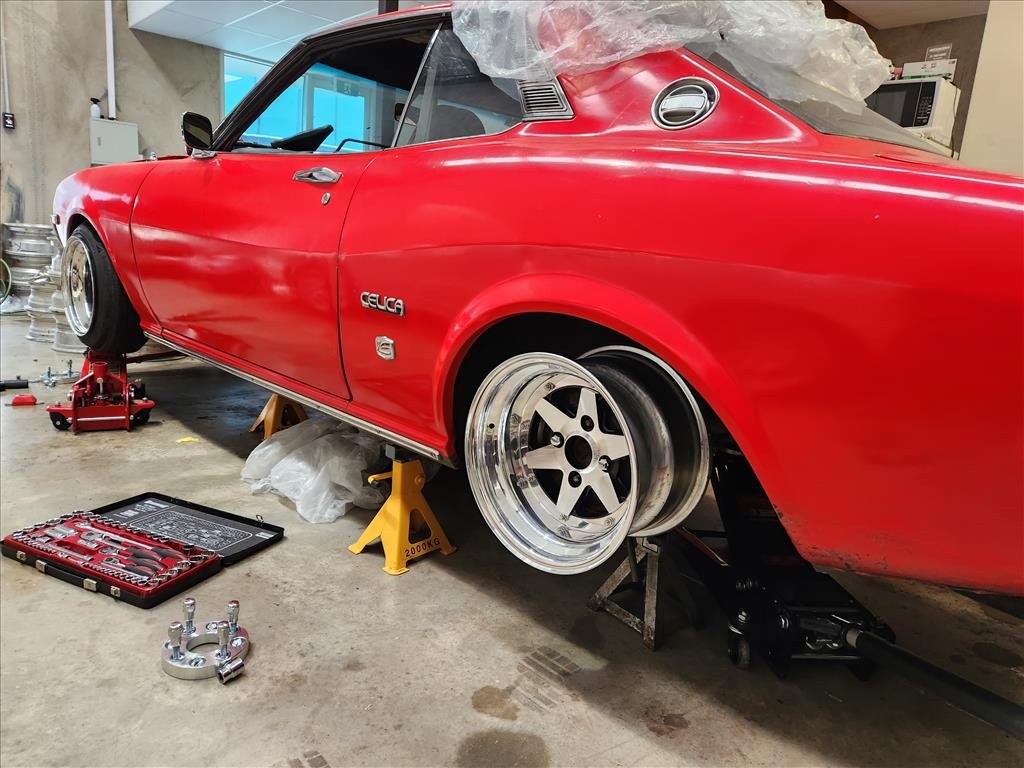
Spent a couple hours at the bros shop getting some new tyres fitted up to the wheels for the Celica. Can't beat the quality of Austone, best $40 each ever. 175/60 seems better for the 9J than what was on it, and relatively little trouble fitting for stretched tyre. Don't they look nice shimmering in the sun? So I've actually got a full set of MK3 as you would've seen in a previous post but because they won't fit on the factory metal I ended up buying the longchamps pair. Didn't think I would be into the different wheels on each but actually don't mind it. I think the front needs to come down a coil at least, it's just a pain in the ass to do it so maybe I'll wait for a bit and get the rear squared up first. After taking it for a bit of a blat around the block it seems like the only rubbing is on driver side rear so I will get an adjustable panhard bar to try pull it the other way around 5mm, should about even it out and hopefully not cause rubbing on the other side. I would like to avoid trying to roll the lip on the guards as I'm pretty sure they're basically made of bog. I'd probably end up cutting the guard lips if they become an issue.
- 79 replies
-
- 13
-
-
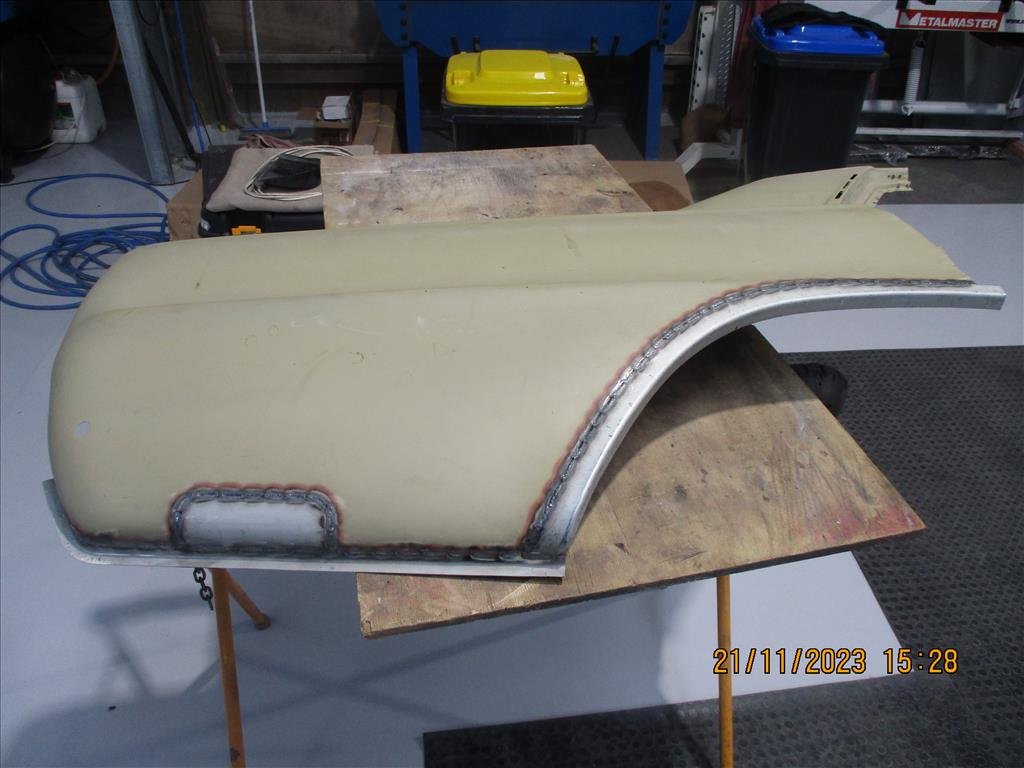
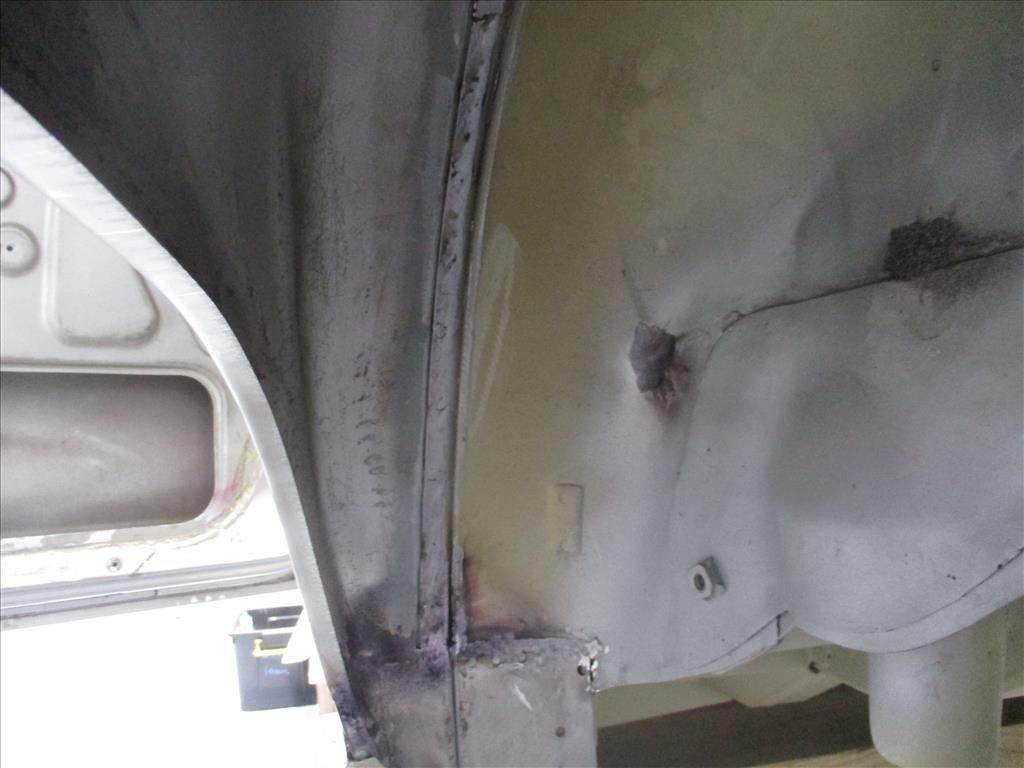
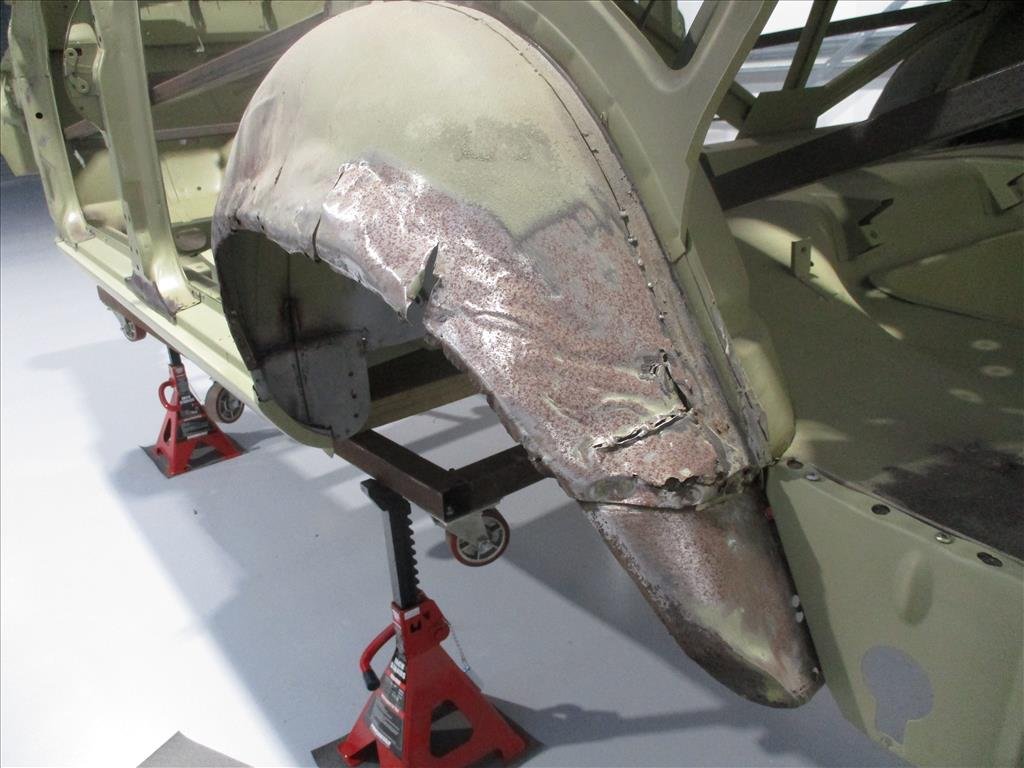
Another timely update from Mr Panel Barry arrived today. He's finished with the rear arches now on both sides and has tidied up some of the other boot floor area bits too. He's now going around the edges of the rear quarters to tidy up the mess there so they well nice and line up as best as possible. Still a little work to do but it's coming along really nicely. As you can see it's pretty pitted and mangled before. I think we're nearing the home straight for this rear end. The arches were one hell of a job and he's done excellent work.
- 79 replies
-
- 18
-
-
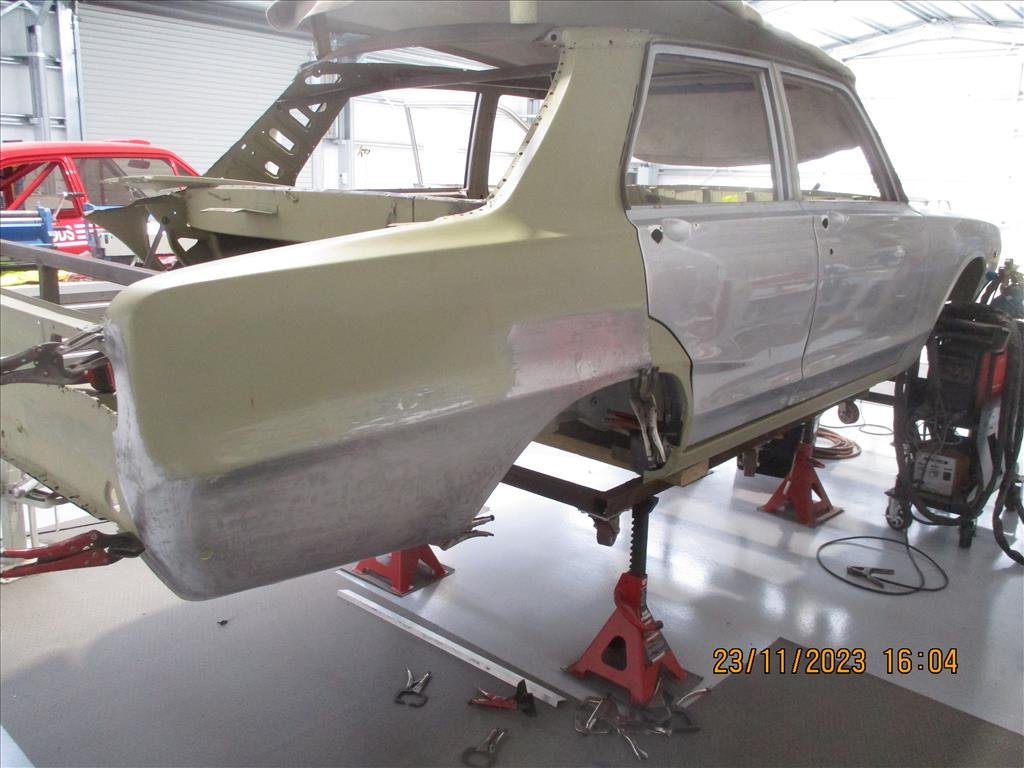
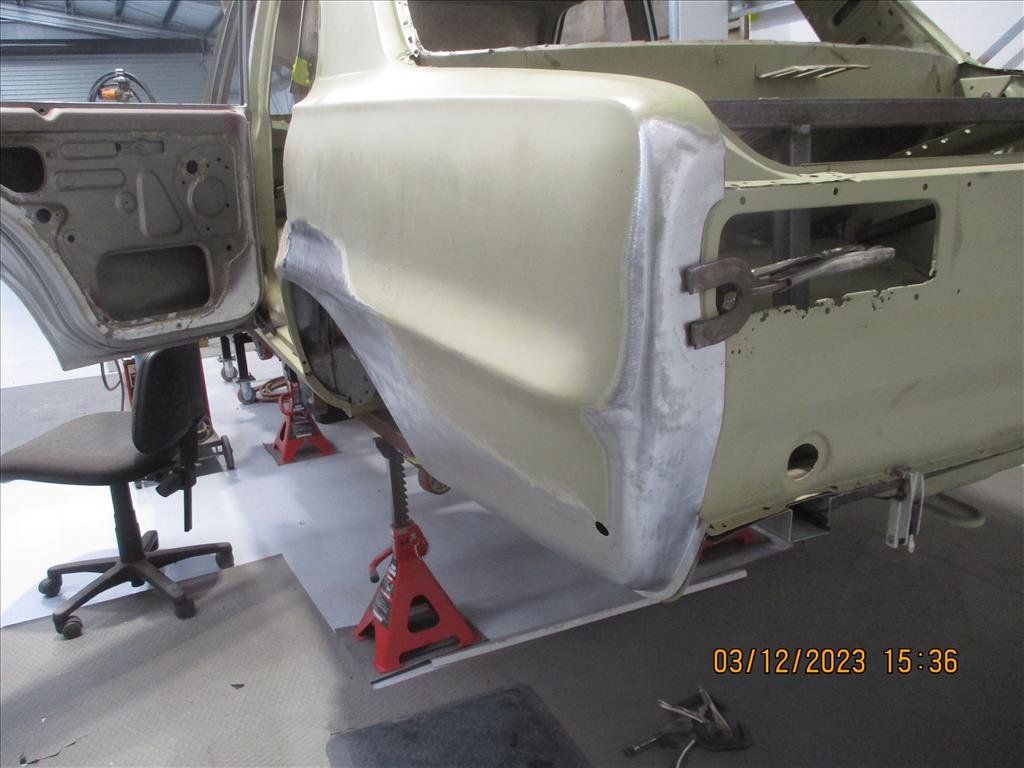
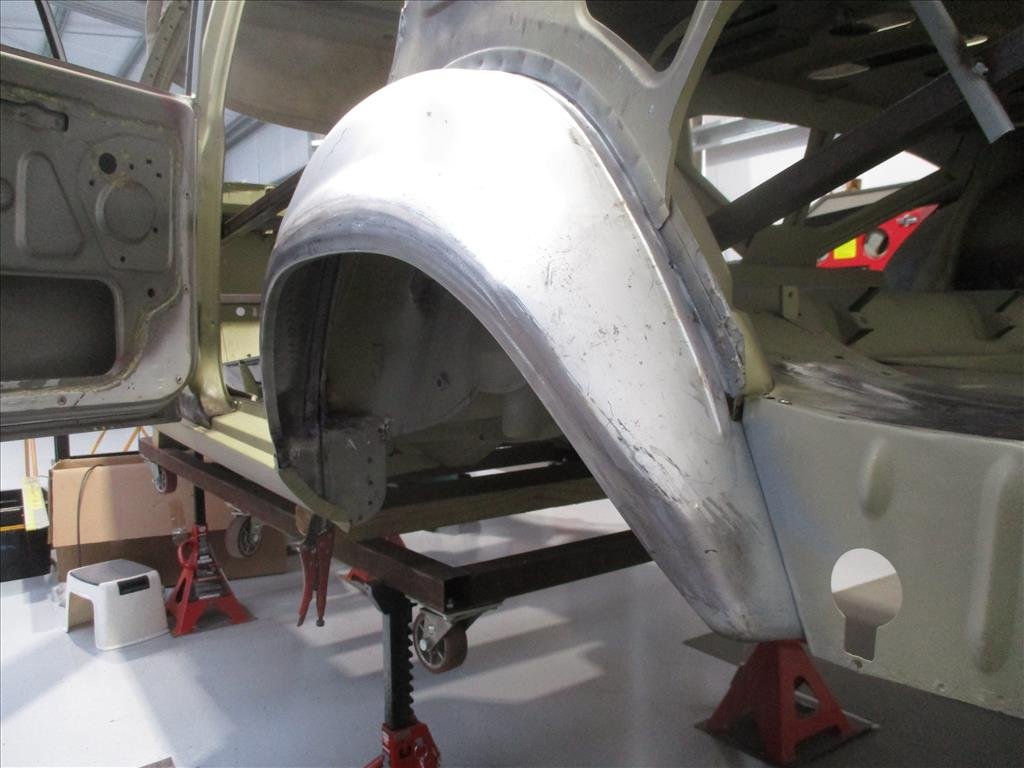
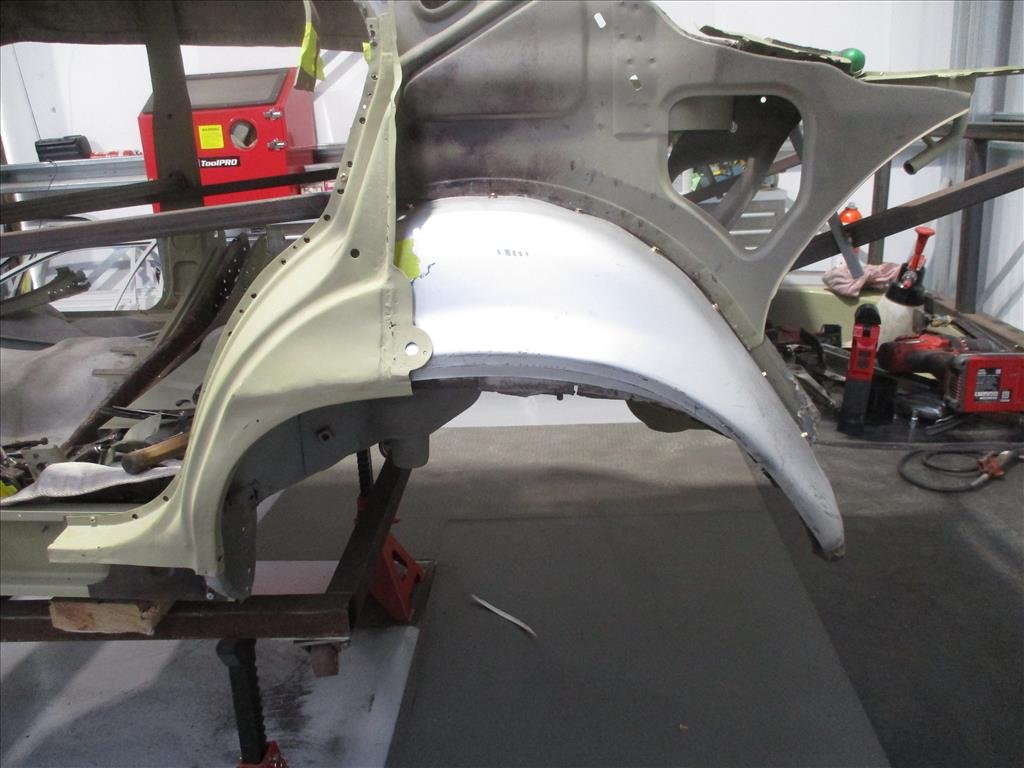
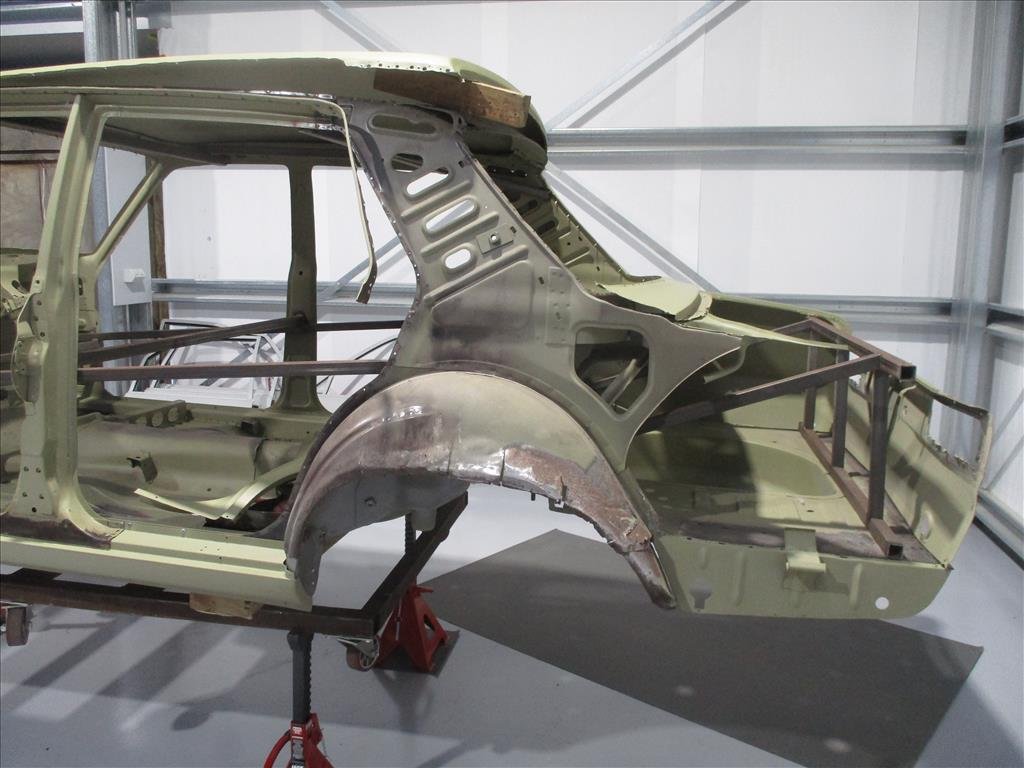
I was just thinking I haven't heard anything from panel Barry for a while and then bing, email arrives. He's been busy. Passenger side is pretty much buttoned up now, the outer rear quarter is not welded into place so still the little touches to go but man.. what an improvement! And just a reminder of what it was beforehand. He's already charging away on the driver side as well so shouldn't be too long then it can go back together in the back end.
- 79 replies
-
- 17
-
-
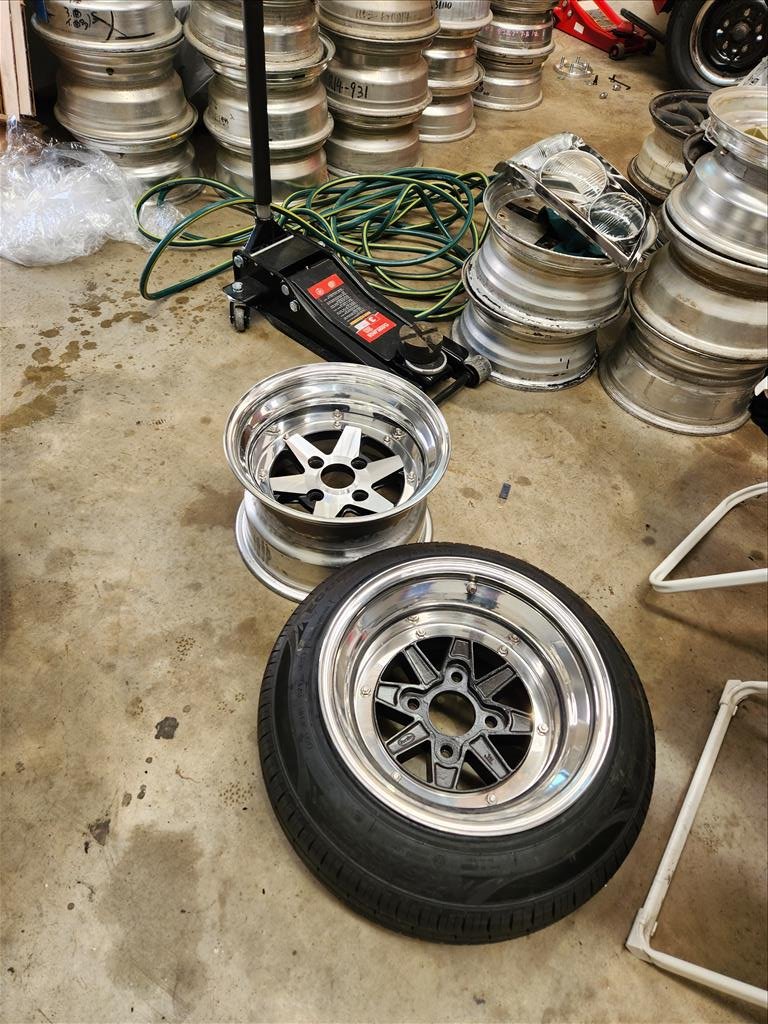
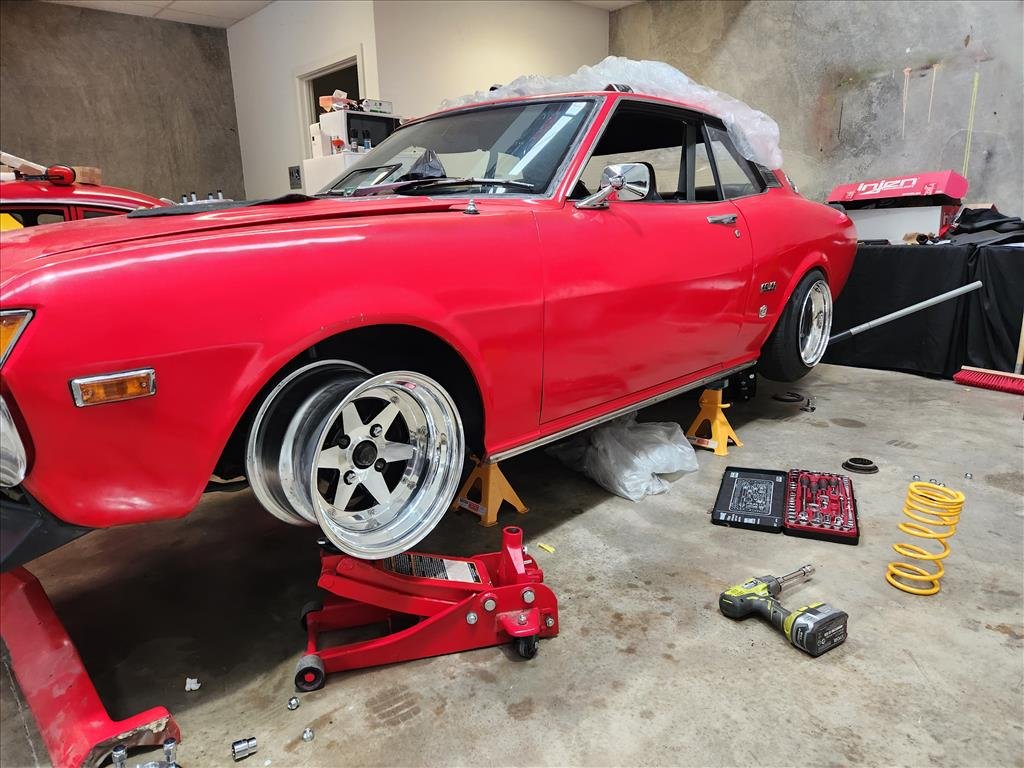
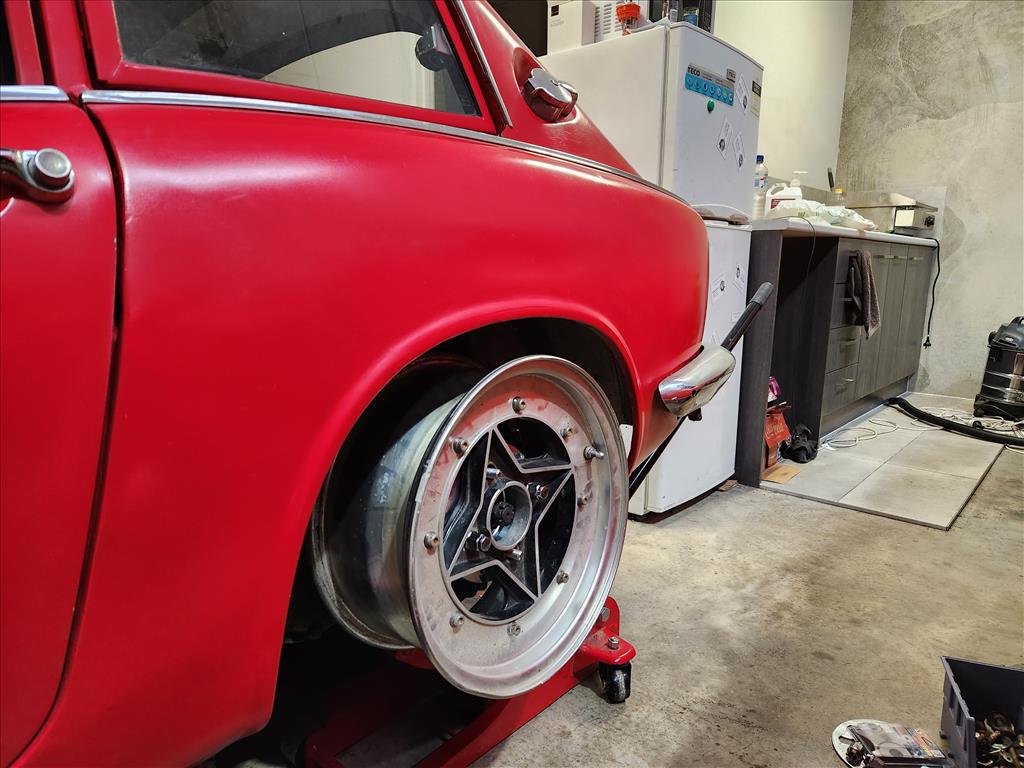
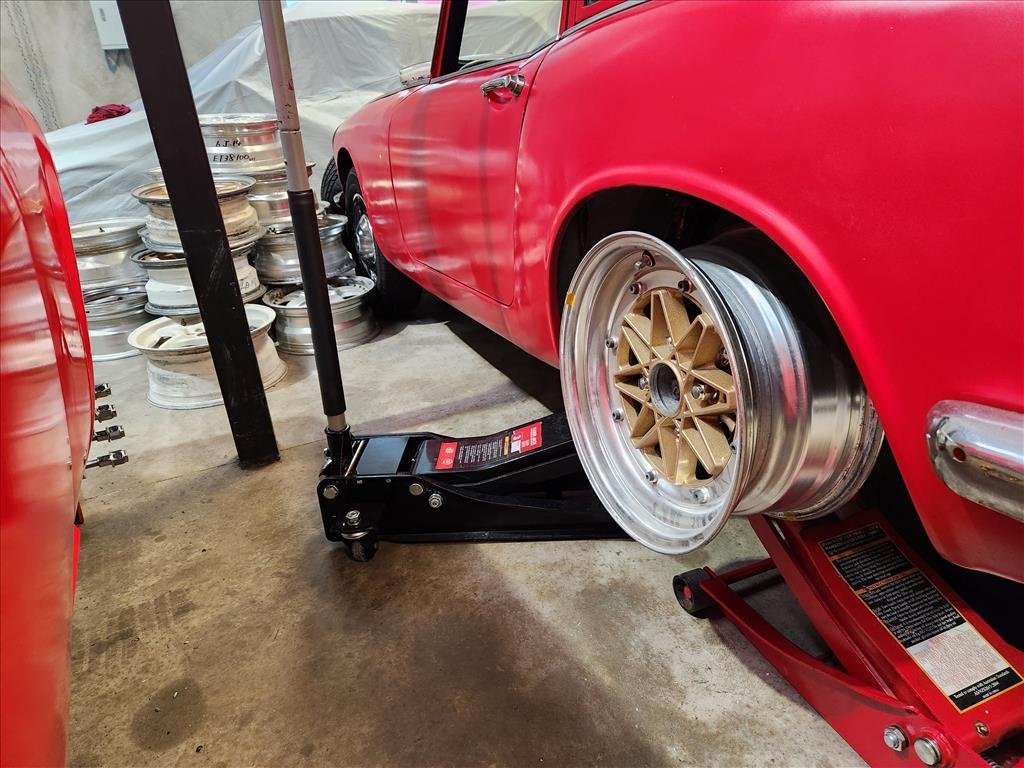
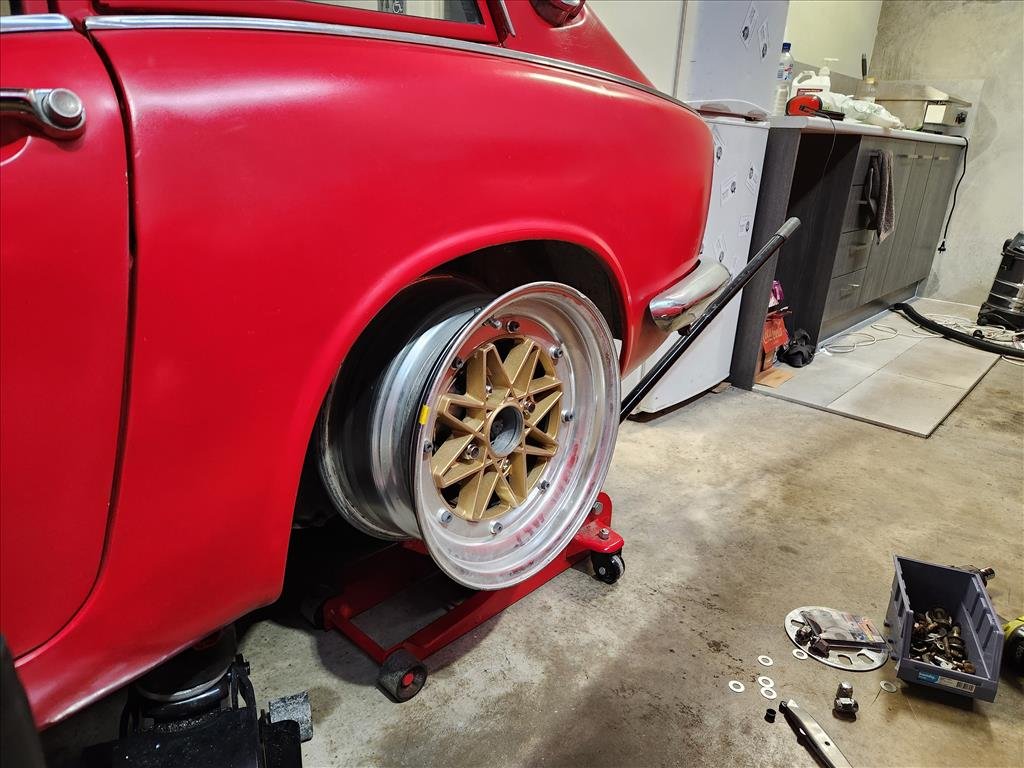
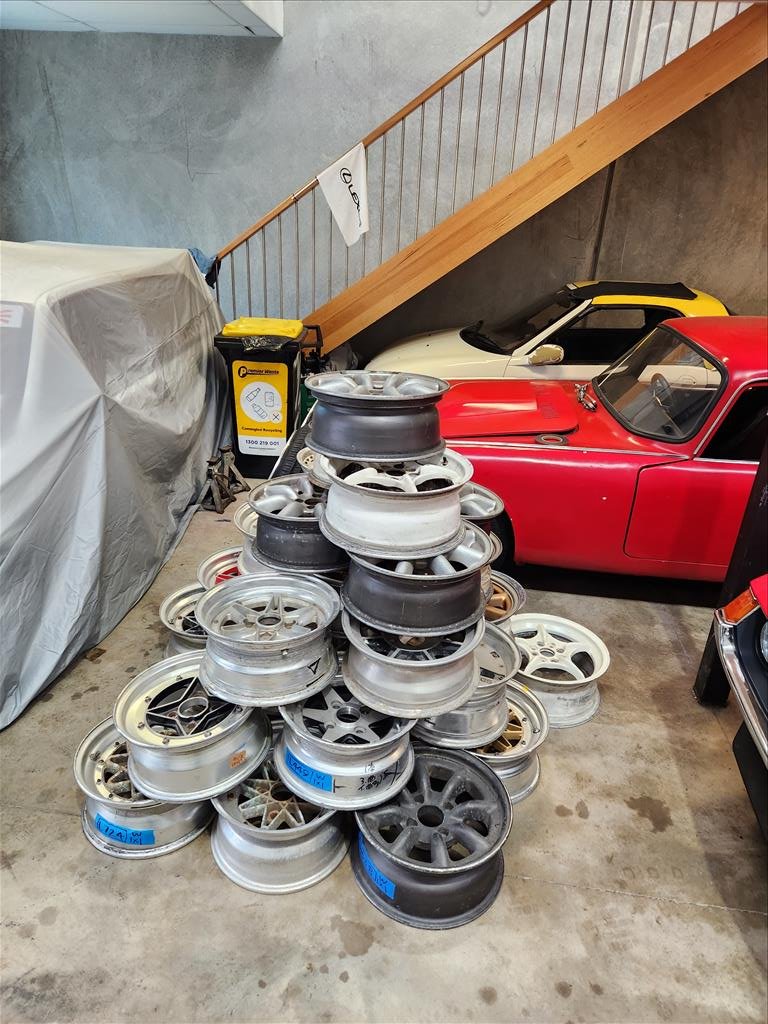
Back from WTAC and my wheel guy has completed the SSR MK3 wheels I gave him to put together a little while back. They ended up being 14x9 -22 and 14x9.5 -28 (approx). They're pretty crazy but also it's a problem and apparently I can't measure properly because the 9.5s will no way fit on OEM body. Because I'm kind of indecisive and trying to put a 155/65 on a 9.5 isn't working very well I asked to borrow a longchamp that he's just rebuilt in 14x9 -15 spec to have a measure up too. Might have to buy them, damn. Anyway, some photos of various fit testing with the 14x9 front and rear. I removed the springs in rear and disconnected shock so it's basically on bumps at that height, looks sick. But I think maybe a slightly less chunky tyre might be the go. Perhaps a 165 55 or something, not sure 100% on the sizes of tyres which are available so a bit more research required. Oddly the longchamps fitted better on the rear and the MK3 better on the front? Probably our measurements are off. I am definitely loving the longchamps..
- 79 replies
-
- 11
-
-
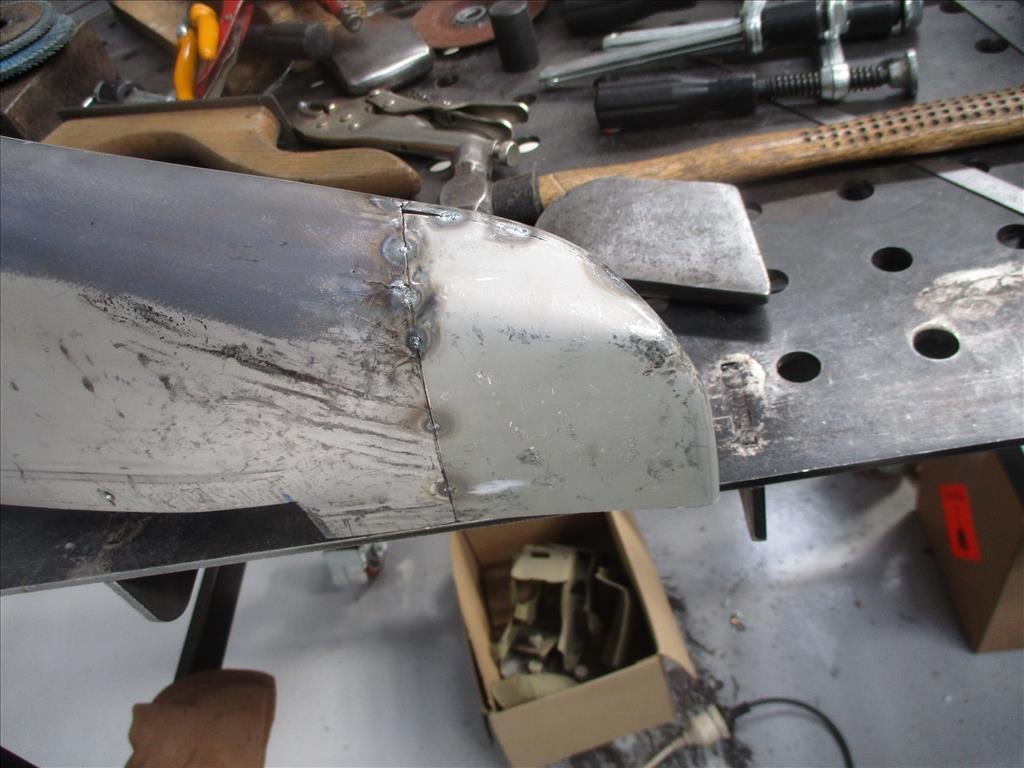
Panel Barry's been hard at work doing various small patch jobs and finishing up some chassis work on the Skyline as well as rebuilding basically the whole rear end. That's all very exciting but what's really exciting is this. The Ford Escort inner arches look like they will fit up really nicely with a little bit of finagling and a bit of extra metal. The curve is amazingly close. Might be a smidgen wide for the outer skin as I think it pushes it out slightly so it cannot join quite correctly but in the grand scheme of things I think that's fairly small all things considered.
- 79 replies
-
- 14
-
-
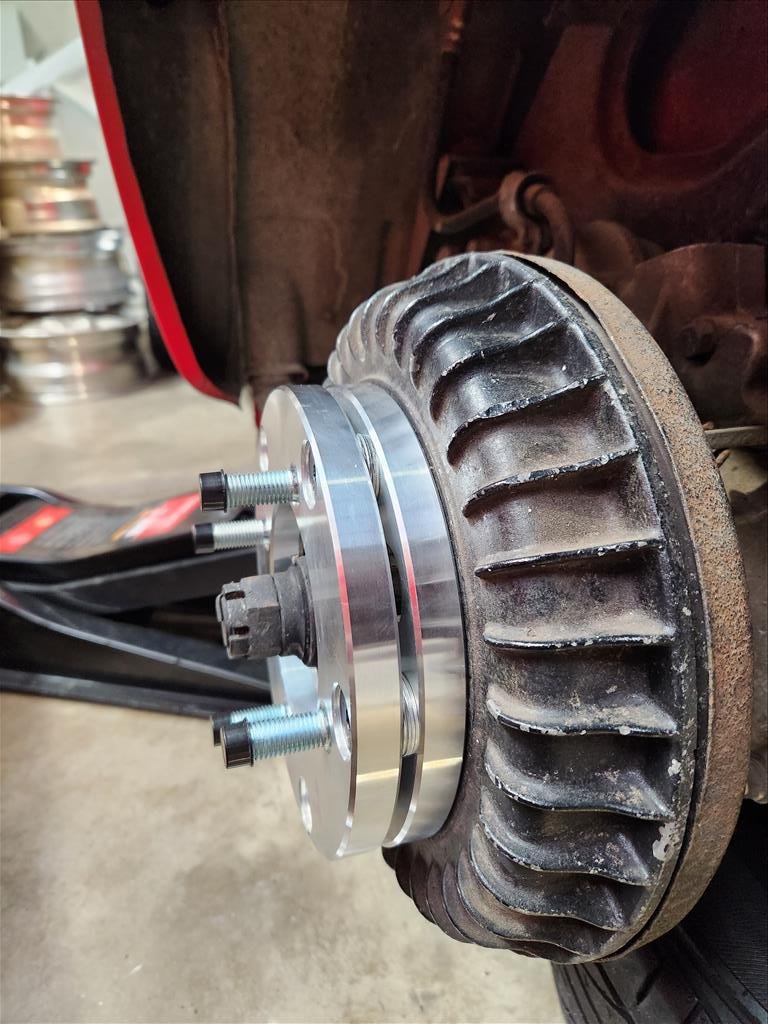
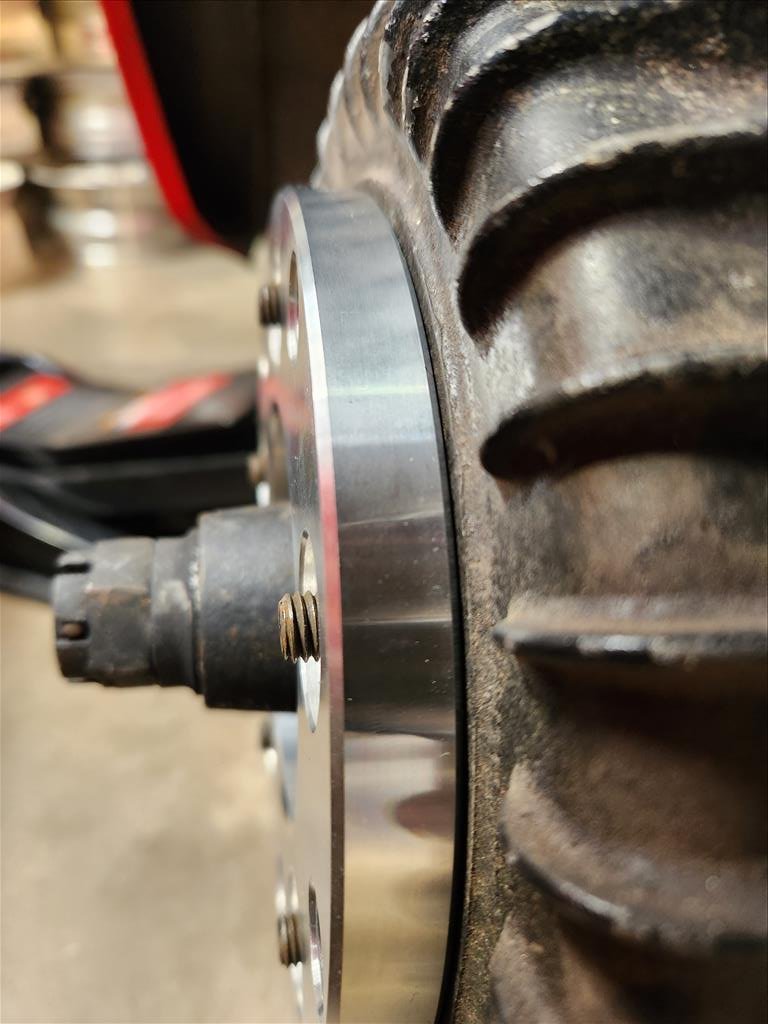
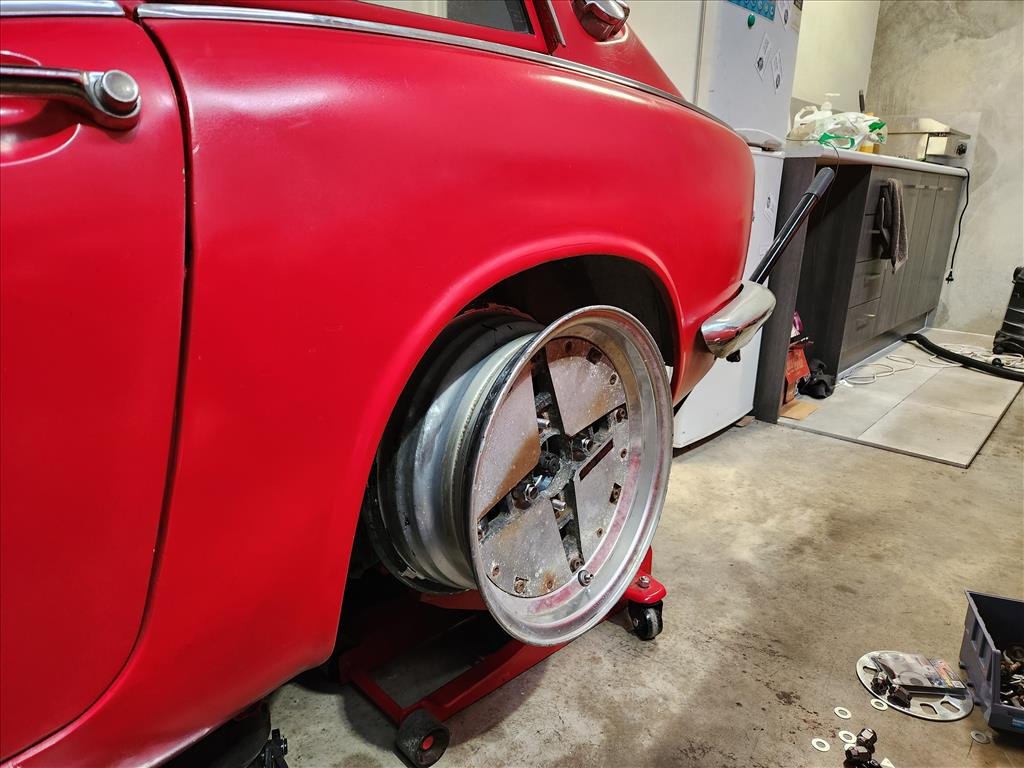
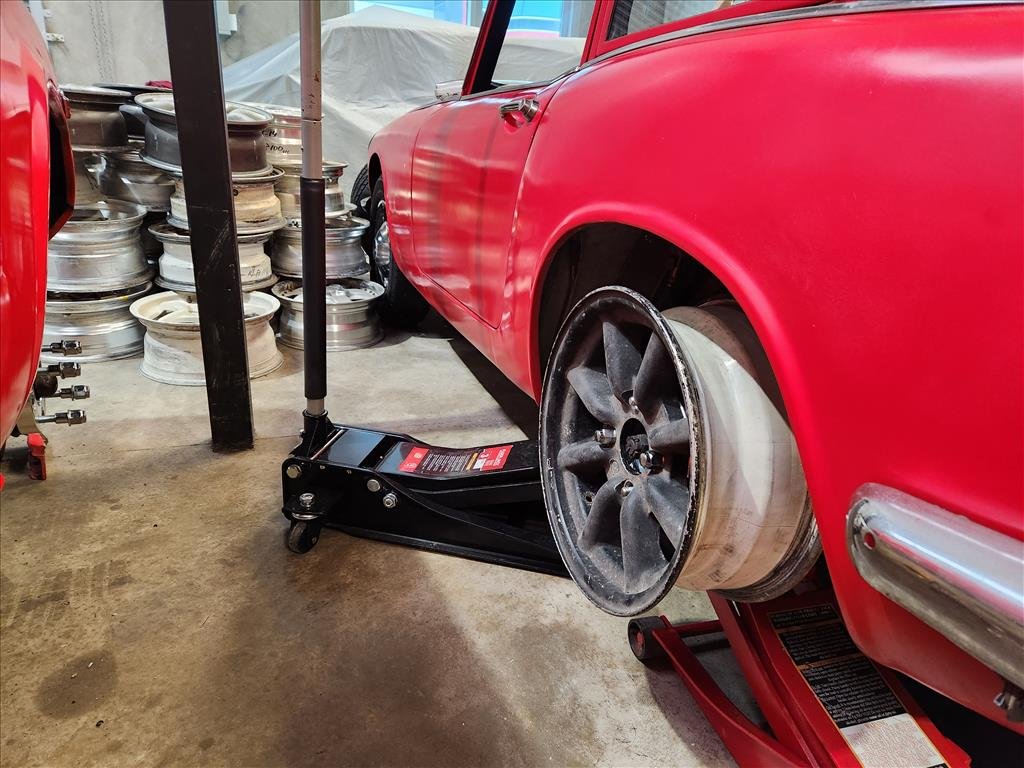
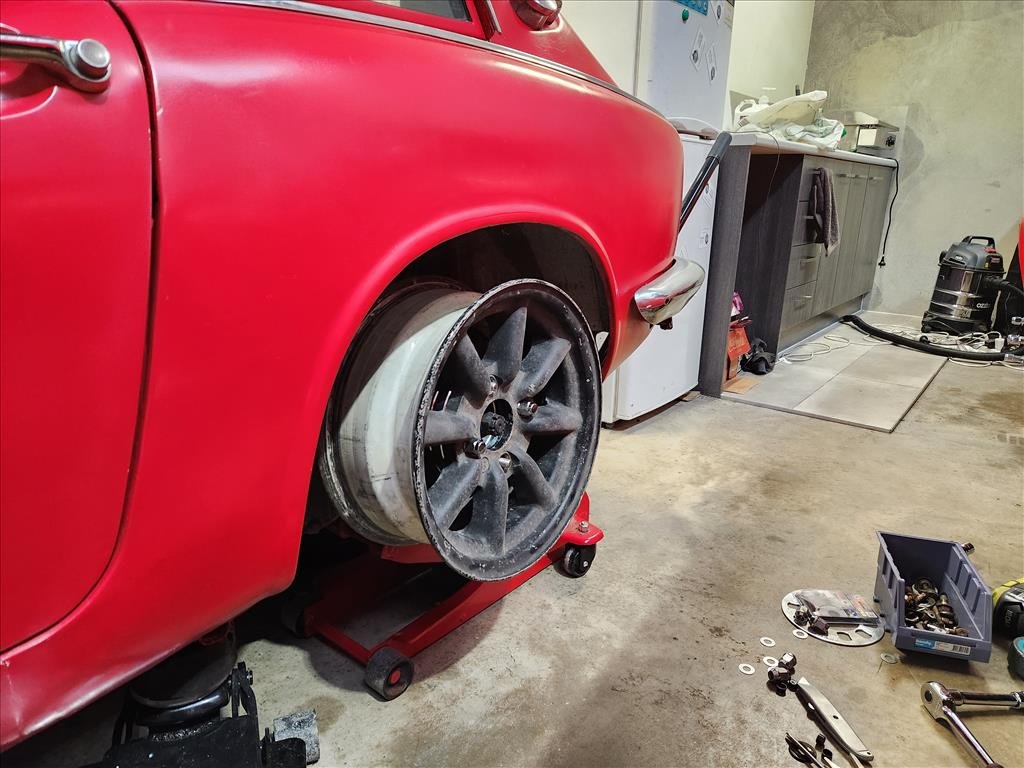
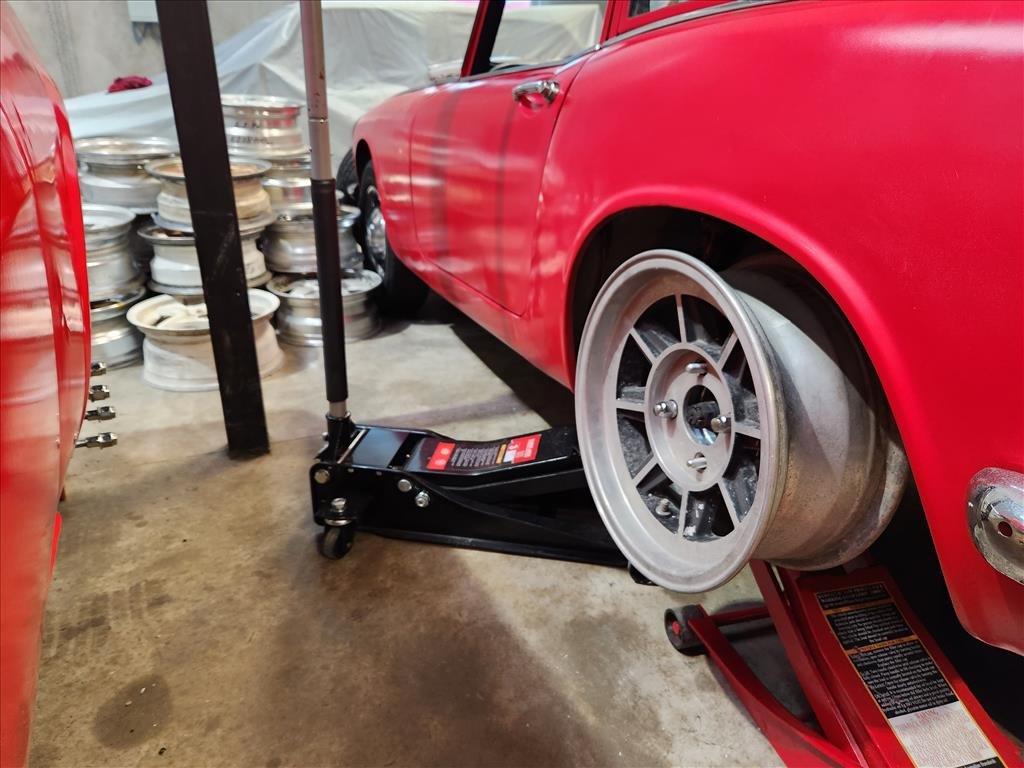
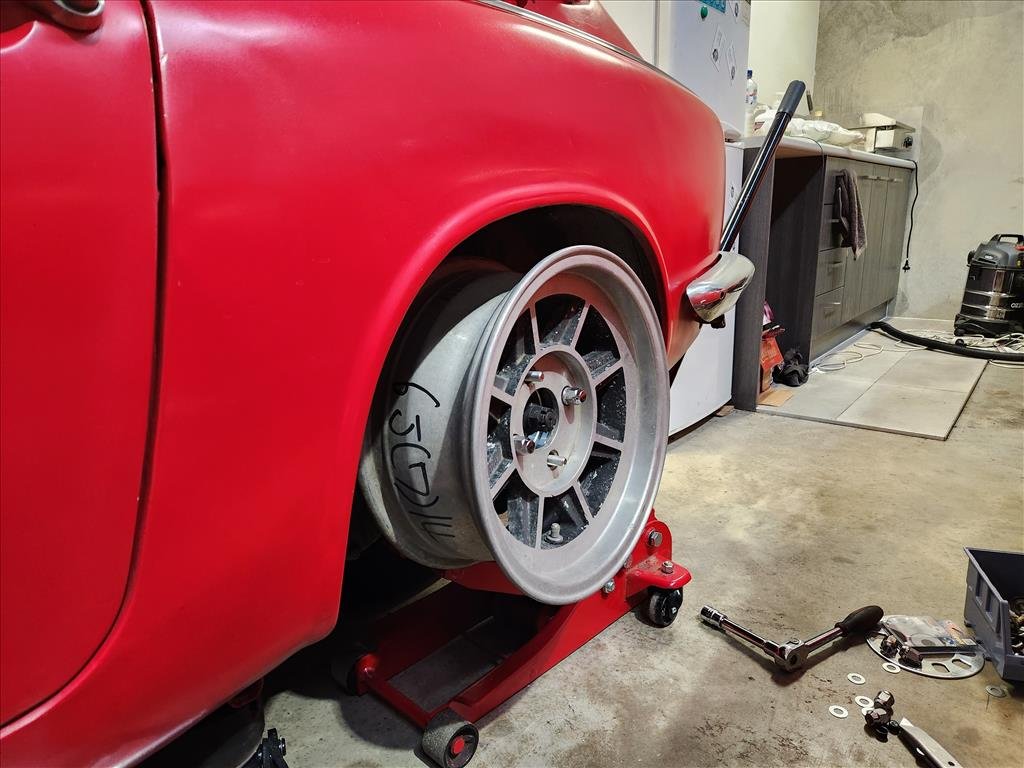
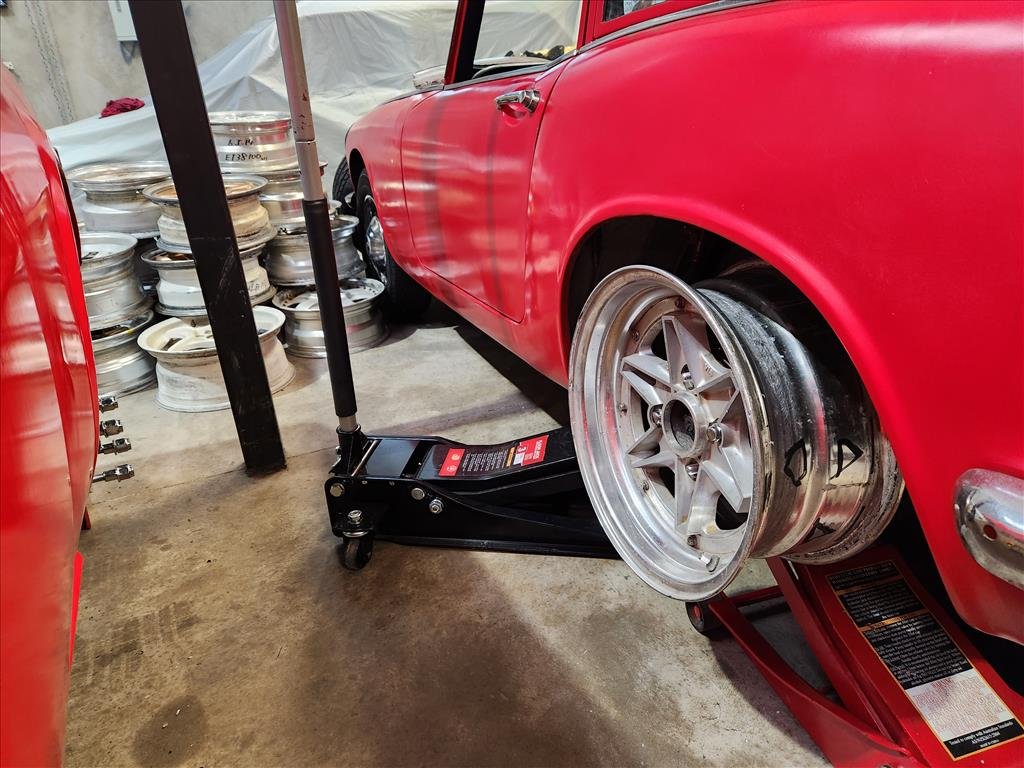
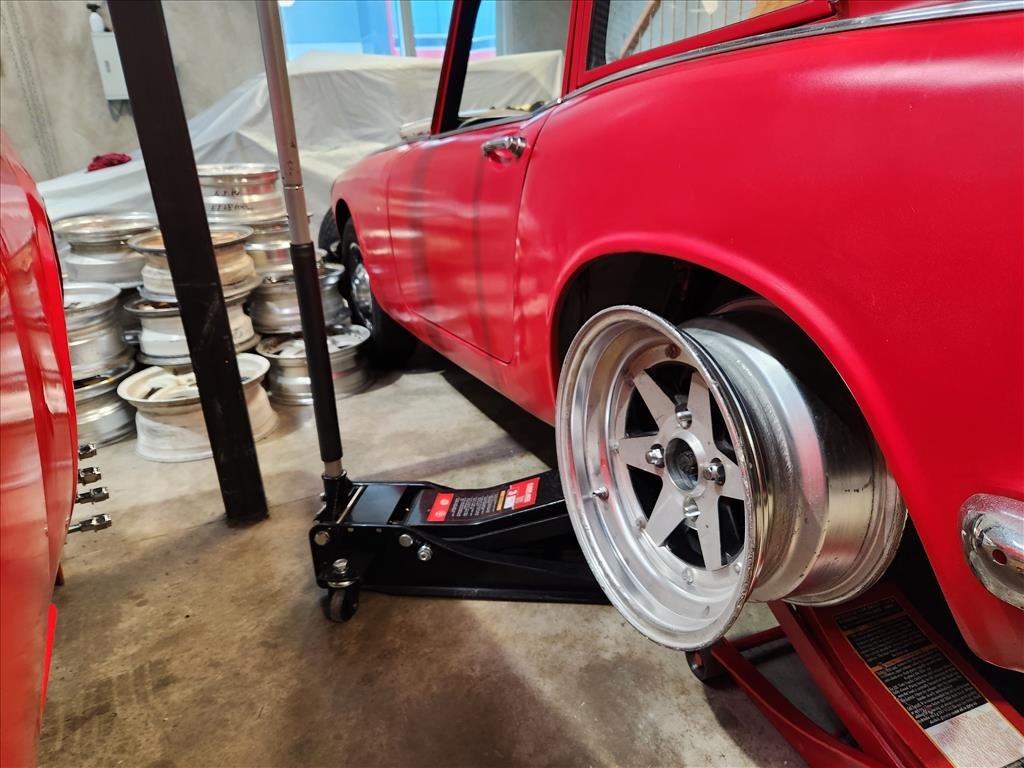
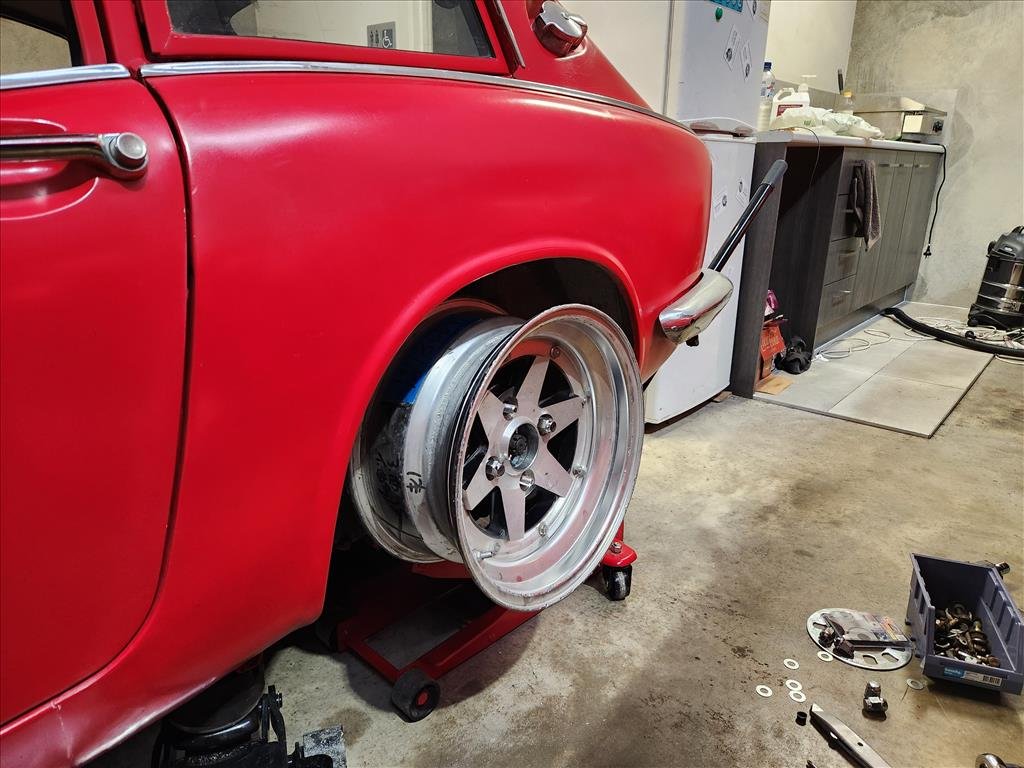
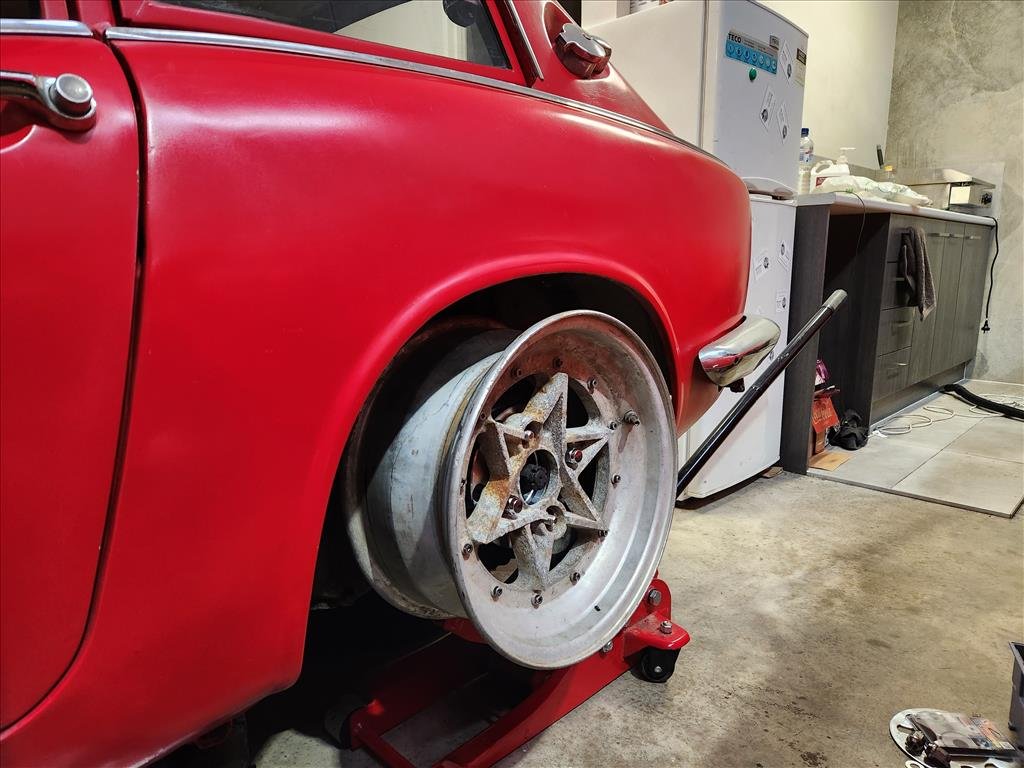
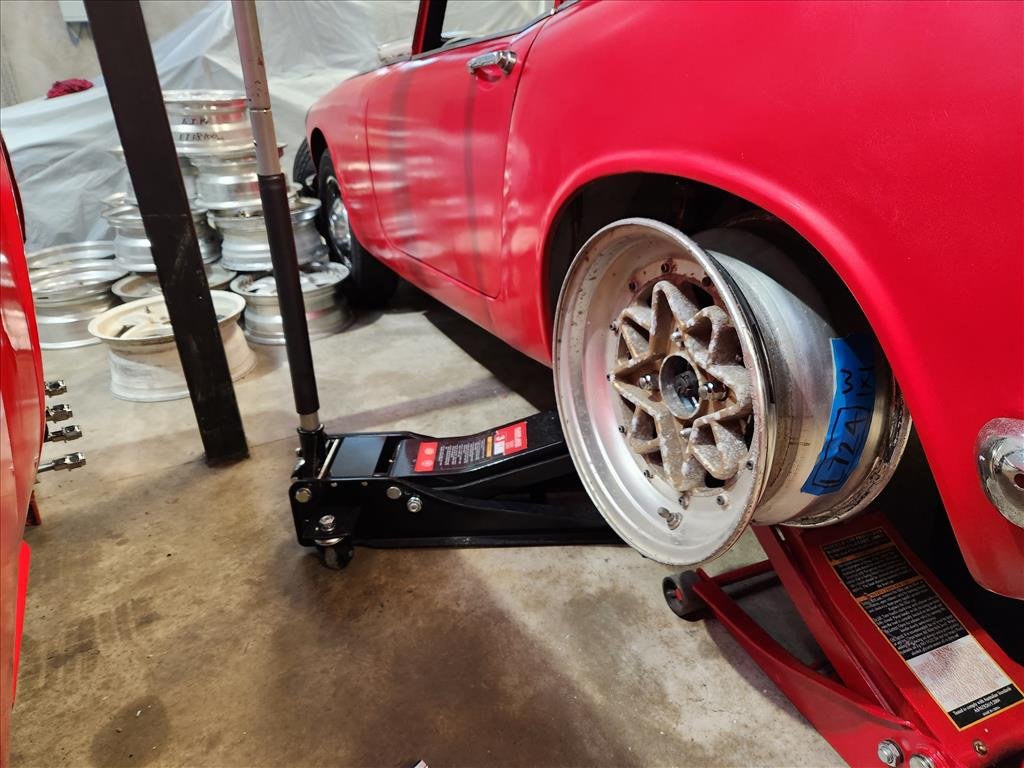
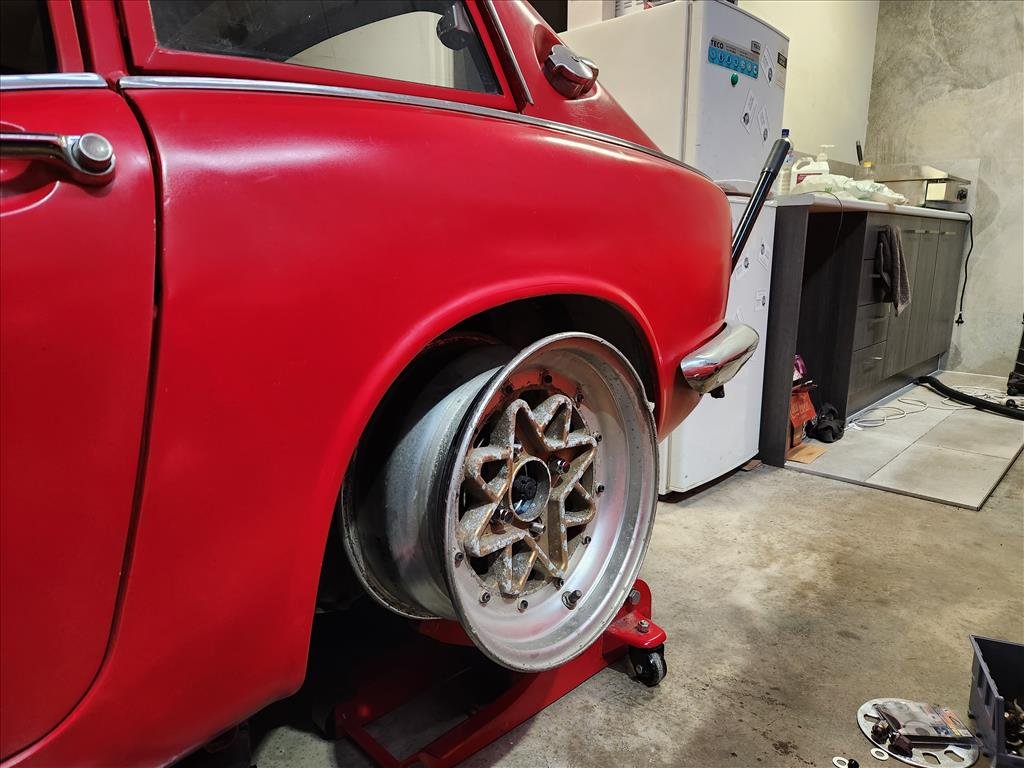
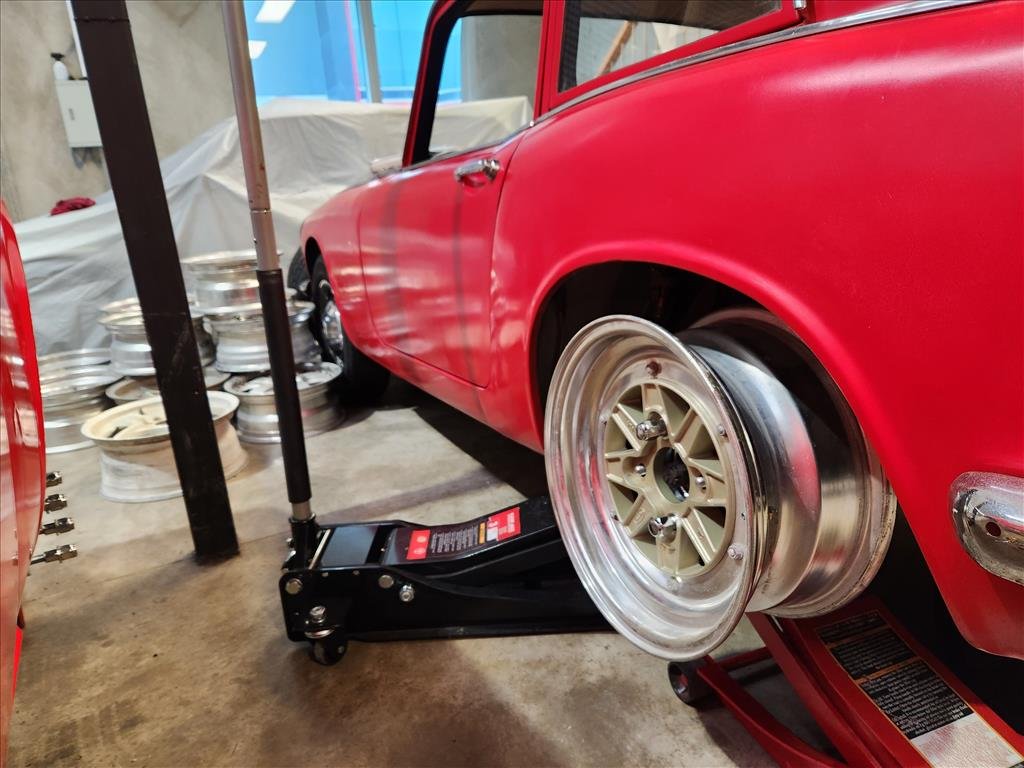
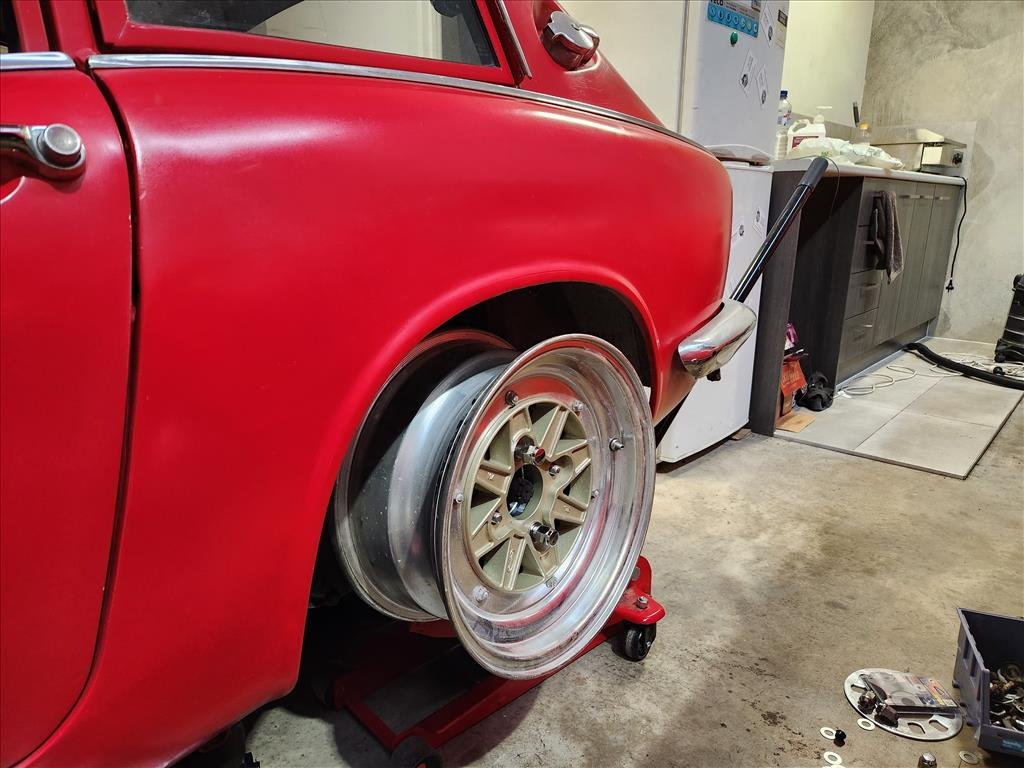
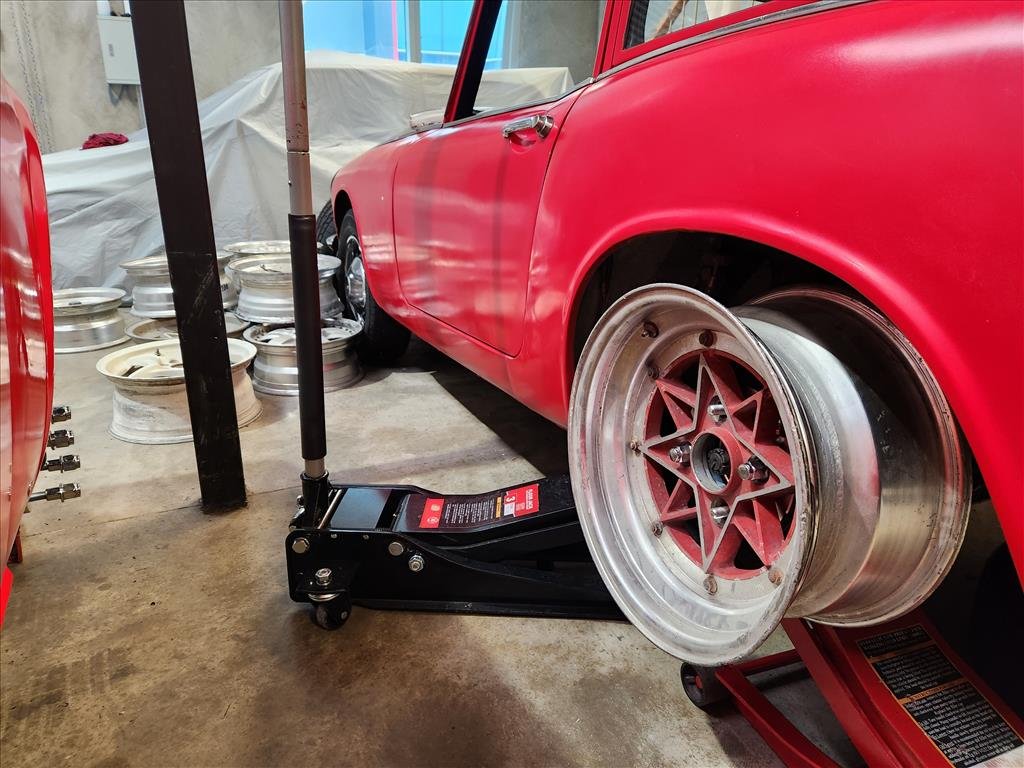
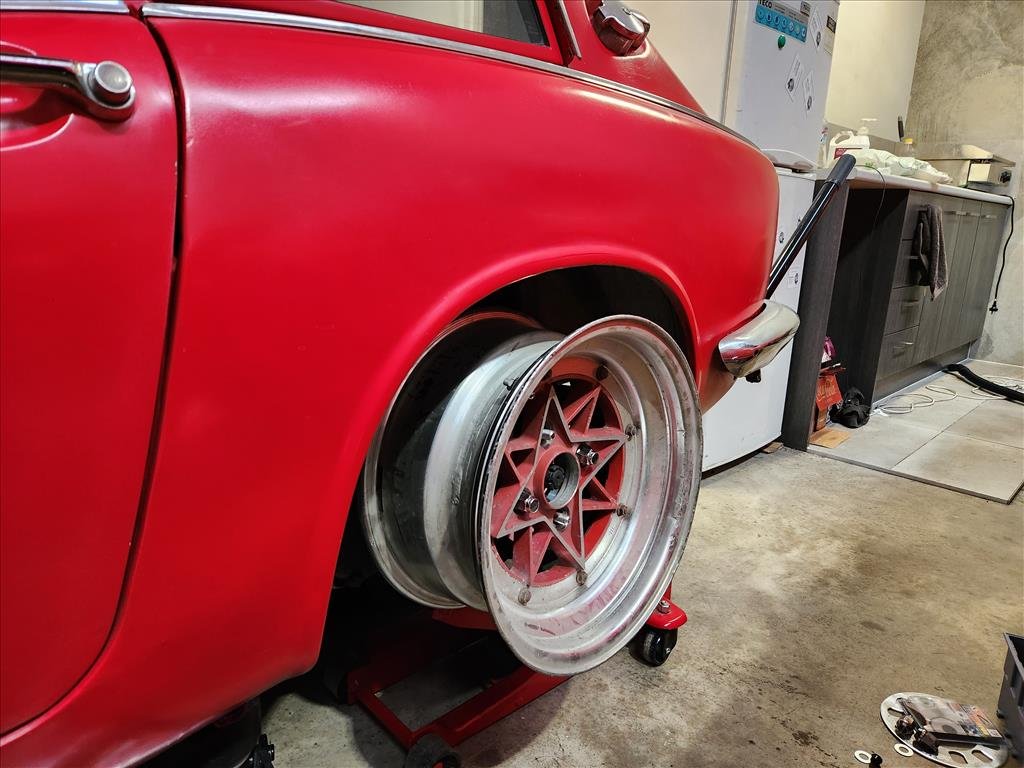
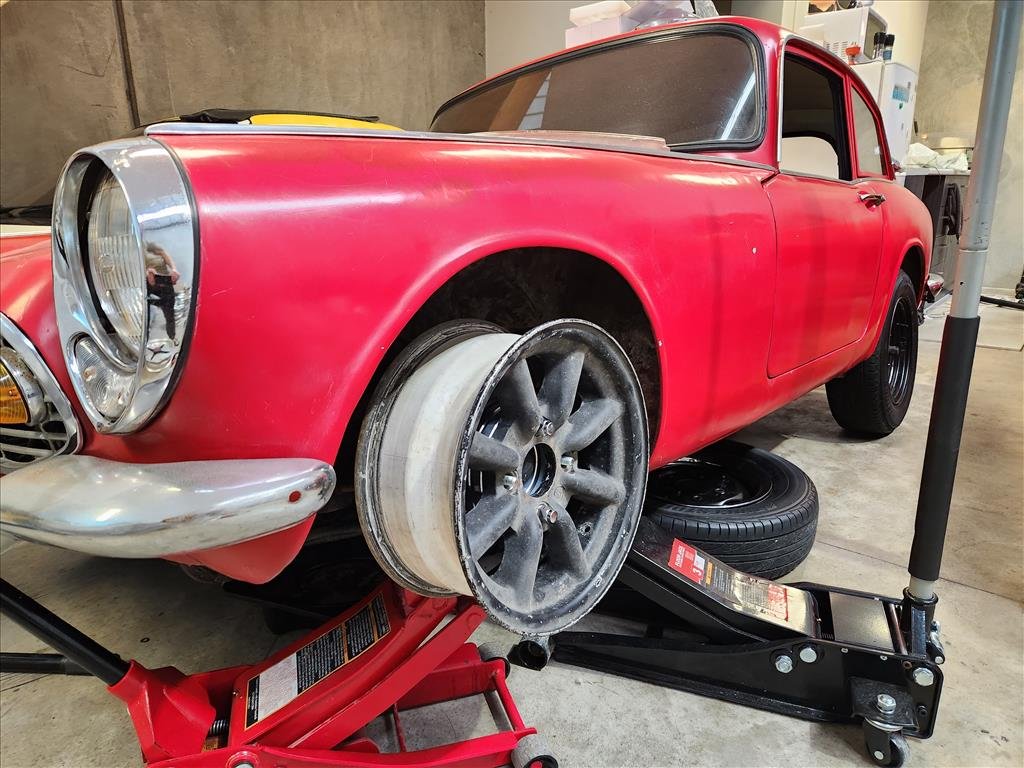
Strap in kids this one is image heavy. I received the spacer adapters during the week and this is how they work. There are two parts with the outer part being bolted to the inner part using those allen head screws. Not super into those allen screws as they have a tendency to round out but probably limited for choice. Apparently in 1965 M12 wheel studs were not invented yet so the S600 just has M10 and the spacer place didn't have a suitable small nut to use however the OEM nuts probably can work but they protrude past the spacer, along with the stud. We cannot machine anything out of the other side of the spacer because of where the studs are for the 4x114 portion so for the purposes of this exercise I've just used some washers. This makes the effective spacer 35mm instead of 30mm. So now, feast your eyes on a large variety of wheel testing in the rear. These are all 6-7 inch wide in varying offsets. Anything more than 6.5 is pretty much a no go due to the width and the spacer so no super deep dish sadly. In the front I knew it'd be a struggle so I didn't go crazy and just mounted up this watanabe which is 14x6 and it still pokes out a bit.. maybe I can find 14x5.5 or find some way to put a little camber up front. I also noticed a lot of grease and fluid up front that I decided to ignore. I like the look of the watanabes as the faded black coating that the used ones usually have matches the 30 year old dulux paint job on the car. I'll have the machine shop make a slightly wider inner spacer portion so I don't have to go cutting studs up I think and we'll go from there. Worst case maaybe I can find a smaller nut and cut stud but would prefer to avoid that.
- 79 replies
-
- 15
-
-
Speaking of momentum, a bit more work getting done on the Skyline while we wait for those arches to be made. Bit of a hole in the back chassic leg here and the other side wasn't looking super flash either so some new bits being made up.
- 79 replies
-
- 19
-
-
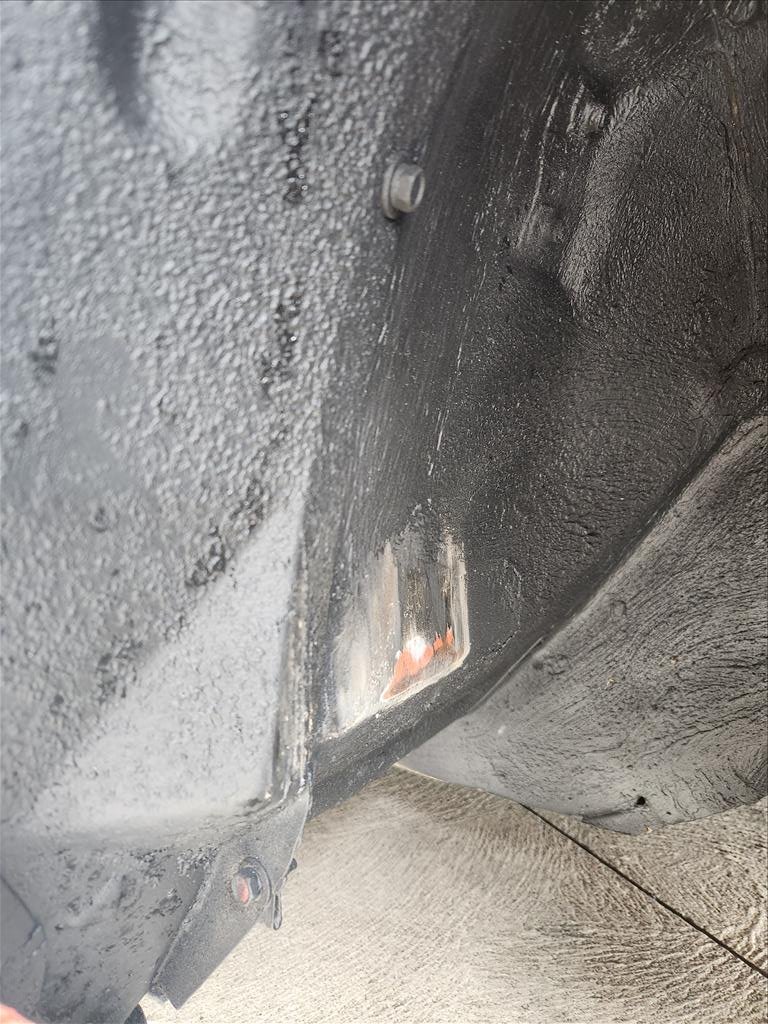
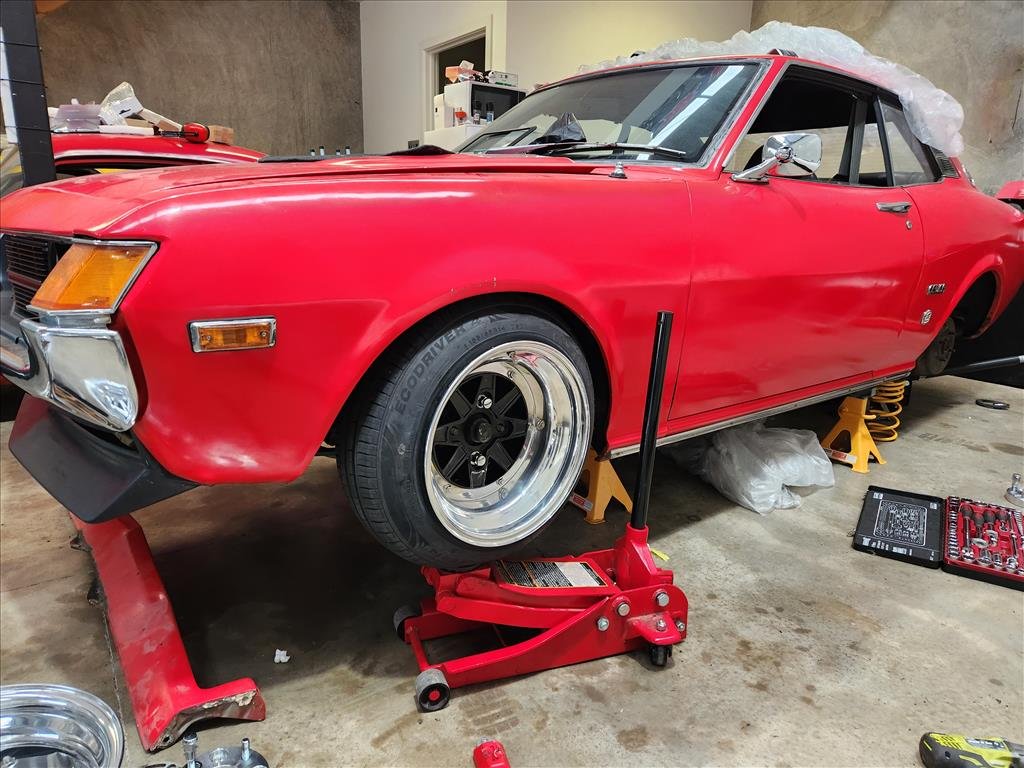
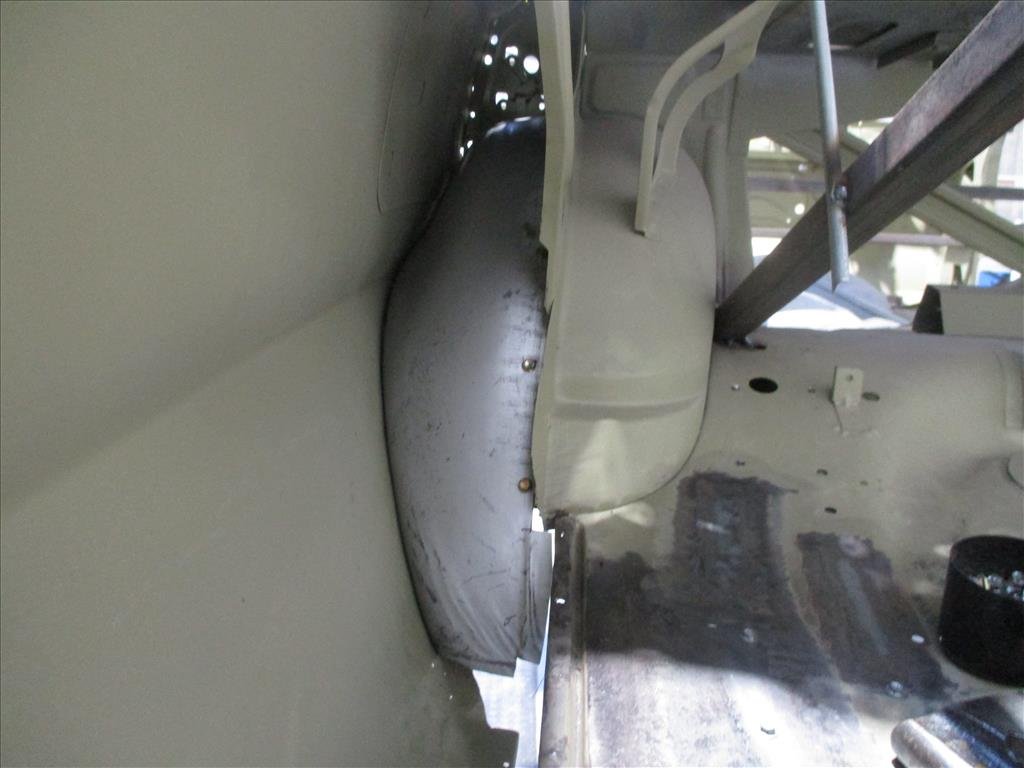
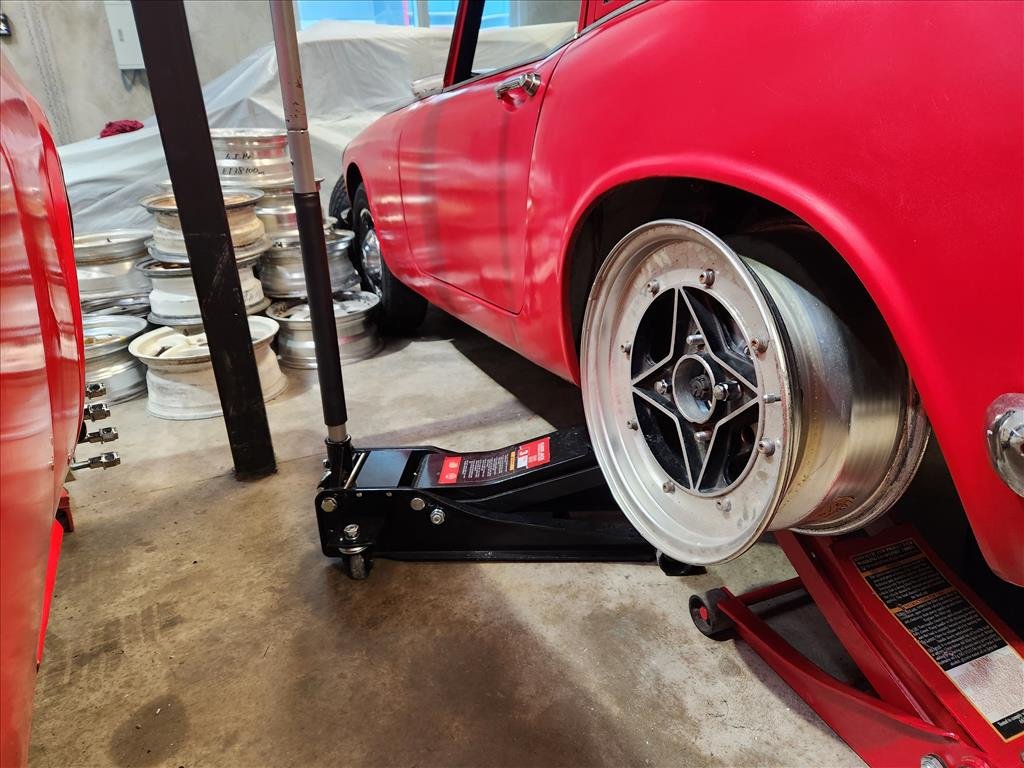
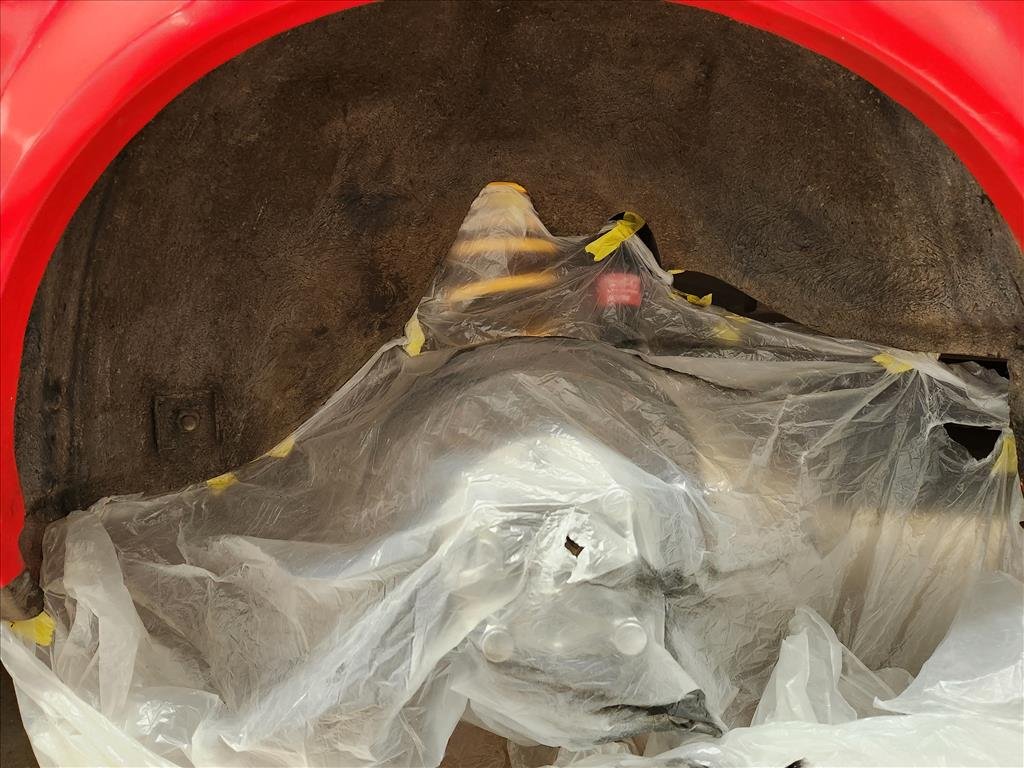
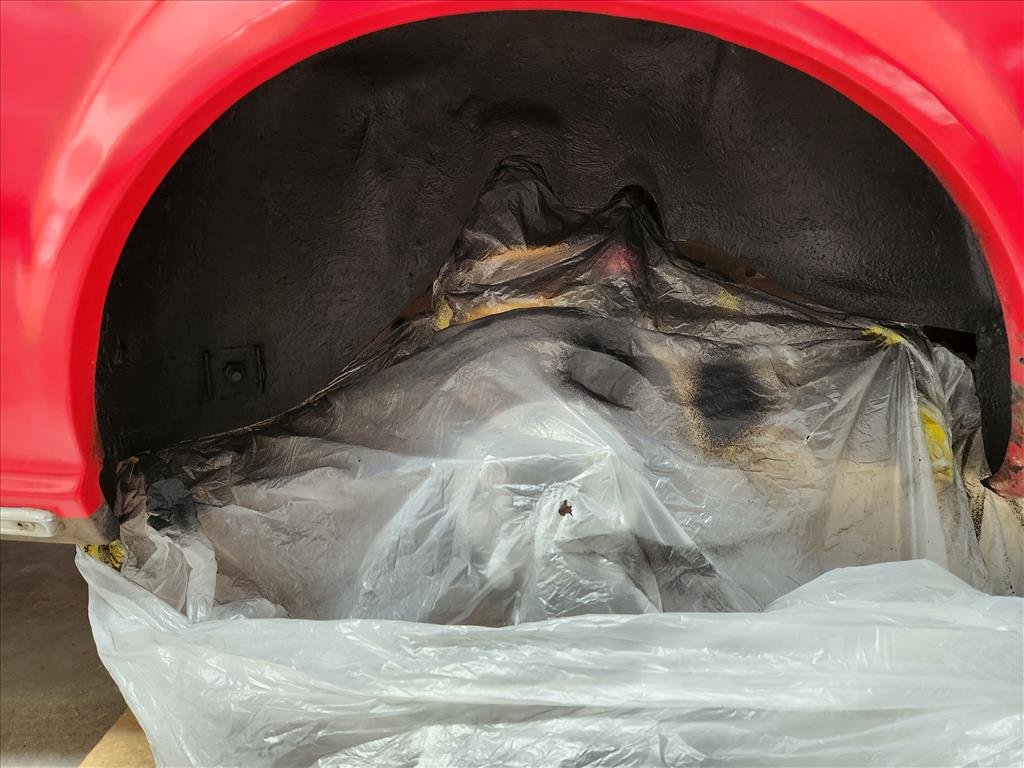
Not a huge amount happened today but in the interests of keeping momentum going there is a little update. I have taken the wheels off the Celica to get the new lips put on so while it was in the air I sprayed the rear wheel wells with underseal. It's not perfect but it's better than it was. Found out some of the rear guard pocket is made of fibreglass.. not really a surprise. It's probably not perfectly coated but it just has to be better than it was, that's all. Next task is working out which wheels to put on the S600. Because it's 5x130 (yeah I know, wtf) stud pattern I'm getting some spacer adapters made up but they have to be 30mm because of the way that it's done so I'm wondering what kind of width I'll be able to get under there. I don't think we'll be able to do big dish however the rears have been widened by some Barry in the past so not sure how wide they even are.
-
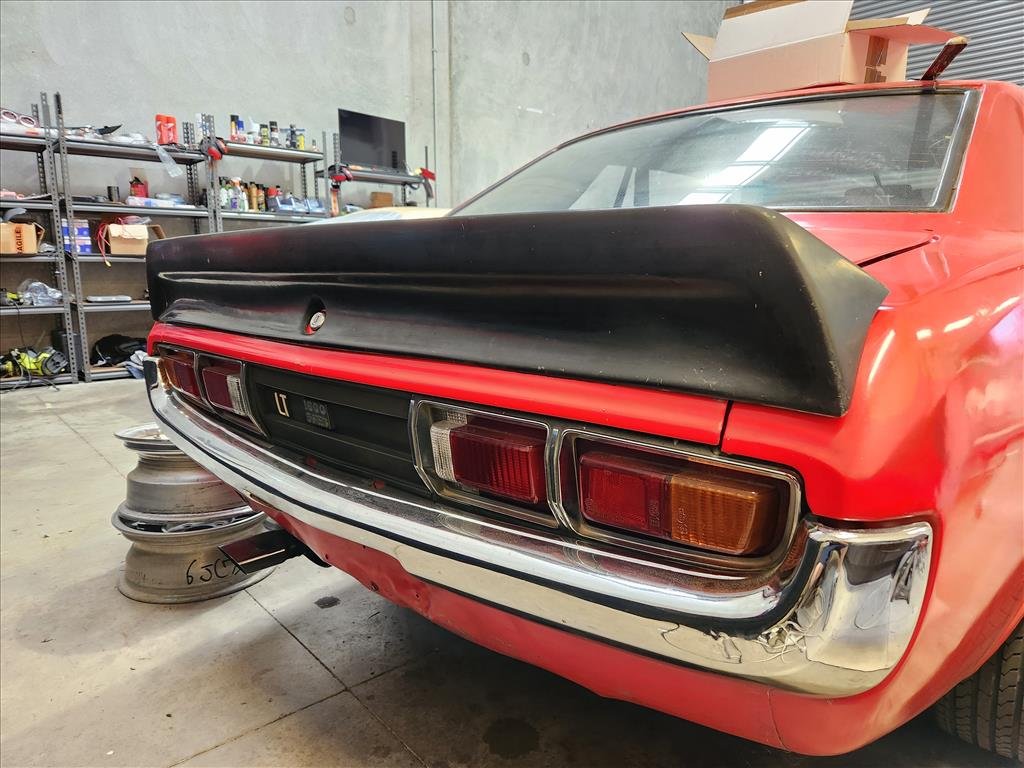
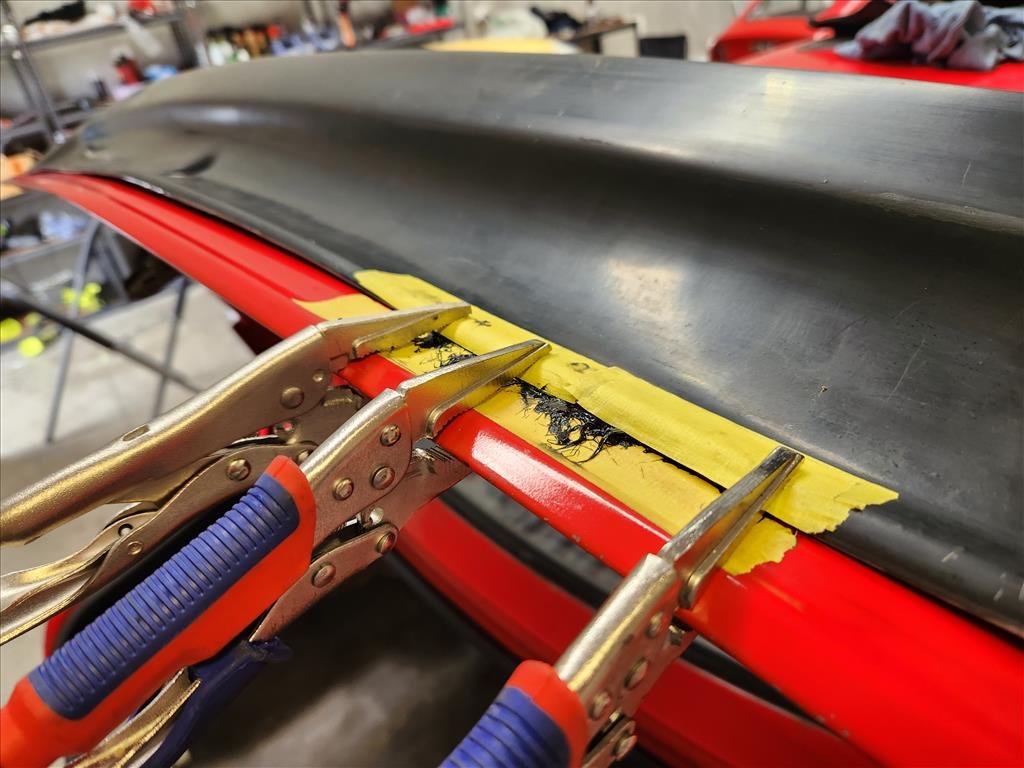
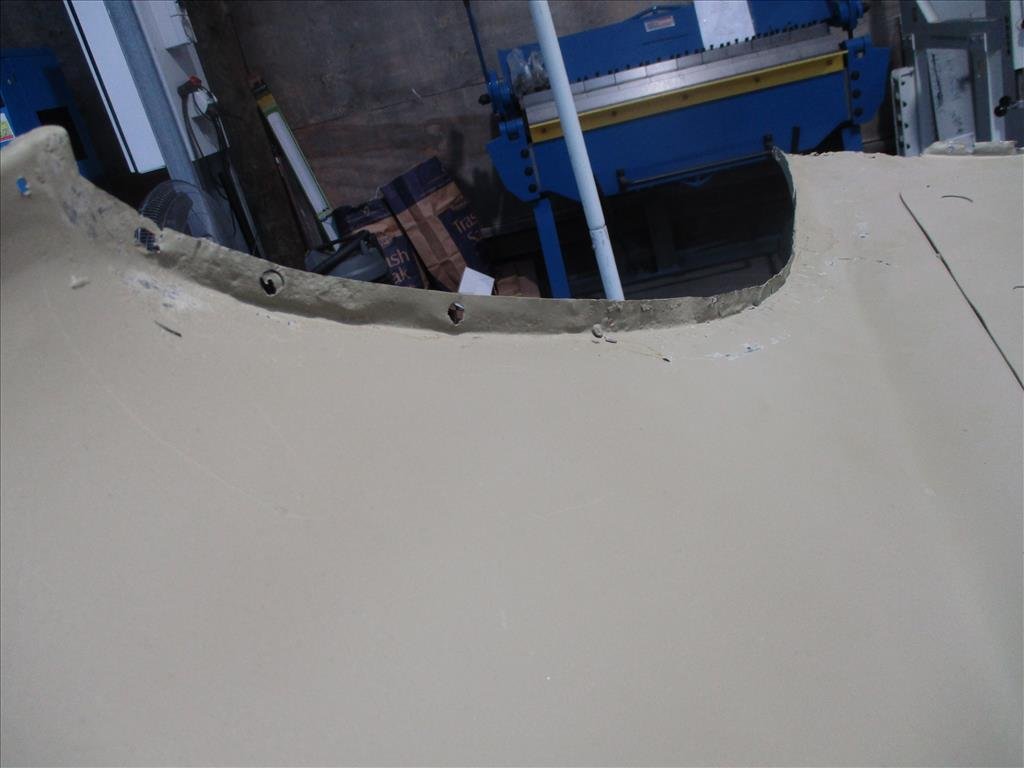
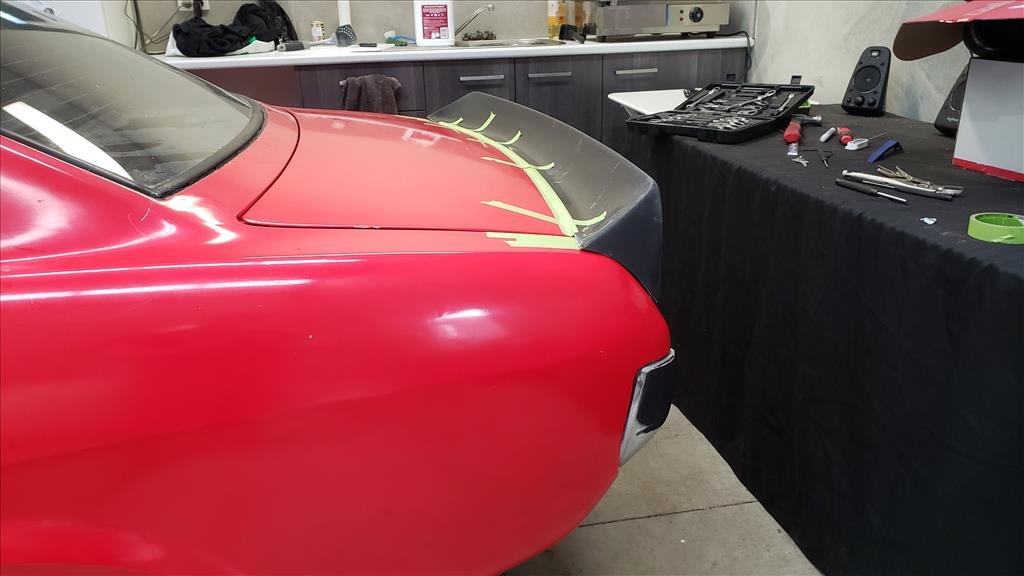
It's Sunday! That (usually) means workshop day. For the rear wing on the Celica because it's fibreglass and generally averagely put together I had the problem of the passenger side contacting on the rear guard. I thought maybe it was to do with the rubber boot seal so replaced that which did make a different, just not in the area I needed. Ended up just trimming a bunch of stuff off the edge which was the last step really and that's probably going to be good enough. As you can see the fit is pretty terrible on the back but I decided to make the top fit best then deal with the back fit later. When it's a bit warmer I'll Sikaflex it on.
-
Whoops, realised I posted the other Skyline post in the wrong thread! The Skyline is back on the cutting block after a long hiatus and struggling to find somewhere to work on it. As you can see the rear inner arch is mangled and it's basically same on the other side. Repairer suggested getting some old Ford Escort reproduction pieces as they look fairly similar and he thinks he can make it work. Saves trying to remake that whole lot from scratch and considerably cheaper so a set of those have been ordered. He's also started working on chassis rail repairs as well so things are steaming ahead!
- 79 replies
-
- 14
-
-
mlracing 1971 Skyline 2000GT Sedan (Hakosuka)
mlracing.co.nz replied to mlracing.co.nz's topic in Projects and Build Ups
Remember me? Not surprised if you don't. I forgot for a while too. First time Hako has left the storage in years! Off to it's next money draining adventure as we try to restart the restoration
- 54 replies
-
- 21
-
-
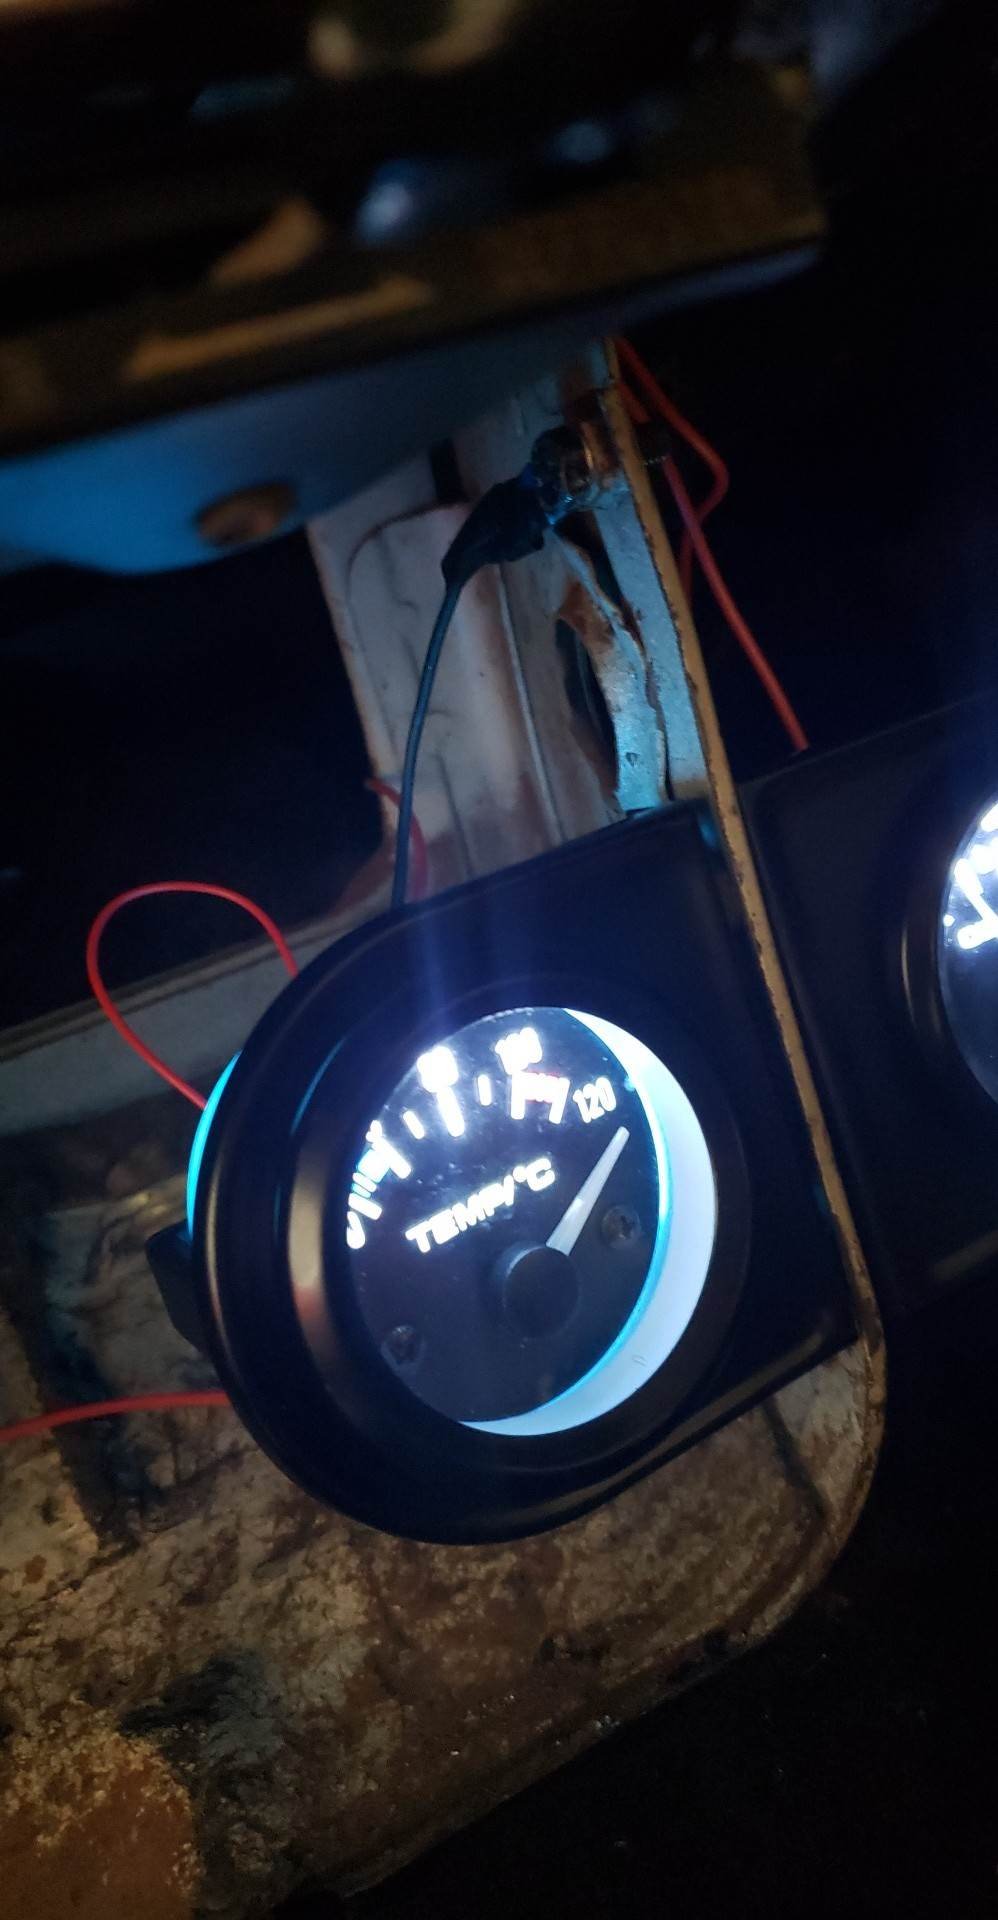
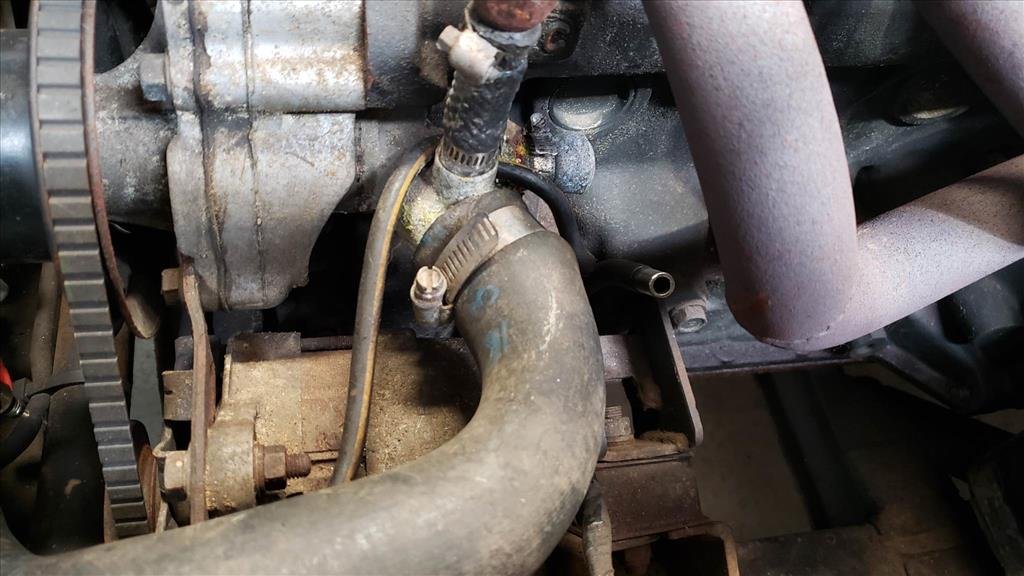
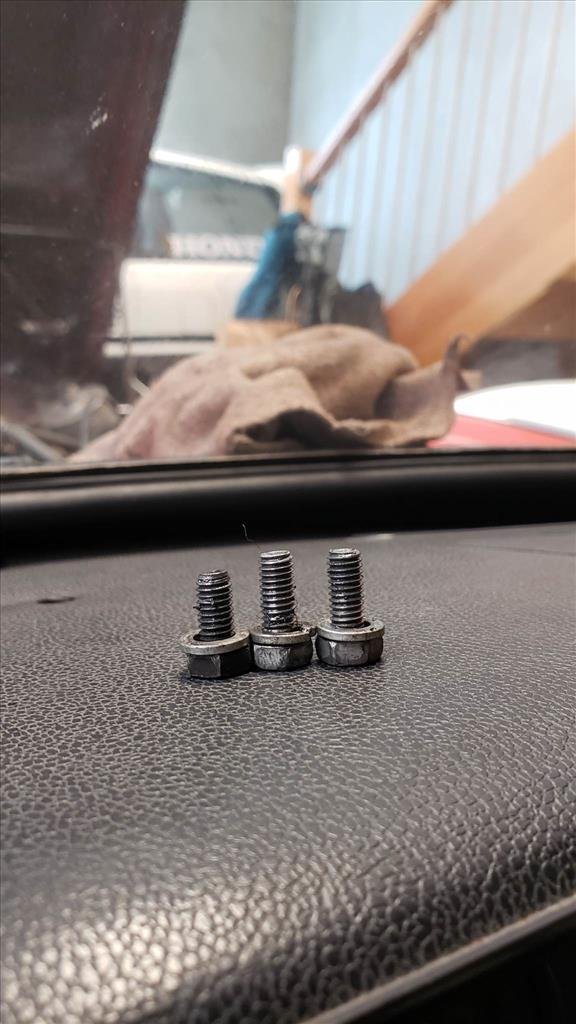
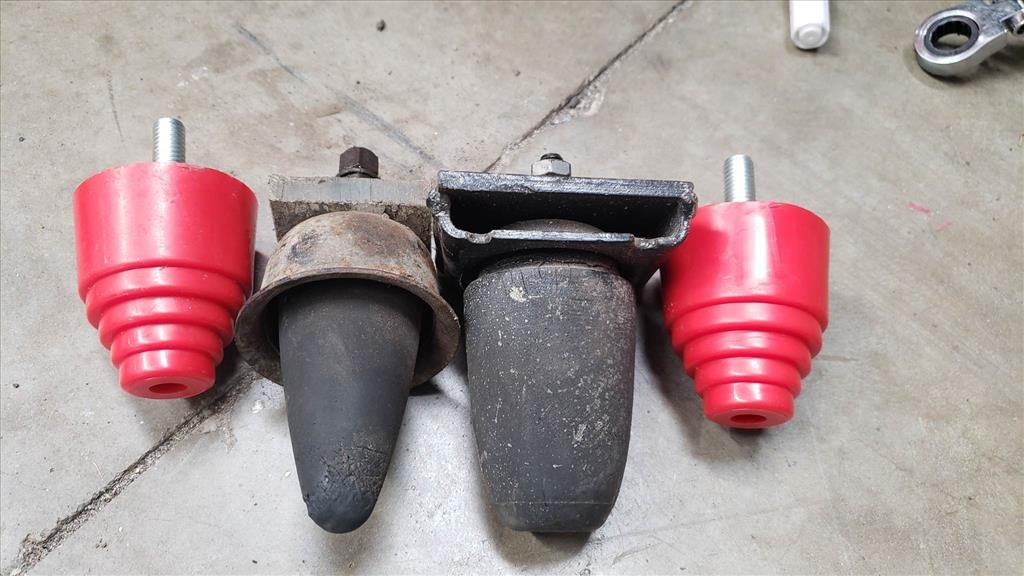
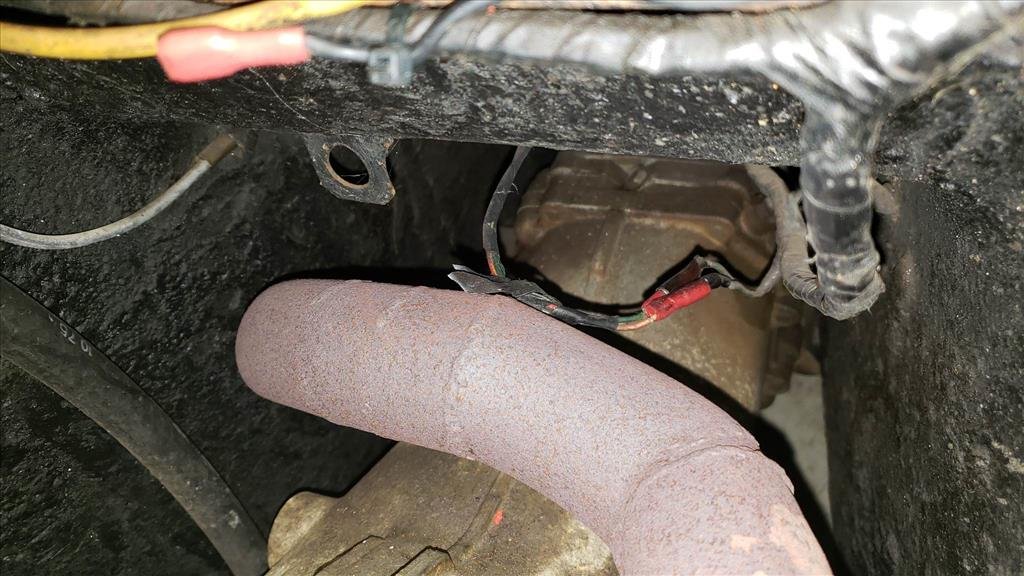
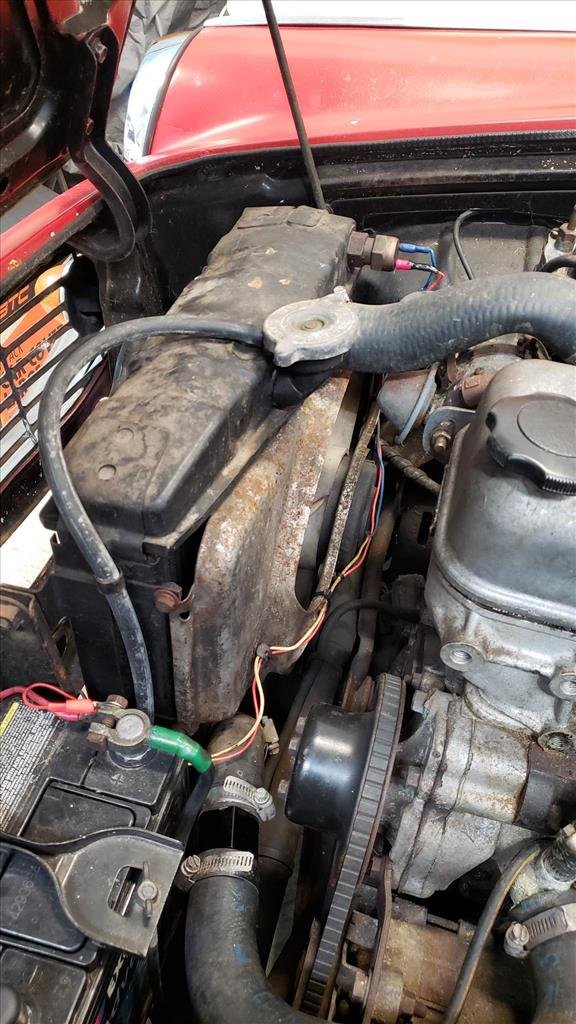
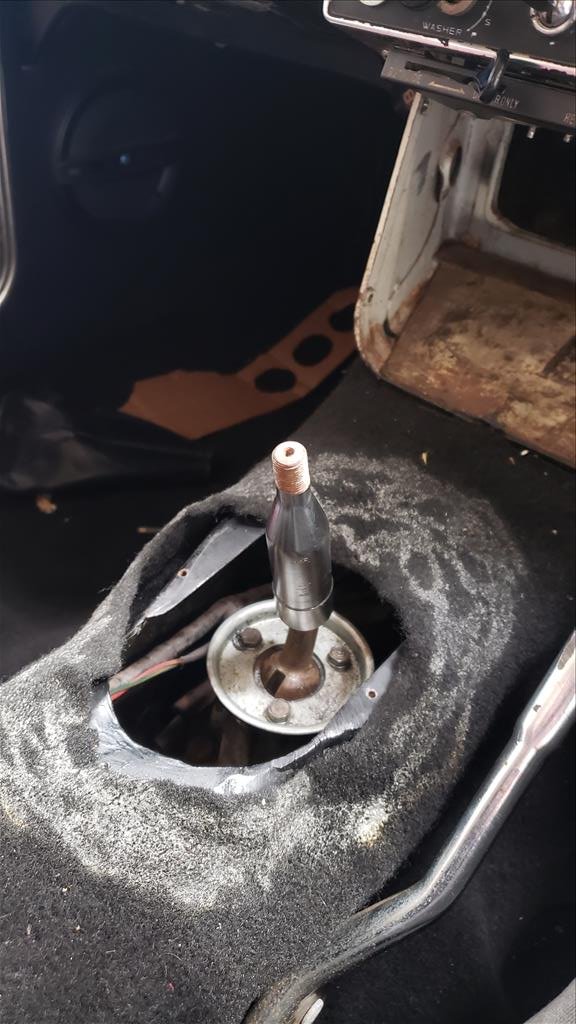
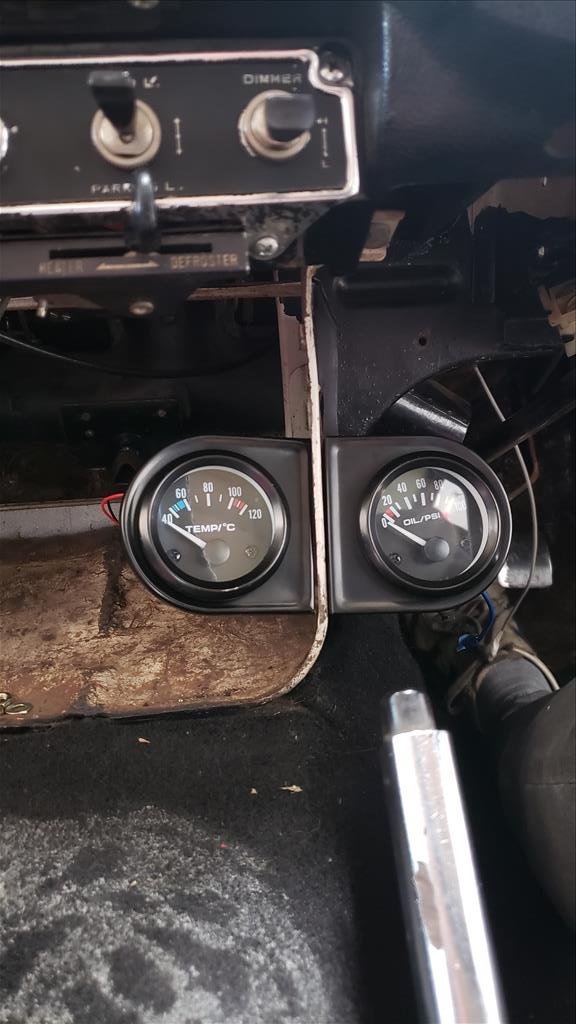
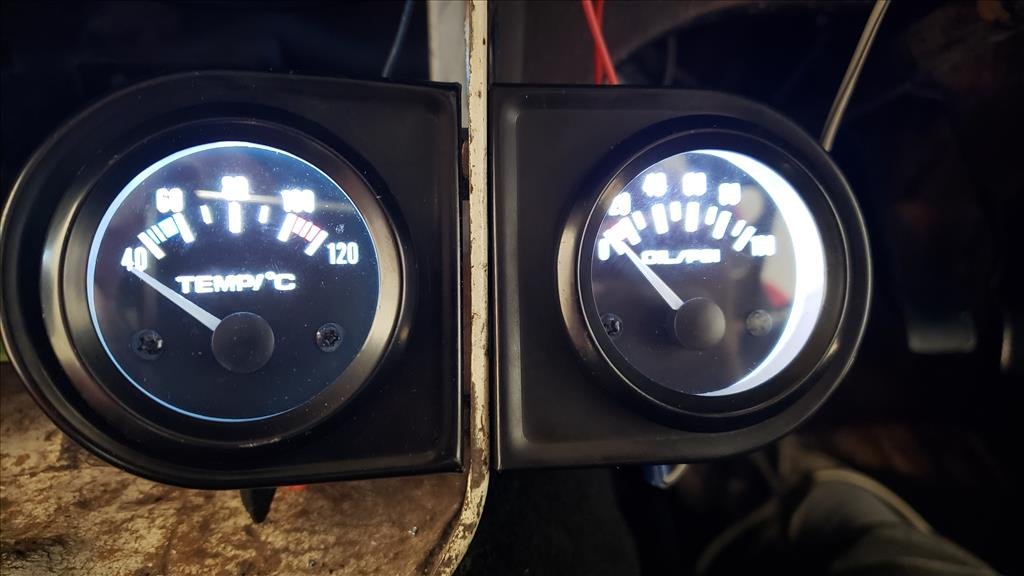
A few items arrived last week to get some more jobs ticked off on Barry's list. Actually neither of these things were even on the list I made but you know how it goes.. start doing something then you see something else you want to do then rinse and repeat. First up was to get that water temperature gauge connected. After draining the fluid out I was able to just swap out the Barry metal pipe that was there for the usual radiator hose adapter and that fits up nice, no leaks. Problem is when wired up the gauge goes flying to the maximum temperature. It even does that when it's not grounded so I can only thing that maybe there's a short somewhere or the sender is broken or something. I think the only way I'll be able to test it is to take it out and put it in some hot water or something and see. The reason I'm not scared of it actually being over 120 degrees is the second job of the day, which was actually the first. A friend of mine noted that I didn't have the fan relay actually powered so that was a simple job with some terrible wiring and crimping. I idled the car up and it turned on so we can presume that it isn't getting overly hot as the fan does turn off again. I don't know what was going through the mind of Barry when this wiring setup was done. I tried to undo the bolt to re-route the wire but it seems fairly well rounded so seems like the solution will be to pull the hose but I don't want to do that just at the moment until I take off that sensor for the gauge which will happen sometime in the future. Previously I mentioned that our shifter bushes were gone so these are the replacement items. Left is what came out, right is what is in the kit. This kit is for a whole bunch of Mazda RWD gearboxes so not all of the bushes were needed for mine but I replaced a couple of busted/missing ones and the difference was amazing. Of course there are some different bolts for the top plate, because why wouldn't there be? Was snooping around and found some wiring hanging down on the exhaust so that's cool. Tucked that up out of the way. One of the other things that was bugging me was the rear bump stops. As you can see, they are not the same. The red ones I will replace them with are for a Hiace but the idea is the same, simply a stud through a hole. Problem is said hole on the car is smaller than said stud so it needs to be drilled out. Job for another day.
-
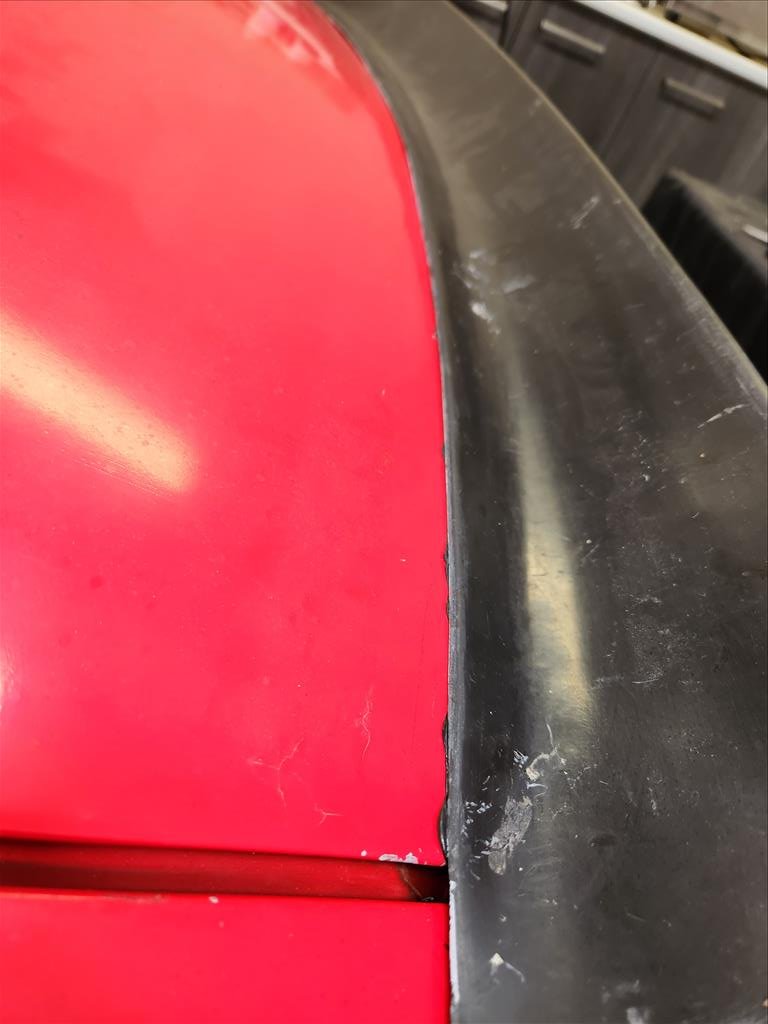
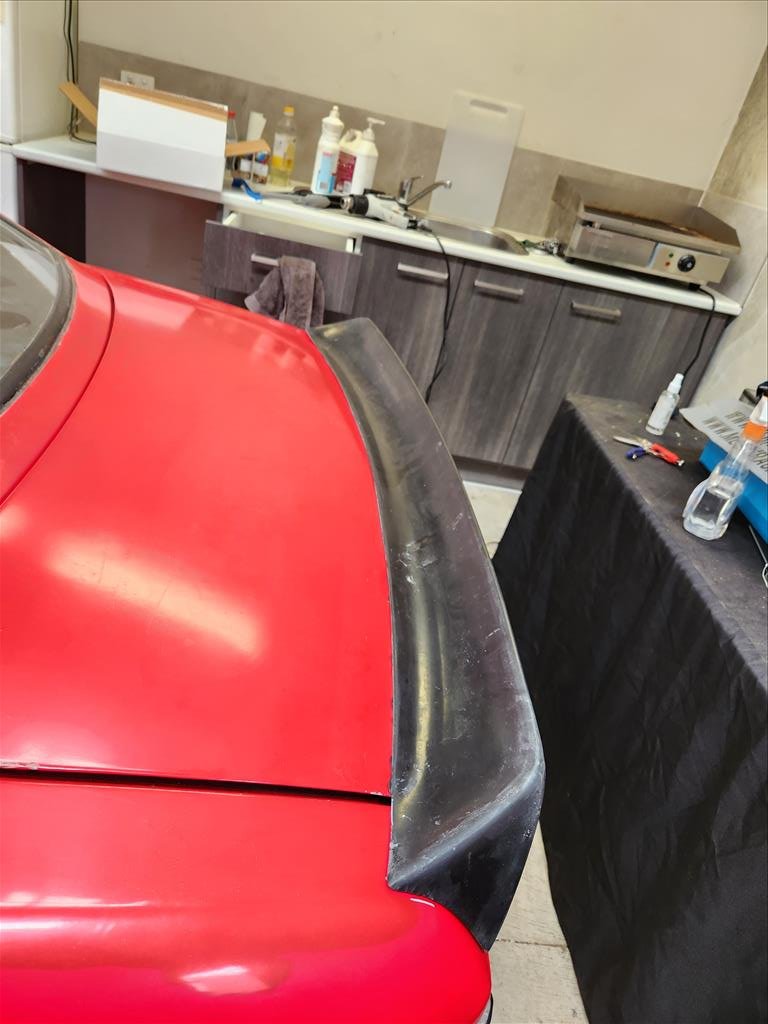
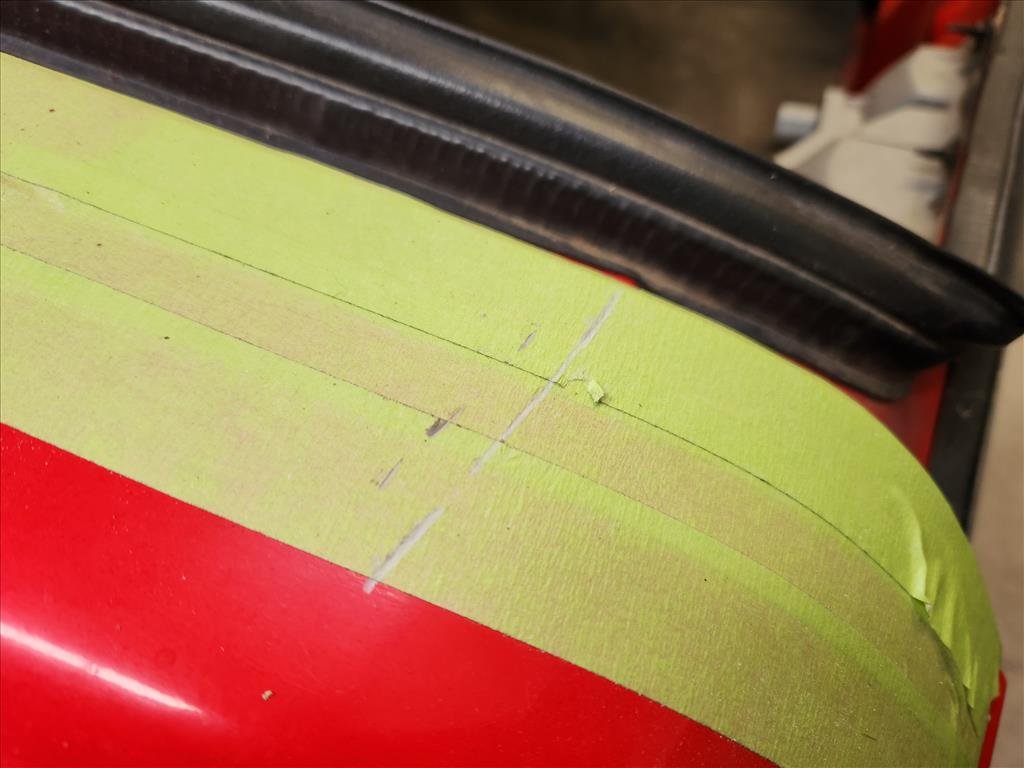
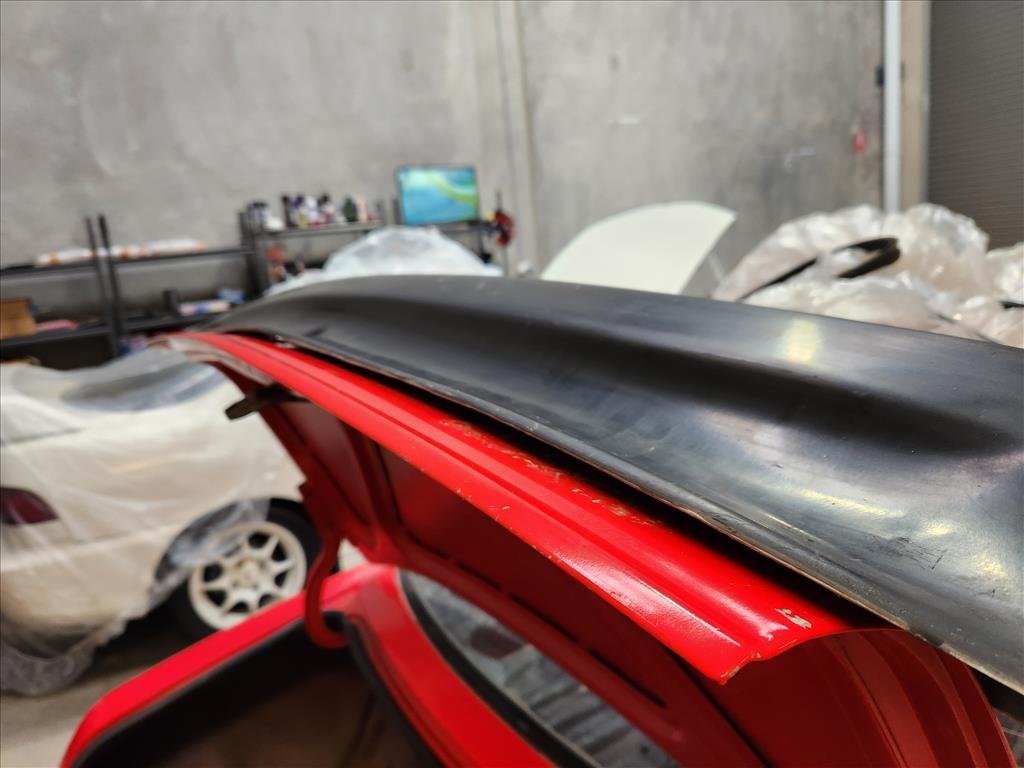
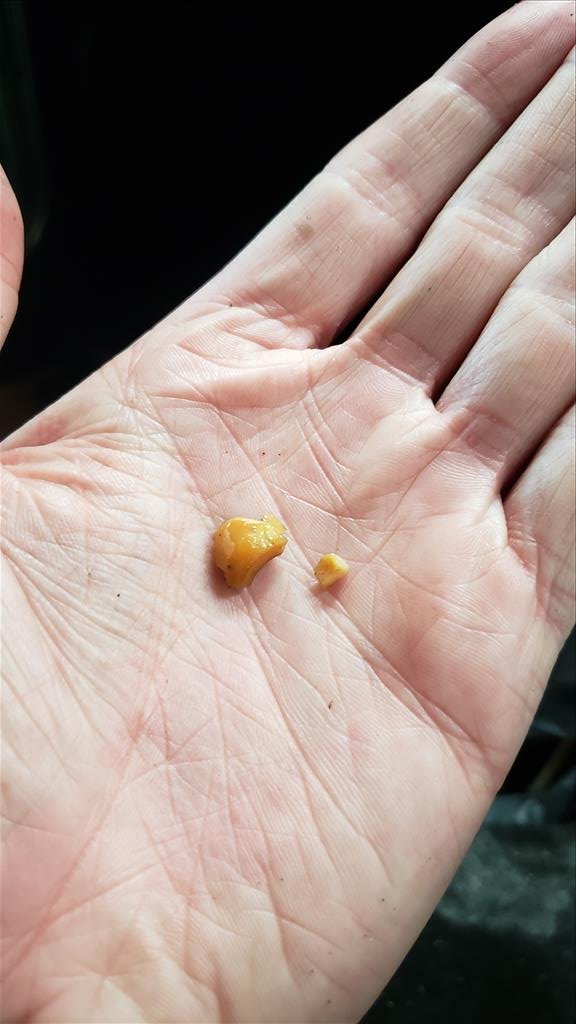
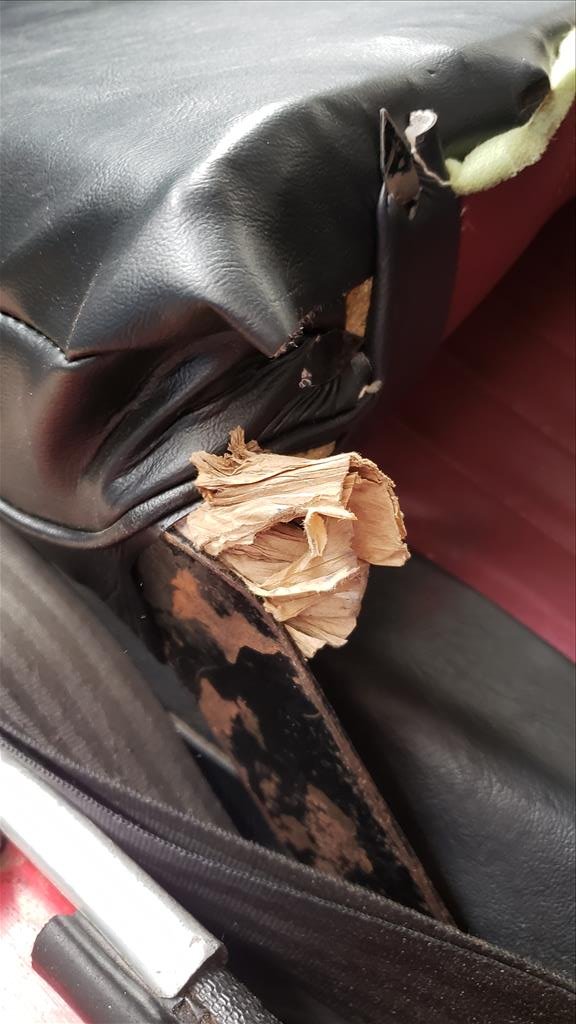
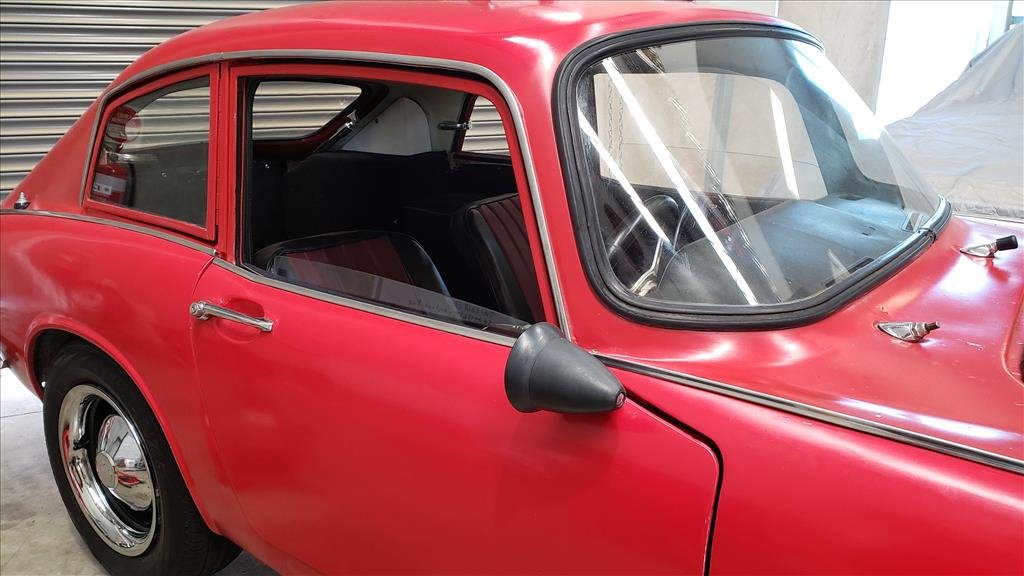
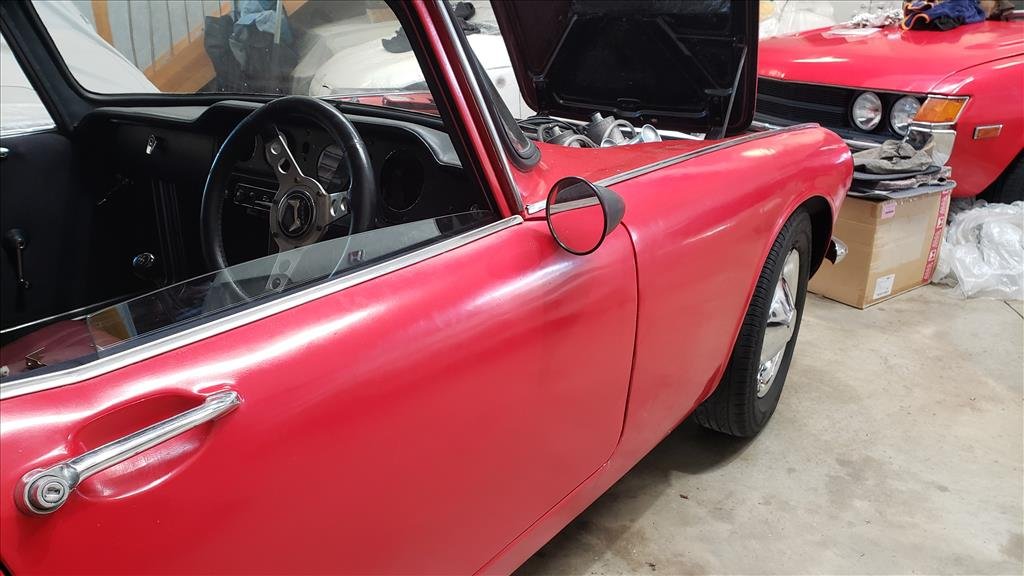
Most of the big dollar stuff that I want to do on the Celica has been taken care of for the time being so now we can start tinkering with the time intensive jobs. I spent a bit of time with getting this rear wing to fit up on the back and into shape as it's a bit warped. It's not stuck down properly yet but that's about the position it will be. It still warped but also the boot is shutting unevenly so I've ordered a new boot rubber seal as the current one looks quite old and crusty. Reason for doing this is the wing hits considerably more on the passenger side rear quarter than driver side so before I start irreversibly cutting more out of the wing to get it to sit flatter I thought I'd at least try to get the seal even. Barry got some love this weekend as well. Where the oil pressure gauge was located was prime position for smashing it every time getting in and out of the car so I decided to move it to the left and also temporarily mocked up where water temperature gauge will live. Don't look too much into all this as remember we will be remaking the top gauge panel soon and gauges will live up there; this is just more a proof of concept for senders working. I also investigated that short shifter I found in the box of spares and it does indeed look like it fits but the shifter bushing is long since gone out of business. Thankfully it looks like these can still be purchased and they aren't expensive. Not sure it will make shifting better though, probably not but we'll see. I also found a mirror in the Barry box that came with the car and fitted it up. Yeah that's not going anywhere near the car ever again. Seems like my seats are made of paper as well.
-
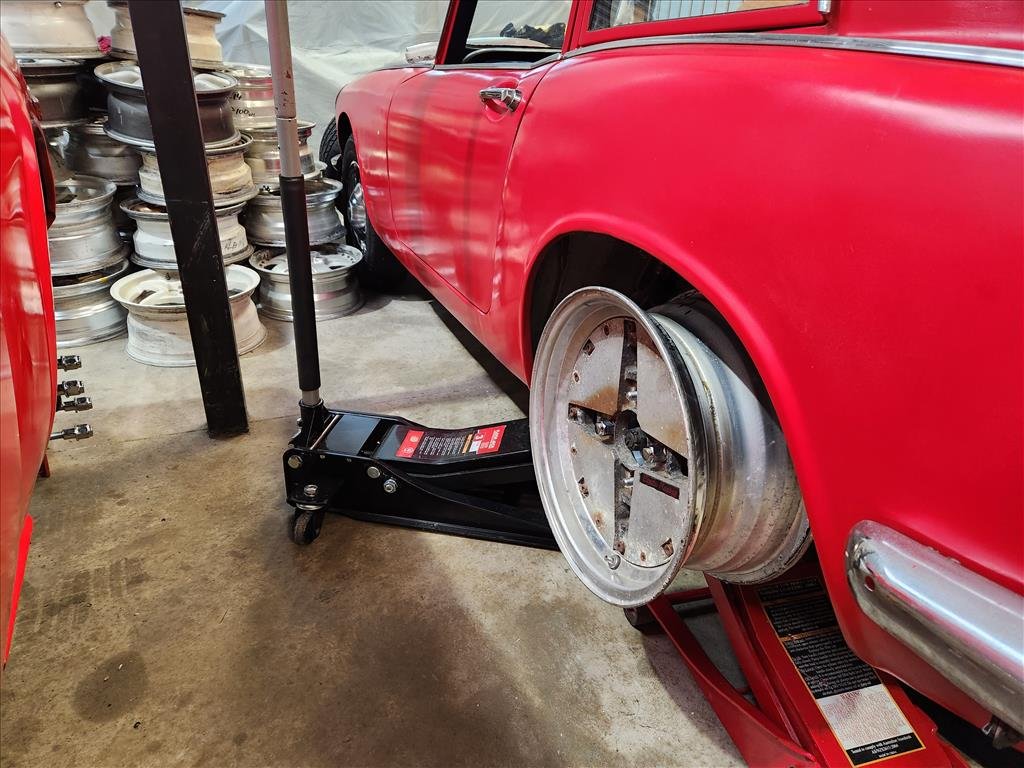
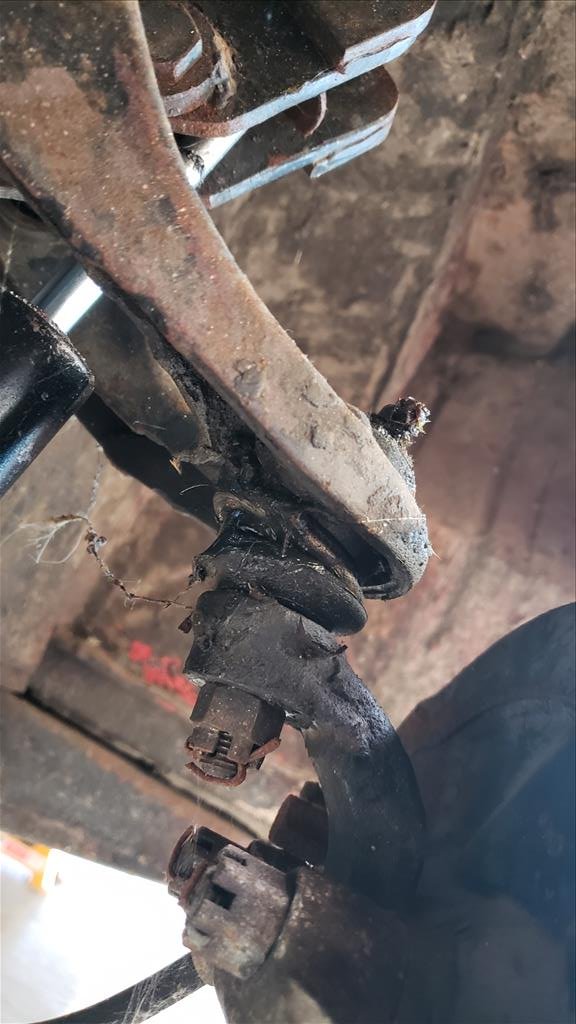
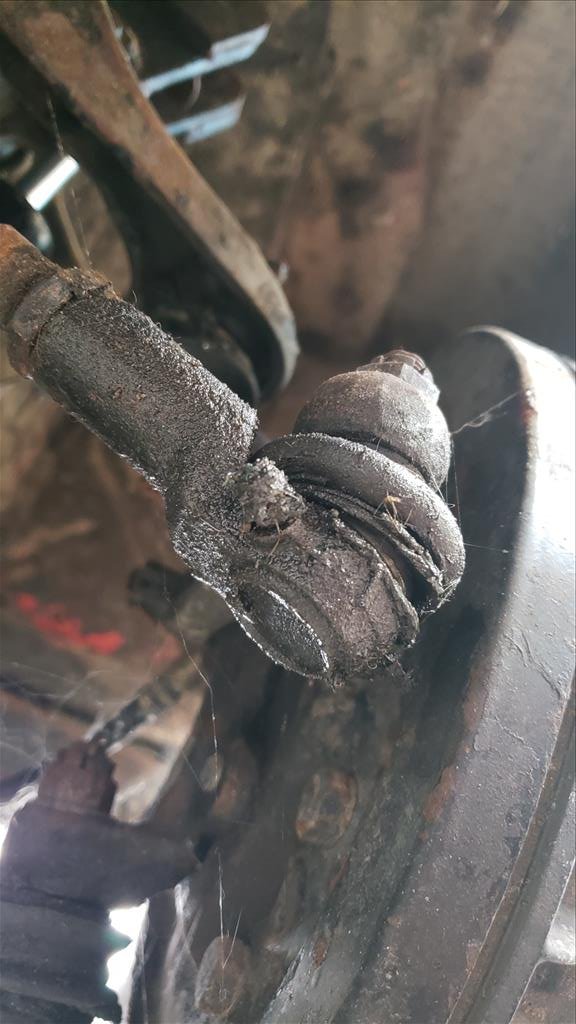
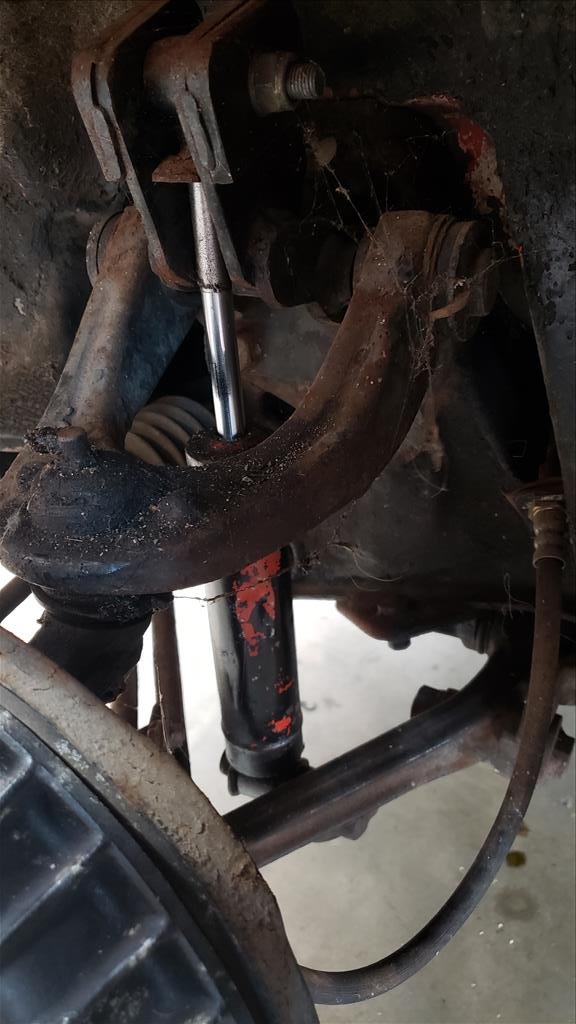
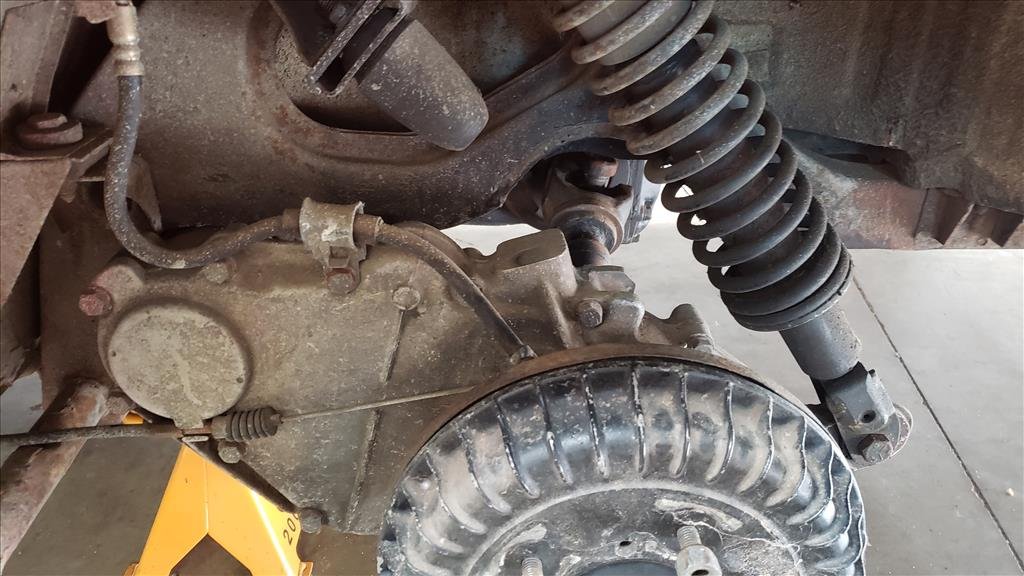
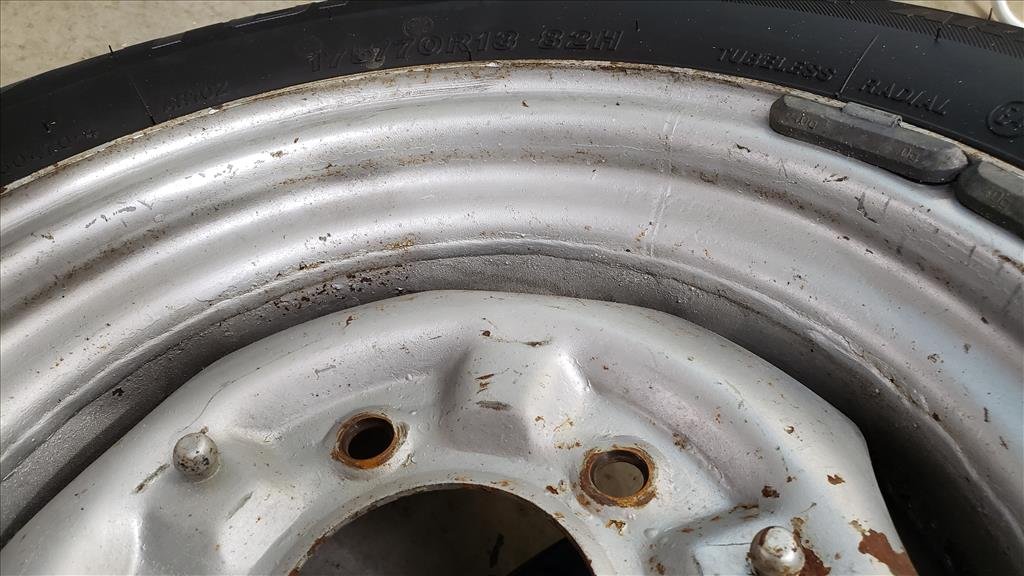
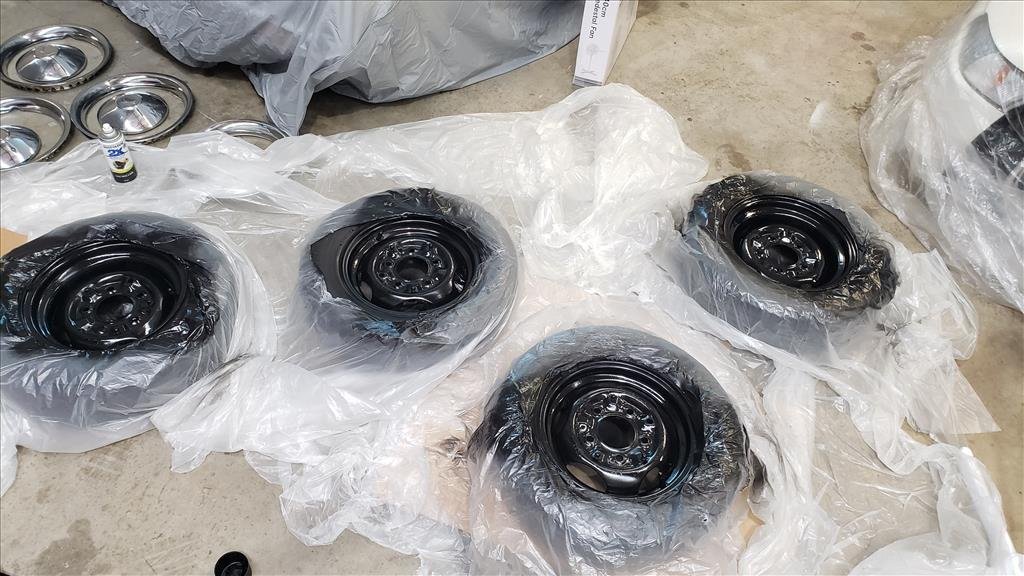
Bit of Barry love today. I'd not actually ever taken the wheels off yet to check what's going on under there but I wanted to paint them anyway to get rid of the crusty rusted bits and just try tidy it up a bit. Let's see what we're dealing with under here.. That's not looking good That's not looking good That's not looking good And that's just on one corner! All of the shocks need replacing, bump stops are different between the corners, springs are tiny in the rear.. it's just money right? This shot you can see how the rear originally worked with that chain drive. The shocks on this car look very much like motorbike items, or most likely some very close iteration of them considering the history of Honda. The spring I can compress with my hand so.. might need an upgrade. The rear wheels have been widened it looks like.. one of them runs wobbly but the tyre is big enough to absorb it. Anyway, to the main event. I fired up the paint booth and my favourite paint (Rustoleum) and go to work.. I kind of like it with all black.. shame there's a bunch of stuff that sticks out that looks terrible So this is what it looks nice now with the trim rings and the centre caps. Just a little bit nicer than crusted old rusty wheels I reckon
- 79 replies
-
- 19
-